


Gahm
-
Posts
1,217 -
Joined
-
Last visited
Content Type
Profiles
Forums
Gallery
Events
Posts posted by Gahm
-
-
You are on your way to another great model, Bob! As Martin already mentioned the contrast between the light boxwood, the black trim and the copper bottom looks VERY good!
Thomas
- Canute, Martin W and popeye the sailor
-
 3
3
-
Beautifully done, Mike! A pleasure to watch the hull take on its shape!
Thomas
- Canute, mtaylor and Stuntflyer
-
3
-
I am pretty intrigued myself by this 3D printing approach. How is the quality of the carronade barrels? Once painted is a 3D printed barrel comparable to a brass barrel with respect to precision and details?
Btw, you do a really good job on your Syren model! I love to follow the progress.
Thomas
-
Thank you so much Carl and Dirk! And thanks for all the likes.
- Carl, you are right, it takes a bit of patience to get all these hammocks done. But it is good practice for other repetitive tasks such as the ratlines
")
- Dirk, complaints need to go to Jesse . . . he started this

Thomas
- Dubz, Nirvana, Tigersteve and 1 other
-
4
-
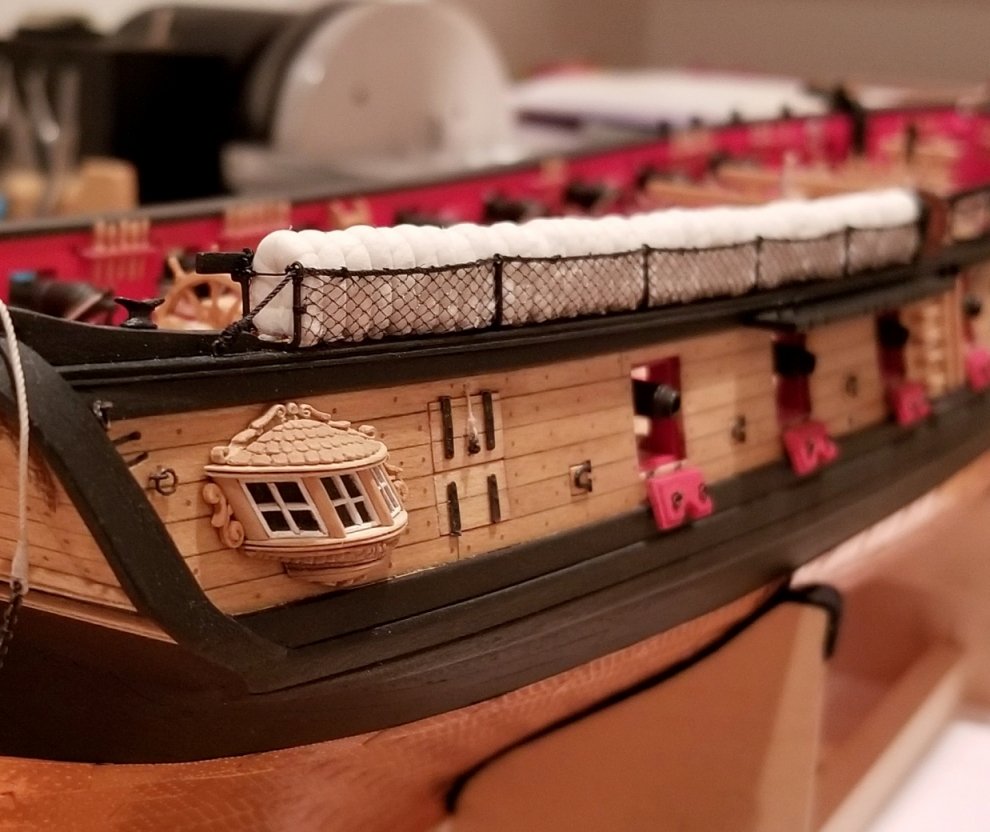
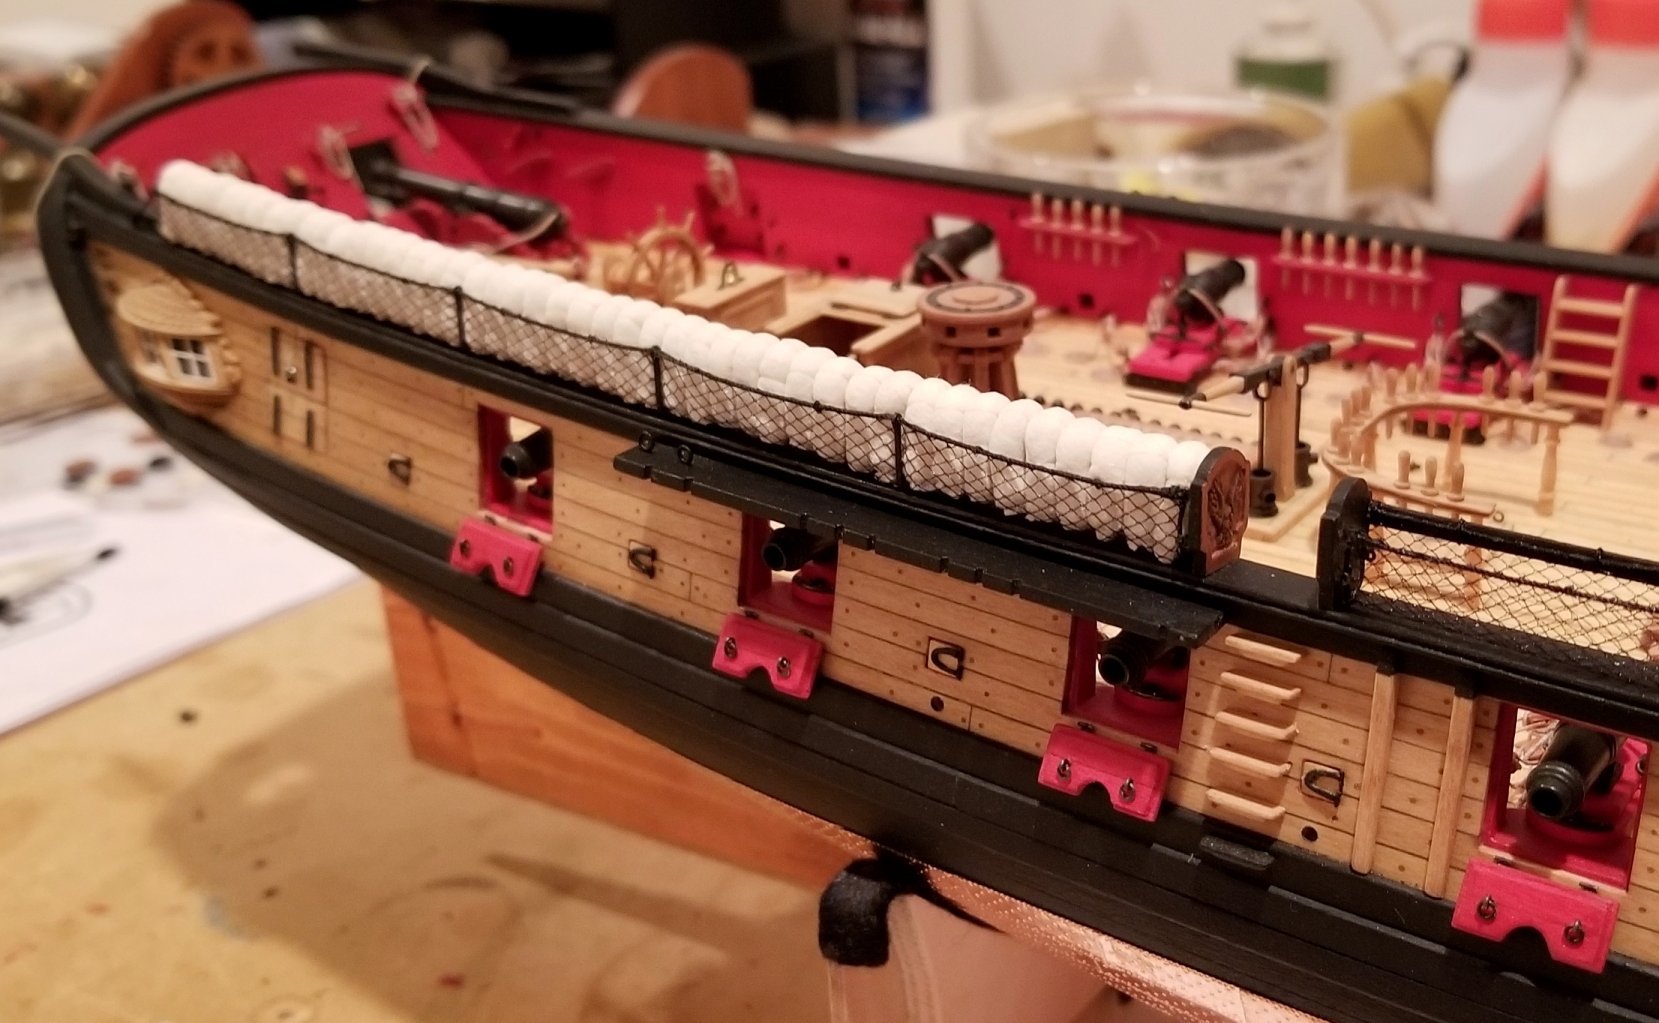
Before continuing with the remaining hammock nettings I wanted to make sure I had a good handle on the hammocks themselves. Building an acceptable representation of a hammock at the Syren scale of 1:64 turned out to be a real challenge. One of the major problems was that all the fabrics I could think of did not scale well at 1:64. The fabric texture was always far too coarse. So after some experimentation I settled for the process documented in images 1 – 4.
First I cut a ‘kernel’ of 19mm length for the hammock from a 0.063” Syren rope. Both ends of the kernel were hardened with CA glue. The kernel serves two purposes: It helps to reproducibly determine the length of the hammock, and it prevents the hammock from ‘collapsing’ and flattening out when it is folded back to its final U-shape. The kernel was glued to the top end of a 30mm x 30mm eggshell colored Polyester fabric piece. I chose Polyester because of its super fine texture (which unfortunately was still too coarse to be used for the hammocks) and its high flexibility. This piece of fabric was roughly cut to the width of the kernel, wrapped around the kernel, the roll secured with CA glue, and both ends of the roll cut back precisely to the CA hardened kernel ends (img 1). To diminish the fabric texture I glued this roll to the top of a 30mm x 40mm (width x length) piece of very thin silkspan, wrapped the silkspan around the fabric roll, and secured both ends with 2 metal clips (img 2). These metal clips were then mounted in 2 vices and the hammock roll thoroughly soaked with water. Contrary to regular paper silkspan can be nicely processed when wet and it turns pretty translucent, which again allows to see the fabric roll and with that to have a reproducible measure for the length of the final hammock (img 3). The hammock was then formed by tying 7 double overhand knots (2 at the ends and five at equidistant intervals) using an eggshell colored 100wt silk thread, securing the ends of the roll with CA, cutting them to their final shape, folding the finished hammock in the middle to it its U-shape, and gluing both halves together with CA (img 4). Img 5 shows all the material needed to build enough hammocks to fill the first rack. Once all hammocks for one rack were made they needed to be arranged in the rack for the best overall impression. At that point the silkspan surface still showed a lot of individual fibers, which gave an undesirable ‘hairy’ impression. To change this into a smooth surface and to fix the whole arrangement in place all hammocks received a final treatment with a thin solution of white glue. The result is shown in images 6 – 10.
Thomas
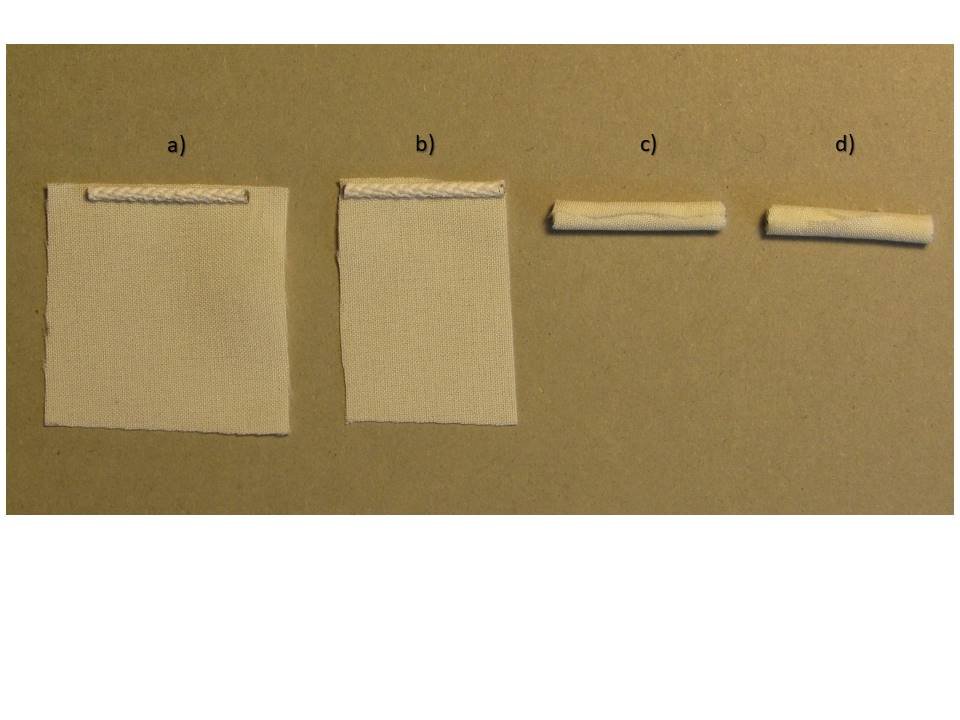
Image 1
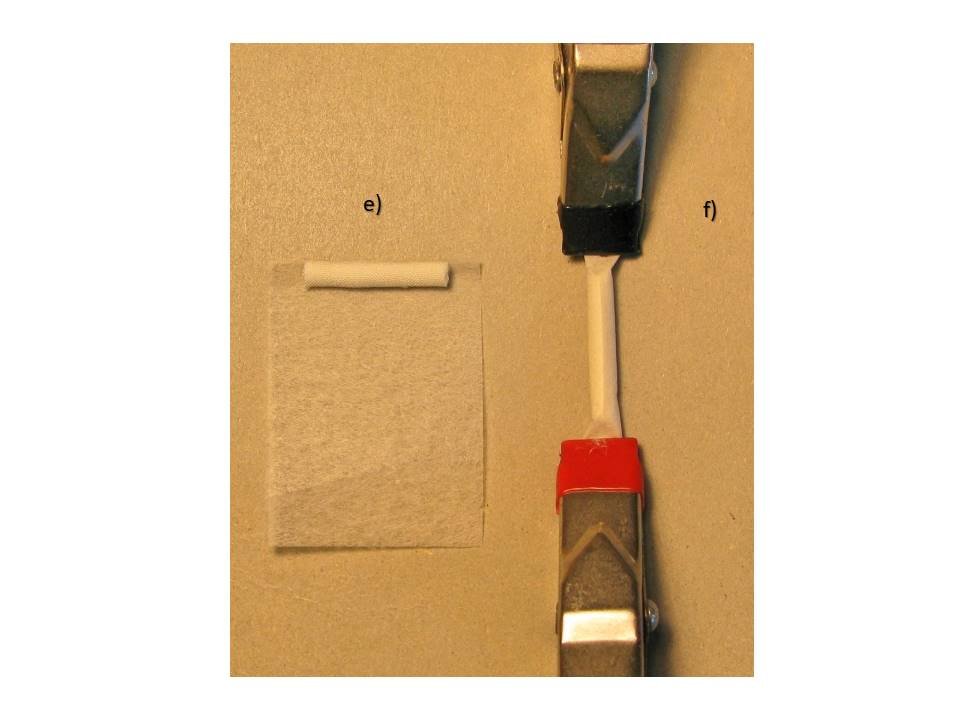
Image 2
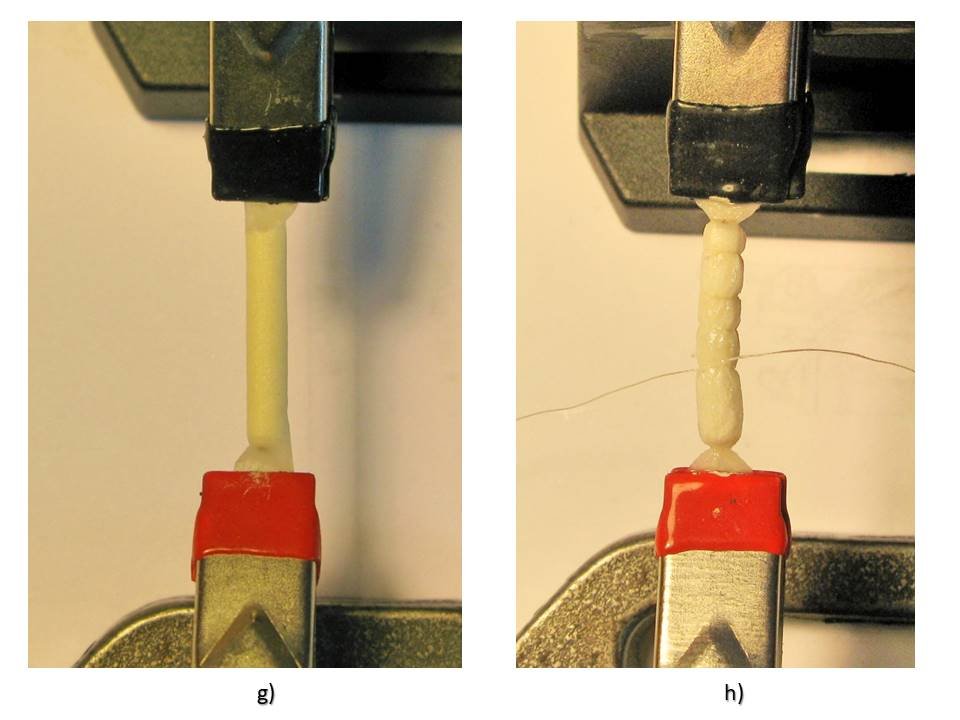
Image 3
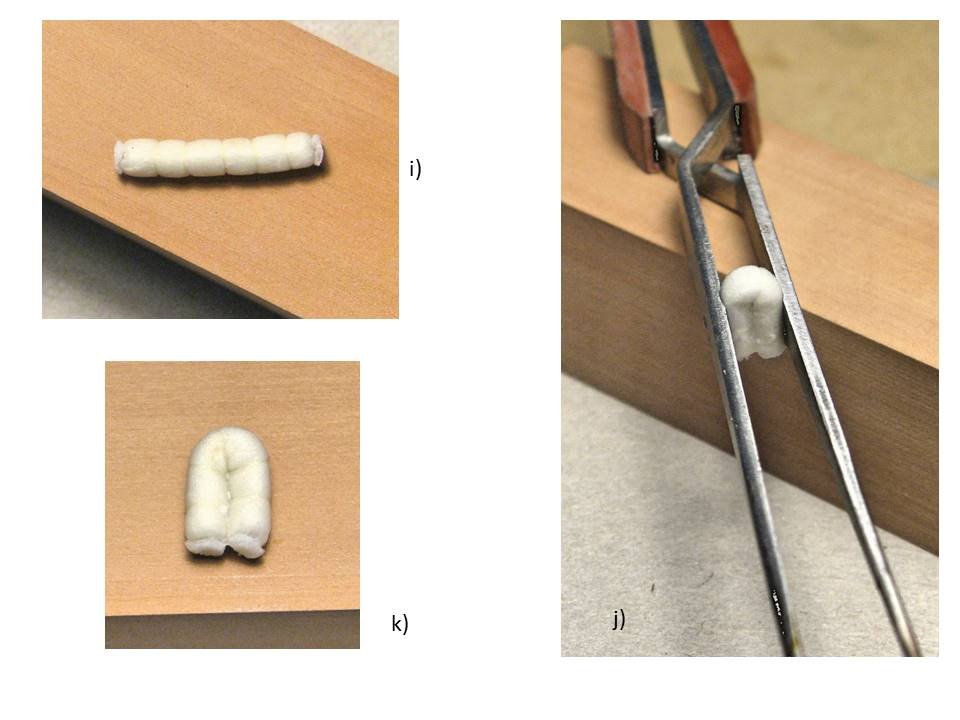
Image 4
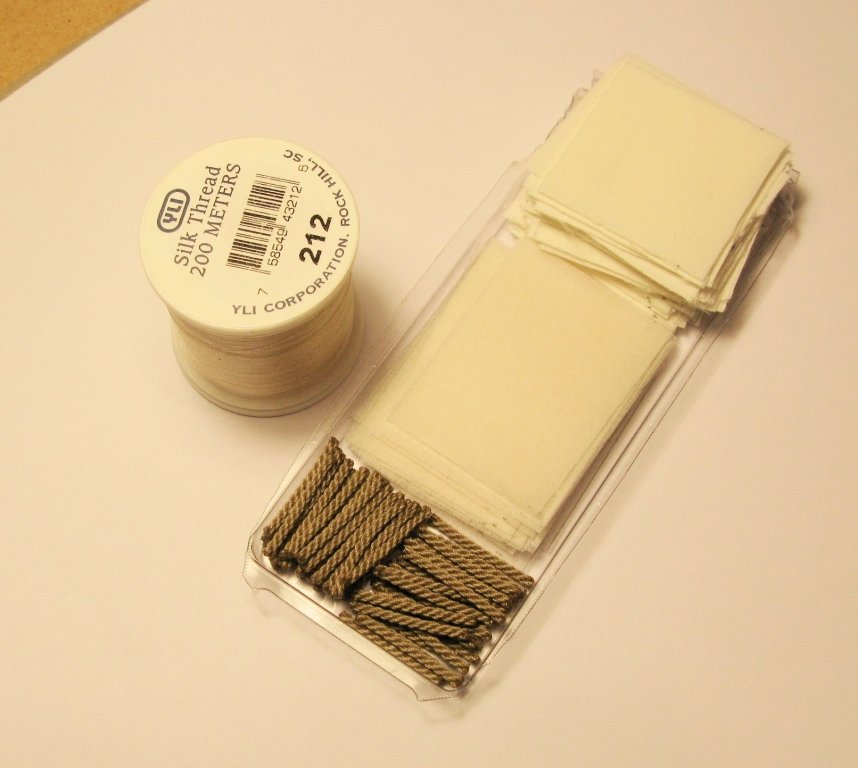
Image 5
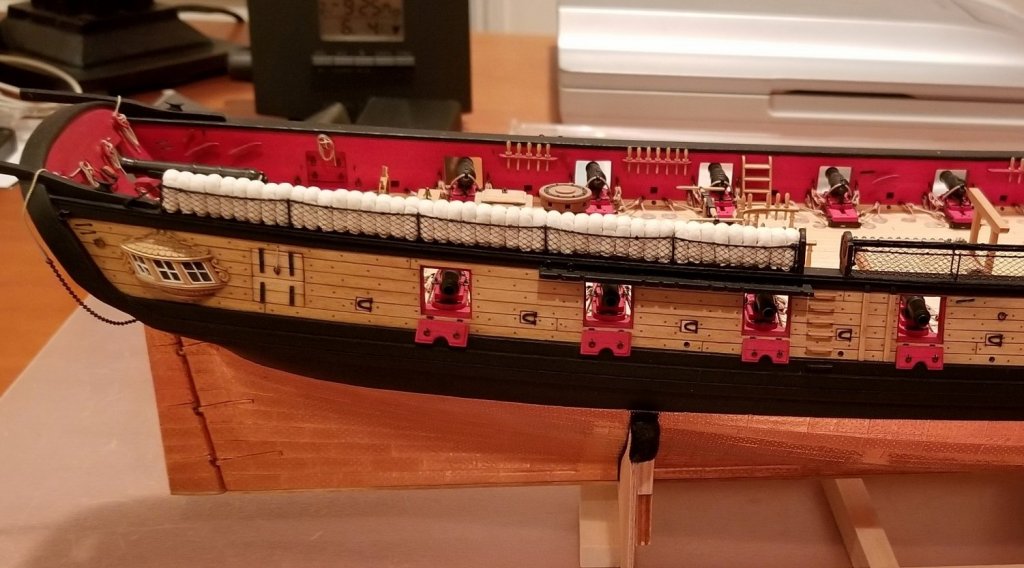
Image 6
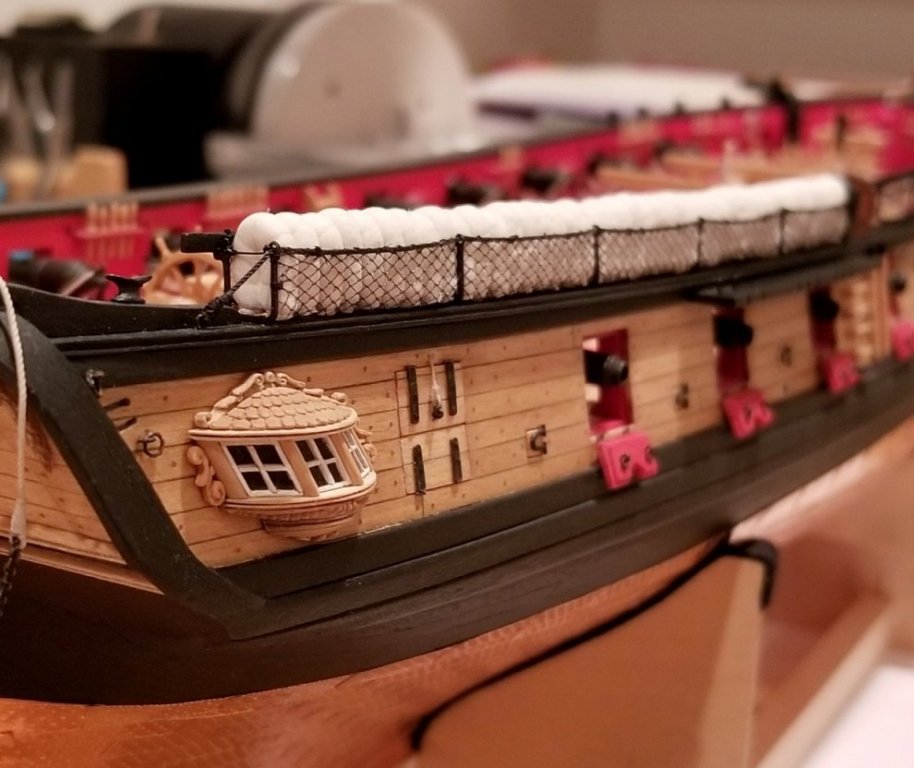
Image 7

Image 8
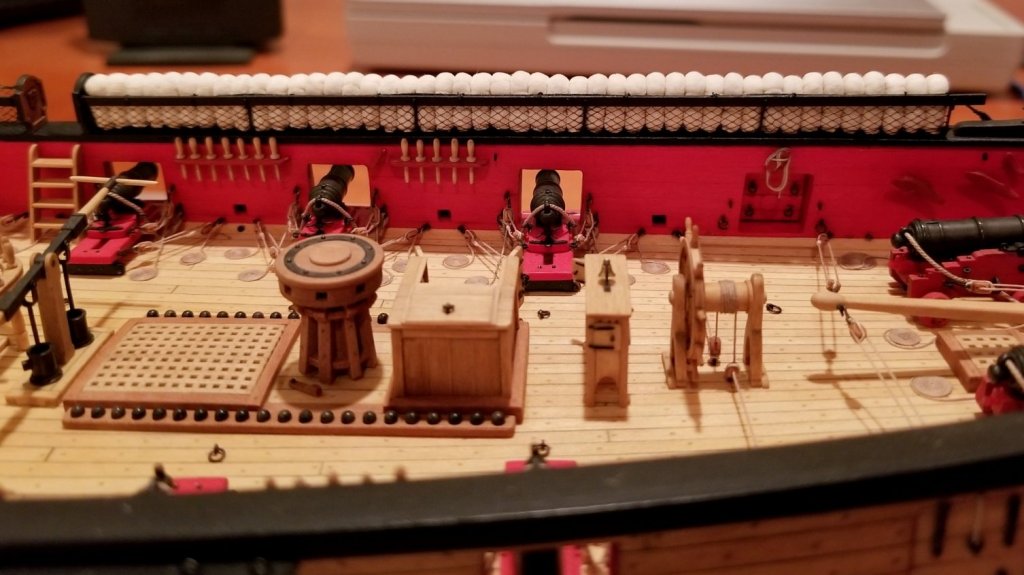
Image 9
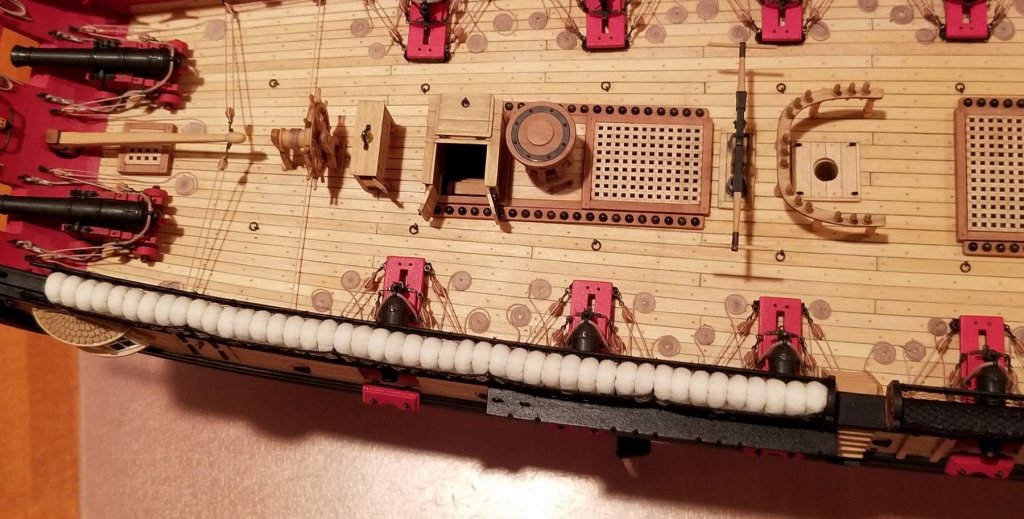
Image 10
-
-
-
Very well done, Bob! Without your description I never would have guessed that the plates are inscribed. As usual I just was blown away by the speed of your progress!
Thomas
-
Great progress, Bob! And beautifully executed. It is always amazing to me to see how the looks of a hull changes as soon as black as a 'contrasting' color is applied.
Thomas
-
That looks really good, Jason! I also find your 3D printing experiment highly interesting. I have been intrigued by Shapeways for quite a while wondering what the final quality might be and whether it is good enough so that 3D printed parts could be used on a ship model.
Thomas
-
Beautiful work, Harley! I will enjoy following your build!
Thomas
-
-
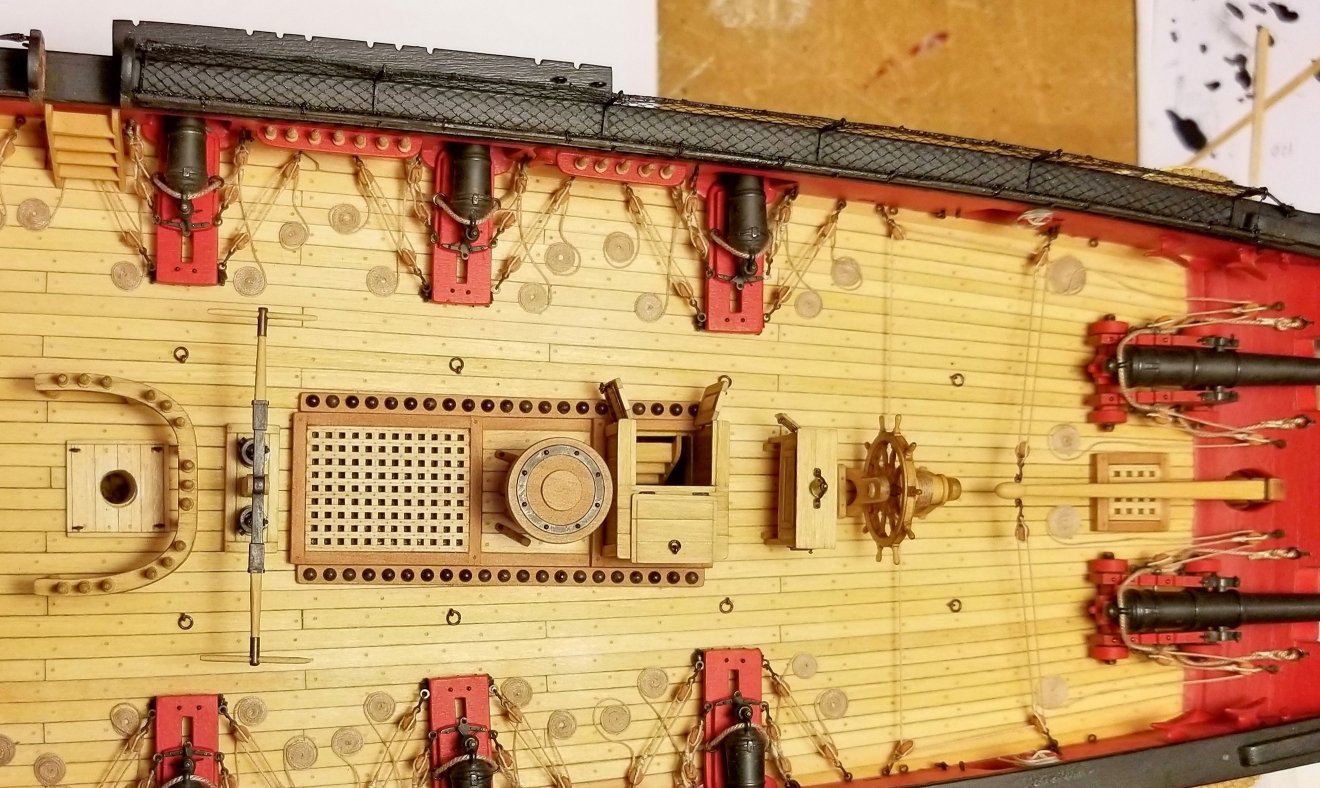
I started work on the hammock nettings. I changed the boarding panels so that the wooden rail could be attached to the back of the panels and not to the side. I also added a little ornamentation to the panels (img 1). I used the hammock cranes from the kit, thinned them down and mounted the whole arrangement as described by Chuck in the kit instructions (imgs 2 and 3). The netting itself was framed with a rope on 2 sides to give it a clear delineation against the wooden rail and the boarding panel side (img 4). Framing only 2 sides allows for easy fine adjustment of the final width and length of the netting when mounting it on the hammock cranes. The ‘unframed’ sides are then attached via black 100wt silk thread and CA glue to the rope which spans from the boarding panel to the last hammock crane. The last hammock crane is also used to attach the ‘unframed’ end of the netting. Images 5 – 10 show different states of the process.
Thomas
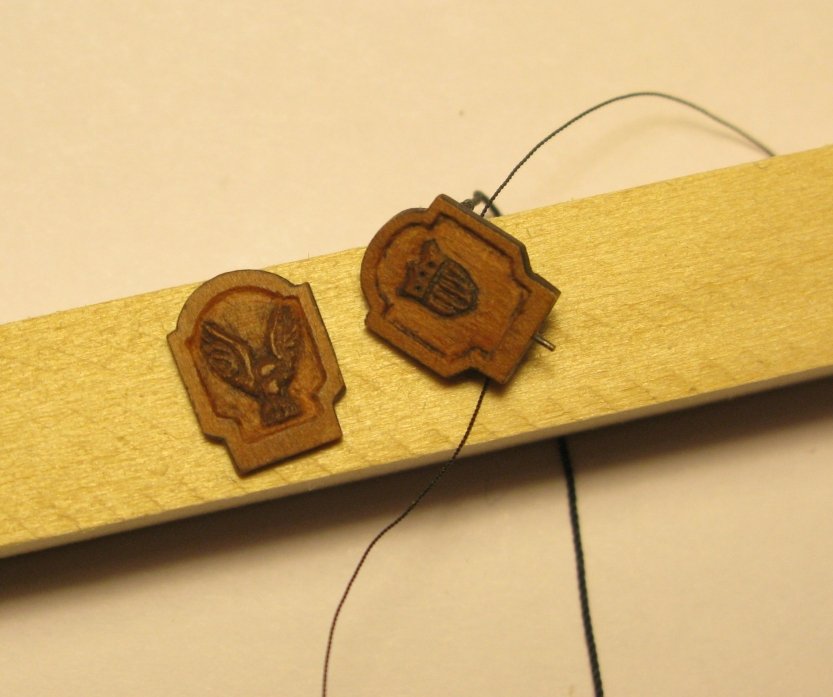
Image 1
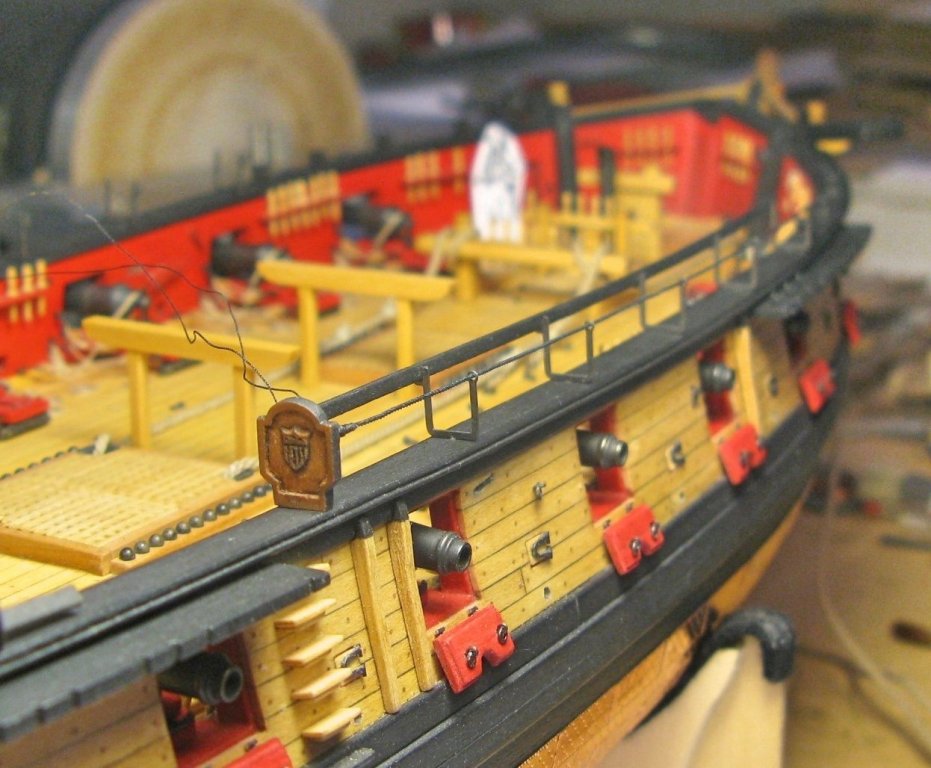
Image 2
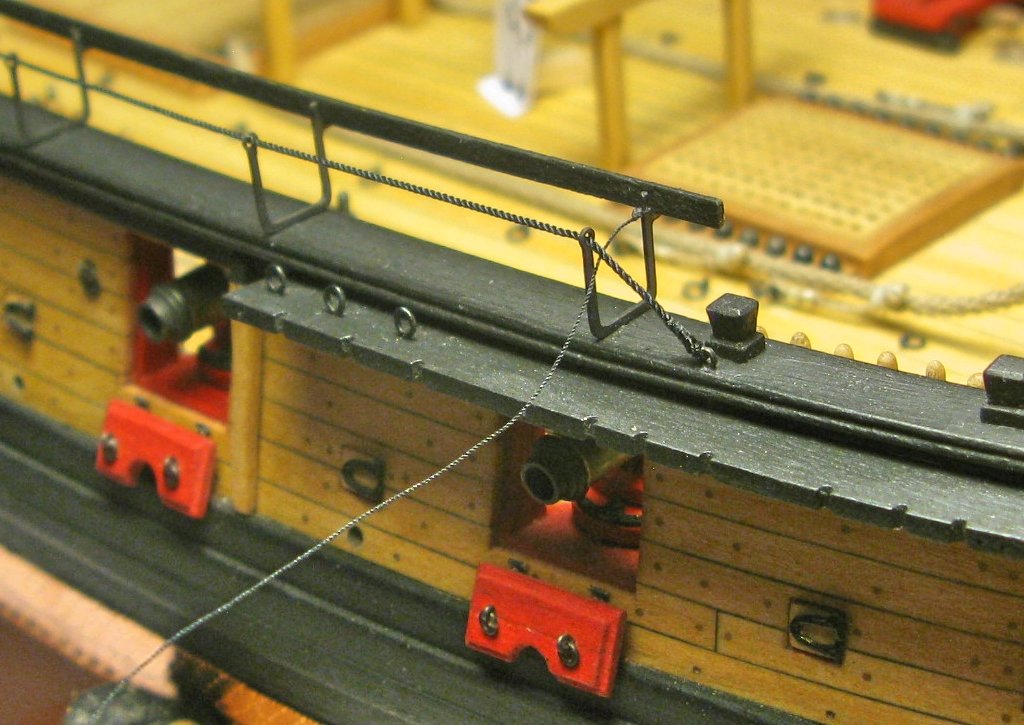
Image 3
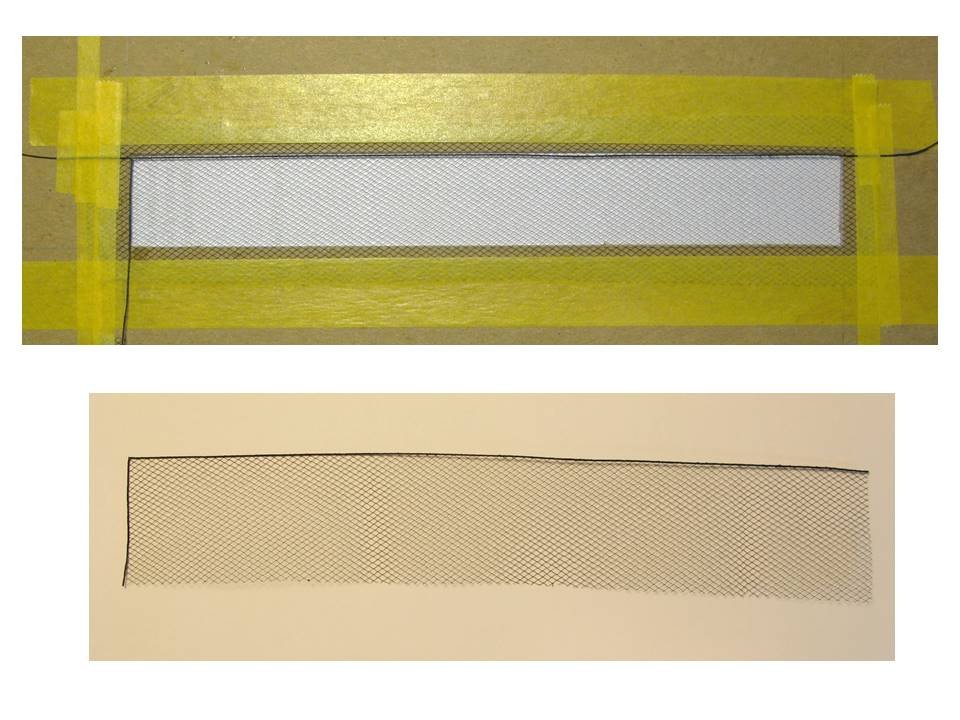
Image 4
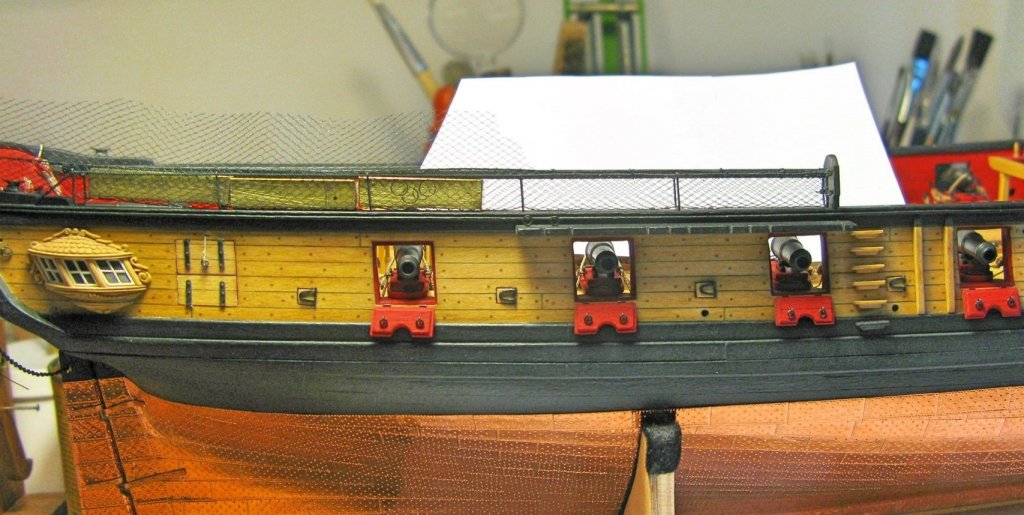
Image 5

Image 6
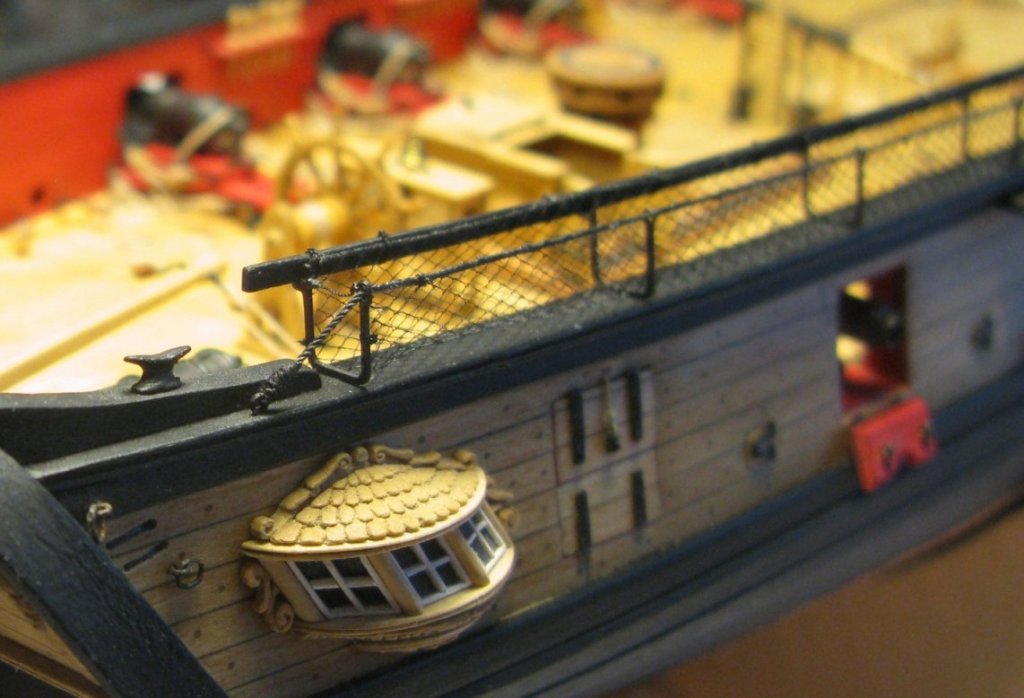
Image 7
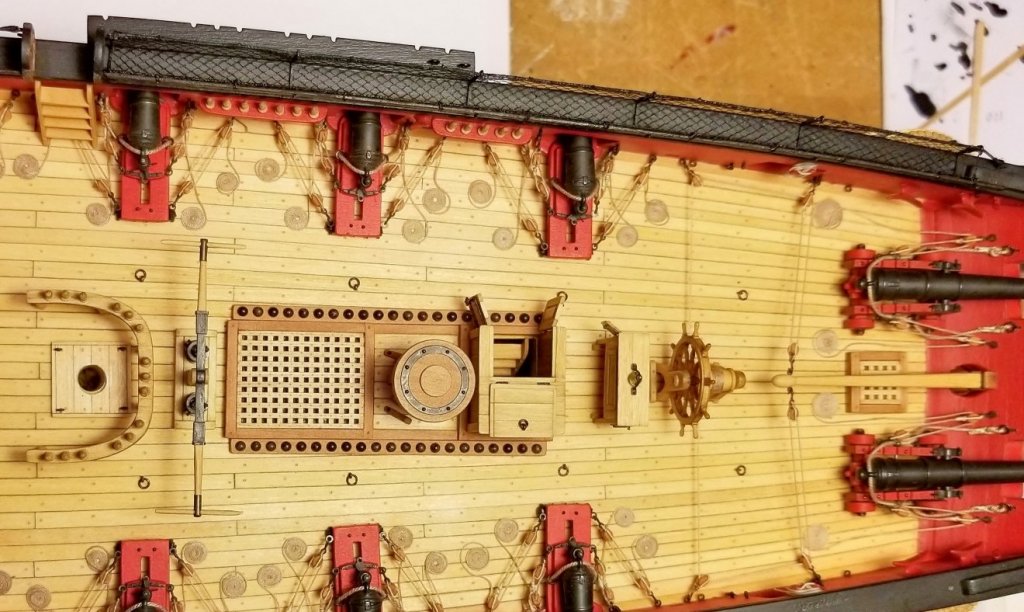
Image 8
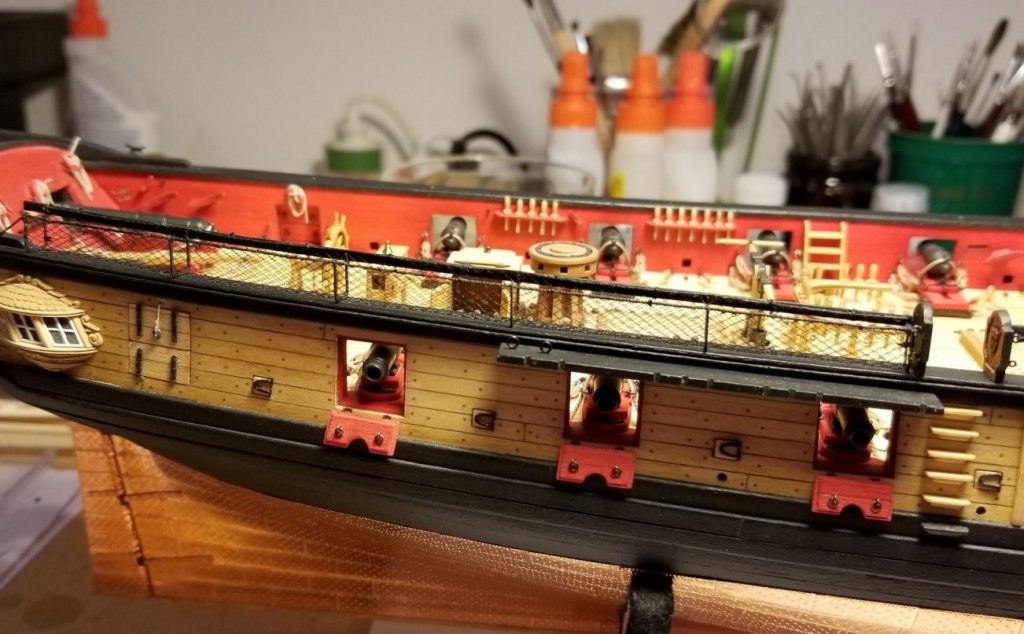
Image 9

Image 10
- Tigersteve, Stuntflyer, _SalD_ and 28 others
-
31
-
-
Bob, your deck looks great . . . clean and crisp as ever. No need to worry about your outstanding craftsmanship. I am sorry to hear about you having health problems. I hope you get over them quickly and continue with the expansion of your model fleet
Thomas
-
Your planking looks REALLY good, BE! Watching this I would love to do a planking job myself right now . . . but I am stuck with hammocks
Thomas
-
Beautifully done, Bob!
Thomas
- mtaylor, popeye the sailor and Canute
-
3
-
-
Albert, I think the question was asked before: how do you achieve such smooth surfaces with your carvings? They can't get better than this!
Thomas
- paulsutcliffe, albert, PeteB and 2 others
-
5
-
Clean and precise planking job - very well done B.E.!
Thomas
- Blue Ensign and Martin W
-
2
-
-
This is an interesting way of doing the gun ports. But they turned out very good!
Thomas
- Martin W, popeye the sailor, Canute and 1 other
-
4
-
-
Wonderful work, Jason! A pleasure to watch!
Thomas
- robdurant, cog, Beef Wellington and 1 other
-
4


The Hayling Hoy 1760 by Stuntflyer (Mike) - 1:48 scale
in - Build logs for subjects built 1751 - 1800
Posted
Absolutely beautiful!
Thomas