Nirvana
-
Posts
5,452 -
Joined
-
Last visited
Content Type
Profiles
Forums
Gallery
Events
Everything posted by Nirvana
-
 Doug, I just finished reading through your build log, I really like what you have done with AL Bluenose II. There is another Bluenose you have to build, but there is no kit for that one The practicum is downloadable and you have it very convenient with the country as well as the plans is to be ordered from ModelShipBuilder. And that Bluenose will be the top of the cream, as the scale is 1/4" - 1'. The practicum is also helpful when building the other kits, as it has other approaches on some issues. Looking forward to your next step.
 -
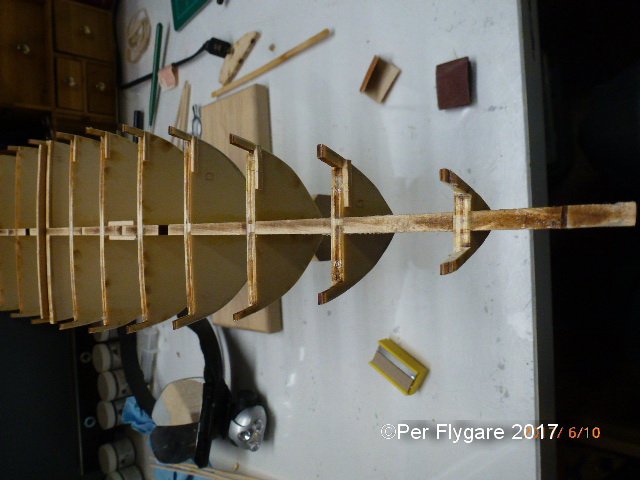
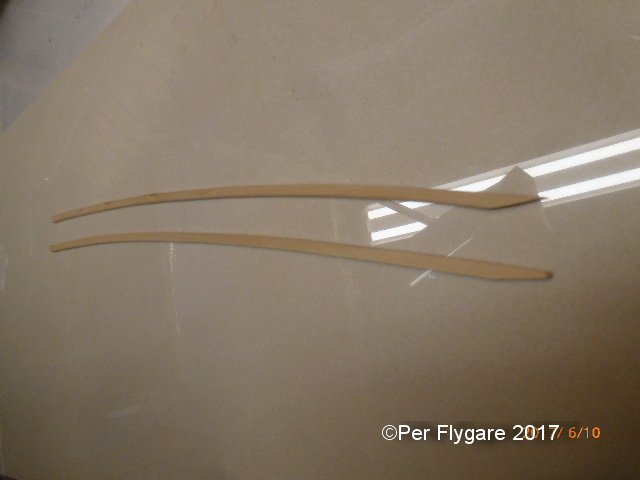
So, there was only one winner of the daily quiz....... and that was my Bluenose. The bananas were the new waterway made out of 3/32" basswood plank. The plank was necessary to get the right width. Since I had a plank with the right thickness I made a single plank of 6/32", this to match the original Bluenose. It was tricky to get it right but now they are down and glued into place. And it looks amazing. Hope this can be inspiring to others. I will leave this to rest over the night.
-
New member from North Sydney Australia
Nirvana replied to Fernando E's topic in New member Introductions
And from Pacific NorthWest a Warm Welcome to MSW -
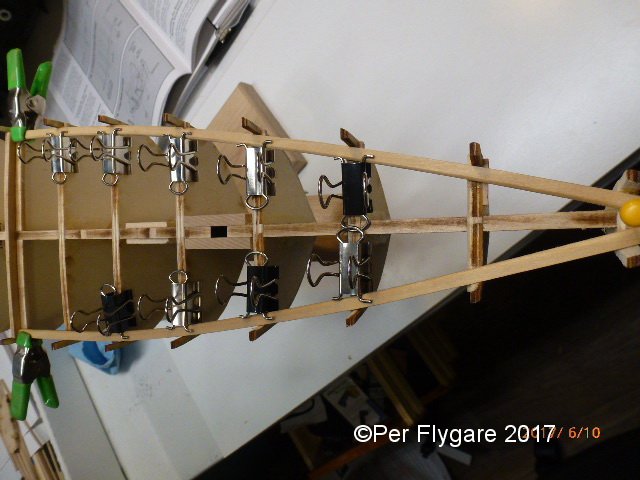
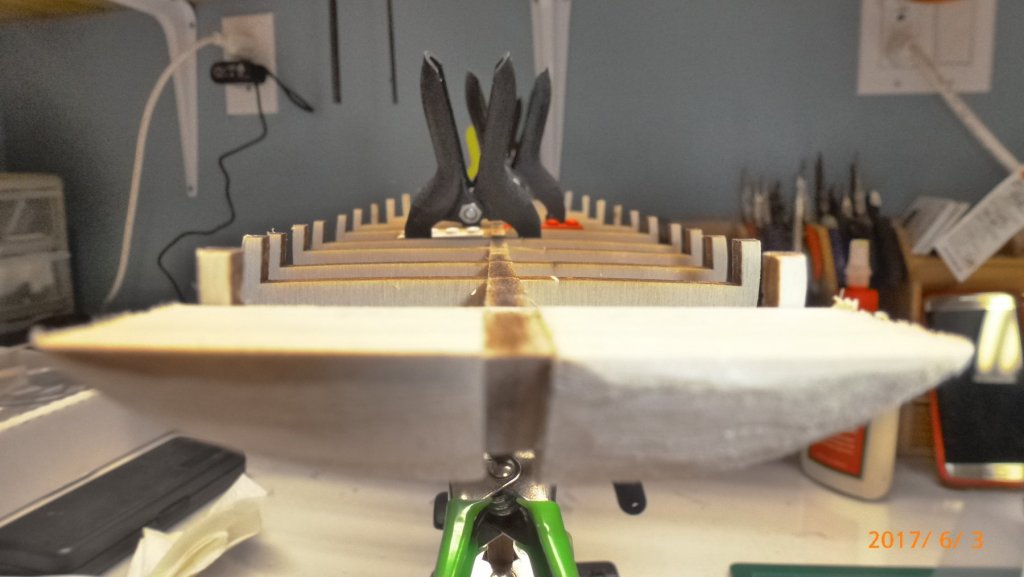
Waterways out! And nothing damaged!
-
Todays quiz: What kind of banana is this?
-
Then starting comparing the notes from Bob's practicum and the plans, obviously Bob got it wrong. In his practicum chapter 2 referring to picture 2.1-1 and text it reads However, the plans from ModelShipway says something completely different. The instructions coming along with the kit doesn't say anything more than the thickness. You really have to pay attention. I am glad I ripped up the first planking as I used the 3/32"x1/8" for the two inner planks. Now I have to figure out which is the better way to go.
-
I wasn't happy how the waterway connected with the bulkheads, so I decided to rip them out and start over.
-
Mike, very nice. And you have the display too. Putting the pinnacle on thin rods did really make her stand out.
- 129 replies
-
- 4
-

-
- finished
- model shipways
- (and 1 more)
-
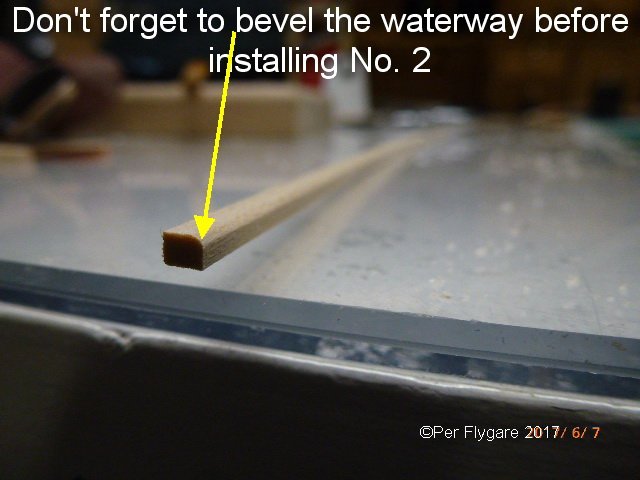
Bob, Thank you. As for the installation of the great beams, it's mentioned to late in the instructions and in Hunts practicum almost forgotten this because he didn't use the laser cut parts. He used leftovers to create his beams. One more work day and then back to the yard and the the "lady". I should had beveled the waterway before bending the pieces.
-
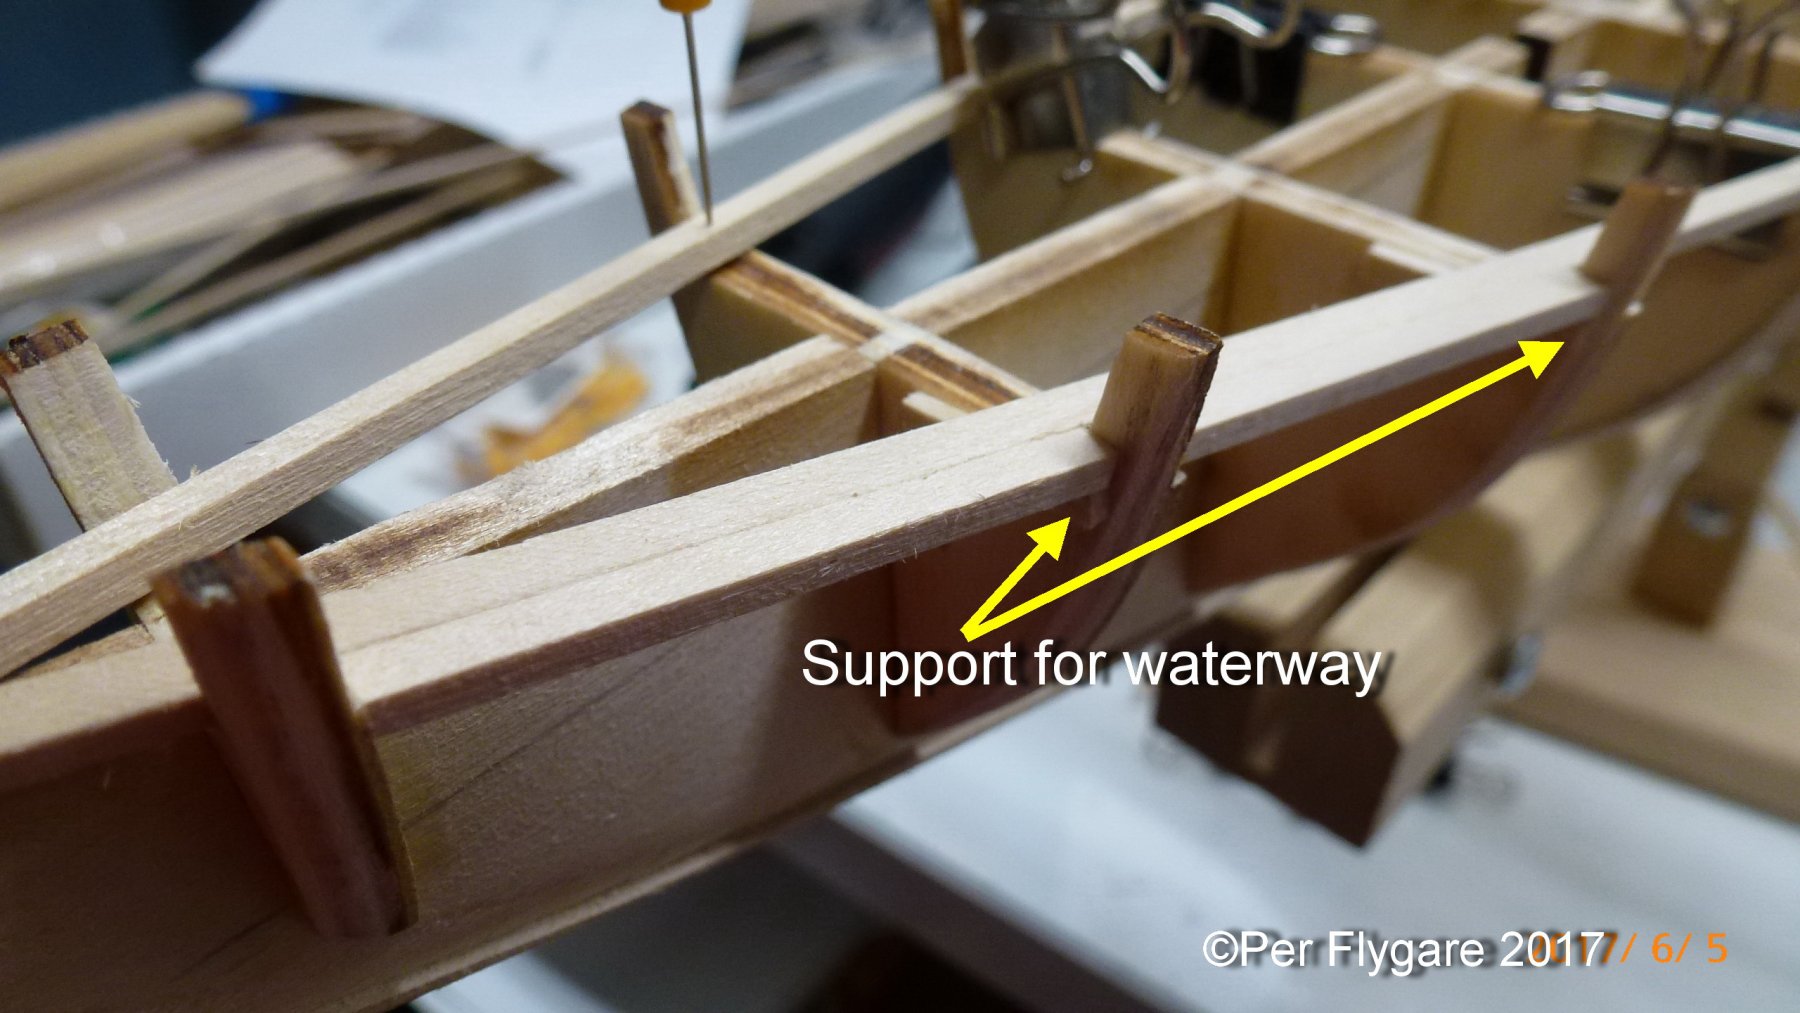
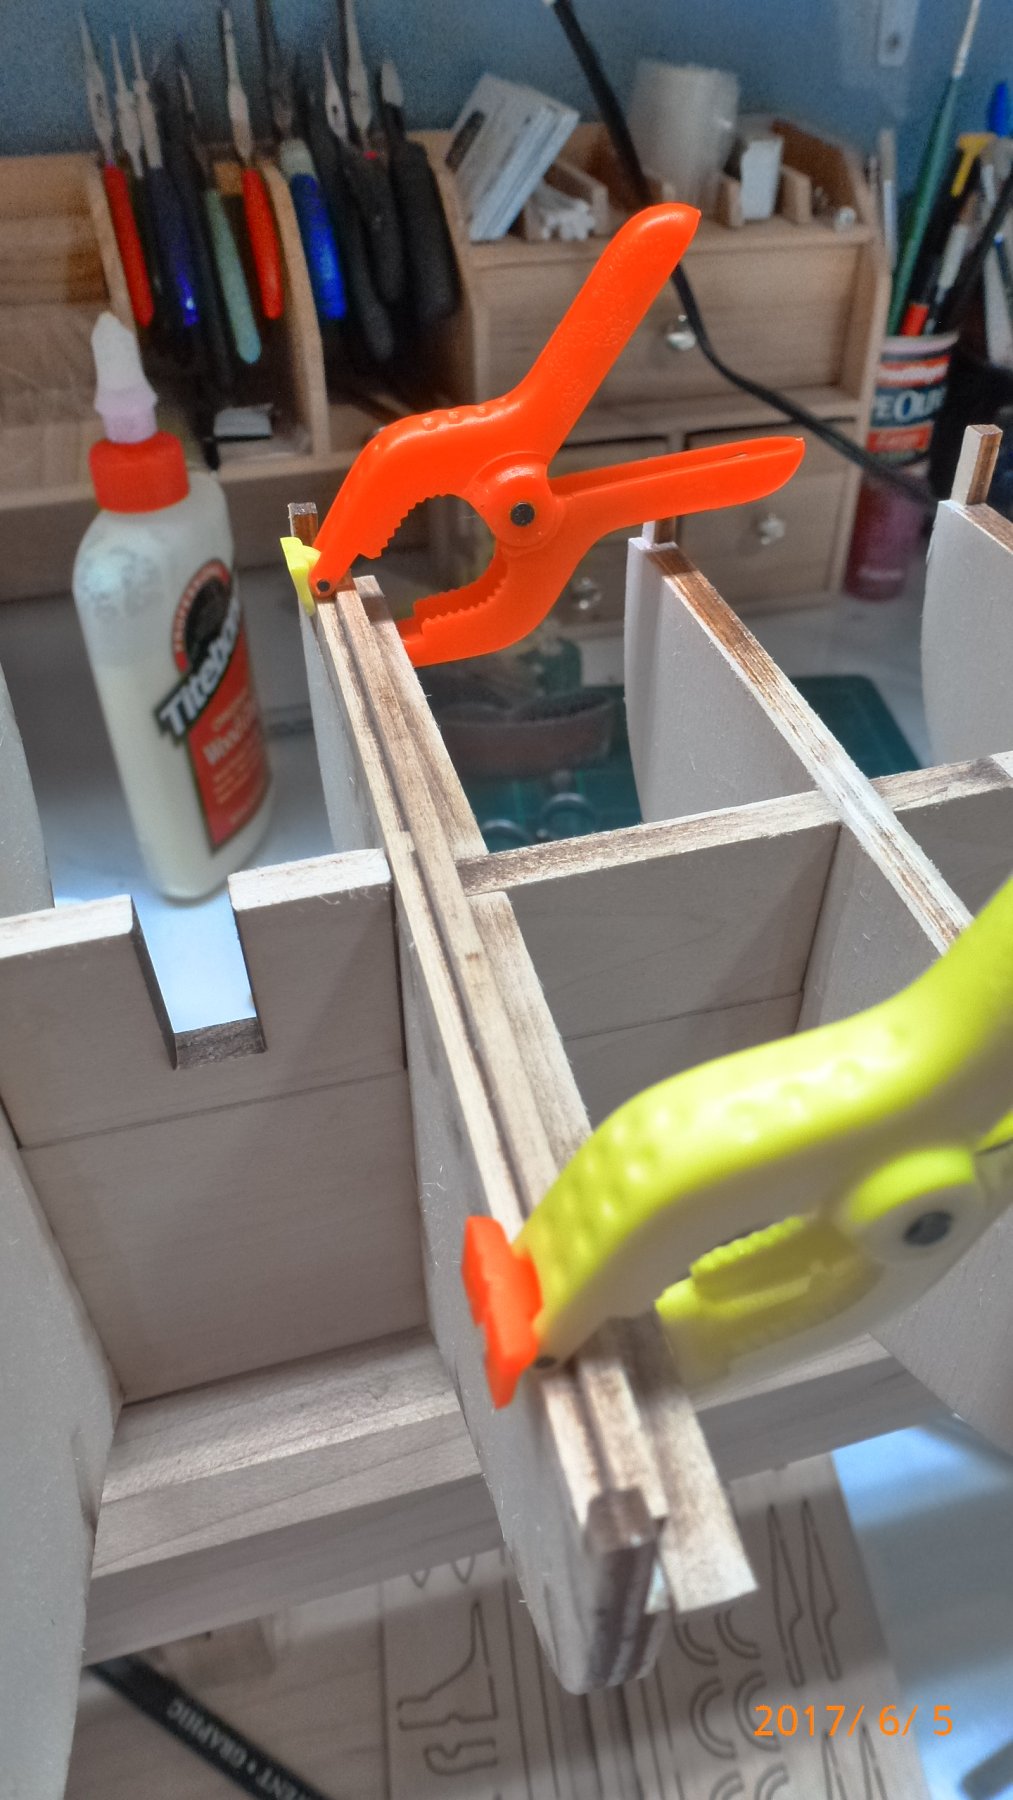
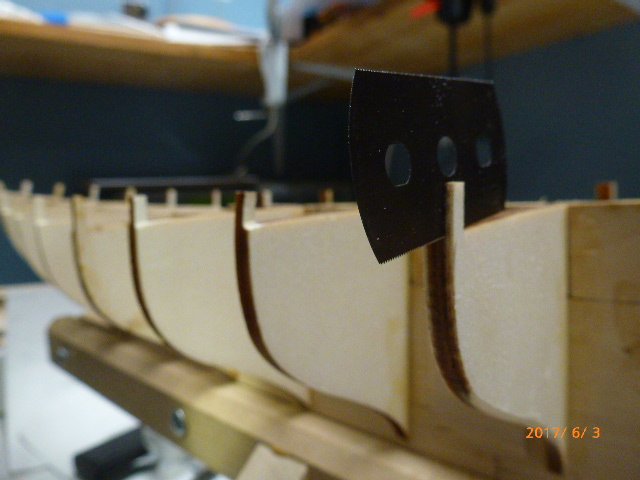
I did remember to do one thing before installing the second waterway. The beveling! Doing this once installed would probably be impossible. The beveling looks more like a rounded corner with the camera. Once installed I think it will be hard to see it.
-
Looking real good, I am just a fraction into the build, so your build amongst others that will be helpful.
- 245 replies
-
- 2
-
-
- bluenose
- model shipways
- (and 1 more)
-
Steve, I like the idea that you kept following through with the idea of finish this kit even though you could had gotten a laser cut model for 70 quids. My hat off for your dedication. Looking forward to the see this yacht on display.
-
Popeye, Hopefully I won't mislead you....😁 along the way. Thanks for the comment.
-
With summer break around the corner I can understand there will be less time with the ship. However, I like the progress and many of us has taken even longer time between updates and commitment to our builds. No hurry, we will be here just rolling our thumbs doing nothing and waiting for another update. lol ☺
-
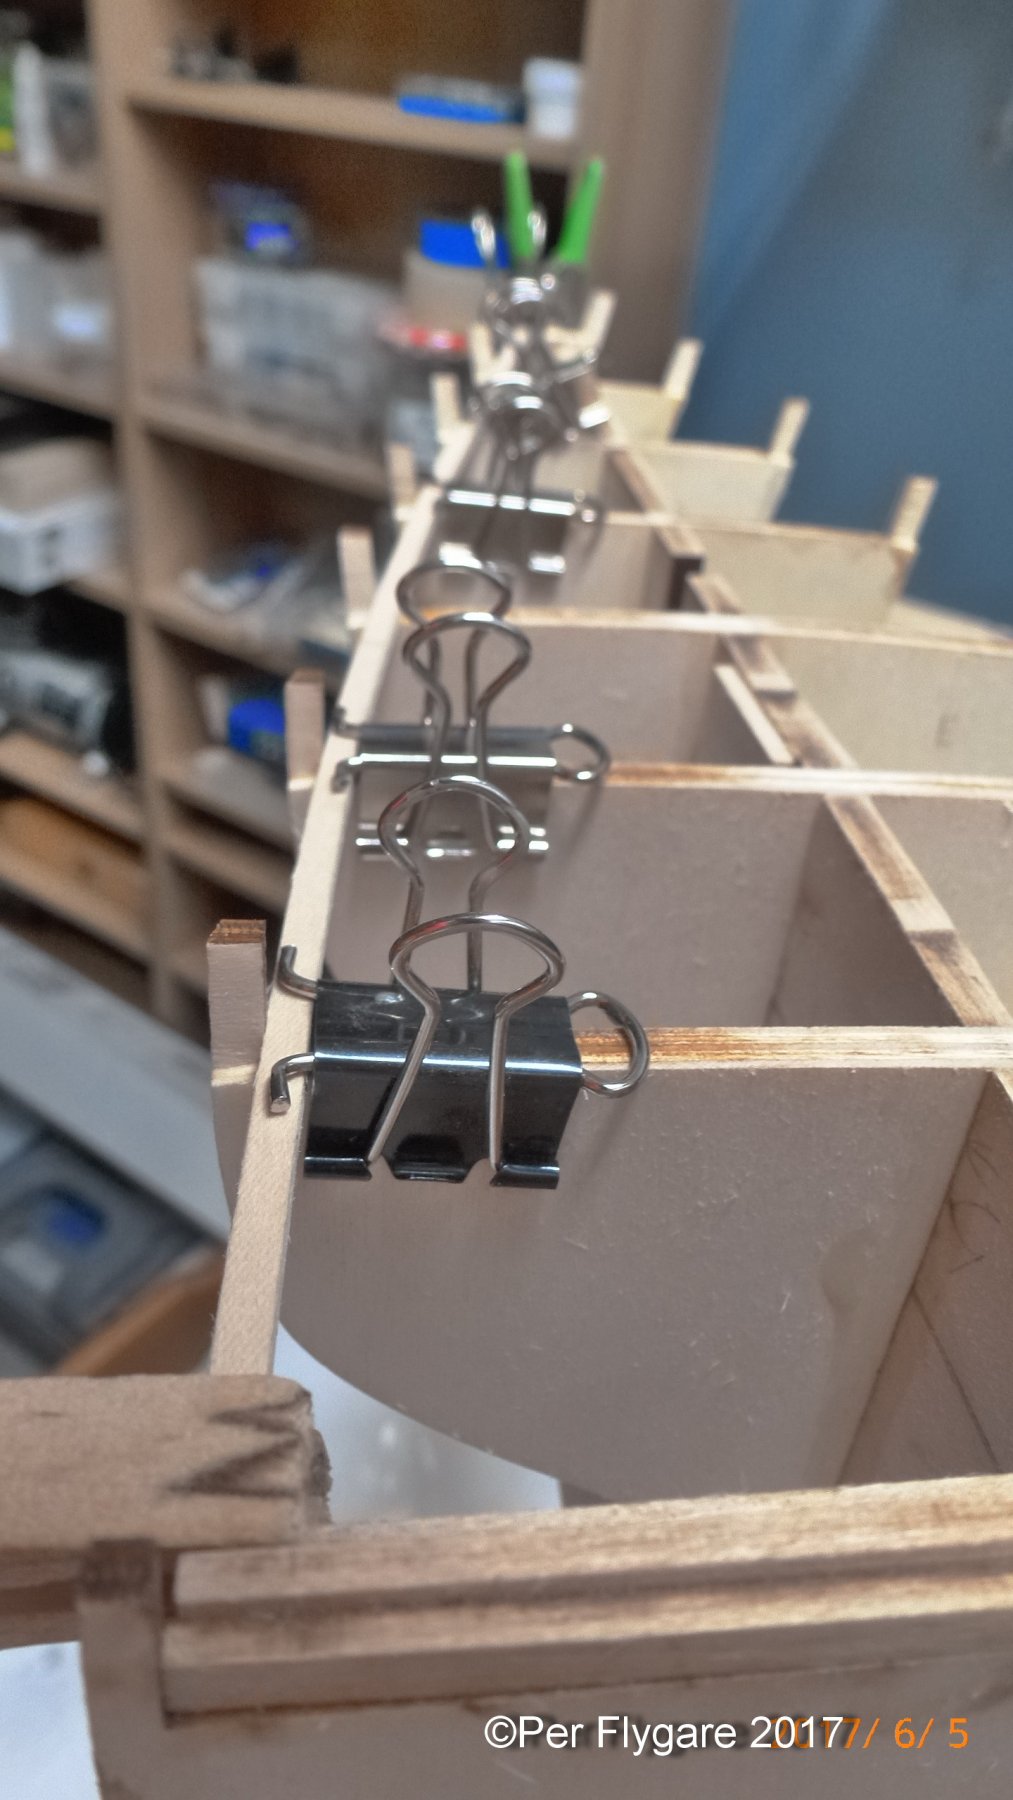
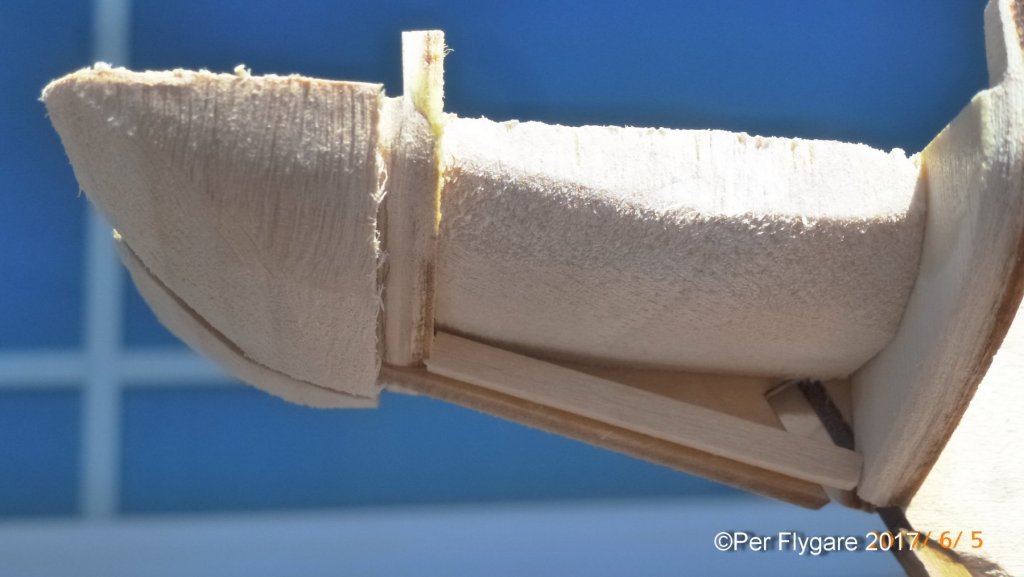
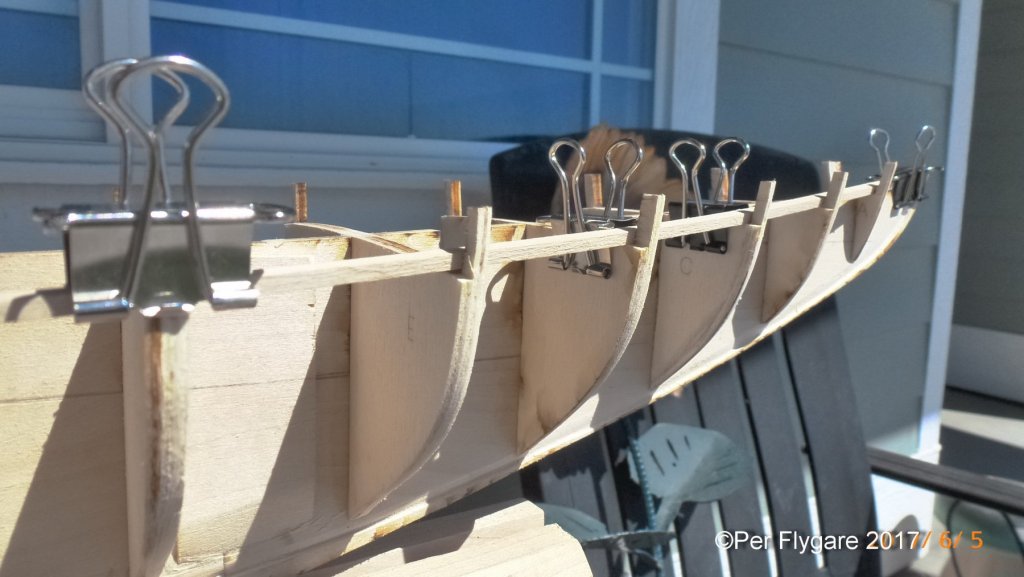
Here waterway inserted between the bulkheads on the supports.

-
The waterway is fashioned the same as we plank the hull. With the ingenious paperclips. Once I have the these two planks in place I am to add on support at the bulwark stanchion extension, that hasn't been notched. This way I will have maximum gluing area for the waterways between the stanchions.

-
Looking at pictures online from Bluenose II and how the foredeck is planked I started wondering if I could take another approach. Bluenose II only has two waterways. They are wider. I don't know if the original Bluenose only had two or not. But what I recall, they build Bluenose II according to the original. Don't know if it will be possible with the kit. But this is certainly something for those that are building the later version of her as this will be accurate.
-
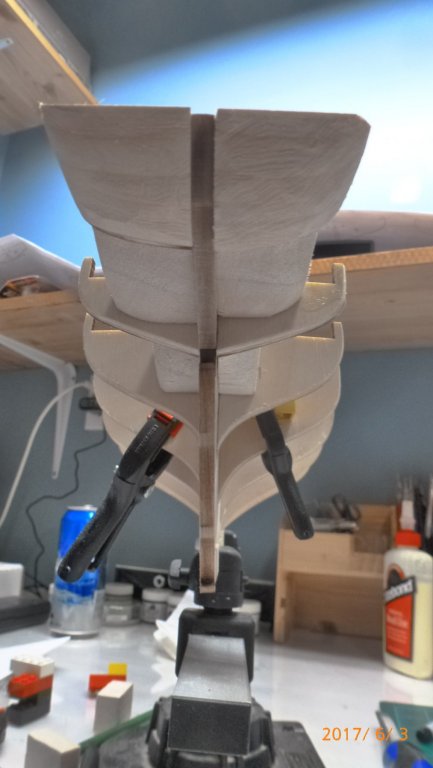
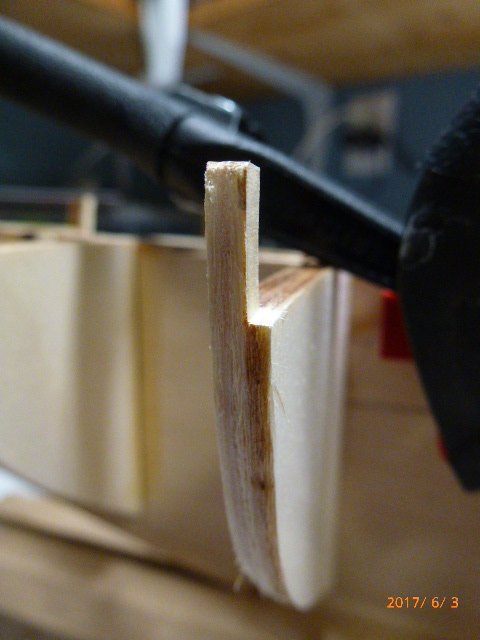
While shaping the waterways (one at the time due to space at the bow) I finalizing the shape of the stern.
-
Eddie, I also have Gene's practicum for references while building the kit.
-
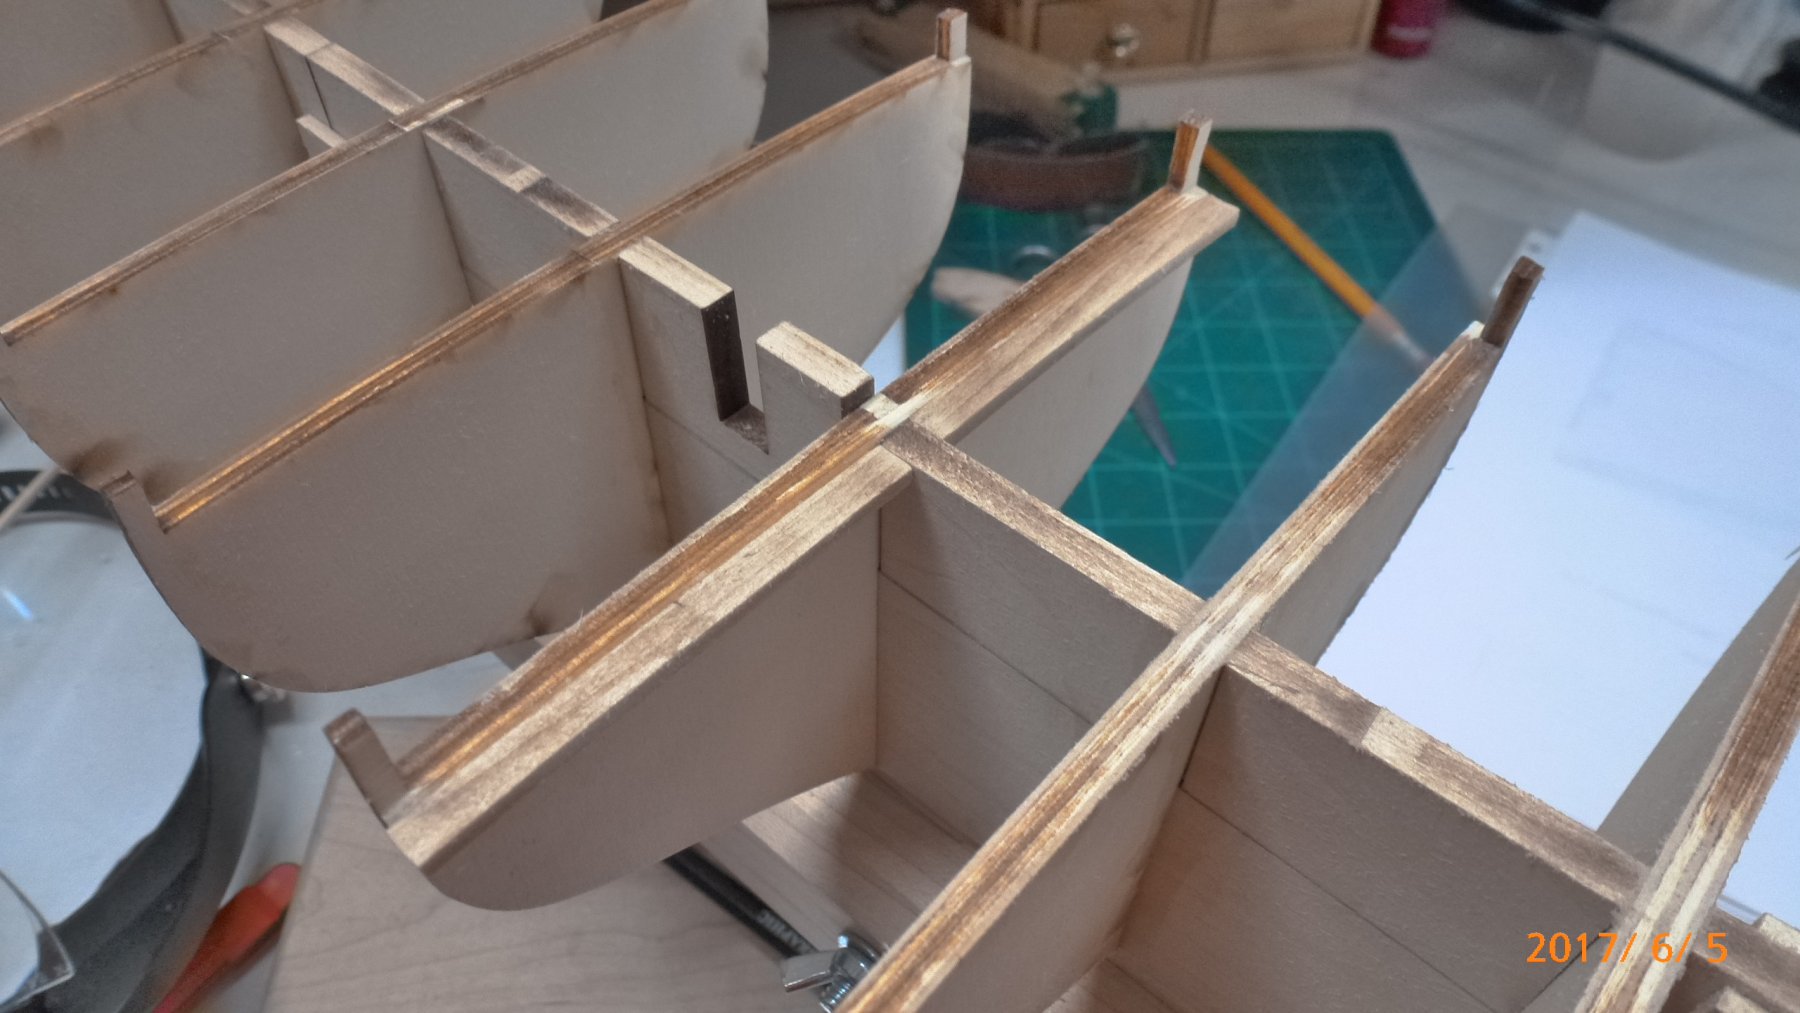
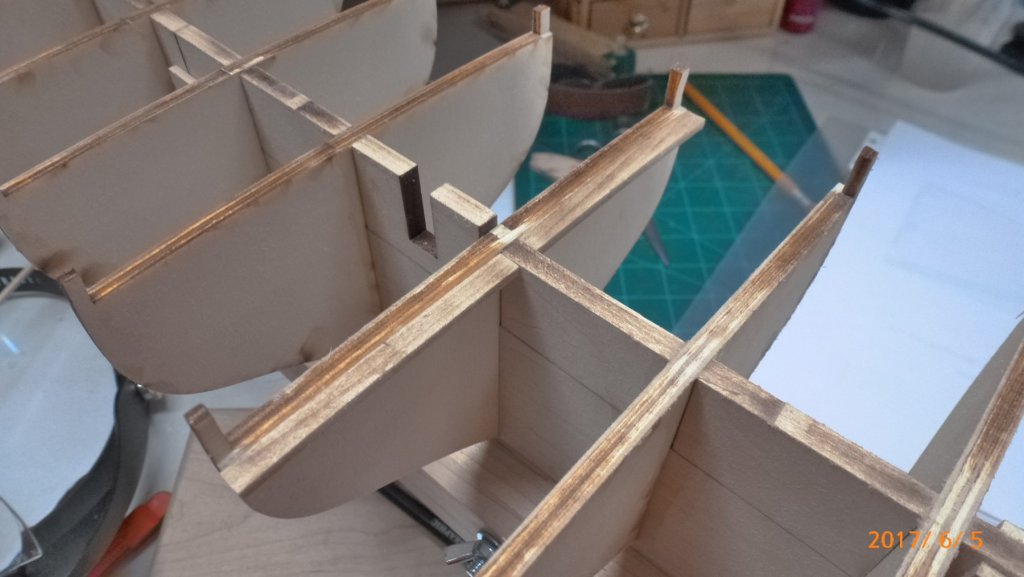
So building is progressing. This kit came amazingly with a stand. As usual pictures is now uploaded for your convenience. I have all the rigging line and blocks from our friend Chuck. Paying attention and reading quite a few other Bluenose build log, I wanted to make sure that I didn't break the stern part. So the first thing I did along with dry-fitting the bulkheads was making sure I made blocks to insert in-between the sensitive parts. The material is just amazing and very nice to work with. Thanks to a perfect straight false keel (4 years old) the bulkheads got a perfect fit where the lego blocks was just an assurance for final perpendicular setting. What I forgot to do was the thin the bulkheads prior the installation of them. Doing so will eliminate and stress and breakage of bulkhead and false keel. But thanks to my great tool the micro saw, this was done without and damage. In order to find the right line for the hull planking the waterways is to be installed prior. Now when looking at the plans the beam and great beams needs to be installed before the waterway is in put In place. These pieces are to be installed on bulkhead H. If the waterways are installed before, you will not be able to get them in place. Both of these beams are really crucial as they will provide support for all deck planking. This is not mentioned in either the instructions nor the practicum from Mr. Hunt.


-
A real femur bone, will keep her occupied for hours and then she will be tired falling asleep on a nice cushion or dog bed in the workshop. That metalwork you are doing is so good, I am considering sending you the raw metal that I have to make wonders for me and Syren. lol Beautiful work.
-
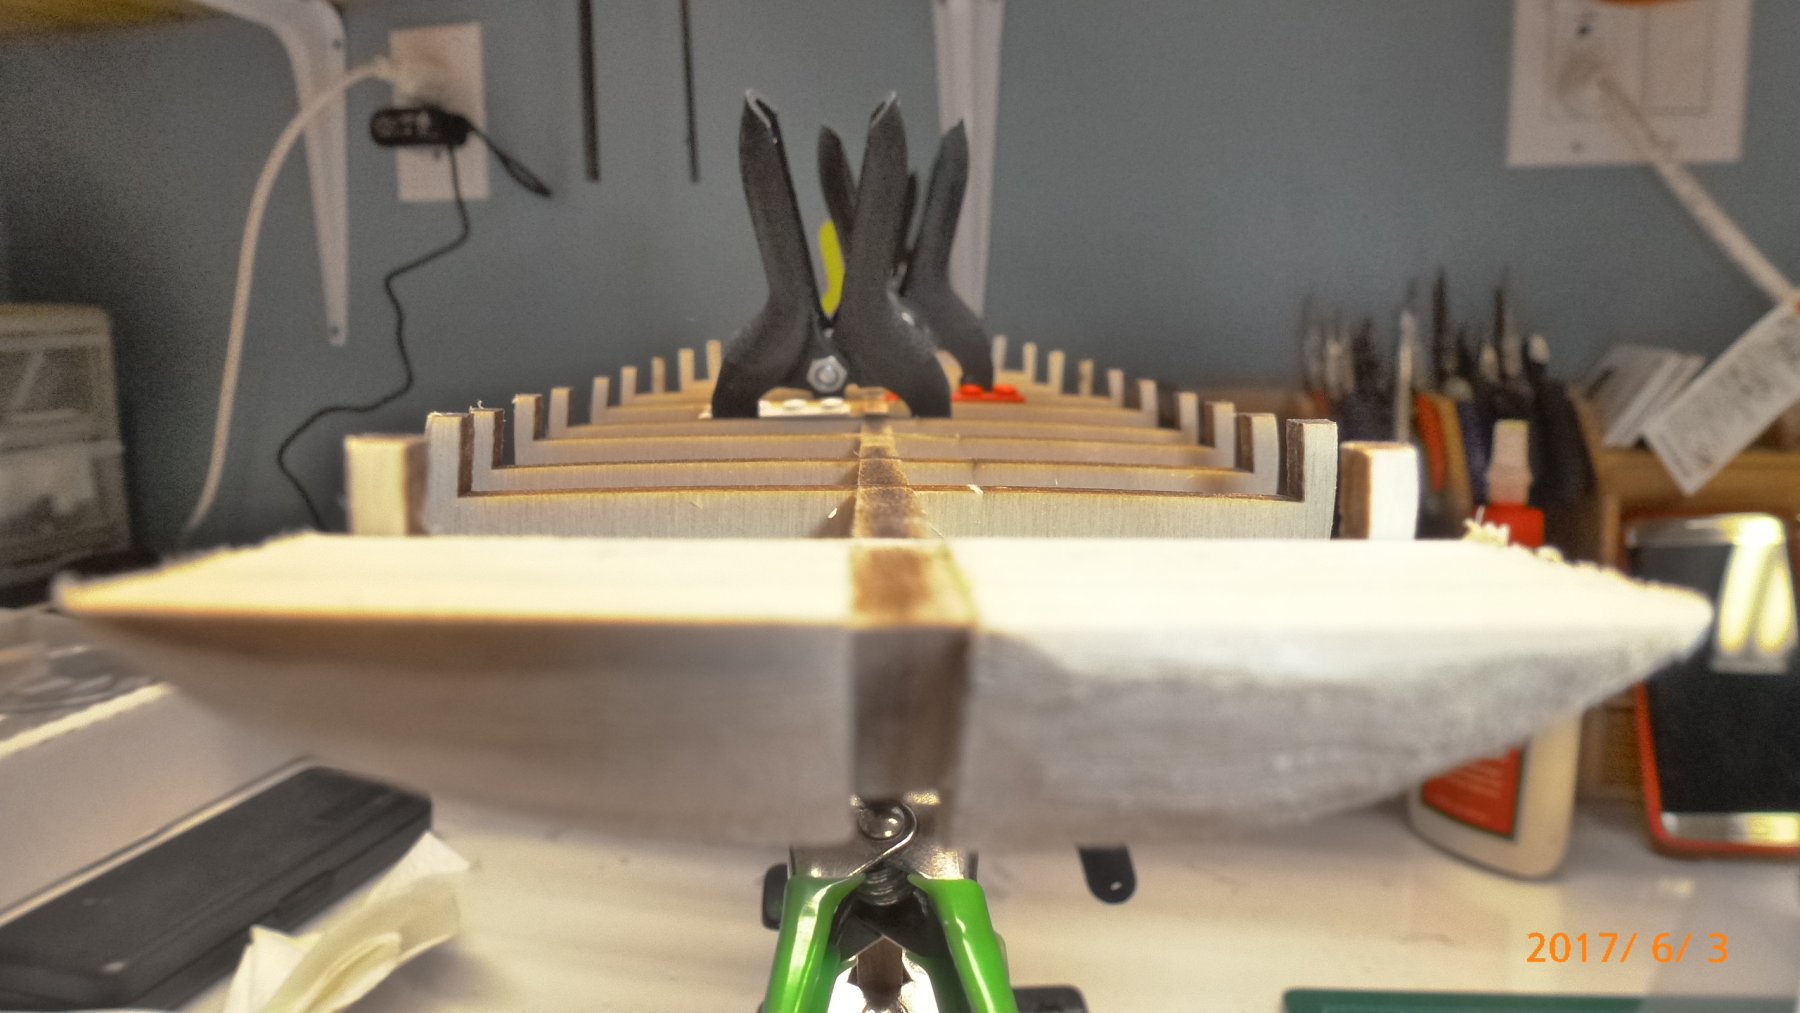
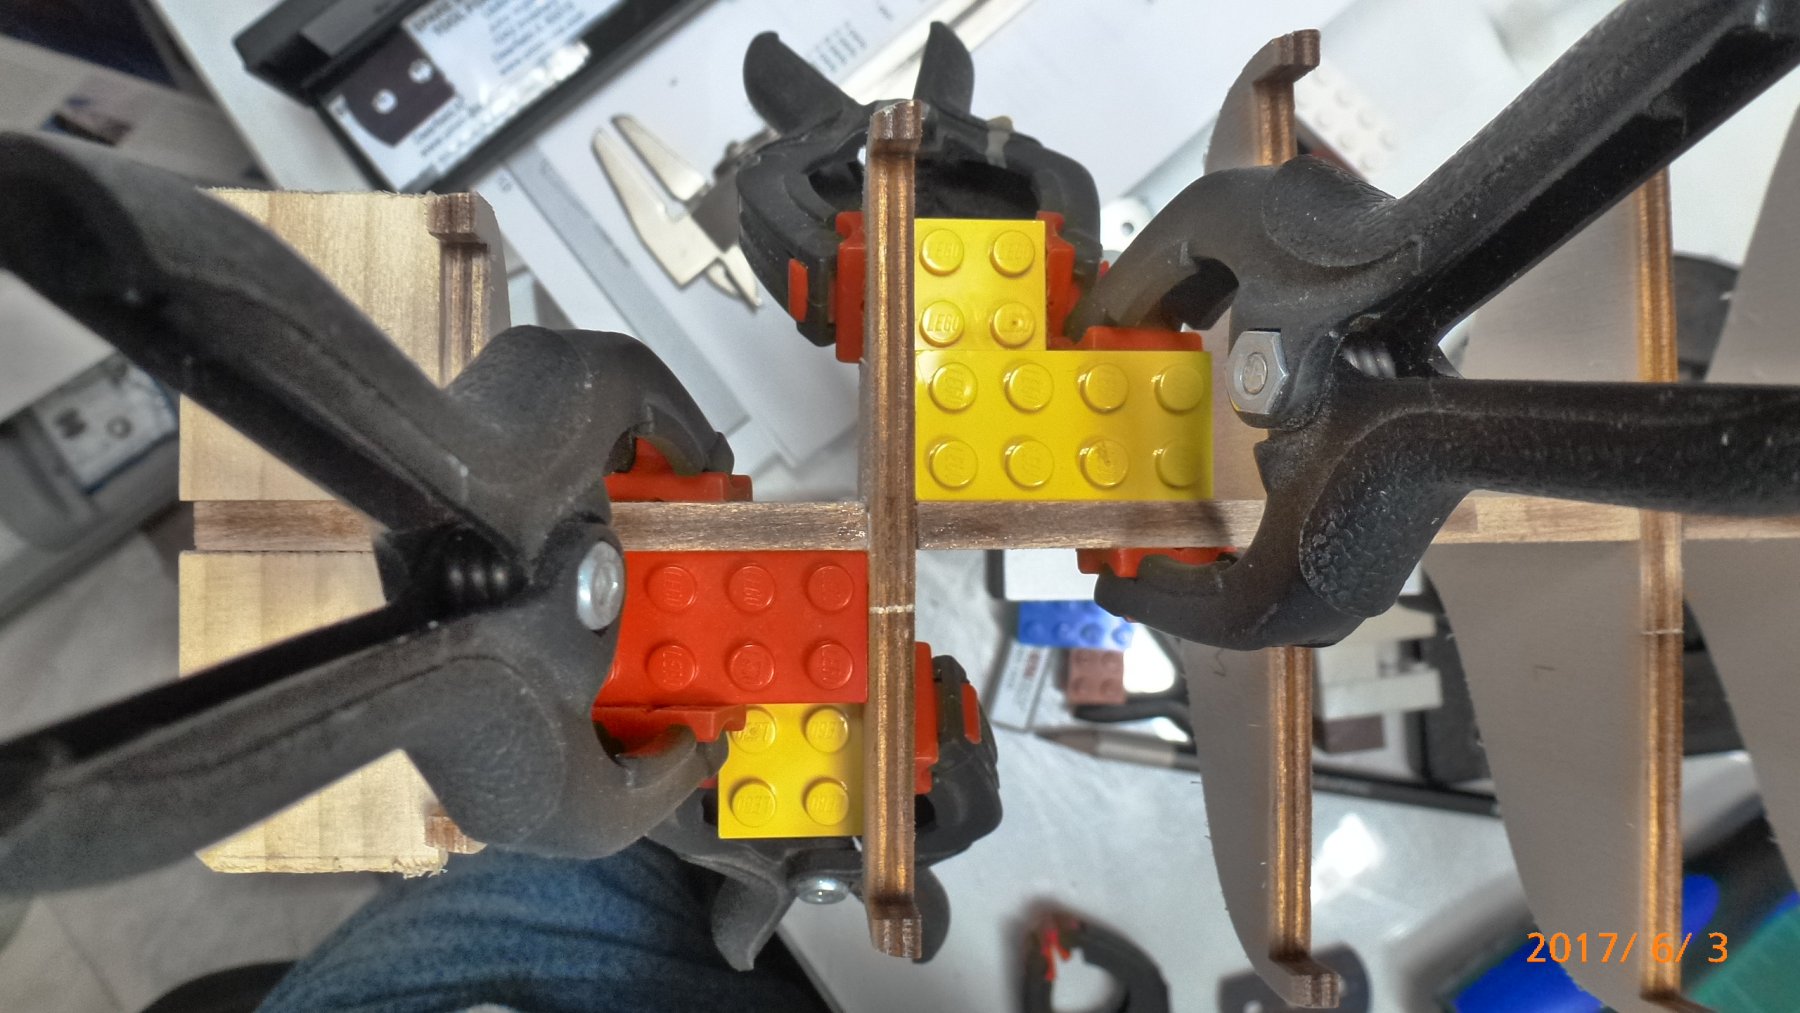
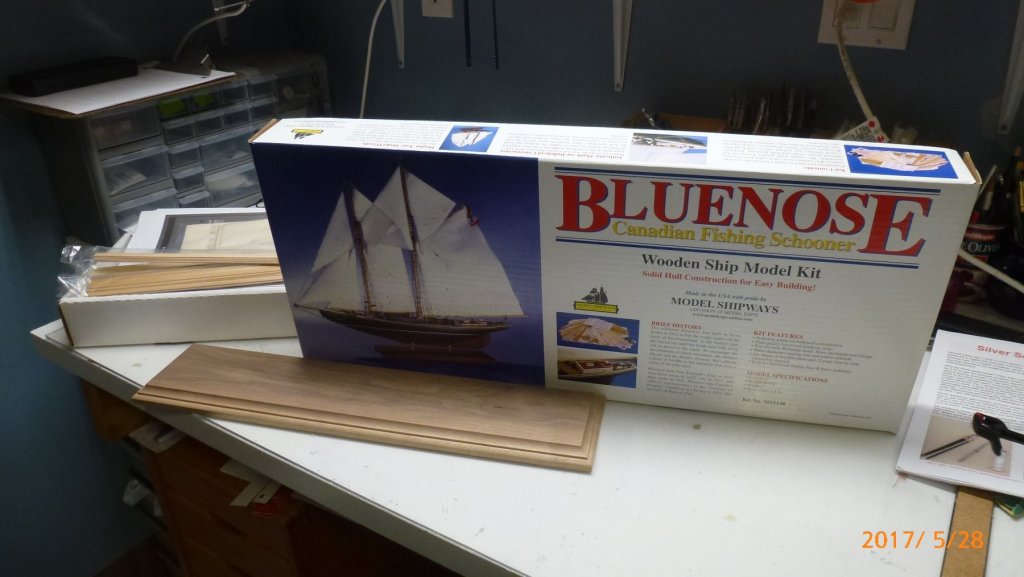
Okay, call me crazy if you like as this will be number three of models that I will be working on. But as I haven't encountered any problems with this one, I will proceed with the build of the famous Bluenose. This while I wait for parts for the Syren and Solo. I guess this kit doesn't need any introduction or picture of contents. So I will leave that out, however I do have extra material that I will be using later while building her. This extra comes from Syren Model Company, with other word our dear Chuck Passaro. This kit was bought many years ago and the keel and bulkhead plywood is still straight. When I was putting the false keel pieces together it turned out so straight I was amazed. The plywood is very nice and very little sanding is needed to get the bulkheads into each slot. Creating the rabbet was not as hard as I thought. Just being careful at the bow where the rabbet is extreme. I pre-beveled the bulkheads so there will be less sanding once they are glued in place.
-
Keith, I am giving my helper a bone while in the shop, this way I have the company of him while I am fiddling with my build. That metal work is very nice.
-
Rich, Isn't this what is so great with MSW, making friends with similar hobbies and interests. That's how I met some of the people from here and getting involved with RC sailing as an example. Enjoy the trip, I know you will like it.
- 1,135 replies
-
- 5
-
-
- model shipways
- syren
- (and 2 more)
-
Thank you Chuck!