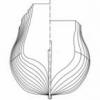
Model Mariner Posted February 19, 2013 Share #1 Posted February 19, 2013 Since I am interested not only in modeling but also very much in reconstruction of ships of the 17th and 18th century I have started this project (several years ago). As a boy I have built a model of the Mayflower from a German kit (Graupner Modelllbau). The plans for this model were well drawn but historically certainly not correct. The model was obviously designed to resemble closely the Mayflower model designed and built by R C Anderson for the Pilgrim Society Plymouth, Mass. In the 1920s but the lines of the hull were certainly far away from authentic. The following 2 pictures show a model from a Graupner kit (although not mine) in comparison to a model built from R C Anderson's plans It has been on my mind for many years to try my own reconstruction of the Mayflower based on whatever reliable information could be found and when I found Chuck’s build log of his Mayflower model on MSW this idea came back. Regarding reliable information for a Mayflower re-construction one has to say that there are only two hard facts about the Mayflower: 1. nobody knows really what she has looked like, there are no plans, no pictures or paintings and no description of her available she had a burden of approx. 180 tons With the Mayflower we have the same situation as with other historic ships like the Santa Maria, Golden Hind and several others: we can reconstruct the ship only so far that we can say “she might have looked like this” using general information about ships of the period or documented dimensions of ships of similar size. Fortunately there are several contemporary documents available which enable us to determine the dimensions and the shape of a hull of known tonnage within certain limits. Apart from the so-called Fragments of Early English Shipwrigthy (Matthew Baker) the most important is a Treatise on Shipbuilding by an anonymous author believed to have been written about 1620 and on this my reconstruction attempt is mainly based. Furthermore I have used some other contemporary data and design rules mentioned in Brian Lavery’s „The Colonial Merchantman Susan Constant 1605”. Before starting the actual build log I’d like to present some parts of my plans (still far away from being completed): The next picture is a frame disposition in the style of the Navy Board models: and the last picture for today shows the current status of my model: Klaus EdT, Elmer Cornish, Erebus and Terror and 2 others 5 Quote Current builds: Berlin 1674 - scratch built - Navy Board Style Mayflower - scratch built (own reconstruction) Link to comment Share on other sites More sharing options...
Alex M Posted February 20, 2013 Share #2 Posted February 20, 2013 Hello Klaus, great to see you back! It is a great research and extraordinary reconstruction you have done with Mayflower! Alexander Quote Current build: HMS Sphynx, 20 gun ship launched in 1775 at Portsmouth, Hampshire. On the drawing board: HMS Anson, 64 gun third rate ship of the line, launched in 1781 at Plymouth Link to comment Share on other sites More sharing options...
Paul Salomone Posted February 20, 2013 Share #3 Posted February 20, 2013 Hello Klaus, I can only express what I really feel, - a fine build indeed, and from what I see, you did your bit of research as well. Shall follow this build. Quote Cheers Paul NEVER RETREAT - NEVER SURRENDER JUST DO IT YOUR WAY AND NEVER LOOK BACK Current Build: 1:72nd German WWII Heavy Battle Cruiser DKM Scharnhorst http://modelshipworld...1:72ndDKMScharnhorst/ Future Build Logs: German WWII Captured Flower Class Corvette. German WWII Armed Trawler. German WWII Aircraft Carrier - Graf Zeppelin. Link to comment Share on other sites More sharing options...
michael mott Posted February 20, 2013 Share #4 Posted February 20, 2013 Klaus the model look beautiful. I will follow along. Michael Quote Current builds Bristol Pilot Cutter 1:8; Skipjack 19 foot Launch 1:8; Herreshoff Buzzards Bay 14 1:8 Other projects Pilot Cutter 1:500 ; Maria, 1:2 Now just a memory Future model Gill Smith Catboat Pauline 1:8 Finished projects A Bassett Lowke steamship Albertic 1:100 Anything you can imagine is possible, when you put your mind to it. Link to comment Share on other sites More sharing options...
the learner Posted March 31, 2013 Share #5 Posted March 31, 2013 I have seen this set of plans before, nice and clean and you should be able to build a good looking model from them. Good luck Quote Cheers, GuyThe LearnerCurrent Member NRG,SMA Current Build: HMS Triton 1:48 on line Link to comment Share on other sites More sharing options...
Model Mariner Posted April 5, 2014 Author Share #6 Posted April 5, 2014 (edited) I did not work on my models for nearly one year,so this log also slipped from my mind. But now I have resumed work on both my models and intend to bring also this log up date (in a slighly shorter form then the "lost" log). When I started with the re-construction I had not yet decided if I would build a model in the Navy Board style (for this reason I prepared the drawing with the disposition of Navy Board framing) or a PoB model. Later on I decided to take the second option and to build a fully planked PoB model in scale 1:64. The bulkheads and centerboard will be made from ply, all visible wood will be pear. So as next step I had to draw a plan fort he bulkheads and a centerboard: and with this the work on the model started:Centerboard and bulkheads: the centerboard (6 mm plywood): the bulkheads are also made from 6mm ply, for toptimbers I glued pieces of pear wood on. My aim is that on the finished model no piece of ply should be visible: bulkheads forward of midships: and the bulkheads of the aft part: Klaus Edited April 6, 2014 by Model Mariner Elmer Cornish 1 Quote Current builds: Berlin 1674 - scratch built - Navy Board Style Mayflower - scratch built (own reconstruction) Link to comment Share on other sites More sharing options...
Model Mariner Posted April 6, 2014 Author Share #7 Posted April 6, 2014 (edited) The centerboard does not include the keel, stem and sternpost, these parts will be made from pear and glued on later. It seems it is impossible today to purchase a bit of ply which is absolutely straigtht, my centerboard was also slightly bent. To rectify this I clamped the centerboard to a flat board onto which I had marked the centerline and the bulkhead positions and so forced it to be straight. Between the bulkheads I glued rectangular stiffeners with the result that the centerboard could not bend back and remained absolutely straight. after all bulkheads and stiffeners were glued in I had a straight and very rigid framing: Since the toptimbers and parts of the frames through gun ports will be visible later on I have inserted pieces of pear in the respective positions. The stiffeners in areas behind gunports have been stained black. View of the stern assembly: The helm port is framed with pear and a false transom (also pear) has been glued onto the tuck piece: Klaus Edited April 6, 2014 by Model Mariner Erebus and Terror, mtaylor, Aussie048 and 3 others 6 Quote Current builds: Berlin 1674 - scratch built - Navy Board Style Mayflower - scratch built (own reconstruction) Link to comment Share on other sites More sharing options...
Erebus and Terror Posted April 6, 2014 Share #8 Posted April 6, 2014 Wonderful work! Model Mariner 1 Quote Building Terror Blog Link to comment Share on other sites More sharing options...
Model Mariner Posted April 8, 2014 Author Share #9 Posted April 8, 2014 (edited) Thanks for the compliment E&T. Up to now she does not really look like a ship but rather ugly. (Dummy) knight for the fore yard tie: The knight for the fore yard tie is located under the forecastle deck and will not be visible on the finished model. The only thing which will be visible is the upper part of the halyard rigged between the knight and the ramshead block and it would be impossible to rig this halyard later on. To overcome this I made a square hole and a dummy knight which fits into it. The dummy knight (with the halyard rigged to a ramshead block) will be glued into this hole later before the forecastle deck will be closed. Preparation for planking and fairing the hull:I prefer to plank in one layer of the correct thickness rather than making the double planking as it is done with the majority of PoB models.In my opinion the best way to get a perfect bevelling is to glue in fillers between all bulkheads and sand them to the required shape. This ensures that the bevelling is correct at each height at each bulkhead. For the fillers I use Obeche, except for the fillers at the bow which I make in layers in following 2 steps:At first I make the bow filler on one side only by cementing 6 layers of 5mm maple wood temporyrily togehter (rubber cement). These are then sanded to the required shape. By taking the layers apart I get templates for the other side, this makes it quite easy the get the bow fillers symmetrically. The fillers at the port side are glued in and sanded to the required shape: and with the starboard side also done she begins to resemble a ship: Klaus Edited April 8, 2014 by Model Mariner CaptainSteve, Omega1234, hexnut and 6 others 9 Quote Current builds: Berlin 1674 - scratch built - Navy Board Style Mayflower - scratch built (own reconstruction) Link to comment Share on other sites More sharing options...
Model Mariner Posted April 11, 2014 Author Share #10 Posted April 11, 2014 (edited) Planking of stern: Planking of the model starts with the stern for the simple reason that the planking of the ships side overlaps the planking of the square tuck and the stern. Since the bulkhead of the tuck is made from ply I put in a frame of pear wood for the port of the tiller and below this a fake transom (also pear) The tuck is planked except a 4 mm strip in the center into which the sternson will be glued later: The lower part of the stern consists of 2 frames made from several strips (A and B in following drawing) which were planked on the outside (D) after glueing them together. The window openings in the inner part (A) into which I have glued window panes (clear plastic - green in the drawing) are a little bit bigger then these in the outer part (B). C shows A and B glued together viewed from the inside. D shows the completet assembly from the outer (aft) side The window grids are made from thin gray thread which is glued into notched in the backside of B. A section through the upper part of the window opening is shown on the left hand side of the drawing. The ply wood behing the windows has been stained black and is not visible any more throughthe windows, the cabin looks dark. The next 2 pictures show the finished stern: Klaus Edited April 15, 2014 by Model Mariner Elmer Cornish, Aussie048, Erebus and Terror and 4 others 7 Quote Current builds: Berlin 1674 - scratch built - Navy Board Style Mayflower - scratch built (own reconstruction) Link to comment Share on other sites More sharing options...
mtaylor Posted April 15, 2014 Share #11 Posted April 15, 2014 Nice work, Klaus. Pear is one of those woods that's a real joy to work with. Model Mariner 1 Quote Mark "The shipwright is slow, but the wood is patient." - me Current Build: Past Builds: La Belle Poule 1765 - French Frigate from ANCRE plans - ON HOLD Triton Cross-Section NRG Hallf Hull Planking Kit HMS Sphinx 1775 - Vanguard Models - 1:64 Non-Ship Model: On hold, maybe forever: CH-53 Sikorsky - 1:48 - Revell - Completed Licorne - 1755 from Hahn Plans (Scratch) Version 2.0 (Abandoned) Link to comment Share on other sites More sharing options...
Model Mariner Posted April 16, 2014 Author Share #12 Posted April 16, 2014 (edited) Toptimbers:Since the inner side of the bulwarks will not be planked, I need to add toptimbers between the ones already treenailed to the bulkheads. Since these are quite thin (approx. 2.5 x 2.5 mm or 1/10") there is always the danger of breaking some of them when working on the hull. To avoid this I have glued pieces of Obeche between them as stiffener, which will be cut out again later: All toptimbers are glued in, the next step is to make the keel, stem and sternson before planking can be started. Keel, stem and sternson, knee of the head: The rabbet in the keel and stem has been cut manually by means of a Stanley knife: Keel, stem (with knee of the head) and sternson are glued onto the model: The hull is now ready for planking Klaus Edited April 16, 2014 by Model Mariner Aussie048, yvesvidal, Omega1234 and 6 others 9 Quote Current builds: Berlin 1674 - scratch built - Navy Board Style Mayflower - scratch built (own reconstruction) Link to comment Share on other sites More sharing options...
jaerschen Posted April 17, 2014 Share #13 Posted April 17, 2014 Hi Klaus Very nice to see your Mayflower here. It's always a pleasure to follow that interesting project. Model Mariner 1 Quote Juergen Actually in progress: 50-Gun Ship HMS Leopard 1790 POB in scale 1/64 HMS Triton 1773 POF 1/48 Finished: Brigg Irene (ex. HMS Grasshopper) 1/50 Link to comment Share on other sites More sharing options...
Model Mariner Posted April 22, 2014 Author Share #14 Posted April 22, 2014 Wales: The run of the planks is determined by the mainwales, so as first step the position of the wales needs to be marked on the hull. I have made a template for each of the bulkhead positions onto which I have indicated the heigth positions of the wales which I have then transferred to the hull: At first I have put on the upper main wale. The main wales are not only bent in two directions but are also twisted considerably over the lengths of the hull. A further difficulty is that the upper und lower surface are (at least with English ships) always horizontal, while the outer and inner surface have of course the angle according to their position on the hull surface. The following picture shows the approximate cross section of the upper wale at different frame positions: I made the wales from strips of pear with approx. 4 x 4.5 mm (final thickness is 3mm instead of the 4,5 mm). After bending these to the required shape the inner surface was sanded to the required angle to achieve the correct fit to the hull surface. The upper and lower surface were stained black before the wale was glued to the hull, the outer surface will be stained later when the wale has been sanded to the correct thickness. The upper wale is glued on but not yet treenailed: The plank between the main wales is on: Lower main wale added, wales and the plank between the wales have been treenailed, approx. 550 treenails for these three strakes: Klaus Omega1234, yvesvidal, Elmer Cornish and 3 others 6 Quote Current builds: Berlin 1674 - scratch built - Navy Board Style Mayflower - scratch built (own reconstruction) Link to comment Share on other sites More sharing options...
Model Mariner Posted May 3, 2014 Author Share #15 Posted May 3, 2014 Planking of the hull: the strakes over the main wale are a relaltively simple job: here the first 5 strakes over and one strake below the wales are glued on and treenailed: Klaus Elmer Cornish, mtaylor and yvesvidal 3 Quote Current builds: Berlin 1674 - scratch built - Navy Board Style Mayflower - scratch built (own reconstruction) Link to comment Share on other sites More sharing options...
Model Mariner Posted July 2, 2014 Author Share #16 Posted July 2, 2014 (edited) Planking of the underwater hull: At first I installed one plank (which served more or less as a guiding batton) between the keel and the main wale in a way that it was approx. in the middle between keel and main wale at each frames station and taking care that it followed a fair curve. Then I worked from the lower wale down to this plank and then from the keel upwards. Towards the bow the planks have to be reduced in widths and the number of planks has also to be reduced. Some stealers are required to achive this, the first stealer is shown in the follwing pictures: Each plank is treenailed twice at each frame position: Planking of the underwater hull is finished, I needed 3 stealers in the bow area: Klaus Edited July 2, 2014 by Model Mariner Elmer Cornish, Omega1234, Mirabell61 and 4 others 7 Quote Current builds: Berlin 1674 - scratch built - Navy Board Style Mayflower - scratch built (own reconstruction) Link to comment Share on other sites More sharing options...
Model Mariner Posted July 3, 2014 Author Share #17 Posted July 3, 2014 (edited) Planking of beakhead bulkhead and main deck: at first the waterway is installed on both sides, most of the temporary fillers between the toptimbers have been cut out, the upper wale has been added: preparation of the the main hatch coaming: strips of balck paper have been glued onto the deck planks as caulking: The coaming of the hatch is glued on, the "opening" of the hatch is painted black and will be covered by a grating later, the first 7 strakes of deck planking are glued on: planking of main deck is finished: the beakhead bulkhead is planked planking of the beakhead deck and one strake of planking over the wale has been added: Klaus Edited July 3, 2014 by Model Mariner mtaylor, SawdustDave, Mirabell61 and 4 others 7 Quote Current builds: Berlin 1674 - scratch built - Navy Board Style Mayflower - scratch built (own reconstruction) Link to comment Share on other sites More sharing options...
SawdustDave Posted July 3, 2014 Share #18 Posted July 3, 2014 Hi Klaus.... I cannot tell you how delighted I am to find your wonderful Mayflower build log. Not only, is it a pleasure to see your fine craftsmanship, but also extremely educational. Following your build is certainly going to help me improve my own attempt to build her as well (actually, I am working on two Mayflowers of different scales). So glad to see your walnut hull tree nailed, as I was not sure if I was going to tree nail the larger of my two builds....now I am sure I will. Dave Model Mariner 1 Quote Sawdust Dave - Current build - USS Constitution 1:60th (scratch).... Visit my blog site - All previous builds.... http://davesmodelships.blogspot.com Link to comment Share on other sites More sharing options...
Model Mariner Posted July 4, 2014 Author Share #19 Posted July 4, 2014 Hi Klaus.... I cannot tell you how delighted I am to find your wonderful Mayflower build log. Not only, is it a pleasure to see your fine craftsmanship, but also extremely educational. Following your build is certainly going to help me improve my own attempt to build her as well (actually, I am working on two Mayflowers of different scales). So glad to see your walnut hull tree nailed, as I was not sure if I was going to tree nail the larger of my two builds....now I am sure I will. Dave Thanks for the kind words, Dave. It's always nice to hear (read) that others find one's log educational as you wrote. My Mayflower hull by the way is not made from walnut, with a few exceptions I use only pear. For the treenails I have tried different kinds of wood. Pear is extremely difficult to draw, so I made most of them from maple but I have tried also other kinds of wood. I do not like the treenails looking brighter than the planks as they look now on my model. But I made some tests and found out that after applying a finish (no matter if oil or wax is used) the oil or wax penetrates the wood of the treenails (since their exposed surface is cut across the grain) much more than the planks and then even maple treenails look actually darker than the pear planks. The following picture shows a piece of ply onto which I have glued some pear planks into which I put some treenails made from maple. On the left hand side (strips marked A) I have applied then one, two and three coats of tung oil, and on the strips marked B one, two and three coats of wax. The parts without numbers show the planks and treenails without any finish applied. As you can see even with only one coat of oil or wax the treenails look alredy darker than the planks. Regarding your own Mayflowers: I certainly would recommend treenailing them. It is a tedious job but in end the result is worth the effort. Klaus Piet, EdT, SawdustDave and 1 other 4 Quote Current builds: Berlin 1674 - scratch built - Navy Board Style Mayflower - scratch built (own reconstruction) Link to comment Share on other sites More sharing options...
SawdustDave Posted July 4, 2014 Share #20 Posted July 4, 2014 Thanks for your response, and the great demo Klaus. I was, indeed, wondering about the tree nail shade, and what would be the difference after applying a finish. I guess I have now looked at walnut so much, everything is beginning to also look like walnut. Never have worked with pear....although I do see it a lot among really fine builders such as yourself. I look forward to seeing your continued progress. Dave Quote Sawdust Dave - Current build - USS Constitution 1:60th (scratch).... Visit my blog site - All previous builds.... http://davesmodelships.blogspot.com Link to comment Share on other sites More sharing options...
Model Mariner Posted July 5, 2014 Author Share #21 Posted July 5, 2014 Planking of the upper works: A few more strakes of planking have been added and drilled for treenailing: the same on the starboard side with treenails put in: Klaus Elmer Cornish, Piet, mtaylor and 2 others 5 Quote Current builds: Berlin 1674 - scratch built - Navy Board Style Mayflower - scratch built (own reconstruction) Link to comment Share on other sites More sharing options...
Model Mariner Posted July 8, 2014 Author Share #22 Posted July 8, 2014 To be able to continue the upper part of the planking the windows at the great cabin had to be built in (they are made up in about the same way as the stern windows described earlier): Midships I have reached now the part where the planks are glued and treenailed only at the relatively thin toptimbers. At midships this is the final height, so at least in this area there is no more danger of breaking the toptimbers: For a considerable time I was not sure if I should leave the upper works naturally of if I should paint it. In the end I decided to paint some parts. The geometrical patterns consisting of triangles of different colors which are often shown on Mayflower models are obvioulsy derived from the drawings of Matthew Baker, but were outdated already at the time of the Mayflower. My idea is to stain the upper strakes in red and then paint some yelow friezes onto the stained planks.Since paint and I are not very good friends (I always fear to spoil my models when I have to apply paint) I tested this at first on a few planks (which are not glued onto the model) to see what it looks like: Since this did not look too bad (at least from a distance of several feet) I decided to follow this route (note: no risk - no fun). The next picture gives an idea how the planned decoration would look on the model (at the aft part the decoration is painted onto a piece of cardboard - not yet the model): For the red I intend to use wood stain, for the black strip Chinese ink (which penetrates the wood better than wood stain) and for the yellow acrylic paint) Klaus WackoWolf, Piet, mtaylor and 2 others 5 Quote Current builds: Berlin 1674 - scratch built - Navy Board Style Mayflower - scratch built (own reconstruction) Link to comment Share on other sites More sharing options...
SawdustDave Posted July 8, 2014 Share #23 Posted July 8, 2014 What a beautiful hull planking Klaus. This will help me greatly. Thanks again. Dave Quote Sawdust Dave - Current build - USS Constitution 1:60th (scratch).... Visit my blog site - All previous builds.... http://davesmodelships.blogspot.com Link to comment Share on other sites More sharing options...
Model Mariner Posted July 16, 2014 Author Share #24 Posted July 16, 2014 Thanks for the comments and likes! The next three planks are now on and have been stained red (the red does not look as bright as in the pictures): I made a draft of the envisaged frieze on a strip of paper of the size of the three planks. Since I did not know a better way to transfer the design to the planks I drew it on to a strip of cardboard and cut away the upper part. The lower part (black in the next picture) was used as a jig to trace at least the central wavy line slightly with pencil onto the red planks. The frieze was then painted with yellow acrylic paint freehand onto the planks. The wet yellow paint dissolved the red wood stain a little bit and mixed up with the yellow, so this resulted in an orange hue. At first I thought I would paint once more over the dry acrylic paint to achieve the envisaged yellow but decided in the end against it, I like the dull orange actually more than a bright yellow. Klaus Piet, mtaylor, Elmer Cornish and 5 others 8 Quote Current builds: Berlin 1674 - scratch built - Navy Board Style Mayflower - scratch built (own reconstruction) Link to comment Share on other sites More sharing options...
Model Mariner Posted July 17, 2014 Author Share #25 Posted July 17, 2014 Pintle braces, gudgeons and rudder: I used brass strips 0.2 x 2 mm and a brass tupe with an inner diameter of 1 mm to make the pinle braces and gudgeons. The tube has been soldered to the outside of the bent brass strips. I made a simple jig to be able to fix the tube and brass strips in the correct position for soldering: Five pairs of pintle braces and gudgeons of different widths are required (since stem respectively rudder are tapered from keel to transom): To be able to position the gudgeons correctly at the stem the rudder has to be made. The rudder is made from 3 parts bolted together (glued and treenailed in the model): The tiller is shortened since the inner part it is not visible when the rudder is mounted on the model. Klaus Elmer Cornish, jburchfield1@wowway.com, mtaylor and 2 others 5 Quote Current builds: Berlin 1674 - scratch built - Navy Board Style Mayflower - scratch built (own reconstruction) Link to comment Share on other sites More sharing options...
SawdustDave Posted July 17, 2014 Share #26 Posted July 17, 2014 I guess there is no end to the many different paint patterns found on Mayflower models huh, Klaus. That is not a criticism mate, I really like the looks of the one you are using....just haven't seen that one before. Beautiful job on her rudder. Dave Quote Sawdust Dave - Current build - USS Constitution 1:60th (scratch).... Visit my blog site - All previous builds.... http://davesmodelships.blogspot.com Link to comment Share on other sites More sharing options...
Model Mariner Posted July 31, 2014 Author Share #27 Posted July 31, 2014 The catheads were made and glued onto the model: 2 more strakes of planking and a wale added: The poop deck has been planked. Black paper has been used to imitate the caulking: planking continued: Planking of the ships side is finished: Klaus Mirabell61, mtaylor, SawdustDave and 3 others 6 Quote Current builds: Berlin 1674 - scratch built - Navy Board Style Mayflower - scratch built (own reconstruction) Link to comment Share on other sites More sharing options...
hlipplaa Posted July 31, 2014 Share #28 Posted July 31, 2014 Looks good, really patient of you to do all that treenailing. Payed off. Quote Halve maen 1608 (rigging and improvements to be finished) Enterprise 1799 Building currently Link to comment Share on other sites More sharing options...
SawdustDave Posted August 1, 2014 Share #29 Posted August 1, 2014 (edited) Also finding different versions of her wales.... Guess we can put them anywhere we like. I like the double whales below the gun ports. Now thinking I might go with that on my MF#2. Dave Edited August 1, 2014 by SawdustDave Quote Sawdust Dave - Current build - USS Constitution 1:60th (scratch).... Visit my blog site - All previous builds.... http://davesmodelships.blogspot.com Link to comment Share on other sites More sharing options...
Model Mariner Posted August 3, 2014 Author Share #30 Posted August 3, 2014 Thanks for the comments and likes Now back to painting. What I have achieved is certainly not perfect, but I'm not unhappy with the result: From a distance of a couple of feet I think it looks rather good, so I have put on a pinted board on top of the beakhead bulkhead as well: Klaus Omega1234, Aussie048, archjofo and 3 others 6 Quote Current builds: Berlin 1674 - scratch built - Navy Board Style Mayflower - scratch built (own reconstruction) Link to comment Share on other sites More sharing options...

Recommended Posts
Join the conversation
You can post now and register later. If you have an account, sign in now to post with your account.