


usedtosail
-
Posts
2,423 -
Joined
-
Last visited
Content Type
Profiles
Forums
Gallery
Events
Everything posted by usedtosail
-
 Sounds great Anthony. Will you have a separate build log for it?
 -
Bring a warm coat Dave. It has been kind of chilly around here lately.
- 742 replies
-
- 4
-

-
- constitution
- frigate
- (and 1 more)
-
Thanks Michael. Your Halifax is looking so good. You will have plenty of time later to pick up on the Constitution.
- 1,354 replies
-
- 1
-
-
- constitution
- model shipways
- (and 1 more)
-
Congratulations Gramps/Anthony. I am looking forward to following along with your build, as this boat has peaked my interest, being Sicilian as I am.
- 32 replies
-
- 2
-
-
- santa lucia
- panart
- (and 1 more)
-
Nice work so far. I look forward to following along with your build. If you have any questions as you go, don't hesitate to ask questions. There are some really good Connie builders on this site.
-
Thank you, and you are very welcome Michael. I enjoy documenting my work and hope it will be a help for others in the future. I look forward to following along with your future build when you get to that point.
- 1,354 replies
-
- 2
-
-
- constitution
- model shipways
- (and 1 more)
-
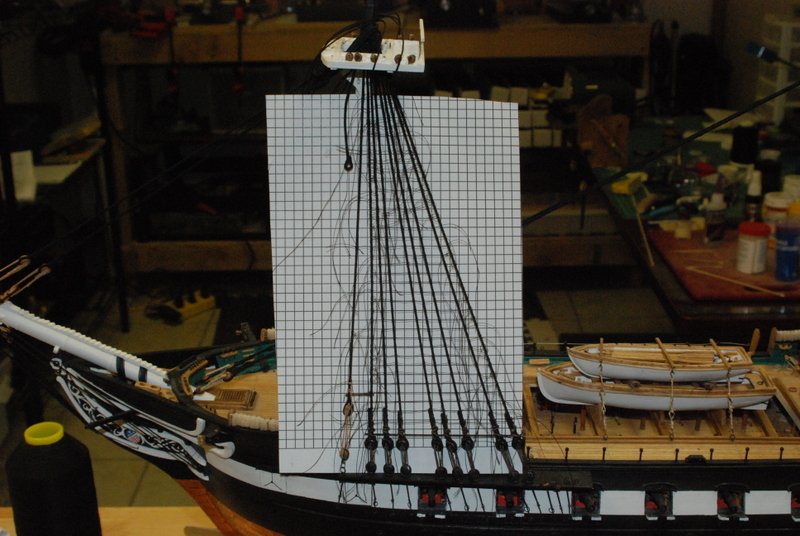
As promised, here is the jig I started doing the ratlines with. It worked pretty well, but the spacing was a bit uneven with it. I then switched to graph paper as a guide, which is how I have always done ratlines in the past. I tied all of the fore port ratlines before fixing any of the knots. I then started fixing every fifth line, which corresponds to the ratlines that start at the swifter. Once these dry I will fix the intermediate ratlines. I left one ratline off about 1 1/2" below the top for the futtock stave. I split some3/64 x 3/32 " strips to make 3/64" square strips for the futtock staves. I painted these black.
- 1,354 replies
-
- 10
-
-
- constitution
- model shipways
- (and 1 more)
-
Well. my approach for the snakes between the fore and main stays worked out nicely. I basically just tied the snake lines to the stays with clove hitches, weaving the snakes back and forth. It may be hard to see in these photos, but I like the end result. So now I am adding the ratlines. Here are few to start, but I have about half of the fore port ratlines tied on this morning. I have not fixed any of the knots yet, so I can adjust as I go. I am using two 5/32" wide wood strips that I clamp at each end as guides, as well as graph paper behind the shrouds as guidelines. I get some pictures of those tomorrow.
- 1,354 replies
-
- 9
-
-
- constitution
- model shipways
- (and 1 more)
-
I love your attention to detail on those boats. The pinnace is coming out great.
-
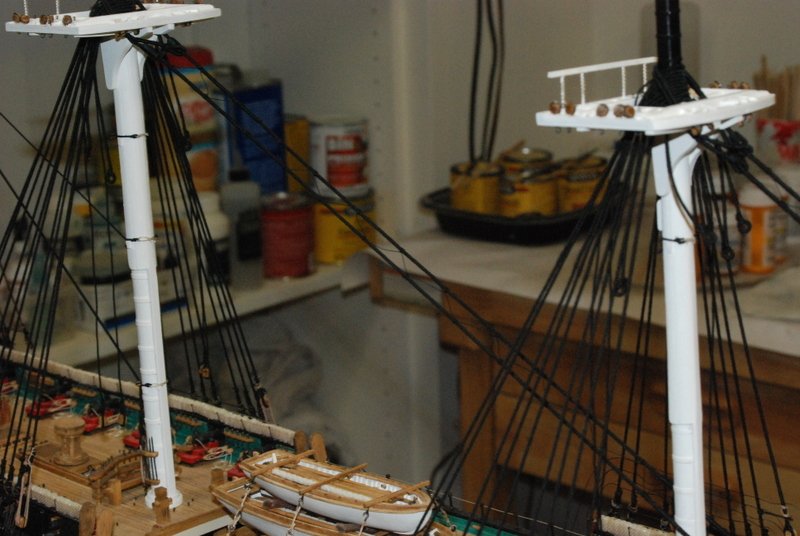
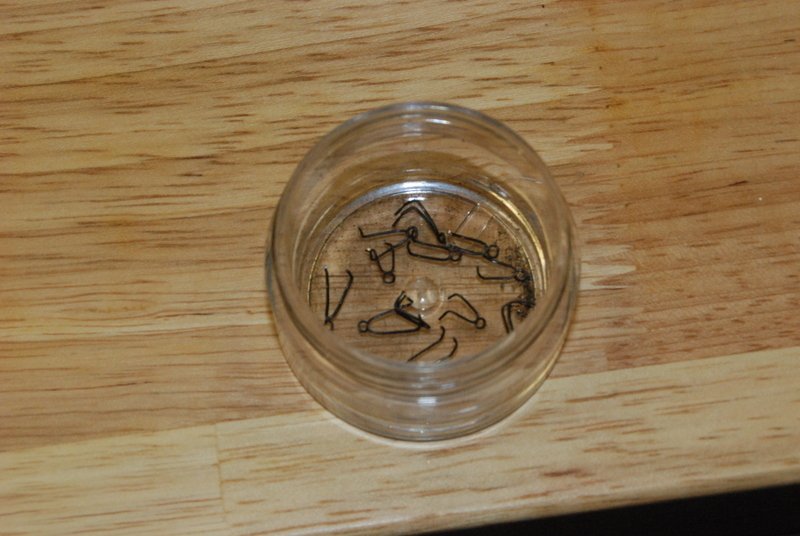
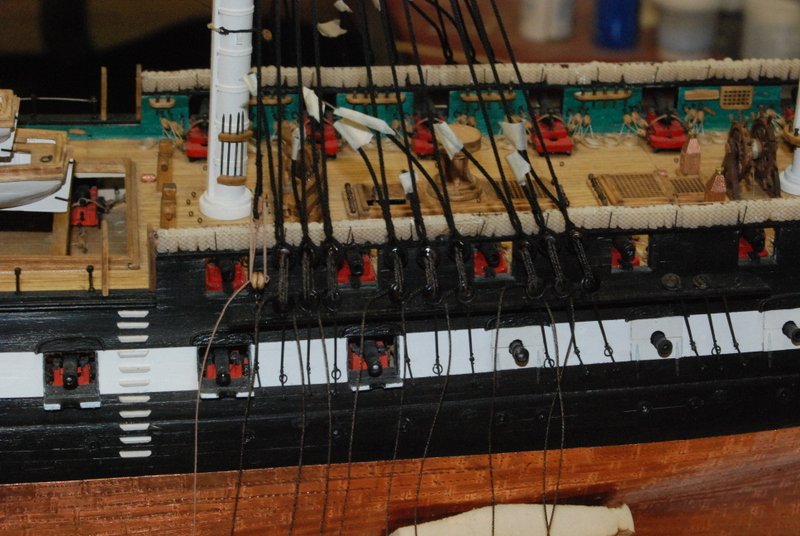
Thanks Popeye and all the likes. I am really enjoying the rigging of this ship. There is a lot to do but I think I have a good plan to get it all done in a reasonable time, like maybe this calendar year? I am taking my time though because I don't want to look at something and wish i had done it better. You all know what that is like. I finished adding the mizzen sheer poles and tied off the deadeye lanyards. You can also see in those pictures the breast backstays, which I added to all the masts, but are just hanging loose for now. These were supposed to be added to the mast tops before the fore and main stays, but on the main and fore masts I was able to slide these under those stays. On the mizzen I added them before the mizzen stays. These are just hanging for now because if I rig them now they will interfere with the ratline rigging. I did make the wire brackets that fit over the lower deadeyes that the bottom tackle blocks for these will be hooked to. It took be some trial and a few errors to get something that both looked good and stayed hooked. The plans are not much help with these. These and the triple blocks with hooks that go into them will be put aside until after the ratlines are rigged. Before the ratlines, I am going to add the snakes between the fore stays and main stays. I have done some experimentation and I think I can tie these like ratlines with clove hitches. We will see how that works. Xken has a different method he used on his Connie, which will be my fall back.
- 1,354 replies
-
- 7
-
-
- constitution
- model shipways
- (and 1 more)
-
Its on my possible future builds list, but right now I am dealing with another American icon ship. Yours looks great, Mike.
- 504 replies
-
- 2
-
-
- washington
- galley
- (and 1 more)
-
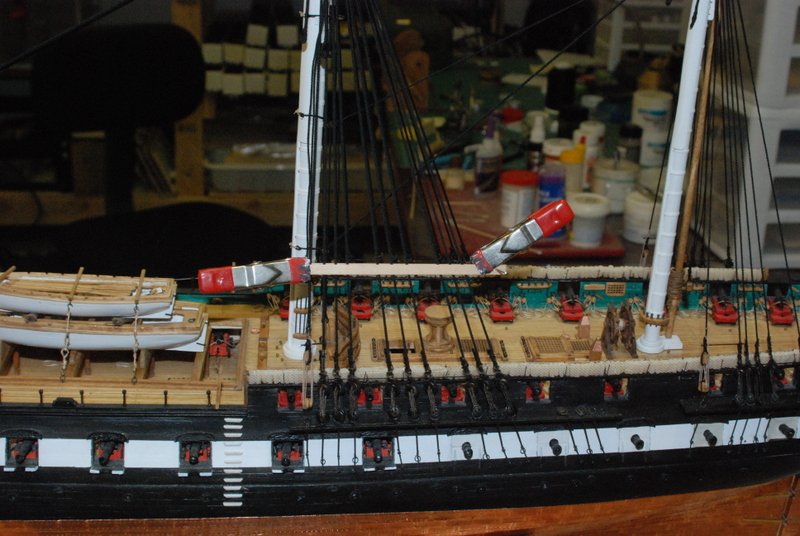
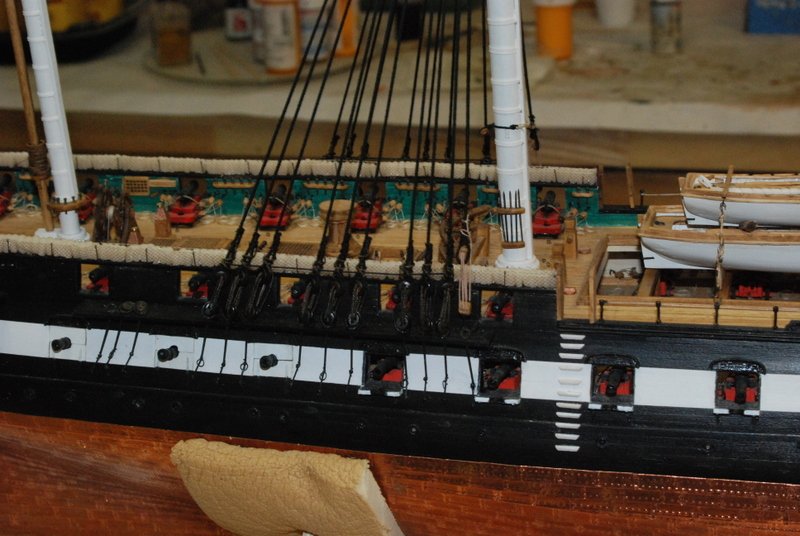
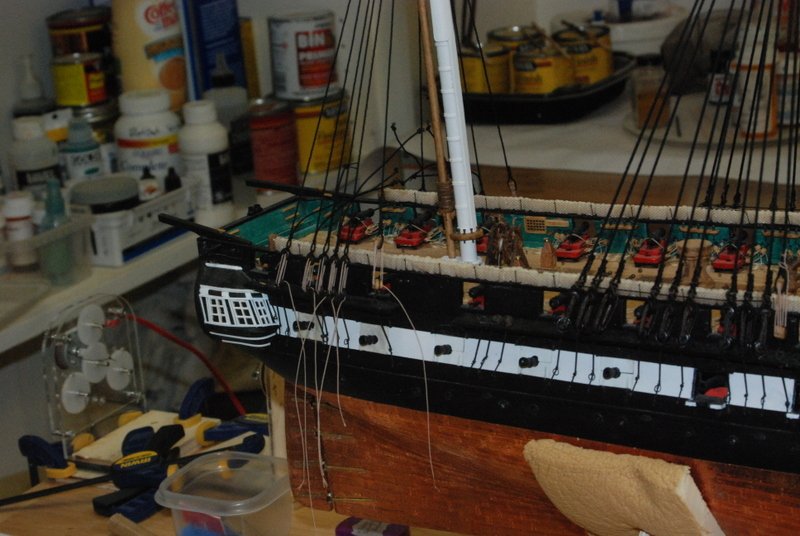
Thanks Rob and Popeye, and the likes. I finished the mizzen stay and preventer stay. These were a little tricky because with the bullseyes they had to go through on the main mast, the serving of the bullseye at the bottom end had to be done in place. I did these, then did the loop at the top for the mouse on the main stay, but the top loop first on the preventer stay. At the bottom, I already had the eyebolts in the deck for the bottom bullseye for these, so I stropped them with hooks that I just hooked into the eyebolts after threading the lanyards through the bullseyes, tightened them up, and tied off the lanyards to themselves. Now to add the sheer poles to the mizzen shrouds.
- 1,354 replies
-
- 12
-
-
- constitution
- model shipways
- (and 1 more)
-
Happy Birthday! Do you believe another year has gone by. Stay well and have fun my friend.
-
Add me to the list of on lookers. I really enjoyed making the cross section of this ship, which itself is pretty big. If i were to try to make the full ship the admiral would have a cow! A replacement keel is the right solution. Hopefully the rest of the kit is OK.
-
Just found your build log Michael. Great work so far. I look forward to following along.
-
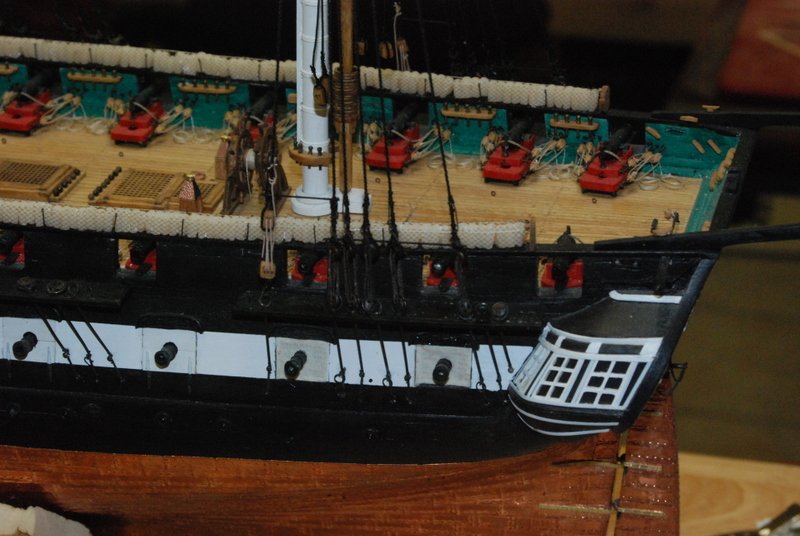
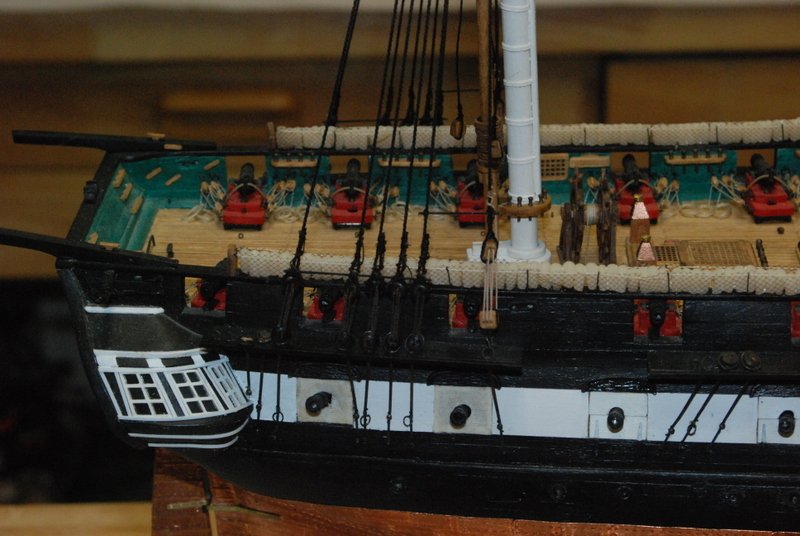
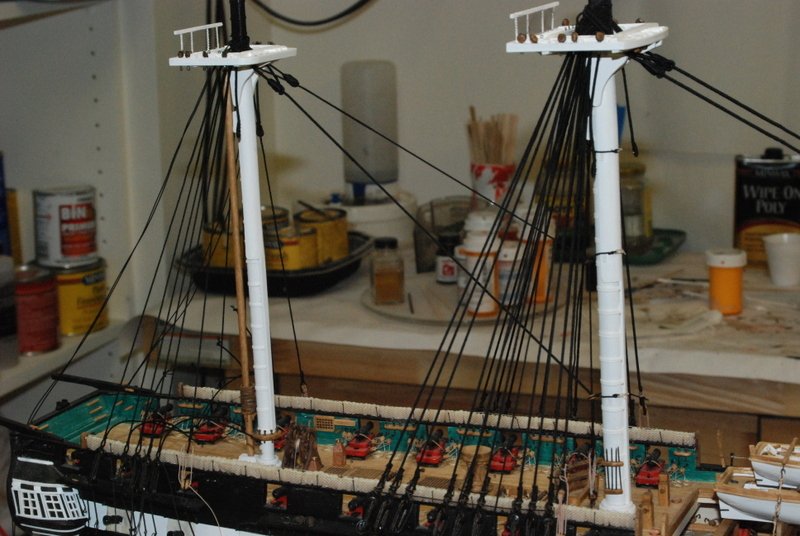
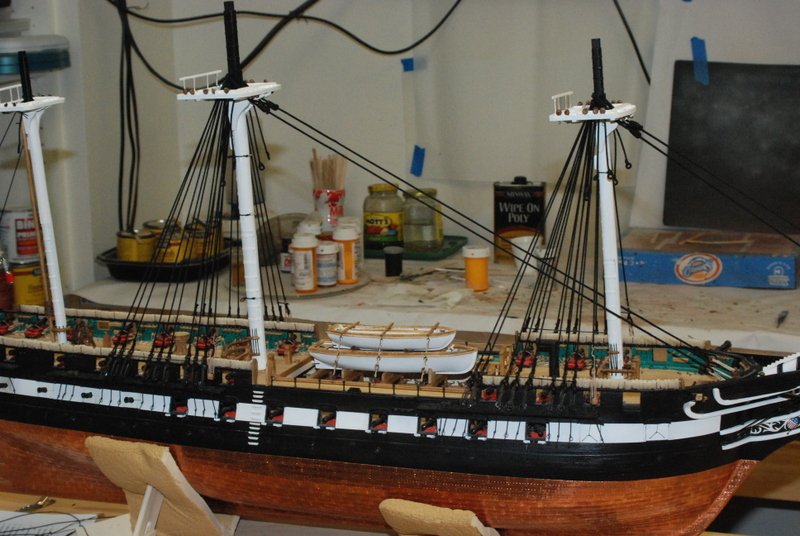
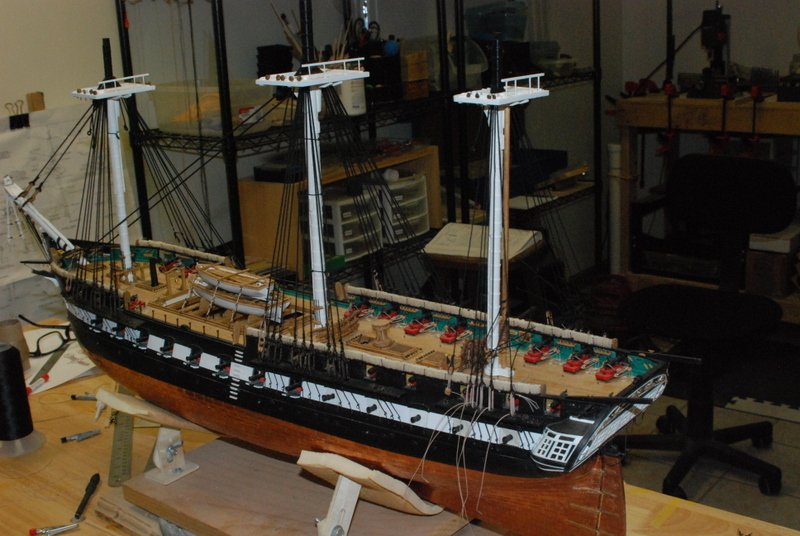
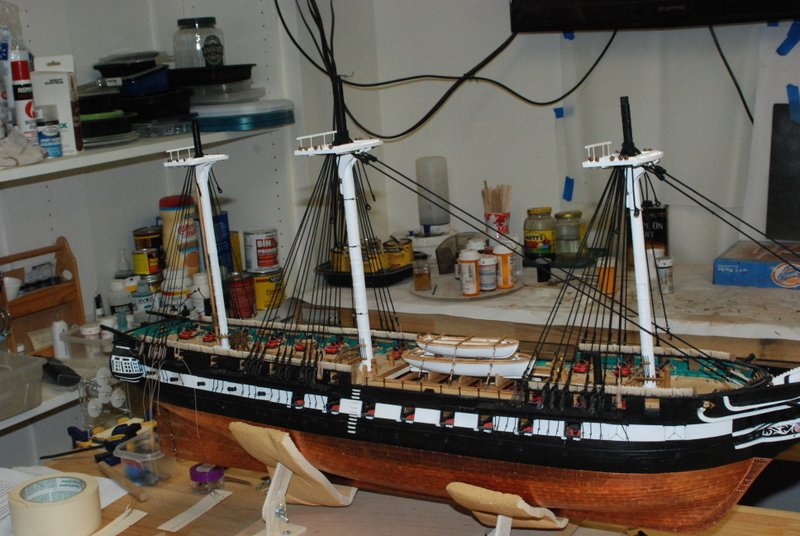
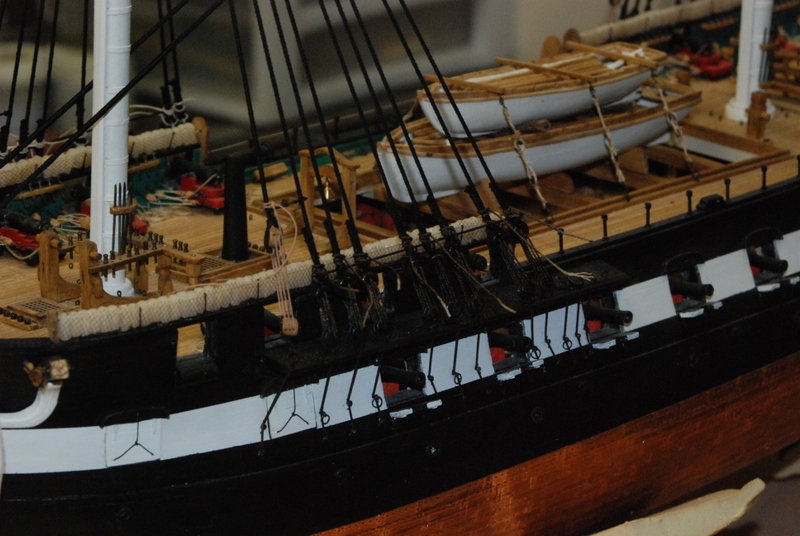
Well I am back from a week's vacation in St. Lucia. What a beautiful island. The trip was a Christmas present to our two kids, as one last vacation together before they start their own families. It was great! But, now it's time to get back to work. I finished up the main shrouds and have added the mizzen shrouds. Here is how the main shrouds and deadeyes came out: And the mizzen so far. I still have to add the sheer poles and tie everything off. And here is some overall shots so far. The masts are in good alignment so far. As always, thanks for the interest, comments and the likes.

- 1,354 replies
-
- 12
-
-
- constitution
- model shipways
- (and 1 more)
-
Not at all Rob. i went into this project feeling like I have not done enough research, so any information from more knowledgeable folks like yourself really is appreciated.
- 1,354 replies
-
- 2
-
-
- constitution
- model shipways
- (and 1 more)
-
Thanks Rob. I really appreciate your help and suggestions.
-
I am not sure how the vinyl works, but if you want to stay with wood I have found that a coat of primer on the wood helps the copper tape stick much better than bare wood.
- 742 replies
-
- 5
-
-
- constitution
- frigate
- (and 1 more)
-
Your welcome Captain. I think we all benefit by those who have come before us.
- 1,354 replies
-
- 3
-
-
- constitution
- model shipways
- (and 1 more)
-
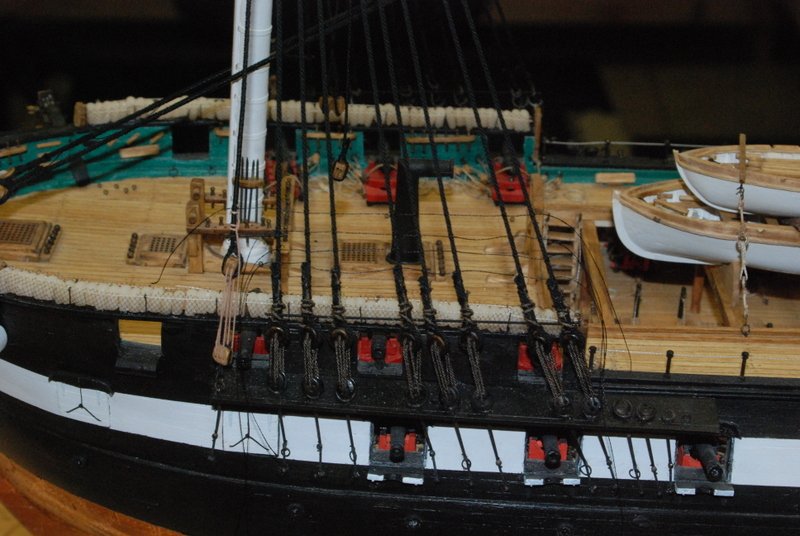
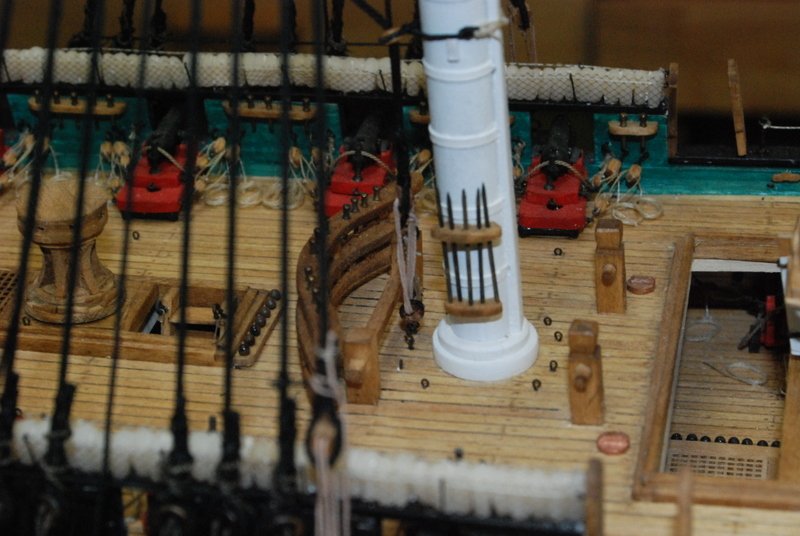
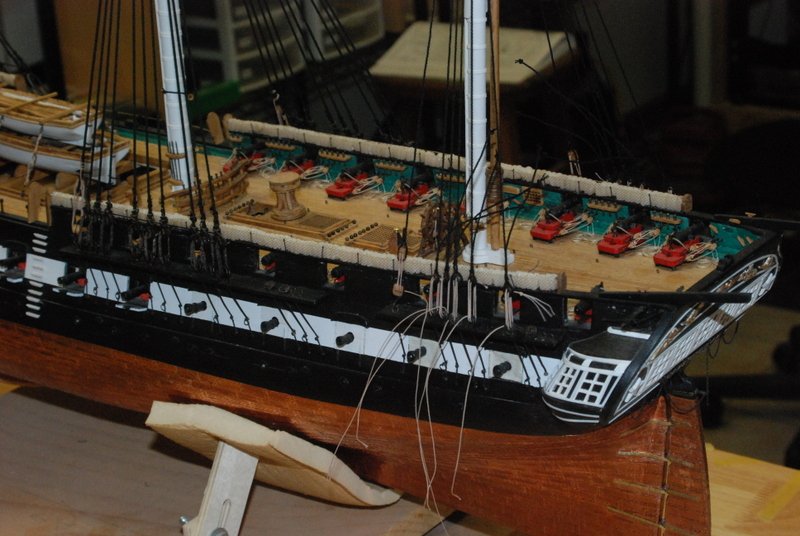
The Model Shipways Constitution comes with dummy guns (just barrels) for the gun deck. You can buy a separate kit that is all the guns for the gun deck, but then you have to build the gun deck to hold them. I went half way and added a partial gun deck.
-
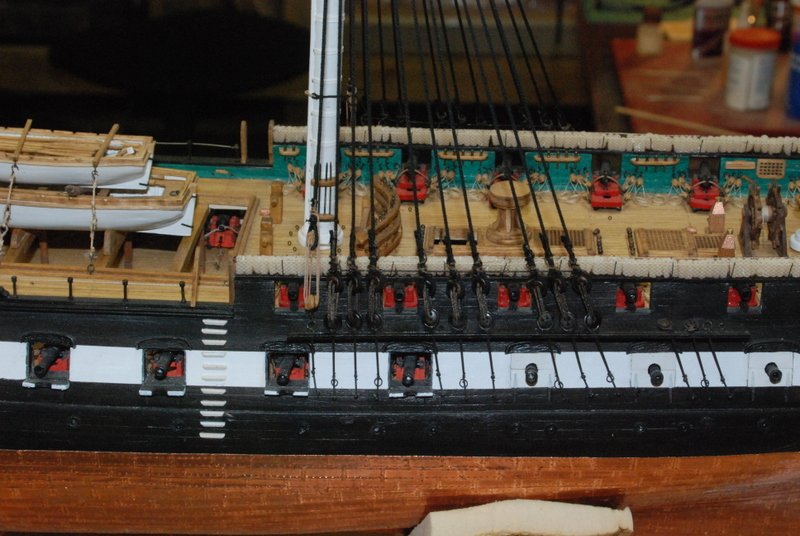
OK guys, you convinced me. I tried a couple of different stains last night and did not like the look of the lighter ones, so I went all in and used Dark Walnut. They are a nice rich dark brown now, and as a bonus the deadeyes are darker too which look more like the real ones. Here is how it looked right after I stained the lines. And here is how they looked after they dried overnight. I was a little worried that the lines would get stiff, but if they did it was not very much. I am very happy with the result. Thank you for getting me to change this. Keep those suggestions coming....

- 1,354 replies
-
- 10
-
-
- constitution
- model shipways
- (and 1 more)
-
Thanks guys. This is useful information. I remember reading or hearing that when the Connie went to all nylon ropes as it is now the colors changed to a darker color for the running rigging. I don't remember where I read/heard that, but that is why I am a little skeptical to use the existing rigging colors as gospel. But if it only a matter to stain them a bit darker, I will give that a try.
- 1,354 replies
-
- 1
-
-
- constitution
- model shipways
- (and 1 more)