
.JPG.ca33079f5815b861e67b9c2cccd37982.JPG)

Blue Ensign
-
Posts
4,286 -
Joined
-
Last visited
Content Type
Profiles
Forums
Gallery
Events
Posts posted by Blue Ensign
-
-
I can sympathise Glenn, I knackered a disc back in the 1980’s playing sport, catches me out occasionally, usually making a silly little movement. I find rest, a tens machine, ibuprofen, and a liberal supply of Merlot, gets me through it🤞.
Hope you’re back firing on all four soon.
B.E.
- hollowneck, mtaylor and Glenn-UK
-
 3
3
-
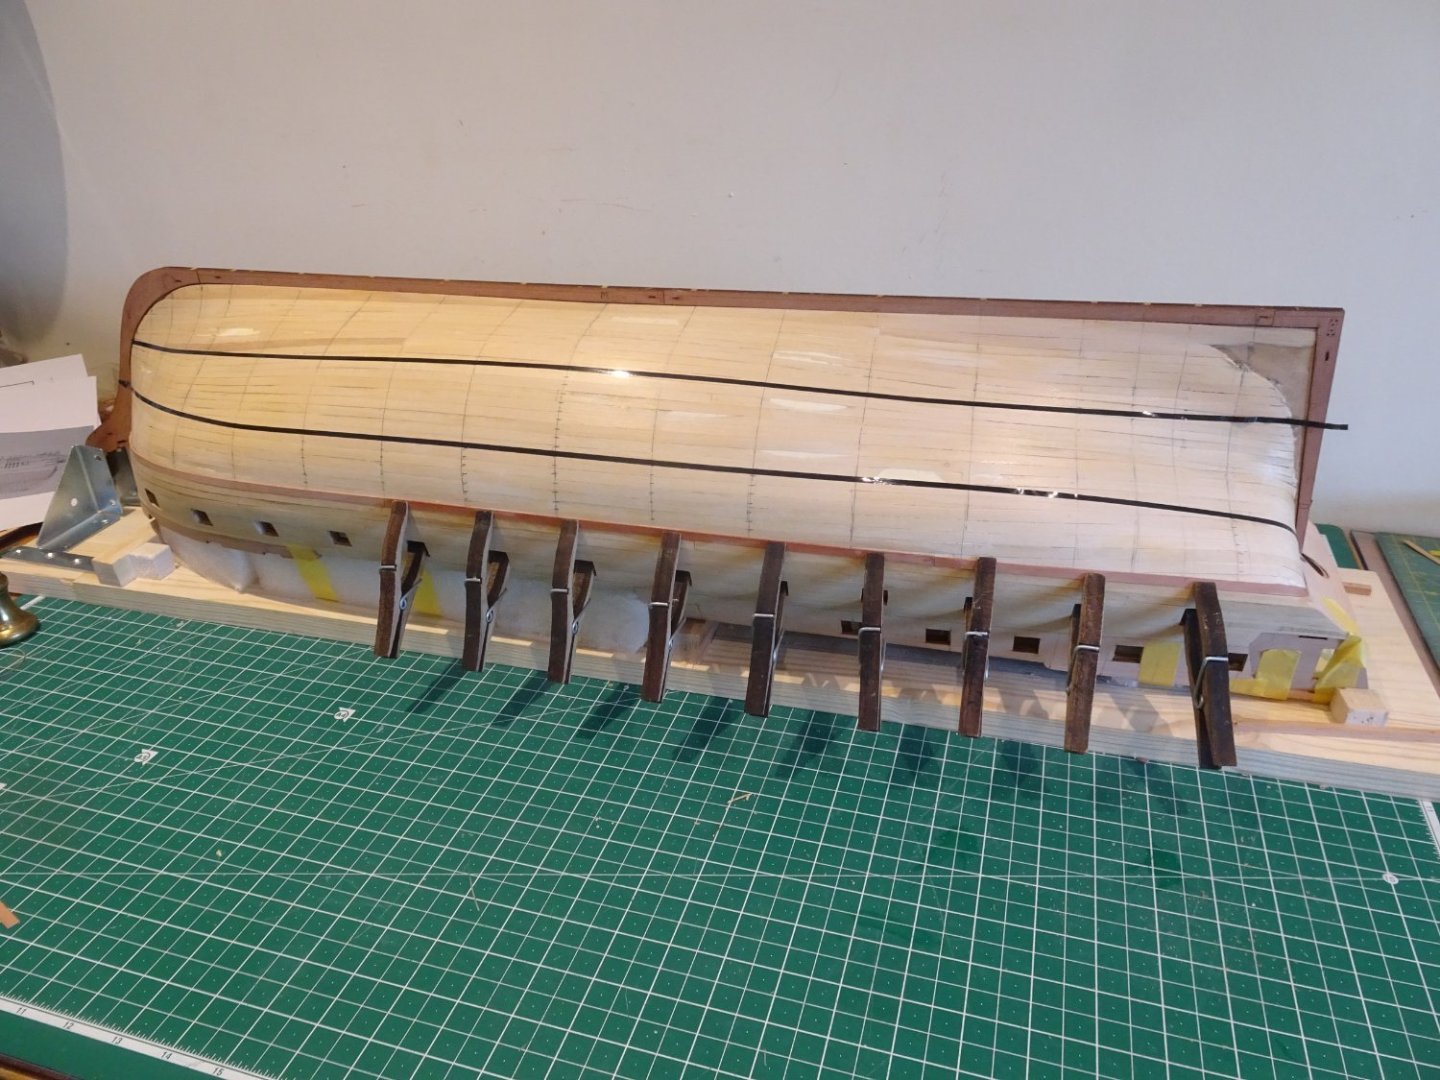
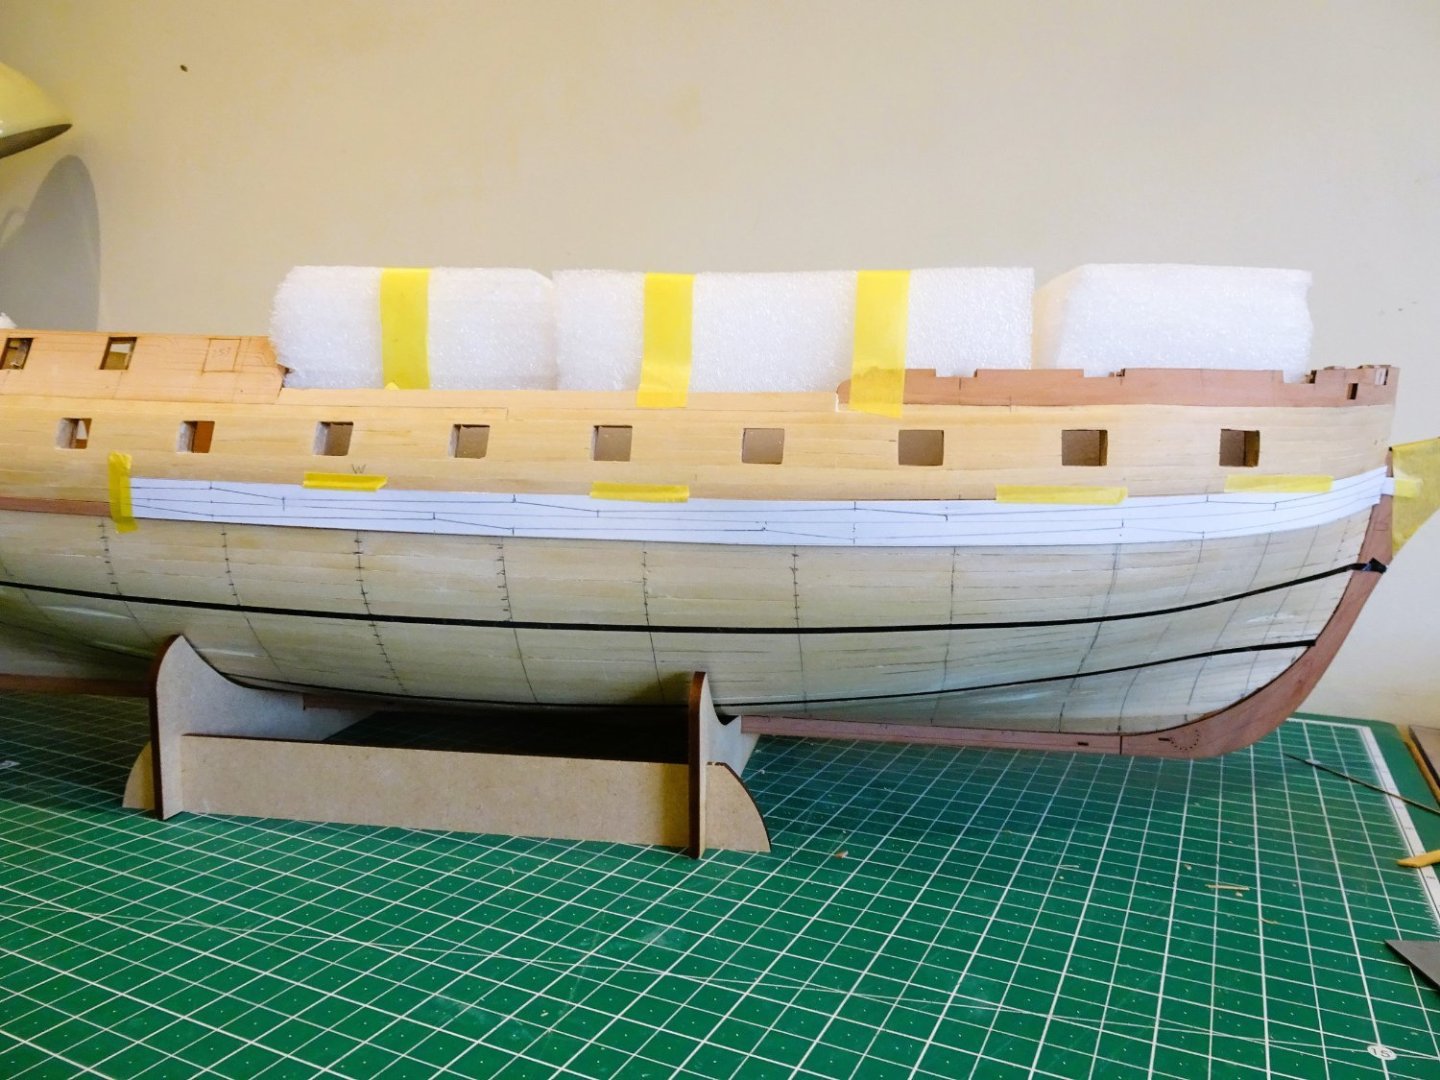
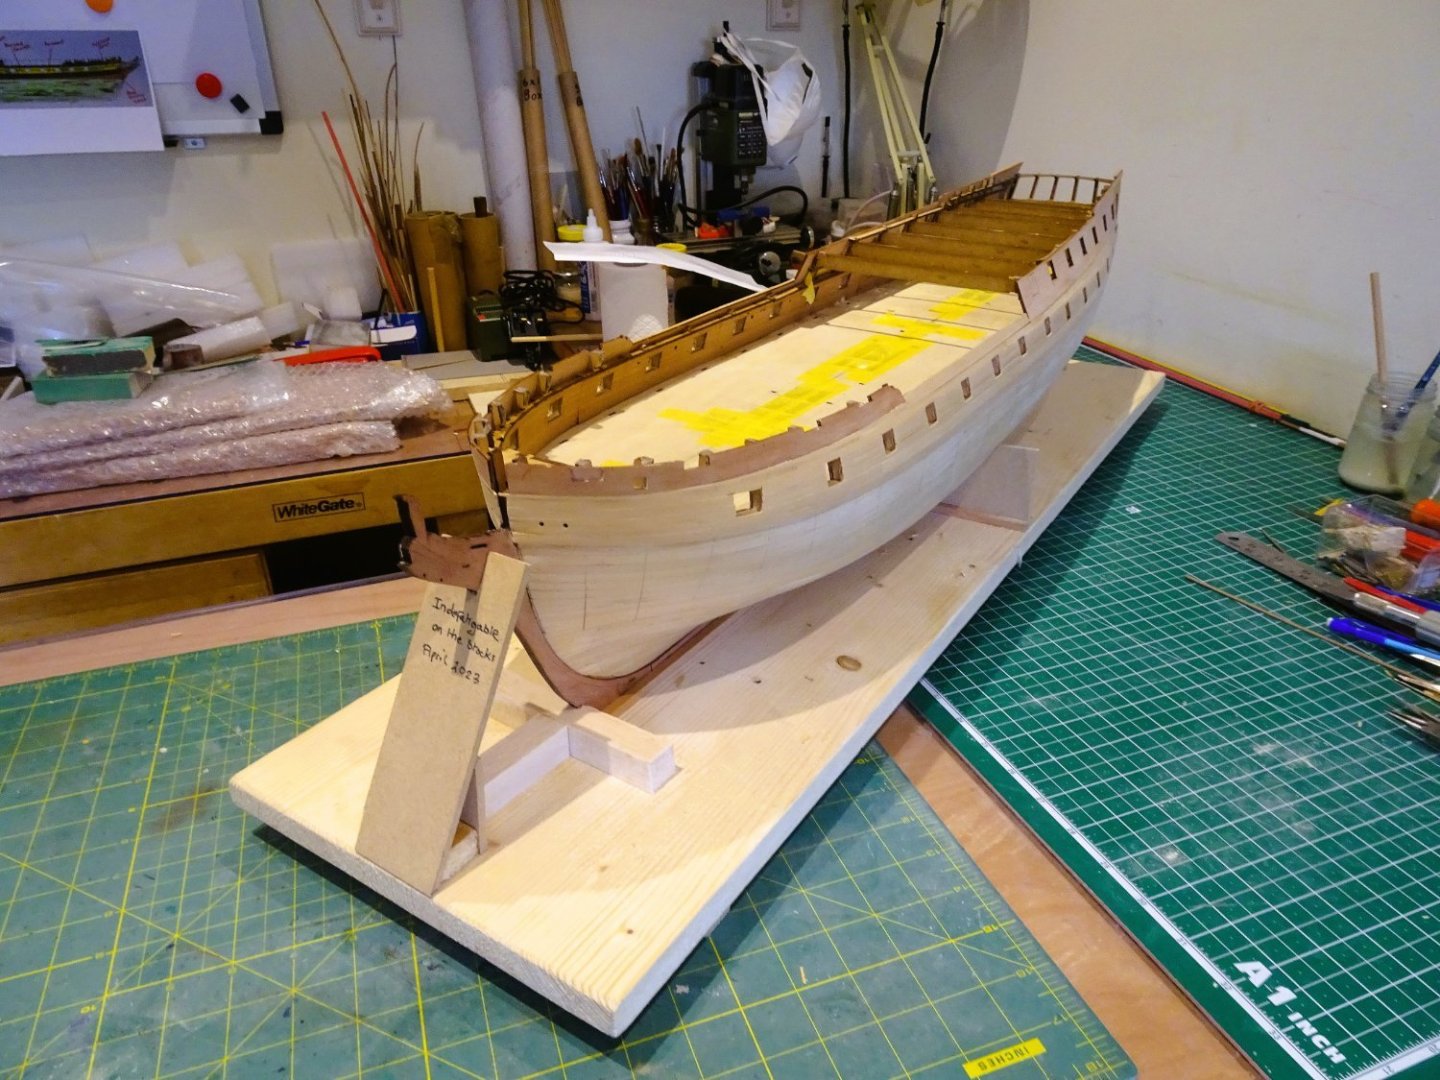
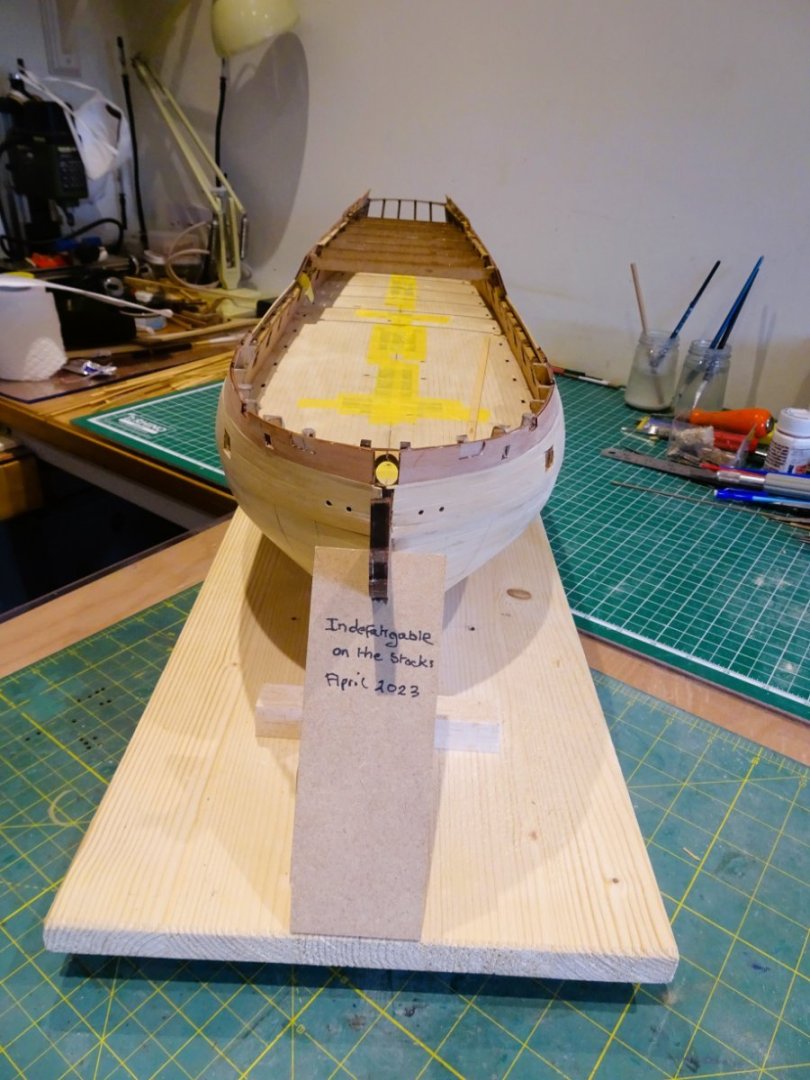
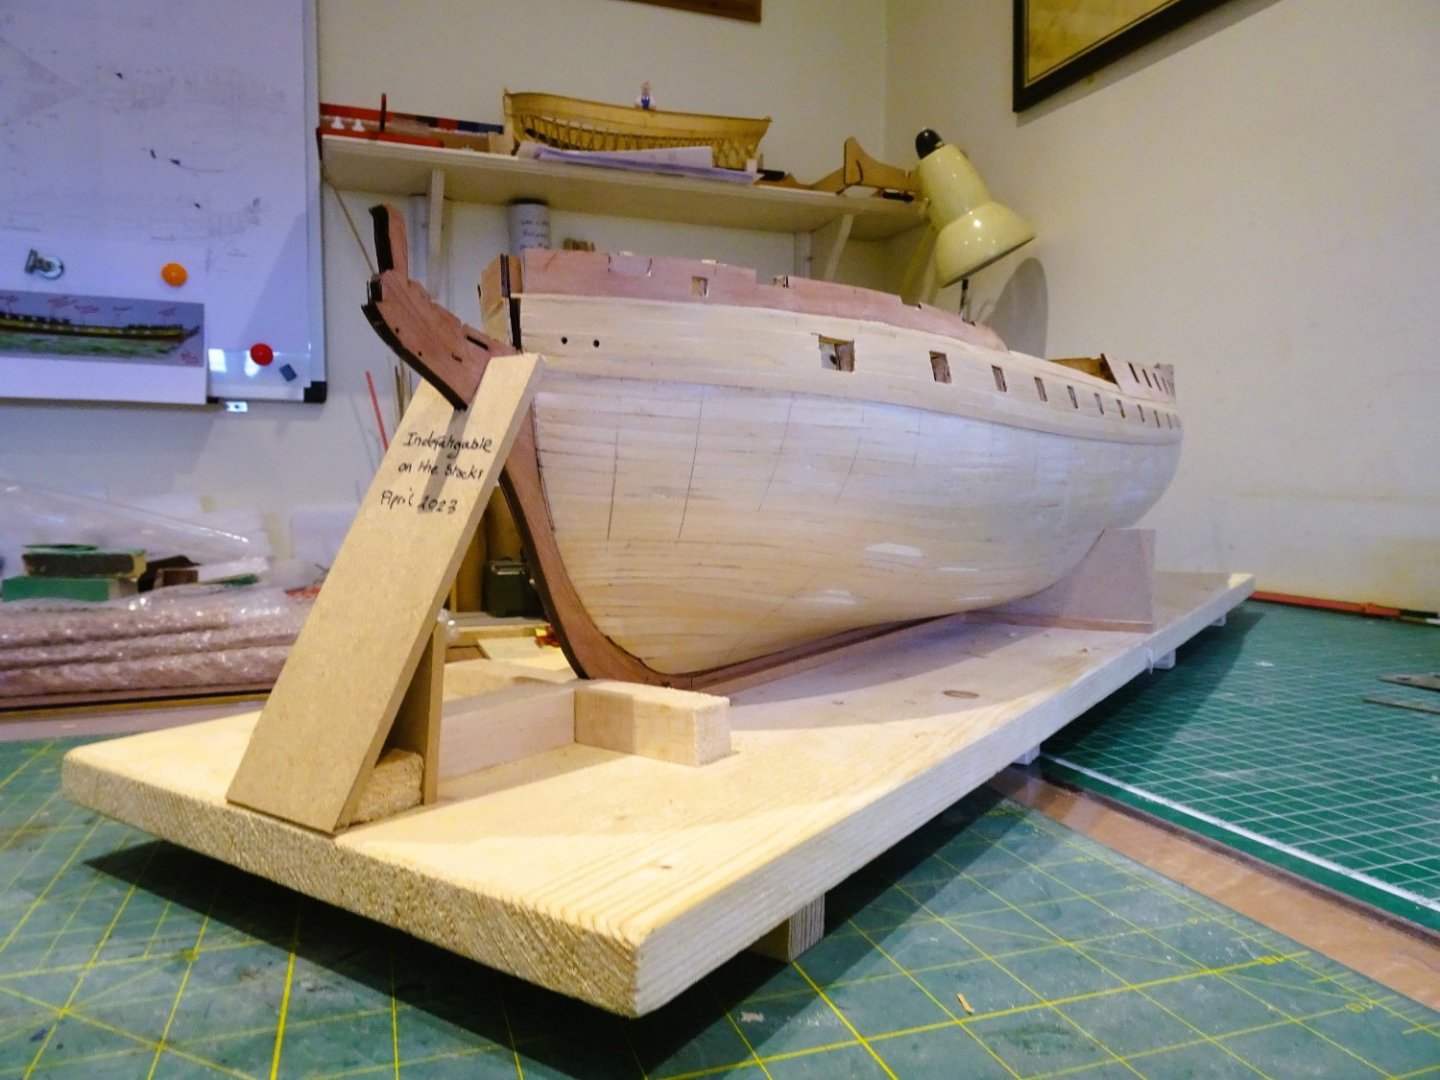
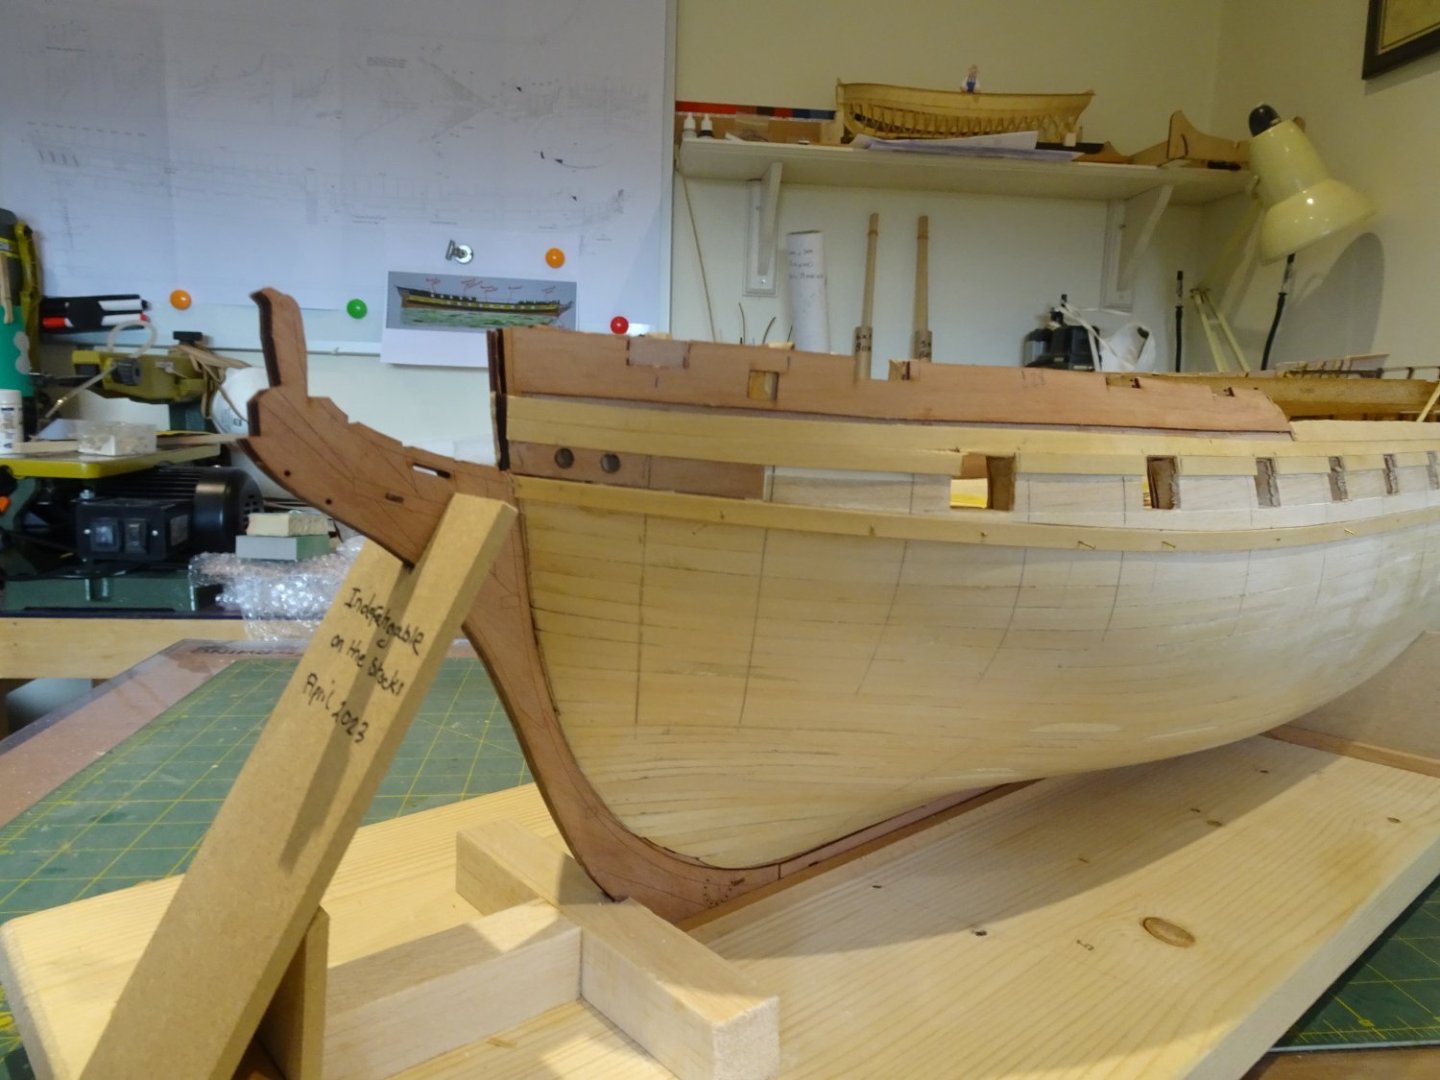
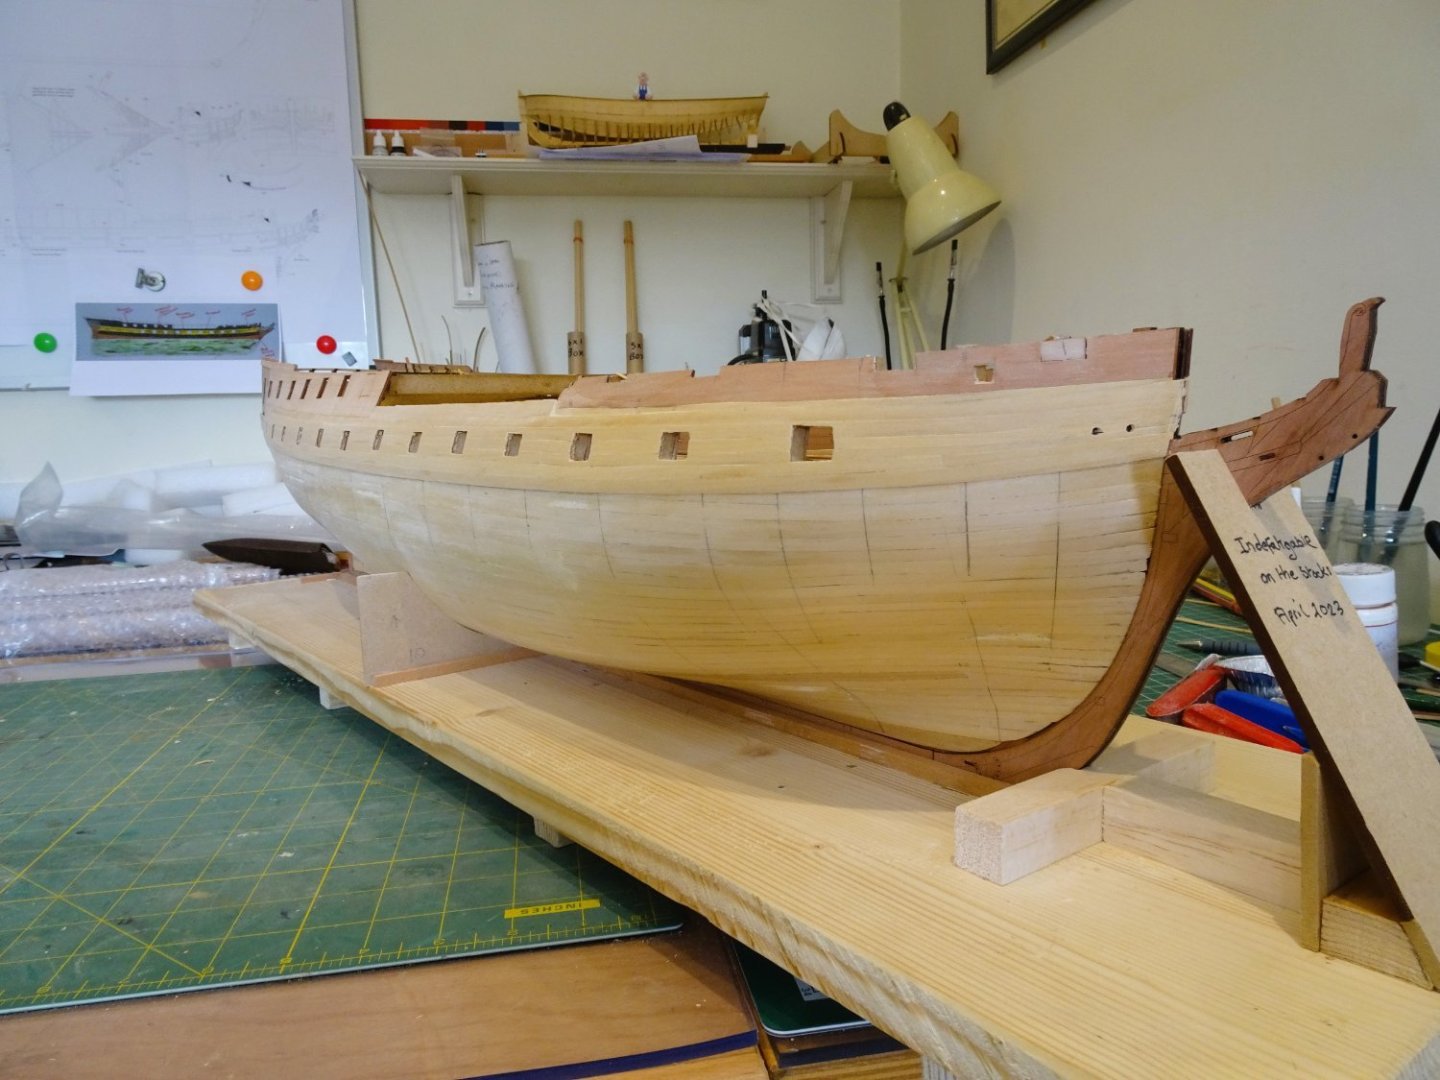
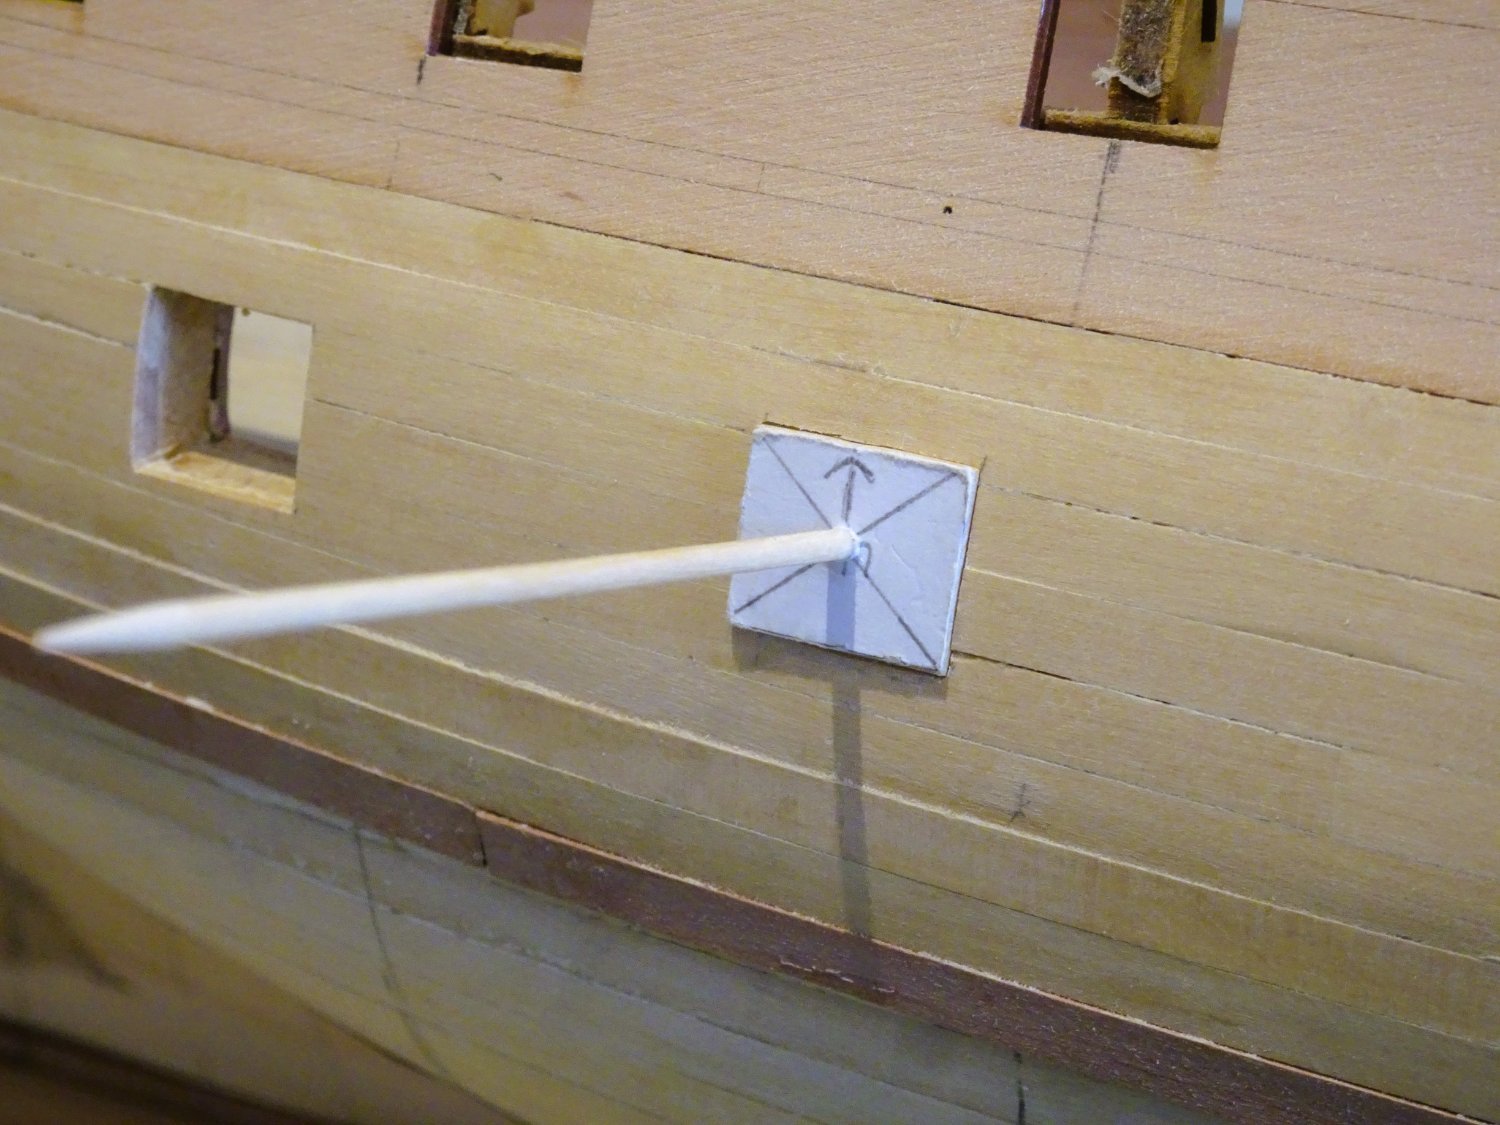
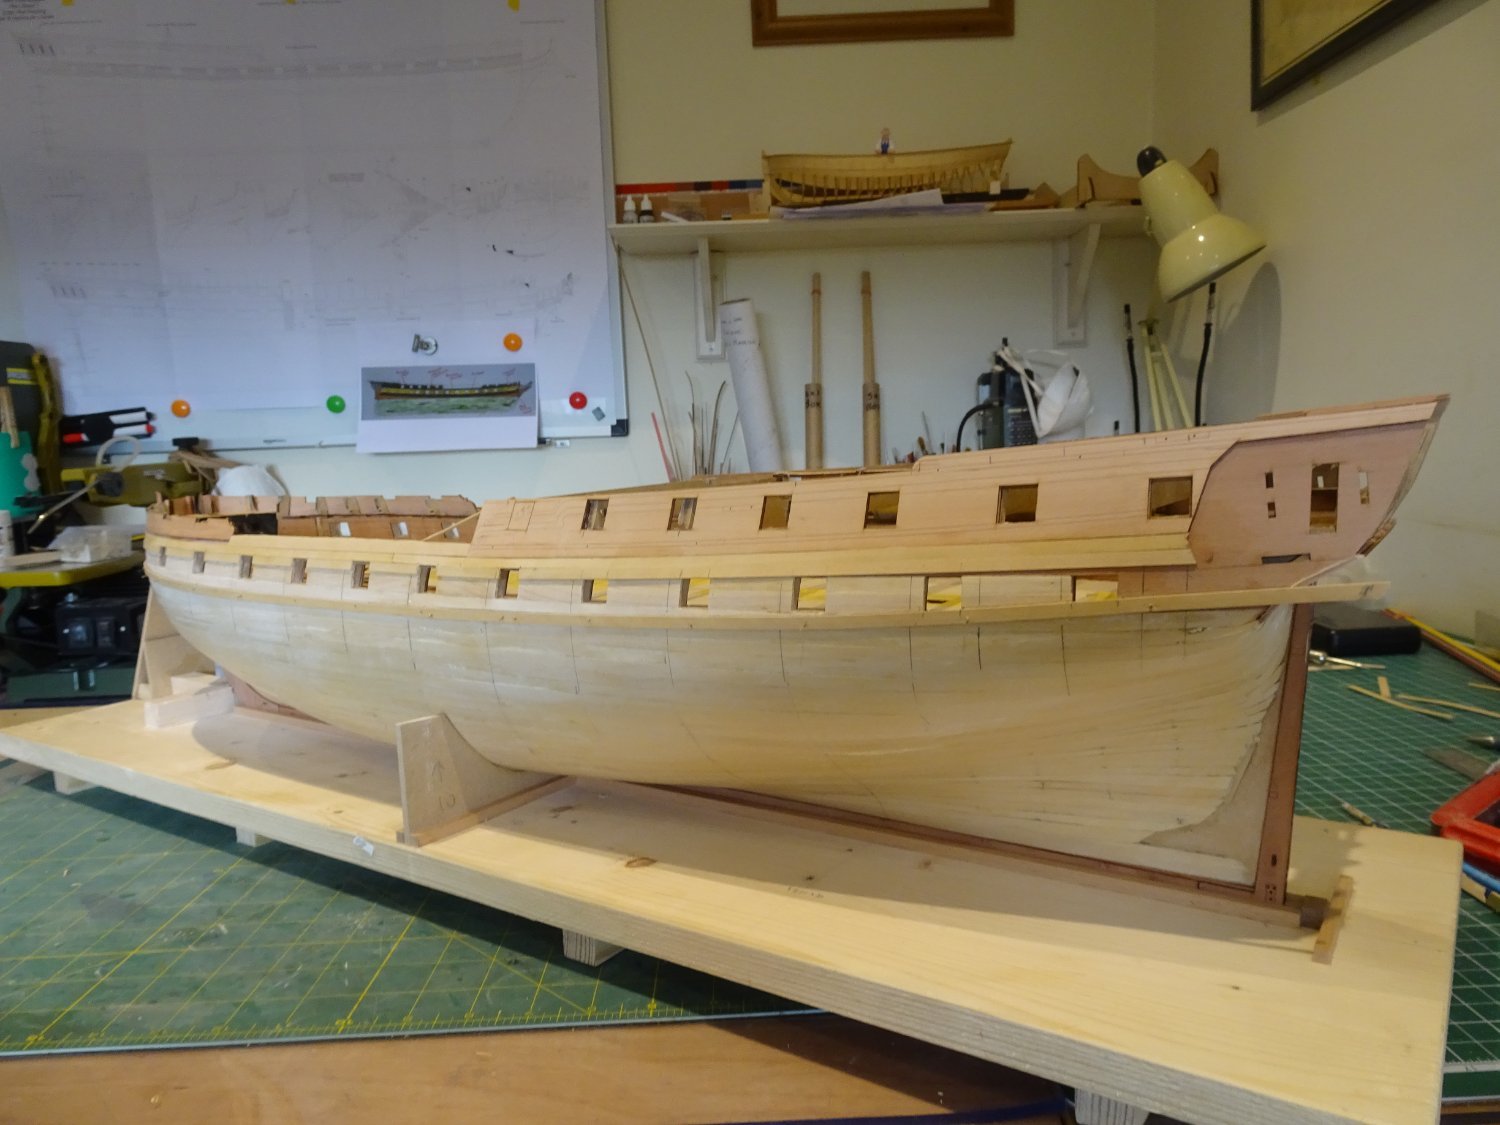
Post Thirty-three
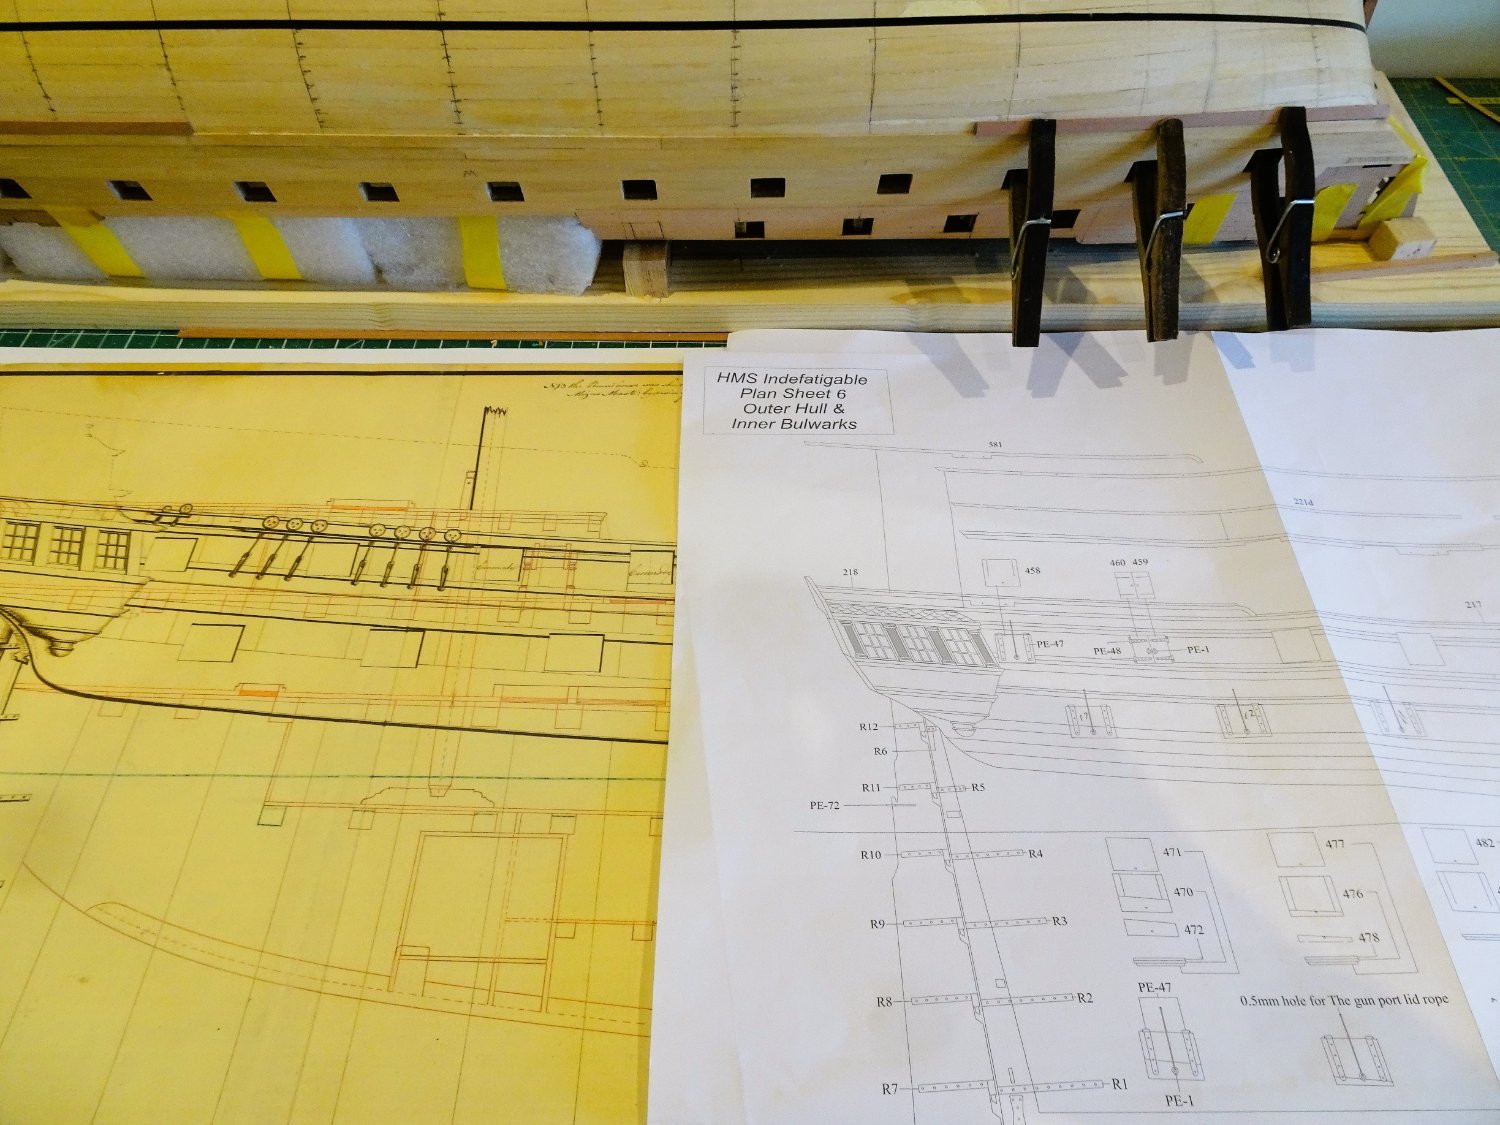
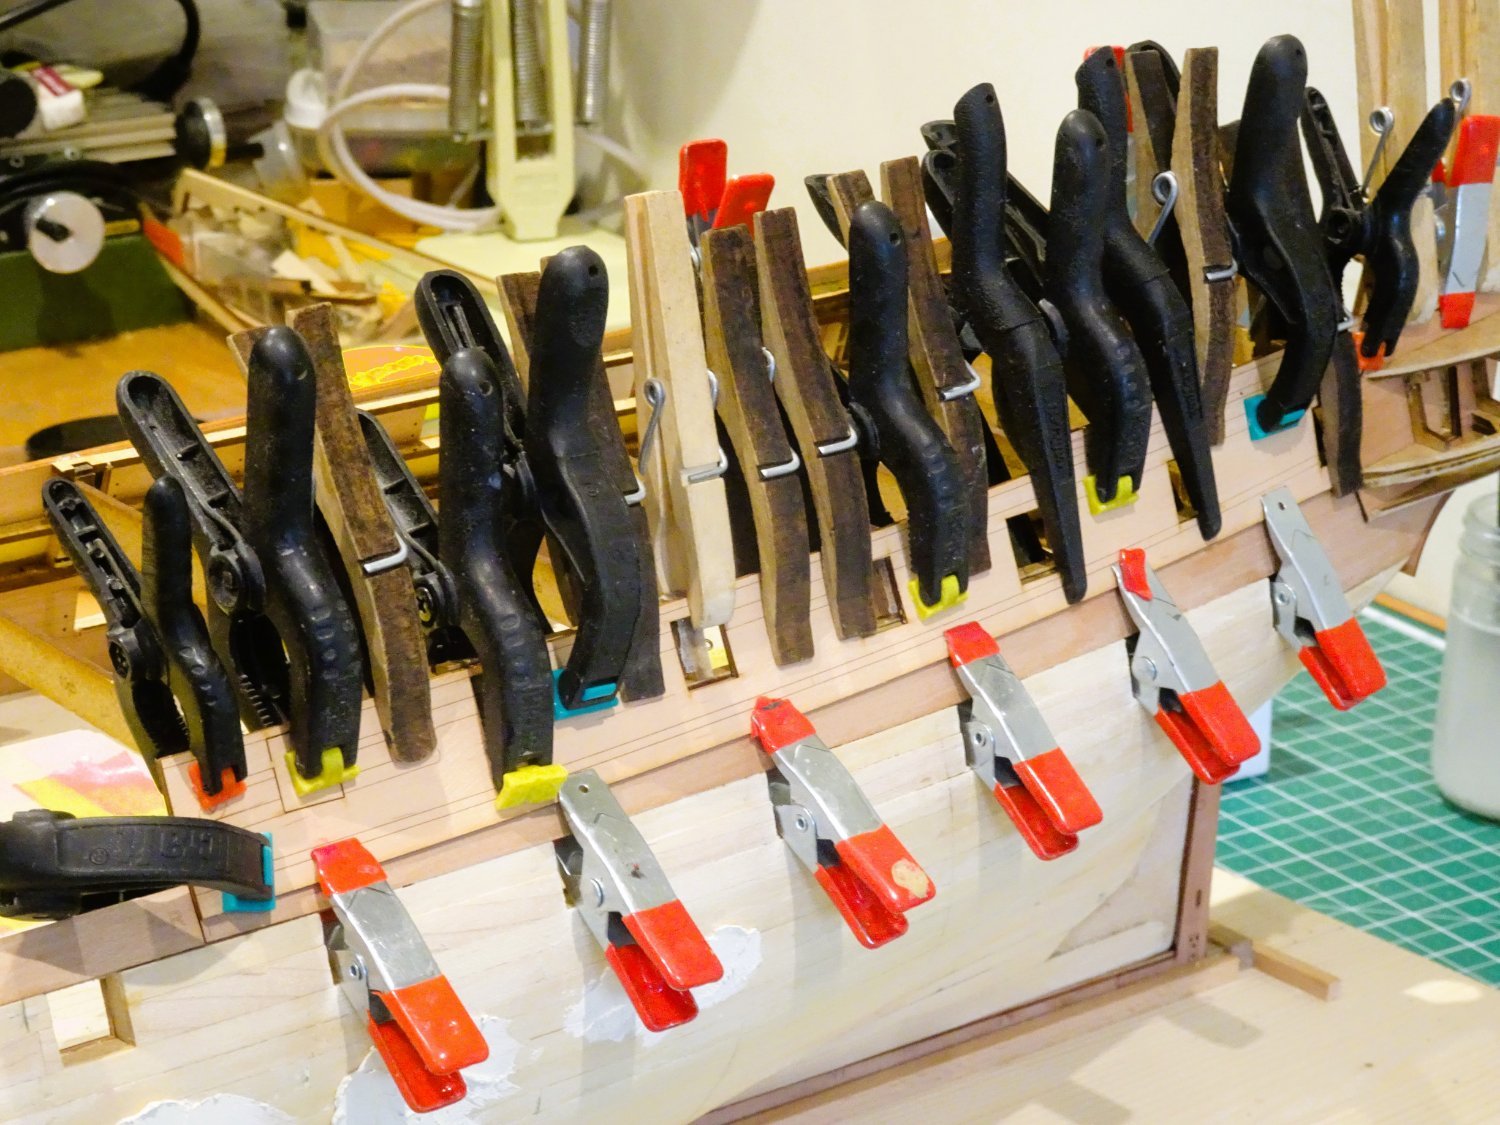
Gundeck ports.
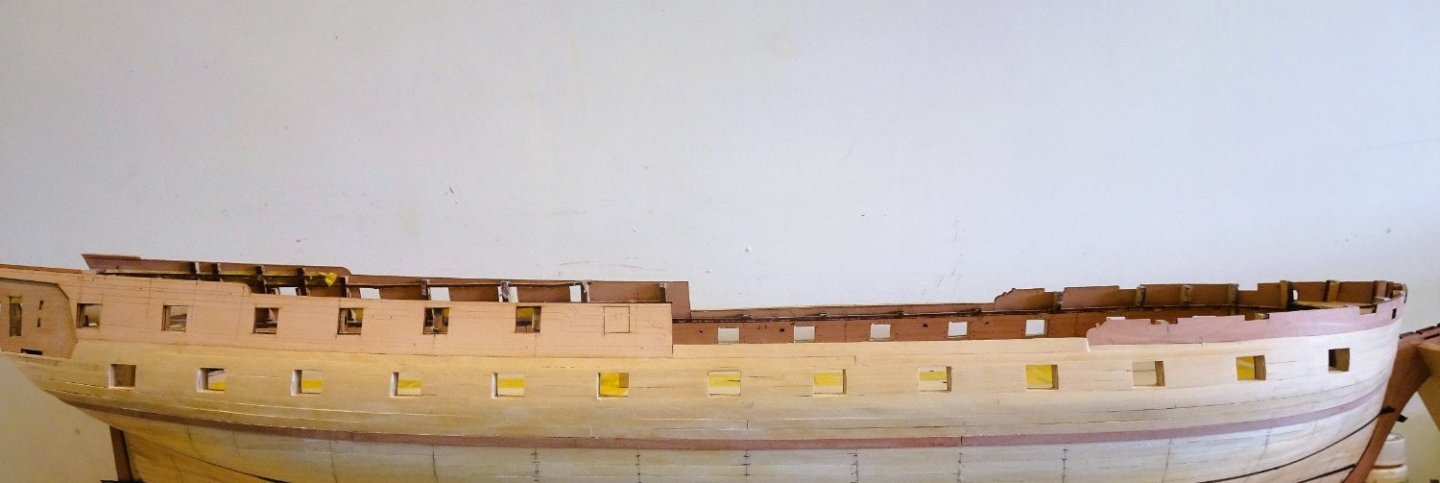
It has never been one of my favourite jobs - finishing off gunports, it’s so easy to get them out of shape, but I didn’t think the set-up on Indy would give me any trouble.
Chris has designed the hull with the ports framed, and the finished port openings and frame dimensions on the plans match.
The ports are rectangular on the gun deck and the kit plans match the Adm. plans for scale.
I wasn’t expecting to do more than square the outer planking to the port framing, a little light sanding, and job done.
There is a little more involved than that.
0992
I initially made a pattern jig to regularise the height of the ports followed by a further template port, cut from the plans full size.

0997
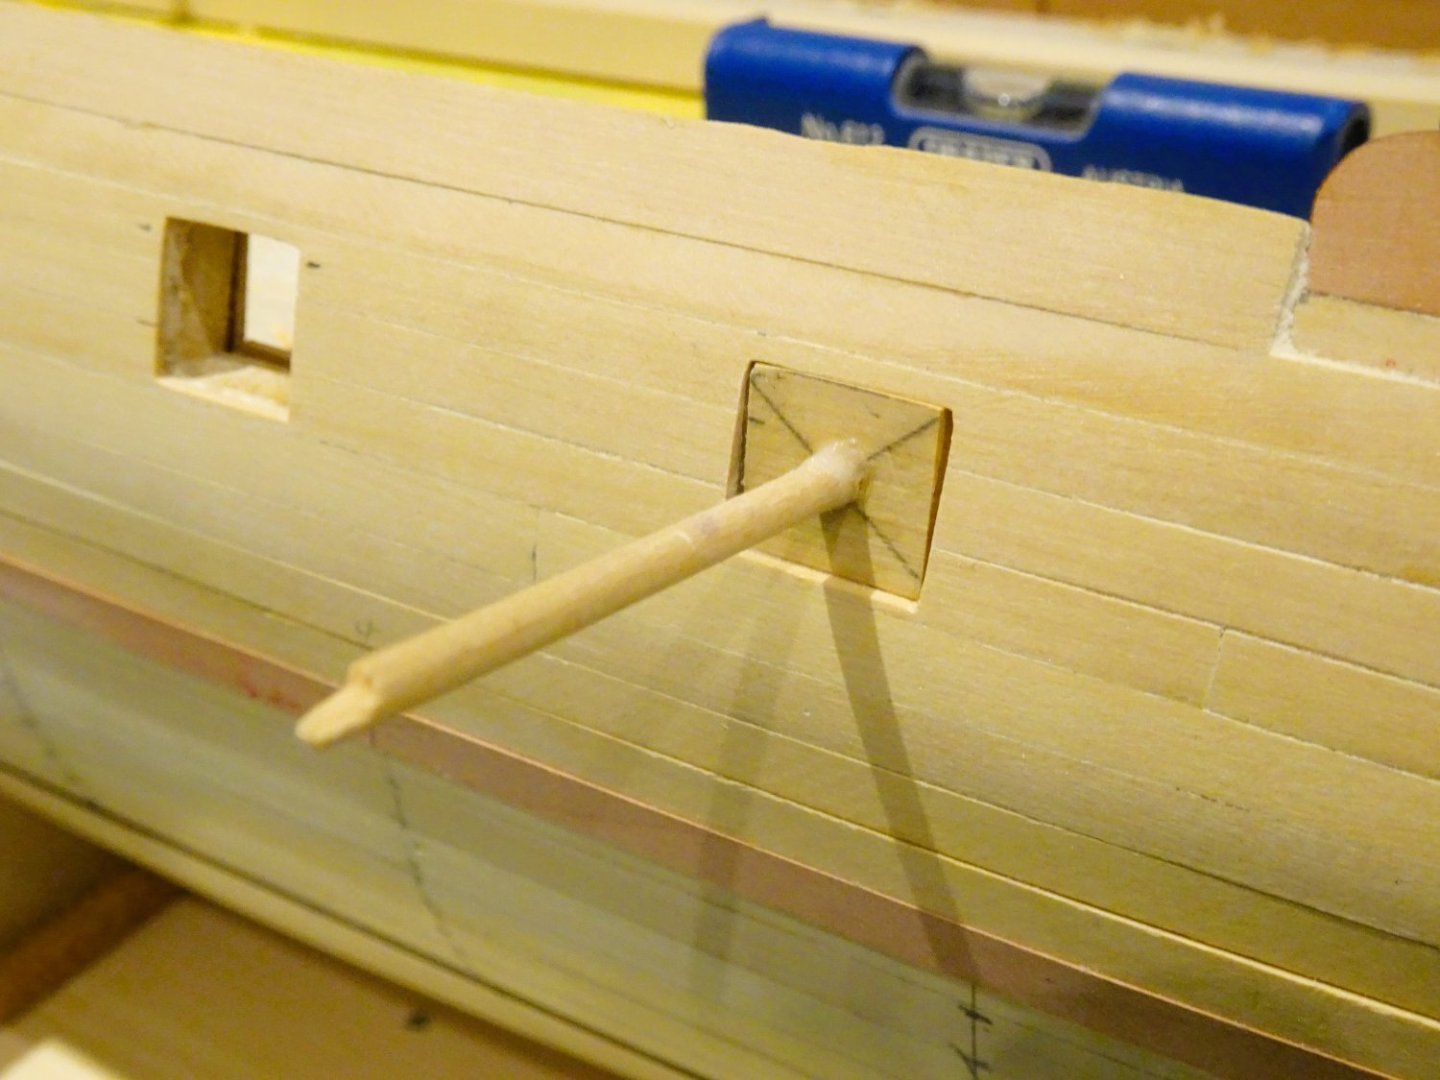
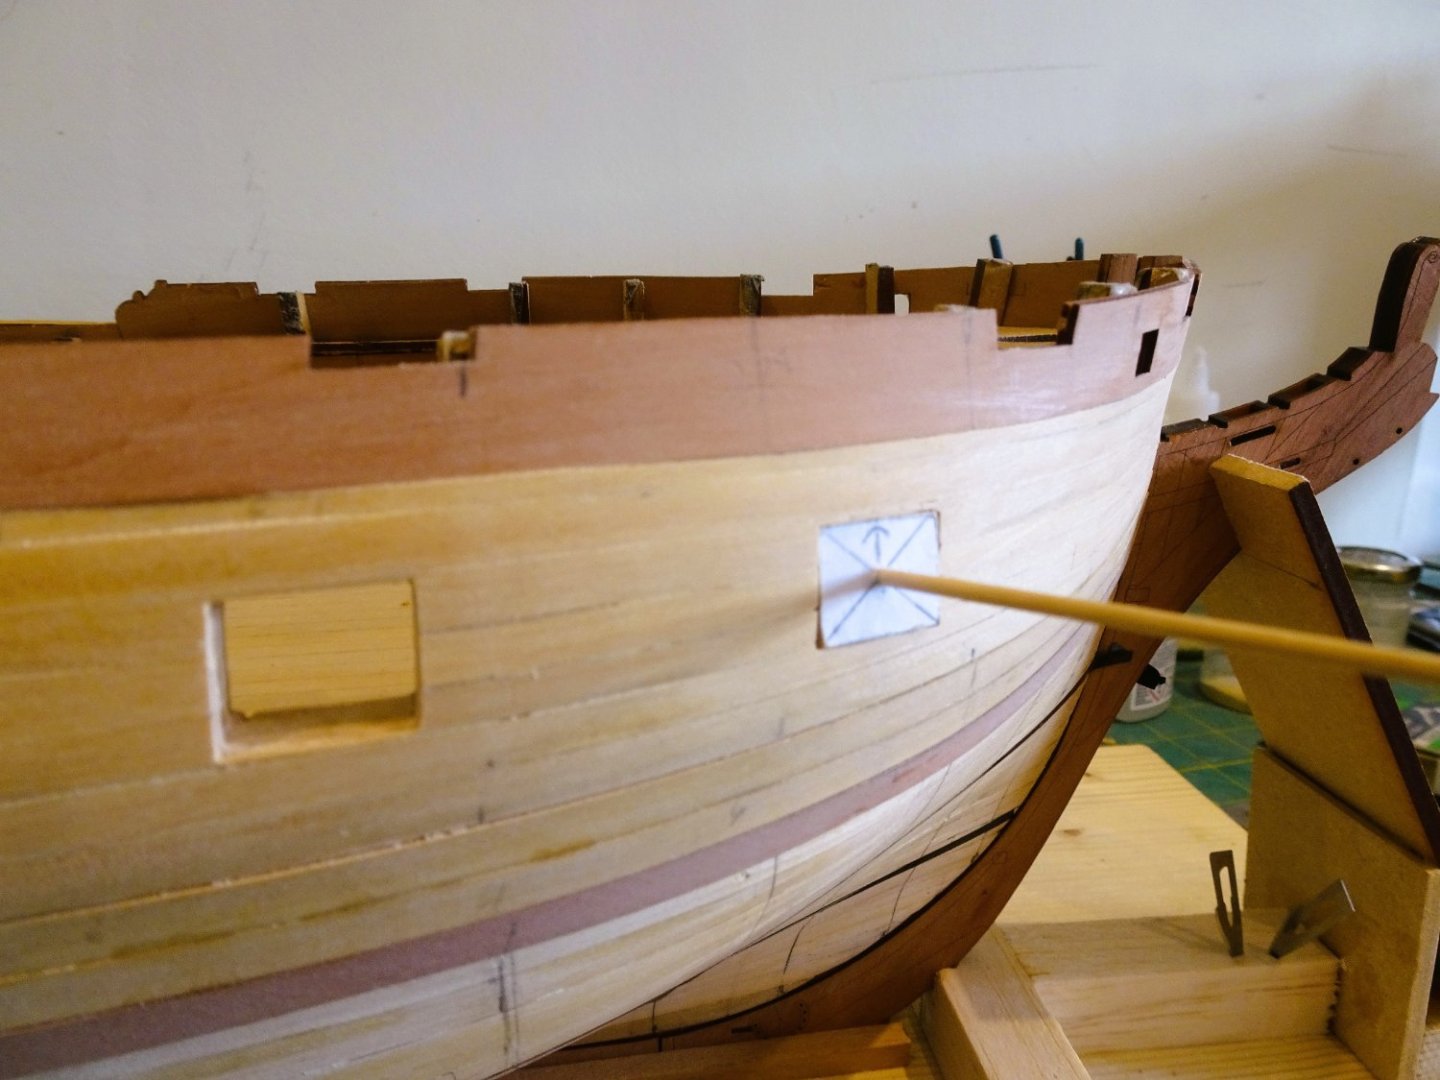
The port width exceeds the frame space, by around 1mm so careful sanding is required to obtain the width without losing the shape.
0999
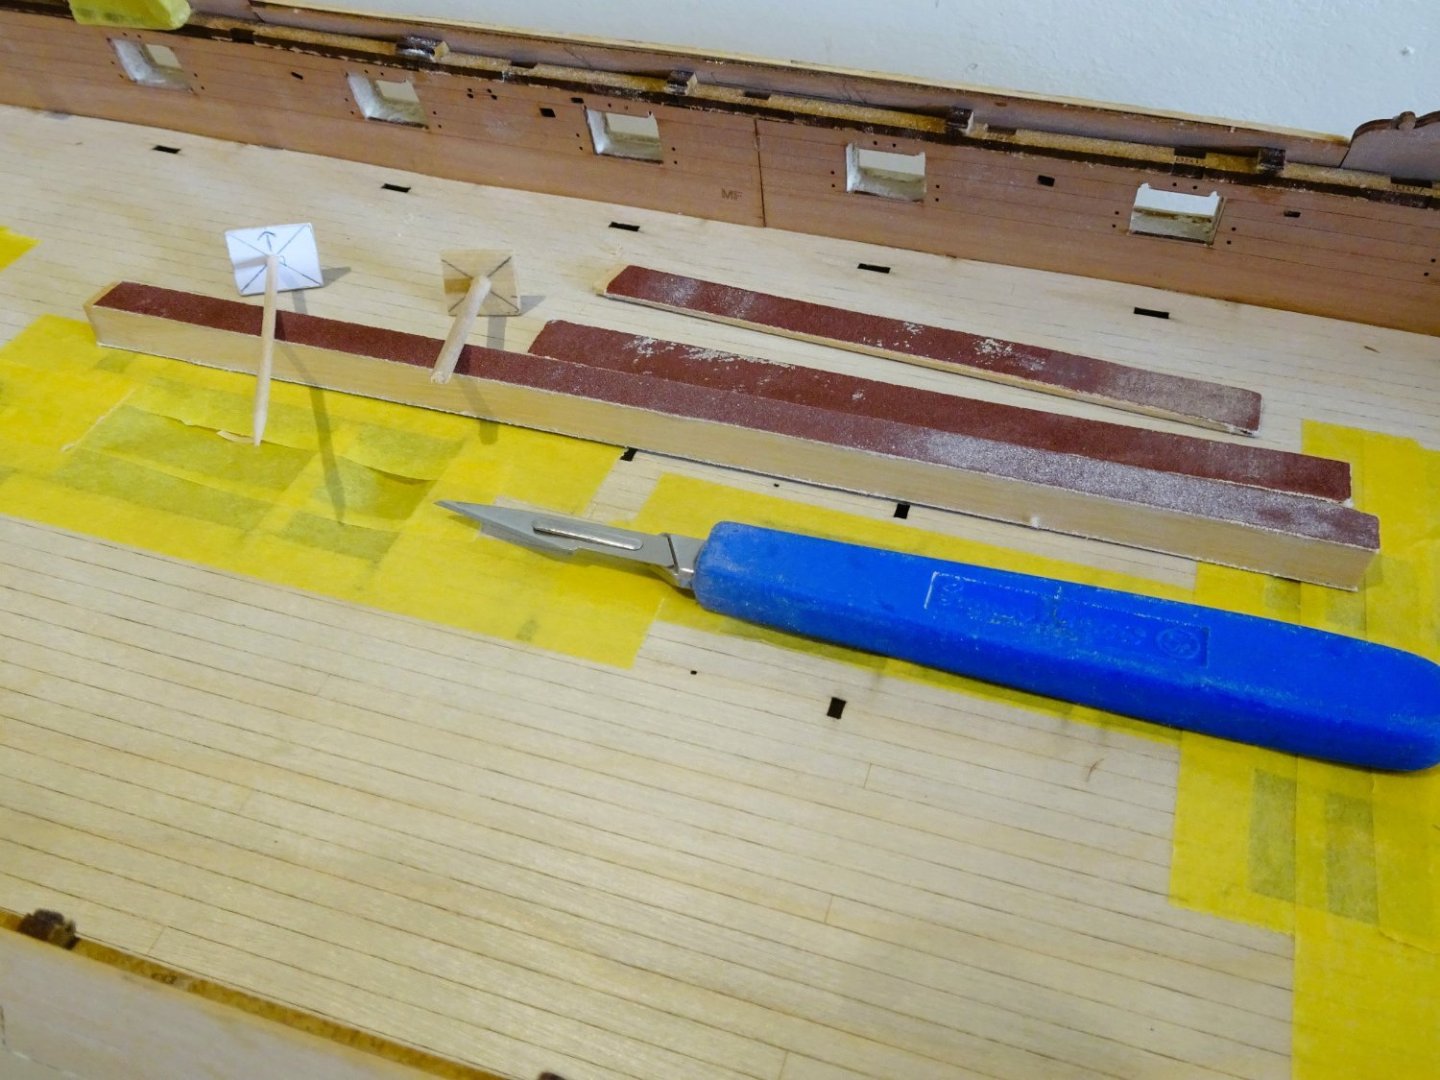
For this I used a square stock sanding stick with paper on two sides only. I am using 320 aluminium oxide for the purpose.
It is then a case of sand and check, sand and check, a good few hours’ work sees one side of ports completed, but not the inboard side.
0996
0995
A state of inertia can be induced by staring at the ports trying to spot variations along the hull, but I am fairly satisfied with the progress.
The kit includes port stops (linings) for those ports with lids, but I am pondering whether to add them to the remainder.
I do think ports look more stylish with stops, and there are contemporary models without lids that have stops in place.
Indy would no doubt have had stops originally as her gun deck was originally the lower gundeck of a Sixty-four.
1000
Onto the Starboard side.
B.E.
29/05/2023
-
Always a pleasure to follow your projects Nils, you select such interesting subjects.
Regards,
B.E.
- mtaylor, Canute, FriedClams and 1 other
-
4
-
Looking very smart Kevin,👍
B.E.
- Kevin, mtaylor, Hubac's Historian and 4 others
-
7
-
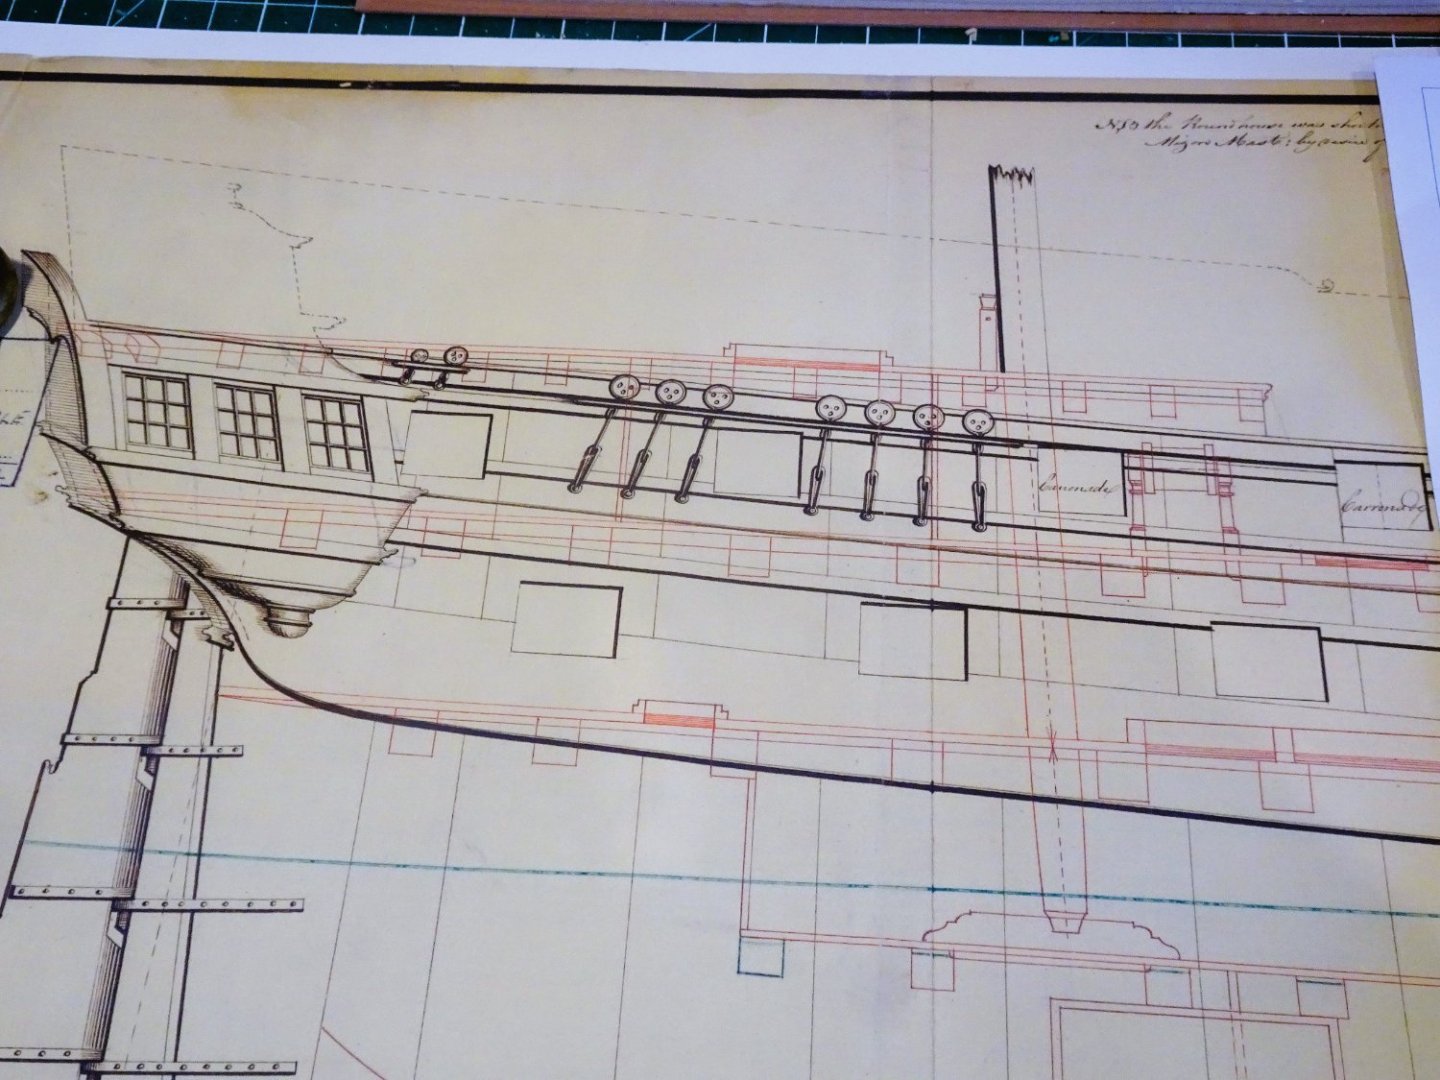
I don’t really know Jason, I’ve been having trouble working out the Main wale details relative to the kit plan, Adm plan, and given dimensions.
On a two decker the Upper wale was used to secure the chain plates for the Fore and Main shrouds, on Indy these are now attached to the Main Wale, as is the norm for single deckers.
On the Indy kit plan there is a 1x4mm strip that looks like a channel wale to secure the Mizen chains, but I’ve not studied the kit that far ahead.
Cheers,
B.E.
- mtaylor and Oldsalt1950
-
2
-
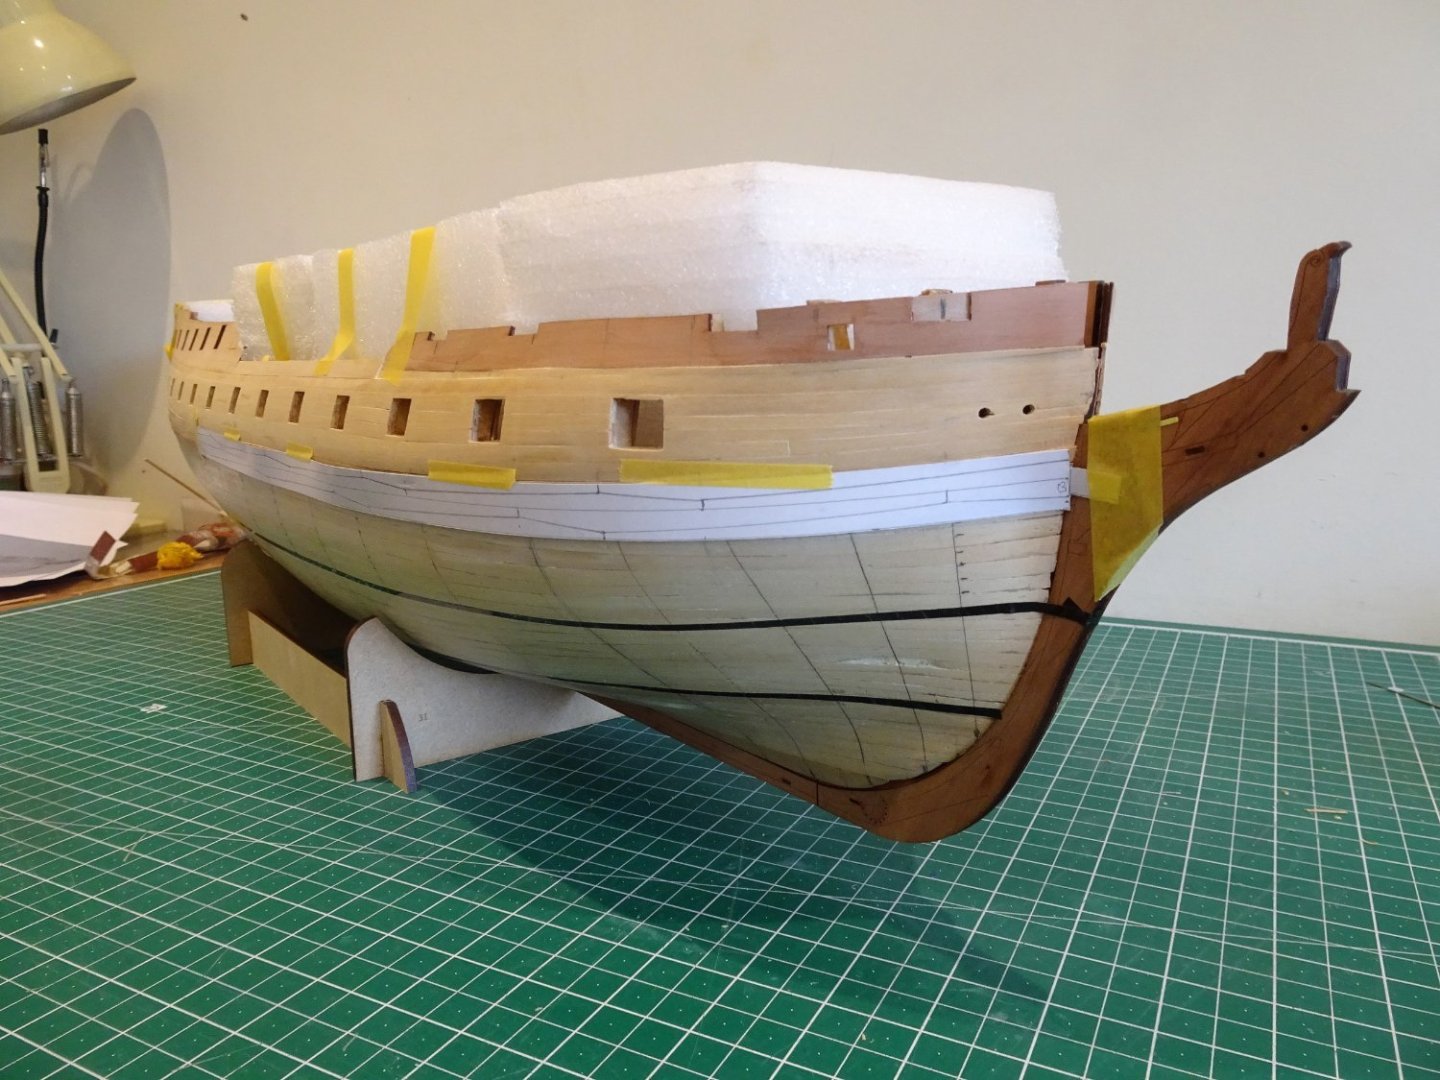
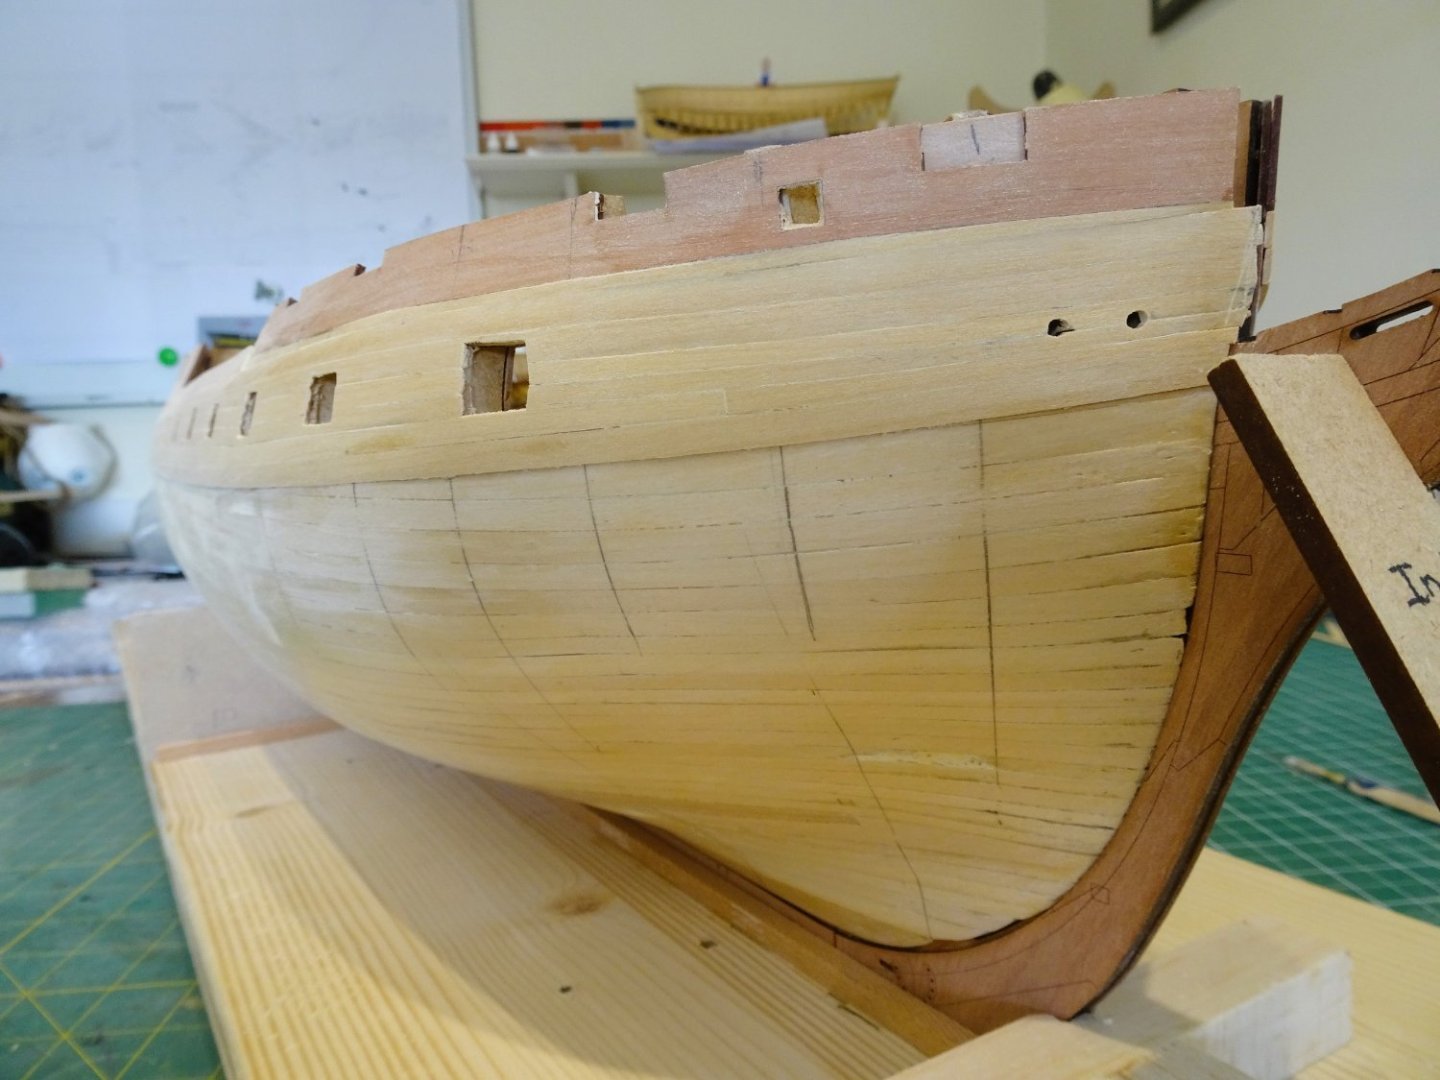
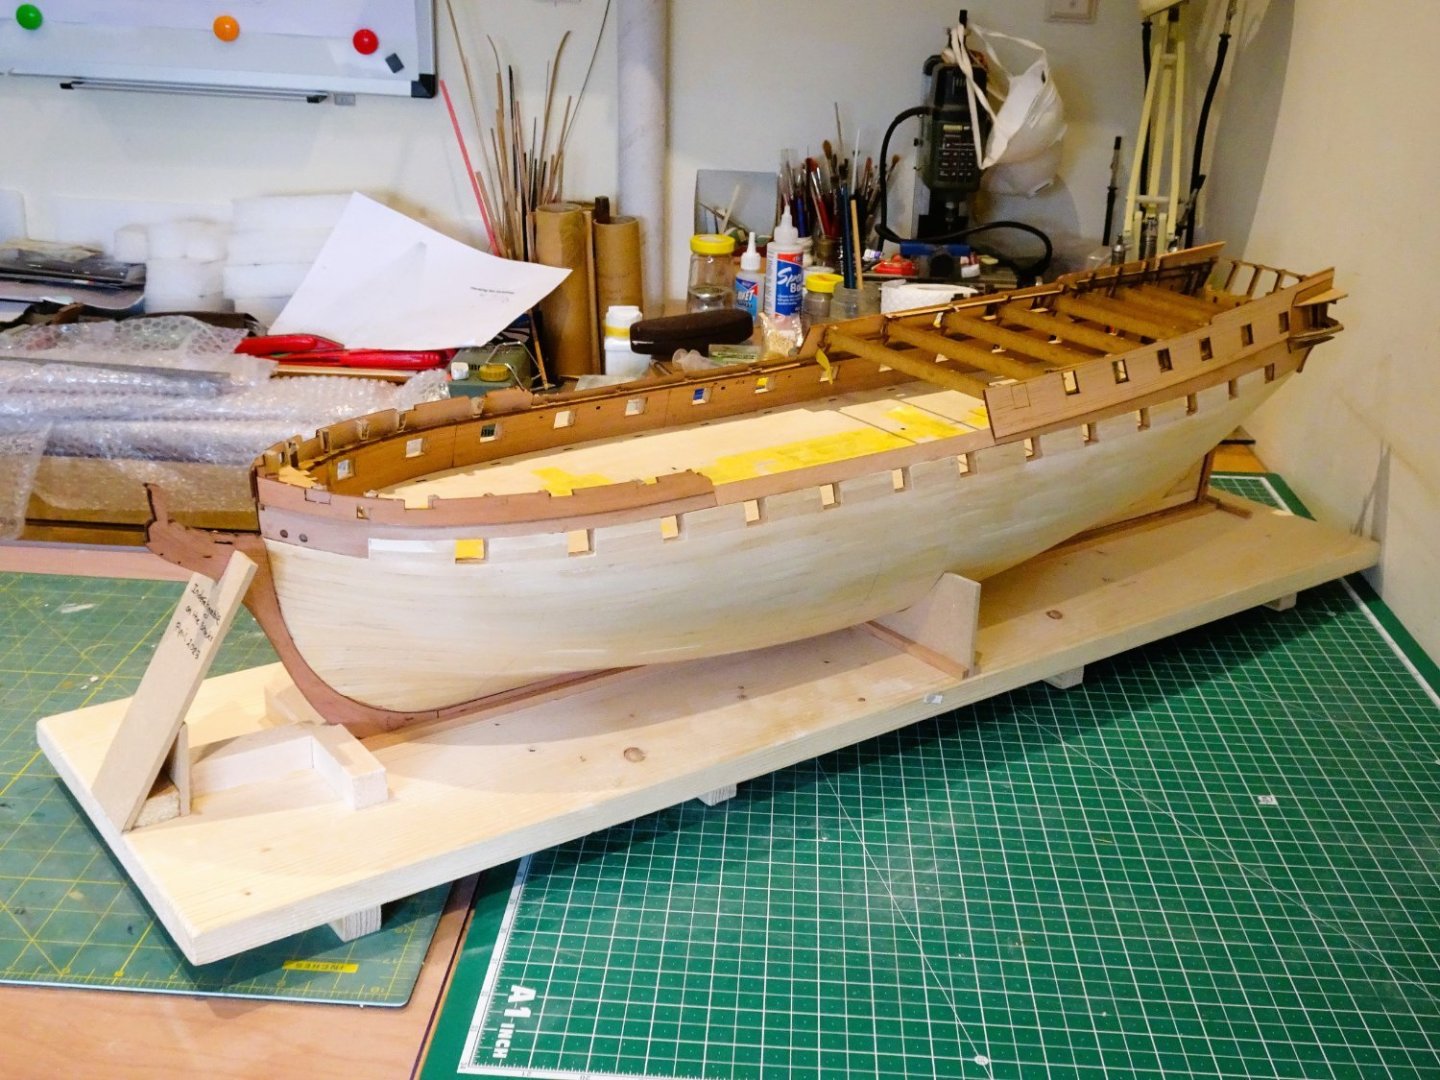
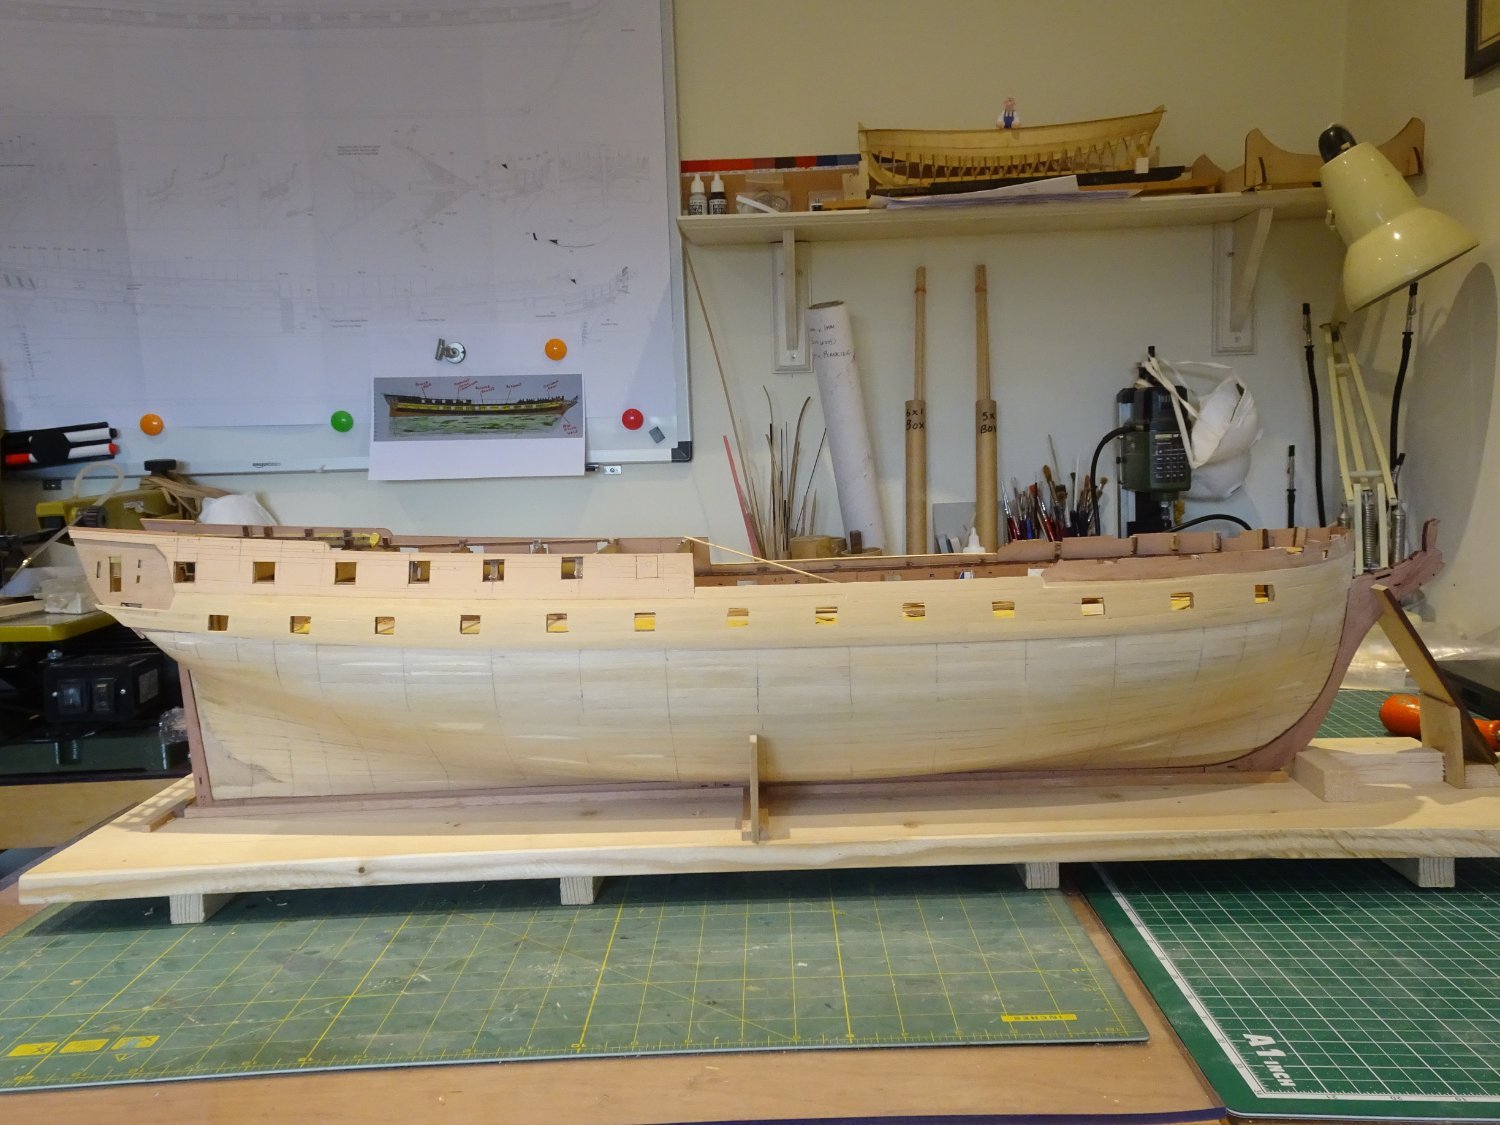
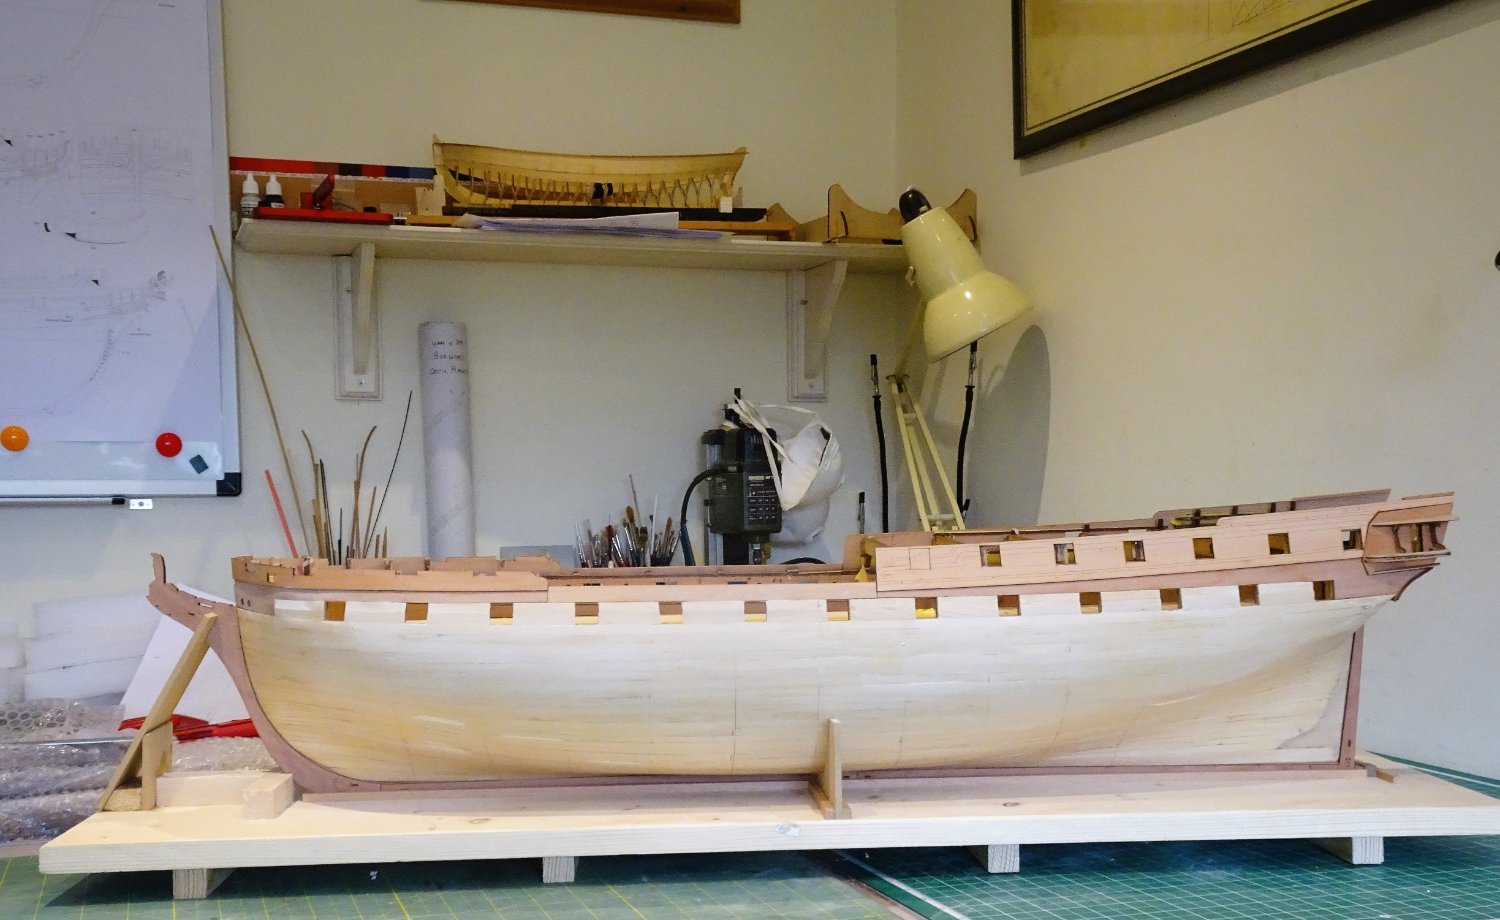
Post Thirty two.
The thing about wales.
0978
The lower strake (in Pear) of three, over which the kit Wales would be fitted has now been glued into place. It was possible to clamp this strake, so pva was mostly used.

0984
This too has been tapered by 1mm at the bow and left full size at the stern.
0991
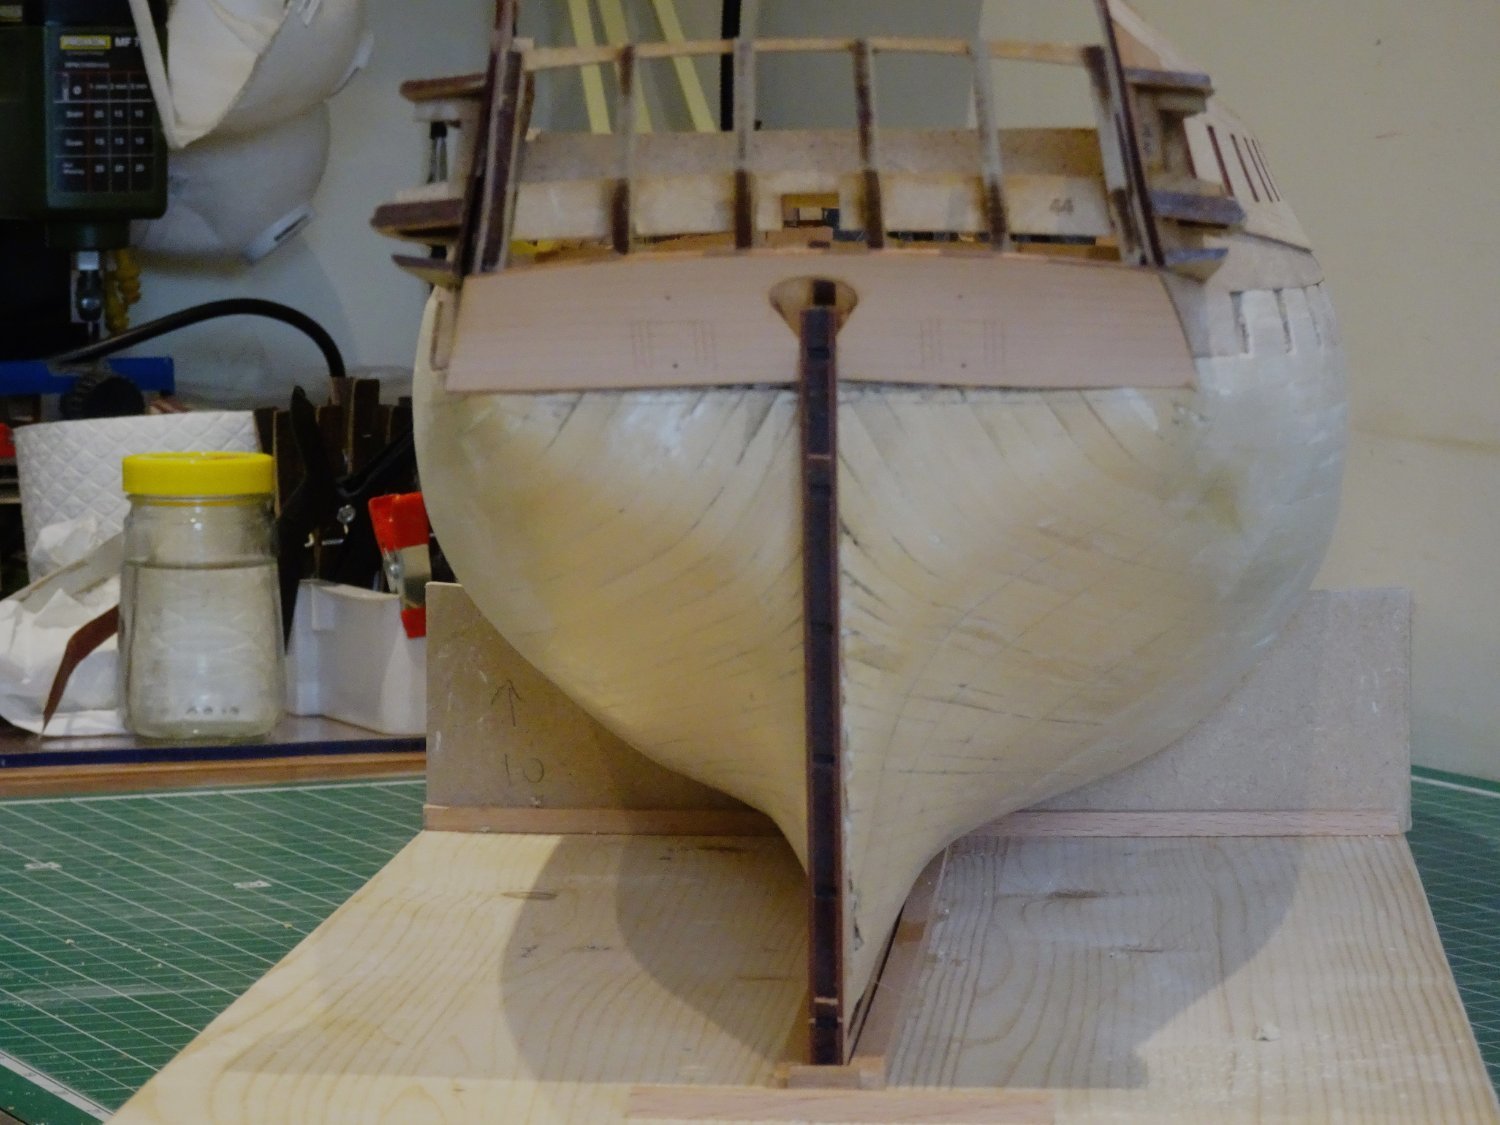
The stern piece requires a sharp short bend with twist to conform to the transom.
Wales have been on my mind for a while now, and a decision has to be made.
On the kit the black strake is represented by a 4x1mm strip which is used to form the line of the wale. This fits directly over the previously fitted ‘marker’ strake.
Below this (3) strakes of 5x1 strip make up the wale. This equates to a wale depth of 3’ 1¾”
0977
The Adm. plan of Indy shows a wale depth of 27mm at midships. If this is at 1:48 scale, the equivalent @ 1:64 scale gives a 4’ 3” depth of wale.

0975
It could possibly be that the Adm. plan upper wale line includes the Black strake, the relationship between the line on the plan with the aftermost three ports compares well with the kit plan drawing.
The rub is that as far as I know the Black strake was not part of the actual wale but was a slightly thicker first plank fitted above the wale.
The use of straight strips in the kit is a simplification; the wales on this size of ship would have been made up using hook and butt, or at least top and butt, or anchor stock planking.
Chris has his practical reasons for simplifying the arrangement for kit purposes, but even so it would have been nice if only on the plan, the proper arrangement had been shown.
I have no direct reference to the wales on Ardent class ships but Goodwin’s The Construction and Fitting of the English Man of War 1650 – 1850 gives the proportions of the planking strakes, for the different patterns used.
The wale would consist of two strakes of two Top/hook and butt planks, locked together.
On a hull as large as Indy I think it deserves a more authentic looking wale but I acknowledge that in practice once the wale is blackened the effect is less evident to the casual eye.
Nevertheless, I still fancy having a go.
The Plan
I have decided to use Top and butt only, hook and butt is an added complication, and my aim is to give a visual representation of the different pattern of the wales on these ships.
The overall length of the wale is 826mm, which will require around 28 top and butts planks each side.
I shall be using 8mm as the depth of two planks matched together, which gives an overall depth of the wale of 16mm around 3’ 4”. This is deeper that the kit wale by 1mm, but is still slightly less that the depth given by Goodwin for a thirty-eight gun frigate of 3’ 6”
The planks will be of 120mm in length.
The touch 30mm in from the end. (¼ of plank length)
The touch depth is 2/3 the depth of the strake (8mm) = 5.33mm.
The butts are ½ the depth of the touch =2.66mm.
I will be using 6mm strip to form the planks.
0980
I made a rough scheme drawing to give me an impression of the look and proportions of the wale.
0981
I now need to see how I can produce a test plank that can be replicated in a jig of sorts.
To make the measurements easier I will try a touch of 5.5mm and a butt of 2.5mm, easier to see.
B.E.
26/05/2023
-
-
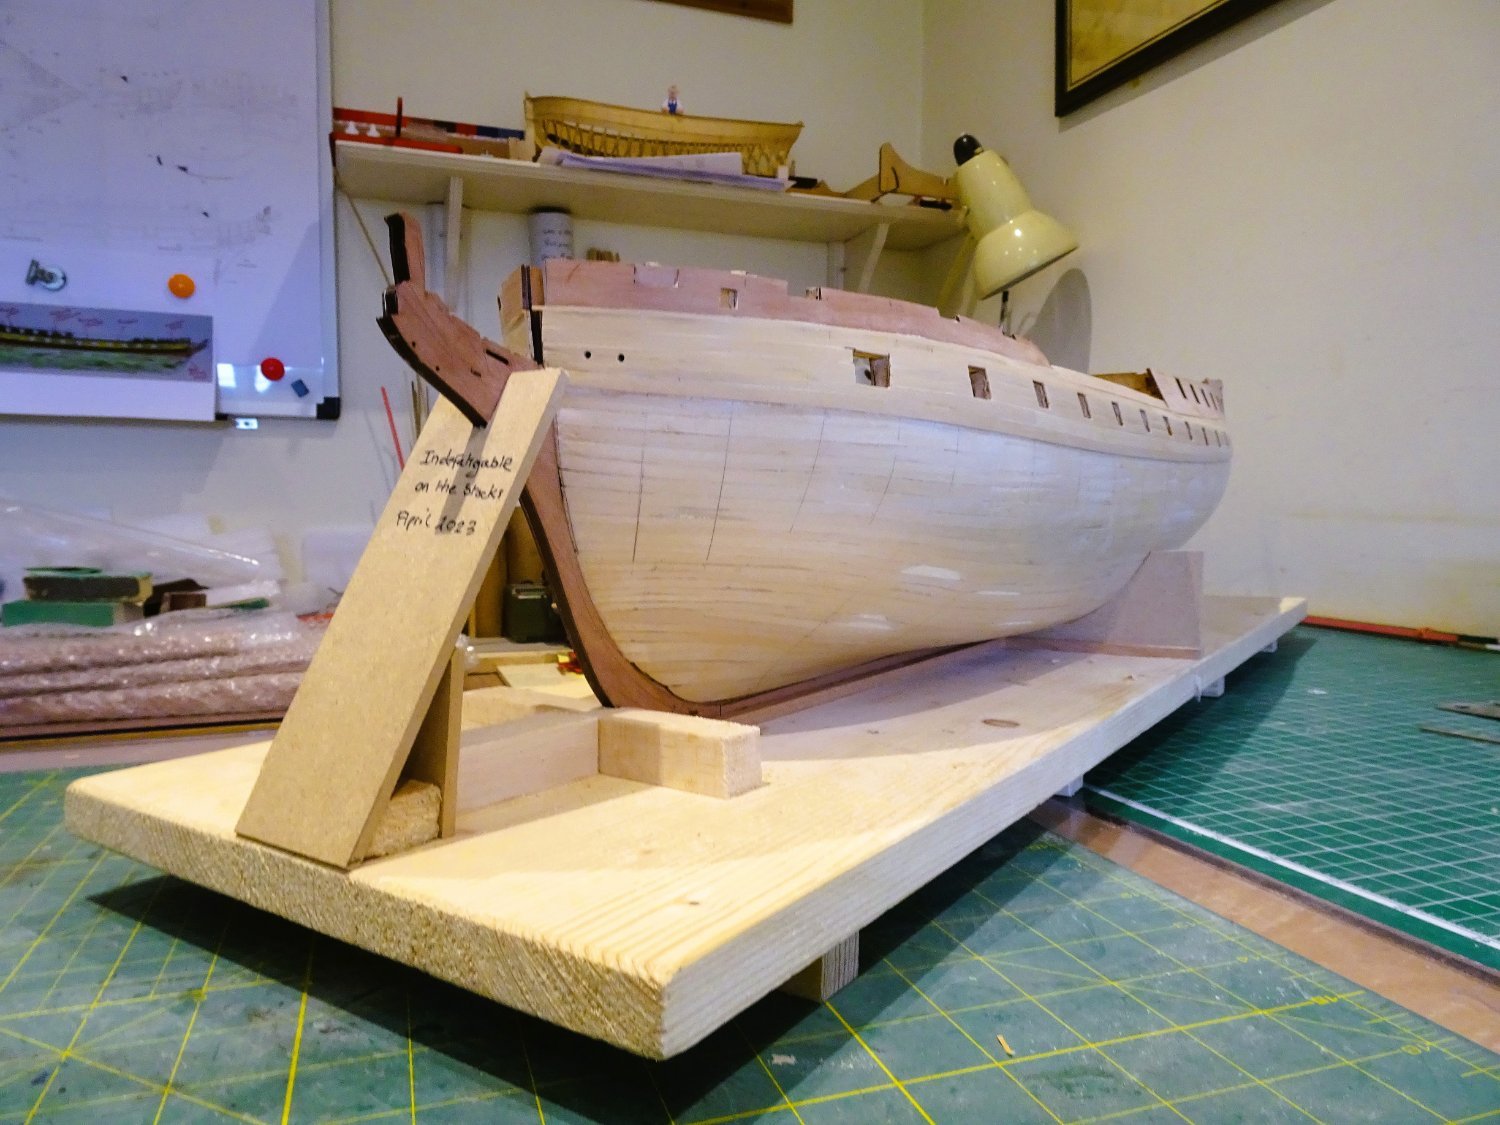
Post Thirty-one
Prepping the hull.
Not a lot of progress made since my last update, but working in the garden, and a week in the Wye Valley have intervened.
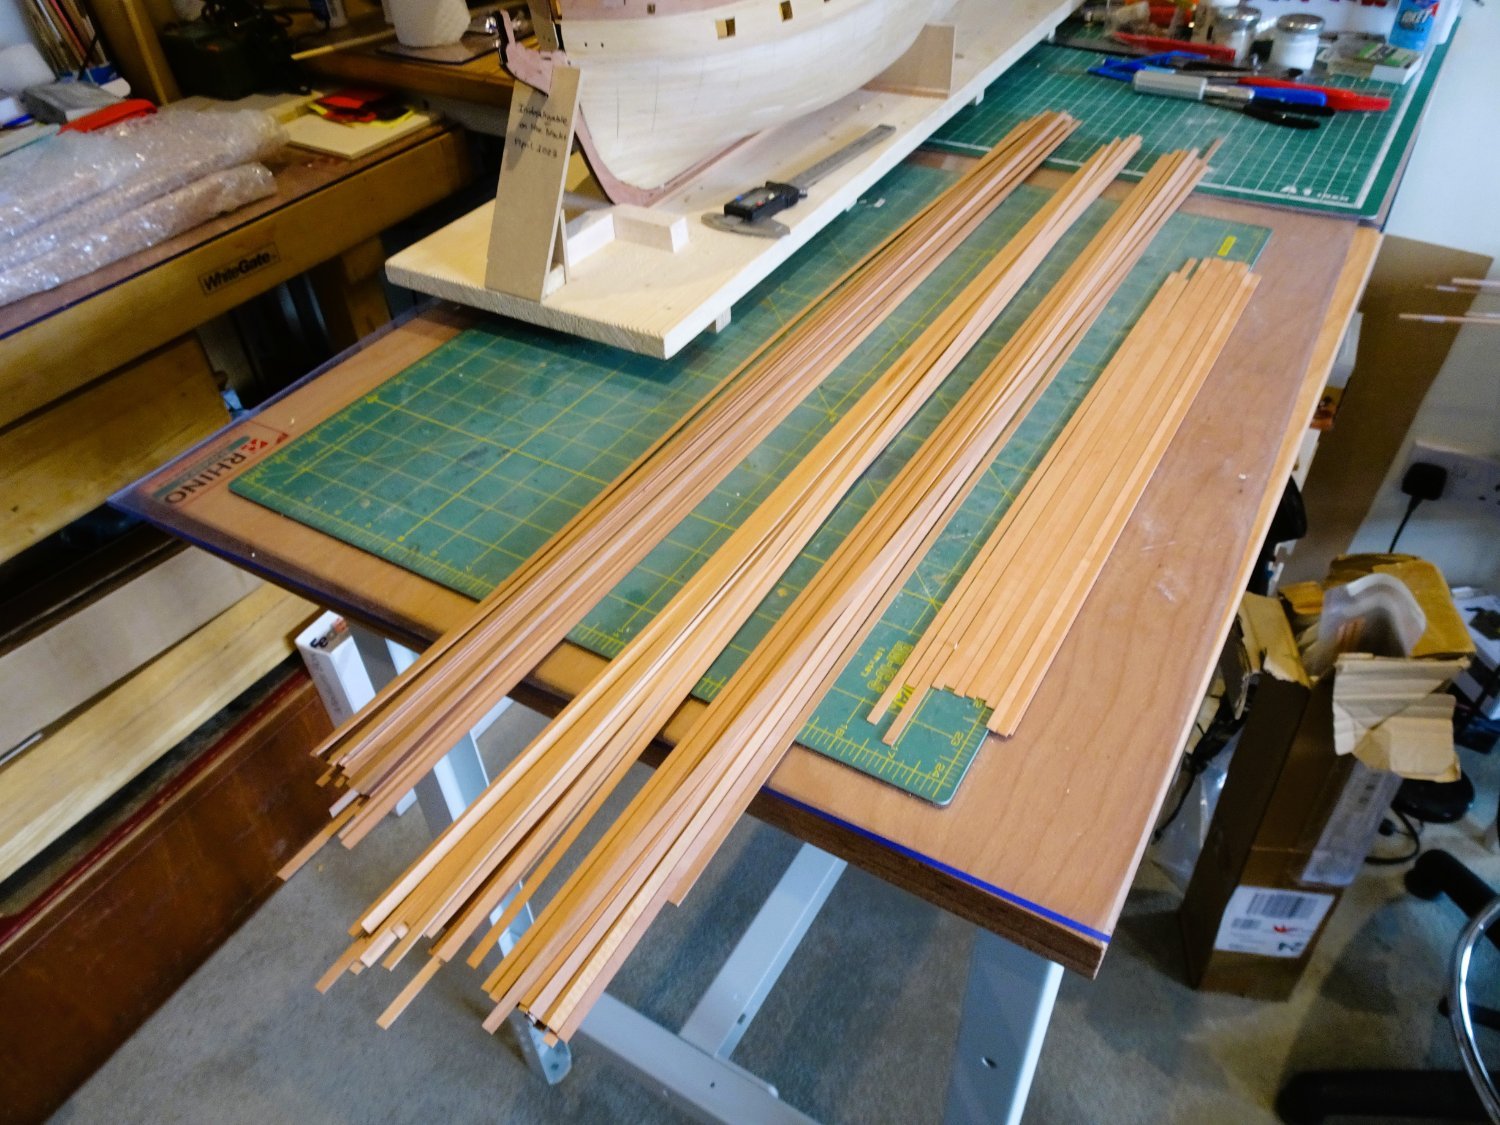
The good news is that my hull planking timber has arrived, quicker than I thought. Ordered on 12th May, dispatched on 22 May, received on 25th May.
Excellent service, thank you Vahur.
0968
The colour is consistent throughout the different sizes, and random checks on the timber strips indicate consistent width and thickness.
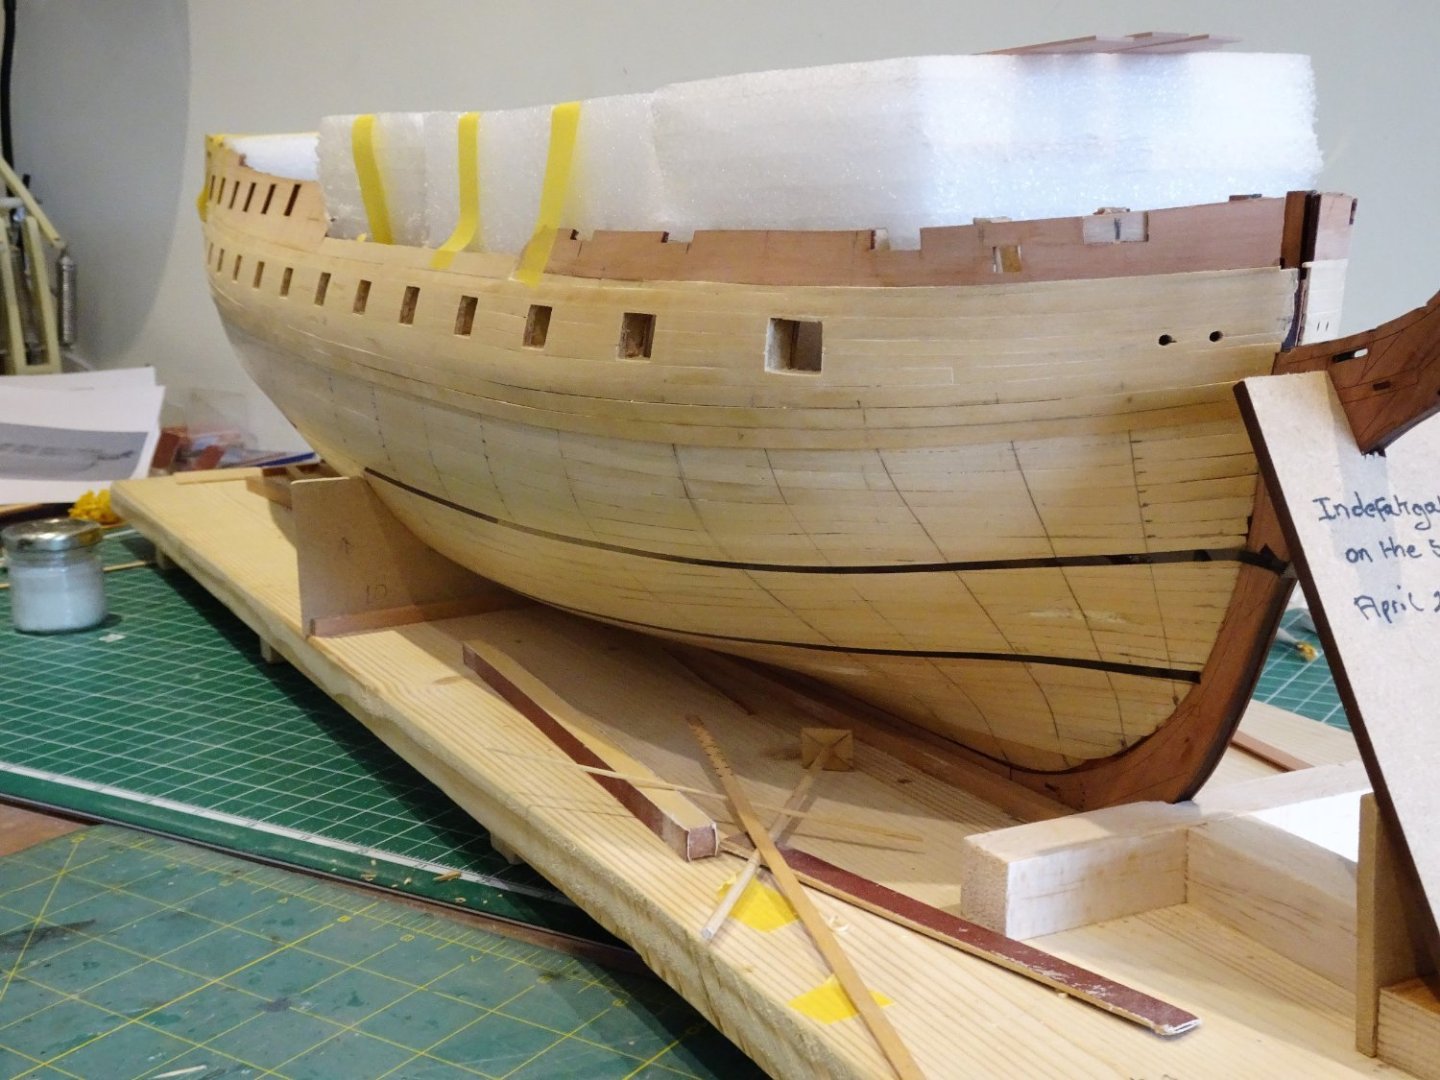
0971
Pending delivery, the bulkhead lines have been re-drawn which will be used to work out the strake runs.

0972
I have been doing preliminary work on lining off into three sections, but for now I have added two of the three planks below the Black strake, over which the wale timbers will be fixed.
These I have tapered by 1mm at the bow.
These top two strakes are of Box but the lower one will be Pear to avoid any awkward mismatched timbers showing above or below the wale.

0970
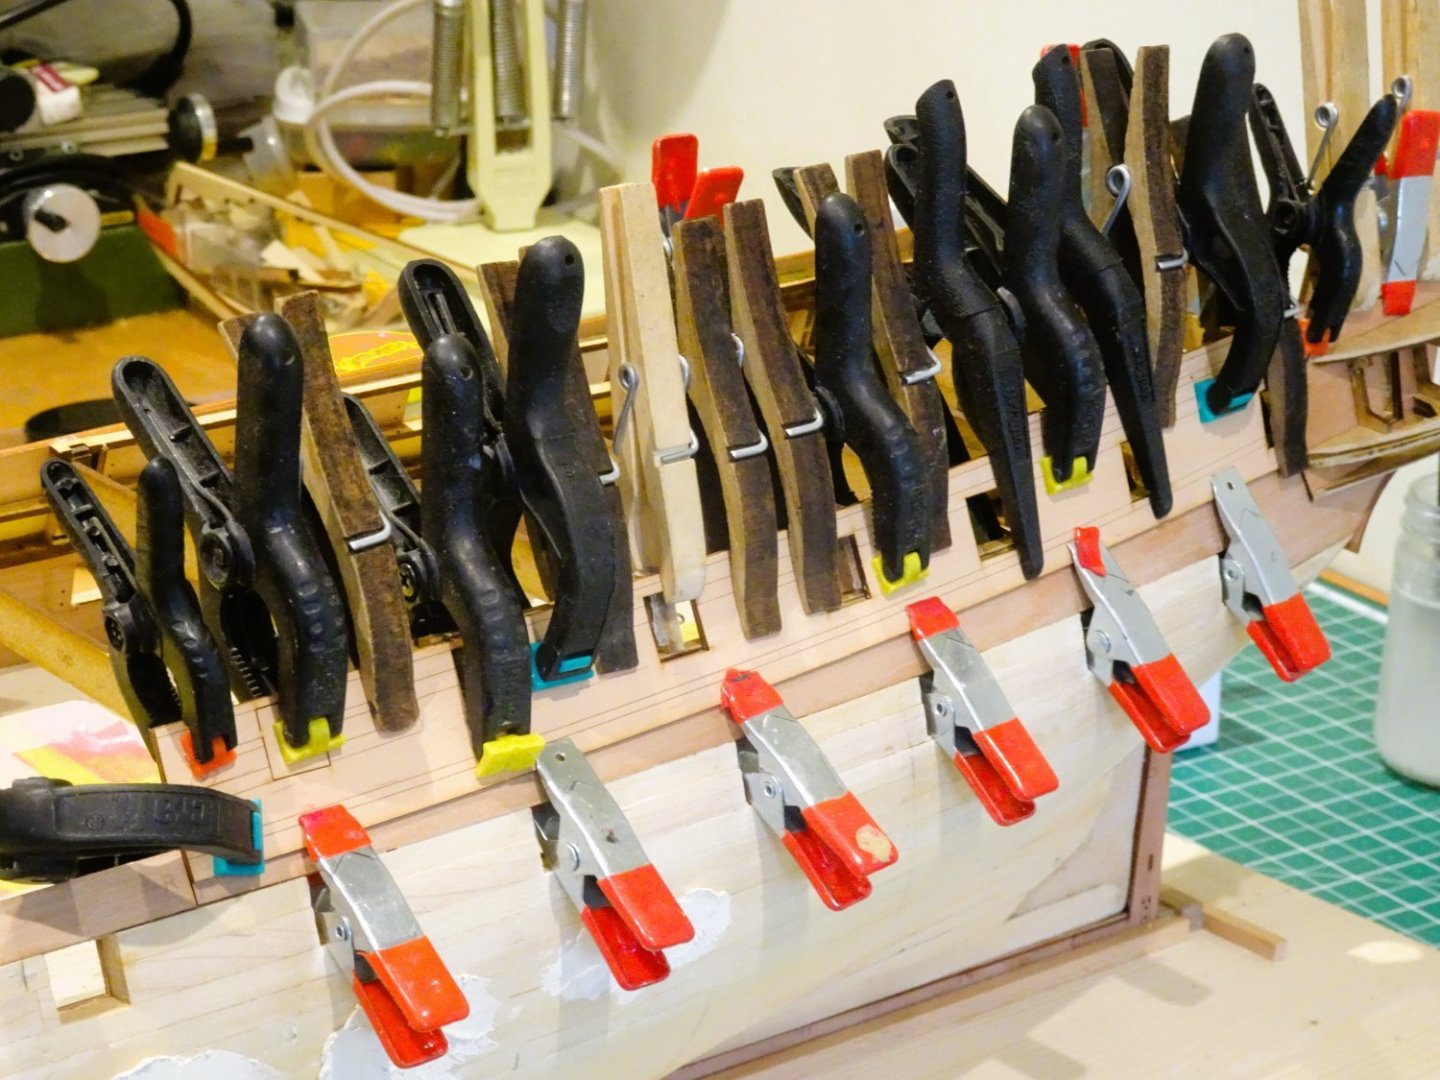
I have also been working on clearing the gunports, and to this end bespoke sanding sticks, scalpel, and template jig are used.
This is slow work and not a job I enjoy.
0966
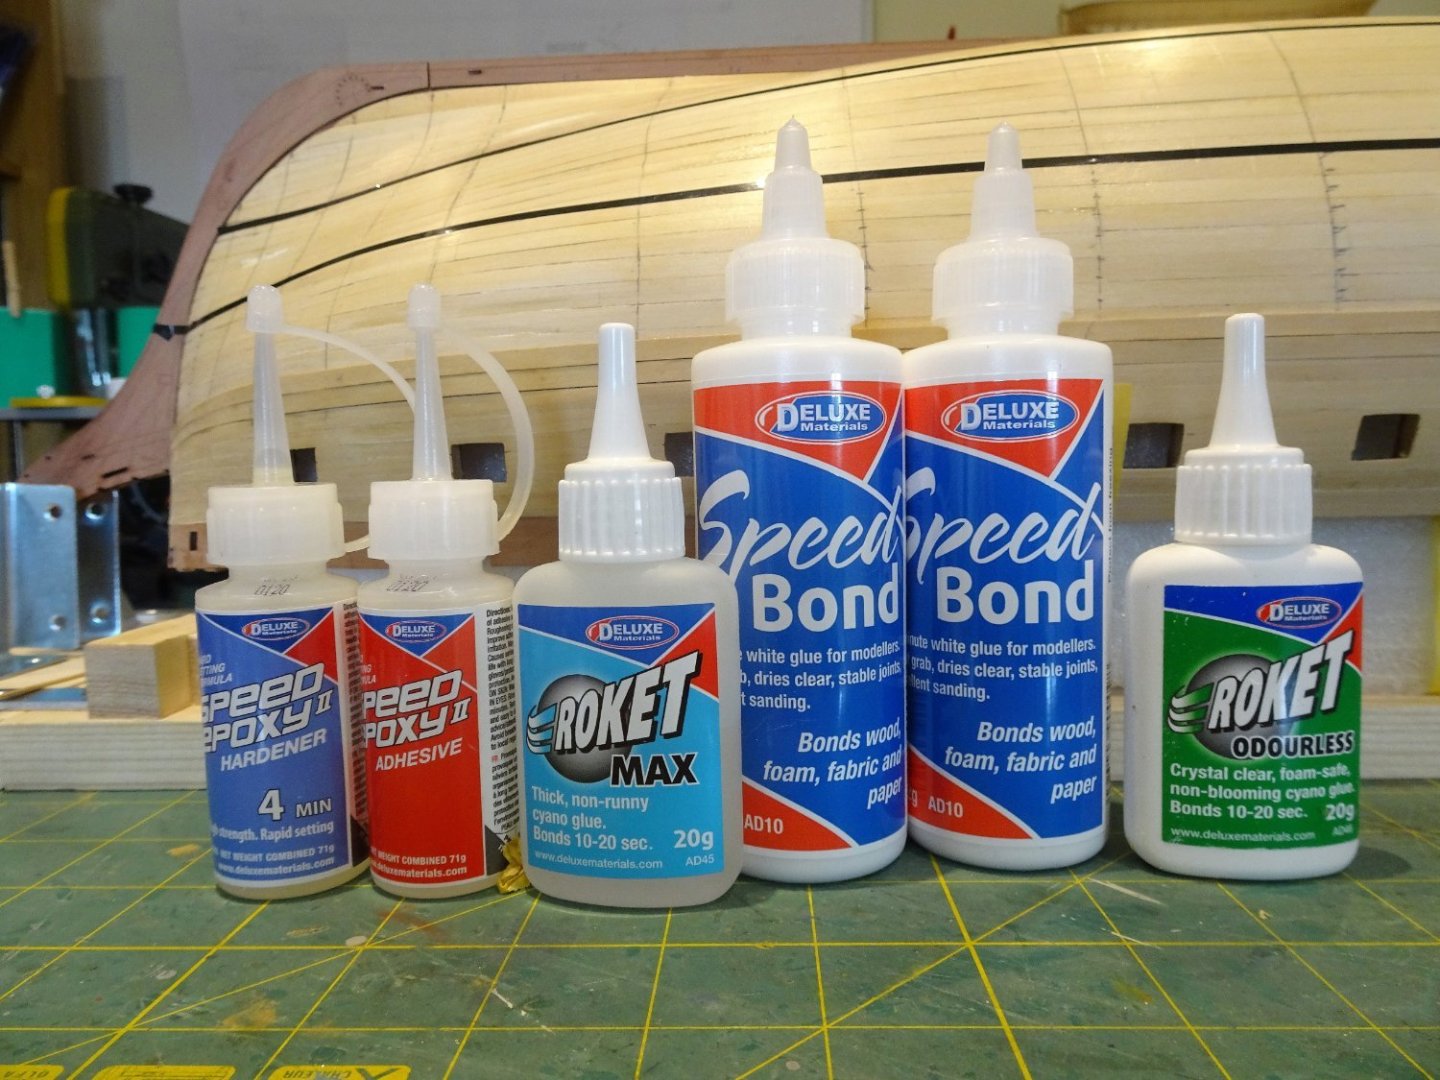
Don’t get much change out £50 when consumables are replenished, I avoid thinking about how much I have spent on this project overall to date. 🙄
B.E.
25/05/2023
-
Yes, that's the one Glenn, but with Indy it would require two rows of interlocking planks, four strakes deep in total..
B.E.
- hollowneck, davyboy and mtaylor
-
3
-
-
Very nicely done James, some great deck detailing on that kit.
B.E.
- hollowneck, mtaylor, thibaultron and 2 others
-
5
-
-
-
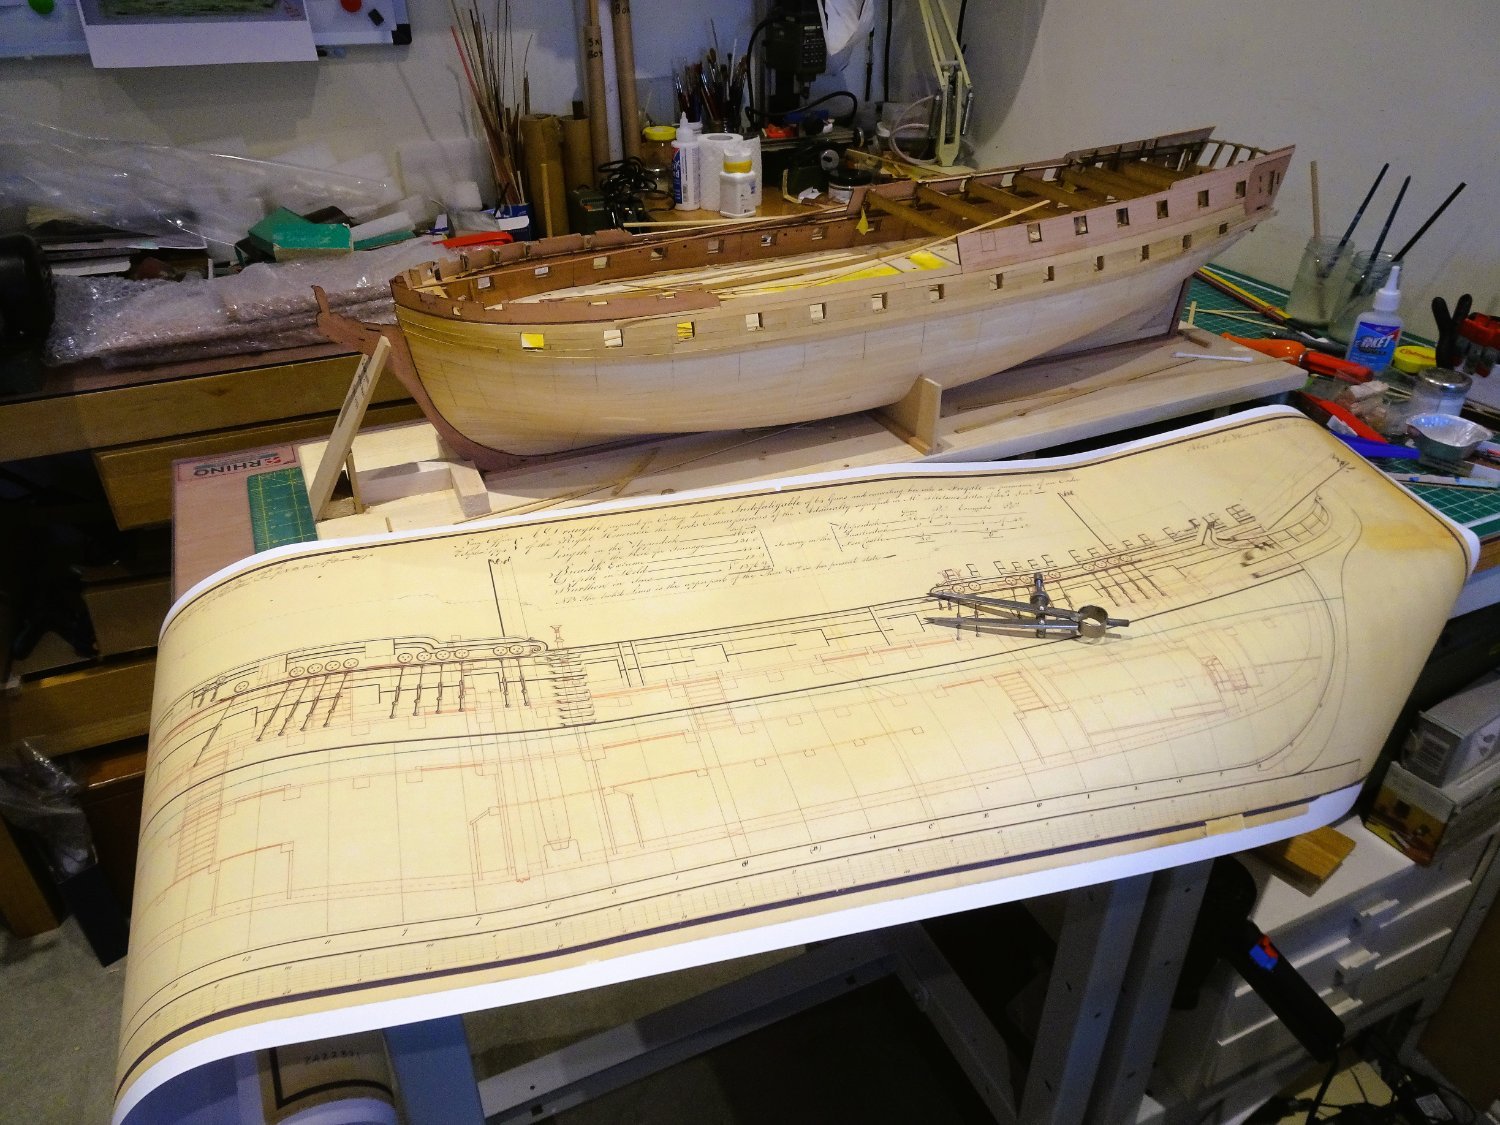
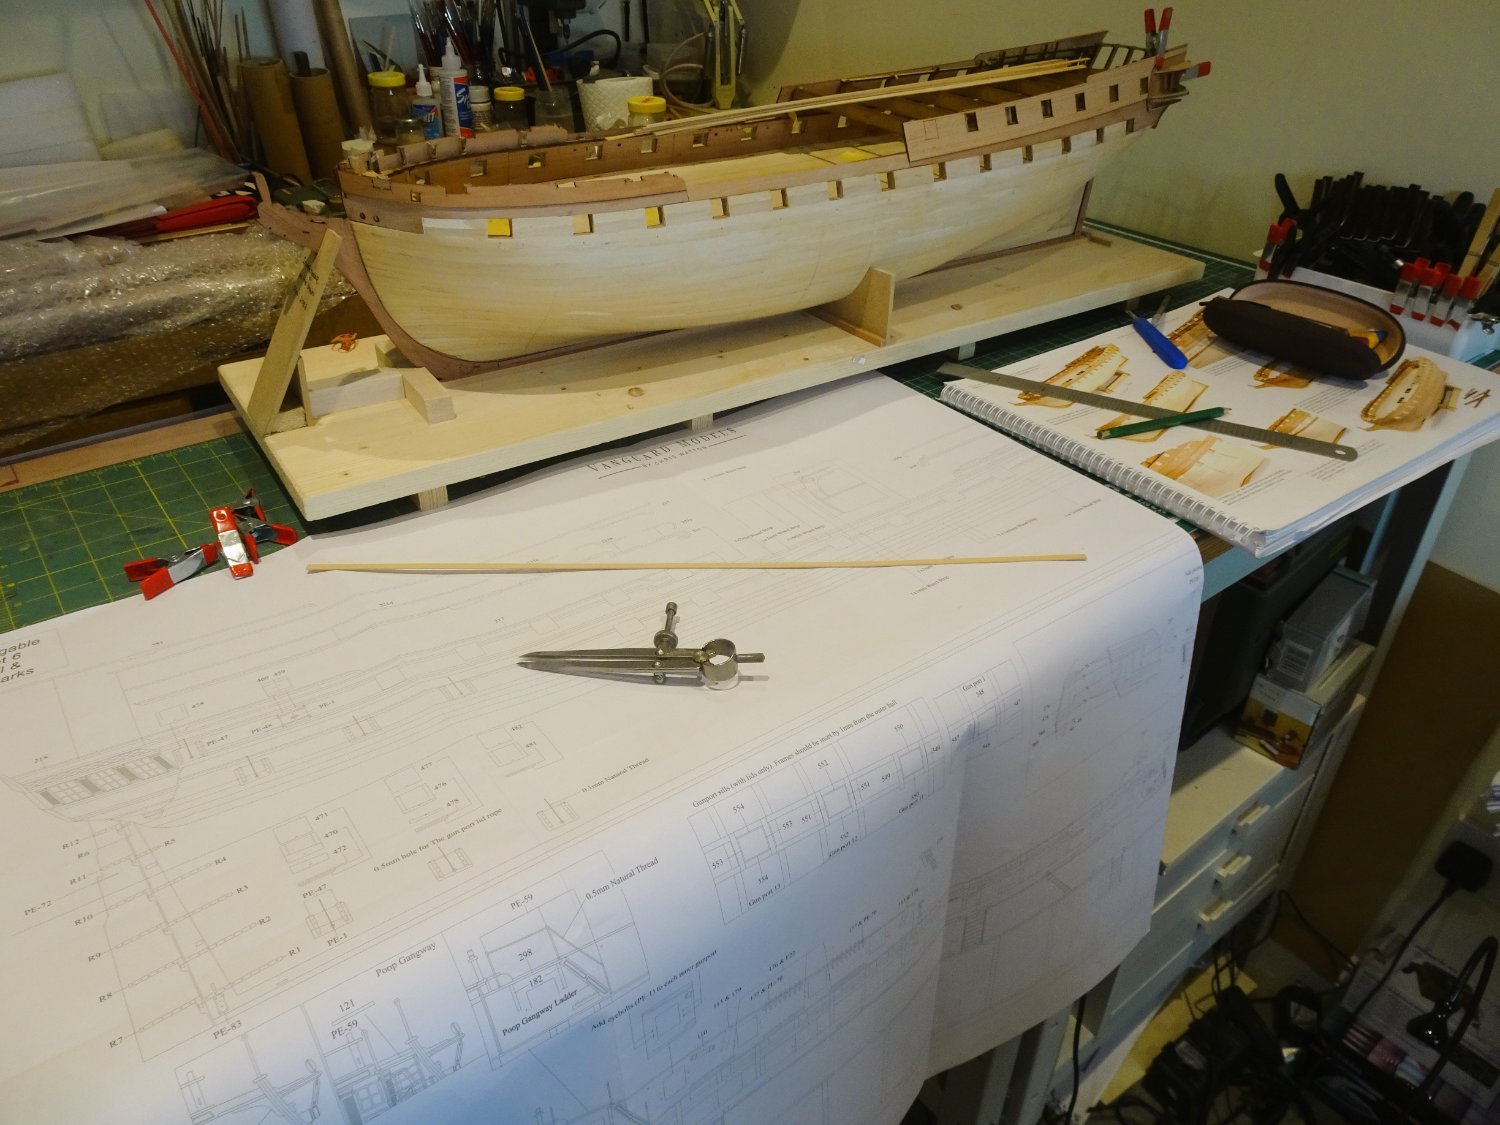
Post Thirty
A conundrum
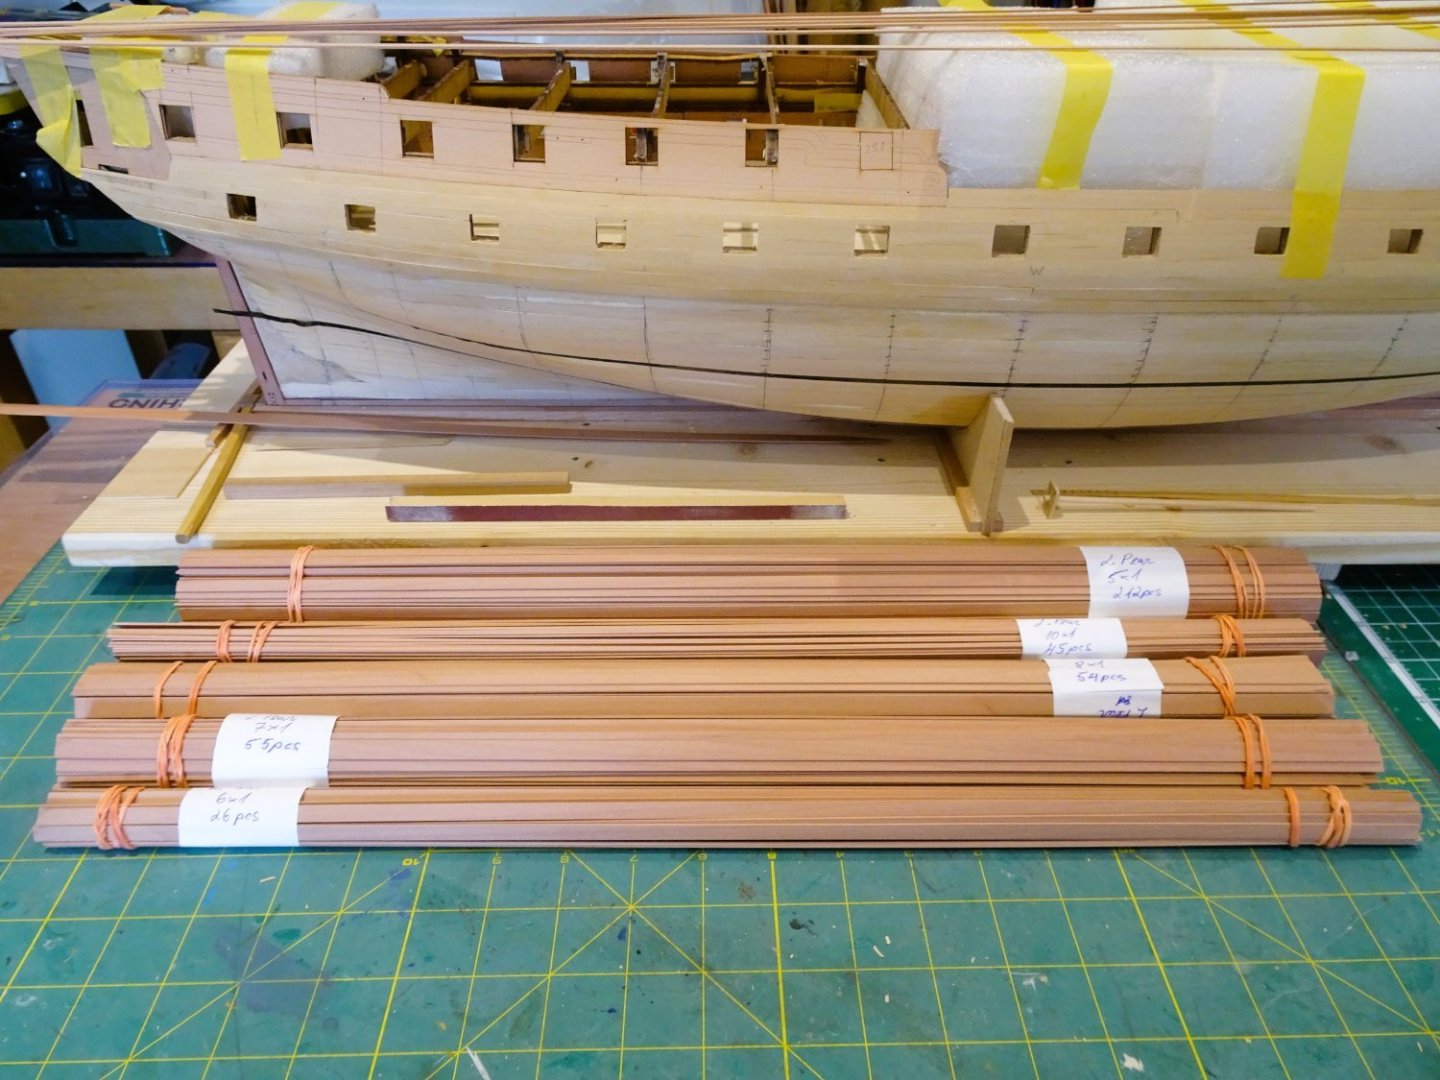
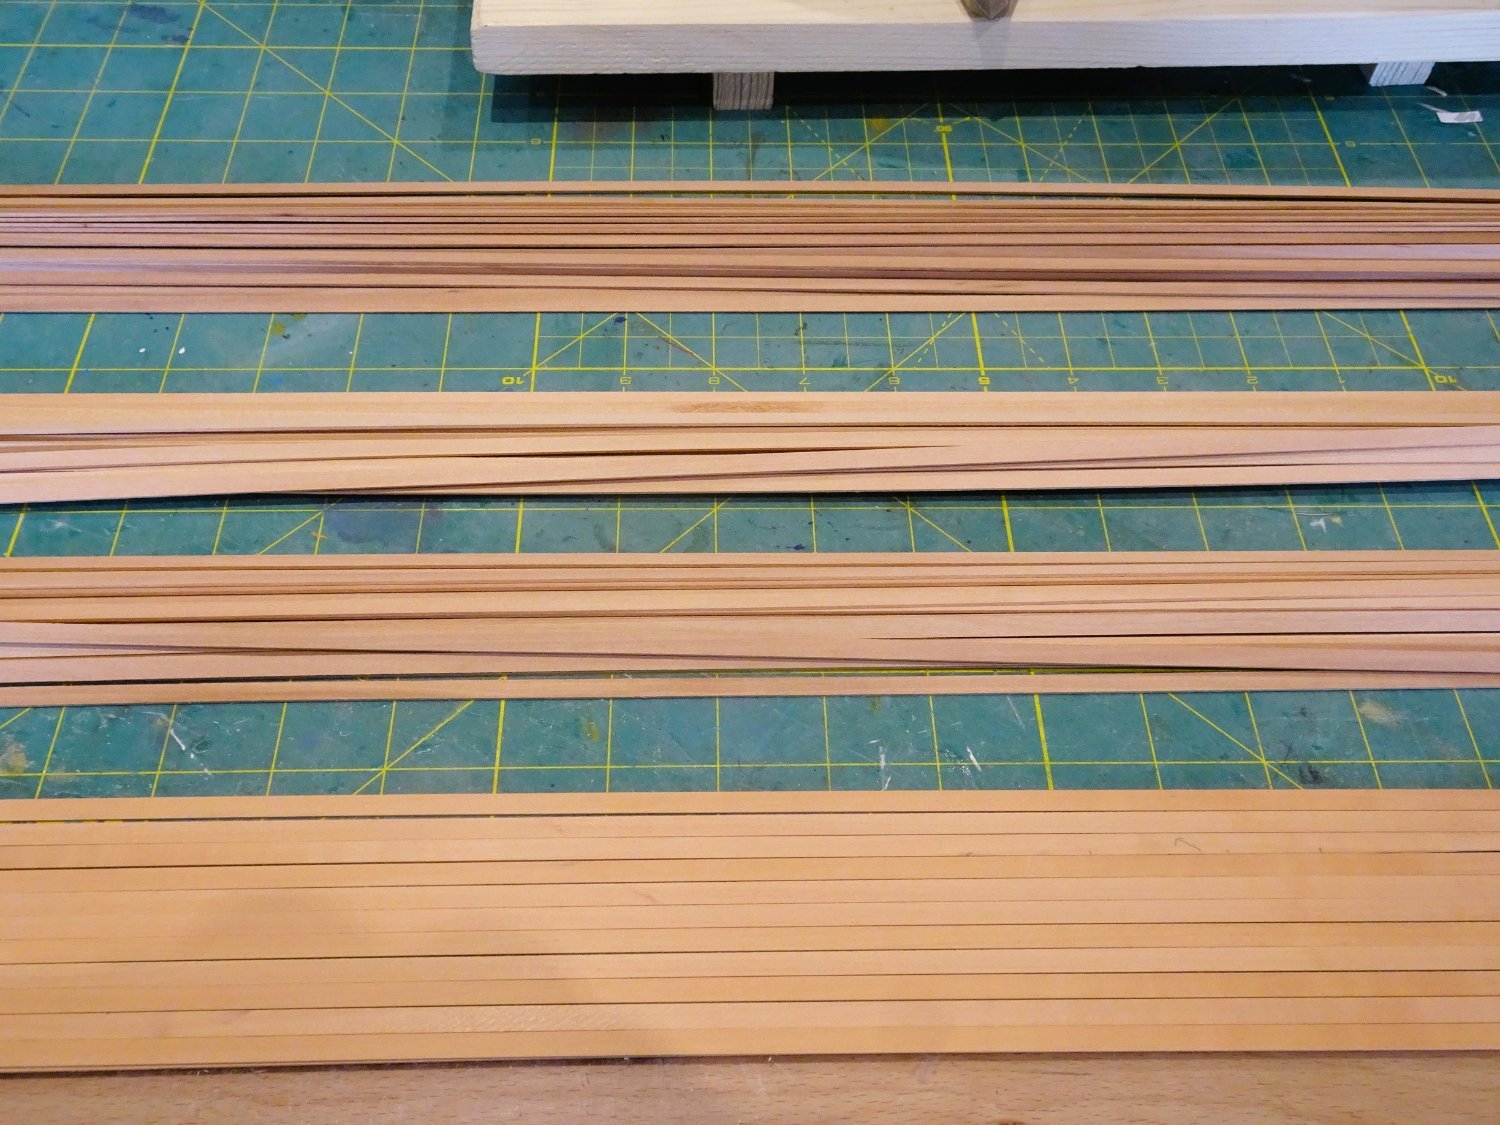
I have spent the afternoon sorting and checking my planking strip.
(102) 900mm lengths of 5x1mm Pear strip is supplied for the hull planking.
There is quite a colour variation which may be split into three shades, Dark, light, and medium.

0956
In my kit (37) are Dark, (24) are light, and (25) are Medium.

0955
The shorter lowest selection in the above photos is Light pear from hobbymill.eu and from previous experience the colour is consistent.
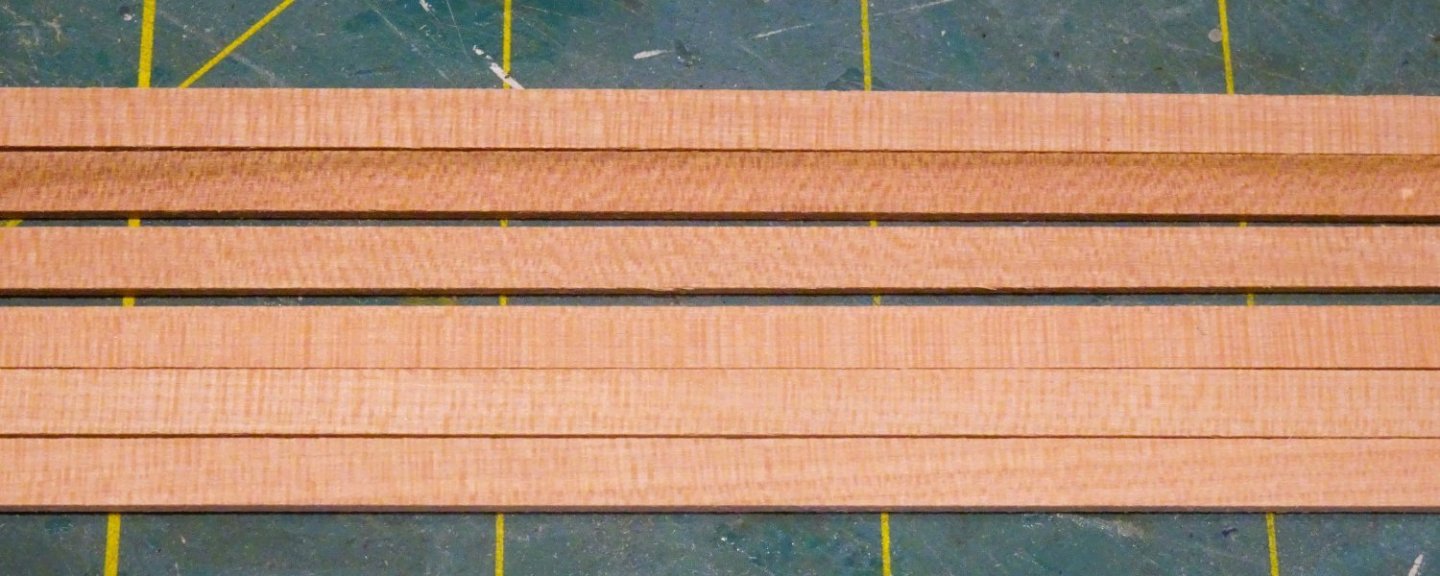
0957
There is also a fourth category (16) strips, with vertical graining, that I prefer not to use.
Mixed colour shades applied either randomly, or by design, in the planking strakes is something that doesn’t appeal to my eye, but if the intention is to copper and paint the hull then this is of little relevance.
For me it means that there is insufficient strip to complete the hull without distinct colour variation along the strakes.
As I hope to leave the hull with a natural wood finish this is a little disappointing, but I infer no criticism of the kit.
My thoughts are turning to buying a new supply of timber from hobbymill.eu, an indulgence maybe, but this is a project that has already incurred a not inconsiderable cost, and I want to make it as good as I can.
I was quite happy to have a Pear lower hull, but the situation now provides the option of replacing pear with Boxwood, and also including wider strips for spiling.
There is only a small difference in cost between Pear and Box.
One of the general downsides of kit timber is the lack of wider strips for hull planking, which is really is a bonus in planking. Fortunately, wider stuff is now more readily available from specialist sources.
Using Pear I would have a contrast below the wale and a match to the stem, sternpost, and keel.
With Box these elements would provide a contrast to the main hull planking, and Box is my favourite modelling timber.
-Copy.thumb.JPG.3d289d353b4b8566bea20dd854f6c734.JPG)
08070
Nevertheless, I have decided to opt for Pear as demonstrated on my Sphinx build, above.
I quite fancy a slightly darker lower hull, and if my planking standard falls below what I hope, then the hull will be coppered anyway.
I now have a few weeks wait for the new timber to arrive, but meanwhile I can fettle those gunports, and mark up the hull for the planking runs.
B.E.
11/05/2023
- dunnock, Glenn-UK, Thukydides and 18 others
-
21
-
Thanks for the 'likes' and continuing interest Guys.
Post Twenty-nine
Planking continues.
After a couple of fine weather days and a Bank Holiday weekend enjoying the Coronation, I returned to finishing the Topside planking on the Port side.

0942
0944
0945
0947

0948

0951
0949
This marks the limit of the Boxwood hull planking, from hereon I will be using Pear.
Before I can get to the planking there is the wonderful world of tick strips and bandings to set up, and butt shift patterns to consider.
B.E.
10/05/2023
- Kevin, Knocklouder, mtaylor and 28 others
-
31
-
I think she will look good Kevin, nice working of the wale around the lower counter. 👍
B.E.
- Canute, Oldsalt1950, mtaylor and 6 others
-
9
-
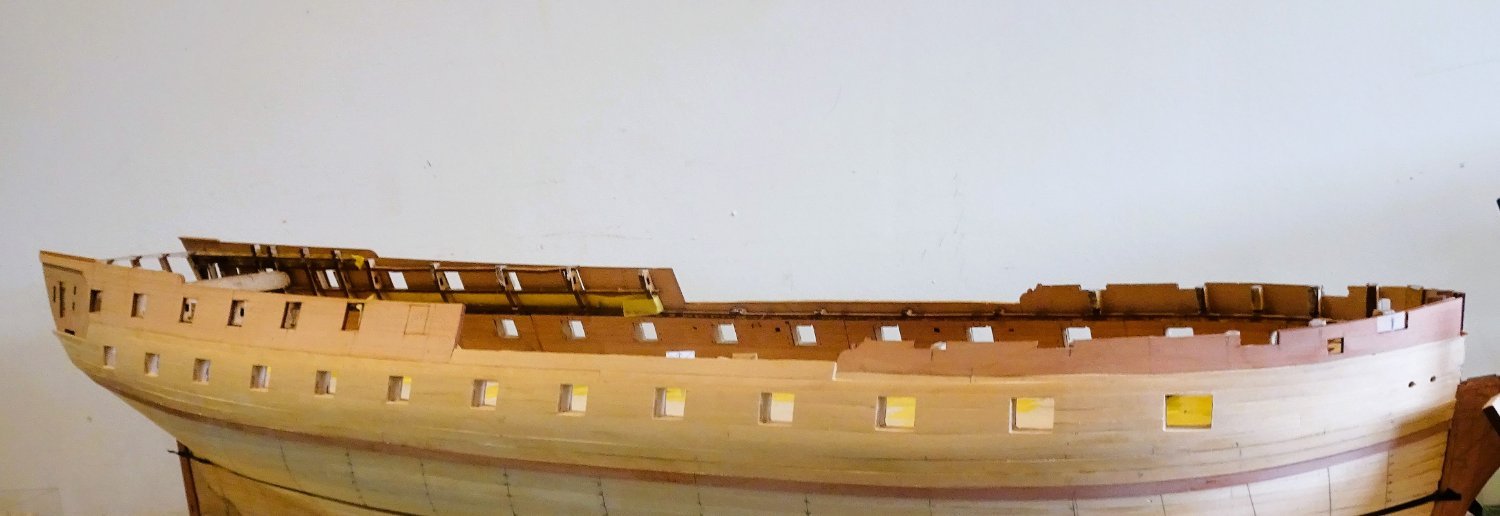
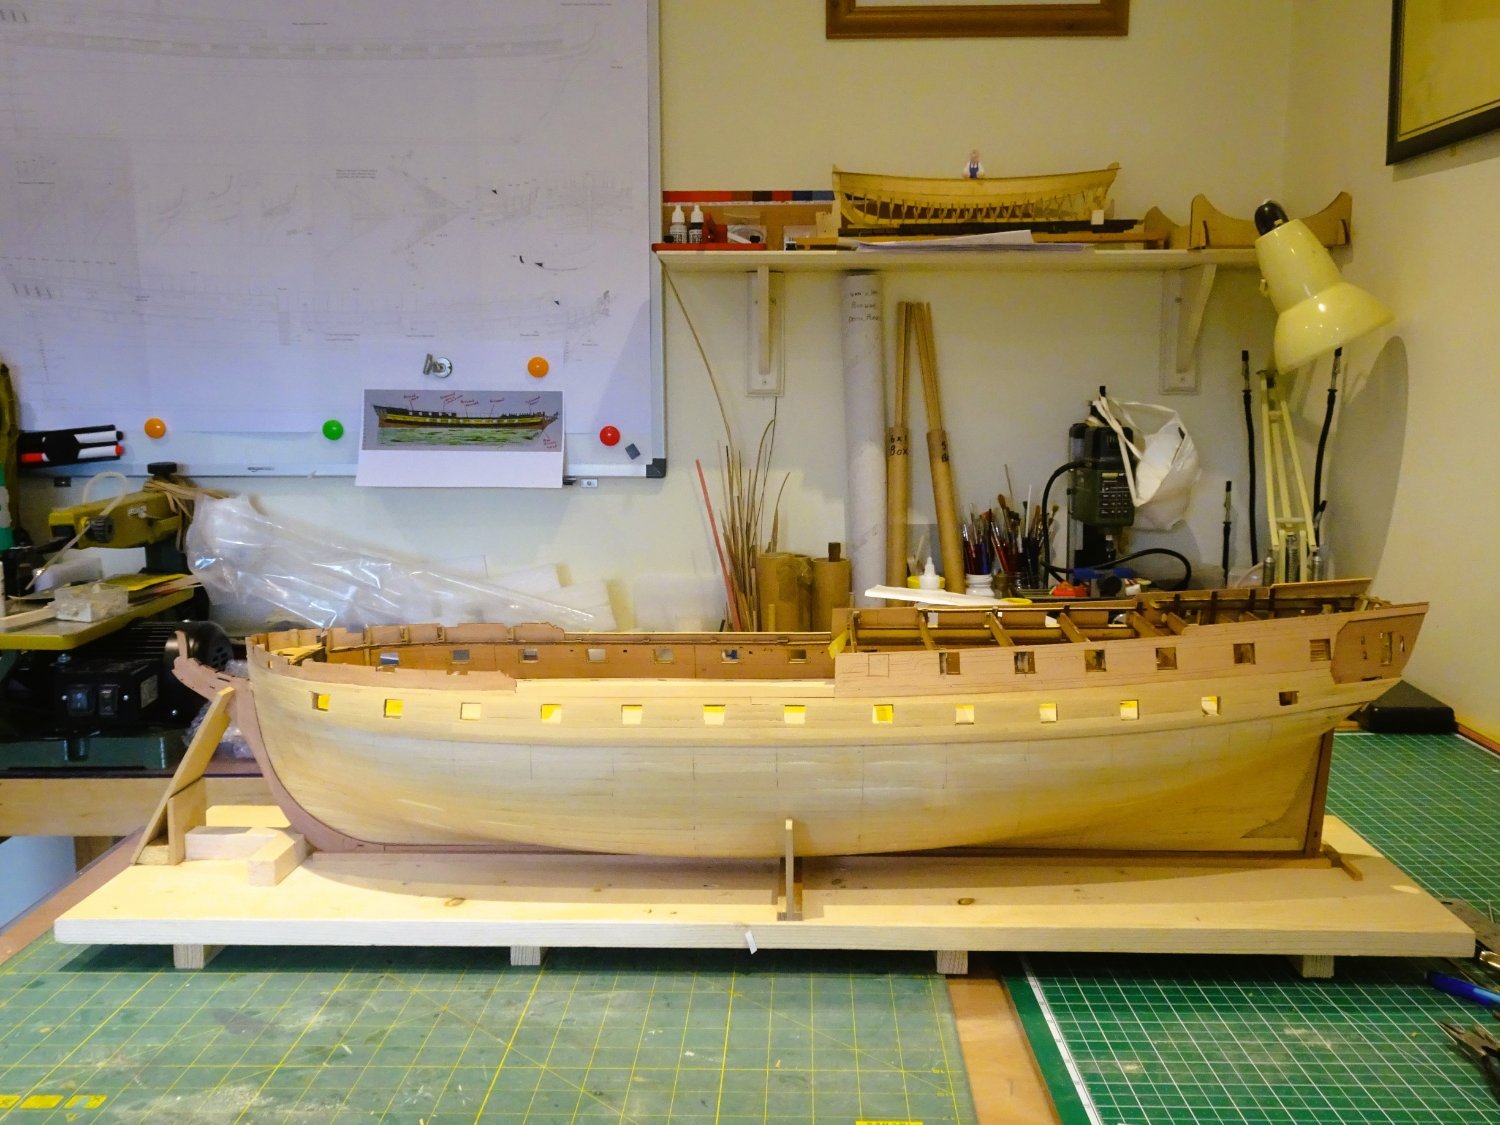
Post Twenty-eight
Second planking begins
I start by taking the trouble to sort and match the Box planking strips I obtained from Hobbymill eu.
They are well colour matched and consistent in dimensions.
So, time to apply the first Box plank.
0925
The blurb indicates fitting the first plank directly underneath the outer pear bulwarks; seems simple enough, but when it comes to the bow pattern there is an inconvenient gap between plank and pear bulwark of around 2 -3mm.
0938
The second plank fitted without issue; I used ca to start at the bow but followed by using pva for the remainder. It is possible to clamp these two strakes.
Both strakes were fitted without tapering.
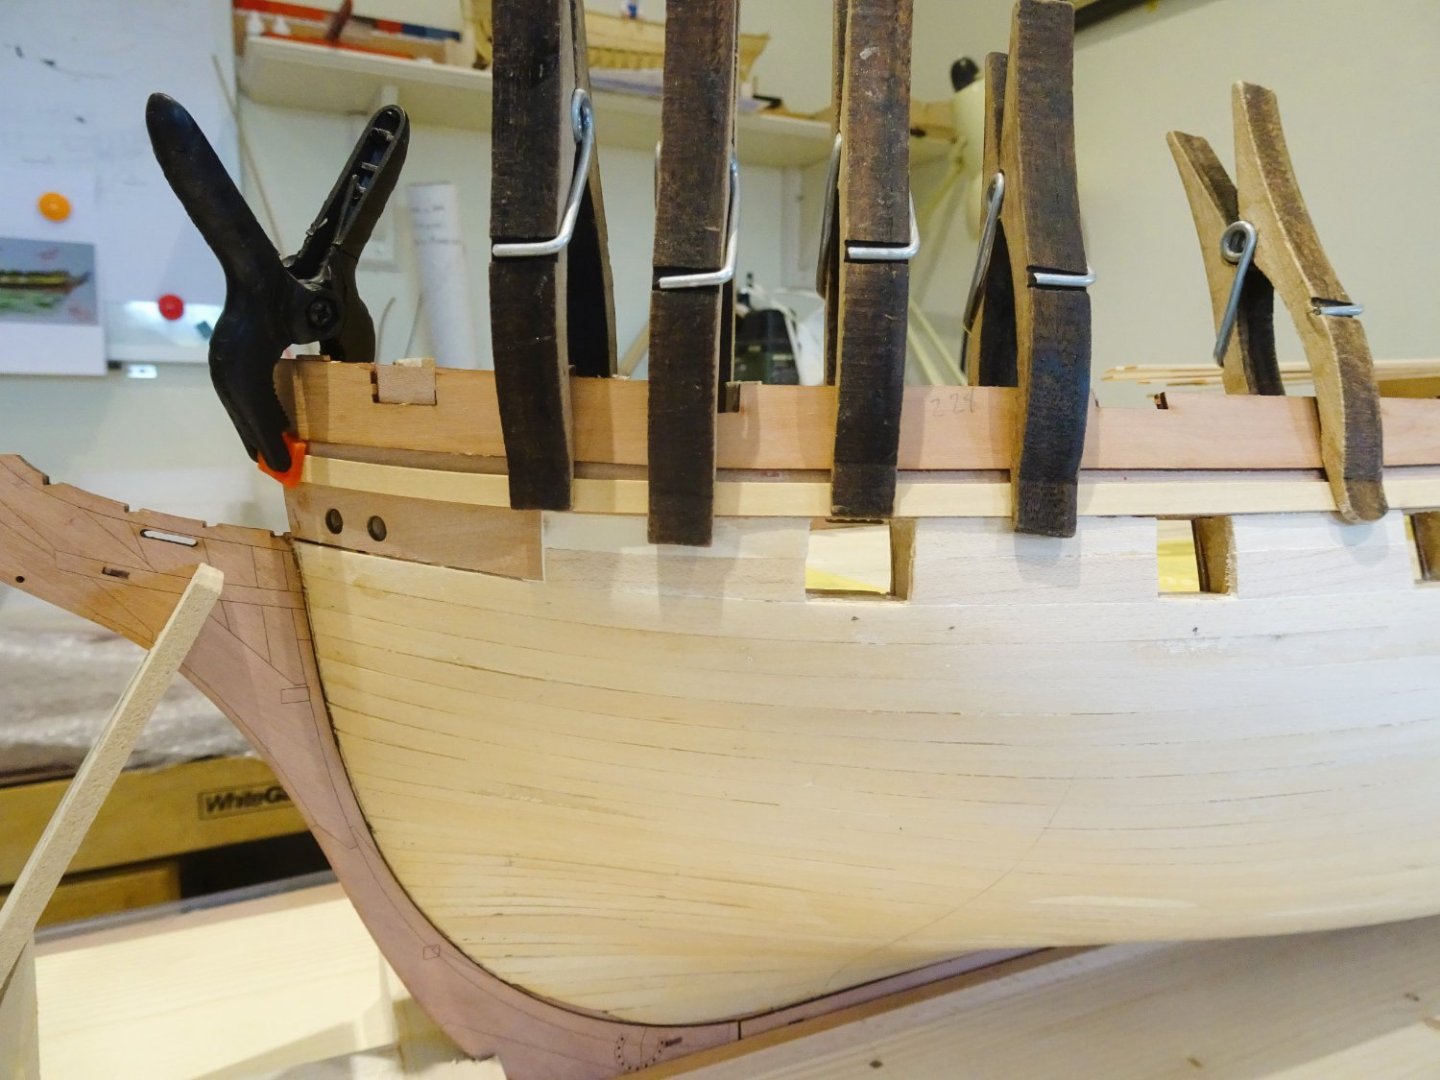
The manual suggests the strake that represents the top level of the Wale (in fact the Black Strake) is next fitted.

0924
The line is taken from Plan six and marked on the hull below the gunport centres. (above the ports in the case of the aftermost two) It is then a matter of running the plank along the hull.
I pinned the plank to the hull, and applied heat to form the shape. Pins are not an issue with this plank as it will be covered by a further wale plank.
I opted to plank the topsides down to it, and then glue it into place. My preference is to part clear the ports as I go along.
Fixing the planks between wale and topsides is not quite as straight forward as it may seem, if the intention is not to cover it all in paint. In that case the paint will hide a multitude of sins.
On many kits the wale line is marked after the second planking has been applied, and I suppose this could still be done. It is just a matter of marking the dots on the second planking rather than the first. This would I think simplify the topsides planking.

0937
The wale sweeps up at the stern and bow, more so at the stern, and has a slight concave curve around midships.

0934
This means the planking between the gunports and down to the wale will have to be made to fit, requiring tapering at both bow and stern.
Starting with the stern I tick stripped each gunport to determine the taper. The hull mid-section is broadly full width with tapering stating around the second gunport from the bow, and fourth from the stern.

0928
0940
Not an entirely authentic method of planking the Topsides, but the taper at the bow will be masked by the hawse bolsters and at the stern by the Qtr gallery lower finishings, so little to draw the eye.
I am using ca gel exclusively now, but take the precaution of having a container of acetone and cotton buds handy to remove any ca spillage.

0933
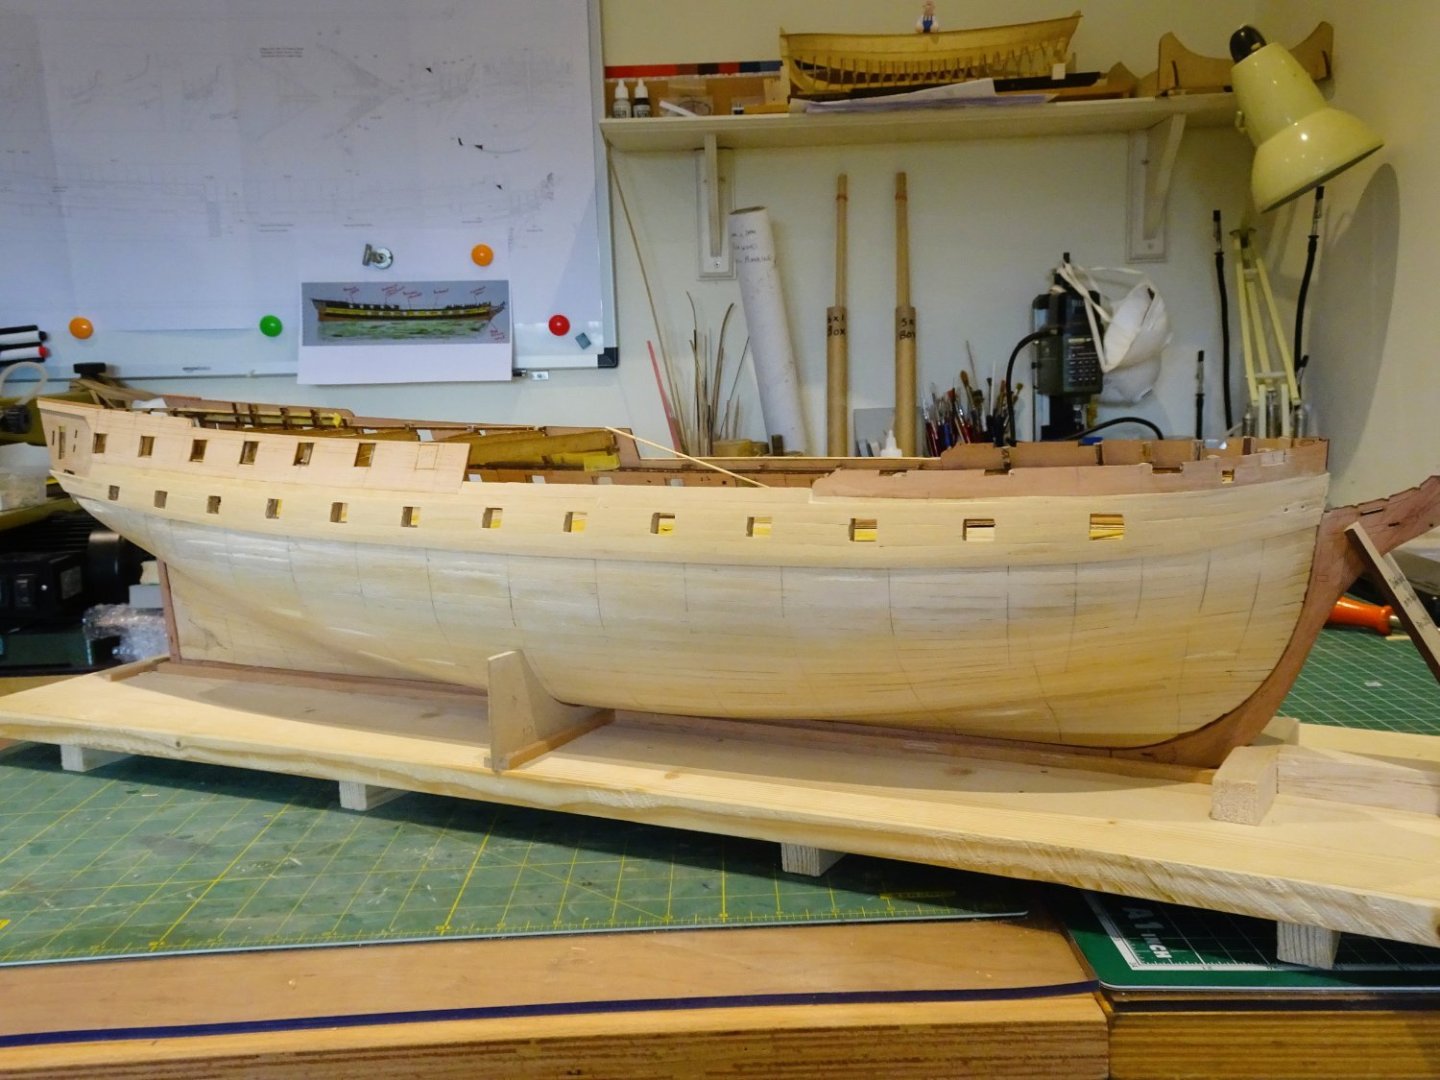
0926
0930
0941
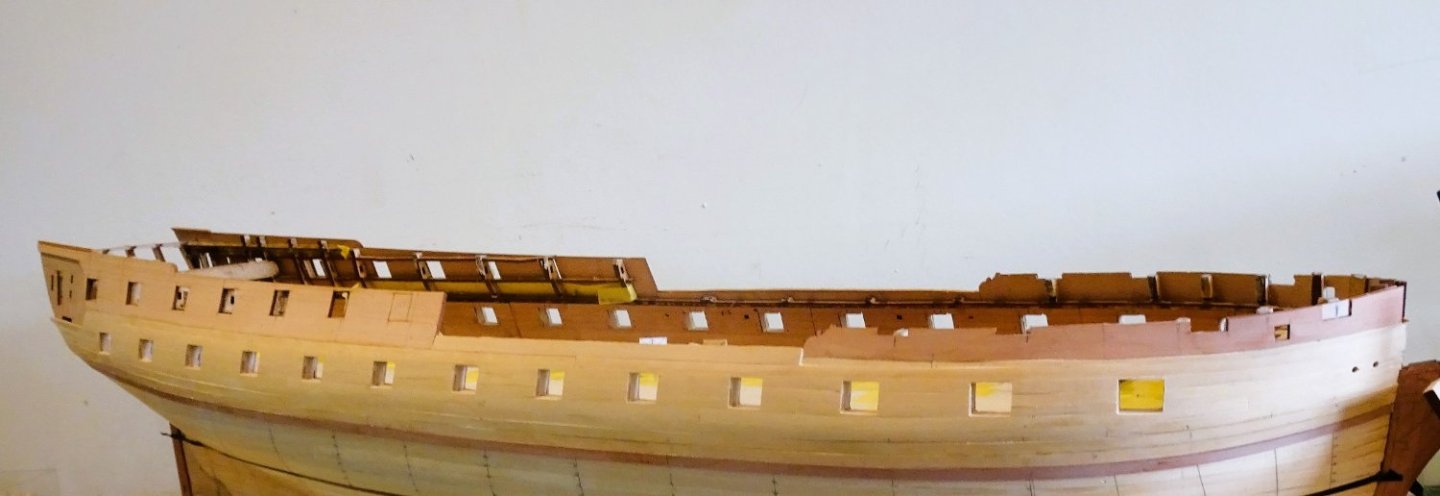
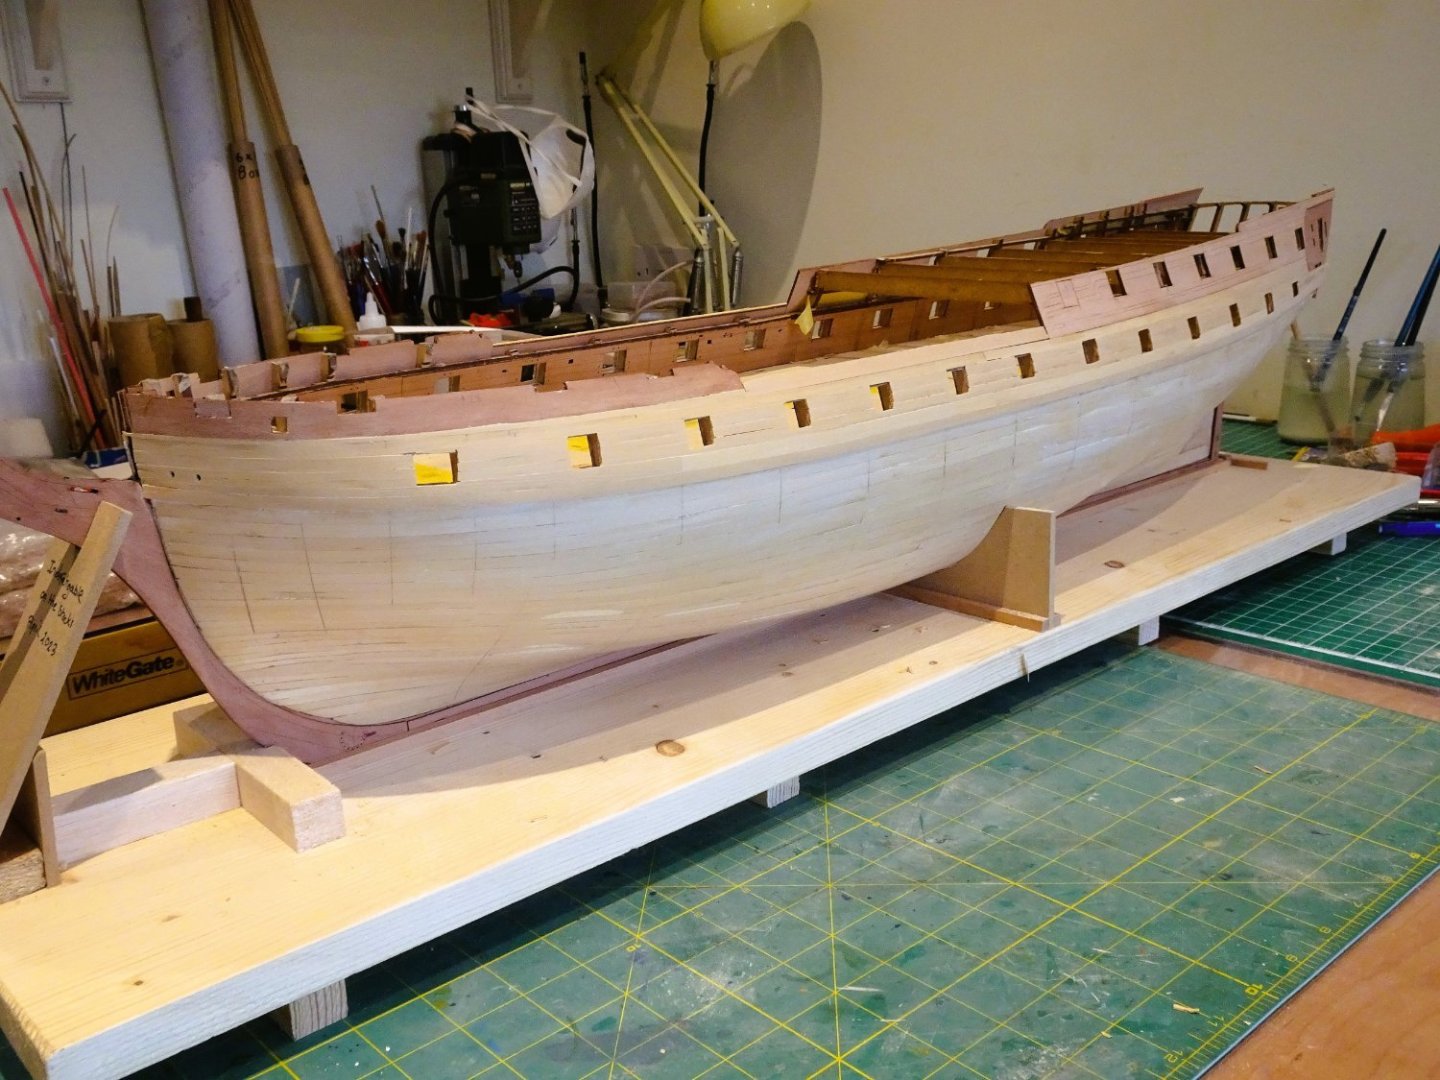
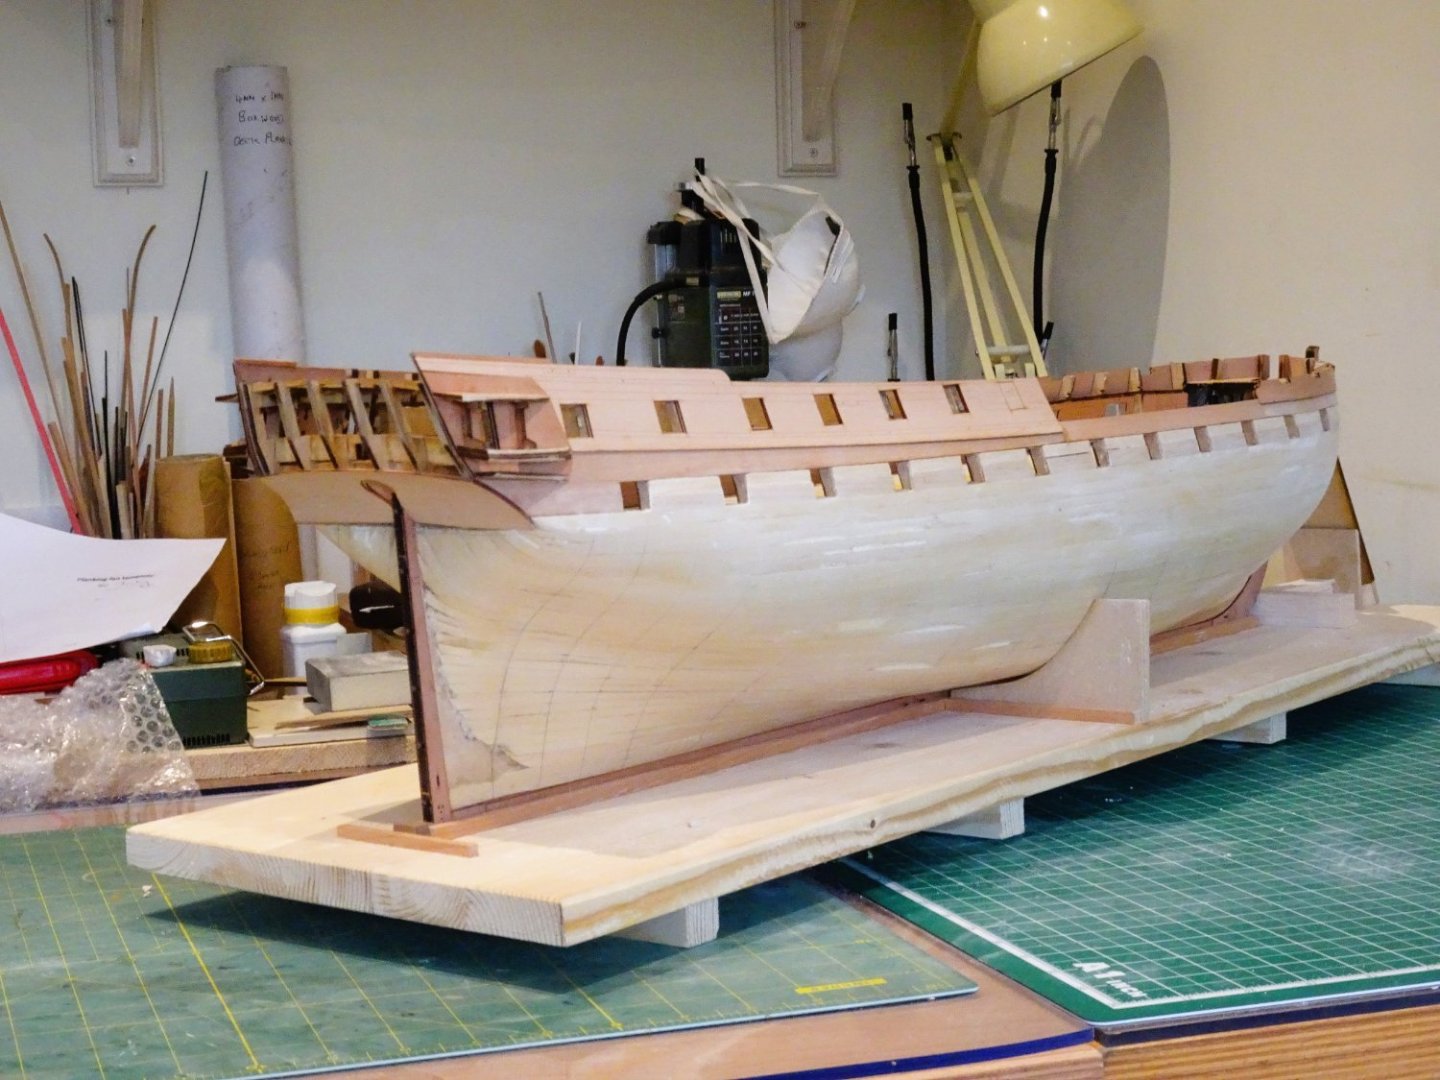
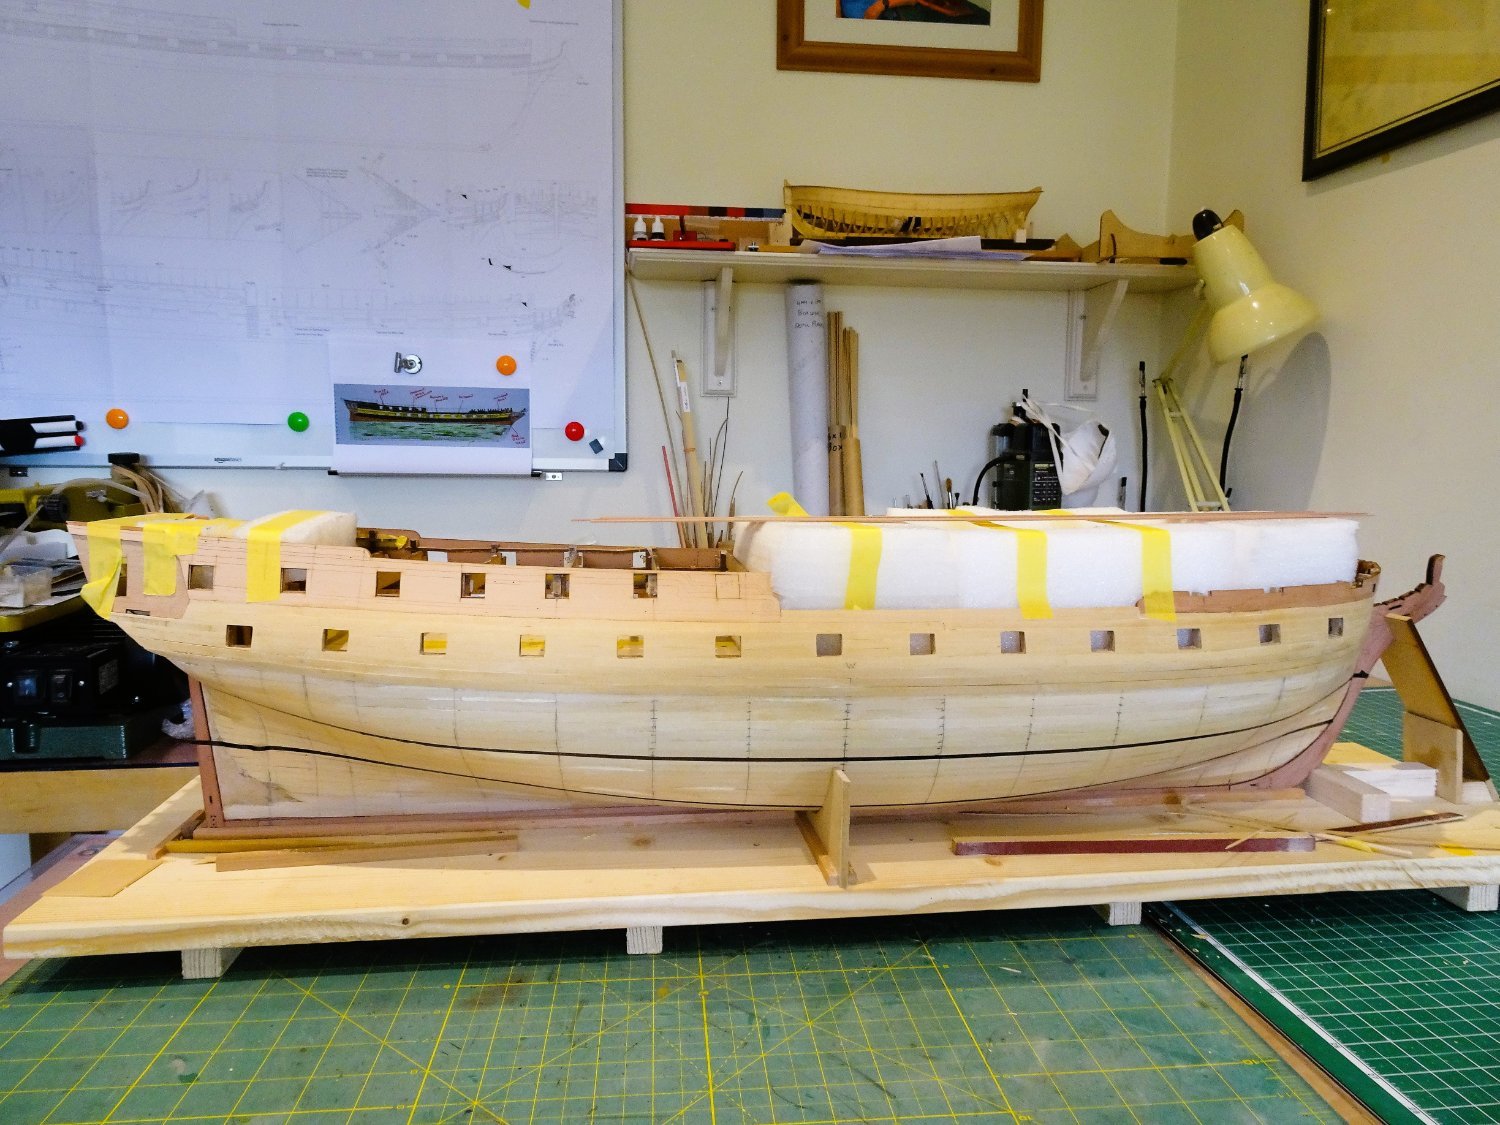
After five days the topsides planking is completed on the Starboard side. A preliminary sanding has been applied, but the gunports remain unfinished at this point.
Onwards…
B.E.
05/05/2023.
- Helge Hafstad, hollowneck, Kingspoke and 31 others
-
33
-
 1
1
-
-
-
Thank you Jim and Kevin, much appreciated.👍
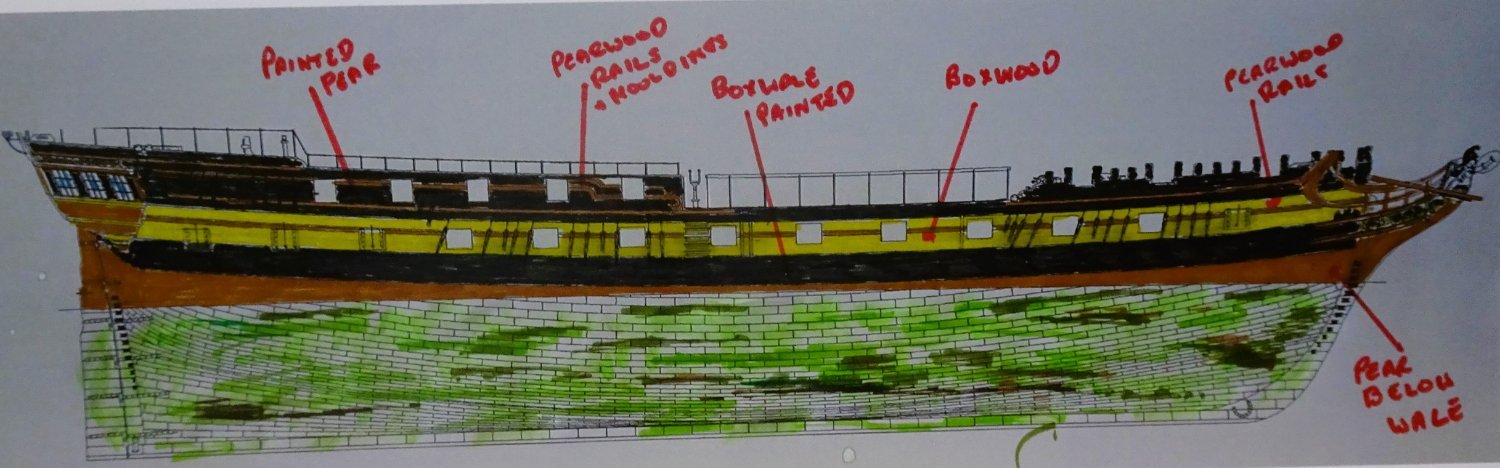
Post Twenty-seven
The plan.
Before I proceed to the planking, I need to consider the colour scheme of Indefatigable, and how I will represent it using a minimum of paint.
I am not concerned here with the standard colour schemes of the late Napoleonic era British warship as represented by the Indefatigable kit, altho’ I’m not a fan of the bright yellow paint job on the prototype model, but that’s down to personal preference.
I will be using a combination of Pear and Boxwood for the hull planking, and I hope to display the natural beauty of these expensive woods rather than cover them with paint.
My idea is to use Boxwood down to the wale which will represent the ‘yellow.’ The application of w-o-p will darken and enrich the Box colour in this area.
On the kit the ‘ochre’ stripe authentically follows the deck lines which means it overlaps the wale, particularly at the stern where the ports cut into the wale.
Below the wale I will use Pear for the lower hull, the kit provided pear is too good to waste, but it will be supplemented with wider strips for Garboard use, and other spiling requirements.
The topside Pearwood panels will be painted black, but I may leave the rails and mouldings natural.

0922
This rough schematic shows the approach I will be taking. The main departure from the kit suggested scheme is that the wales are painted without regard to the deck levels, and the woodwork below the wales will be left natural.
The wale itself will be painted black or a variant thereof.
I have yet to decide whether to apply either Top and butt or Anchor stock planking to the wale. I did on Pegasus, and Chris kindly provided it on Sphinx.
I am undecided regarding coppering, a lot of extra work, but I quite like the effect. I have thoughts of partly coppering her, to demonstrate the use.
My preference is for that ‘old penny’ look and like the idea of aging the copper using the method pioneered by Alistair (Aliluke) on his HMS Fly build.
Of course, a build is dynamic and subject to change as things progress, but it’s good to have a plan in mind at the start.
B.E.
01/05/2023
- jpalmer1970, davyboy, Oldsalt1950 and 18 others
-
21
-
20 hours ago, Admiral Beez said:
I’m still perplexed by the bowsprit extension being off centre. Im tempted to cut it off and rotate it to centre. Im going to remove the yards anyway and install them when I do the rigging. Thoughts? And why is the ship’s wheel so far under the poop - there’s no way the helmsmen could see the sails or have any situational awareness.
Jean Boudroit explains that the Bowsprit cap is offset to Starboard since if it were central to the axis of the Bowsprit it might obstruct the rigging which follows the line of the Bowsprit. The riggers of British ships were obviously not of the same opinion.
The Helmsman did not apparently need a clear view for steering, he responded simply to orders. I suppose one advantage of having the wheel in that position is that it is more protected, and the tiller and lines are shorter.
B.E.
- Obormotov and Admiral Beez
-
2
-
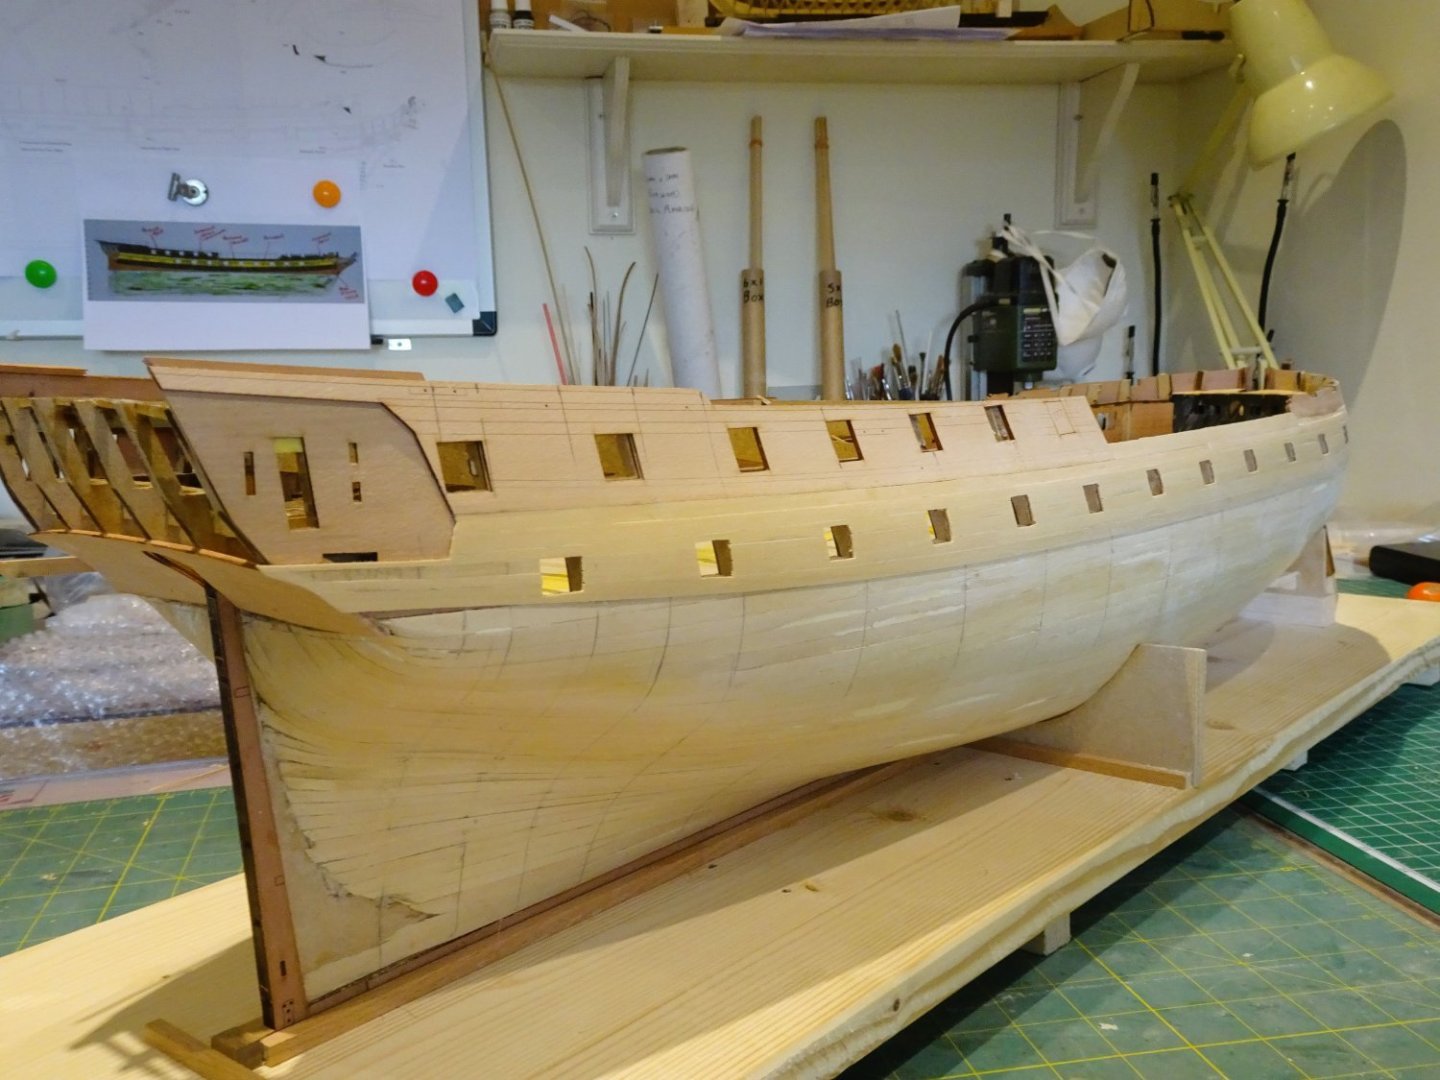
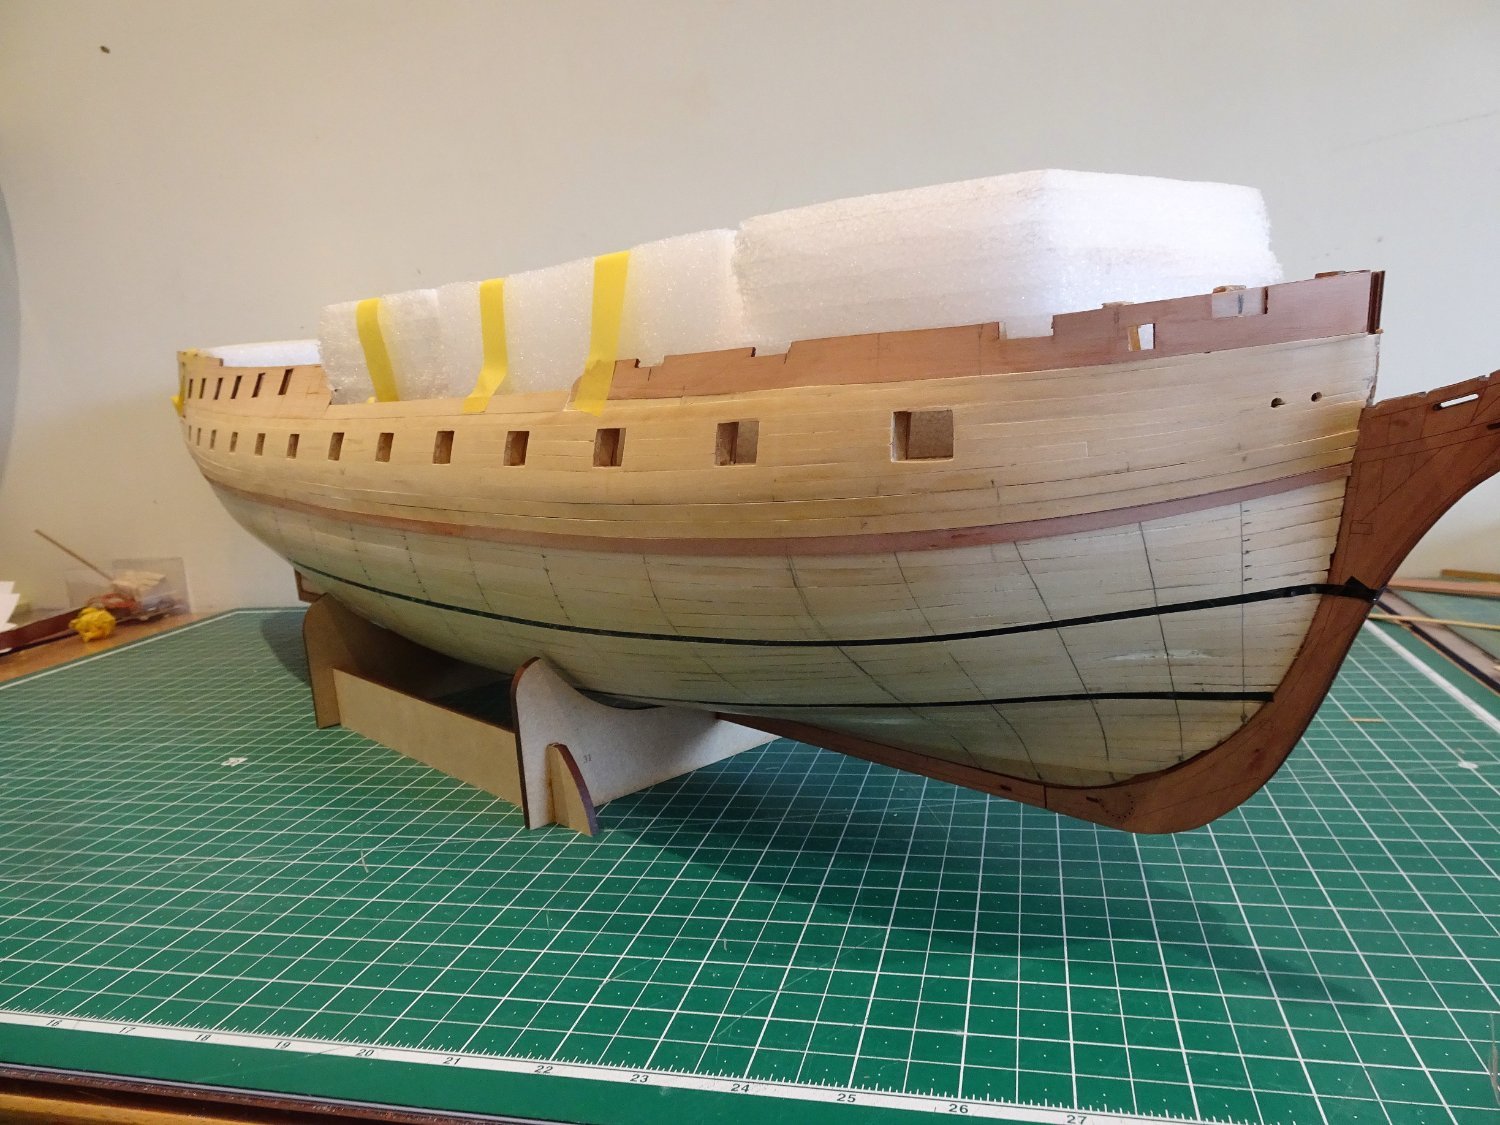
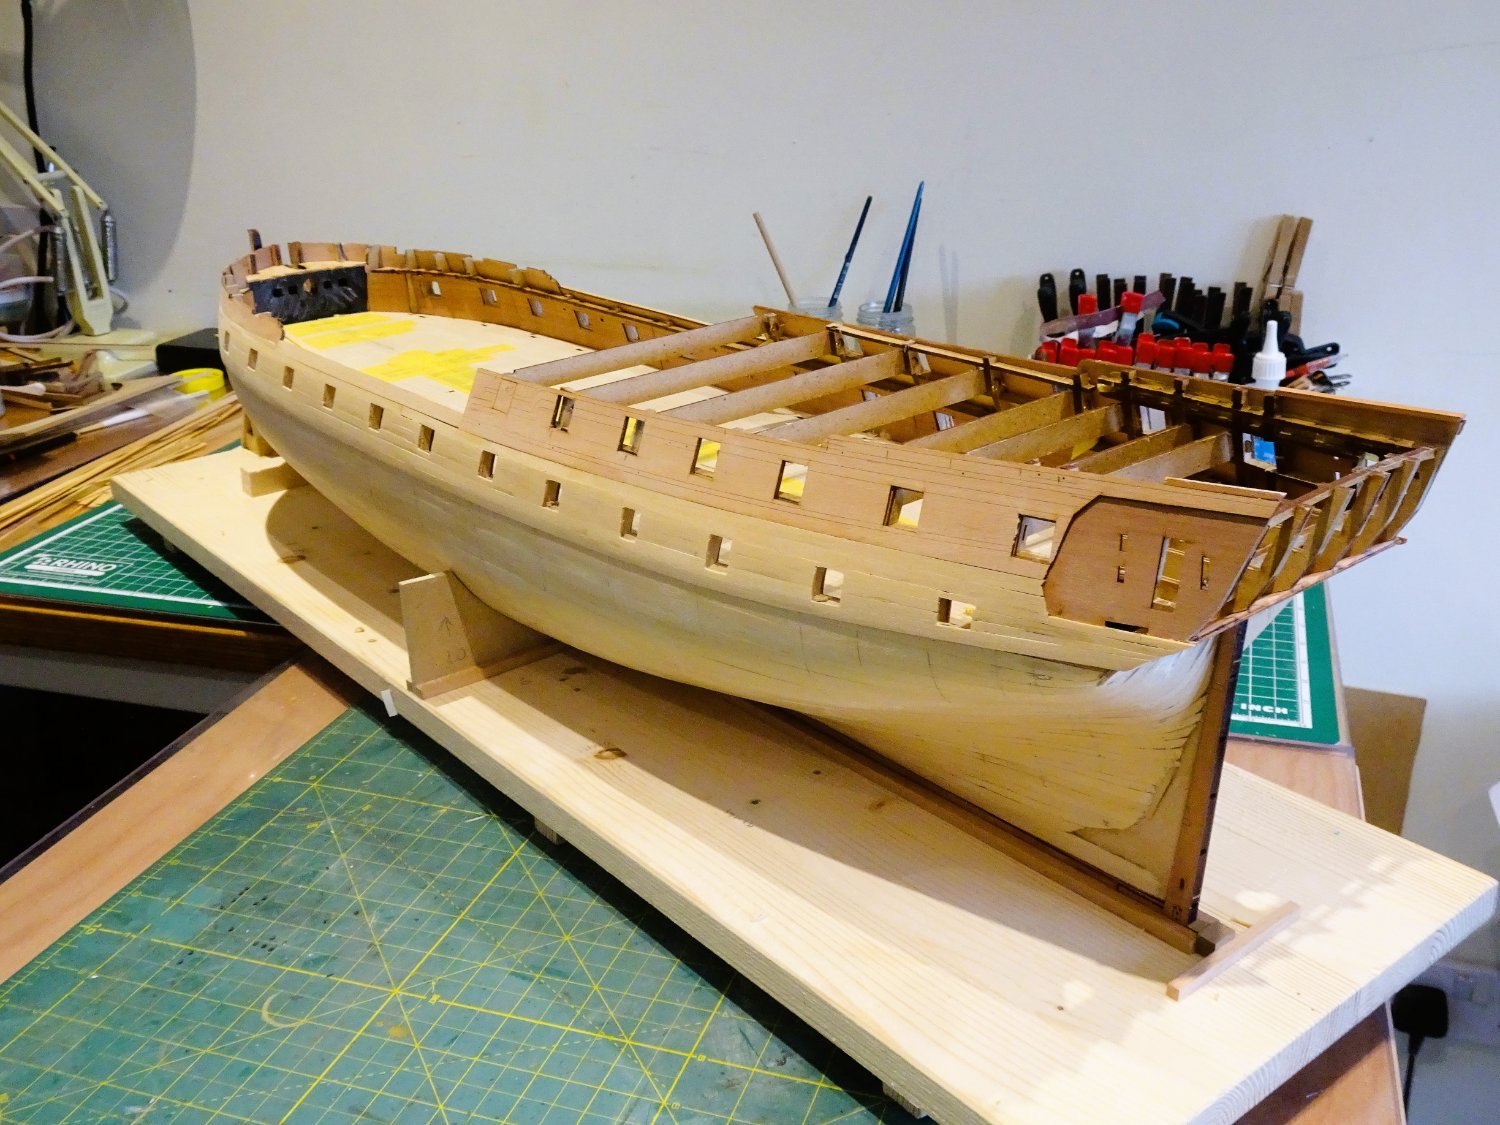
Post Twenty-six
Fitting the outer Hull Patterns completes the cladding of the qtr deck bulwarks.
0906
Note.
Section #208 indicates parts #246/250 but should be read as #252/253. These are the outer patterns.
Parts #246/250 are the first layer outer patterns fitted earlier in section 155.
0917
0915

0916
I’m still fiddling around with the hull spotting noticed areas in the planking that would still benefit from a little extra fettlin’. A few low areas were re-filled and sanded smooth.
The better I get the hull at this stage, the better the second planking should be.
0920
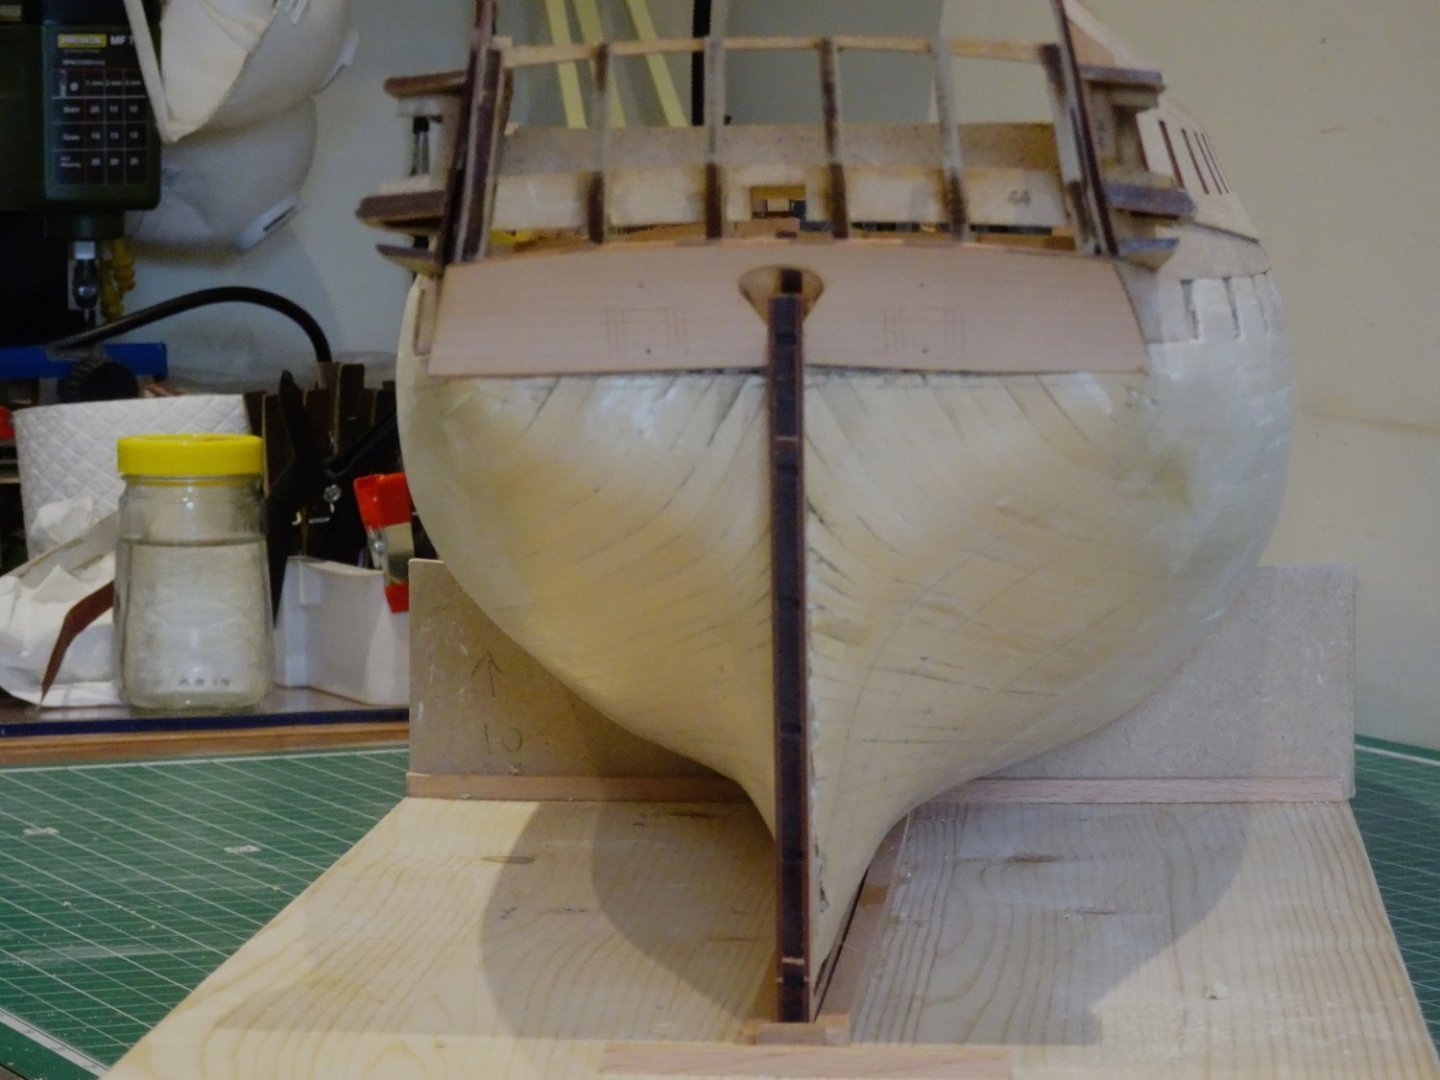
The final job in this section is to add the lower counter outer pattern.
0919
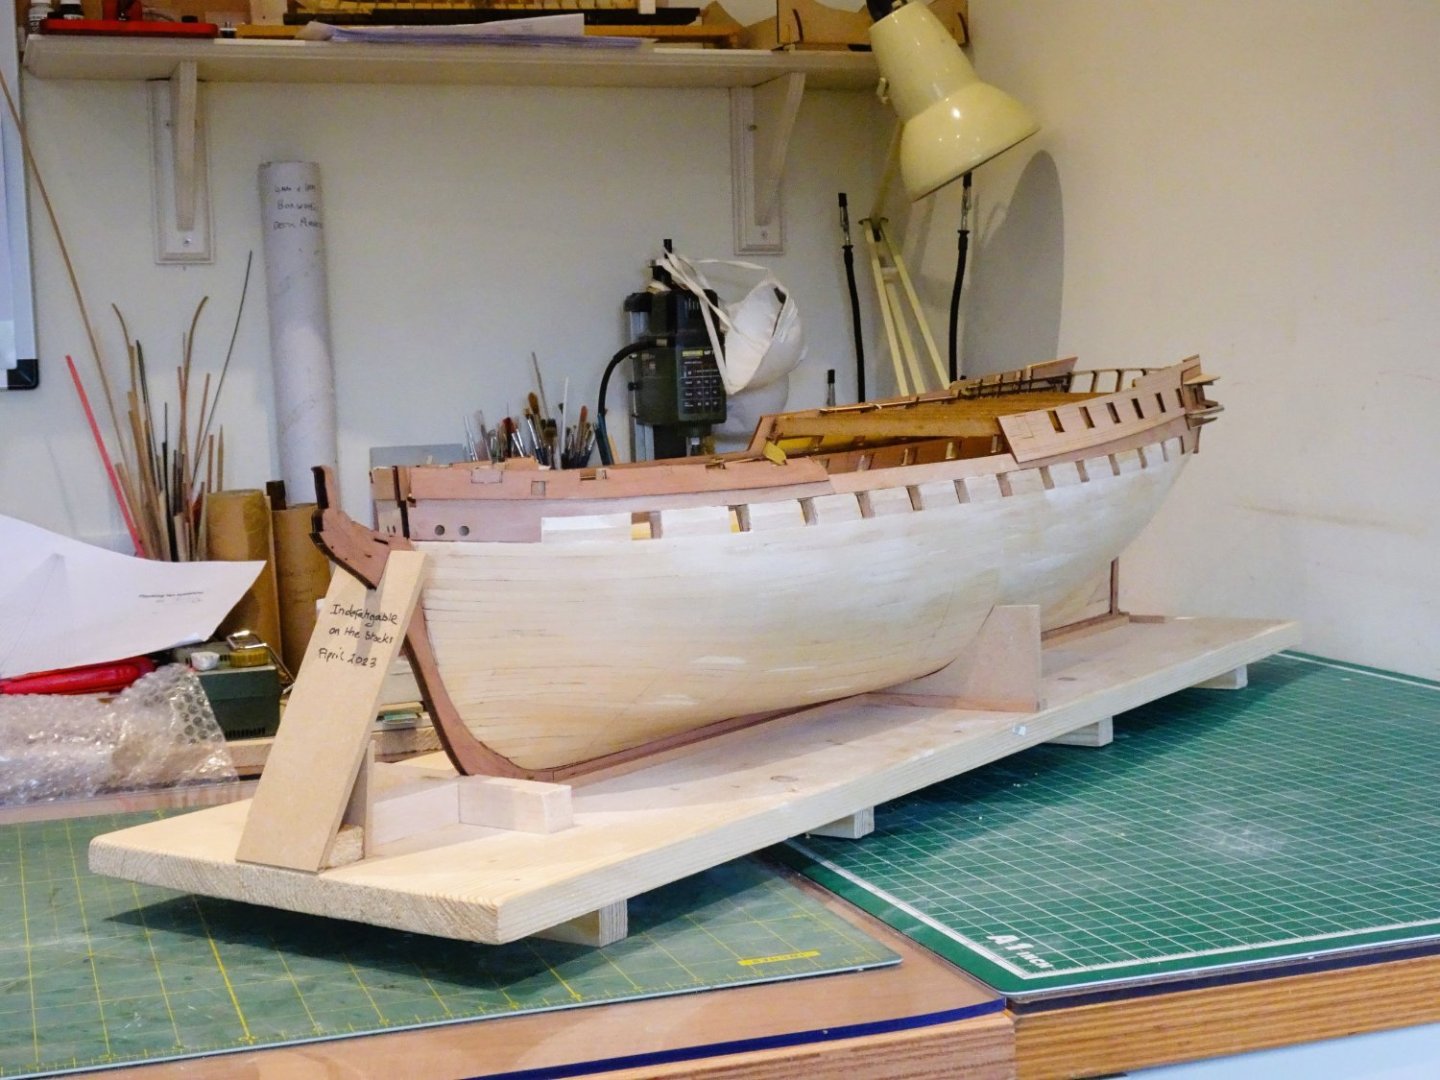
This stage represents only two months’ work but feels much longer.
I now need to work out a strategy for the second planking.
B.E.
30/04/2023
- davyboy, Knocklouder, JeffT and 27 others
-
30
-
The bench also doubled up as an arms store, but would be considered, an unnecessary luxury in British eyes for whom 'sitting down on the job' would be anathema.
The entire Berthing to the main ladderway is very French and would probably have been removed on refit.
What to do with it really depends on how easily it can be removed and what lies beneath. If there is a ladderway down to the upper deck then the usual British arrangement could be put into place.
You are still left with making new ladders to the Poop deck, the usual arrangement is one either side, which would then require modifying the solid Poop deck rails.
B.E.
-


-Copy.JPG.b5d6bc9684b3f573c16d3dd3259ff2ca.JPG)


HMS Indefatigable 1794 by Glenn-UK - Vanguard Models - 1:64
in - Kit build logs for subjects built from 1751 - 1800
Posted
While the planks were immersed in the hot water I did a trial fit of the Spirketting. In the photo below the left-side front pattern has been test fitted. I used some brass pins to help with the alignment with the eyebolt holes.
I think you mean the upper ledges, Glenn, the spirketting fits below the gunports.
Ease back on the medication.😉
B.E.