
.JPG.ca33079f5815b861e67b9c2cccd37982.JPG)

Blue Ensign
-
Posts
4,286 -
Joined
-
Last visited
Content Type
Profiles
Forums
Gallery
Events
Posts posted by Blue Ensign
-
-
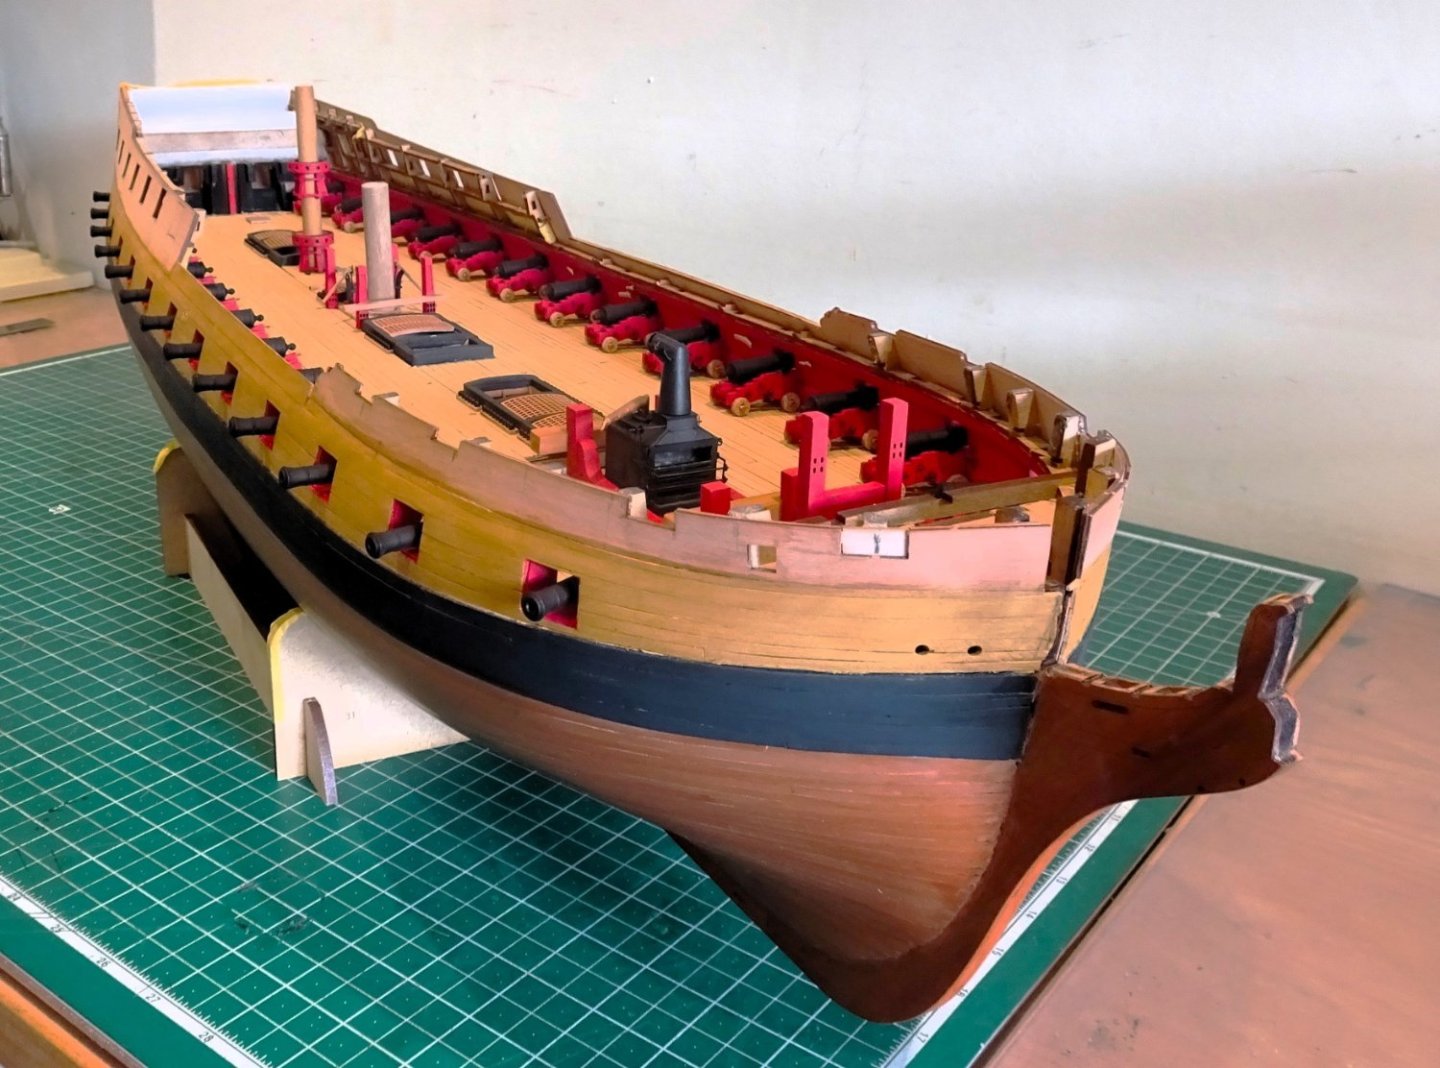
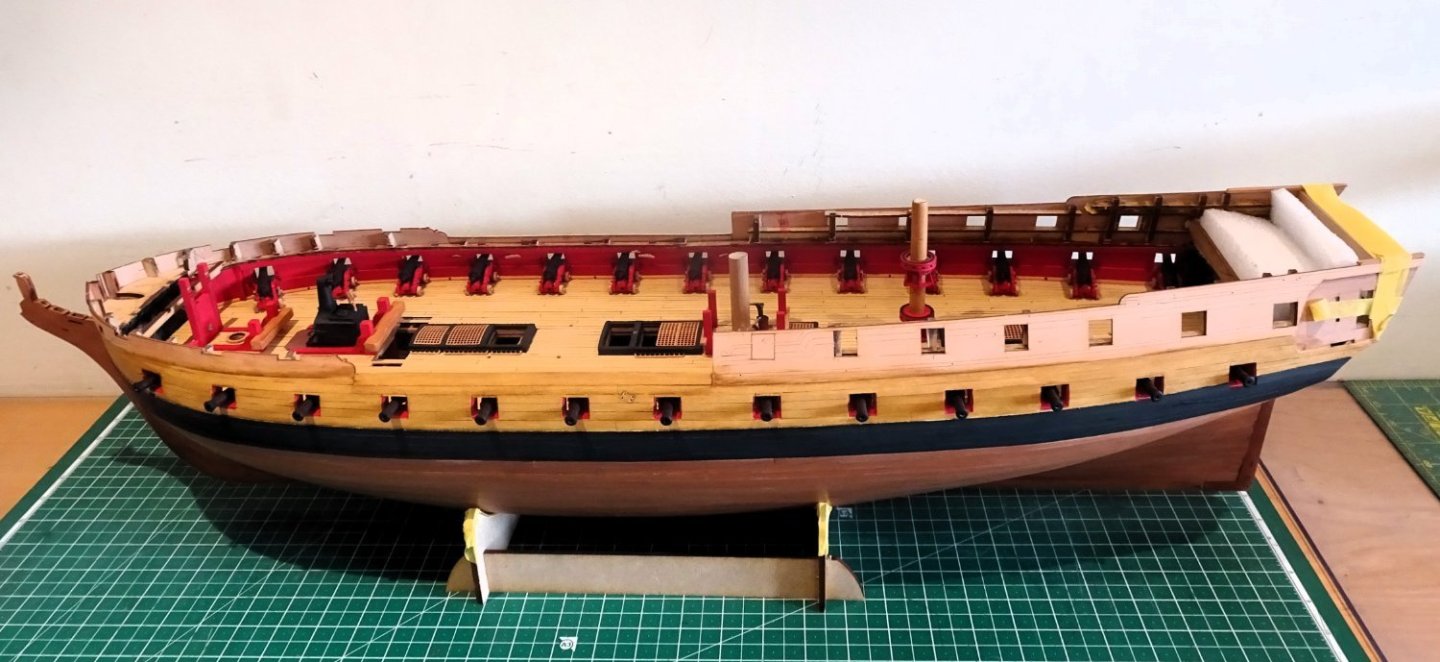
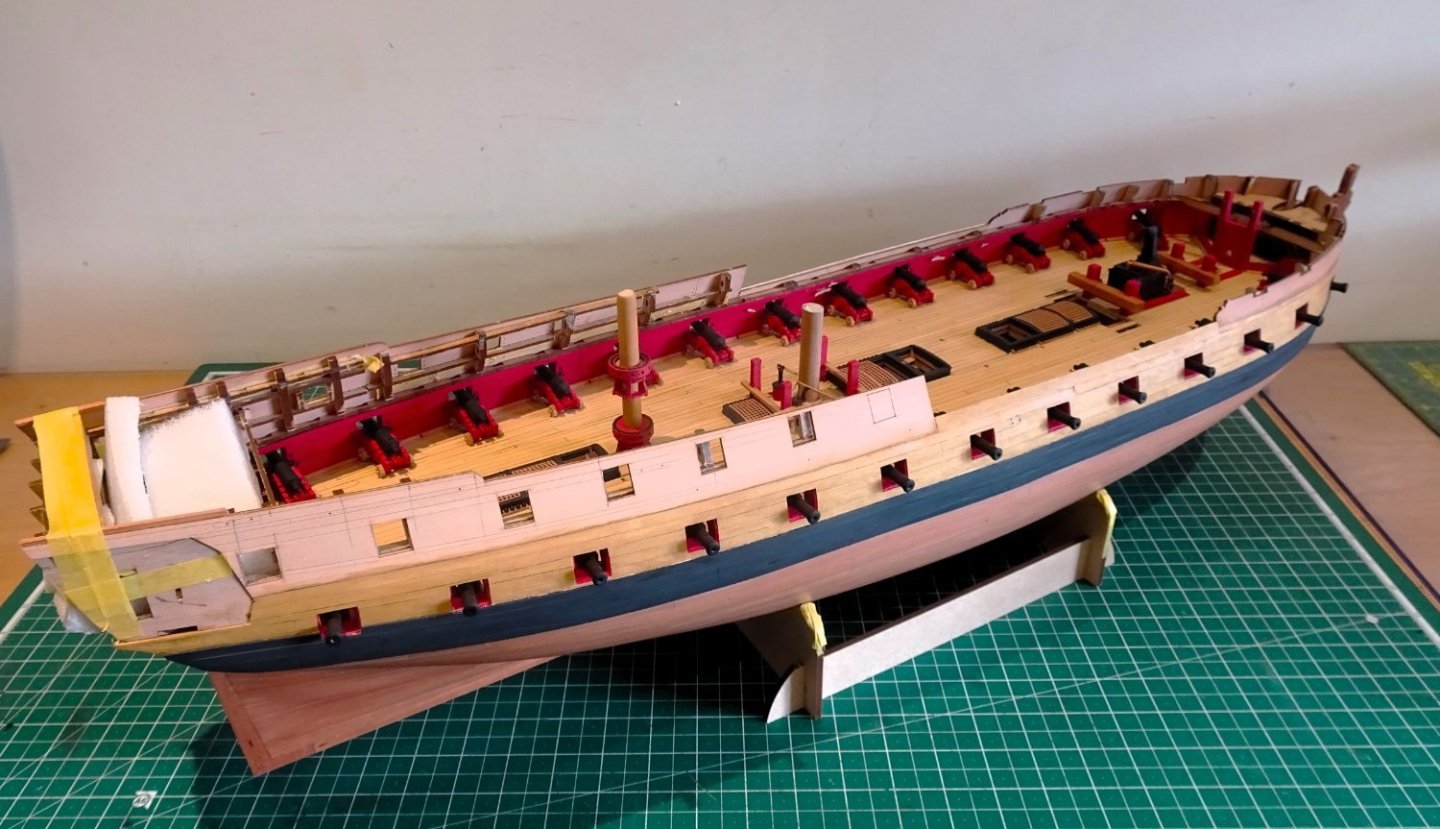
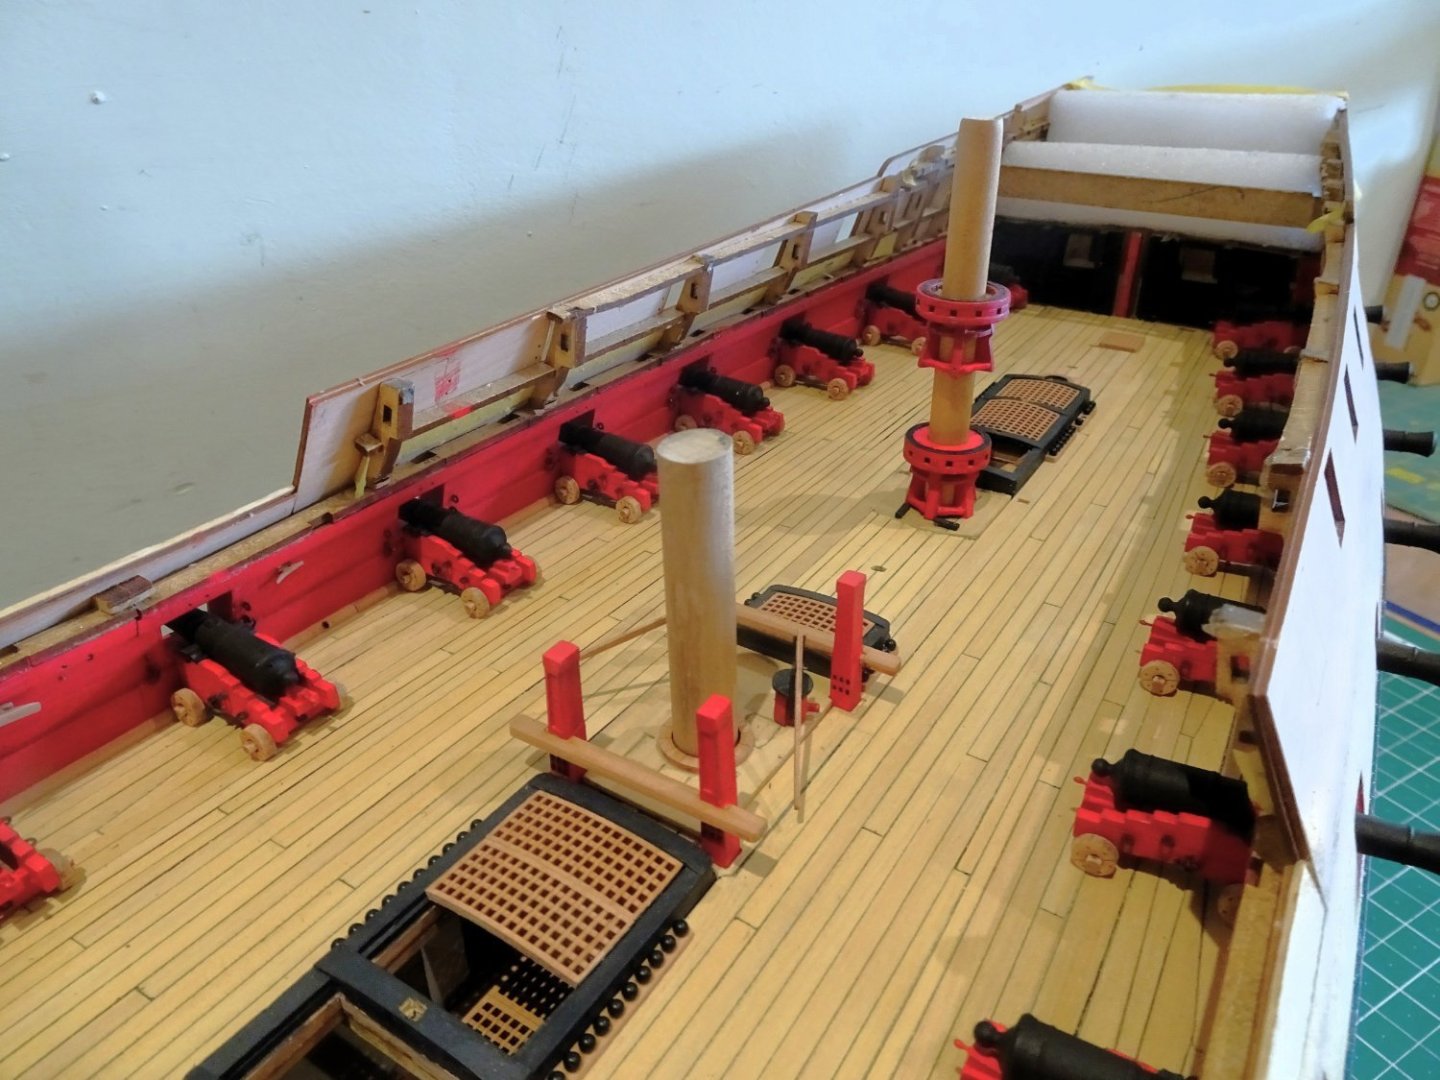
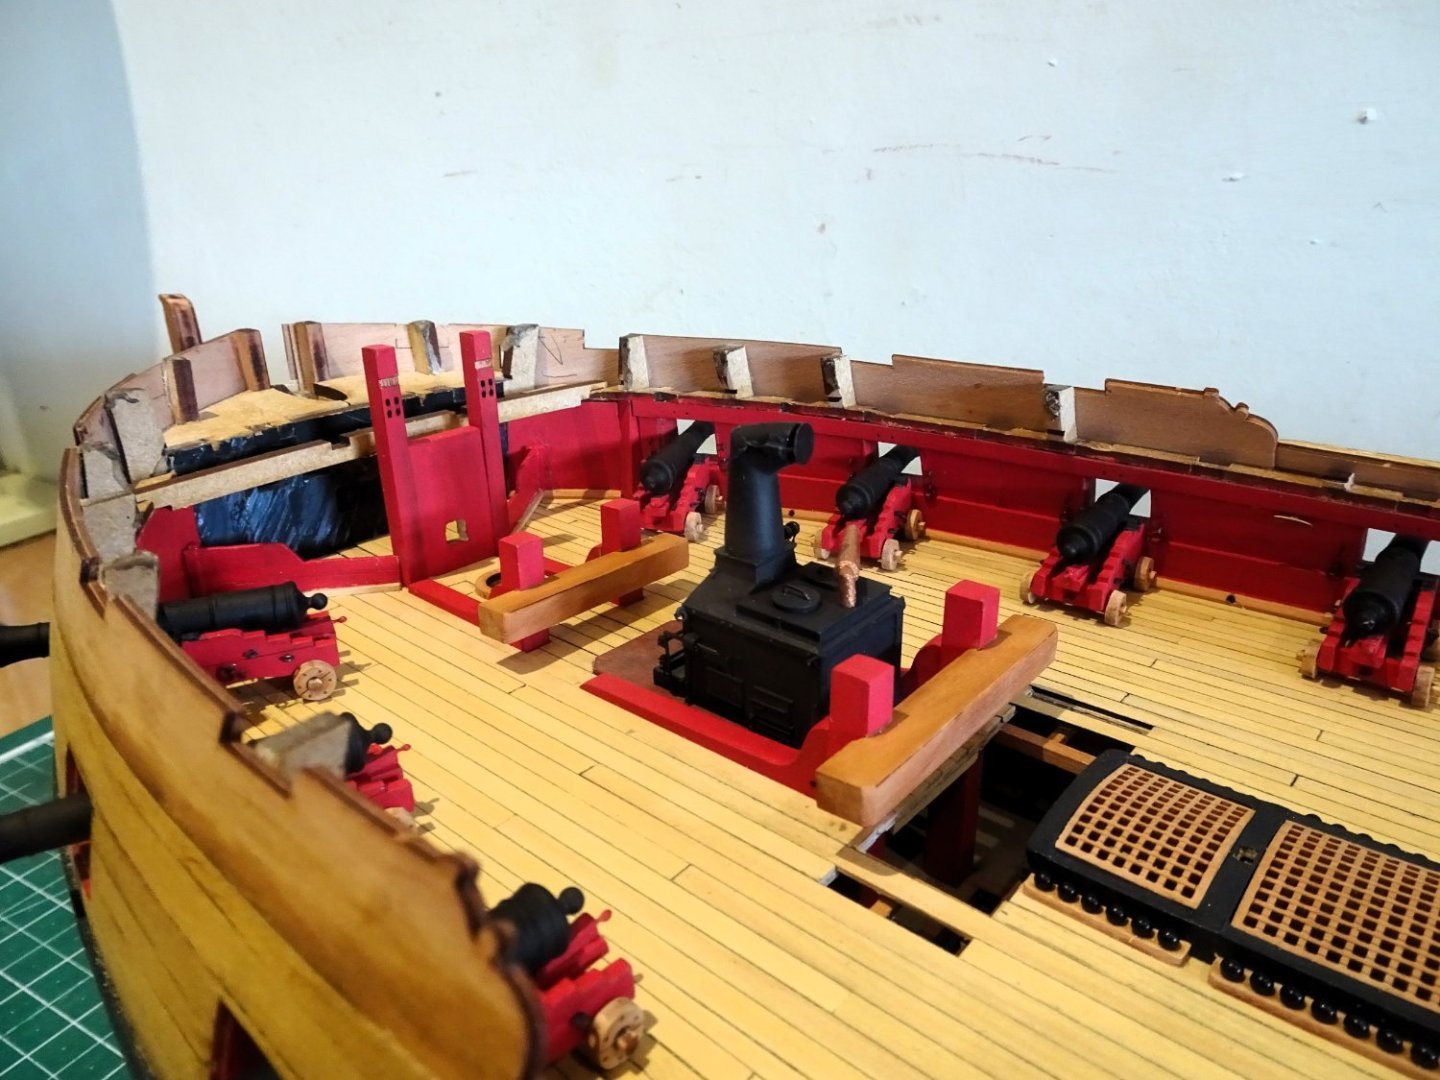
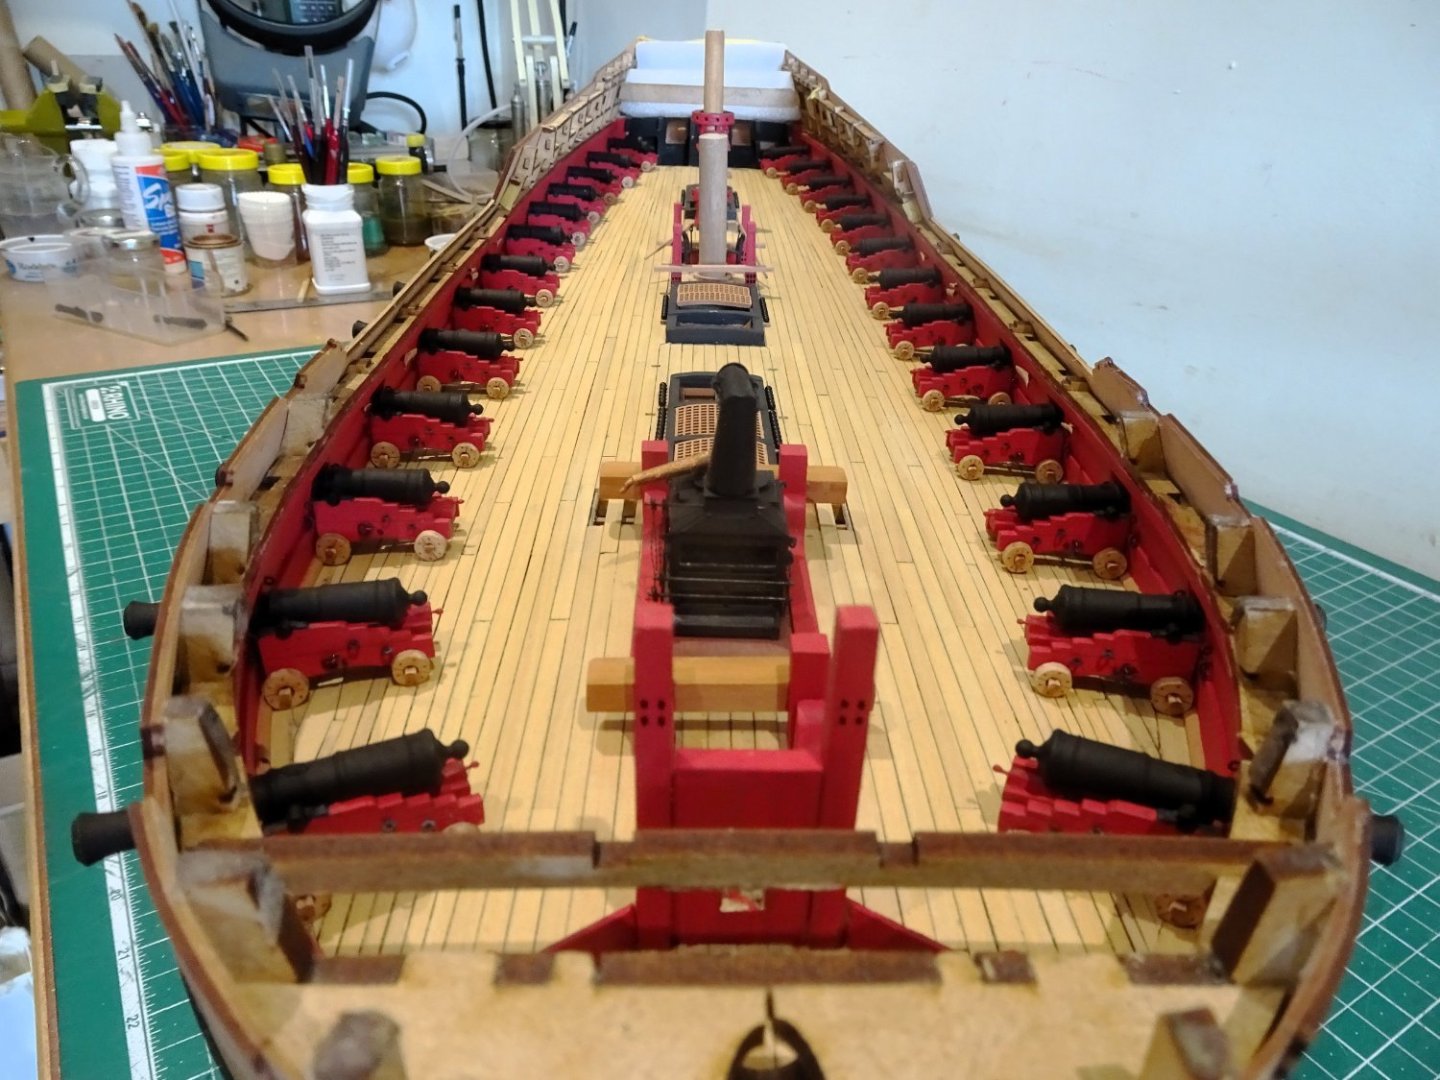
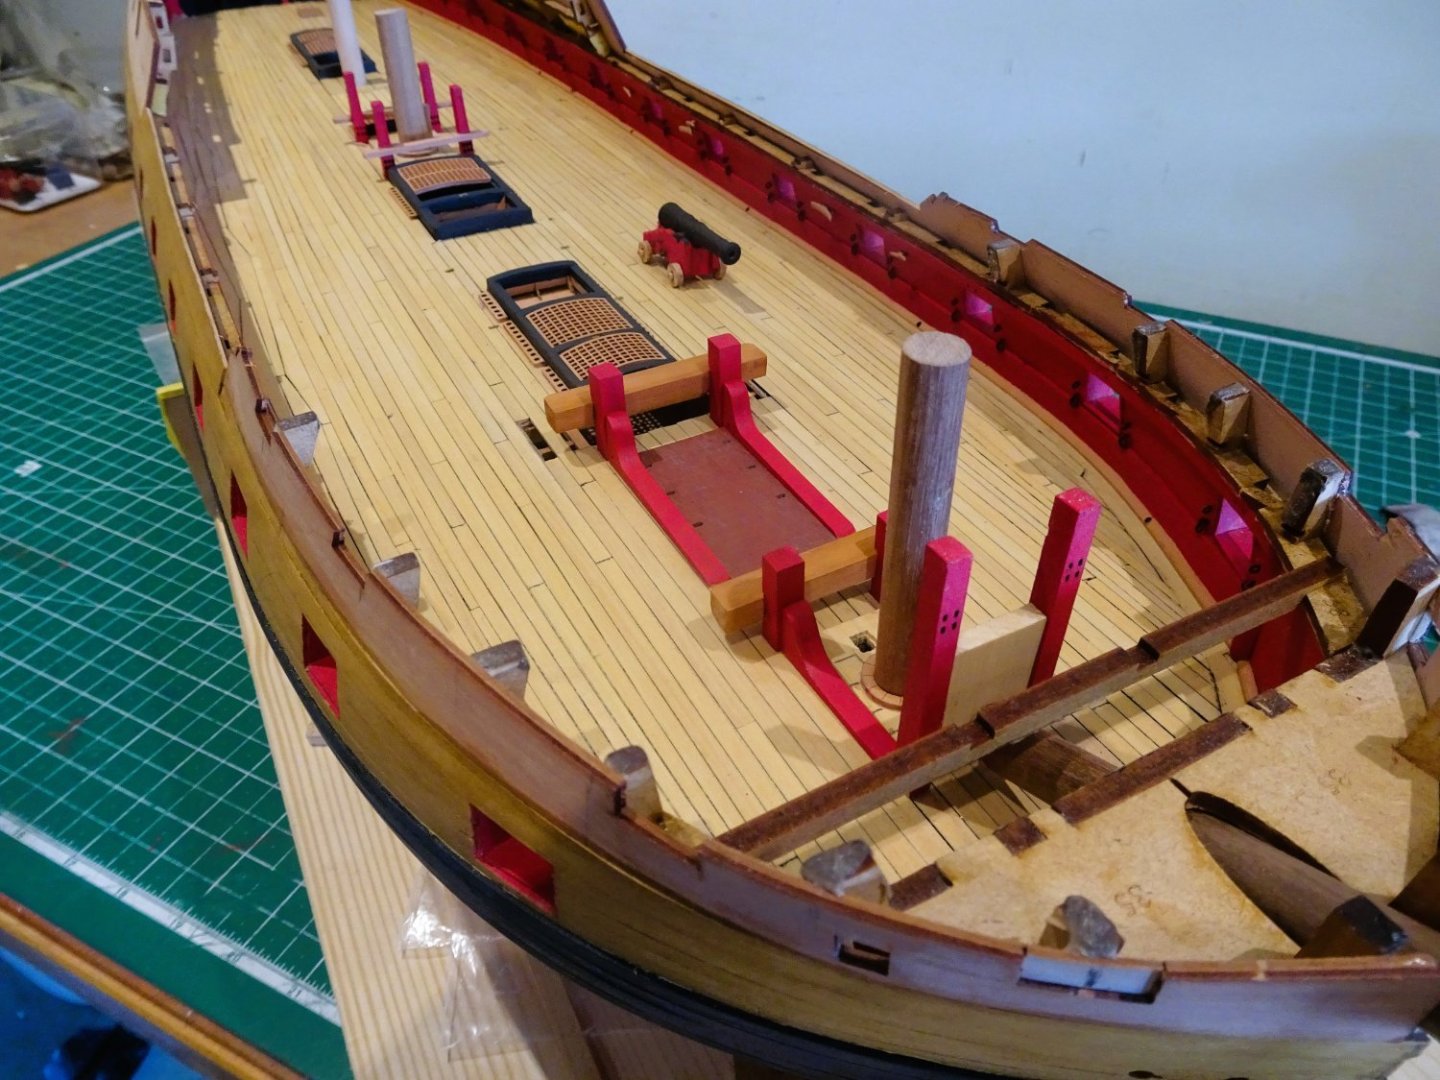
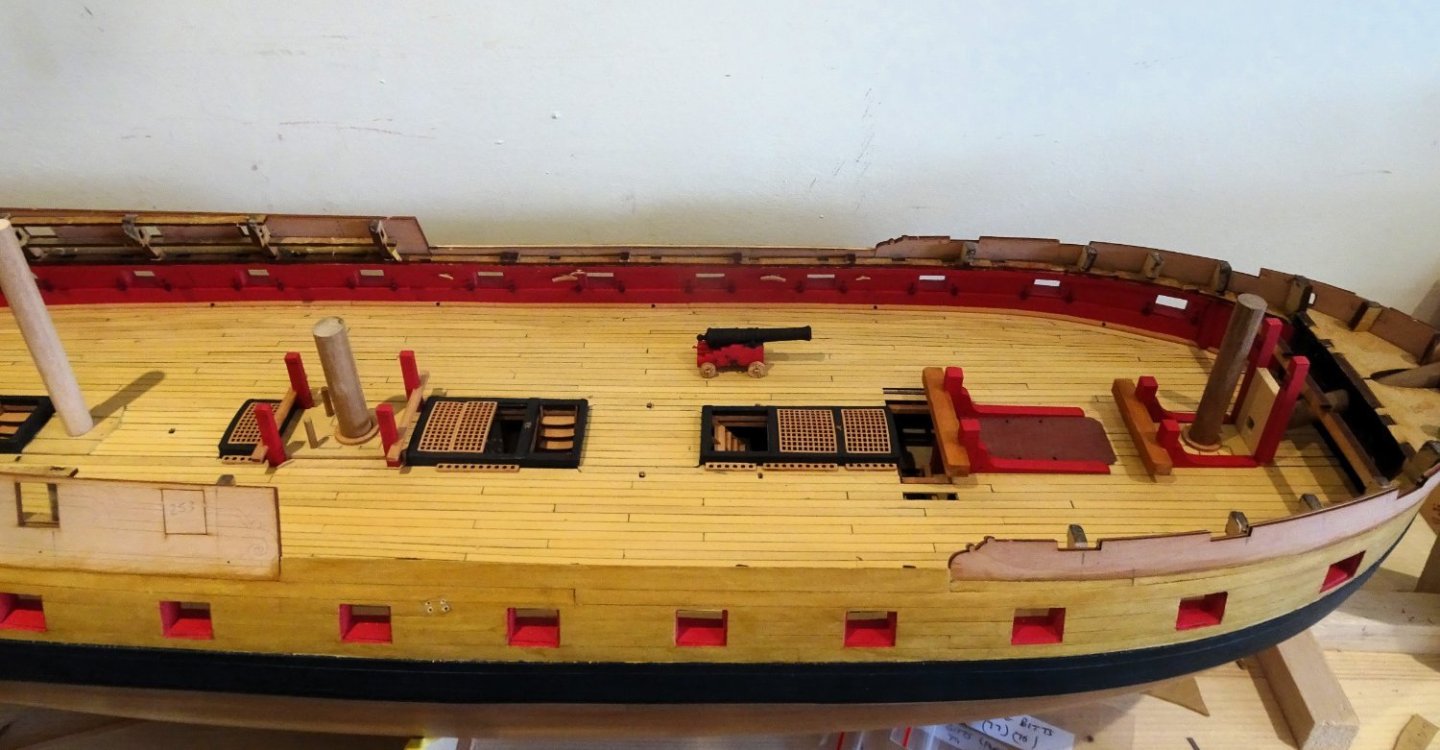
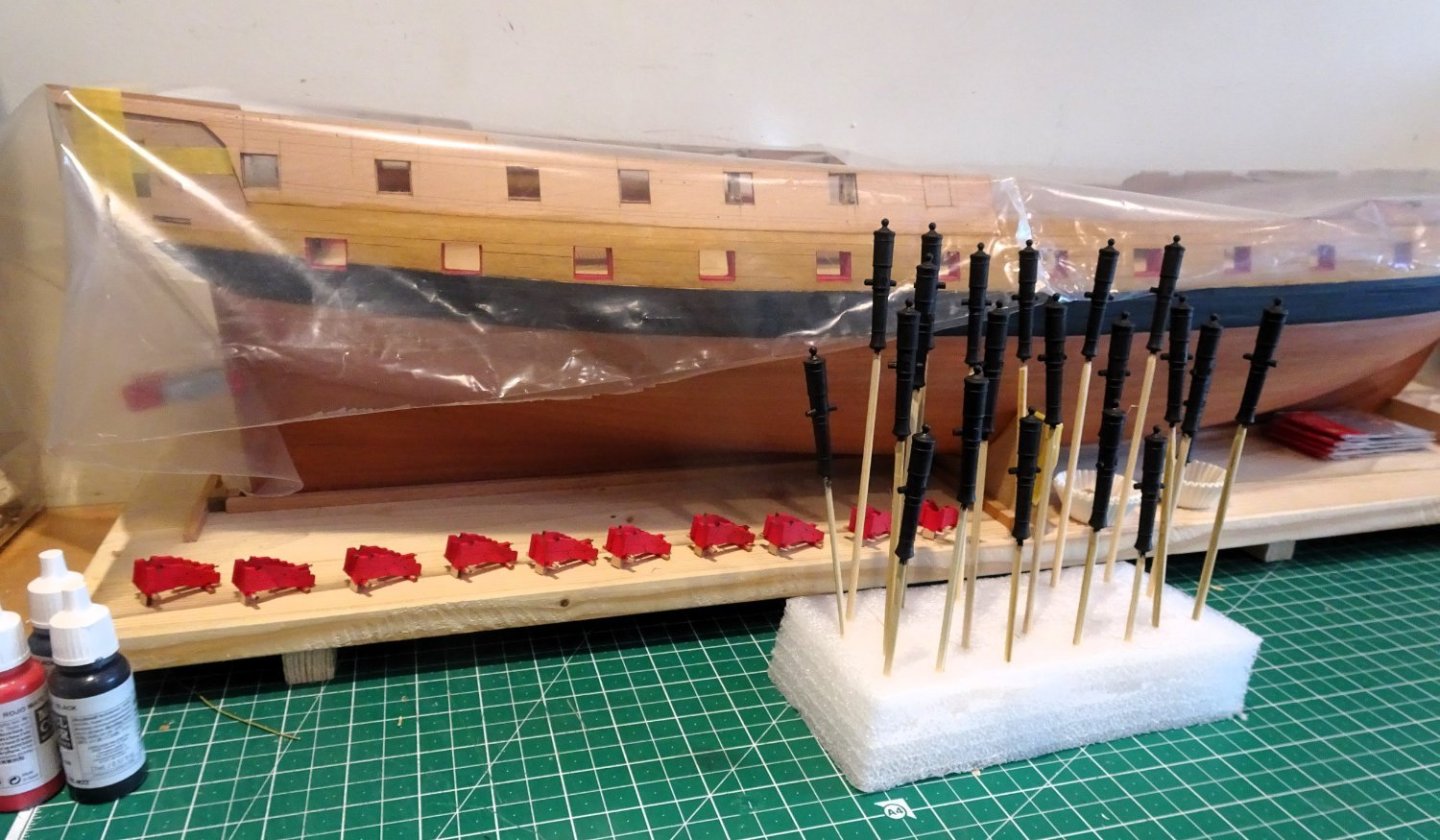
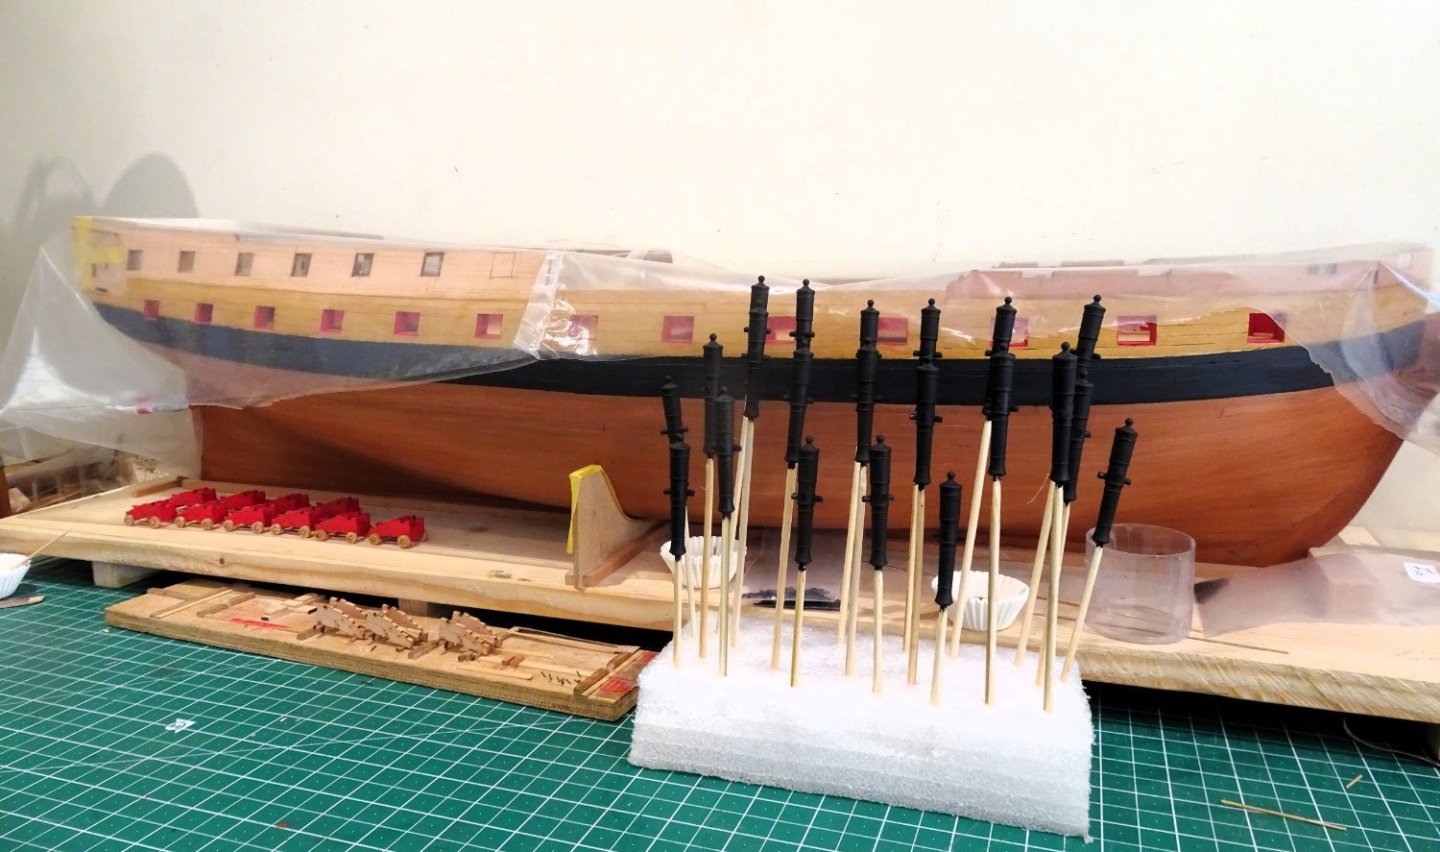
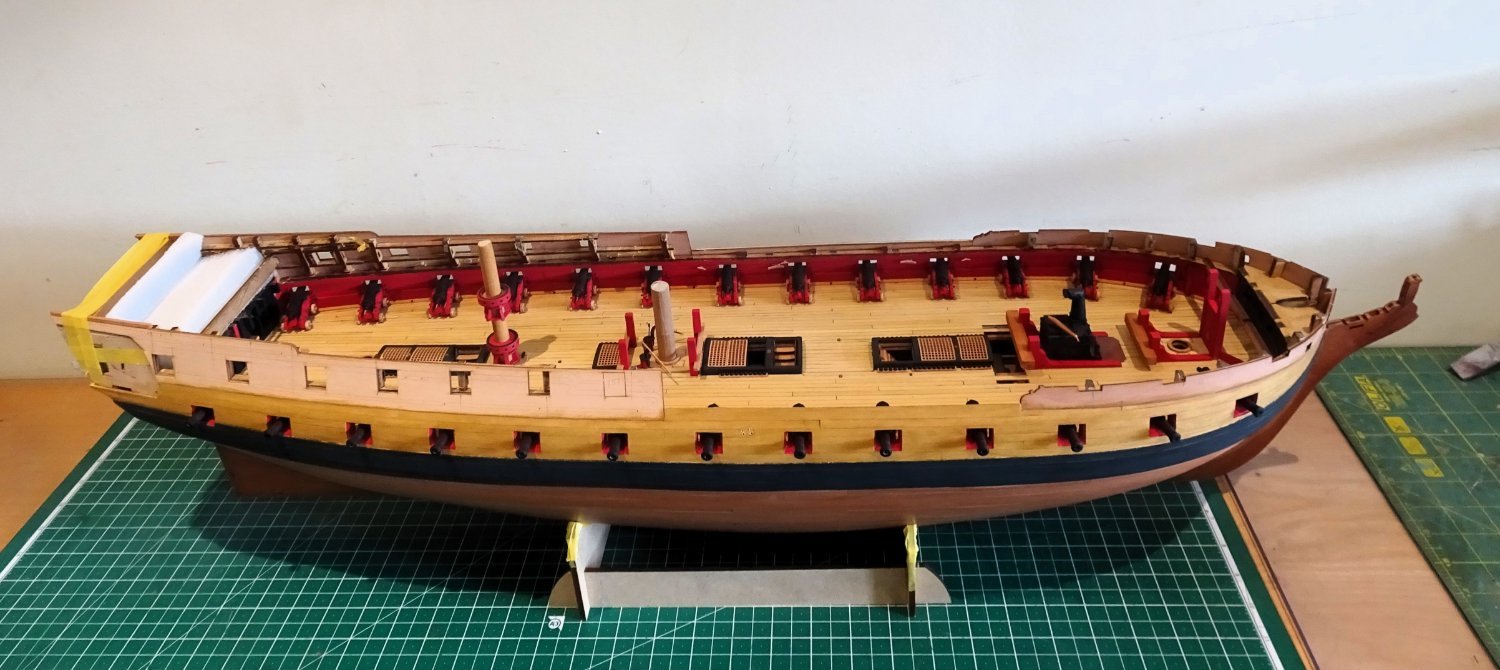
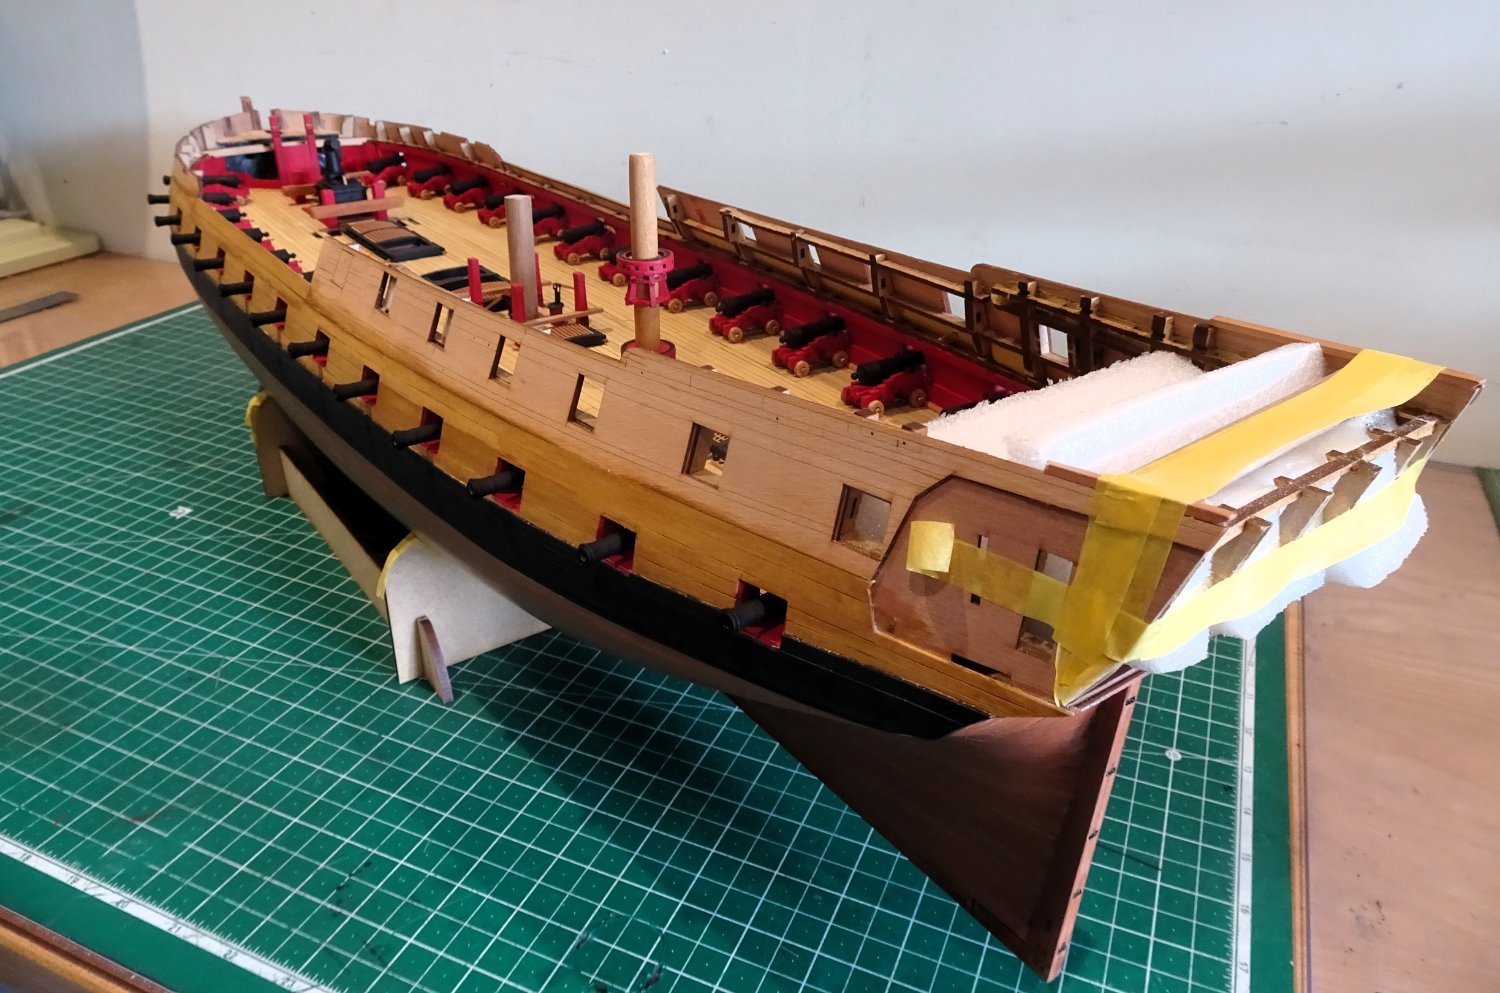
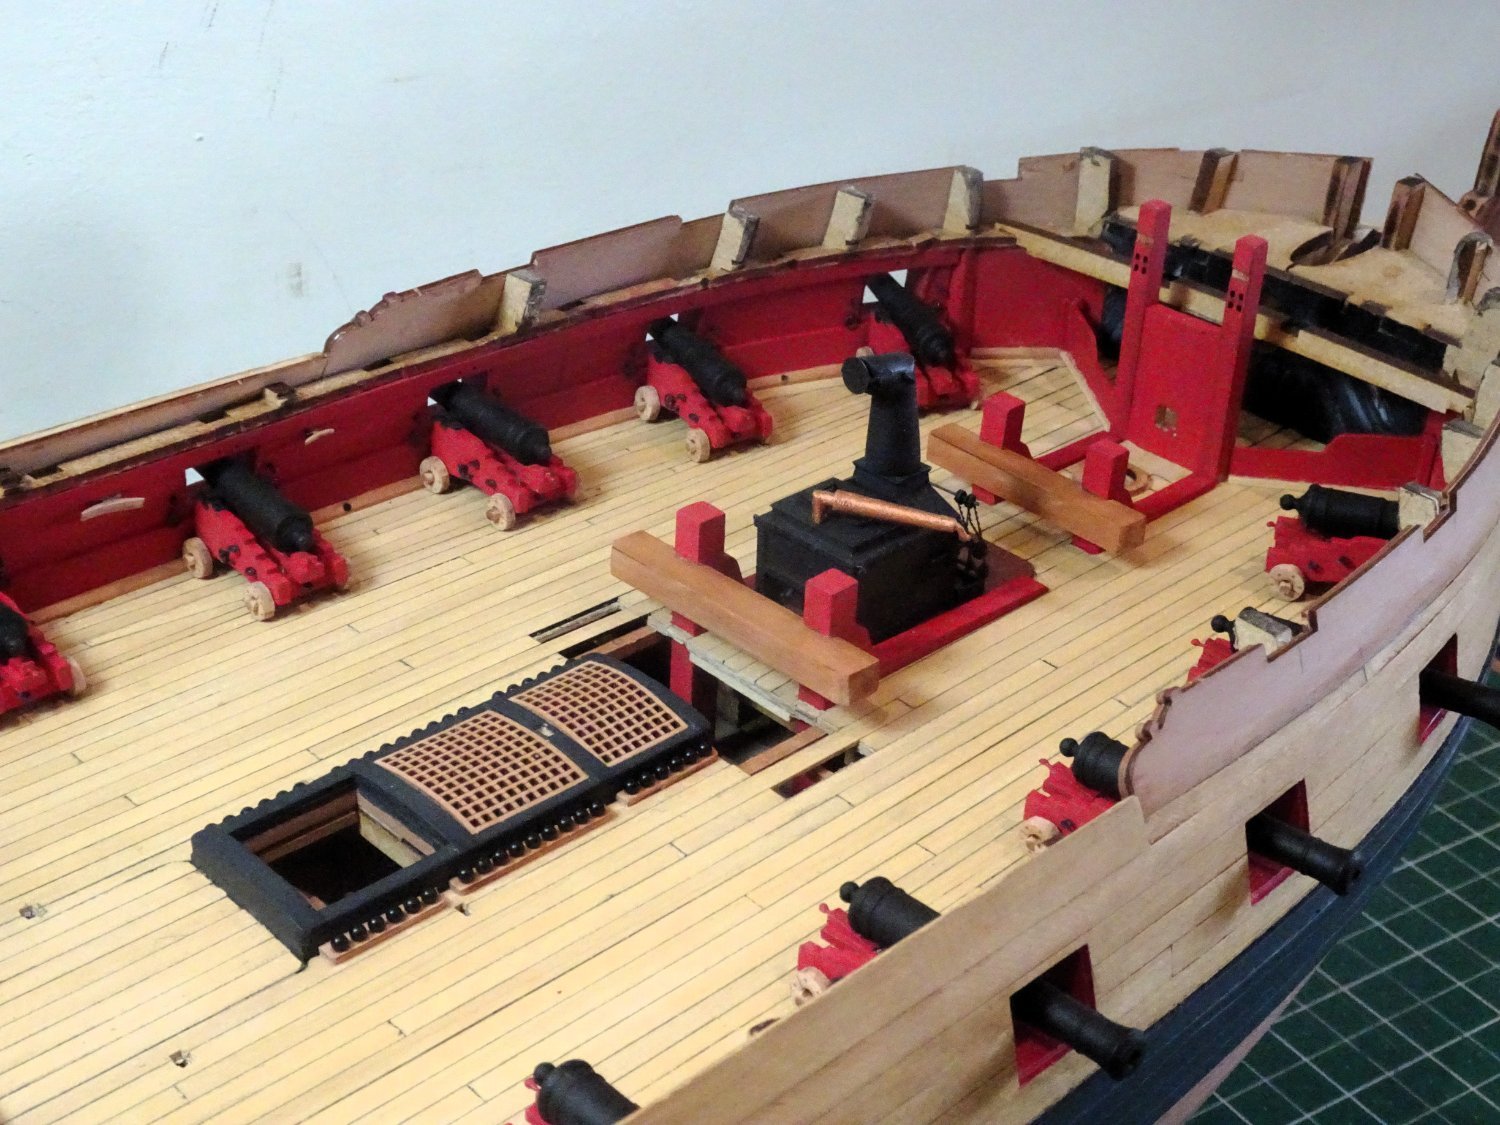
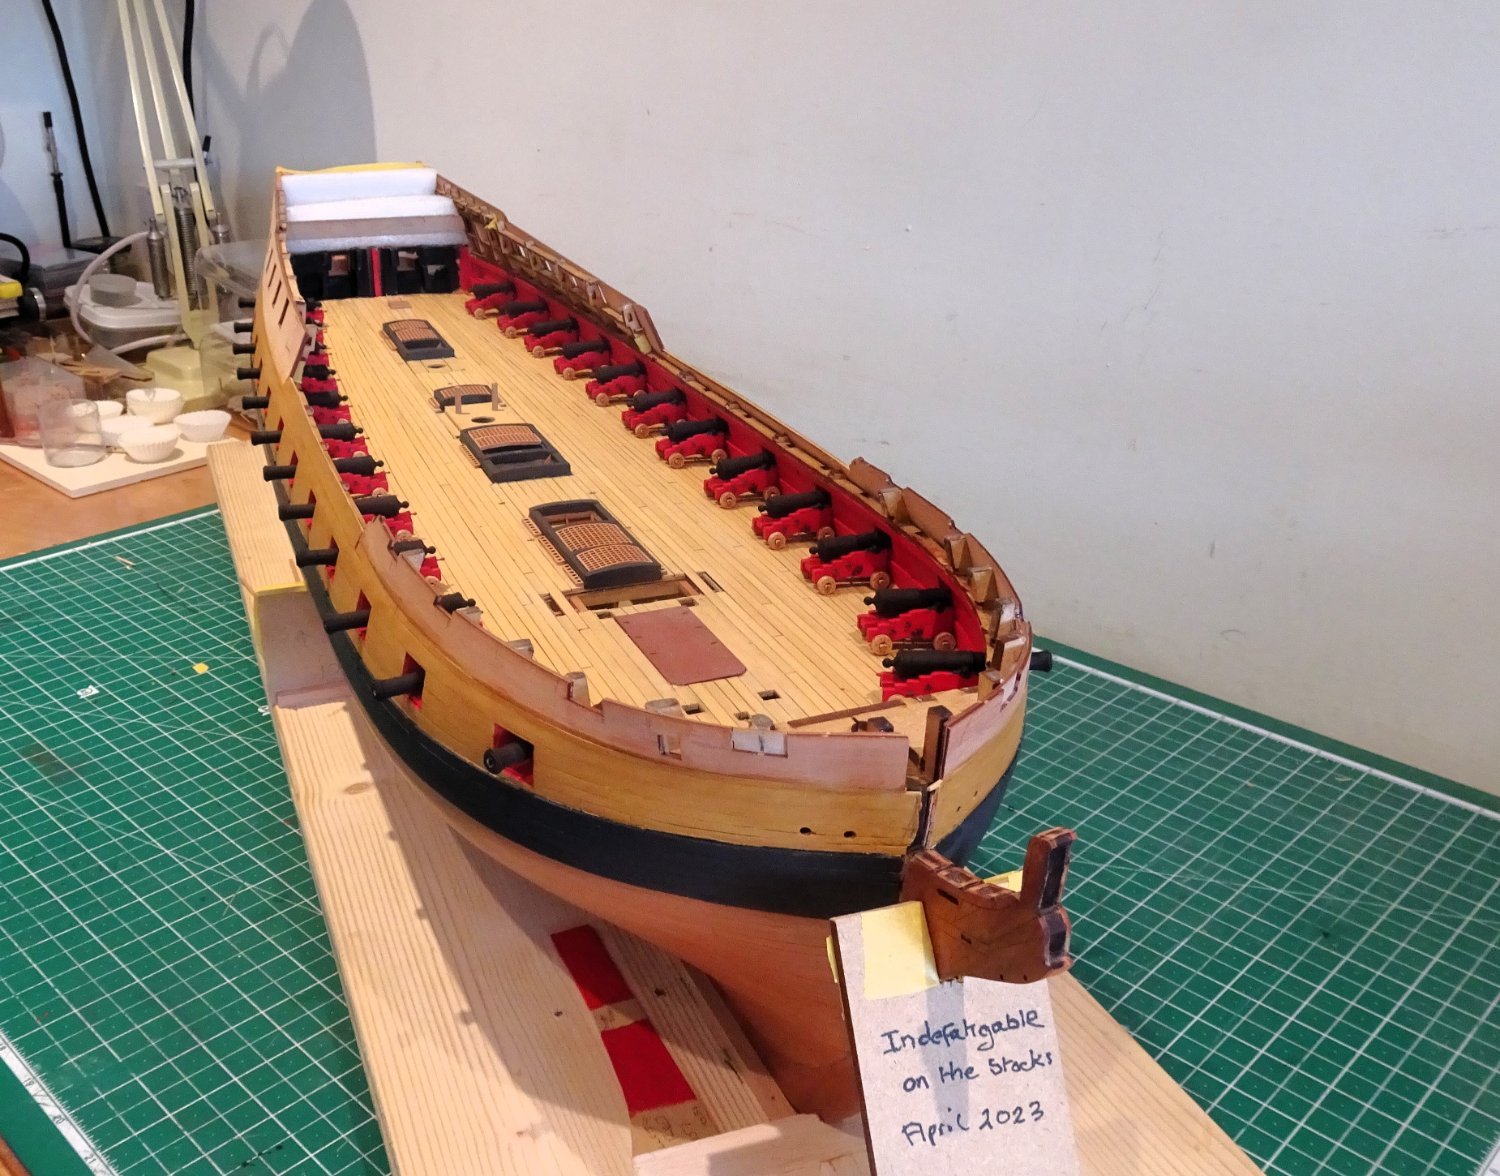
Post Seventy-one
I’m now at the six-month stage of this build, altho’ I’m a fair way behind those of my fellow Indy builders who started around the same time.
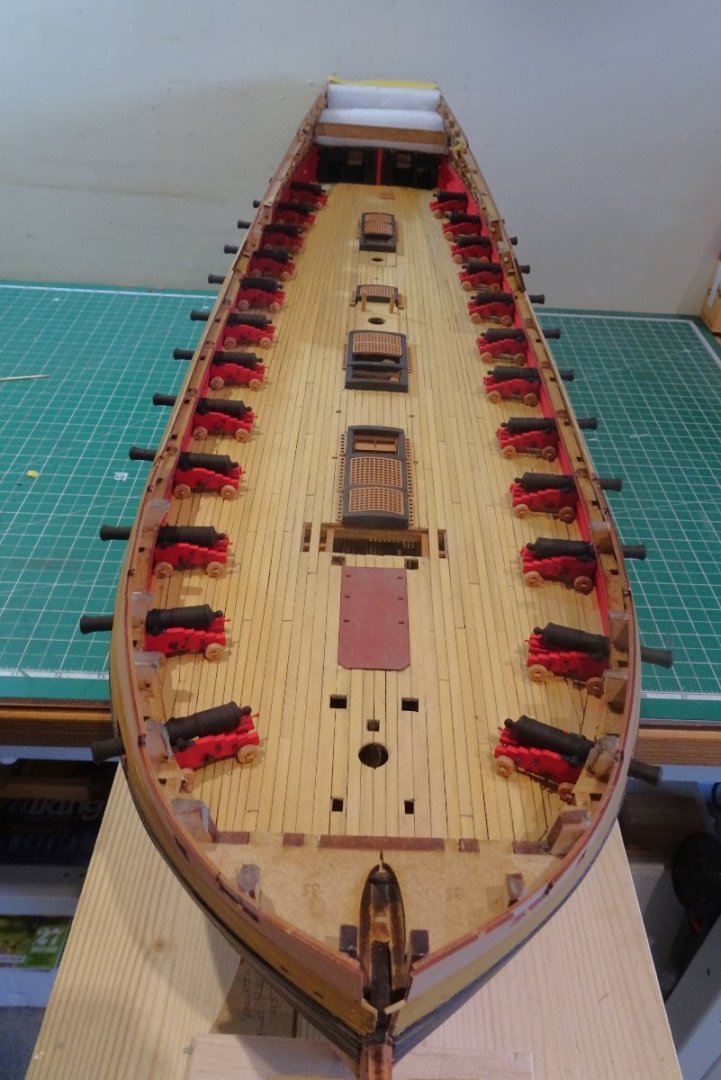
A photo set to mark this milestone point.
1912

1915
1918
1916

1917
1919
1920
1923
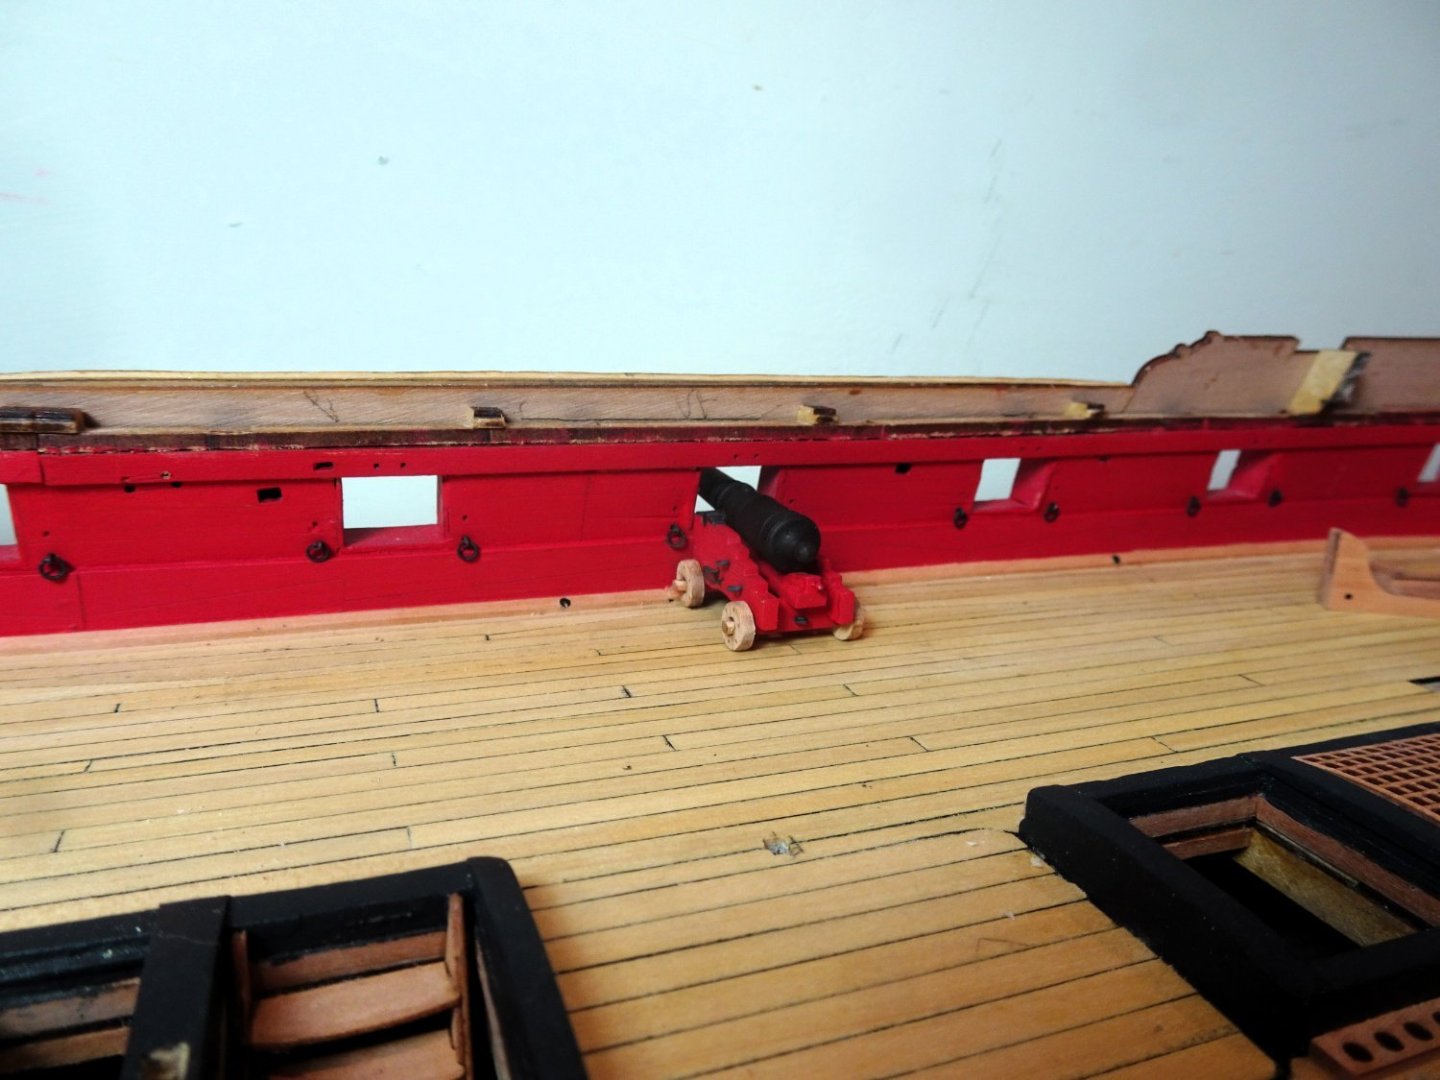
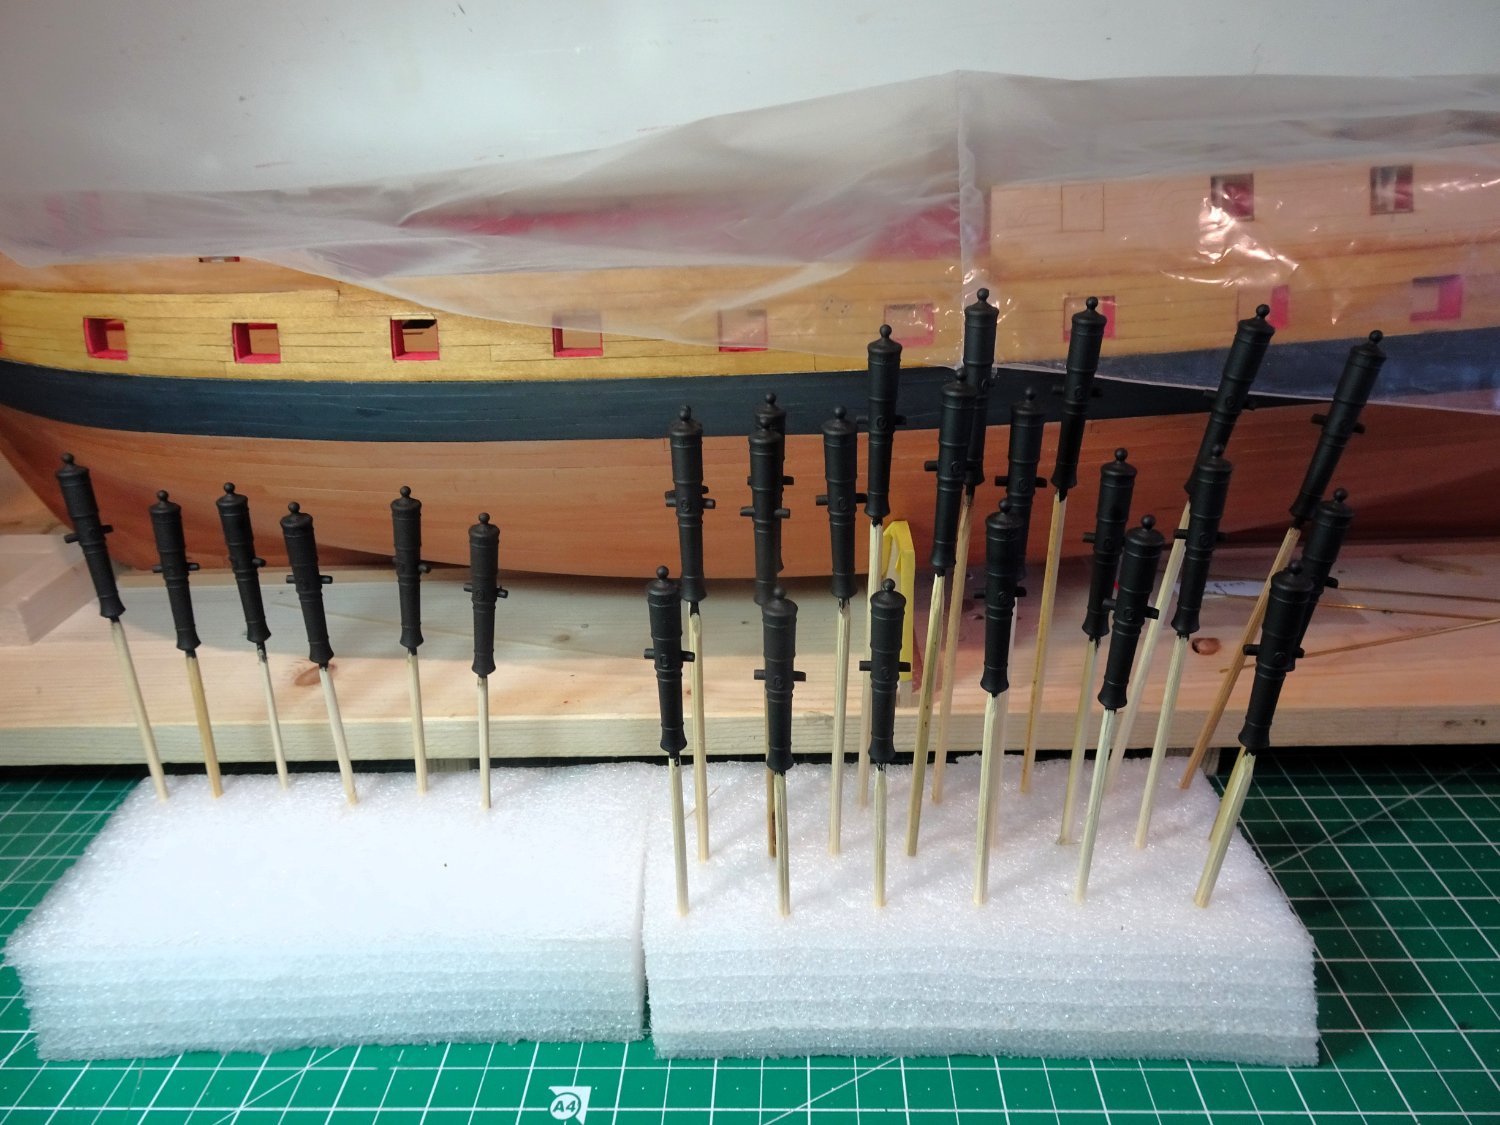
The gun barrels are only temporarily in place.

1931
1932
The heavy construction element has now been completed. There should be a lot less clutter and dust around from this point on.
I am now getting close to the stage of a build that I enjoy best.
B.E.
29/08/2023
-
Post Seventy
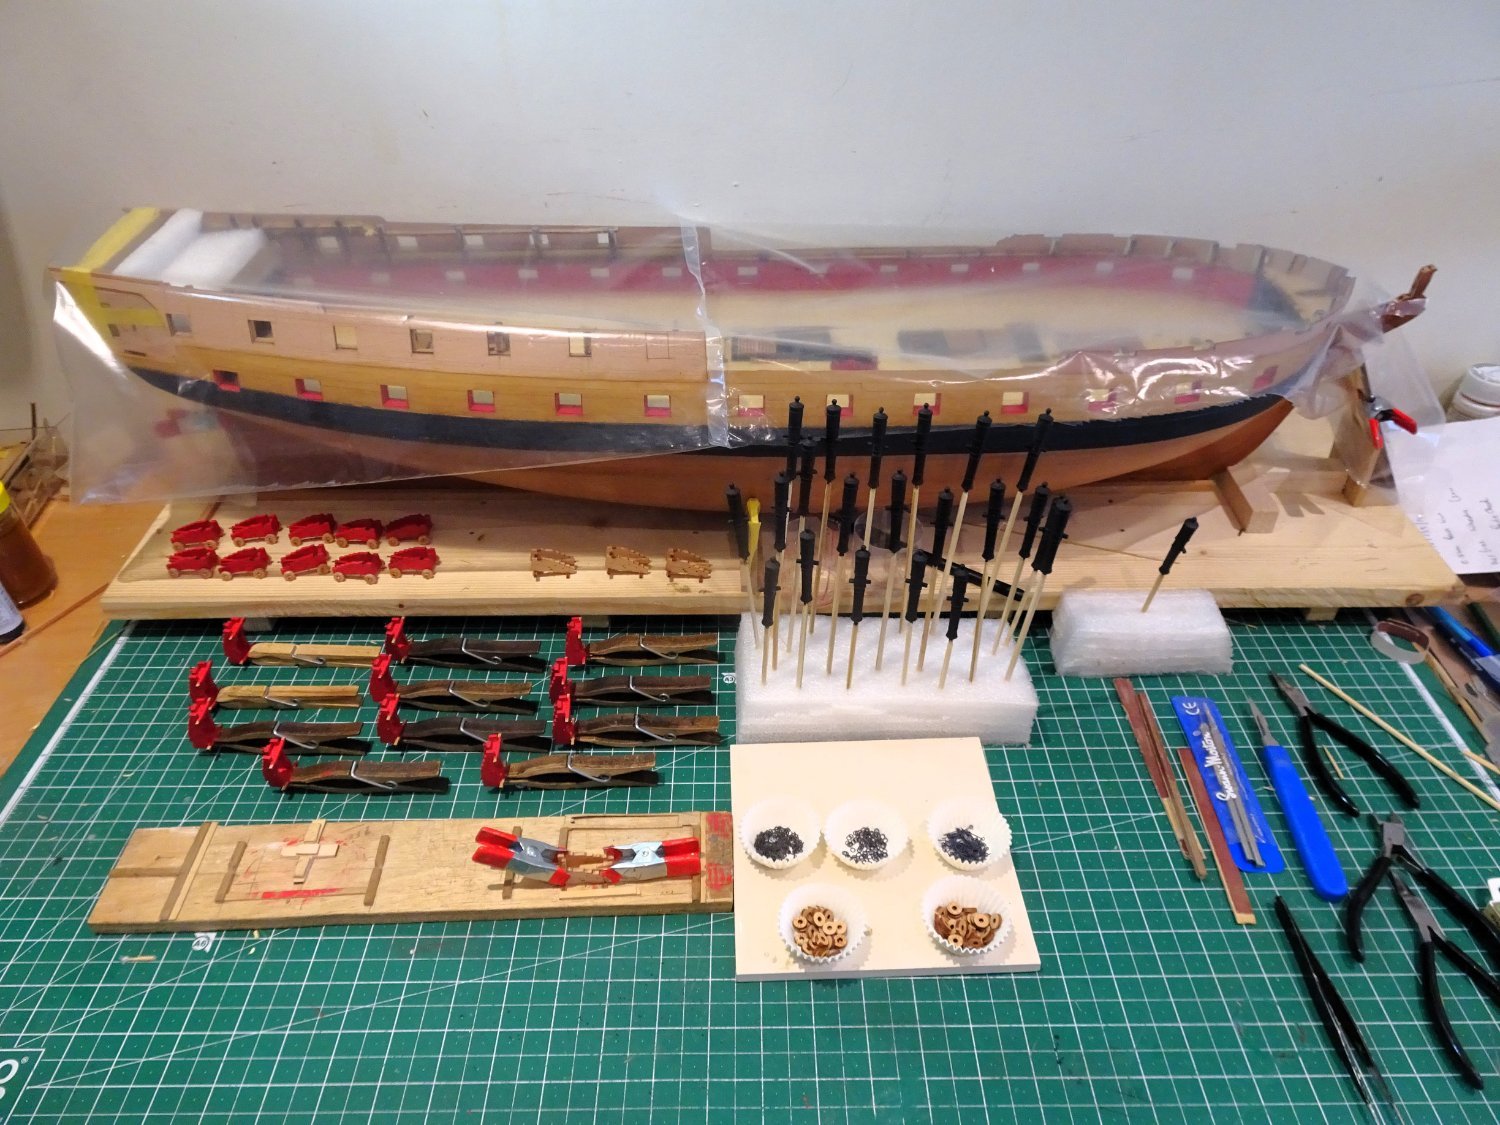
Bits and pieces
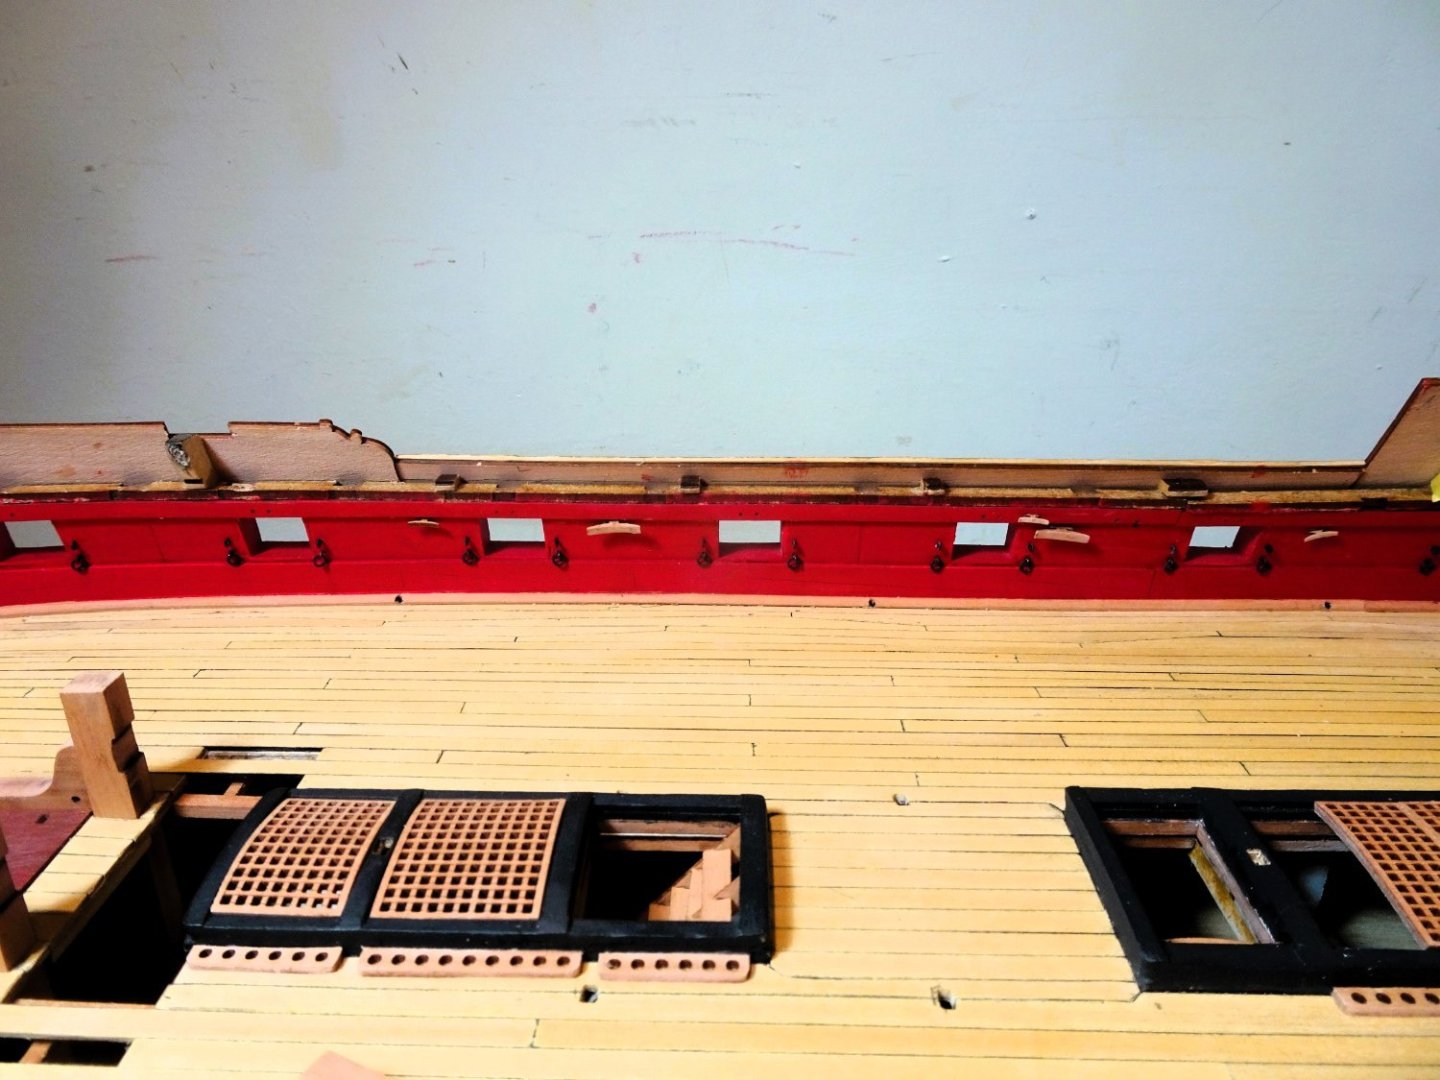
Lots of bits and pieces to add at this stage, guard stanchions around the hatches, shot to the garlands, and the gun carriages to secure along the hull.

1891
1910
I also decided to repaint and weather the guns, I could still detect those longitudinal striations given certain light and angles.
1902
What fun it is to fit the shot into the garlands. Lively little beggars, pinging around the deck, bouncing down the ladderways never to be seen again, but most certainly heard.
1901
I found using these broad nose plastic tweezers gave me the best success.
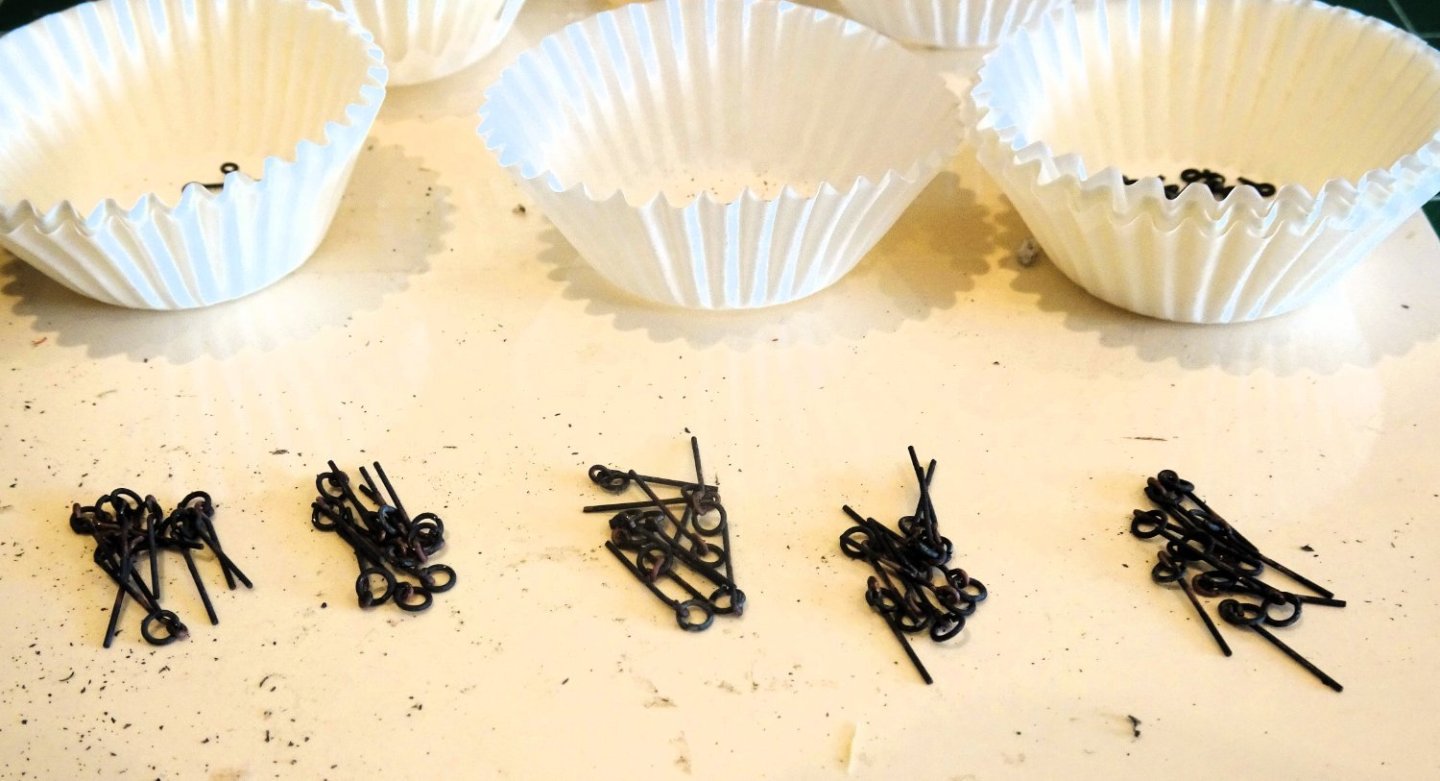
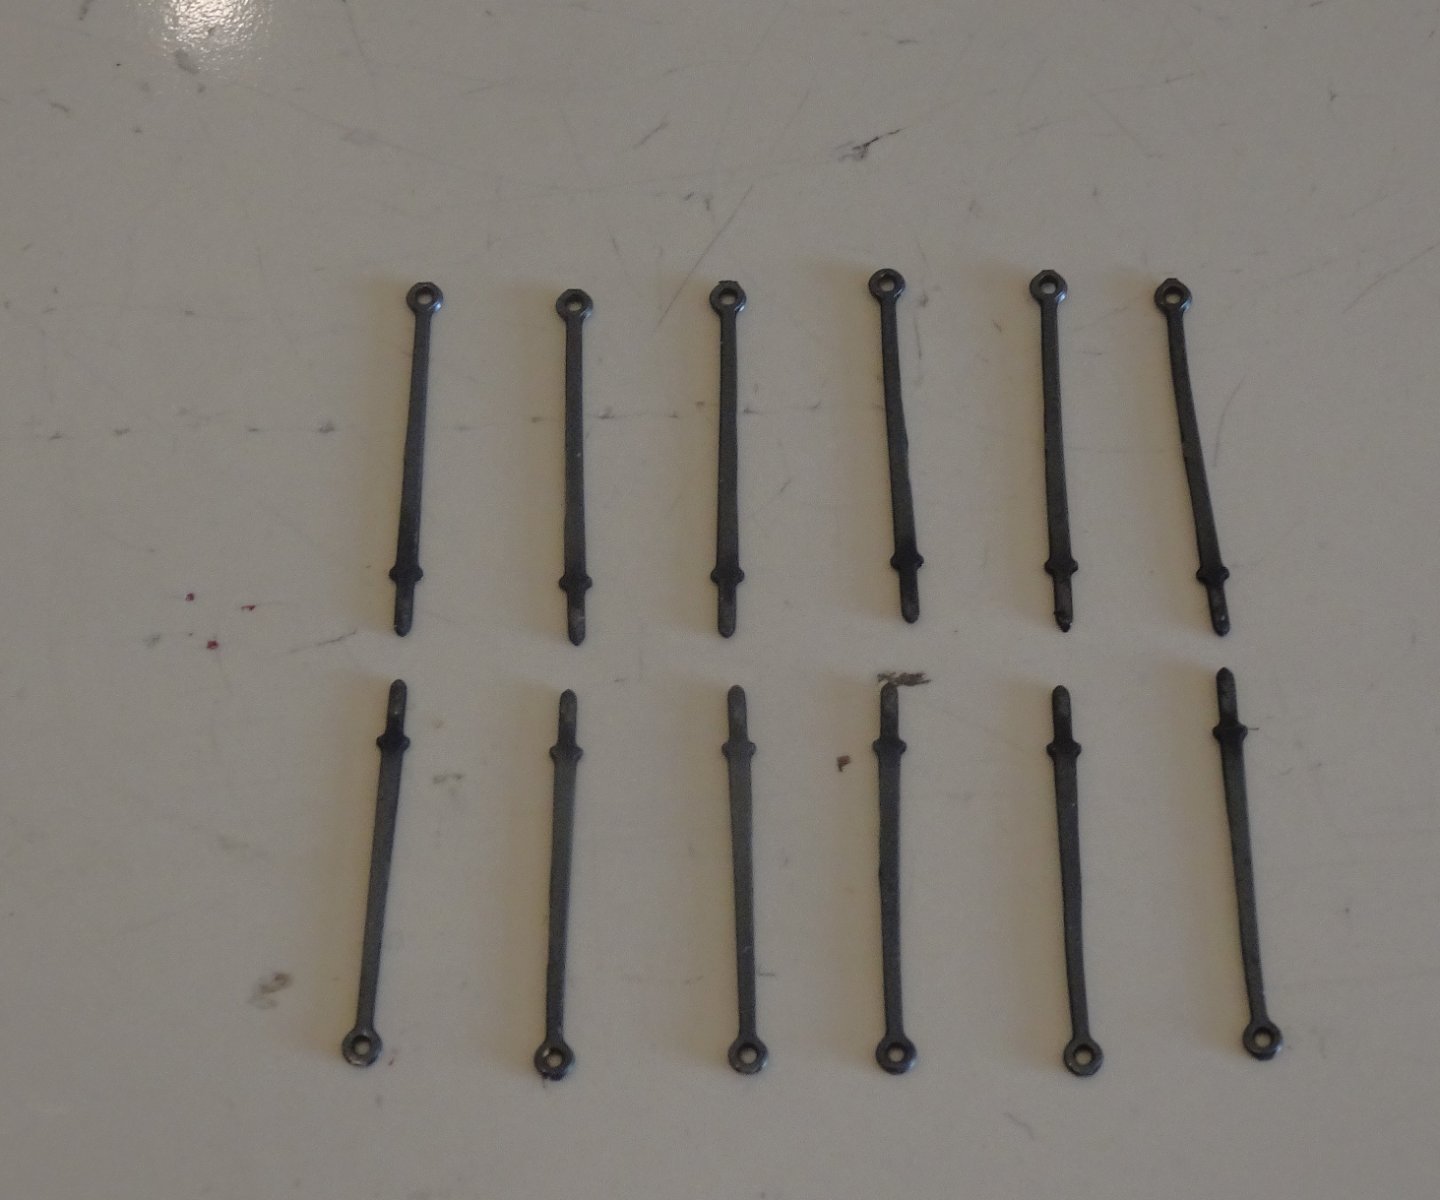
The stanchions
As with other ‘ironwork’ I prefer to chemically blacken.

1895
I try to ensure that any tabs from the fret are completely removed from the stanchions before this process.
This macro reveals three examples requiring more attention.
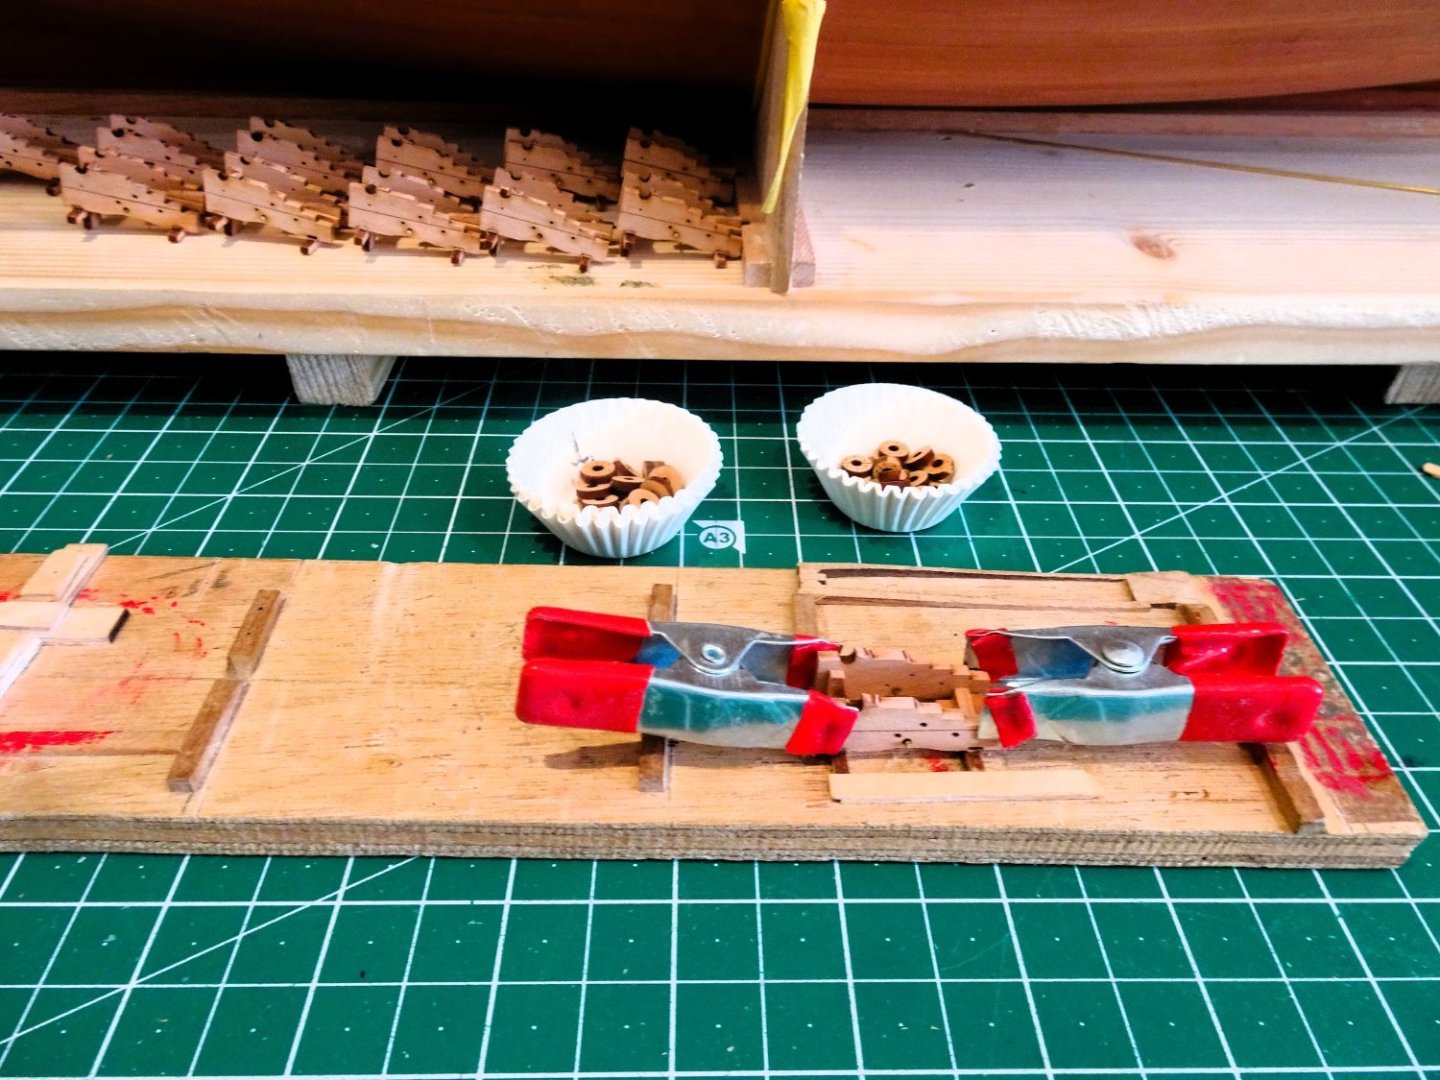
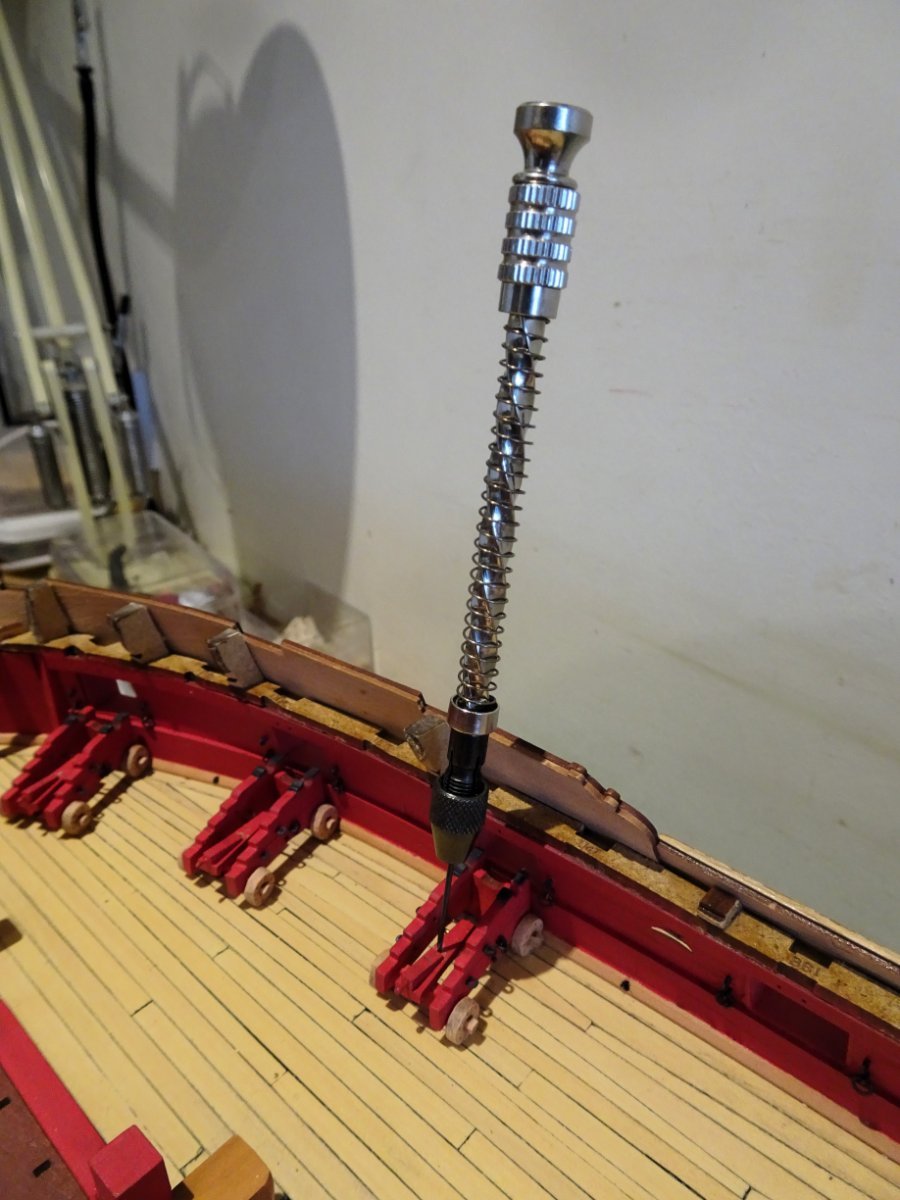
Gun carriages.
I secured these using 1mm brass wire thro’ the bed and into the deck.

1892
An Archimedean drill is perfect for this job.
1894
At this point the carriages are all secured. I used ca on either end of the wire.

1906
I think a general tidy-up is called for before I move on.
B.E.
27/08/2023
- CiscoH, hollowneck, Thukydides and 16 others
-
 19
19
-
Post Sixty-nine
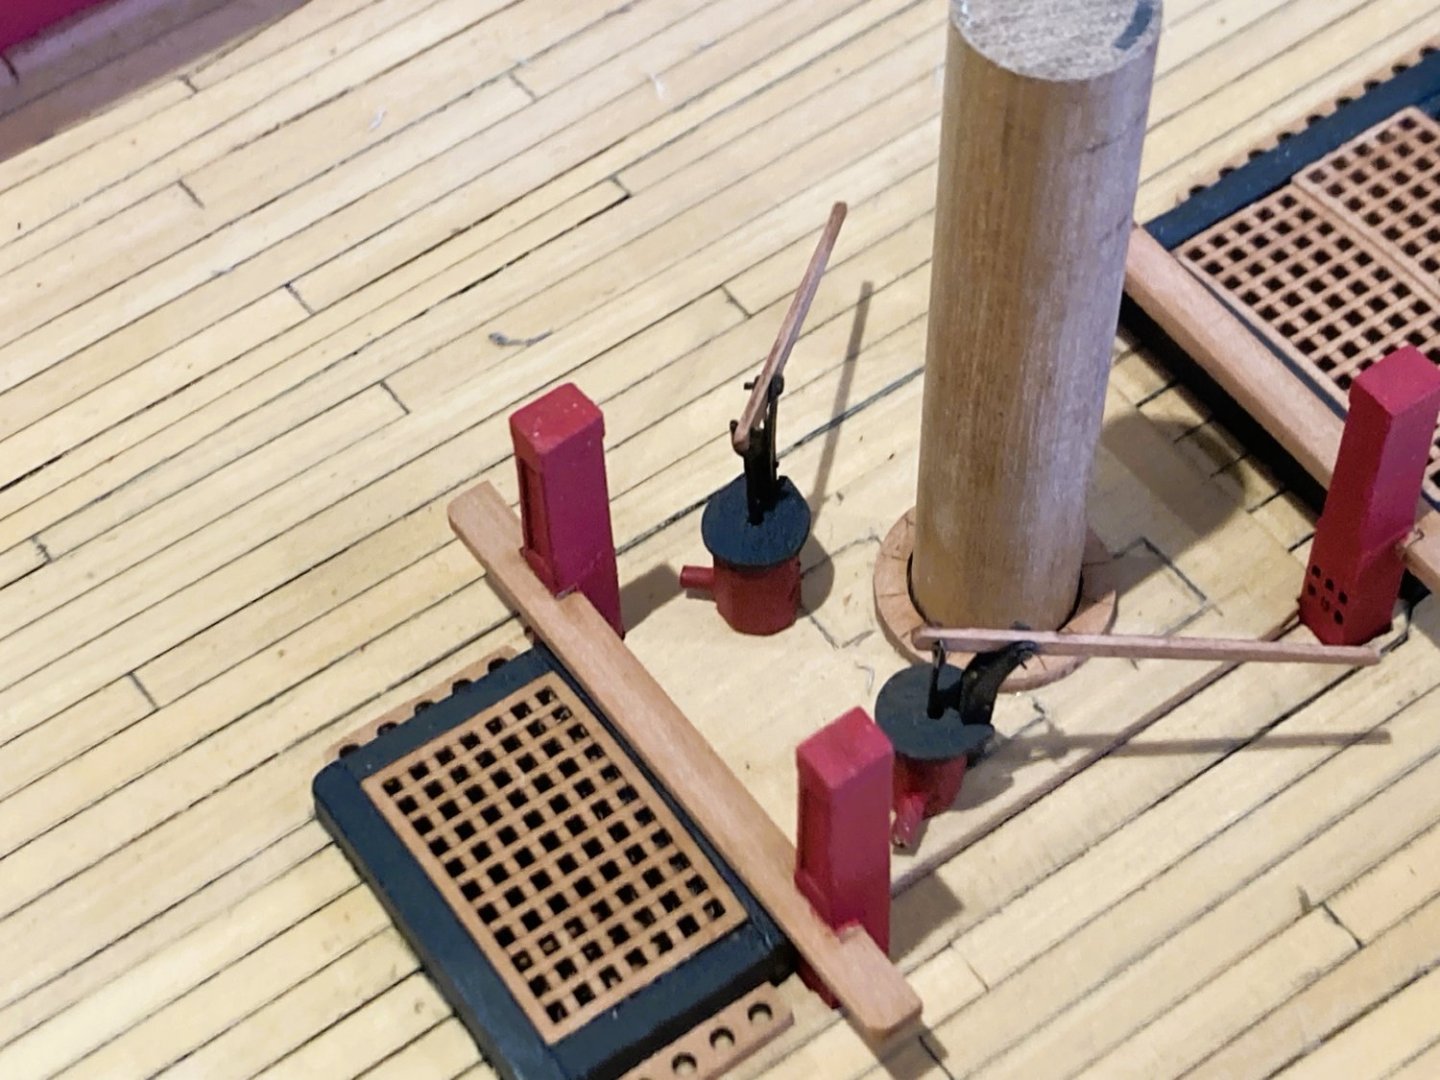
Capstans
I decided to add ‘iron’ reinforcing rings to the capstan trundle heads.
For this I used my dividers to cut rings from thin black card. I sprayed the card with matt varnish before cutting to reduce the risk of rough edges.
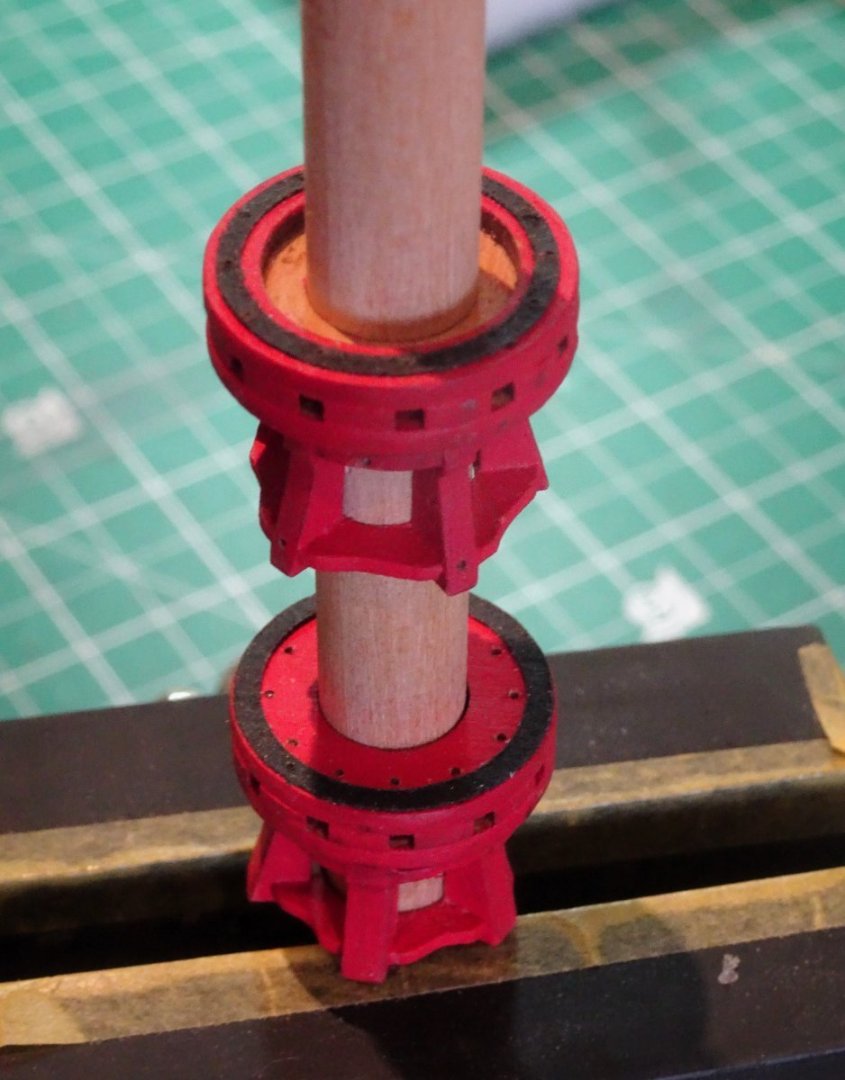
1887
The rings were marked with the iron fastenings; fitting these corrected my initial error, as I was able to re-position the capstan bar retaining pin holes.
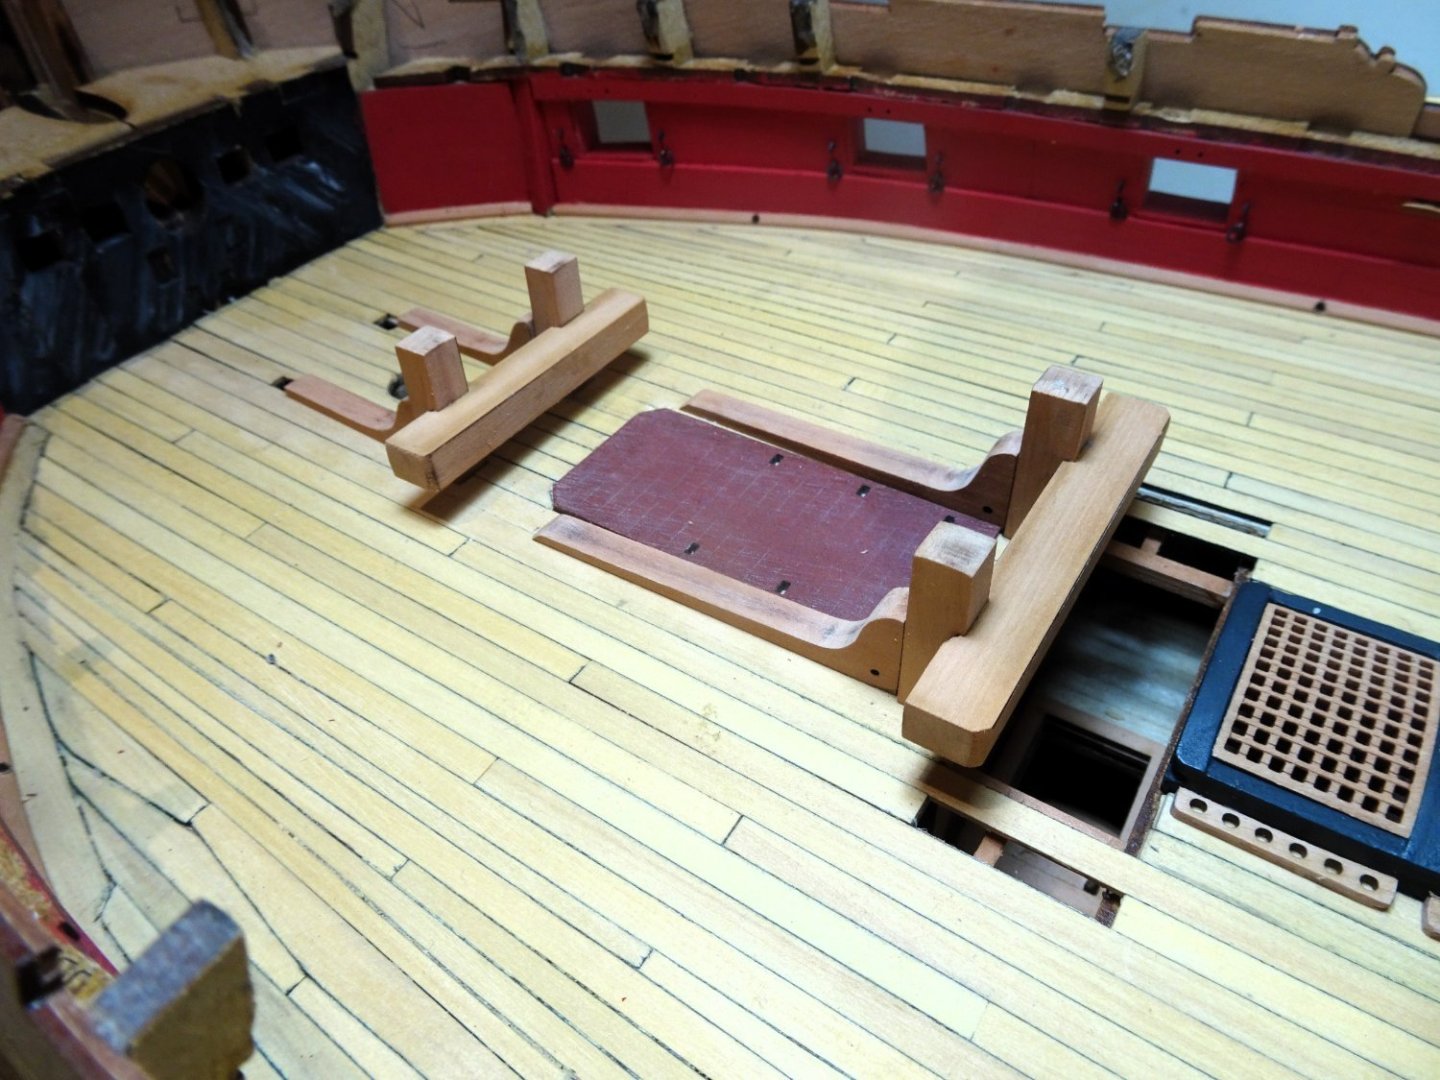
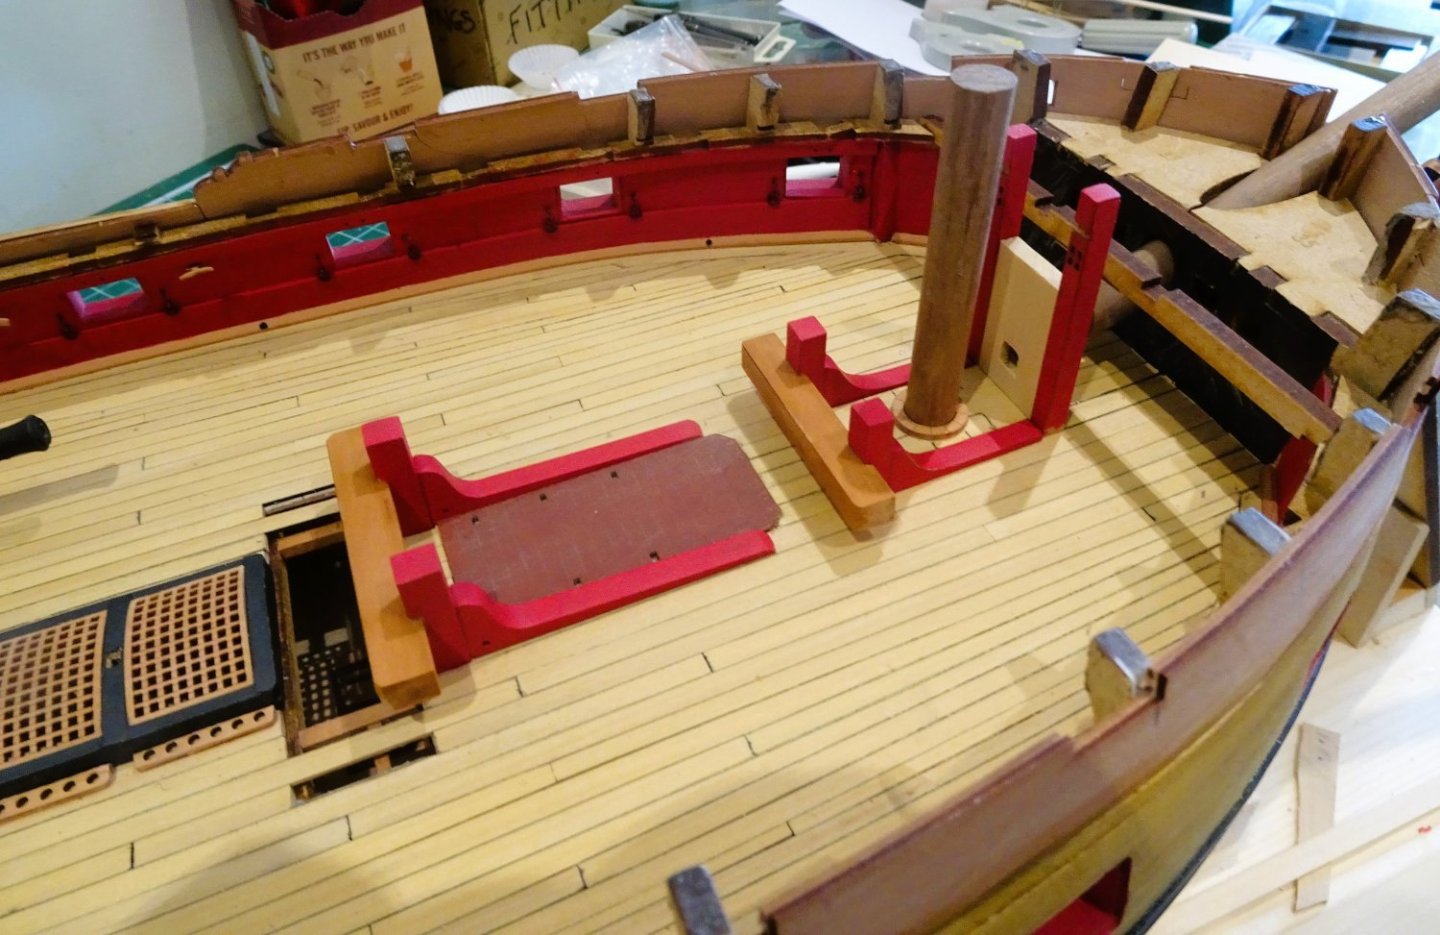
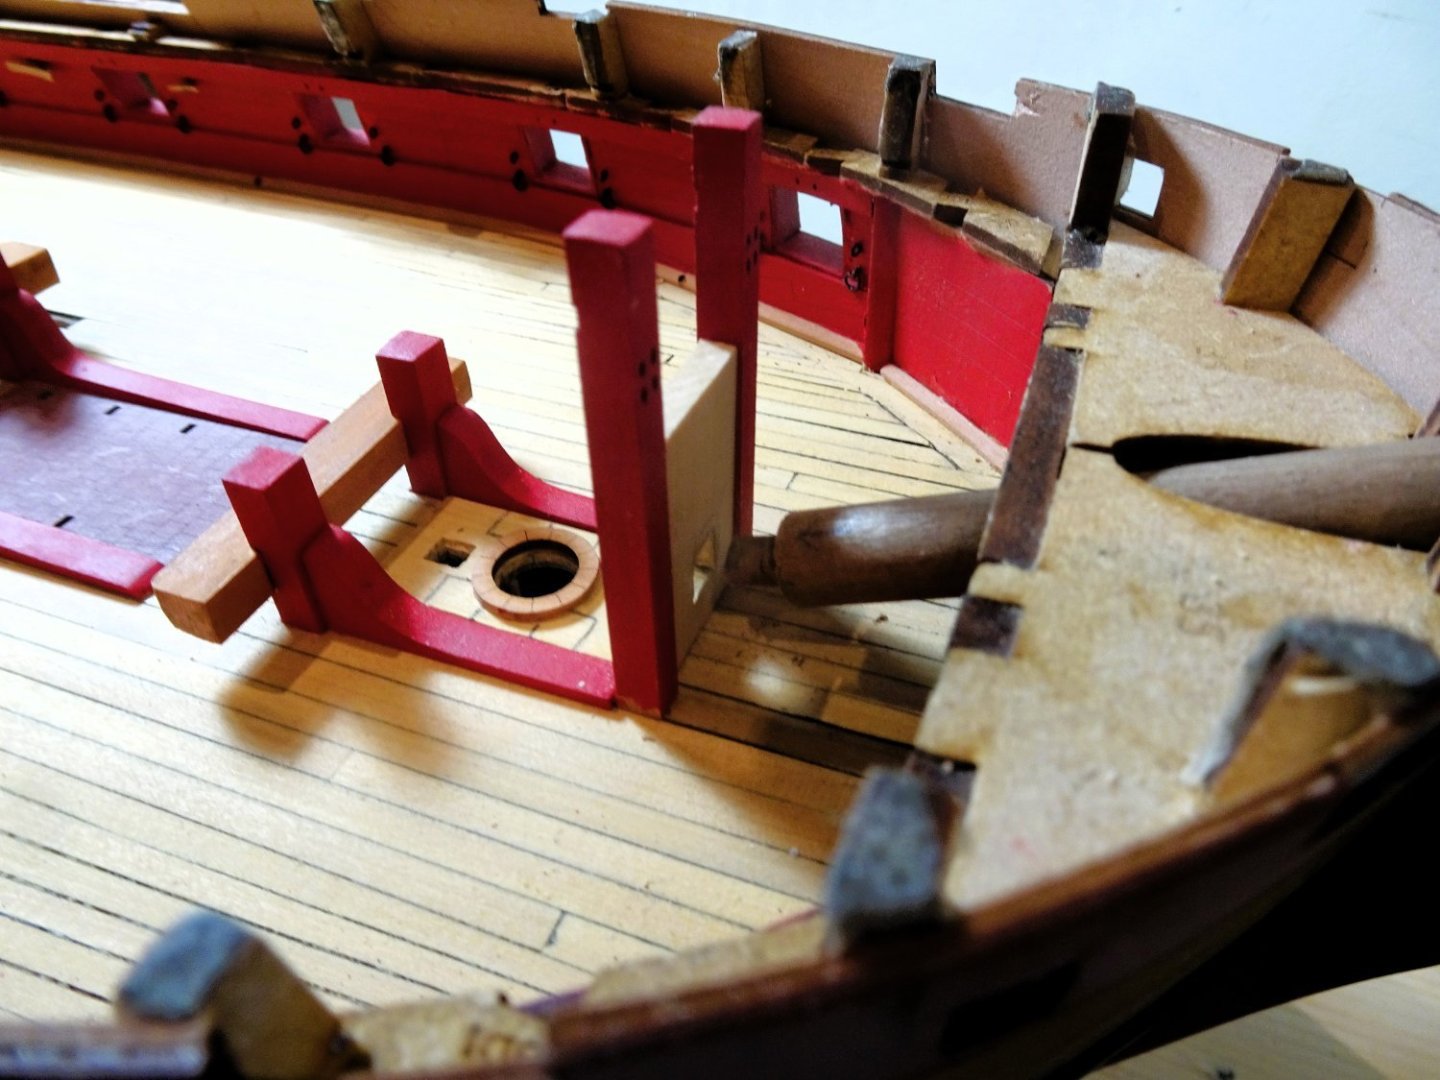
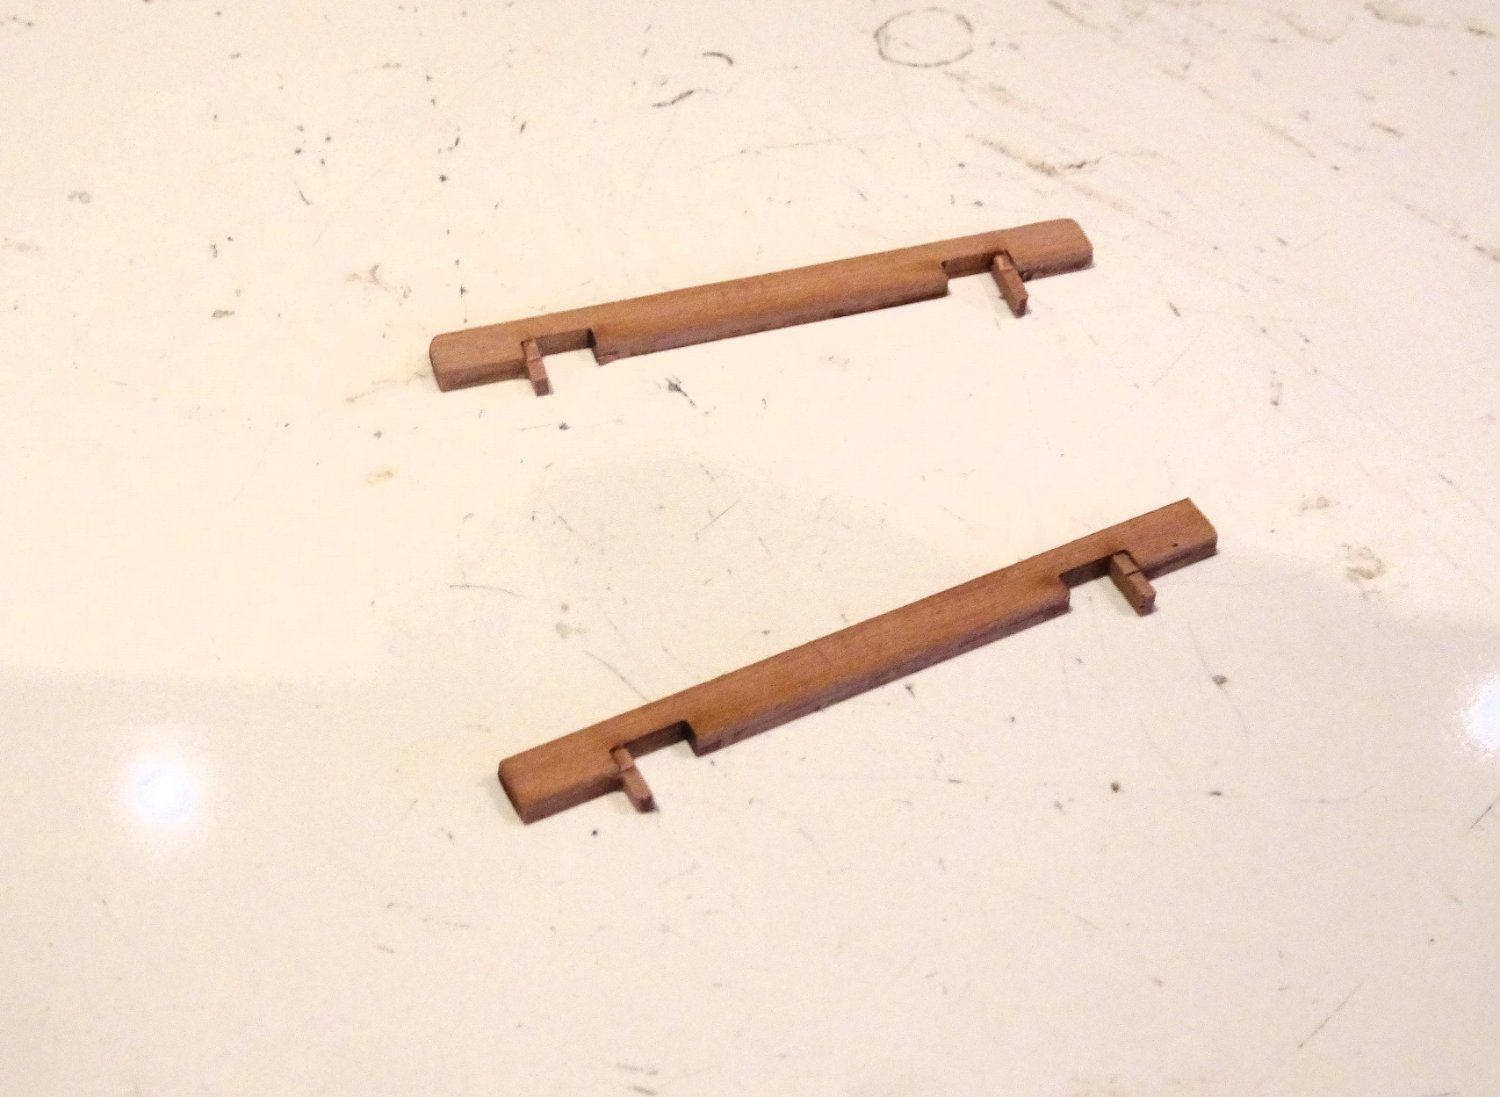
Manger Boards.
There are rules about Manger Boards concerning their heigh and shape. They fit against the bulwark at the outboard end, and against the Bowsprit step legs, inboard. They are higher outboard and cant down inboard.
For practical purposes I have scaled the height to fit over the spirketting.
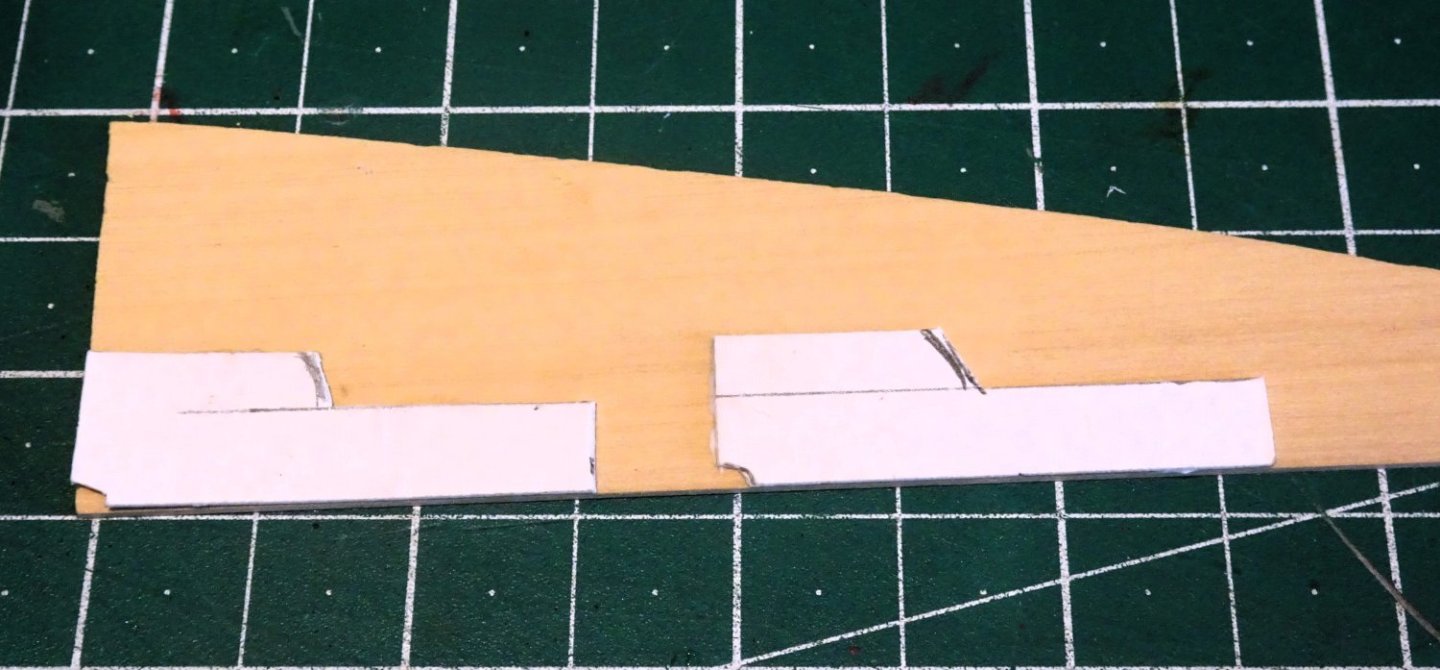
1868
1879
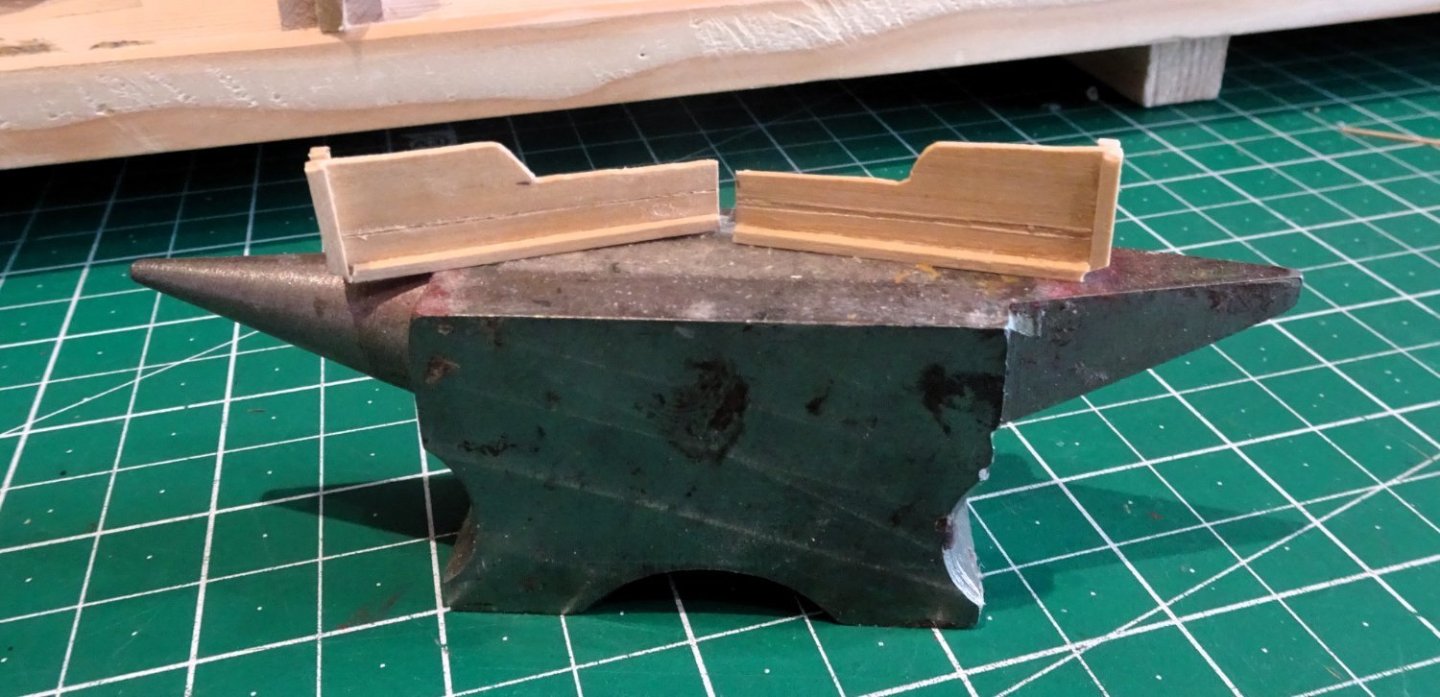
The Manger boards are fairly simple to make, cut from some scrap 1mm Boxwood.
1878

1875

1883
They will be clearly visible thro’ the Foc’sle deck beams, so worth adding on a ‘skeletal’ version such as mine.
1876
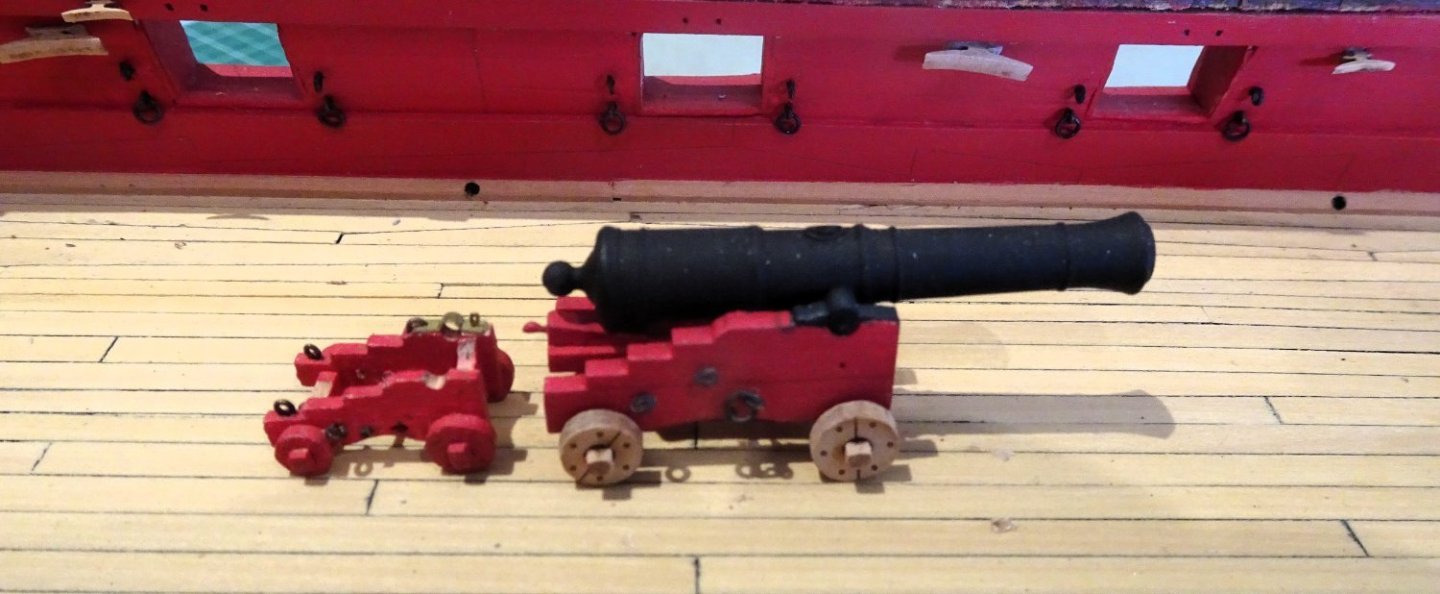
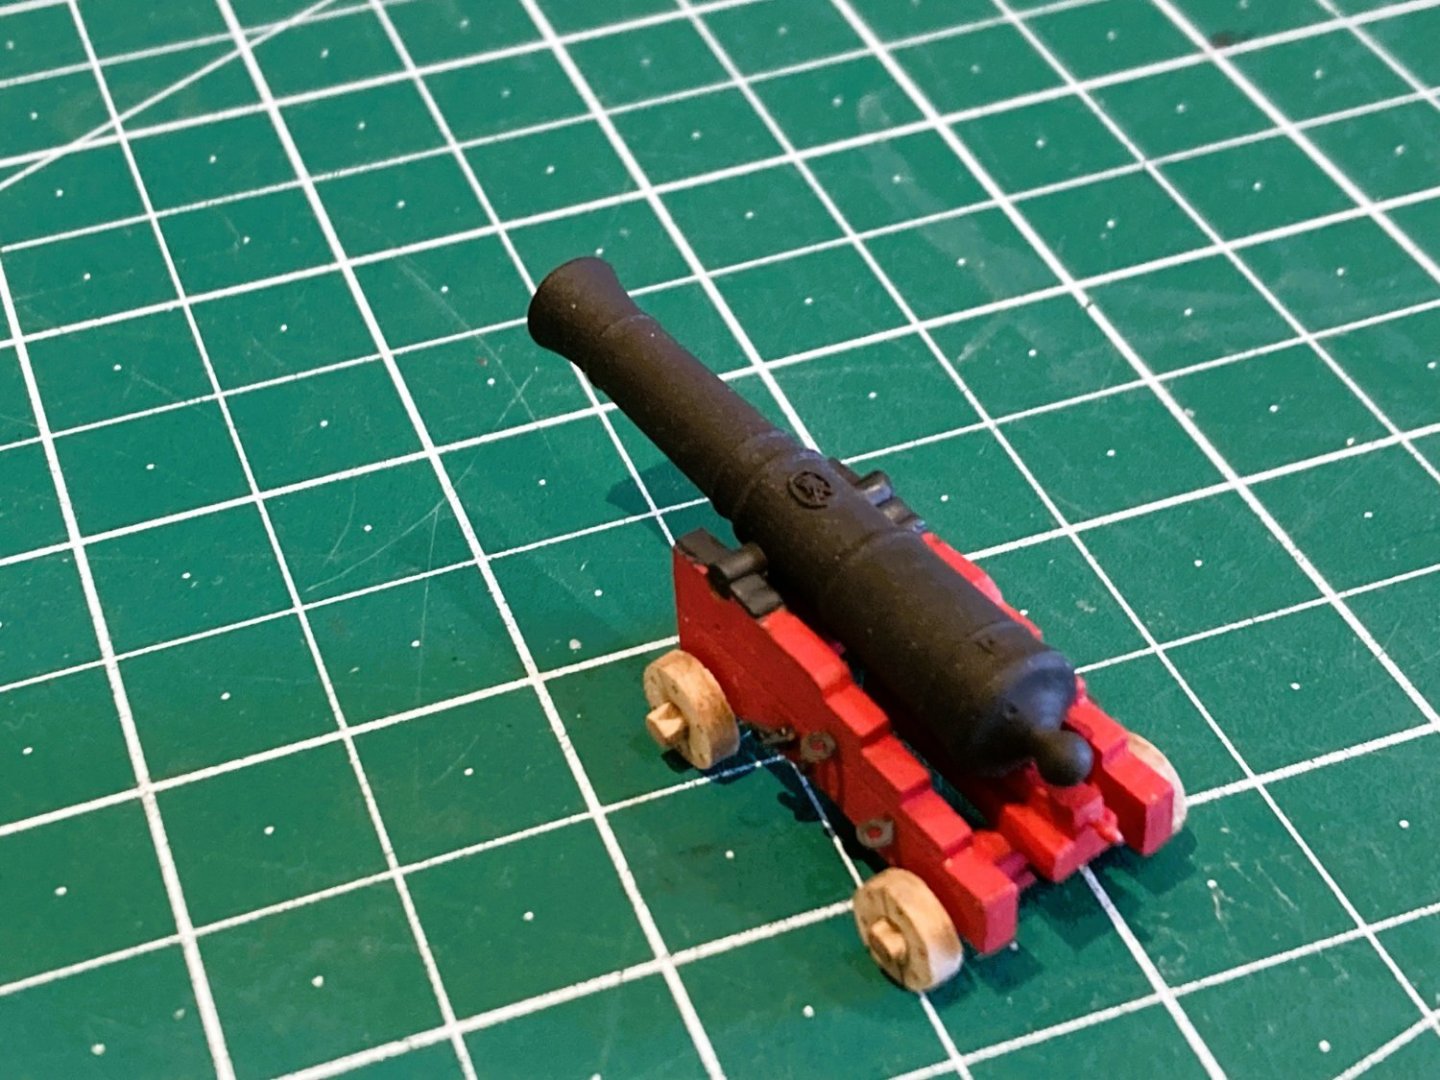
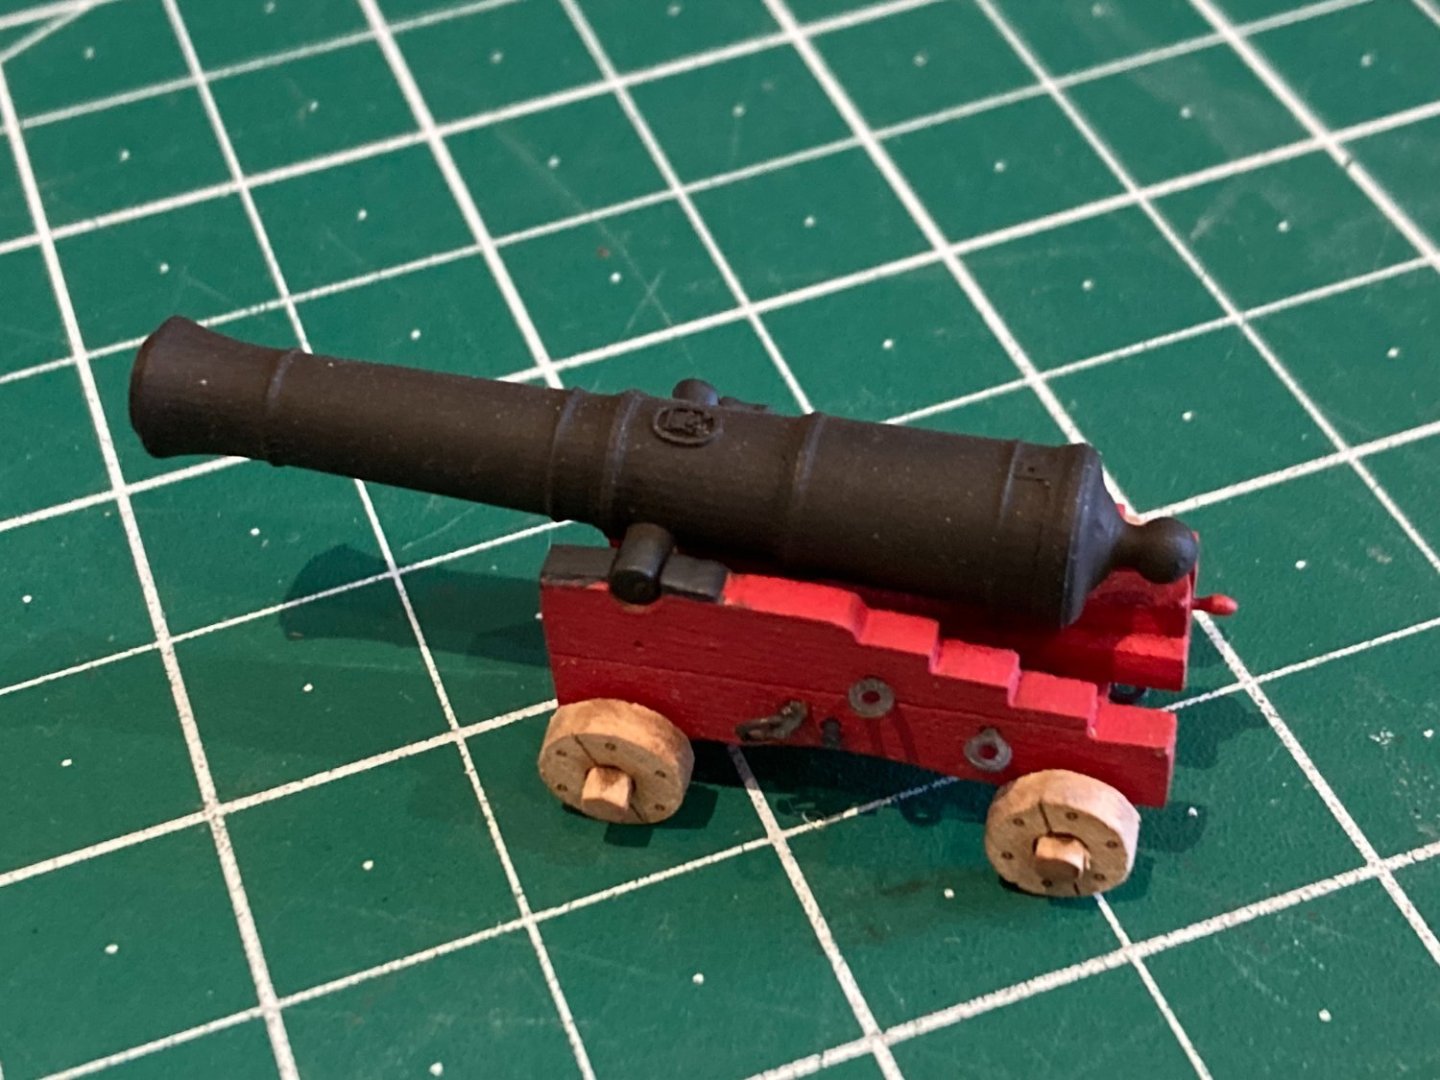
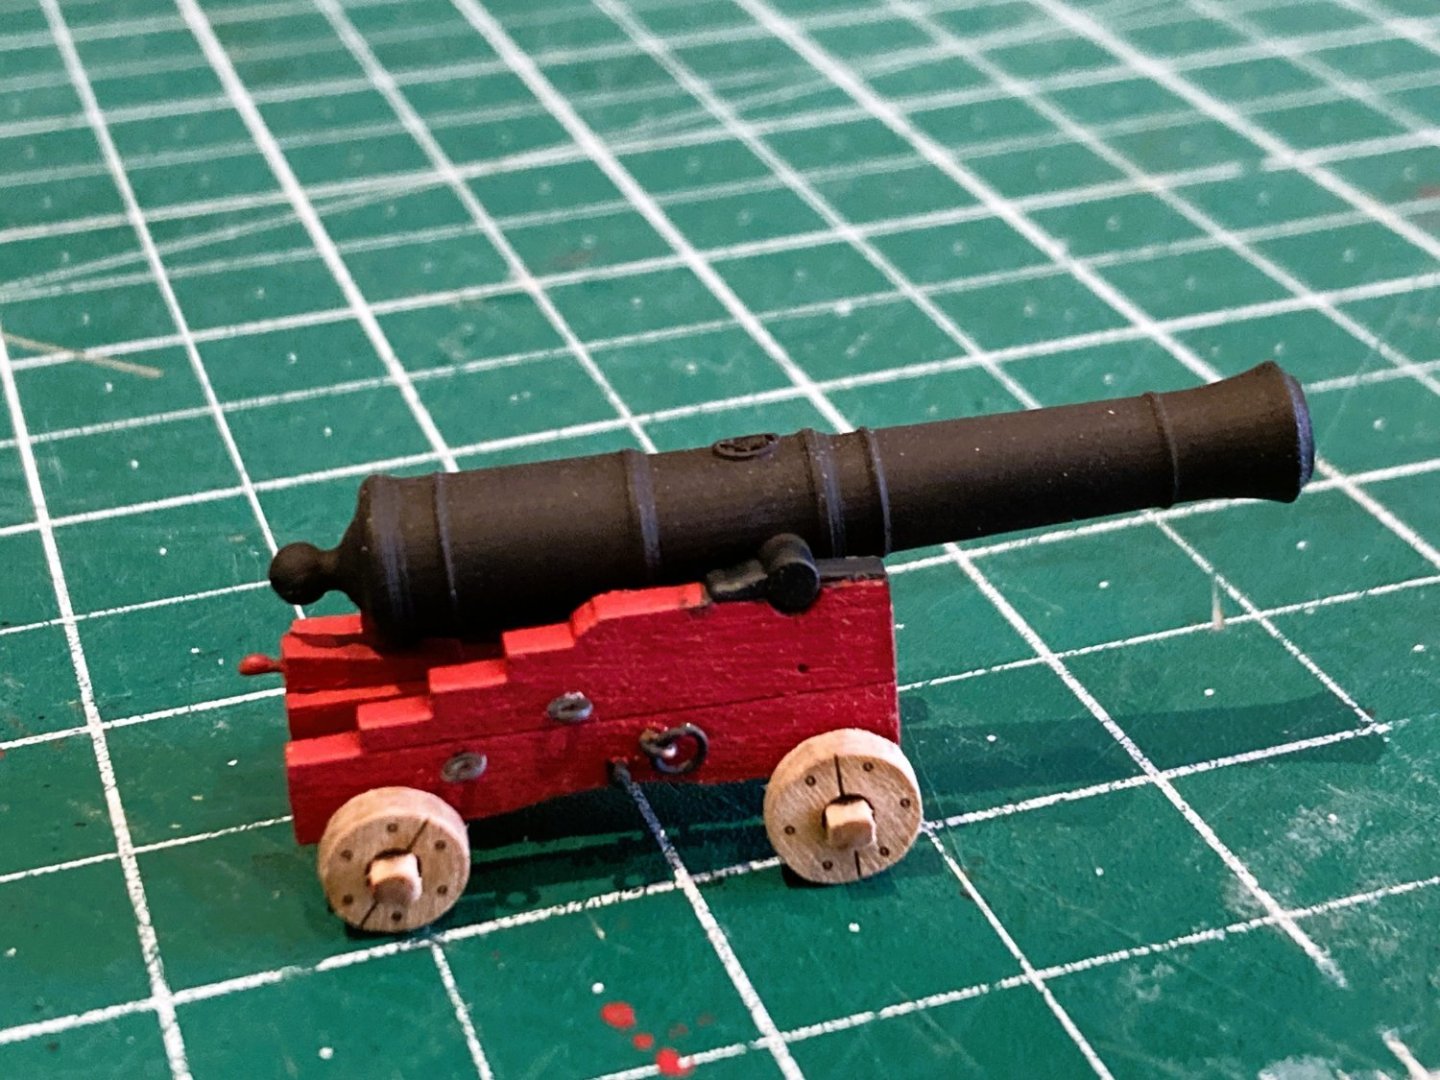
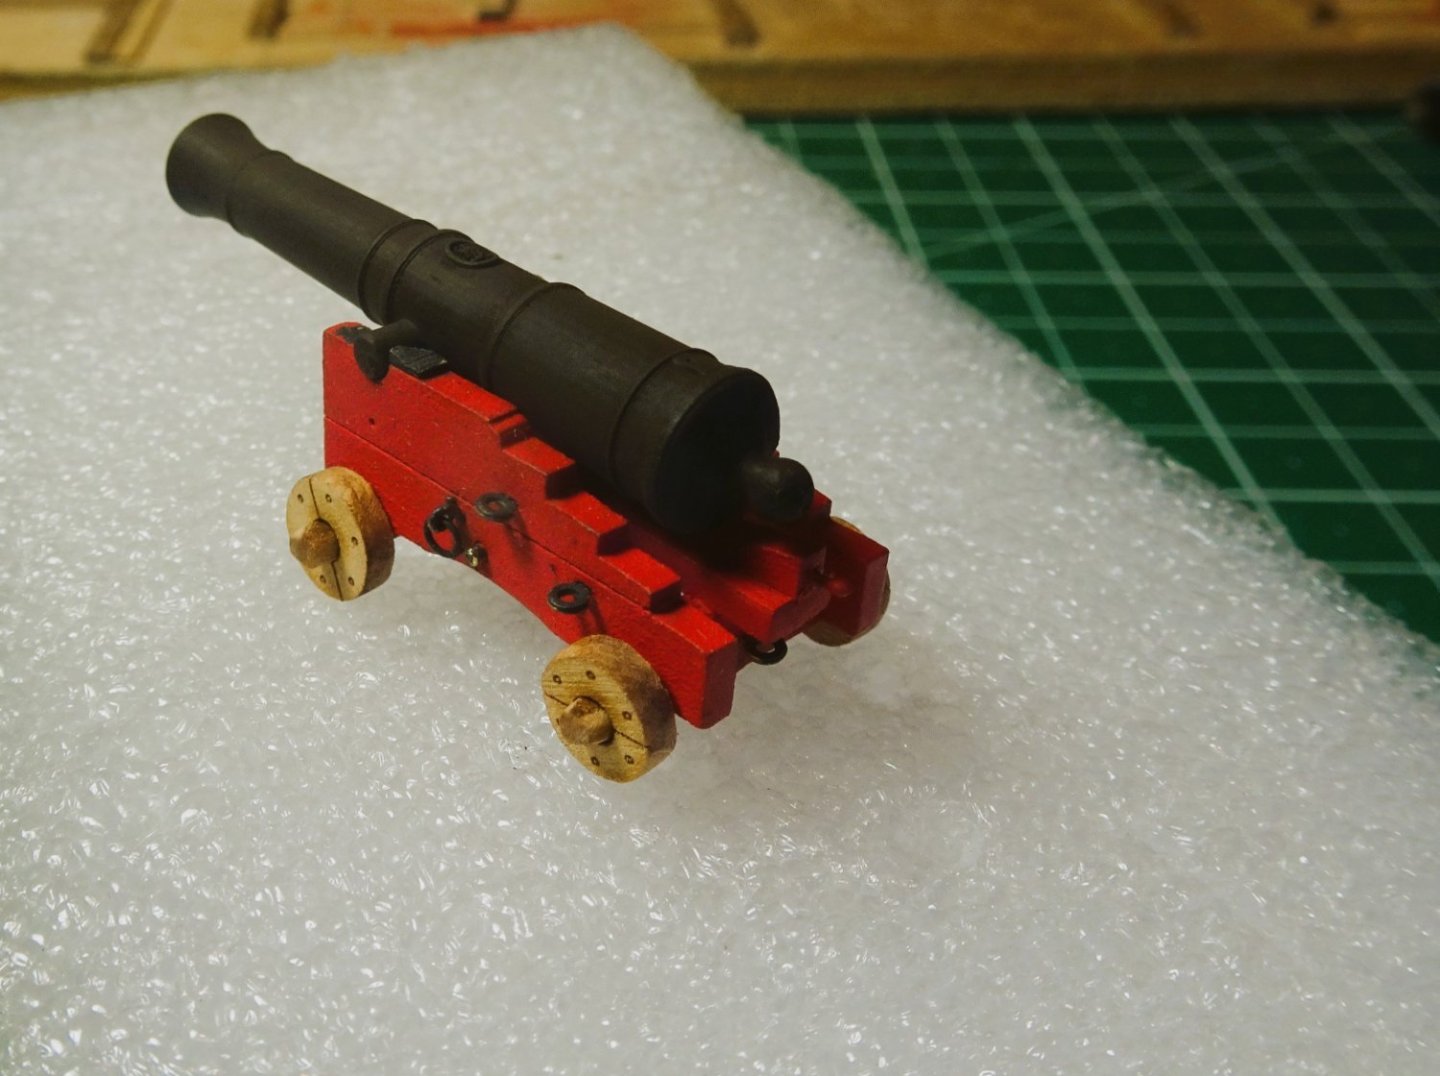
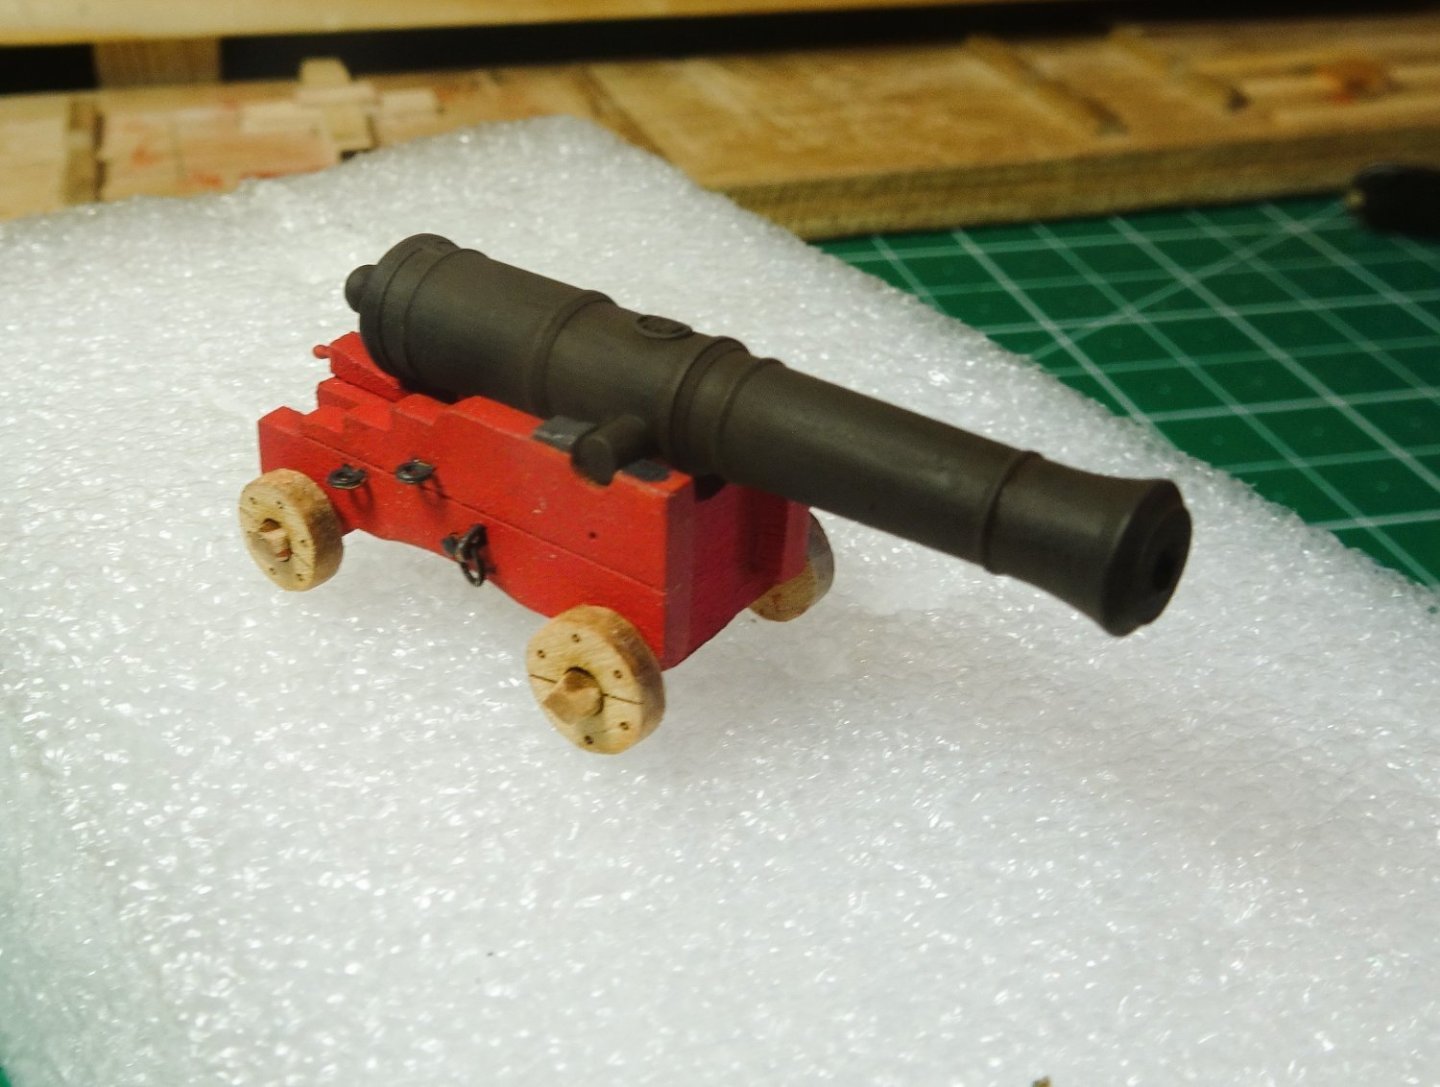
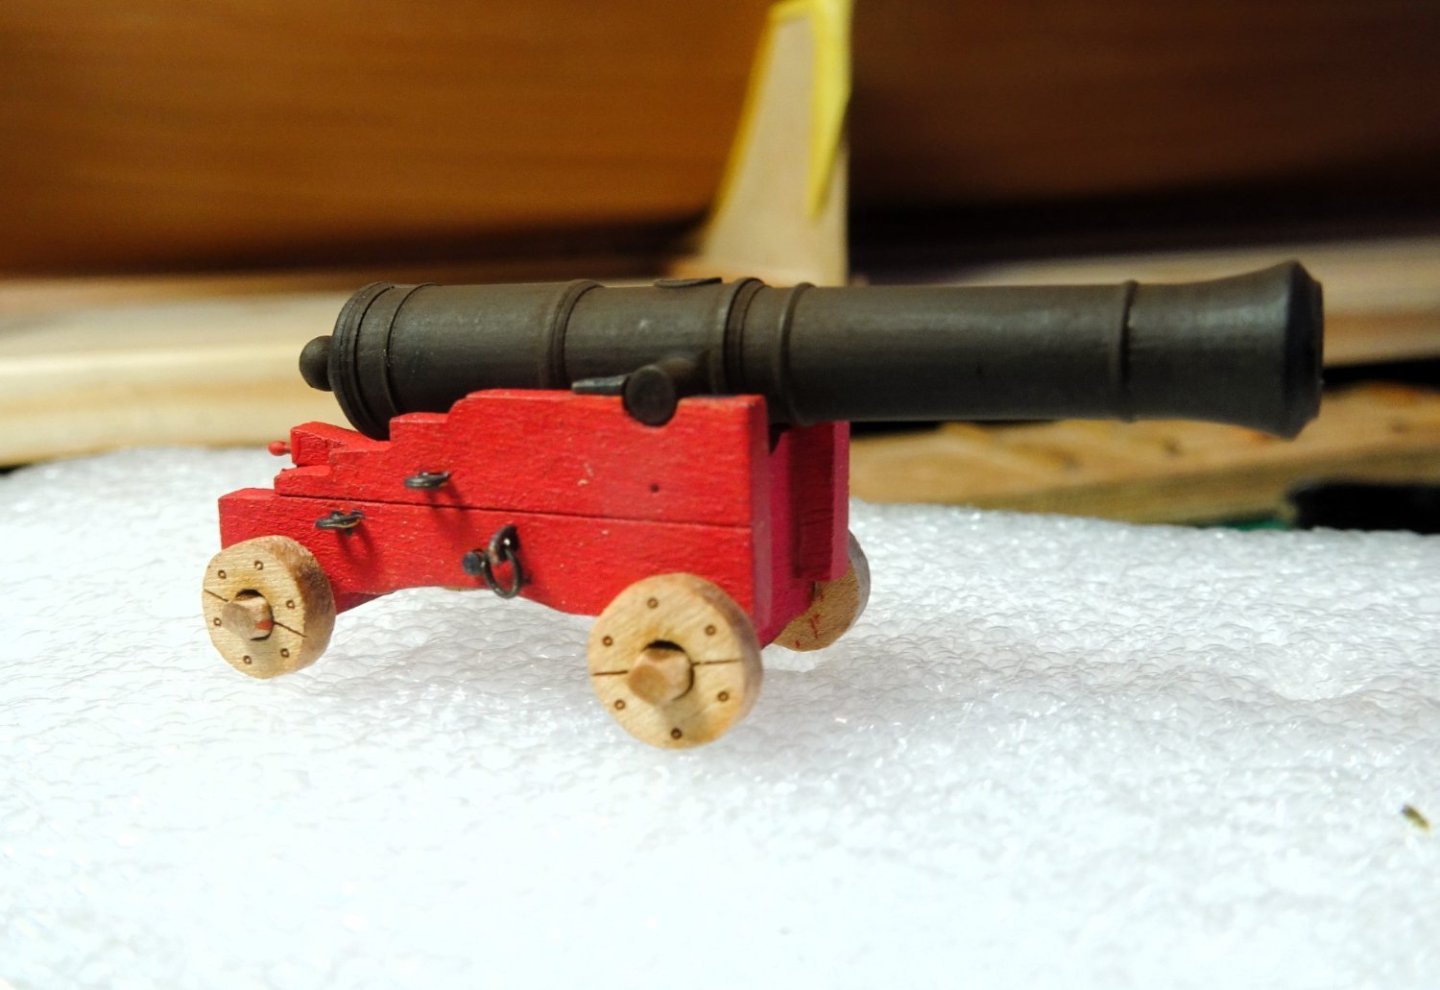
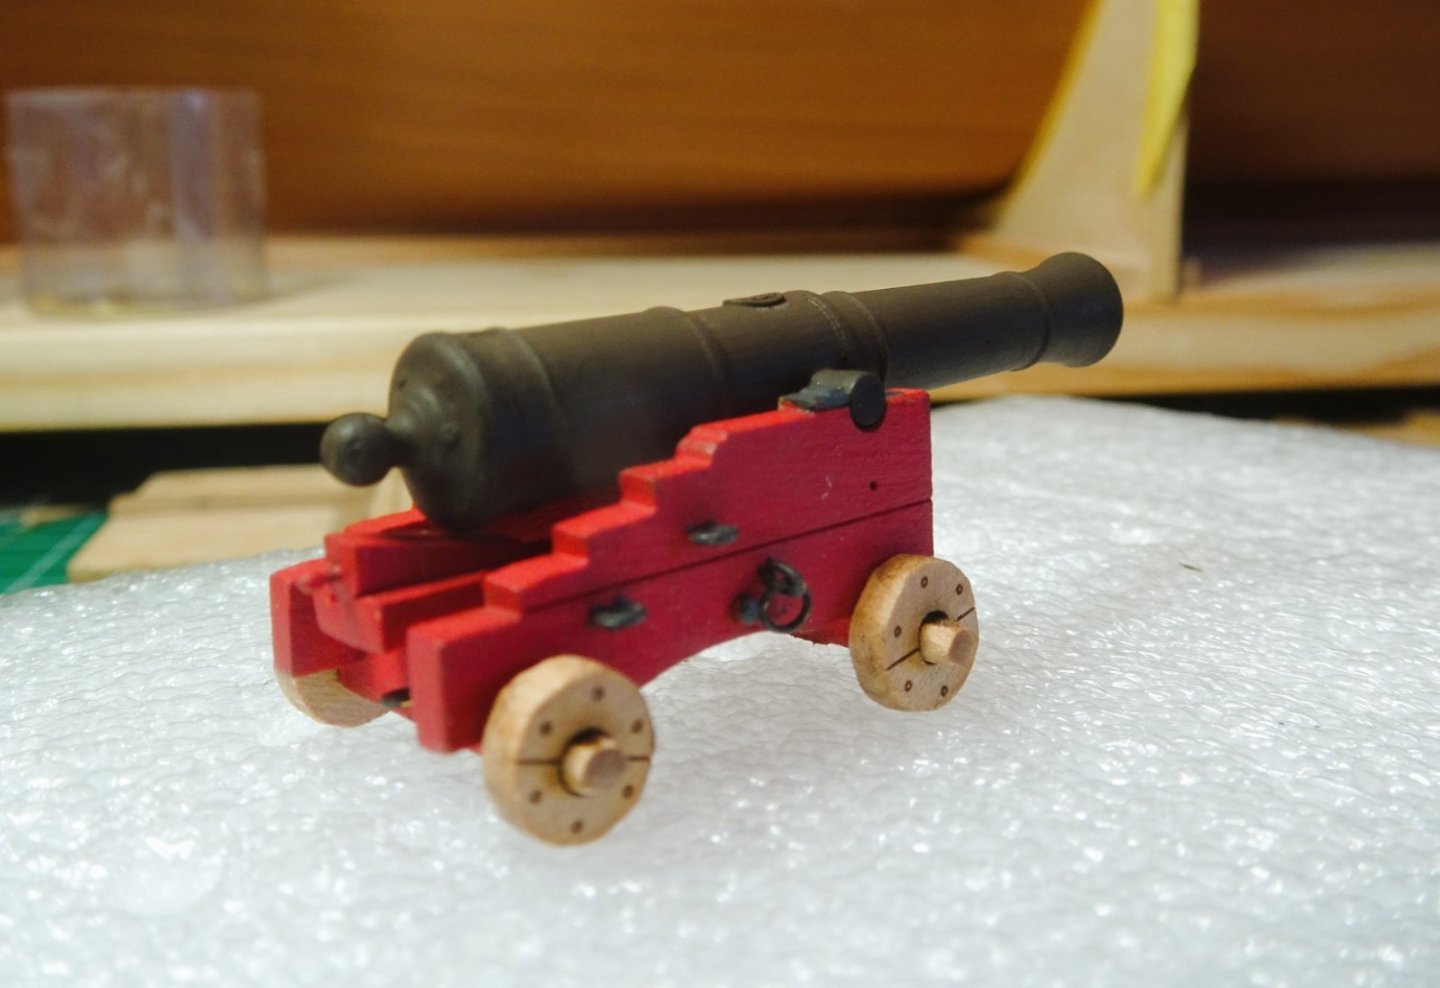
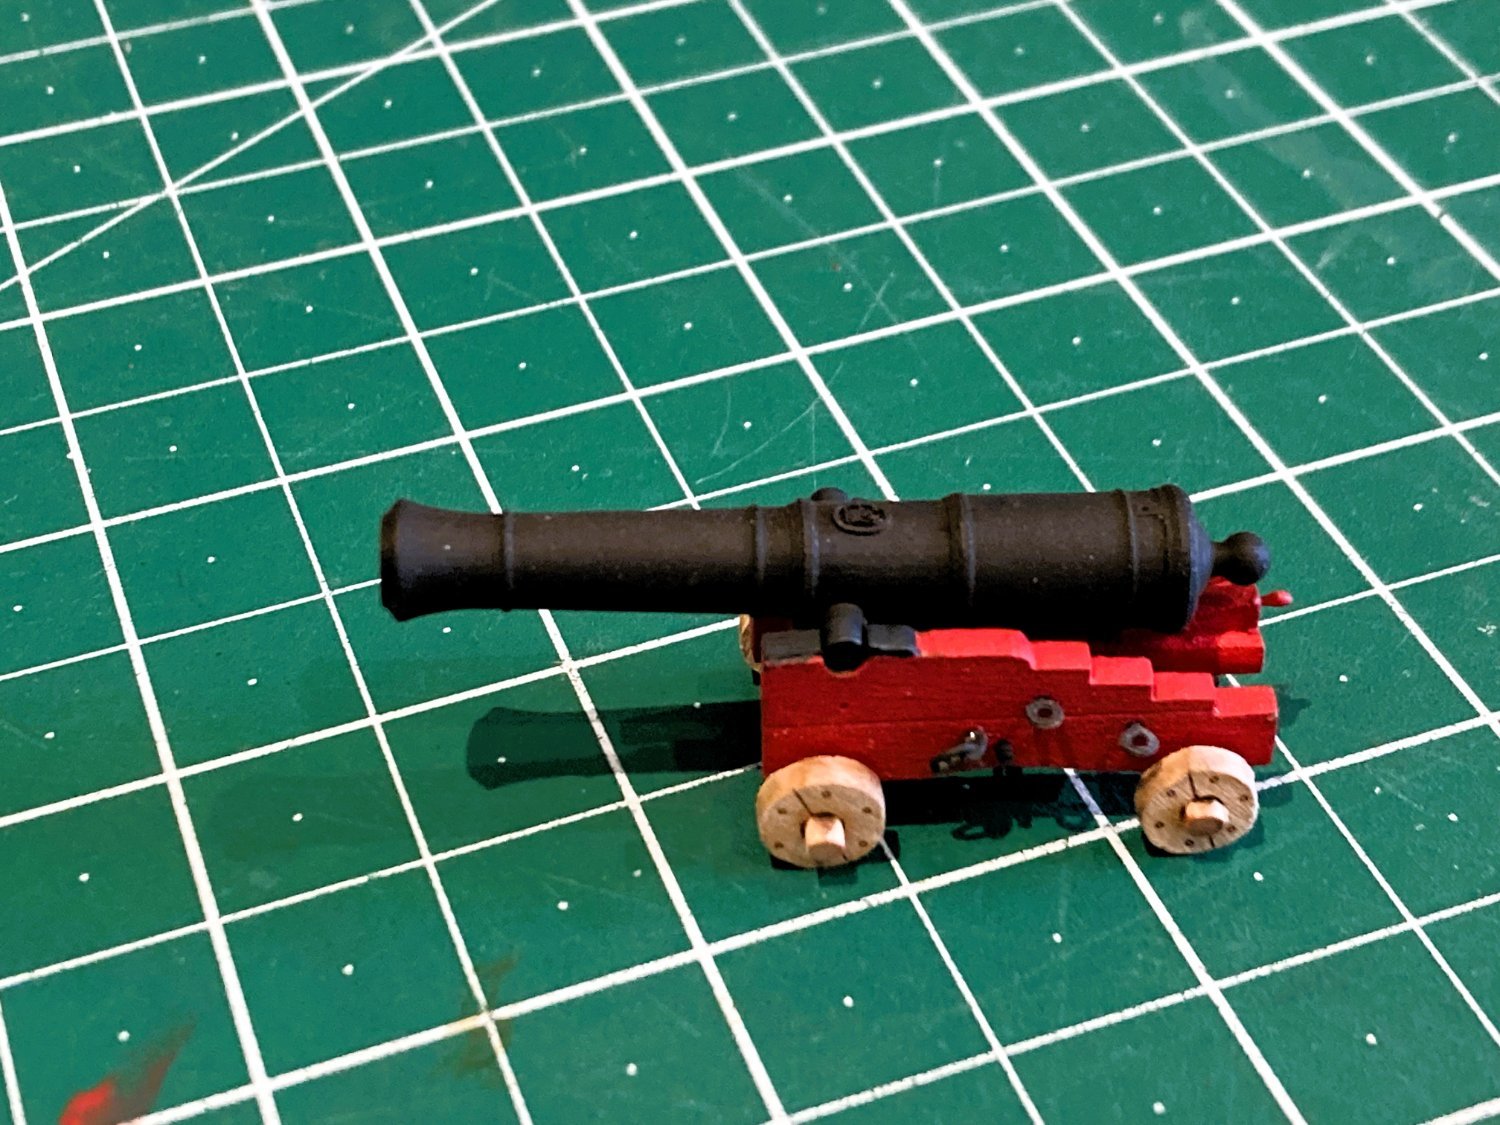
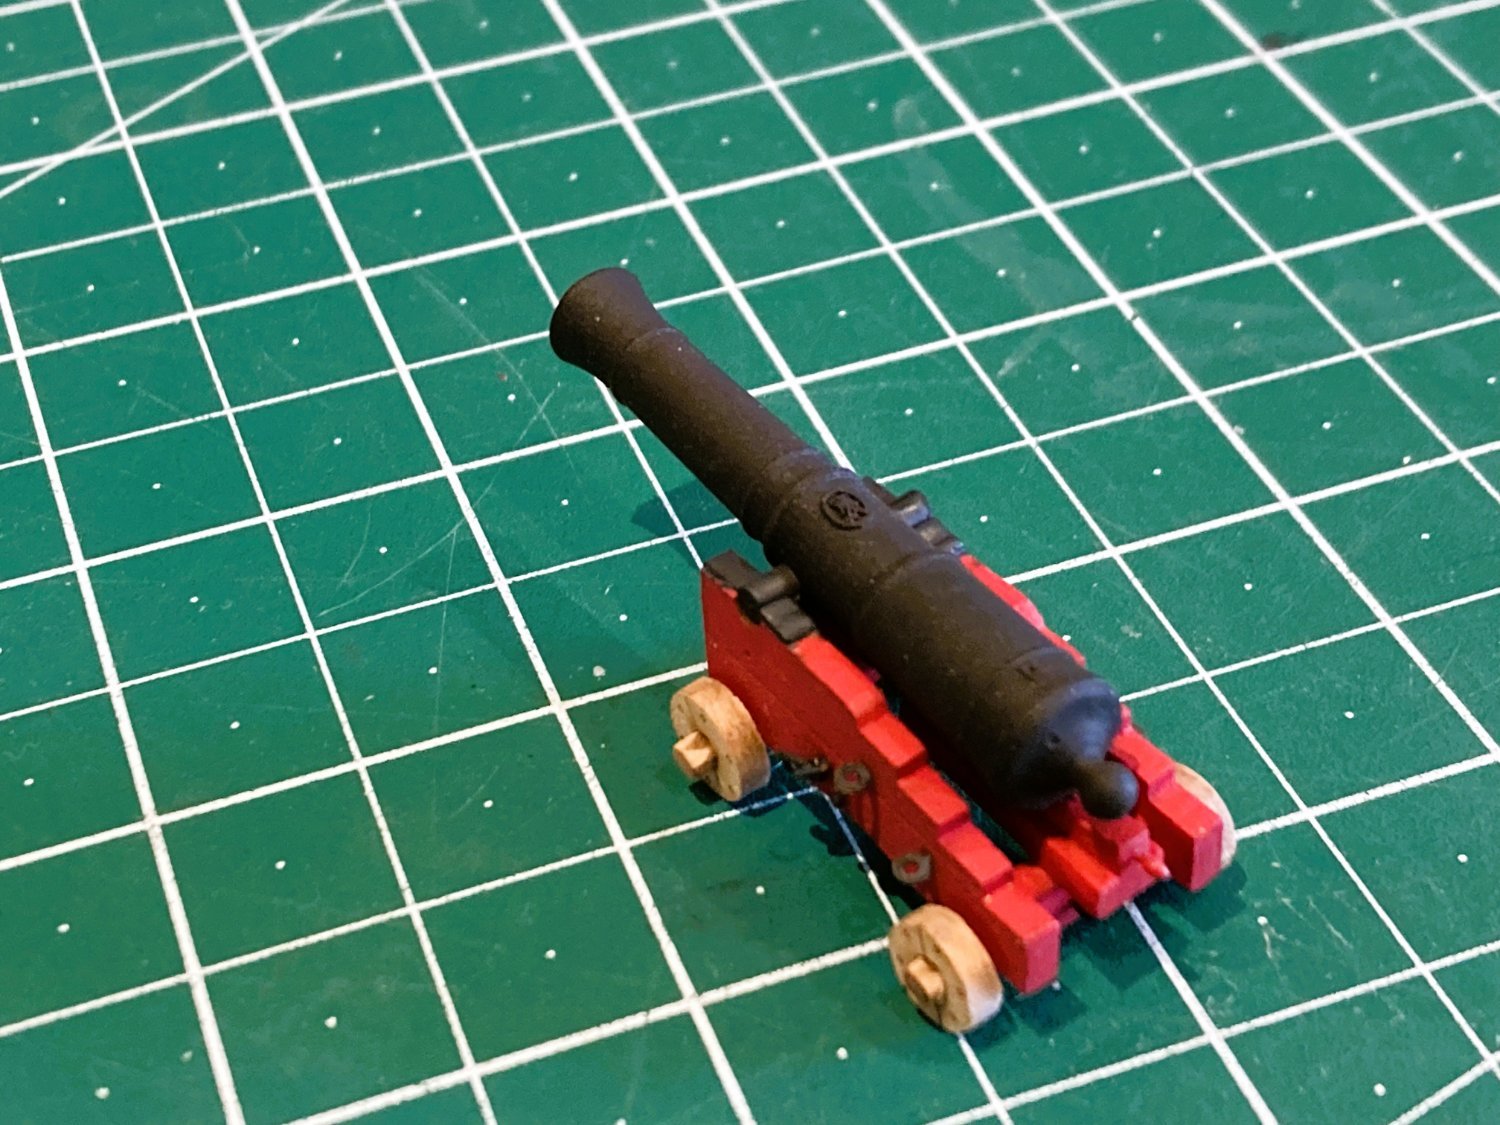
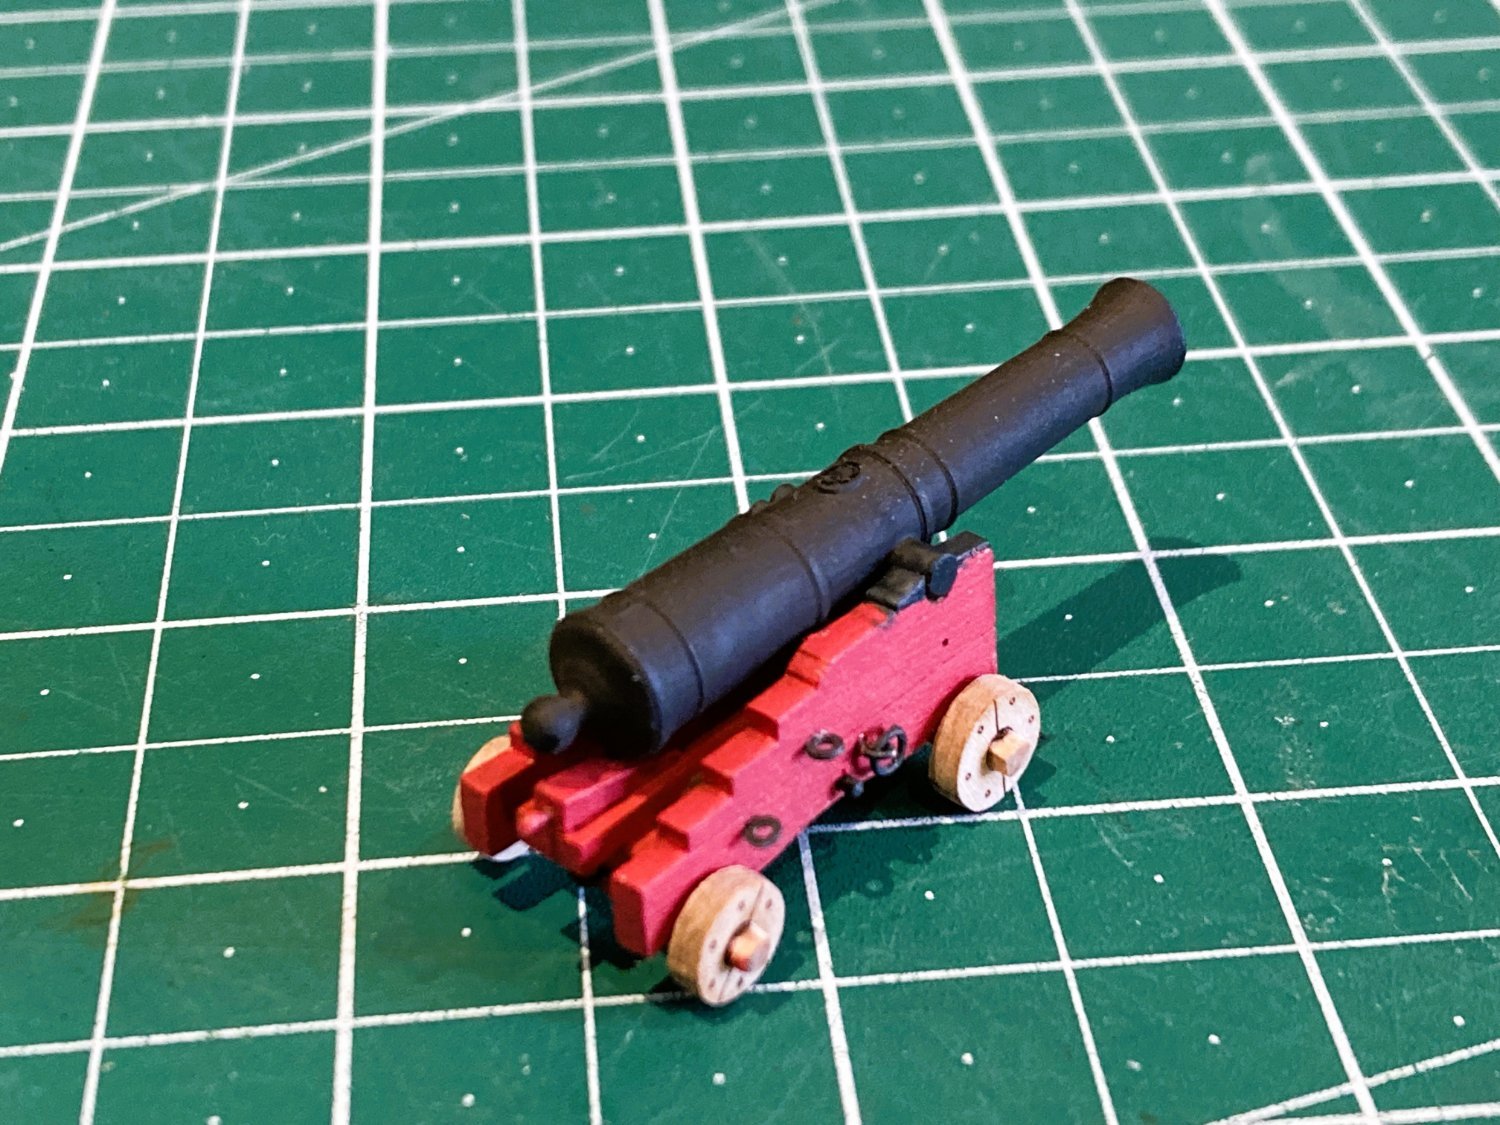
Picking thro’ my scrap box I came across this little fellow, a six pounder carriage from the cutter Alert.
Hard to believe these two are the same scale.
Movin’ on.
B.E.
26/08/2023
-
-
Thank you Nipper, I do enjoy taking the photos and writing up the log, a diversion from the more repetitive tasks of a build. Being long retired I can devote as much or little as I fancy, and with our poor summer this year, I have been grateful for the interest.
Cheers,
B.E.
-
Post Sixty-seven
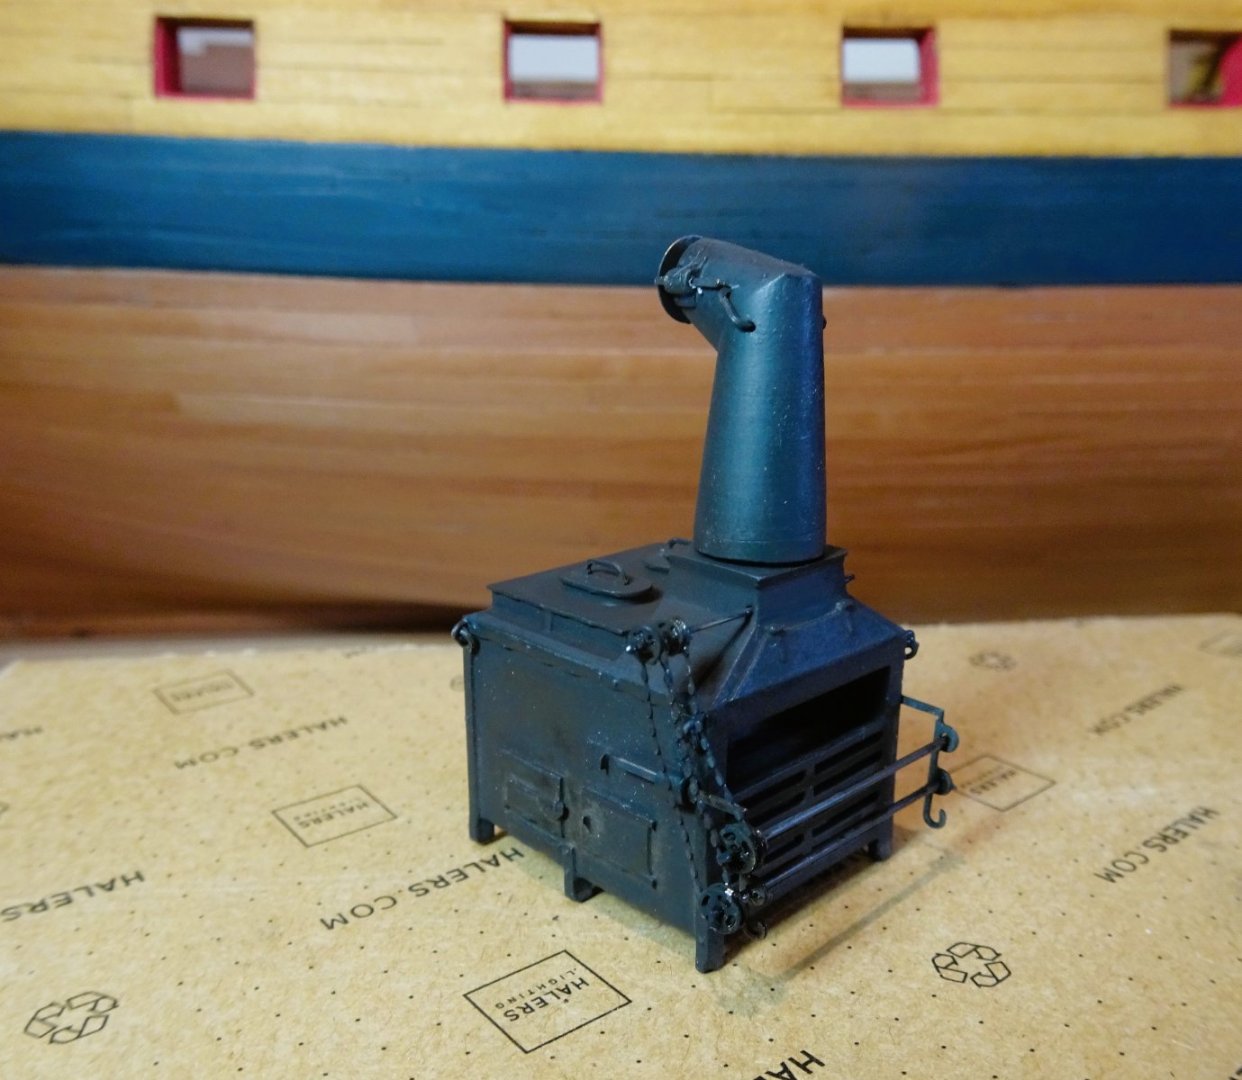
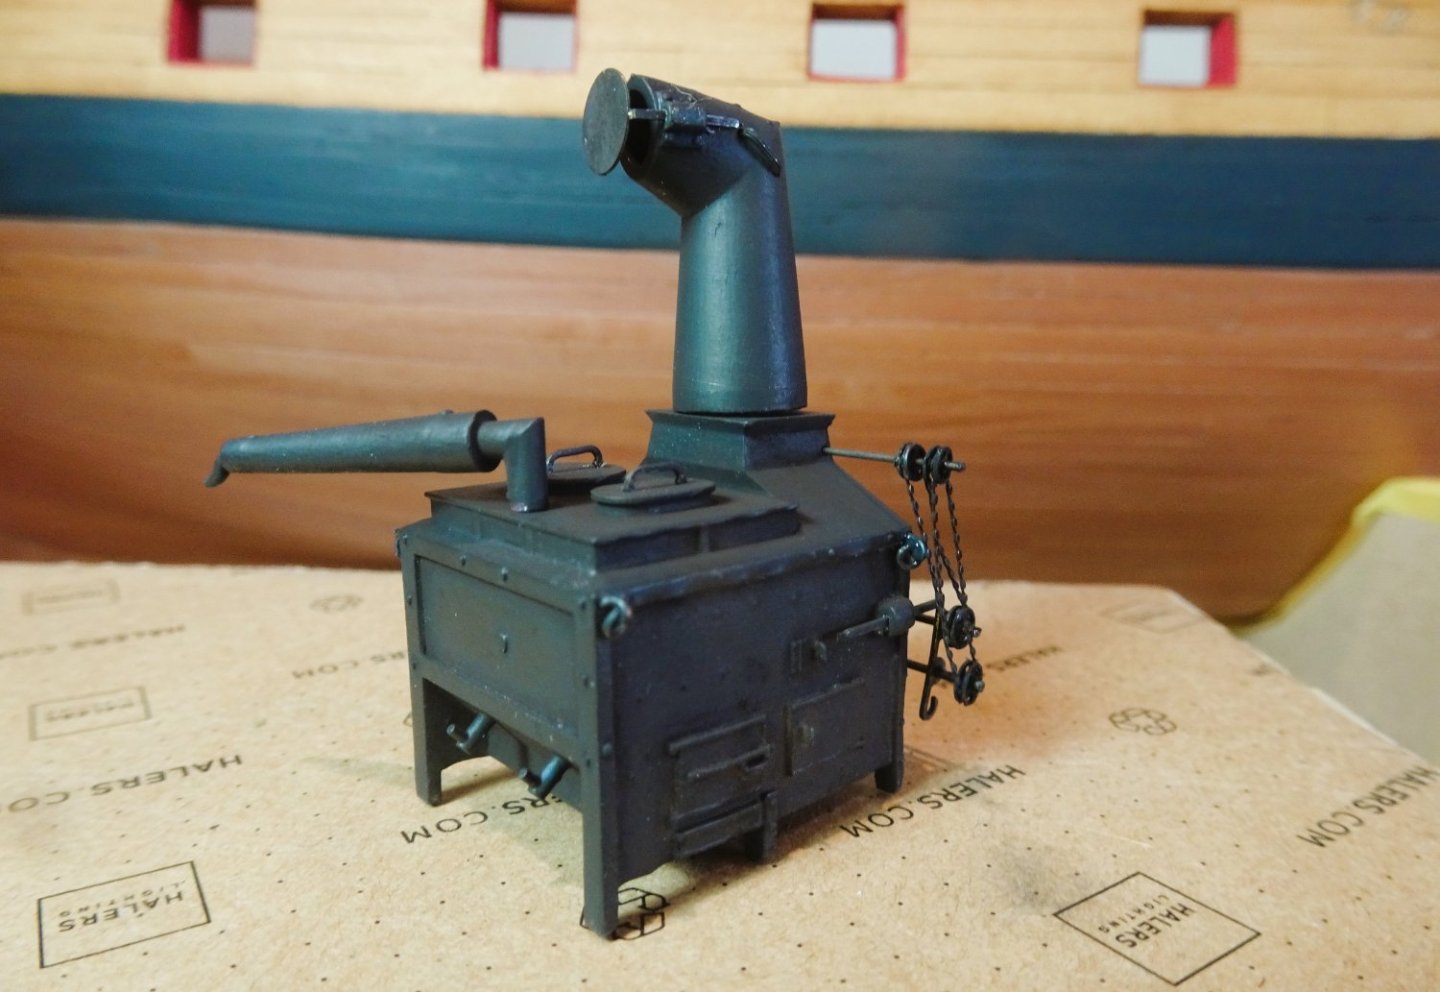
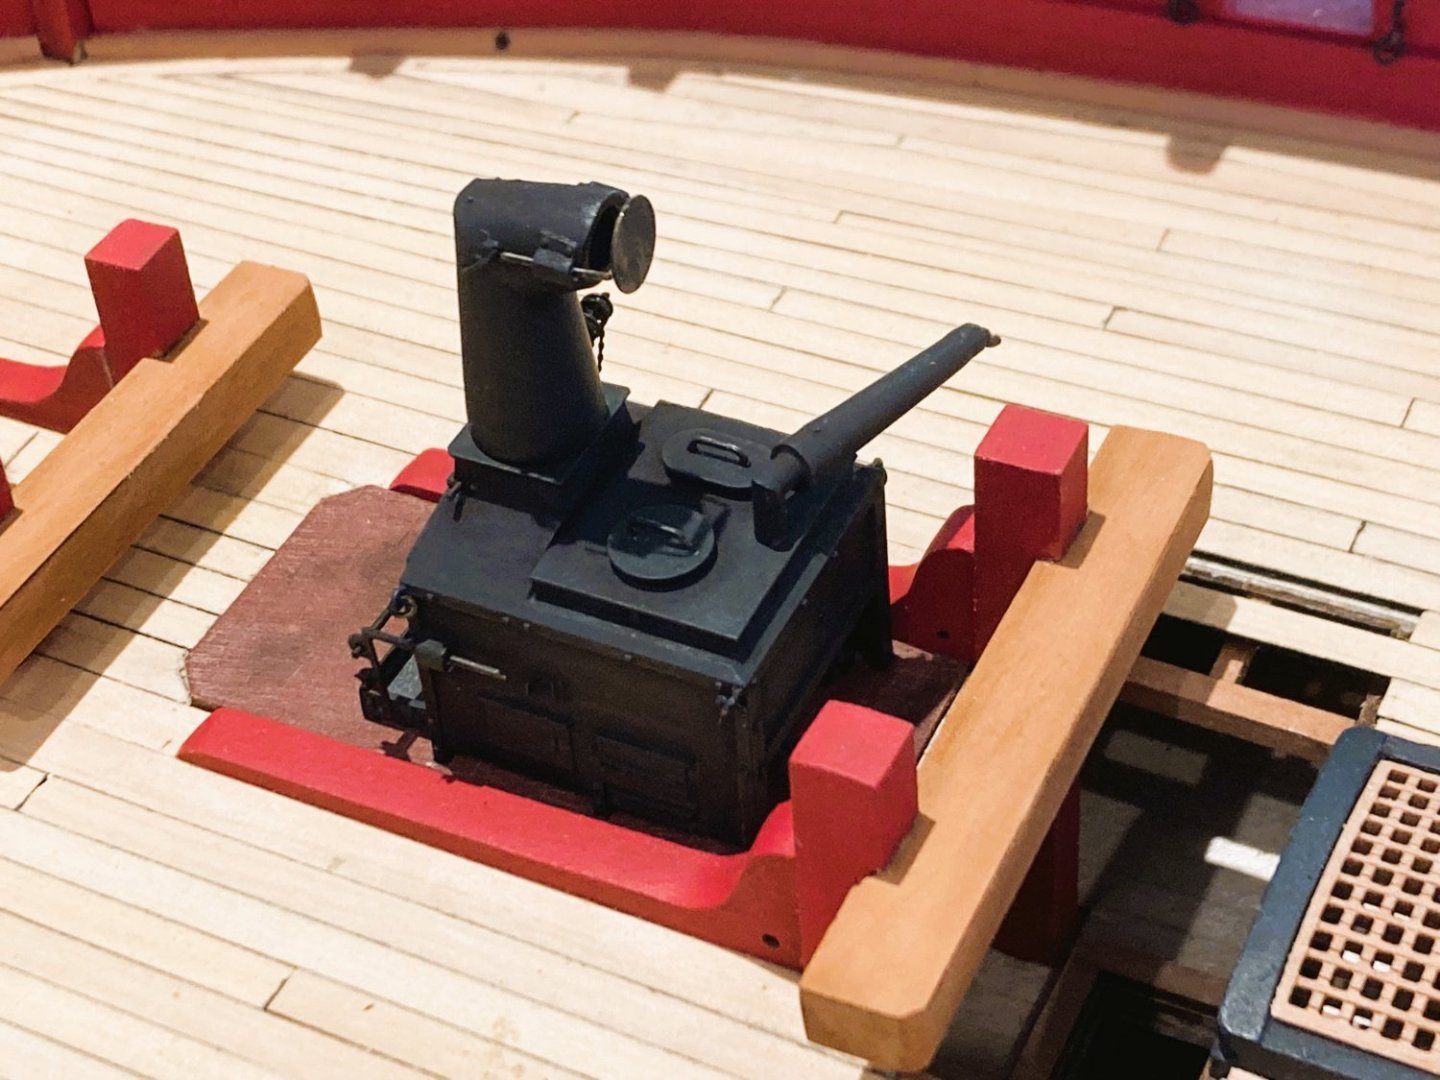
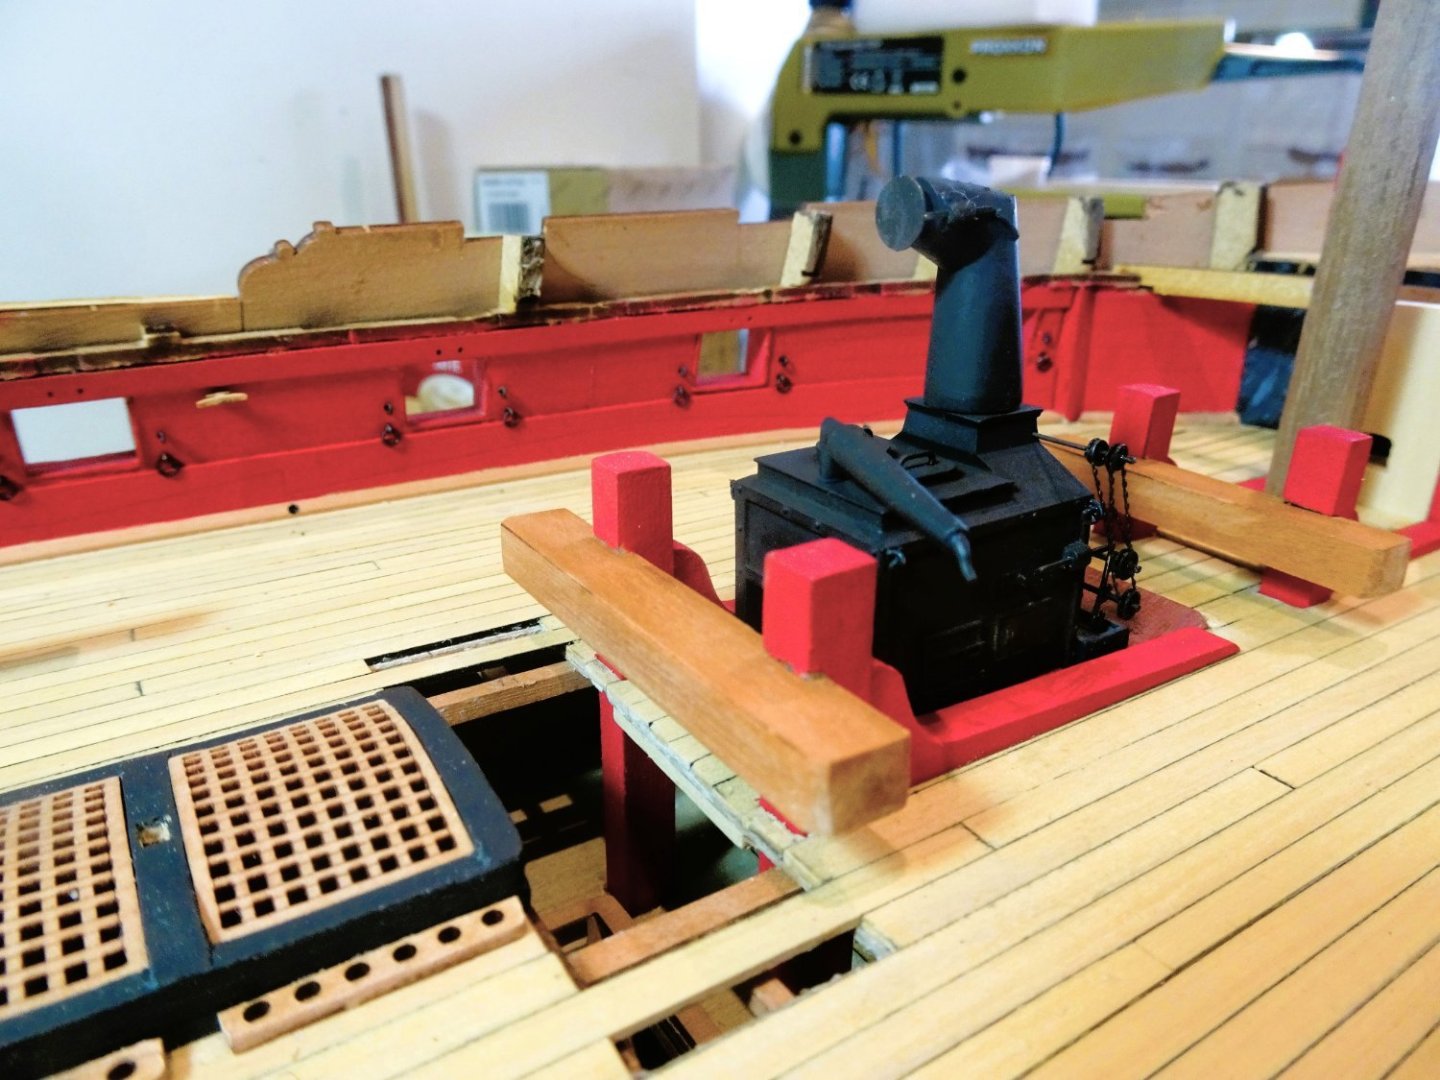
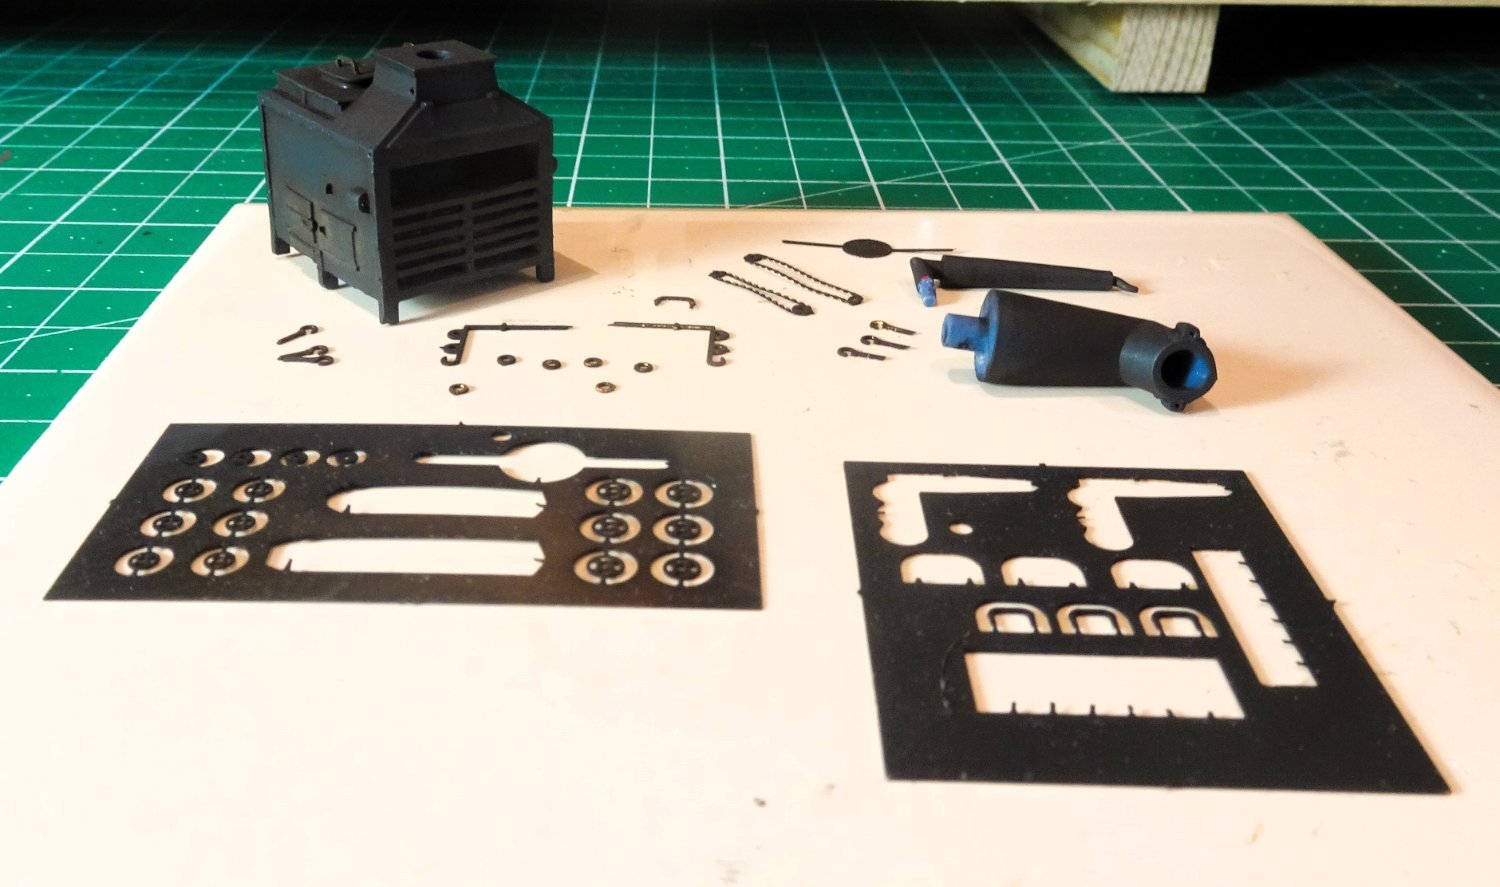
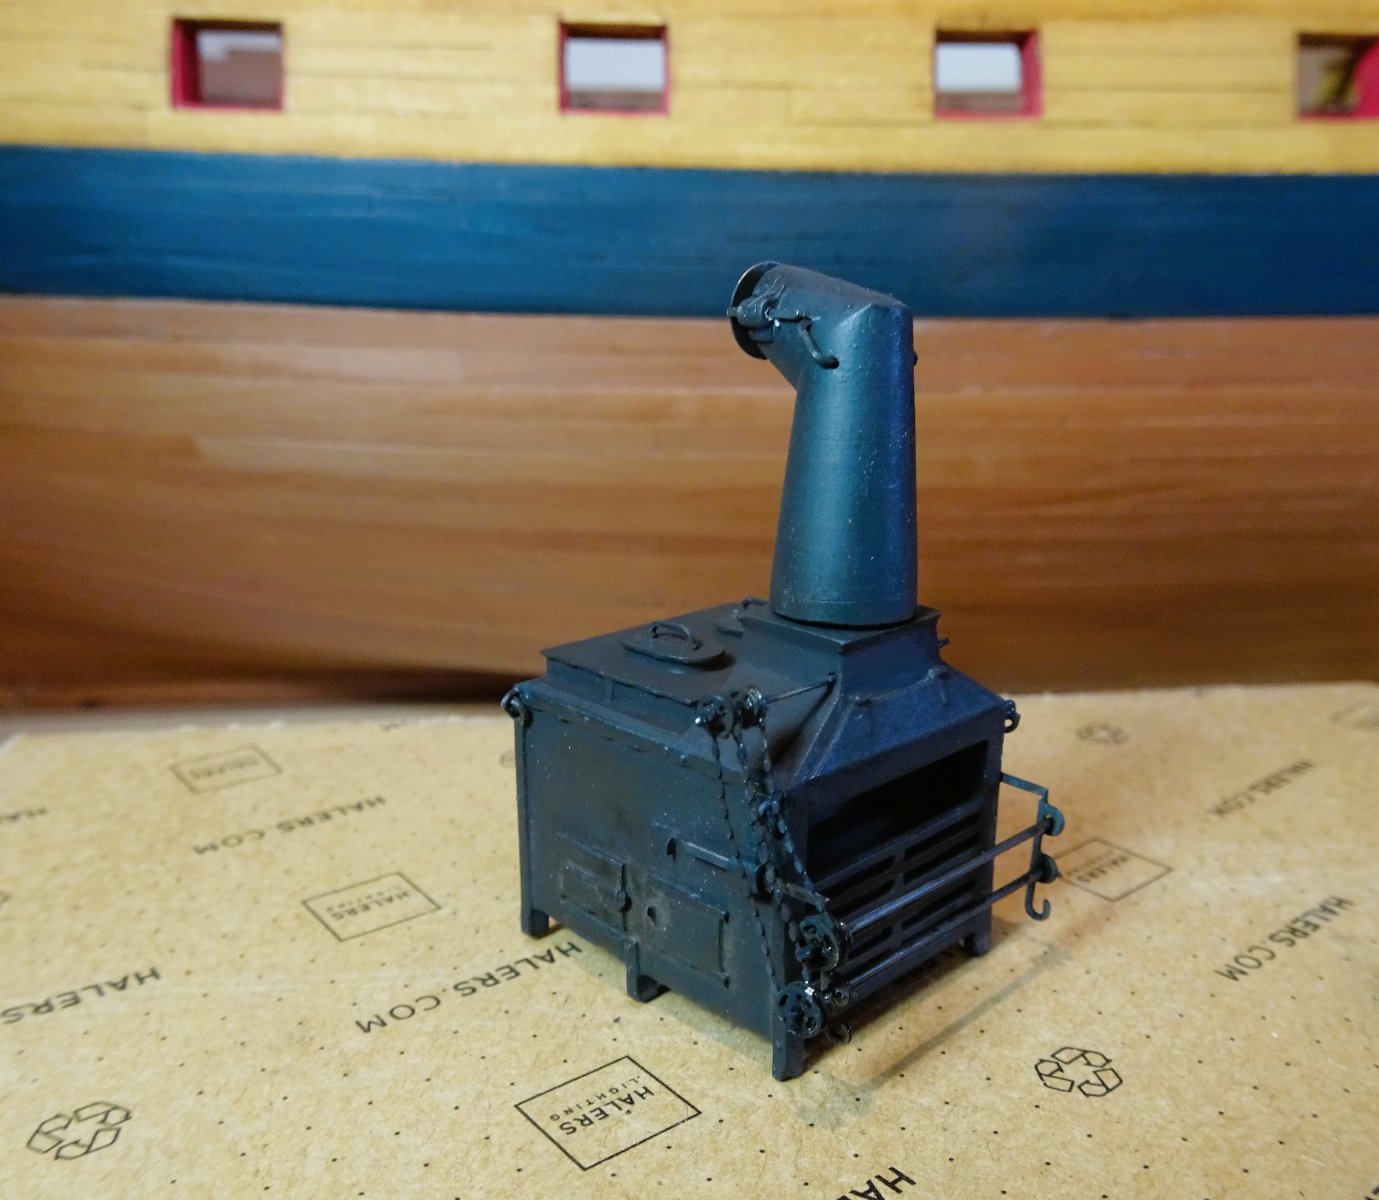
The Stove.
The Brodie stove is a nicely detailed resin model complete with chimney, condenser, and drip tray. Additional etch is provided for detailing such as the spit chains, lifting rings,
I have constructed stoves using a wood core and etch panels, (Sphinx), all wood versions (Syren) and as with the beautiful Syren version this is all about painting and weathering to get a realistic look.
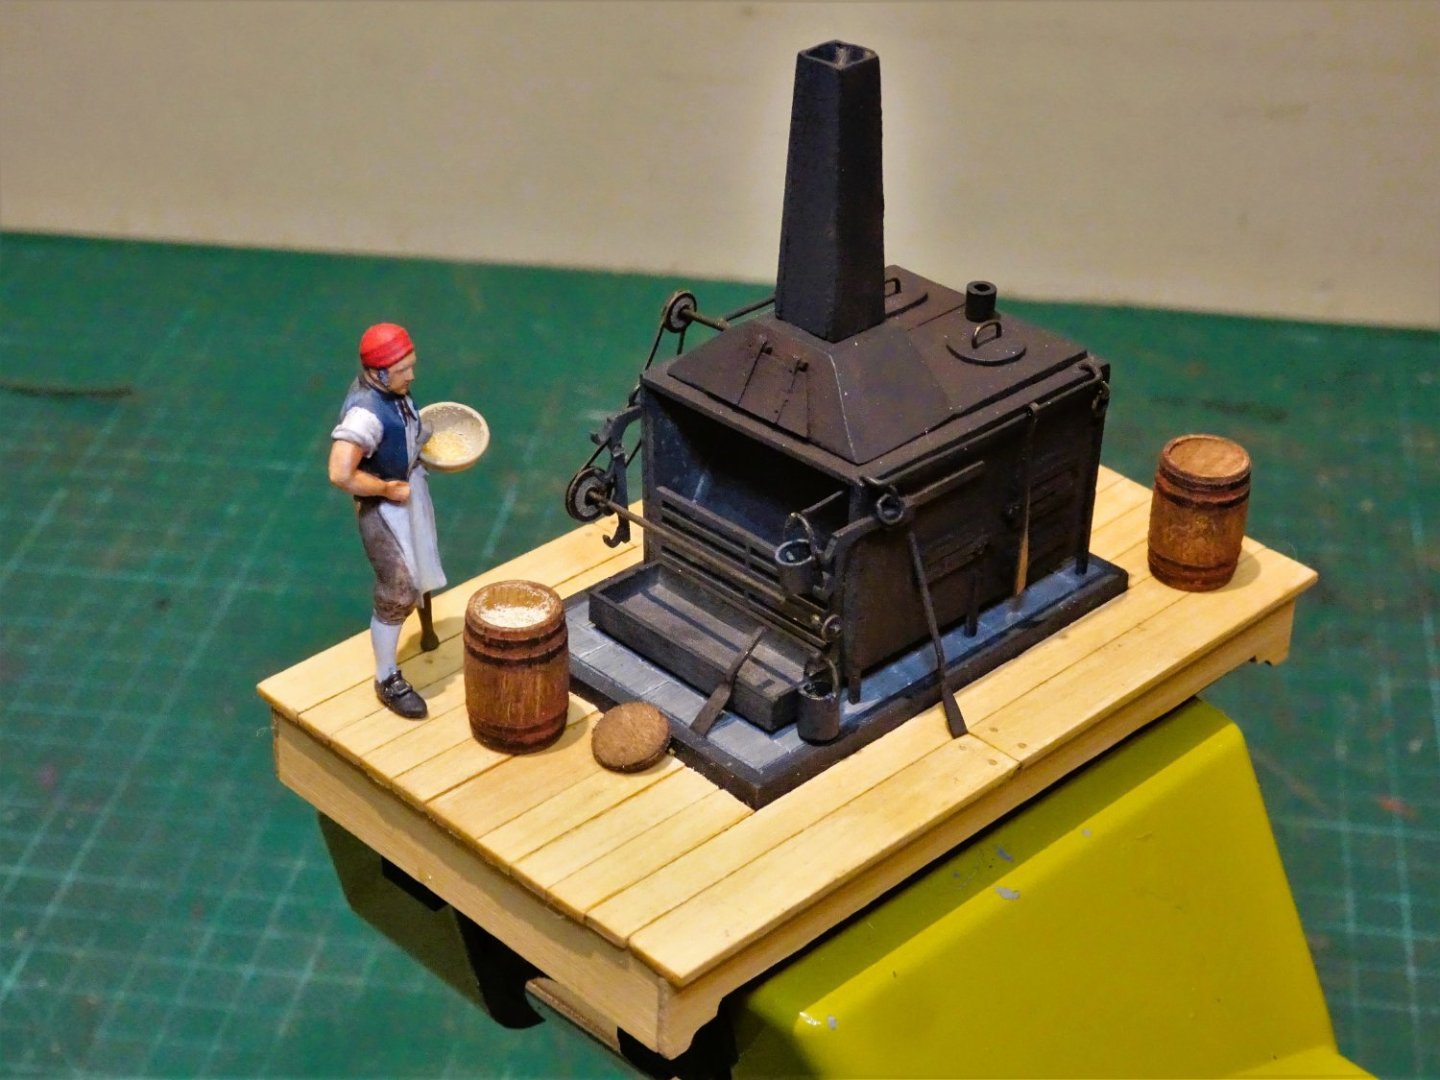
9150
The 'Syren' Stove at 1:48 scale, with the 'Vanguard' Cook, a perfect combination.
I enjoy doing this sort of thing, and it makes a pleasant change from the repetitive elements of the build.
I am using Vallejo Black/grey for the base coat followed by weathering powders.

1852
The etch is chemically blackened before fitting.
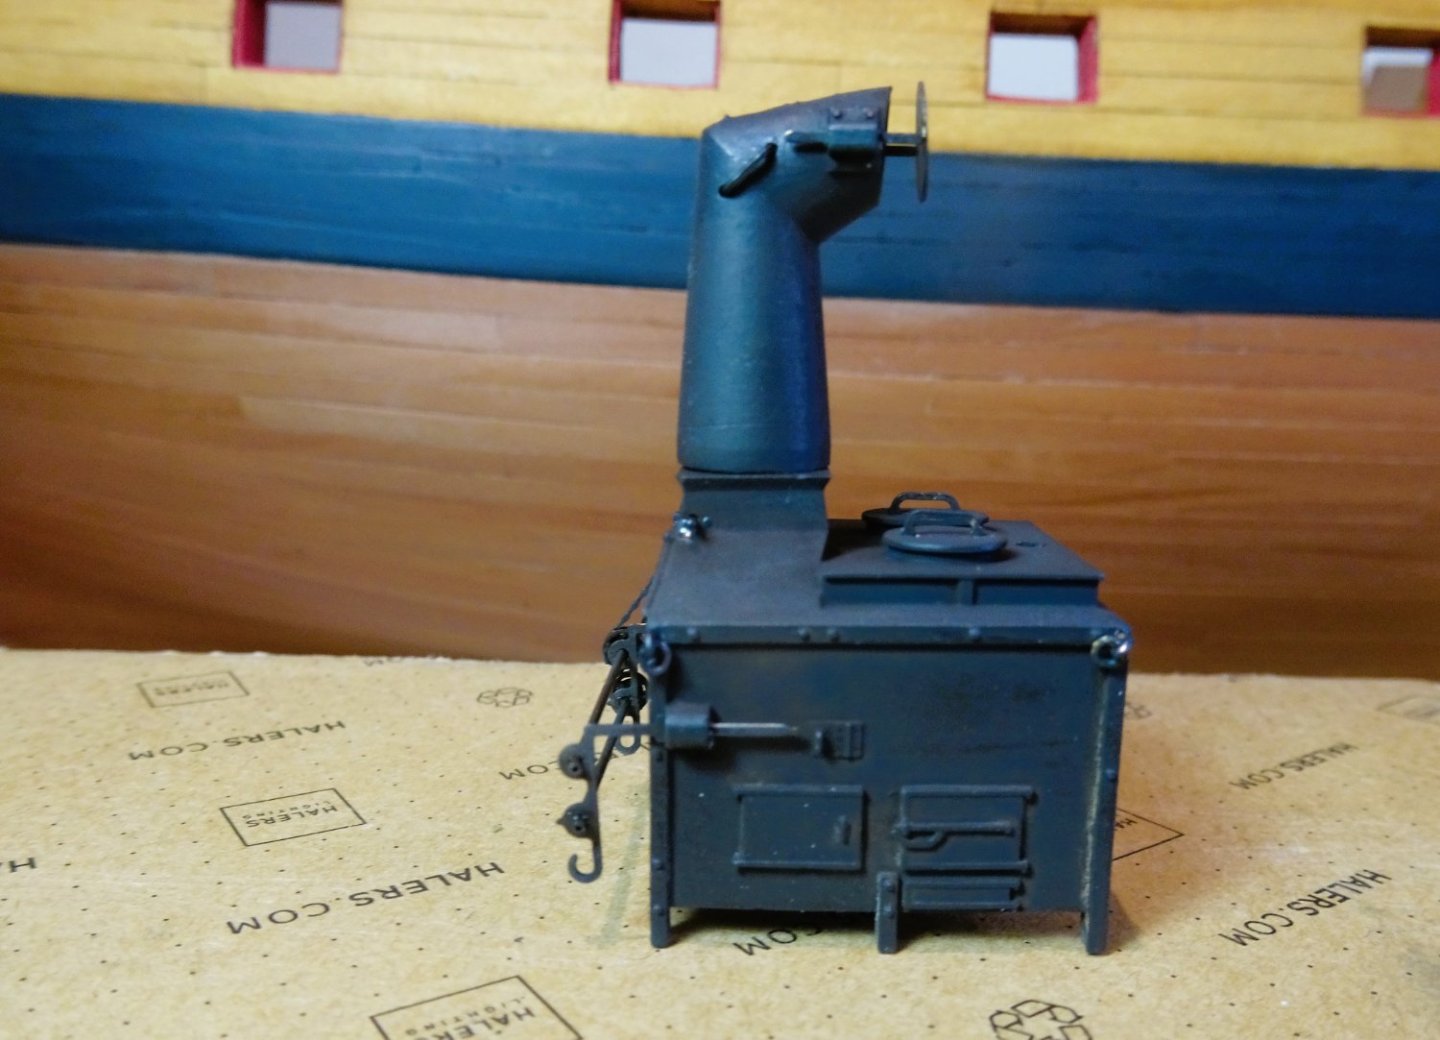
When it came to the rods for the spit I couldn’t quite relate to the given sizes 0.8mm and 0.4mm, all I could find in the kit box was 1mm and 0.7mm.
I found 0.6mm suited best for the upper chain rod, and I used 0.7mm for the two lower rods.
1854
Assembly of the chain mechanism is a delicate business that tested my eyesight to the limit, but the result is excellent particularly at 1:64 scale, kudos to Chris for the design.👏
1858
I didn’t want to over-weather the look. A light touch using Black, dark brown, and a touch of slate grey to represent ash marks, I thought sufficient.
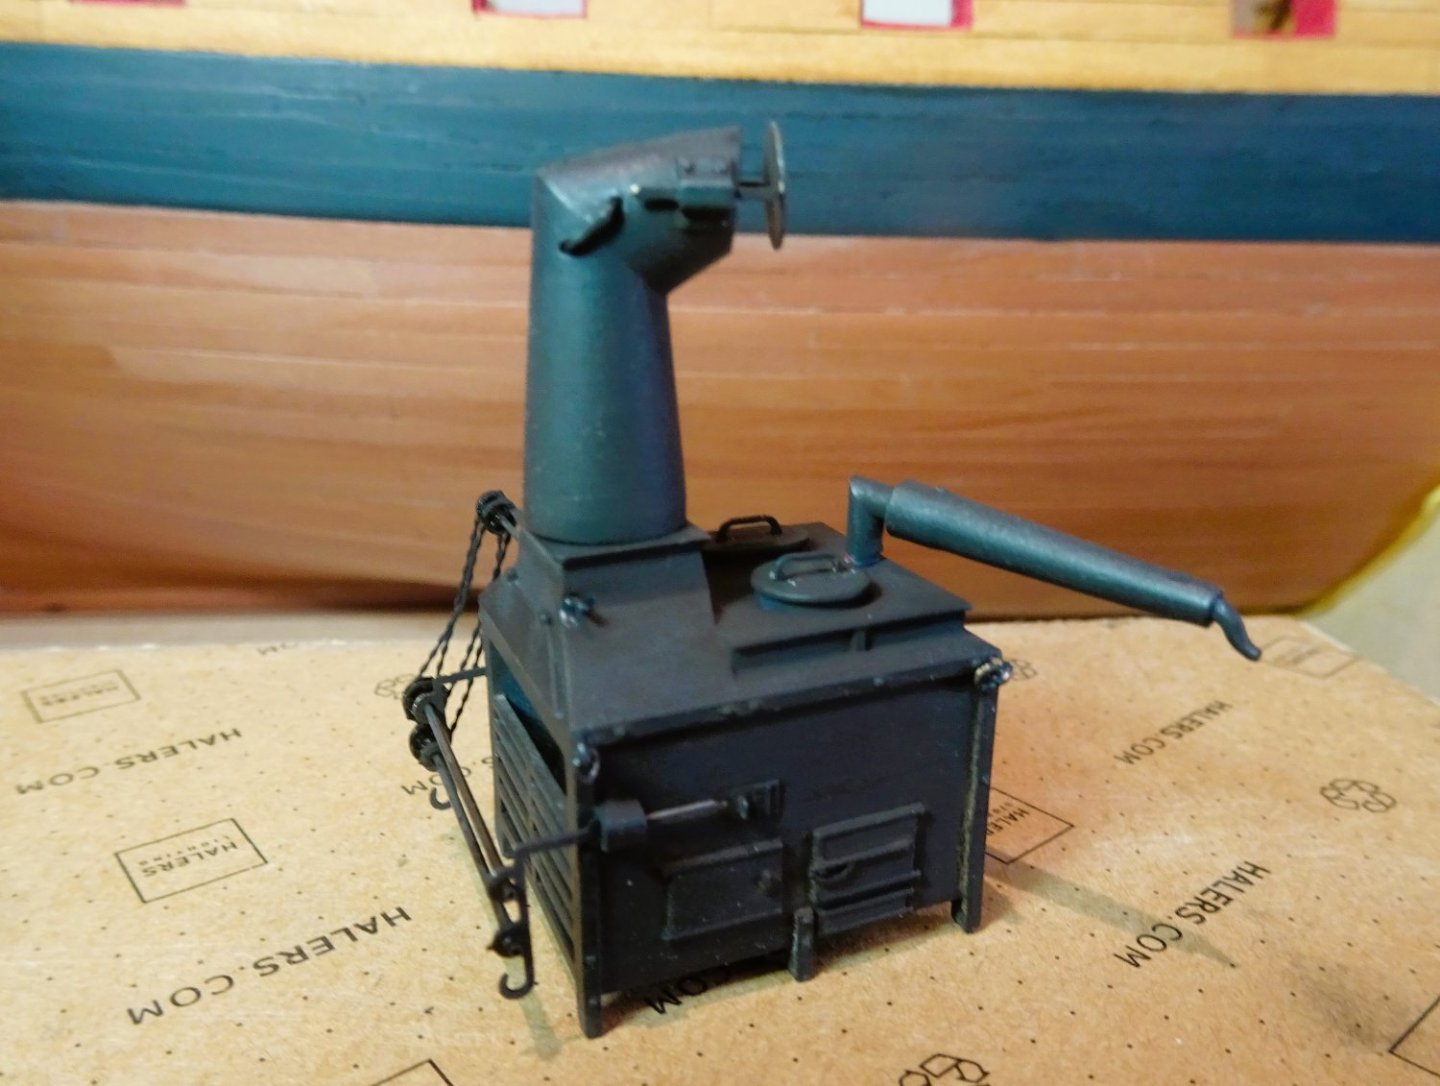
1859
The sharp eyed may notice something missing from the condenser jacket.
Wearing the wrong specs I mistook the water inlet and overflow pipes for sprue and cut them off.😒
I wonder if the condenser should even be shown as ‘iron’.
I note that on the Victory Brodie, the condenser is shown as made of copper, which sort of makes sense given the purpose.
I may re-visit this.
1862
One other thing that caught my eye were the taps for the boiler drain. Something very Victorian about the cast valve taps (Parts BS8), so I omitted them.
1143
1866
I did think about adding a few whistles and bells to the stove such as rails and swinging arm to the range grate, but decided it was not worth the effort given the scale and ultimate view.
Onwards,…
B.E.
24/08/2023
- rybakov, mgatrost, chris watton and 20 others
-
23
-
Post Sixty-six
Deck fittings cont’d
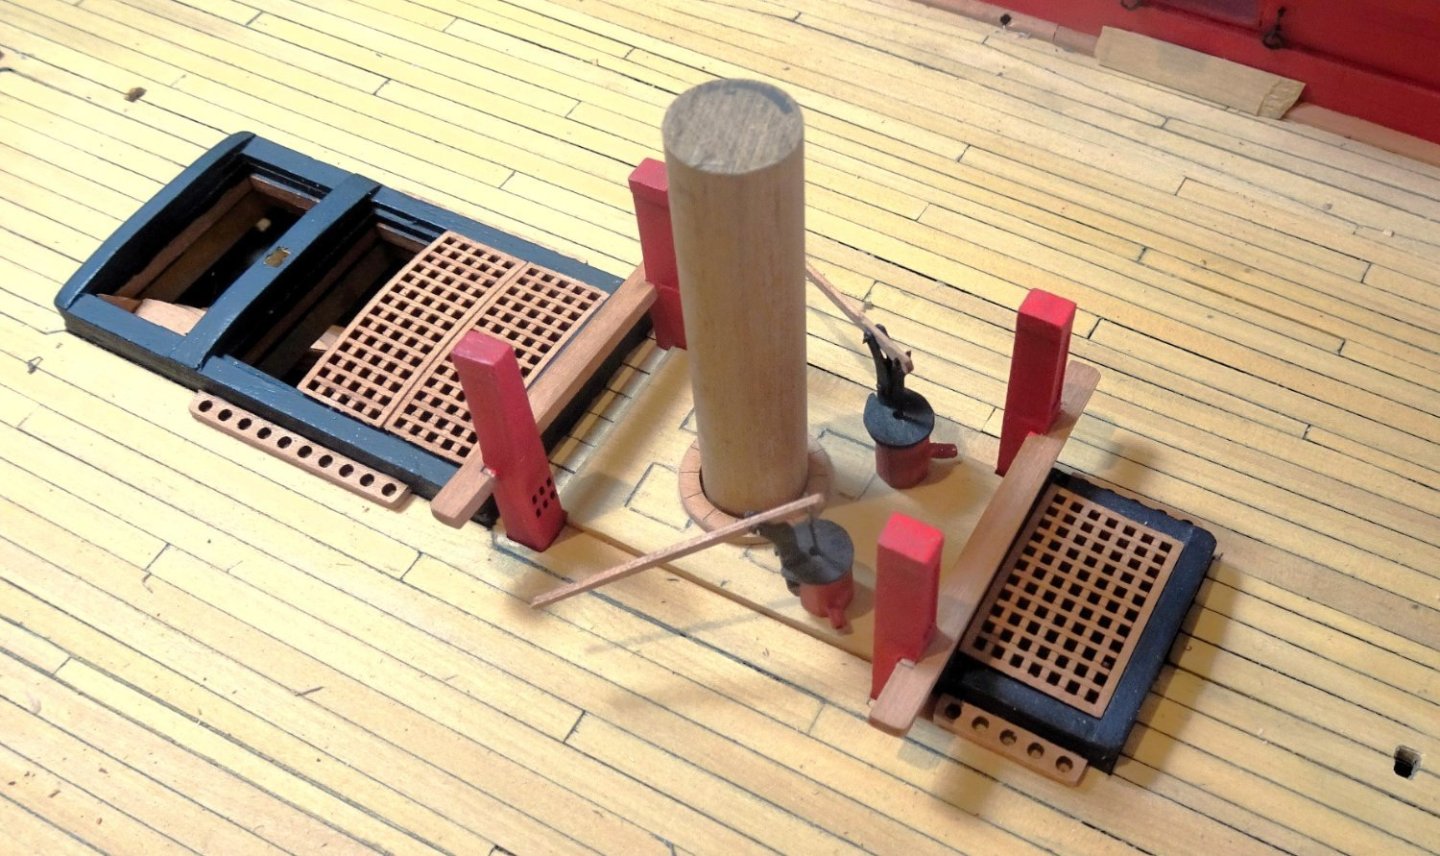
Pumps.
The Elm tree pumps are made up using octagonal shaped sections and laminated brass etch for the iron work.

1831
This little assembly project is surprisingly time consuming.
The pump sections are tricky little beggars to char clean whilst maintaining a sharp octagonal profile.
The etch laminations were secured with ca which mars the surface for blackening.
It took repeated scraping of the etch to remove ca overspill to get a uniform cover.
1844
1150
One thing missing from the pumps is the discharge pipes which are easily added.
I used short lengths of brass tubing around 1.5mm ø
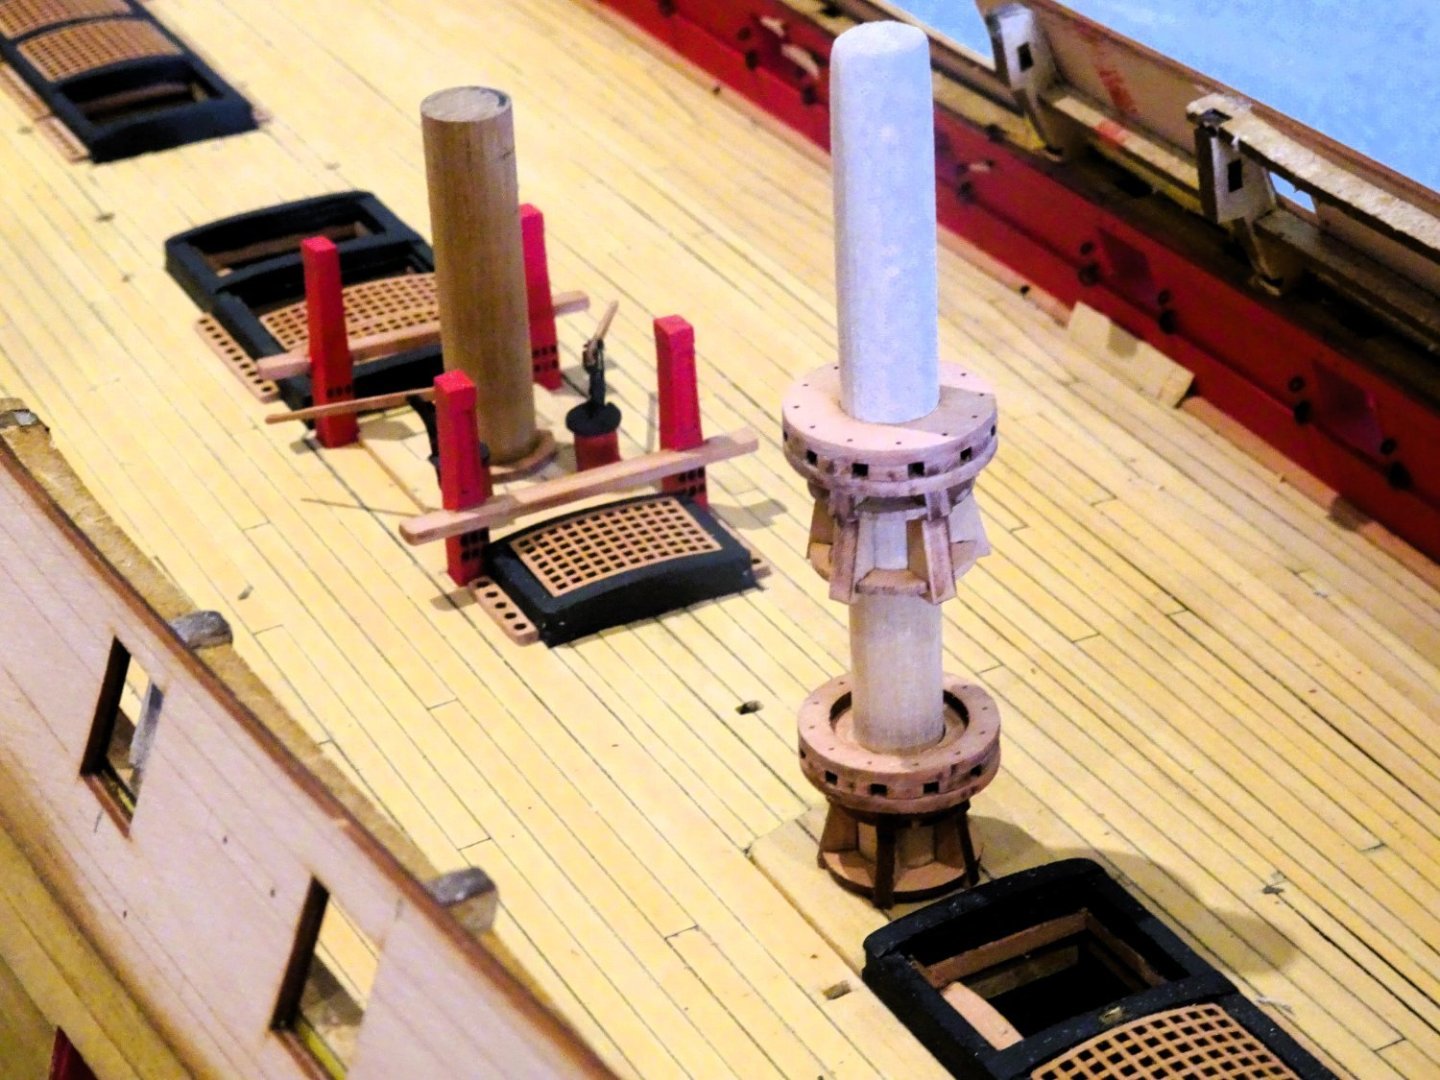
Capstan(s)
I made up both Lower and Upper Capstans, and they are a delight to assemble with precise and clean fitting.
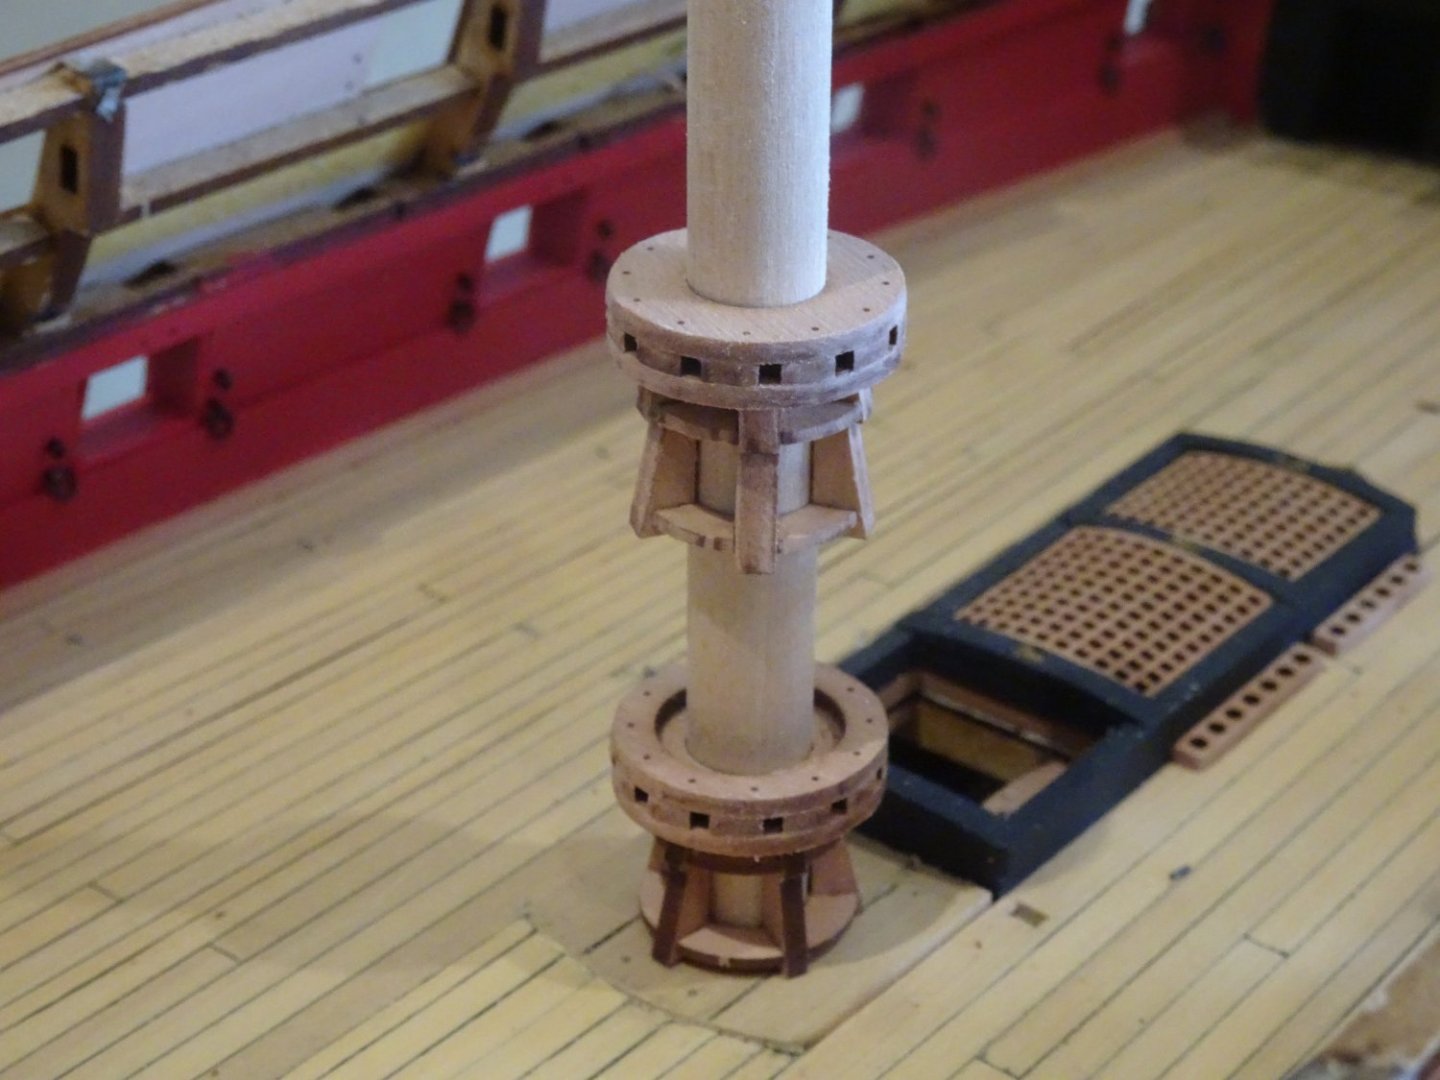
1839
One thing I would have liked in the kit is an etch or laser board ring to represent the iron reinforcing ring around the trundle head top.
.thumb.JPG.d6803583318f282be473b2bac21d3374.JPG)
3534(2)
This shot of the Syren Capstan at 1:48 scale shows what I mean.
1840
I haven’t checked but I hope the Upper capstan follows thro’ on the Qtr deck and aligns with the barrel. 🤞
I made a small error in assembling the Capstan, the knowledgeable will spot it, the not so, perhaps not.
The Capstans will be fettled and painted later.
The final and most complex item is the Brodie Stove which is up next.
B.E.
23/08/2023
- jpalmer1970, Glenn-UK, allanyed and 18 others
-
21
-
-
Maintaining copper is a tricky business during the constant handling during the remainder of the construction. I suppose that unless the copper is damaged, it could be re-treated later.
I seem to recall that on my Pegasus build I used cling film to cover the lower hull taped to the wale with varying success.
I wonder, could you construct a cut out polystyrene cradle to rest the hull in that would allow you to to turn the hull about without contact.
The build board I made to hold my Indy keeps her secure for most activity, and I don't need to handle the hull. The downside is that it is a bit of a beast to move about and there will be times when I need to transfer her to the keel clamps to get specific angles for better access.
B.E.
- mtaylor and Old Collingwood
-
2
-
Getting enjoyment from the build is the main thing Kevin, without that a build is unlikely to be finished.
I like the look of your Indy, and it will be interesting to see a fully masted and rigged version.
I'm sorry you won't see that on my version, which will have stump masts only, if any masts at all.
ps. You haven't forgotten to fit the lower finishings of the Qtr galleries have you?
Regards,
B.E.
- mtaylor and Old Collingwood
-
2
-
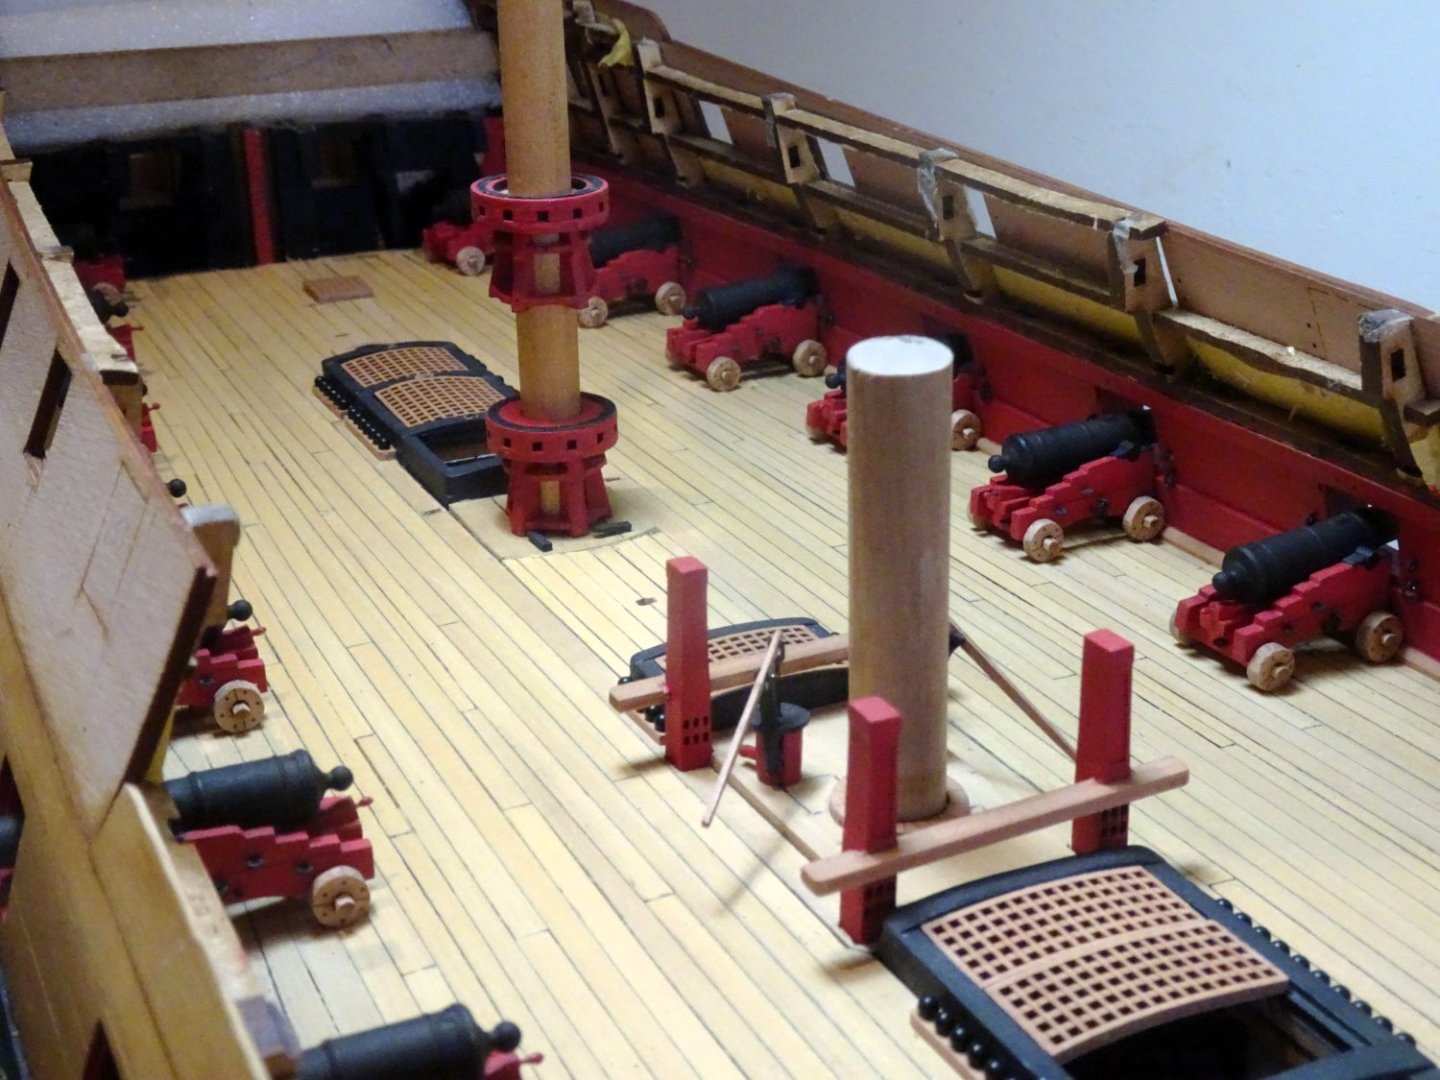
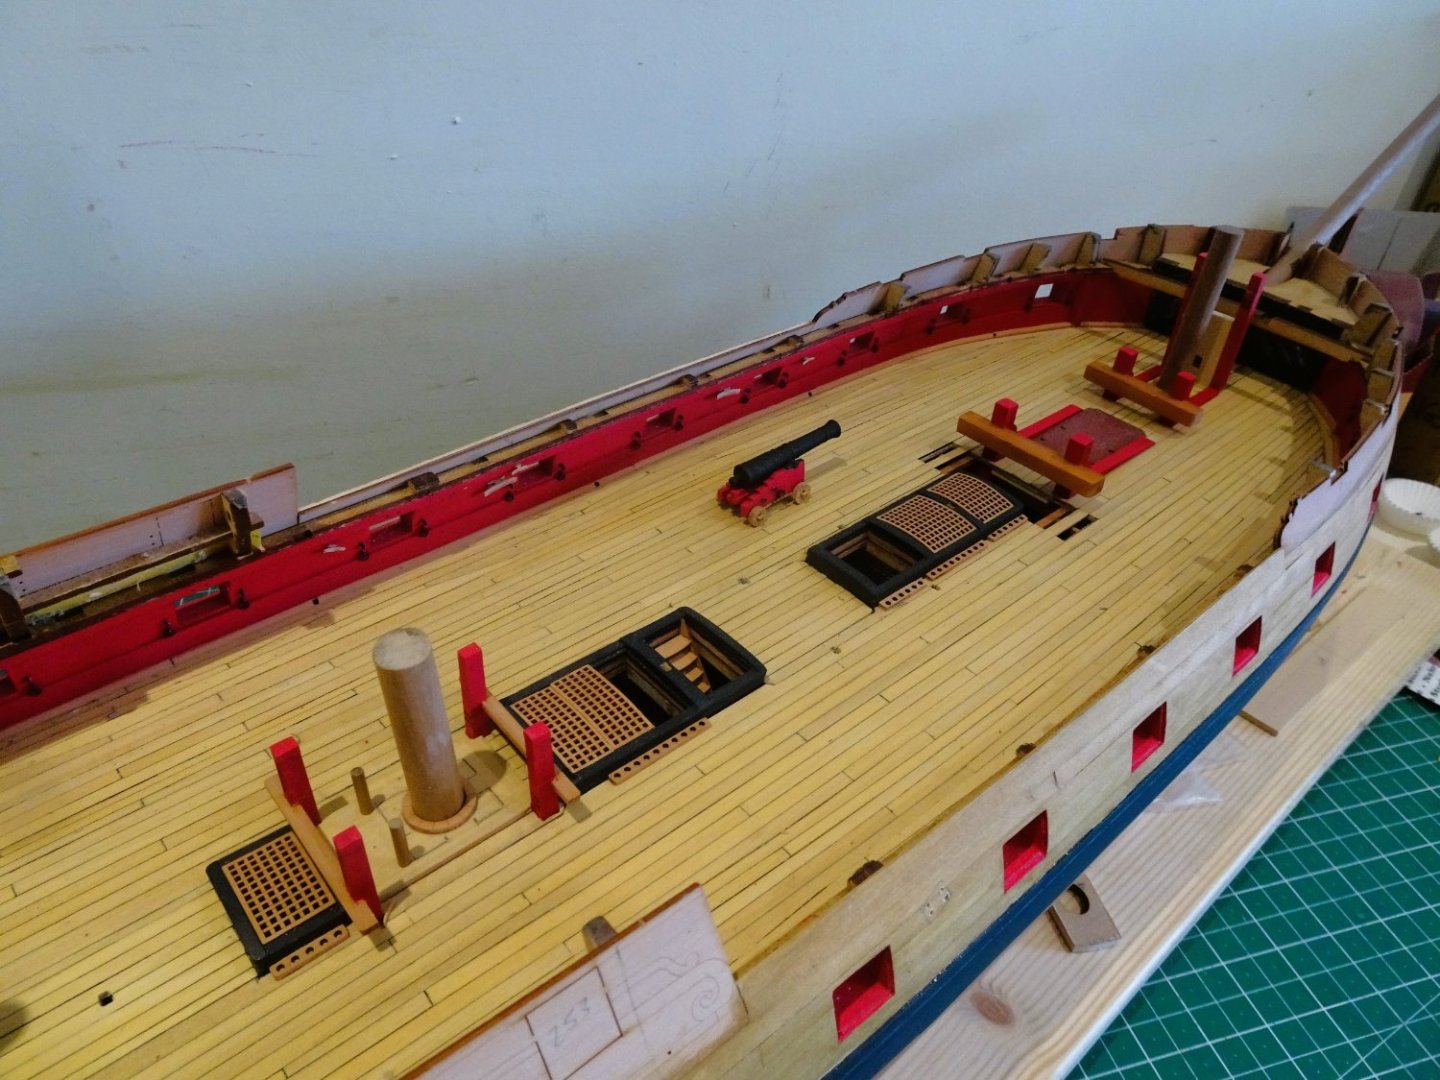
Post Sixty- five
Bulwark and Centre line fittings.
The bulwark fittings are attended to next; repetitive, and not the most exciting aspect of a build.
1798
Fifty-two ring bolts to make-up and blacken.
1804
Boring as the process is, I think ring bolts look so much better than simple eyebolts and are the proper connection for the breeching ropes.
Cleaning out the bulwark receiving holes is an awkward exercise using a 0.8mm drill and pin vise. Because of the close proximity to the deck I am careful not to transfer any blackening from the iron work to the deck during fitting.
1806
A set of cleats are fitted along the bulwark to take various lines, the larger ones for the tack/ sheets.
A set of additional holes are required to be drilled thro’ from inboard to outboard. This represents what would be the fixed blocks, to take the sheet and tack lines.
1811
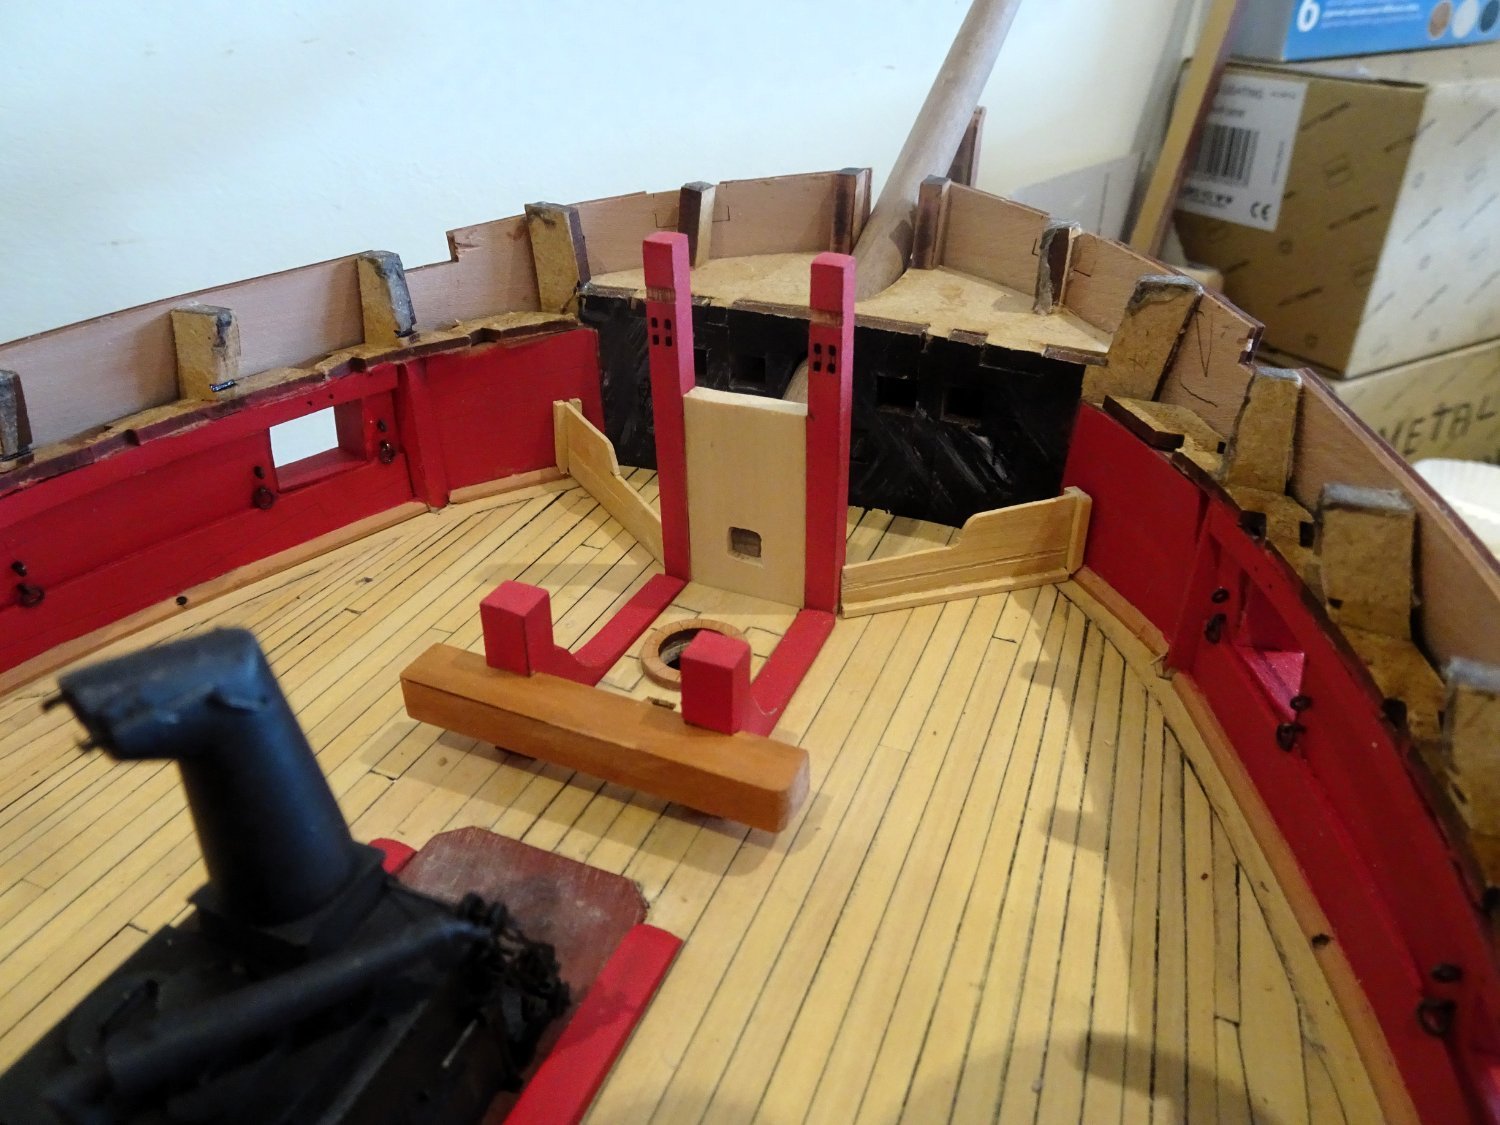
The Riding Bitts went together beautifully, the Main bitts less so.
1816
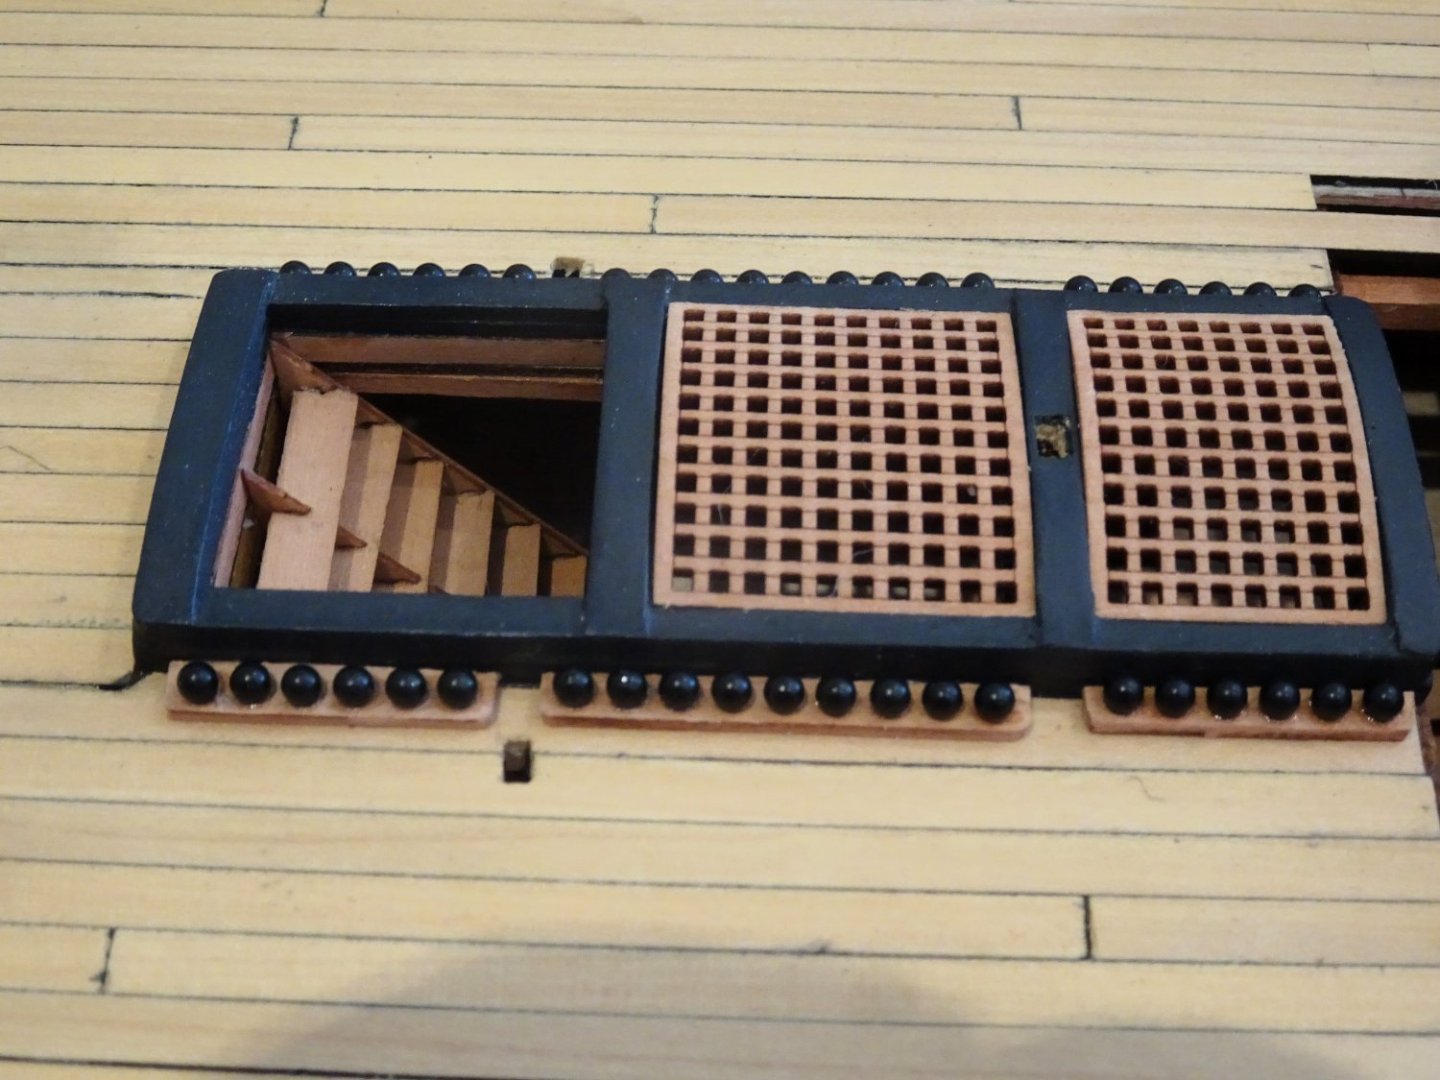
As can be seen here my modification allows for a view down thro’ three deck levels, to the Orlop, giving the impression that all deck are fitted out.
The slots of the cross pieces to the Main Bitts were a loose fit over the uprights leaving a gap of around 0.7mm. Not too much of a problem if the item is to be painted, but I intend to leave the cross pieces unpainted.

1807
I used small pieces of Pearwood strip to resolve the issue.
1808
The posts will be painted red, and the cross pieces left natural.
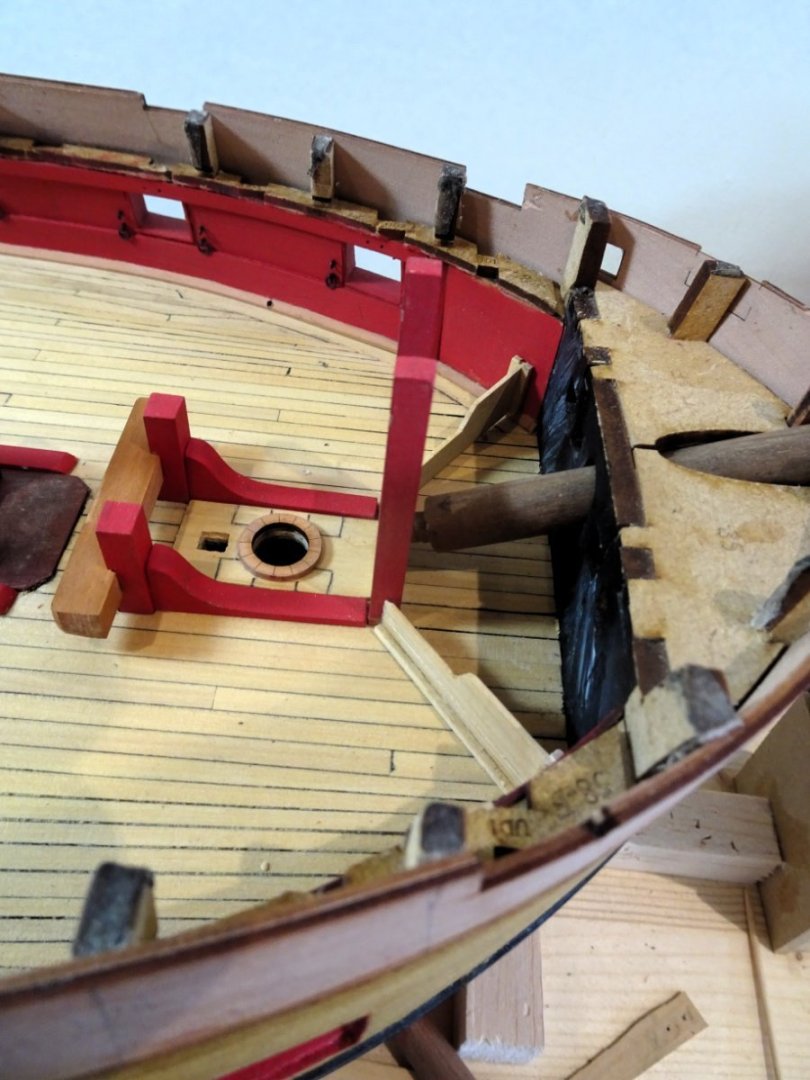
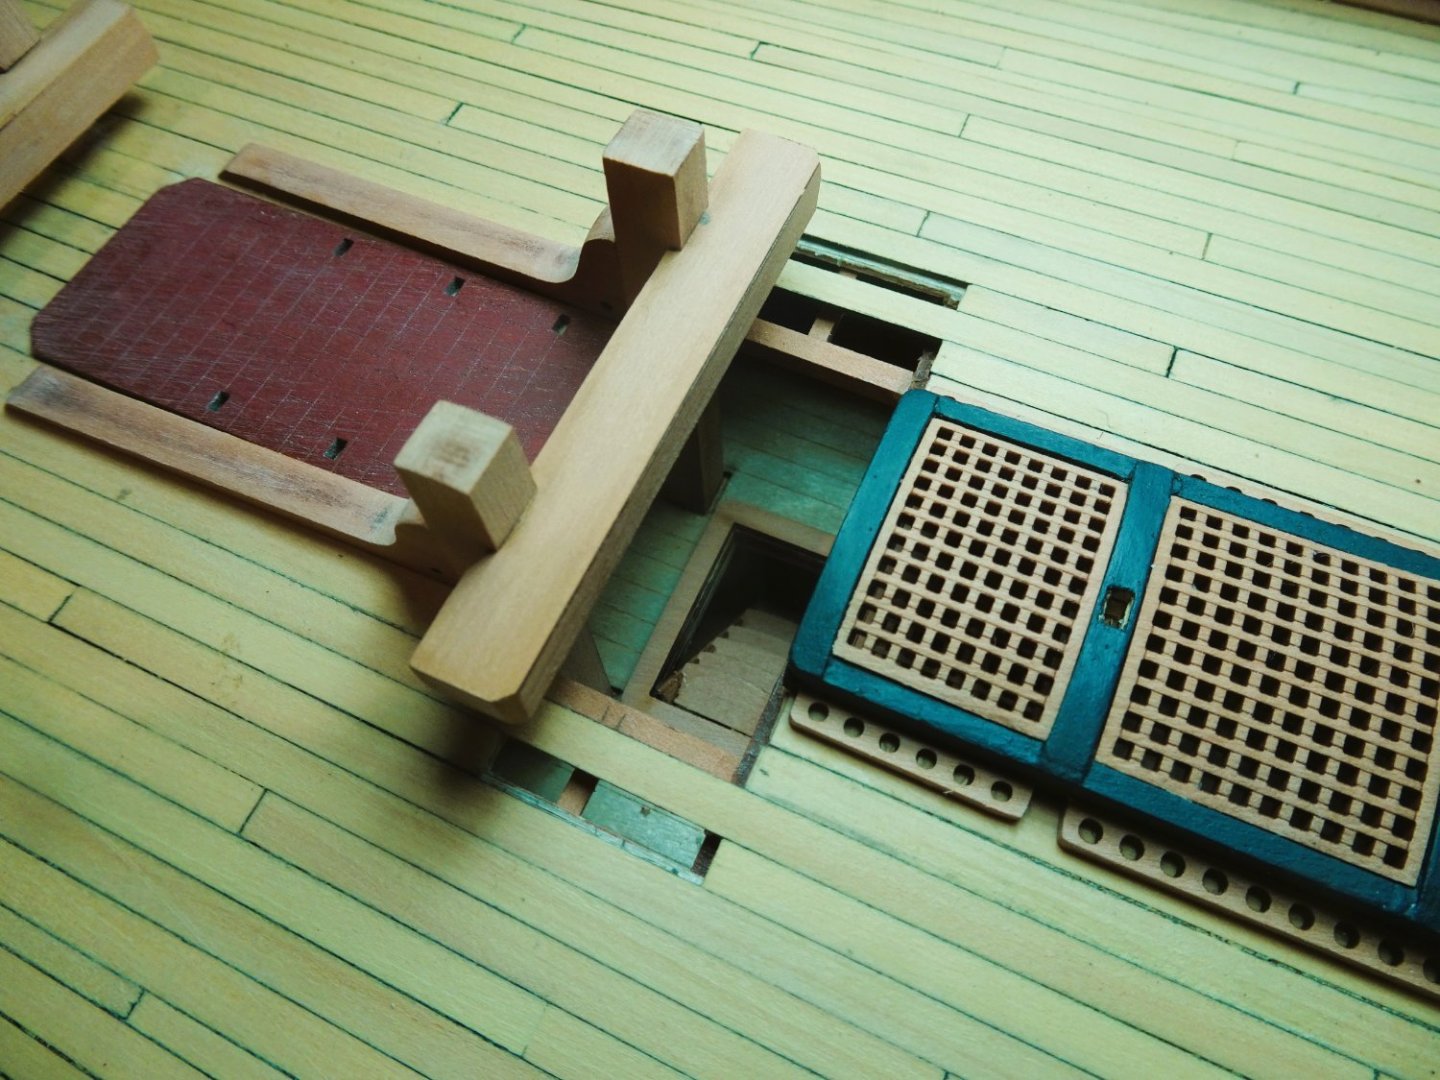
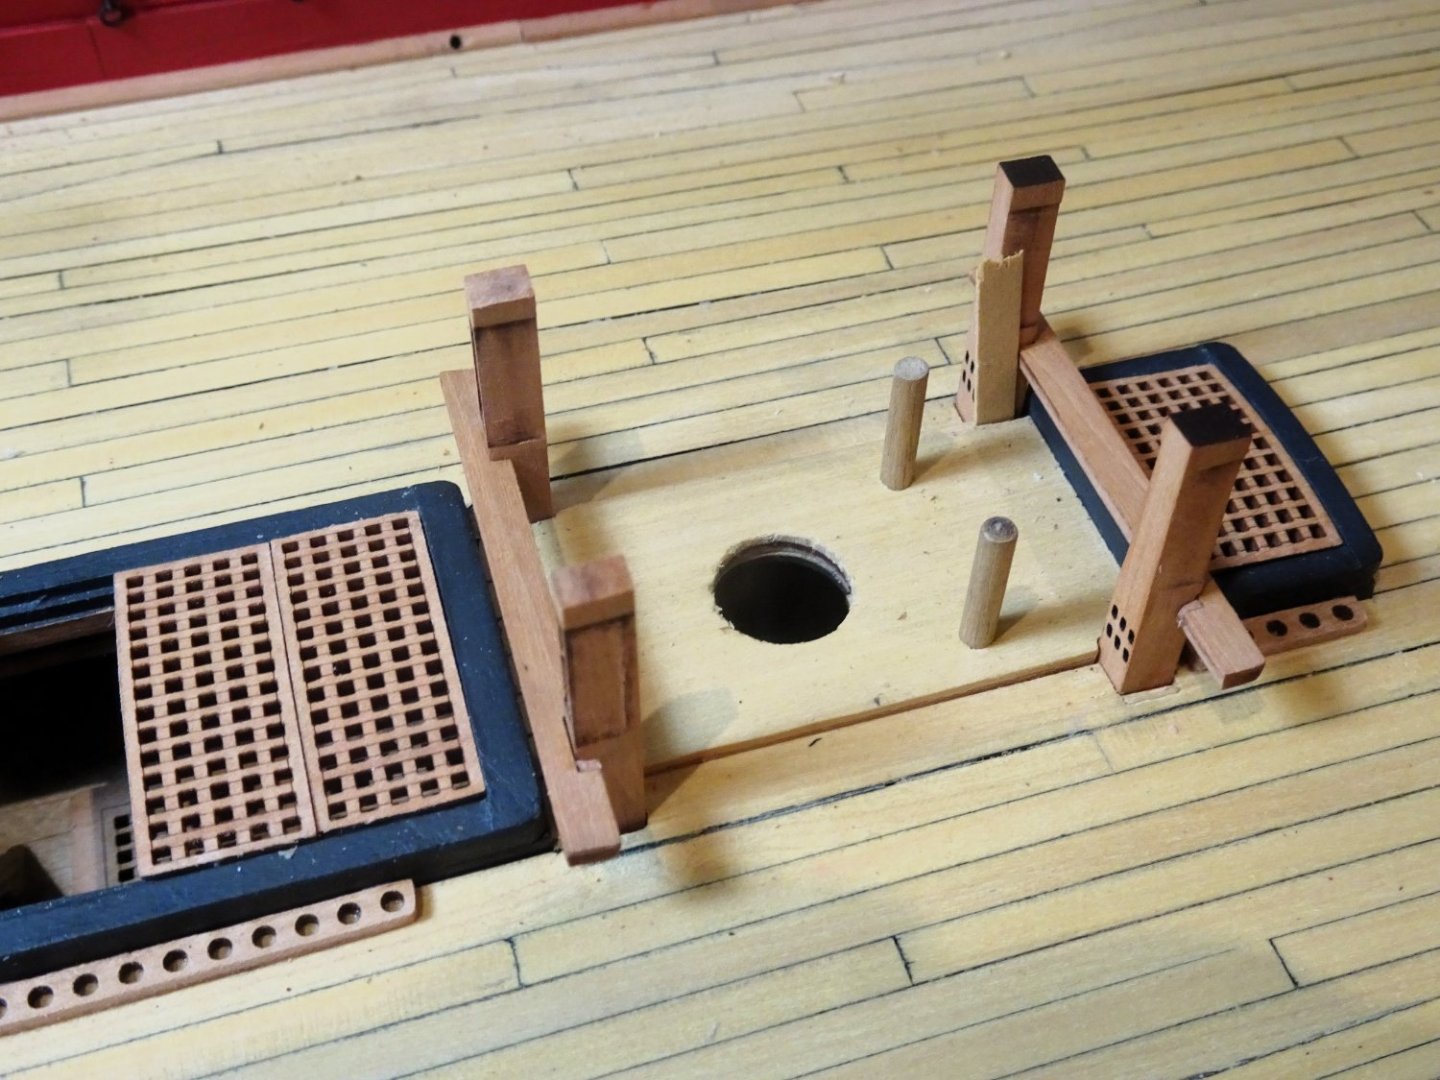
Bowsprit step.
The kit Bowsprit stop is attached to the underside of the first upper deck beam (UD1)
This is intended to fit in a deck slot forward of the Topsail sheet Bitts, a simplification which for practical purposes has no relevance if the kit is assembled as an oob build.
1827
In practice the Bowsprit stop should fit between the Fore topsail sheet bitt posts and take a mortise to accept the Bowsprit heel.
I made a new Stop cut from 4mm Boxwood sheet. This is glued between the Topsail sheet Bitts which are fitted now rather than much later in the build.
1819
An angled tenon is cut into the Bowsprit end to fit the stop.
This is relevant to my build because my Foc’sle deck will mostly be missing, and I intend to add manger boards which run from the bitt posts.
I did a similar modification on my Sphinx build.
 1825
1825
1826
1828
I now have the Stove, Capstan, and pumps to make up.
B.E.
20/08/2023
-
Thank you, Allan,
I have seen that interesting thread;
As with much that concerns our interest there are more questions than answers. I note that although Brian Lavery (Arming and fitting) has a lot to say about carriages, construction detail of trucks is absent.
I am content to accept that both solid and composite trucks were both in use during the 18th century, but in terms of my Indy build at 1:64 scale, I am happy to use the composite trucks provided.
If nothing else they add a little interest to an otherwise plain fitting.
Regards,
B.E.
- SIDEWAYS SAM, mtaylor, allanyed and 1 other
-
4
-
Your work is impressive Robert, no mean feat to complete a Victory model to such a high standard.
She looks wonderful, well done. 👏
B.E.
-
23 minutes ago, hollowneck said:
…….. that I may completely overlook that none have their breeching ropes or tackle...
I’m following in the pure tradition of Navy Board style models, Ron,
Well that’s my excuse anyway..😉
B.E.
- hollowneck and mtaylor
-
2
-
Post Sixty-four
Still with the guns
It’s the tweaking that takes the time, adding modified ring bolts, highlighting the missing cap square elements, and touching up the paintwork .
Even so I have not made the additions I included on the much smaller guns I fitted on Pegasus, such as pin and chain fastenings for the cap squares, and truck keys.

1099
The hinge bolts for the cap squares are already moulded onto the Indy 24’s but I added the forward part using thin Fibre board.
1100
I also gave an impression of the missing trunnion cap by painting the gun trunnions with a line of Vallejo Black/grey.

1103
I think the effect passes muster given the viewing angle available with the guns in place.
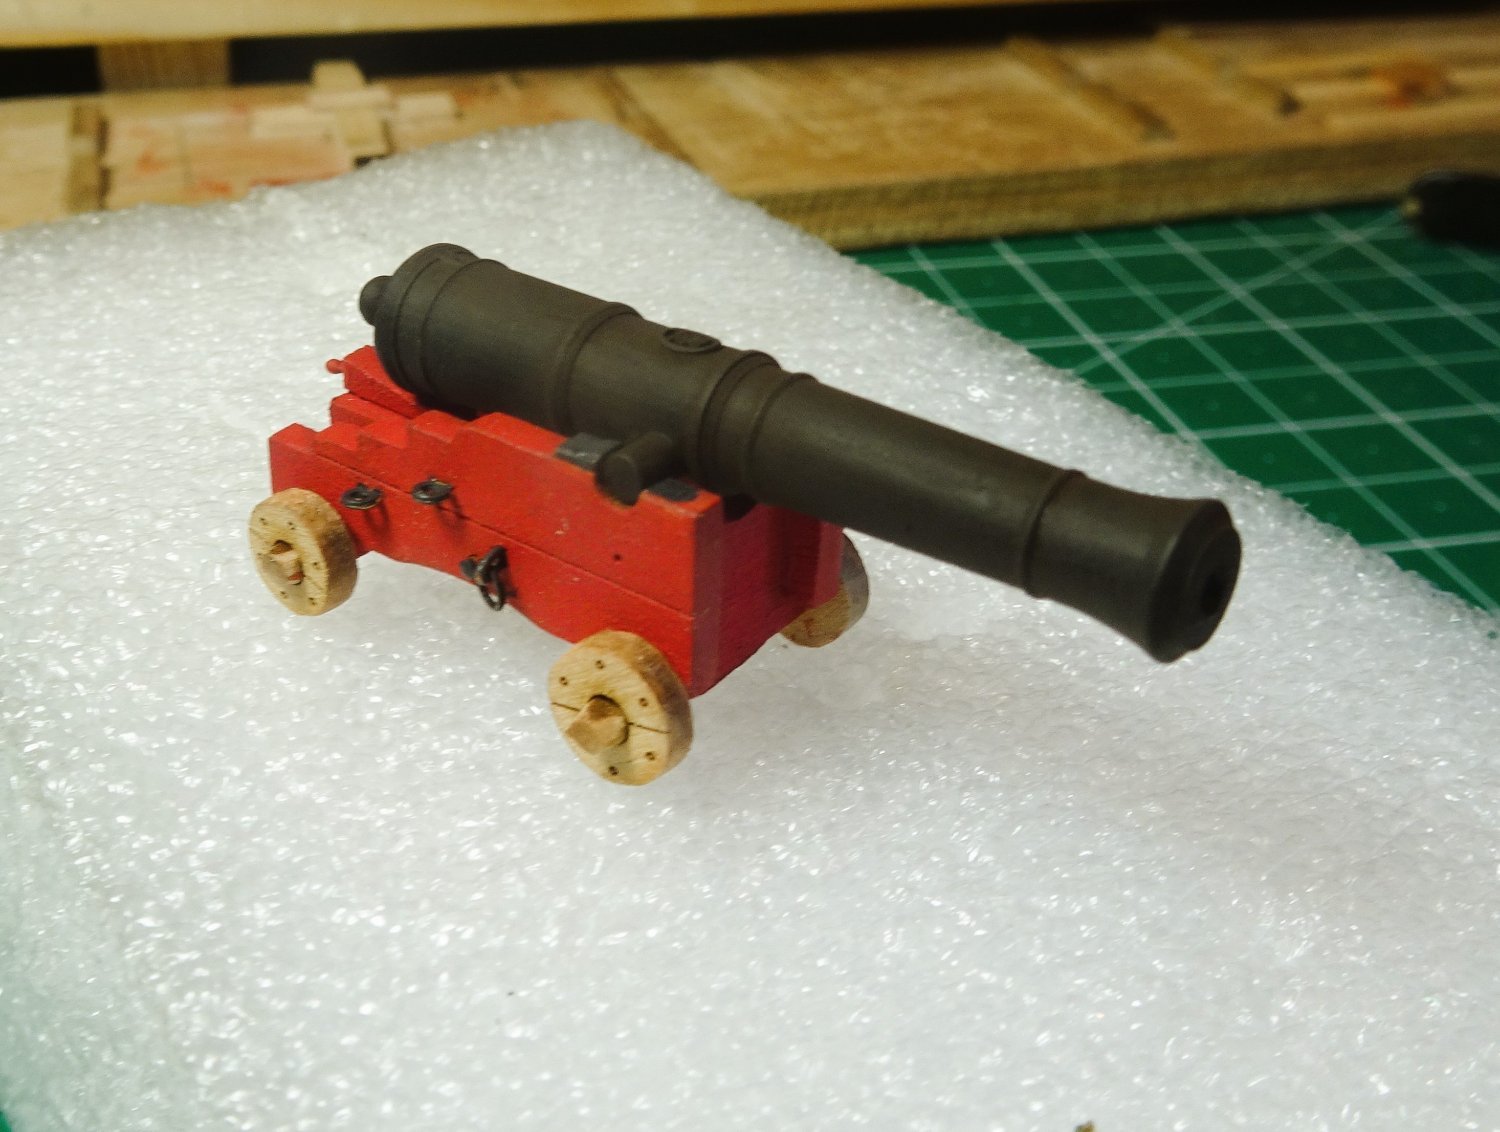
1105
The quoin handle shows up nicely on this shot, and is clearly visible with the gun onboard.
1106
The macros do pick up some flaws, but at normal viewing they look ok.
The issue of the square axle/round hole remains, but doesn’t stand out with the guns in place on Indy.
1767

1768

1771
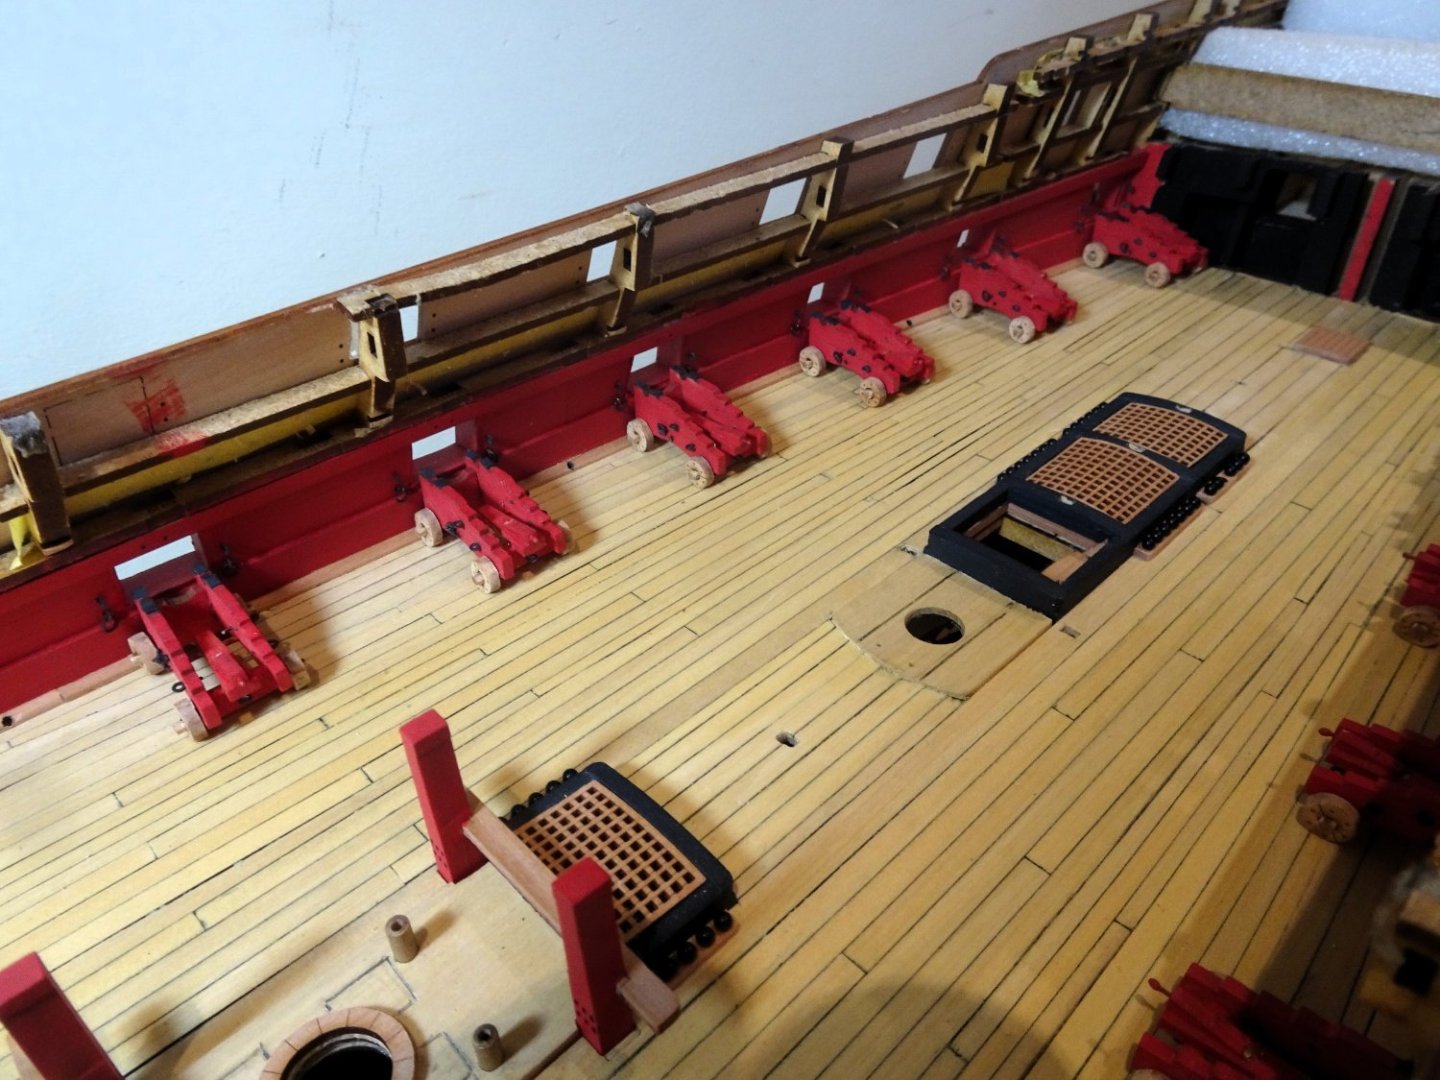
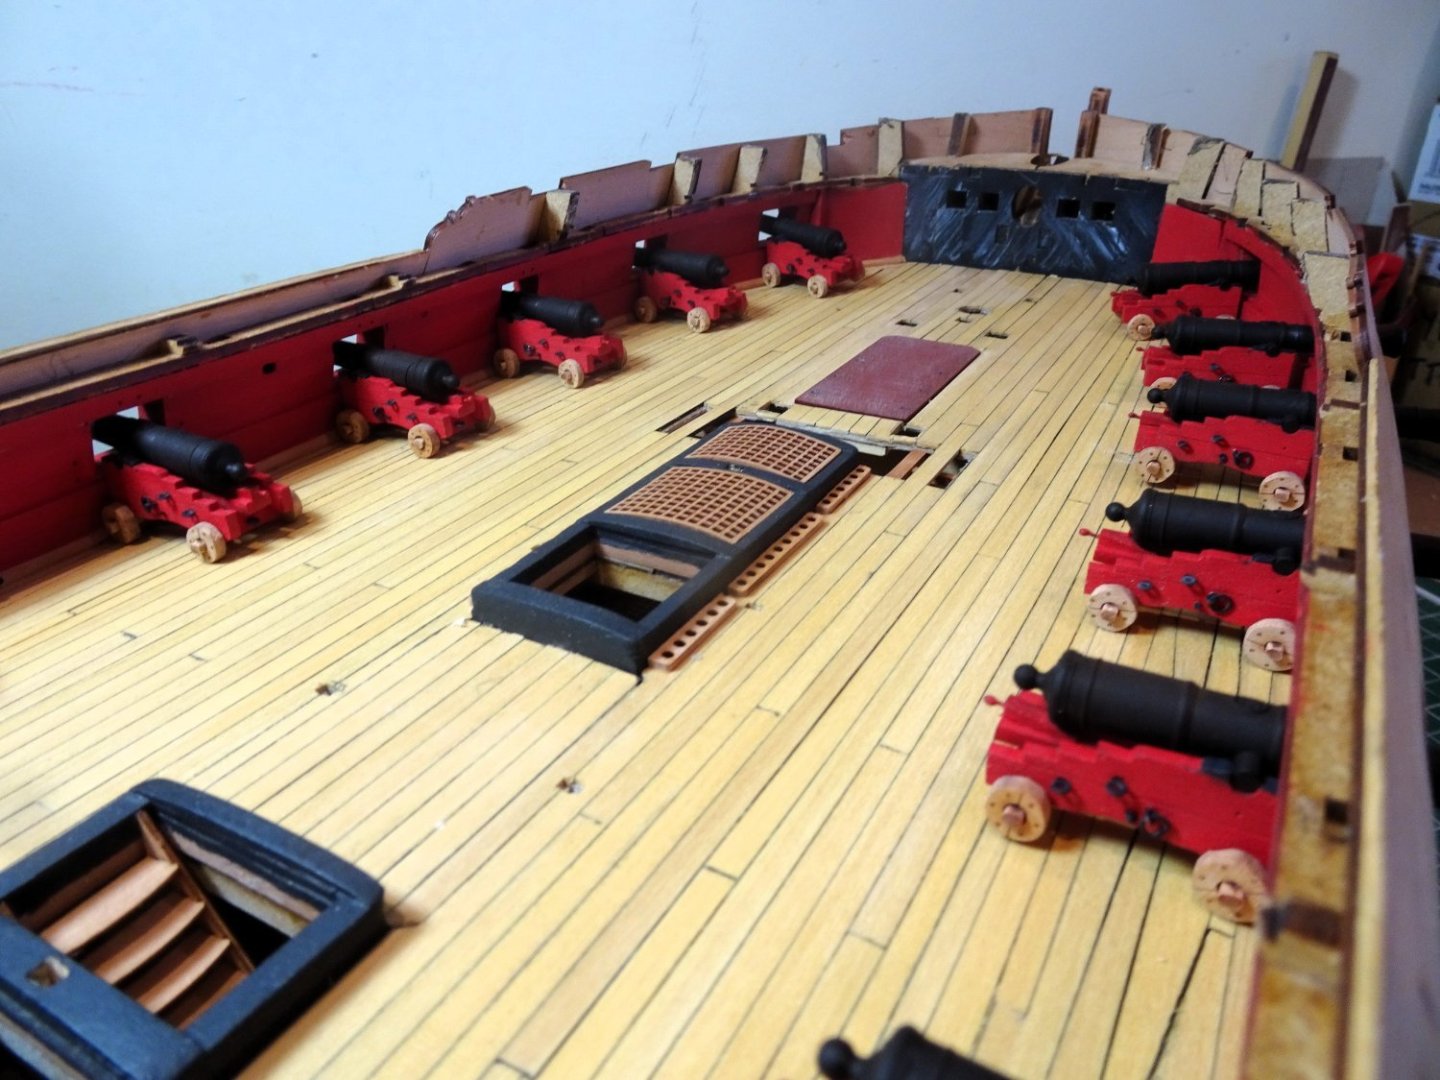
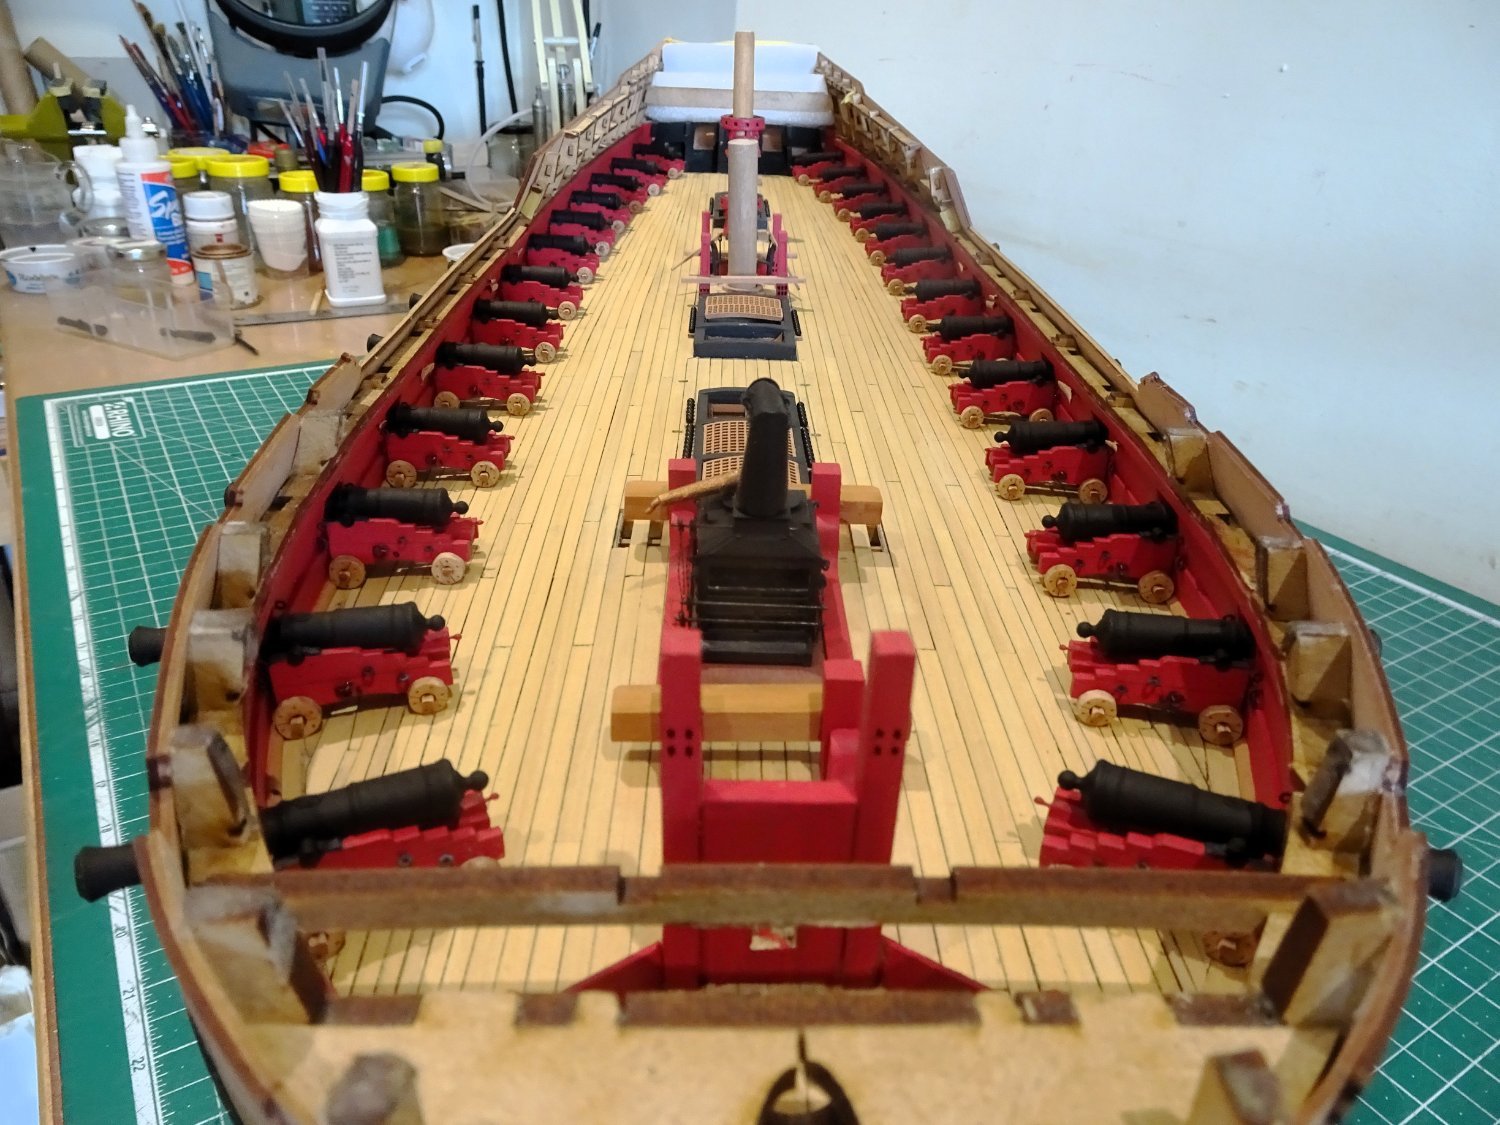
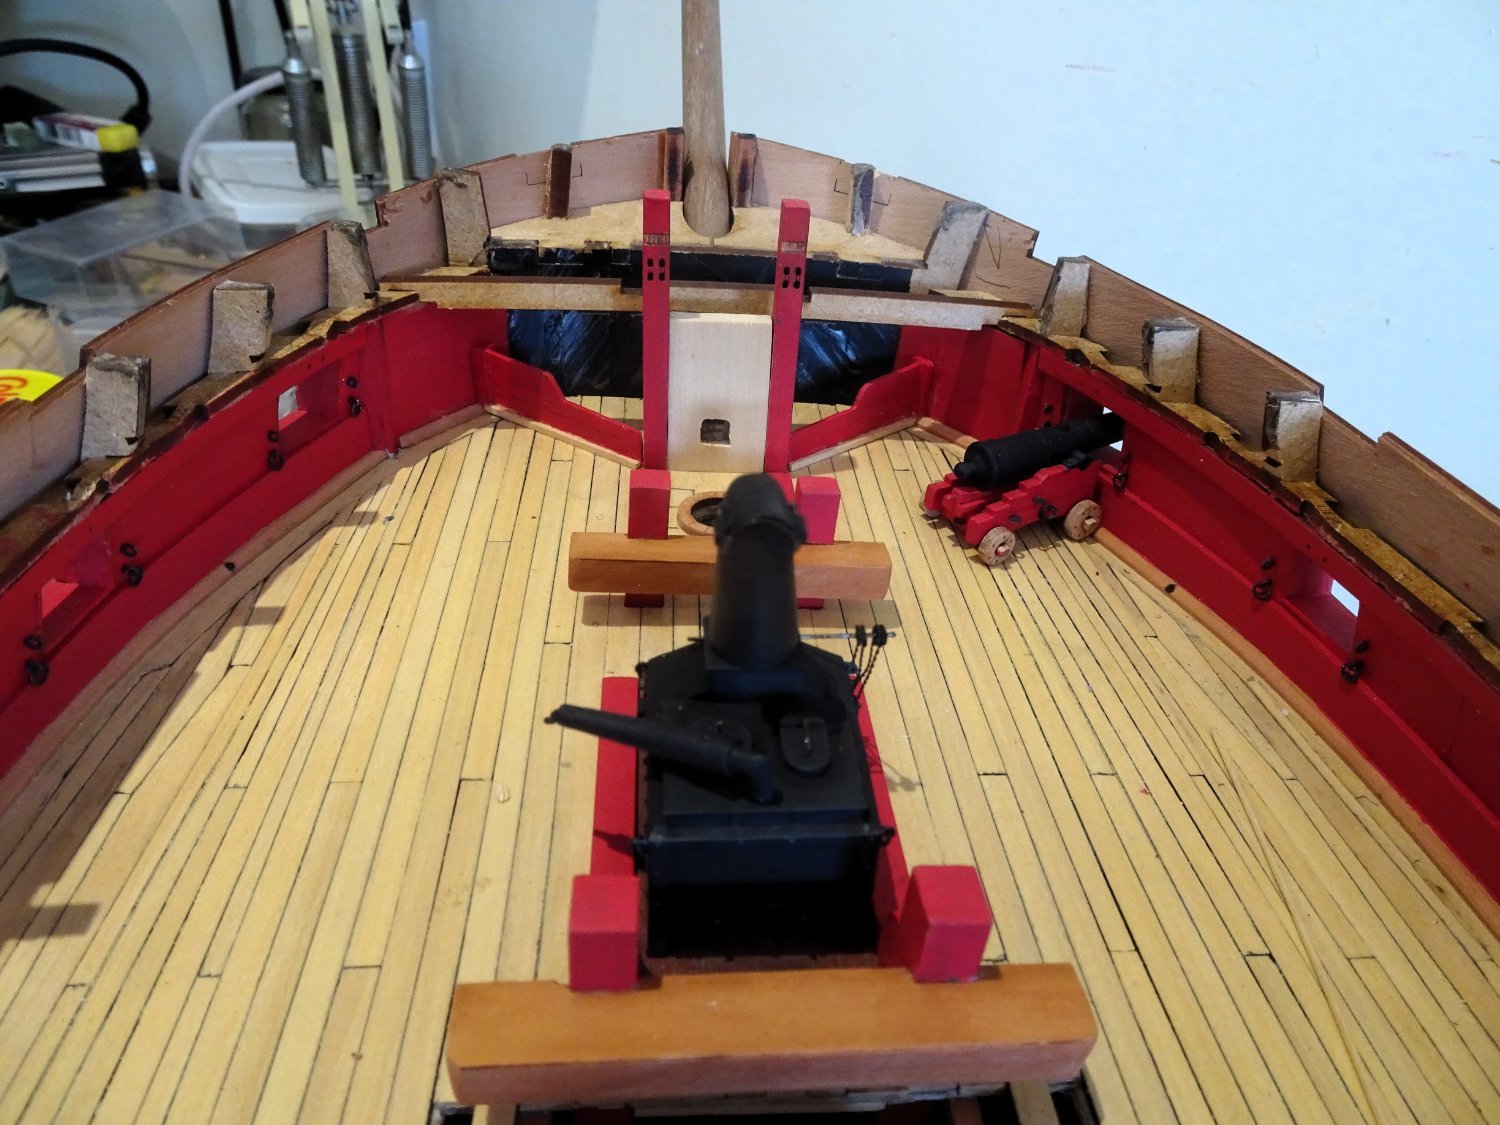
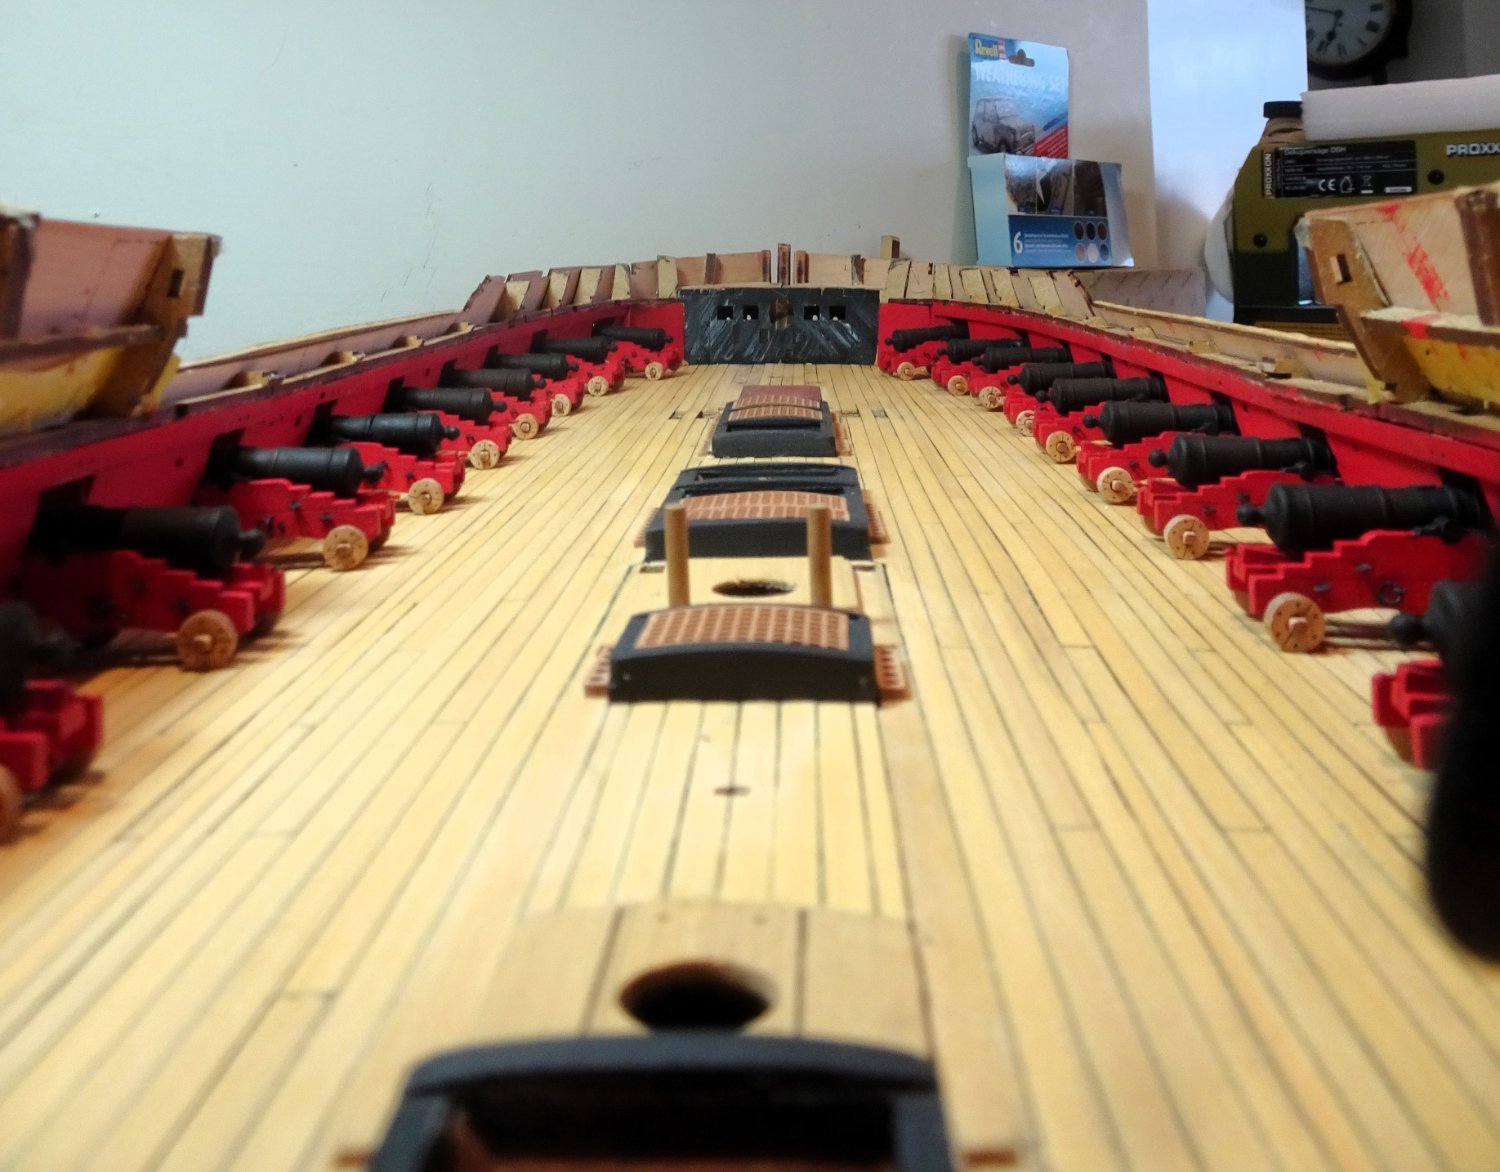
These chunky guns do look impressive lined up along the expanse of the Indy gun deck.
1764

1760
I don’t intend to rig the guns and will glue and pin the carriages thro' the bed to the deck.
Not quite the end of the gun story, I have another session when I get around to the carronades, and the remaining 12 pounder longs.
Moving onto the centre line fittings now.
B.E.
17/08/2023
-
-
-
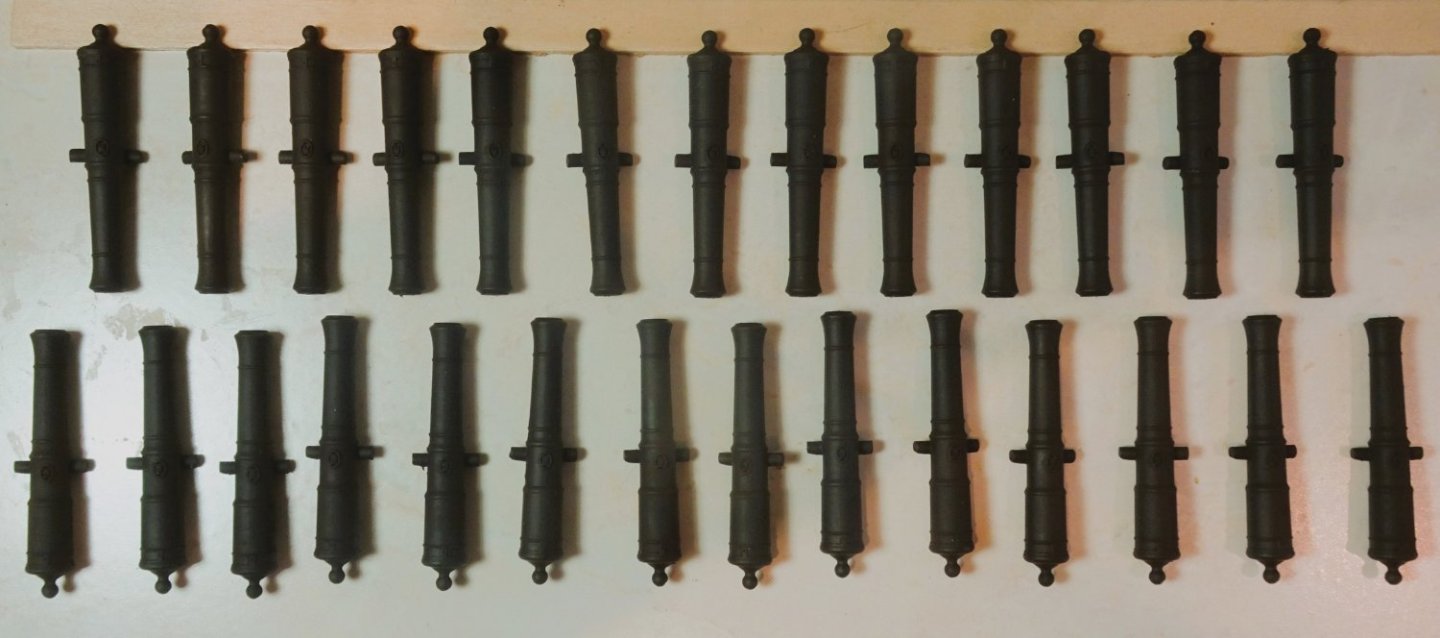
Post Sixty-three
Guns, guns, and more damned guns.
Busy days down at the Gunwharf with production in full swing.

1698
1707
 1703
1703
The guns were given a further coat of Vallejo black to ensure that none of the unwanted striations showed through.
1705

1725
Chris was thoughtful enough to include a spare carriage set, and a number of spare wheels and other bits to cater for any mishaps.
Just as well, in my case a couple of wheels did ping off into the ether during over enthusiastic de-charring, never to be seen again.

1728
At last, all but two guns more or less finished.
The casting of two of the guns failed, and replacements are hopefully en-route from the Foundry.
Still some tidying up to do, before a trial fit aboard Indy.
B.E.
16/08/2023
-
Thanks Dave,
It is a representation of a (part) of a cap square designed to be seen from above and aft when fitted on the ship. Chris has designed the carriages with tabs to allow fitting in deck slots for security. The barrels are fitted later thro' the ports so as a practical matter proper cap squares cannot be fitted.
I have in mind to tweak matters a little as I am not using the tab system.
Cheers,
M.
-
Post Sixty-two
Looking at the Guns -part two
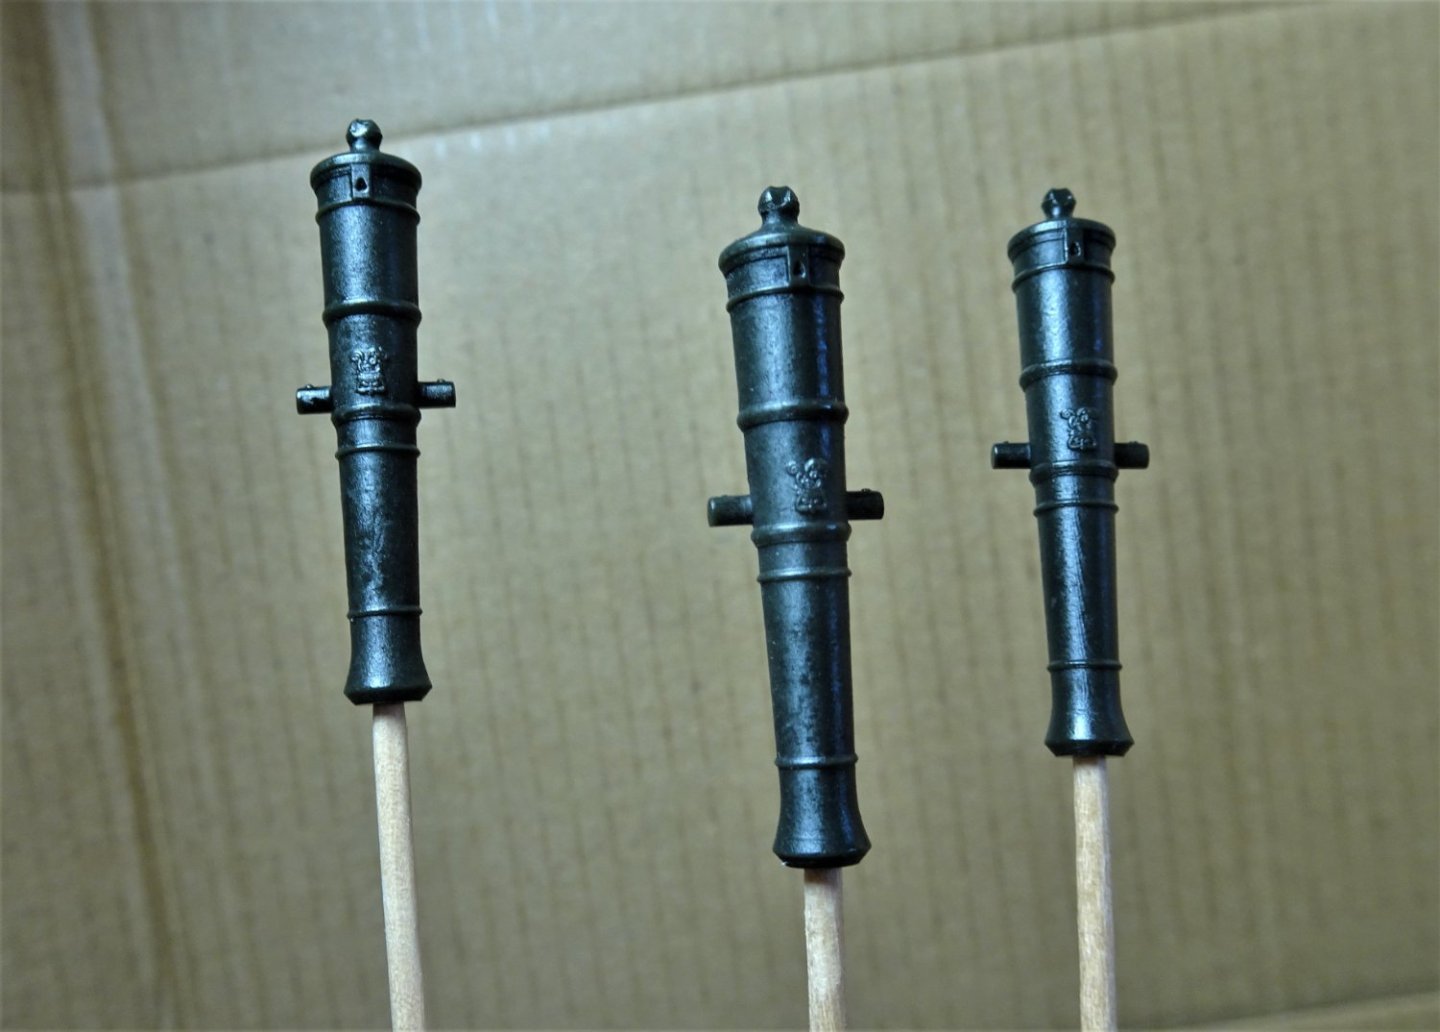
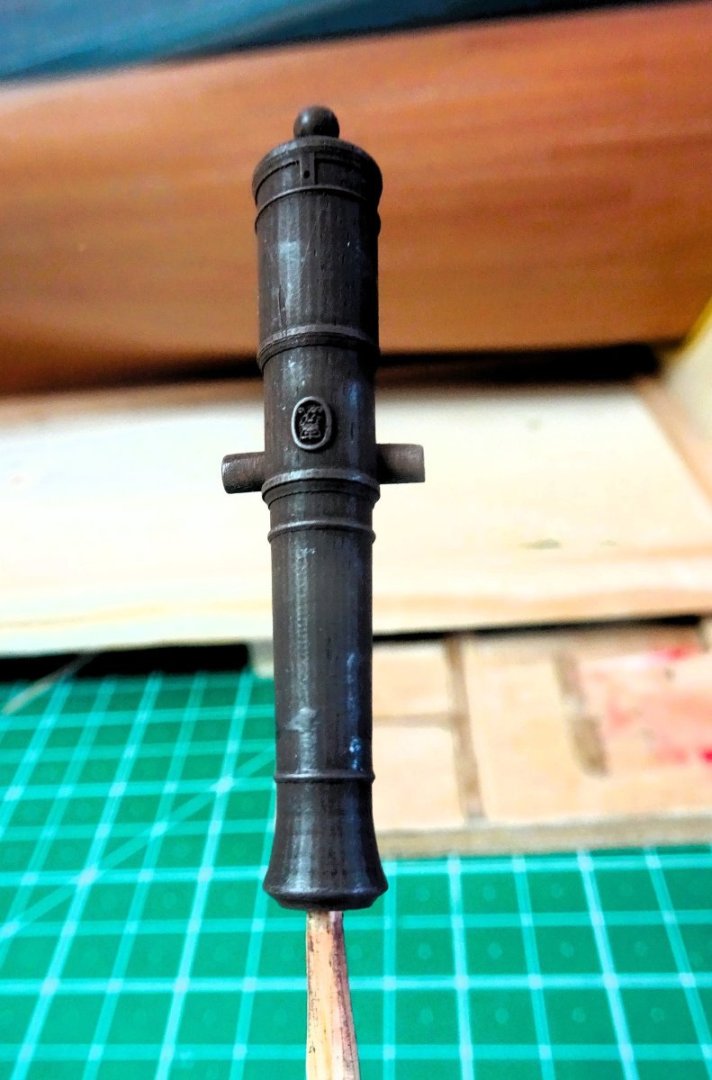
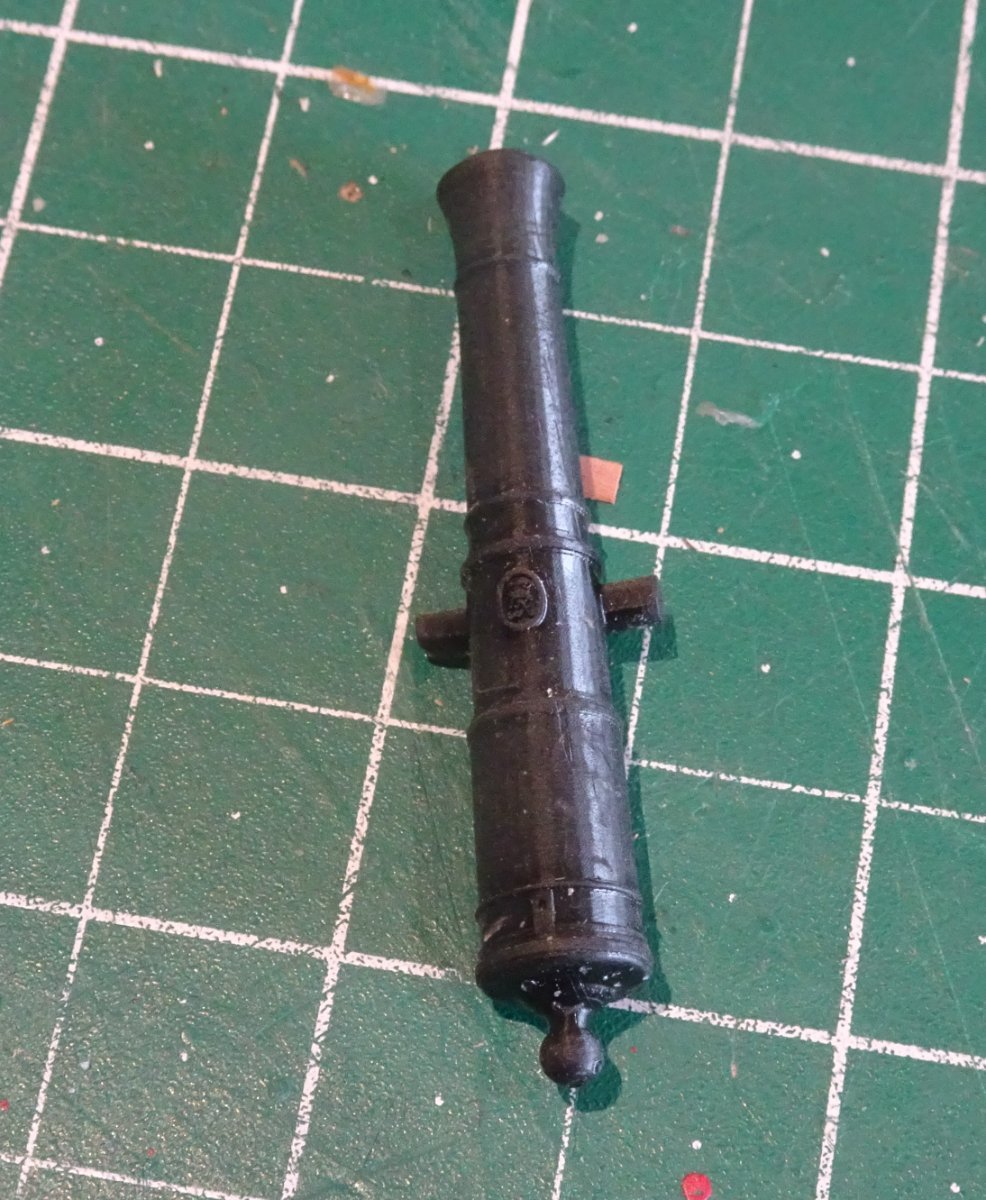
The barrels
The Main armament consists of 24 pounder long guns, 9½ ft Armstrong pattern versions, reproduced in resin which is the way to go in my opinion. Saves all that brass blackening and includes details such as the touch vent and monogram.

1654
24 pounder Indy gun in the raw.
The barrels contain the monogram which can be seen to be there, but difficult to see in detail, except for the cartouche which surrounds it.
This surprised me a little as the monogram on the much smaller 9 pounder guns (Sphinx) seemed much better defined, and to my eye look better without a cartouche. Was there ever a cartouche?
5849
Nine pounder Sphinx guns.
A small issue maybe for the 24 pounder guns on Indy where this detail will be mostly hidden from close view, but the two 12 pounder Foc’sle guns will be fully on show.
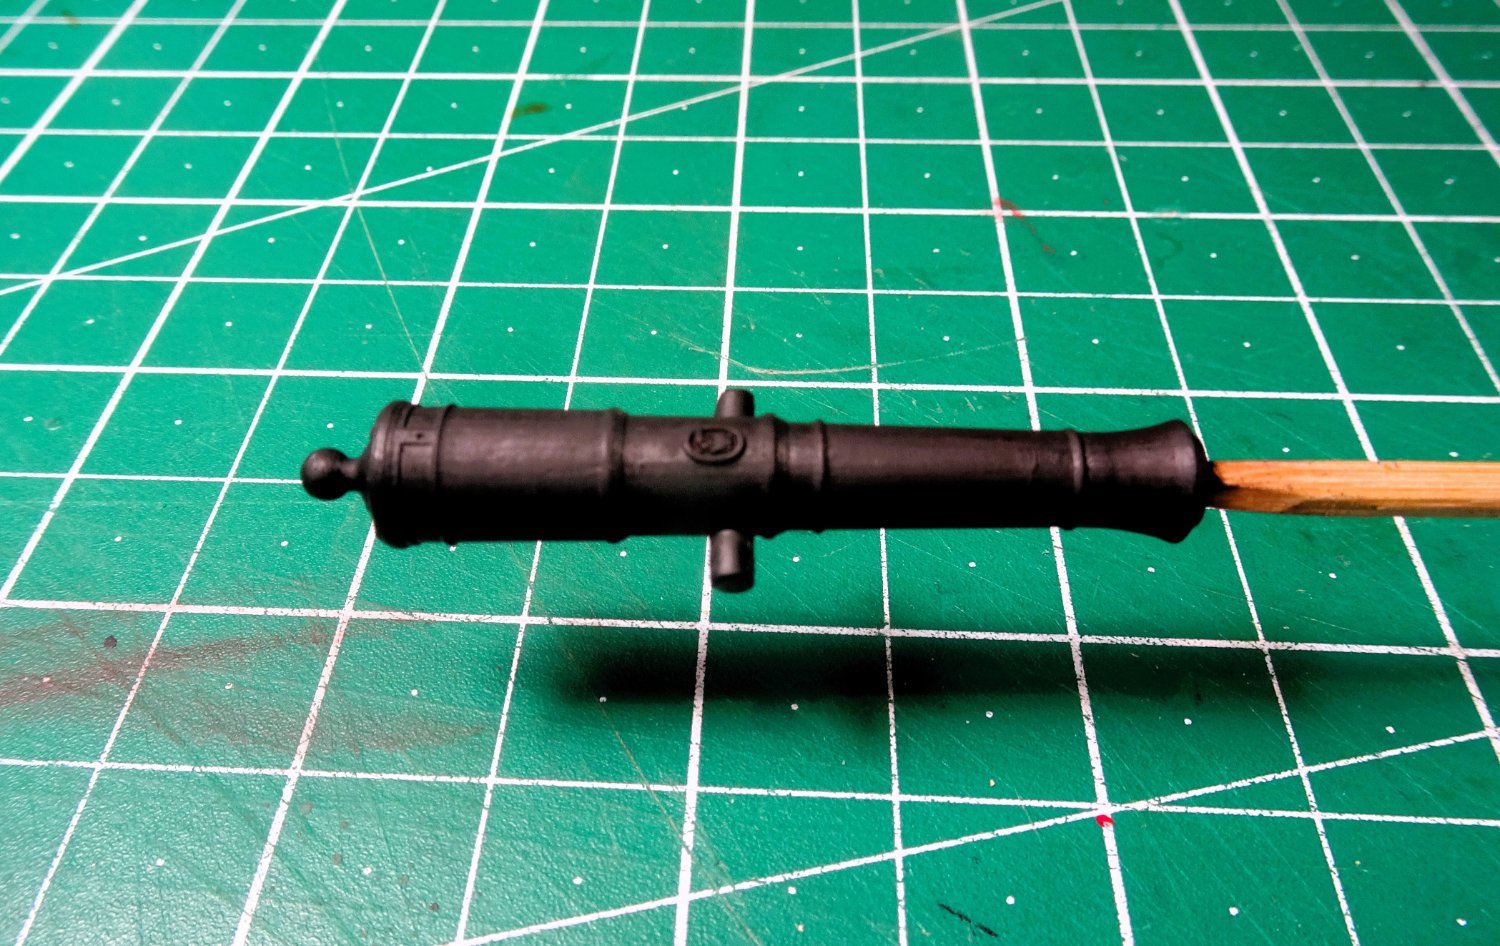
There is an alternative should I be motivated to use it.
Syren produce delightful little George 111 fibre board monograms in two sizes.
1719
Here is one attached to a damaged 24 pounder, I do prefer the look, but I’ve spent enough time on the guns, and I’ll live with the 24 pounders as is. I will use the alternative Syren monogram detail for the two fully visible 12 pounders.
Finishing the barrels
.thumb.JPG.2d7b1cf65fd27980051b047043ad87d3.JPG)
5934(2)
With the Sphinx guns (above) I simply washed, dried, and sprayed with fixative before treatment with weathering powders, I used Revell rust, dark brown, and deep black.
Buffed up and the gun was good to go.
1659
Not sure that will work with the Indy guns, using this treatment the finish is not satisfactory, and I am concerned about the visible striations running along the barrel.
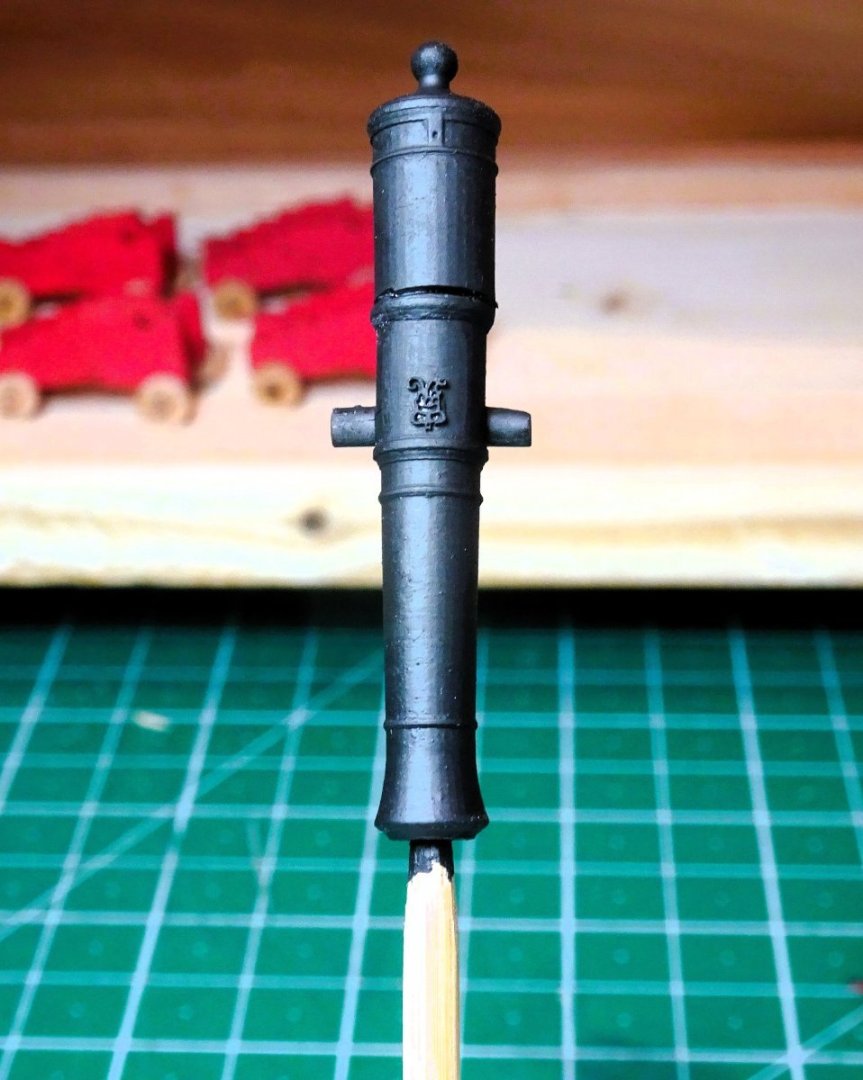
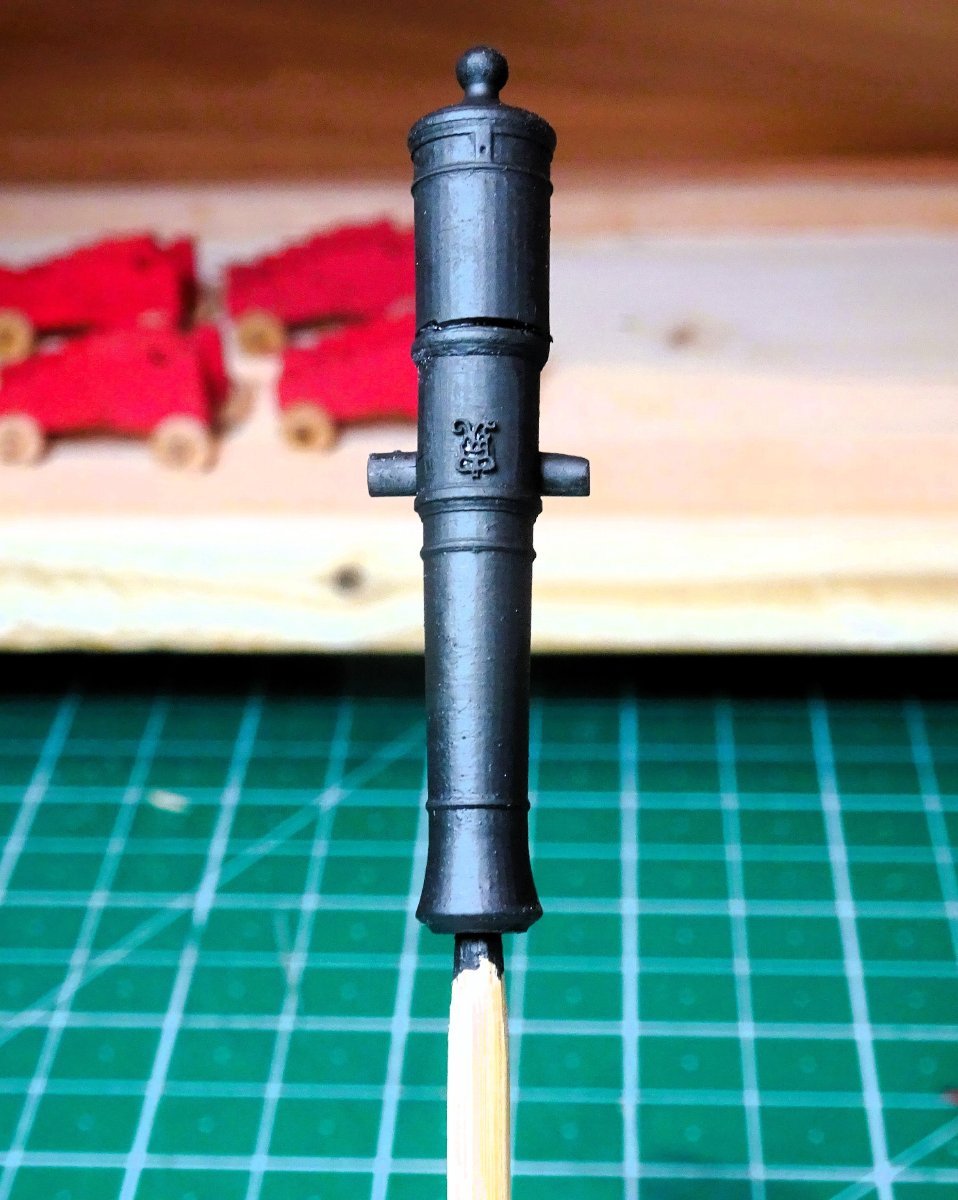
Plan B

1675
The gun is gently cleaned up using 600 grade paper between the reinforcing rings, and painted with Vallejo Black, much improved I think.
1677
1680
1683
1684
So paint and weathering powder it is.
B.E.
14/08/2023
-
The kit provided guns are overscale, and inaccurate in shape and style.
I replaced mine with brass 32mm length guns from RB Models (Poland) but since then resin versions have come onto the market. Vanguard sell six pounder gun sets which you may wish to consider, and I believe Chuck (Syren) also supply resin barrels.
While you're at it you may wish to consider the swivels. The Amati supplied versions are awful, I again used brass versions 15mm from RB models which are spot on for scale. These do involve making your own crutches.
The Amati gun carriages just about pass muster, but the trucks looked very thin and I also replaced those.
B.E.
- Knocklouder, Keith Black, mtaylor and 4 others
-
6
-
 1
1
-
Thanks for looking in Timmo, good to hear from you.
Even the excellent Vanguard kits still offer a little scope for scratch indulgence.
With Sphinx it is the Great cabin and Qtr galleries that mainly sated my desire to meddle, but Chris took away that option with the Indy kit and kindly made the modification for the benefit of kit modellers in general. 😉
Cheers,
B.E.
- AJohnson, Ryland Craze and mtaylor
-
3
-
Thankyou Theo,
The Top and butt planking went well, but were I to do it again I would fit that first, after the margin plank.
That way I could better work out the planking arrangement after the centre strakes had been fitted.
Cheers,
B.E.
- Thukydides, hollowneck, mtaylor and 1 other
-
4
-
Got a nice period look to it, a fine build you should be pleased with, well done.👍
Pegasus is a step up, but she makes a fine model, I think you're more than ready for it.
B.E.
- Knocklouder, VitusBering, mtaylor and 2 others
-
4
-
1


.JPG.0553521cf245ee0902c0e7aca6630932.JPG)


.JPG.938851a3aed4df93ca9e2b8dc1f13e46.JPG)


HMS Indefatigable 1794 by Blue Ensign - FINISHED - Vanguard Models - 1:64 scale
in - Kit build logs for subjects built from 1751 - 1800
Posted
It is Nipper, in my opinion they are the trickiest sections that can make or break the look of a model. Always a relief when those two tasks have been completed, hopefully with satisfaction.
Post Seventy-two
Quarter deck beams
This section starts with yet another not very exciting task, that of prepping the Qtr deck beams.
These are nicely proportioned Pearwood beams with the necessary camber and containing the slots for the carlings.
These need careful cleaning up as they are heavily charred on the top and bottom surfaces. The danger is that with the camber it would be all too easy to put too much pressure on a beam resulting in breakage.
1936
Soft hands are required for this job, and I use a cambered former to support the beam during cleaning of the top surface.
1935
I begin by scraping, using a scalpel blade to remove the heavy char, it would soon clog a sandpaper.
1938
Fitting the beams is a slow business with great care needed to avoid breaking the tabs off the beam ends.
1939
The aftermost deck beam is fitted first. A tricky exercise involving cutting away sections of the mdf frames both sides and sanding the ends of the beam. I found that the recesses at either end of the beam needed a lot of fettlin’ in order to sit right down on the beam housing.
Note:
Were I starting this section again I would have trial fitted the beams before I set the gun carriages in place.
I found that I had to remove sections of all the mdf frames to get placement of the beams without the risk of stress both to the beams and myself.
My veneer saw proved useful for this task.
The forward beam at the break of the Qtr Deck has a classic curved design typical of the Ardent class of ships.
1941
Chris has designed a former over which to shape the laminated beam to give it the proper camber.
I will retain this little jig, it has potential for use on other projects.
1943
1945
The forward beam sits perfectly over the Main bitt standards.
1946
The final check is to confirm the beams are seated properly and present a level surface across all points.
Two days work on this task, I can now remove the beams for a final cleaning up and painting.
B.E.
30/08/2023