
.JPG.ca33079f5815b861e67b9c2cccd37982.JPG)

Blue Ensign
-
Posts
4,286 -
Joined
-
Last visited
Content Type
Profiles
Forums
Gallery
Events
Posts posted by Blue Ensign
-
-
Post 16
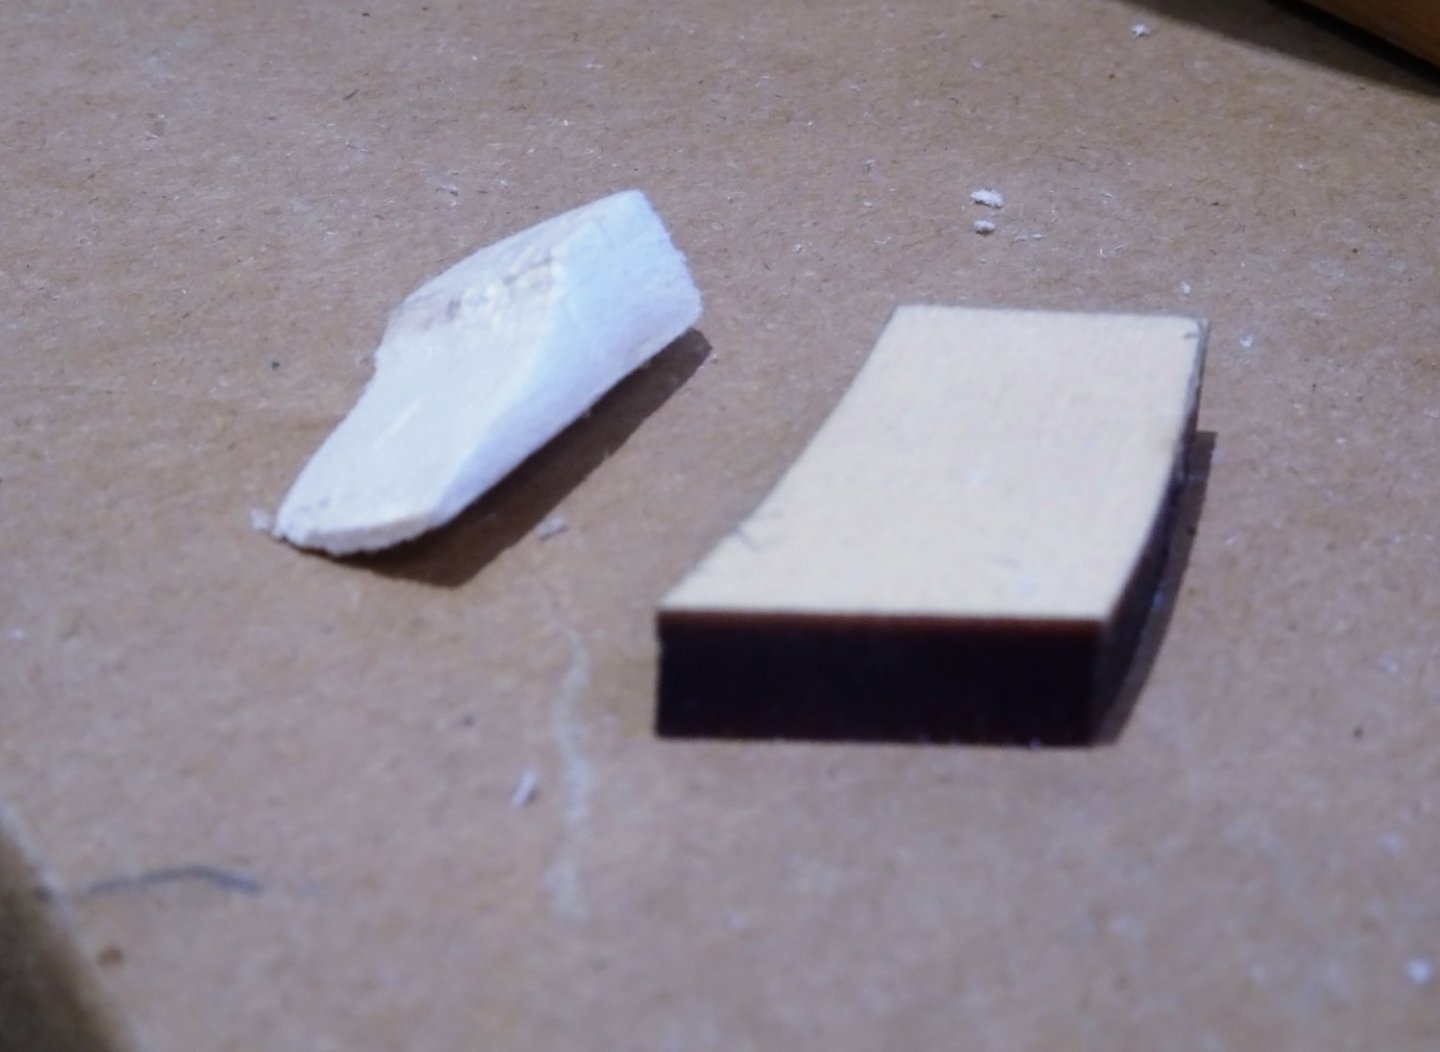
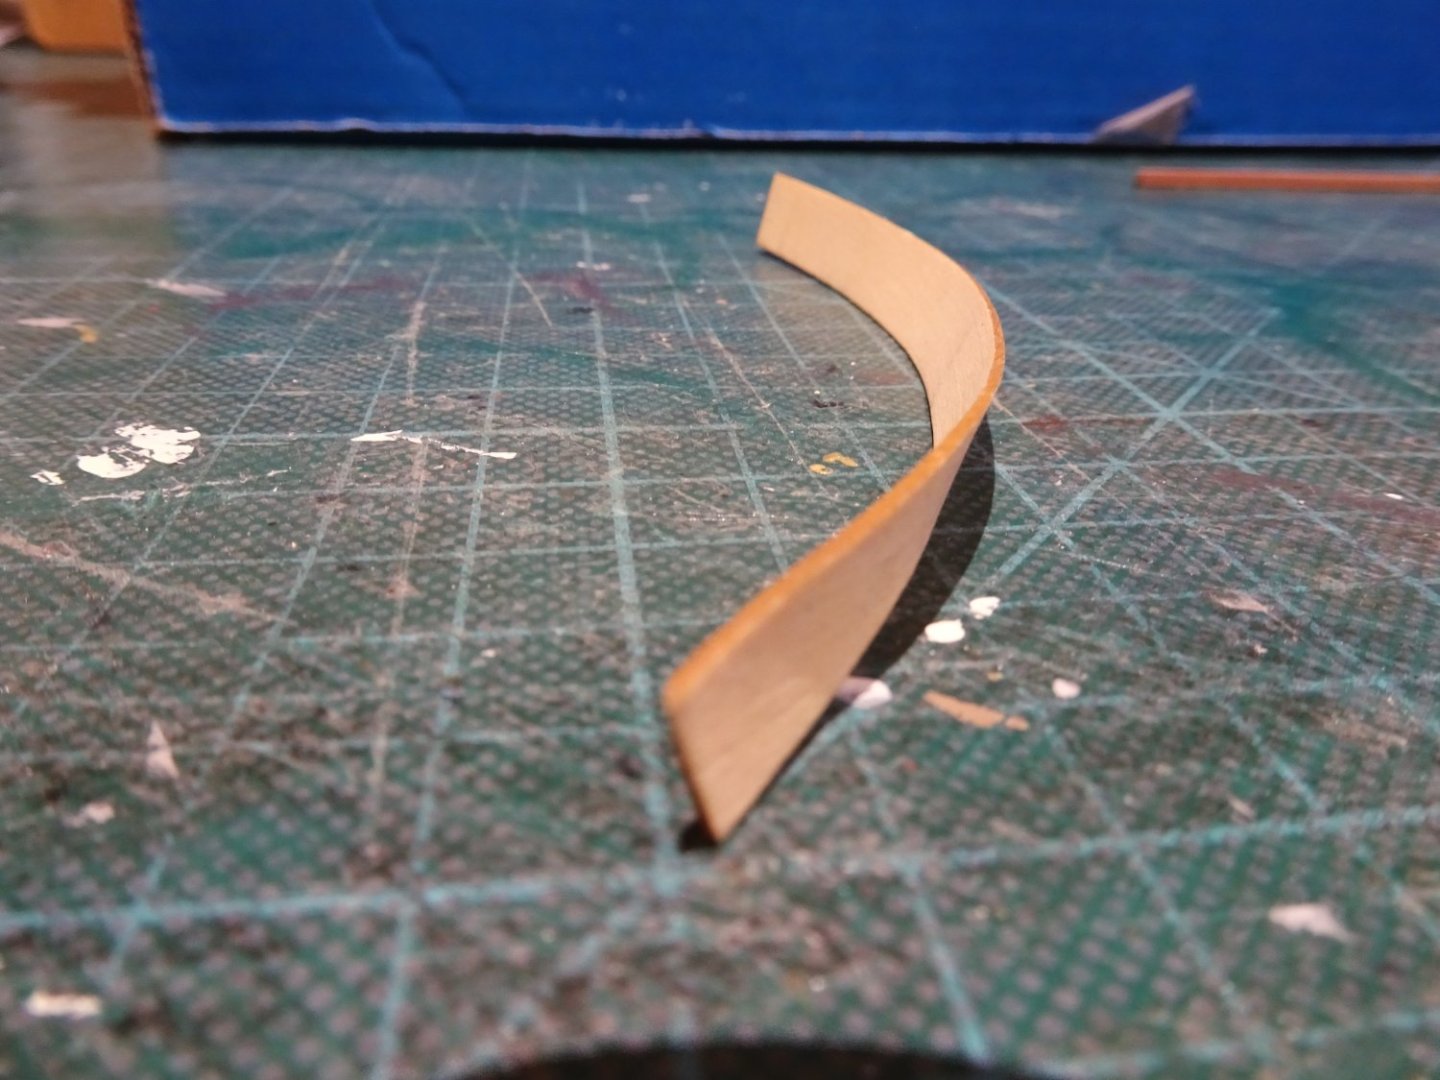
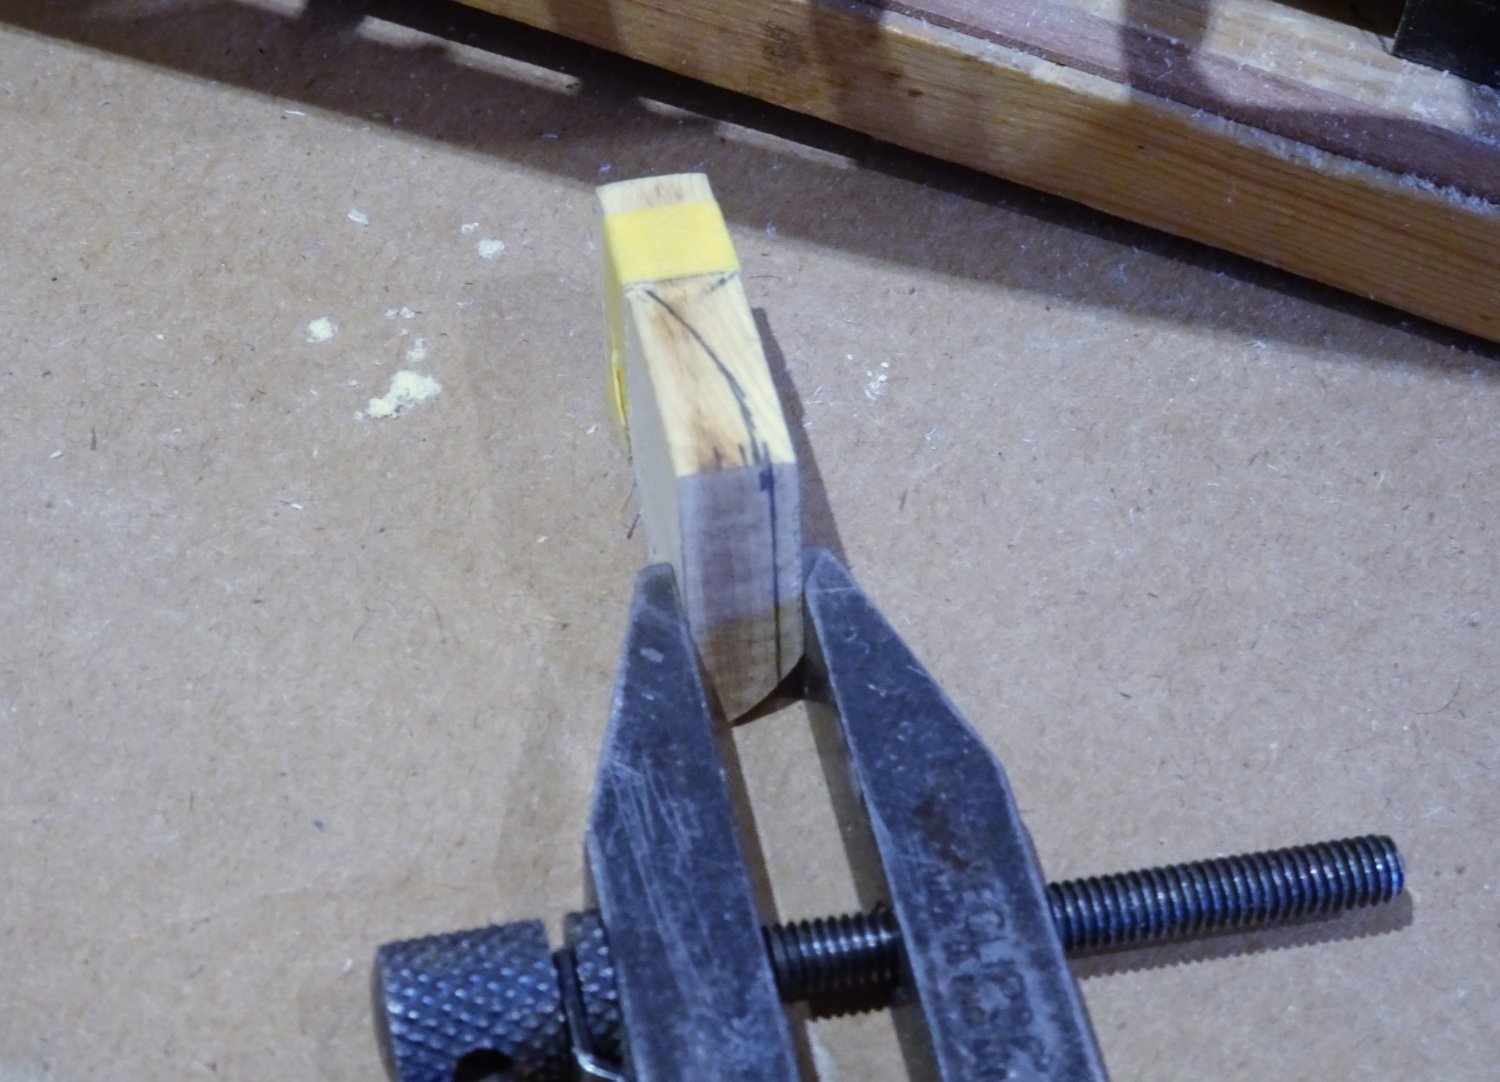
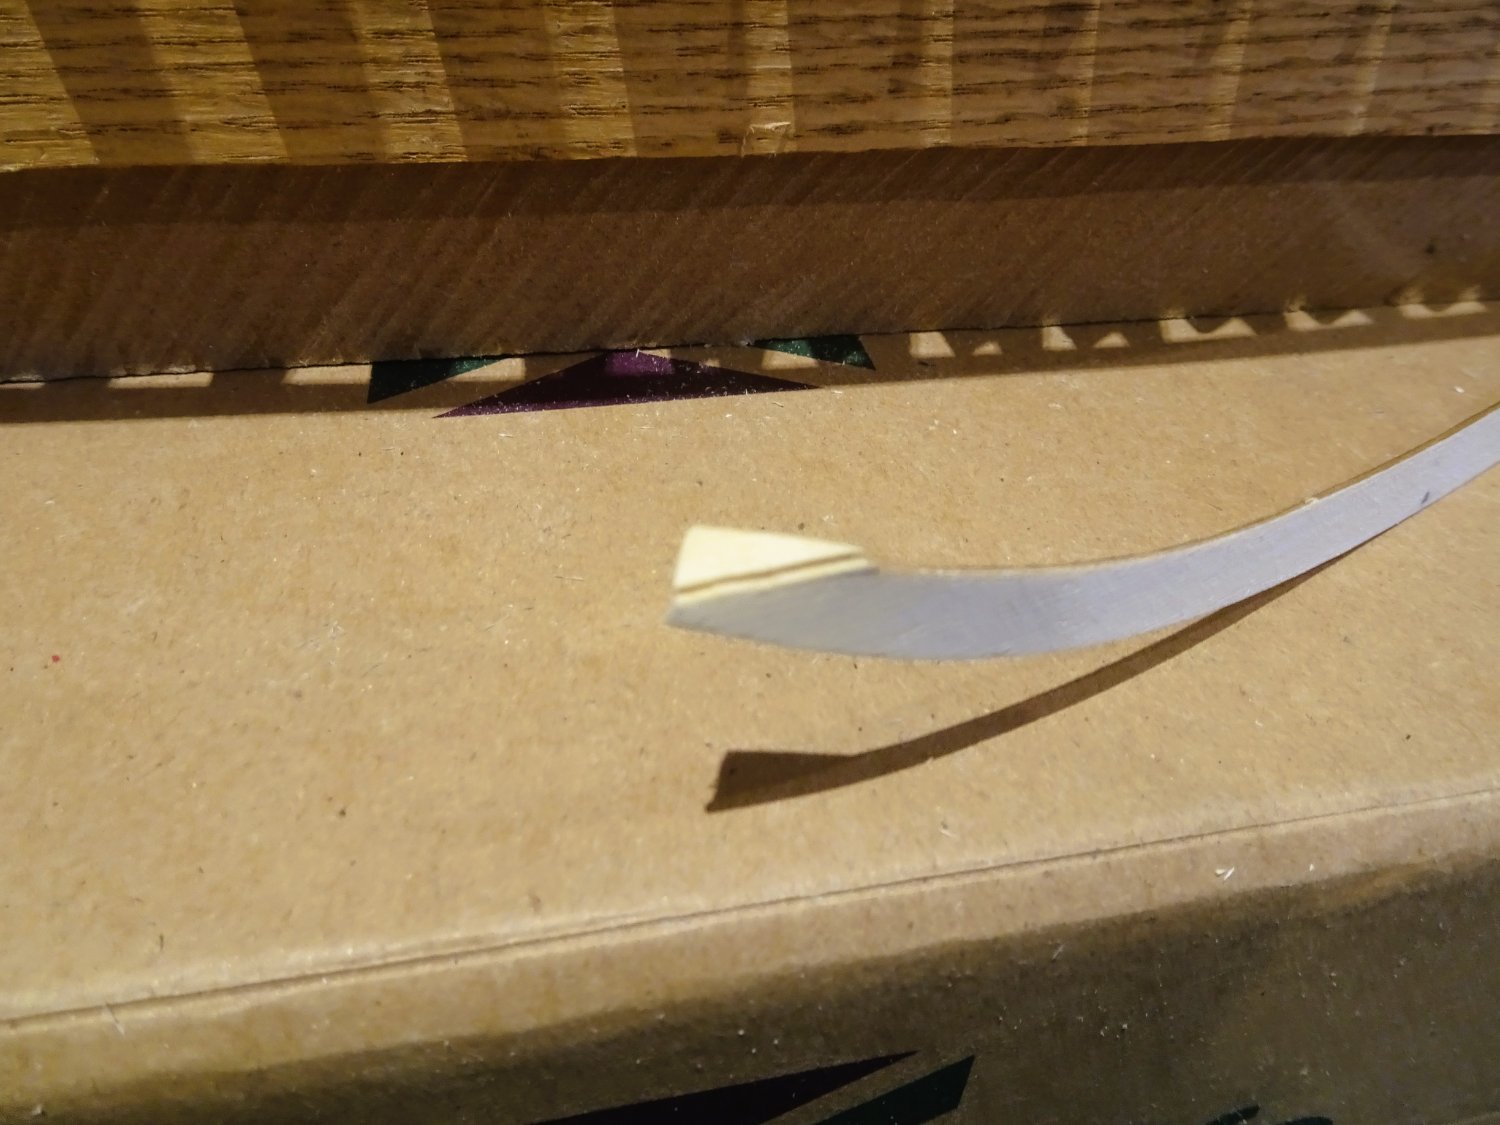
With the rails in place the stem bolsters have to be shaped and fitted.
Chuck describes this step as challenging and provides six blanks from which two finished bolsters are required.
Hoping that’s enough, but if it isn’t, perhaps I need a different hobby.
0346
To give me a feel for shaping these bolsters I carved a Balsa block before moving onto the cedar.
0349
0350
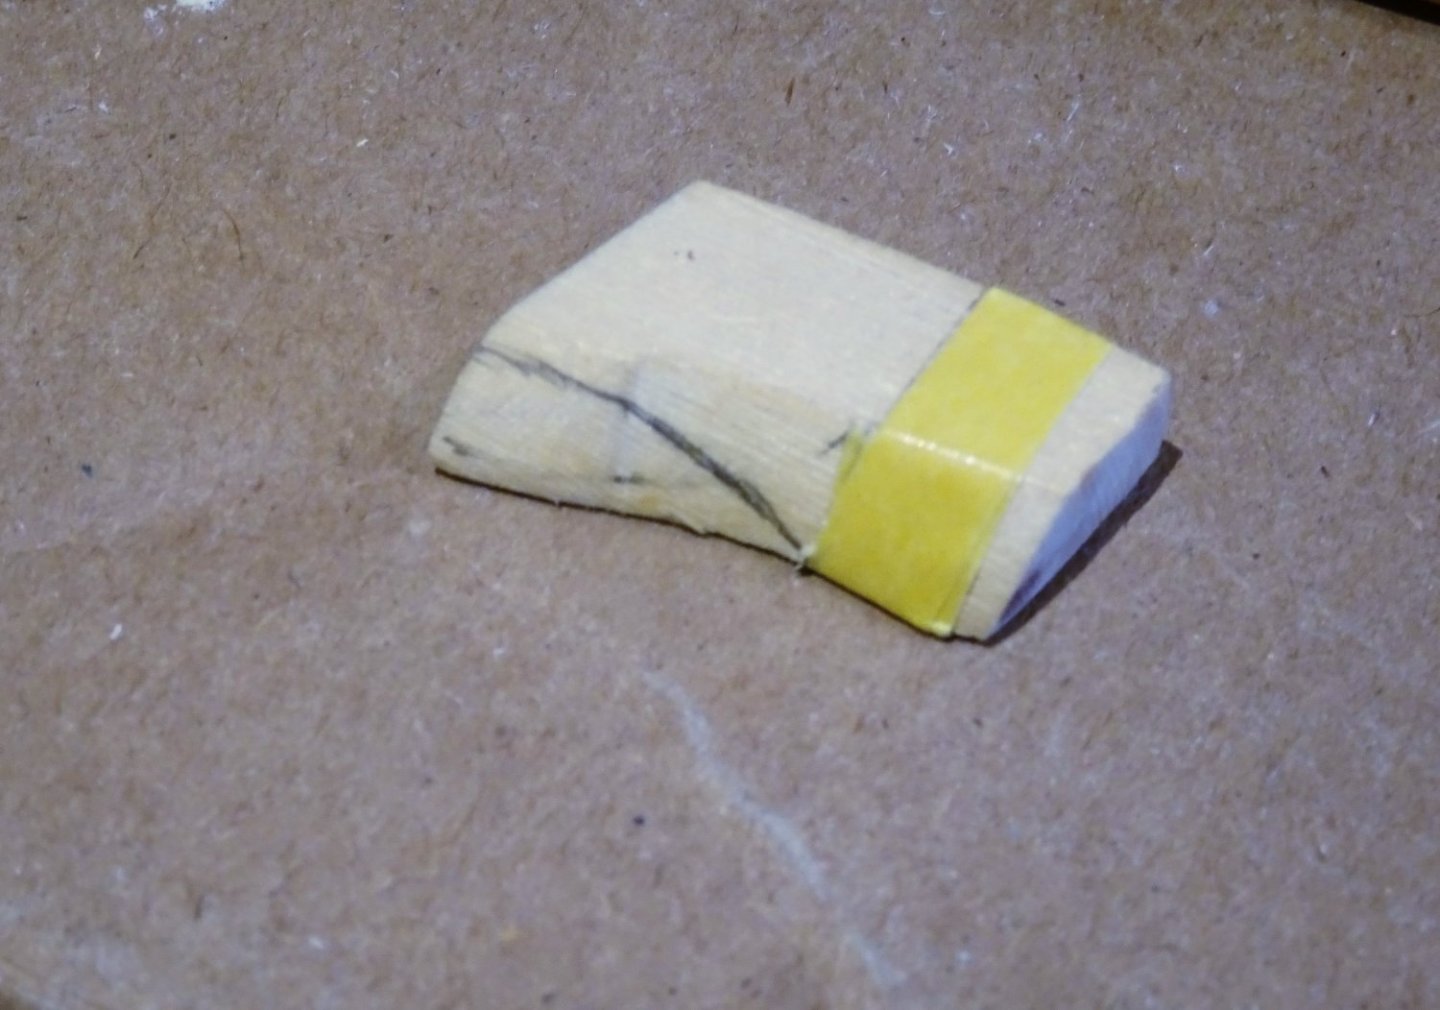
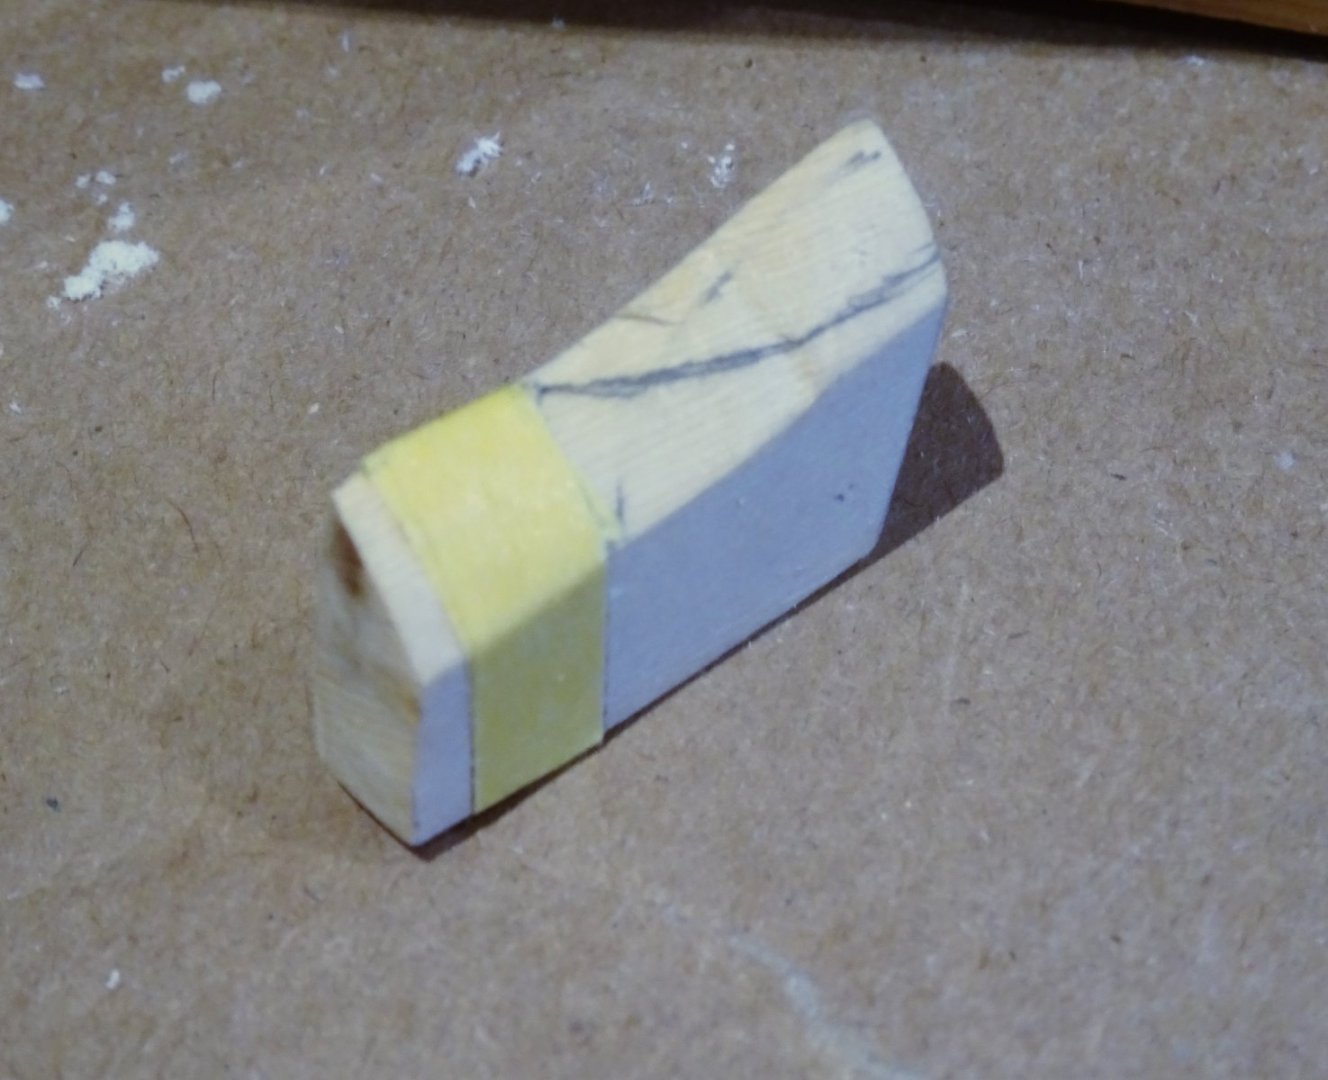
To achieve the shape, I used a No11 scalpel blade, and finger sanders with a curved profile.

0351
0352
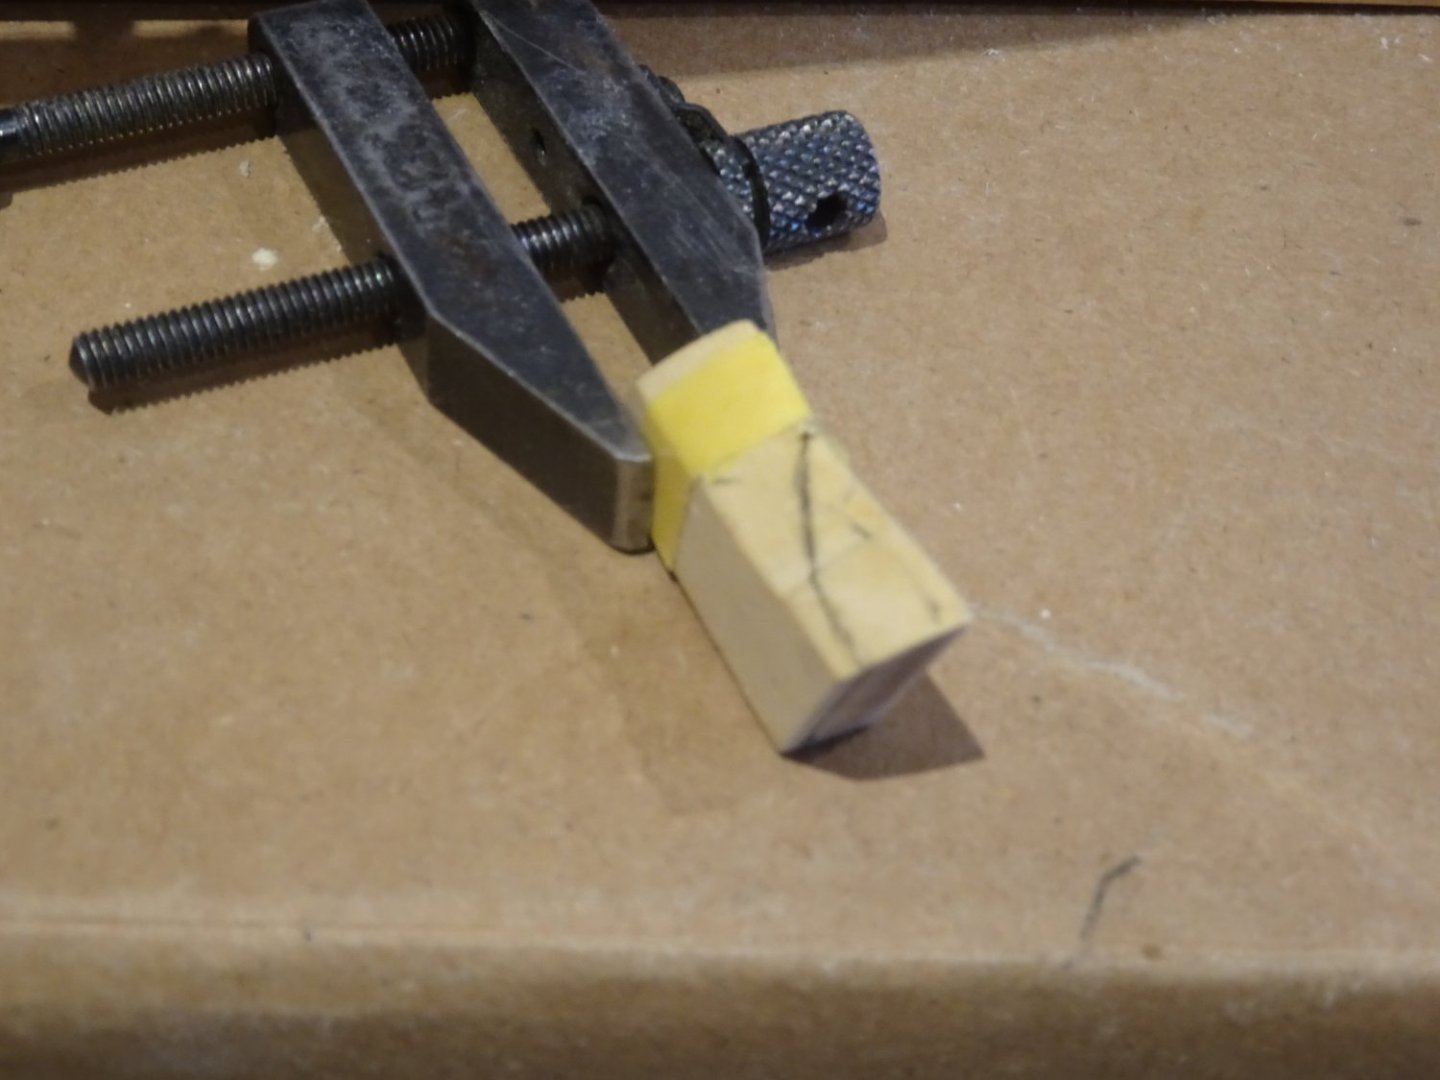
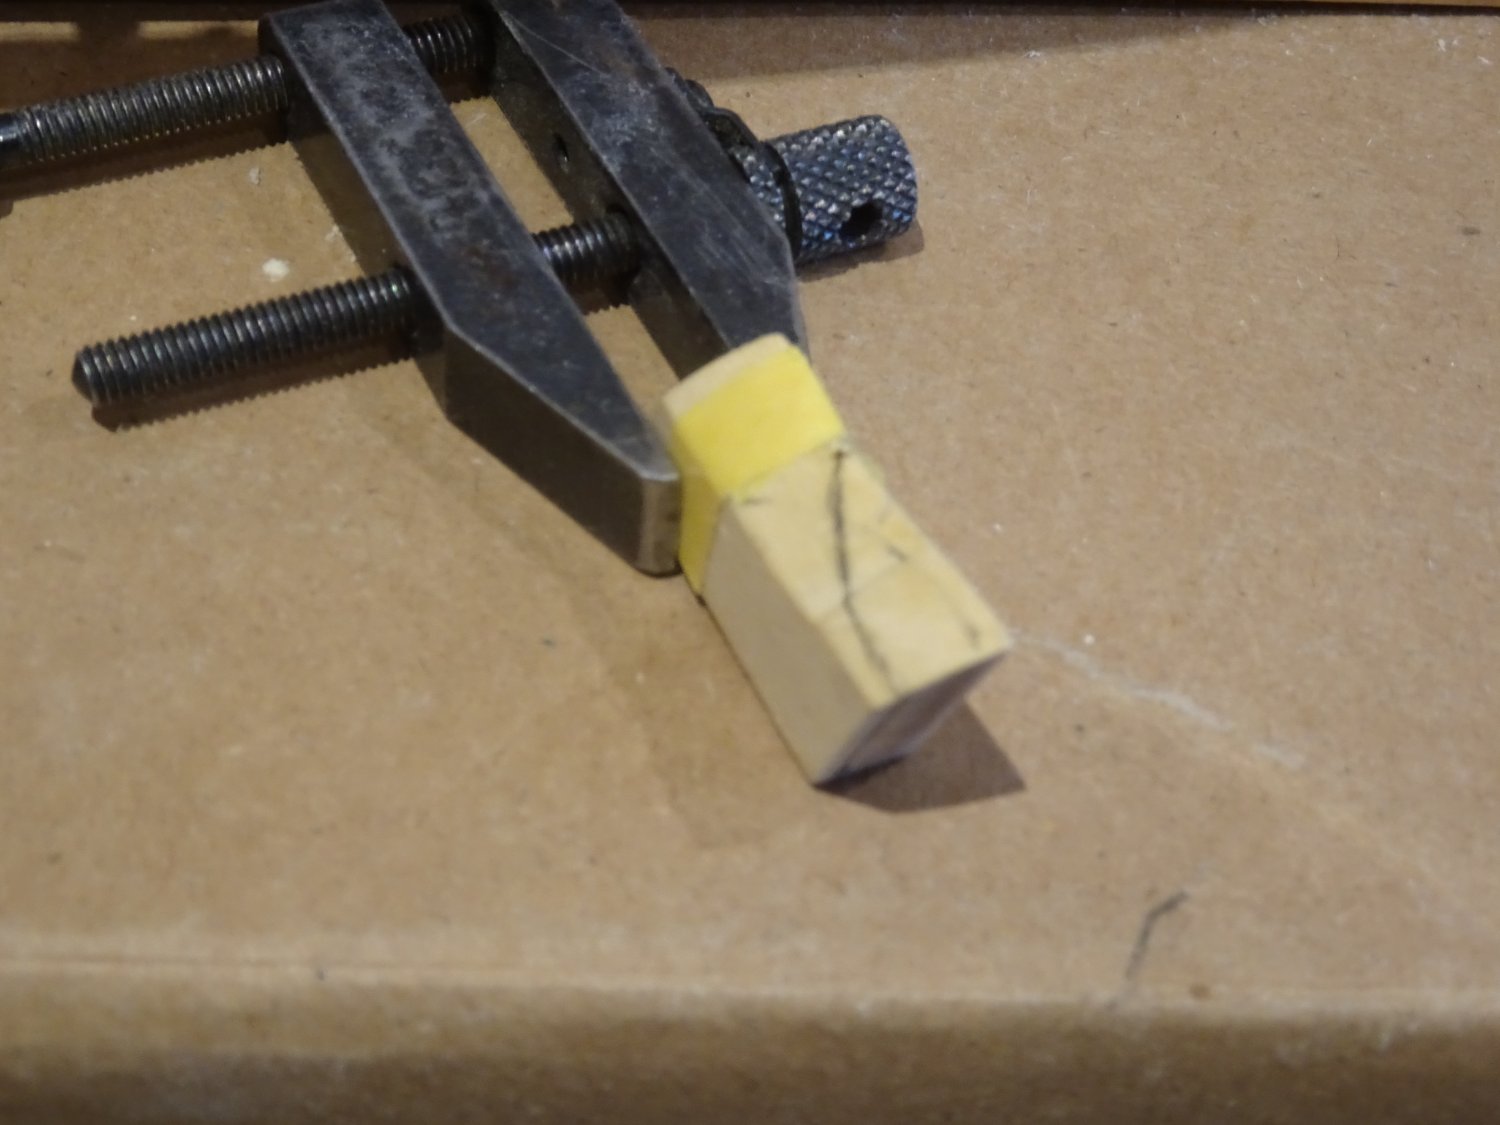
Once the bevels are cut the most difficult part is holding the bolster to impart the concave shape down to around 0.8mm thickness at the bottom edge.

0353
0354
Multiple trial fittings are required during the shaping process.
0362
The final finishing was done with the bolsters in place.
0372

0367
All went well with four blanks left. The recess for the bolster roller was cut using micro chisels.
0370
0373
I can’t help thinking that the boat looks better without those baulks of wood, necessary as they are to perform one of the main operational functions.
Perhaps once the decorative rail and decoration is applied they won’t look so prominent.
B.E.
08/03/2023
-
-
Thanks for your comments Guys, much appreciated.
@ Nipper - a stretch too far to add false 'real' frames to the mix, but I am watching Chuck's Speedwell development with great interest.
A very large box is due to be delivered by UPS today, as close as it gets to being like a kid at Christmas again.😊
B.E.
- gjdale, Nipper, hollowneck and 2 others
-
 5
5
-
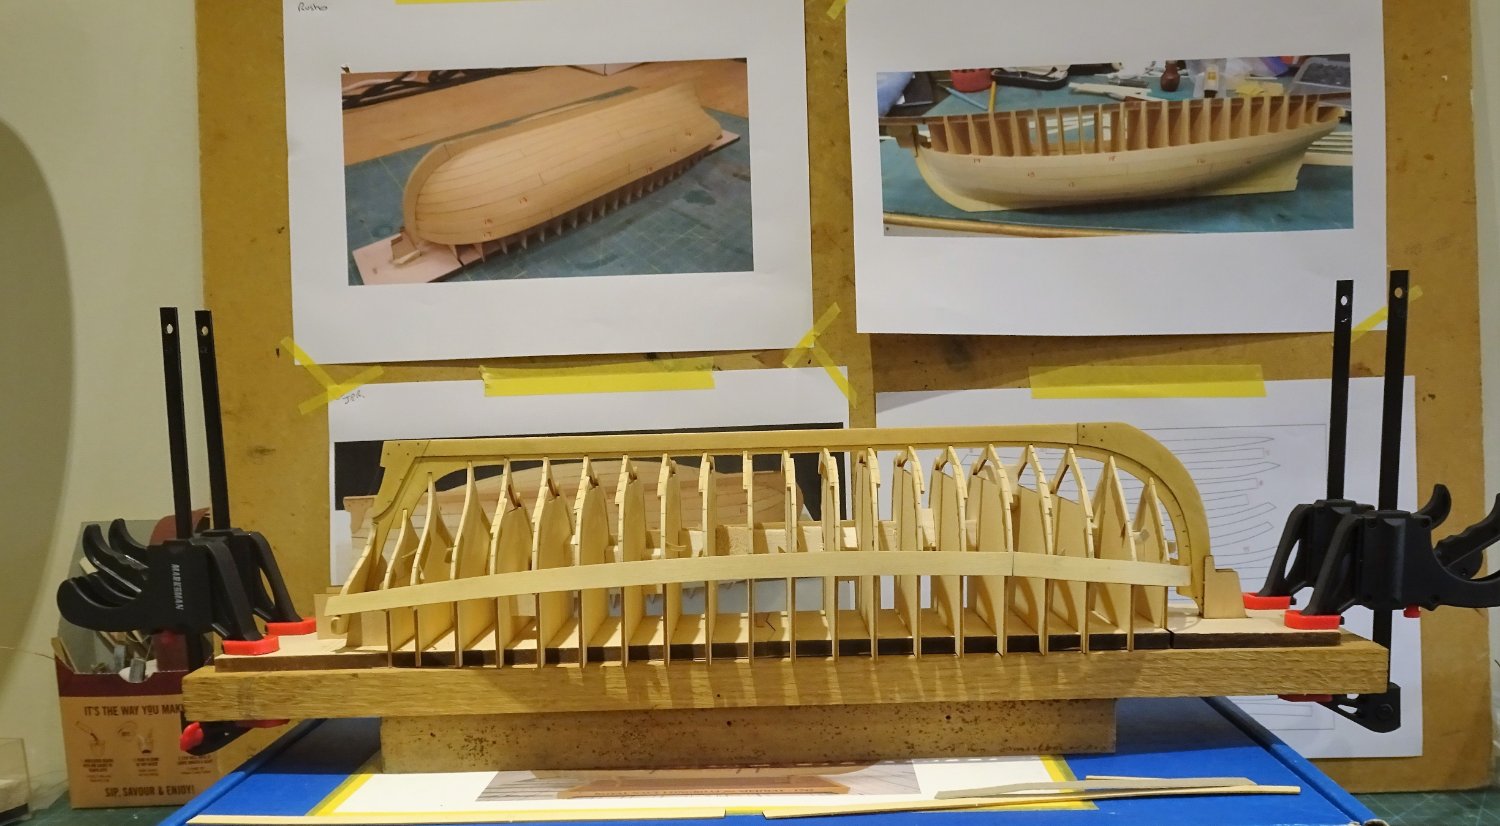
Post 15
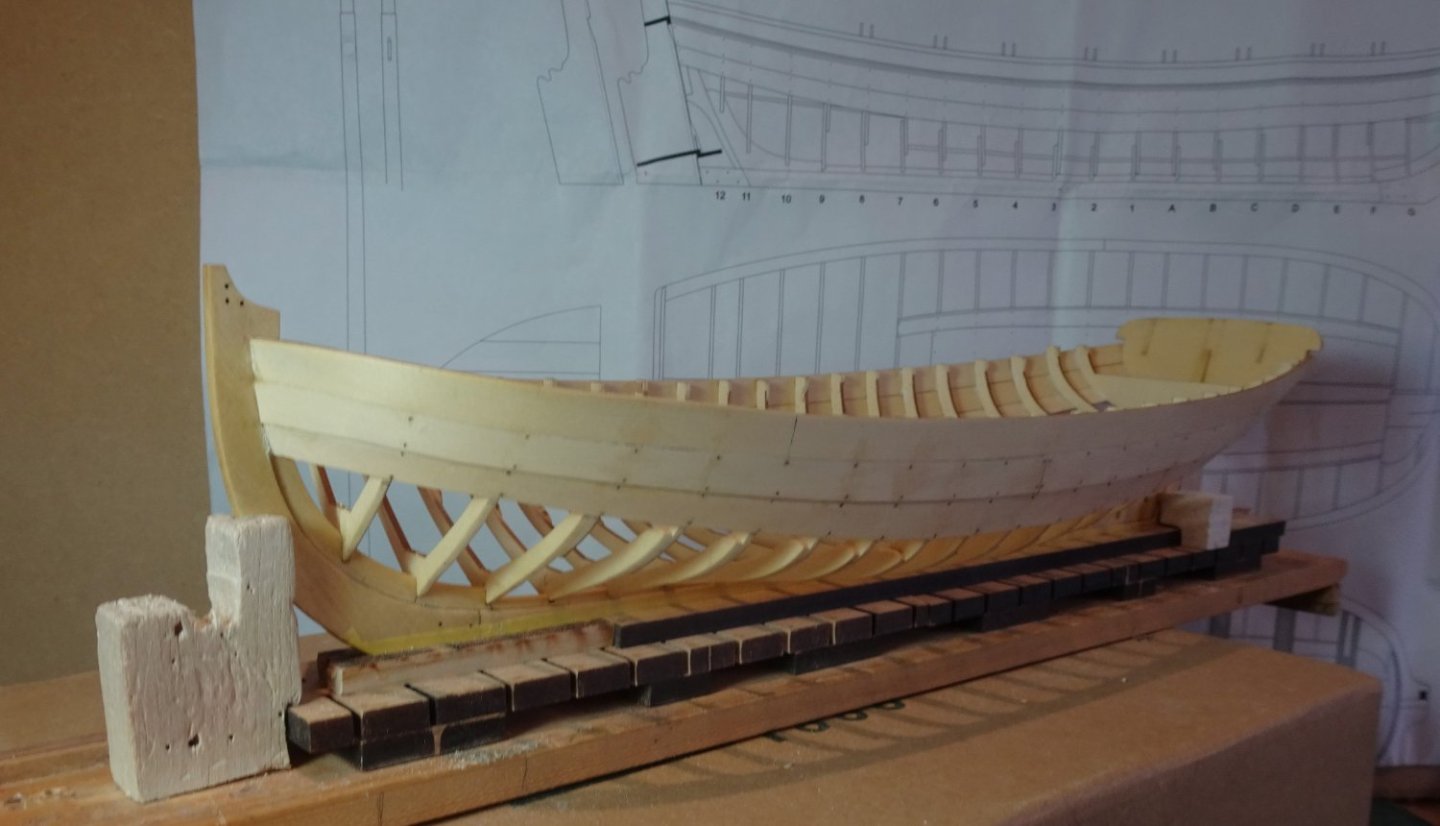
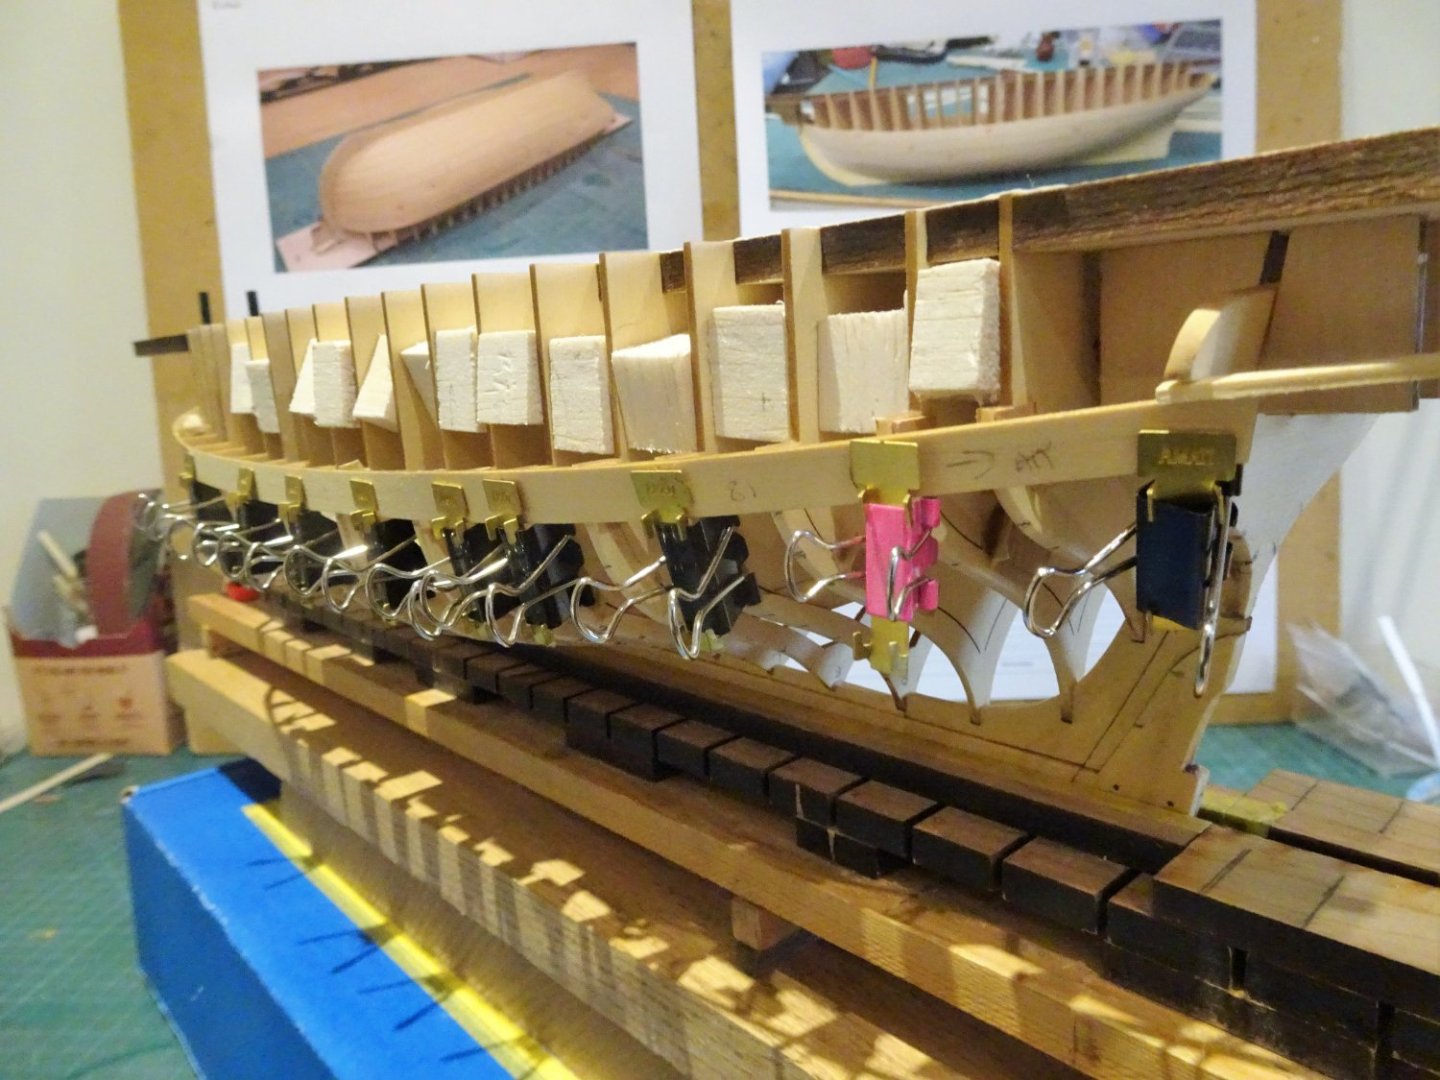
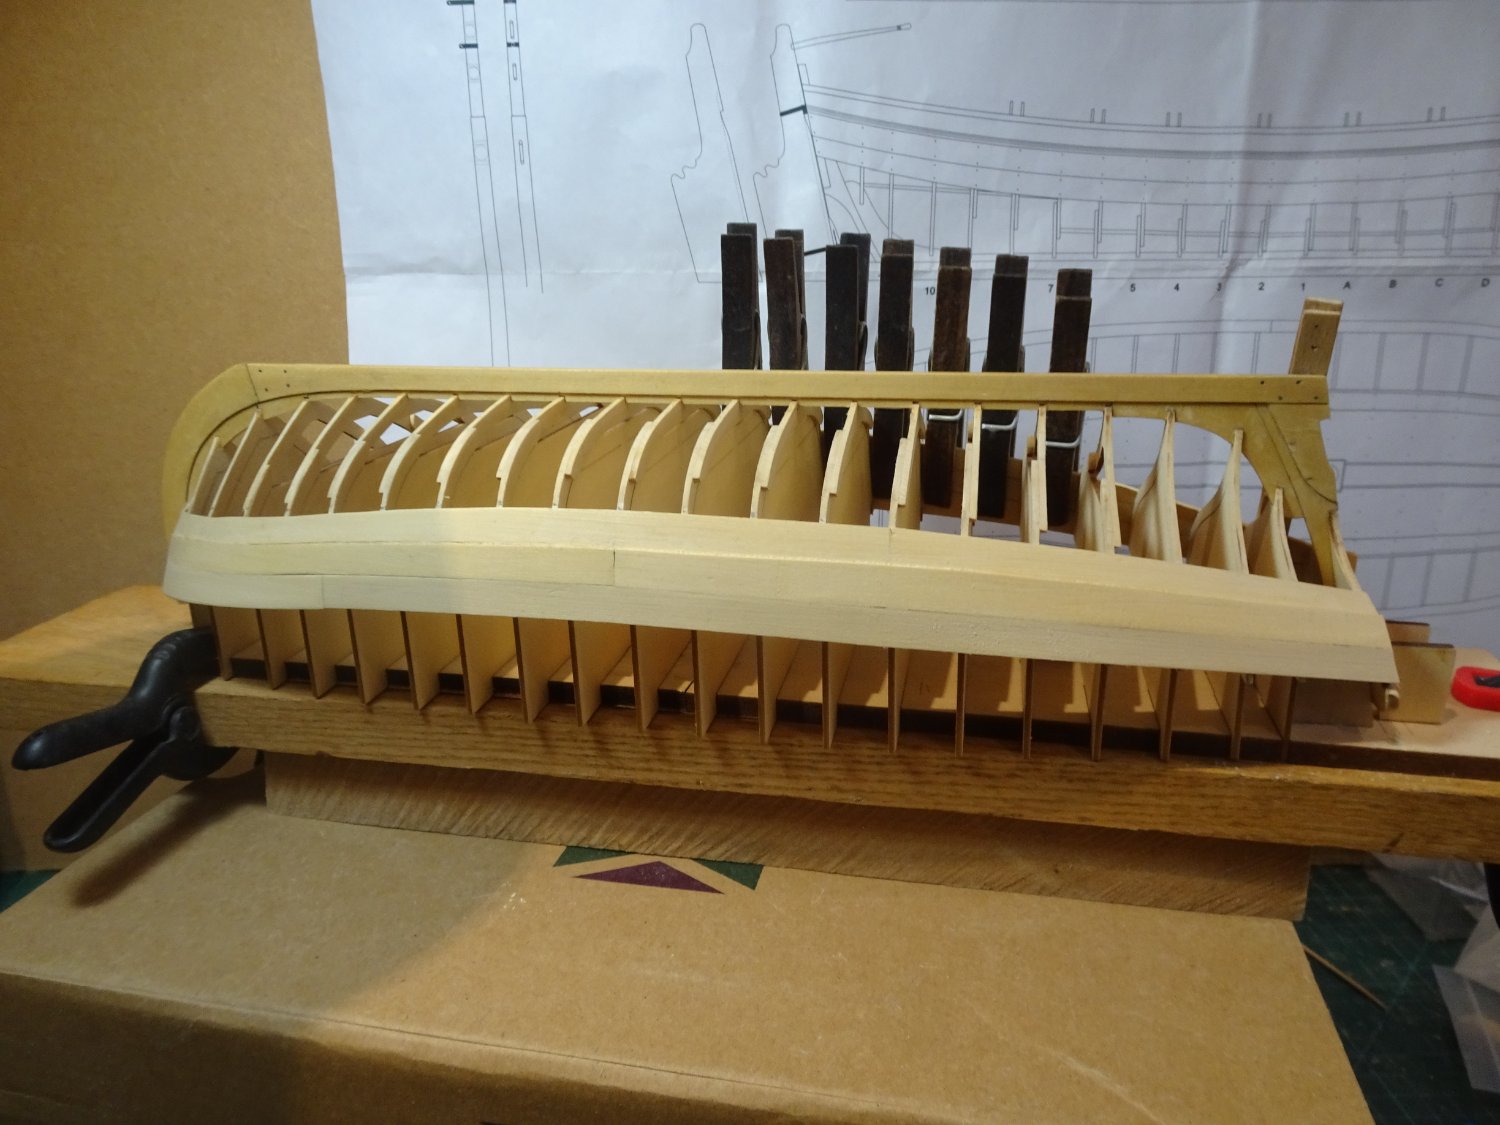
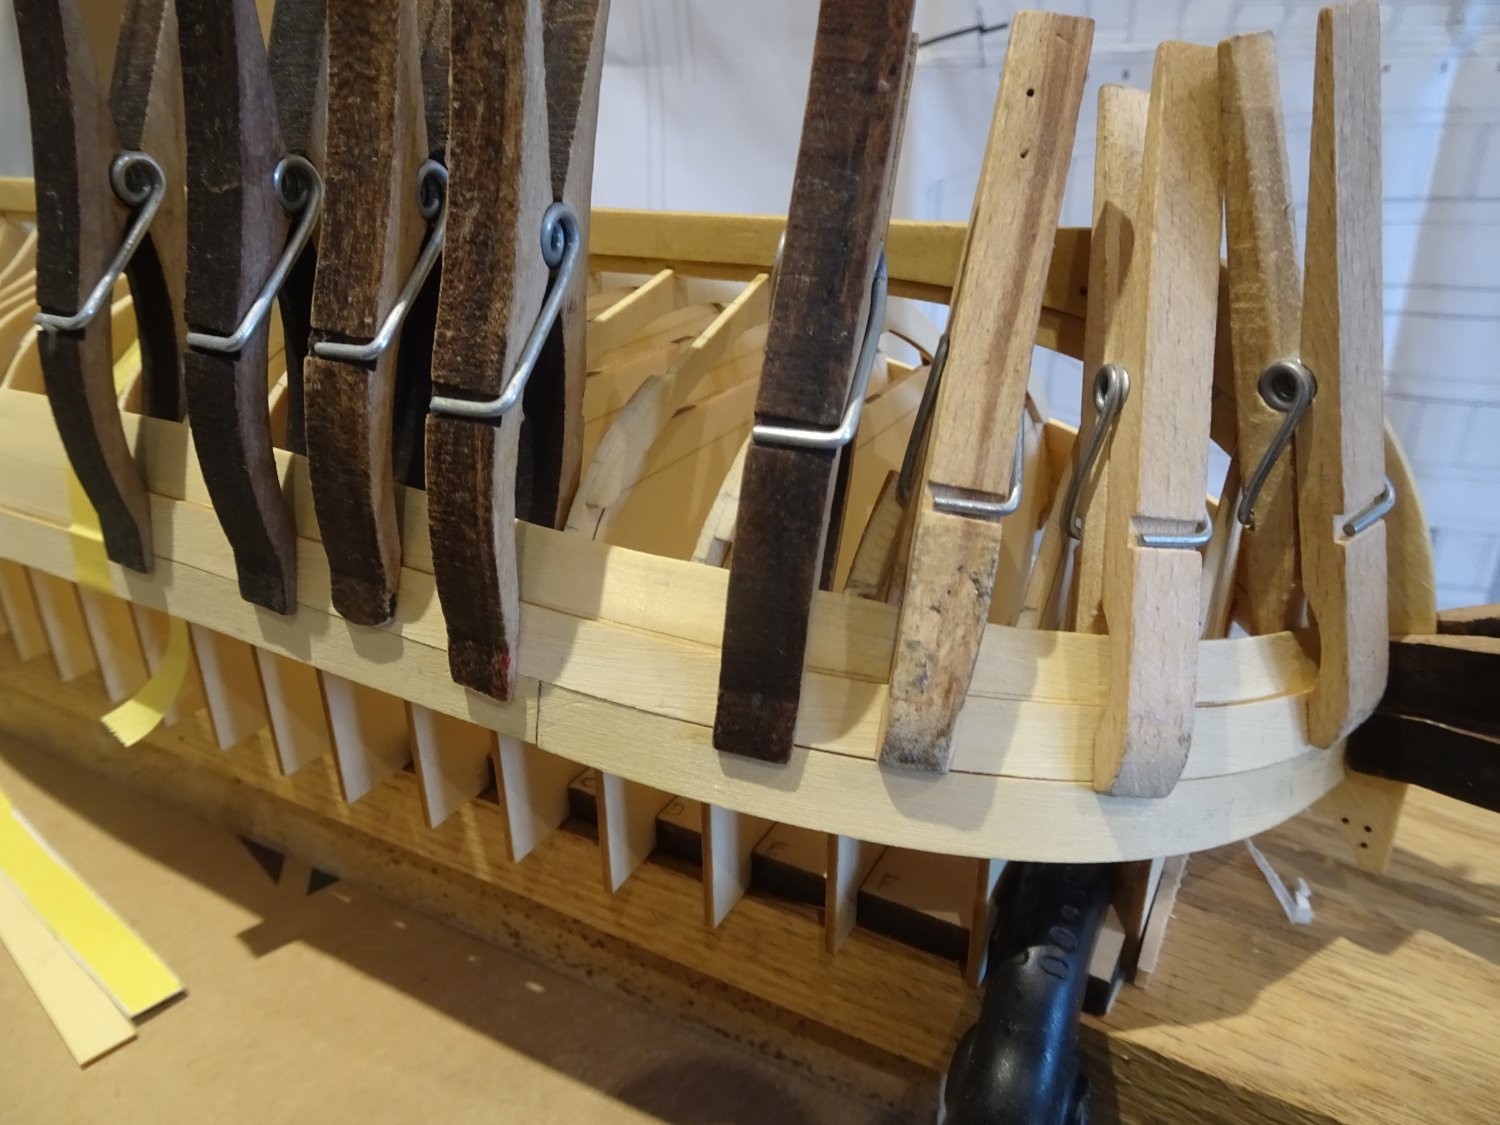
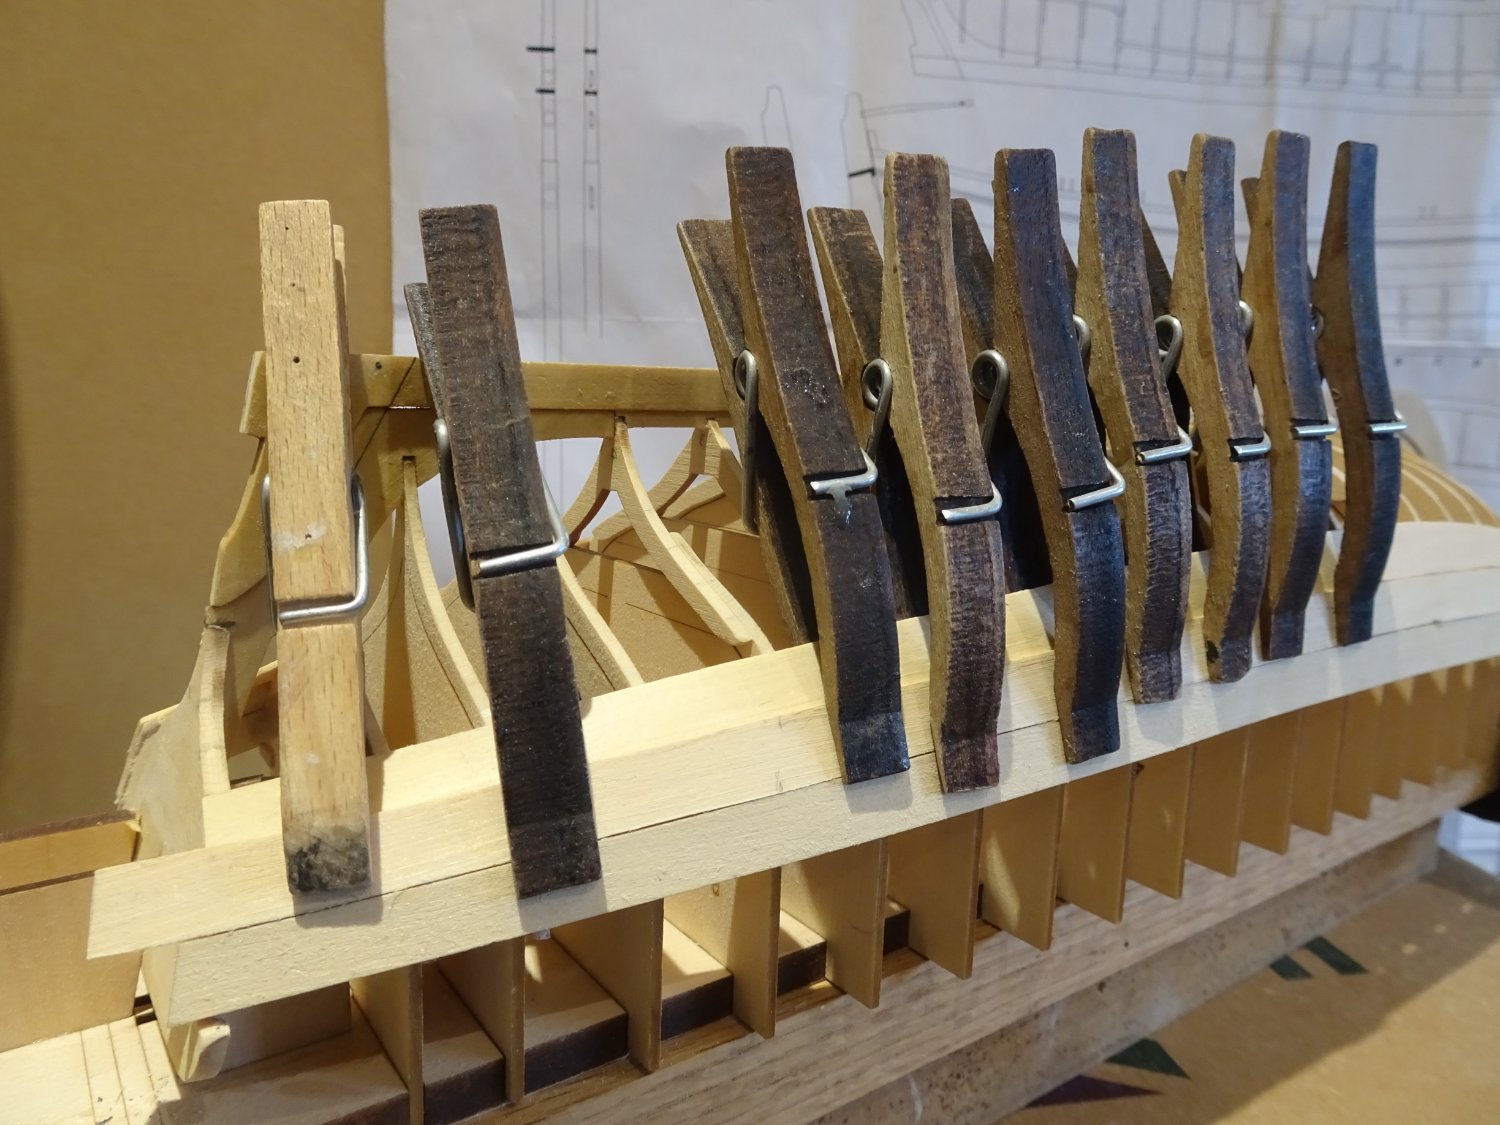
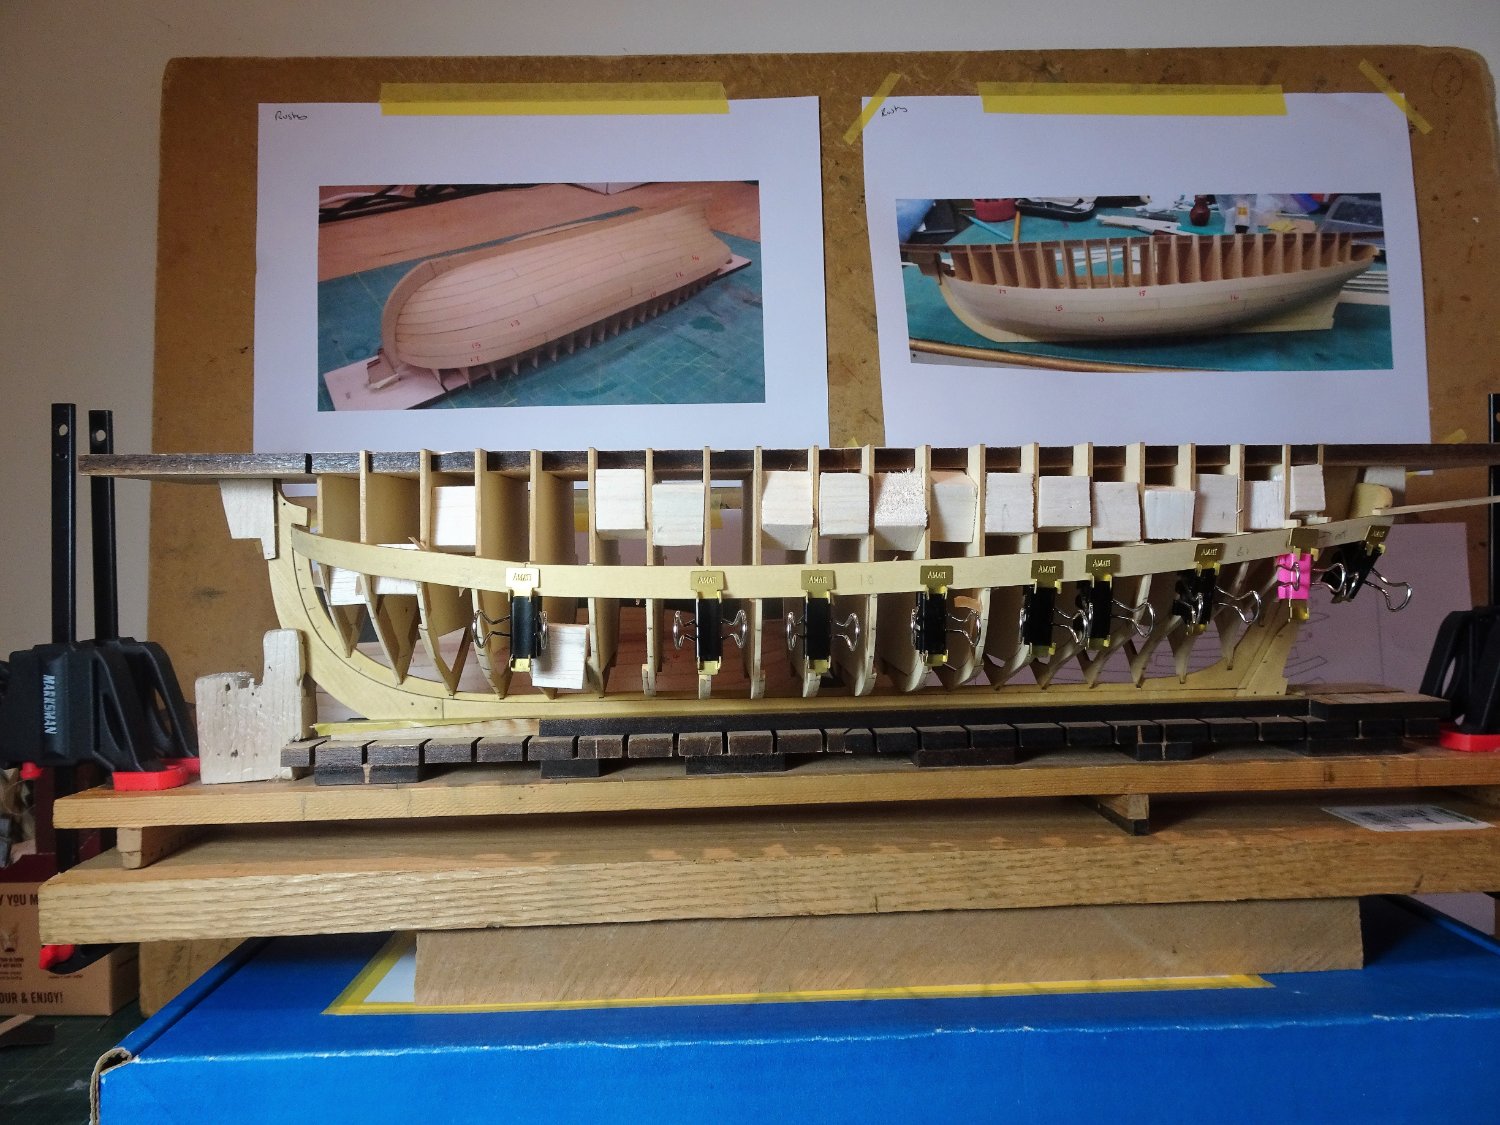
The next stage is fitting the Capping rails, this will secure the frame tops and stiffen the frames further.
I reduced the frame depths a little at the sheer before I added the rails which went on without any issues.
0331
I fixed the bow section first followed by the aft, centring the rail along the sheer.
0333
This is a fairly painless exercise, just need to ensure that the rails sit right down on the sheer and a tight join at the centre is achieved. A slight bevelling where the rail fits beneath the transom was required.
0335
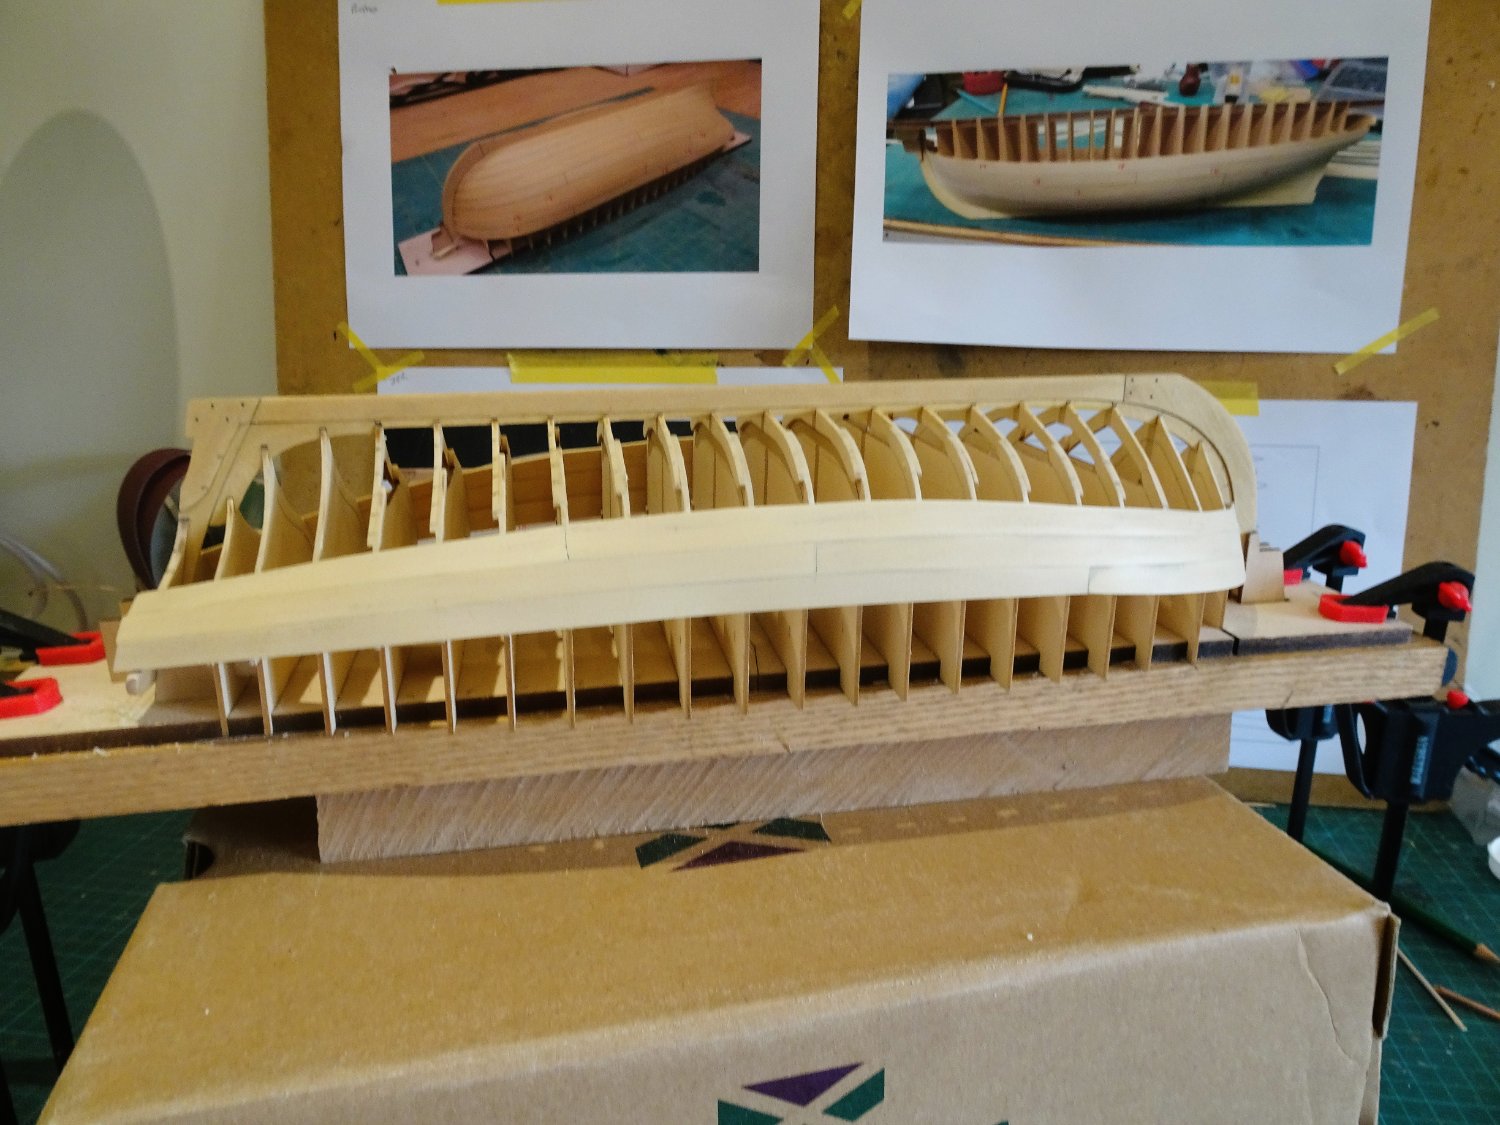
I love the run of the sheer on this model.

0338
0340
0342

0341
0336
0343

0345
Fairly satisfied with progress thus far, but a somewhat more testy aspect looms.
B.E.
06/03/2023
-
Cheers Guys, thanks for your support. 👍
@ Kevin - I was rather thinking of following you, and crib off your progress.😉

I have informed my shipyard assistant of the impending project, and he's of the opinion that he'd rather be sniffing around the woods and meadows, than spend long hours in the workshop, listening to me muttering to myself.
B.E.
- Haliburton, davyboy, mtaylor and 11 others
-
14
-
HMS Indefatigable 1794
The Prologue.
I find myself once again beguiled by that modeller’s honeypot known as Vanguard models and I finally succumbed to Chris’s latest offering, having mulled it over for several weeks.
Why the wait, wots not to like, some may say, but this will be the largest project I have undertaken since Norske Løve way back in the 1980’s.
Indefatigable is about the same hull size as Norske Løve, (1:70 scale) but not so tall. It will still demand a sizeable display area.
As with my Sphinx build this will be Navy Board style, I’ve no room for masting and rigging, and I have developed an affection for the look.
I opted for the basic kit as all the masting, rigging line, and block work will not be used, simply added to my ever-growing pile of discarded kit parts. If I decide to add stump masts my preferred material is Ramin.
From a preliminary assessment I don’t think Chris has left me much to fiddle with. He has addressed the issue of realistic Quarter galleries, the provision of Lodging knees, and a properly fitted out Great Cabin, complete with Rudder housing.
He has solved the issue of lower deck cannons coming adrift early in a build, and the stern decoration and Figure are wonderfully sculpted.
In terms of authenticity this kit hits the spot and is what in the end persuaded me to go for it.
As with Sphinx I will be taking a minimalist paint approach, and will look to represent the ochre band along the gunport line more subtly, using natural woods.
It was the all-painted hull that also delayed my decision; authentic as it is, I prefer the natural beauty of wood on a model of this type, and I needed to have a clear idea of the approach in my mind.
The makings are expected to arrive on Tuesday, and I will be working the initial stages of the build in conjunction with my current Medway project.
B.E.
05/03/2023
-
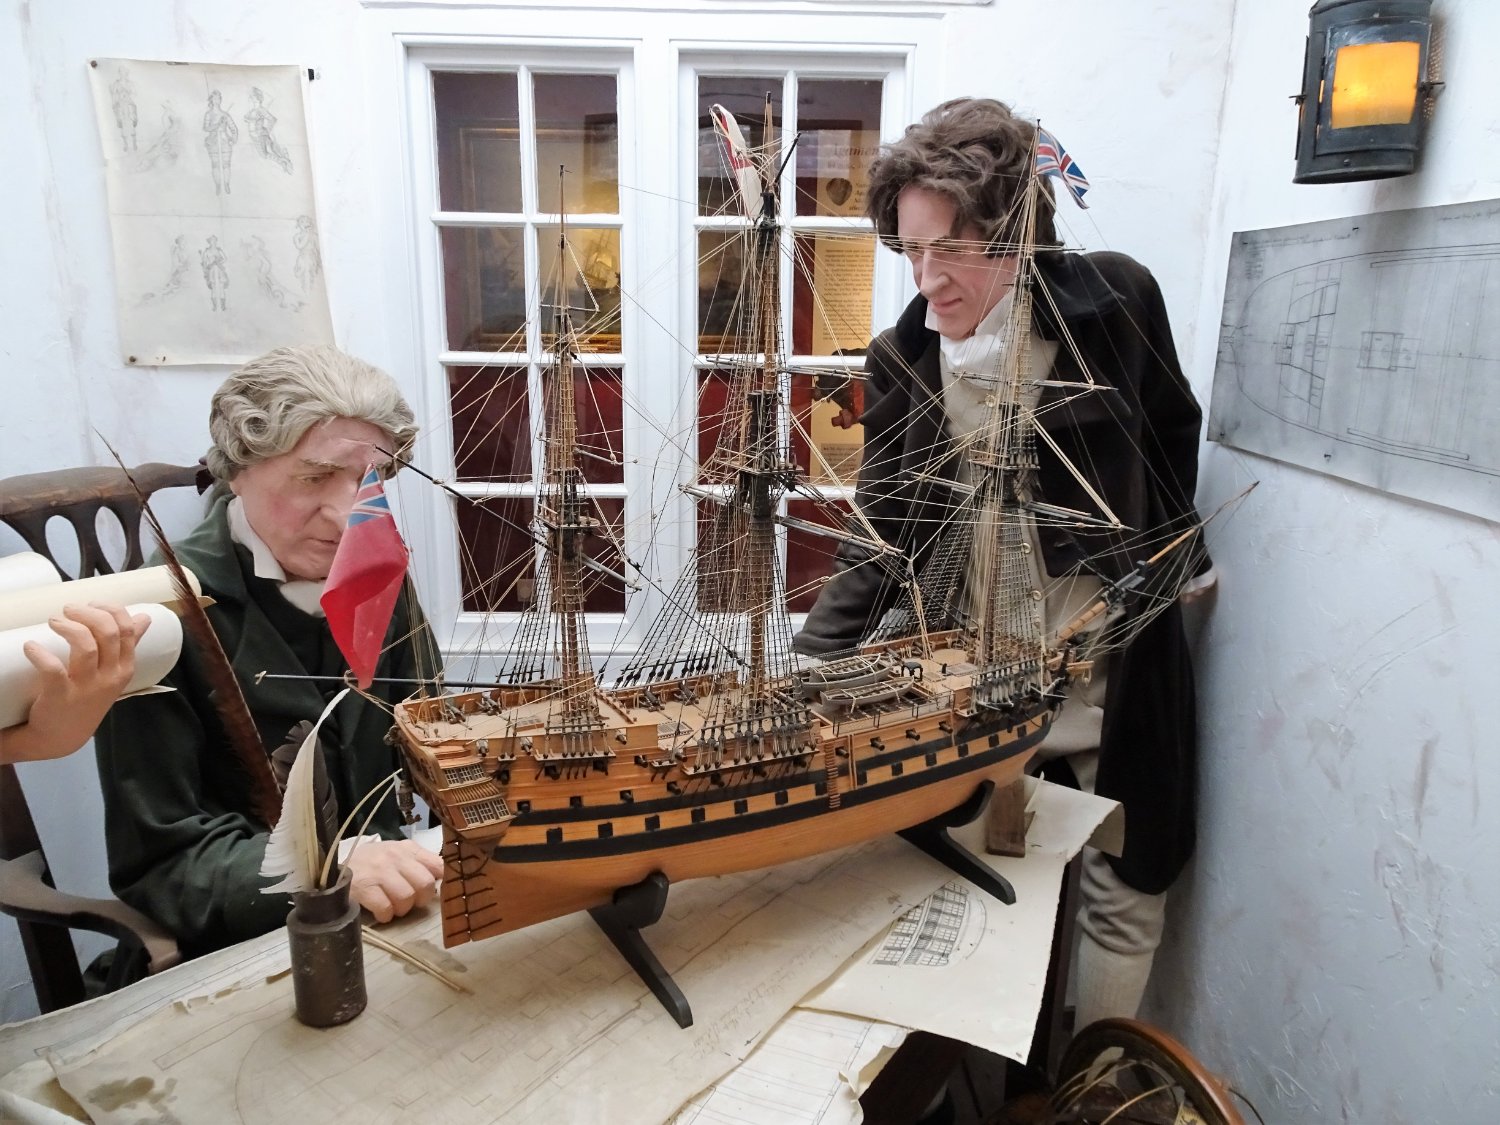
Vanguard re-imagined.

A conversation between Sir Christopher Watton, notable ship designer for his Britannic Majesty, and Mr James Hatch (seated) acknowledged Master shipwright, and preferred Navy Board contractor.
Think you can knock this up by Easter Hatch, need to recoup some funds, don’t you know.
That’s a big ask Sir Christopher, I ain’t left the yard in months, and I’ve only just finished chopping down that last Sixty-four you’ve had me working on for weeks.
Well, do your best Hatch, and don’t forget the penalty clauses..
- chris watton, DonSangria, Rob Dow Tea and 38 others
-
19
-
 21
21
-
 1
1
-
Phew, that's a relief, thank you Chuck.
It's so reassuring to have your expert eye watching over my efforts and those of others on MSW, it is much appreciated.
B.E.
- Ryland Craze, Chuck and mtaylor
-
3
-
-
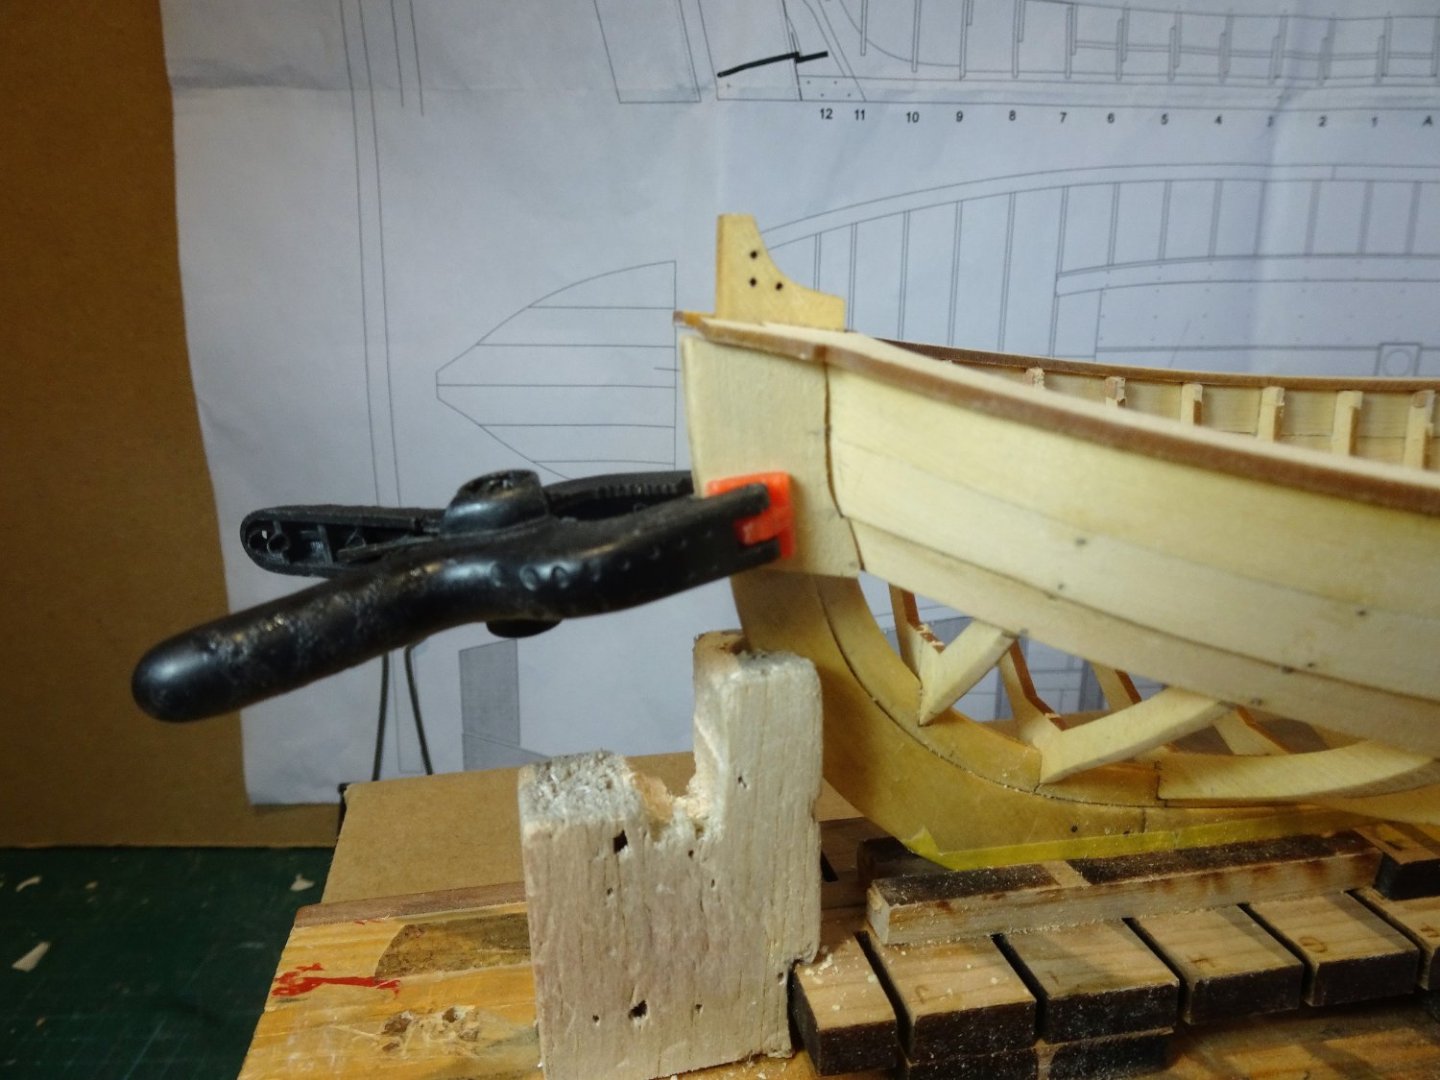
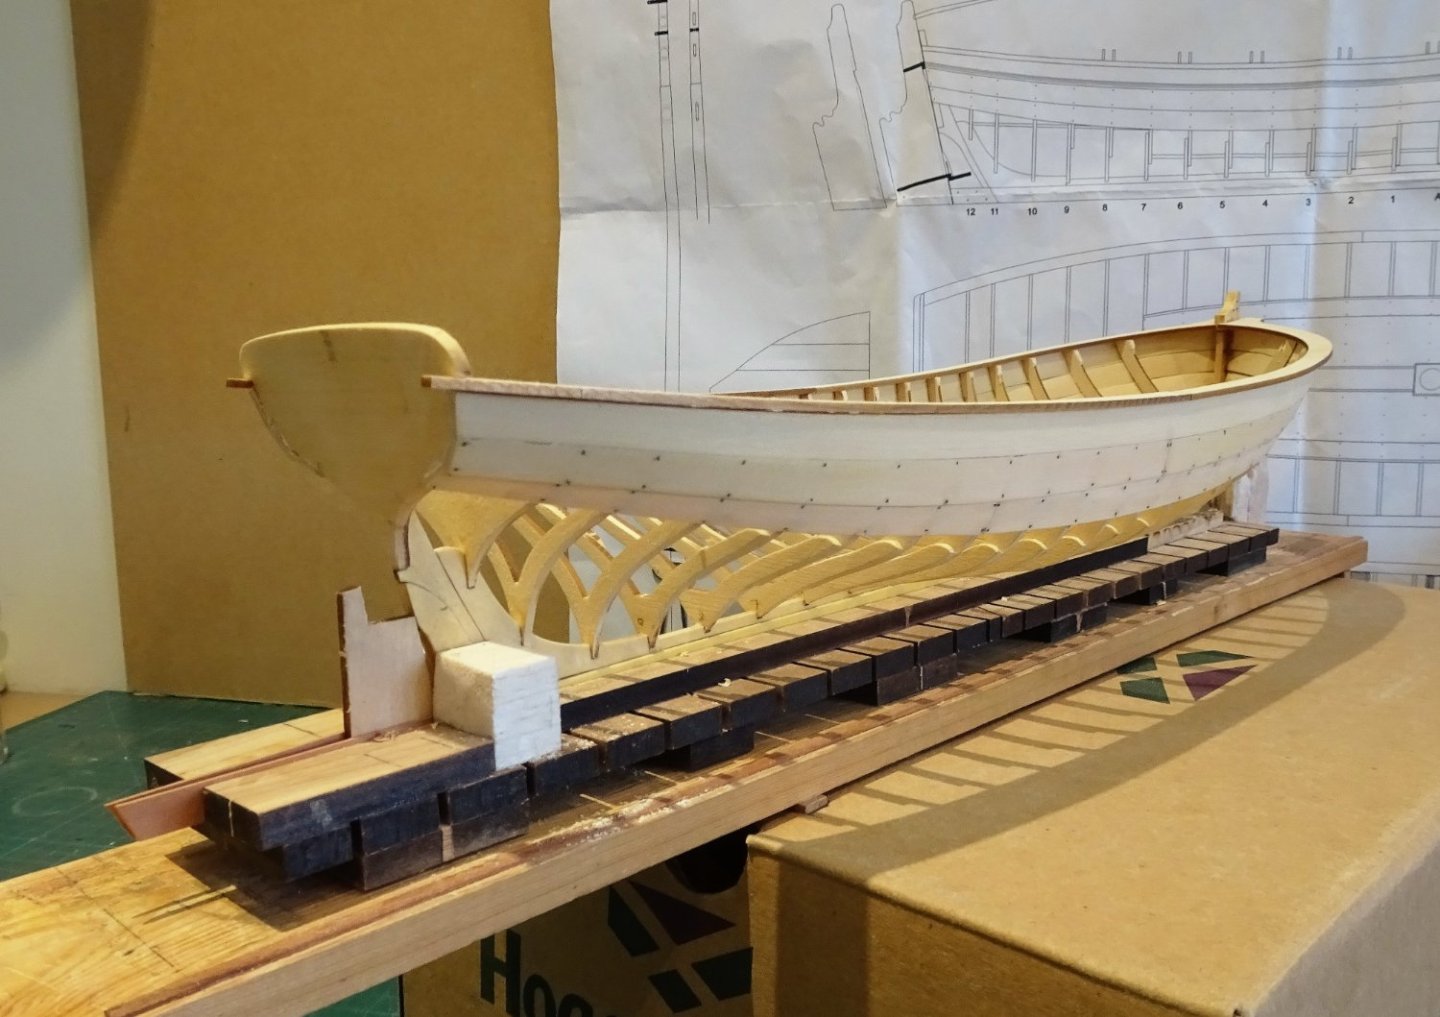
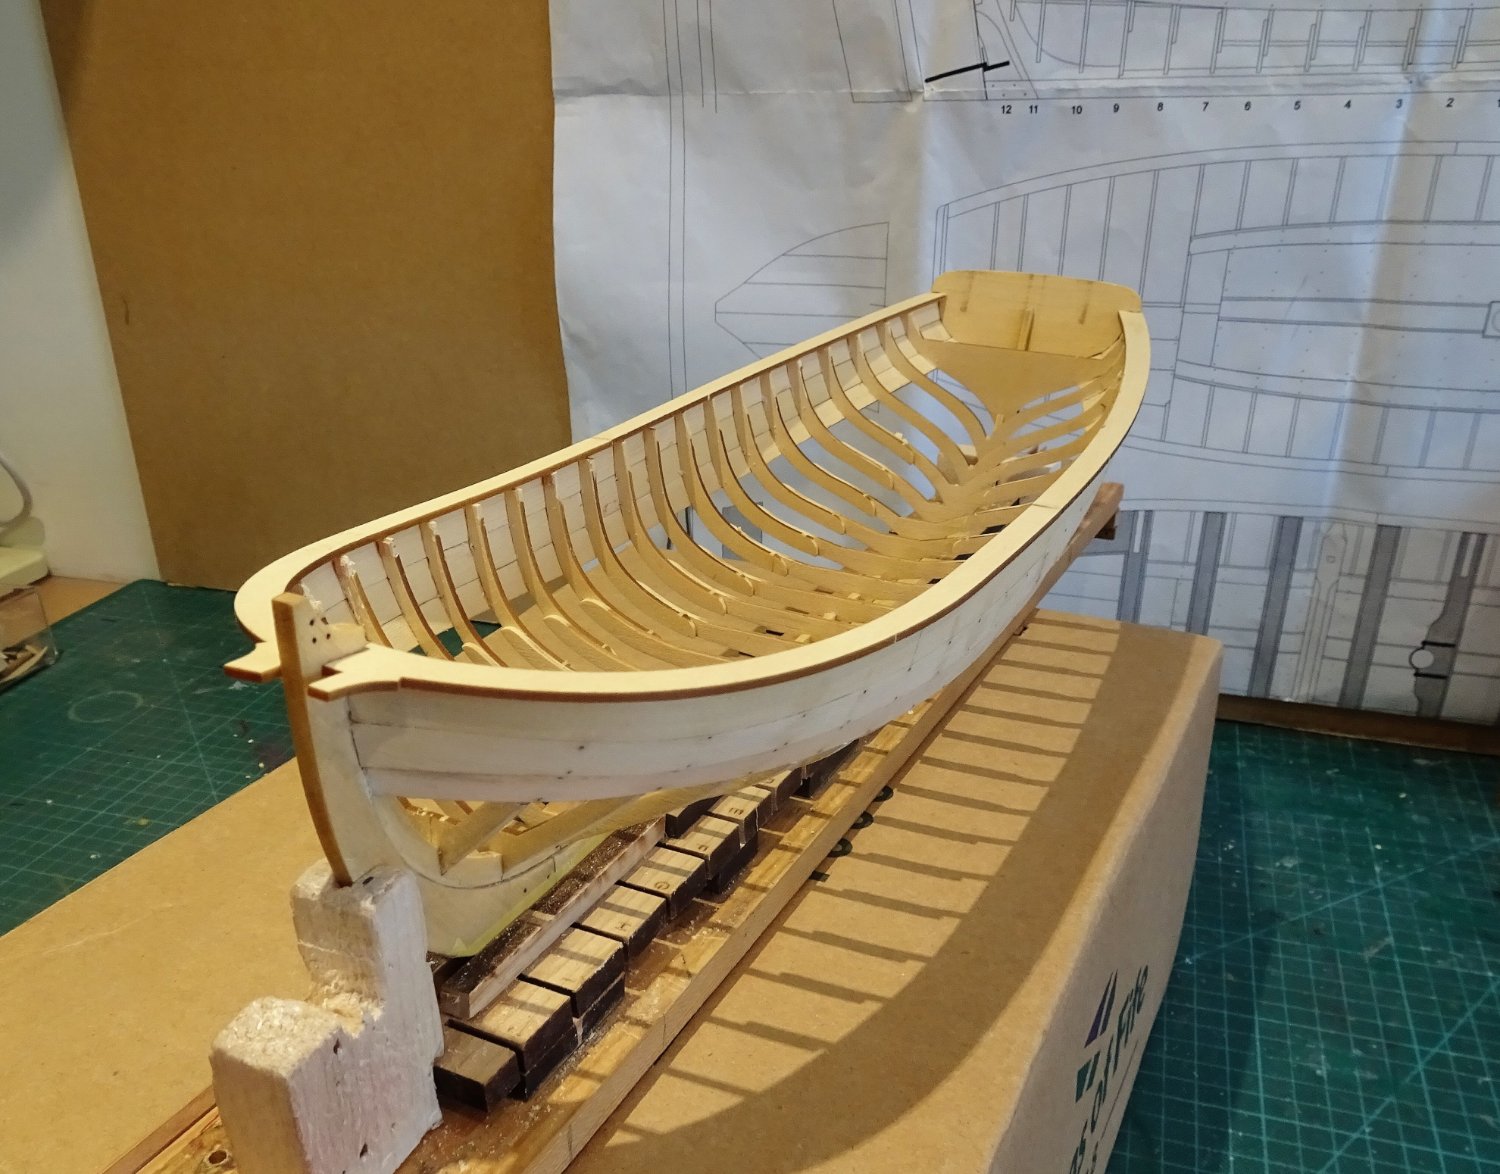
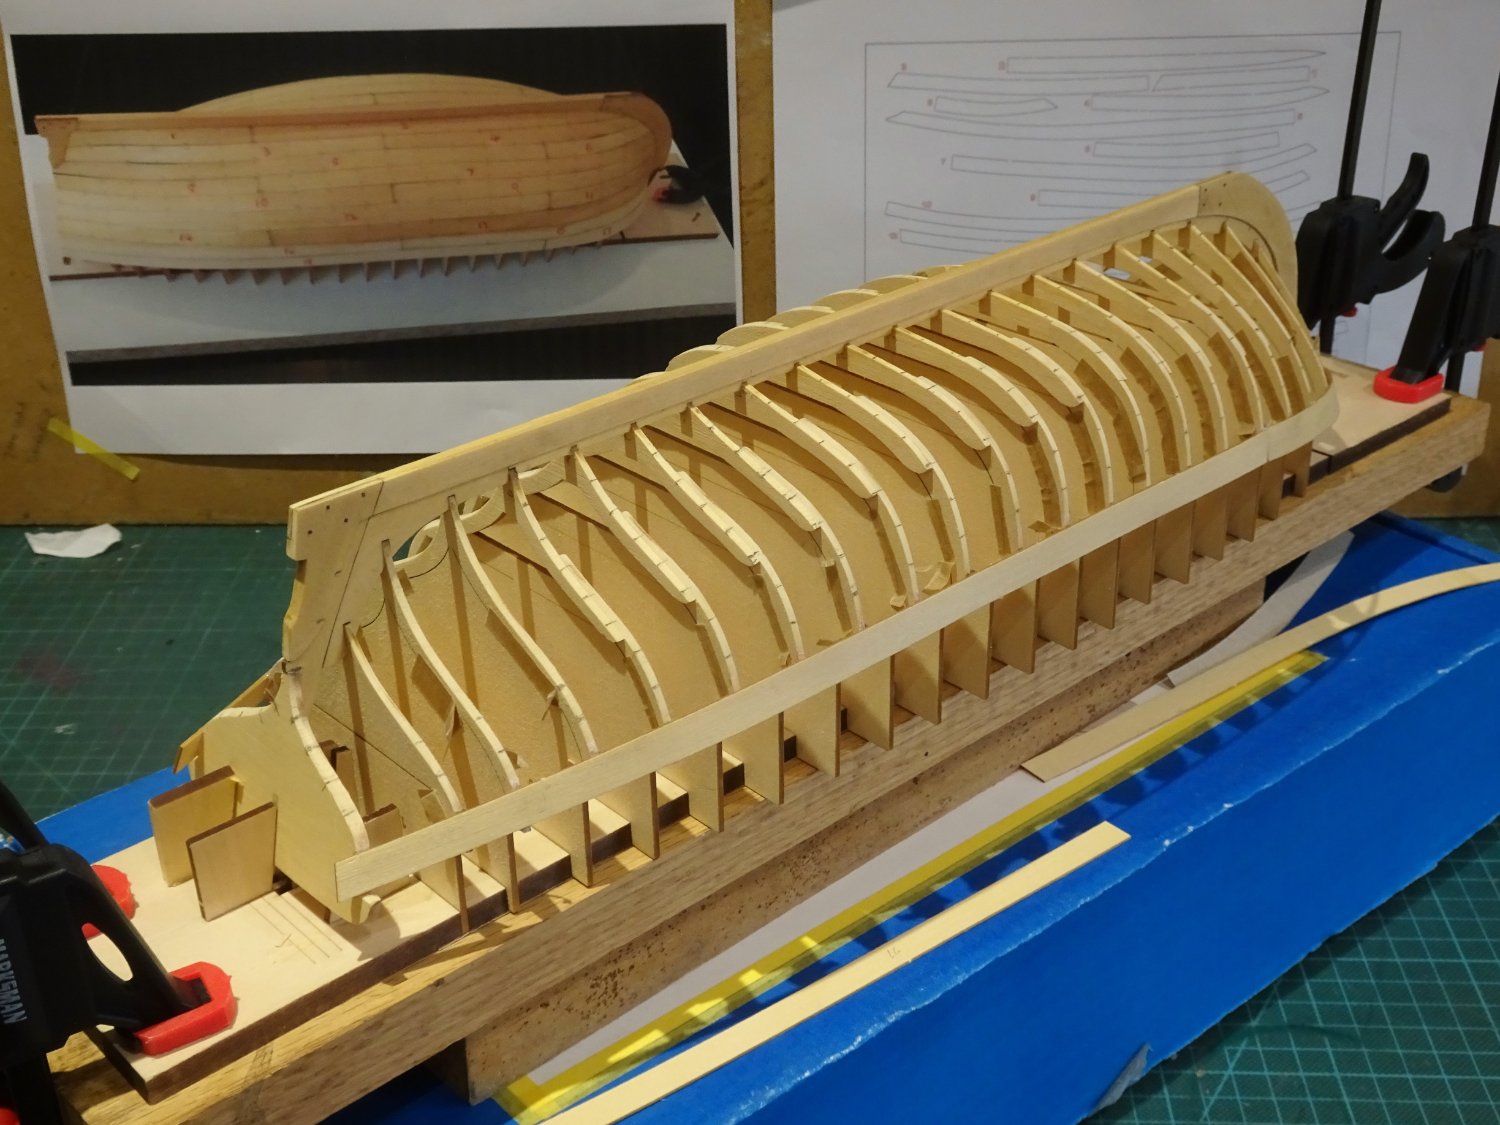
Post 14
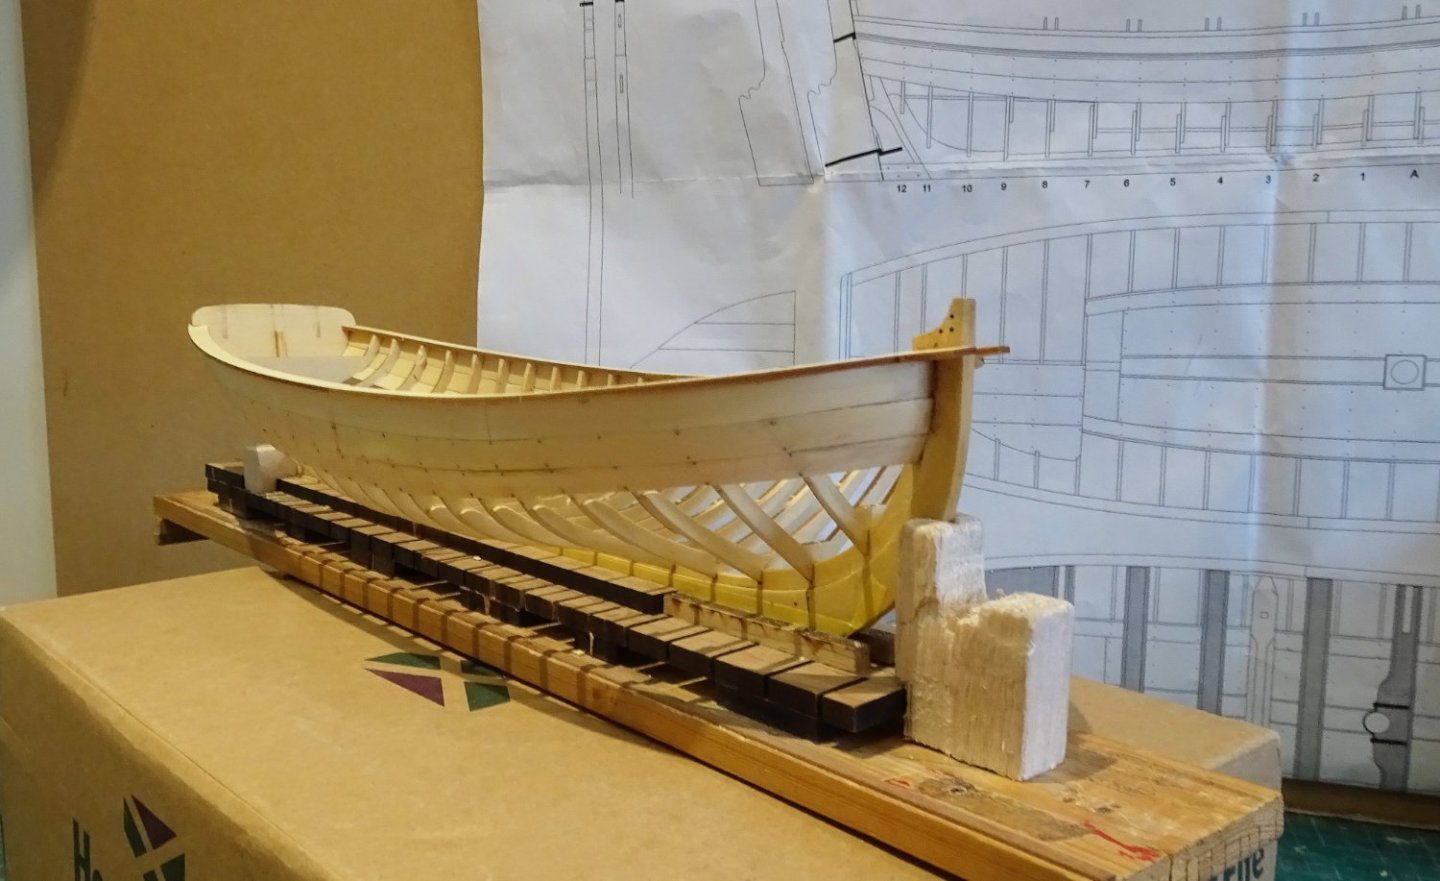
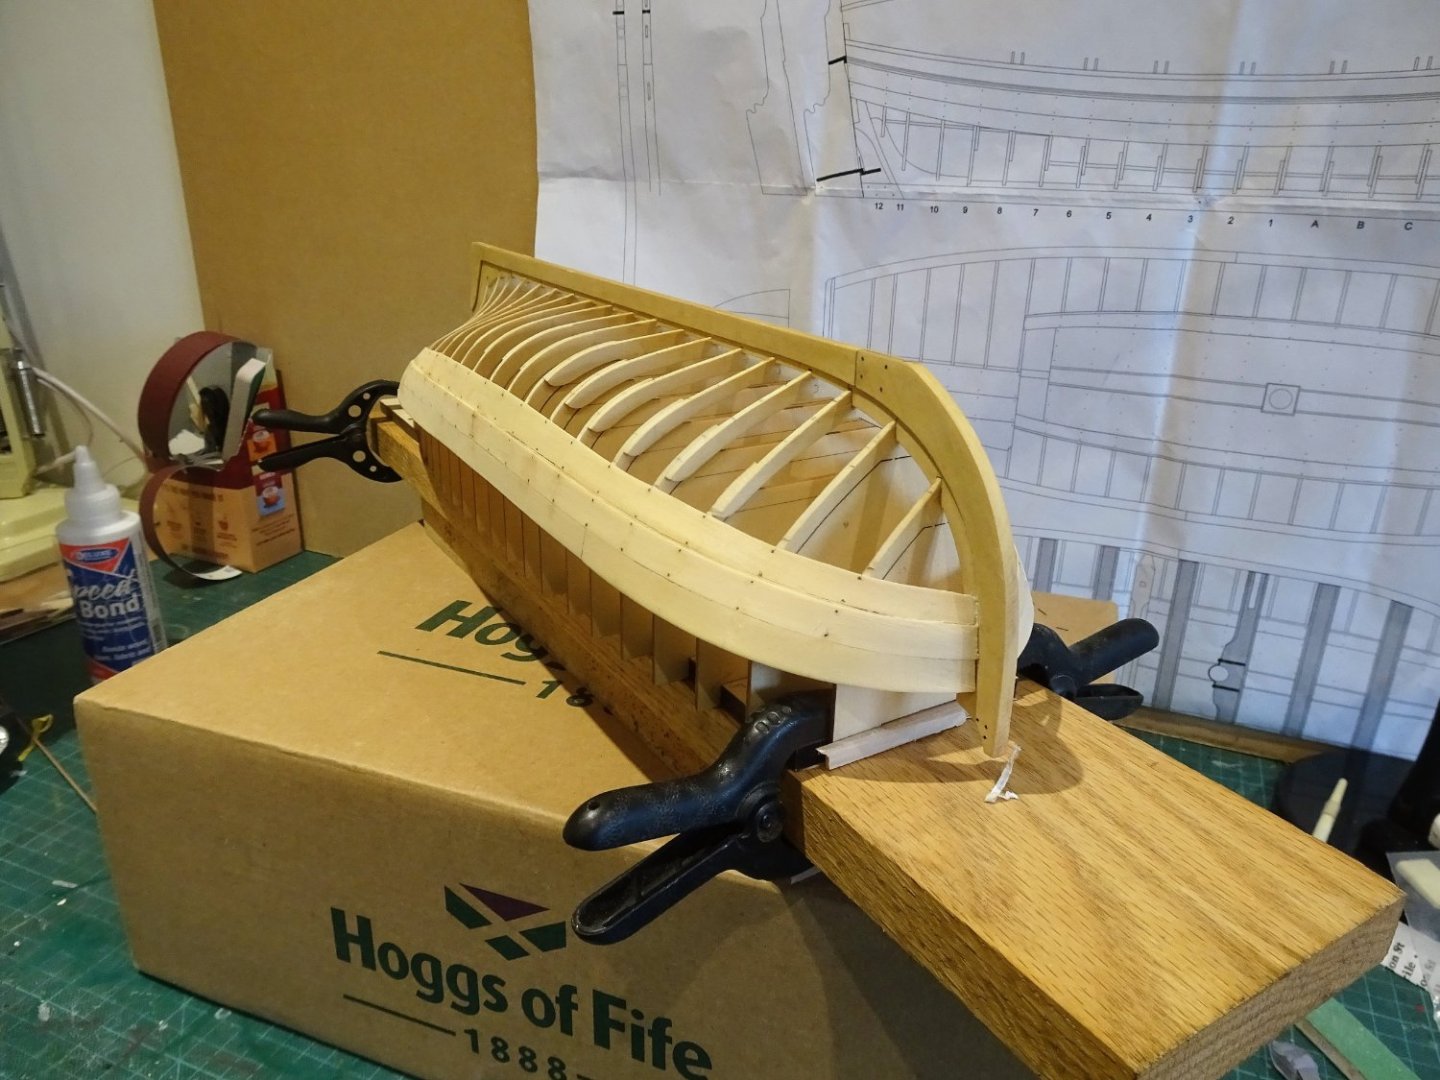
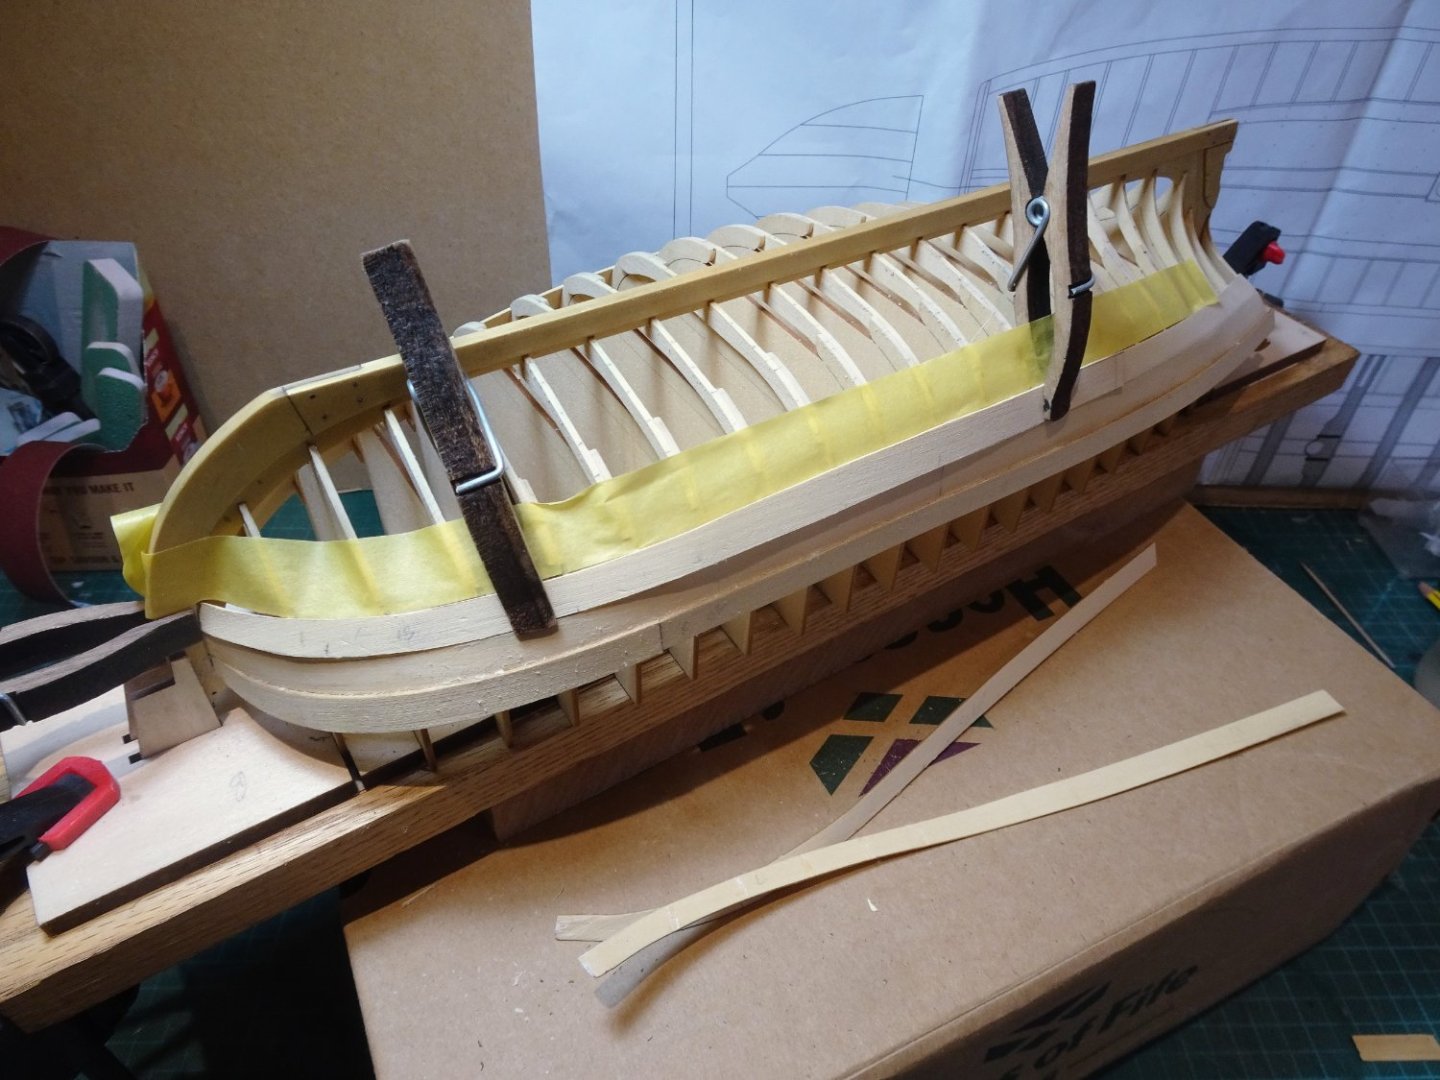
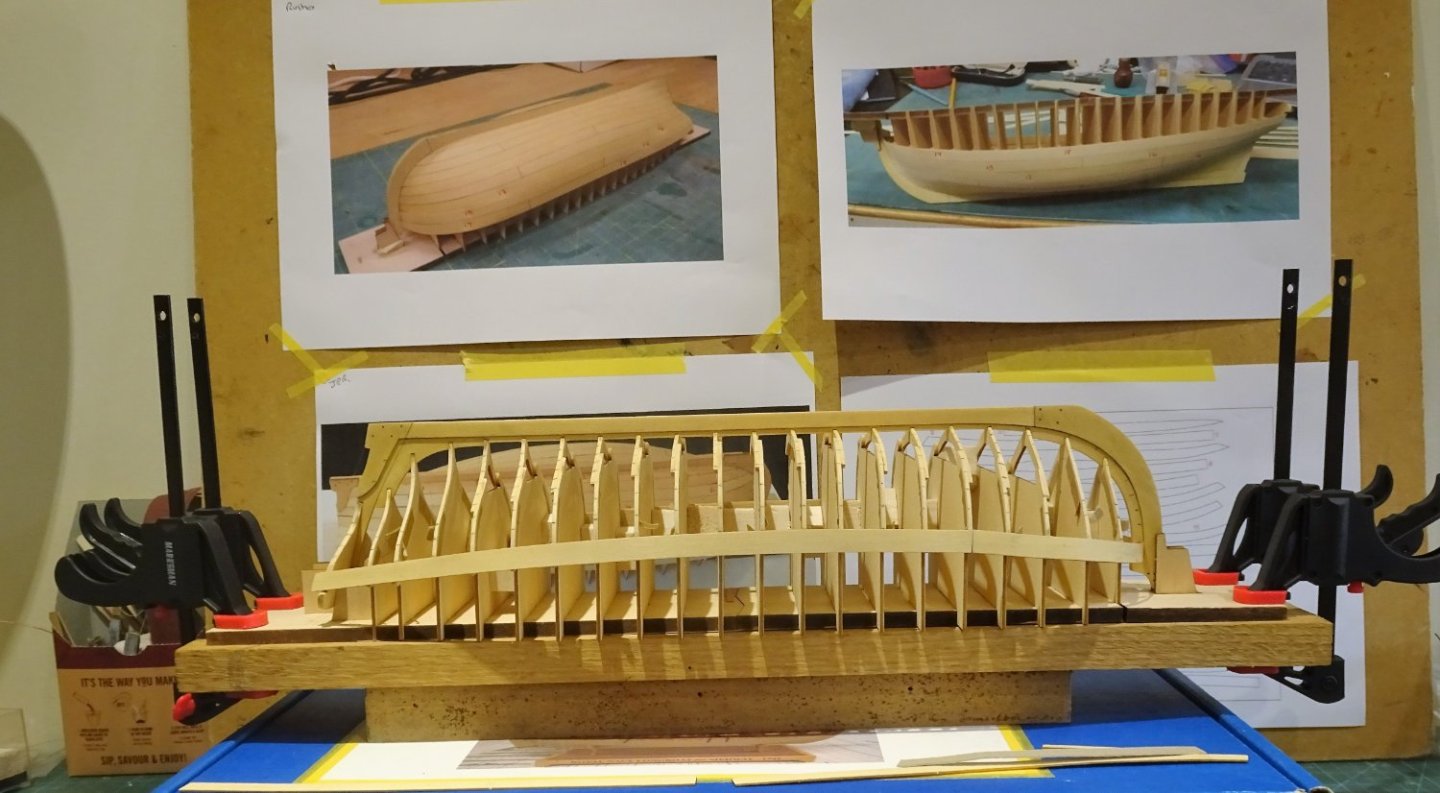
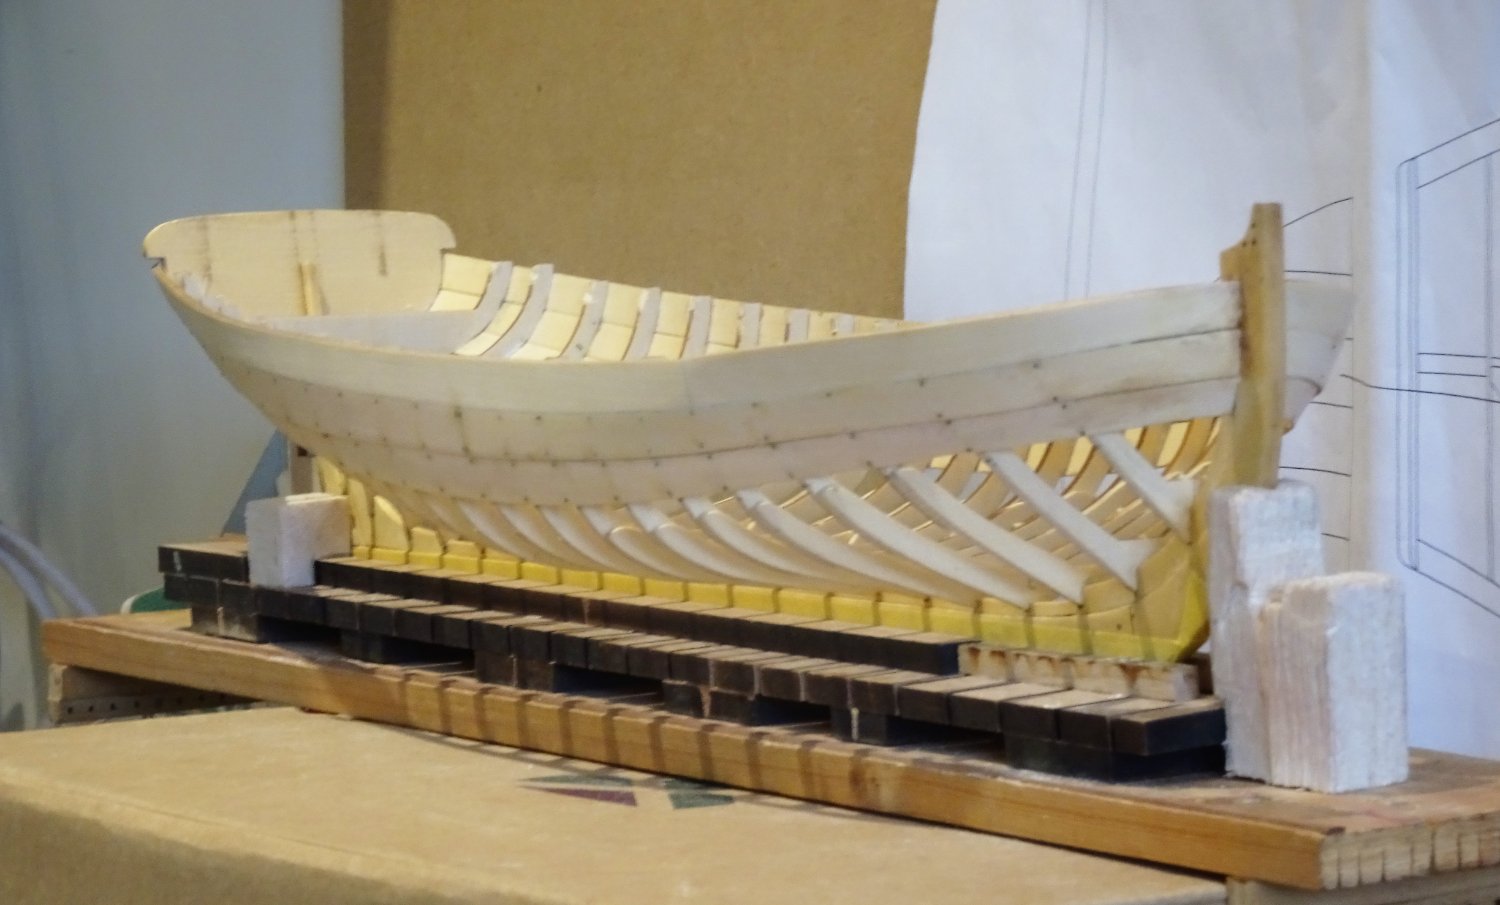
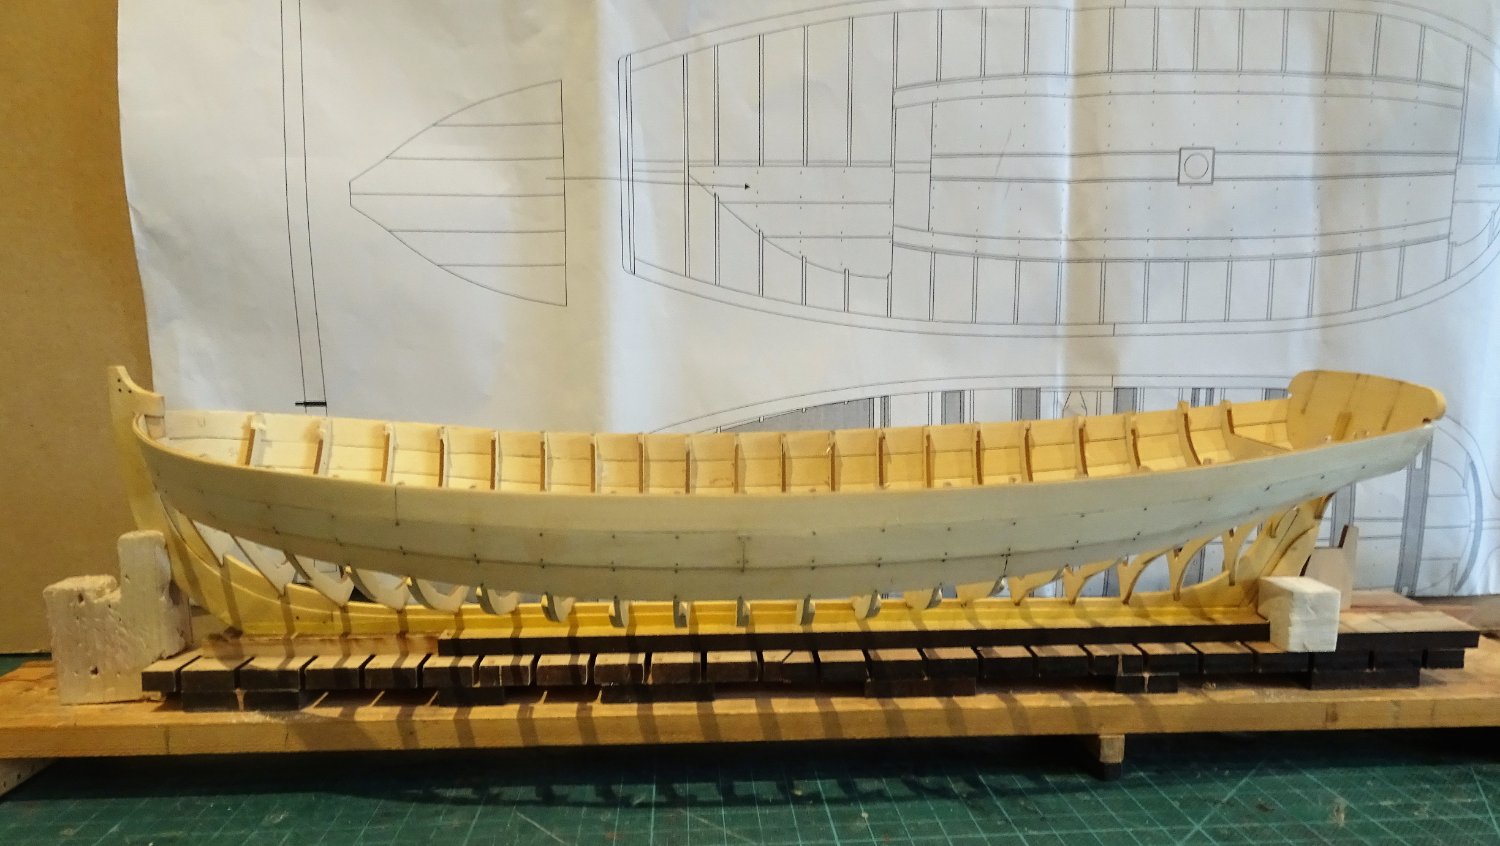
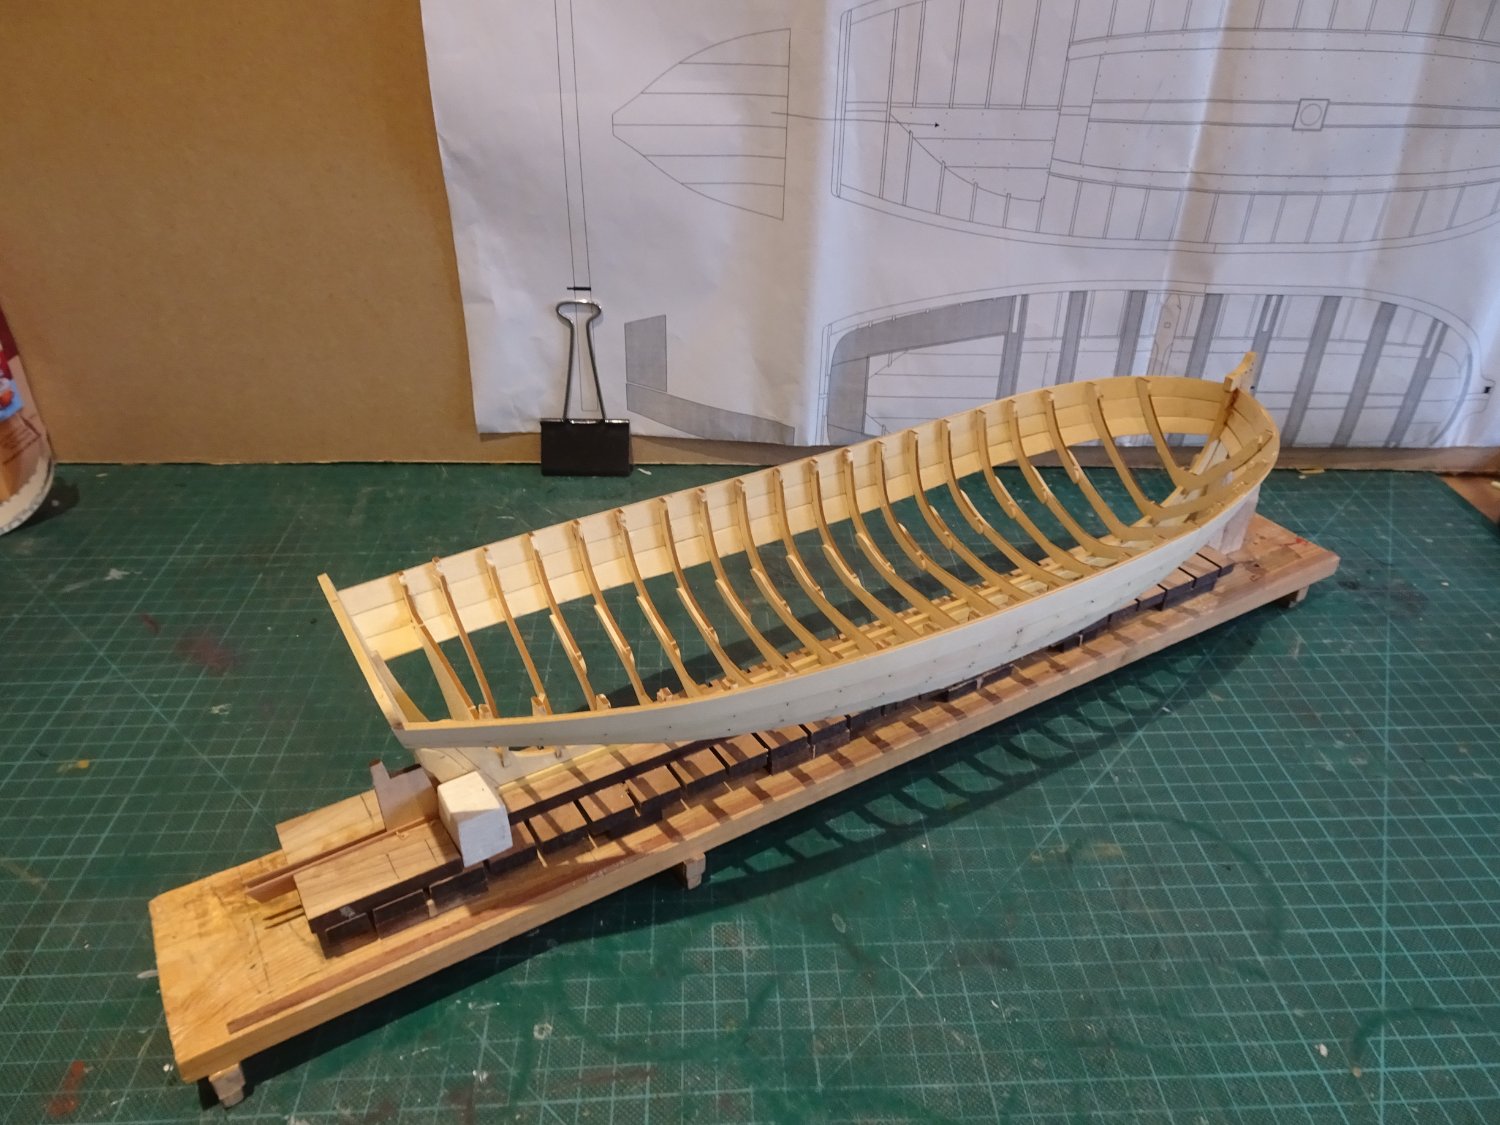
Removing the base board went without issue, and the hull will now remain upright as work progresses.
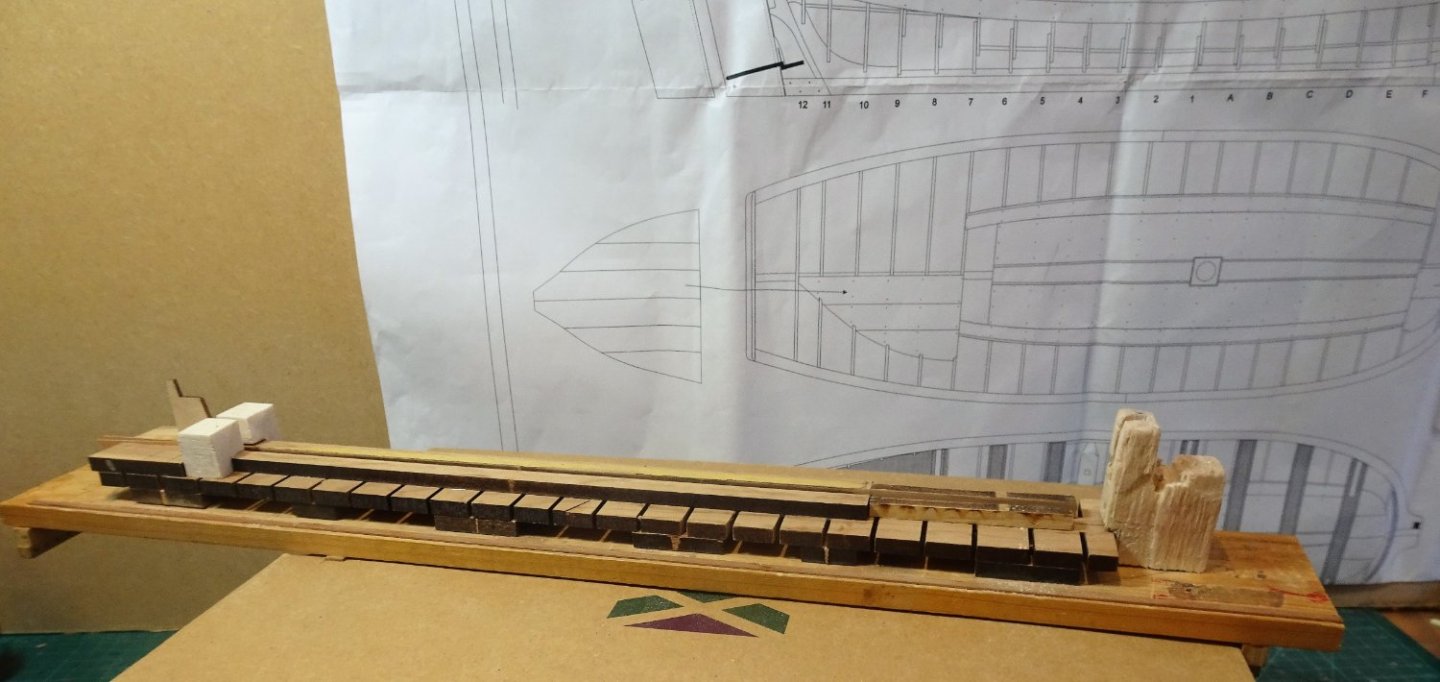
0311
The Queen Anne Barge building board is taken into service to support the Longboat for the remainder of the build.
An issue developed with the upper wale plank on the starboard side where it had slipped partially out of the stem rabbet.
 0310
0310
Poor fitting on my part no doubt.
0309
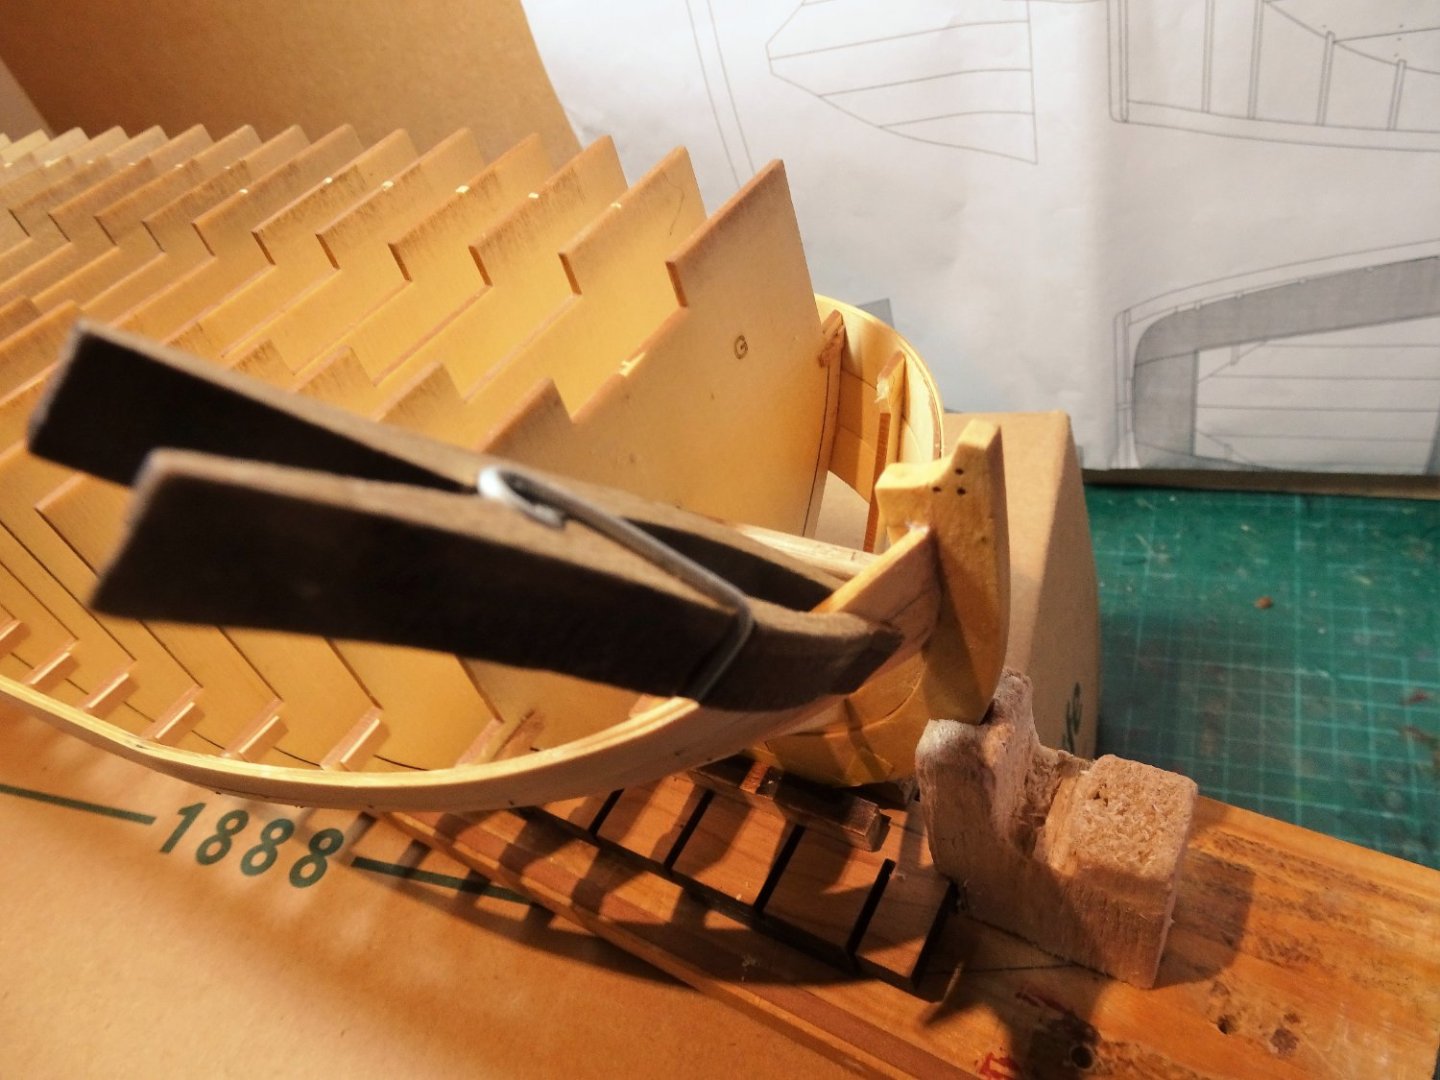
Acetone was used to free the top two planks at the stem, and with the use of clamps and a prop the offending planks were re-set.
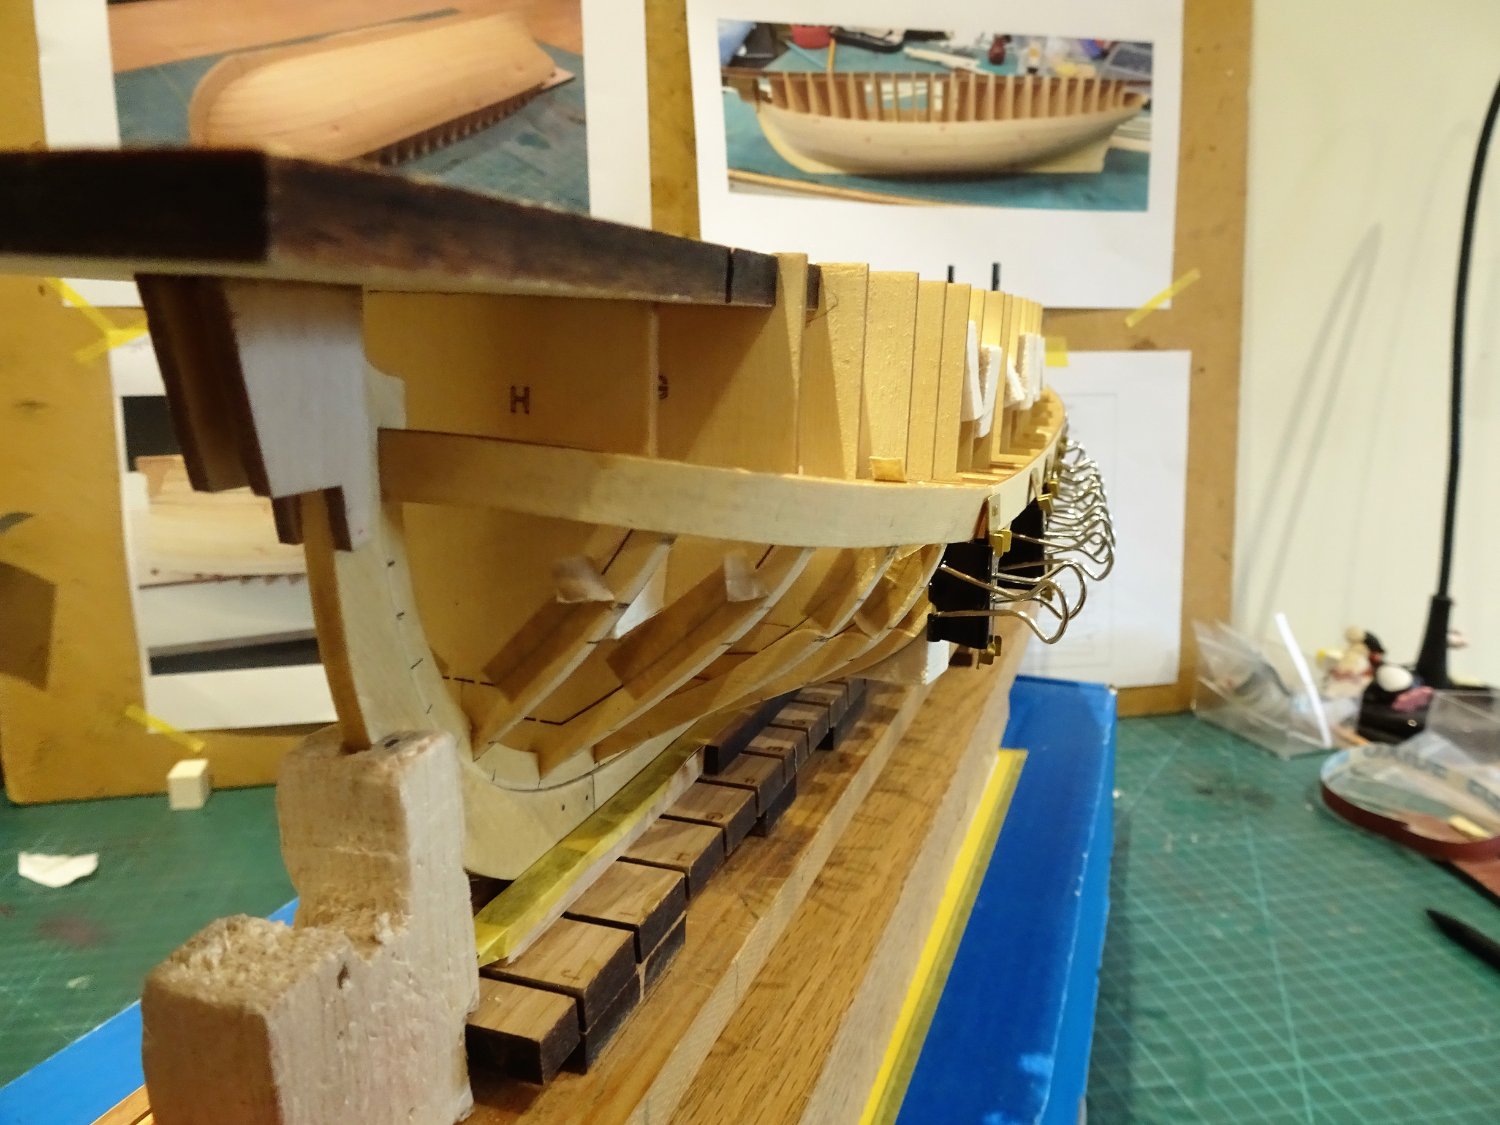
Fortunately, in this area the bow plank/stem rabbet will be covered by bolsters attached to the stem which support the roller fitting at the bow.
0313
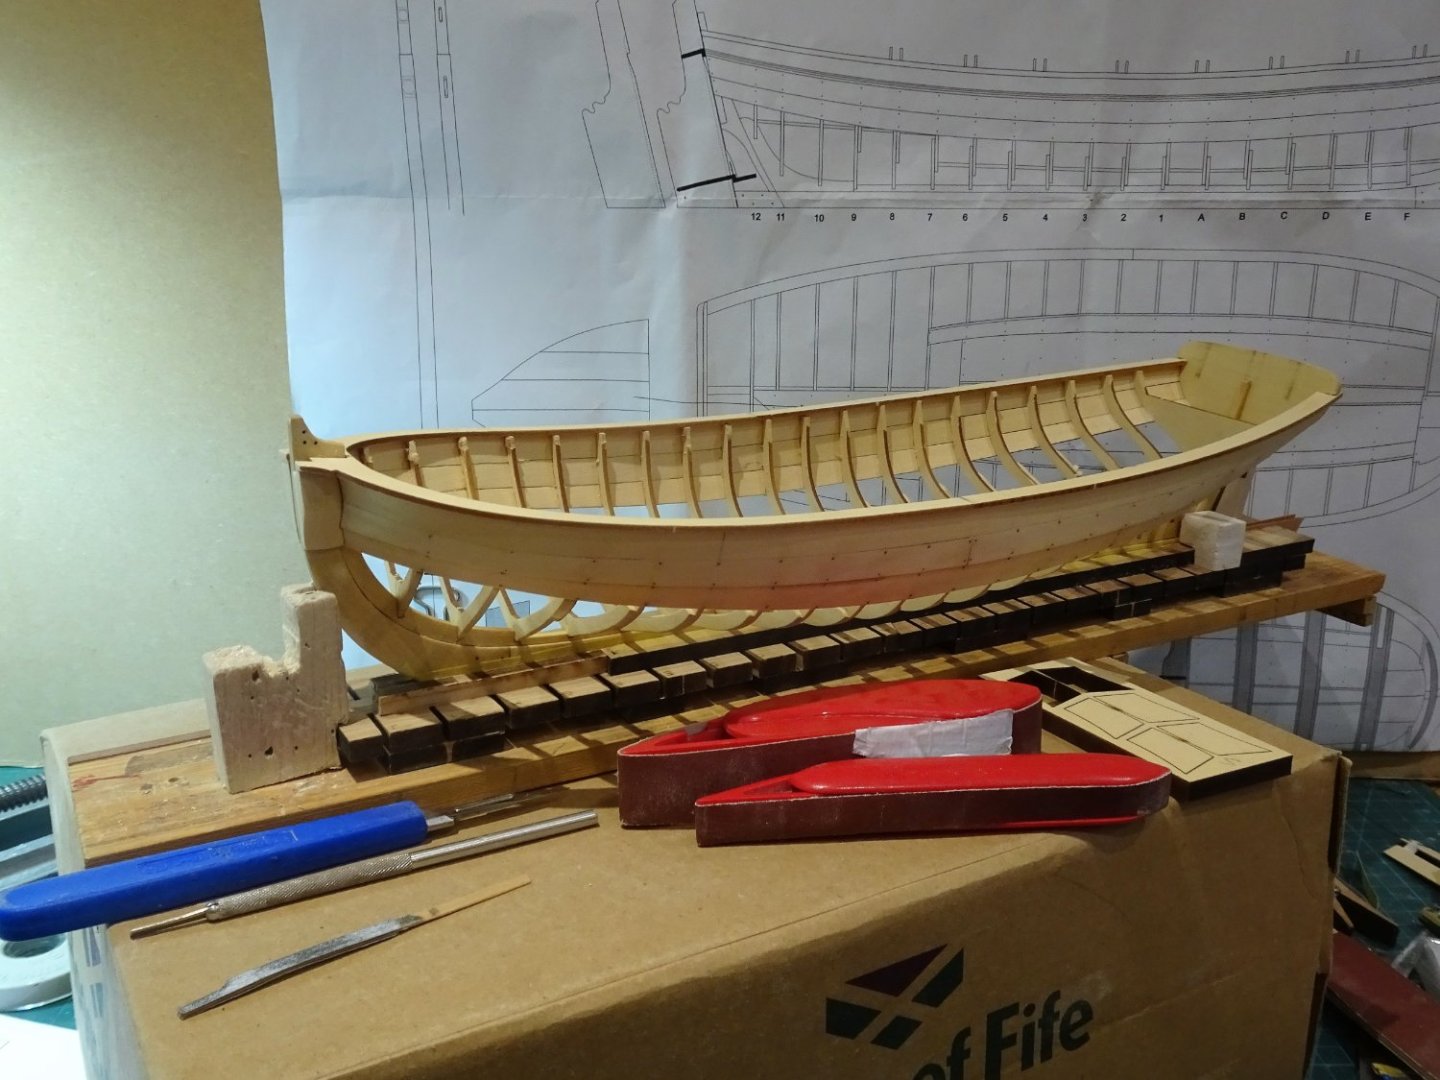
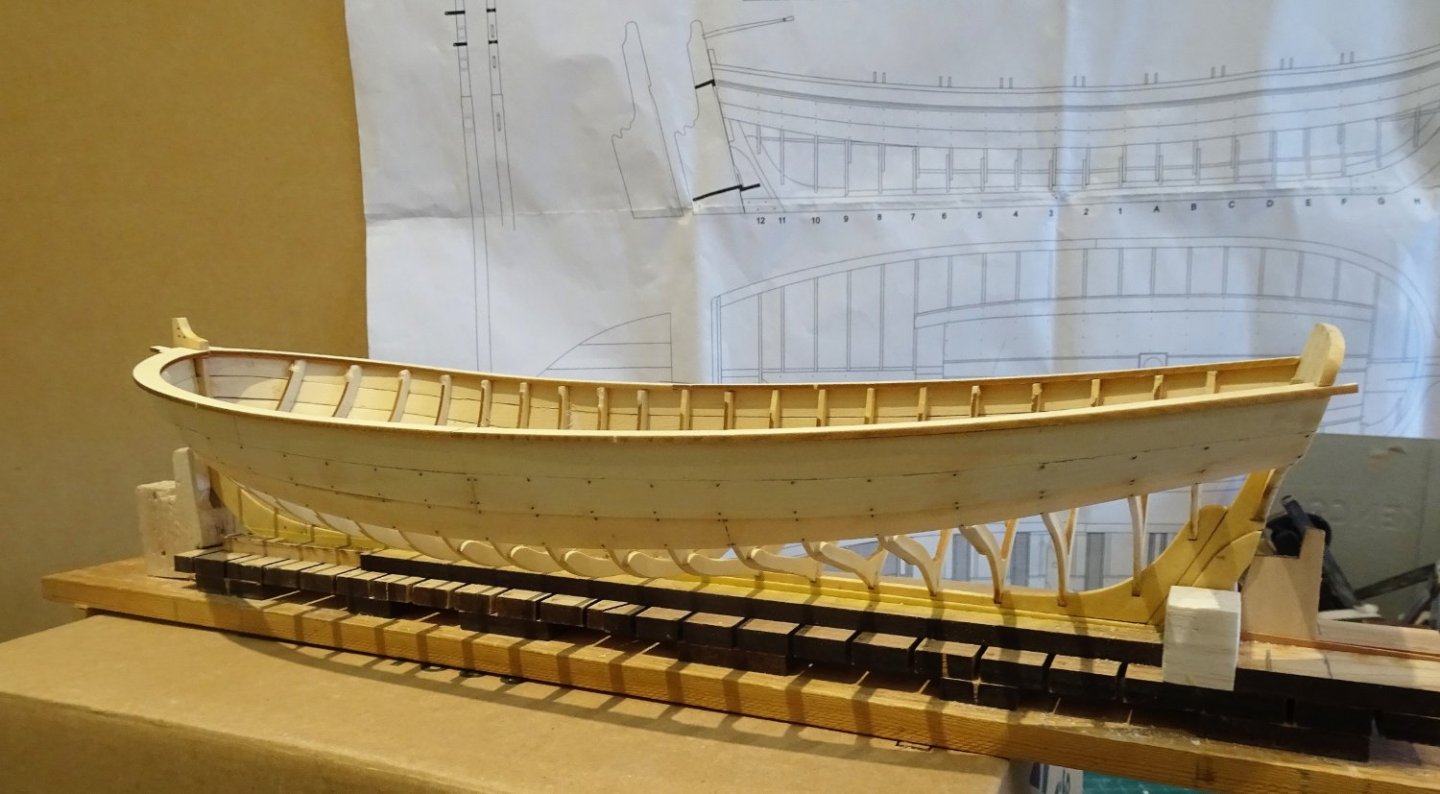
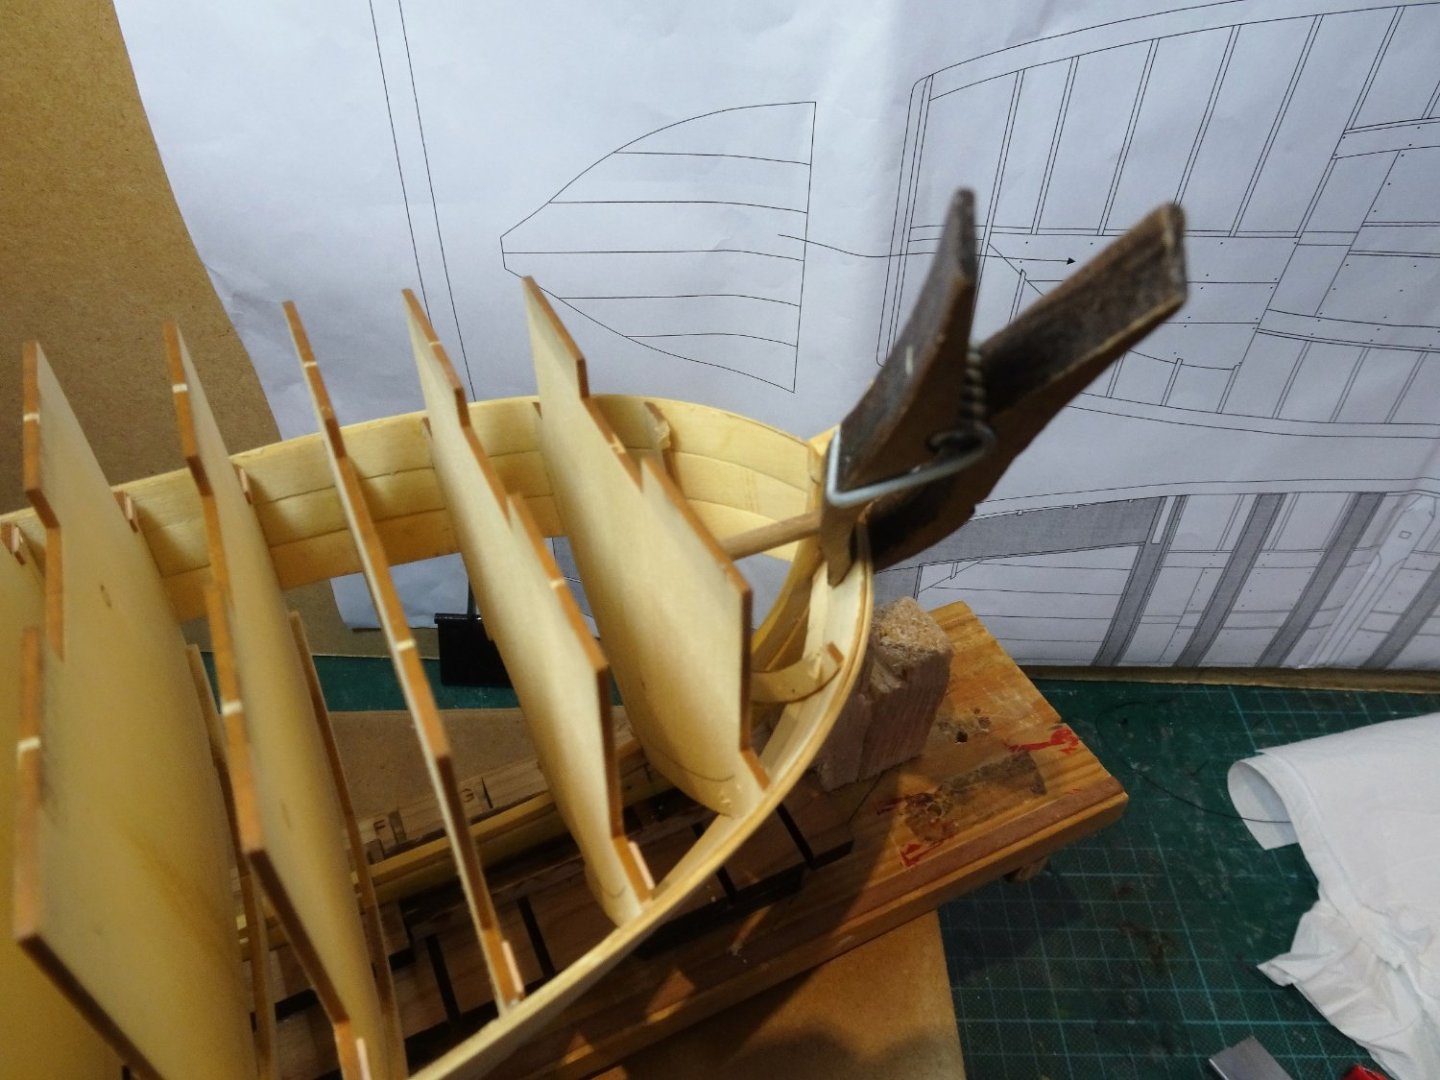
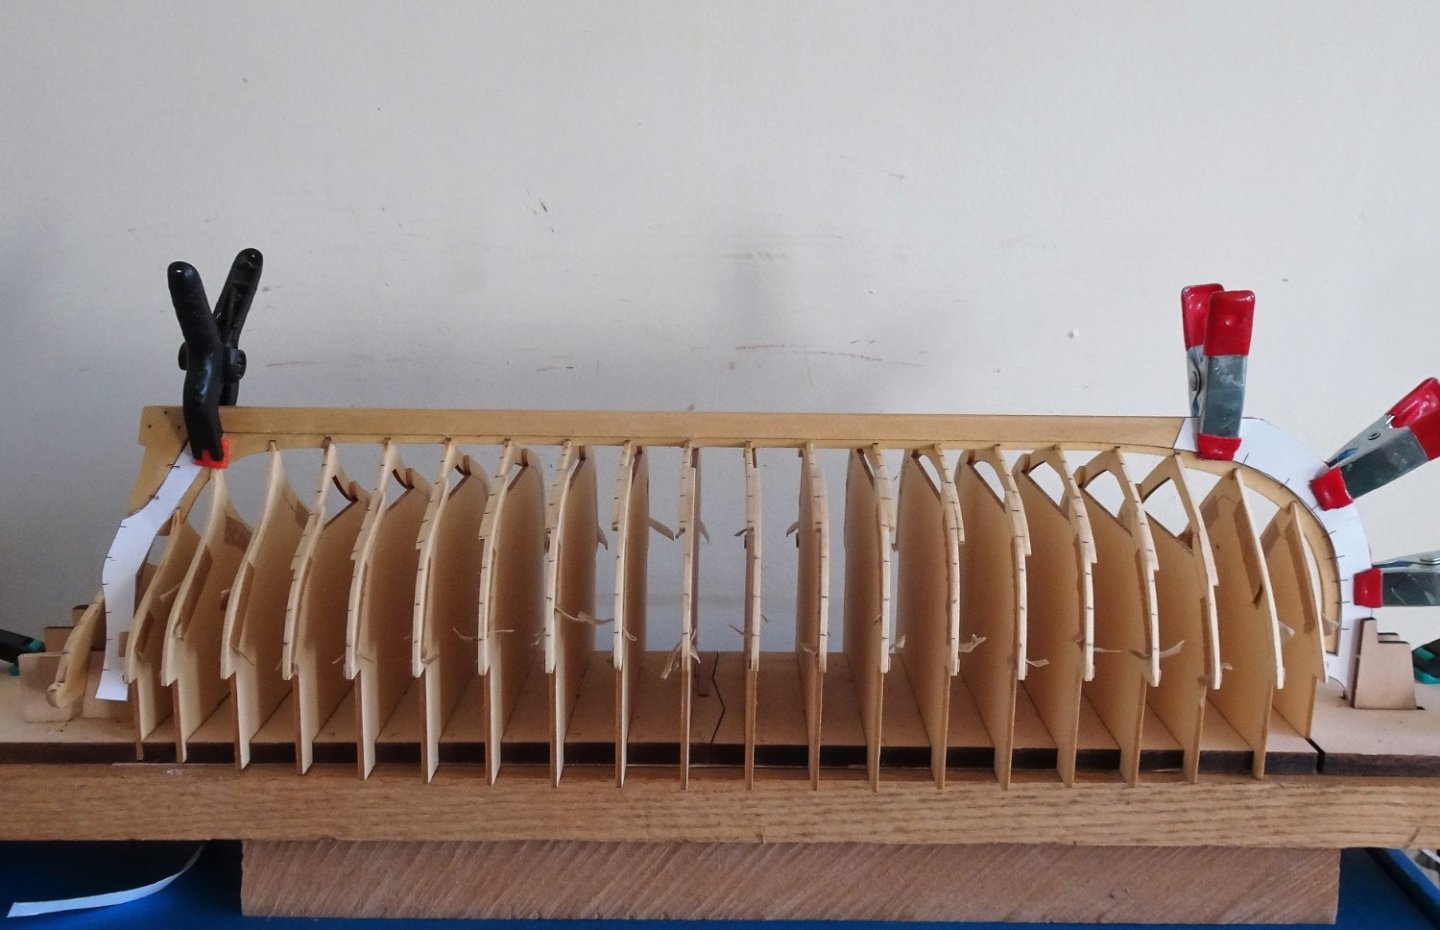
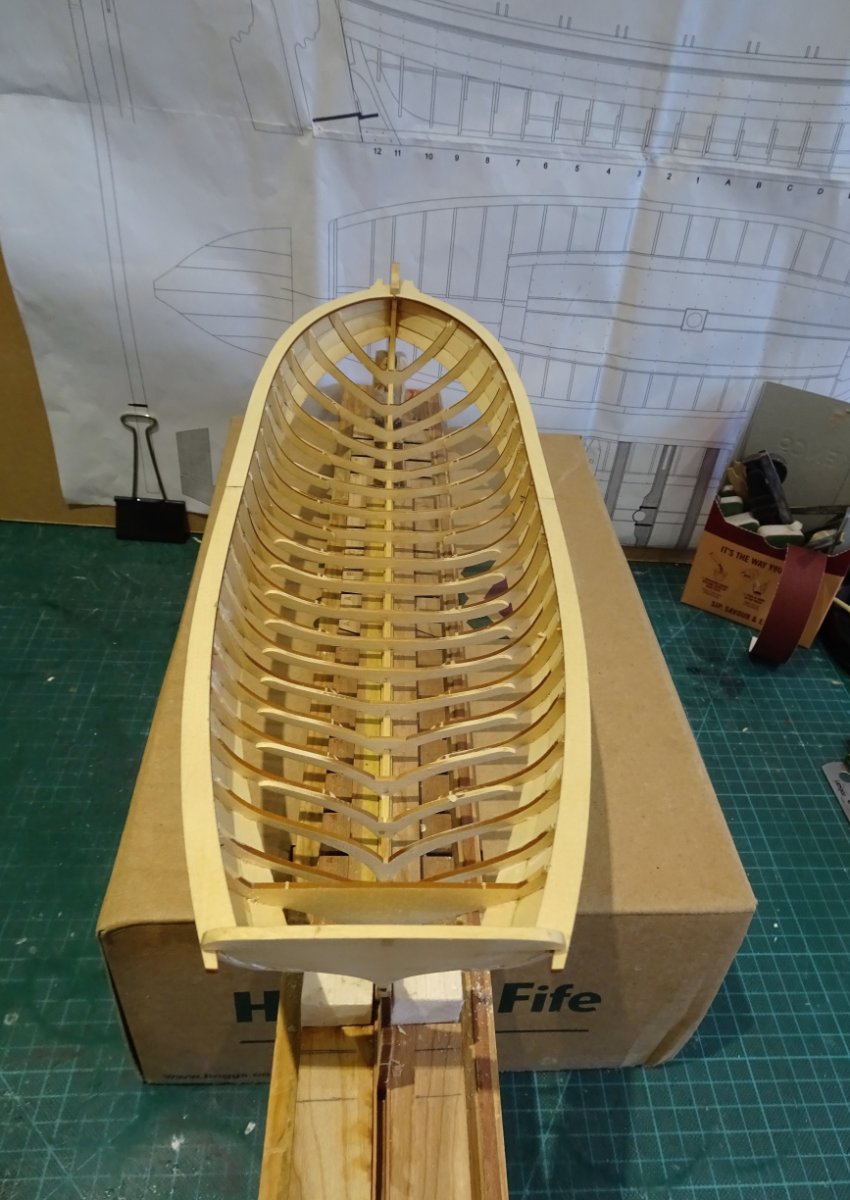
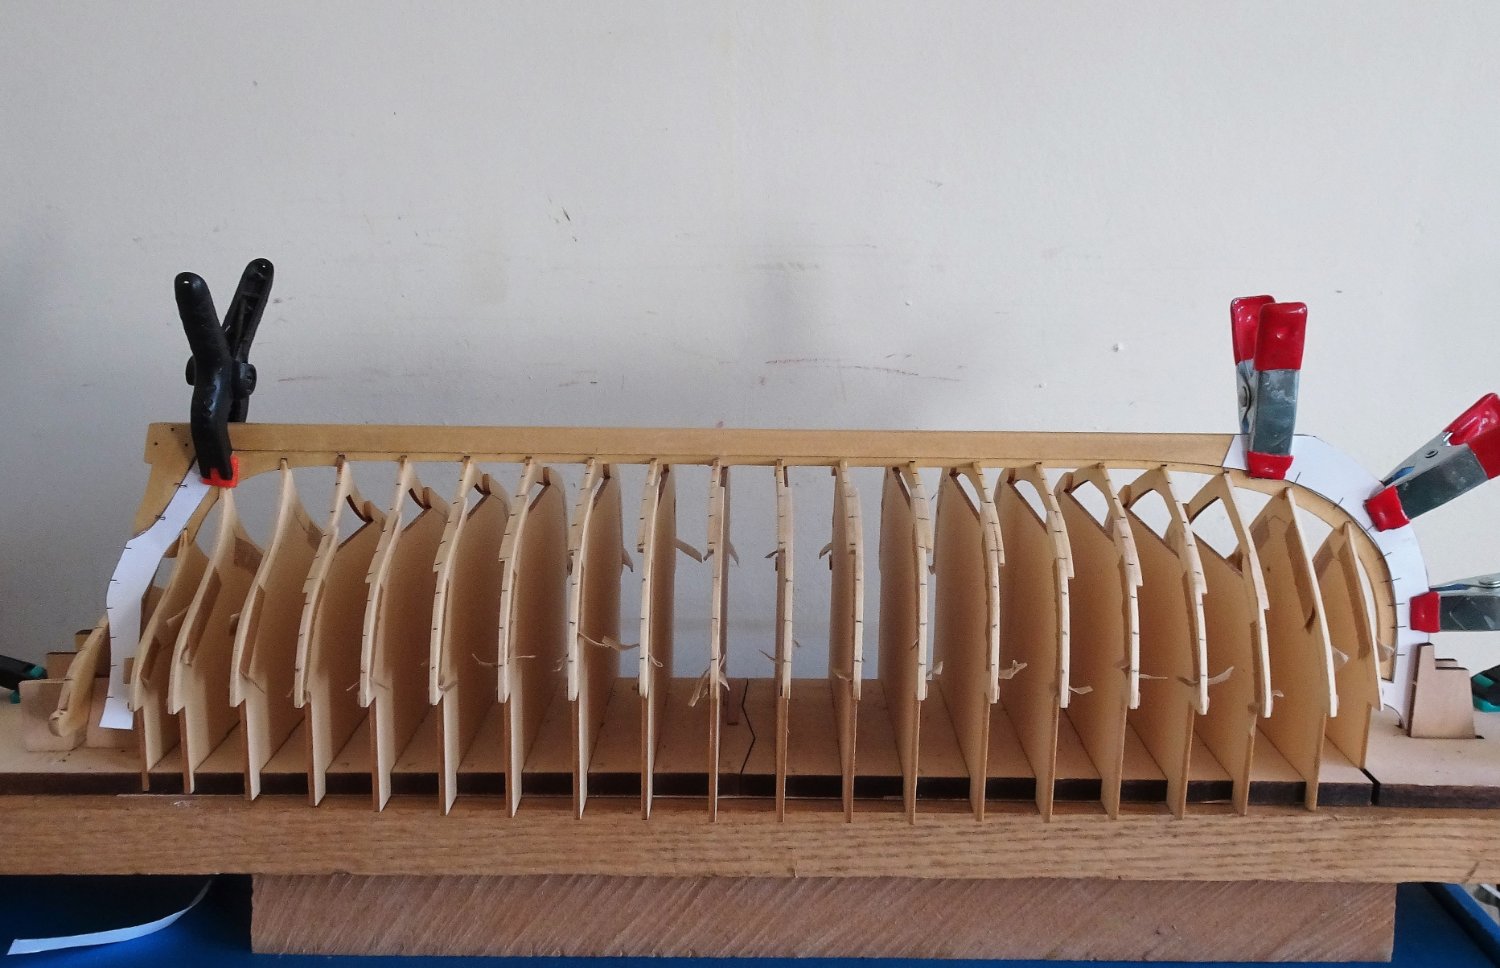
The tools I used to release the frames. A chisel blade to ping off the supporting tabs, and micro saw blades to release the frame centres.
Fairly easily done with a micro saw, and apart from the alarming creaking as the centres release from the frame bottoms all went well. Only one frame needed re-gluing.

0330
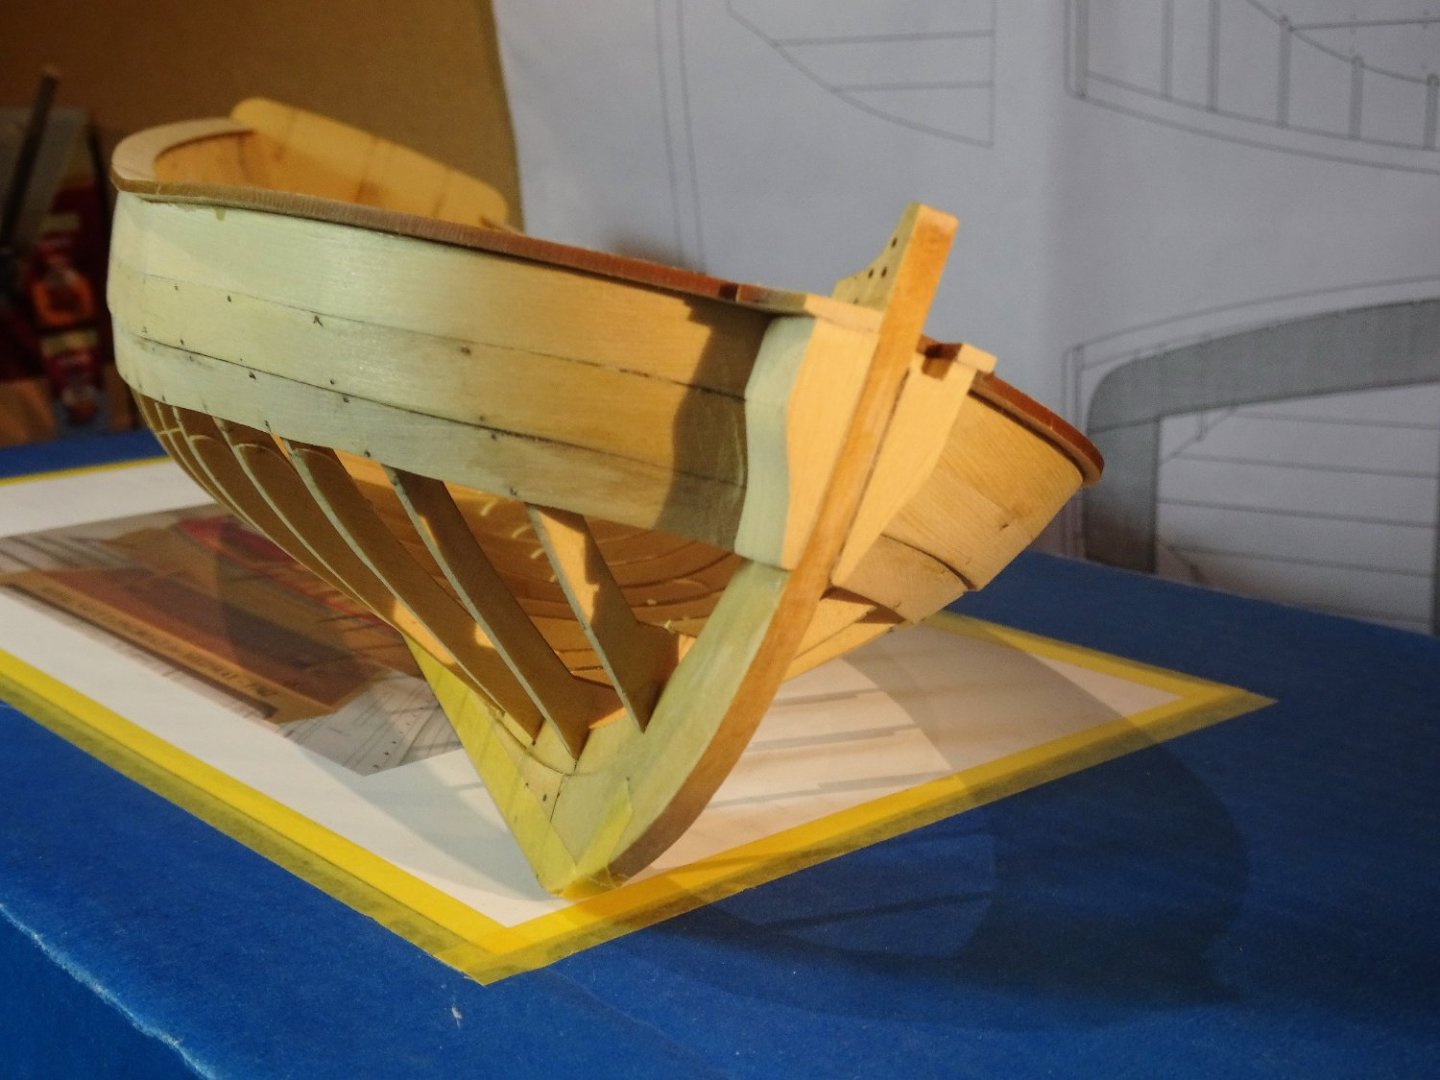
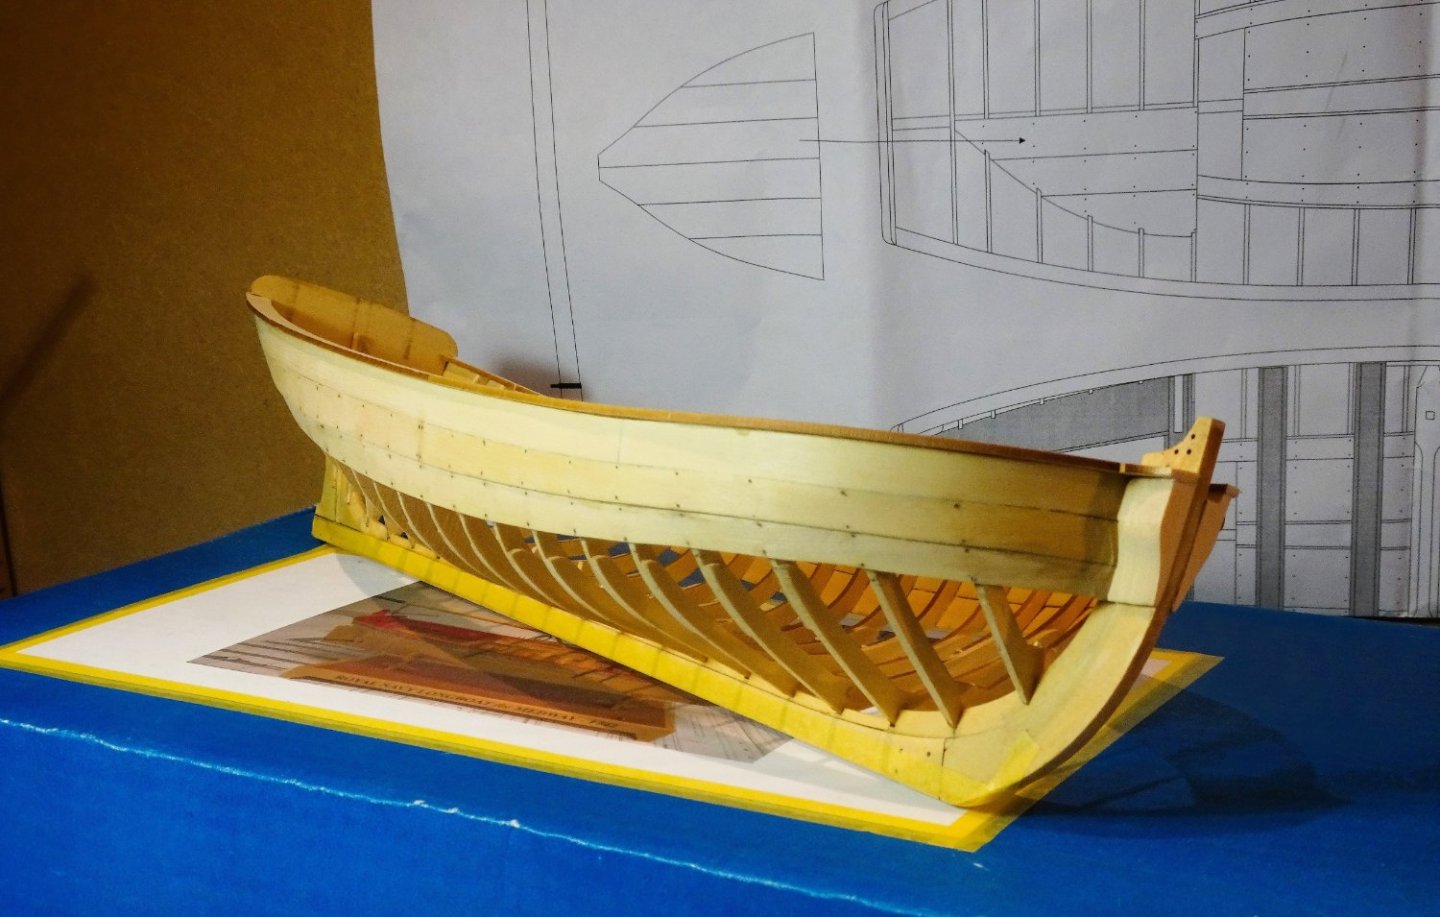
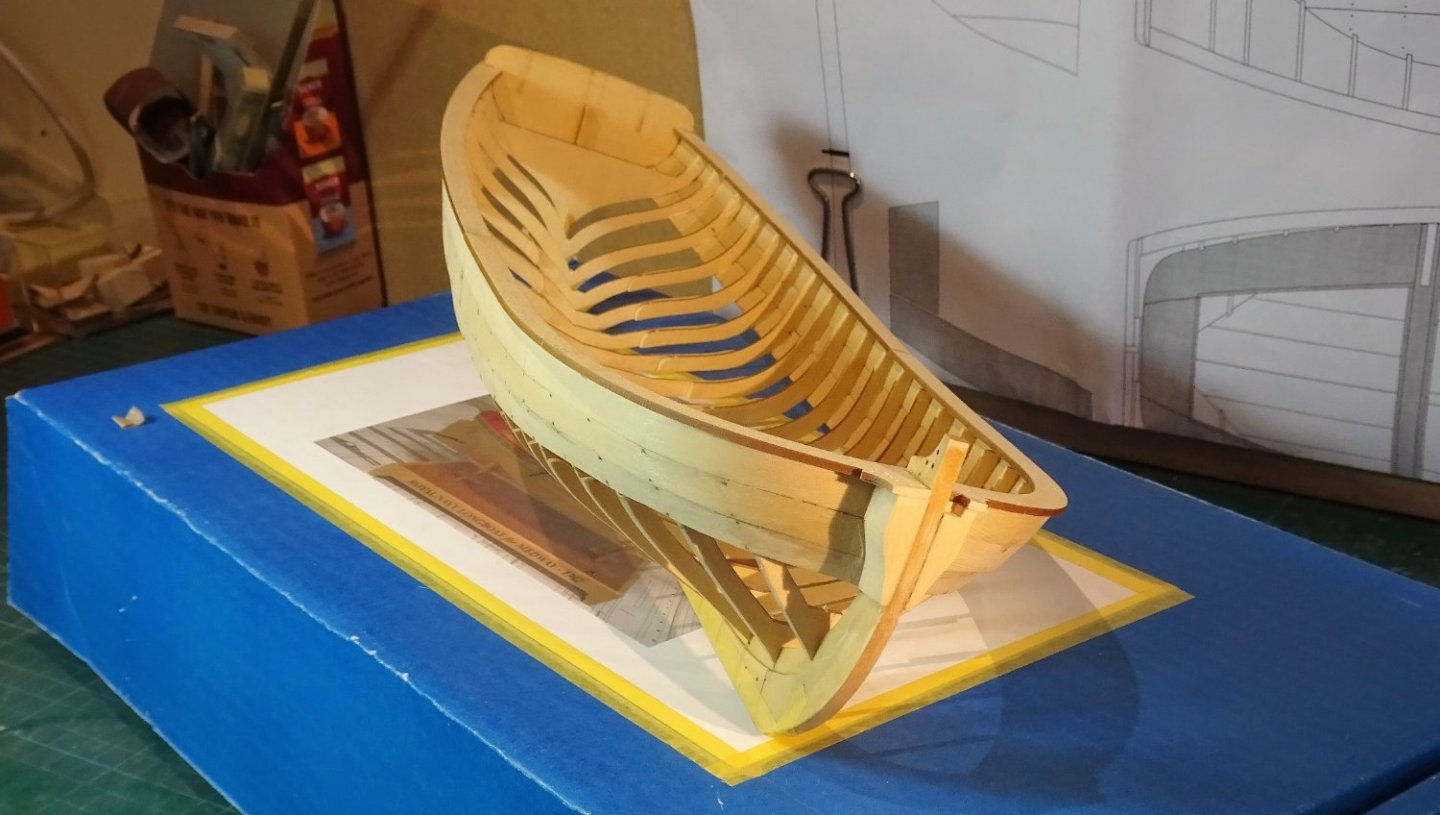
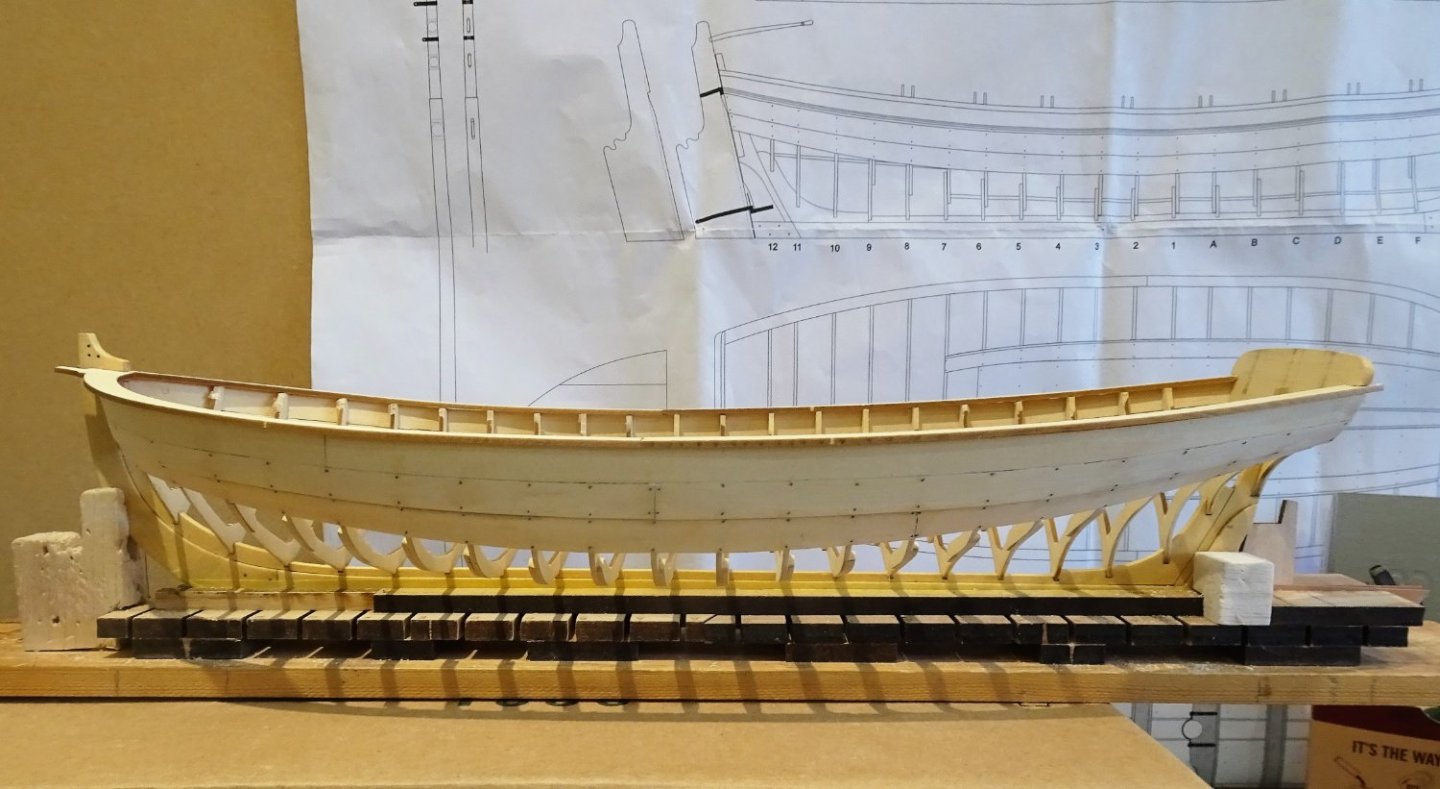
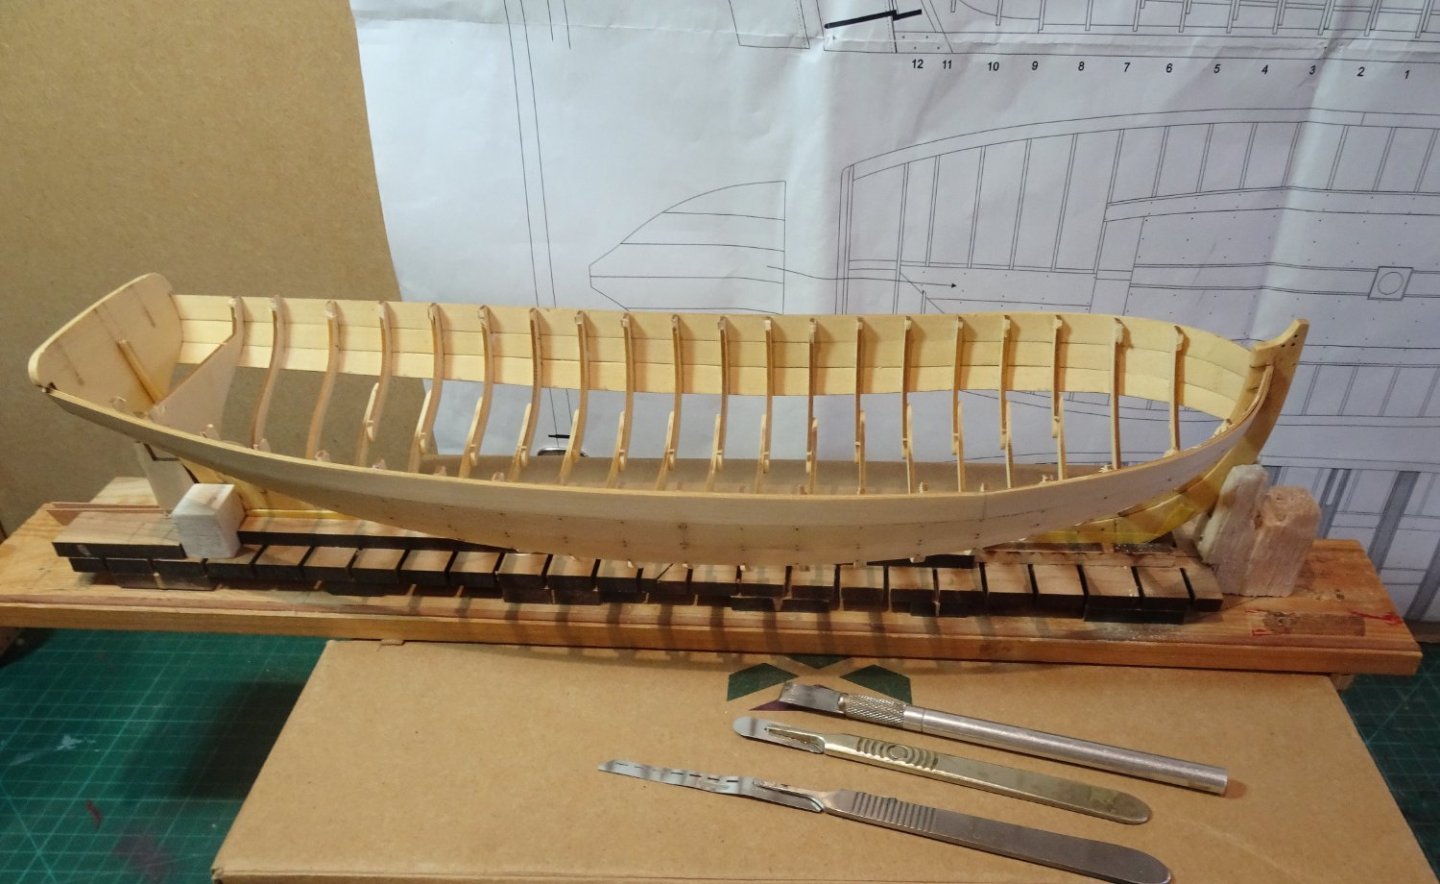
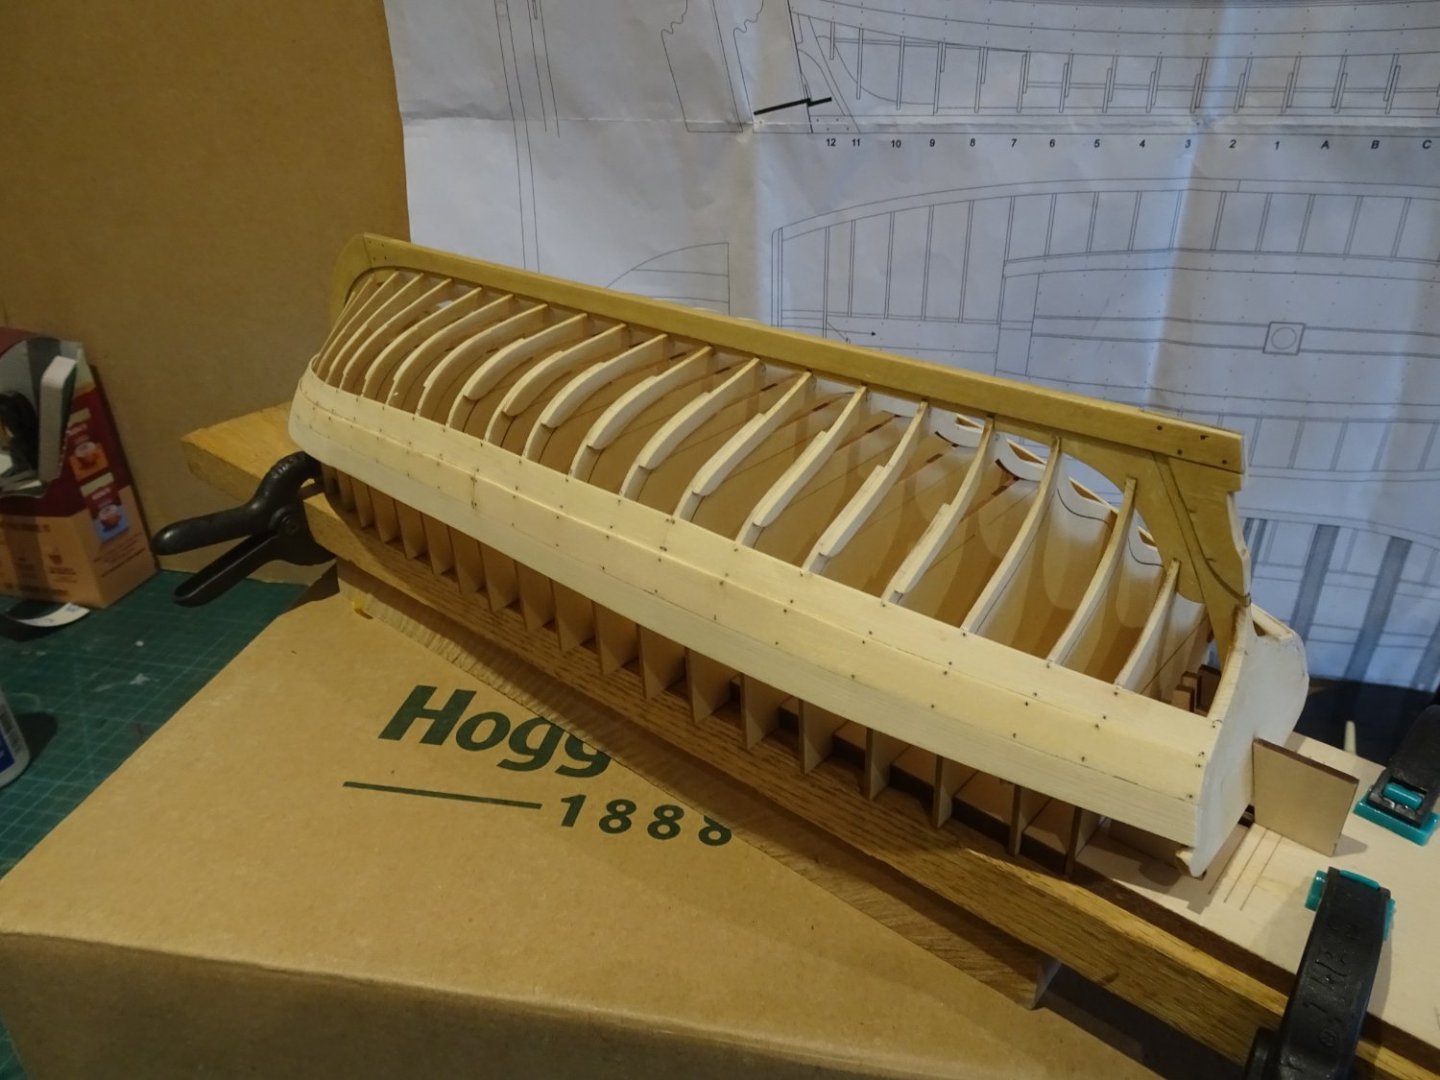
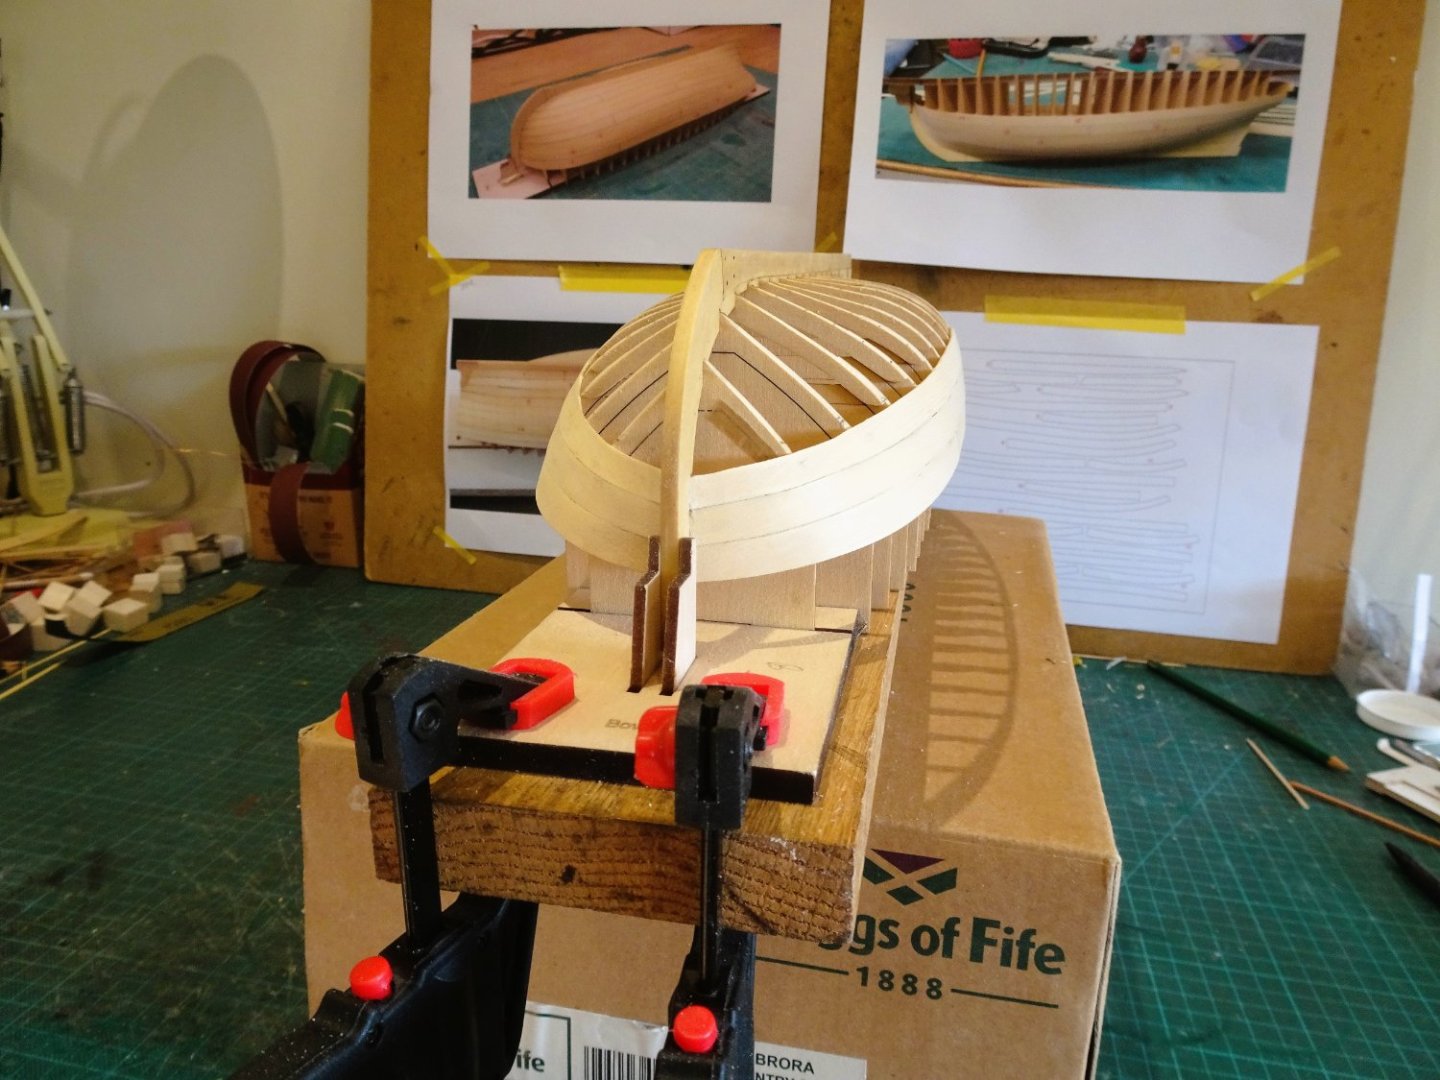
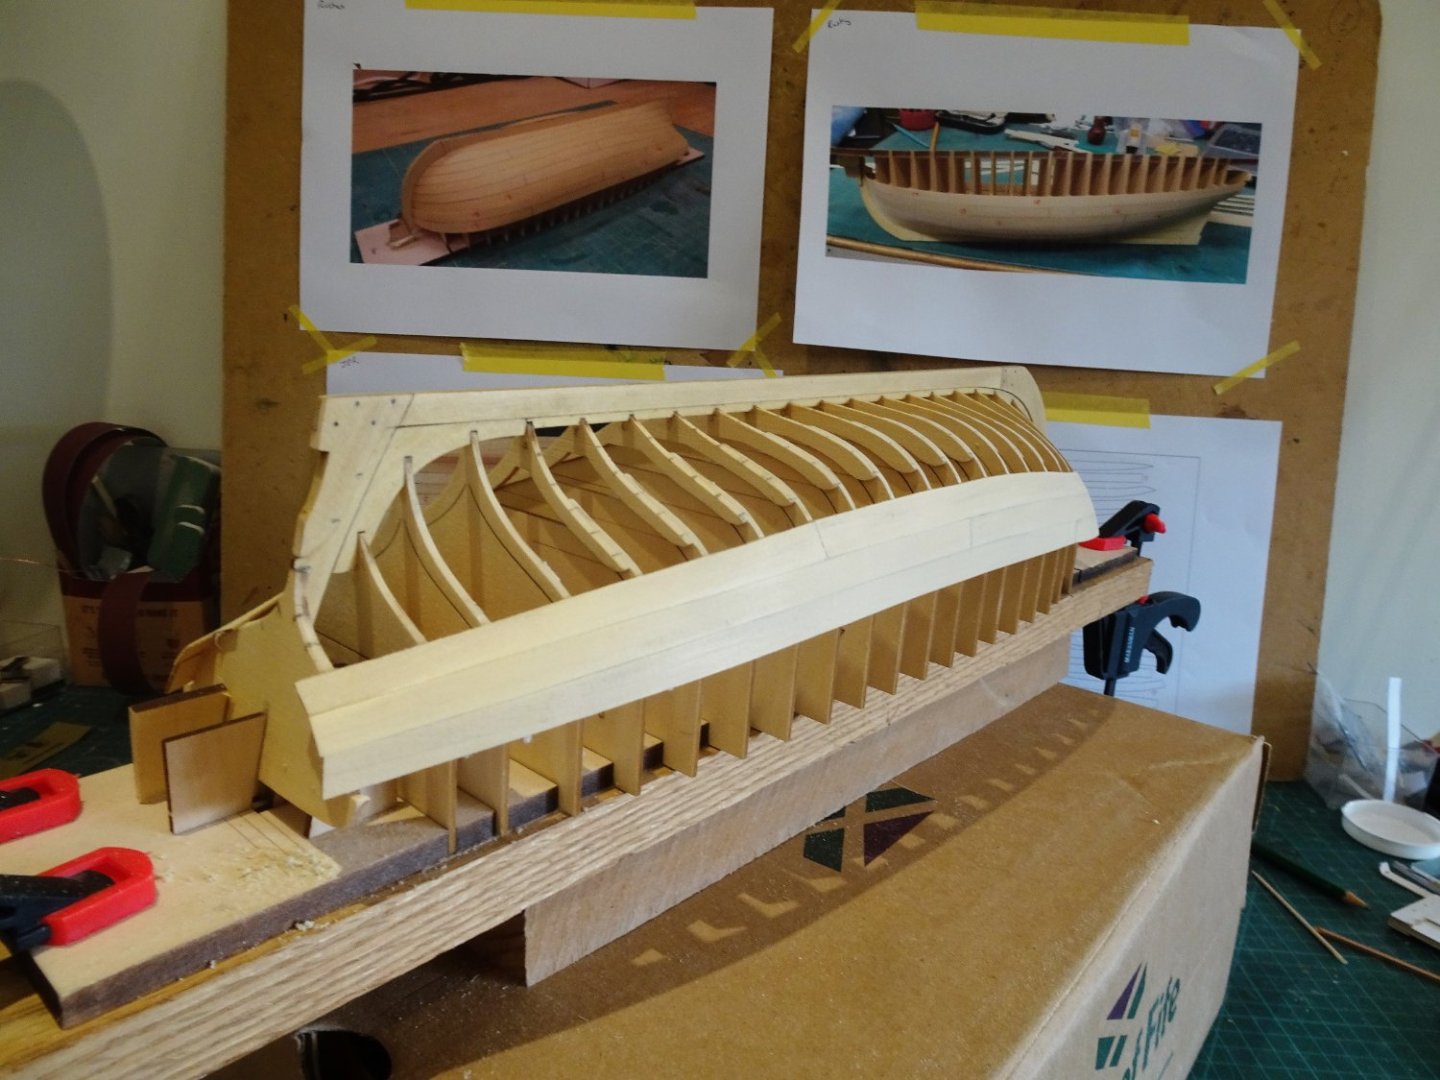
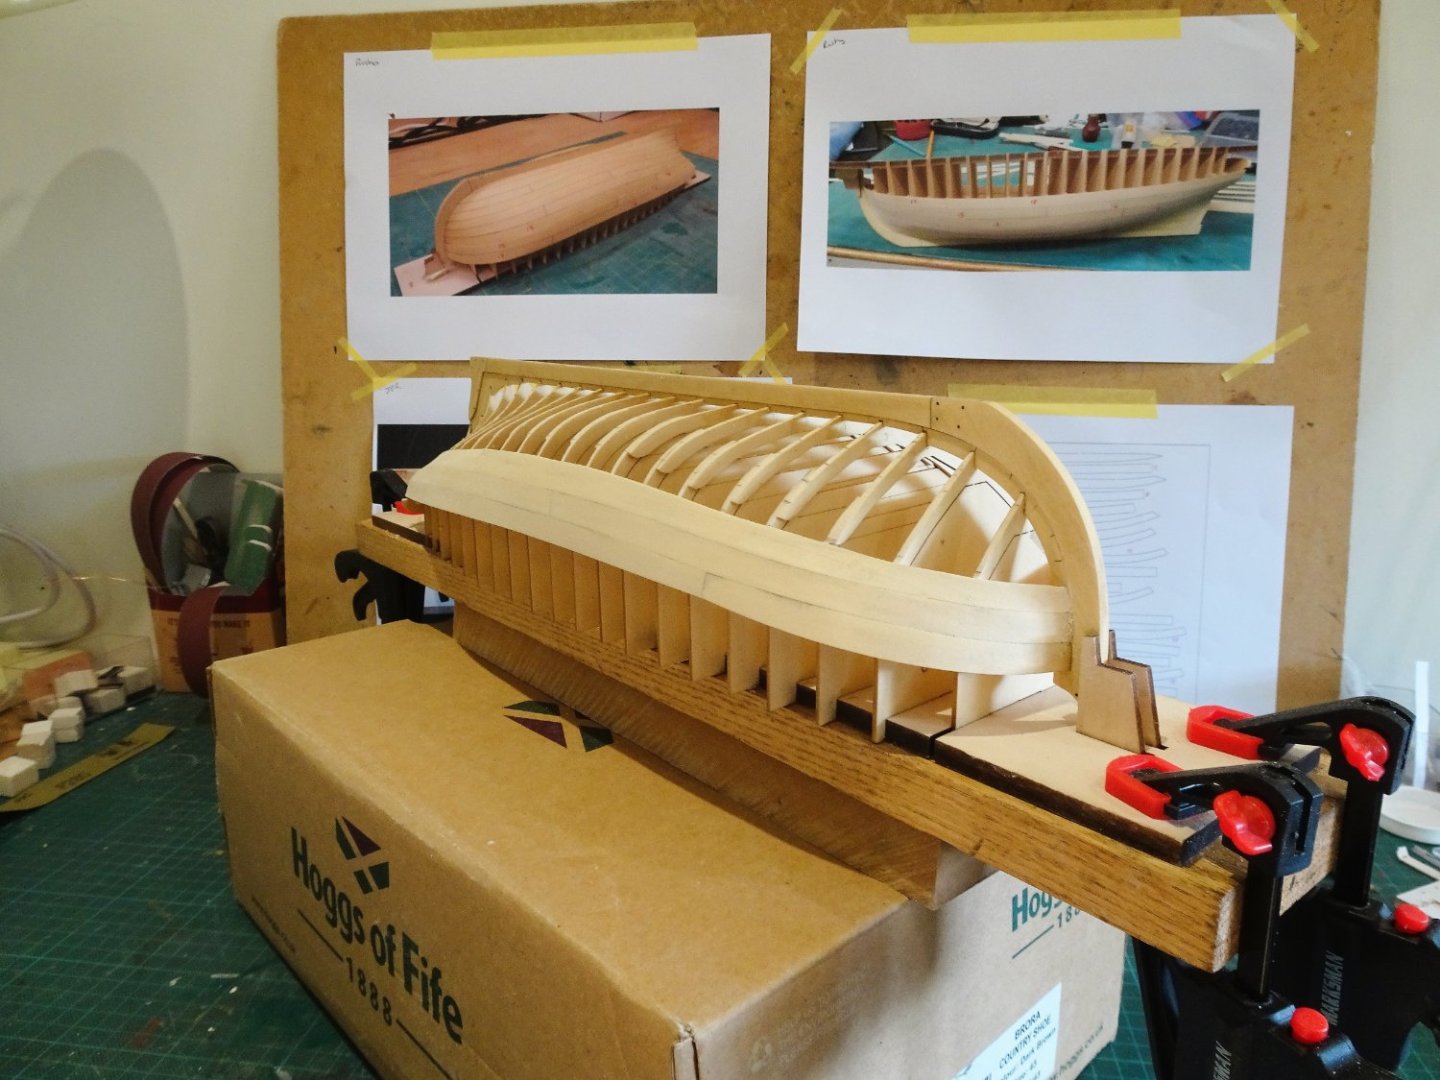
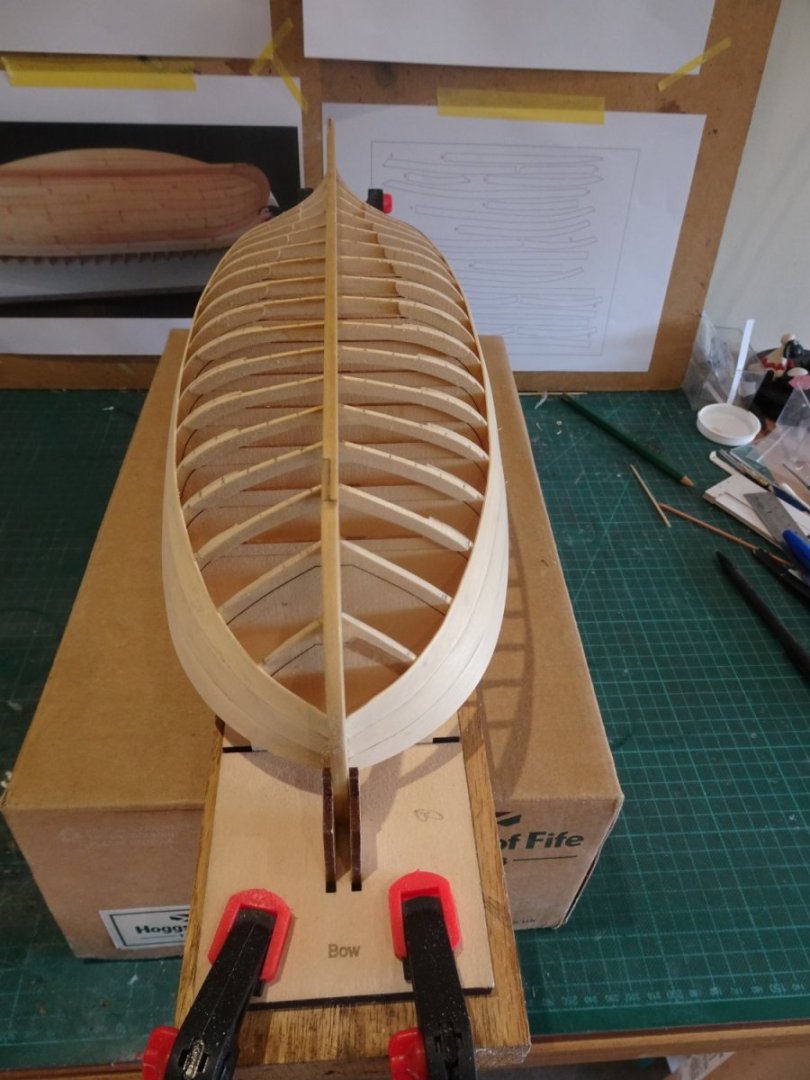
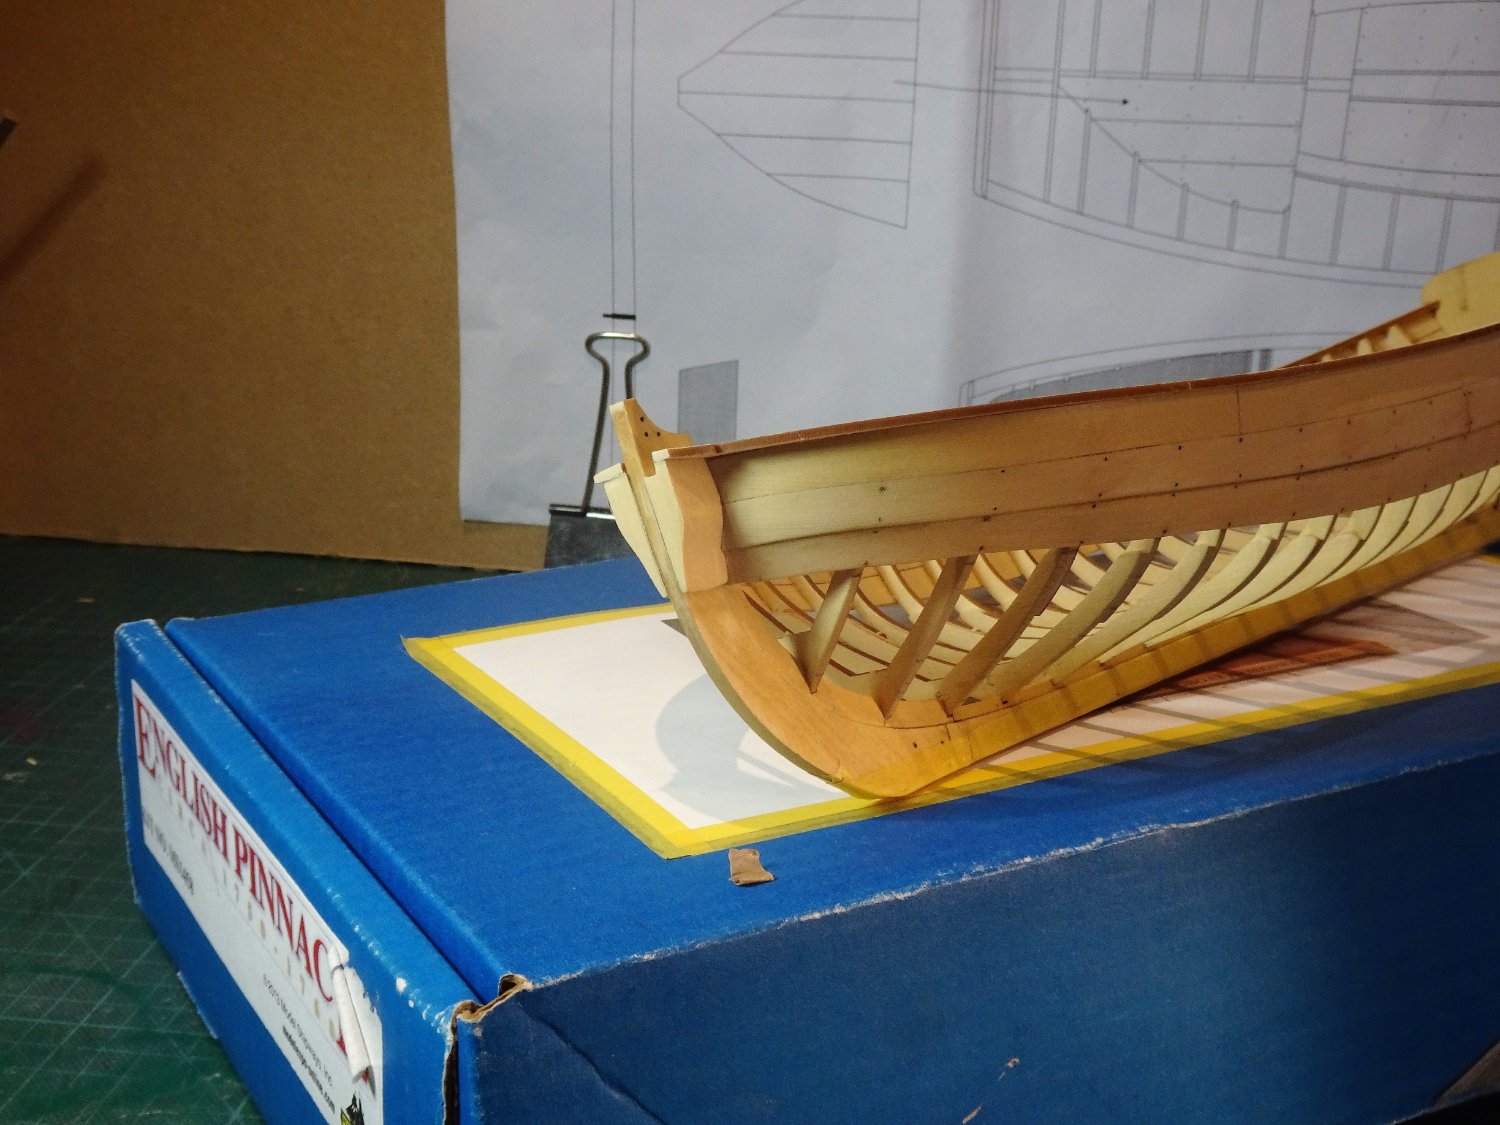
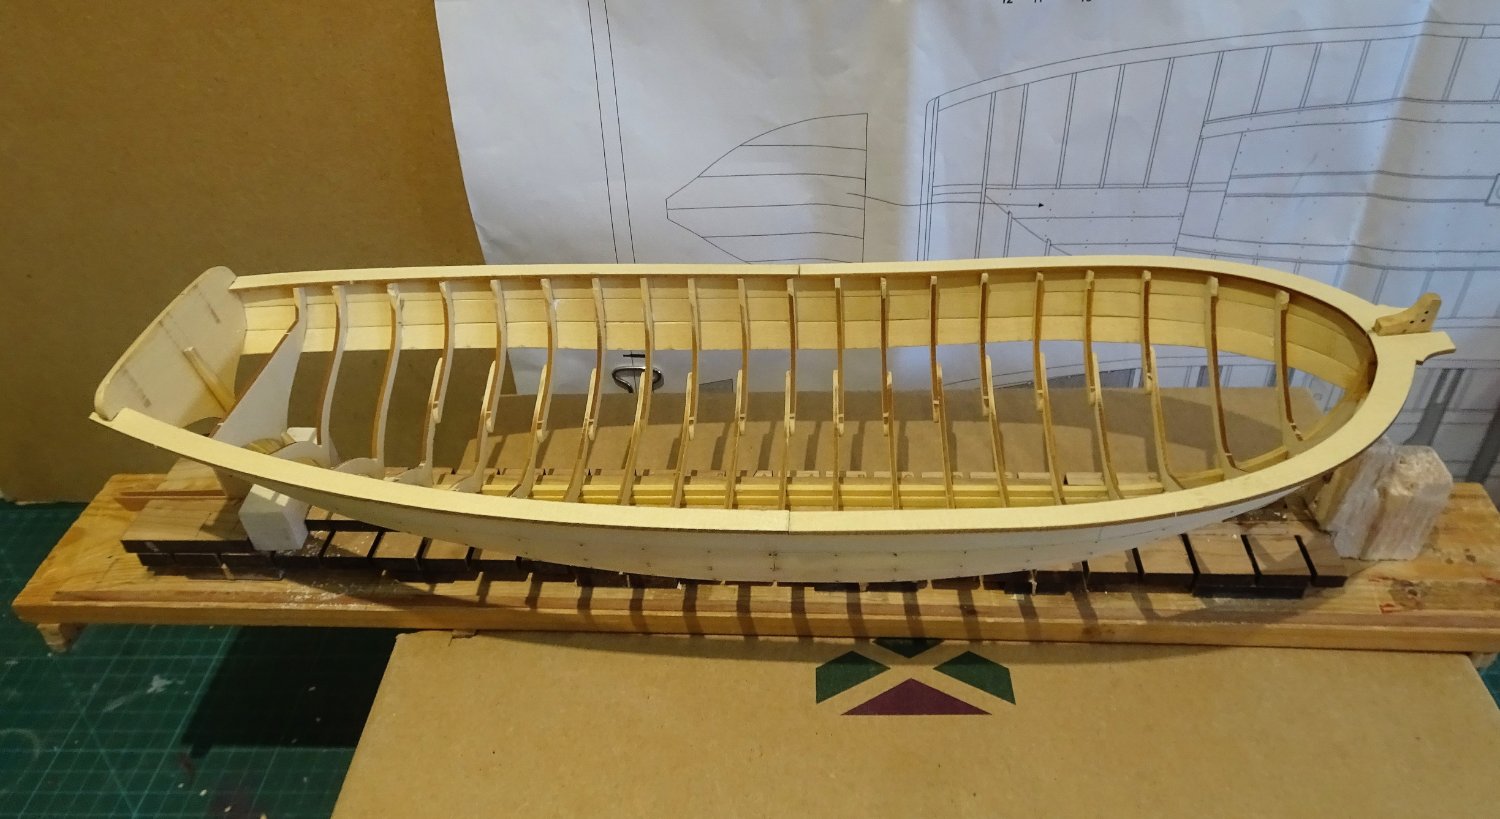
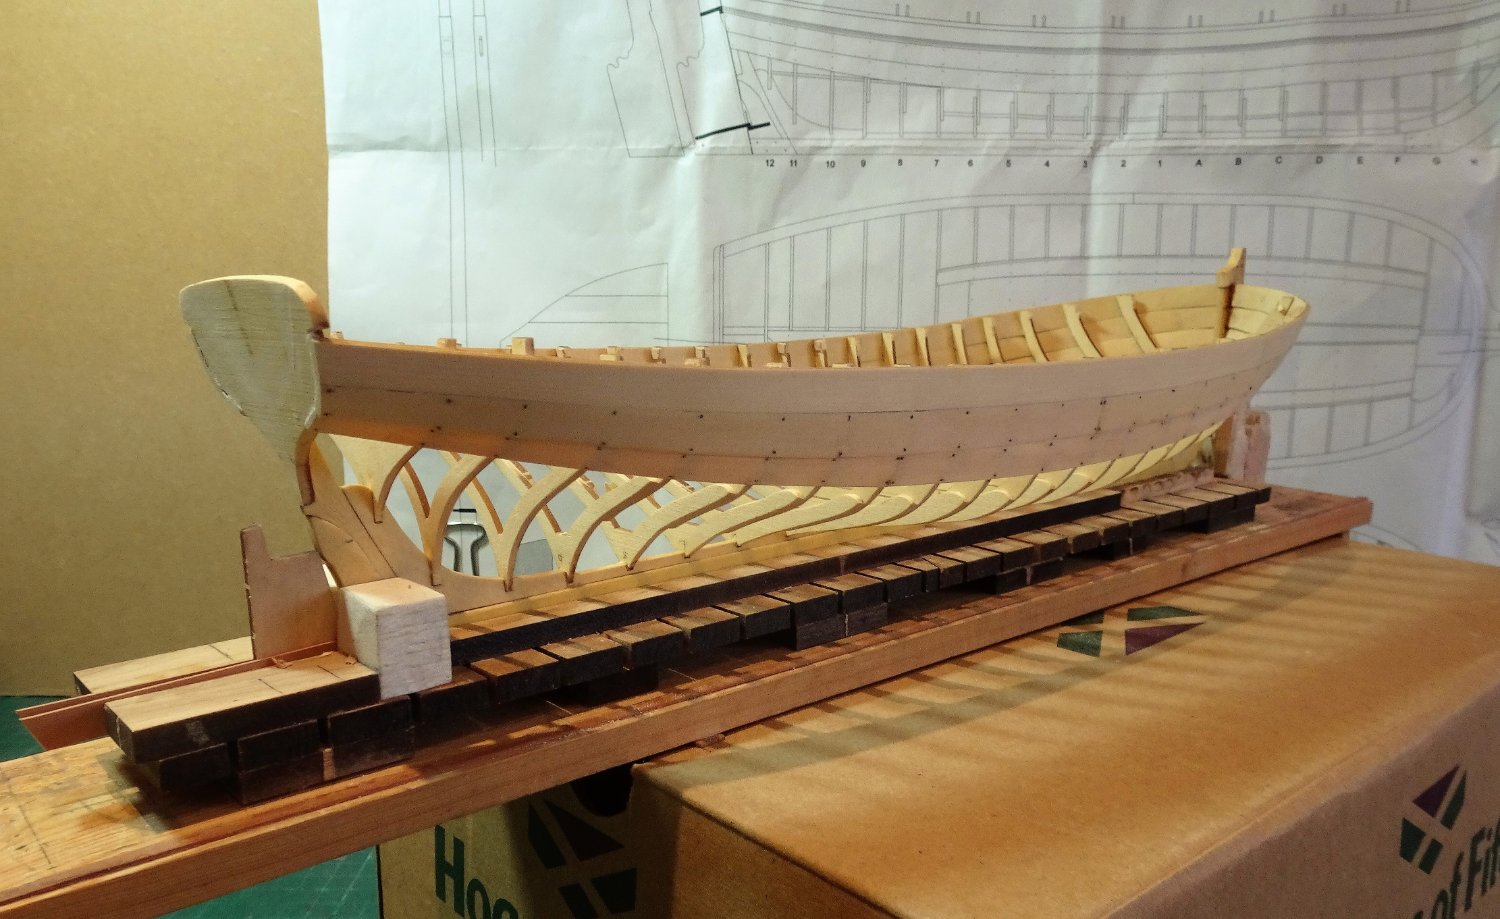
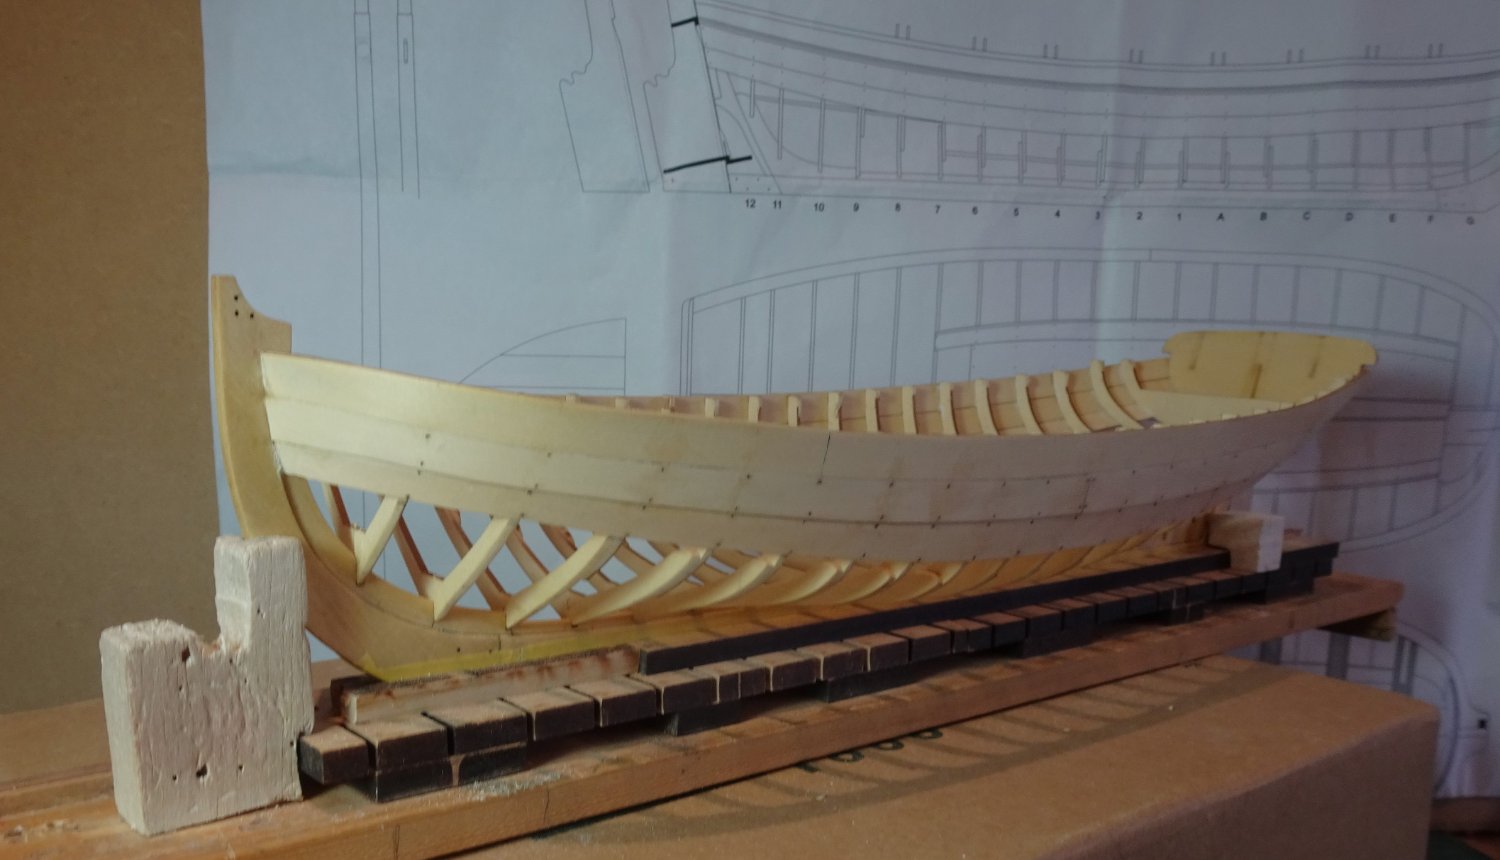
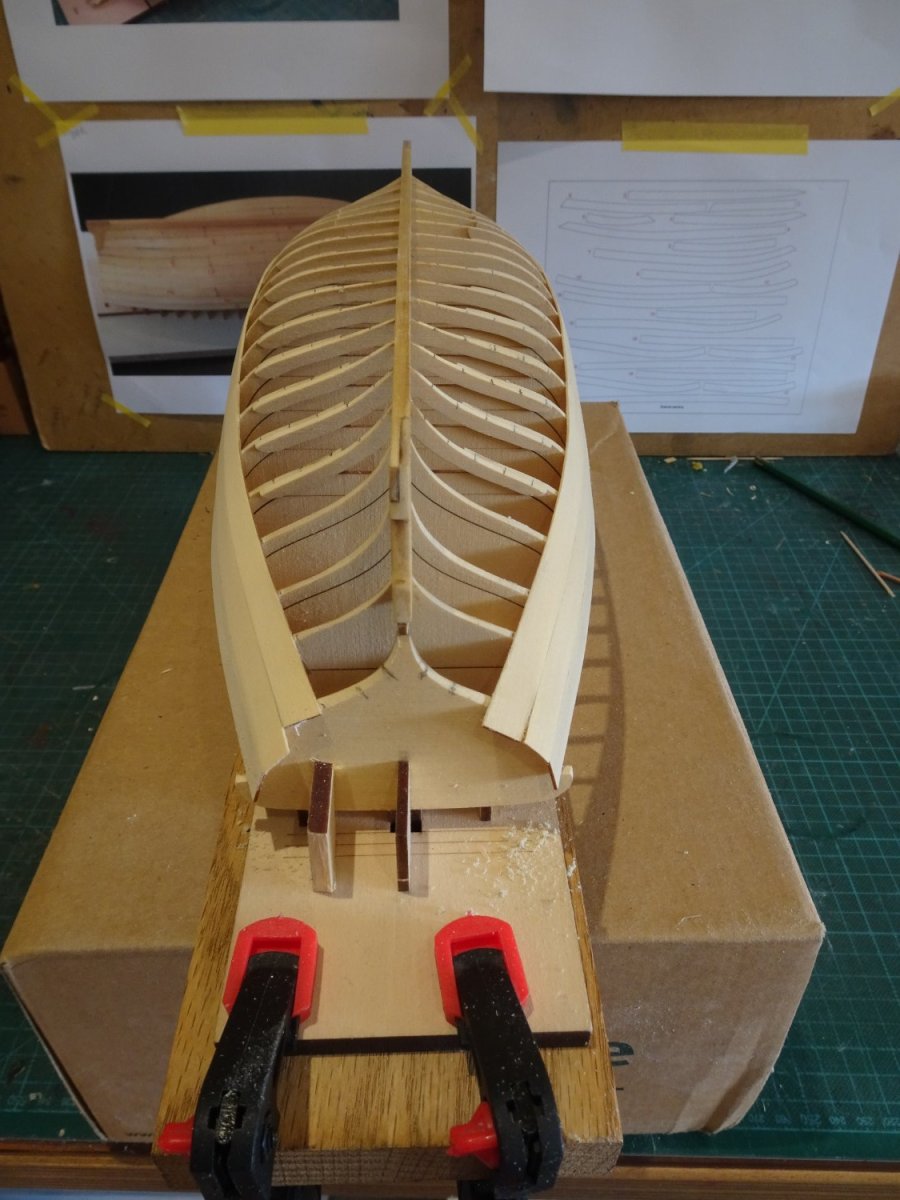
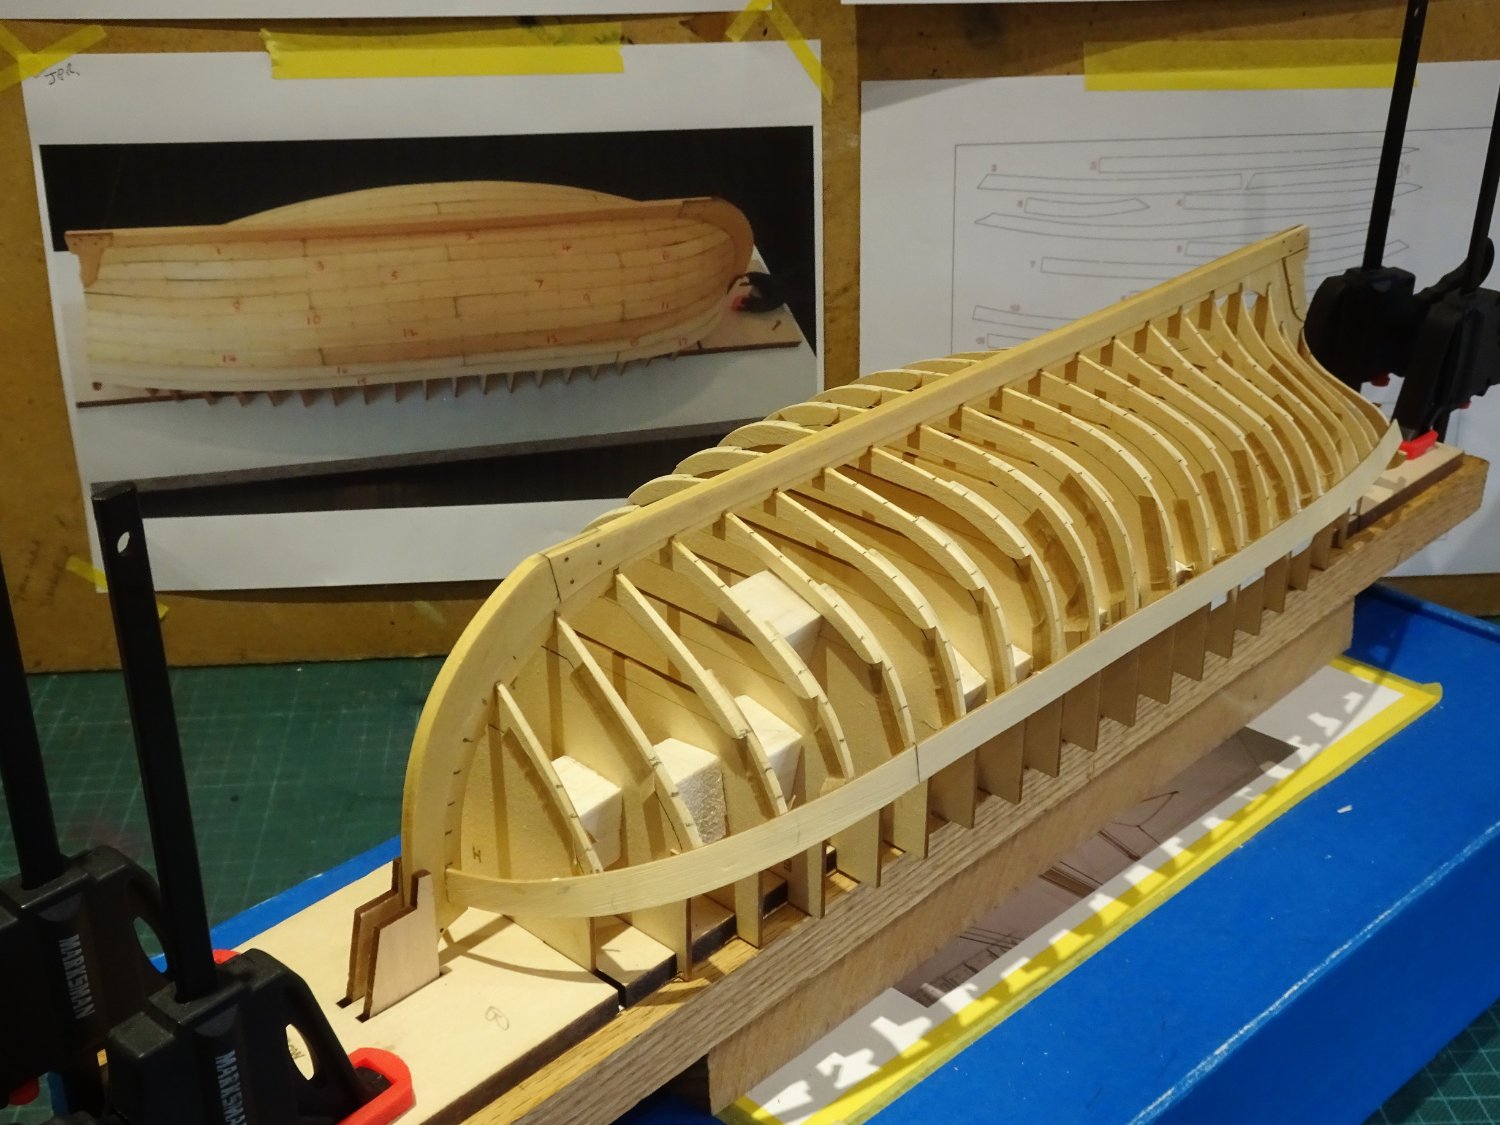
This is the first real opportunity to see what a fine model, and what great lines she has. I am content with my decision to build her open framed.

0326
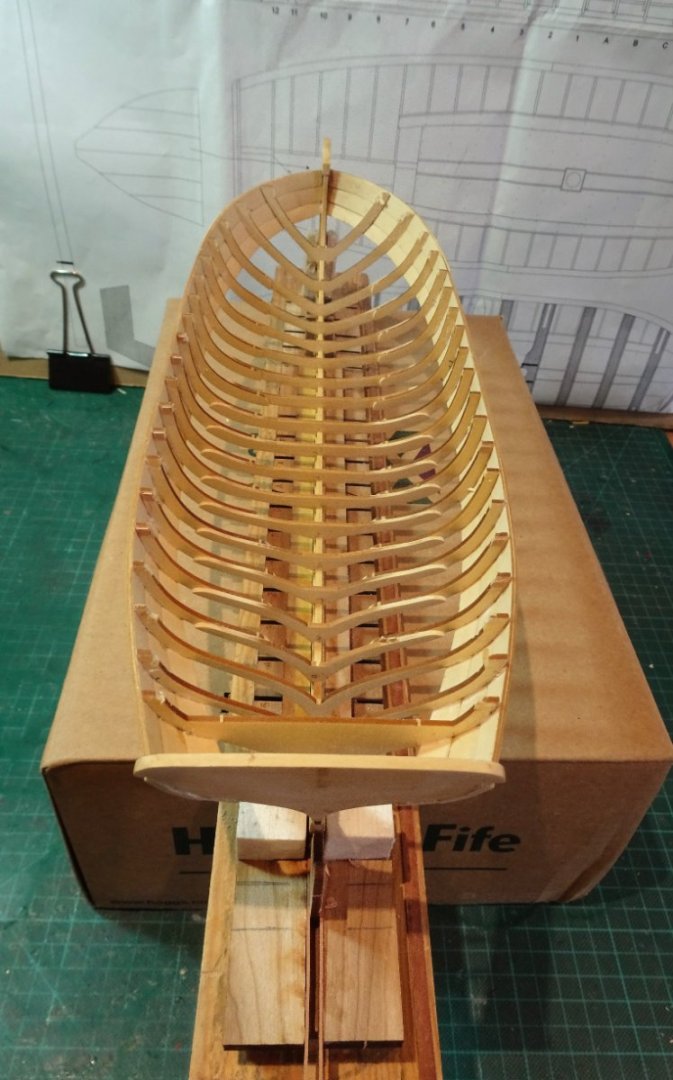
0316

0315
0319

0322
A fair way to go yet.
B.E.
04/03/2023
- Wintergreen, mtaylor, JpR62 and 11 others
-
14
-
-
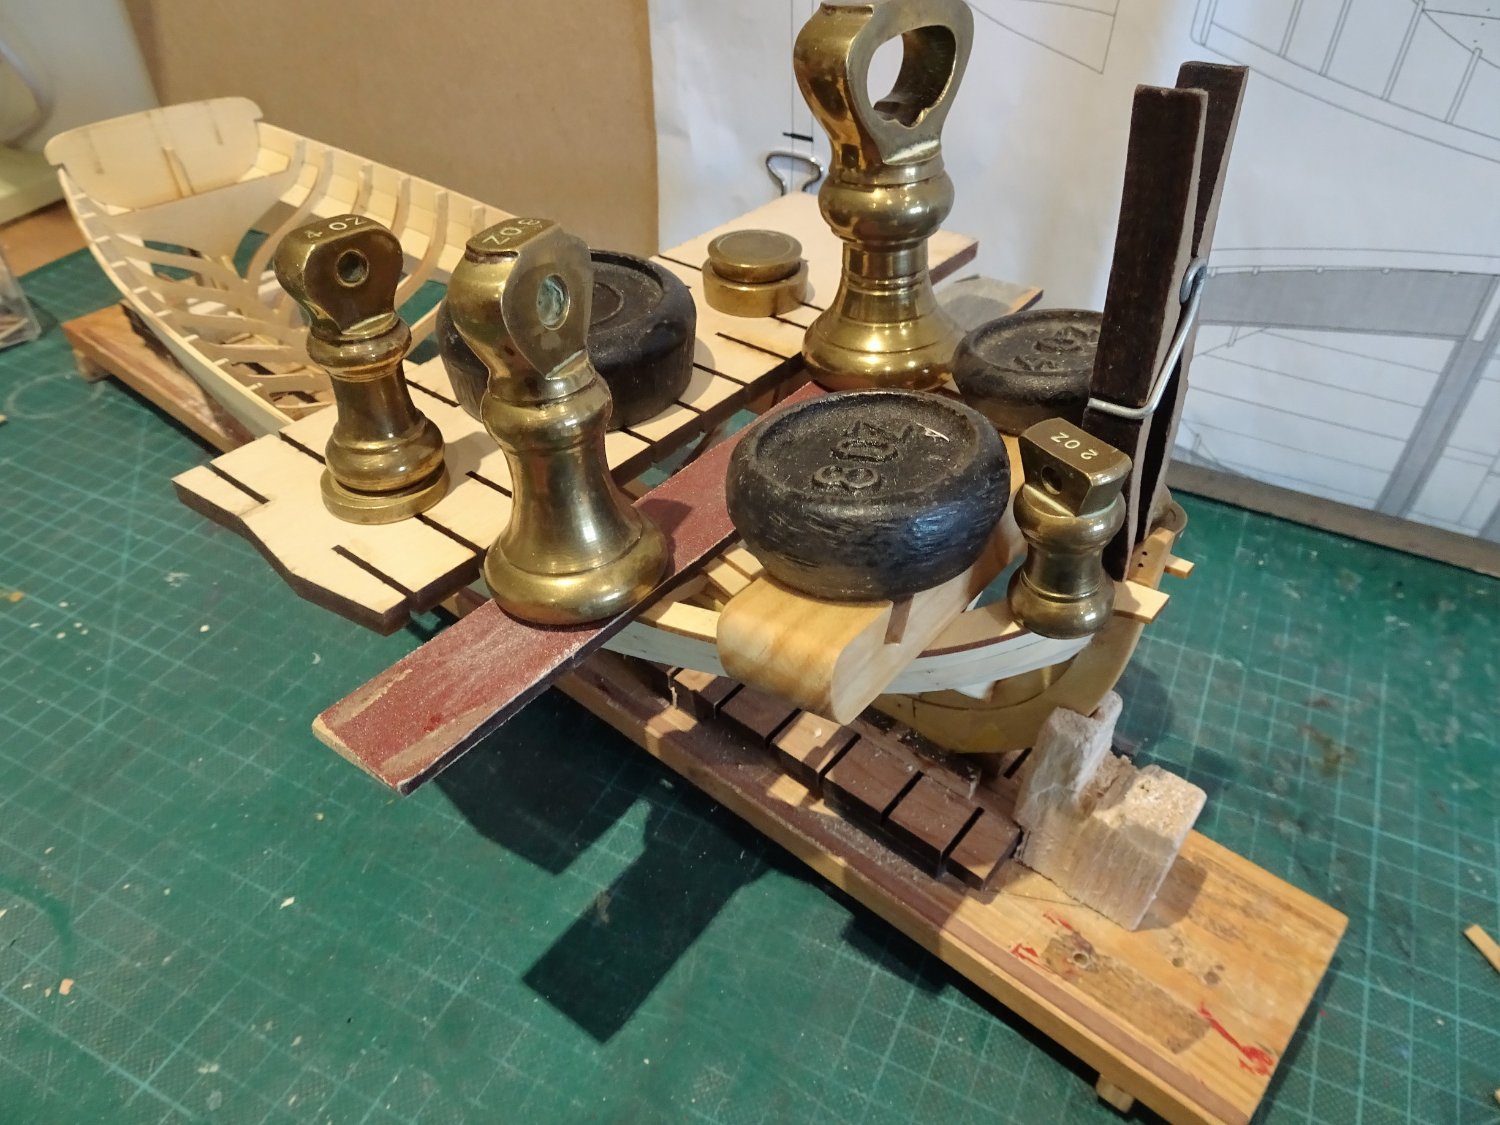
Post 13
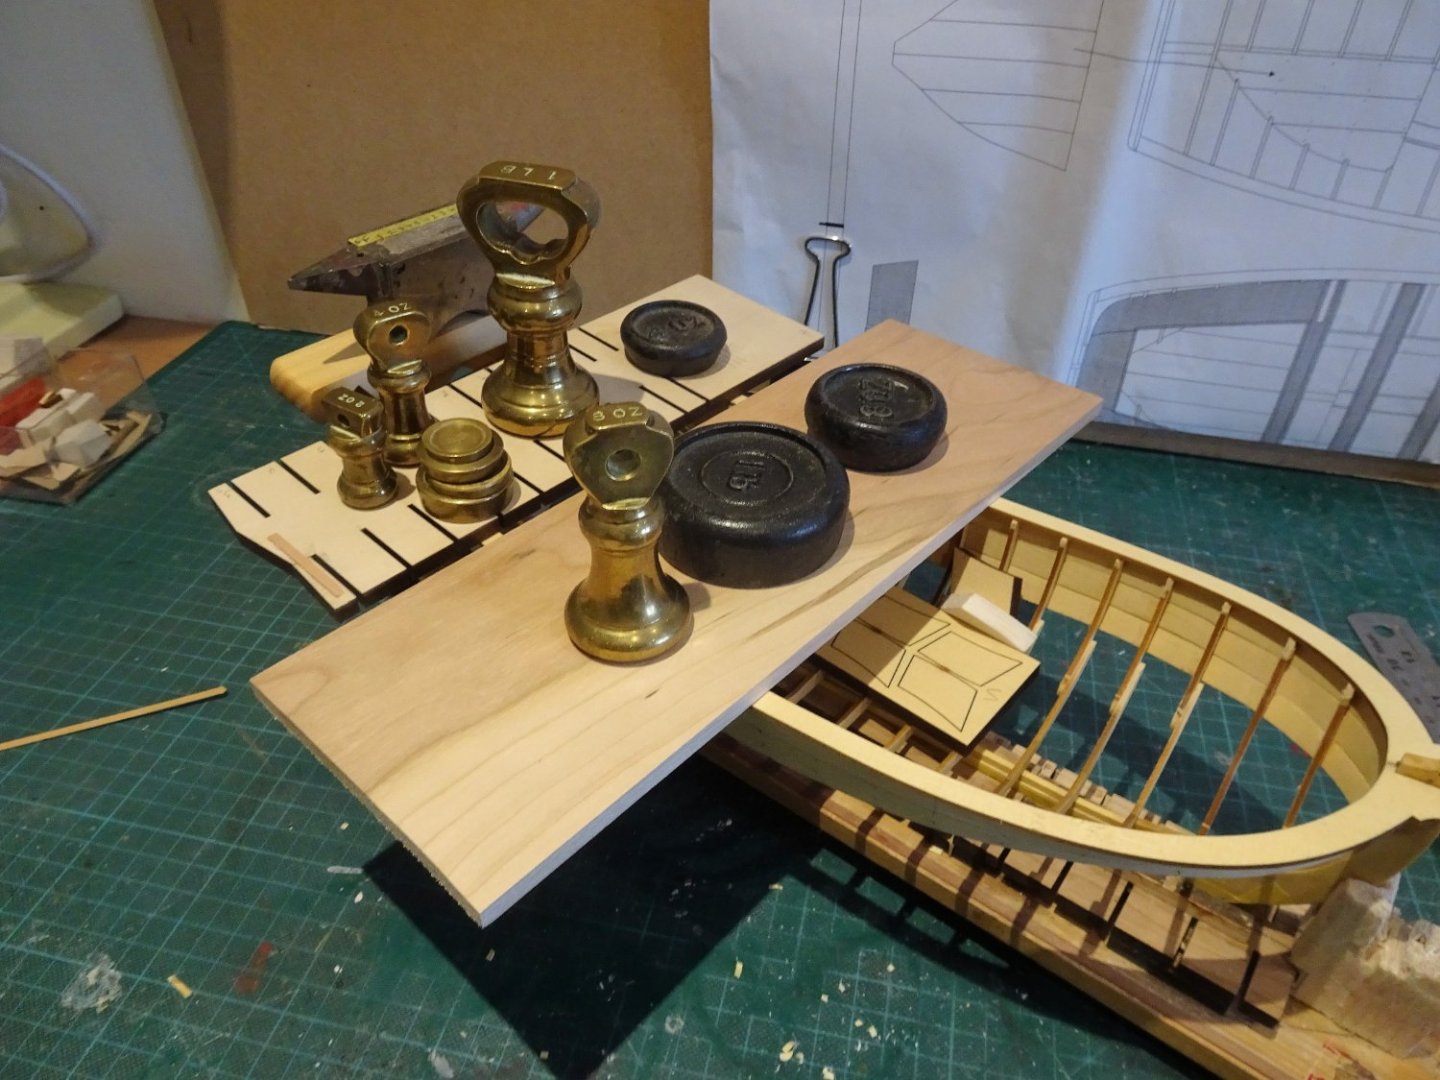
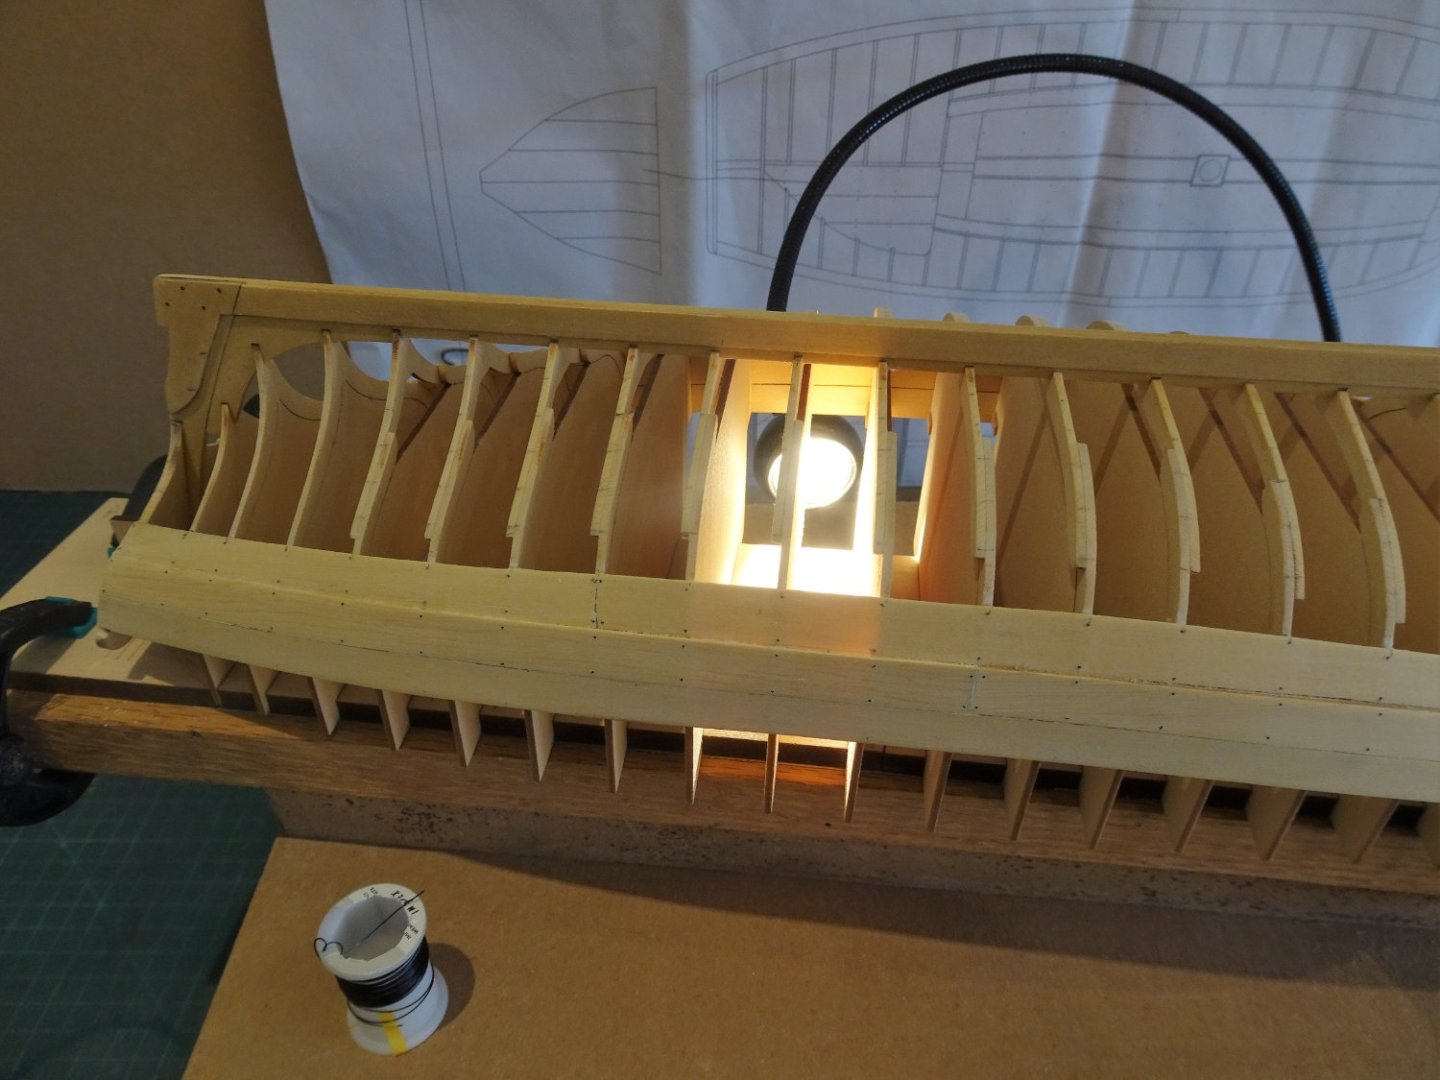
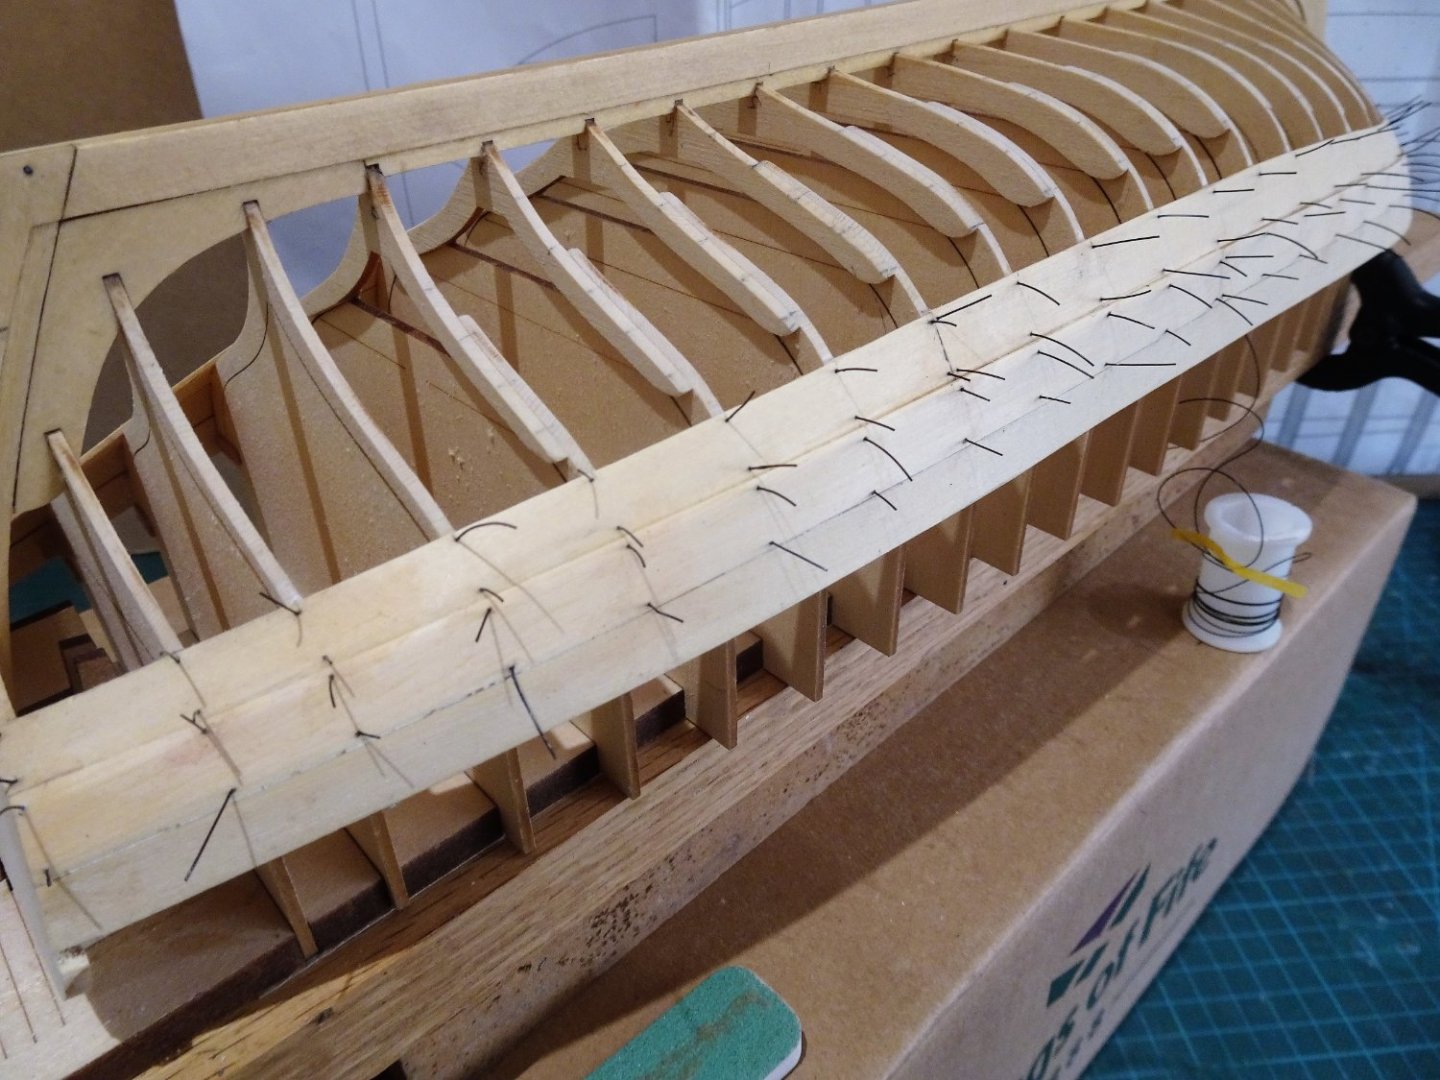
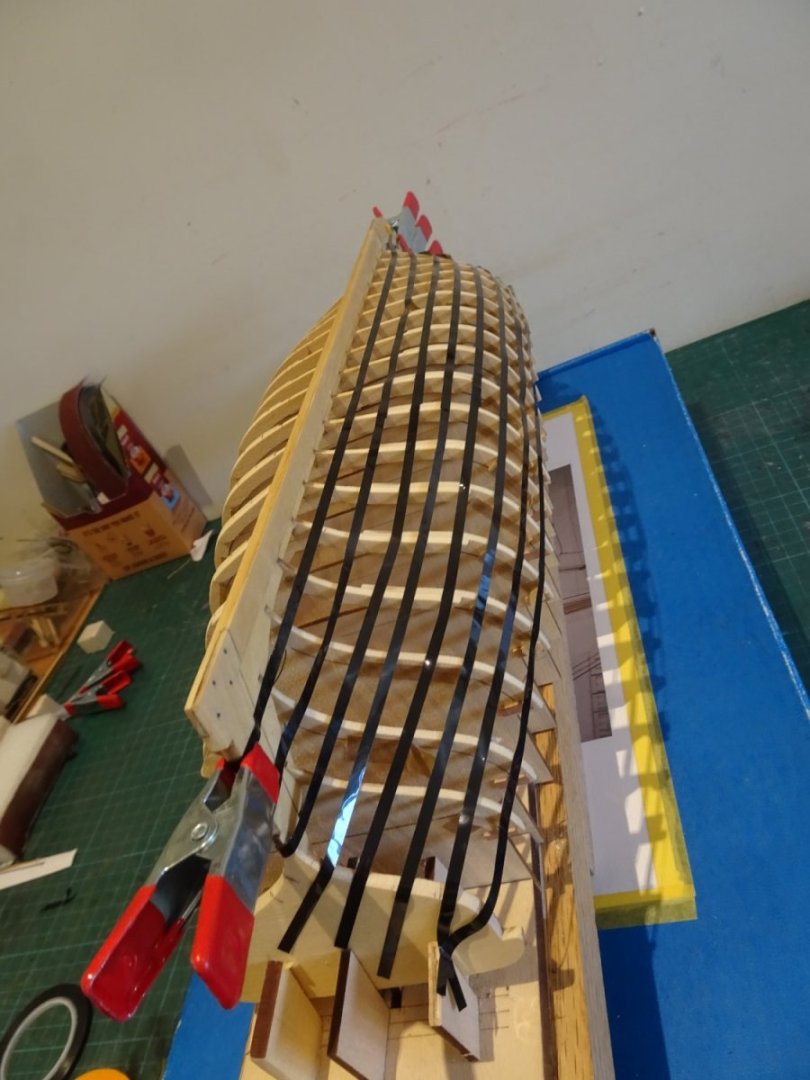
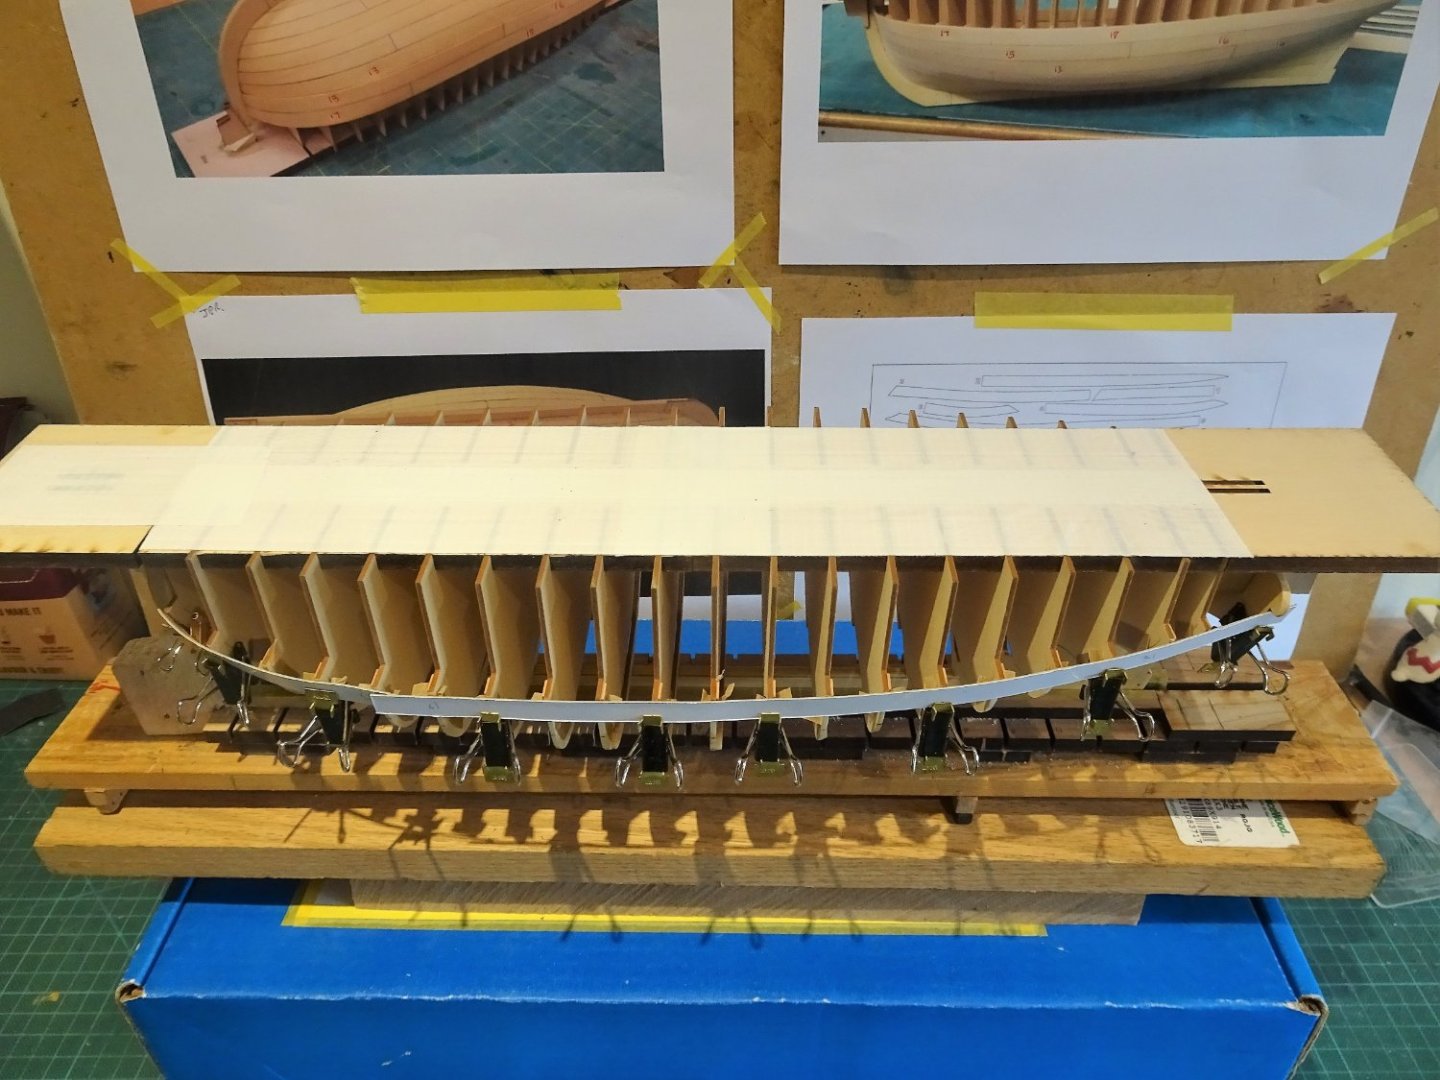
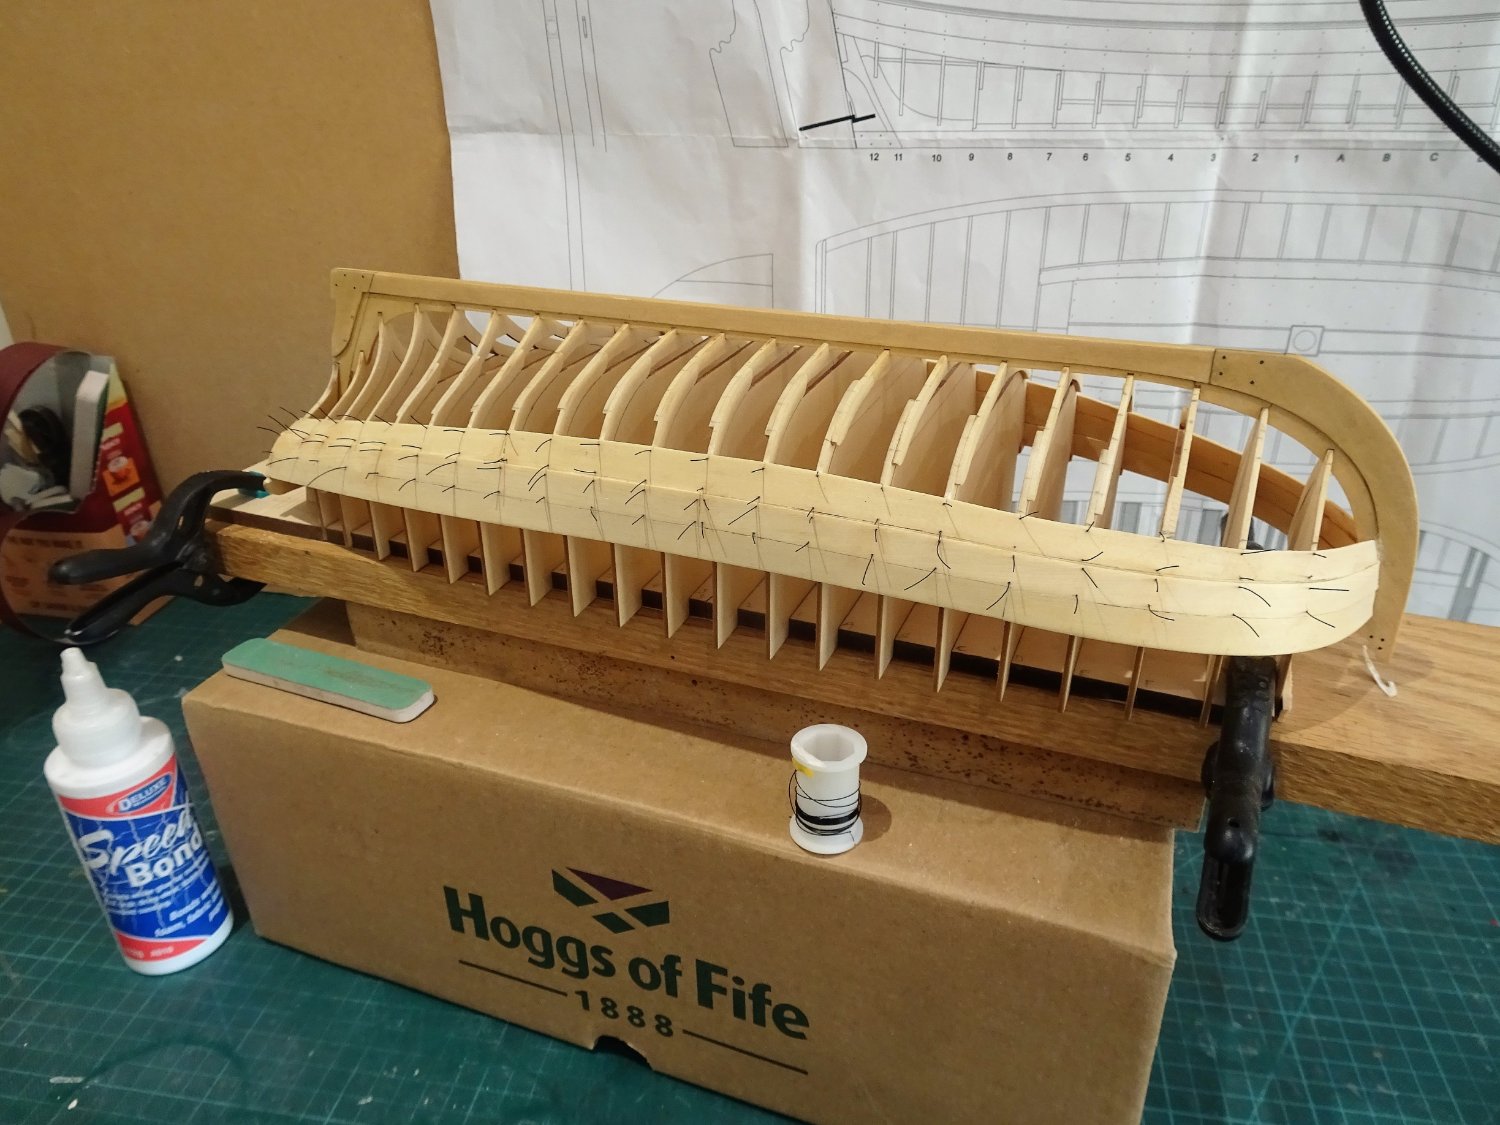
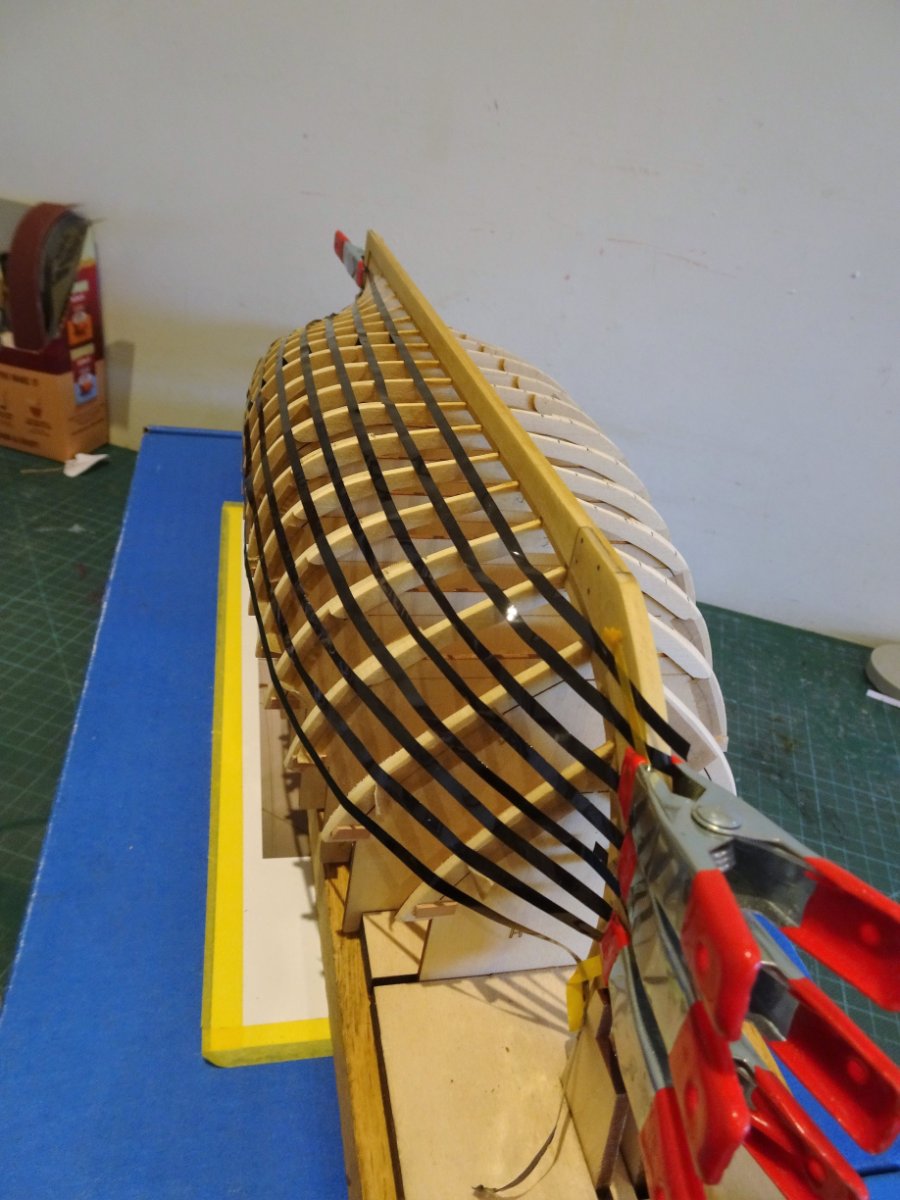
With the hull still inverted and secure on its board I decided this was a good point to add the planking nails.
10lb monofilament line provided in the kit was used. This size line has a given diameter of 0.11” (0.279mm)
A #77 drill is indicated for use which has a ø of 0.4572mm. The actual line is close enough to 0.3mm ø
I was somewhat puzzled by this, why use a drill that is almost twice the size of the line required to be fitted.
I found that a 0.4mm drill was more than sufficient for the task.
0291
Tape was used to mark the frame lines.
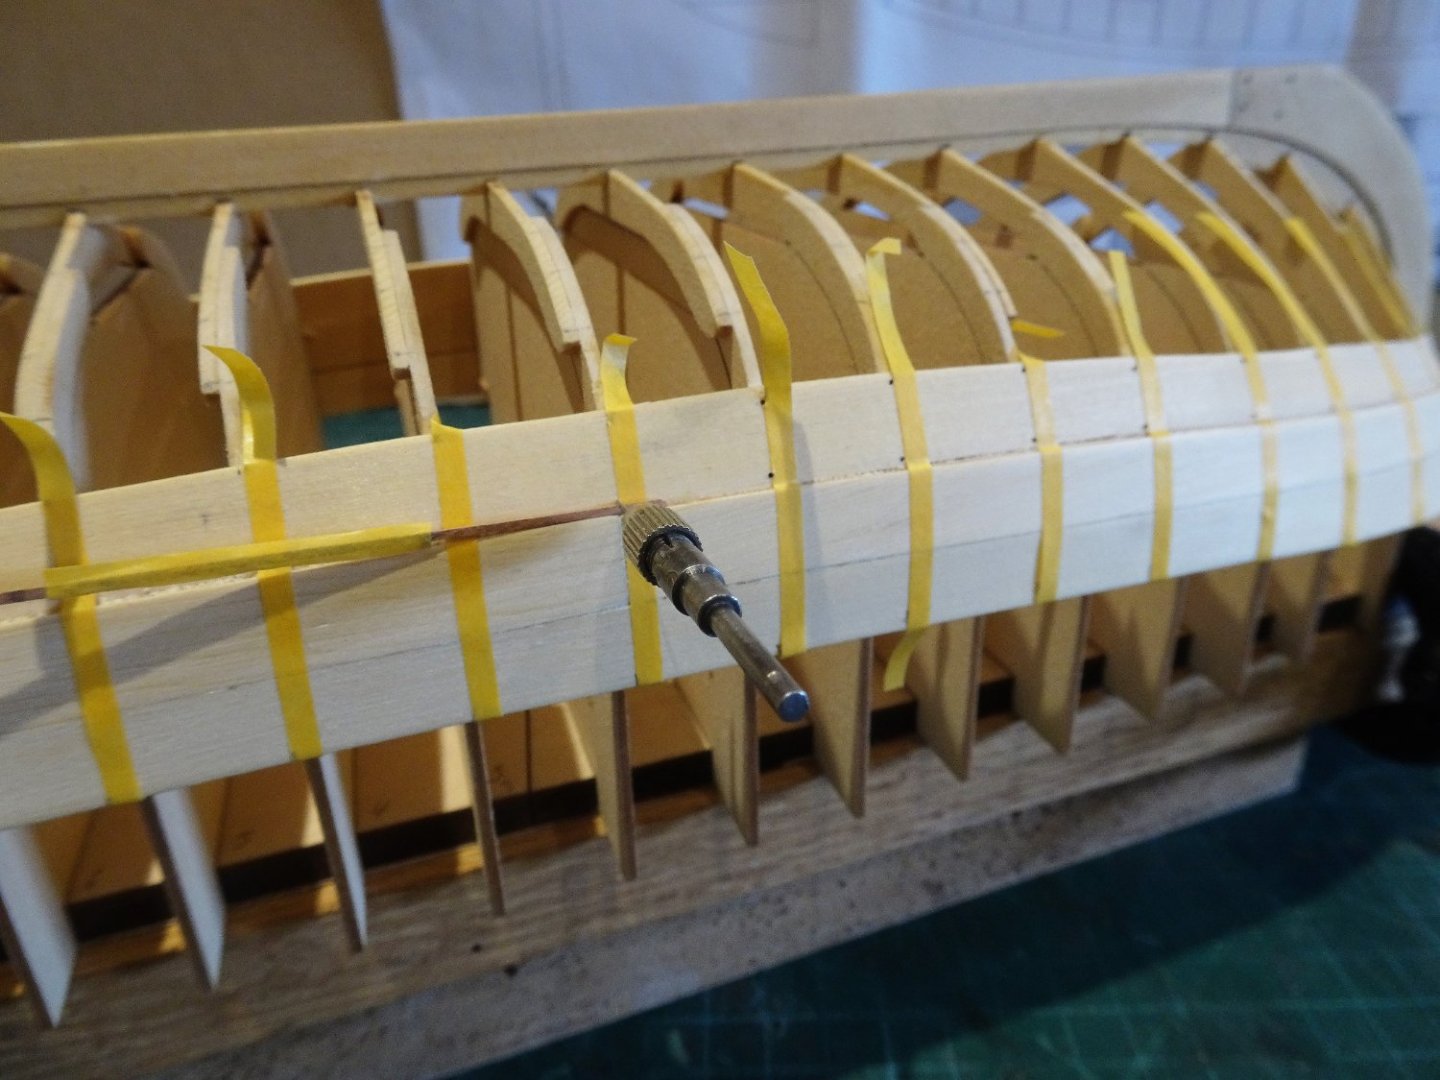
0292
A wood strip was used to position the holes top and bottom of the planks.
0294
I used a flexible light behind the hull to reveal the frames.

0295
It is then just a case of dipping in pva and inserting ad nauseum. Can’t really complain as there are only four strakes to do in total.
0297
I don’t think I would have had enough 10lb line to complete a full hull.

0299
0304
0302
A little more fettlin’ before I can turn the hull the right way up and start removing the centres.
B.E.
03/03/2023
-
12 hours ago, Kevin said:
intentions are at this stage is to let the wood do the talking, after all a lot of it is going to be boxwood, so unless i completely mess up the hull planking, there will be no added colour, just varnish
A sentiment I fully endorse Kevin, I have an aversion to covering up high grade timber with paint.
The ingenuity of Chris's design allows for a high level of satisfaction early in a build; it would have been inconceivable a few years ago to have reached that stage in only three days.
Great progress.👍
B.E.
-
Thank you, Haken, Gus, and Bob.
@ Haken - certainly not me!
@ Gus - Thank you for looking in.
@ Bob - I can relate to the fairing issue Bob, I do exactly what you do, and am still left with that niggling thought at the end.
With this planking exercise it was the plank I traced myself, using Tamiya tape on the hull, that gave me the least trouble.
It was a useful exercise tho' but there is a temptation to think that a tiny bit of tweaking will do the job, when it clearly doesn't, and Chuck's advice to use tick marks reveals that in places more needs to be taken off that first imagined.
Regards,
B.E.
-
Post 12
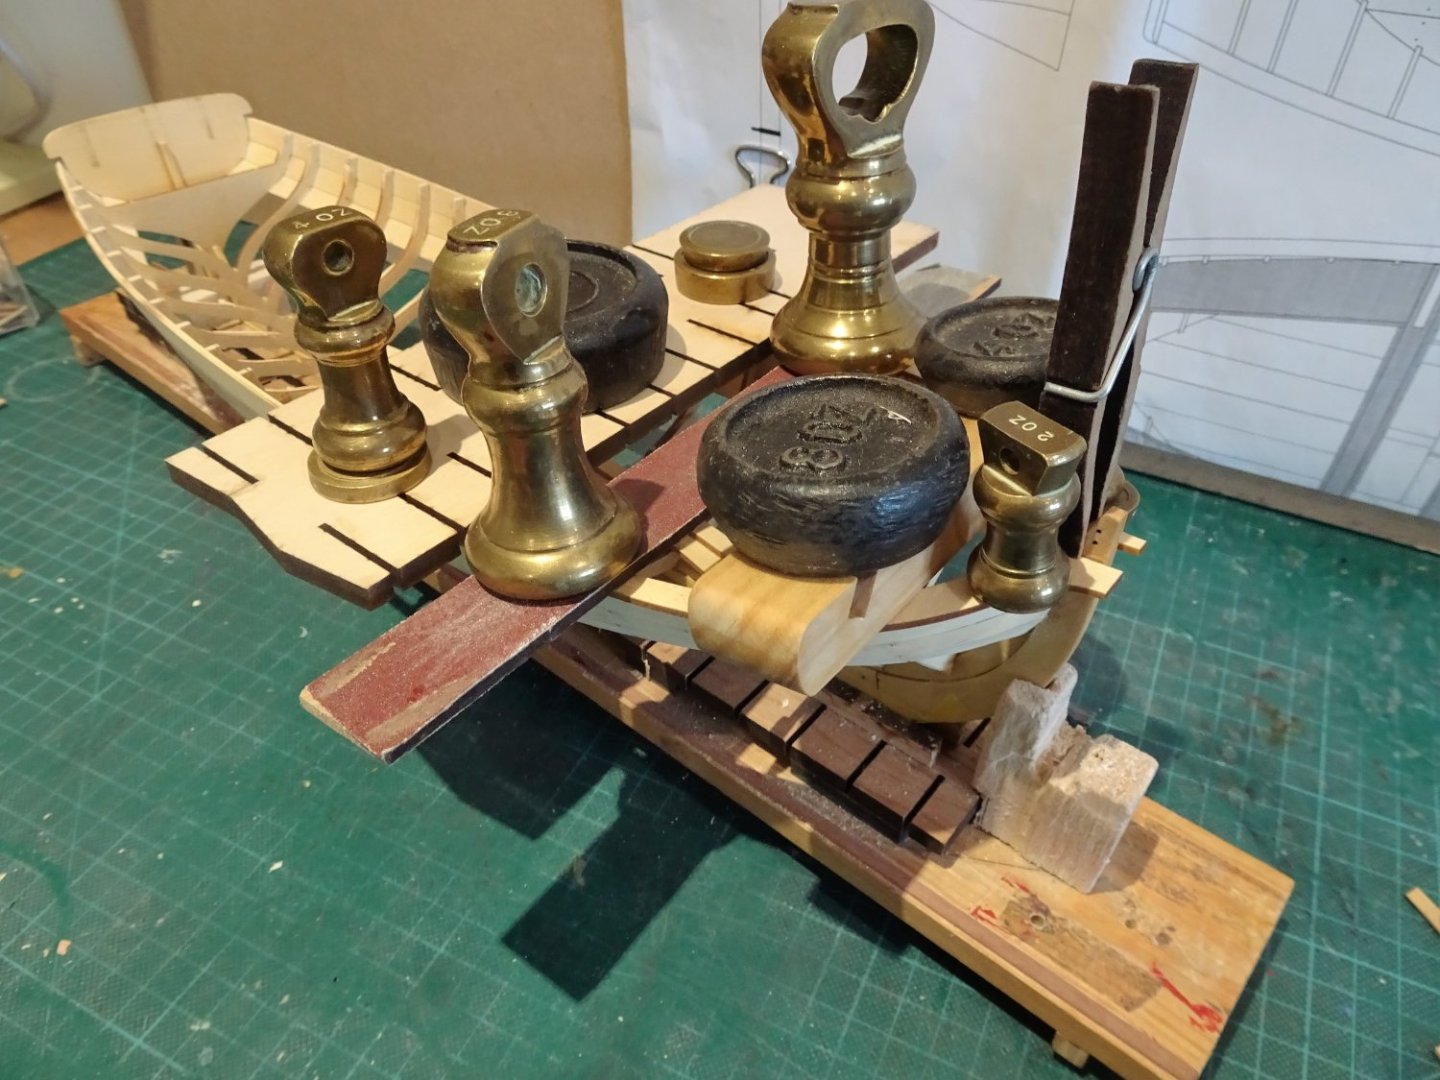
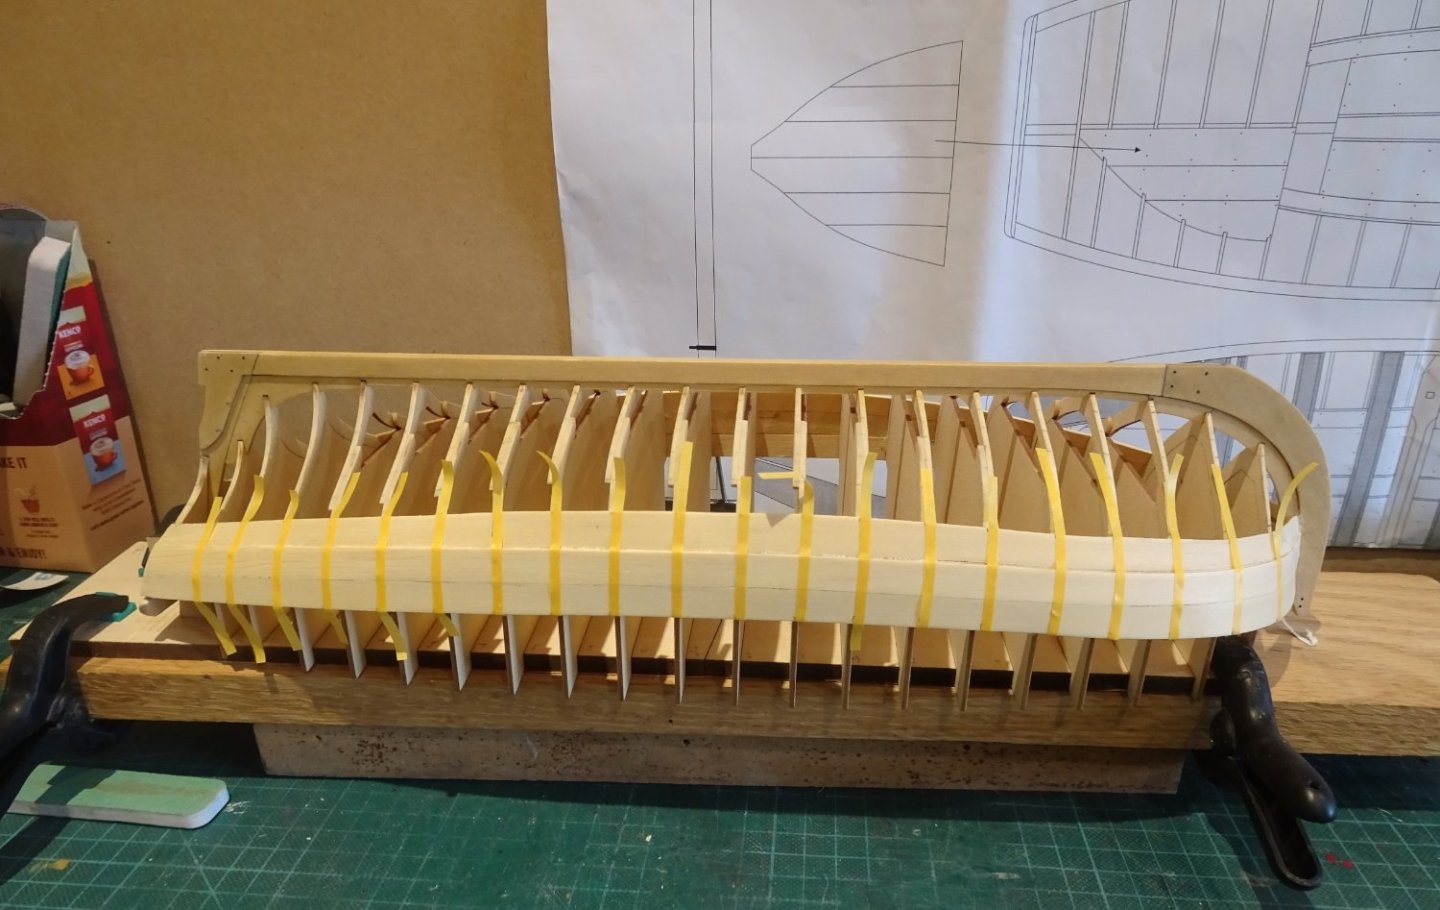
Picking up on an idea used by Jean-Paul, but one that seems natural to me, I decided to form the two upper wale planks over the existing planks.
0277
The planks were first soaked to give flexibility, and once held in place were given the hairdryer treatment. This way much of the stress was taken out of them.

0278
I used Tamiya tape to protect the existing planks.
0271a
0275
I again fitted the sheer planks first using ca for the bow bend, and pva thereafter. The hull was turned the right way up for the process.
It is worth checking the frames before gluing; I found several instances where the ca had not fully grabbed the first layer of planks at the top edge.

0274
A side benefit of those little blocks fitted to protect the frames during fairing is that they provide an anchor in a tricky place to hold a clamp during re-gluing.
Oh dear, whilst securing the bow wale on the s/b side, the bow plank 13 (third down) snapped along the grain between the bow rabbet and first frame when I inadvertently pressed too hard.
Unlucky 13 for me, I have already had one breakage, and both sides were re-cuts.
0279
The one small compensation was that the broken plank came away easily. I left the aft one in place.
Am I downhearted, you bet, I am thoroughly annoyed at my ineptitude.
0283
Re-fitting the new plank proved quite a trial taking a long session of sanding and dry fitting before it sat easily without stress.
I had already scrapped an earlier one after a fair time having cut it a tad too short to meet the aft plank join.
The lower wale planks were attended to next.
Starting with the starboard side;
Again, I had to do a lot of tweaking to get the bow section (15) to fit. The aft section (16) was also problematic.
When tweaked to fit it lay above the joint line of the corresponding plank beneath it, revealing the cheat that belies the wale as one thicker plank.

0288
I re-cut another plank using a Tamiya tape pattern taken from the hull, which covers up the offending joint.
The port side went a little easier.

0285

0286
Above – dry fitting the lower wale planks.
Overall, I found the planking trickier than I seem to remember from when doing the Royal Barge.
Perhaps it’s just as well I went for the open frame version.
Movin’ onto a final sanding and finishing of the planking.
B.E.
28/02/2023
- James G, Ryland Craze, shipman and 10 others
-
13
-
Worth fettlin' the columns Derek, even if the only ones ultimately visible are those adjacent to the Main ladderway.
You've made a nice job of them.
B.E.
- mtaylor, SIDEWAYS SAM and DelF
-
2
-
 1
1
-
Coppering looks good, and it does hide a multitude of sins, I was glad of it on my Pegasus build.
If you want to add a degree of authenticity the rudder straps and pintles on copper hulls were made of a cuprous alloy, iron doesn't work with copper. Painting them a coppery/bronze colour would be more accurate.
B.E.
-
In 1771 Britain's most famous Naval hero, Nelson, first put to sea at the age of twelve under the patronage of his uncle, Maurice Suckling, a Royal Navy Captain.
A boy had to grow up quickly in those days.
B.E.
- Keith Black, mtaylor, davyboy and 1 other
-
4
-
Enjoy your new adventure Derek, it's a great kit to build.
You'll have one advantage over me in that you will be able to furnish the Great cabin, Chris's furniture arrived to late for me, I couldn't get the stuff between the beams.
A lot of the mods I made to Sphinx were addressed by Chris on his Indy kit, especially the Quarter galleries, which is perhaps the trickiest change I made on Sphinx.
B.E.
- DaveBaxt, DelF, SIDEWAYS SAM and 3 others
-
6
-
Thank you Ryland and Bob, it's good to have your respective works to refer to. 👍
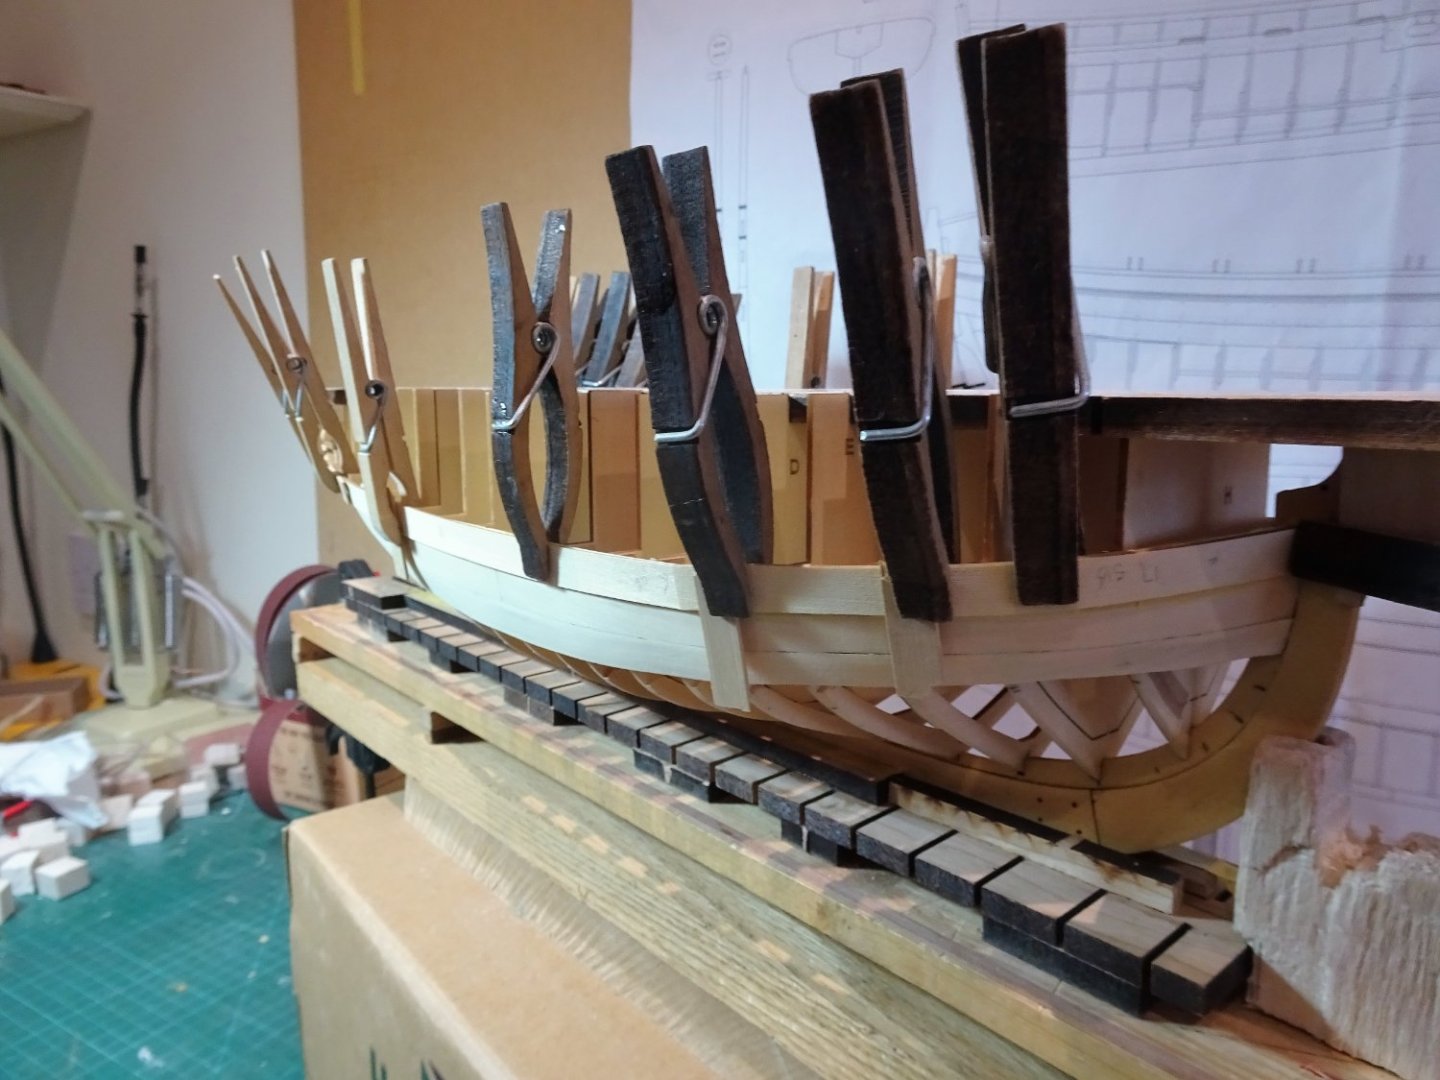
Post 11
The three required strakes of this version are now fitted, but not fully fettled.
I found that the planks altho’ pre-spiled did require a fair amount of tweaking to get them to fit.
0270
0267

0263
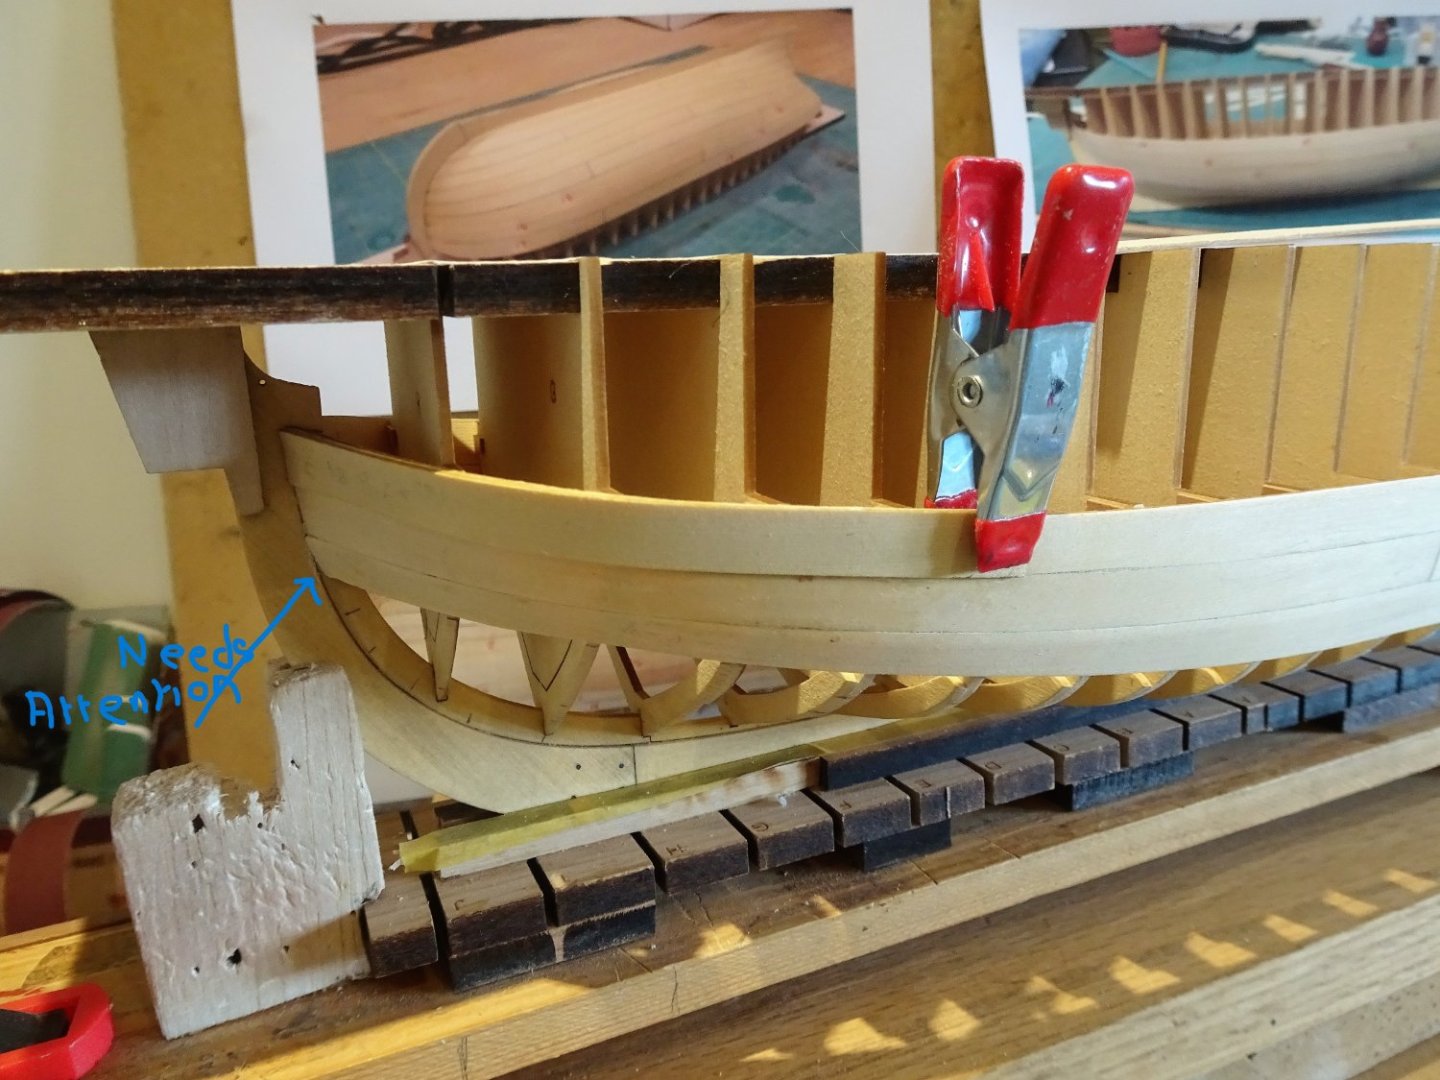
The second strake below the sheer (plank15) proved trickier to fit.
Starting with the port side, once around the bow curve it did not readily sit down against the sheer plank. Repeated bending and some sanding was required to get the plank into position.

0266
The aft section (plank16) was a little easier but did require some sanding and bevelling along the section between frame 8 and the transom. Mid way along a slight curve was induced, and from frame 8 a slight twist is also required where the plank starts to curve beneath the transom.
0265
The forward plank on the Starboard side also required similar treatment. The aft section (16) proved problematic, I just couldn’t get rid of an annoying gap, so the plank was scrapped and a replacement cut which went on with minimal sanding and bevelling.
The third strake bow plank (13) is a long plank near 70% of the overall hull length.
0262
An almost instant disaster the end of the plank split along the grain where it fits into the bow rabbet, just where you don’t want it – under pressure at the bow.
Fortunately, there is sufficient sheet to cut replacements which is easily done using just a scalpel. Based on the trial fitting of the now replaced plank, the new plank can be tweaked before cutting to allow a little extra material for better sanding to fit.

0264
Both sides of plank (13) were re-cuts and it took me some time to get anywhere close to a tight fit.

0268
The same applied to the aft section where both planks (14) were re-fits.
0269
The one comforting thought is that the first and second strakes are covered by an extra layer of duplicate planks which form the wale, so there are in effect two chances to get it right.
This will be the next step.
B.E.
22/02/2023
-
A great looking model Andrew, full of interest, and those sails are excellent.
Well done!
B.E.
- Ryland Craze, AJohnson, king derelict and 2 others
-
4
-
1
-
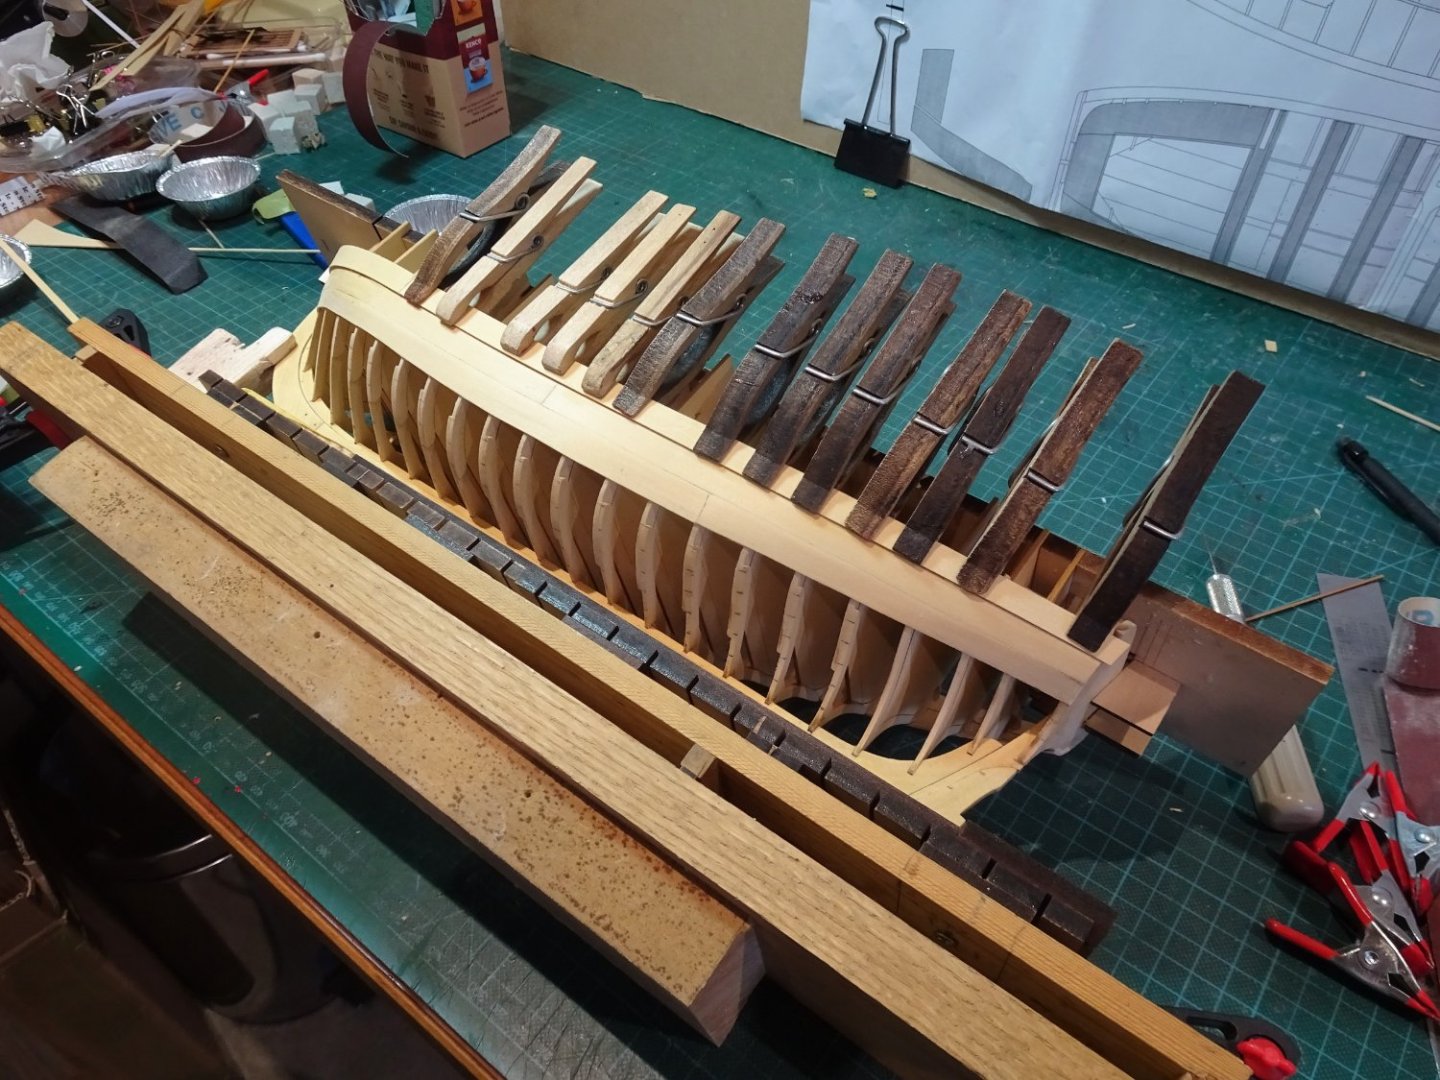
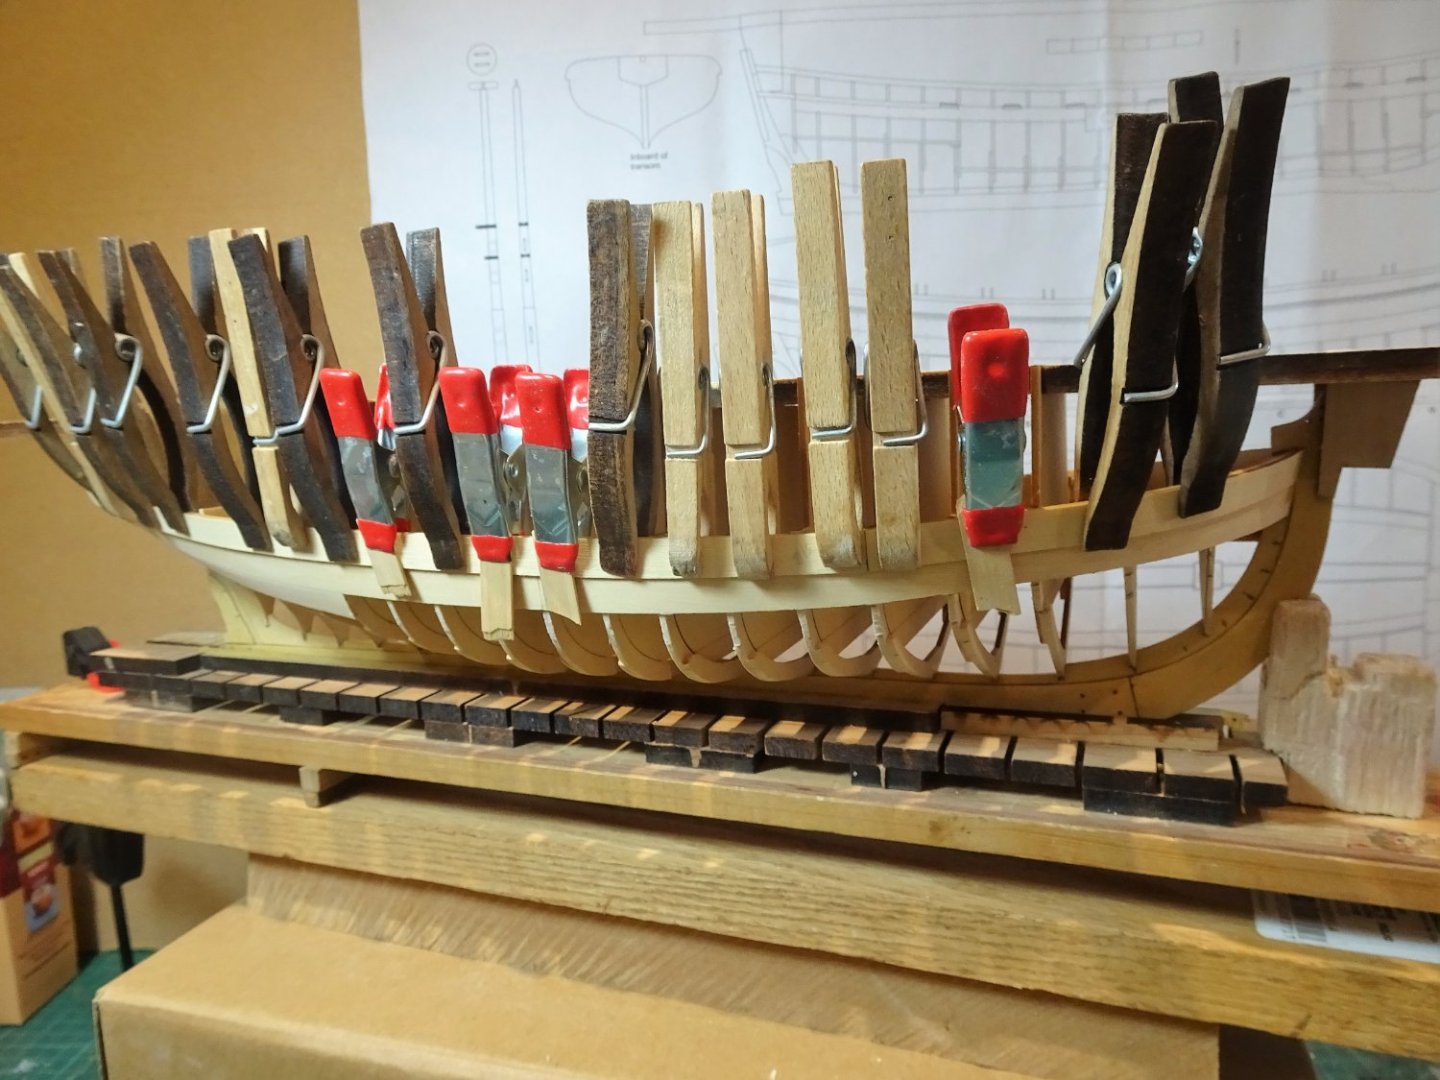
Post 10
Planking begins.
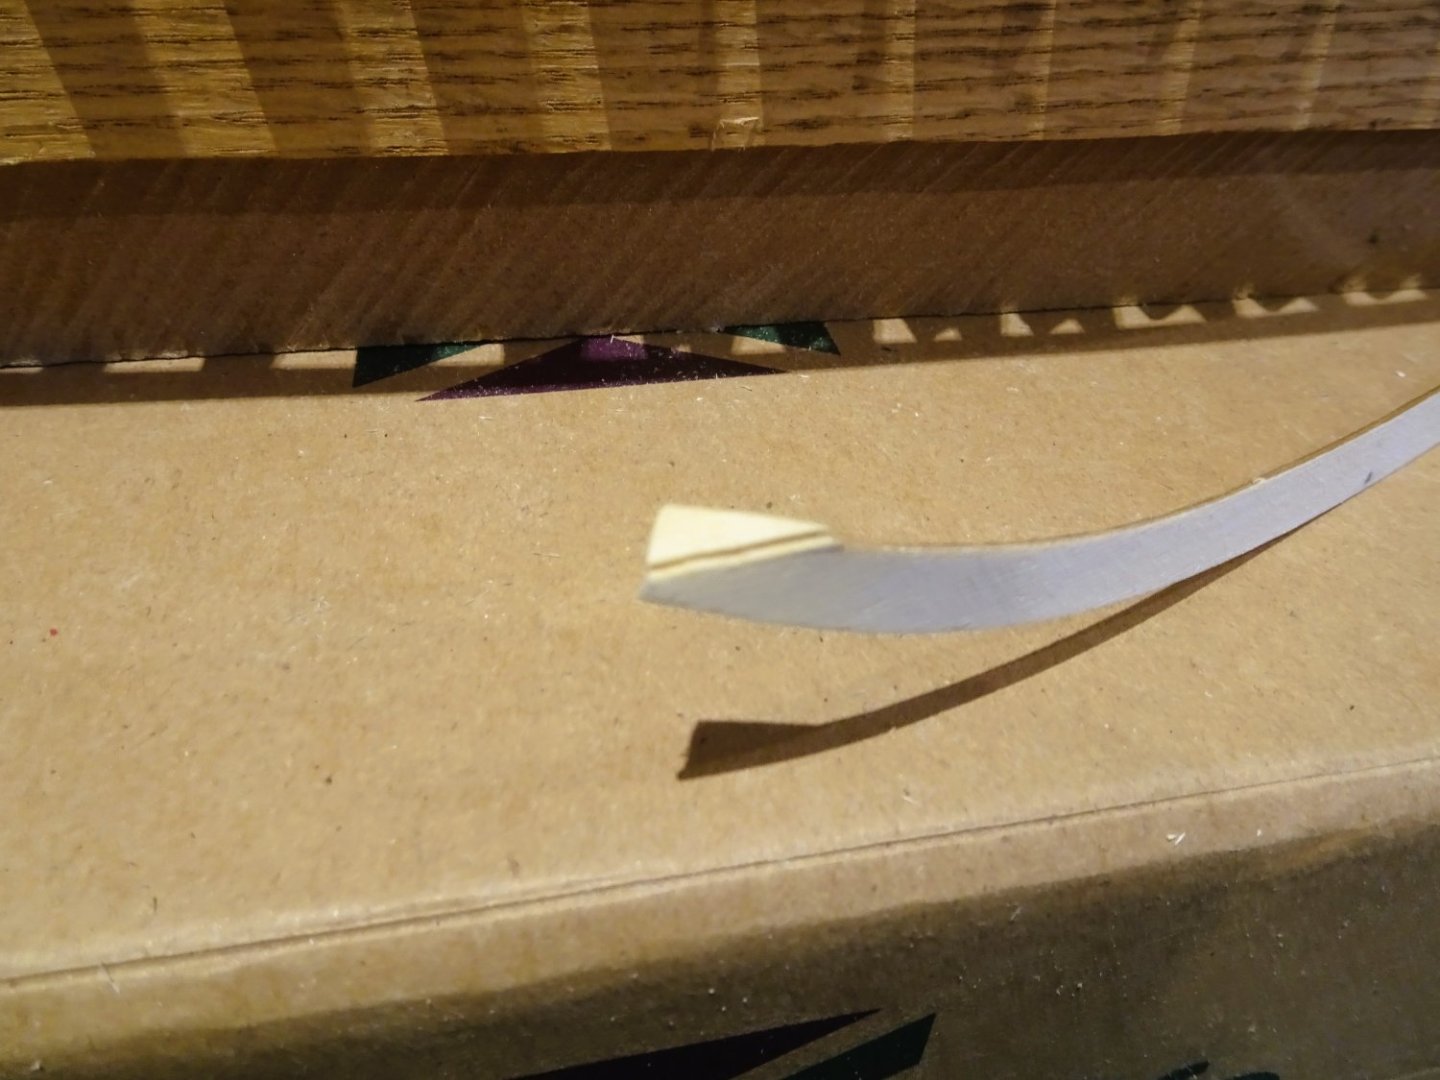
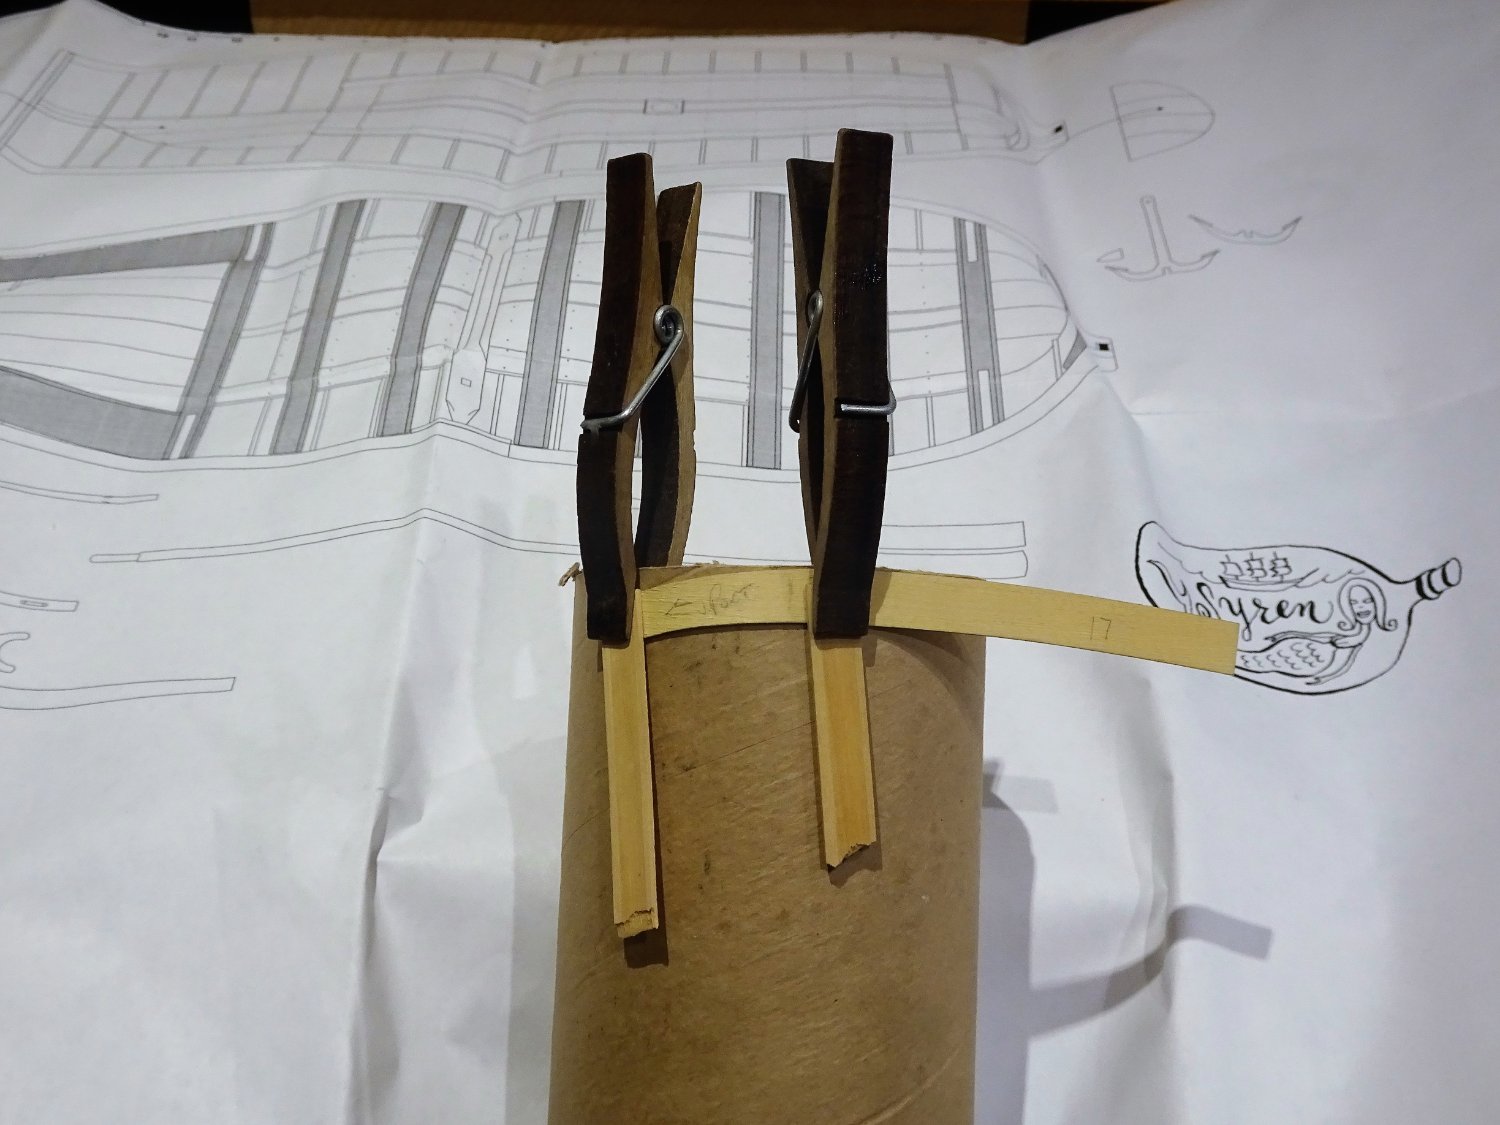
The sheer line plank at the bow begins with Plank 17.
0235
As you can see this is the port side and this short section has a downward curve, which at first sight may seem counter-intuitive, but it is correct to keep the line right as it bends around the bow frames.

0237
I use water and heat to perform the bend around a large circumference tube. Not having used Alaskan Cedar in a build I was a little nervous of using heat only in case the strip snapped at the bend point.
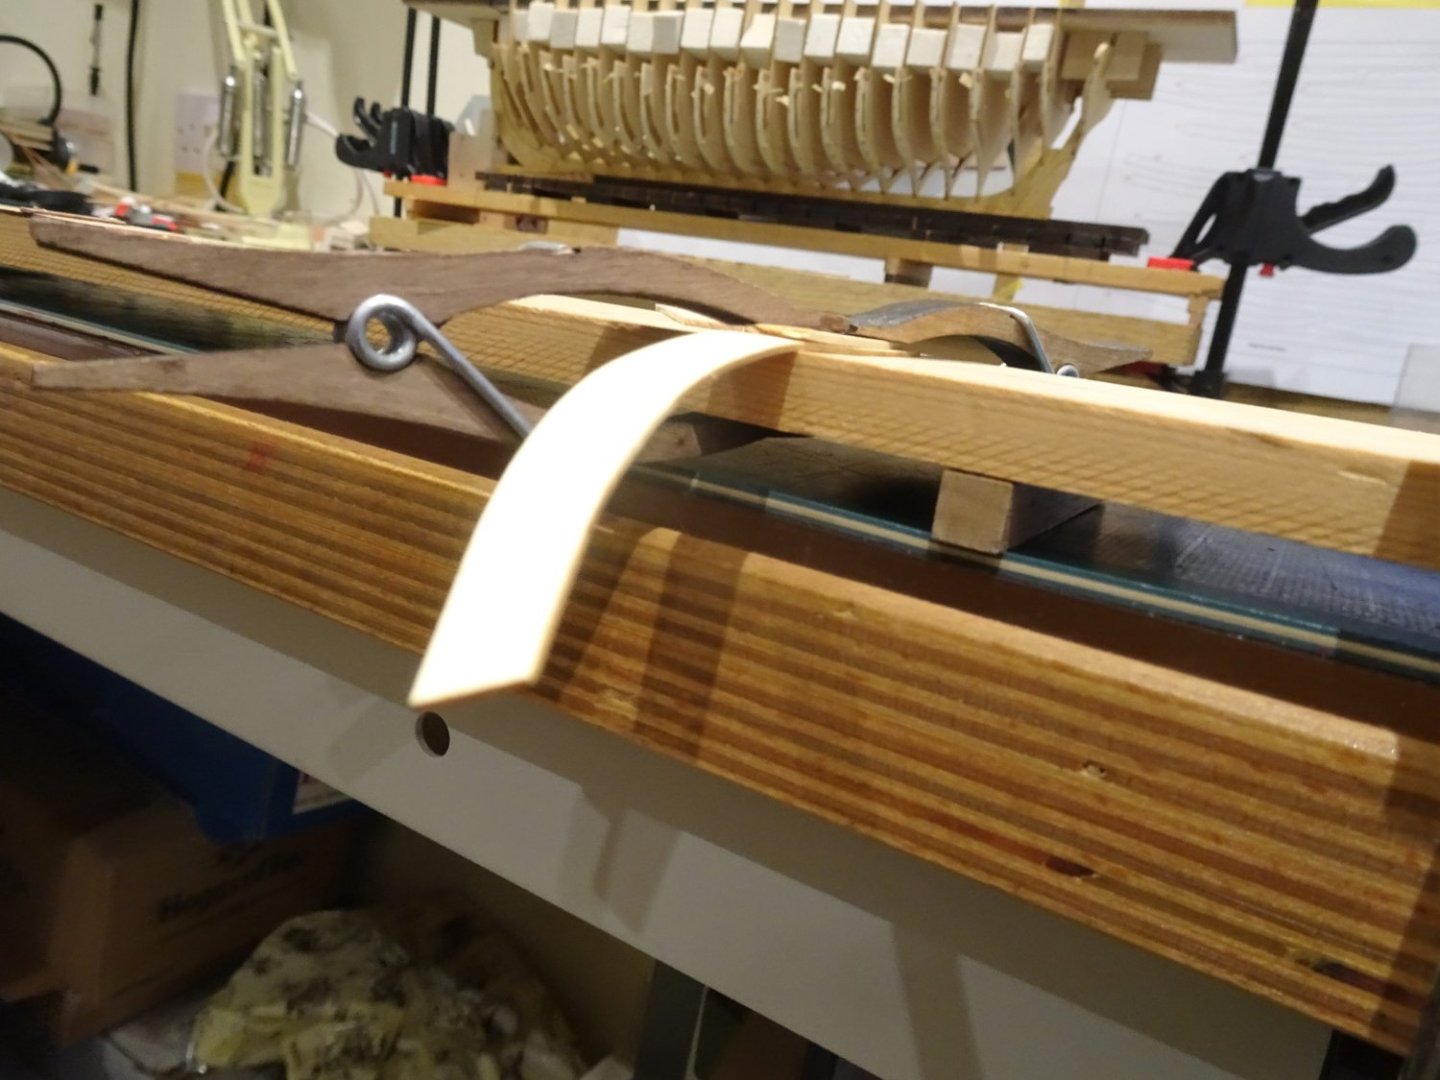
0238
0239
Several bending sessions were required to get a stress-free lie around the bow, plus a small twist at the bow end so the plank sat square within the rabbet.

0243
I have re-inserted the balsa spacer blocks to help support the frames during fitting of the planks.

0247
I opted to use ca to glue the first plank, apart from any other consideration it is always tricky to clamp planks around the curve of the bow, and it is useful to hold the plank at the exact level for an instant grab.
0248
Dry fitting the aft plank, this piece needed no adjustment for fit.
The aft section of the sheer plank is a lengthy piece for which I will again use ca, progressing two frames at a time.

0249
At the transom a piece of 1/16th strip was used to allow for the capping rail which sits beneath the transom wings.
With first sheer strakes glued into place the hull is again inverted for the next two strakes to be fitted.

0251

0255
0258A
I do seem to have a slight variance in a couple of the frame tops above the sheer planks port and Starboard, towards the stern, but otherwise the application went quite smoothly.
The next two planks are likely to prove more of a challenge to get a tight fit against the sheer plank, but at least I now have a plank to work against.
B.E.
14/02/2023
-
Very nice work, I can only hope my efforts achieve close to your result.
B.E.
- Ryland Craze and Diver
-
2
-
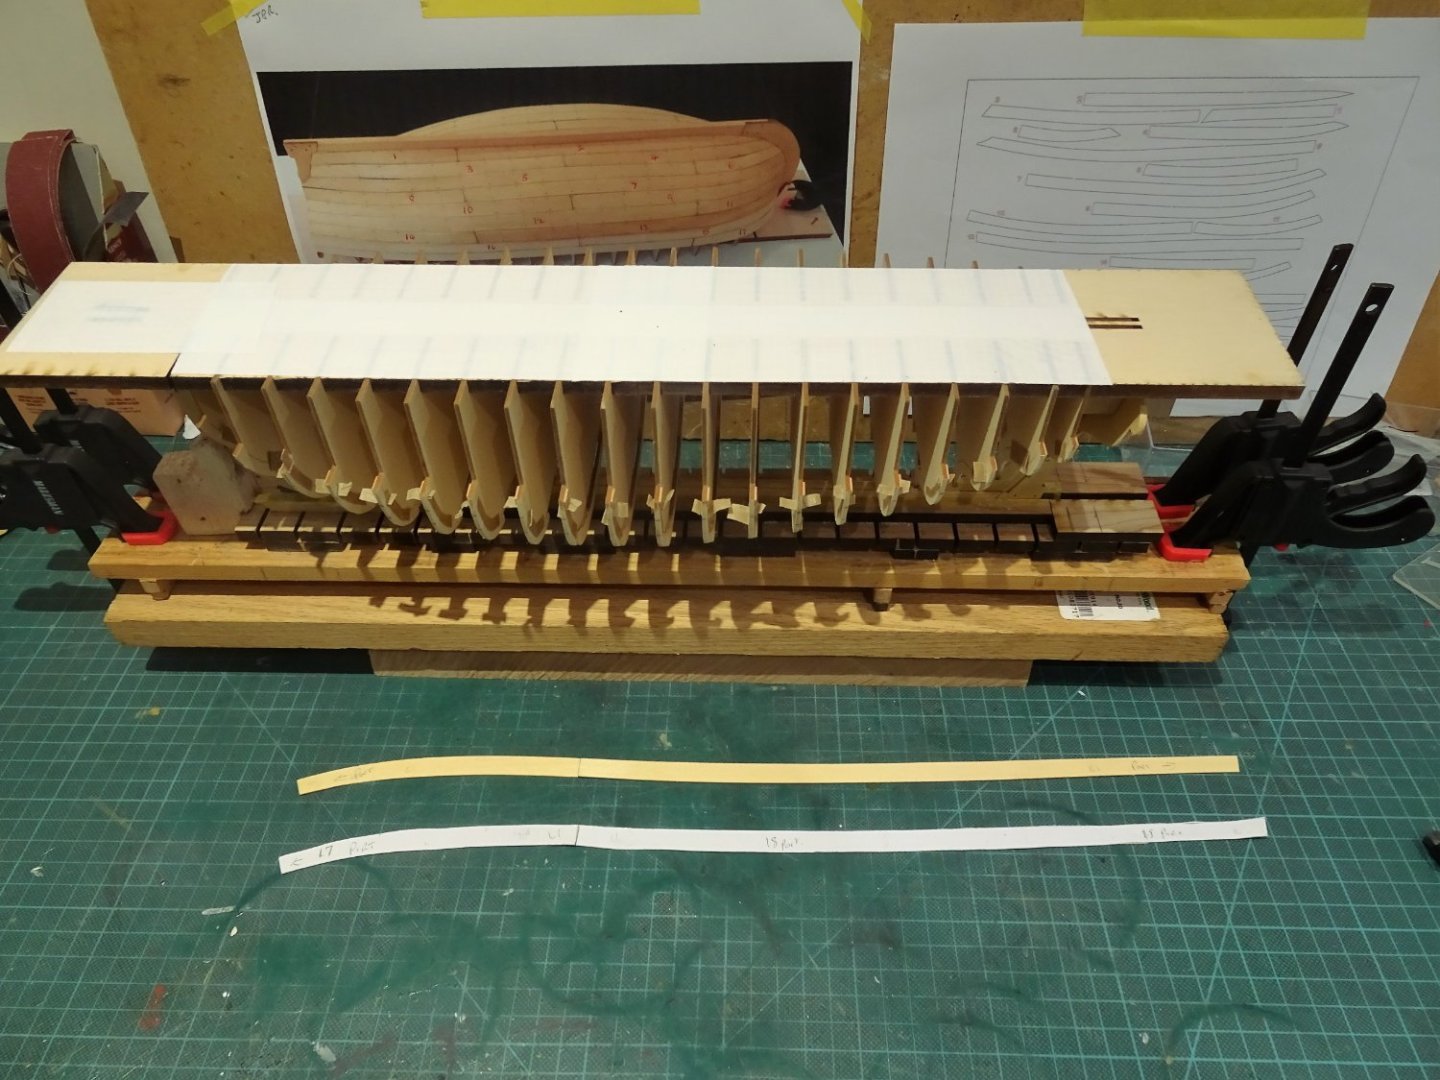
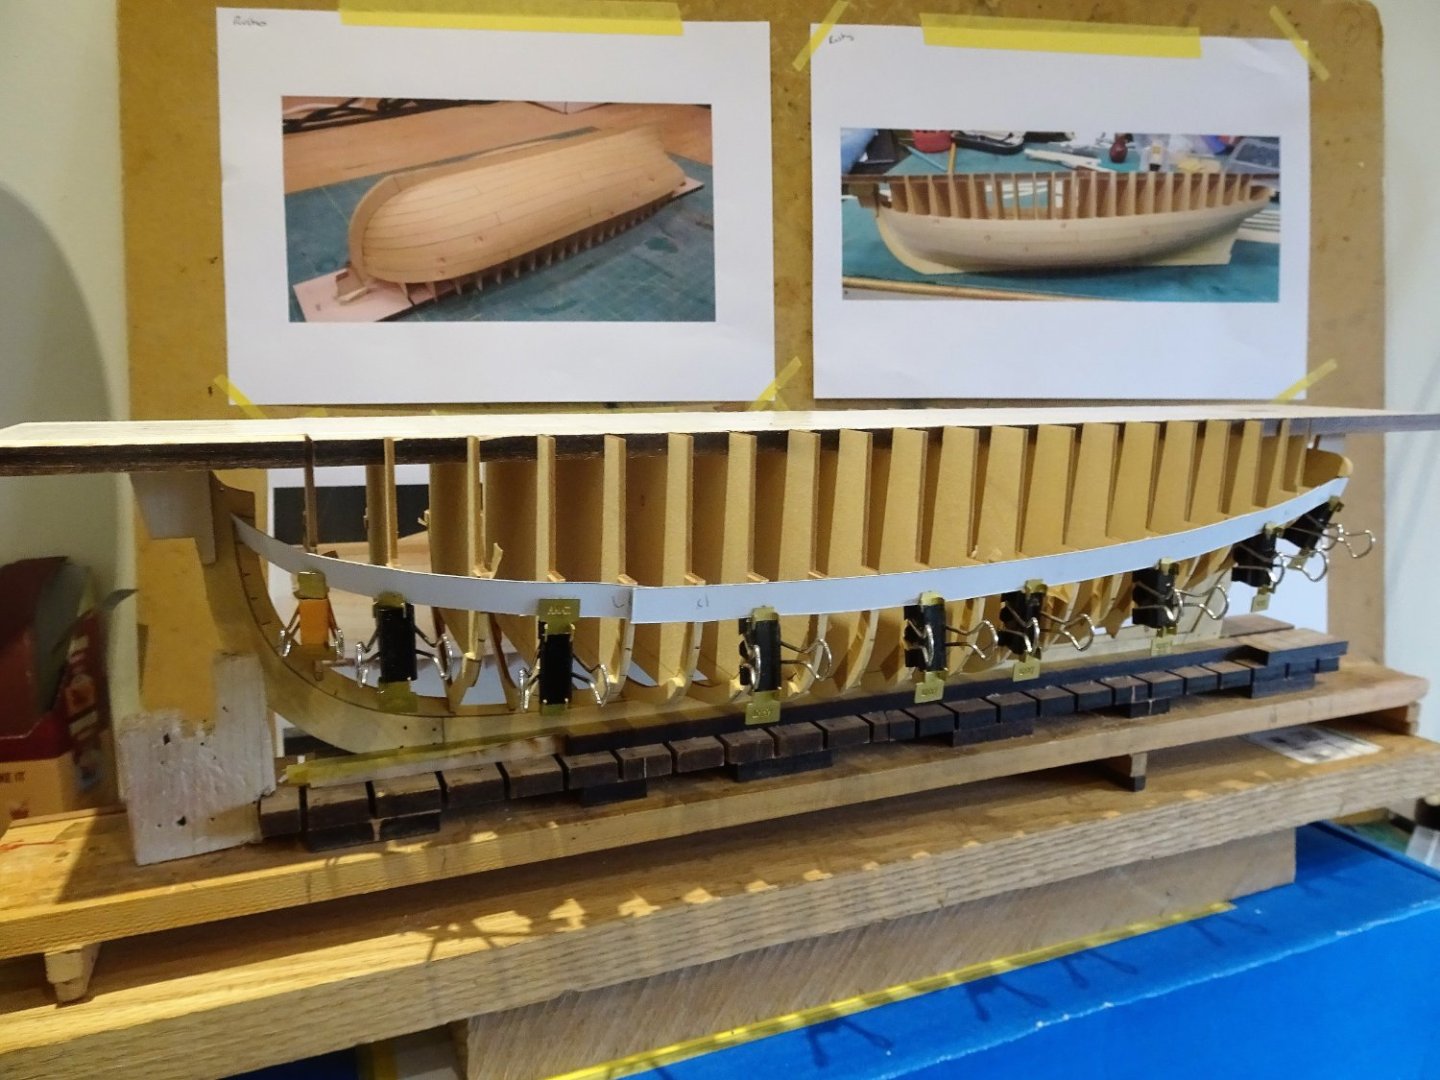
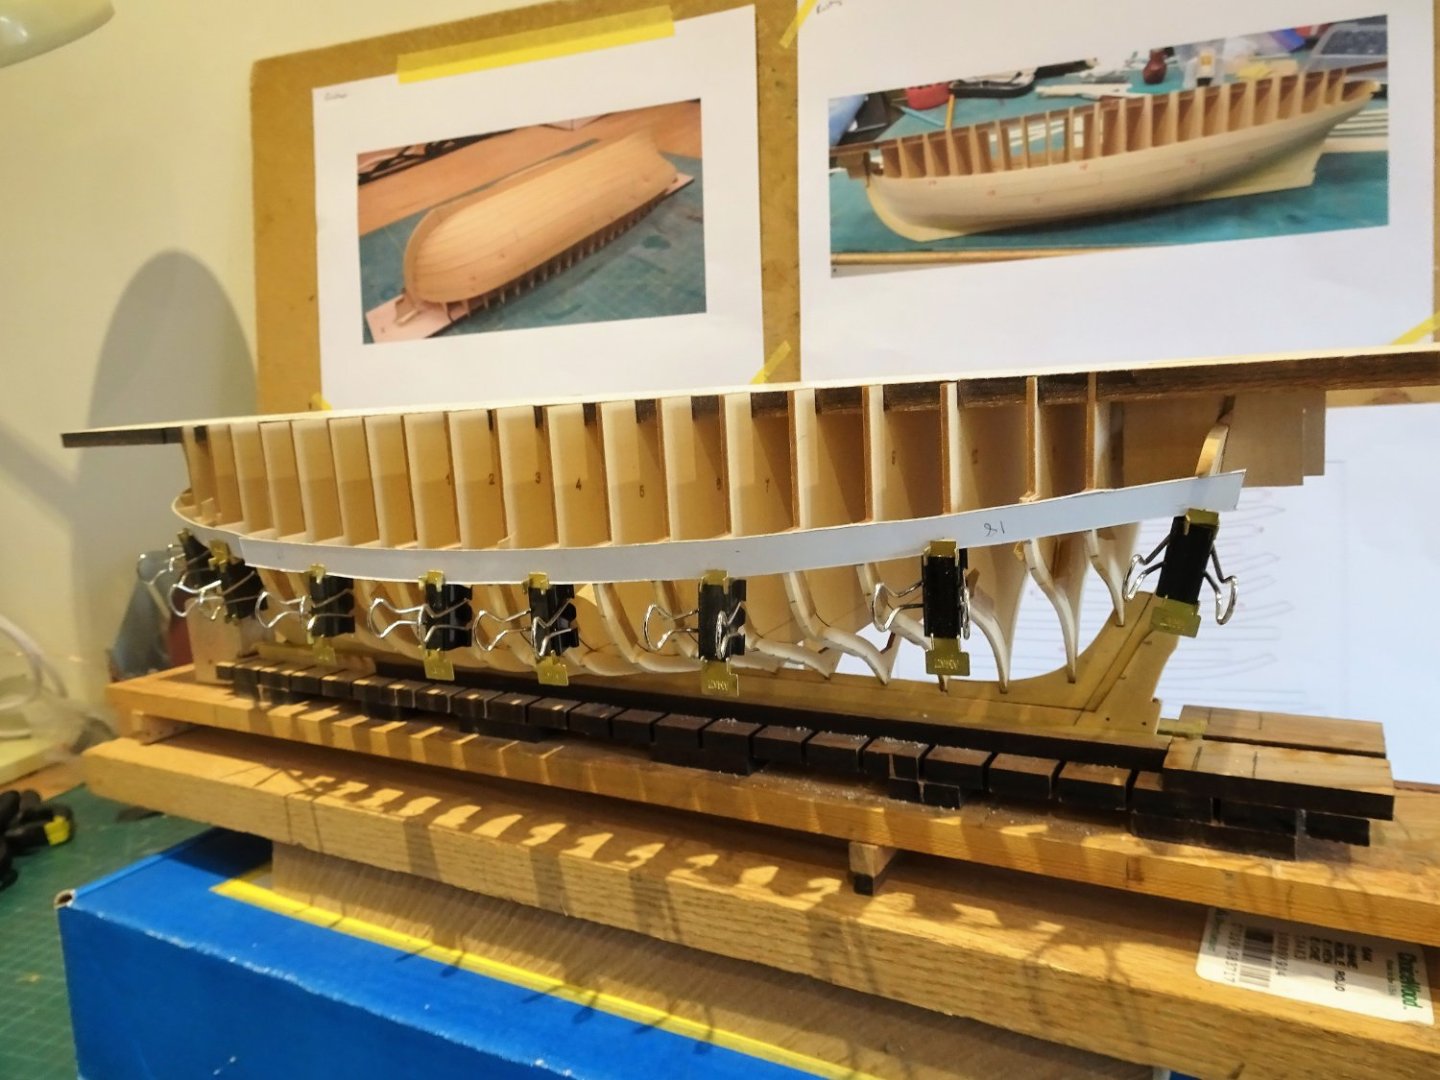
Post Nine
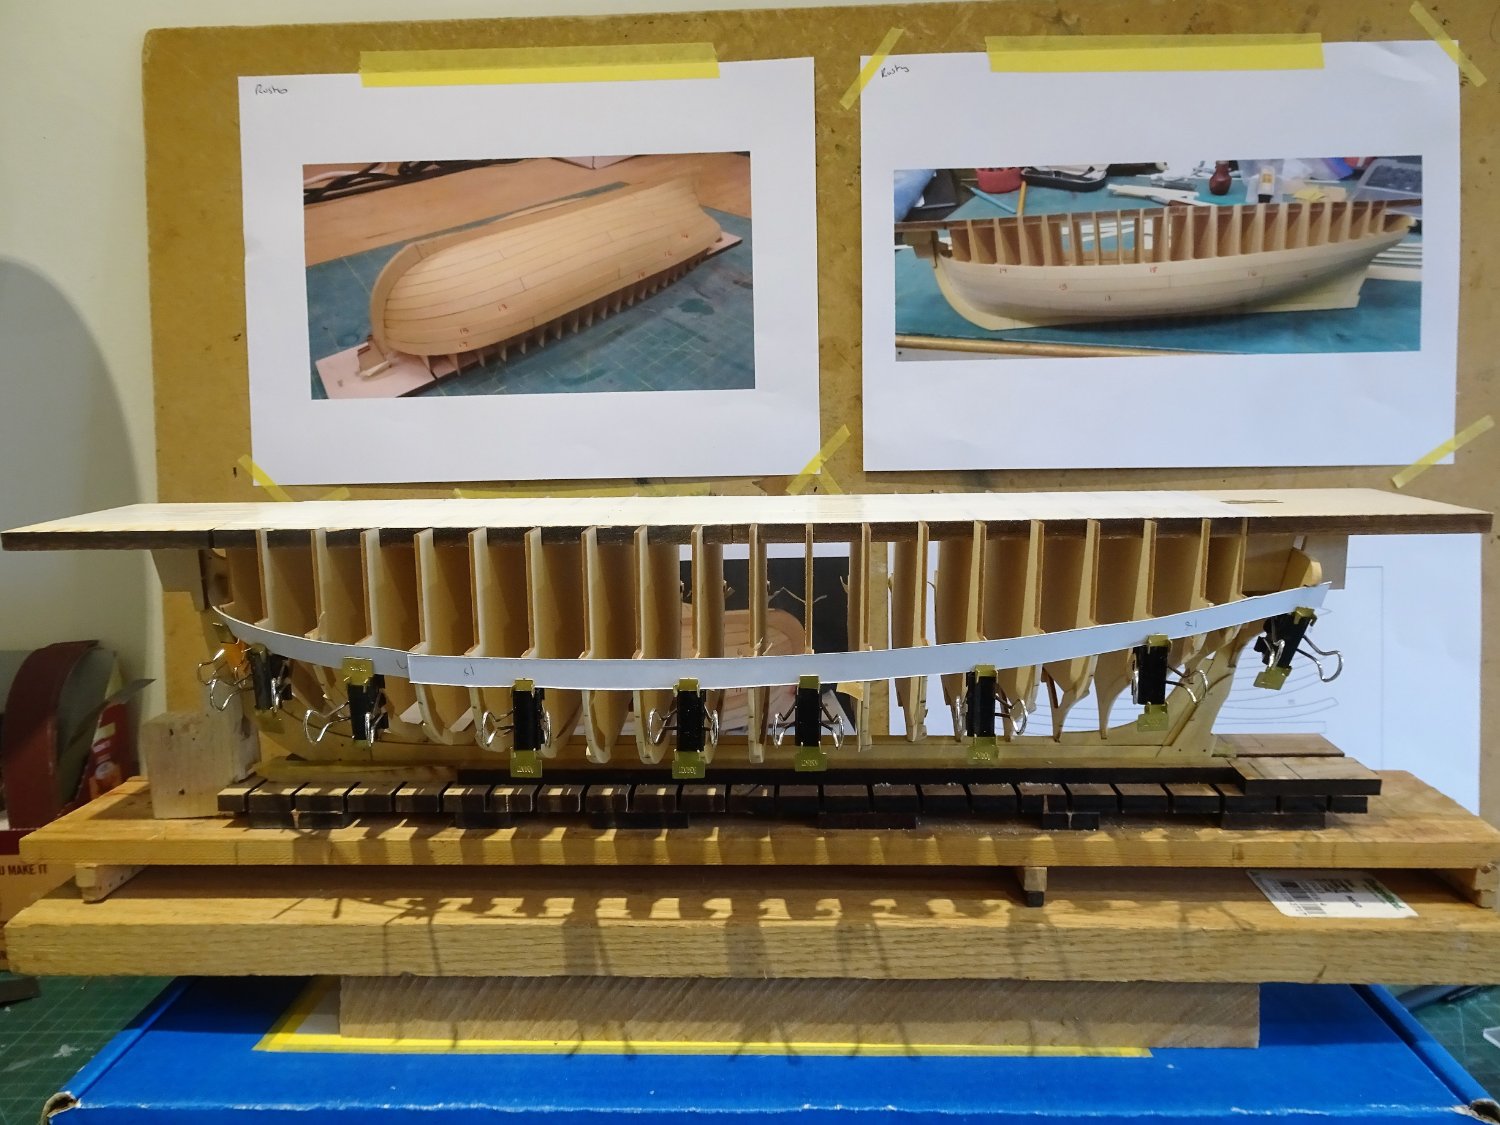
After a short delay back to the lining off.
0207a
This time the tick strips match both sides.
0227
I had a dabble with the tape fully in the knowledge that the pre-spiled planks obviate any need for the process.
As an exercise to gain an appreciation of how Chuck arrives at his end result it is useful, particularly how the aft three and foremost three frames were not initially tick marked, but the run being eyeballed to the stem and Transom.
One has to bear in mind that Chuck won’t always be there to pre -spile planks for you.

0228
This I found easier said than done with the tape reluctant to stick at the bow; doesn’t bode well for leisurely sighting and tweaking of the line, but I get the idea.
So, I will now move onto the planking…
Even though a fully planked model gives more modelling for your money I have made the decision to complete her with open frames, and only plank the top three strakes.
This will match the style of the Queen Anne Barge that I completed in 2021.
In some ways this is more of a tricky build than a fully planked model, where one starts with the Garboard planks and works up the hull sequentially. I will be starting at the seventh strake and need to ensure that I use the correct planks at the correct level.
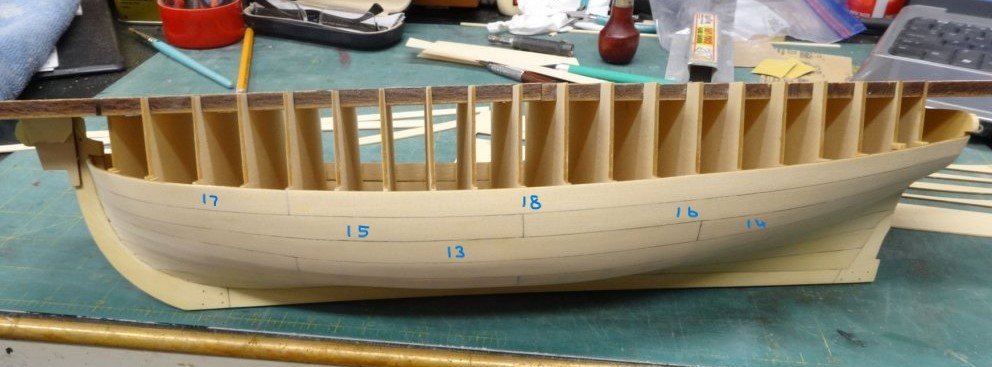
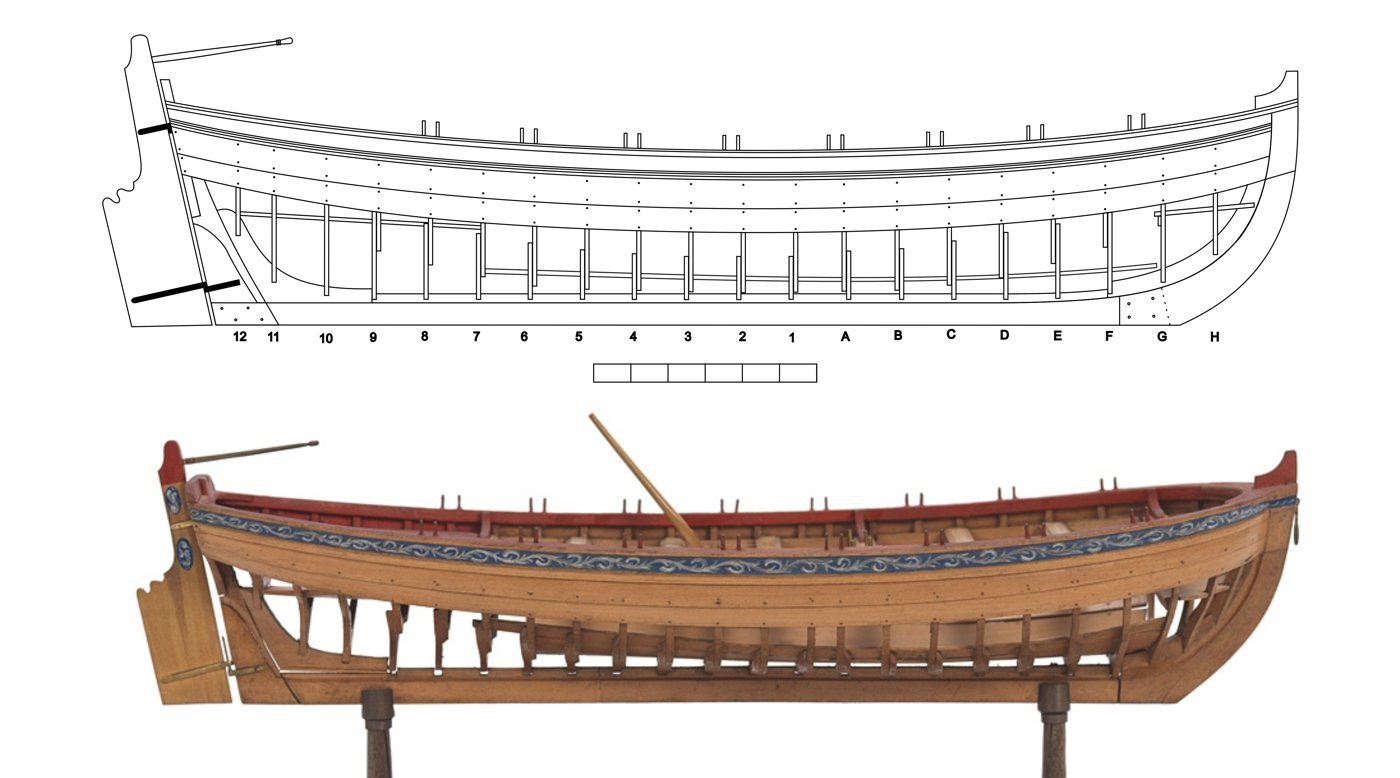
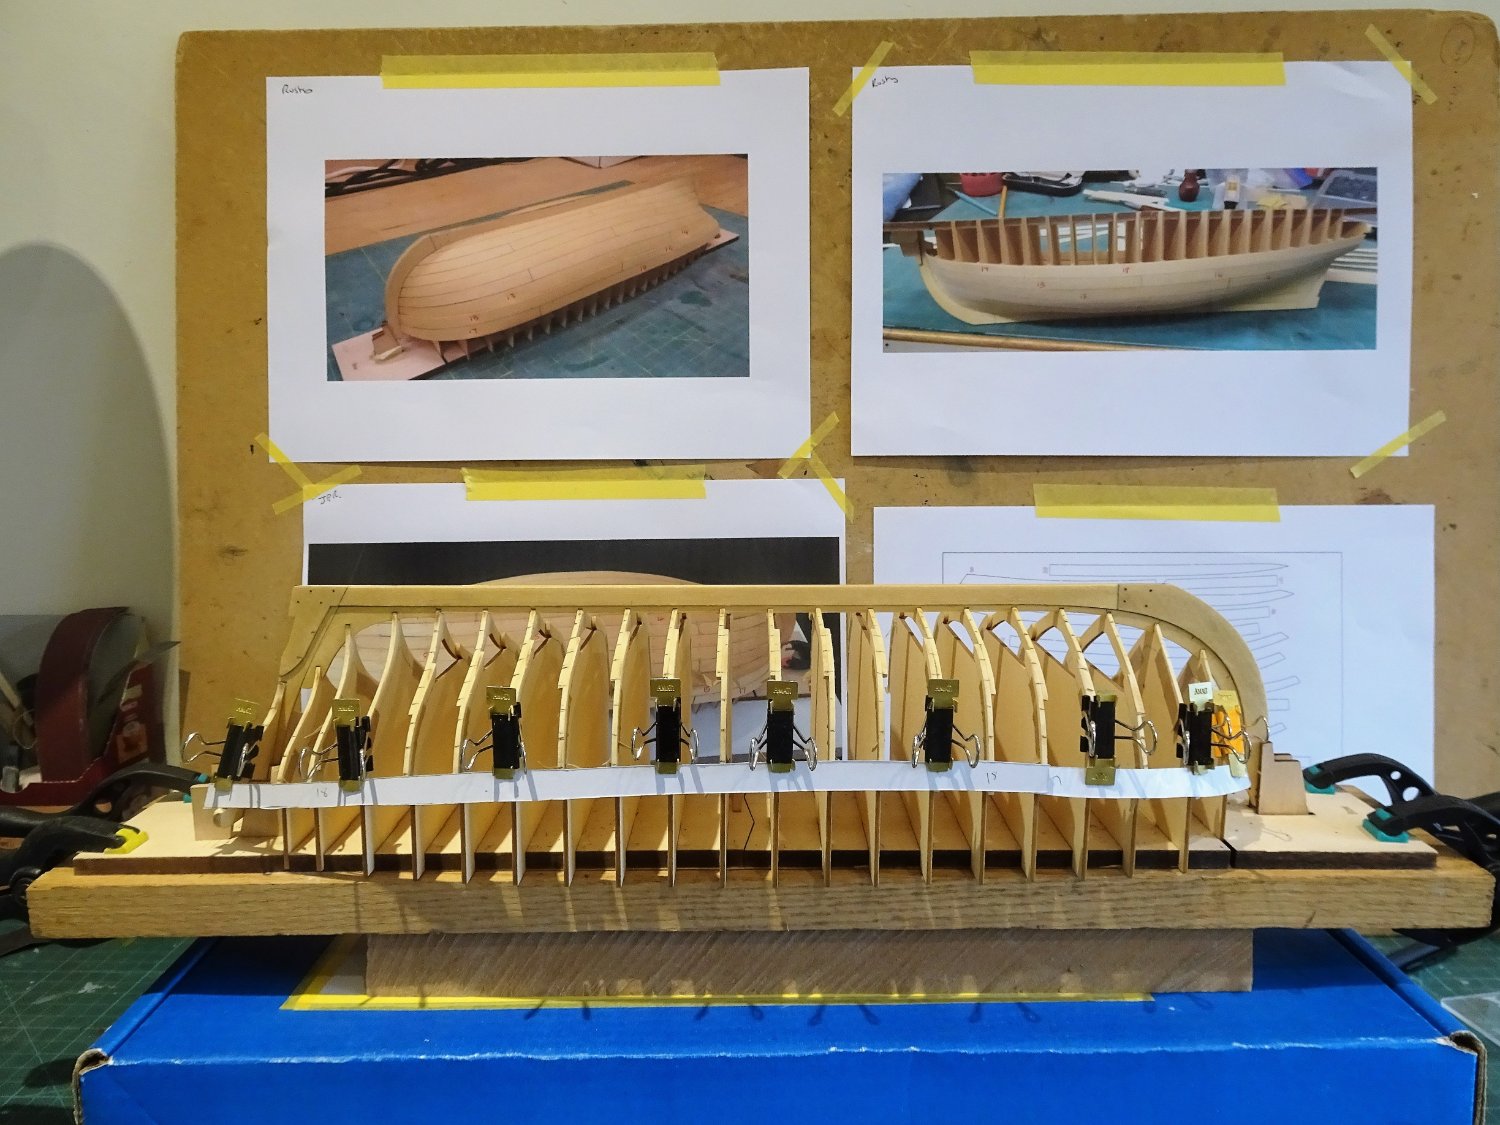
Rustyj Dsc0048 numbered.
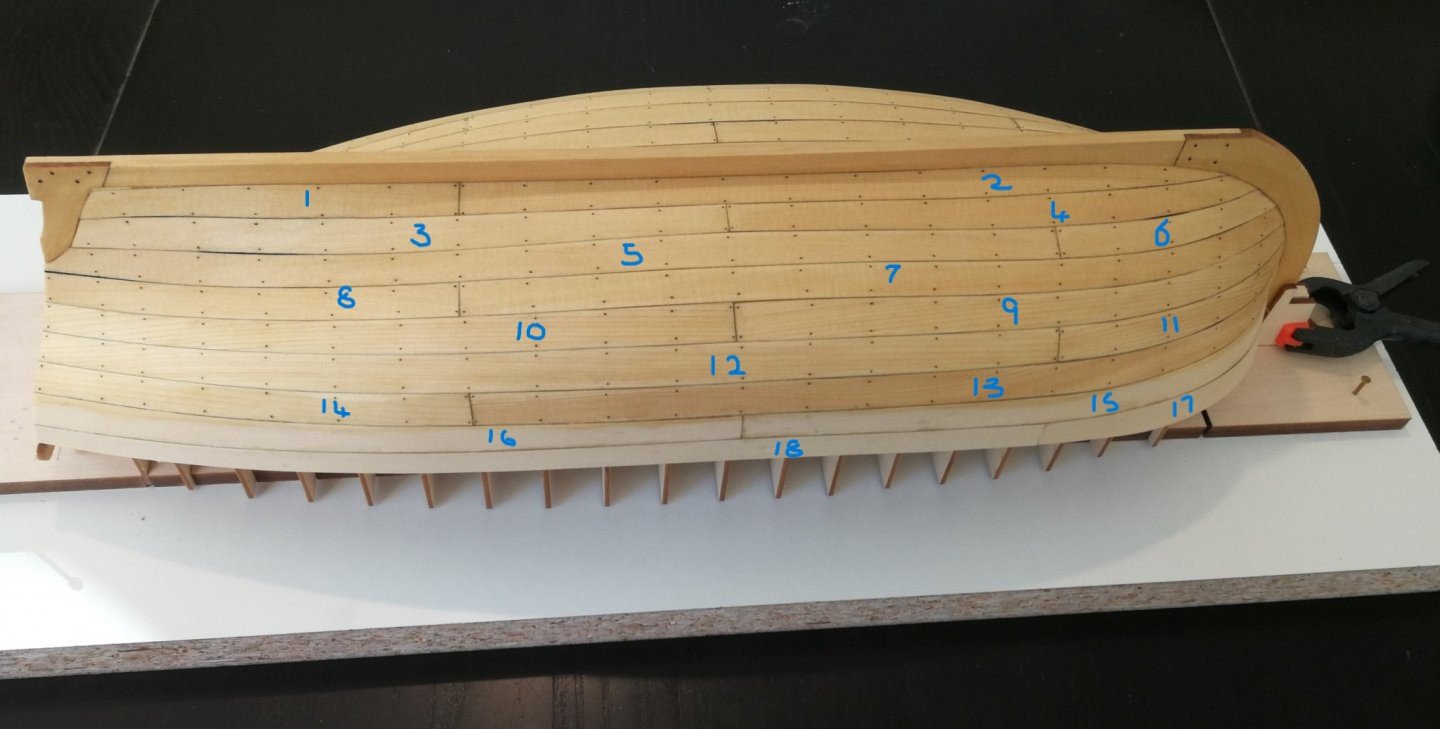
Jpr62 HULL3 03 numbered
To this end I have borrowed a couple of photos from the builds by Rusty and Jean-Paul on which to mark the plank numbers.
I have started by playing around using card replicates of the planks to give me a feel for the job.
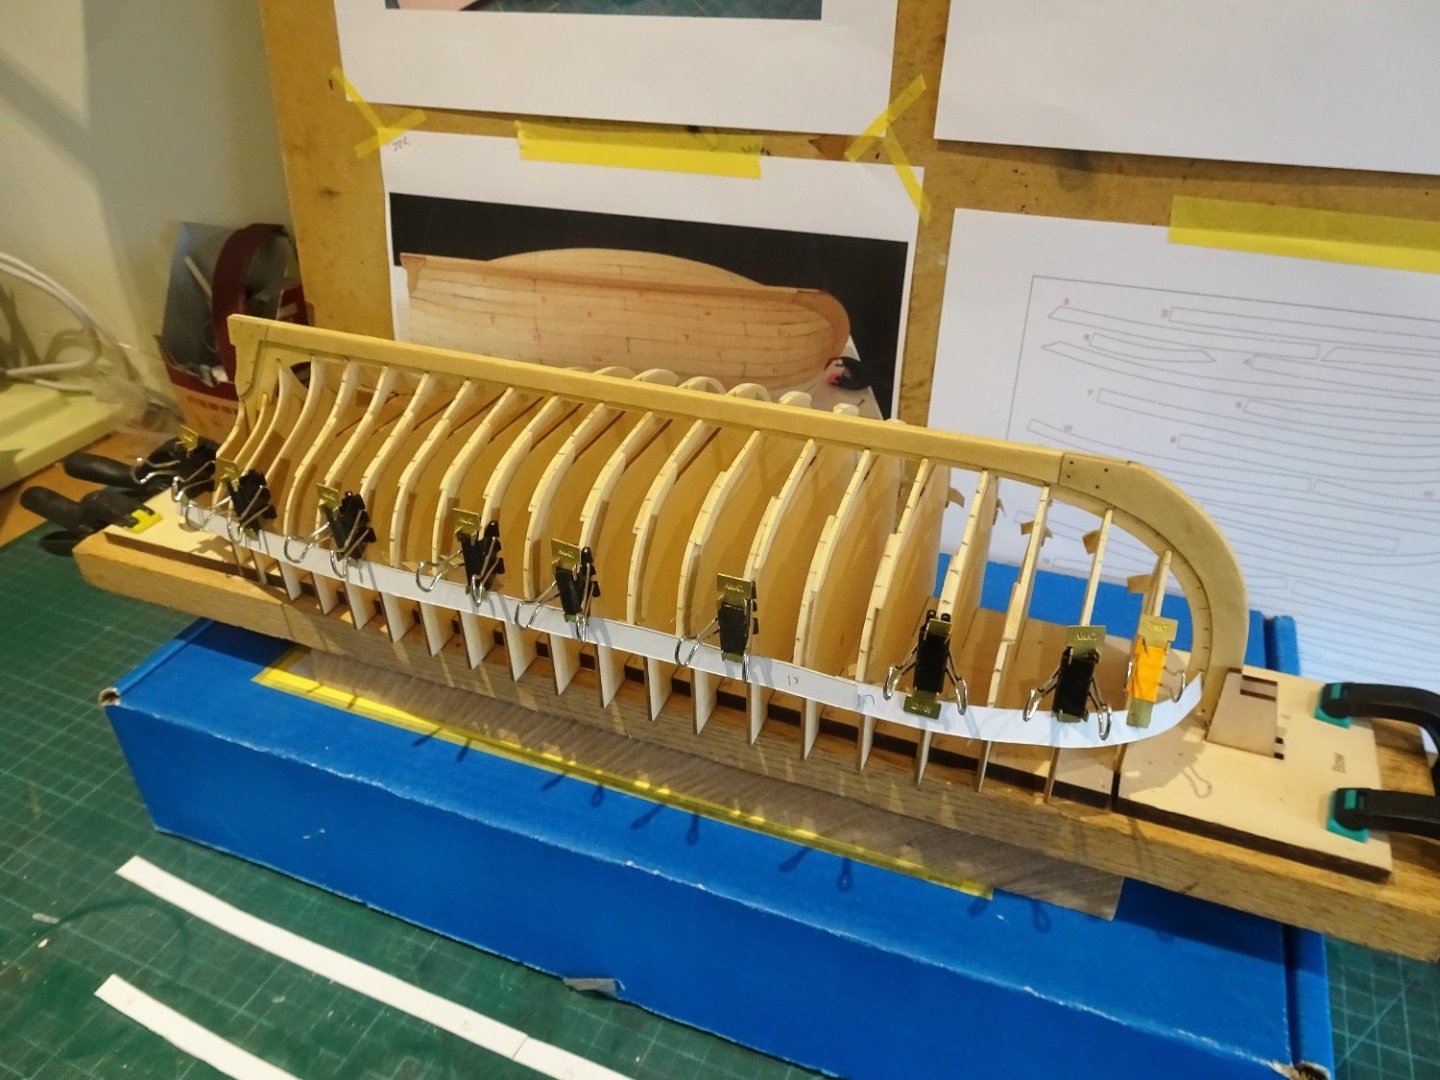
0229
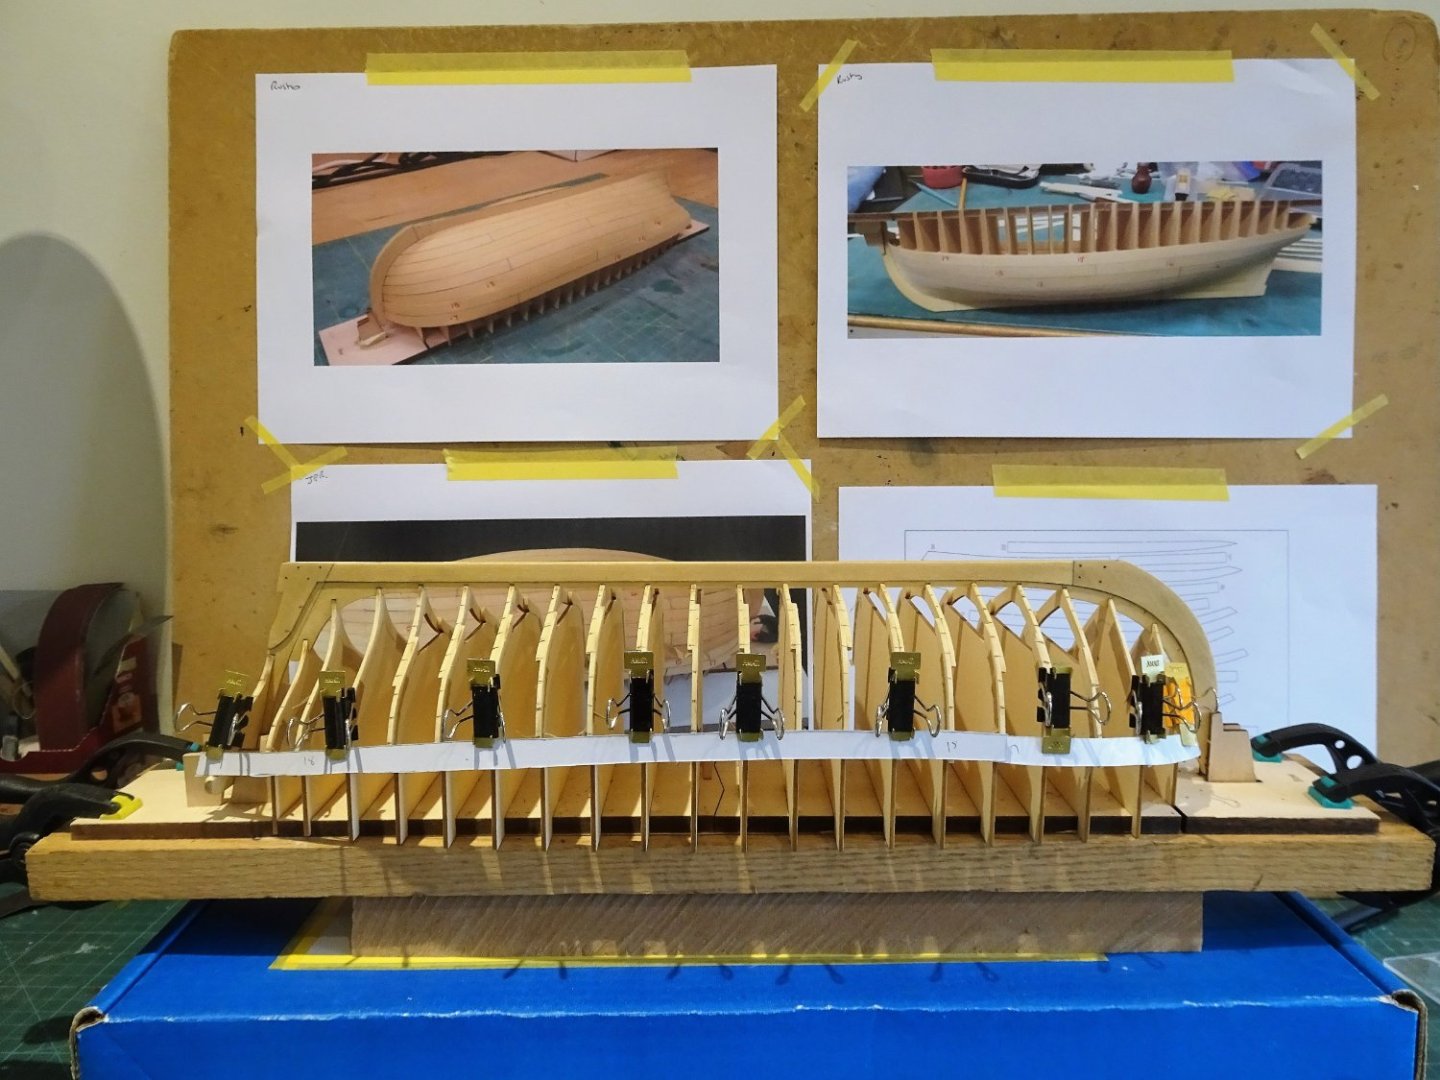
0230
I’m pleased to note that the sheer planks pretty much hit the tick marks for the upper strake.

0231
0232
0233
0234
I have decided to start from the sheer rail with the hull the right way up. Here, the frame tops, stem rabbet, and transom wings provide a guide. (Making allowance for the capping rail that will fit beneath the wings)
B.E.
11/02/2023
- CiscoH, Chuck, Knocklouder and 9 others
-
12


HMS Indefatigable 1794 by Blue Ensign - FINISHED - Vanguard Models - 1:64 scale
in - Kit build logs for subjects built from 1751 - 1800
Posted
Chapter One
Formulating a plan
Wow – Sphinx on steroids!
01591
I’ll leave my assistant to do the initial inventory while I continue to fiddle with Medway.
I can’t be doing with hauling that box around, so first steps are to sort the box content and put aside all the items I won’t be using. Smaller delicate items are put into a smaller container.
I have been waiting to see what the supplied Red Alder deck planking looks like. Jim’s prototype build used maple pre-engraved decks.
0374
Under artificial light.
0378
Under natural window light.
1601
It is a nice-looking wood, but I understand Alder tends to darken with age, in tone it reminds me of Tanganyika, but a lot nicer.
My preference is for Boxwood for decking.
I would have gone for the top of the range Boxwood kit, but I didn’t need the Pearwood blocks, (£140) and the premium for the Boxwood version is a hefty £590. That’s a good chunk of a Sphinx worth!
Still, I want what I want, therefore I have put in an order for the necessary Boxwood planking from
Hobbymill.eu precision milled exotic woods and woodturning blanks
which also allows me to include wider strips which are often necessary for decking purposes, and sheet to cut margin planks.
Also included is Boxwood planking for the Topsides down to the wale. I am thinking of a contrasting wood for the Gunport stripe.
I am also thinking of coppering this model, think the wonderful model of Bellona, but I am easy with a pearwood lower hull should my resolve fail.
This is an additional cost but one that is only equivalent to the cost of the pearwood blocks set and provides me with a nice saving over the cost of the Boxwood kit.
I have little doubt at all that the cost of sundries and extras will add more as the build progresses, they certainly did on my Sphinx build.
Time for a little light assembly work I think.
B.E.
09/03/2023