
.JPG.ca33079f5815b861e67b9c2cccd37982.JPG)

Blue Ensign
-
Posts
4,575 -
Joined
-
Last visited
Content Type
Profiles
Forums
Gallery
Events
Everything posted by Blue Ensign
-
 Thanks Erik, Tulle is widely available on the net from material suppliers, it is cheap to buy and the minimum quantity of a yard or so will give you a lifetime supply. For one model you could probably get away just ordering a sample. 🙂 B.E.
- 261 replies
-
- 3
-

-
- muirneag
- vanguard models
- (and 2 more)
-
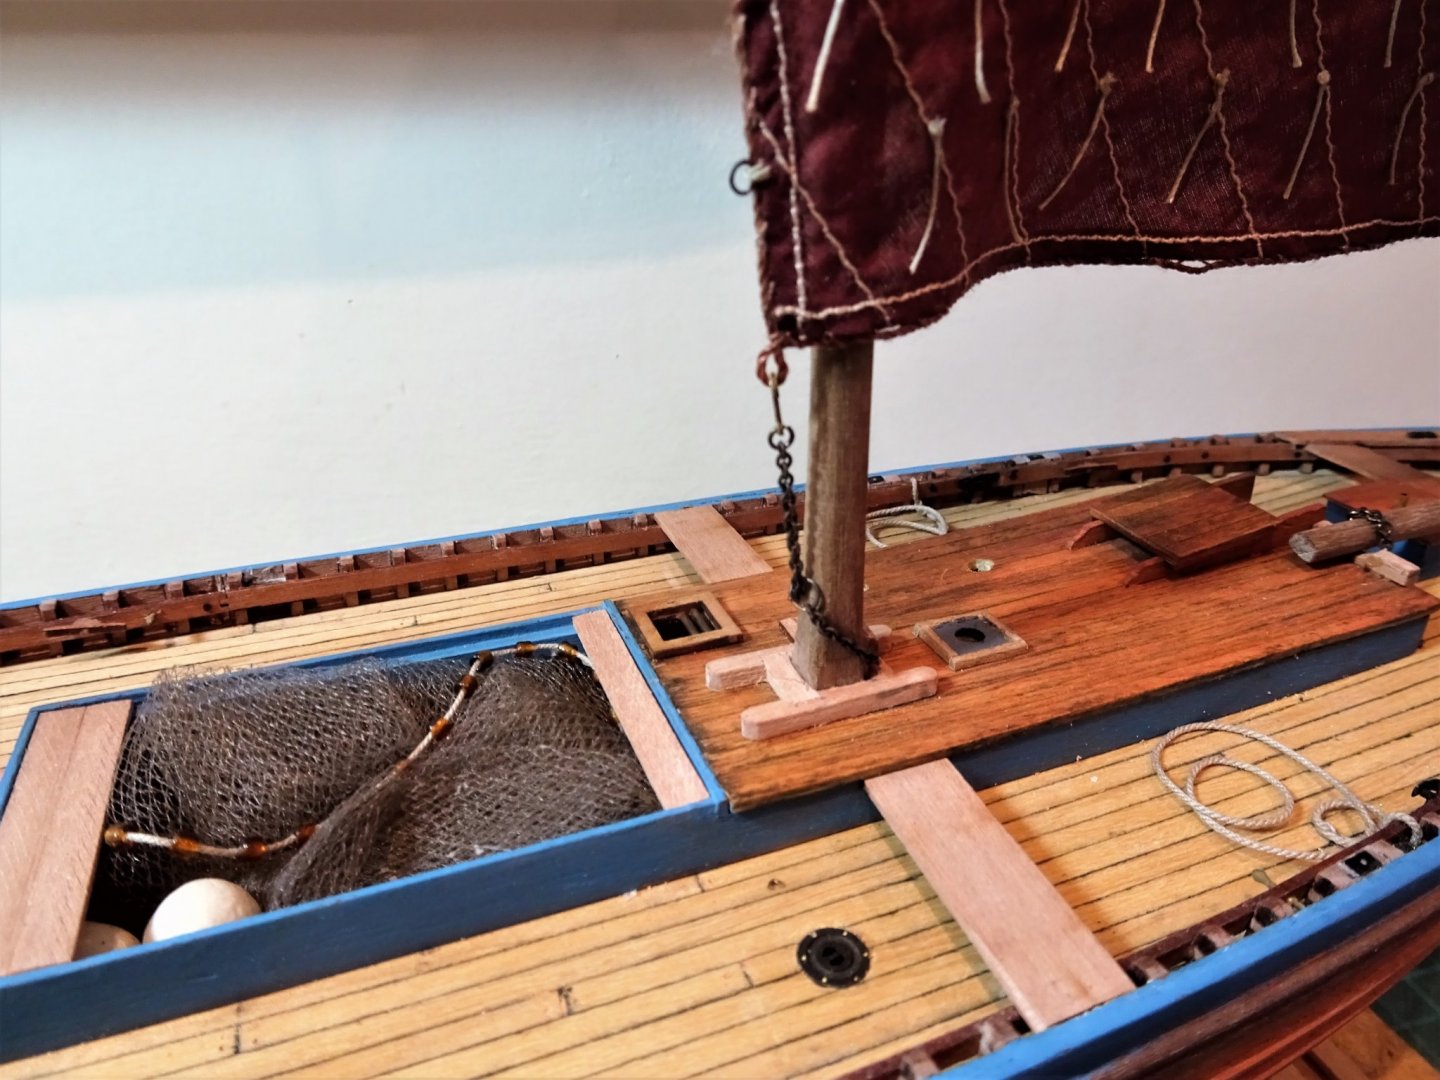
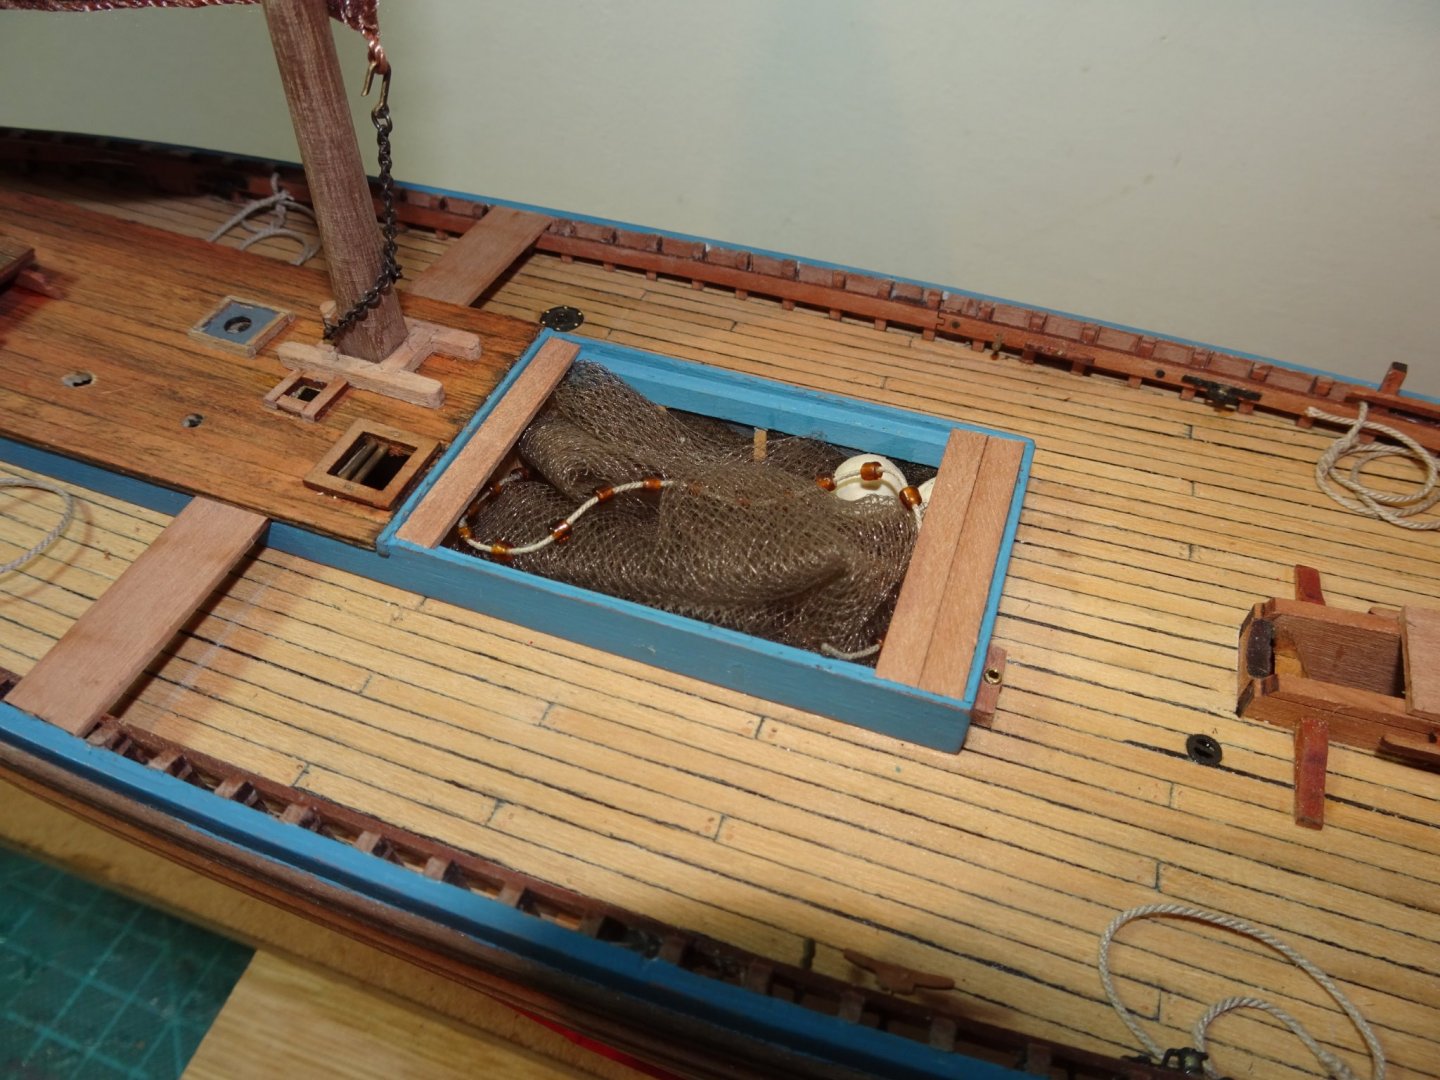
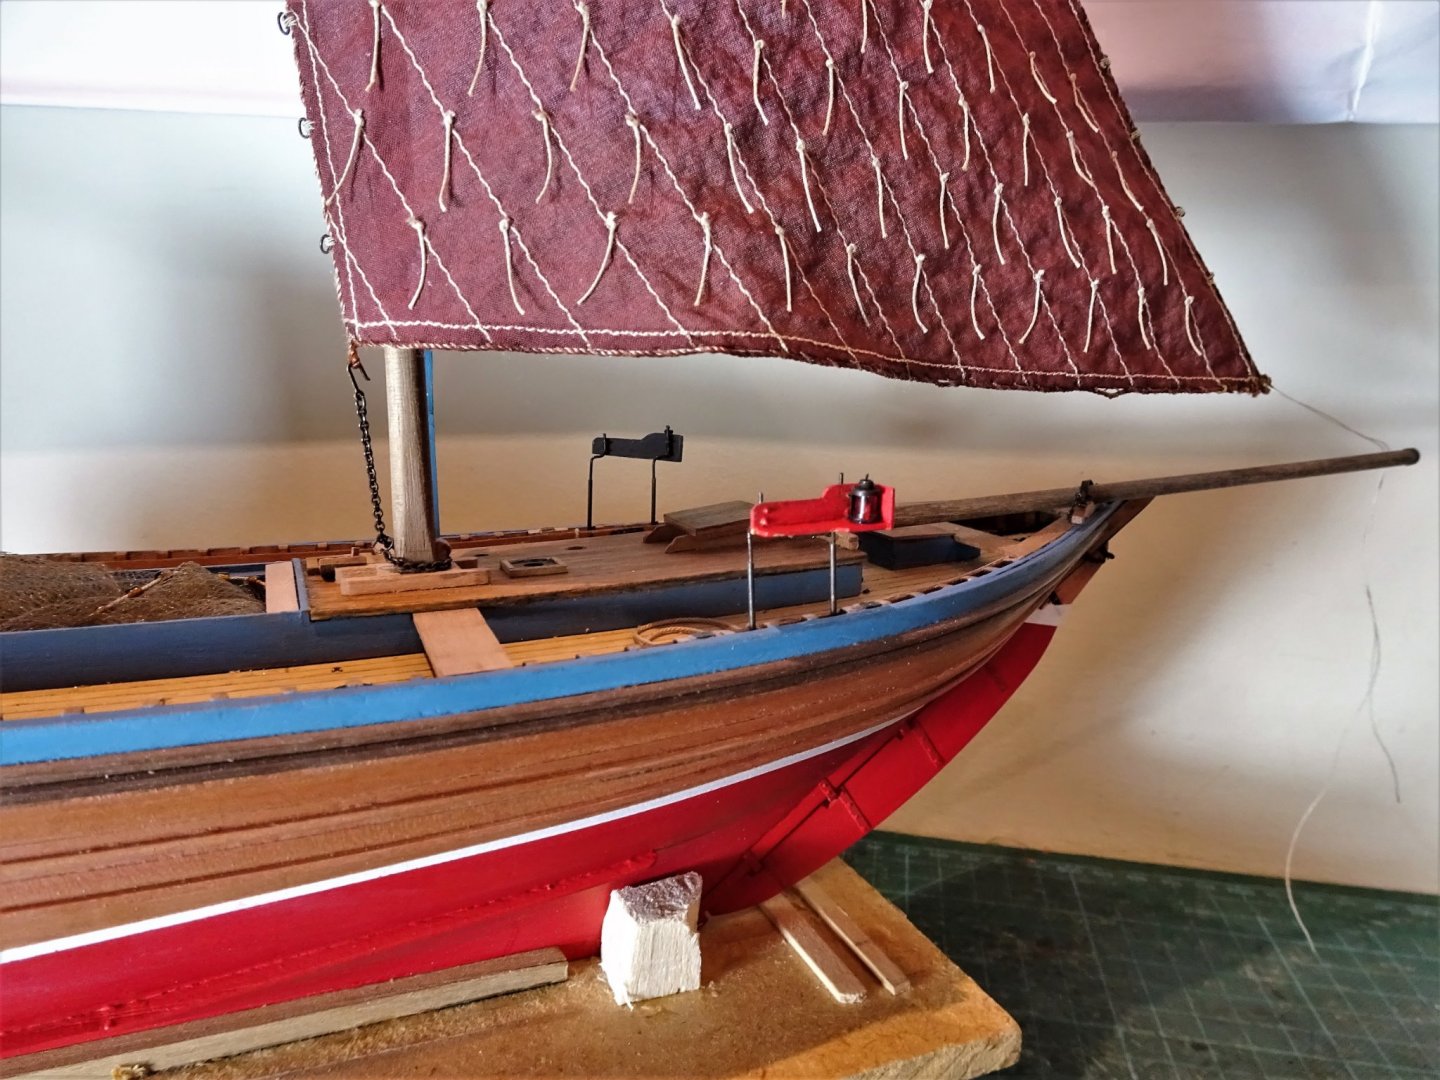
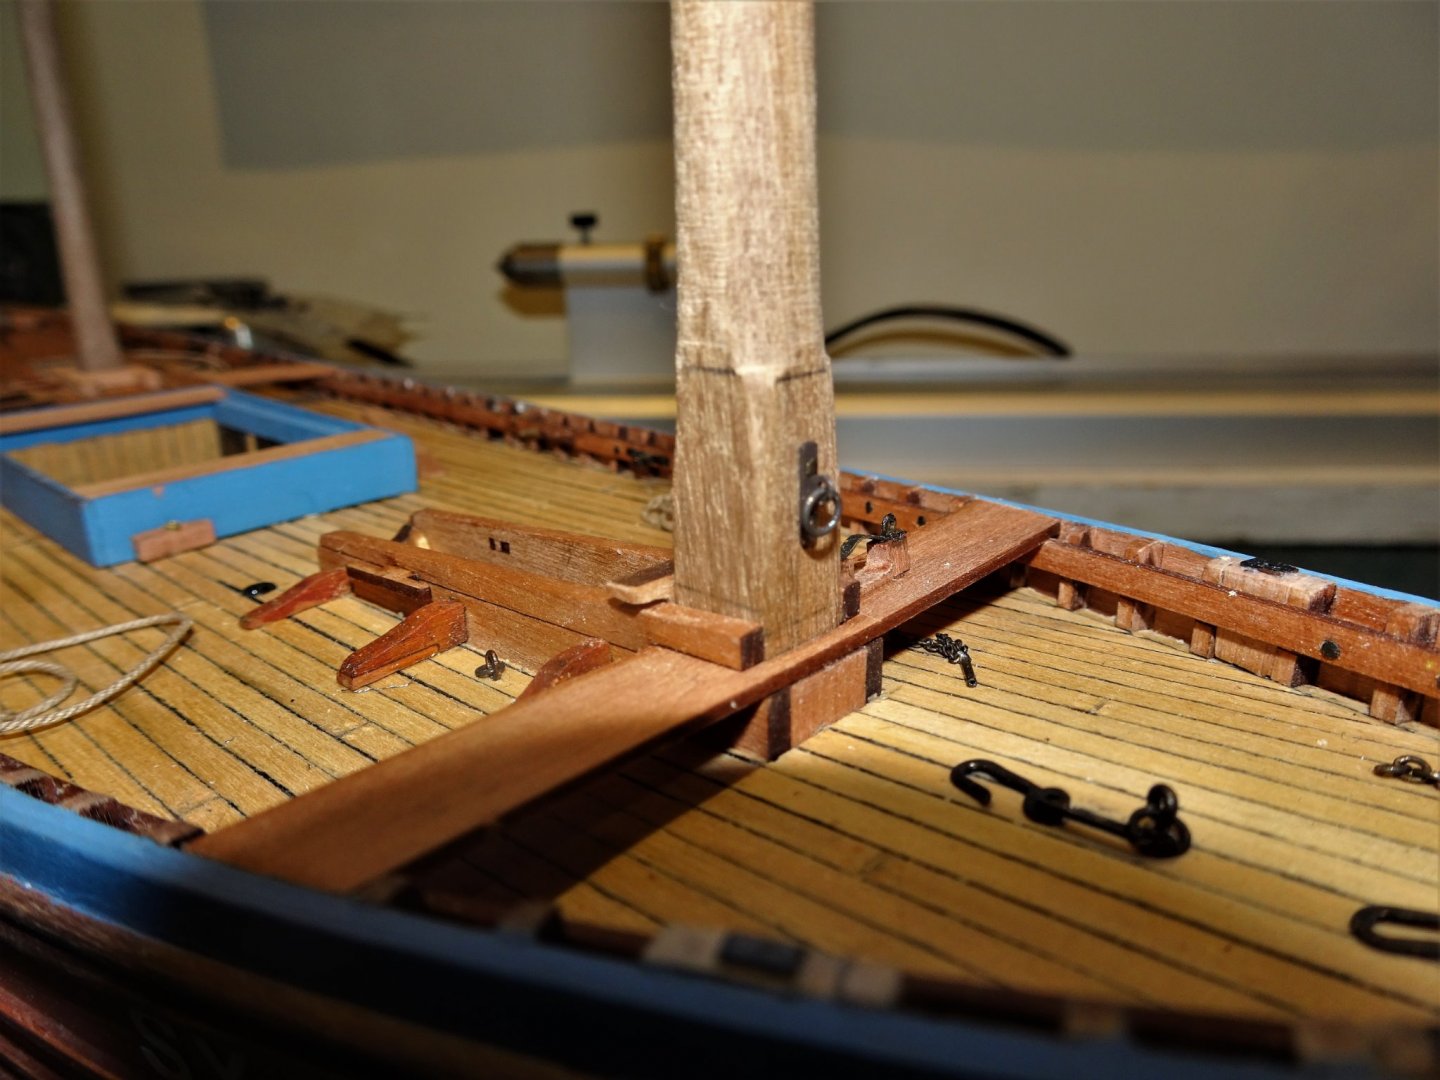
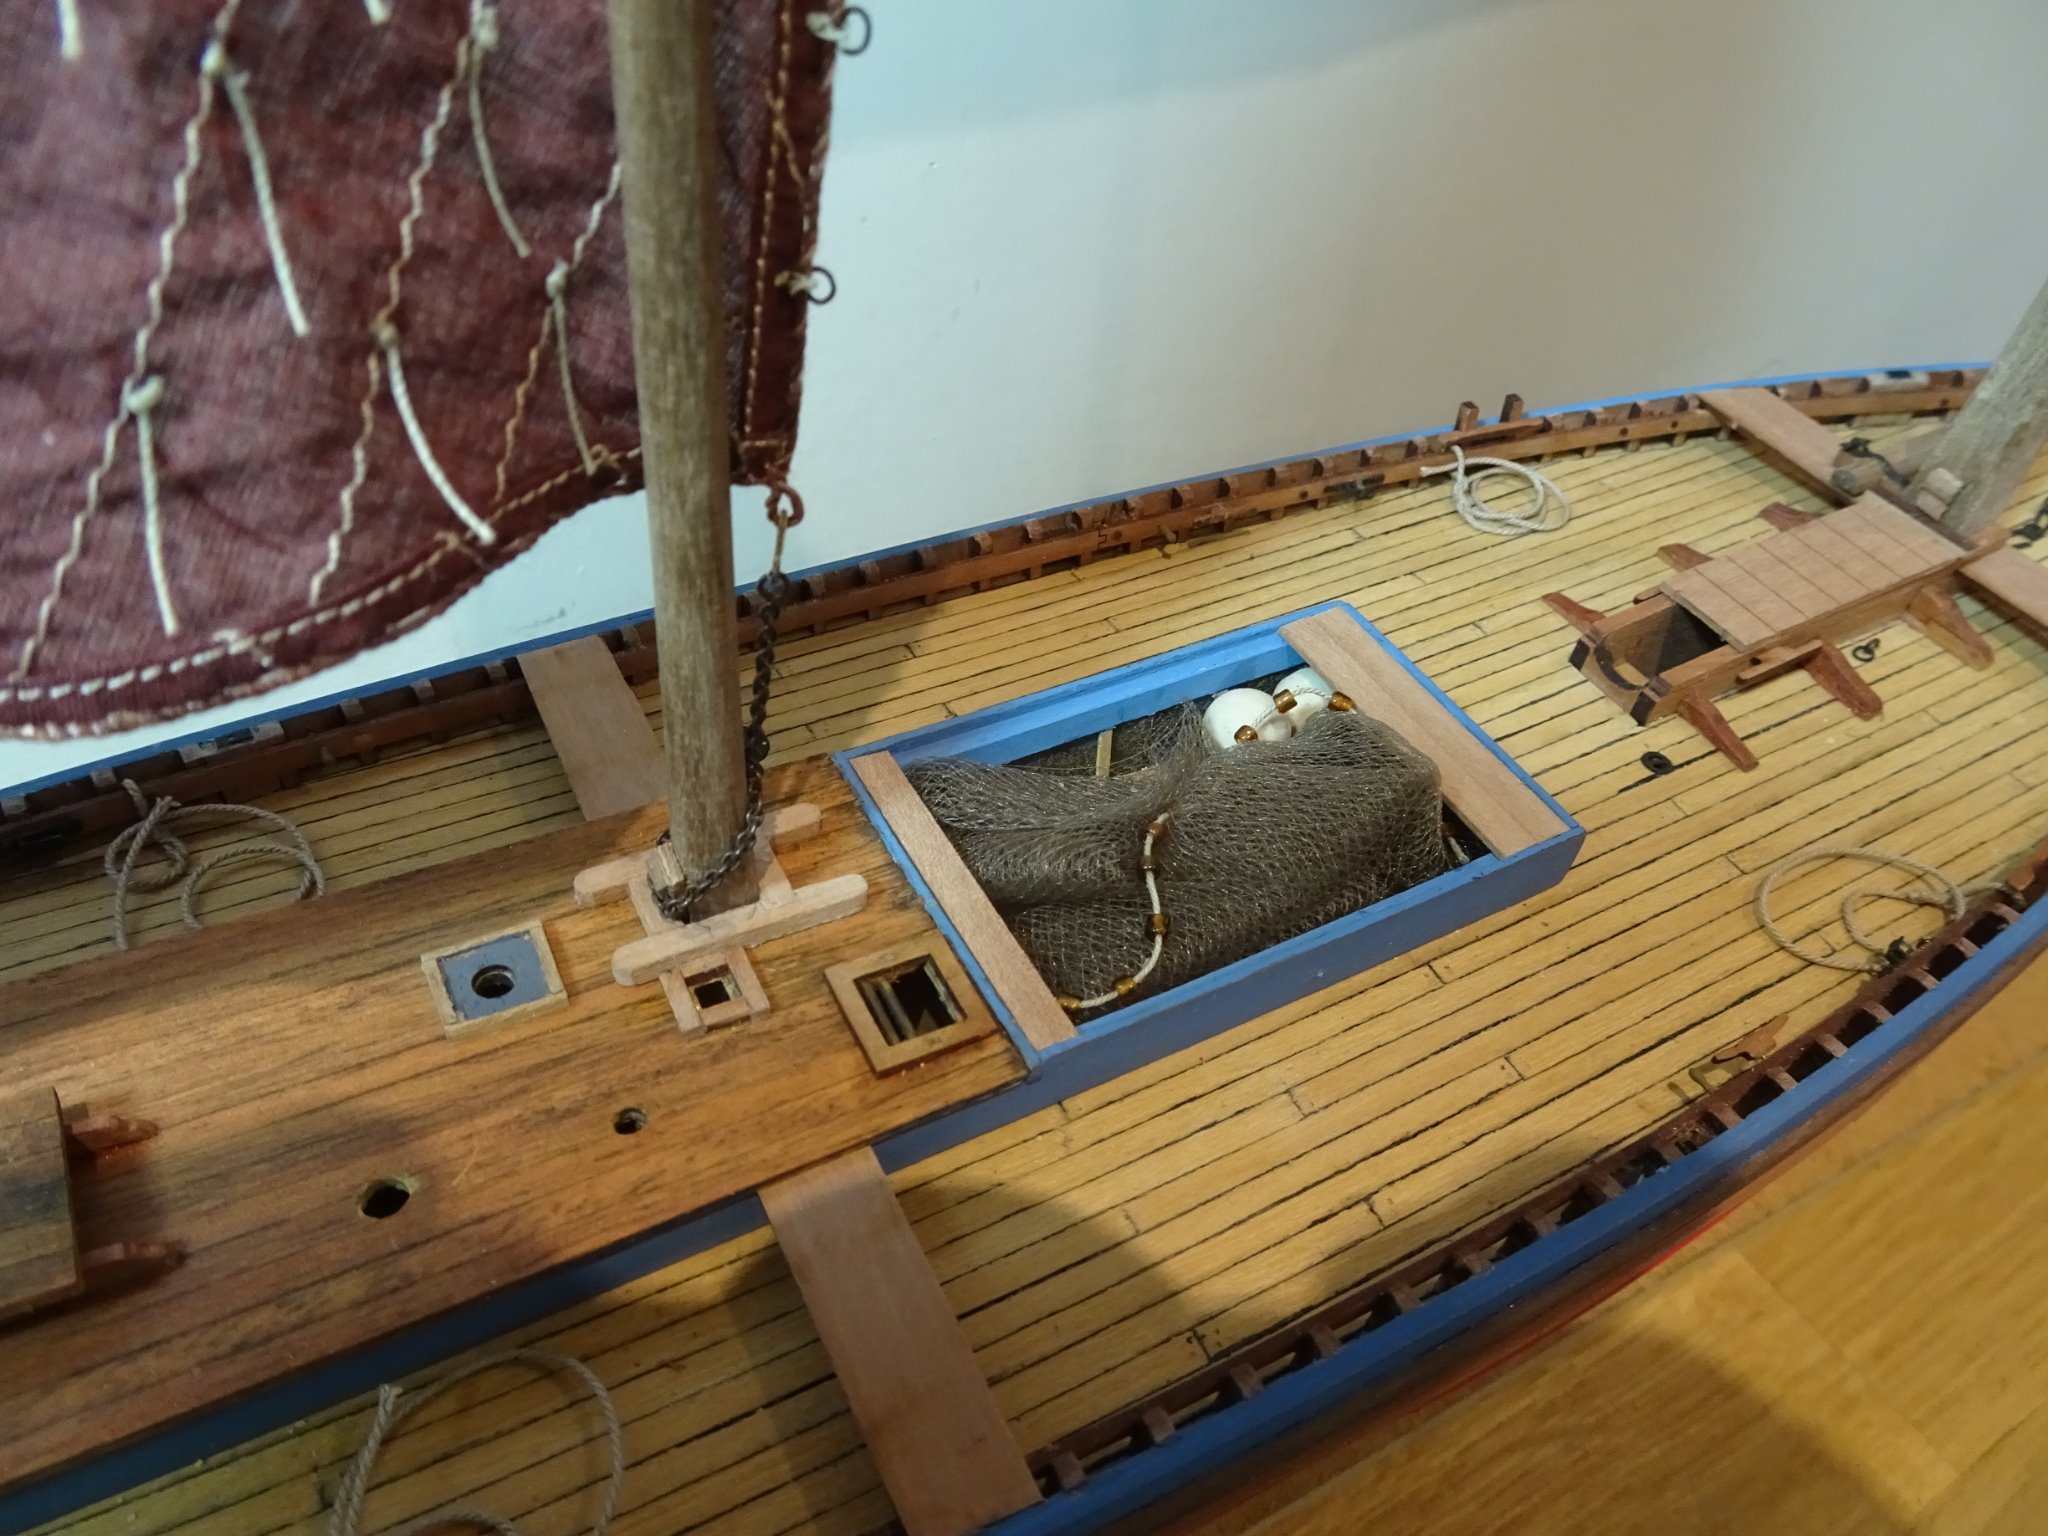
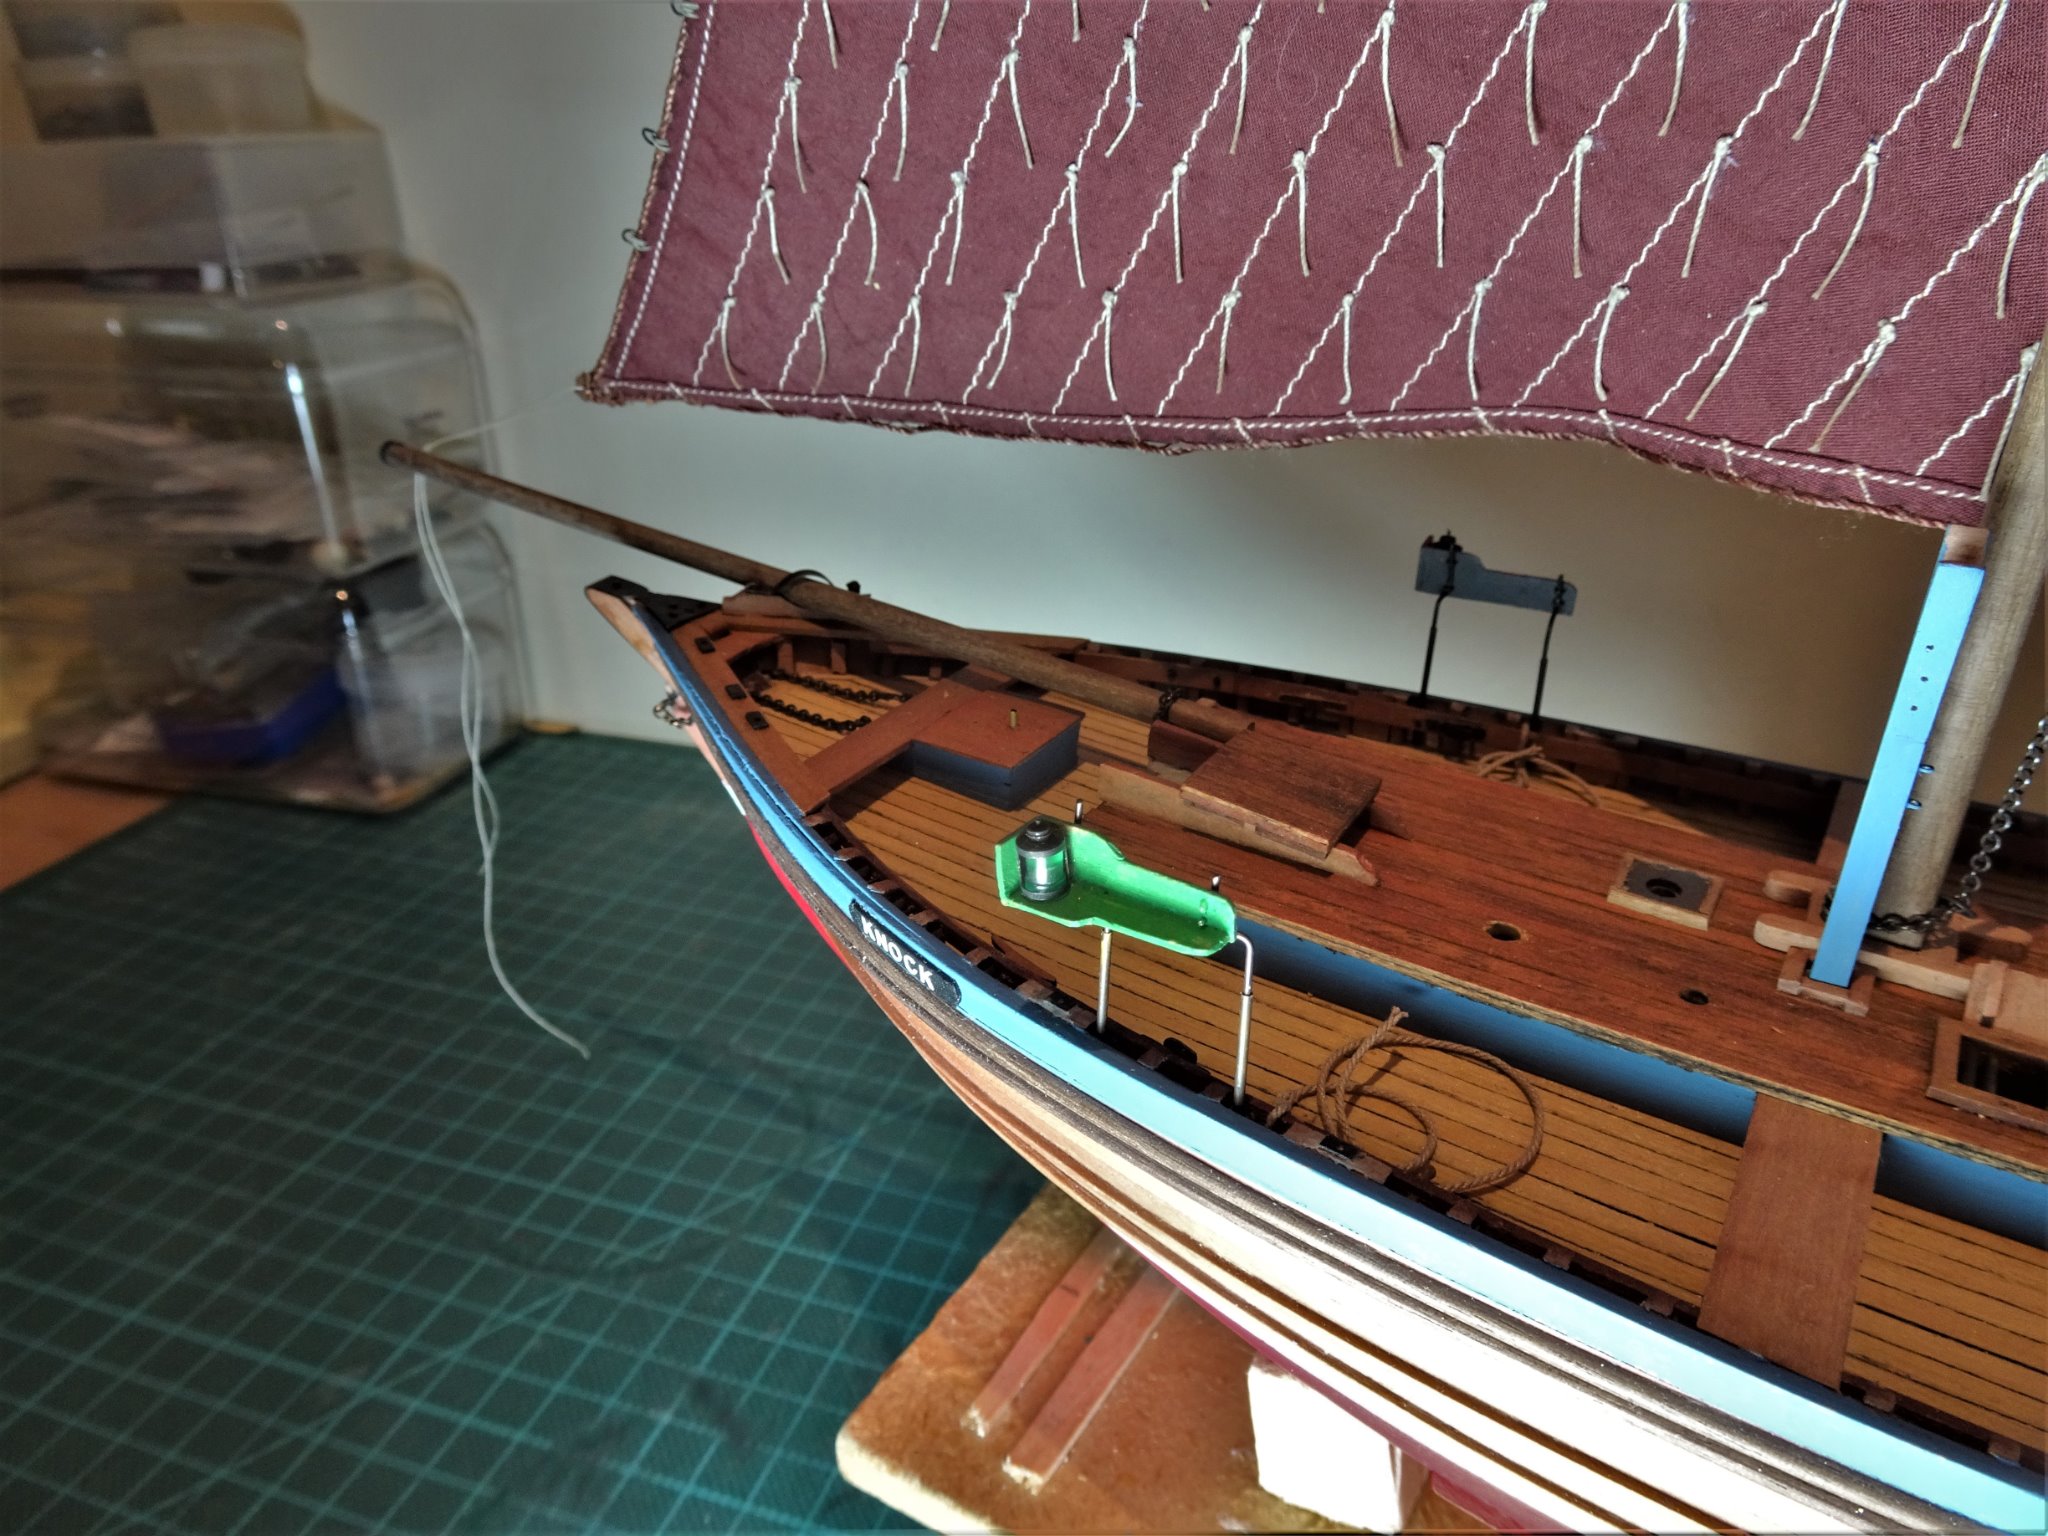
Post 44 This post concerns a mixture of those little finishing off tasks that progress a build towards completion. Parrels For these I use slightly elongated tubular beads of 2mm ø and 1.75mm in length. 9189 9187(2) Parrels attached, not a difficult job with the yards in place. Tuckle chain. This secures the tack of the Mizen Lug and is fastened around the mast foot. Those with a copy of the Edgar March book can see a photo of this detail on Muirneag in his book Sailing Drifters. 9180(2) The ring and hook are silver soldered to the chain. 9193(2) Testing the fit of the Tuckle chain. 9198 Thinking about nets It is of some surprise to me to read that luggers the size of Muirneag carried around 70 nets, each about 600 square yards which when strung together extended nearly 2 miles with a catching area of 33,000 square yards. In our scale terms each net would be 860 mm in length. 9203 To represent the nets, I am using Tulle material in a fetching shade of peat brown. 9201 Excellent for scale and the only issue with Tulle is that it is quite a springy material so a touch of pva in the folds helps to hold it in shape. 9199 A glimpse of the floats, aka Baking Beads which do the job at the scale involved. Navigation lights I have got around to completing the light boards which now have the lanterns installed. 9214 On the advice of John (Jim lad) I did try to impart a blueish green tint to the Starboard lamp by misting it with a rattle can spray of Ocean blue auto paint but it wasn’t really effective. I couldn’t get the lightness and clarity I would have liked. 9210 These are too delicate to leave insitu and will be one of the last things to be fitted on the model. 9219(2) 9224(2) I’m quite pleased the way things are going and I can now turn my attention to the rigging line and blocks. B.E. 04/12/20
.thumb.JPG.68afd48f2850174b24432c711125cf05.JPG)
.thumb.JPG.e3f4eb63038a7a06cc9735e9eefaba91.JPG)
.thumb.JPG.410eab7892cbcff697203f07e0bc6383.JPG)


.thumb.JPG.09882bddcfbc5f448c1720f841294c6b.JPG)
.thumb.JPG.cadd87764368dd4093488e95a33324f1.JPG)
- 261 replies
-
- 17
-
-
- muirneag
- vanguard models
- (and 2 more)
-
Thank you Erik, I have been thinking about adding the Registration to the sails but haven’t quite decided how to go about it. I would want the lettering to appear to be painted on and not appear too stark against the sail. The requirement to show Registration details on Fishing Boats has been in force since the Sea Fisheries Act of 1843. In summary the letters and numbers are to be painted on the Main Sail either in Black or white depending on the colour of the sail and be one third larger than those on the bow of the boat. If you want to read up on the various acts and regulations here’s the link. https://www.maritimeviews.co.uk/west-cornwall-luggers-and-mfv/the-lettering-and-numbering-of-fishing-boats/ Regards, B.E.
- 261 replies
-
- 4
-
-
- muirneag
- vanguard models
- (and 2 more)
-
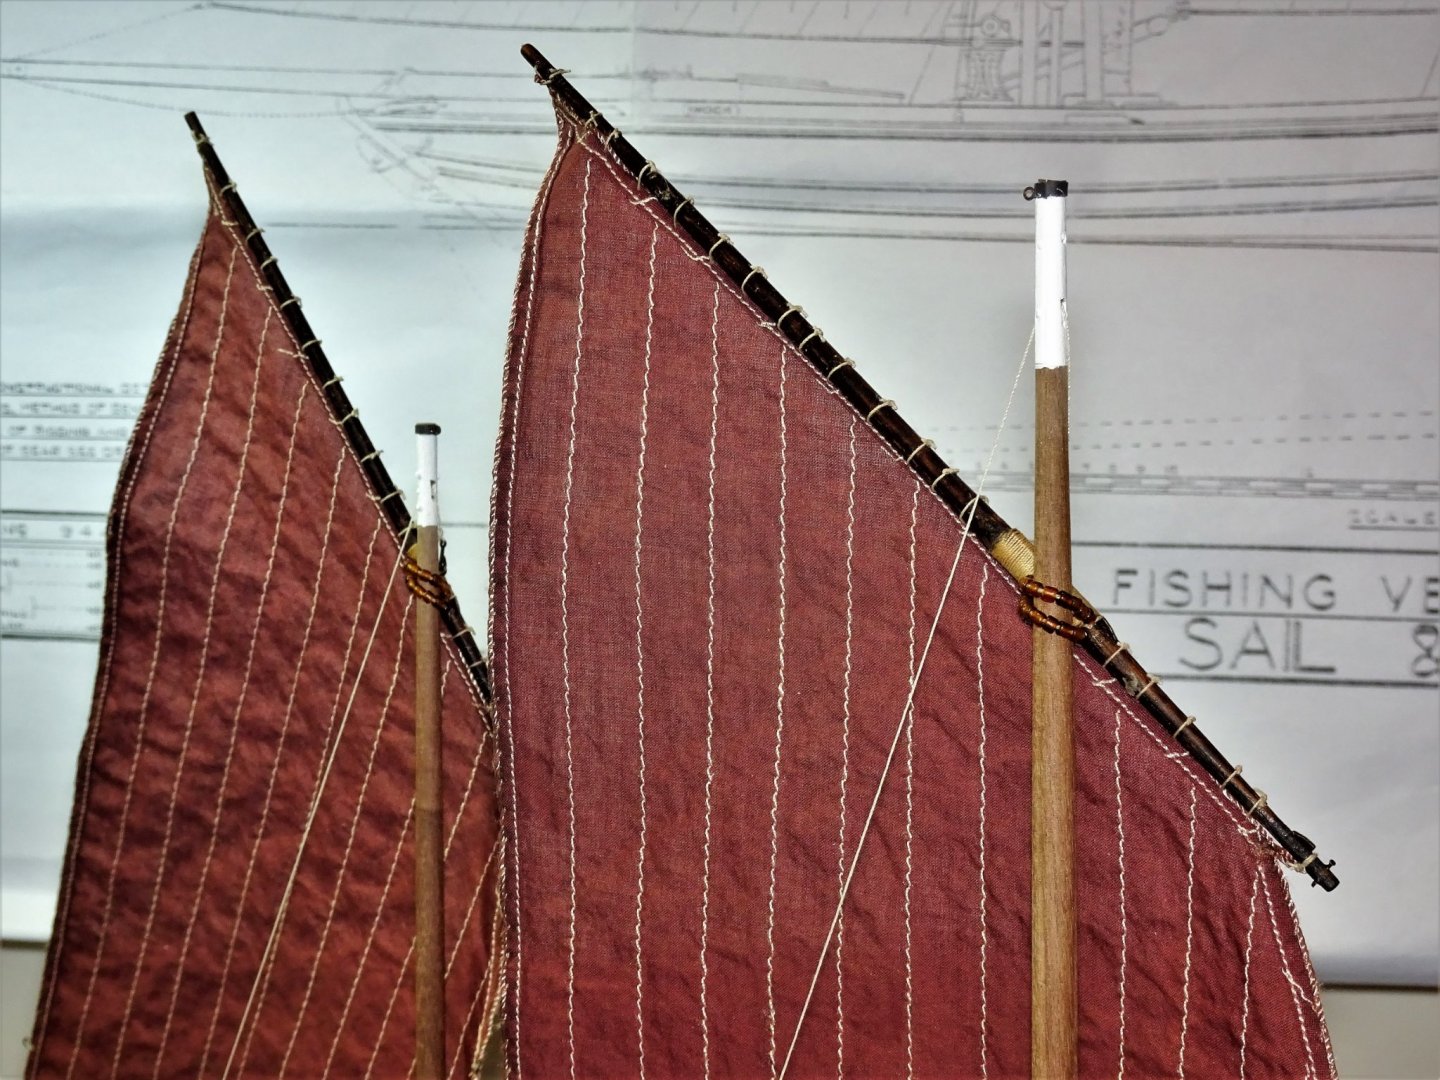
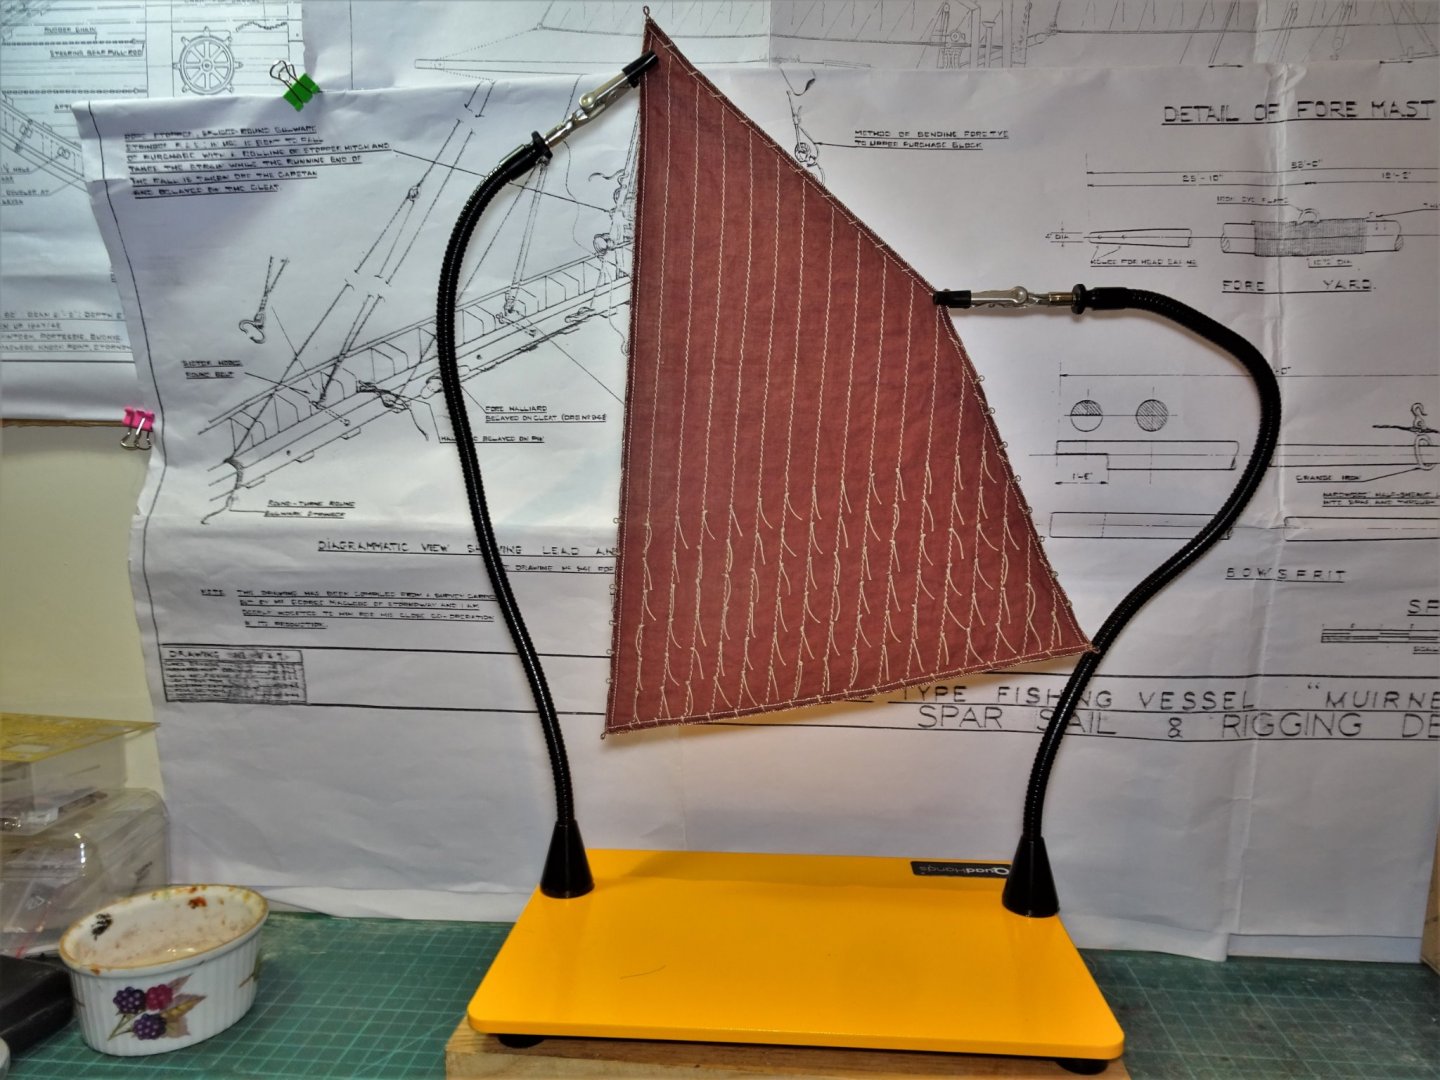
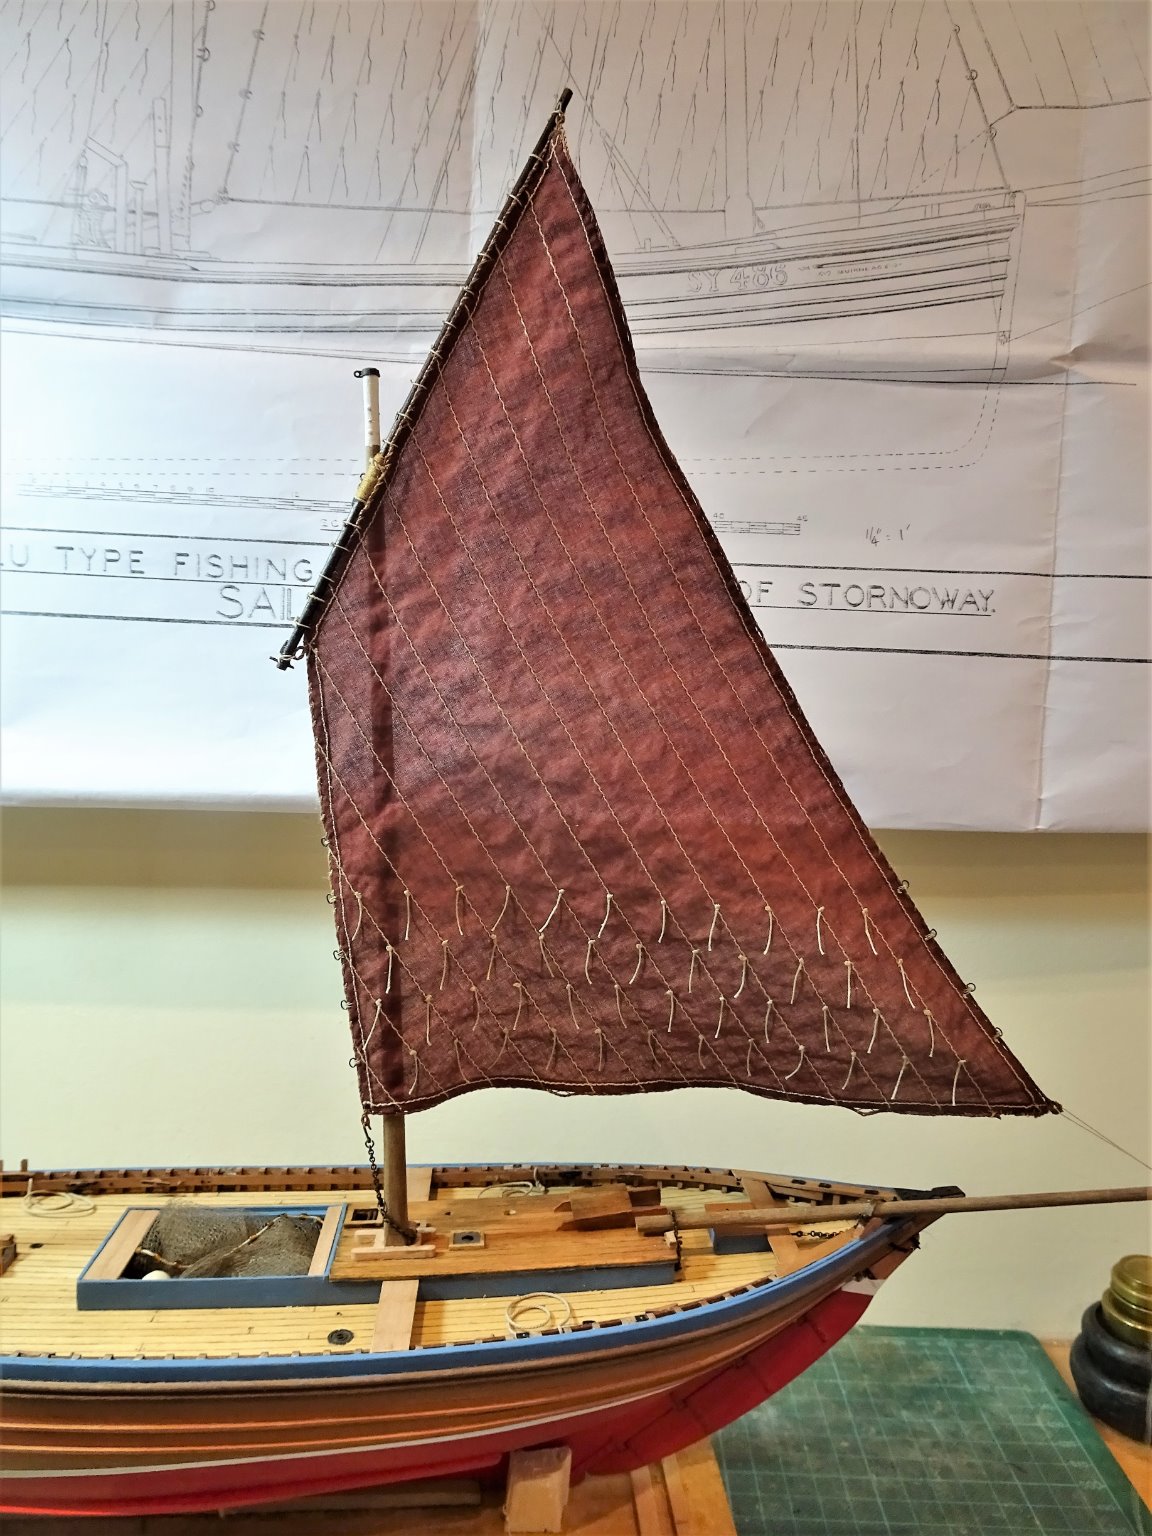
Post 43 Bringing sail and yard together Completing the Mizen sail took less time altho’ I did have to repair the clew loop which became unravelled. Once again, the Quadhands proved a very useful and flexible aid. 9140(2) Use of these magnetised arms is not restricted to the provided base. Distances can be increased using any old piece of ferrous metal, in this case a steel rule. With the sails completed it is time to test the fit on the model with a jury rig. 9152(2) 9153(2) 9156(2) 9162(2) 9157 9160 I can now attend to the parrels. Once in place the yards can be removed as they will slip easily over the masthead. B.E. 02/12/20
.thumb.JPG.6456487010c0c3e1a9a71f372849bc64.JPG)
.thumb.JPG.3fa8093ce3987ffce0275e0f5b434b02.JPG)
.thumb.JPG.2a94c94fe4336e46afeb50345bf34db7.JPG)
.thumb.JPG.7d739416d35a5460f5ae29cdfcd8d0e1.JPG)
.thumb.JPG.94290786f441a06b34e4daa1981b2db0.JPG)
- 261 replies
-
- 19
-
-
- muirneag
- vanguard models
- (and 2 more)
-
Try Abe Books Erik
-
You won’t be disappointed Richard, it’s a great read apart from the technical stuff, I would go so far as to say that Edgar March is to fishing vessels what C.N Longridge is to Victory. Loads of copies available in the U.S. of A. Erik, hint, hint. 😉 B.E.
- 222 replies
-
- 1
-
-
- First Build
- Lady Isabella
- (and 2 more)
-
Well Erik you may as well name her Fidelity as you say the plan is so close to the kit layout as makes no difference, and it's nice to represent a real vessel. Had I not bashed the kit into Muirneag, I would have gone for Fidelity. 🙂 B.E.
- 222 replies
-
- 2
-
-
- First Build
- Lady Isabella
- (and 2 more)
-
Hi Tony, In my primary reference book Sailing Drifters by Edgar J March He gives information directly from a Zulu builder William McIntosh who worked in his father’s yard in 1894. Masts were of Norwegian white wood and the yards of Larch. As far as the model timbers are concerned, I would have used Walnut for the yards, but I didn’t have the right size for the Fore lug. I reluctantly used one of the whitewood dowels, but knowing how tricky they are to stain evenly I first coated them with sanding sealer, two coats rubbed down in between. I then use a Medium oak stain followed by Dark Jacobean oak. I painted this on rather than wipe it on and off, and after a couple of coats with a fine rub down in between what you see is the result. Cheers, B.E.
- 261 replies
-
- 3
-
-
- muirneag
- vanguard models
- (and 2 more)
-
Looks superb Erik, a great paint job. I think dry transfer is the way to go, it's my preferred option if I can get hold of them which is getting more difficult over here. Have you decided on a 'port' yet, the name of which is usually carried on the Starboard stern quarter. Regards, B.E.
- 222 replies
-
- 1
-
-
- First Build
- Lady Isabella
- (and 2 more)
-
Thank you Thomas, The sails are an (expensive) extra with the kit, but the material is as fine as I have seen for model purposes. They are obtained from Master Korabel in Russia. Chris Watton has only recently confirmed to me that the material is cotton, and the sail bolt ropes and stitching are of polyester. This does mean that the sail cloth takes a dye very well but the polyester not so. It could possibly be got around with a more complicated dye process, but I simply resorted to staining the bolt ropes with a waterproof marker. The panel stitching is fine and beautifully done and I left it well alone. B.E.
- 261 replies
-
- 5
-
-
- muirneag
- vanguard models
- (and 2 more)
-
Not quite done yet Richard, I have the whole process to repeat again on the Mizen sail. Having struggled for years with various methods of holding things this QuadHands is a wonder, every serious ship modeller should aim to add one to their tool stock. B.E.
- 261 replies
-
- 5
-
-
- muirneag
- vanguard models
- (and 2 more)
-
Looks the part Richard, 👍 If you haven't done so make sure it fits between the standards of the Riding Bitts. B.E.
-
Great job on the deck fittings Glenn, love the cleanness of the head ledges and coamings. Well done 👍 B. E.
- 778 replies
-
- 2
-
-
- cheerful
- Syren Ship Model Company
- (and 1 more)
-
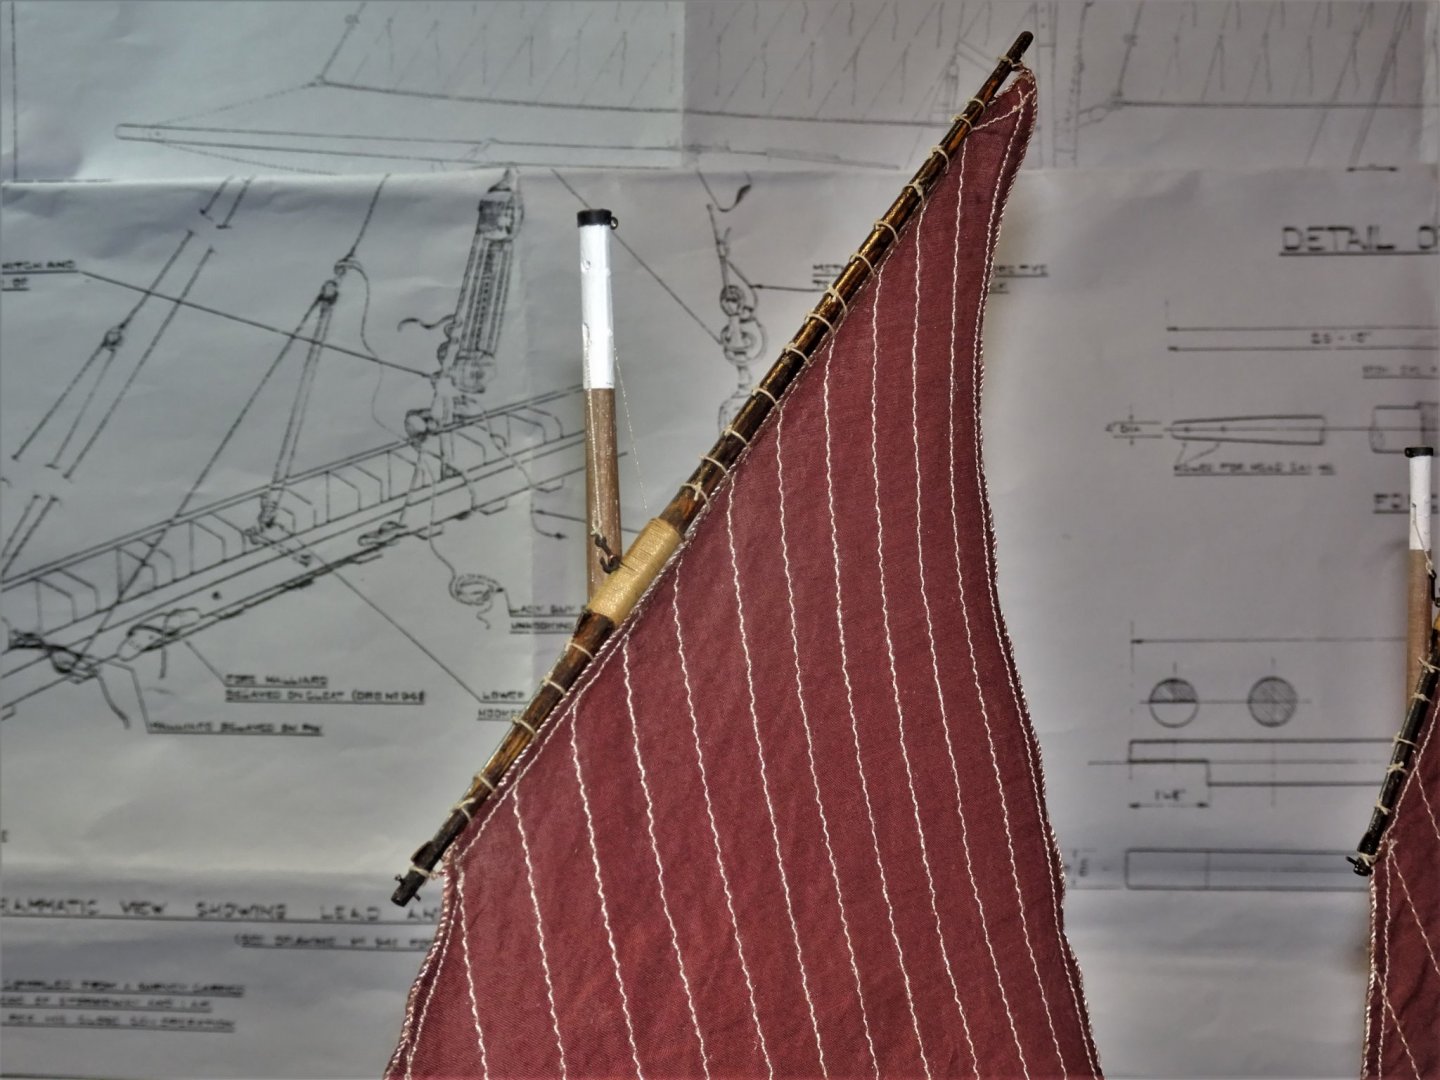
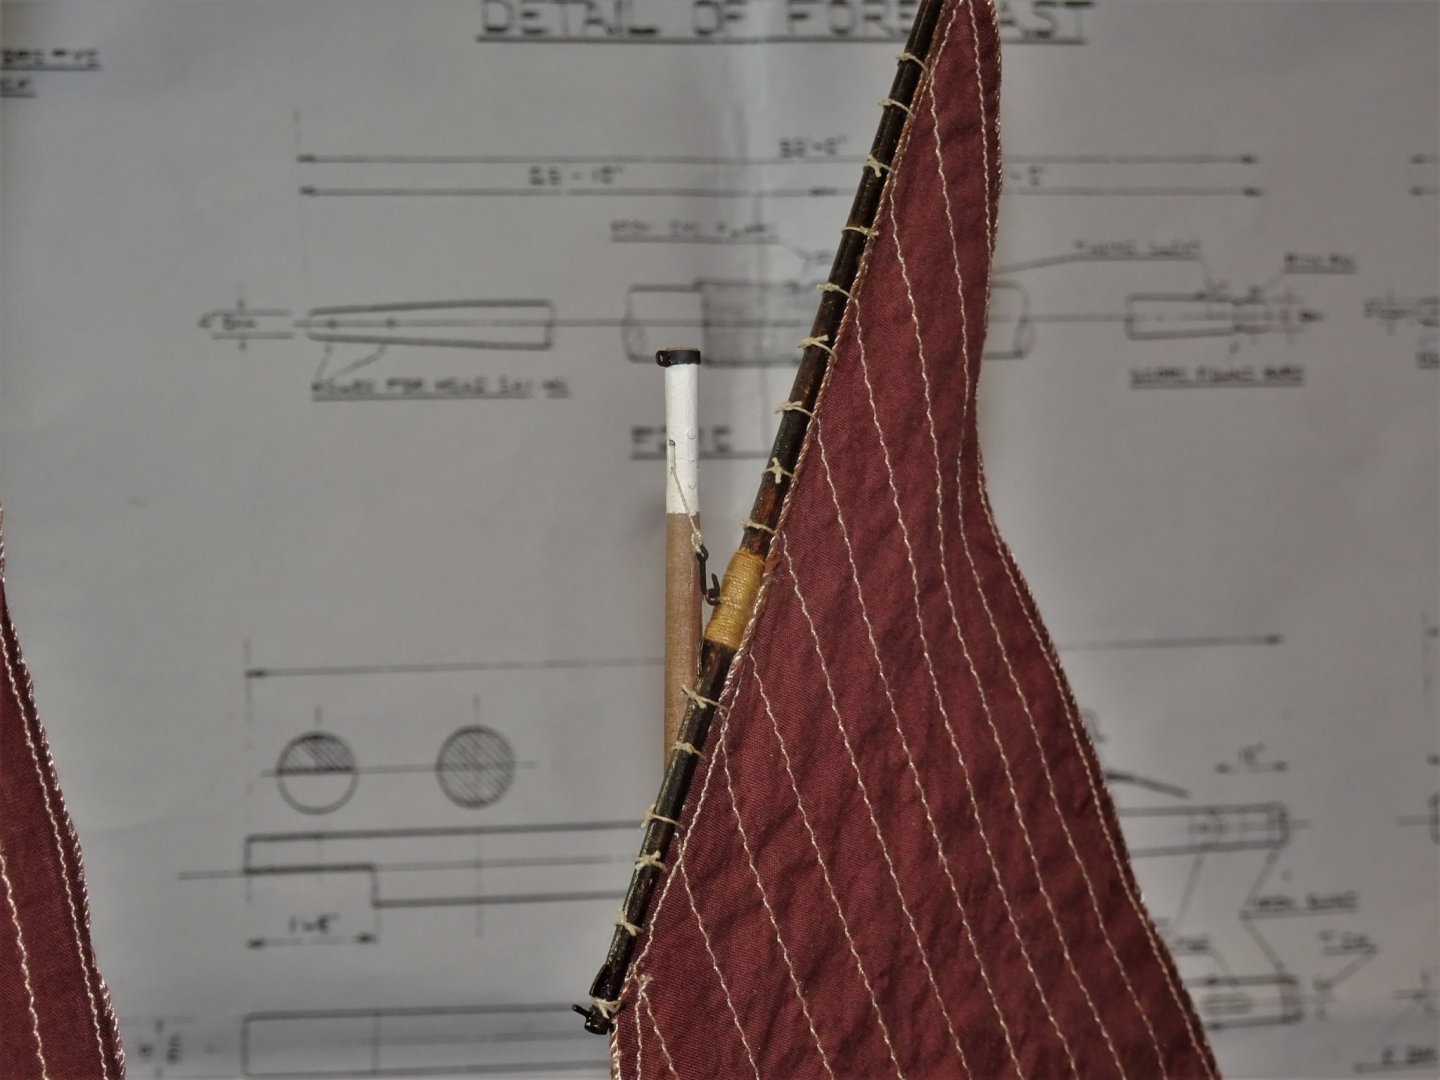
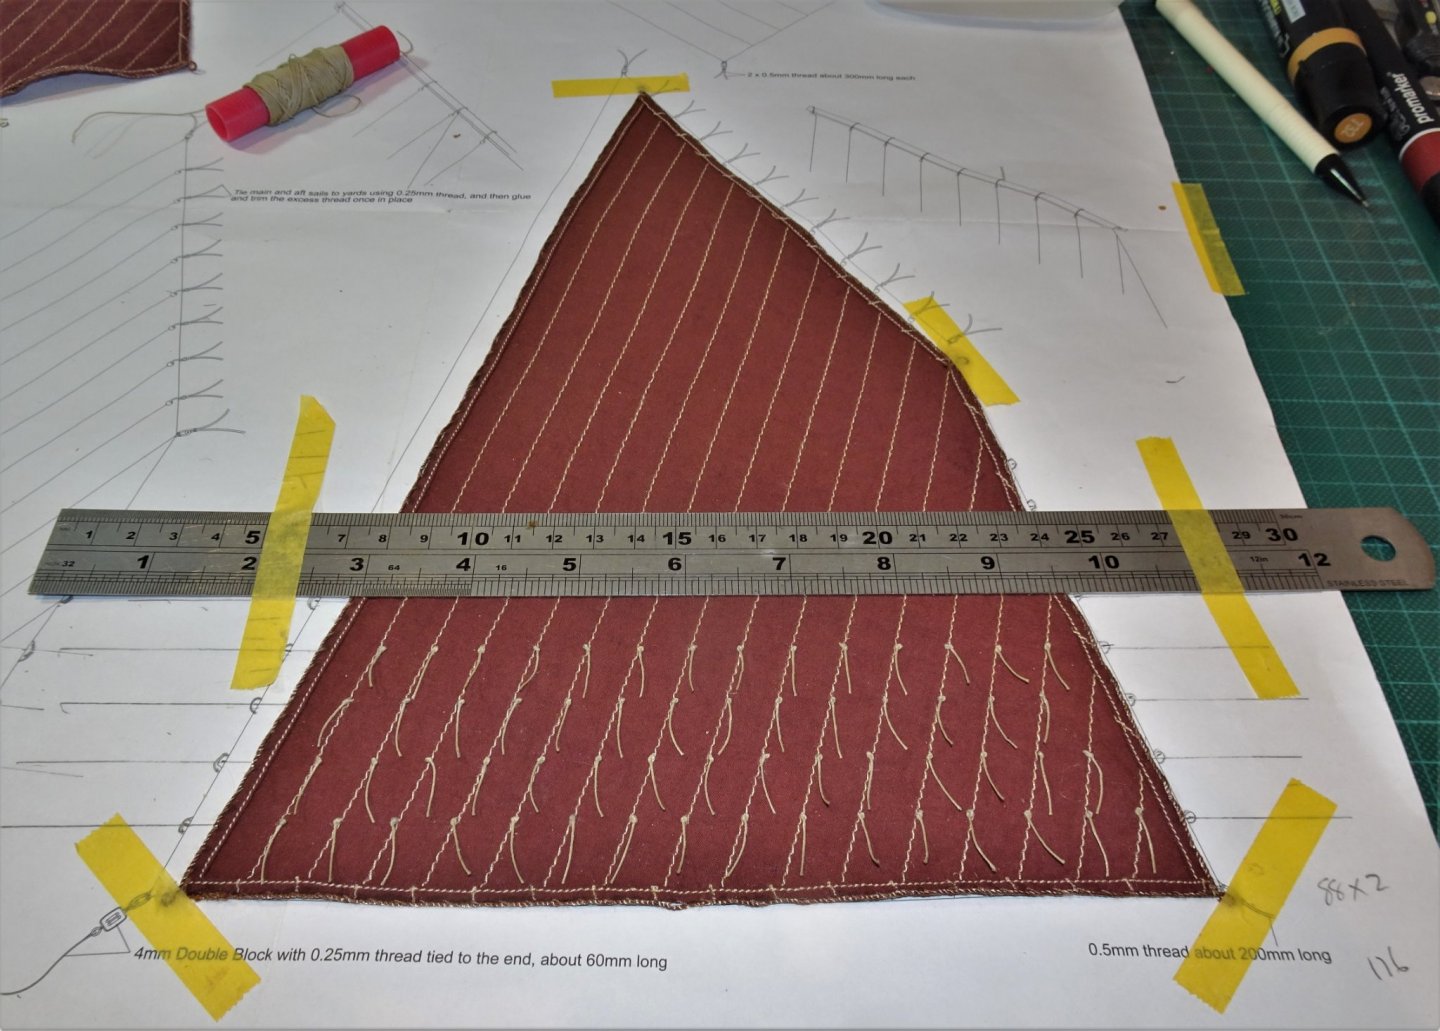
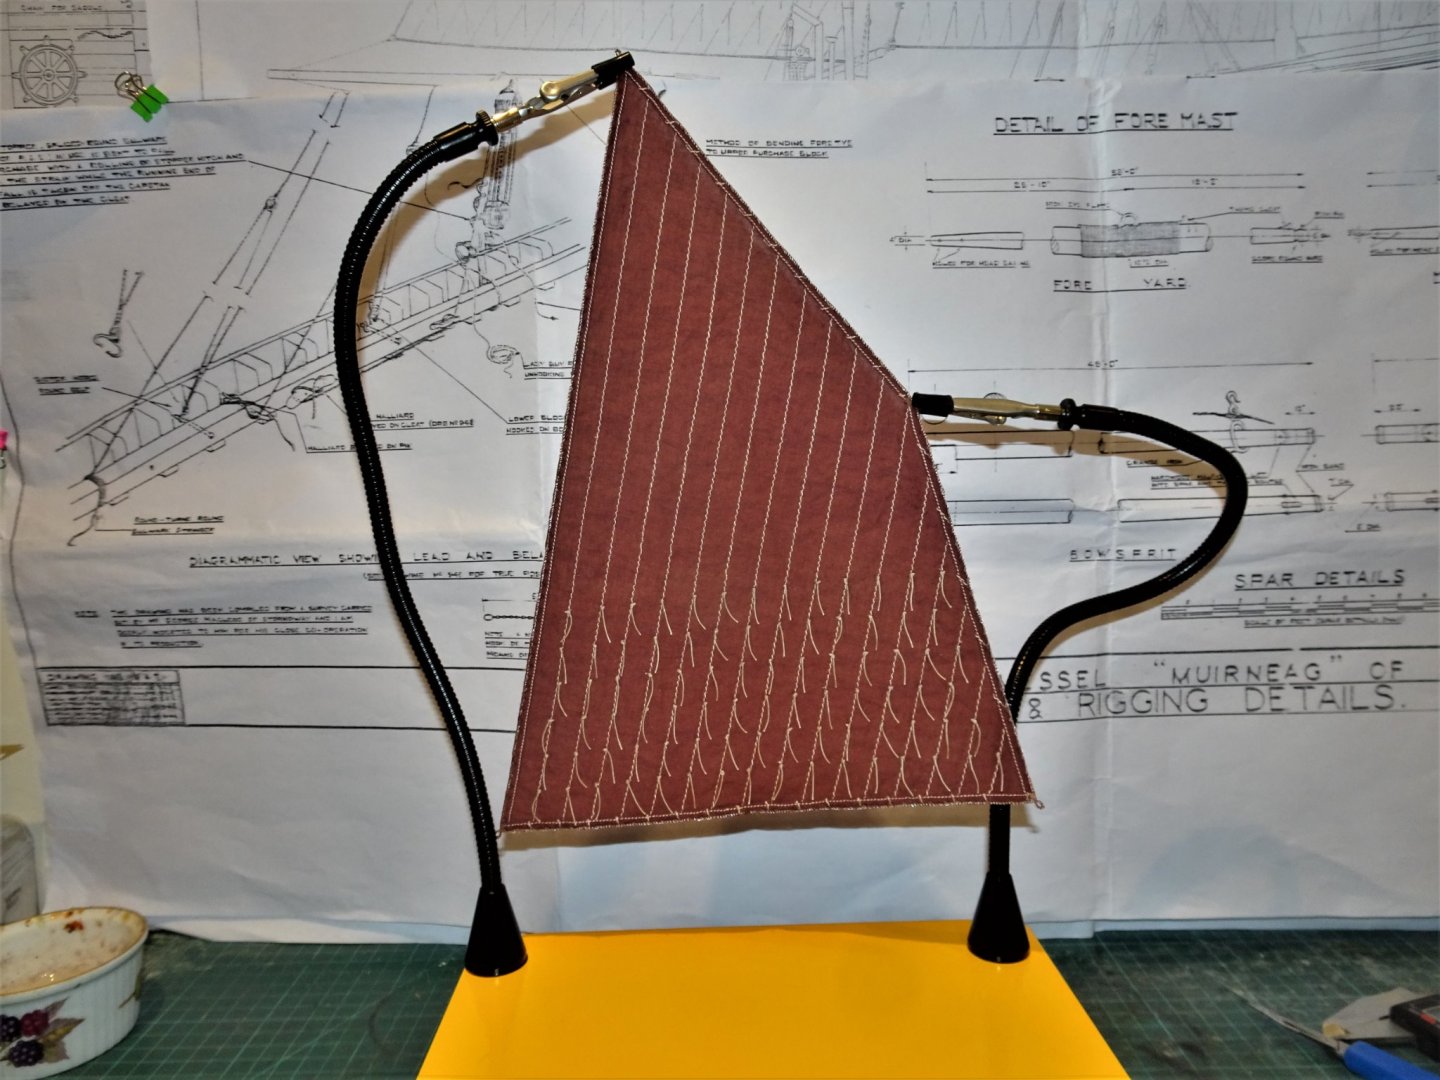
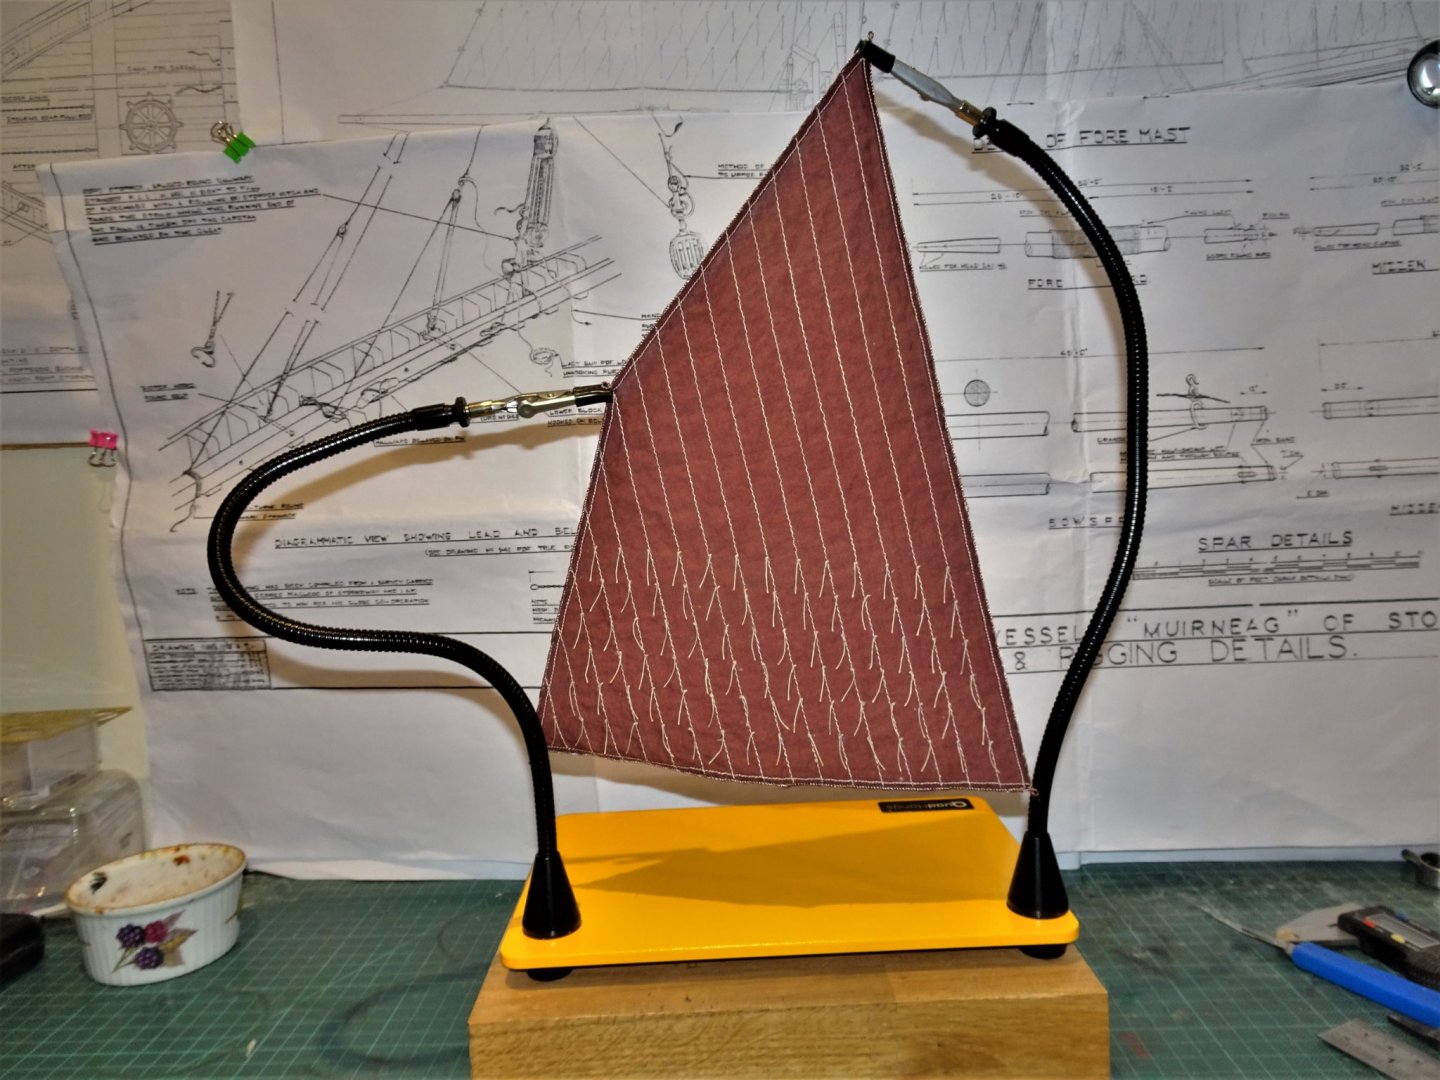
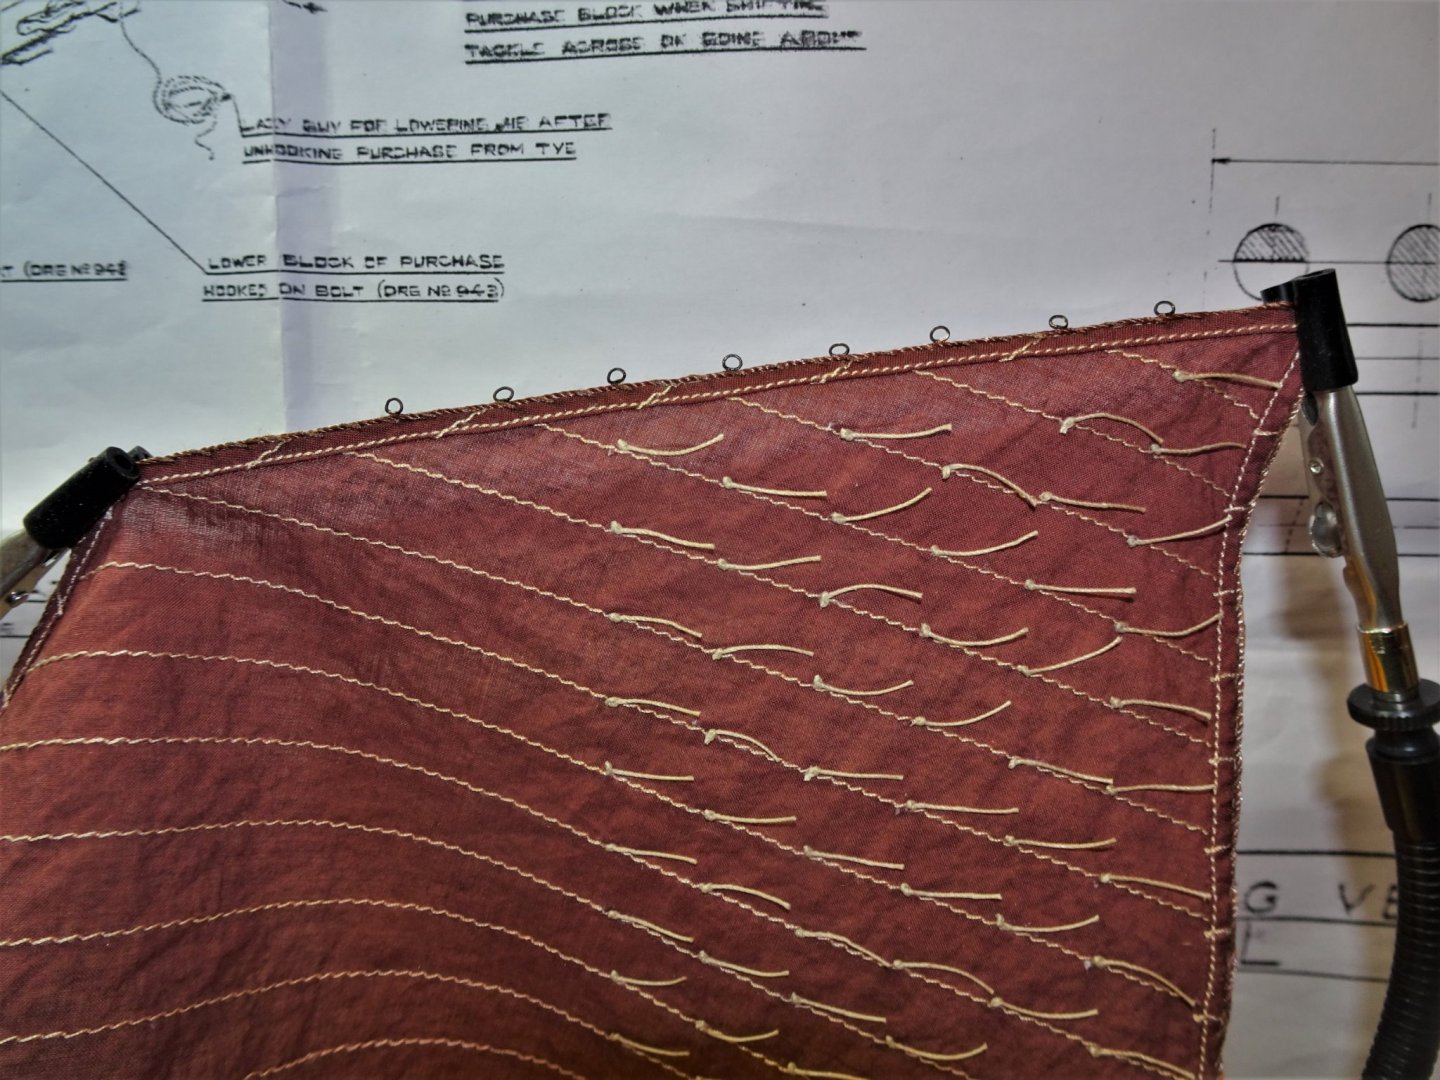
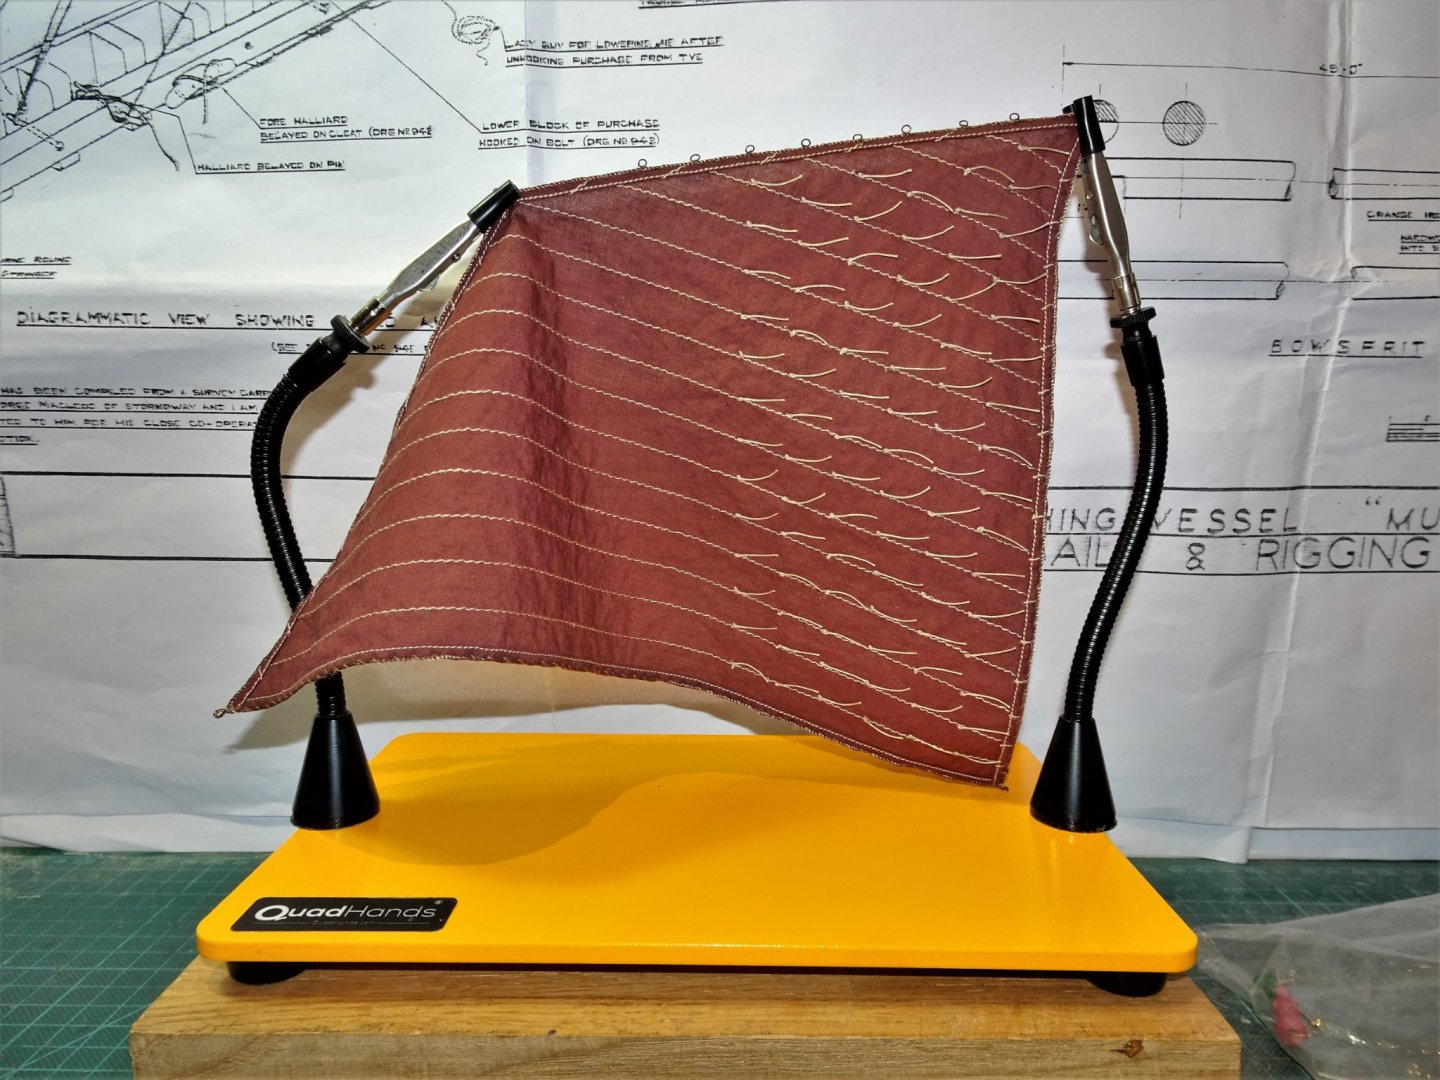
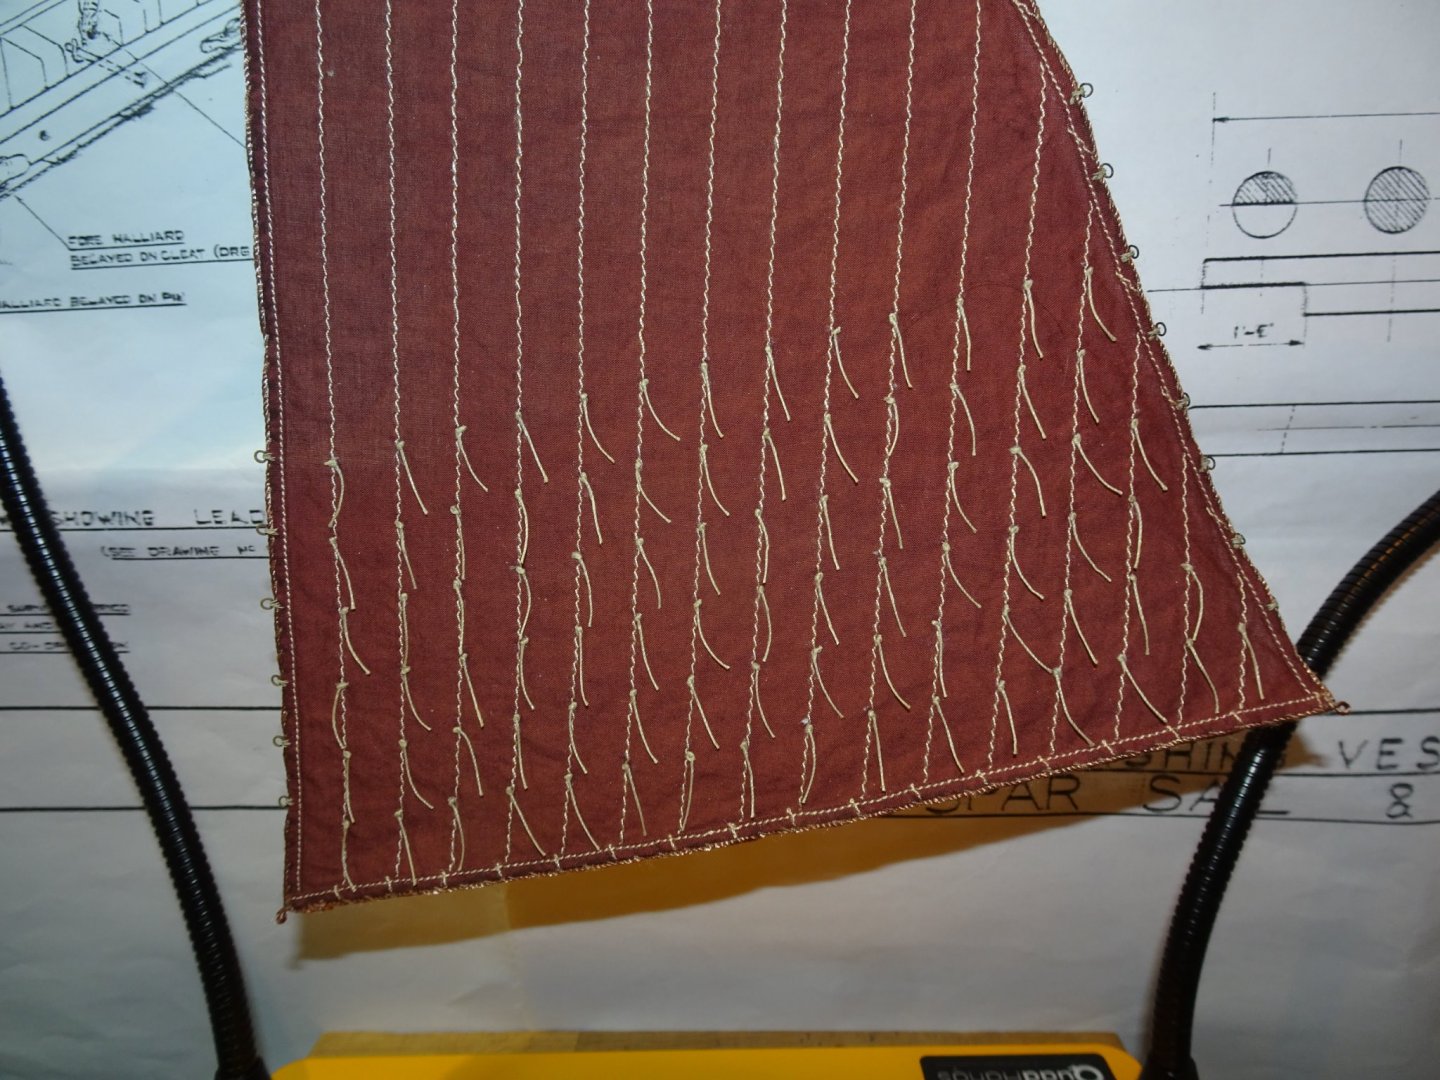
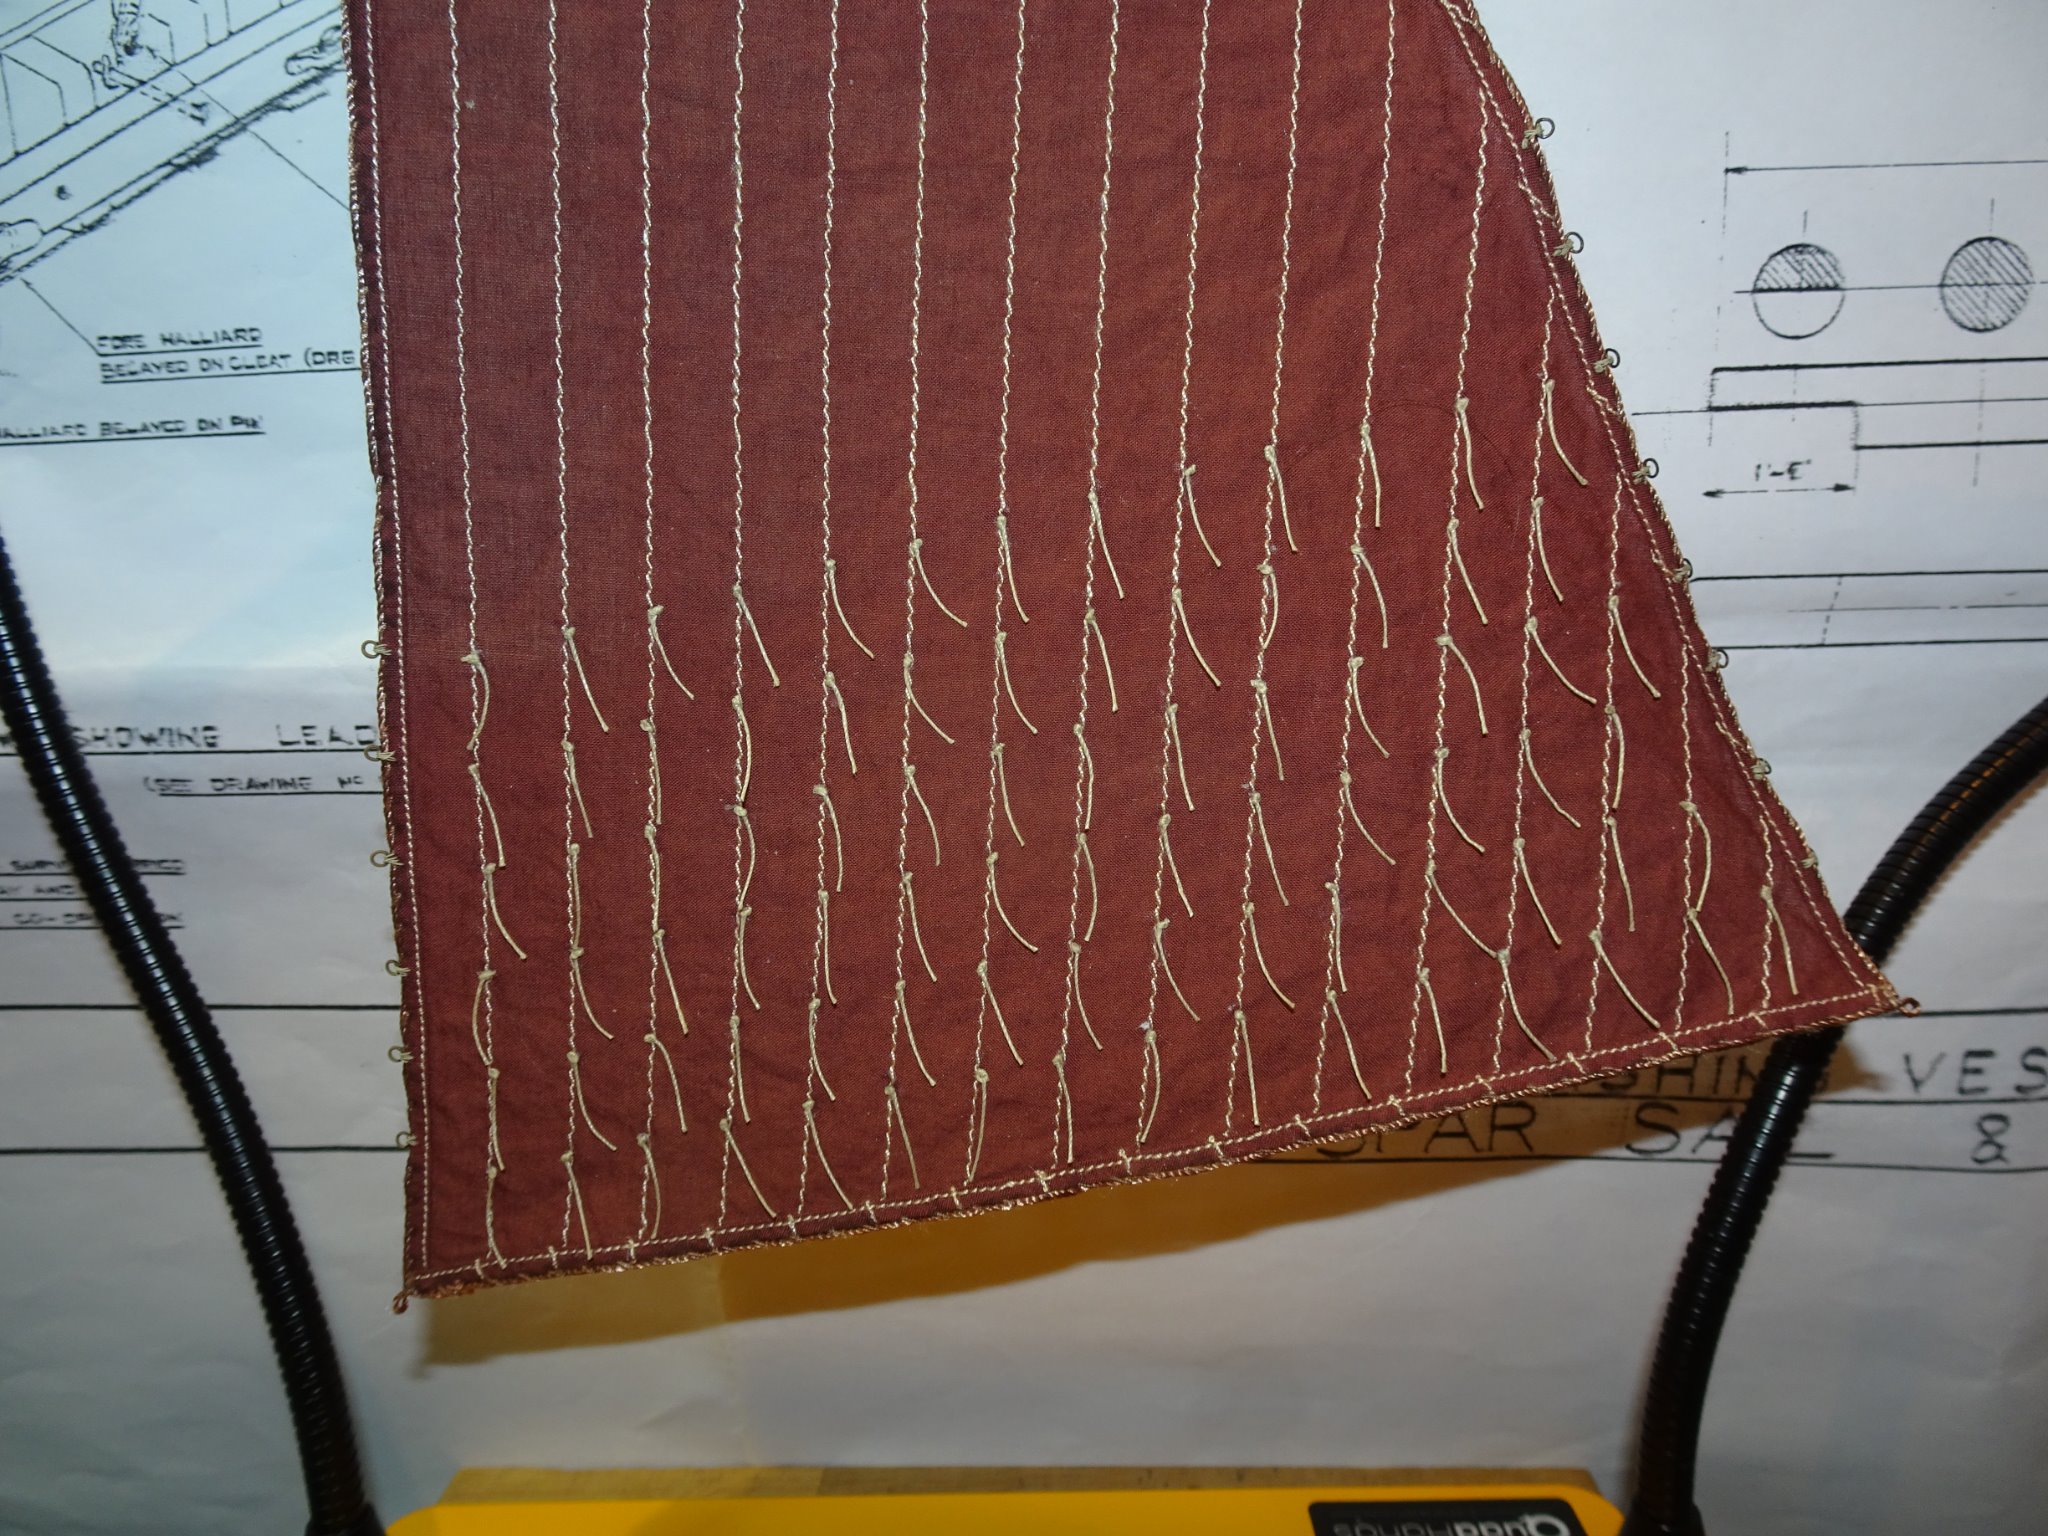
Post 42 Fettlin’ the sails Reef points are a tiresome thing but add realism to a sail. To fit them properly a double length line is passed thro’ a hole in the sail and knotted at the top each side. The issue with this at scale is that getting them to hang naturally can be problematic without resorting to use of pva to hold them down on the sail. This risks marking the previously dyed material. My approach is to simply glue the points to the sail at the knot. This way the point lies flat, and the application of glue is better controlled. Even So it is exceeding dull work, knot, trim, and glue, 88 times each side for the large fore lug sail, which has six rows of reef points. 9082 For gluing the sail is taped over the plan and a steel rule used to level the points across the sail. 9088 9093 Three days later and the Reef points are completed on the large Fore Lug sail. I now turn my attention to the Luff cringles, which as everyone knows run down the leading edge of a sail. 😉 These are of an iron ‘D’ shape and there are eight of them on the Fore Lug. For these I have used 2.5mm ø fine brass rings to which the ‘D’ shape is imparted and the joint silver soldered for security. 9095 To aid fixing these tiny fittings I used a smear of ca to hold them in position atop the bolt rope whilst a needle and thread is used to secure them to the sail. 9096 My recent acquisition proved very useful to hold the sail for this exercise. 9101 I used 0.1mm Morope line to secure the rings thro’ the Tabling (Hem) of the sail. 9103 Sail completed by the addition of the Leech cringles. The same procedure will be repeated to complete the Mizen Lug. B.E. 28/11/20
- 261 replies
-
- 16
-
-
- muirneag
- vanguard models
- (and 2 more)
-
Looking very nice Erik, I'm interested to see her smart authentic black livery. B.E.
- 222 replies
-
- 3
-
-
- First Build
- Lady Isabella
- (and 2 more)
-
Cheers Guys, @ Richard, - I feel for me too, but it has to be done.🙂 @ Bob, - the stitching does seems to become less obvious over time, I don’t notice it as much on the Fifie now. @ Erik - Marking the bolt ropes is no problem, but the stitching on the sails is so fine that the risk of bleed onto the sails is too high for my tired old eyes. It all gets a bit complicated with dyes, it comes down to relative proportions with combined materials, but the clincher is that hot dyeing would be required and there is no way that Mrs W is going to let me loose on her induction hob with a pot of dye. 😄 @ Glenn, - a few hours ago neither did I, 😉 but it sounds good, still not sure how to go about it yet.🤔 I'd better make a start on those reef points. B.E.
- 261 replies
-
- 4
-
-
- muirneag
- vanguard models
- (and 2 more)
-
Thank you Rusty and Bob, and for the 'likes' Post 41 Sails The sail set comprises, Fore, Mizen, and Jib. I am using the nicely made but expensive kit provided addition, but even these can be enhanced by the addition of reef points. It is a tiresome exercise but certainly appropriate at this scale. One other item I need to consider is whether to add cringles to the luff and leech of the lug sails. Underhill indicates rope cringles around iron thimbles for the leech and iron ‘D’ type thimbles for the Luff. My first job is to check that the sails fit the yards and add the details to the kit sail plan. 9019(2) The sails are a good fit to the plan 9026(2) The Reef points and cringles are marked on the plan. Just the small matter of adding 268 14mm knotted lines to the sails. Wonderful.🙄 This will be done after the sails are dyed. Colouring the sails This is the description given in the Sailing Drifter book by Edgar J March. Sails were ‘barked’ a rich, dark brown, almost black colour. They were seldom tanned the warm Red of the English drifters. From my experience with the sails on my Fifie build I am aware that the sail stitching and bolt ropes do not take dye at all, leaving them stubbornly white, which is annoying against the rich brown sails. The Dye blurb says add salt for cotton, rayon, or linen, and vinegar for nylon, silk, and wool. That is white vinegar, not the stuff you put on your fish and chips. To replicate the colour, I am using Rit brand (cocoa brown) dye powder. The recipe’ and procedure I used was as follows:- Before I start I wash the sails gently and iron out the creases, well Mrs W does. Into a plastic bowl I poured 4 pints of hot water. 4 teaspoons of dye powder (virtually the whole packet) were dissolved in a 1 pint jug of near boiling water from the kettle. This was added to the bowl followed by a dessert spoon of salt, and two dessert spoons of white vinegar. The mixture was well stirred, and the sails added. I am mindful that the jibs were coloured but were only lightly dressed so it was immersed first for only a few minutes. I stirred the lugs around for approx 20 minutes which gave me the depth of colour I thought was ok. The sails were then rinsed in cool water until the water ran all but clear. They were then hand washed in warm water with a mild detergent added, rinsed, and put to dry flat on an old towel. 9039(2) Still wet, the colour difference of the Jib reflects the much lighter dressing applied to this sail. 9045(2) The sails have dried a little lighter in shade, and there is also a little shrinkage in the lug sails, no doubt due to their longer immersion in hot water. 9044(2) As with the Fifie sails the bolt ropes and seams have not taken the dye so I suspect they are of polyester. I tried samples of silk (Which took the dye) and polyester (Morope) which didn’t. It looks like I will need to use a fine point waterproof marker to colour the bolt ropes and reduce the starkness of the white. The seam stitches are more problematic as there is a high risk of overspill. This concludes Part one of the sail saga. B.E. 25/11/20
.thumb.JPG.9079aee98a53fab6c520183949920999.JPG)
.thumb.JPG.5952b124c8fb6a05c09b1a53baace265.JPG)
.thumb.JPG.c3d3837722717a4eccf77e69777fbf92.JPG)
.thumb.JPG.1a3e32c875ad1b89e98d0b9c7d114b01.JPG)
.thumb.JPG.0e75b0db11eb1e8caa704ec11c40208c.JPG)
- 261 replies
-
- 15
-
-
- muirneag
- vanguard models
- (and 2 more)
-
She’s a sweet little cutter Doug, well done. 👍 B.E.
- 40 replies
-
- 2
-

-
-
- sherbourne
- caldercraft
- (and 1 more)
-
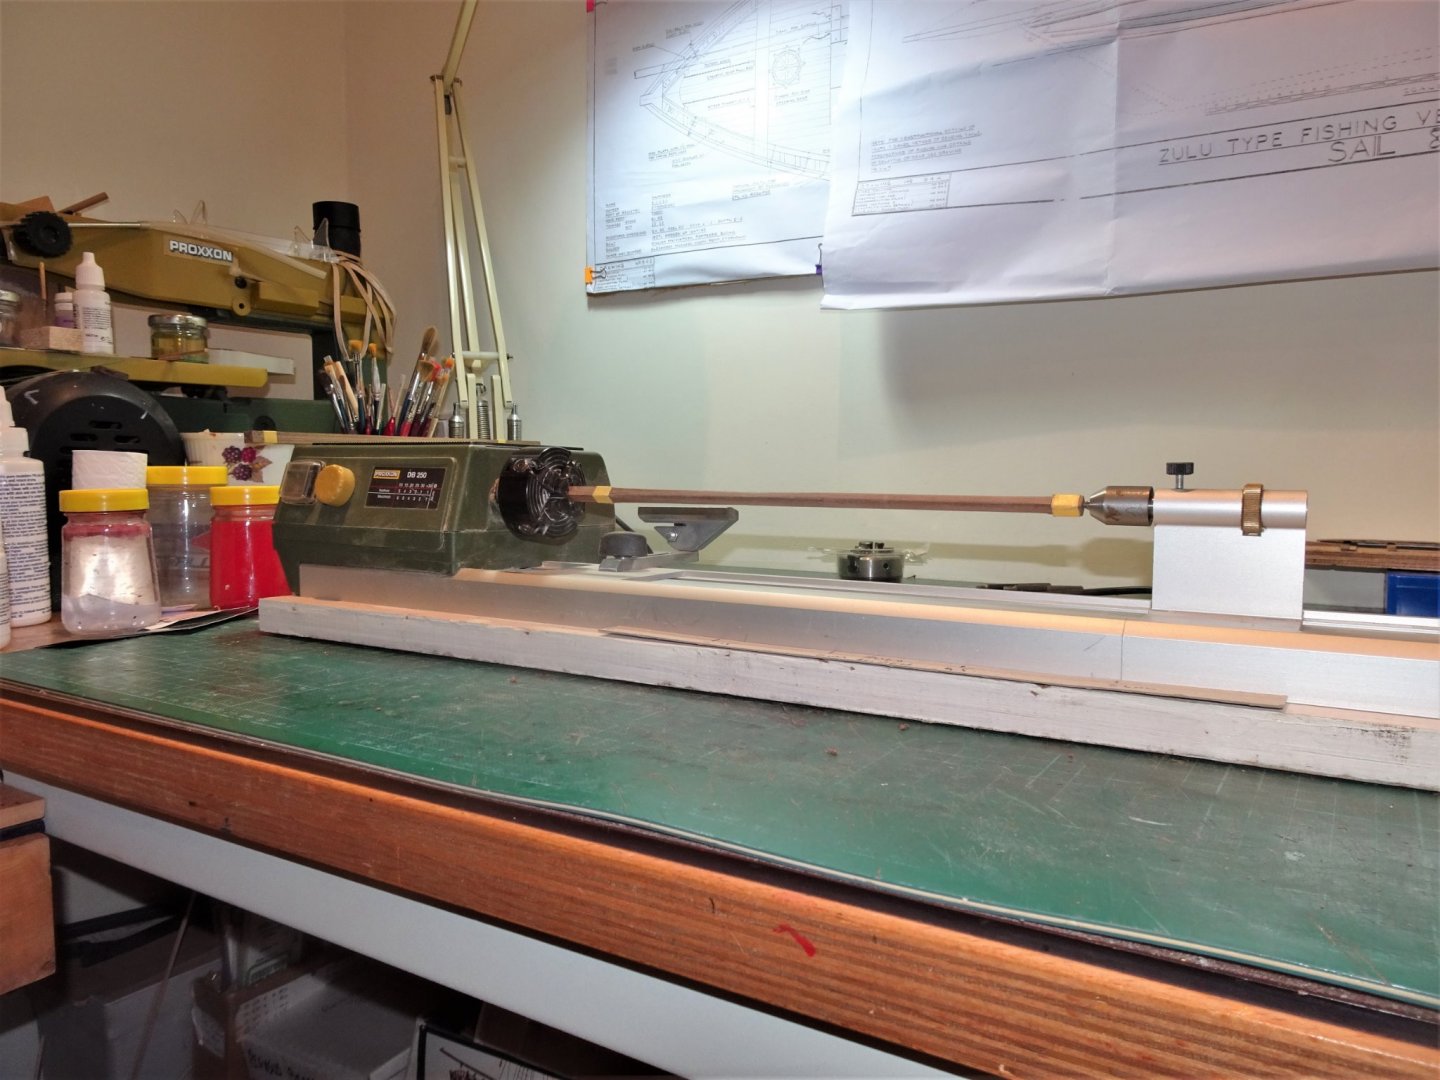
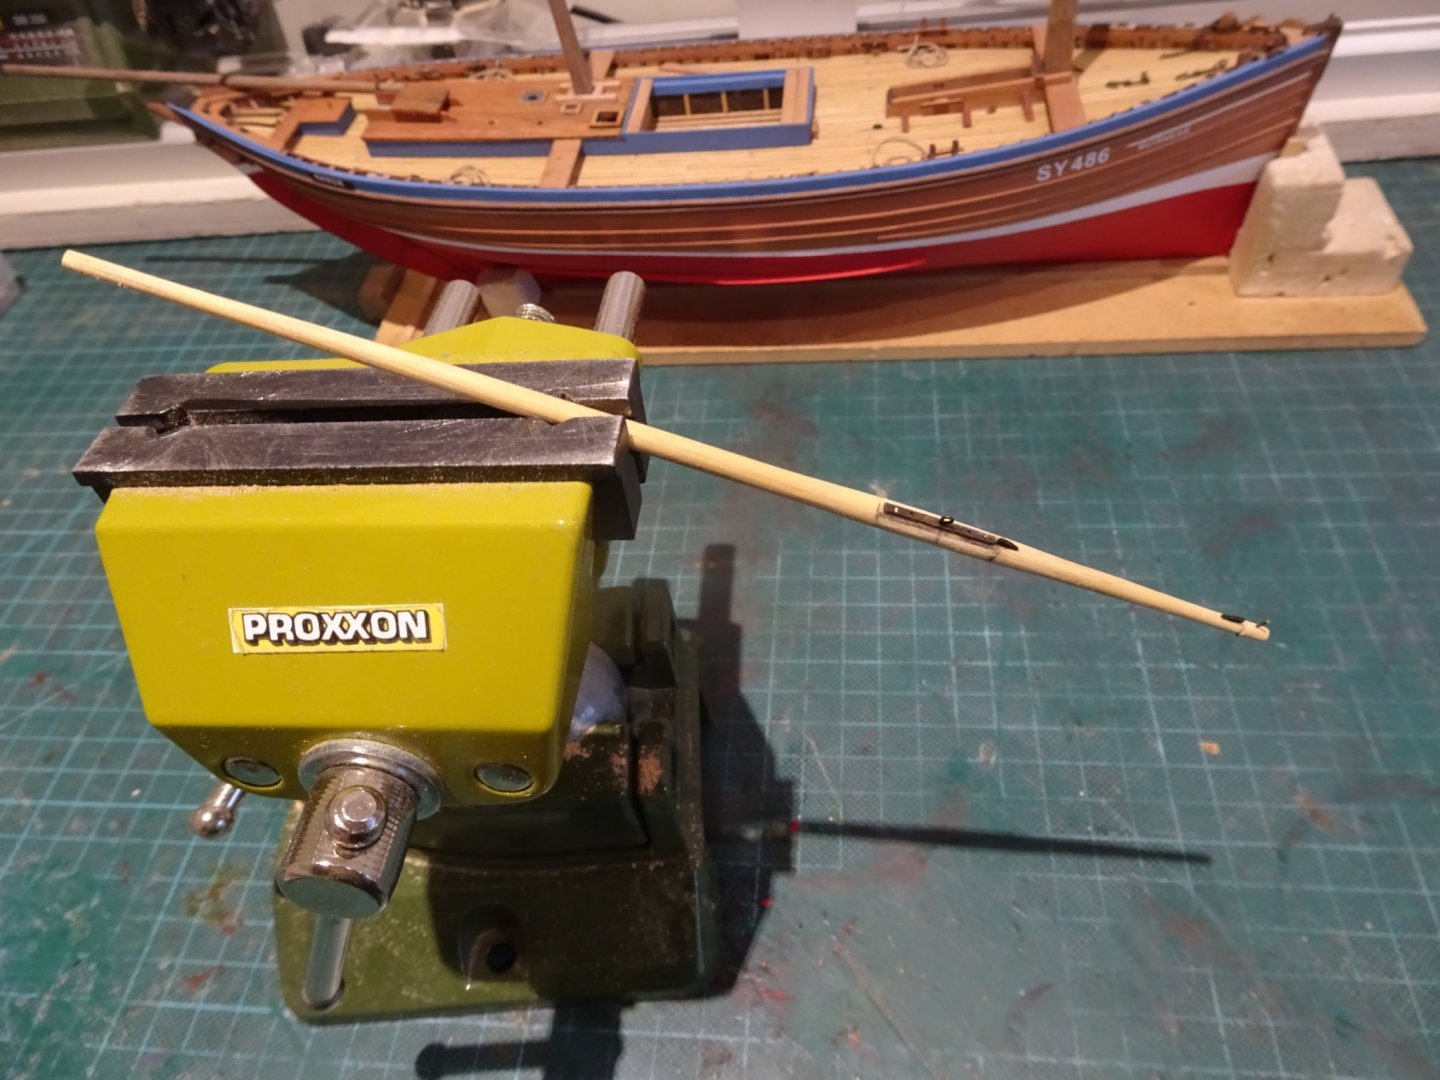
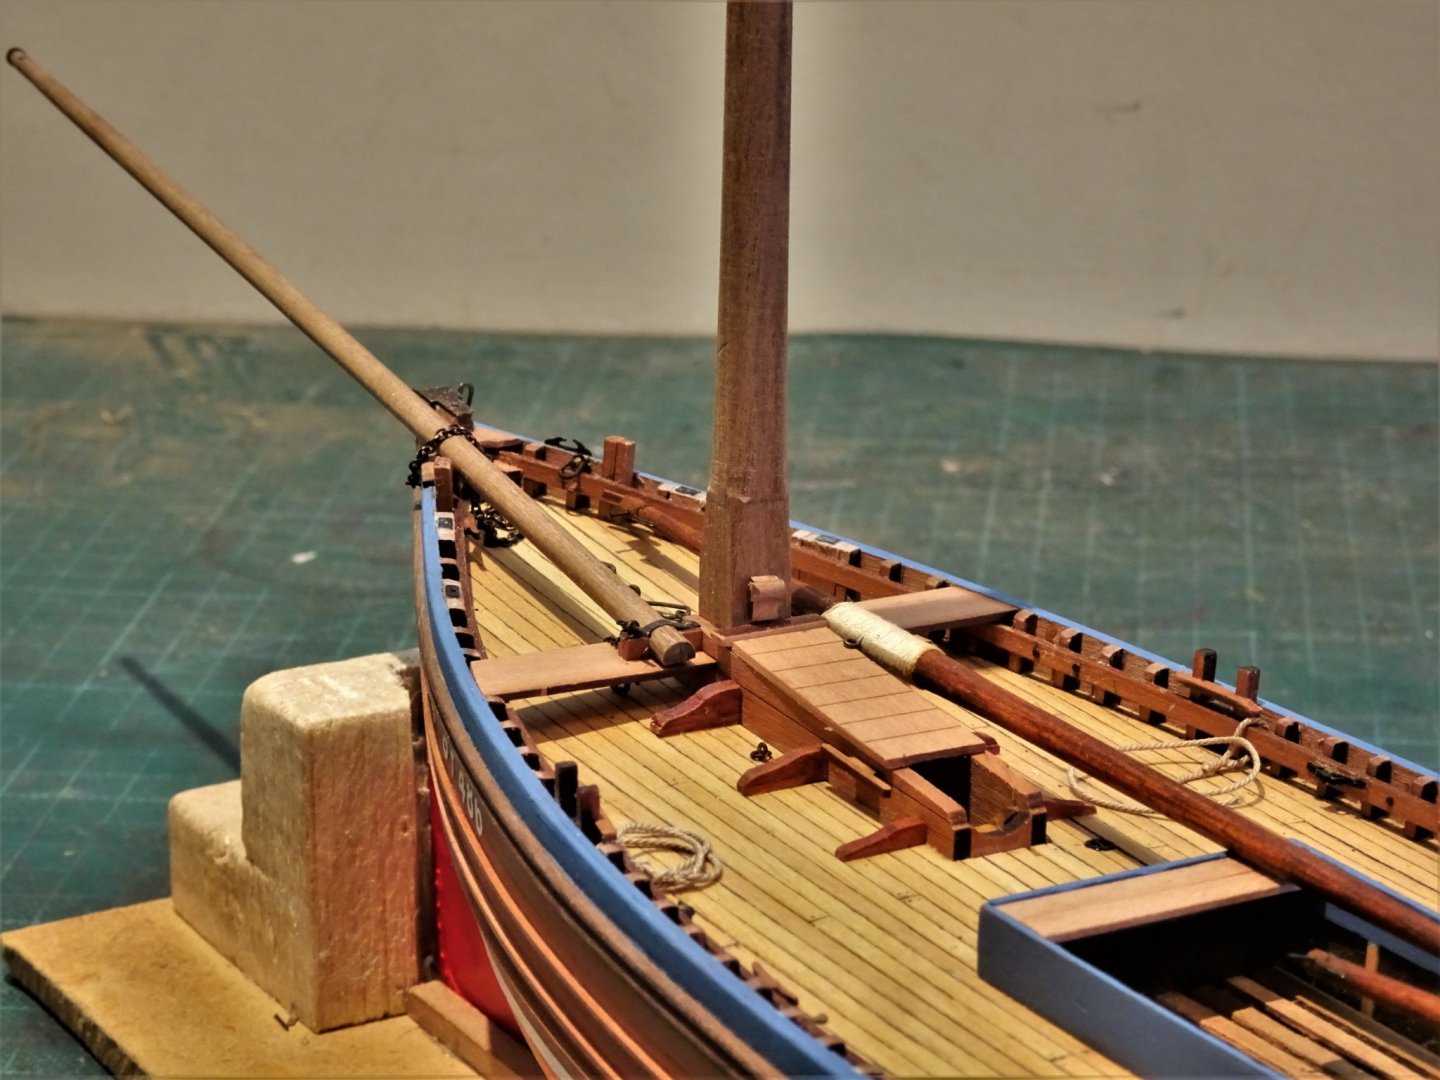
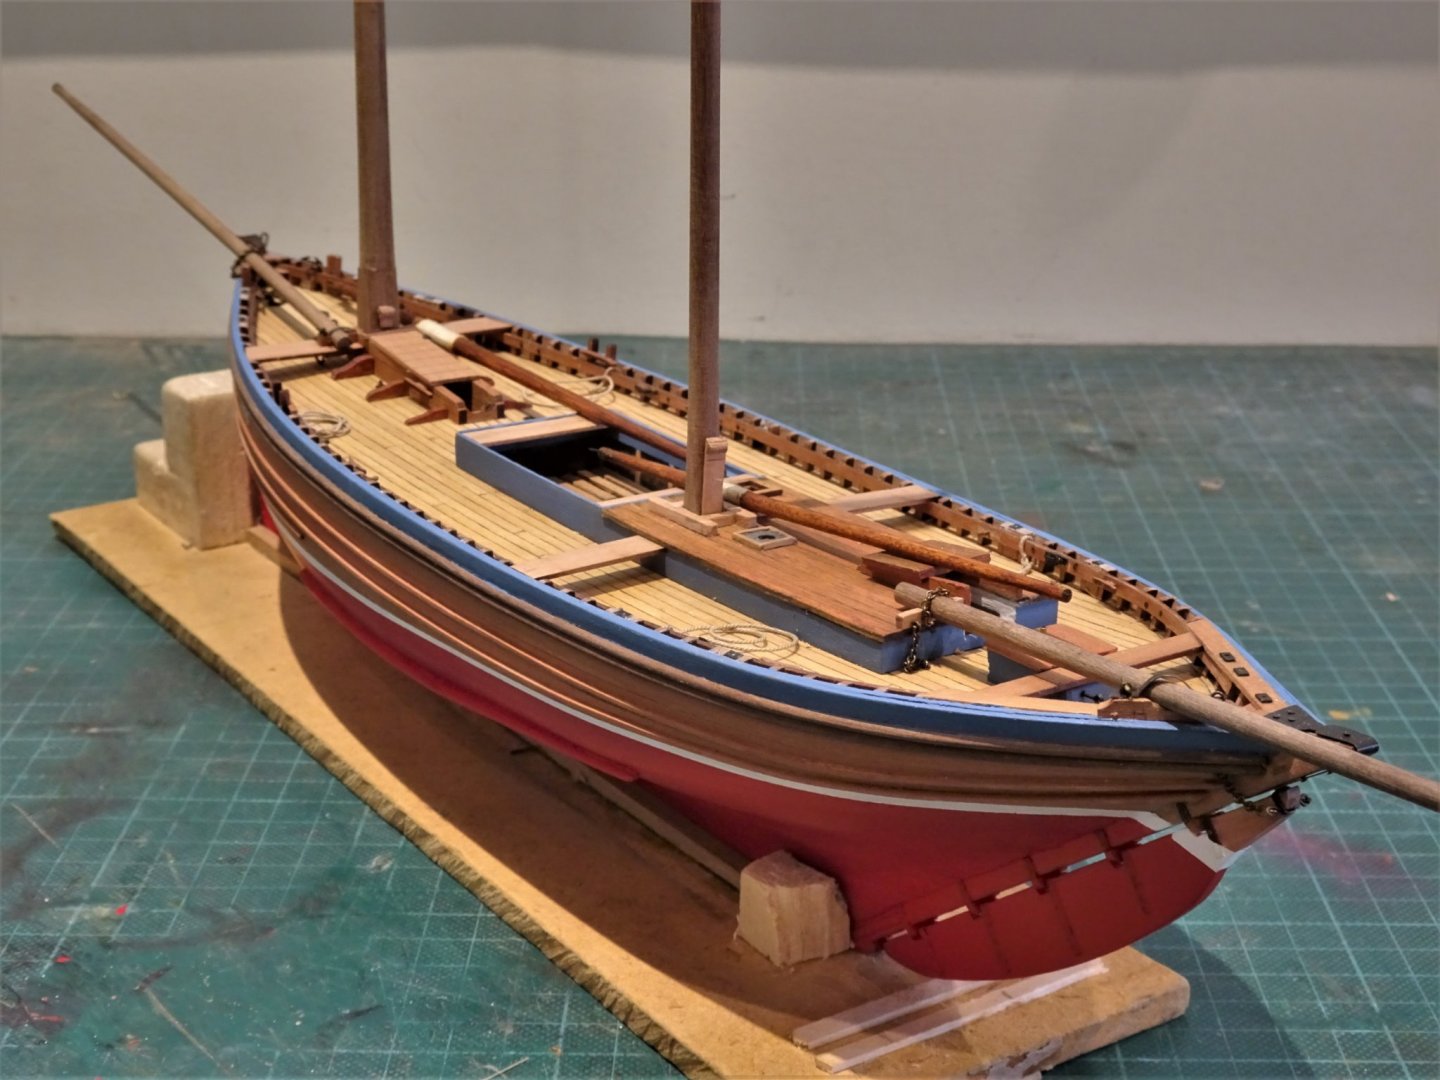
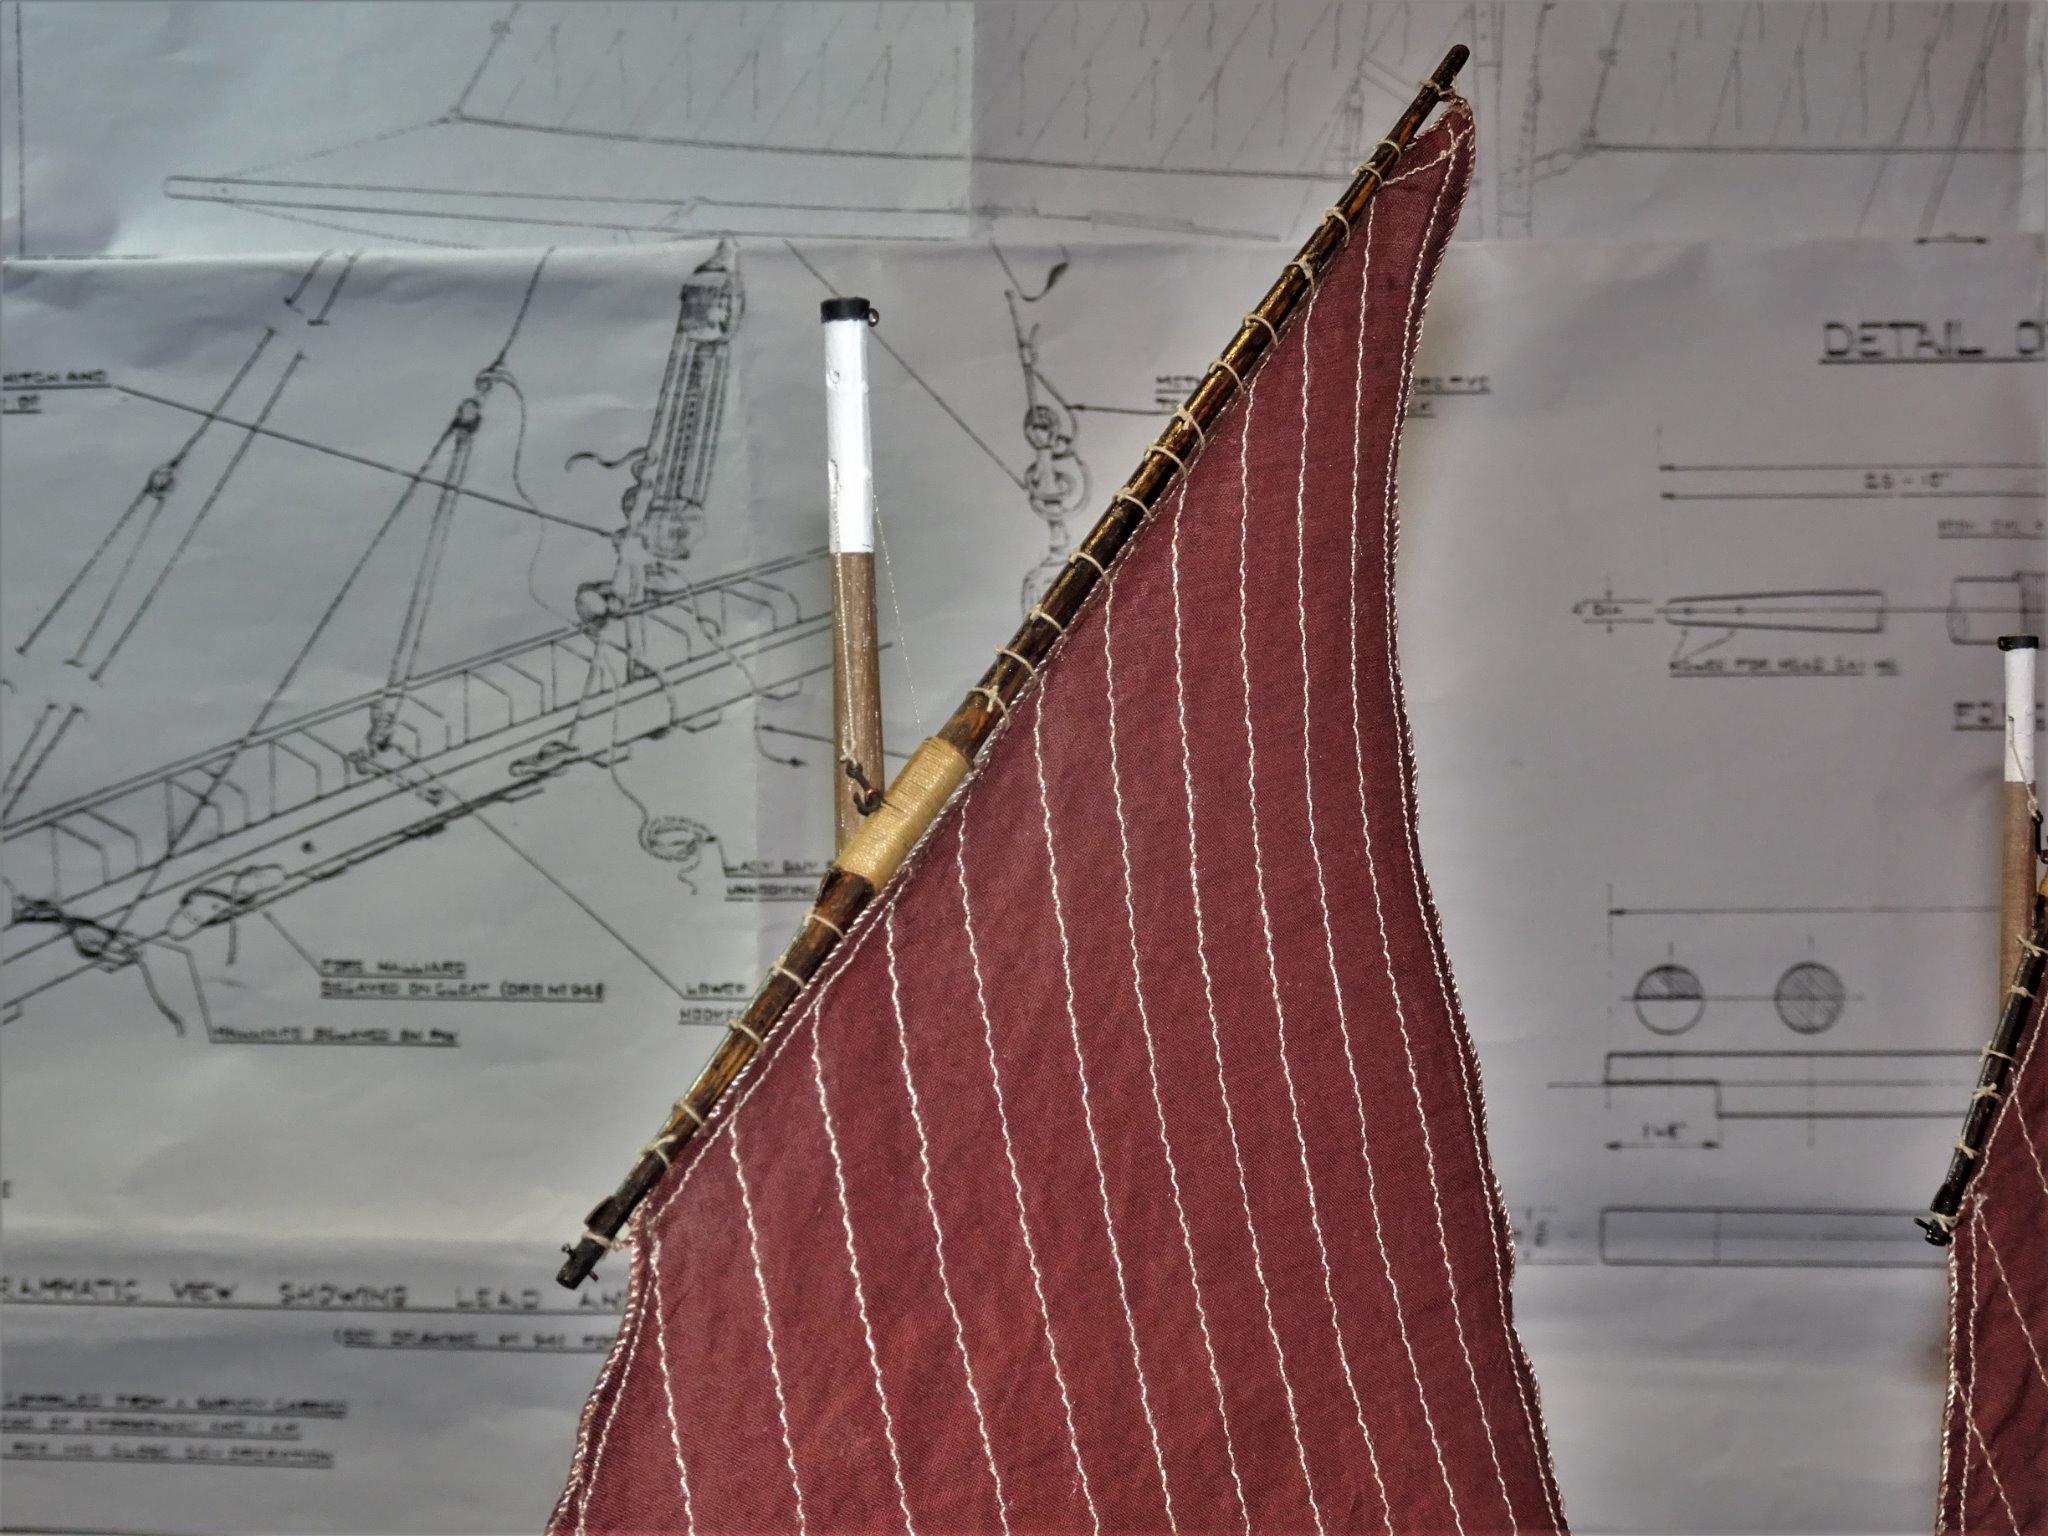
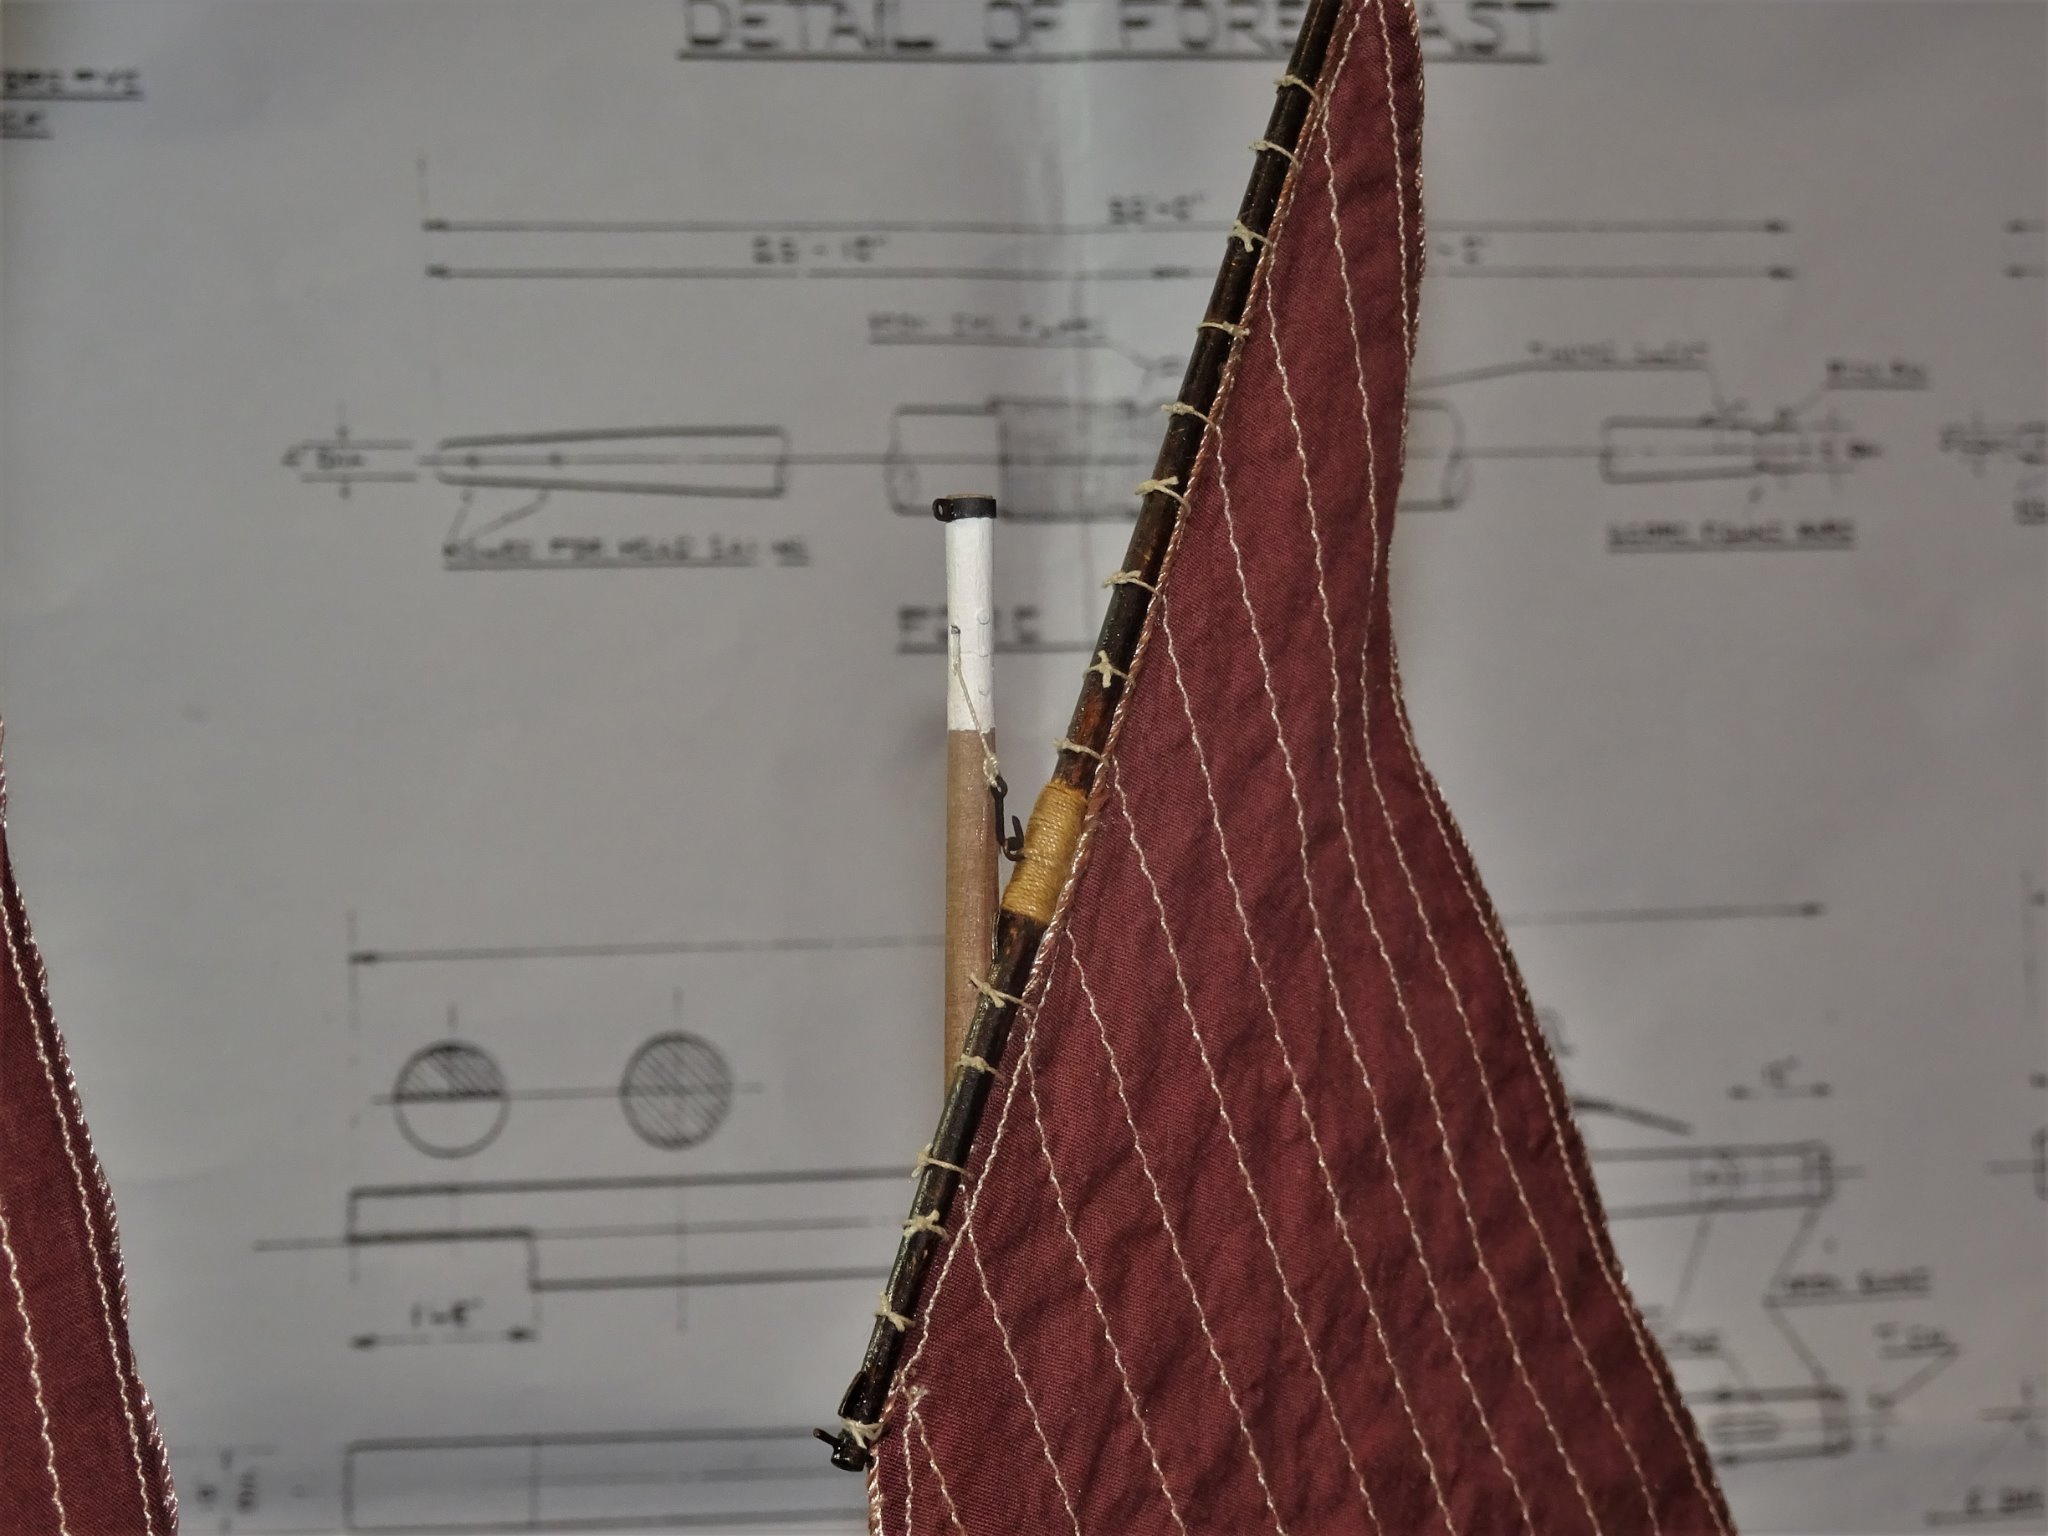
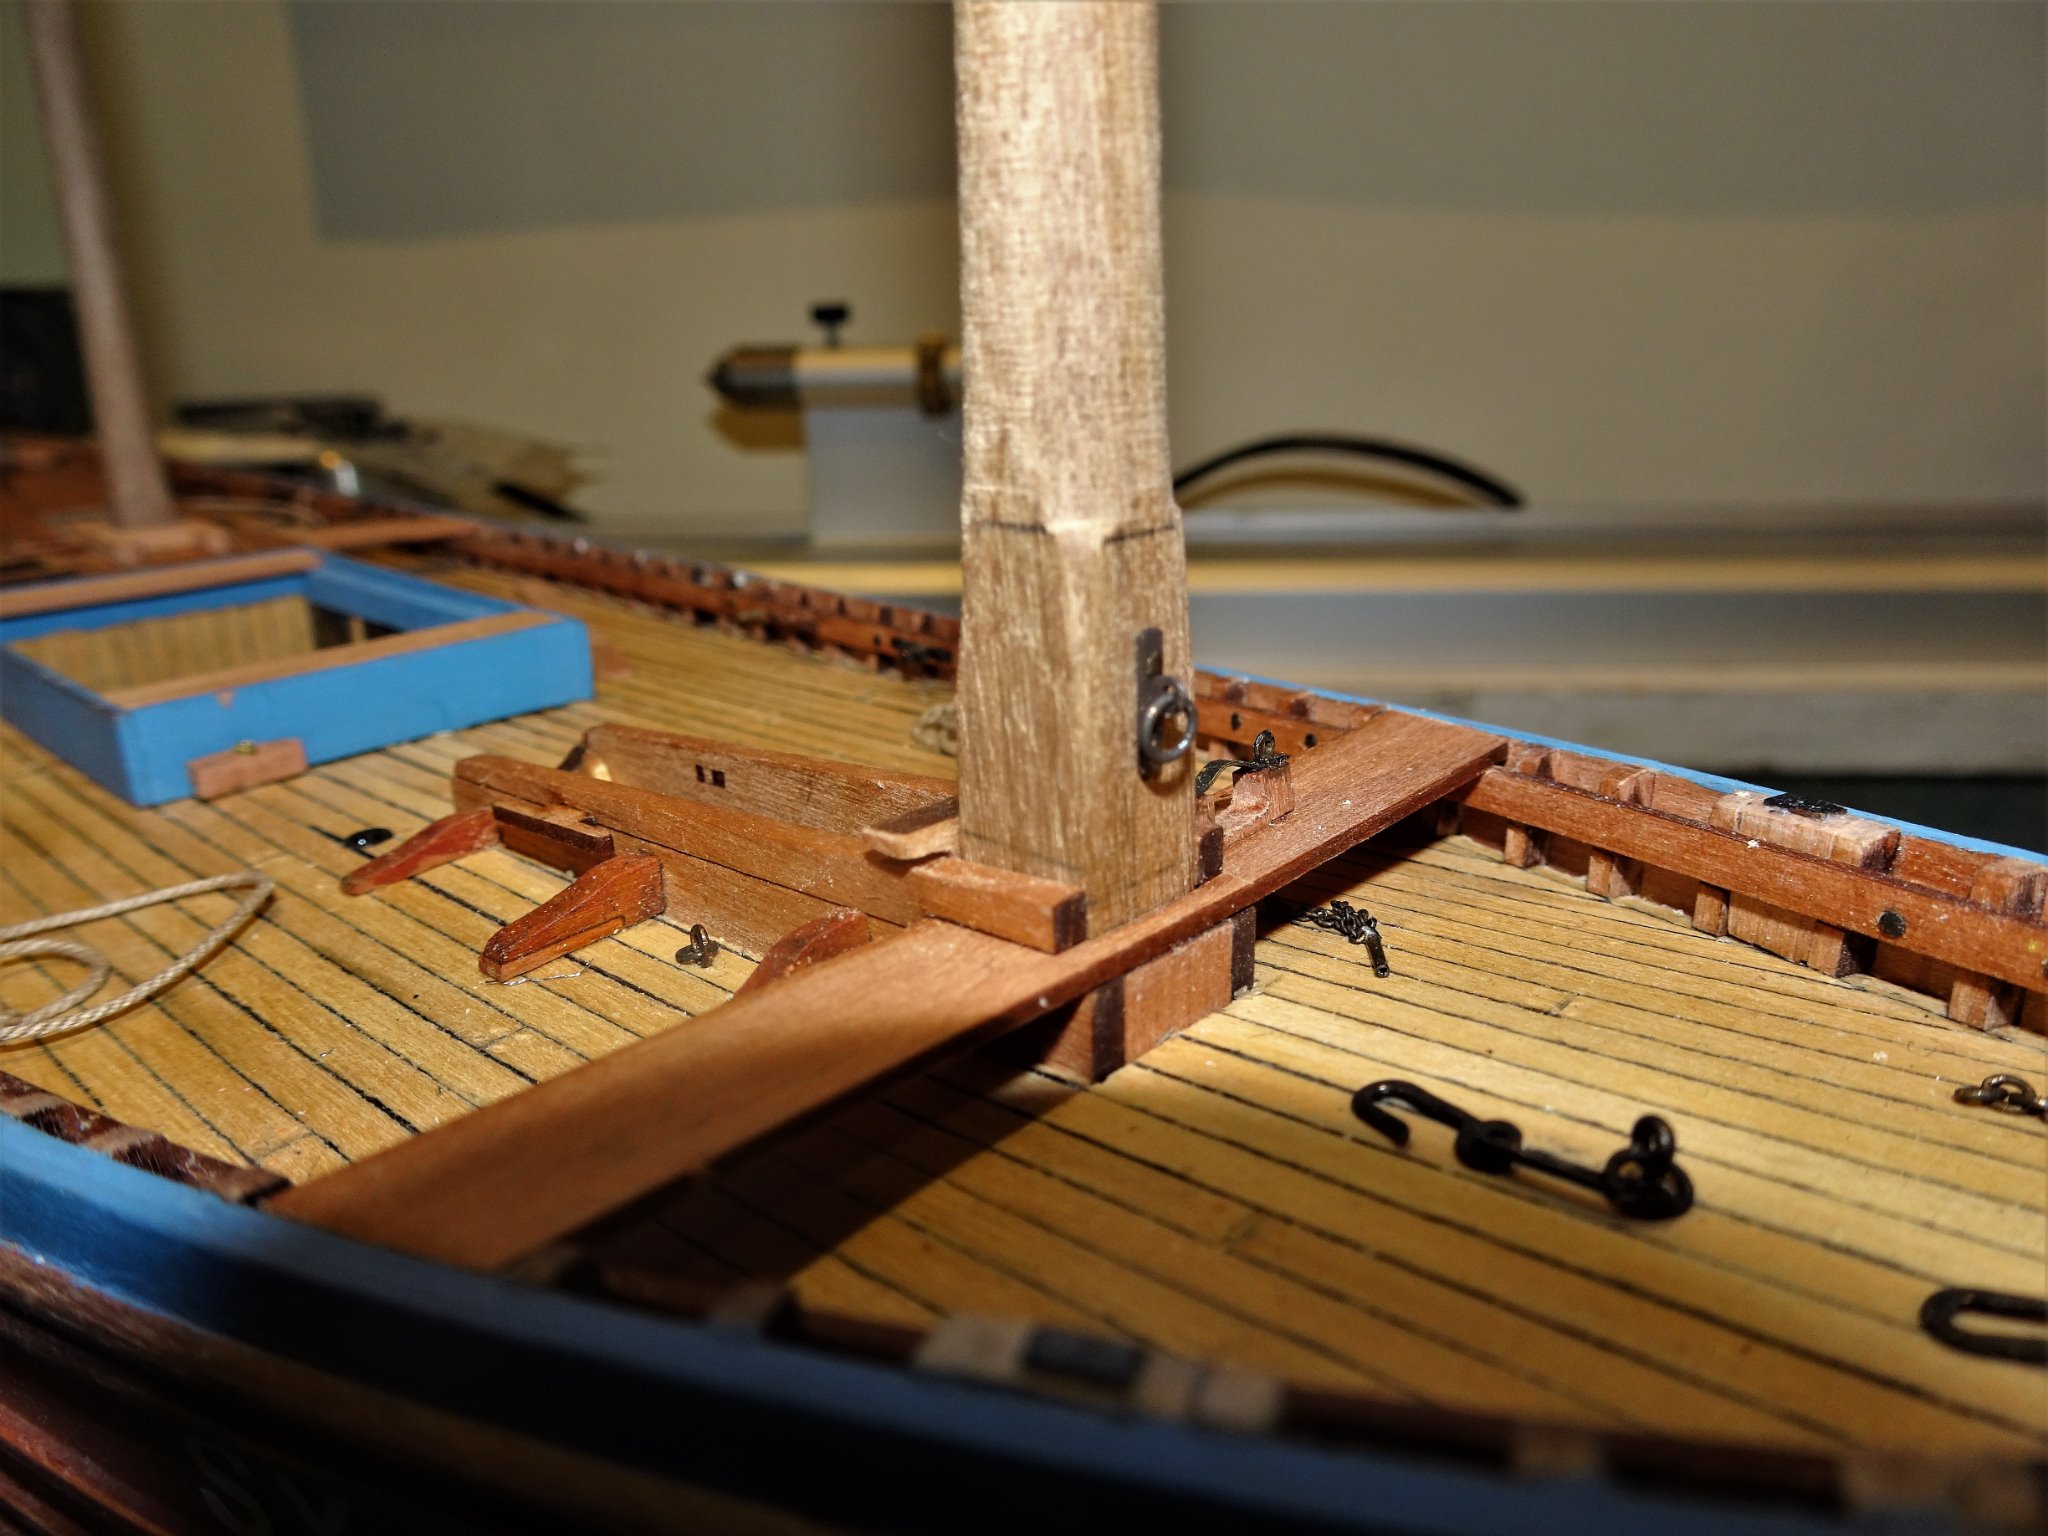
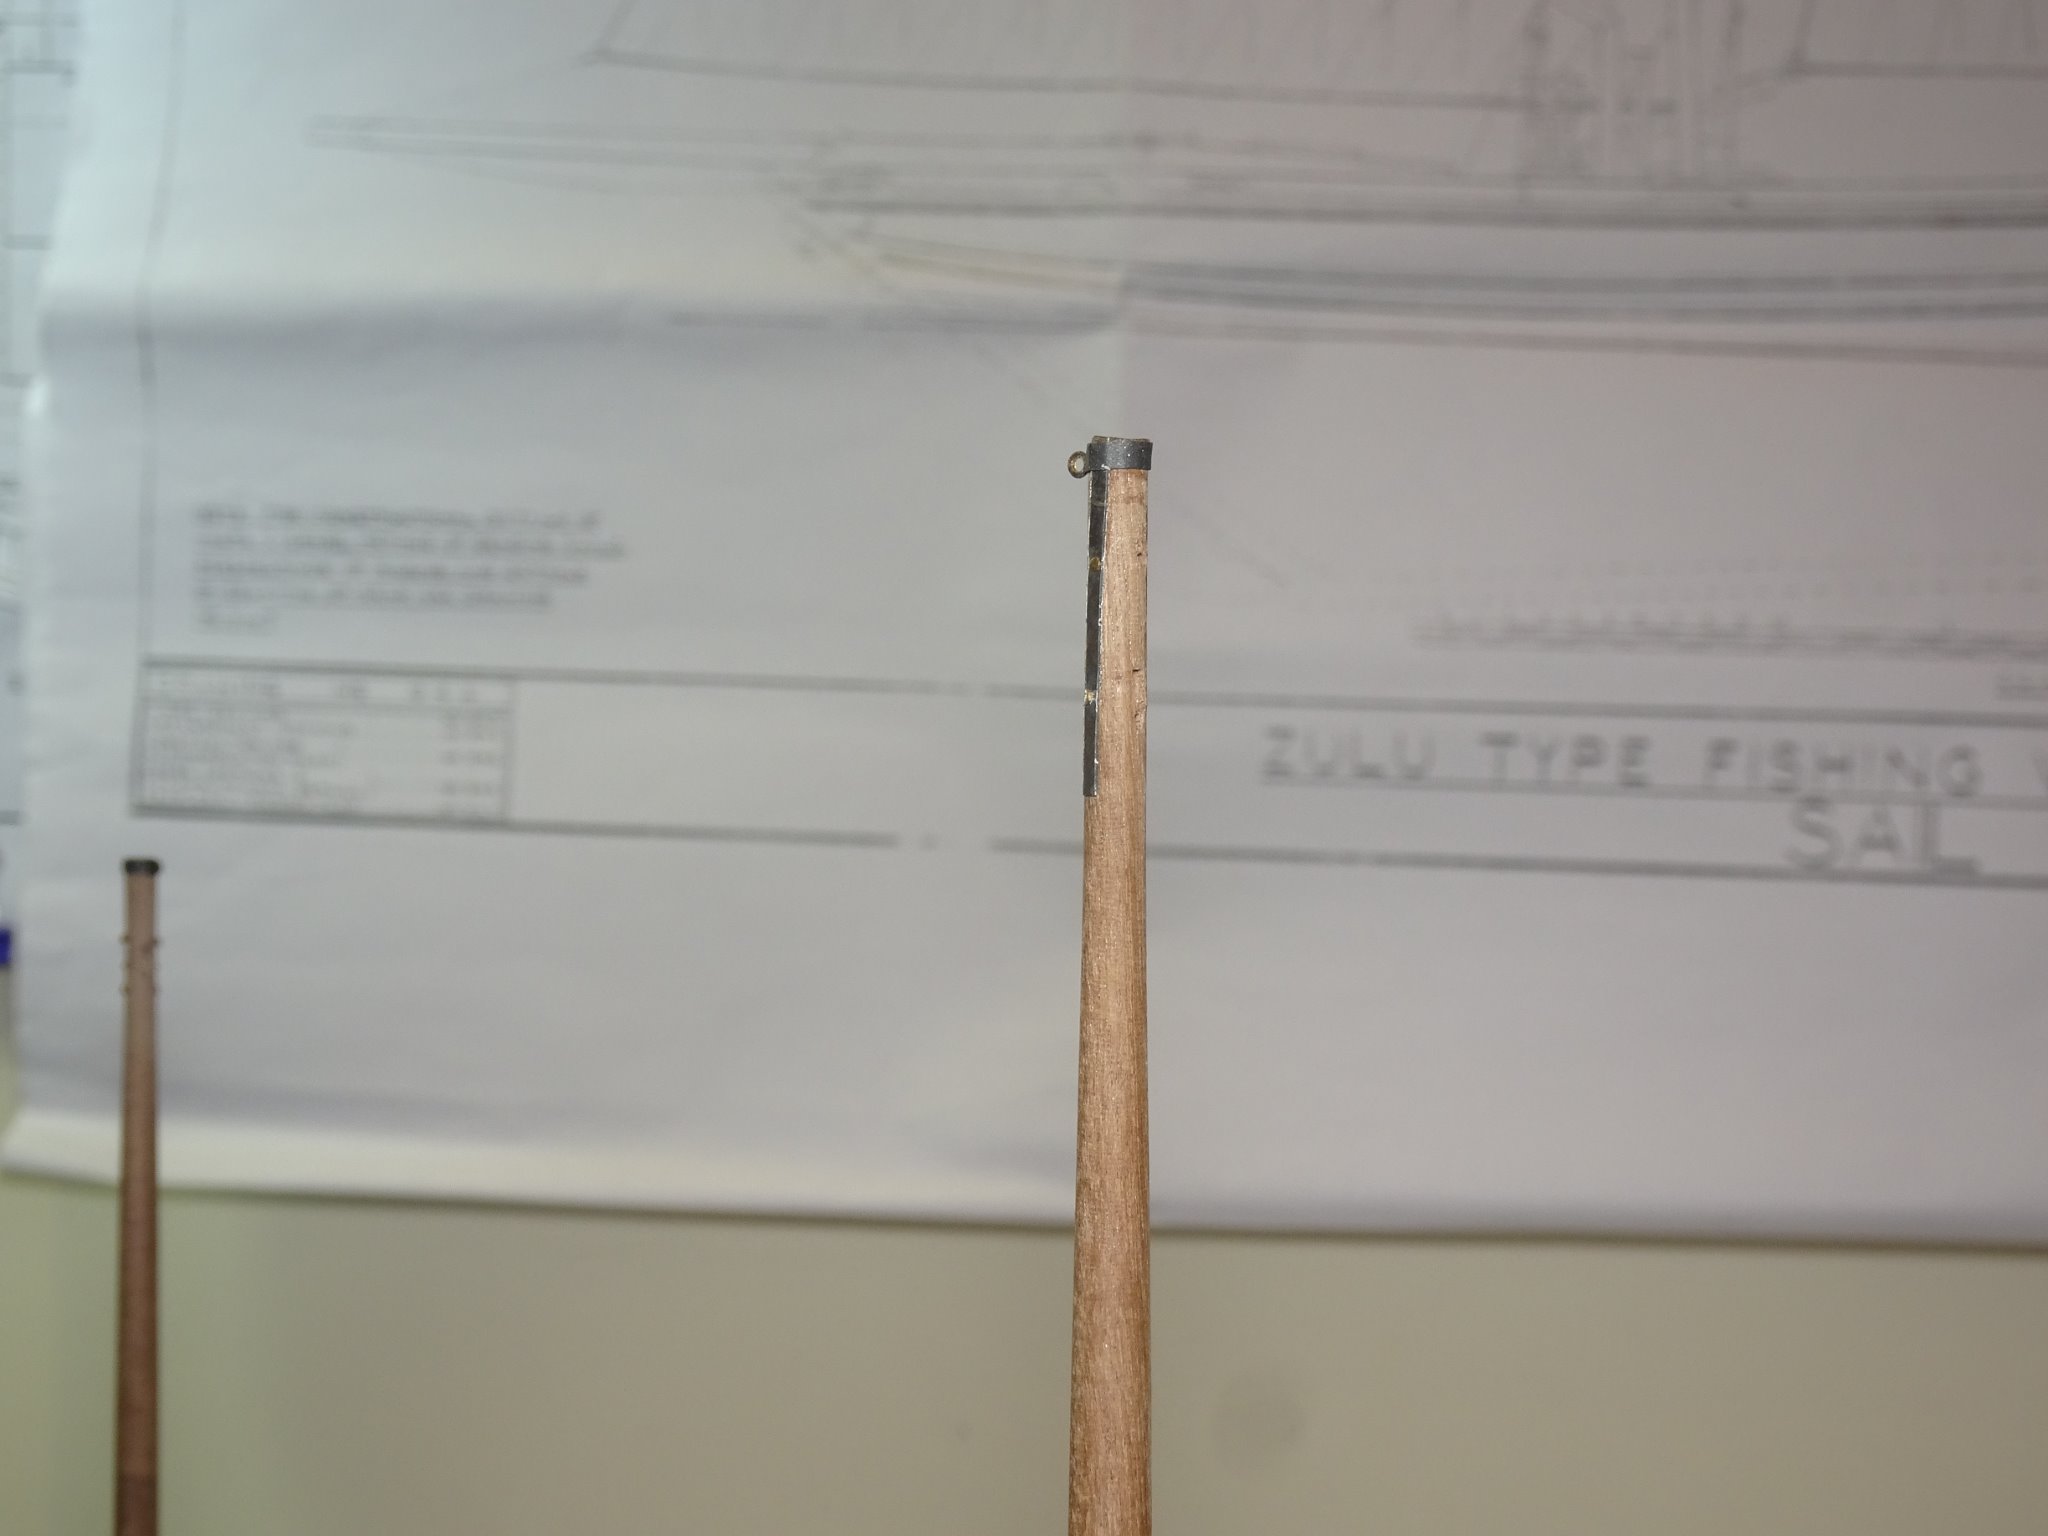
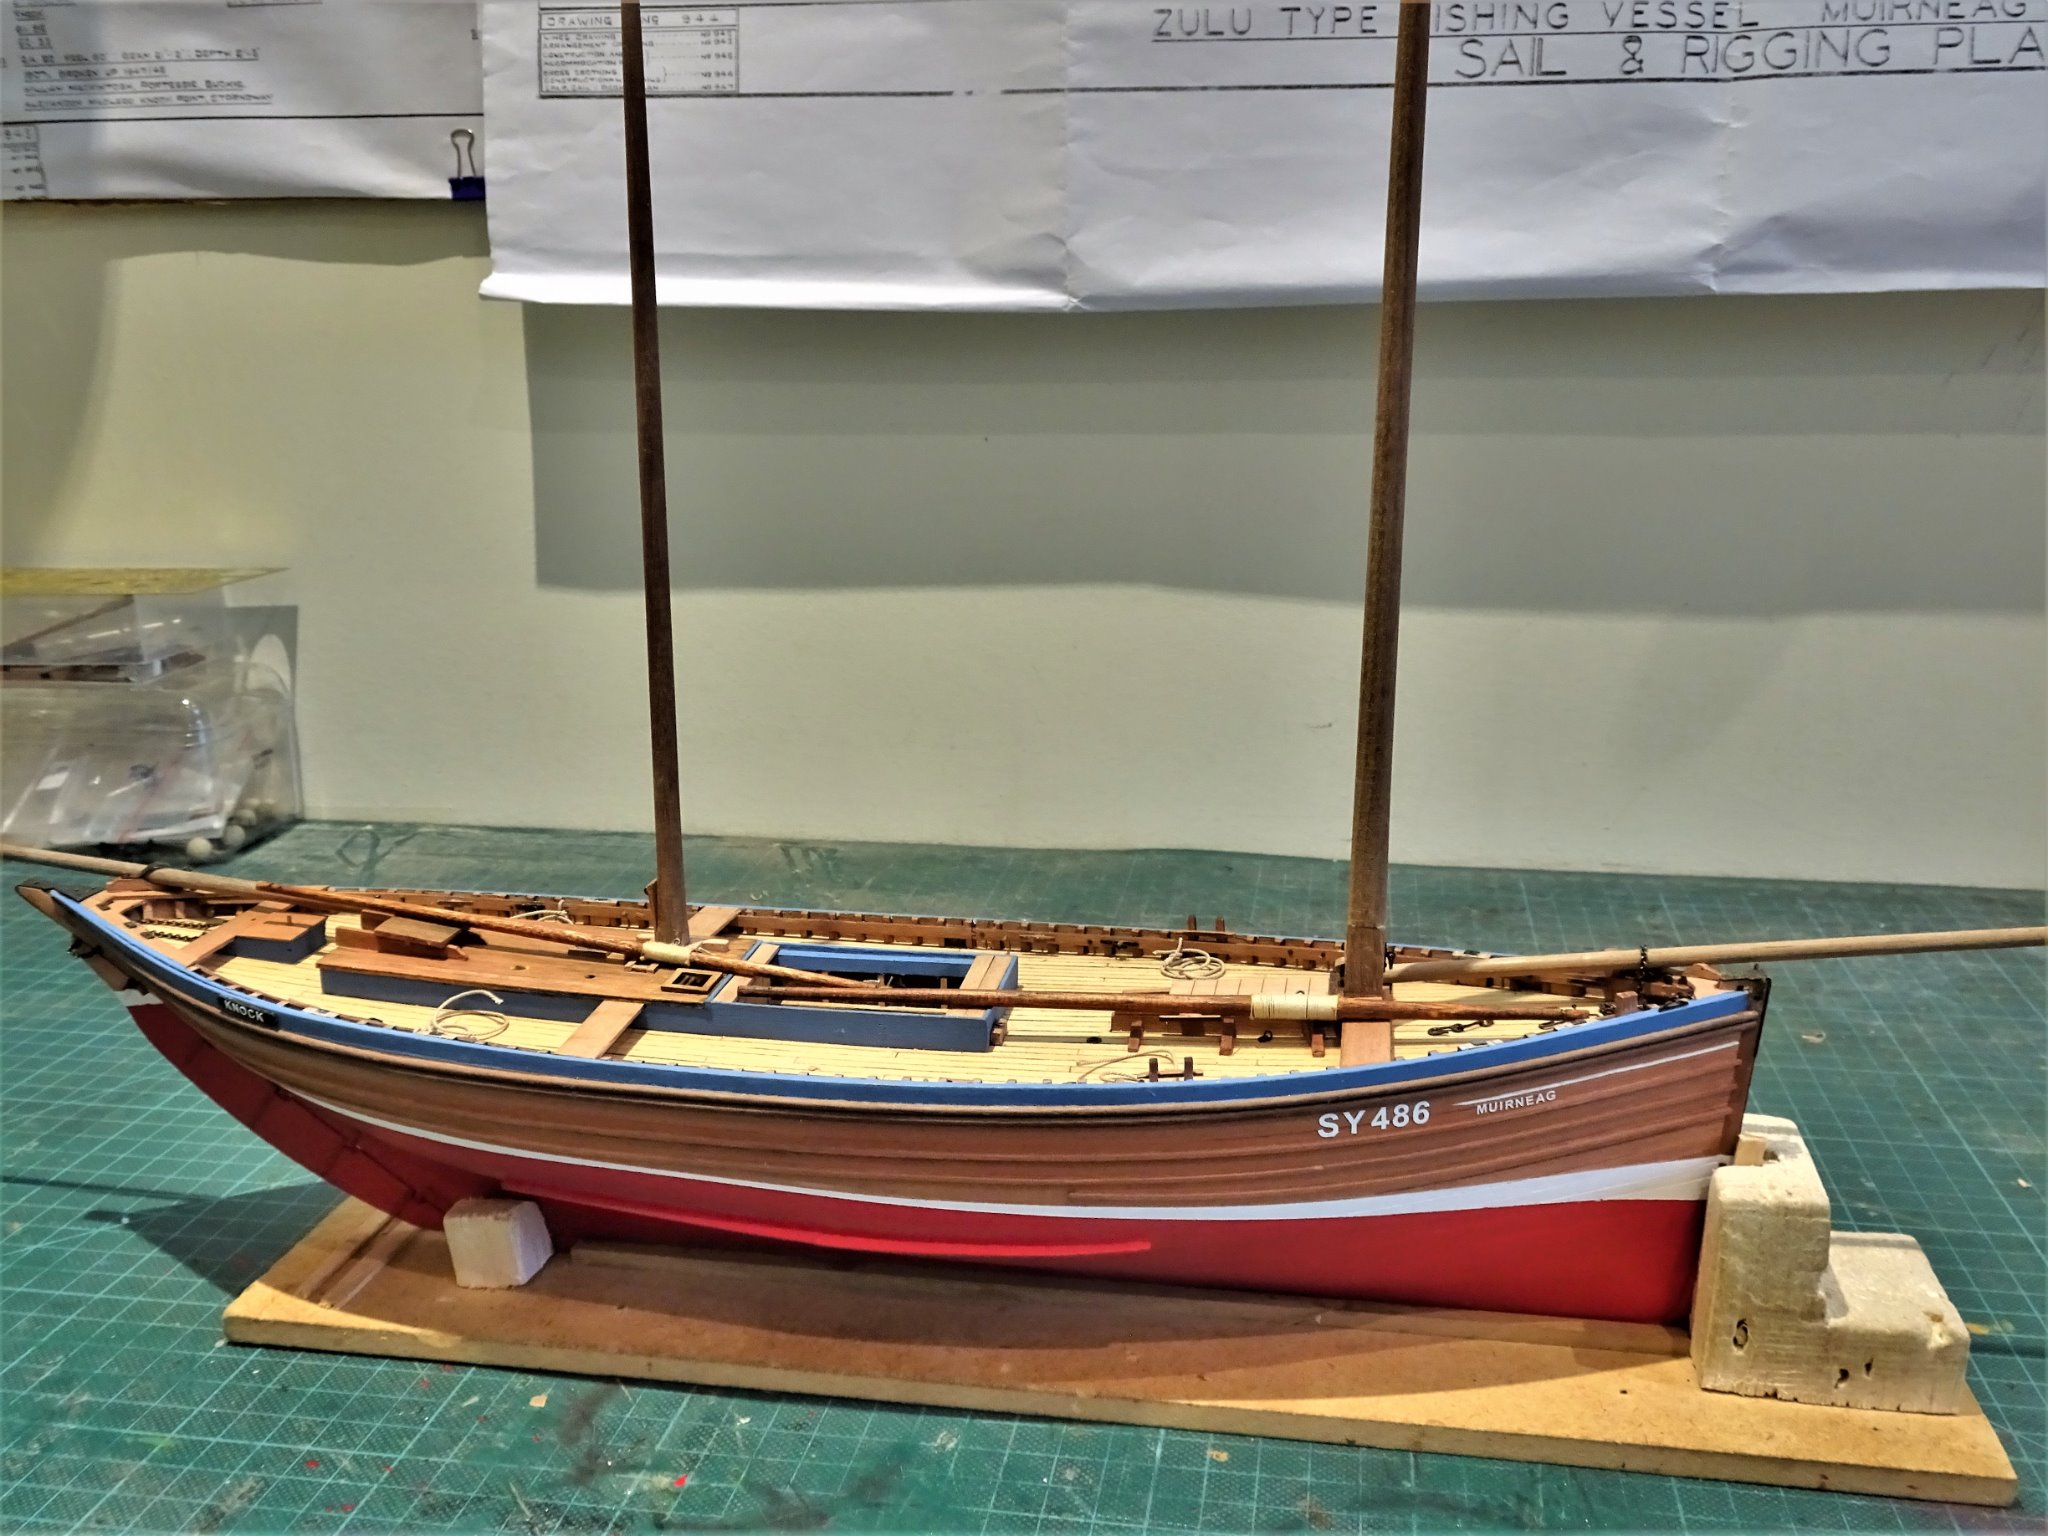
Post 40 Mast making. There are only minor differences between the Underhill plan dimensions and the kit dimensions, and I will be working with the kit dimensions, not least because the expensive but very nice kit sails are presumably cut to suit the given dimensions. I am using Walnut Square stock for both Fore and Mizen masts. 8851(2) Allowing for extra length to fit in the lathe chuck and tail stock, the square sections are marked to the correct point above the partners and the taper was marked at the quarters on a card to allow for a running check on progress. 8854(2) I start the process by shaving the square stock into eights on a ‘V’ jig and scraping with a scalpel blade. 8858 The rounding and tapering are completed on the lathe using sanding papers and emery cloth. Always worth wearing a face mask when doing this job, Walnut dust is nasty stuff. Fairly straightforward and there are few fittings on the mast. 8950 1½ sheaves at the Fore Masthead, iron straps and a band with an eye to secure the Fore Burton stay. The Mizen mast has a single sheave and a band with an eye for the Burton stay. 8875 Secured on the fore face of the squared Fore mast is a plate to take a wire strop to secure the hooks of the jib halyard when not in use. The yards. Only two to make, and here I am following the Underhill arrangement. Fore Yard This comprises a 38’ spar with an offset taper. At the slings the diameter is 12½” tapering to 4” on the long end and 5” at the short end. 8869 At scale this equates to 180mm length, 4.9mm ø at the slings, 1.6mm ø at the head, and 2mm at the fore. Atop the centre part is an iron plate with an eye for the yard halyard hook. This portion of the yard is served both to secure the iron plate and for protection. Mizen Yard The Mizen yard has the same set up It comprises a 32’ spar with an offset taper. At the slings the diameter is 7” tapering to 3¾” on the long end and 4¾” at the short end. At scale this equates to 152.4mm length, 3.0mm ø at the slings, 1.5mm ø at the head, and 2mm at the fore. 8942(2) The yards before they are stained, and the serving is applied. 9015(2) The yards are stained with Dark Jacobean Oak and served with 0.1mm line. Bowsprit The Underhill plans show an overall length of 49’ (233mm) which is a scale 16mm shorter than the kit length, not much in the overall scheme of things. 9004 At the inboard end there is a shoulder cut to butt against the saddle. 9002 9000 I left the ladderway open but decided to otherwise enclose the ‘skeegs/Skegs’ (Mast Housing) with boarding cannibalized from the fish hatch cover. 8987(2) At the Bowsprit outer end, a half sheave is cut to take the jib outhaul. An iron band is fitted over the end, and a Cranse iron is yet to be fitted. The kit does provide a brass etched cranse of sorts (PE12) but it is a simplified version. I won’t actually fit the Bowsprit for a while yet, too much risk of catching the end whilst rotating the model. It will in any case be secured without glue when the time comes. 9008 Wedges can be seen aft of the masts used to secure the angle of rake required. The Mizen wedge has yet to be cut to length. 9010 8991 I think that will do for the sticks for a while, time to check out the Boys own book of sail enhancement. 😉 B.E. 24/11/20
.thumb.JPG.0822d53483f94d20dceae2c3ae0b28d1.JPG)
.thumb.JPG.2551f97eebc4ee14a13c5af8b512aa75.JPG)
.thumb.JPG.ea8ed150b8ddd60a38a484d78af3f235.JPG)

.thumb.JPG.bb99f60064be279b22c9e7fa0fc05683.JPG)


.thumb.JPG.9f8f24c0709f0030e75f0830de77aaea.JPG)
.thumb.JPG.a52f49d447a5f65ac541f464bc7c2aad.JPG)
- 261 replies
-
- 20
-
-
- muirneag
- vanguard models
- (and 2 more)
-
Your hull looks good Erik. Personally I like to see strake lines thro' the paint to a degree on period ships, imparts a reality in my view. otherwise you may as well have a plastic hull. When I did the Top and Butt planking on the wale of my Pegasus build, I positively wanted the lines to show thro' otherwise I might as well have used straight planks. I used to have this argument with my Dad in relation to door painting. he always strived for a plastic smooth finish. I aimed for a smooth finish but didn't mind seeing some grain show thro' provided there were no runs/ thick spots etc. A matter of taste I suppose. B.E.
- 222 replies
-
- 5
-
-
- First Build
- Lady Isabella
- (and 2 more)
-
Ah Richard, Richard, it hasn't taken long, fresh from your success with the Fifie I see you're a lost cause now fully seduced into the world of model ship building. 😀 There's no cure you know. Following on from what James said, if you mark on the plank towards the stern where it starts not to lie flat, dampen it, put the strake in a vice, twist it using pliers whilst applying heat with a hair dryer and Robert's your Mothers brother, - works for me. ps Love that expression 'coggle over' know what you mean about using a six inch metal rule, but sometimes it's the only thing that will do, annoyingly I've misplaced mine and I miss it. B.E.
-
Thank you for the suggestion cotrecerf. 👍 According to the reference caraway seeds are 2mm in length. At my scale the herrings would be around 3.5mm - 5mm in length, still you have given me something to think about, and painted and piled into a cran basket may do the trick. Regards, B.E.
- 261 replies
-
- 1
-
-
- muirneag
- vanguard models
- (and 2 more)
-
Thank you all for your 'likes' and generous comments. @ Martin, - I was surprised when the phone was answered, he sounded a really nice chap, and I don’t think us modellers need much of an excuse to talk endlessly about the subject.😃 @ Glenn and John – I did think about making some scale ‘silver darlings’ when doing my Fifie build, but then reality kicked in.😉 I will however make a set of Cran baskets, quite relaxing basket weaving. Cheers, B.E.
- 261 replies
-
- 2
-
-
- muirneag
- vanguard models
- (and 2 more)
-
All looking good to my eye Tim, nicely done. 👍 B. E.
- 436 replies
-
- 3
-
-
- vanguard models
- alert
- (and 1 more)
.JPG.83df96743c86be23ebcd7f2dc49cebce.JPG)
.JPG.fcfb88613360b560ffcf288b9f4186f1.JPG)

.JPG.7696146ebab8885ae67d6990d03ef232.JPG)


.JPG.0f7a293b5810647c08b4cc25a918b161.JPG)
.JPG.9517b85f69918ed20eb0d8e0818b109b.JPG)
.JPG.43caee482270e86ba40a6759e484ff4c.JPG)
.JPG.dd6d2cb88f36857476adeeb1812757b4.JPG)
.JPG.6e8c44e518439fadd93140957af1a71d.JPG)
.JPG.f1d8ec9bdadc4ad69270b9f5dde3016b.JPG)
.JPG.562a7bbb278e24ee8eeab5436a72d6bc.JPG)


.JPG.7cfeef50c57ea9310e5cf6b265558820.JPG)
.JPG.1a91dc9fc532d187164c629dd9d09714.JPG)
.JPG.47c19dfed3faa788ac866f3630664337.JPG)
.JPG.288b2e7f1b68ee9b704b3854eed59977.JPG)
.JPG.073133fc91020d8053289f5c3d45bb2e.JPG)
.JPG.af58d46728c2941a8915a5674c48a714.JPG)
.JPG.284446a299e2a89a8655efbad8466577.JPG)


.JPG.a5a0ce02befd0be92c922b9fbd26d86c.JPG)
.JPG.818adb74254e7133aaa6f5b105ca6ba3.JPG)


.JPG.1bd4193680c0cb24e3a3966e79156739.JPG)
.JPG.5aaa29e1e175cb5a2af5463eead73640.JPG)