


SawdustDave
-
Posts
1,770 -
Joined
-
Last visited
Content Type
Profiles
Forums
Gallery
Events
Posts posted by SawdustDave
-
-
-
Thanks to my friend, and fellow SOS builder, Bill Short, I am trying to finish up the running rigging for the foremast spars.
I ran into something of a complete mystery to me. Going through R.C. Anderson's "Seventeenth Century Rigging", I cannot find a reference. So, I'm hoping one of you shipwright's might have the answer to my questions below.
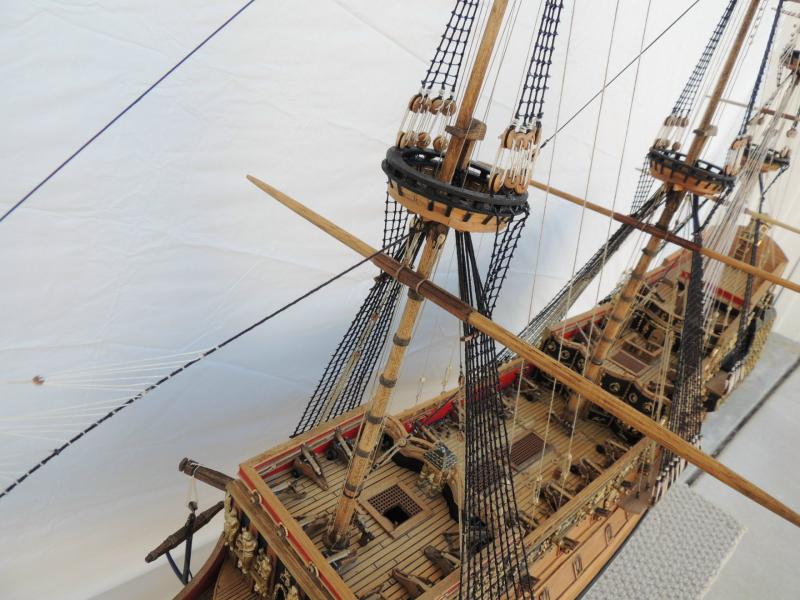
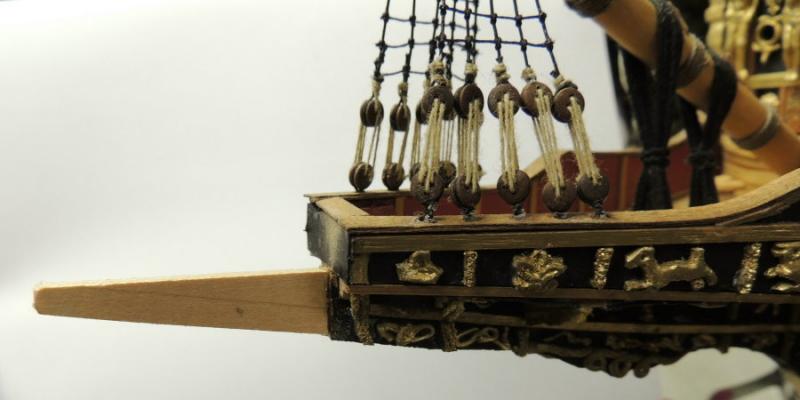
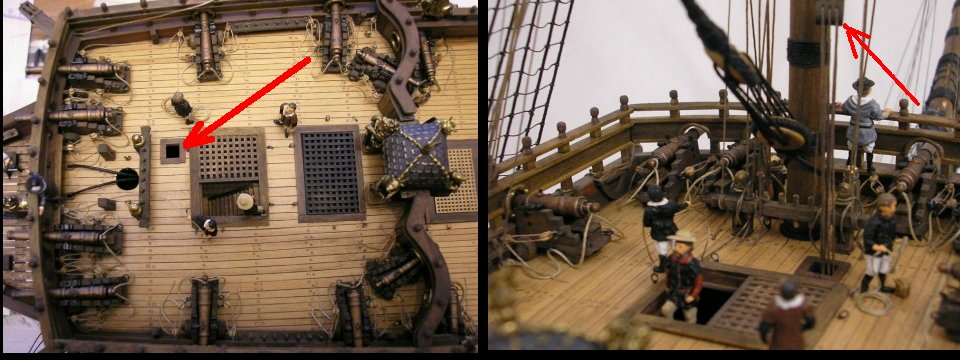
The following two pics are from the amazing build log posted by Doris in 2011. Her gallery of photo's have been my primary source of information since discovering early on just how flawed my old plan sheets are. So, here is the mystery.....
The small hole shown in the left pic below.....
Is there a name for it? What is it's function?
I assume the big triple block directly above the hole is hanging from the cross trees and would be used to haul up something very heavy from below deck (that is my second question).

- Canute, CaptainSteve, JesseLee and 4 others
-
 7
7
-
Don, Pat, David, Bill....... Thanks for your visit, and words of encouragement.
Bill, I found the R.C. Anderson book you recommended on Amazon. It is on the way. Thanks.
Cheers all- Canute, CaptainSteve, mtaylor and 1 other
-
4
-
So true Michael. You have described exactly what I will be doing as I continue forward from here. Sorry if my whining and moaning came across as being without hope.
Like I said earlier, I admit that I have long been spoiled by Chuck's clear and precise rigging instruction script.
Actually, I'm quite sure I'll figure this thing out.
Thanks as always.- michael mott, Canute and edmay
-
3
-
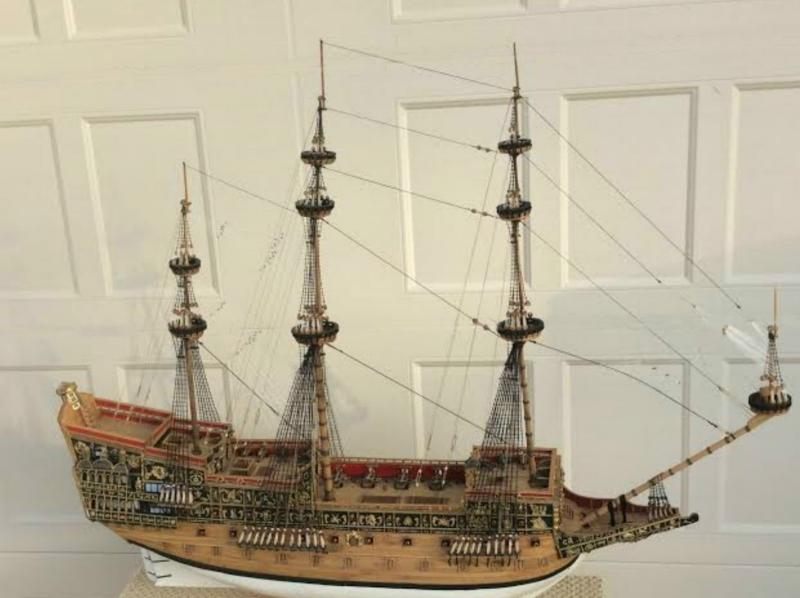
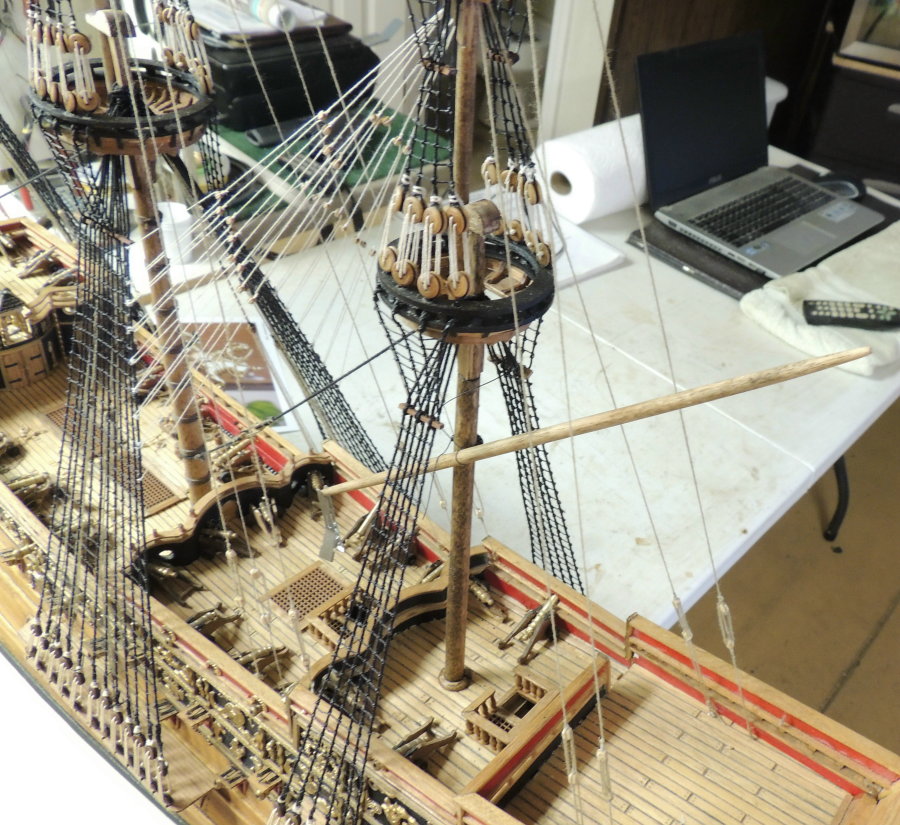
All spars now hanging from their halyards.....
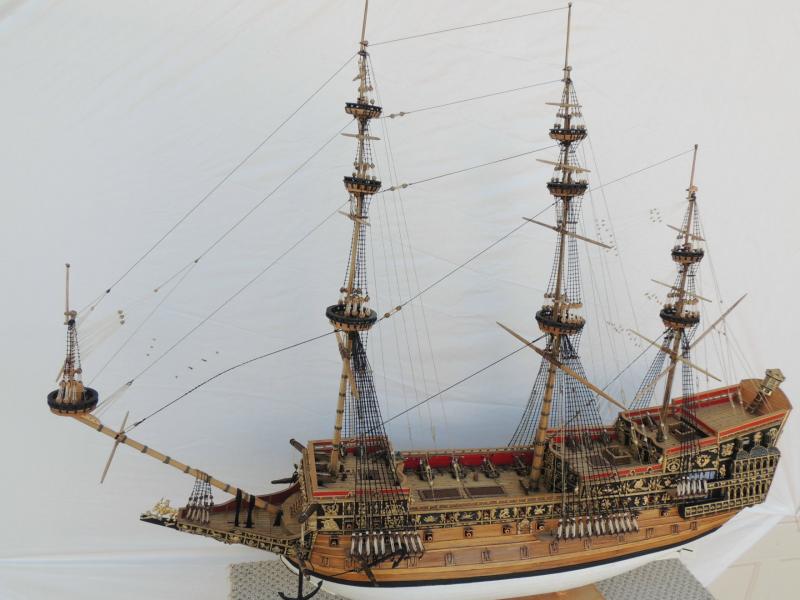
Mixed emotions for me at finally achieving this major milestone.
As much as I am excited to be able to begin with her running rigging, I am admittedly intimidated by the aspect of going forward without a clear set of plans..... specifically, the belaying points.
I am plowing through all of Doris's final pics looking for any clues.
We all know, she will eventually become fully rigged - one way or another.- CaptainSteve, edmay, GrandpaPhil and 17 others
-
20
-
Thanks for the suggestion Hubert:
Searches on the internet for belaying plans for the SOS have not been much help. The pics you posted here, while they illustrate the configuration of the lines, they still do not address belaying points..... location of inboard pin rails, bits, etc.
I'm pretty sure they must have used shroud cleats and possibly a few kevels.
I do find a wide use of belaying pins in my drawings, located along the upper cap rails, but no indication of which lines are belayed to which pins.
My rough plan, at this point, is to take one spar at a time and come up with solutions based on personal experience.
Cheers- CaptainSteve, BANYAN, mtaylor and 2 others
-
5
-
Hoping to hang the final four spars to her masts today.....leaving three to go on the bow sprit.
Finally taking a serious look at just how pitiful the plan sheets really are regarding the belaying of virtually all of this model's running rigging.
Guess I am completely spoiled by Chuck's thorough guidance in rigging. Makes me really appreciate the time he puts into his description scripts.
Just look at this miserable mess....
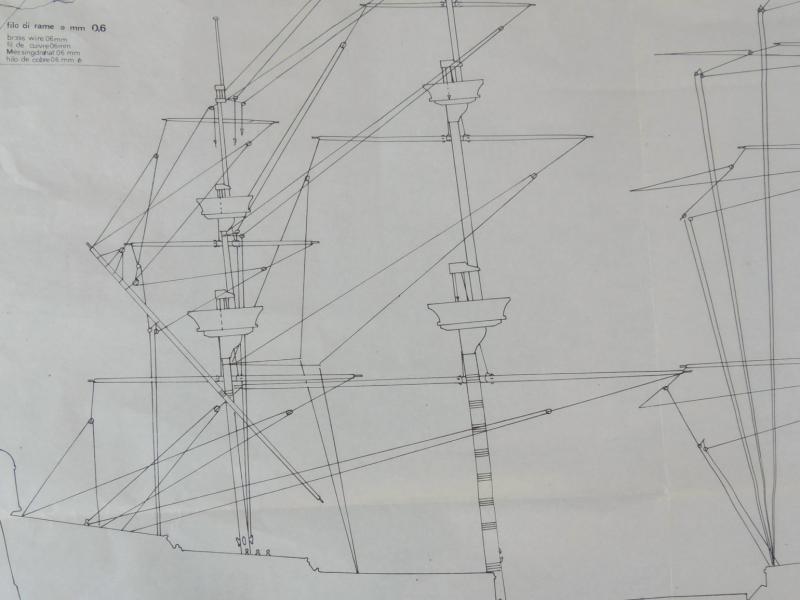
- mtaylor, aviaamator, dgbot and 4 others
-
7
-
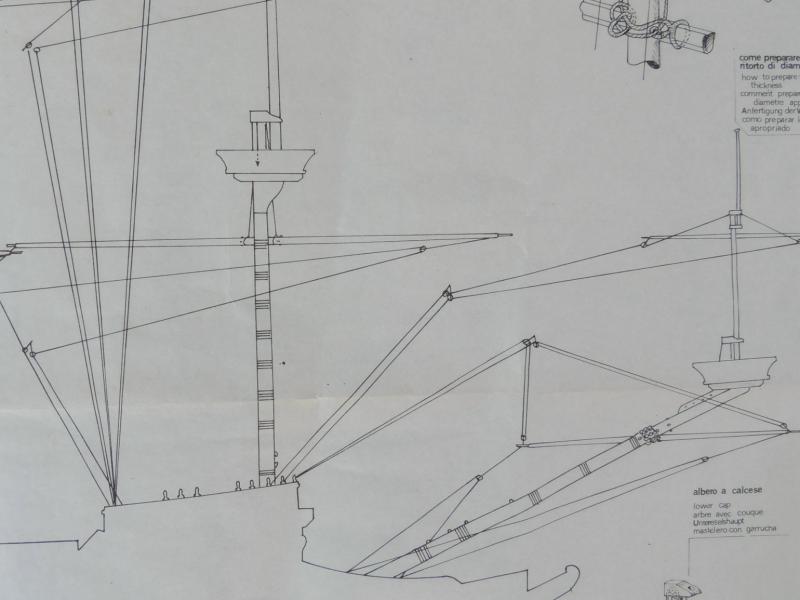
Plenty of rigging for sure Pat.... and made especially difficult by the fact that I am working from a set of plan sheets that does not indicate belaying points!
Having to rely on my personal experience with other large ships of the line I have built over the years.
I think I can get it pretty close, but will have to make a lot of guessing.
These have got to be the worst set of plan sheets I have ever worked with.Thanks for your visit.
-
Ed....Re-visiting your amazing build log is always such a mixed bag of emotion for me. As much as it serves as an inspiration on one hand, it reminds me just how sloppy my work is. Somewhere in there, I can't help but be just a little better than before the visit.
Thanks again.Dave
-
-
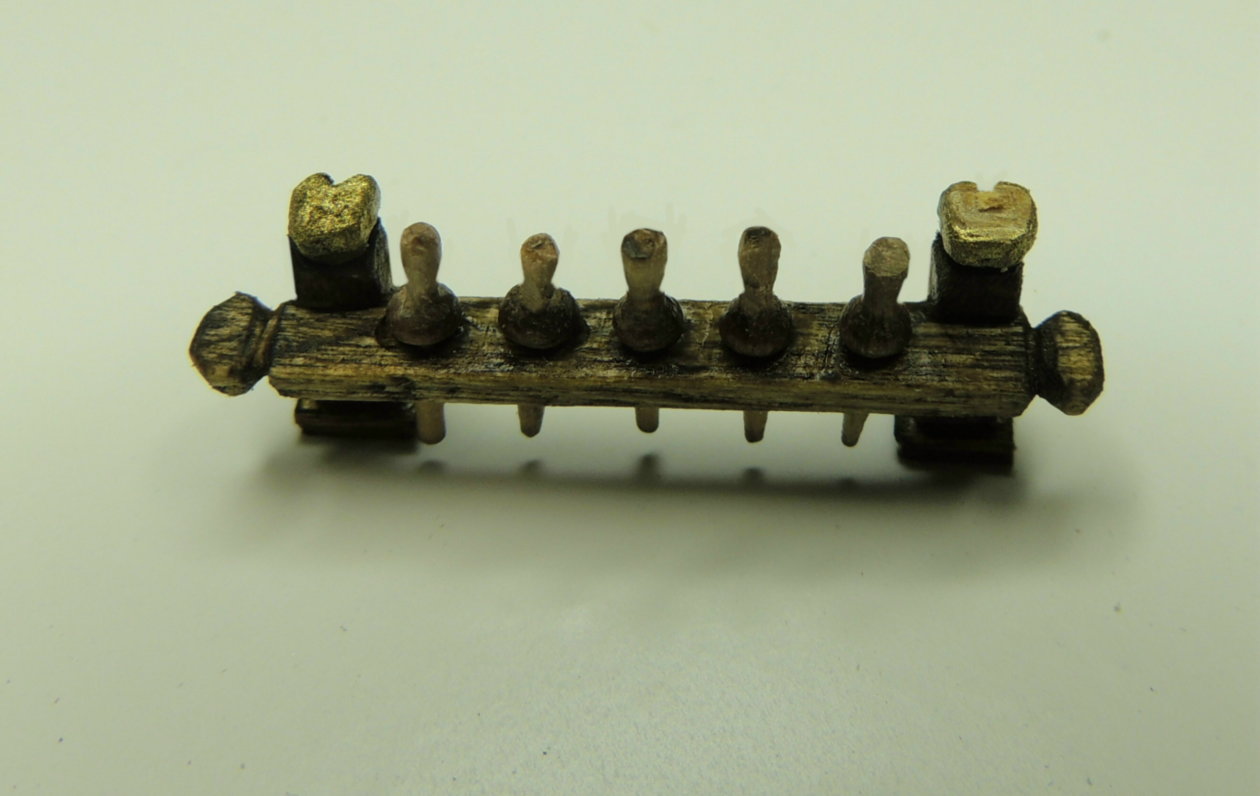
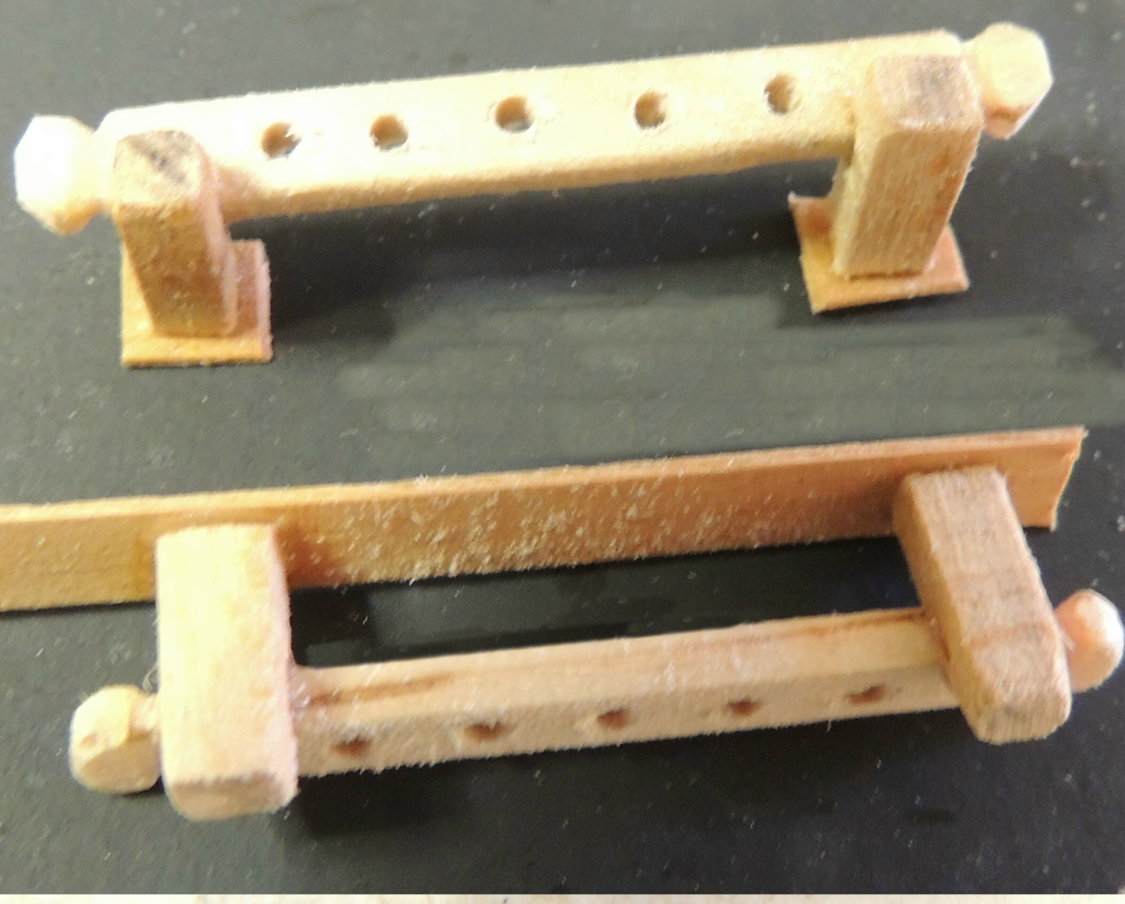
Improved Pinrails....
After trimming the oversized pins, looks more better....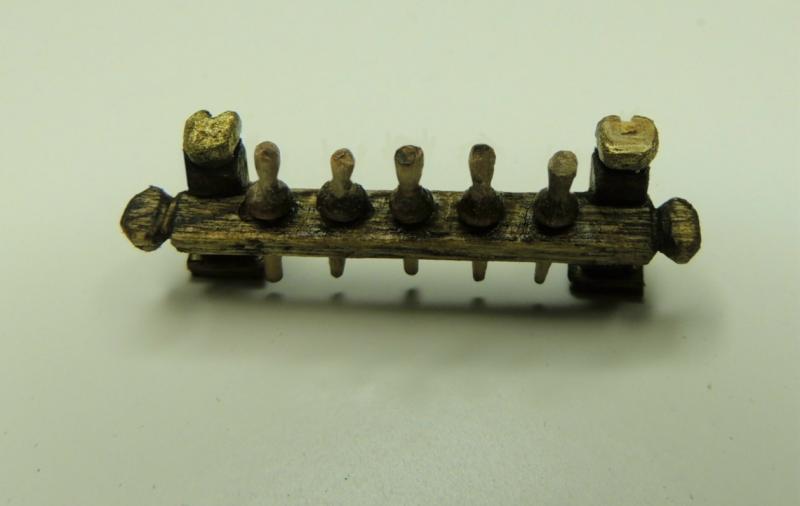
- BANYAN, mtaylor, marktiedens and 3 others
-
6
-
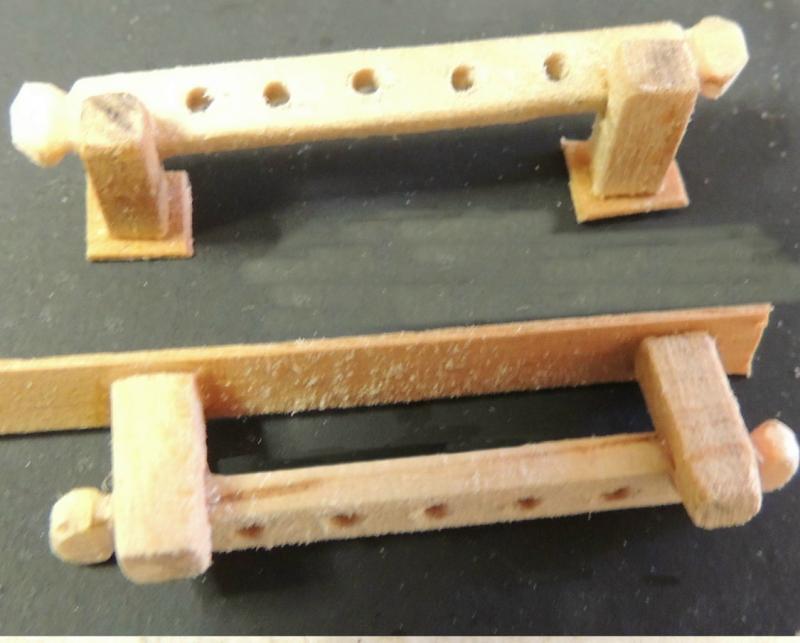
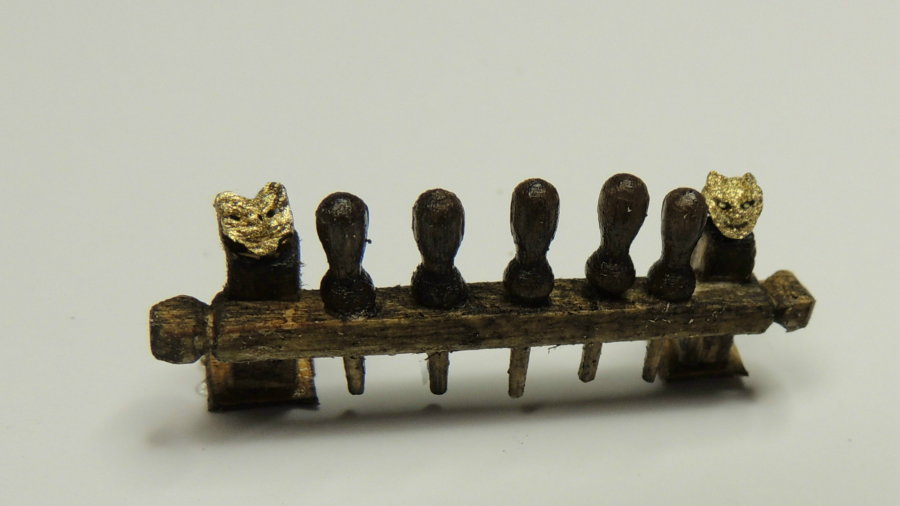
Began the morning working on these pin rails that will be located at the fore mast and main mast.
After staining, I added the little gold lions faces to the tops of the rail posts.
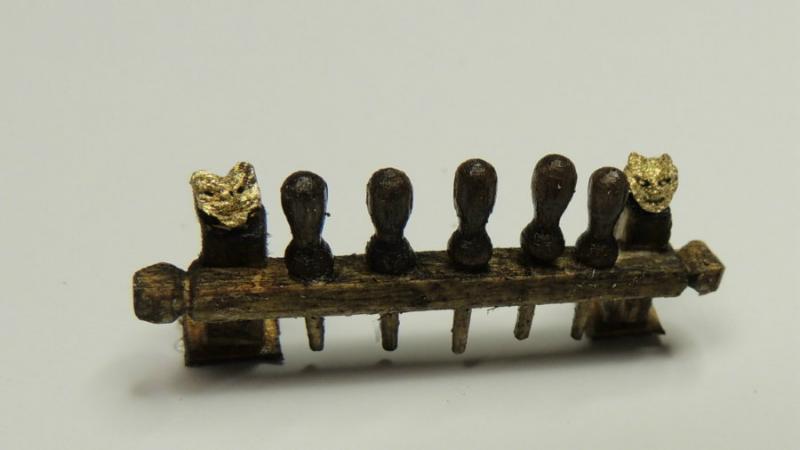
Thinking the pins are much too heavy for scale. Easy enough to scale down slightly before gluing them in place.
Once again, as usual, the camera is our biggest critic.- JesseLee, Canute, CaptainSteve and 2 others
-
5
-
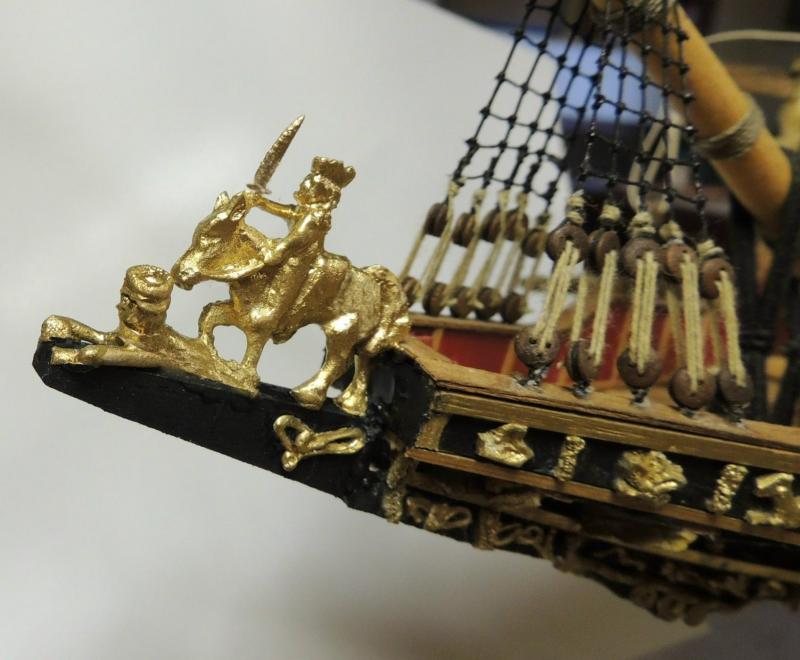
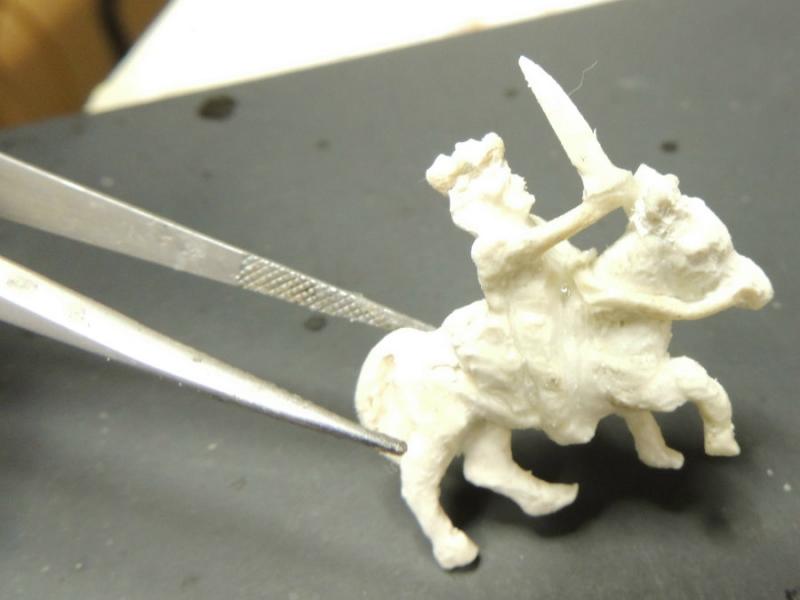
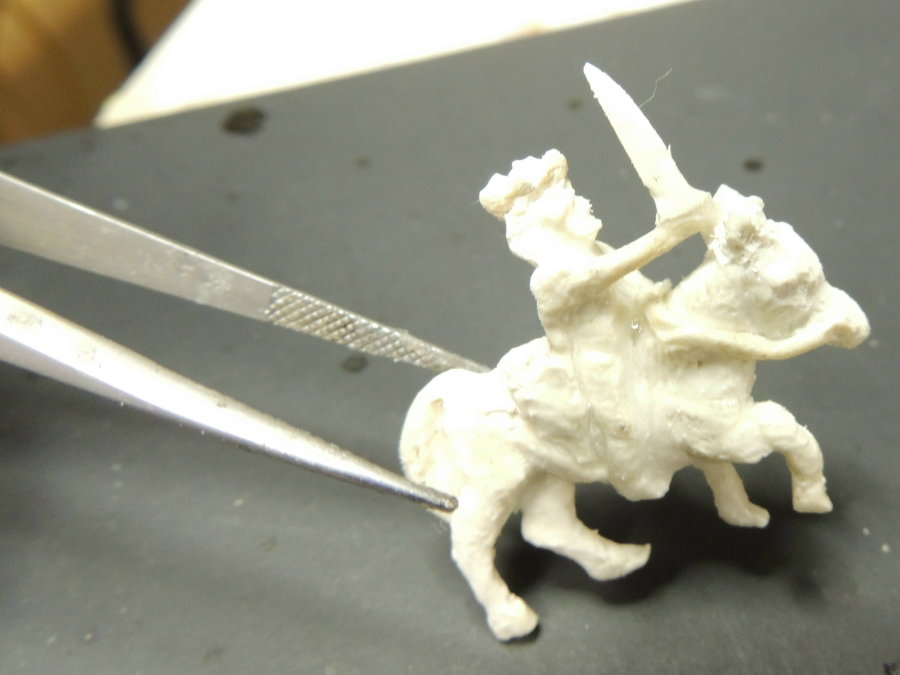
King Chuck mounted and ready for a fight.
Guess the figurehead sculpture cleaned up fairly well.
I do not want to hear that the horse looks a little bit like a donkey. That is a camera angle thing I didn't notice until after I posted this pic. I'm just glad I do not have to make a living with a camera.
I also added the little lion laying in front of the steed.
I've got to do some cleaning up and adding some hind paws to that little figure.......looked ok until the camera told me otherwise.
While waiting for the figures to dry, I began hanging the lanteen yard.

Back to a little bit of rigging.... no crows feet on this one.
-
Thanks Pat...... Looks like the "clean up" is going pretty well. I'll post results in a few.
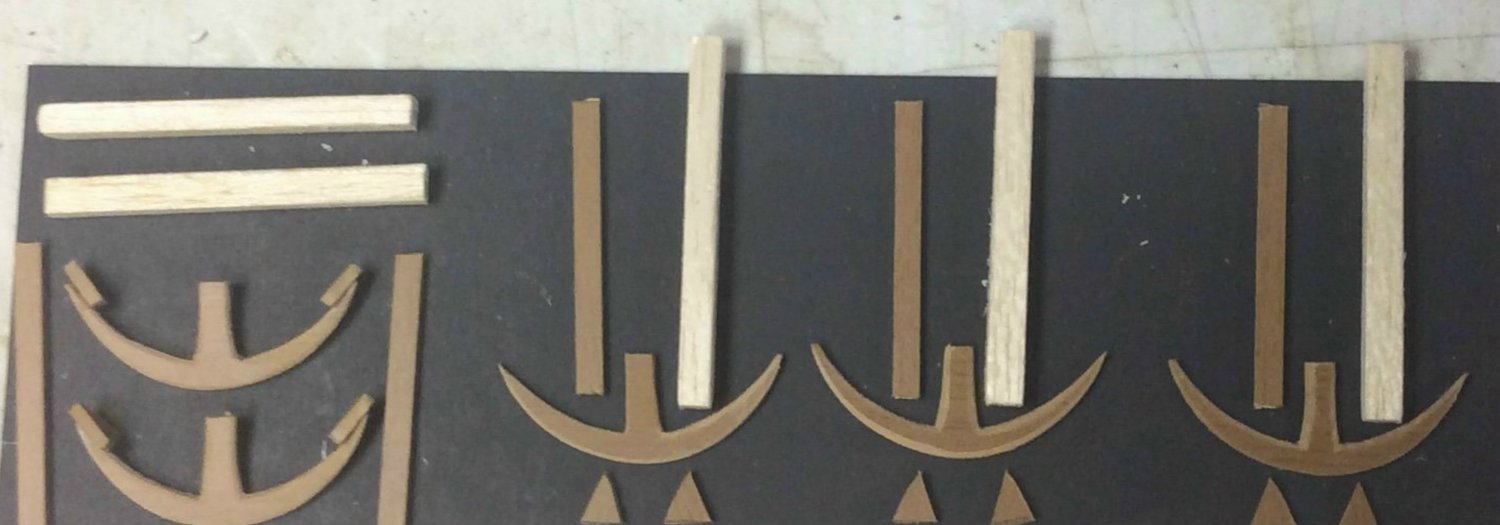
Jessie Lee - Only six pieces counting the ring.
Once the parts are cut and assembled, everything is filing and shaping and wrapping.
Give it a shot....just take your time. You can do it.
-
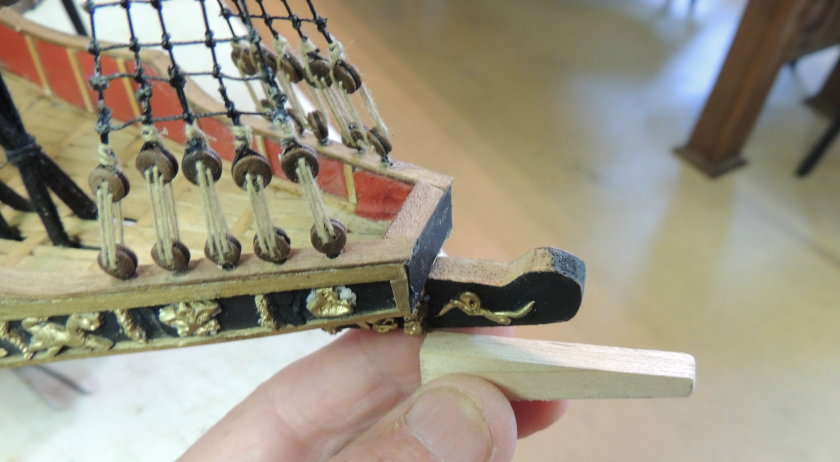
Beak extension .... used a small nail to reinforce this joint. Once painted, I think the joint line will blend in perfectly.
Figurehead roughly shaped.... just removed from the oven..
Can't say I'm real happy with it at this point. We'll just wait and see how it cleans up. -
Guess I've put off the figurehead sculpting long enough. King Chuck sitting on his royal steed with raised sward is kinda intimidating, to say the least.
I'm just playing around with some Sculpy for now, as I need to get the scale right on the first pass.
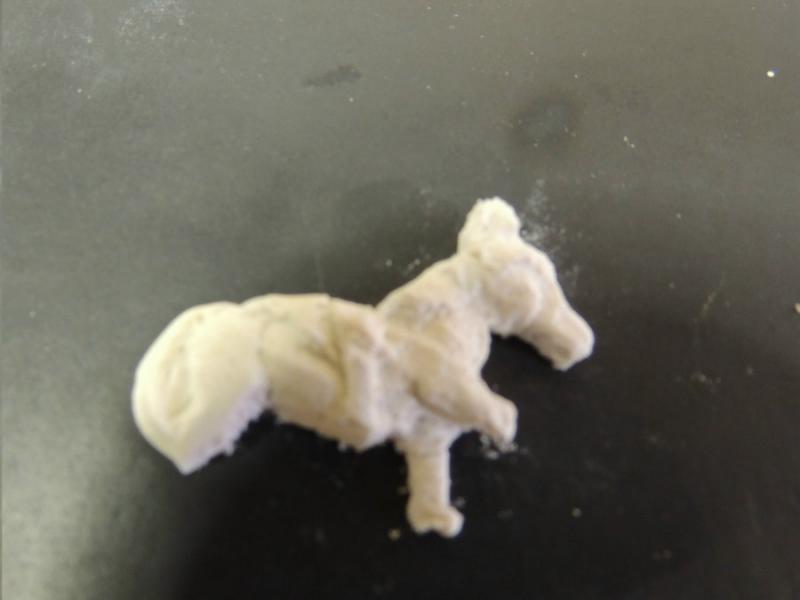
Also, I have known for a long time that the beak has got to be extended by about 1/2" to accommodate this figure.

-
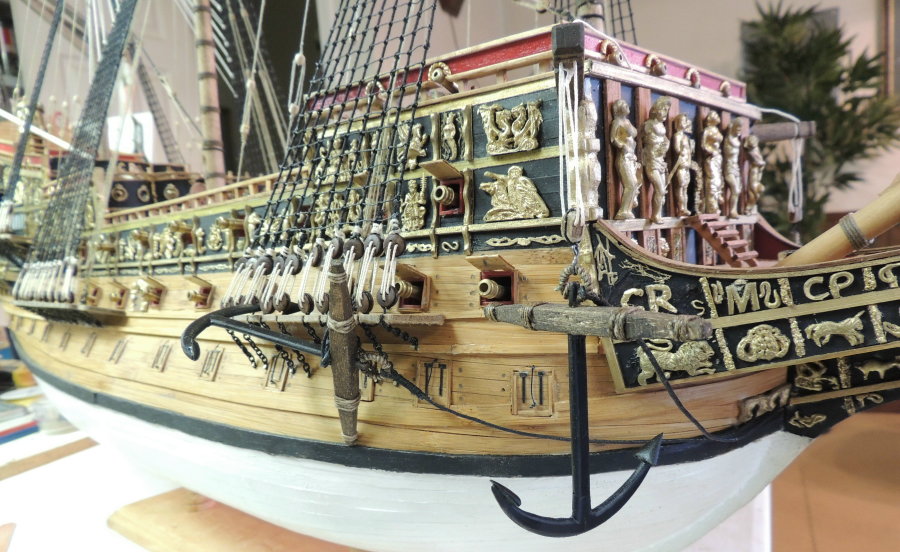
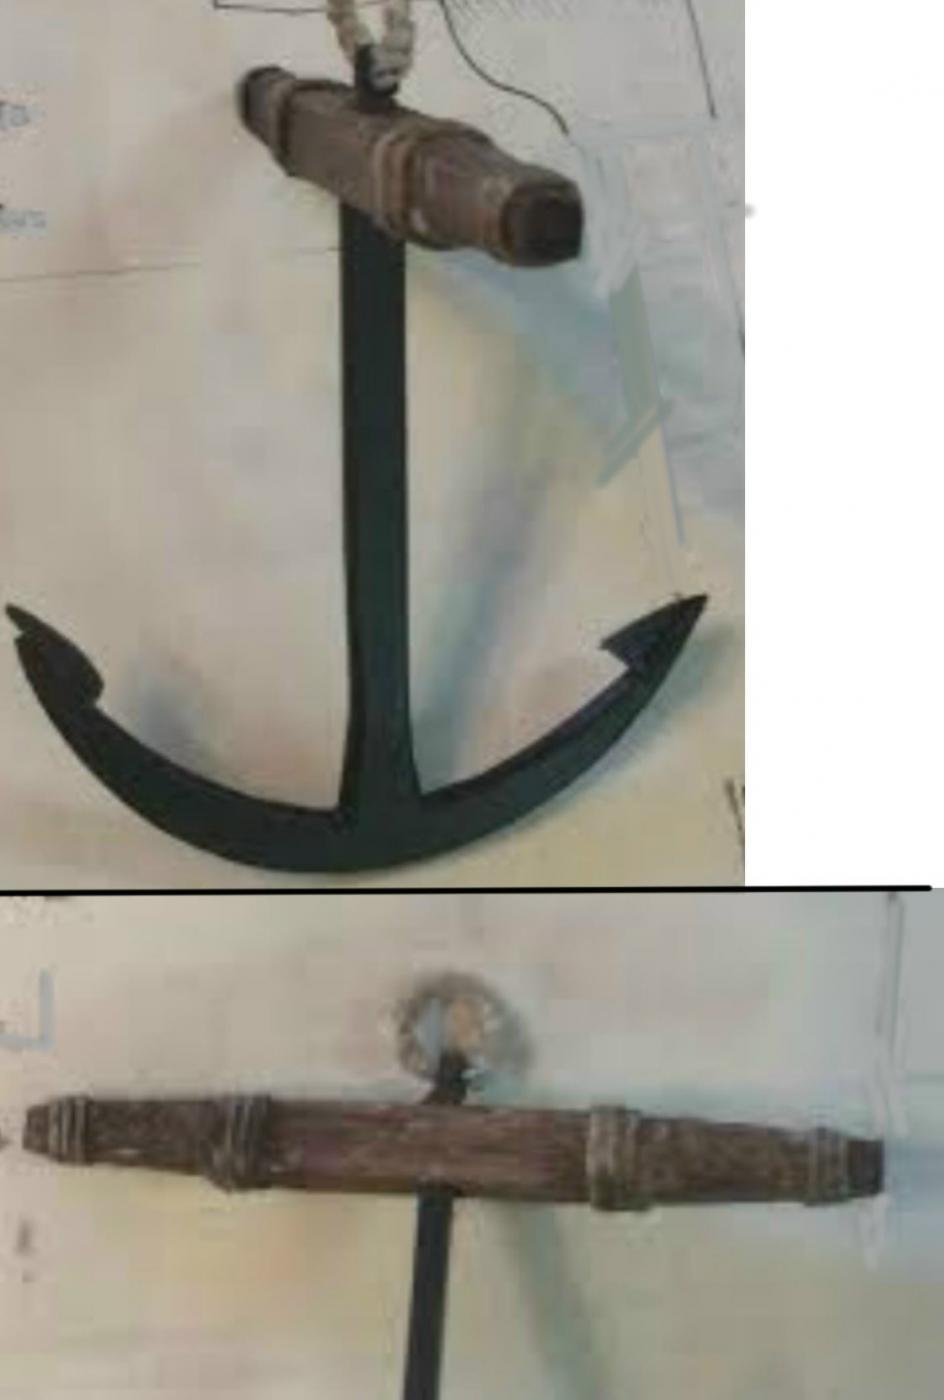
Anchors installed....
I still need to wax the ropes a little in order to get them to appear more natural.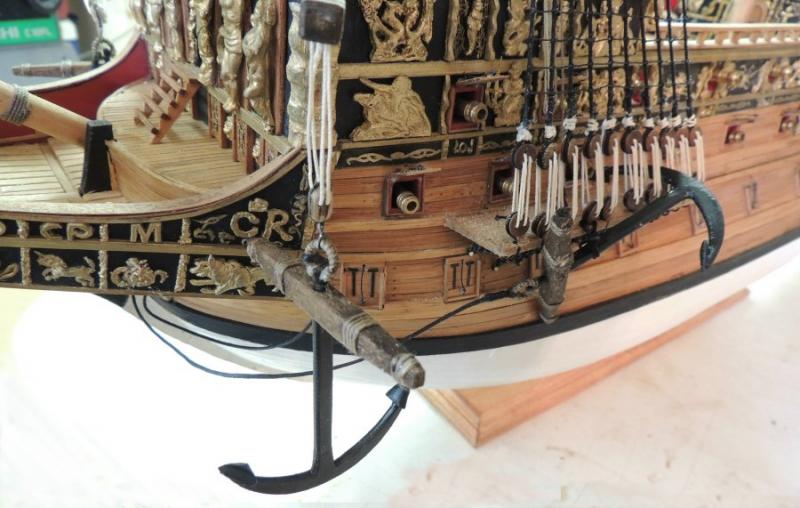

-
-
Took an inventory of remaining tasks this morning.....
Anchor davits, six anchors, poop deck flag staff, add extension to beak, pin rails, capstan, two pumps, create 4 flags, all spars..... three major carvings, including the beak head figure of King Chuck on a horse.
Good news.... NO CROWS FEET!Then comes final rigging.
I have not decided on canvas yet.
- mtaylor, dgbot, marktiedens and 4 others
-
7
-
Great to see you stop by Rusty.
Coming along slowly, but finally getting past the rat lines, I feel like we're moving at a good pace now.Thanks
And thanks to so many of you mates for popping in and boosting me along. The help with the "crows feet" term meant a lot.Cheers
- Canute, mtaylor, CaptainSteve and 2 others
-
5
-
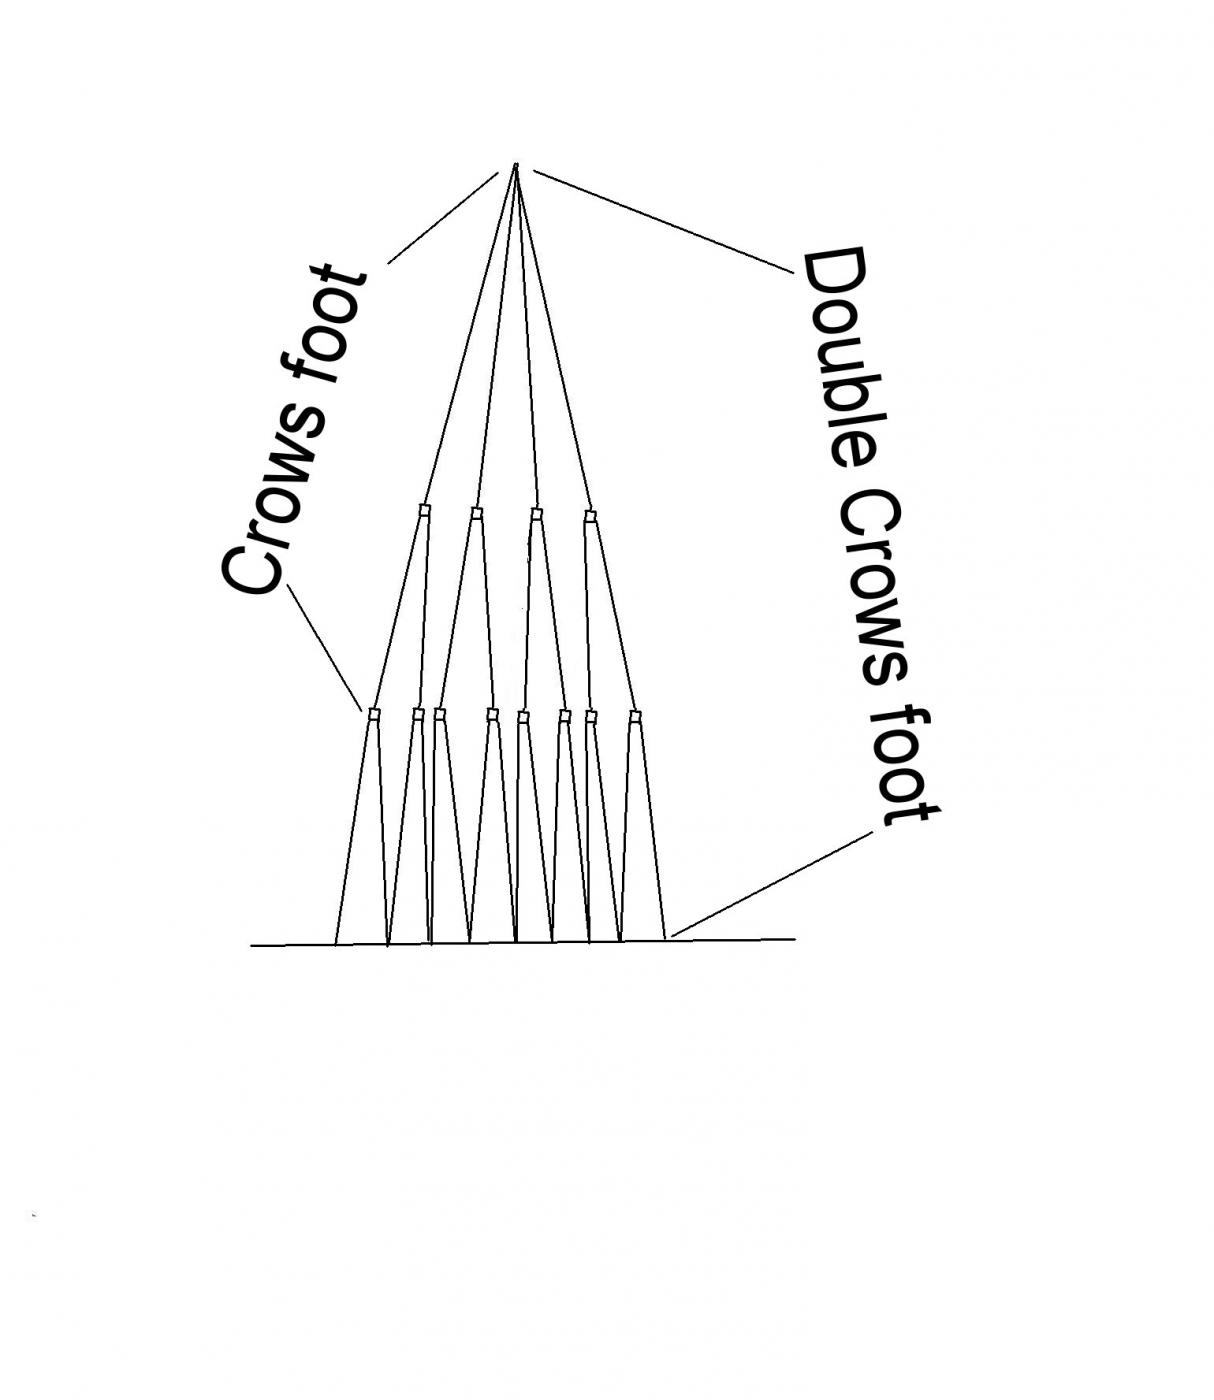
So, now we have a name for the hair-pulling rigging.... "Crows foot"
Then, I assume what I've been wrestling with would be called "Double Crow's Foot".

Whatever we call it, I came to the shop this morning and, after careful study, concluded the entire bowsprit rigging had too much slack and had to be re-tensioned.
This took four cups of coffee and almost as many hours.
Still not perfect, but as good as it's going to get.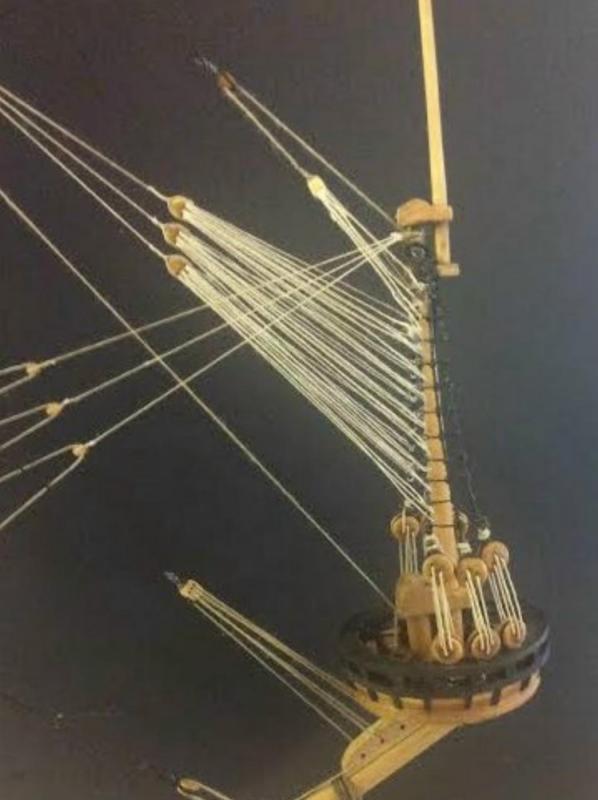

-
Jbshan.... You be da MAN!
Although I like Mark's "Reason to drink large quantities of alcohol"....
Will also accept "Reason to pull hair out in large chunks!"
Hope the genius who suggested that bright idea had to walk the plank in shark infested waters.
Ok by me to never run into them again.
-
Na....jbshan.
I should have been more clear in my question.
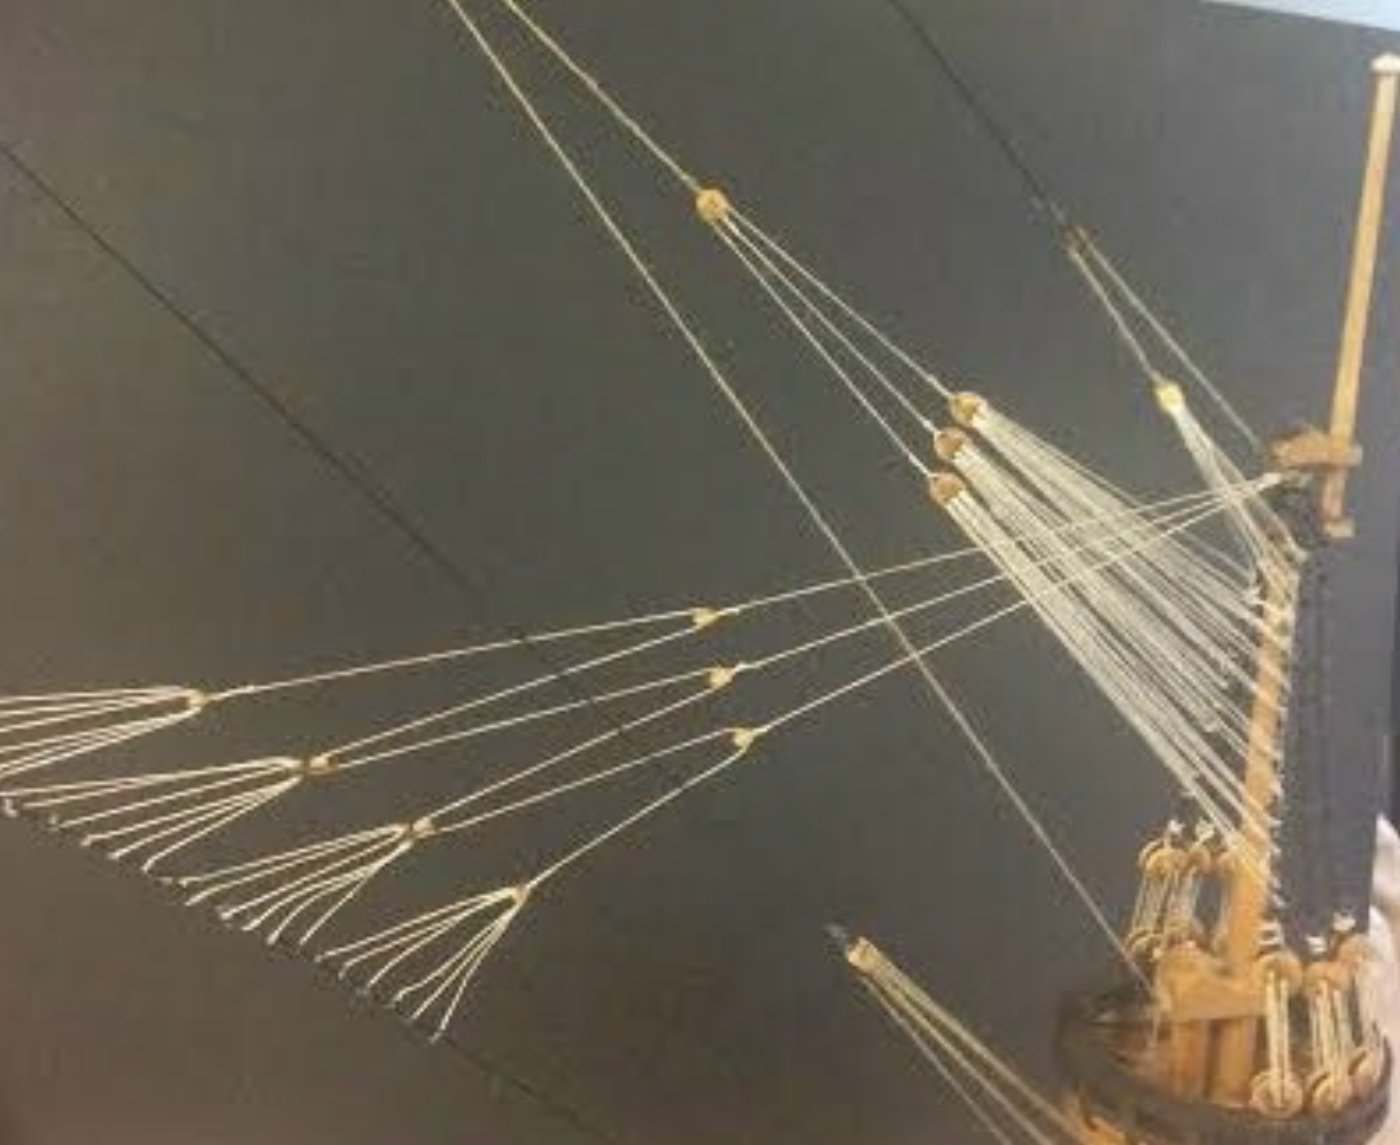
The rigging I am asking about runs from beneath the second top of the missen mast....four lines with single blocks.....then 8 blocks....then 16 ties onto the main mast shroud.
Also ran into this type of rigging at the bow sprit mast.
It's a real booger, I have never run into before.
Took a few tries to work out the geometry and getting good tensions.
- Omega1234, Canute and CaptainSteve
-
3
-
PROGRESS REPORT - All standing rigging completed.
Some of the lines are much too white. I will be adding a slight tan stain to tone them down.
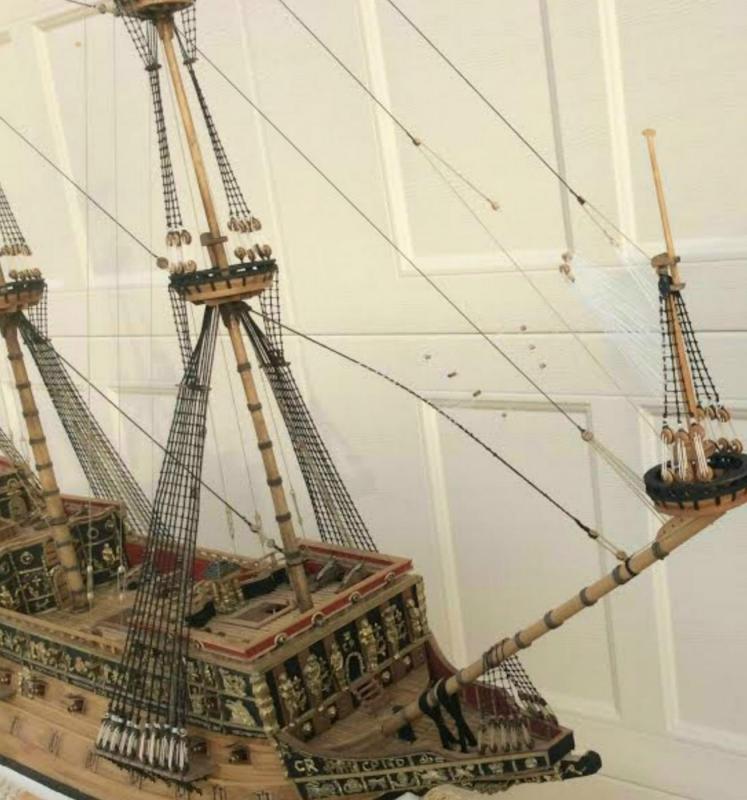
Enough knot tying for now. Think I'll work on the anchor davits and build some anchors next.
Someone do me a favor and look back at the second pic in #828 and tell me what the technical name for the "fan rigging" running from the top down to the shrouds.... starts with 4 blocks, then 8 "flyers" with 16 belaying points.
Heck of a challenge to get the tensions right.Cheers
- yancovitch, Jack12477, mtaylor and 11 others
-
14


Sovereign of The Seas by SawdustDave - FINISHED
in - Build logs for subjects built 1501 - 1750
Posted
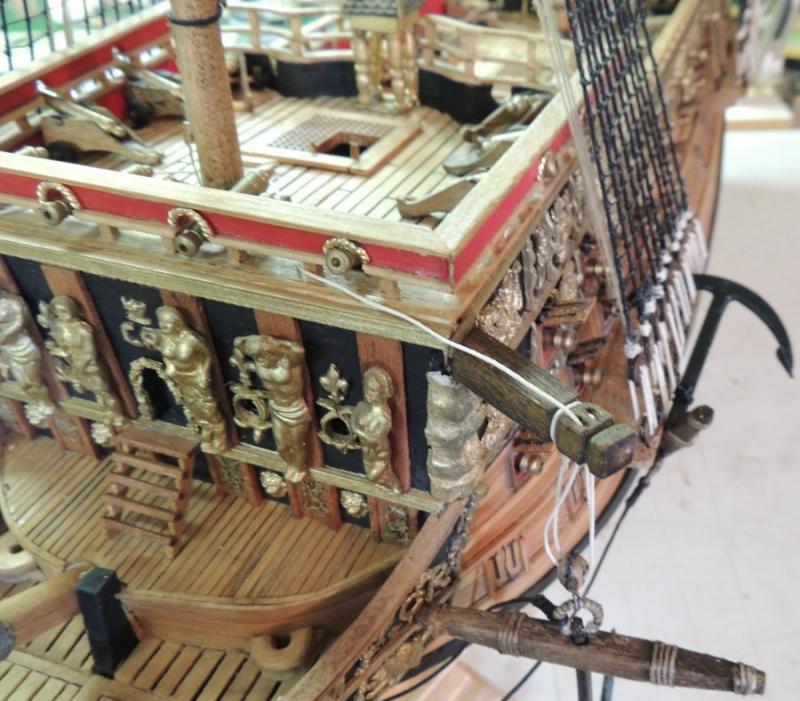
Not a likely place to stow a rudder Pat. That opening is really small.