HOLIDAY DONATION DRIVE - SUPPORT MSW - DO YOUR PART TO KEEP THIS GREAT FORUM GOING! (Only 27 donations so far out of 49,000 members - C'mon guys!)
×

kirill4
-
Posts
907 -
Joined
-
Last visited
Content Type
Profiles
Forums
Gallery
Events
Everything posted by kirill4
-
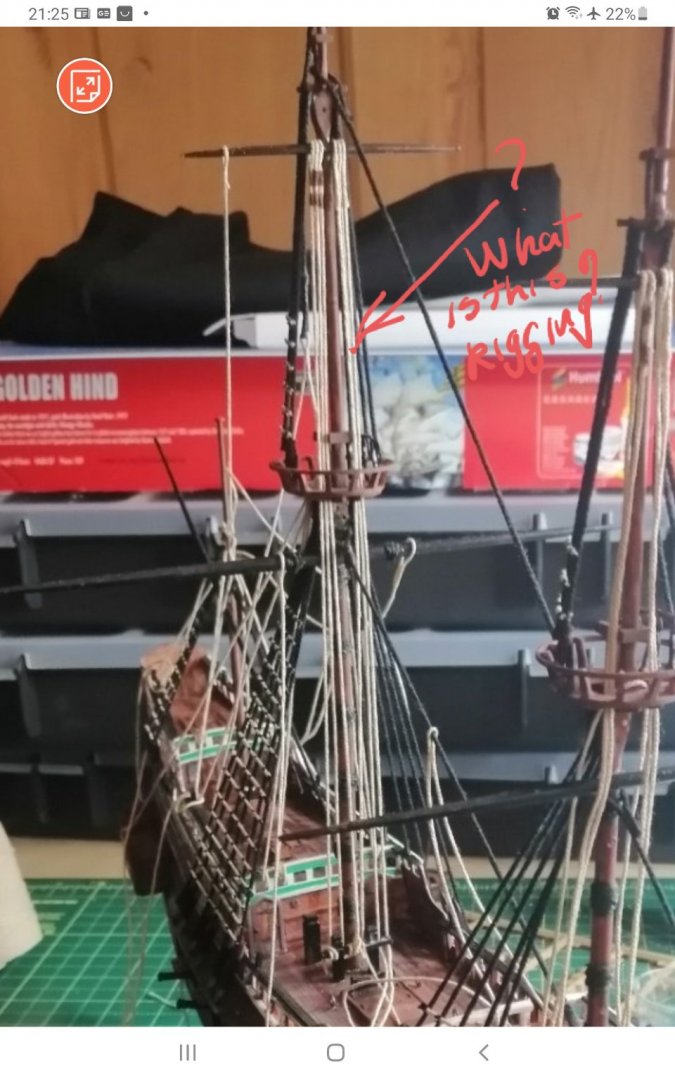
 one of the rigging lines You shown by arrows,most probably are main sail tie halliyards and another one most probably topsail lifts... but they doesn't looks like you shown on your model, when all that lines just attached to topsail yard :)))...there is no sence at all to show such rigging arrangements :))) however , I think ,it is your model, and You can do whatever You like to do on it ,just to get fun ! Wish You All The Best! Kirill
- 265 replies
-
- 2
-

-
- Golden Hind
- Airfix
- (and 1 more)
-
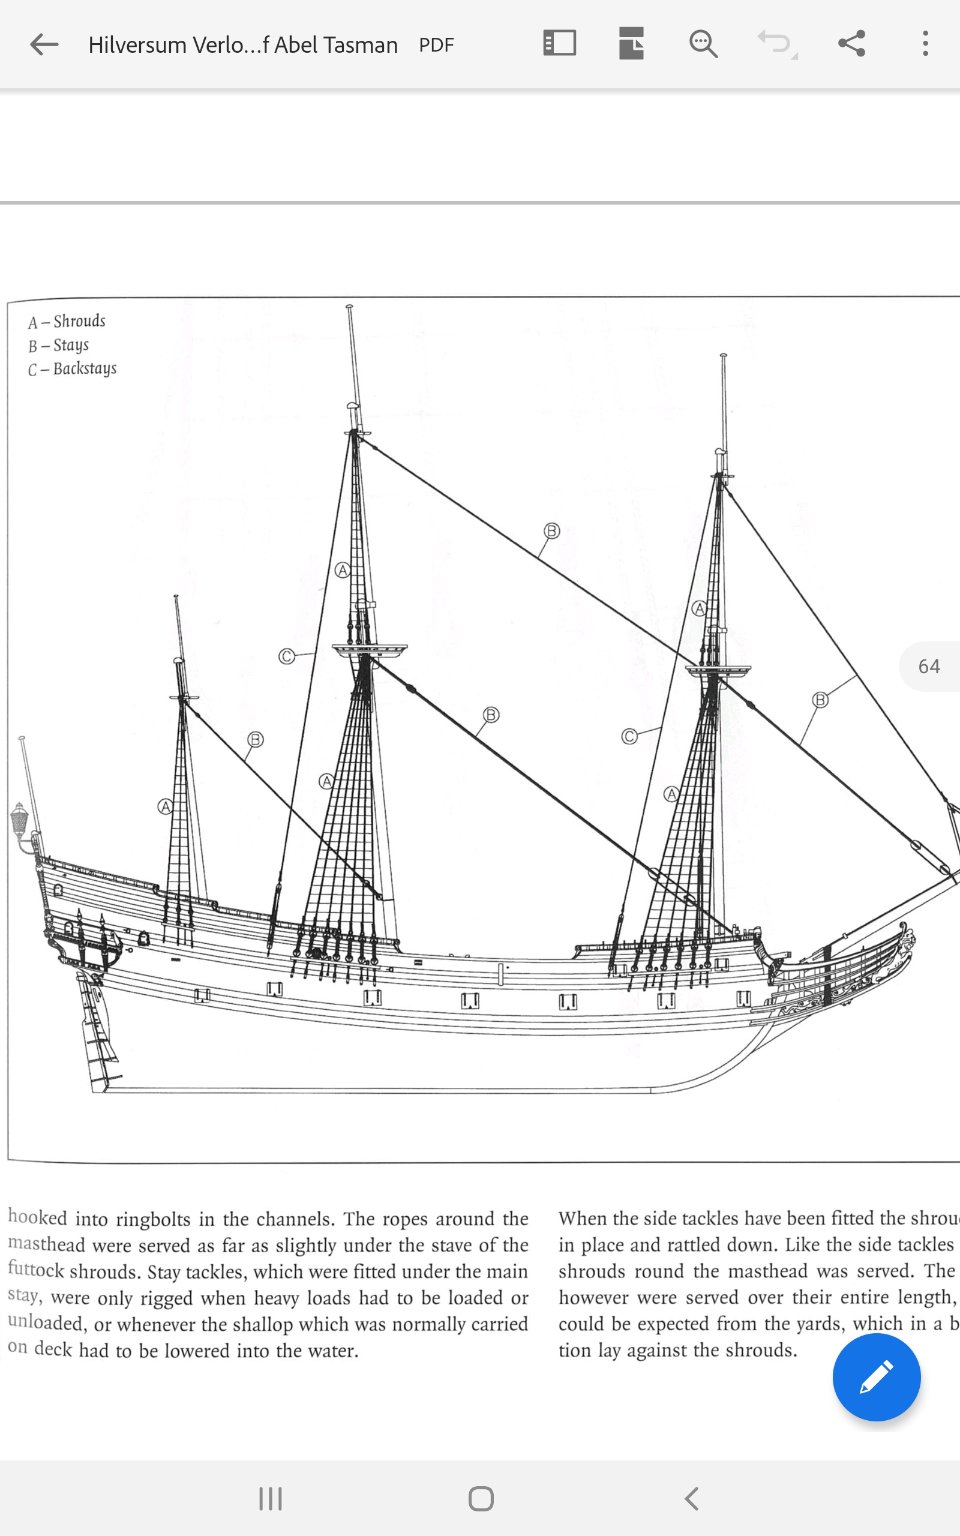
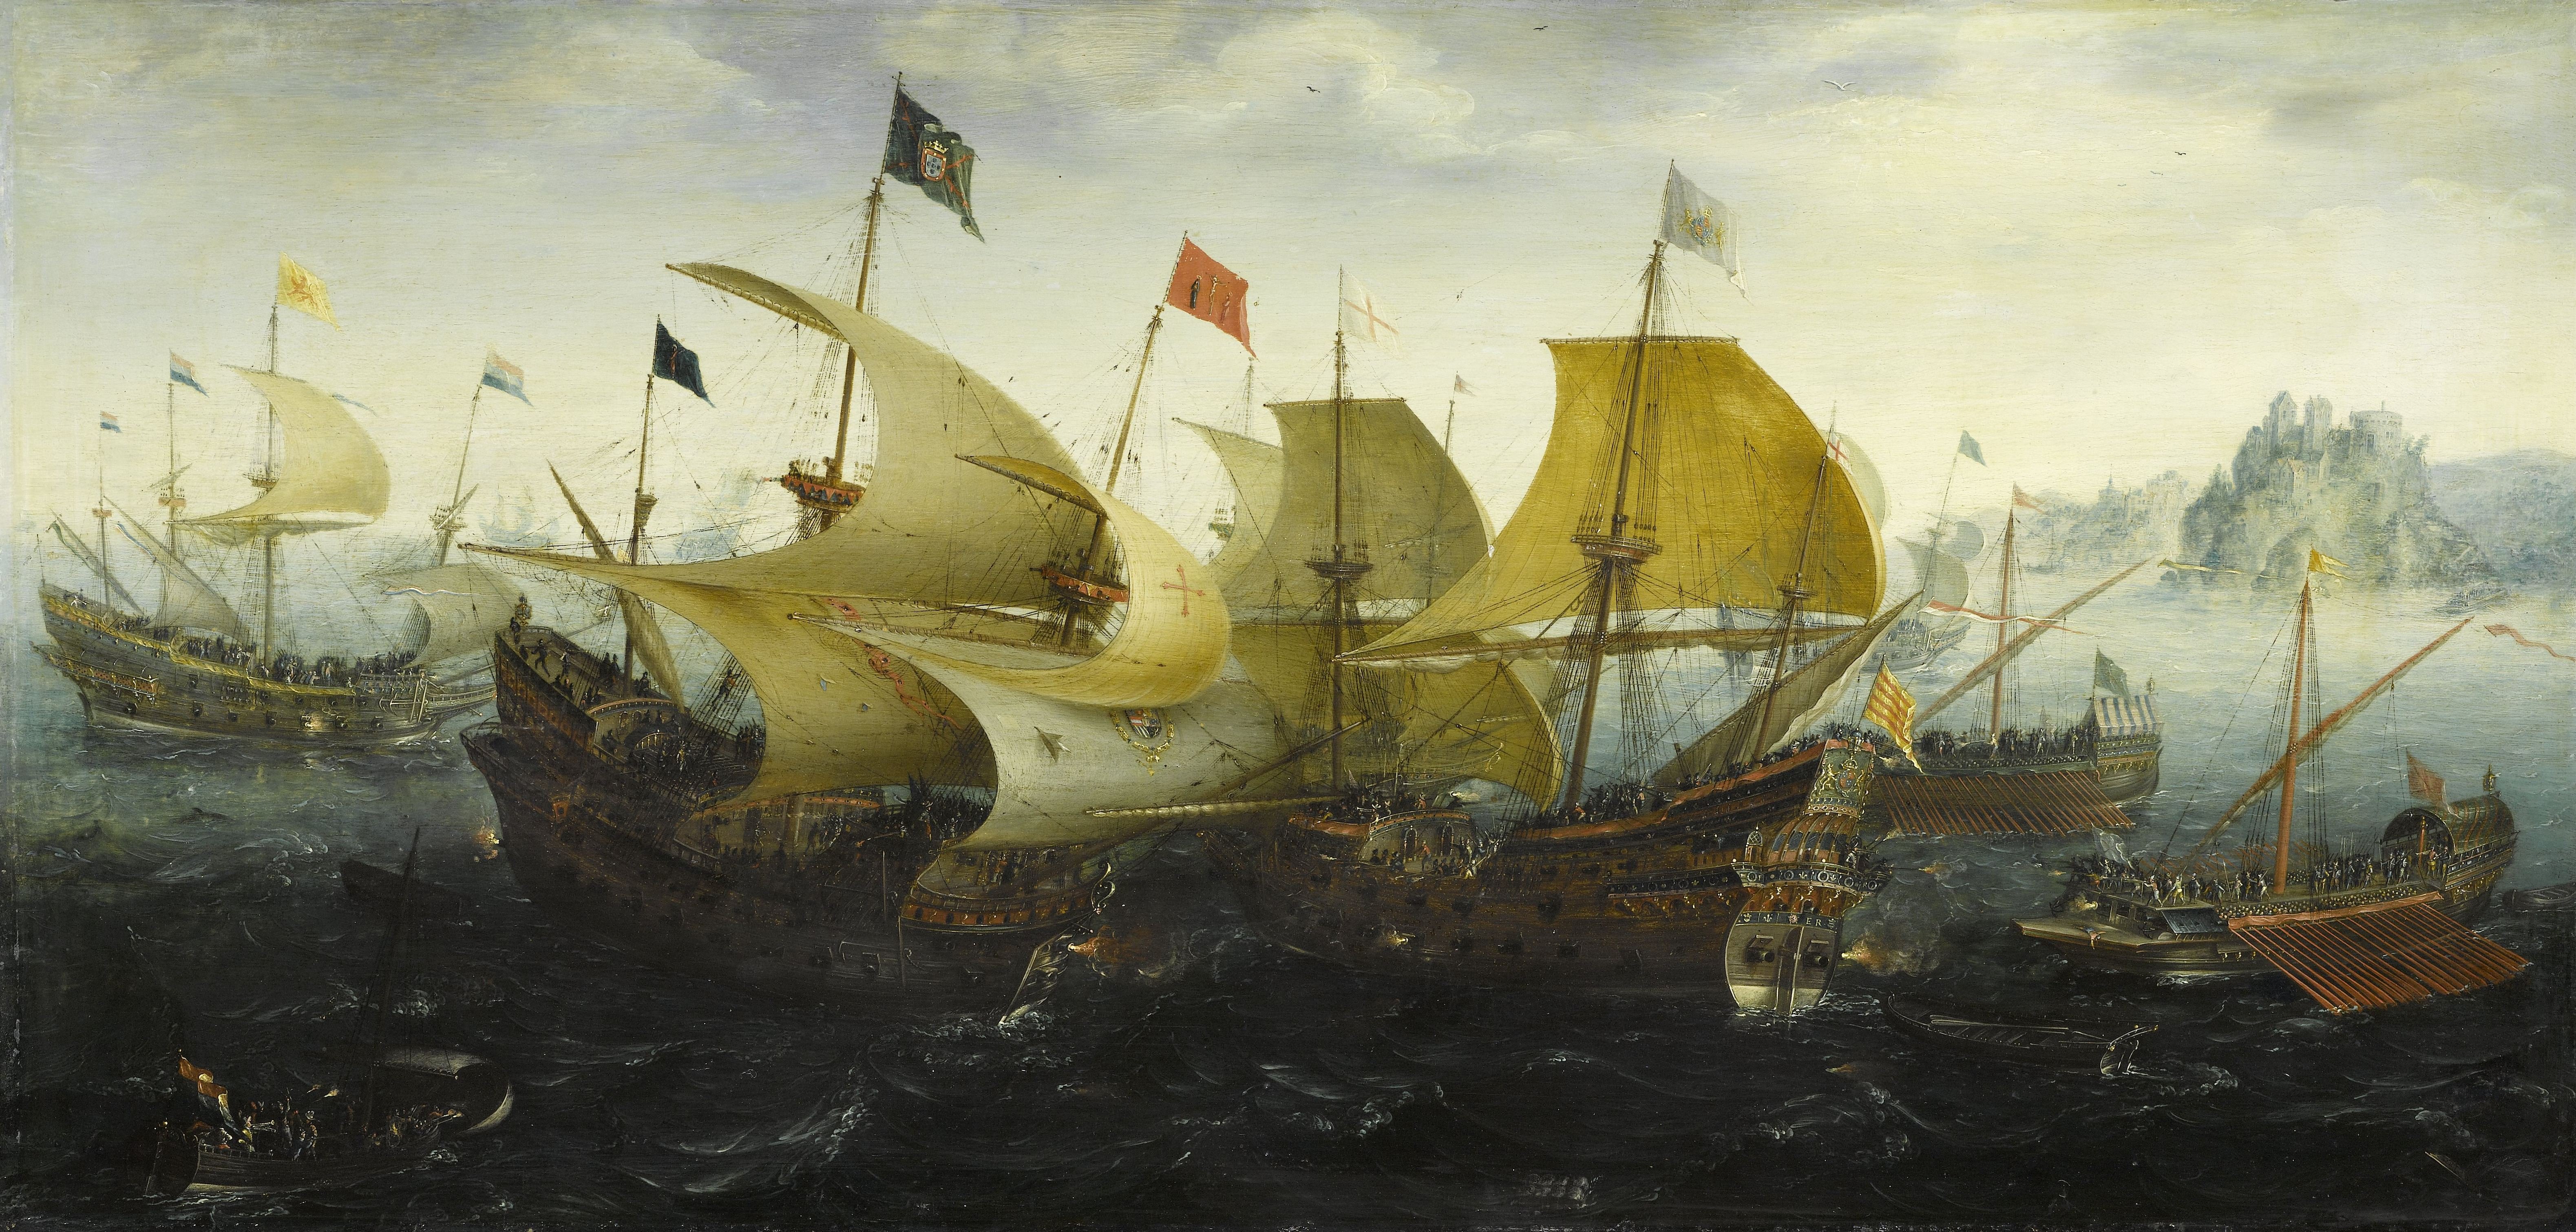
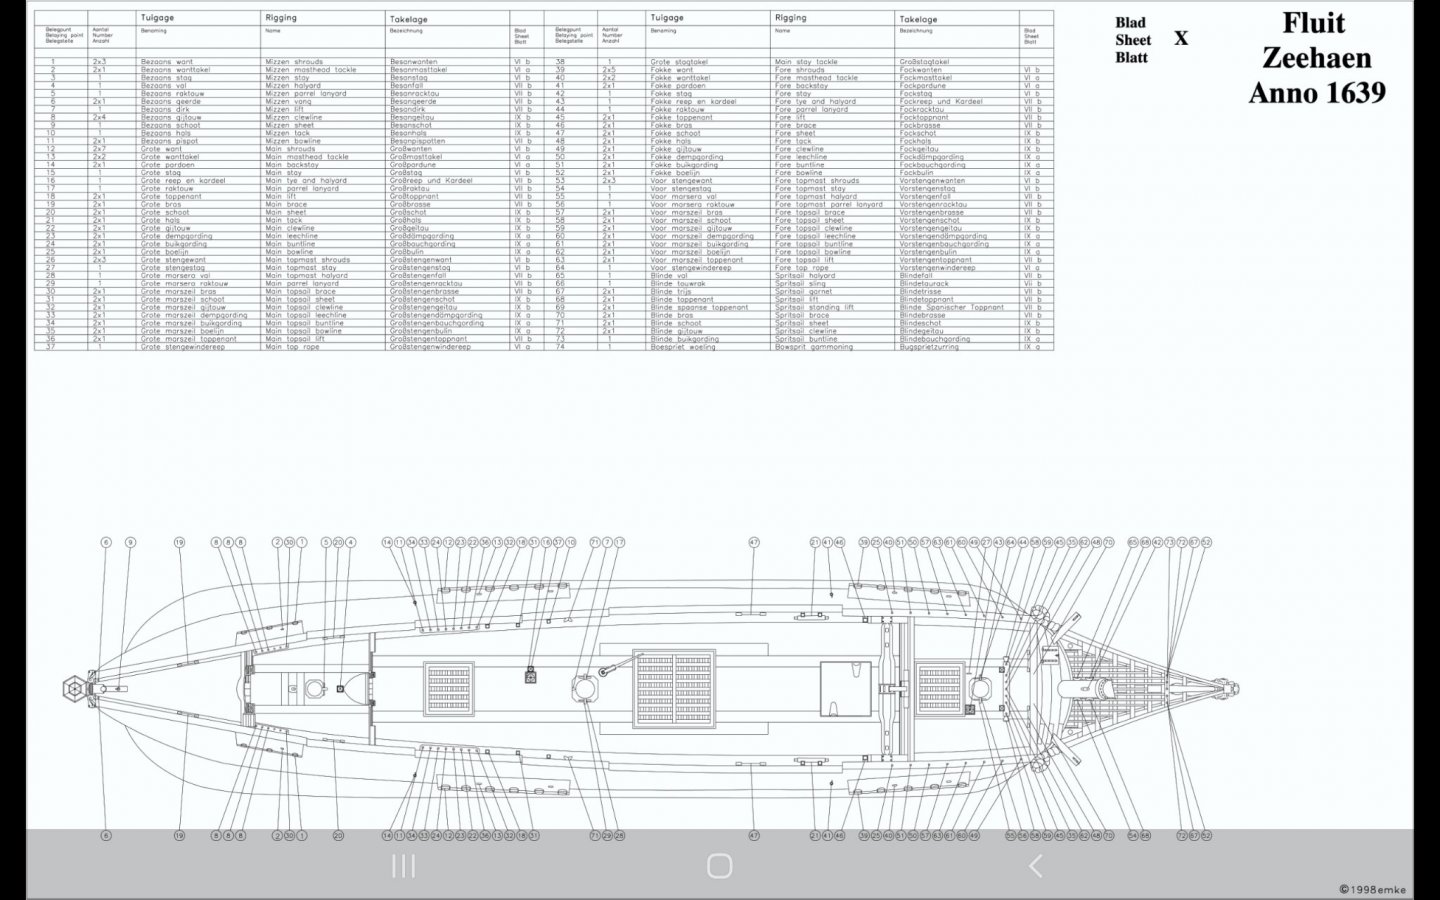
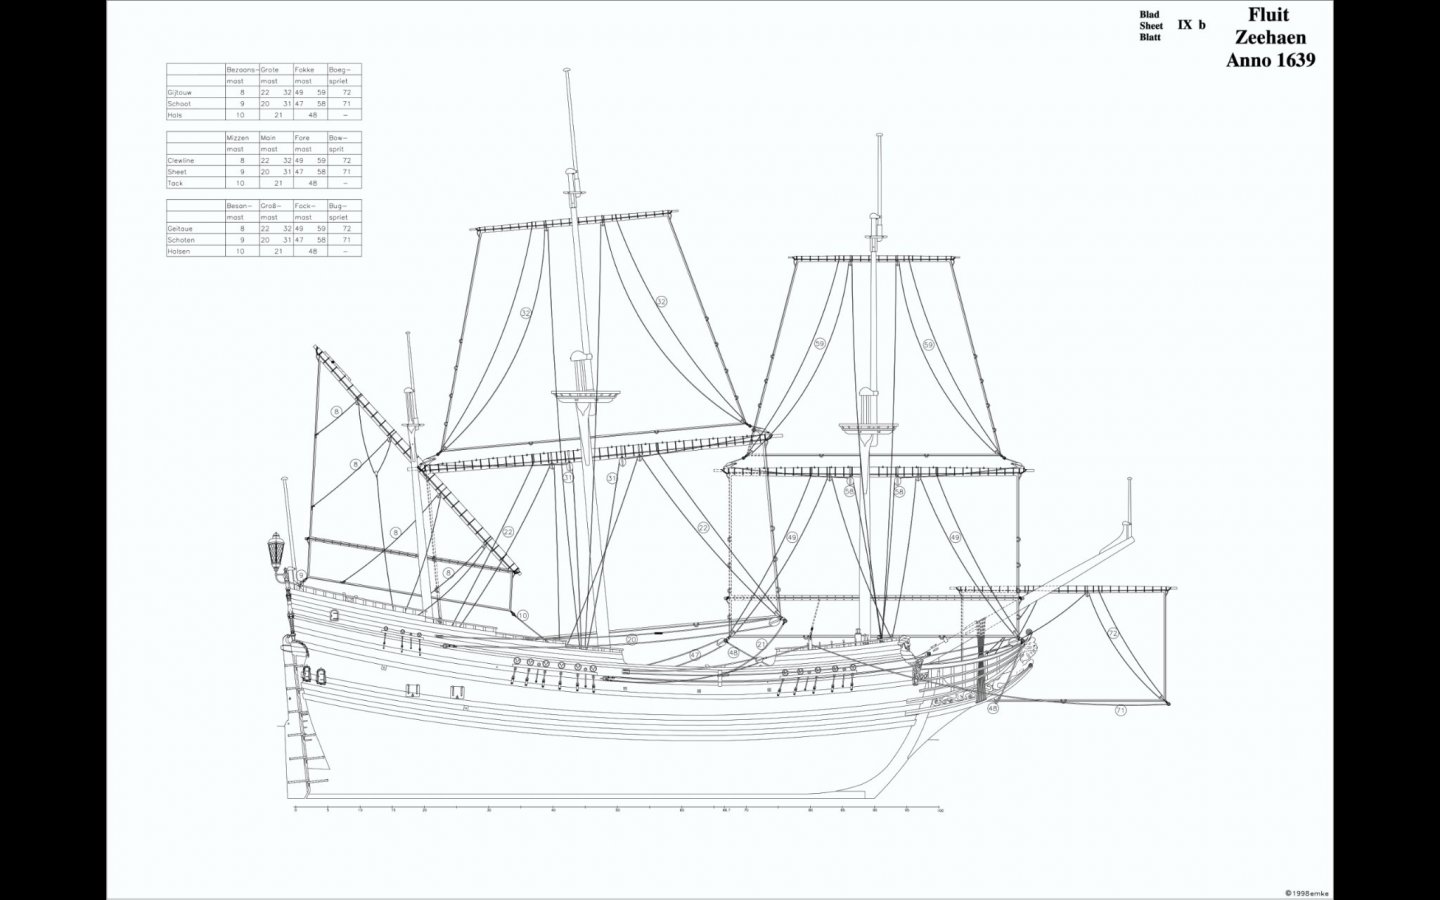
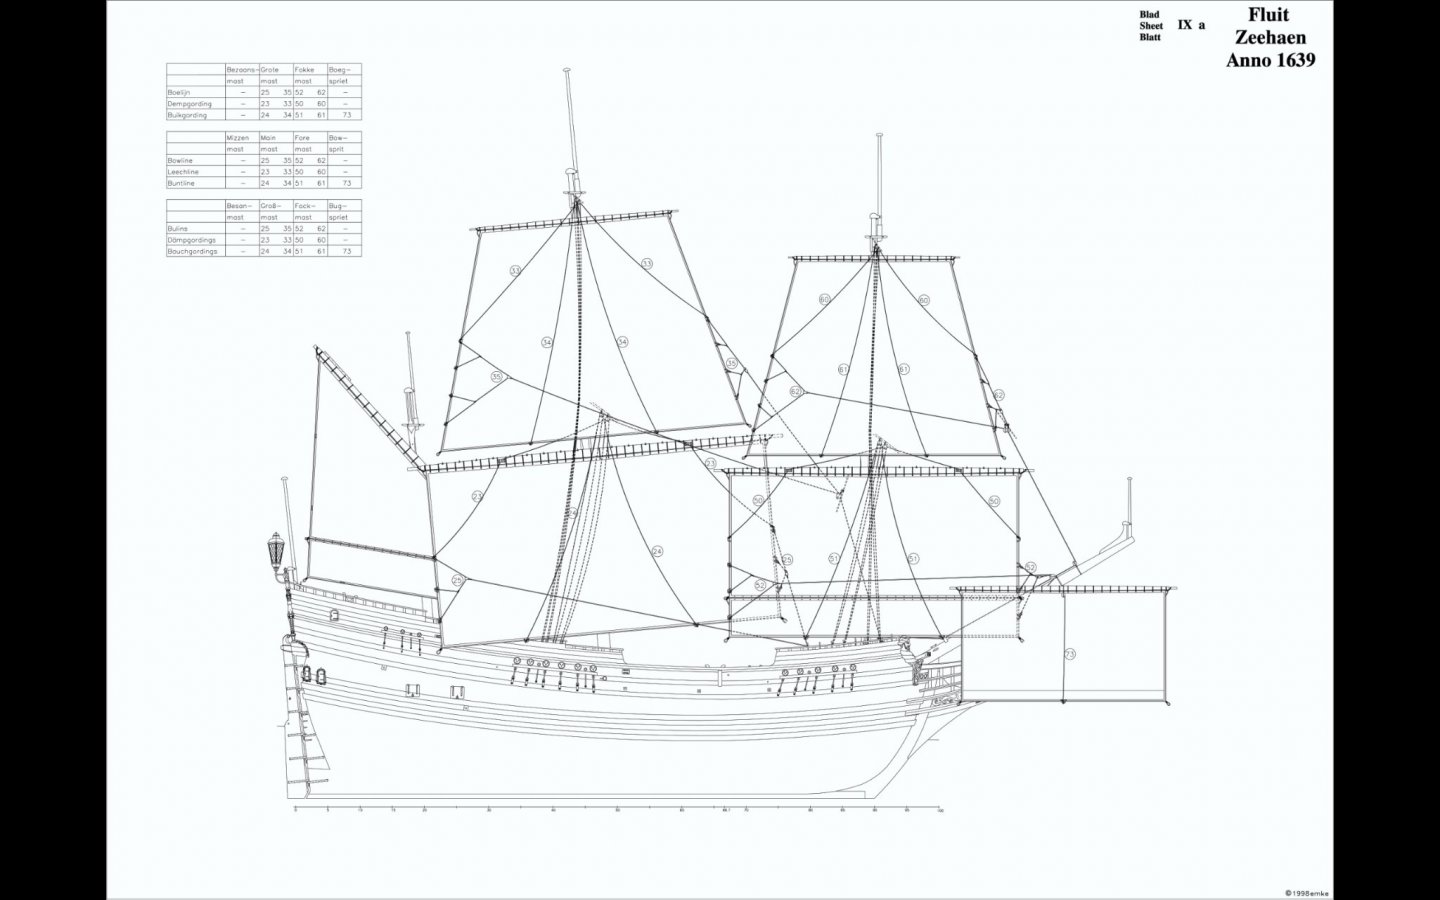
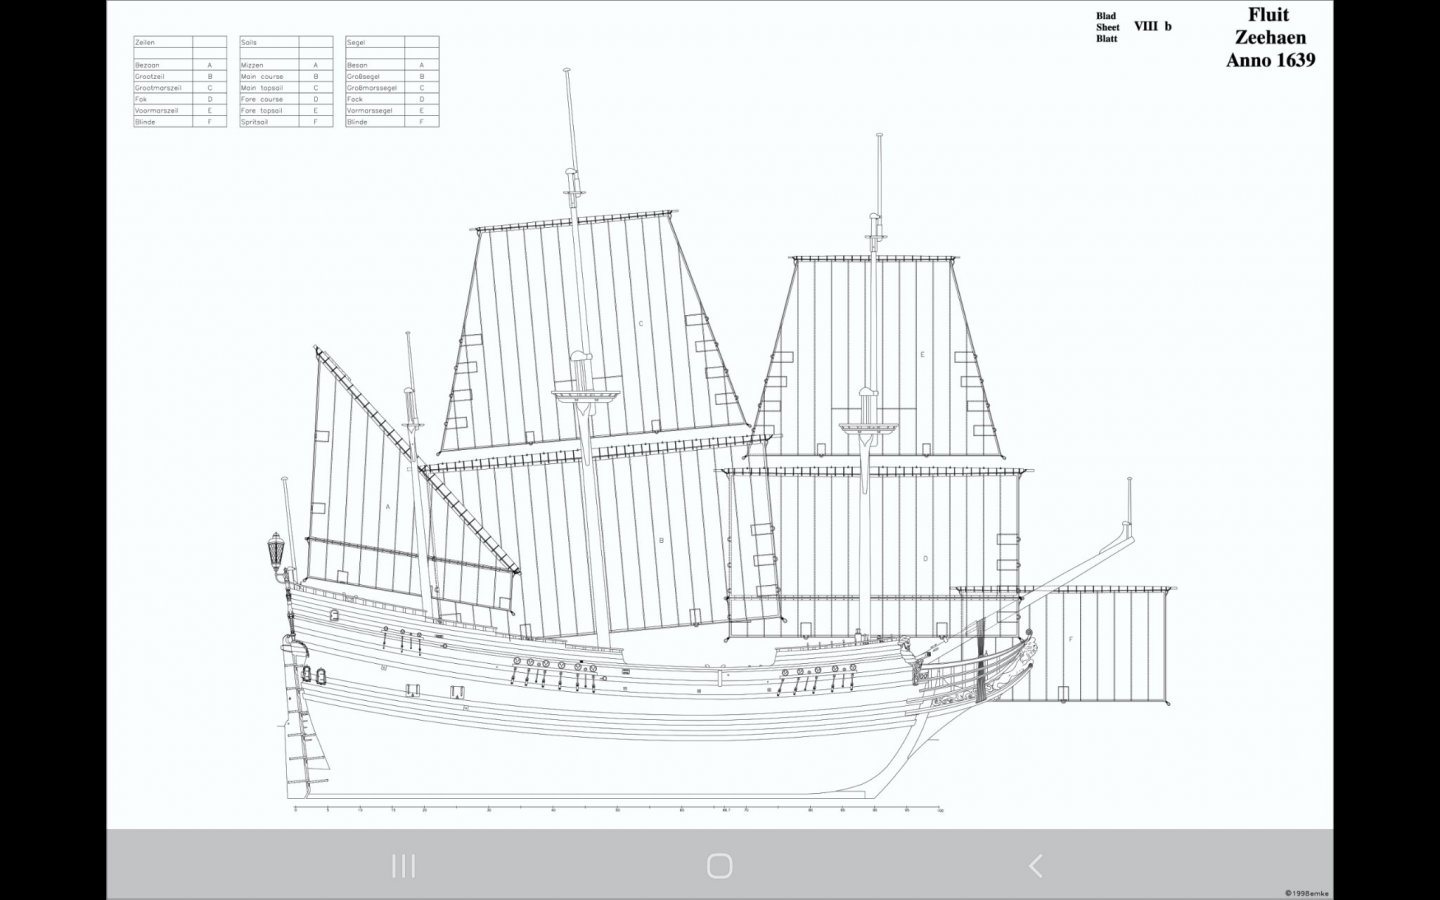
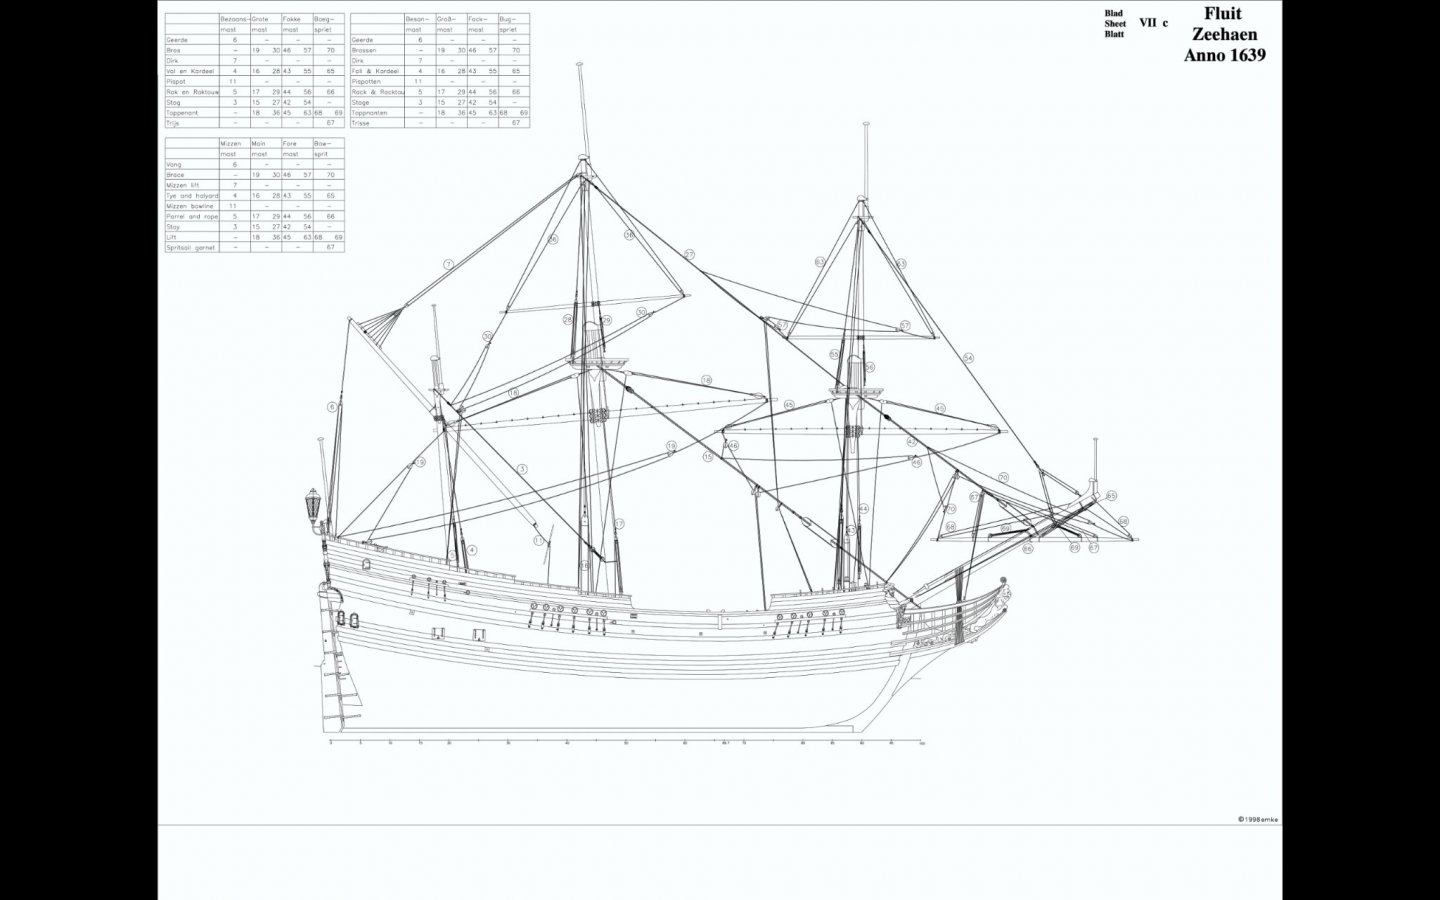
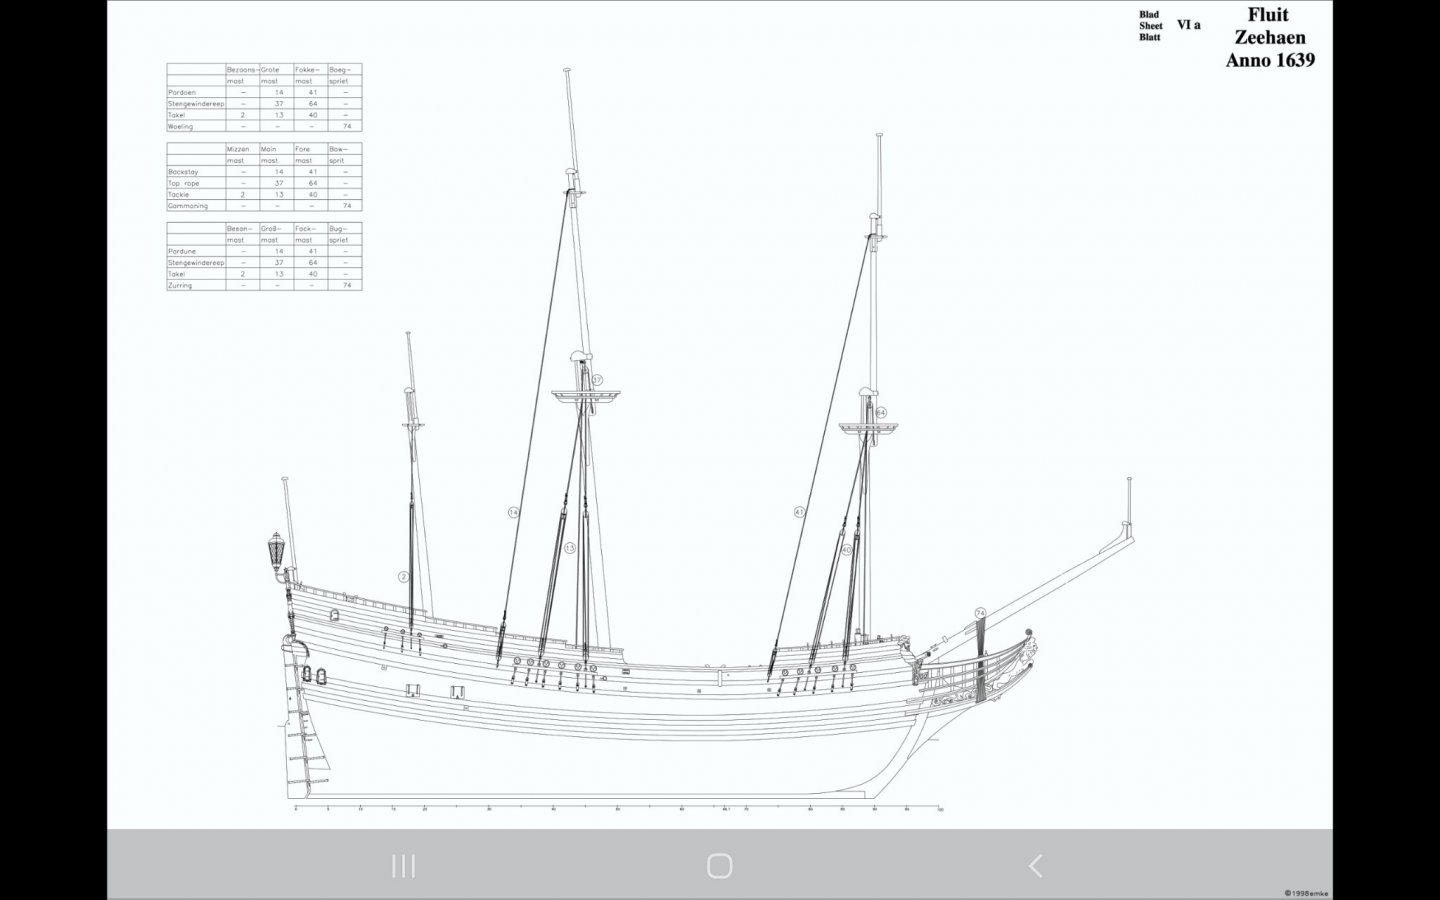
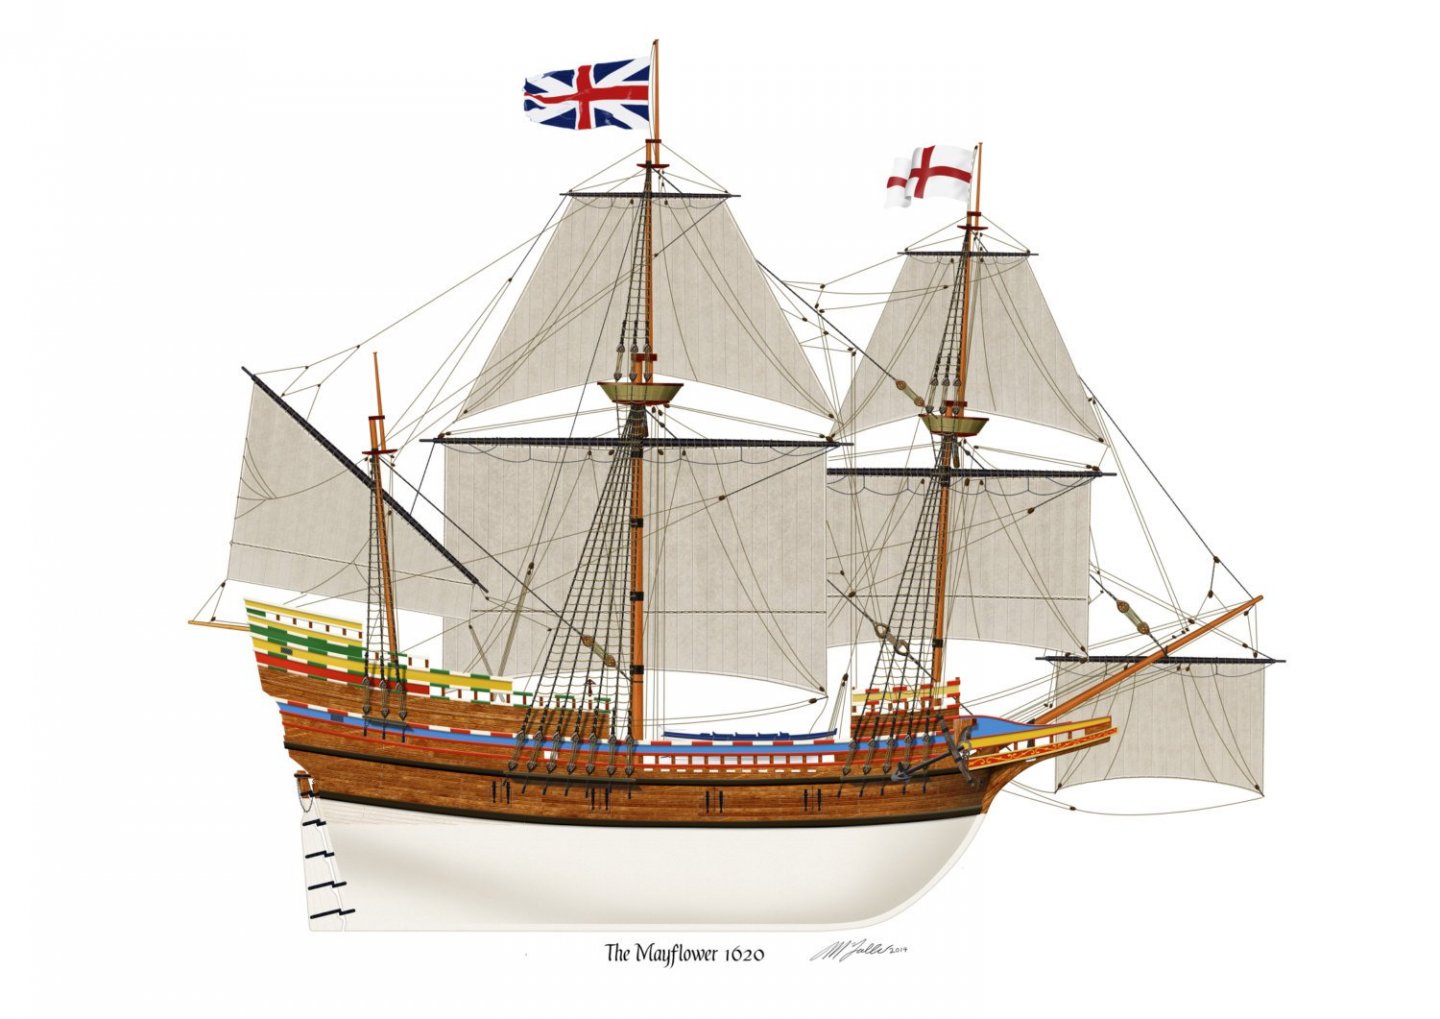
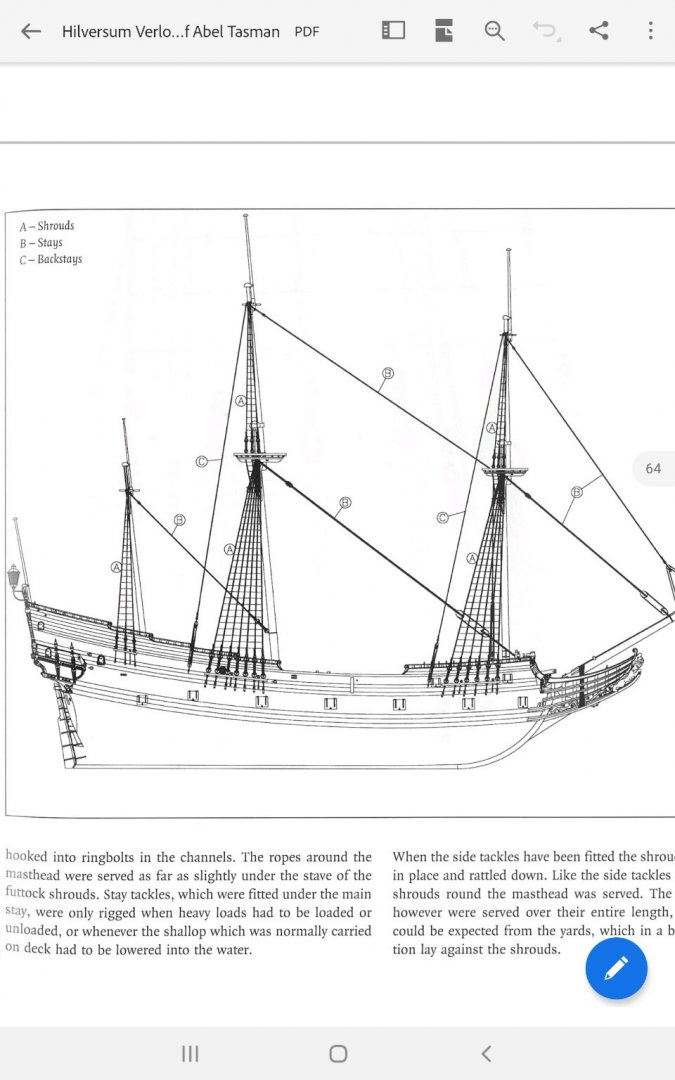
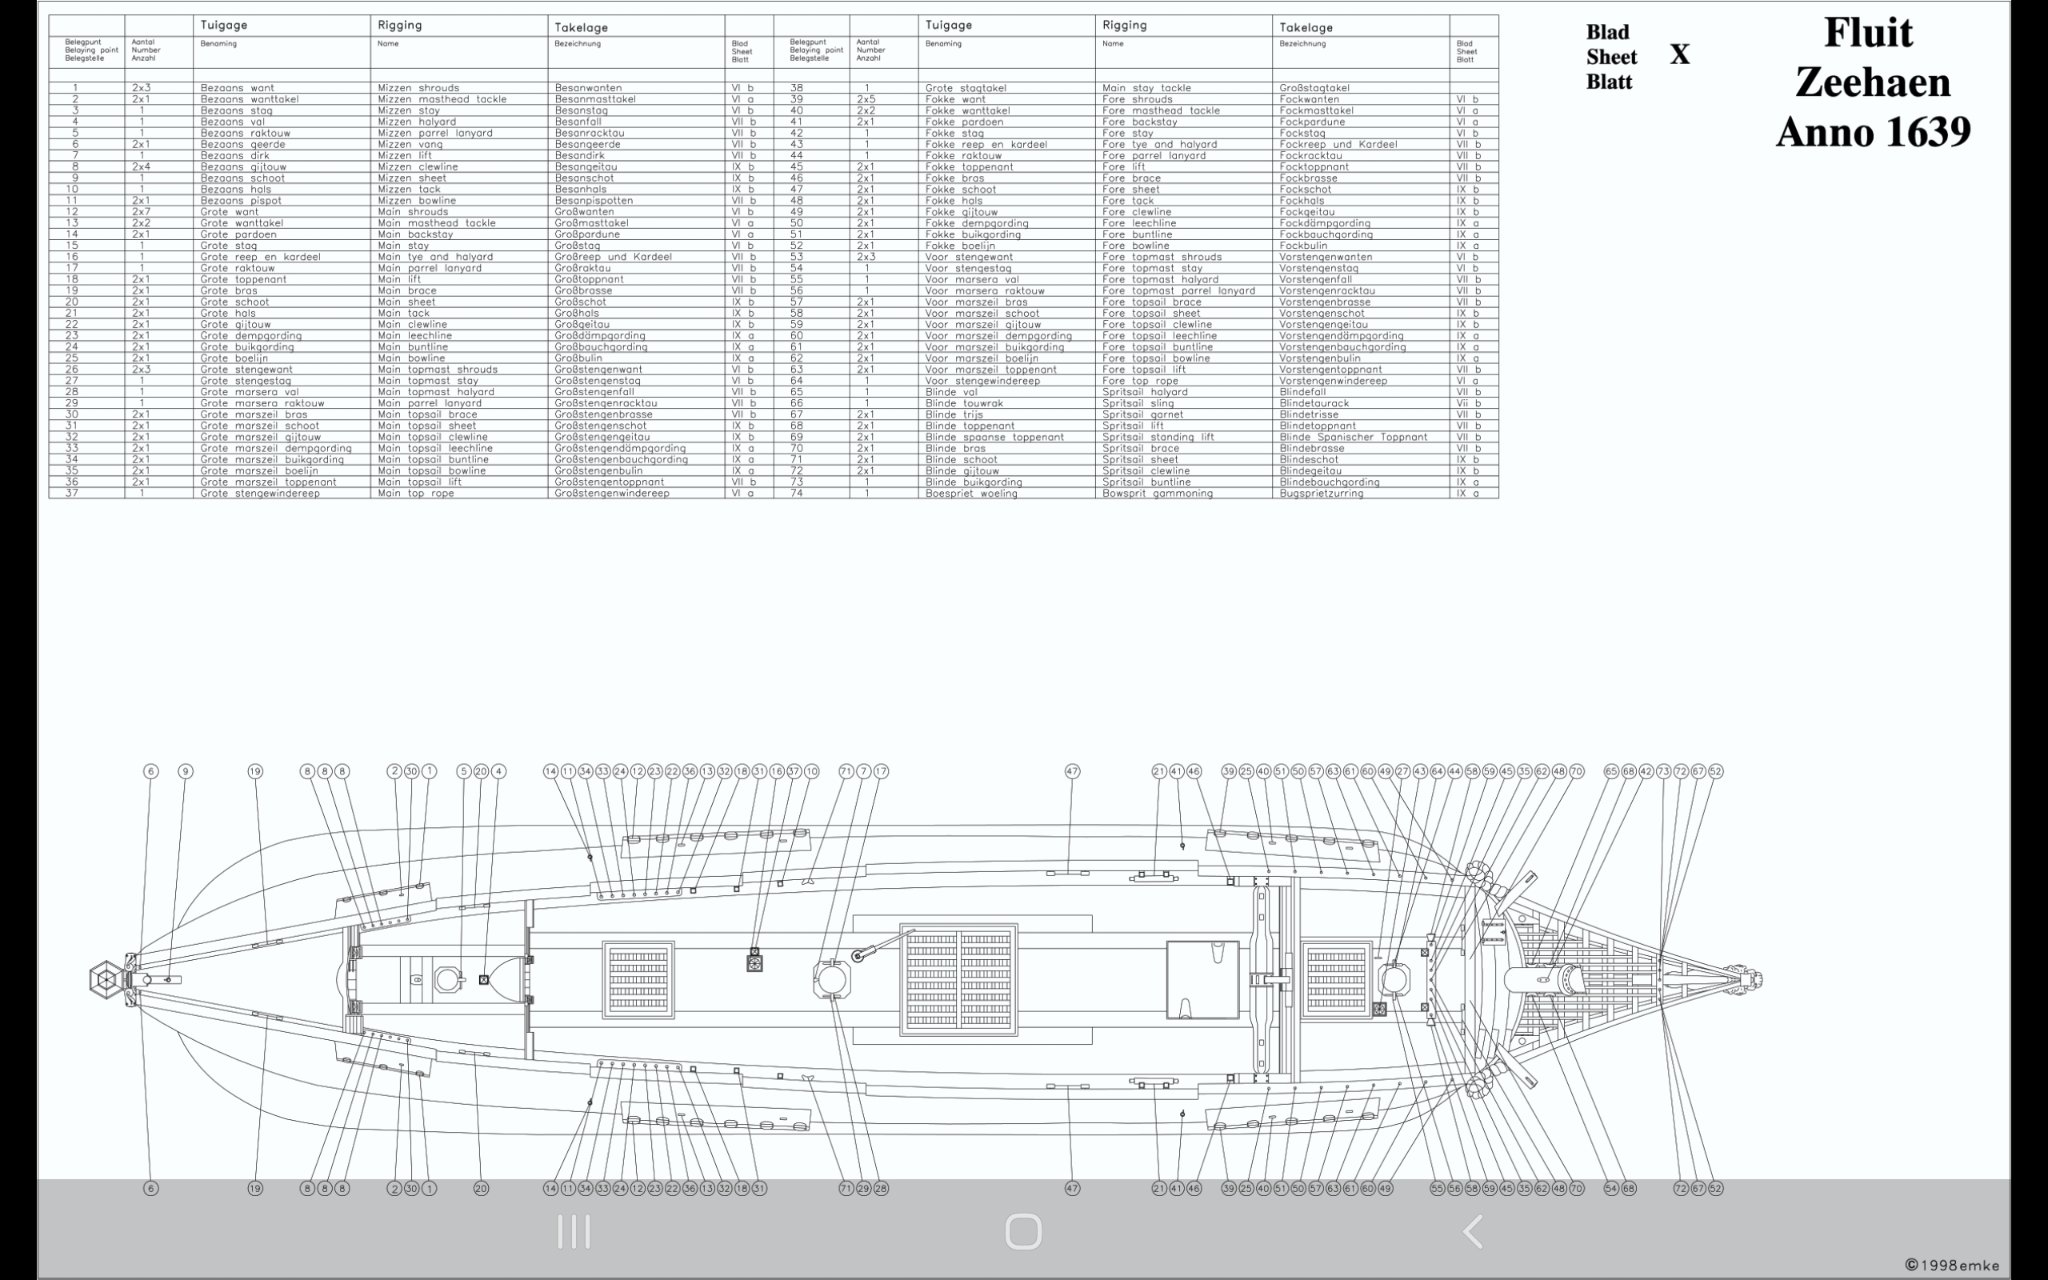
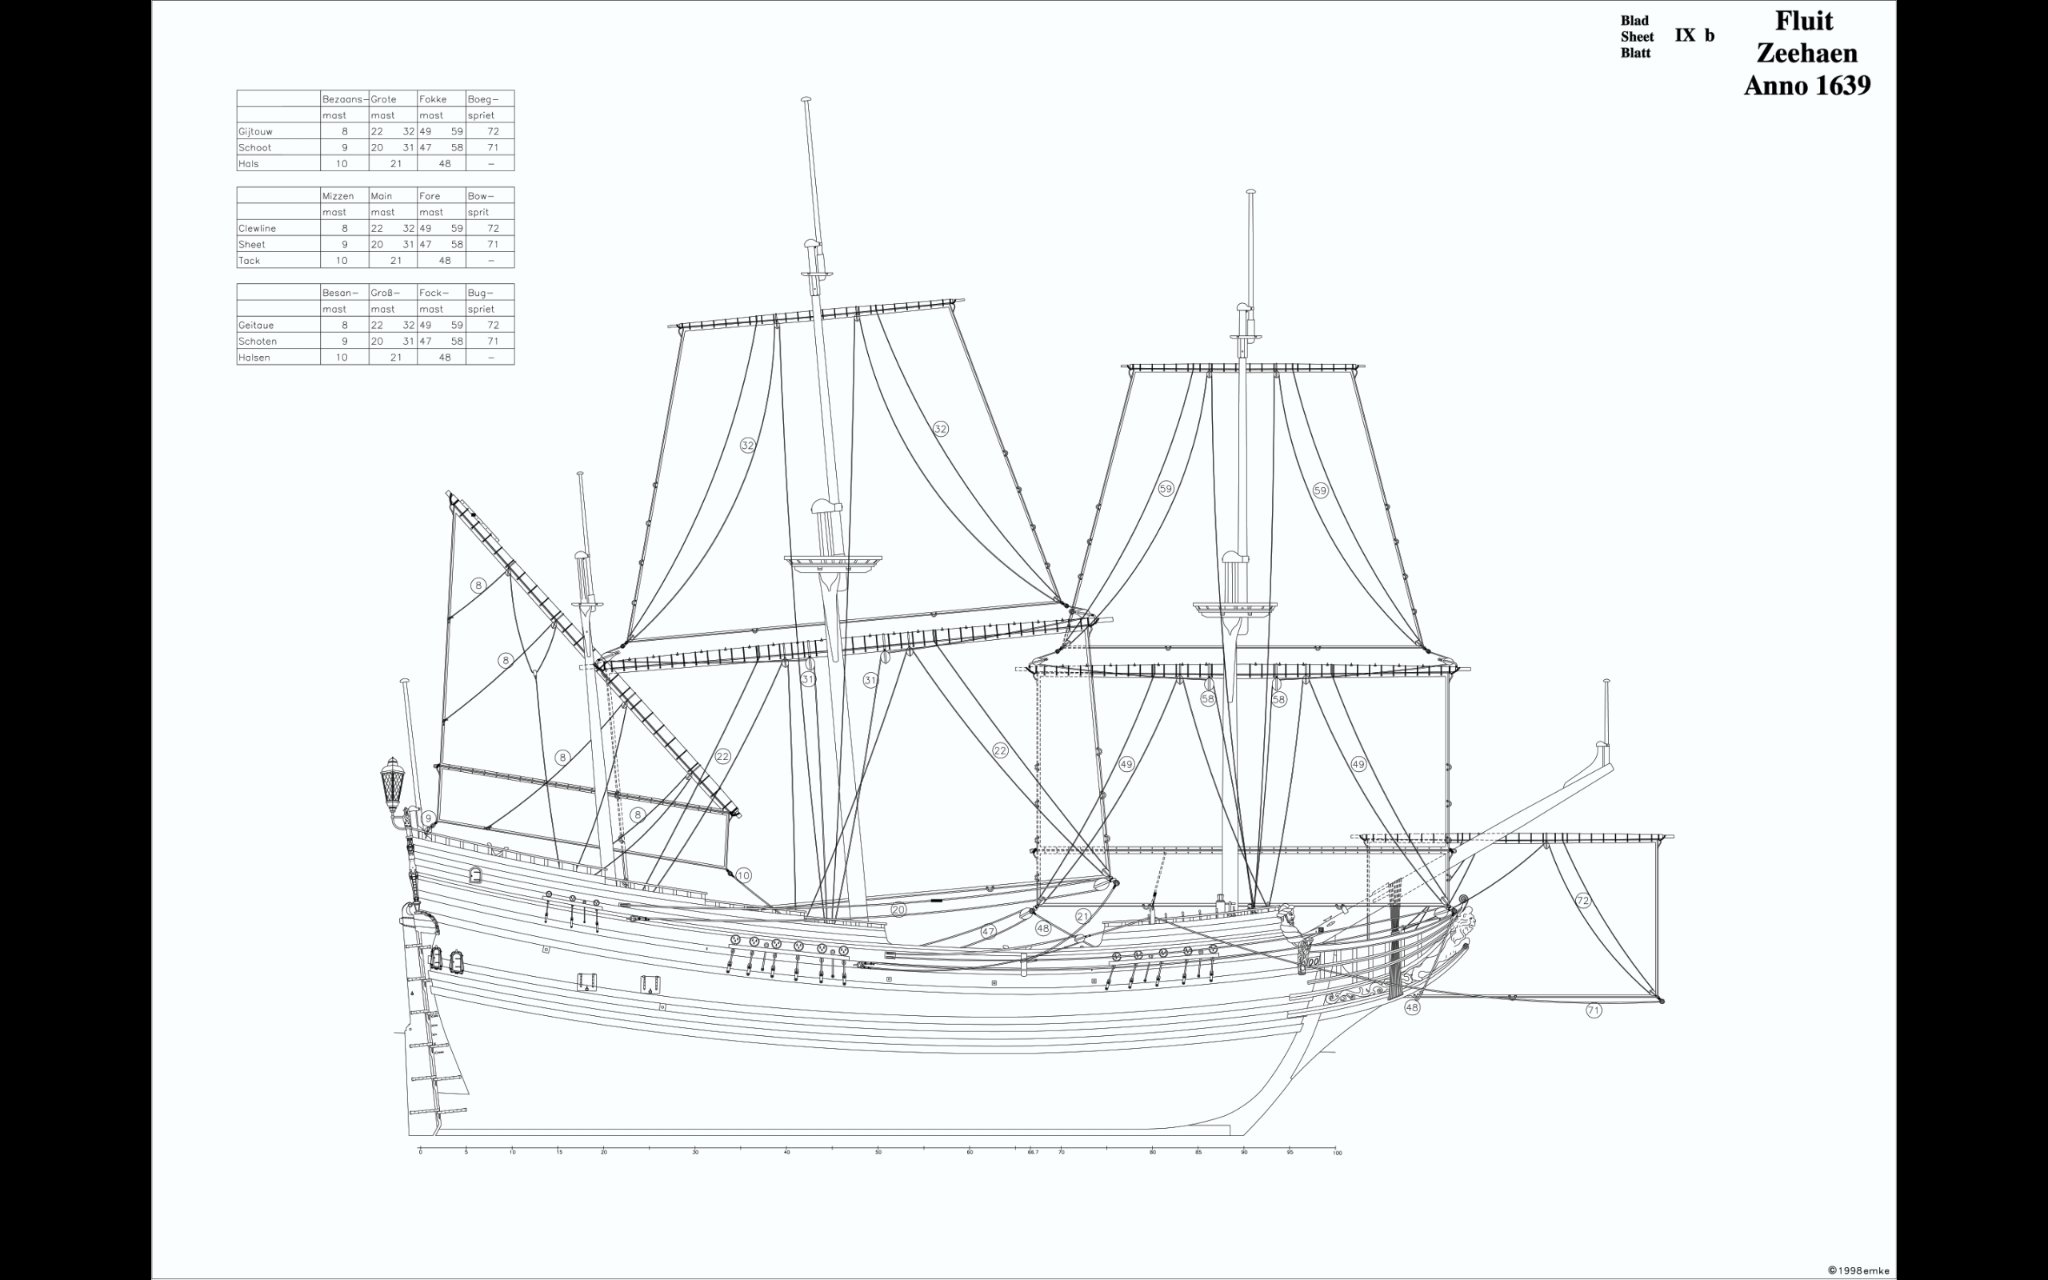
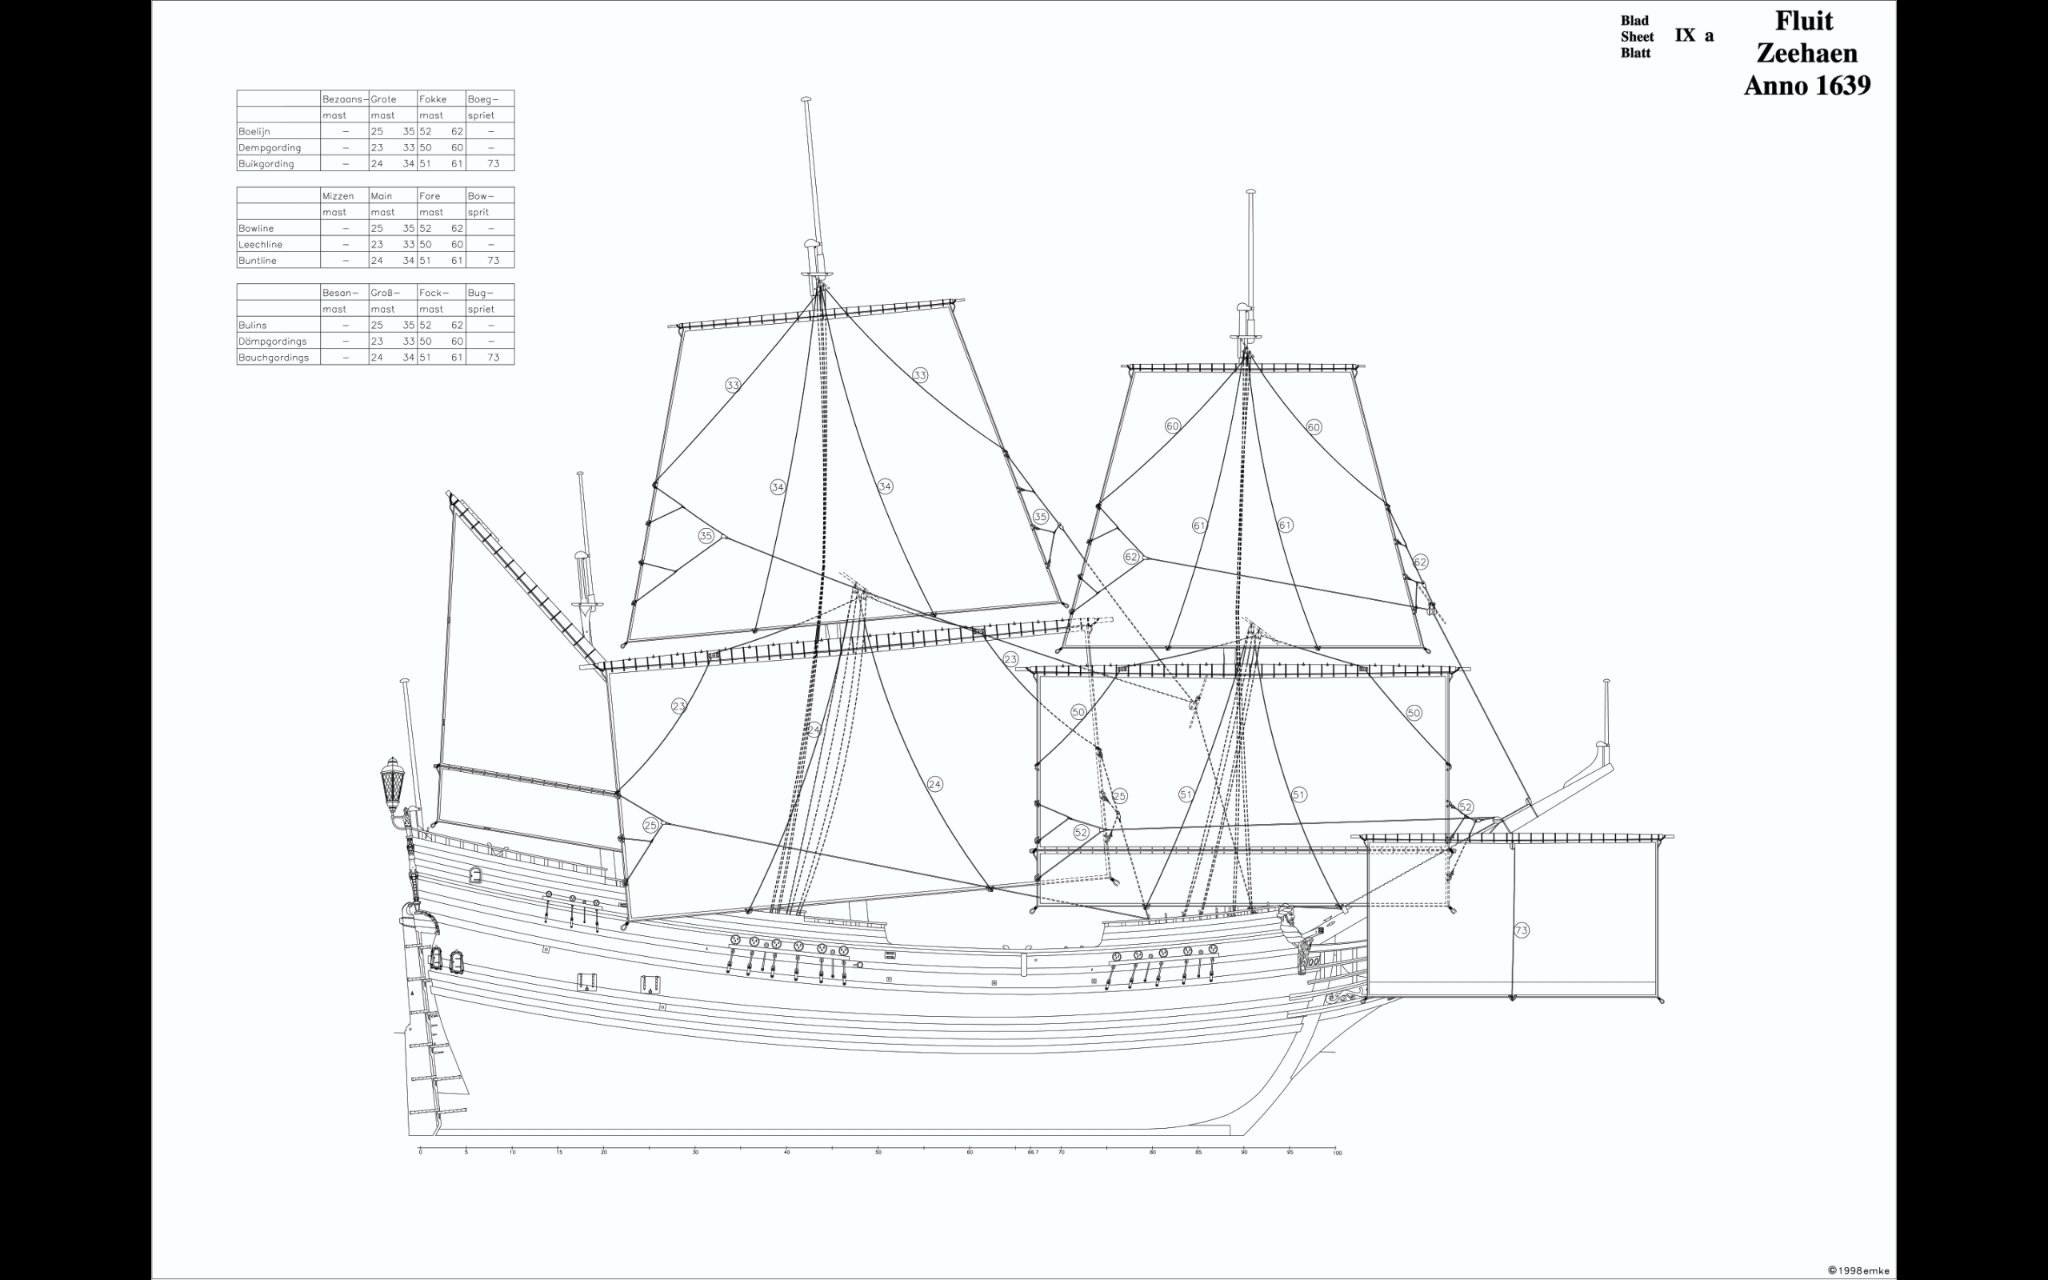
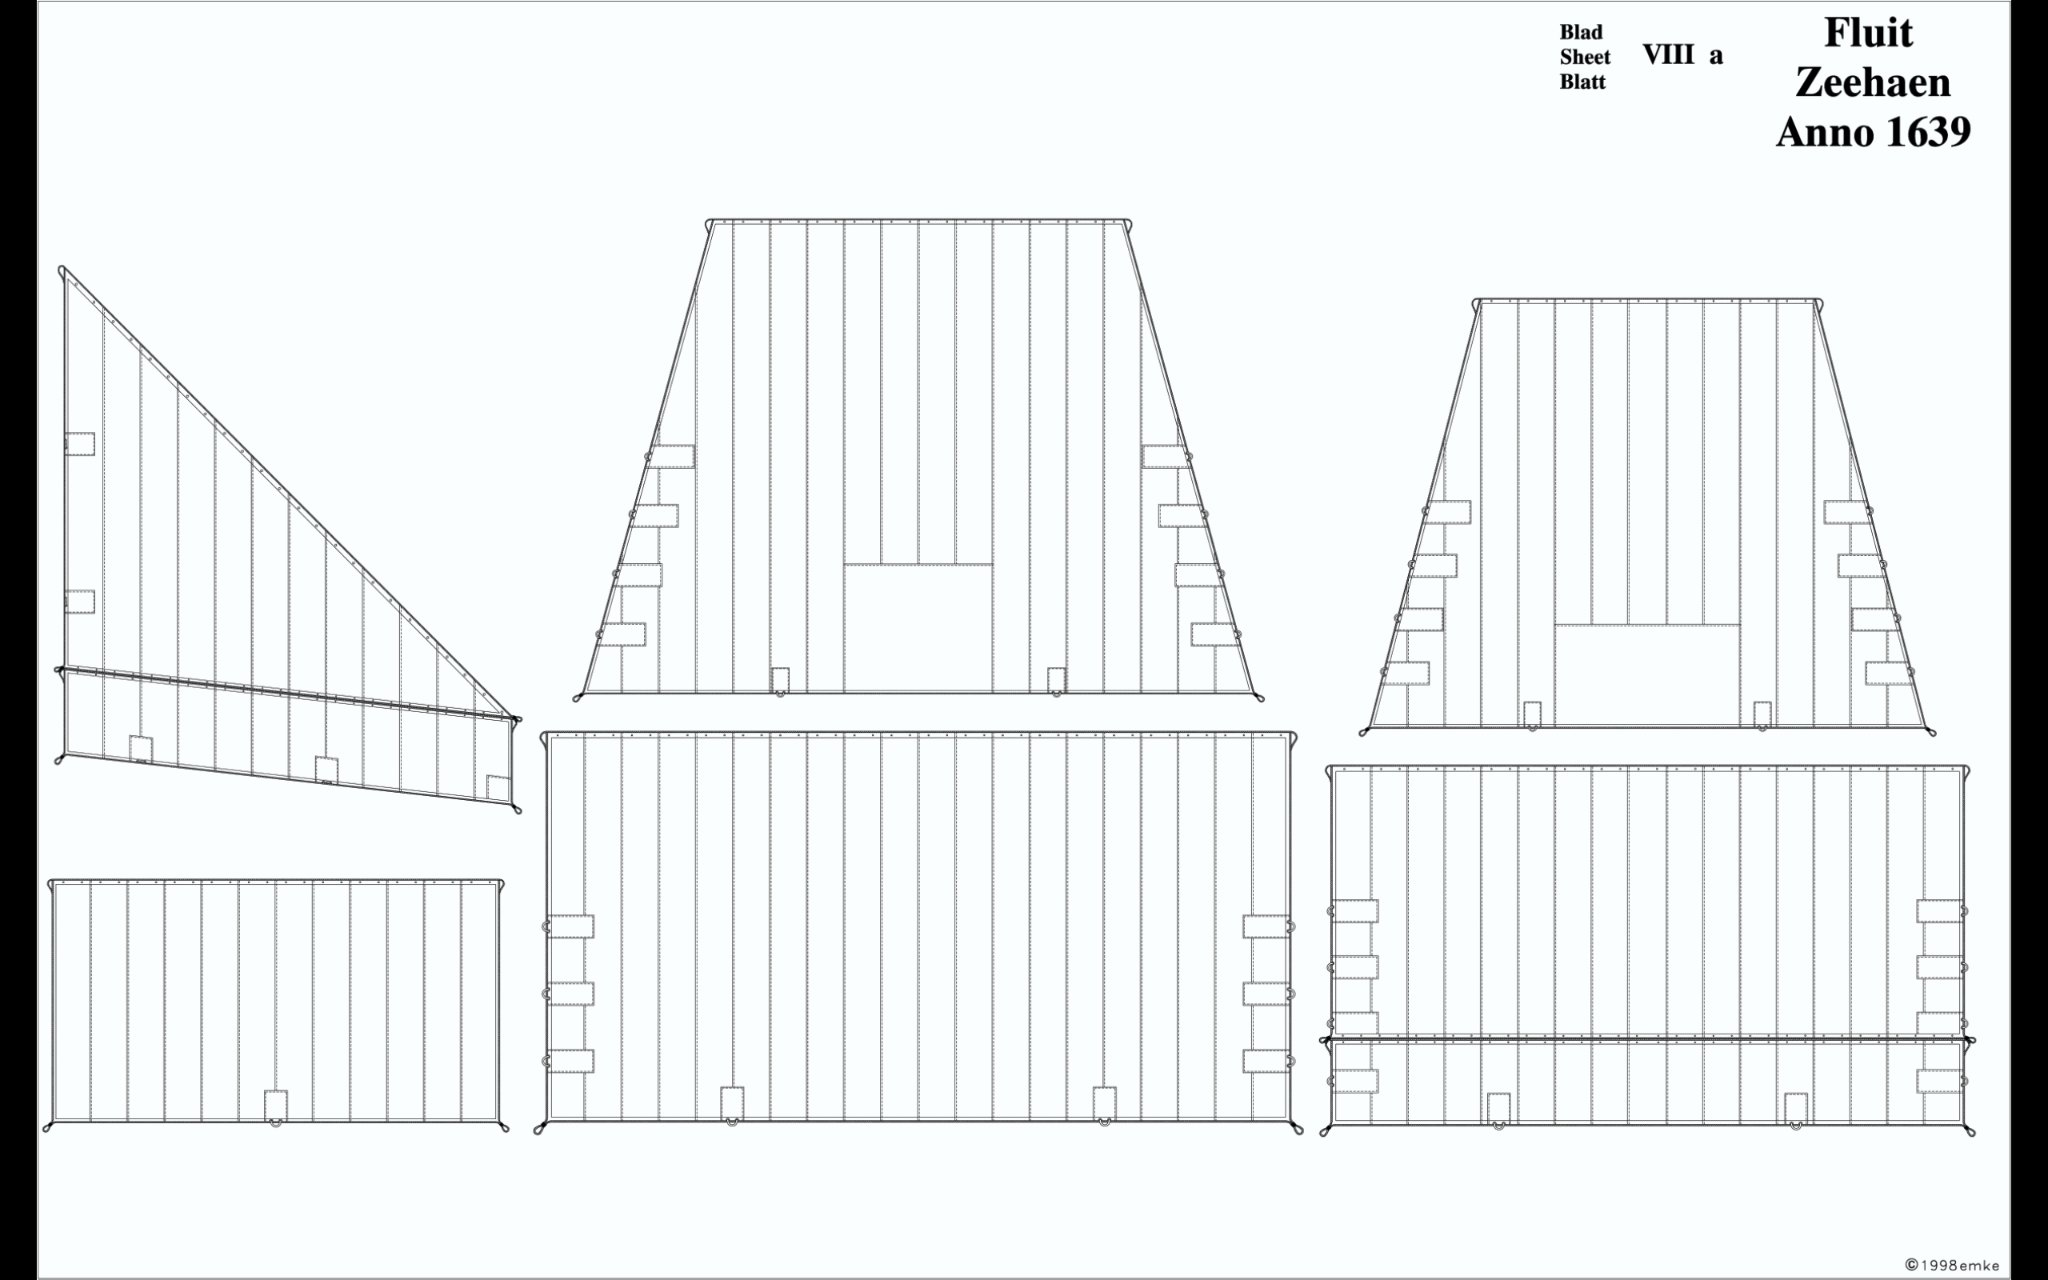
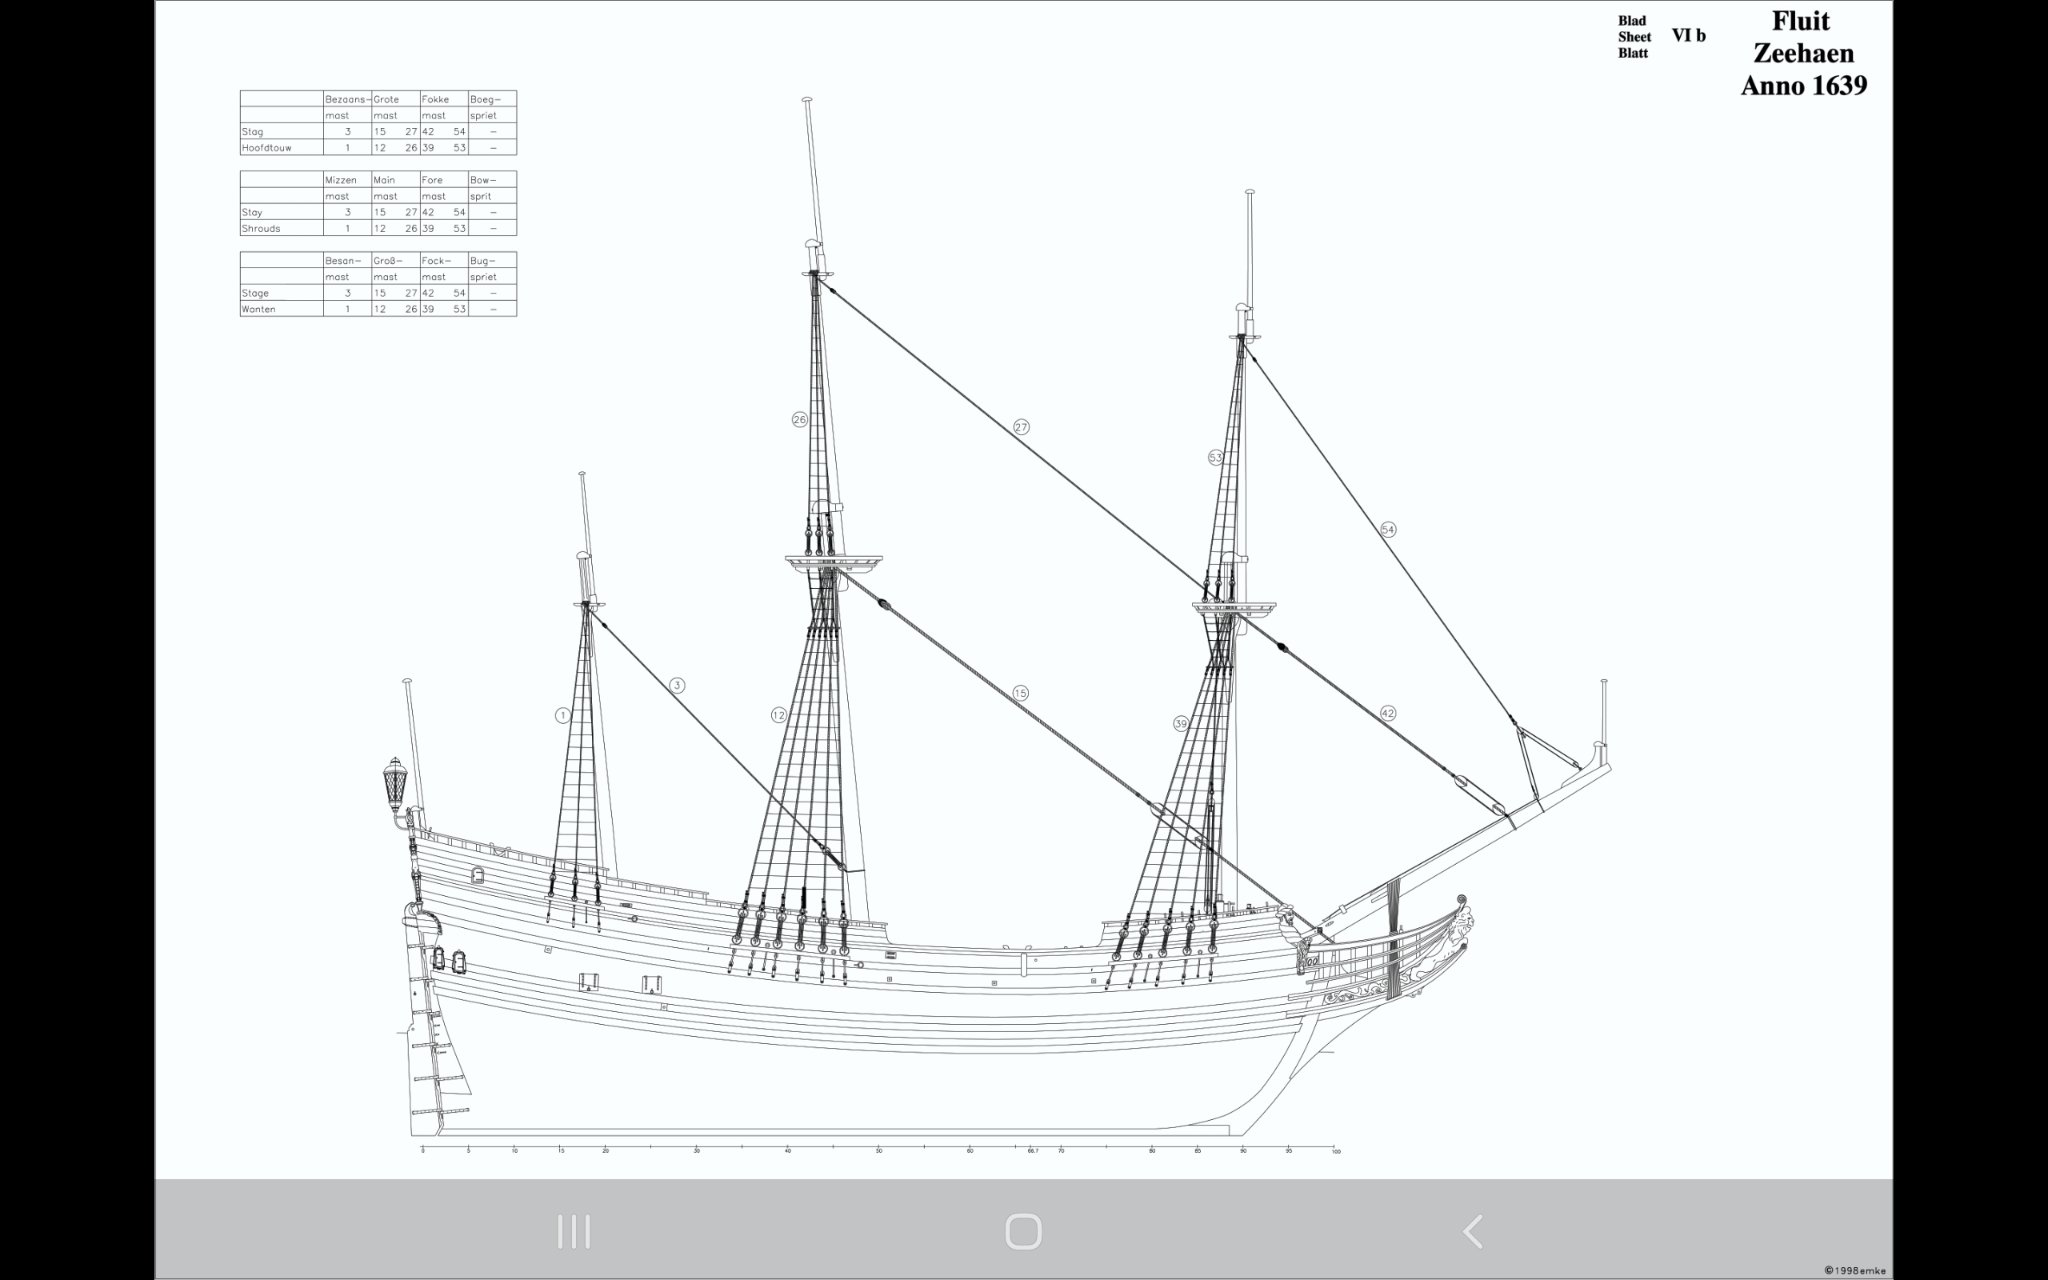
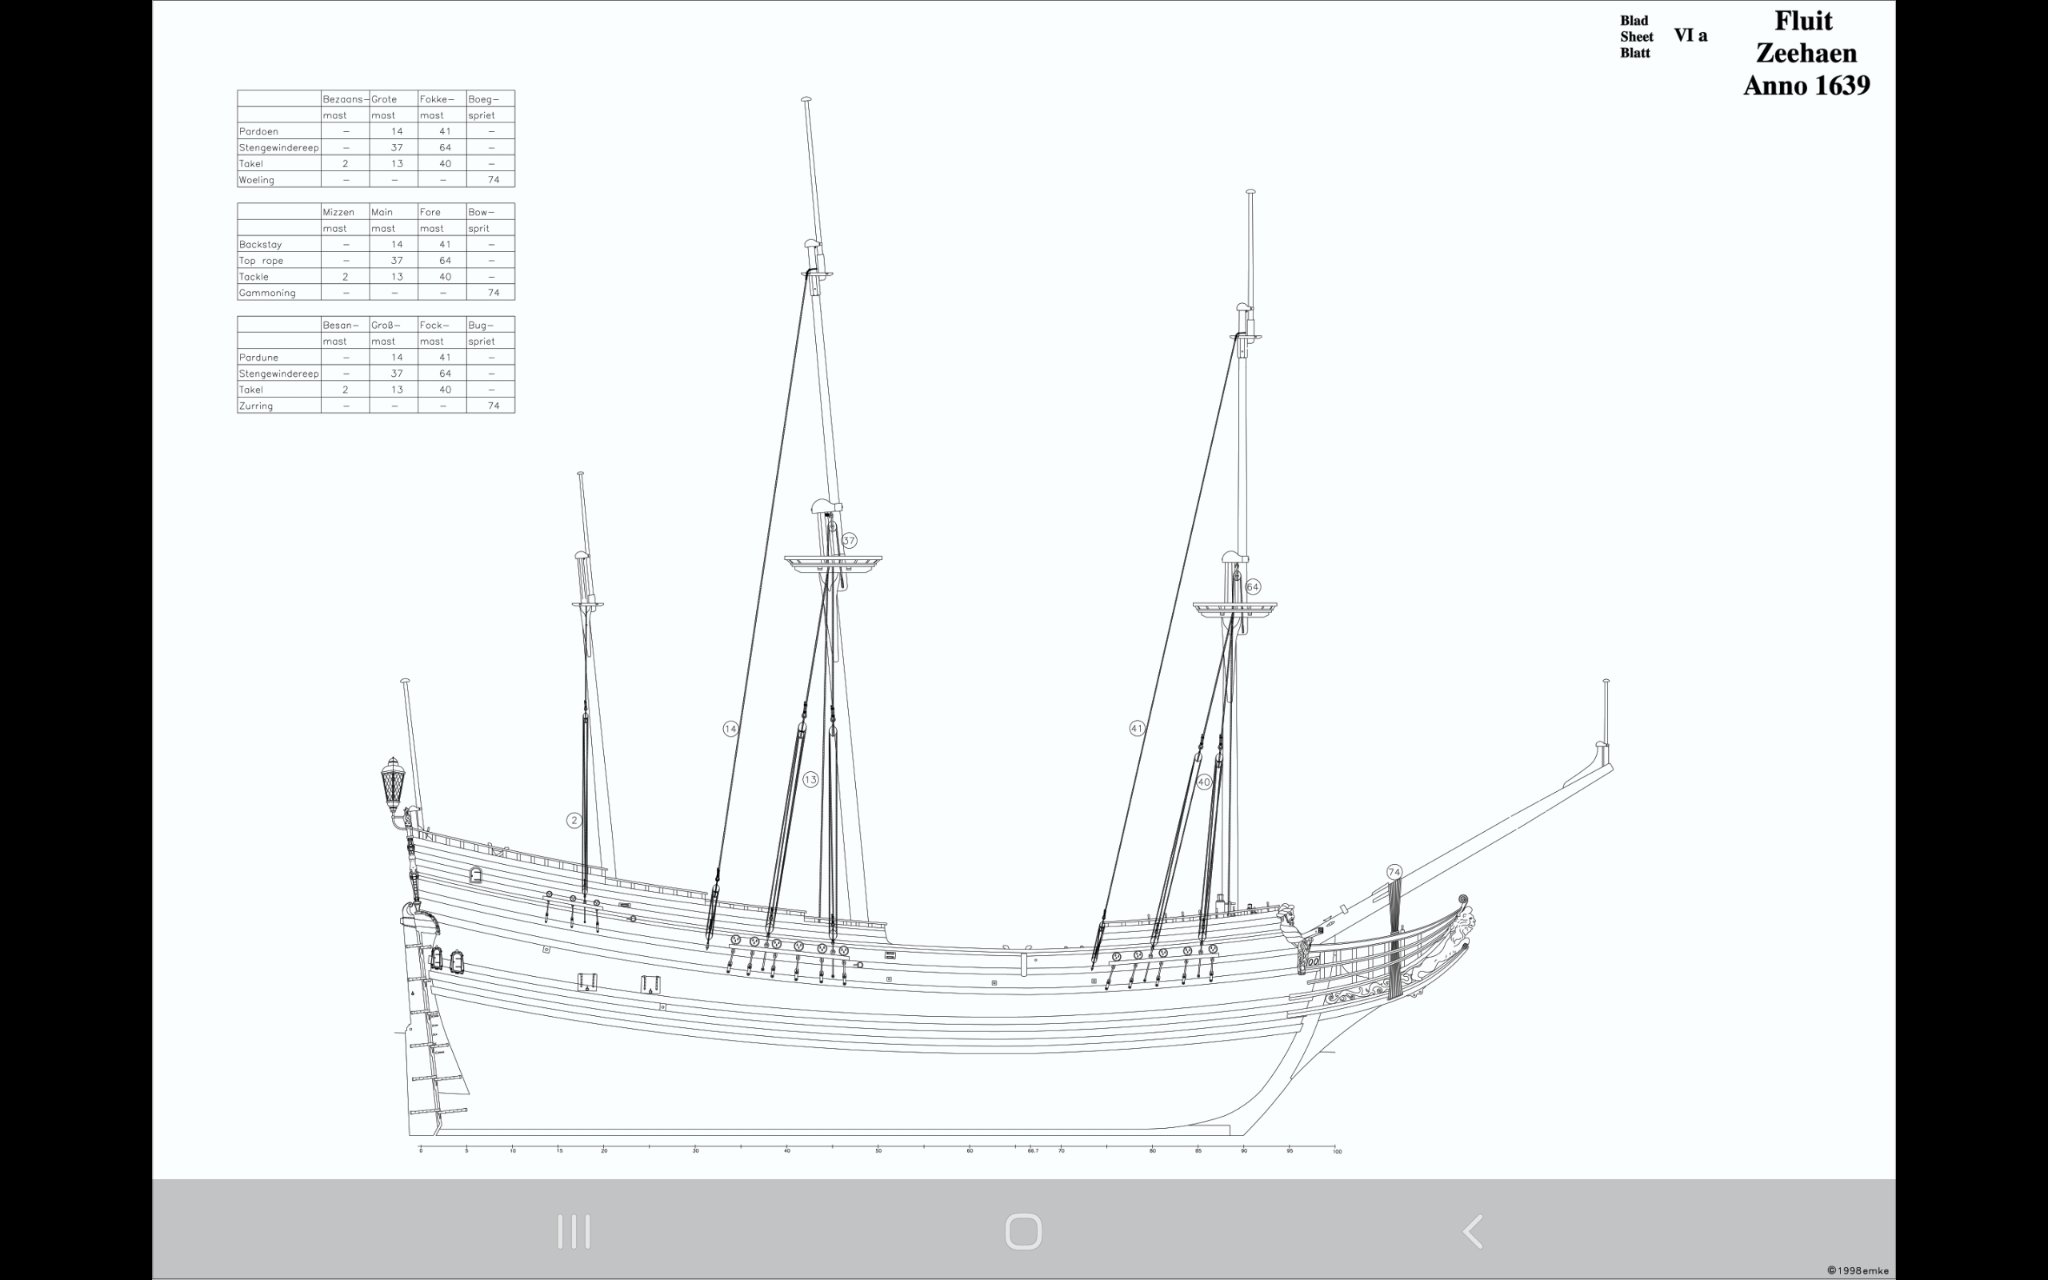
Mayflower rigging is almost identical to the fluit's rigging I shown to You earlier/ Ab Hoving reconstruction ... Please don't hurry up and check rigging lines of main and top sails and yards rigging and how they are working and attached to belaying points... Please be familiar with all that lifts lines,clew lines,leach lines of the sails etc. :)))... a little time need to spend for this study ... and You will find some interesting and funny things You made now in your rigging :)))
- 265 replies
-
- 2
-
-
- Golden Hind
- Airfix
- (and 1 more)
-
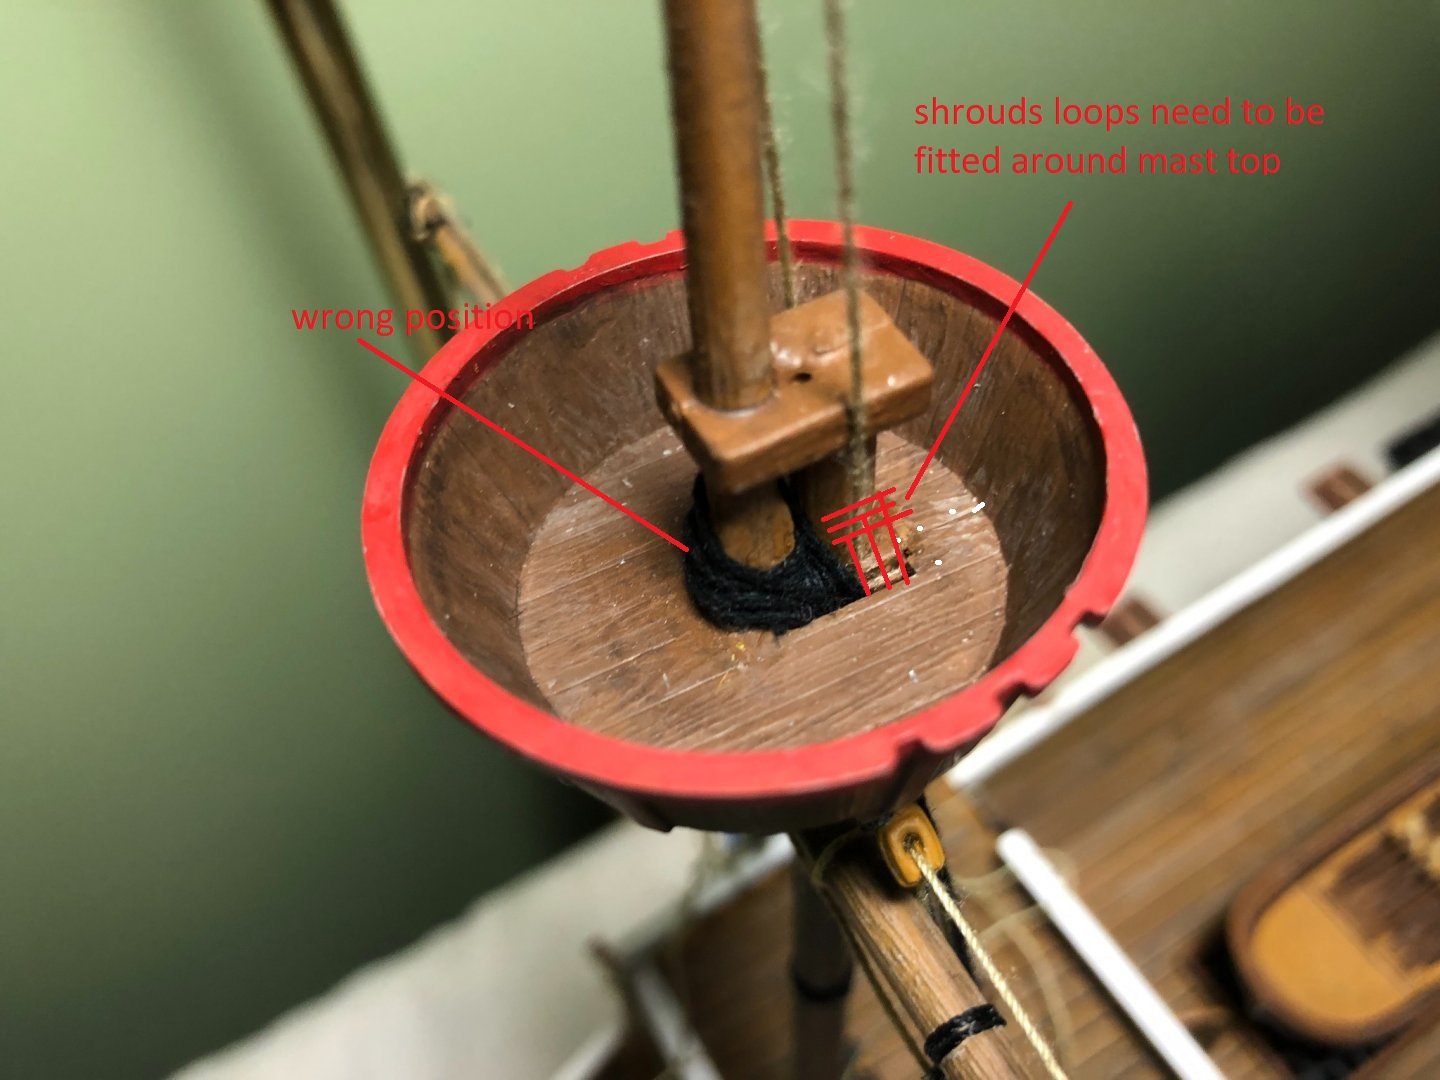
Good day, deadeye chains looks good, there is something wrong with shrouds arrangements... All the BEST!!! Kirill
-
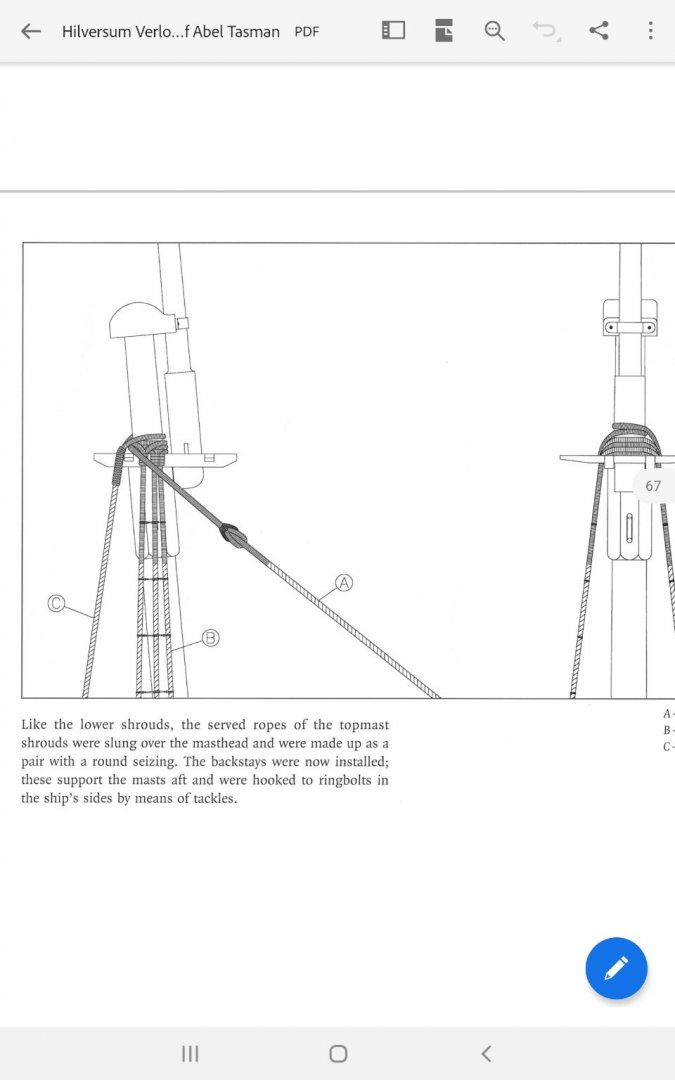
I understood it should be running rigging of main and topsails , at least such running rigging ocupate this area as a rule the only difference will be how to show them ... I have some pictures made by famous author Ab Hoving which probably could help You in rigging your galleon model and save some time otherwise ness-ry for study books about rigging

-
I'm sorry, I didn't attach picture to my post, I thought I did it but actually not ,sorry I questioned about this rigging
- 265 replies
-
- 2
-
-
- Golden Hind
- Airfix
- (and 1 more)
-
Good day, Dear Bosco72, Please advise, what is the purpose of this rigging? Can't understand their functionality...seems to me there could be something wrong with arrangements... All the best! Kirill
-
Thank you very mach, Bruma, clear about deadeyes... I thought/ planned to use "dremel " hand drill to machine a little bit topgallant 2 mm conventional deadeyes to smaller size? but it is just my plan... I didn't try to do it... And I think to use liquid plastic to replicate/ casting blocks and dead eyes as much as I need in different sizes and shapes... they are seems too expensive for me if planned to purchase all ness-ry quantity on the market... I planned to purchase 10 pcs of each sizes and shapes( high quality professional made blocks and deadeyes) I need and than to replicate them in epoxy or in plastick...as much as I need...
- 399 replies
-
- 2
-
-
- cutty sark
- revell
- (and 2 more)
-
Ah, sorry, that chain You was lucky to find ,smallest one , how many links per cm is it ? is it "Trumpeter" made/ product? sure/agree that clipper sheets( of this period) need to be made from shain! even we have to sacrifice a scale a little bit
- 399 replies
-
- 1
-
-
- cutty sark
- revell
- (and 2 more)
-
Good day Bruma, some vital important questions for me, 1. What are the sizes of deadeyes which you use? all 3 sizes ( main,top and top gallant)? or You use more sizes? Where did you find them( deadeyes)? 2. I saw you use same size for top gallant and top mast deadeyes? why? or it looks same only on the foto?
- 399 replies
-
- 1
-
-
- cutty sark
- revell
- (and 2 more)
-
Good day shipman, for this site ,for ordering , maybe we could use google translator?...sometimes it works but this smallest chain size, 16 links per 1 cm , may be it will be good for sheets? or it is still too big?
- 399 replies
-
- 1
-
-
- cutty sark
- revell
- (and 2 more)
-
Good day Bruma, Oh! Exelent work!!! Very clean and accurate! studied your posts with great interest! Will follow your build with great interest! Have plan to assemble this kit somewhere in future ... found some shops with chain and steel ropes... there are sizes in chains(segments)/cm http://www.greenstuffworld.com/en/97-hobby-chain https://lavka-korabela.ru/products/tsep-10-zvenev-sm?tab=tabOptions https://www.shipmodeling.ru/shop/model_elements/tsepi/ it looks like smallest will be 16 links / cm - link of 0.65 mm approx in length? Shipman mentioned somthing 0.45 mm link...
- 399 replies
-
- 3
-
-
- cutty sark
- revell
- (and 2 more)
-
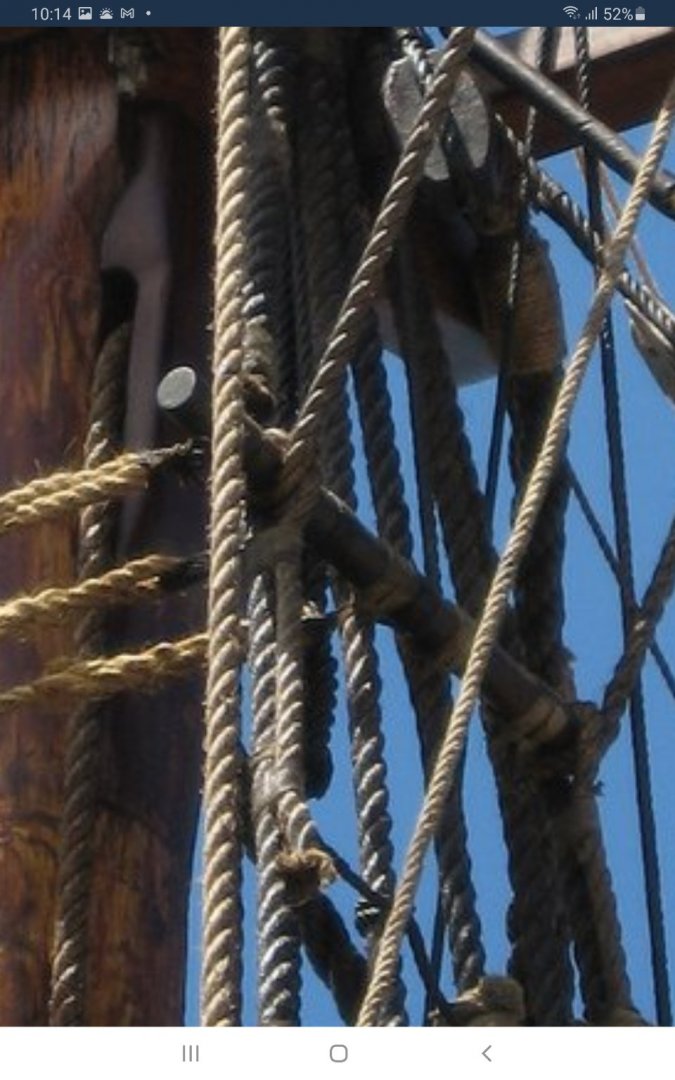
Good day, Assembled model generally looks right , but masts are not strait anymore probably due to excessive tensions of the rigging... There are more good pictures with clear details which You could use as guidance for making rigging
- 265 replies
-
- 2
-
-
- Golden Hind
- Airfix
- (and 1 more)
-
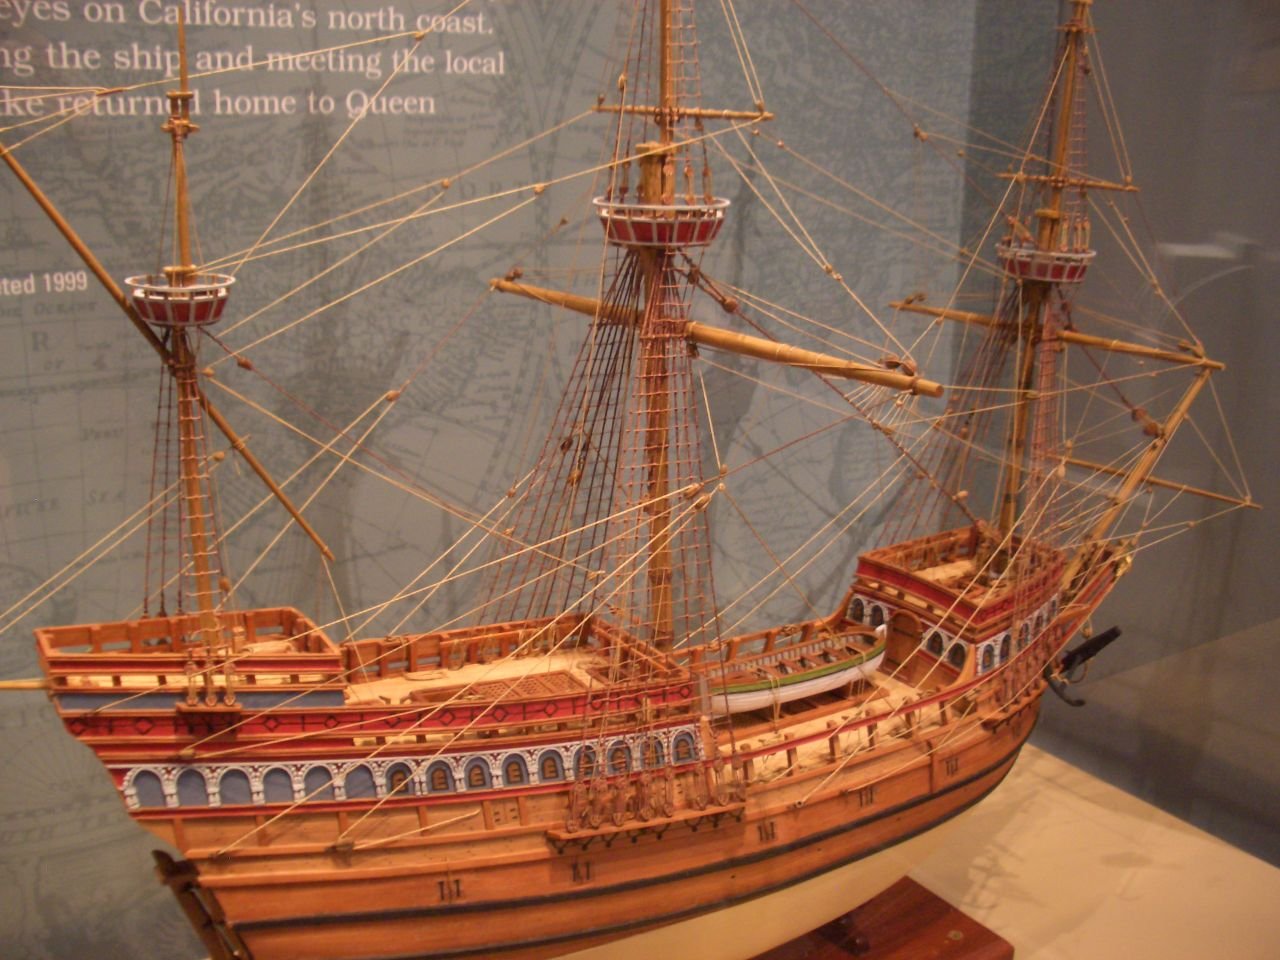
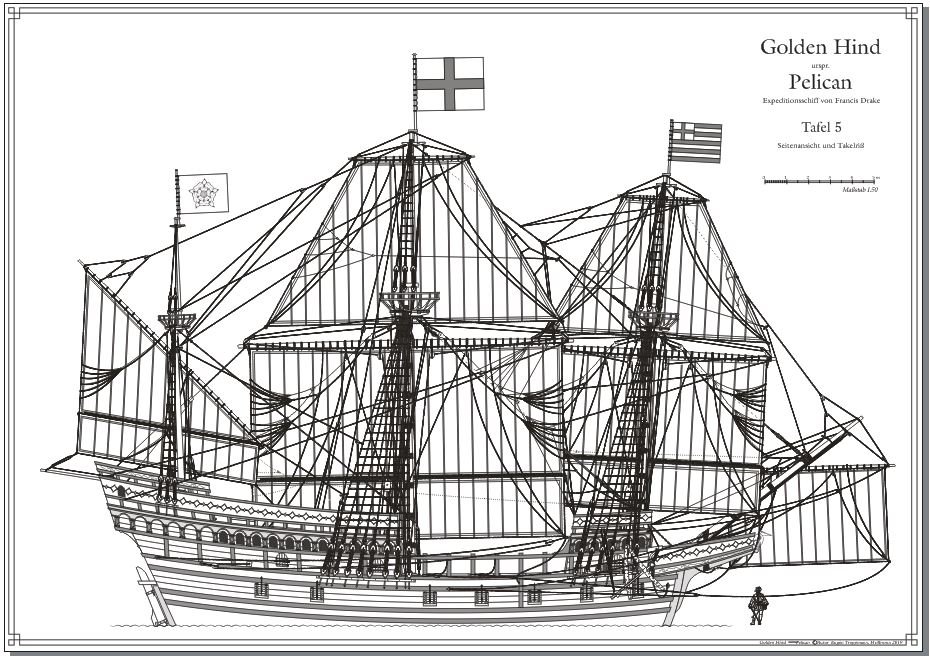
Good day Andy, I will follow as well !!! I like galoeon's period... :))) Good luck in building!!!:))) ps compare to the replica itself...at the first glance... deadeyes kit's is a wrong shape ,they need to be in triangle form, and belaying pins form/ shape as well are not correct...and moreover actualy no need them fitted in pinrails( if supposed to be fitted by the kit) during this period...
.thumb.jpg.237cef265223a039b152ff76a8379797.jpg)
-
Good day, Dear Bosco, I don't know why , but your stays , fore and main are fitted in wrong way... very wrong :))) for example,there is no room for fore sail being left...??? Or You did it in purpose? In such case just discard my comment as unimportant
- 265 replies
-
- 2
-
-
- Golden Hind
- Airfix
- (and 1 more)
-
Good day, Dear Baker, As I knew, belaying pins were in use - such artefacts were found in ship wrecks of 16-17 centures...founds of remains of W. Barents expedition for example...there were belaying pins ... may be You meant pin rails? as I understood,they were not in use in that period
-
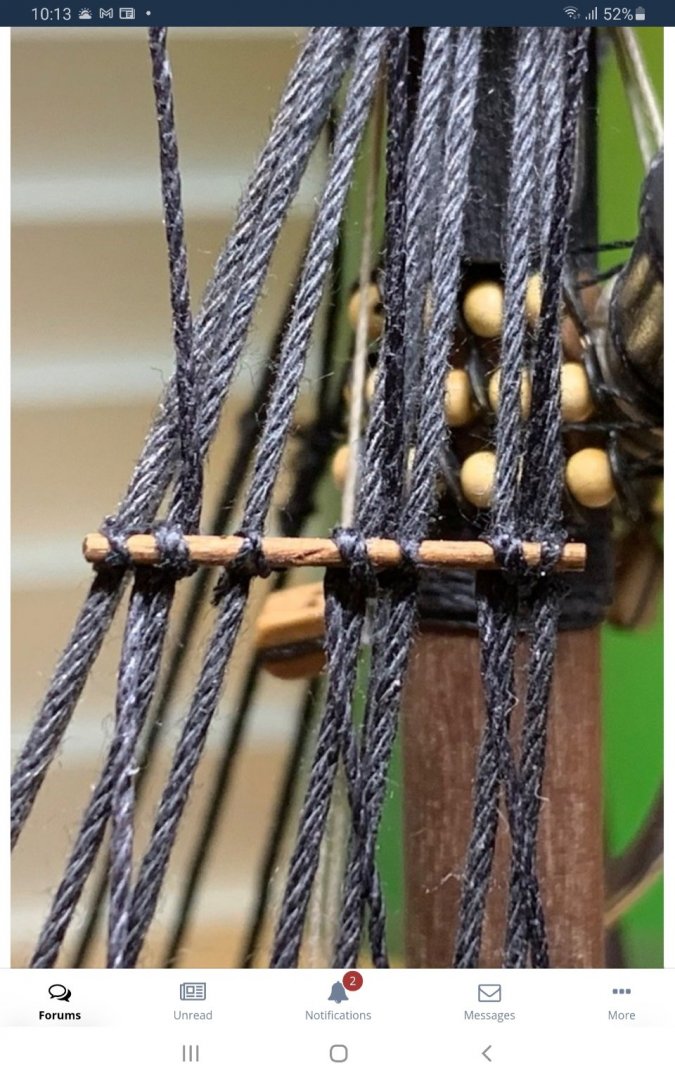
Perfect!!! Looks Very Good!!! I read somewhere that talreps/ or deadeyes lanyards of standing rigging tarred all the way as well... means not only ratlines could be dark colors... I didnt darkening lanyards on my model...may be need to do it
-
thereis GH reconstruction by Aker
-
Good day Bill, This is correct for the period of 16 - 17 centuries No pin rails at all ! they not in use yet some belaying pins however coud be used - fitted in holes drilled trough railings...- see Vasa artefacts and Mary Rose as examples.... no pinrails You will see as well on the drawing GH made by eugen.t I posted above
-
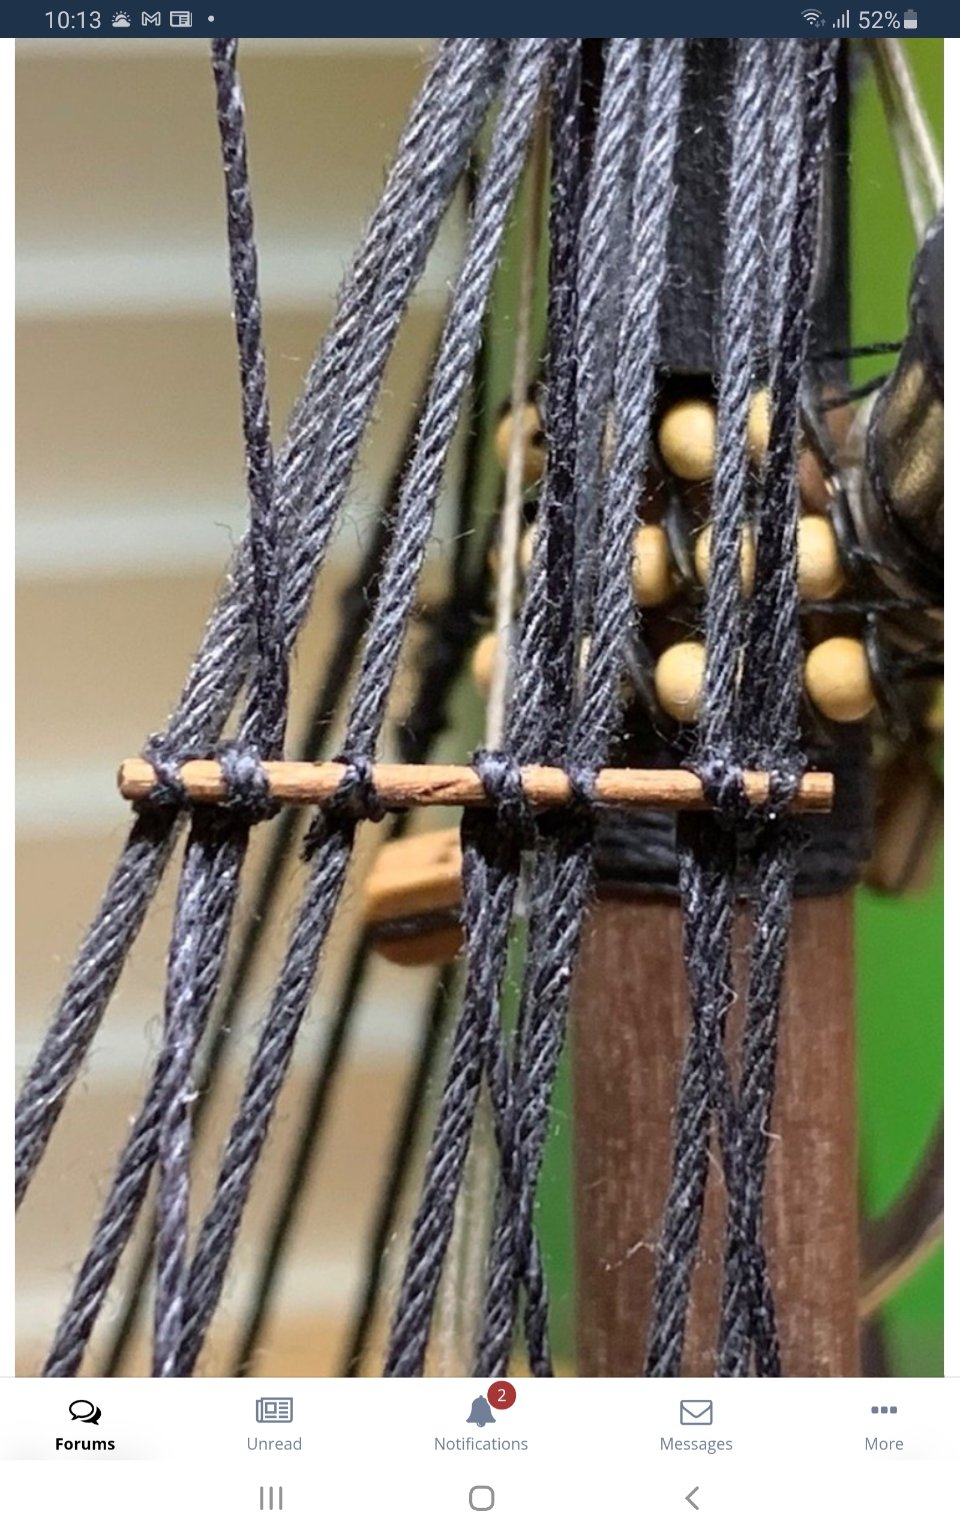
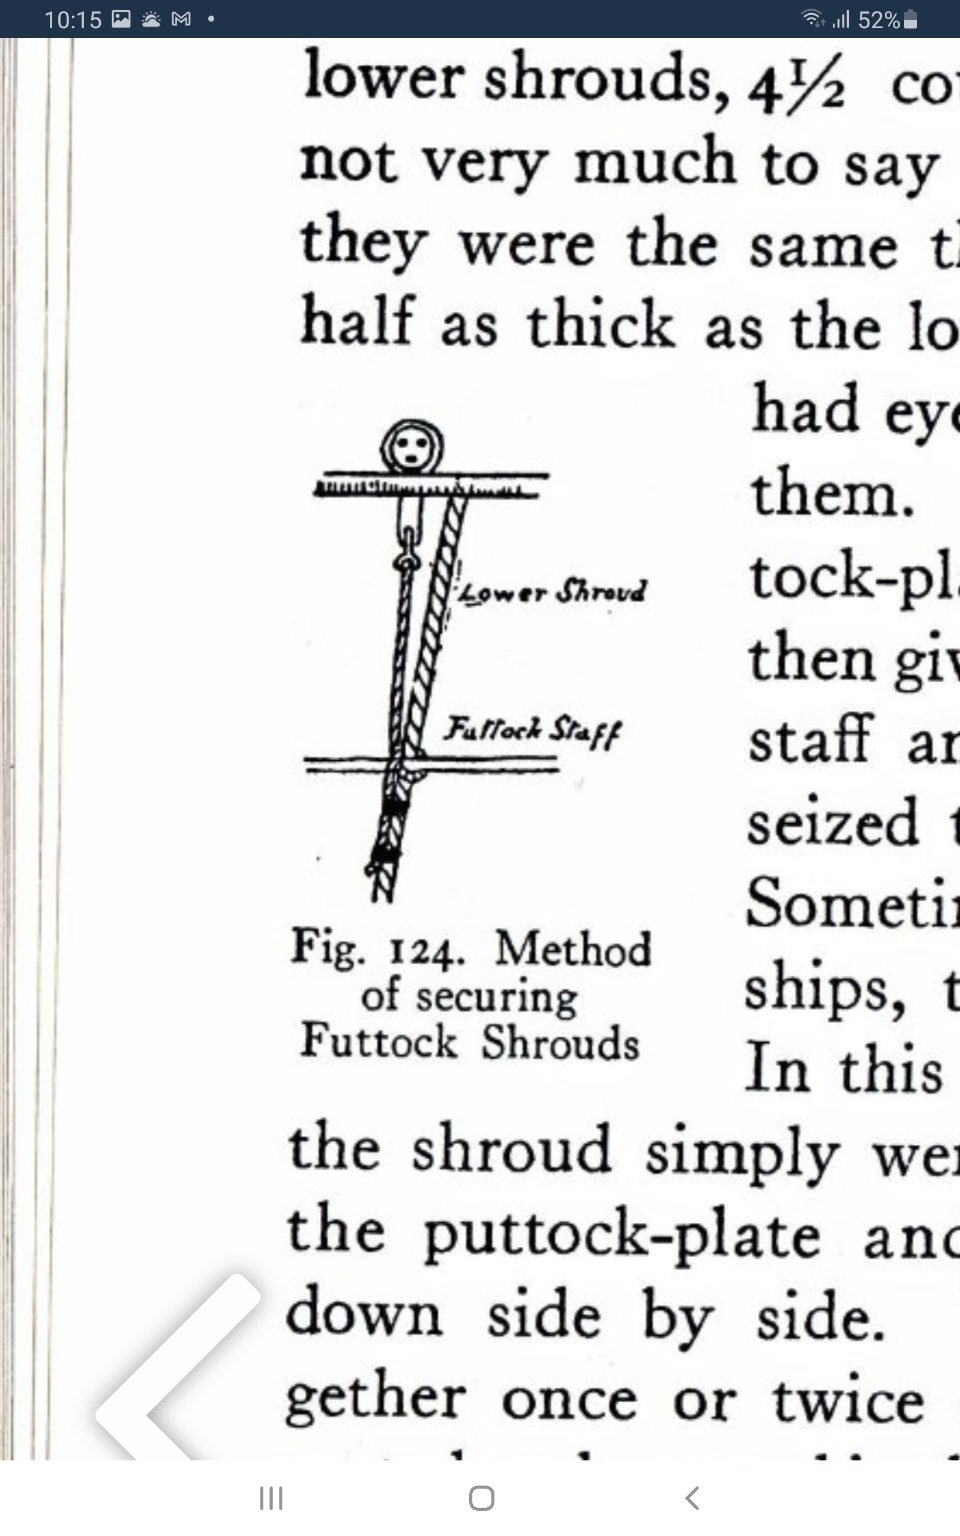
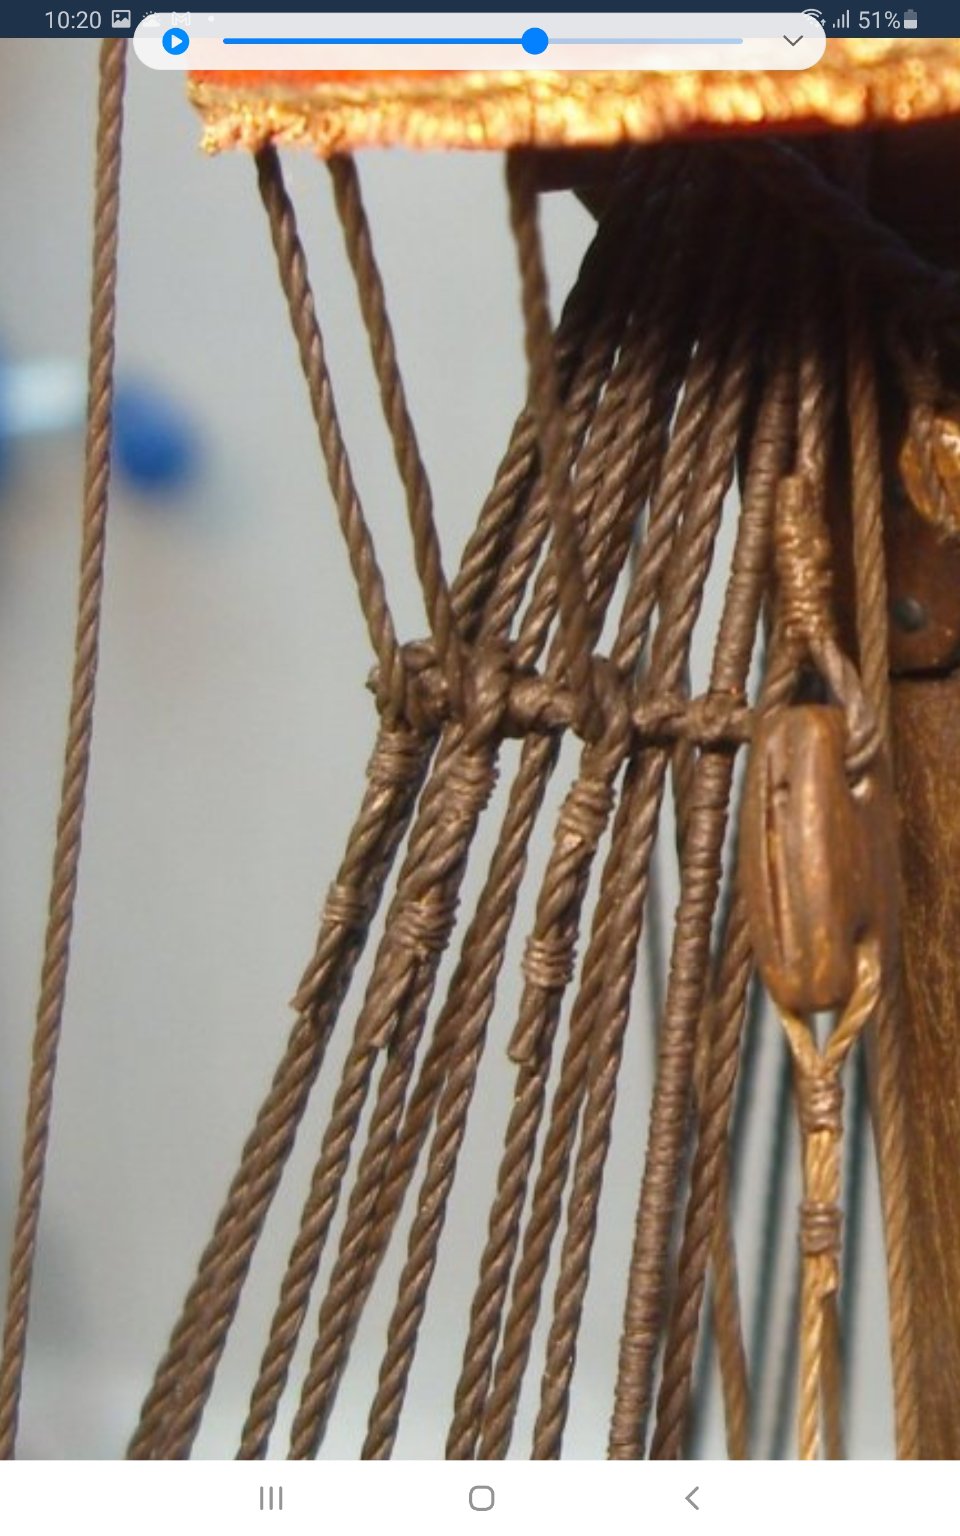
Jonathan, Good Day! O!!! Yes!:))) It looks very nice now! However,One moment!!! please check carefuly how You did pass the line around staff... You started from inside,but need to be started from outside: than f-shrouds goes down under f-staff passes behind main shroud than goes up and outside between f-shroud and upper part of m-shroud thas making half hitch and down along main shrouds seized to m-shrouds and cutted in ness-ry length


-
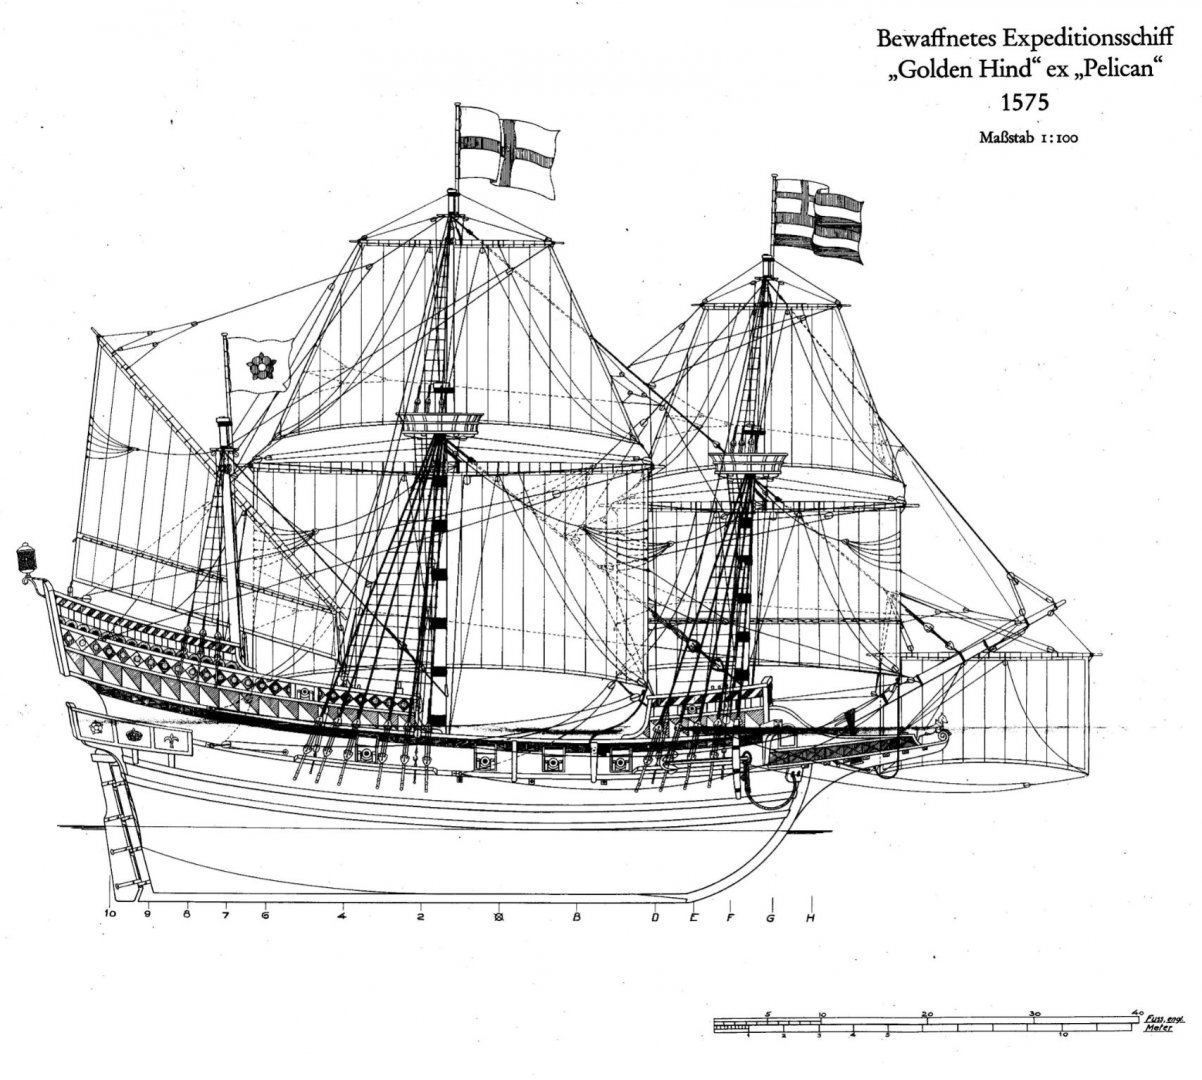
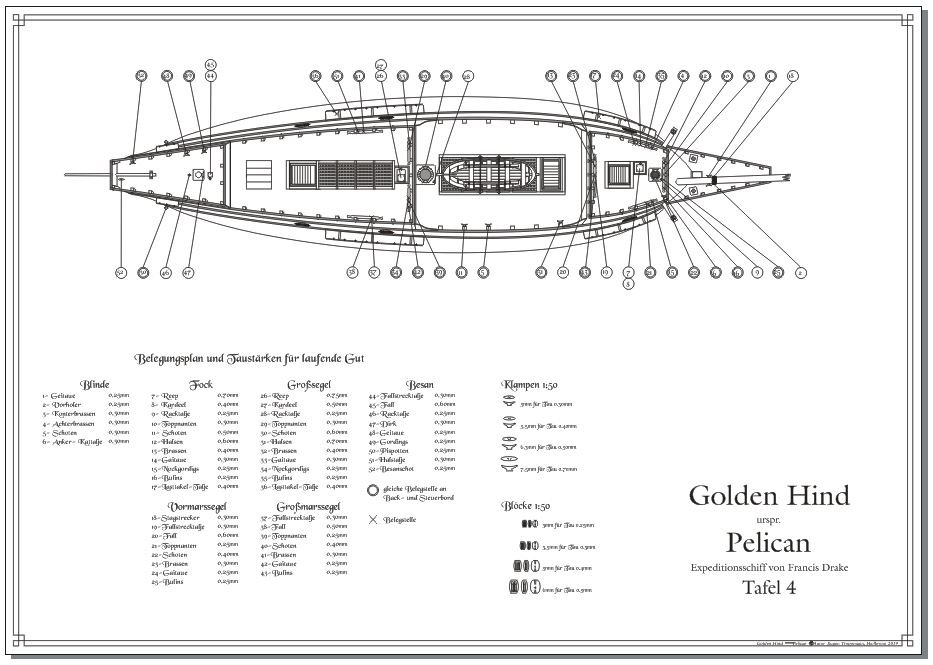
Good day Bill, There are exelent rigging plans made by our colleague from Germany eugen.t https://www.segelschiffsmodellbau.com/t6619f952-Alternative-Rekonstruktion-der-GOLDEN-HIND-11.html You could use this rigging plans as well... rigging of Mayflower(replica) and GH in reconstruction are almost identical...
-
Good day Ron! How is going You and your galleon? Do You have any progress in building? All the Best!!! Kirill


.jpg.0e88b009a4a694fd907fc4690451dae5.jpg)