Louie da fly
-
Posts
7,989 -
Joined
-
Last visited
Content Type
Profiles
Forums
Gallery
Events
Everything posted by Louie da fly
-
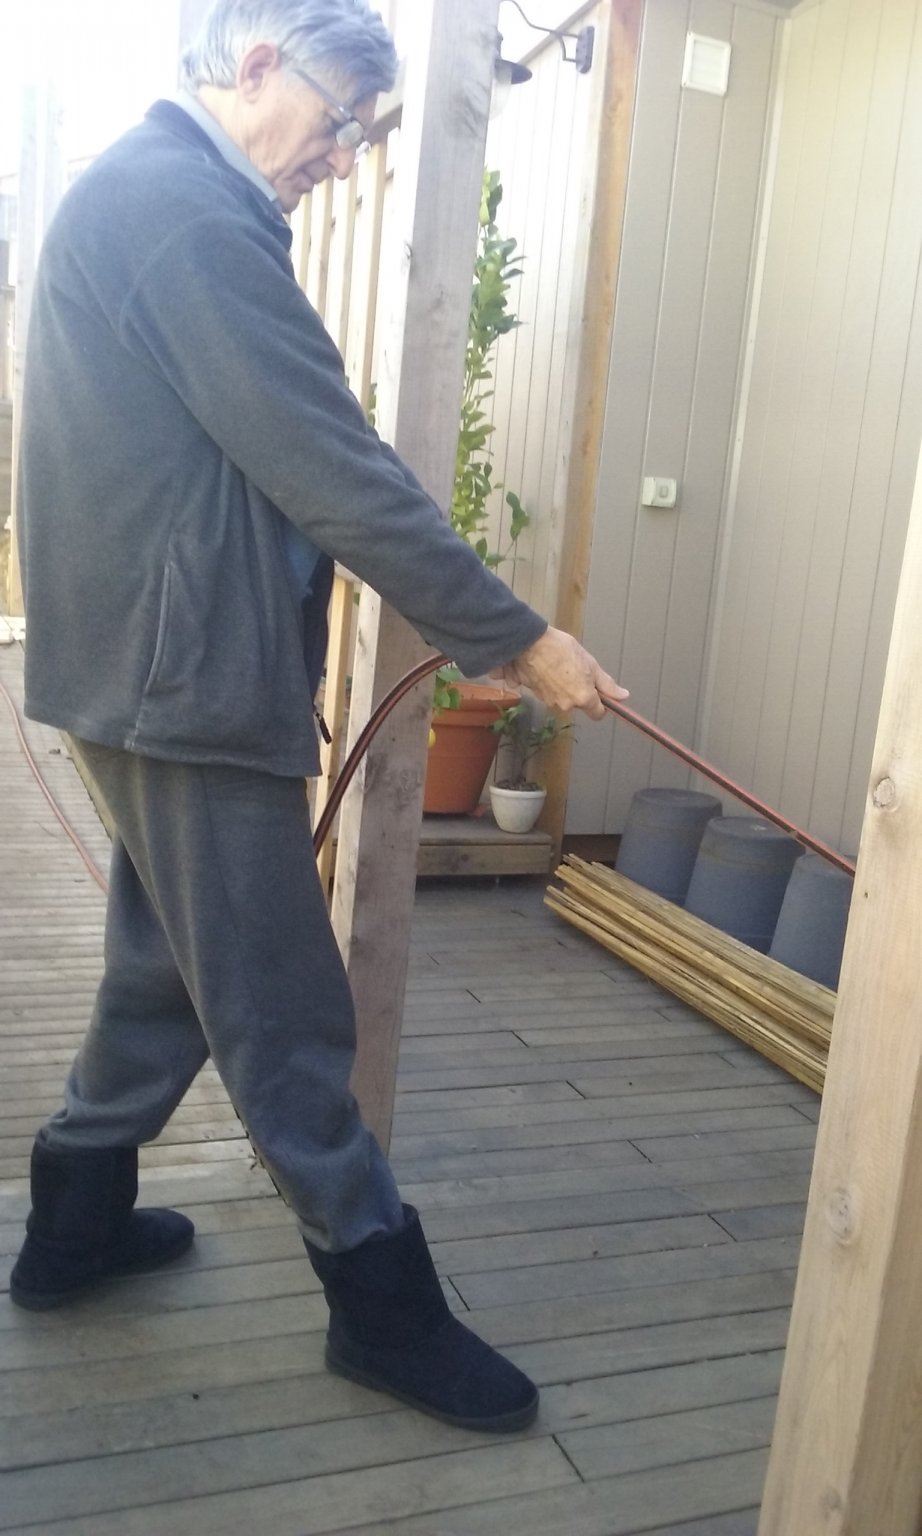
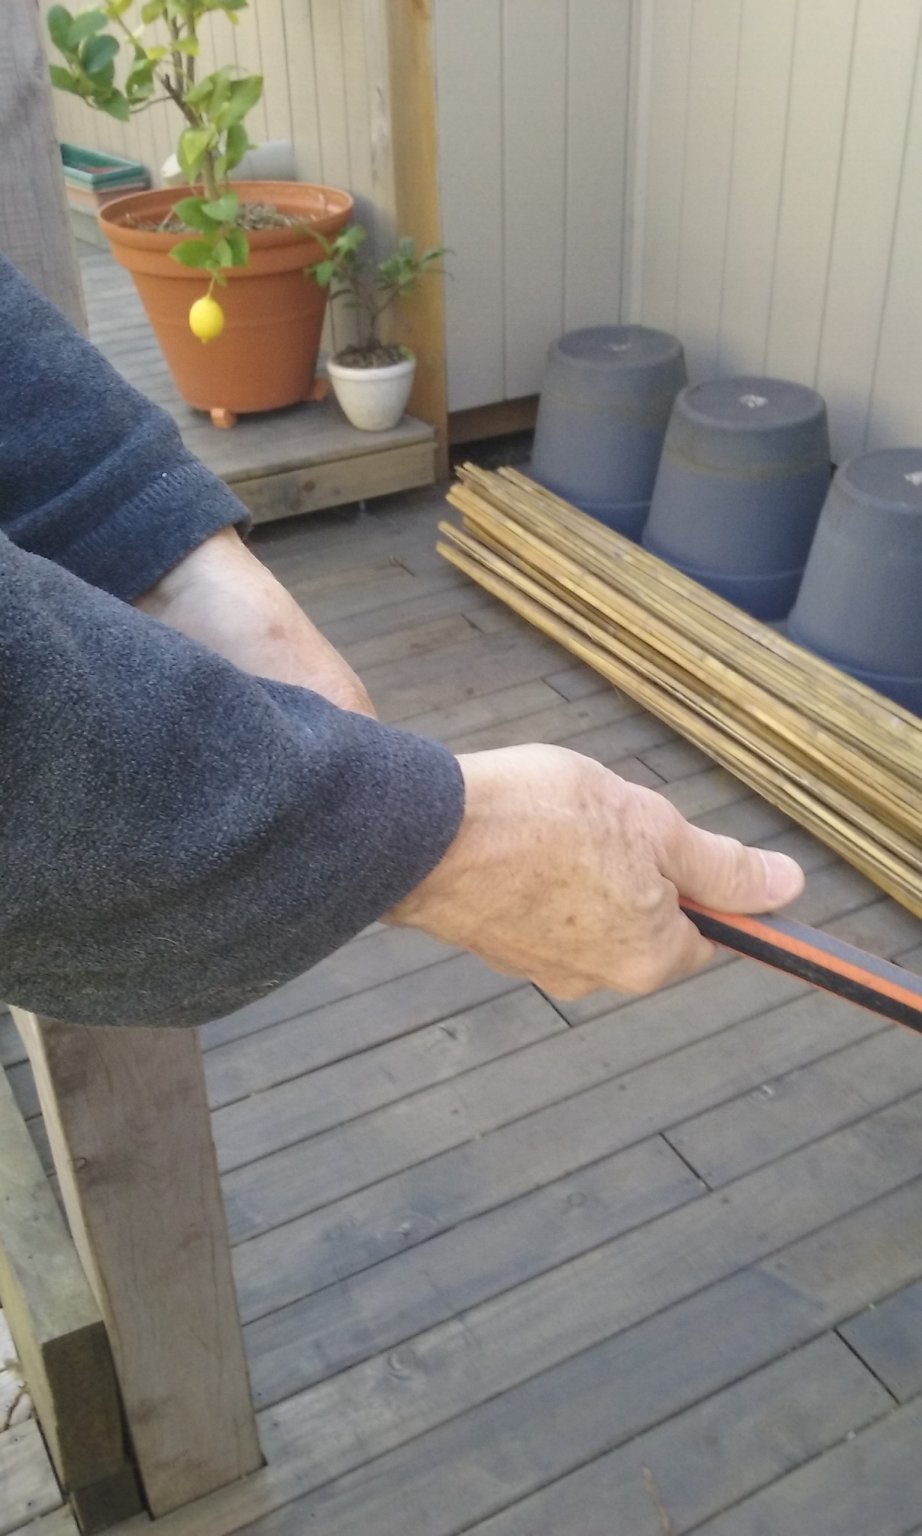
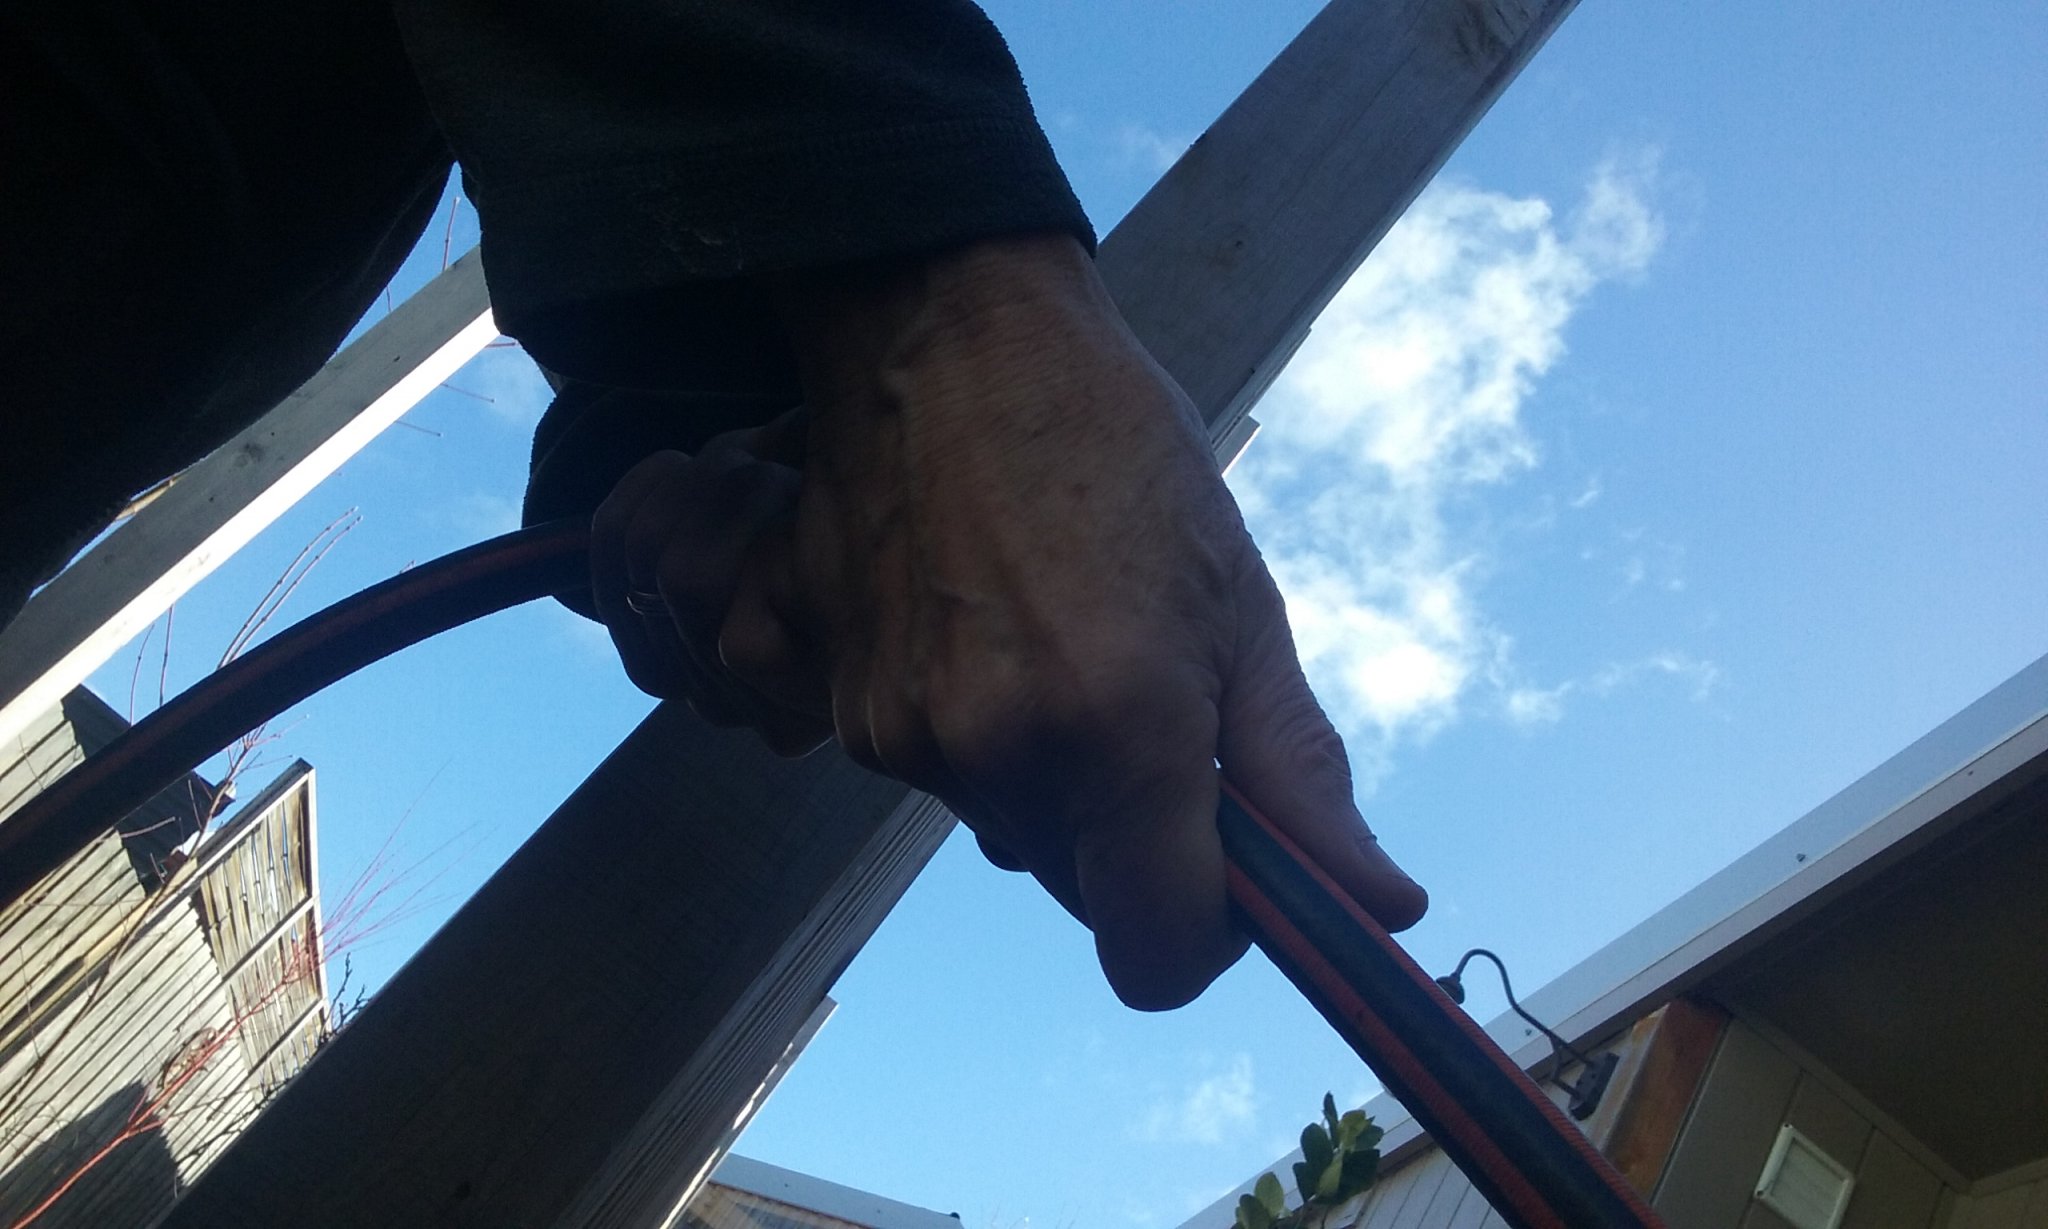
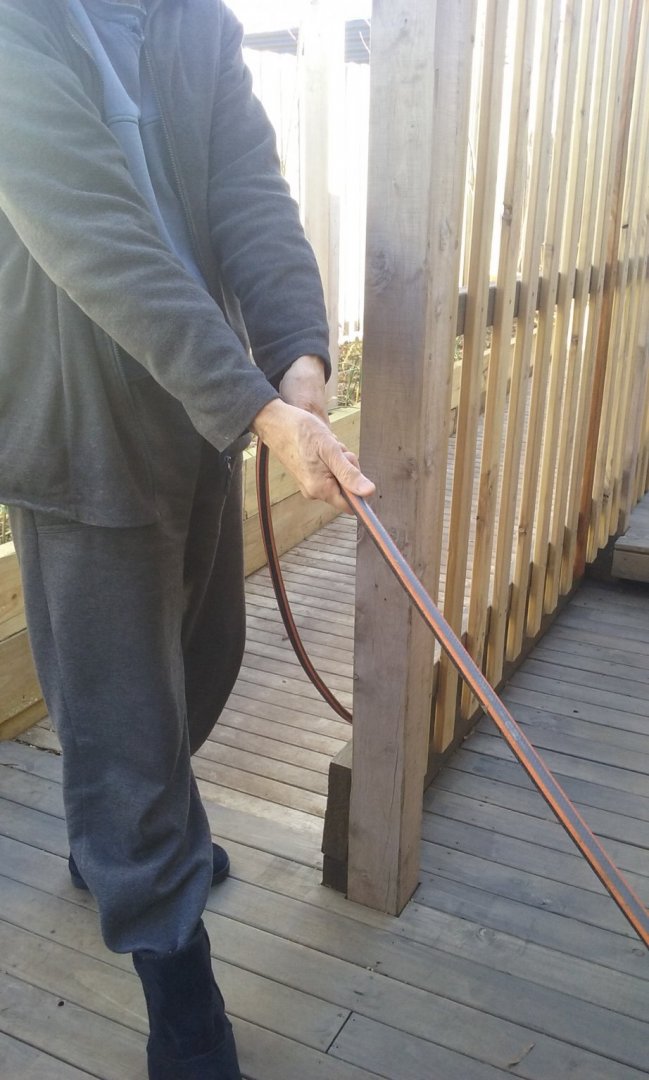
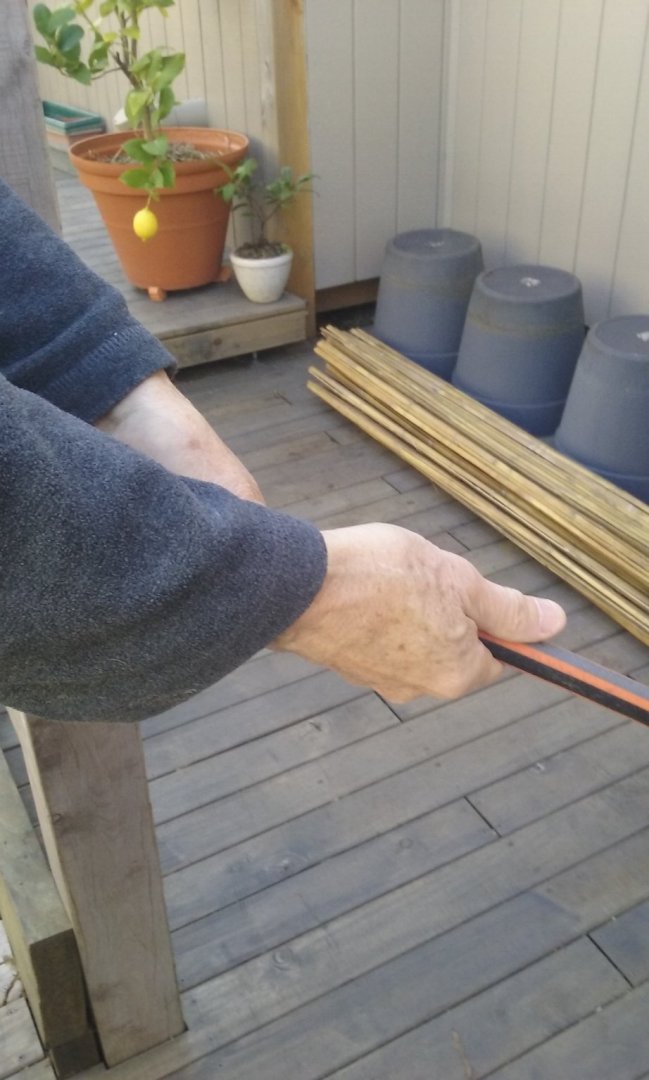
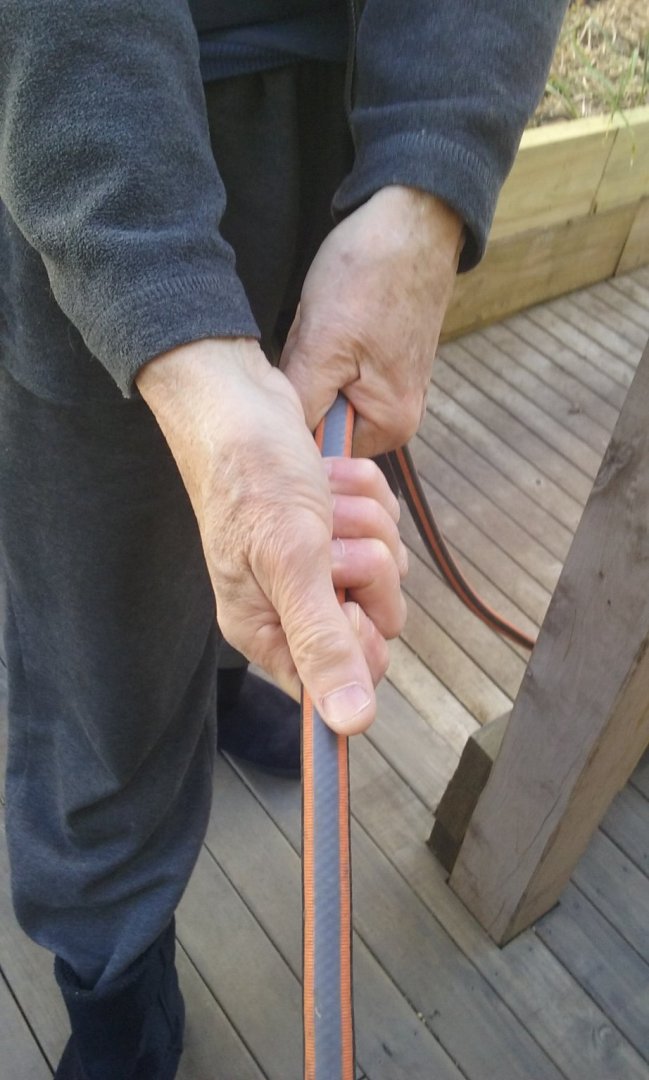
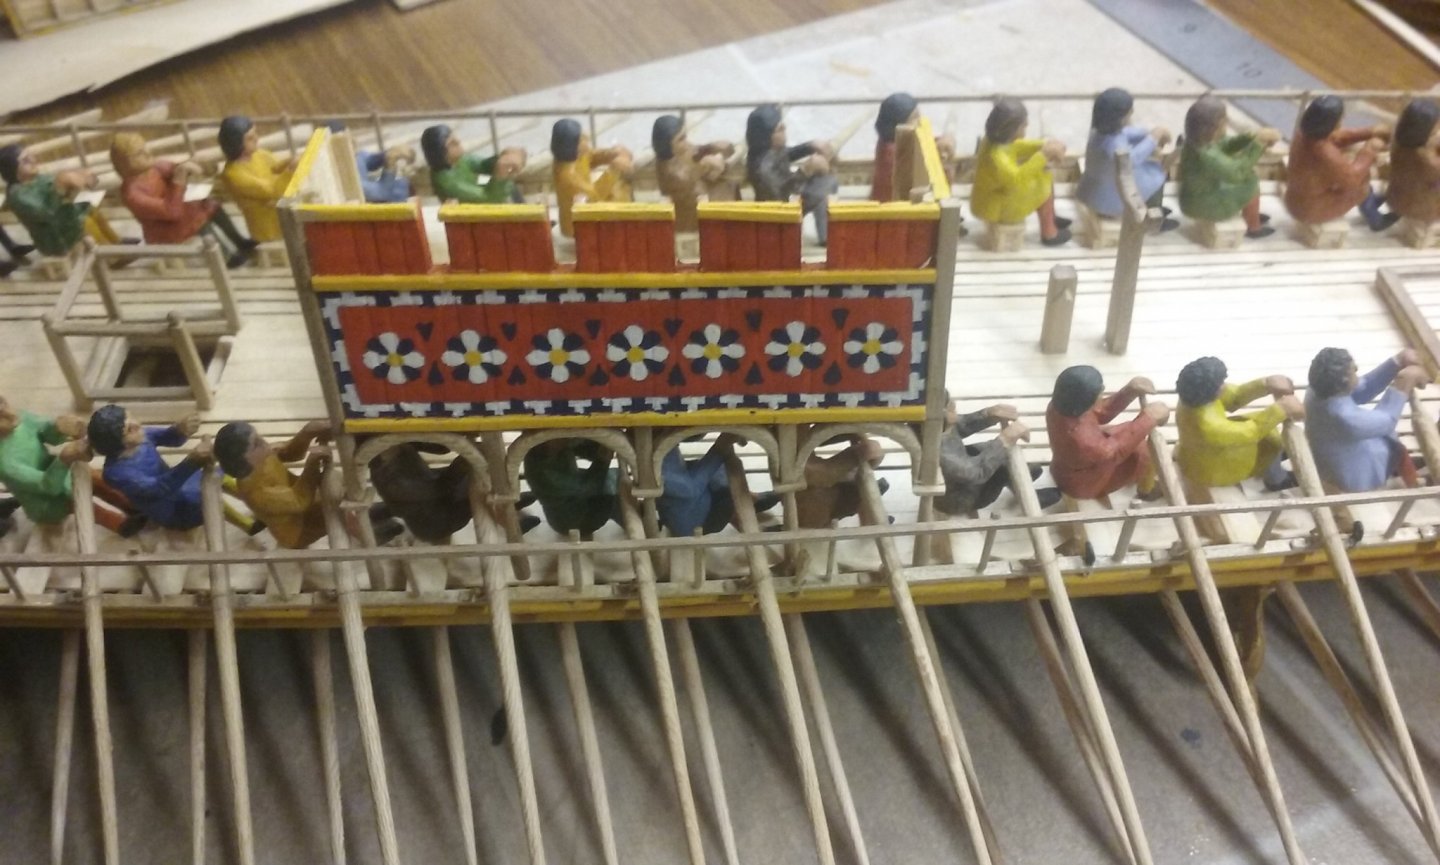
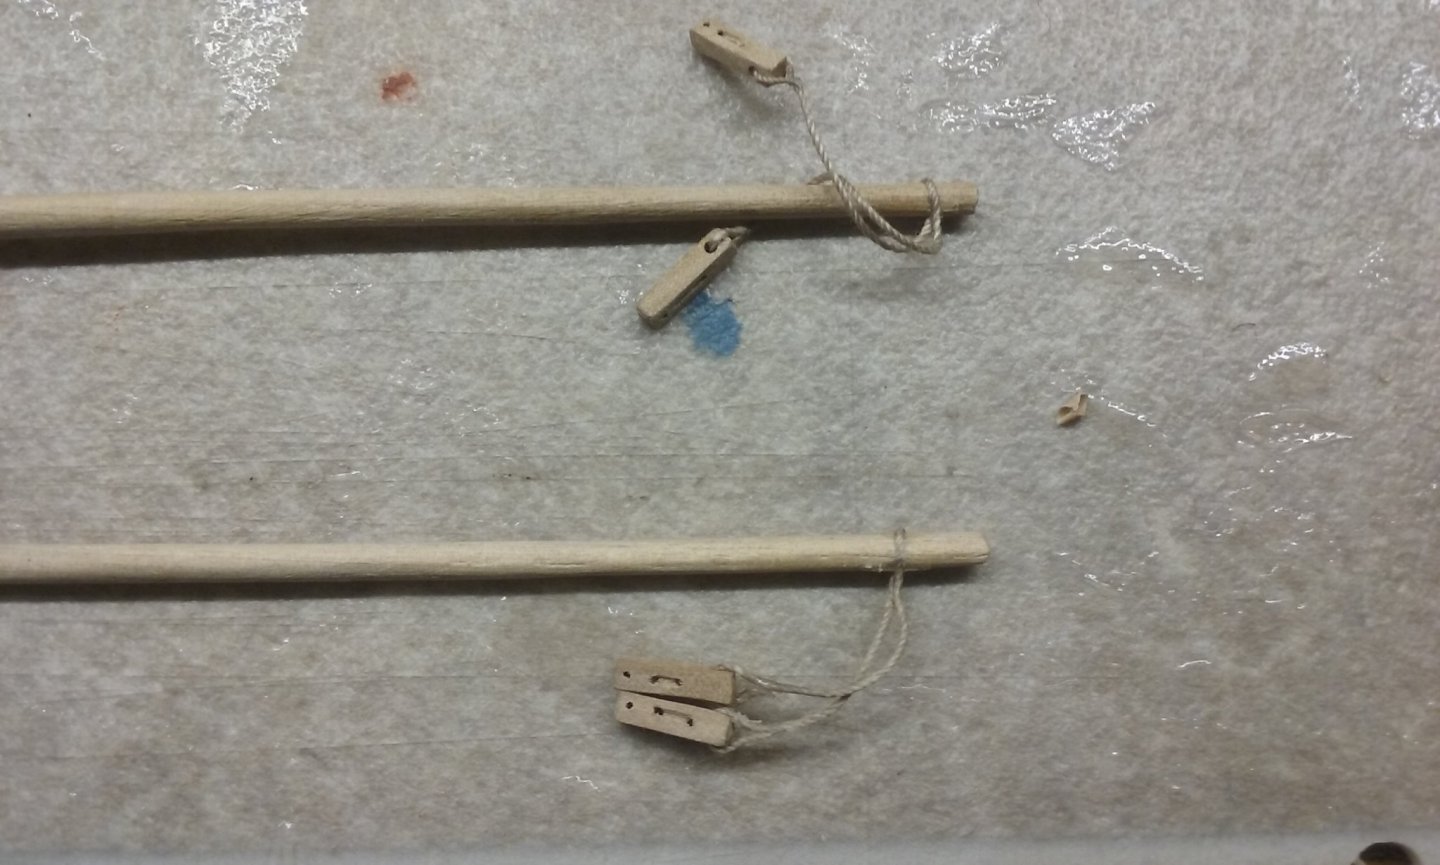
 I've finished re-making both the castles. I had to juggle the spacing between the castles and the pump - basically by slotting the inboard columns further into the body of each castle. Note that I've taken off the rear uprights of the side "walls" and moved them inward, and cut a slot into the back of each column where it crosses the floor structure, so the column sits flush with the back of the "wall". But now there's (just) enough room for someone to get between the pump and the castles on each side. I thought about removing the capitals from those columns so people wouldn't bash themselves against them, but when it's a contest between aesthetics and practicality, aesthetics has to win (ask Frank Lloyd Wright about his beautiful - but leaky - flat roofs!) I decided to move the castles a little aft to allow more room for the oarsmen to swing, as mentioned by Landrotten Highlander above, and cut into a couple of the benches a little to allow the columns to slot in. It seems to be the best solution. Unless you look really carefully you can't see that it's been done, and the oarsmen look better without their reach being obstructed by the columns. I'm not quite ready to glue the castles in place - there are other things that need to be done first - but it will be soon. But in other ways it hasn't been my day. I discovered I'd miscalculated the number of sheaves necessary for the halyard knights - I'm really rubbish at this sort of thing - the halyard block has three sheaves, but the knight needs four so the downhaul can be pulled horizontally back to the bitts. So I had to start again from scratch to make new knights each with 4 sheaves instead of three. That's three versions of each knight I've had to discard as the build has evolved. And the fore knight was all finished - in fact it had been glued in - when I realised there was something wrong. In drilling the sheave holes (with a hand drill) I'd somehow got them a bit skewiff so the rope which went into hole number three came out the other side at hole number two! And the same with holes four and three. There was nothing I could do about it - I had to pull the knight out (fortunately the glue was still wet ), trash it and start again. So that's yet another knight I've had to discard and re-make! But now I've finally completed the fore knight - everything's now all square and ok - installed the tackle from it to the halyard block, glued the foremast in place and temporarily strung the block to the mast. The halyard itself and the rest of its tackle will be added later, but the knight and its tackle had to be done before the mast was glued in place. I think I should have added the shrouds to the mast before I put it in, but in all the excitement I forgot. I think that can be remedied without too much trouble. Finally, I've decided to go back to "version two" of the sail configuration, with the foresail hoisted and crewmen clinging to the yard unfurling the sail with the after sail, also furled, in the process of being hoisted up. So I get to use those figures I carved after all. Today I asked my lovely wife to take photos of my hands as I pulled on a garden hose, pretending it was the halyard downhaul, so I could get the hands correct on the carved figures. That's it for now. Next I have to make a new 4-sheave knight for the after halyard. Wish me luck!
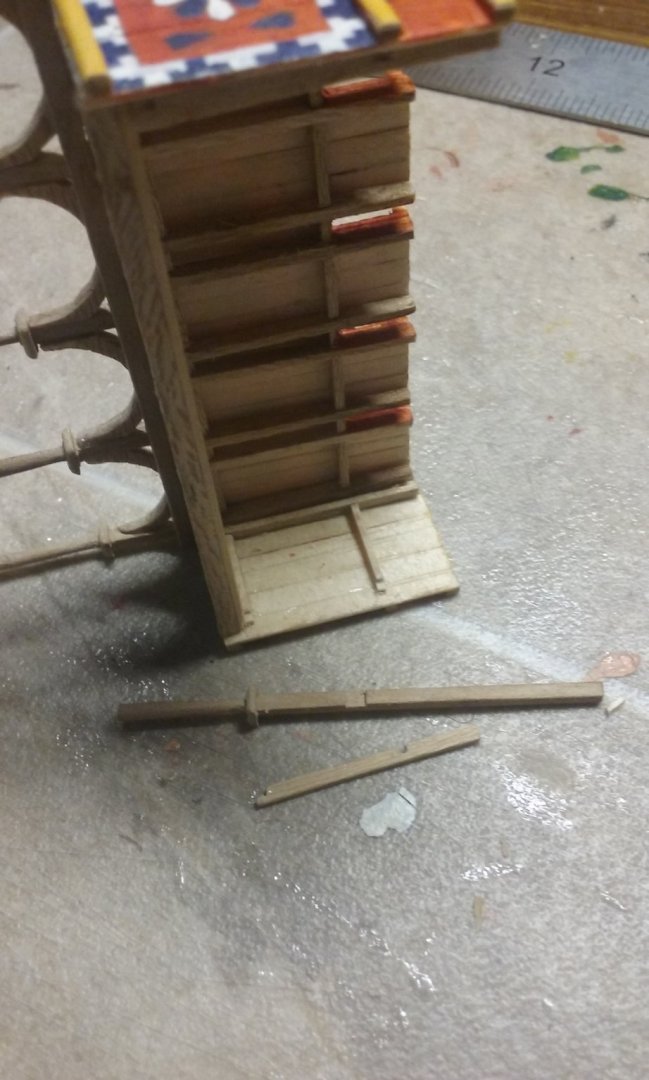


-
So how thick are your strakes? It might be possible to make the angle shallower so it goes further along the strake, but there's obviously a limit to that (the "thin end of the wedge" gets too thin). The idea of fully carved stem ans sternposts is very cool. It'd be really nice to see. And RC would be good too. Just sail, not oars, I suppose? I'd be interested in what you have to say about efficient square sails, too.
-
Good word. Not a bad name. We still have those words in English, though not all that commonly used nowadays - swart or swarthy, and mew for a gull (named after its call, perhaps?) I have to say, having seen the giant child-eating gulls they have in the UK I was very happy to get back to our normal sized ones. The scarphs (yeah alright, I like traditional weird spelling) on Viking ships appear to be in the thickness of the planks rather than the width, as in this pic from Cathead's build log Was that what you had in mind? Though a scarph of this type would be best lined up with a frame, obviously it doesn't have to be.
-
Fair enough. 2mm isn't much - it's probably hard to see the difference between the two mast tops - so it's probably right to do all that work again (sigh) tomake a new top that looks right on the foremast. I do know what you mean . . . If I had a dollar for every change I've had to make in a scratch build, I'd have - several dollars.
- 756 replies
-
- 4
-

-
- galleon
- golden hind
- (and 2 more)
-
Nice clean work, Slowhand. Looking good.
-
Those tops look very good, Patrick. It's hard to tell from the photo whether the foretop is too big because it's closer to the camera than the maintop is. Just check it by eye to be sure, or take a photo from directly side-on, so you don't get the camera messing up the proportions. Otherwise you may be giving yourself unnecessary work.
- 756 replies
-
- 1
-
-
- galleon
- golden hind
- (and 2 more)
-
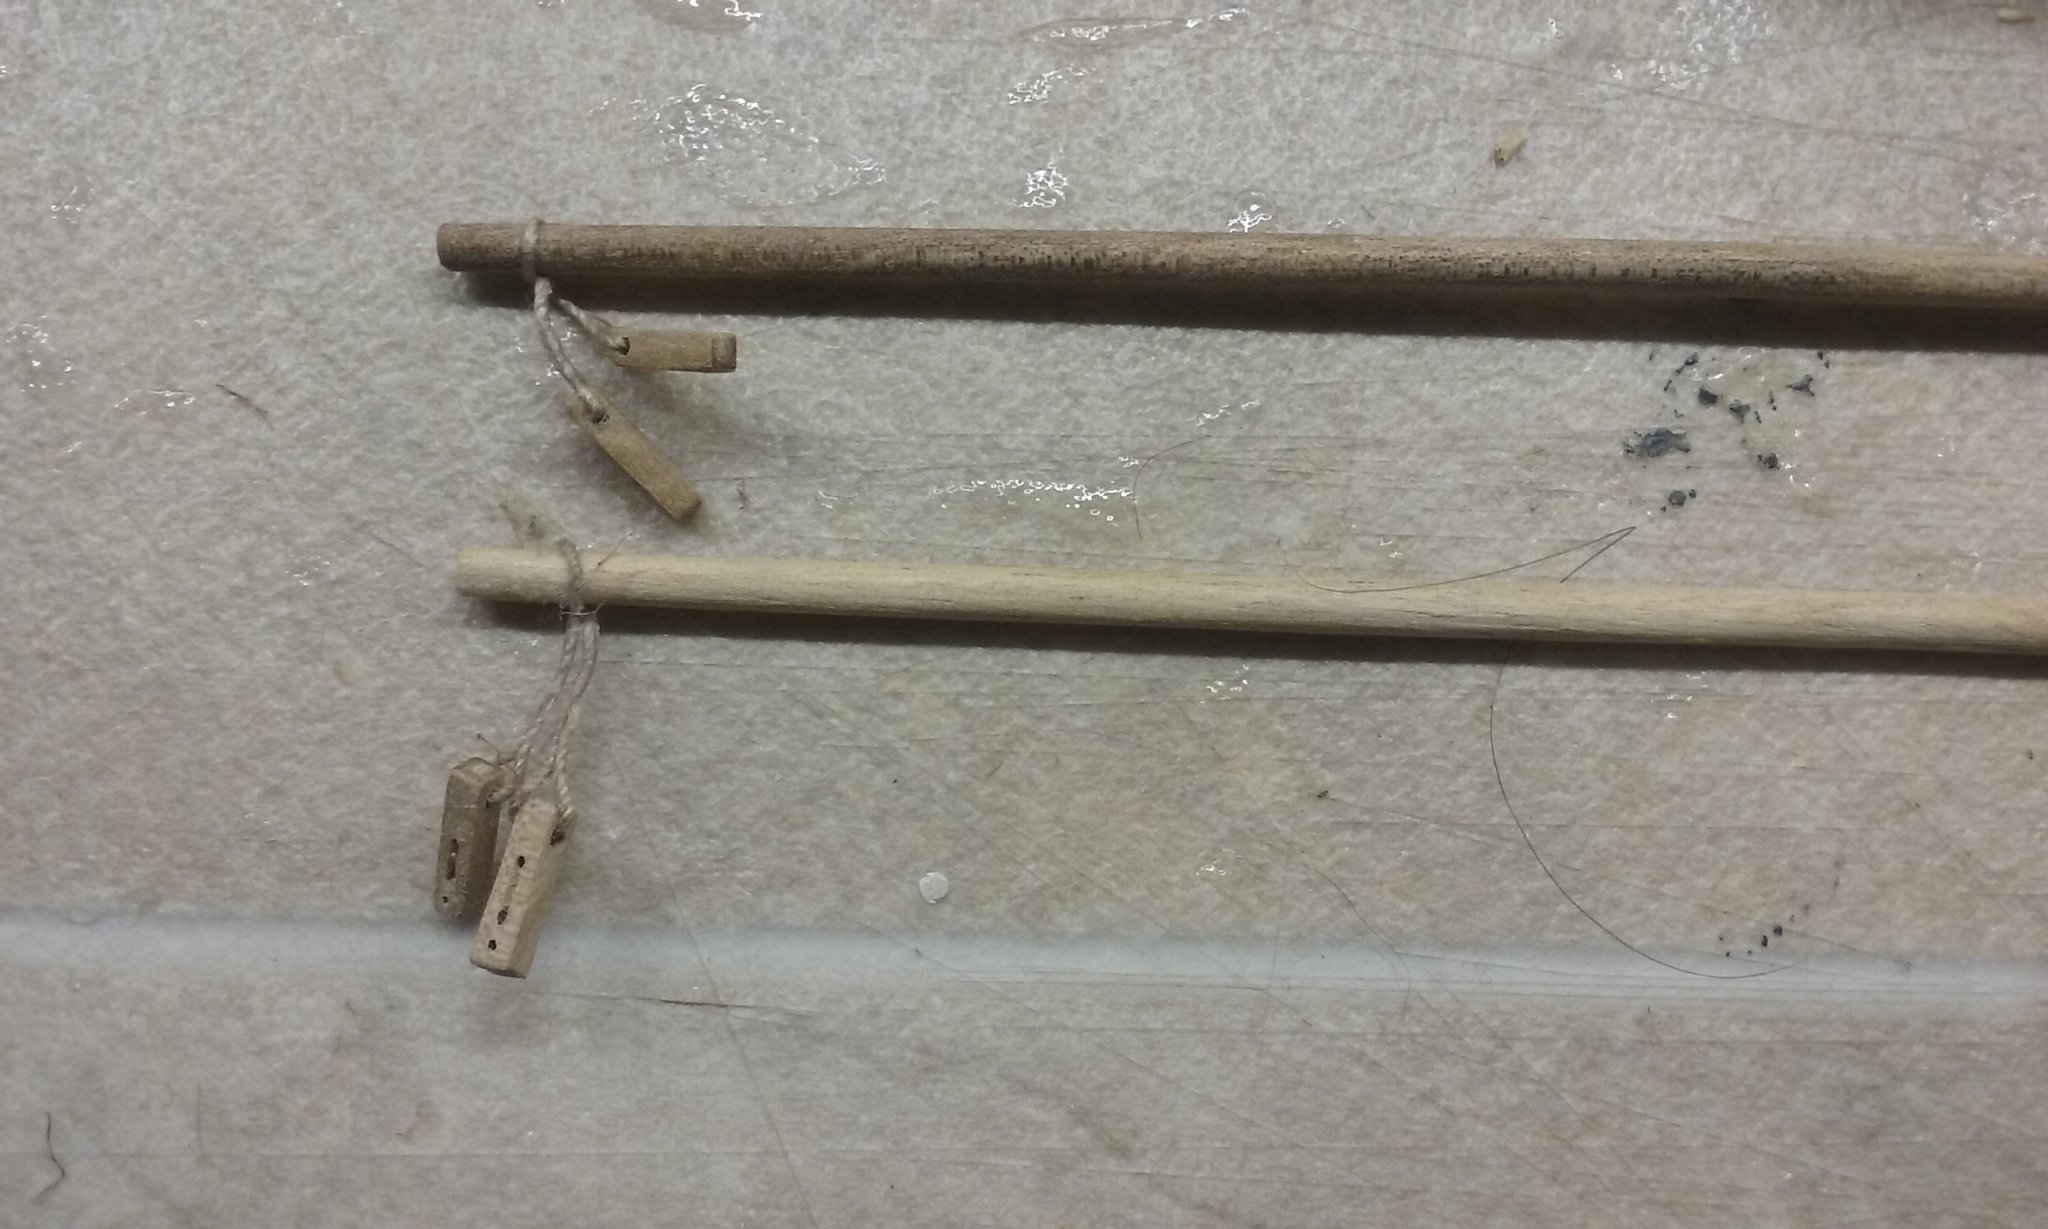
That's looking very nice. I seeyou have a couple of eyelets and cords in the plug for when you need to lift it out. Good idea.
-
Nice repair, and I agree about not repairing the cracks. It's a fine line to navigate, but the client brief was to maintain the aged look and you're doing the right thing. You're not trying to make new, but to repair what absolutely must be repaired without disturbing its (very attractive) patina of age.
- 71 replies
-
- 4
-
-
- great harry
- henry grace a dieu
- (and 3 more)
-
You could still use the three part system for the jig but bolt it together, so it can be unbolted and removed later. So long as the joins were solid enough that should work ok.
-
Well, there was a famous longship called Ormen Lange (long serpent). Perhaps you could call this one Kort Orm (Norwegian for short serpent - at least according to Google Translate). Glad you realise this. Good to see you're taking the right attitude . . . . BTW, the ship's looking good. And step by step you're overcoming the obstacles as they arise. Who knew that staining the wood would make it swell that much? Haven't heard of that one - I did know it as cack-handed (the idea doesn't bear thinking about), or now you're in Oz you'd be called a molly-dooker.
-
Yes, a bit of experimentation to see what works best, and you should be ok.
-
Good idea. I think I'll make use of it for my own build.
- 179 replies
-
- 4
-
-
- shipyard
- wütender hund
- (and 1 more)
-
Hello again, Guy. Once you've decided what model to make, it's a good idea to start a build log. The instructions on how to do that are here. Having a build log lets the rest of us see your progress, and offer advice and encouragement as you go. And the members here are a very supportive and knowledgeable community. Looking forward to seeing your model under way!
-
New Member: Boats Billy, Wichita, KS
Louie da fly replied to Boats Billy's topic in New member Introductions
Good to see your model, Billy. The thing to do now is start a build log and upload your photos there. Then everybody gets to see them and follow your progress. Instructions on starting a log are here: You'll find a lot of helpful people along the way who'll be able to offer advice and encouragement as you make your journey. -
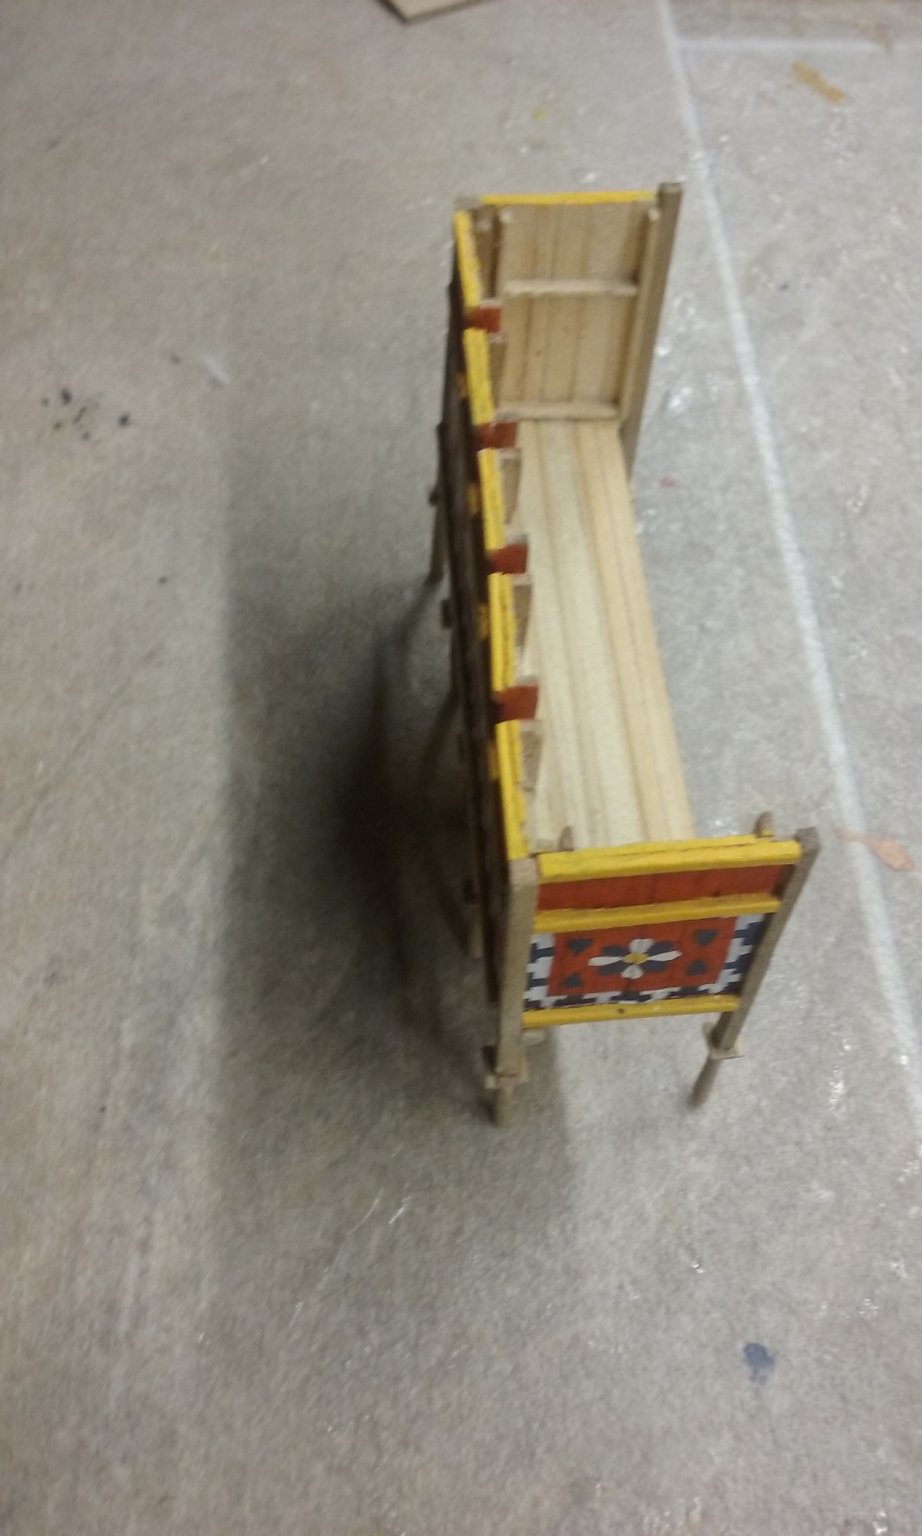
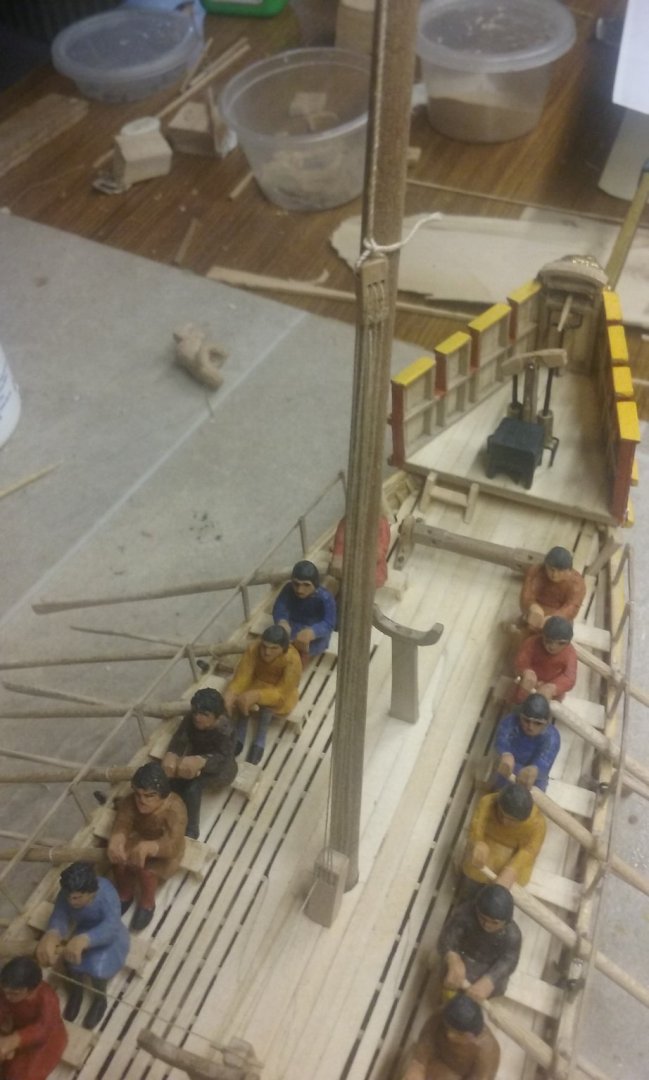
PhilB, I wouldn't rebuild the castles - the problem is not with them but that the spacing of the benches is unequal. Currently all the columns are evenly spaced, which is the way it ought to be, and the arches are all the same size, which looks better than if I'd lined the columns up with the benches (which is where the original mistake occurred). I'm stuck with it - short of a major rebuild of the ship I can't do anything to fix the bench spacing. And you're right - nobody will notice but me - when you're looking at the model the oarsmen under the castle aren't terribly visible anyway - the photo is taken from a viewpoint lower than normal eye level and exaggerates it (as they often do). However, for my own peace of mind perhaps I could have the offending column come down through the bench - or at least cut it off short so it looks like it does. Again, a compromise, and I'm not sure which compromise I'd rather live with. LH, I didn't take it as a criticism - in fact I hadn't noticed it myself. But whether I decide to cut the column short or leave it as it is and treat it as a learning experience I haven't yet decided. There are plenty of things about the model I'd have done differently if I did it again (don't ask me about the sternpost) - maybe one more won't to make too much difference. To be honest most of my attention at the moment is on how I'm going to do the rigging. Onward and upward.
-
I'd like to LH, but I'm afraid I've used up all the adjustment available to me - at least I think I have . . . I'll sleep on it. The castle is only dry fitted for the moment. But if I'd got my distances right in the first place this problem wouldn't have happened, and I might just have to live with it.
-
Sounds like a very good project. Looking forward to seeing it. And don't worry about the time it takes. Some people build fast, others build slow. Just go at your own pace.
-
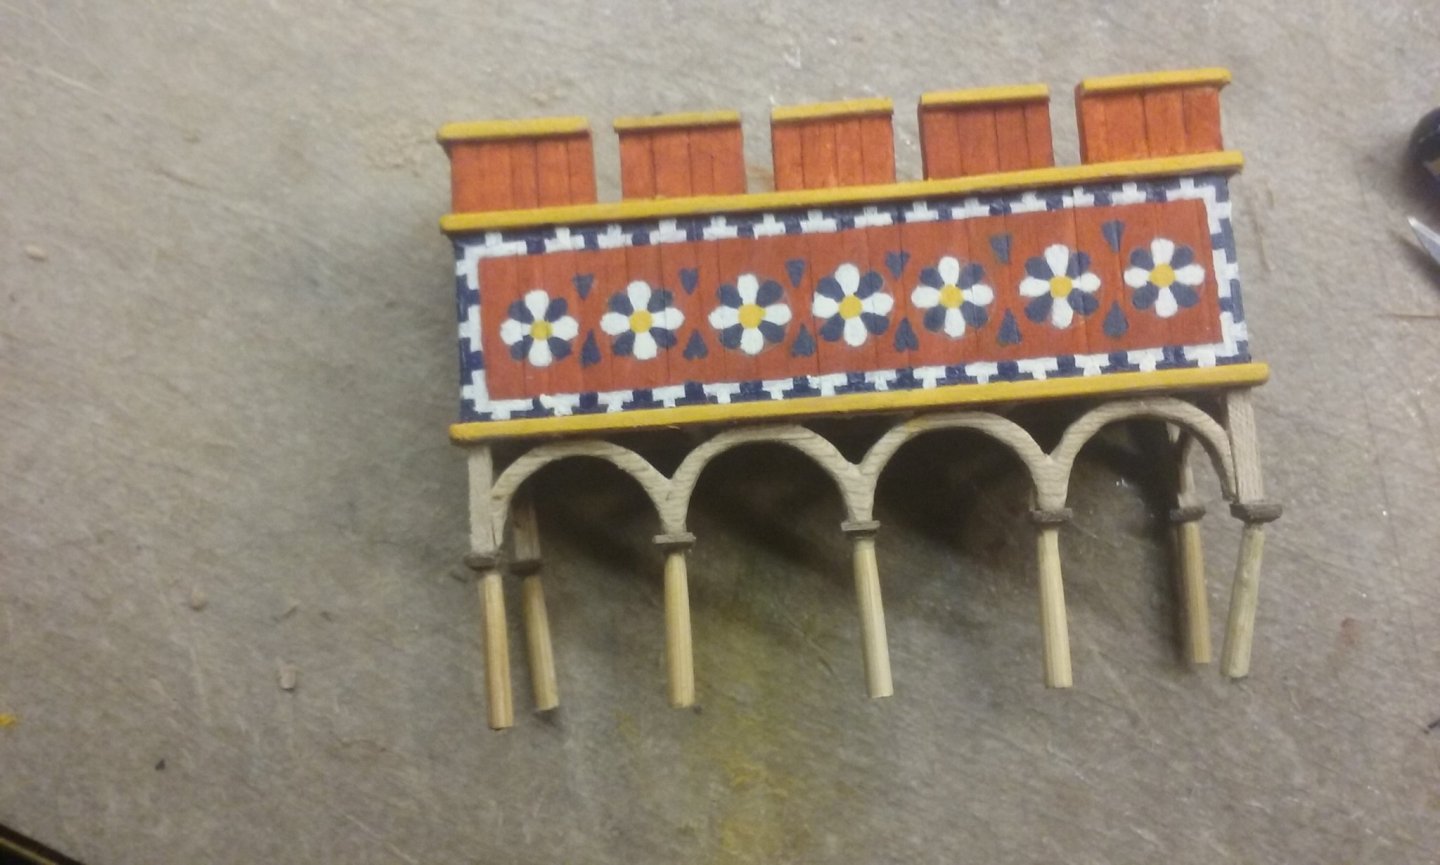
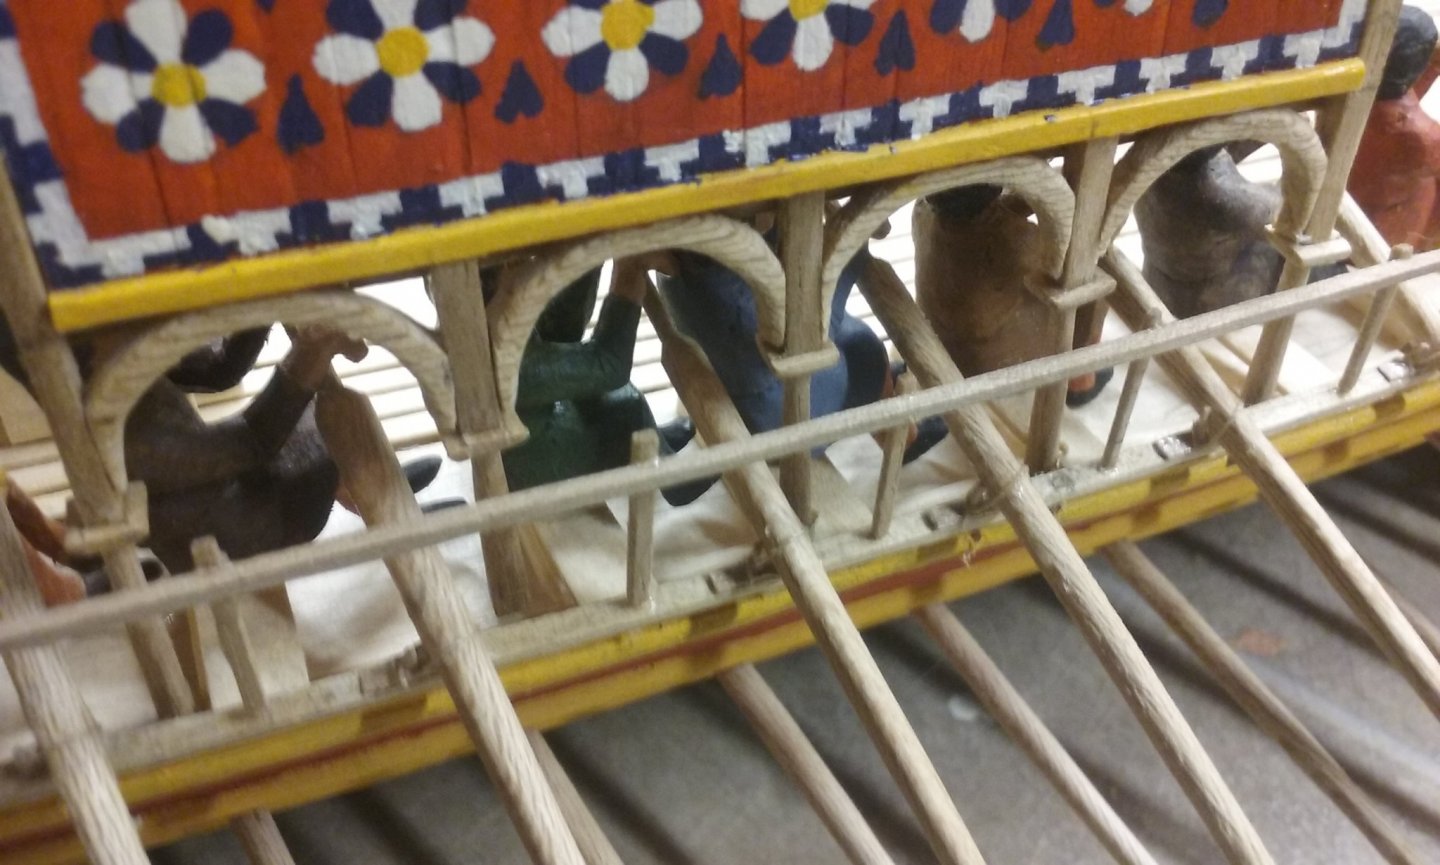
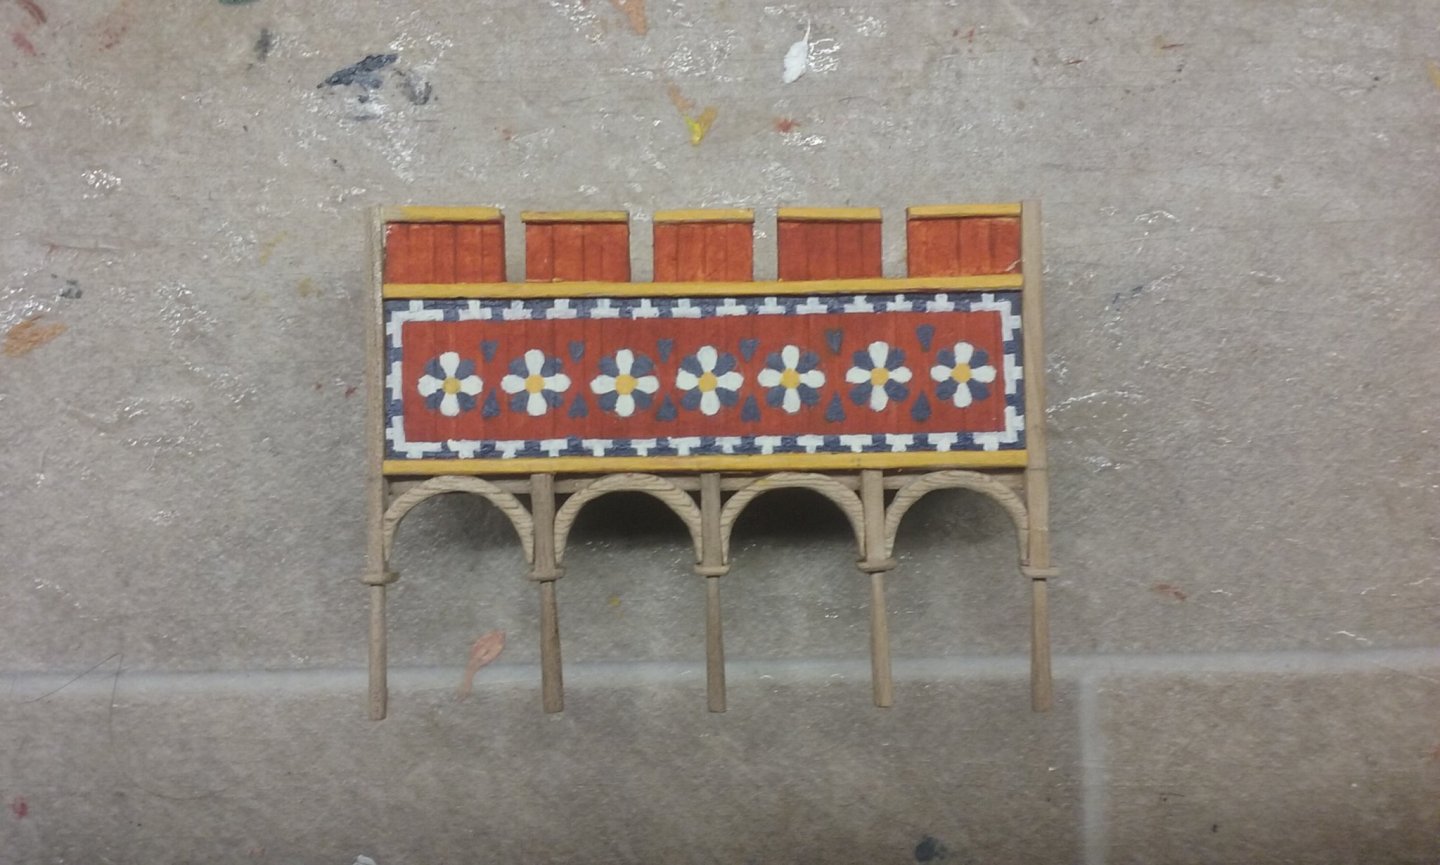
And some more - the front face of the port castle is done. I re-used the arches -once I'd separated them I just had to trim them a bit to fit. And here's the castle dry fitted in place. Doesn't look too shabby at all . . . you'd never know I'd stuffed up. Still working on the back of the castle - If it sticks out too much inboard the crew won't be able to get between the castle and the pump assembly. And here are the blocks for the tacks and the vangs in place on the yards. I've made four bitts to take various bits of rigging (halyards, sheets). And here they are in place. (The aftermost one is a bit hard to see because it's mostly hidden behind the aft crutch for the yards.)


-
Hi Jackie, and welcome to MSW. Do you have a ship model you're building or planning to build? Make sure you start a build log when you do - there's instructions on how to do that either here or here depending on whether you're making a kit or building from scratch. It's a very good way to get help and advice if you hit problems, and encouragement from people with common interests. Looking foward to seeing more from you.
-
Fantastic work, Hellmuht! I've been waiting to see the outside planking completed, and it's even better than I'd hoped.You've really pulled it off perfectly. It does look like the lashings got through the planks as in the original. My hat's off to you for doing all that work to make it right.
- 158 replies
-
- 3
-
-
- byblos ship
- Egyptian
- (and 1 more)
-
Beautiful work, Mustafa.
-
You're doing a beautiful job on this, Rodolfo. I've never seen a shroud fixing like that either. On the original Mataro Ship in the Maritime Museum in Barcelona the shrouds are fixed to the hull by pairs of blocks. But I realise you're not doing a precise copy of that model - this is your build, and you make the decisions.
-
What did you use a preposition to end up with for? As Churchill (the Prime Minister, not the Duke of Marlborough) is reported to have said - misplaced prepositions are a grammatical fault up with which I am not prepared to put. I also enjoyed the diversion, but it really was time I got back the serious busines of modelling - it's not supposed to be fun! And I agree about the "put it aside" technique. It has served me well on more occasions than I like to think of (damn! There's that preposition again!) Banyan, thanks for that, mate. At the moment I think I have all the thread I need, of all thicknesses and colours I need. I think it was actually your advice that led me to getting that cotton thread (from Spotlight), for which I'm very grateful. It's high quality stuff.
-
Serves me right. If I'd waited till the benches were in it wouldn't have happened. Still, lesson learned . . . I'll try not to make that mistake again. Me too. At first I really thought I'd have to do everything again. It's often good to sleep on a problem . . . Not where I live - very limited choices unless I send overseas for it, which I didn't want to do. As it is, I have several different thicknesses, all white, which I can dye the corrrect colour. And relatively cheap.
-
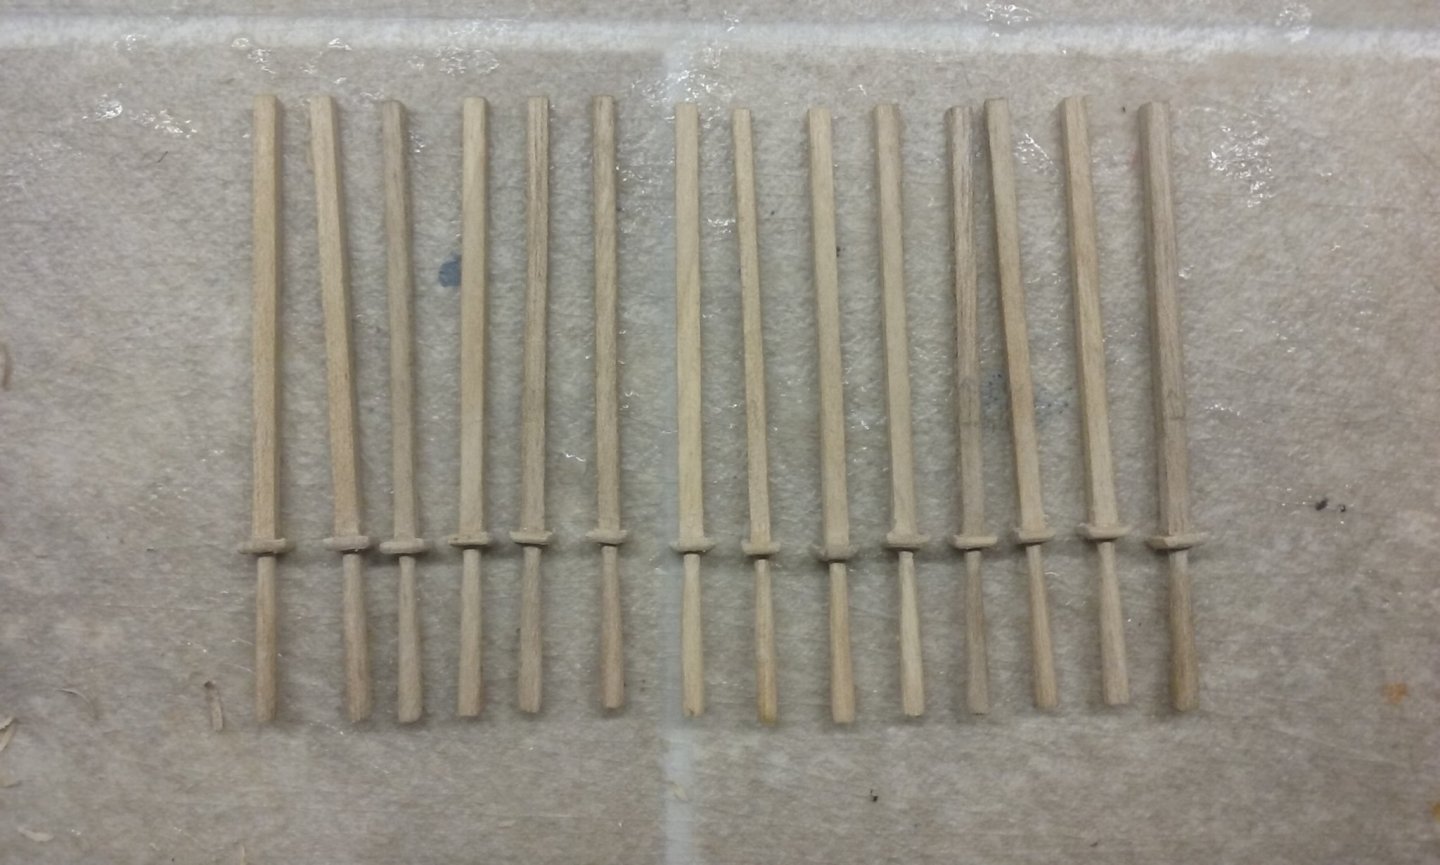
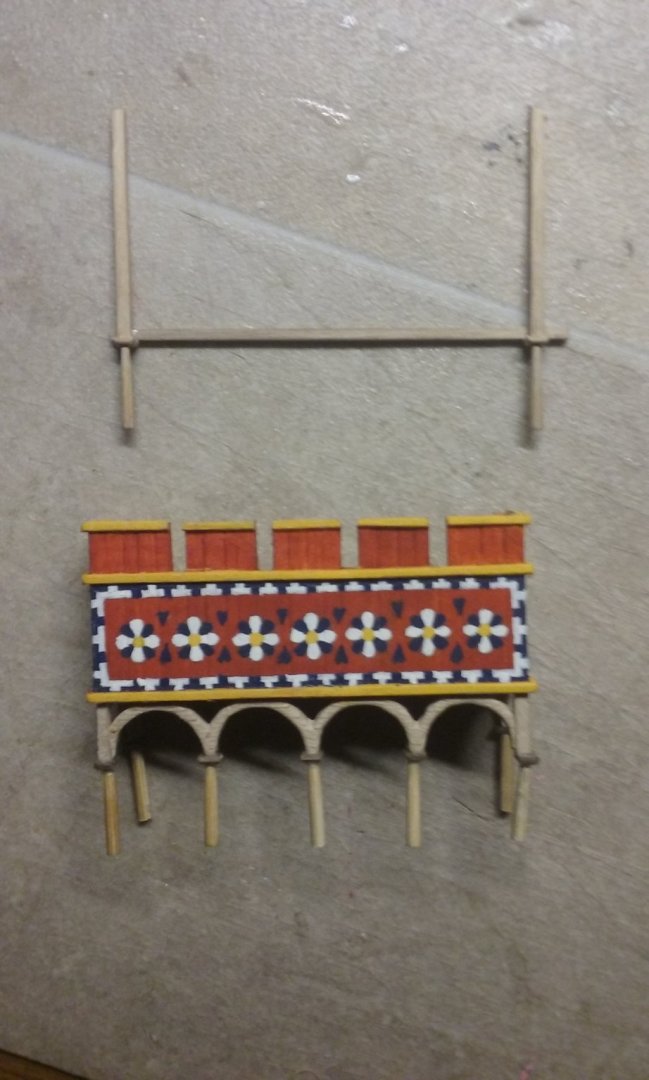
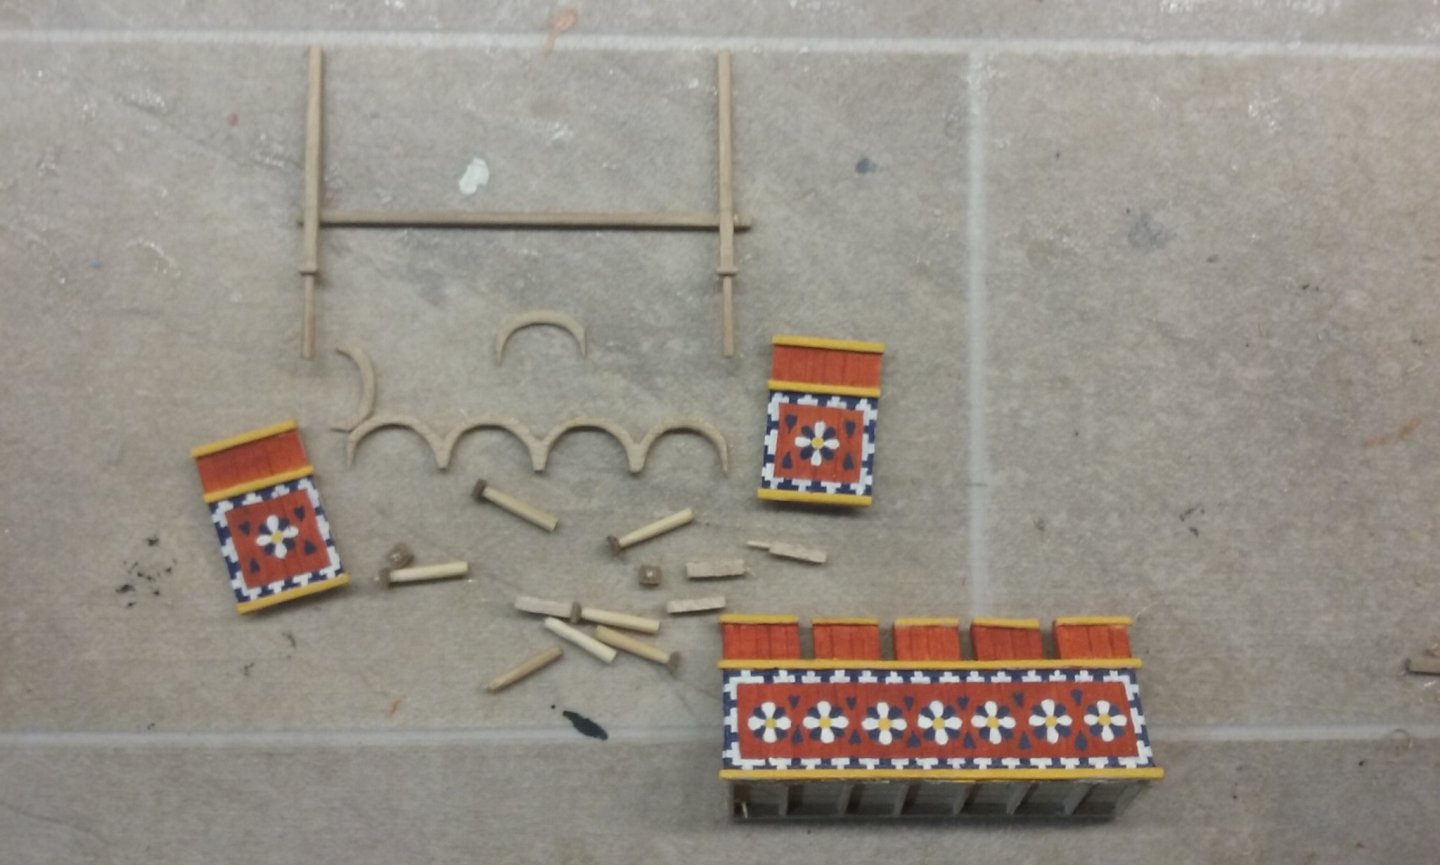
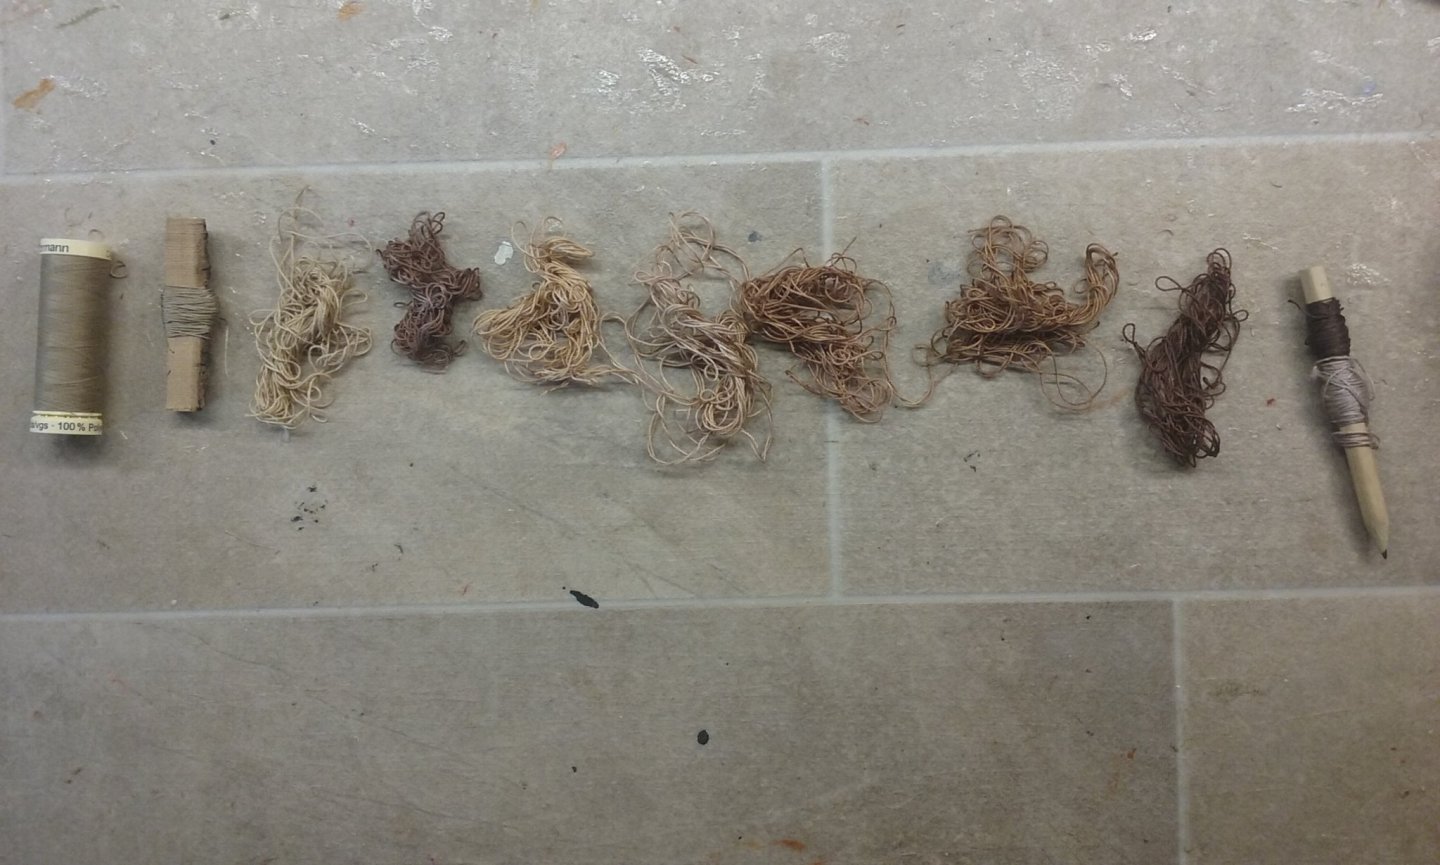
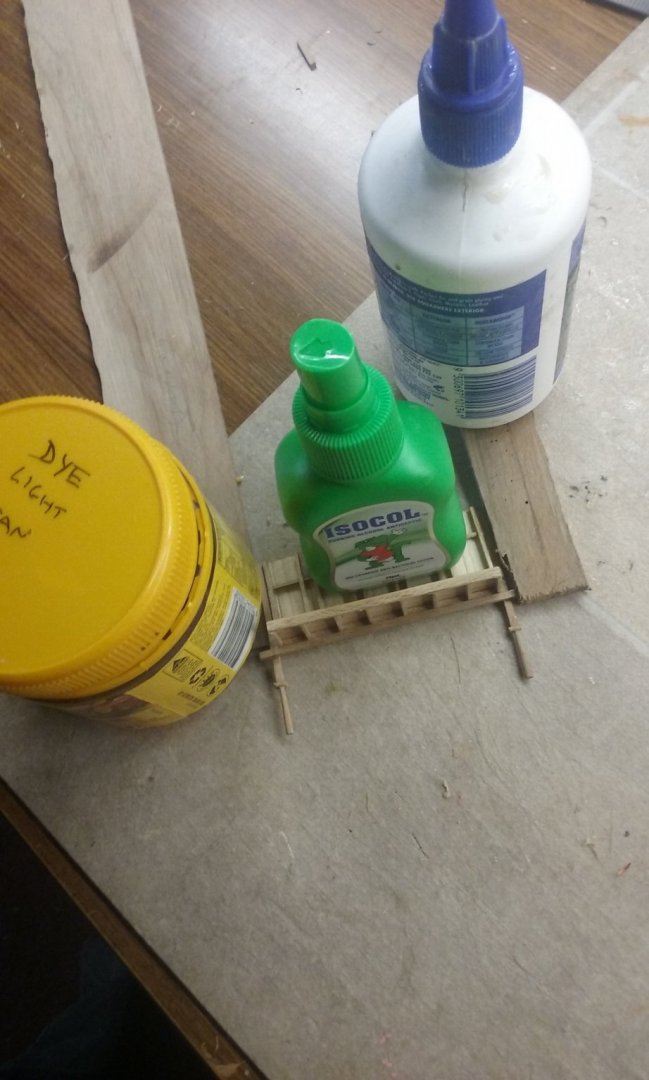
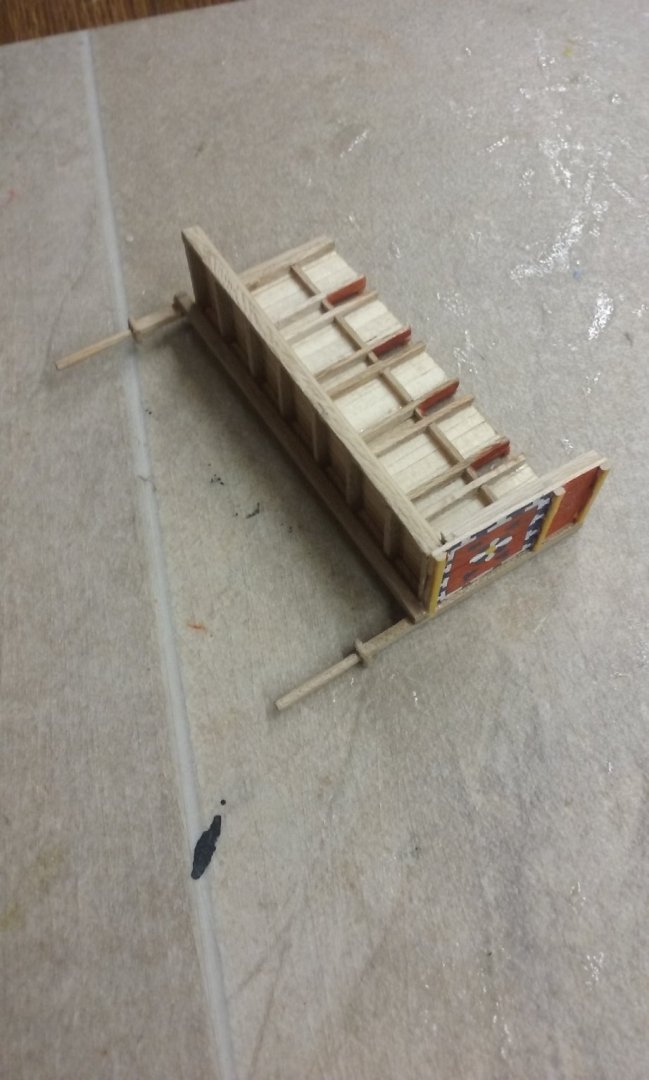
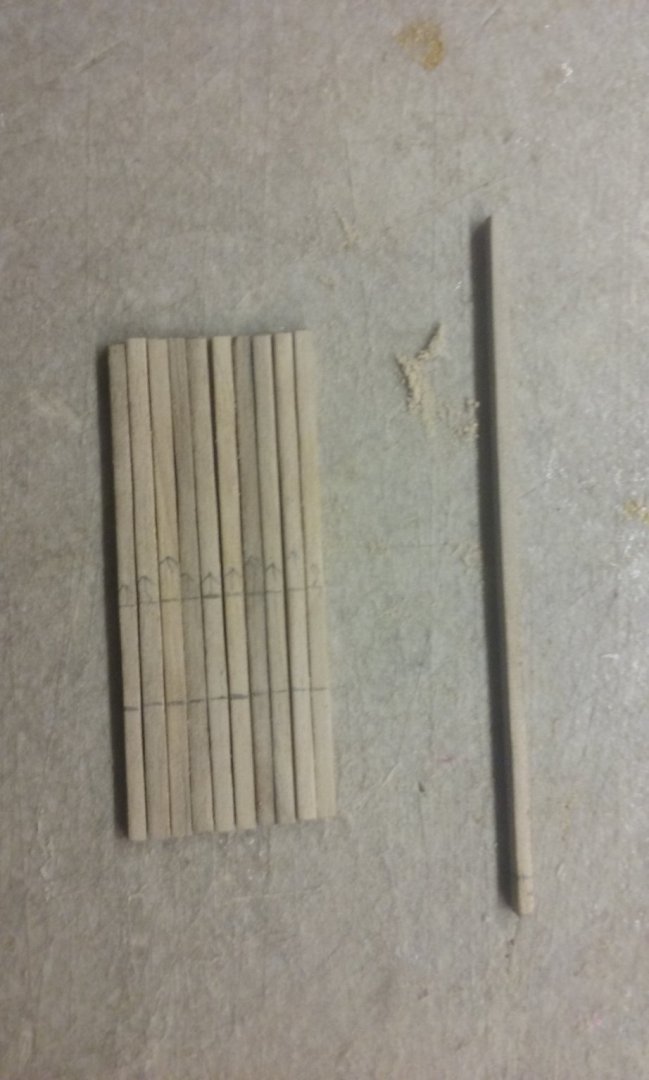
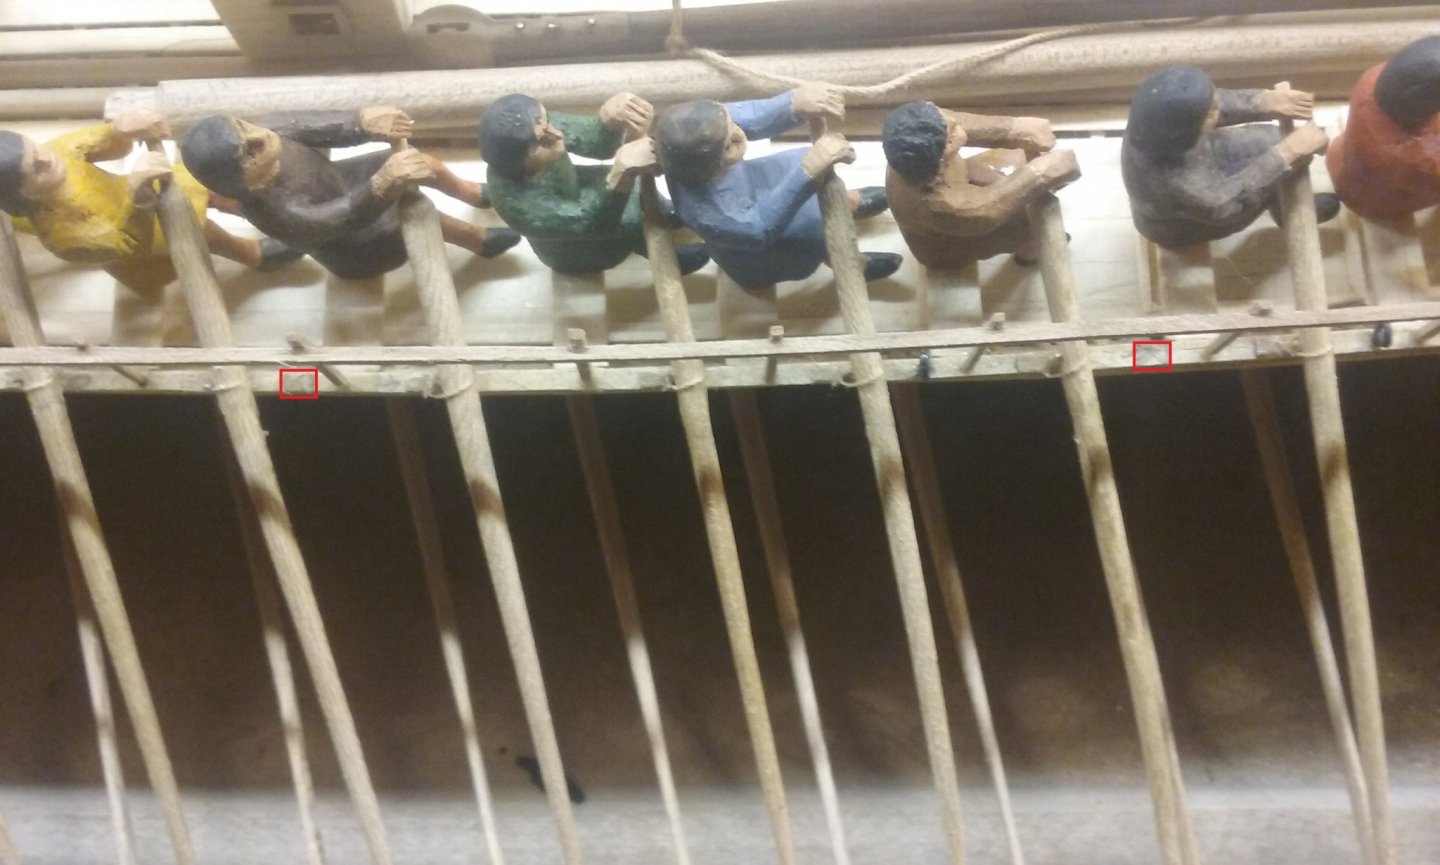
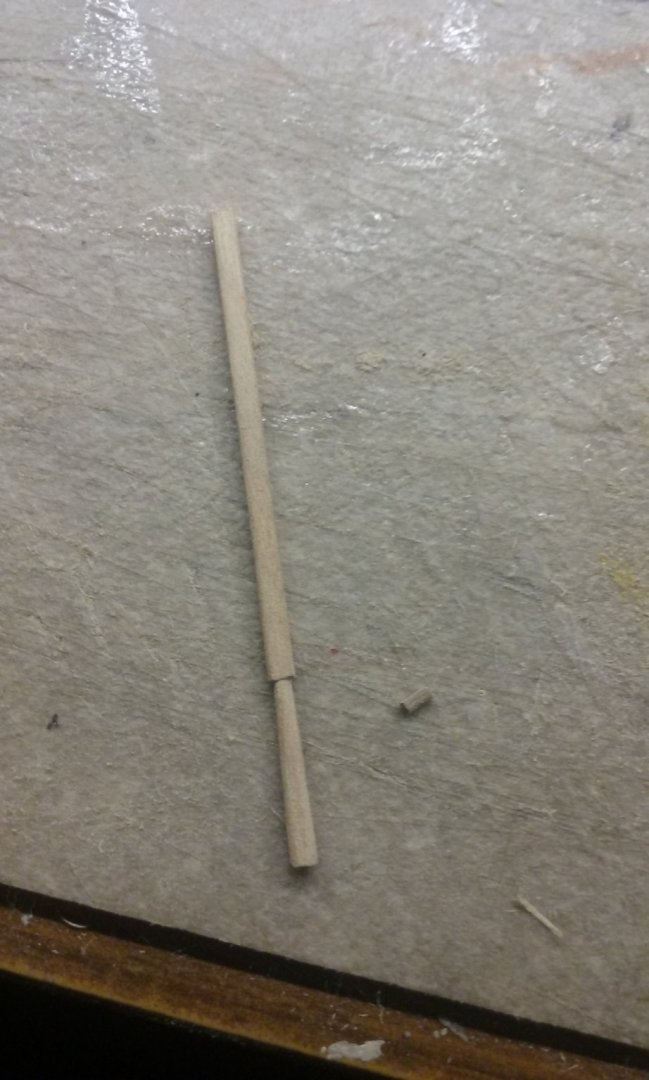
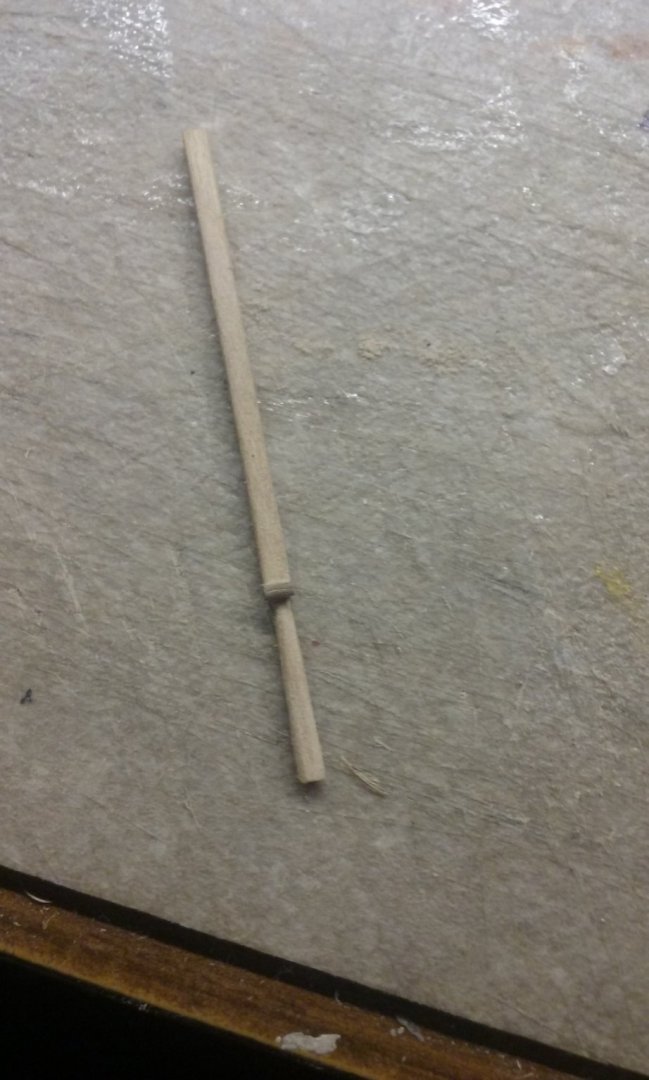
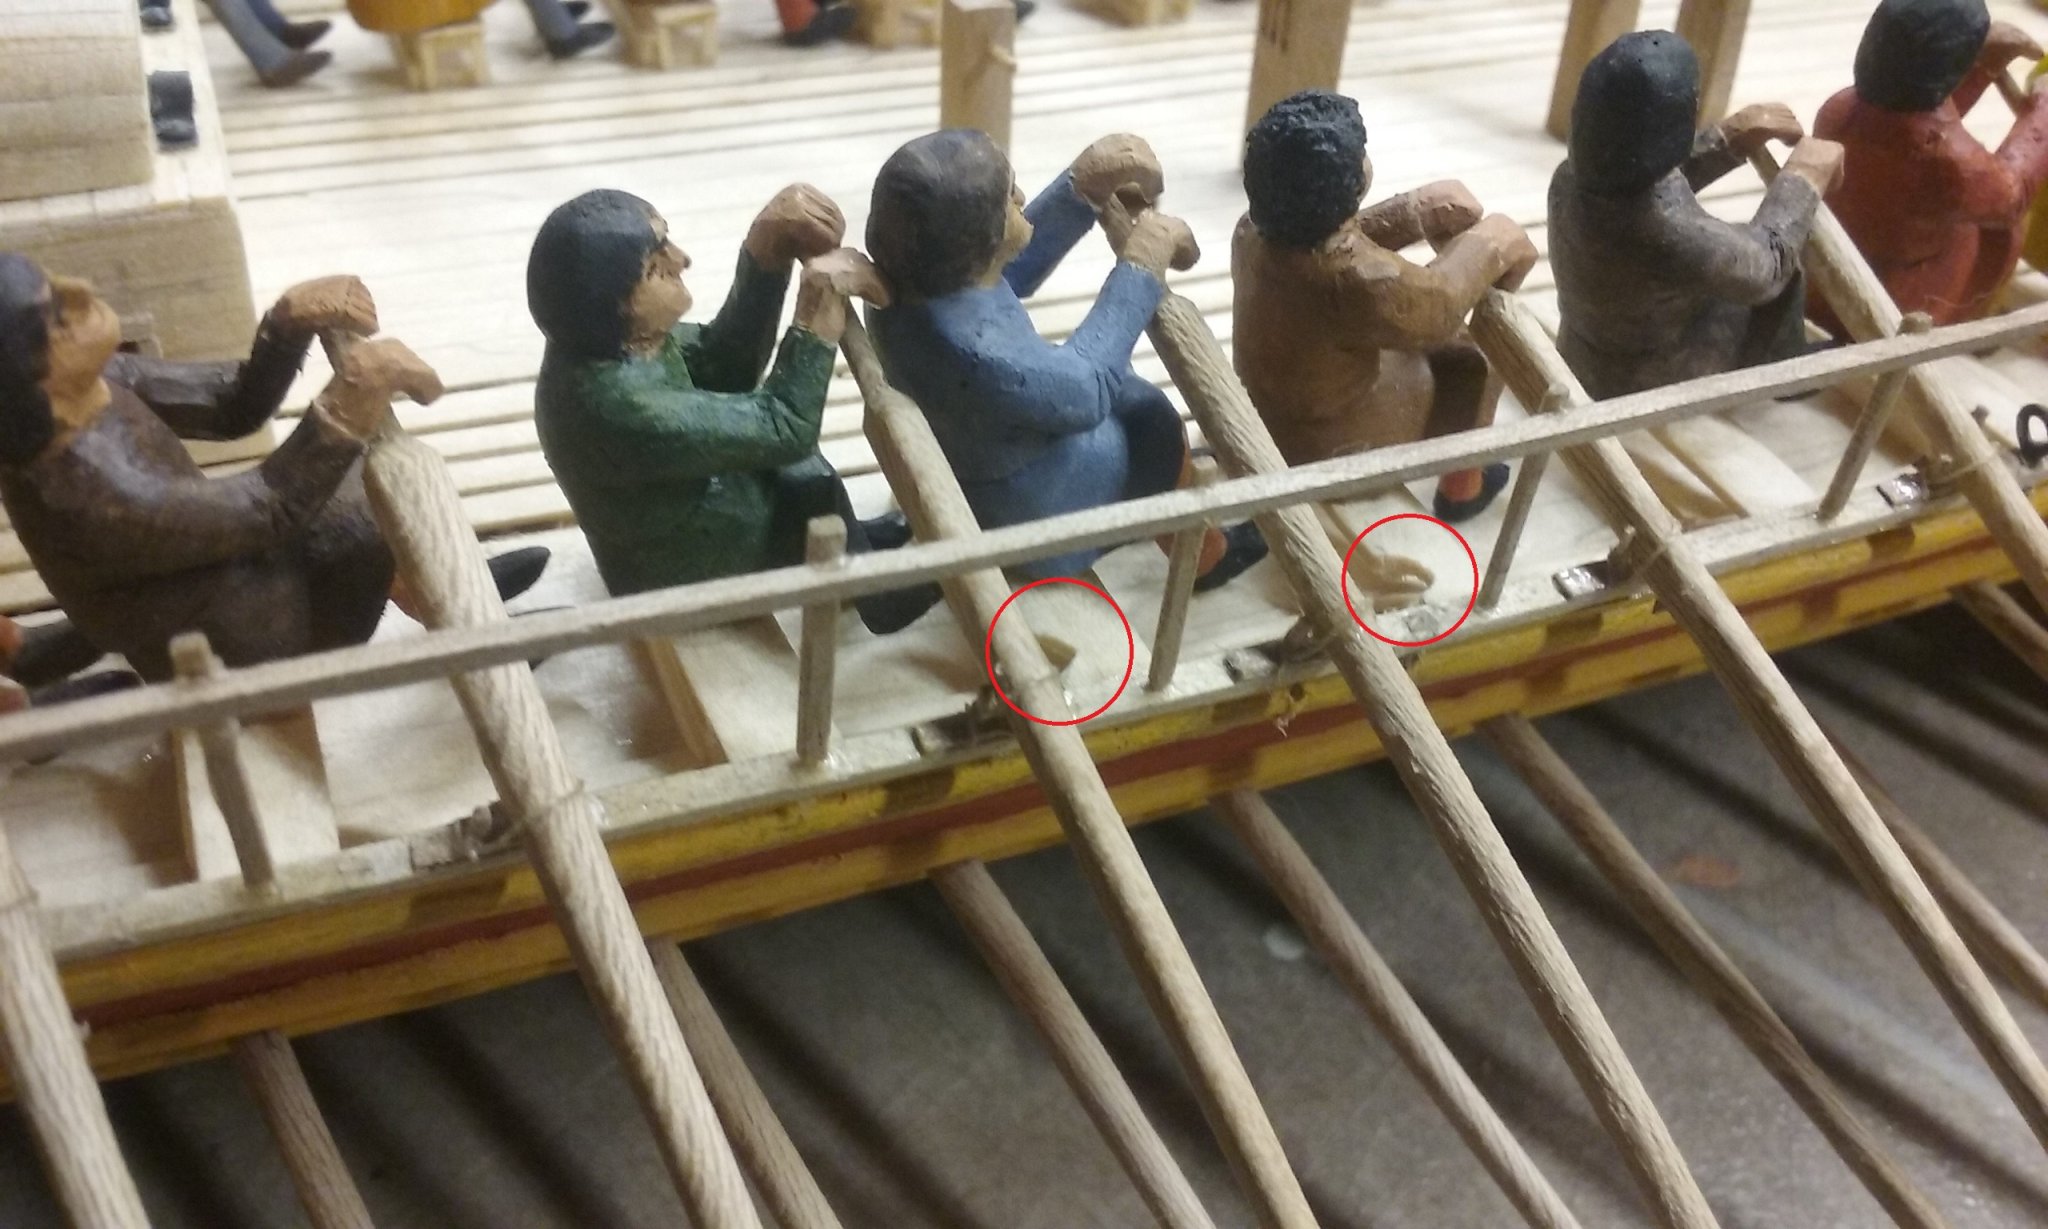
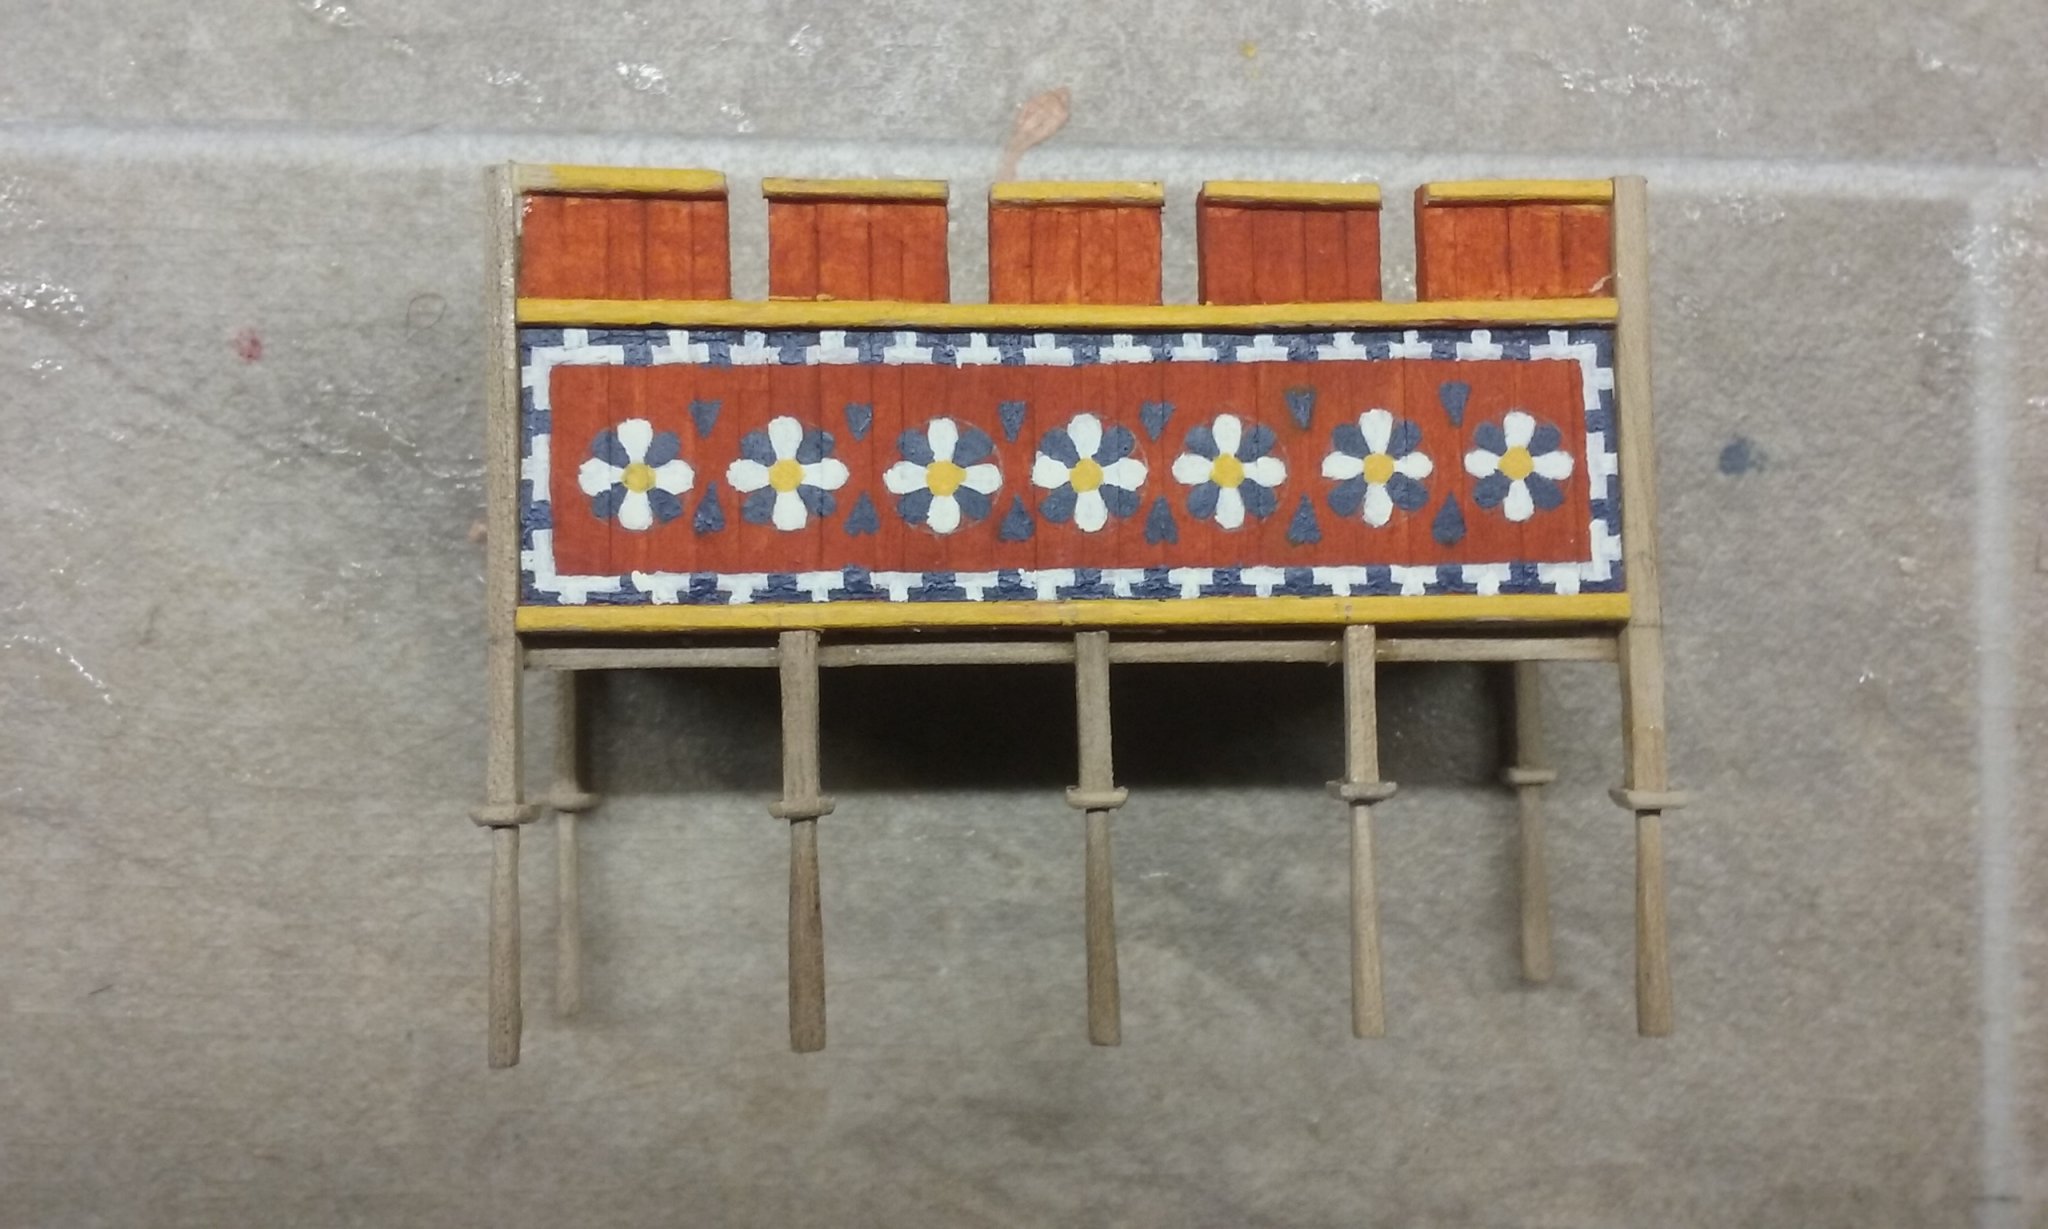
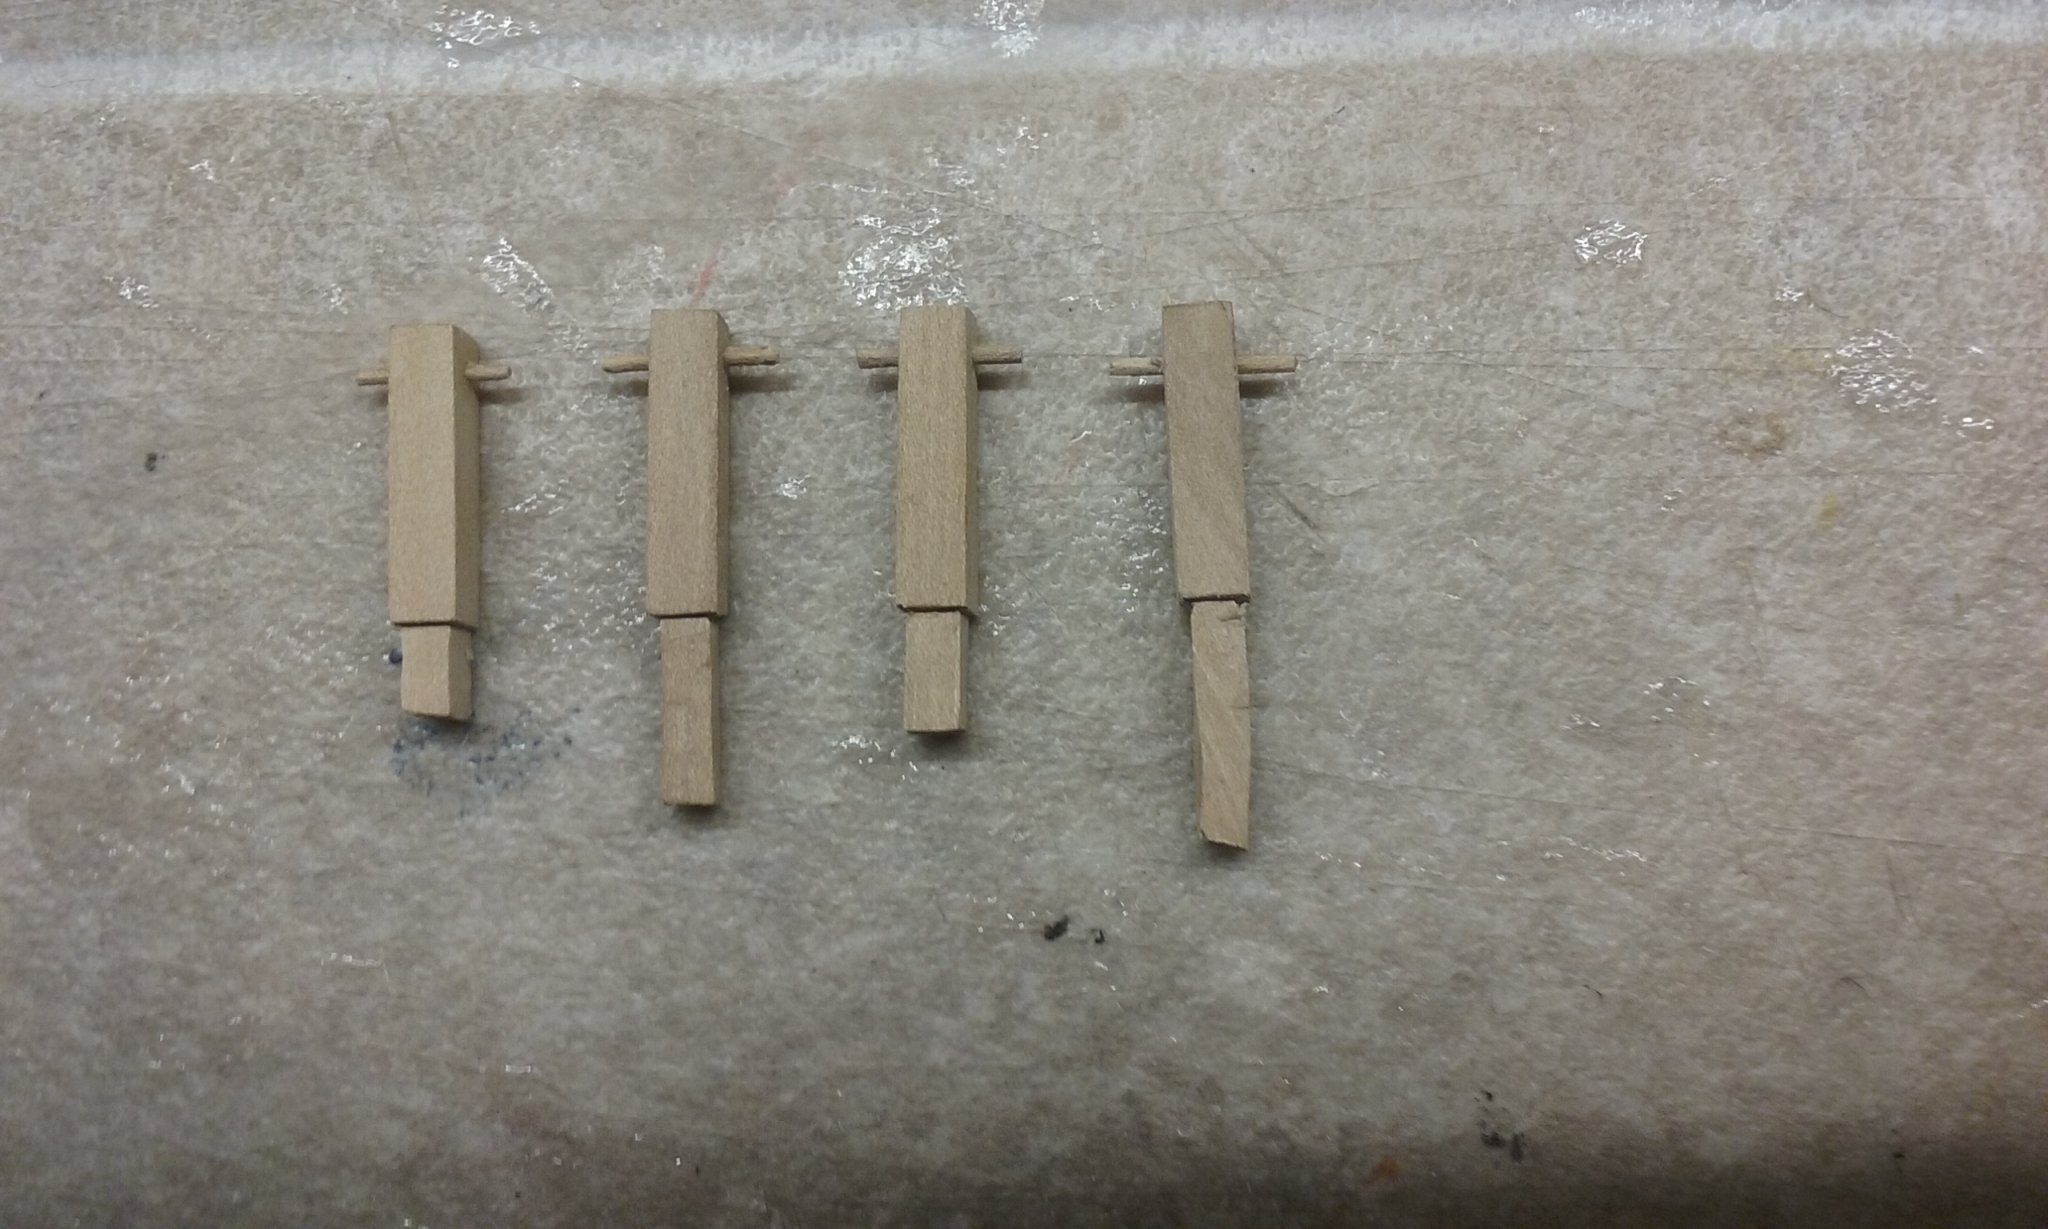
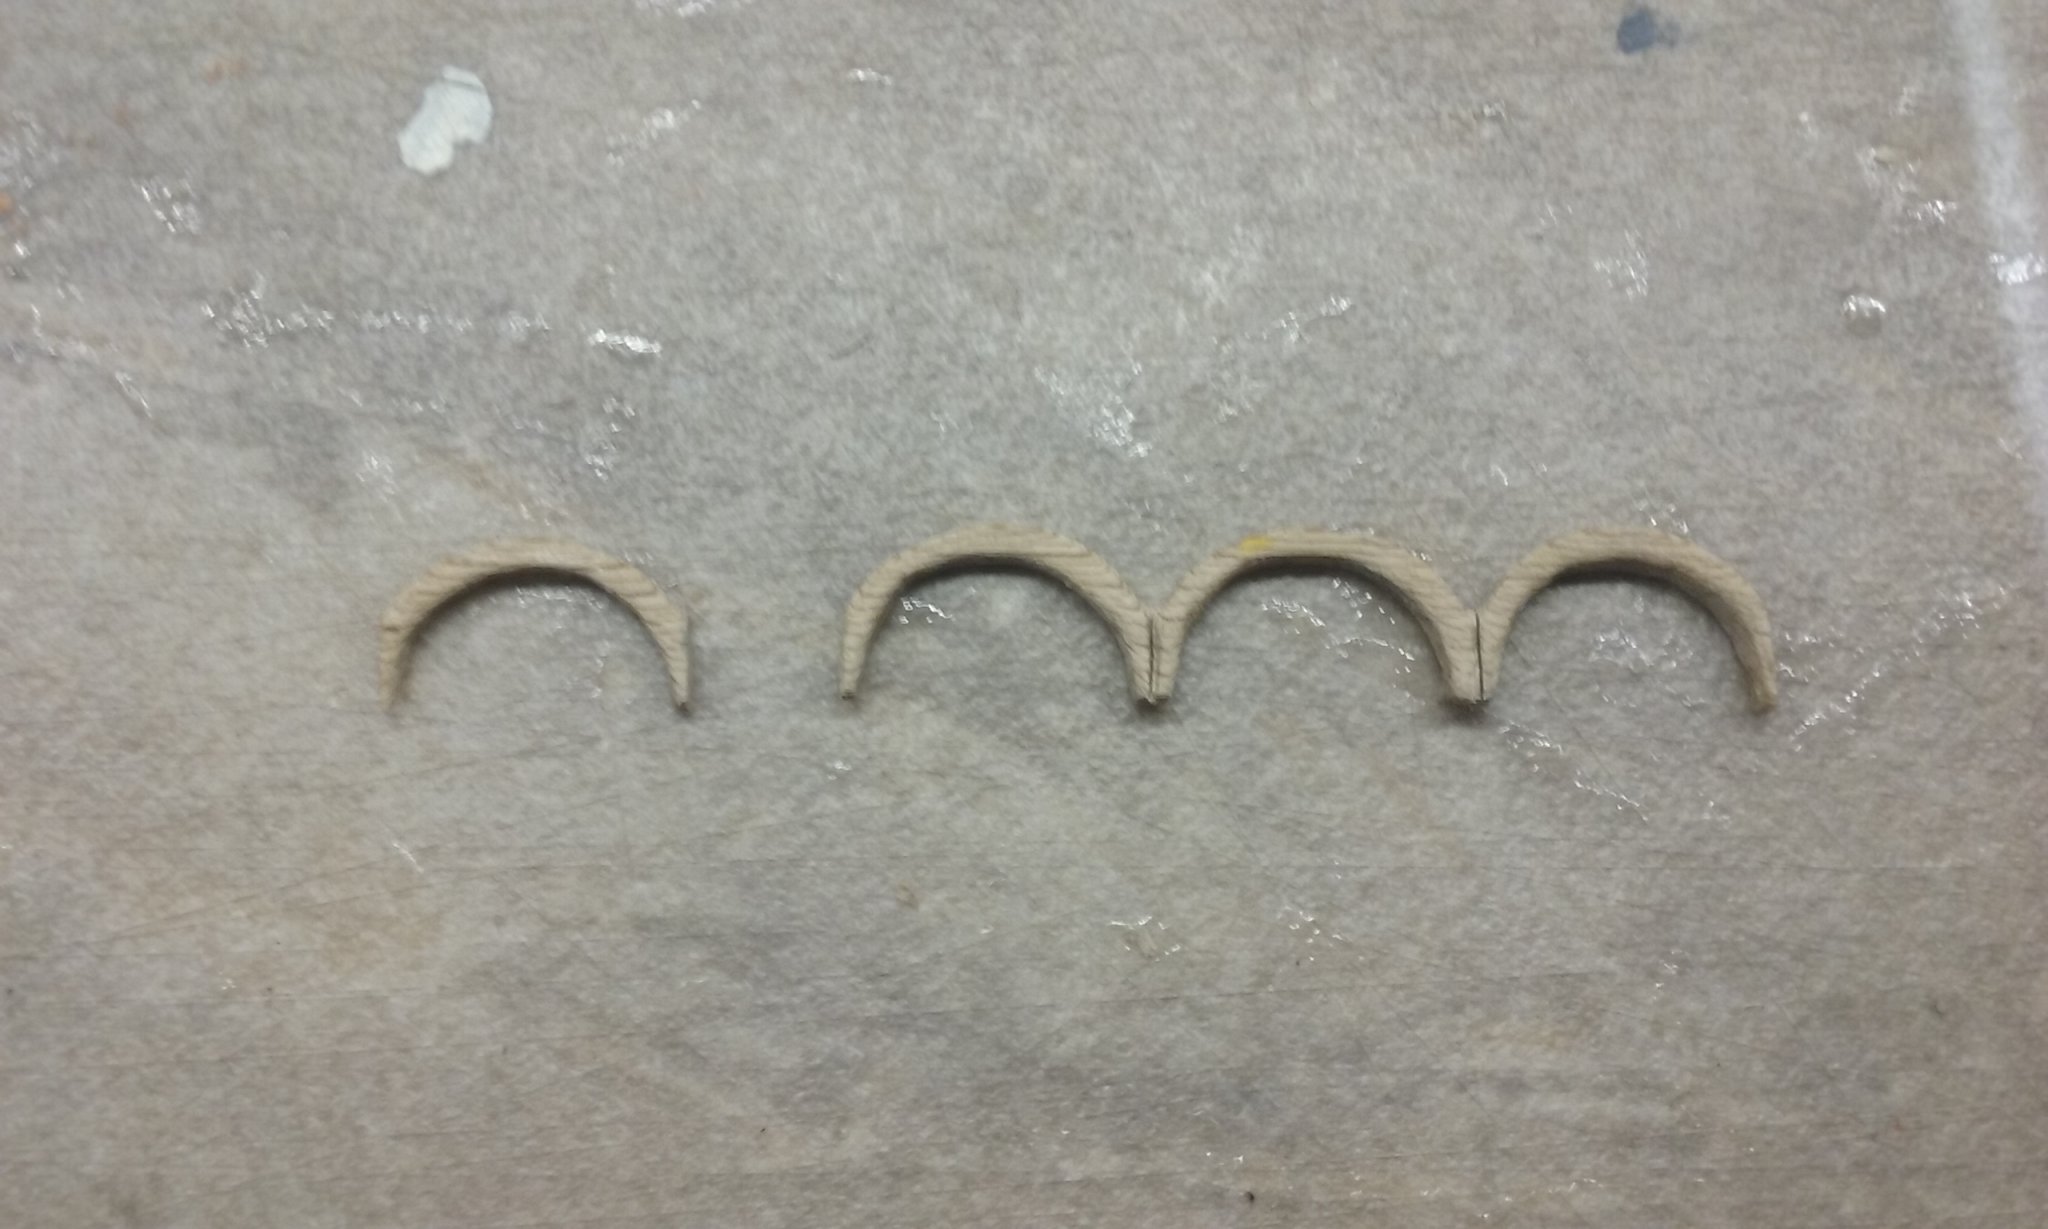
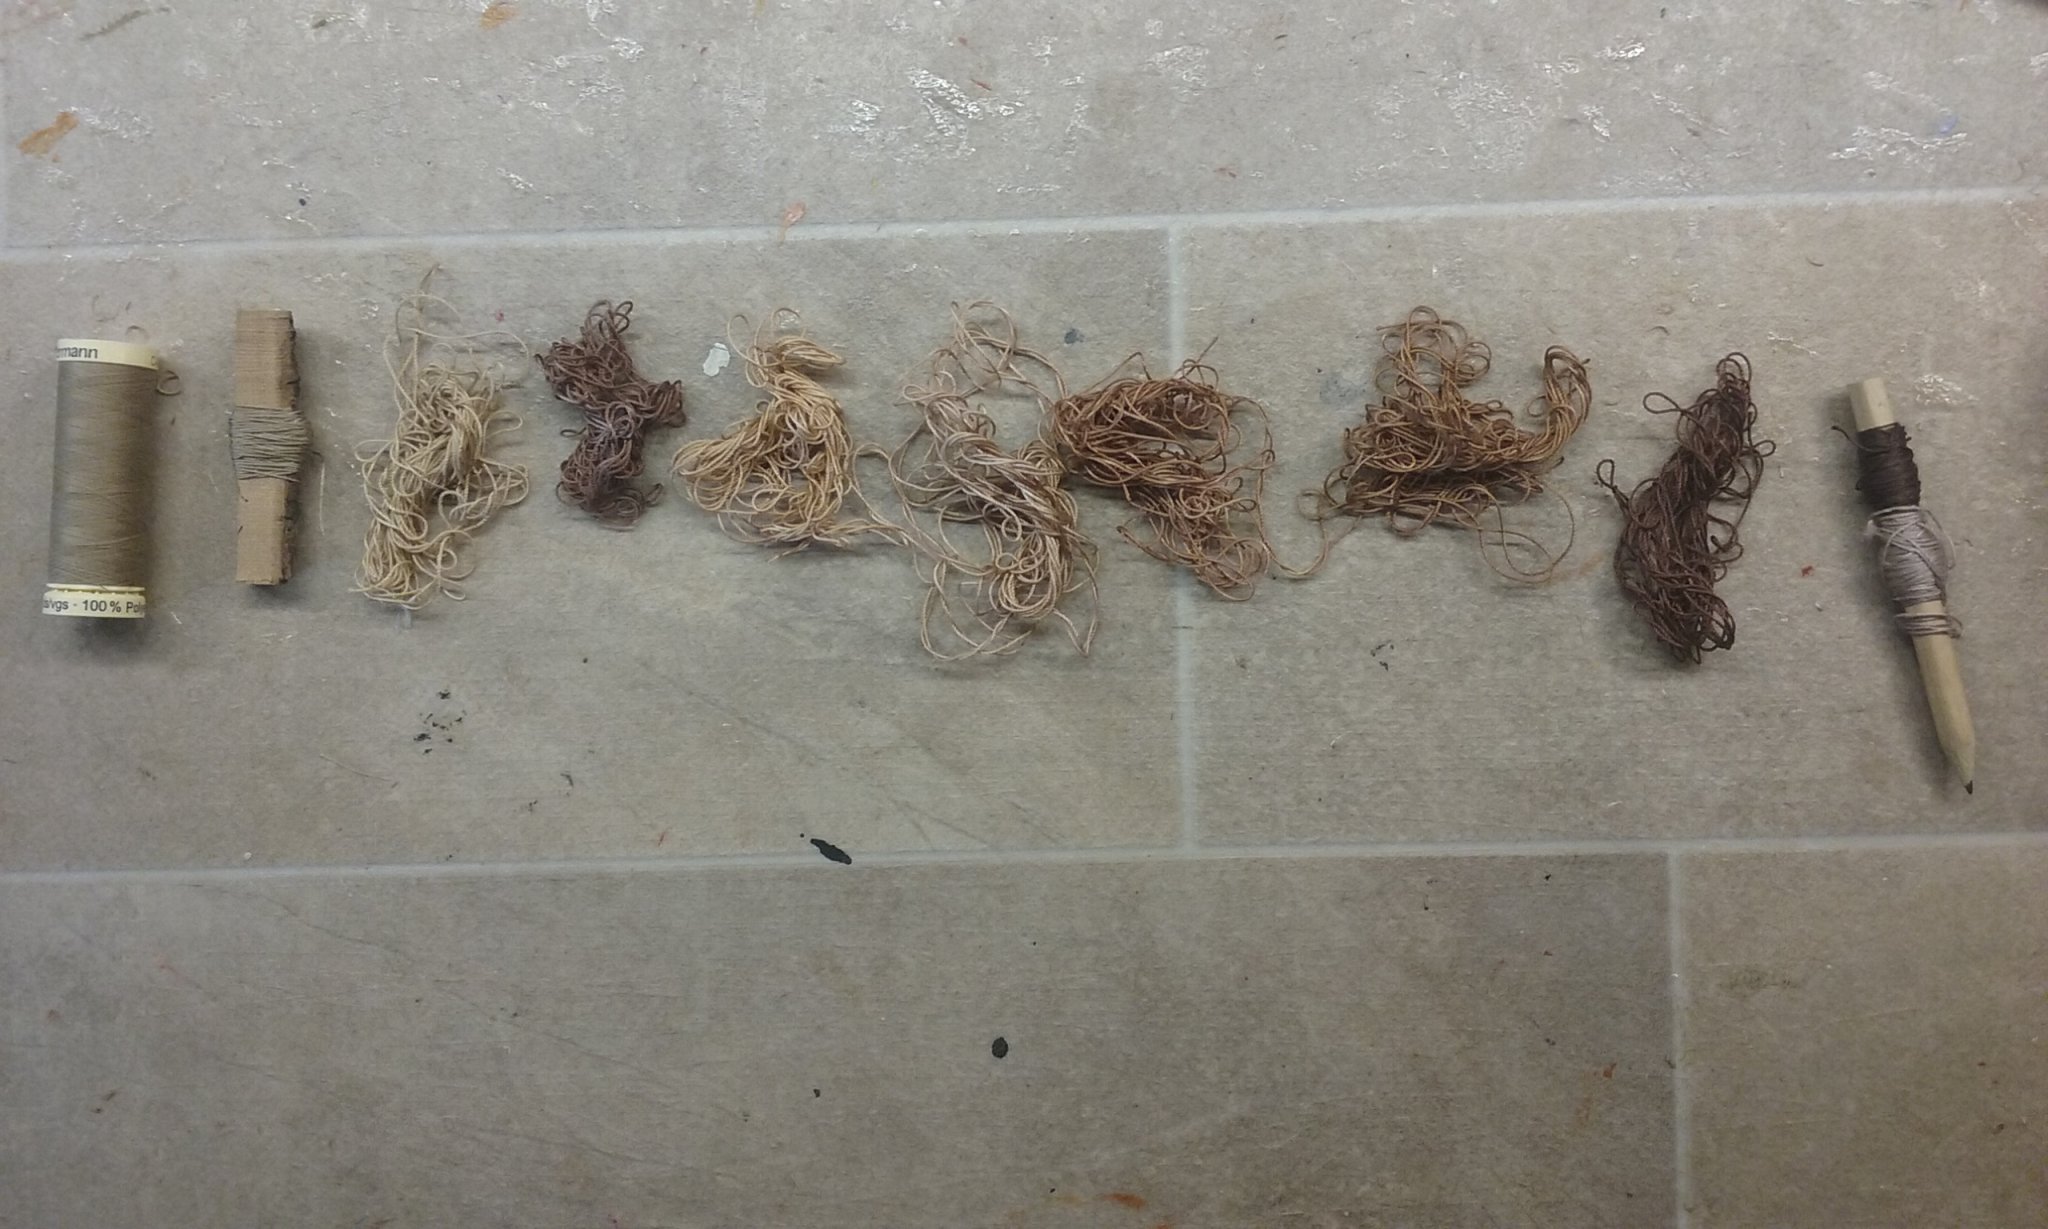
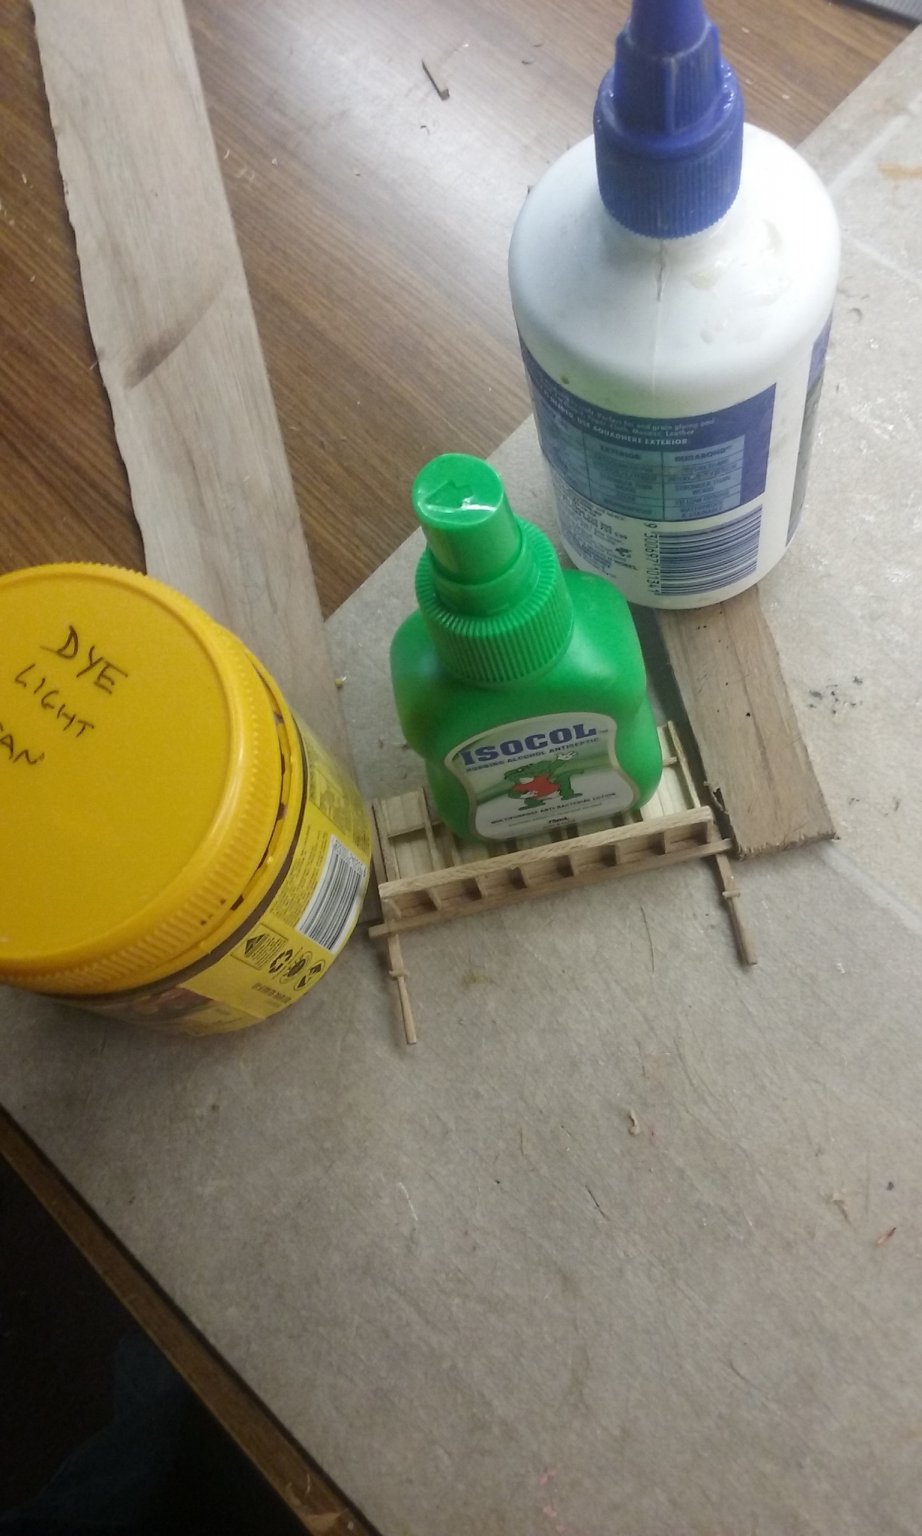
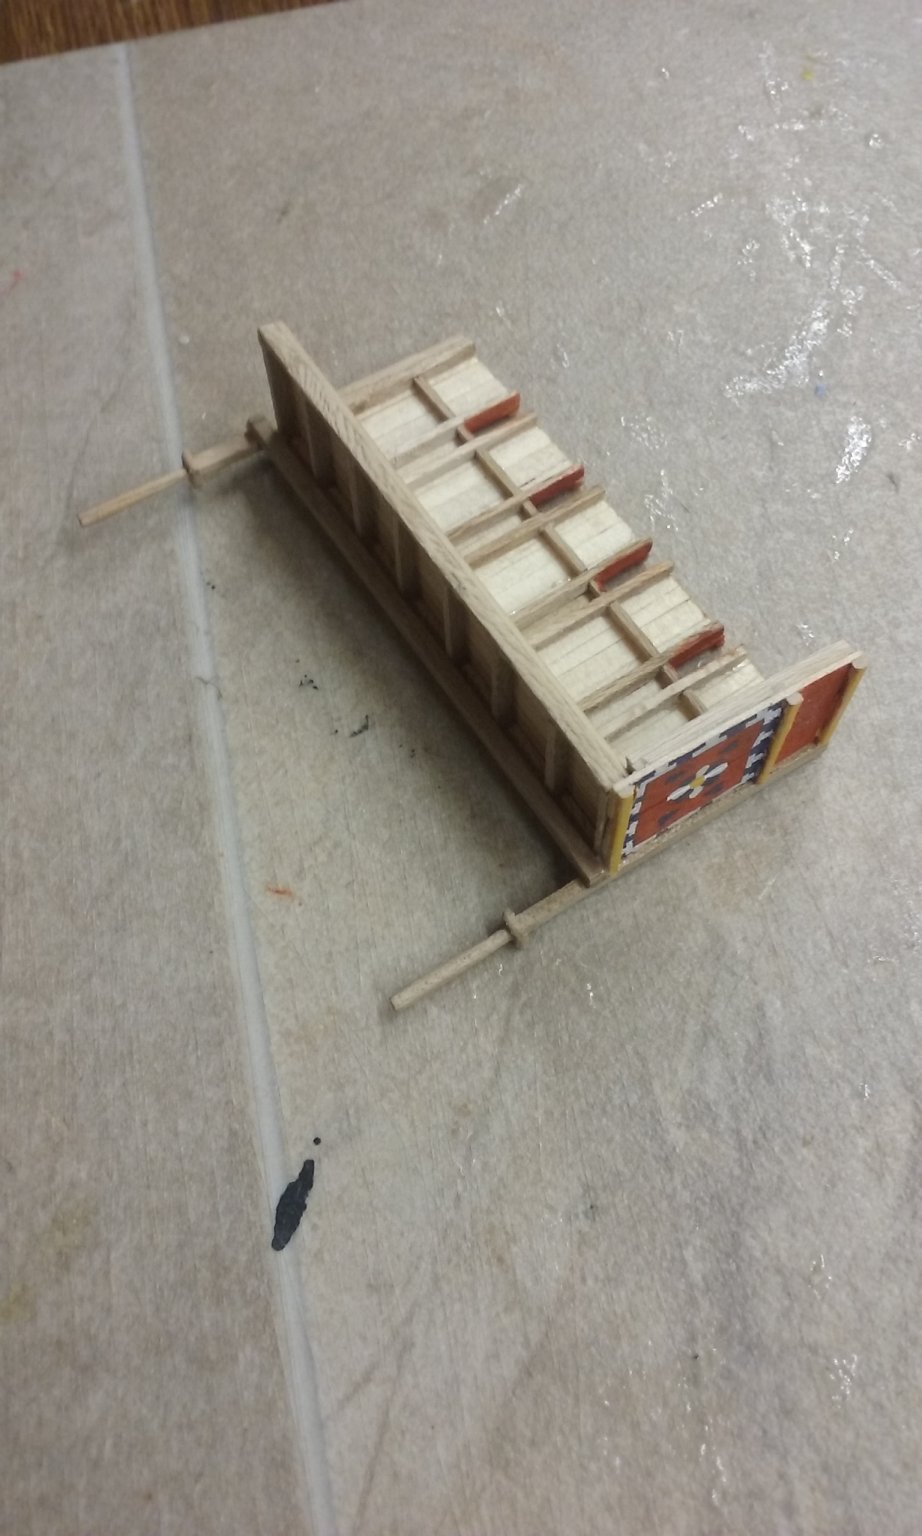
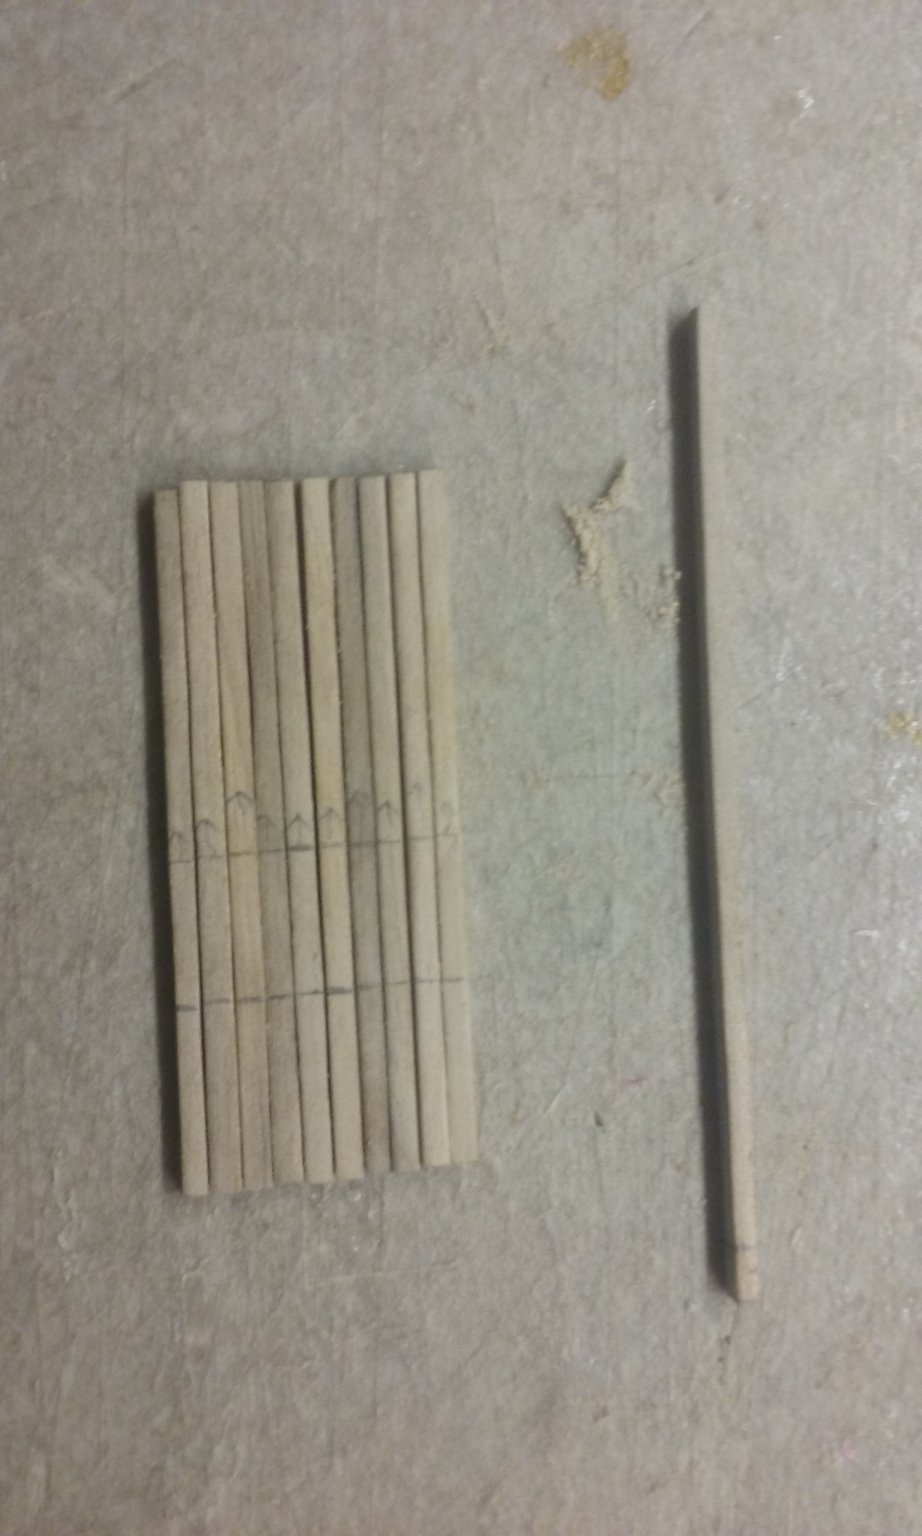
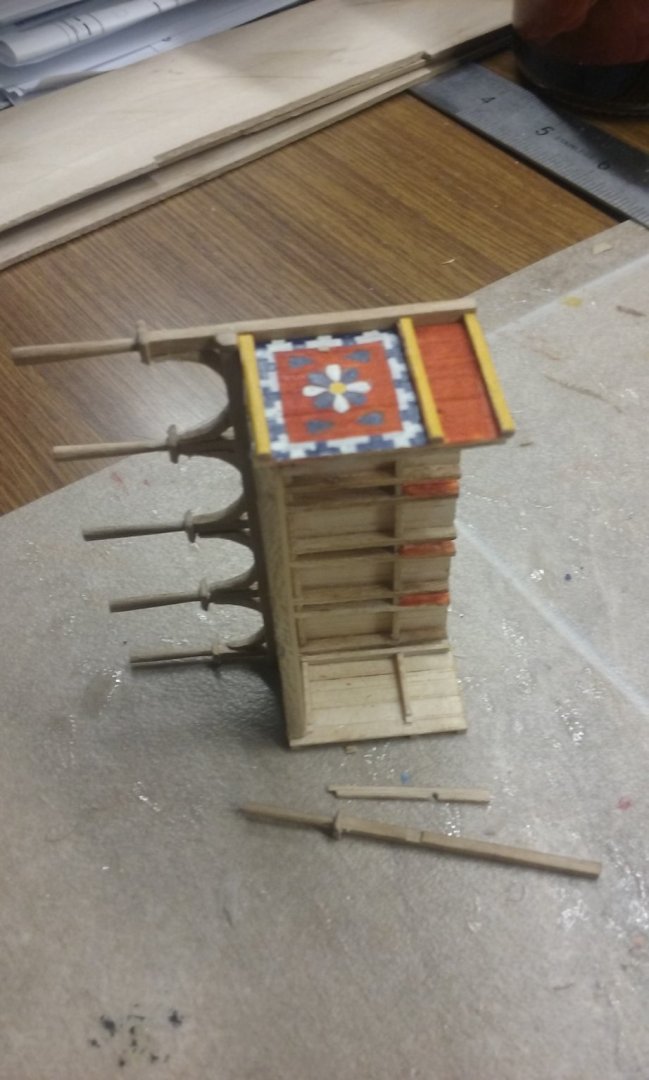
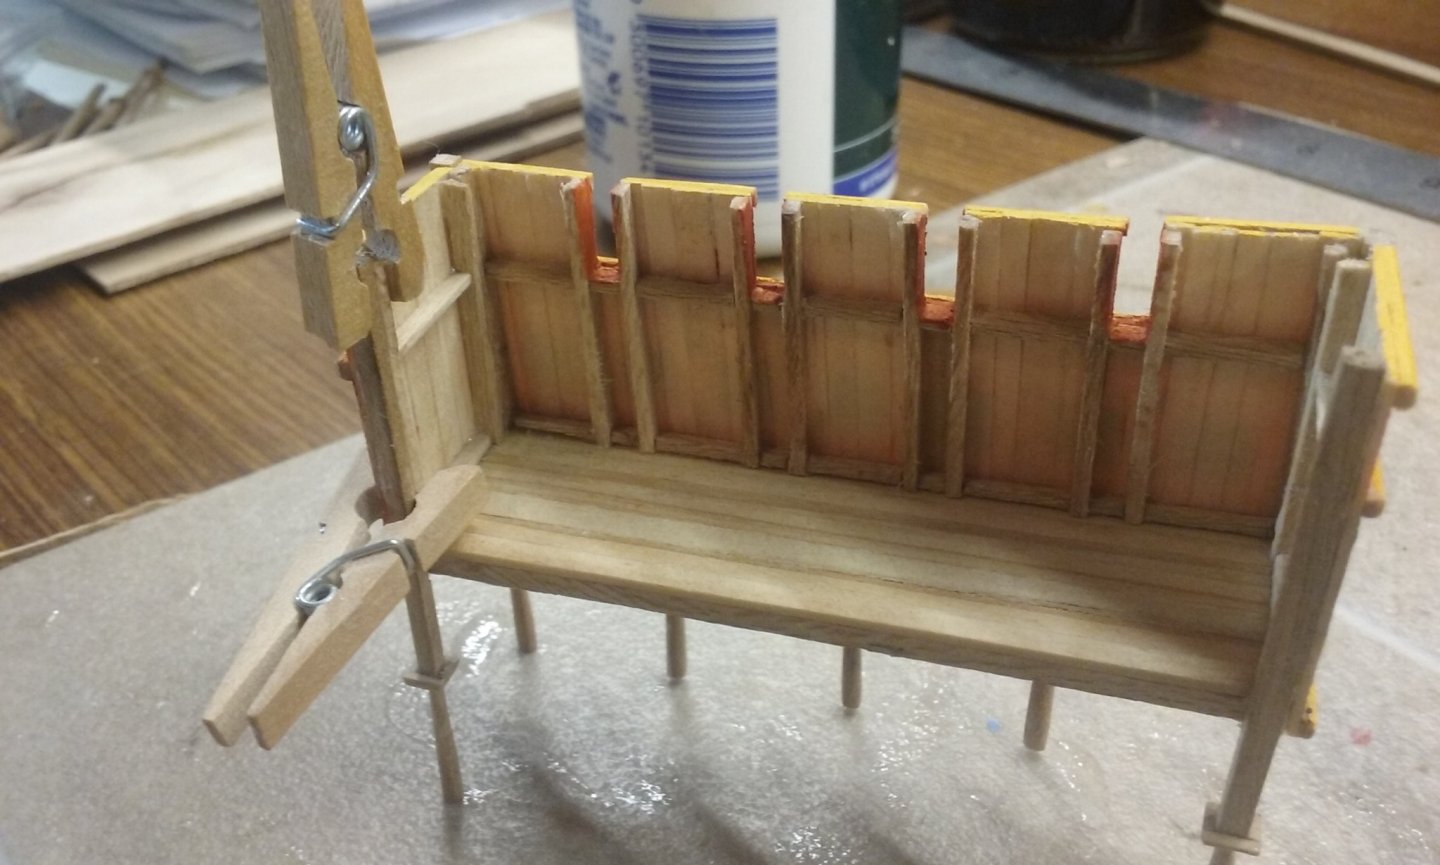
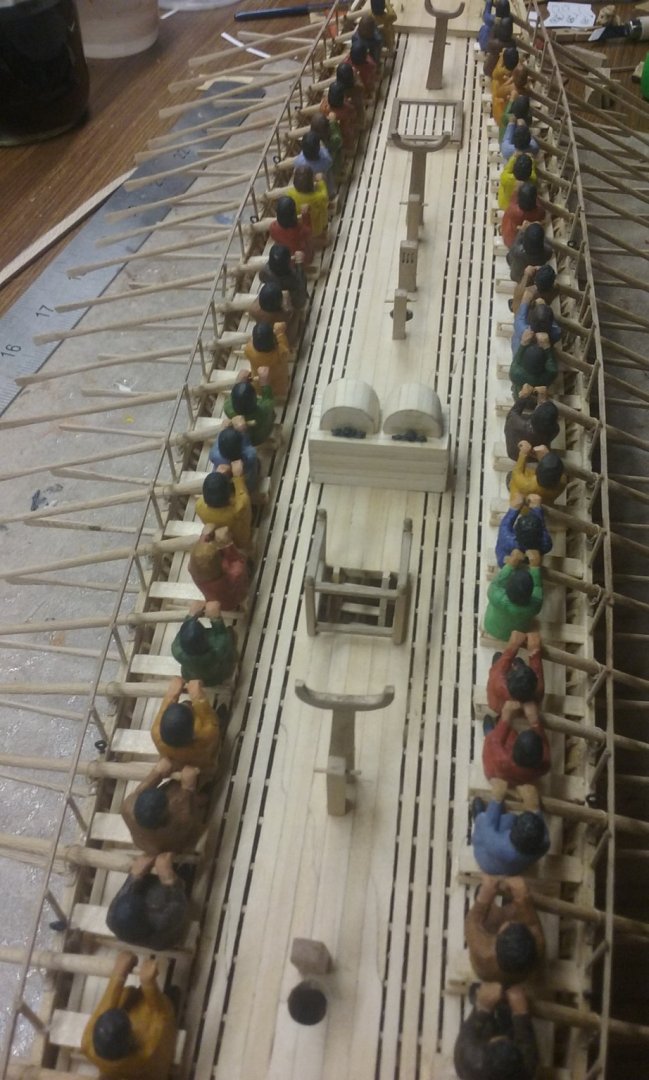
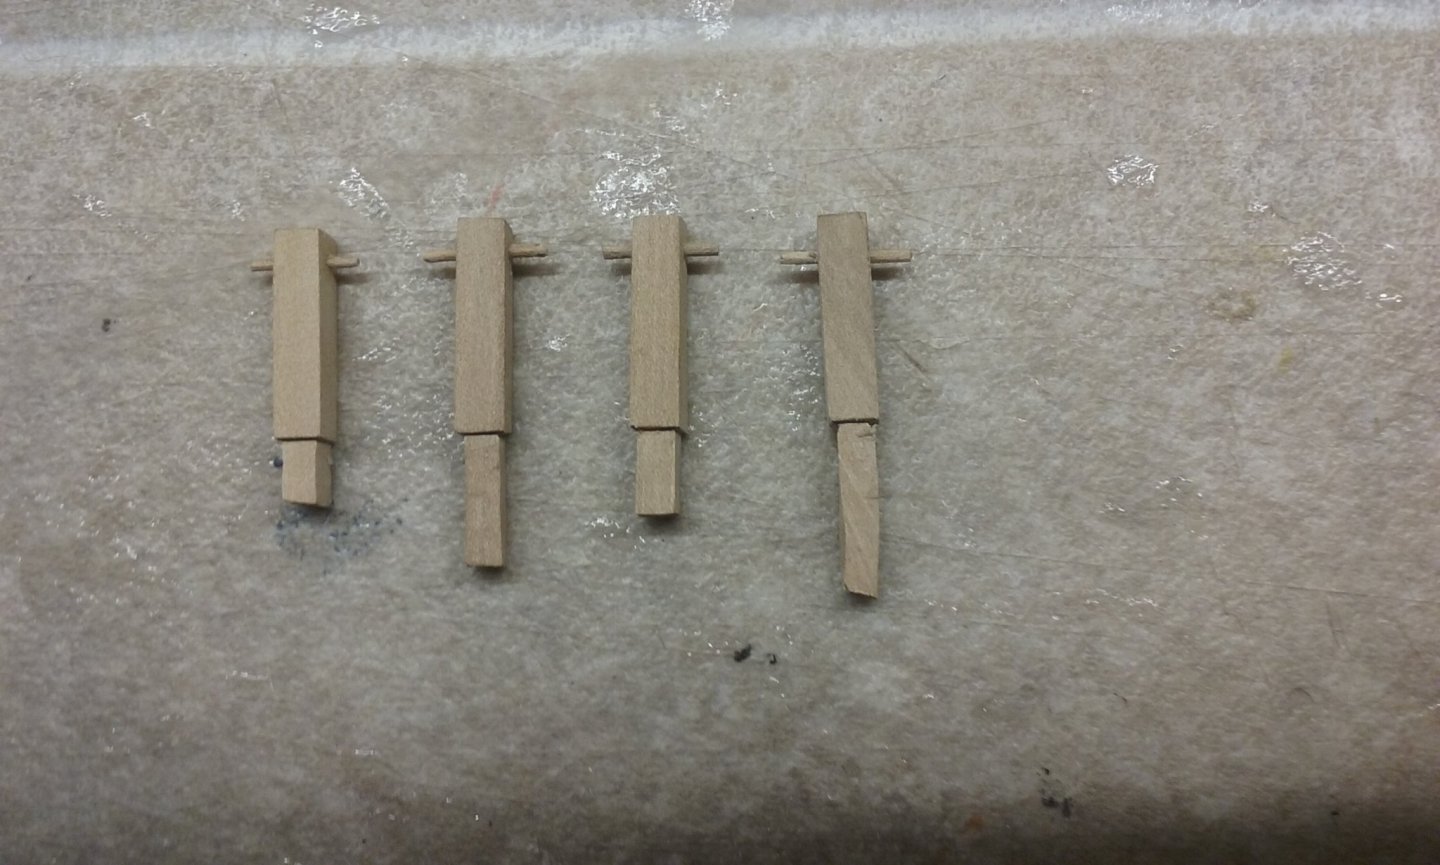
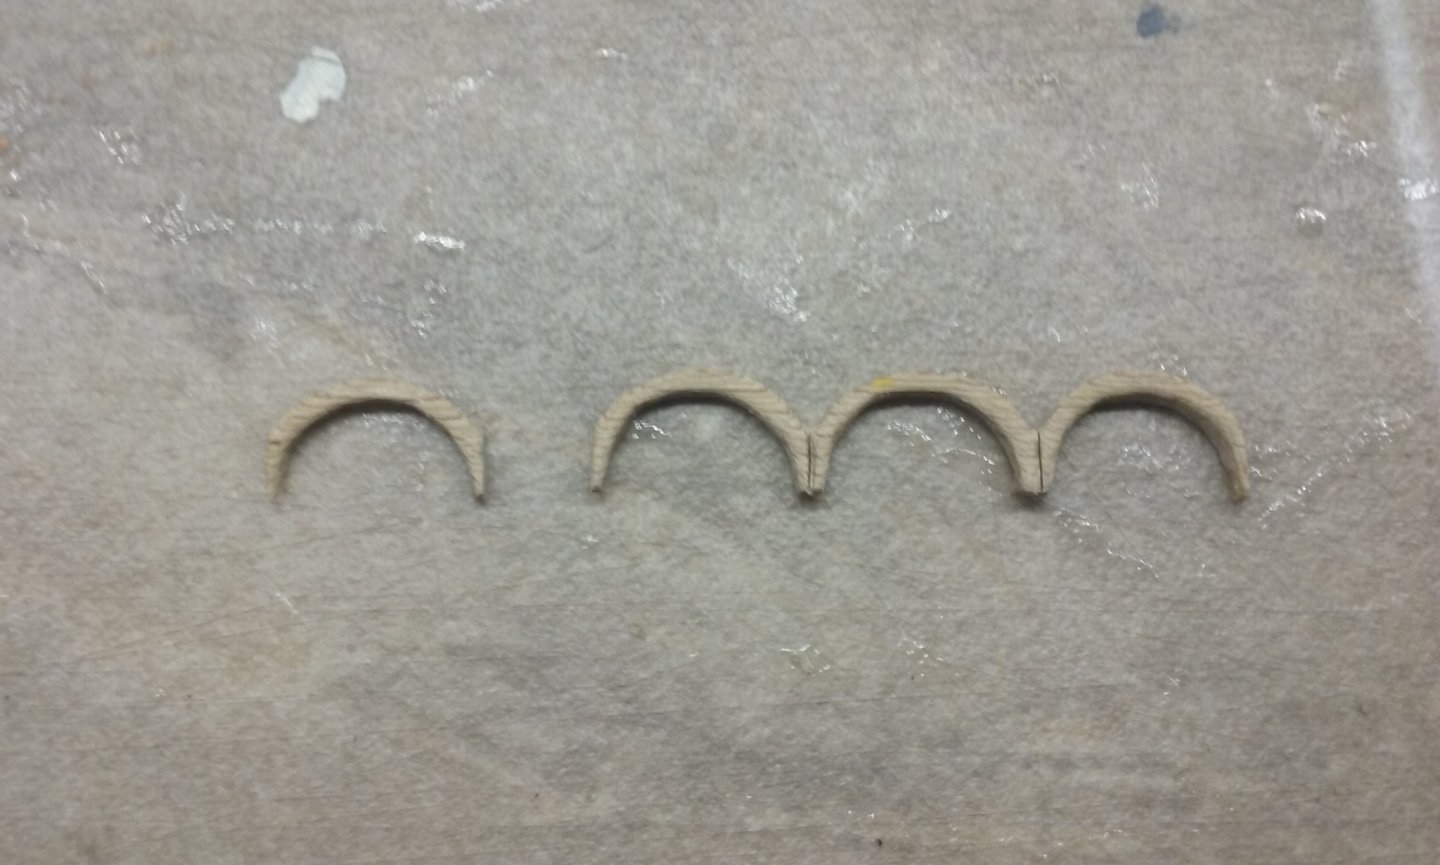
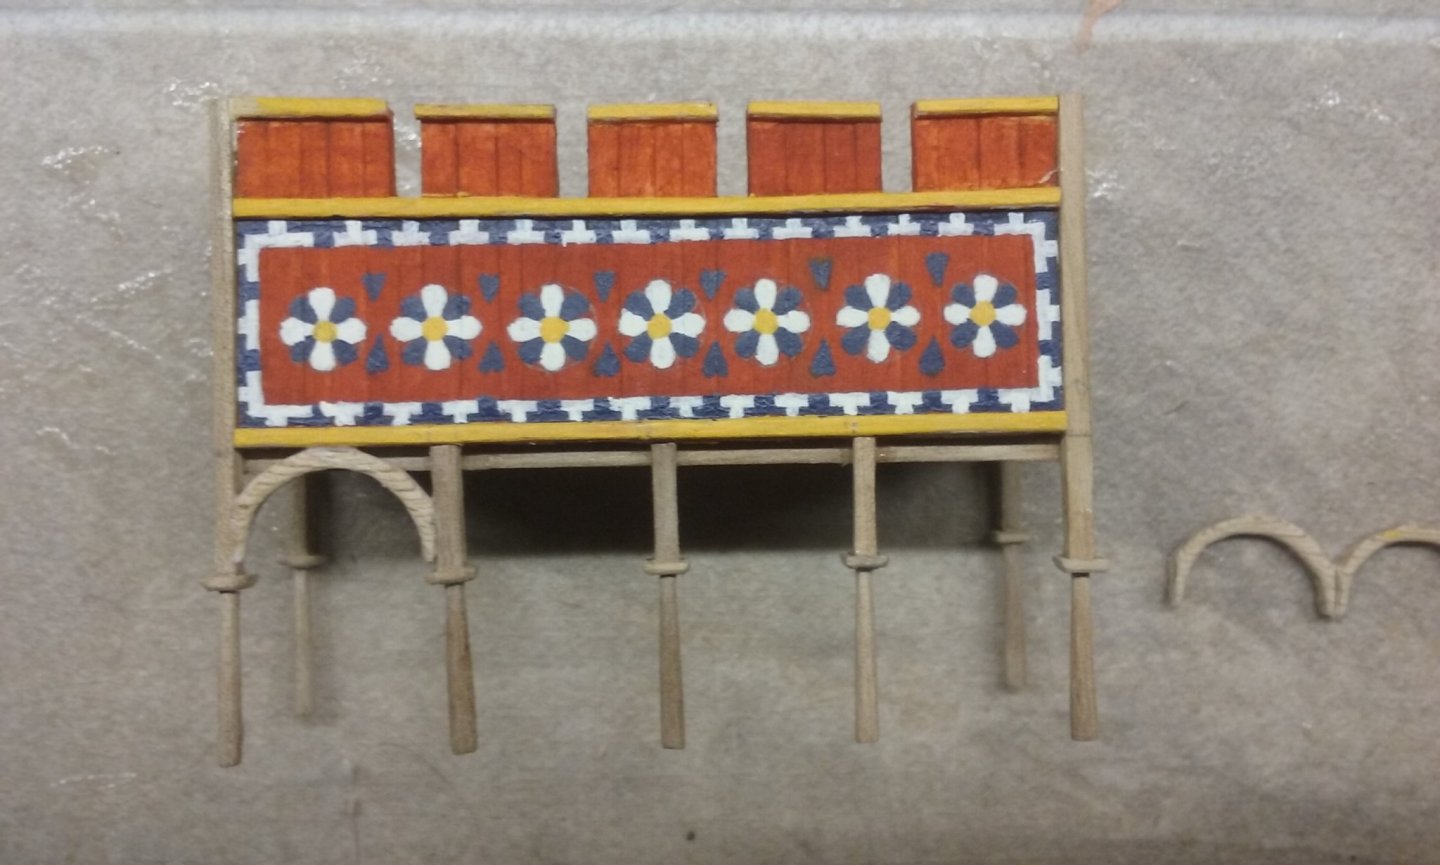
Yes, you're quite right, Phil. Blame it on Liteflight - he started it . The one about the Queen sounds vaguely like the old children's rhyme "Rain, rain, go away. Come again another day" and "Mots d'heures gousses rames" is "Mother Goose Rhymes" (Mère l'Oye). But "Let Stalk Strine" is "Let's Talk Australian" spoken with an Aussie accent. It took me years to find out that the "Afferbeck Lauder" who supposedly compiled the book is just "Alphabetical Order". Gloria soame is "glorious home" and terror souse is "terrace house". I'll leave the others for your ingenuity to sort out. (The first to guess them gets an all-expenses paid trip to Outer Mongolia on a yak). By the way, just on an incredibly picky linguistic point, the word réveillez seems to imply the meaning of "Re-awaken", presumably return to wakefulness after being asleep (otherwise why is the syllable re- in there?). Perhaps there was once a word éveiller which meant "to wake" - not from sleep but from the normal human state of unawareness? After all, (at least according to that fount of all knowledge Google Translate) the word éveillé means awake. And yes, éveille would be the second person singular imperative of the verb éveiller. I admit that using tu when addressing the queen is a bit disrespectful, however. But otherwise the joke doesn't work . . . *********************************************************************************************************************************************************************************************************************************************************************************** Now back onto the actual topic of the thread (yes, I've derailed my own thread again), here's some photos of what I've been working on lately. And a warning to the wise - think ahead and don't make things out of sequence! I made the xylokastra (wooden side castles) back in October - December 2018, almost 2 years ago. But more importantly, I made them before I put the oarbenches in. So, guess what? The columns that support the castles don't fit in the spaces between the benches. No matter what I do I can't make them fit. The red squares below show where the columns should go. Unfortunately they don't. (By the way, I neglected to mention that I'd finished all the rope loops attaching the oars to the tholes - you can see them in the photo above) After great rending soul-searching, I finally decided my only option was to re-make the castles. Which was a real pain, because I'd spent so long painting them with pretty patterns and it looked like I was going to have to do it all over again. I slept on it and came upwith a cunning plan - if I kept the top part with all the pretty painting, re-made the columns, cut the arches apart and put them between the columns, I might be able to re-use almost everything if I was prepared to bodge sufficiently. I'd always been unsatisfied with the old columns anyway. I'd just joined them to the top structure by putting a dab of glue on the tops, and right from the start they'd begun to come loose. You can see this on the far right column in the picture above, but they all did it. A more secure method of attachment would be a definite improvement. So I made a whole set of new columns - each carved to the full height of the castle structure from a single piece of wood, so there was no join between the column and the bottom of the arches. Here's the first one in progress. As the column is now made from a single long piece of wood, the capital had to be built up by gluing thin strips around the column and then sanding them to shape. Here is one of the old castles, with the two new end columns and a beam joining them. The beam will be below the floor structure, but as it'll be behind the arches it won't really be visible. Actually, I got the position of the beam wrong. If you look at the next photo I've moved it up to the correct height. So, then I pulled the old castle to bits: The old columns (and their capitals) are likely to get thrown out. I've scored between the arches, but won't separate them until I'm ready to use them. And here is the old superstructure glued to the new column assembly. The Vegemite jar is now mult-tasking as a weight to keep everything in place. And with one of the end panels glued in place. Note - the big worry I had was that the new configuration of the castle structure was wider than the old one because it had to fit between the benches, which was the problem I was trying to solve. But by adding the end columns to the ends of the castle, I'd made it just the right amount longer, and it still looked good. I've since realised that it's better to have the intermediate columns only coming up to the bottom of the castle floor, as then I wouldn't have to change the battlements. So I'll cut those columns shorter before I add them. And here are the results of my experimentation with dye colours. I already had thin cotton in the colour I wanted (the reel on the far left) and my purpose was to dye thicker white thread to match that colour. I had dye in "brown" and "tan" and tried various mixtures. My first attempt is on the far right - just brown in two different strengths and dipped for different times. The dark one I'm keeping for tarred rope - it's not black but dark brown, but that's probably closer to the colour of rope tarred with natural tar. The others are various mixes of the two colours in different strengths, but none of them achieved the colour I wanted. I showed it to my lovely wife (the expert in this sort of thing) and she said "It needs green". "Oh, and you have a packet of green dye that's been hanging around ever since I've known you." She added green dye to the mix - and - perfect! The thread next to the reel on the left is the end result. I'm very happy with it. There's more going to come - I'll add an update in the next few days.