Louie da fly
-
Posts
7,991 -
Joined
-
Last visited
Content Type
Profiles
Forums
Gallery
Events
Everything posted by Louie da fly
-
 Gallie subtile is a direct transliteration from the Italian term galea sottile which means "narrow galley" - i.e. intended purely for warfare. This is the only one of Henry VIII's oar-propelled warships that is built like a Mediterranean galley - naturally enough, since Henry imported Venetian shipwrights to build her. I don't believe she is characteristic of the type of oar-propelled vessel that Grace would have used. On the other hand, though skin-first clinker building was traditional in the north Atlantic, by the mid-late 16th century it had been almost completely superseded by carvel. Additionally, to get any sort of speed through the water when propelled by oars, a vessel has to be extremely smooth below the water line. So I would incline towards carvel construction. I agree. I went through this whole issue when working on my dromon. Certainly it would be preferable for a galley to be narrow - it reduces water drag. However, it may not have been as narrow as the galeae sottile, which, by the way, are often shown with a single huge lateen - see many of the contemporary pictures of Lepanto, and several by Bruegel. So perhaps it's not so much an issue after all. If the Mediterranean galleys performed like the Olympias, the only galley reconstruction I know that's seen sea service, they'd be very unstable, and would capsize if they heeled more than 10 degrees - so they'd only use the sail if they were directly before the wind. In which case centre of effort is not an issue, and a single mast may be ok. Steven
- 27 replies
-
- 4
-

-
- irish galley
- galley
- (and 1 more)
-
That's a nice model of the Brendan. I have The Brendan Voyage at home, and recently re-read it. Quite an adventure! A few more thoughts. In the 15th century, Spanish and Basque carracks (such as the Newport ship which was Spanish before the English captured it) were at the cutting edge of maritime development, but by the mid-late 16th the galleon had become master and the focus had moved north, particularly to Holland, whose fleets of galleons were able to sail directly to Asia, bypassing the the overland route upon which the Venetians and Genoans relied and depriving them of their monopoly of trade. Though Mediterranean galleys certainly traded to the north Atlantic, they weren't designed for it and were very vulnerable to rough seas - many's the galley fleet that sank in a rough Med storm (which is why the fighting season was confined to the summer months). I believe that vessels built for the North Atlantic would have been much more robust, even at the cost of the lightness necessary to an oar-propelled vessel. And I think any oar-propelled vessel would be described at the time as a galley, whatever its form, simply because it would be so unusual to see one - the great majority of seagoing vessels of the time were sailed. In fact, I'd say that rather than maneuvring by sail they'd be using oars to attack ships that were becalmed and unable to escape. Mediterranean war-galleys were pretty much built around the gun platform at the bow, but it's likely that Grace's "galleys", being packed with men, would simply board and overwhelm the (much smaller) crews of their prey by sheer numbers. Regarding the number of masts, the pictorial evidence seems to suggest a single one, and in the absence of information to the contrary I'd think a single mast would be the way to go. However, these are only suggestions for your consideration - this is your model, and the final decision regarding the form of the ship is yours. I'm enjoying following the detective work. Steven
- 27 replies
-
- 6
-
-
- irish galley
- galley
- (and 1 more)
-
A few more observations. If you haven't already done so, get hold of the book "Age of the Galley" and read the section on Renaissance galleys, particularly regarding the arrangements for rowing more than one man to the oar - known as a scaloccio, if I remember correctly. It could be useful in working out your plans. Also, the interscalmium, the distance between oarbenches usually ends up as about a yard (0.9M). Closer together is too cramped for the oarsmen, further apart just adds extra weight for no gain. This could give you some idea of the dimensions of your reconstruction. Ships were often portrayed shorter than they really were, to save space on a page (or on a seal, as with the seals of the maritime towns in the Middle Ages). I'd agree with Bob Cleek regarding the size and type of ships that would have been used. I wouldn't base too much on Mediterranean examples. I don't know when the lug came into use, but I'd be wary of extending information too far backwards in time. Chapman is up to two centuries after Grace O'Malley, and so are many of the ships you mention. There were considerable variations in ship design from period to period and from region to region. I'd recommend going with what you can be sure of, and only extrapolating with great care and when no other means serve. Having said that, have fun with the research! Steven
- 27 replies
-
- 4
-
-
- irish galley
- galley
- (and 1 more)
-
Pat, thanks for the info. I don't have Discovery channel but I would like to have seen it (though I've often found Discovery shows to be disappointing - a lot of puff and not much fact. However, one can always hope it's an exception to that rule, enlightening and full of fascinating information). Has anyone else seen the program? Probably too much to hope they've found a dromon . . .😉 Steven
-
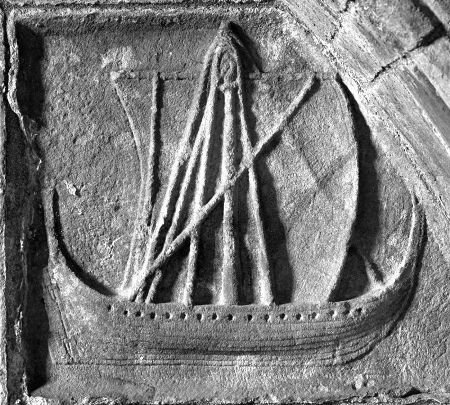
A very interesting project, Deperdussin1910. You've really taken on a huge research job and I wish you well with it. I find research and speculative reconstruction just as interesting (or perhaps even more) compared with the actual building of the model. I was going to say ignore the Mediterranean galleys in your reconstruction, but on second thought the Venetians and probably the Genoans were trading in galleys to Western European ports in the 16th century (there's one shown in an Antwerp harbour scene dated 1515 -1521 at https://artsandculture.google.com/asset/antverpia-mercatorum-emporium/RwFbg96tzEartg?hl=nl ), so the Irish could have been exposed to them. However, I doubt they'd have copied the design if they had their own tradition of shipbuilding, particularly galleys. Another possible source of information is the Anthony Roll - https://en.wikisource.org/wiki/Anthony_Roll/Third_roll - dated 1545, showing Henry VIII's navy, and including a number of "rowbarges". These are shown with furled sails, but I'd hazard a guess they were square rigged, as were most northern/Western European ships of the time. Though it's extremely limited as a source, I'd say the best evidence you have is the carving from the Clare Island abbey. To my eye it shows a double-ended, clinker-built ship with a single mast, very similar in design to Viking ships of centuries earlier, but with a stern rudder. It doesn't show any yards, so it's impossible to tell what its rig is, but I'd be prepared to bet money on a square sail, as this was the rig used throughout this region for centuries when the lateen sail dominated the Mediterranean, and in fact came to largely displace the lateen as the main motive equipment in the following centuries. Another image that may be of help is from the 1528 tomb of Alexander MacLeod in St Clement's church, Rodel, Harris. Though this is Scottish rather than Irish, I think there's a pretty high likelihood of trade and cultural/shipbuilding influences passing both ways between the two Gaelic nations. It is an elegant vessel, and as with the Clare Island carving, had I been asked to give a date to this image I would have put it centuries earlier, as it is very reminiscent of ships associated with the Vikings, and their successors of the 12th and 13th centuries. Like the Clare island carving it is double-ended with oars, a single mast and a stern rudder. In this case it is shown to have a square sail. I think this image might well be a good candidate for the design of one of Grace O'Malley's "galleys". I hope that helps and I wish you every success with your project. Steven
- 27 replies
-
- 4
-
-
- irish galley
- galley
- (and 1 more)
-
Looking very good indeed. A beautiful ship. Steven
- 141 replies
-
- 1
-
-
- sir winston churchill
- woody joe
- (and 1 more)
-
Thanks Götz, Tom and Mark for the suggestions. Tom, your idea is what I should have done. Well, a lesson for next time . . . Steven
-
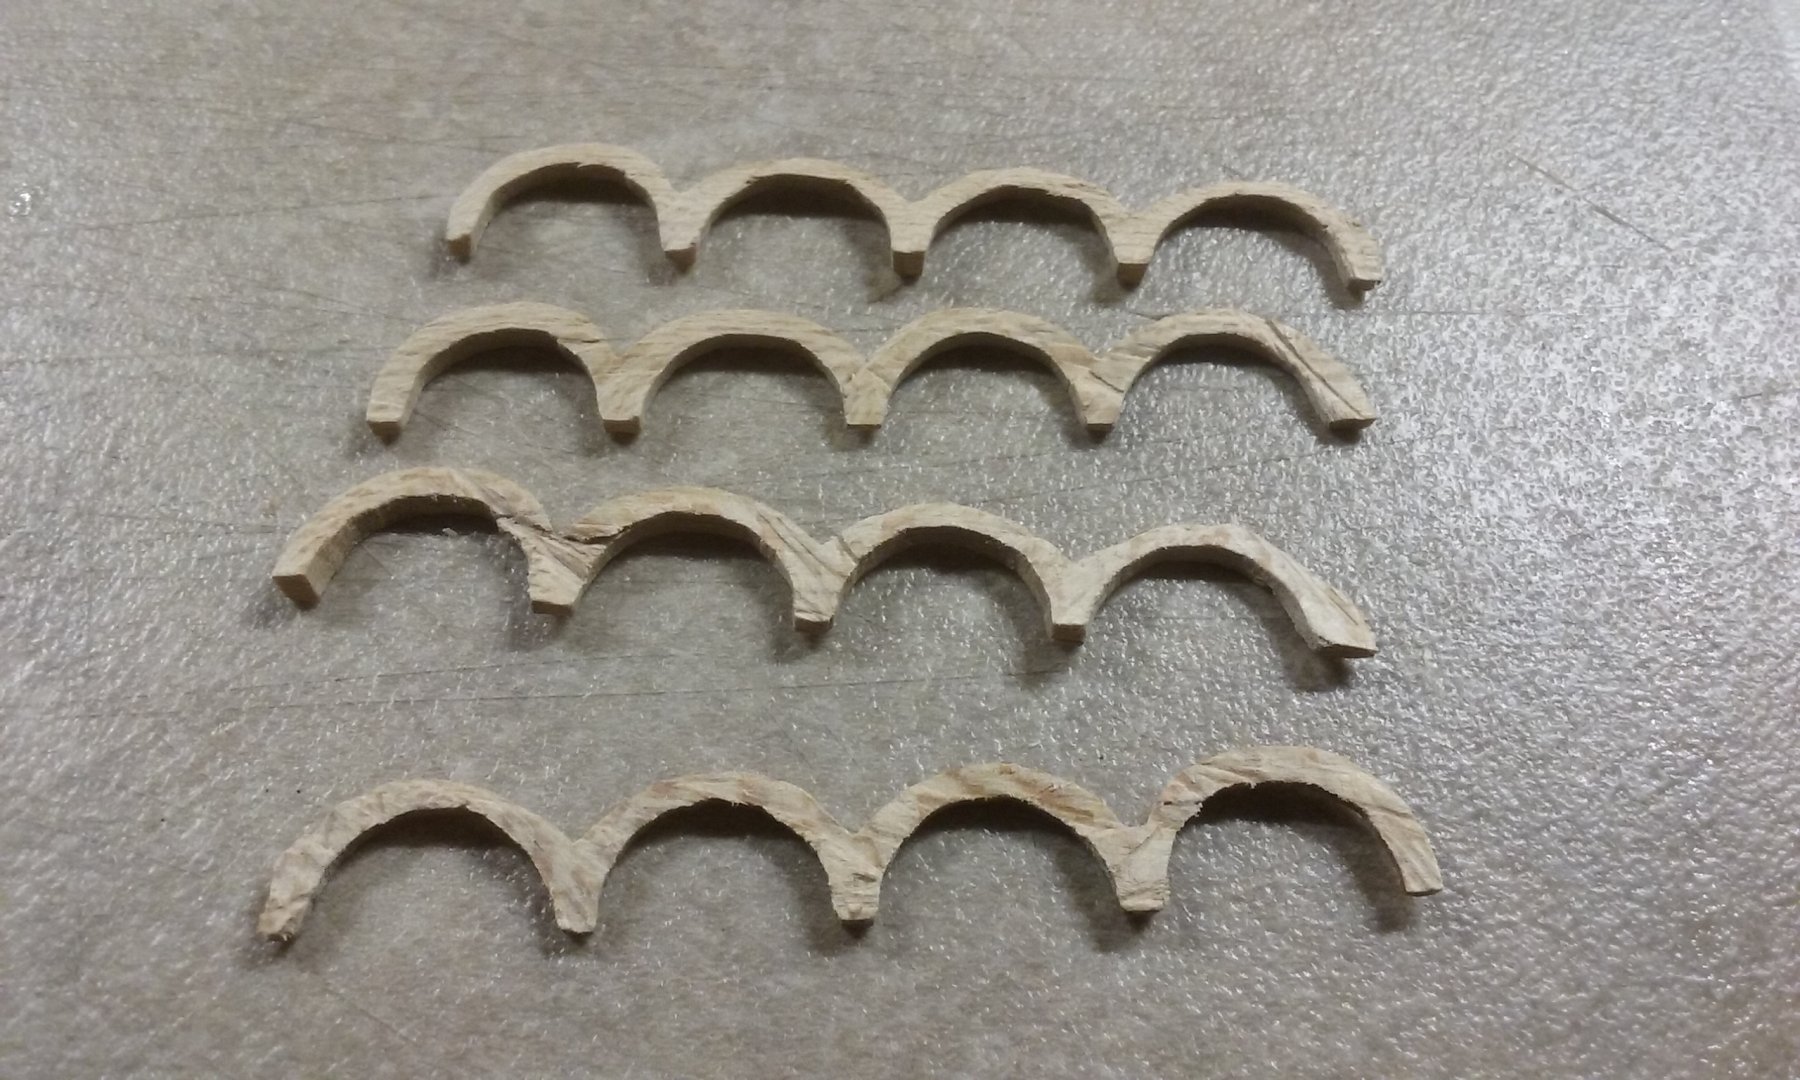
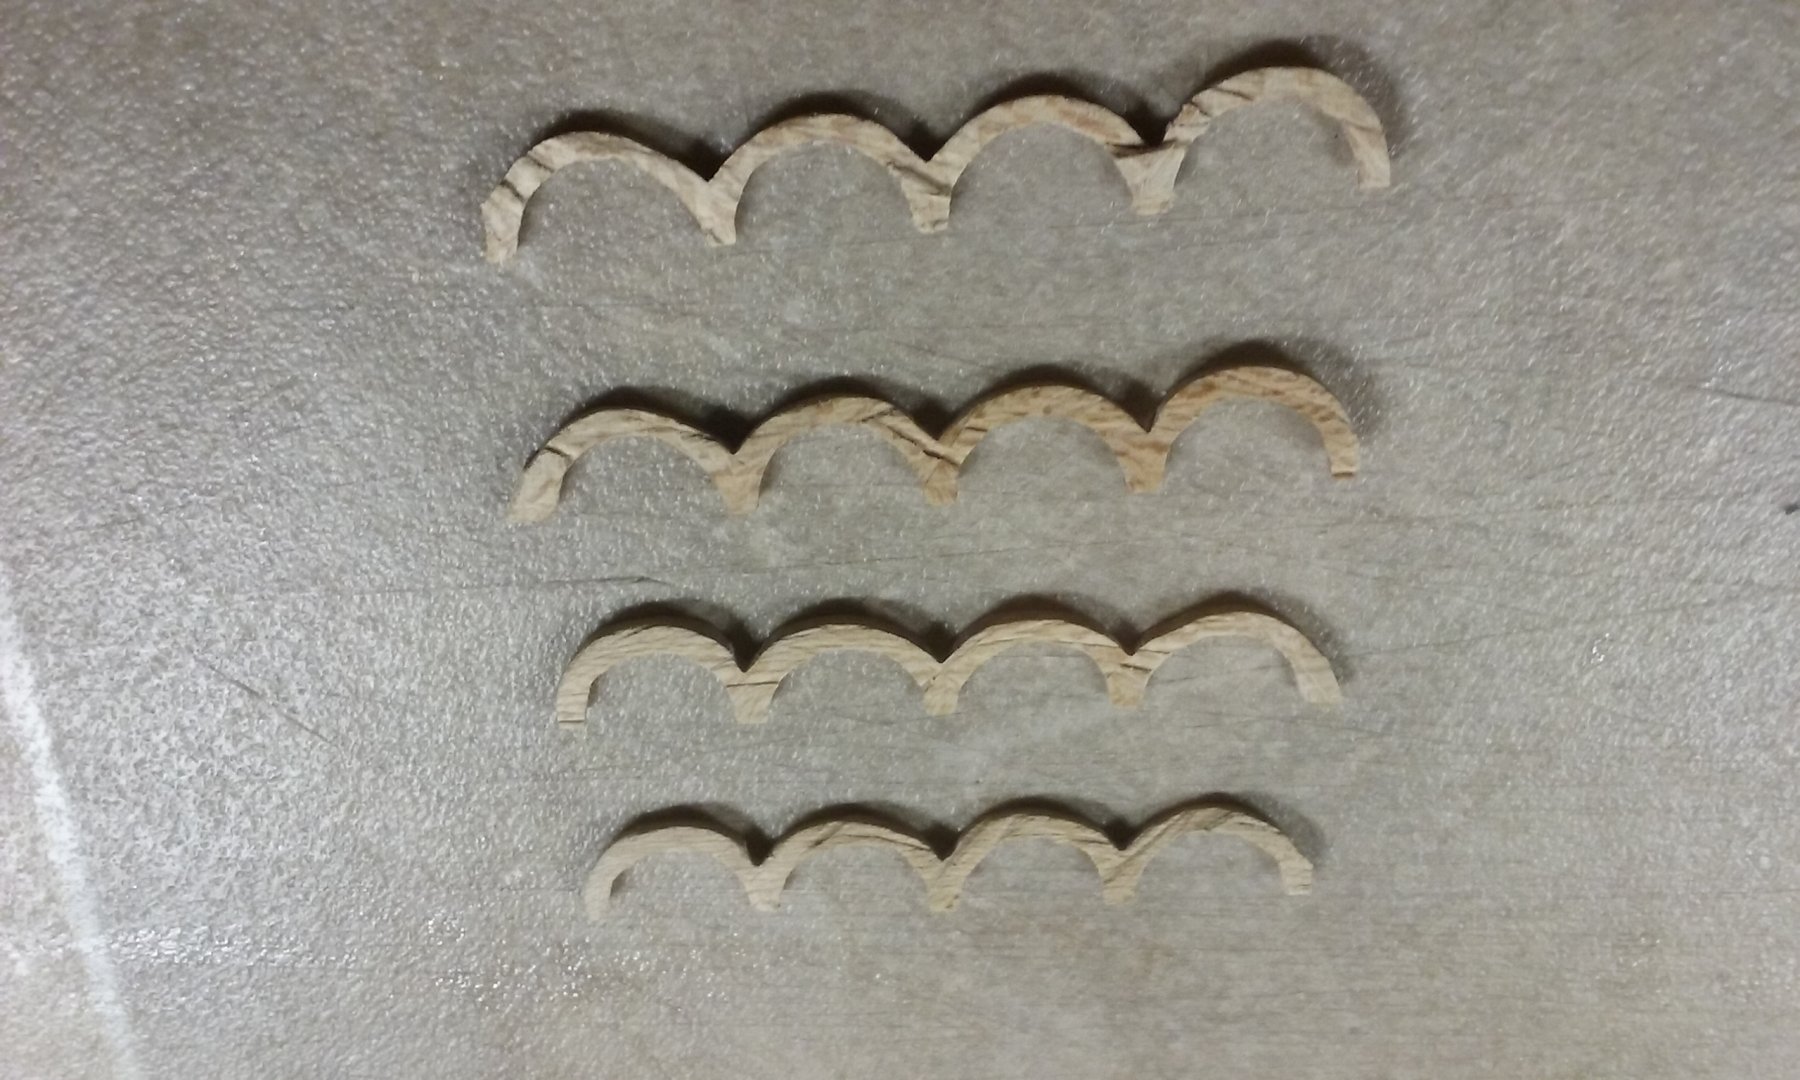
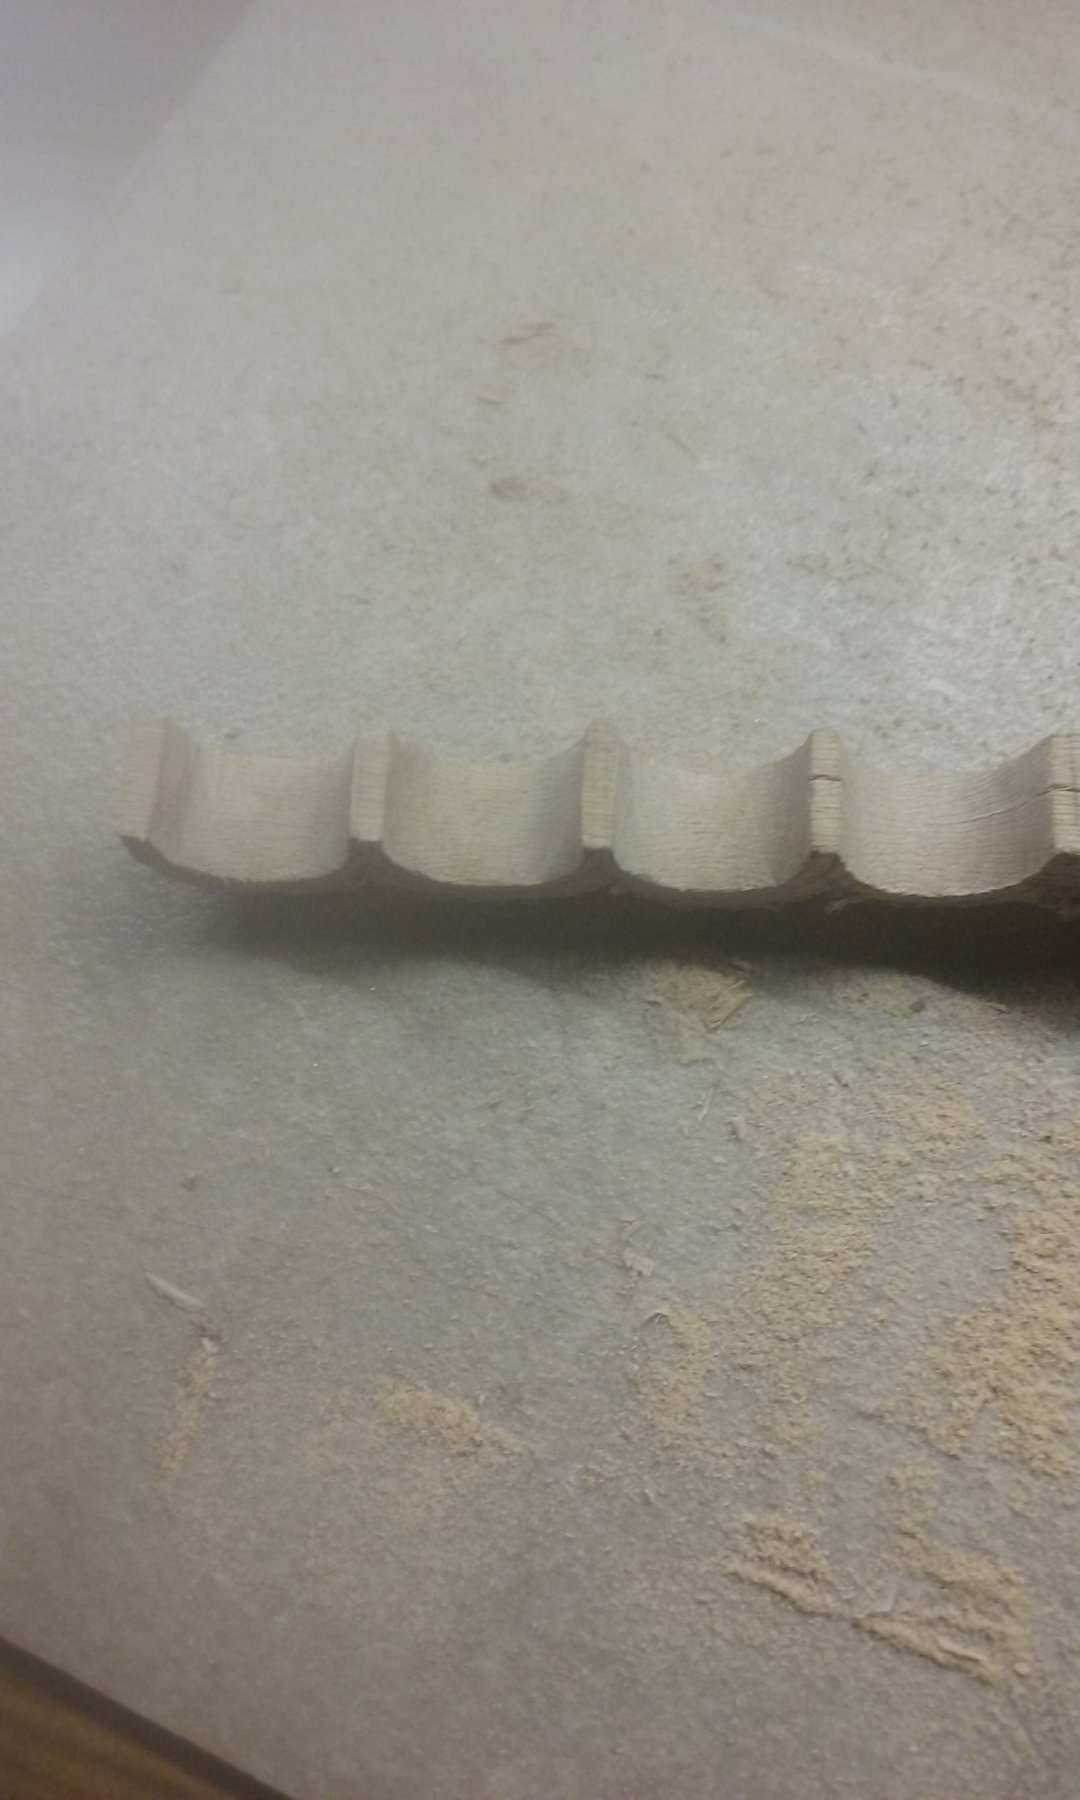
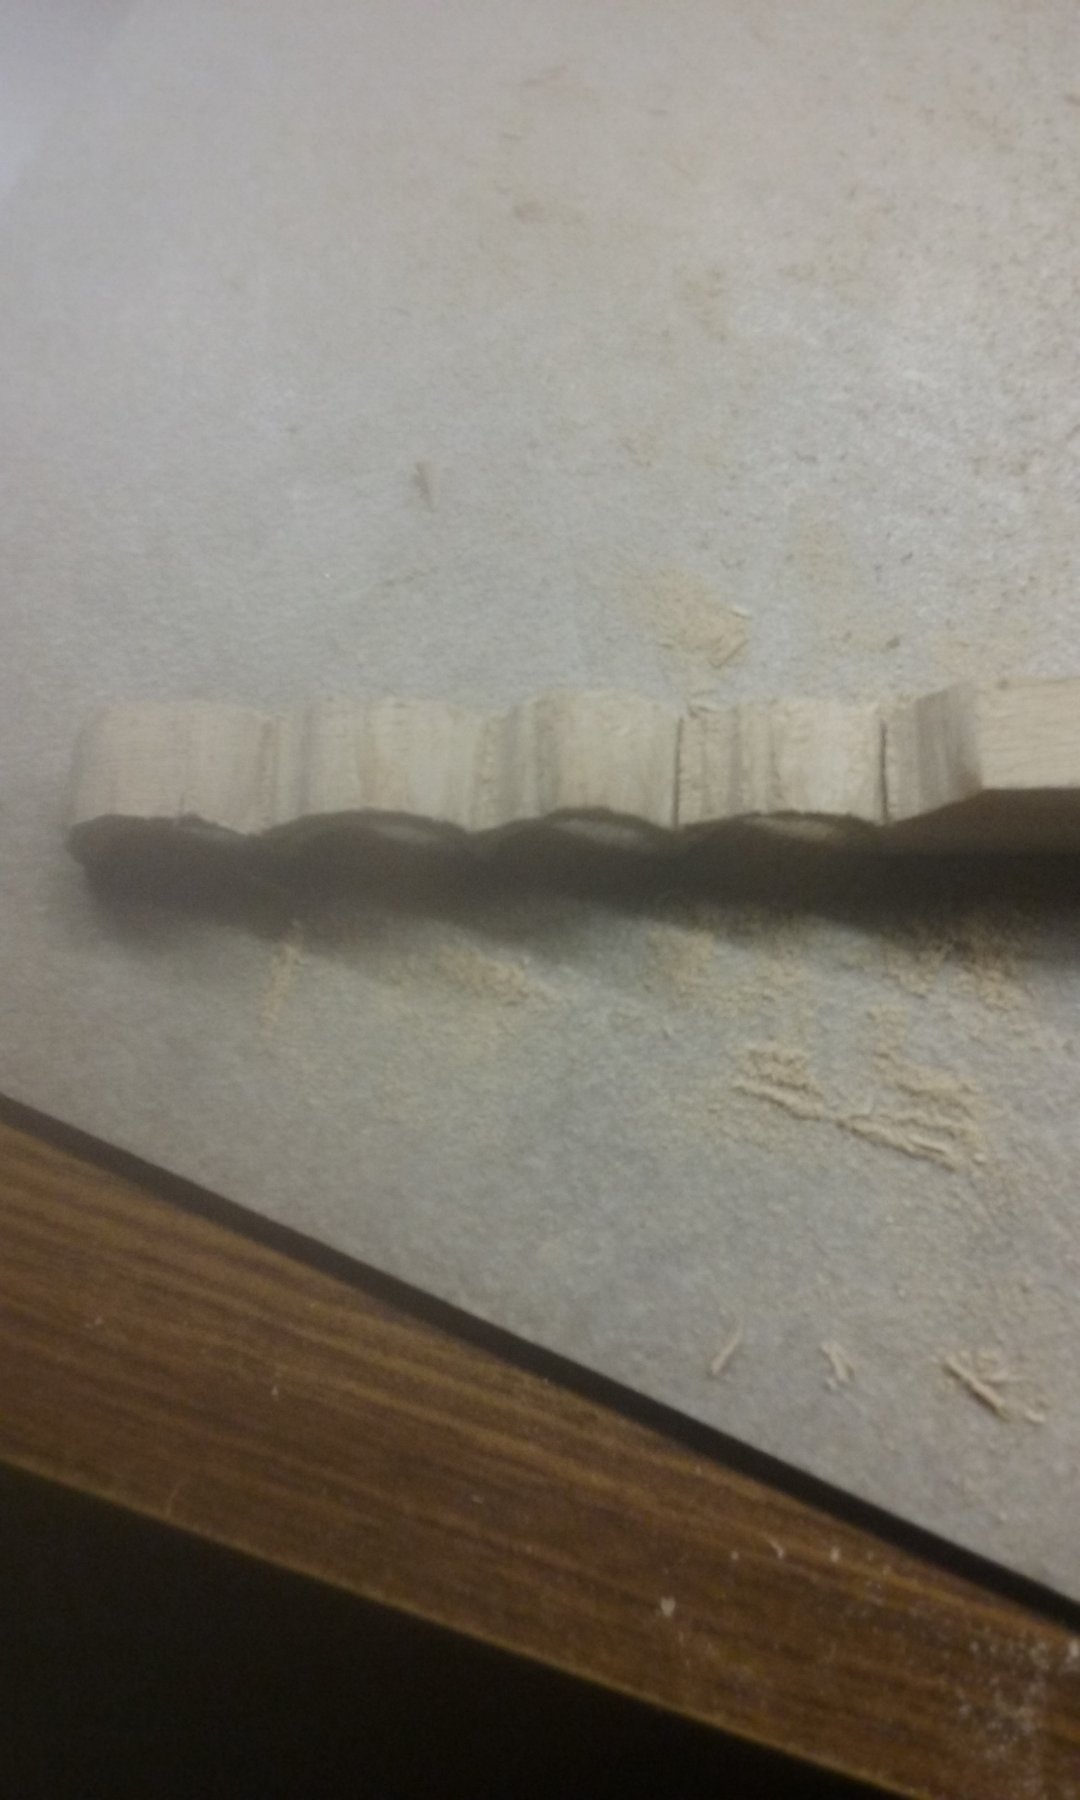
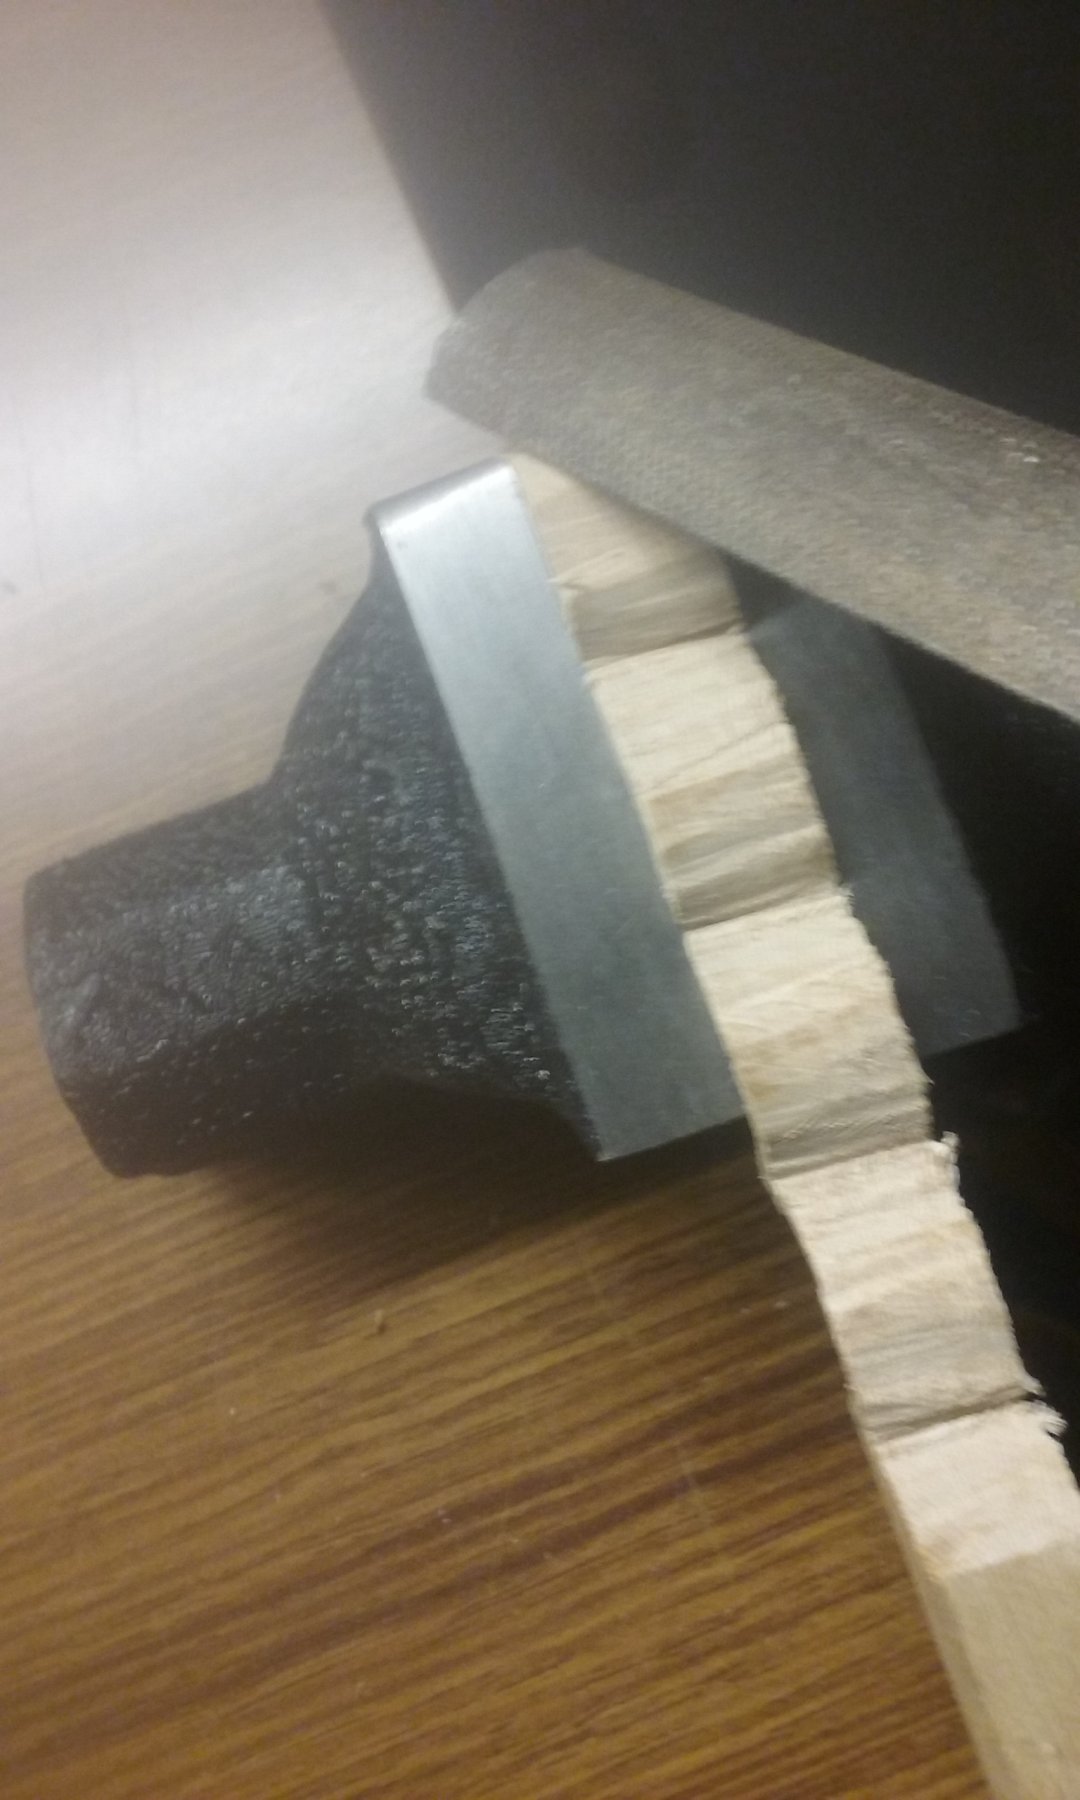
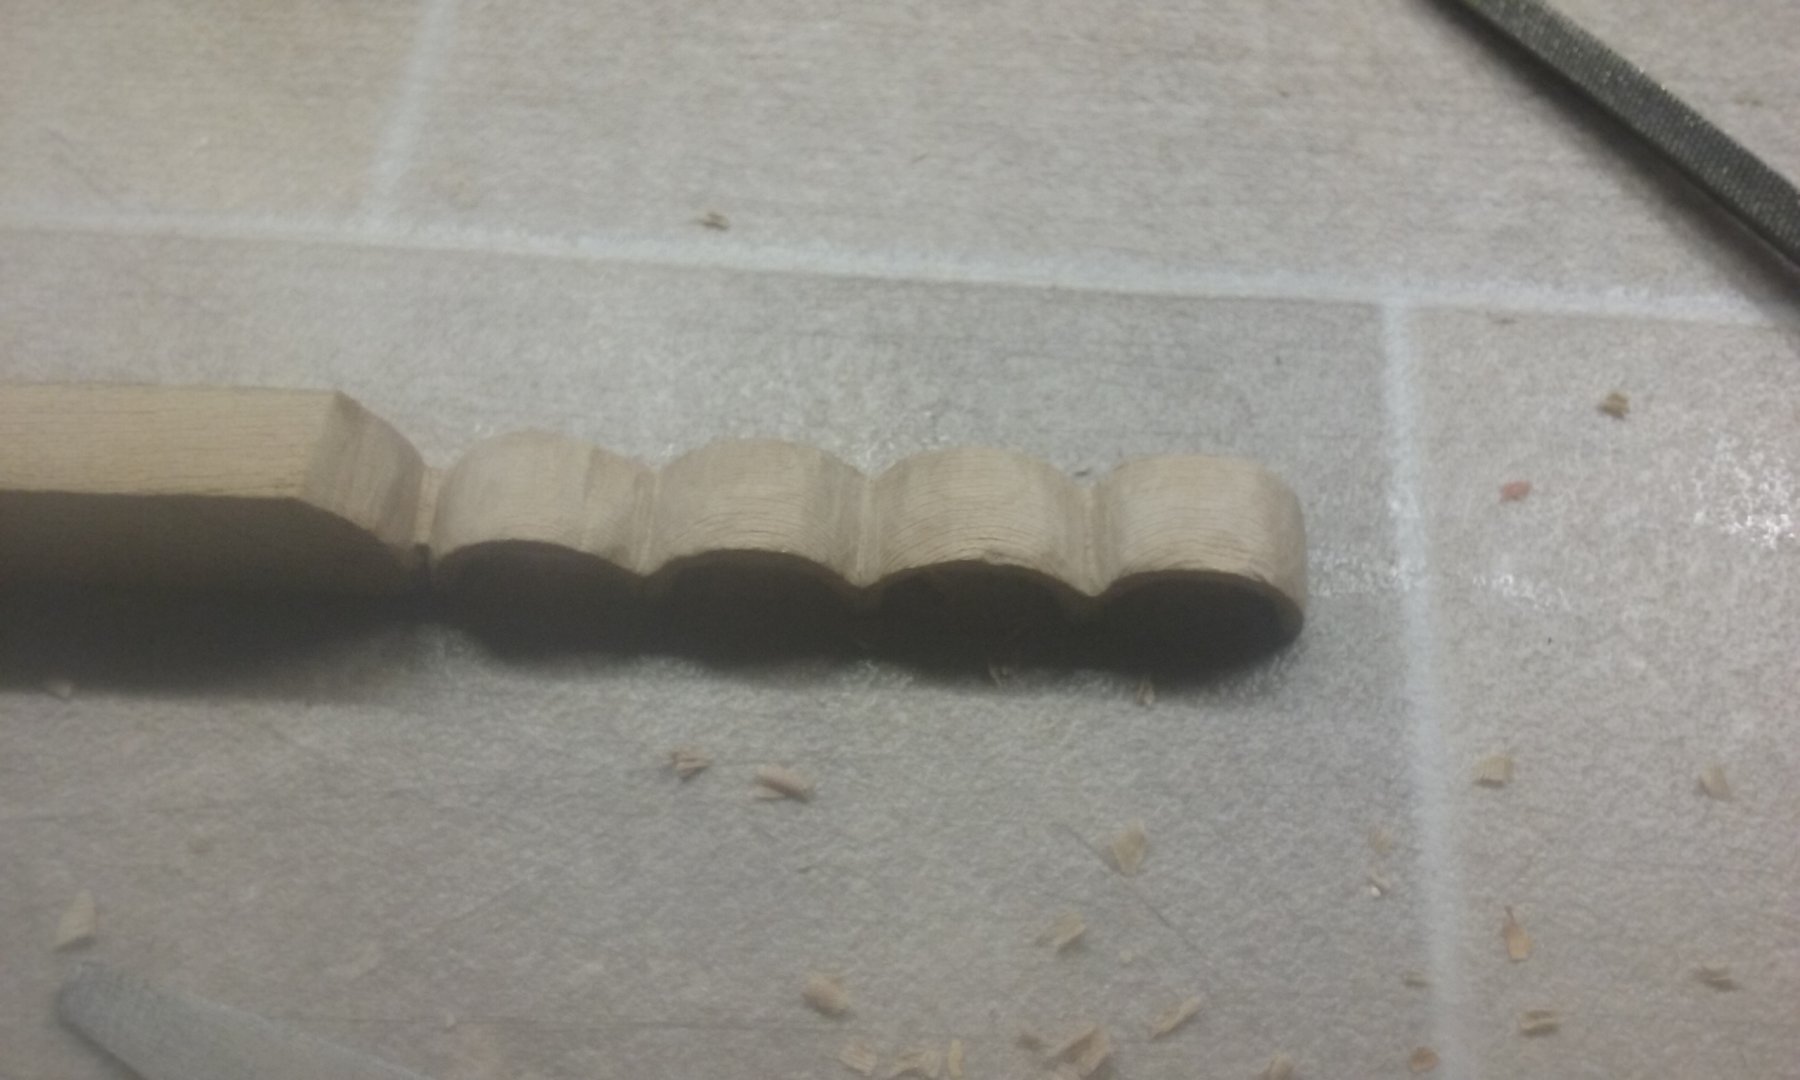
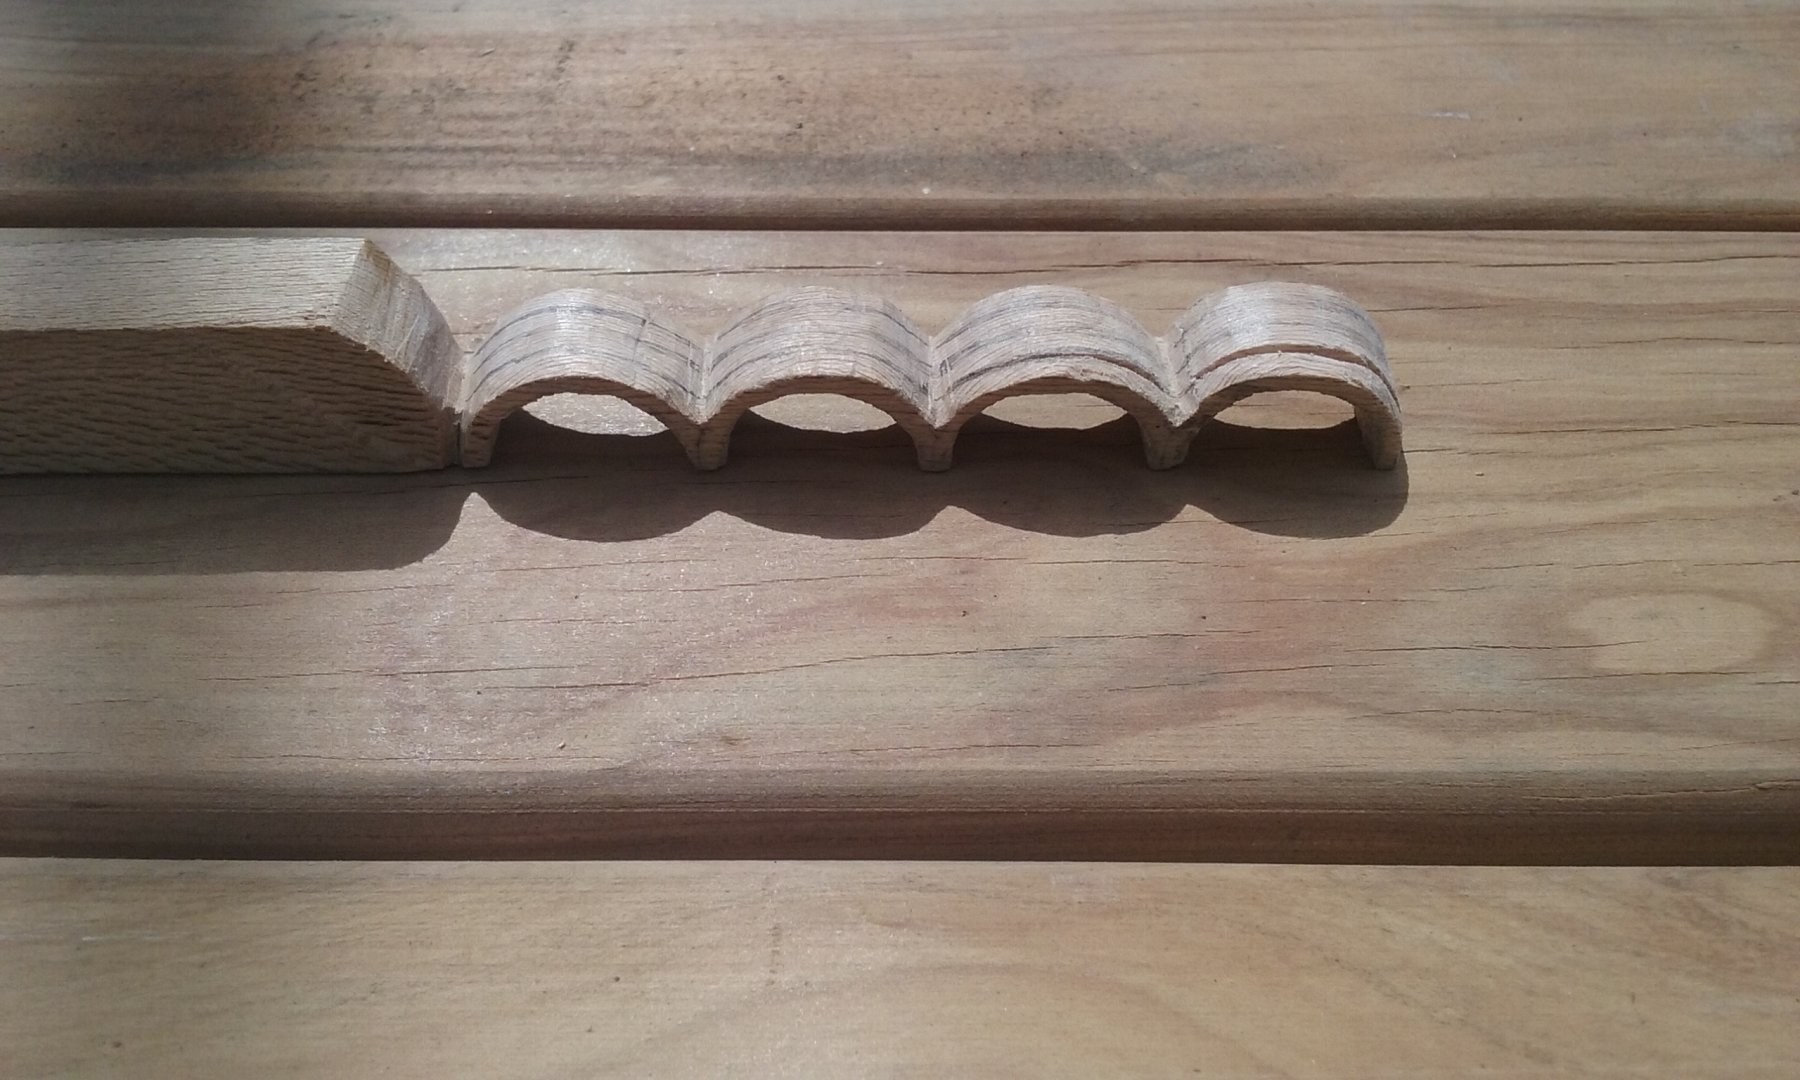
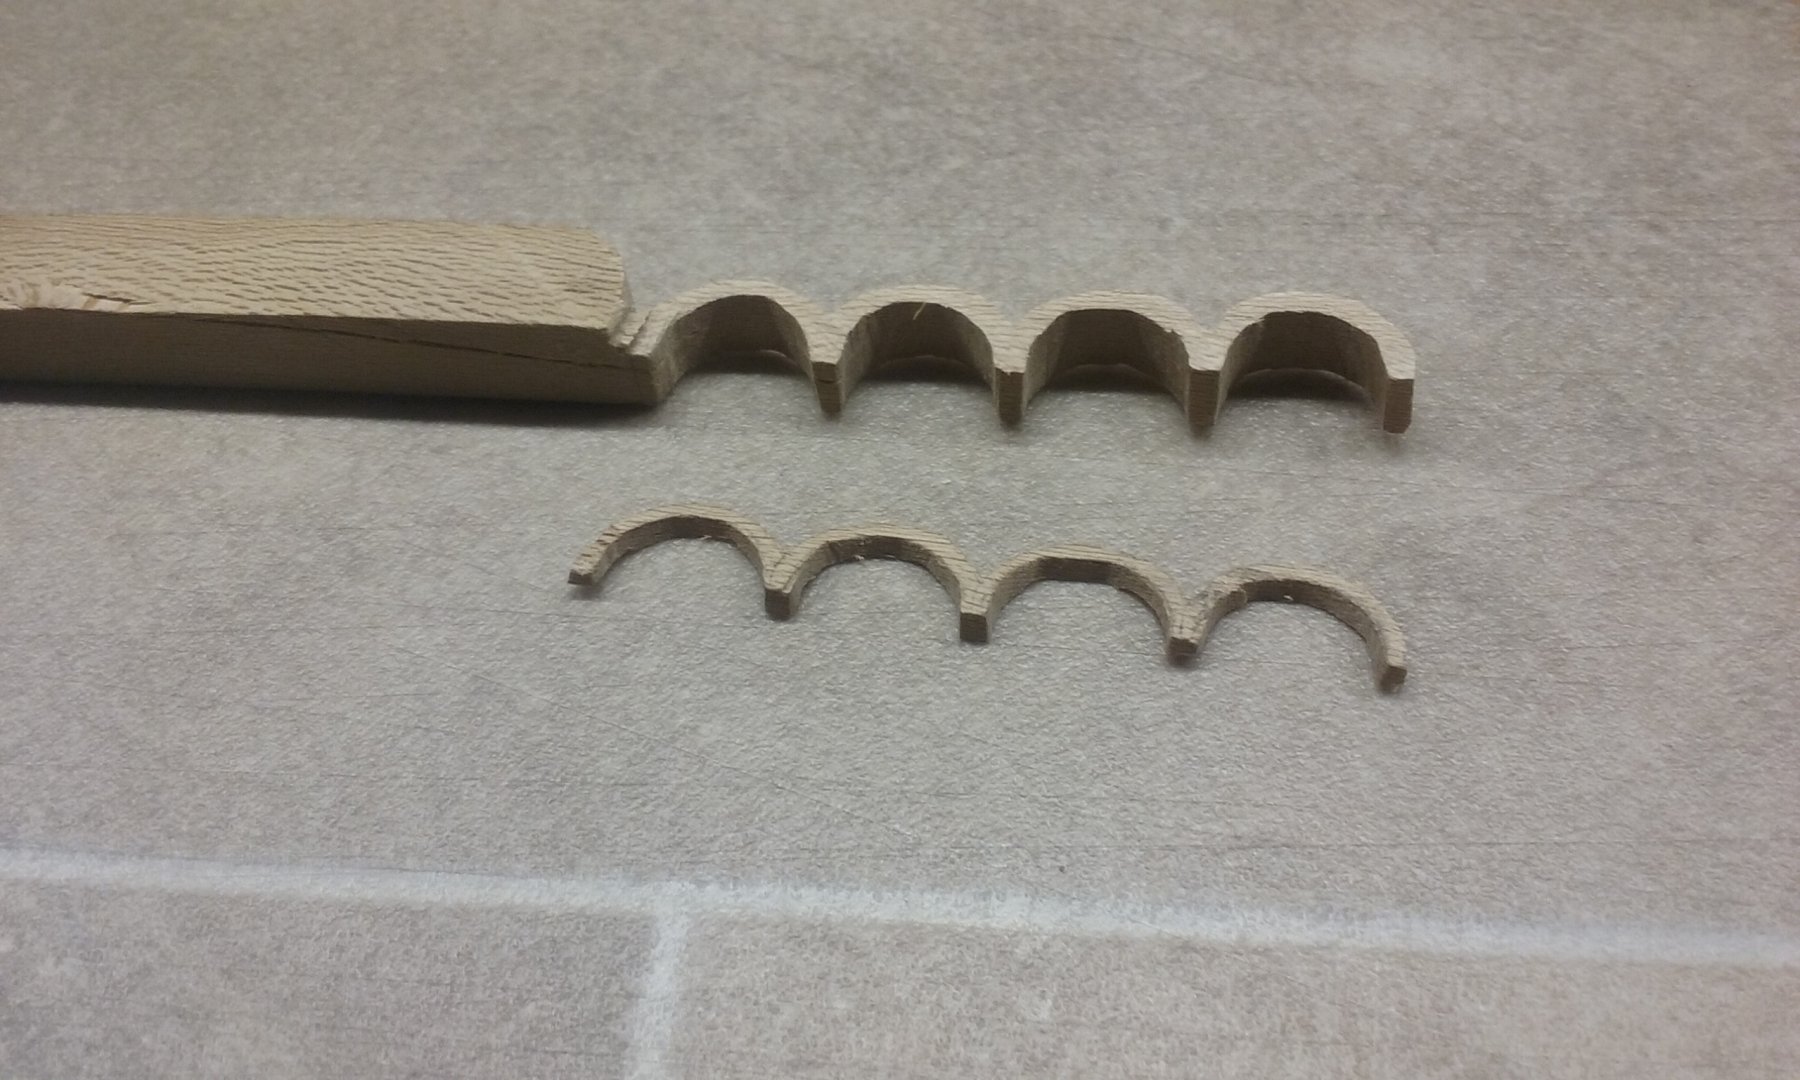
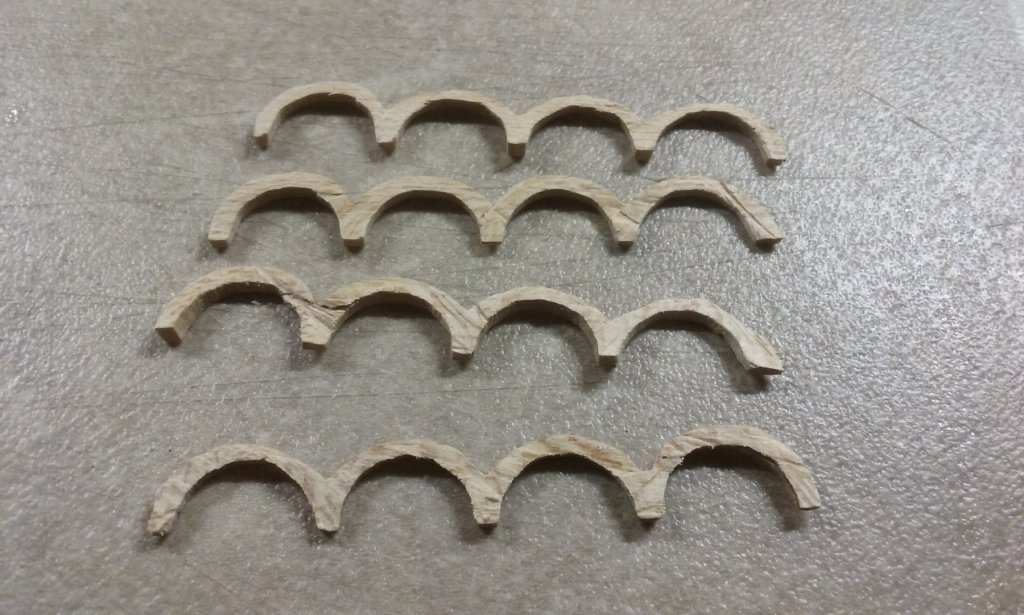
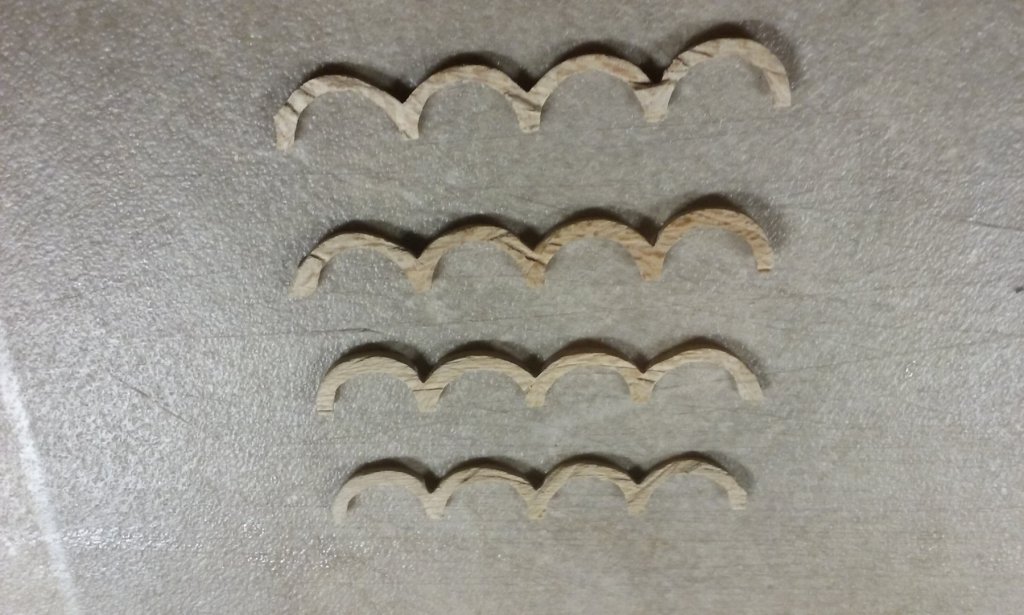
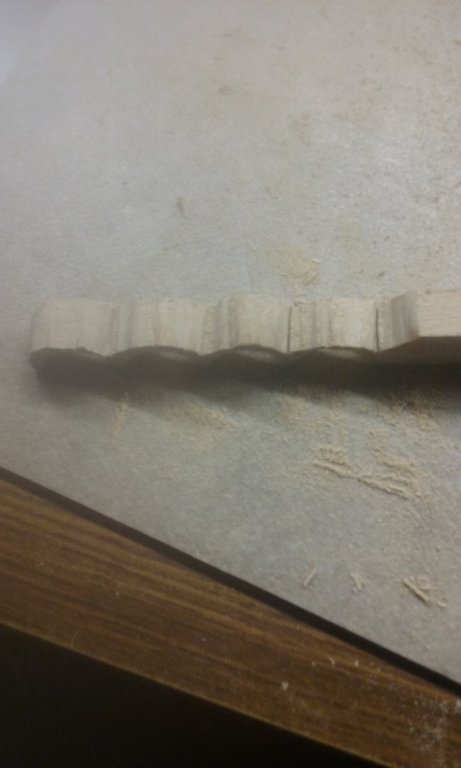
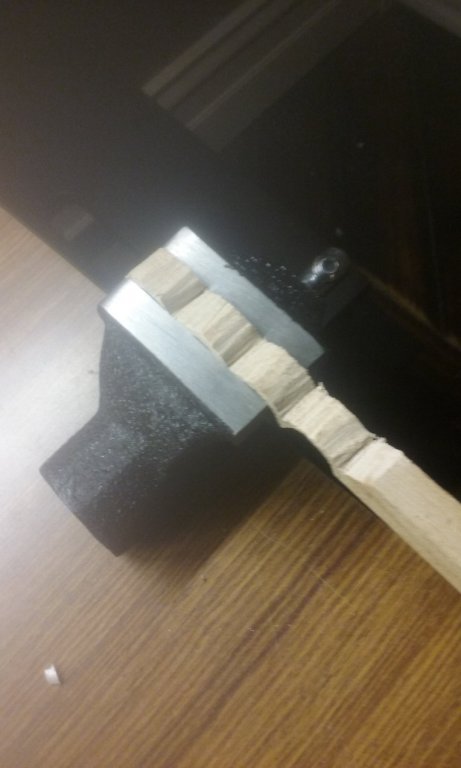
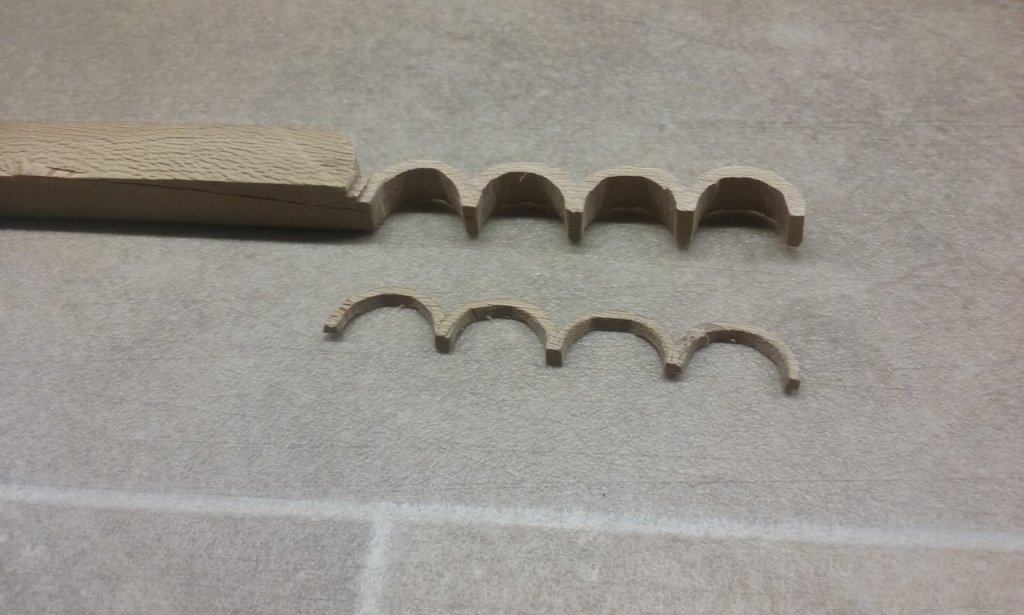
Thanks everybody for the likes. Pat, actually the grain ran that way because in the bit of wood I had available. That it gave a bit of strength was fortuitous. HOWEVER, I really wouldn't recommend this technique. It would have been far less work, worry and grief if I'd just made a template and cut four arcades from a sheet of wood 1mm thick. Slitting the four apart from a single block was a real hassle. Perhaps if I'd had a more professional workshop it might have worked better - but then again perhaps not. The major problem was that the piece of fretsaw blade I used to cut the arcades apart kept wandering and cutting in where it wasn't wanted, and there seemed to be very little I could do about it. See the dodgy cut lines in the pictures below. I haven't yet decided whether they're worth keeping or whether I should just start again. After all that work I'd be reluctant to throw them away, but it might be the best thing to do. But first I'll see if I can salvage them. If I can get them thick enough, with smooth faces to the outside, they may be worth it. Certainly, the idea I had to make them all identical (based on what others on the forum have done in making multiple blocks) didn't really work very well. There was quite a bit of variation between them anyway, so the major purpose for the technique wasn't achieved. I didn't really gain anything from the experiment except the experience of doing it and the knowledge it's not a very good method. Perhaps that's worthwhile enough in its own right 😥. Steven
-
World's oldest intact shipwreck discovered in Black Sea
Louie da fly replied to RichardG's topic in Nautical/Naval History
Amazing stuff! Now if they can only find a dromon . . . (sigh) Steven -
Brilliant work on the rivets, Dan. I'm in awe . . . Steven
- 238 replies
-
- 2
-
-
- leviathan
- troop ship
- (and 2 more)
-
Looking good, Patrick. I think you're right going with the multiple support beams (which would probably be described as "knees") - they seem to be quite common in ships of this time. Regarding the name "chains", the lower deadeyes at the ends of the shrouds are fixed to the hull with iron chains, as you can see in the first and second pictures in your post. The widened wales that support both these chains and the shrouds themselves are called "chain wales", which got shortened over the centuries to "channels". However, that whole section of the ship is often just referred to as "the chains". Hope that clears it up. How wide the channels themselves were - your guess is as good as mine. However, there is some archaeological information - I don't know if the channels survived on the Mary Rose which was maybe 50 years before the Pelican (the photos of her all seem to be taken from inside, so you can't see them) but they certainly did on the Wasa which was maybe 50 years after. But again I think you're right in making them wide enough to support those barrels. You could probably get a pretty good idea by scaling off from that last picture - you have the size of the sailor next to the barrel, so you can estimate the size of the barrel, and thus work out how wide the channel would have to be to fit both the barrel and the shrouds/deadeyes. Steven
- 756 replies
-
- 3
-
-
- galleon
- golden hind
- (and 2 more)
-
Thanks, Patrick. I currently have nightmares about the rotten thing breaking just as I'm about to finish, after all that work . . . And thank you also to Michael for the kind comment, and to Carl for the suggestion (but I don't think I'll put dowels in - you're right - the scale is too small, and they wouldn't be visible). Thanks also to everybody for the likes. The support and encouragement of my fellow modellers is greatly valued, especially on the (fortunately rare) occasions when everything seems to be going wrong and (you all know the feeling) you just want to toss it in the scrap bin and find another hobby. Steven
-
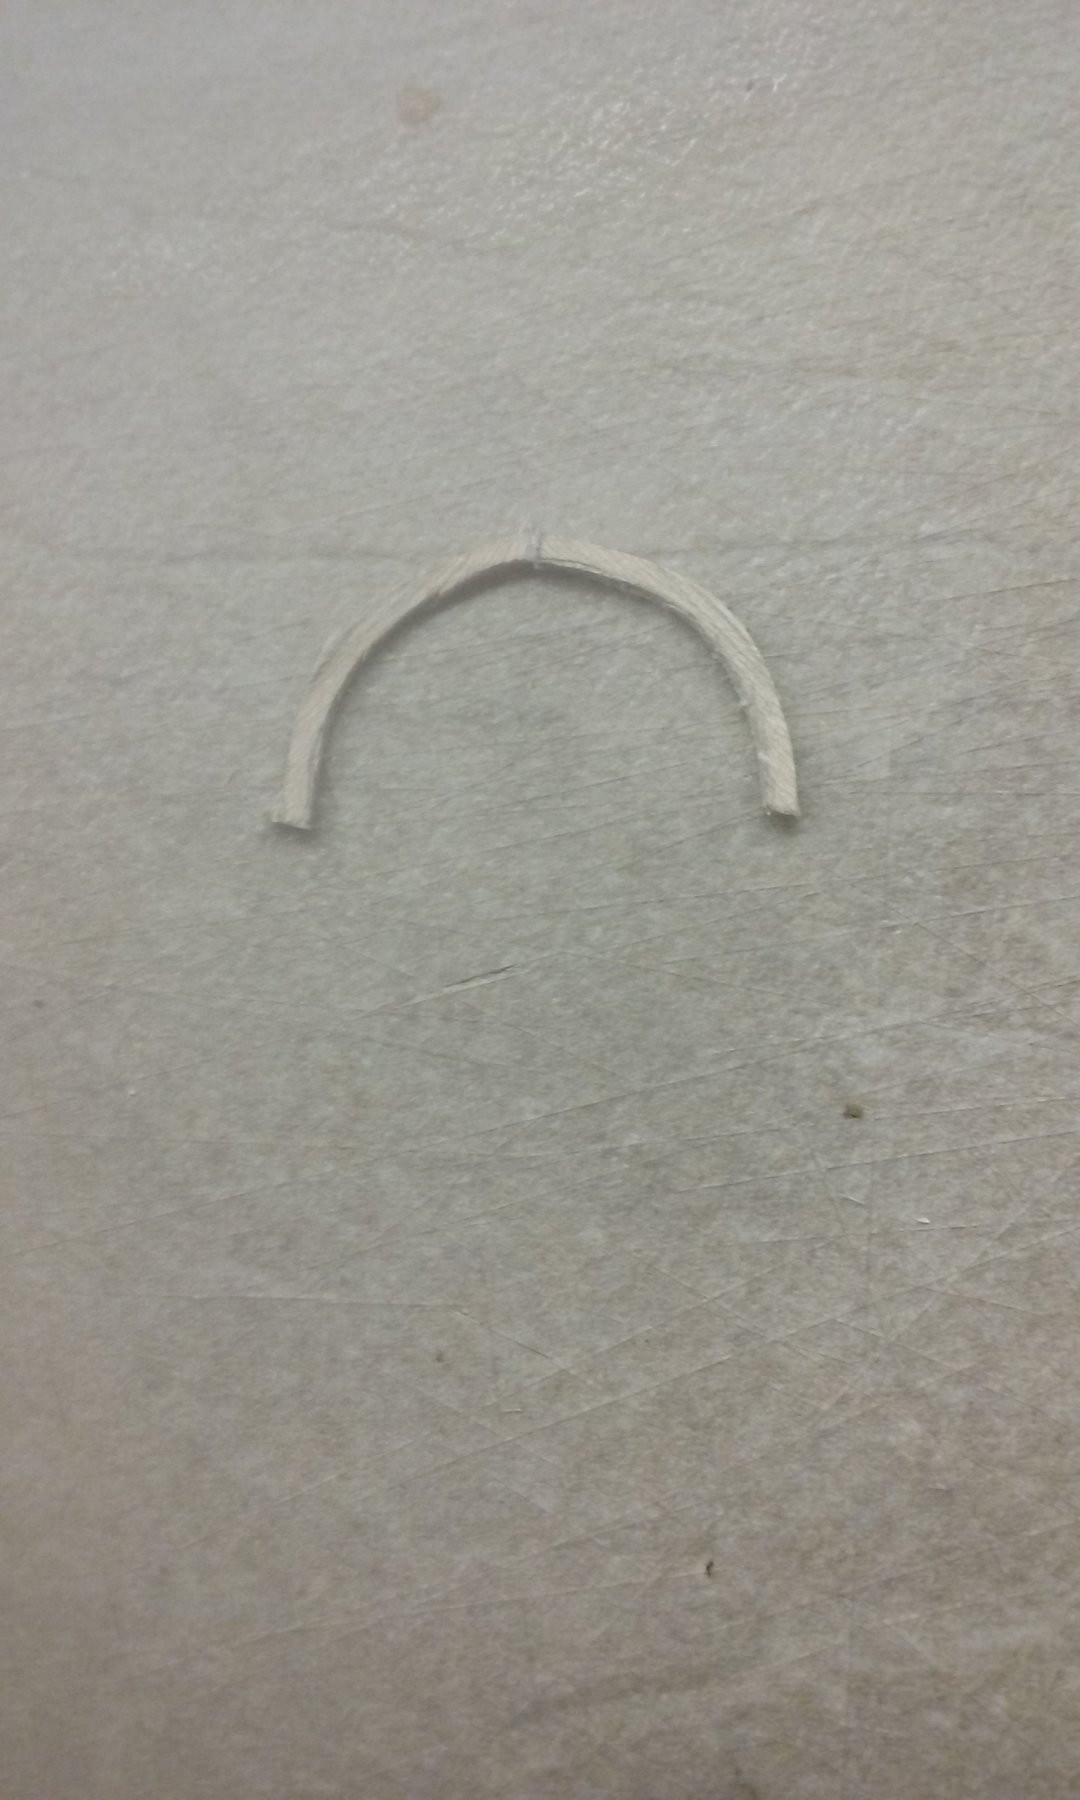
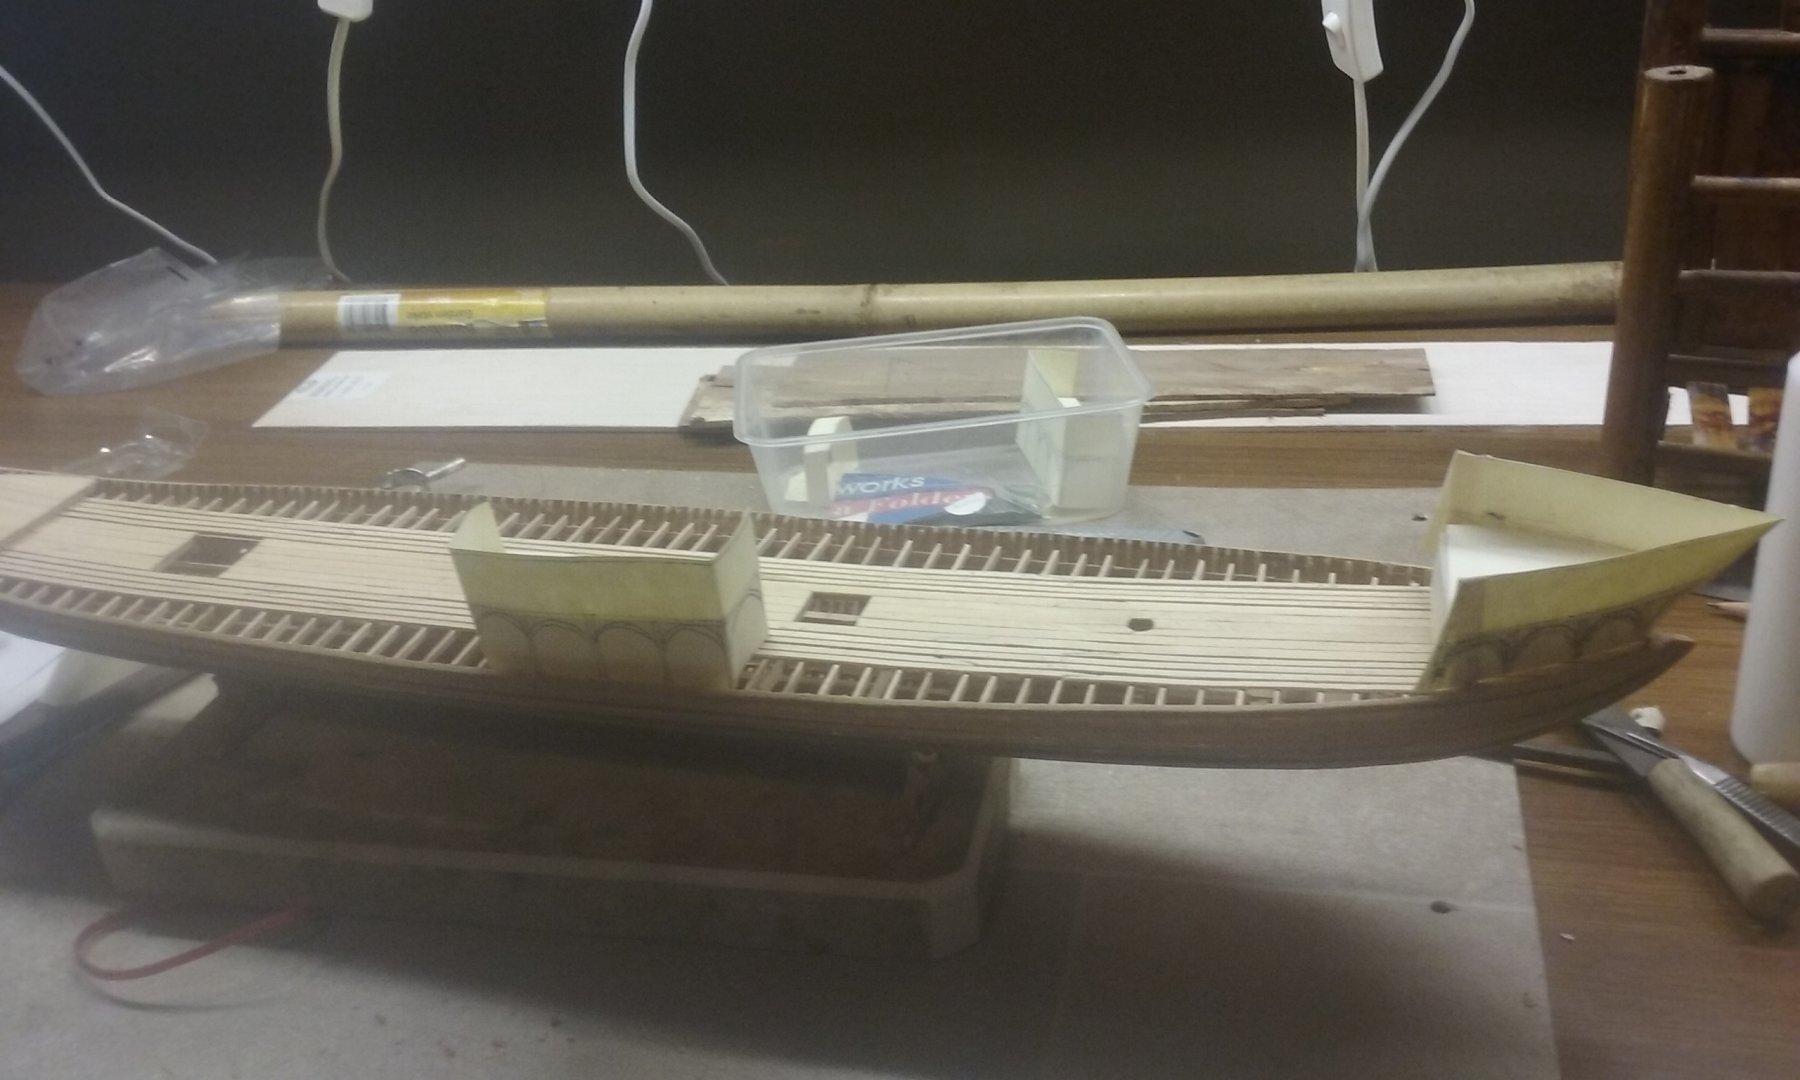
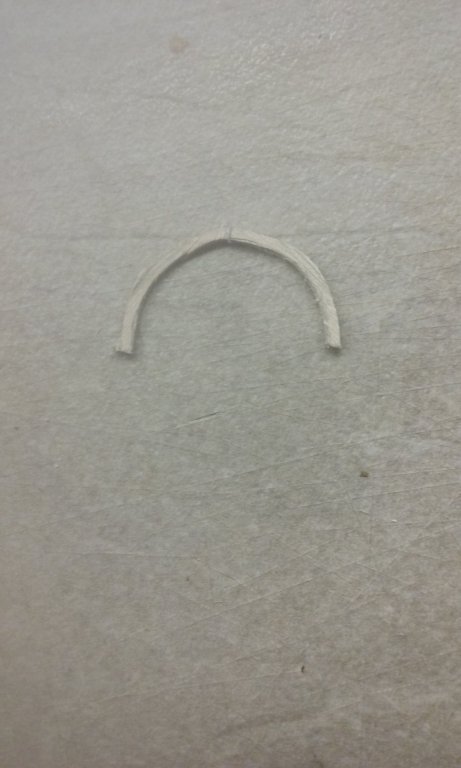
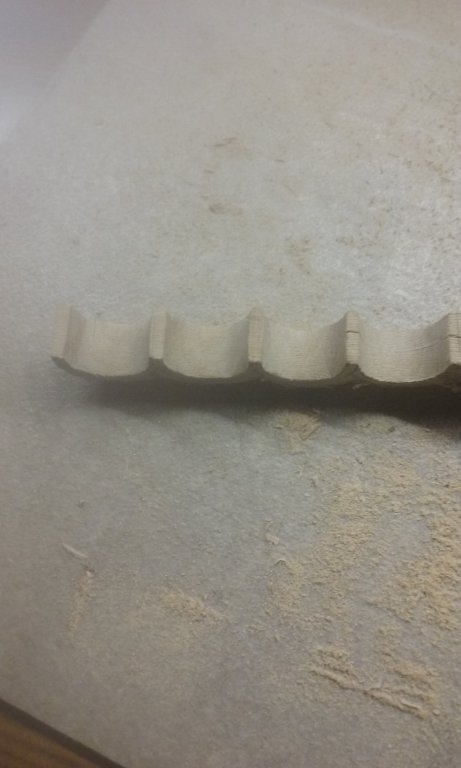
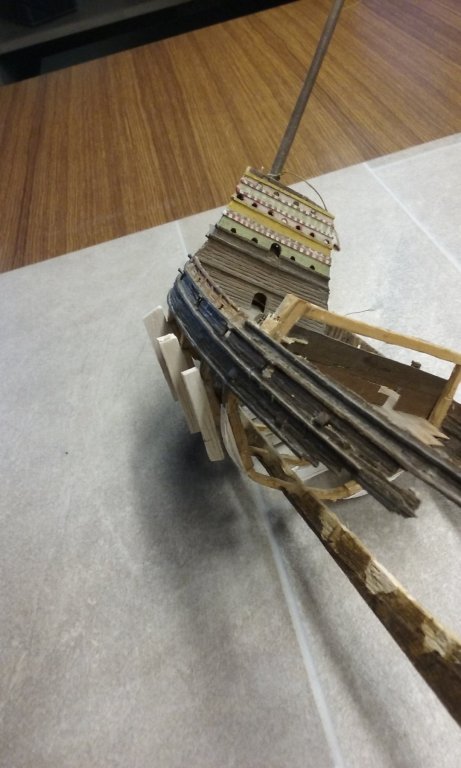
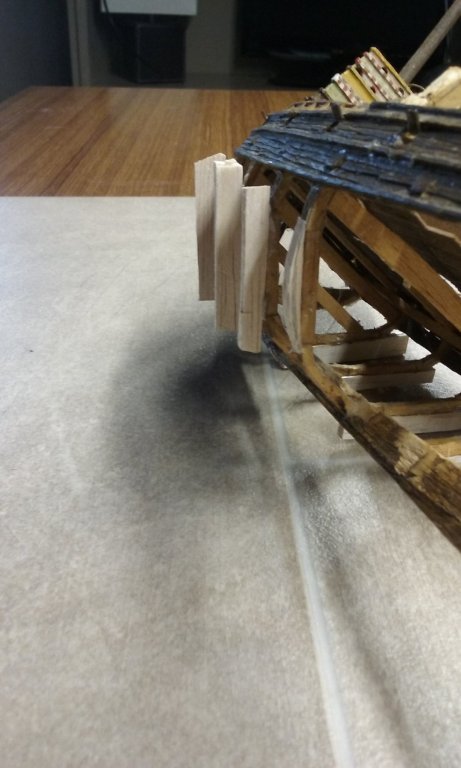
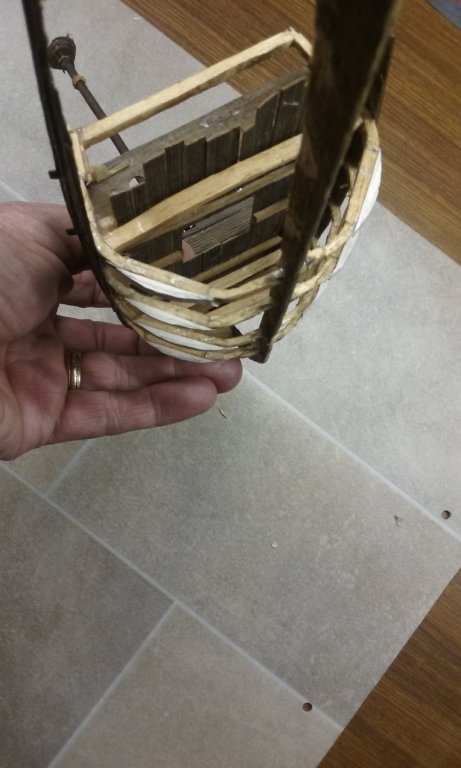
Finally making a start on the superstructure. There are two wooden "castles" amidships (one each side) and a triangular fortified wooden forecastle, all of which I've designed to have a set of four arches supporting them, standing on round posts. You can see the idea in this cardboard mock-up. As all the sets of arches (I suppose I should really call them arcades) are identical, I decided to try something a little different, and make all of them from a single block of wood and then saw them apart. I'm sure I took photos of the block with just the concave side of the arches cut and smoothed, but I must have deleted them. I discovered it's a very bad idea to use a file on something this delicate. SNAP! Had to glue it back together before I could proceed. One arcade separated from the others. Just two more cuts to do, then I can get onto smoothing them off. I used a fine saw-blade, broken short, and worked VERY slowly and carefully cutting them apart. I didn't want to break them again. Definitely an education. And I've just made a start on the "hoops" for the arched awning at the prymne or poop deck. I'm doing six of them; this is the first. There'll be "stringers" running between them (inside the arches) to keep them all the same shape. There'll be a pair of posts supporting each of these "hoops". Steven


-
When I look at this stuff I go all vague - far out of my league. But then I've always thought anything more modern than a water wheel is an instrument of the devil 😉
-
Nice to see you back, Dick. She's looking very good. Steven
- 263 replies
-
- 1
-
-
- nave tonda
- round ship
- (and 2 more)
-
That's right - I remember we had a discussion about that, and though metho was an unknown quantity it appeared it might still work. Isopropanol is probably difficult to get hold of here, but you can get metho at the supermarket for next to nothing. I decided as I didn't have isopropanol but I did have metho I'd try that first, and it seems to have worked. Steven
- 740 replies
-
- 3
-
-
- Tudor
- restoration
- (and 4 more)
-
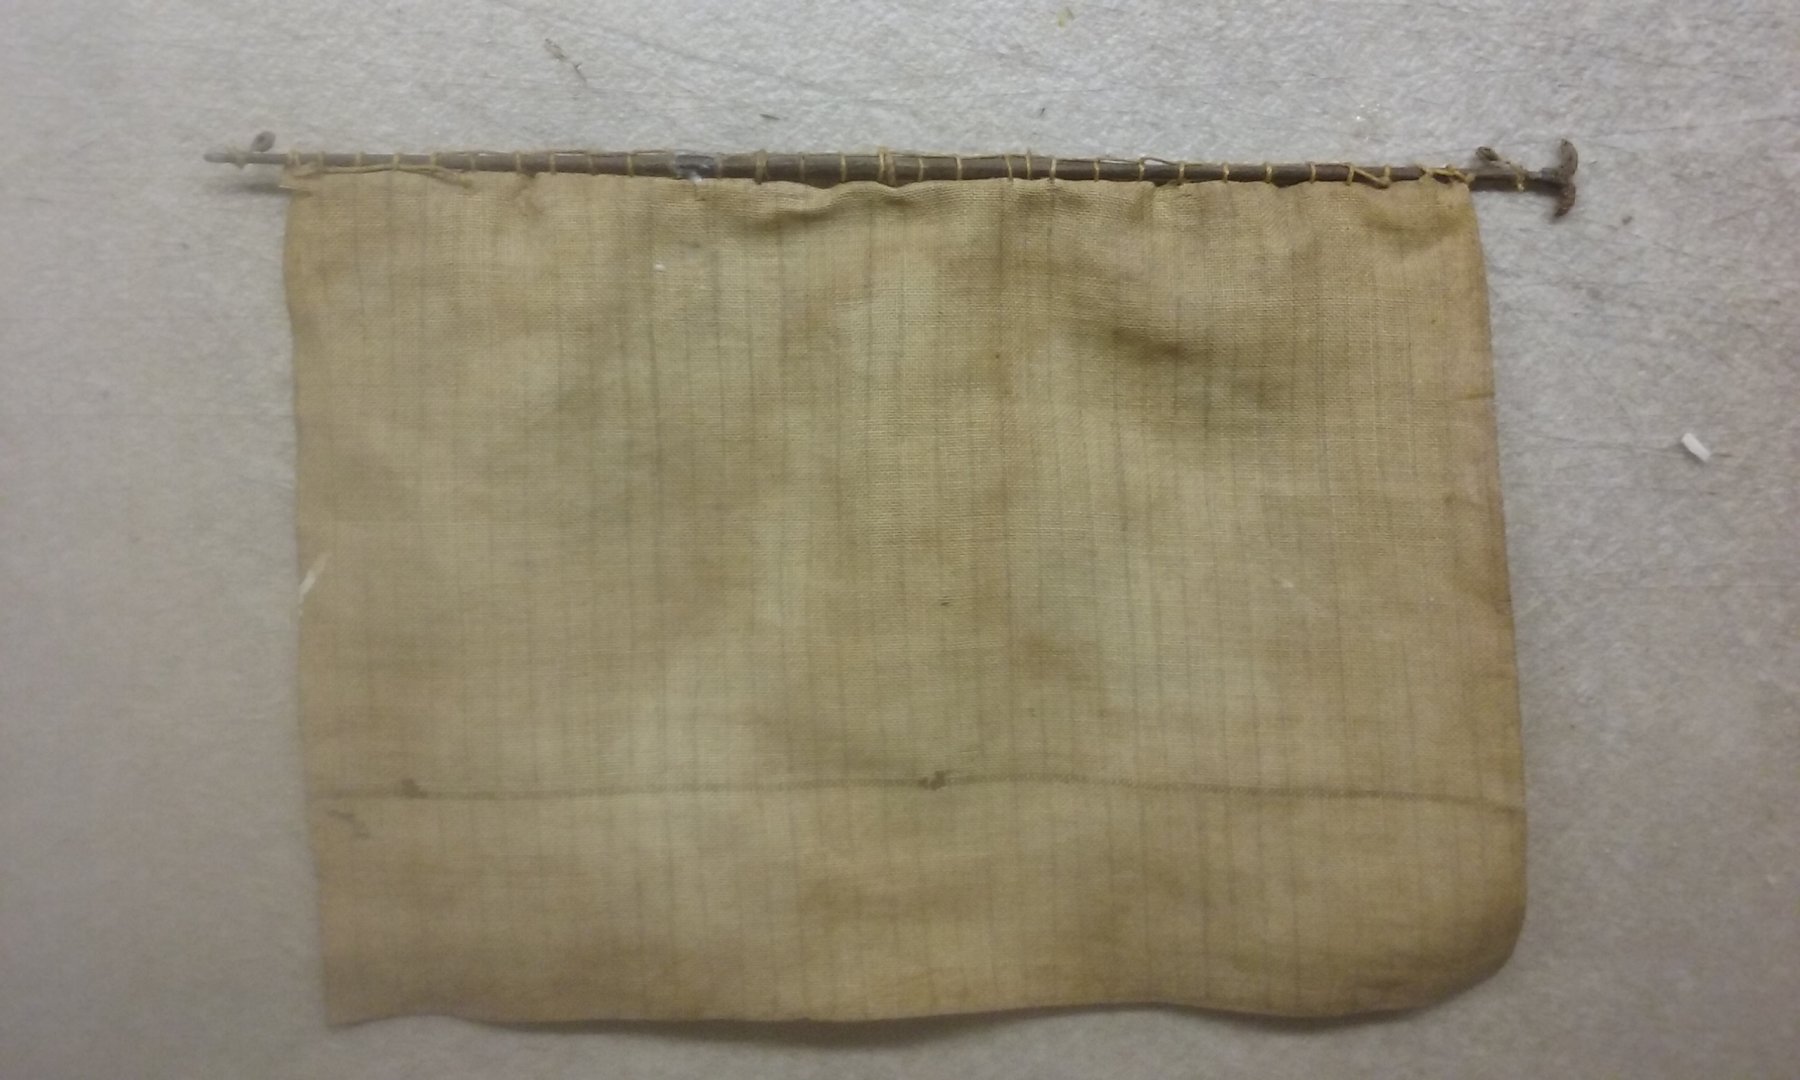
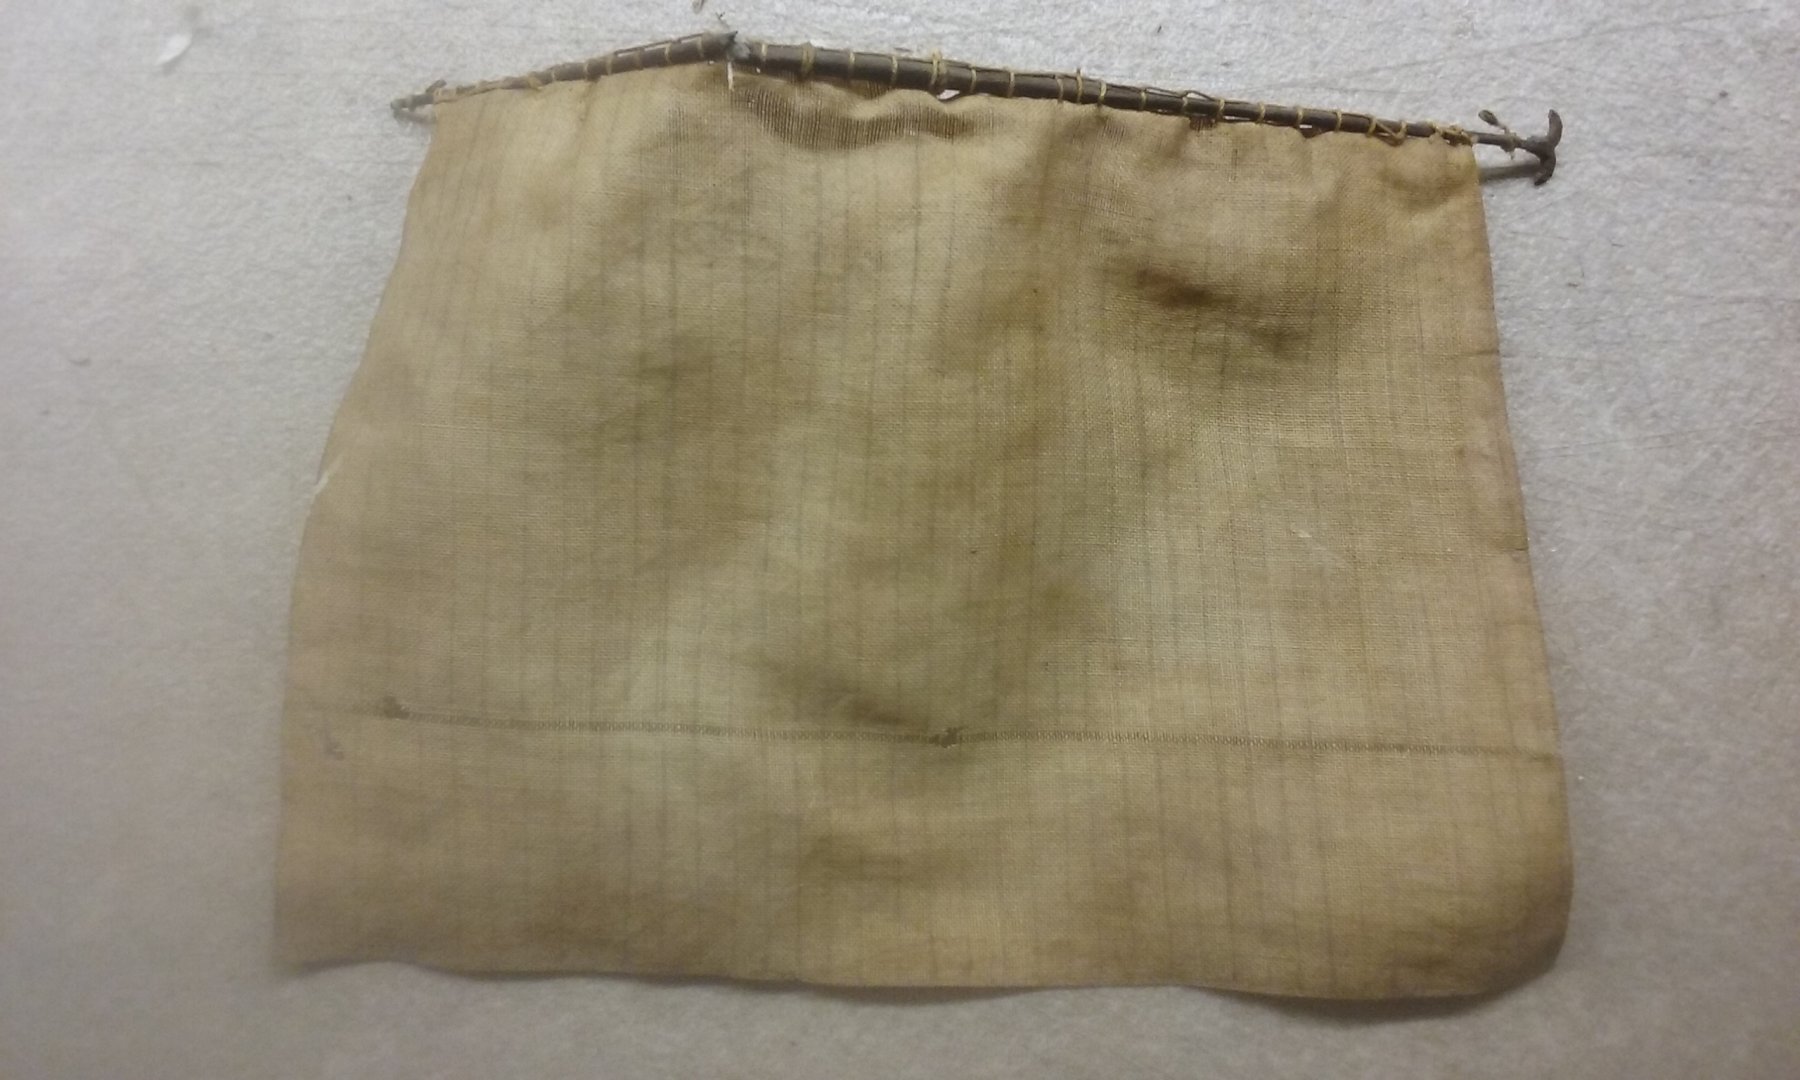
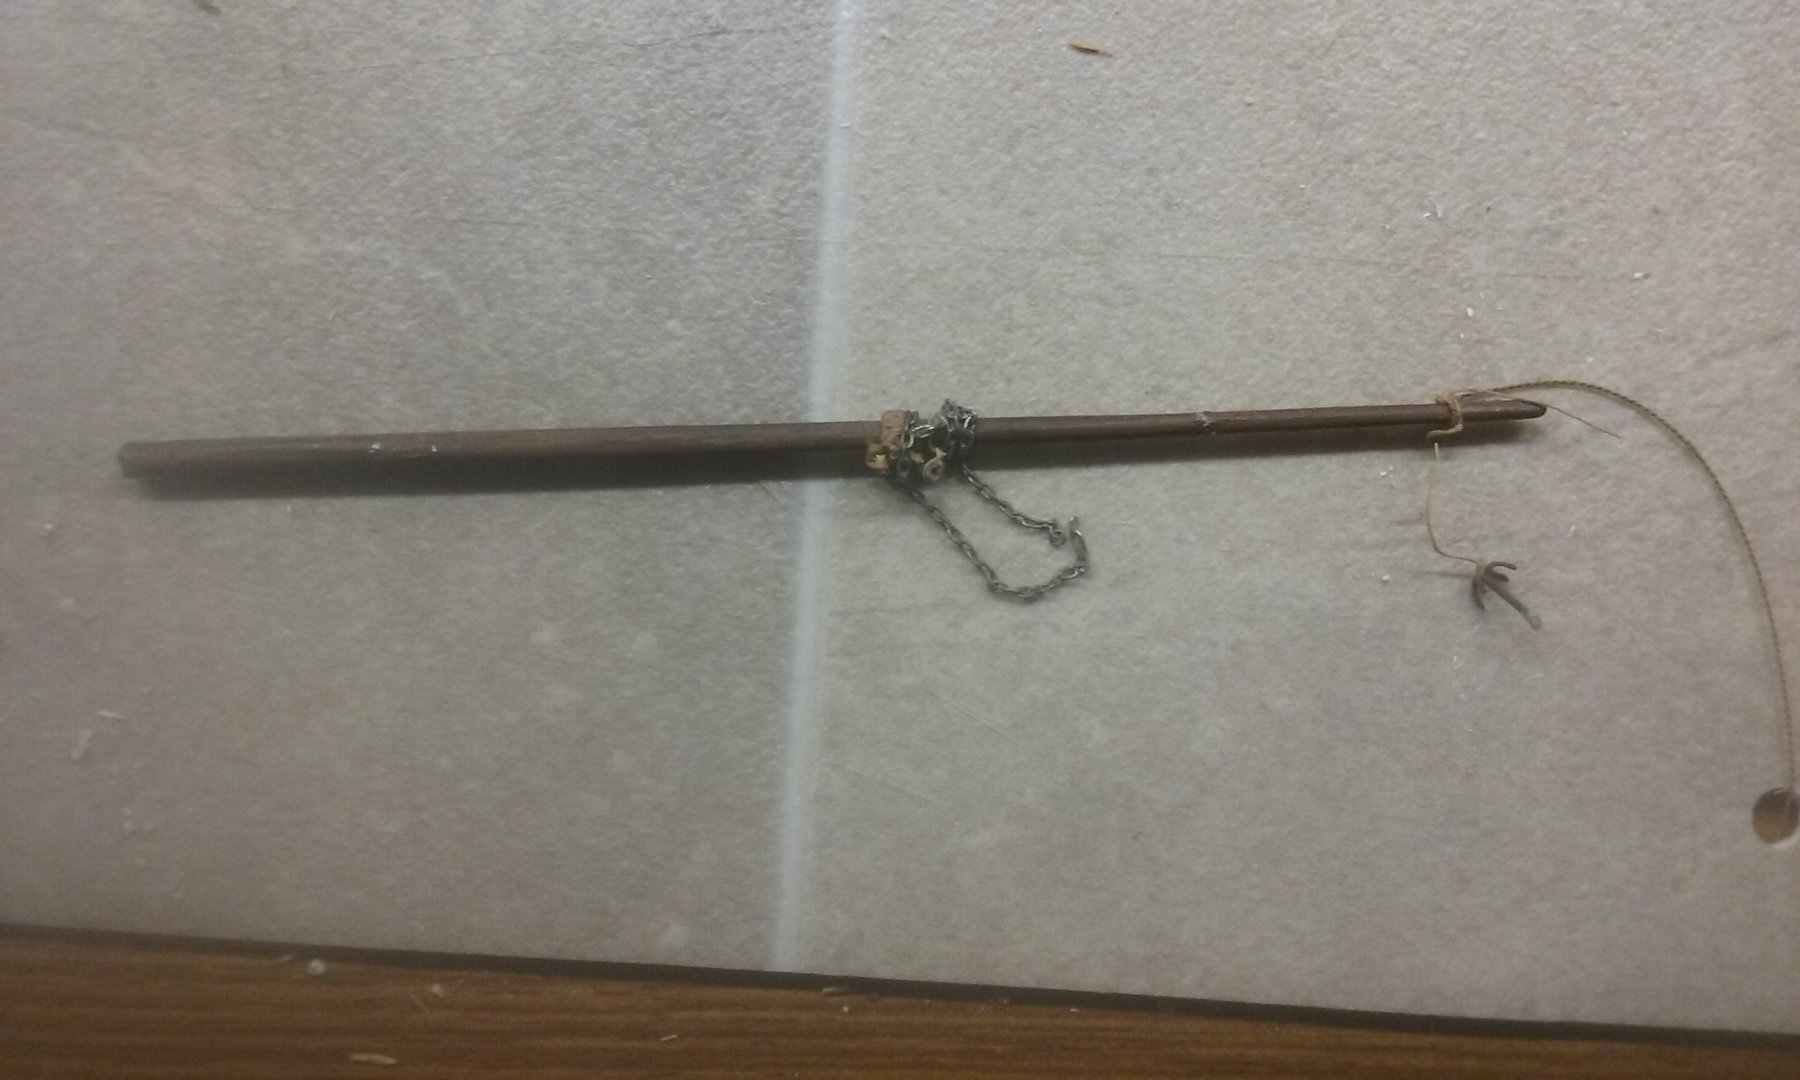
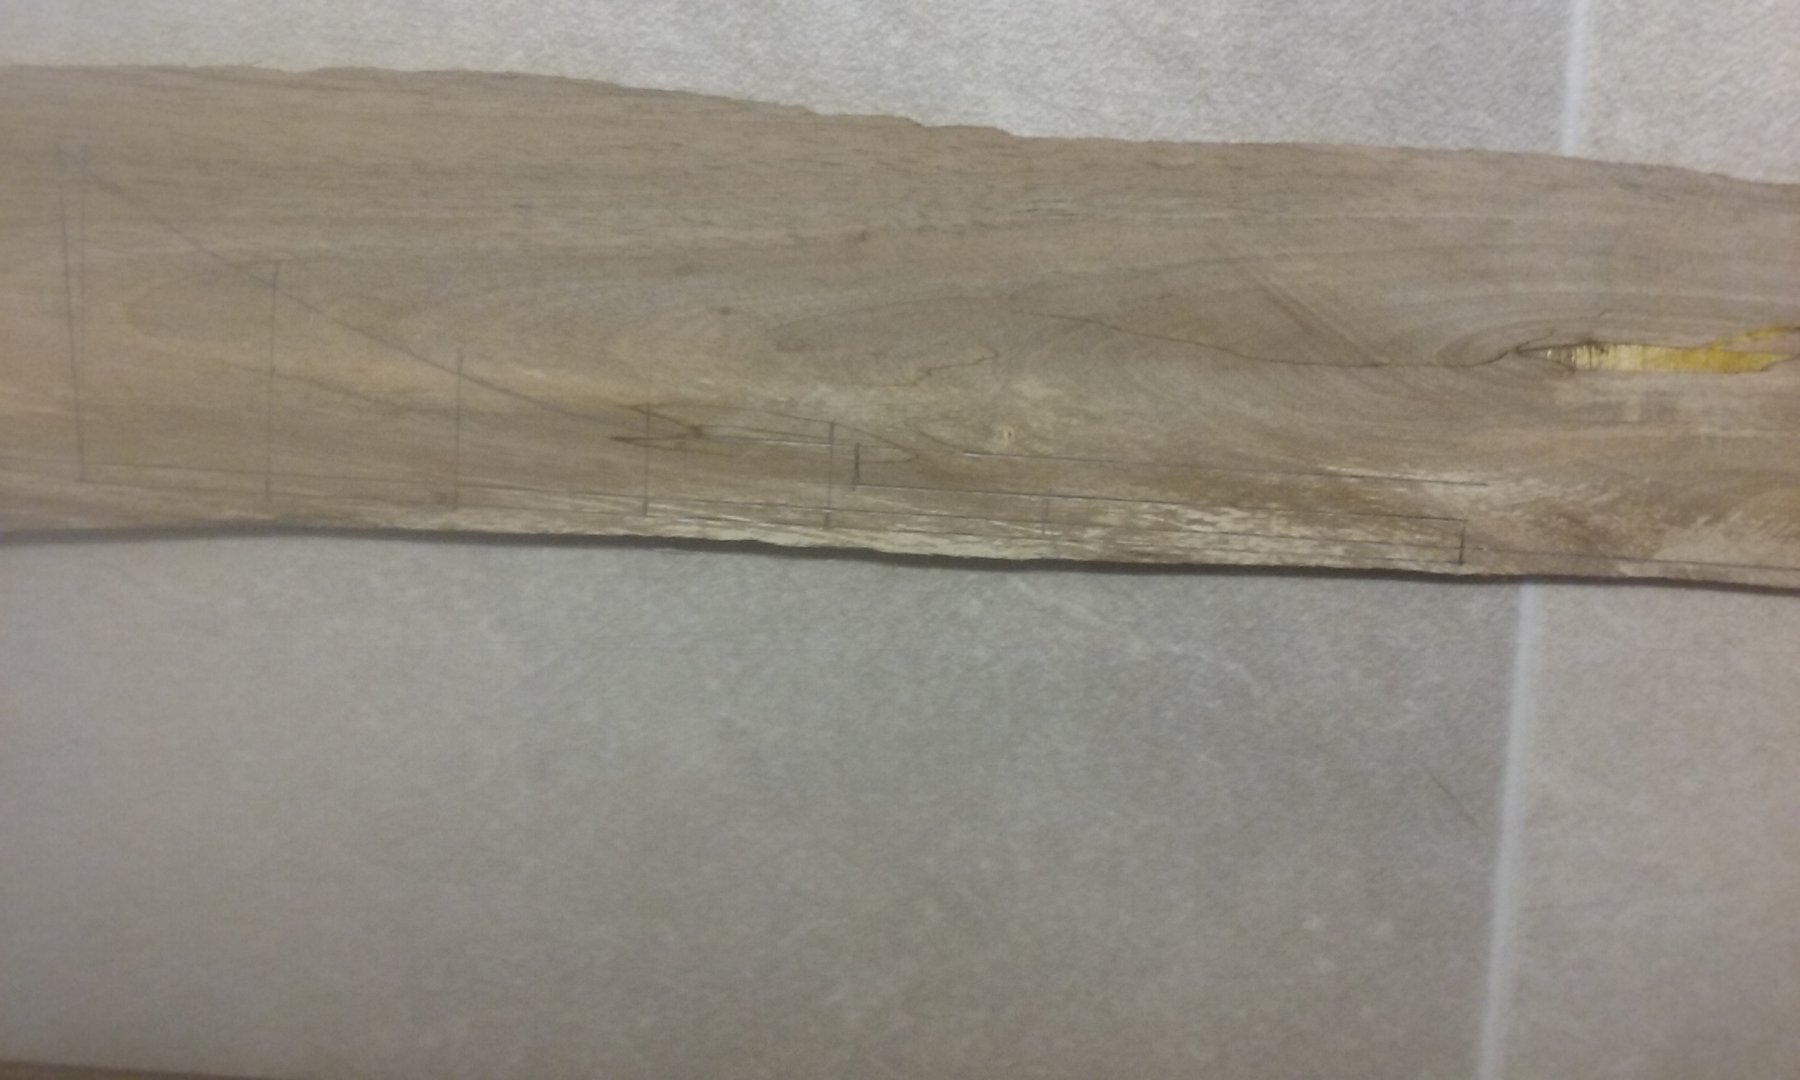
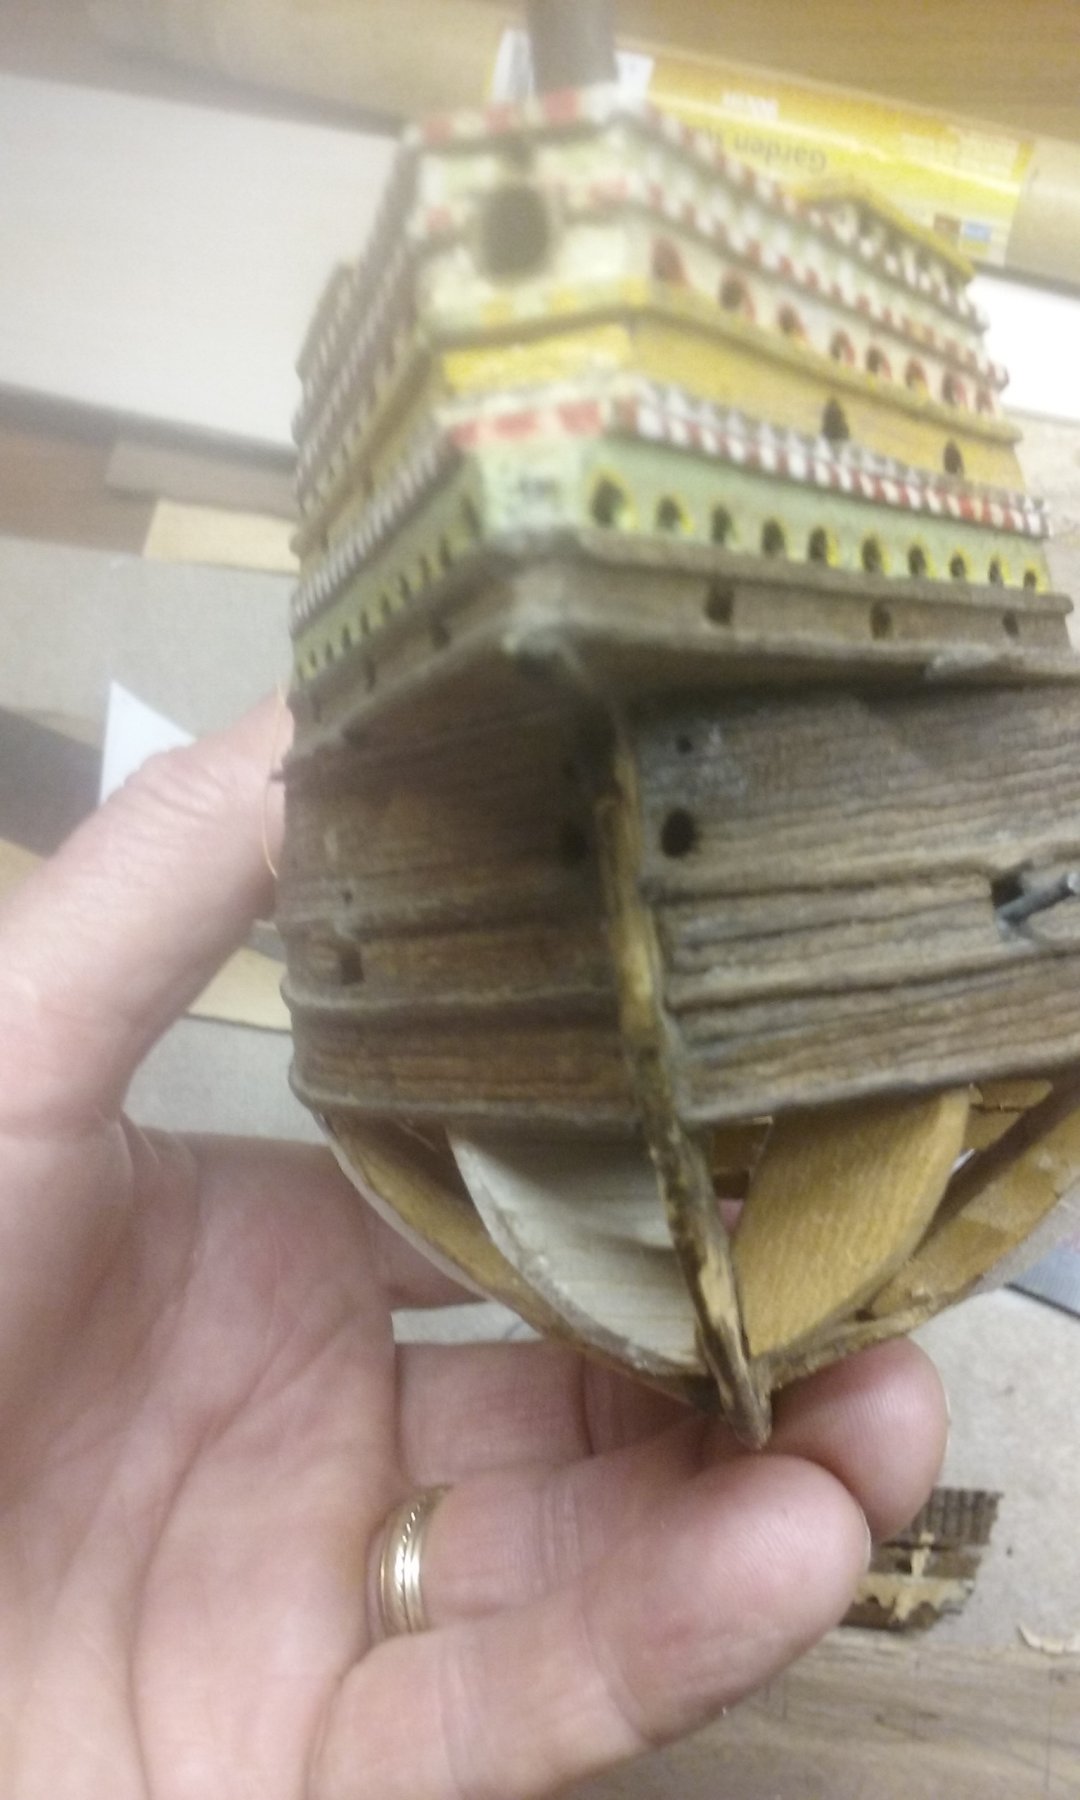
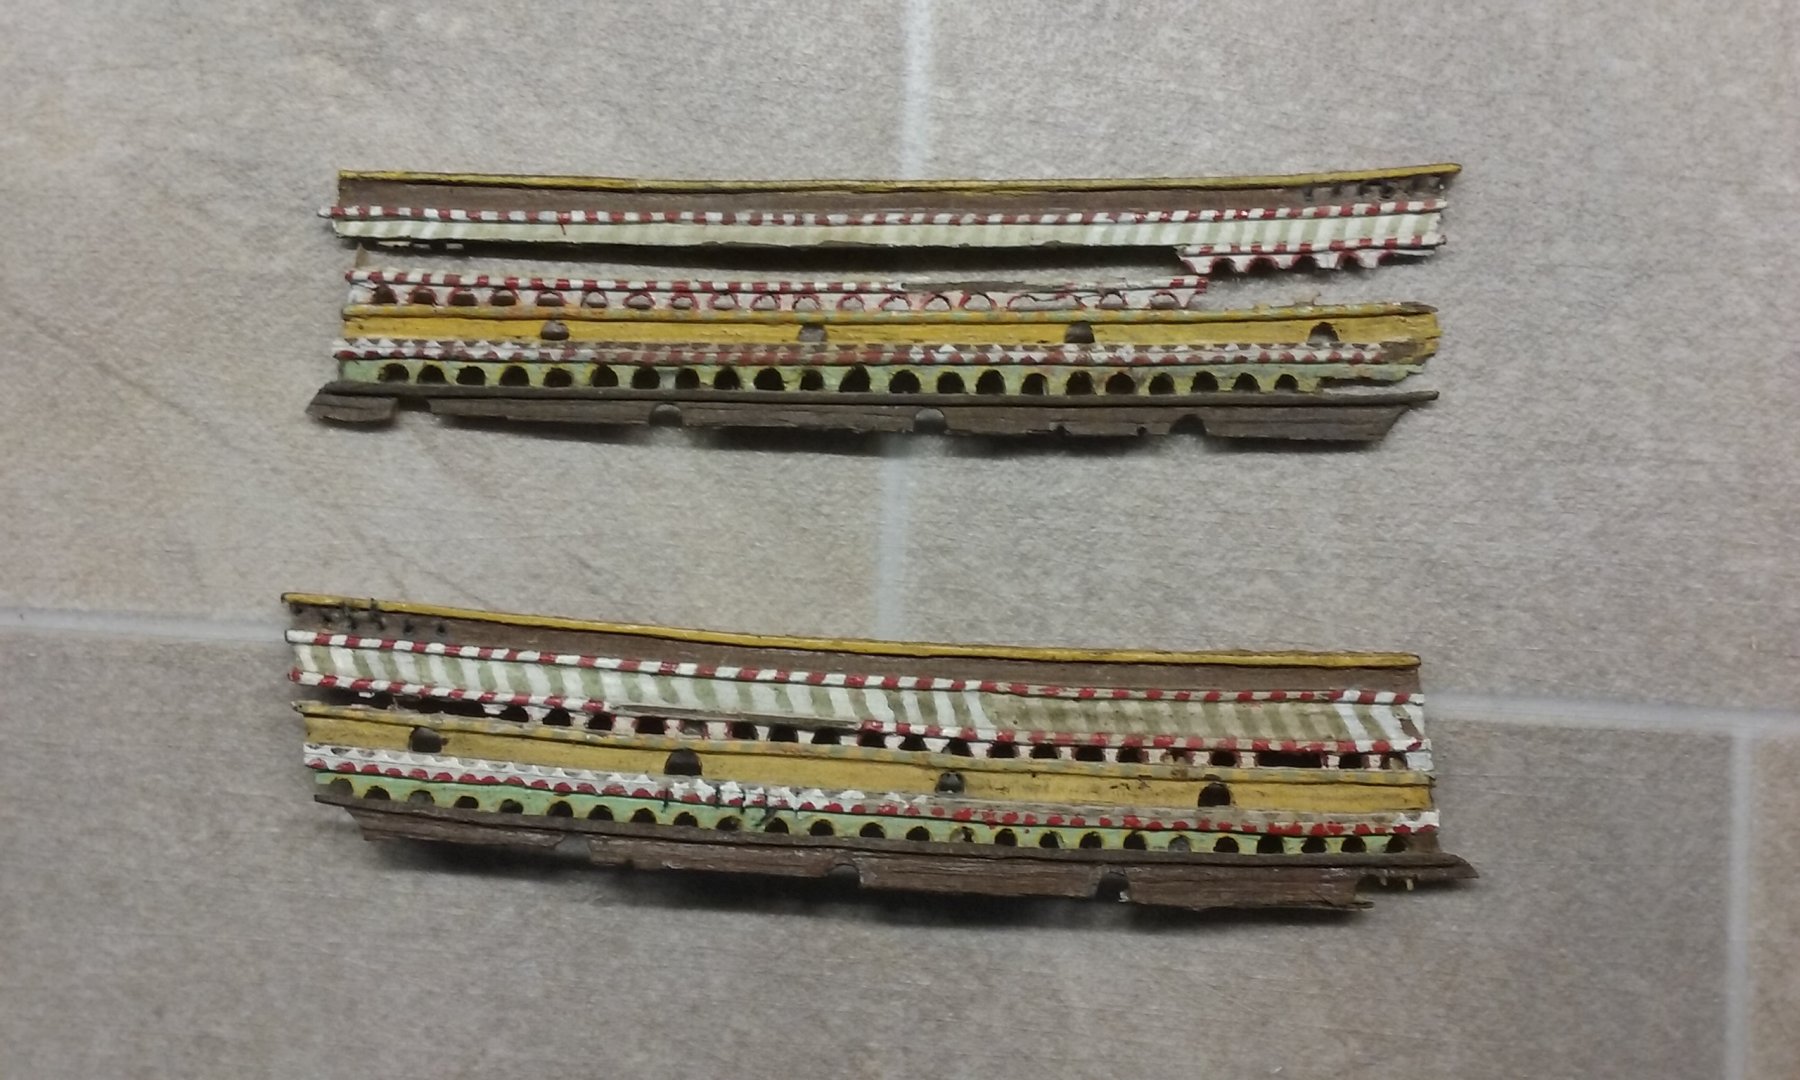
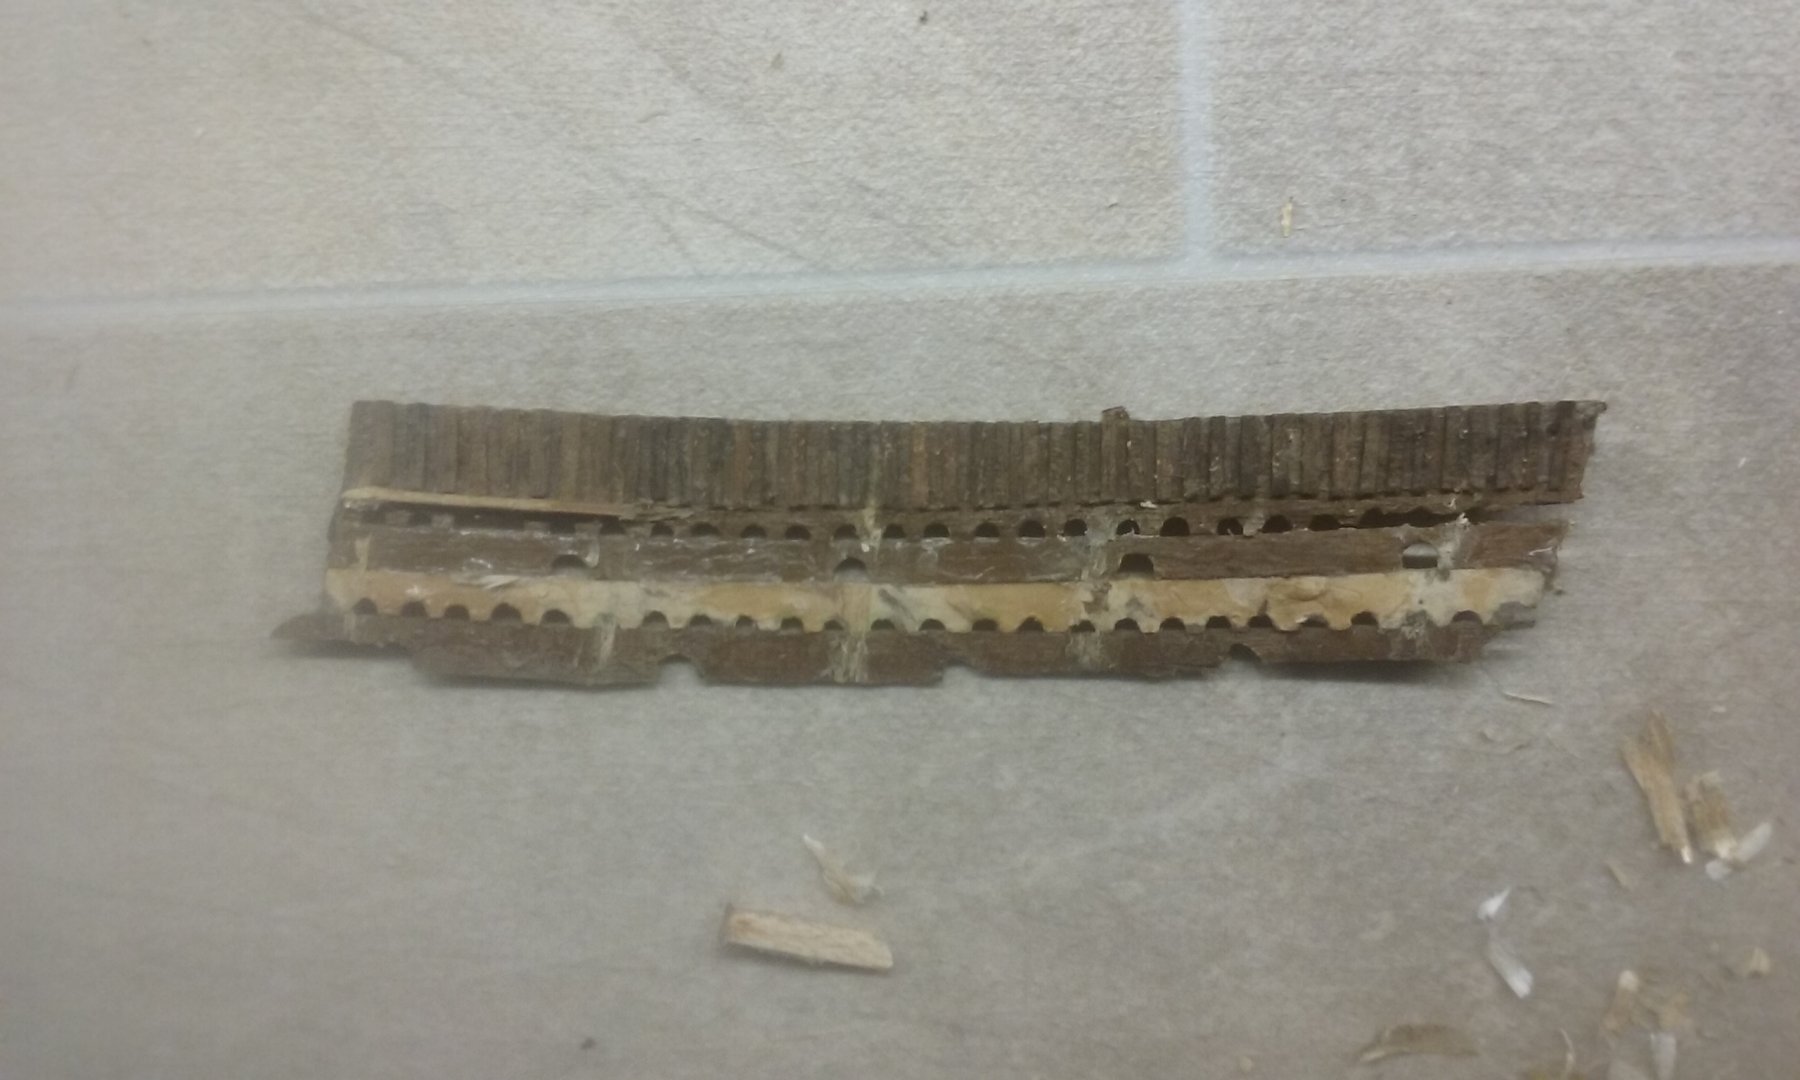
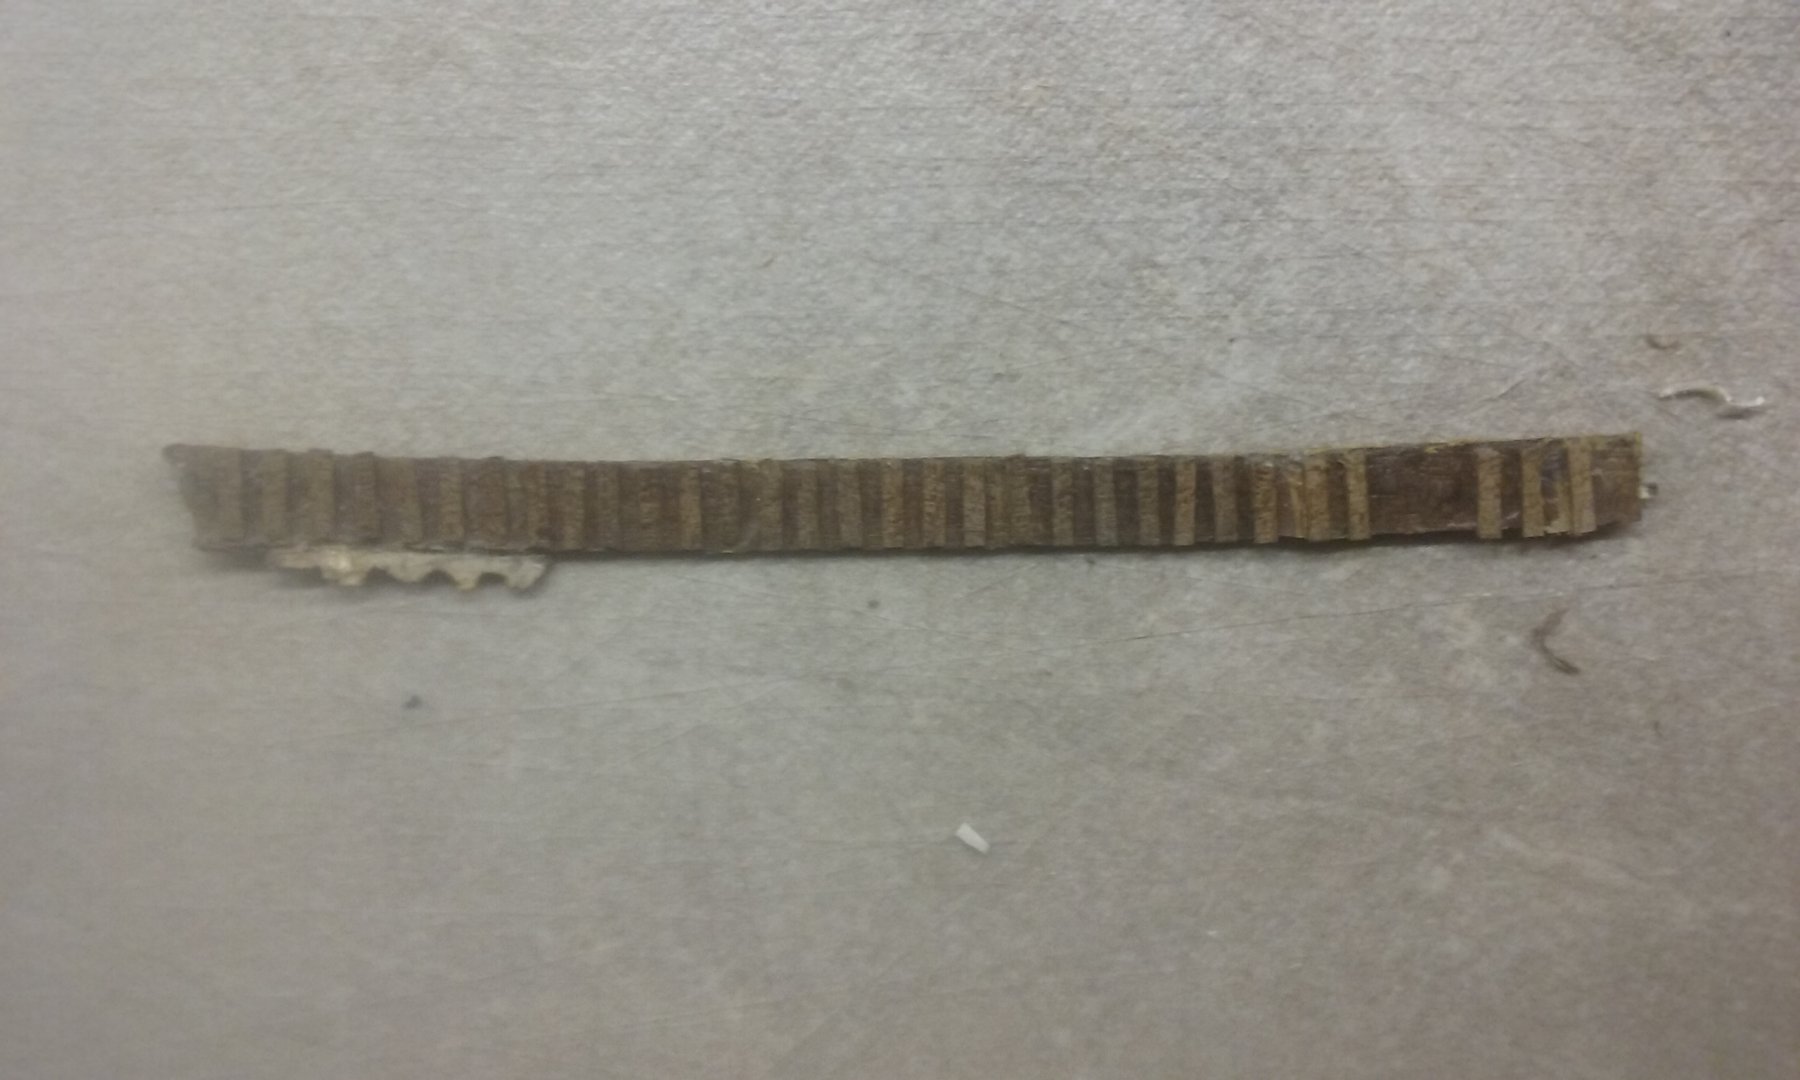
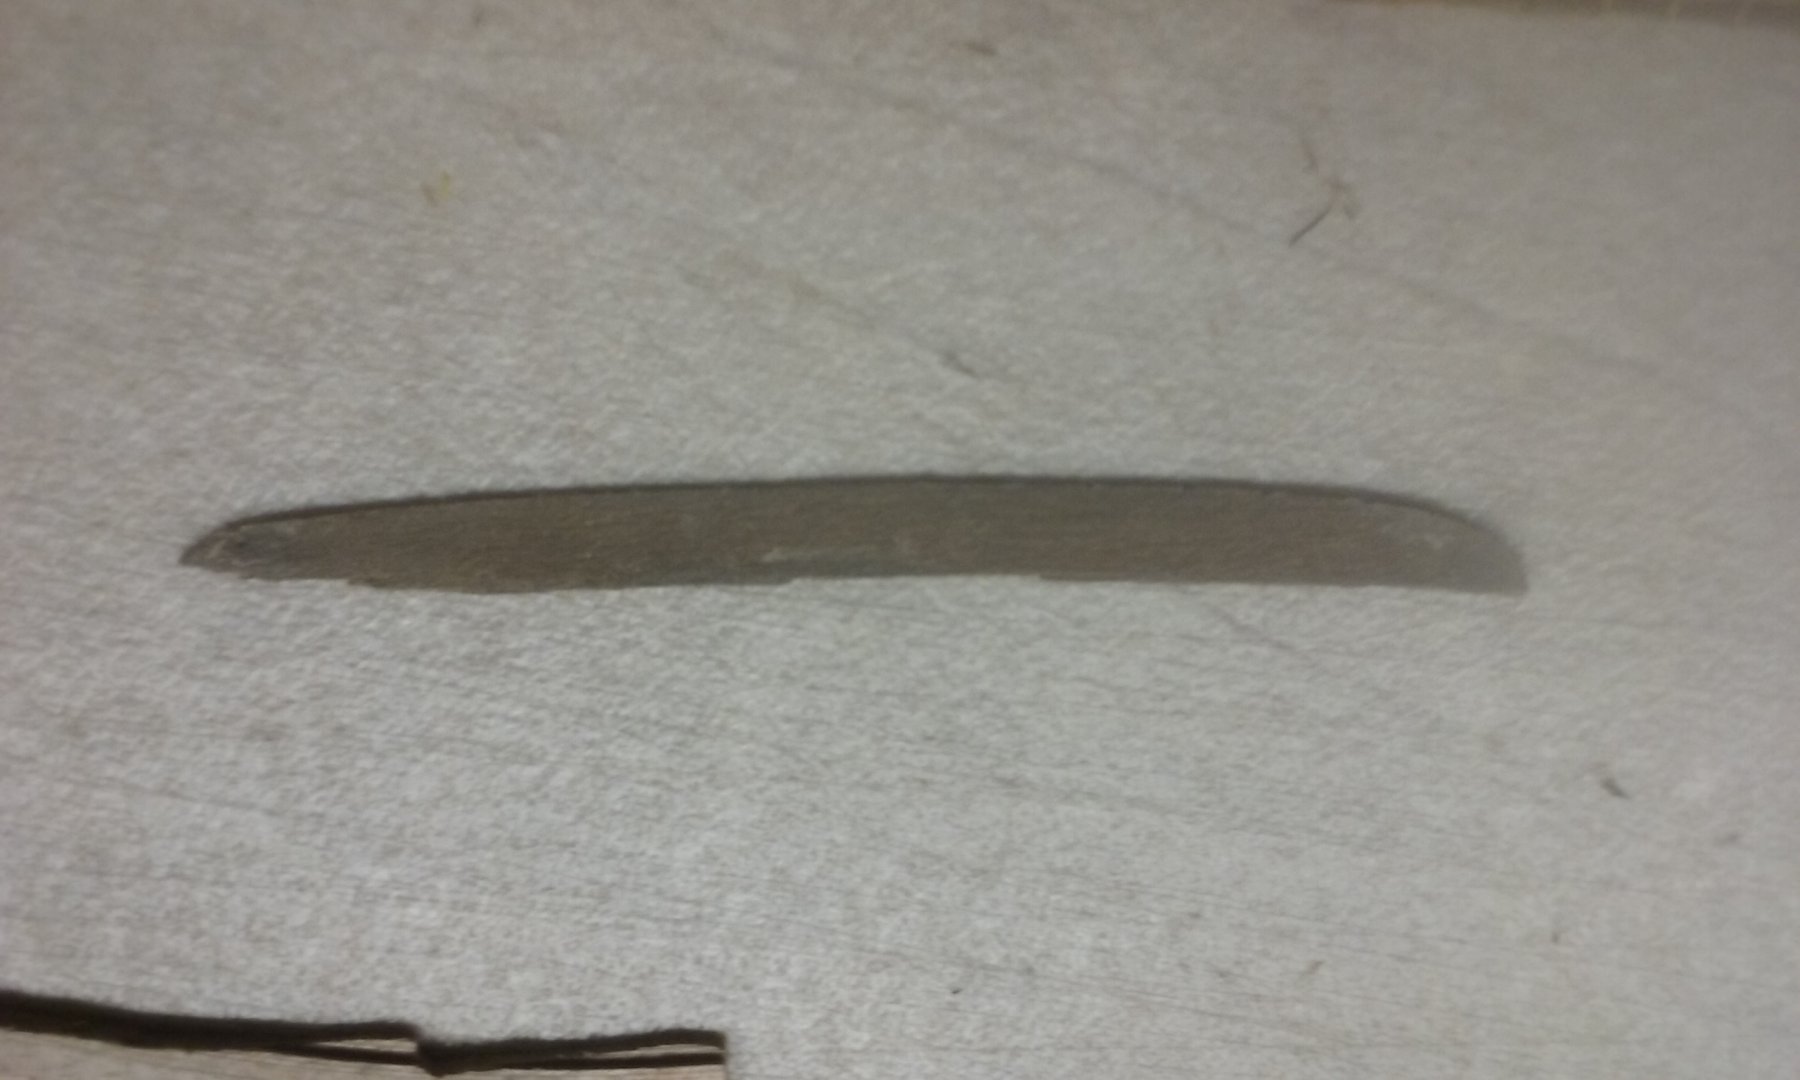
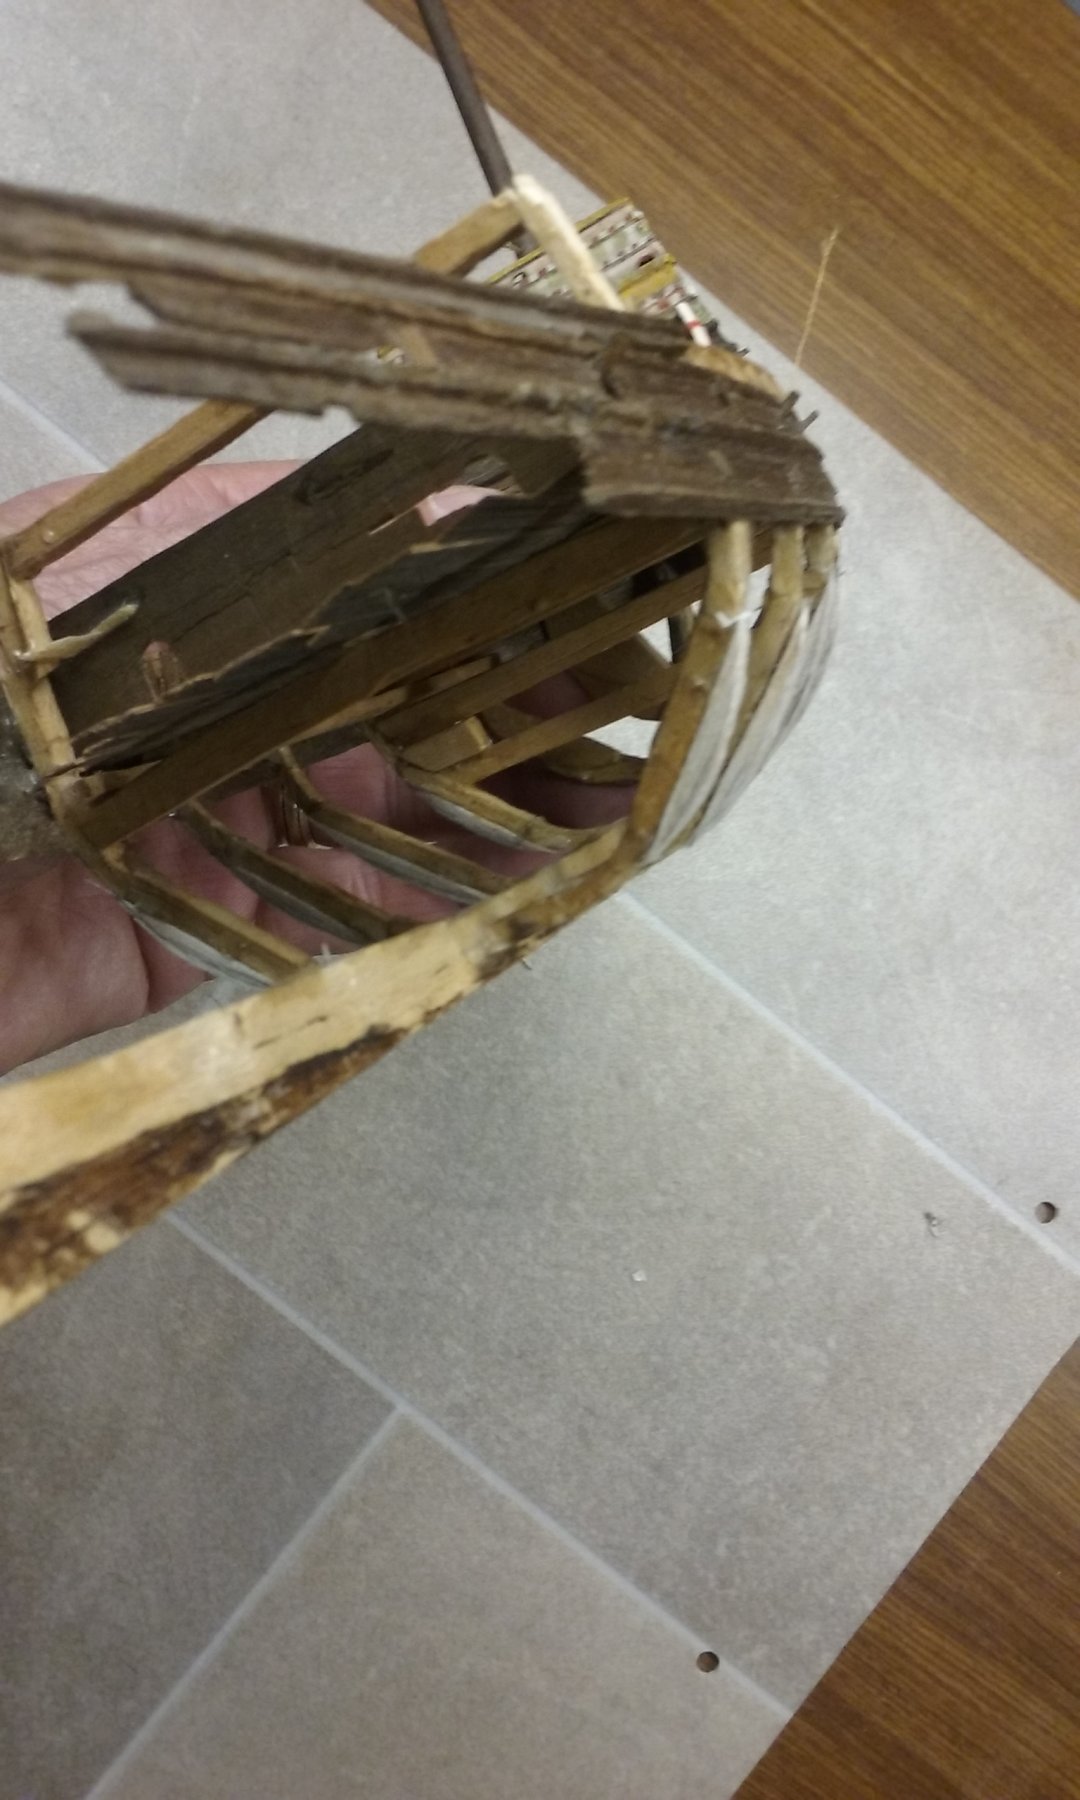
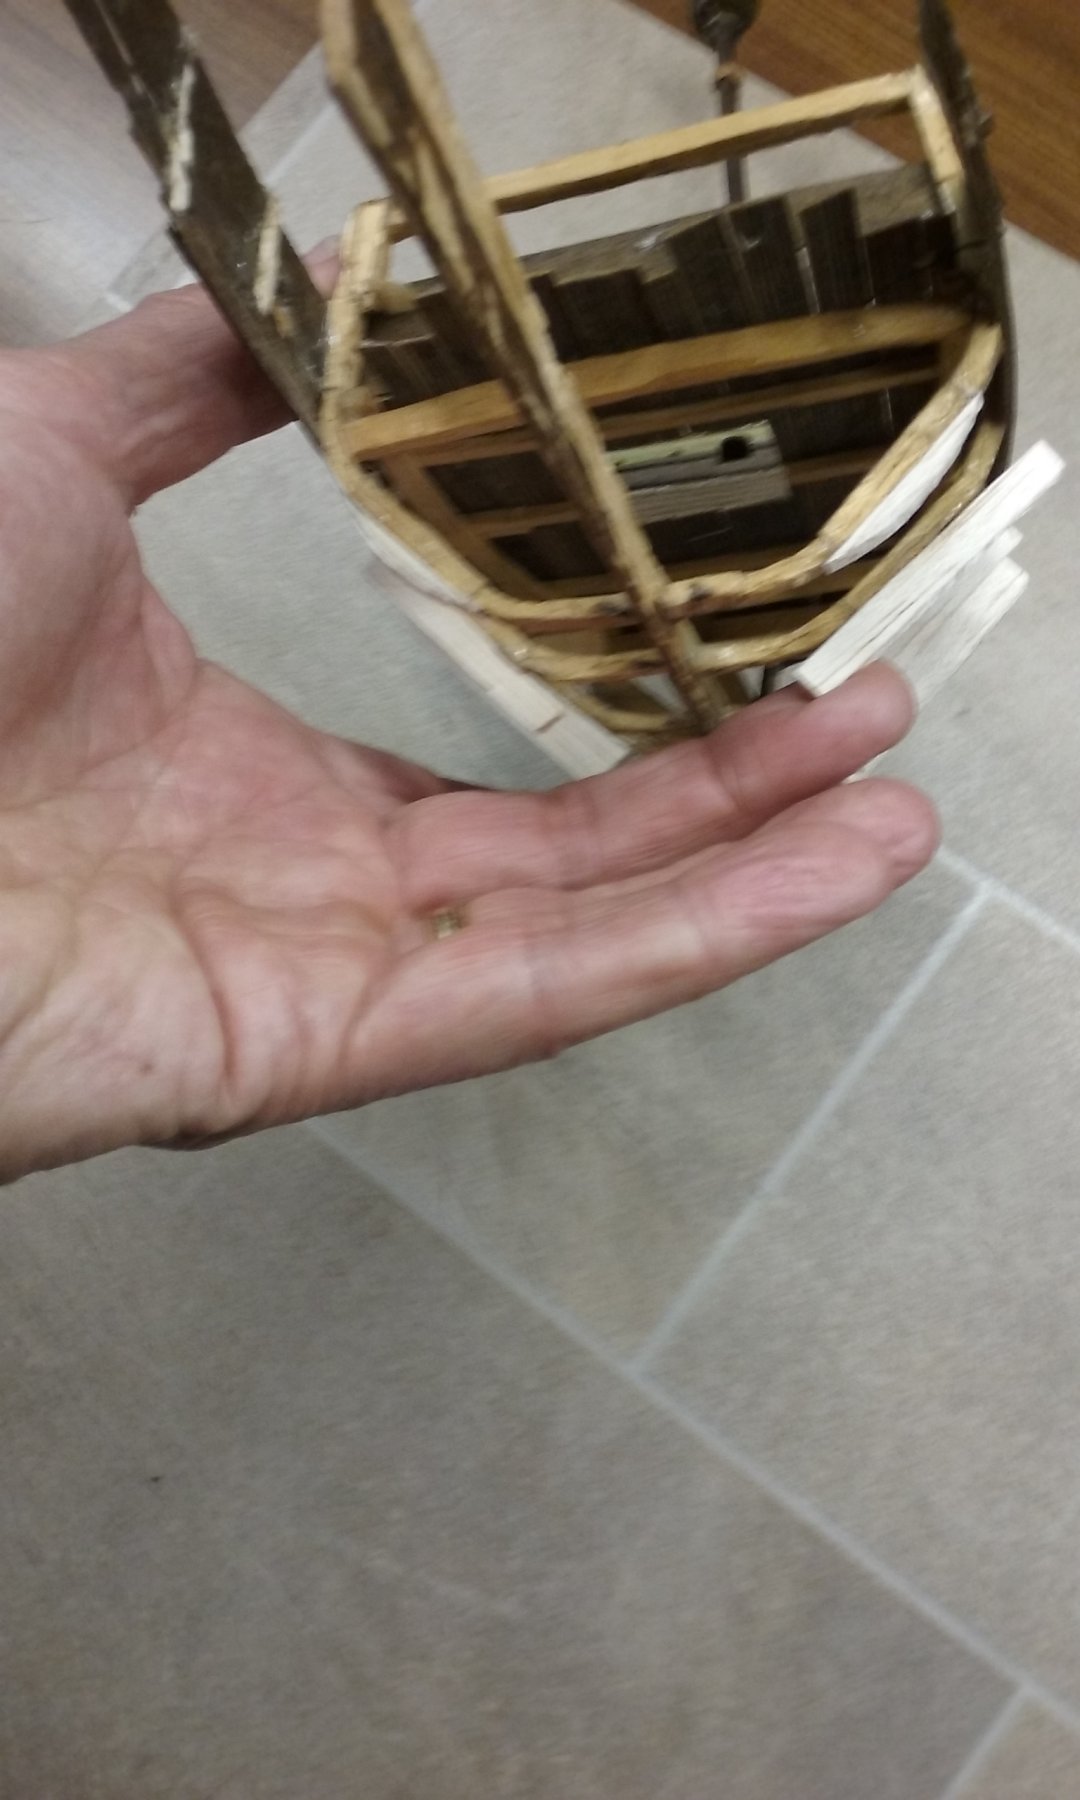
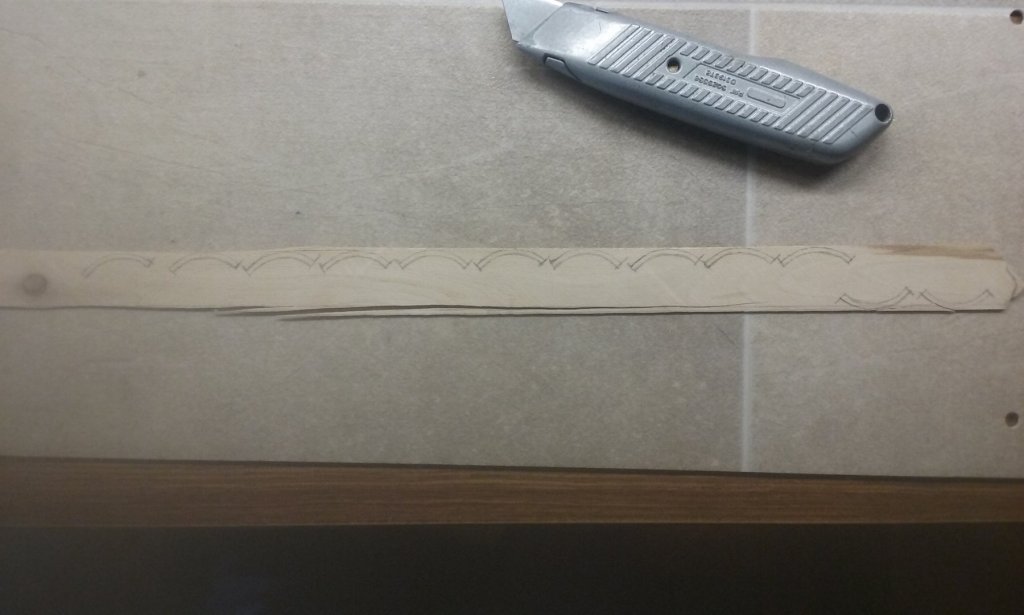
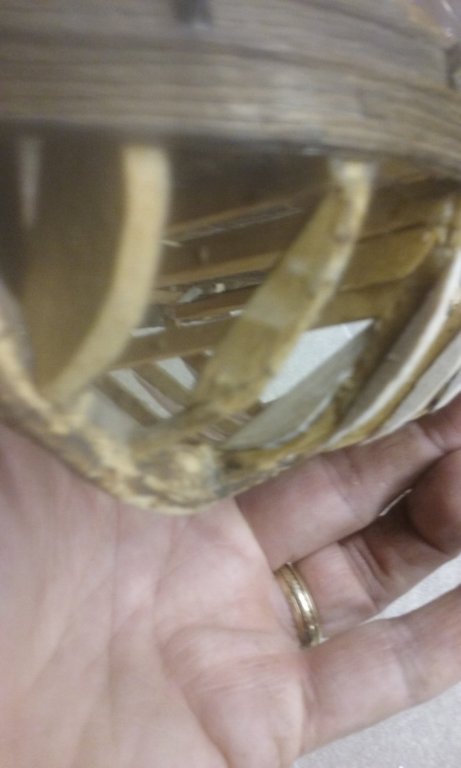
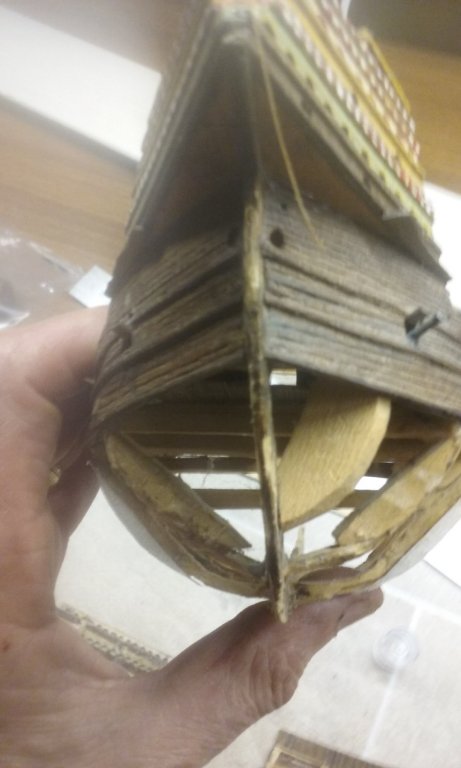
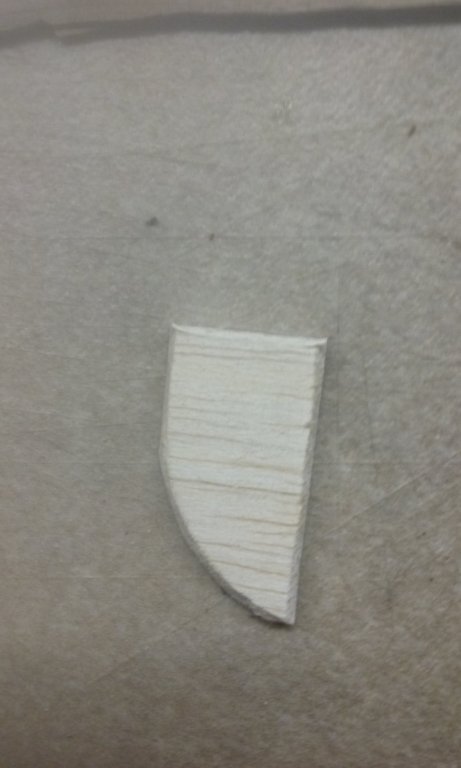
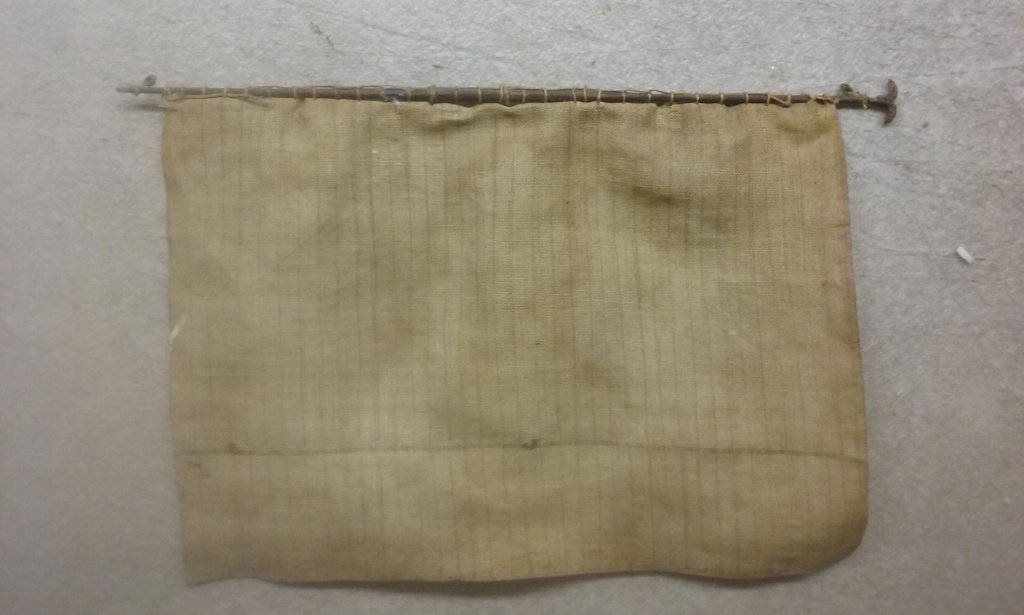
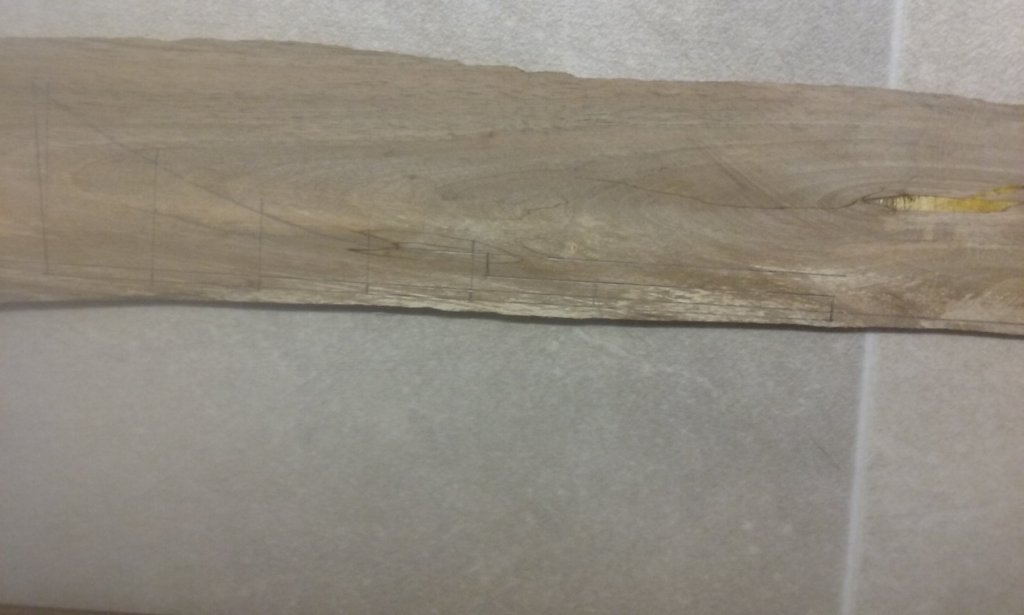
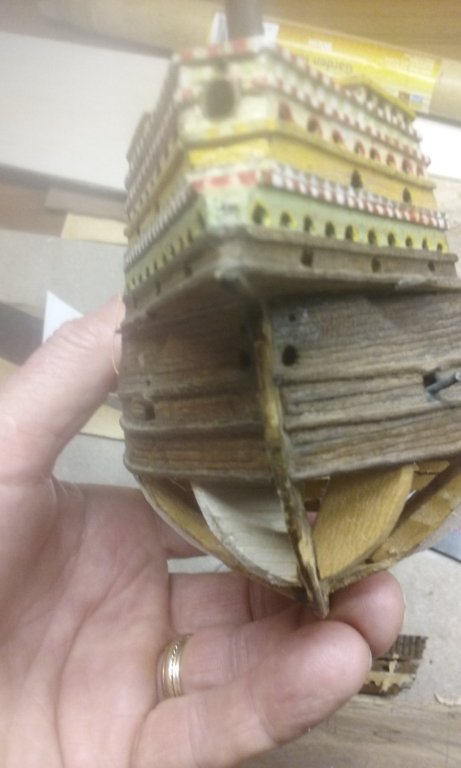
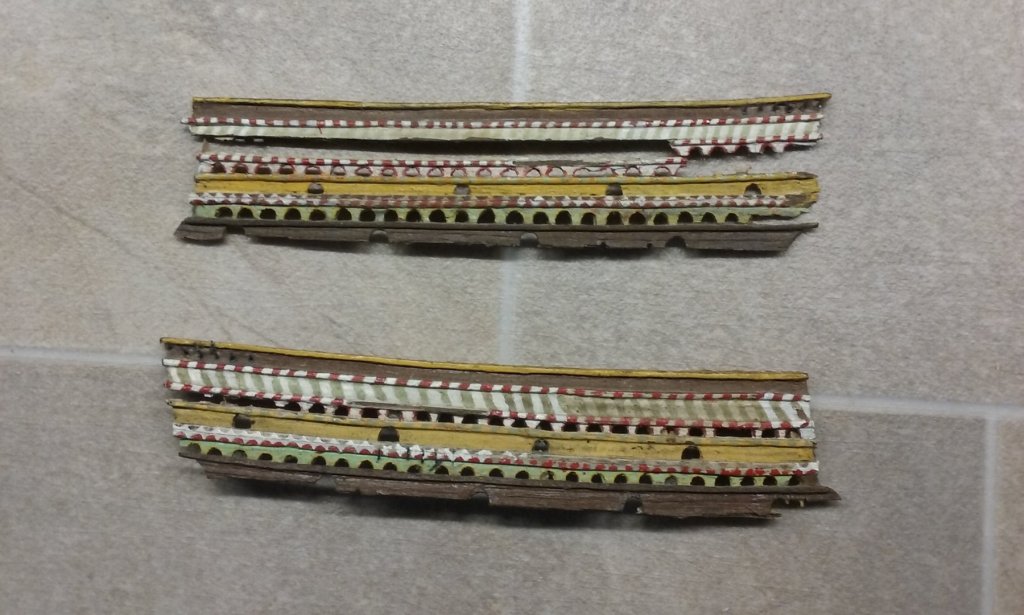
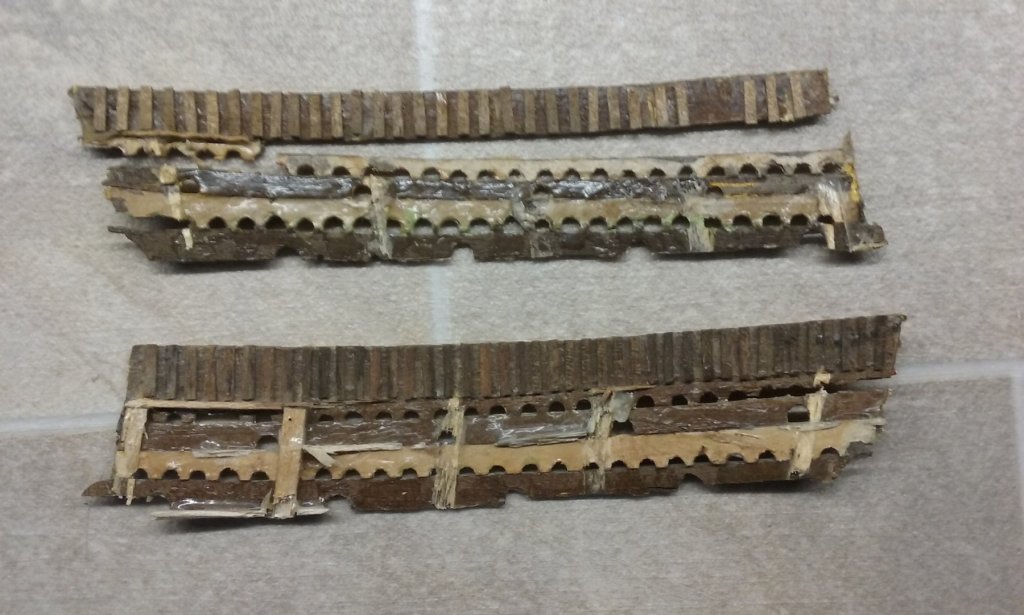
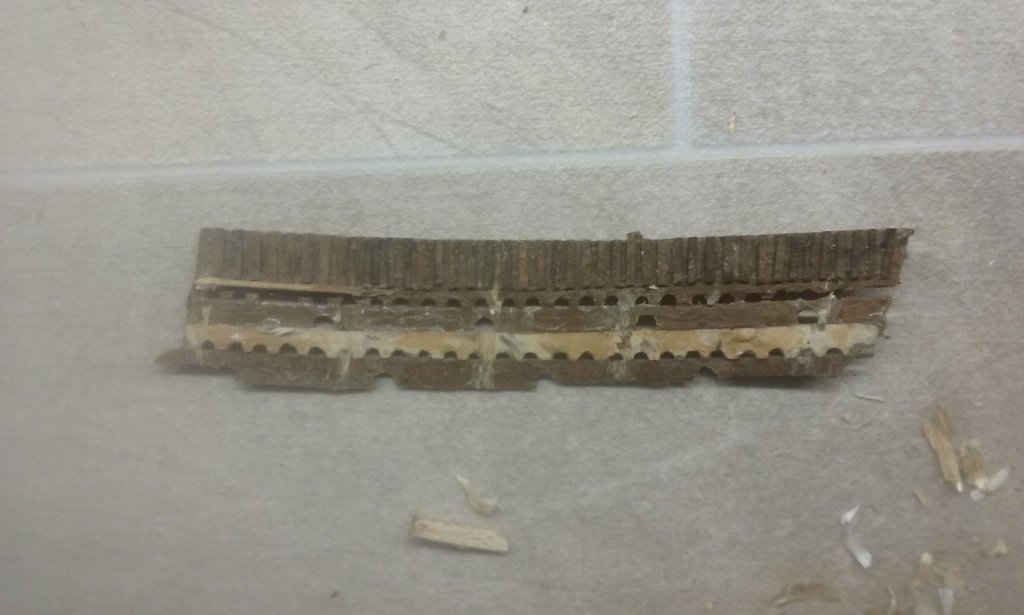
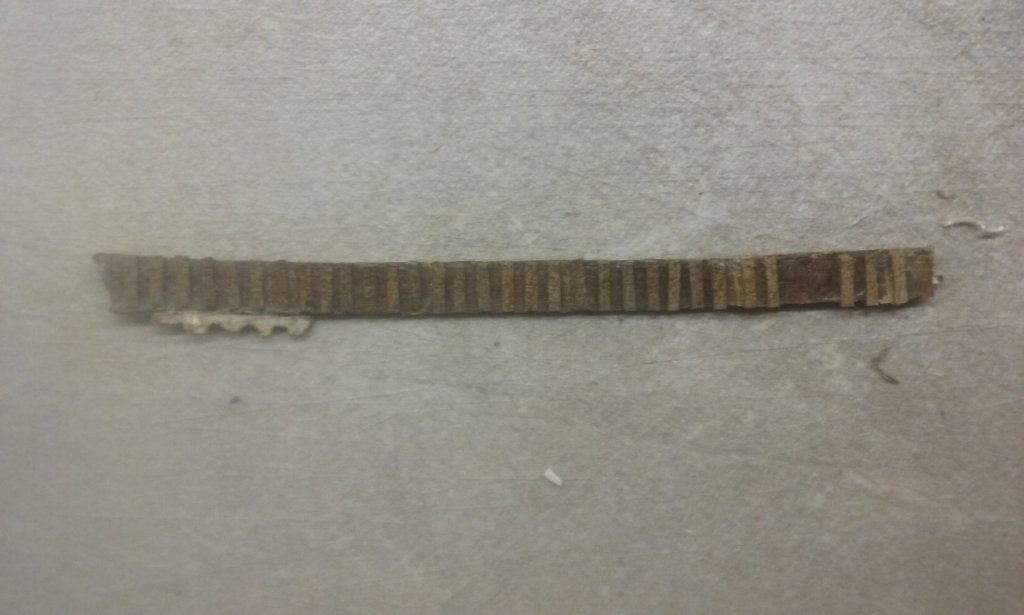
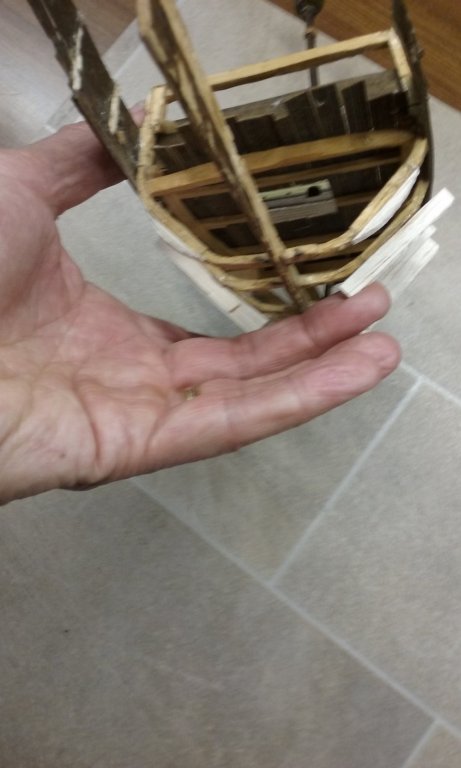
Doing repairs to the existing structure. I intend to keep as much as I can of the original model, though some of it is in pretty poor condition I think a lot of it can be repaired. Here are the sides of the aftercastle made up of strips glued together, with arches cut out of the individual strips where the gunports are. Here they are seen from the back, with remnants of the frames and decks still attached. I was VERY enthusiastic about white PVA glue when I made this model - I seem to have slopped it on with great abandon. I've taken a tip from (I think) Druxey and used methylated spirits to help dissolve the glue. It seems to work, but there's a LOT of glue and it's over 40 years old. The metho seems to soften the glue, however, and make it easier to remove with a scalpel. The idea is to get back as close as possible to bare wood before I put it all together again. Note that I was clever enough when I was 17 to glue paper to the back of the strips containing arches, to keep the wood from splitting. I remember I used a tiny woodcarving gouge to cut the arches. The pieces below have had the metho and scalpel treatment, and are quite a bit better than when I started. Still a bit more work to do, but making progress. There were breaks in these panels even before I started work and they broke a bit more while I was removing them. Because the shape of the aftercastle is to change (it will become narrower at the stern), these strips will have to be separated and glued back on individually. Here is the main channel which broke off the ship at some point. I've taken off the glue and will glue it back on when the time comes. The matching face of the channel is still attached to the ship, so it shouldn't be too hard to put it back on. One of the frames was a little fragile and likely to bend under the forces of the new planking, so I've glued a reinforcing piece to strengthen it. One of the solid bits of balsa that acted as cant frames seems to have vanished, so I've replaced it. Bowsprit broke at some time, but the break was clean and fitted together well, so I just glued it back in one piece. The mend is about half way between the chain and the end with the grapnel. Snapped fore yard glued back together. The sails were made from waxed drafting linen (extremely finely woven fabric), which I'd washed in hot water to remove the wax. After over 40 years they have all gone dark brown and the linen has deteriorated quite badly. So all the sails will have to be replaced. I'm keeping the old ones to use as templates. One of the things that really got on my nerves even back in the day was that I'd made the keel out of balsa, and even though I'd stained it to match the Queensland walnut of the rest of the model, it looked like - balsa. So I'm making a replacement keel out of walnut - you can see the pencil outline below. I'll trim the balsa keel back where the existing frames are still in place, and it'll be full size from there on back to the stern. I'll be doing the same to the stempost at the bow. Steven


- 740 replies
-
- 7
-
-
- Tudor
- restoration
- (and 4 more)
-
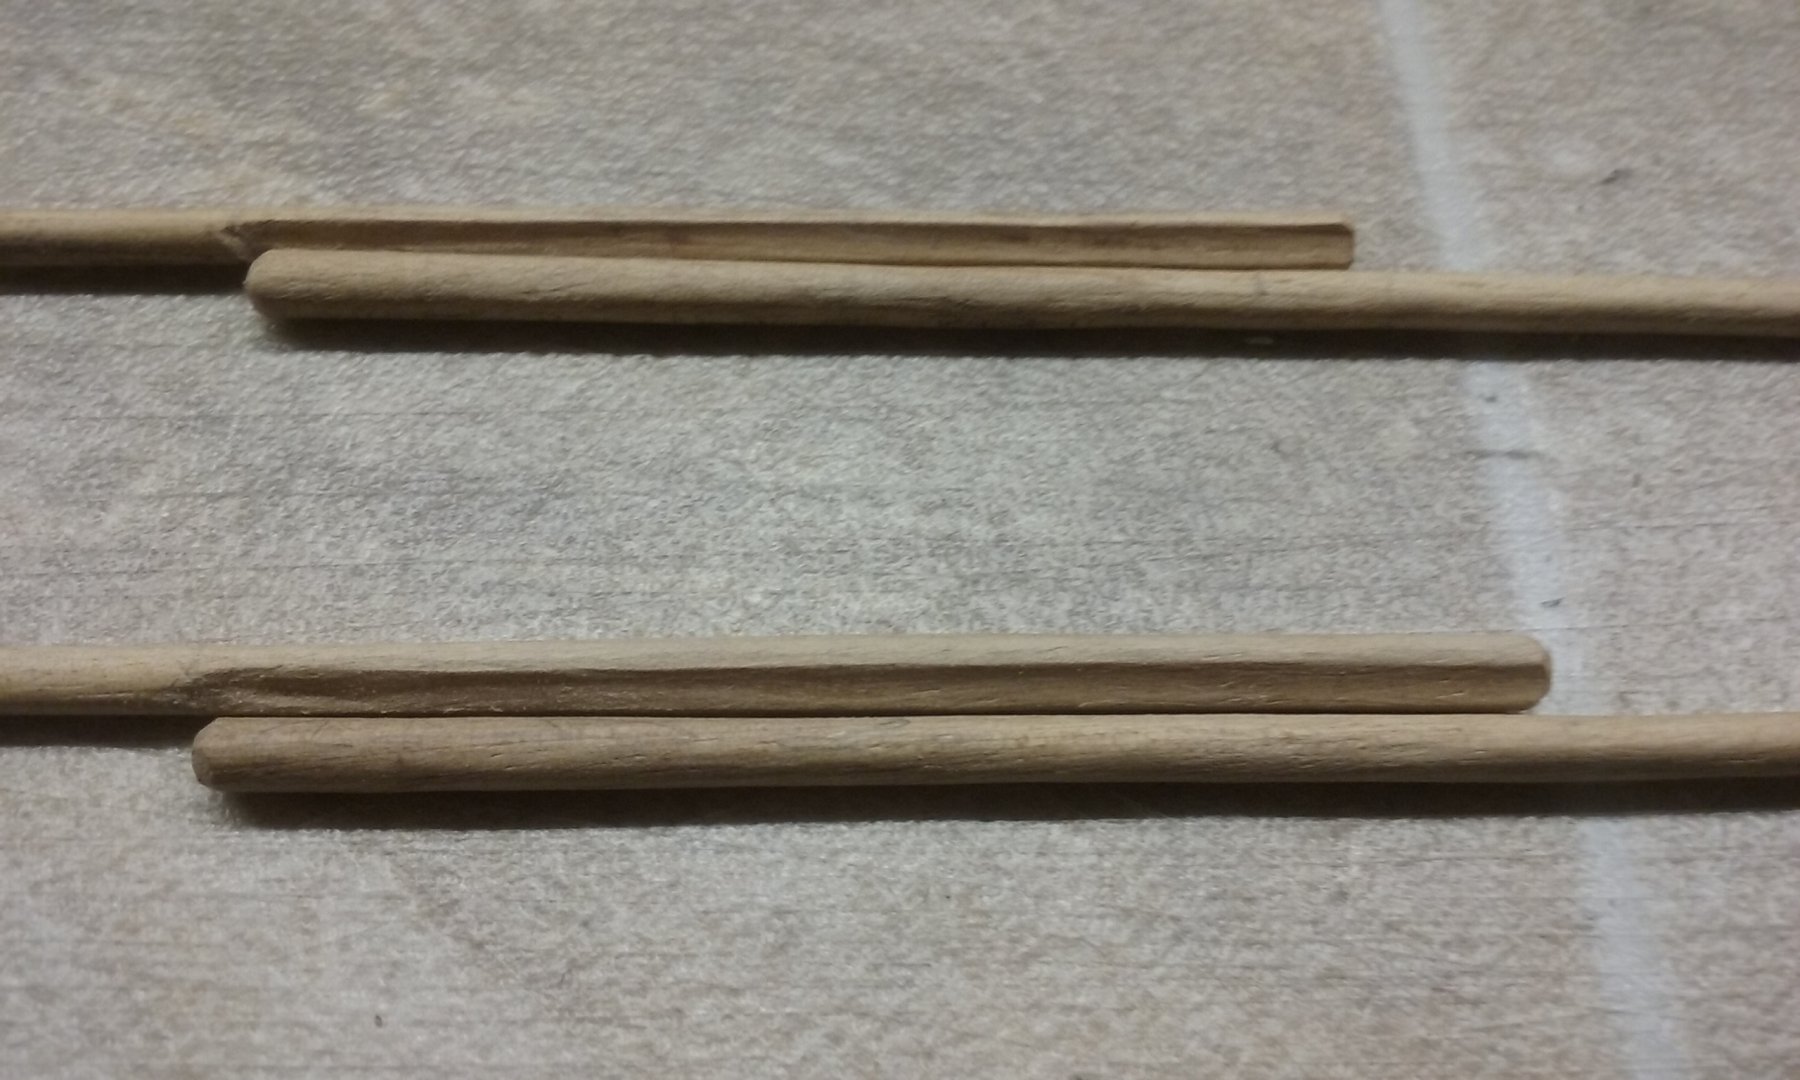
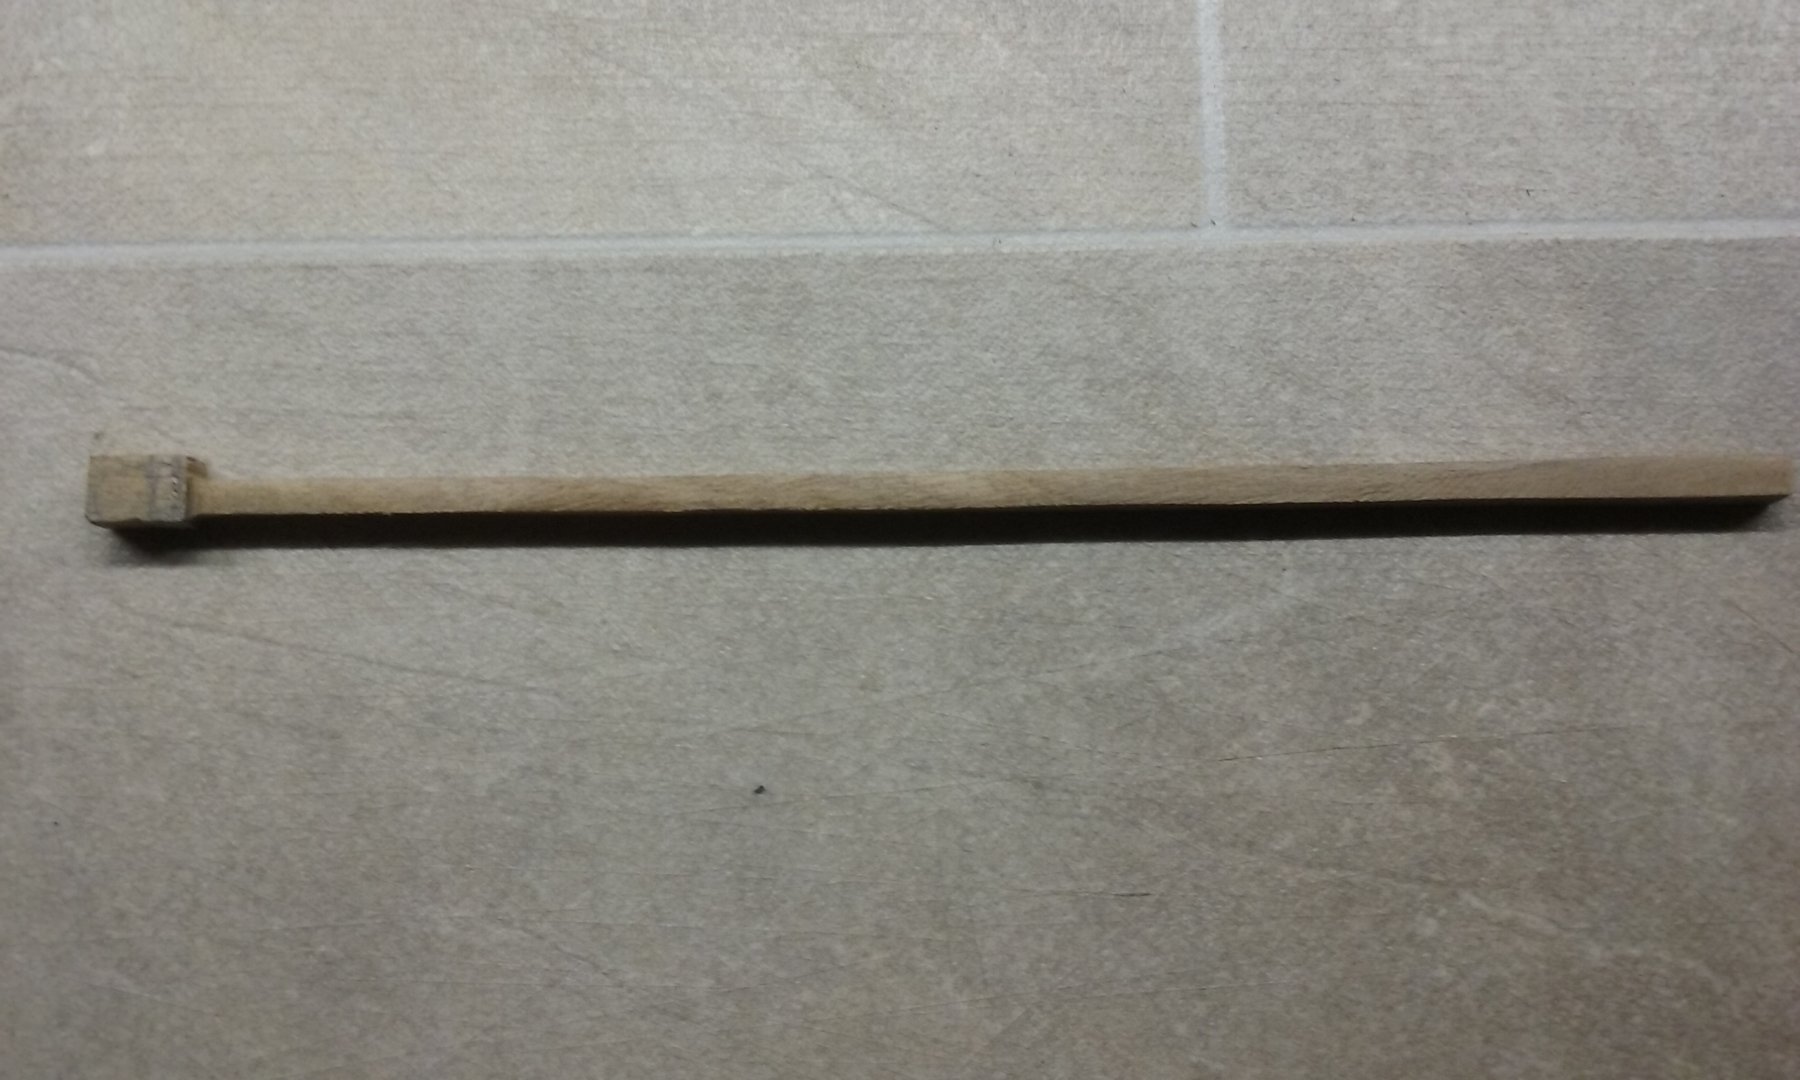
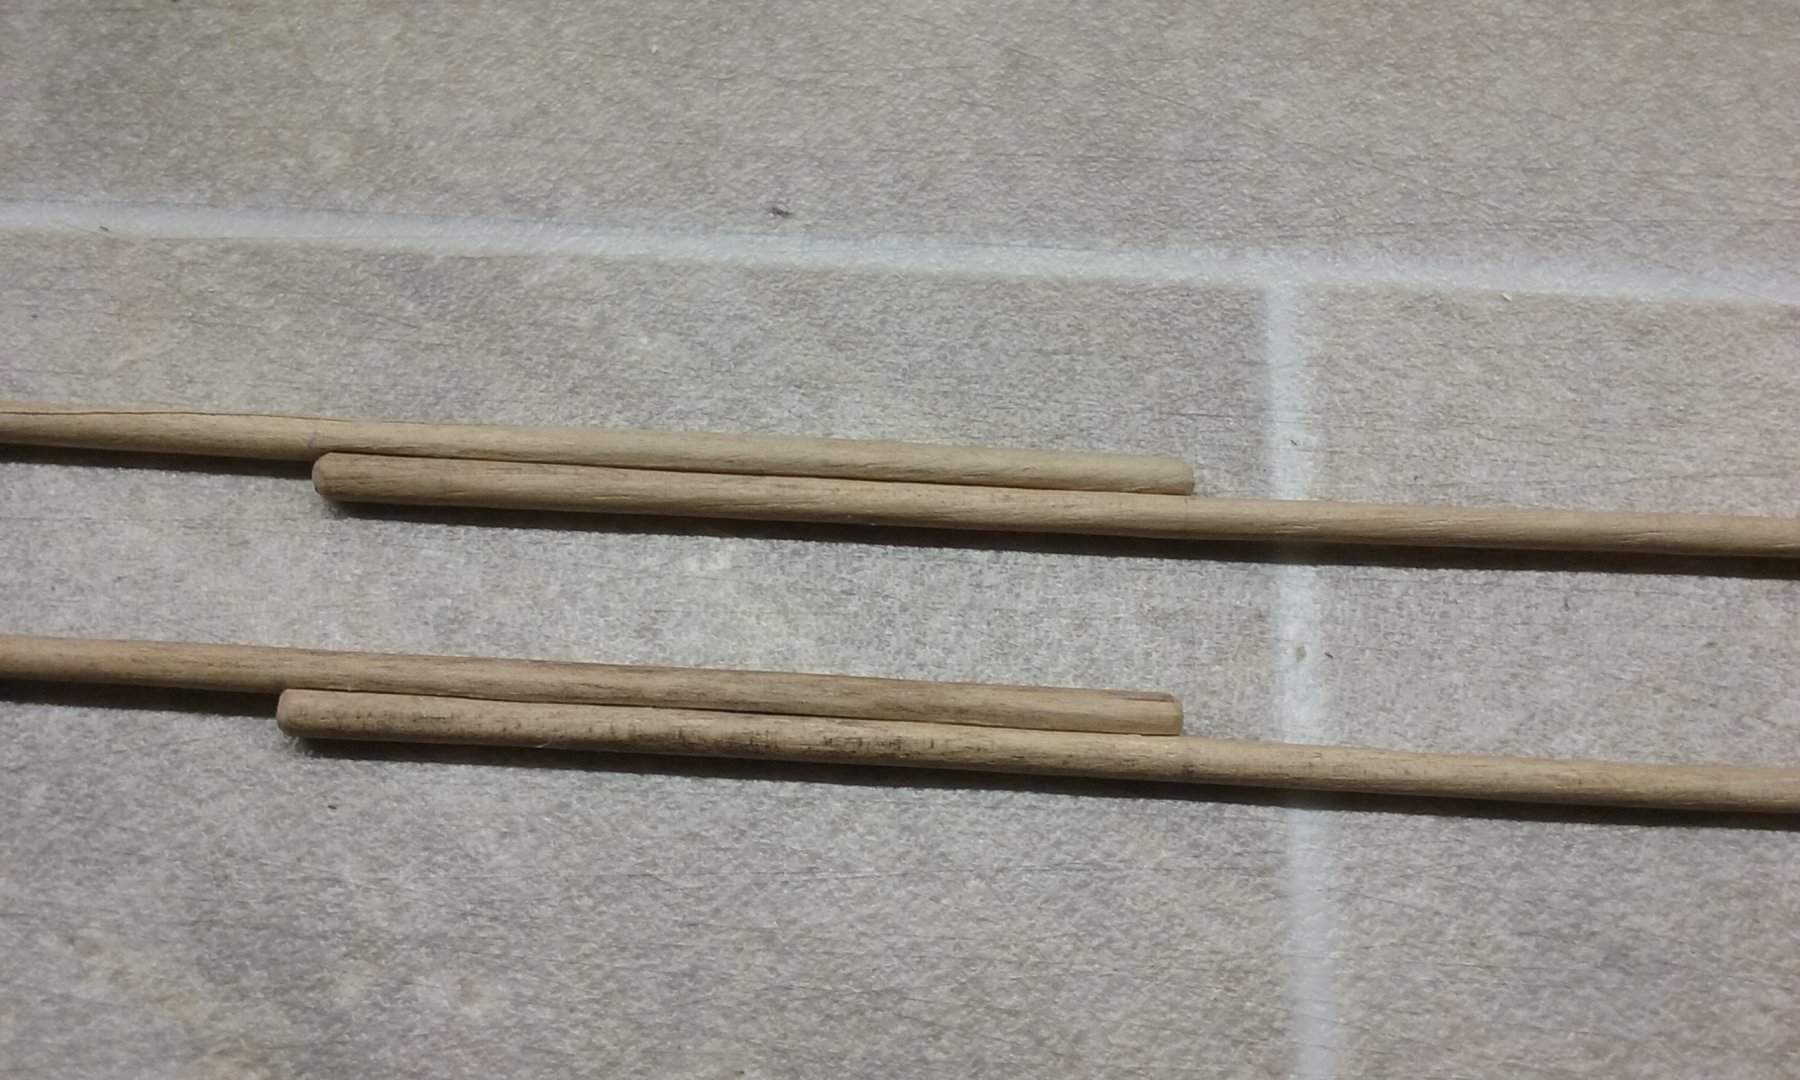
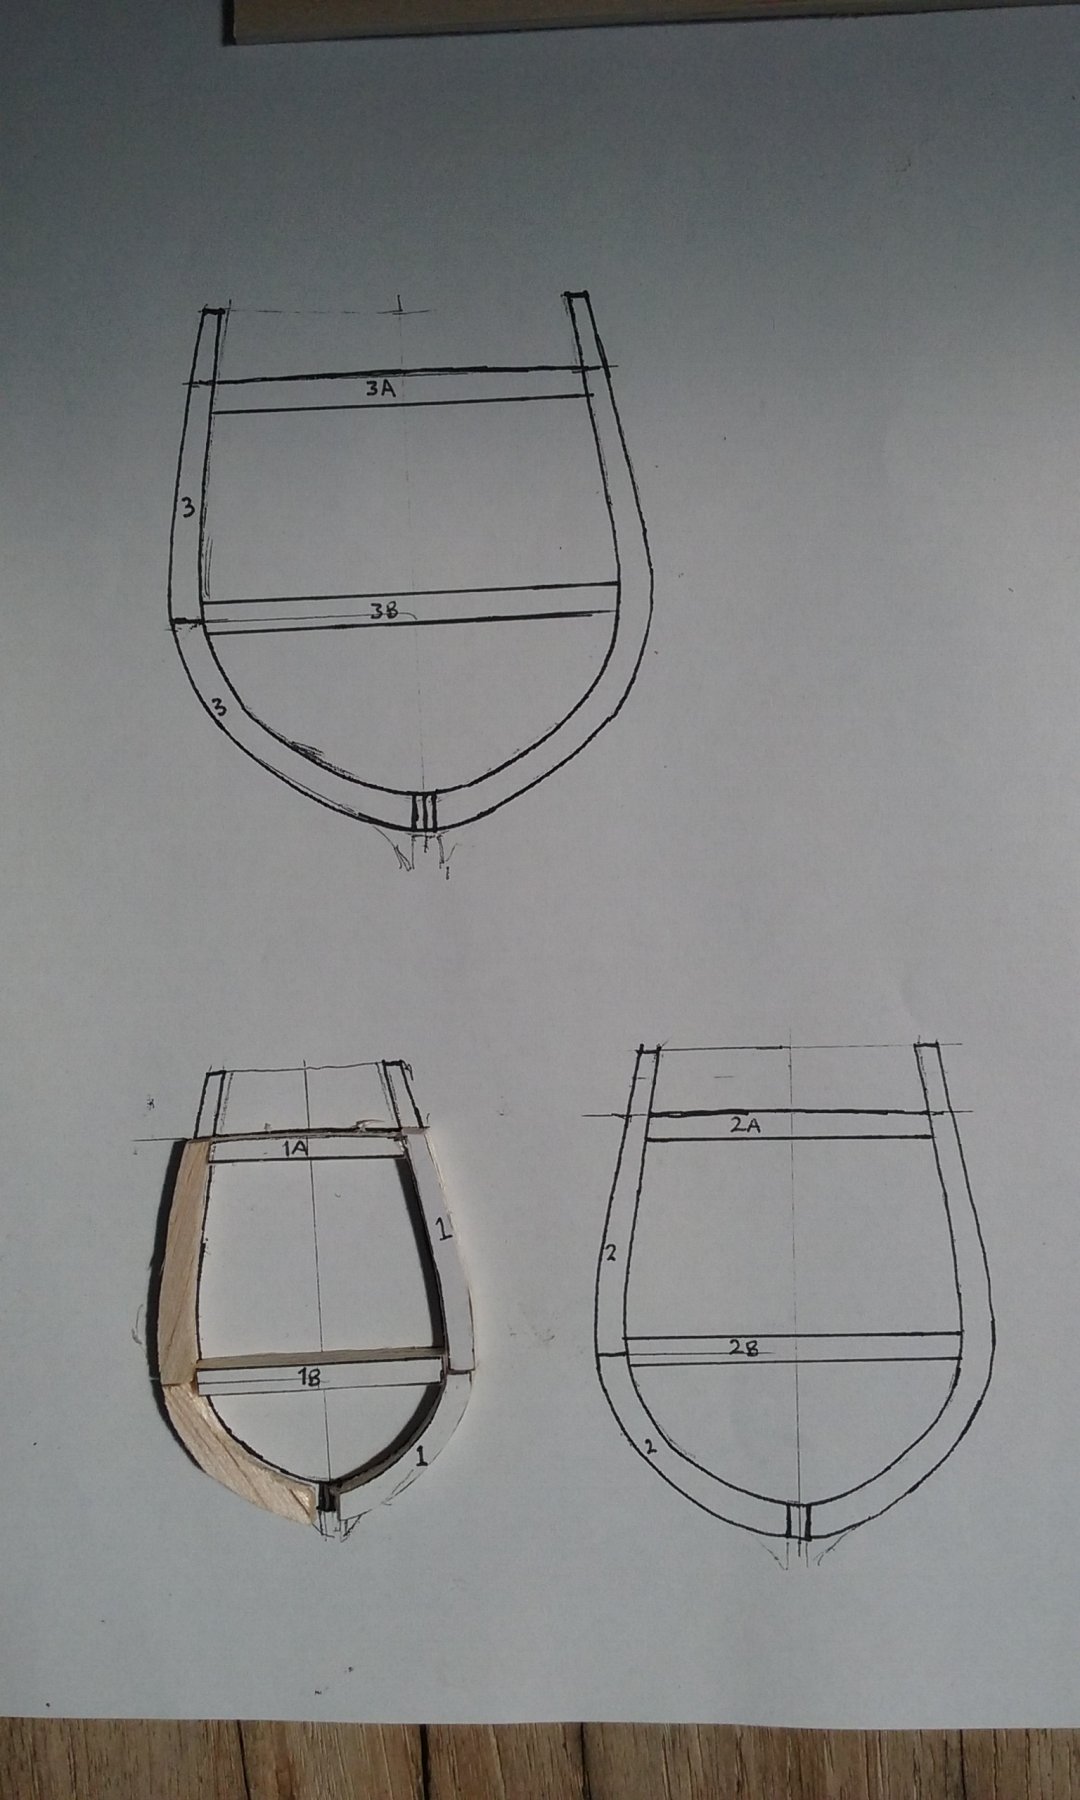
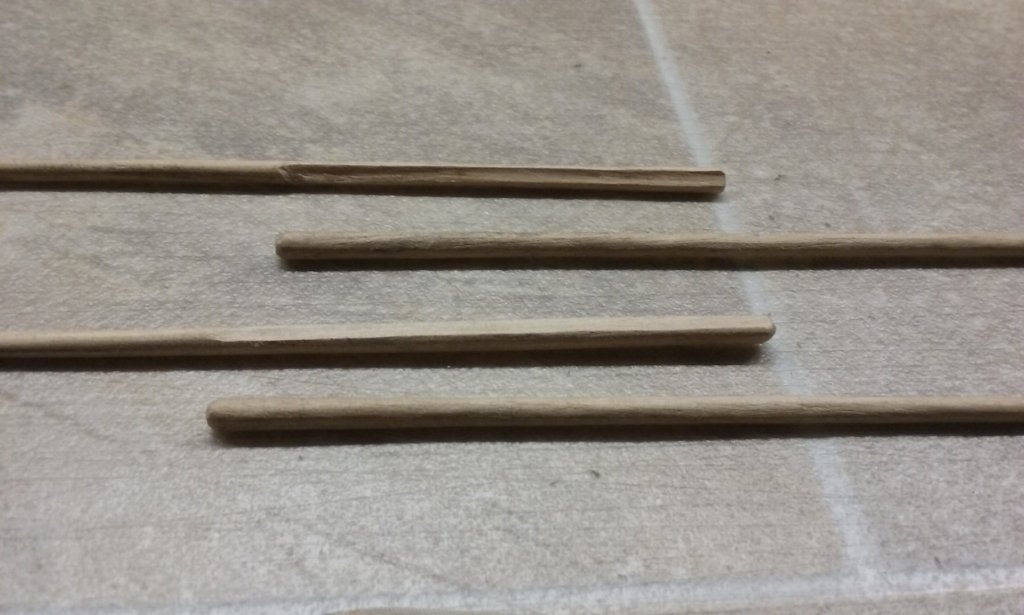
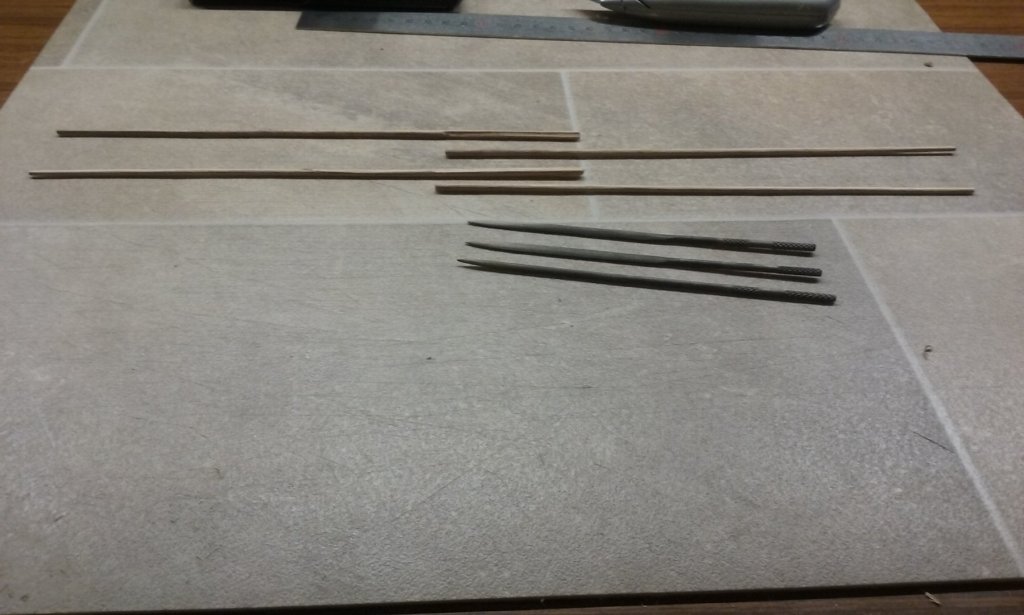
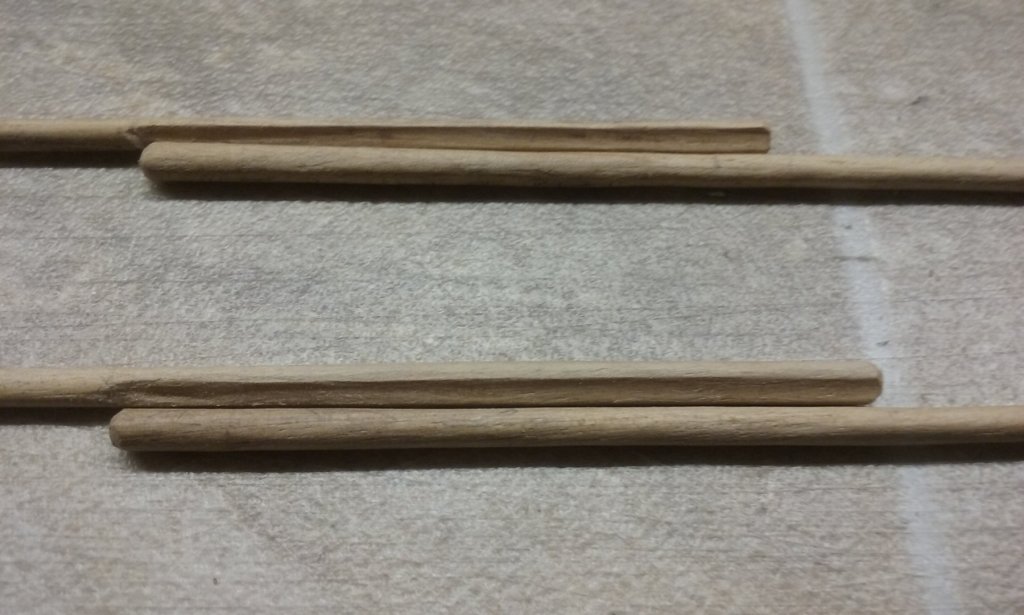
I've decided to go with the shorter masts and yards. I've made six masts overall - the first two taken directly from Age of the Dromon which I decided were wrong, then the longer ones, which looked too long. Because I didn't want to shorten those ones to find out if shorter ones looked better I then had to make two new ones. And I've ended up with two that will actually go into the ship. Here's the second (or sixth!) mast under construction. I've shamelessly copied the concave joint of the mainyard of Woodrat's Cocca/Nave Tonda to join the two spars of each yard. The're glued together but I've yet to add rope lashings. Steven


-
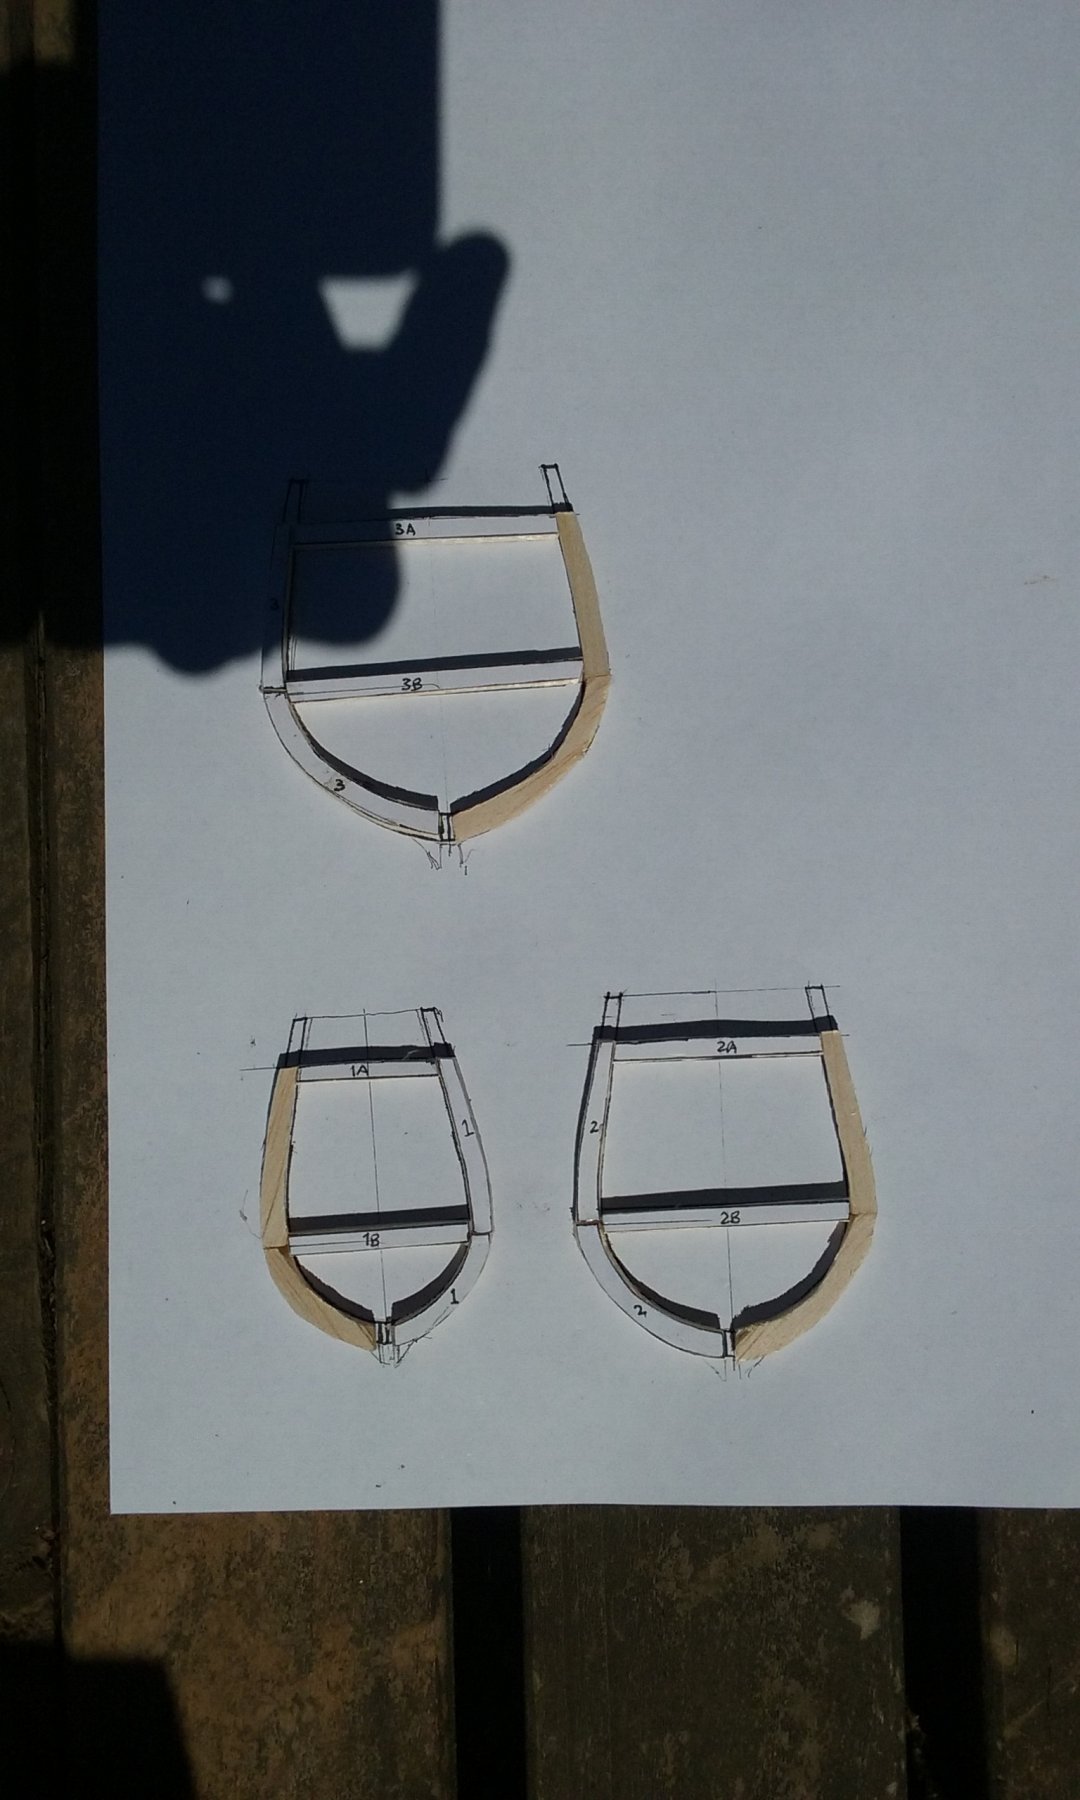
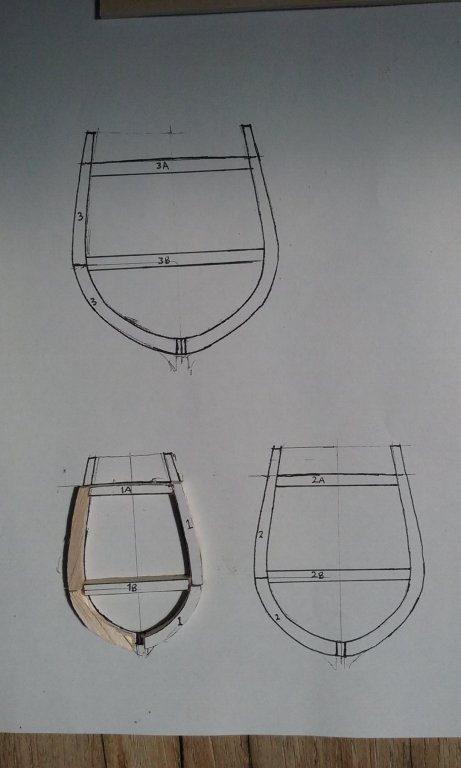
Fixing the outline of the existing frames in line with the shape of the frames per the Mary Rose discoveries. Steven

- 740 replies
-
- 8
-
-
- Tudor
- restoration
- (and 4 more)
-
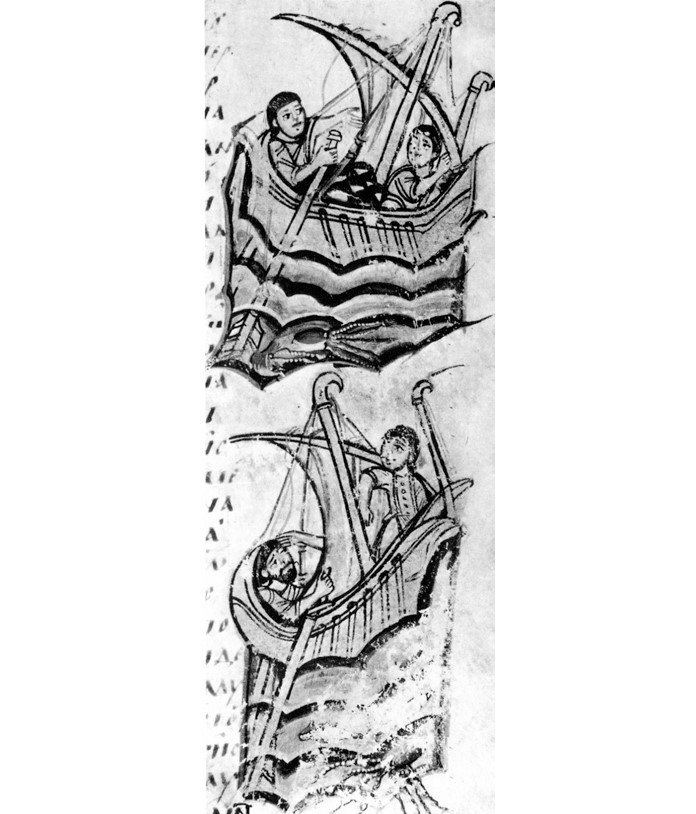
Thanks everybody for the likes and the comments. Roger, ancient Mediterranean ships were certainly built this way, but the the first millenium AD saw a transition between tenon and framed construction and by the time of this dromon shipbuilding had almost completely evolved to a fully framed method with very few or even no tenons between planks. I'm pretty sure none of the Yenikapi galleys had any tenons at all. Mark, in Age of the Dromon Professor Pryor states (based on 12th century Sicilian galleys) that the fore was the "main" sail and the "middle" was smaller. On the other hand, the only Byzantine picture of two-masted galleys (from the late 9th century - about 200 years before mine) shows the foremast smaller than the "middle" mast. [Edit: Though evolution did occur in Byzantine ship design, it was pretty slow. The Yenikapi galleys span several centuries but have only minor variations between them. Which leads me to believe the picture below is probably almost as appropriate for the 11th century as for the 9th.] However, as Prof Pryor says, that may be artistic licence - perhaps an attempt to fit the picture into a restricted space on a page. In earlier posts, particularly those of June 21-24 I've outlined my reasoning for the masts and yards. There's very little out there, either pictorial or written, and absolutely nothing in the archaeological record. According the the theory, I've got a pretty good relationship between the sails, with the "combined centre of effort" of the sails a little forward of the centre of resistance of the hull. Ideally it should be pretty much directly above, but a little forward is pretty ok too. And no, the galleys were pretty much confined to sailing before the wind because a heel of more than 10 degrees would have swamped them. Messis, thanks very much for the compliment. Steven

-
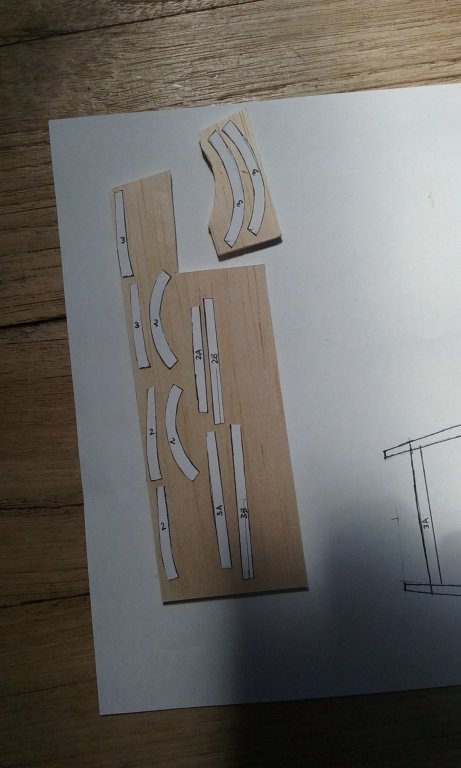
First action - making new frames to accommodate the new shape at the stern. Steven

- 740 replies
-
- 10
-
-
- Tudor
- restoration
- (and 4 more)
-
Thanks, Druxey. I certainly hope so - it's really all I have to go on. Still, who's going to tell me I'm wrong? Ah, for a time machine . . . Steven
-
I don't know how I missed this build log up till now. You've done a very good job with this. It's really interesting to see you taking on what is really a pretty steep learning curve, What I particularly liked was that rather than do what so many newbies do and try to build something far too complicated and difficult (usually HMS Victory!) which normally ends in failure and disappointment, you took on something simple enough but with enough challenges, to allow you to methodically carry it all through, picking up skills and knowledge as you go, resulting in an impressive final product. The next and subsequent models will be better still, and you'll keep on amassing skills and experience till you'll be the guy whose builds people refer others to as an example of what to do. Welcome to a fascinating (and addictive) hobby! Steven
- 27 replies
-
- 3
-
-
- union
- constructo
- (and 1 more)