HOLIDAY DONATION DRIVE - SUPPORT MSW - DO YOUR PART TO KEEP THIS GREAT FORUM GOING! (Only 72 donations so far out of 49,000 members - Can we at least get 100? C'mon guys!)
×


Louie da fly
-
Posts
7,989 -
Joined
-
Last visited
Content Type
Profiles
Forums
Gallery
Events
Everything posted by Louie da fly
-
 Brilliant work on the rivets, Dan. I'm in awe . . . Steven
- 238 replies
-
- 2
-

-
- leviathan
- troop ship
- (and 2 more)
-
Looking good, Patrick. I think you're right going with the multiple support beams (which would probably be described as "knees") - they seem to be quite common in ships of this time. Regarding the name "chains", the lower deadeyes at the ends of the shrouds are fixed to the hull with iron chains, as you can see in the first and second pictures in your post. The widened wales that support both these chains and the shrouds themselves are called "chain wales", which got shortened over the centuries to "channels". However, that whole section of the ship is often just referred to as "the chains". Hope that clears it up. How wide the channels themselves were - your guess is as good as mine. However, there is some archaeological information - I don't know if the channels survived on the Mary Rose which was maybe 50 years before the Pelican (the photos of her all seem to be taken from inside, so you can't see them) but they certainly did on the Wasa which was maybe 50 years after. But again I think you're right in making them wide enough to support those barrels. You could probably get a pretty good idea by scaling off from that last picture - you have the size of the sailor next to the barrel, so you can estimate the size of the barrel, and thus work out how wide the channel would have to be to fit both the barrel and the shrouds/deadeyes. Steven
- 756 replies
-
- 3
-
-
- galleon
- golden hind
- (and 2 more)
-
Thanks, Patrick. I currently have nightmares about the rotten thing breaking just as I'm about to finish, after all that work . . . And thank you also to Michael for the kind comment, and to Carl for the suggestion (but I don't think I'll put dowels in - you're right - the scale is too small, and they wouldn't be visible). Thanks also to everybody for the likes. The support and encouragement of my fellow modellers is greatly valued, especially on the (fortunately rare) occasions when everything seems to be going wrong and (you all know the feeling) you just want to toss it in the scrap bin and find another hobby. Steven
-
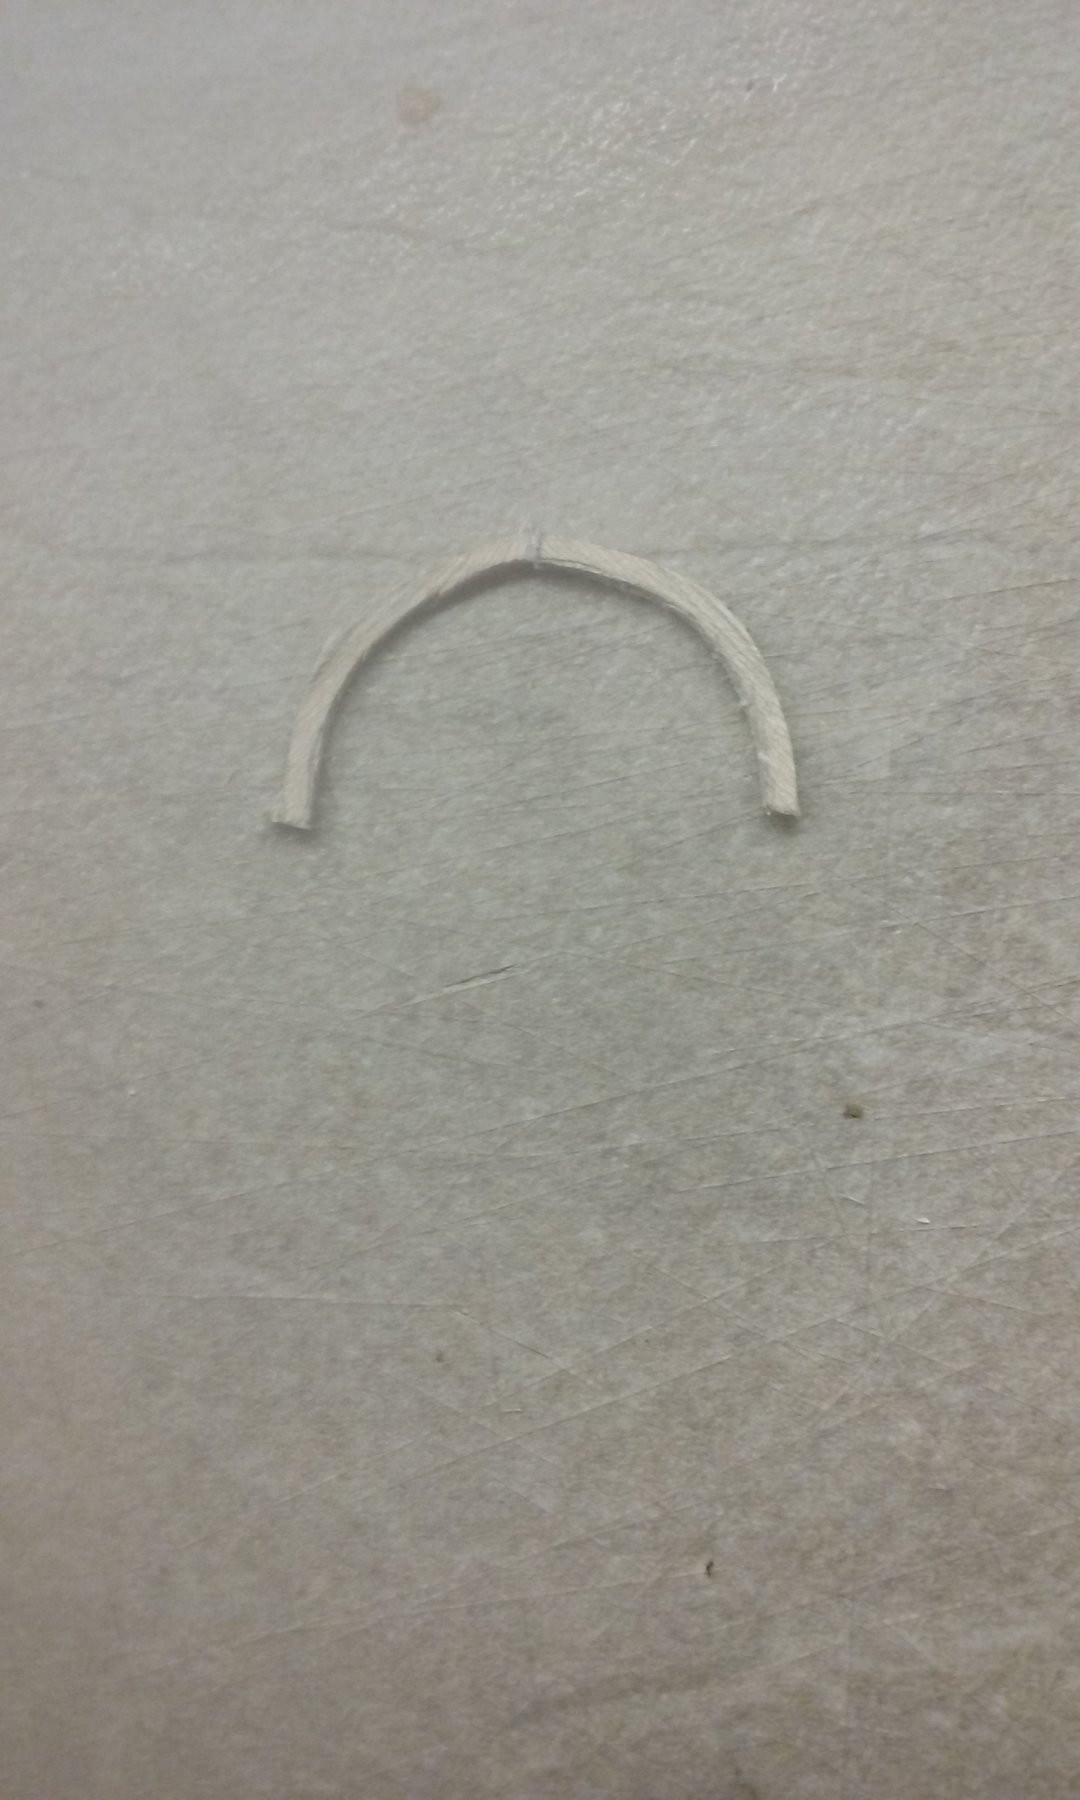
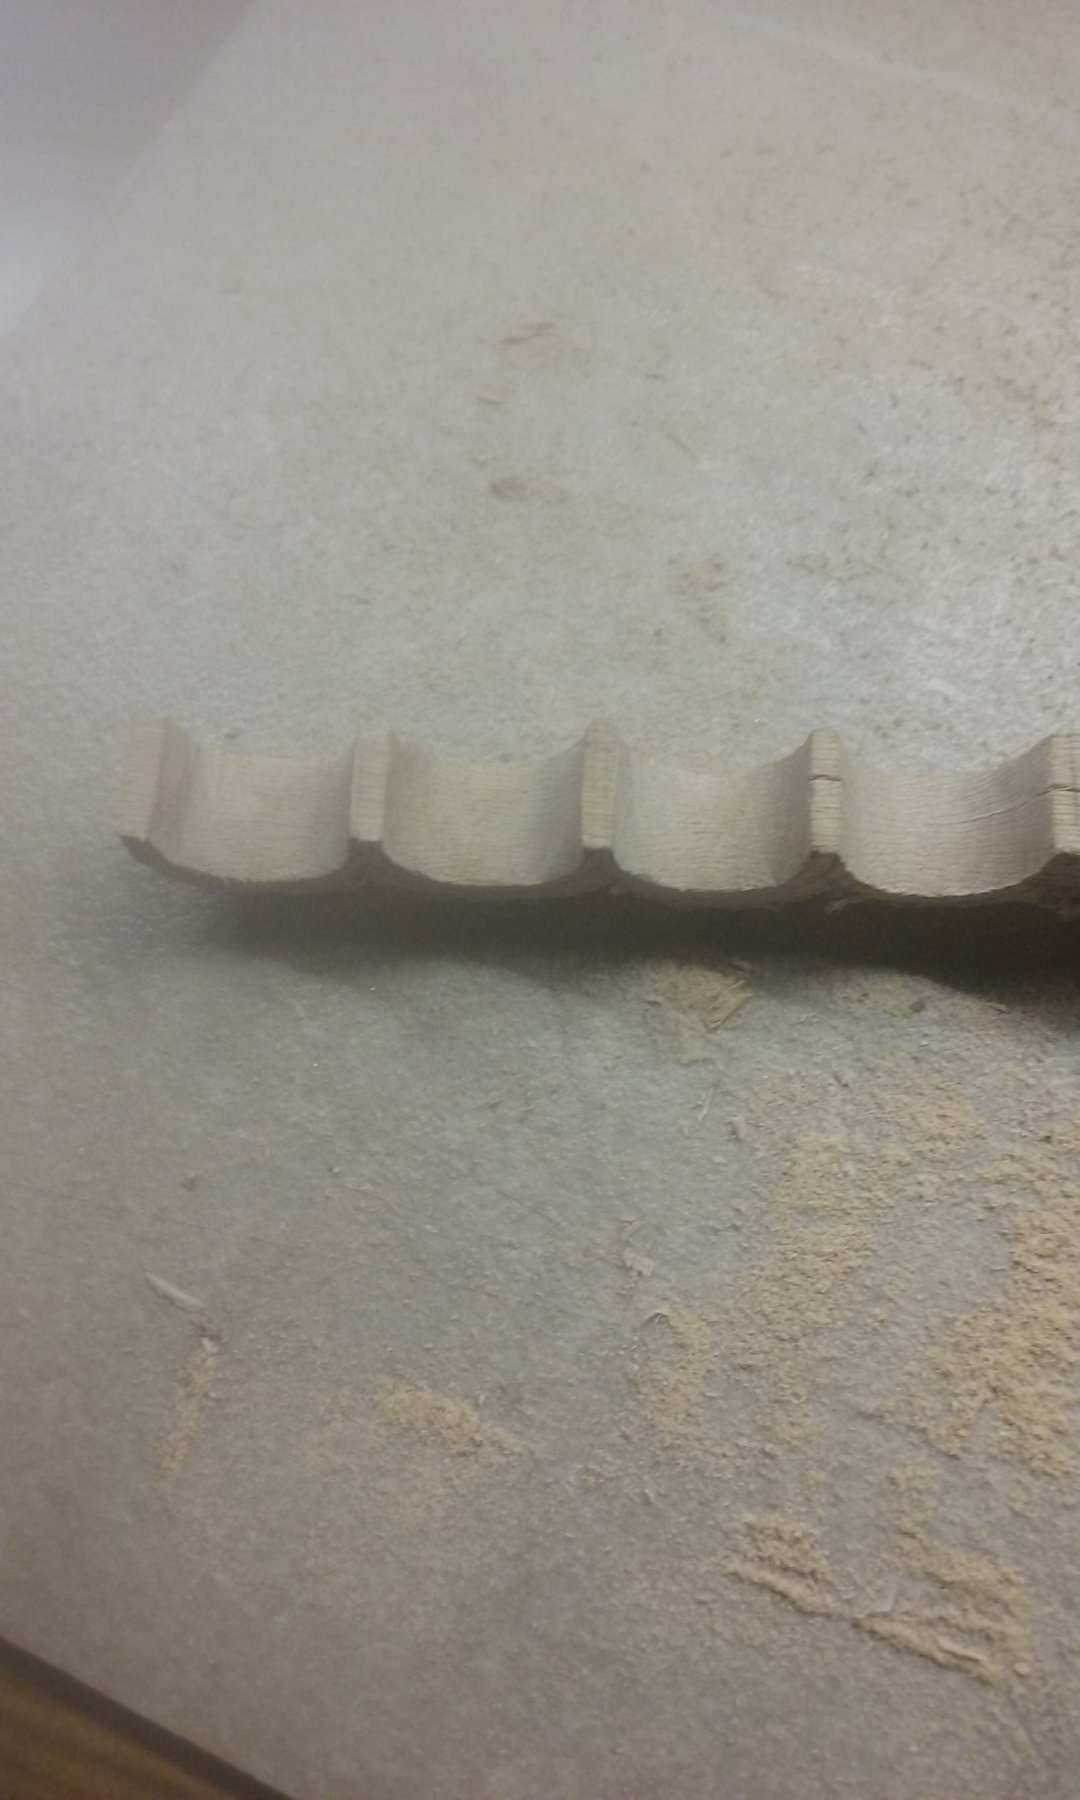
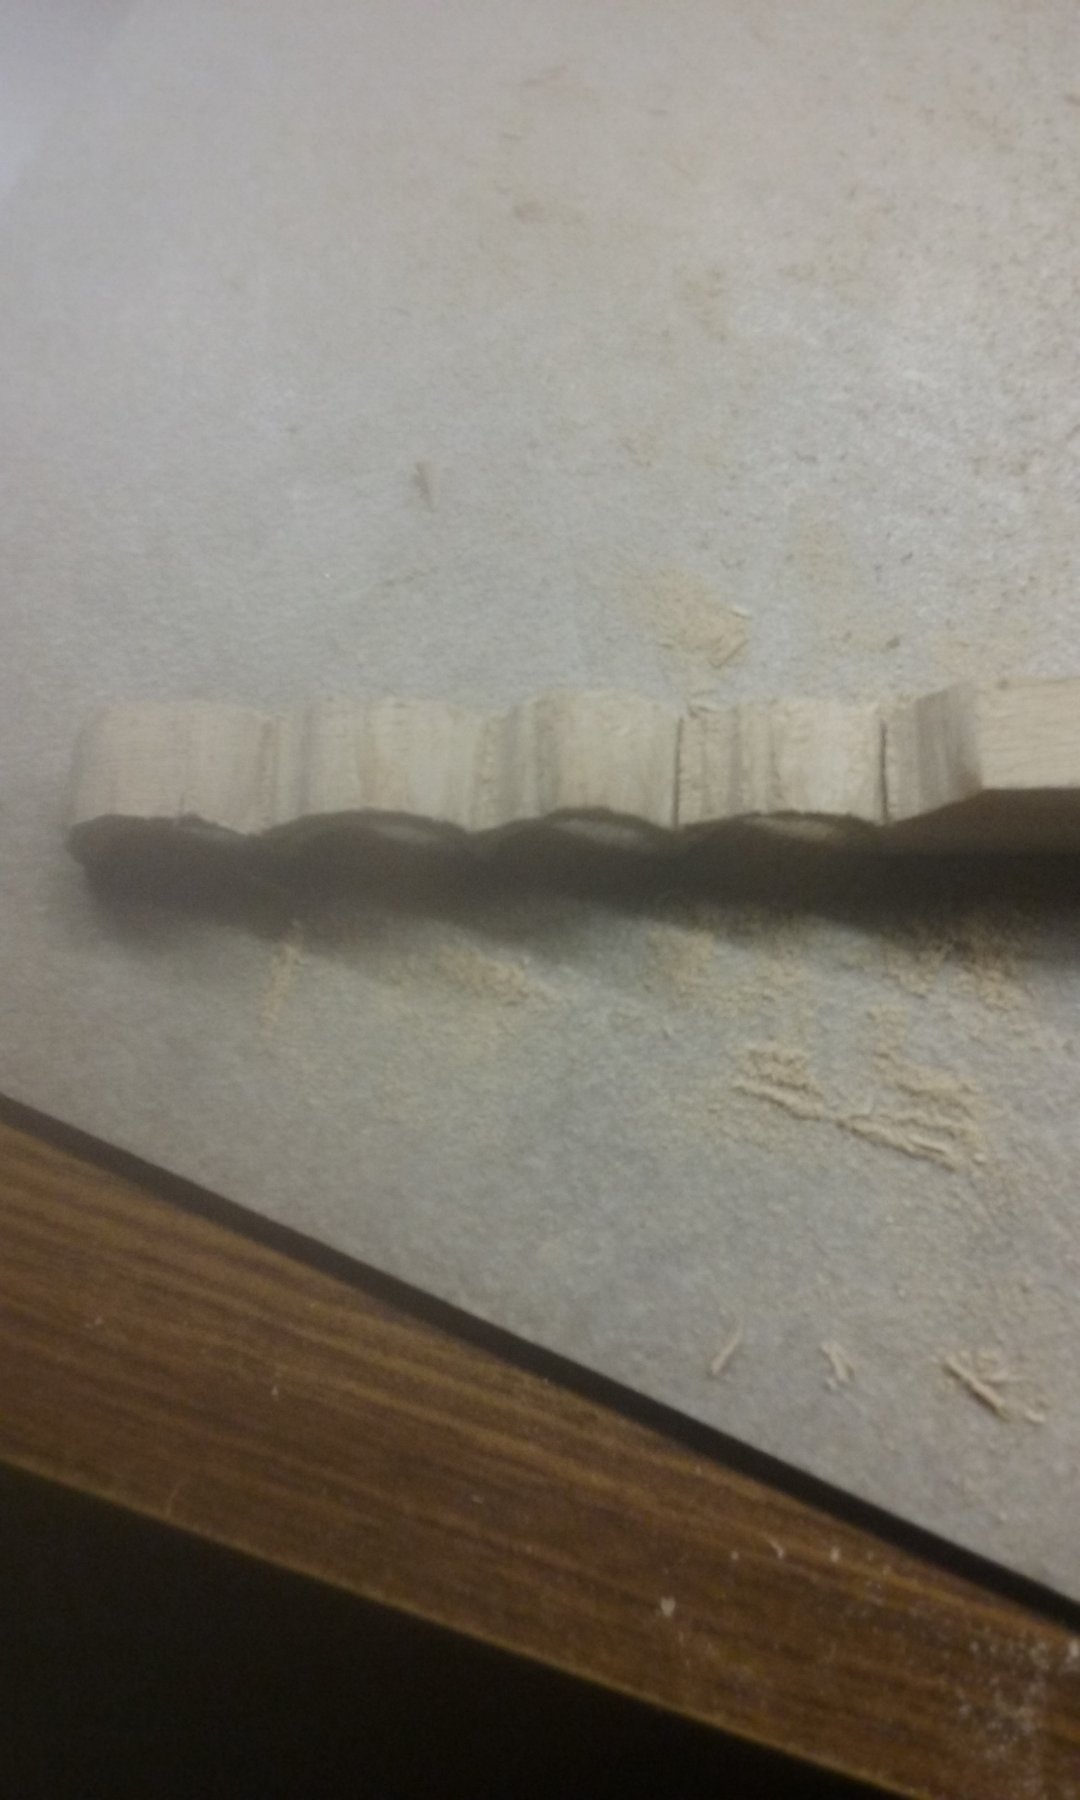
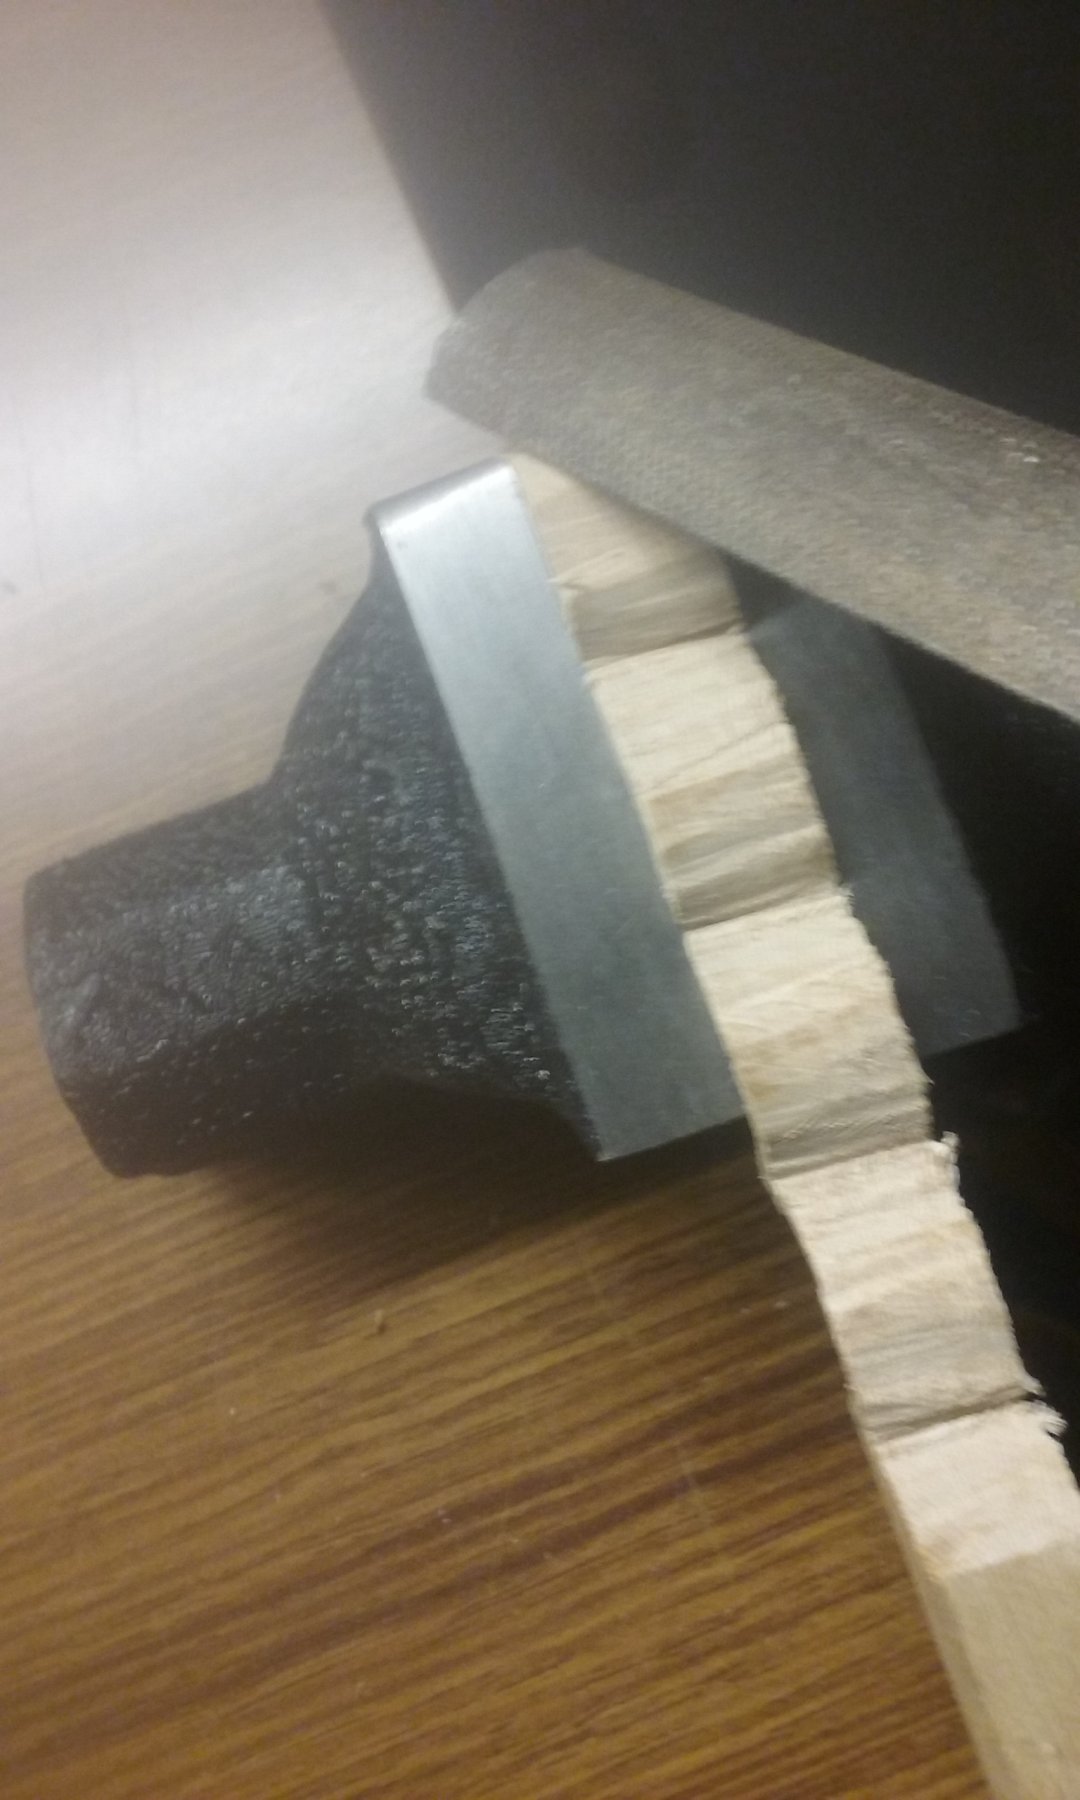
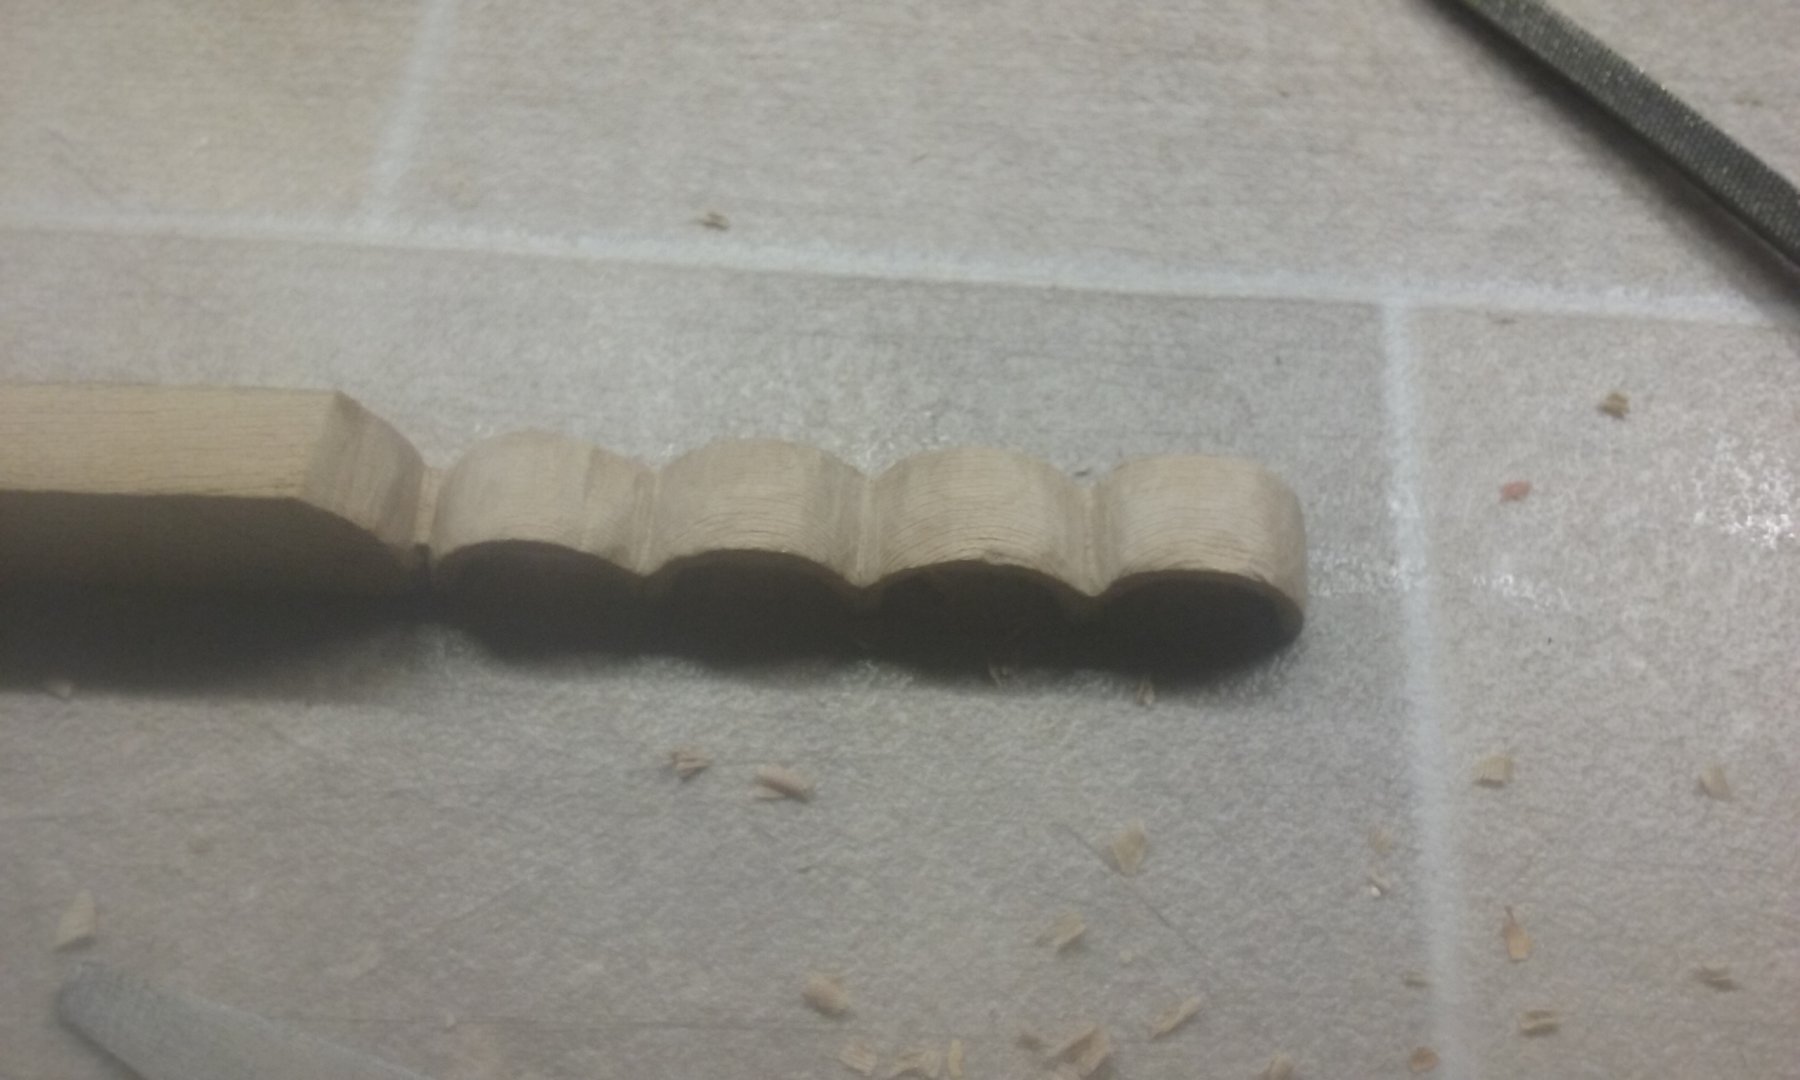
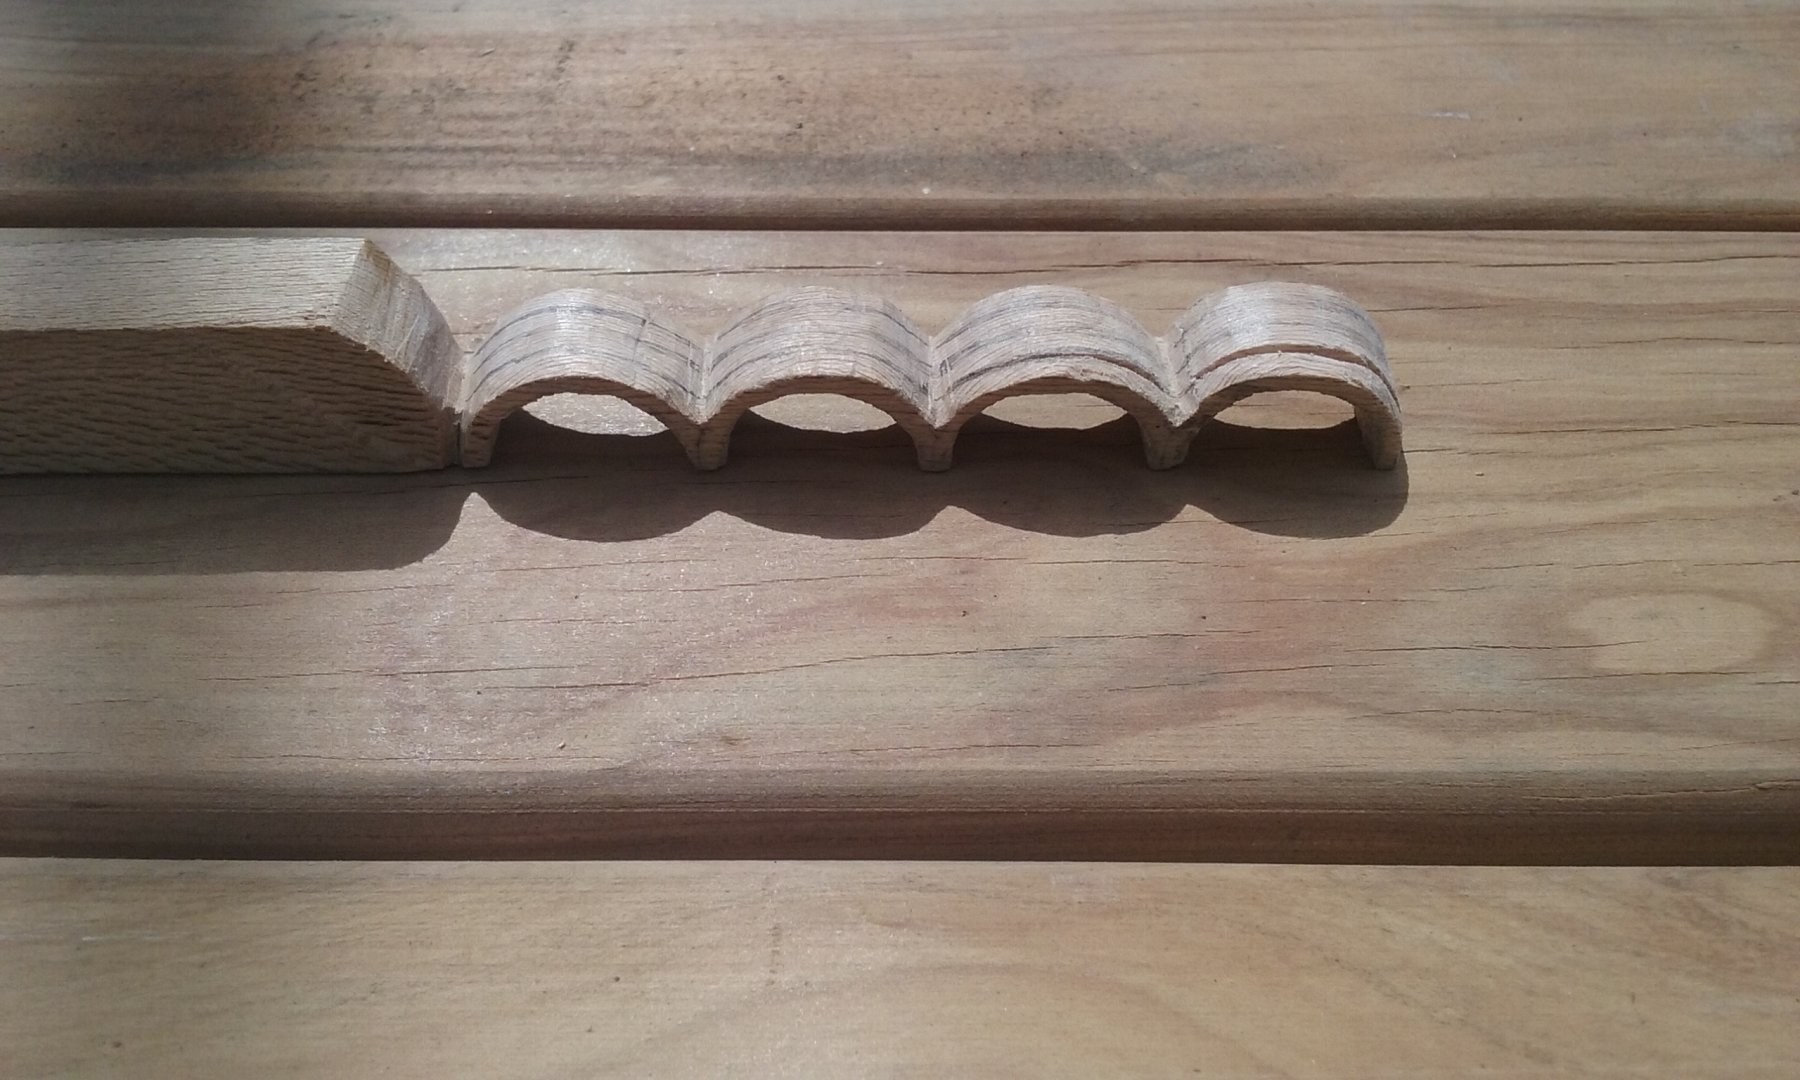
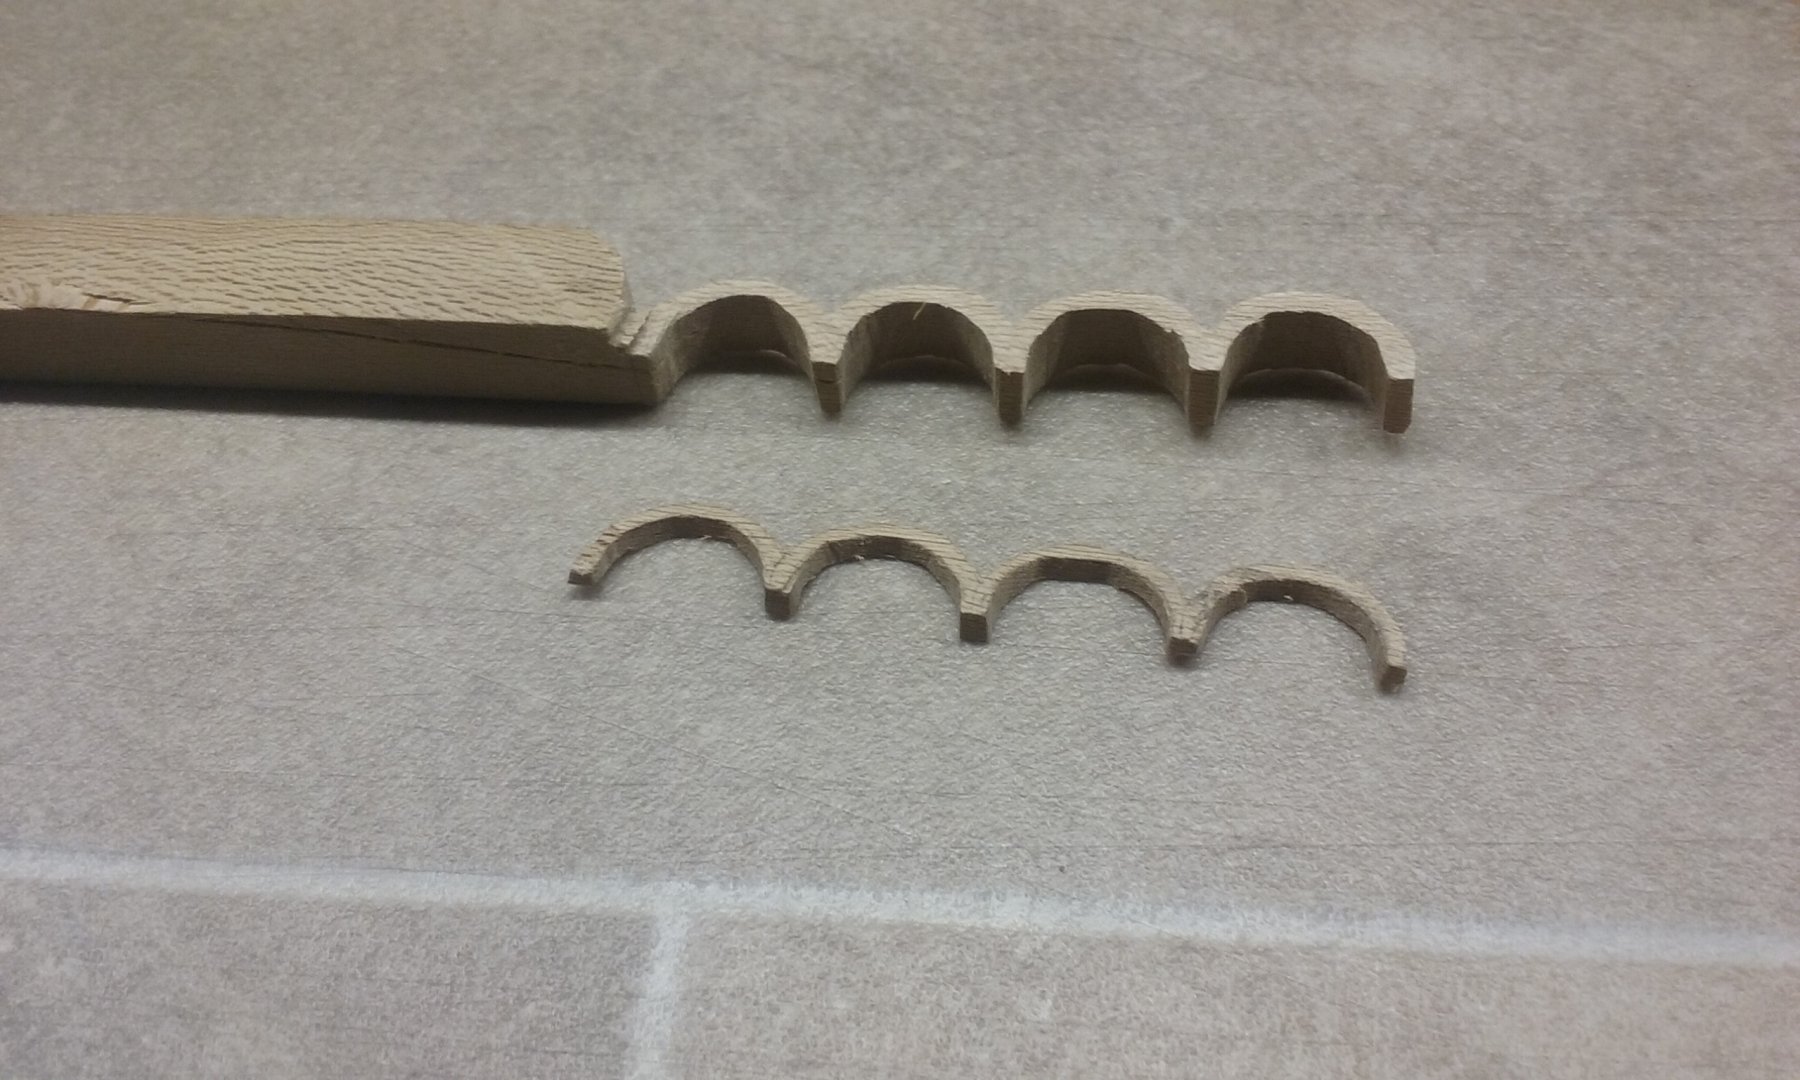
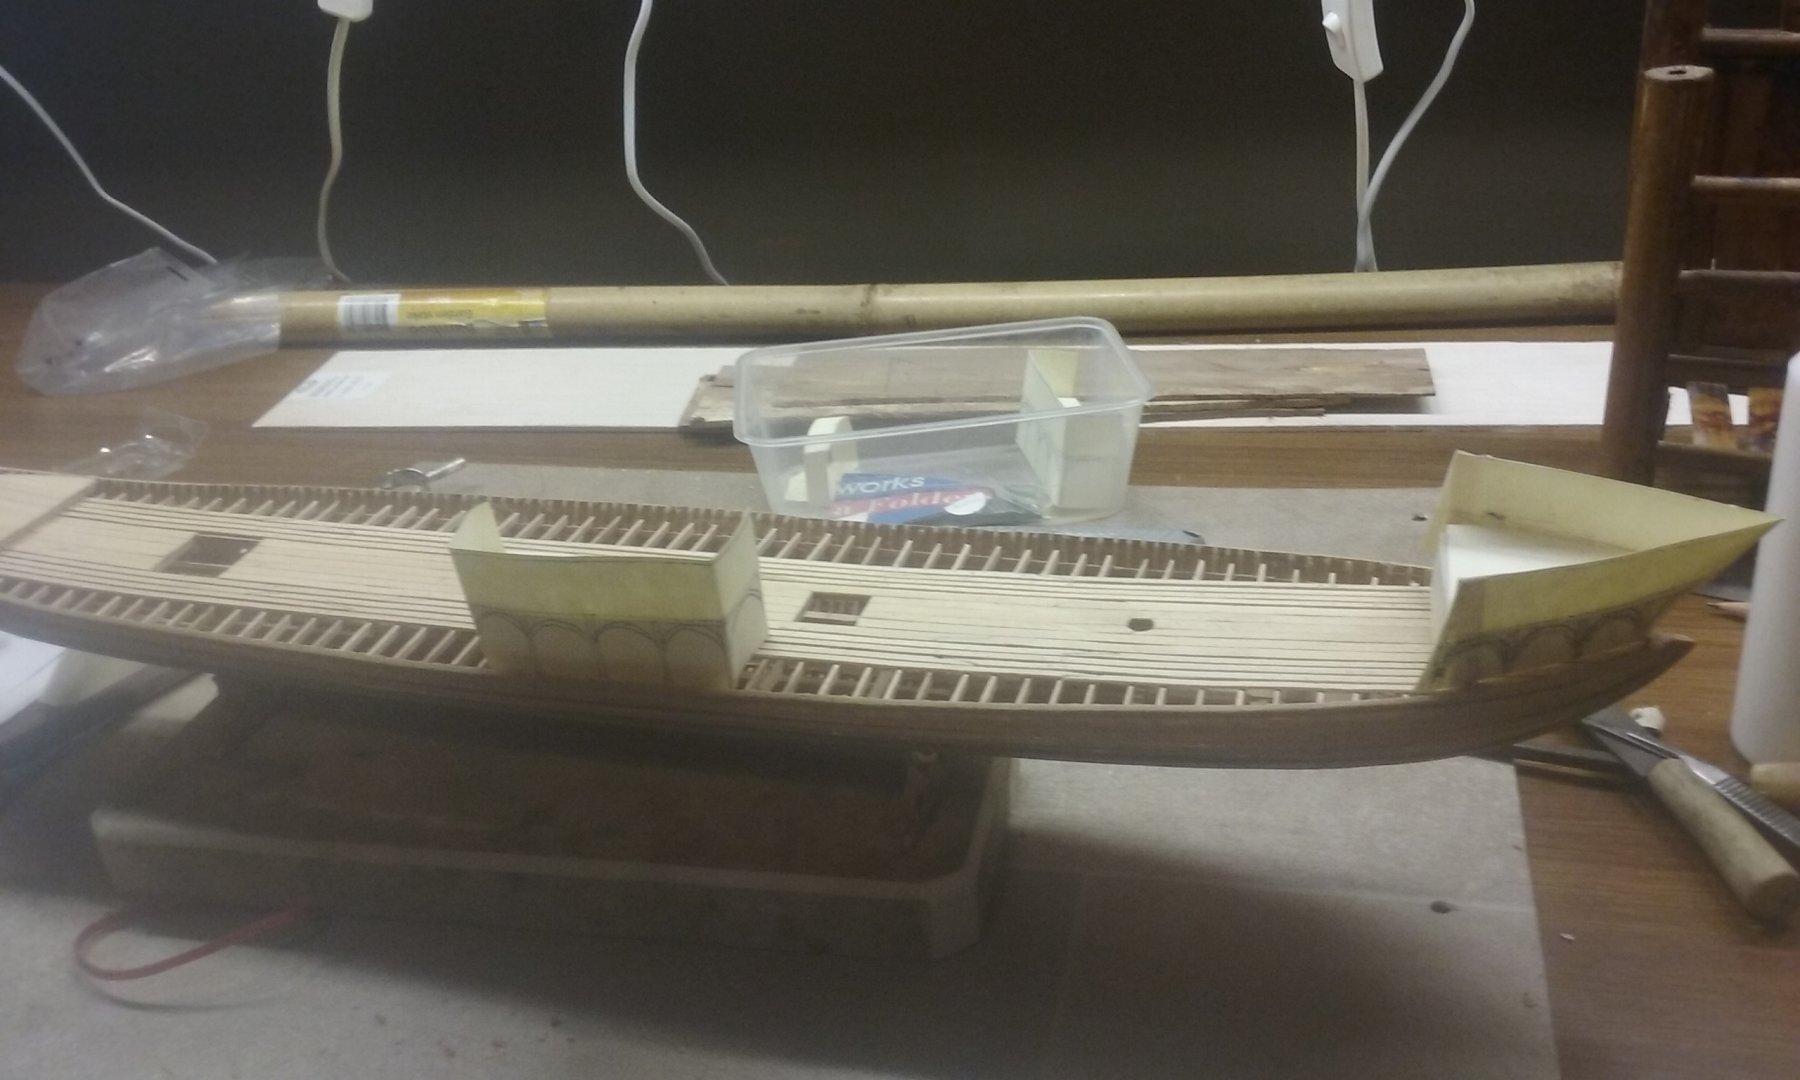
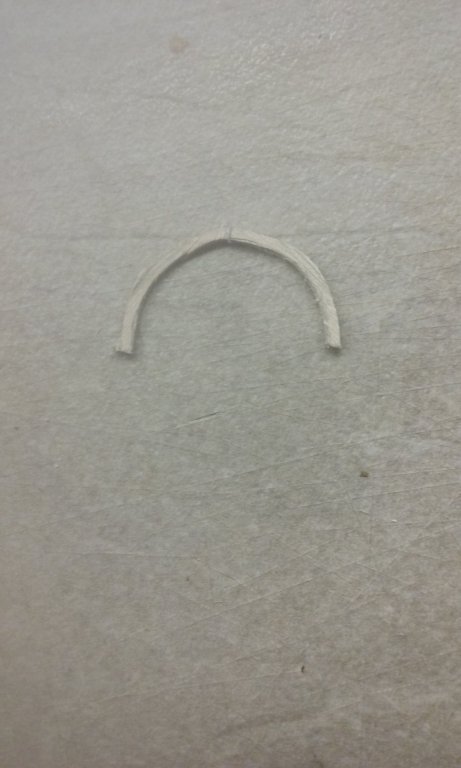
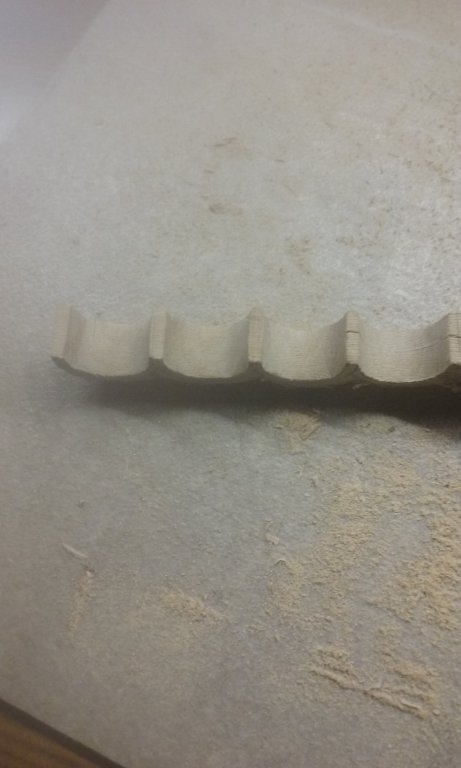
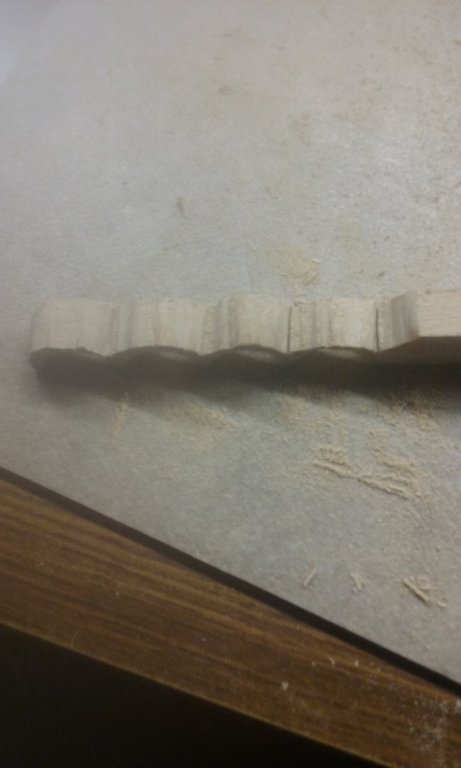
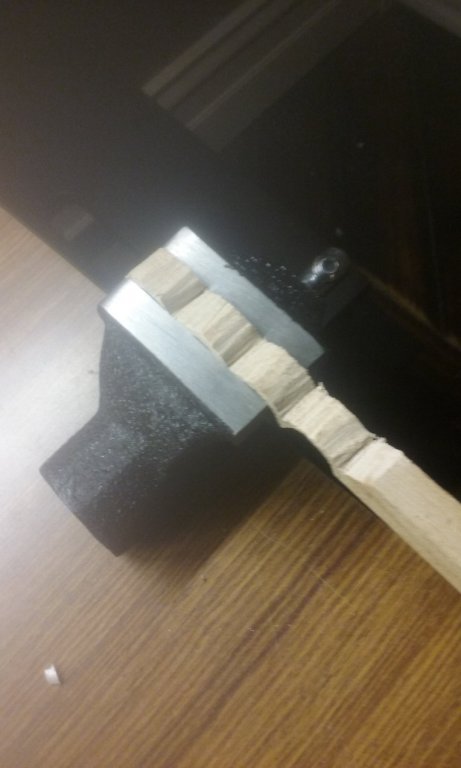
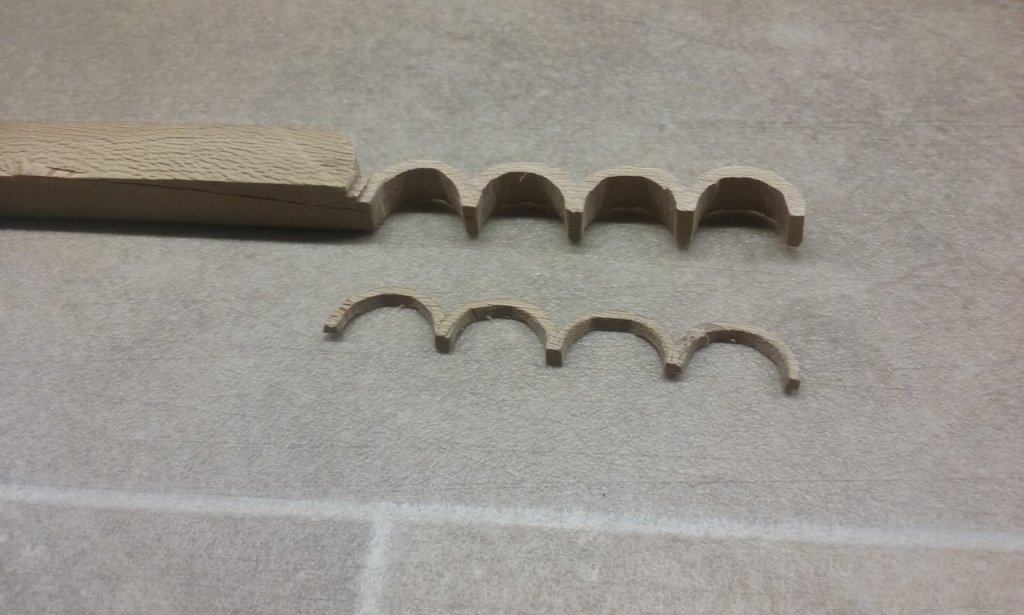
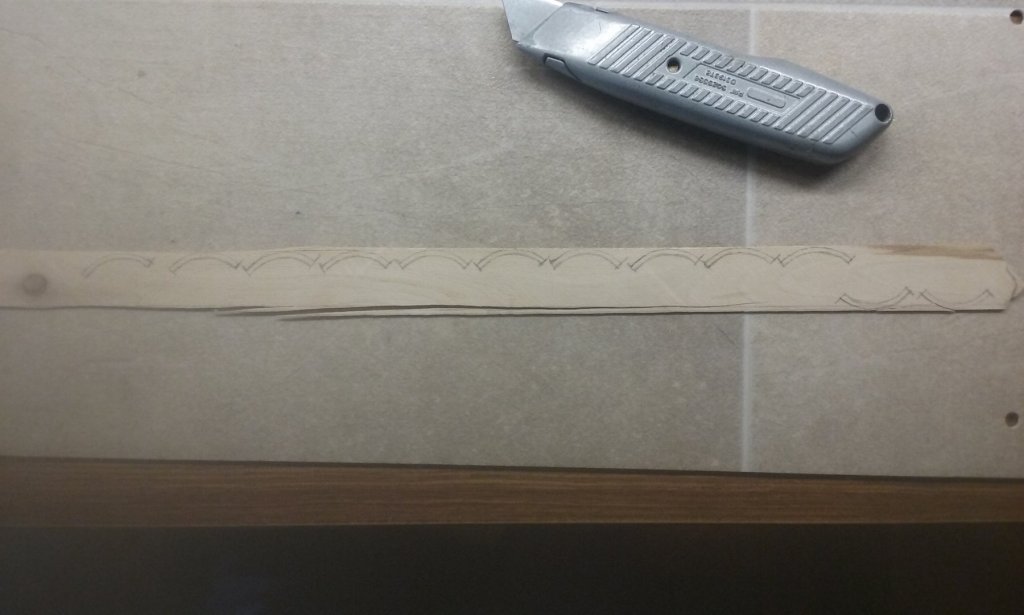
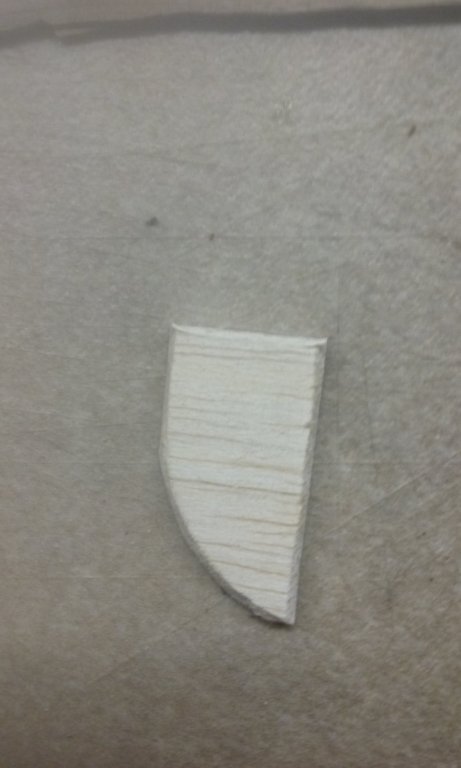
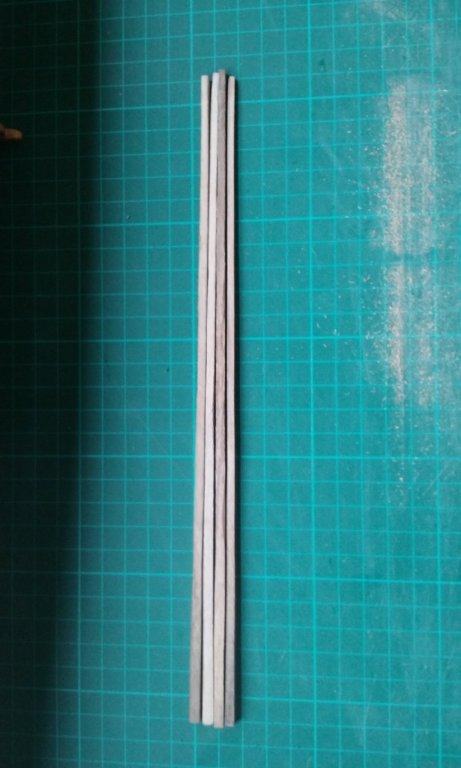
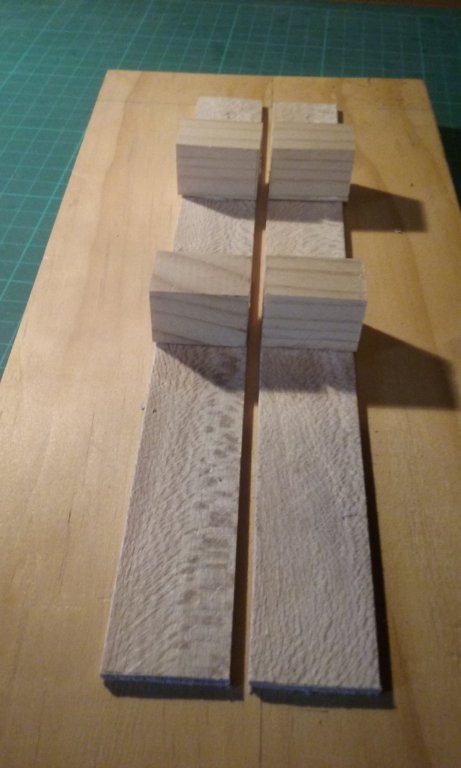
Finally making a start on the superstructure. There are two wooden "castles" amidships (one each side) and a triangular fortified wooden forecastle, all of which I've designed to have a set of four arches supporting them, standing on round posts. You can see the idea in this cardboard mock-up. As all the sets of arches (I suppose I should really call them arcades) are identical, I decided to try something a little different, and make all of them from a single block of wood and then saw them apart. I'm sure I took photos of the block with just the concave side of the arches cut and smoothed, but I must have deleted them. I discovered it's a very bad idea to use a file on something this delicate. SNAP! Had to glue it back together before I could proceed. One arcade separated from the others. Just two more cuts to do, then I can get onto smoothing them off. I used a fine saw-blade, broken short, and worked VERY slowly and carefully cutting them apart. I didn't want to break them again. Definitely an education. And I've just made a start on the "hoops" for the arched awning at the prymne or poop deck. I'm doing six of them; this is the first. There'll be "stringers" running between them (inside the arches) to keep them all the same shape. There'll be a pair of posts supporting each of these "hoops". Steven


-
When I look at this stuff I go all vague - far out of my league. But then I've always thought anything more modern than a water wheel is an instrument of the devil 😉
-
Nice to see you back, Dick. She's looking very good. Steven
- 263 replies
-
- 1
-
-
- nave tonda
- round ship
- (and 2 more)
-
That's right - I remember we had a discussion about that, and though metho was an unknown quantity it appeared it might still work. Isopropanol is probably difficult to get hold of here, but you can get metho at the supermarket for next to nothing. I decided as I didn't have isopropanol but I did have metho I'd try that first, and it seems to have worked. Steven
- 740 replies
-
- 3
-
-
- Tudor
- restoration
- (and 4 more)
-
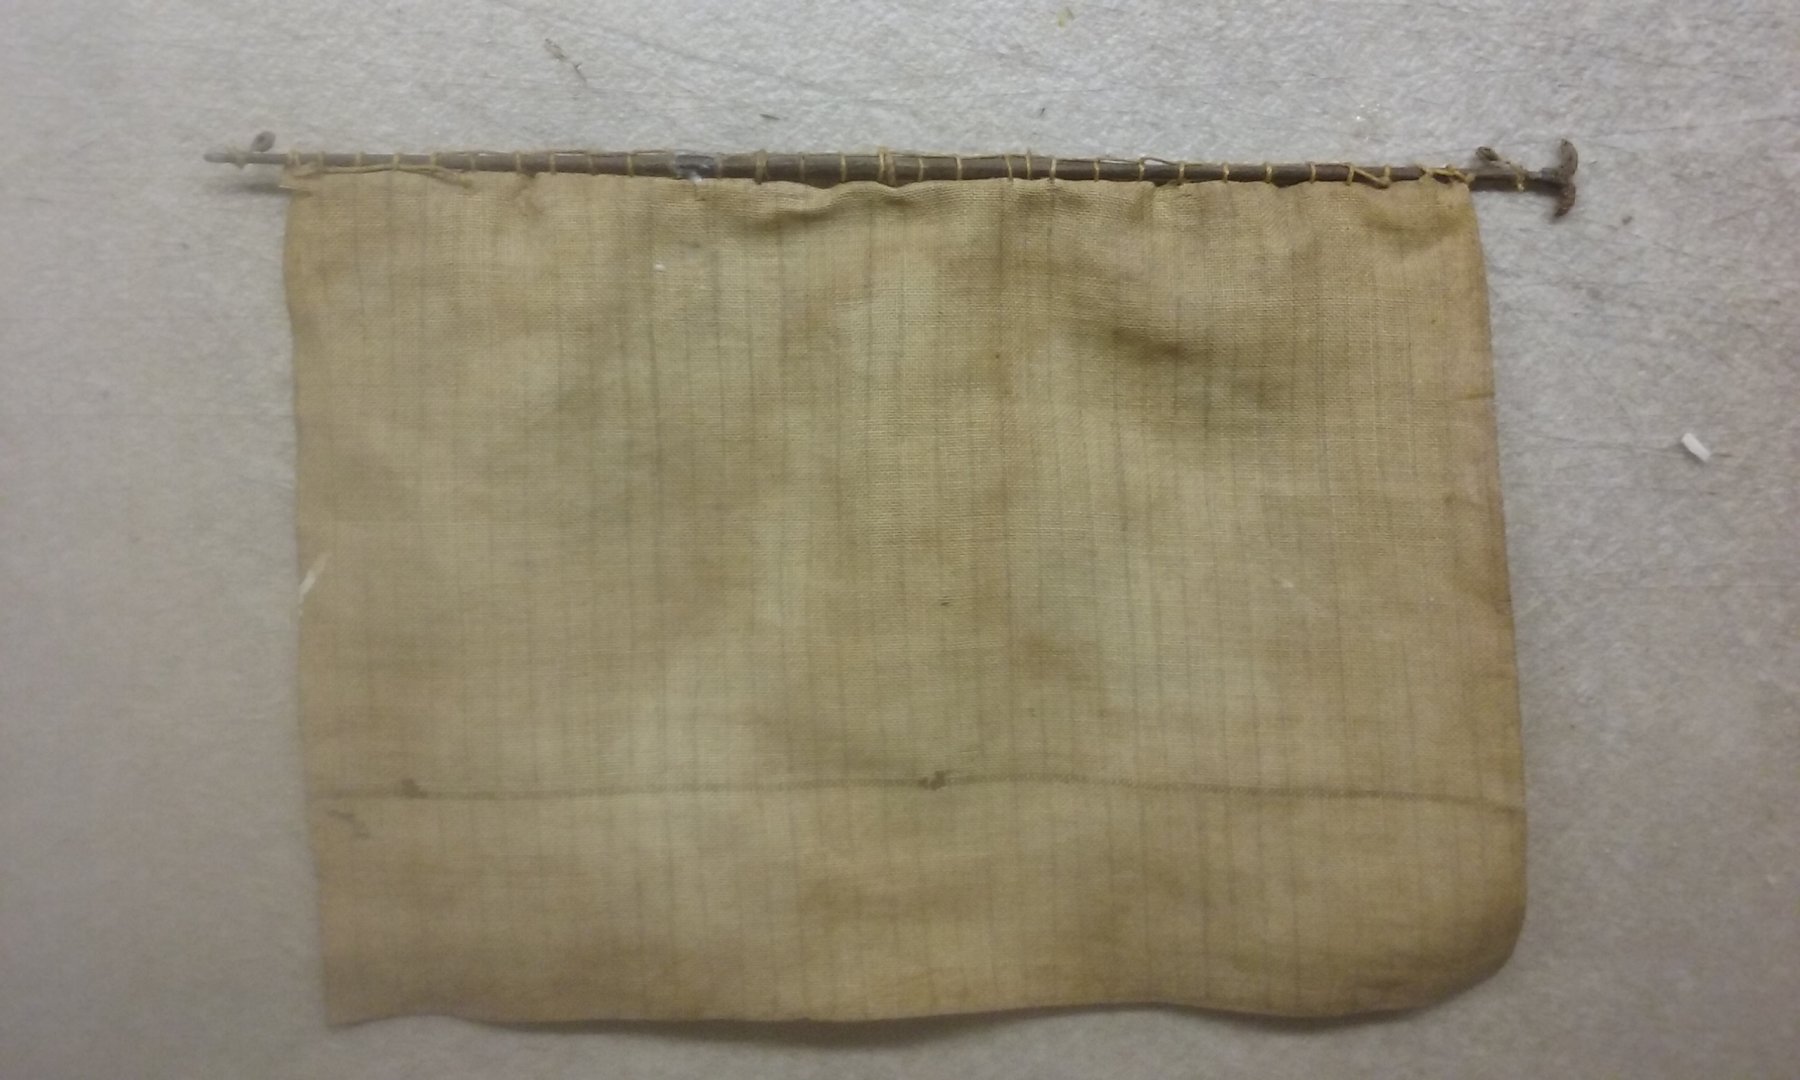
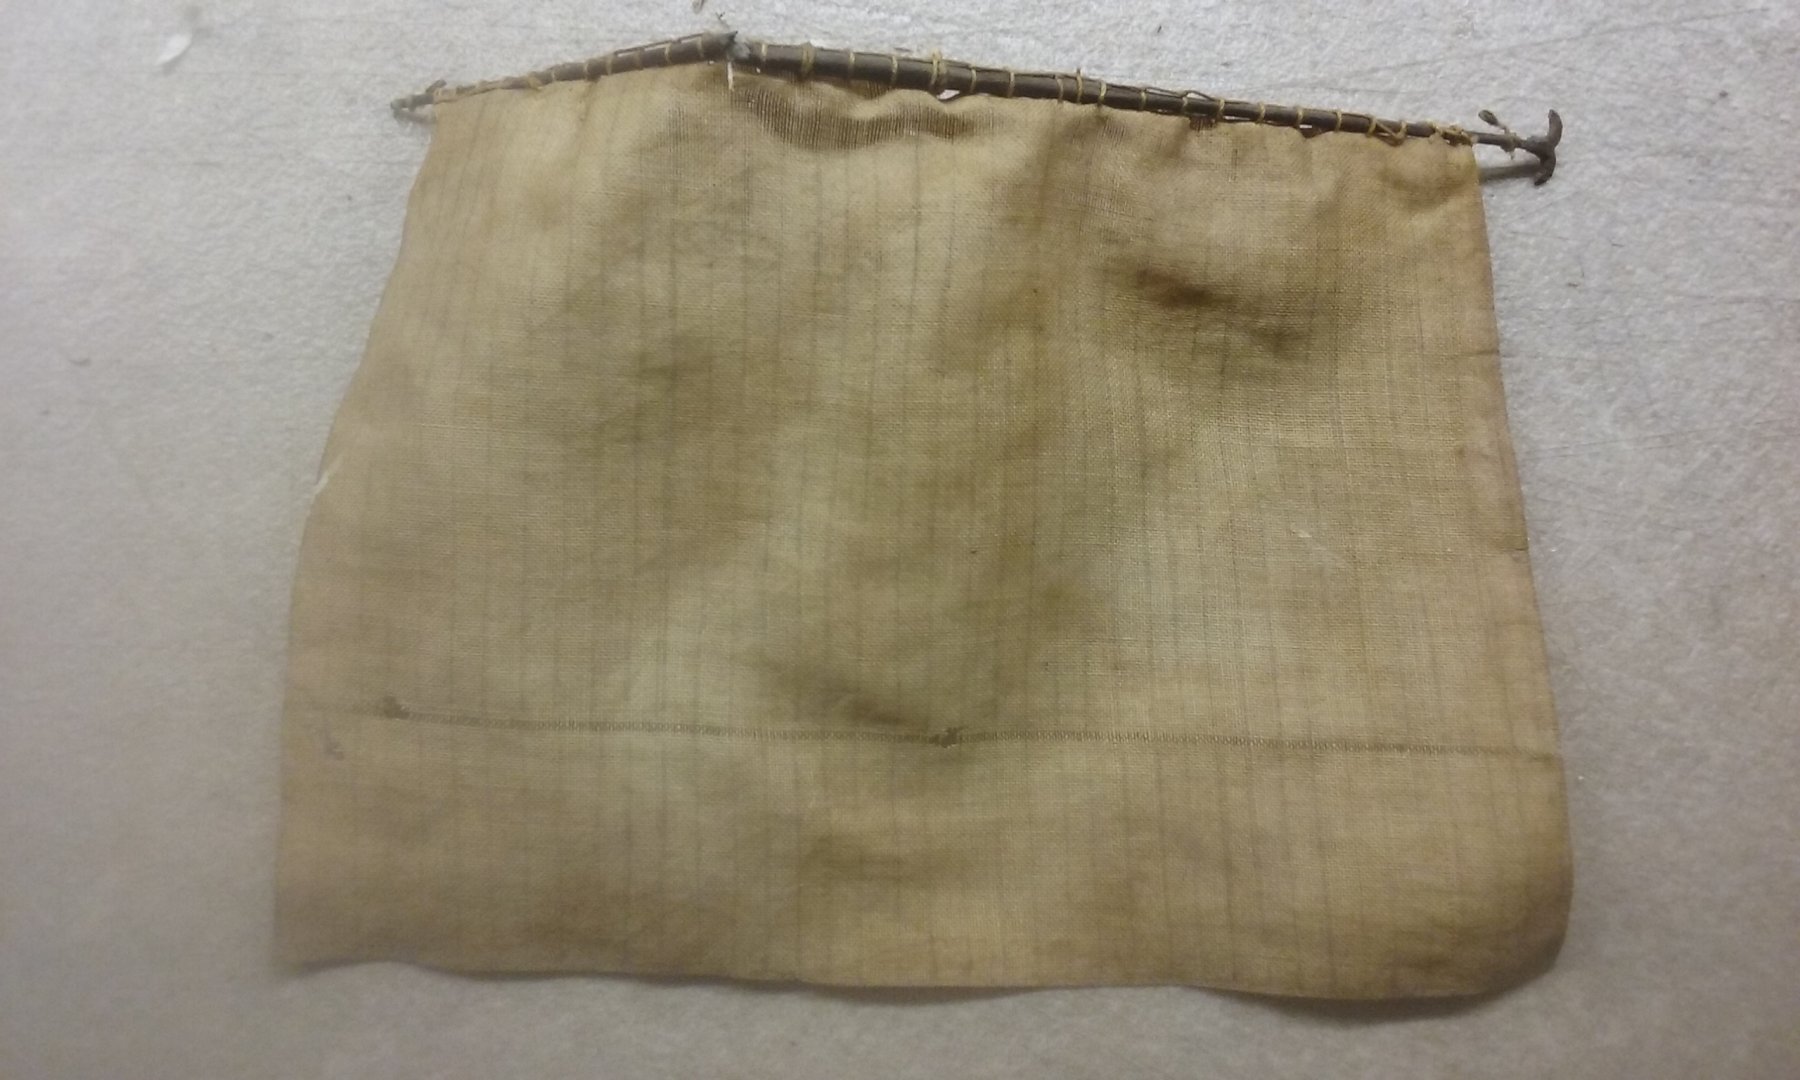
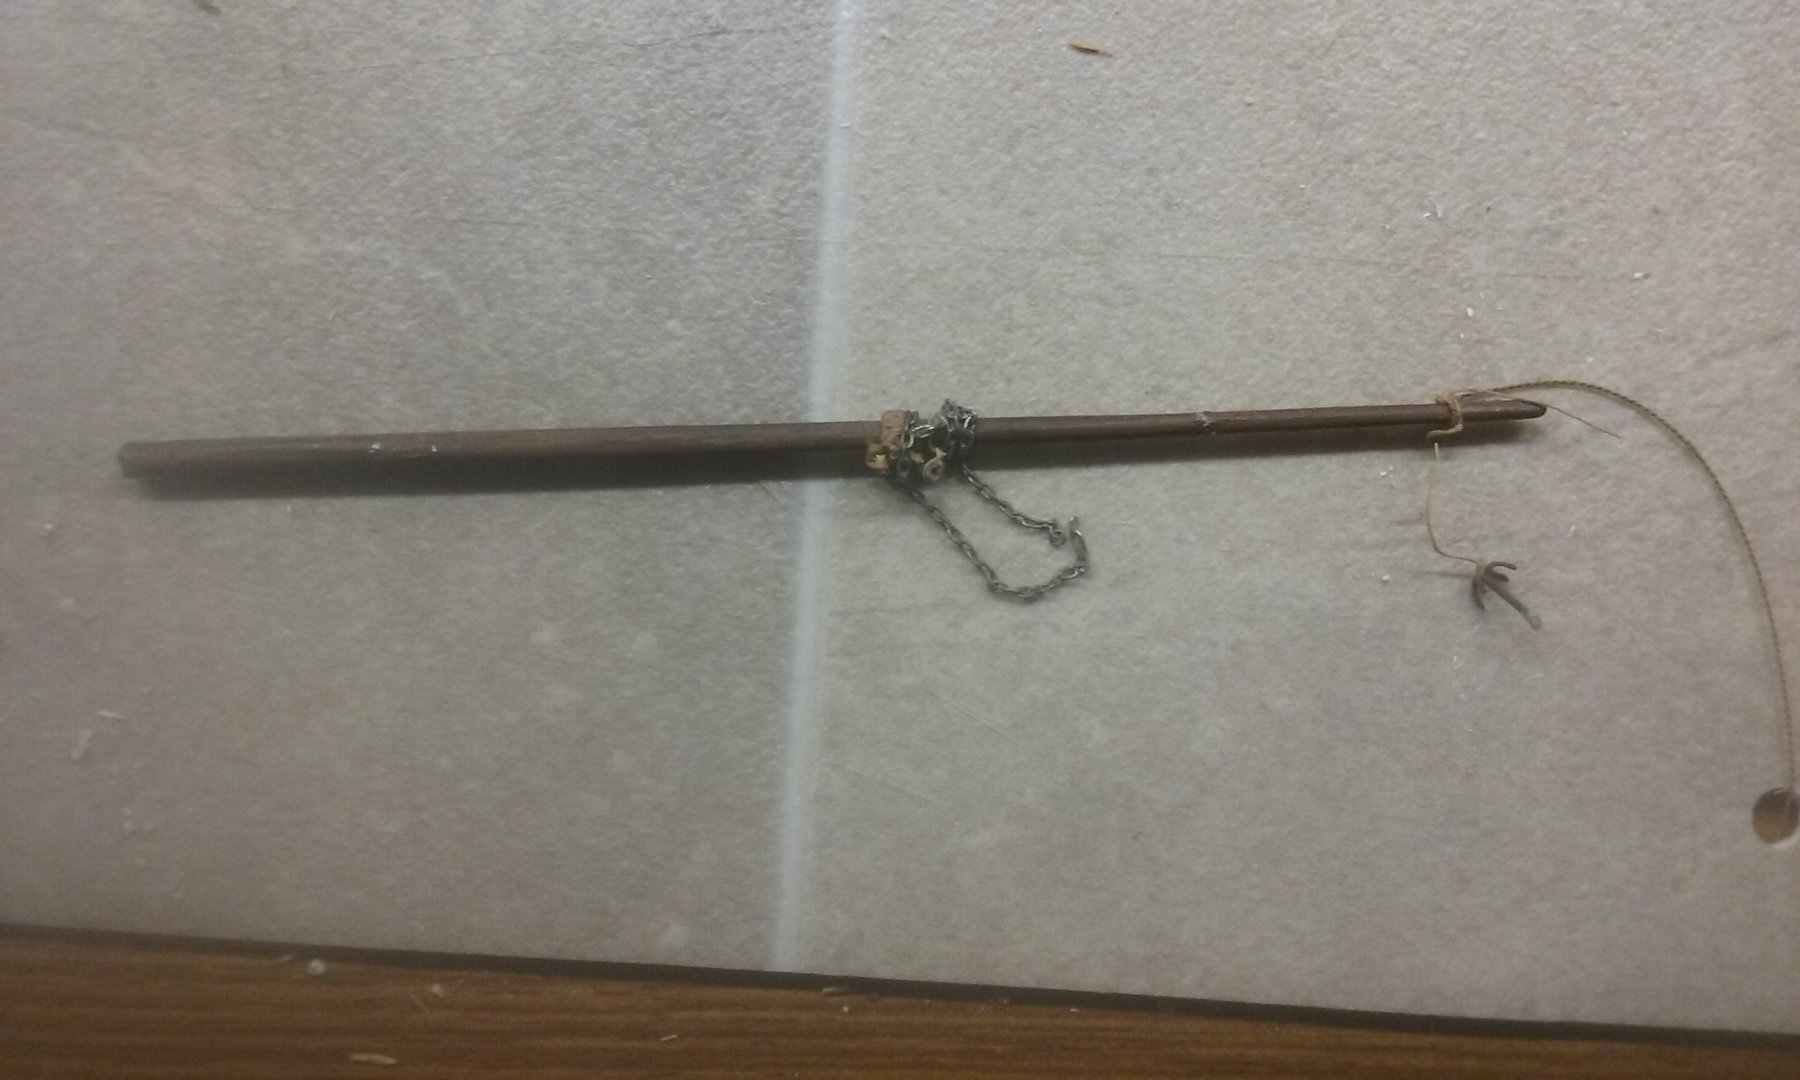
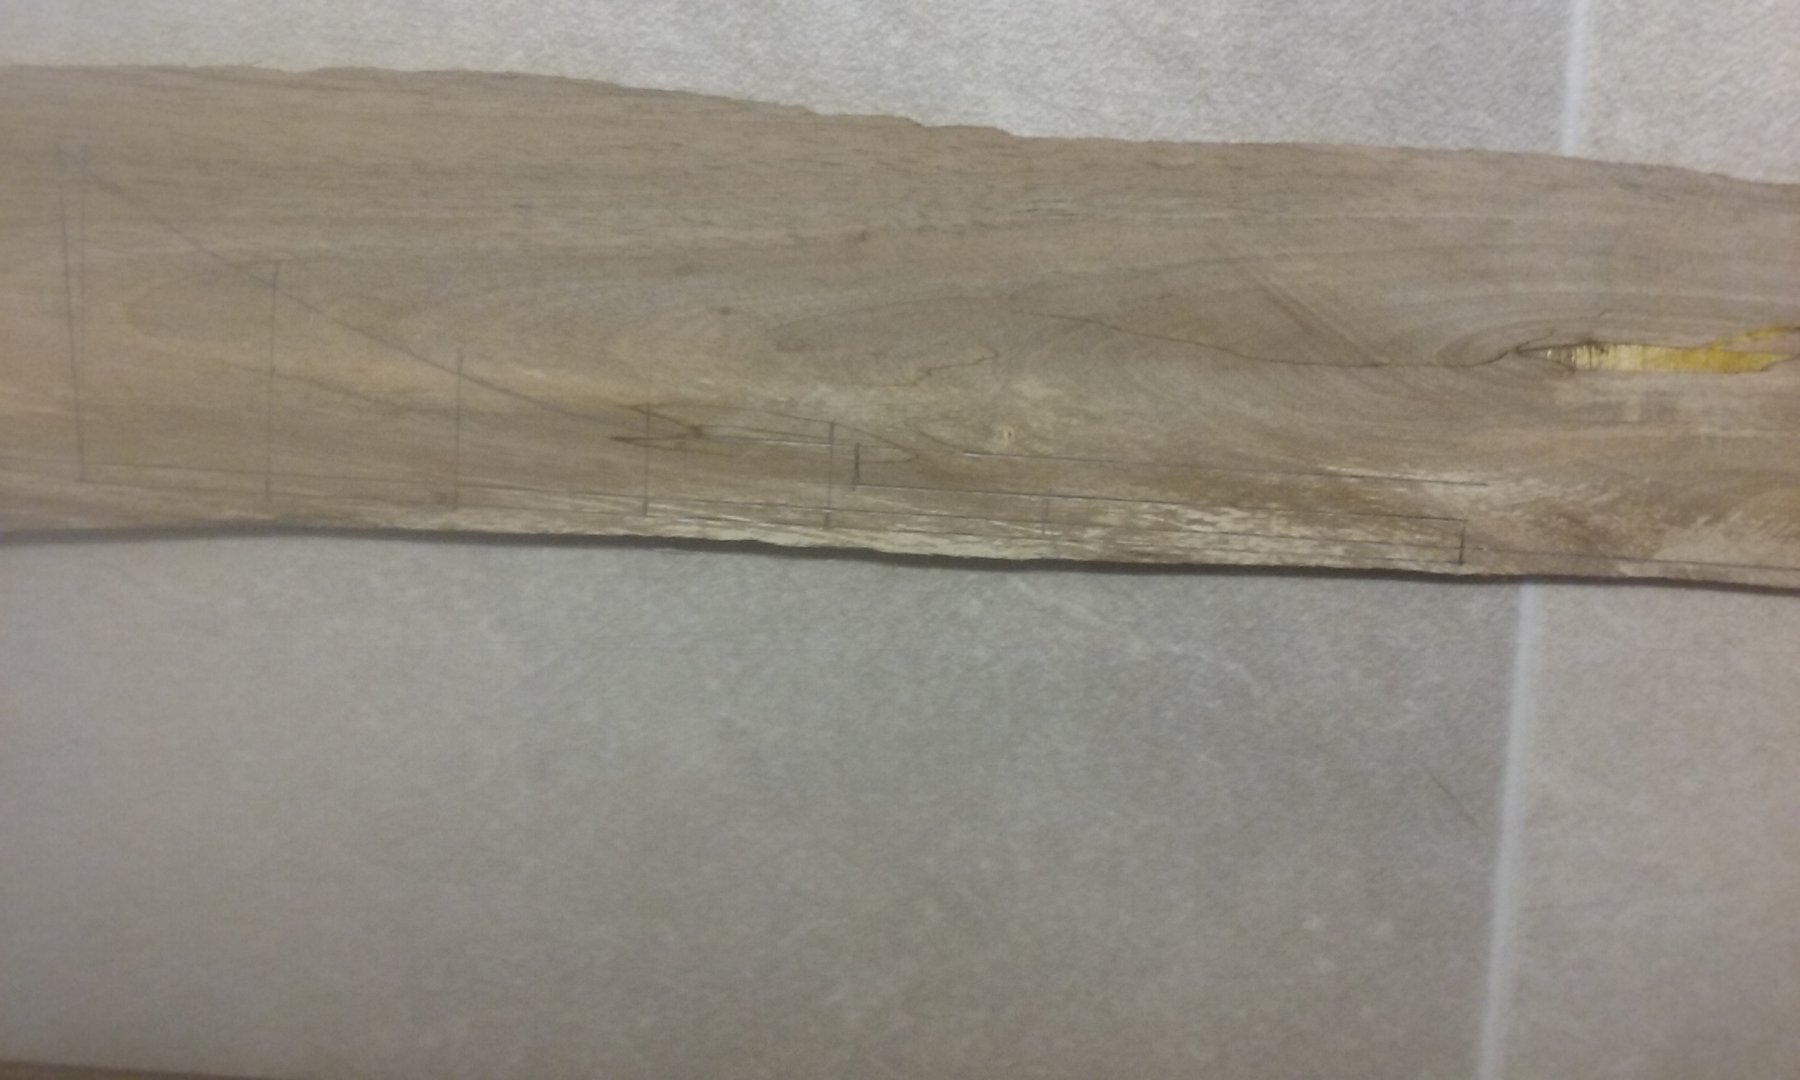
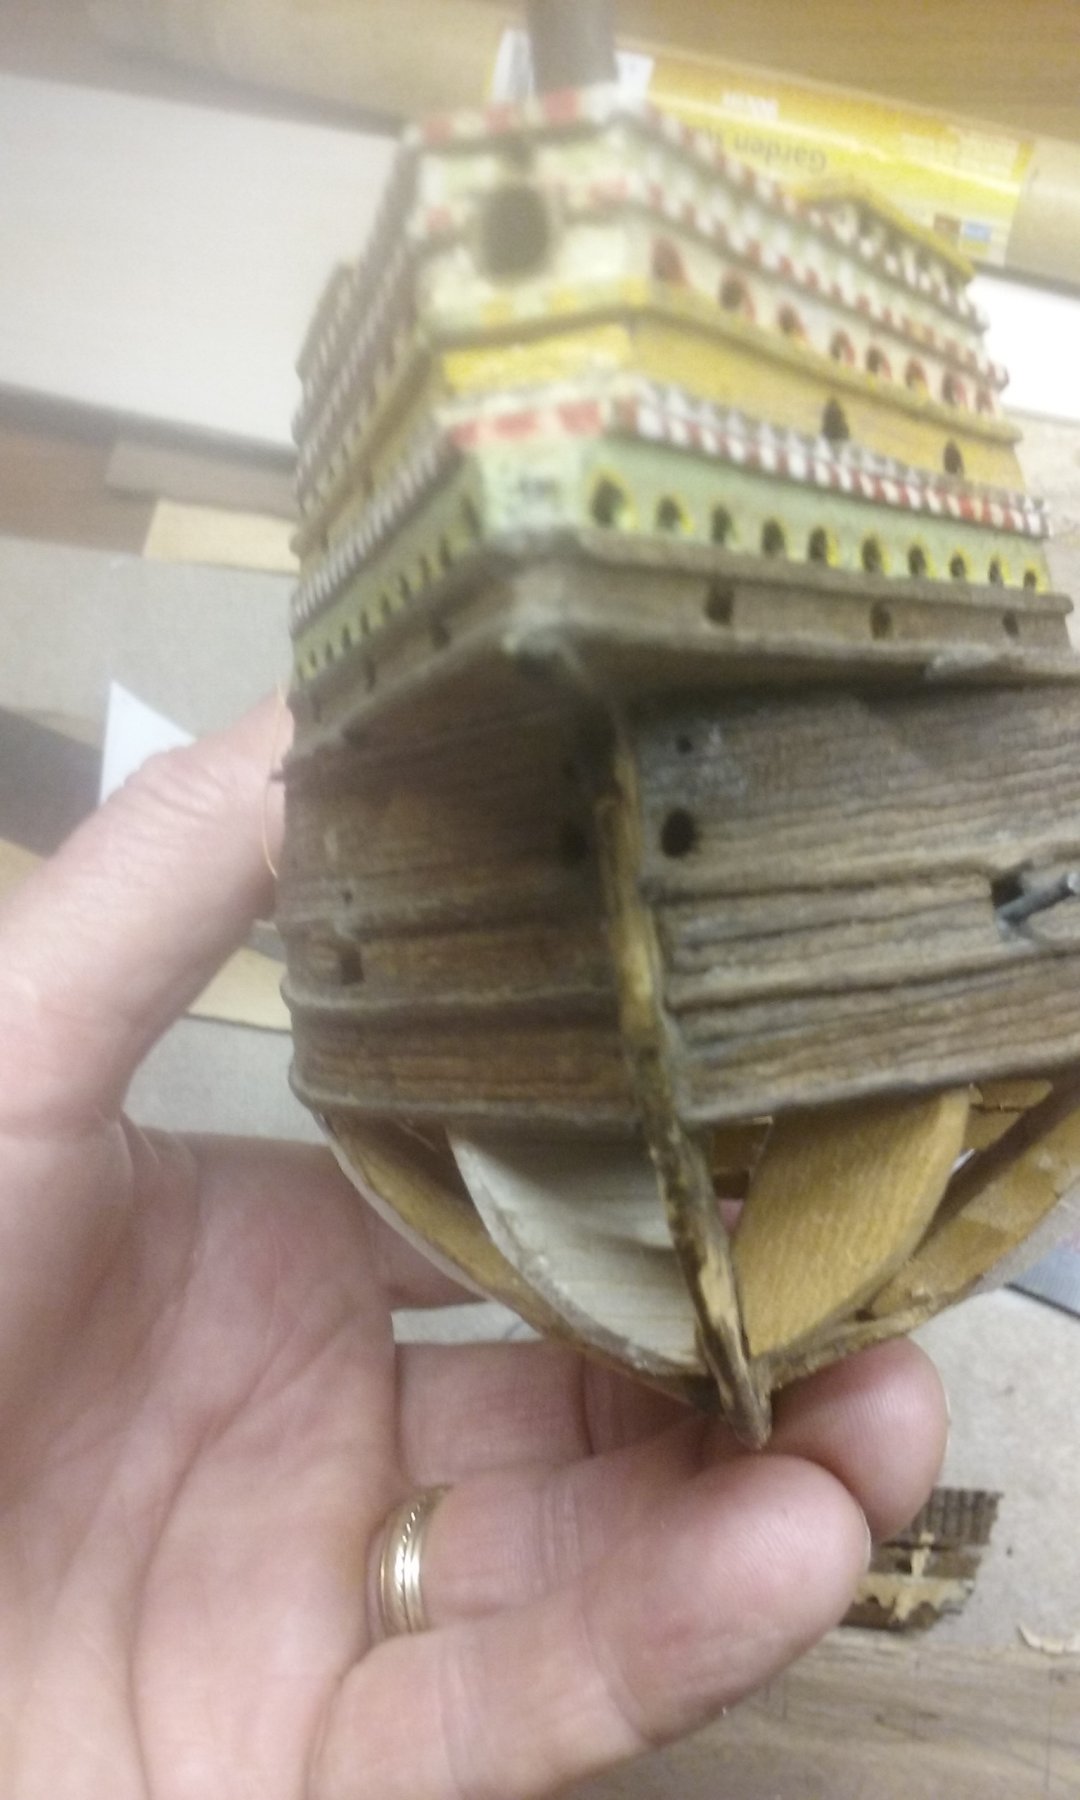
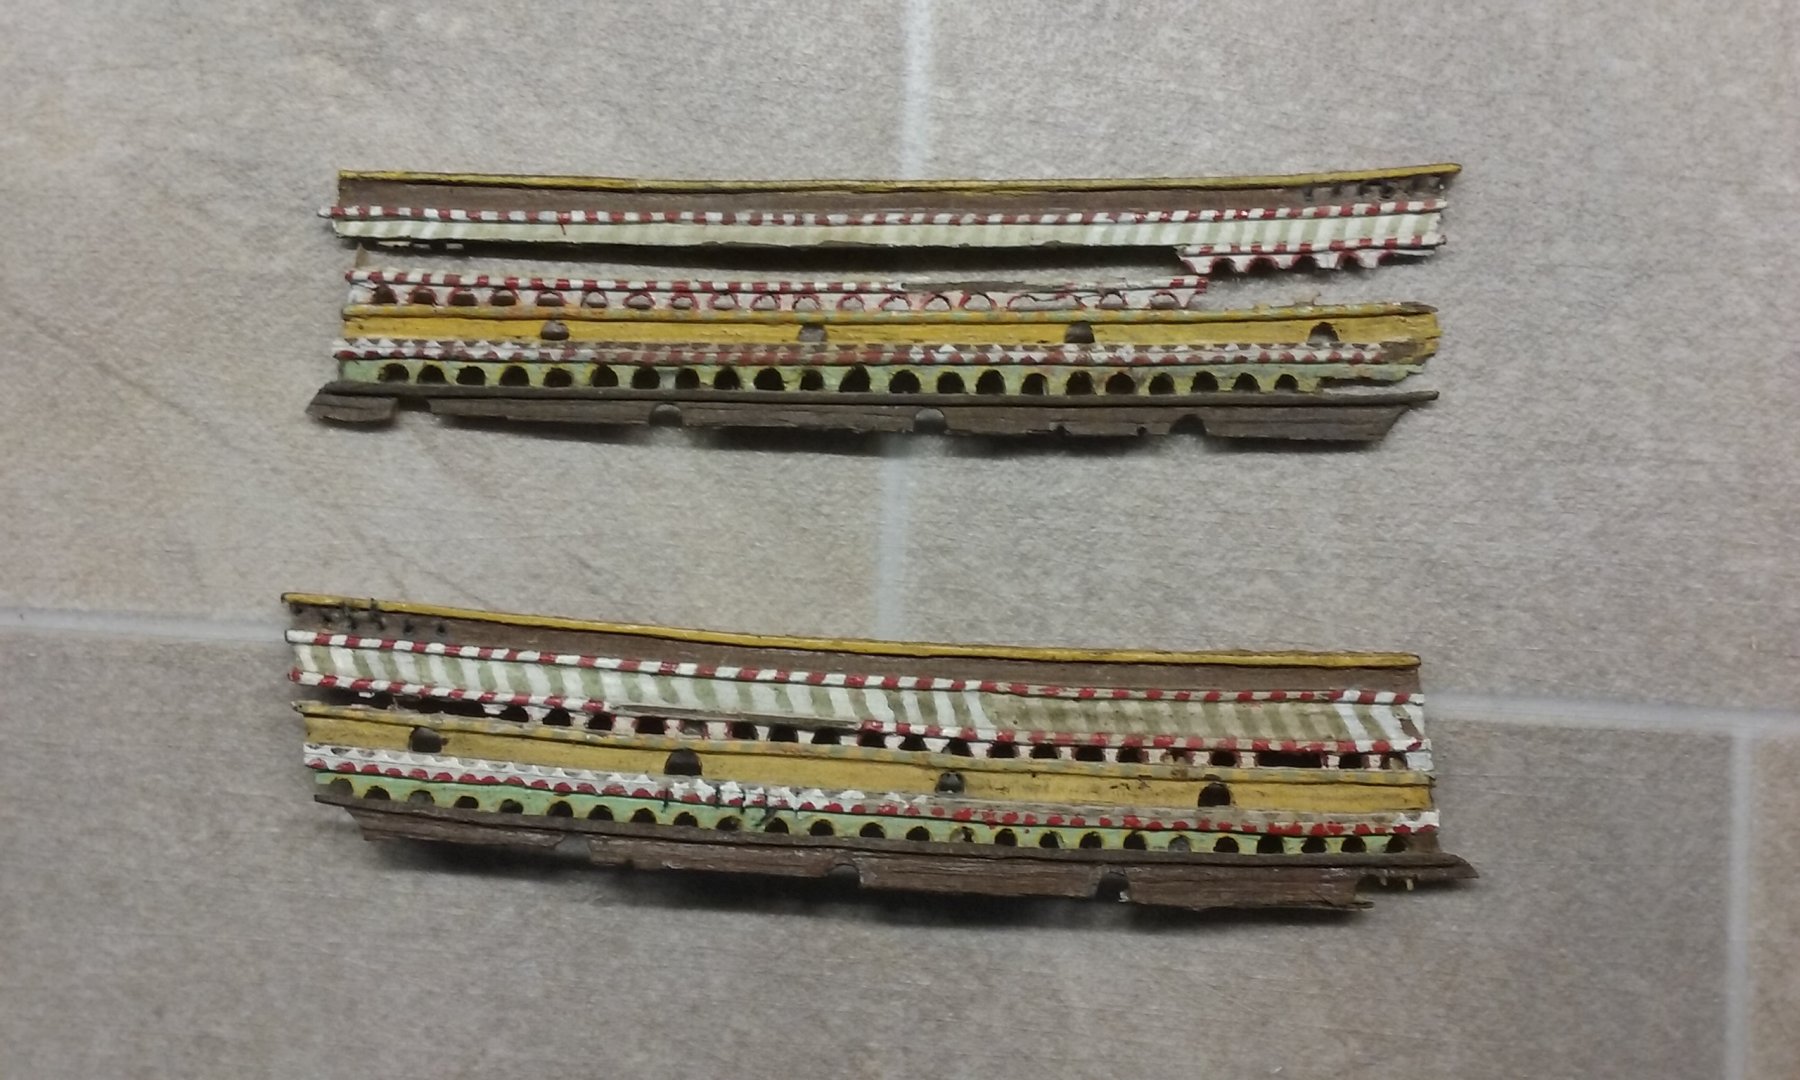
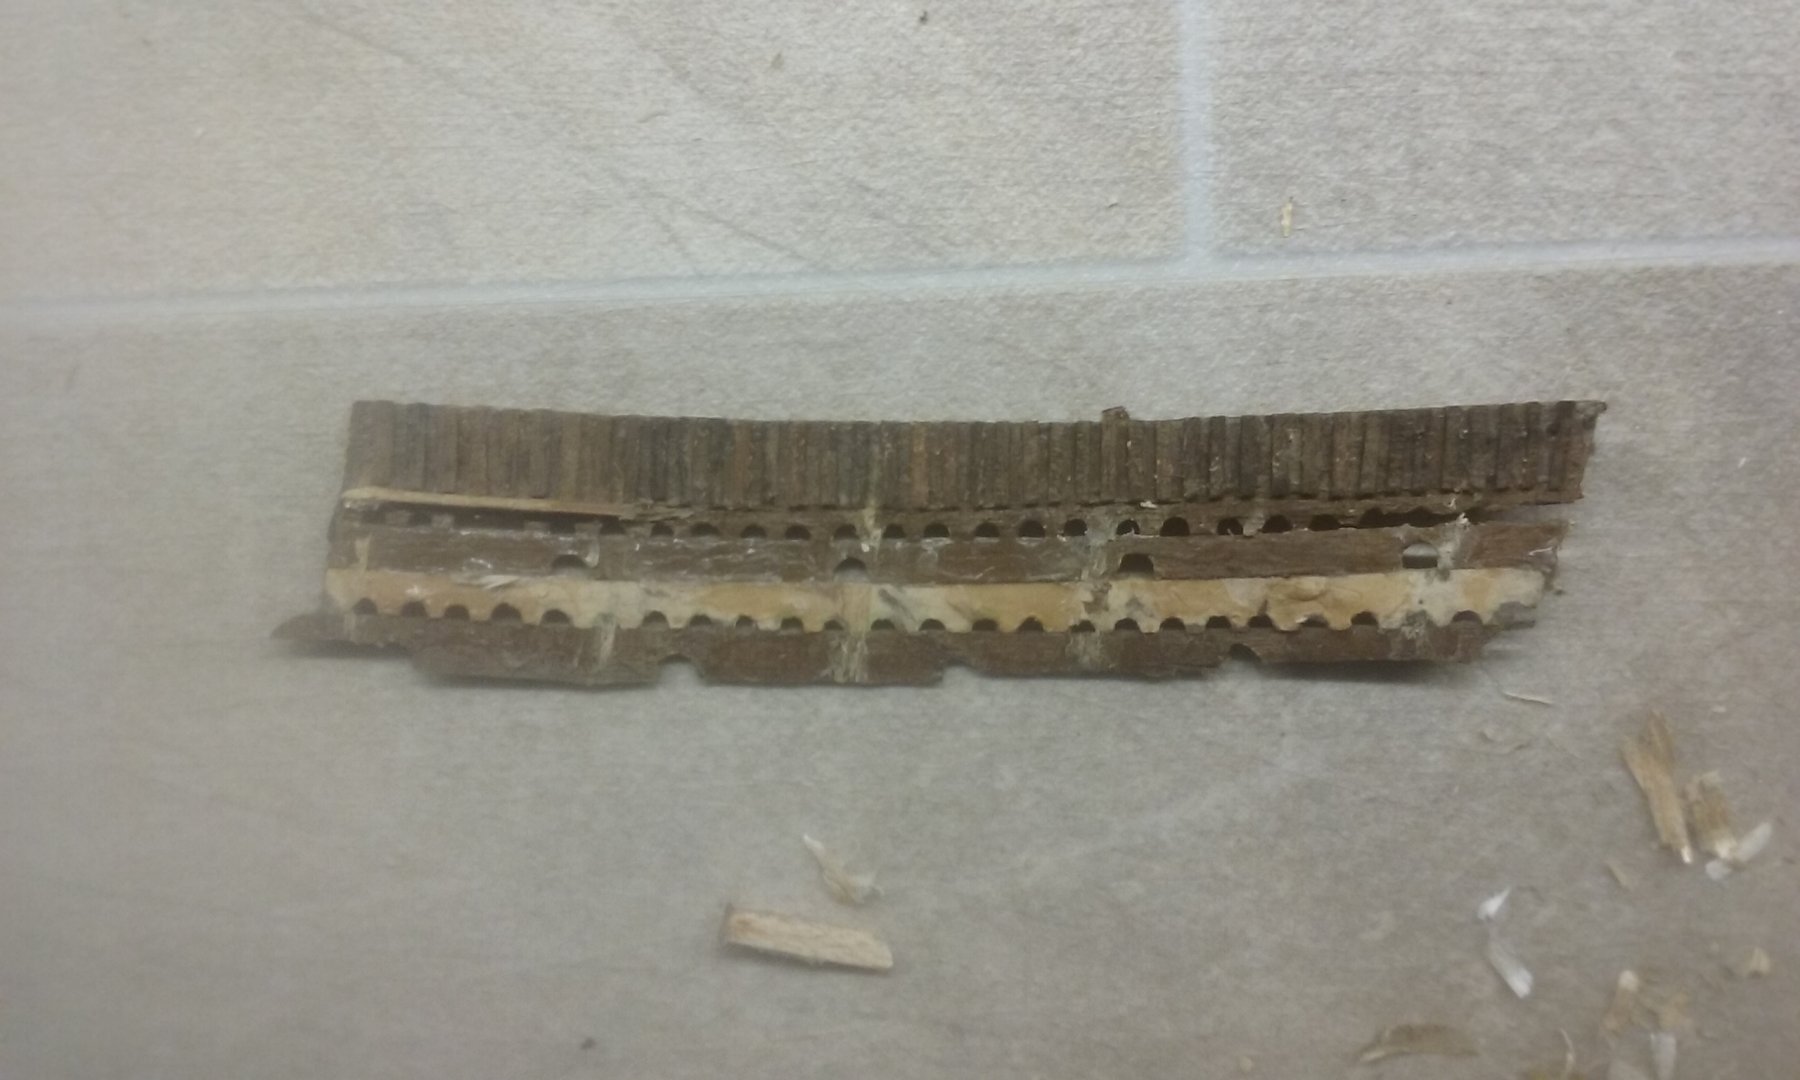
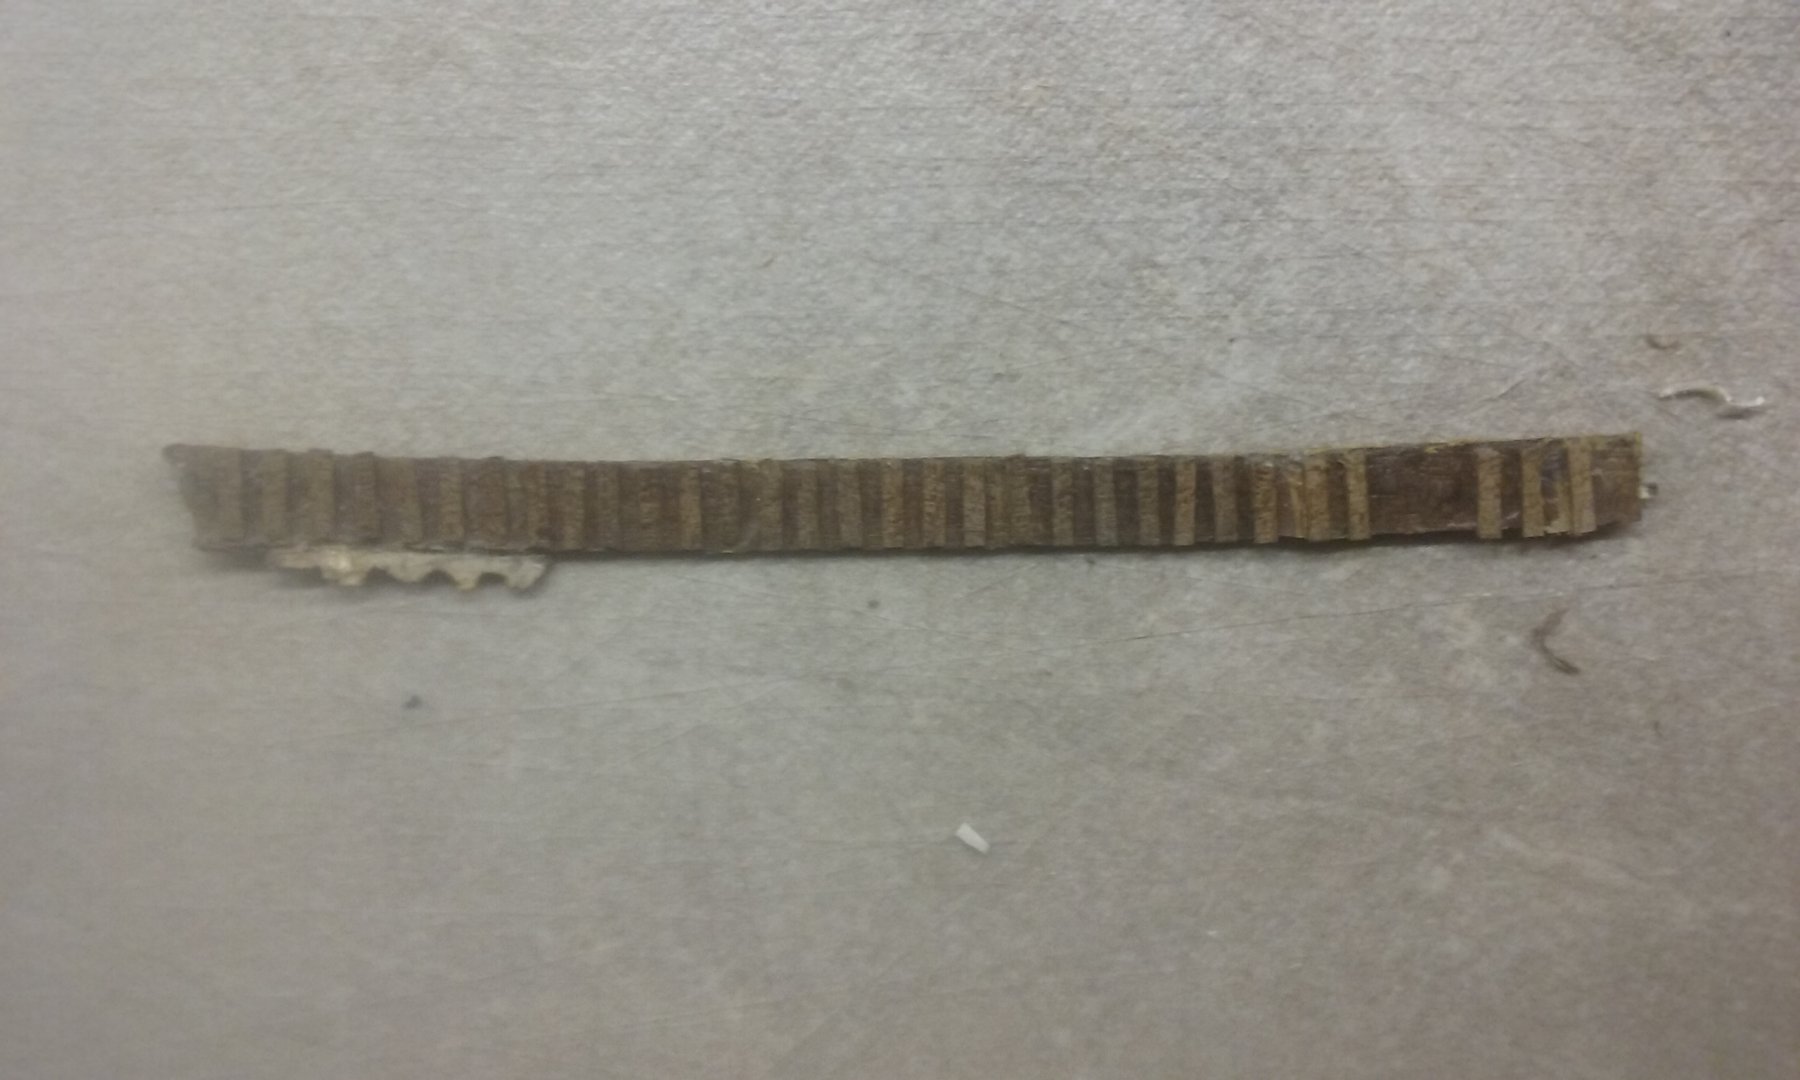
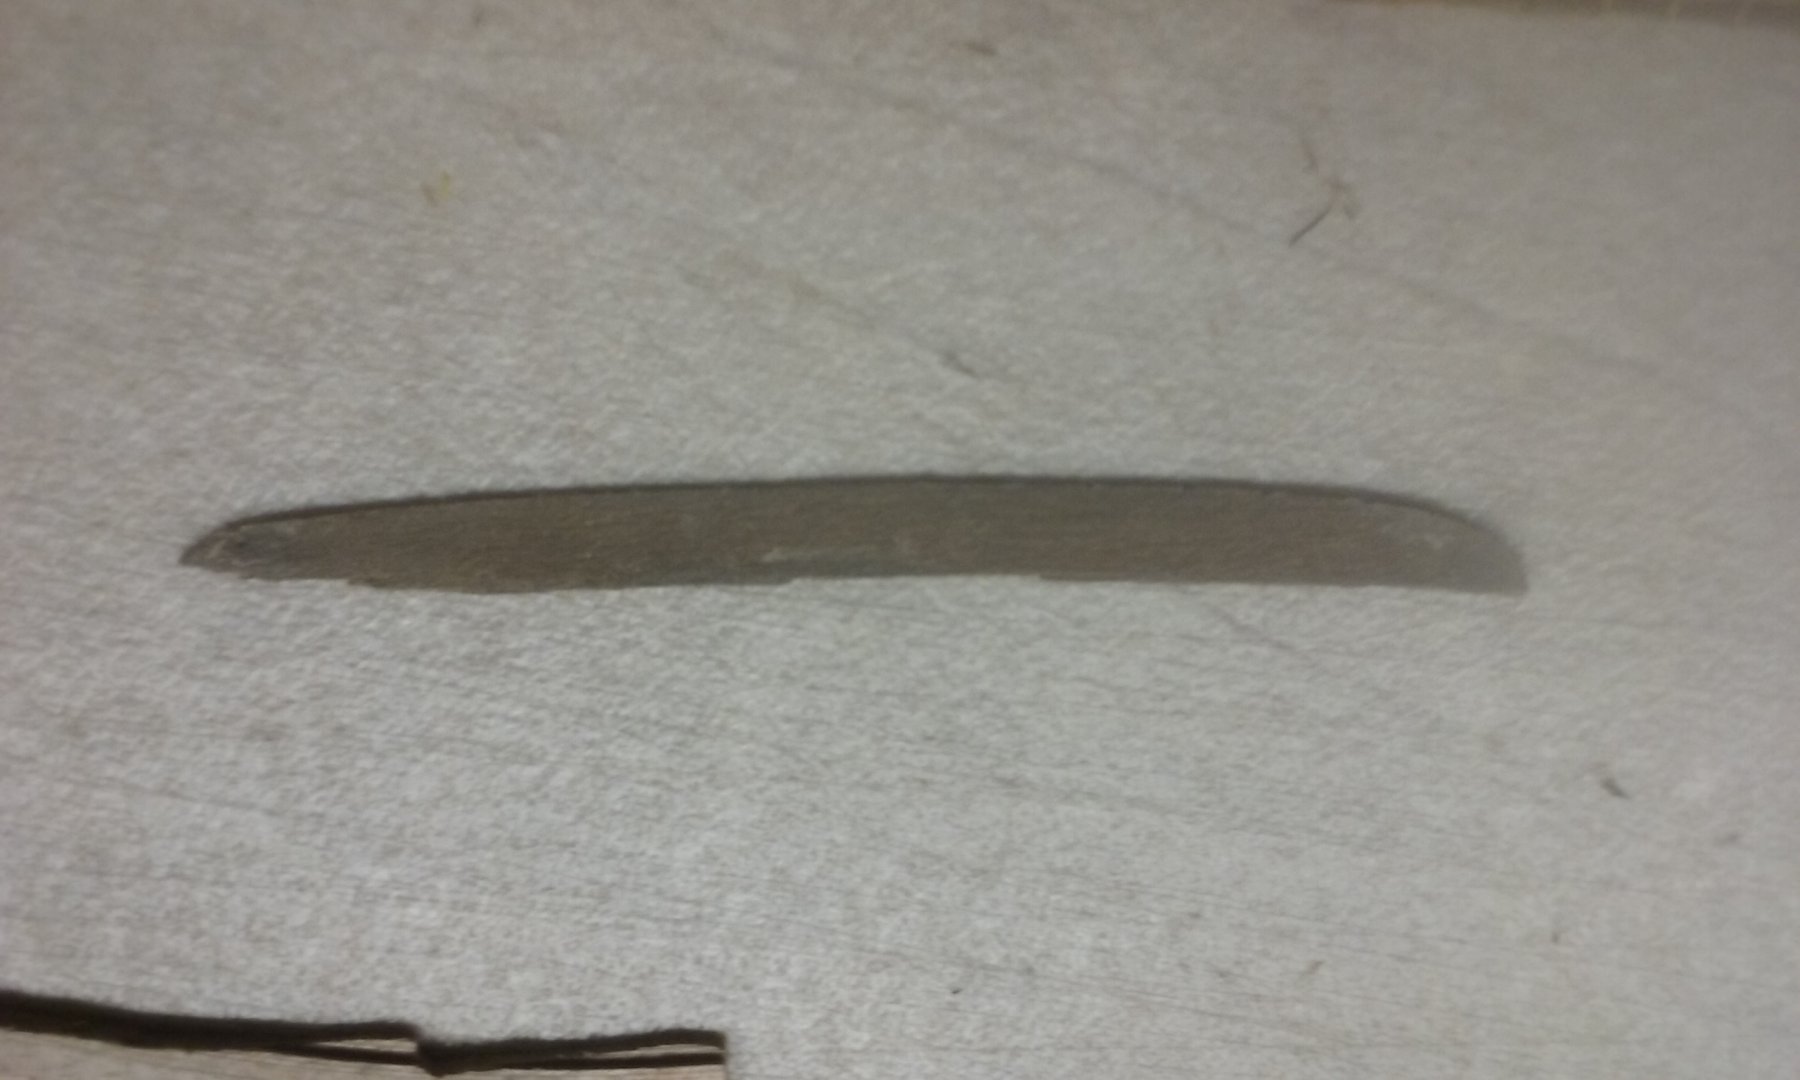
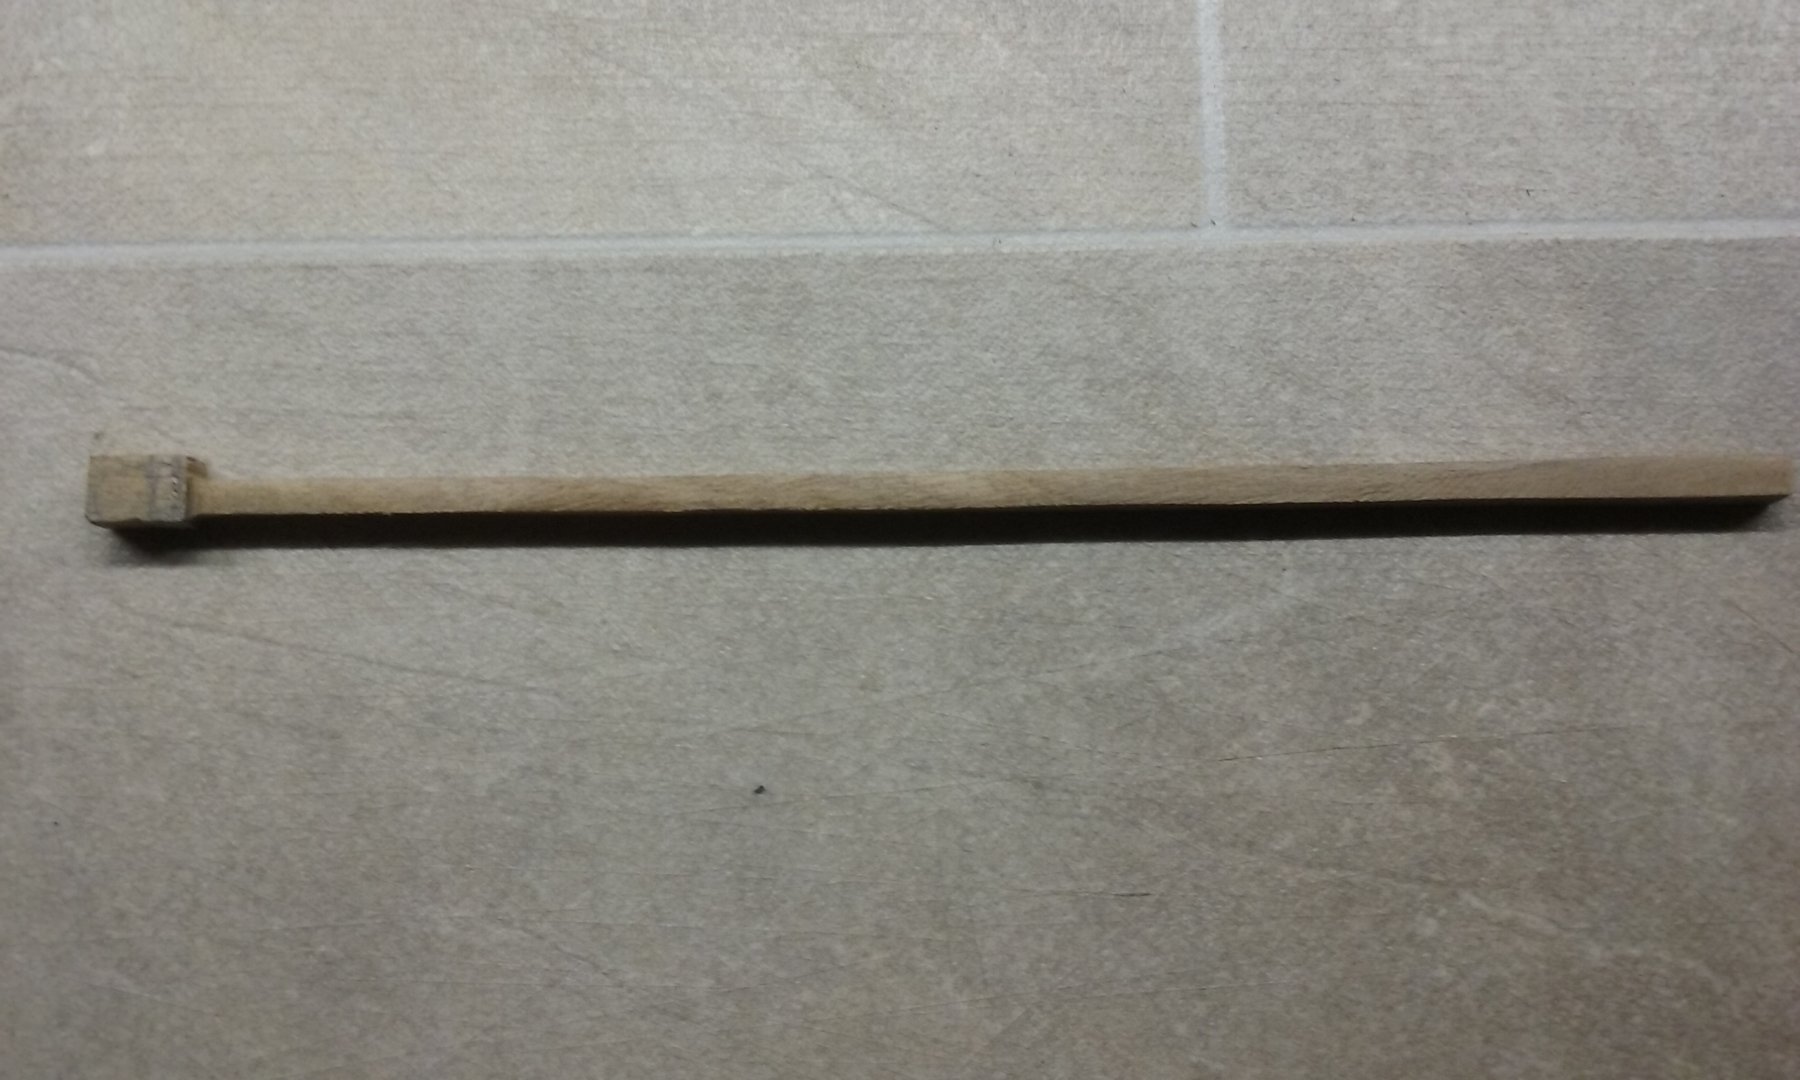
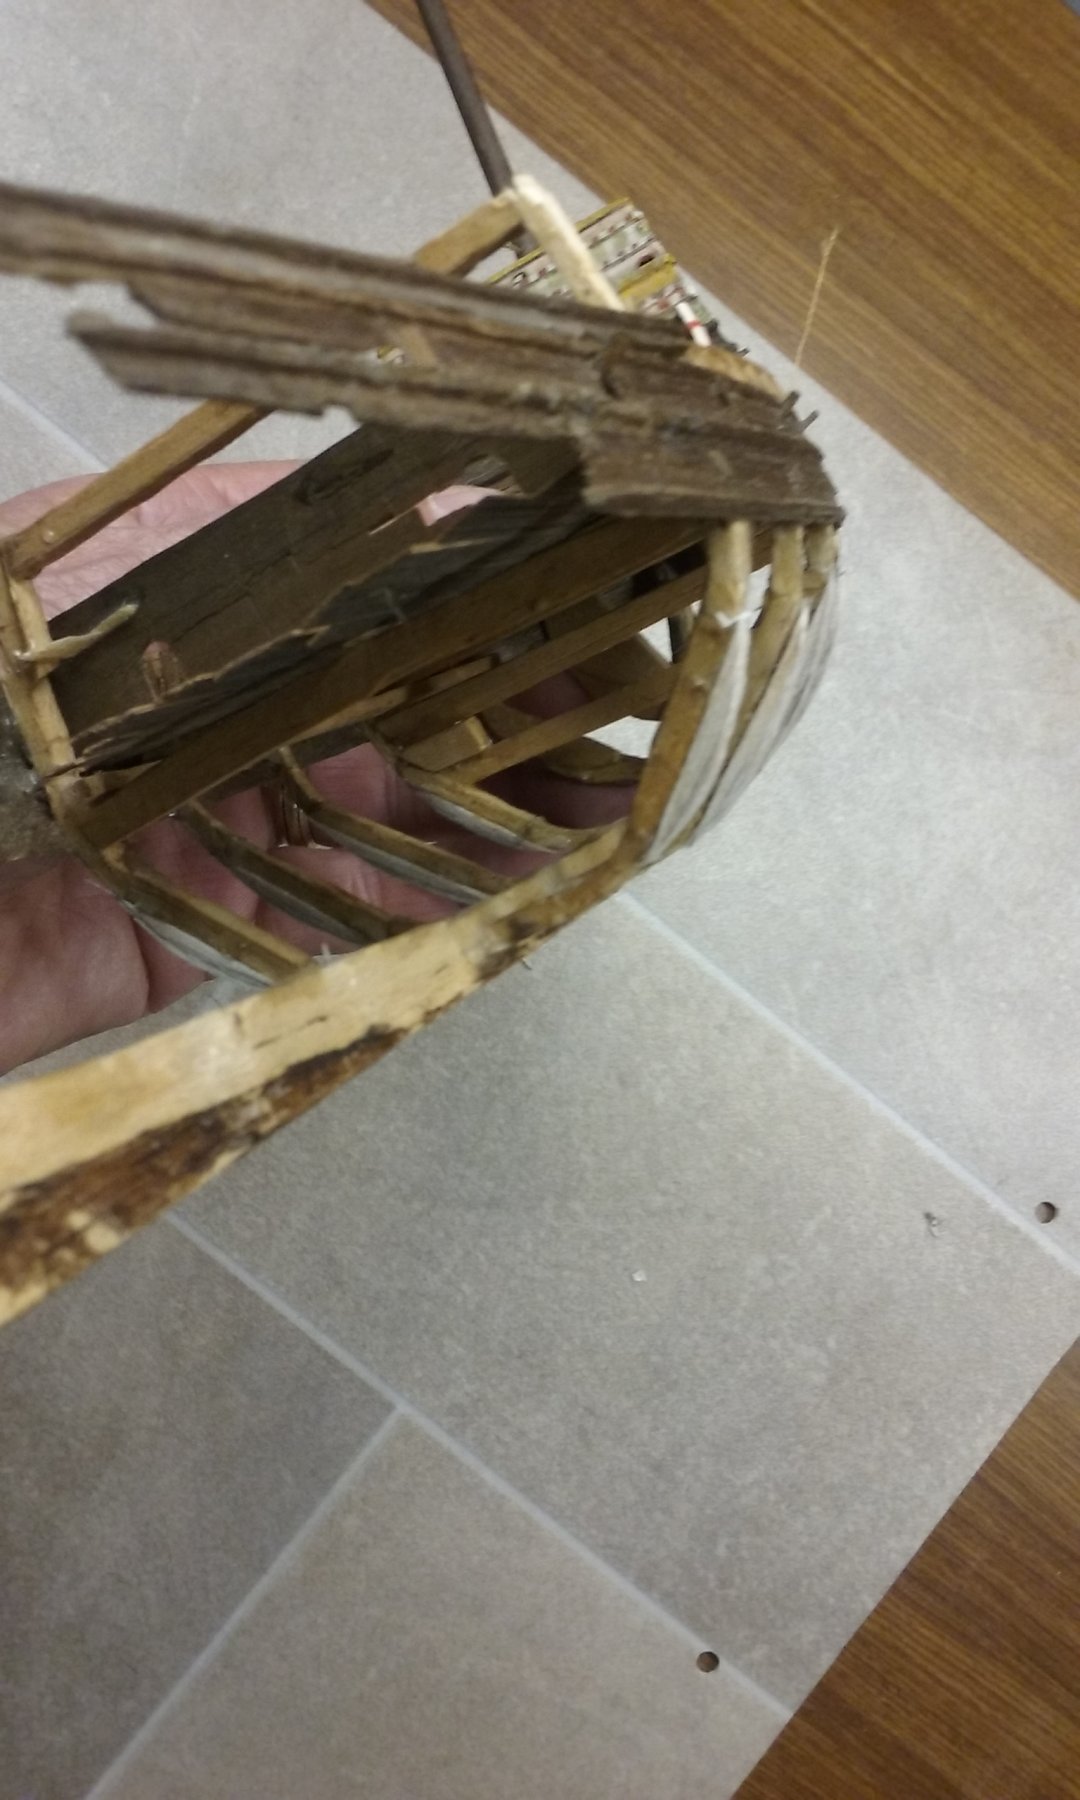
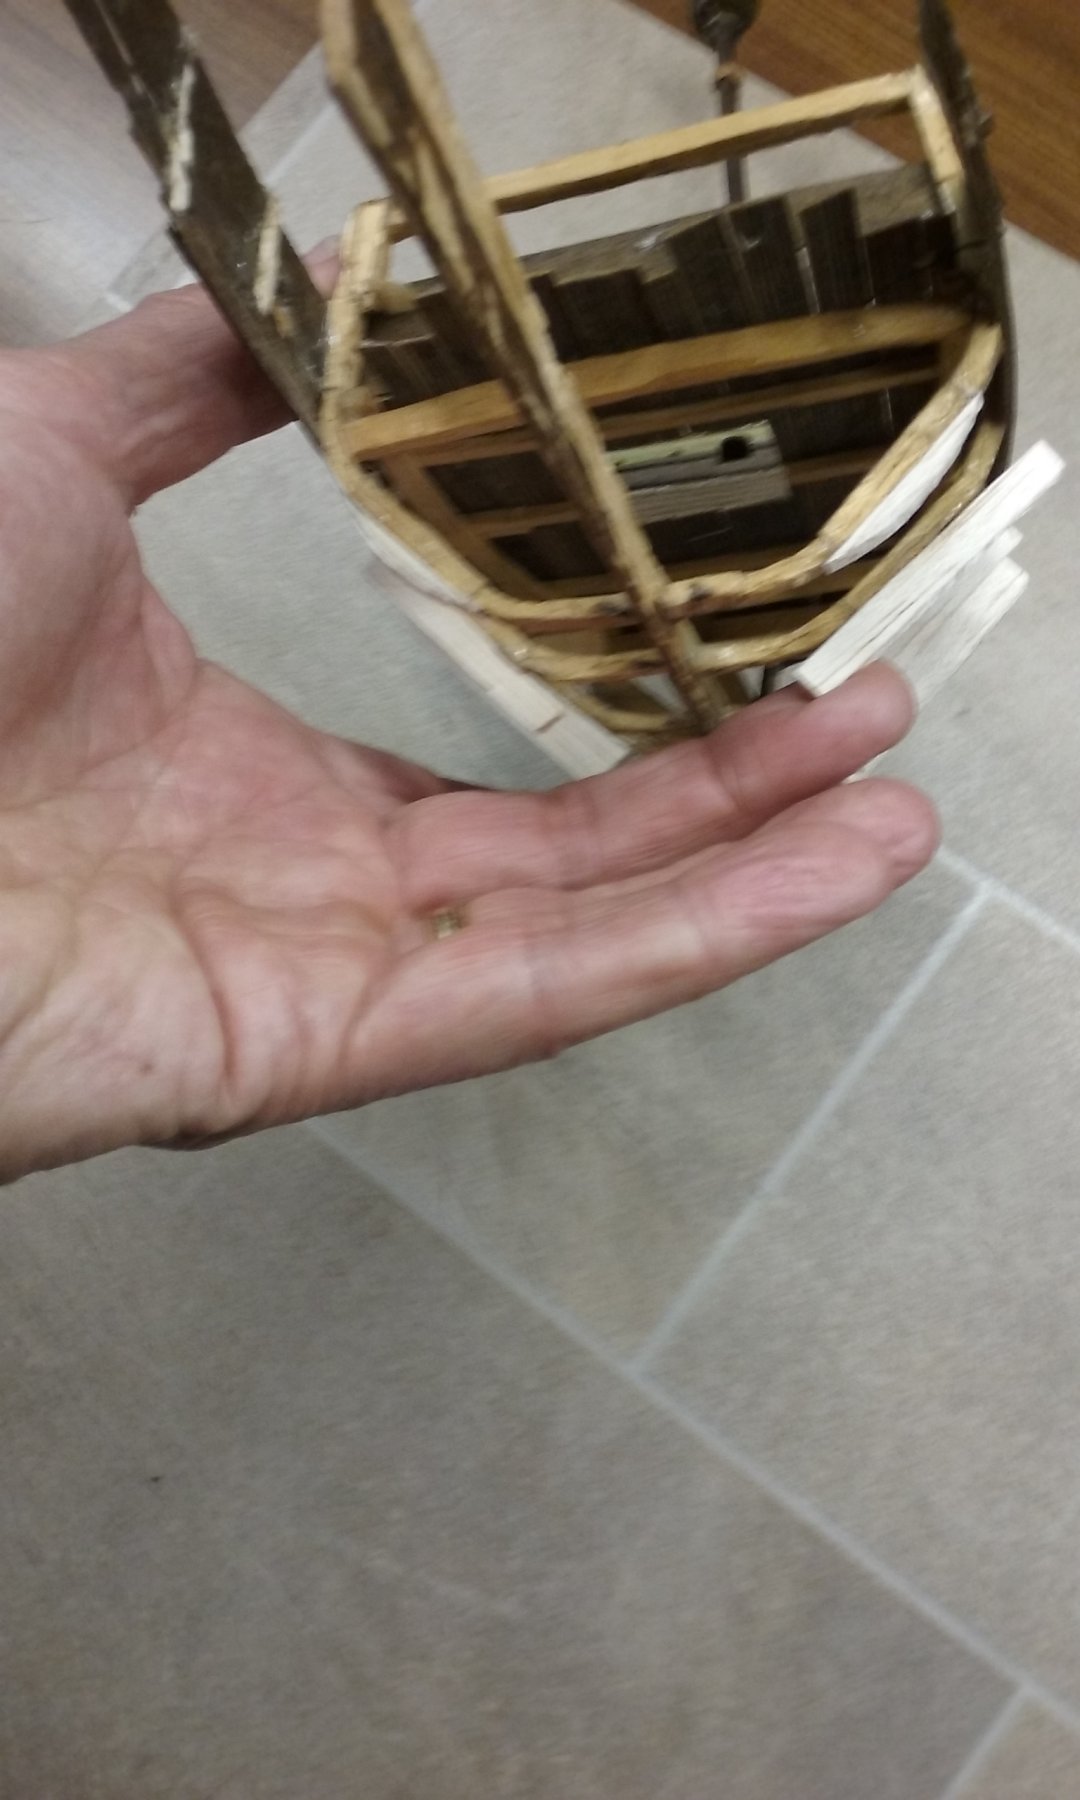
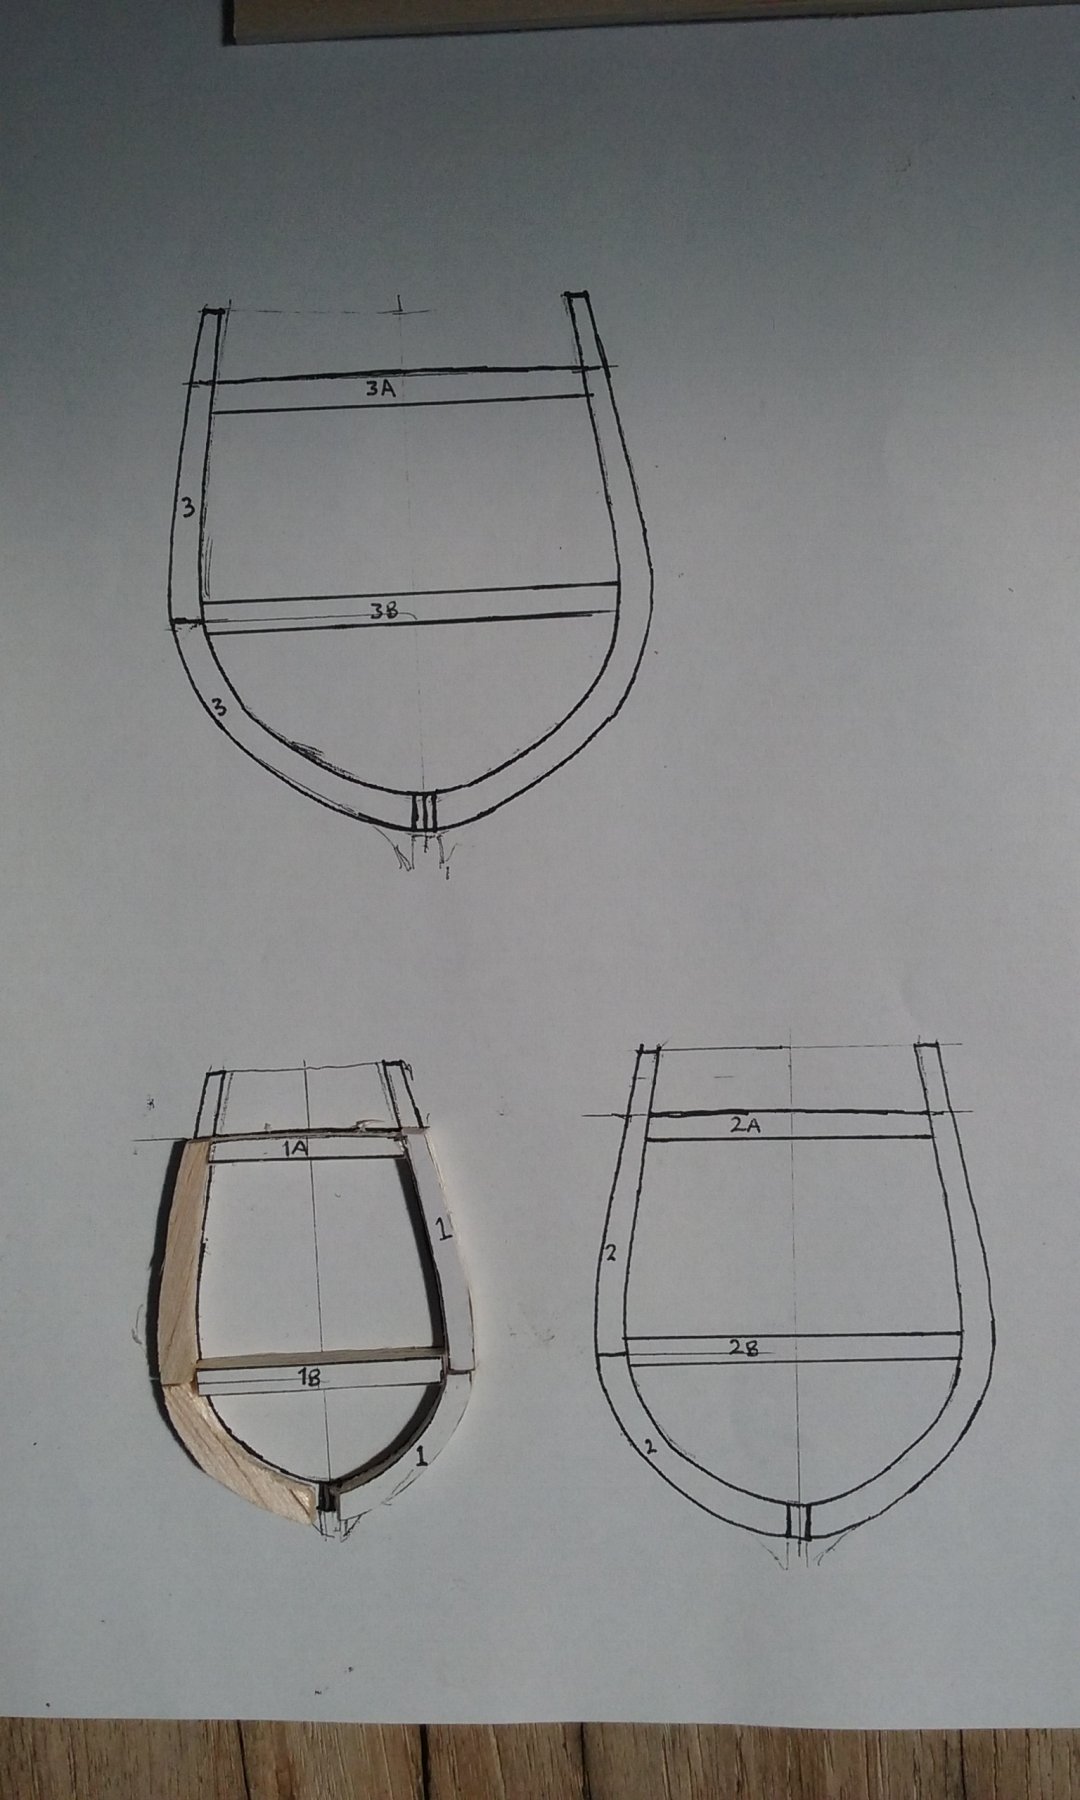
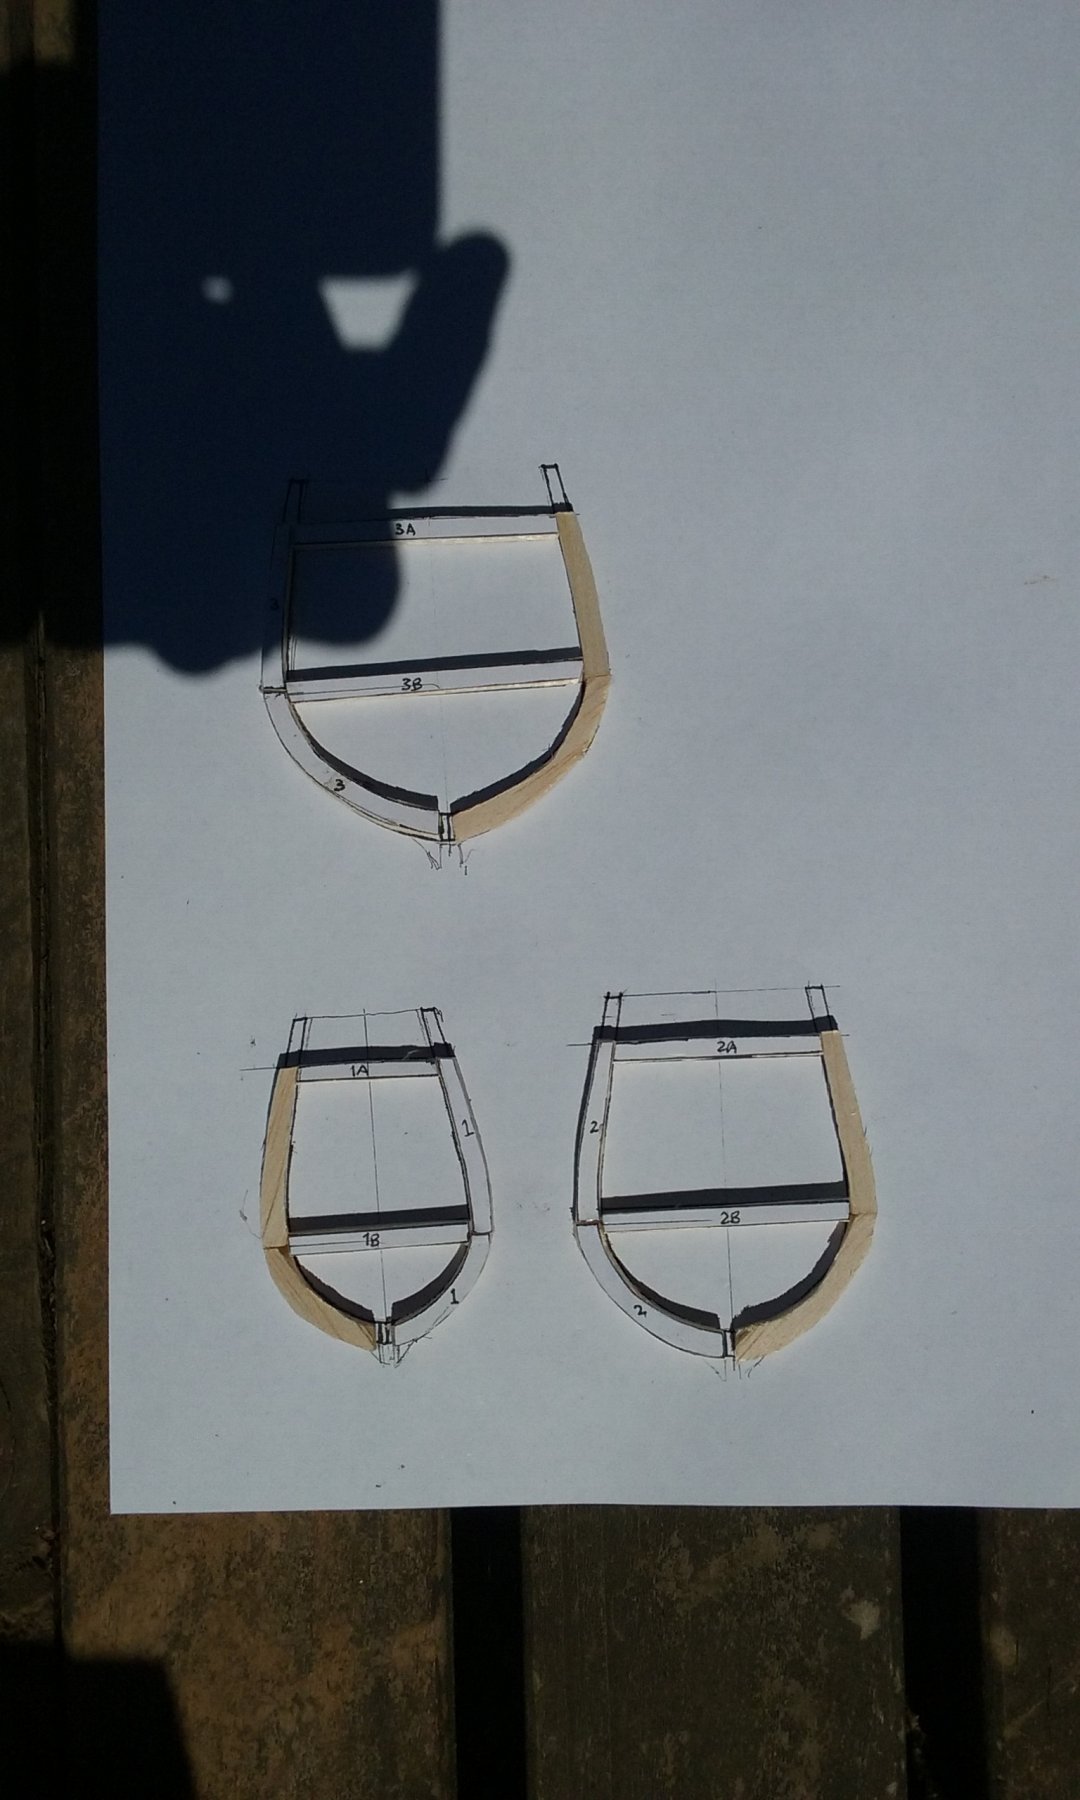
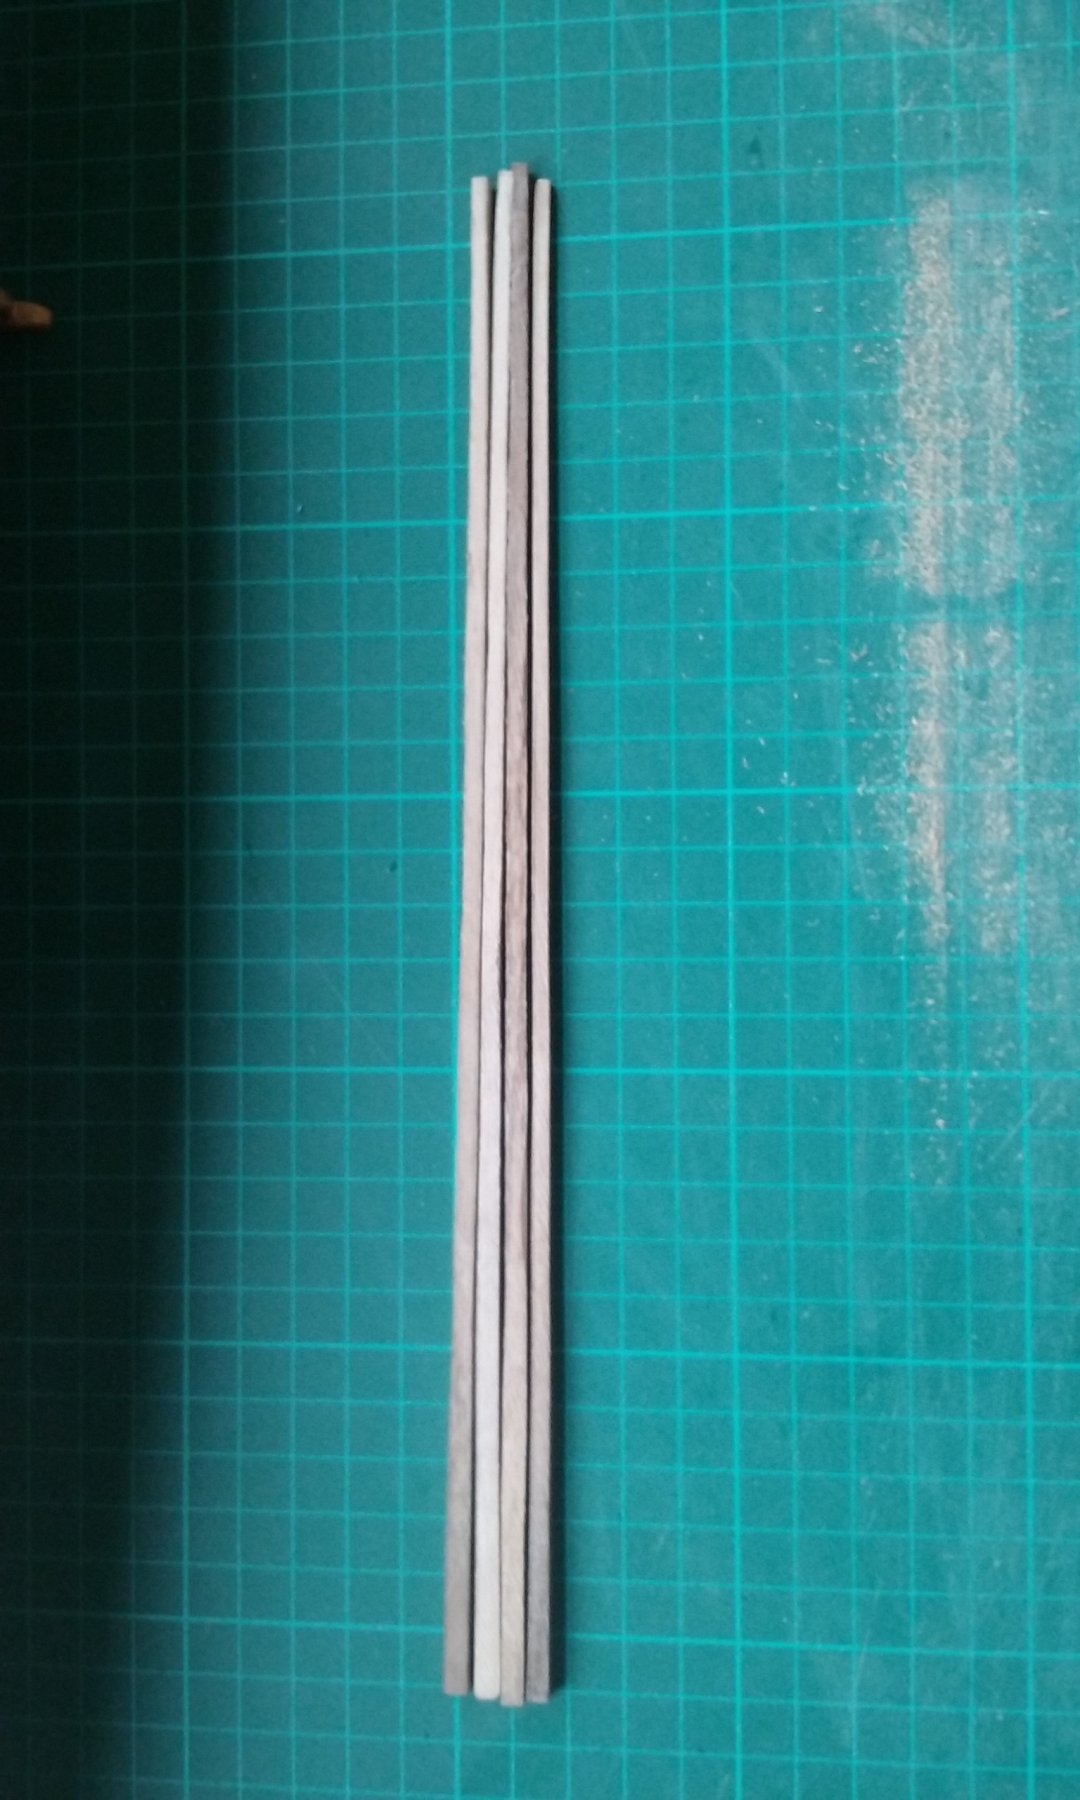
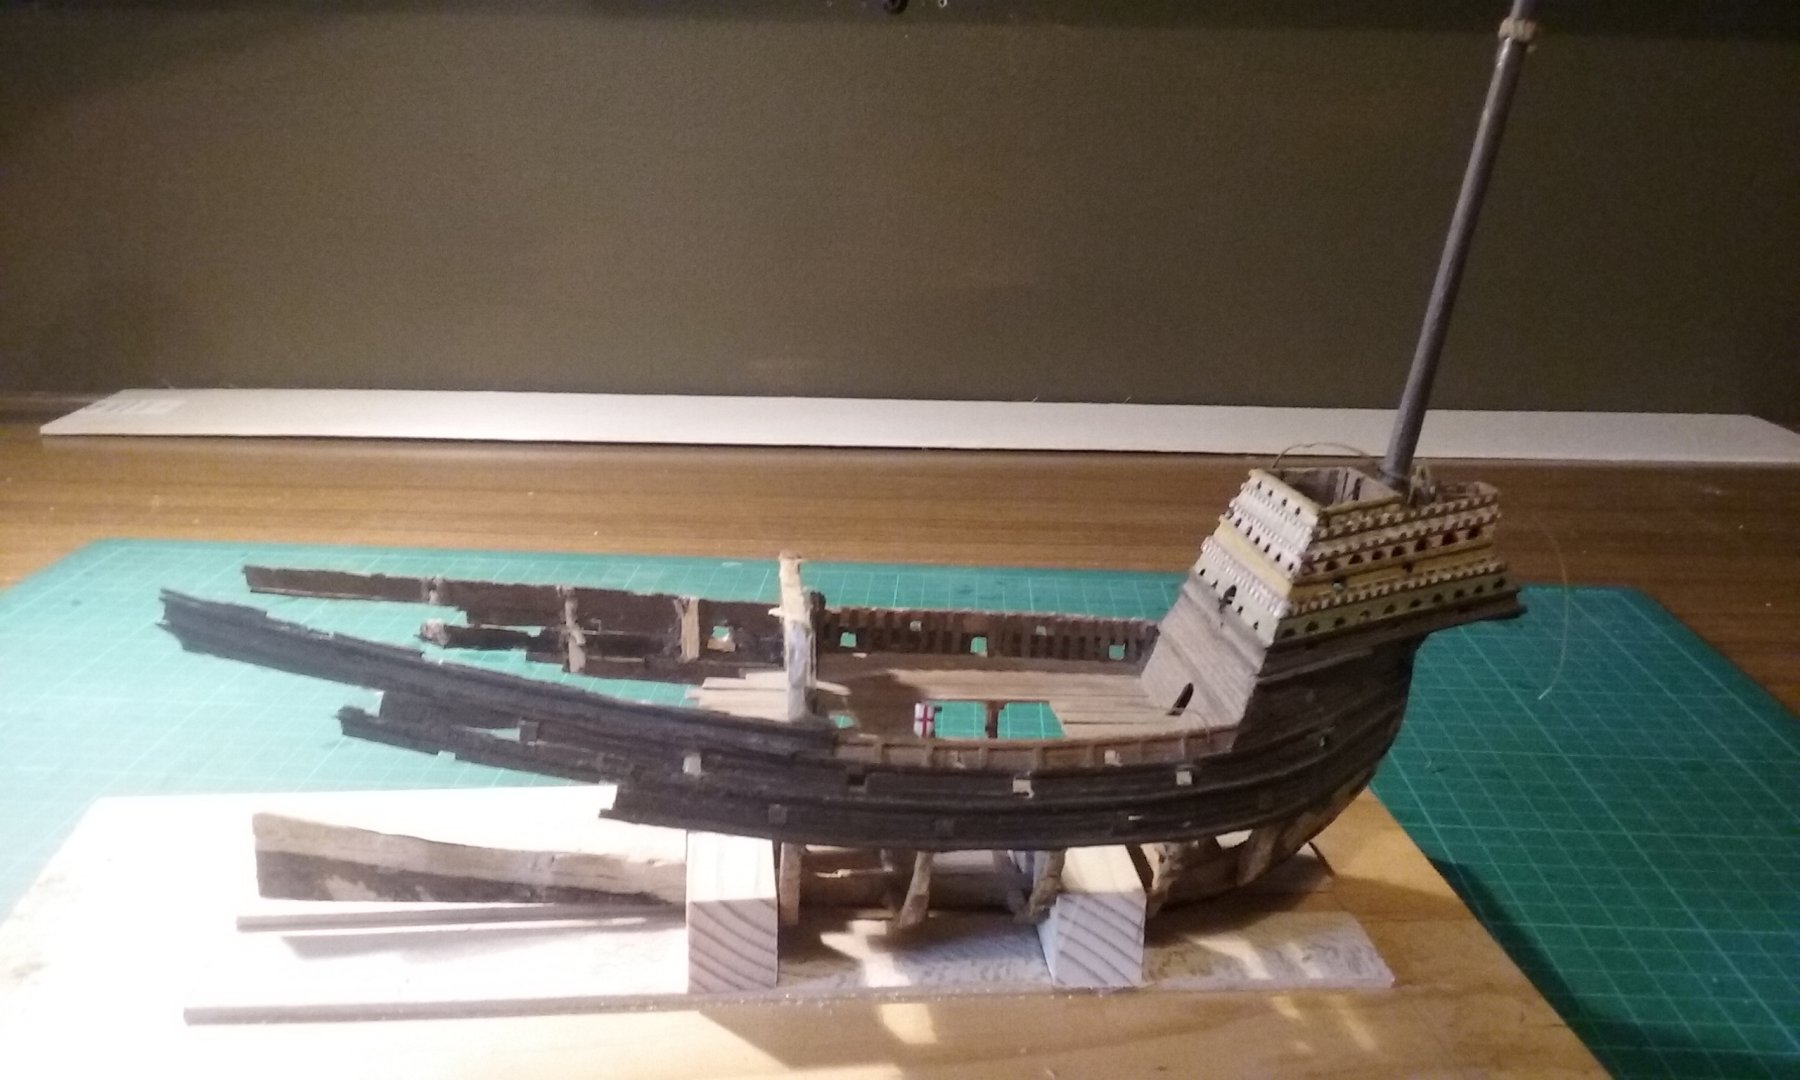
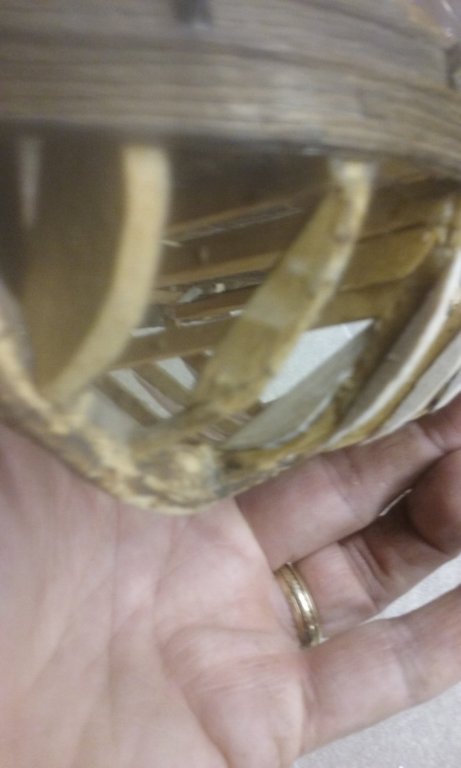
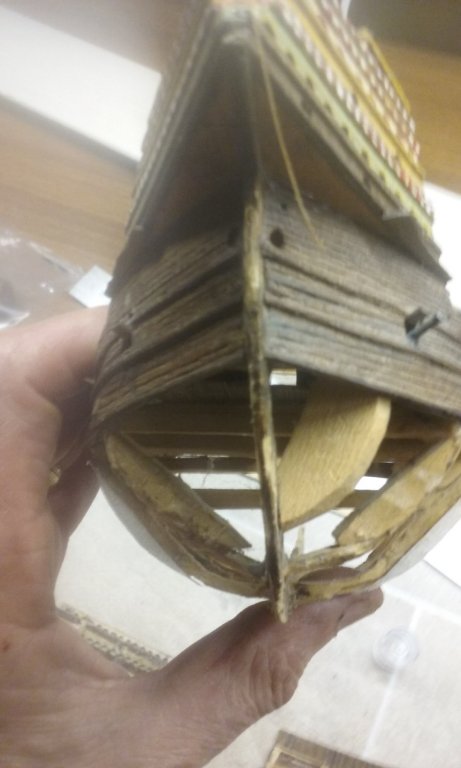
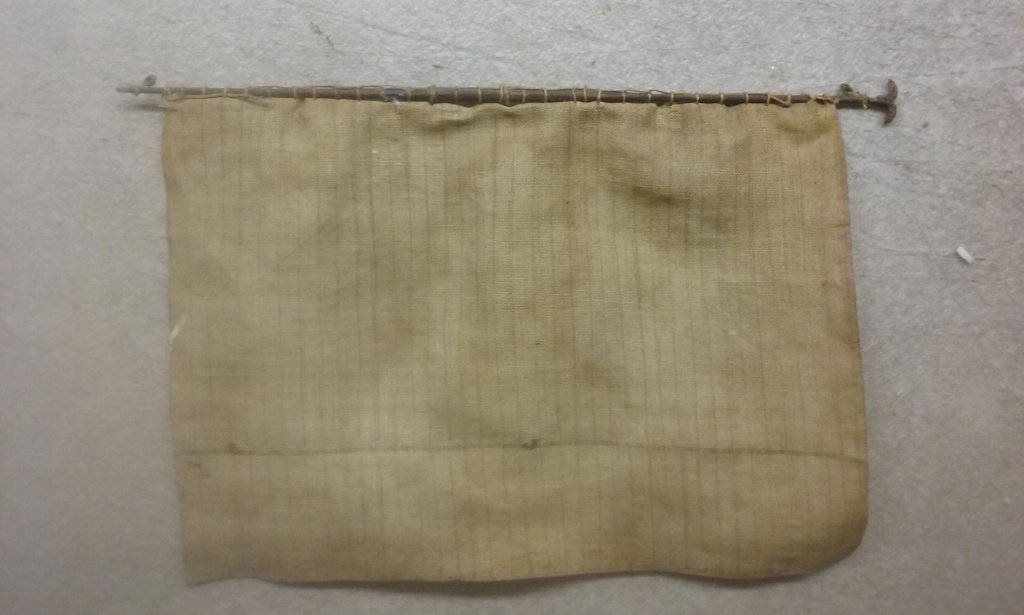
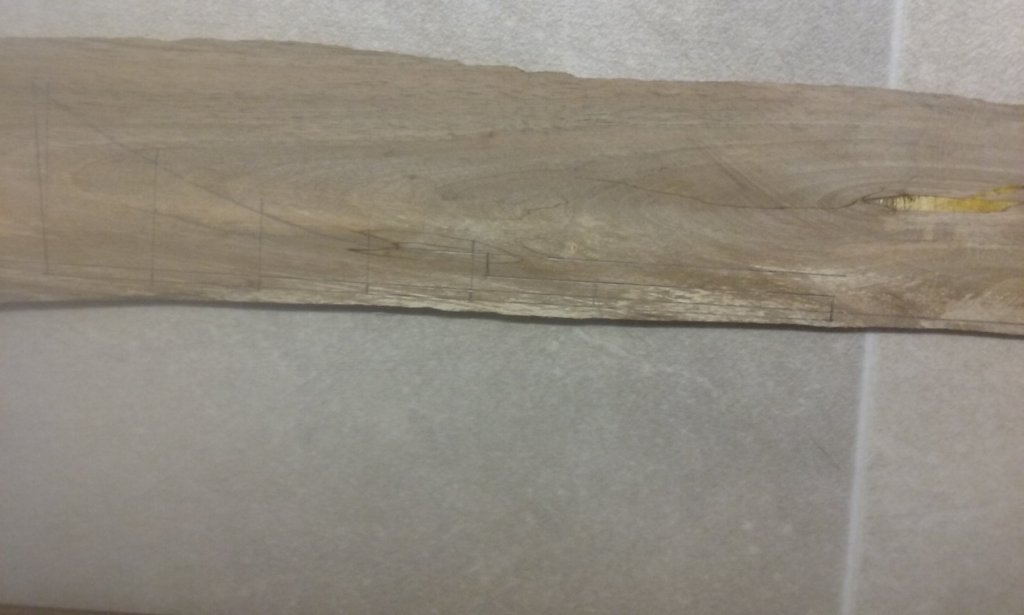
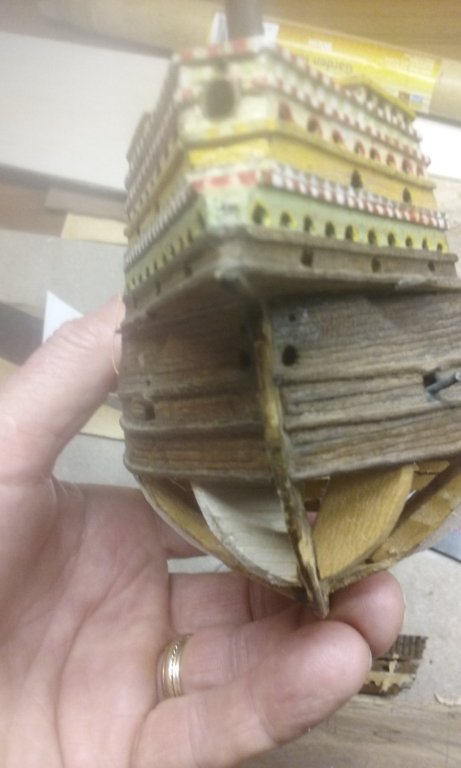
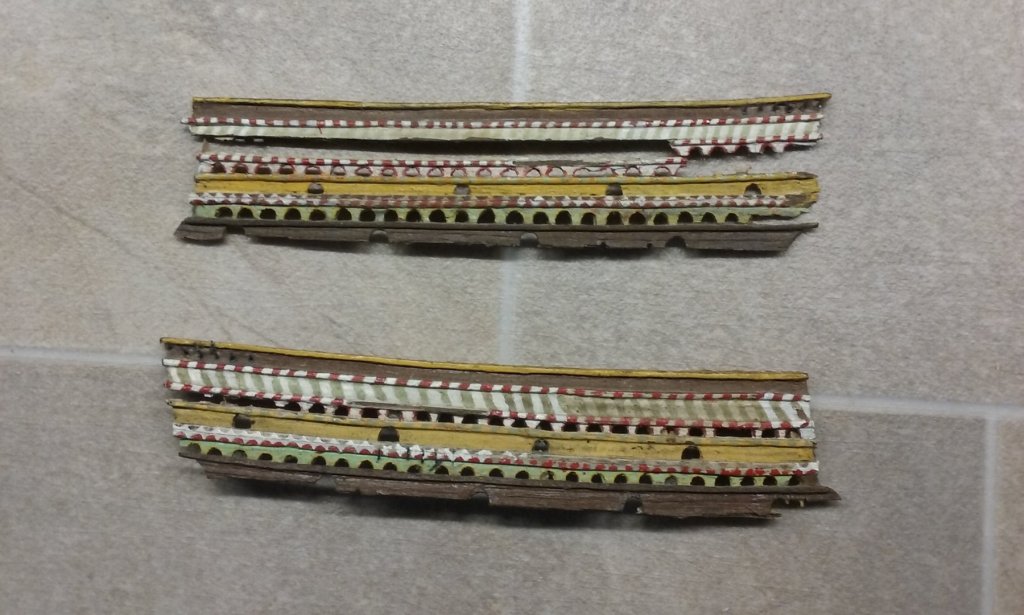
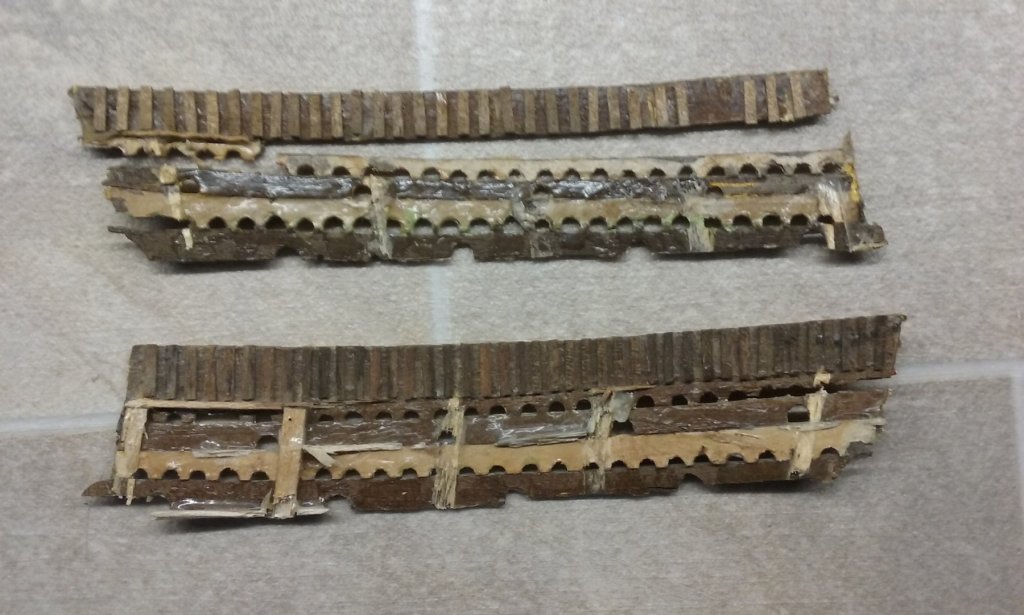
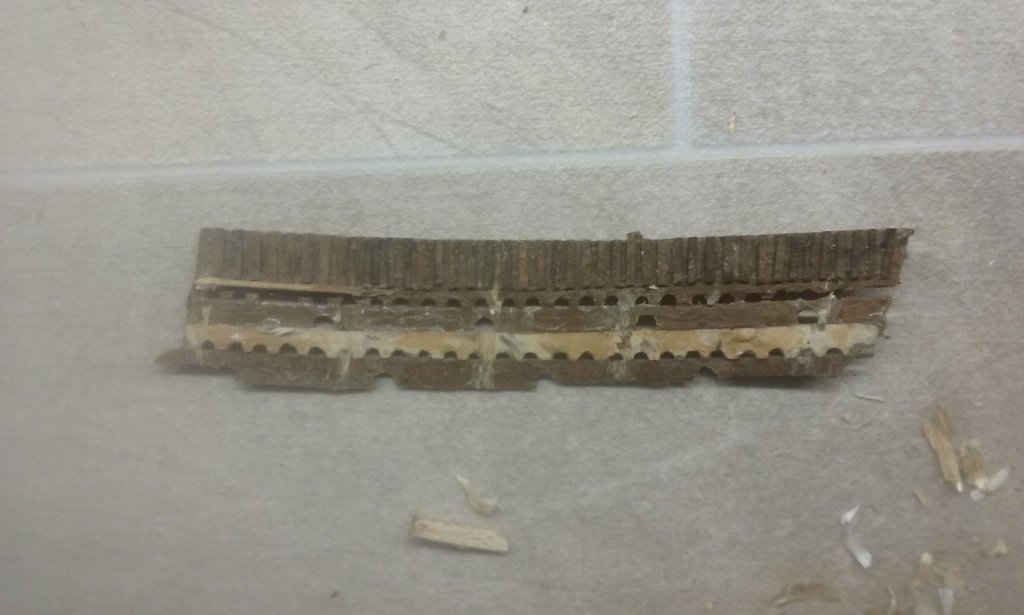
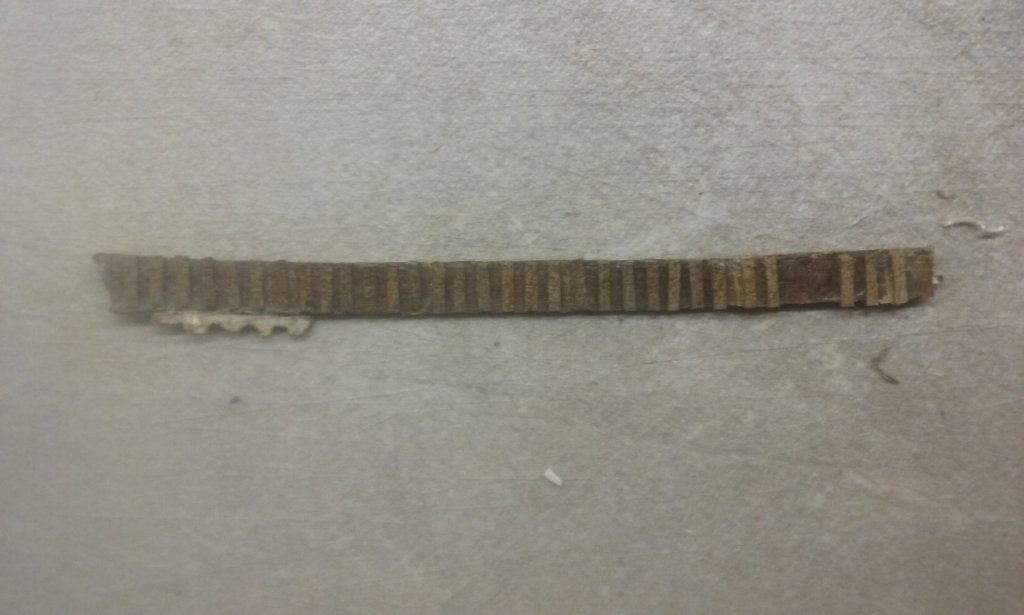
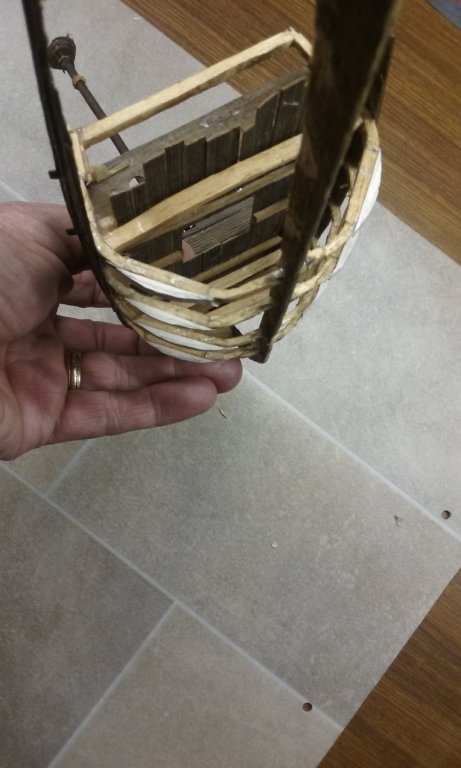
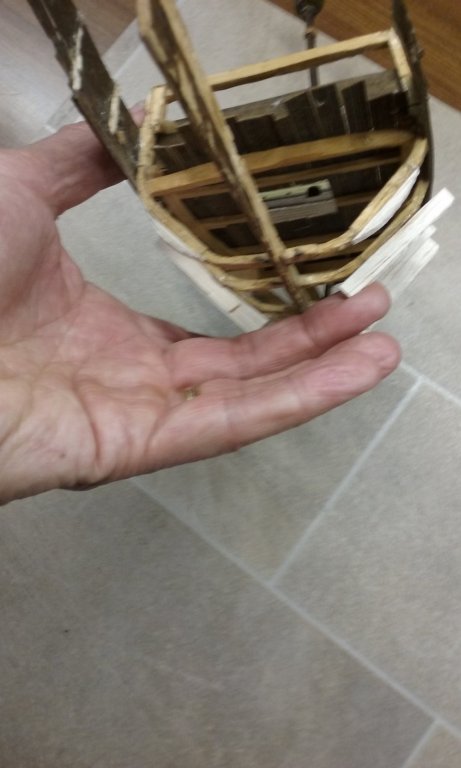
Doing repairs to the existing structure. I intend to keep as much as I can of the original model, though some of it is in pretty poor condition I think a lot of it can be repaired. Here are the sides of the aftercastle made up of strips glued together, with arches cut out of the individual strips where the gunports are. Here they are seen from the back, with remnants of the frames and decks still attached. I was VERY enthusiastic about white PVA glue when I made this model - I seem to have slopped it on with great abandon. I've taken a tip from (I think) Druxey and used methylated spirits to help dissolve the glue. It seems to work, but there's a LOT of glue and it's over 40 years old. The metho seems to soften the glue, however, and make it easier to remove with a scalpel. The idea is to get back as close as possible to bare wood before I put it all together again. Note that I was clever enough when I was 17 to glue paper to the back of the strips containing arches, to keep the wood from splitting. I remember I used a tiny woodcarving gouge to cut the arches. The pieces below have had the metho and scalpel treatment, and are quite a bit better than when I started. Still a bit more work to do, but making progress. There were breaks in these panels even before I started work and they broke a bit more while I was removing them. Because the shape of the aftercastle is to change (it will become narrower at the stern), these strips will have to be separated and glued back on individually. Here is the main channel which broke off the ship at some point. I've taken off the glue and will glue it back on when the time comes. The matching face of the channel is still attached to the ship, so it shouldn't be too hard to put it back on. One of the frames was a little fragile and likely to bend under the forces of the new planking, so I've glued a reinforcing piece to strengthen it. One of the solid bits of balsa that acted as cant frames seems to have vanished, so I've replaced it. Bowsprit broke at some time, but the break was clean and fitted together well, so I just glued it back in one piece. The mend is about half way between the chain and the end with the grapnel. Snapped fore yard glued back together. The sails were made from waxed drafting linen (extremely finely woven fabric), which I'd washed in hot water to remove the wax. After over 40 years they have all gone dark brown and the linen has deteriorated quite badly. So all the sails will have to be replaced. I'm keeping the old ones to use as templates. One of the things that really got on my nerves even back in the day was that I'd made the keel out of balsa, and even though I'd stained it to match the Queensland walnut of the rest of the model, it looked like - balsa. So I'm making a replacement keel out of walnut - you can see the pencil outline below. I'll trim the balsa keel back where the existing frames are still in place, and it'll be full size from there on back to the stern. I'll be doing the same to the stempost at the bow. Steven


- 740 replies
-
- 7
-
-
- Tudor
- restoration
- (and 4 more)
-
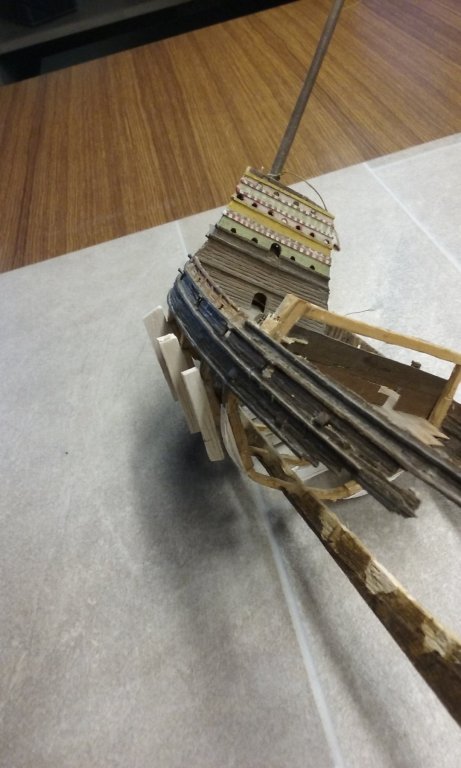
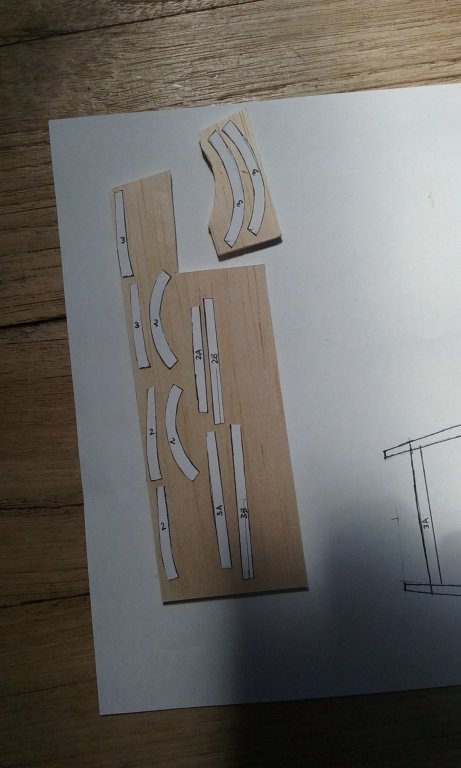
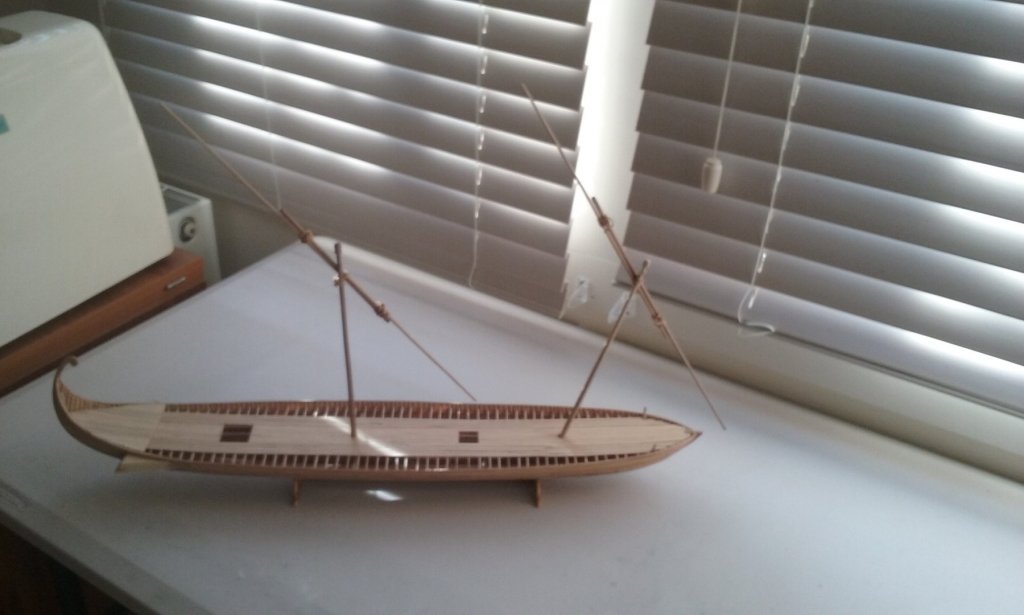
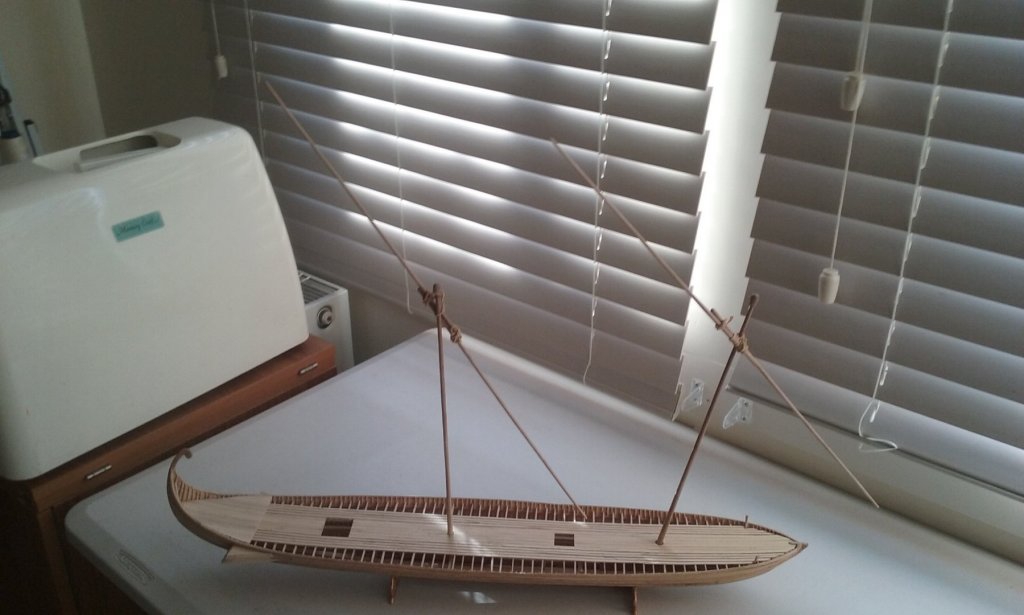
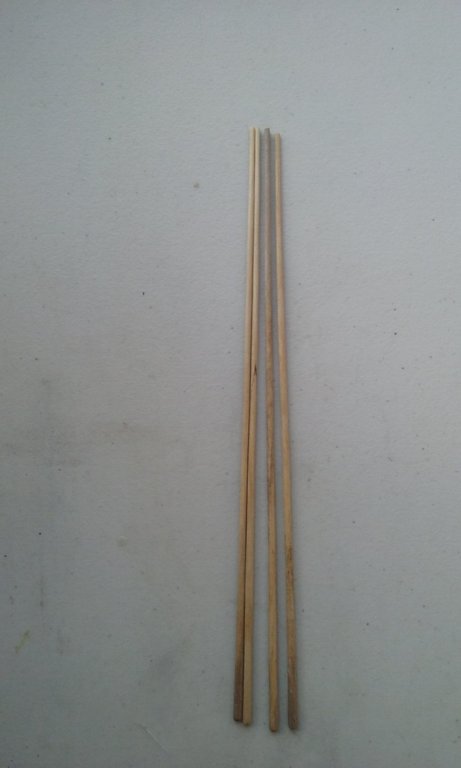
I've decided to go with the shorter masts and yards. I've made six masts overall - the first two taken directly from Age of the Dromon which I decided were wrong, then the longer ones, which looked too long. Because I didn't want to shorten those ones to find out if shorter ones looked better I then had to make two new ones. And I've ended up with two that will actually go into the ship. Here's the second (or sixth!) mast under construction. I've shamelessly copied the concave joint of the mainyard of Woodrat's Cocca/Nave Tonda to join the two spars of each yard. The're glued together but I've yet to add rope lashings. Steven


-
Fixing the outline of the existing frames in line with the shape of the frames per the Mary Rose discoveries. Steven

- 740 replies
-
- 8
-
-
- Tudor
- restoration
- (and 4 more)
-
Thanks everybody for the likes and the comments. Roger, ancient Mediterranean ships were certainly built this way, but the the first millenium AD saw a transition between tenon and framed construction and by the time of this dromon shipbuilding had almost completely evolved to a fully framed method with very few or even no tenons between planks. I'm pretty sure none of the Yenikapi galleys had any tenons at all. Mark, in Age of the Dromon Professor Pryor states (based on 12th century Sicilian galleys) that the fore was the "main" sail and the "middle" was smaller. On the other hand, the only Byzantine picture of two-masted galleys (from the late 9th century - about 200 years before mine) shows the foremast smaller than the "middle" mast. [Edit: Though evolution did occur in Byzantine ship design, it was pretty slow. The Yenikapi galleys span several centuries but have only minor variations between them. Which leads me to believe the picture below is probably almost as appropriate for the 11th century as for the 9th.] However, as Prof Pryor says, that may be artistic licence - perhaps an attempt to fit the picture into a restricted space on a page. In earlier posts, particularly those of June 21-24 I've outlined my reasoning for the masts and yards. There's very little out there, either pictorial or written, and absolutely nothing in the archaeological record. According the the theory, I've got a pretty good relationship between the sails, with the "combined centre of effort" of the sails a little forward of the centre of resistance of the hull. Ideally it should be pretty much directly above, but a little forward is pretty ok too. And no, the galleys were pretty much confined to sailing before the wind because a heel of more than 10 degrees would have swamped them. Messis, thanks very much for the compliment. Steven

-
First action - making new frames to accommodate the new shape at the stern. Steven

- 740 replies
-
- 10
-
-
- Tudor
- restoration
- (and 4 more)
-
Thanks, Druxey. I certainly hope so - it's really all I have to go on. Still, who's going to tell me I'm wrong? Ah, for a time machine . . . Steven
-
I don't know how I missed this build log up till now. You've done a very good job with this. It's really interesting to see you taking on what is really a pretty steep learning curve, What I particularly liked was that rather than do what so many newbies do and try to build something far too complicated and difficult (usually HMS Victory!) which normally ends in failure and disappointment, you took on something simple enough but with enough challenges, to allow you to methodically carry it all through, picking up skills and knowledge as you go, resulting in an impressive final product. The next and subsequent models will be better still, and you'll keep on amassing skills and experience till you'll be the guy whose builds people refer others to as an example of what to do. Welcome to a fascinating (and addictive) hobby! Steven
- 27 replies
-
- 3
-
-
- union
- constructo
- (and 1 more)
-
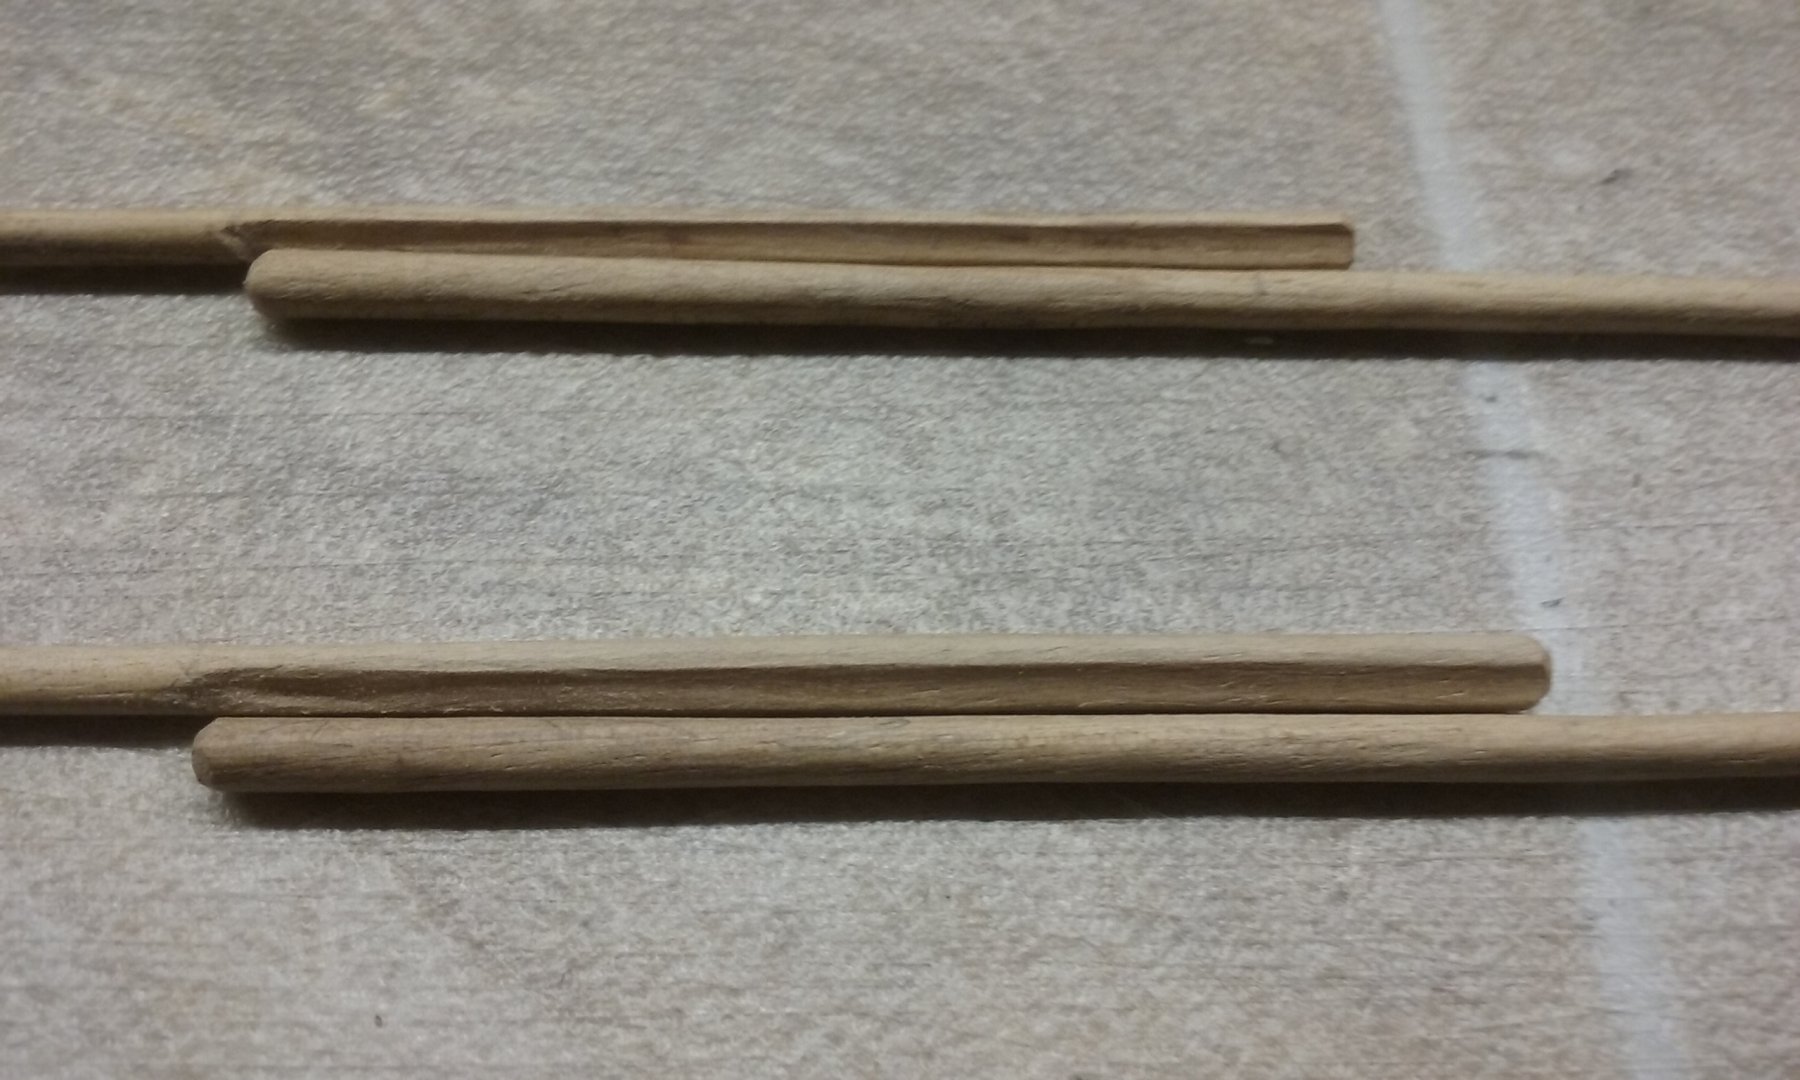
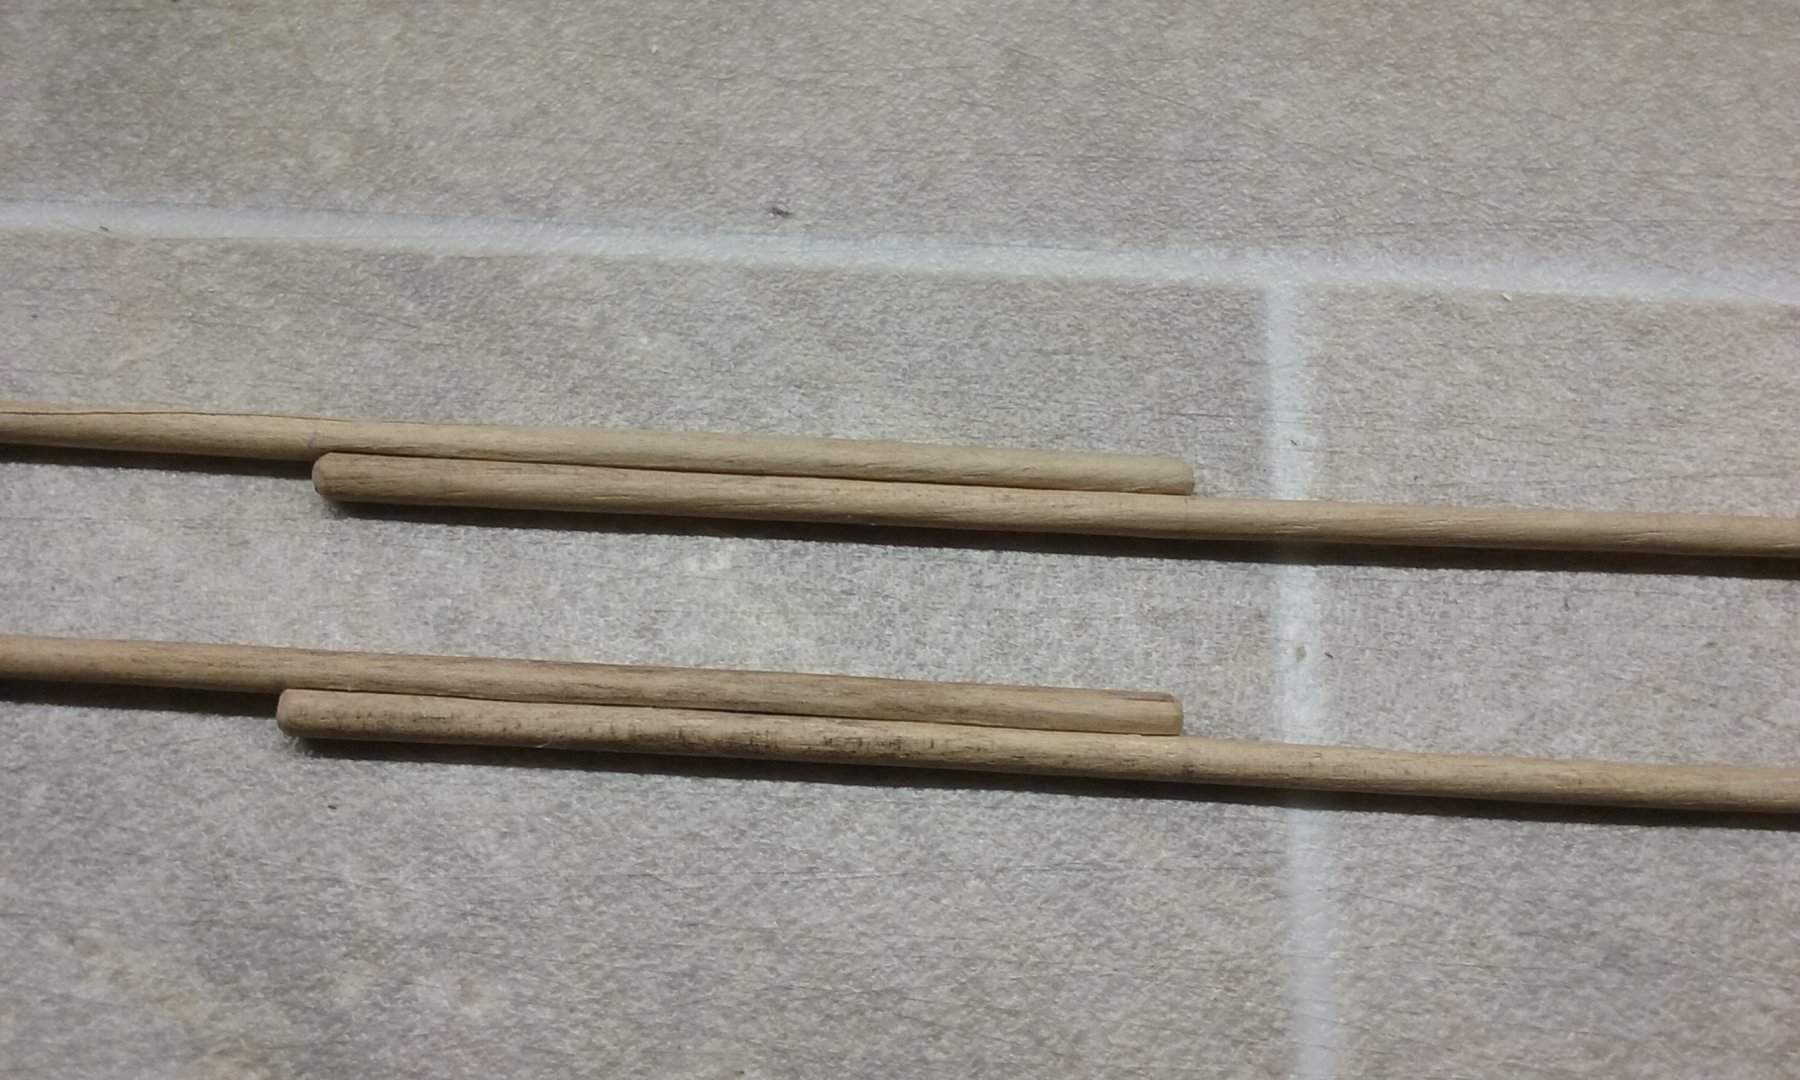
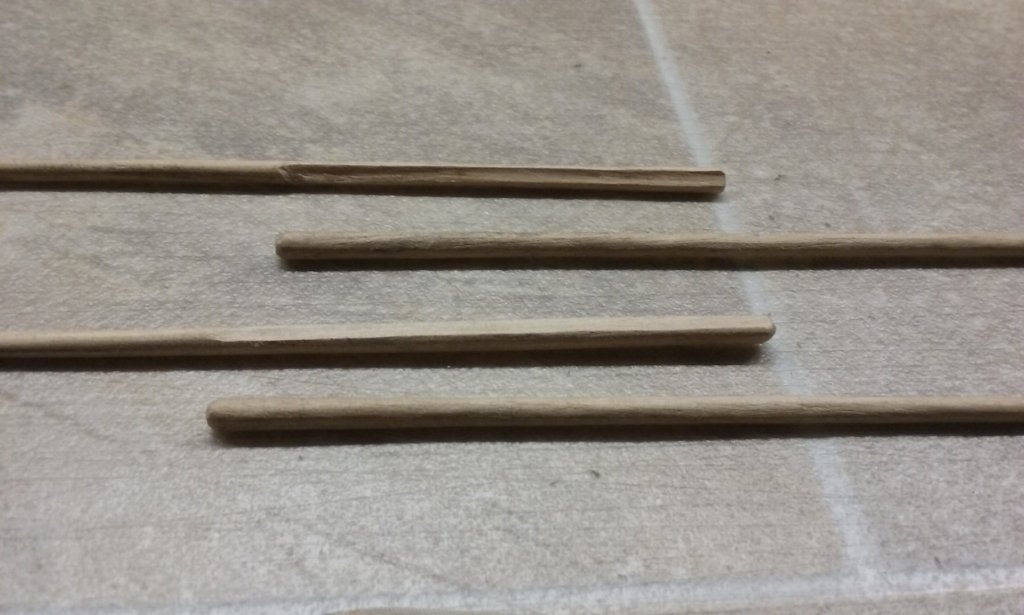
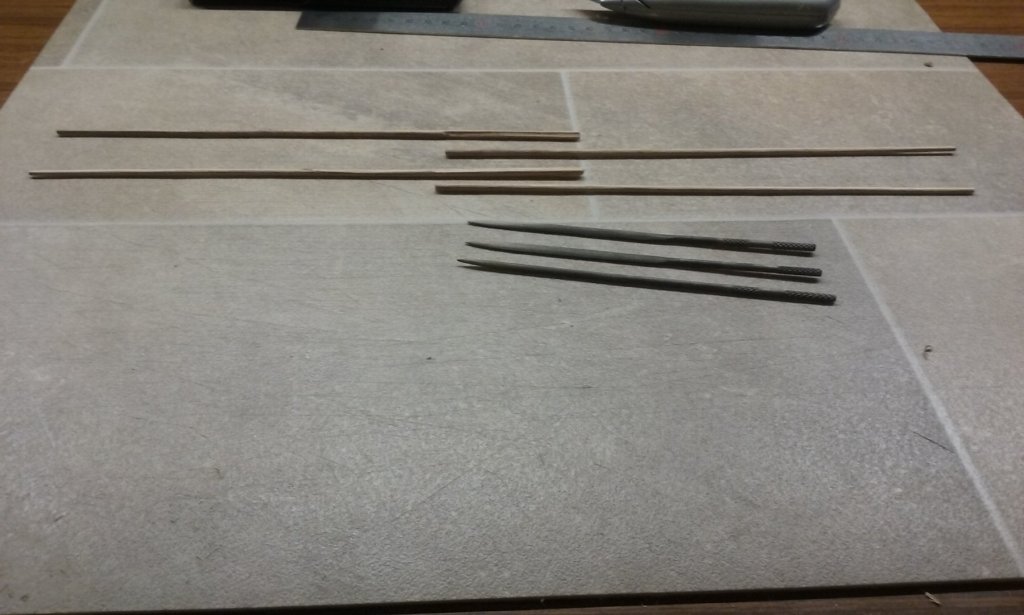
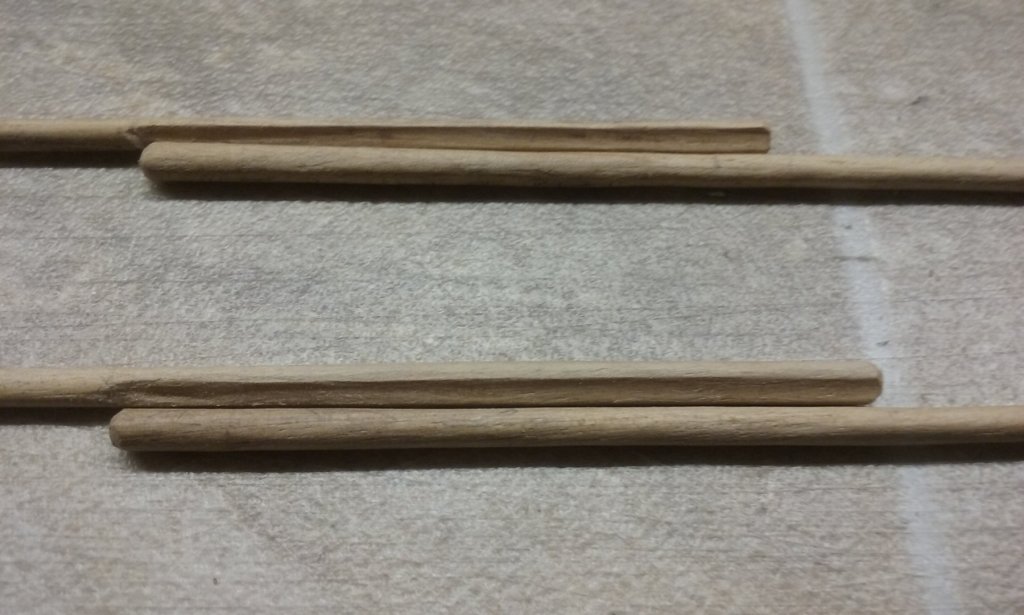
Lest it be thought revisiting the Great Harry has caused me to neglect the dromon, I've been working on the yards and trying to reconcile the yard lengths and mast heights with what's in the contemporary records, what's theoretically best for sailing, and what looks right. Here are the yards squared off but not yet rounded. Then rounded off. The masts and yards are made of walnut from the neighbour's tree which died some years ago and which I've been gradually using up. I have a suspicion that masts would have been made of fir, but contemporary pictures show a dark timber, so I feel justified using walnut. Once I'd dry fitted the masts and yards they looked too long, likely to capsize the ship, so I've revisited both I ended up making the yards the length of the foreyard estimated in Age of the Dromon and made new masts [edit: which were shorter, but longer than the masts in the book], that look right with the yards. As the yards are each made of two spars, I just had to slide the spars past each other till the overlap gave me the length I wanted. Here is the ship with the long masts and yards (temporarily held in place with rubber bands). And here it is with the shorter ones. The shorter ones look better to me, and if I decide to go with them I'll be shortening the spars that make up the yards to fit within the range of overlaps shown in contemporary pictures. There's a lot of theoretical speculation in all of this and the best I can do in the long run is go with what I think is right. Steven
-
Not necessarily. This ship dates from fairly early in the development of shipborne artillery and the guns were still pretty small - see the artillery from the Lomellina wreck of 1516 at http://www.archeonavale.org/lomellina/an/l_11a.html Also this was a merchant rather than a dedicated warship (though it could have filled both roles if needed) and would not have carried the largest calibre of guns available. Steven
- 190 replies
-
- 1
-
-
- ragusian
- marisstella
- (and 1 more)
-
Of course it is! Old memories, and regrets that I made a model of this quality as a teenager, almost finished it, then pulled it to bits and neglected it for decades. And a determination to eventually do it justice. Don't think it hasn't occurred to me. But I really think it deserves better of me after all these years. Patrick, I've already got a copy of this thesis, but you've inspired me to have another, closer look at it and I'm seeing things there I'd never noticed before, so thank you. Roger, I have all the pics and contemporary descriptions from the Anthony Roll (they're downloadable from the Net), but they're not in book form, just digital, and perhaps the quality isn't as high as in the book. The appendices and glossary would be very useful, too. Terminology has certainly changed over the centuries. I've done a little investigatory work on all this (I find language fascinating!), which I've put up at for those who are interested in this kind of thing. I find it particularly interesting, for example, that the 16th century word for boatswain is botisman. The word swain for "man" is very old (dates back to Anglo-Saxon times, and the Scandinavian name Sven is the same word). Steven
- 740 replies
-
- 3
-
-
- Tudor
- restoration
- (and 4 more)
-
Thanks, Roger. Is there much explanatory text in it? I have the pictures themselves, but background text might indeed be useful. The other vessels on the Roll are also very interesting - I've thought of doing a 1:200 model of each class of vessel to go with the Great Harry - the roo barges, the "galeasses" (really they seem to be missing oars entirely and are more like galleons) and the galea subtile . . . but there's even less information available on them than on the Great Harry. Might be fun, though. Steven
- 740 replies
-
- 3
-
-
- Tudor
- restoration
- (and 4 more)
-
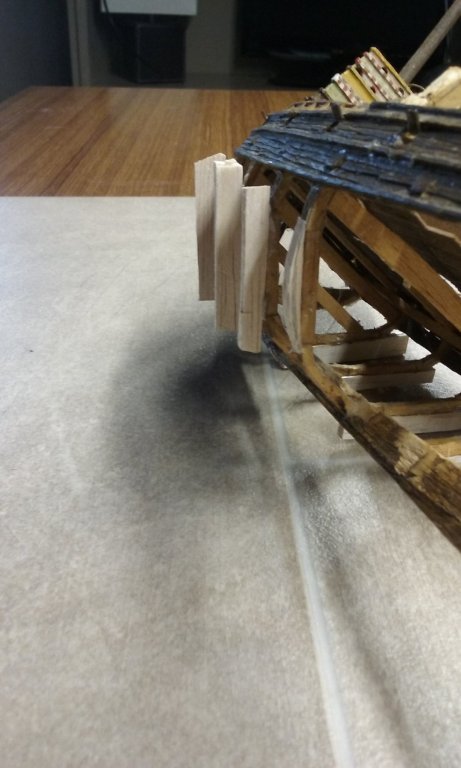
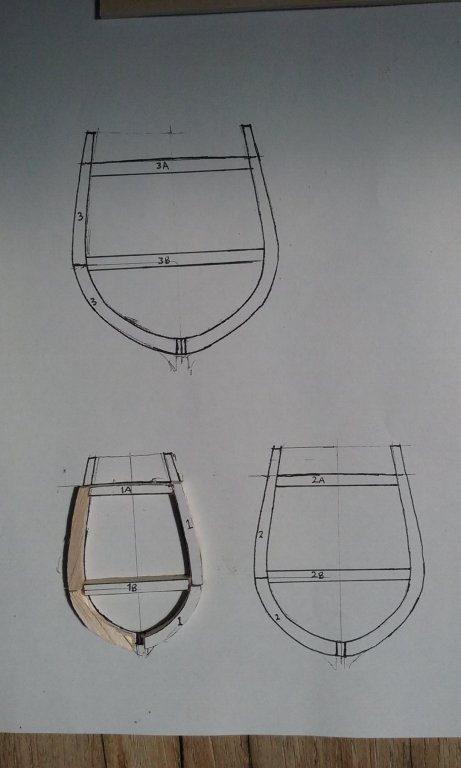
Back to the Great Harry after a delay of over two and a half years. All this time I've been working on a folding table in my wife's sewing room/ironing room, which also doubles as a bedroom for the incontinent old dog (which means we have to mop the floor every morning and can't leave a chair on the floor). Just this week we finished converting the sitting room/library/spare bedroom, so I've finally got a dedicated space to work on models which has storage space, a nice big desk with drawers in it, a chest of shallow drawers, and overhead shelves for reference books and tools and two more shelves each with enough vertical room for a ship model, masts and all. Not as much light here as in the other room, so I'm going to have to work on that. I hate working with insufficient light. So now I can work on the Great Harry when I'm stuck/bored with the dromon. I've put together a little stand to hold her upright while I'm working on her. My first project will be to re-do the frames I made two and a half years ago as I've realised the flat stern extends well below water level, which would stop water flowing past the rudder. Looking forward to it. The ship's been sitting there sneering at me far too long . . . Steven


- 740 replies
-
- 11
-
-
- Tudor
- restoration
- (and 4 more)
-
Very good progress so far, Peter. Looking good. Steven
- 236 replies
-
- 2
-
-
- artesania latina
- kitbashing
- (and 2 more)