Louie da fly
-
Posts
7,586 -
Joined
-
Last visited
Content Type
Profiles
Forums
Gallery
Events
Everything posted by Louie da fly
-
 Lovely work, Dick. Steven
 -
Dick, every time I think it can't get any better you come up with something new and amazing! Really looking forward to seeing her spread her wings. Steven PS: Thanks for the comment on the dromon
-
Thanks for all the likes and the comments. Bearegalleon said Nope, not on this one, though one of the guys I've carved to be part of the crew is a Varangian Guardsman (He's the tall one). I've been in Hagia Sophia and taken photos of the famous runic graffiti - it says something like "Halfdan was here". But there's graffiti everywhere in Hagia Sophia! Including some ship names and dates from the 18th century on one of the marble columns on the southern gallery, plus another of a ship I think is 15th century scratched on another column (I have photos!) Steven
-
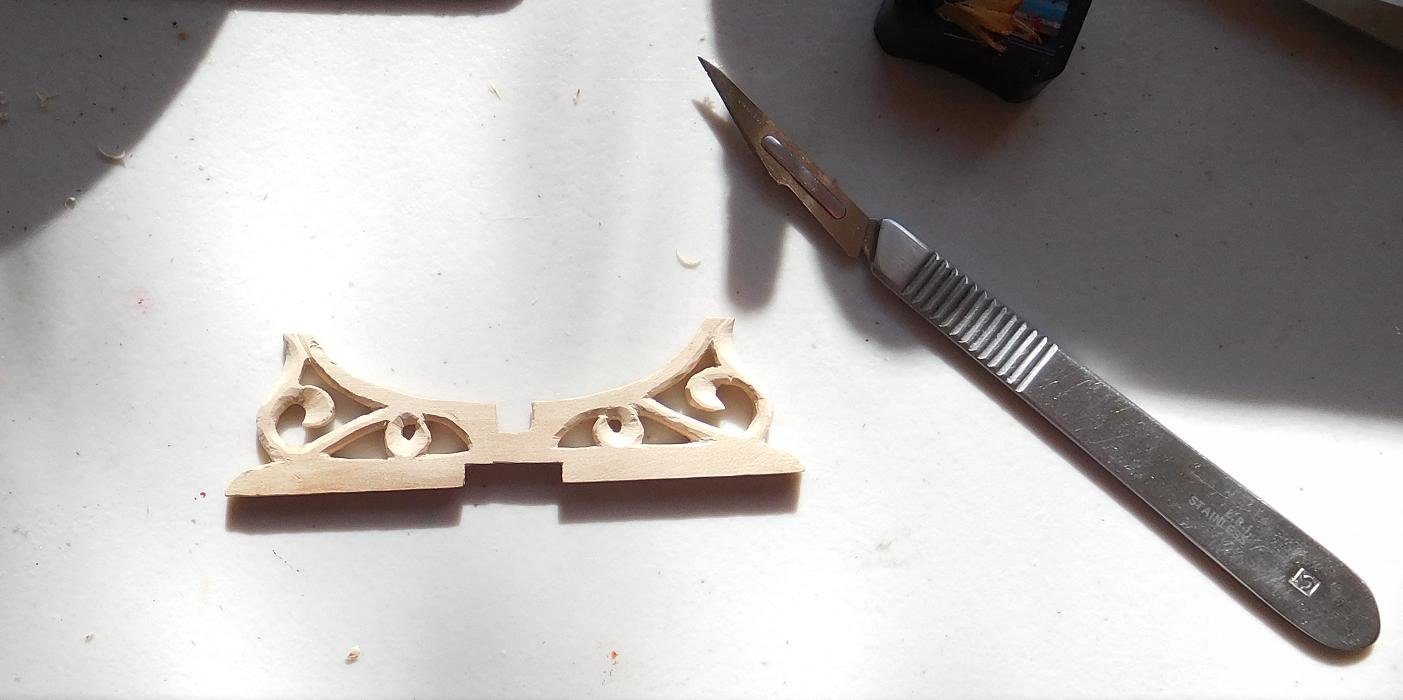
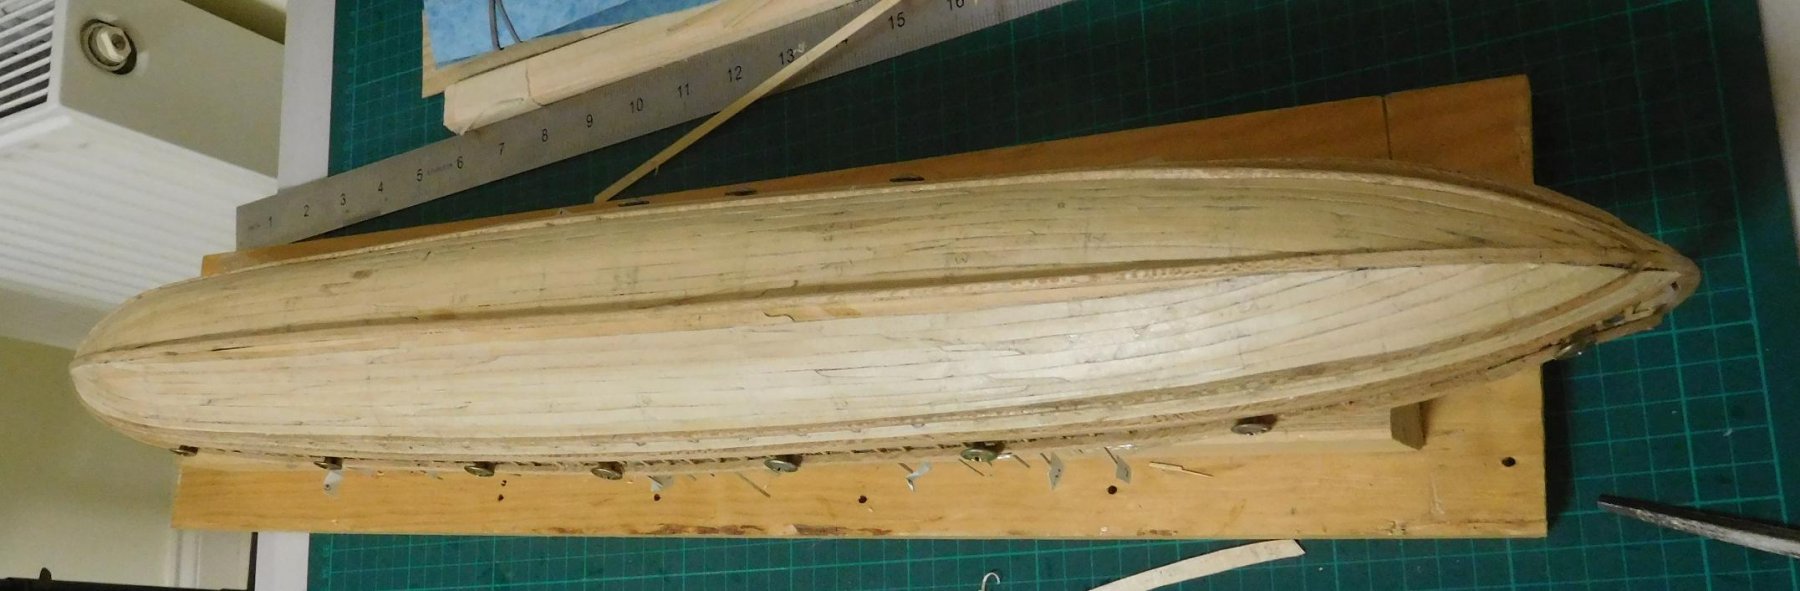
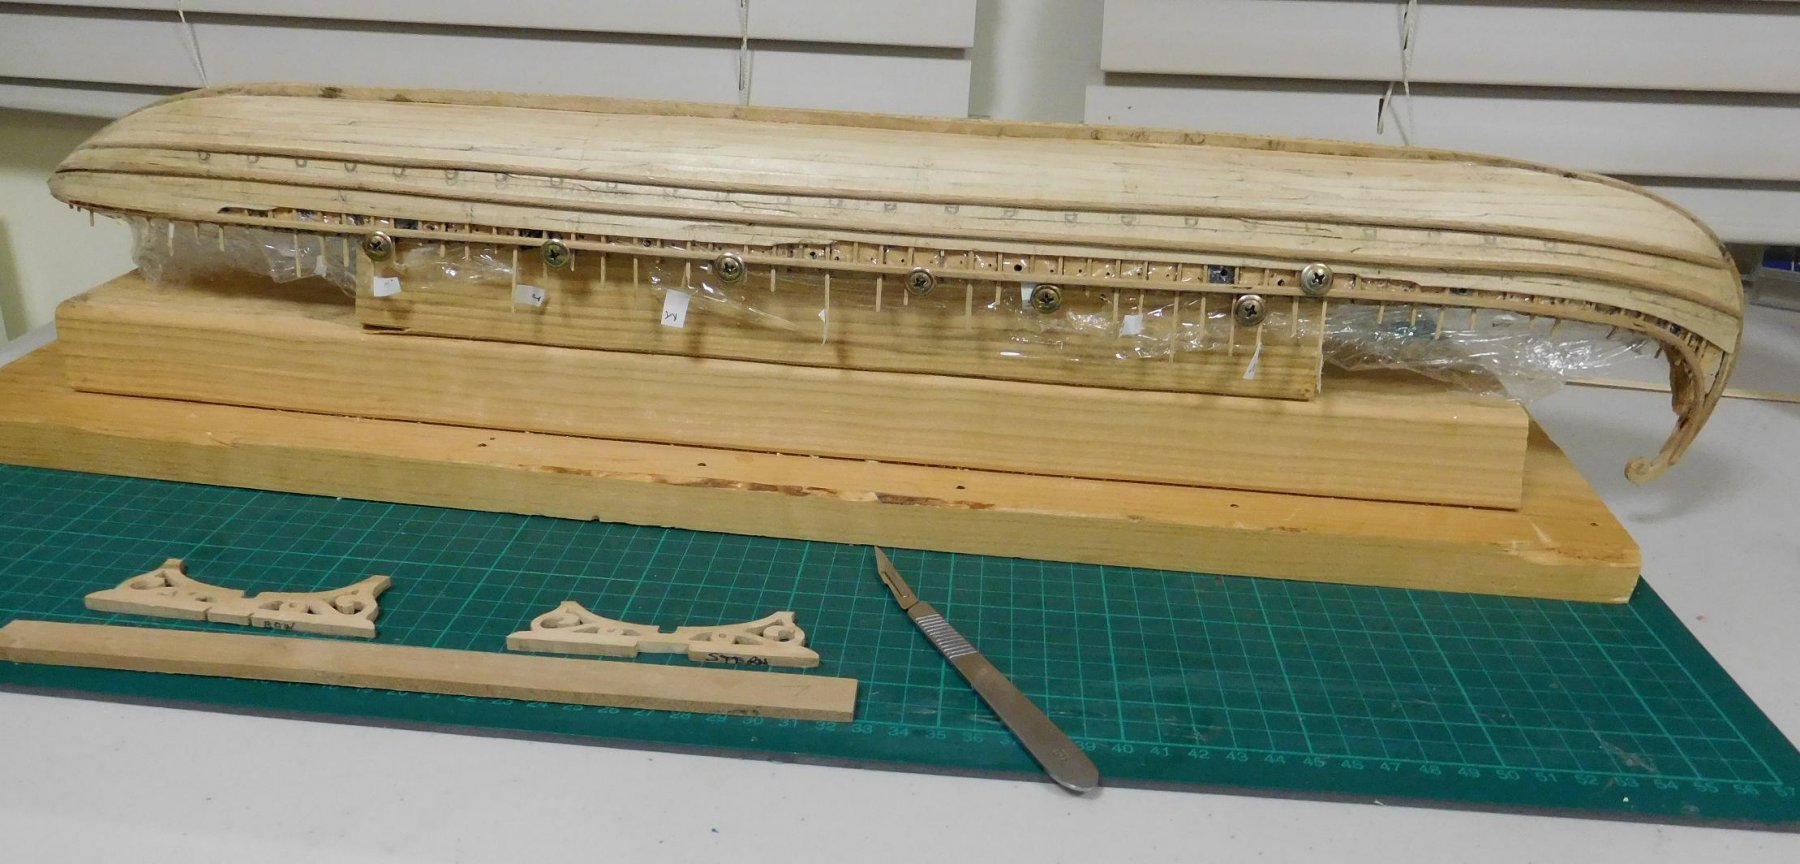
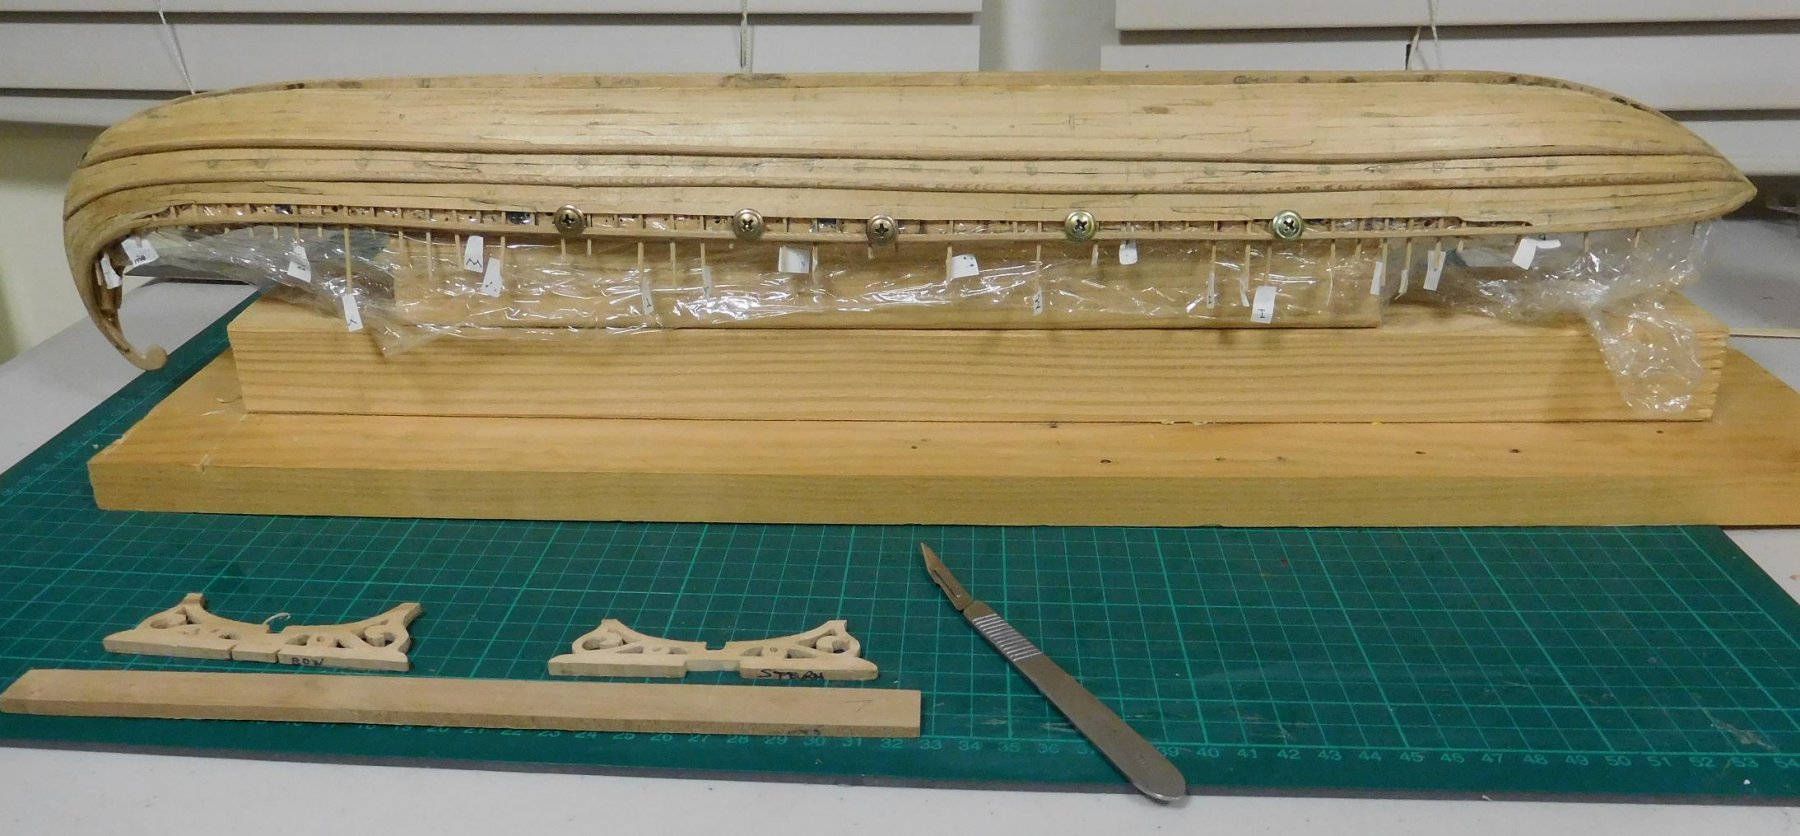
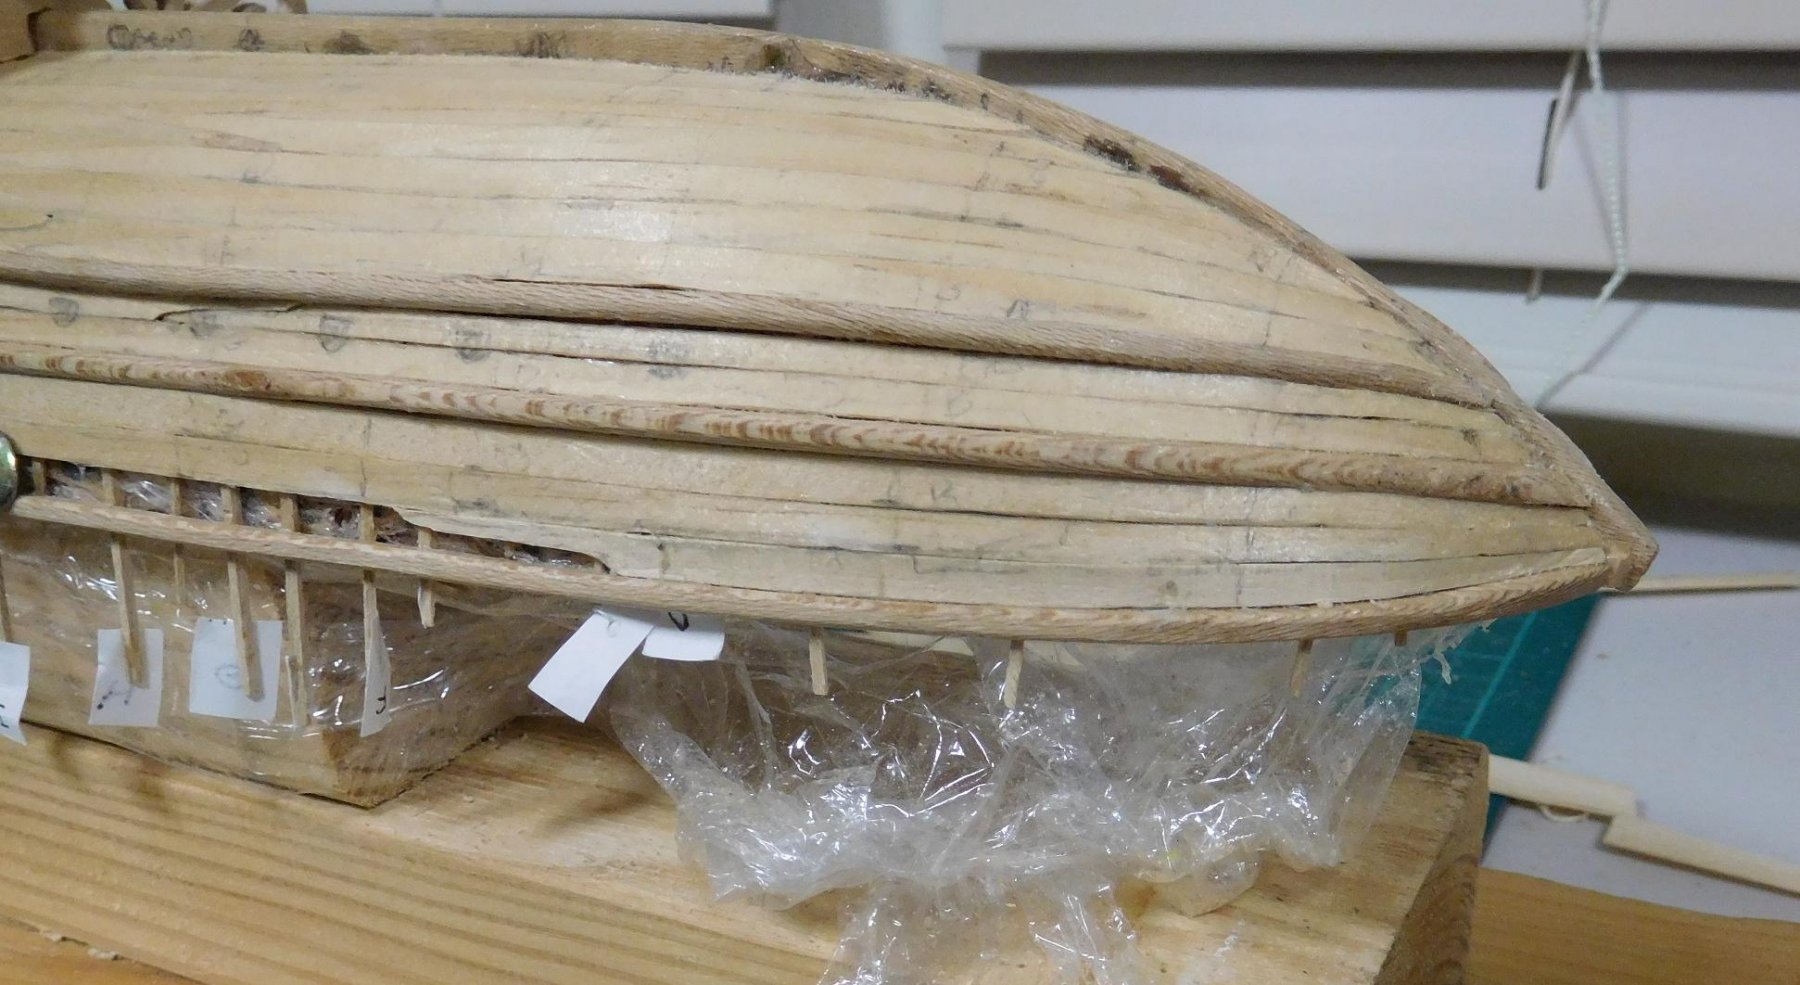
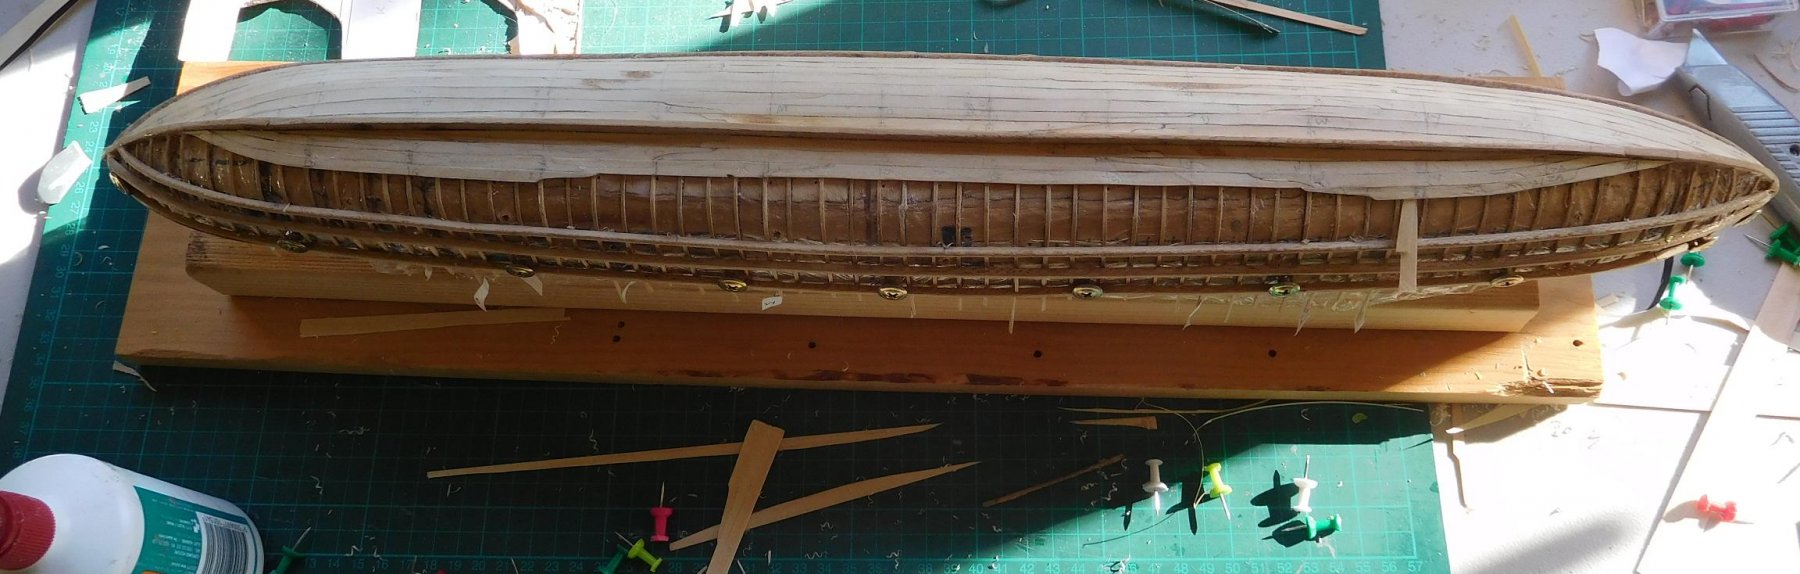
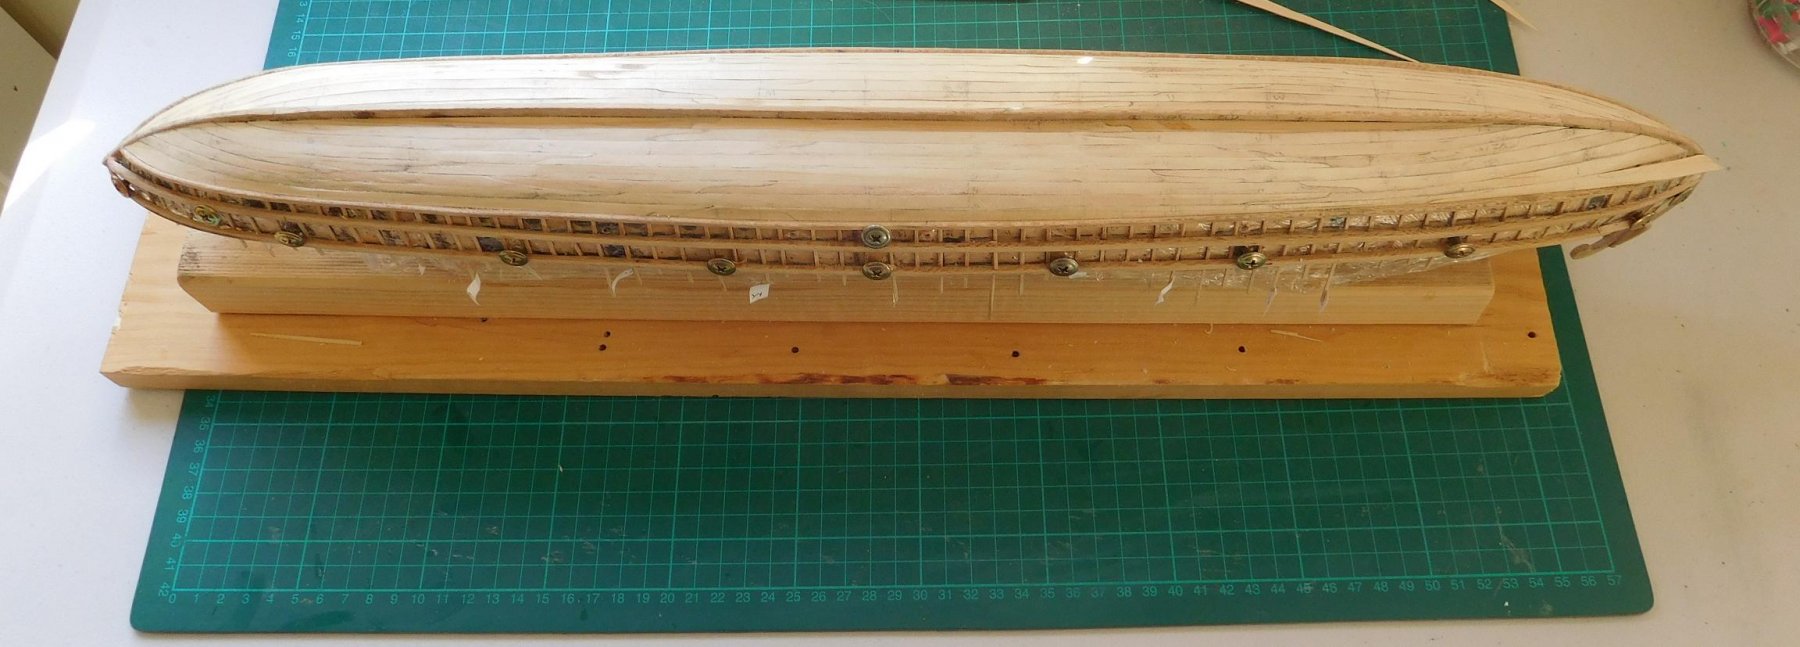
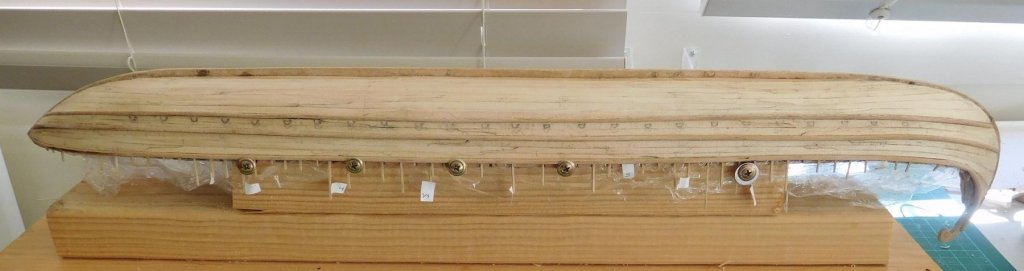
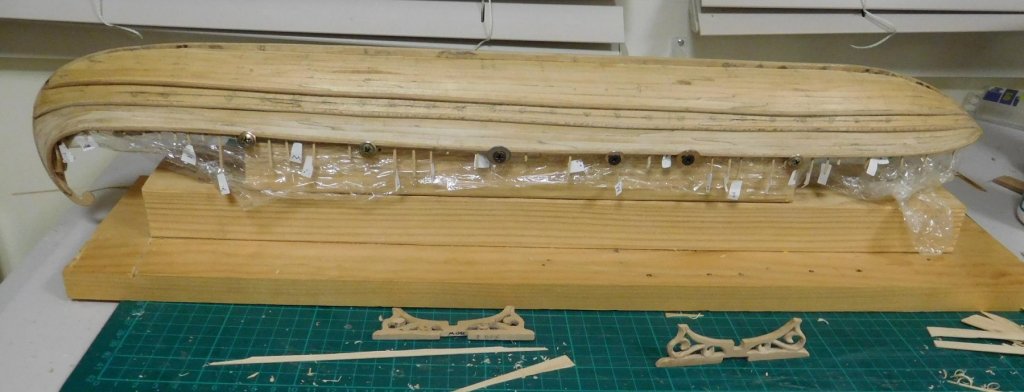
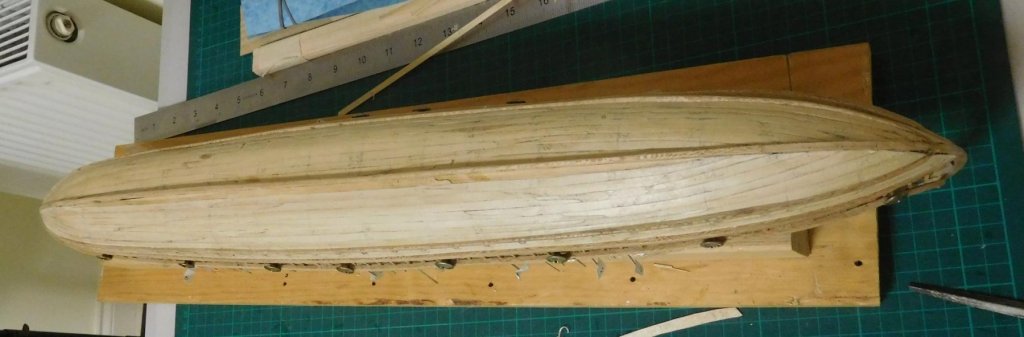
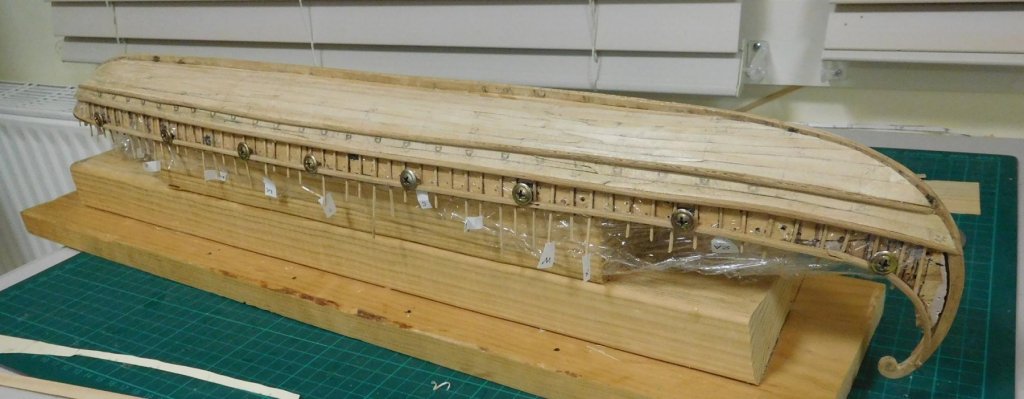
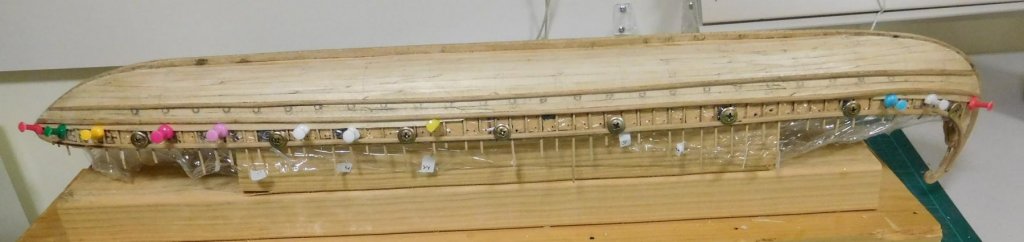
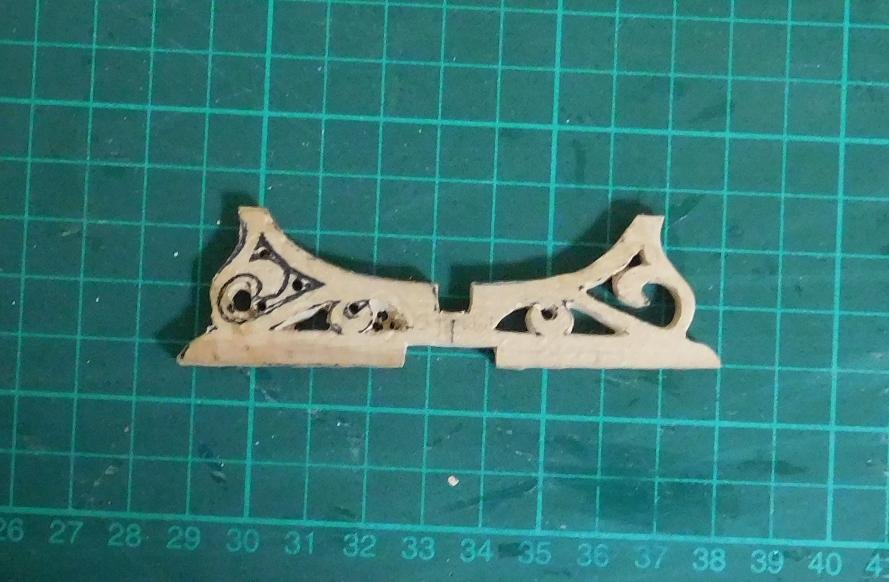
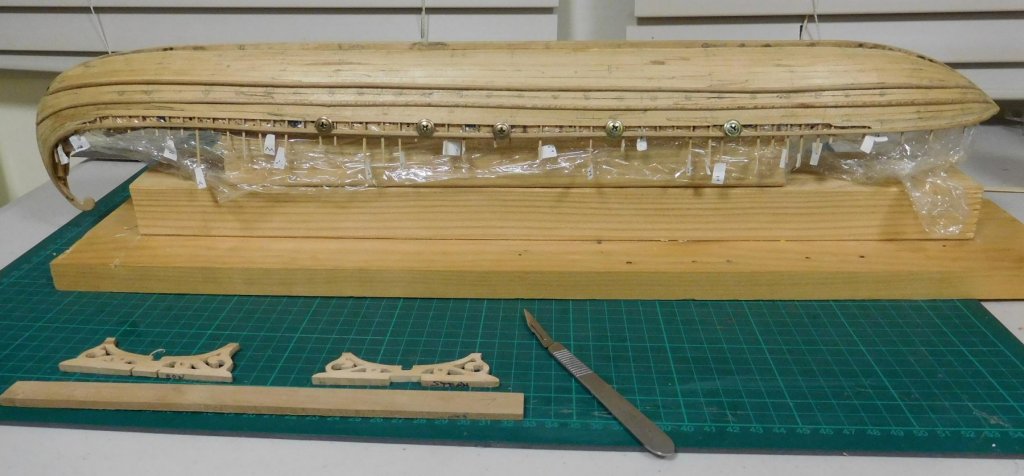
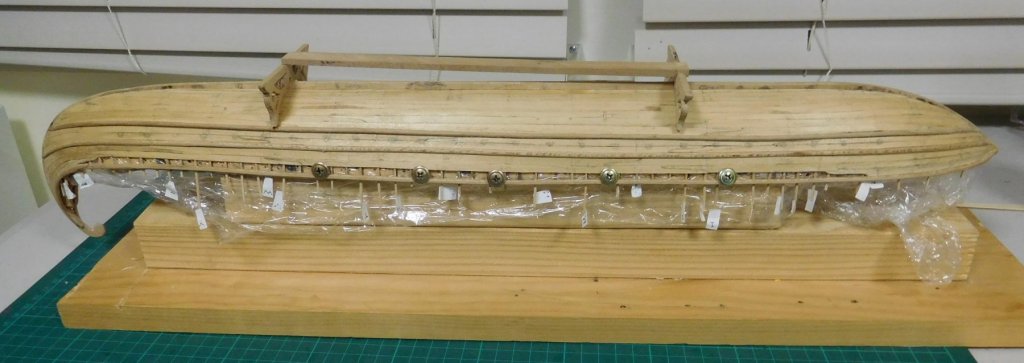
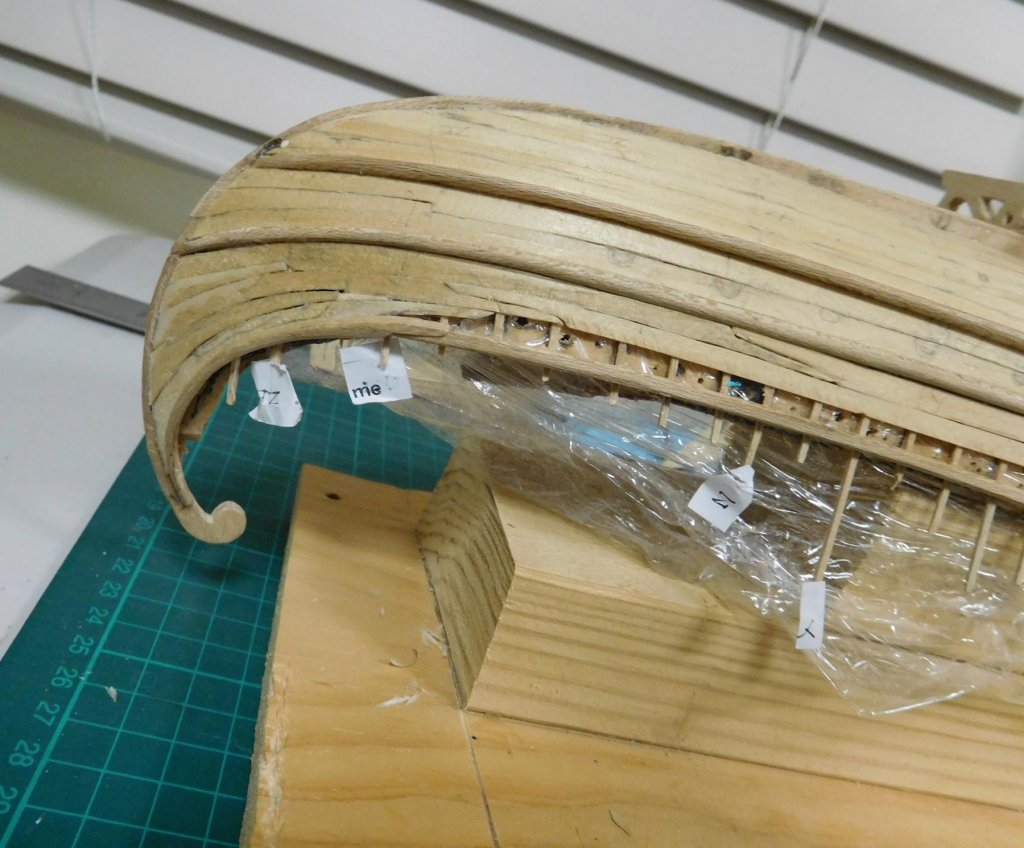
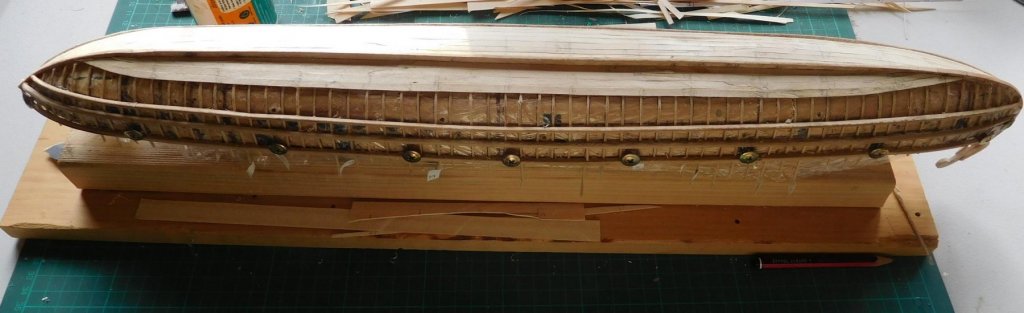
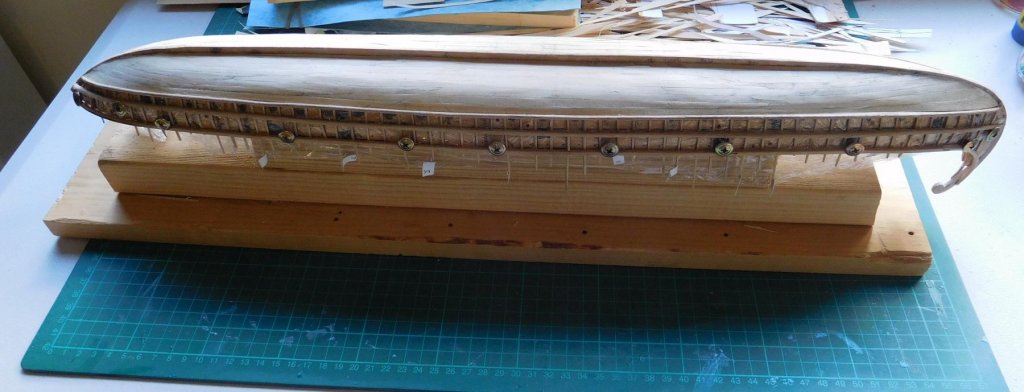
Finally, the planking is complete! (breathes sigh of relief). Funny, the ship seems rather taller than I was expecting while I was putting the planks on. But of course it includes the part of the hull which would normally be underwater. Next I'll fill gaps and smooth off the hull, and cut the oarports, and then I'll be ready to take the hull off the plug. There's still a lot left to do, but there's quite a sense of achievement in getting this far (even though at times I felt it would never happen). Thanks to everybody who encouraged me with likes, comments and advice, and I particularly have to thank Woodrat for his generosity in cutting the timber sheets I made the planks from and sending them over from the other side of the continent. It's finally borne fruit, and I even have enough left over to plank the deck as well! And I've also been working on the stand - I've started carving the vines and leaves into 3 dimensions. One end piece is roughed out and I've just made a start on the second one. Steven

-
Sorry to hear about the damage, but your repair looks very good. Steven
-
A Strange Place For A Titanic Memorial
Louie da fly replied to Jim Lad's topic in Nautical/Naval History
In Ballarat where I live, there is a bandstand in the main street in memory of the Titanic's bandsmen. Steven -
Beautiful work, Patrick. And the depth of your research is very impressive. It is wonderful to see someone putting so much time and effort into assembling all the information available to get a model as close as possible to the reality, especially when the information is so scarce. I feel the same about research - I think it is at least half the fun of modelling. Steven
- 756 replies
-
- 3
-

-
- galleon
- golden hind
- (and 2 more)
-
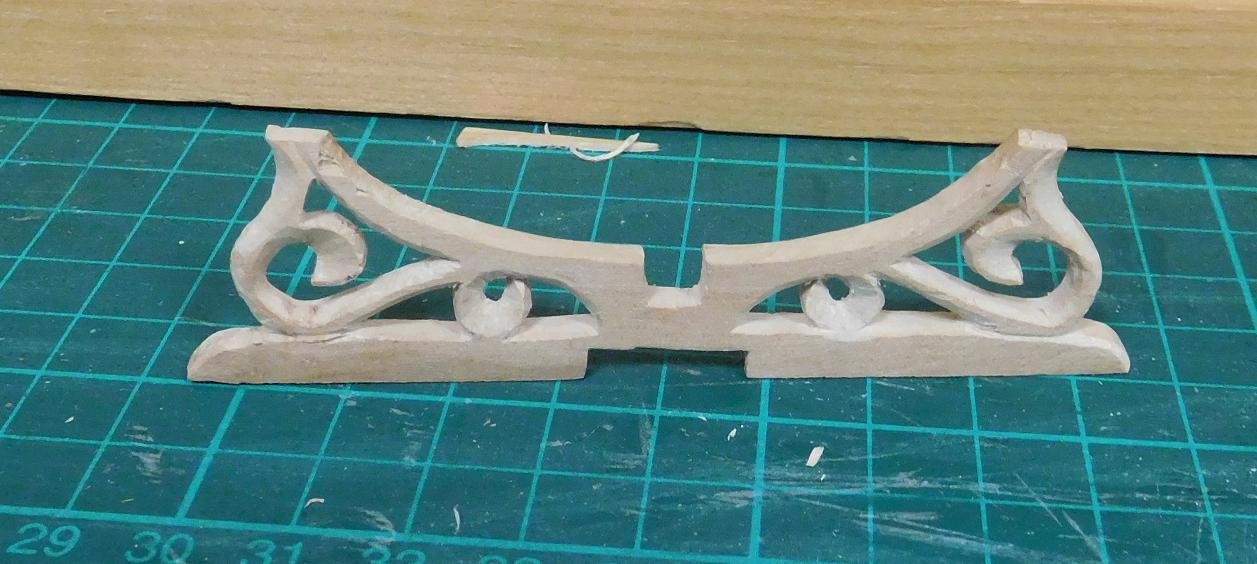
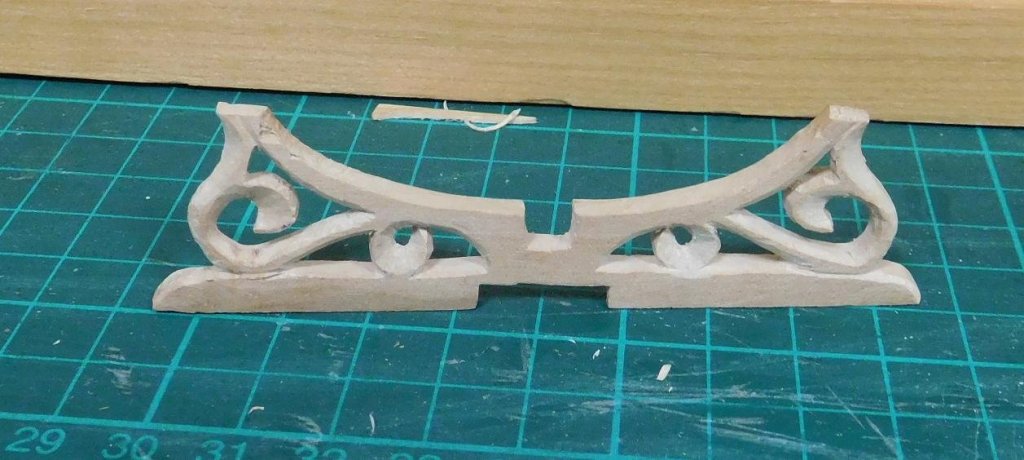
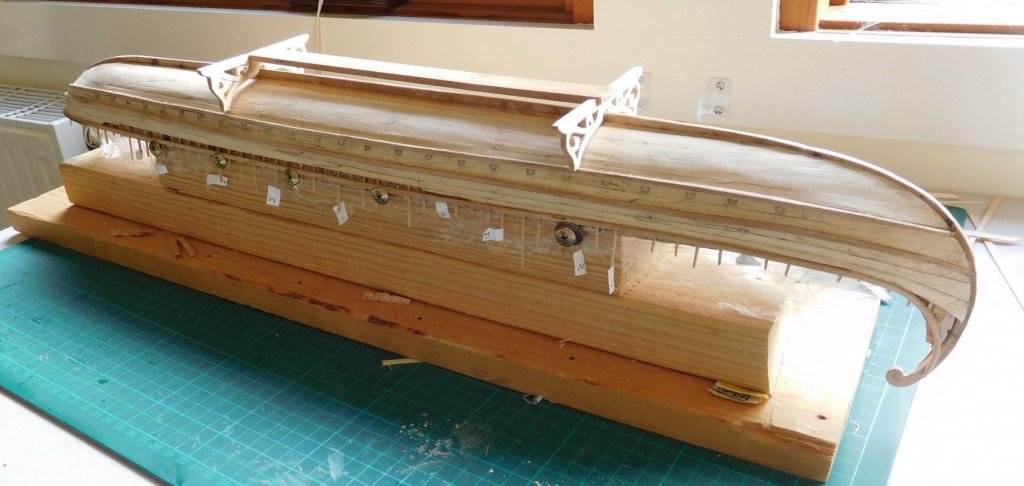
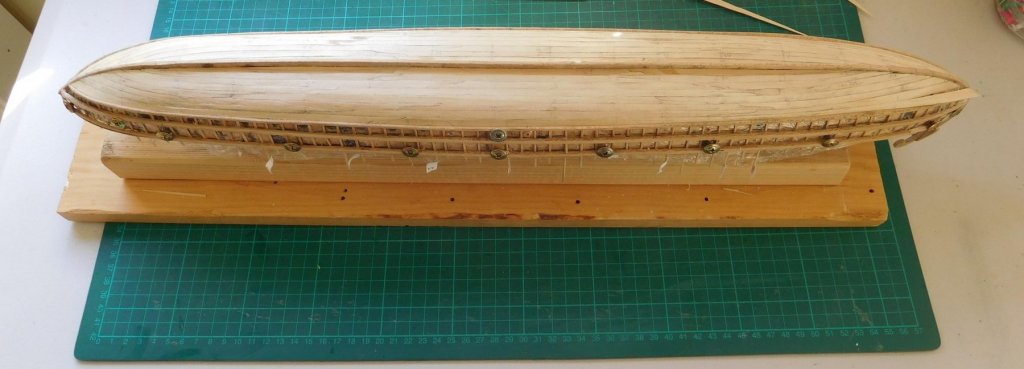
Finally got a chance (and the energy) to get to the computer and update the build log. I've come to terms with the fact that the planking isn't and won't be perfect and decided to do the best job I can to make a worthwhile model, even if there's a bit of behind-the scenes bodge that only I know about. Really, looking at it again, its' a damned good-looking ship and definitely worth the extra work to bring it up to scratch. I think a bit of filling and sanding will make all the difference. And I've learnt a lot that will stand me in good stead for the next build. So, apart from a bit of tweaking still needed around the "tail", I'm almost finished planking. Here are some progress pics This (above) is the bit I'm least happy with. If I can get this straightened out I think I'll be a lot happier with the build. Up to the antepenultimate plank . . . And the stand is making good progress - not yet where I want it to be, but looking good. I may put some three-dimensional work into it - the vines and leaves - rather than just leaving it as a flat surface. Just dry fitted at the moment, until I finish all the carving. But I think it will be a fitting adjunct to the model itself. More updates in due course. Steven


-
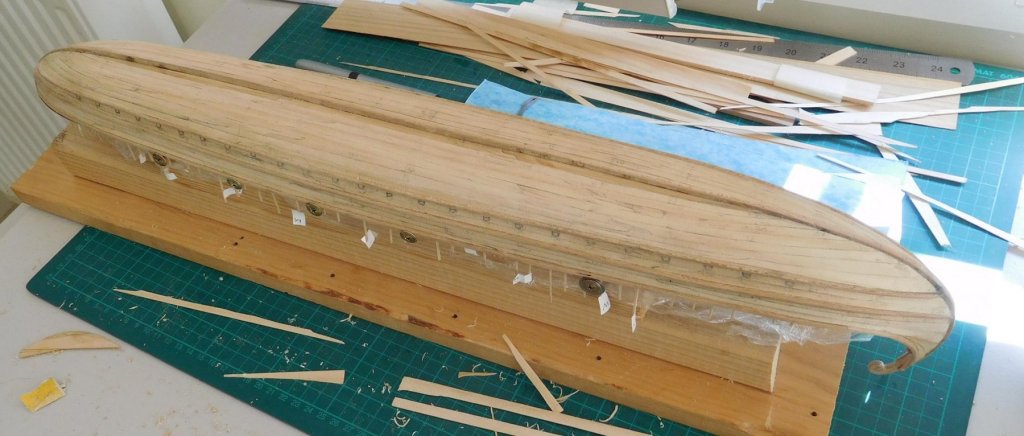
Hi Martin, I've got about three planks to do, plus a bit of tidy-up (well, bodge, actually) to fix an earlier miscalculation. I've been meaning to post progress pics, but with pressure of work in my new job all I want to do at the end of the day is lie down on the couch and veg out (for non-Australians, that's acting like a vegetable - lie there doing nothing). Give me till the weekend and with a bit of luck I'll be able to summon the energy to complete the planking. I'll still have to do some filling and sanding to smooth off the surface, but overall it's starting to look pretty good. Then I can move on - first cut the oarports, then take the hull off the plug and put in the other half of the frames (between every pair of the existing ones). Then I can work out what to do next - I'll probably put in the mast steps first and then work up a structure to hold the lower bank of oars in position. Still a long way to go before she's complete, but little steps, little steps . . . Steven
-
That sail looks magnificent. I can't wait to see it in place. Steven
-
A very worthwhile tip! Your microwave steaming technique sounds worth trying, as well. Steven
- 525 replies
-
- 2
-
-
- anchor hoy
- hoy
- (and 1 more)
-
That's very impressive, Dick. So what did you finally use to make the sail, and is there a chance of a tutorial in the future for those of us who want to follow your lead? Steven
-
I've missed this topic. The Warrior is really looking good. And if you want to get some information on some obscure detail, Wiltshire's not that far from Portsmouth (he says, as an Australian where a trip of 878 km between Melbourne and Sydney is all in a day's driving). By the way if you want to continue the Portsmouth collection without having to build the Mary Rose (as dicussed earlier), there's always https://en.wikipedia.org/wiki/HMS_M33 Steven Like this
-
At least I can answer the one about the preventer stay - it was a back-up for the stay itself in case it broke. Instead of an almighty disaster you'd have a nuisance - you'd still have to replace the stay itself as soon as possible, but in the meantime the preventer stay would hold the mast in place. Steven
-
I doubt there were many "well-built" crewmen on a carrack - at least among the topmen. The cook, maybe . . . By the way, Dick, I really ought to take the opportunity to say how good that ship looks, and how well she resembles the contemporary pictures. That last profile picture of her really shows up what a magnificent job you've done. Steven
-
Thanks, Carl, but I've gone too far now to change tack (sorry!). Anyway, the faults aren't all that obvious to the naked eye and should respond very nicely to a bit of judicious filling (By the way, anybody recommend a good filler? Otherwise I'll use thinned white glue and sawdust from the build - I've got oodles of it!). And once filled and painted, they should vanish. The thing is, with the wonderful examples on this forum I'd set my sights pretty high for what was really my first serious set of planking. That I didn't reach that exalted level first time isn't really anything to be upset about. Though I'd have liked the planks to run more smoothly together like the ones the experienced guys do, I'm actually rather proud of the results I've got. Steven
-
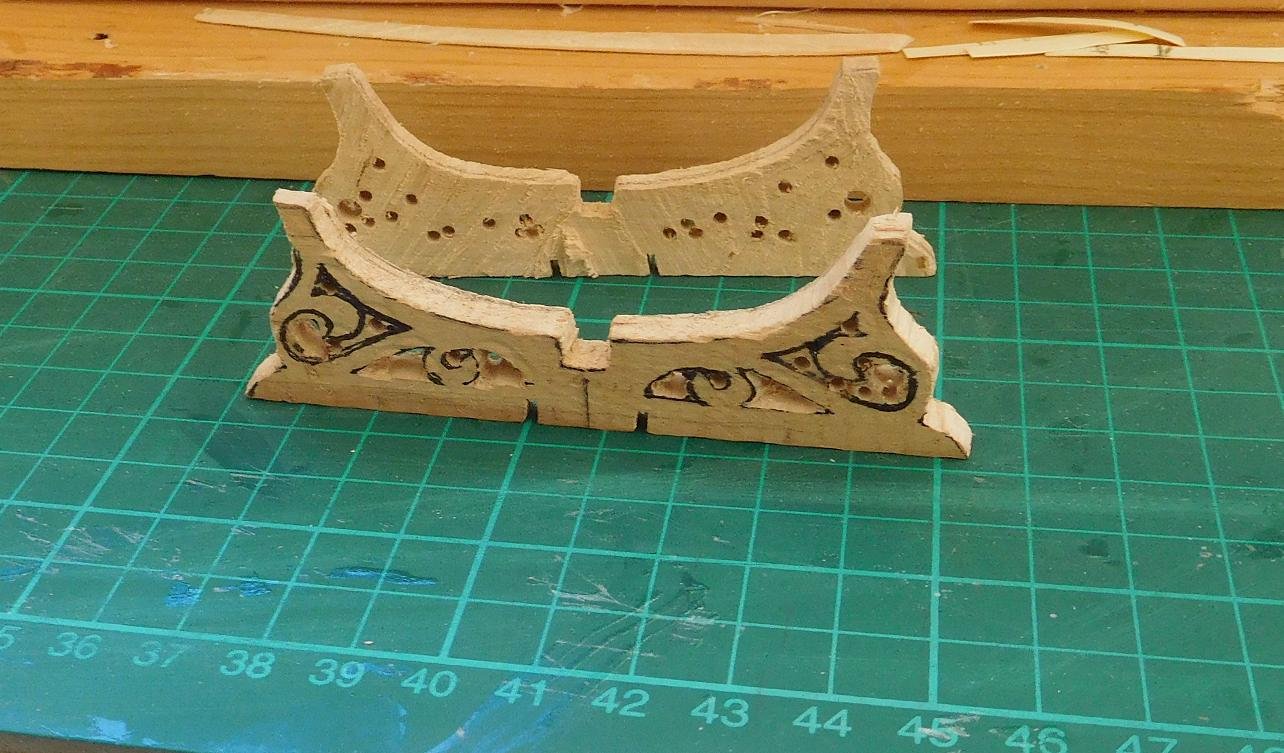
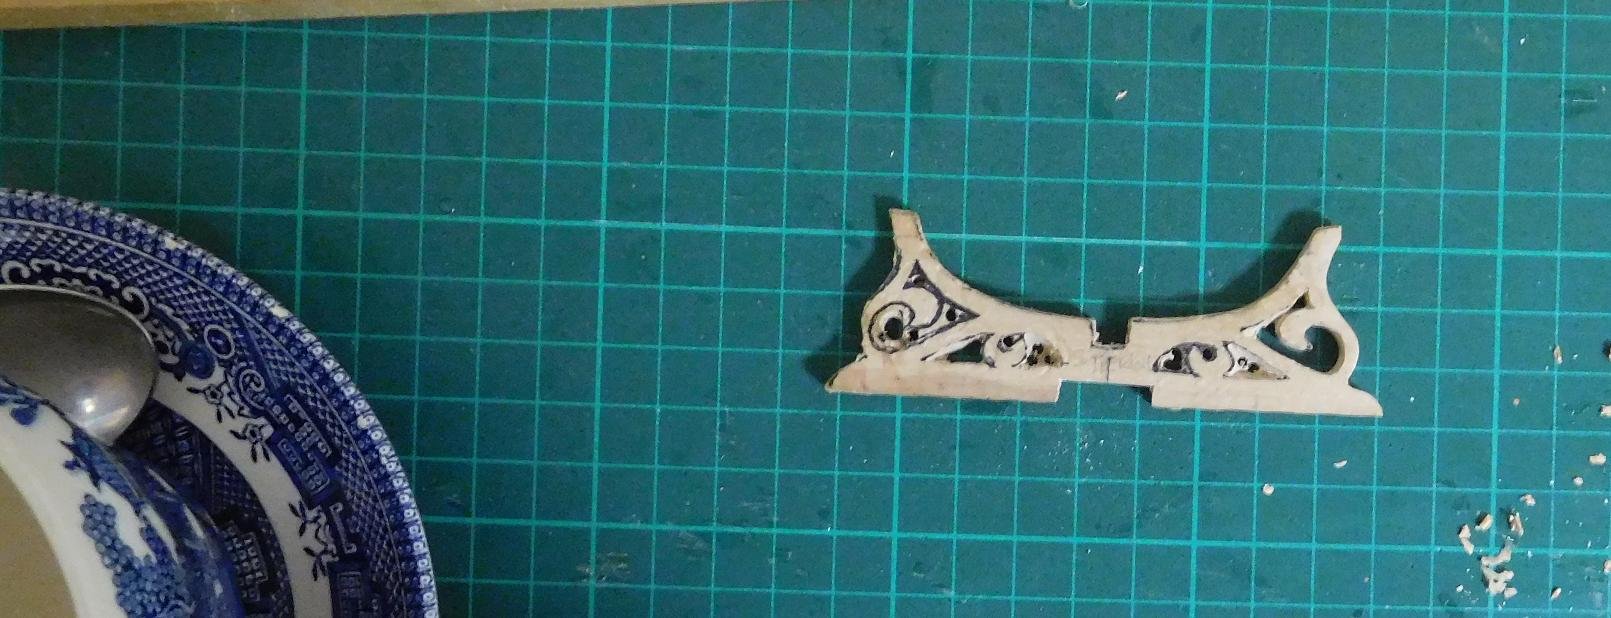
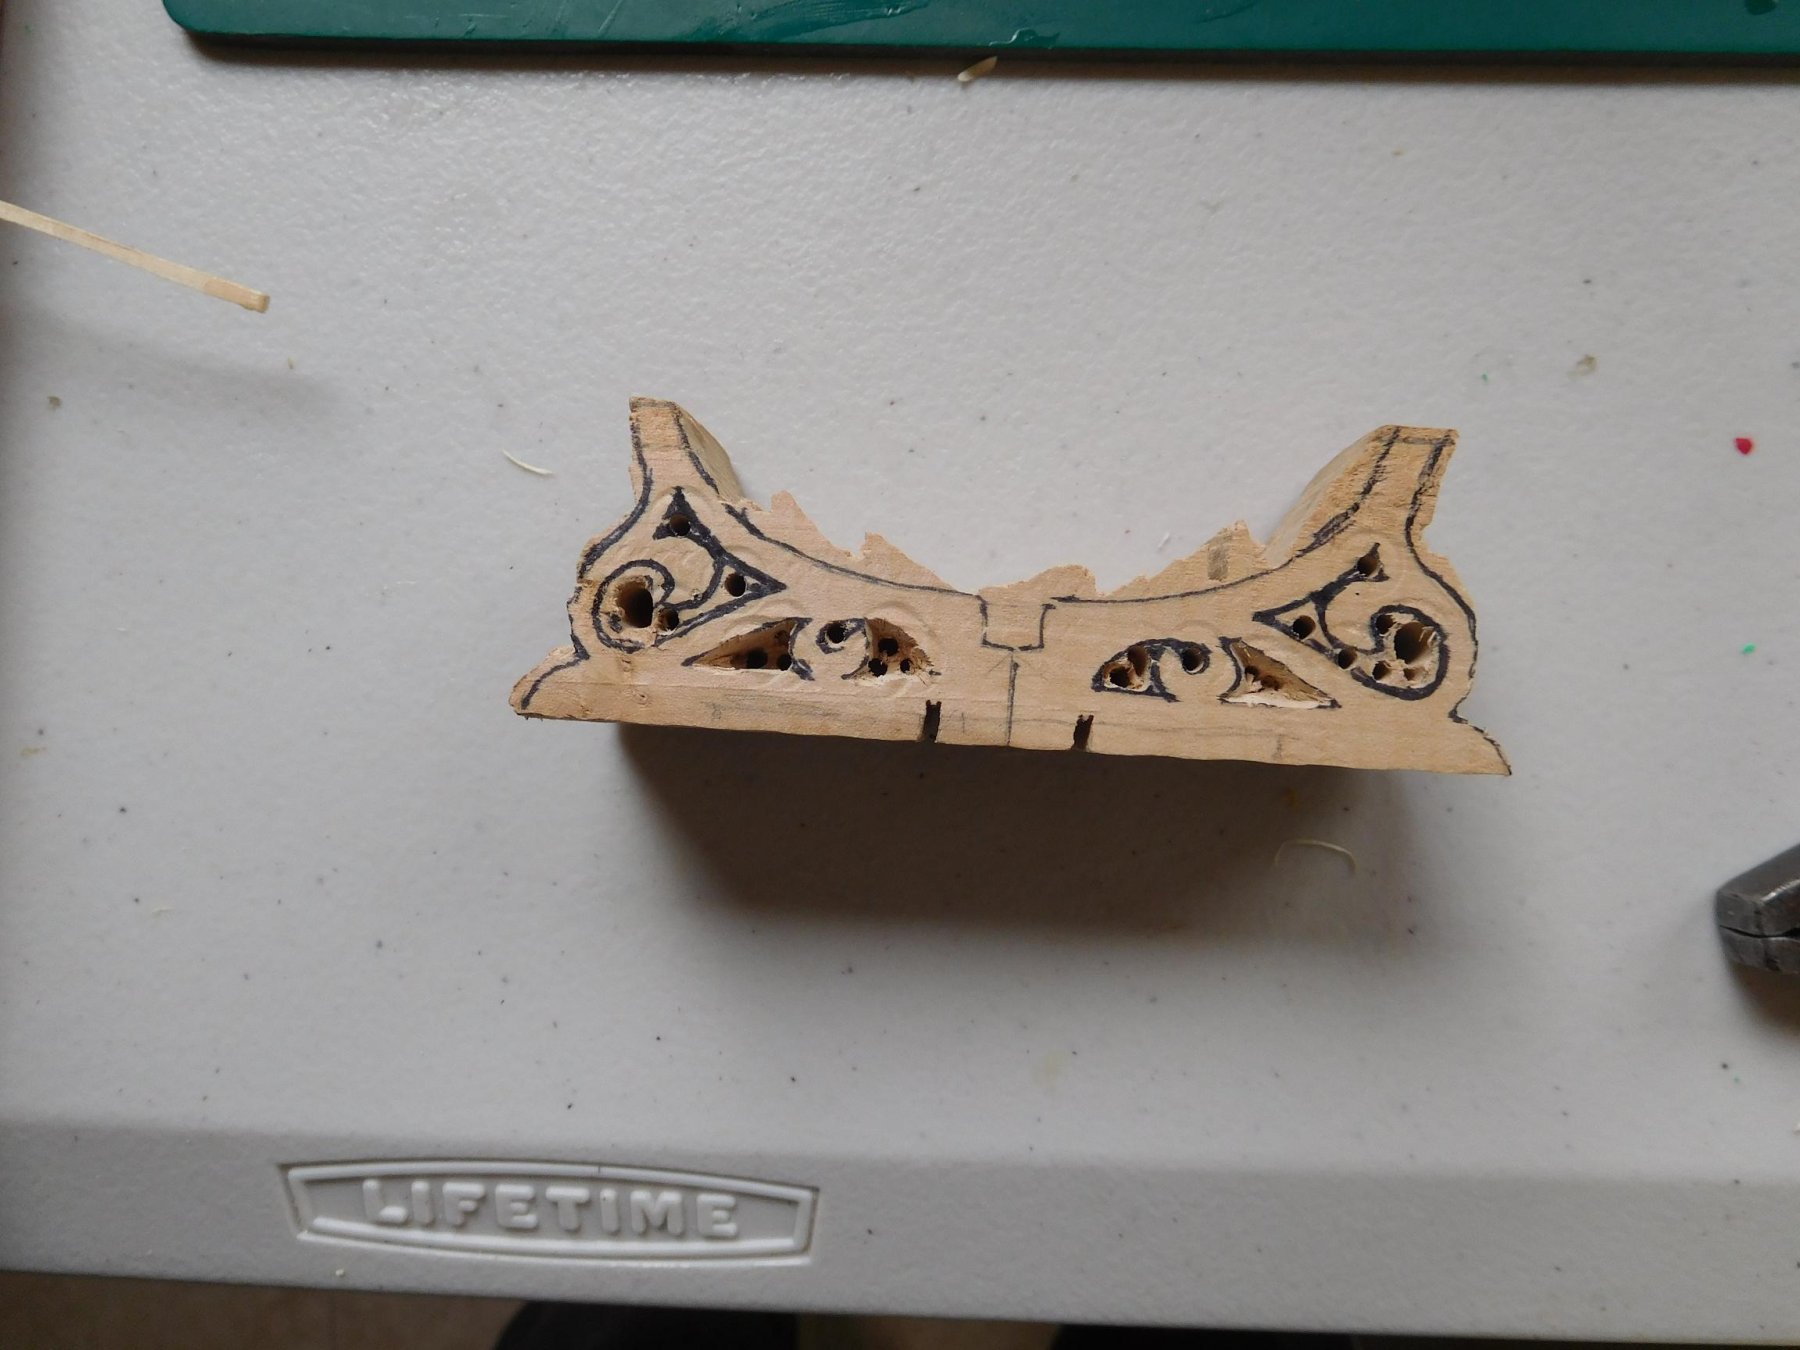
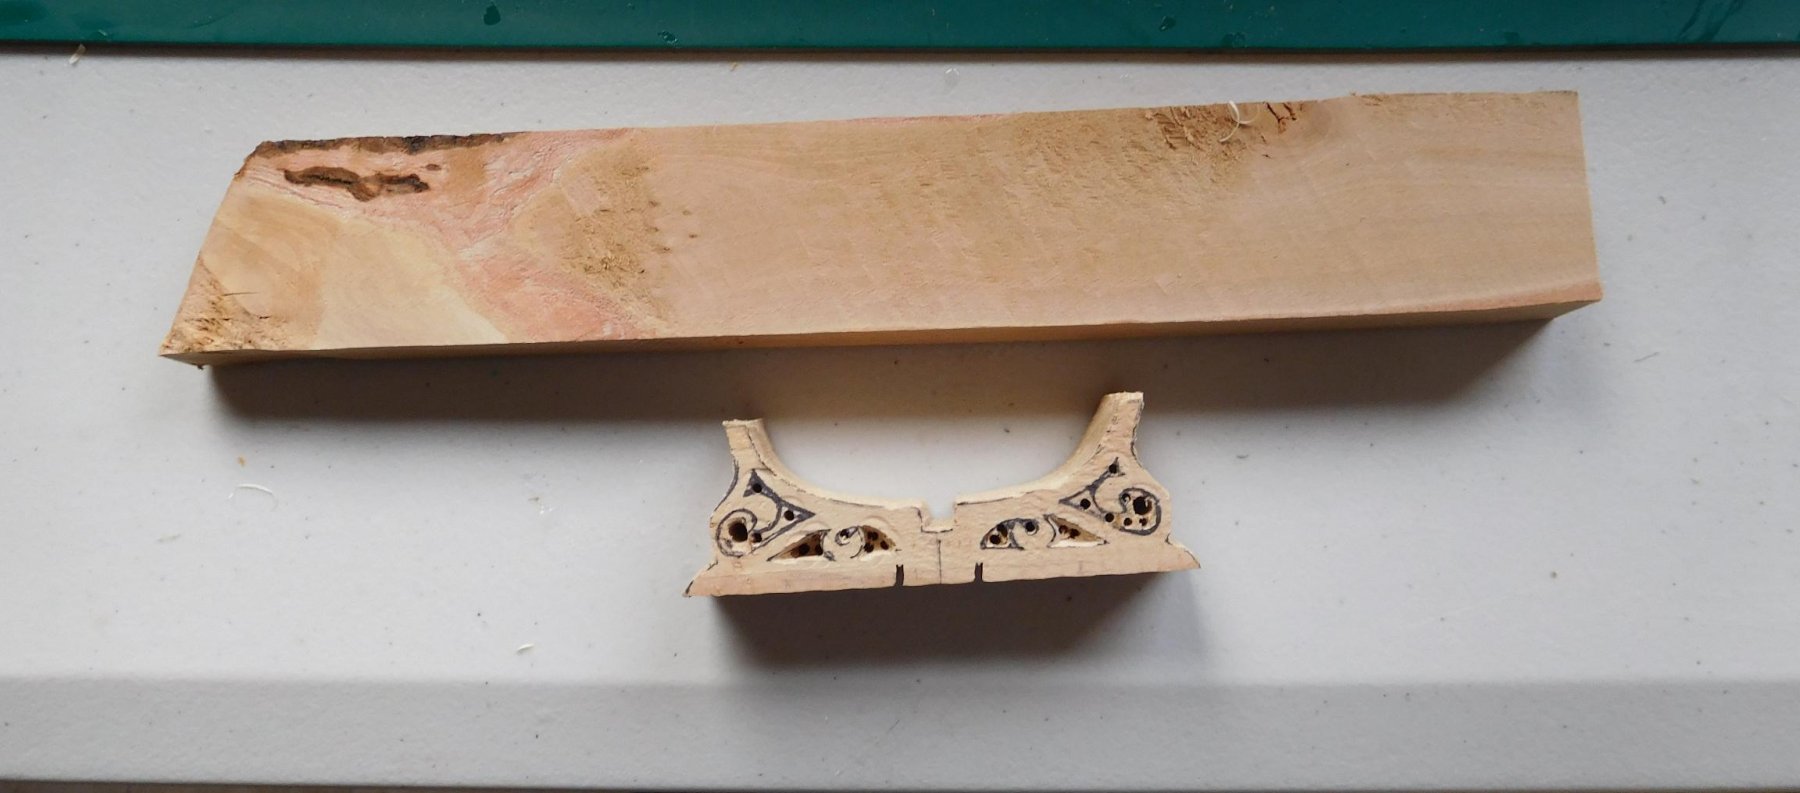
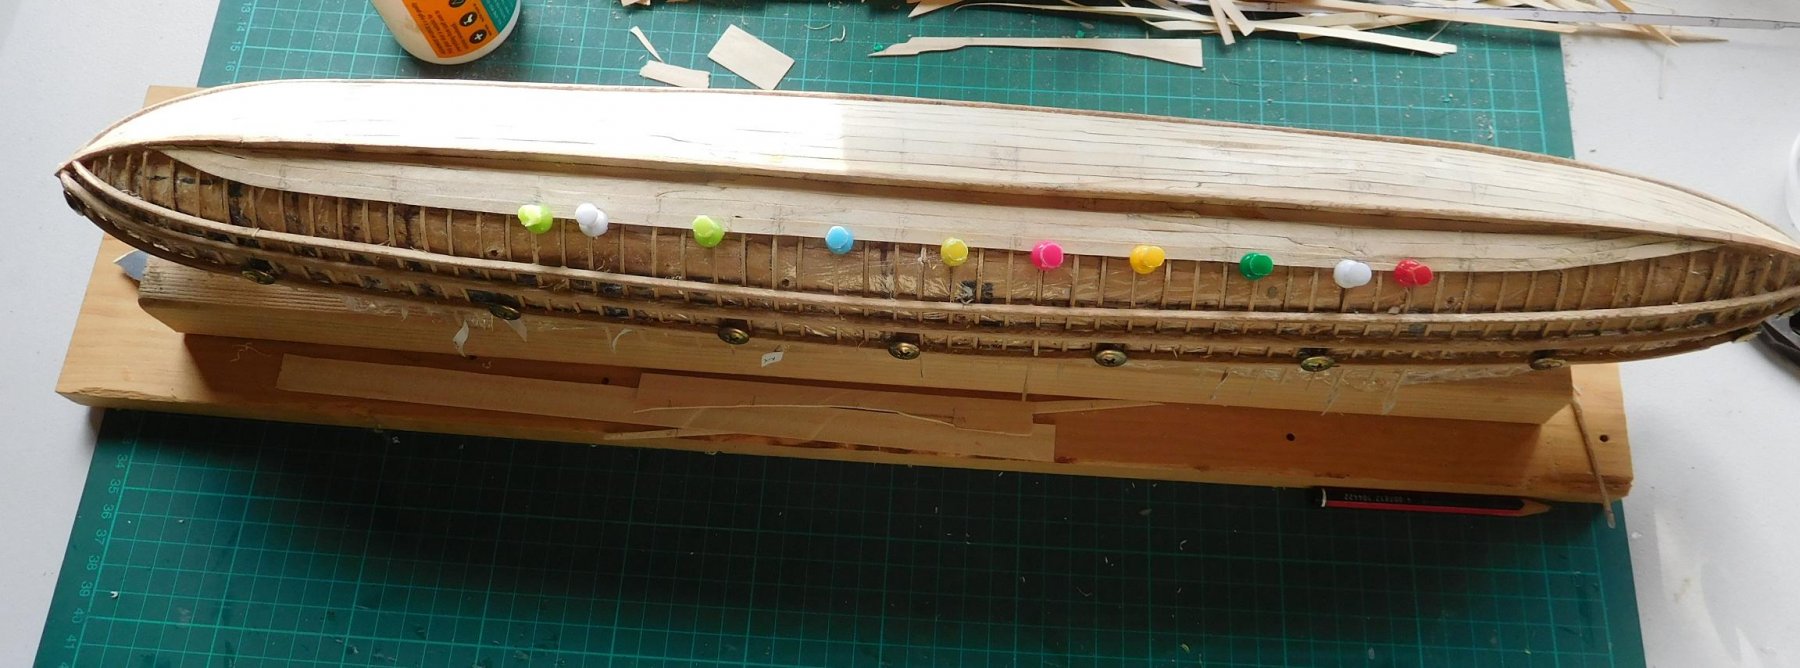
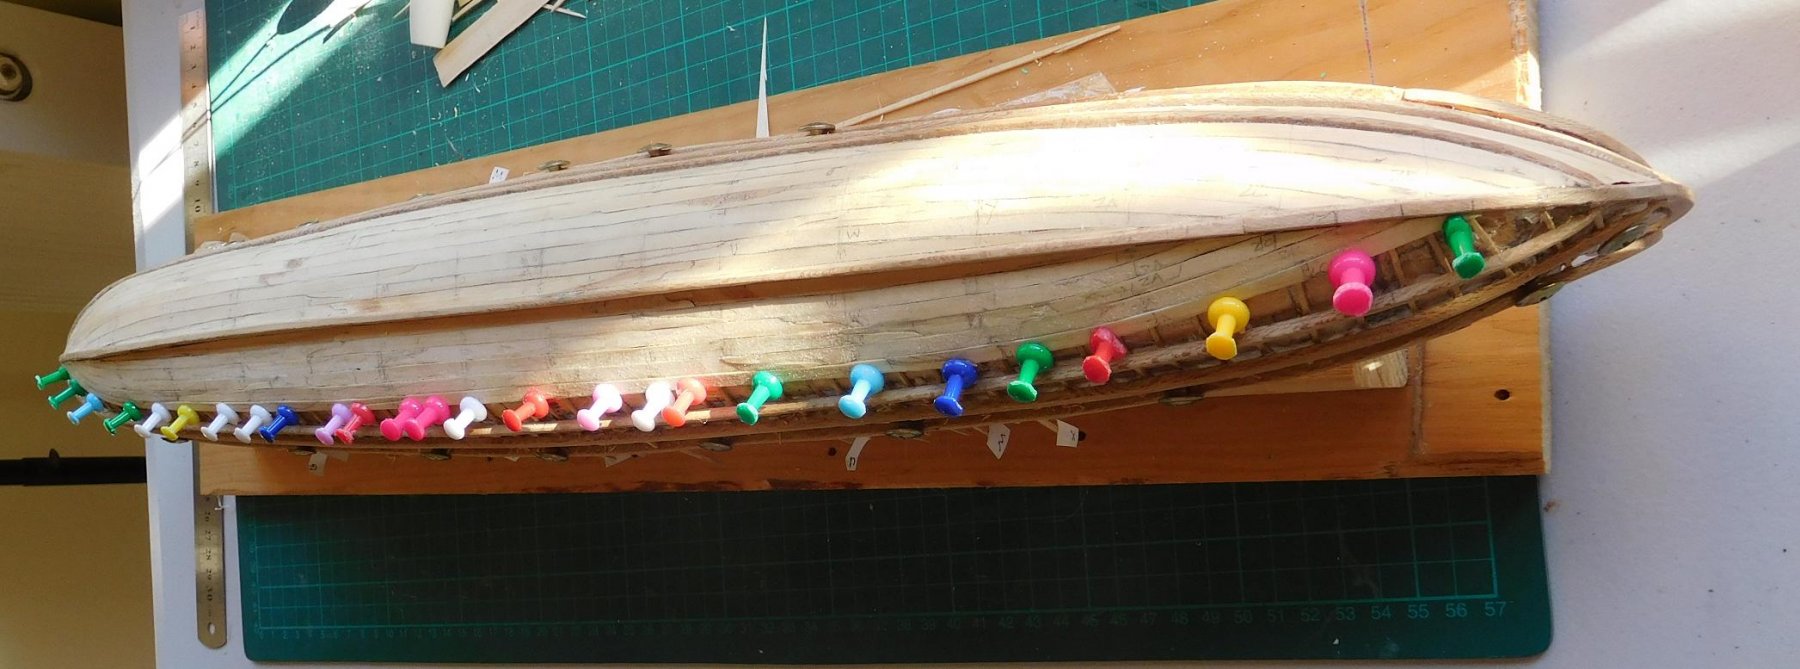
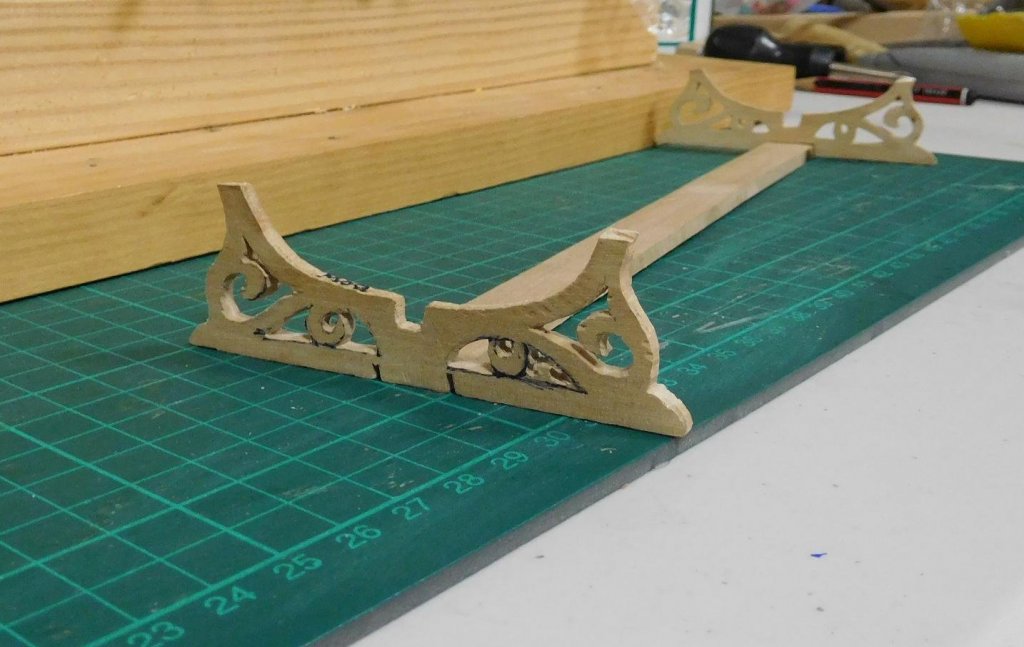
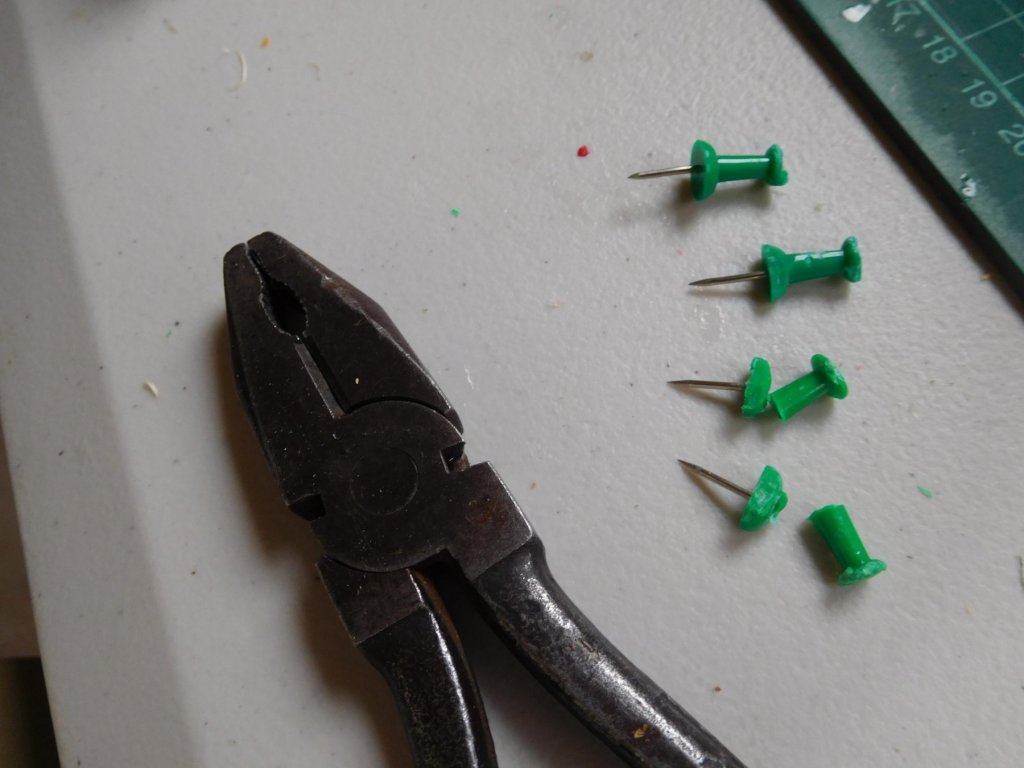
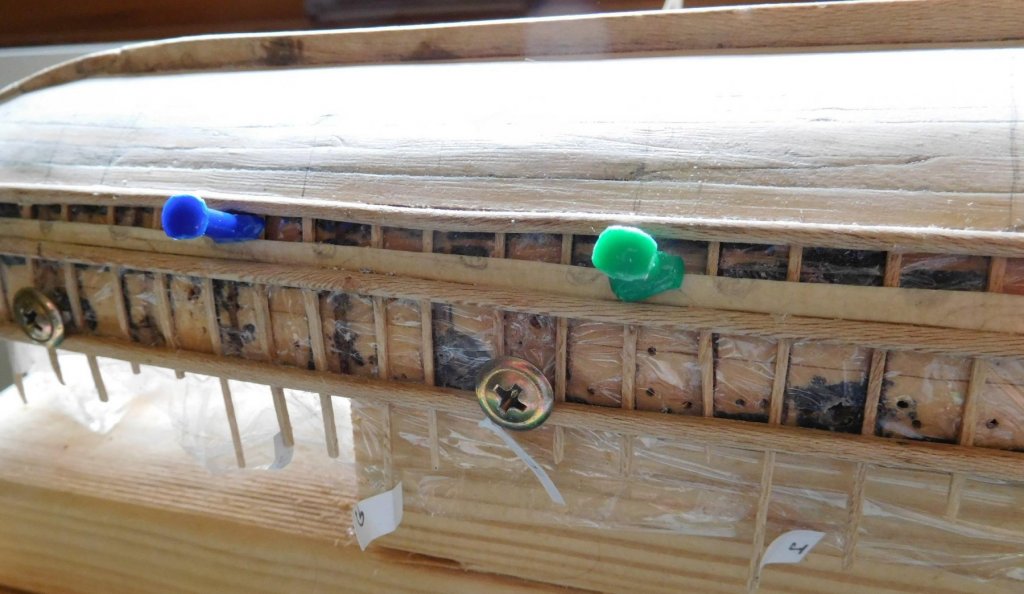
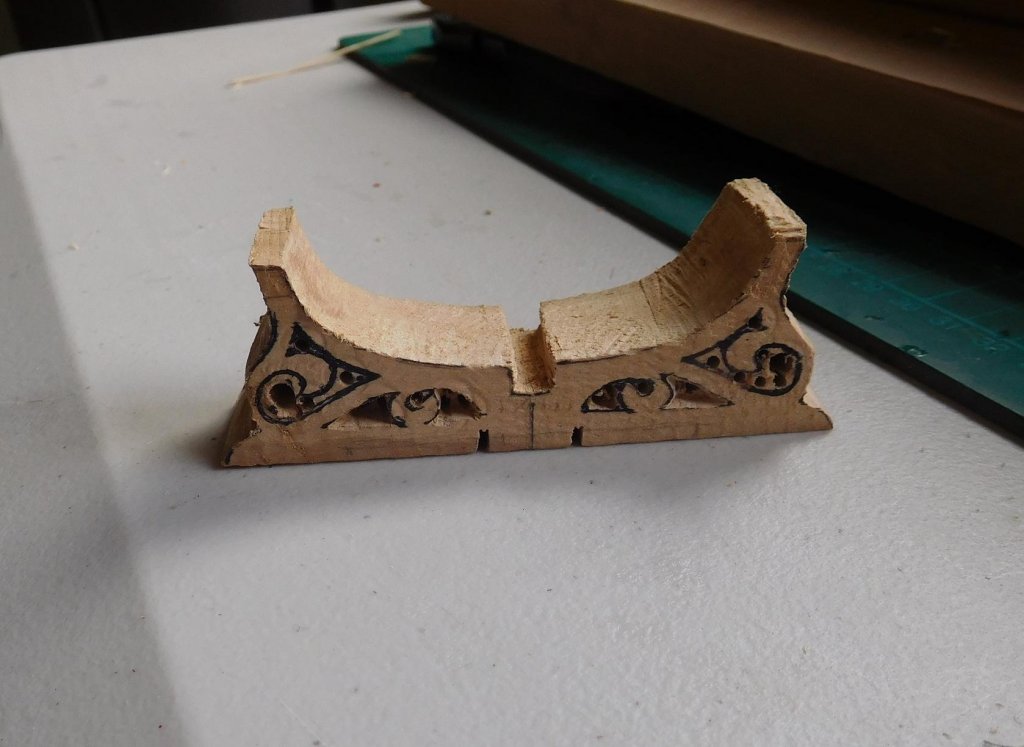
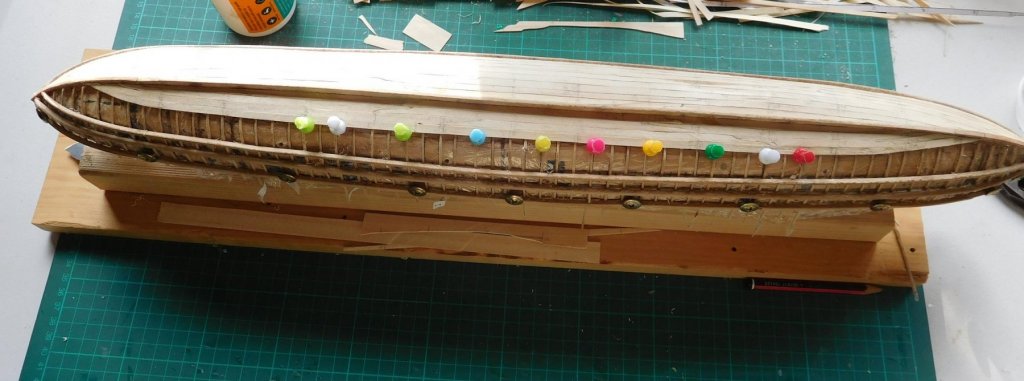
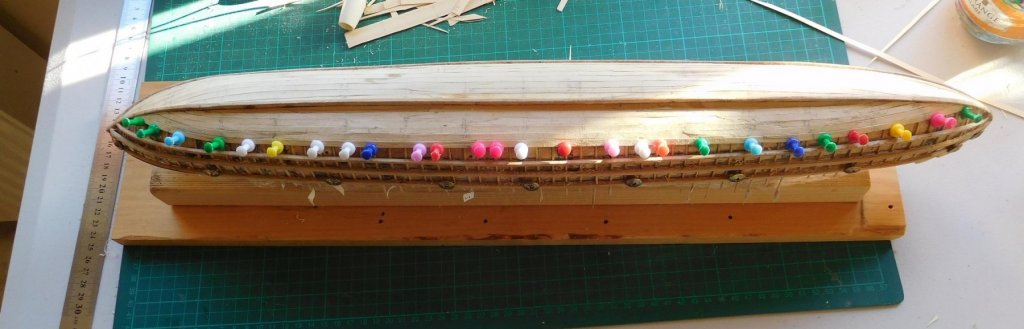
I've been working on the stand for the ship in between times. Here are some progress pics. Roughly sawn to shape and holes drilled for the openwork, which I've made a start on. The timber is pearwood, from the neighbour's tree. Once it's shaped I'll cut two layers about 4 or 5mm thick to make the ends of the stand. Smoothed off the outside shape somewhat, and roughed out a bit of pearwood to make the joining strip from. It will fit in a horizontal slot at the bottom to join the two parts of the stand. When I'm planking sometimes the heads of the pushpins are too big to fit in the space available, so I've been trimming them down with a Stanley knife. Unfortunately they aren't all that strong and when you try to adjust the position of one, or take it out with a pair of pliers . . . It's great fun trying to lever half a push pin out of the plug with a knife blade, without destroying the planking adjoining it. Steven


-
Thanks Banyan and Druxey. It means a lot coming from people like you. If I can emulate the quality of your work I'll consider myself a true ship modeller. Steven
-
As the hero of The Castle said "Yeah, but you've done something to it . . ." That's worthy of going into the Pool Room along with the jousting sticks . . . Steven
-
Greg, you never fail to amaze me with the quality of your work. Lesser mortals like me can only gasp in awe. Steven
-
That's a nice looking model, André. And very nicely executed. Steven
-
Selamat datang, Jonk. I've always admired traditional Indonesian ships and boats. They are very elegant. Steven
-
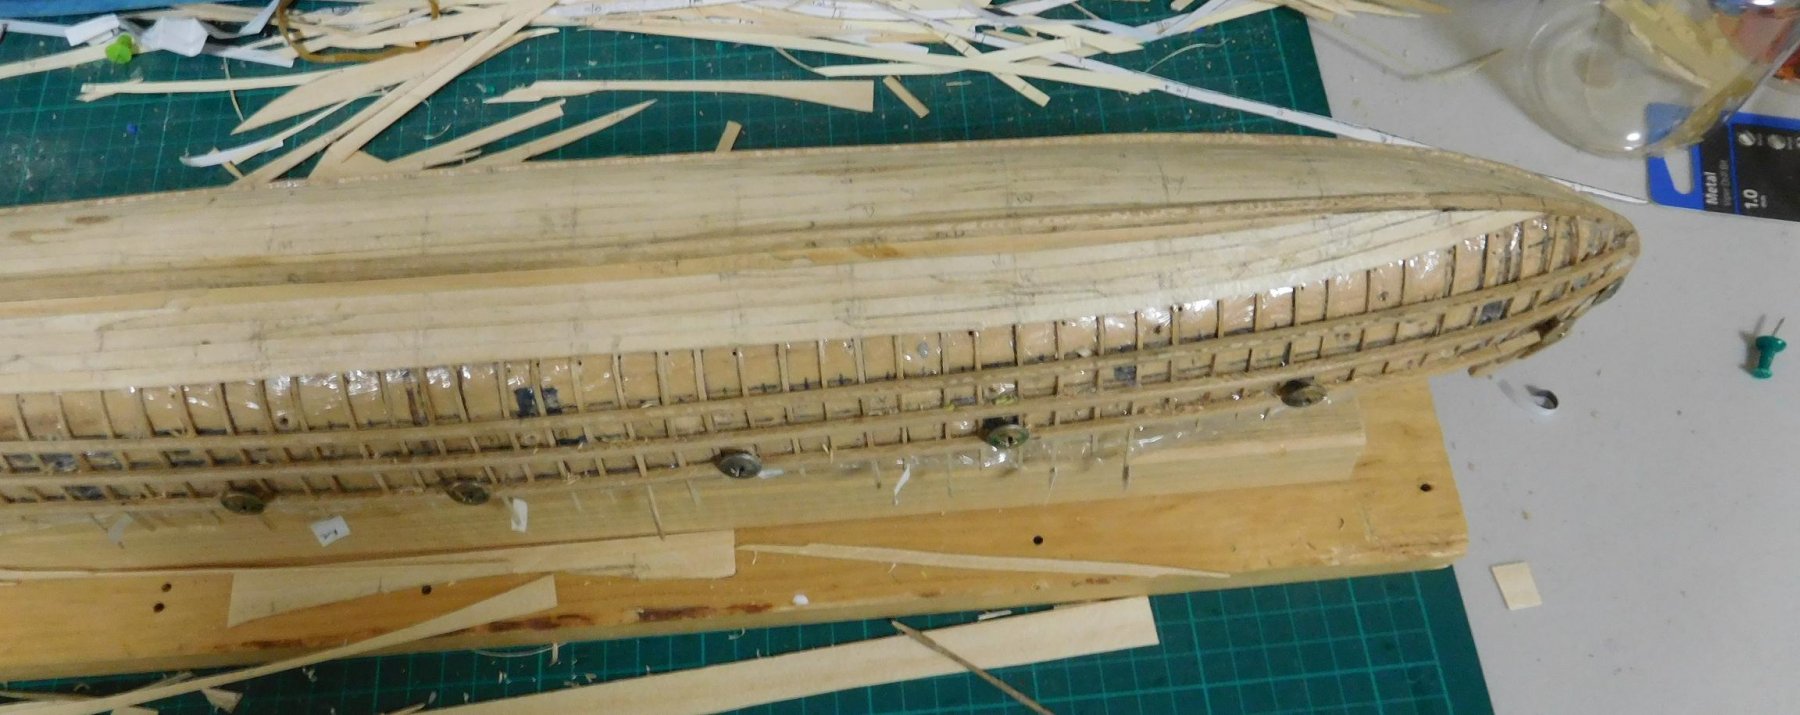
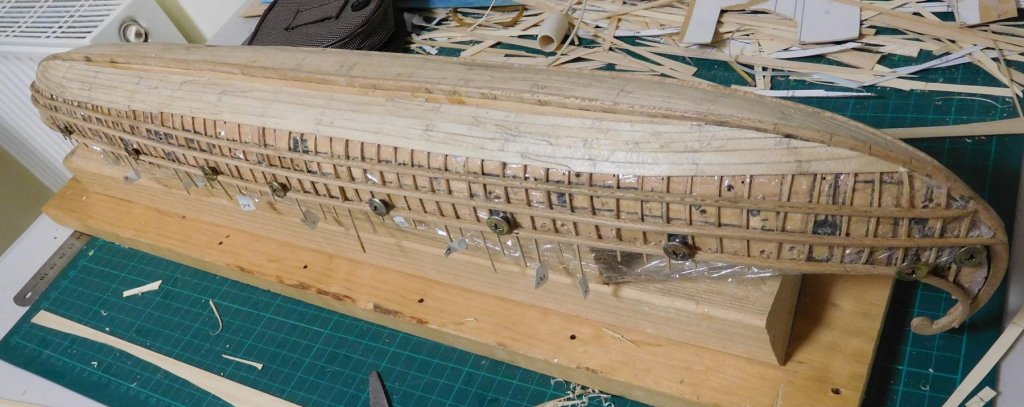
Thanks, Russ. And thanks everybody for the likes. I just realised today why I've been having so much trouble, having to cut exaggeratedly curved planks for the bow and stern which get wider and wider as they approach the ends. It all comes down to making the garboard strake far too short due to inexperience. I misinterpreted a tutorial and now have to live with the result. It's far too late to fix it now - if I tried removing the planks I'd destroy the frames because they're so frail. So I'm putting it down to experience and I'll do better on the next model I make. I've found my planking technique has improved as I've gone along, however. I've been working on the starboard side planking. Here's some progress pics. On the last photo above you can see the effect of getting the garboard strake wrong - the gap between the top plank and the wale should be pretty much the same all the way along the hull, but it's become far too wide at bow and stern. I won't make that mistake again. I've got the underwater hull completely planked now, and I'm about to start on the sides. Looking forward to finishing and taking her off the plug at last! The planks are a little wonky - caused by really thin planks over frames not perfectly in line because I'd cut grooves in the plug for them. Another mistake that won't be made a second time. If ship modelling is all about learning from your mistakes, I've certainly learnt a lot! Still, nil desperandum - I'm having a lot of fun with it and the faults (that are so obvious to me at the moment) won't detract from the final model. And with experience I'm becoming a better modeller. Steven


-
I've put this in my favourites as an example of difficult planking done well. Well? - - - Magnificently! Steven
- 525 replies
-
- 2
-
-
- anchor hoy
- hoy
- (and 1 more)
-
How big are those lubber holes, Dick? Are they big enough for someone to squeeze through? They look rather small - but doubtless you've already worked that all out. Steven