


Louie da fly
-
Posts
7,980 -
Joined
-
Last visited
Content Type
Profiles
Forums
Gallery
Events
Posts posted by Louie da fly
-
-
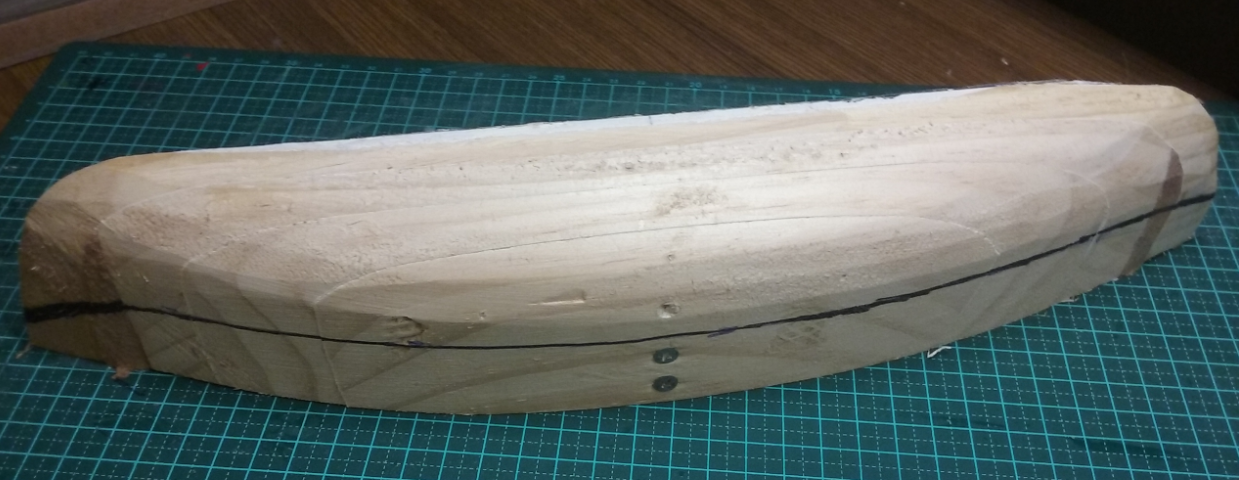
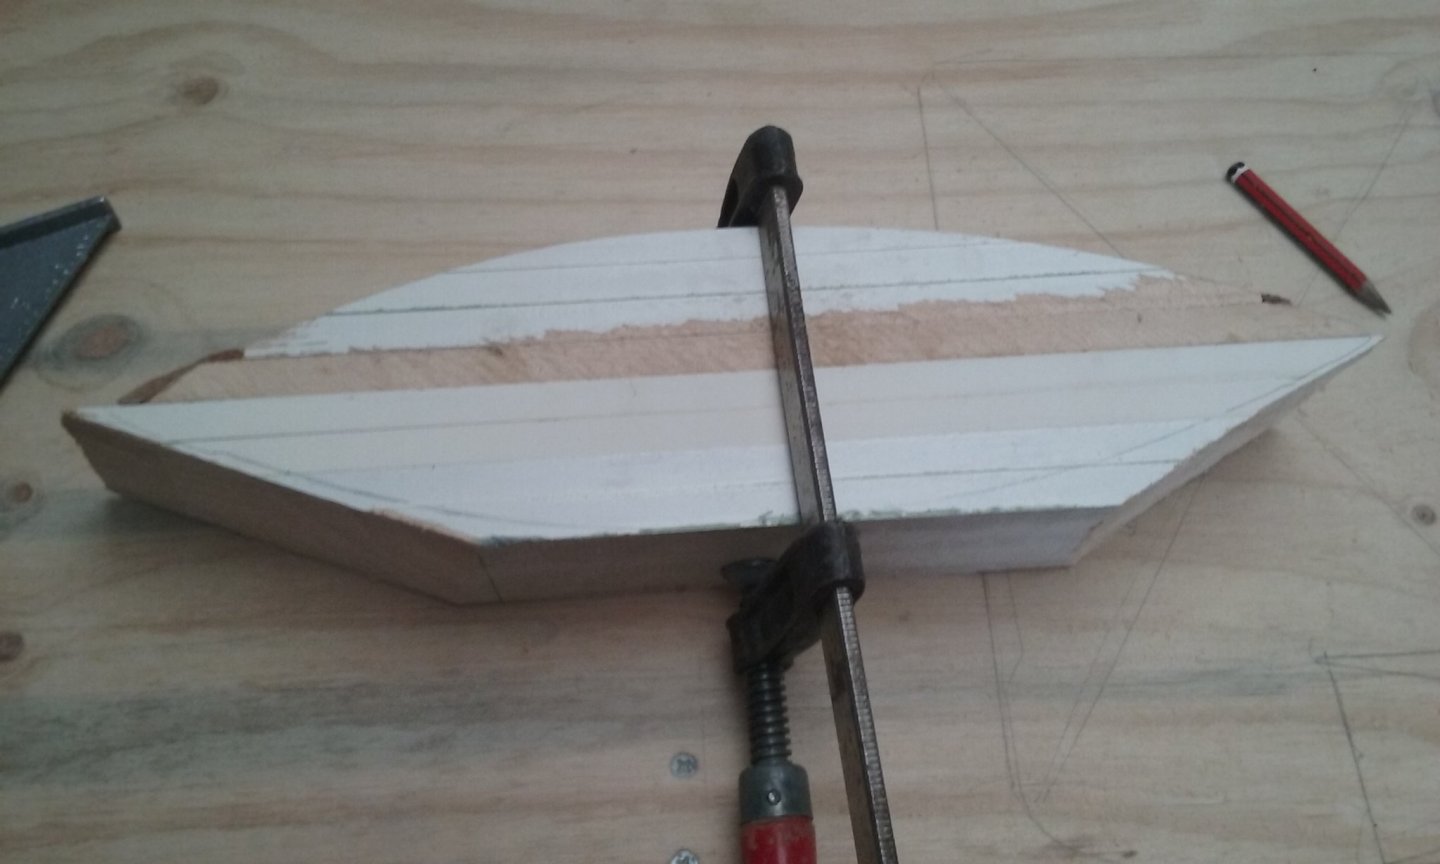
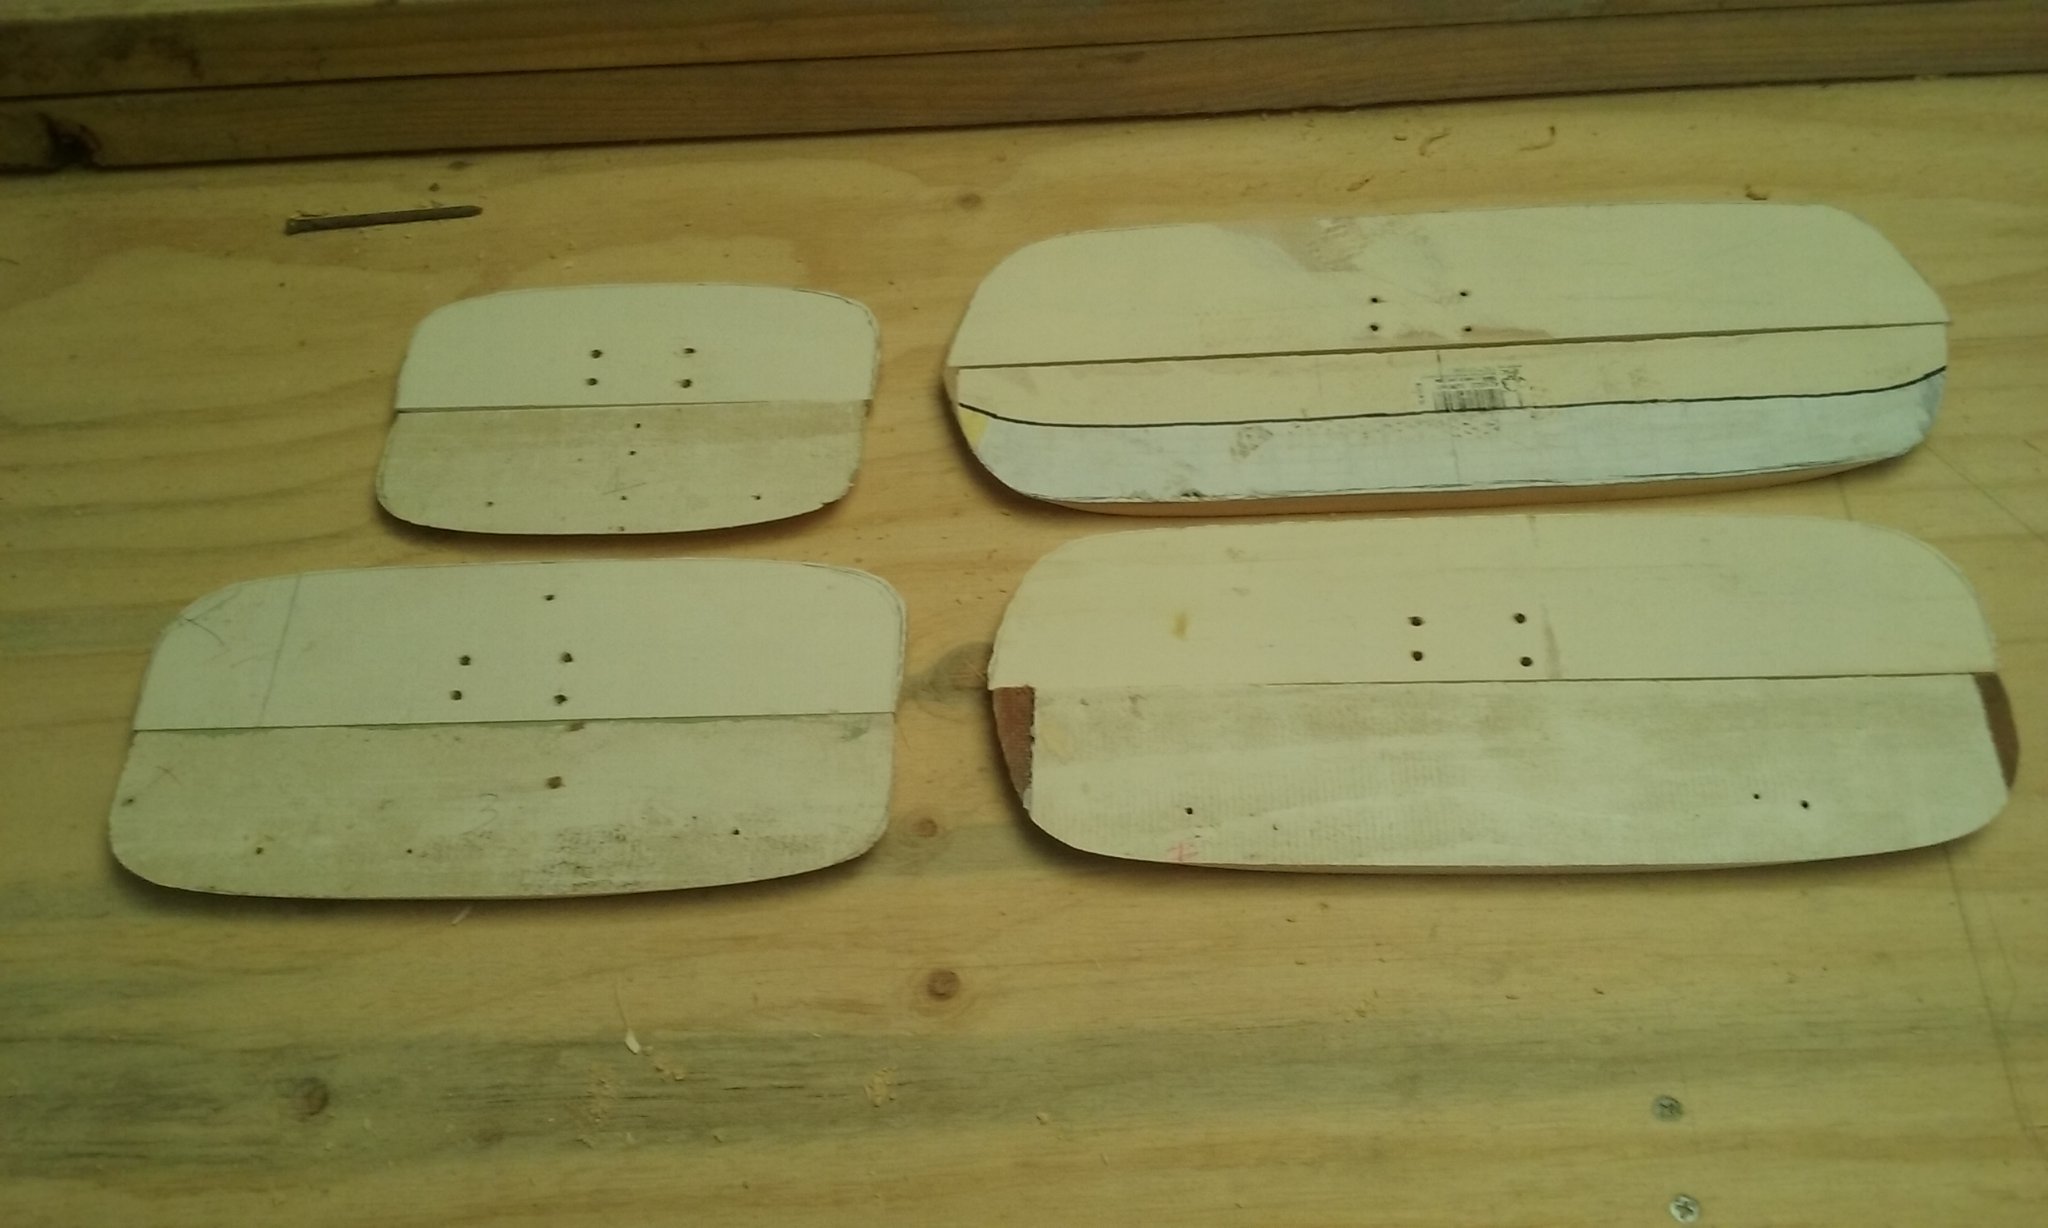
Marked the wooden strips that make up the second half of the plug, so they match the first half:
Then I noticed that the strips were somewhat the wrong shape - the ends should either slope inwards as they go lower on the hull (towards the ends of the ship), or at midships they should be vertical - otherwise the ship will have a tumble-home - effectively it would be wider than the extreme breadth as taken from the drawings I was working from. So I re-shaped them somewhat, and have also cut the outlines of the second half's strips to match them.
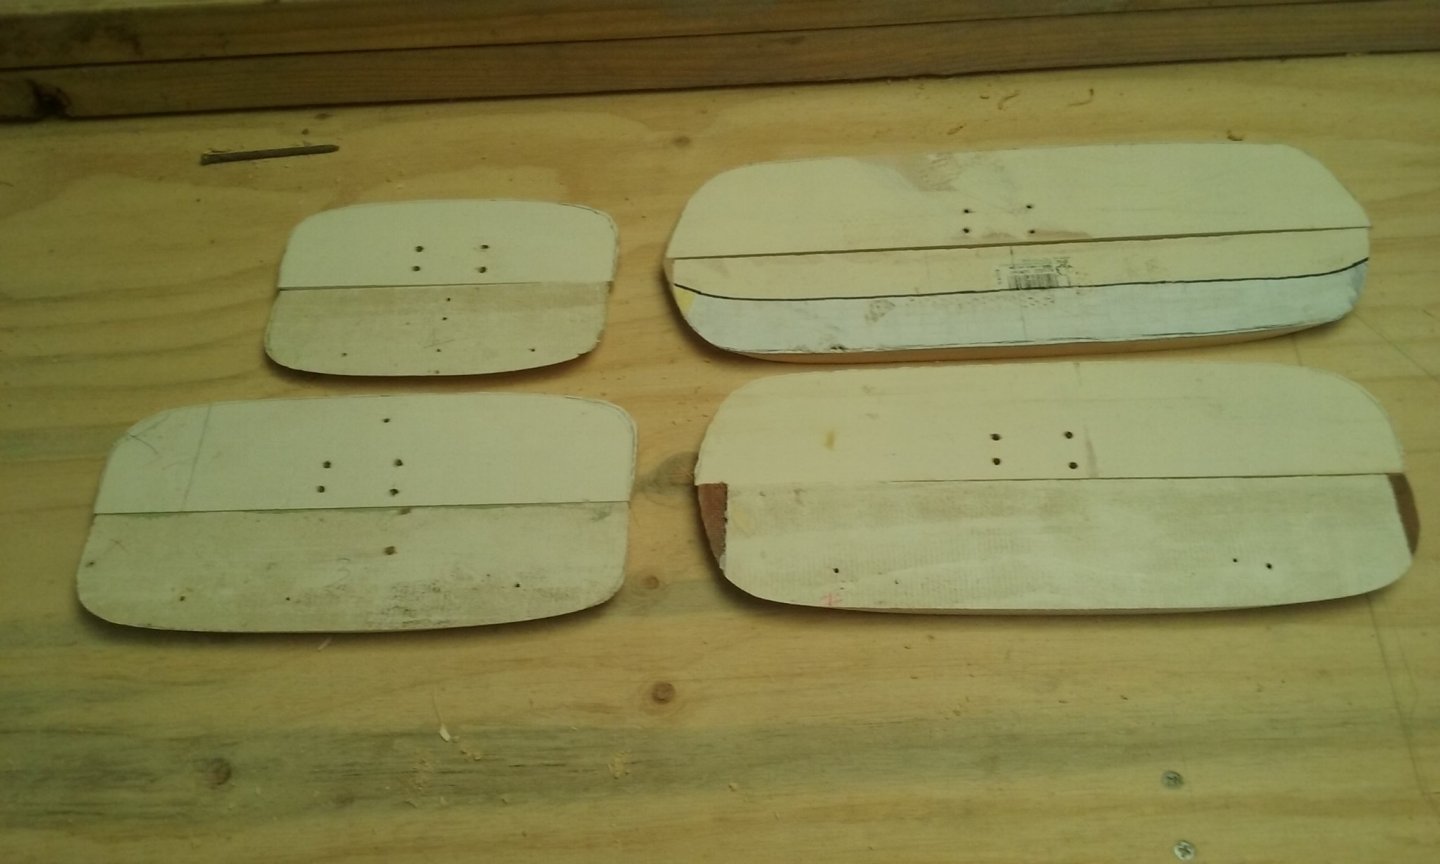
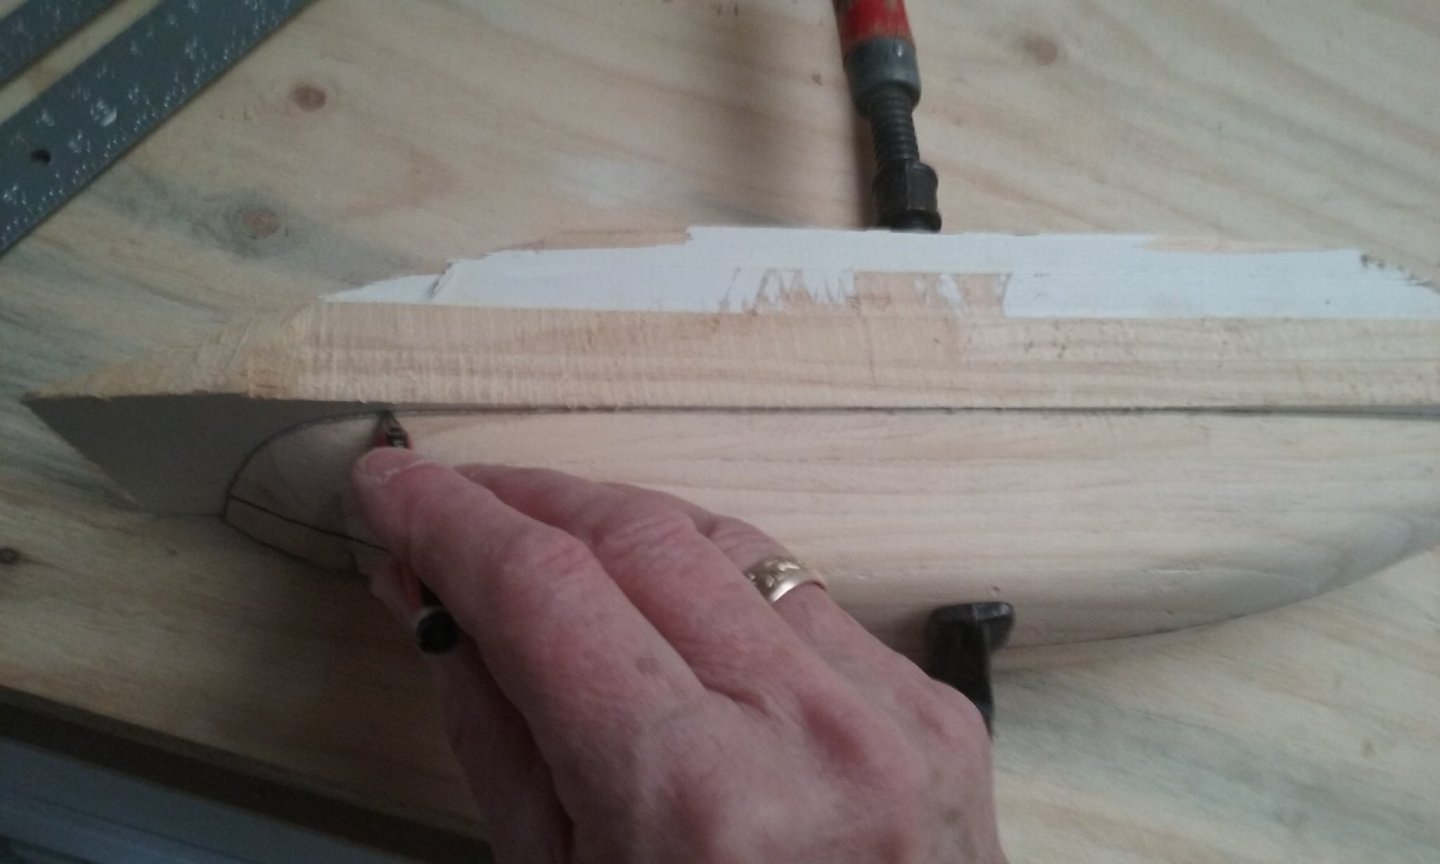
Next step is to fully shape the second half.
Steven
- Cathead, Archi, Chuck Seiler and 4 others
-
 7
7
-
Ah, yes. I know this one. I have admired it for quite a while. Mine will look very similar, but some of the details will be different - closer to the details on the city seal. For example there will be no bowsprit, the castles will be "tapered rectangles" rather than triangles, and some of the detail of the castles and their supports will be different.
The hull shape and the mast and sail will be very similar.
Steven
- Cathead, mtaylor, Chuck Seiler and 1 other
-
4
-
-
Beautiful work, mate!

Steven
- Chuck Seiler, Estoy_Listo and LyleK1
-
3
-
Thanks, AnobiumPunctatum. Chapman has already alerted me to this book. However, the fact that it's in German (which I can't read) and it was written in 1984, before the knarr finds, means that it would probably only be of incidental interest. However, I'd be interested in seeing the shape Zimmerman proposed for his reconstruction.
I have Landström's book, and I'm taking a lot of his ideas on board.
Steven
-
I've just been doing some research to find out how thick I should be making the planking on the nef, based on the knarr finds which are the only near equivalents to a nef for which archaeological evidence exists.
The planking on the knarr Skuldelev 1 was 1" (25mm) thick on the bottom, but on the sides it was as much as 2.5" (62.5mm), much thicker than the planking on the Gokstad (long) ship, which was 25mm (1") at its thickest, tapering down to even less.
So if this (admittedly rather small) sample is to be believed, the knarr was much more strongly built than the longship, sacrificing seaworthiness for strength, as befits a cargo vessel which carries a load of 15 tons. On the other hand, it has been calculated the ship I'm basing my model on, Haithabu 3, could have carried 60 tons, so it was probably even more strongly built.
At 1:75 scale, that means the bottom planking will be 0.3 mm thick, while the sides should be 0.83mm - but I'll probably make it somewhat thicker because the ship I'm building carries four times the load of the knarr from which I got my figures.
Worth knowing.
Steven
-
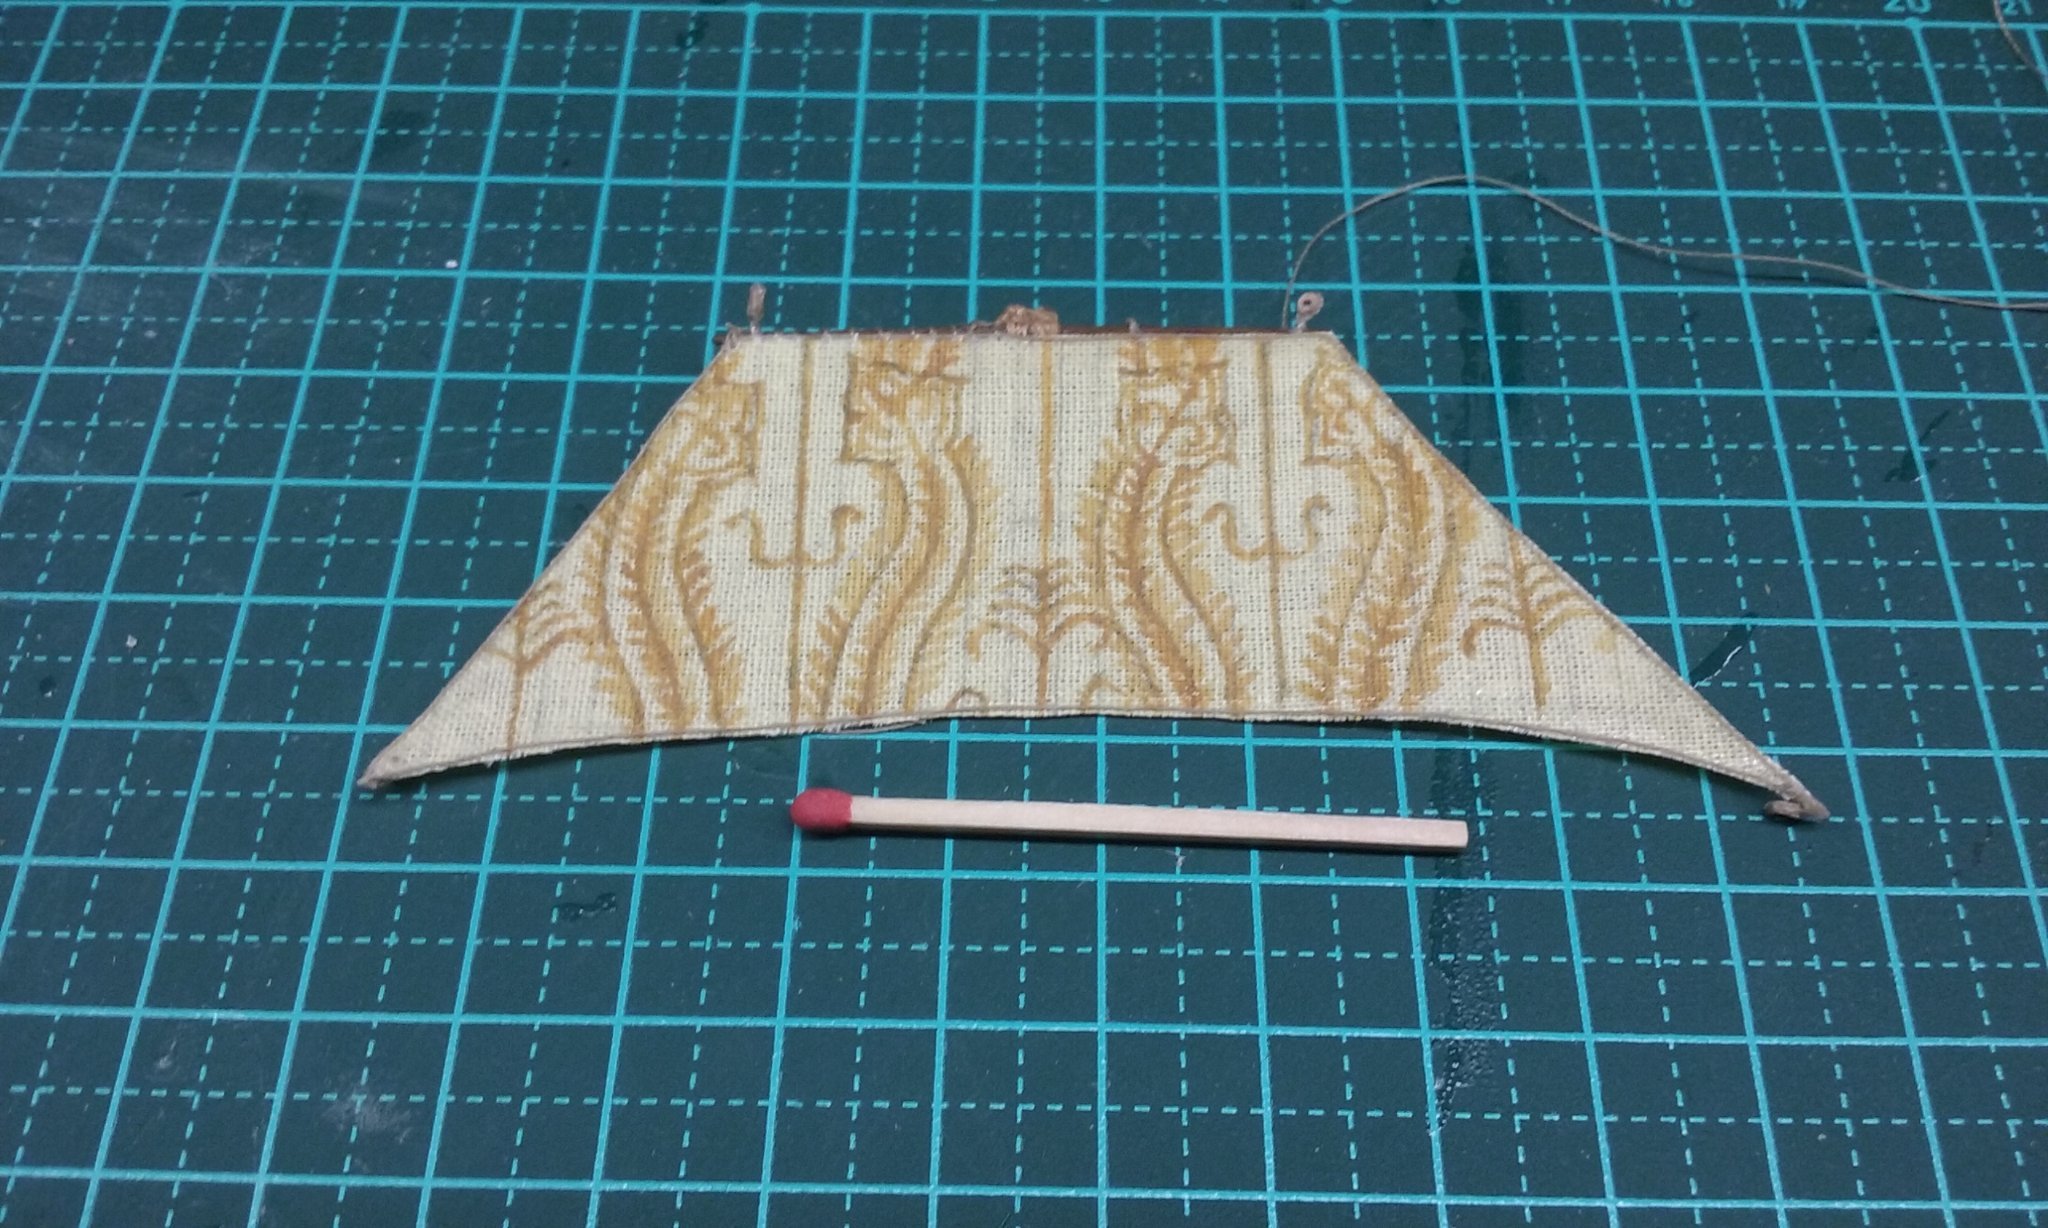
Pat, you've caught me out! Yes, it's an enormous matchstick, made bespoke to fool people. (Maybe I'll put in a ruler as well, for those who can get their heads around that.)
Dammit! I just broke the fore topgallant yard again!

Oh well, back to the drawing board. I'm determined to keep the original yard if I can, but it's very annoying having this happen. (My own fault, by the way).
Steven
- druxey, Keith Black and BANYAN
-
1
-
 2
2
-
Very interesting, Chapman. Unfortunately, ich spreche nicht Deutsch . . .
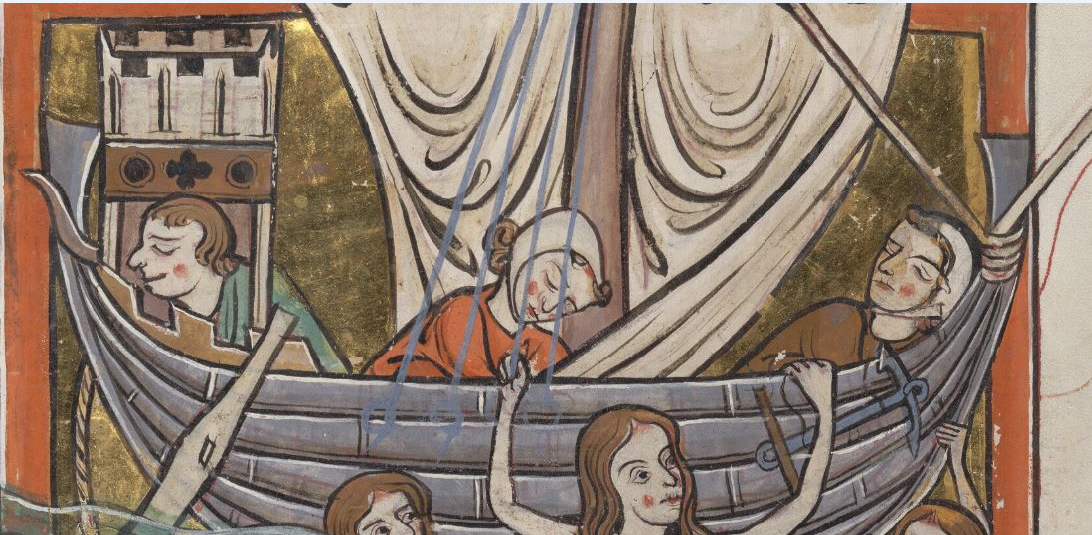
But it would be interesting to see how Zimmerman interpreted the available evidence - mostly it's just what we see on the seals, plus three manuscript illustrations (as far as I've been able to discover so far) - plus a lot of speculation based on such things as Haithabu 3 and Skuldelev 1 (if I'm right in thinking nefs were a development from ships like the knarr, which is by no means certain).
Thanks for your interest.
Popcorn's on the table as you enter . . .

Steven
-
-
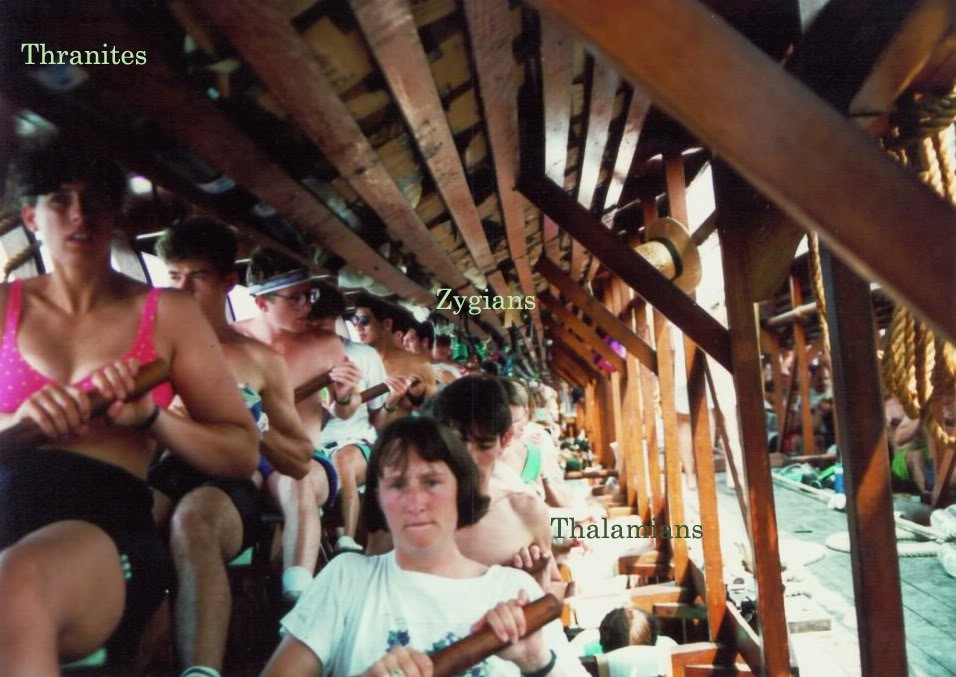
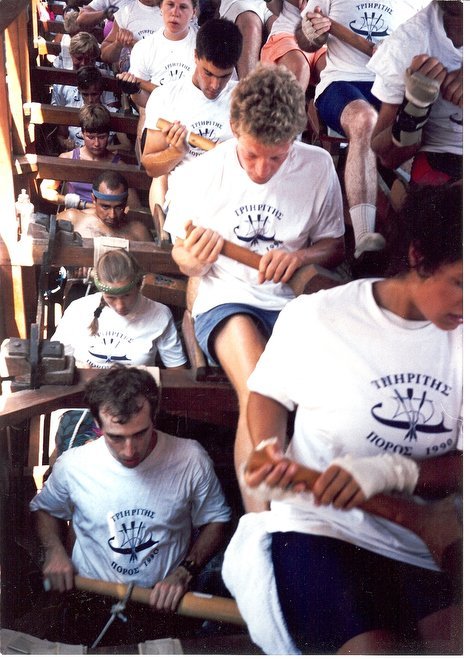
Ian, to get the motion to approximate the real thing, you might like to look at the sea-trials of the trireme reconstruction Olympias in 1990 -
I've seen RC galleys with an oar action which is nothing like this - with the oars on the back-stroke going right up in the air. As you can see on the video, in reality they almost skim the water.
I hope this is of service to you.
Steven
-
I've found that since I finished my dromon and was left with only the Great Harry, concentrating on a single build I sometimes get a bit stale, so I've decided to start another one. When I get tired of working on one, I can go to the other with a fresh viewpoint. It's also good while I'm waiting for the glue to dry.
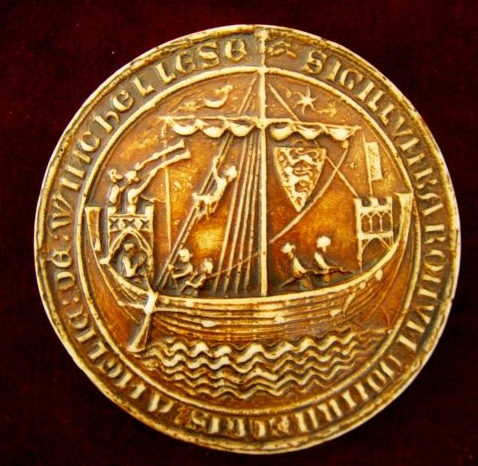
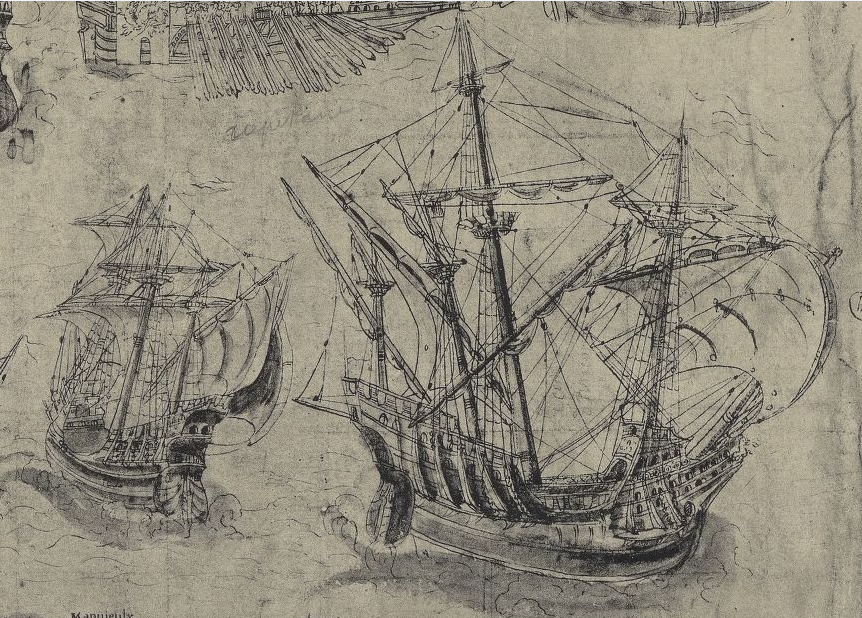
I've always been enchanted by the "longships" with castles (often described as "nefs" - the Mediaeval French word for ship) shown on the seals of port cities from the end of the 13th century. Though I originally thought of these as Crusader ships, by the time they start appearing, the main Crusades were all but over.
The first of these had castles separate from the hull - many with a castle at each end, but some with only one, at the stern. Here are a few examples, out of quite a large number I've managed to collect while researching these vessels.
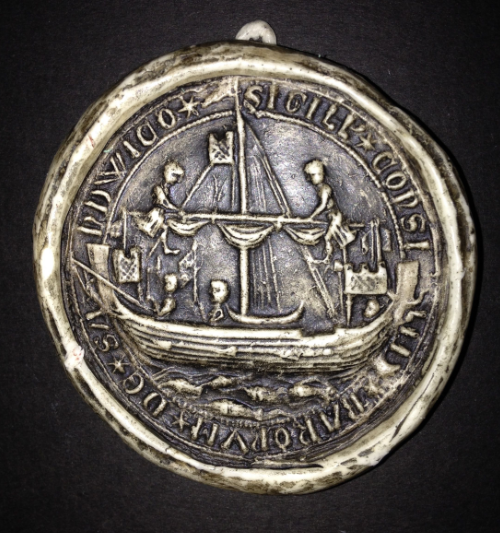
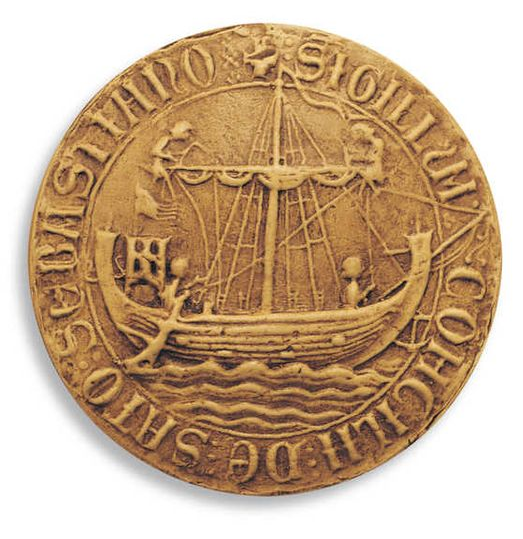
Seal of Sandwich - 1238 Seal of Melcombe Regis - 1290-1305 Seal of San Sebastian, Spain - 1297
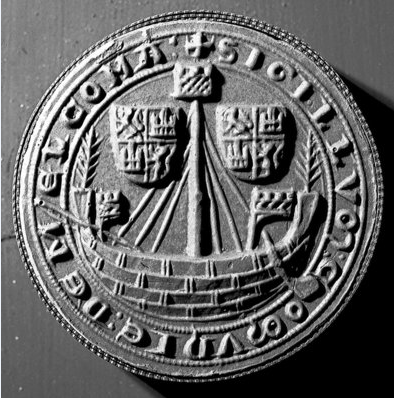
but over time they were incorporated somewhat, with the castles extending over the stem and sternposts.
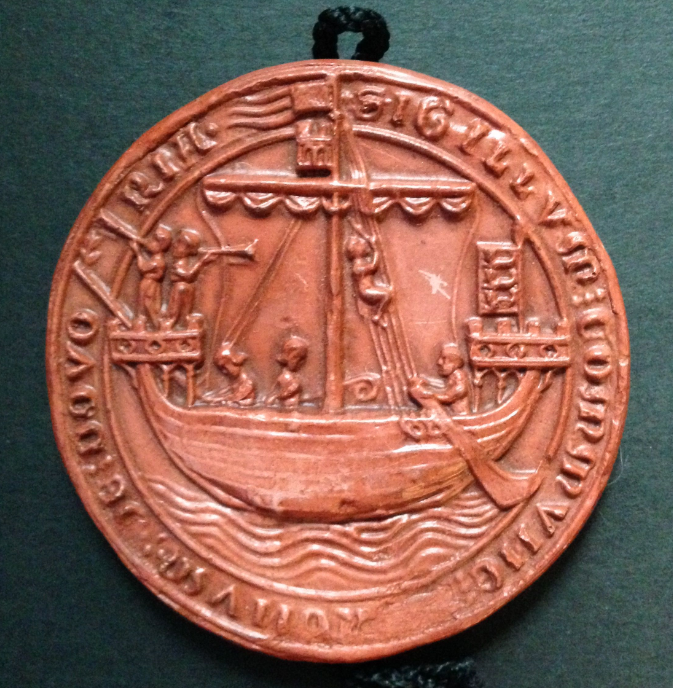
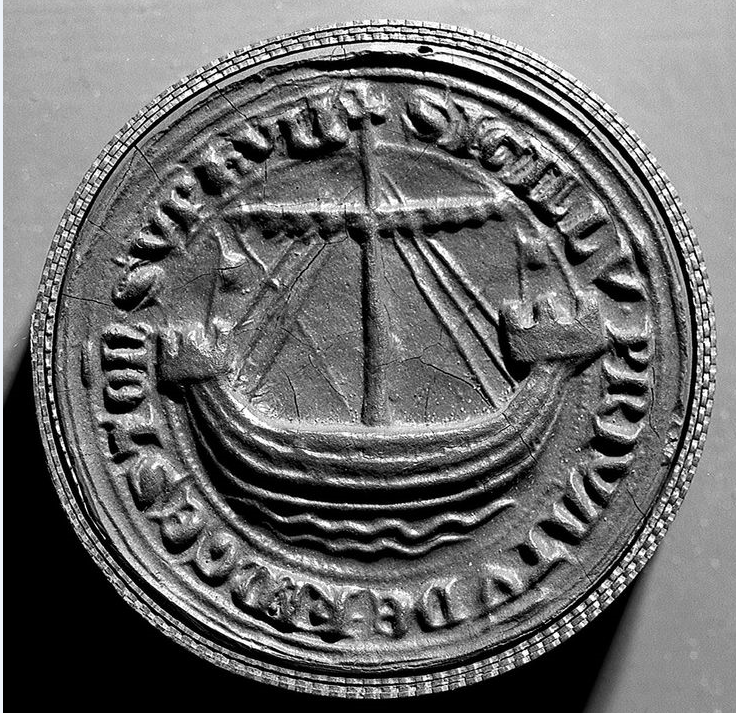
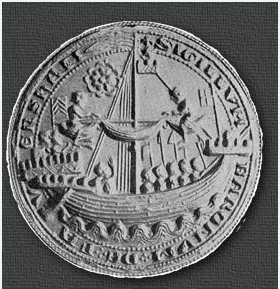
Seal of Dover - 1284 Seal of Kingston-on-Hull - 1348 Seal of Faversham - Date unknown
I like the earlier ones better - they're much more attractive in my view. And the most beautiful of all is the ship from the seal of Winchelsea, dating to 1274.
I spent quite a lot of time thinking about the form the hull would take - were they long and sleek like the Viking longships (Gokstad, Skuldelev etc)? It is usually assumed the representations on the seals are shown shorter than the reality, to squeeze them into the circular shape of the seal, but on the other hand, though these would certainly serve as warships, I believe their main function would be as merchant vessels and would have to be wide and deep enough to carry cargo.
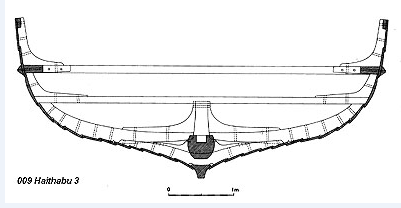
Getting a bit speculative here, bit I decided to take mine as following the tradition of the knarr, the cargo ship used by the Vikings. So I'm basing the hull shape on the largest knarr found, Haithabu/Hedeby 3. From the website https://www2.rgzm.de/navis/ships/ship009/ship009engl.htm "According to the reconstruction the ship had a total length of 22.08 m [72 feet], a width of 6.2 m [20 feet] and a height of 2.52 m [8.26 feet]. The cargo capacity would have been about 60 tons."
Using information from the above website, I managed to get diagrams of the ship as reconstructed - from above, from the side, and a midships section.
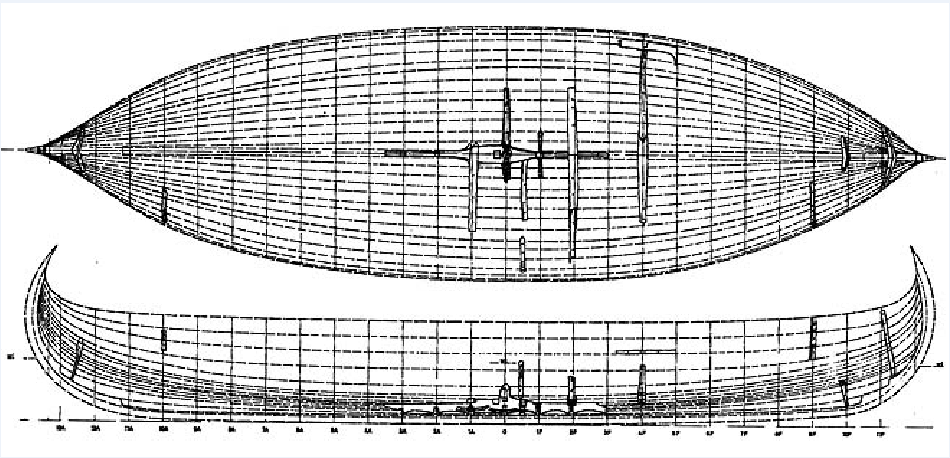
There is more information out there to help with the shape of the hull. One thing I will change, however, is the shape at the bow and stern. The stem and sternposts of knarrs curve backwards into the body of the ship, but in a nef they curve outwards. In fact, the shape of stem and sternpost in these vessels seems to be characteristic throughout the type, always wider at the top, with the outside of the curve following the line of the hull, with the inner surface of the stem/sternpost curving inboard somewhat.
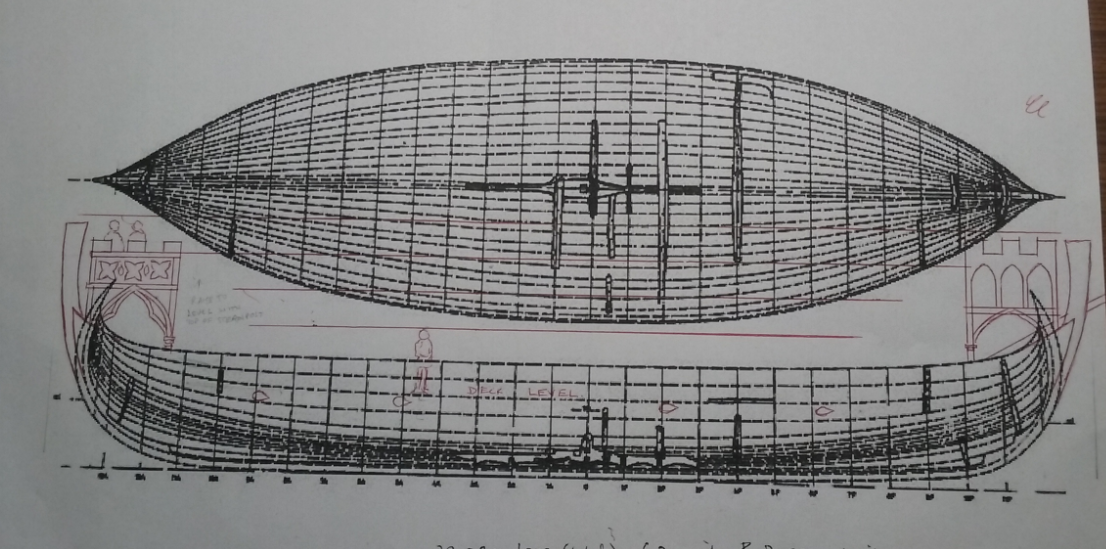
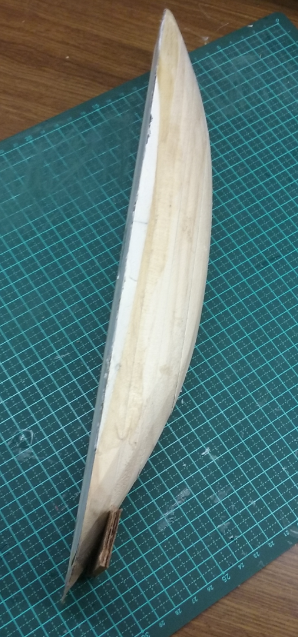
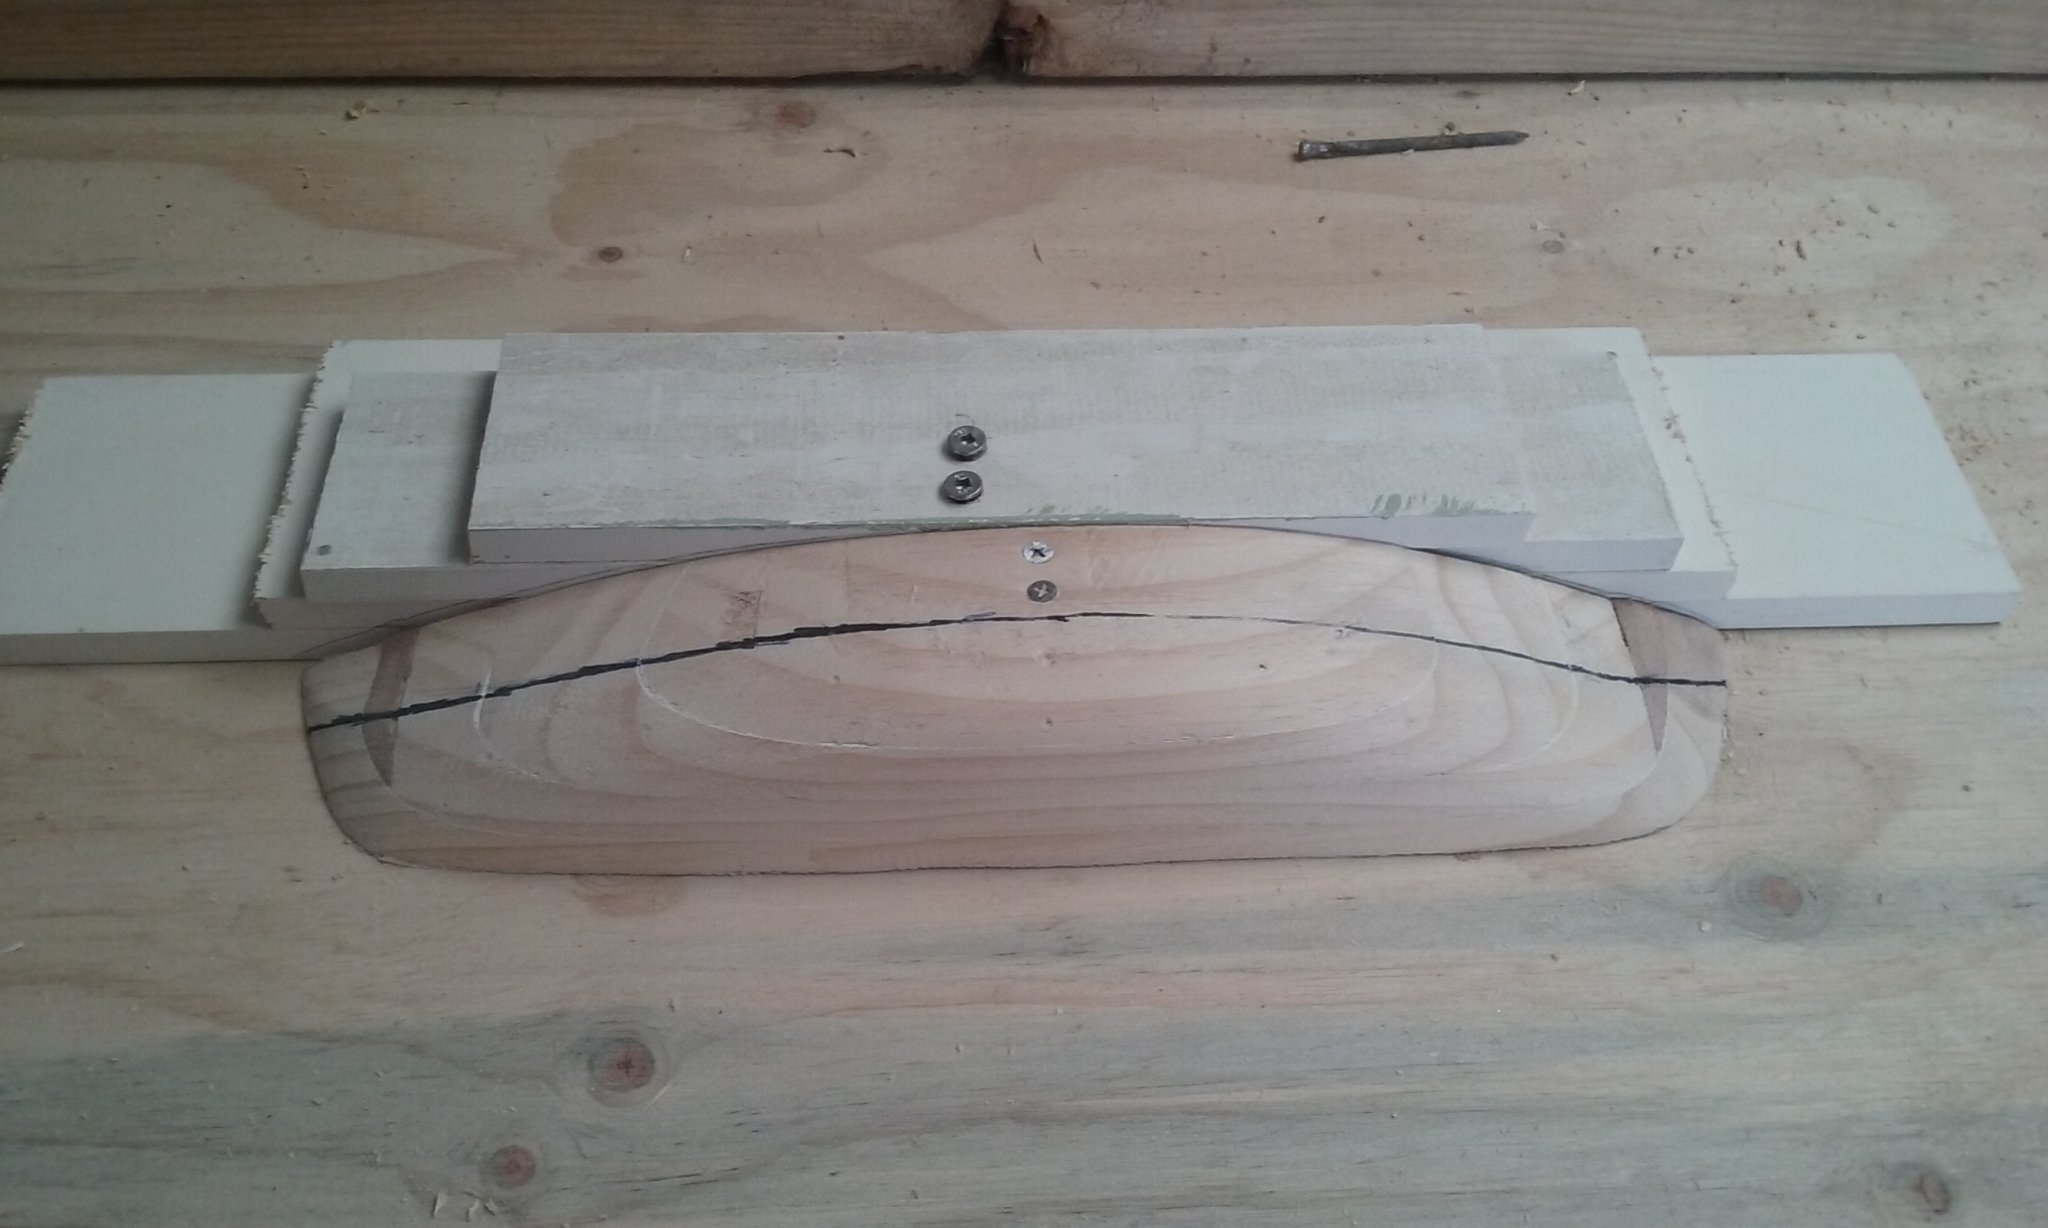
I'll be building this ship on a plug - rather than work out frames on paper, I decided to make a shape that looked right, using the midships section and other information I've collected (from other knarrs) to give an idea of the bow and stern sections.
And it'll be clinker built - I'm going to try just overlapping adjoining strakes on a smooth plug and see how that works.
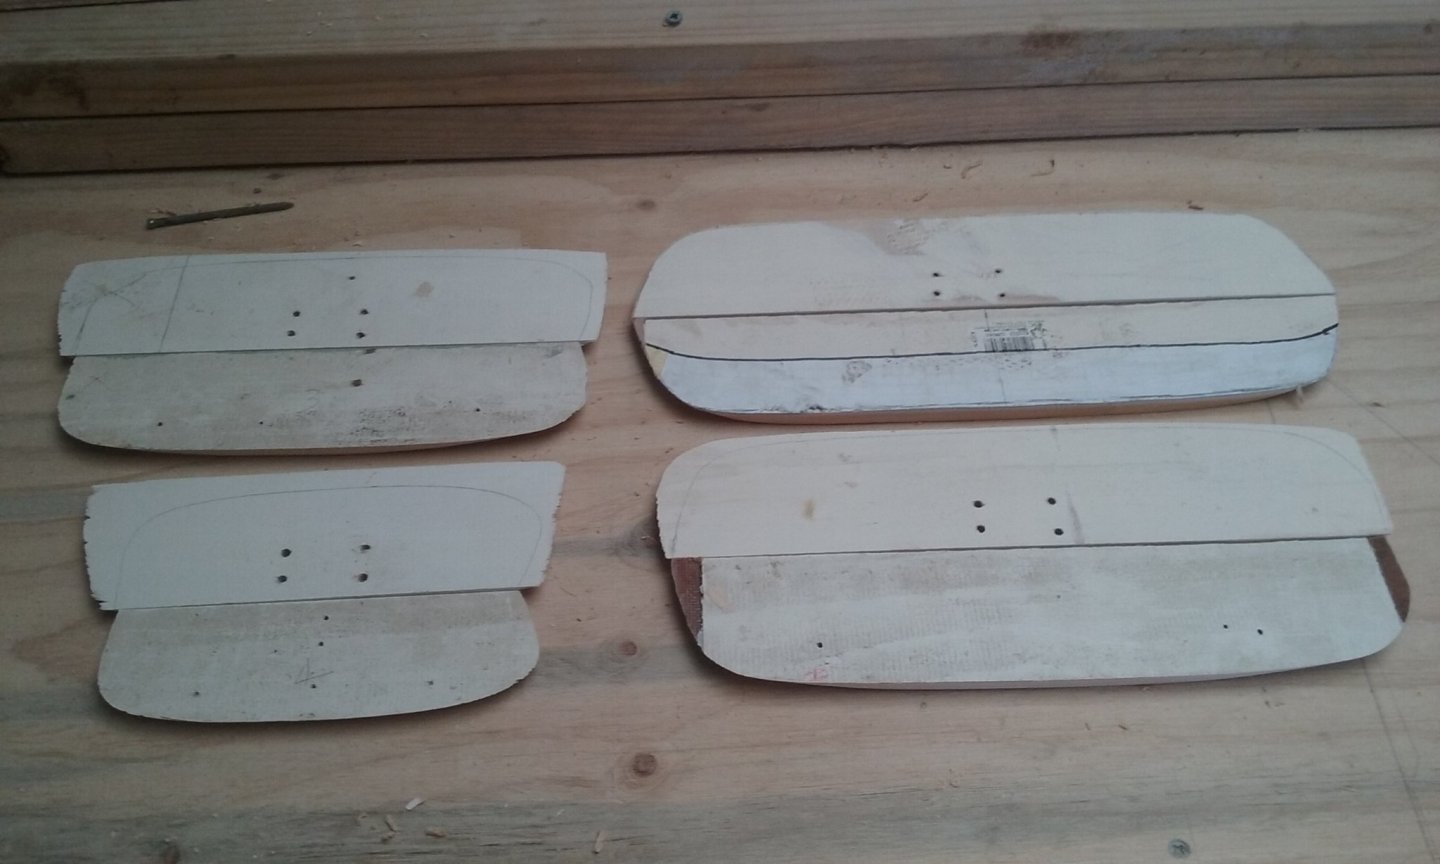
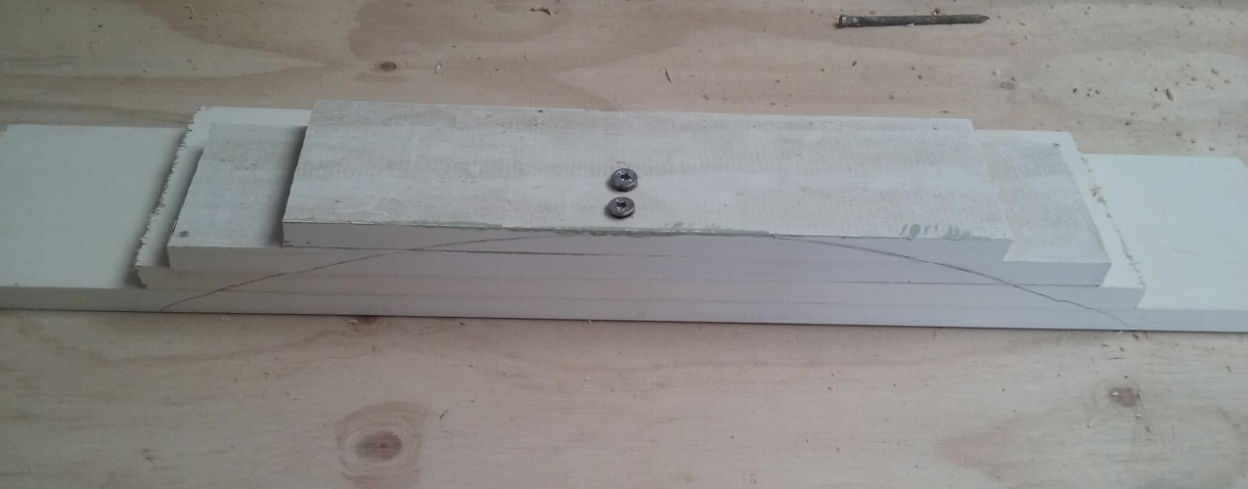
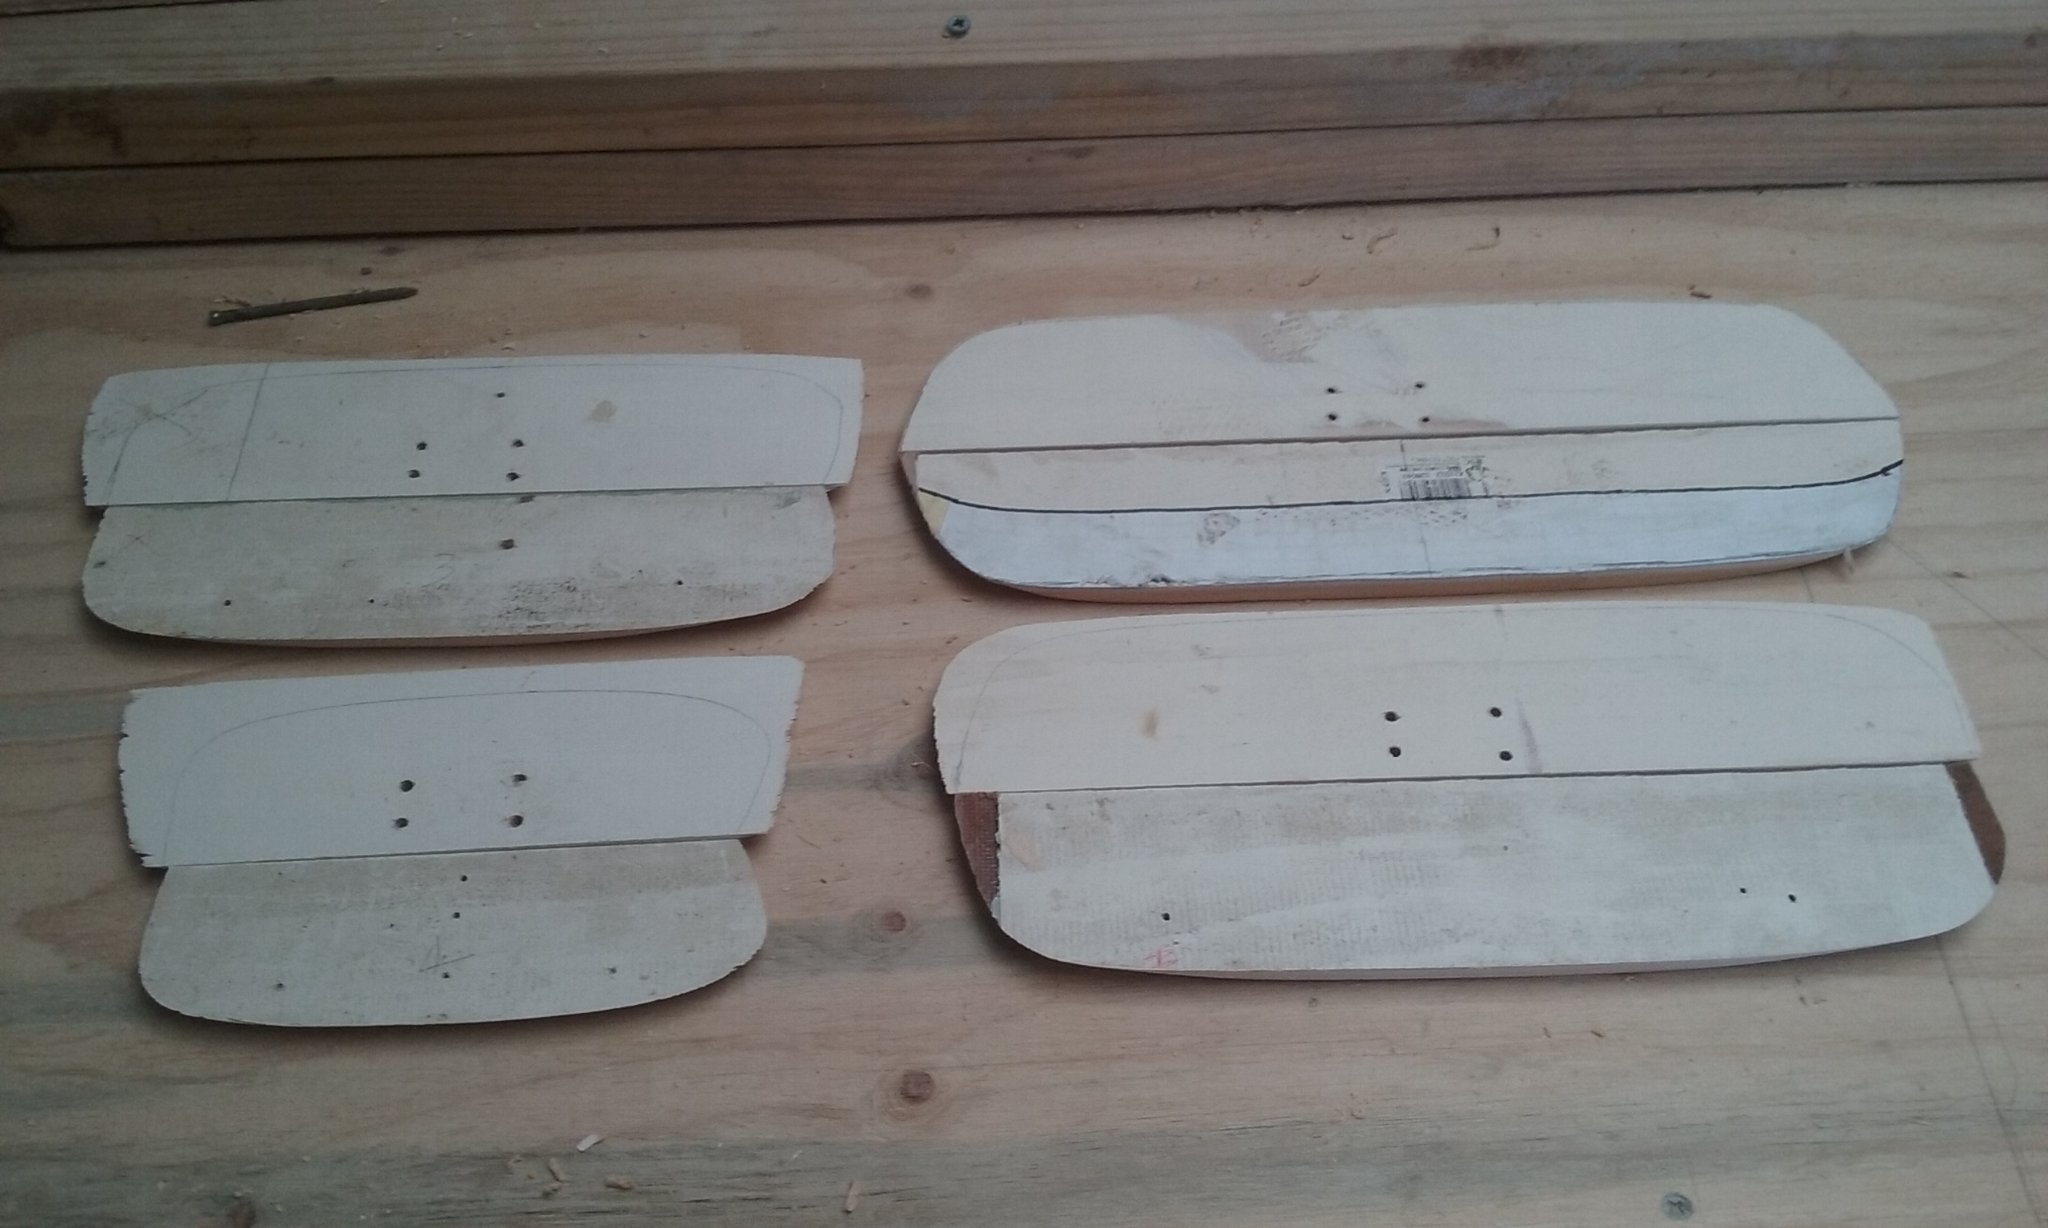
So, here we go: The plug is made of 4 relatively thin strips of wood each side, which are temporarily screwed together and then shaped.

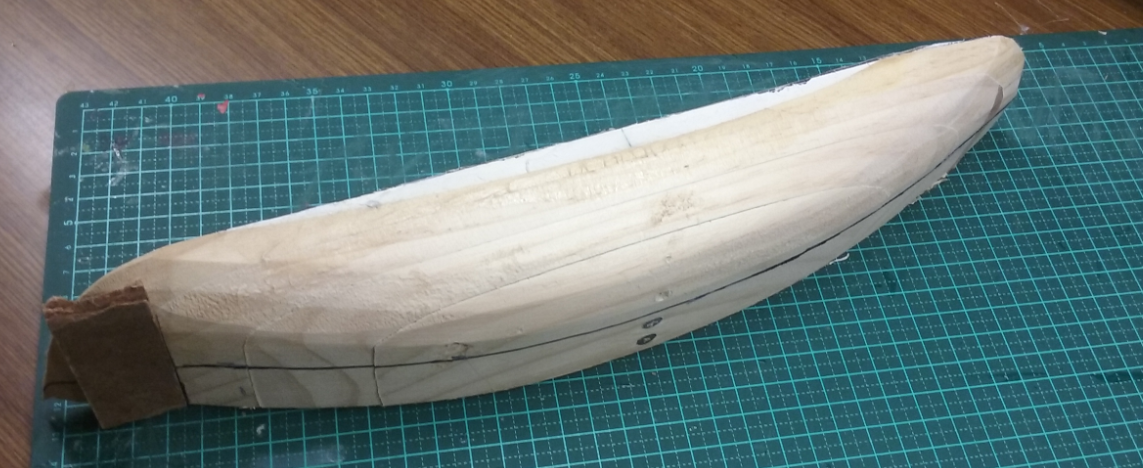
Note: I stuffed up a bit with the 2nd inner strip - made it a little too short - so I had to add a bit to pack it out, then sand it to fit the rest of the hull.
And now the other side:

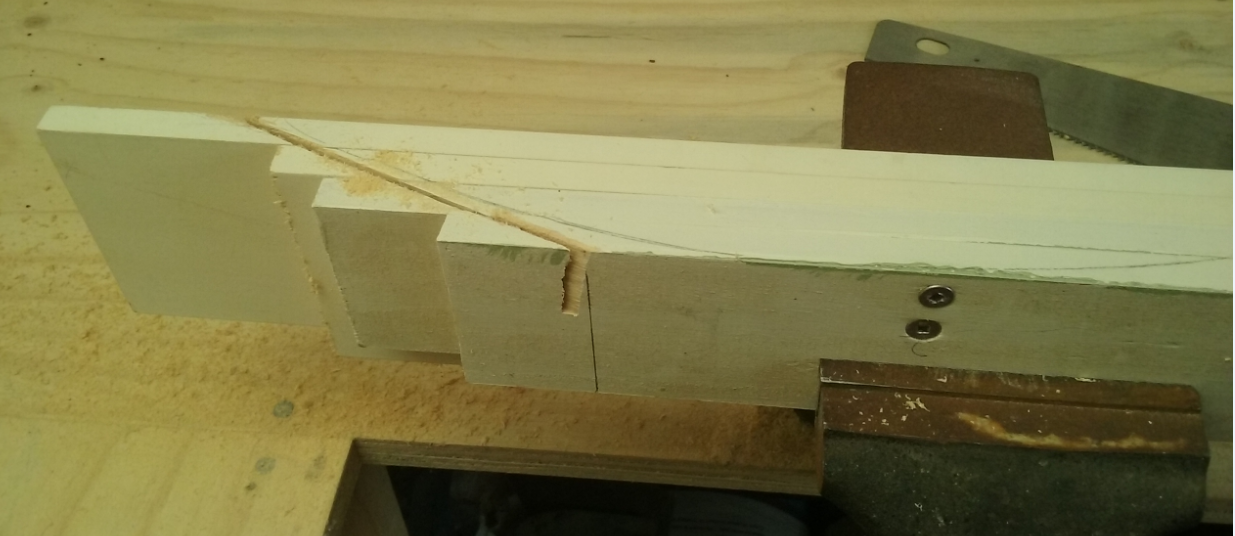
Marking out the hull shape.
Next step is to smooth off this side of the hull to follow the pencil marks, then pull the two halves apart and line up the strips of the second half with those of the first half, and shape them so they are mirror images of each other.
More to come.
Steven
-
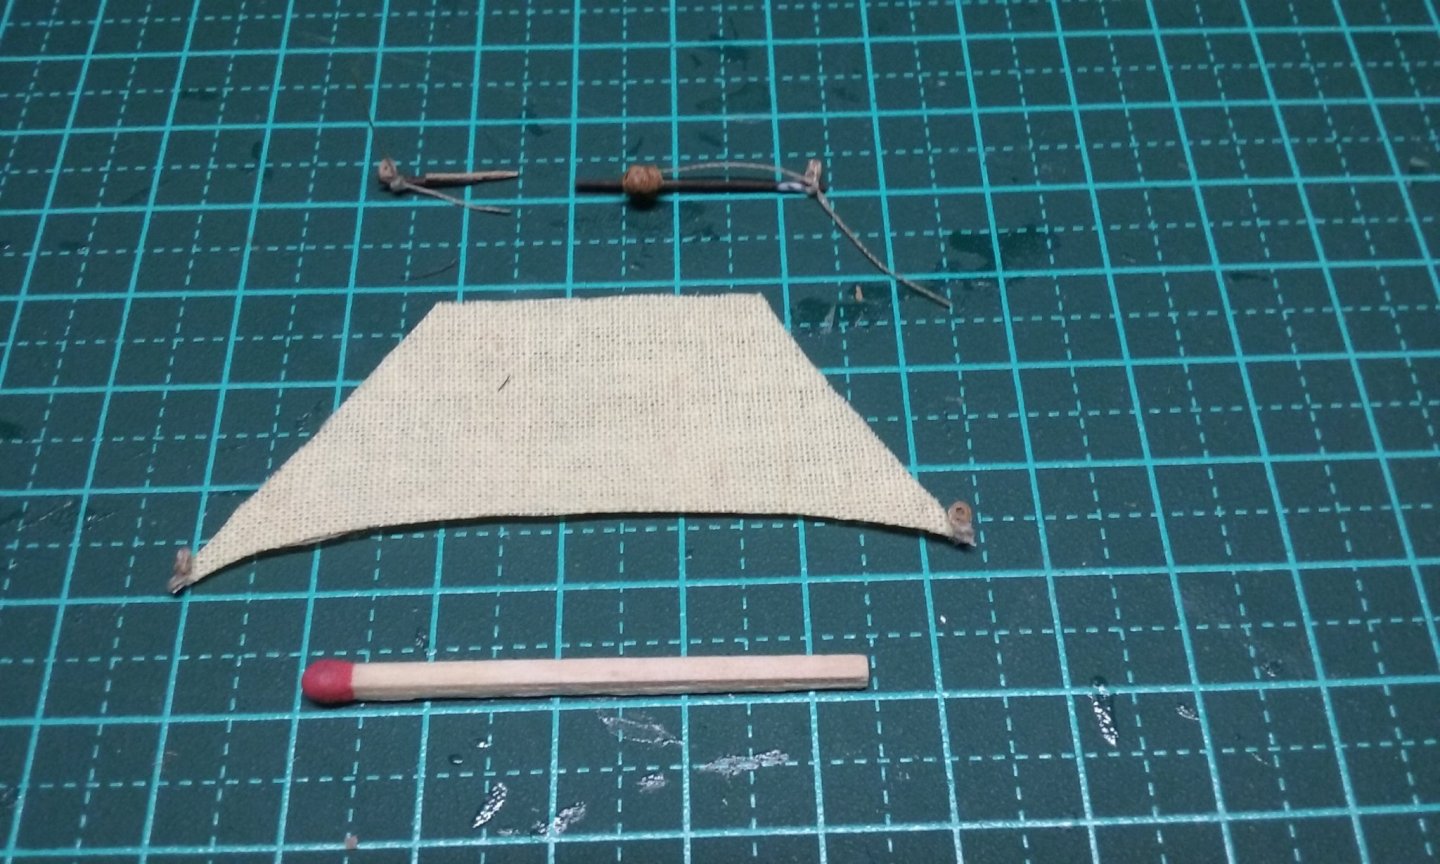
And on to the topgallants.
For a change, the main topgallant yard didn't break while I was working on it. I think that's the only one that hasn't, so far. And (just for Pat
 ), a matchstick for comparison.
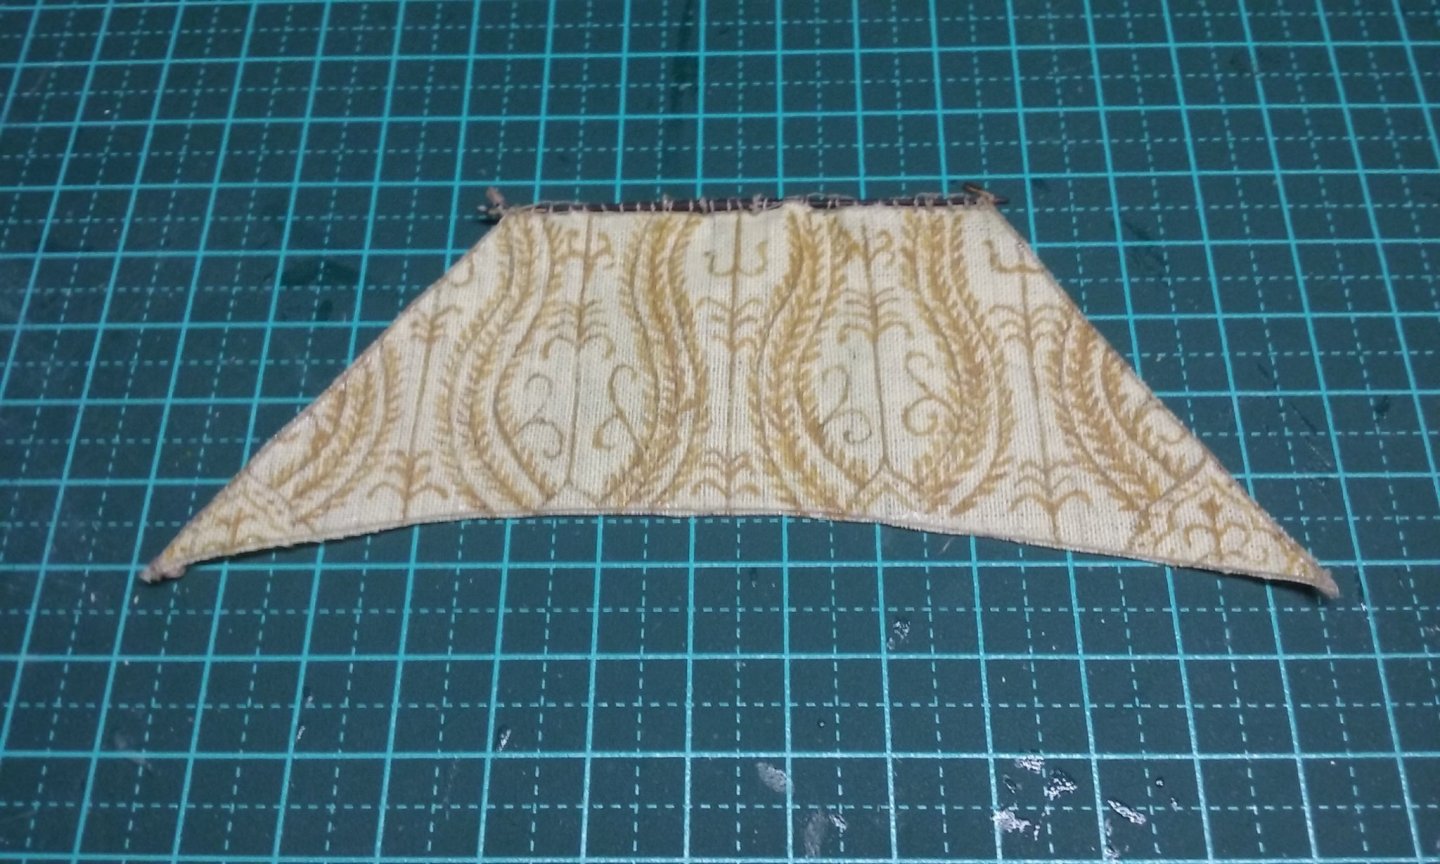
Front view:

And rear view. Sewing on the "robands" is in progress. If you look carefully you can see the blocks for the lifts at the yardarms and for the clewlines attached to the yard. The fuzzy thing in the middle is the parrel truck, made entirely of cotton thread way back when I was 17 and had no idea what they were or how they worked. And at the lower corners of the sail, the blocks for the clewlines. The sheets will be added later, when everything is ready to be put in place.
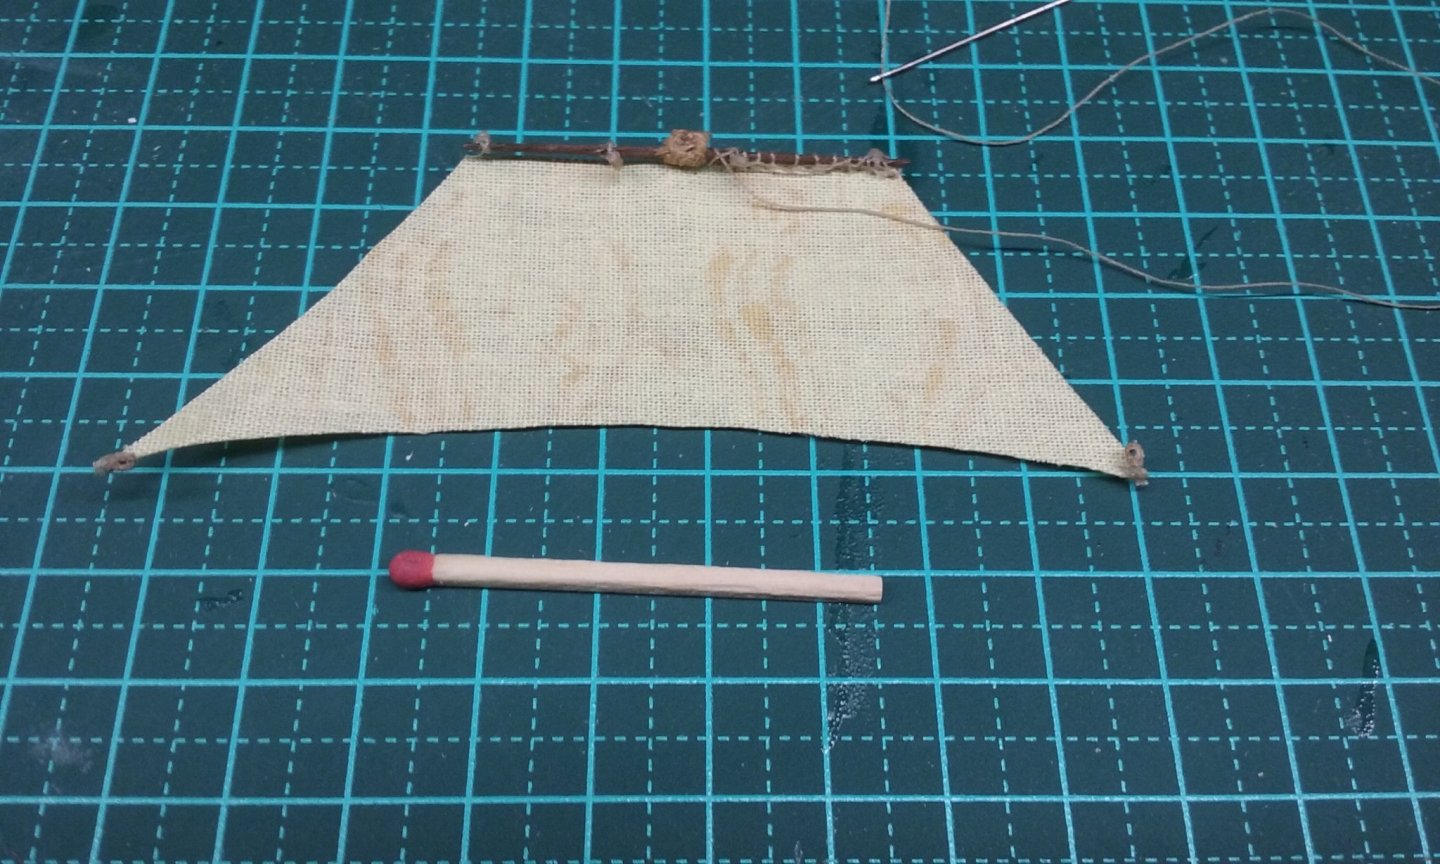
And complete.
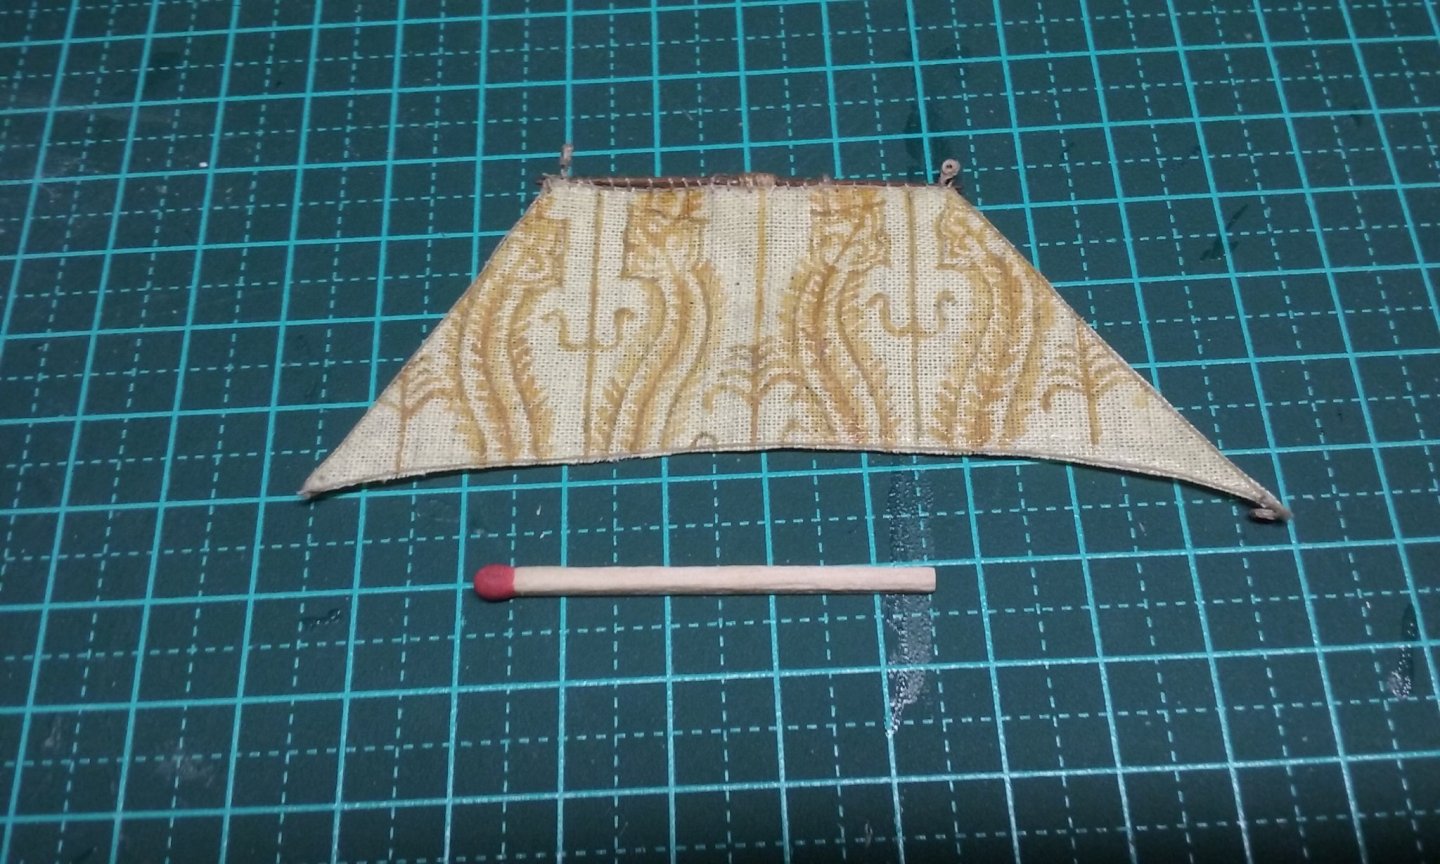
Fore topgallant:
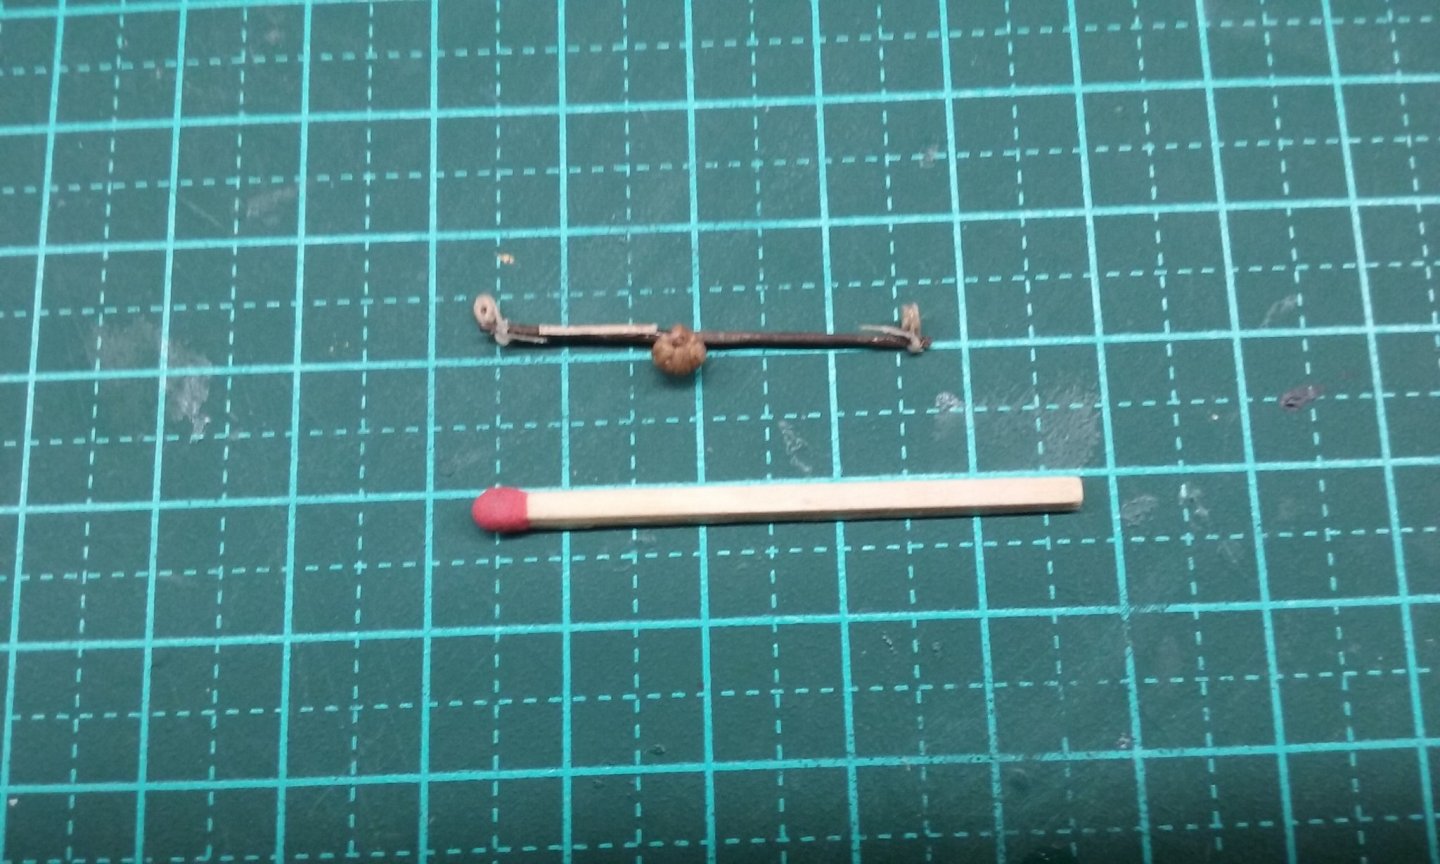
I started putting the blocks on for the lifts and - surprise! surprise! the yard broke. But being experienced at this kind of thing now, I added a fish (the lighter coloured strip attached to the yardarm)
And glued it back together
Once that's dry and secure, I'll trim it to shape and add the blocks for the clewlines. Then sew the sail to the yard.
Very slow and fiddly, but the result is worth the time and trouble.
This is the last of the square sails, and all the yards for the lateens are newly made, so I shouldn't have problems with them breaking because of age and brittleness.
Steven
- Jeff T, mtaylor, Keith Black and 5 others
-
8
-
1 hour ago, Old Collingwood said:
Have you asked them over at the official Mary Rose site for details of her sister ship.
To be honest, it never occurred to me.
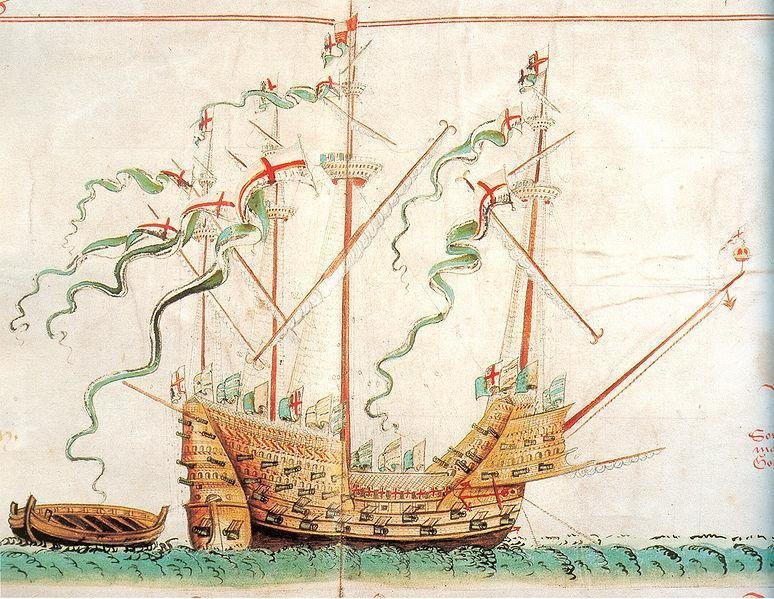
But really, my main concentration is on restoring the model I built way back then, which was based on the theoretical reconstruction in Björn Landström's book The Ship, published before the Mary Rose discoveries. I admit I haven't been consistent with this - I've changed things and added things reflecting my current state of knowledge, but mostly I've tried to keep it as close as I can to the original idea rather than to bring it up to date.
Steven
-
Actually, Jean Jolivet's map of Normandy of the same year also shows a ship (in this case a galleon) with a topgallant, but in this case only on the main mast.
[Edit] And are those reef points on the forecourse? At a time when bonnets were all the go? Hmmm . . . [/Edit]
Steven
-
Thanks everybody.
Pat, I usually add a matchstick (the wooden one, not the pastry)
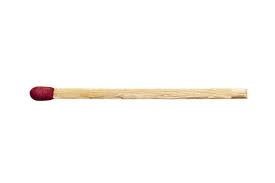

to the picture for scale, as a lot of people (me) have trouble with mm or inches, and matches seem to be a standard size throughout the world, unlike coins etc.
Working on the topgallants next. As far as I can remember, this (the Anthony Roll of 1545) is the earliest representation of ships with topgallants.
Steven
-
Well, as Effie in the TV series Acropolis Now would say - "How embarrassment!"
No alien abduction - just a senior moment on my part. I had the yard all the time, but the fact that I'd cut the topsail too big (to allow for the sail to "belly") meant it didn't line up with the yard, so I thought it must be for another sail. Going back to the original picture I'm working from sorted that out, and I finally worked out what went with what.
One problem I've been hitting is that the threads holding the old blocks to the yards have got brittle over the last fifty-plus years, so they often fall off and have to be re-attached - which in turn involves stripping the strop off the block and doing it all again. Also, so far I've only had one existing yard that didn't have a break in it - and this one is no exception. So I had to fish the yard at the very end. (See below - the fish is at the right-hand end)
So here's the yard, with all the blocks attached. First with the new strops uncut
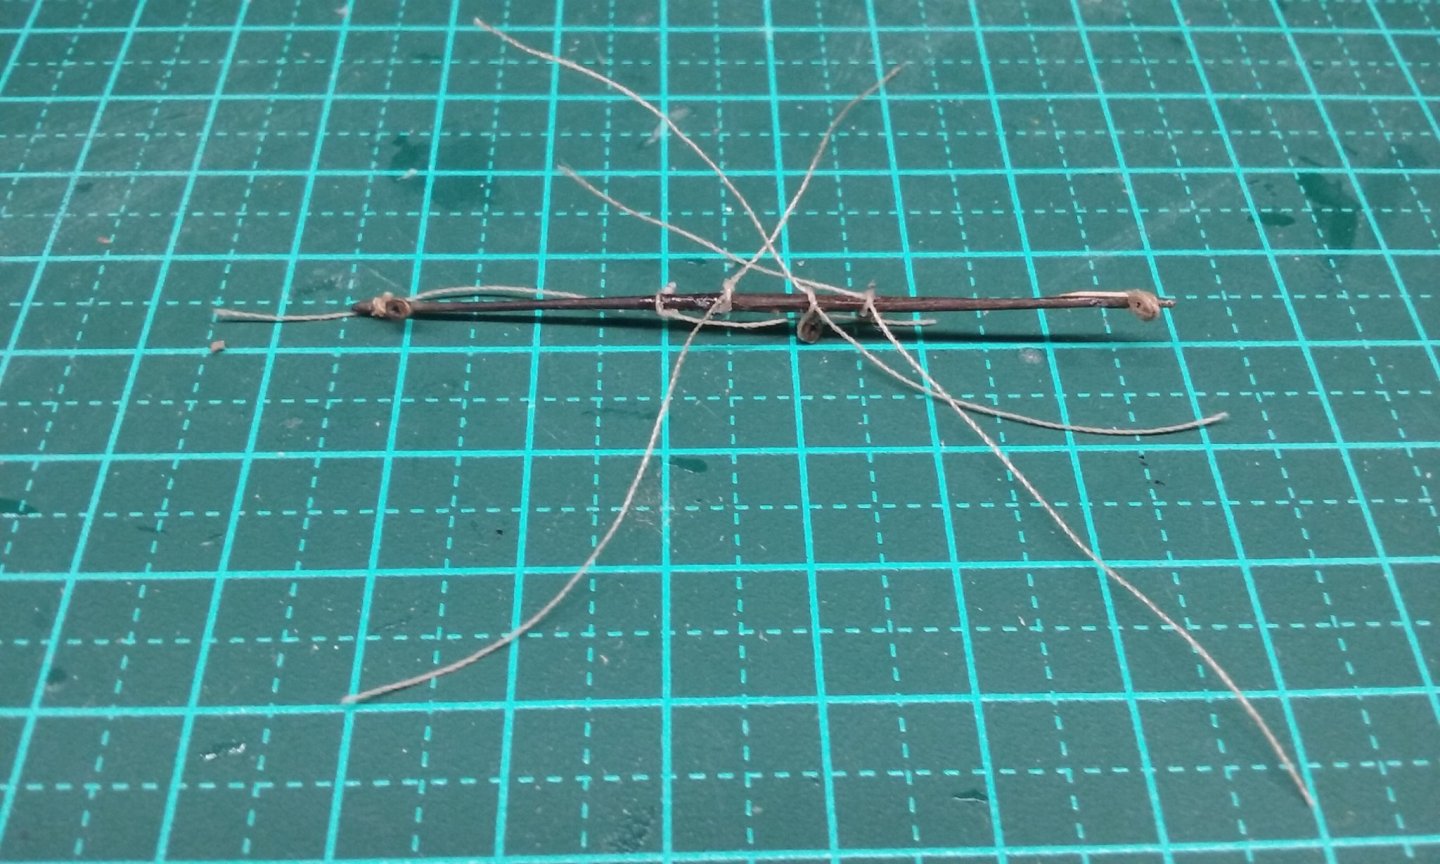
and trimmed to length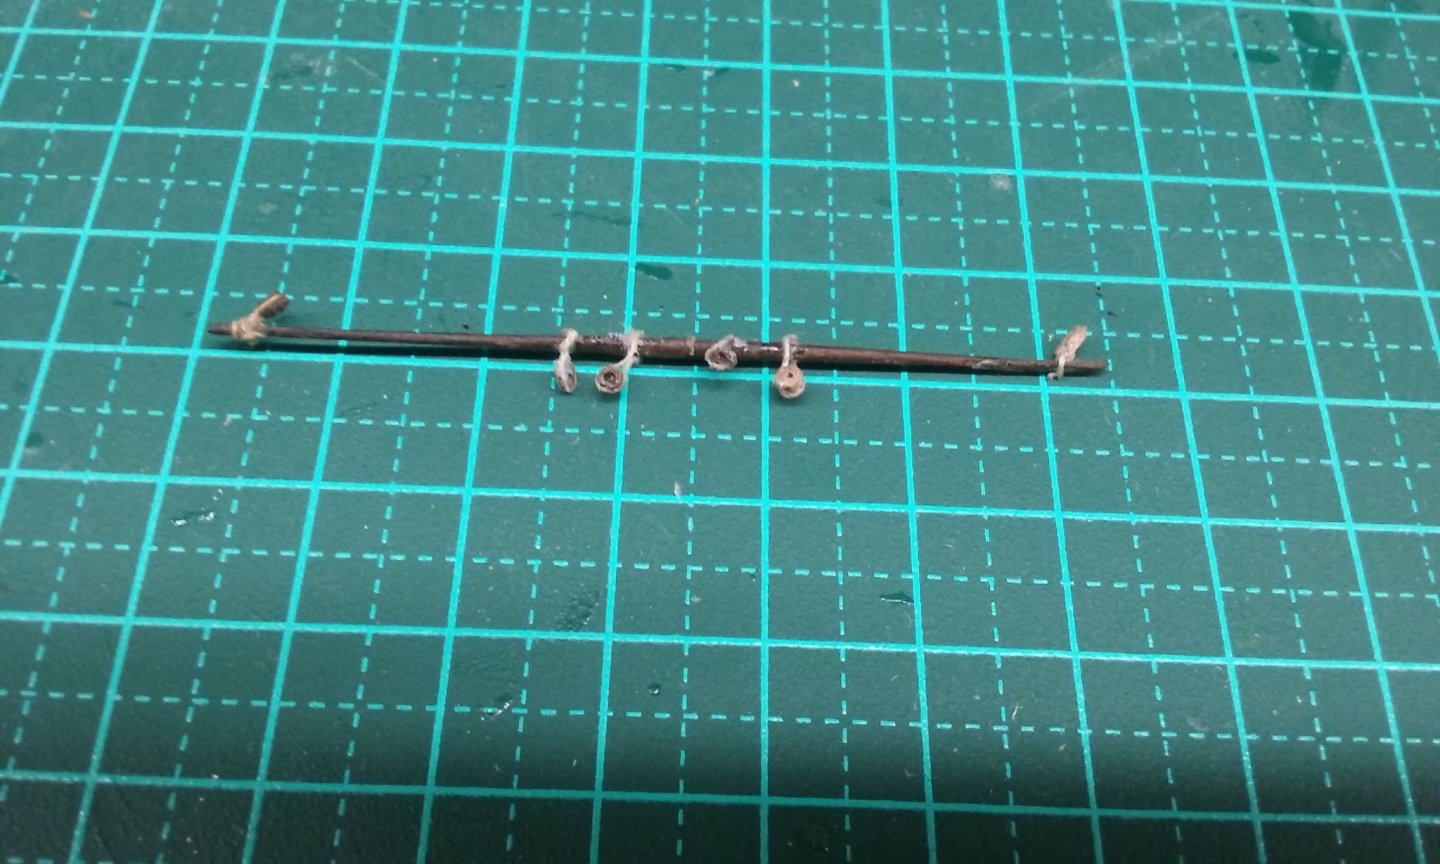
Sail with yard
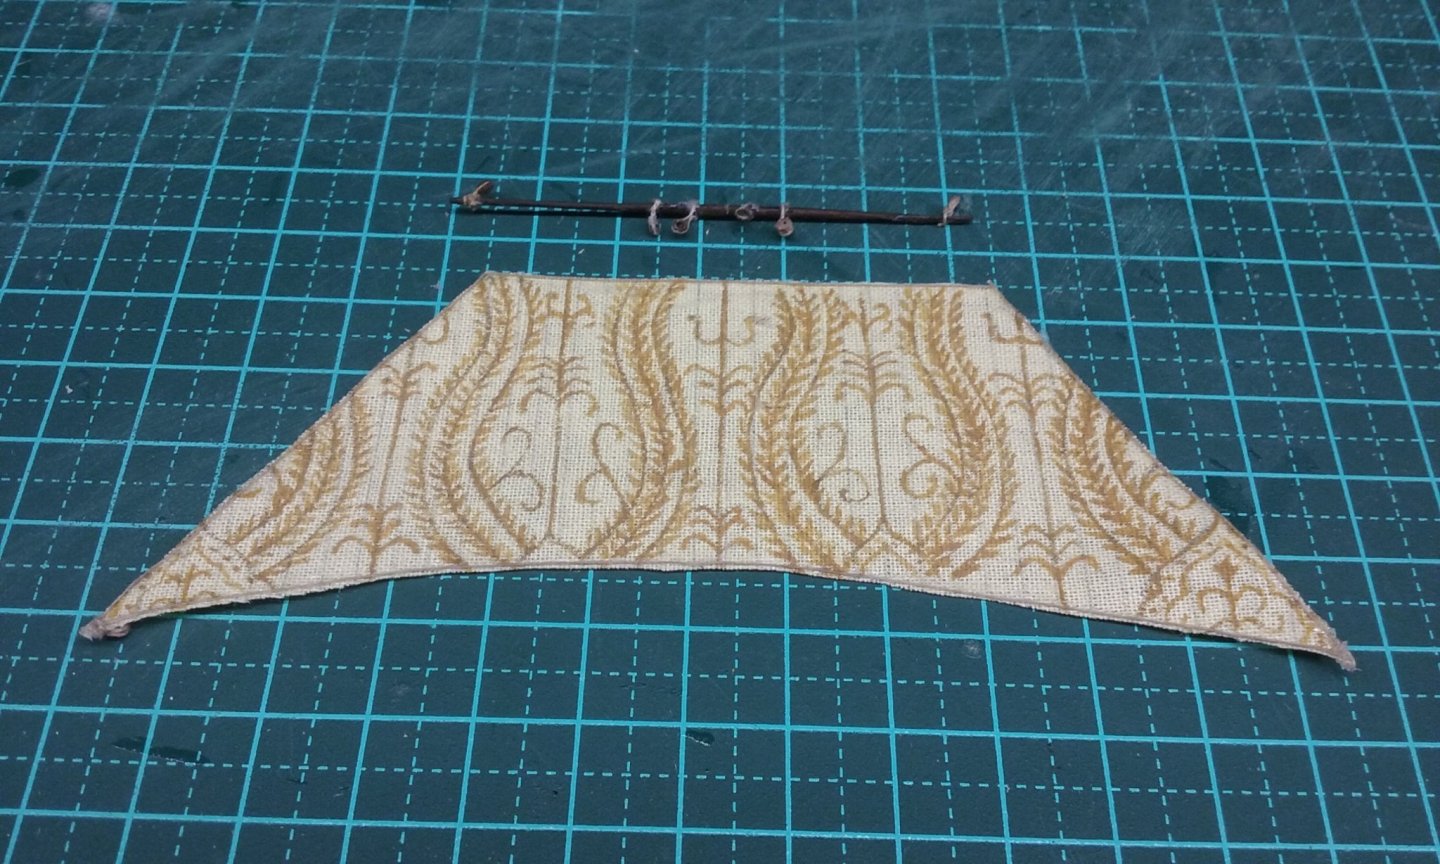
And "robands" in place holding the sail to the yard. From the back
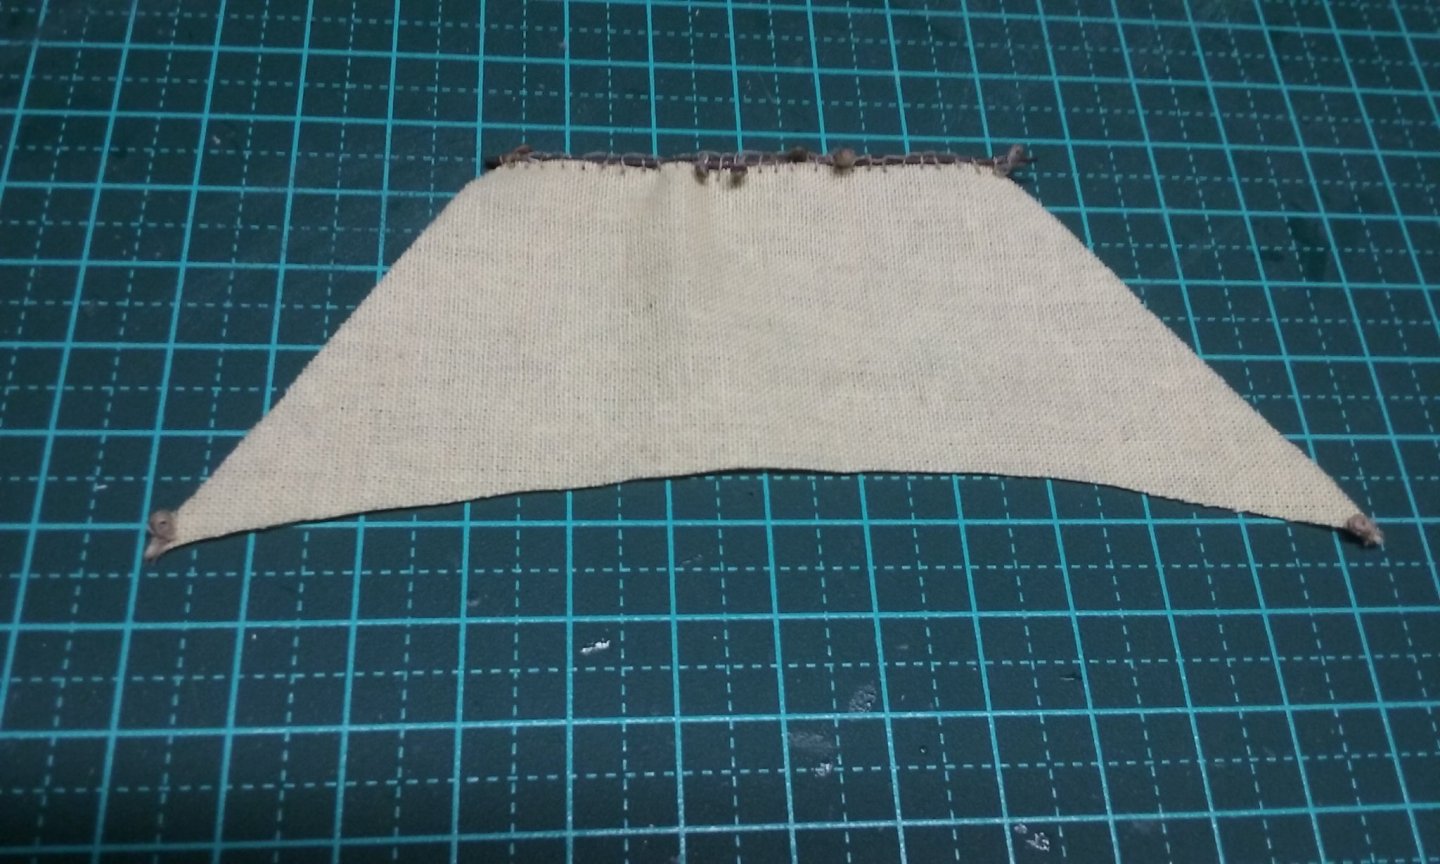
And from the front.
Now I can go ahead with the next part of the build. Sigh.
Steven
- Roger Pellett, Baker, mtaylor and 7 others
-
10
-
Welcome to MSW, Joseph! You'll find quite a few plastic models among the build logs, and quite a few Constitutions as well. It's a very popular ship to model. You might find them helpful. Just use the search bar at the top right of this page.
And if you have any questions, the build logs might have the answers, and if not, the people here are very happy to help.
Don't get intimidated by the quality of some of the builds (as I was when I started). There is a wide range of skills here, from total beginner to acknowledged experts in the field, and every build is a learning experience.
Welcome aboard.
Steven
-
-
16 hours ago, mtaylor said:
Just speculation here... If the figurehead was the "spirit" of the ship (the guide, etc.) would have been possible that these were removed before any of the ships were buried?
If I recall correctly, the sagas mention taking the figurehead off when entering a friendly port so as not to offend the local trolls and bring a curse down on the ship (not sure - I read this along time ago). But apart from the Oseberg ship I know of no "figureheads" or fittings for them - and the Oseberg's one is pretty much integral with the ship itself.
Aha! Here's a reference - from https://www.tandfonline.com/doi/full/10.1080/00253359.2020.1778300 - "Viking Age figureheads are sometimes described as magical. According to the Landnámabók, an Icelandic text describing the settlement of Iceland by the Vikings, these frightening figureheads should be removed when approaching land in order to not upset the spirits on the land."
Steven
- mtaylor, Balclutha75, Cathead and 1 other
-
4
-
It all looks good to me, and though the figurehead is fairly simple, it seems to me that it's well within the "window" of Viking decorative styles and known "figureheads" (and let's face it, no actual figureheads have ever been found), as discussed earlier in this thread.
Steven
-
Looking very good, Rodolfo. The naus had enormous mainsails and the yards were very wide indeed. You've captured that "look" very well. Having done furled sails on my dromon, I know how difficult that is, but again, you've done a brilliant job of yours.
Steven
-
-
-
So putting a link to an MSW build log onto another forum is ok? Because I do that a fair bit, as I believe MSW is the best forum around and reference to its build logs can help others who aren't even members, and - who knows - might persuade them to join.
Steven
- Ryland Craze, ccoyle, thibaultron and 1 other
-
4


Henry Grace a Dieu (Great Harry) by Louie da fly - FINISHED - Scale 1:200 - Repaired after over 50 yrs of neglect
in - Build logs for subjects built 1501 - 1750
Posted
Finally got the foretopsail yard fixed and sewn to the sail.
And I've now done the lateen sails as well. Here's the complete suit of sails, with yards attached.
And I've finished gluing ratlines to the lower larboard foremast shrouds.
Paper from the guide stuck to the shrouds before I put the sticky tape onto it, and glue blobs that stuck between the back of the shrouds and the sticky tape, that had to be removed.
I picked the paper off with tweezers. For the blobs of glue I've used water, rubbing alcohol etc.
Not a perfect result and I think I'll be revisiting these shrouds to clean them up further. And I'll need to re-think the whole process for the next sets of shrouds and ratlines.
Steven