Louie da fly
-
Posts
7,990 -
Joined
-
Last visited
Content Type
Profiles
Forums
Gallery
Events
Everything posted by Louie da fly
-
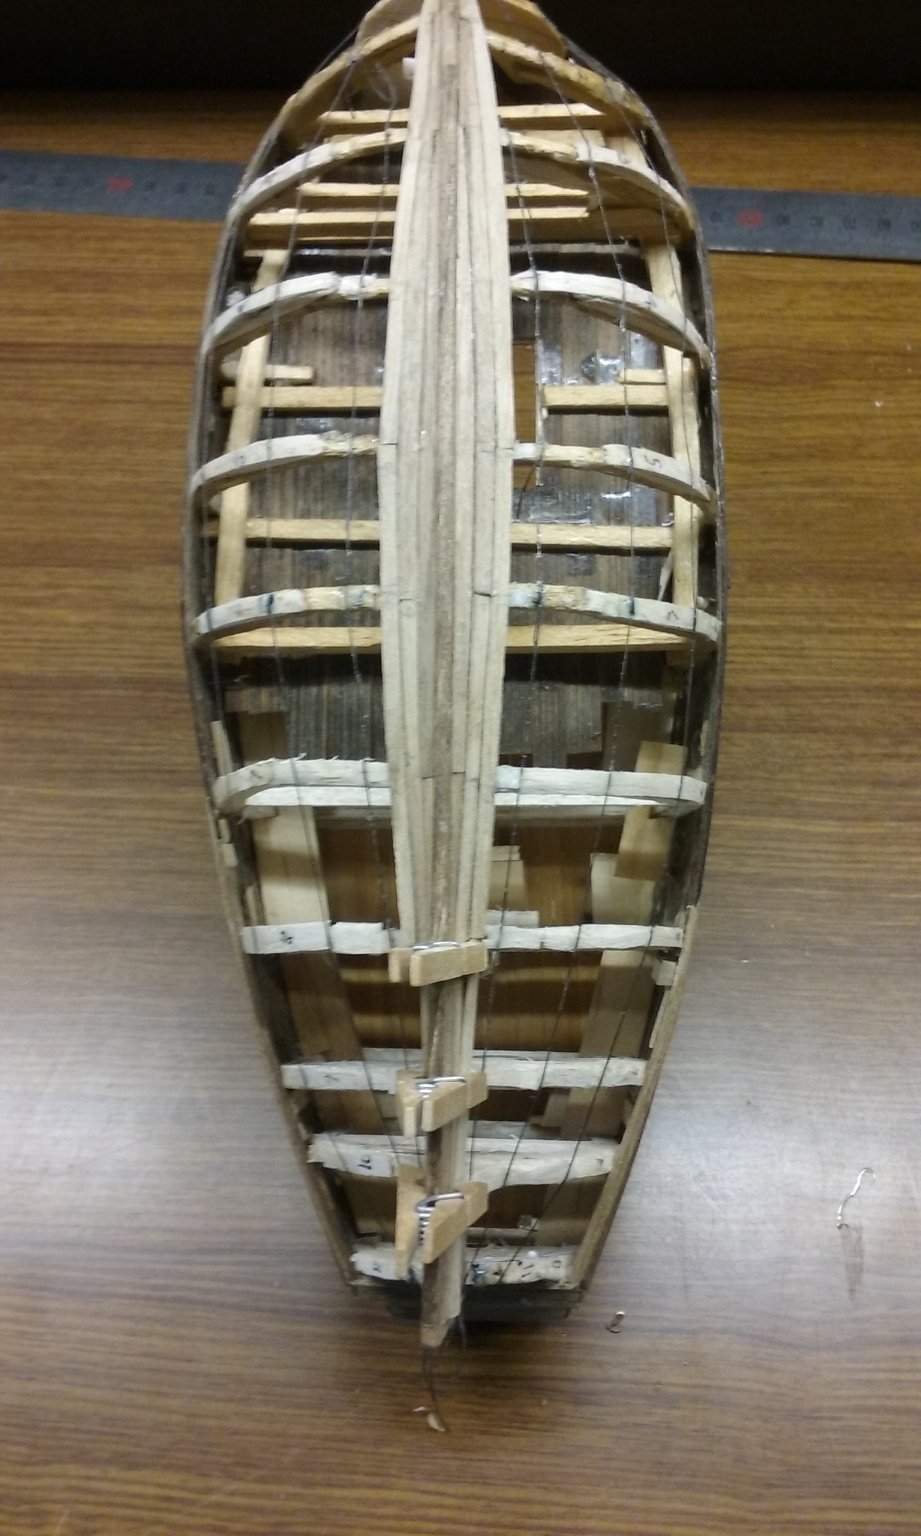
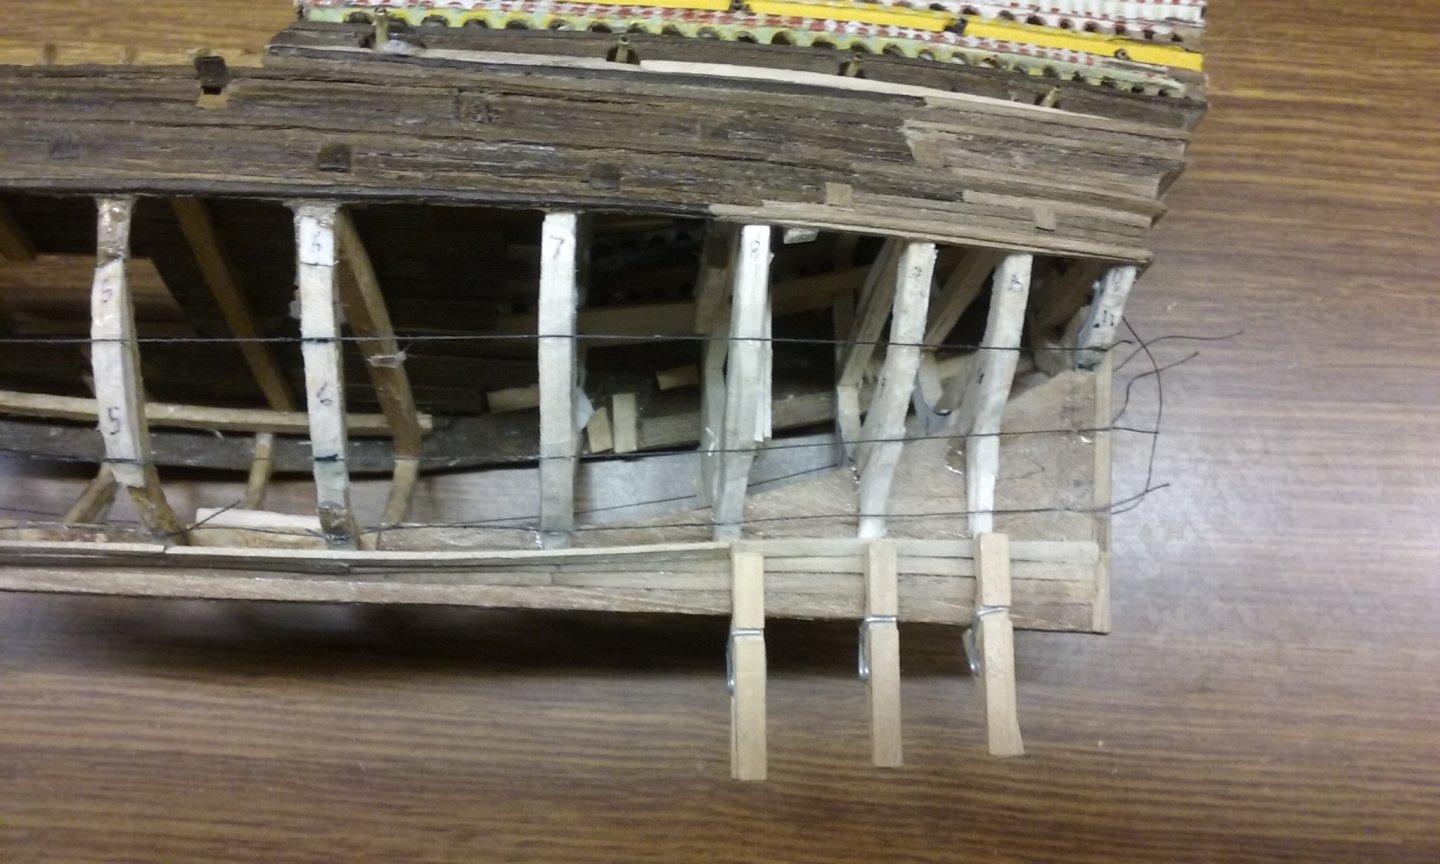
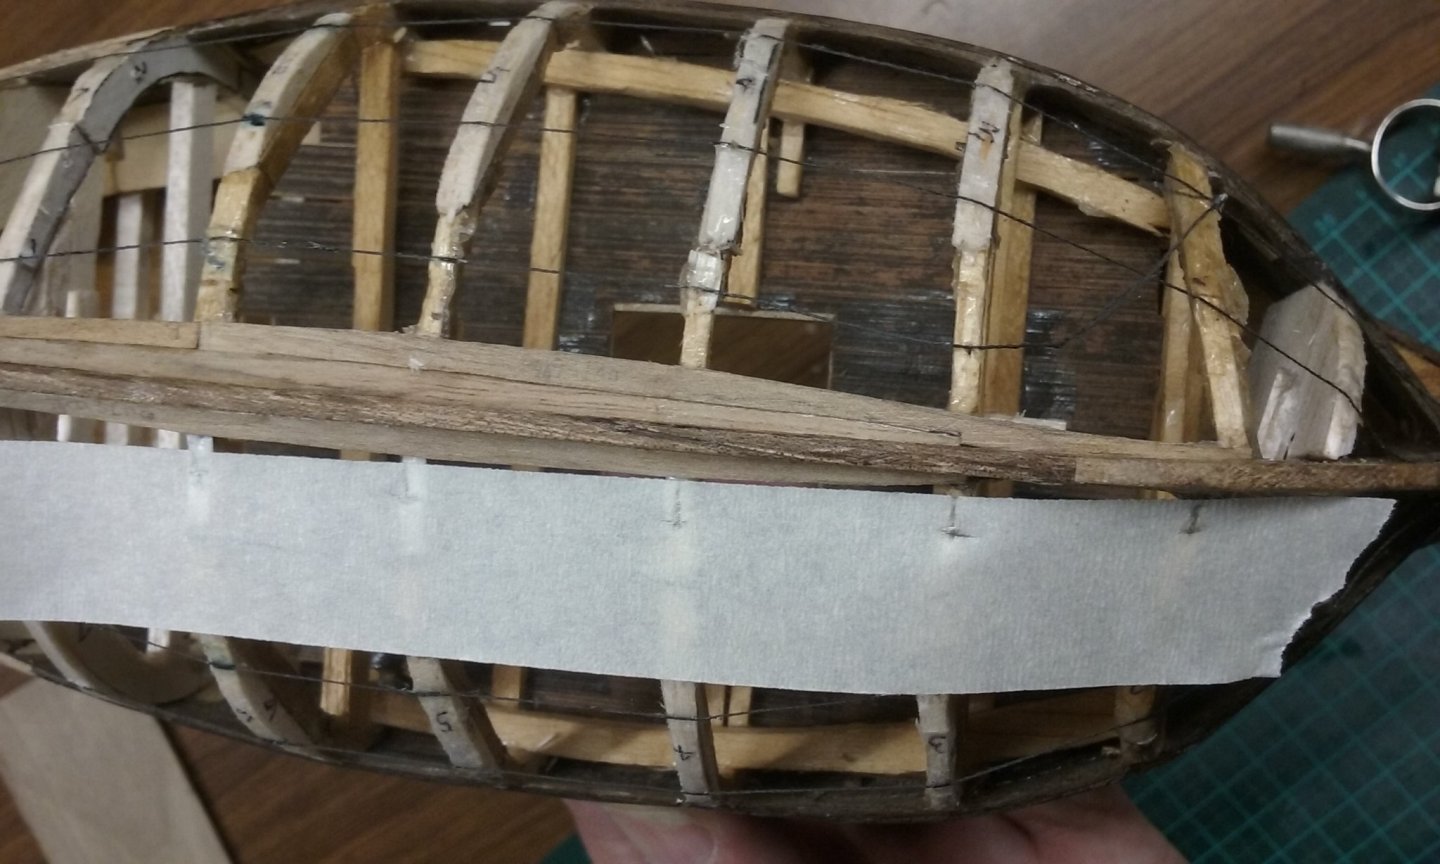
 Well, after a glitch that resulted in my removing and replacing two planks that I'd already glued down, I seem to have picked up momentum . . . It looks worse in the photos than on the model, but I'll need to compensate for a width problem with the foremost plank on the starboard side - it's got a wave in it between frames 3 and 4 caused by the previous plank, that I hadn't noticed till it was too late. Still, my attitude with all this is that the Great Harry is where I'm learning my trade with planking. Mistakes just get put down to experience, with a resolve to avoid that particular mistake in future builds. There are inequalities in the surface of adjacent planks, due to unequal thickness planks and other issues. This should all be resolved when it comes to sanding.
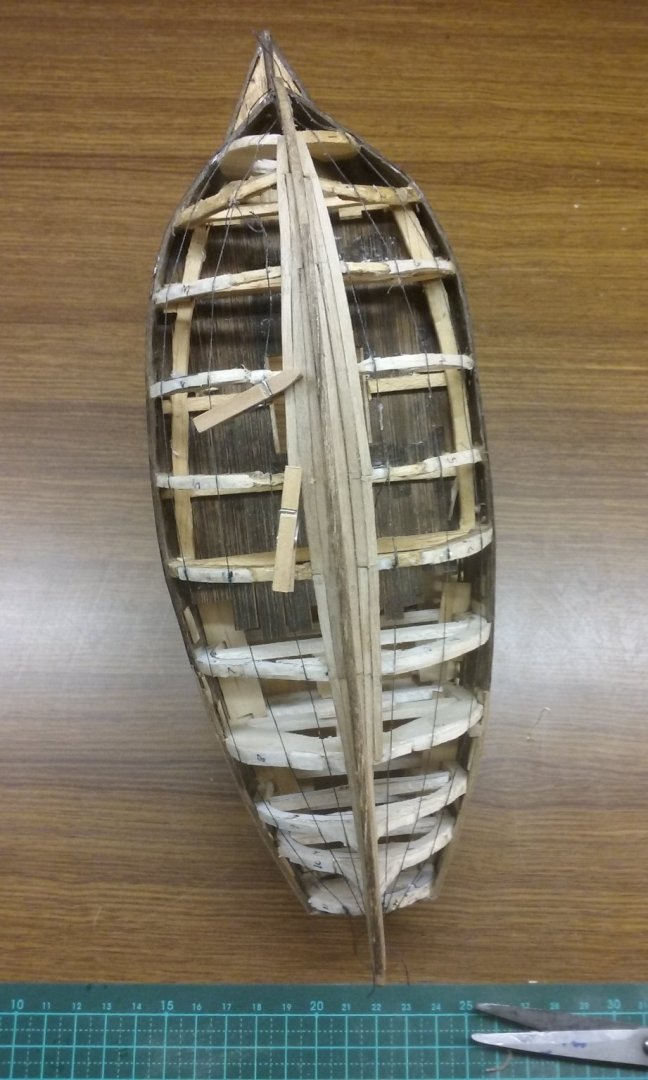

- 740 replies
-
- 7
-

-
- Tudor
- restoration
- (and 4 more)
-
Very enjoyable following this. I like the unusual blocks. Are you going to have shrouds, or is the bipod mast supposed to make them unnecessary?
-
Maybe the best thing to do would try it on some scrap - duplicate the overlapping strakes as best you can and drill a 1mm pilot hole and see if it breaks. Then follow it up with a 2mm drill. Scrap "feasibility studies" are always worthwhile. If it stuffs up, you haven't lost anything.
-
Regarding the weight of the sails, you might like to try paper instead of fabric - it can be very convincing - see https://modelshipworld.com/topic/25784-barco-catalan-by-gbmodeler-148-scale-mediterranean-fishing-boat-finished/page/2/?tab=comments#comment-756498 I agree, the painting is a bit unclear - I magnified my original as much as I could, but it's hard to tell whether the mainyard is single or double. Double mainyards are very common in contemporary representations, but I think there's enough uncertainty there for you to feel justified in making yours single.
-
It's very interesting following this build and seeing your ingenious solutions to problems. Walnut has a reputation of being easily broken and unwilling to bend without splintering. However, I'm using it on my Great Harry without much trouble, though my planks are pretty thin because the model is at 1:200 scale. What is the thickness of the planks on the Helga Holm? Your rivets look very good. Yes, paper or card would probably be good for the other side.
- 179 replies
-
- 3
-
-
- longship
- Helga Holm
- (and 1 more)
-
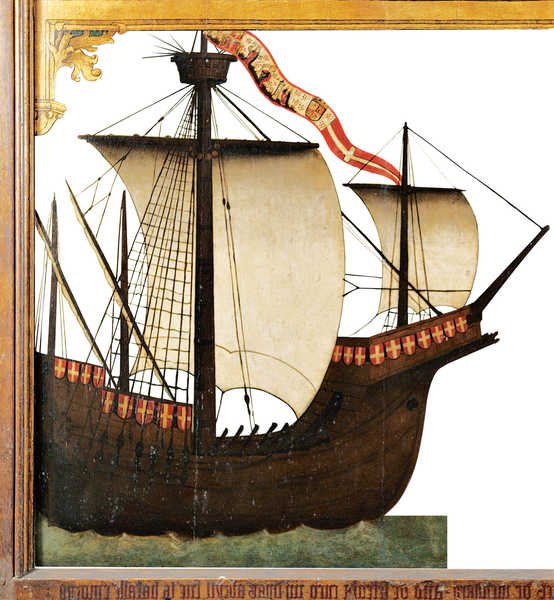
Interesting problem. The general principle is that in the Mediterranean they fixed the lower ends of the shrouds with pairs of blocks, while in the Atlantic they used deadeyes (caps de mouton). Columbus set forth from Palos de la Frontera, on the southern coast of Spain, on the Atlantic side of the Straits of Gibraltar. So perhaps his ships were fitted with caps de mouton, as was this Spanish carrack of 1475, from an altarpiece depicting the battle of Zumaia, off Gibraltar. Note that these are fixed on the outer side of the hull.
-
Good decision. Are you planning to make a two-part mainyard? That is, two spars overlapped at the centre? This was normal practice at this time. And note from the painting above the mainsail (and I think also the foresail) had sheets not only at the lower corners, but also "sheets" in the middle of the sail - which your model's pre-cast sails don't show. There was an interesting discussion of how to achieve that here https://modelshipworld.com/topic/4915-venetian-carrack-or-cocha-164-by-woodrat-completed/page/14/ and the following pages. I think Woodrat did an amazing job of it, but it was pretty difficult to achieve.
-
Oh, yes! Beautiful work. I particularly like your Lancaster diorama. Very lifelike! I made the Airfix Victory back when I was a teenager. My parents had been to the U.K. and brought back all kinds of detailed drawings for me. It was very much a labour of love. I hope you enjoy it as much as I did.
-
Welcome to MSW, Jon! Not sure if you're not already past the "beginner" level, but you might like to look at this for some idea of what to build first - these kits are all distinguished by good clear instructions and relative ease of building, but with a good-looking model at the end. https://modelshipworld.com/topic/18657-new-to-ship-modelling-but-what-do-you-build-first/ And make sure you start a build log of your own - this is how you do it: https://modelshipworld.com/topic/24705-before-you-post-your-build-log-please-read-this-starting-and-naming-your-build-log/ It's the best way to get advice, help and encouragement from the other members. Pretty much any problem you might encounter has probably been met and dealt with by someone else, and the members are very willing to give the benefit of their experience. There are quite a few build logs of Viking vessels on the forum - look under "Up to and including 1500 AD" - both under "kits" and "scratch builds". You should get a lot of information on the joys of building a model Viking ship, as well as the trials and tribulations. This period is my own favourite, so if you start a Viking ship you'll probably find me chipping in every now and then. The Amati Drakkar is a popular Viking model and there are a couple of logs on MSW for it. Type in "Amati Drakkar" in the search button at the top right of the page. Most seem to have had success, but at least one member has had trouble with getting the planking to follow the shape of the frames, though. Another has had a similar problem with a Dusek Viking model, so maybe it's something common to clinker-planked kits? I haven't built either of these, so I'm not in a position to comment further. Just a heads-up, not an attempt to discourage you.
-
Looking for advice on starting a build log
Louie da fly replied to Ken_2's topic in New member Introductions
Welcome to MSW! Yes, put up whatever seems appropriate in your log. At the bottom of the box as you write your post there's a note: Drag files here to attach, or choose files... - that's how you upload photos. And there's a useful trick - If you want to re-size your photos, double click on the picture you've placed in the text - it gives you a menu to reduce the size of your photo if you wish. The other thing I'd suggest is that you outline the steps you took in making something, so others who follow after get the benefit of your experience - including the mistakes (sometimes the best way of learning!). Other than that it's pretty much open slather. And have fun with it. That's what it's all about, after all. -
Welcome to MSW, Mark. I am unbelievably envious of your opportunity to get down and dirty on the Mary Rose. I went to see her in 2009 (flew 12,000 miles from Australia) and got here just after they closed her down to construct a new building around her. Never got to see the ship, but to compensate they increased the artefact display and I saw lots of stuff - including that enormous VD syringe! To help you make a decision on what to build first, look at https://modelshipworld.com/topic/18657-new-to-ship-modelling-but-what-do-you-build-first/ These are all good "starter" kits - clear instructions and not too difficult to build, but nonetheless an impressive model at the end of the process. And once you've decided on your model, make sure you start a build log. The instructions are here: https://modelshipworld.com/topic/24705-before-you-post-your-build-log-please-read-this-starting-and-naming-your-build-log/ It's a great way to get help, advice and encouragement, and we get to see your model under way (one of the pleasures of being on this forum). Don't get too worried about the quality of some of the models here - I know it can be a bit intimidating to start off with, seeing the amazing stuff some people are able to do - but nobody will criticise - we were all beginners once - and the skill level here ranges from total beginner to god-like expert.
-
David, welcome to MSW. One of the best things you can do is to start a build log - even for a model in progress, it's a great way to get help and advice - and encouragement. The instructions are here: https://modelshipworld.com/topic/24705-before-you-post-your-build-log-please-read-this-starting-and-naming-your-build-log/ Those models look very good. However steep the learning curve may have been, you are already producing creditable models. Keep up the good work, and don't fail to ask questions if you need assistance. The people here are very friendly and helpful, and there's a lot of expertise freely available.
-
Thanks everybody. The last thing I'll be doing is to make a case - I'm off to buy perspex today. A final comment - If I were to build the model again there are quite a few things I'd change. For a start I'd make it about 2 metres longer (full scale) - the poop deck needed to be considerably bigger than I'd made it in my drawings if it was to take the awning and the steersmen, and I had to sacrifice an oarbench on each side to fit it in. I'd also start the curve of the "tail" further forward so it was higher - the poop deck had to be lowered so it didn't overlap the sides of the ship. And I would have made the forecastle higher - according to the sources much of the Greek Fire apparatus should have been underneath the foredeck, not on top. The pump would still have to be on the deck, but the oil tank and brazier should have been below. At the time I was worried that the parapet would get in the way of the lateen yard, but I believe I could have had a higher parapet and still not had a problem. I'd also have been a lot more careful about the placement of the benches - they weren't spaced as equally as they should have been. I do know the benches on the Yenikapi galleys weren't exactly spaced, but the differences were pretty minor. As it was, the spacing between the tholes and the benches was different for every oarsman - another reason I couldn't mass-produce them. And I'd have a double-sheaved calcet (integral block) at the top of each mast, not single, as I've since found large numbers of near-contemporary calcets - all of them double sheaved. However, having said that, I'm very pleased with the model as it turned out. Certainly it could have been improved, but I think it's pretty darned good.
-
This weathering is looking really good. Keep up the good work.
- 265 replies
-
- 3
-
-
- Golden Hind
- Airfix
- (and 1 more)
-
Beautiful work, Silverman. She's really looking good.
-
Belissimo, prestissimo! Those blocks are beautifully and precisely done. My hat off to you sir!
-
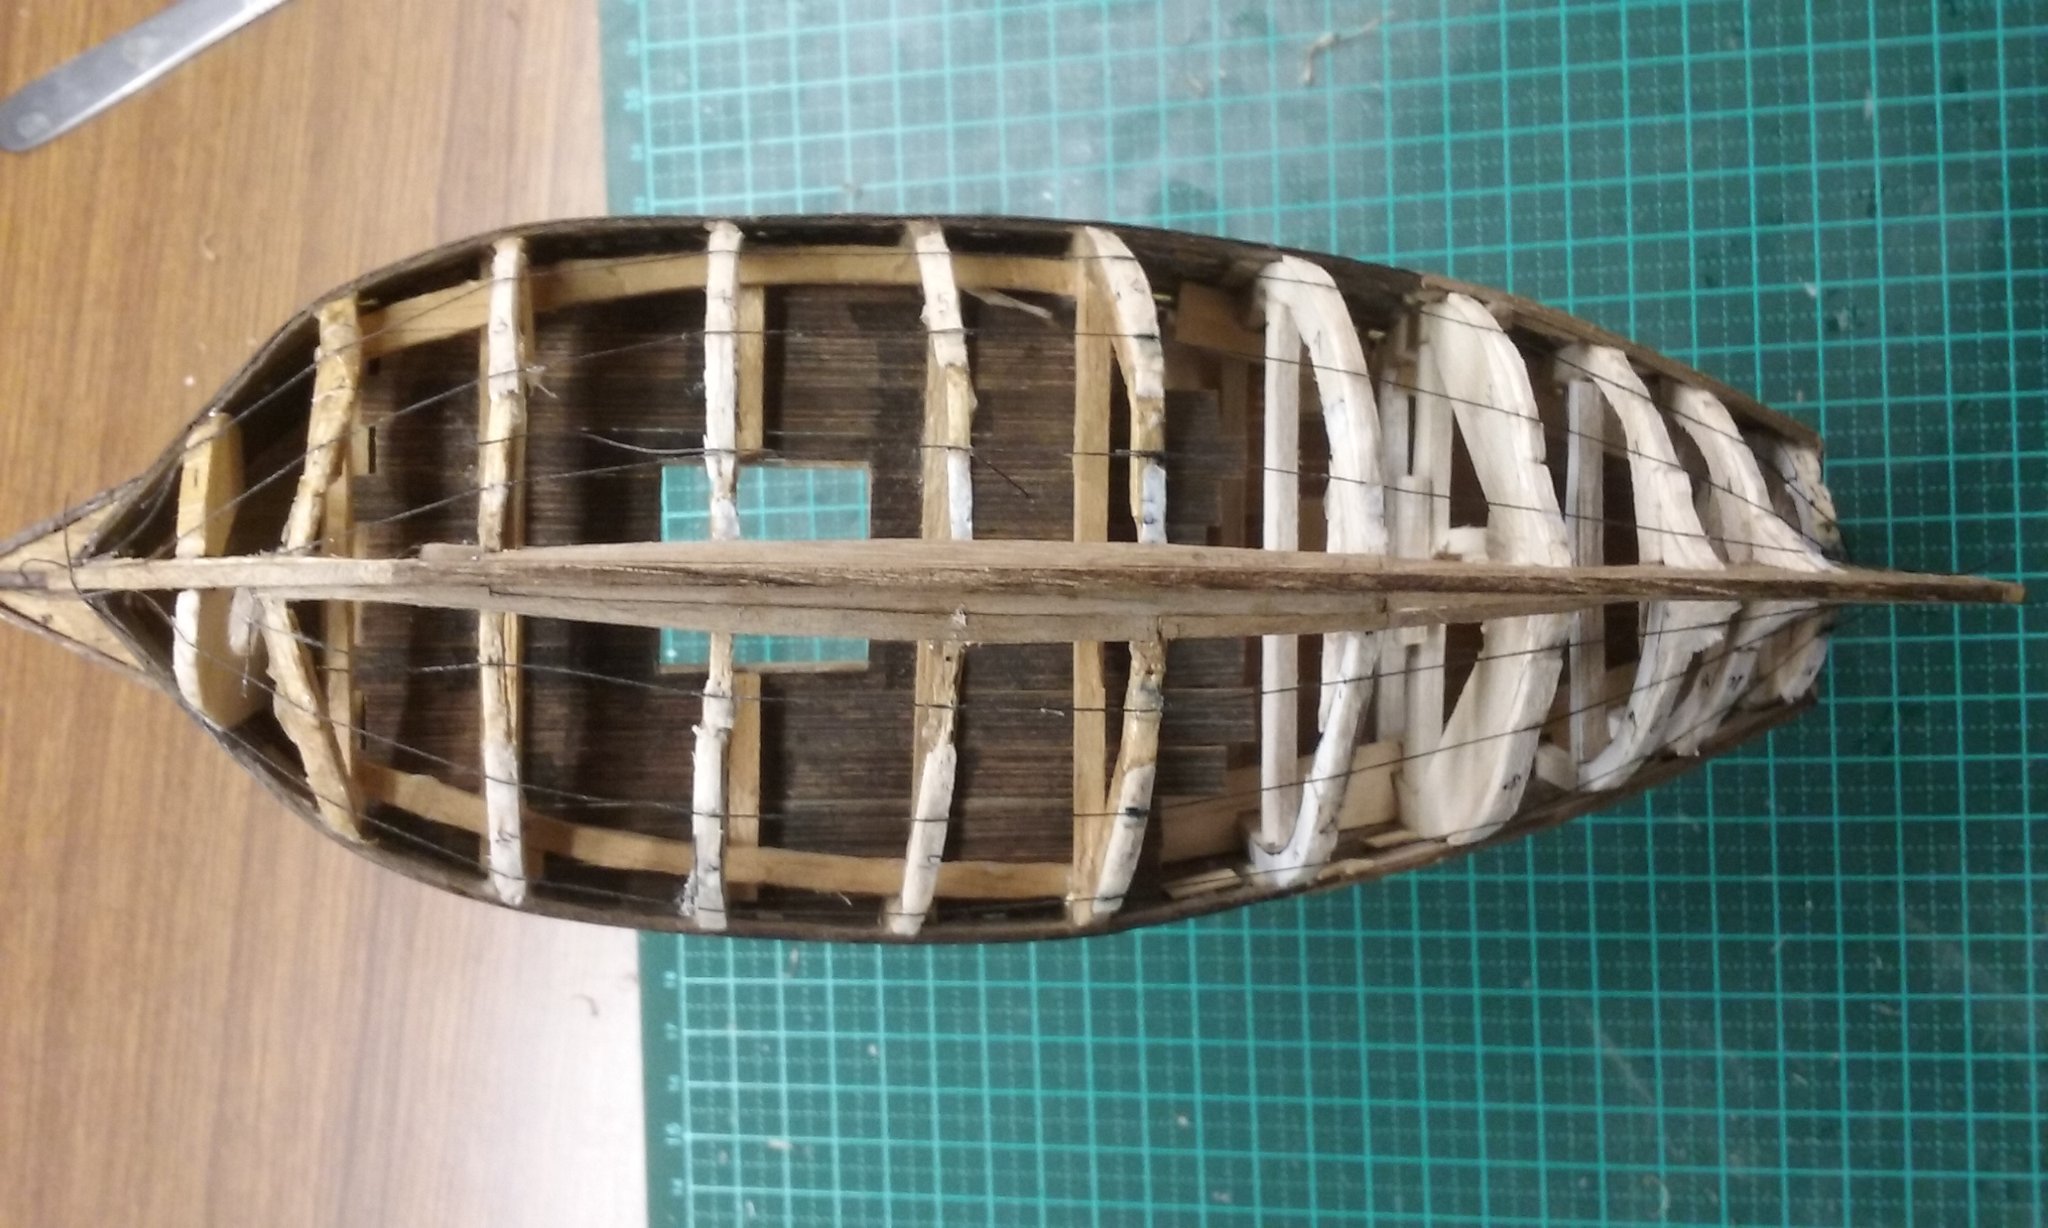
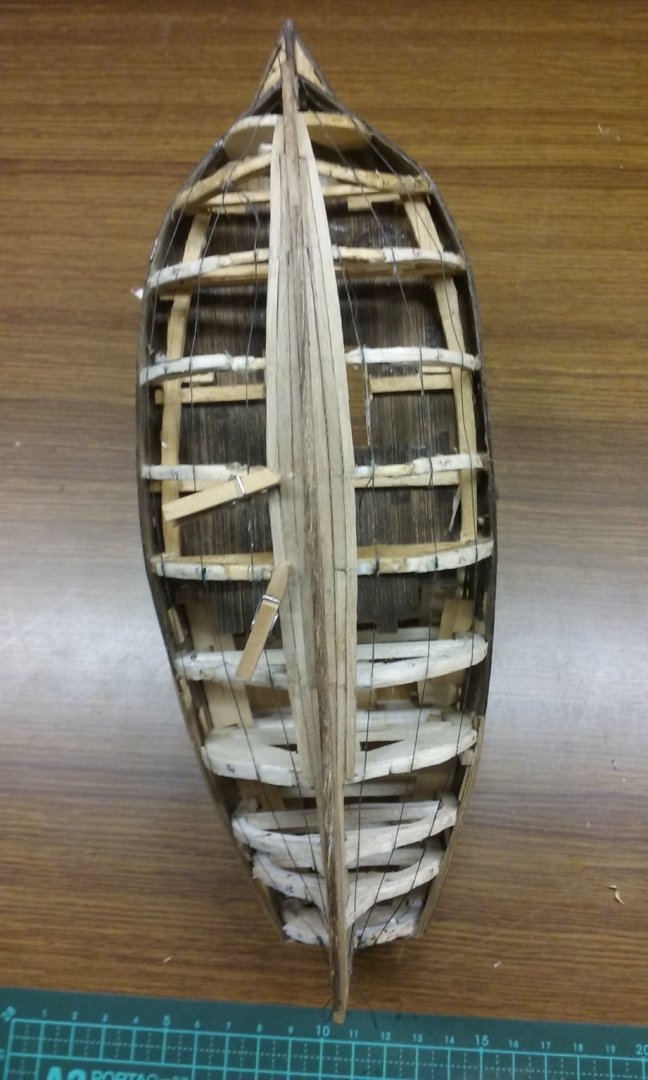
Well, perhaps not an expert, but less of a duffer . Currently I feel like i know absolutely nothing about planking - but little by little I believe I'm learning to see how things should be. I think by the time I've planked everything below the waterline in the Great Harry I'll move from being totally ham-fisted to being merely slow and awkward . . . Of course planking the underside when the ship is in such a state of completeness elsewhere (with a mast that's already in place and can't be removed without doing damage, and cannons sticking out the sides) does make it rather more difficult.
- 740 replies
-
- 6
-
-
- Tudor
- restoration
- (and 4 more)
-
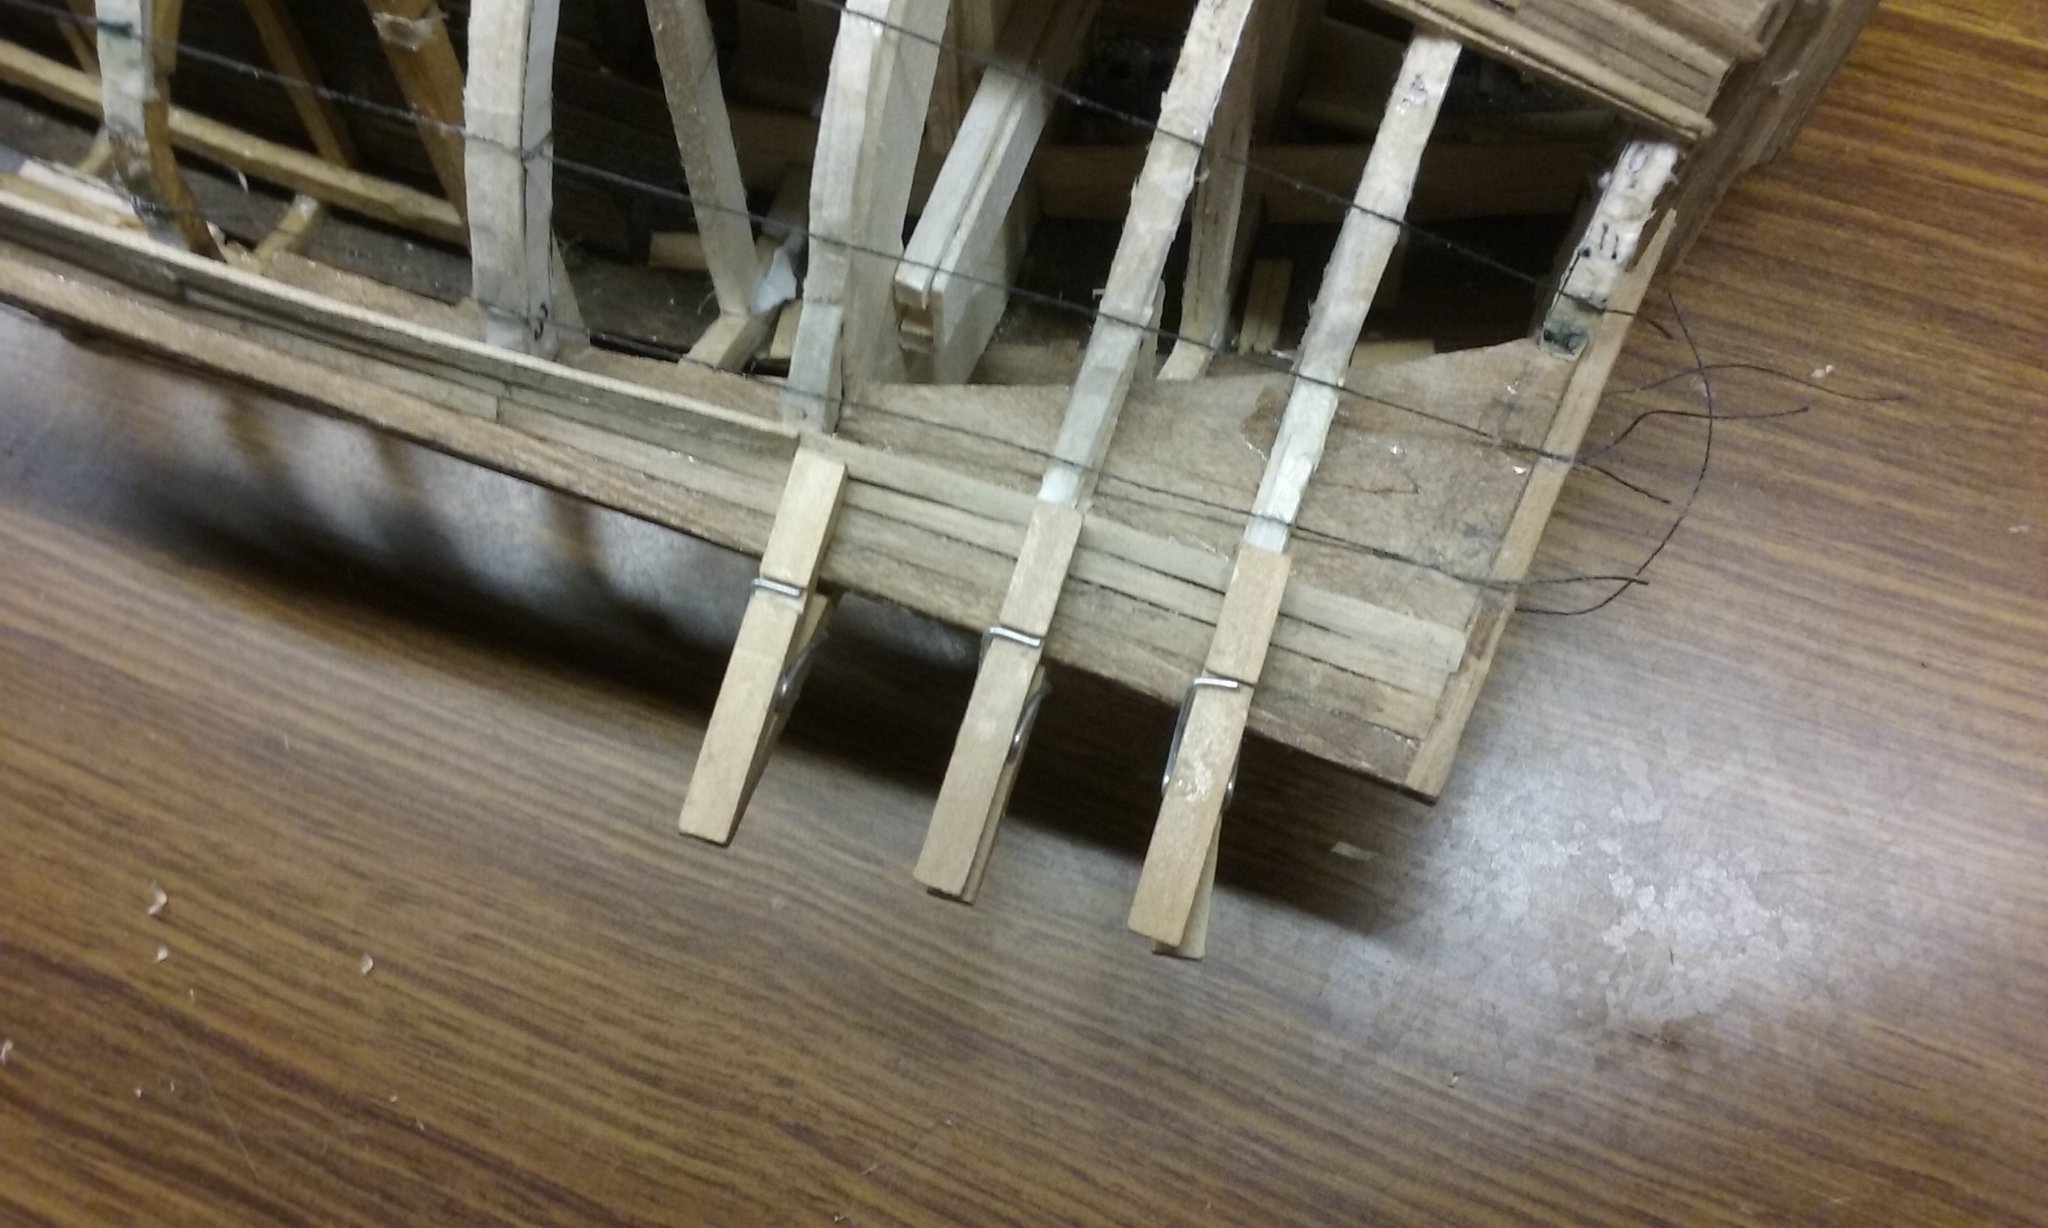
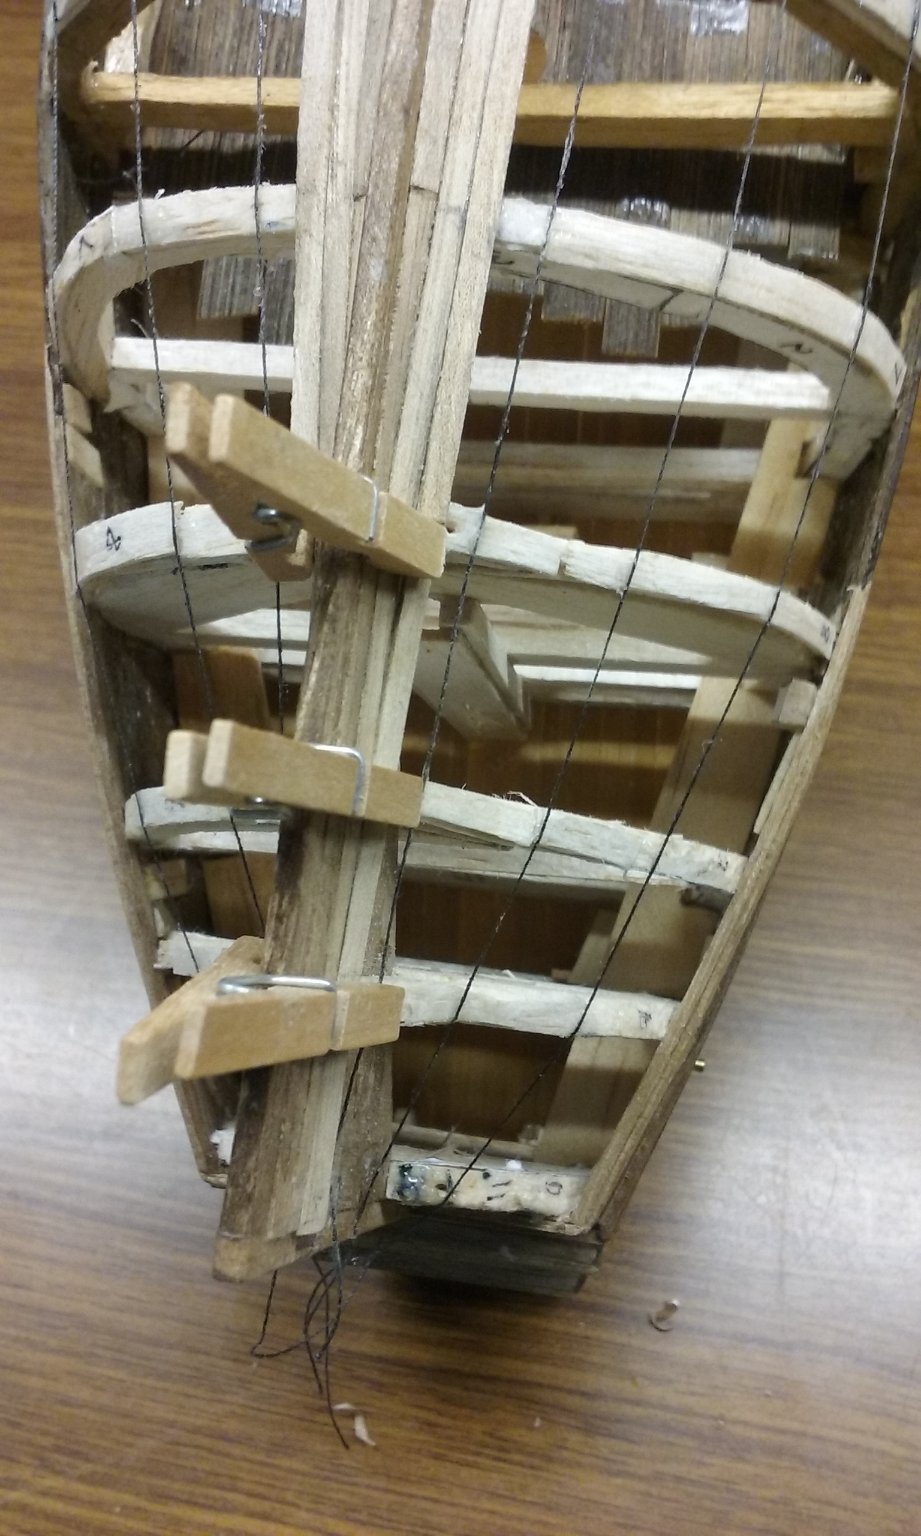
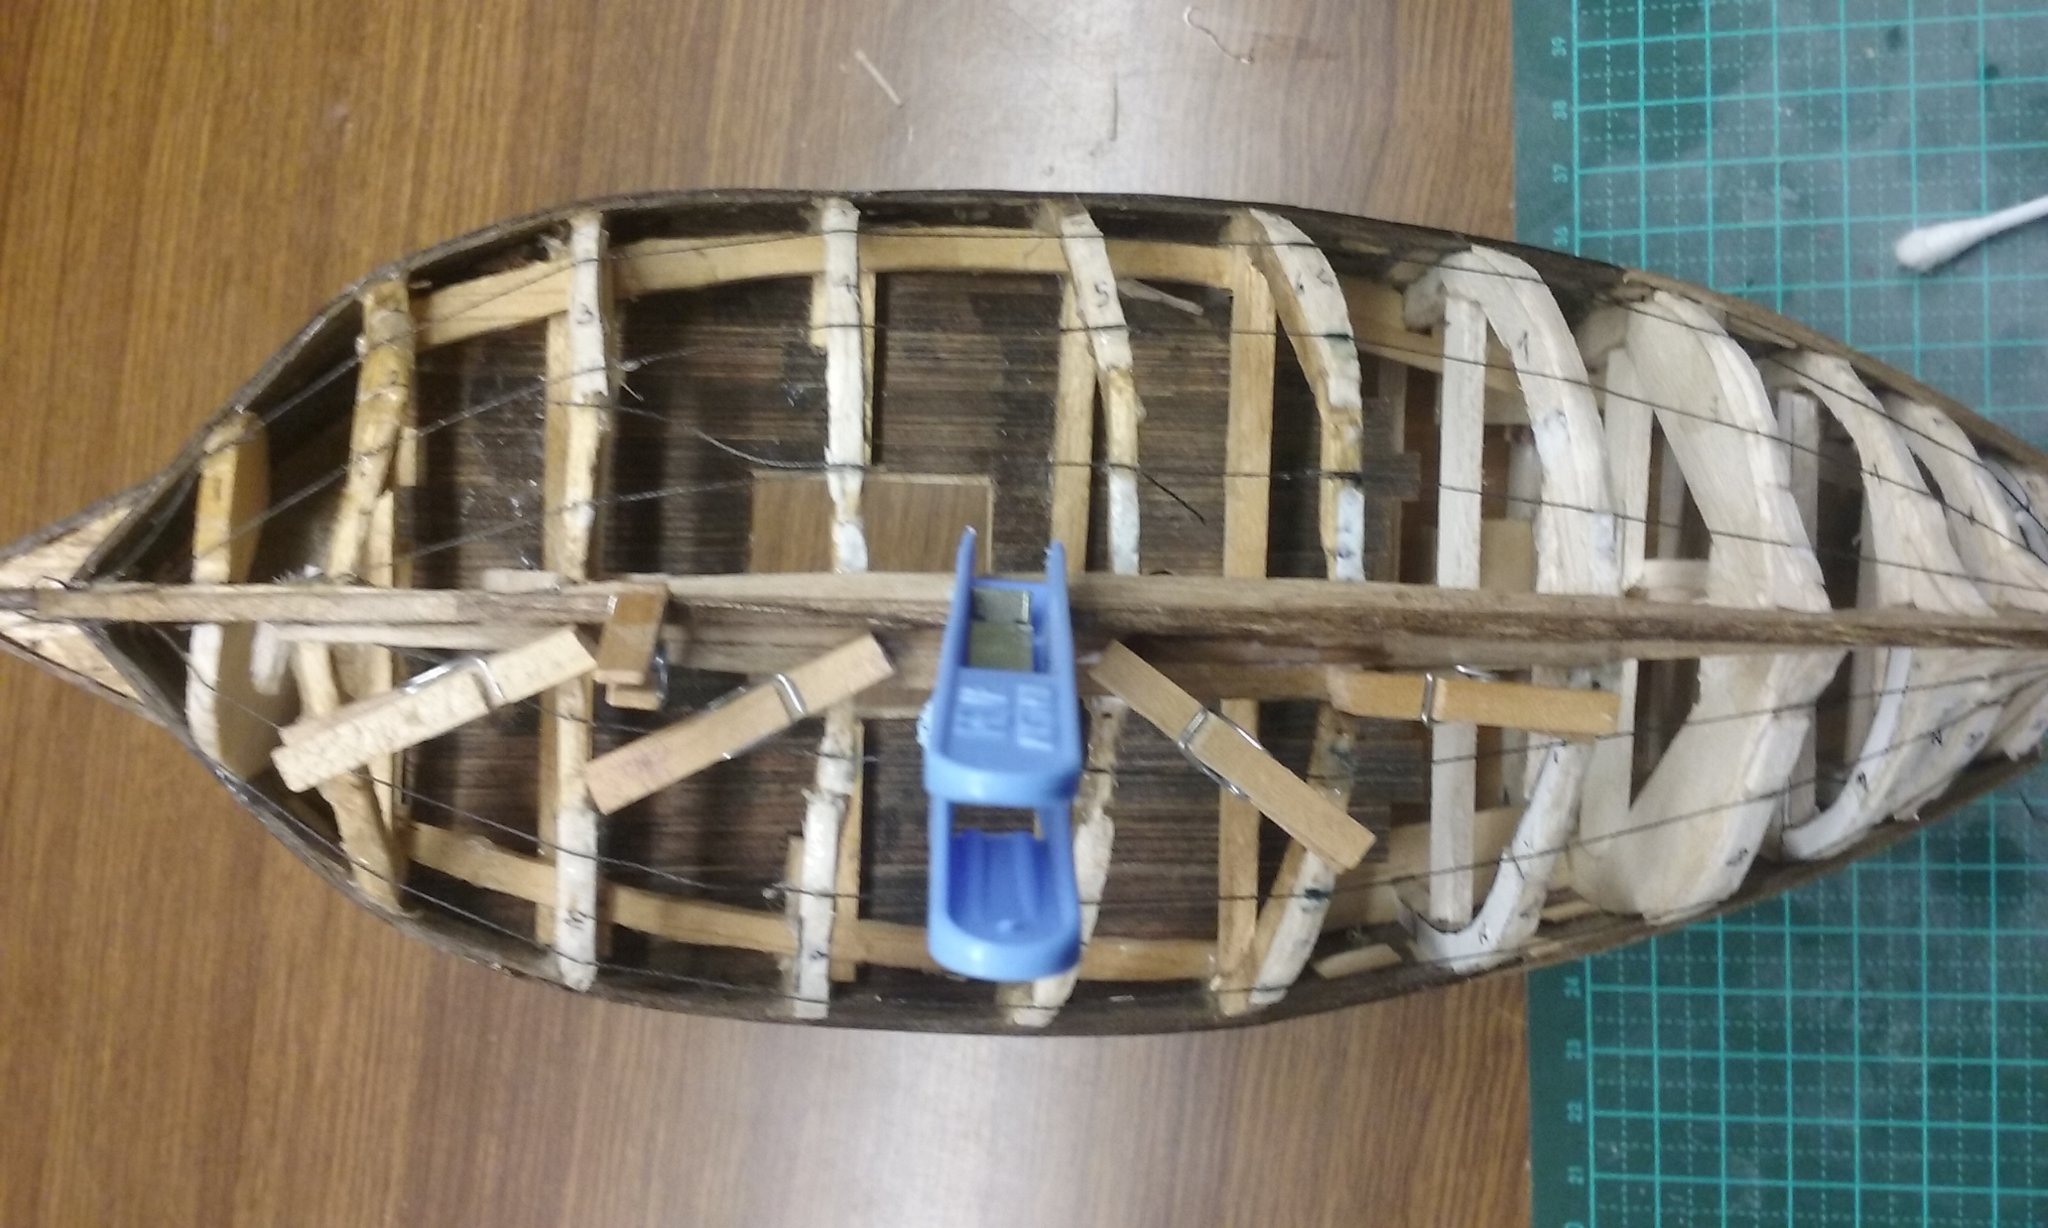
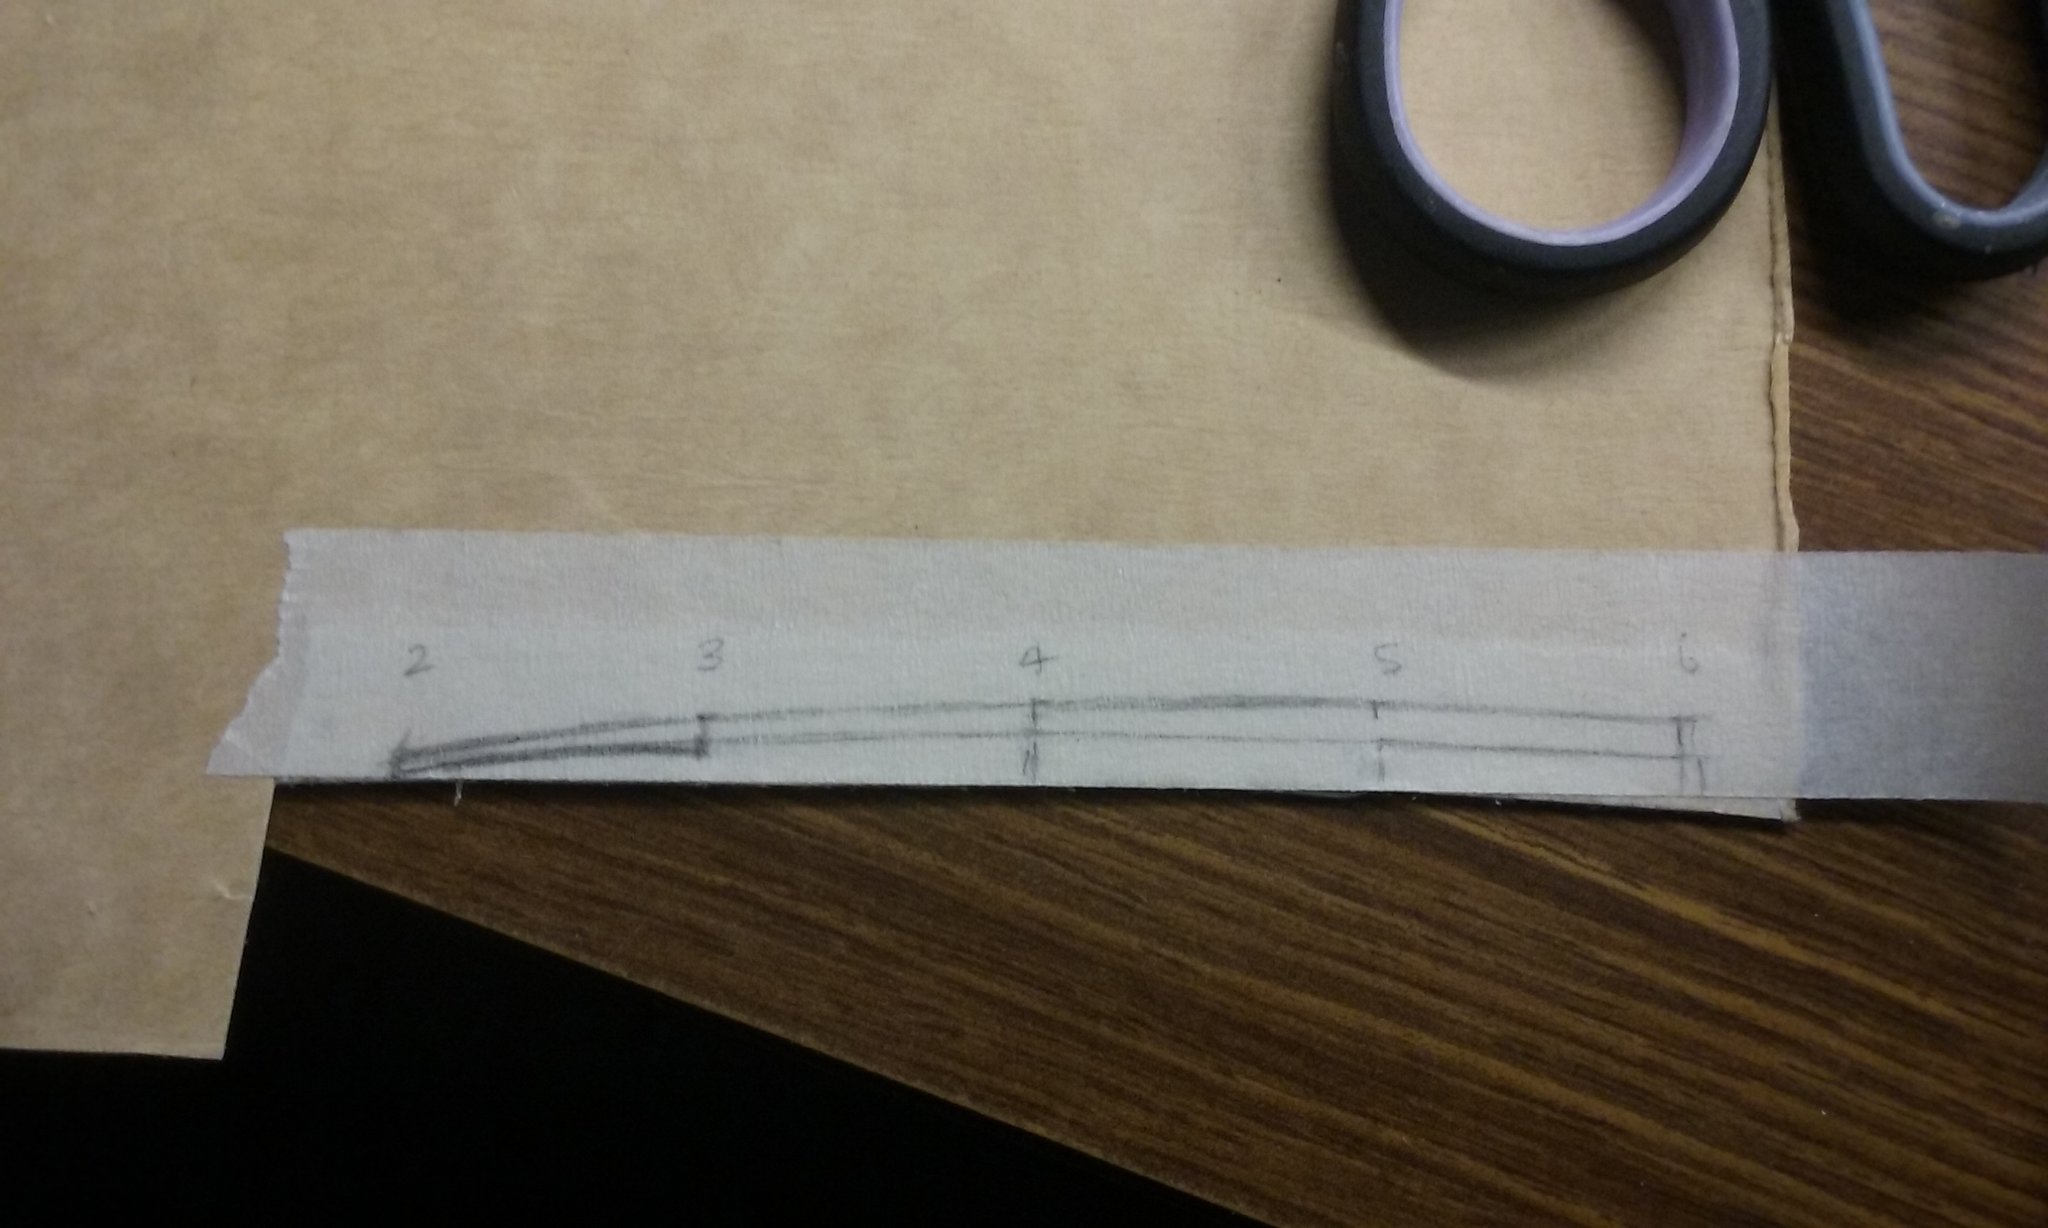
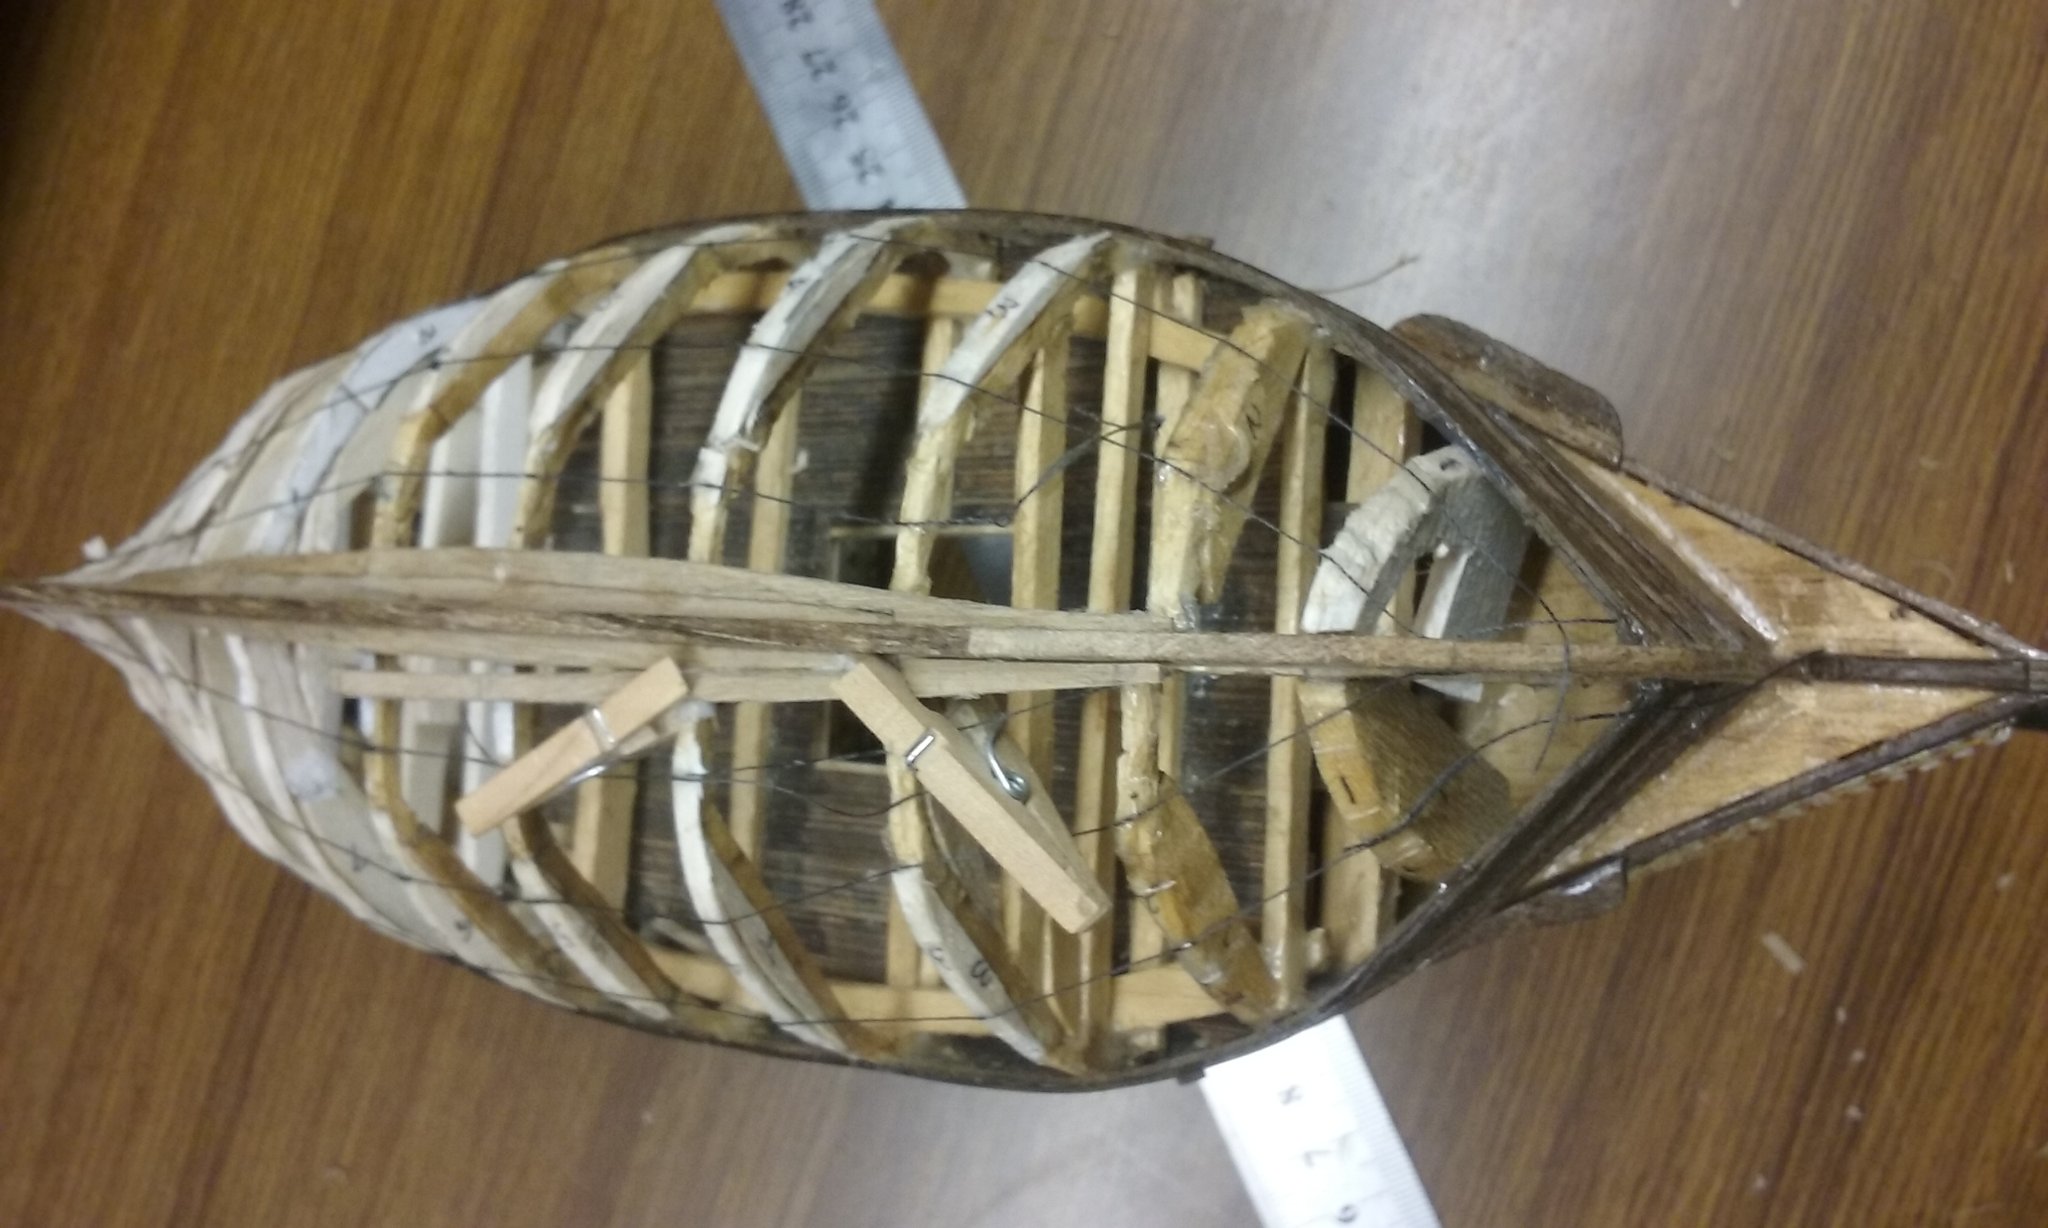
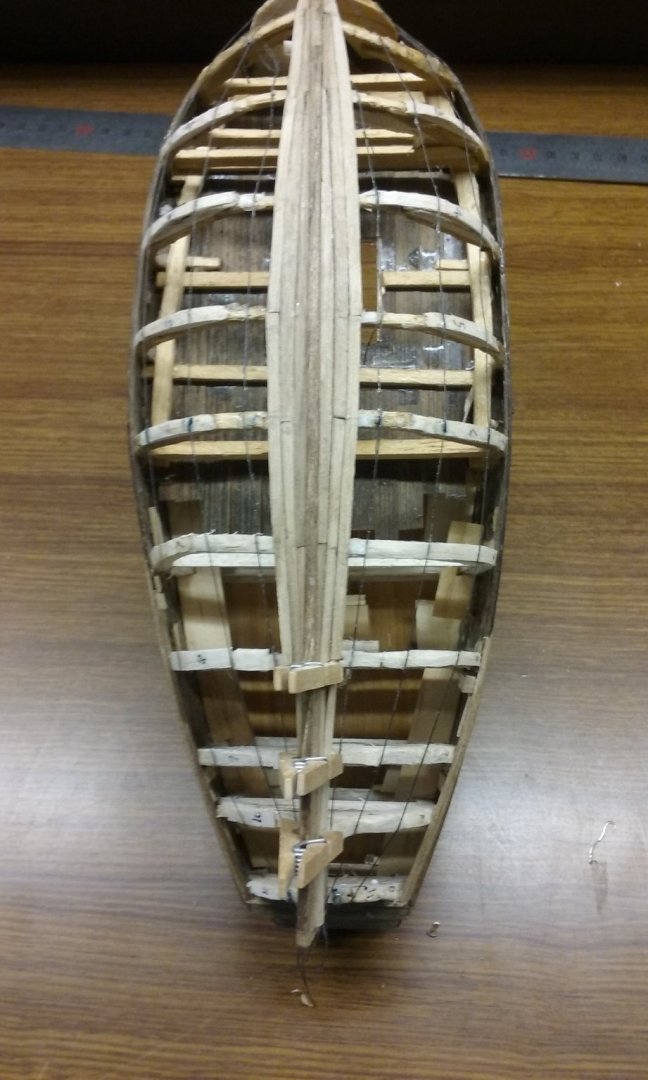
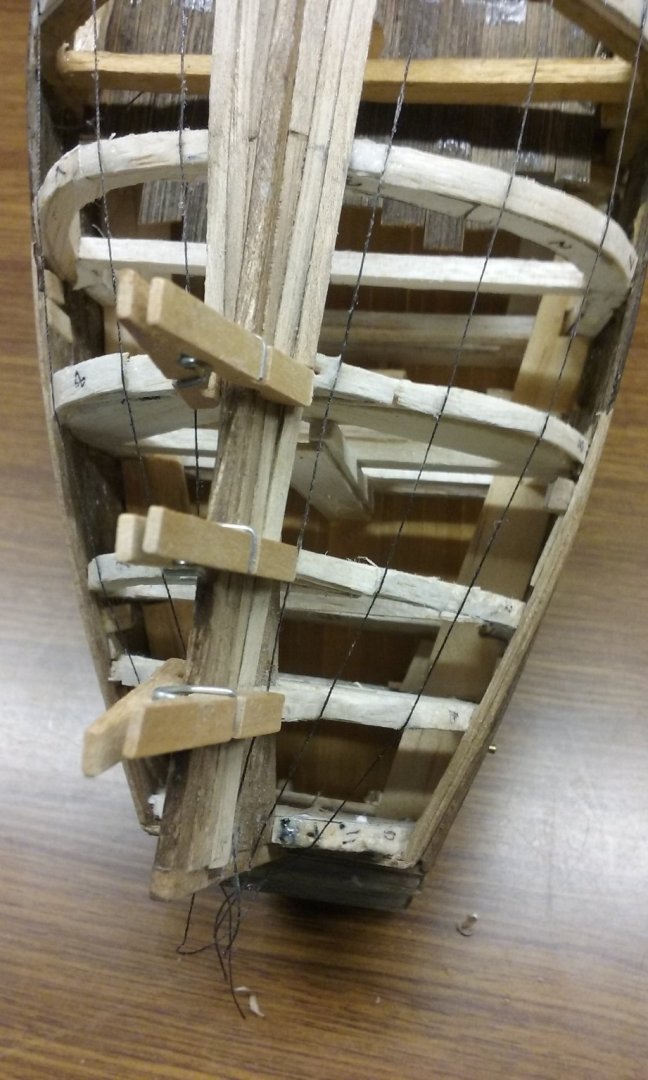
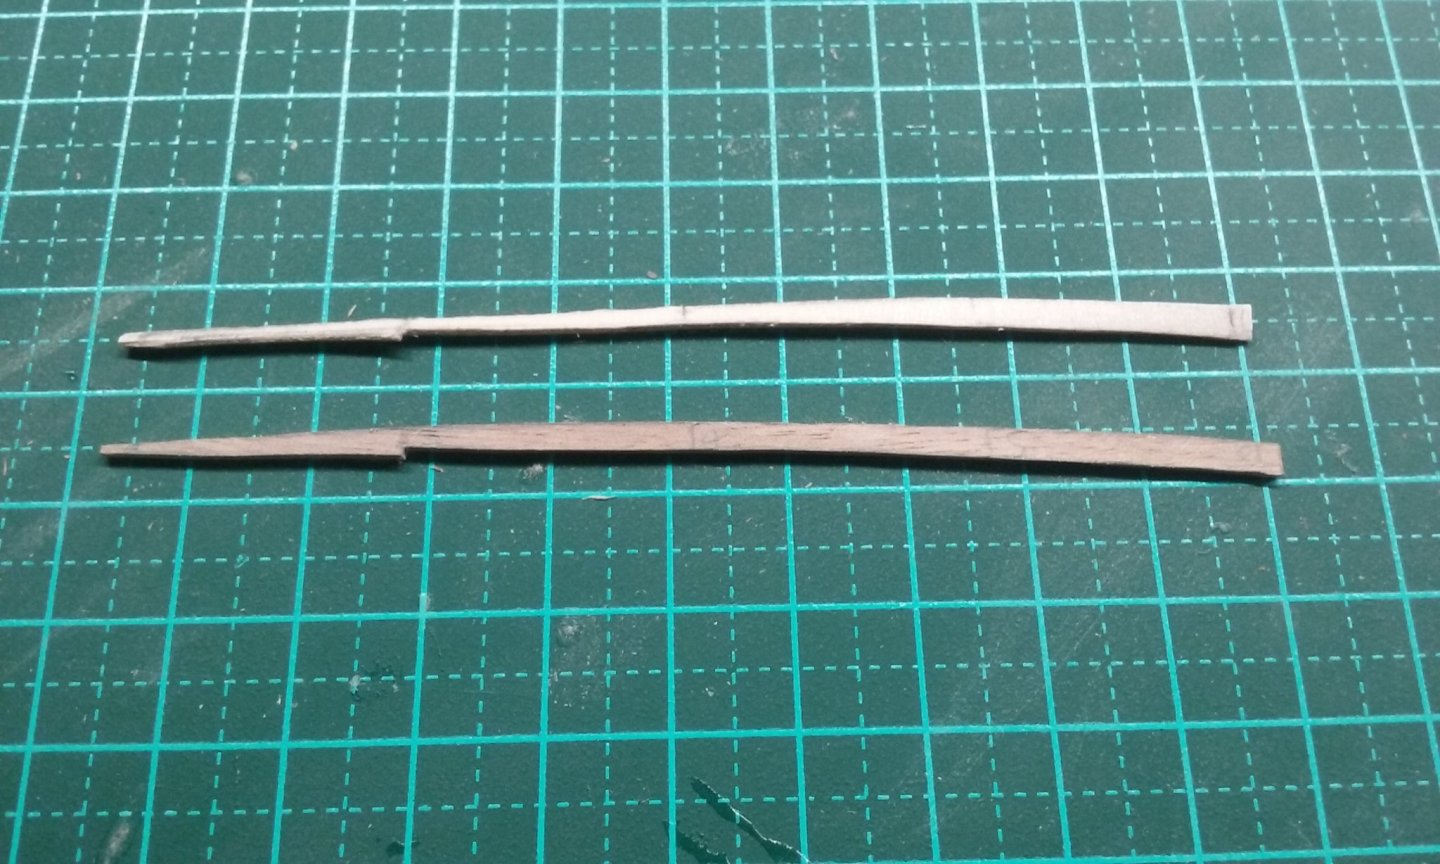
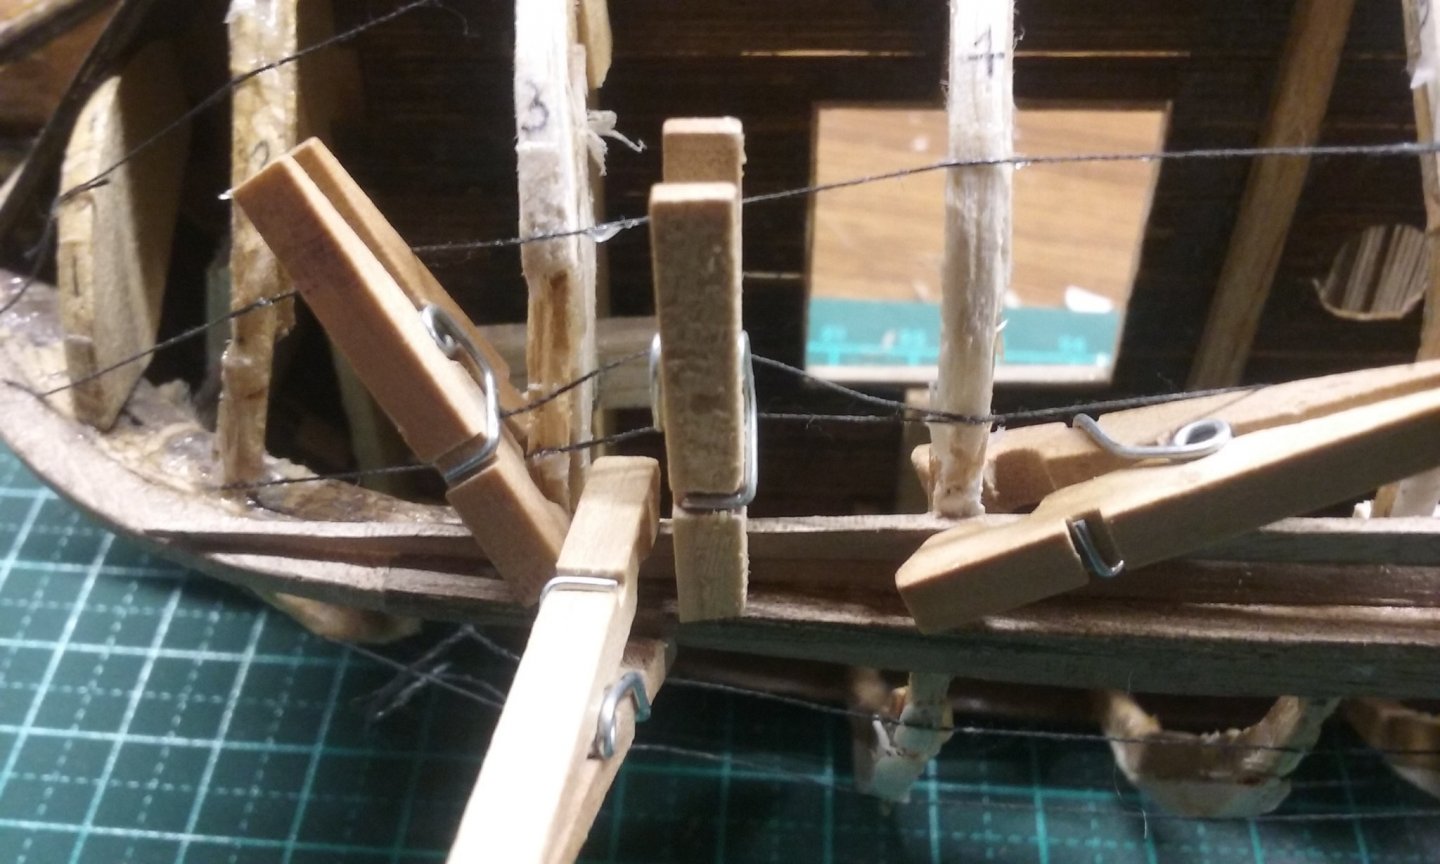
And here is the nother one. Clamped in place And the second plank added to make the full strake. Marking out for the corresponding plank on the port side: Cutting the plank to match the cardboard master: Clamping the forward end. Oops Had to make a new one: This time it fits! And when the after end is clamped down to follow the curve of the hull it will fit too. I'm learning a fair bit. Planking at my level of skill involves a lot of trial and error. And needs endless patience . . .


- 740 replies
-
- 9
-
-
- Tudor
- restoration
- (and 4 more)
-
Very good question - unfortunately i don't know the answer to this one; it would probably be in some archaeological report somewhere. Does it make a difference to how yo're doing the model?
-
Revenge 1577 Mainmast questions
Louie da fly replied to Jonathan_219's topic in Masting, rigging and sails
That's news to me as well - I'd thought there was a "tenon" at the lower end of the topmast that fitted into the space, and that the fid just made sure it didn't waggle around. You learn something new every day (if you're not careful!) -
Revenge 1577 Mainmast questions
Louie da fly replied to Jonathan_219's topic in Masting, rigging and sails
Though this is from a later ship, this diagram might help you understand how the crosstrees and trestletrees work. The top is a different shape in the later vessel, but the principle is unchanged. which I think means the topmast can't slip through the hole - it rests on it, and the fid holds it in place. -
Thanks for that Silverman. I've looked at the other thread and bookmarked it. Not likely to do much about it straight away, but I'll definitely get around to it.
-
Hi, Eric. First let me say that you've done a very good job with cutting off the tops of the frames, and particularly that you've recorded how you did it for the information of others who follow. Regarding the angle of the top strakes - I can't see a sensible way out. Whether it's because of your inexperience, or bad instructions/kit I don't know. Probably a bit of both. But I agree - the best thing is to put that problem to one side for the moment and see if anything occurs to you. In the meantime, yes, go ahead with your deck planking to replace the ready-made stuff. That should be rewarding and interesting, and put you in a better frame of mind to perhaps come up up with a solution to the strakes. In the long run, that issue might end up being a case of putting it down to experience, but you'll at least have given it your best try. Sorry to hear about the personal issues. I agree - the hobby is supposed to be a relaxation away from problems, so concentrate on the parts that are relaxing and enjoyable - you don't need the extra frustration in your "time out". But I'm sure you already know that. Take your time with the model. It's not a race. I hope things get better with time.
-
Beautiful work, David. She's looking better and better.
- 136 replies
-
- 1
-
-
- kolderstok
- batavia
- (and 1 more)