


GuntherMT
-
Posts
2,213 -
Joined
-
Last visited
Content Type
Profiles
Forums
Gallery
Events
Posts posted by GuntherMT
-
-
-
-
No idea on the patina, but nice progress. On the anchor chain locker location, remember that the chains need to go over the windlass (or winch, or whatever it is), so they really can't be any farther forward because you wouldn't want the chains to be coming vertically off of the windlass into the locker. If anything, I would expect the locker entry to be farther aft, not farther forward, but I don't really know, that's just my knee-jerk reaction based on completely different types of vessels.
-
-
... the files from the camera are too large to post, so I guess it is back to the iPad. The Syren materials arrived, and they are great! I don't have any pictures not on the camera, and have to get back to my homework. sorry, I will be back to work as soon as possible!
As mentioned, you can simply re-size them to post. For reference the size limits for the forum are 1600 pixels on the long side, and 2mb in file size. This allows for pretty nicely sized photo's.
My photo's all start out as 6000x4000 pixel images from my camera and are re-sized for the build log. I keep the originals in a separate folder.
- Elijah, Mahuna, Gerhardvienna and 2 others
-
 5
5
-
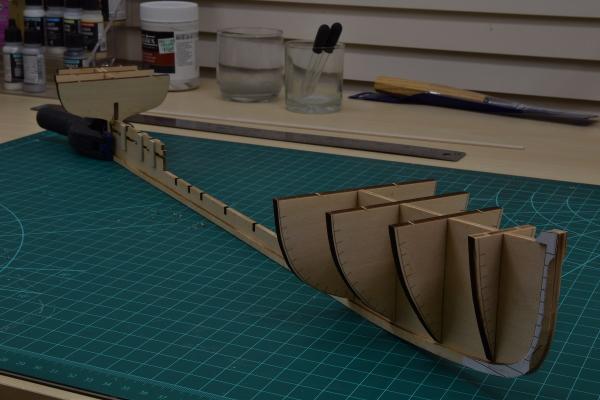
As promised at the beginning of this log, very slow progress!
I've beveled the bow bulkheads and the two pieces that go forward of the first bulkhead, and glued them all in place and added reinforcements to the bulkhead joints.
I did the beveling for the bulkheads on my 1" belt sander with 300 grit belt, and then finished to the lines with a sanding block by hand. For the bow pieces ahead of the first bulkhead I used a sharp chisel and then finished with a sanding block.
I'll do the final fairing in place using planking strips.
-
-
-
-
-
If you are using a soft wood like basswood for the first planking, don't be afraid to use a heat gun (or a blow dryer) and just edge bend them. The kit planks should edge bend just fine.
For where edge bending won't get it done, especially for a first planking, drop planks and stealers are not a sin.

- Elijah, Seventynet, daveward and 1 other
-
4
-
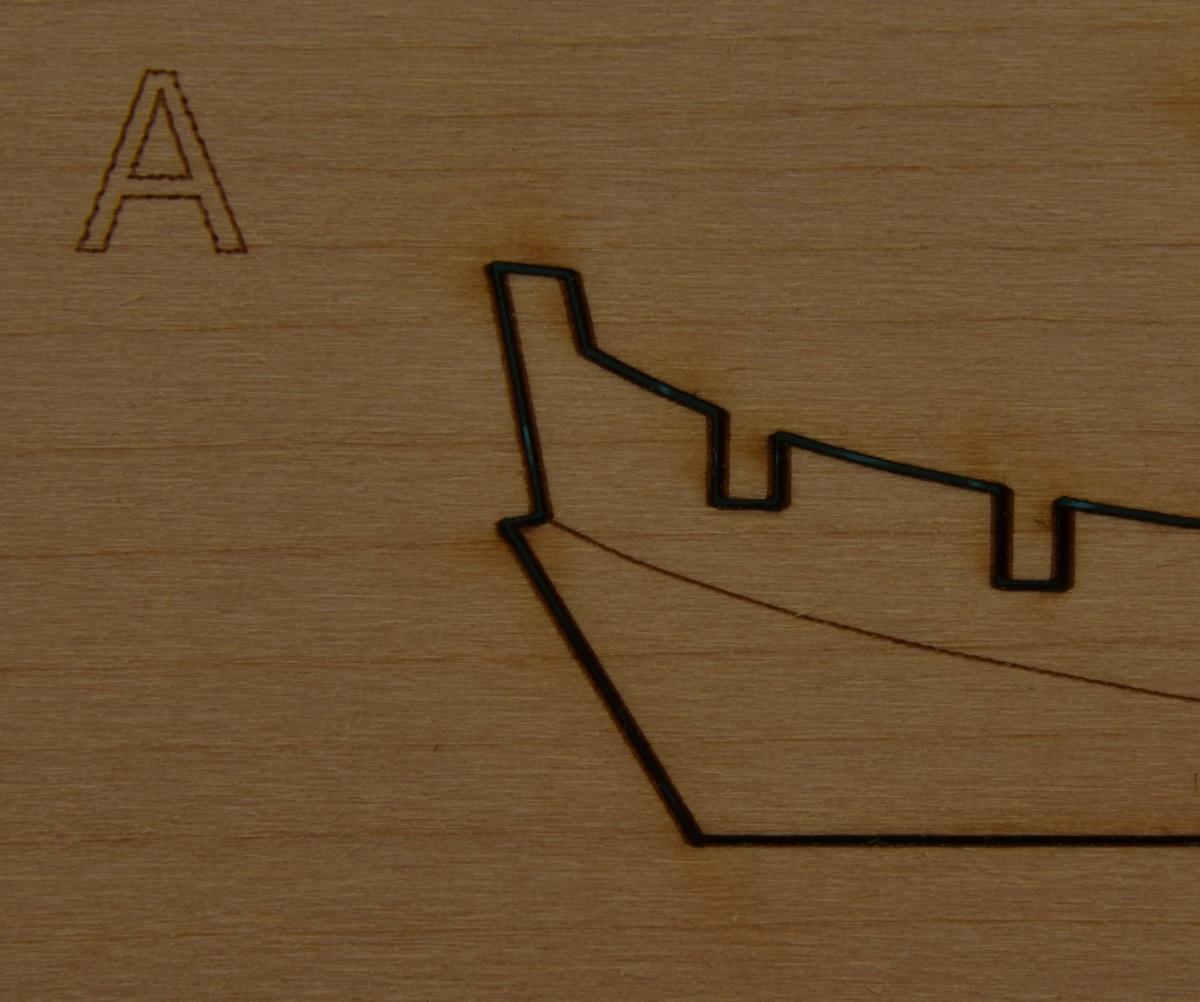
I'd certainly ask them for a replacement. The laser-cut basswood parts in my USN Picket Boat kit have a kerf so thin that my #11 X-acto blade won't fit into it.
This made me curious, so I pulled my long boat kit off the shelf, and this is what it looks like:
Notice how much crisper the corners are compared to yours. Call them and ask for a replacement.
-
-
-
Hi David,
Your Connie is looking great!
I've been a bit lax keeping up with this build, so I've missed out on a bit and will try to address a few questions you've asked, or issues you ran into in this response.
First - Your problem when trying to cut thin slices of dowel for sheaves. I highly recommend getting a good razor saw to handle this type of very thin cutting. They are not expensive, I am using the one from UMM USA - http://umm-usa.com/onlinestore/product_info.php?cPath=21_28&products_id=35 Hopefully that link works, if not look for the JLC002 JLC Micro Combo Saw. I use that along with the Micro Mitre Box http://umm-usa.com/onlinestore/product_info.php?products_id=3340 more than any other tool I own, with the exception of the X-acto handle/blades.
Also, if you round a piece of hard-wood like Boxwood or Pear, it will slice much better than a typical dowel.
Second - N'thing what everyone else said about the sequence. Think things through and do it in an order that makes sense and works for you.
Third - Inhaul tackle. I left these off of the AVS for a few reasons. One is that the deck arrangement didn't really have the room for the in-hauls on a couple of the guns, the eye-bolts were simply too close to the guns when in the out position. Two is that I agree that the in-hauls would only be rigged when action was pending, and my model was to be displayed on the way's without sails. It seems to me that they would be out of place on a ship displayed without sails. I did however mount all of the ring-bolts that the tackle would have been rigged to, as they would be a permanent part of the deck. In the end, whatever you think will look good is how you should probably do it.
And Finally - Coils. As you know, I did place the coils on my deck, as I like how they look. In the last year I've had the wonderful opportunity to go sailing on 5 different tall ships, and my observation about things like 'dressed coils' was that they were a lot more common than I would expect based on discussions on this forum about how they would only be present for inspections. I imagine that different captains would run their ships in different levels of 'dress', and that in the end, other than inspections, that is what would determine the presence of things like this.
My general observation about how 'dress' coils are handled on ships that are actually being sailed is this - When the ship is being sailed in tight quarters where the tacks or turns that will require sail handling are frequent, the ropes are cleaned up in very quick 'functional' loops in between the maneuvers, but whenever the ship was going to be maintaining course for any sort of time (10+ minutes) the crew would go about dressing all of the lines as soon as the course was set and the captain was happy with the trim. I realize that these ropes were all sail handling ropes, not gun tackle, but I would think that if they were so good about dressing the lines that are used to sail the ship, then they would also be pretty good at dressing lines for the guns when they were not in active use.
On the only ship I have had the pleasure of sailing on that had 'real' guns (6 pounders) rather than sleeved 'show' guns, they kept the guns lashed sideways to the bulkhead when not ready for action. Because of that, they didn't have the flemish coils, simply because they were stowed completely differently when not in use, and the tackle was completely removed and stowed off the deck.
In summary, my personal opinion is that on a ship like the Constitution, the captain was highly likely to run a very tight ship as compared to a merchant ship or a privateer, so the likelihood of ropes being properly 'dressed' at all times that conditions allowed for it, was probably also very high. But in the end, you are the modeller and you should dress them in a way that is pleasant to you.
Happy Modeling!
- CaptainSteve, mtaylor, UpstateNY and 3 others
-
6
-
Thanks all,
Dave - At this point the plan is to basically do it out of the box, except that I will probably do walnut veneer planking on the decks that the kit says to scribe, like many other builders on here have done. Since most everything else is painted, I don't plan on replacing any of the other wood on this one, but we'll see what happens as I progress.
-
Beautiful planking work on this. Thanks for sharing, great job so far!
- Elijah and Seventynet
-
2
-
Thanks for the comments and likes everyone, and welcome aboard. As promised, progress is very slow!
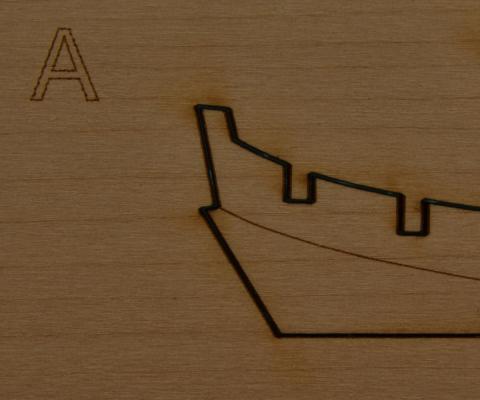
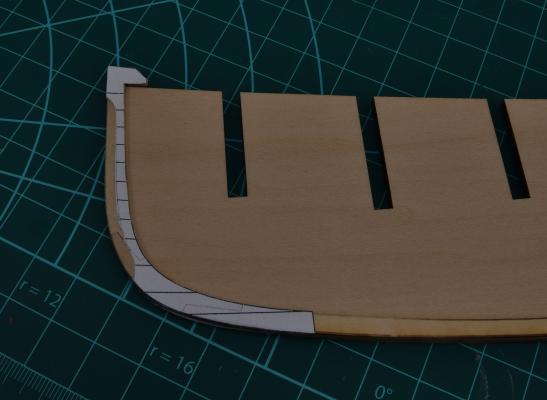
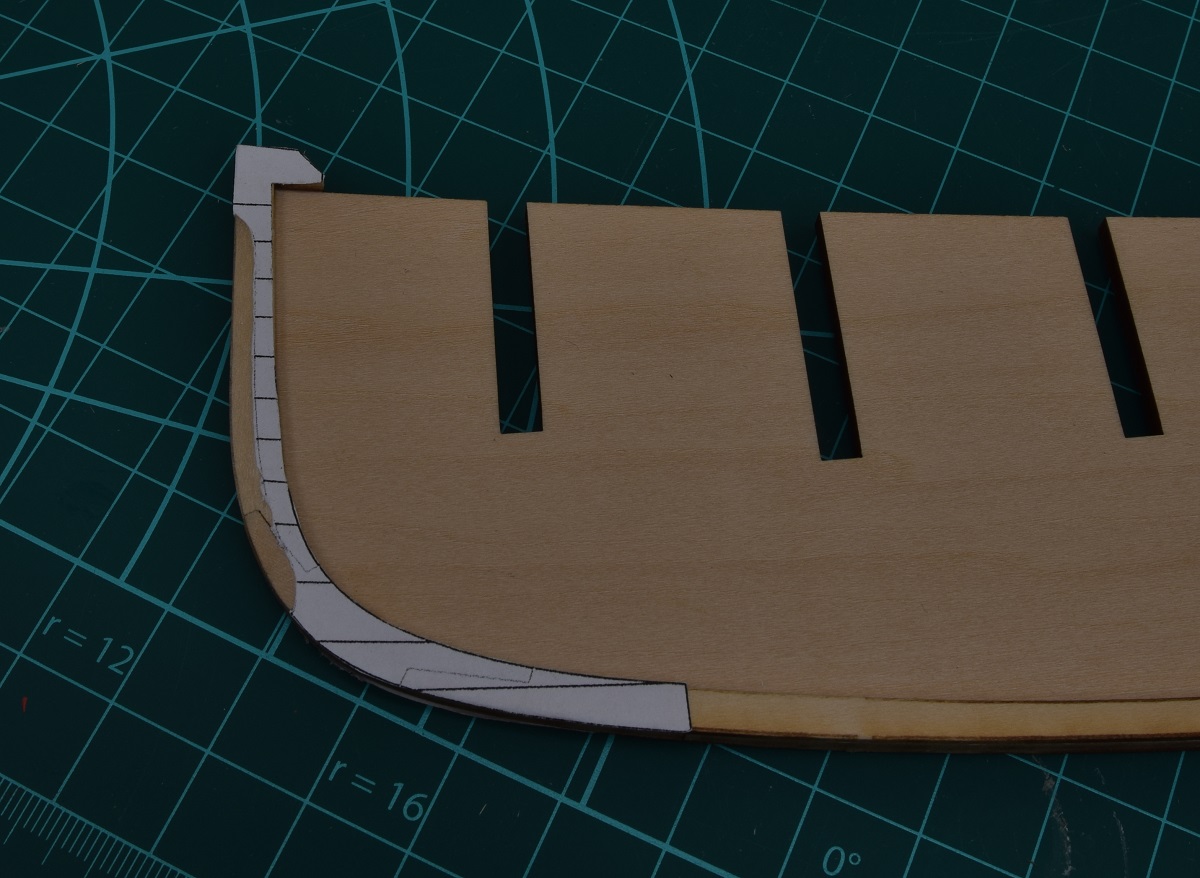
A card-stock sheet is provided with a pattern for the cutwater, as well as a pair of patterns that match the keel in order to mark the first filler blocks for the planking pattern. Interestingly, these patterns for the planking also have a lighter mark which is the same pattern as the cutwater. Instead of cutting the cutwater pattern out of the card stock, and using the other patterns to mark the first filler blocks, I made paper copies of the card-stock sheet and cut out those patterns and used a glue-stick to paste them to the keel, and used that for my cutwater pattern.
Here are the patterns glued to the keel.

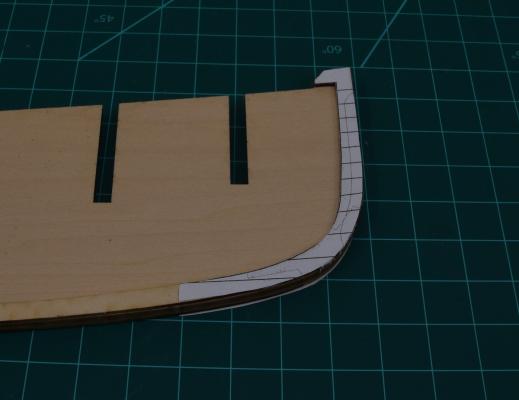
Here we have the cutwater rough-cut on both sides ready for final sanding to exact shape/depth.
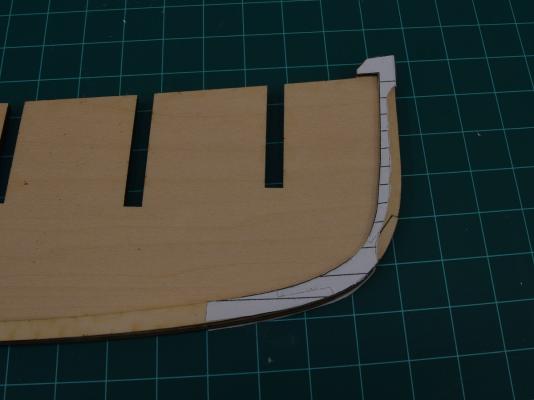
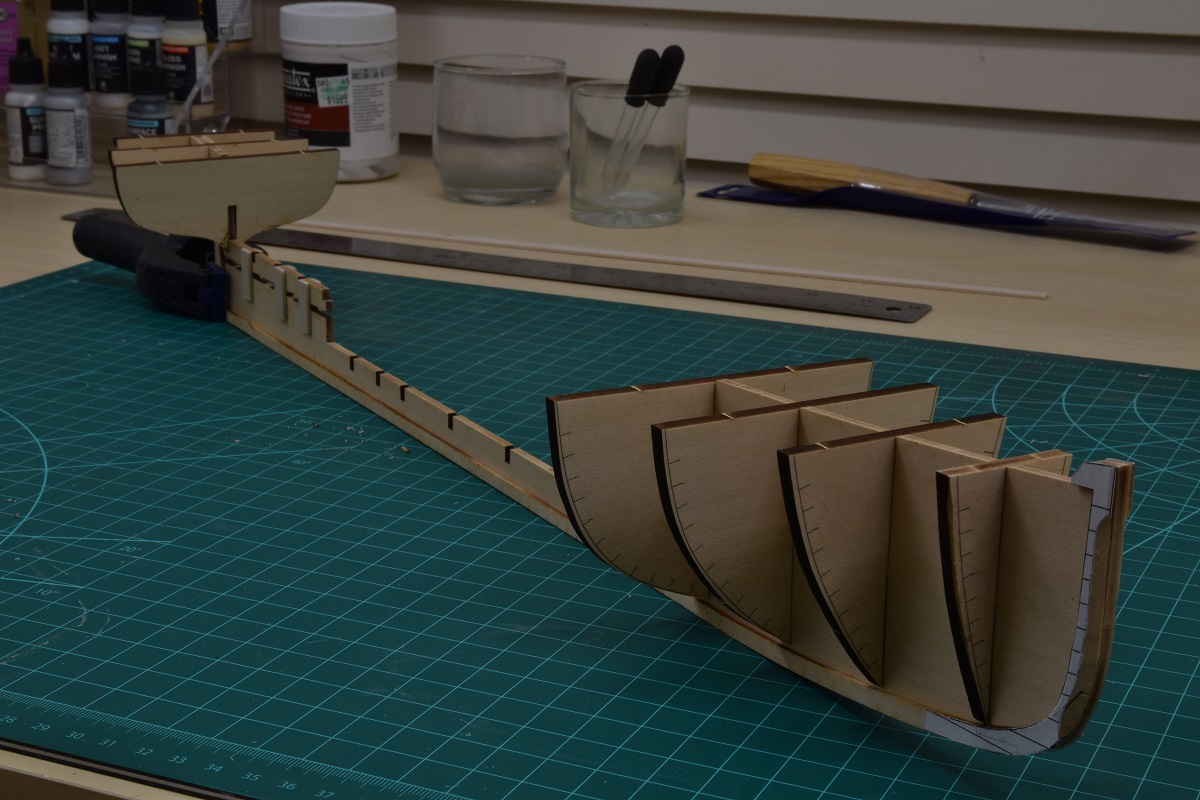
And finally, I have the forward and aft bulkheads cut out and did a test dry-fit. They all fit perfectly, and will need no shimming of any kind, which is pretty nice. I haven't removed the laser char or beveled them yet.
- egkb, coxswain, Duanelaker and 18 others
-
21
-
-
-
-
Yea, on the AVS I just used a gunport edge to start my planking pattern, and then maintained the pattern and ignored where they fell after that just to keep it simple since it was my first planking of a ship with gunports at all. I think I did some testing to see if one starting point in particular made it better or not by using a ruler, since the shift pattern I used was an easy 1" between the points where butts would fall, and the AVS only has 4 gunports, so I just aligned a 1" mark with both sides of each gunport and looked for the starting point that would give the least amount of overlap points with the ports.
- Seventynet, Bill Hime, Canute and 3 others
-
6
-
Ian,
That's not what I meant. What I mean was, if you look at almost any model (or actual plans) that shows the frames, there will typically be (at least on the one's I've paid attention to) a frame along at least one edge of the gun port. Since the planking on an actual ship would land on the frames, that would indicate that usually a plank would not end in the 'middle' of the gun port alignment.
I'm sure that this is not a hard rule, as there were so many different ships made, but it's something that I've seen mentioned on planking in a few places (not that I could find any of them to reference).
-


USN Picket Boat #1 by GuntherMT - Model Shipways - scale 1:24
in - Kit build logs for subjects built from 1851 - 1900
Posted
Another itty bitty update.
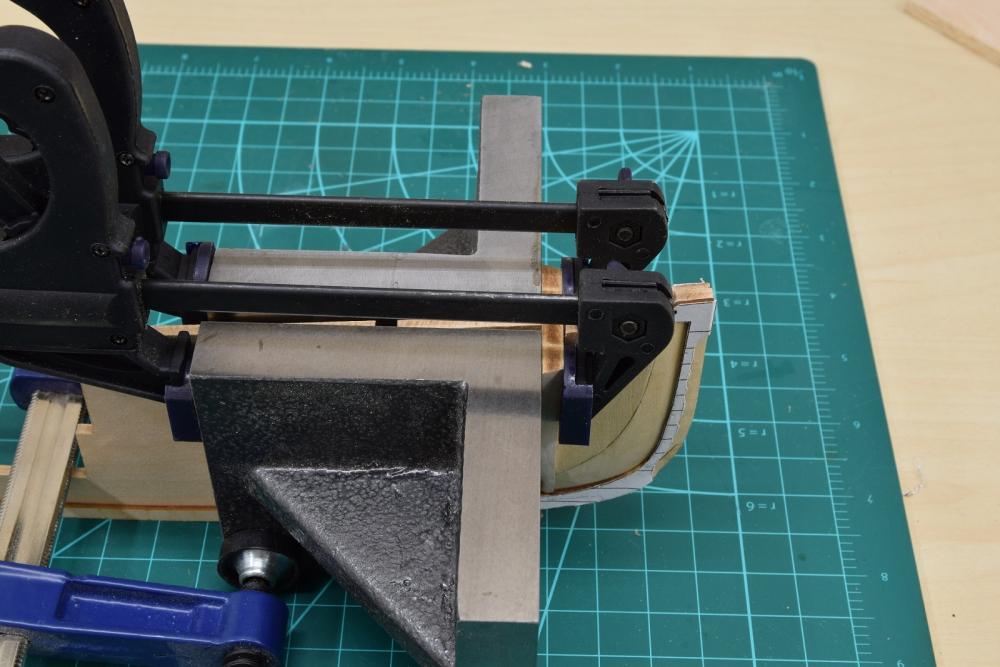
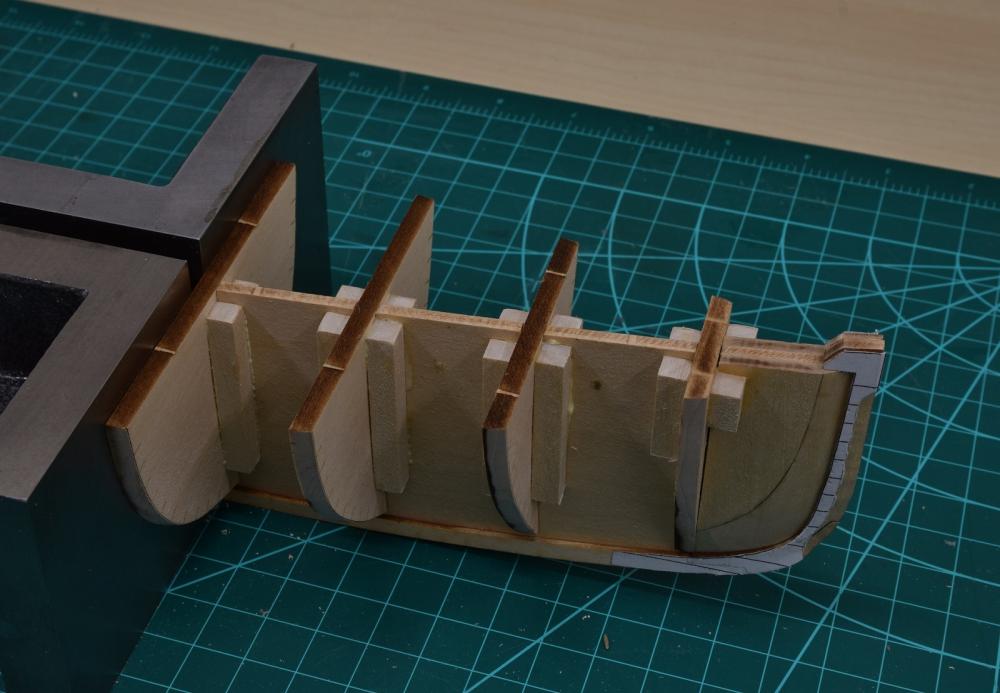
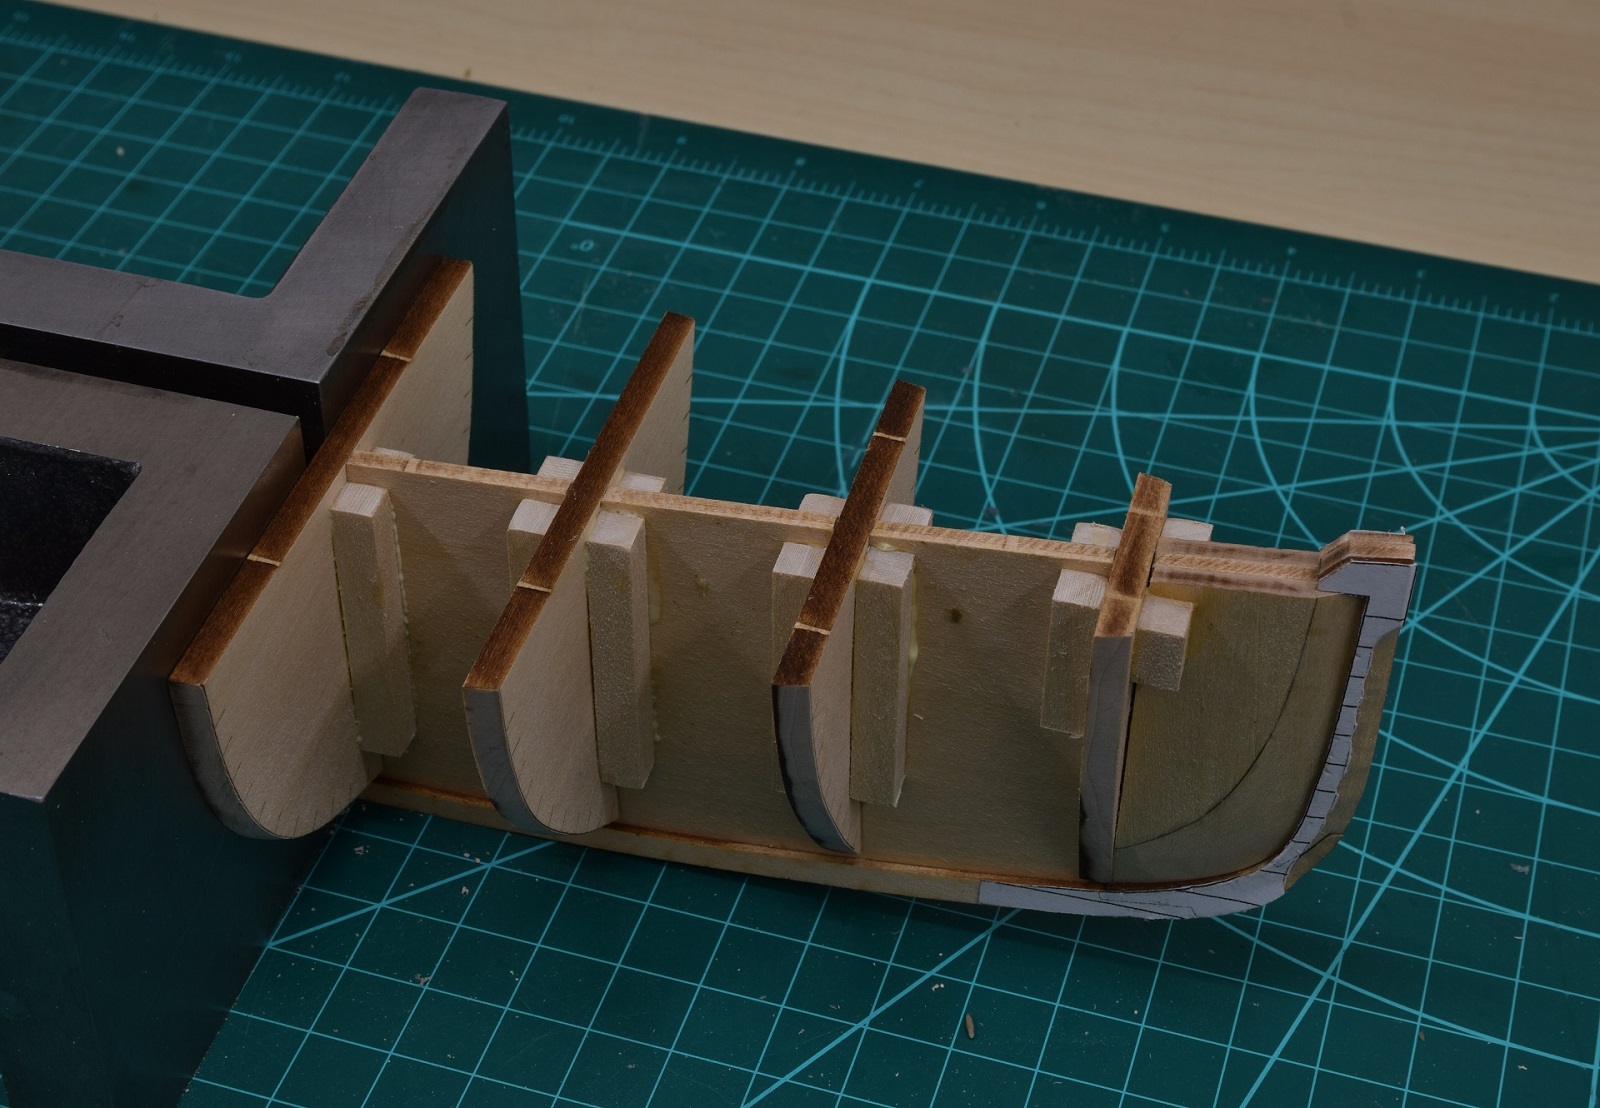
I beveled the stern bulkheads and glued them in place, then added a few little bits that don't show up in the photo's very well (side braces between the 2nd and 3rd bulkhead and a brace between the pieces on either side of the keel under the last stern bulkhead).
Then I got the rest of the bulkheads cut out and cleaned up some of the laser char. For those building this kit in the future, *warning* these things are extremely fragile and if you forget to support the side of the bulkhead you are working on and try to hold it from the other side, they absolutely WILL break at the center. Don't ask how I know this.
Primed with Vallejo Air grey primer, and then painted with Vallejo Air "US Blue Grey" using an airbrush.