


GuntherMT
-
Posts
2,213 -
Joined
-
Last visited
Content Type
Profiles
Forums
Gallery
Events
Posts posted by GuntherMT
-
-
Really like your approach to the filler blocks, I've never seen that before, but it clearly works quite well. I'd probably use wood glue though, just because I don't like CA very much.
As far as Naval Action... I am purposely avoiding that, as I'm sure it would suck me in and completely eliminate all my free time for the foreseeable future.

-
-
-
-
-
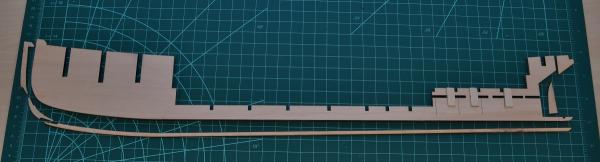
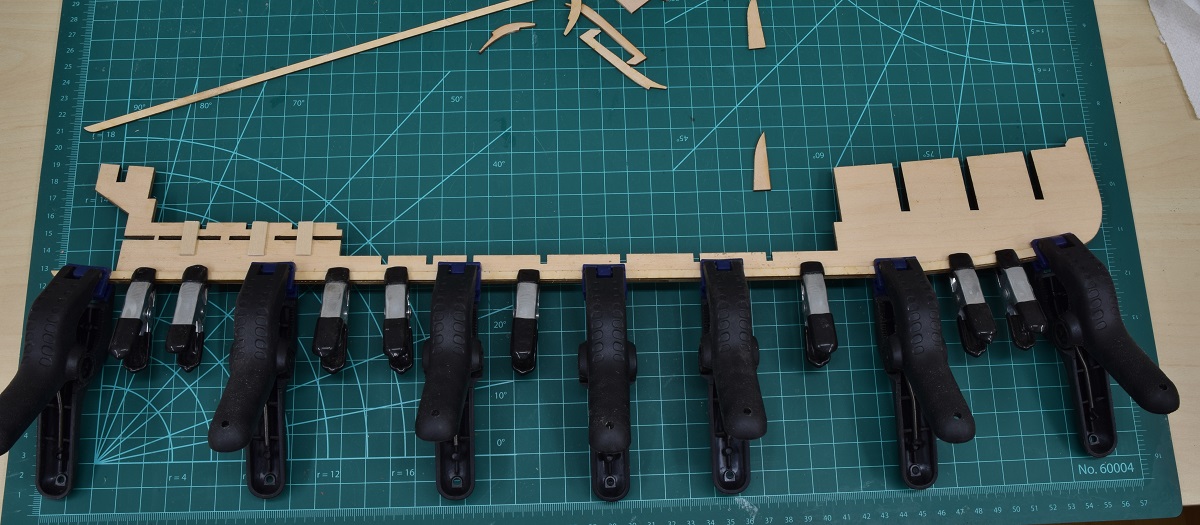
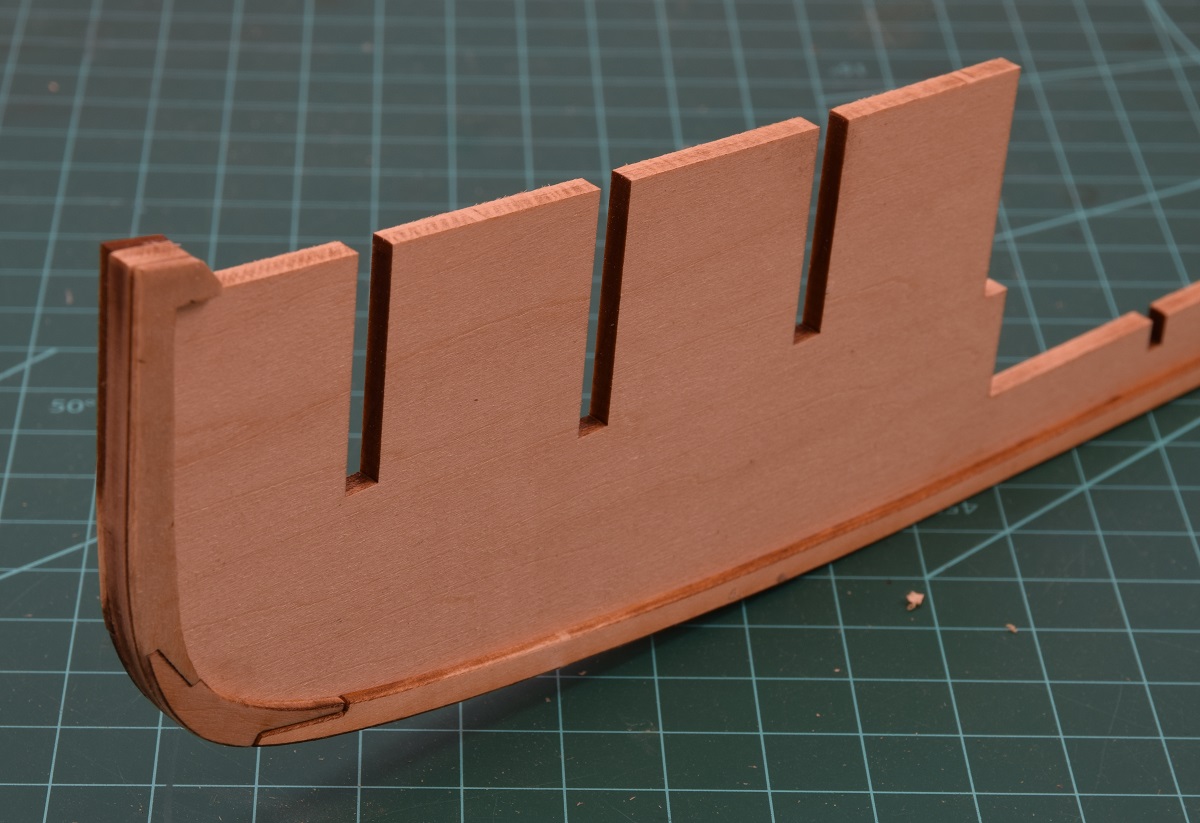
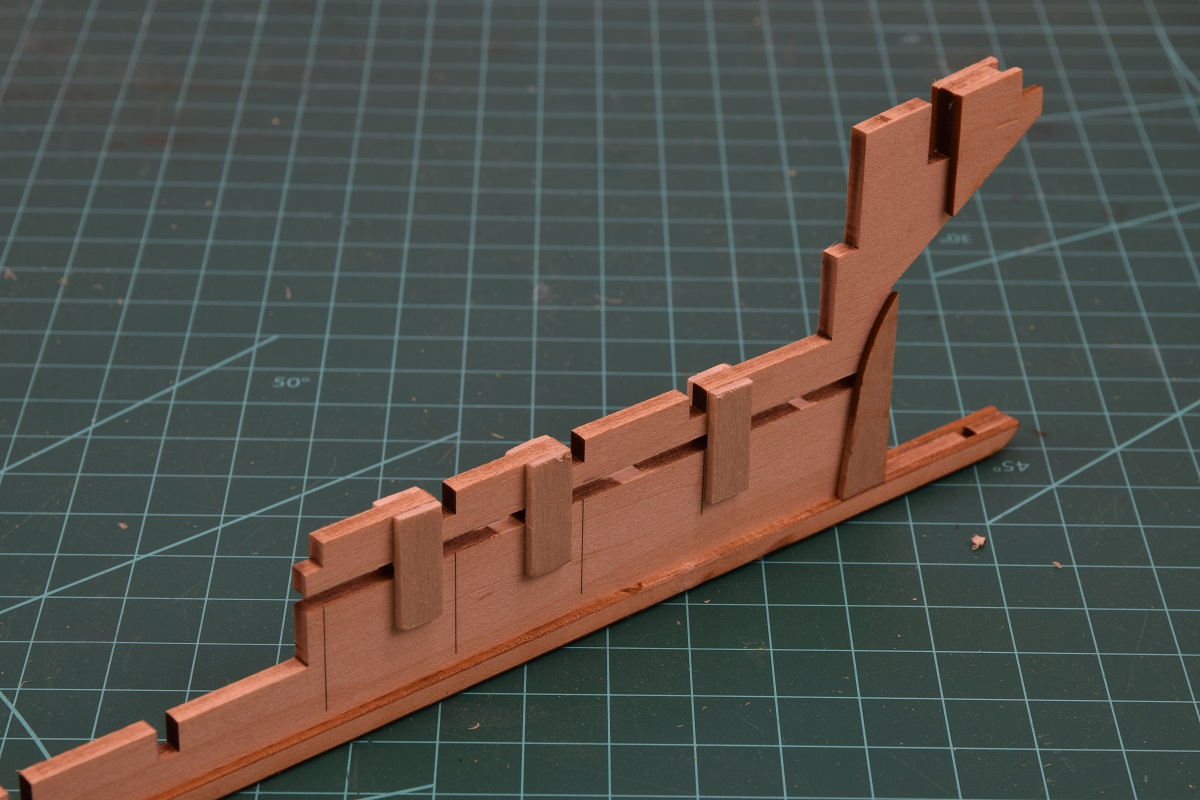
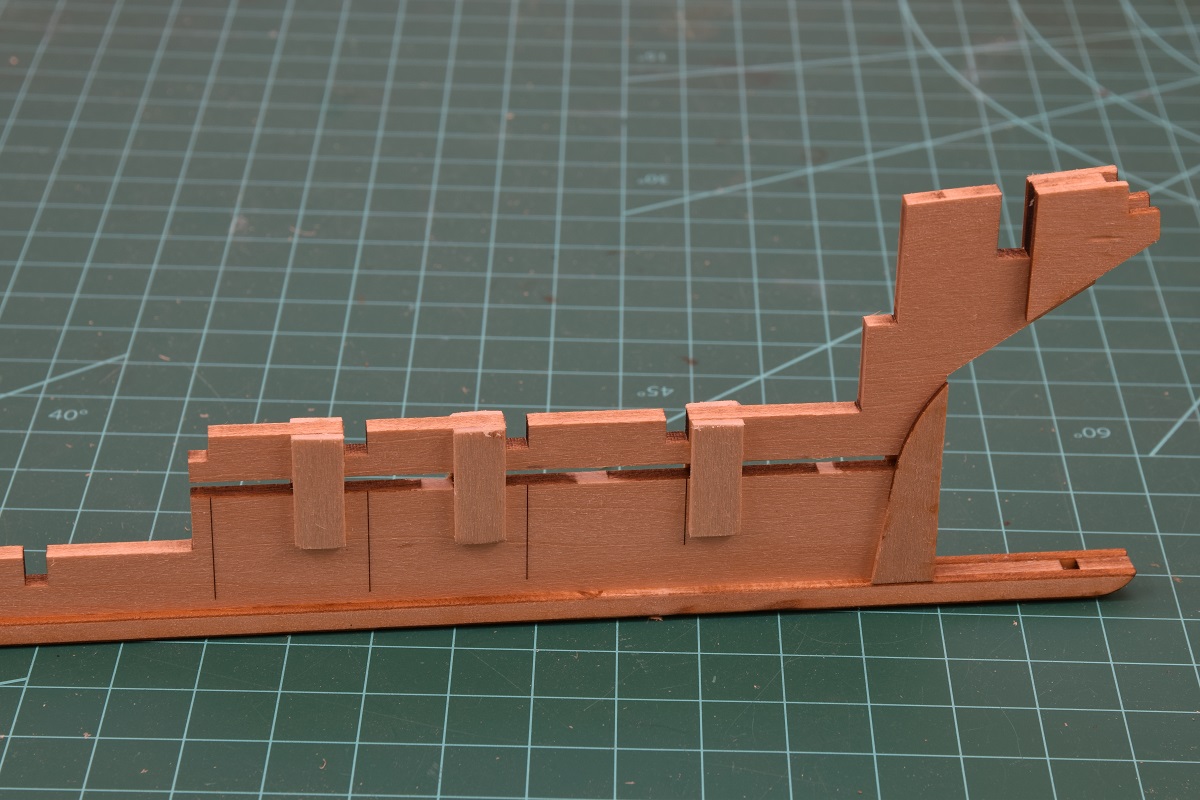
Small update on the Picket Boat.This kit uses an interesting system for the keel. Instead of a separate piece (or pieces) that attach to the bottom of the false keel, this one uses pieces that are applied to either side of the false keel in order to widen it to create the 'keel' as a laminated piece where the false keel is sandwiched between the side pieces. Since this is a model that will be painted, not left natural, this seems like it should work just fine.Here is the false keel, with the parts that will make up one side of the keel laid along side in the approximate areas that they'll be glued to the false keel.
 The long main 'keel' glued in place and clamped (you can never have too many clamps):
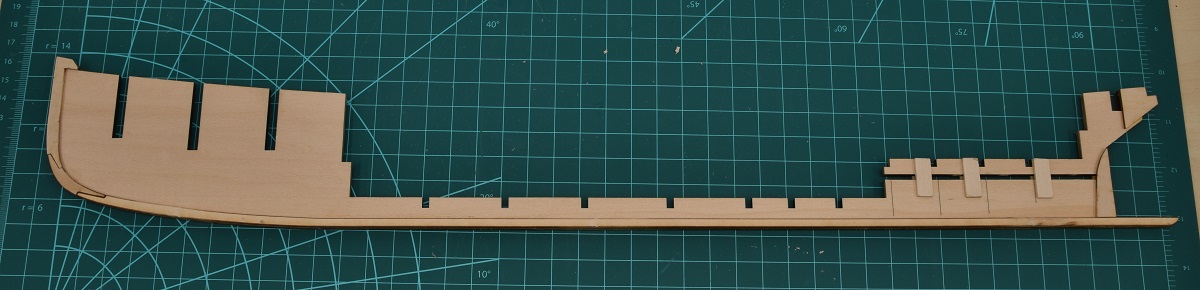
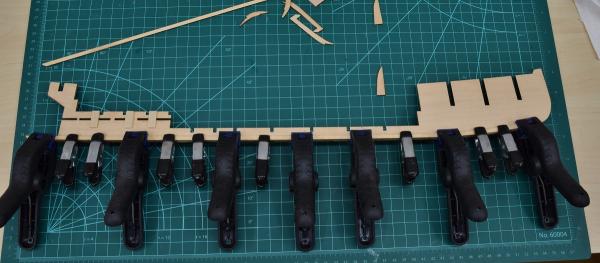 The finished keel glued in place on both sides of the false keel.
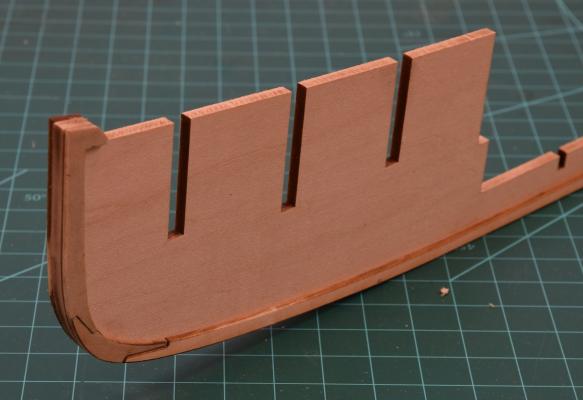

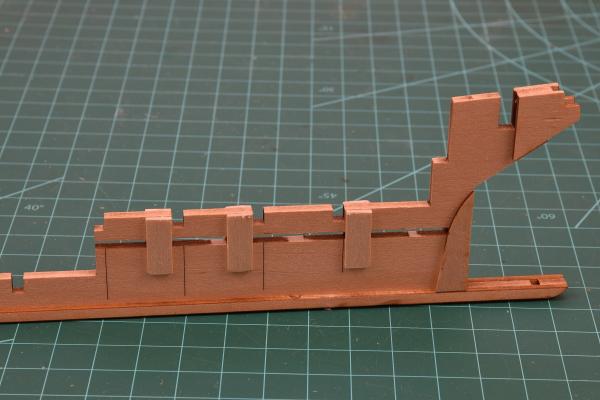 You can also see in the stern pictures how the pieces of the false keel have been removed now that the supports are in place so that the propeller shaft can be placed through the centerline of the keel.Next up is carving the cut-water in the bow. The kit provides a template for this in card stock, but I'm going to go make copies of it and cut out the template and paste them to both sides instead of trying to cut out the card stock and trace it.
- src, _SalD_, Ryland Craze and 19 others
-
 22
22
-
-
Frank,
It looks like the first frame you installed is canted away from the other two frames. Is that just something from the camera angles? How are you ensuring that the frames are vertical relative to the keel so that they are all equally spaced at the top? It looks like your clamping arrangement should take care of that, but the apparent difference in the gap between frames 27 ~ 28 vs. 28 ~ 29 makes me wonder if you should have something farther up on the side of the frame ensuring a 90 degree angle to the keel?
Great progress, and beautiful work. Really looking forward to seeing this.
-
-
You mention a tunnel for the propeller shaft. Will your boat be radio controlled? That should be fun.
Bob
No R/C Bob, it's just the way the kit is designed.
Thanks for all the likes everyone. Just got home tonight (9pm, got up this morning at 4:30am... the life of a working stiff I suppose) and tomorrow is picking up family from the airport and dinner, so won't get anything else done in the immediate future. As I said above, this is likely to be a fairly slowly moving build log for a while.
-
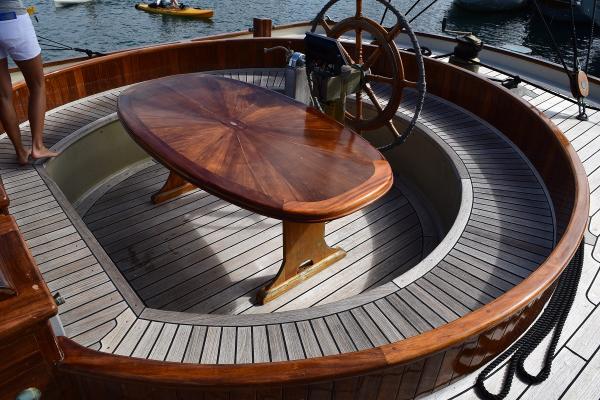
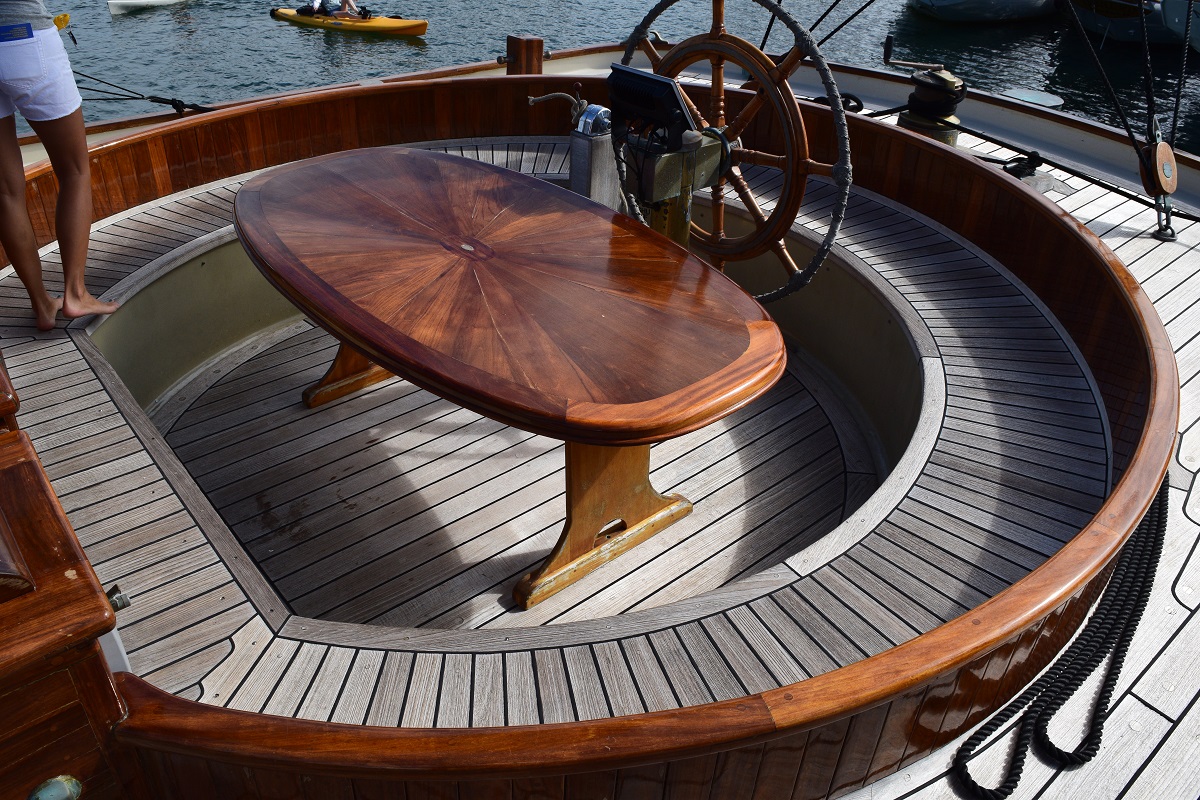
She has a wheel as opposed to a tiller (and an engine evidently).
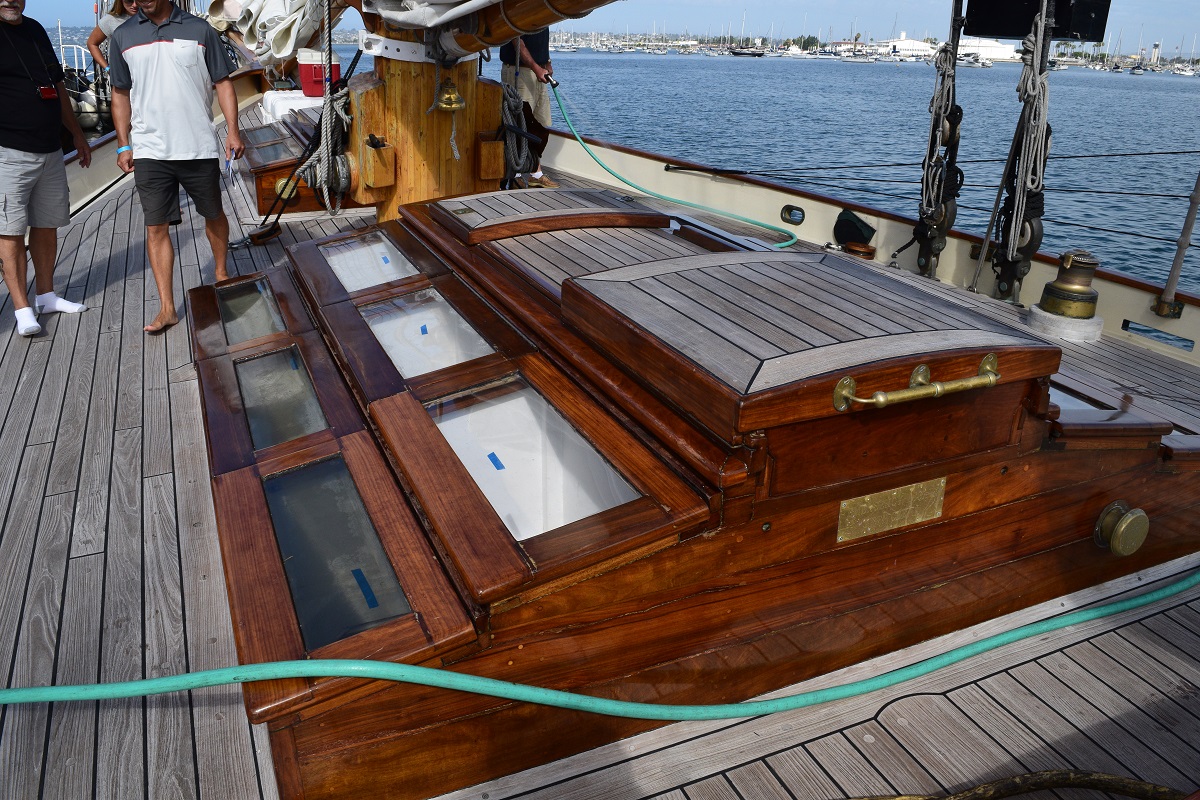
Beautiful deck!!! The fitting is outstanding!
Just as an FYI, for all semi-modern replica's, if they want to take passengers away from the dock (whether for pay, or for educational outings with school groups, etc.) the Coast Guard requires that they have an engine or they won't be certified to carry passengers.
The deck of the replica truly is a thing of beauty. When I was on her they were making everyone take off their shoes in a carpeted area at the edge of the dock before boarding to keep people from tracking any grit onto the boat which would potentially damage the deck over time.
I'd like to see some good detail photo's of the original as well.
-
-
One last post on the old AVS log. Just announcing to everyone who had this log followed, that I've finally gotten around to beginning the next build - the Model Shipways USN Picket Boat #1.
- skipper1947, GLakie, zoly99sask and 5 others
-
8
-
So it's been quite a while since I completed the Armed Virginia Sloop, and it's well past time for me to get back to making sawdust in the shop.
This log will probably be quite a bit slower developing than the AVS log was, as I have a lot more time consuming things going on in my life right now that were not happening during the AVS build.
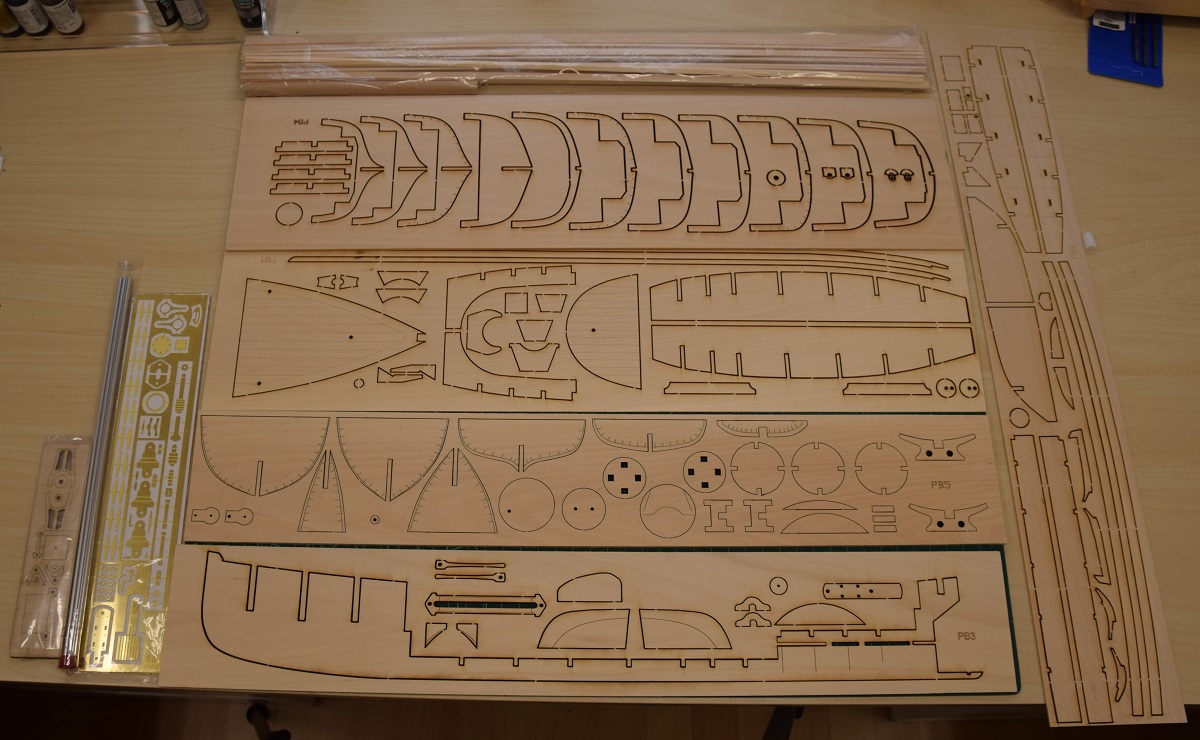
To start with, a photo of the basic kit contents, although I forgot to include the little box of cast parts including the cannon and propeller. Most everyone knows what those look like anyway.

I've only just begun, with the preparation of the keel parts, and the gluing of the 'bridges' that will allow the removal of the wood needed to make a tunnel for the propeller shaft.

That's really all I've gotten done at this point, but hopefully the beginning of the log will give me the kick in the rear I need to dedicate more time to actually working on this.
-
This will be a build log for my Model Shipways USN Picket Boat #1, a 1:24 scale representation of the steam launch built in 1864 that was responsible for the sinking of the Albemarle in Plymouth, North Carolina.
This first post will be used as an Index for the build log which I will do my best to keep updated as I add content.
Index:
Section 1 - Hull start and framing.
1. The beginning, keel preparation.
2. Forward bulkheads beveled and placed.
- Canute, Ryland Craze, mrshanks and 6 others
-
9
-
-
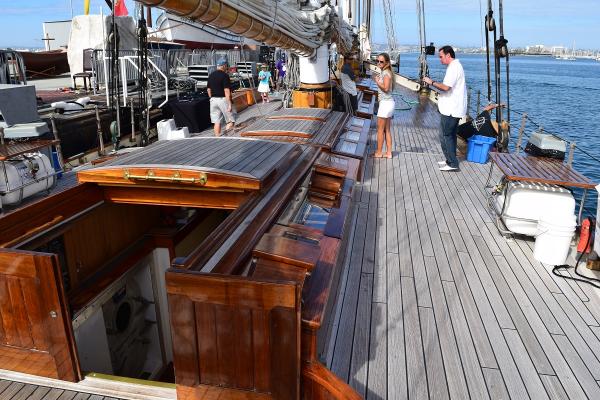
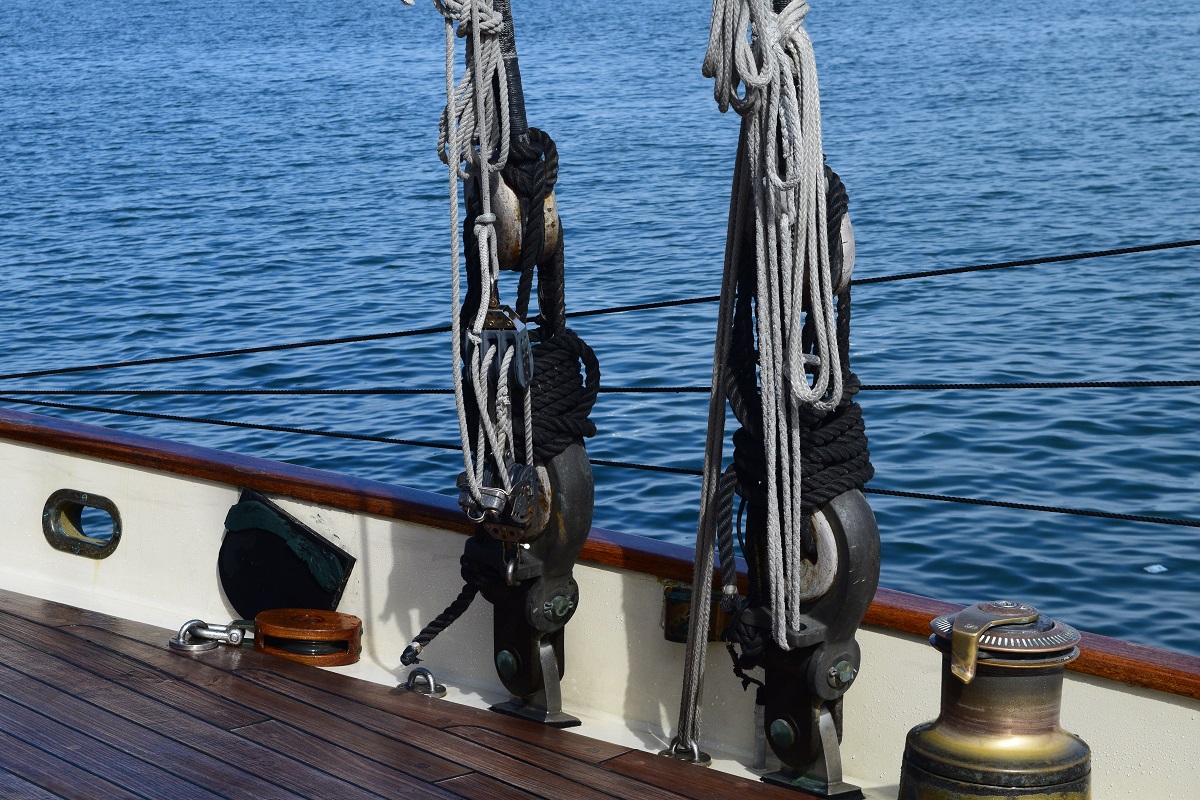
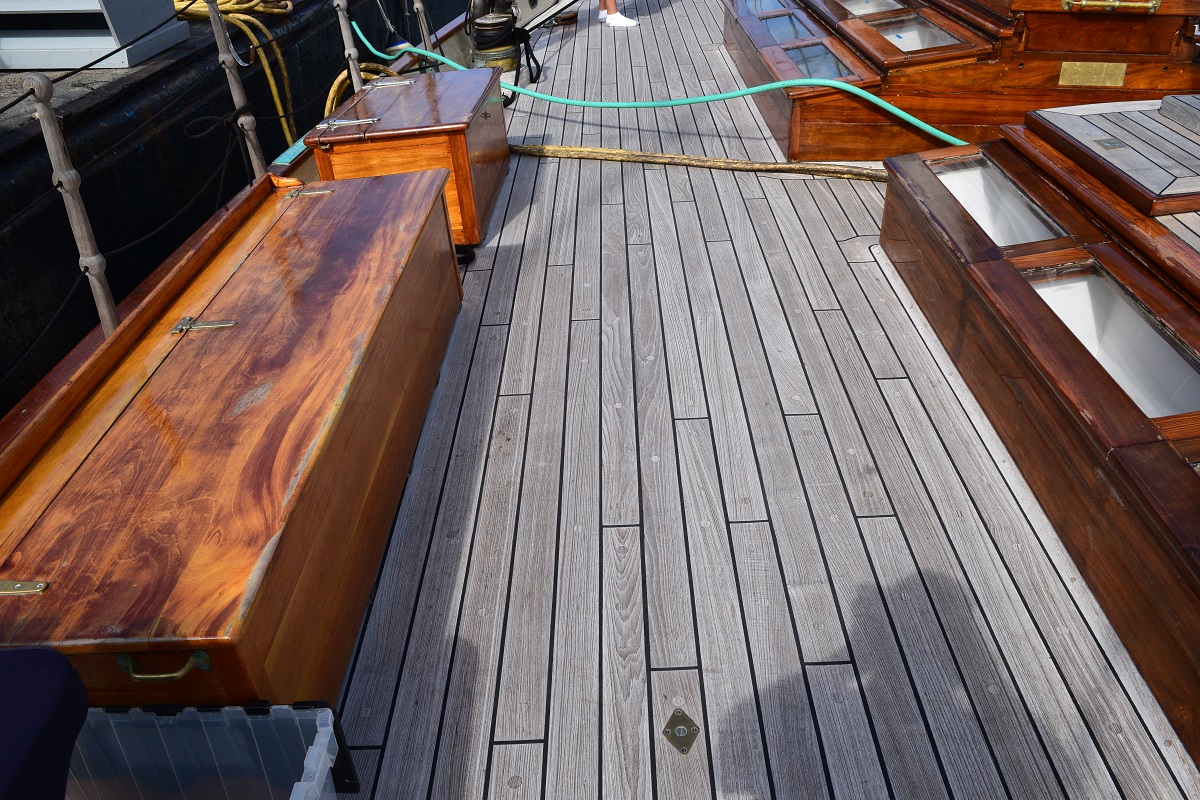
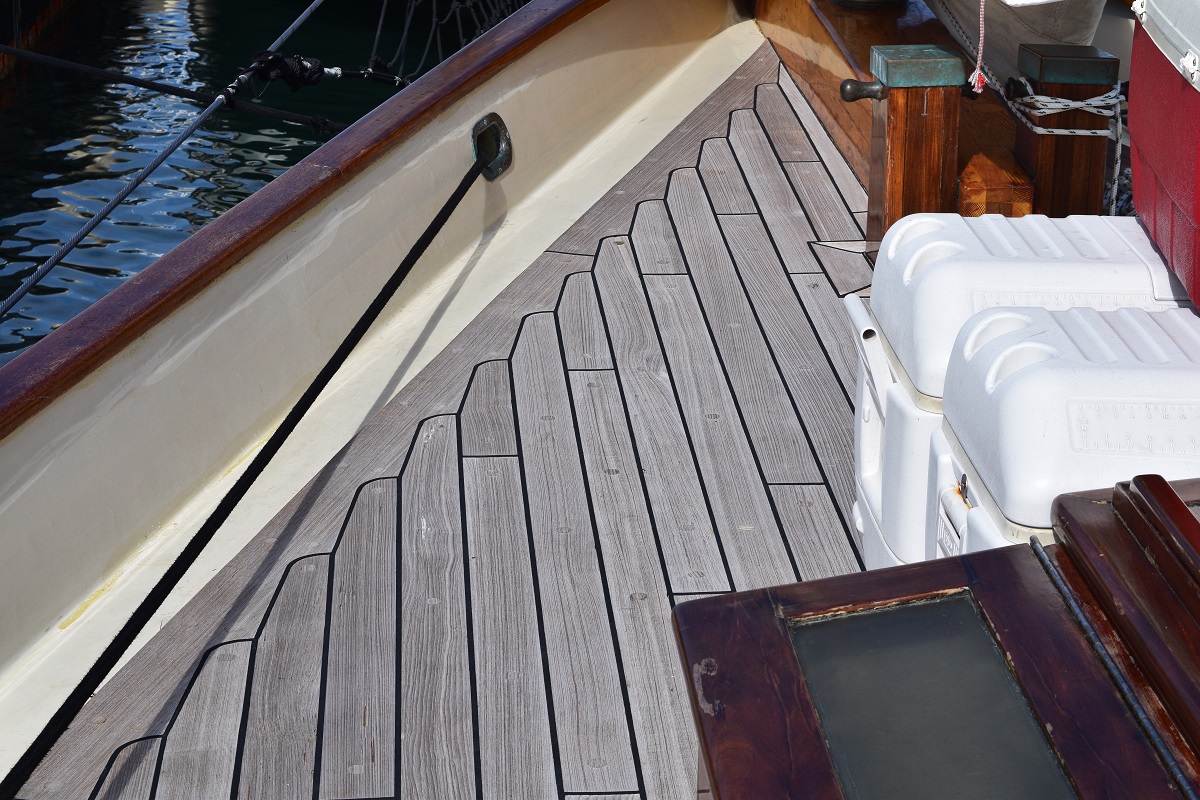
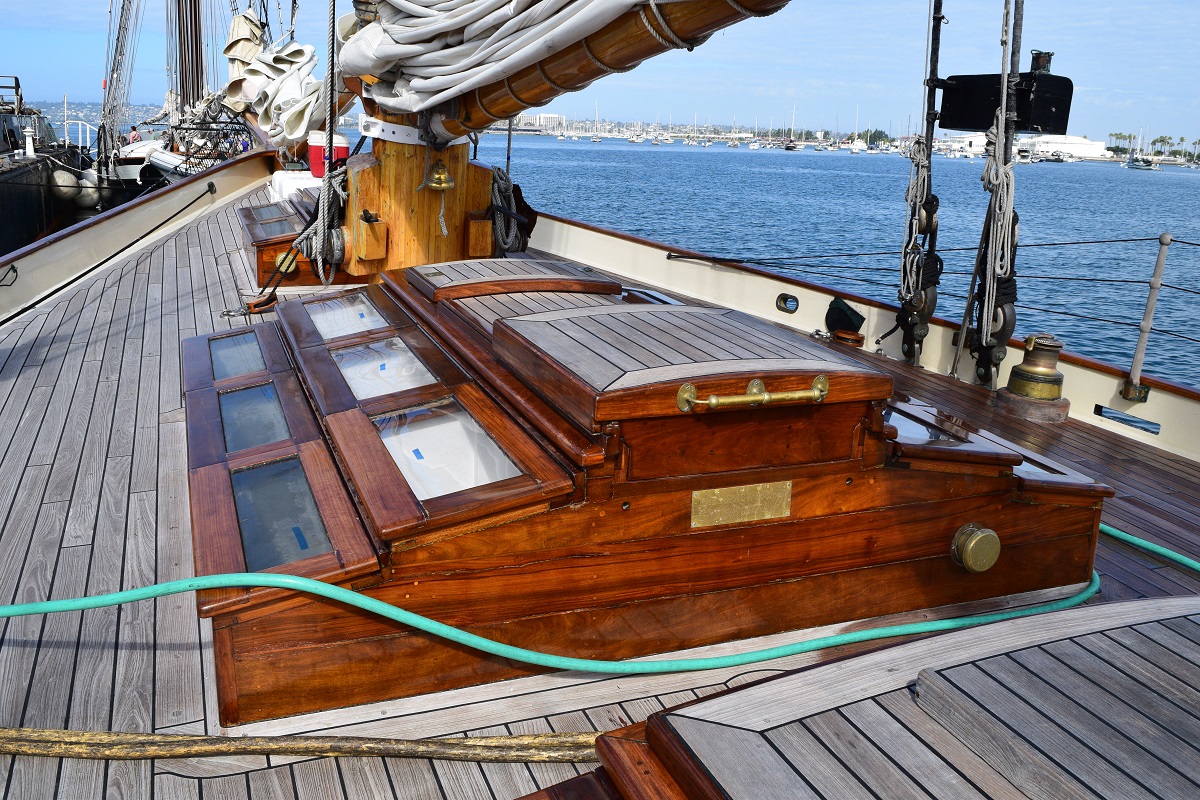
I got your PM Tim, so here is a photo-dump of sorts. Hopefully some of these are helpful, but I think that there are so many differences between this ship and the model plans, that to properly make her as the replica, you would have to do it from the keel up with that intention. As I said before, I have no idea how many of the differences are due to the model plans vs. how many were changed when they built the replica in order to make her legal for charters or simply because the owner/builder wanted her that way. Notice that the deck is just completely different. There are a lot more cabins, and no big ship-style capstan at all. The 'boxes' along the outside edges are something that I'm sure is purely for the charter legalities, as they are filled with life preservers (and double as benches of course).
If at an point you decide that you would like this post / photos to be gone in order to un-clutter your log, please let me know and I'll remove them.
In any case, here we go. Click on any photo to view it at full 1200x resolution. If you want larger versions of any photo, or a detail 'crop' of a specific point, the originals are at 6000x4000 and I can upload them to where you can access them if wanted. I have quite a few more pictures, but these ones show most everything and the rest start to get a bit repetitive, other than some pictures of the masts/rigging that I can add later on if you'd like.
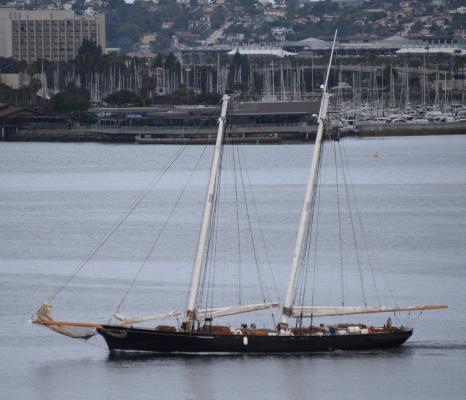
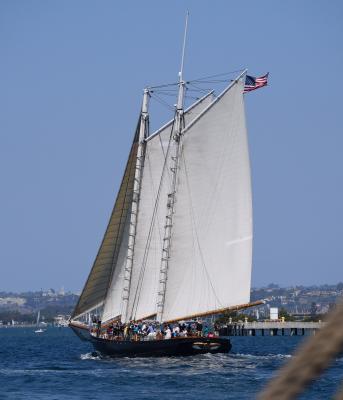
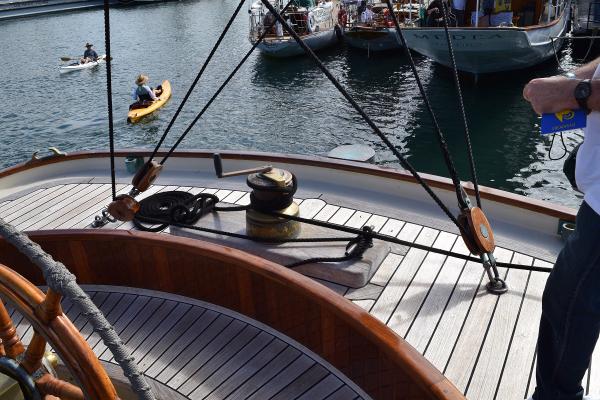
Generic shots of her under power with bare poles, and under sail.
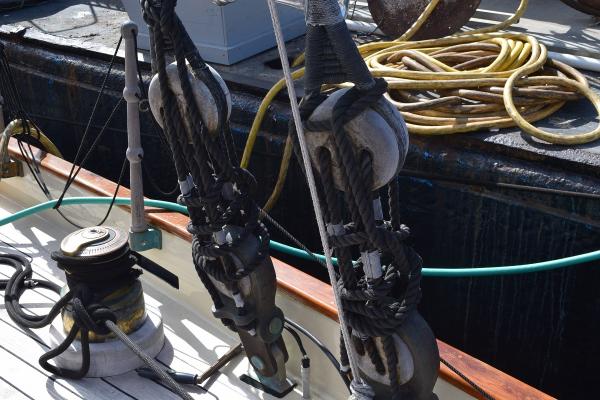
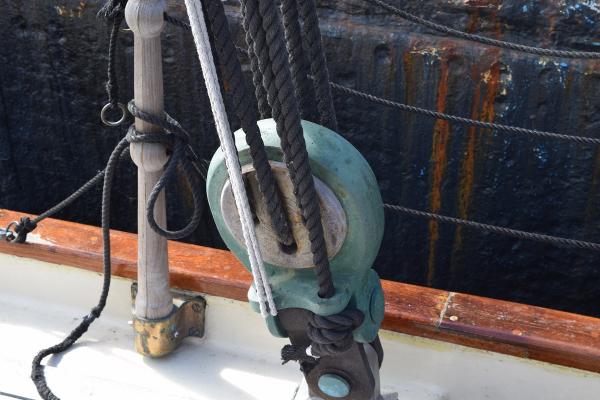
As requested specifically, the dead-eyes. These would require that they be designed into the project from the start, or I suppose you could mount them directly to the deck and pin them.

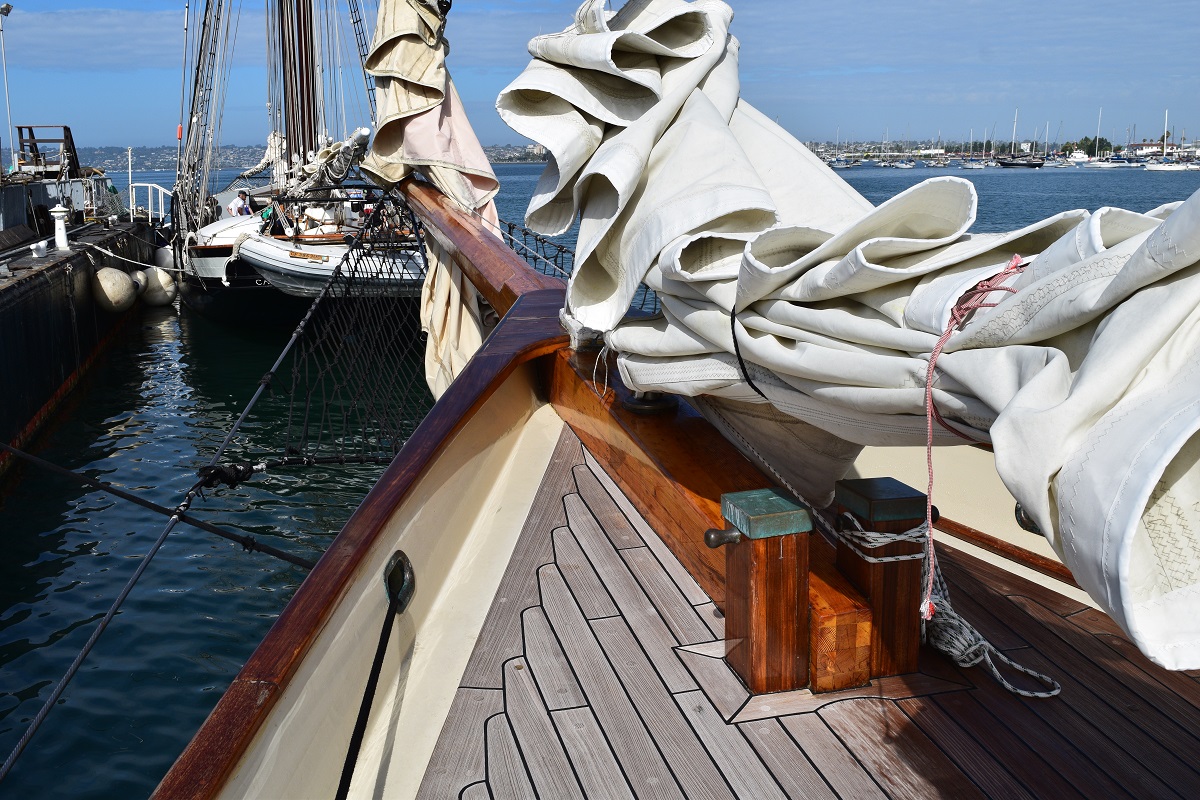
Stern showing detail of her decoration.
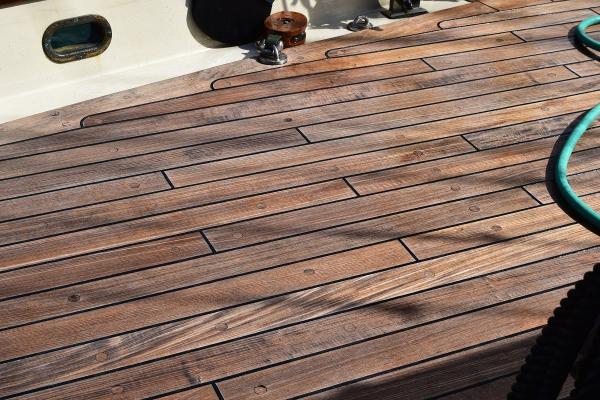
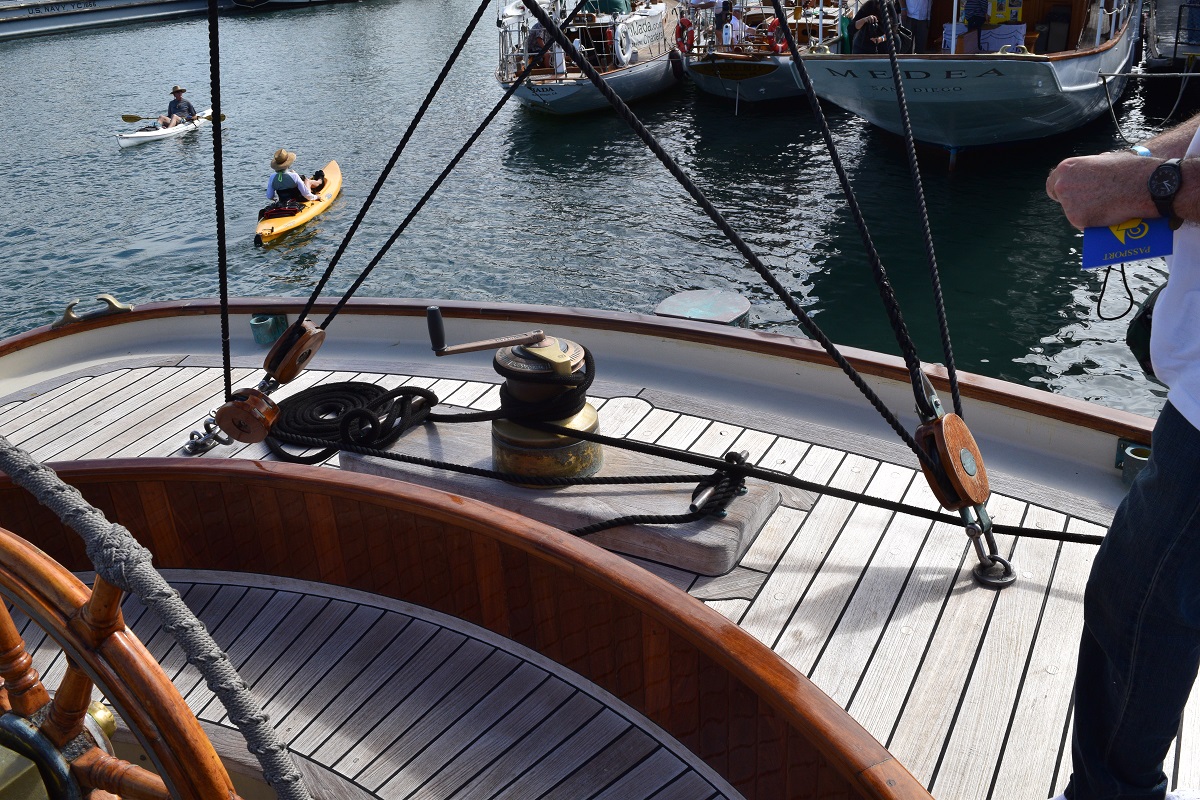
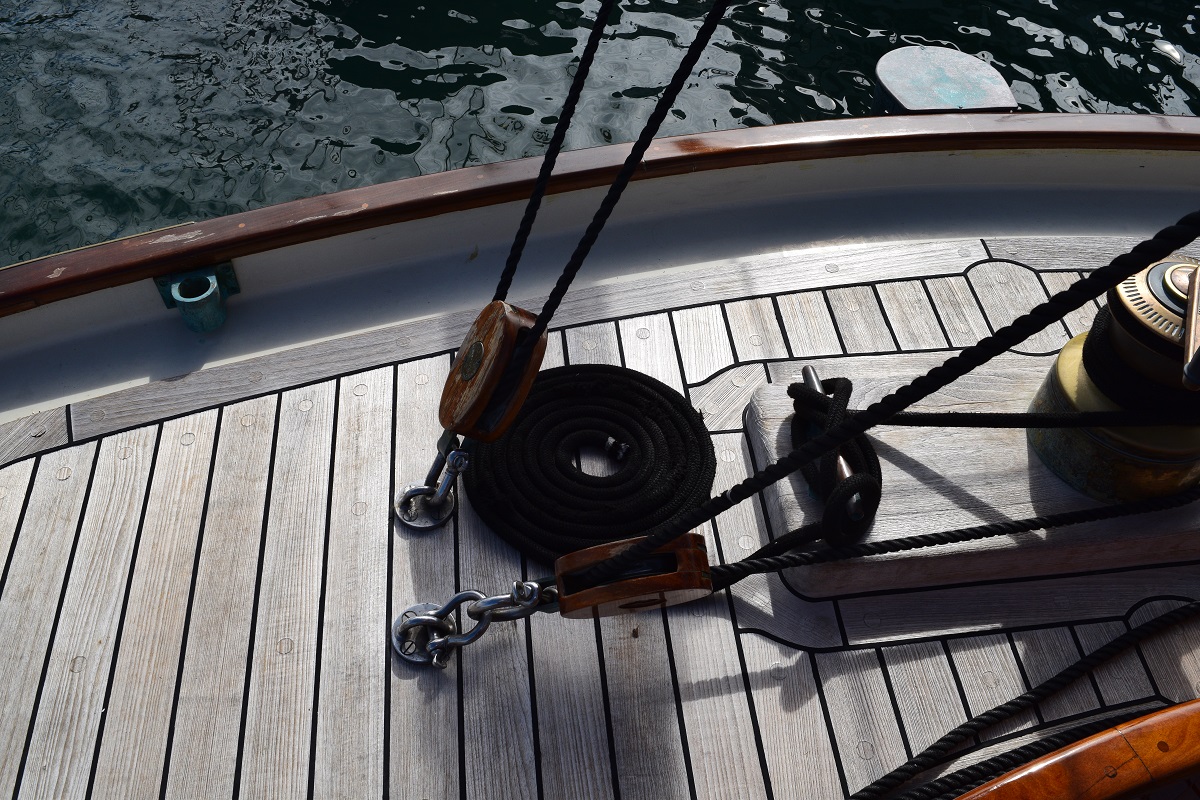
Deck shots showing cabins, life preserver stowage, and of course the beautiful teak deck and nibbing.


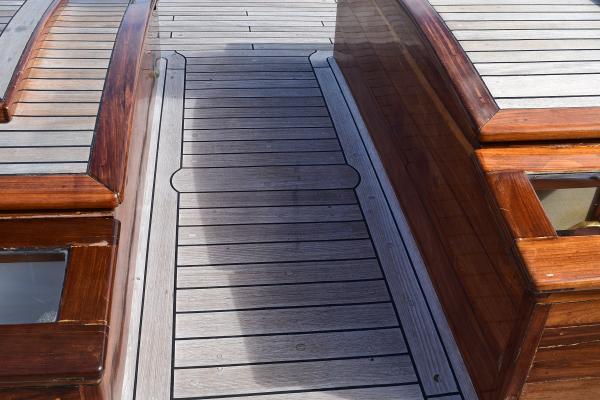

Wet deck showing how the teak colors up when water is added!
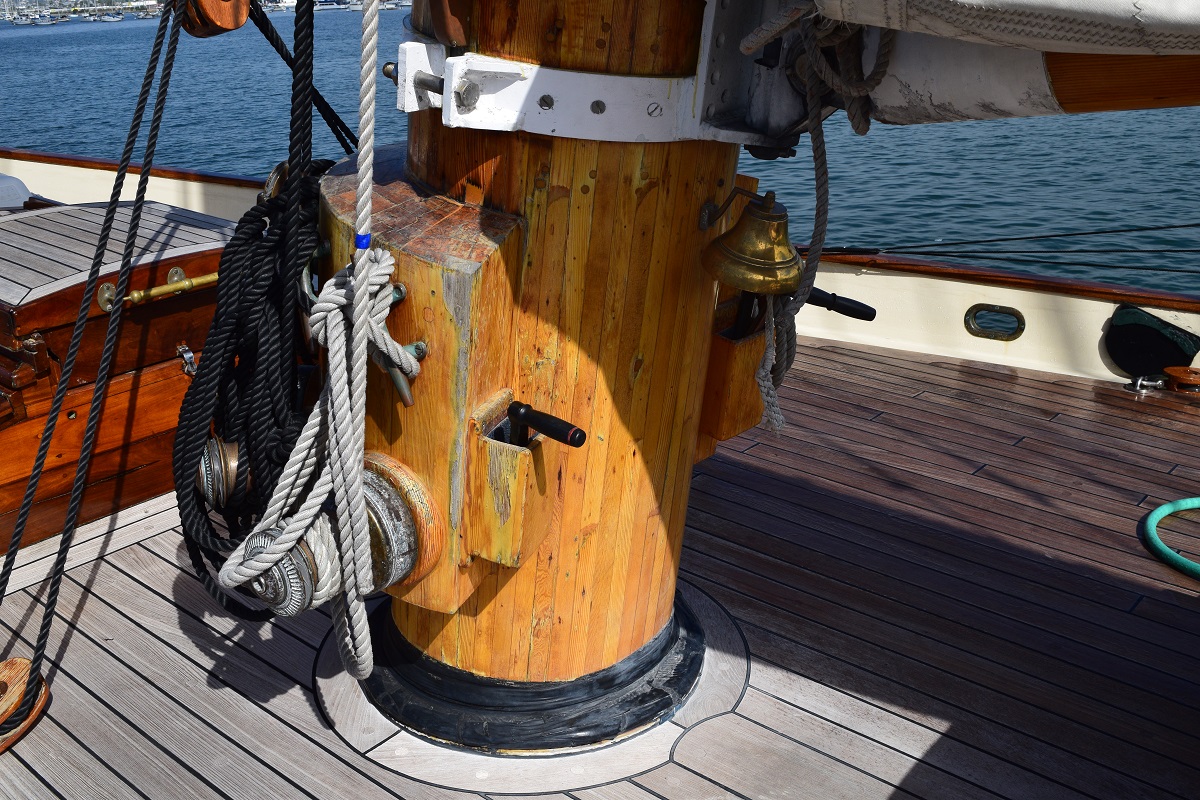
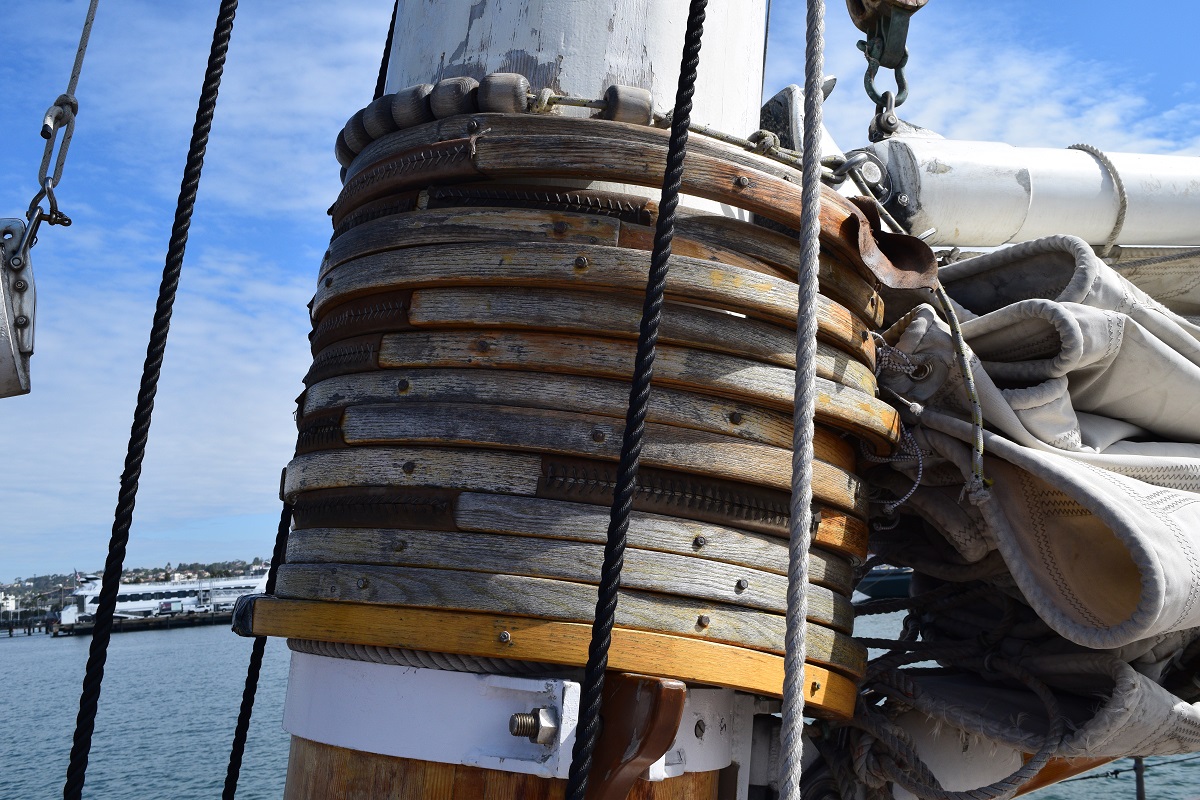
Mast base. I forgot to make a note of which mast, but fairly certain this is the foremast.


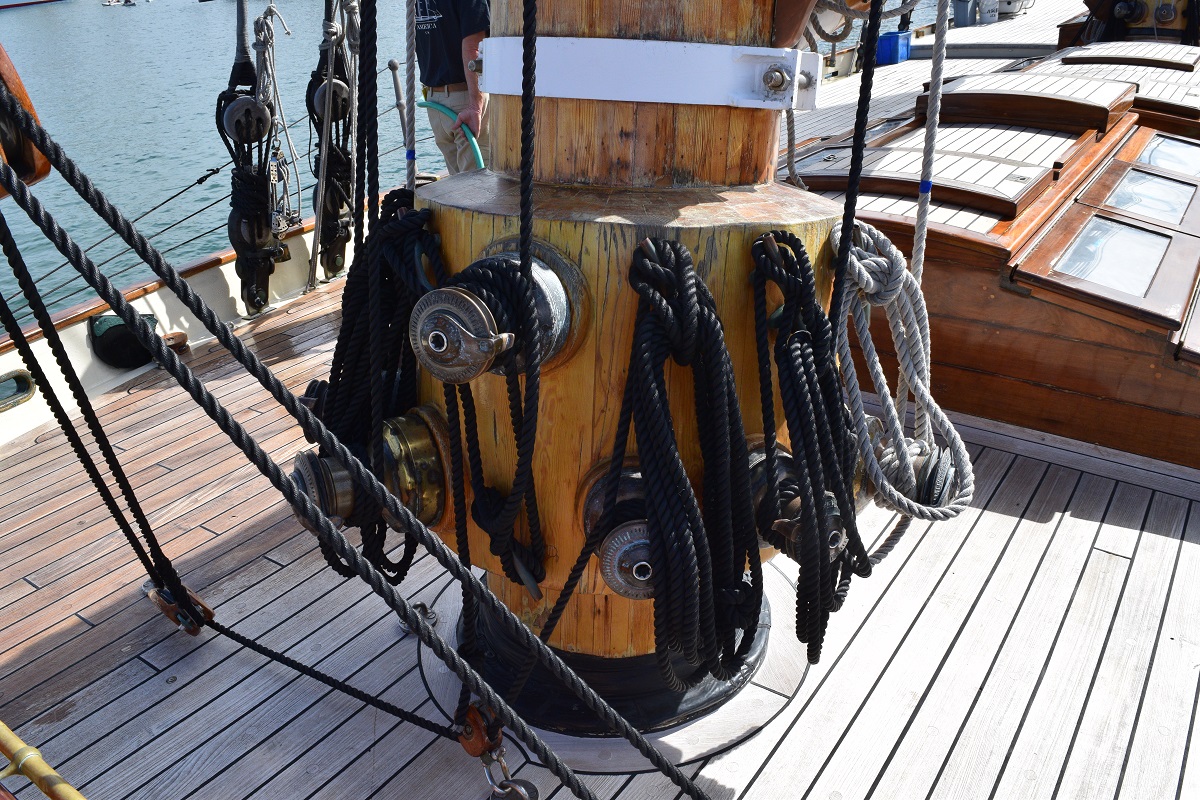
The mast hoops.

Stern showing how things are mounted internally, rather than to the rail.

Bowsprit.

- EJ_L, Mirabell61 and Elijah
-
3
-
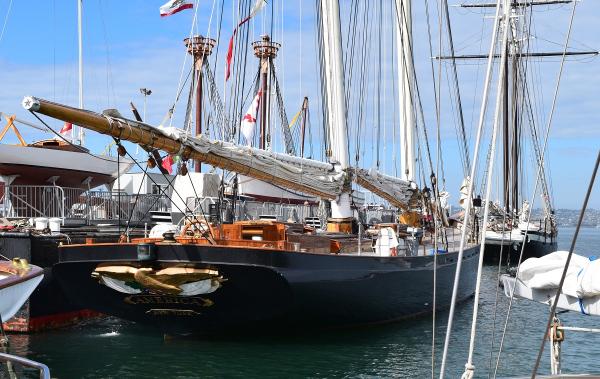
Interesting build, and you are doing a very nice job. There are a fair number of differences between this model and the replica America in San Diego. I don't know her history well enough to know if the replica was changed from the original that the kit is based on, but the replica doesn't have a jib-boom at all, only a single piece bowsprit. Also the dead-eye mounting is completely different.
I have a bunch of pictures I took of her in September if you are interested. Just let me know what area you'd like to see. Please send me a PM though, as I haven't had the time to keep up with all the forum logs lately.
Edit: Oh, the 'deck drains' are called scuppers.
-
Nice work, Frank. Who makes that razor saw? It appears to have teeth on each side.
Greg - I believe that is the saw from UMM - http://umm-usa.com/onlinestore/index.php
I have one and it's one of my more heavily used tools, along with the micro-miter box they sell for it. It's a fantastic little saw. And yes it has teeth on both sides.
Micro Mark has copied it exactly (of course) and sells it for more.
- Omega1234, Elijah, FriedClams and 3 others
-
6
-
-
For what it's worth Greg, I don't think I was ever slowed down on my planking by the glue. When properly applied, it will give a good tack almost immediately, and by the time I had my next plank shaped and ready, I could remove any clamps without it problem.
On the other hand, plenty of people who are much better at this than that I am, seem to be able to make CA work just fine!
-
Good looking start Daveward. Seems like you've done a good amount of reading before you started, as you seem to have a very good idea of what needs to be done at this point in your build.
Good luck and welcome to the hobby!
- Canute, Bill Hime, Seventynet and 3 others
-
6
-
Looks like you are doing just fine Greg, nothing jumps out at me other than the CA that you have already pointed out. I personally prefer to not use CA at all when I can avoid it, and in the case of the planking I did not use any CA at all that I remember, just regular Titebond wood glue (PVA). It is much easier to clean up if (when) I use too much, and if I wipe it off while it's still damp, it won't cause any issues with discoloring the wood at all.
Of course you are on the first planking layer here, so it won't be visible anyway after the walnut layer goes on.
-


Lady Nelson by daveward - Amati/Victory Models - 1:64 Scale - First wooden ship build
in - Kit build logs for subjects built from 1801 - 1850
Posted
Make sure that before you actually lay any planks, that you fair everything using test planks so that the planks lay flat against the entire width of the bulkheads. It looks like most of your filler blocks will need to be sanded down further in order for the planks to lay against the bulkheads instead of being held off of them by the fillers.
As far as spacing on the planks, is this a double planked kit? If so, just get the first planking on to give yourself a smooth hull form, and don't worry about the spacing. For the second layer, pick a scale 'length' and go with that, don't worry about where they end, since the bulkheads don't actually correspond to where the frames would have been. In theory there were planks in line with at least one edge of the gunports, so a plank shouldn't end in middle of a gunport, but that's probably not something very many people would notice.
As far as how to arrange the planks, I know you've read through the tutorials, so you should know how the offsets work, you just need to decide how many planks are in your shift pattern (3, 4, or 5) and then just pick one as your starting point and go with it.
On my AVS I wanted the planking pattern to be visible, so I used 16' scale length planks, which is pretty short. Most people go with 20-28' scale length I think.