


Keith_W
-
Posts
1,145 -
Joined
-
Last visited
Content Type
Profiles
Forums
Gallery
Events
Posts posted by Keith_W
-
-
The market is saturated with so many versions of HMS Victory. It looks as if this one is different to the others in that it is "semi" plank on frame and includes sails. However, historic accuracy is an unknown. The quality of the fittings and wood looks to be excellent.
But ... is there any reason to buy anything other than a Caldercraft Victory apart from price and size?
- mtaylor and modeller_masa
-
 2
2
-
Of course nobody is offended ... your model, your choice!
-
If you go to the first page of my build log for the Royal William (link in my signature), you can see miniature reproductions of the ship's plans. Euromodel provides some of the best plans in the business.
-
Without knowing the model and being able to see where the frames should be, it is difficult to know if this was a builder's error (e.g. cut the grating holes in the wrong position), or whether the manufacturer positioned the frames wrongly. Either way, you need to glue a beam under the broken deck to support it. This is what I would do:
- cut the widest beam you think will fit through the hole
- drill a hole through one end of the beam and tie some string to it IN CASE you drop it and need to fish it out.
- push the beam through the grating hole and try to rotate it to fit. If it does not fit, trim it and try again.
- when you get it to fit, apply glue and attach it to position, then cut off the string. Don't worry about the excess string that you can't reach, it will be inside the hull and it won't be seen.
-
You could consider staining the wood to mimic the colour scheme and partially paint the model. You do have to be careful with wood stain though, because I found to my cost that some stains, especially oil based stains, do not glue well. What I normally do is stain twice - once before installation, and again after sanding. This is because it is almost impossible to sand all glue residue off, and if there is any glue residue left it will interfere with the stain. Some parts of my current model are painted, some are stained, and you can subtly see the wood grain through the stain.
-
-
Your house must be massive for you to have something like that lying around somewhere and forgetting that you had it
") I have a typical Melbourne home ... expensive and small. I would definitely notice something like that in my house!
I have a typical Melbourne home ... expensive and small. I would definitely notice something like that in my house!
- mtaylor, Boccherini, BLACK VIKING and 4 others
-
3
-
 4
4
-
How about answering the questions that people have asked you? The solution is simple - unglue it, reposition it, and reglue it. You have already received many answers on how to reposition it so that it is square. The only question left unanswered is how to unglue it, and to know that, we need to know what kind of glue you used. It may be as simple as water soluble PVA, in which case you simply use water. Otherwise, most glues will dissolve in Acetone.
-
5 hours ago, Richard Dunn said:
I do want to say I am not wanting to upset anyone or offend anybody with that comment, but it is true sadly.
I could do a whole post on which plans have what issues and back it up with photographic evidence on every count but that might make me a target for trolls.Not at all, Richard. Most people on this site are concerned about accuracy. I think you will see that on any modeller's forum, e.g. I have seen discussions on tank and plane kits which were criticized for being inaccurate. If you look over the build logs, particularly by some of the more ambitious modellers, a lot of effort goes into research and correcting kit deficiencies. And don't forget that MSW is part of the Nautical Research Guild, whose mission is ... nautical research. So any feedback you provide about inaccuracy of texts and kits is welcome. In fact, more than welcome ... I for one would LOVE to see it. It would be a very valuable resource for anybody who wants to build a Cutty Sark. This is why I suggested you sell plans or discuss developing a kit with a manufacturer. It would be the ONLY kit I am aware of which has measurements laser scanned from the actual ship.
If trolls were to attack you for anything true that you have said, I am sure many members would defend you. Not to mention the mods.
- druxey, mtaylor, Rik Thistle and 1 other
-
4
-
My order for rope from Chuck at Syren arrived faster than expected - 12 days instead of the anticipated 20 days. This means I can get back to work on what I dread the most - rigging.
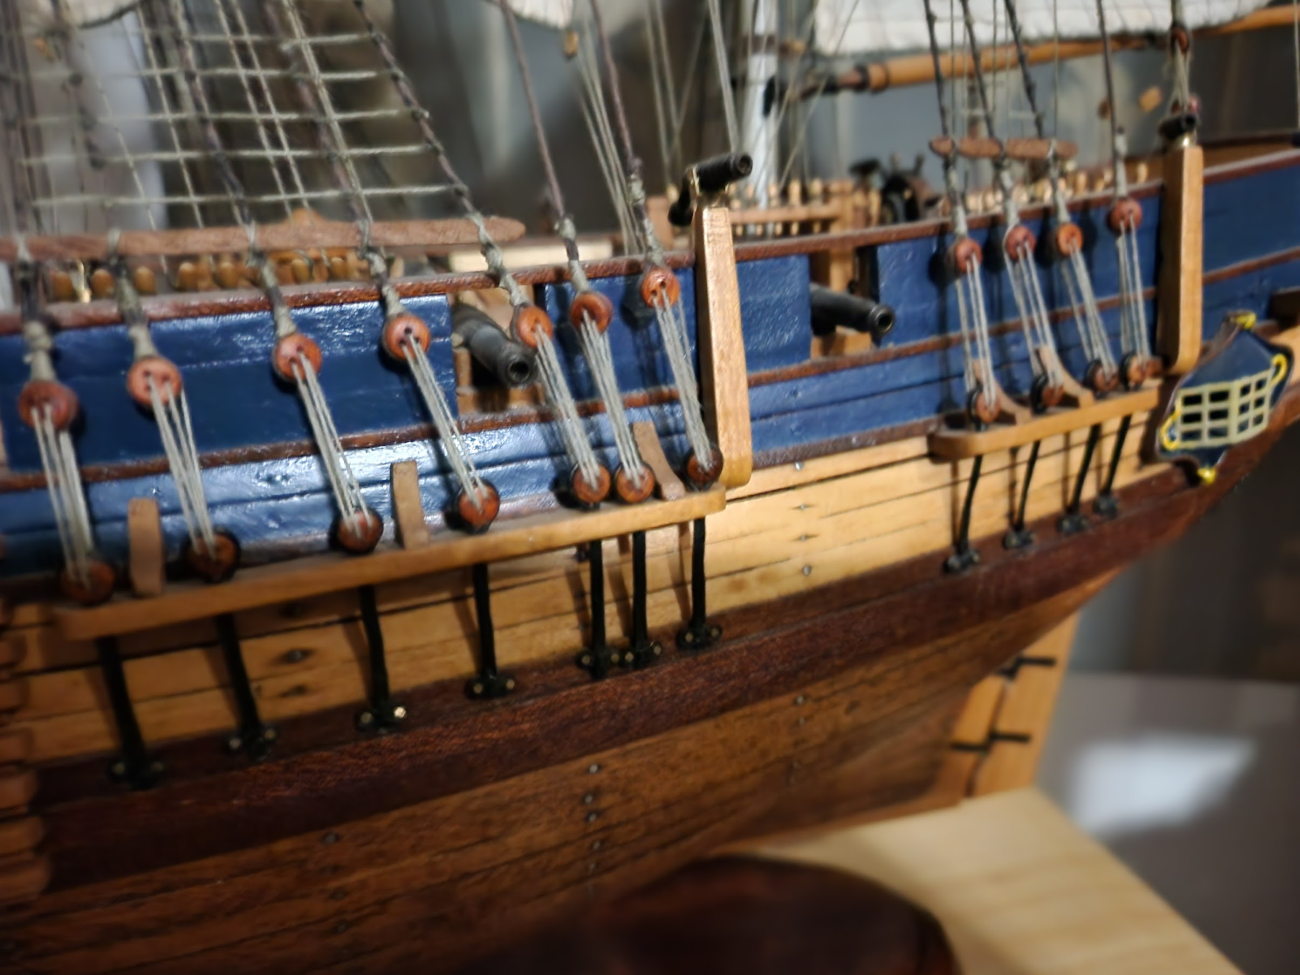
I would like to thank @BANYAN for lending me his rope server. I was originally going to serve my rope with tan string, but he convinced me to use black. He also pointed out that some lines were served along their entire length, e.g. the first line in the shroud, to prevent chafing. I had forgotten this. I have VERY FINE black string, and even with the machine it took forever to serve 56 lengths of rope for the shrouds. This is his machine:
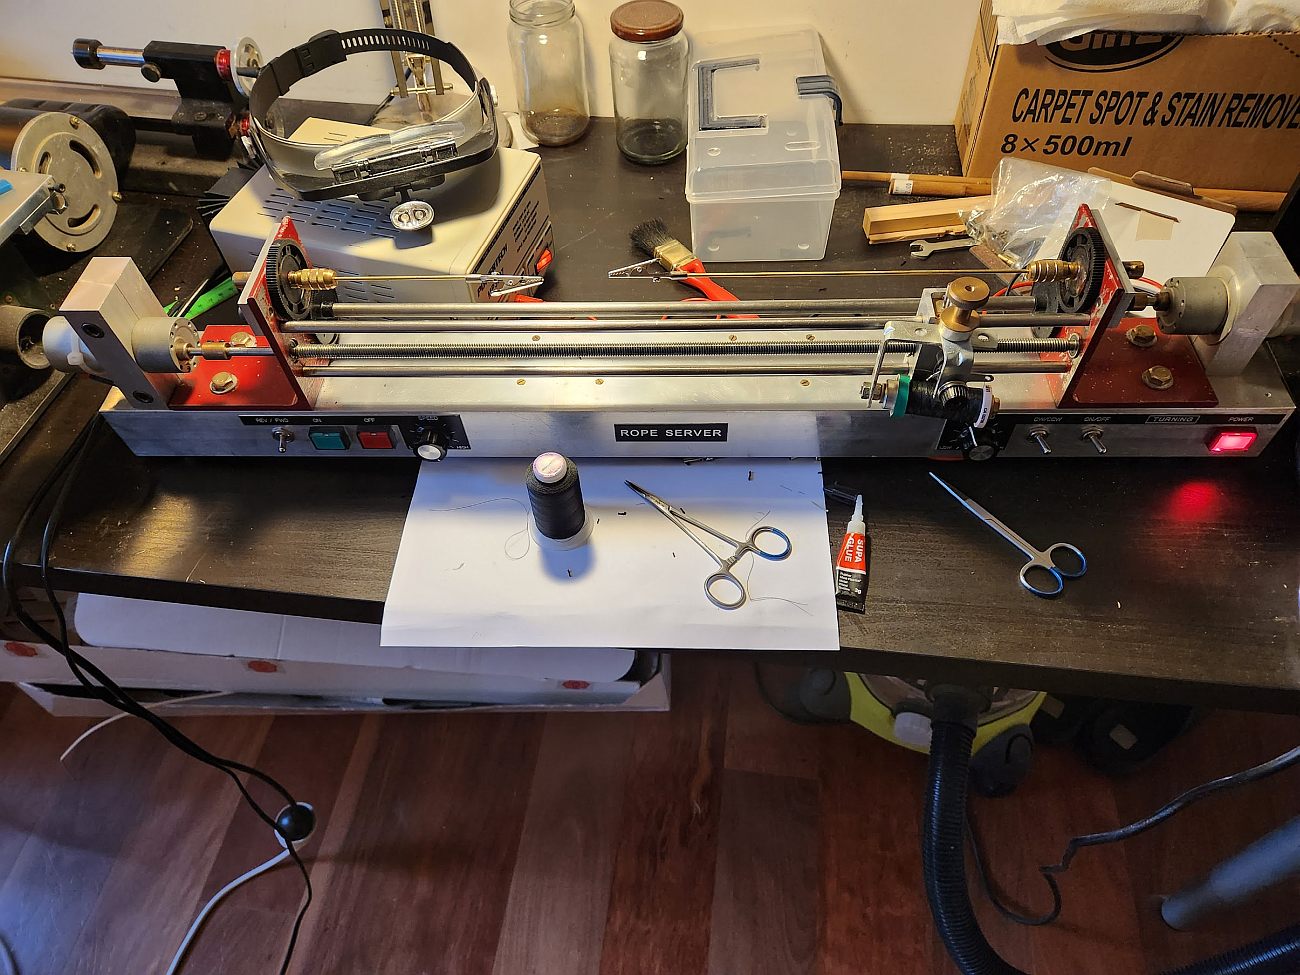
Notice there are two motors - one to turn the rope, the other to advance the feed. It is possible to set the machine up, leave it running, go make a coffee, etc. and return to have your rope all nicely served. I forgot to ask if it had an auto-off feature, because I was not game to leave it running unattended. It's not my machine! So I sat there and manually served all the rope. It took a really long time. On the plus side, I covered a lot of podcasts.
All the rope has been served and tagged sequentially so I don't lose track of which is which.
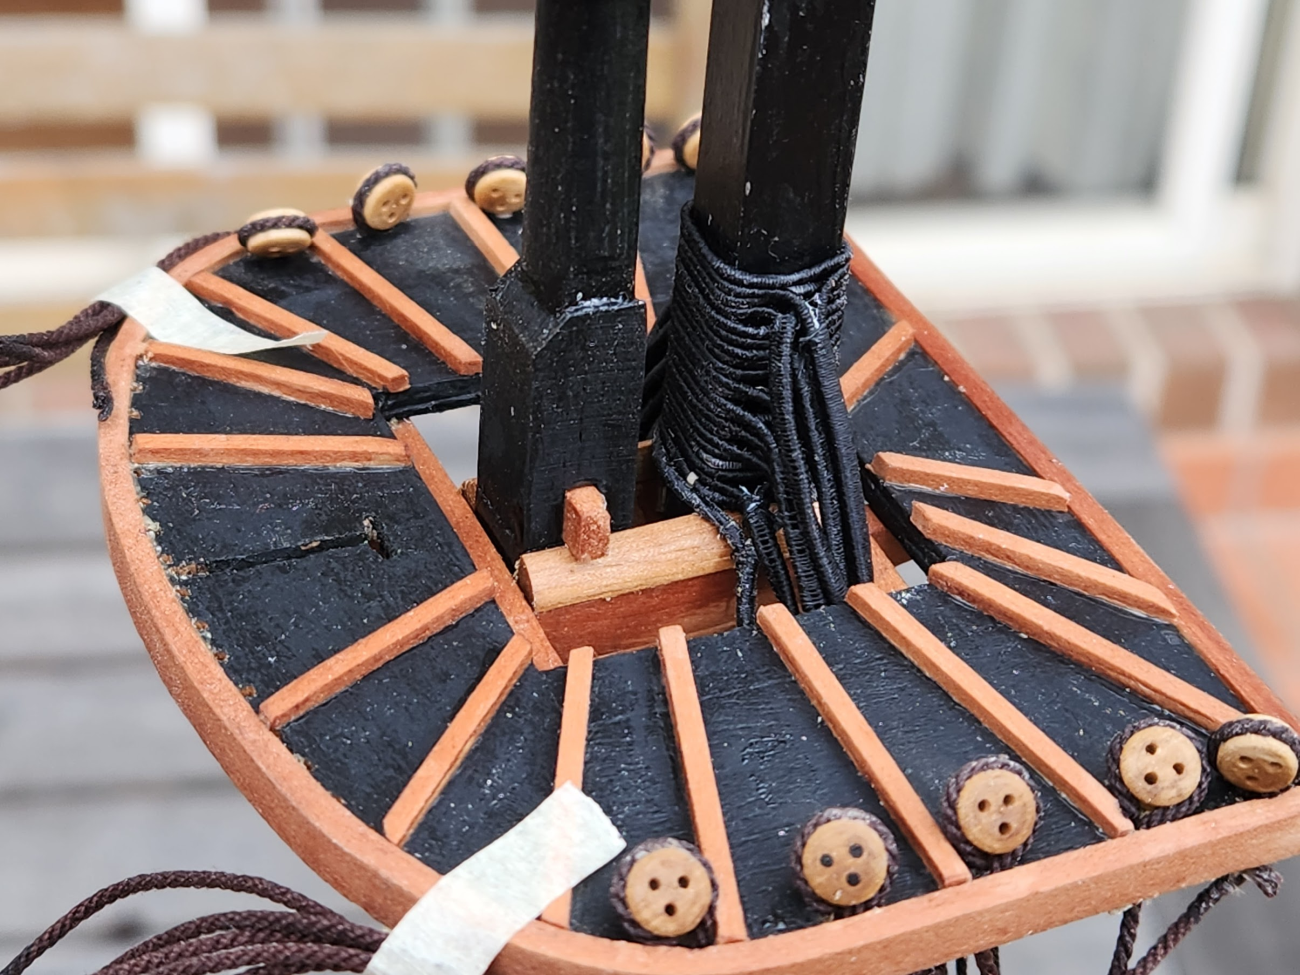
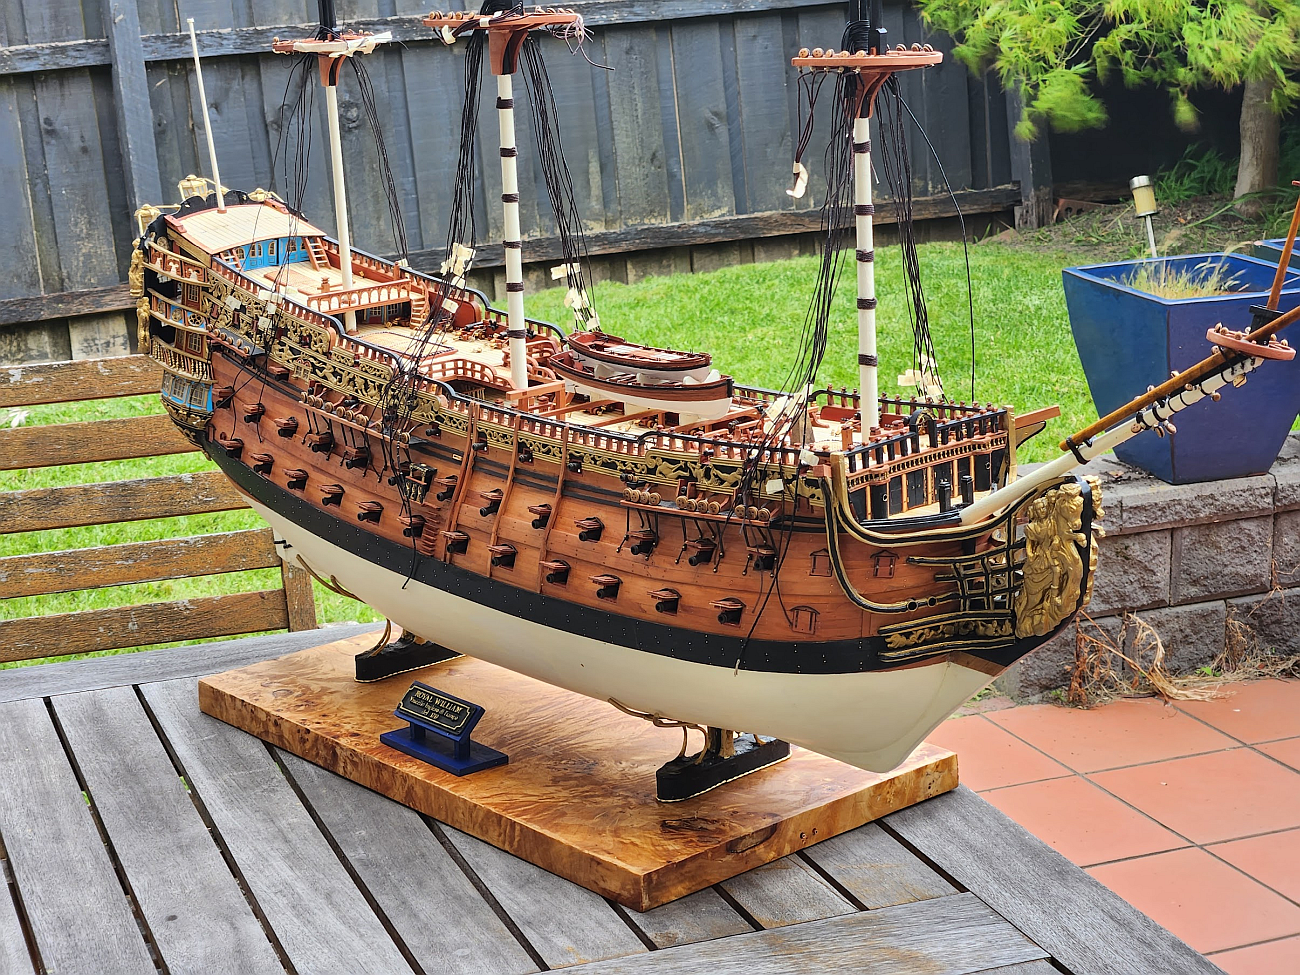
The served rope neatly stacked. The fid was made by cutting off the bottom of the topmast and topgallant mast, cutting a square hole using the table saw as a dado cutter, and gluing the bottom back on. Once securely glued on, a hole was drilled from the bottom, through the fid, and the whole thing was pinned together. It was sanded flat and painted, and you can not see that it has been cut. I know that the crows nest should be painted all black, but I like the contrast of the pearwood to black so I left it that way.
I have also constructed a base out of plywood and veneered it with maple burl. The reason I did not use the Euromodel base is because I need to route power into the ship through the supports. You may recall from my earlier posts that very early in the build, I drilled a hole into the keel, placed a nut there, and soldered wire to the nut to run power to the whole ship. The whole thing was reinforced with spare plywood. This was always the plan.
You can see the support I made for the ship in the second photo. This is 3mm brass rod, bent to shape with the help of my vice. It was then soldered with reinforcements. It is then screwed through the base into the hull with an extra thick stainless steel bolt, and I made the base extra wide. The base is also ballasted for even more stability. It is really solid and stable and I doubt it would tip over in the car even if I took a fast corner.
I can tell you that applying burl veneer is not easy! When you receive it, burl is always badly warped thanks to the grain of wood running in different directions, and there are holes everywhere. The first step is to flatten the veneer - spray it with water, then sandwich it between two melamine boards. After 24 hours, it is dry and must be used within a few hours otherwise it will curl up again (don't ask me how I know). Then brush on some PVA thinned with water (70/30) on both the veneer and the substrate (the plywood frame), and sandwich between the boards again. Wait 24 hours. Then trim and apply the edge veneers, trying to match the grain as best as you can. Clamp and wait 24 hours per side. Then it's clean up time - patch all the holes with spare veneer, trying to achieve a colour match. Make up some filler by mixing sawdust with thinned PVA. Sand the whole thing flat, going down the grits to 600. Then I applied Tung oil. So far 6 coats. I am waiting for the last coat to dry before I seal it with wipe-on poly. It is almost 2 weeks and the Tung oil still feels a little bit oily.
If you look closely, you can see that I applied the top veneer before the edges. In hindsight, I can recommend that you do not do this, because you can see the side of the edge veneer. I should have applied the edge veneer first, and then the top veneer so that it overhangs the edge.
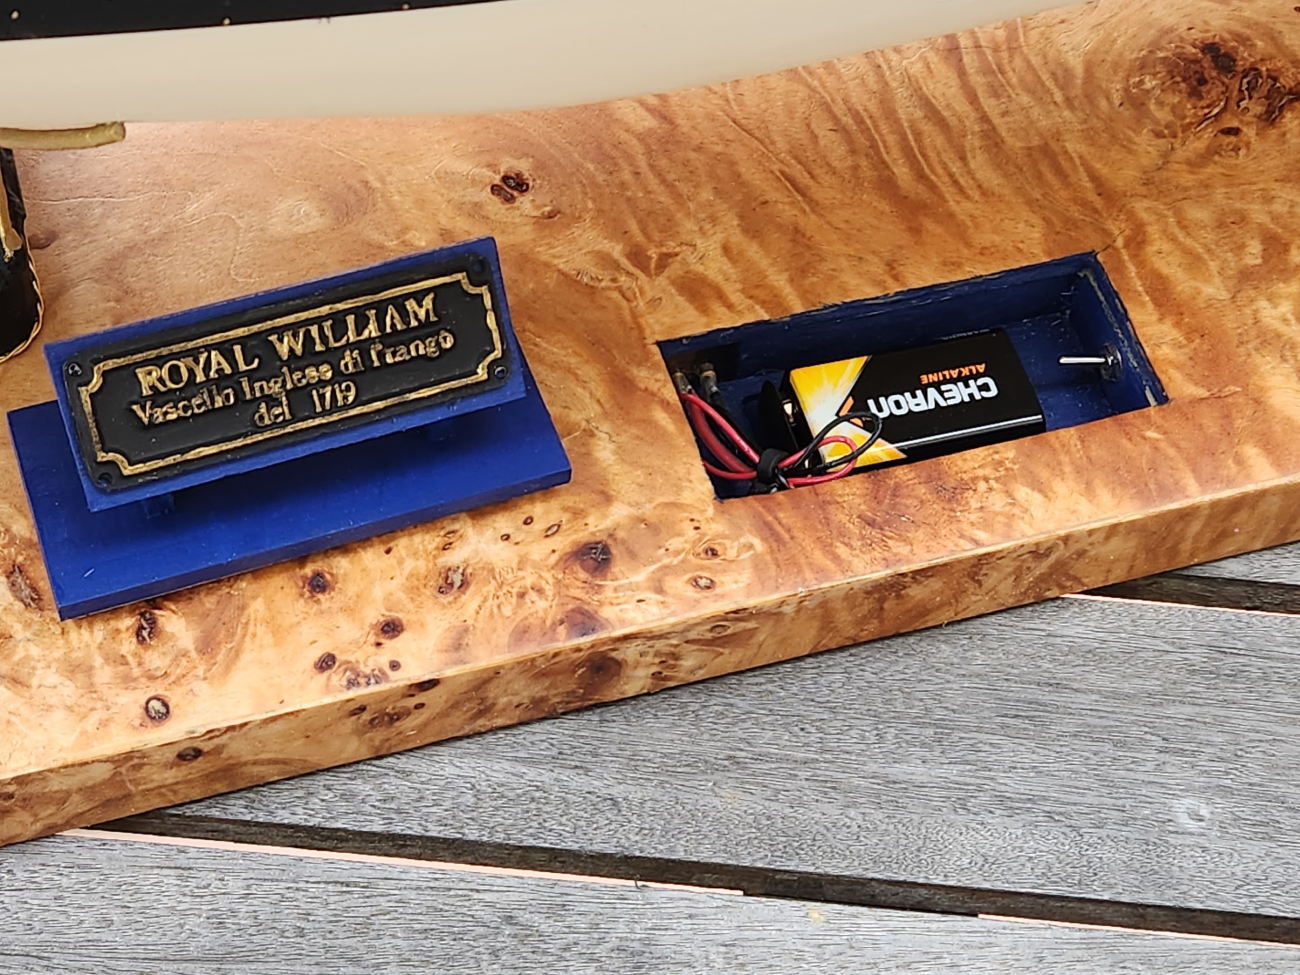
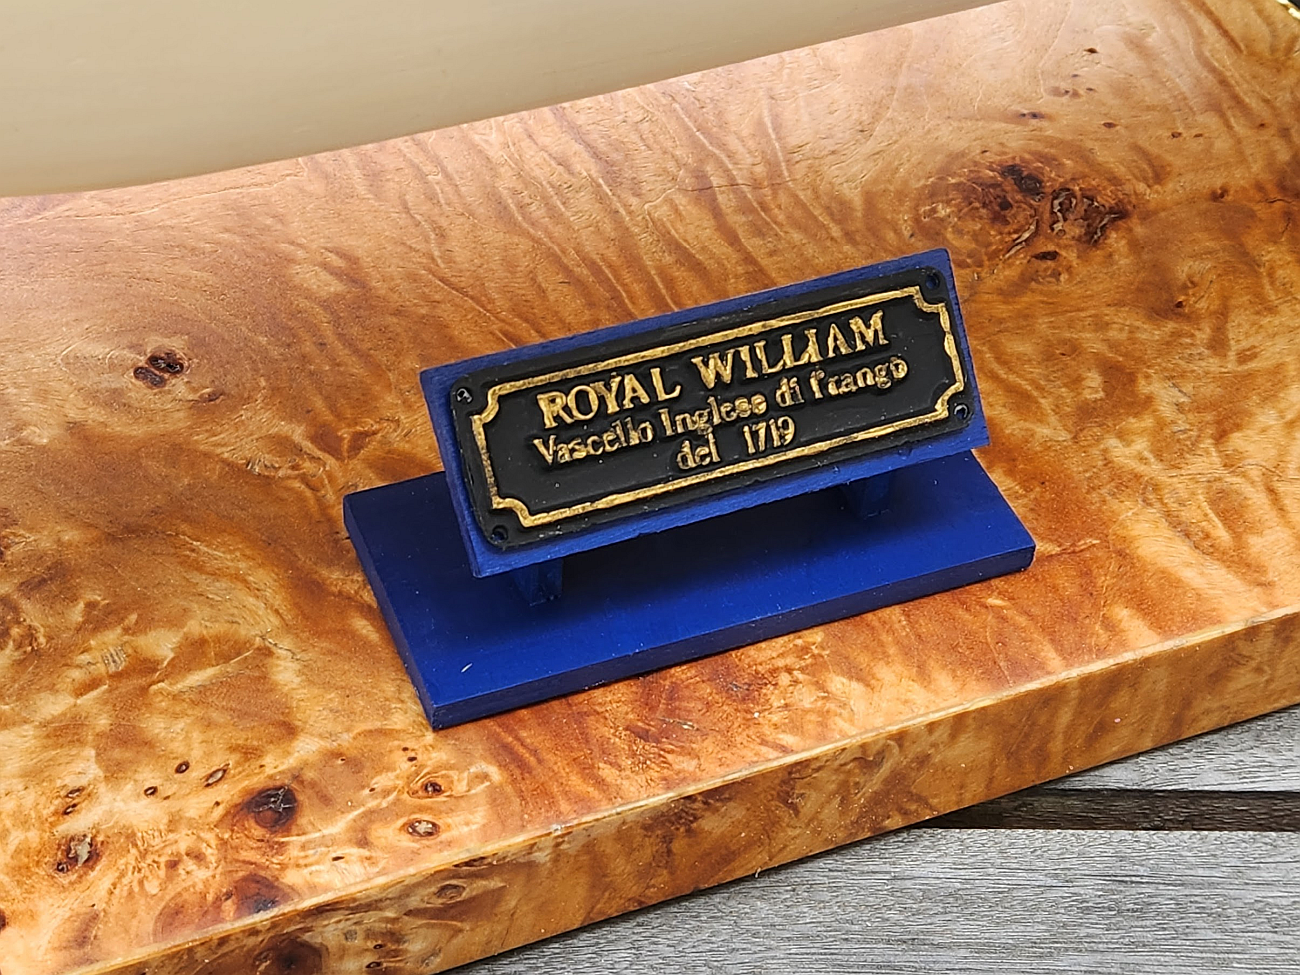
Removing the name plate reveals a hidden compartment with the battery and a switch.
After going through all that rope, I found that I did not order enough. Another order was fired off to Chuck, hopefully this will be enough rope to finish the project. And I am woefully short of deadeyes, Euromodel did not supply anywhere near enough of the 3mm deadeyes. I have put together a shopping list and will visit my hobby shop later this week.
- Chuck, ccoyle, Keith Black and 8 others
-
11
-
Pretty amazing that you are doing this. 1/40 is a bit too large for me, I do not have anywhere in the house that would fit such a model. I would be really interested in seeing progress pics of the model as she evolves, though. If you wish to monetize your work, perhaps you could discuss selling your plans to a model kit manufacturer. Since your files are digital, it should not be too difficult to offer the kit at a more "reasonable" scale, say 1/72.
- druxey, mtaylor and Scottish Guy
-
3
-
Chris, I think we are all fed up with Amati dragging their heels on this kit. If they have lost interest, maybe you should purchase the rights back from them and then offer it for sale as a Vanguard kit.
- Morgan, mtaylor, chris watton and 2 others
-
5
-
I just came across your build log. Re: staining. I stained my planks before I installed them. This is because glue prevents the stain from working. If you try to stain your planks after installation, you will find that you won't be able to get all the glue off and it will product a blotchy finish. The disadvantage is that you have to sand after installation, and this removes the stain. But that is no problem, just stain again. I realize that this advice came a little too late for you. Take a look at my build log (in my sig).
-
6 hours ago, mtaylor said:
I'm in also.. Had thoughts back then about buying one, but several of my fellow Marines talked me out of it. In some ways, I'm glad they did.
Why would marines talk you out of buying a model kit? 😄
- Canute, Old Collingwood, mtaylor and 2 others
-
5
-
18 minutes ago, BANYAN said:
Keith, I drew up the parts in CAD to scale (including a test legend) and a railroad modeller who lives in the eastern parts of Melbourne etched them for me. I can pass on his details if you need them?
Yes please!!!
- mtaylor, Glen McGuire and Keith Black
-
3
-
I would happily pay $2000 for this and consider it reasonable. 41 sheets of pre-cut wood is much more than what some kits which are slightly less expensive will give you. I am working on one of those kits at the moment! However, from my recent order with you, I know that shipping to Australia will add substantially to the cost, and I will not want to buy the kit in instalments. I will wait until you have finalized and released more chapters before ordering.
- GGibson, thibaultron, Canute and 1 other
-
4
-
How did you get the PE parts made?
- Glen McGuire, mtaylor and Keith Black
-
3
-
These massive yawning gaps appeared on my HMS Bounty, completed in 2008. This is a single planked model. Back then, I was less experienced with wooden ship model making. My method at the time was to soak the planks in my bathtub, bend it with a steam iron, then install it. It appears that the wood was not dry enough when it was installed, which has two effects - (1) the wood will shrink as it dries, and (2) the PVA glue will not penetrate wood which is saturated with water, it needs to be dry - it will thus form only a surface coating resulting in a weaker glue bond. The combined effect of both - stress pulling the joint apart + weaker glue bond, resulted in the gaps. You can also see that different wood species react differently to being installed wet. The walnut (darker coloured wood below the wales) remains nearly perfect. The limewood (yellow coloured wood below the painted blue band) has suffered the most. My theory is that the limewood is more porous and swells more than walnut.
To my mind, the solution would be:
1. Construct your models properly. Don't install wet wood, make sure the planks are glued together and not only to the frame.
2. Keep models in a humidified condition, or conditions similar to when it was constructed
3. Treat the wood with swelling agents like polyethylene glycol to keep the fibres saturated and fat. This is what is currently being done to the Mary Rose in Portsmouth, and has been done to the Vasa and Batavia in Fremantle, Australia.
4. Choice of varnish and sealant will affect the rate of moisture migration in wood, but won't prevent it entirely.
- mtaylor, GrandpaPhil, tmj and 1 other
-
4
-
-
-
This has to be one of the more incredible build logs on MSW. With most of the other logs, the focus is on research and craftsmanship. With your log, it's also about engineering and getting the project to work. I can't imagine myself ever acquiring the skills to do what you have done.
- Knocklouder, Ian_Grant, Glen McGuire and 1 other
-
3
-
 1
1
-
-
OK I made an attempt at compiling a list of model kits available for the ships at Trafalgar. Feel free to quote this post and modify it.
ENGLISH SIDE
Victory: Corel (1/98), Billings (1/75), Caldercraft (1/72), Artesania (1/84), Airfix (1/180), Heller (1/100), Revell (1/450)
Temeraire: None
Neptune: Corel (1/90)
Leviathan: None
Conqueror: None
Brittania: None
Agamemnon: Caldercraft (1/64)
Ajax: Euromodel (1/74)
Minotaur: None
Orion: None
Spartiate: Heller (1/150)
Royal Sovereign: None
Belleisle: None
Mars: Caldercraft (1/64)
Tonnant: None
Bellerophon: Victory Models (1/72)
Colossus: None
Achille: None
Revenge: None
Polyphemus: None
Swiftsure: None
Dreadnought: None
Defiance: None
Thunderer: None
Defence: None
Prince: None
Euryalus: None
Naiad: None
Phoebe: None
Pickle: Caldercraft (1/64)
Entreprenante: None
FRENCH SHIPS
Scipion: None
Formidable: None
Duguay-Trouin: None
Mont Blanc: None
Heros: None
Bucentaure: None
Neptune: None
Redoutable: None
Indomptable: None
Fougueux: None
Intrepide: None
Pluton: None
Aigle: None
Algesiras: None
Swiftsure: None
Argonaute: None
Achille: None
Berwick: None
Cornelie: None
Hermione: None
Hortense: None
Rhin: None
Themis: None
Furet: None
Argus: None
SPANISH SHIPS
Neptuno: None
Rayo: None
San Francisco de Asis: None
San Agustin: None
Nuestra Senora de la Santissima Trinidad: Artesania (1/84), OcCre (1/90)
San Leandro: None
San Justo: None
Santa Ana: Artesania (1/84)
Monarca: None
Bahama: None
Montanes: None
Argonauta: None
San Ildefonso: OcCre (1/70)
Principe de Asturias: None
San Juan Nepumoceno: Artesania (1/90)
-
After looking over your build log, I went to Trumpeter's website and saw that the completed model is 1265mm long! I pulled out my tape measure and I wouldn't have anywhere to put it in my house! This is a really big model, I just didn't realize how big it was from looking at your photos.
OcCre HMS Victory Limited edition
in Wood ship model kits
Posted
Of course! That is a fair observation, and it was something I missed when I looked at the video. Thank you for pointing that out.
I for one would love to see more French ships on the market. We have plenty of British and Spanish ships. But there is no Bucentaure or Redoubtable.