HOLIDAY DONATION DRIVE - SUPPORT MSW - DO YOUR PART TO KEEP THIS GREAT FORUM GOING! (Only 44 donations so far out of 49,000 members - C'mon guys!)
×


BobG
-
Posts
3,109 -
Joined
-
Last visited
Content Type
Profiles
Forums
Gallery
Events
Everything posted by BobG
-
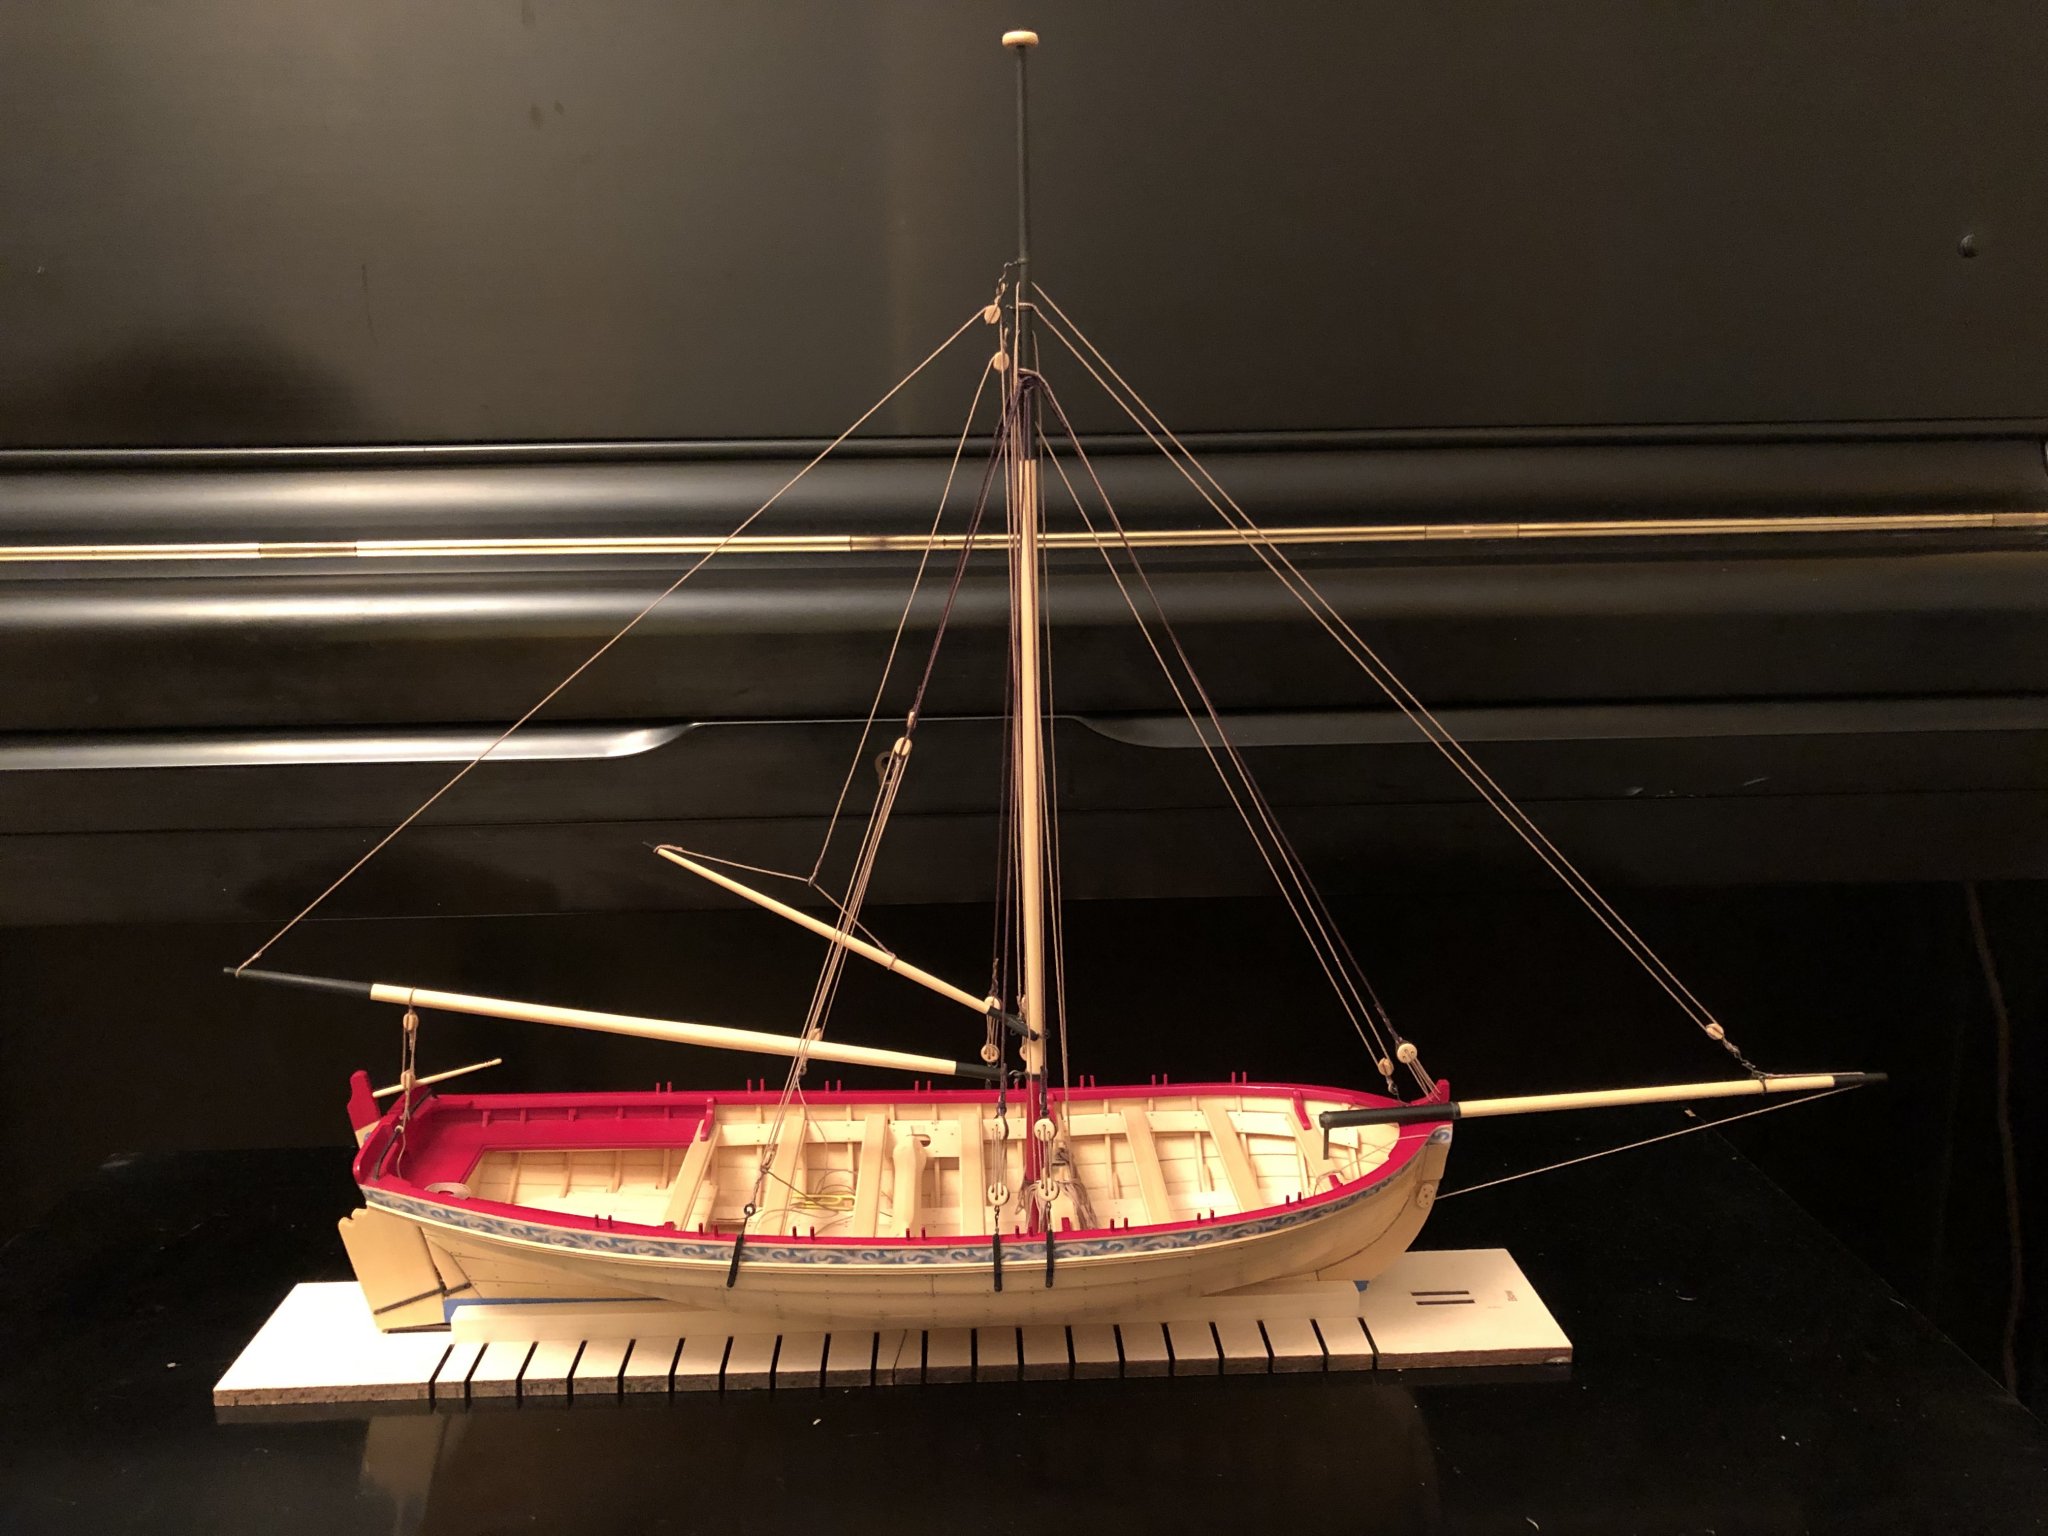
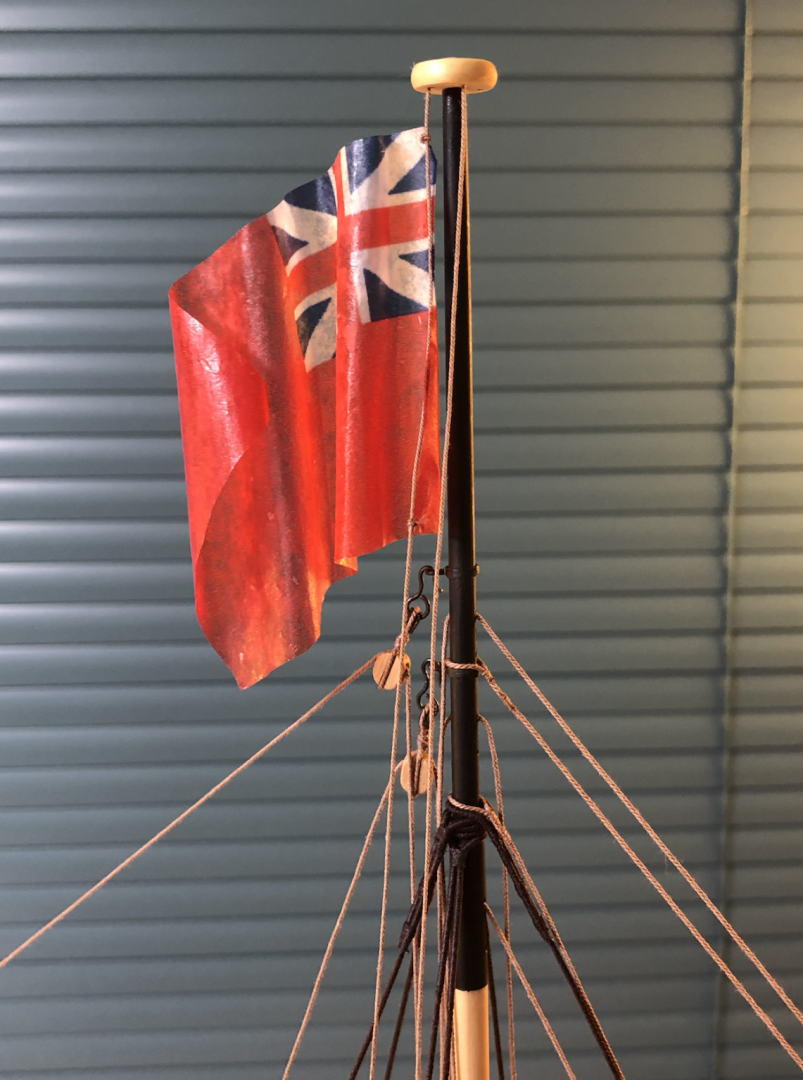
I made the flag today and rigged the flag halliards and made rope coils for them. I tried to make the flag look like there was a light breeze blowing...just enough to for it to look like it was wavering just a little. Chuck says he uses Kryon Matte Fixative to soak the tissue paper flag. I didn't have that but my wife had some Krylon Fine Art Fixative so I used that hoping that fixative is fixative! It took me a while to get close to the look that I wanted. The flag is very delicate to work with and the fixative is a bit sticky so my fingers would stick a bit while I was shaping it. Be careful not to let the tissue paper fold onto itself when the fixative is tacky because the tissue will stick together. That happened to me a couple of times so I sprayed it again so it wouldn't tear when I separated the stuck tissue. I used various sizes of dowels to help shape it along with simply manipulating it with my fingers. I didn't like the look on the first two tries so I just soaked it again with more fixative and reworked it. I think it looks pretty good. It's fairly transparent and has a bit of a sheen to it when the light hits it at an angle. I don't know if that's typical or whether the fixative I used gave it a slight sheen. Tomorrow I'll work on the grapnel and maybe get started on the display base. Thanks for reading if you got this far...
- 170 replies
-
- 8
-

-
- medway longboat
- Syren Ship Model Company
- (and 1 more)
-
It looks really good, Bob. You've got a special build going here. I think it's the first one in this group build that has sails. I've been toying with the idea of it might look like with furled sails? I'm hesitant to attempt sails at this point though for fear that I would just muck up what already looks pretty nice to me. I look forward to see your progress with the sails.
- 87 replies
-
- 2
-
-
- medway longboat
- Syren Ship Model Company
- (and 1 more)
-
You've done a fine job with this lovely boat. These small boats have a special charm about them and I always enjoy seeing them get built.
-
Art, your canoe is absolutely beautiful...it's a stunning model. I've enjoyed following your build and look forward to whatever you decide to build next.
-
Dave, Ages of Sail has 2 x 5 mm strips: https://www.agesofsail.com/ecommerce/am2460-12-walnut-wood-strips-2mm-x-5mm-(10).html
- 77 replies
-
- 2
-
-
- point berlin
- diorama
- (and 1 more)
-
Thank you so much for your detailed reply and encouragement, David. I've got several models to choose from for my next build. I'm going to get the POB off the shelf and take a look at it again. It will certainly be in the running. I'll be looking forward to see what your next build will be too.
-
Beautiful boat...this one will be on my list for sure!
- 100 replies
-
- 3
-
-
- zulu
- vanguard models
- (and 2 more)
-
Wonderful work on your Pride of Baltimore, David. She has such beautiful lines. I have this model on the shelf and I'm beginning to think of my next build since I am nearly completion of the Medway Longboat which is my third model. My first two models were the Indian Canoe by Midwest and the Batelina by MarisStella. Both of these models were plank on frame as is the Medway Longboat so I've never done a POB build yet. I've been spoiled by the quality of the instructions and materials of Chuck's Medway Longboat kit so I'm hesitant about jumping into the Pride of Baltimore primarily because of all the basswood that is used. The Medway Longboat uses Alaskan Yellow Cedar and the Batelina is walnut and both of those wood finish so nicely and crisp. The Alaskan Yellow Cedar is particularly nice to work with. Would you suggest substituting some other wood for much of the basswood in the Pride of Baltimore kit? Congratulations on beautiful ship!
-
Very, very nice!
-
Absolutely beautiful in every way. Great craftsmanship! I actually like the black background for your final photos...very dramatic...
- 77 replies
-
- 5
-
-
- morel
- master korabel
- (and 1 more)
-
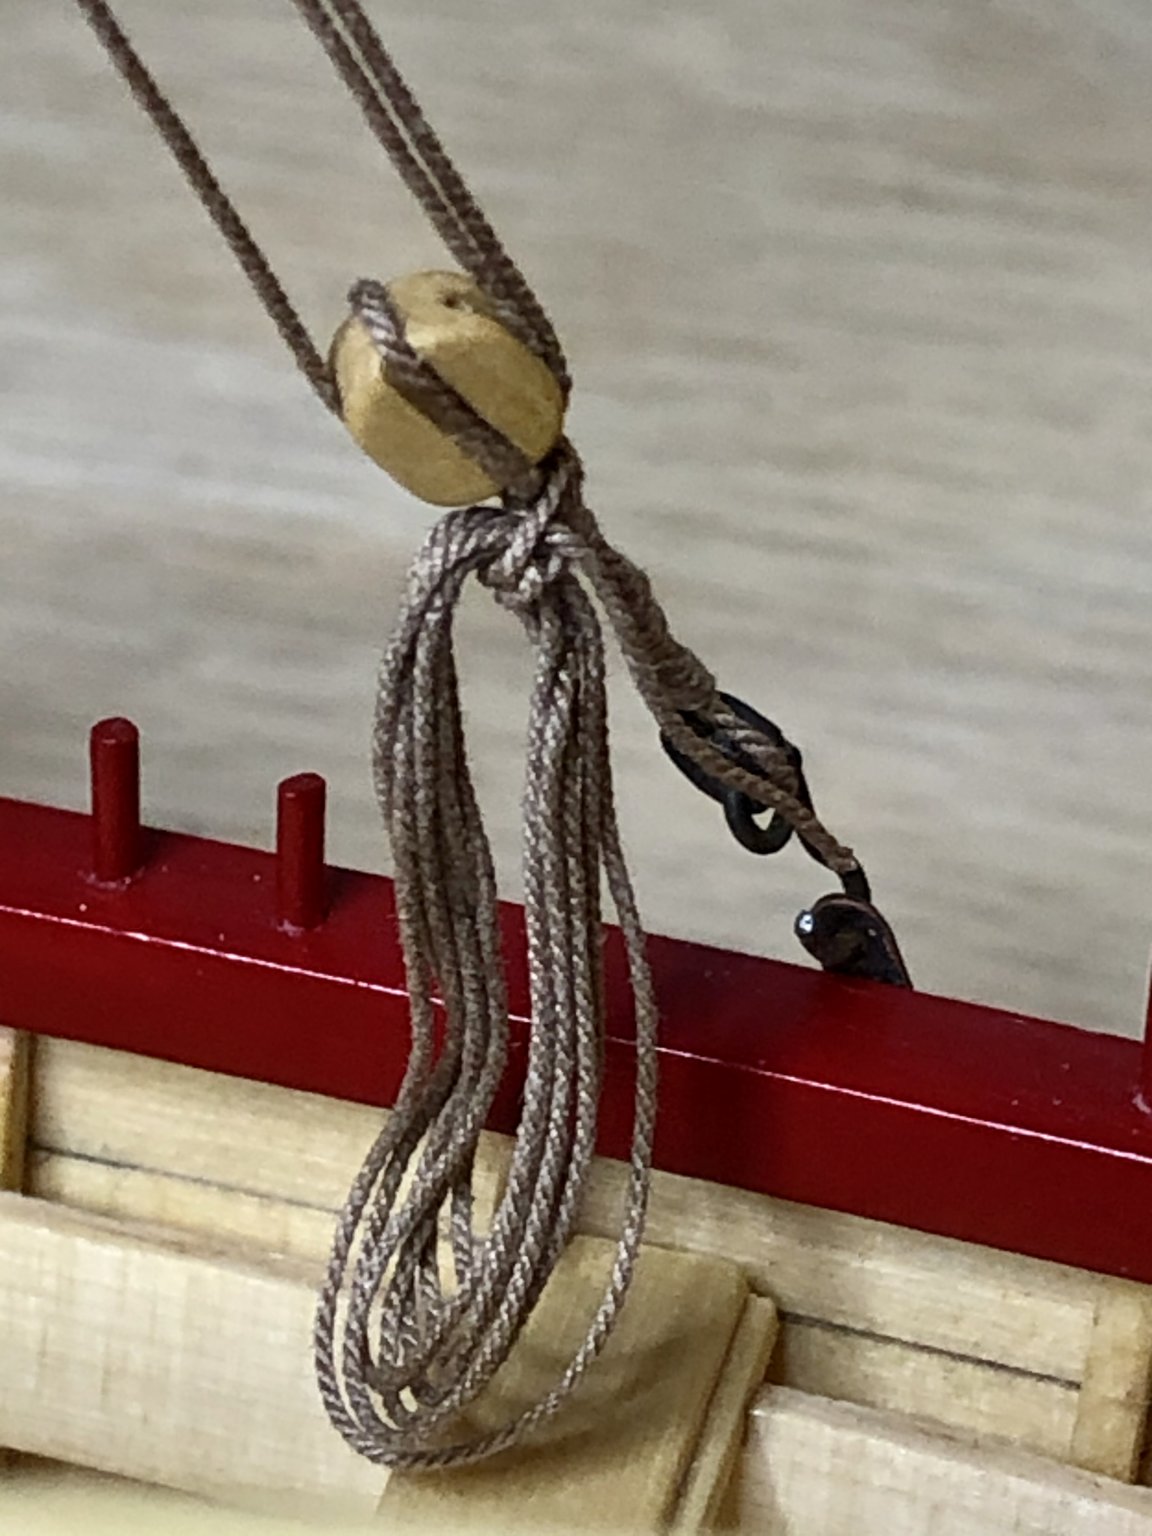
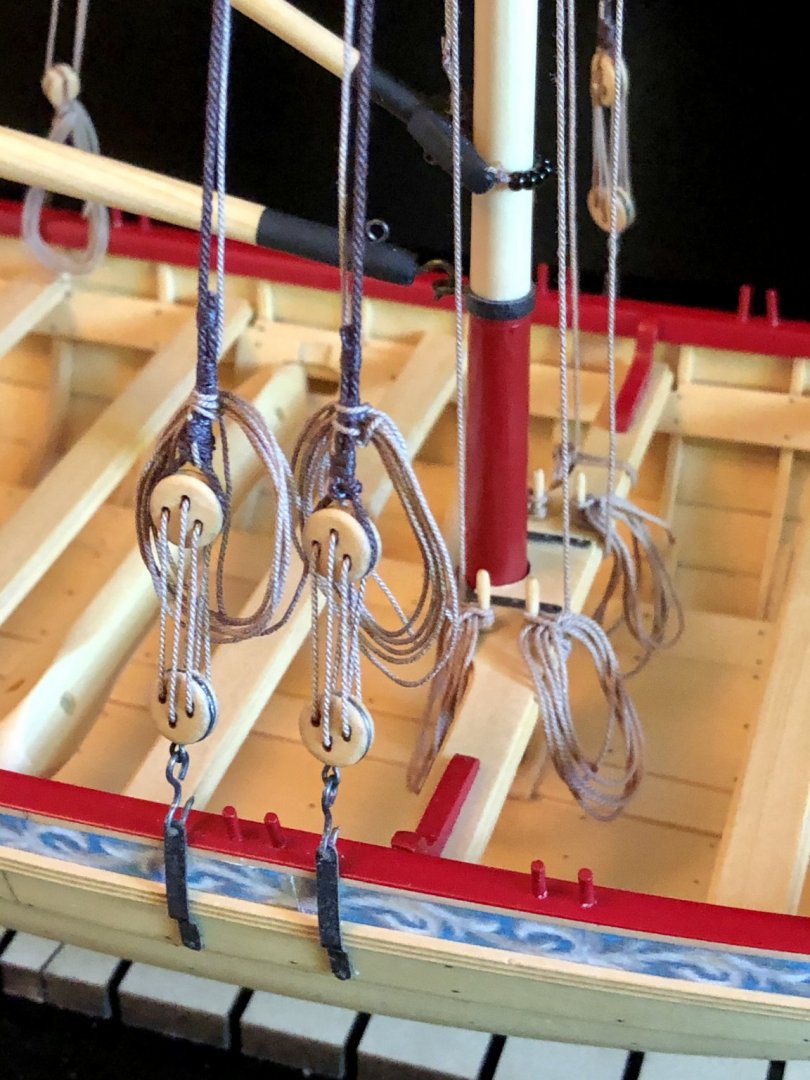
I only had a little time to work on my longboat today. I was able to get the rope coils finished for the backstay tackles and I redid another coil that I wasn't happen with. It's really nice not to have a tangle of lines and alligator clips laying around in the boat now.

- 170 replies
-
- 7
-
-
- medway longboat
- Syren Ship Model Company
- (and 1 more)
-
Derek, I'm sure all of Chuck's Syren kits are outstanding. I'm just about finished with his Medway Longboat and it's a great kit also. I've got my eye on the QAB too.
- 221 replies
-
- 1
-
-
- queen anne barge
- Syren Ship Model Company
- (and 1 more)
-
The number of thin coats depends upon the color being used also. On my Medway Longboat I probably put down 20 thin coats of red since red is fairly transparent but I only put 5 or 6 coats of black since it is much less transparent.
- 221 replies
-
- 2
-
-
- queen anne barge
- Syren Ship Model Company
- (and 1 more)
-
Hi from Azores and thank you all in advance
BobG replied to Marco Silva's topic in New member Introductions
Welcome Marco. You've picked an interesting and ambitious model to build as your first ship. As you said, patience is one of the most valuable aspects of model ship building. Make sure you understand each step thoroughly before you actually do it and ask questions if something seems confusing. I'm don't think anyone has ever completed a build without making any mistakes. We all do make errors but there's nearly always an acceptable fix and the more experienced modelers on this forum will be happy to assist you. Good luck with your first ship! -
That's good to hear. I'm very interested to seeing your sails. I've been thinking about how this model would look with full or furled sails. I don't think I've seen one posted yet.
-
I'm looking forward to seeing your work, Ryland. Your build looks great so far!
- 170 replies
-
- 1
-
-
- medway longboat
- Syren Ship Model Company
- (and 1 more)
-
Like many, I'm least comfortable with getting the planking done well but I love painting. I've been very pleased with Vallejo Acrylic Model Paints used with good brushes and applied in many thin coats. I also use Tamiya Model Masking Tape. I have several different sizes and they work very well when carefully applied. They also make a masking tape that is especially for curved surfaces and it works really well. Good luck with your painting!
- 221 replies
-
- 2
-
-
- queen anne barge
- Syren Ship Model Company
- (and 1 more)
-
Everything looks great! I see you have been using a Quadhands tool. I got one about a week ago and have been using it on while rigging my Medway Longboat and it's a fantastic tool to have. Man, those magnets are strong though aren't they? It's a 1000 times more stable and useful than the cheap "helping hands" thing I was trying to use before I got the Quadhands.
-
Thanks BobW for your compliment. I've read your log and your model looks wonderful. Have you been able to make any progress on her lately?
- 170 replies
-
- 1
-
-
- medway longboat
- Syren Ship Model Company
- (and 1 more)
-
Thanks everyone for the likes. I can barely believe that I am nearing the completion of this model. Still a ways to go but I can see the finish line. I've notice that there have been a lot of build logs started but most of them have been inactive for quite a while. This model is such a beauty and so much fun to build that I wonder why so many builds seem to have stalled or maybe people just haven't posted their progress recently...? I would love to see how each of you are doing with your model and get some more conversation going on this group build.
- 170 replies
-
- 1
-
-
- medway longboat
- Syren Ship Model Company
- (and 1 more)
-
You set the bar really high for yourself...they looked incredibly good to me!
- 77 replies
-
- 4
-
-
- morel
- master korabel
- (and 1 more)
-
It just keeps getting better and better, Justin. Did you make those hinges from scratch?
- 77 replies
-
- 3
-
-
- morel
- master korabel
- (and 1 more)
-
Thank you so much, Robert. This model was a big step up for me and I have learned so much building it. This is my third build and the first two were much simpler models. Chuck's instructions and all the build logs here have helped me immensely. The planking is already spiled so I can't take that much credit for how it looks. However, you still have to make precise bends with twists and be careful when gluing them on the hull. I broke a few along the way but was able to cut new ones when that happened. I think the quality of this kit makes me look more skilled that I actually am! Your shrimp boat is magnificent!
- 170 replies
-
- 1
-
-
- medway longboat
- Syren Ship Model Company
- (and 1 more)
-
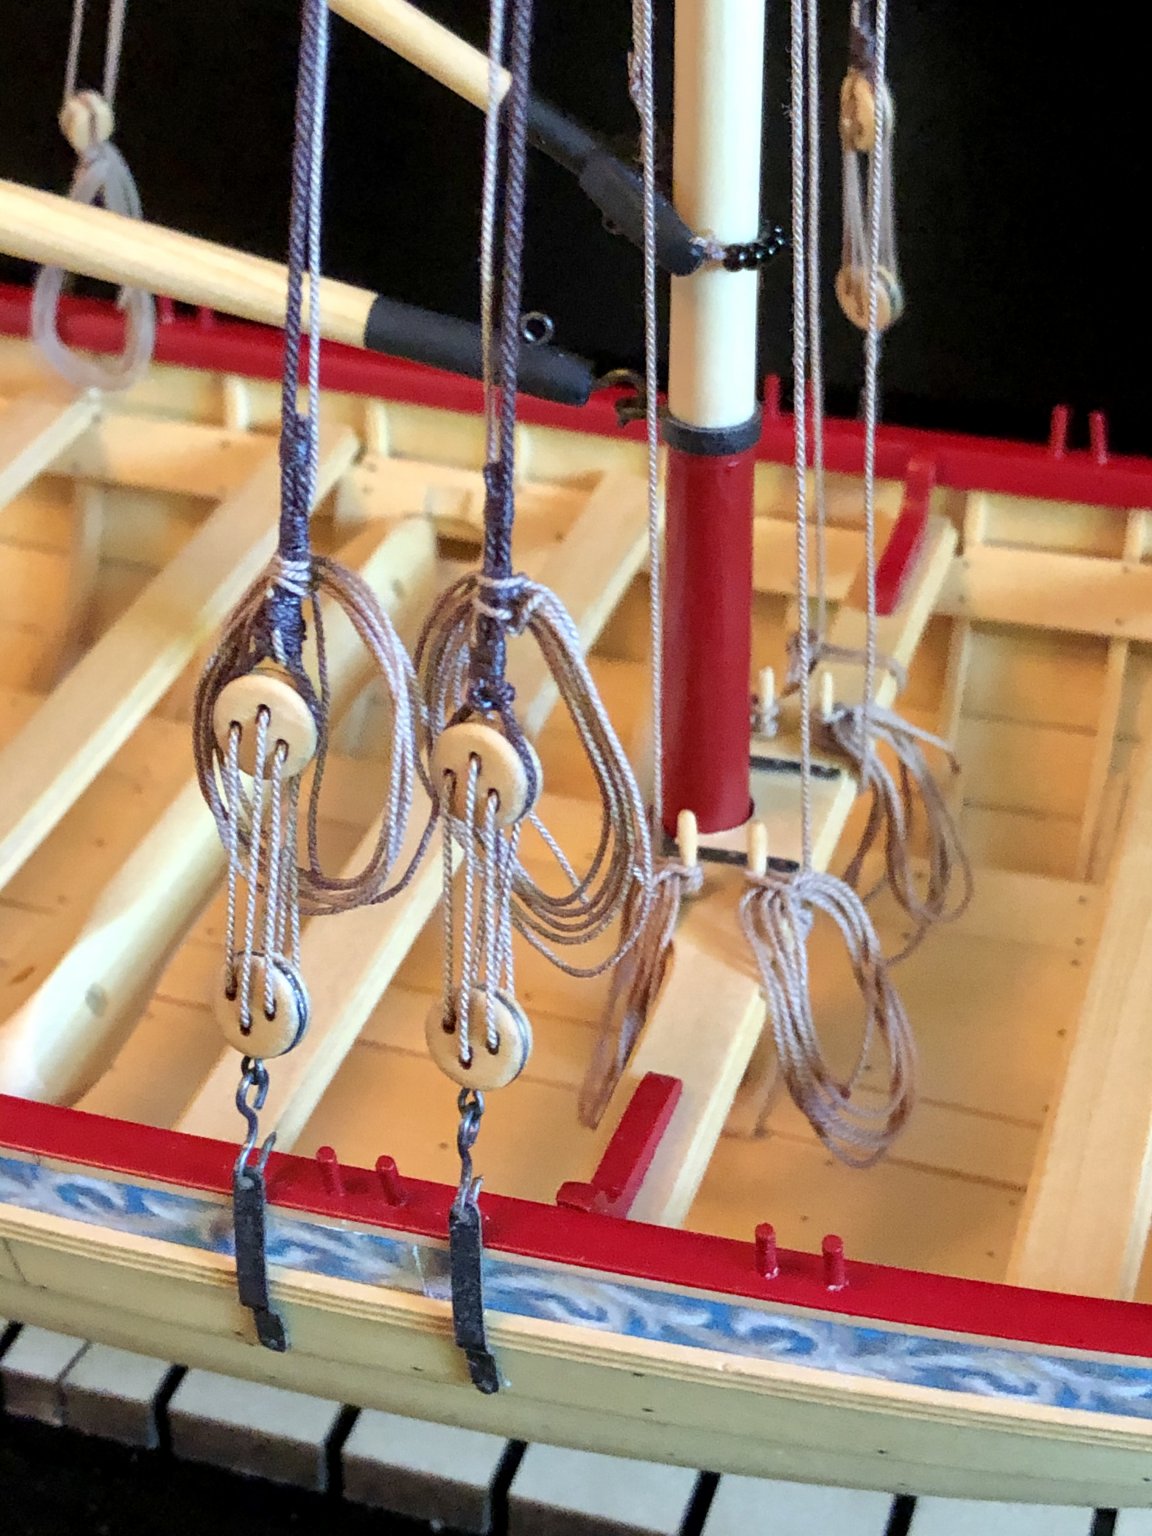
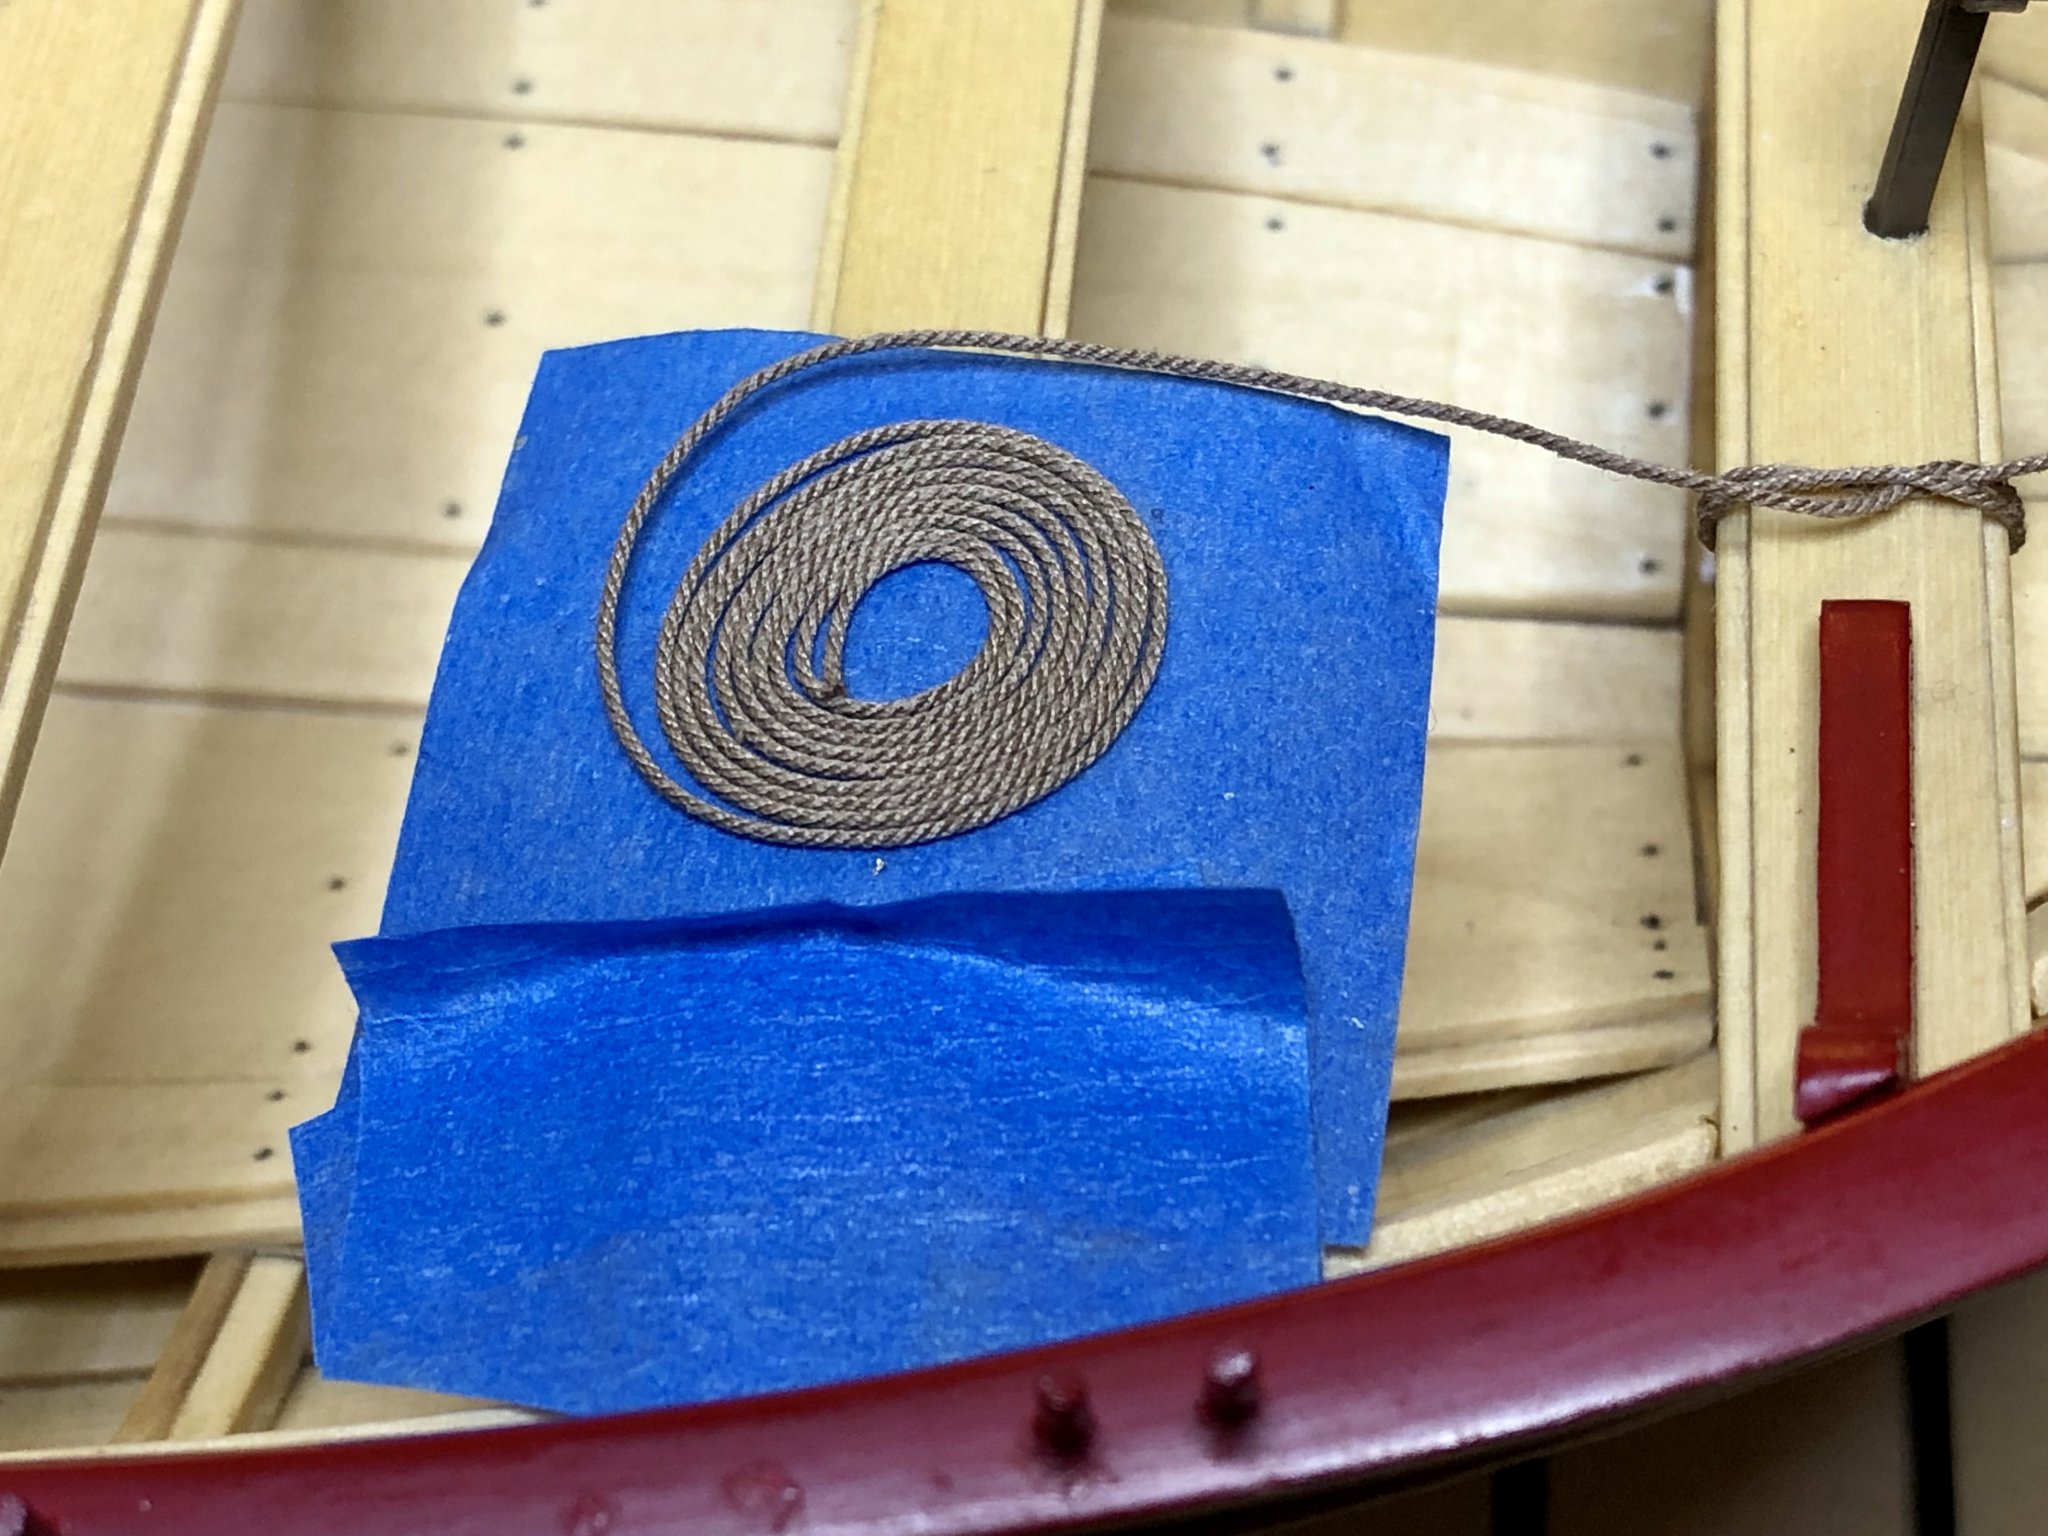
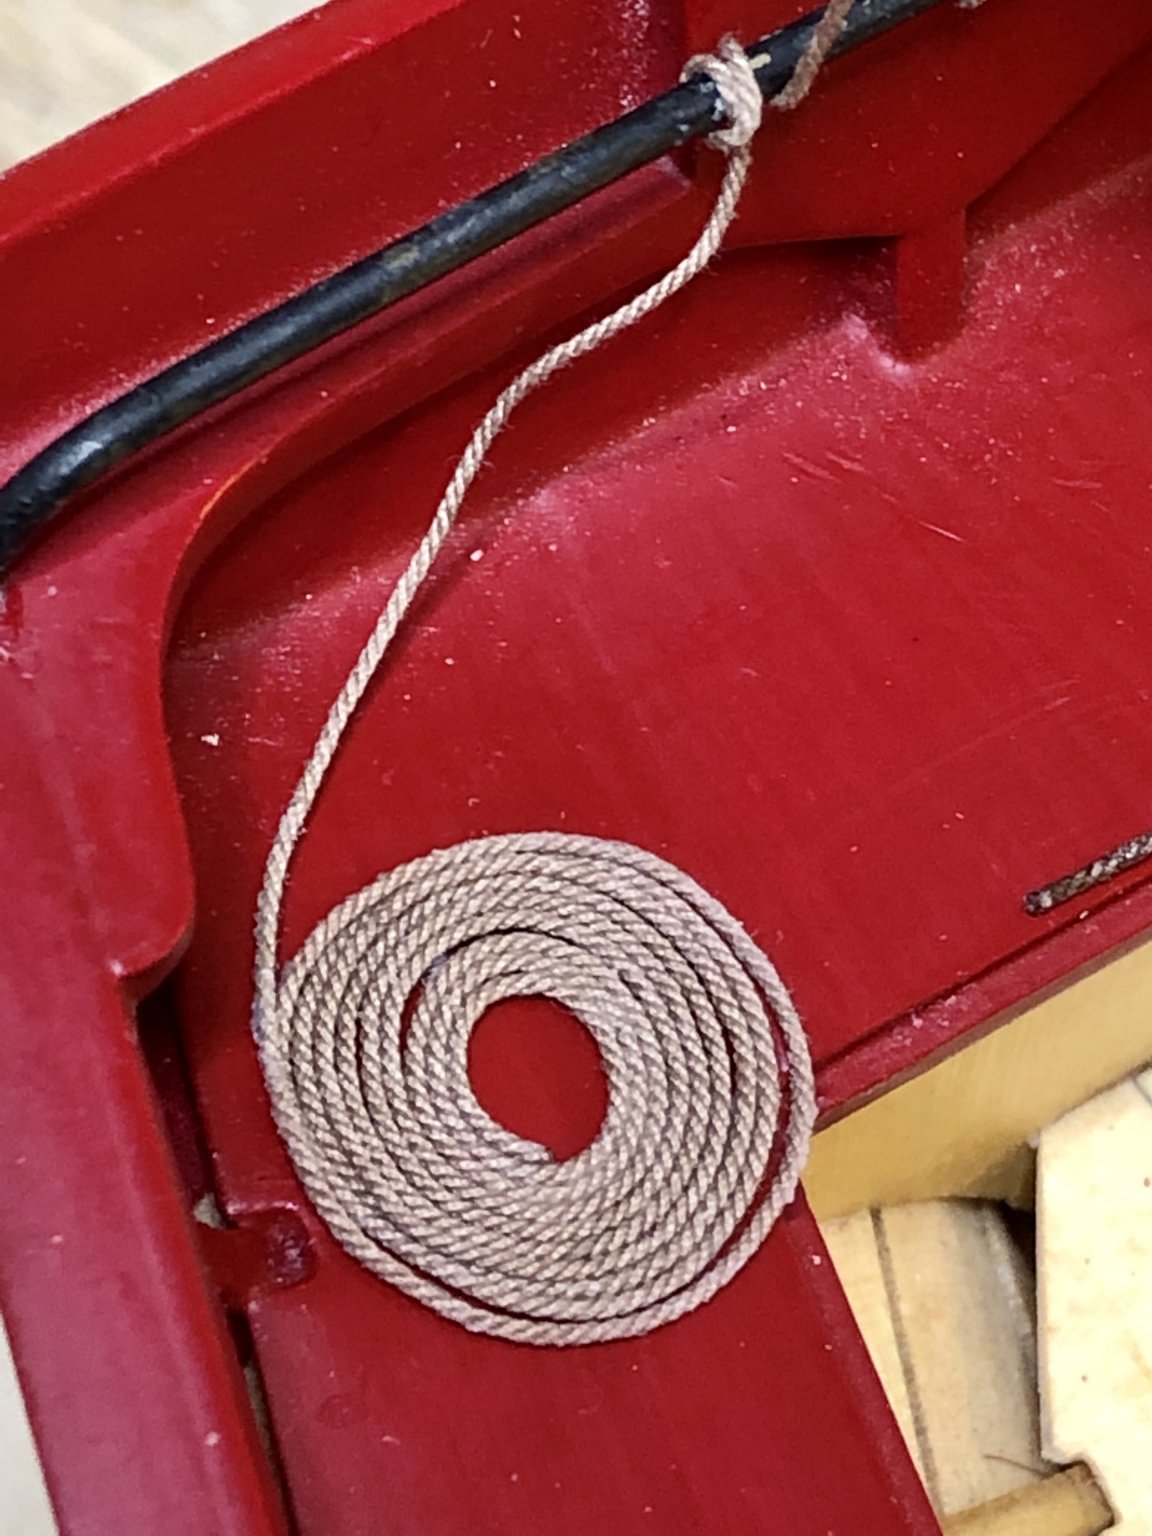
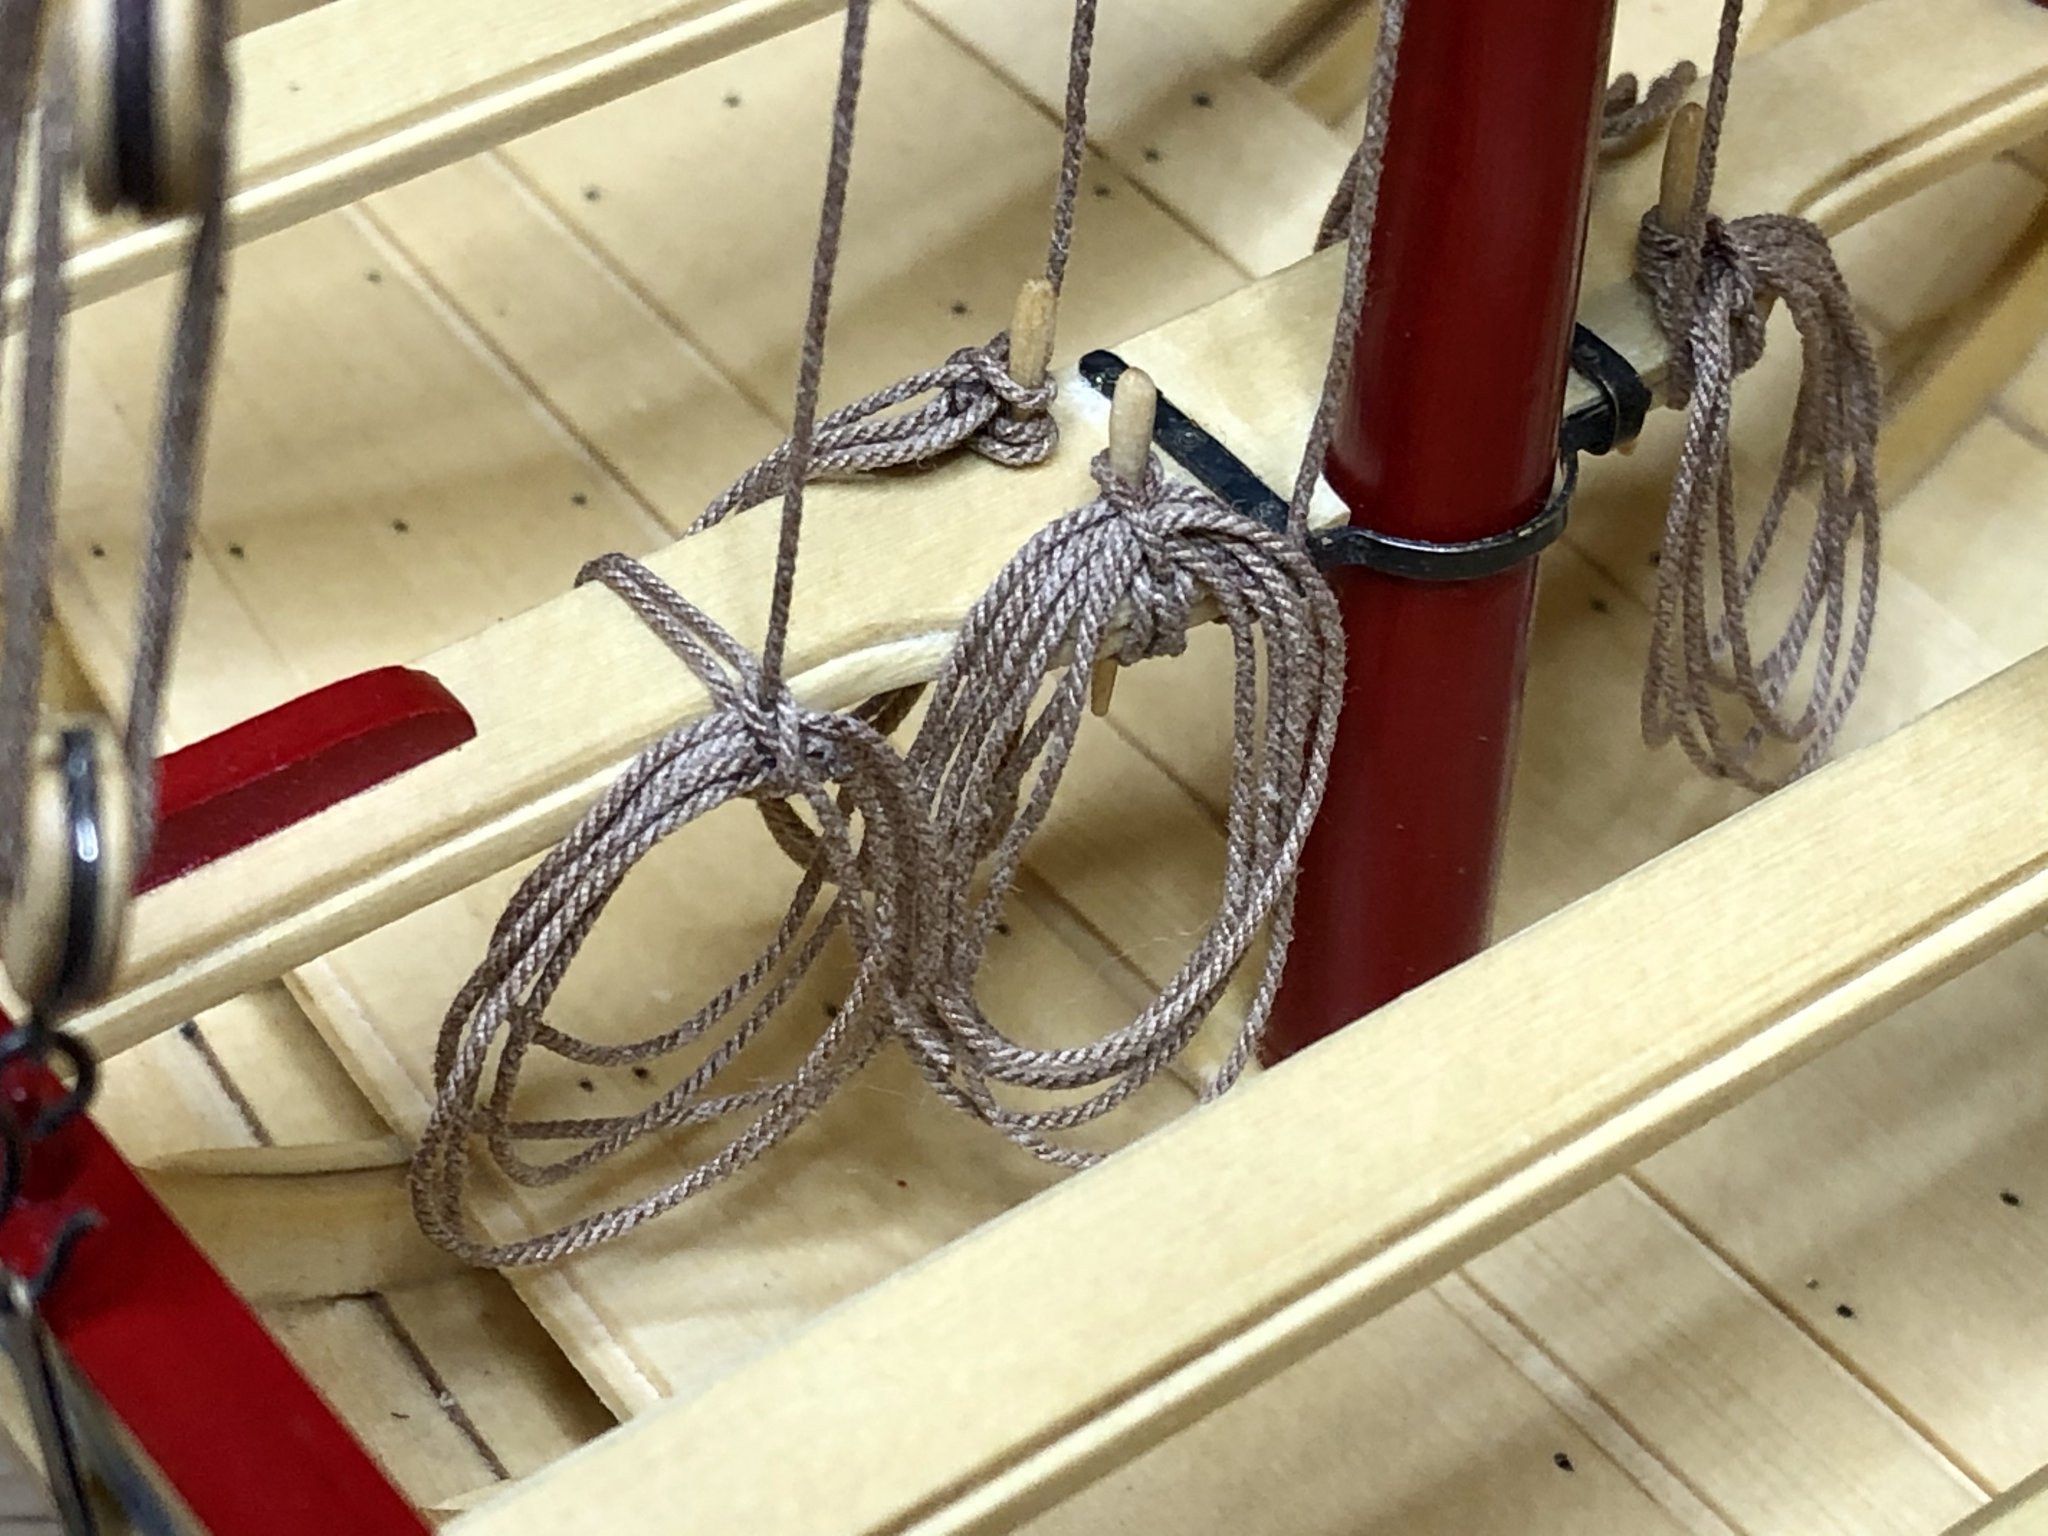
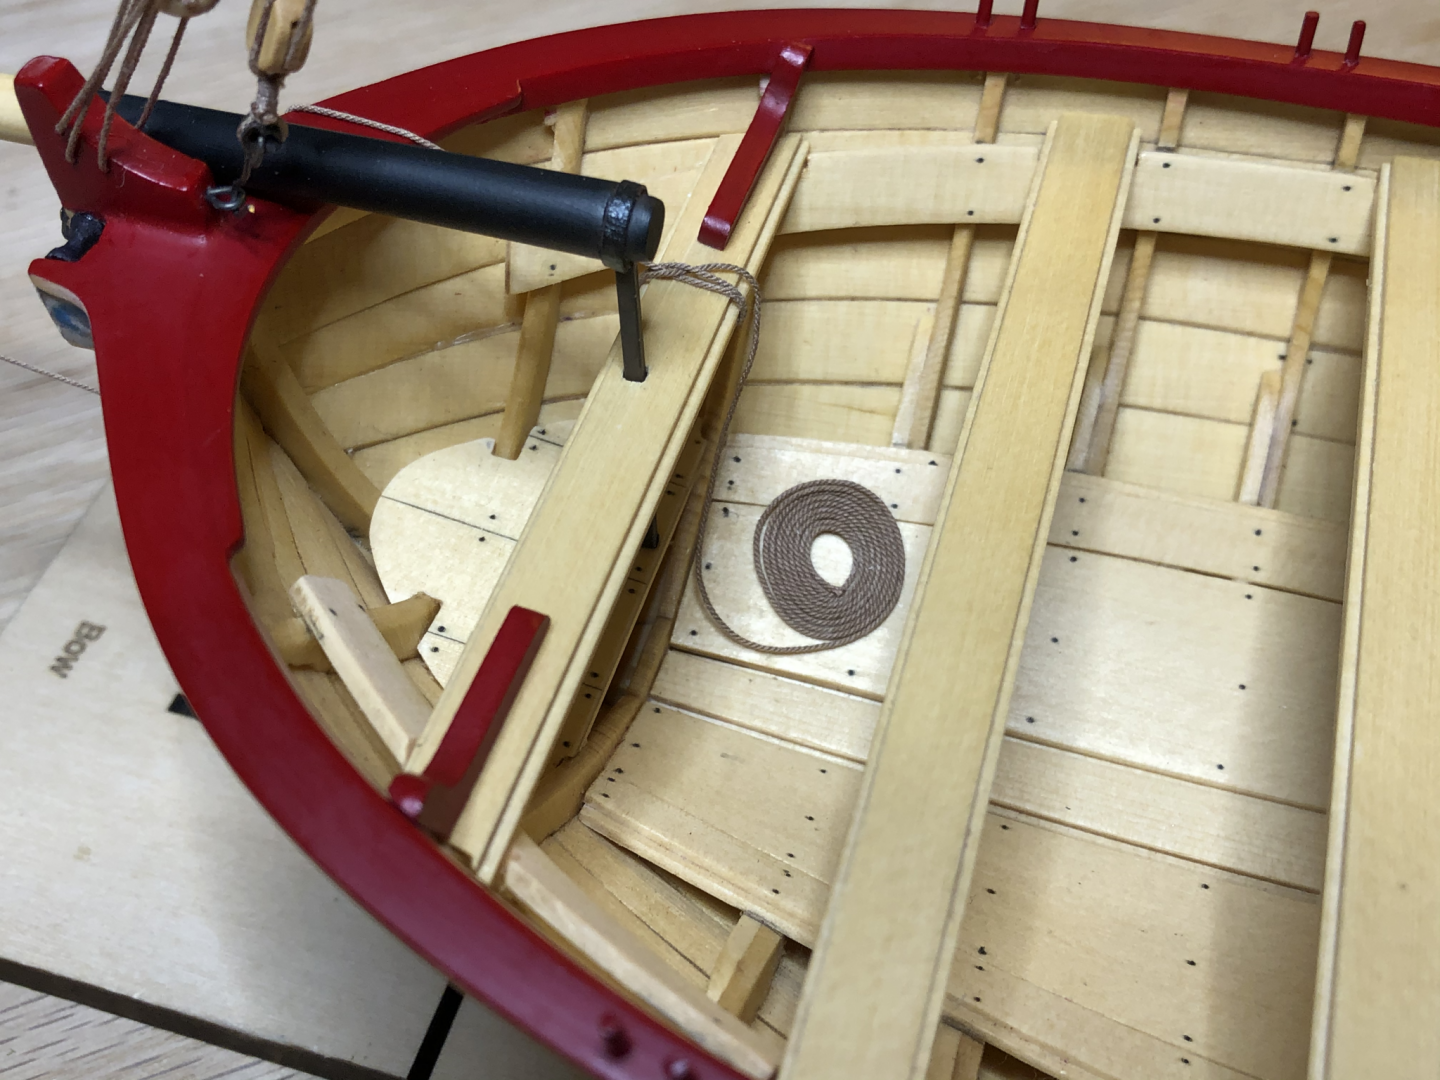
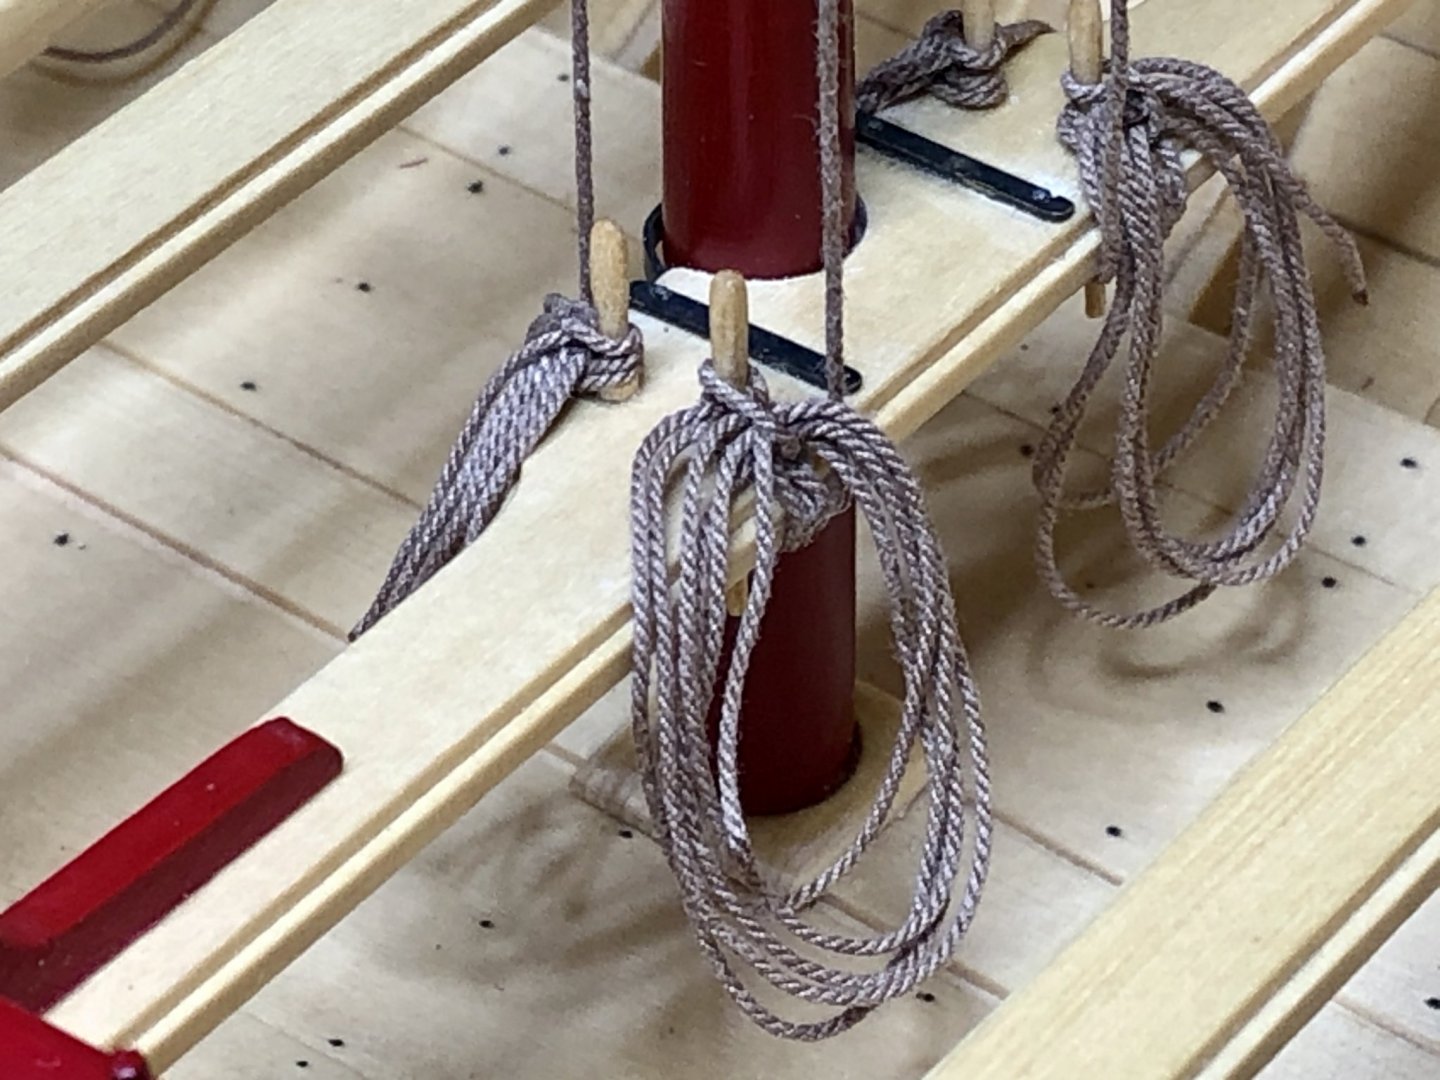
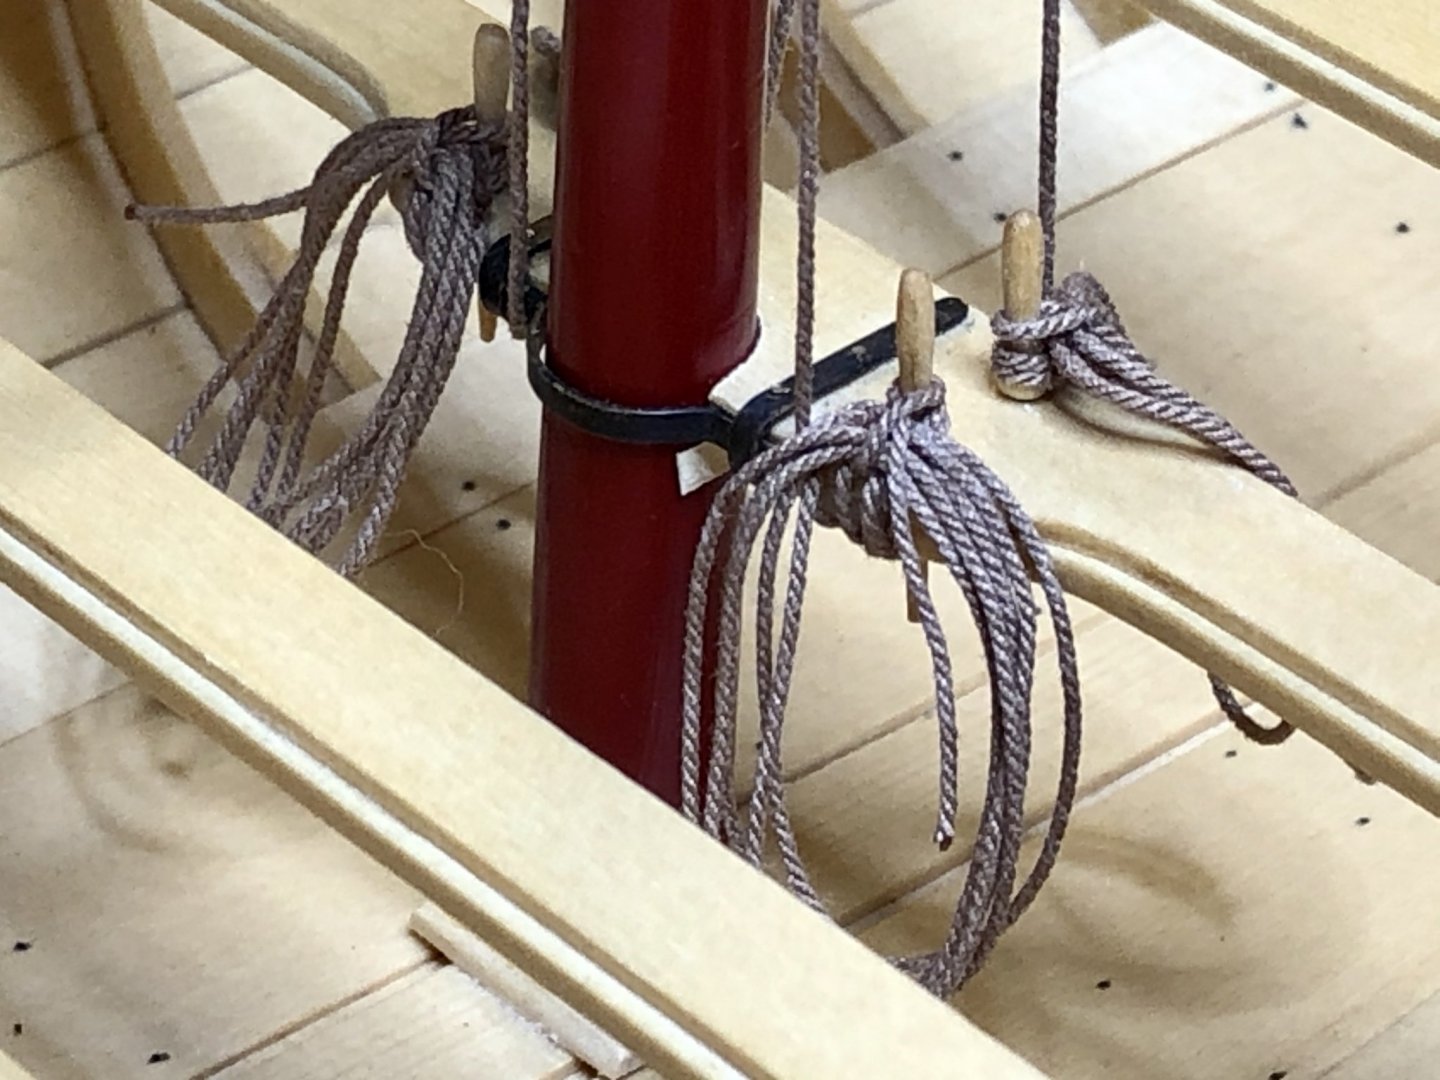
....and the rigging continues... Today was rope coil day on my build. I secured the boom, peak halliard, throat halliard, and the jib halliard lines to the belaying pins and made rope coils for them. I also secured the forestay halliard to the mast thwart since no more belaying pins were open and made a rope coil for it. Then I secured the outhaul to the bow thwart and made a flat deck coil for that rope and I did the same for the main sheet line. I always seem to underestimate how long a task in model ship building will take. I didn't think it would take be very long to secure the lines and make the rope coils but it was time consuming. It can be fiddly since there were so many shrouds and various lines to work around. I ended up using tweezers a lot. I took my time trying to make the coils look natural and not too perfect. I still have to make the coils for the backstay tackles. I also still have the flag to make and the flag halliards to rig and make coils for them plus I still need to make the grapnel too. I wasn't sure how to make the flat deck coils so here's what I ended up doing. I took a piece of blue painter's tape and laid the rope down in a circle on the sticky side of the tape while pinching it lightly with tweezers. I just kept coiling the the rope down starting from the outside and working towards the center. I left a bit of space in the center because I wanted a more natural look to the coils. Then I painted them with a thin coat of diluted white glue and let it set up for a few minutes before using an Xacto knife to lift the coil off the painter's tape before it got fully dry. It worked out pretty well. Here's a photo of how I made the flat rope coils: These are the coils I made for the lines secured to the belaying pins:


- 170 replies
-
- 6
-
-
- medway longboat
- Syren Ship Model Company
- (and 1 more)