DONATION DRIVE - SUPPORT MSW - DO YOUR PART TO KEEP THIS GREAT FORUM GOING!
×


ccoyle
-
Posts
10,520 -
Joined
-
Last visited
Content Type
Profiles
Forums
Gallery
Events
Everything posted by ccoyle
-
 Hold that thought. 😉
 -
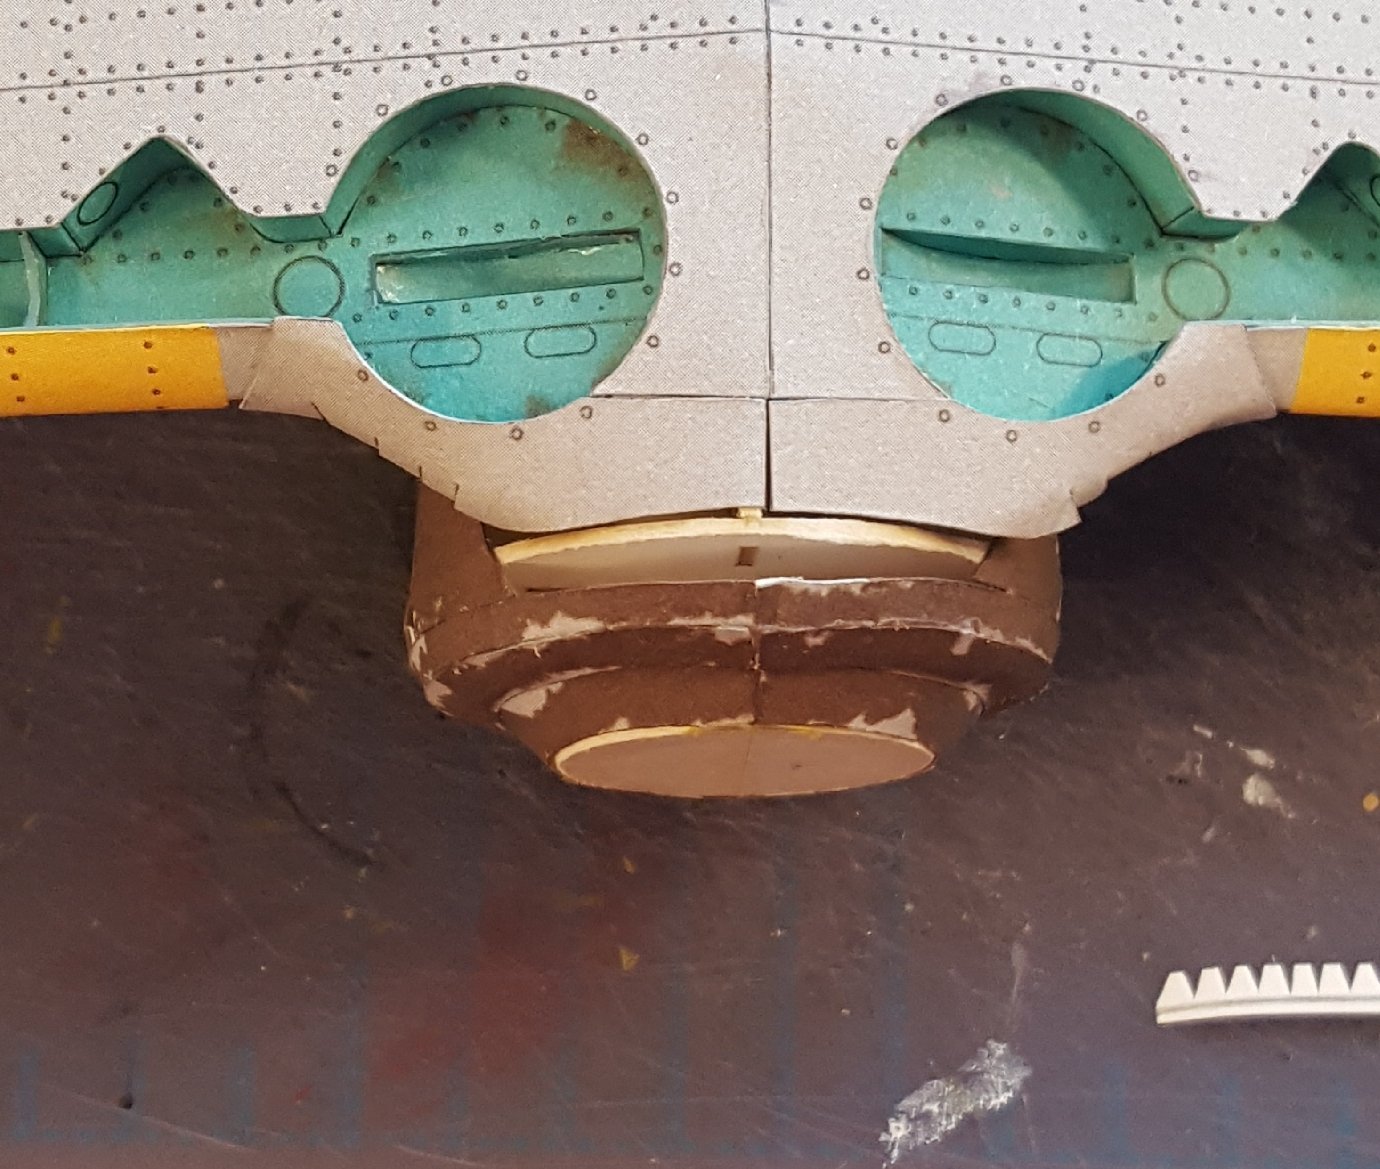
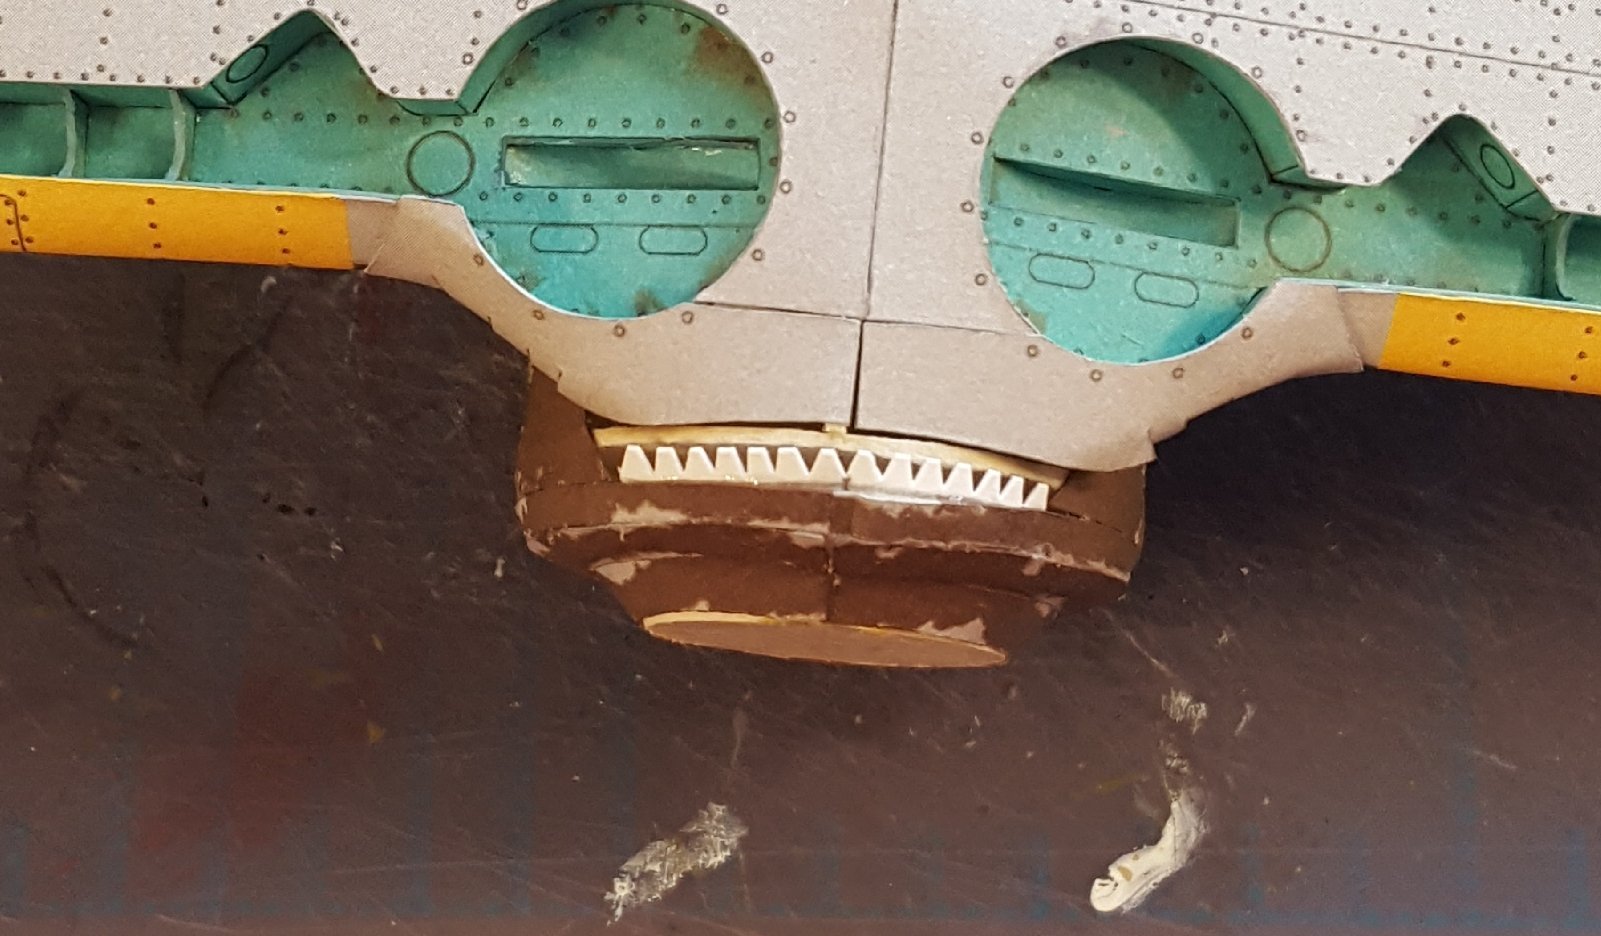
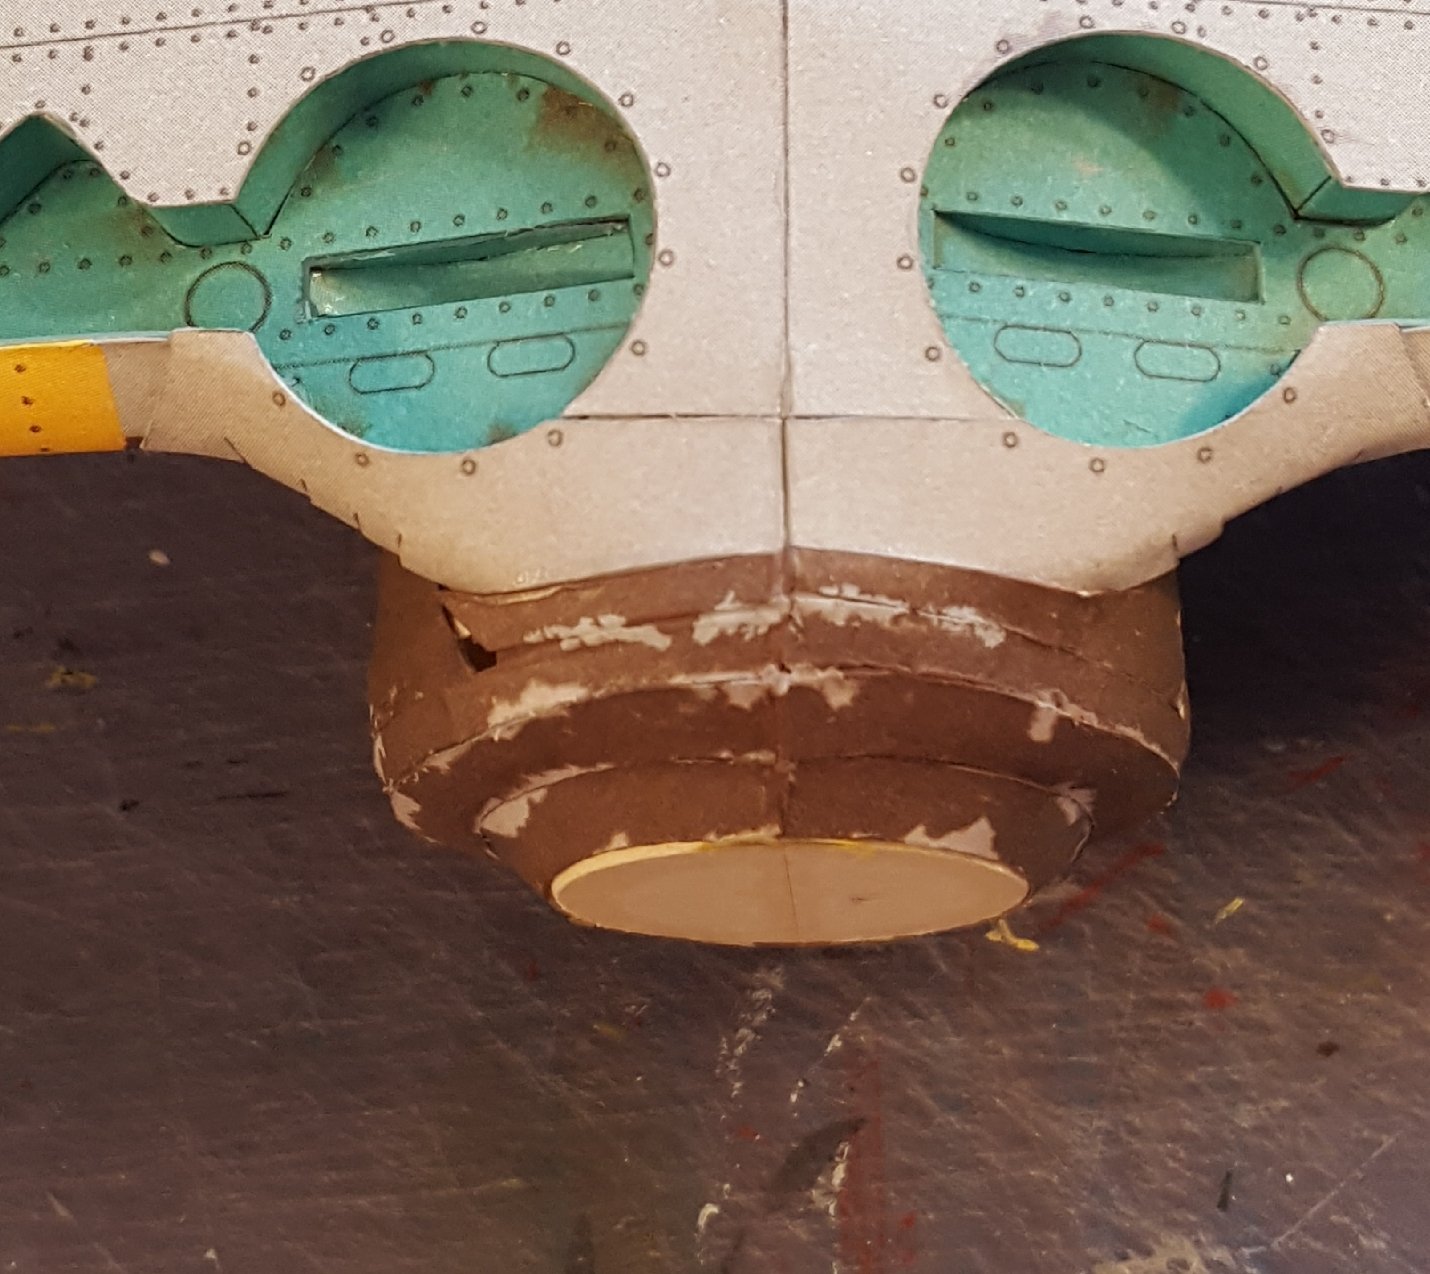
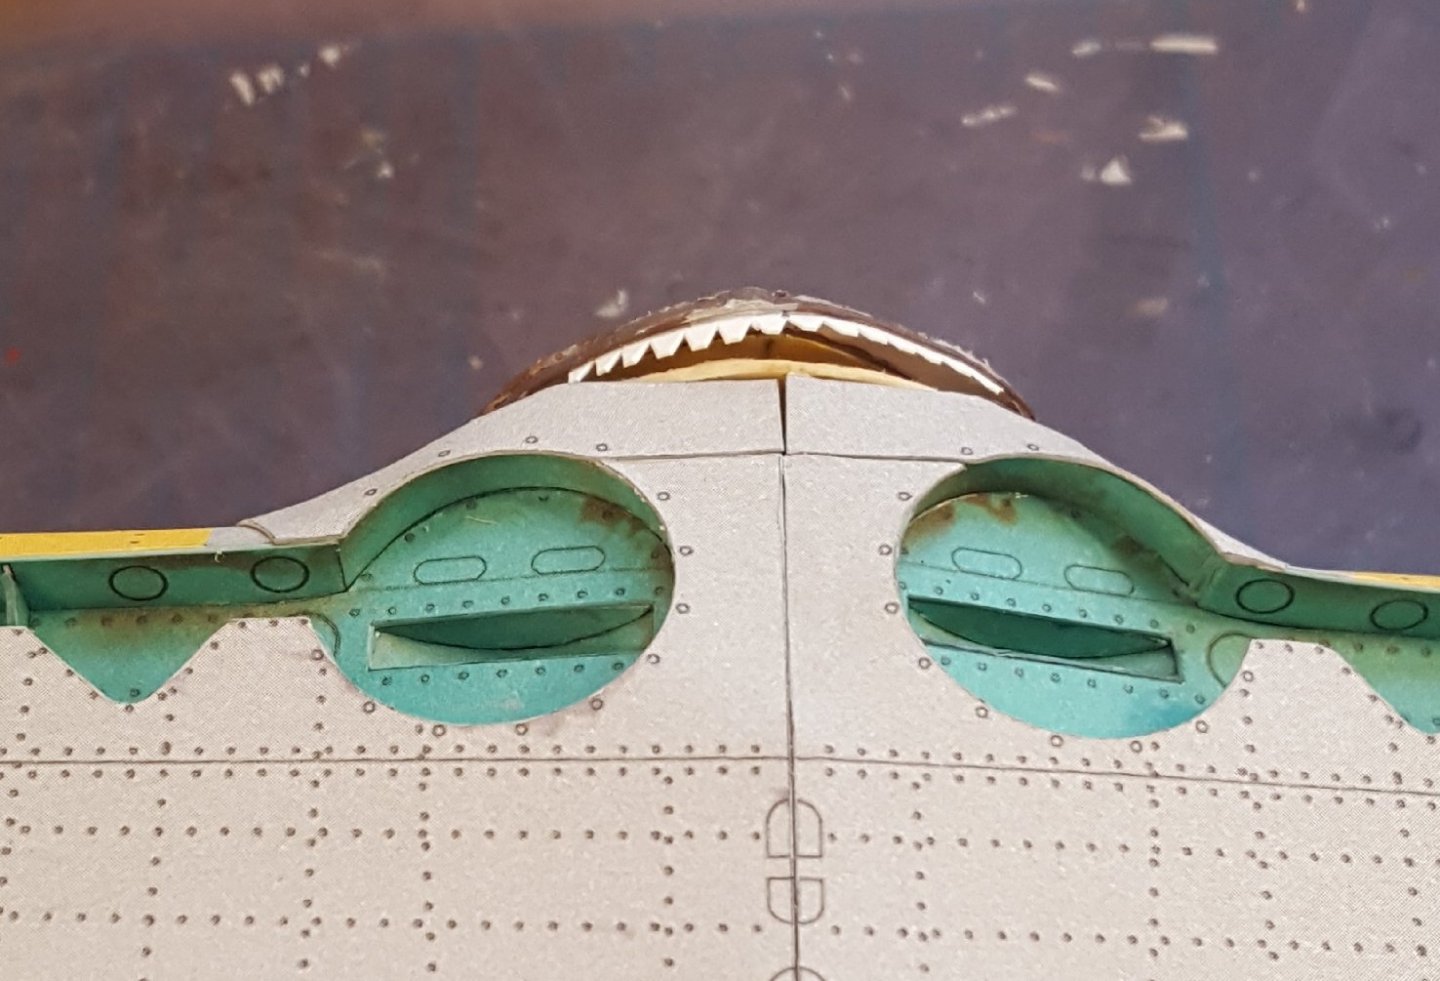
Okay, now things get a little ugly . . . First, the wheel wells were completed. You'll notice that there are a couple of pieces of fairing added to the front of them. That gap that was mentioned back in post #31 was not covered by these pieces. So, the first order of the day was to fill in this gap, beginning with a joiner piece cut from some scrap. But, as you can see in this shot, the ring that the joiner strip attaches to is too big. I had to snip the ring open, remove a bit of material, and then rejoin it so that the resulting skin structure could meet the underlying bulkhead properly. Once that was done, I had to create some filler pieces. I first made a template to fill the gap, then cut the fillers from one of the surplus color swatches provided in the kit. These were glued in and touched up -- some random "chipping" helps hide the surgery scars. And here's where it gets really messy. The wing fillets are made in two pieces. The larger aft piece (mostly obscured in the photo) actually fits well and was not a problem to install. Nope, the problem was with the smaller forward piece. There simply was no way that the fillet, the lower wing fairing, and the forward fuselage were going to meet properly. At all. Yet again, the diagrams did not present a clear view of this particular aspect of the build, meaning some guessing about the shaping was necessary, but even so, this joint wasn't going to happen cleanly. This brings back some rather unpleasant memories of my Yak-3 build, whose leading edge wing roots were also a major headache. Some filler is plainly going to be required here -- will report back later on the result.


- 125 replies
-
- 12
-

-
Well, if I can help tempt anybody, $70 for the POB II kit is really a steal, and the finished model can be quite spectacular.
-
Try a matte clear acrylic top coat.
-
I've got my fingers crossed for you -- just holler if you need any advice. I also read German, so let me know if you need something translated.
-
Mostly it's because bedtime is approaching. Sleepy modelers tend to rush and make mistakes -- it's best to know when to quit for the day.
-
A little more progress -- wing tips added and one wheel well built and installed. Parts for the second well have been cut out. You can see the rather torturous shape into which the wheel well wall (say that five times fast) must gently be shaped. I only had enough evening modeling mojo to complete one well.
- 125 replies
-
- 14
-
-
Very well done -- congratulations! I always appreciate seeing a model that is a little off the beaten path.
-
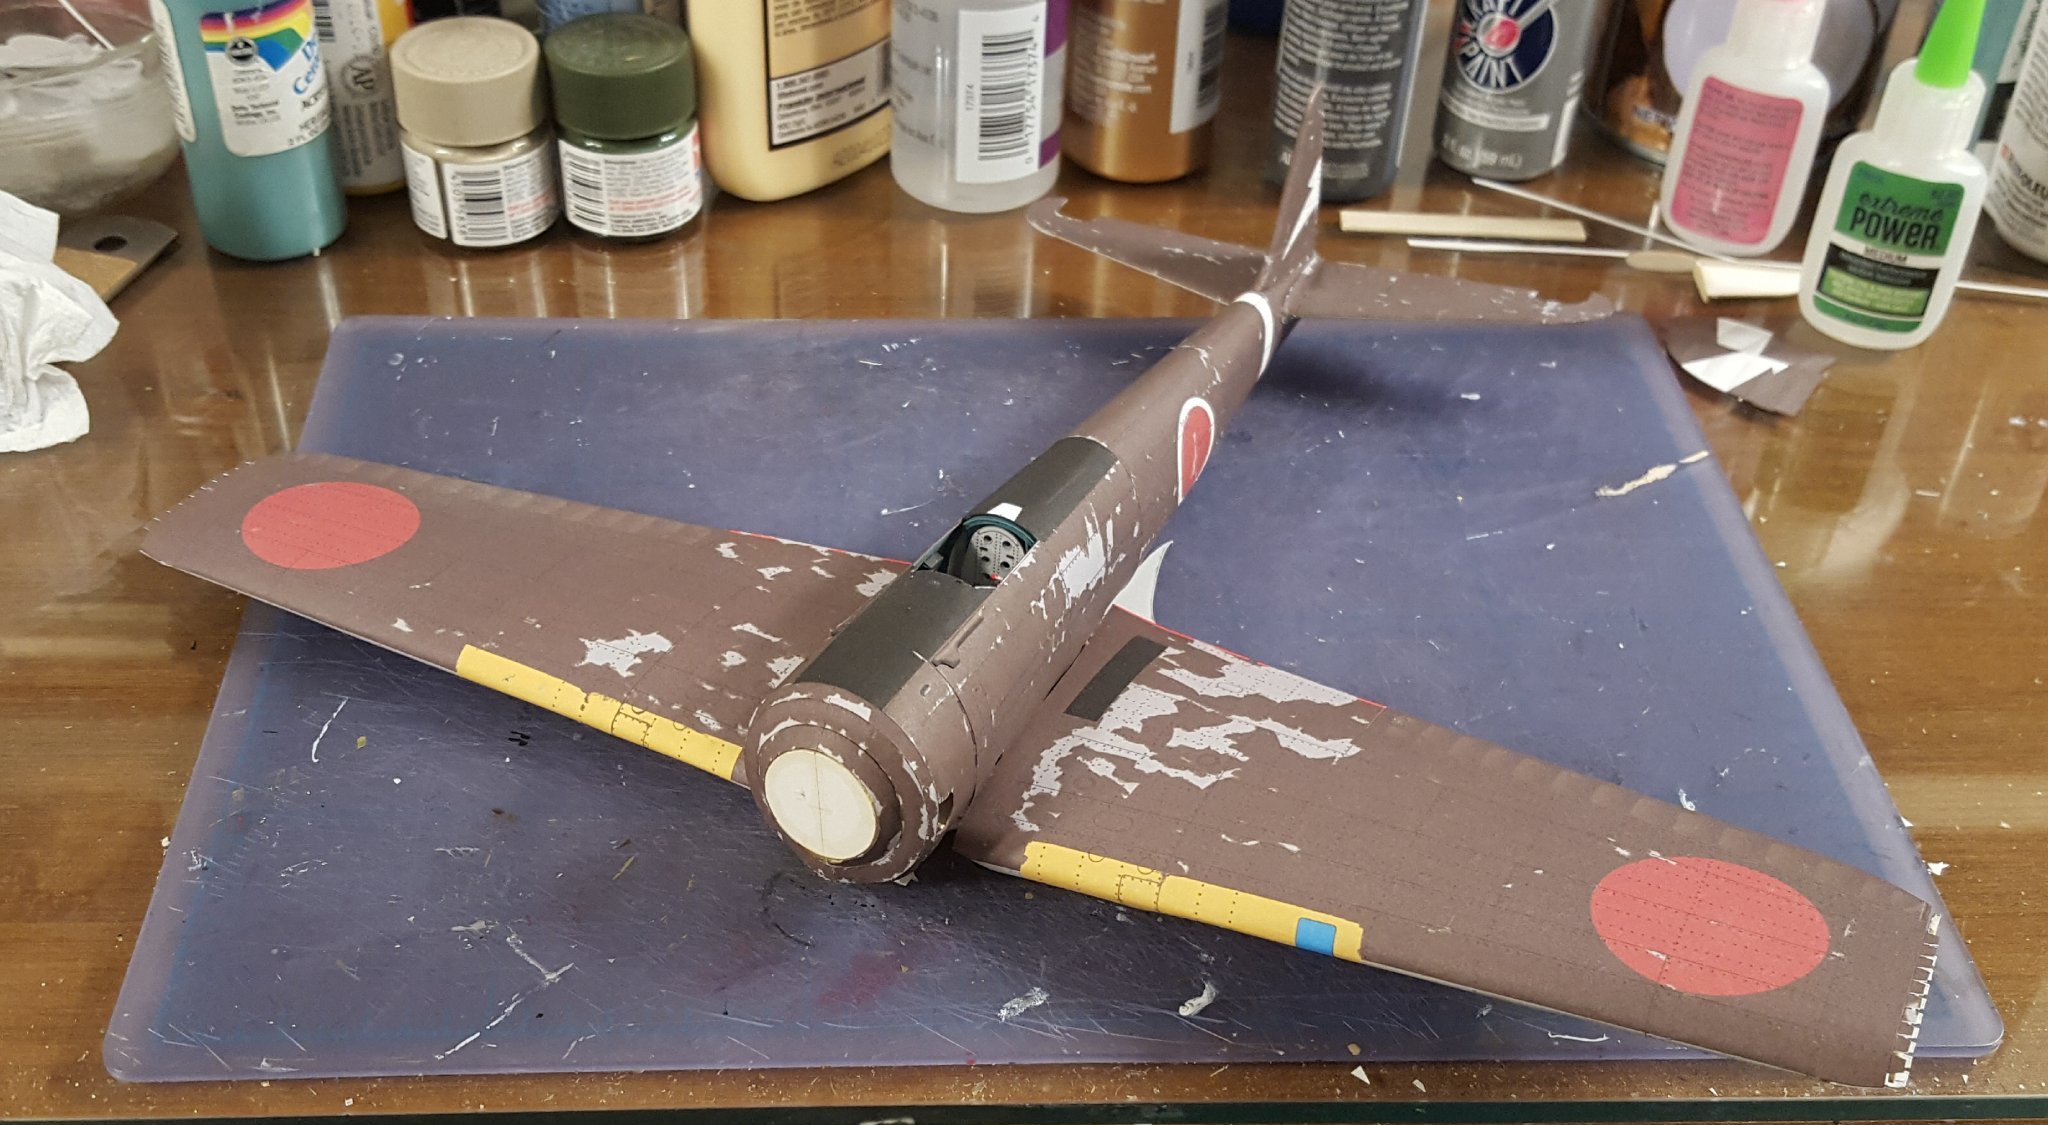
From what I've been told, the Japanese used a very poor-quality paint that chipped and flaked easily, hence the characteristic scruffy look.
-
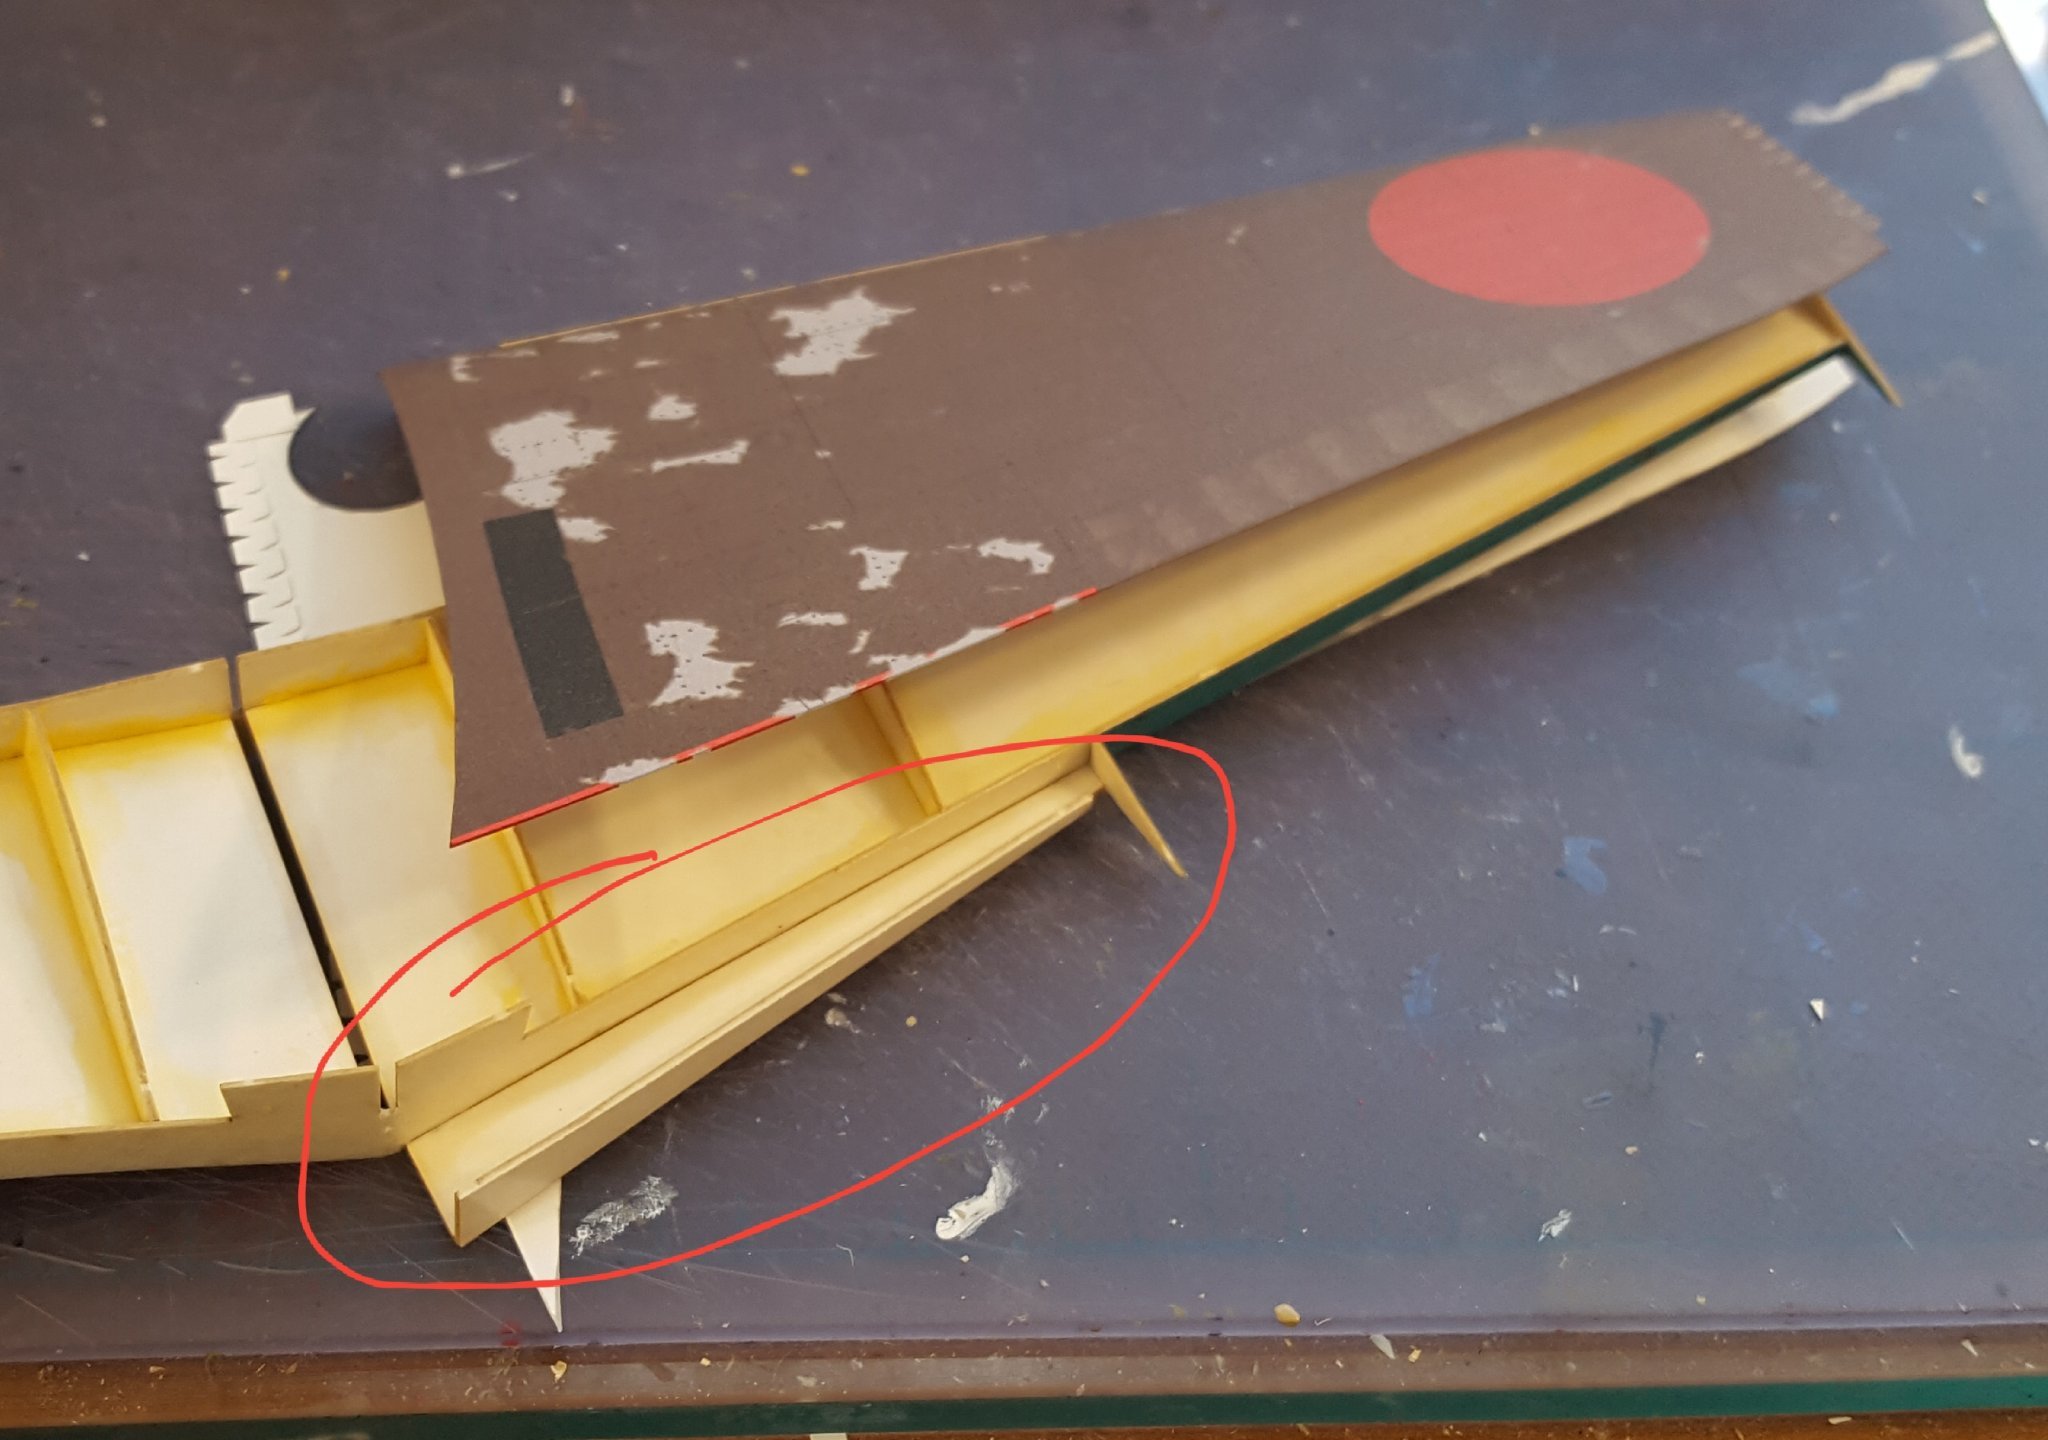
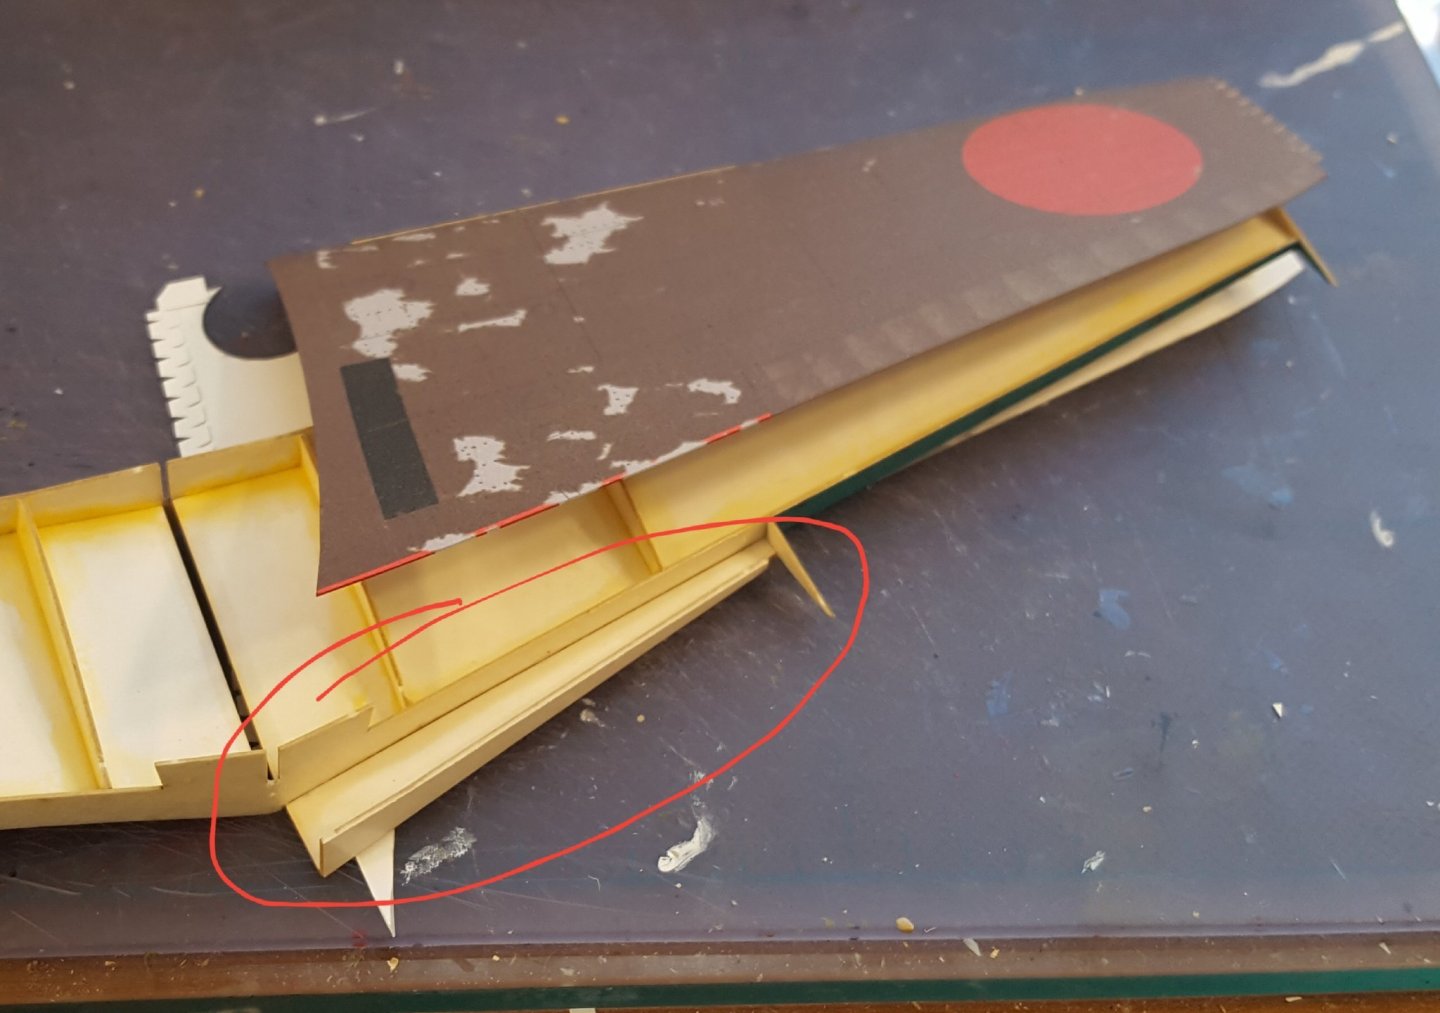
So, this trough-like structure (circled) is the best I could come up with for the aft skeletal pieces. Whether it's correct or not is debatable, but the wing skin does fit properly, and the skinned wing will fit the fuselage correctly -- as far as I can tell at this point. I won't apply the skins until after I have built and fitted the wheel wells. BTW, a strange detail of this kit's construction is that optional parts are provided to make the ailerons as separate assemblies. This wasn't an option for the rear control surfaces -- the rudder and elevators were printed as separate parts, so separate they had to be. I won't make the ailerons separately, as IMO there is little to gain visually by doing so, unless one chooses to display them in an up or down configuration, and building them separately allows more opportunities for boogering things. There are two completed examples of this kit at kartonowki.pl, and both of them have separate ailerons, but with the ailerons displayed level with the wing. You can judge for yourselves whether the reward is worth the risk.
- 125 replies
-
- 11
-
-
Frankly, I'm impressed by how much progress some of you guys have made on a kit that's only recently been issued!
-
All the time.
-
Actually, the situation I've run into is similar to what happened with the Mohawk, albeit on a different structure. Part of the wing construction hassle is that the perspective shown in the single diagram of the skeleton, which looks fore-to-aft, makes some aspects of the aft construction unclear, making a certain amount of guesswork necessary. To tackle this, I'm going to have to cut out and shape the wing skins to deduce where the contact points for some of the skeletal elements should be. Of course, I'll report later on whether this all worked out or not.
-
Well, a card model doesn't bear the same loads and stresses as a real airplane, but its builder does have to construct it without raising his blood pressure dangerously high, like this wing might be doing. 😆
-
Each wing is one piece except for the wingtips. Like most low-wing monoplanes, each wing will have a long fillet along its root where it joins the fuselage.
-
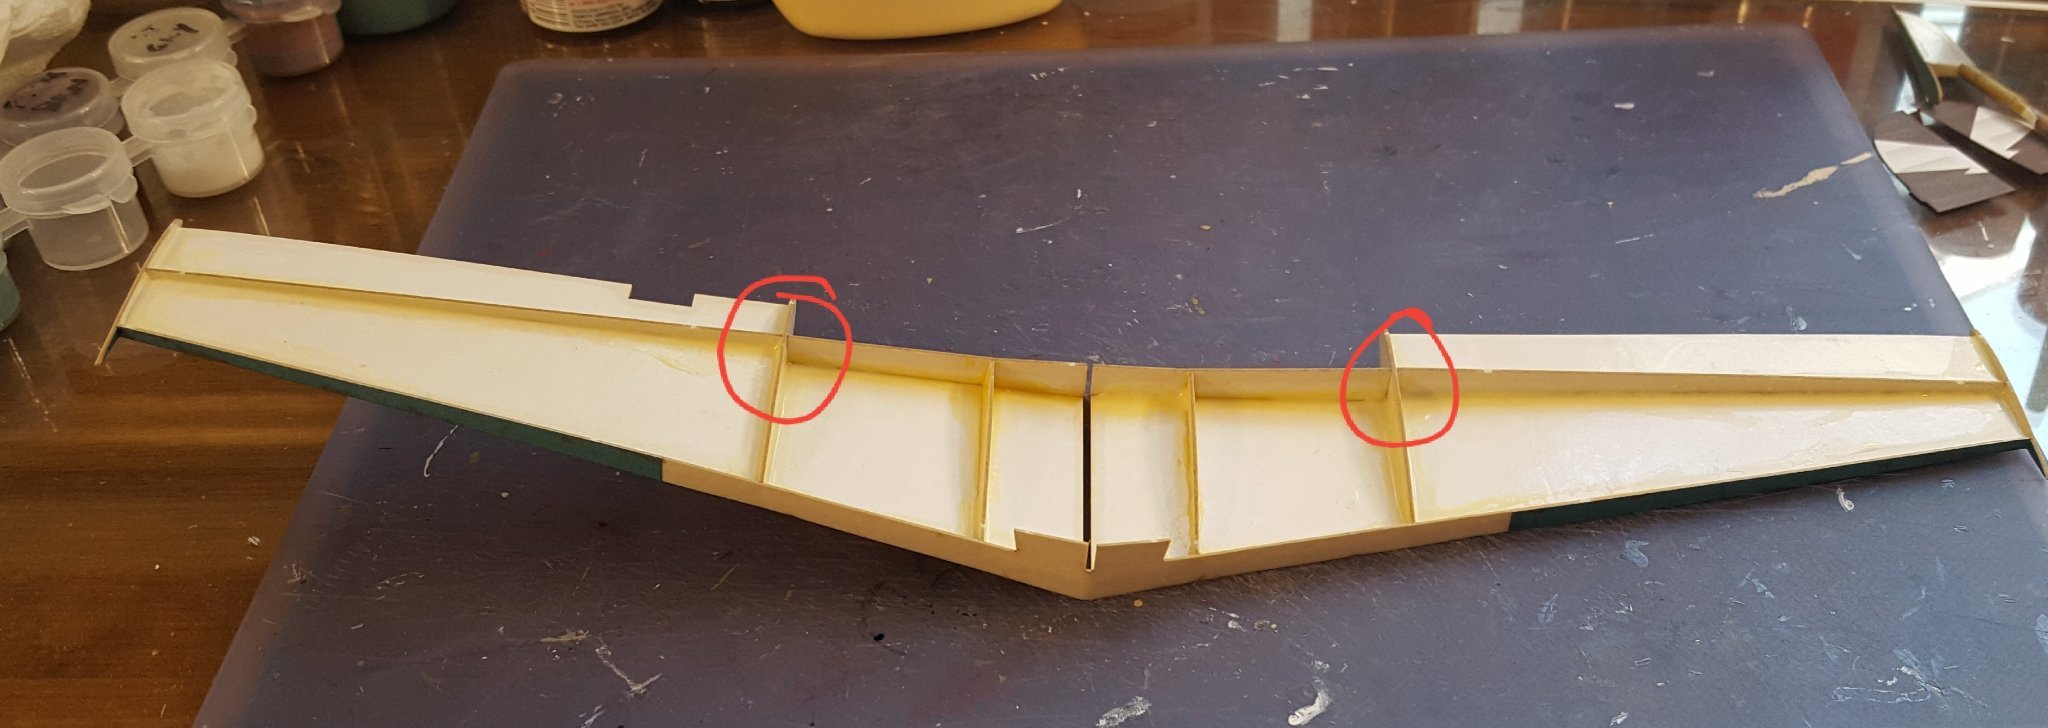
Working on the wing skeleton. This has been a less than enjoyable part of the build. One problem has been that there are only two interlocking joints in the entire structure (circled); the rest are butt joints. Butt joints might not be all that bad except 1.) most of the joint locations are not marked, neither on the kit parts nor on their laser-cut replacements, and 2.) white glue and wood glue have both shown a remarkable inability to "grab" the laser-cut cardboard quickly, forcing me to tack the parts with CA and then reinforce with wood glue afterwards. Oh, and 3.) the two main spars are each a single, long, FLOPPY piece. So, non-grabby glue + no locator marks + floppy parts + almost no interlocking joints = 🤬. But it's done.

- 125 replies
-
- 11
-

-
-
Hello from the foothills in North Carolina
ccoyle replied to Tewhano's topic in New member Introductions
Welcome, Tewhano, from your neighbor to the south. I hate to be the bearer of bad news, but since your last forays into model ship building some rather unsavory characters have come on the scene in the form of unscrupulous manufacturers who shamelessly copy wooden model kits and then sell them. Your Halcon is made by one of these companies, which are mainly (though not solely) located in China. Please have a read here to learn about our stance on model kit piracy. If you want to have a crack at a kit in a larger scale, not to mention a kit that is far superior quality-wise, give us a shout, and we can direct you to any number of reputable manufacturers and dealers. Cheers! -
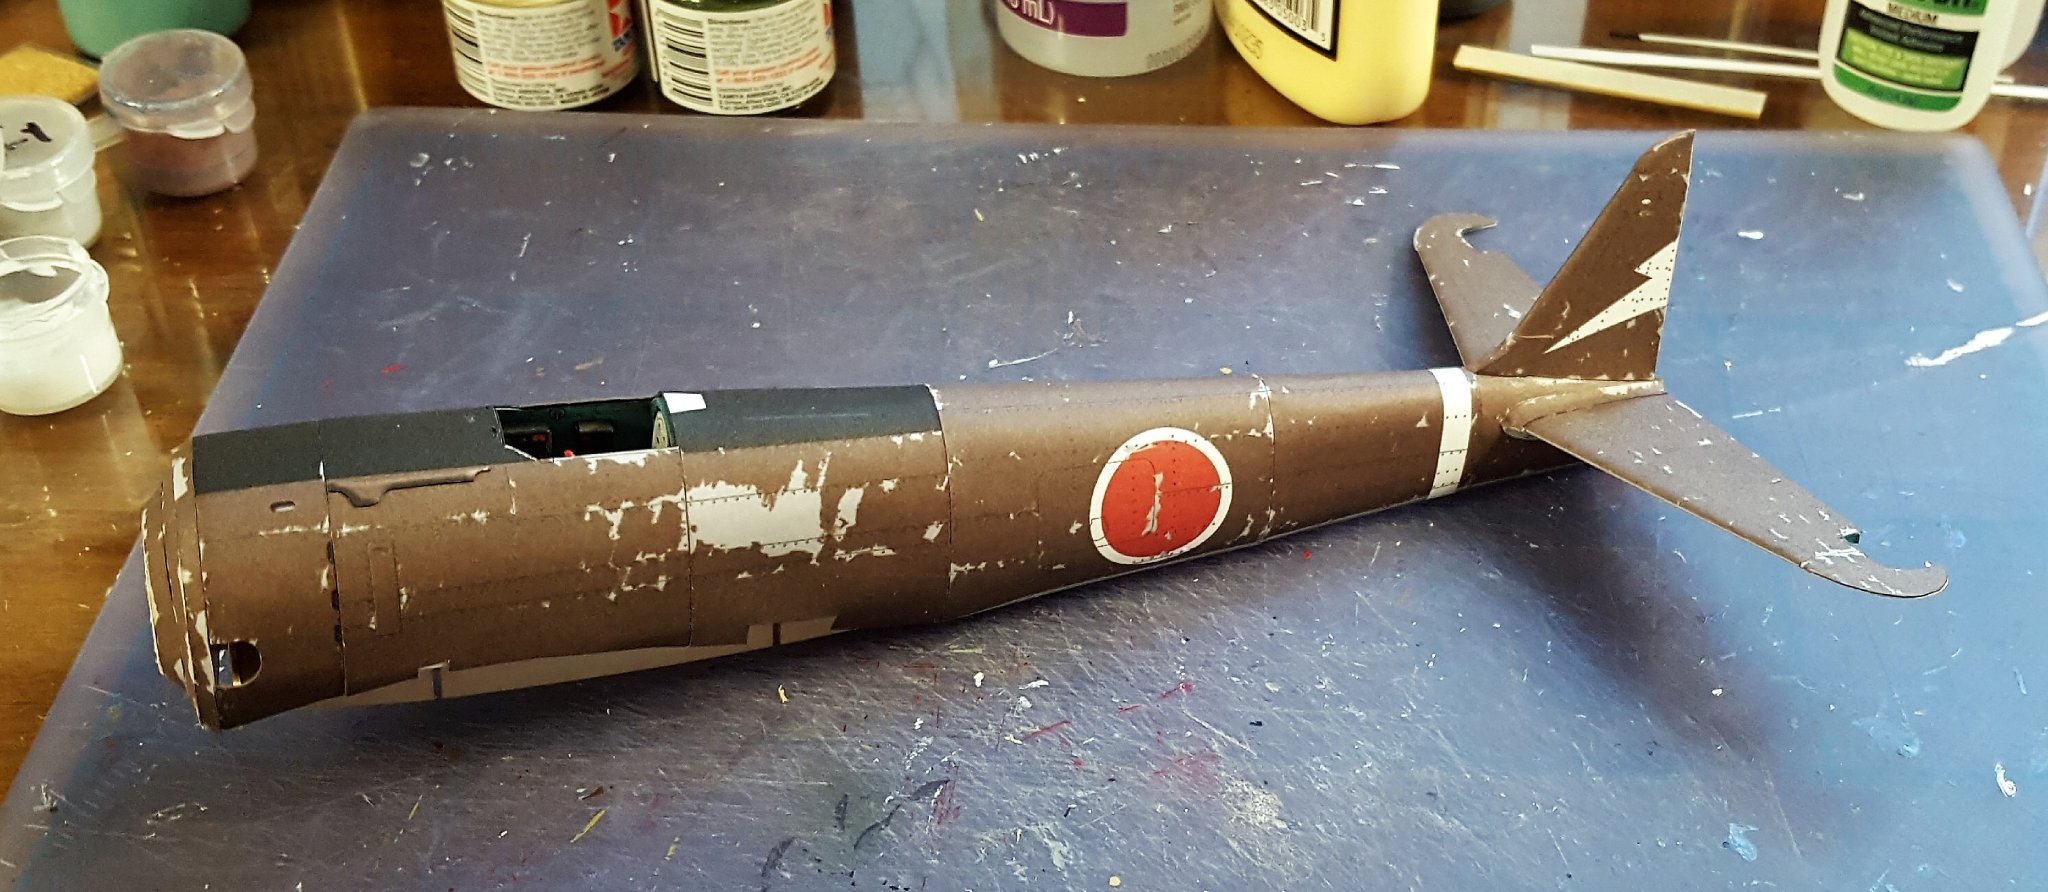
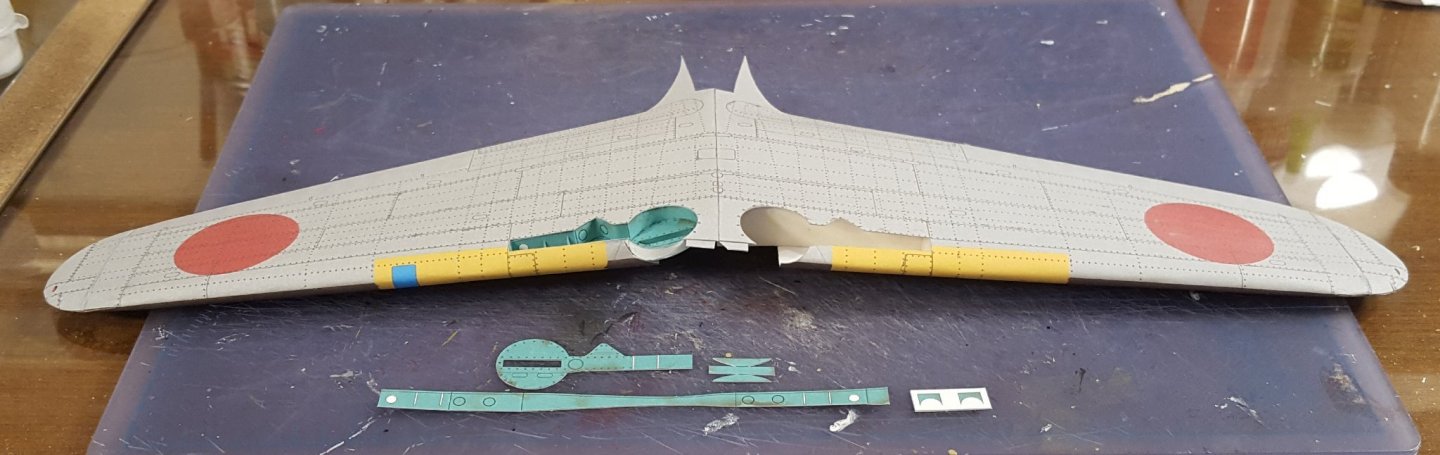
All stabilizers mounted and fillets in place. In order to counter the slight offset of the horizontal stabilizers, I had to add a tiny bit of dihedral -- normally the stabilizers lie in the same plane, but here they will tilt up just a smidge. The difference will only be noticed by the geekiest of airplane geeks. My wife just now asked about why the plane looks so scraped up. 😆

- 125 replies
-
- 13
-
-
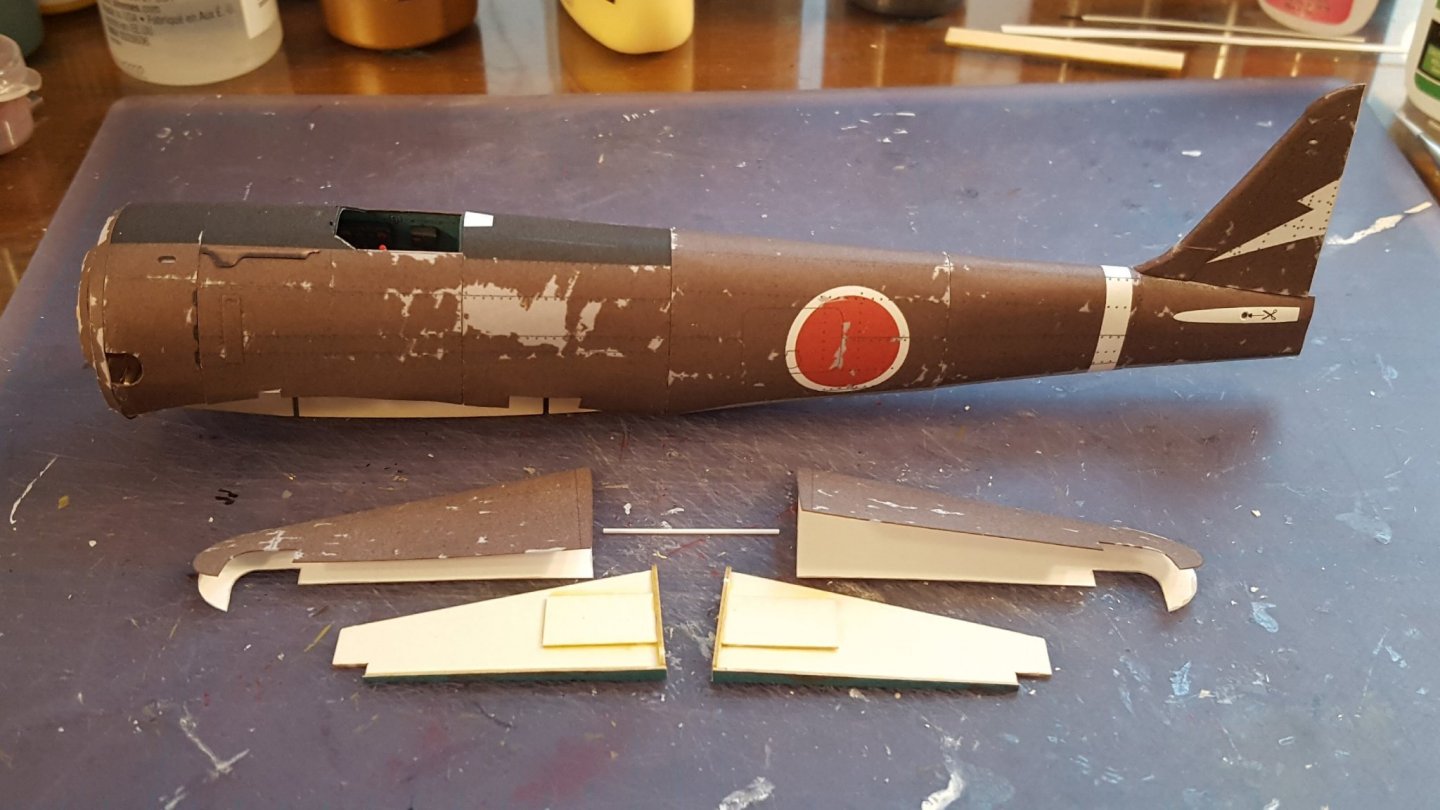
Burnin' a vacation day today and getting a little work done before settling down to watch some World Cup qualifying. I made a slight error with the vertical stabilizer which I did not catch until after it was done -- the vertical frame piece is supposed to set inside the skins about 1 mm back from the edges instead of flush. You can see the difference by looking at the aft edges of the stabilizer and fuselage. Hmm . . . oh, well. Horizontal stabilizer sub-assemblies completed and ready for final assembly.
- 125 replies
-
- 12
-
-
Greeetings from Italy, Sardinia Island
ccoyle replied to Ugo Crisponi's topic in New member Introductions
Welcome! I love the figurines -- some very skillful painting on display there! -
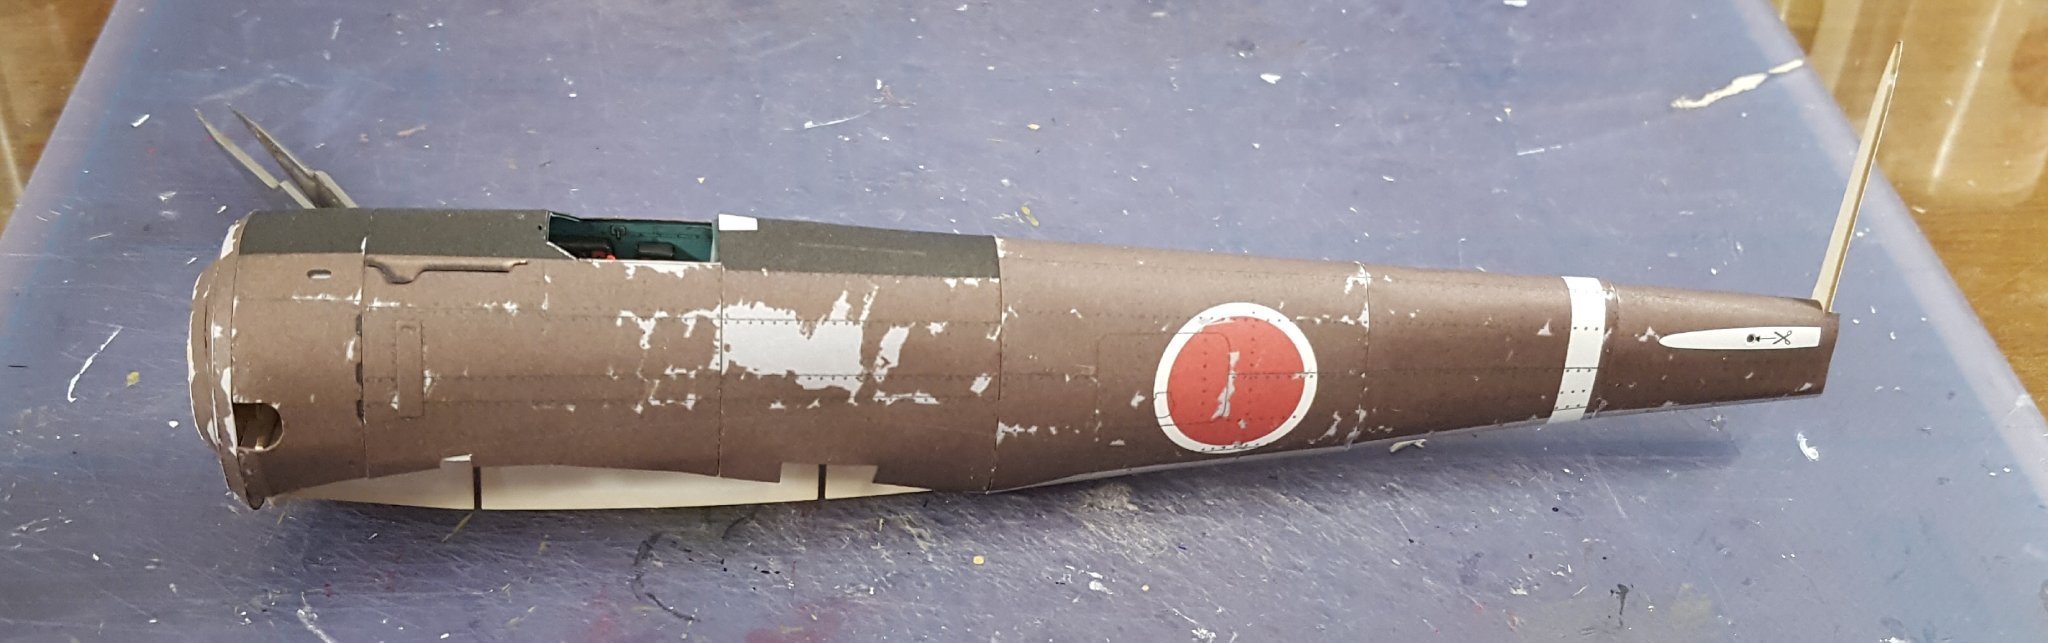
Fuselage complete. Had to do a little nipping & tucking to get everything together to my satisfaction, but managed in the end. There's something weird going on with the empennage section -- the little center-line tick mark on the top and the bottom seam both line up properly with the section in front, but the printed horizontal stabilizer areas are not level. The port side is about 1 mm higher than starboard. But I'll deal with that later.

- 125 replies
-
- 14
-
-
Rotary tool recommendations, preferences
ccoyle replied to Steve116's topic in Modeling tools and Workshop Equipment
I don't build them, but I bought one a couple of years ago so I could hunt an extra ten days in SC. Never once even saw a deer whenever I took my BP rifle out. 😢 Anyways, the real reason I chimed in on this thread is to say that I own a Dremel tool with a flex shaft attachment. I used it quite a bit when I was building wooden kits. I soon ditched the flex shaft -- it worked fine, but I just preferred working without it. Now that I'm working mostly in card, I rarely use my Dremel, but it does work nicely for turning aircraft wheels. As others have pointed out, you do have to pay attention to what you're doing when using a rotary tool for tasks like sanding, as it can very easily and quickly remove more material than intended.