ccoyle
-
Posts
10,527 -
Joined
-
Last visited
Content Type
Profiles
Forums
Gallery
Events
Everything posted by ccoyle
-
 For anyone interested, these are high-quality kits, and difficult to come by in the present geopolitical climate.
 -
See post #1 in the "Mandatory - for sellers" thread.


-
Potential buyers always appreciate a few images, if you can post them.
-
I have had similar mixed results with CA and EZ-Line. I now use Evergreen Canopy glue whenever possible. I still have to do a 30-second count, but at least most of the time I get the desired result.
-
MV Mountwood by MikeBerk - FINISHED
ccoyle replied to MikeBerk's topic in - Build logs for subjects built 1901 - Present Day
Great work! -
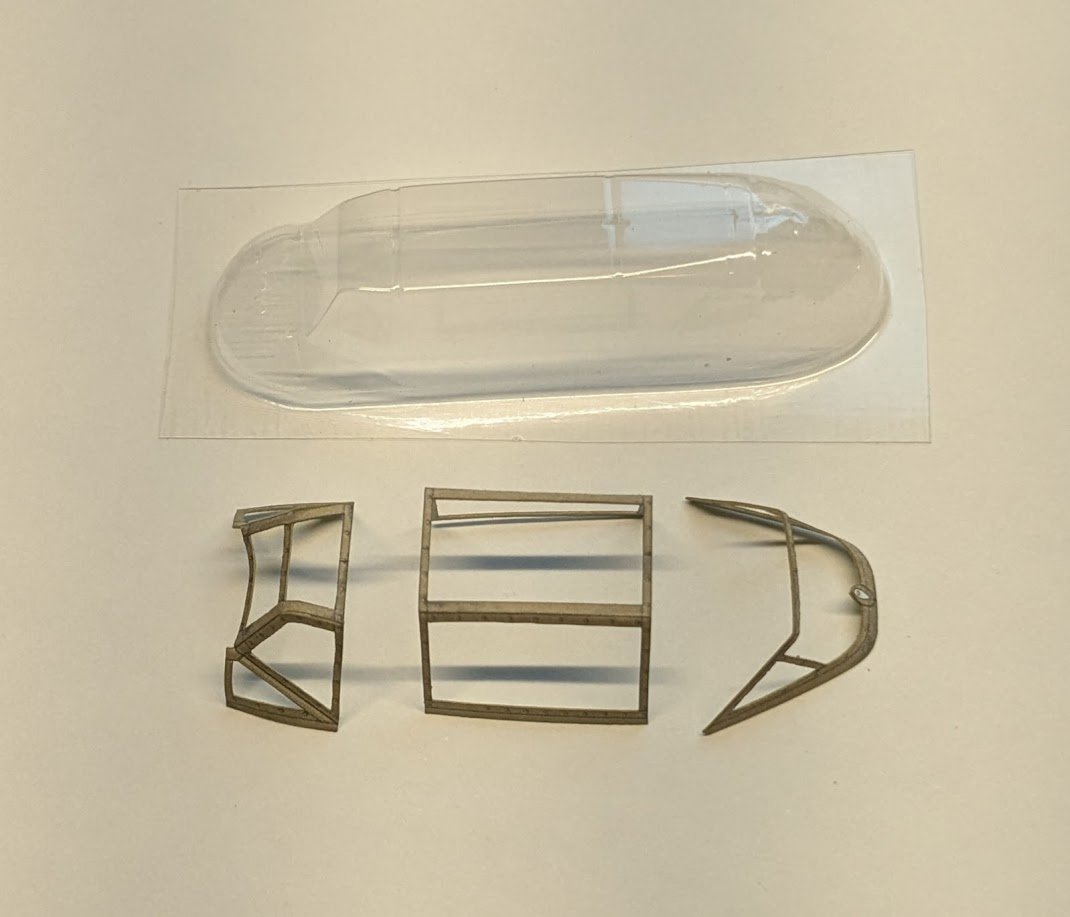
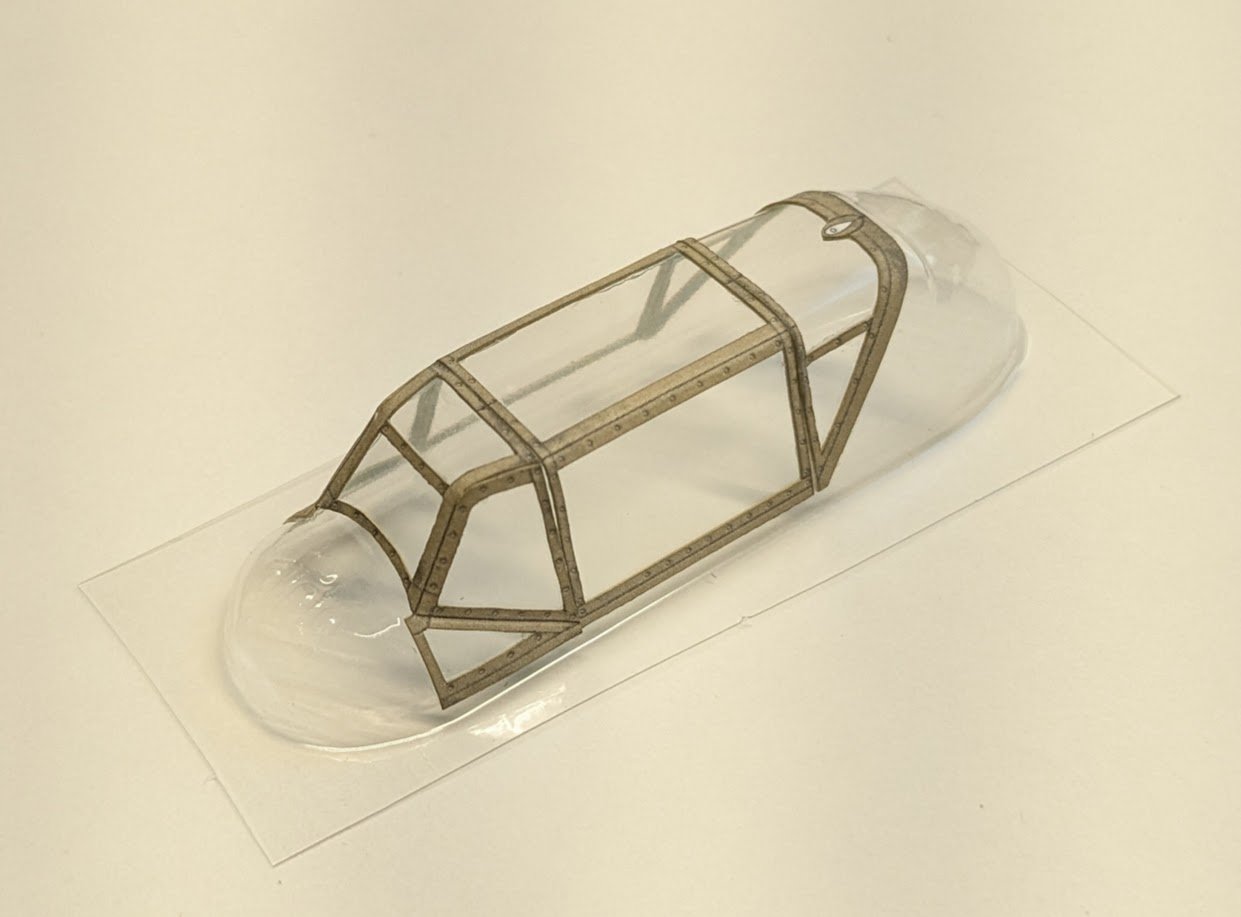
We are now into the home stretch. The major components are done, and there remain only a few bits and pieces. Some of it is tiny details that are easy to overlook, and others are not so easily overlooked -- like the canopy and propeller. Here is the canopy in progress. The kit includes both inside and outside frames. I have always found inside frames very difficult to do. Not only are they hard to position properly inside the molded canopy, but aligning them with the outside framing is nearly impossible, for me at least. And after all the effort, the interior framing is never something that stands out to the viewer. Solution: I use only the exterior framing, but I paint the interior color on the back side before gluing the framing to the canopy. This helps with the illusion that there is interior framing when in fact there isn't. And all glued up: Canopy glue requires 24 hours to fully cure, so I will resist the urge to mess with this until at least tomorrow afternoon. The canopy flexes quite a bit while cutting it out, so a full cure is required to help prevent separation of the frames from the canopy. Before adding the canopy I will need to build and install the gun sight as well as the armored headrest, which is a feature that was not found on the earlier E-4.
- 85 replies
-
- 18
-

-

-
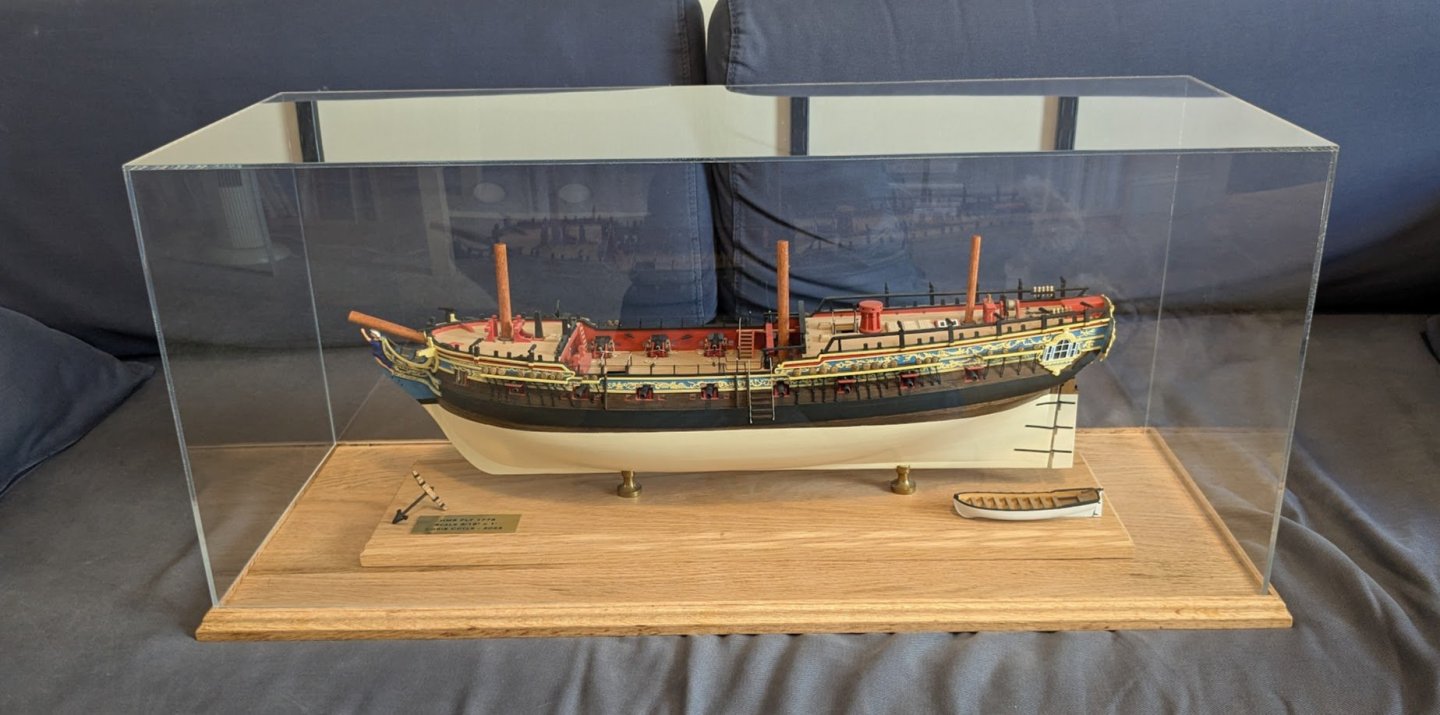
Finally, finally got around to having a base built for the dust cover, which I have had for at least a year, possibly more. With that, Fly is officially cased and done for realz now.
- 69 replies
-
- 24
-
-
-
- fly
- victory models
- (and 2 more)
-
Beautiful model, Rick! I have split your posts into a separate topic to avoid the misconception that this model is the same model as in the other build log. Cheers!
- 14 replies
-
- 1
-
-
- portland
- BlueJacket Shipcrafters
- (and 1 more)
-
Mamoli's Blue Shadow rigging question
ccoyle replied to johnhoward's topic in Masting, rigging and sails
Hi, John. I have split your query off into a separate topic. I can't answer whether the Blue Shadow is over-hatted, but on the question of British vs. French practice, I would lean towards British, since she's a colonial vessel. -
Beautiful boat -- looks like a CLC Chester Yawl.
- 72 replies
-
- 1
-
-
- Seguin
- BlueJacket Shipcrafters
- (and 2 more)
-
A very novel subject and well executed!
-
Looking very good! You did well with the stern gallery castings. Sometimes such castings provided in kits look a little clunky, but I think the bronze color here and the warm wood tones complement each other nicely.
-
We can't stay mad at our fur babies forever, can we?
-
It does look like a wonderful way to see some country!
-
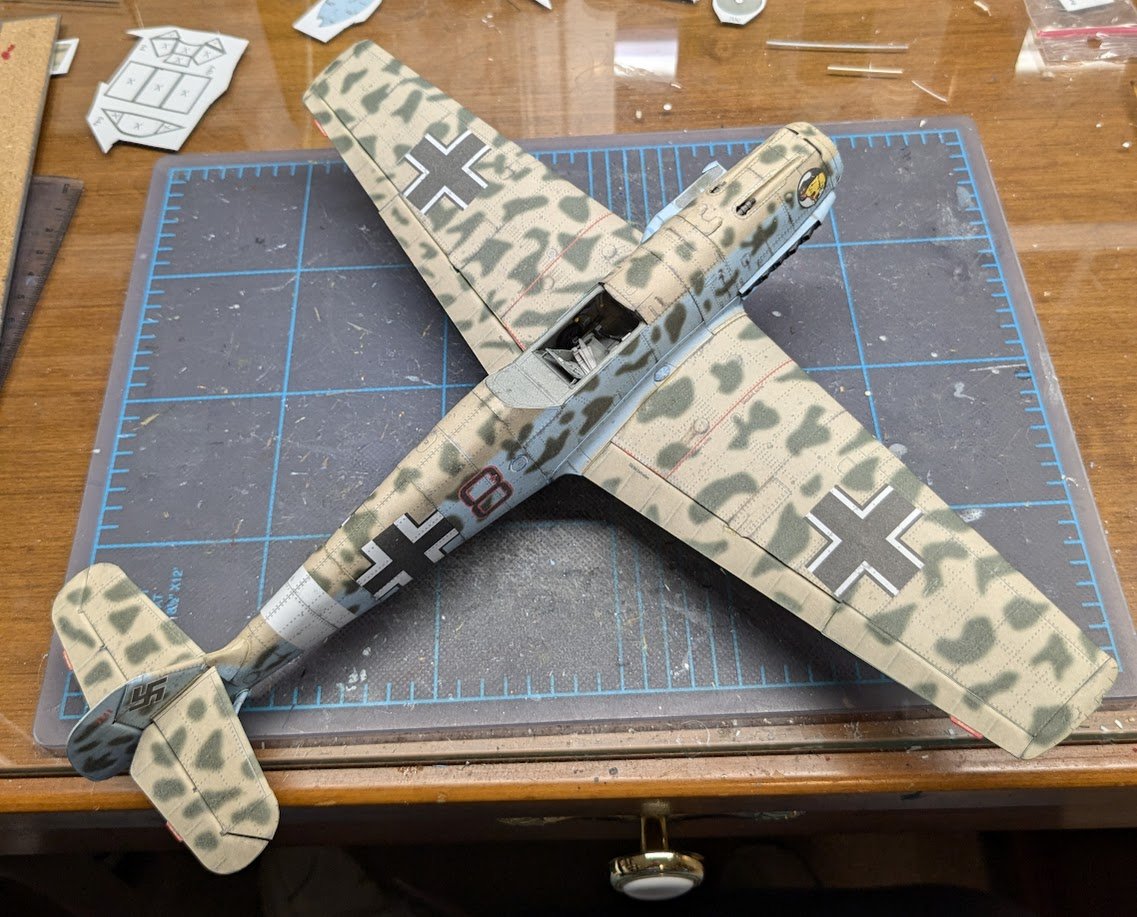
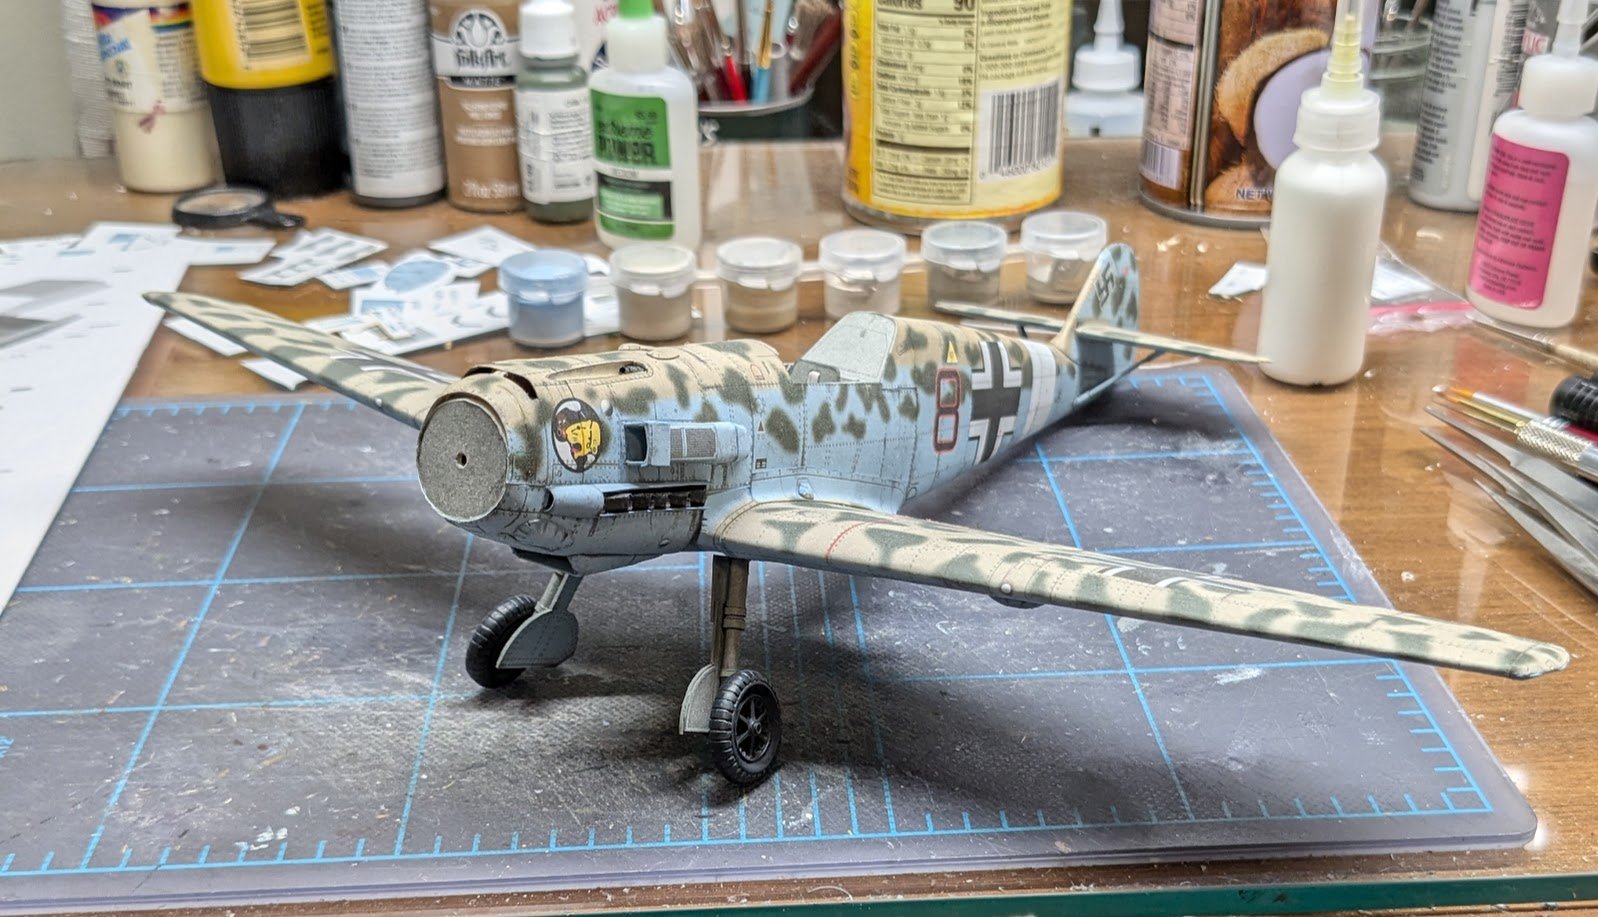
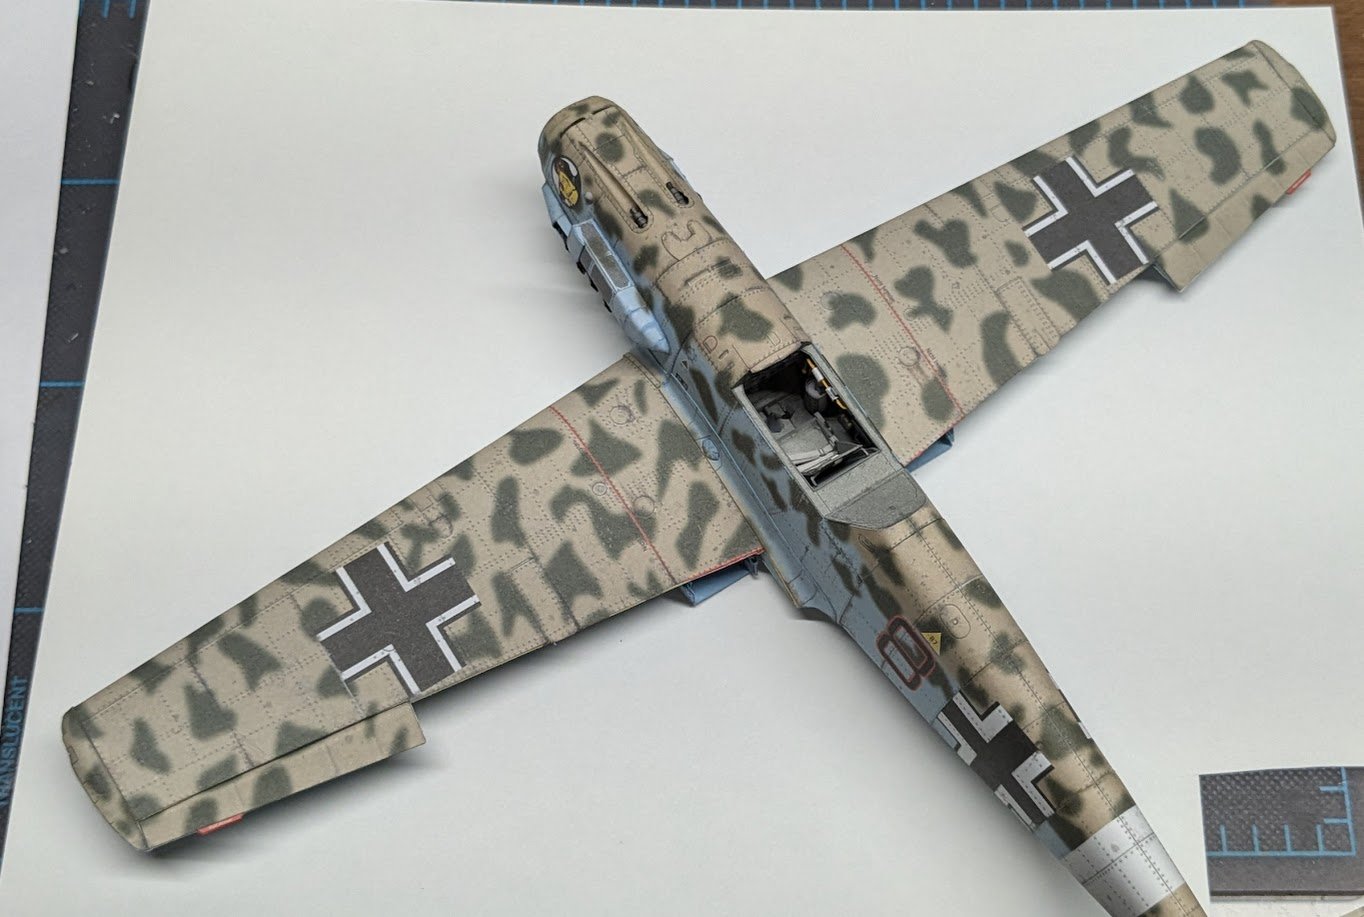
I know that some of the plastic gurus have jigs for aligning everything, but I just do it by eye. One gear is canted slightly farther forward than the other, but I think I got the angle between the struts more or less correct. She sits with wings level, which is a good sign.
-
Sorry to hear about the ship burn-out, but trains are a very enjoyable alternative! Hope you find some buyers soon!
-
Absolute beginner here - new to ship modeling
ccoyle replied to AlanR's topic in New member Introductions
Welcome aboard! -
Model builder's wife, upon viewing [insert name of junk item here]: "I think this needs to go (in the trash / to Goodwill)." Model builder: "But that could come in handy for a model some day!"
- 185 replies
-
- 8
-

-
- Flying Dutchman
- Black pearl
- (and 2 more)
-
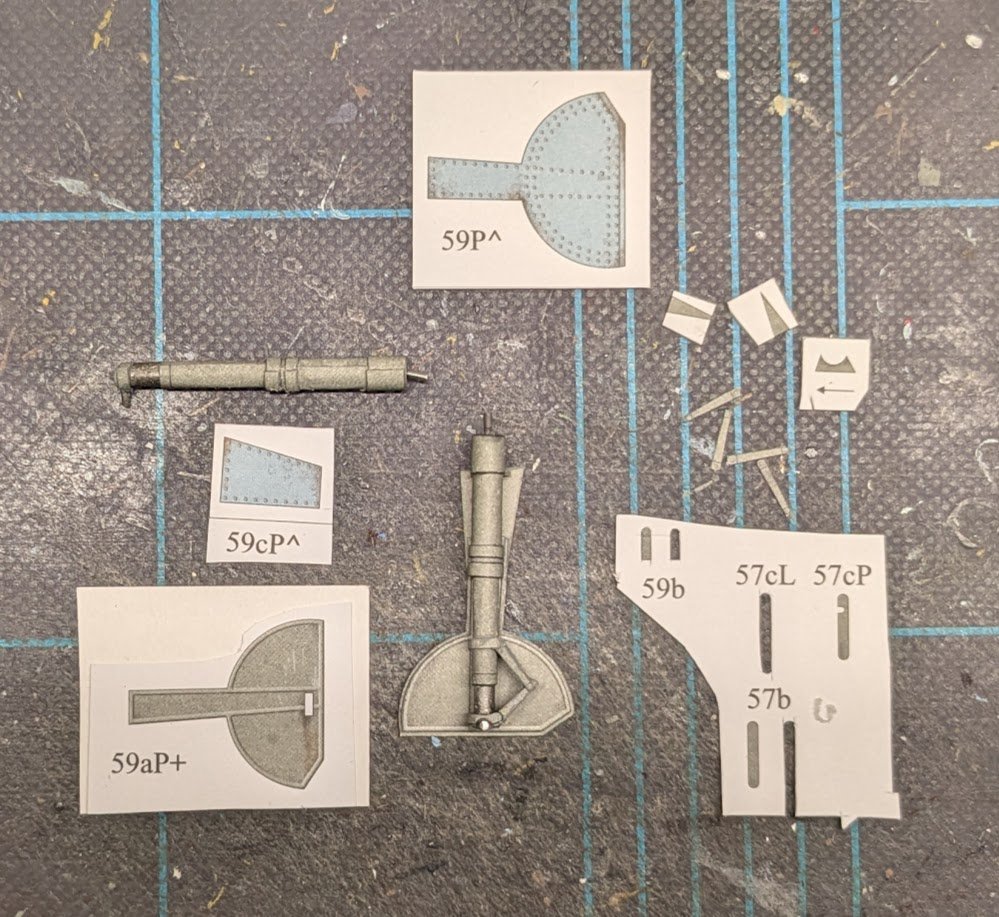
Here's what I've managed to get done today. First, both ailerons are complete. And I also managed to get one landing gear done, along with its doors (16 parts). Now of course I have to do the whole landing gear assembly process one more time. 😵💫
- 85 replies
-
- 13
-
-
Don has nailed it -- the tackles would have been stowed when the ship wasn't in action. Also bear in mind that lots of stuff on a ship model is 'optional' to some degree -- if you wish to display a tidy deck sans tackles and rope coils, then by all means do so.
-
Just catching up on your project -- that's some exceptionally skilled craftsmanship on display!