ccoyle
-
Posts
10,587 -
Joined
-
Last visited
Content Type
Profiles
Forums
Gallery
Events
Everything posted by ccoyle
-
Regardless, she is an official Goodwill Ambassador for the City of Baltimore and does sail on the Chesapeake, so she meets the OP's criteria.
-
 I built the motorized King Tiger way, way back in the day.
 -
Use 'FINISHED' in the title (all caps), but 'done' as a tag. I probably fixed most, if not all, of those already. All part of what I get paid handsomely for. 😉
-
Lots of possibilities out there. Baltimore clippers are common kit subjects, e.g. Pride of Baltimore II from Model Shipways. Wye River Models also makes a number of kits featuring Chesapeake Bay work boats.
-
Hey, Rik, I had to remove your tags. Not because I'm mean, though. See here.
-
I agree, but I don't see much there to get excited about -- a small selection. most of which are available from other manufacturers already. Meanwhile, untold thousands of ship and boat subjects still have no representation at all in the wooden kit world.
- 1 reply
-
- 4
-

-
Handsomely done!
-
I fixed it for ya. Looks like you're off to a good start.
- 27 replies
-
- 1
-
-
- Gjoa
- Model Shipways
- (and 1 more)
-
Welcome aboard!
-
Try getting hold of a copy of Ship Modeling Simplified by Frank Mastini. It's often available in public libraries as well as being easy to find (and cheap) online. The book is a bit dated in some respects, but it's still a good introduction to the hobby.
-
New member with broken Ship in need of a professional restoration
ccoyle replied to a topic in New member Introductions
Welcome, James. I have moved this to the new members intro section and spruced up the title. -
That looks quite nice, actually.
-
Welcome aboard, Toni! I have tagged your log as a first build -- this lets members know that the builder might need that little extra bit of encouragement. One bit of advice I would give is to avoid using the brass nails. If left in, they will make sanding an onerous chore, being harder than the surrounding wood. I use push pins (with drilled pilot holes) to temporarily tack first-layer planking in place. Cheers!
-
Welcome aboard, Brian!
-
Congratulations, Reg! She's a real beauty.
- 137 replies
-
- 2
-
-
- winchelsea
- Syren Ship Model Company
- (and 1 more)
-
Interesting discussion with a younger coworker who saw a picture of my Pup fuselage. Coworker: "What is it?" Me: "A Sopwith Pup. You know the Pup?" Coworker: "No." Me: "Well, do you know the Sopwith Camel? The Pup was the Camel before there were Camels." Coworker: "No." Me: (slightly incredulous) "Really? Well, how about Snoopy? Do you remember that Snoopy was always pretending to be a World War 1 flying ace?" Coworker: "Yeah." Me: "Snoopy flew a Sopwith Camel." Coworker: (realization dawns) "Oooh." I live to enlighten my coworkers. 😅
- 54 replies
-
- 18
-

-
-
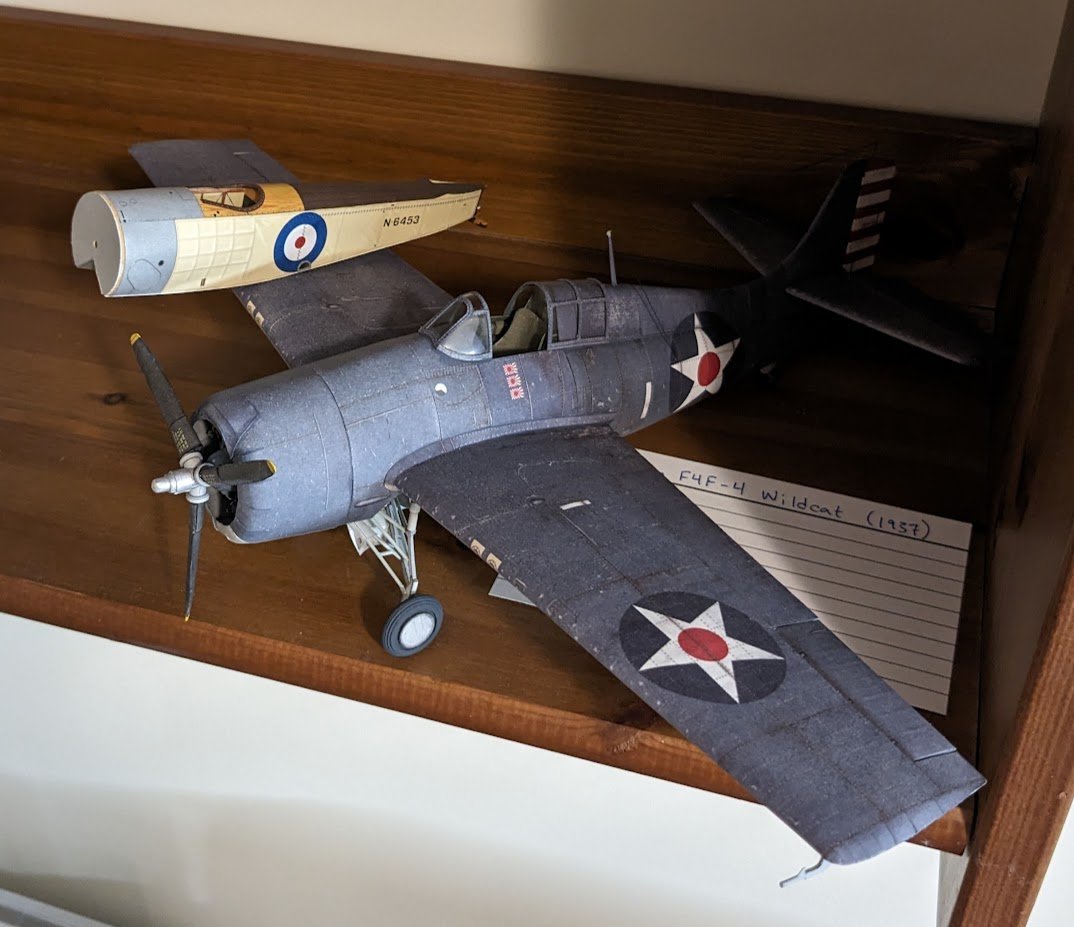
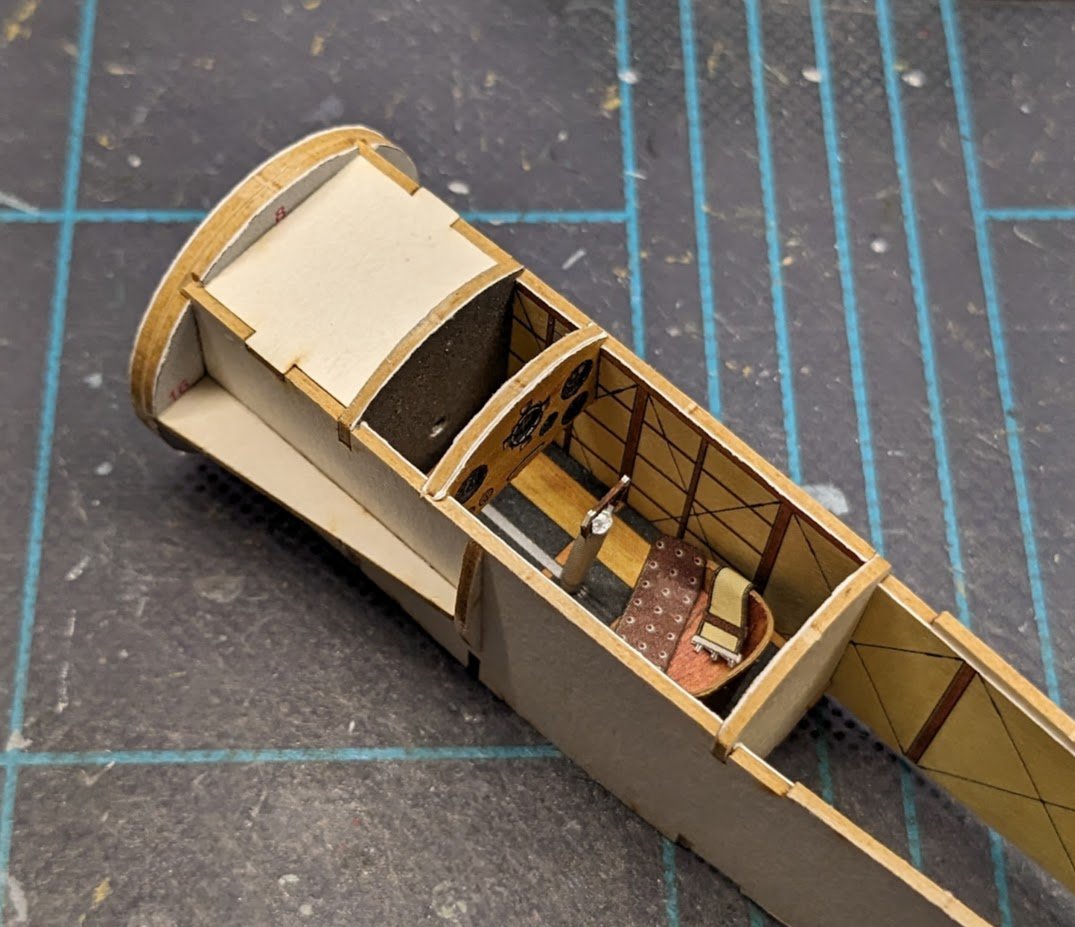
Not too much extra to see in this photo -- some doubled details (to add depth) and the skinned tail skid. I did something similar to this photo for my Nieuport 11 build just to show the incredible increase in size between a WW1 combatant and one from WW2. Pretty remarkable, I think.
- 54 replies
-
- 17
-
-
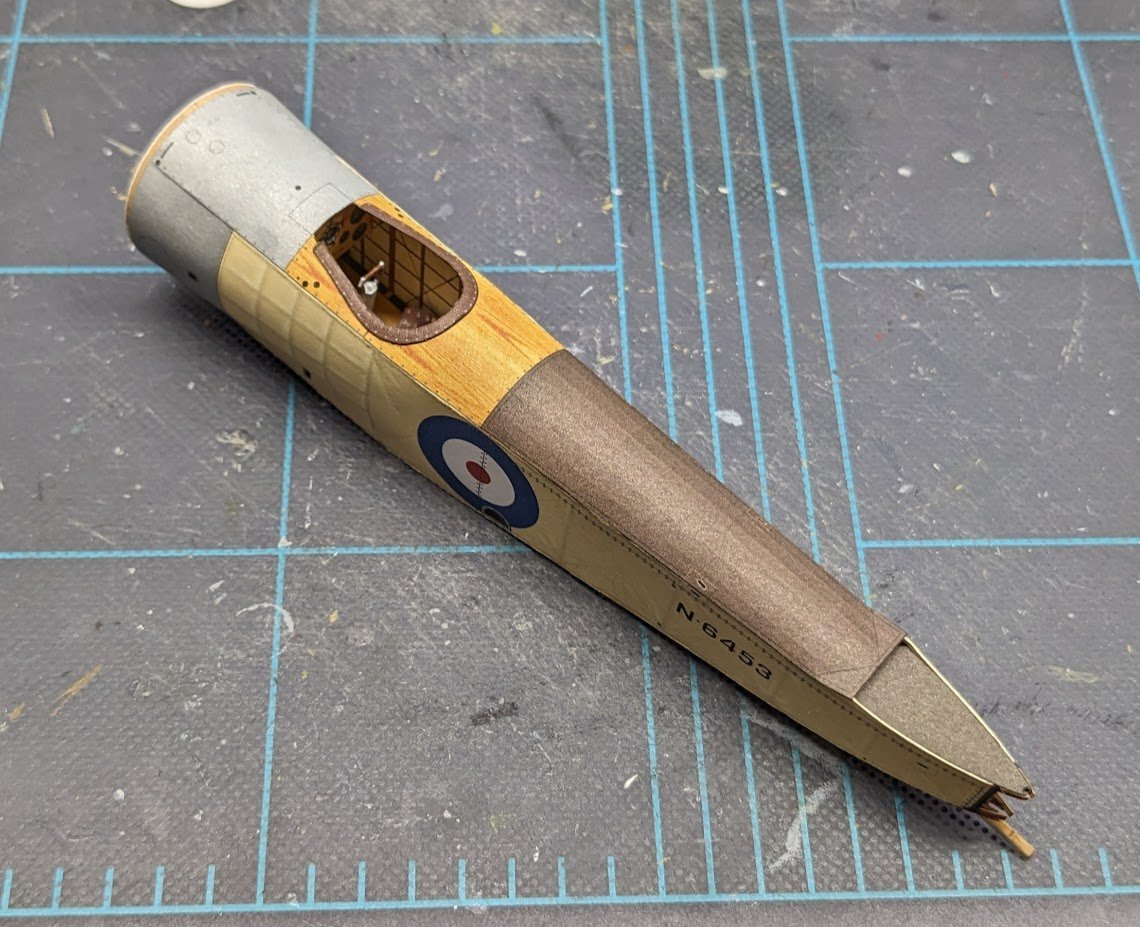
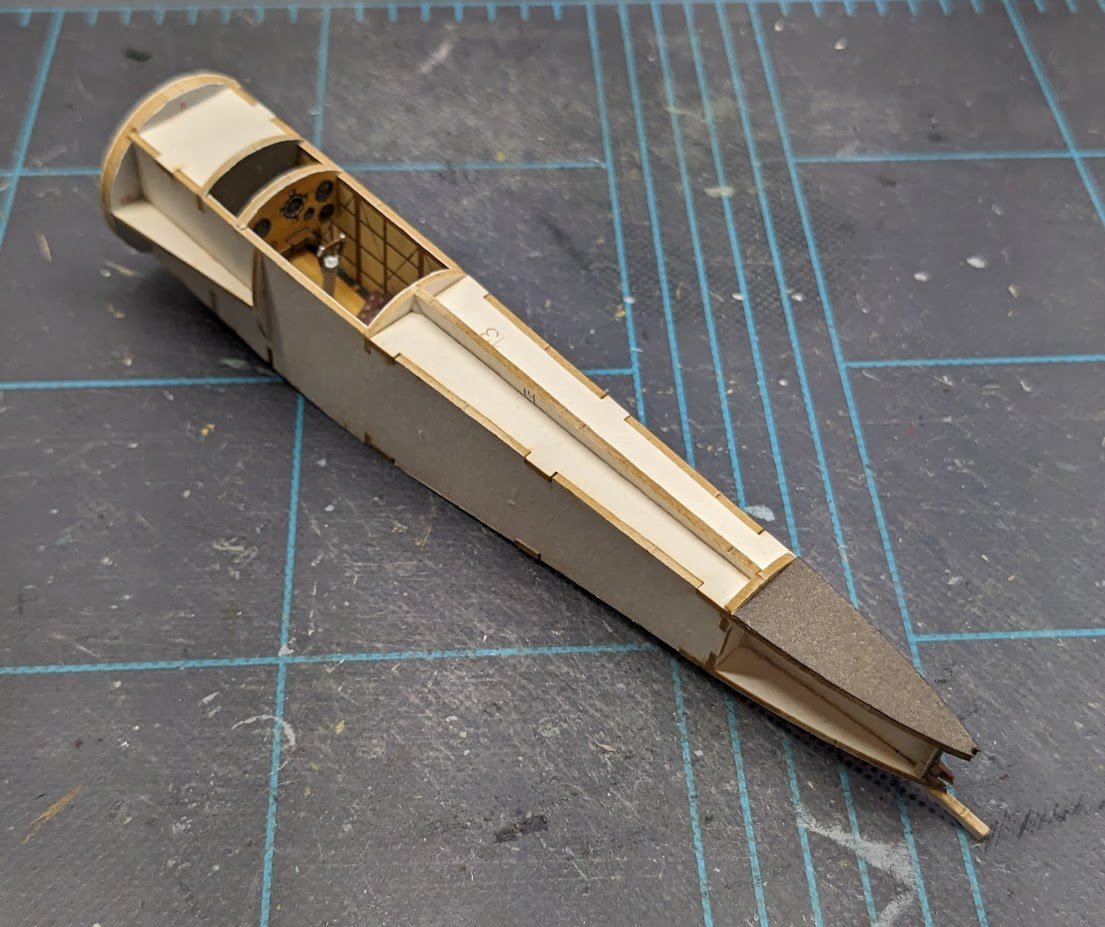
External skins prepped . . . . . . and added. Those 'wrinkles' you can see on the left side near the cockpit are actually printed on the part. Still have detail parts to add.
- 54 replies
-
- 15
-
-

-
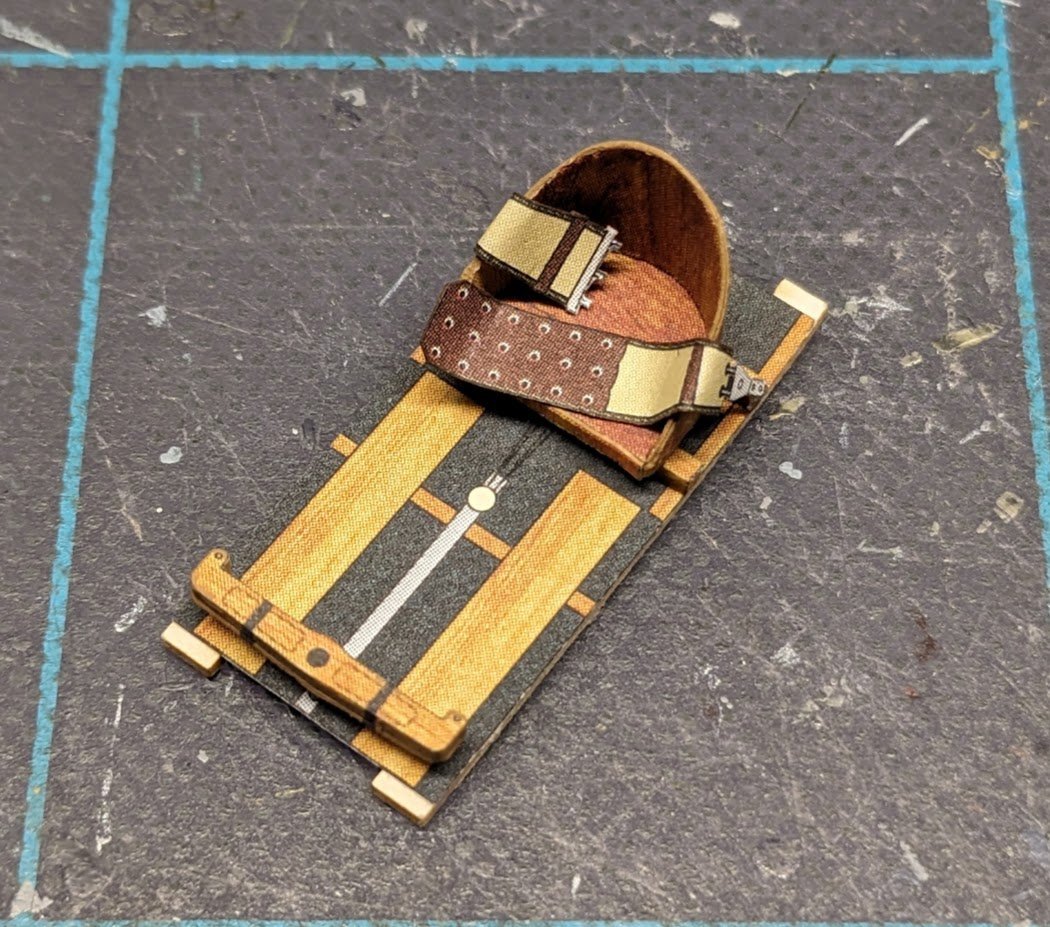
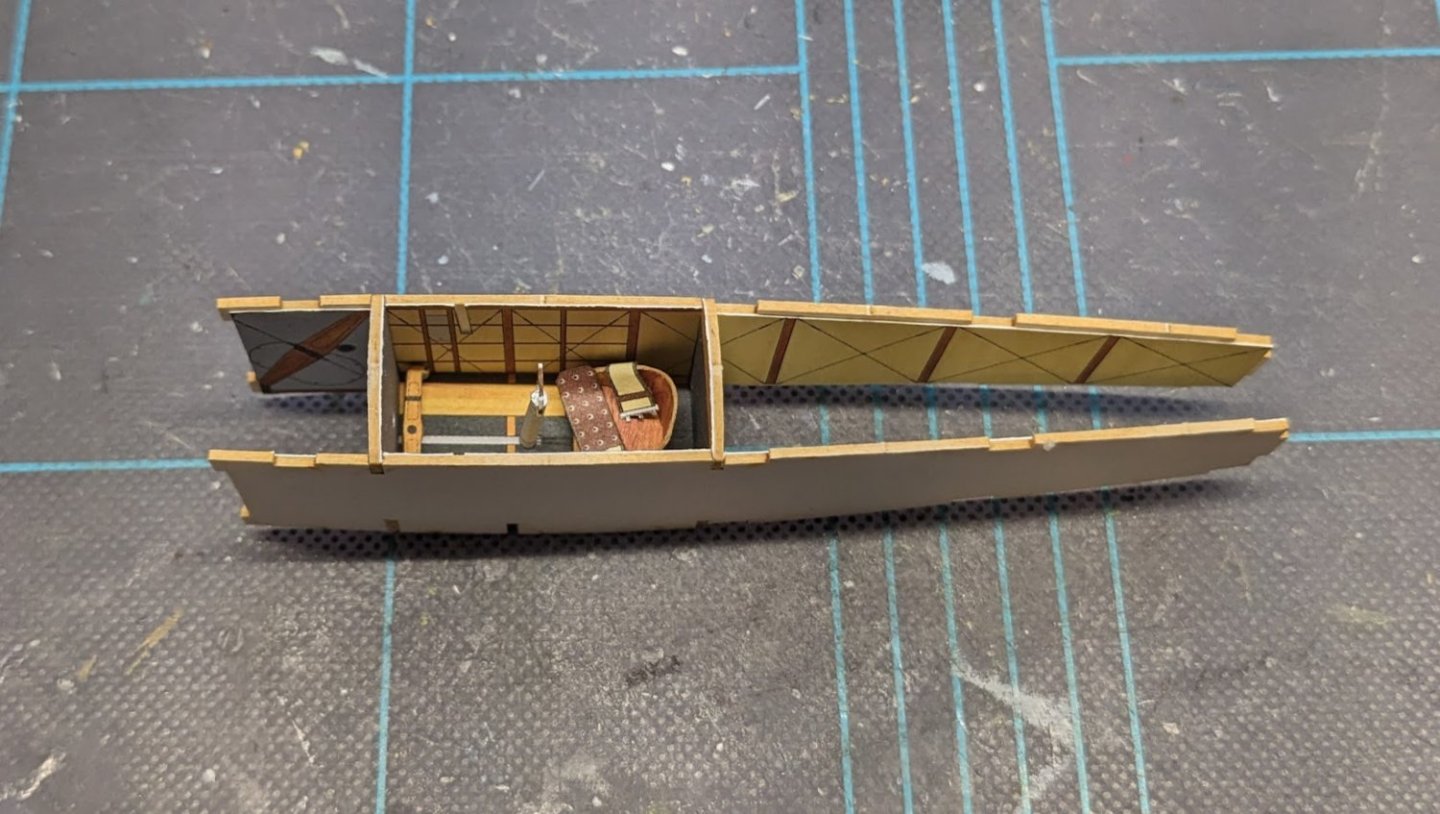
A note on some of the interior printing that is visible but will obviously not be seen once the fuselage is closed up: Believe it or not, there are some insane modelers out there (Poles, usually -- duh) who will open up parts of their build and scratch-build interior components such as stringers, bracing, and control cables, thus necessitating some printed interior details. I am not one of those modelers, so don't ask.
-
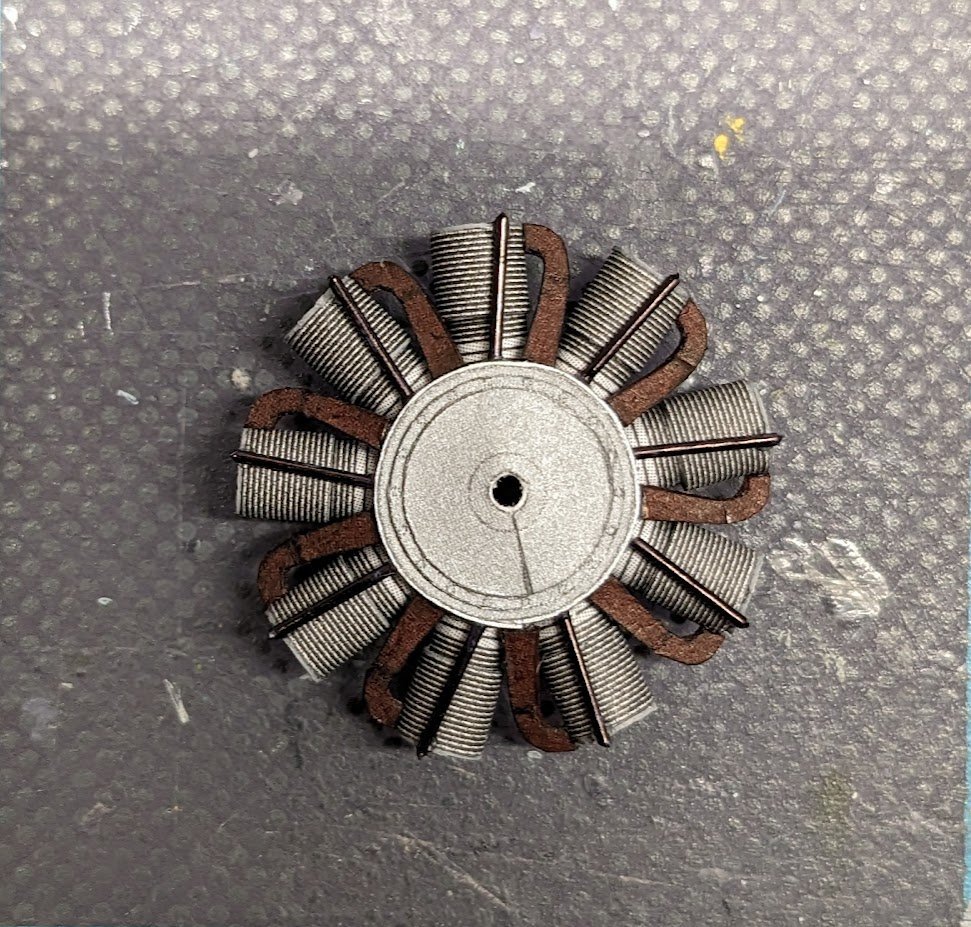
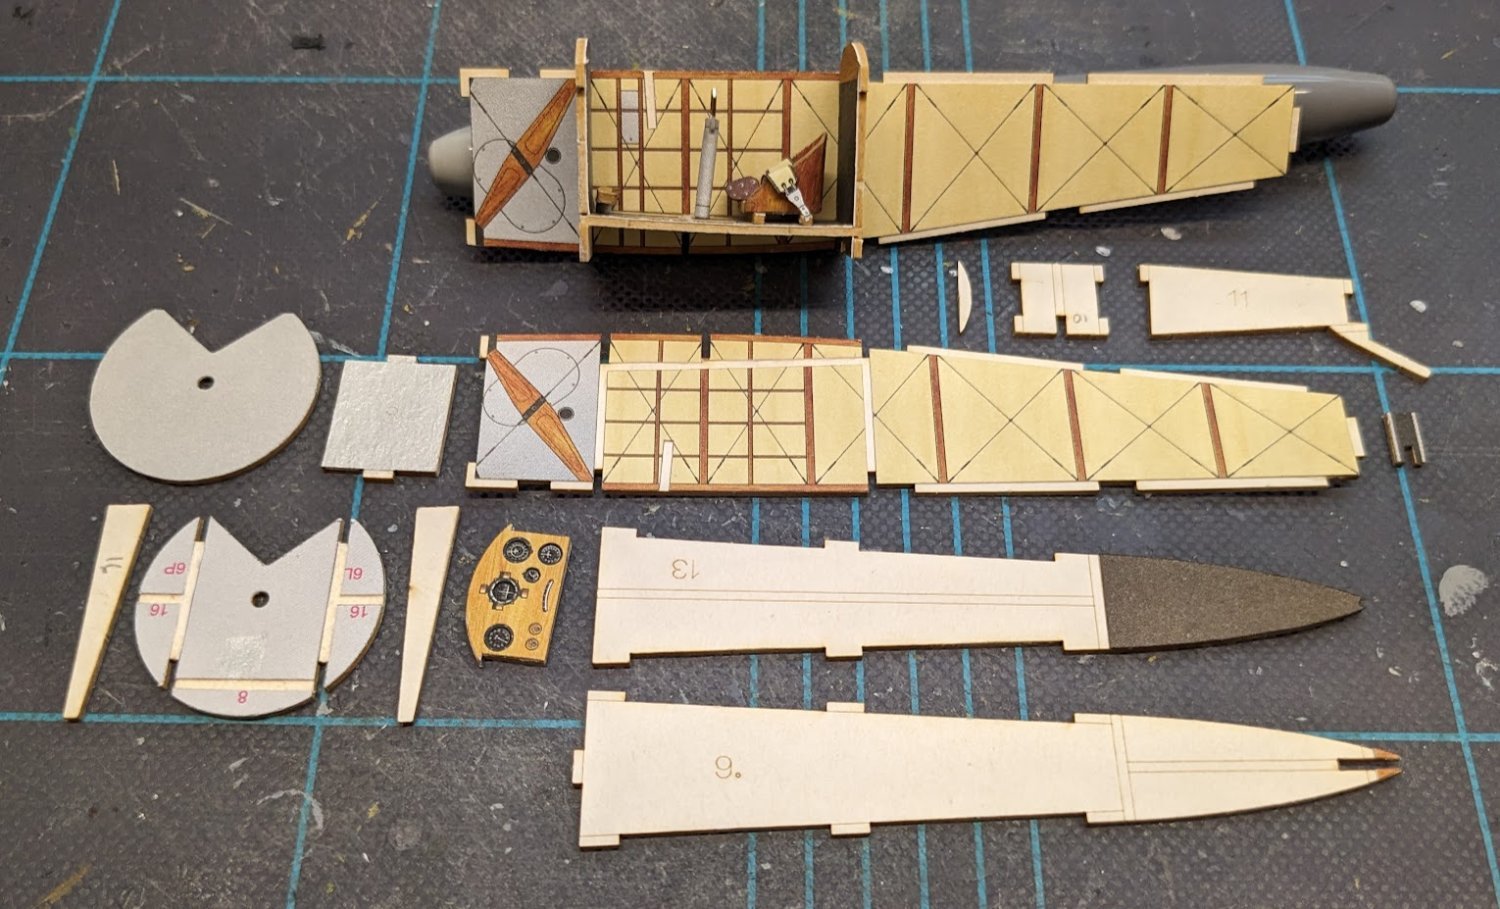
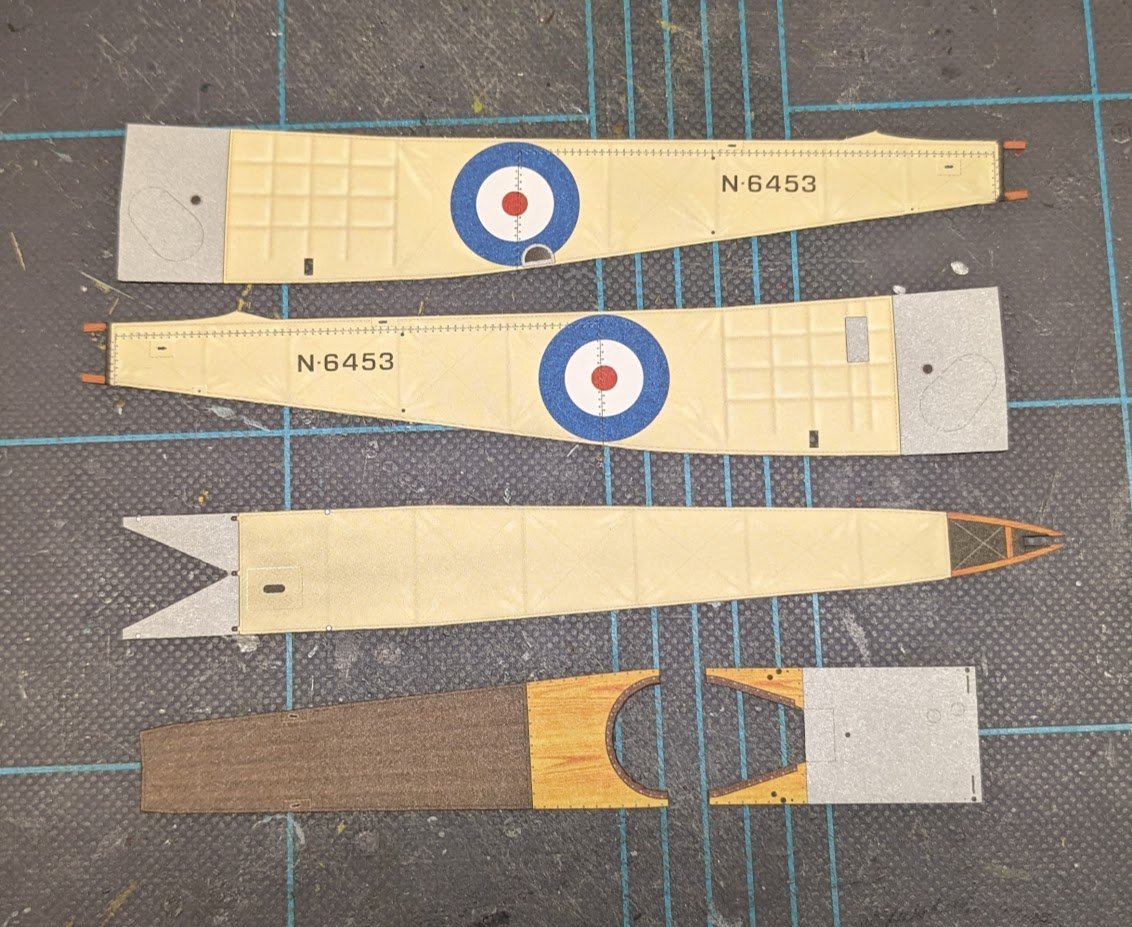
Once again, a Mistewicz design just falls together sweetly without any hitches so far. Here's the fuselage structural pieces ready to be glued up (I found out later that three pieces were missing from this group shot, but they're on the model -- which is what counts). And bit by bit it gets put together. Skinning starts next!

- 54 replies
-
- 23
-
-
Welcome aboard!
-
I wouldn't trust them. All of their kits are listed for under 100 GBP -- an extremely unlikely proposition.
-
I've always used diluted Aleen's Tacky Glue for this job, and I've had fabric glue recommended for it as well but haven't tried it.