


toms10
-
Posts
897 -
Joined
-
Last visited
Content Type
Profiles
Forums
Gallery
Events
Posts posted by toms10
-
-
On 3/7/2019 at 9:54 PM, Dan03 said:
I purchased one of these glue bottles from Lee Valley Tools for under 10 bucks and it works great. The tip is customizable. Mine will lay a consistent bead of Titebond along the edge of a plank without too much fuss or mess. Plus the glue is aways sealed away and a simple squeeze brings it up the tube. No need to invert and shake the glue to the top to dispense. The middle size is perfect for modelling.
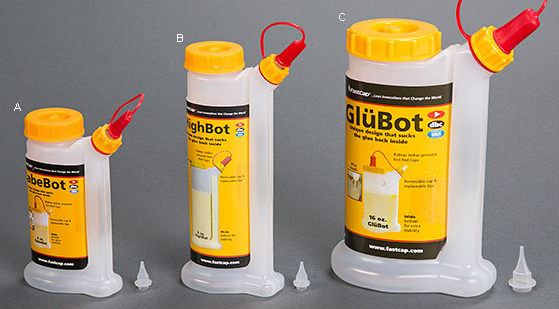
These are pretty good. I purchased the "baby" on amazon for a few bucks.
Tom
- Canute, mtaylor and Ryland Craze
-
 3
3
-
3 hours ago, Bluto 1790 said:
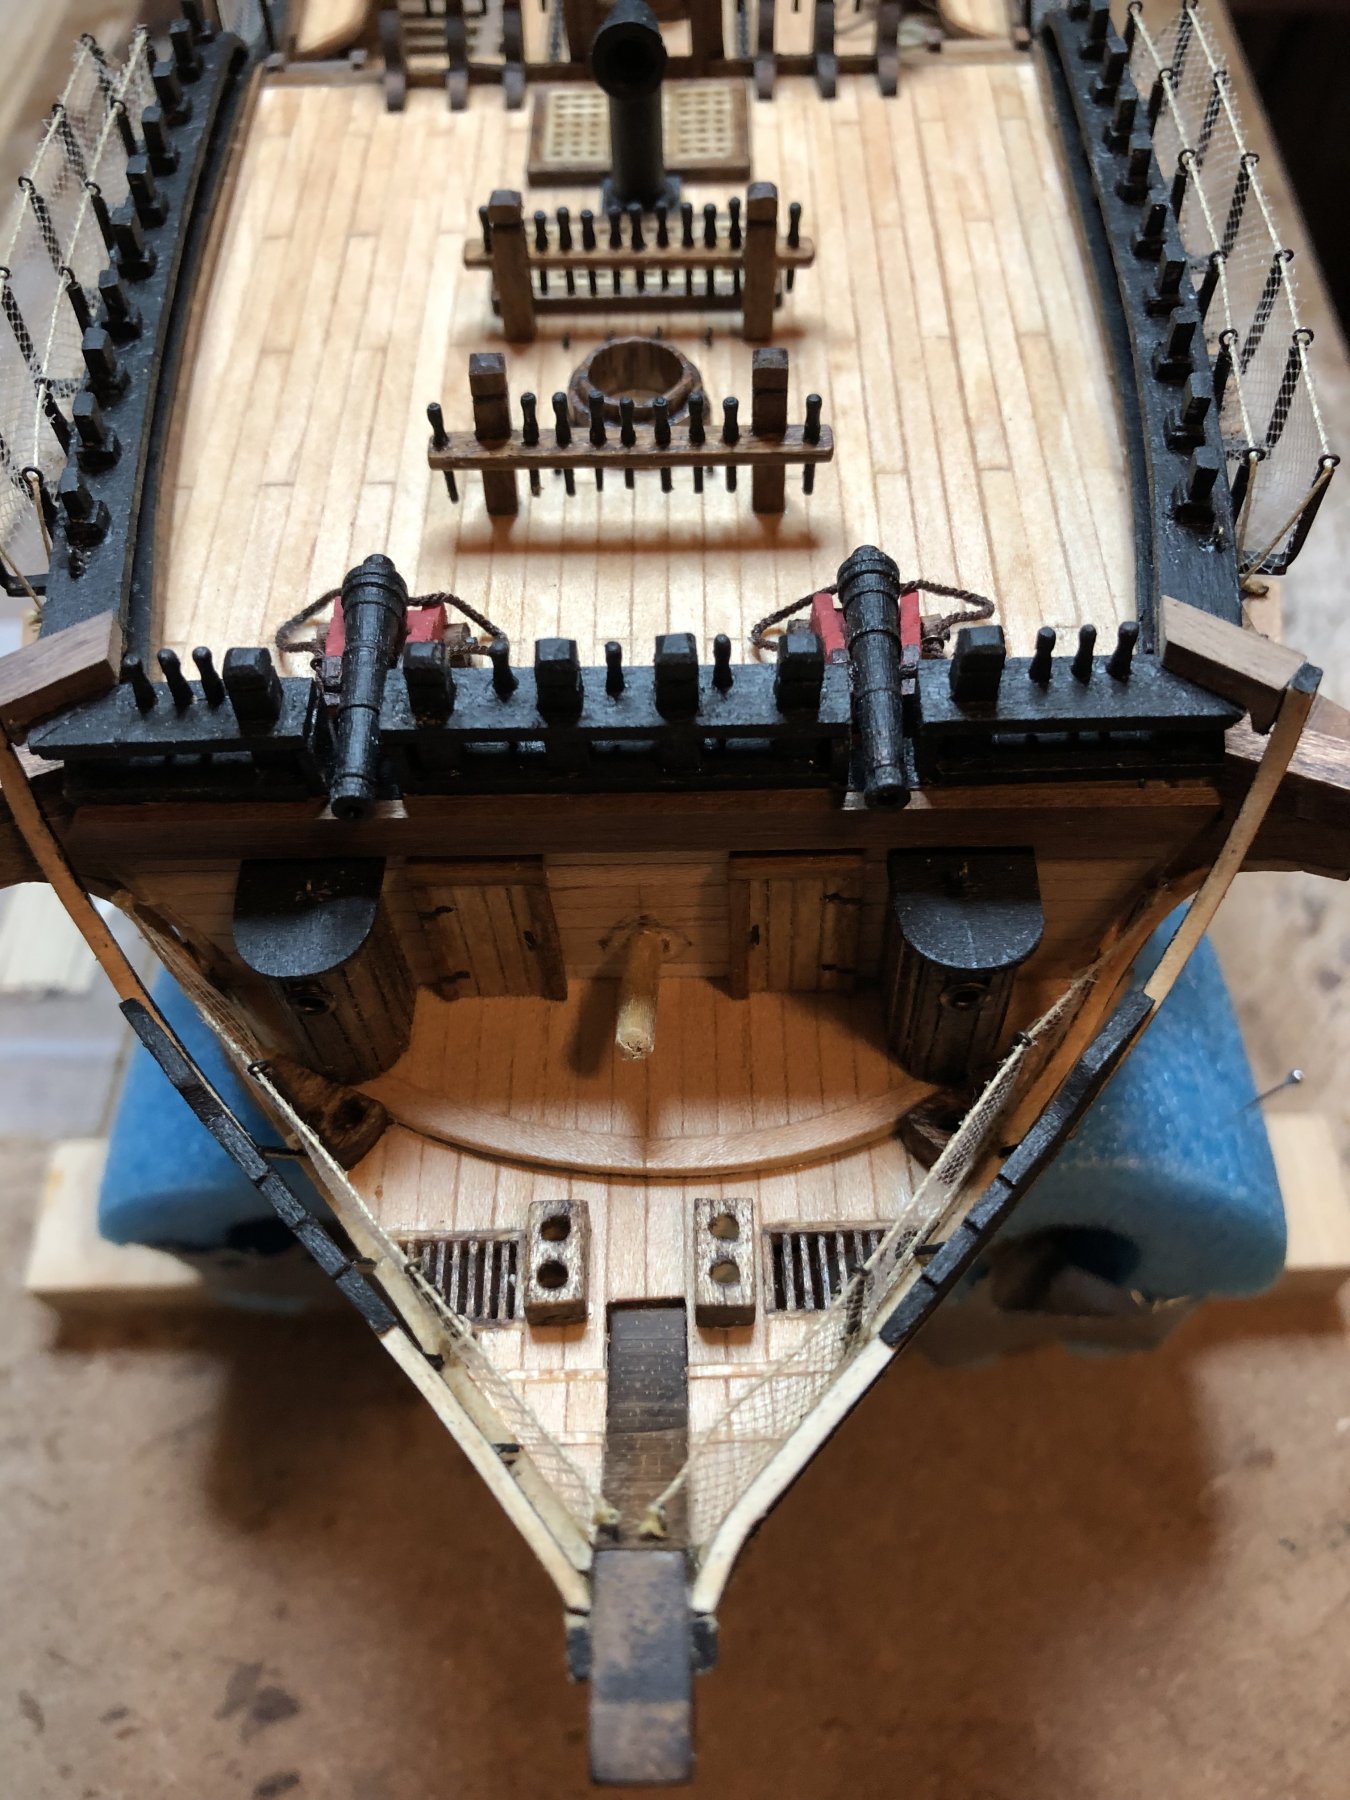
Right about now is when I felt I had to make modifications to the belaying system on the poop deck around the mizzen mast. There is a woefully inadequate amount of belaying points in this part of the ship. The deck plan shows only 7 pins on the rail behind the mast with NO BELAYING POINTS anywhere else on the poop deck. So, being the master of my own ship here, I decided to over-rule the ship's architect and have added a pinrail of 5 pins each on both sides of the deck >>>
Hi Jim,
Glad to see you are back at it. The model is really looking good. I to wondered where all the lines were going to be belayed. There just doesn't seem to be enough belaying pins on the drawings. I like the extra pin racks on the poop deck. That deck is relatively bare and so makes sense to add some there. I am sure I will be doing something similar when I get to that point. Keep up the good work and if the Admiral won't let you cut a hole in the ceiling above the refrigerator then maybe you can just get a shorter one!
Tom
-
Hi Jim
It is good to hear from you. I was beginning to wonder if you hit a big lottery jackpot and ran off to some secluded tropical island 🏝. Hope you get to get back to those rat lines soon. Thanks for the compliments. My progress goes in short spurts also. That darn life thing seems to get in the way for a lot of people. 😁. Maybe one of the moderators can help you with you notification issue.
Tom
-
Finished some of the bow work and played with some of the small sculptures on the stern. Michael Angelo has nothing to worry about. 😁. Progress is a good feeling no matter how small.
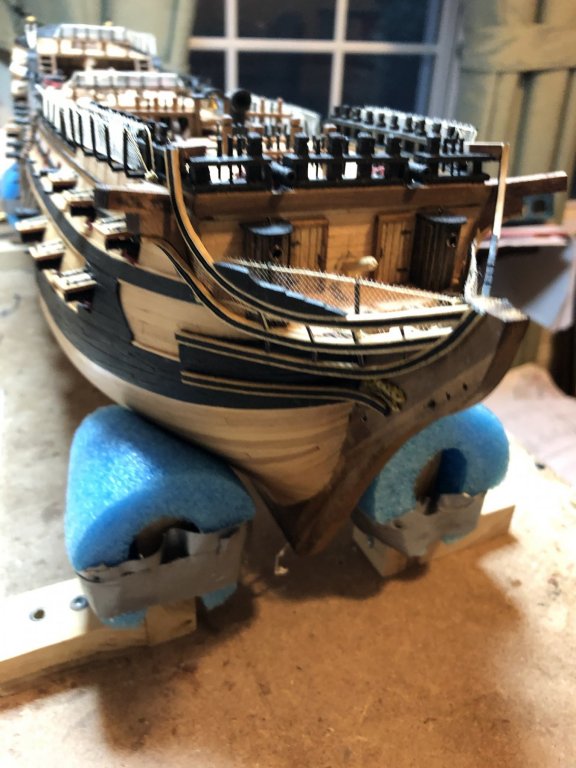
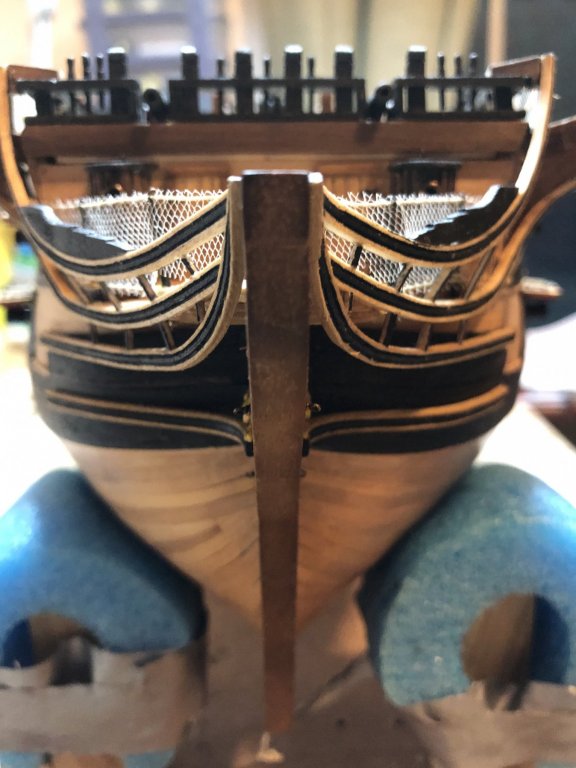

At 1:85 scale the sculptures can get pretty small so detail is very difficult. At least for me.

Tom
-
Hi Mark T
i just saw Chuck this past weekend at the Northeast Joint Modeling Conf. In New London CT. Bought some blocks. Saw his rope too. Very nice. Thanks for the interesting information about the tar colors. Definitely keep it in mind for the next. Just have to make the cranes for the forecastle deck and then string up the beige Tulle and the netting (except on the bow) will be a thing of the past on this model. 😁. Wasn’t my favorite part so far but it really put a nice touch to the model.
Tom
-
Hi Steven
at 1:200 I agree you would need to go with black so it would be seen. I was having a hard time deciding but ended up going with the untreated rope color. As mentioned above it probably not wrong either way.
Scott
i did see the the black on many pictures of many ships also. I found arguments for both treated and untreated. Treated naturally would last longer but on the other hand the treatment stuff would get all over the hammocks. Black is definitely more visible on models and paintings but may not be historically accurate. Since this model will most likely never get out of my living room and the rails are black I ended up going with the contrasted beige. Thanks for checking and passing on the info to me. I welcome all the comments I can get as they only add to my knowledge which is never enough.
Hi Mark
Thanks for the info. I don’t think I will bring it to the “canvas” stage. Don’t want to cover up the work already done. If I am visualizing what you are saying correctly wouldn’t the canvas also have to go down the sides also to keep the hammocks dry. I have never come across the canvas on hammock netting. But then again I have only been doing this for a few years and this is only my 2nd model. I still have a ton to learn.
Tom
-
-
-
-
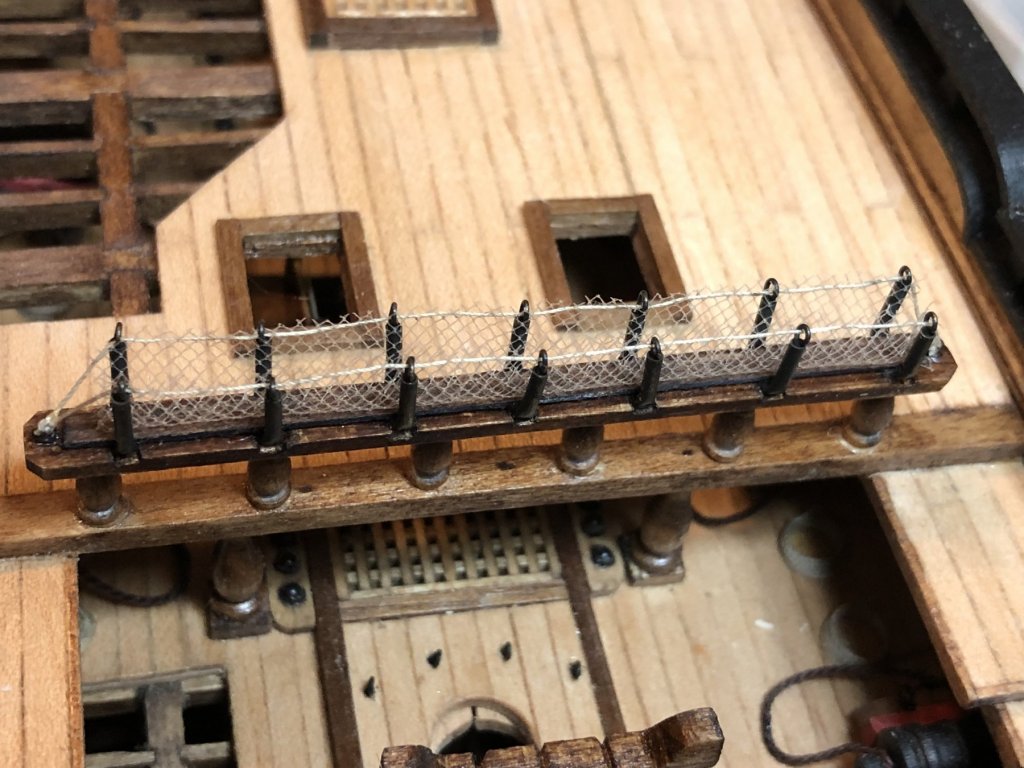
I think threading hammock netting is less fun than rat lines. Very tedious but when it’s done it looks pretty good. Finished the poop deck netting’s after 3 nights.
Now on to the midship netting’s. 😳
Tom
- Bluto 1790, GrandpaPhil, Gahm and 3 others
-
6
-
After a long time searching for some tan netting for the hammock cranes I ended up using some Tulle that I picked up at Joanne’s. It’s a bit on the fine side but it will do. Better too fine than too coase at this scale. I found the perfect size in black but the netting is not supposed to be tarred. That would make a mess with the hammocks. Here is the first attempt that came out okay. The dark wood and black cranes make the netting stand out a bit. I was concerned that the Tulle was so fine that you would have difficulty seeing it. Holding the fabric up withou a dark background made it almost invisible. It is an awful lot of work to be invisible!😳


Tom
-
Well I took John’s advice and went with the tan Tulle since I came up empty at Hobby Lobby. It came out okay. The black cranes and dark wood make the netting more visible than just holding the Tulle in the air without a backdrop
Thanks John for pushing me over the edge. 😁
Tom
-
Thanks John. I did see the Tulle but it was so fine I could barely see it. I did pick up a piece just in case though as that may be my only option.
- CaptainSteve, John Allen and mtaylor
-
3
-
-
I am starting to work on the hammock cranes and netting on my Leopard and am trying to decide the color of the netting. My brain (which doesn’t always fly straight) tells me they should be a natural color rope that is not tarred. If they were tarred it would get all over the hammocks when stored. Yet when I look at pics of models (some of them world champion winners) the netting is black. My guess is because it seems to be very difficult to find netting in a tan color and if you do then it has hexagonal holes instead of diamonds. I like the way the black looks but it doesn’t make sense to the engineering side of my brain. Any thoughts out there to steer me in a direction?
- CaptainSteve, mtaylor and Keith Black
-
3
-
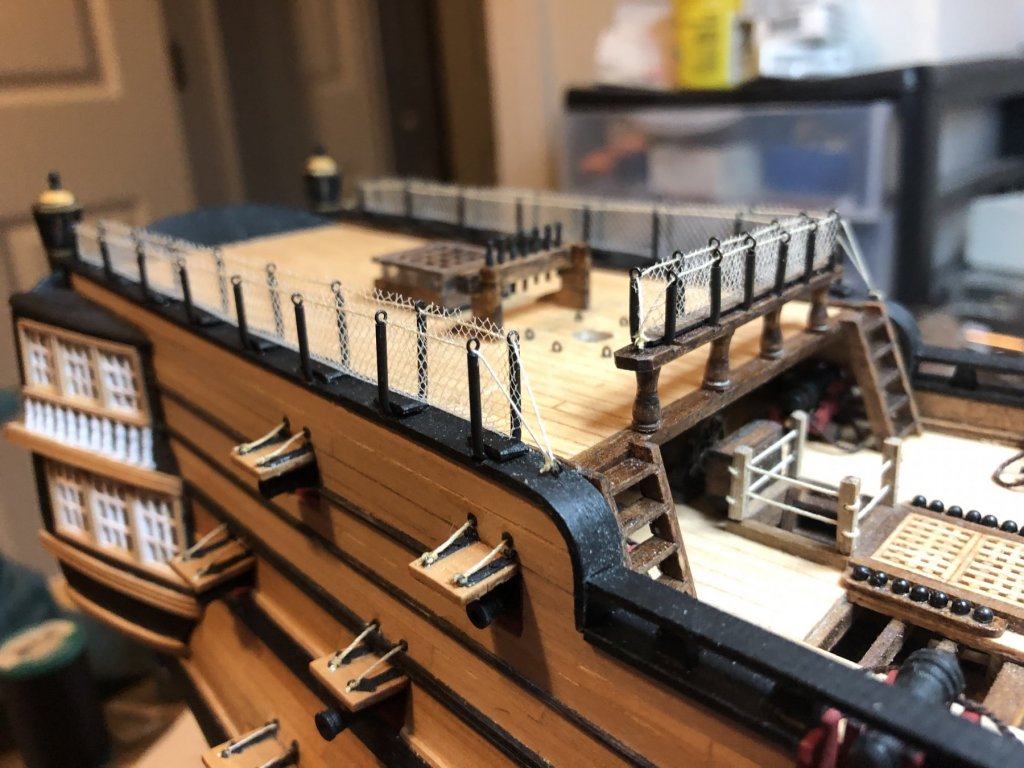
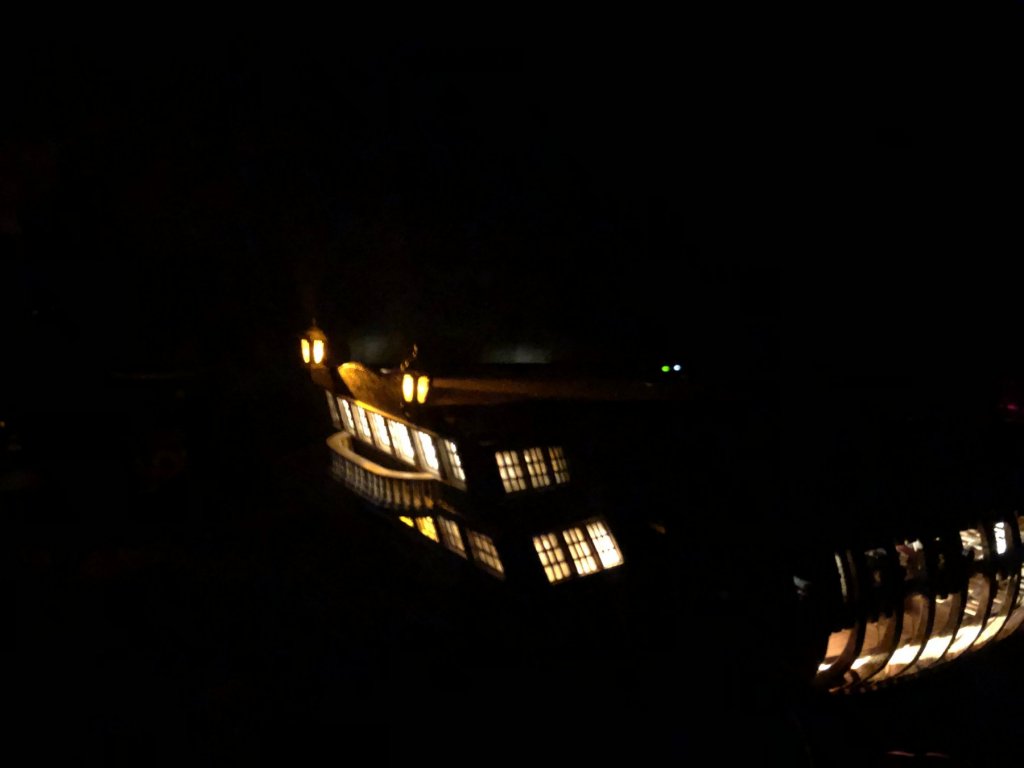
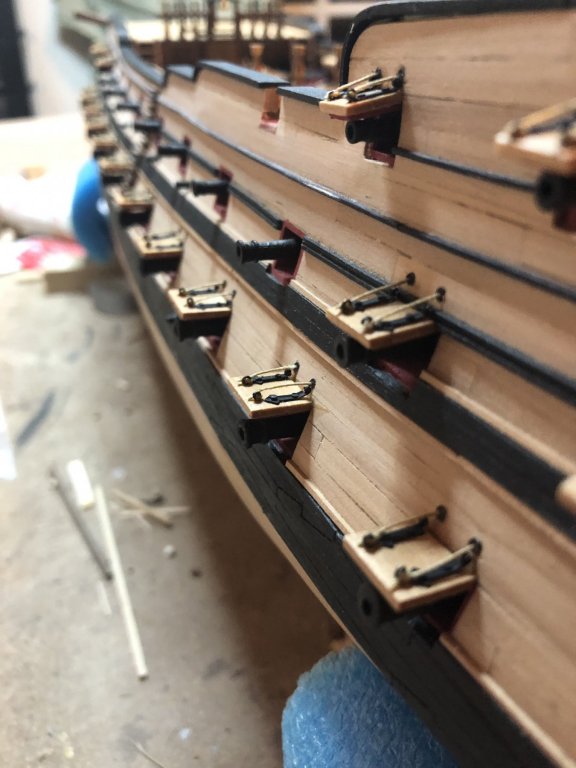
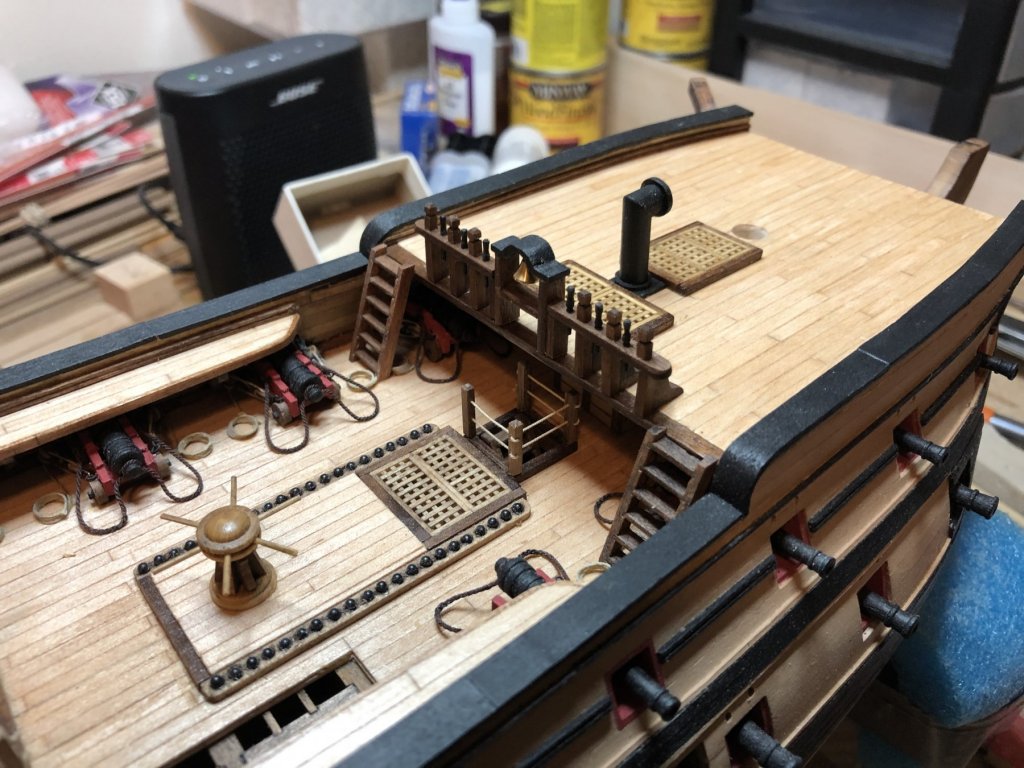
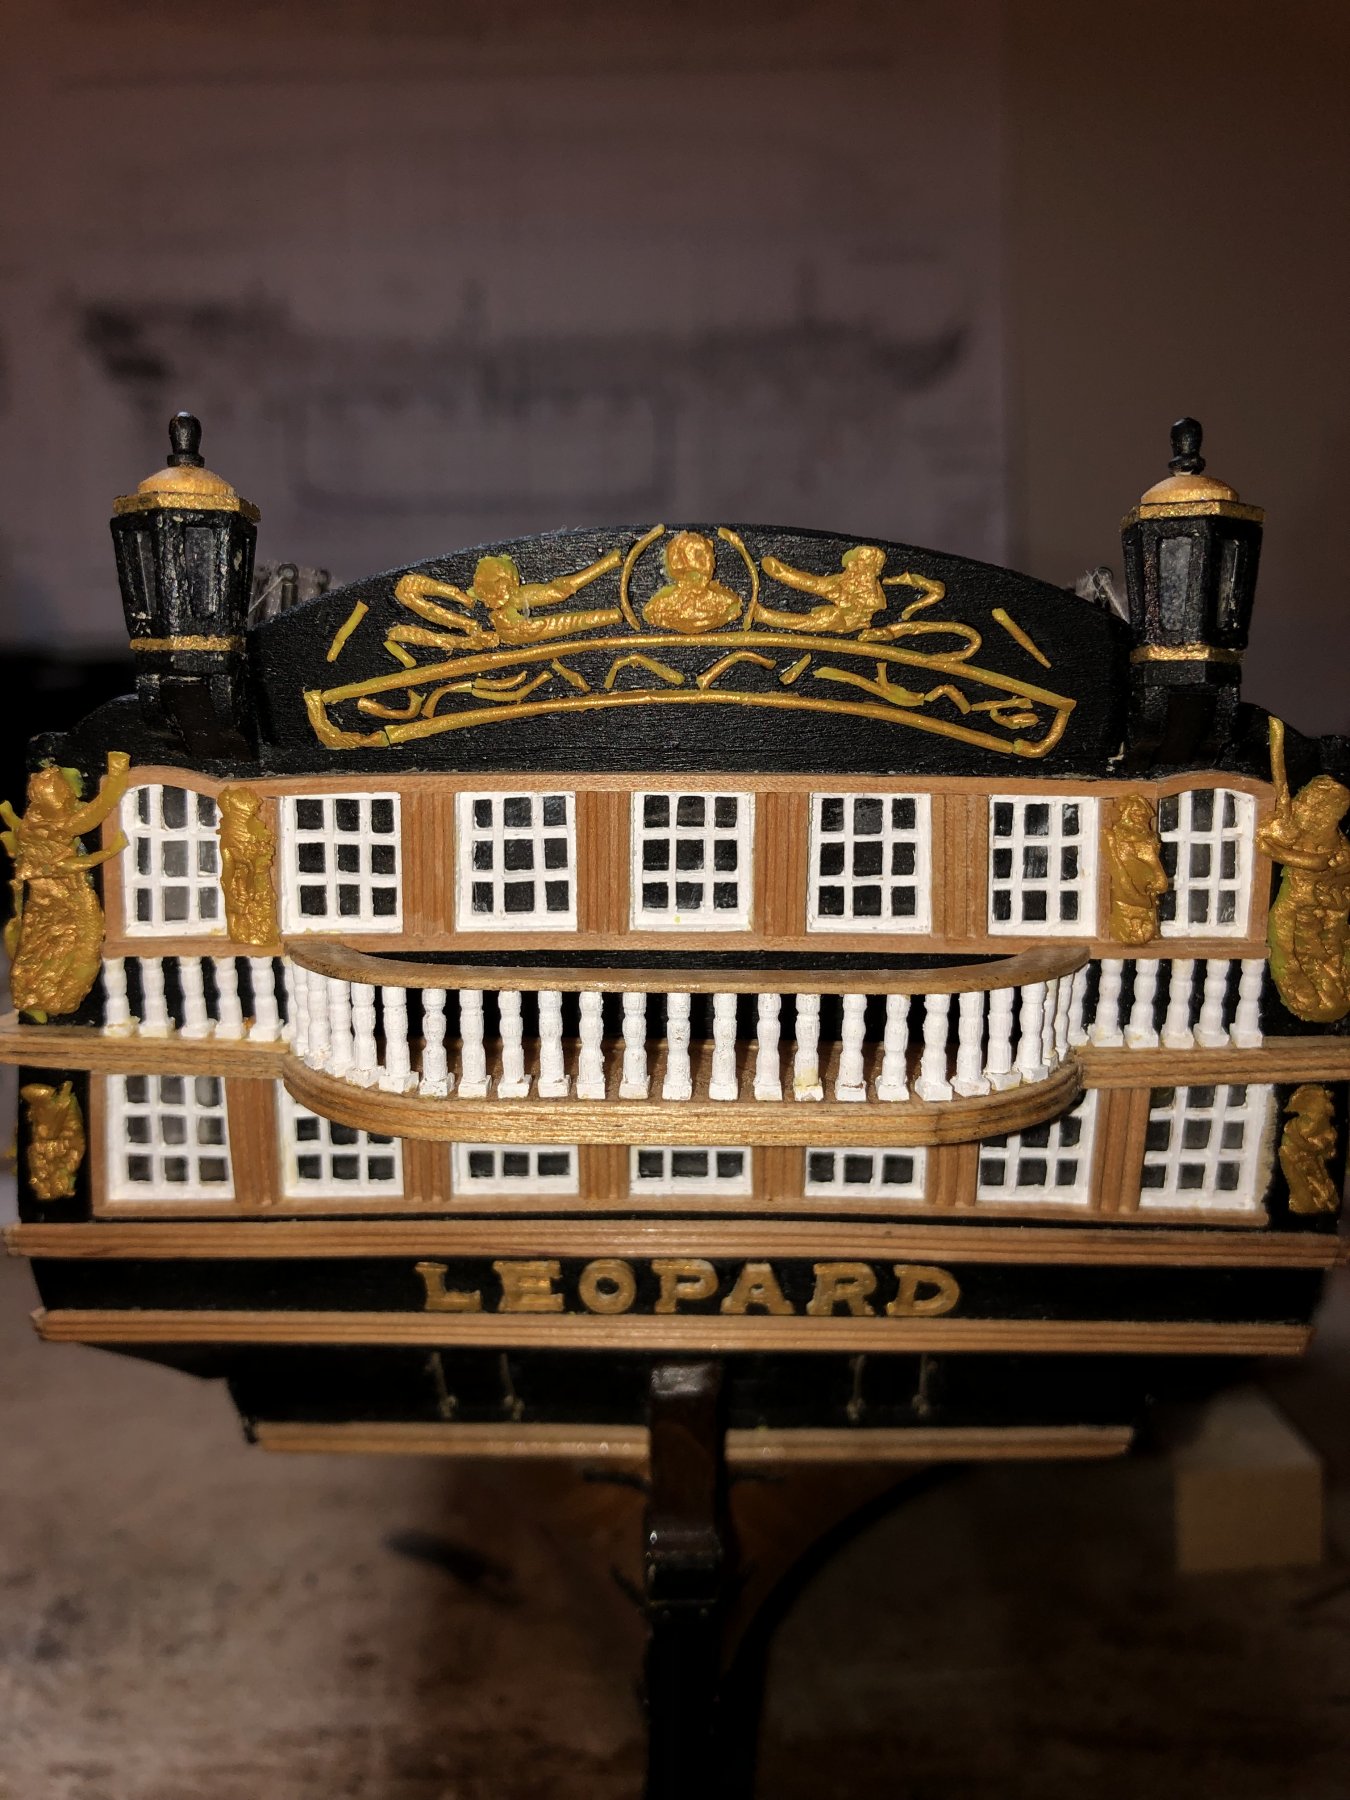
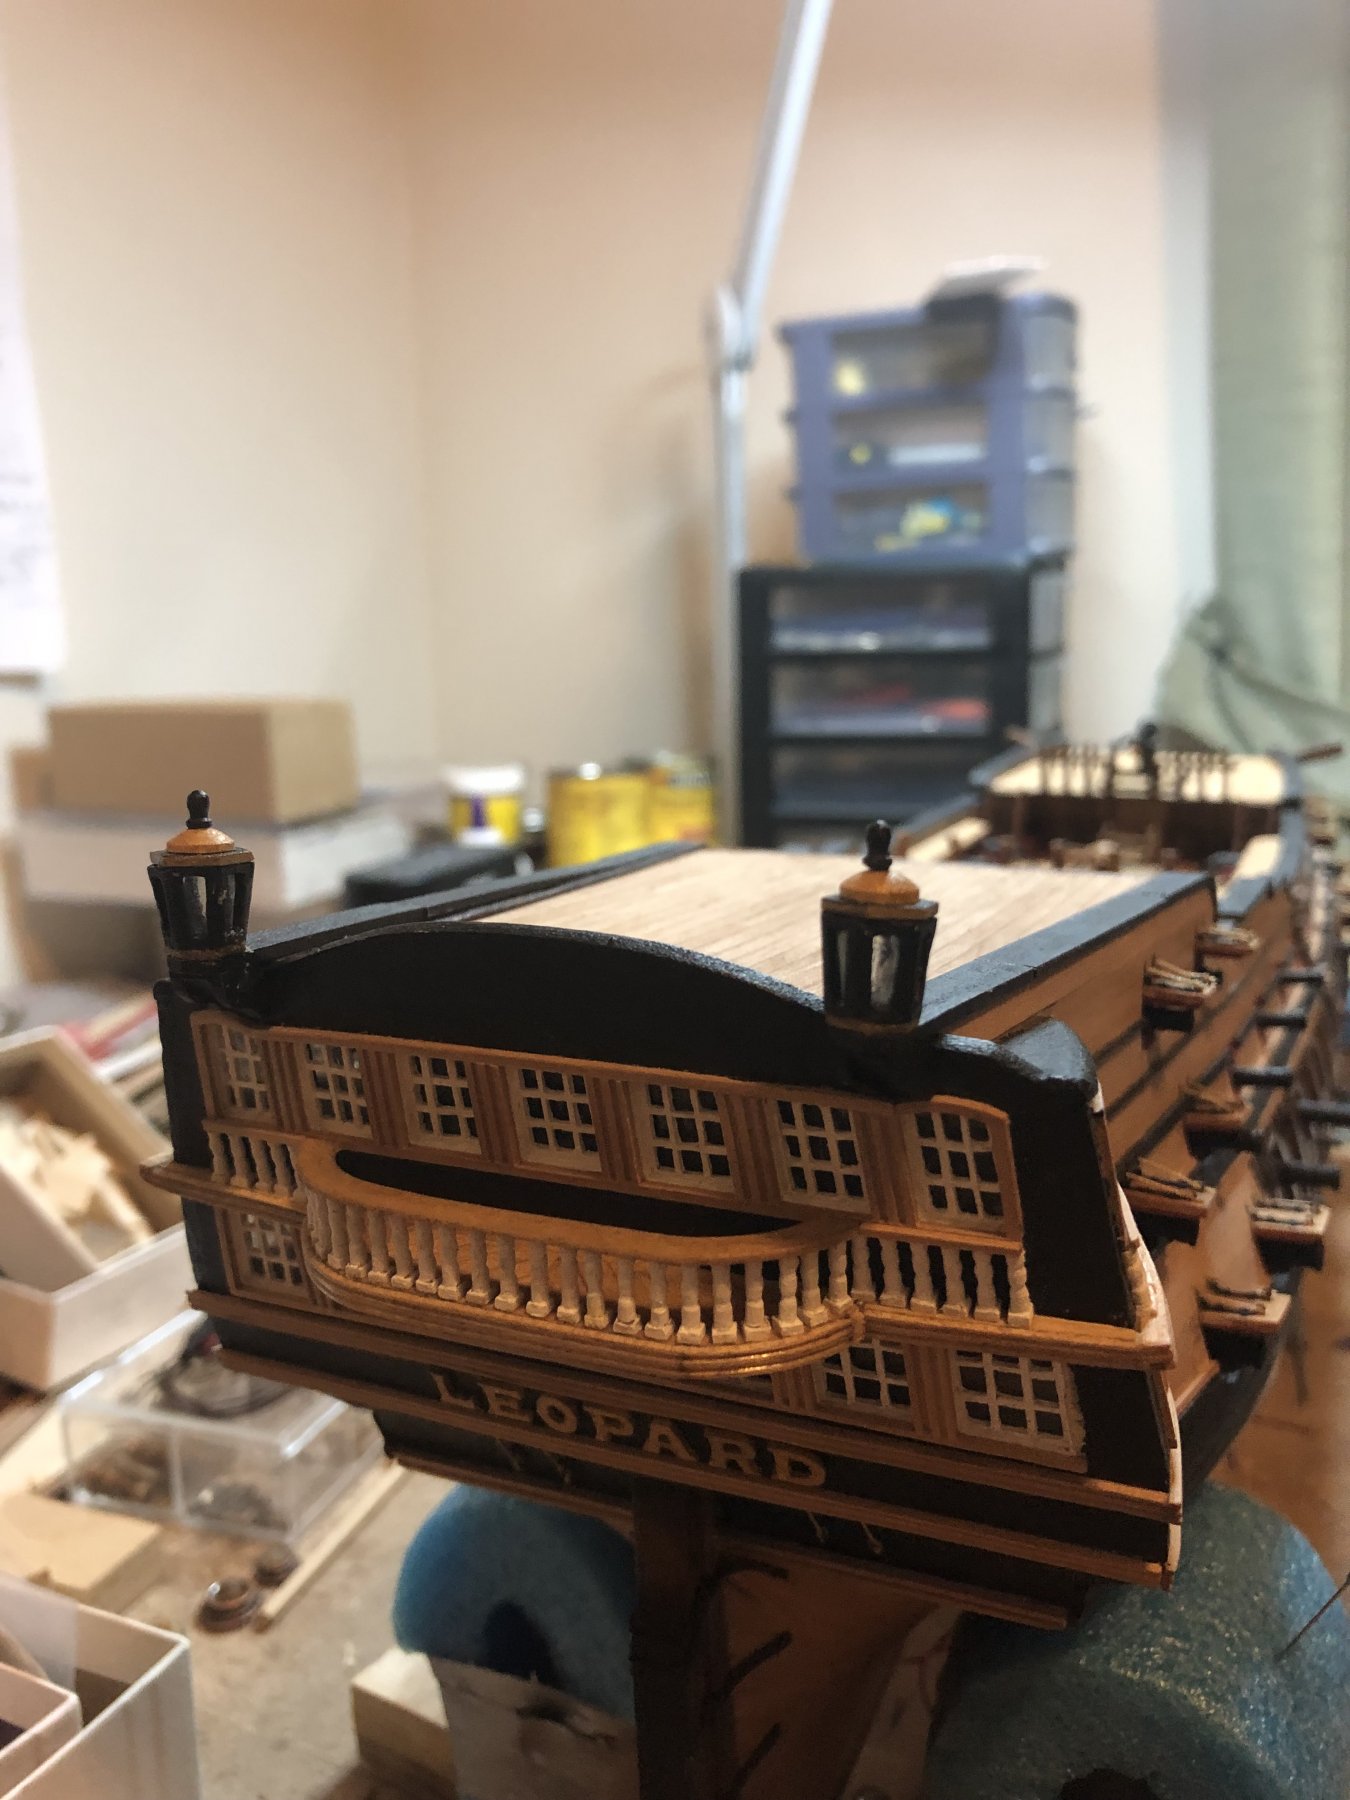
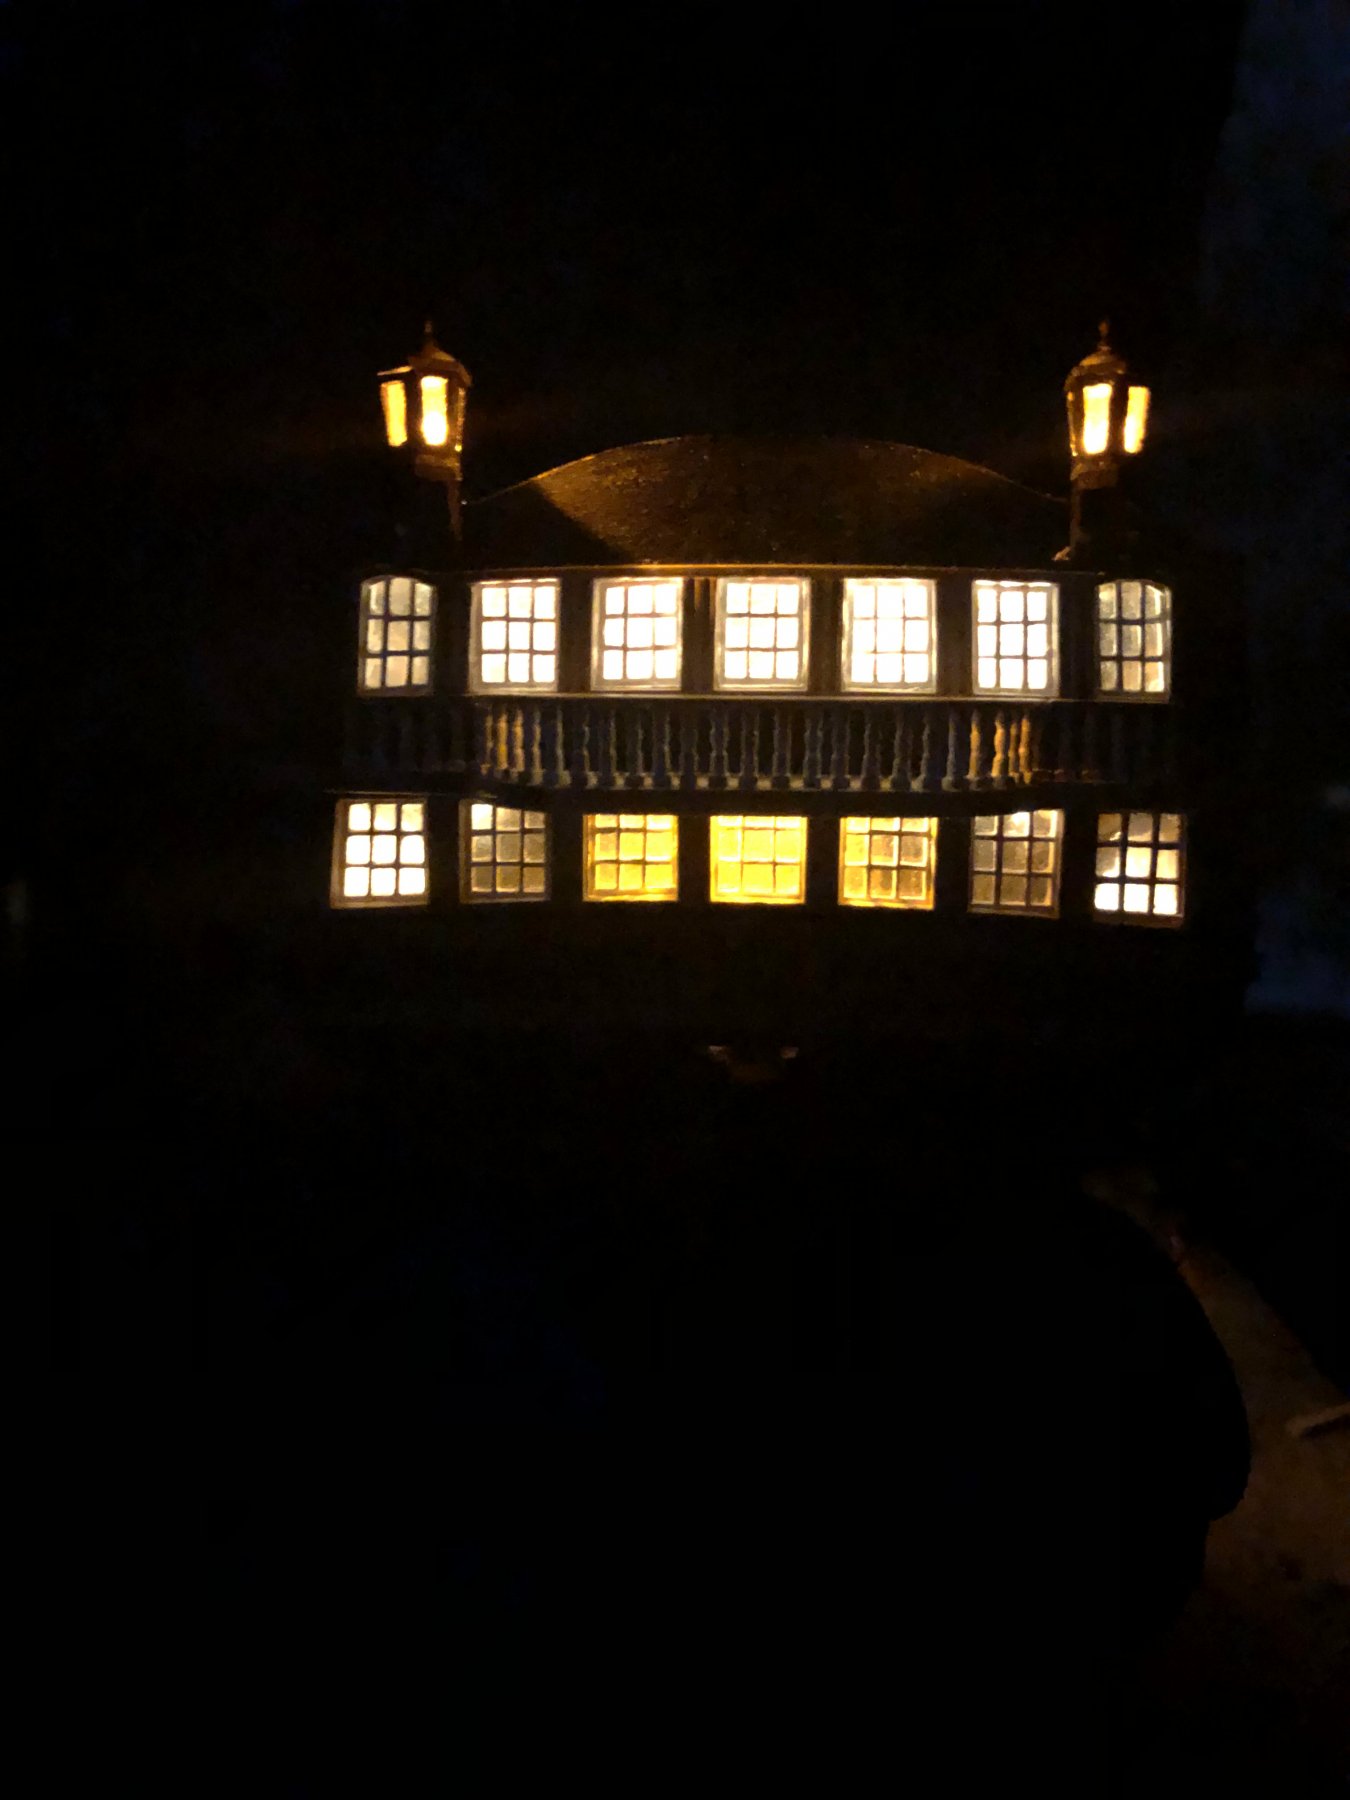
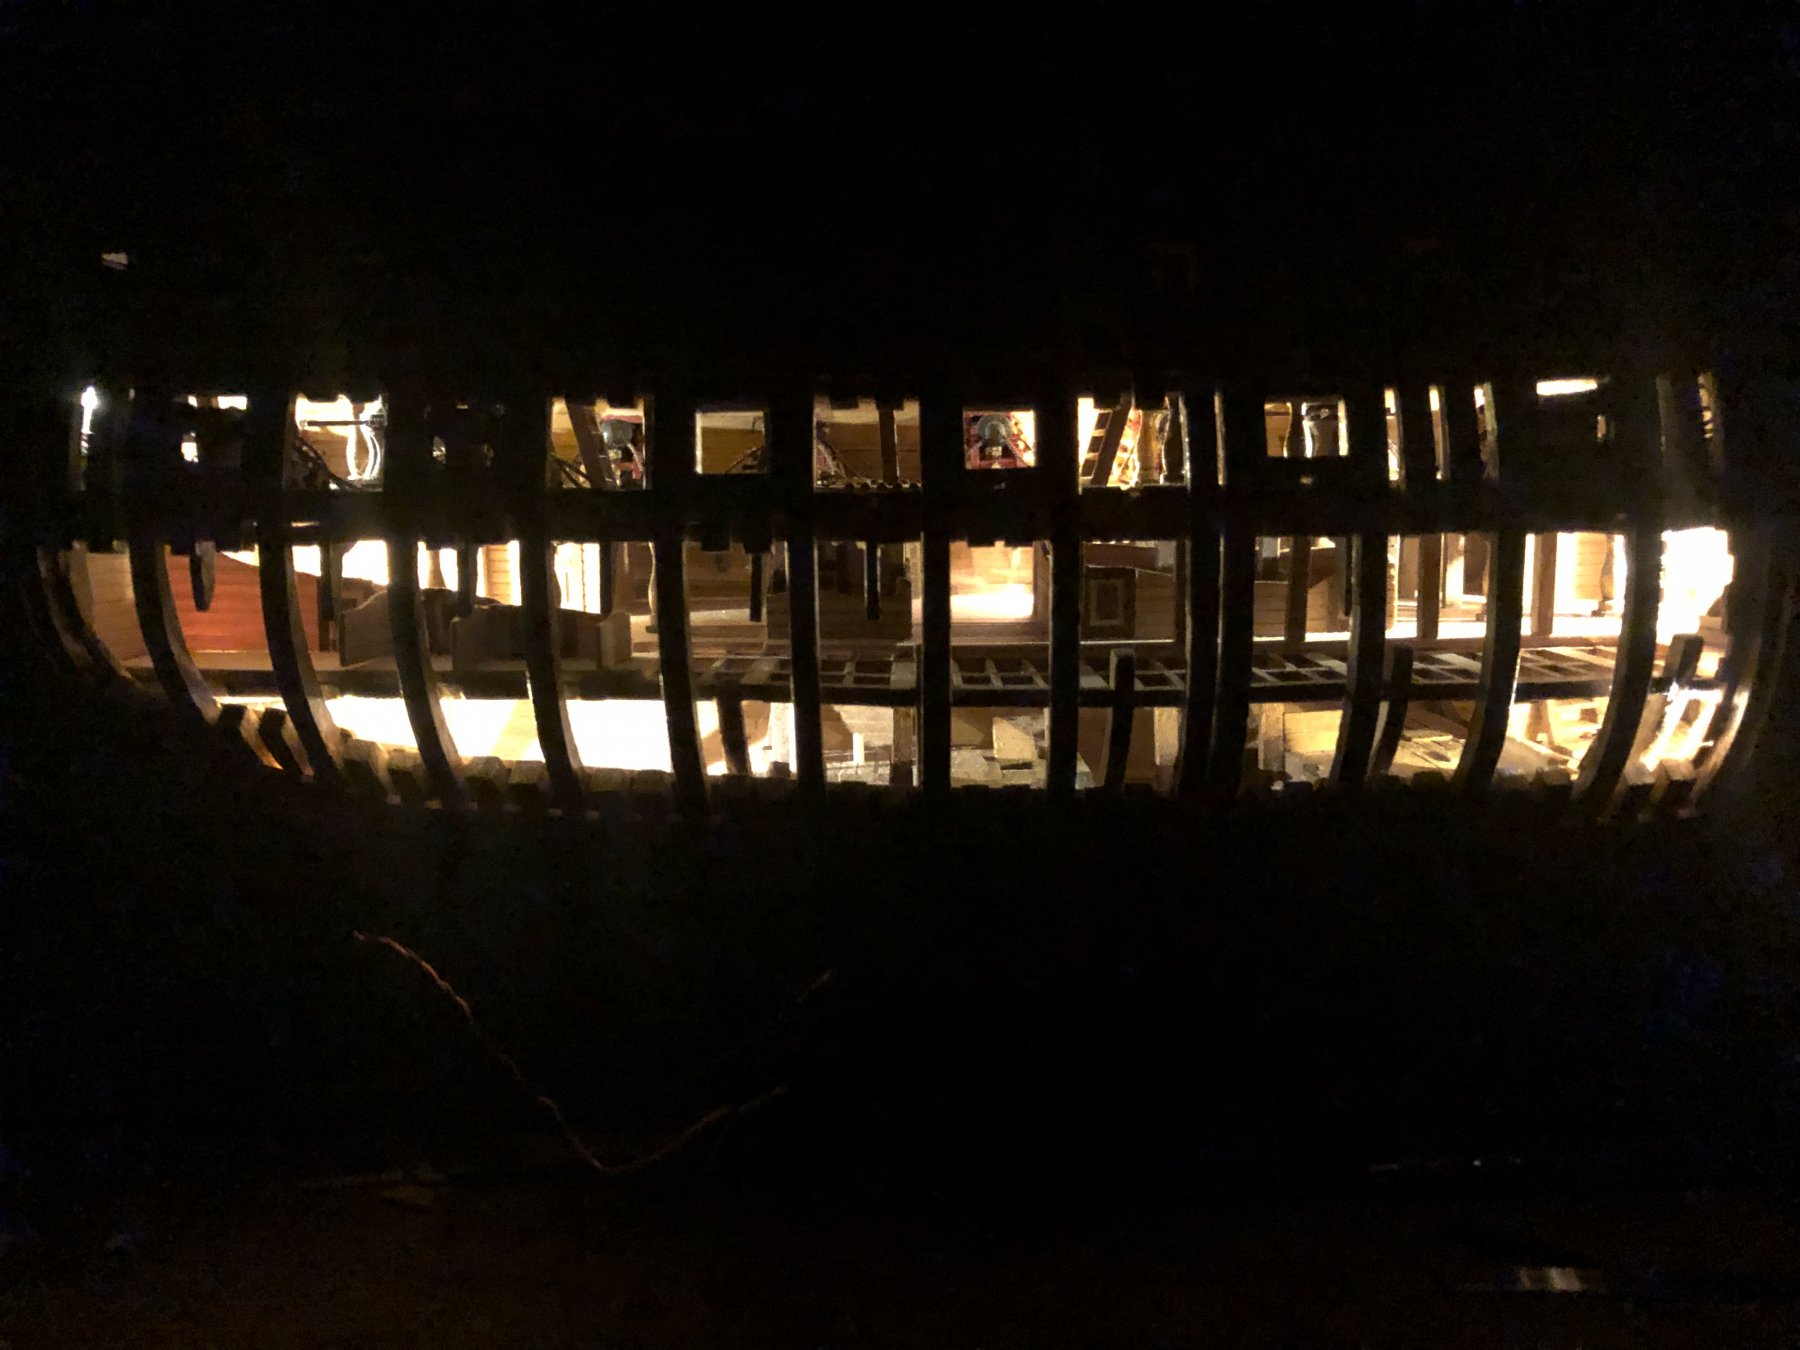
Got a little further. Built and wired the stern lanterns, attached the gun port lids and the poop deck along with the top rails.
The lanterns

some night time photos of lanterns lit up
gun port lids
and the poop deck

and a couple more night shots


Tom
- mtaylor, Bluto 1790, GrandpaPhil and 7 others
-
10
-
-
-
Who needs CNC machinery and lasers when you have a gift like the talent Doris possesses. I am just going to sit back and stare for a while.
Tom
- popeye the sailor, Baker, DORIS and 4 others
-
7
-
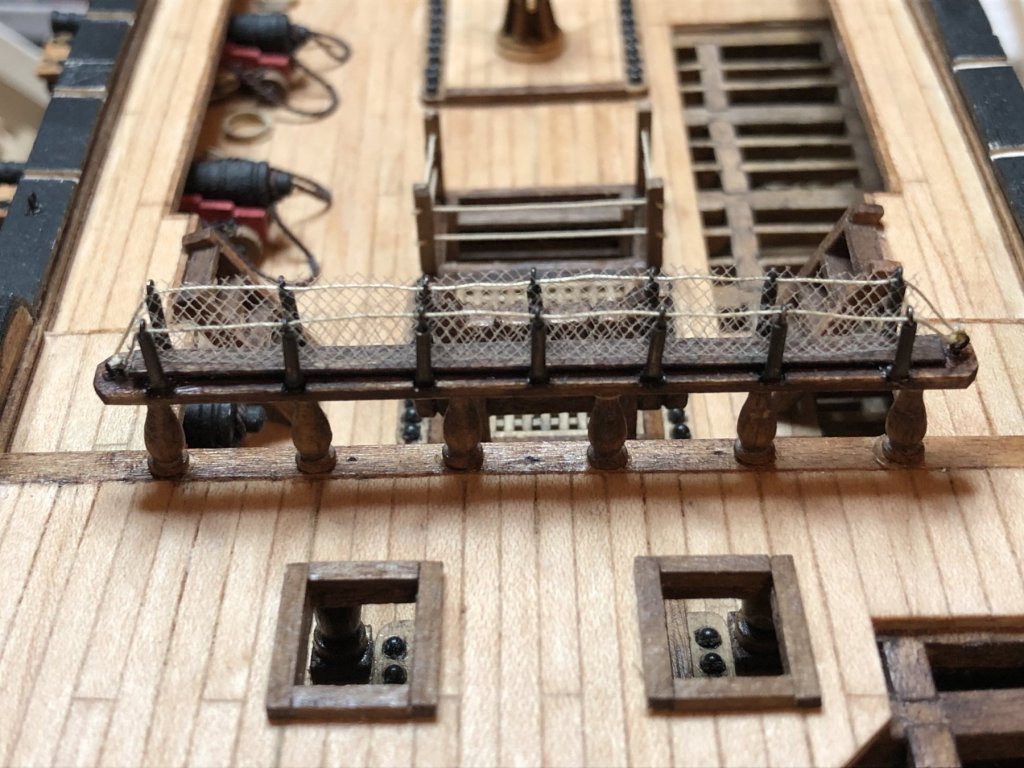
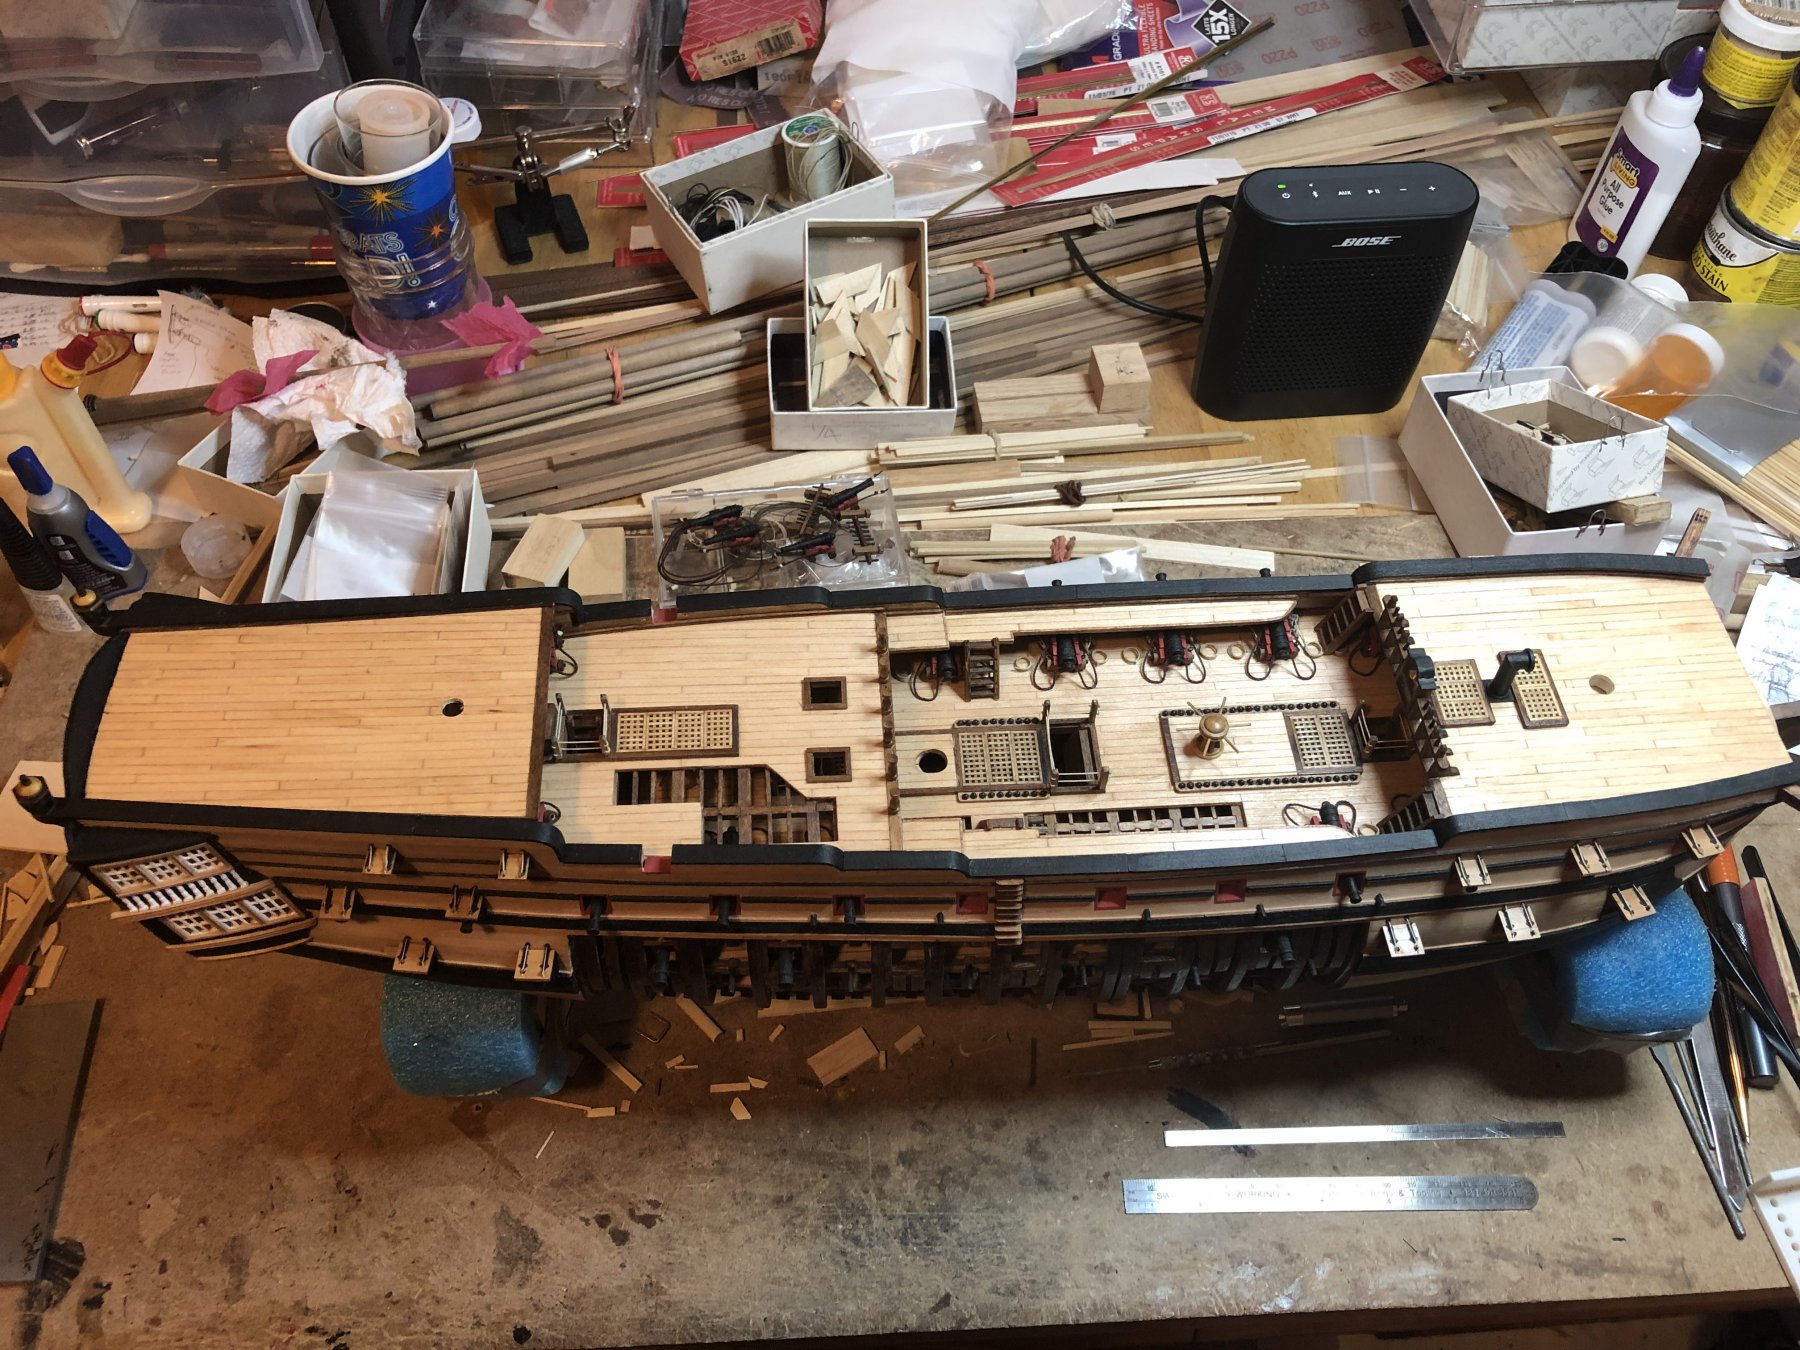
I haven’t posted in a while but I have been doing a lot of “lurking”. I have been busy making both the poop and forecastle decks along with the top rails. Also managed to get the ships bell, stove pipe and some grates on the f’castle deck. I made about 35 belaying pins. That was a bit of a pain but figured it out using my “drill” lathe. I am not sure what is more fun and challenging; building the model or coming up with ways to make things on a shoestring budget. 😁
here are are some pics of my progress.
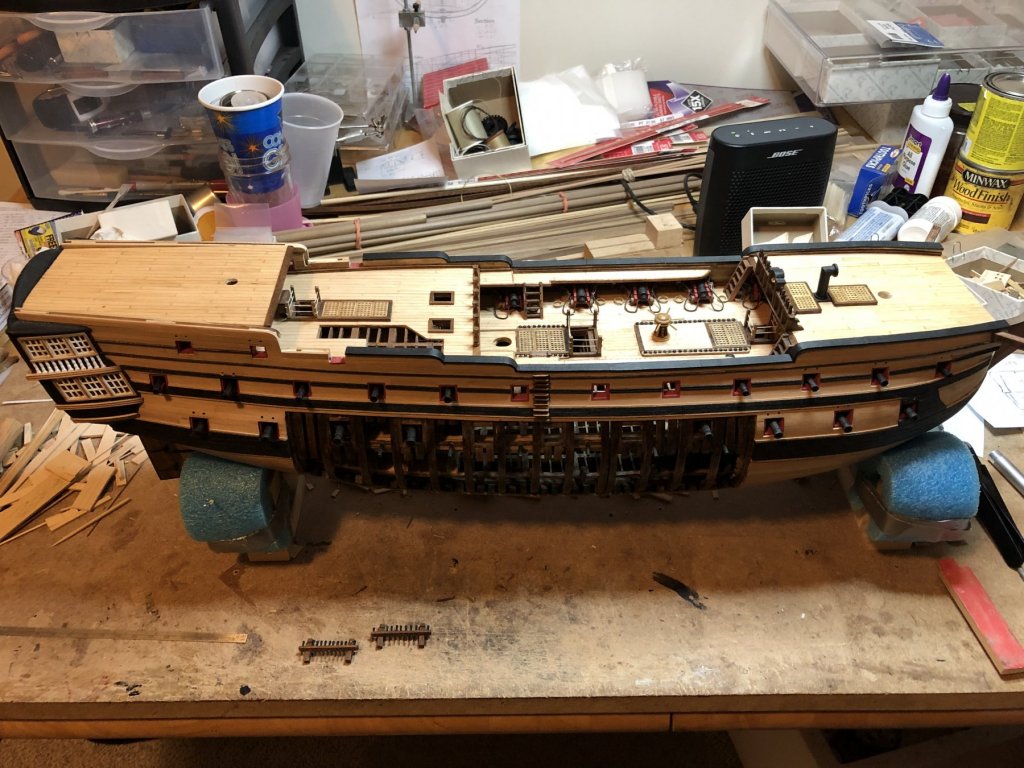
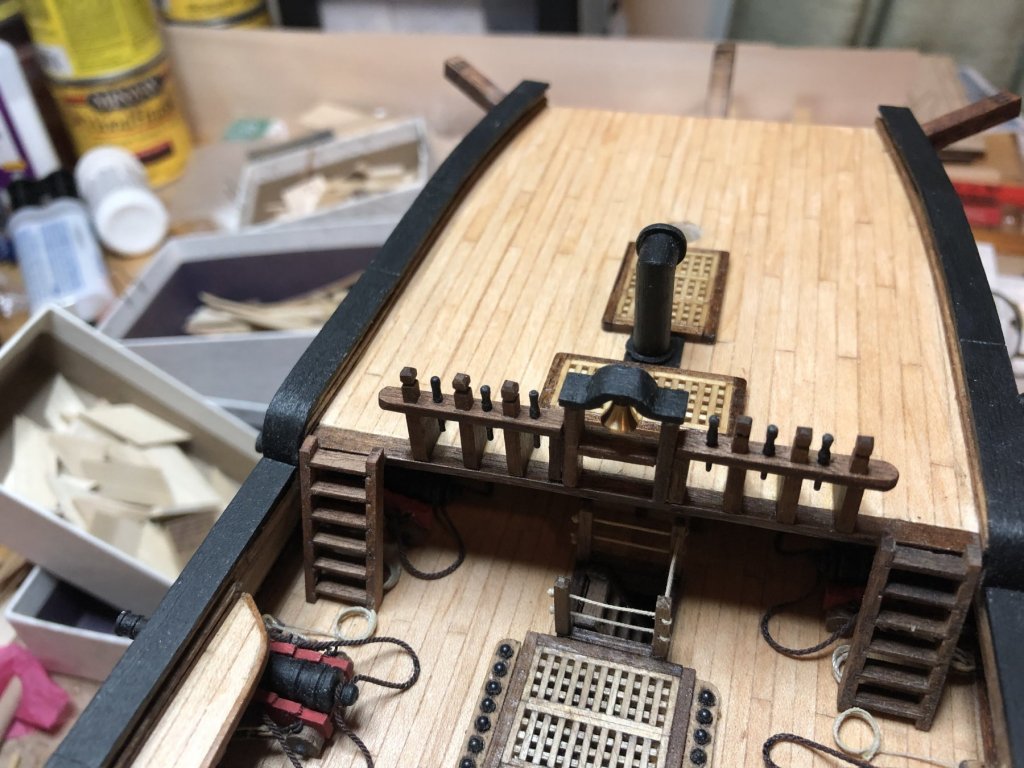
Tom
- GrandpaPhil, Jack12477, Valeriy V and 5 others
-
8
-
-
Hello Doris,
I just came across this build and I am speechless. I don't think this can be called a model anymore. I am thinking more like a piece of art. Your talent and attention to detail is on a level all its own. Thank you for sharing your methods and giving us something to aspire to.
Tom
- Piet, BETAQDAVE, FrankWouts and 4 others
-
7
-
-
A quality piece of art. You should be proud. Congratulations.
Tom
- popeye the sailor and J11
-
2


Mystic Seaport visit during the 2019 NRG conference
in NAUTICAL RESEARCH GUILD - News & Information
Posted
What is a CAMM pass?
Tom