


toms10
-
Posts
897 -
Joined
-
Last visited
Content Type
Profiles
Forums
Gallery
Events
Posts posted by toms10
-
-
hanks to all for the comments and likes.
3 hours ago, Bluto 1790 said:As for your wales - - - well, I'm very annoyed at you!
At a scale of 1:85 you have made super looking hook and butt wales. At my scale (1:80) I had tried to make hook and butt but was having too many failures and they looked horrible, so I 'copped out' and did the easier top and butt wales instead.
I know how tricky these complicated wales are to make so my hat is well and truly off to you!
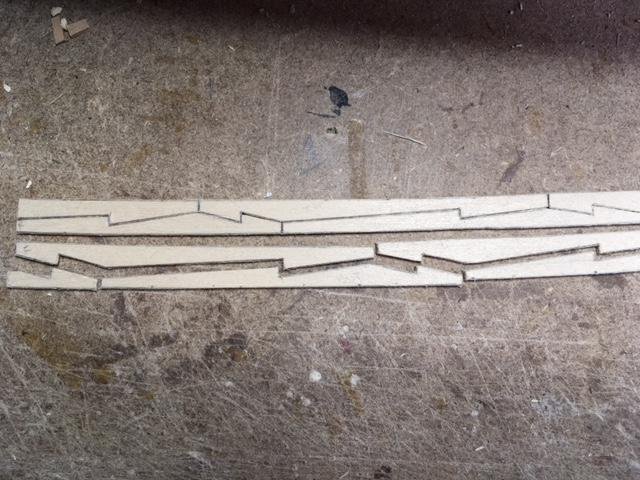
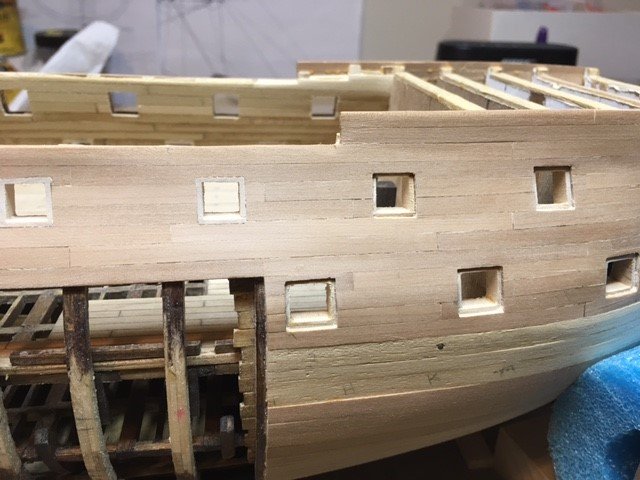
Jim, I would like everyone to think each plank is individually cut and fitted... but then I would have live with the fact that I have mislead my modelling friends. To make the joints fit nicely I actually did the following on a 1mm thick piece of scrap basswood that was wide enough to accommodate all 4 rows of planking. These planks are going to be painted so the wood type was not particularly important.
1) I traced the outline of each plank from my original scaled drawing on a scrap piece of paper.
2) Cut out the piece of paper along the outer edge of the top and bottom planks and laid it on my model to make sure the contour of the curve on the drawing matched up with my actual hull.
3) I took the paper and put it on the basswood and with a straight pointed probe, poked through the paper at each intersection of every line to leave a small mark on the wood.
4) With a sharp pencil I basically connected the dots to transfer the lines of each plank onto the wood. Since the basswood is very soft, the pencil made an impression in the wood which served as a bit of a guide for the next step.
5) Now I took a #11 Exacto blade and cut along each line to separate the pieces... much like a puzzle.
6) Lastly, I took a bit of very fine sand paper to barely clean up the edges. The result is each piece fitting nicely with the adjacent piece.
Here is a picture showing what I did. All the parts have already been cut apart but to help illustrate I put the top 2 rows back together to show the pencil lines I followed. The bottom 2 rows are moved slightly apart to show the individual pieces. Now my secret is out. Now I wish I could come up with a way to "cheat" the carvings.

Tom
- mtaylor, davyboy, Bluto 1790 and 1 other
-
 4
4
-
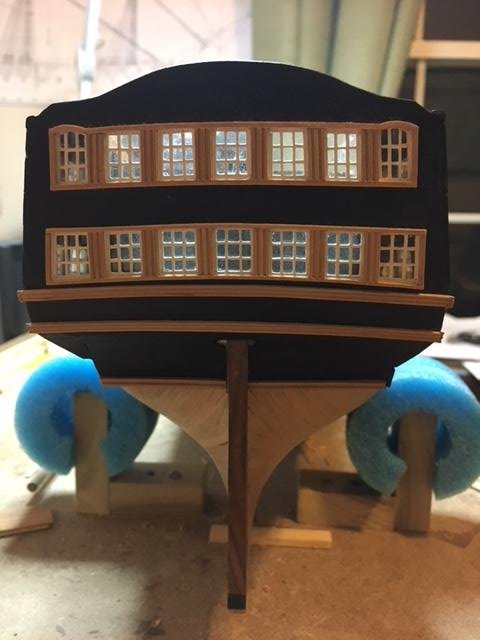
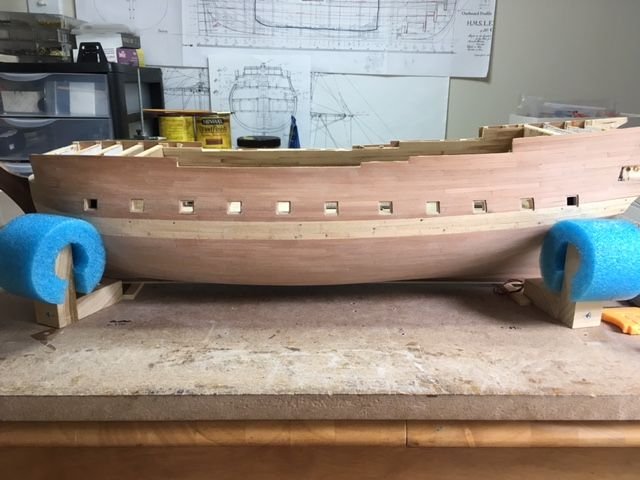
It has been a while since I posted but I have been making some progress on the stern windows. Below are some pics. I am currently trying to make the tiny spindles for the overhang below the top set of rear windows. I don't know what that is called. At 1:85 scale they need to be about 2mm in diameter with undercuts down to 1.5. Not exactly an easy task when you have to make about 75 of them that need to look the same since they will be right next to each other. Luckily I have access to a lathe and tool room to make tool bits and such. Problem is keeping the wood from splintering apart at such a small dia. I have tried various wood and am actually having success using toothpicks. I plan on painting them either white or gold so the wood color is not really important. The sculptures will be a gold color once I figure out how to make them. I will probably use some type of clay, maybe Sculpey since that is more forgiving than wood. It will be my first attempt at sculpting/carving so I am pretty scared. So to delay the terror I decided to work on the hook and scarf planking on the wales. I did a small section next to the cutout and other than needing a bit of paint touch up in the joints I am happy with the way they came out. I am going to finish the wales now just to keep the "good feeling" going.


Tom
-
-
14 hours ago, Bluto 1790 said:
First, since I fitted the fore stay and preventer I've been unhappy with the size of the mouses on these stays. (It doesn't feel right to say 'mouses' instead of 'mice'!)
It just annoyed me immensely every time I looked at them >>>
If it annoys you eliminate it. That is my motto! The model is really looking good Jim. I thought two steps forward and one back was the normal process????
Tom
-
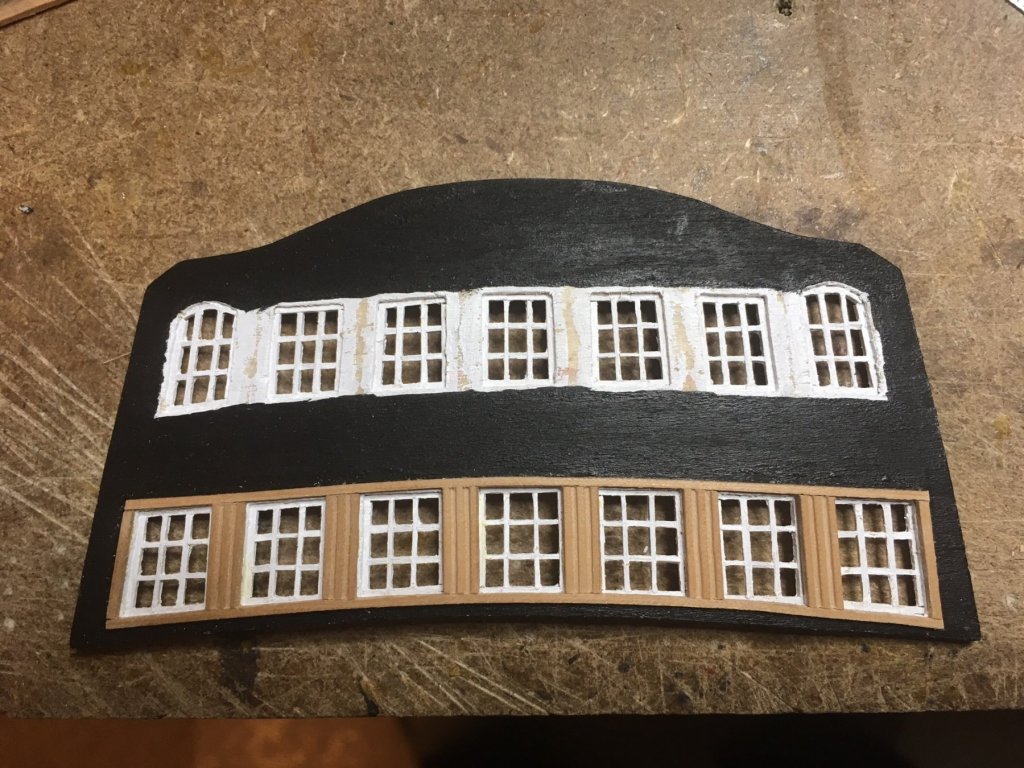
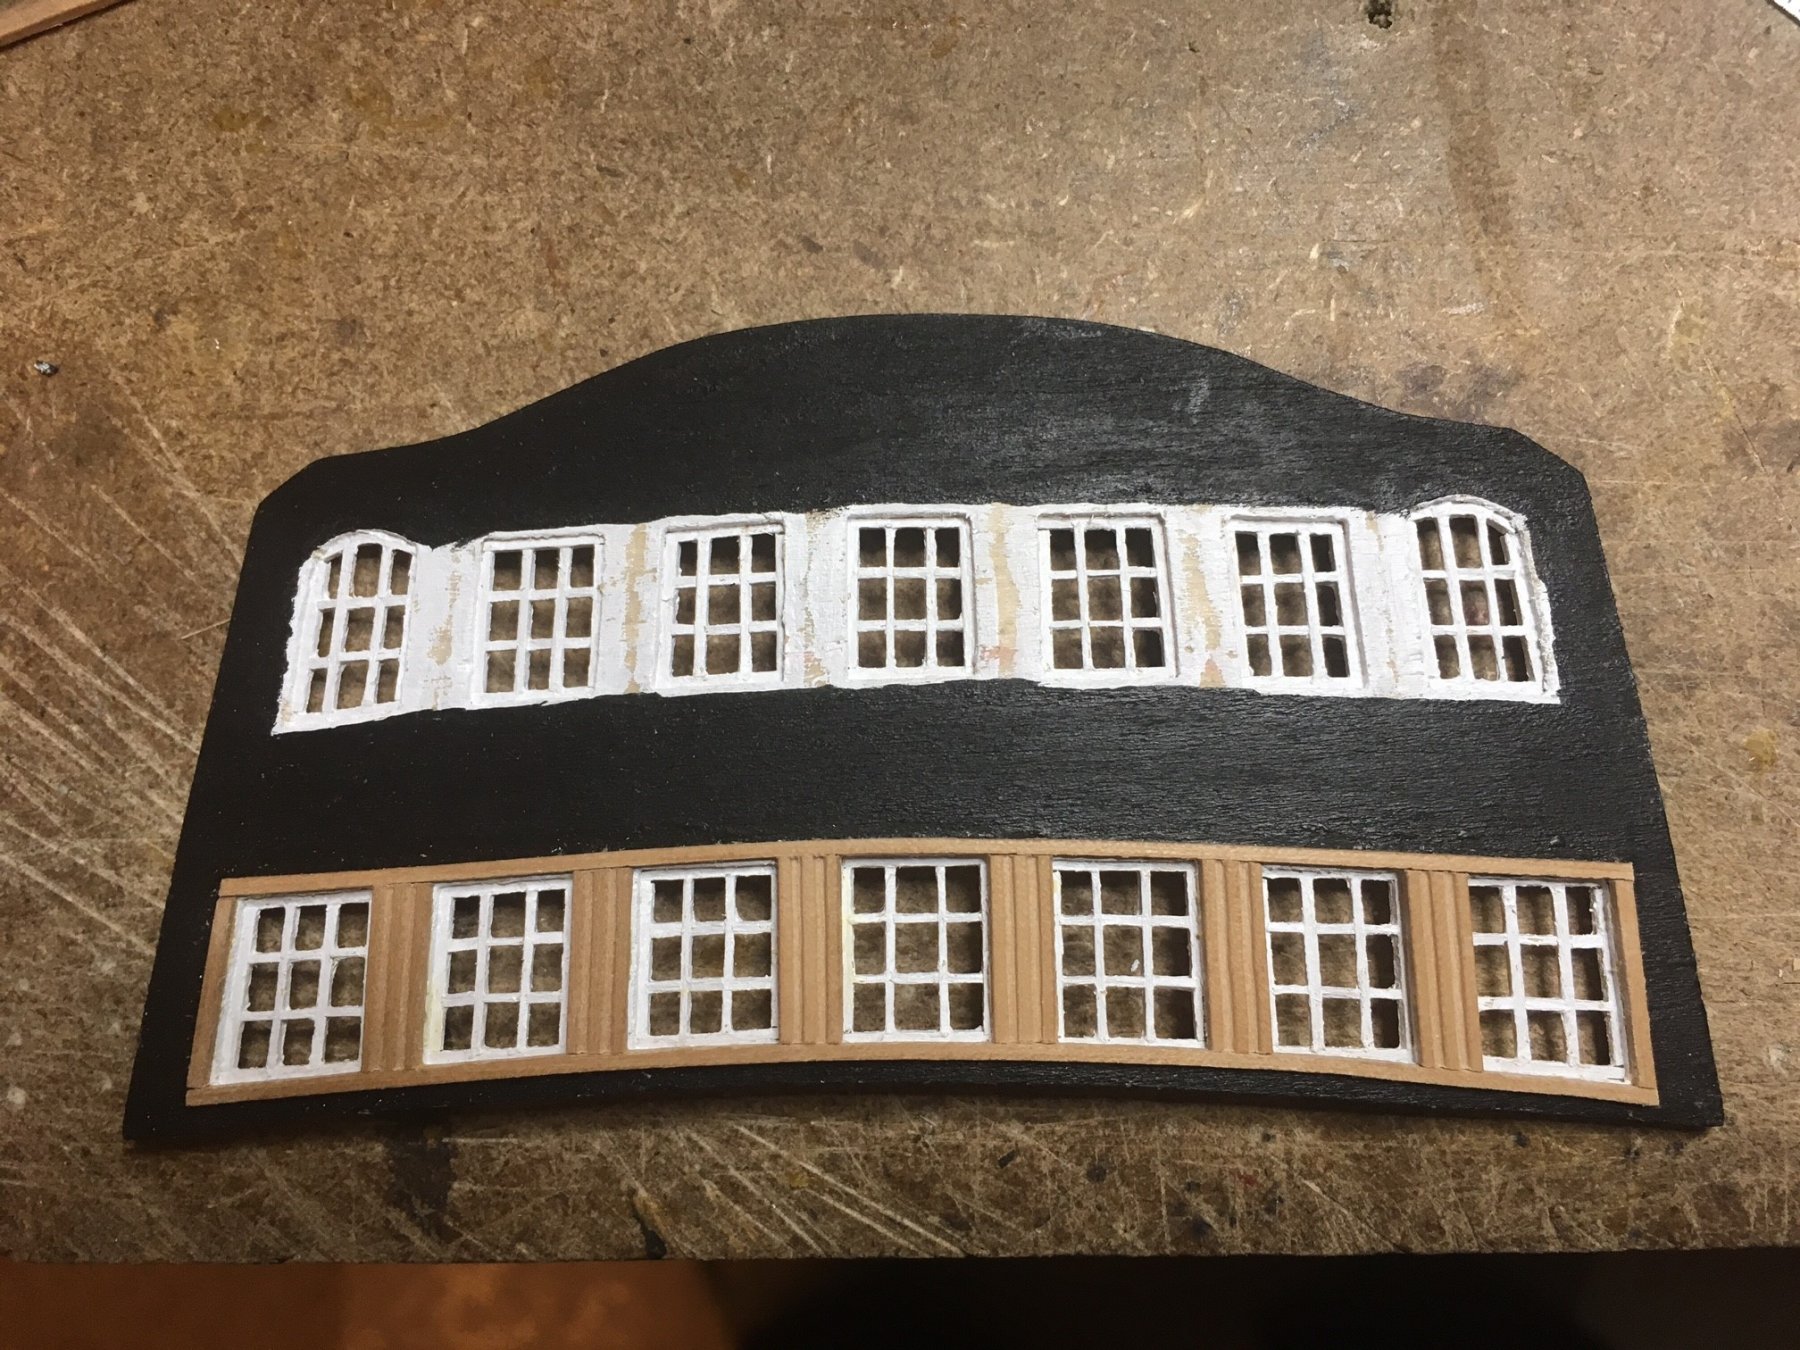
Here is a bit more progress on the stern windows. I added some mouldings to the lower set to get a an idea of what it will look like. Still needs to be touched up a bit in the lower right corner and some slivers removed from some of the frames. At 1:85 scale some of the intricate details will get lost I am sure.
Tom
- src, luc, CaptainSteve and 3 others
-
6
-
OK ~ as with the deadeyes and most of the blocks, I cheated with the anchors -- I bought over-the-counter items instead of trying to make my own. The ones I got are quite acceptable and probably better that I would have made myself.
Jim,
There is no such thing as cheating. I like to think of it as using the available resources to fit your needs and accomplish the goal. I would think in our cases the goal is making an eye pleasing piece as a result of a hobby interest. You certainly have met the goal.
Tom
- mtaylor, Bluto 1790, leginseel and 1 other
-
4
-
On 10/14/2017 at 2:41 PM, Beef Wellington said:
Very nice lights Tom, do you have any photos you could share of the work in progress, would love to learn your technique.
Hi Jason,
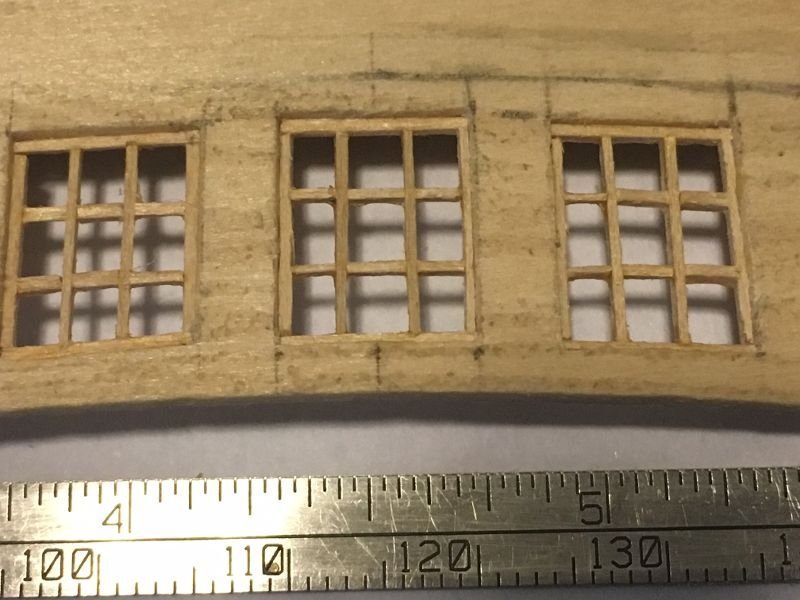
Unfortunately I don't have any in progress pics. Basically I just used a scrap strip (1 x 4) of basswood that I sanded down to about 0.75mm thick. I then took a razor blade and sliced off pieces going with the grain of the wood about 1.5 wide. Pretty much eyeballed that dimension because the width of the window frames facing outward is actually the 0.75 thickness. This keeps all the frames looking the same thickness. I fit the vertical frames to the height of the window opening. I then fit the cross members piece by piece. It was tedious but not as bad as it sounds. The pieces had a tight enough fit to hold in place on their own until I applied some glue to the back side of each joint. Once everything dried I could sand the front faces flush if need be. The back faces need to be somewhat close but not perfect which is why I only eyeballed the width of each frame. My plan is to cut a piece of matte finish mylar to fit the entire opening and glue that in from the back. The only thing I would do different is to make the frames out of a would that is a bit harder so you don't have to worry about the "fuzz" or stringers that basswood produces. These frames are going to be painted white so that will help to reduce the fuzzy look... I hope. This post is proof that a picture would have been worth a 1000 words. Wish I thought of that as I was going along.
Tom
-
Started working on the stern area. Built the window frames piece by piece for the back area. Talk about tedious but I am pleased with how they came out. I will be painting them white. Now I need to put in the mouldings around them and start thinking about the spindles.

Tom
-
6 hours ago, Bluto 1790 said:
Tom said "Okay so I lied a little." ~ we're all entitled to change our minds, Tom!
That planking looks very neat as do the gun port liners.
Now I need you to speed up some so that I can copy your rigging!
Jim,
I will pick it up a notch or two... should be there in a year. You will just have to take a break for a while.
On the other hand, I was kind of planning on using your log as a guide.
Tom
- mtaylor, Bluto 1790 and herask
-
3
-
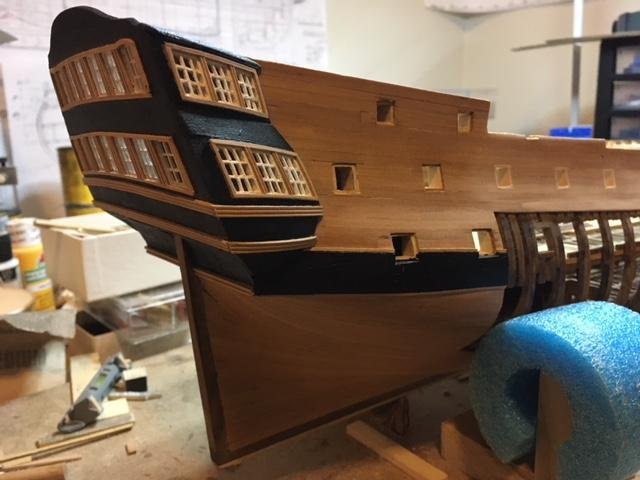
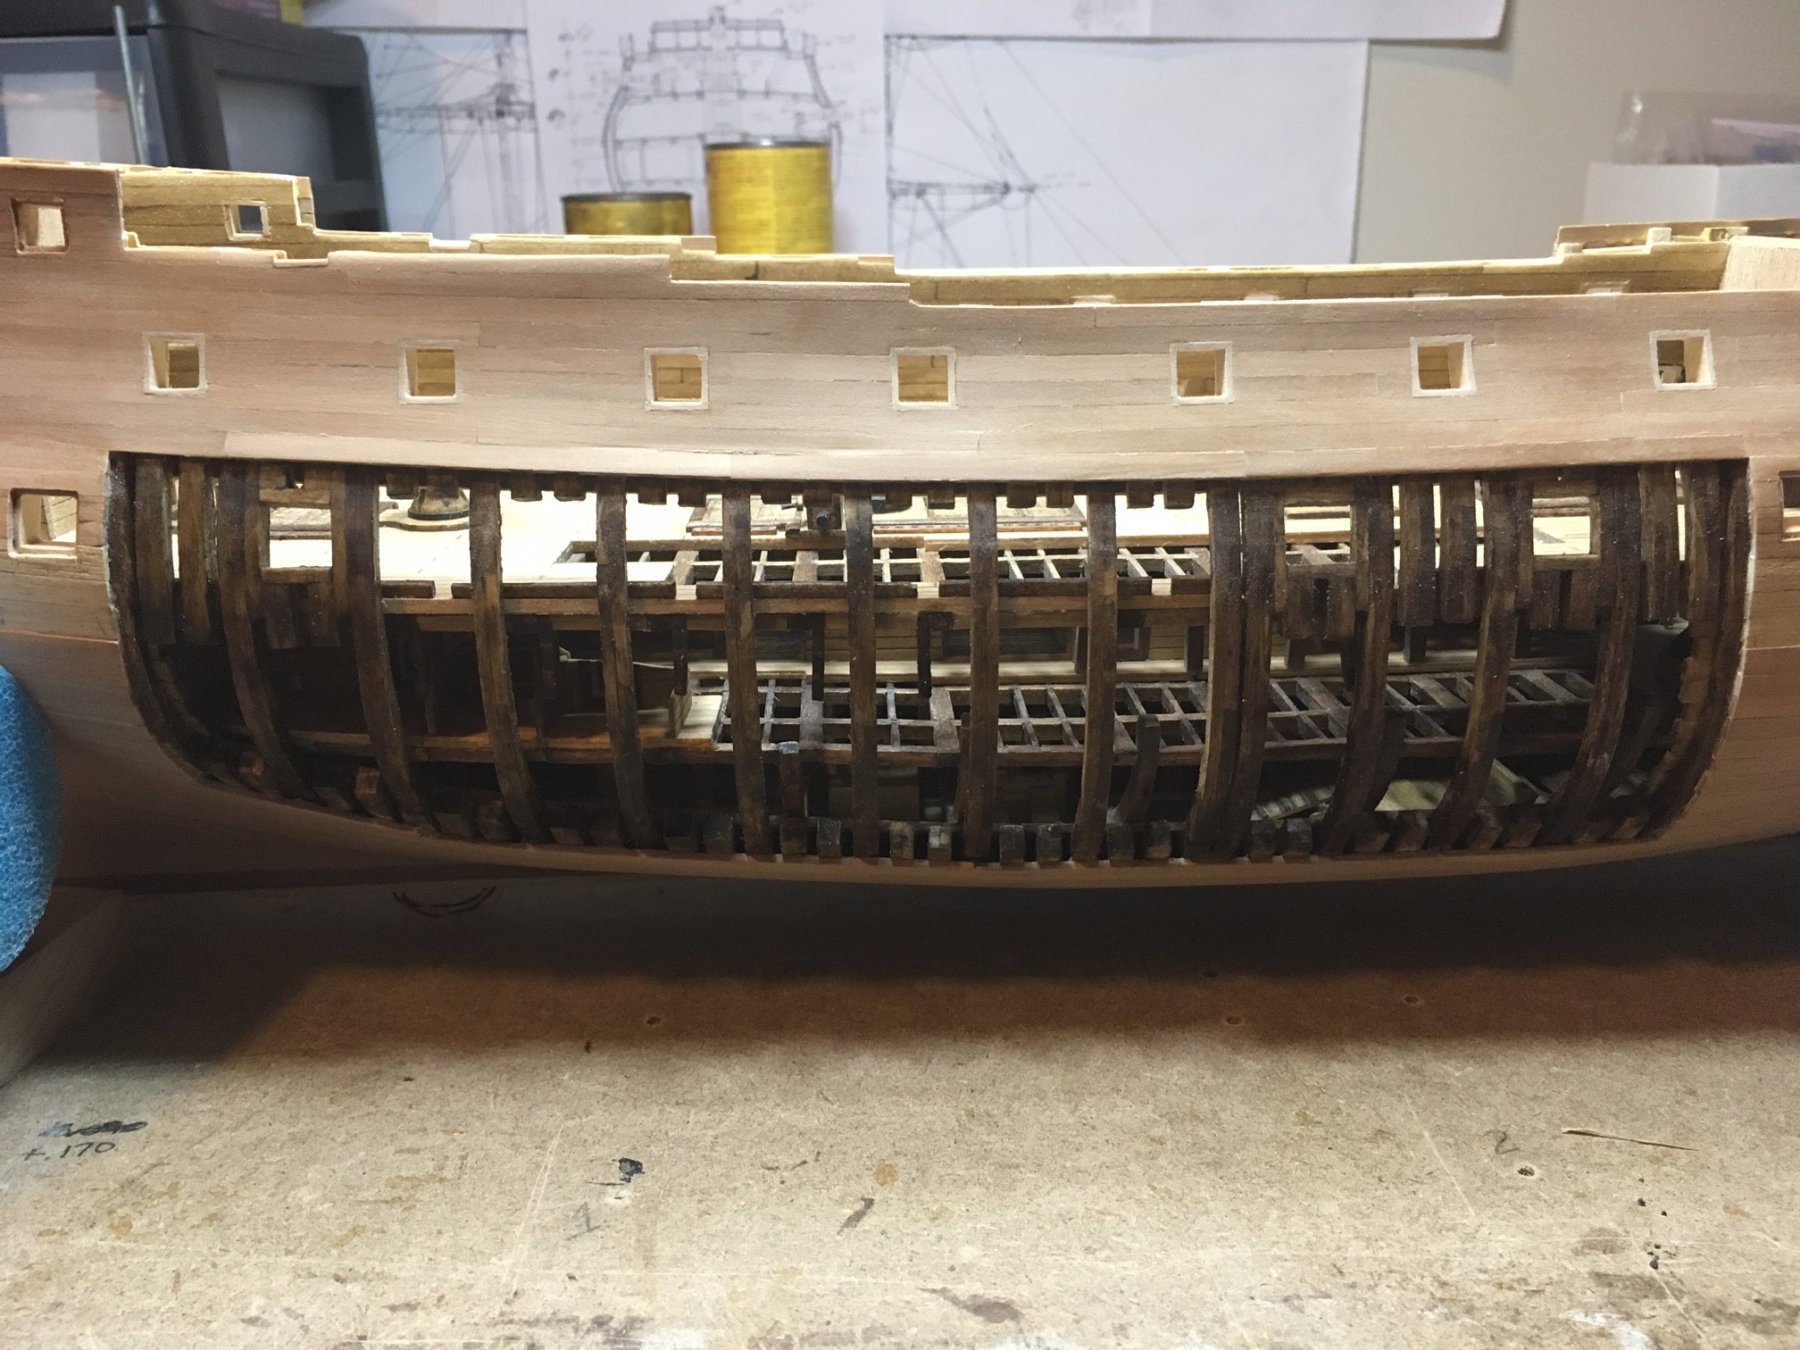
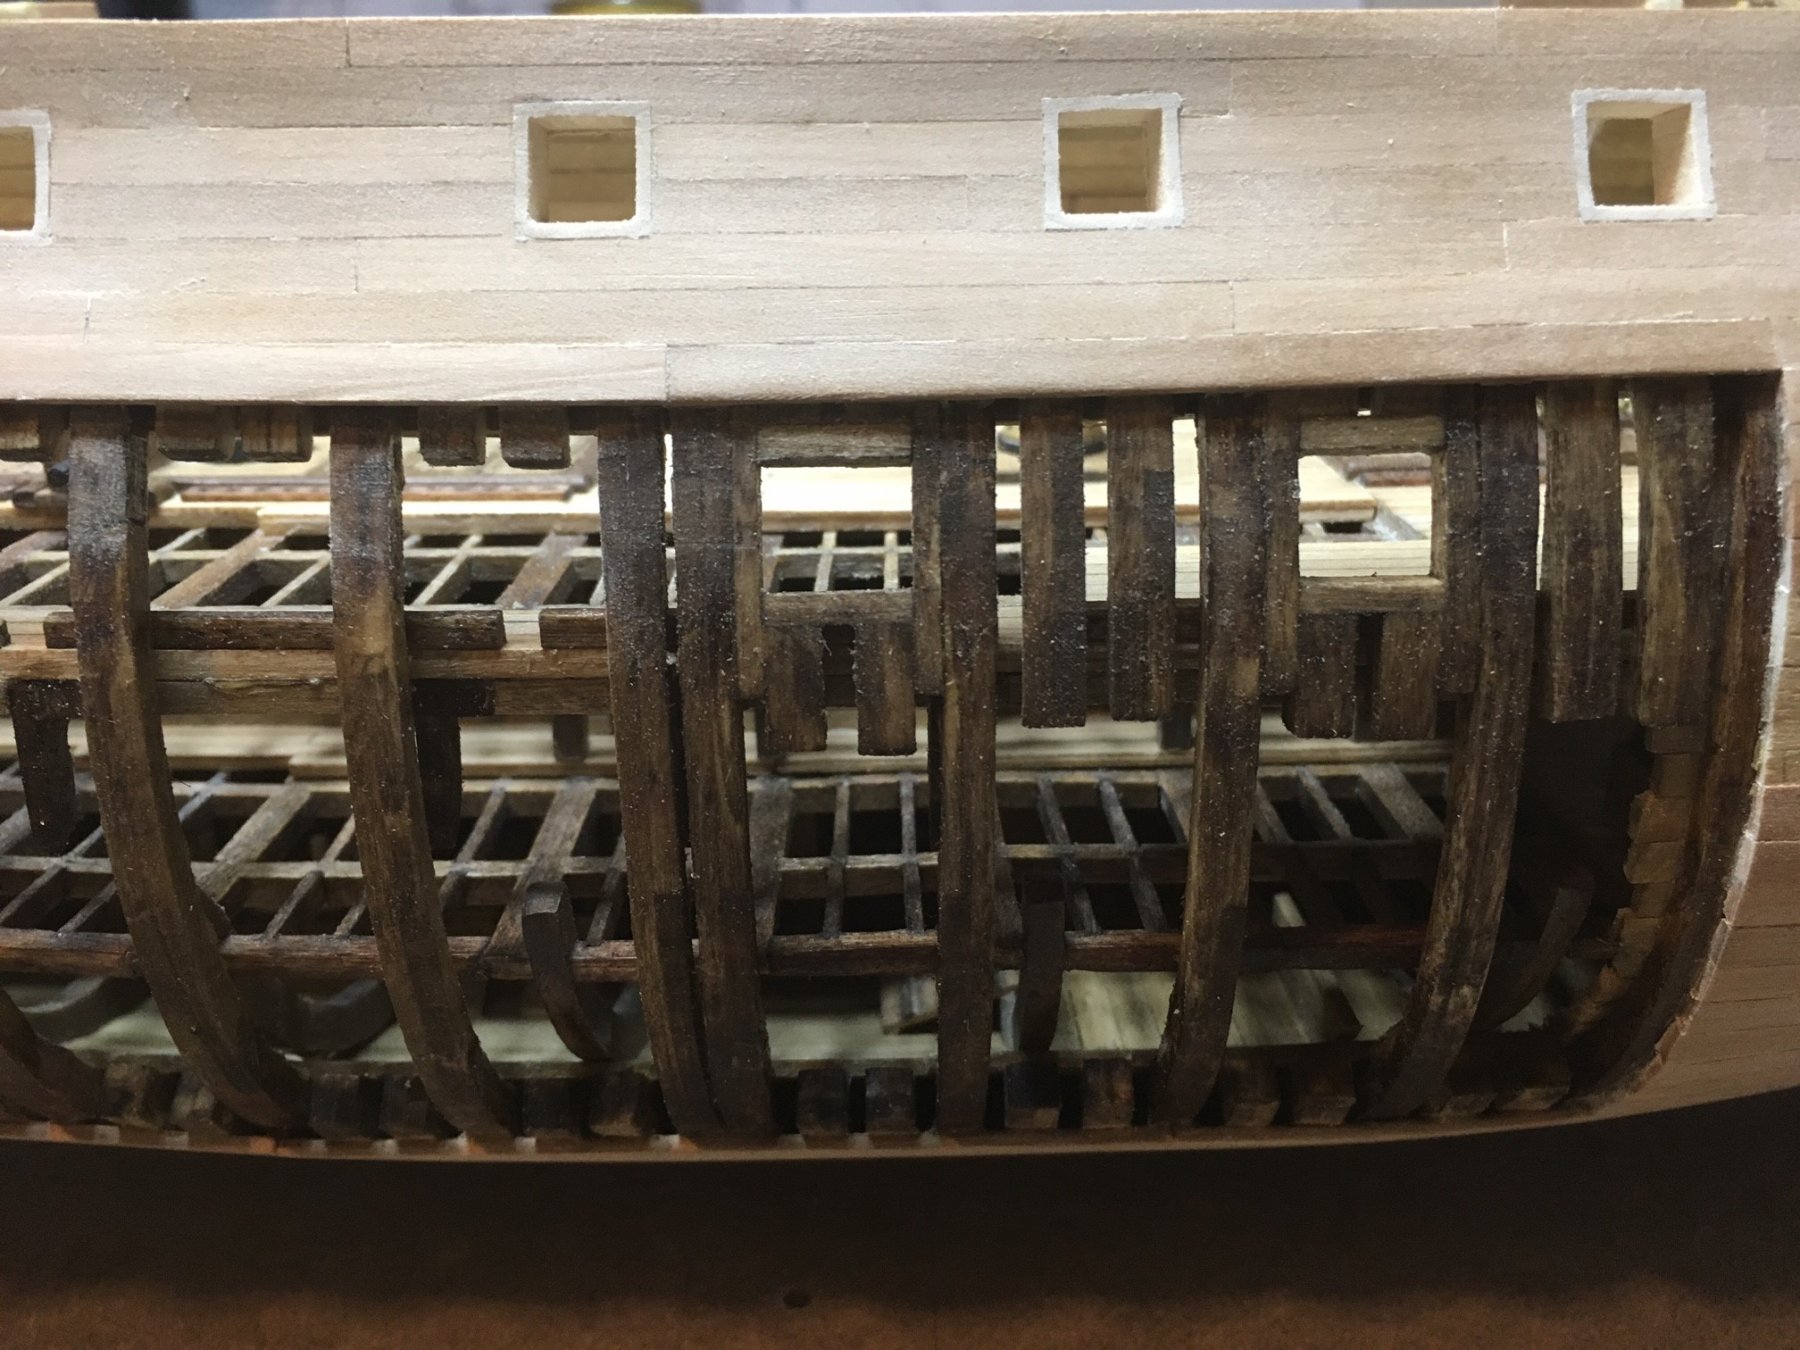
Okay so I lied a little. Instead of working on the stern cabins and wales planking I decided to finish up the exposed framing. Now I can start working on the stern.


Looks like I have some saw dust on the camera lens.
Tom
- Jack12477, tarbrush, kees de mol and 7 others
-
10
-
Jim,
Looking fantastic. I am looking to your build as an inspiration to what I hope someday mine will become. Keep up the good work.
Tom
-
My 2 cents ... rigging is the difference between a field goal and a touchdown. I always hear people say how much detail is on a model and that is what makes it special. In my opinion rigging is probably the most detailed work of a model.
Tom
-
-
-
ntmcd1,
I also built the AL Constellation. It was my first attempt at model ship building so I really didn't know any better about the accuracy or drastic lack of it. I picked up the kit from a fellow MSW member for a very low price so I said why not. The model provided a vast amount of experience for me since I had none previously. I don't think I could have completed it without the help of everyone on the MSW site. I did quite a bit of bashing on the rigging and made the sails from scratch since the kit did not supply any. As for the hull I ended up keeping it pretty much the same as the kit. Now that I am scratch building my second model I can see how silly it was for AL to release this as the 1798 Constellation. I don't really have the pride in model that I used to. On the other hand, most if not all the people that look at it don't know the difference anyway. They just look at the overall model and go wow, look at all the detail and then my pride returns a bit. I guess all will be fine as long as nobody from MSW ends up in my living room!
A link to my build log is in my signature.
Tom
-
And the learning just keeps coming. This is why I love this site. I didn't even know about frapping. I like the idea as an option to coils of rope on the deck. Thanks to all of you for sharing.
Tom
- mtaylor and thibaultron
-
2
-
Hi grsjax,
I am far from an expert but I made some rope with my ropewalk out of 100% polyester and it came out very "stretchy" or somewhat elastic. If I use something with at least 25% cotton and the rest polyester the rope does stretch like an elastic. The polyester also tends to have a sheen about it which I don't like but that is just a preference.
Tom
-
Hello everyone,
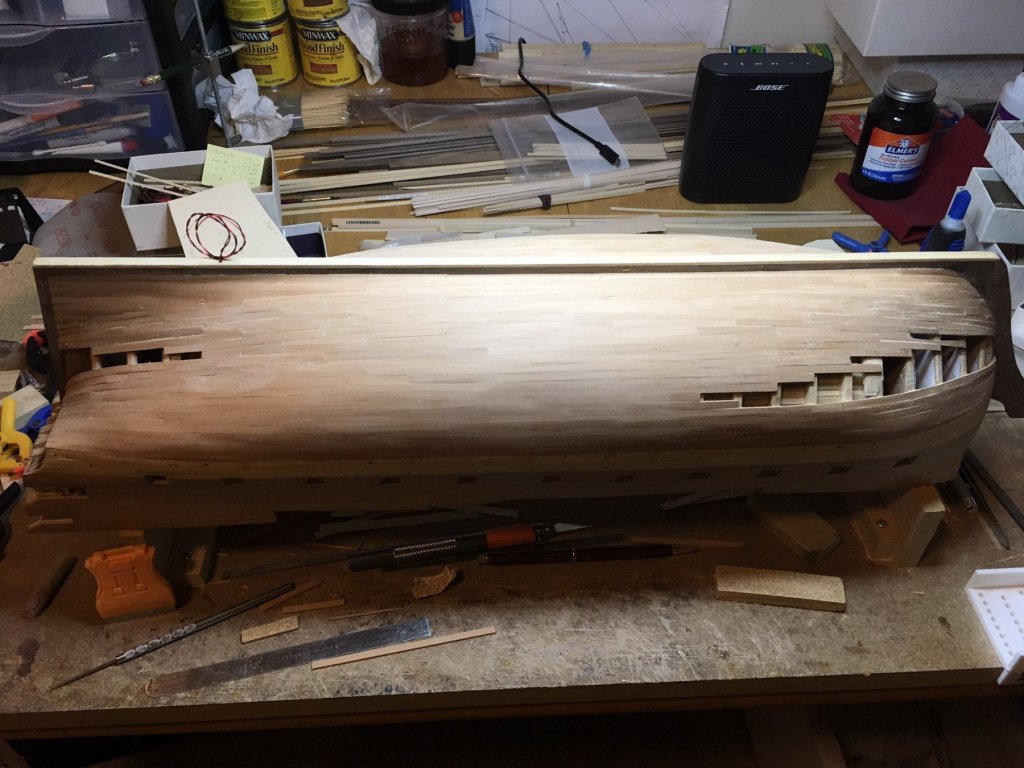
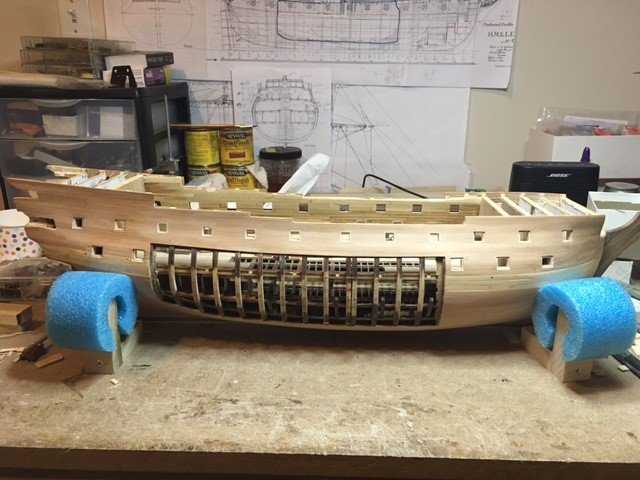
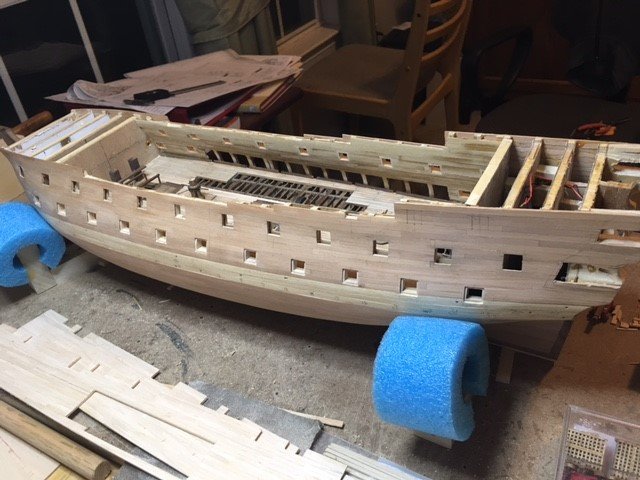
Planking is now complete... more or less. I am relatively pleased with it especially being my first POF with single layer planking. The Swiss pear was nice to work with. The wales planking with all the interlocking pieces will actually be a second layer and painted black. I think my next step however, is to locate the next level of gun ports and get those cut out.
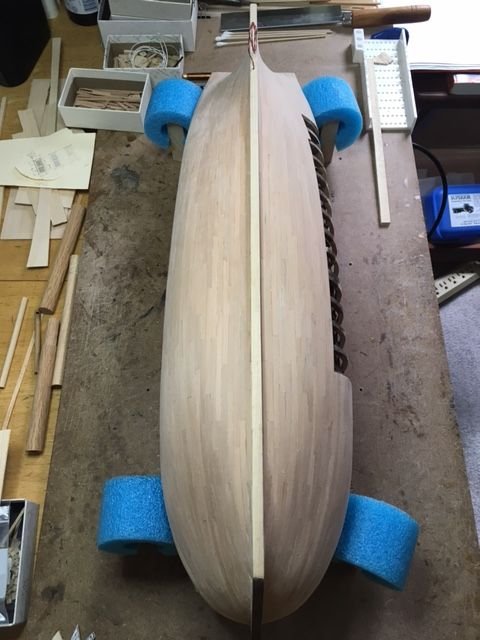
I also had to change my fixture for holding the hull now that the planks are in place.
Tom
- Kevin, Jack12477, Landlocked123 and 3 others
-
6
-
Hi Jim,
She is really come to life with the addition of the masts. Glad to hear you are feeling better. Keep up the good work.
Tom
-
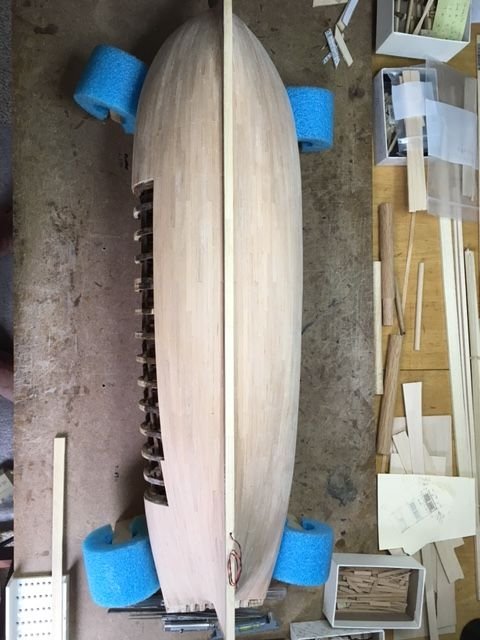
The dim light at the end of the planking tunnel is getting brighter! Pretty much just have the upper bow section on both sides then let the sanding commence. There are a couple of rough areas at the tight bends but with the planks being 1/16" thick there is plenty of stock to get everything smoothed over. All the lighting wires are now covered up. Part of me does not want to test them to make sure nothing silly happened since they were installed!

Tom
-
Hi Jim,
Rigging just adds another dimension to a model. Looks really good. I found in my last build that one of the fun things about rigging is as you mentioned above, there is variation in every ship as to exactly where every line needs to be. Trick is to put them all in a place where they can all "function" with each other. As for the bees wax... I found it a must.
Tom
-
Hi Jim,
Looking goooood. Before you know it, you will be tying the clove hitch knots for the shrouds in your sleep..... for days and days.
")
Tom
- John Allen, Ulises Victoria, mtaylor and 1 other
-
4
-
-
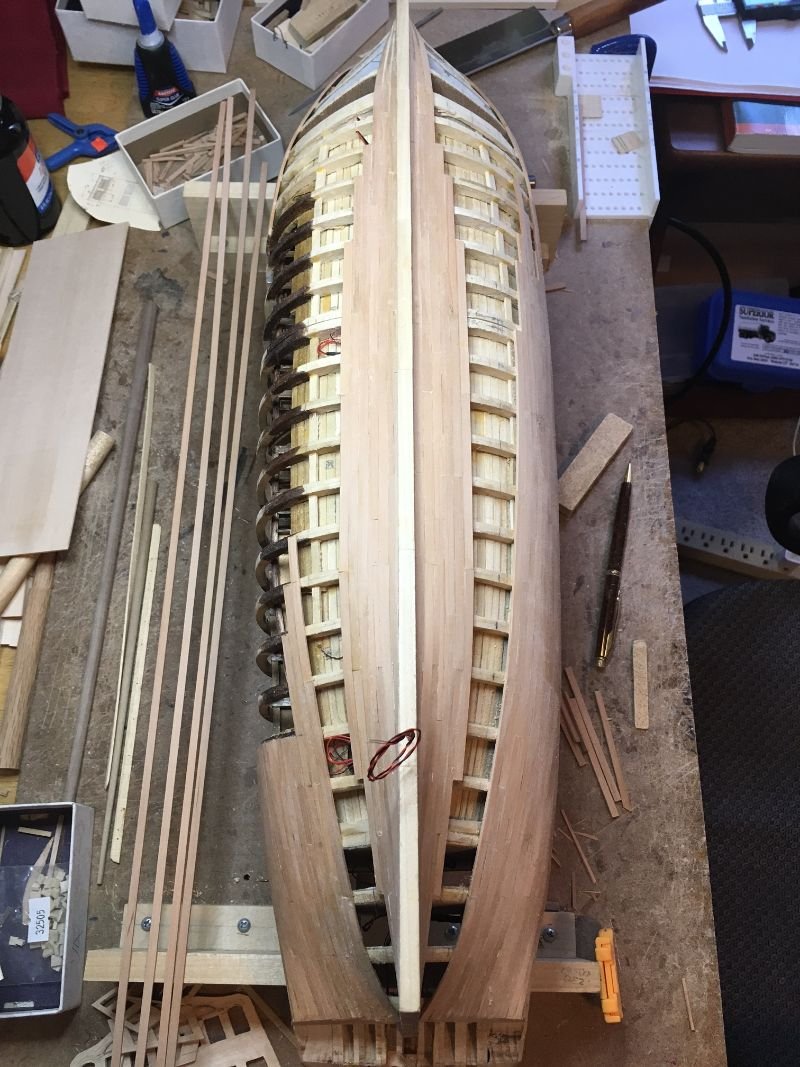
Some more progress pics on the planking. Pace is pretty slow but hey, it is summertime and this thing called "working for a living" keeps getting in the way.
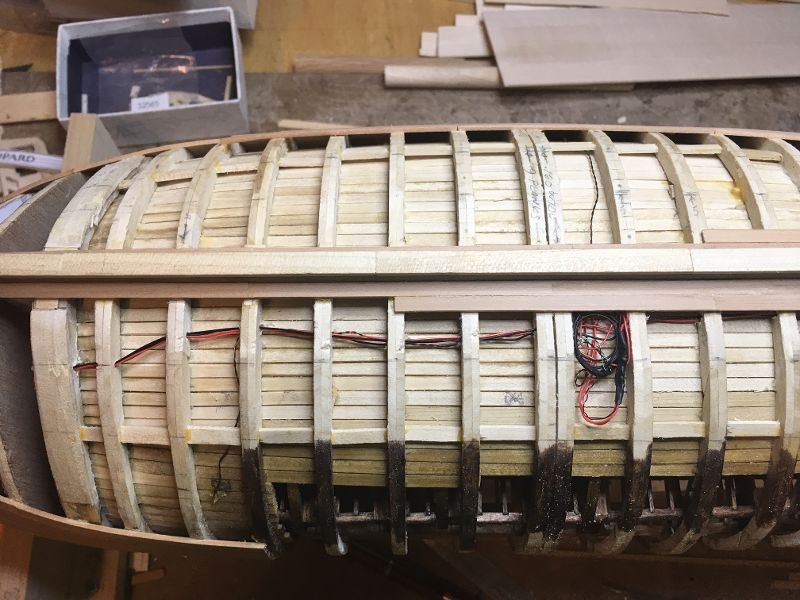
The electrical wires coming from the bow to midship on the starboard side all bundled and ready to get sealed in with the planking.
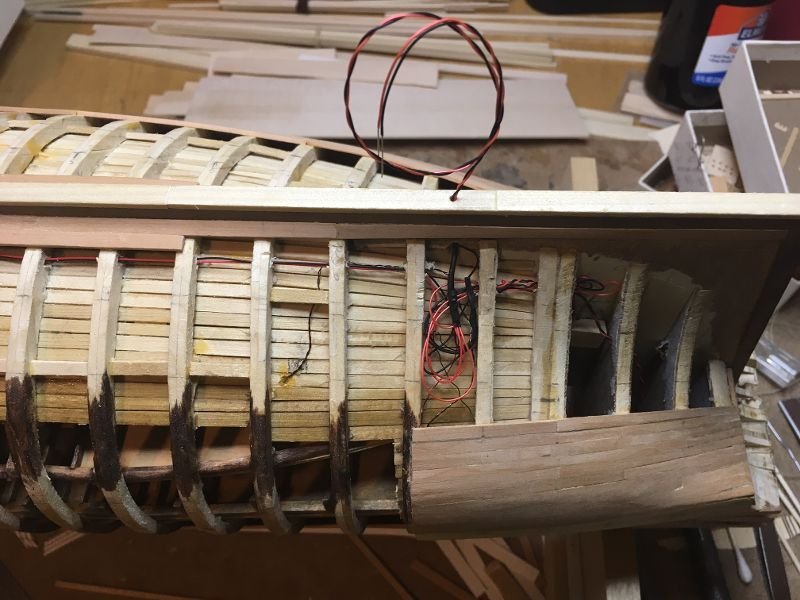
Aft wire bundle on starboard side and the connection leads to wire bundle at midship. The single loop coming out of the keel will go through rear mounting post that will attach the hull to the display board. The wires will go through the display board and feed out through a channel underneath the board. The planking looks pretty rough but it should be fine with a little sanding.
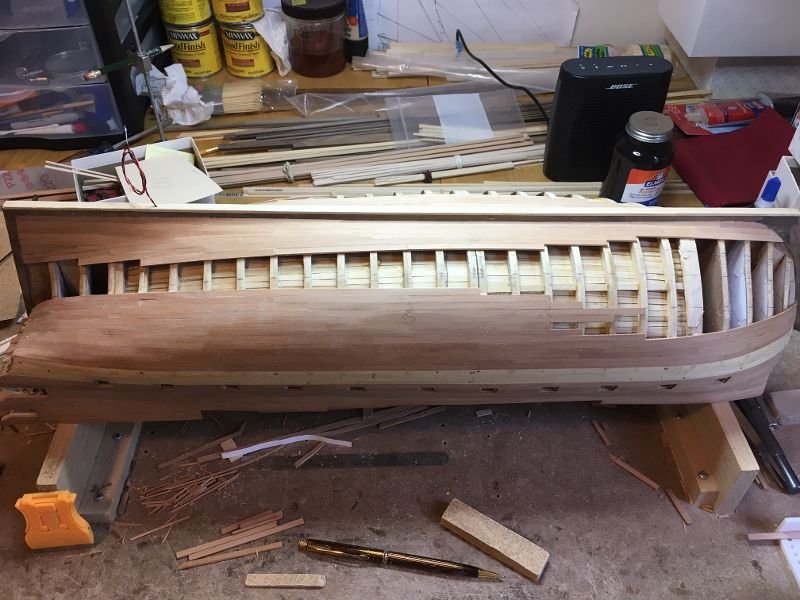
Port side planking progress. Again nothing has been sanded and shaped yet.

Starting to see a dim light at the end of the planking tunnel!!
Tom
- Kevin, Bluto 1790, Landlubber Mike and 7 others
-
10


HMS Leopard by toms10 - FINISHED - 1:85 scale POF/POB
in - Build logs for subjects built 1751 - 1800
Posted · Edited by toms10
Hi Richard,
Glad to have you as part of my build log. My thought when starting this project was why go through all the efforts with cant frames and other items when nobody will see them? As this is my first scratch model it is hard enough already. My end goal is to have a nice looking model to display in my home. Purists will need to look elsewhere.")
Tom