newbuilder101
-
Posts
870 -
Joined
-
Last visited
Content Type
Profiles
Forums
Gallery
Events
Everything posted by newbuilder101
-
 Next build?????
 -
Your last comment made me laugh. Your balusters look great Theo! If I had the proper tools, I'd be using them too, instead of my labour intensive method. I did try a drill, but there was nothing left of the wood! The scalpel just worked better for me. Keep up the good work!
-
All I can say is beautiful! The block and tackle assemblies do look even better, but I thought it looked good before.
- 1,279 replies
-
- 1
-

-
- agamemnon
- caldercraft
- (and 1 more)
-
Those bricks look fantastic! I'll have to remember this method.
- 2,191 replies
-
- 1
-
-
- confederacy
- Model Shipways
- (and 1 more)
-
Thanks again for all the input! Judging by all the advice given, I think my next step will be to make a brand new mold with plenty of vents and try again.
-
That might just be worth a try!
-
Augie: I forgot what you said about the cannons, since I`m still taking in the wonderful sound of ``young lady``!
-
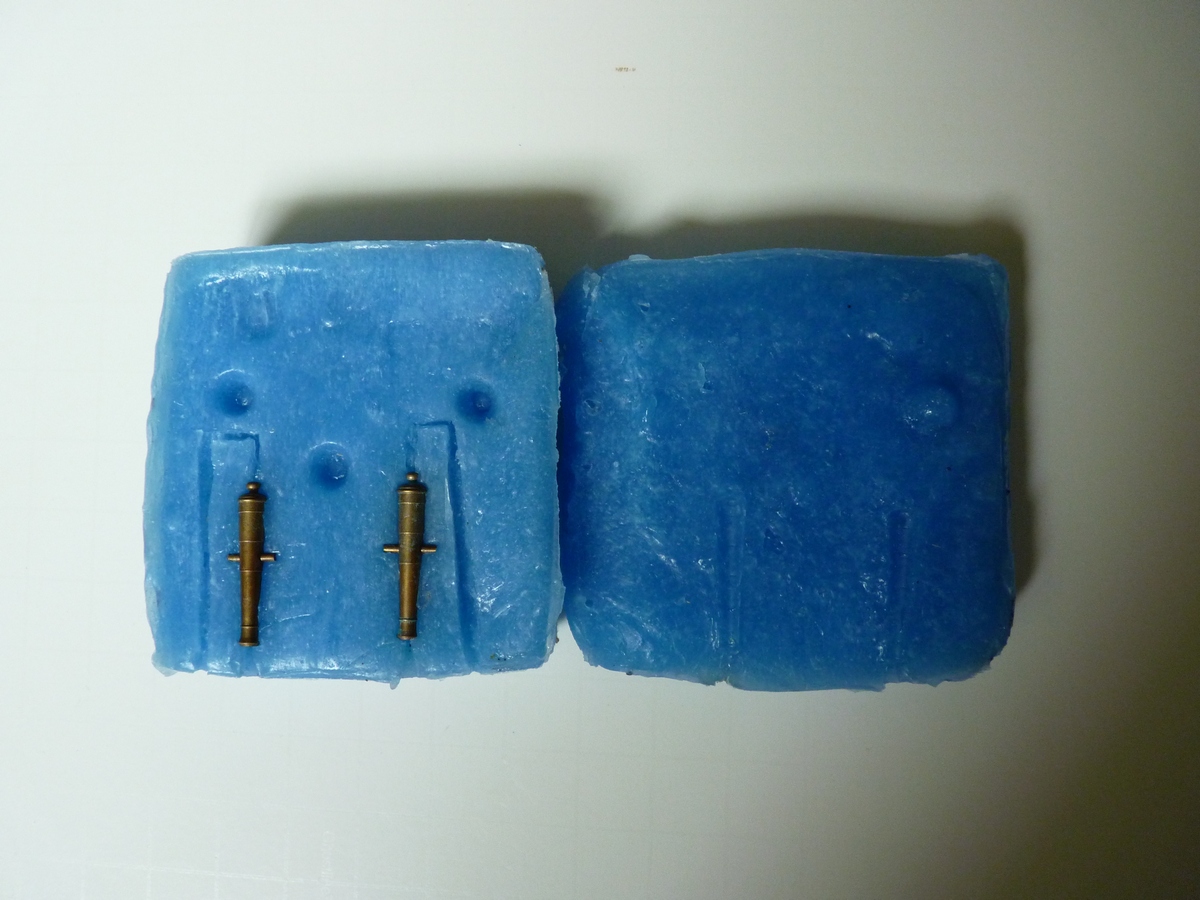
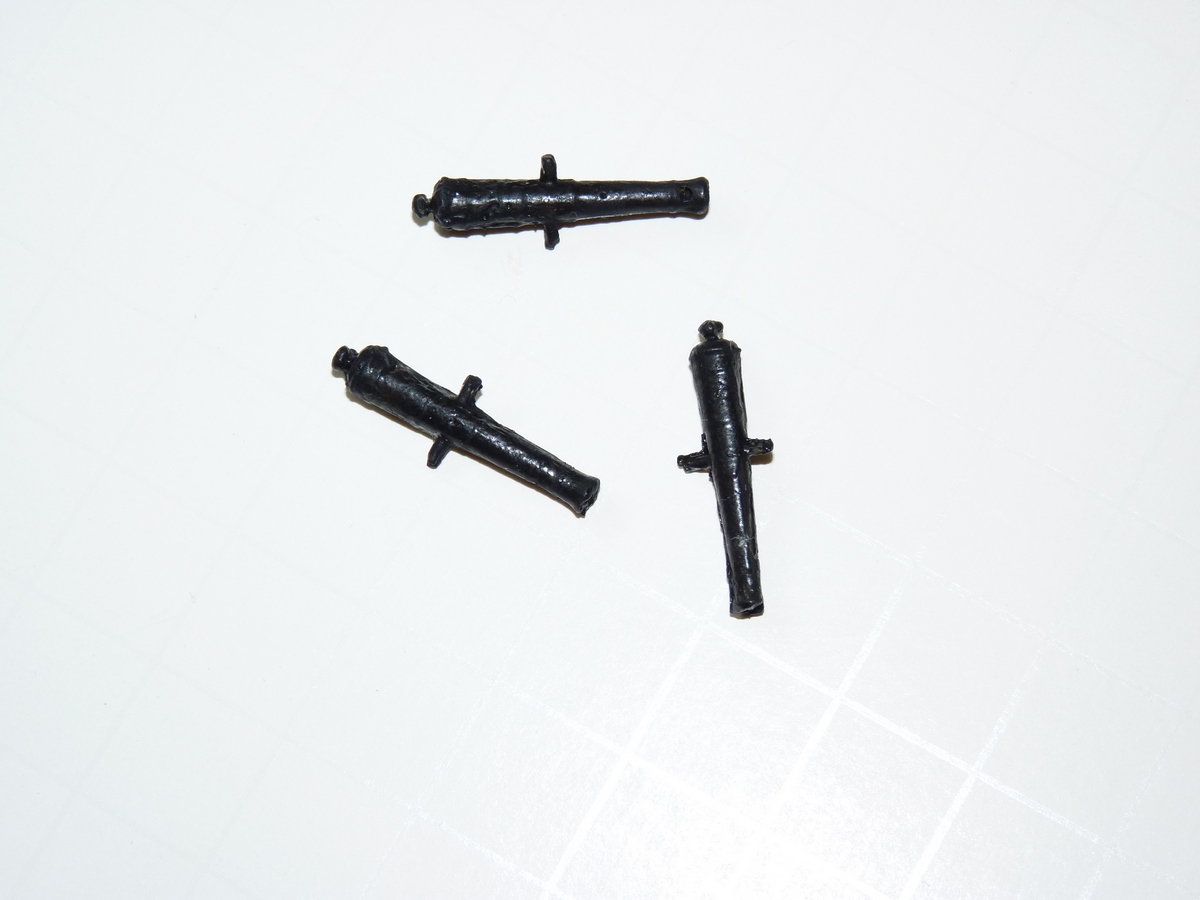
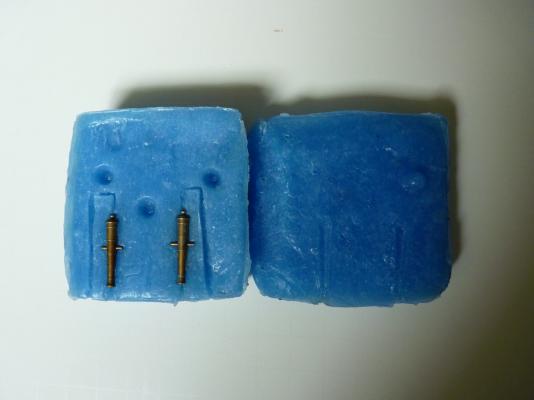
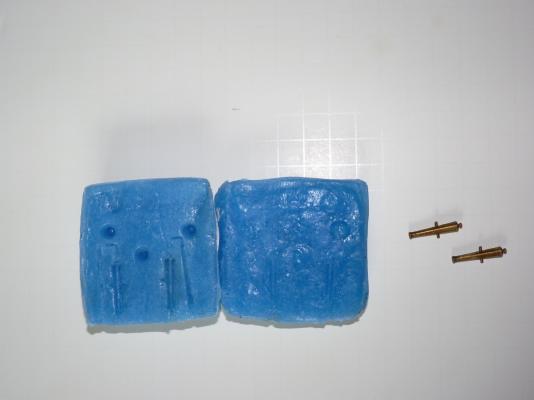
Thank-you everyone for taking the time to help! Bob: I haven't totally ruled out metal yet. If my next few tries with resin don't work, then that may be next. Steve: I did paint both sides of the mold first, but will try "CPR" on it next time. Goodness knows they certainly need resuscitation! I've made a couple of 2 barrel molds, and the setup time is about 8-10 minutes. Ed: I am seriously considering metal as an alternative, but would like to give the resin another couple of tries using the advice given. I've included a few photos of my molds and some of the rejected barrels. The barrels look better in the photos than they really are, at least they don't look good to me.

-
I have been experimenting with casting my own cannons from resin lately - without much success. More info can be found here: Cannons
-
Okay, I think I'm ready to fire my cannons.......................out the window that is! I have tried casting with mixed results, none of which has yielded the end product that I deem acceptable for mass production! I have come to the conclusion that the biggest challenge has been casting at such a small scale - 1/96. These things are tiny! The problem arises in trying to pour/force the resin into the 2 part mold. Because the scale is so small, the pour hole has to be kept relatively small as well, and thus the problem. Just out of frustration, I tried filling the cavity in each half mold and then "slapping" them together.....believe it or not, this gave the best results, but still not exactly what I want. I will try to post a pic of the trials later. The diluted Vaseline worked quite well as a release agent and sticking was never an issue. For the curious, I used polyester casting resin and RTV rubber molds. I may keep experimenting, or try something totally different - I am DETERMINED to make these things myself!
-
Looking good Sjors! I don't know about Merlin, but it looks like you've been busy and managed to get a lot done on your own!
- 1,616 replies
-
- 1
-
-
- caldercraft
- agamemnon
- (and 1 more)
-
WONDERFUL! Love the detail and clean workmanship!
- 2,191 replies
-
- 1
-
-
- confederacy
- Model Shipways
- (and 1 more)
-
More beautiful rigging - a delight to see! Congratulations on 40 years! I heard that Sjors is celebrating the 36th anniversary of his 29th birthday.
- 1,279 replies
-
- 2
-
-
- agamemnon
- caldercraft
- (and 1 more)
-
Sorry to hear about your health issues. Hopefully the report you get tomorrow will be nothing but positive and your hand will return to normal quickly! Take care of that pneumonia...you don't want a relapse.
-
You've really made a lot of progress - great job! Now, get going on your "long walk." I know she will look great with her final planking on!
- 1,616 replies
-
- 1
-
-
- caldercraft
- agamemnon
- (and 1 more)
-
I have to agree with everyone - great work on the waterways and margin planks! The swiss pear does look very nice.
- 2,191 replies
-
- 1
-
-
- confederacy
- Model Shipways
- (and 1 more)
-
Looks great Mark! Keep this up, and before you know it you'll have a ship - a beautiful one at that!
-
Beautiful! I love that particular hue of red.
- 2,191 replies
-
- 1
-
-
- confederacy
- Model Shipways
- (and 1 more)
-
No argument about the workmanship here. I can definitely tell that version 2.0 is going to be a winner! Nice work!
-
Great work on the deck house! Nice to see updates again, thanks!
-
Can't think of any other comment except "WOW"!!!
-
Sorry for the late reply, but thank-you very much Frank, Matti and Michael! Always appreciated! Matti: I use Testors gold for the carvings, and artist's acrylic for the blue. I use washes with the blue, but not the gold. Summer seems to finally be here and the great outdoors beckons! The shipyard will have to wait for a rainy day.
-
It really does look terrific! Great job...as usual!
- 2,191 replies
-
- 1
-
-
- confederacy
- Model Shipways
- (and 1 more)