newbuilder101
-
Posts
870 -
Joined
-
Last visited
Content Type
Profiles
Forums
Gallery
Events
Everything posted by newbuilder101
-
 Thank-you Nils! You're right about the scale - it makes it very hard to have the level of detail that I would like. Glad to know I'm not the only scratch builder that feels this way Bob and thank-you for the kind comments!
 -
David: Looking forward to seeing your log! Adding the link will bring more visitors to your build as well. Thank-you very much Bindy! I have really enjoyed scratch building, so far, but I think the term "scratch" more accurately describes what I do with my head when I face each new piece that I have to fabricate.
-
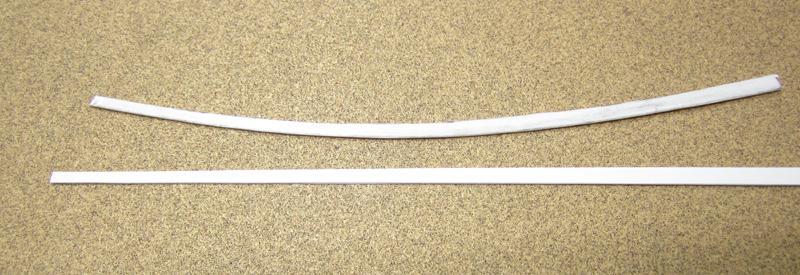
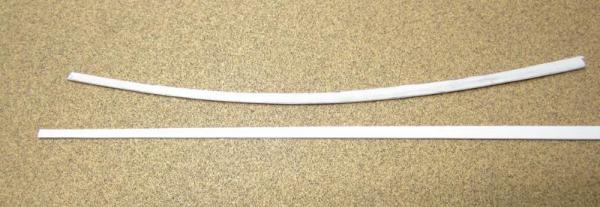
I think the best way to show spiled planks is to have a look at Chuck's tutorial on planking here: http://modelshipworldforum.com/ship-model-framing-and-planking-articles.php (Planking Tutorial - Lining Off a Hull Chuck Passaro) It's a method of cutting planks - you start with wood that is wider than normal planks so that you can cut them with the curve especially at the bow. This means you can't use the planks that came with the kit though, since they are already narrow strips. The plank at the top of the photo has been cut to the curved shape, not bent. Hope this helps.
- 1,616 replies
-
- 5
-

-
- caldercraft
- agamemnon
- (and 1 more)
-
What an informative way to build a ship's wheel. I will be tucking that one away for future use, it's terrific!
-
Gorgeous! I will have absolutely no problem "bearing" with this model to the end! It's a thrill to see each new update, and always leaves me wondering: "What amazing thing will he make next?"
- 1,215 replies
-
- 2
-
-
- sloop
- kingfisher
- (and 1 more)
-
Forgot to say Thank-you for all the "likes" too!
-
Piet: Thank-you for your kind comments and for stopping by! Grant: Thank-you! Fanciest facilities around - locally anyway. Sjors: Thank-you! Getting it to fit perfectly is much easier when it's a scratch build.....better than some of the kit parts that seem like they were made for a different ship! You'll have to give it a try after your Aggy. Nenad: Thank-you! I'm having a lot of fun with the carving - now back to the rest of the gun port liners which are not nearly as much fun. David: Thank-you as well! I was going to check out your builds, but no link to any logs - will we see that in the future? Brian: Thank-you! I'm trying my best to keep it neat, makes good practice for a future scratch POF - if I am brave enough. (Your HMY Fubbs is beautiful) Popeye: Thank-you! I wasn't sure about the colour at first, but when I mustered up the courage to apply a coat I was happy with it. The making of those railings helped raise the level of my scrap box!
-
Wow - what an arsenal, and they look fantastic on deck!
-
Dan: Thank-you for the info - makes complete sense. There are some good resources for identifying ship parts, but they are listed by the part names followed by a description. If you don't know the name, as in my case, then it's a long tedious task going through the list to find what you're looking for. Michael: Thank-you as well! The term "drop" had conjured images of dew drops, tear drops, decorative drops of the lower skirt of fine furniture etc., but now.........I guess it's a decorative 'toilet bowl' as well!!
-
I haven't looked in since yesterday and today the ship's almost done! Well......maybe not, but you are progressing at lightening speed and she is looking excellent!
-
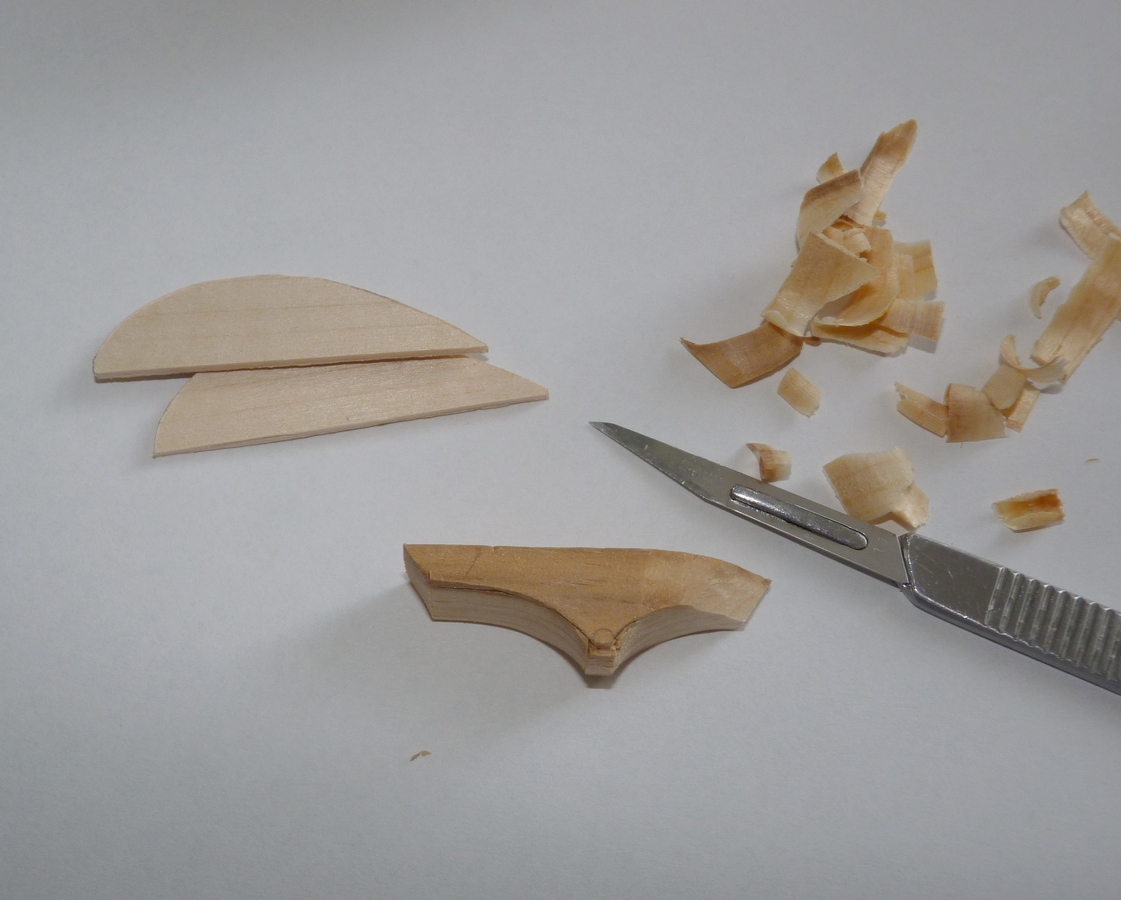
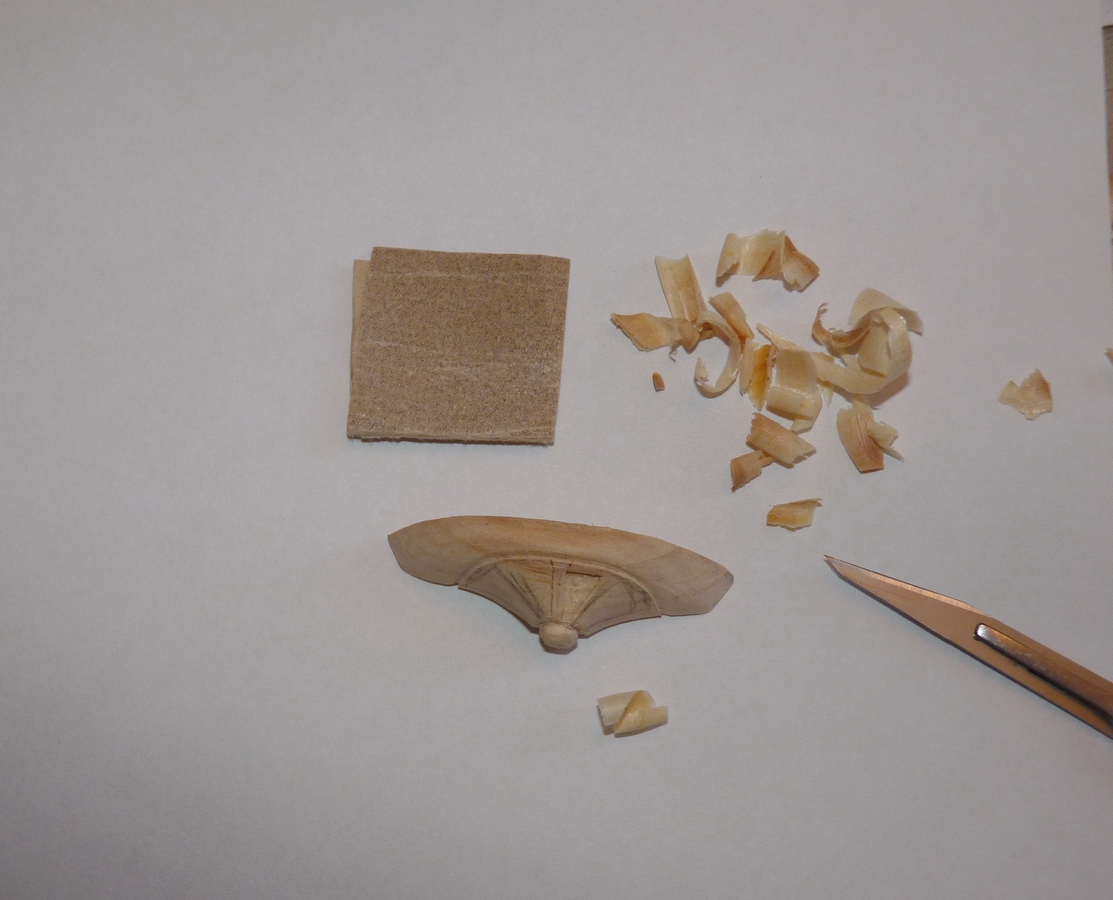
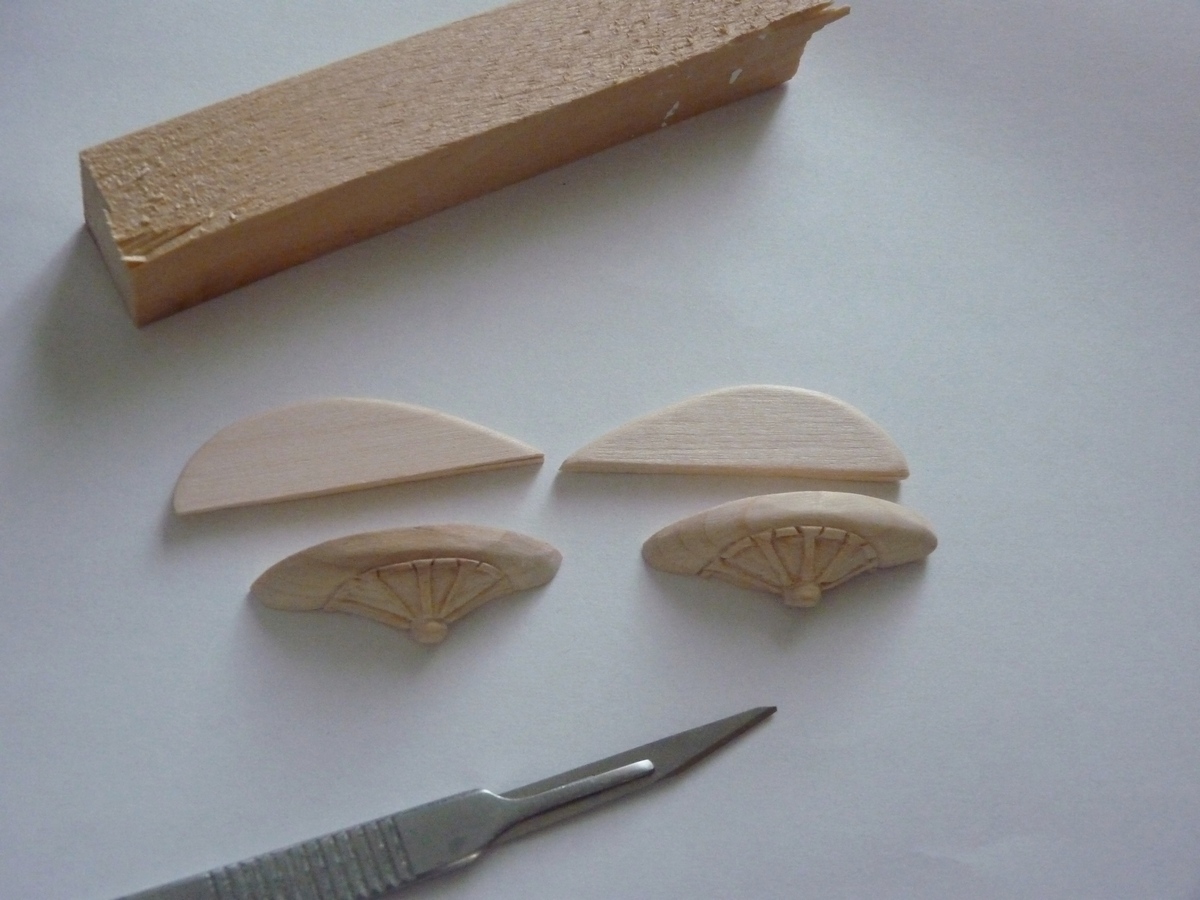
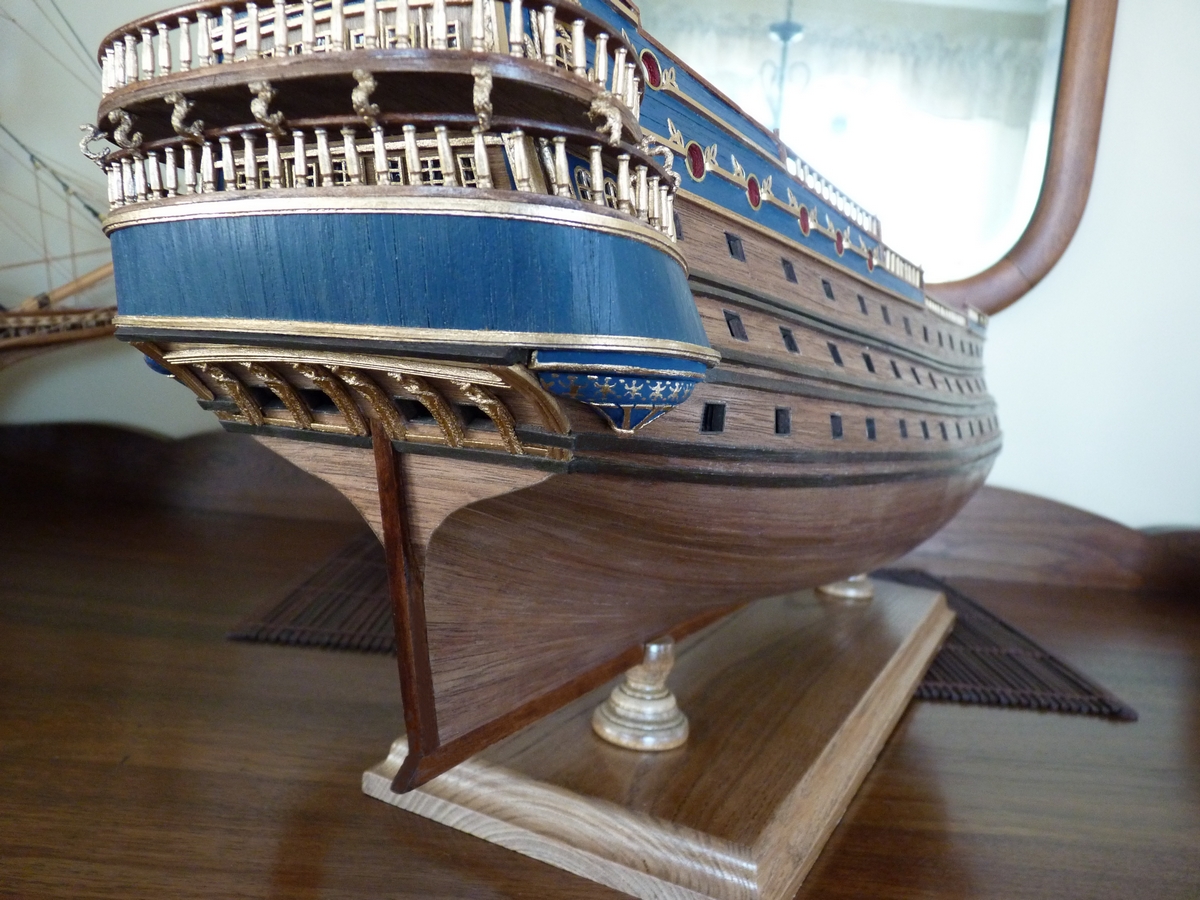
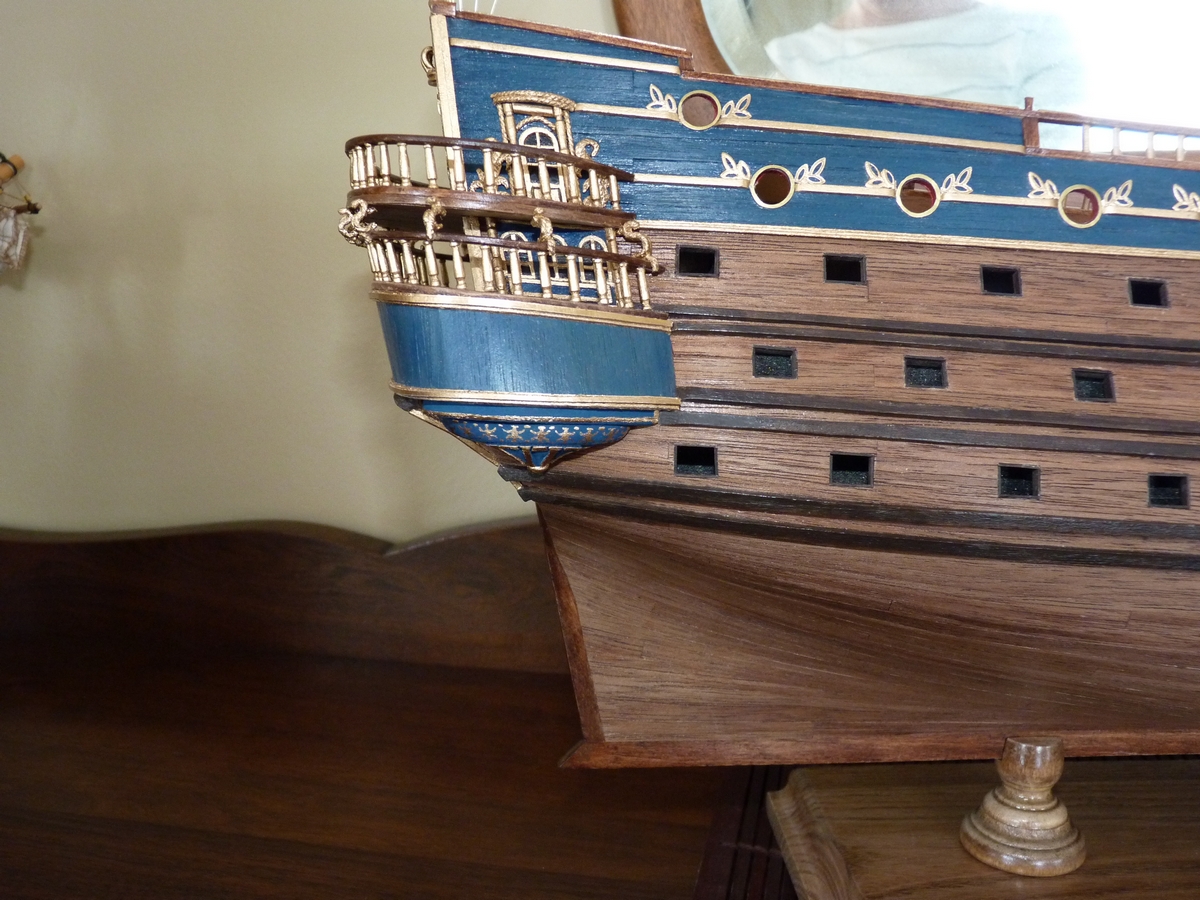
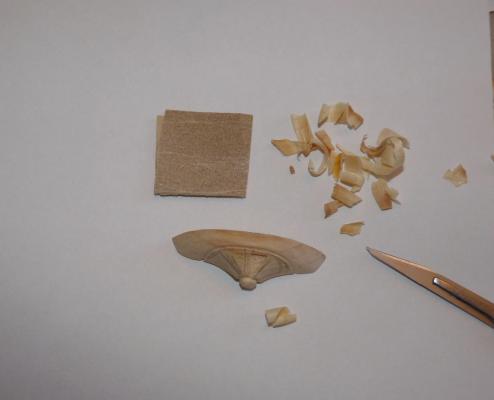
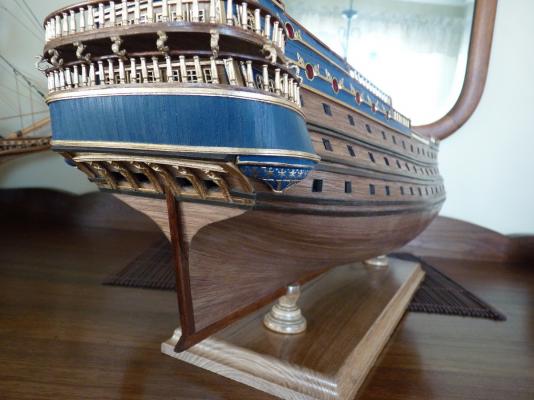
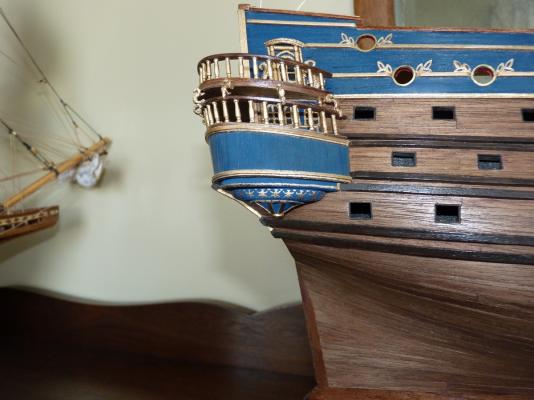
I have a little bit of an update today. I believe these parts are called quarter badges...correct me if I'm wrong. The first pictures show them underway, and then installed on the ship and painted.


-
Thank-you Crackers, Matti, Doris, John and Dan! Your generous comments are appreciated very much and are an inspiration to keep modelling!
-
Wow! Beautiful workmanship!
-
Great job on the planking! How many trees have you used so far?
-
Great demonstration on the video - looks like everything works very well! I am enjoying watching this little cutter evolve into a full fledged sailing vessel!
-
Definitely a home run on this one Robbyn! She's really looking great!
-
VERY nice indeed!
-
Yet another installment of your stunning work! It doesn't seem to matter whether you are working with wood or metal - it's all beautiful!
-
She's really coming to life now! Great job!
-
You'll probably have to delete the photo, using your PC and upload it again to your signature.
-
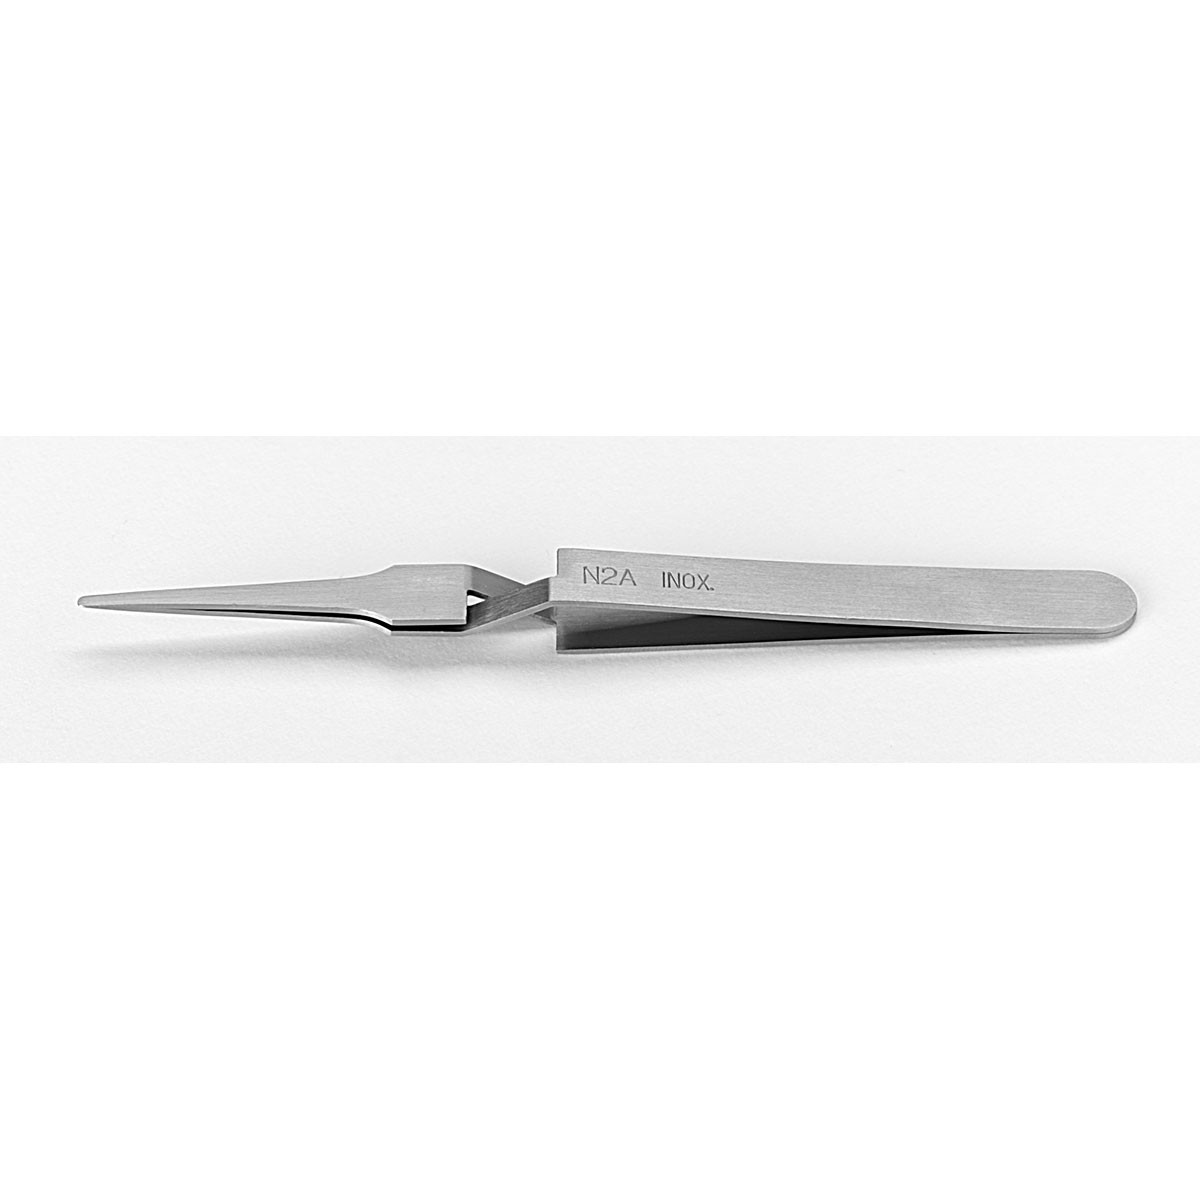
Great work on those tiny blocks! Sjors: Crossover tweezers:

-
She looks beautiful dressed on black. The wood work is lovely....good luck with the thinning.
- 2,191 replies
-
- 1
-
-
- confederacy
- Model Shipways
- (and 1 more)