Cathead
-
Posts
3,543 -
Joined
-
Last visited
Content Type
Profiles
Forums
Gallery
Events
Everything posted by Cathead
-

kit review 1/50 Viking Longship – Drakkar, by Amati
Cathead replied to James H's topic in REVIEWS: Model kits
Nana, see the comment above yours, which addresses this exact question. -
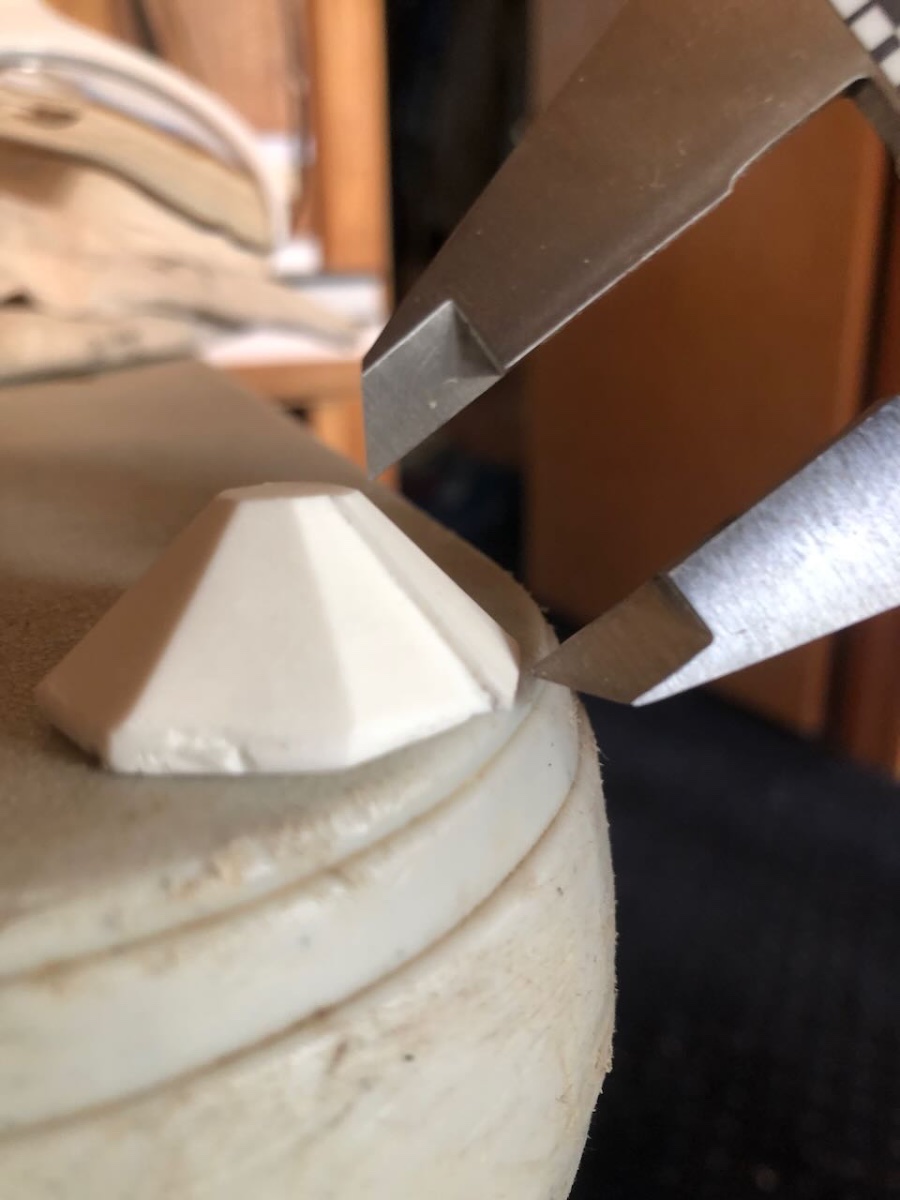
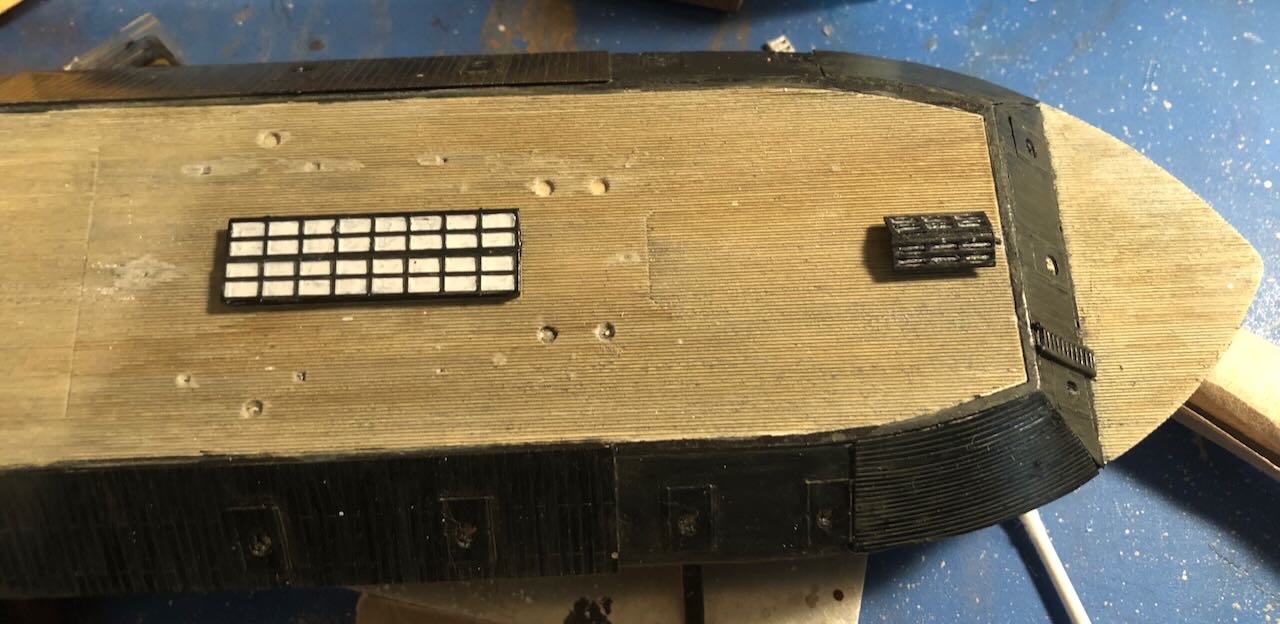
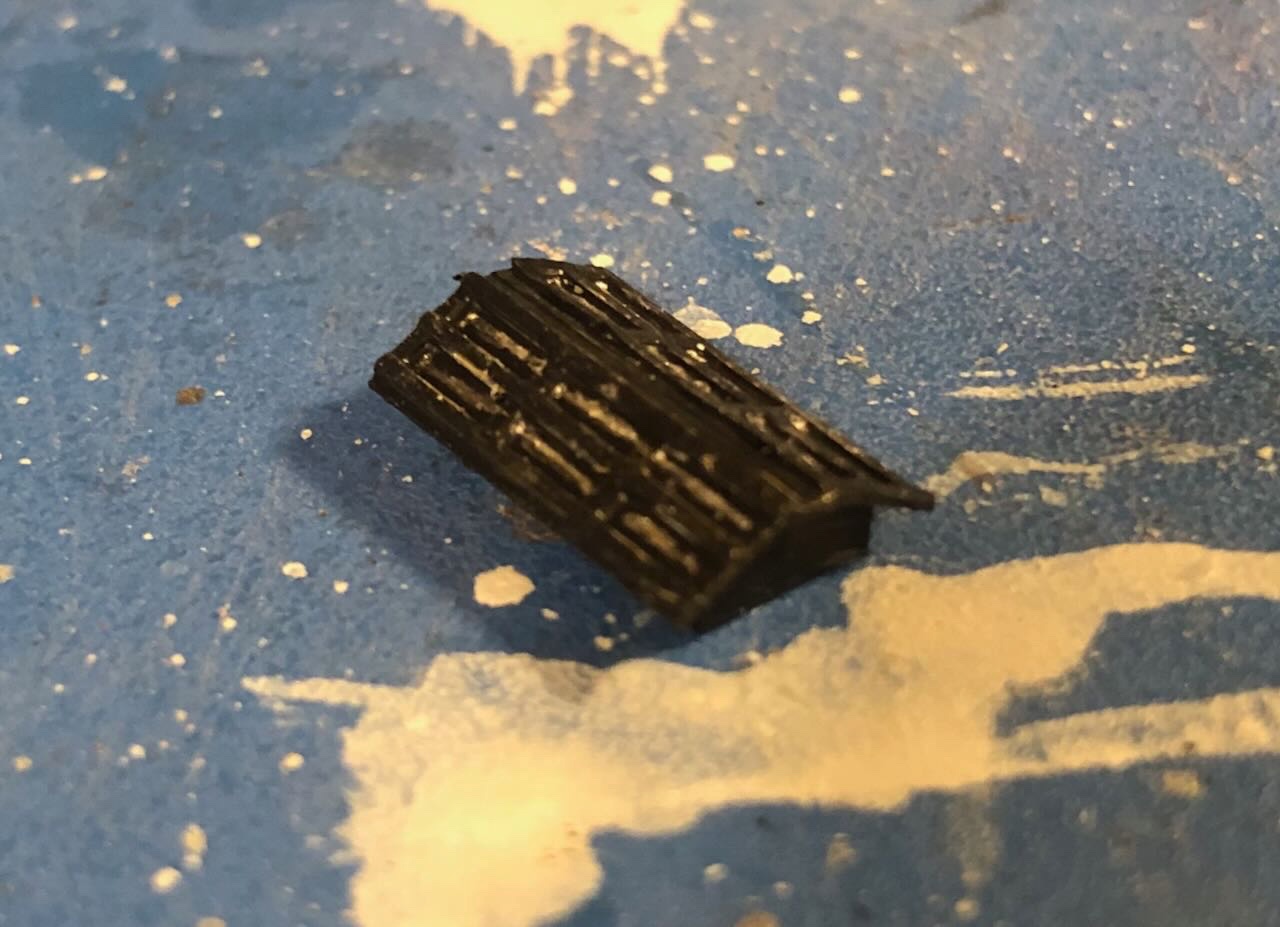
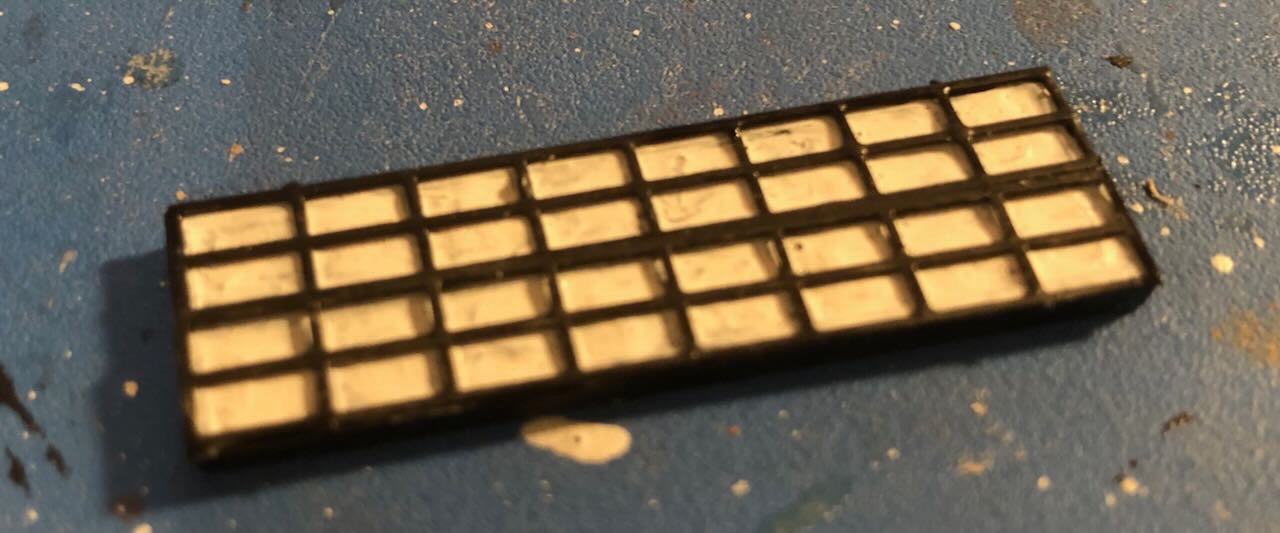
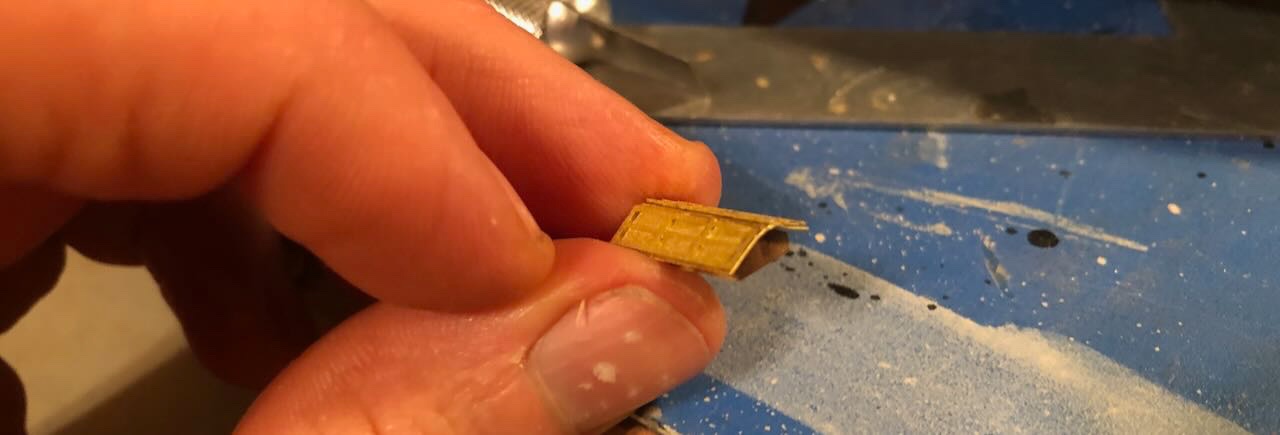
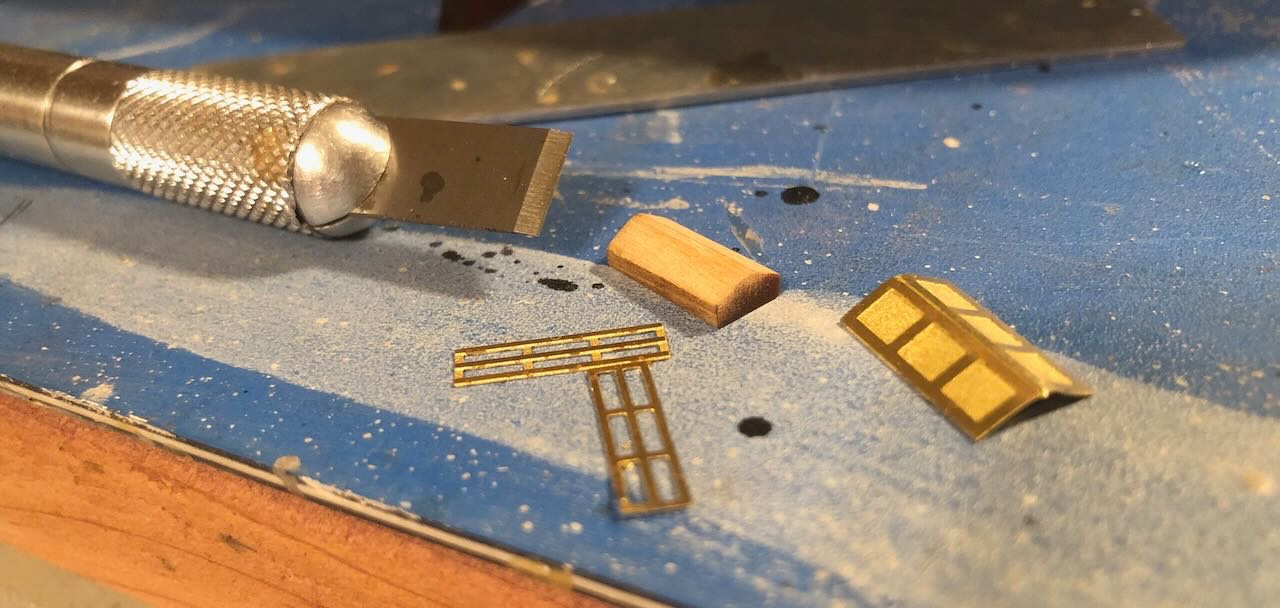
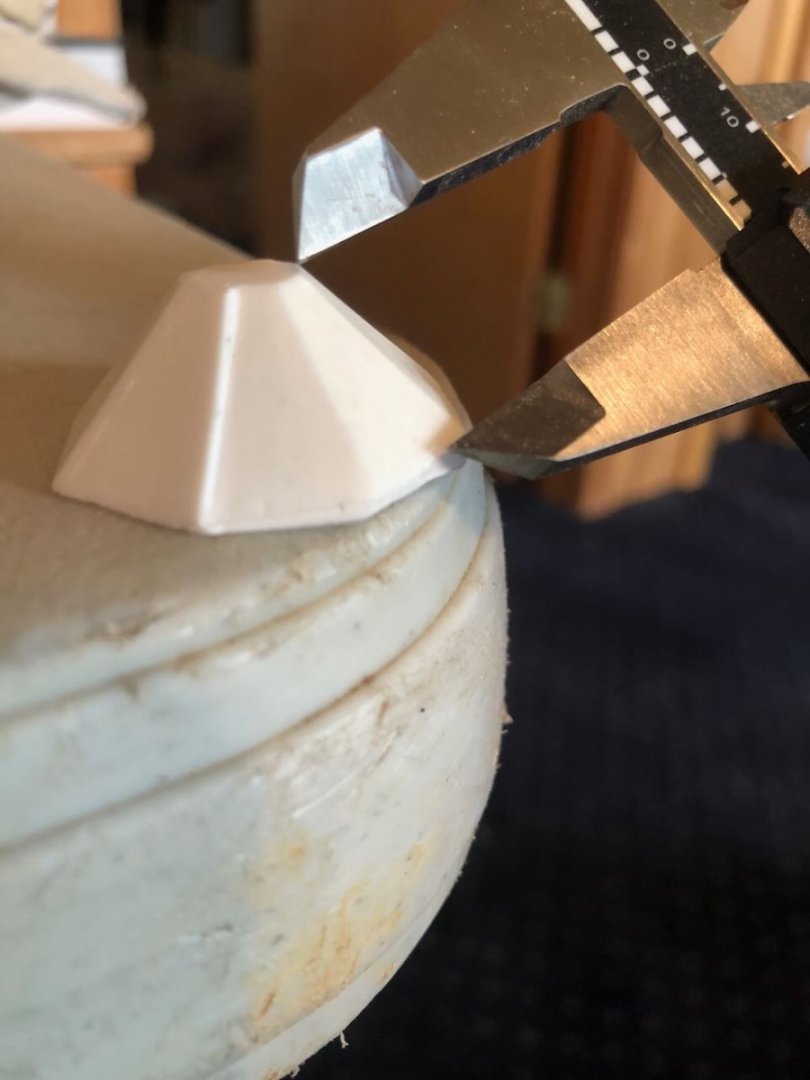
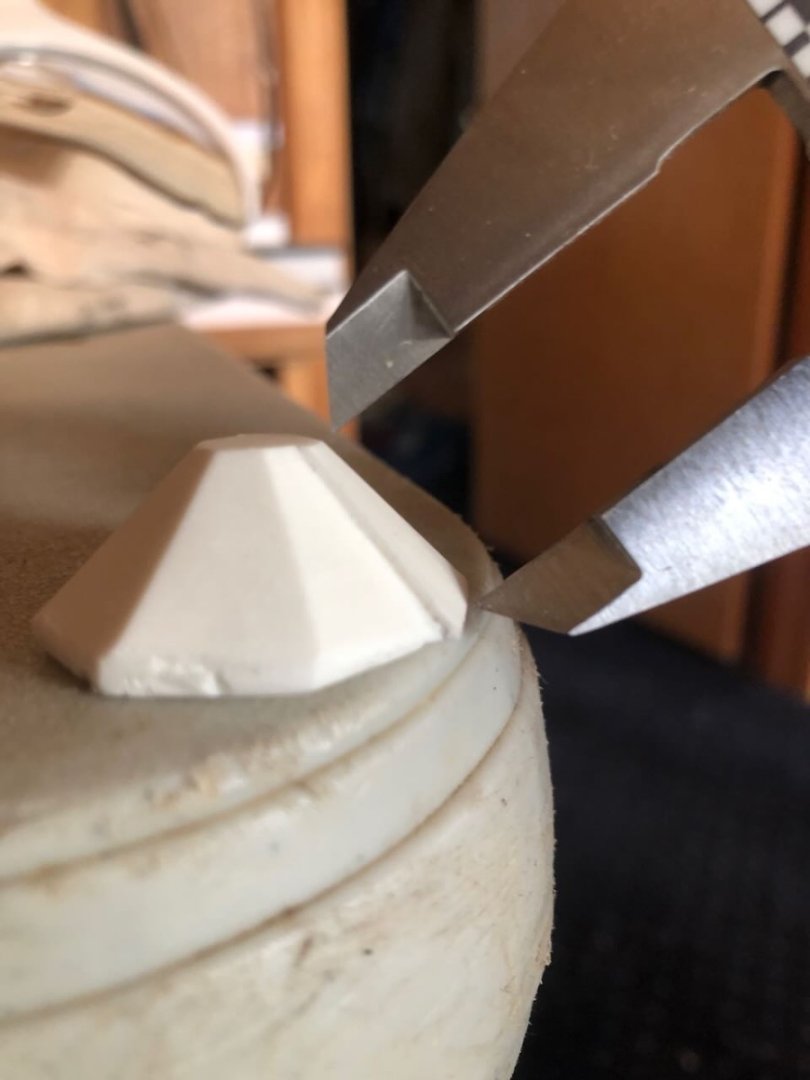
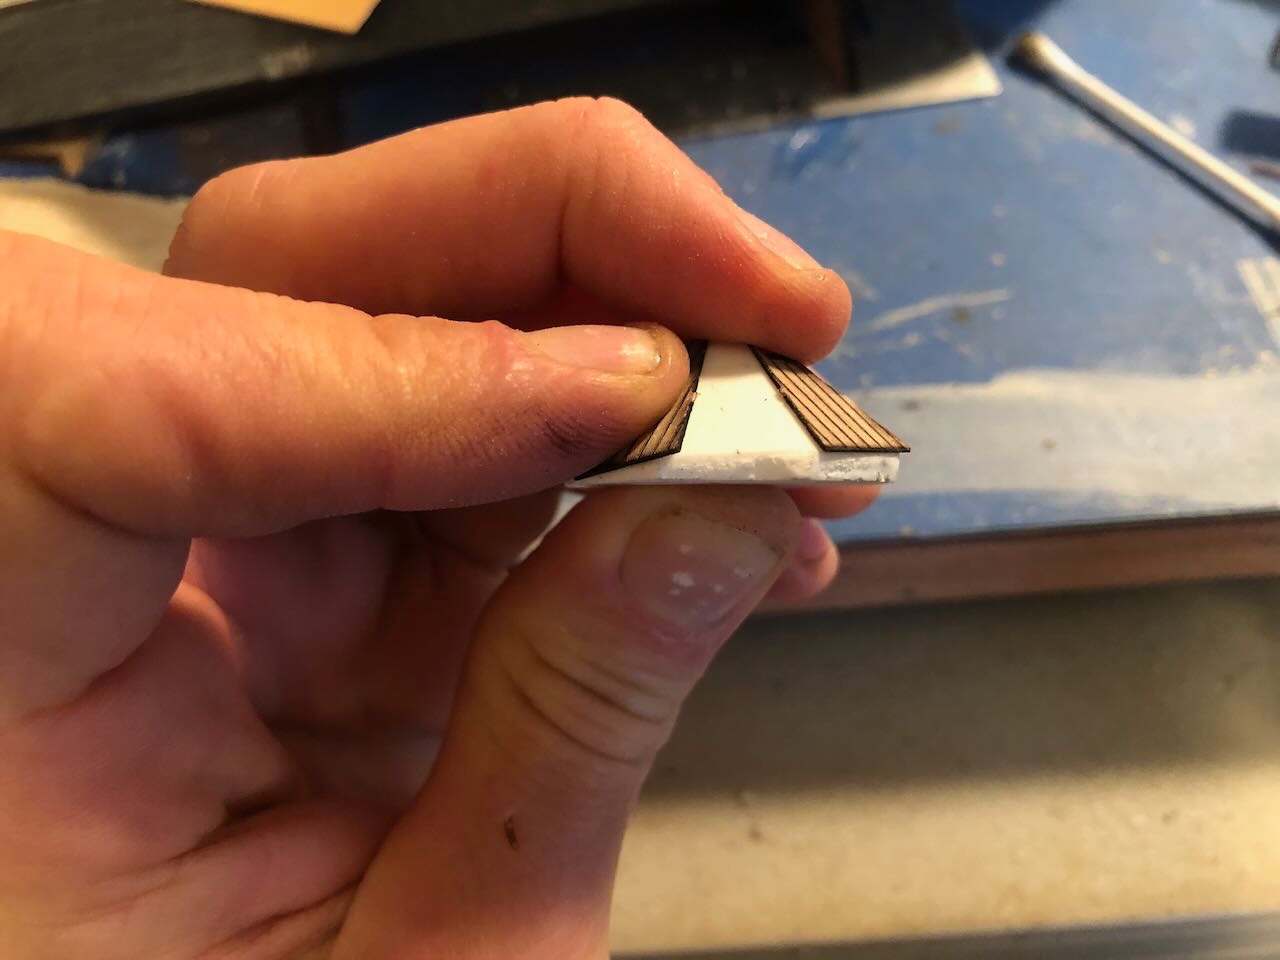
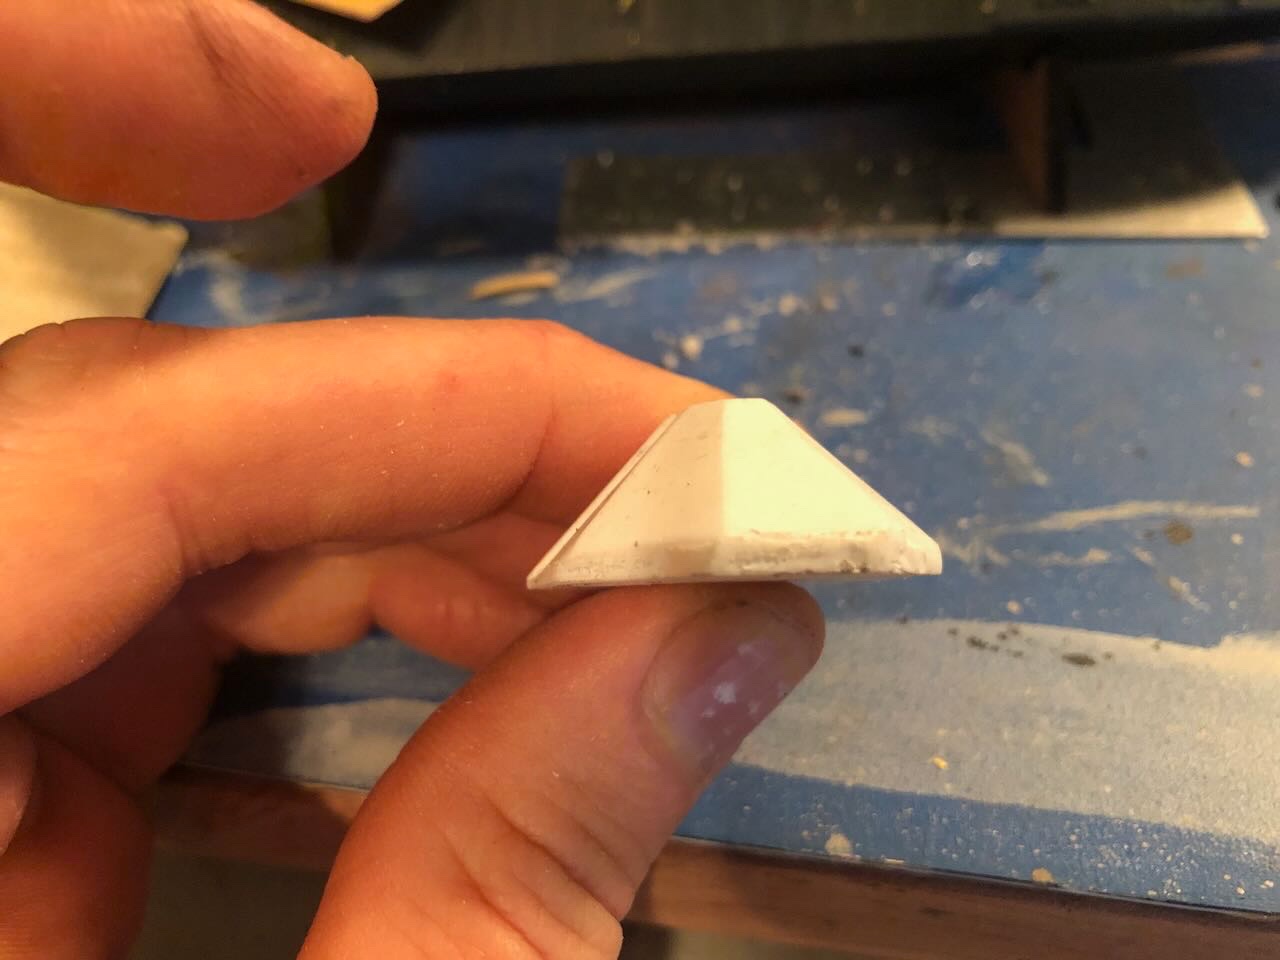
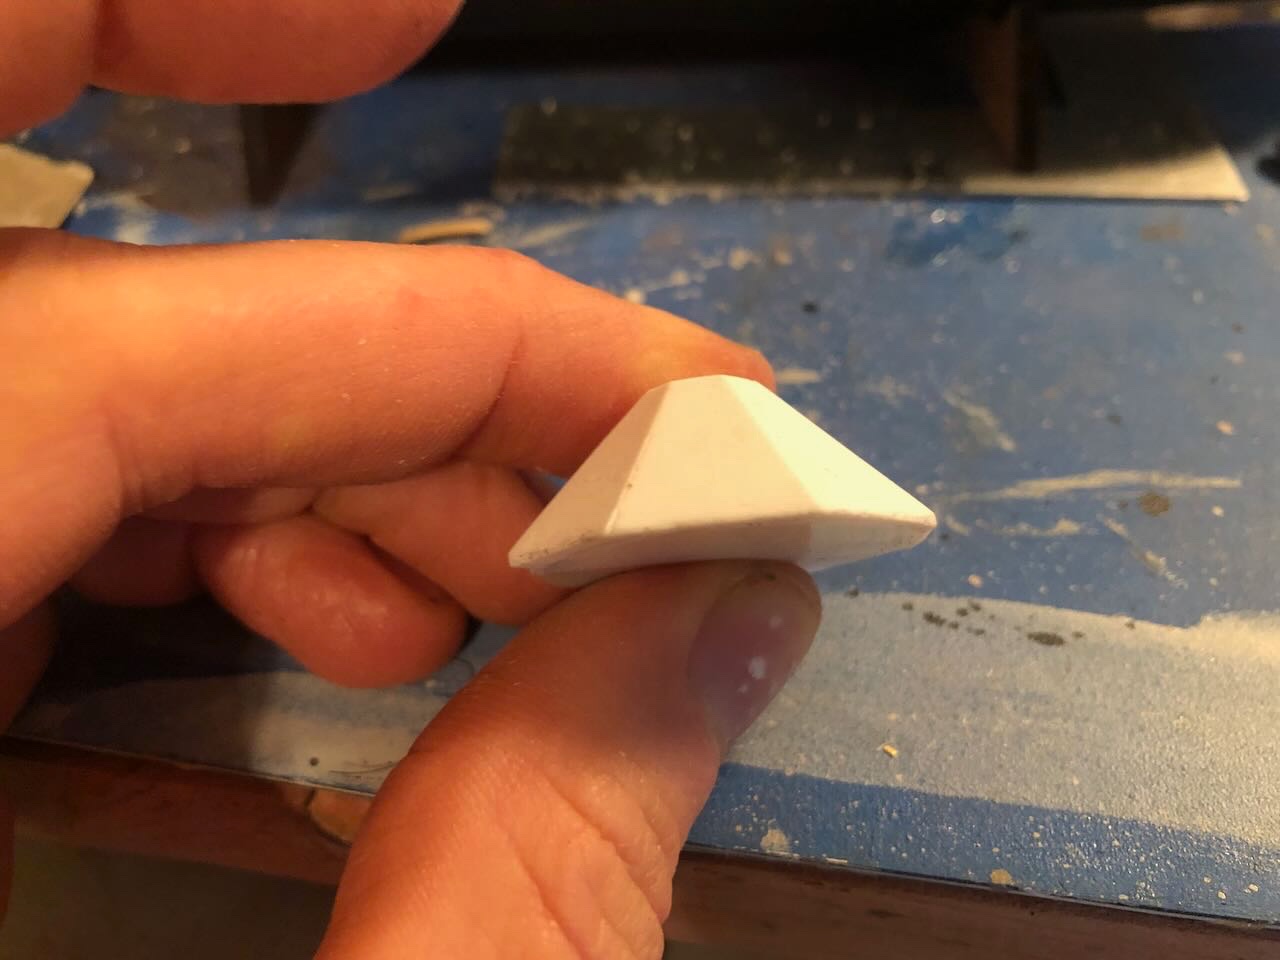
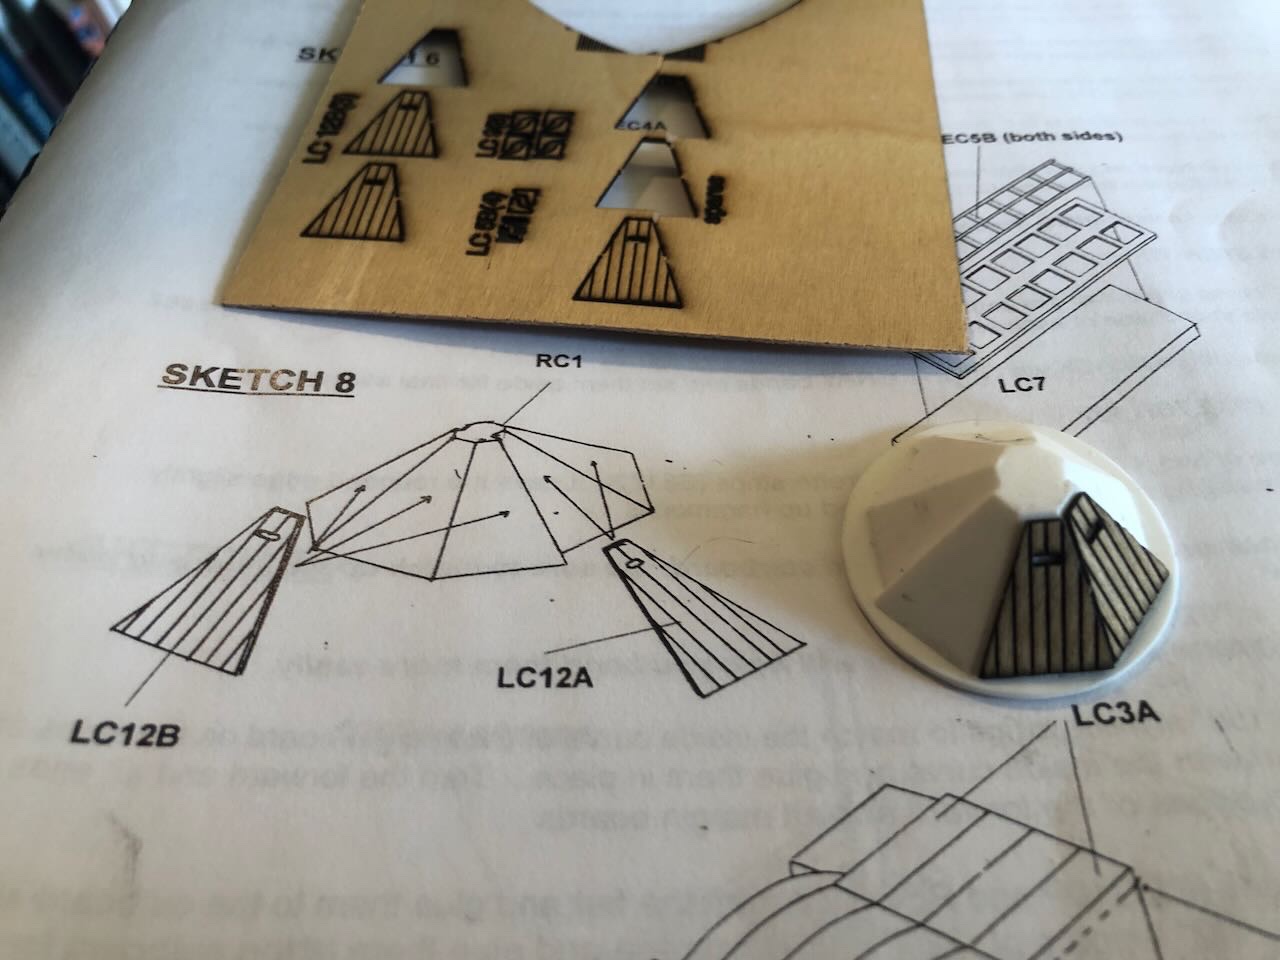
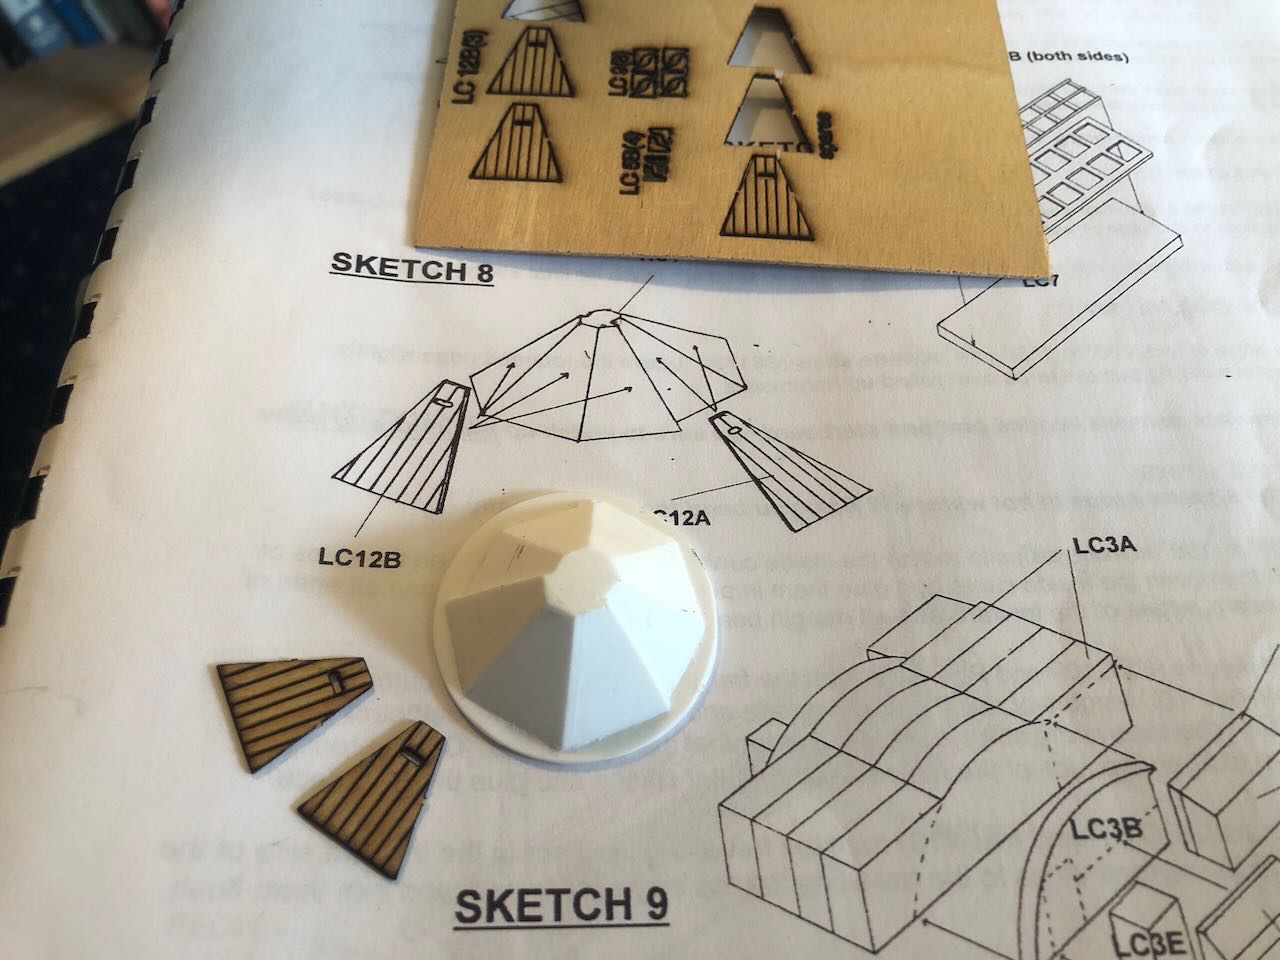
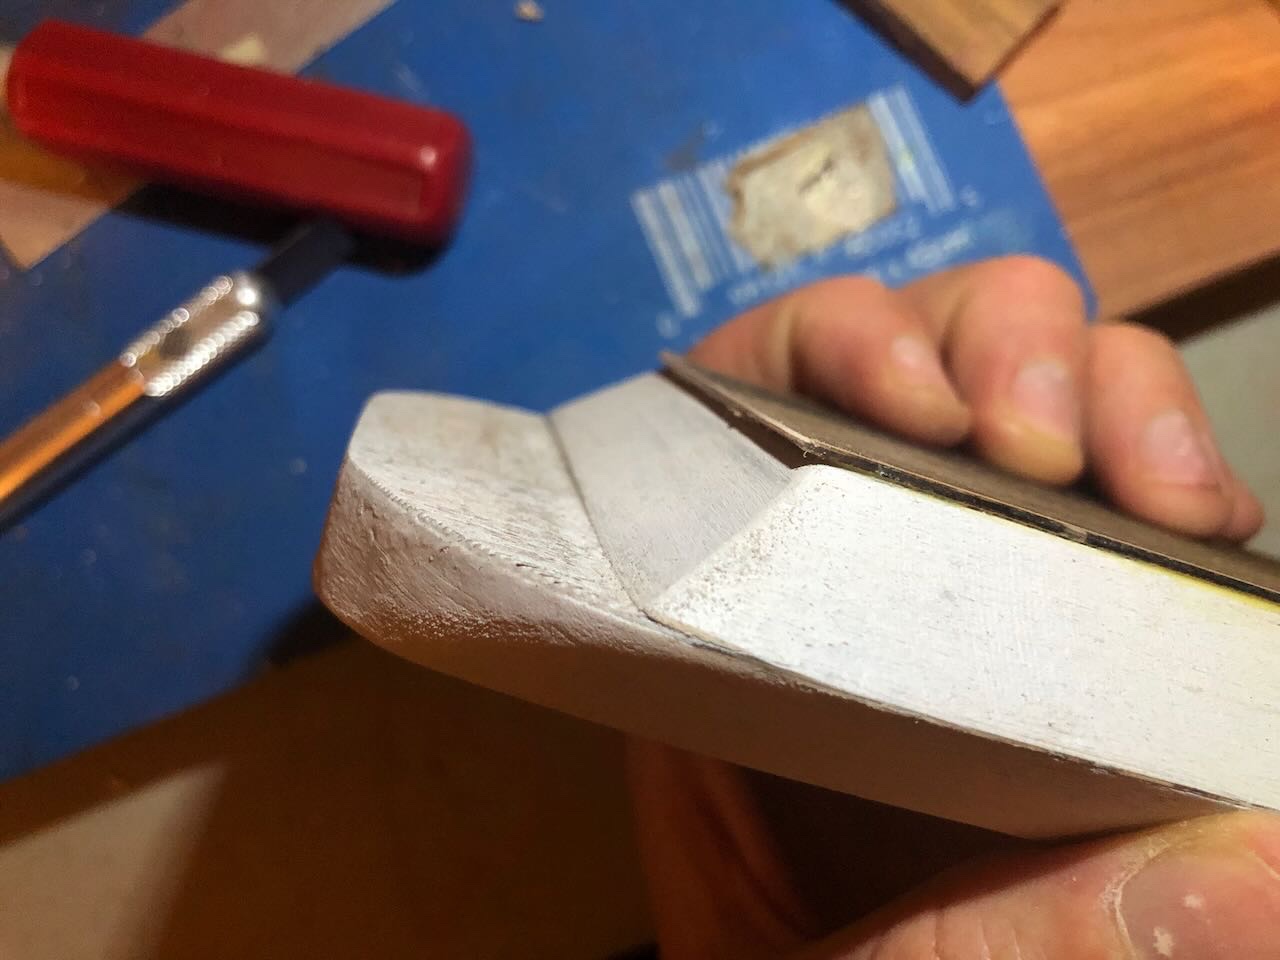
Happy New Year! Got some work done on a few small details, starting with the small and large skylights. The small skylight has an angled roof. You're given a tiny block of wood and told to shape it to the proper angle, which I did with a sharp hobby knife. Then you bend a piece of flat brass to match the roof angle. This should come to a sharp point simulating the two sides of the roof coming together. There was a similar bend needed in the side armor, but that piece had a scoring line on it that made the bend easy, consistent, and sharp. Didn't work that way with this tiny piece. When I tried the bend, it kept coming out as a curve, no matter what I tried, and it kept getting more mangled. I finally more or less flattened it to "close enough" The brass piece also seems quite a bit larger than the provided wood block, so there's a rather "Alpine" roof overhang on the assembled part (see below). But I can't do anything about it, because there's another fine piece of brass grating that goes over this (see photo above), and cutting down the base piece of brass would mean that part would be too big. So again it's just going to have to be "good enough" After painting, here's what the skylight looks like. I used a silver pen to hint at light between the gratings. It's really hard to photograph parts this small with an iPhone, so apologies for the bad image. Next up is the large skylight. This is simpler since it's flat. Just glue a piece of brass to a thin strip of wood, paint, then glue brass gratings over it. I painted the lower brass to look like brighter glass, pre-painted the grating, and assembled. Meh. Here they are set in place on the casement: Now for the real fun. I got started on the pilot house and ran into a doozy of a problem that I'd like advice on. Here's how it's supposed to work. There's a resin core in the shape of the pilothouse, over which you place various pieces of laser-cut wooden "armor". Not sure why these are wood and not brass, for a more consistent texture on the model (where all other armor is brass), but whatever. I'll give the kit credit here, they provide extras of these flimsy little pieces. Looking closely, you see that there are two sizes of armor; slightly larger ones that go on the front three panels, and slightly smaller ones that go around the rest of the structure. Seems pretty straightfoward, right? The resin part is designed to match the wood, you just sand the armor edges to fit and they make a nice neat pilot house. Like this: But first you have to get rid of that big lip of flashing all around the base of the resin core (the armor should reach the deck). Also notice that the core is a little taller than the armor; see it sticking up above those pieces? I cut away the flashing around the base carefully, at which point I discovered that the core isn't even close to evenly cast. This is hard to show for such a small part, so I took a couple different photo sequences. First here's the front of the core once the flashing base was trimmed away, followed by the back: OK...here's what happens when you hold a few of the proper armor pieces against the core. Trust me that the tops of these (hidden behind my fingers) are flush with the top of the core: There's basically a huge angular wedge of resin at the base of this thing; it's properly flush at the front but really thick at the back. Remember that the armor is supposed to reach the deck. Here's another view, trying to use calipers. I couldn't photograph this perfectly, but calipers confirm the huge difference in thickness front-to-back: The smooth sides meant to hold the armor are accurate; their bases line up all the way around. It's this big wedge of extra resin at the base that's the problem. How do I get rid of this? Seems like a ton of sanding (and nasty resin dust), while I'm not sure how to cut it away evenly because the piece is really hard to hold or brace. The instructions simply say "remove the disc of flash from the bottom of the cast resin pilot house". Not much help there. They also later say "sand the tops and bottoms of the sections [meaning the wood armor] flush with the top and bottom of the pilot house", which is funny because the opposite is true. The resin casting is too tall on top (see earlier photo) and has a big wedge on bottom. So my question is, what's the best way to remove this bottom wedge of resin to get a smooth bottom surface that will sit flat on the deck? Do I just take my best shot with a razor saw and hope I don't mangle it too badly? Definitely not thrilled with the quality of this casting or the bare-bones instructions on how to handle it.
- 113 replies
-
- 6
-

-

-
- Cairo
- BlueJacket Shipcrafters
- (and 1 more)
-
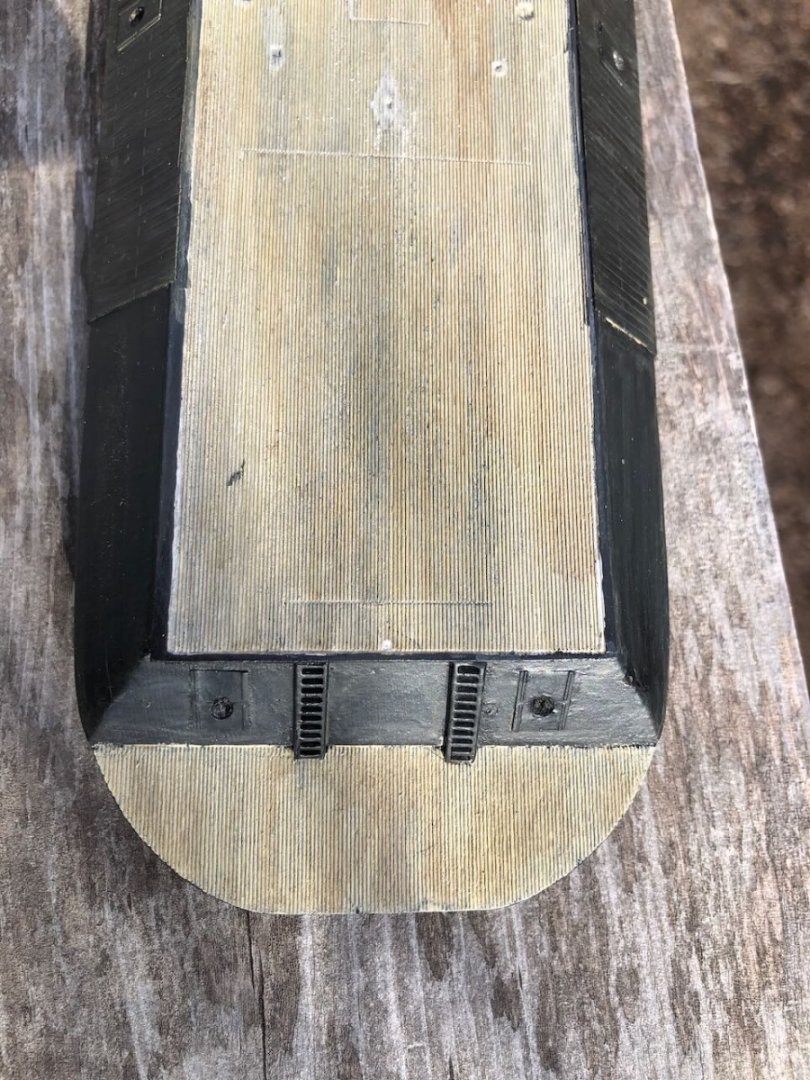
Did some preliminary weathering; it's an improvement though I'm not sure I'm done. I don't really like the way the raw wood casement looks (anywhere there isn't armor). It looks like what it is, a sanded slab of wood painted black. This is especially true on the aft casement (third photo). No trace of the planking or structure that should be there. I tried to create a horizontal texture using brush strokes but it doesn't come through. Not sure I care enough to fuss over it, though. Next up is building various small details like skylights and the pilot house.
- 113 replies
-
- 7
-
-
- Cairo
- BlueJacket Shipcrafters
- (and 1 more)
-
Timber-framed outdoor kitchen - Cathead - 1:1 scale
Cathead replied to Cathead's topic in Non-ship/categorised builds
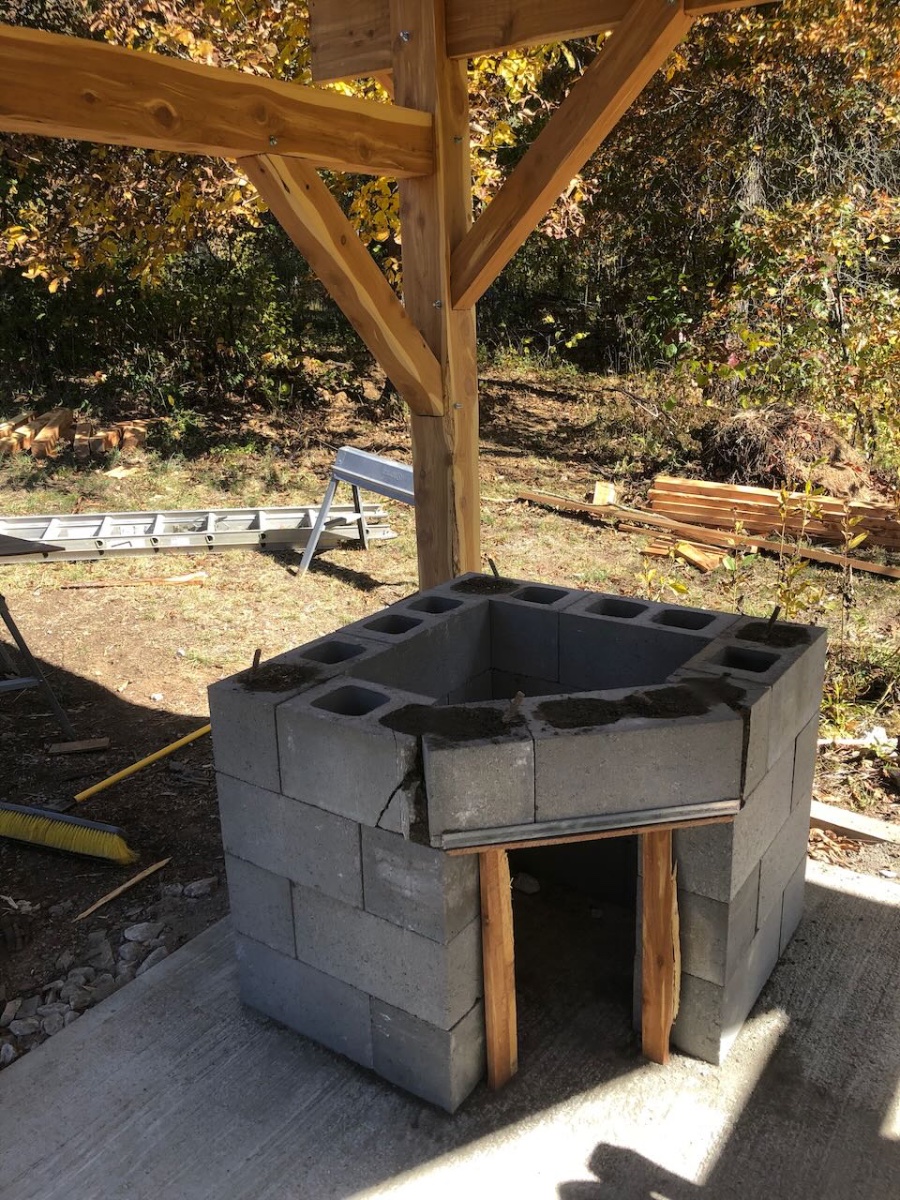
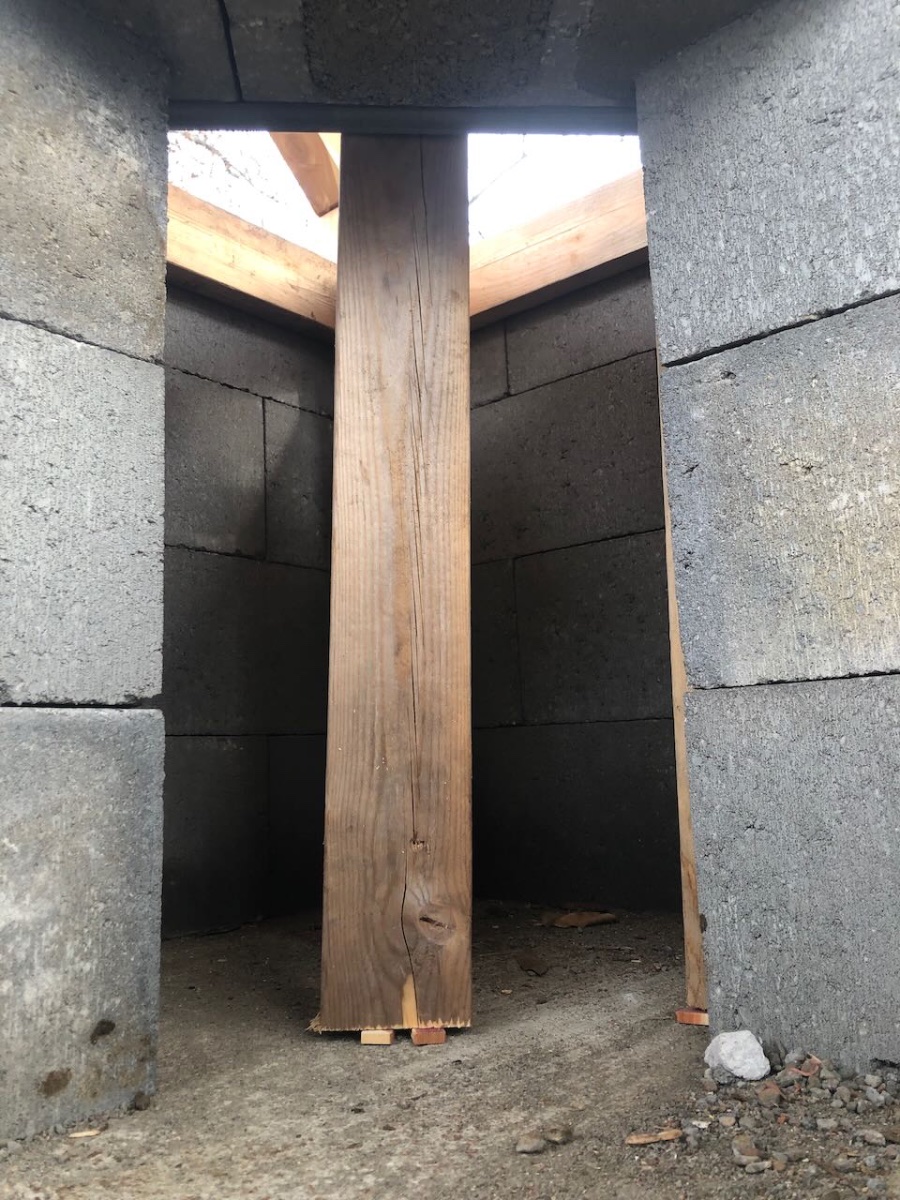
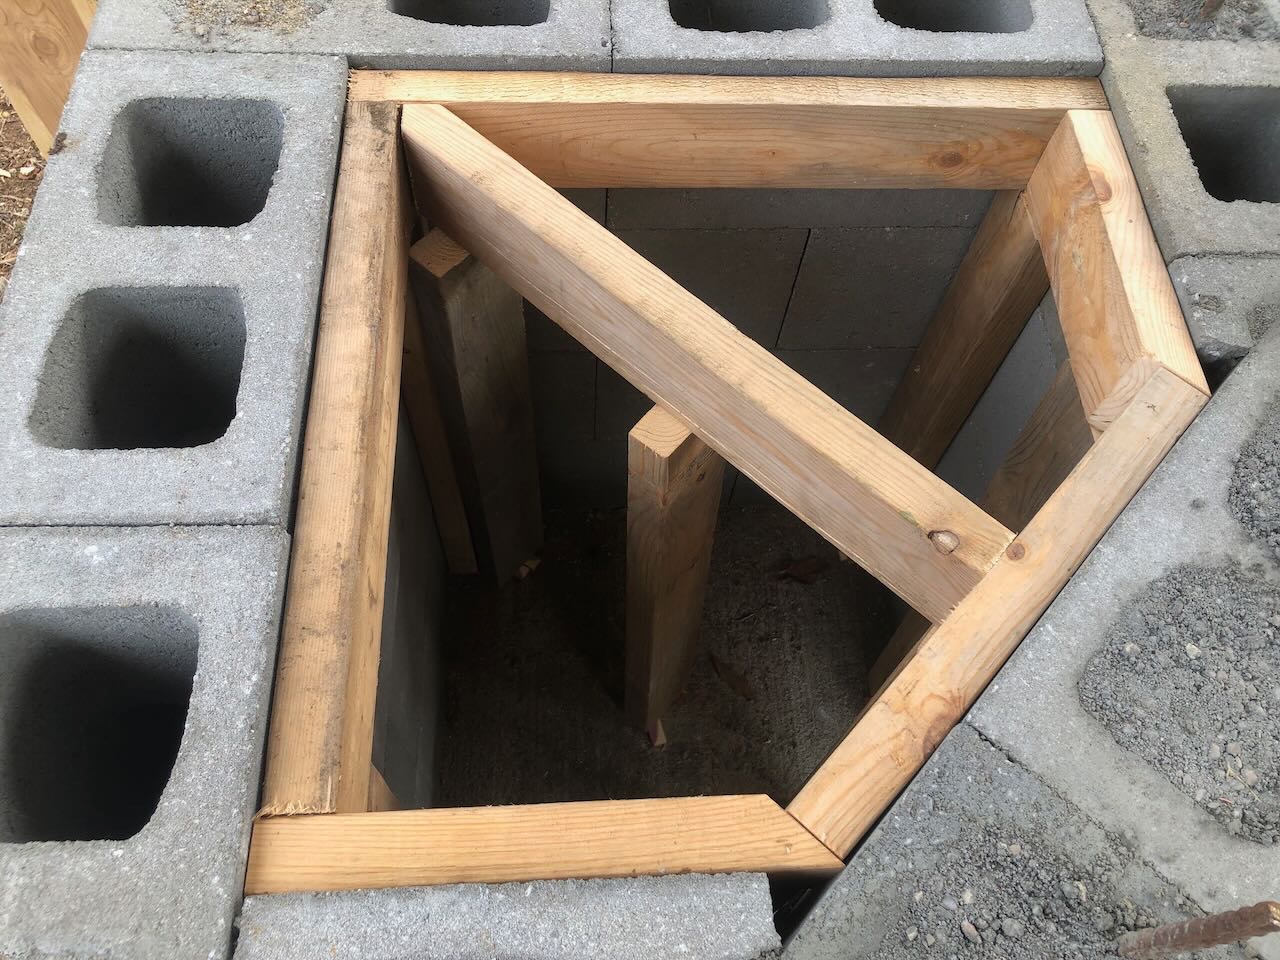
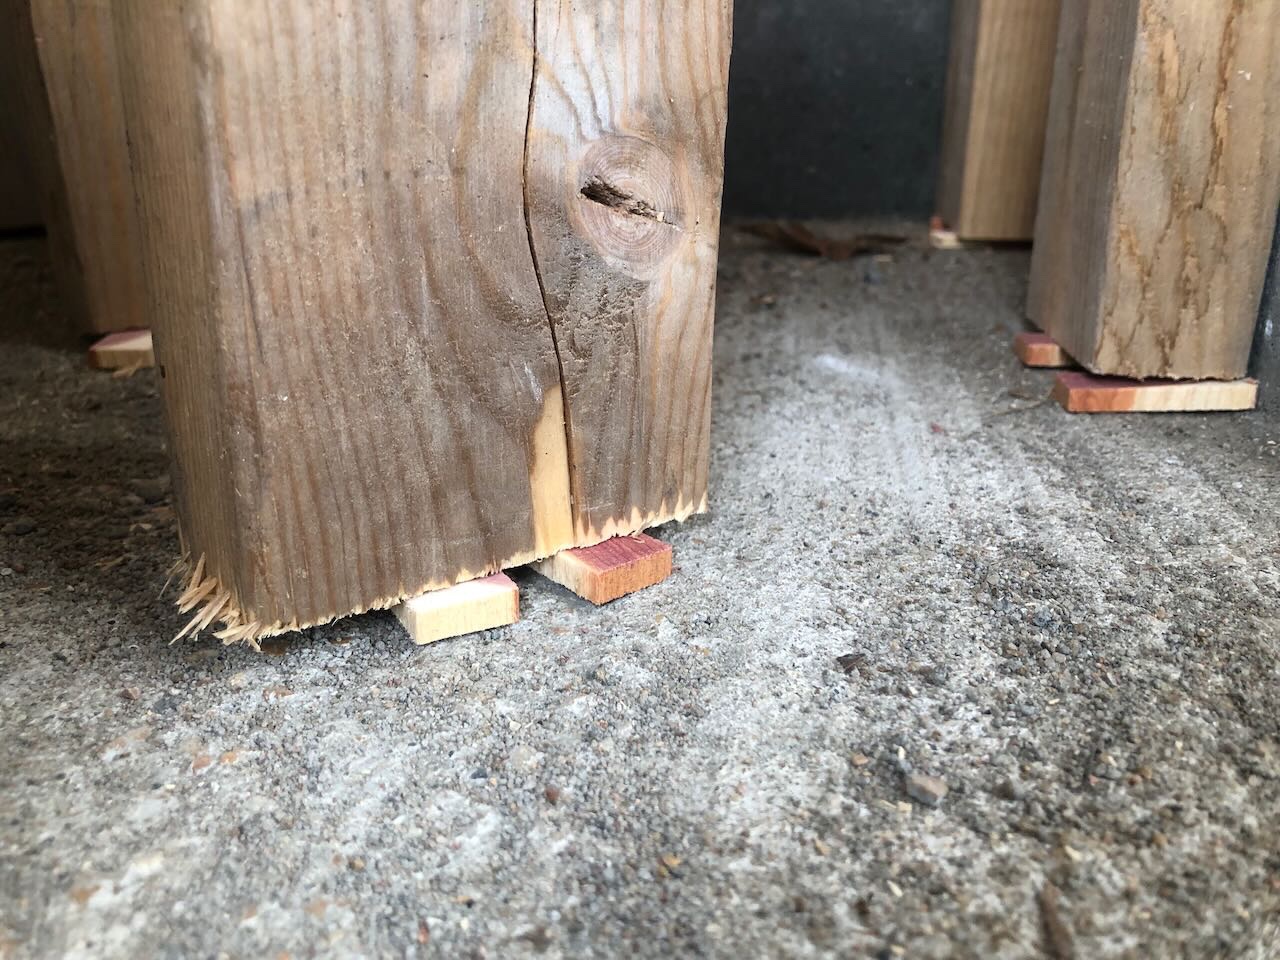
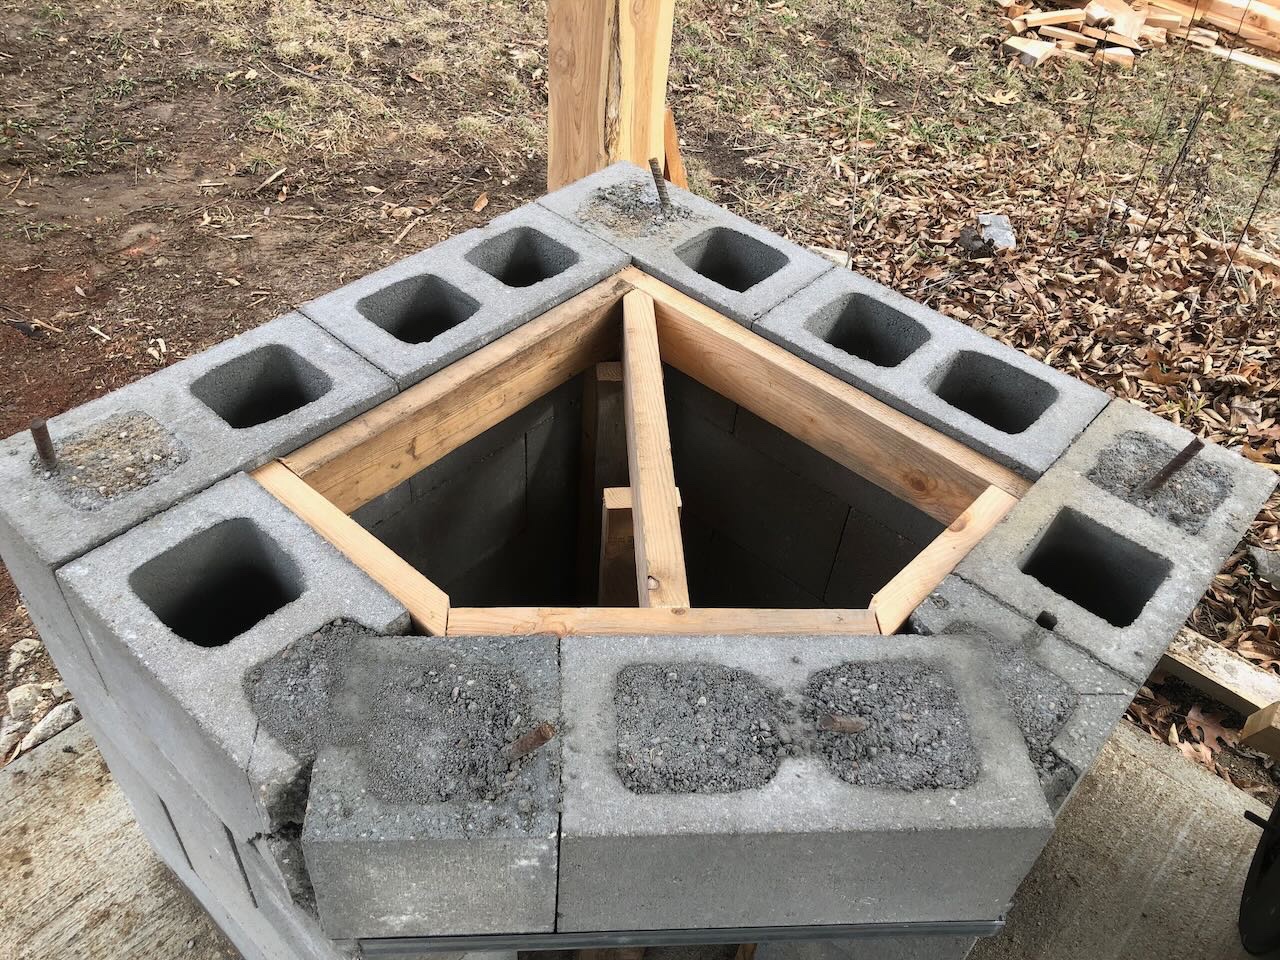
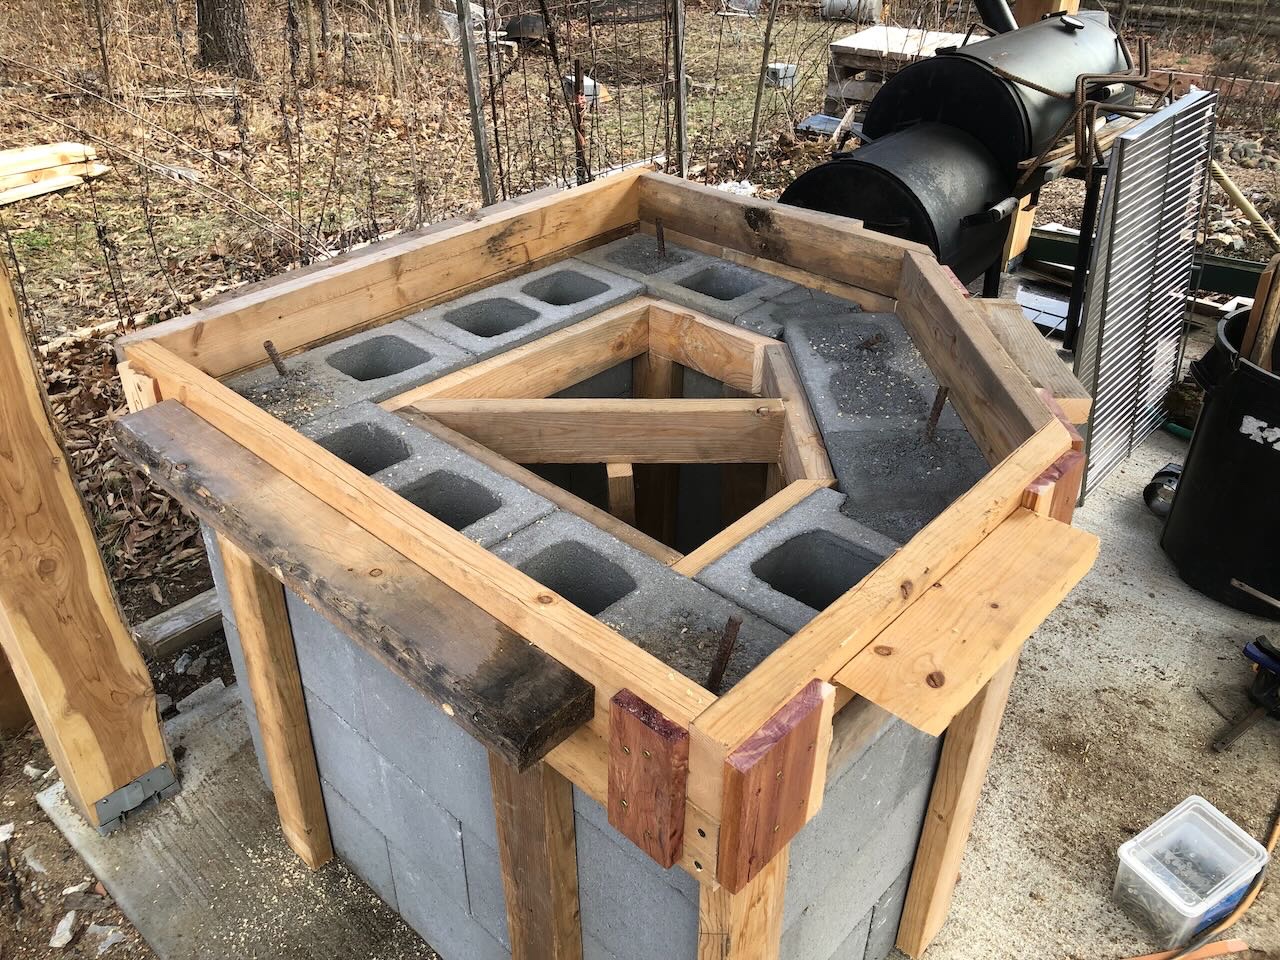
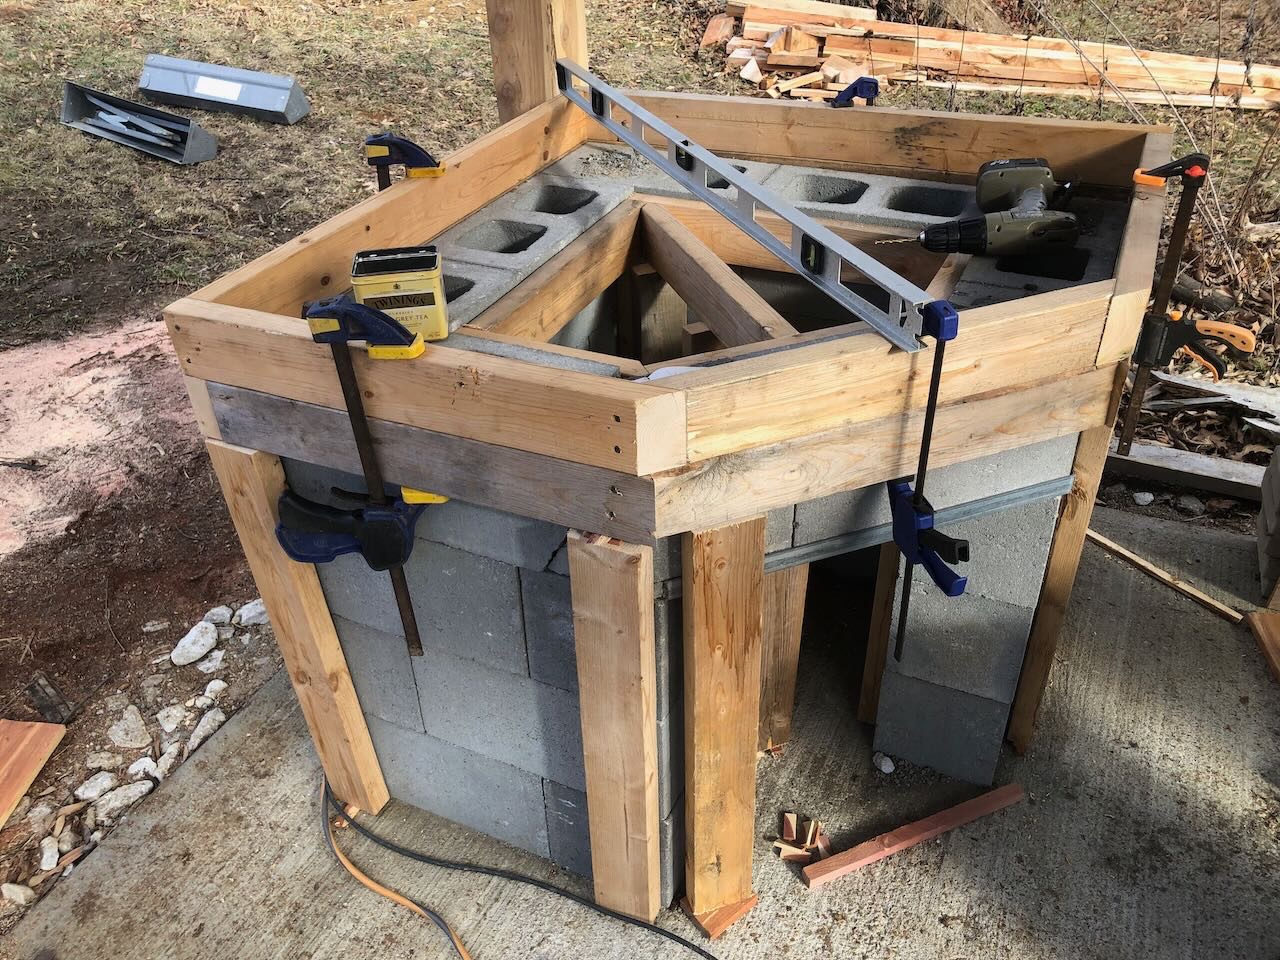
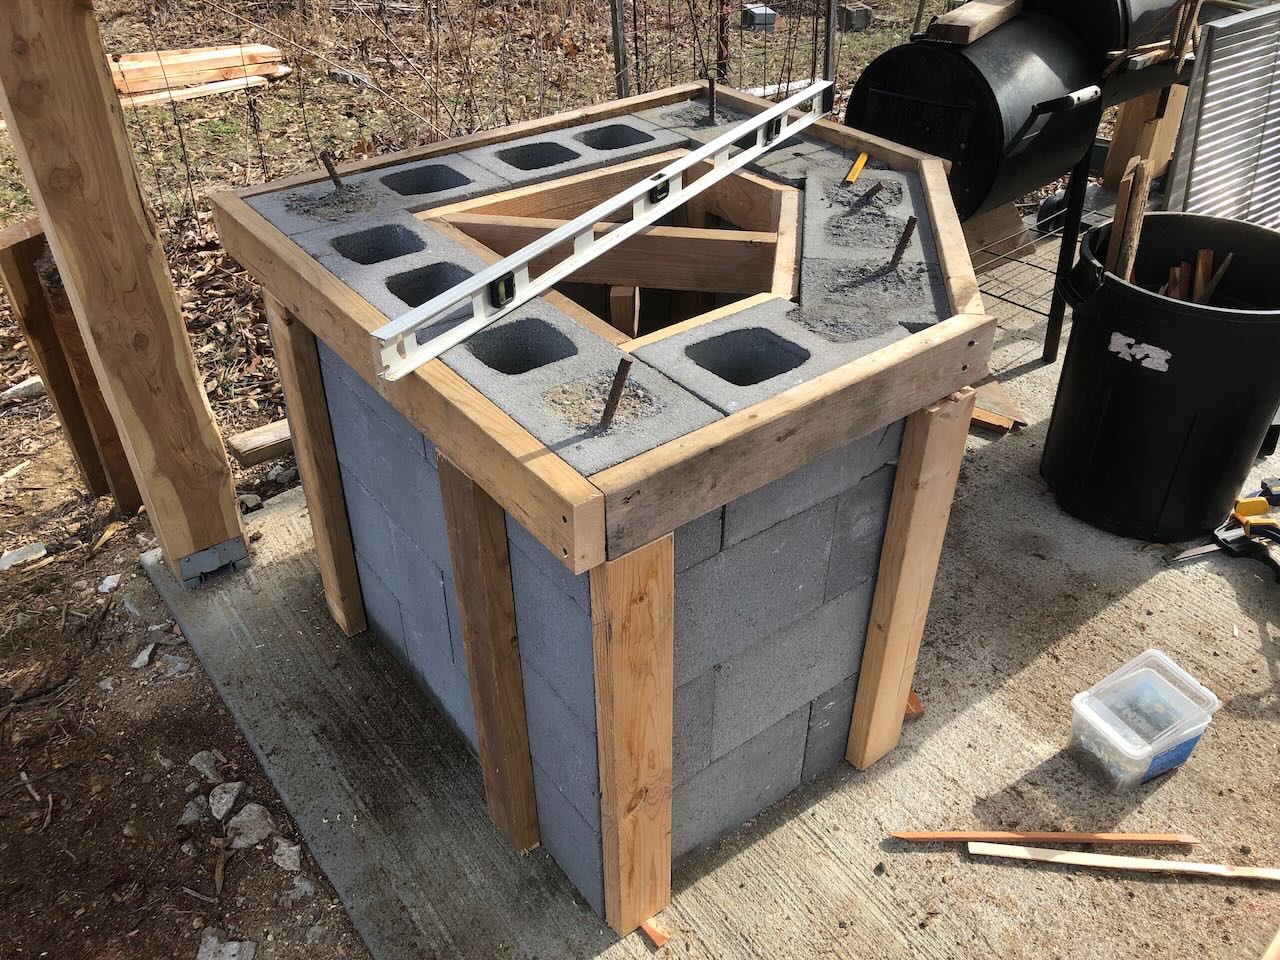
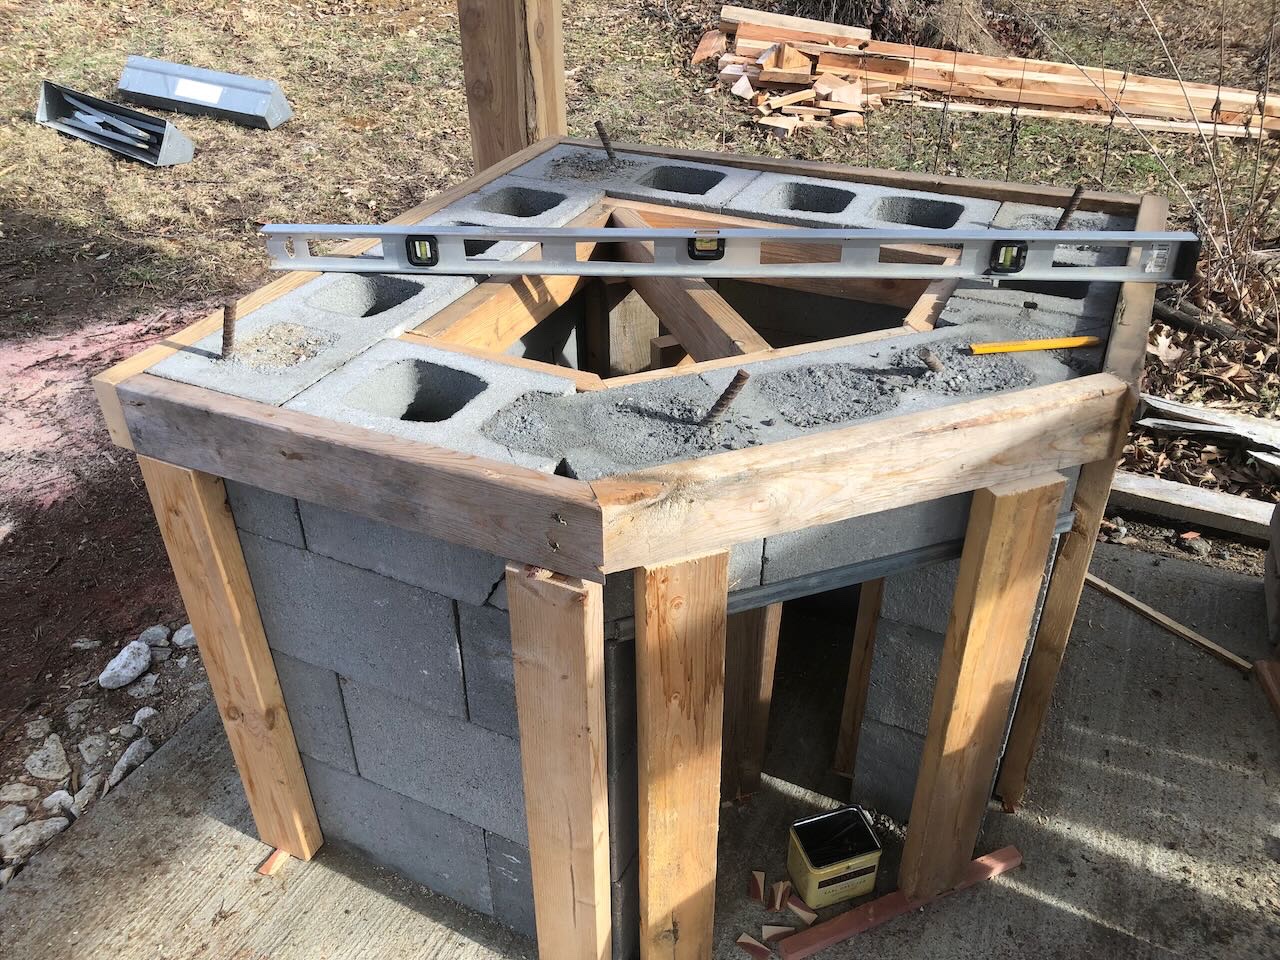
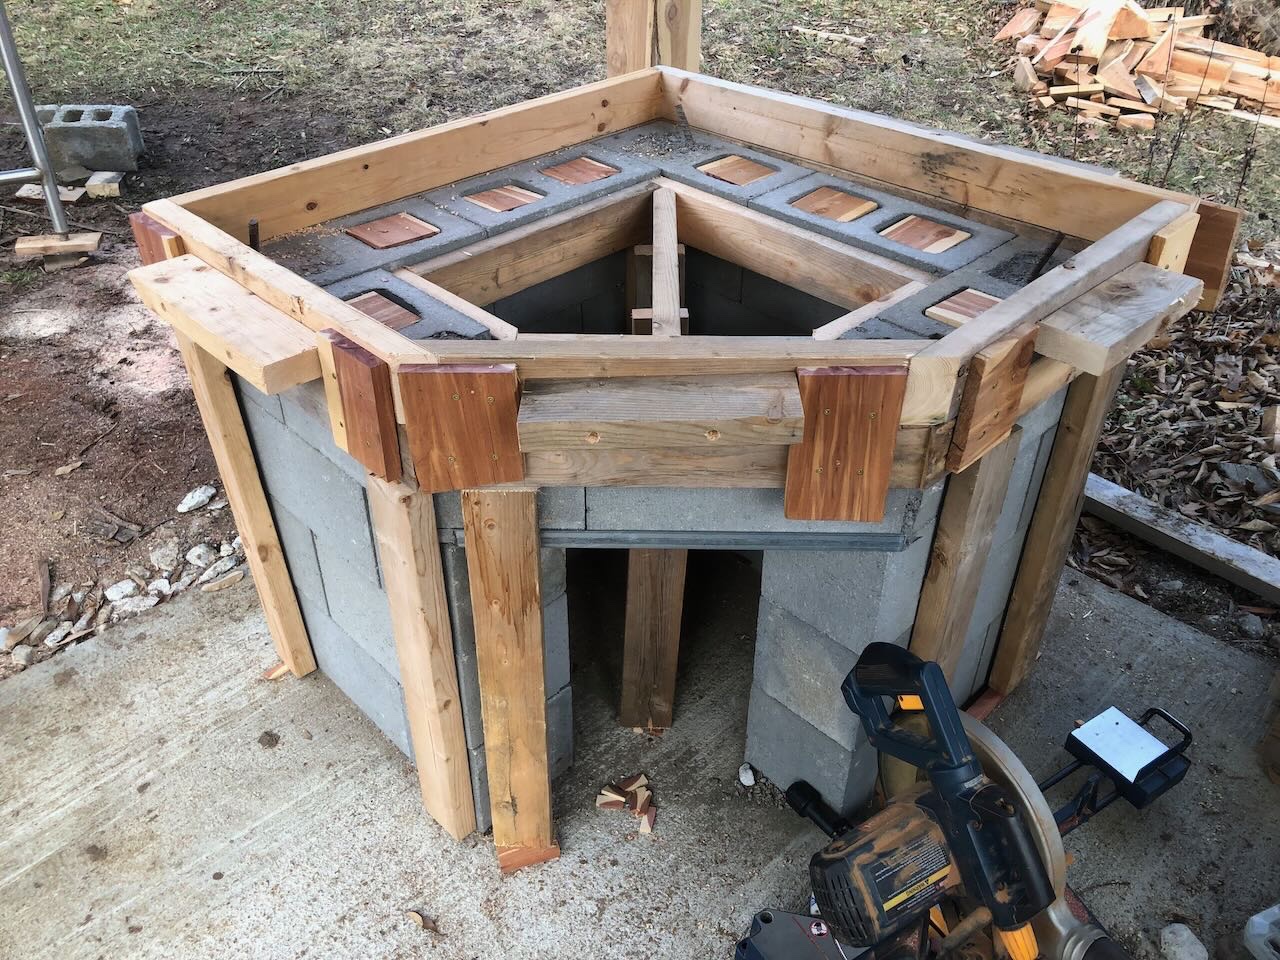
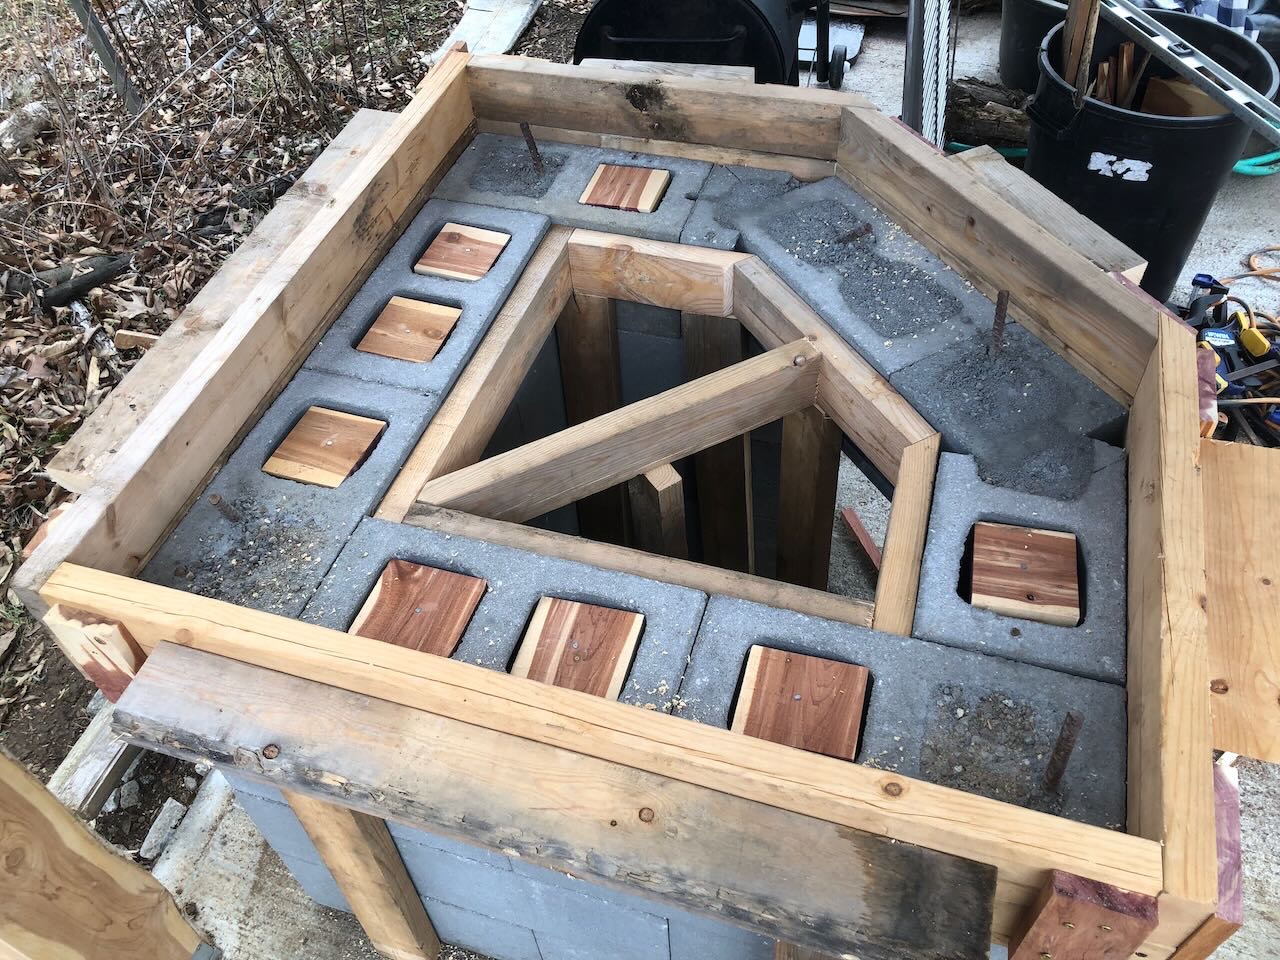
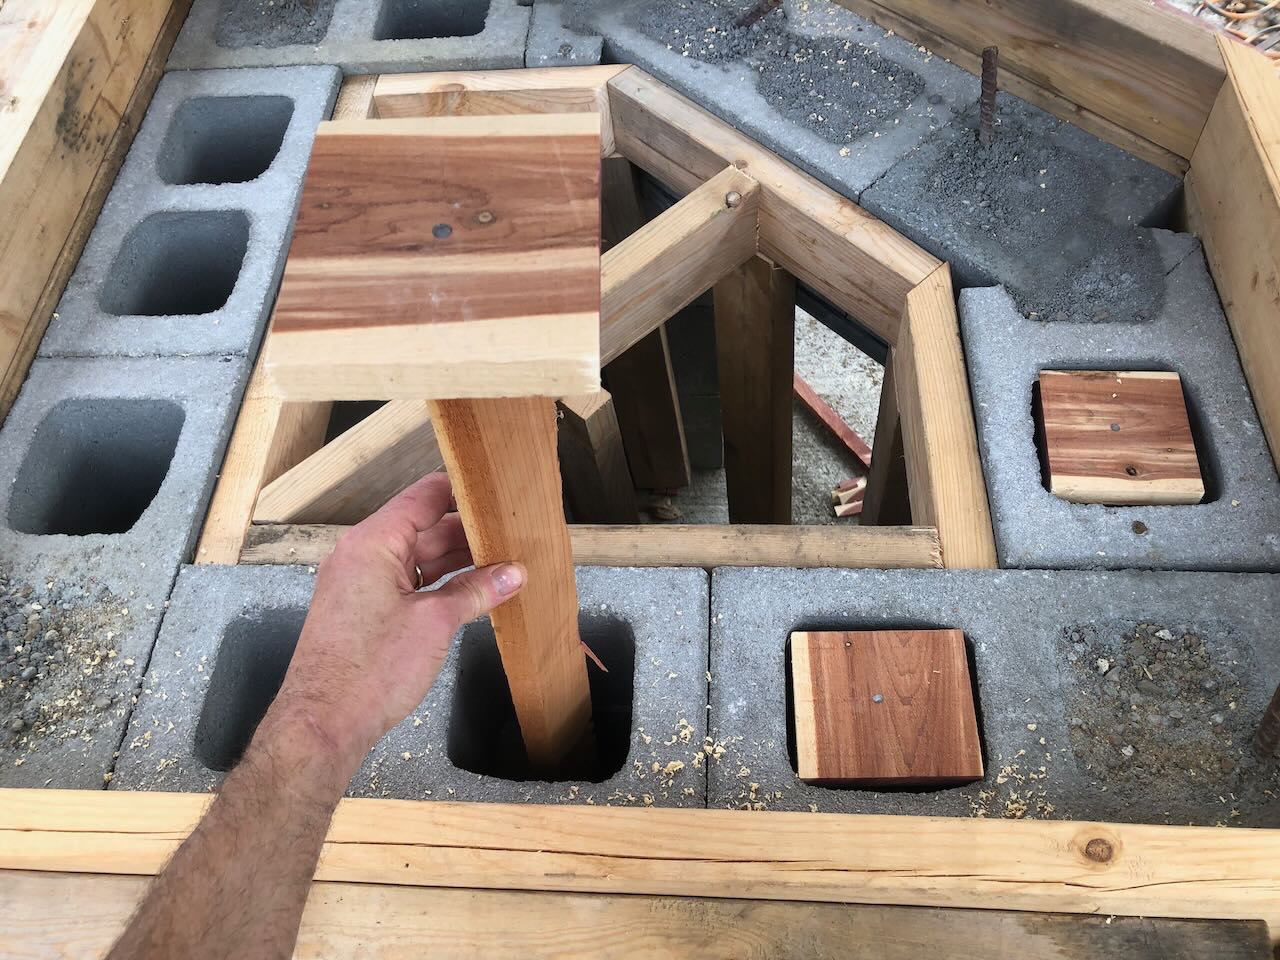
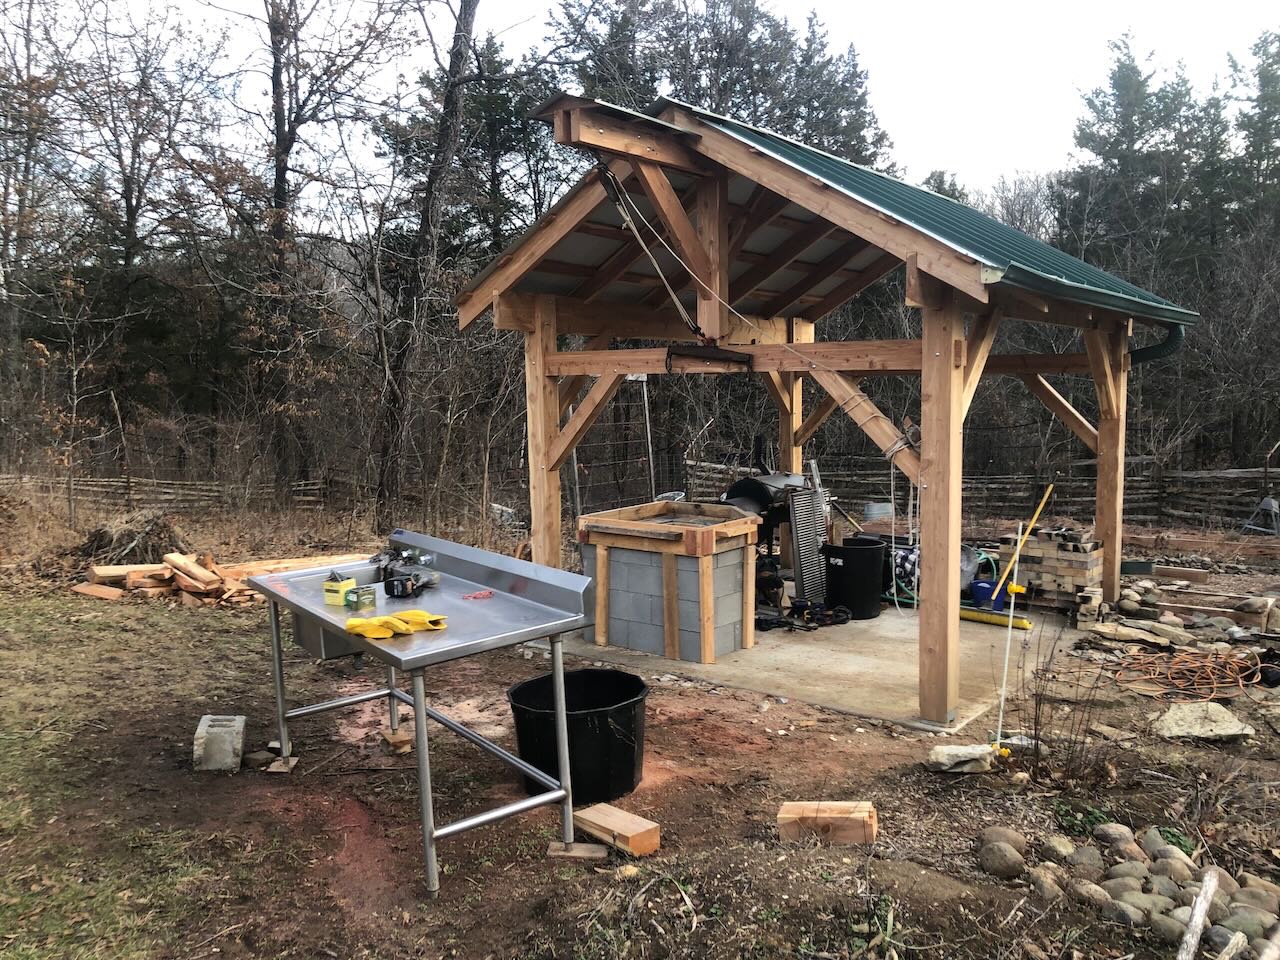
Now for part 2, progress on the pizza oven itself. Here's a reminder of where that's been dormant since October: The next overall step is to pour a 3.5" concrete slab over the whole top to provide a solid base for the oven itself. Before that can be done, I needed to provide a base that spans the inside hole, block the open holes within the concrete blocks, and build a form around the outside. Step 1: Interior I built a frame of scrap pine 2x4s (all pine used in these steps was also saved/salvaged from the porch work this summer). This fits snugly in the interior and will support a piece of Hardiebacker concrete board that will seal the opening. Notice that it's recessed about 3/8" below the surface of the concrete blocks to allow the board to fit reasonably flush with the upper surface. This is supported by scrap pine supports underneath, set up on thin wedges. There's no hardware anywhere, it's all cut to fit tightly and hold together on its own. Once the concrete is set, I'll knock out the lower wedges and all the parts should disassemble themselves from below. That's the goal, anyway. Here's another view: Step 2: Exterior framing Next I built the framing that will form the outer walls of the concrete slab. The slab is meant to be 3.5" thick, so I first built a lower layer of 2x4s flush with the concrete blocks, but adjusted to be absolutely level using shims: You can see that the foundation slopes to the south (following the base slab), so the wooden frame appears to tilt upward to the south. No big deal, it'll be slightly thicker at that end. Once this was in place, and level and tight to my satisfaction, I added a second layer of 2x4s to create the actual walls of the concrete form: I then screwed on cleats to connect the two levels of framing into a solid mass. I also screwed on extra 2x4s horizontally to the upper frames, to help ensure that they don't bend outward under any pressure from the concrete: Step 3: Blocking the interior holes I still needed to block the remaining interior holes in the concrete blocks, which I didn't want/need to do with solid material like gravel or concrete as that would be too much expense and work. So I made a series of wooden plugs nailed onto thin supports, using scrap cedar from on-farm-milled lumber (like the rest of the kitchen). These drop into each hole and fit closely enough that I can use masking tape to seal off the remaining gaps: These will be forever entombed but I don't care, they're scrap wood that would go onto a bonfire otherwise. And here's a view of the finished result: All that's needed now is to cut the filler board for the center and tape over all the smaller openings. But I won't do that until we're close to pouring, which could be anywhere from the next two weeks to the next two months depending on weather. It's really exciting to get this step done as it creates a feeling that we're much closer to having an oven, even that if that could still be months away. But now we can take advantage of the first long-enough warm spell to pour the slab with very little further prep. I already have six bags of concrete in the garage just biding their time... Thanks for your continued interest in this slow-moving project!

- 131 replies
-
- 16
-
-
Timber-framed outdoor kitchen - Cathead - 1:1 scale
Cathead replied to Cathead's topic in Non-ship/categorised builds
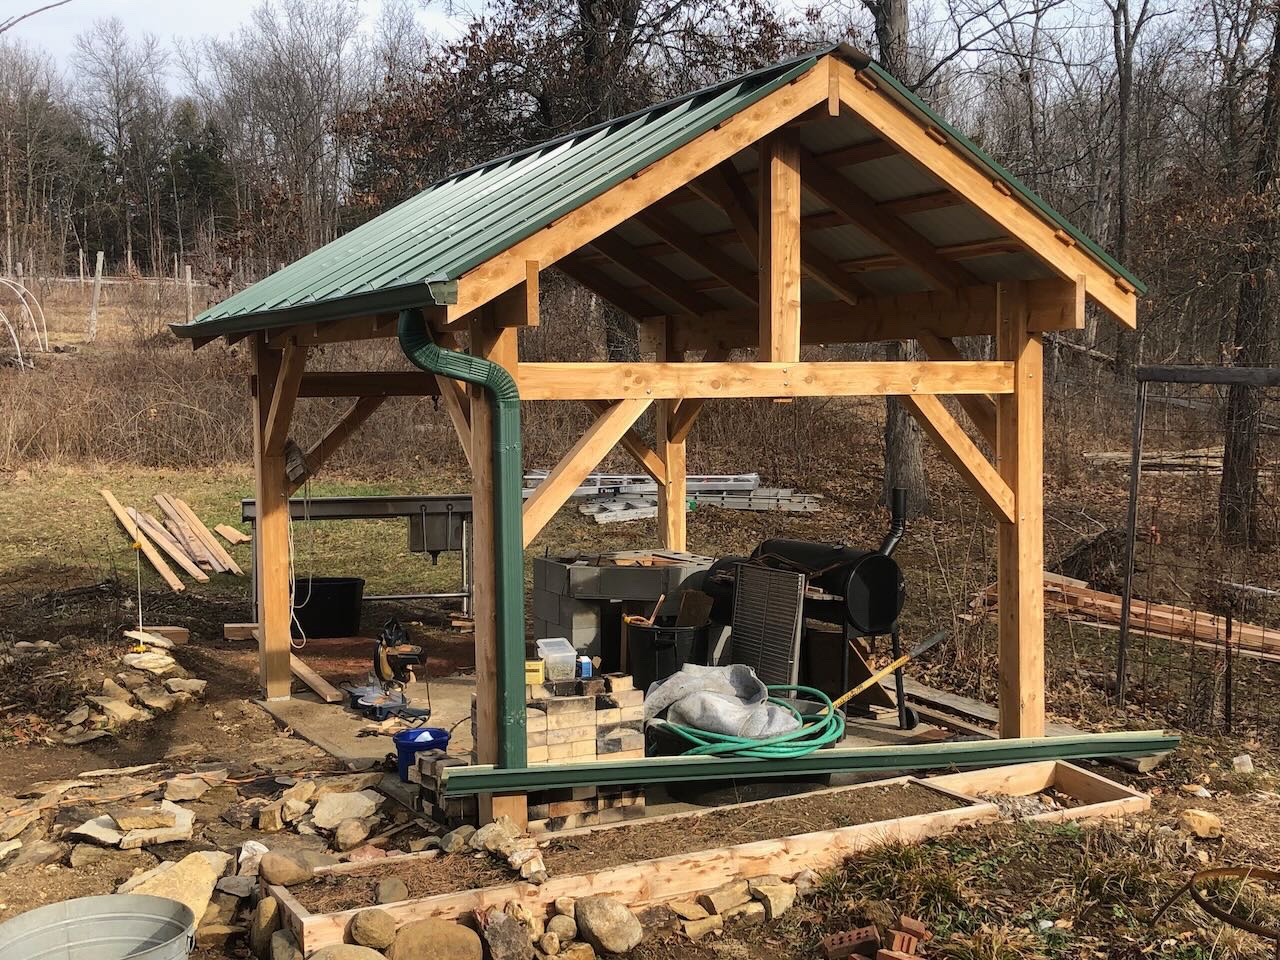
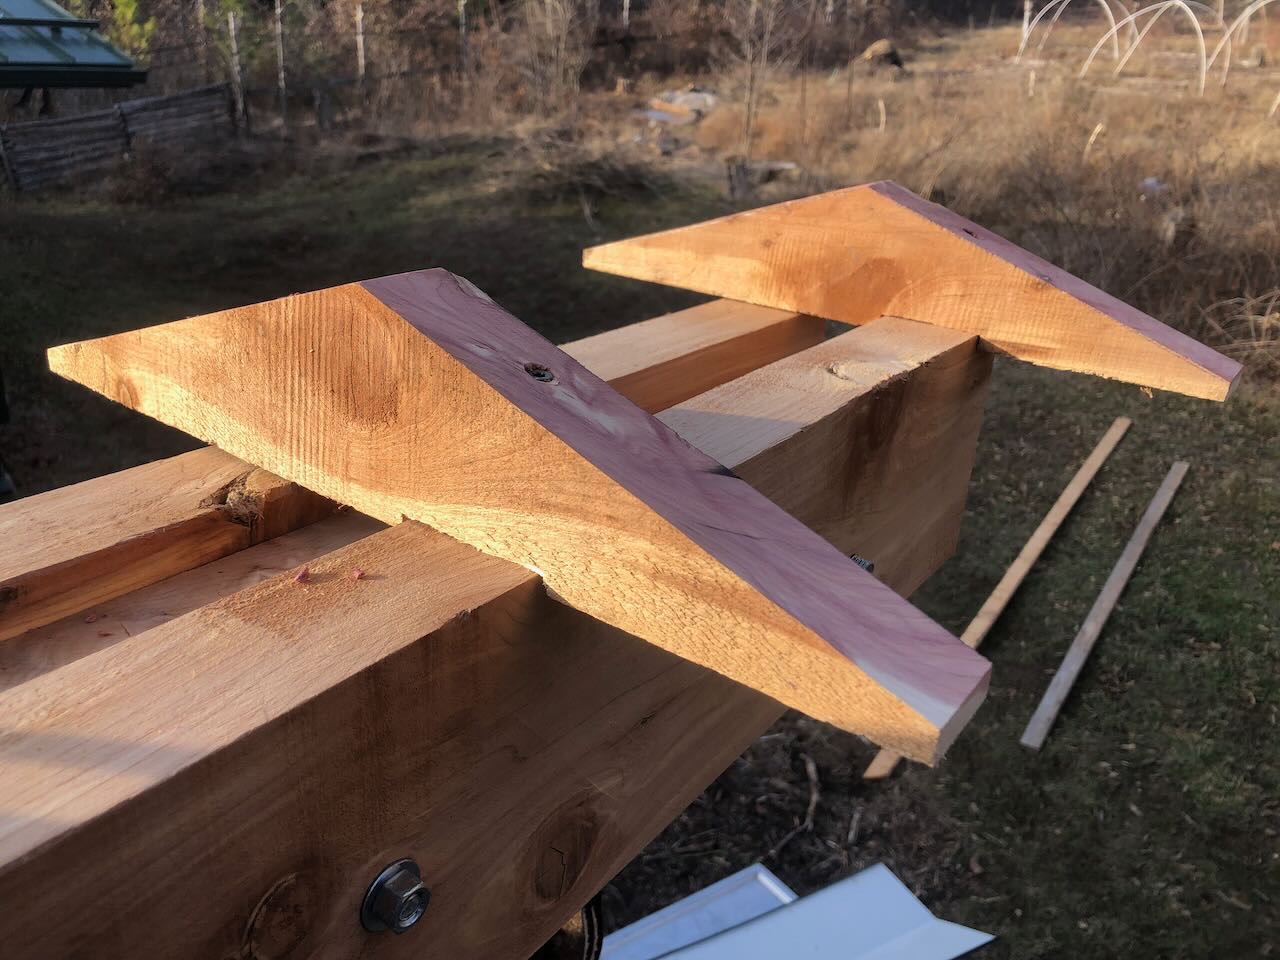
We soared to 71ºF (22ºC) here today, quite a change from lows below 0ºF (-18ºC) last week. That broke today's old record high by a full 4º! So I took a day off and got a bunch done on the outdoor kitchen project, which has been otherwise dormant during a long stretch of cold weather and general busy life. This update will come in two posts since there are two very different accomplishments. First I made some upgrades to the structure, primarily by adding a gutter along the west side that feeds a downspout that feeds another gutter carrying water away to the southeast and lowest corner of the landscape. This will keep rain off the main entrance into the structure. I might or might not add a gutter to the east side. Like the roofing, all the gutter/spout materials were salvaged from last summer's work on our house for reuse here, rather than buying new material. Remember that deer-hanging davit I added on the north side? I wanted to protect that wood, and the pulleys, by adding a small roof extension over it. I used an old piece of roof cap, again left over from the house project and matching what's already on the main kitchen roof. I cut three triangular wedges to match the cap angle and screwed them in place onto the beams: Then I simply popped the metal roof cap on and attached it with roofing screws: Ties the whole thing together nicely. In the next post I'll describe progress on the pizza oven, a preview of which you can see in the last photo above.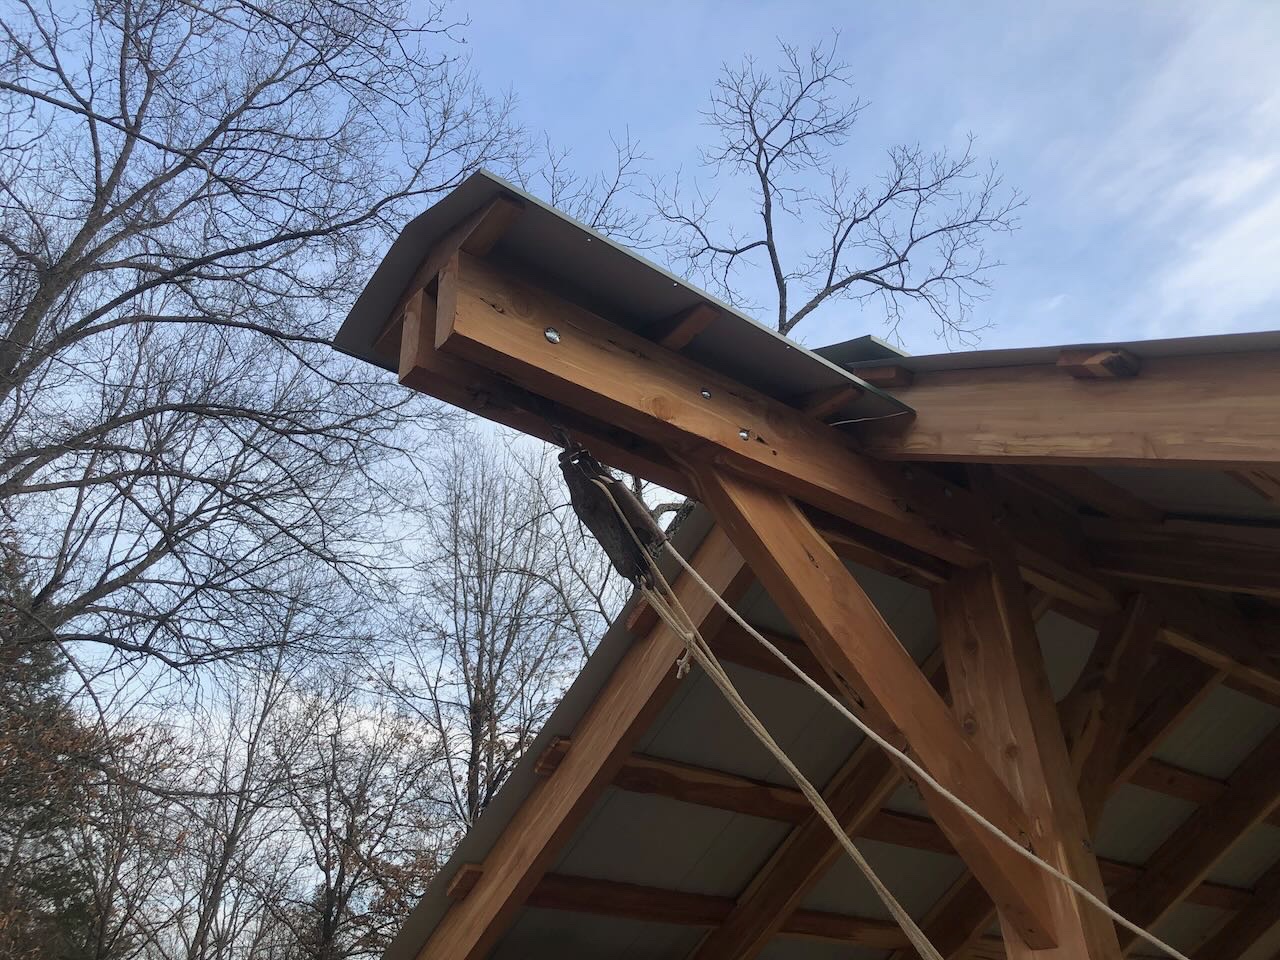
-
I'm glad you found that thread useful! Nice job on the color of those sails.
-
Roger, great to hear from you! I didn't think to try scissors, I assumed anything like that would destroy the brass. Oh, well, something new learned. I've definitely kept a riverboat rail ferry in the back of my head for years. The plans you sent would definitely make a good model, all the elevations and details are there, while I've also always loved a photo I saw somewhere (but can't currently find) of a similar ferry operating on the upper Missouri River, though I wouldn't even know where to begin with that one. The Katy railroad bridged the Missouri River on a fantastic span not far from where I live, first in the 19th century and replacing it in 1930. You can walk out on it today, it's part of a statewide rail trail (though you can't cross the whole span). We visit it regularly as it's such a great vantage point to watch the river.
- 113 replies
-
- 5
-
-
- Cairo
- BlueJacket Shipcrafters
- (and 1 more)
-
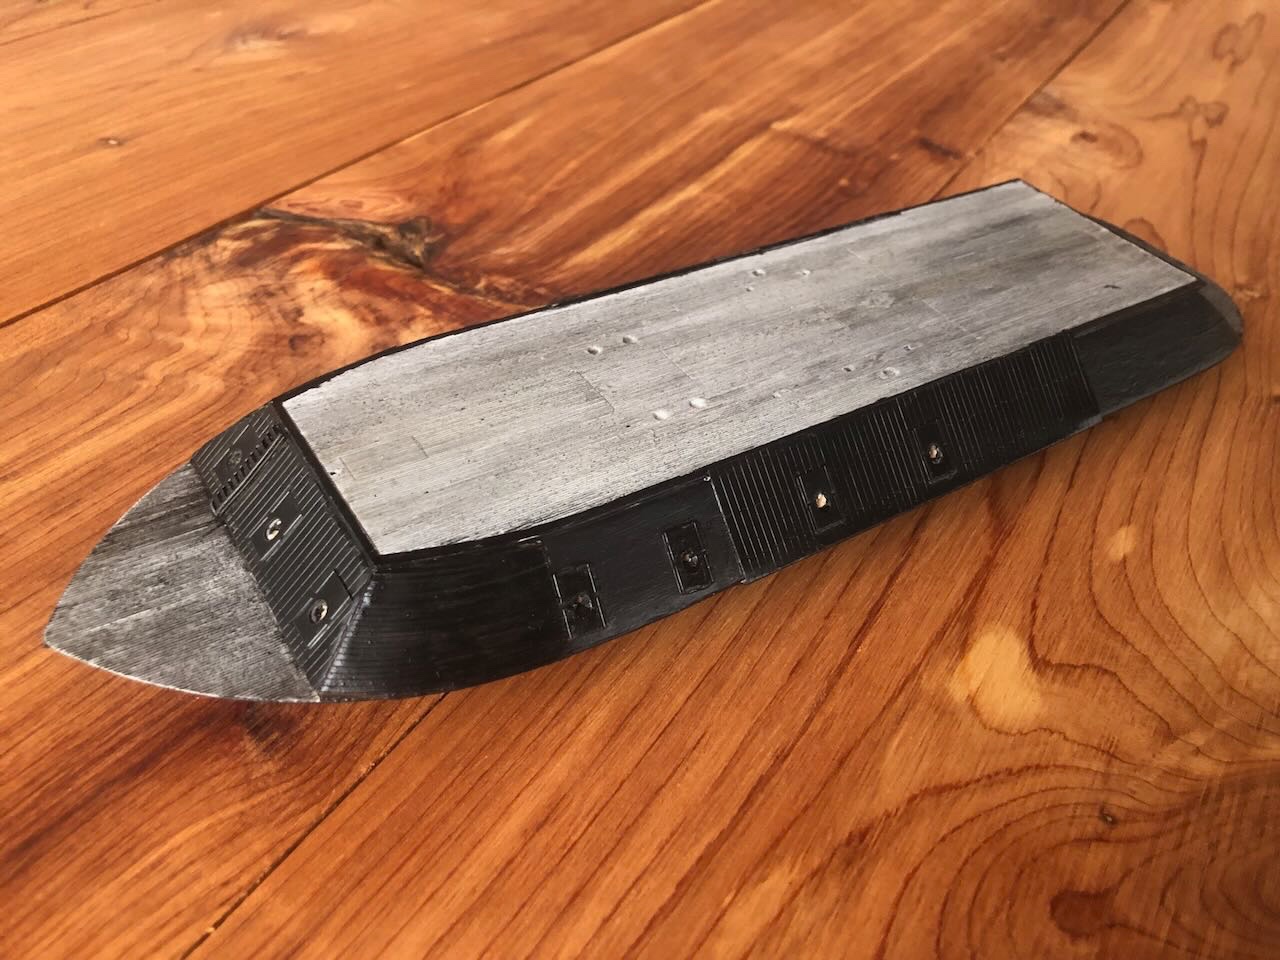
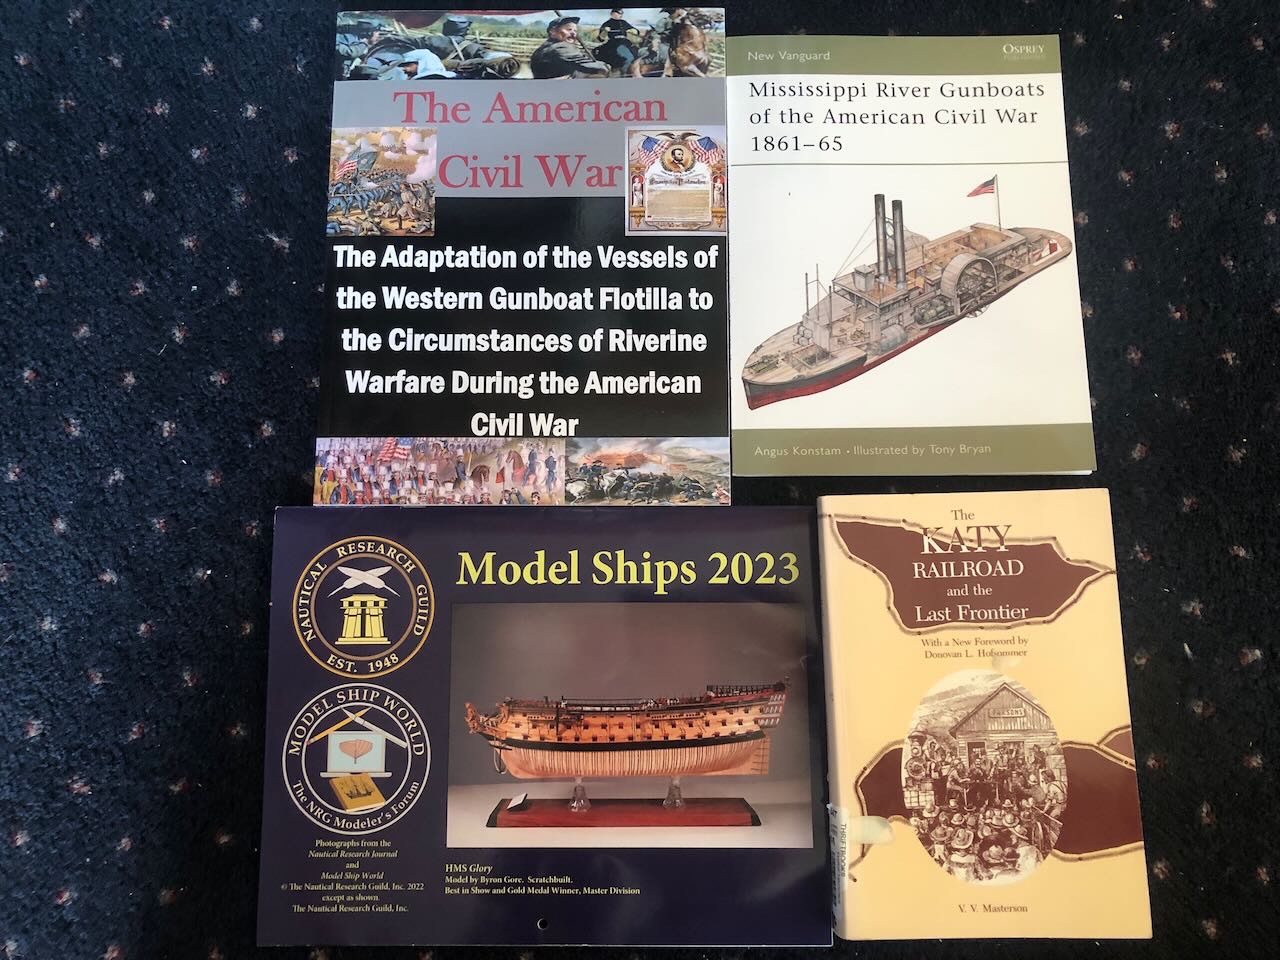
Update time! Just a few days later, downright dizzying speed. I did a preliminary round of hull painting, and it definitely makes a difference: You can see the bright wood shining out from within the cannon holes, I need to go back and darken that. I also intend to do some weathering to give more texture to the surfaces. But it does hide faults nicely! Note that I haven't done anything with the decks yet. Also, here's my Christmas haul of model-related items. Top two are the most relevant, bottom left is obvious, and bottom right is research for a possible future project. Let's see if I can keep up the progress on this thing. A bit worried about all the tiny fiddly brass bits coming up...
- 113 replies
-
- 9
-
-
- Cairo
- BlueJacket Shipcrafters
- (and 1 more)
-
Hey, Ken, I forget where you are exactly, but my grandparents lived for ~30 years in a cabin they build themselves up in the mountains above Black Mountain. It was a beloved place for me, growing up. Fond memories of Christmases in those mountains.
- 113 replies
-
- 5
-
-
- Cairo
- BlueJacket Shipcrafters
- (and 1 more)
-
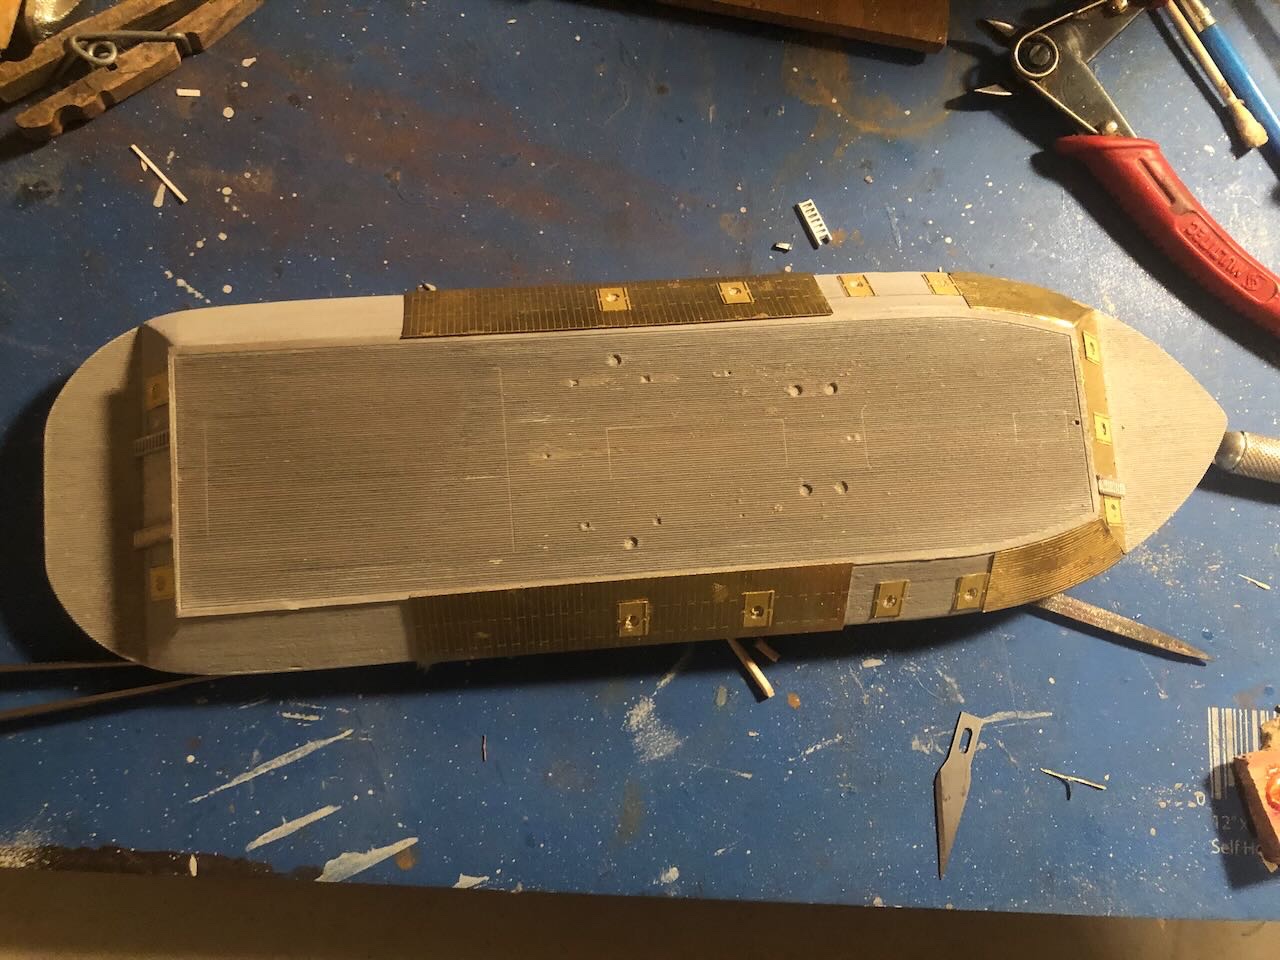
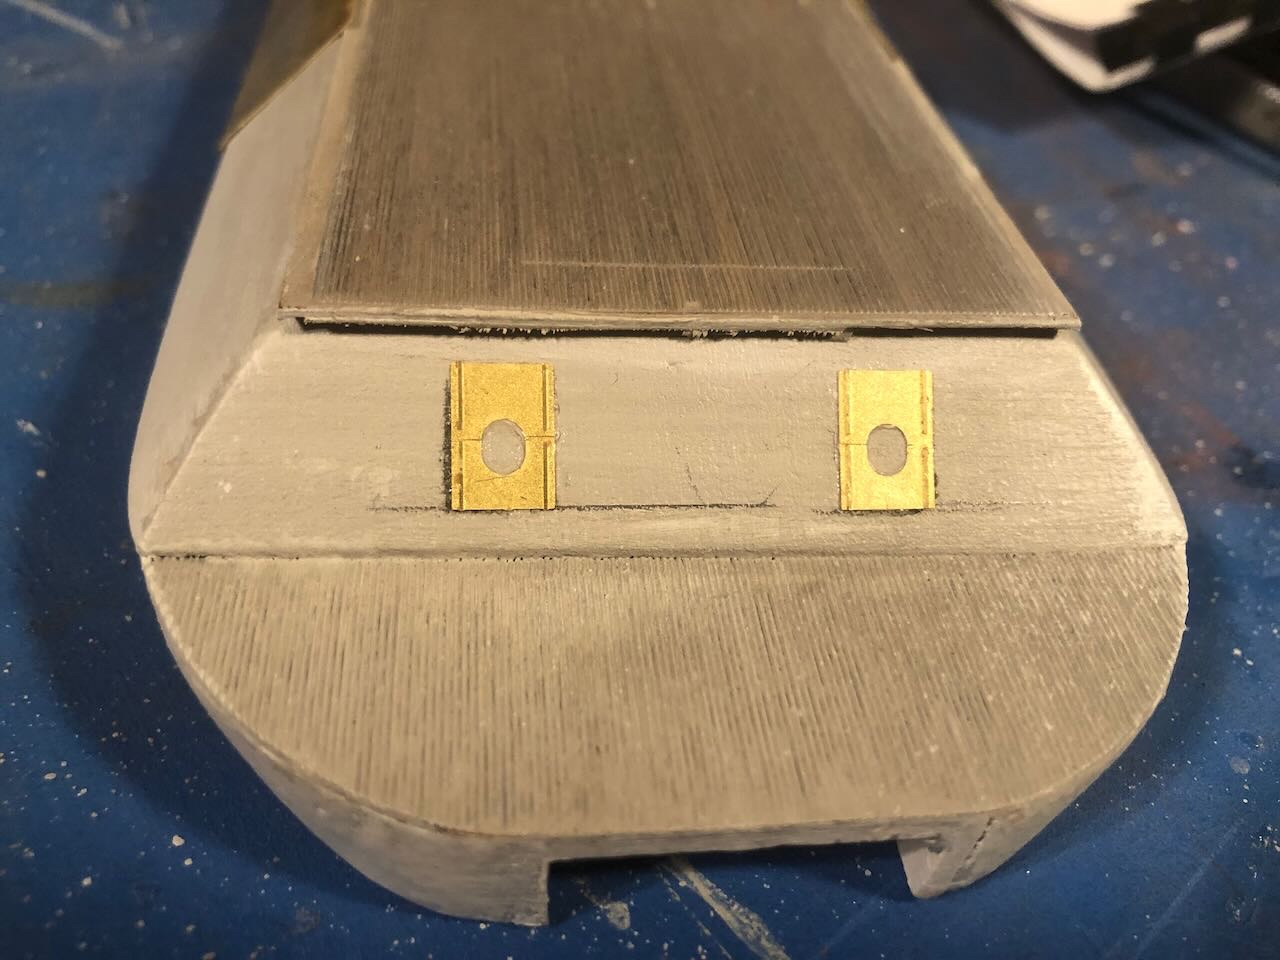
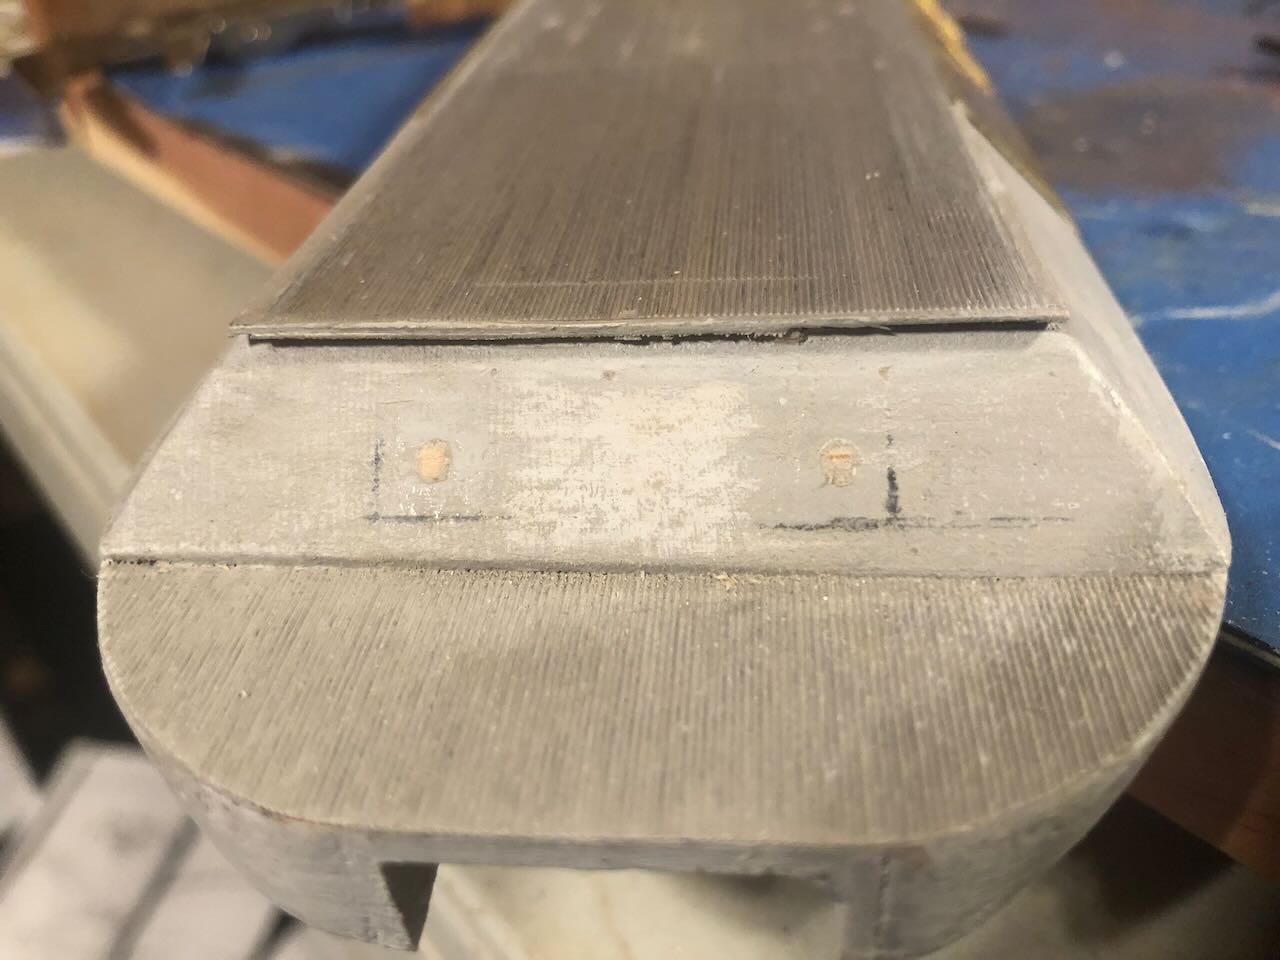
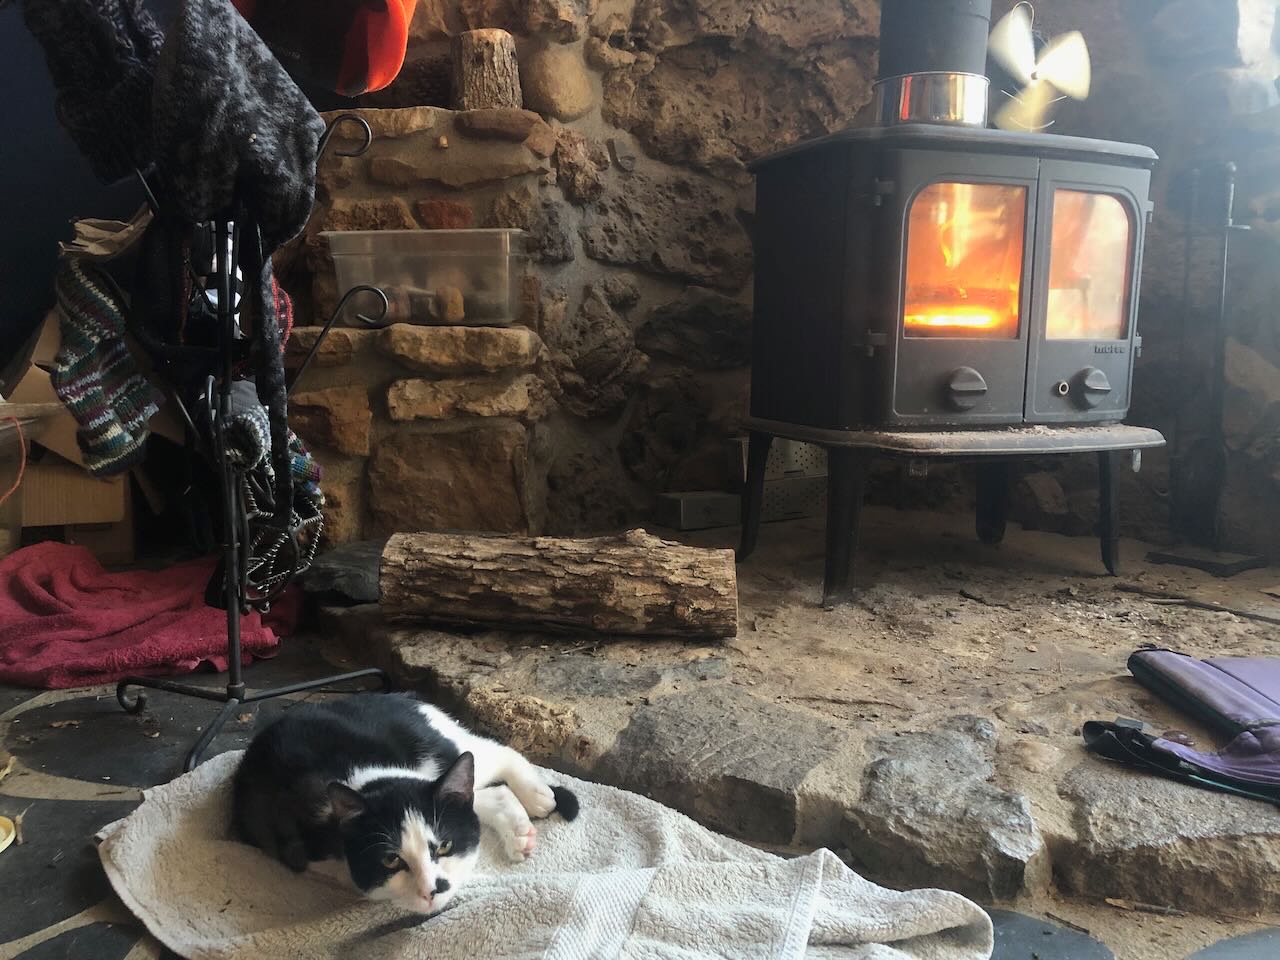
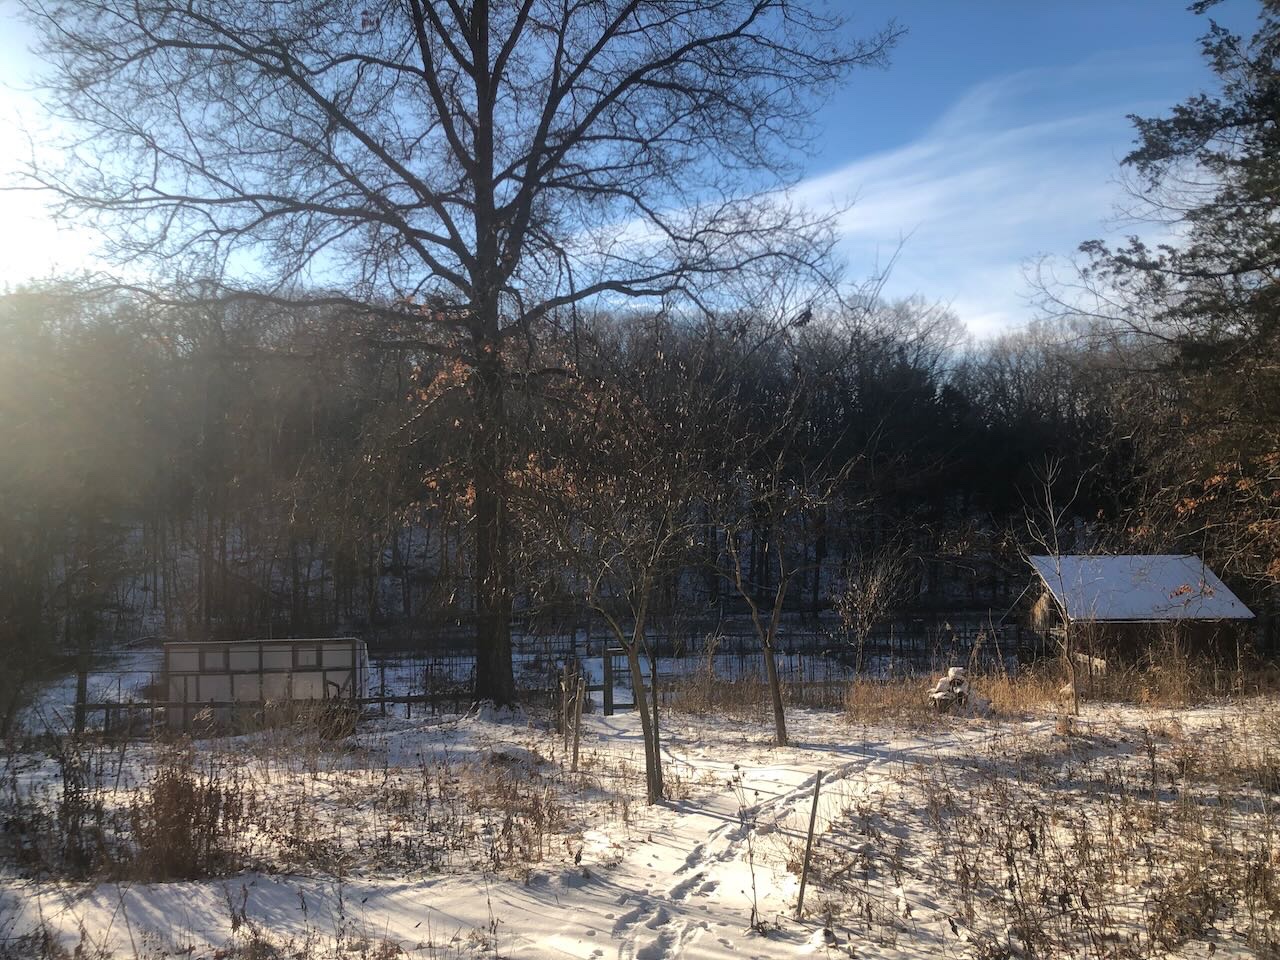
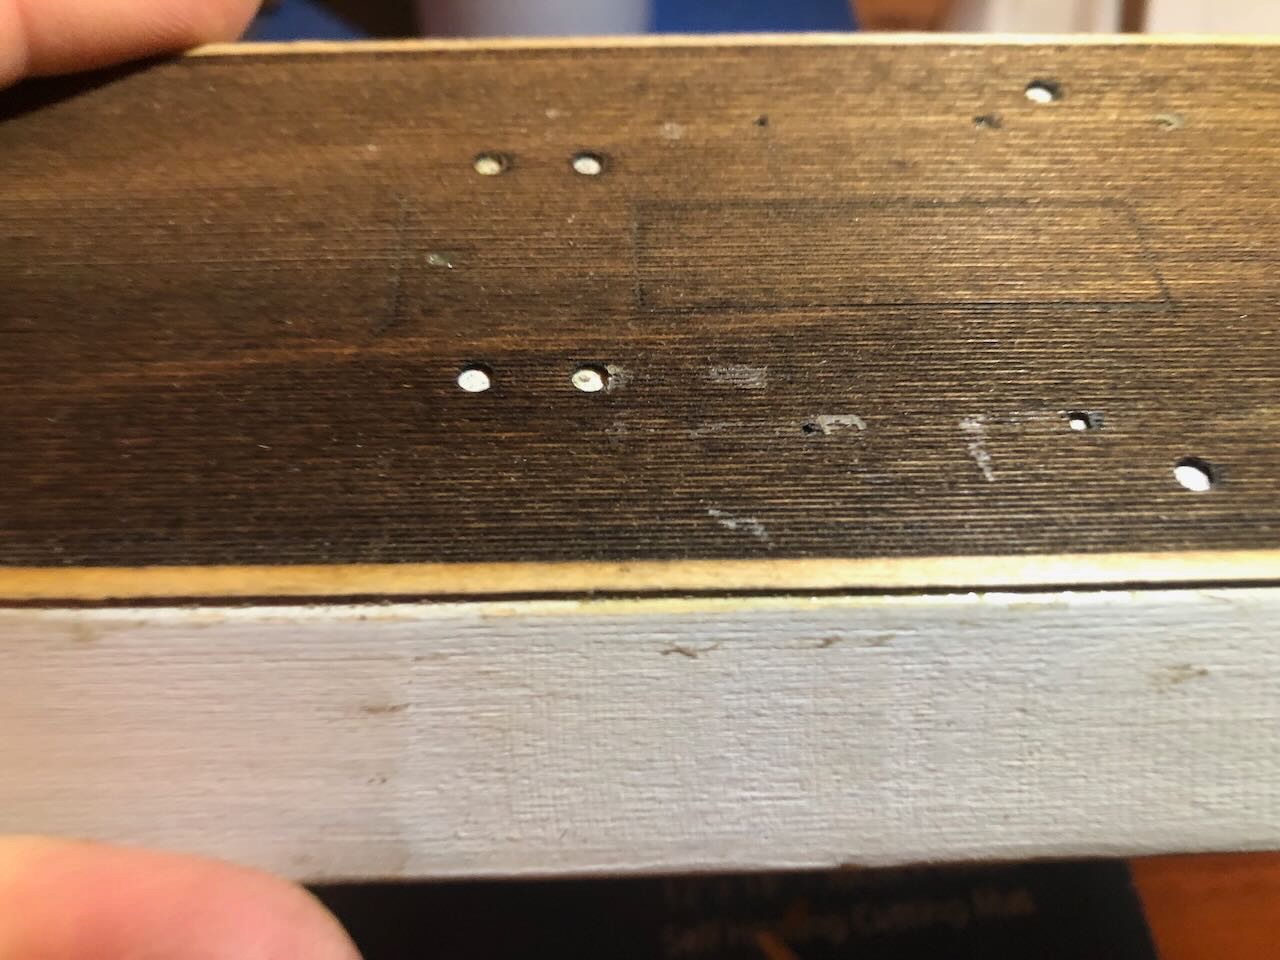
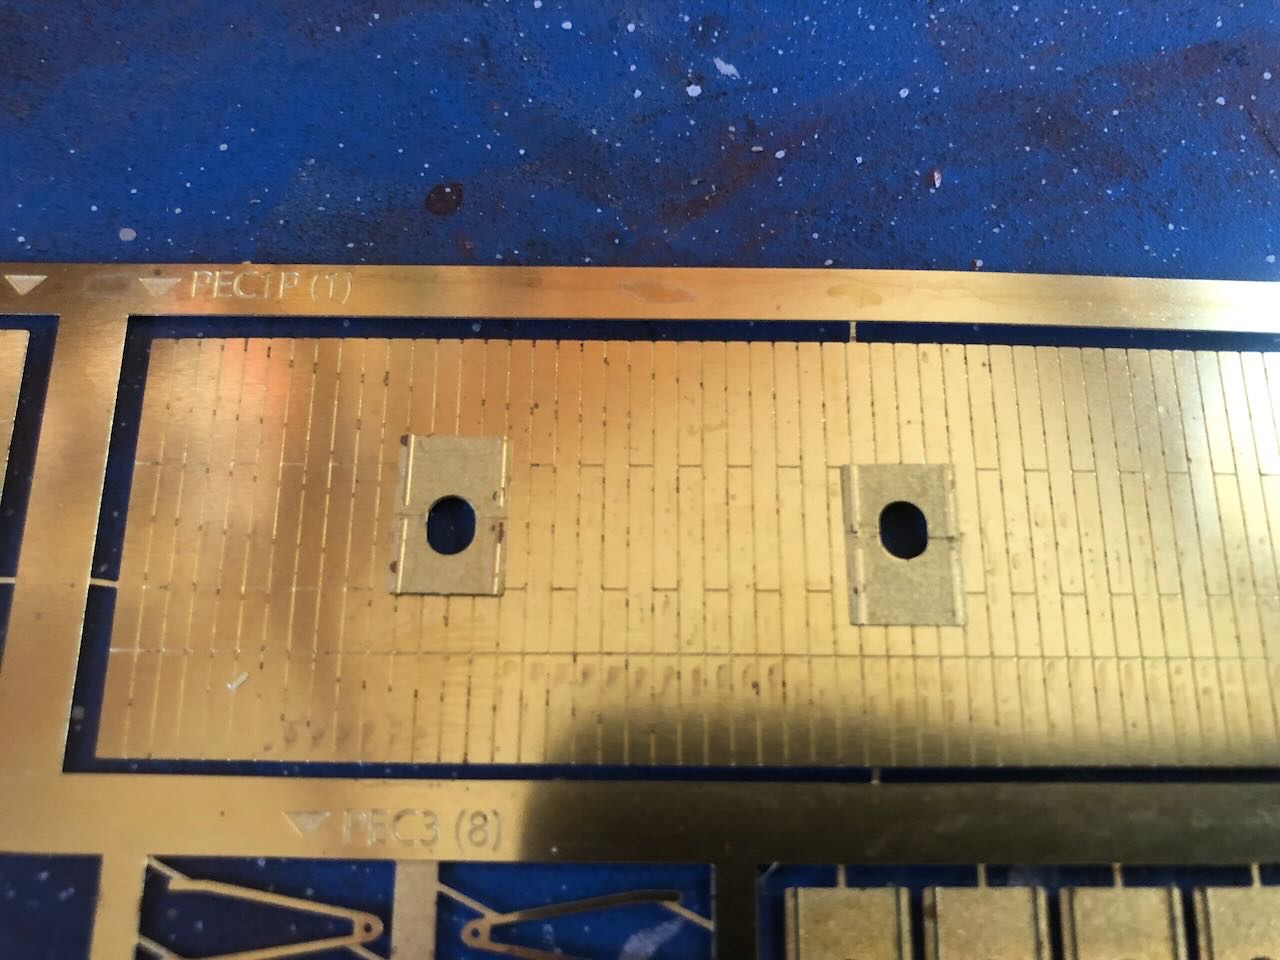
Found another hour last night to dabble in this thing. The next step is to drill out holes that will later hold the guns, and attach the rest of the gunports (the ones that don't go on the armor). So I marked out locations for the guns and ports using calipers to transfer distances from the plans: Below, testing aft gunports. I used their location to set my drilling location (by the middle of the gunport). Anyone see a problem about to happen? Compare to the photo from @mbp521's log of where these go: Yeah, I set the ports on the wrong side of my location line, so they're much too far inward. They should be sitting outboard of the marking line, not inboard. Oopsie. Didn't notice this until after the holes were drilled and the ports glued on. So I chipped the ports off, filled the old holes with toothpicks and wood glue, and filed smooth. Hopefully they'll fade into the background under paint. Here's the updated aft casement, also with ladders attached. These castings are pretty rough but I'm not up for trying to rebuild something more to scale. Below you can see another looming problem. The kit has you drill different hole sizes depending on the size of the gun to be inserted. But some of these are smaller than the gunport opening, leaving extra wood showing behind the port. This will probably look odd since everything behind the port is supposed to be open. I didn't recognize this problem until after everything was glued into place. So I took a sharp knife and tried to carve a "cone" within the gunport to at least set the wood back a little, hoping all the black paint will create a collective shadow effect. It's a bit rough but the best I can do without damaging the brass. If I were to do this over, I'd use a small counter-sink bit or something to widen the mouth of every gun hole before gluing on the ports; this would create a smoother and more authentic negative space behind the ports while not interfering with gluing them on. Oh, well. But since the kit has you glue on the armor before drilling holes, that would require carefully locating all the ports first. Currently instructions have you glue the armor (and associated ports) on before doing any drilling, making the drilling very finicky so you don't catch the brass with the drill bit. You could locate all the gun locations first and drill them all out (so you could countersink everything) but that would require extreme precision on a small rough wood casement, because you can't adjust the armor the way you can adjust individual ports. Personally I'd rewrite the instructions to do these steps consistently; place your armor in its final position and mark ALL the gun holes, then drill them all before attaching the armor & other ports to the casement (rather than attach armor, drill holes through armor gunports and into raw wood, then attach other ports). Anyway, this is what I got trying to follow the instructions (and making my own dumb mistake). Side ports drilled through armor ports (again, very touchy as the drill size is very close to the opening in the brass): Fore casement with more holes carefully drilled through armor ports, and another chunky ladder. Top view: That's as far as I got. I think the next step is to prime and paint this whole assembly; I'm really hoping that subdues the various awkward stuff and helps blend it into a more appealing whole. Merry Christmas, Happy Holidays, festive solstice, or whatever your favorite approach is. Thanks for all your interest and support, both in logs and PMs, as I work through this. I'm stubbornly determined to produce something that'll look ok from 4 feet away in my display cabinet! As a final note, here's the view from Cathead Valley after our bitter winter storm blew through with the coldest December air here since the late 1980s. Luckily we have a well-supplied wood stove, also enjoyed by our current three-legged foster cat.

- 113 replies
-
- 16
-
-

-
- Cairo
- BlueJacket Shipcrafters
- (and 1 more)
-
Lovely! I completely agree that leaving the railings and bimini off produce a consistent open look to the model that shows off your detail and workmanship. A great example of what I often think about in model building re. the tradeoff between accuracy and artistry.
- 111 replies
-
- 2
-
-
- Nonsuch 30
- Model Shipways
- (and 1 more)
-
It may be slow and tedious, but at least it's not steamboat railings! Looks nice so far.
- 282 replies
-
- 3
-

-
- Bluenose
- Model Shipways
- (and 1 more)
-
Great prototype, I'll enjoy following along.
-
Confusing instructions are such a bane of the model world. As a freelance editor experienced in working with global clients, a few years ago I contacted various kit makers to propose having me review their instructions for both English language accuracy and general clarity. All refused, insisting that their instructions were fine. Sigh.
-
Great job on a complex build! She really came out nicely. Don't forget to show us the case when you get her in it! A nice addition to the steamboat library here on MSW.
- 238 replies
-
- 2
-

-
-
- Robert E Lee
- steamboat
- (and 3 more)
-
I don't know about the hot dog situation, but states' names get attached to products all the time without any meaningful connection. For example, "Vermont" gets attached to all sorts of food and craft products that aren't produced in or related to the state, because the state's image as a home to thrifty Yankee craftsmen is so strong. Vermonters hate it because it dilutes the value/brand of their actual products, but can't do anything about it. Virginia does have a strong cultural/historical connection to various smoked meats (like Virginia country ham), so it's possible the hot dogs you saw were using "Virginia" in the same way that "Vermont" gets used even if there was no state connection.
-
Brian, I can't come up with adequate words of congratulations. Just magnificent. I feel like I should say more but it'd just be word salad. I laughed out loud when I saw your towboat plan. I ended up following in your wake by starting a Cairo (of sorts), and I've had it in the back of my head that a modern towboat would be really interesting too, and well outside my normal range. So I guess I'll sit back and let you tackle that first, too! If we ever take our potential Oklahoma road trip, maybe I'll beg a chance to swing down across the Red River and see her in person?
-
Thanks Ian. At my glacial pace it'll be future years before anyone can benefit from a completed build! I'm still hoping I can come out with something that looks decent from a normal viewing distance. But life just keeps not letting me get to this.
- 113 replies
-
- 5
-
-
-
- Cairo
- BlueJacket Shipcrafters
- (and 1 more)
-
If it wasn't clear, that was a World Cup joke, not any sort of comment on your language skills!
-
Welcome! Might want to be gentle with the English members for a few days!
-
I agree that bending around a solid item is good practice, even if you can't find one with just the right radius. Getting a rough pre-bend in the wood makes final adjustment easier and safer. Nice work!
- 158 replies
-
- 1
-
-
- chaperon
- Model Shipways
- (and 1 more)
-
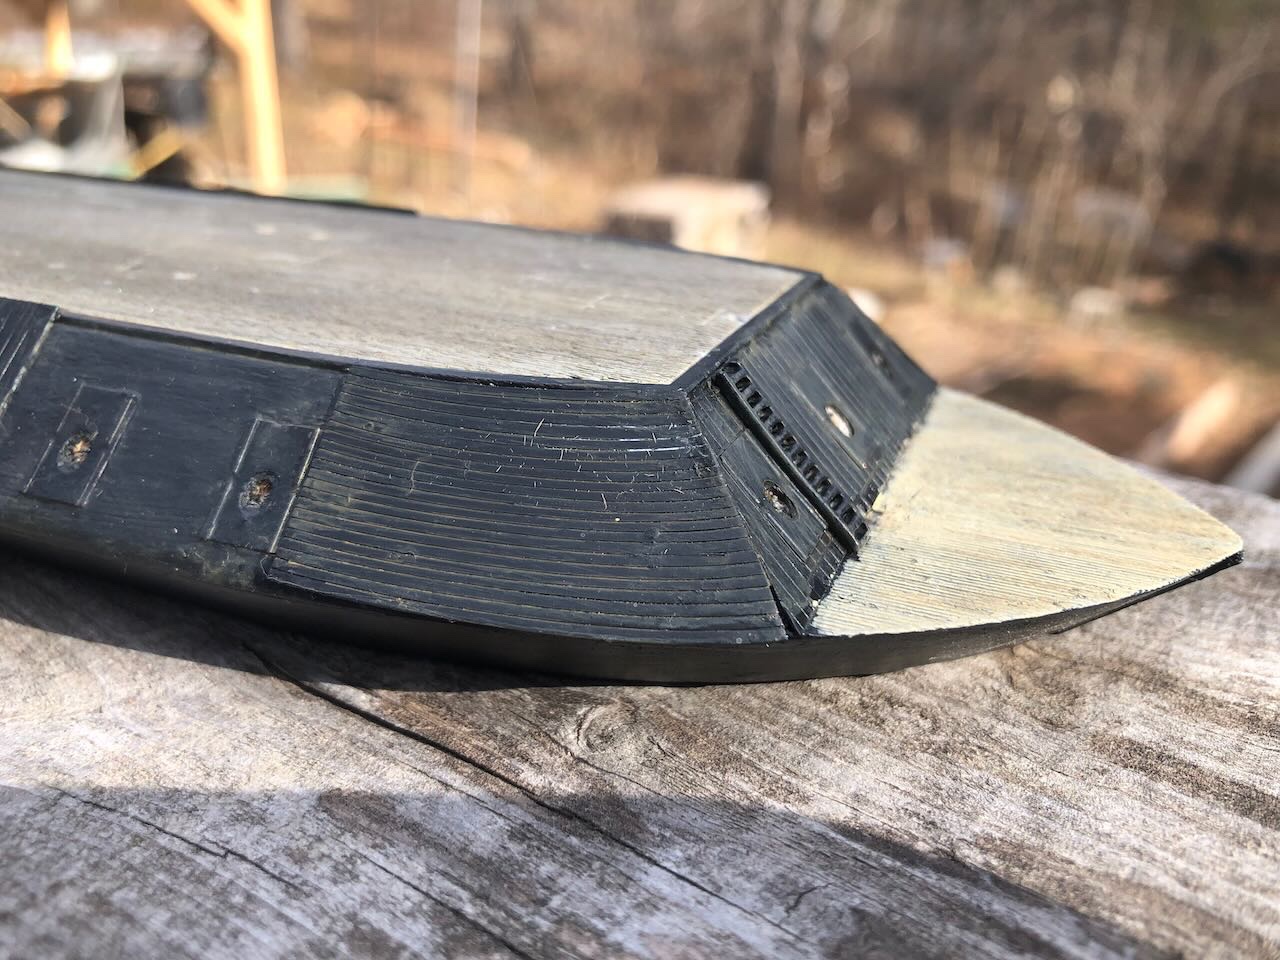
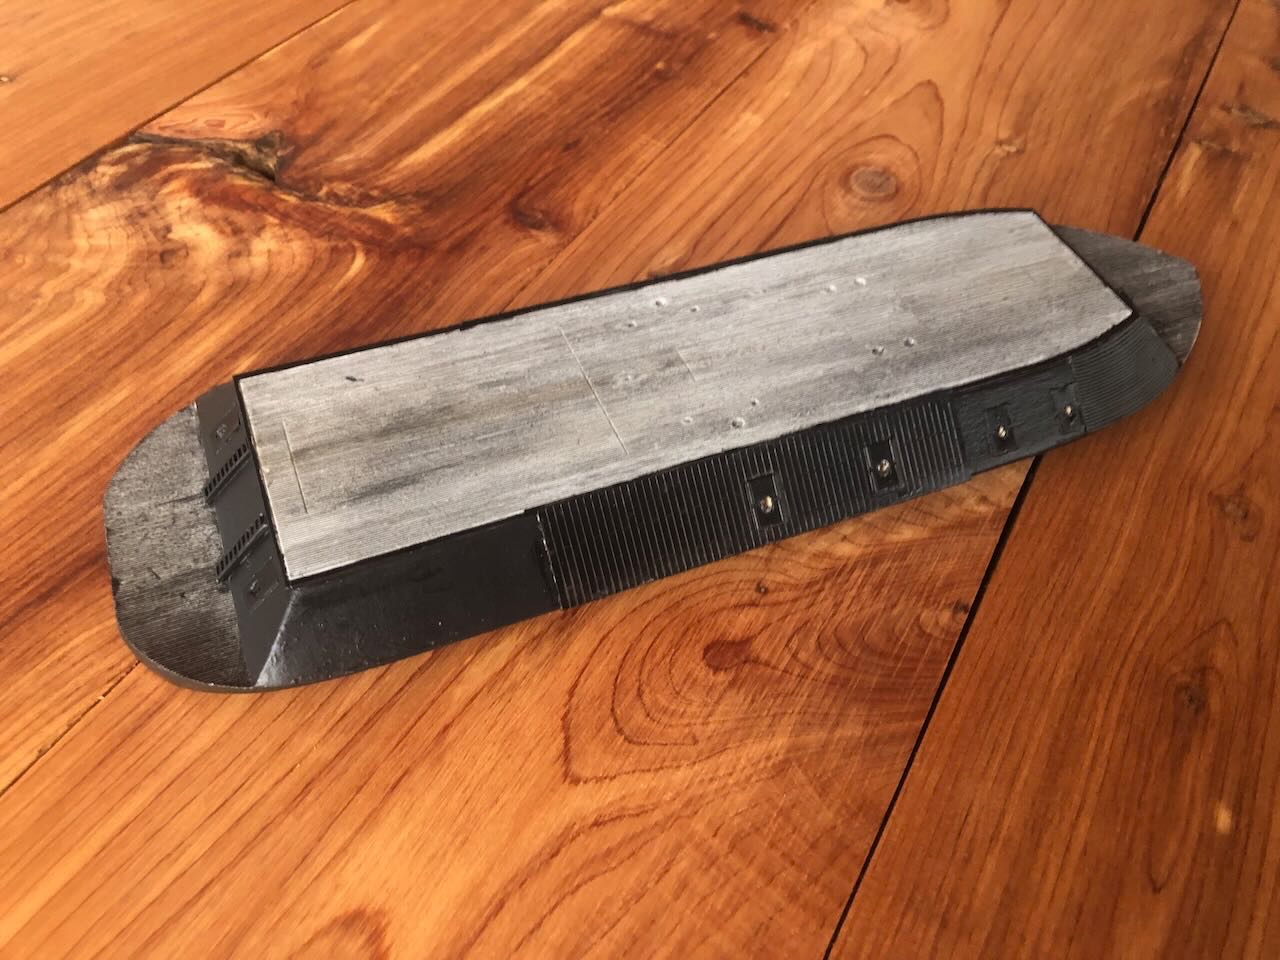
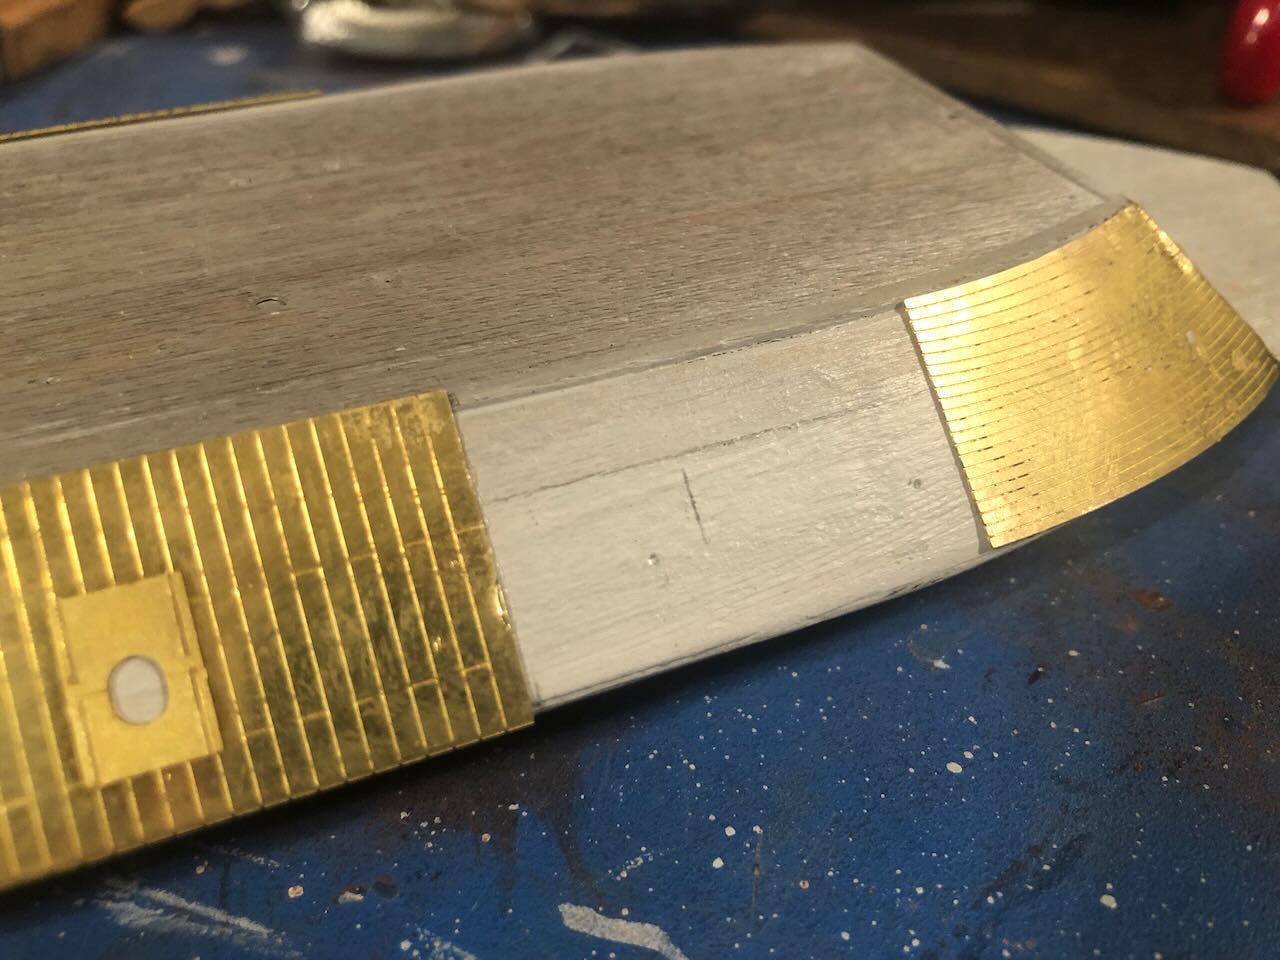
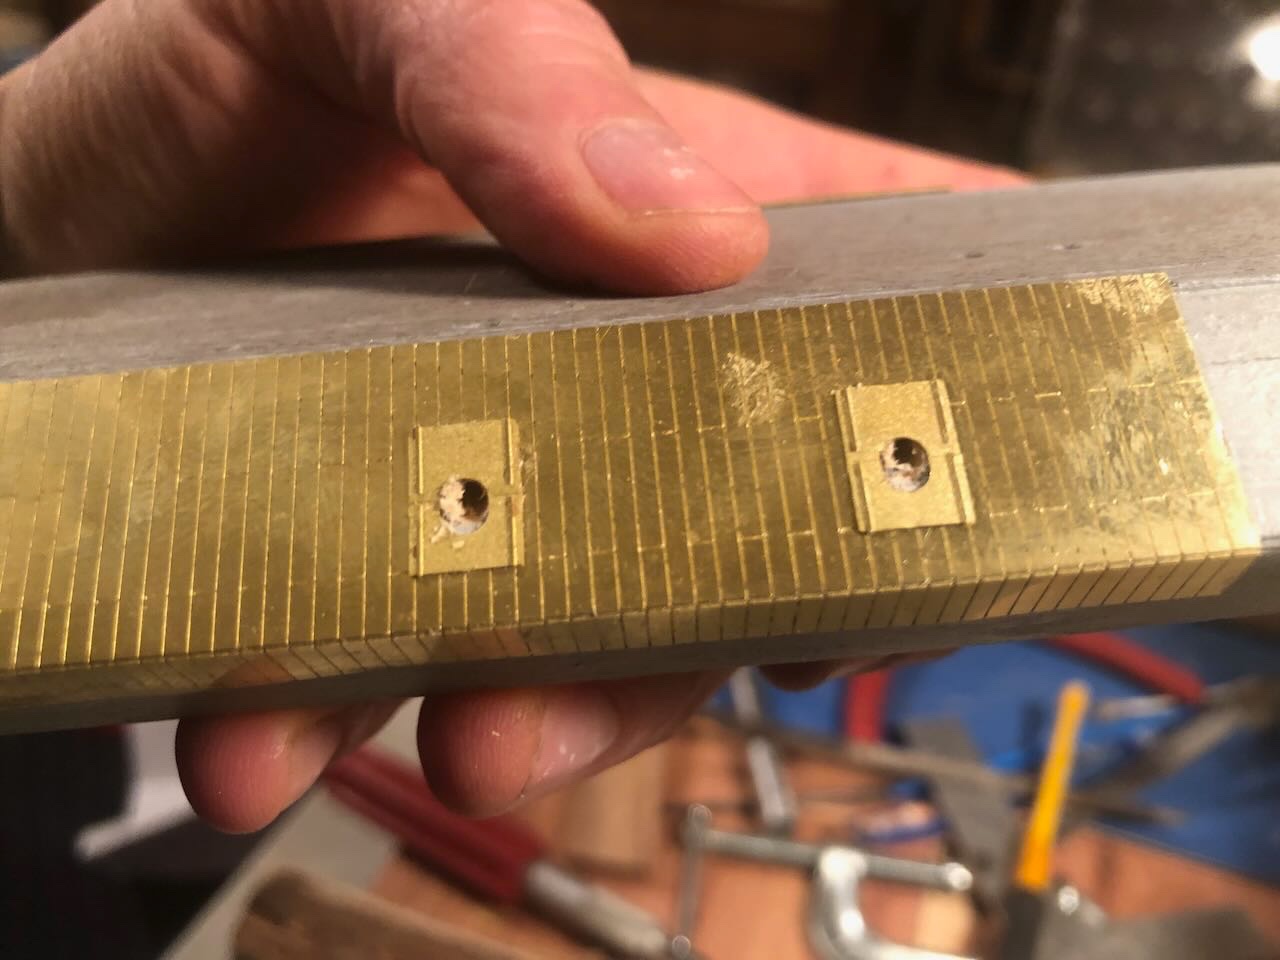
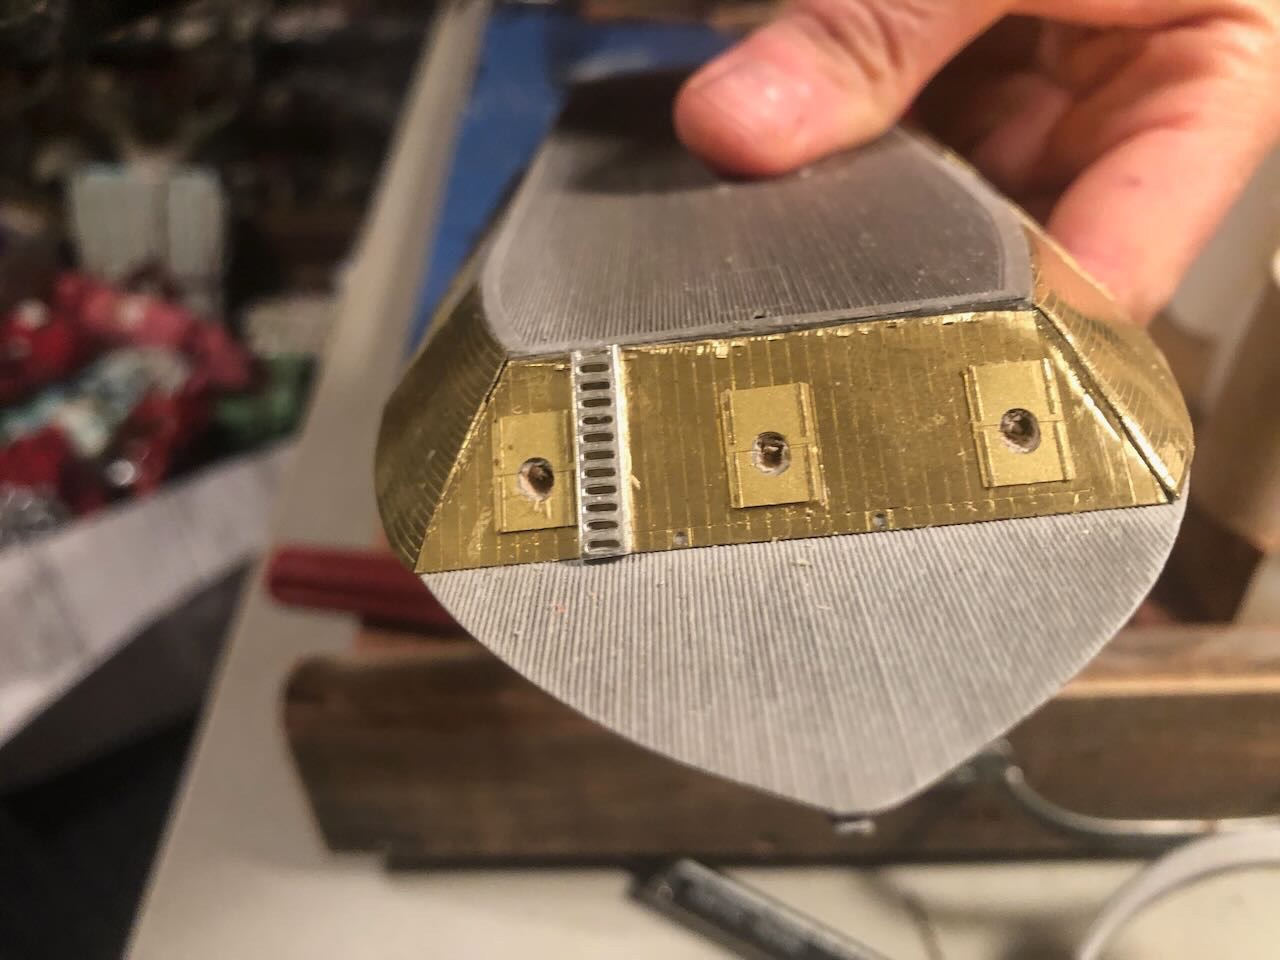
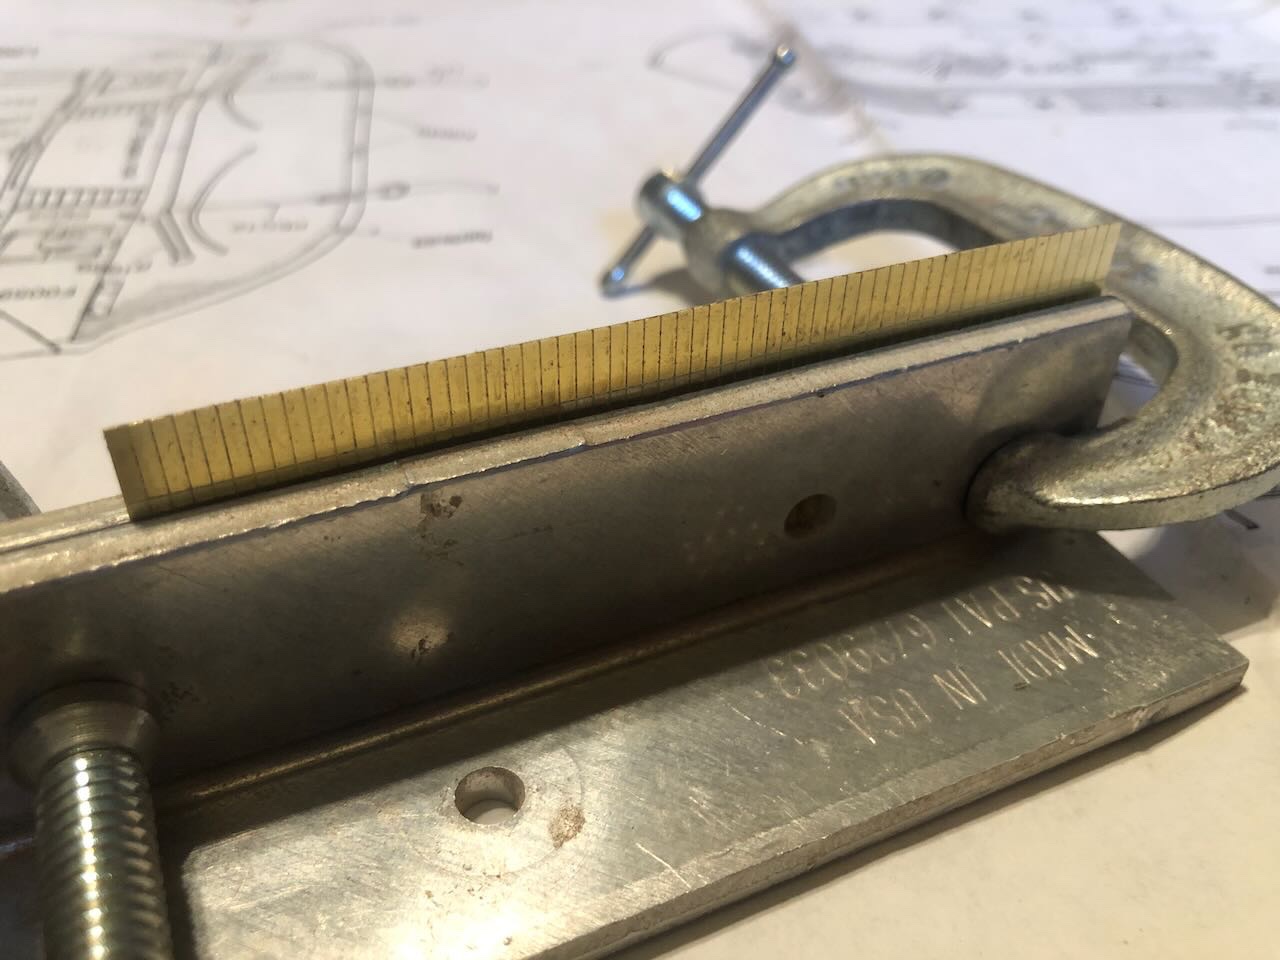
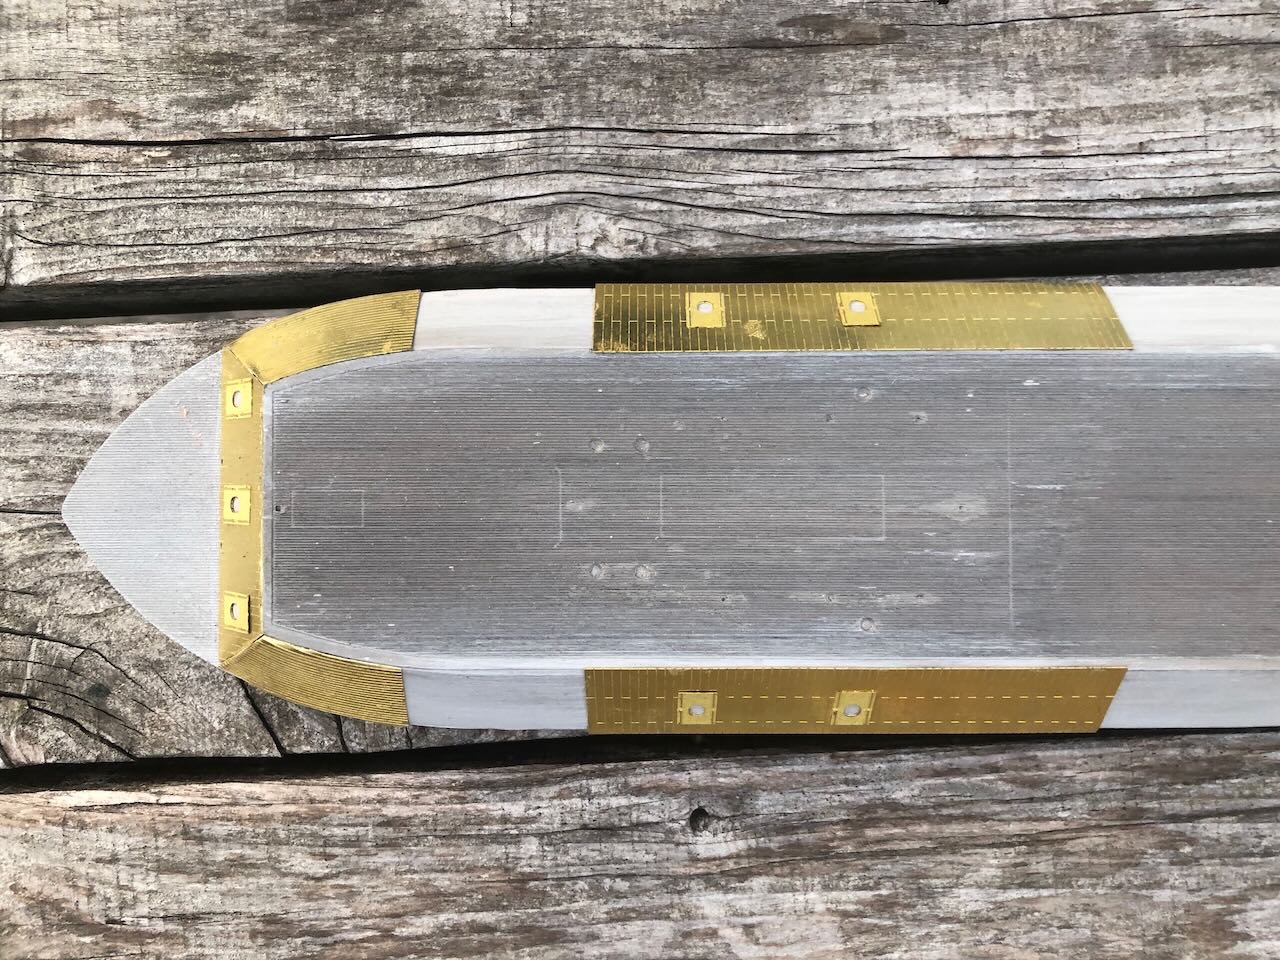
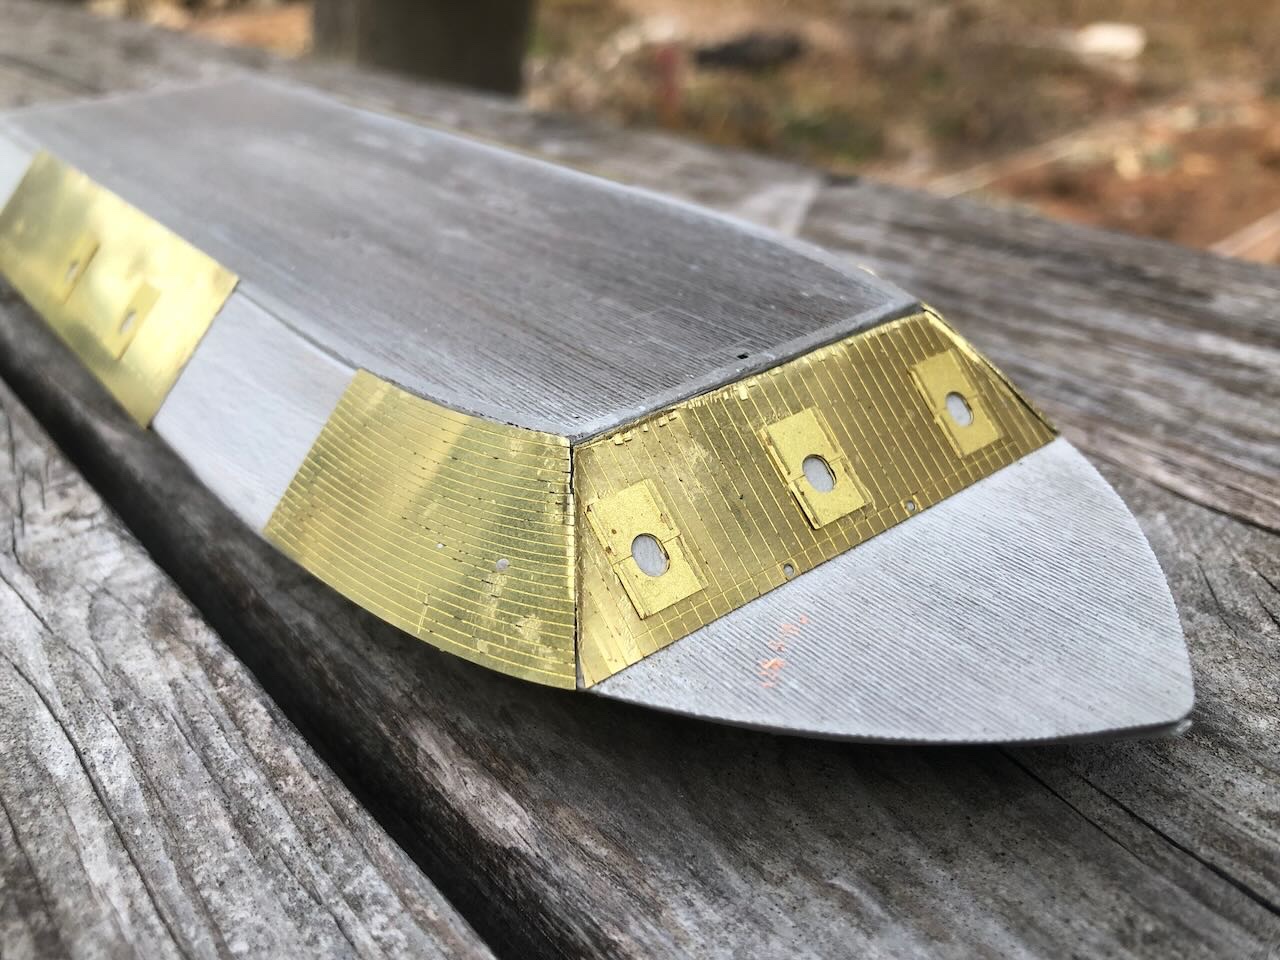
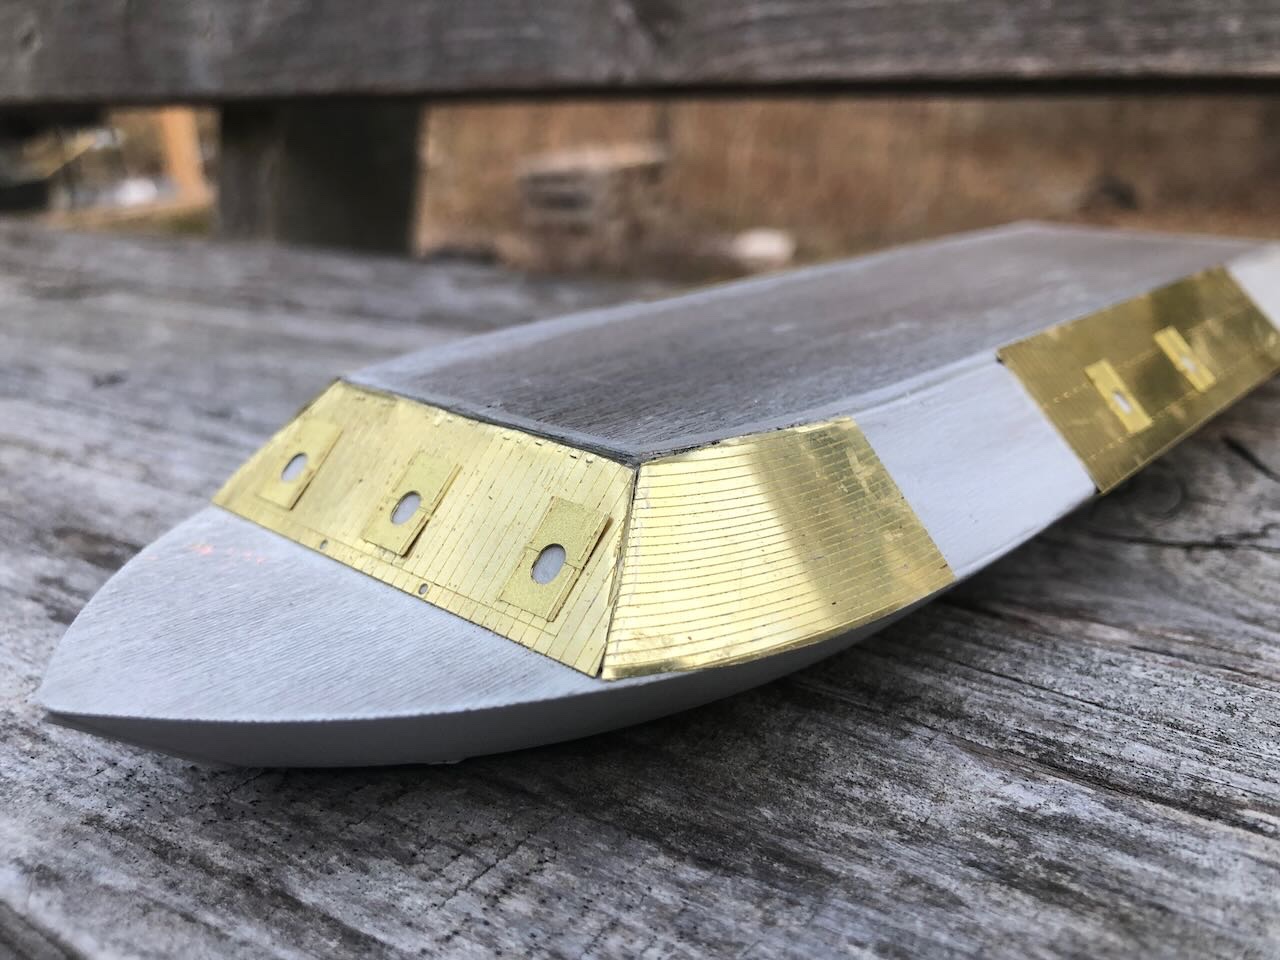
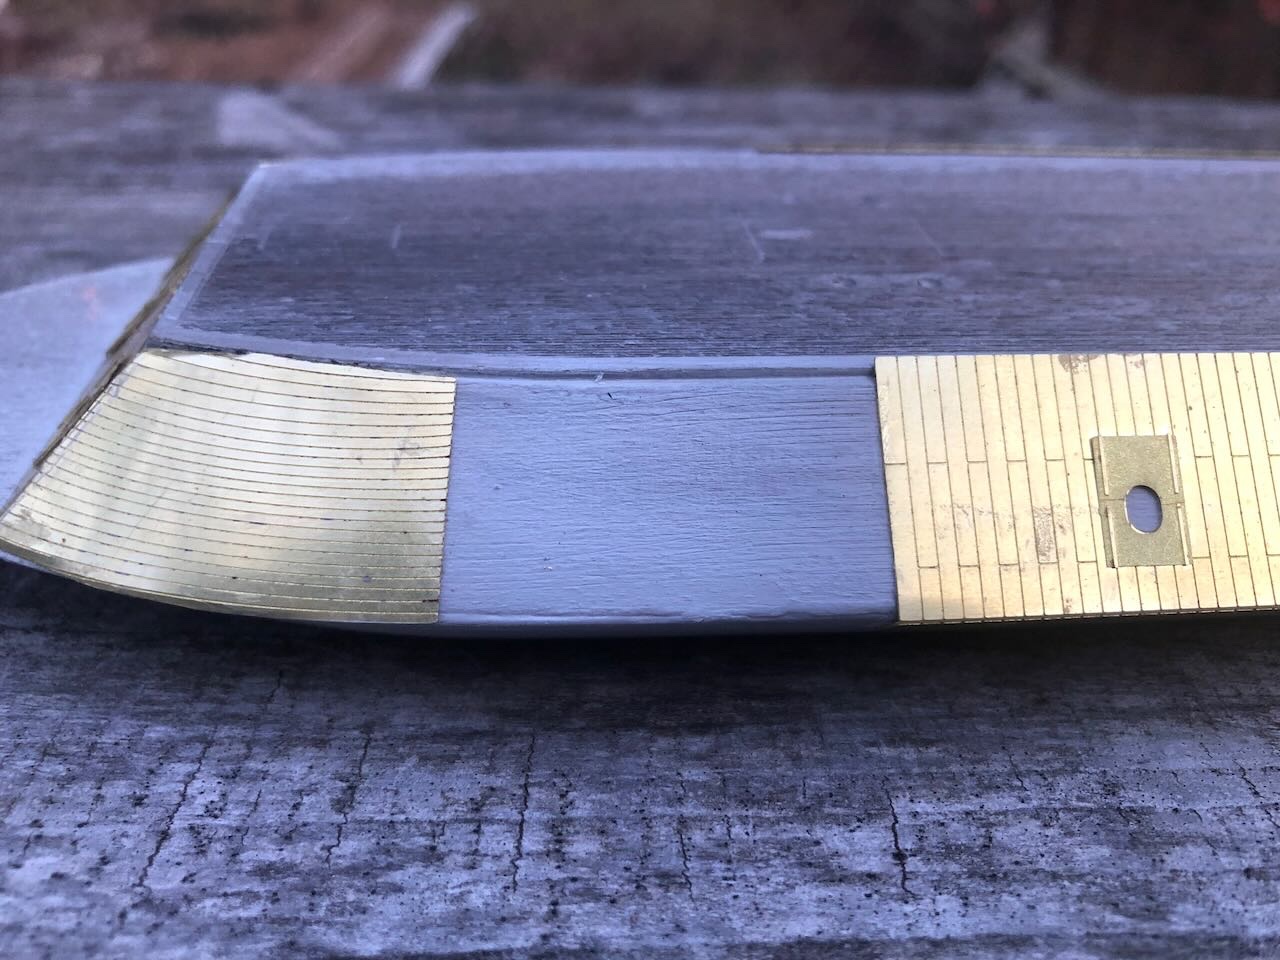
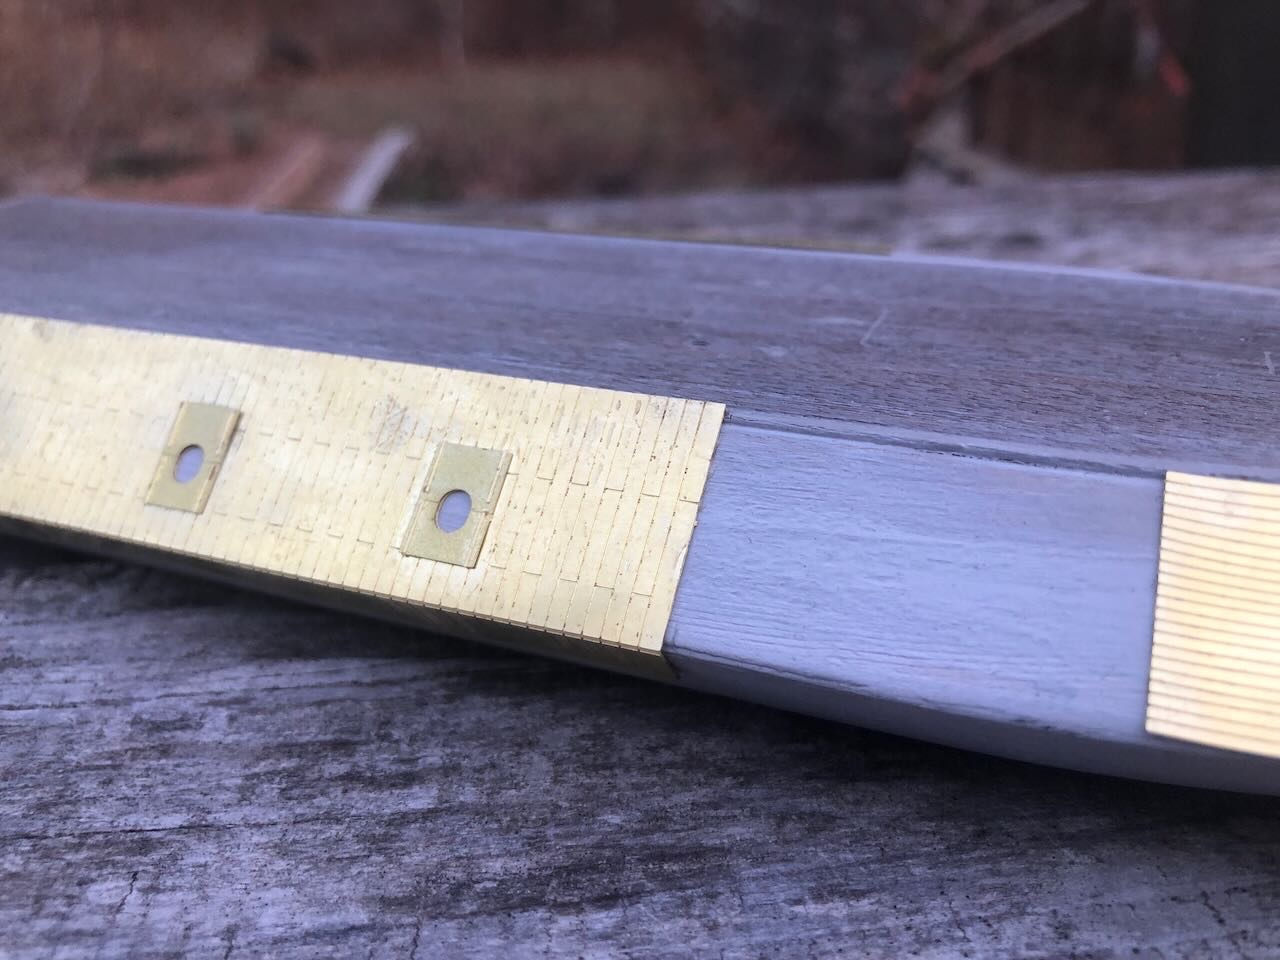
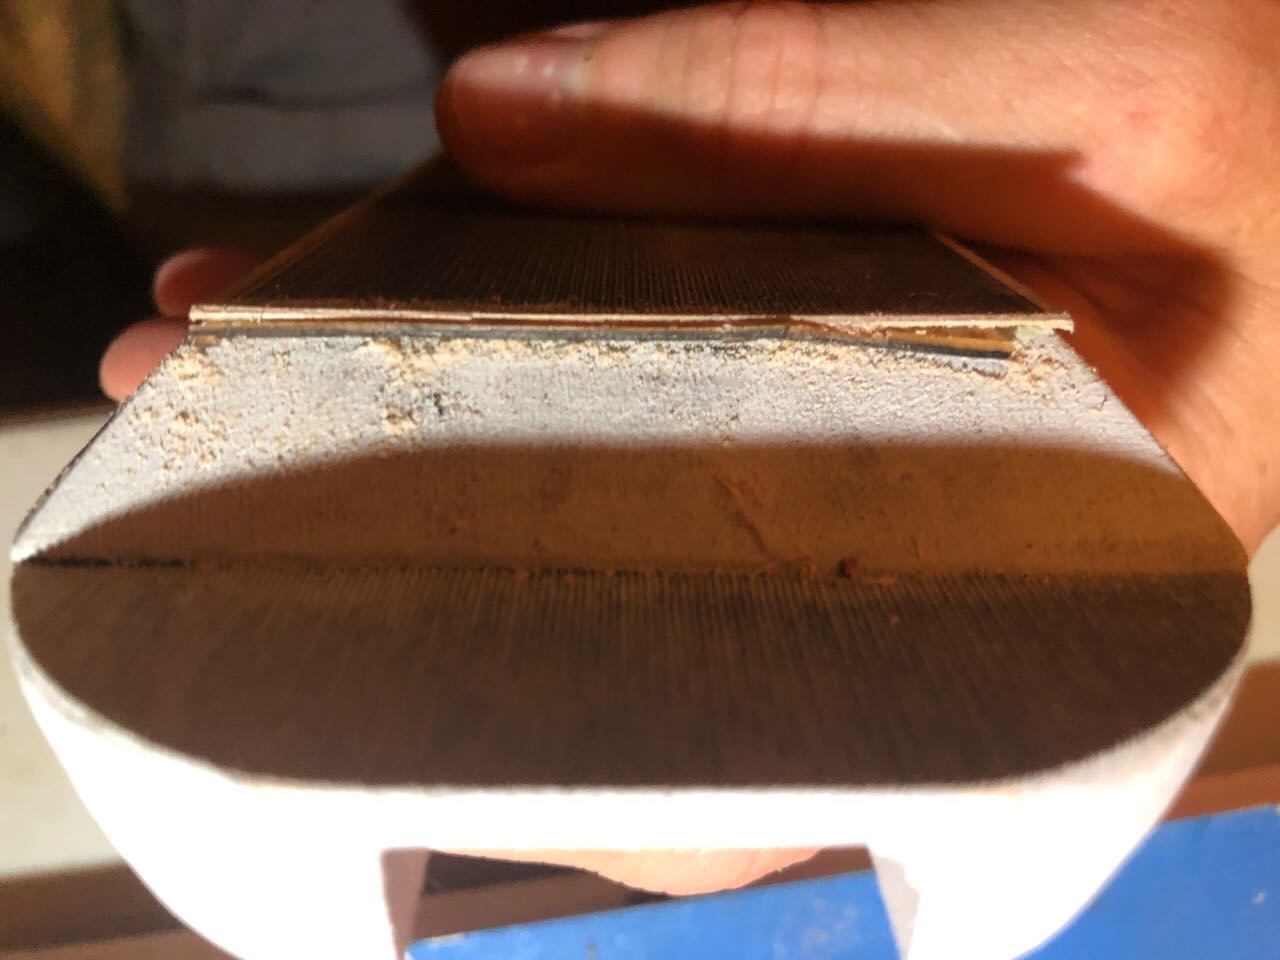
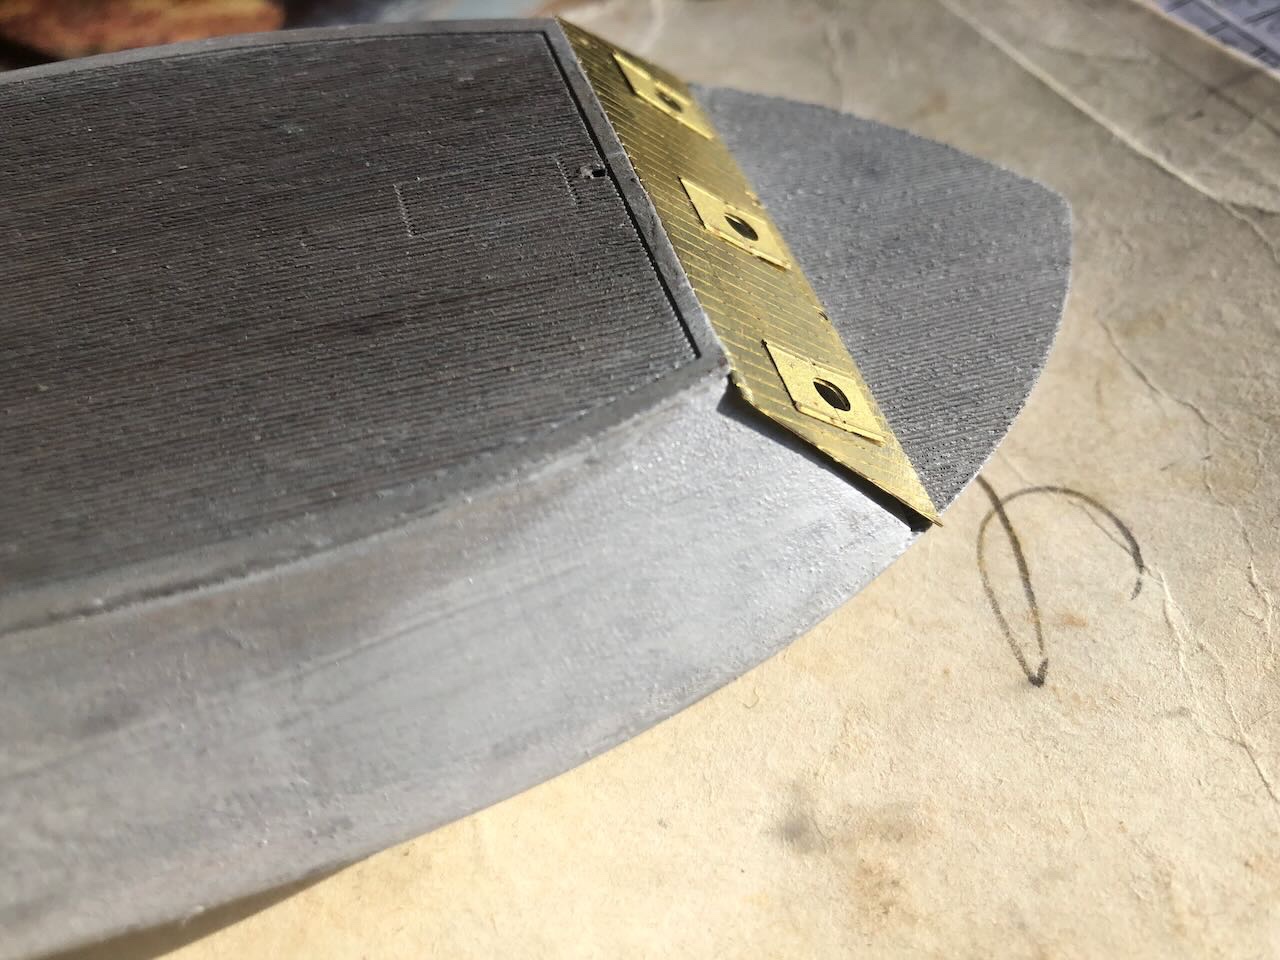
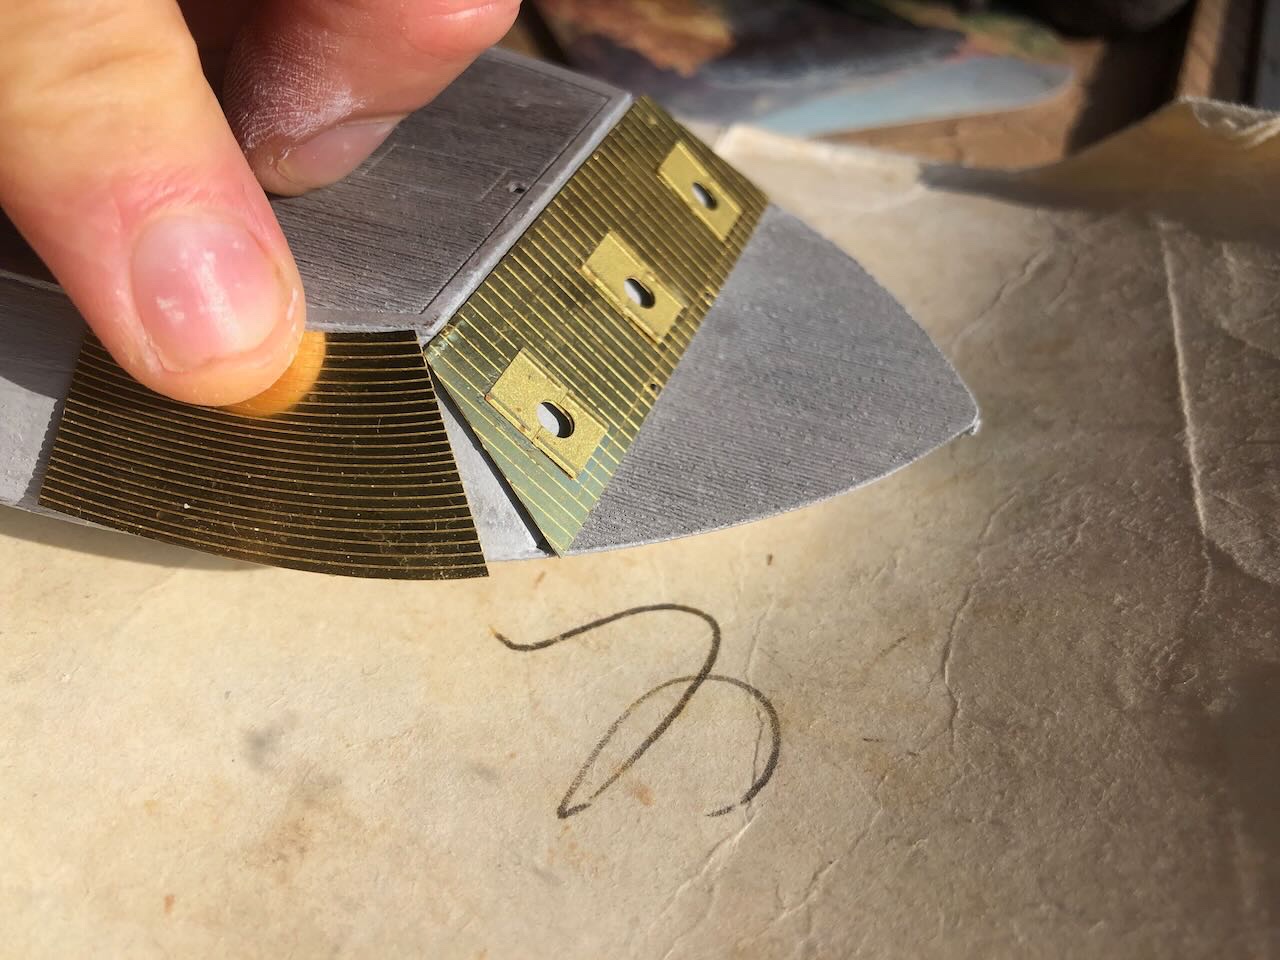
So I was in a stubborn, toddler-like "but I wanna work on my model NOW" mode after posting that. I remembered that I had a pair of model-railroad rail nippers, and decided to see if those would cut brass sheet. Definitely not ideal, they bent and mangled the edges as I worked, but I just went ahead anyway, and with some careful filing and flattening got a moderately workable result. You can see the mangling, but I think the bright brass makes it stand out more than when it's all dark and weathered. I had to cut and file a lot of material to make this fit reasonably well. This will definitely be a "view from a few feet away" kinda model. As you can see, I also added the side armor. This needed to be bent carefully in a 90º bend where it wraps from the casement onto the hull. I clamped the pieces between two metal squares and that worked pretty well. Another example of odd instructions, though, they tell you to glue the gunports to these armor sheets before you do the bend. But that makes an uneven surface in the clamp, and one of the gunports came off. I can't see why you wouldn't just glue the ports on after the sheets are bent, or even after they're on the model. Another problem was that the side armor came out at a different dimension than the front armor; it sticks up further past the hurricane deck. I think it's supposed to tuck in under that deck. I had no control over this because the bend happens along a pre-scribed line. I was not about to try and cut/clip a smooth line off the entire top of these long side armor sheets, so I just ignored the disparity and again hoped that paint and weathering and distance will obscure it. But it's another odd inconsistency about the kit's design. The hull and casement are just too small to allow the brass sheet to fit properly.
- 113 replies
-
- 7
-
-
- Cairo
- BlueJacket Shipcrafters
- (and 1 more)
-
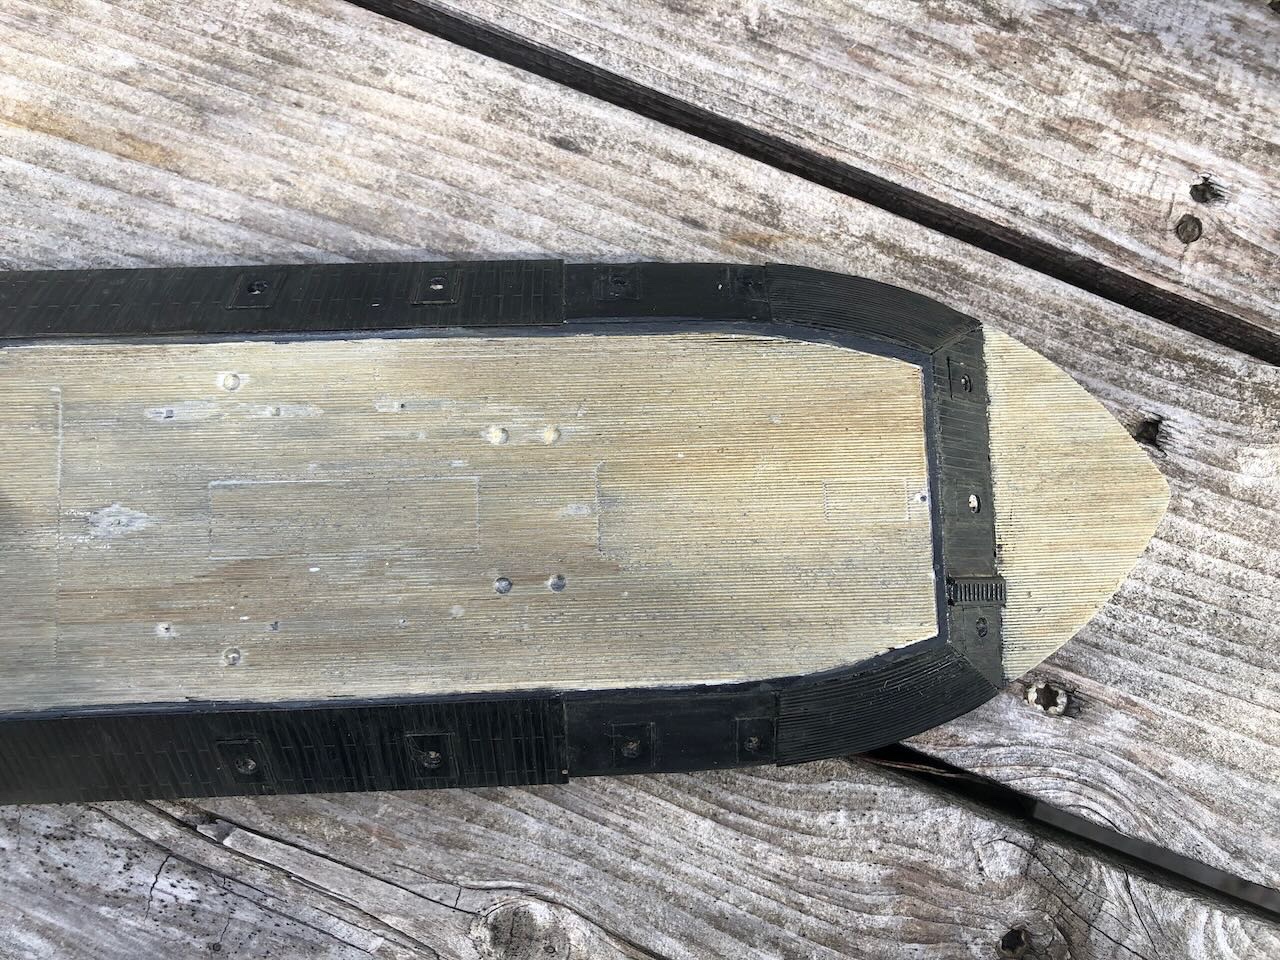
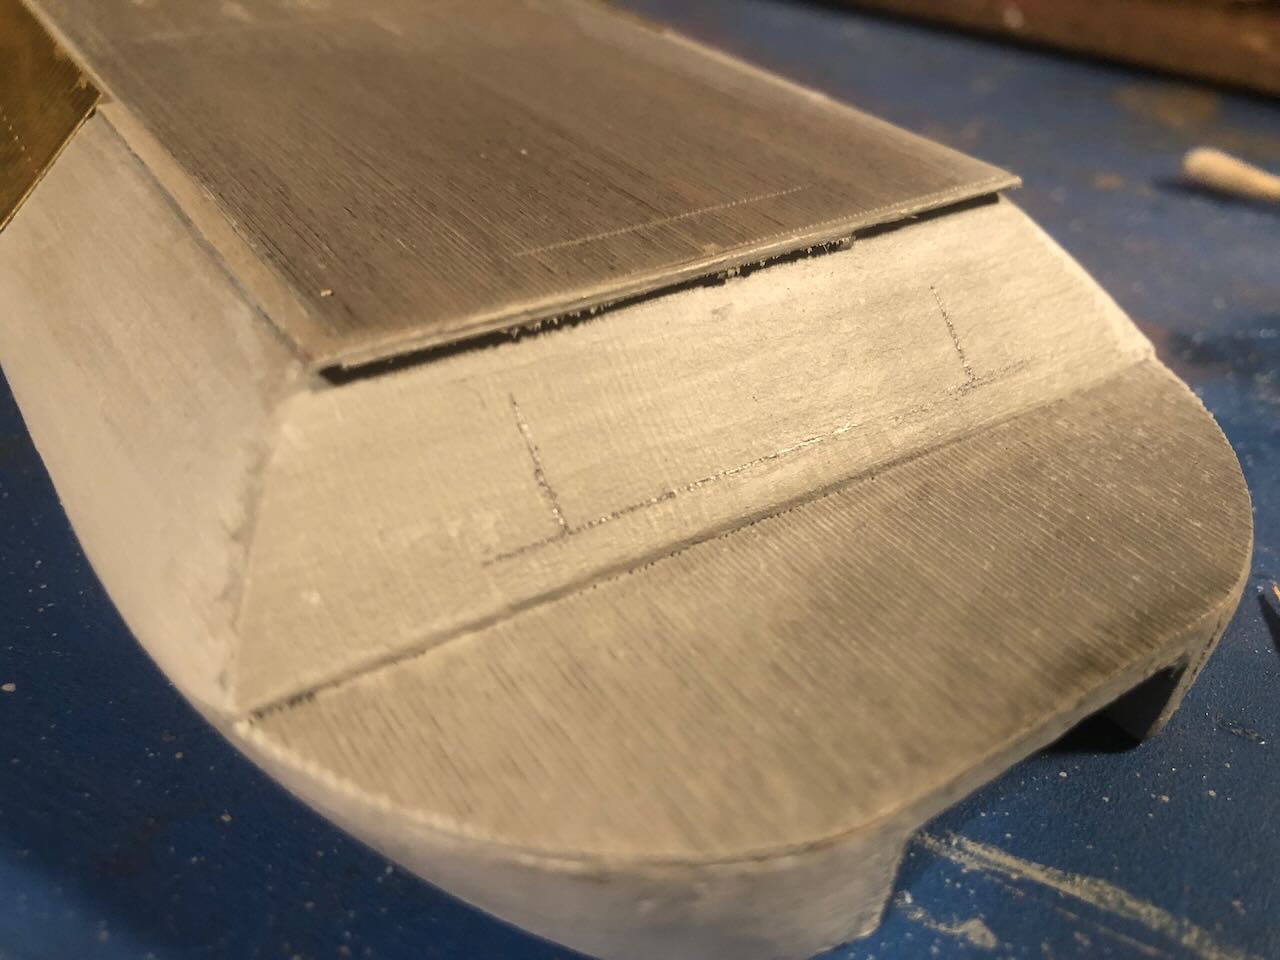
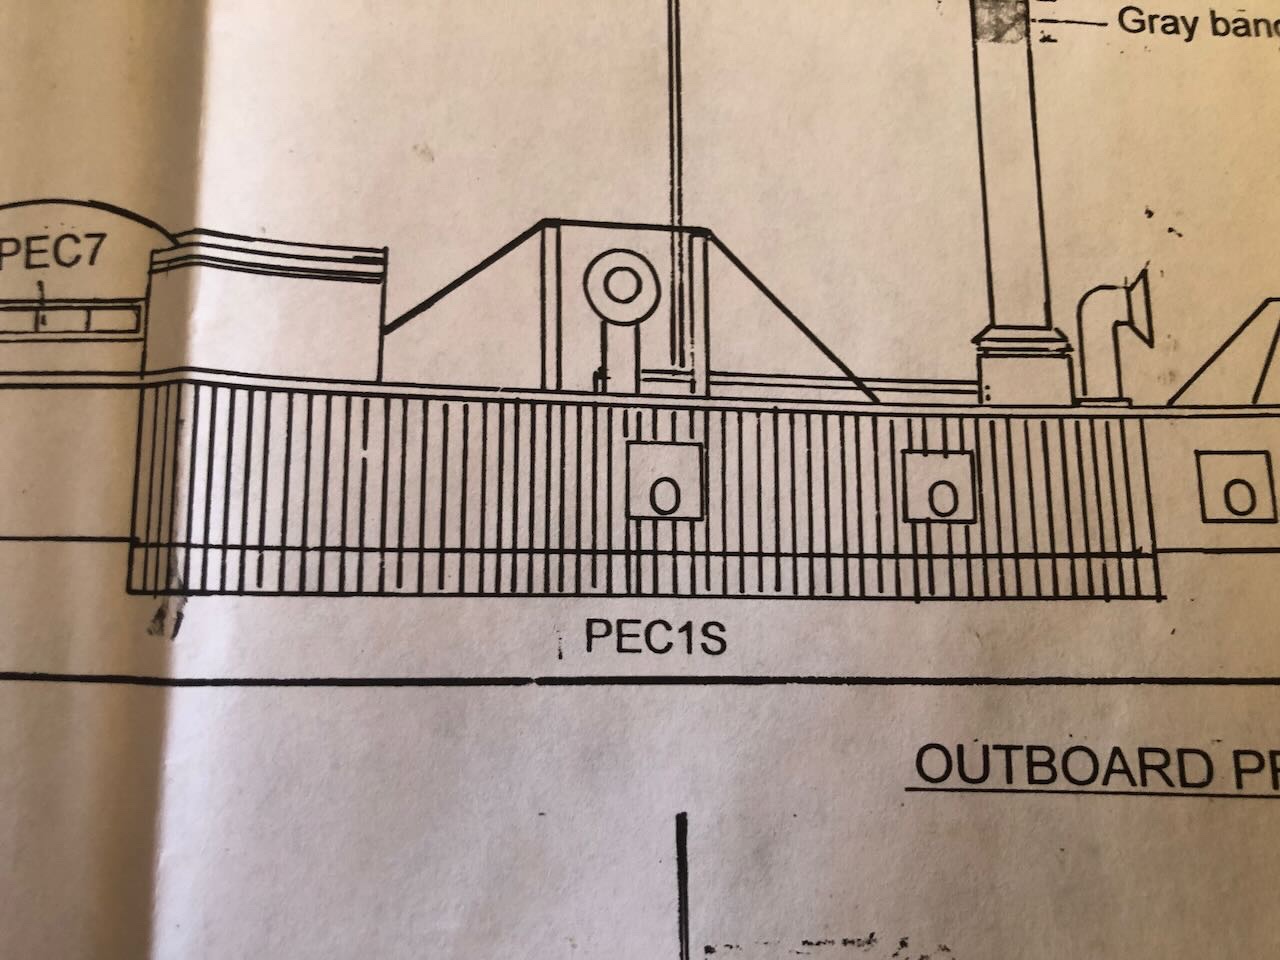
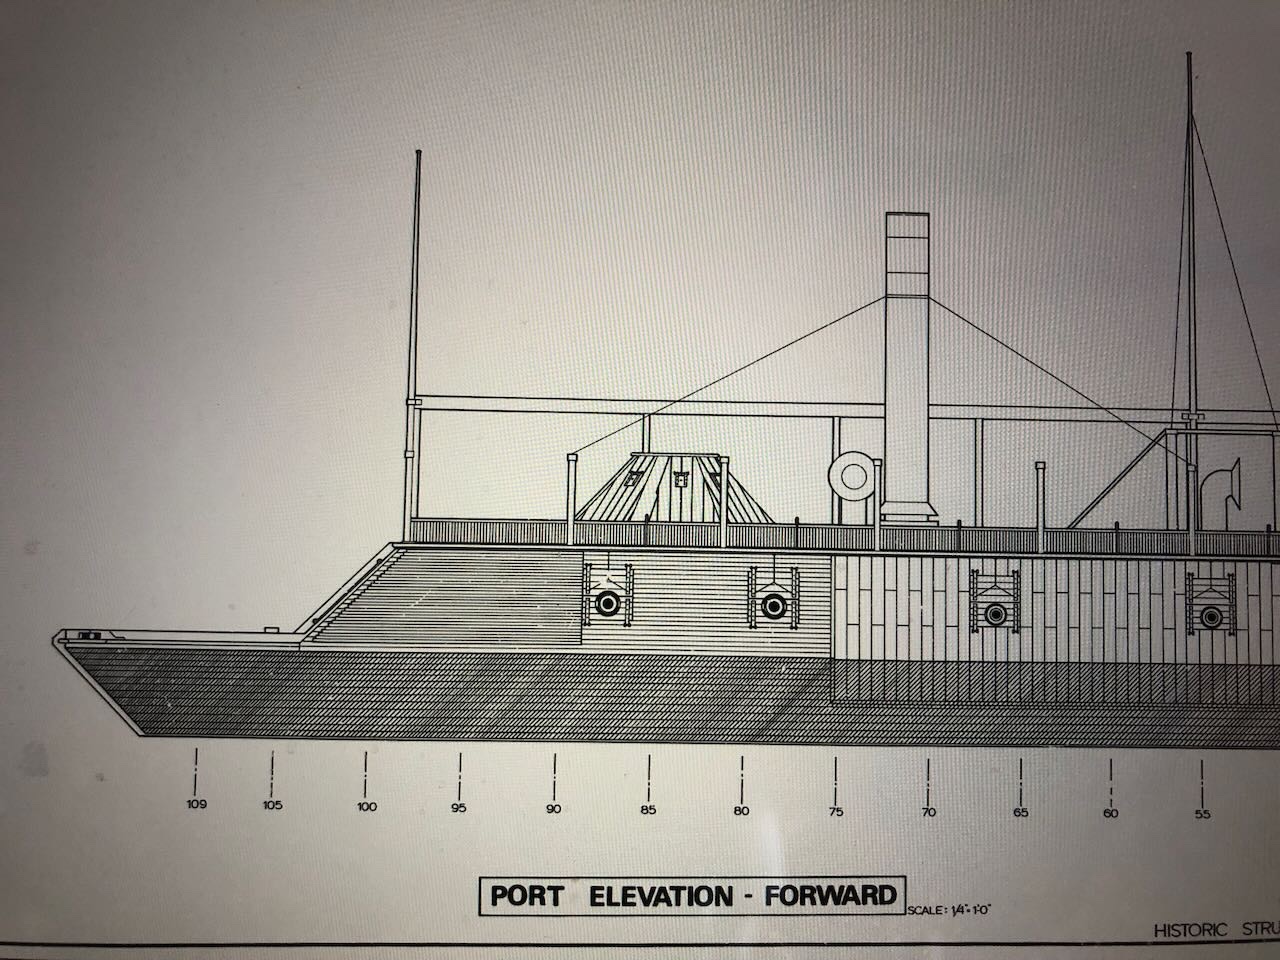
Tried to make further progress this morning and started getting frustrated. The instructions are vague and poorly organized, many parts seem to have a sloppy fit, and it's just not that fun to work on. I can't imagine how this is supposed to be a "beginner" kit. For example, the hurricane deck is far too long for the casement provided. If you line up the bow end with the casement, this is how far it sticks out at the stern end: But this isn't easily fixed, since the deck has a border all around it, and if you just trim the deck to length you'll lose that border and it'll look weird. I tried anyway, and ended up damaging the very thin ply it's made out of, though I was as careful as I could be. I sanded it smooth as best I could. It's still too long, but I don't dare take any more off without ruining the appearance from above. The hurricane deck is also too narrow for the casement provided. There's a clear rim on both sides where the casement doesn't meet the deck. It doesn't seem like it would be hard to machine the casement to a closer dimension in the production end when the shape of the laser-cut deck is already known. Sanding down the casement to eliminate this on both sides would mean removing a LOT of material by hand, and would change the angle of the sides. I'm just going with it. Next frustration was vague instructions on how to place the gunport lids on the armor. All they say is "line up the ovals in the lids with those on the armor". OK, but the lids aren't symmetrical. So which way do they go (test fit shown below): The plans are no help: I consulted the far more detailed plans shared with me by @mbp521, which clarify that the taller end goes up: Next problem, trying to dry-fit the forward and side armor. Neither is even close to the shape/size of the provided casement. The forward armor is too tall and too wide with a noticeably different angle at top: While the side armor is laughably different from the provided casement: These are supposed to fit with a smooth seam between them. The instructions blithely say "trim to fit". OK, how do I do that, I don't have metal-cutting tools. This is supposed to be a beginner's kit. It's one thing to nip metal off thin sprues or file down small nubbins, it's another to cleanly cut an inch of brass without any damage to the piece. @rcmdrvr mentioned using "photo etch shears" when facing the same problem in his log, but I don't have any of those. It never occurred to me I'd need to literally cut the pieces apart to make them fit. I don't think I trust a razor saw to do this without damage. Thoughts?

- 113 replies
-
- 6
-
-
-
- Cairo
- BlueJacket Shipcrafters
- (and 1 more)