HOLIDAY DONATION DRIVE - SUPPORT MSW - DO YOUR PART TO KEEP THIS GREAT FORUM GOING! (Only 20 donations so far - C'mon guys!)
×


BenF89
-
Posts
316 -
Joined
-
Last visited
Content Type
Profiles
Forums
Gallery
Events
Everything posted by BenF89
-
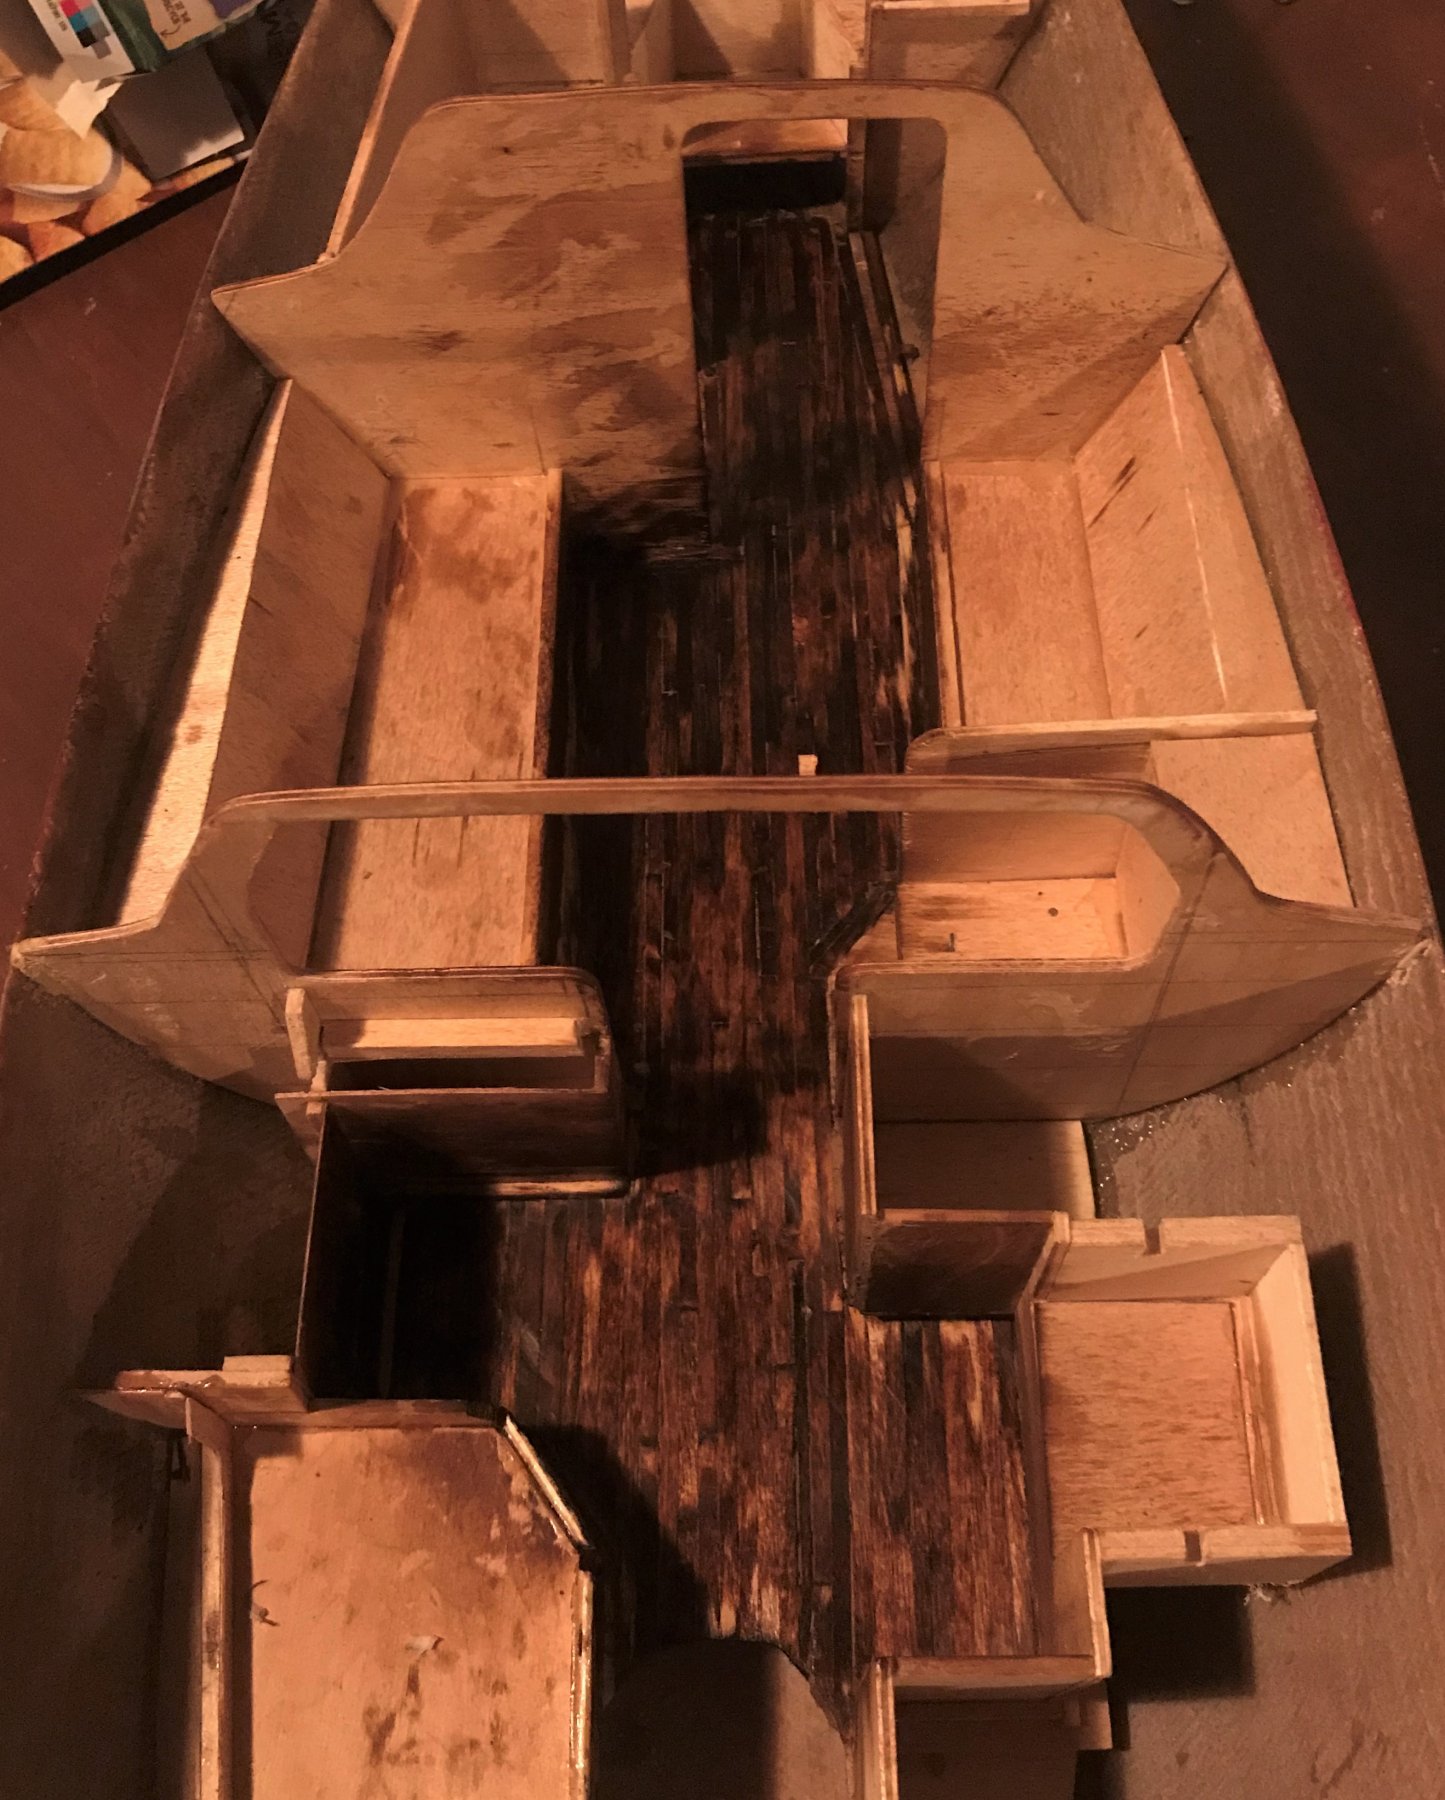
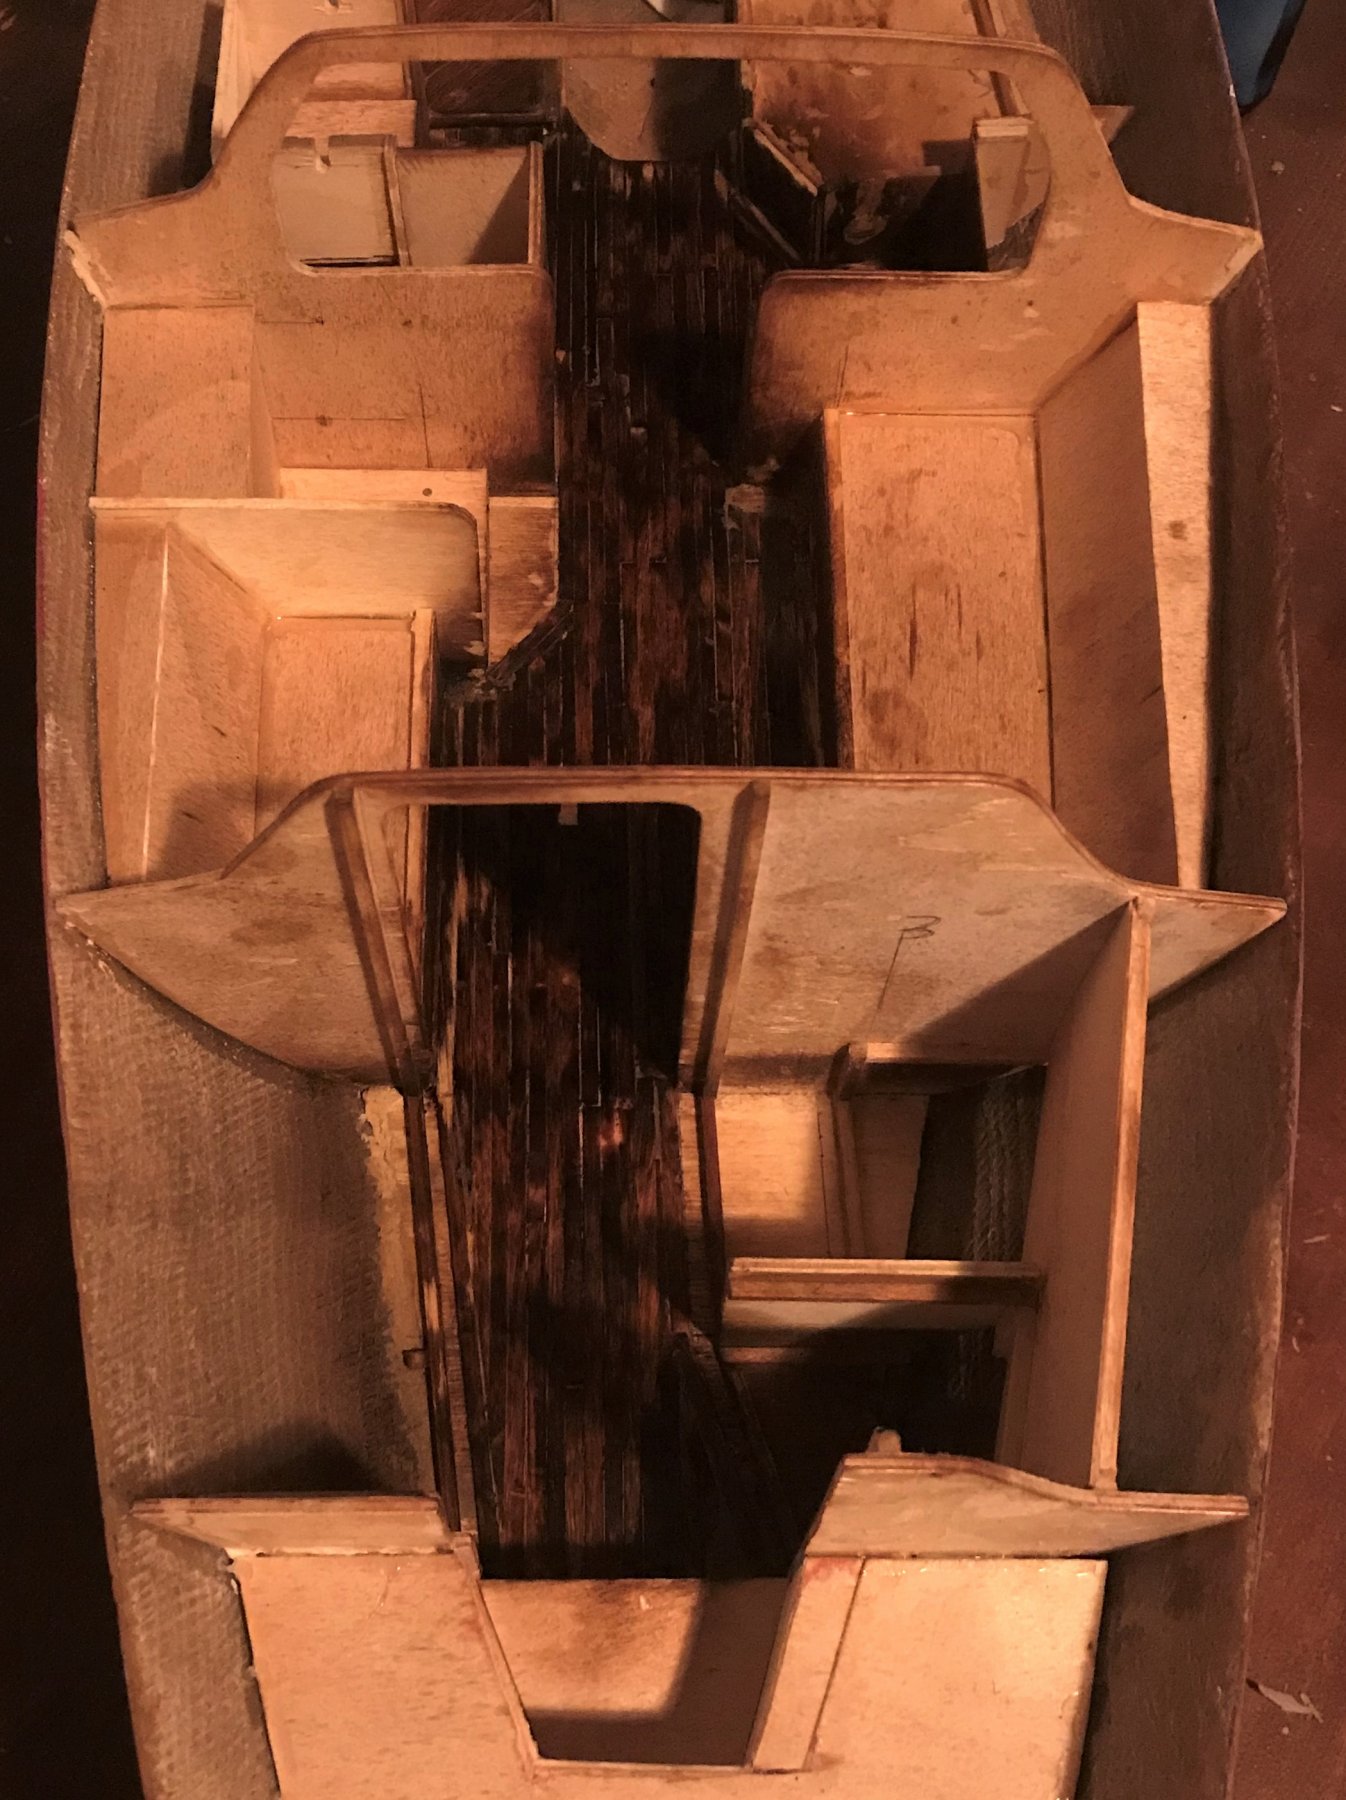
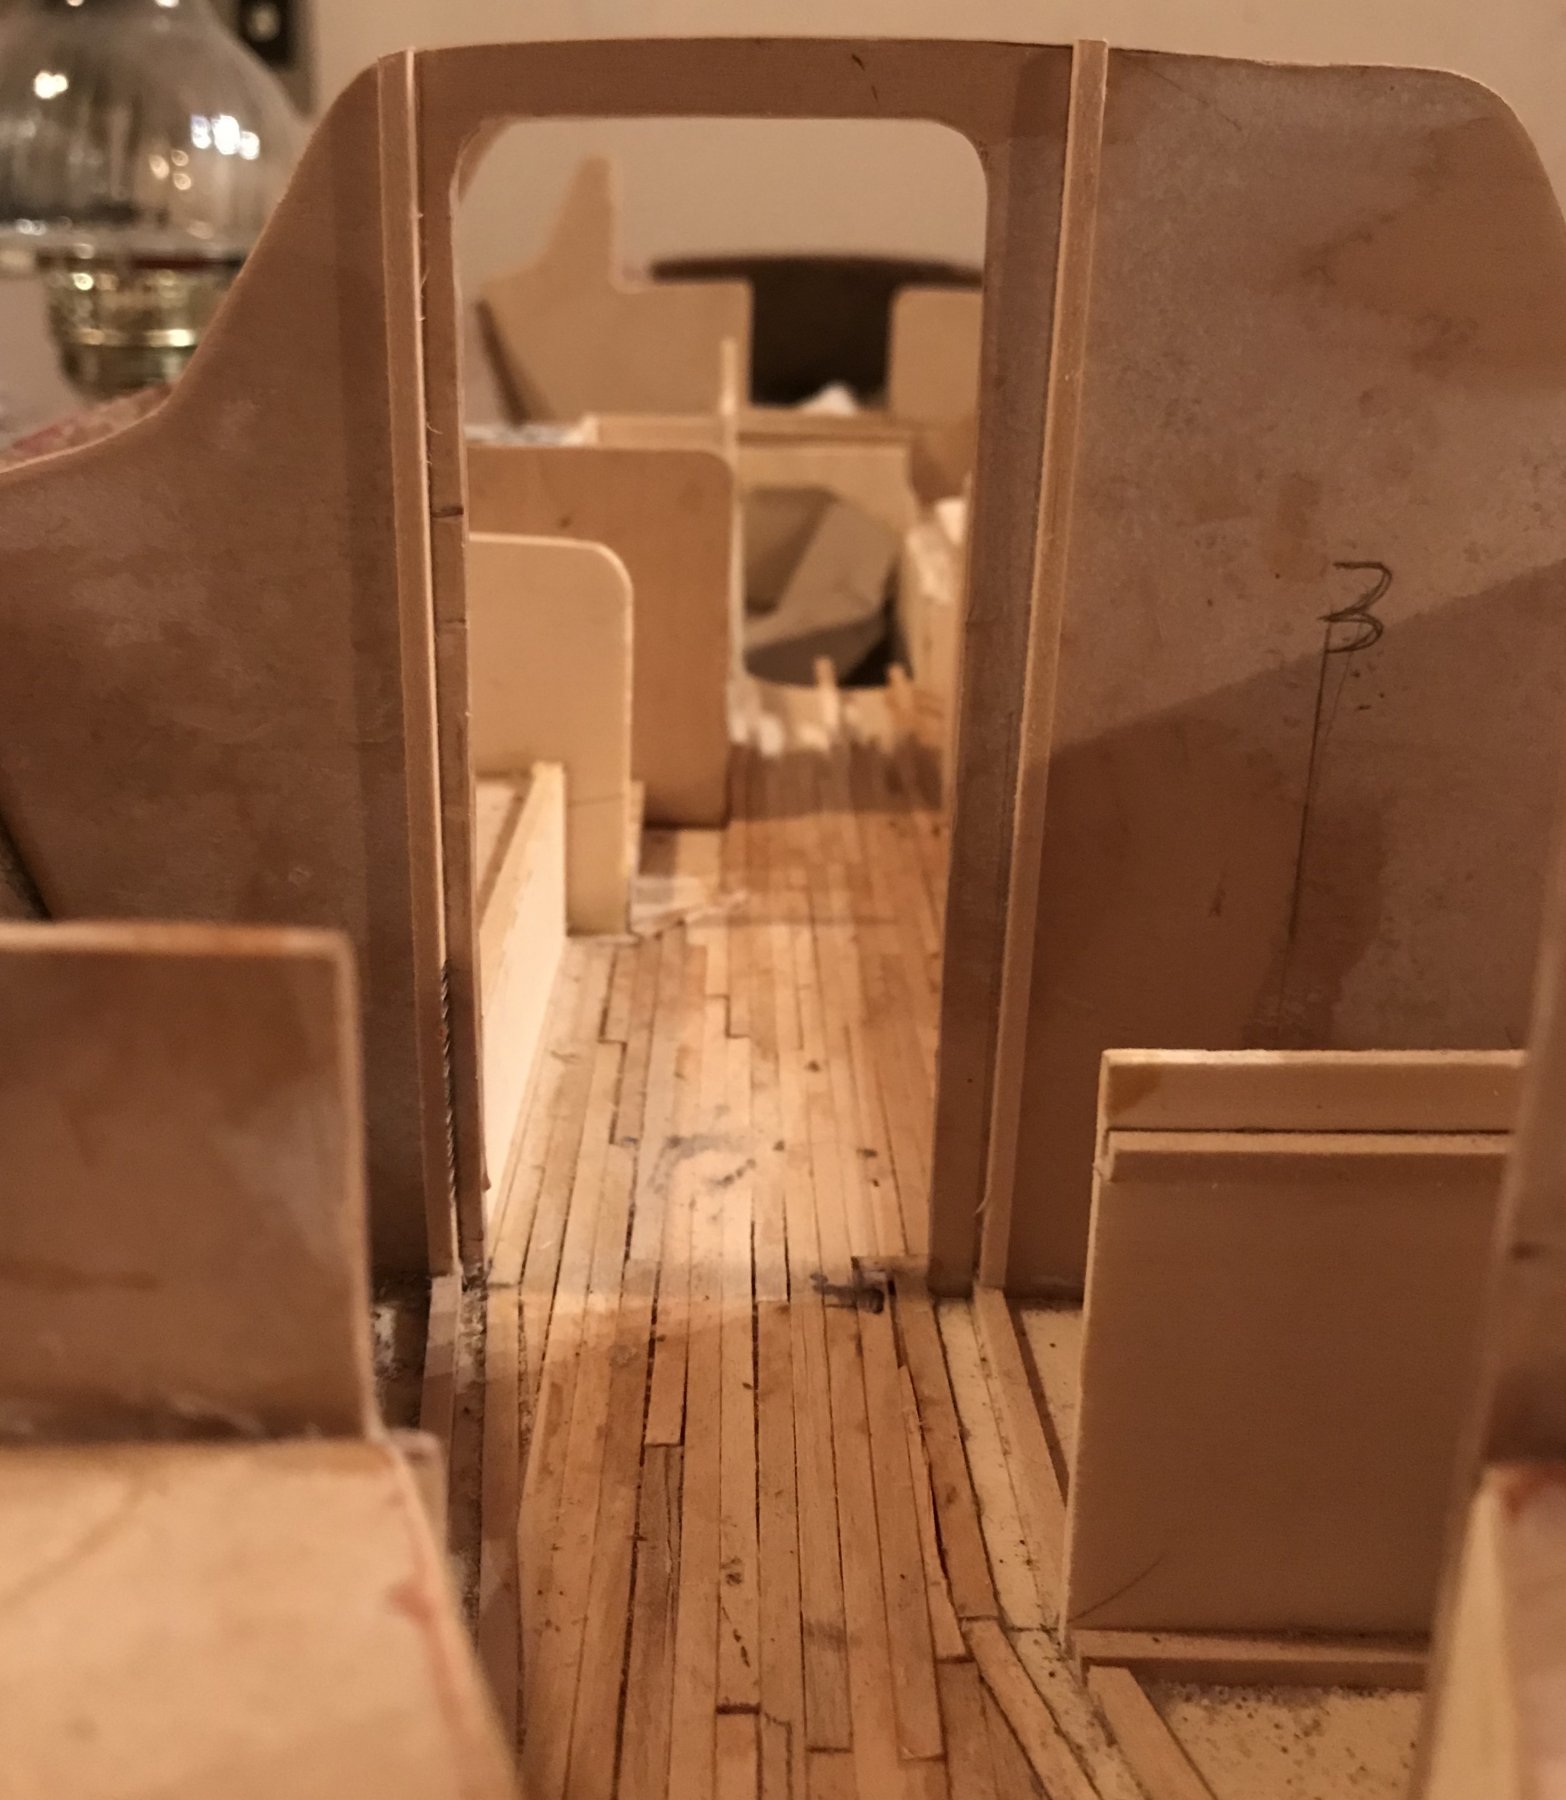
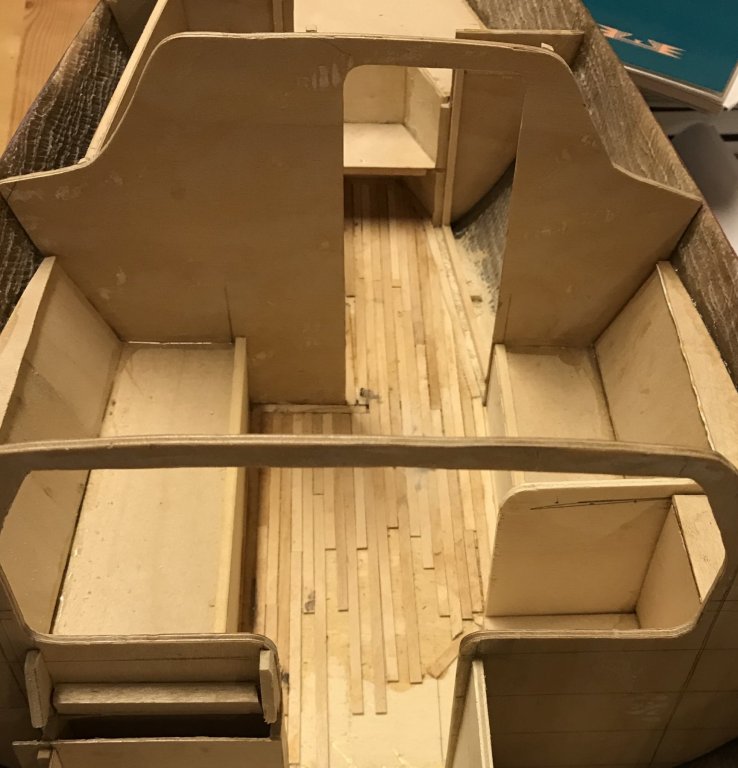
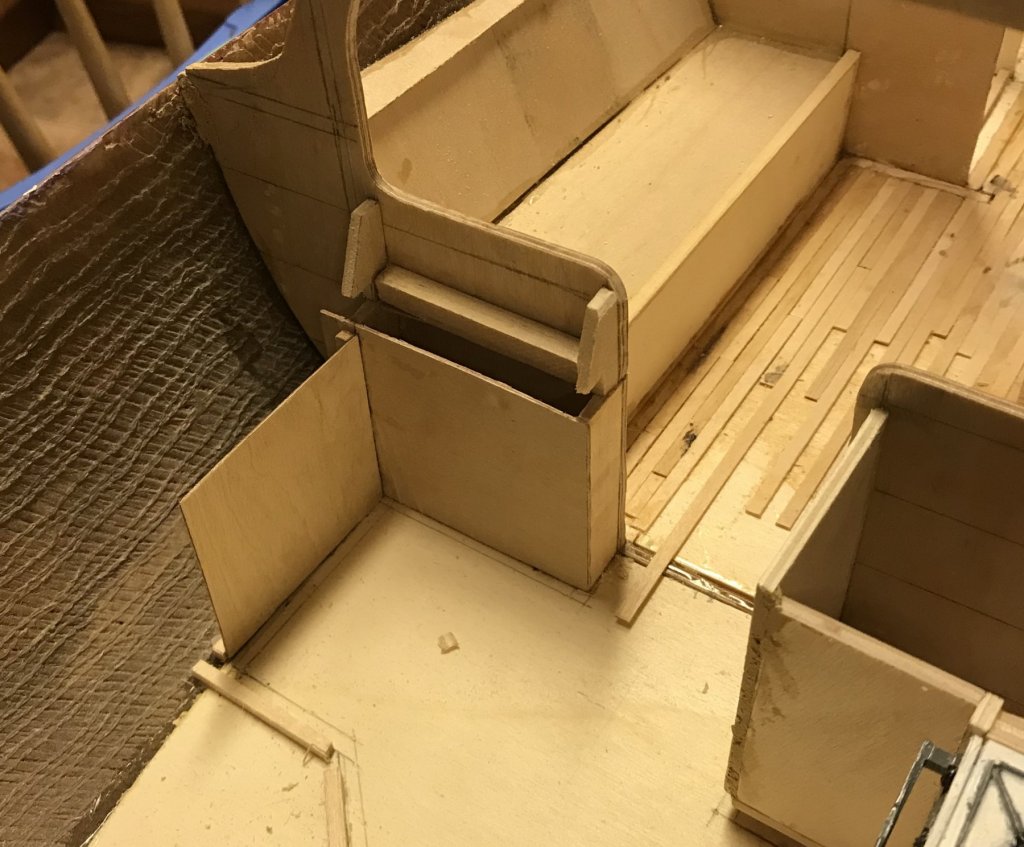
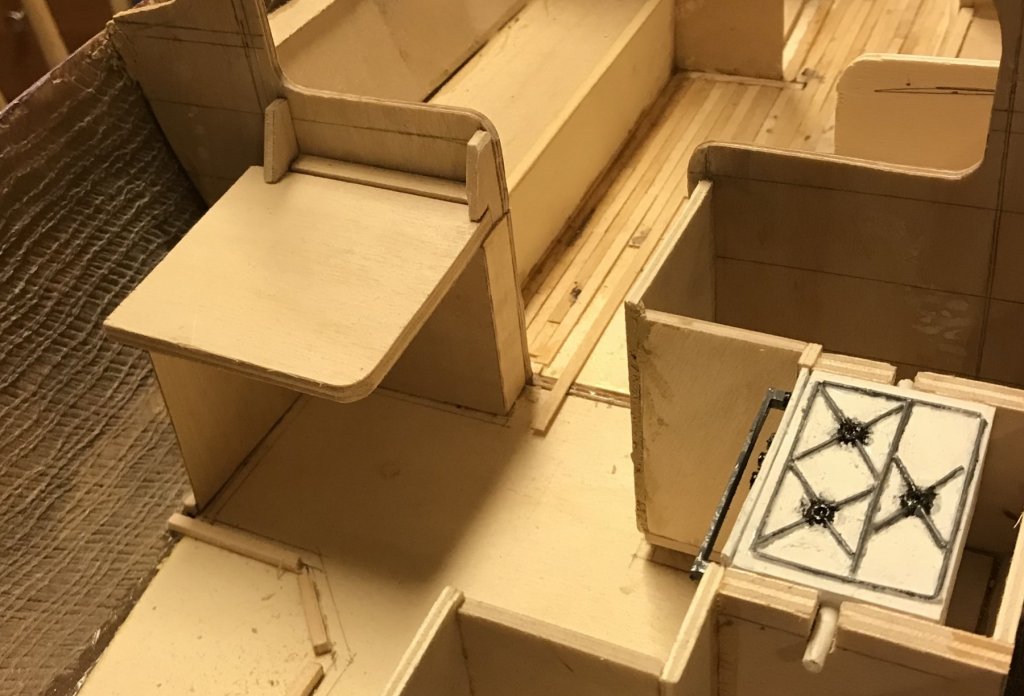
 Thanks Patrick! I realize that the deck has a 'weathered' look - that's super unintentional - I was trying to get it even, but with the variations in the wood, I guess, some areas took more of the stain than others. That said ... _____________________________________ INTERIOR DECK FINISHING - PART 2 I was able to get some more work in. My general process was use a 120 grit sandpaper disc on my new Dremel, sand down the stained deck (almost bare, actually) to even it out a bit between previous sanding grooves and raised areas where there was still filler, then re-stain. After staining I tried to buff/even it out with a polishing/buffing pad on the Dremel (kind of like a hardwood floor buffer, I think). Then I started doing a light 240 grit sanding with the Dremel on a lower speed, taking less stain off each pass. Added more stain. Did a couple iterations of that same process, but started wet-sanding. Finally, the last couple of coats I've just added without sanding down at all between coats. (*Note: I don't actually know what I'm doing- mostly I've been experimenting). While I can't say I got what I was aiming for (an even colorization), I did get a result I think I'm happy with instead - a floor with natural color variations that looks a little 'lived in' - like a real boat. (I may try to hit some of the lightest areas with something to darken them up. Not sure what, though) Here's a couple poorly-lit shots of the (mostly) finished deck: Deck Finish - Looking Forward Deck Finish - Looking Aft One of the unfortunate realities of working in a confined space is that the stain got EVERYWHERE, not just the deck. But, this is OK, since I was planning to do some 'finish planking' and/or painting of the vertical surfaces. My plan is to put some heavy paper or thin cardboard down to cover and protect the deck while I do the remaining work on the bulkheads and other interior furnishings. That's it for now. This was a big step, and now I can start adding detail that would have made doing this step more challenging later in the build. I think I'm going to tackle either the head forward or the rest of the galley next.

-
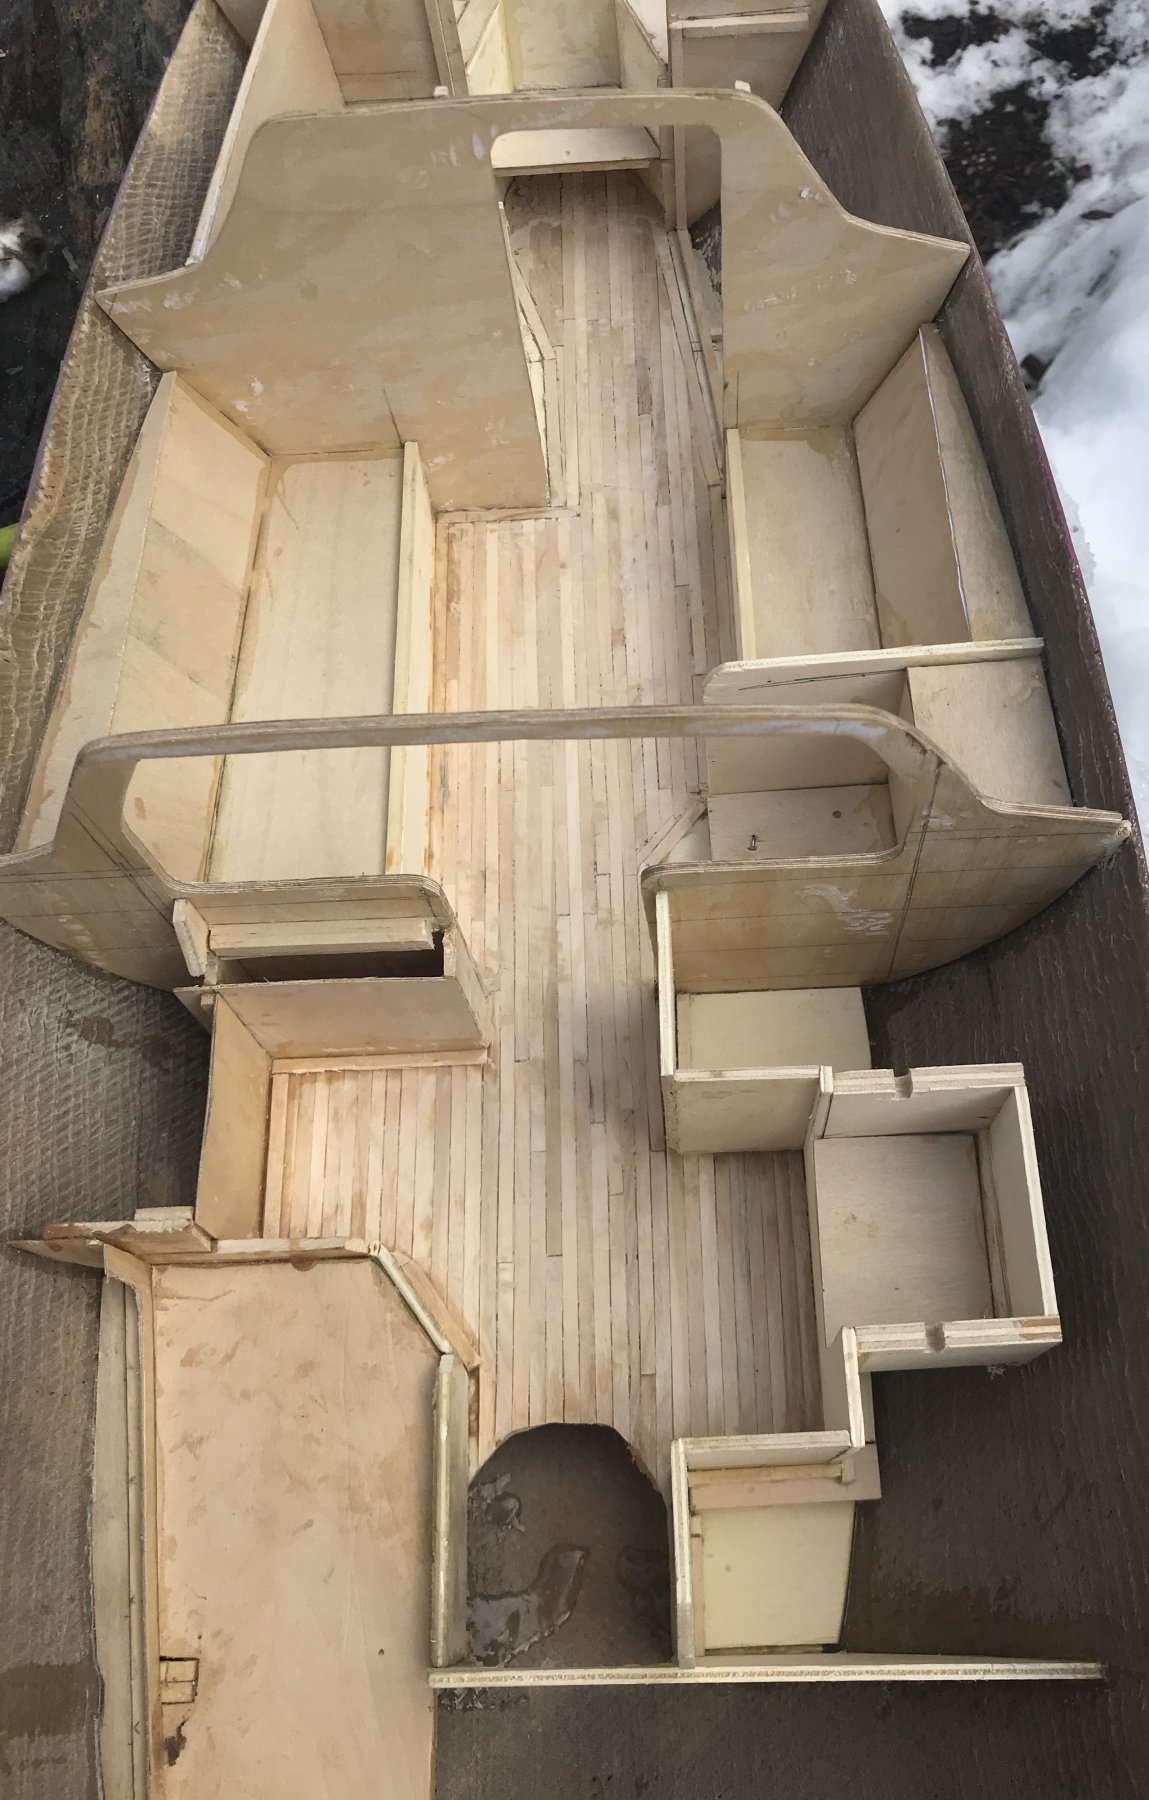
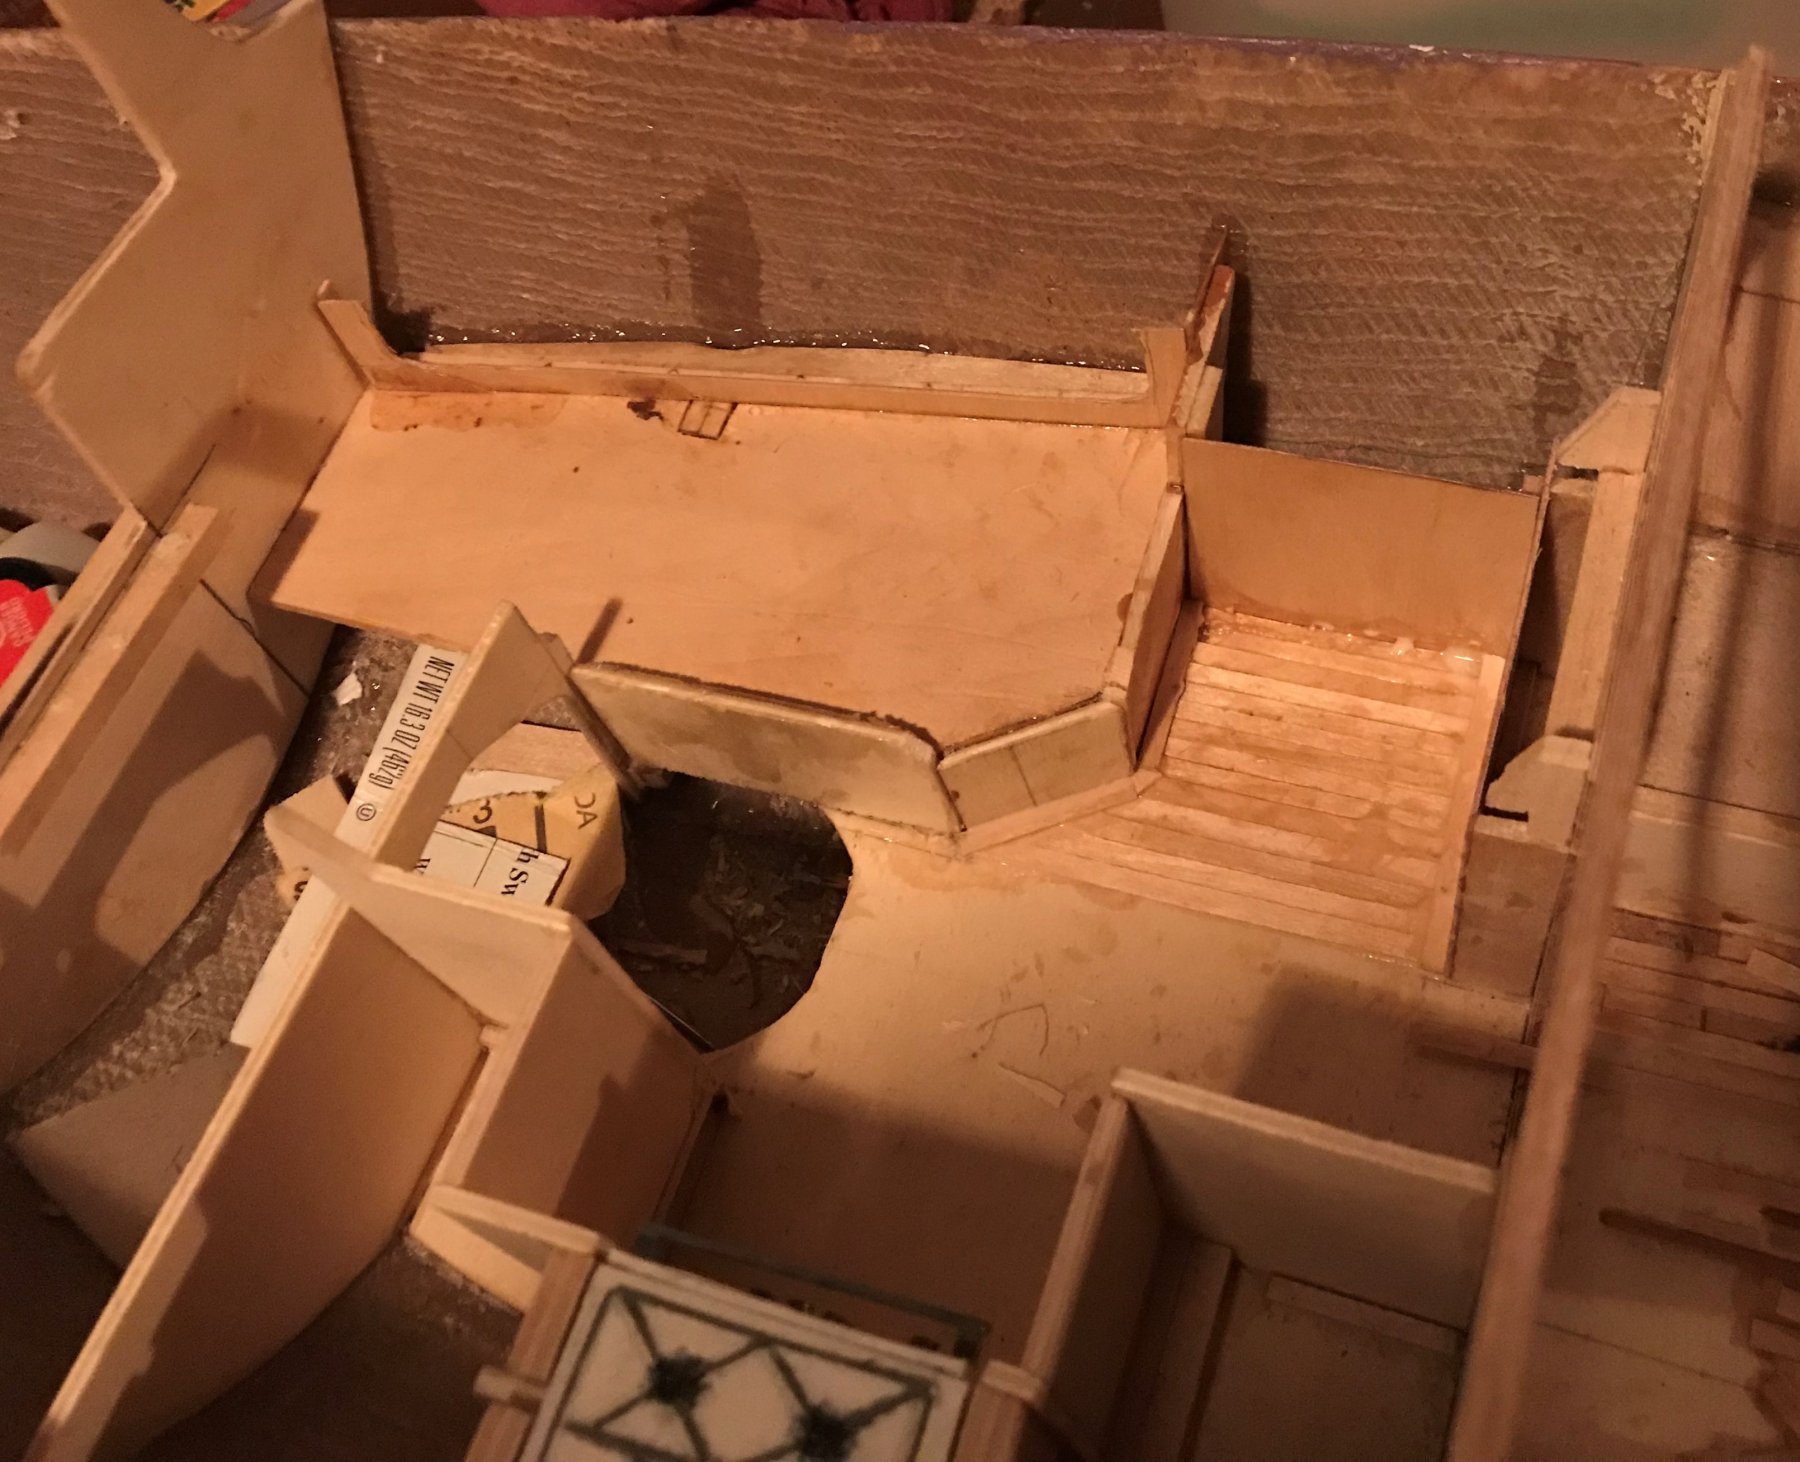
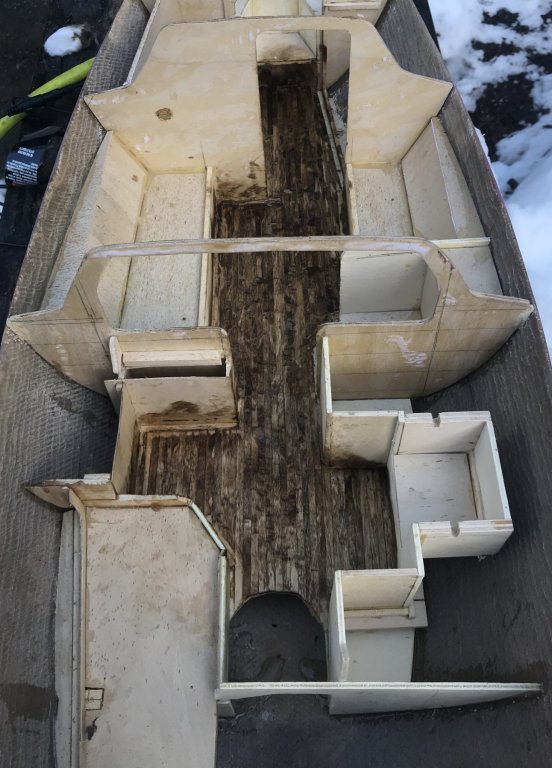
INTERIOR DECK FINISHING - PART 1 I was able to get the first round of fill/sand/stain done. It was nice outside, so I could work without bothering the family with the smell of filler and stain, or the noise of my brand new Dremel stylus tool that I got specially for sanding the floor and other tight spaces. The first picture is the result of filling & sanding, before the first coat of stain. Interior Deck Filled and Sanded It’s not perfect, but once I finish the stain/sand/repeat process, I think it’ll be ok. There’s a ways to go, as can be seen in the picture below of the first application of the stain. Technically, it’s scratch remover for dark wood, but we already had it and I didn’t want to buy like a quart of wood stain for such a small area. I think it’ll work out after a few coats. First Coat of Finish Applied I personally liked a light shade for the deck, but the kids voted that they liked it dark (I had a sample section of dark in a spot that’ll be hidden). So I made it to customer specifications. Hoping to get another shot at sanding and then a second coat it while it’s still nice this afternoon. I have tomorrow off, too, so that might allow some opportunity.

-
Wow, you must have made a trip to Monaco! That’s quite the collection of super yachts! looking great; it’s fun to see them all together.
-
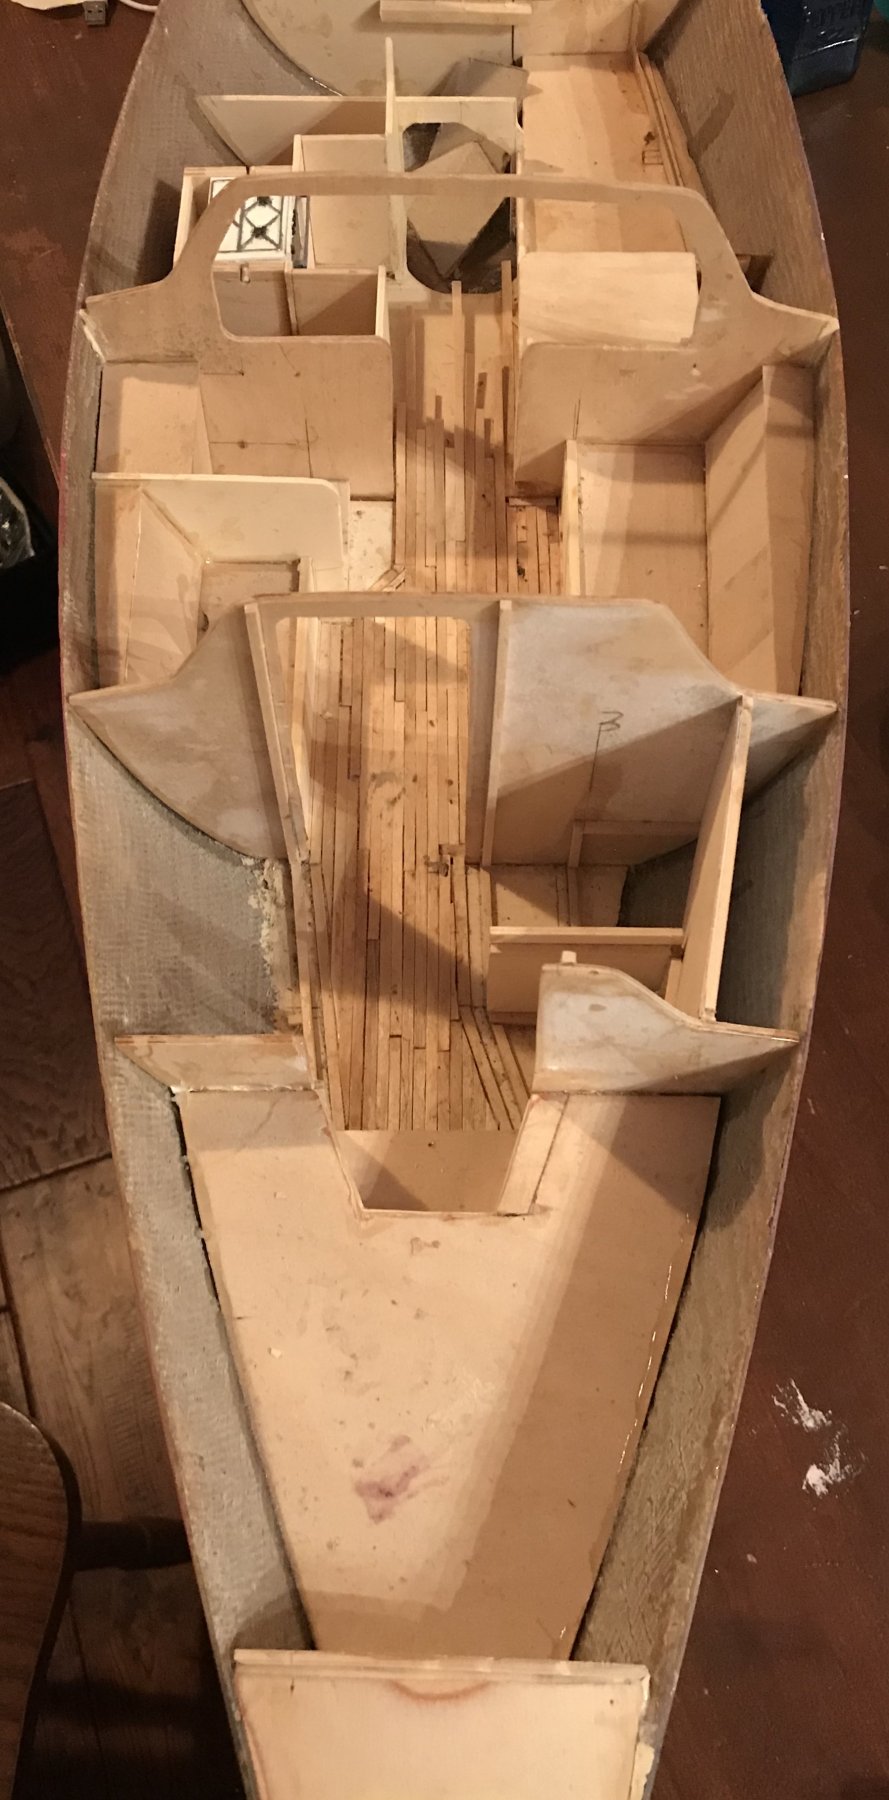
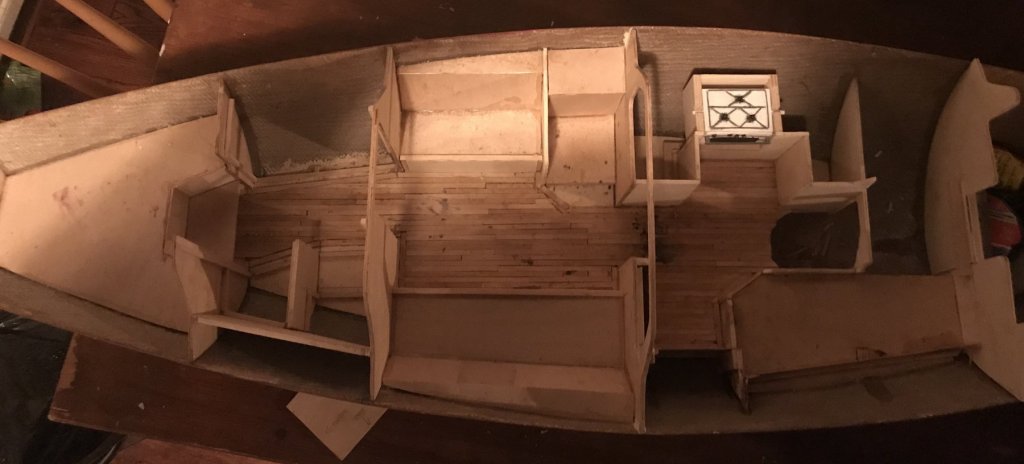
Well, I finished installing the decking. I planked all the way into the galley: Decking into Galley And an overall shot showing all the decking: Accommodation Flooring Overview Next up will be sanding, filling, and finishing. Not sure what I’ll tackle during/after that process. Thanks for looking in!

-
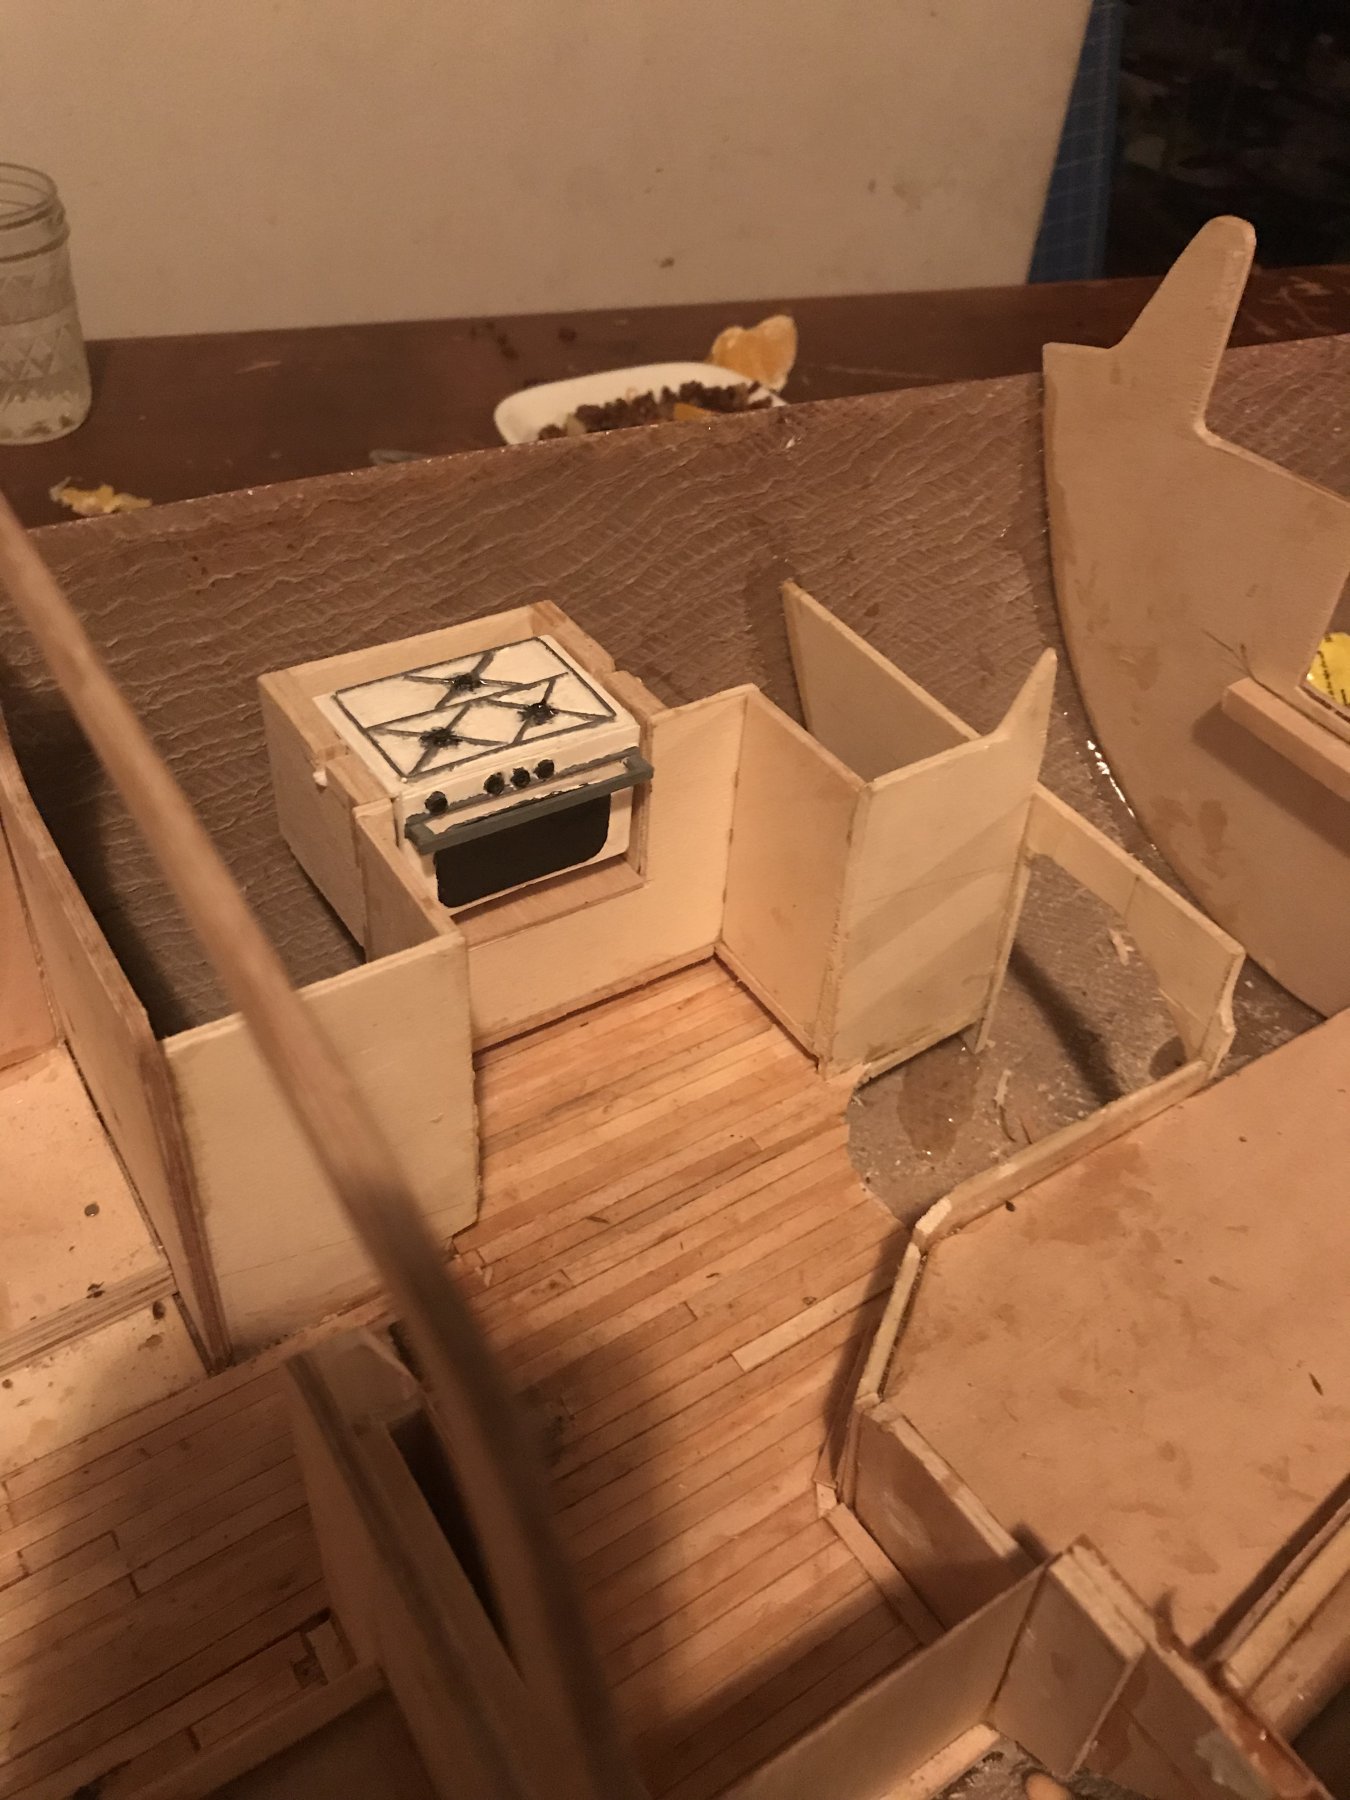
Thanks Patrick! I’m hoping that once I get a finish on everything, it’ll spruce it up a bit. ————————————— Got a bit more planking in the aft compartment last evening; it’s about planked to the galley, awaiting my decision on wood or tile for the galley sole. Most boats I’ve seen, save for very large super sailing yachts and luxury yachts, have planking throughout. Heck, we did wood floor in our kitchen! So it seems the preferred choice. But with the galley installed, I’m concerned about getting planks properly fit in. A single sheet of plastic with a tile pattern would (in theory) be easier, but might not have the right ‘look.’ Decisions, decisions...
-
Quick Update. Not too much more done since I got the quarter berth built. I got some more flooring installed in the forward two spaces, so that all the strip planking is installed there. An overview shot is below: Cabin Sole Planking (To-Date) Next I will finish the strip planking in the aft compartment. I've been debating whether to plank all the way into the galley, or to use some of the 'tile' I got for the area around the wood heater. Finally, for fun, here's a 'POV' shot from the forward 'Vee Berth' space looking aft, as reasonably close to some kind of eye level as I could get. View From forward Berth Obviously, the planking is a bit rough. The game plan is to get it all installed, like I mentioned above, and then do a bit of filling and sanding to get a smooth finish. Then I'll stain it, since access will be hard once the boat's more populated. At least that's the plan for now...


-
If you look at your deck picture, I think I get why the lonely uncovered port. If I’m not mistaken, the gun for that port is beneath the large stairway to the quarterdeck. So it’s open to the weather, hence no gun port necessary. As to the practicality of a gun postion beneath the stair, well, that remains unknown ps looking great OC!
-
All those launches look phenomenal! Really nice work, even if it was a pain in the aft to get there.
-
Thanks Patrick! Happy 2019 to you as well!
-
Thanks Michael! It's good to be back. It was a challenge getting the house sorted out, but we're very happy with it!
-
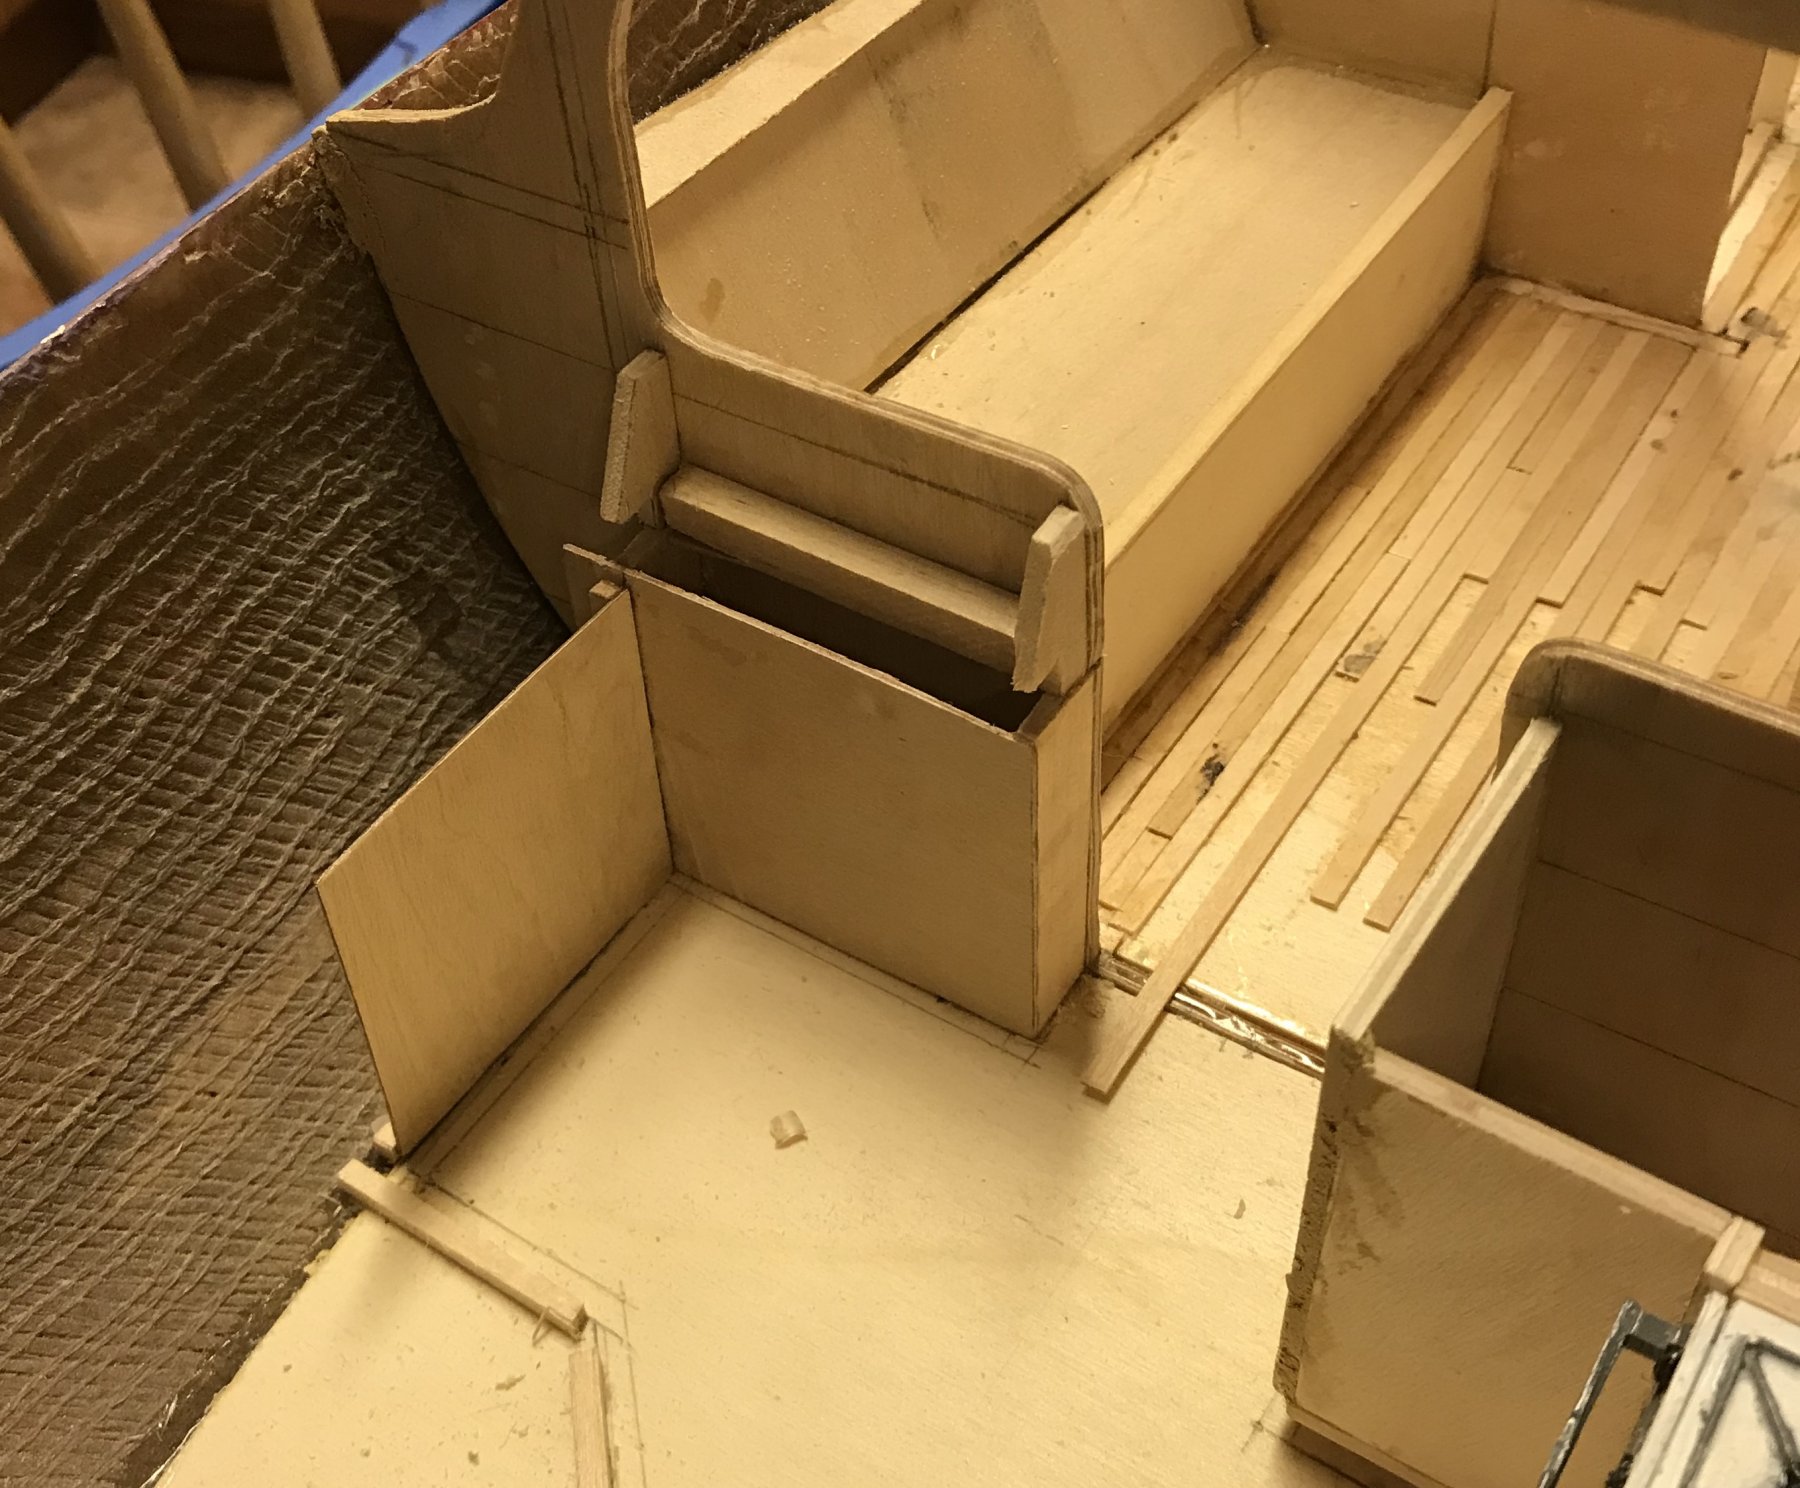
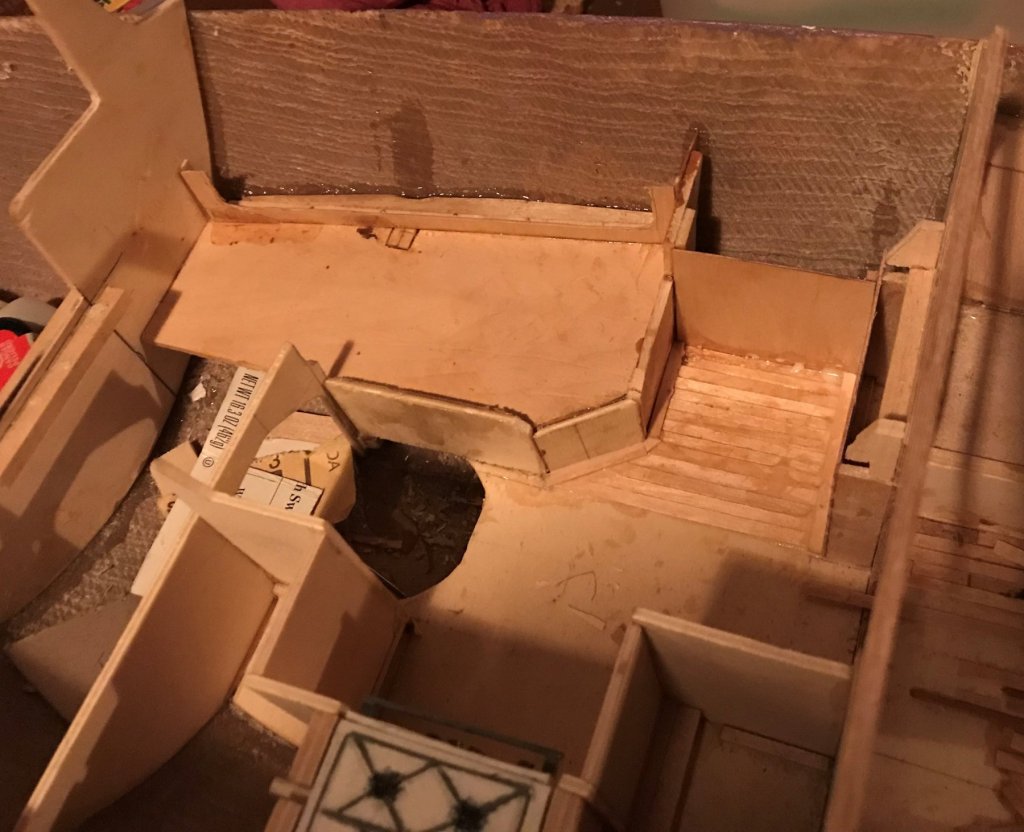
Back again.... So, that 'nothing major' house work turned into a HUGE project - tearing drywall down from walls and ceilings in our kitchen/living room, painting, trim/crown molding, re-furnishing to match the new 'look', etc. Then we decided since everything was already chaotic, we'd do the flooring project we'd been planning. We took out all our carpet and put hardwood floors in all three bedrooms, hall, kitchen, and living room. While living in the house. With three kids, the oldest of which is 5. Oh, and we installed a wood cookstove. Needless to say, it was a busy summer - about three months straight of daily work. Then some down time, plus family visits, then the holidays, and all of the sudden it's January. But, I did get back into the groove a little. Only one picture to show for it, but I built the quarter berth portside aft, and laid some deck planking down in the little 'navigation area' at the forward end of the berth. Haven't quite figured out how I'm going to integrate it into the rest of the planking - I'm hoping it lines up ok. Also, on the outboard side of the berth I put in the lower face of a little storage cubby thing. Aft Quarter Berth Still a lot left to do, with many challenges in terms of how I'm going to pull off what I've got planned. 'Till next time!
-
I bet there were some bright work lights to light up the aft decks during night/low-light operation. A couple of bright LEDs or something shining down on the stern working deck(s) would look really neat in the dark. I don’t know where they’d have been located, though. Could be difficult to actually place them and get wires run to where they should be on the ship.
-
I’ll pull up a chair, too! I love seeing projects like this- workboats or commercial ships. I want to do a commercial workboat of my own some day (though, I want to make mine RC driven), so I’ll be following along with great interest!
-
Coming along great Patrick! I love the personal 'artistic license' you've taken with her. Jaw dropping as always.
-
Take a pic in the dark! Of course, the picture won't properly capture the effect; but, looking at it in the dark would be how I'd decide on what degree of lighting I want, if it were my diorama. Are they individually controlled? If so, it could be a neat idea to have a bunch of little lights, but be able to turn on just one at a time to highlight a section, like an actual sub. That could get complicated, though...
-
If you watch James Cameron's documentary about surveying the Bismark wreck (it's called "James Cameron's Expedition Bismarck"), on one dive they nearly damaged one of the subs by landing on a section of the lower hull that blew off when the ship hit bottom, having likely been weakened by torpedo hits from the Dorsetshire. Now, I expect they were a bit further away than the scope of your diorama, but it wouldn't be unreasonable to have some panels like that lying around. And I don't think anyone would fault other small bits and pieces scattered about. Of course, in the end, you're the one who is going to be looking at it the most; so make it how you like it! I think it looks excellent so far! I've been meaning to ask - what is your reference (if any) for the shell hits and other damage?
-
Just curious- is the second planking intended to simulate the plating, or is that and additional step (or, not a step?) looking really good!!
-
Count me in, too! Last year or the year before, I read through "A Man and His Ship", the biography of William Francis Gibbs, and in the book the Leviathan refit featured as a significant formative experience for him and for Gibbs and Cox. Excited to see what you come up with for your unique challenges of a wartime/peacetime combo model!
- 238 replies
-
- 5
-

-
- leviathan
- troop ship
- (and 2 more)
-
I think it’s admirable you tried it out in the first place! No shame in seeing for yourself and deciding what you like. As others have said, it’s your creation, and it is quite the feat as it is! Keep up the great work.
-
Hi Patrick, Great progress! She’s starting to come together inside! Also, I showed some of the pictures on your log to the colleague of mine familiar with Khalilah, and he was impressed that you pulled off the hull form, especially at such a small scale!
-
So, at 1:200, that means the Hood was 4 meters longer than Bismarck? I didn’t realize the Hood was that big! But, I suppose that’s why she was ‘enemy no 1’ for the Kriegsmarine- large size, but fast and agile because of the slender hull and lighter displacement. Of course, the lighter displacement was because of less armor, so that ended up being somewhat problematic....
-
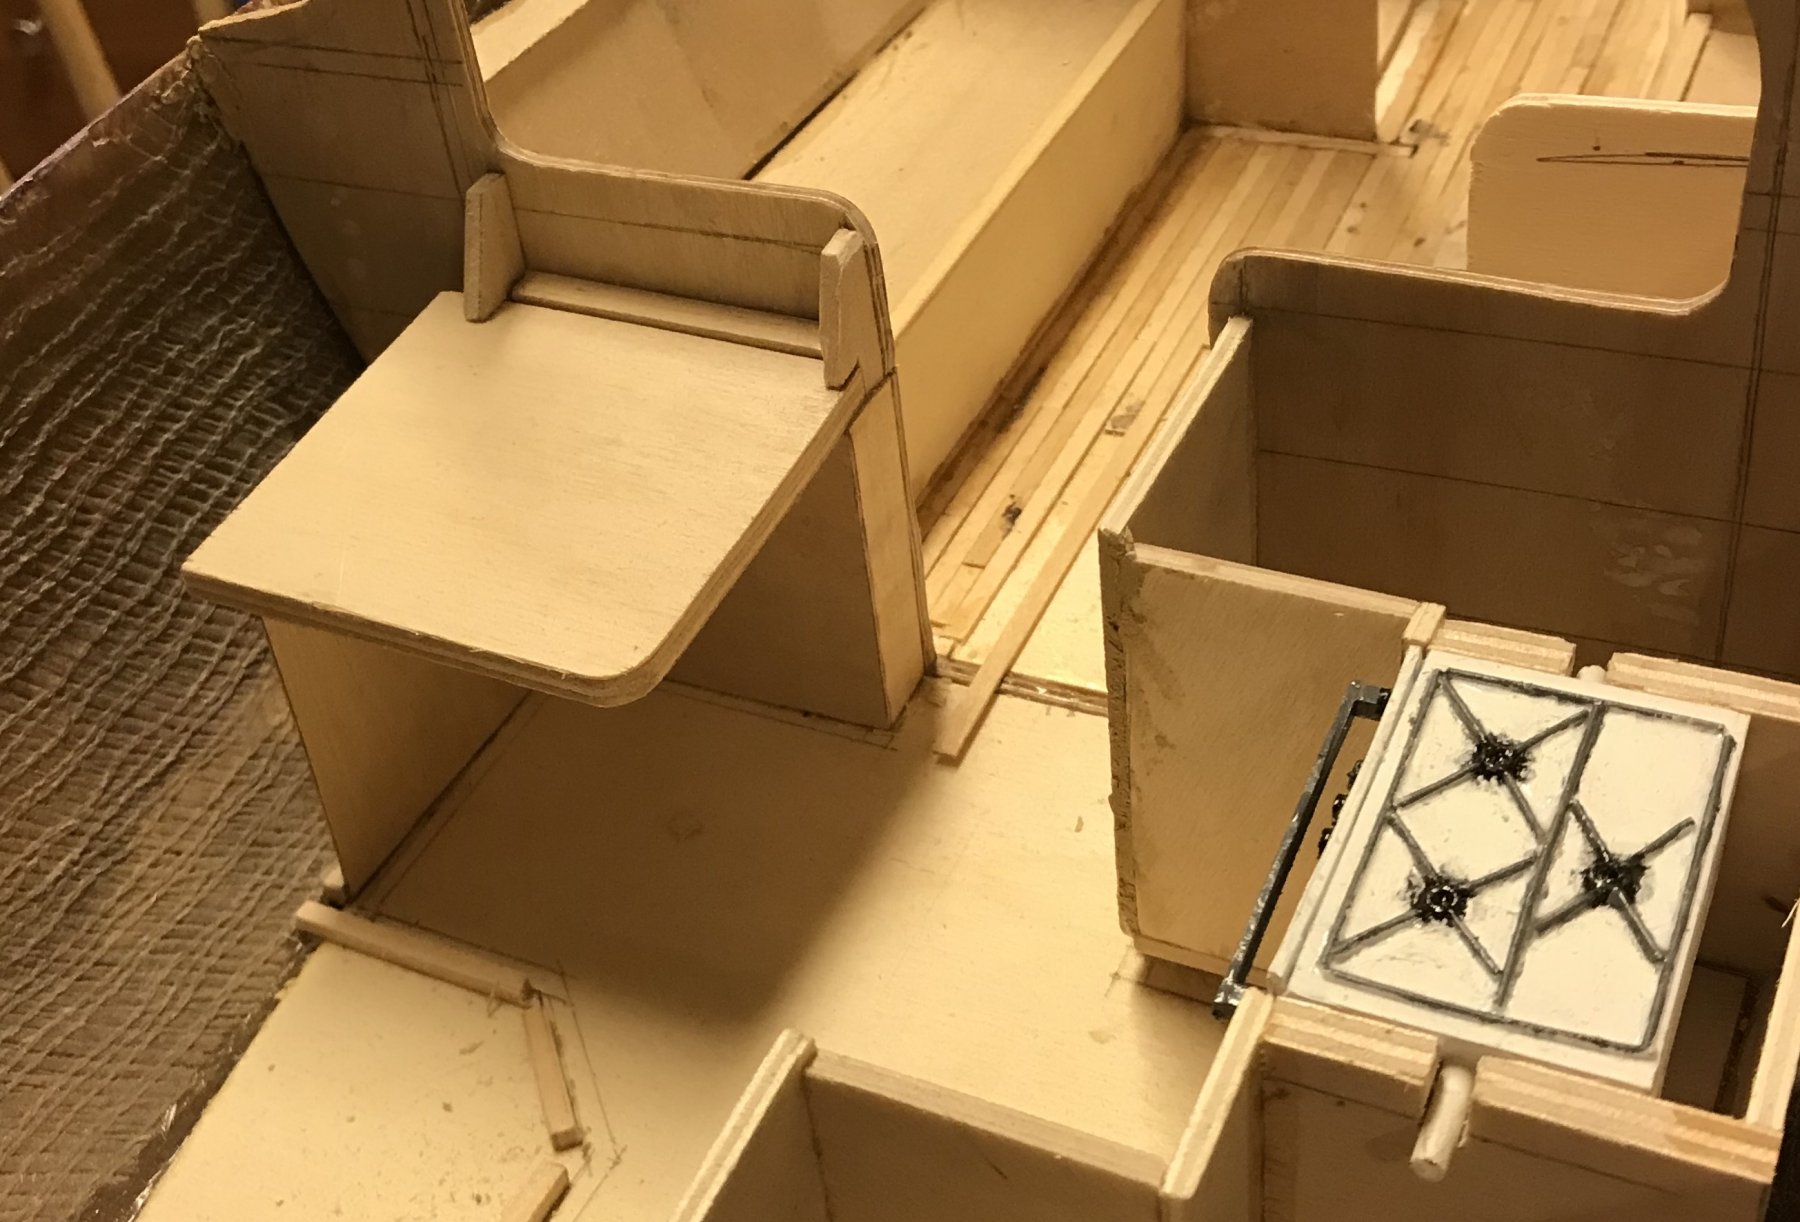
Been quite busy in the ‘real world’ so to speak - between a busy season with my work and the start of a house ‘facelift’ (nothing major- some drywall removal to expose raw wood plank sheathing we just found out we had and a fair bit of painting, for the most part), I haven’t had much time for the boat, and when I have, there wasn’t any time left to post! So here’s a small update on what I’ve done since last: INTERIOR LAYOUT/FURNISHINGS WORK - CABIN SOLE PART 1 AND NAV STATION PART 1 First, I took a break from ‘building’ and started some ‘finishing’. An idea I’ve had for a while was to use wood coffee stirs with square ends as wood planking. It might not be museum quality material, but it’s wood, it’s in roughly right-scale dimensions (to scale it would be something like 2 or 3 inch planks 5-1/2 ft long), and it’s cheap (I a pack of two 1,000 count boxes, so 2,000 total, for $13 on Amazon). I started at the forward end, since that’s where I have completed the furnishings that define the walking flats, and did most of the forward half of the interior: First Run of Interior Flooring After some down time, I got the ‘building’ itch again and started on the nav station. This has its own interesting set of challenges- each ‘sub assembly’ of furniture has- but I’m slowly piecing it together. The first picture is what is permanently installed thus far, and the second has the chart table piece dry fitted in. The angled bracket things will form the sides of a console holding an electronic chart plotter and engine instruments, at a minimum. Though it might not be tall enough for the chart plotter, at least not a decent size one. Might have to think on that a bit... Nav Station Status That’s it for now. Next will be more development of the nav station. At some point. Thanks for looking in!
-
I'm in, too. Always been a Bismarck fan, and there are lots of Bismarck and Hood models, but not so many of this one. Looking forward to following along!
- 405 replies
-
- 8
-
-
- tamiya
- king george v
- (and 2 more)
-
It's a good point. I said the Fitz would be my boat, and that's probably true. But my eventual goal is a completely designed RC boat, like a workboat of some type. Not a replica of an existing boat, though emulating the style of many, but from hull form through to interior design starting with a blank sheet of paper. That would be a fun father-son(s) project, since by the time I get there they'll be old enough to appreciate it. We'll see - lots of time to figure that out. Space is the real issue - we're going to run out of room for all these boats real quick!