HOLIDAY DONATION DRIVE - SUPPORT MSW - DO YOUR PART TO KEEP THIS GREAT FORUM GOING! (Only 13 donations so far - C'mon guys!)
×


Jeff-E
-
Posts
699 -
Joined
-
Last visited
Content Type
Profiles
Forums
Gallery
Events
Everything posted by Jeff-E
-
Hi Matt, Just found this log, looks like an interesting first build for your venture into scratch building. I agree with you that they must have been very brave men who sailed these vessels in the treacherous waters of the Norrth Sea and beyond. I look forward to watching your progess
-
Hi Danny, Your work is top notch as usual, the decks are spectacular
-
Hi Patrick, Anthony, Matthew and Slog, Thank you all for your kind words and input with regard to my small dilema about the gunport linings. I have decided to line the ports with timber and will use the 0.5mm sapellia, mentioned earlier. It will be a bit fiddily to do but as all of you have rightly pointed out the extra effort will be worth it. I hope line one port tonight and I will post some pics tomorrow
-
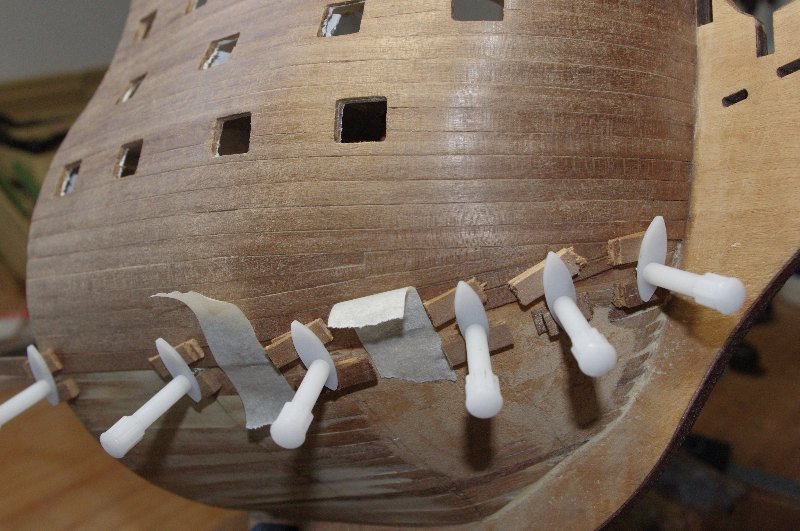
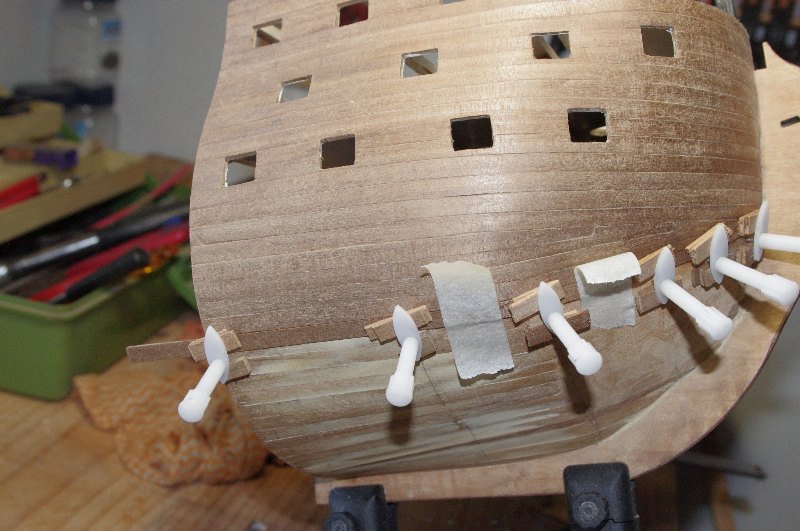
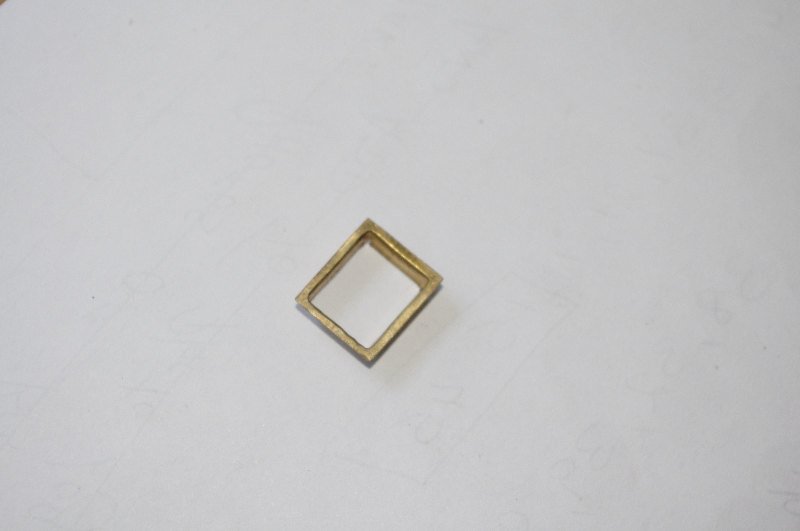
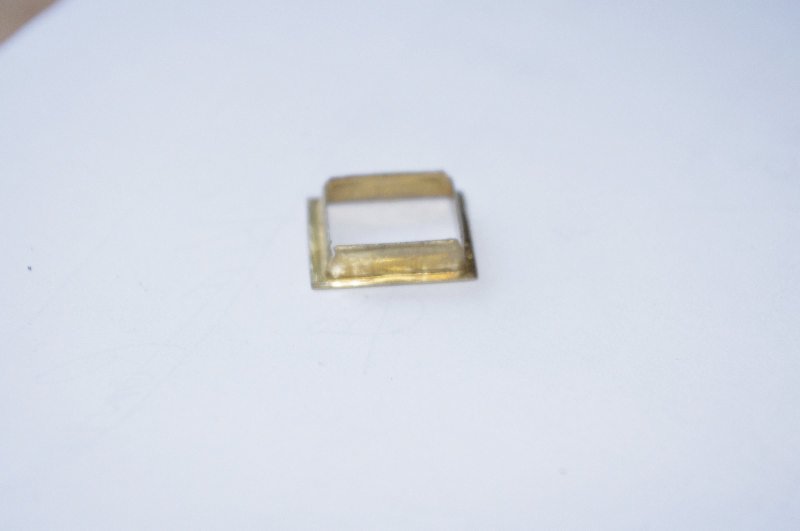
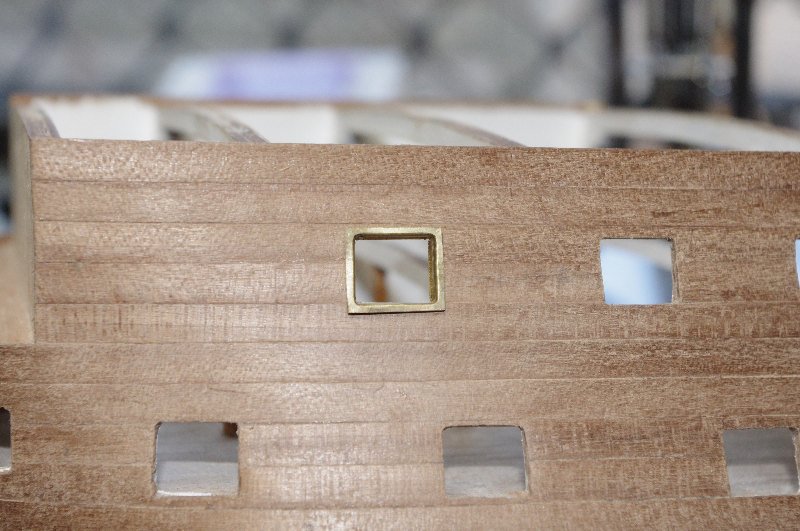
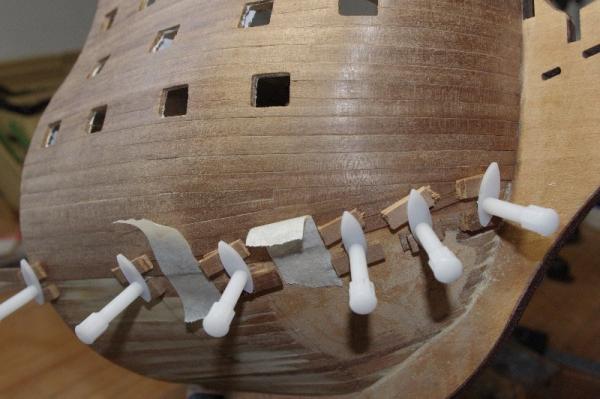
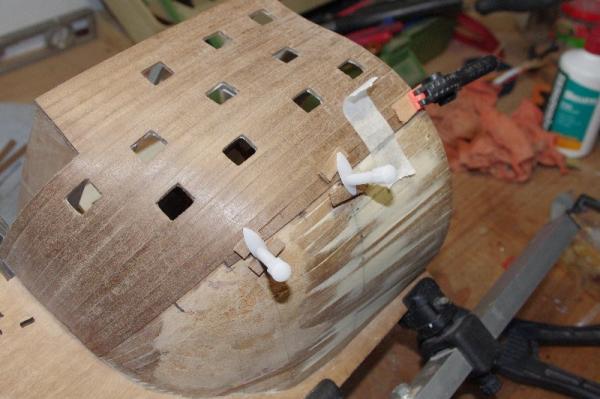
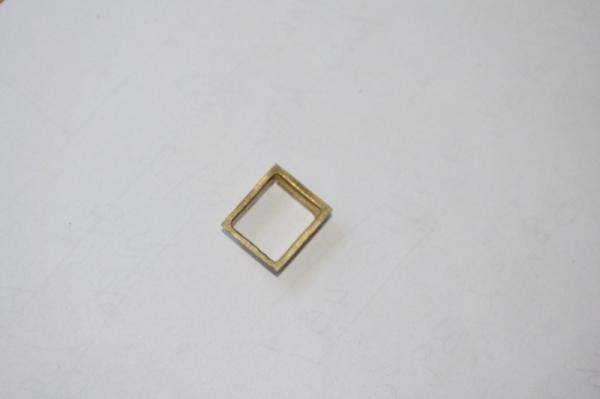
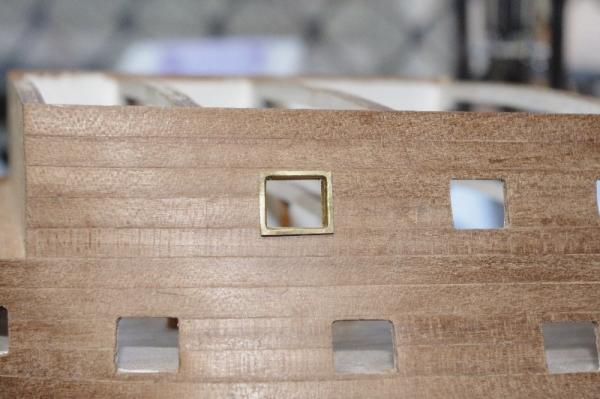
Hi All, The planking is still progressing slowly, I have started to plank around the curve of the hull and have let the planks run fairly close to their natural line this has resulted in them terminating on the plank above and not the stem, but they seem to be laying nicely on the hull and not buckling. I have laid five planks on the starboard side to see how they would look and if it was no good I only had one side to remove. I think they look OK so I have started with the same pattern on the port side. Sorry about all the clamps but I only laid these planks about 20 minutes ago. I will post some better pics on the weekend. I have also been thinking about what to do with the gunports the kit supplies a preformed brass gunporrt linning that, to me, looks a bit tacky. They look more like an open window frame than a gunport linning. So I was thinking of discarding them and lining the ports with timber, I have some strips of 3mm x0.5mm sapillea left over from the 'Swift' which can be trimmed to size but as the thickness of the hull is only 2.5mm I was wondering if it would look alright becuase they would also have to be stepped into the port so that when the lids close they would be flush with the hull The port lids are 1mm ply which are supposed to be lined with I'm not sure what because the plans or instrucions don't say, I am guessing the outside would be the same 1mm x 6mm walnut I'm using for the second layer of planks, if so I will have some sanding to do . Any thoughts would be appreciated Any way I have a while to think about how I'm going to do them while I continue with the planking


-
Hi Kimbely, Your model is looking great. I've just had a quick browse of other models of this ship some have the bowsprit in the centre of the ship some are offset, by the way Revell have moulded the hole in the foredeck for the bowsprit they mean it offset, so as Russ says it looks correct to mount it on the left side of the stem.
- 94 replies
-
- 1
-

-
- santa maria
- revell
- (and 1 more)
-
Hi Ollie , Excellent work on the comanionway and the ladder, they turned out really well. Our wet season hasn't really kicked in yet still in build up conditions , hot and humid days, but we have had a few afternoon storms over the last few days which does cool things down a bit. Glad to hear you are getting some rain.
- 803 replies
-
- 2
-
-
- colonial cutter
- modellers shipyard
- (and 1 more)
-
Hi Matthew, Very nice work with your planks the stern looks great.
-
Hi Mathew, Ollie and Anthony, Thank you all for your kind words, the planking does get a bit more challenging from now on as the it curves under towards the keel Mathew, I'm using Shellys Aquadhere white PVA glue it works well and allows you a bit of time to adjust the planks into position
-
Hi Slog, Thankyou for your kind comments. The strips ar 1mm x 6mm walnut that is why it is taking a while, each plank has to be tapered then roughly bent and then soaked and clamped into position, once it is dry any minor adjusments are made before it is glued into position. A time consuming process but so far I am happy with the result
-
Hi Danny, Just catching up on your log, haven't looked in for a while you have made wonderful progress and your craftsmanship is excellent. I will keep a closer eye on your build from now on
-
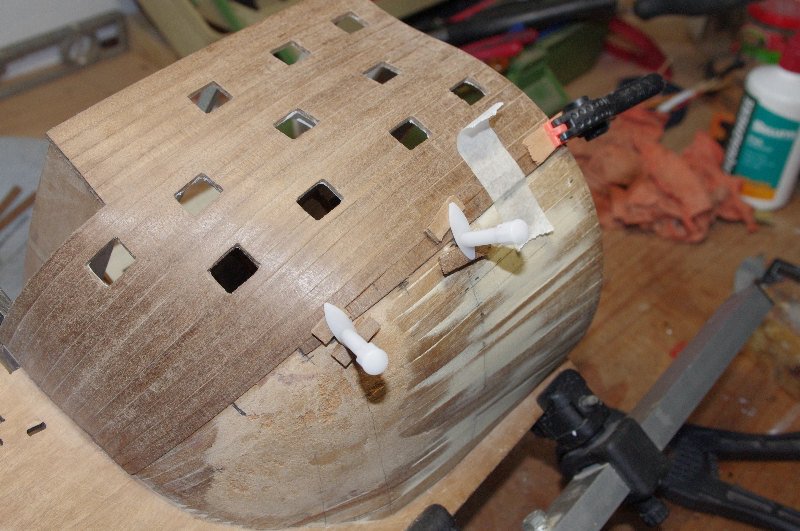
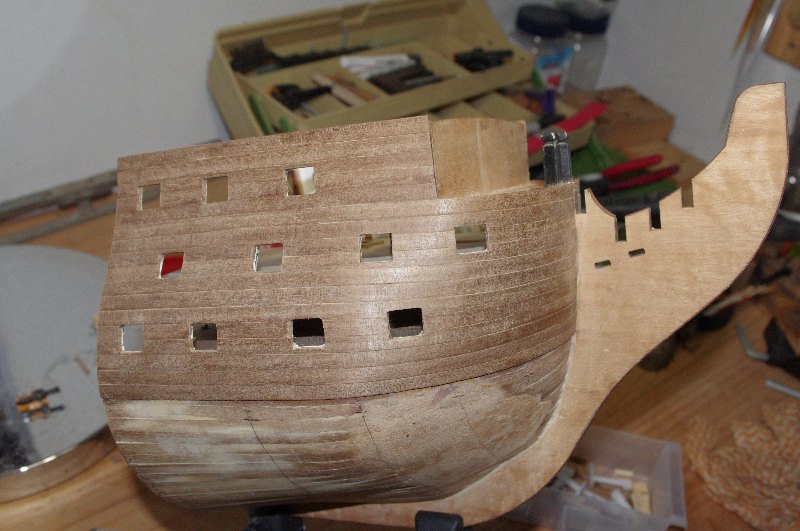
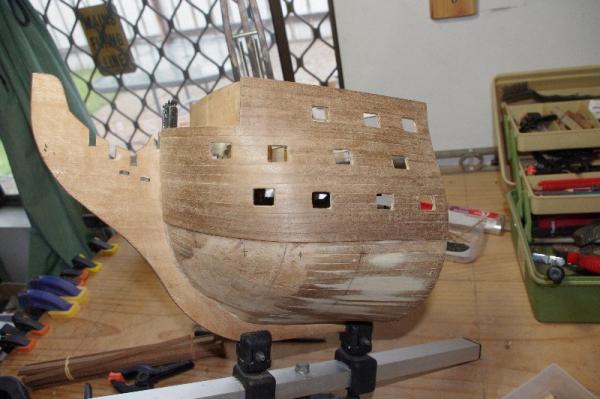
Hi All, Just a small update on the planking it has been slow progress but I want to get the second layer as smooth and as tight as possible so there will be minimal sanding and filling when it is completed. As you can see by the following photos I have nearly reached the point where the planks start to curve under the hull. I will lay three more planks on each side below the last plank shown and then start to let the planks take their natural course, adding stealers and drop planks to fill the gaps.


-
Hi Antony, Absolutely beautiful work, the hold racks and the ryders turned out beautifully. I hope to one day do a scrath build and a cross section similar to this would be a great project Can't wait for your next update
-
Hi John, Nice start on the keel, looking forward to see the stem attached
-
Hi Matthew, Wonderul job with your first planking Regarding you breaking a few planks, have you tried soaking them and pinning them into place and letting them dry first? After they dry you can make any small adjustments required before gluing them into place. I picked this tip up from Dan Vad when I was building my 'Norfolk' it works really well just a bit time consuming
-
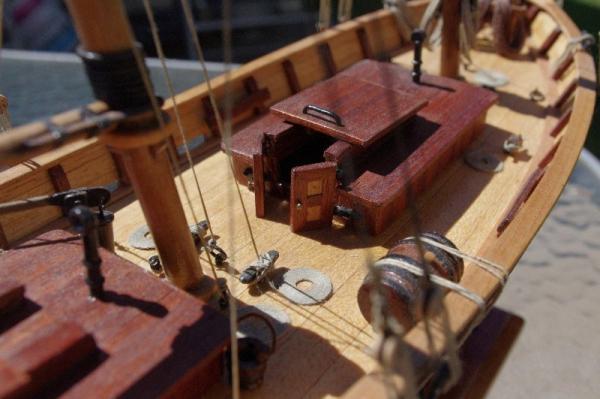
Hi Ollie, Excellent job on your compainway, I like the way it all operates with the opening doors and sliding hatch. With regard to the lighting I think you are correct they would have been oil filled lanterns but I don't think they would have been a permanant fixture but portable so they could be carried from place to place and light the way as you went. However there probably would have been hooks on which to hang them fixed to the companionway and other places on the ship. As for your handles I have attached a photo of the companinway doors on my model of the 'Swift 1805' I don't know how authentic this was for the period but the door hanles were made using the heads of 0.75mm brass pins and the handles from 0.75mm brass wire bent to shape. There are probably a lot better examples around but I hope this helps
- 803 replies
-
- 1
-
-
- colonial cutter
- modellers shipyard
- (and 1 more)
-
Hi Kimberly, Your decks look very good, looks like you have picked out all the details very nicely As for the filler I'm sure you will figure when and where and if you need to use it as you progress with your build
- 94 replies
-
- 1
-
-
- santa maria
- revell
- (and 1 more)
-
Hi John, Your planking turned out very nicely also like your diaorama section, What scale is it?
-
Hi Pygothian, I hope all is well with your kit and no damage has occured. Look forward to you making a start an will follow your build.
-
Hi Slog, Thank you very much.
-
Hi Ollie, Very nice work on your compaionway it looks very authentic, as you say much better than the supplied one in the picture
- 803 replies
-
- 2
-
-
- colonial cutter
- modellers shipyard
- (and 1 more)
-
Hi Kimberly, Your hull painting looks really good, in answer to your question, as Andy says wash and paint and paint all the small pieces first before removing them from the sprue. They can be easily touched up after they are removed. Remember to scrape any paint away from where they are to be glued as the glue will not stick to painted surfaces. Again they can be touched up when the glue is dry. Take it easy and you will build a model to be proud of
- 94 replies
-
- 1
-
-
- santa maria
- revell
- (and 1 more)
-
Hi Richard , Your planking is coming along well. I think the Mahogany lower hull will look great.
-
Hi Slog, Your sheave looks brilliant, great work. and a good soution for making them. Sorry to hear about your anchor but you made a good save . Have you tried using electrical solder and an electric or gas soldering iron? I have used them with success on up to 1.5mm brass wire, it has a lower melting point than silver solder
-
Hi Ollie, Great work on the barrels, they look fantastic. You are progessing well To answer your question I think the door would open outwards
- 803 replies
-
- 2
-
-
- colonial cutter
- modellers shipyard
- (and 1 more)