


G.L.
-
Posts
1,553 -
Joined
-
Last visited
Content Type
Profiles
Forums
Gallery
Events
Posts posted by G.L.
-
-
-
Hahan, you are living very nicely there, just like in a post card. I have the same temperature problems in my worshop. Fortunately it is never as cold here as in Sweden. Yesterday we had the first snow of this winter here, but today it will melt away. Wednesday the weather forecast is already showing +10 degrees Celsius.
- mtaylor, Baker, popeye the sailor and 1 other
-
 4
4
-
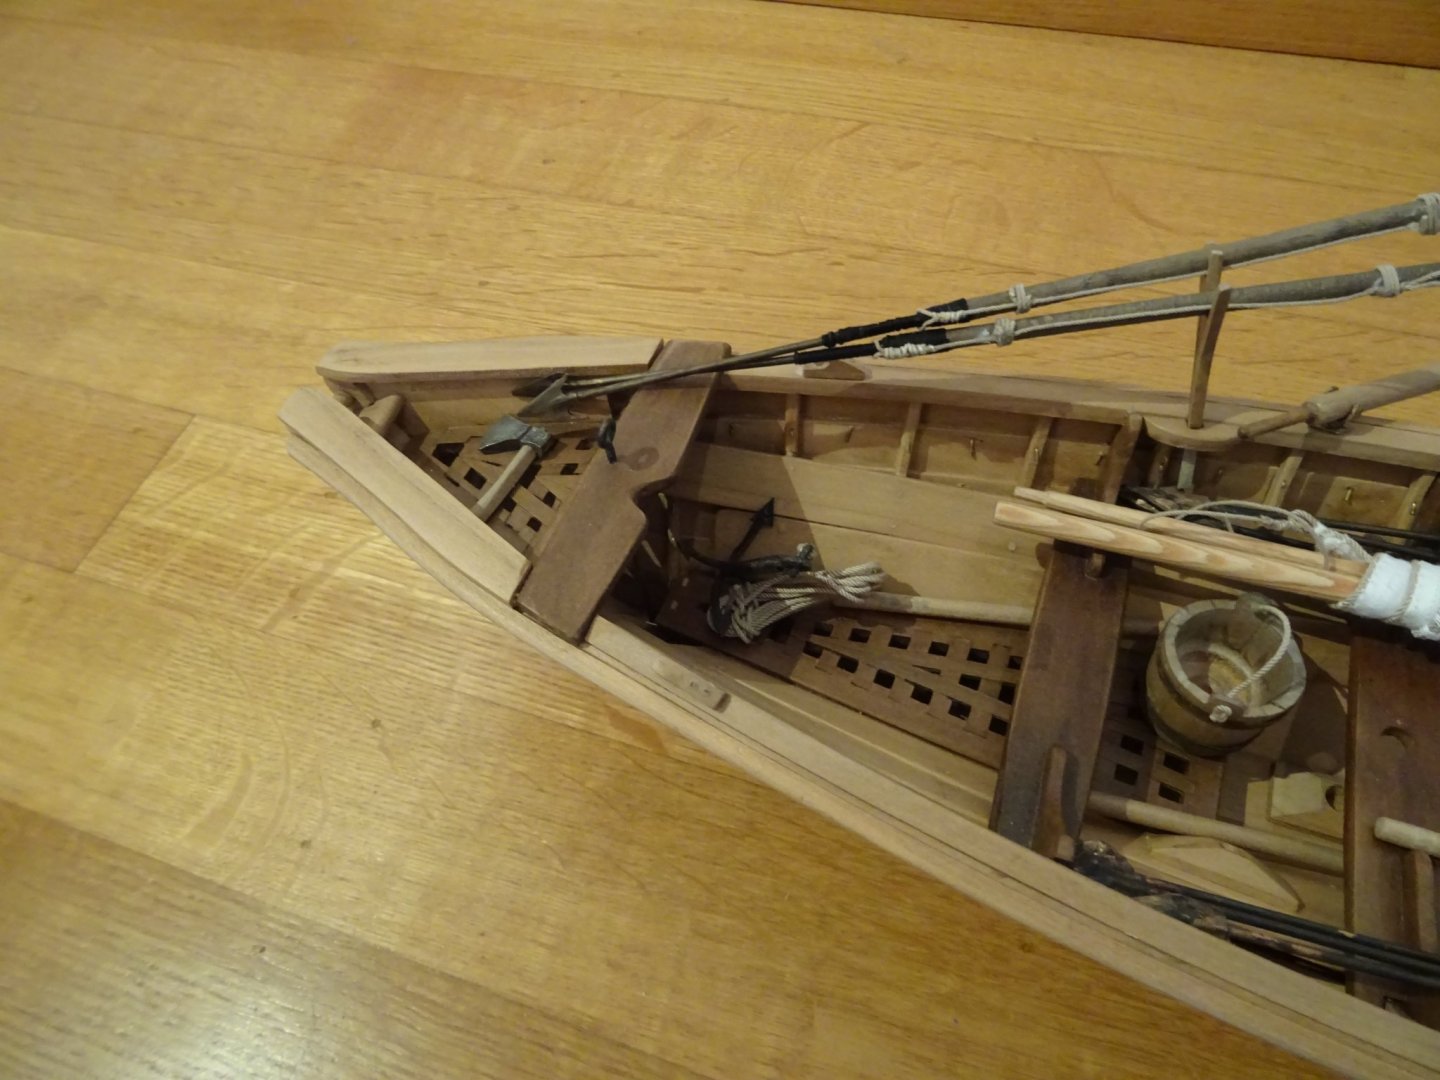
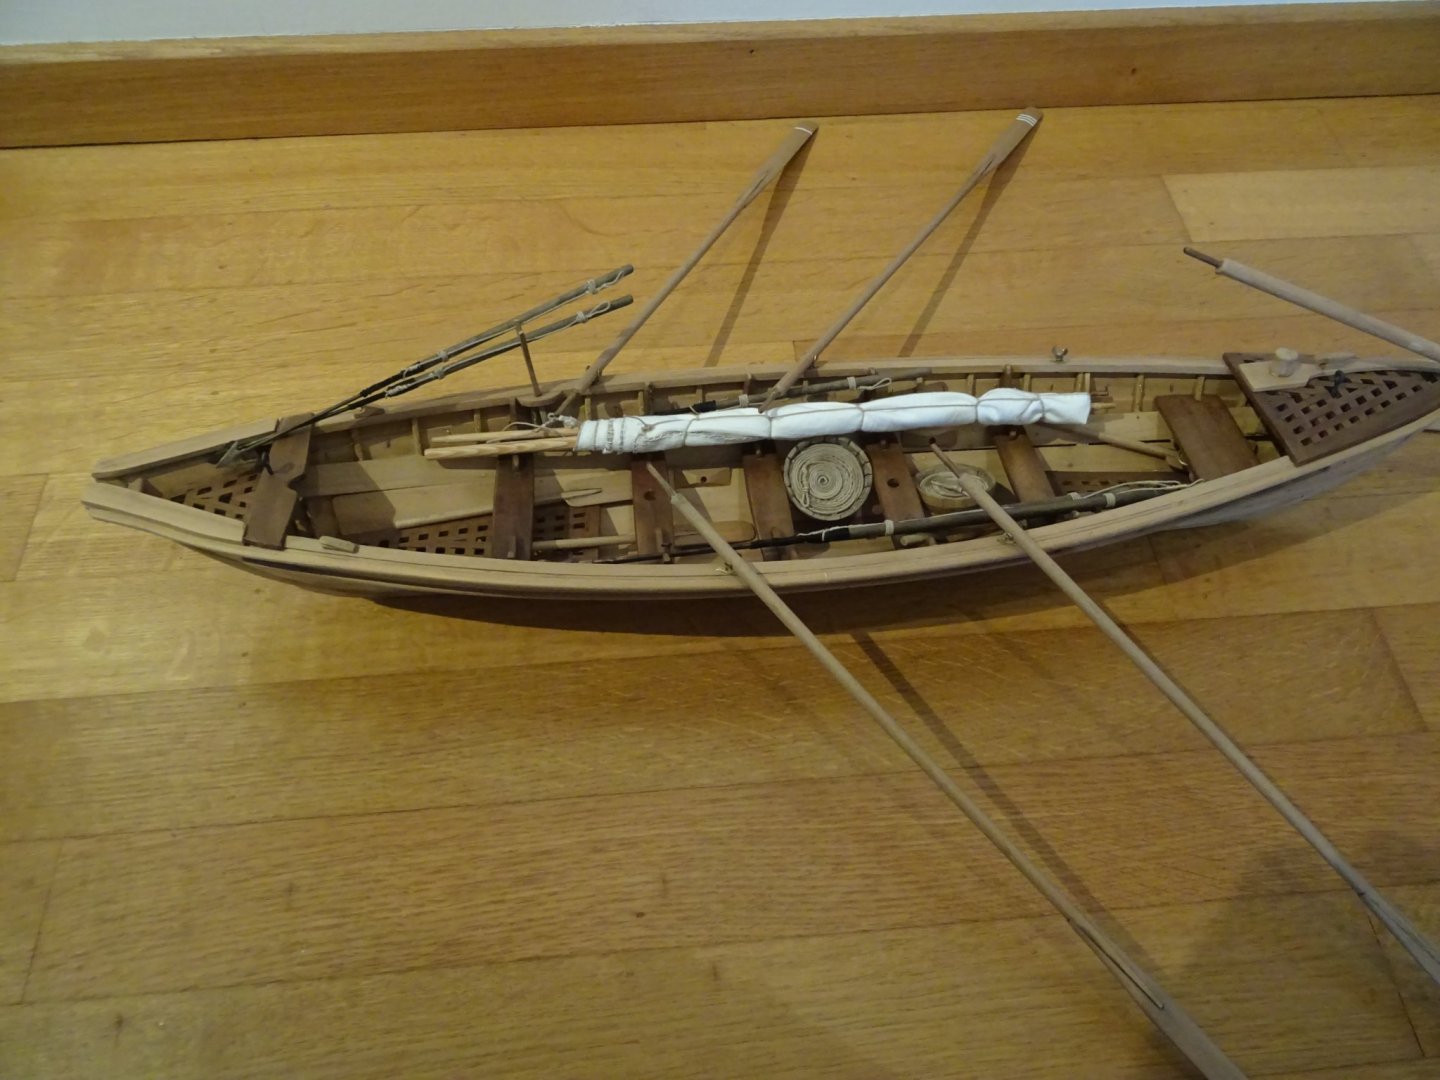
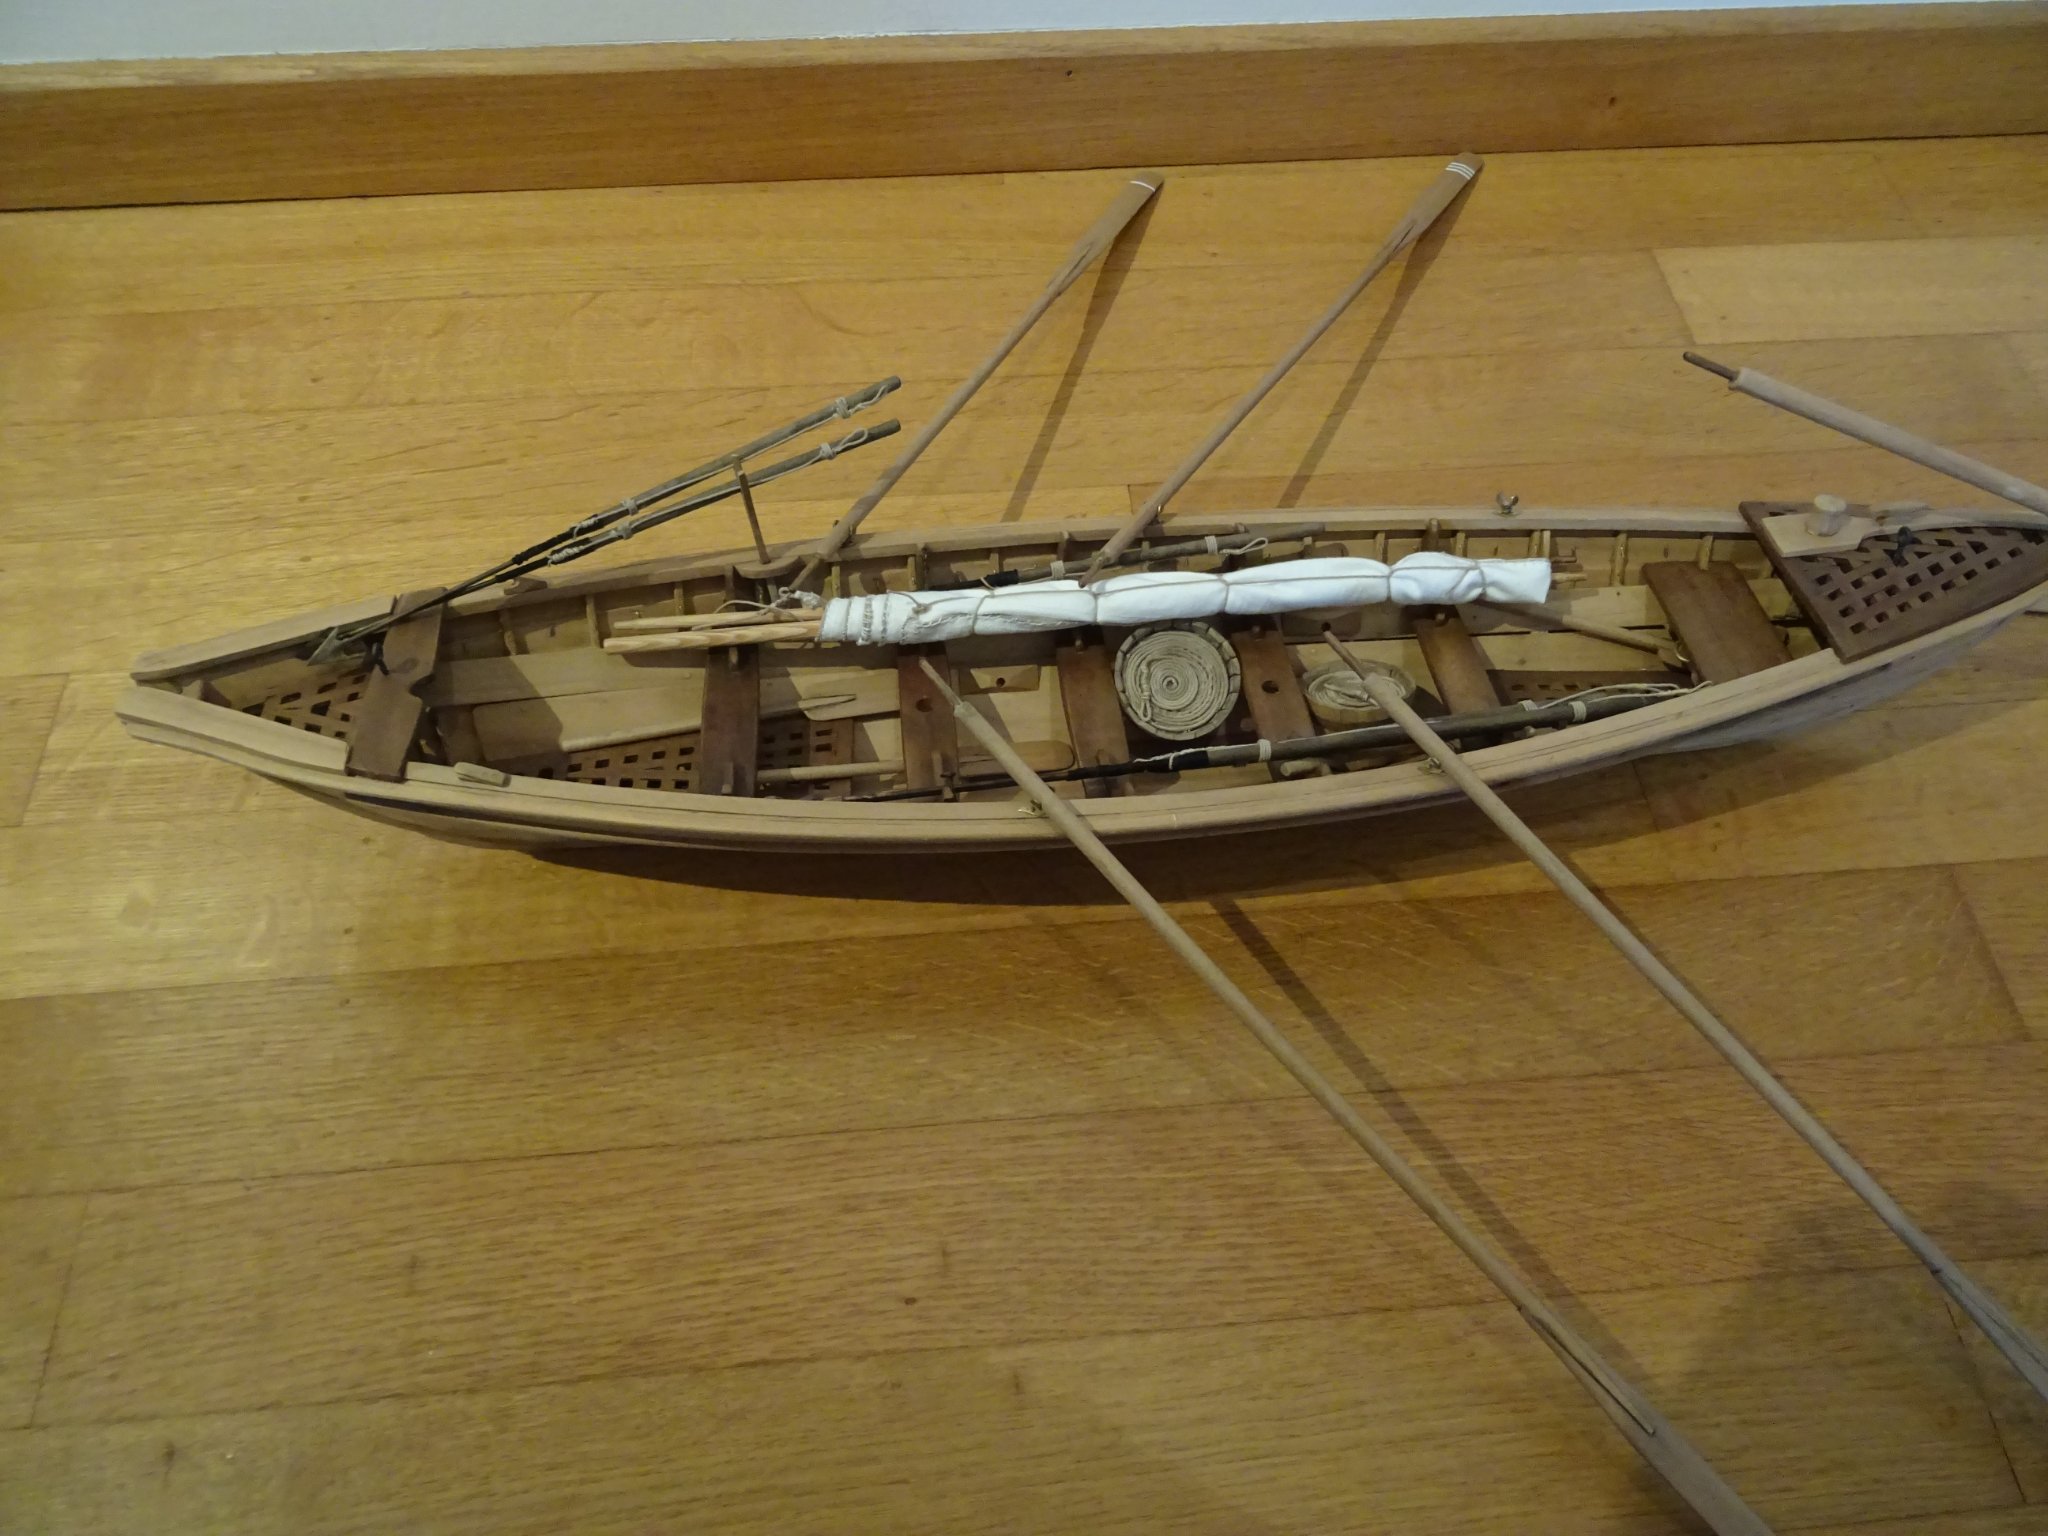
Erik Ronnberg describes a lot more equipment for the boat, but I think that I have made the most essential things to send my crew at whale hunt.
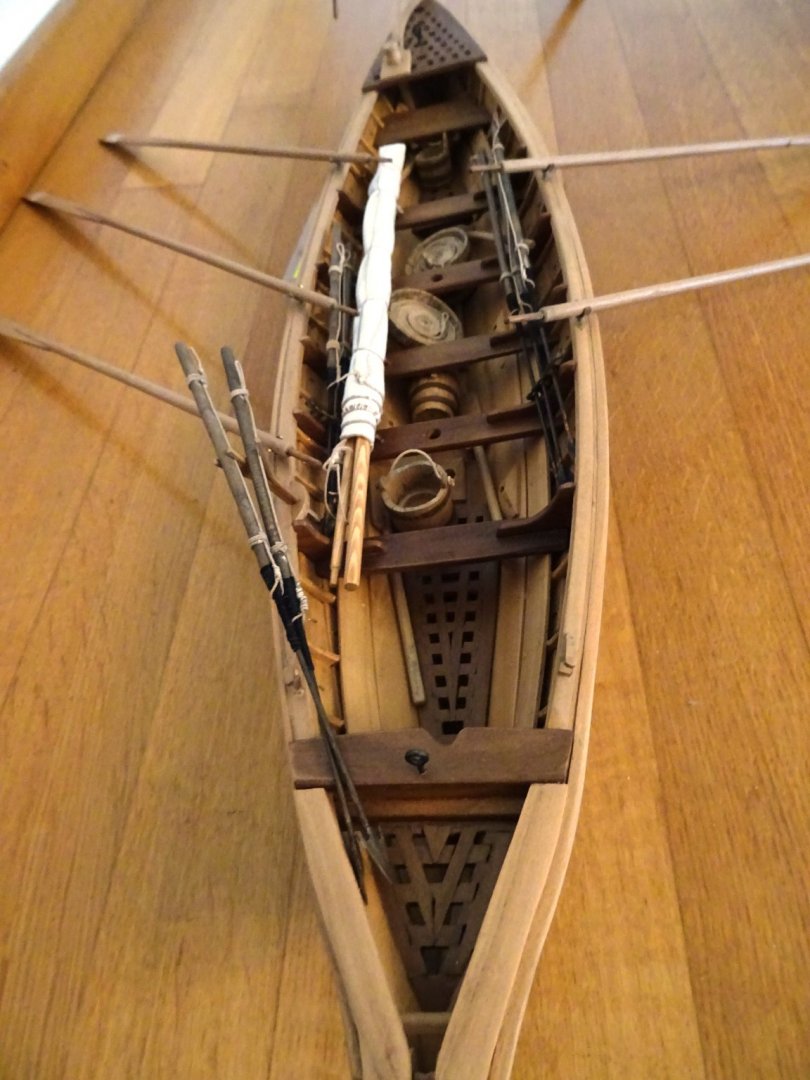
Here is a view of the aft side of the boat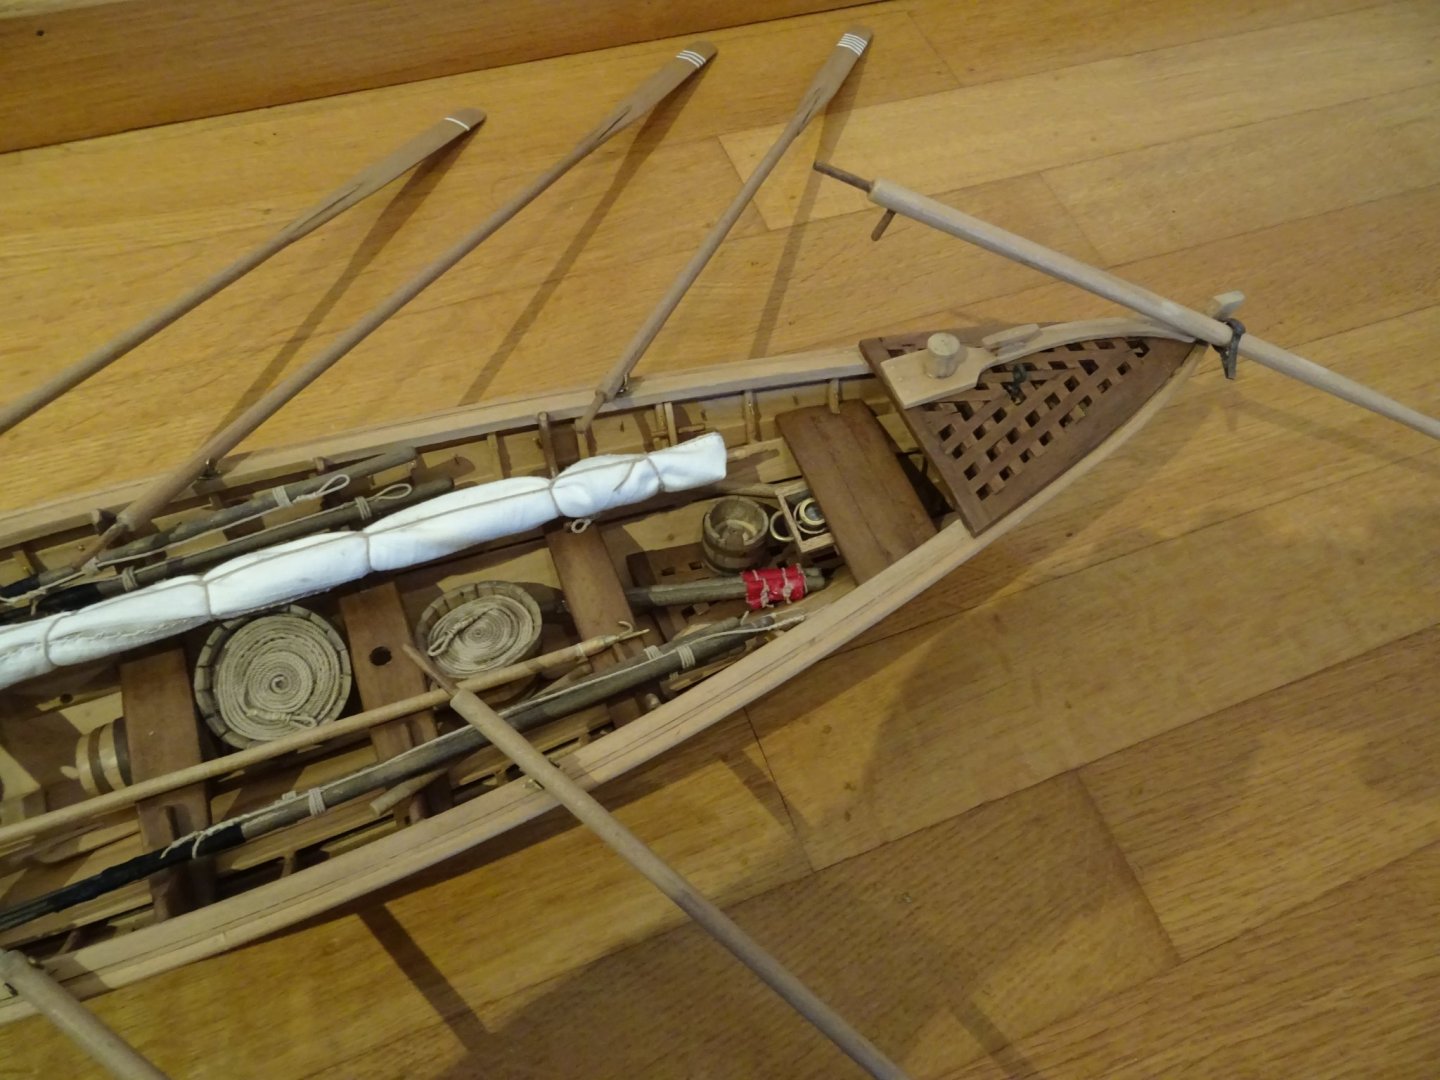
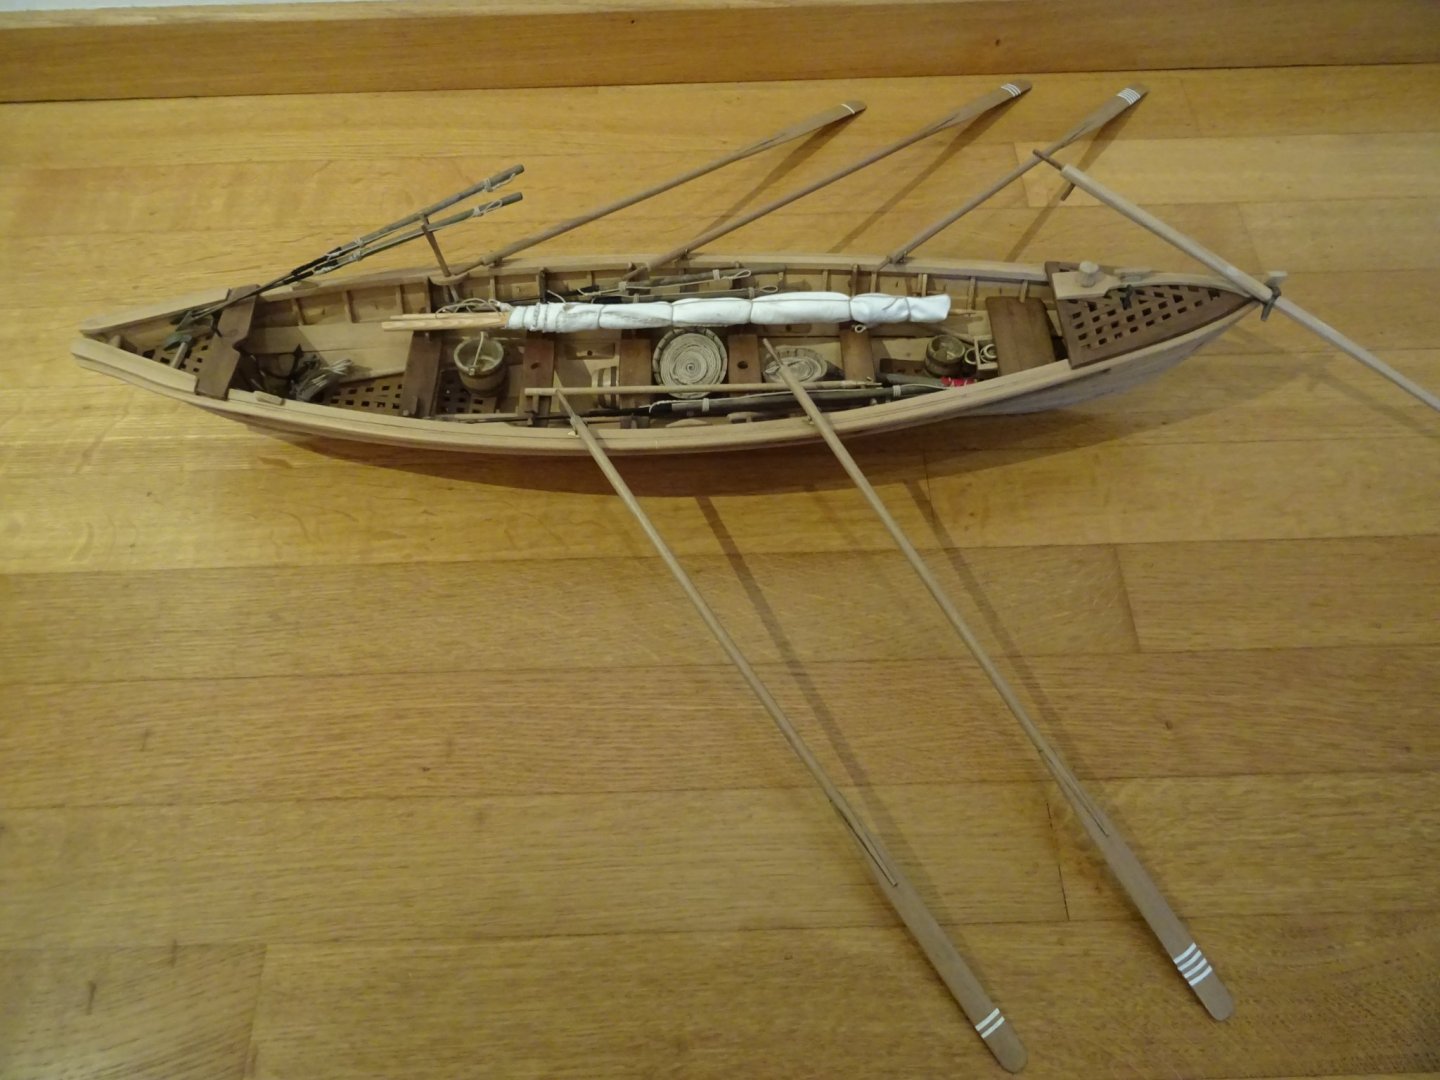
And here a total picture.
 I started this project with a lot of expectations but I am a bit disappointed. Jules Van Beylen, the drawer of the plan, calls it a Norwegian whaleboat. The Maritime Museum calls the original model a model of an American whaleboat. I suspect it is neither. The museum purchased the model in 1943. Probably it was built during the interwar period when modelers did not yet have access to that wealth of information as we have now. I think that the maker of the original model made a kind of a generic whale boat based on what he thought that was a whaleboat without making a an in-depth study of it.
I suspect also that Mr Jules Van Beylen never built himself the model of which he drew the plan and wrote the construction hand-out. In his construction instructions he sometimes remains very vague in comparison to his explanation of building the gaff sailboat in the same handout. Sometimes his prescribed method is not that practical in implementation. If he had made the model himself, the error of the wrong mast thwart on the plan would probably had been corrected.
So, I am left with a bit of an unfulfilled feeling.
To compensate for this, I will expand this project a bit. More on this next week.Thank you very much for reading this log, for your likes and for your encouraging comments.
Till next week!
-
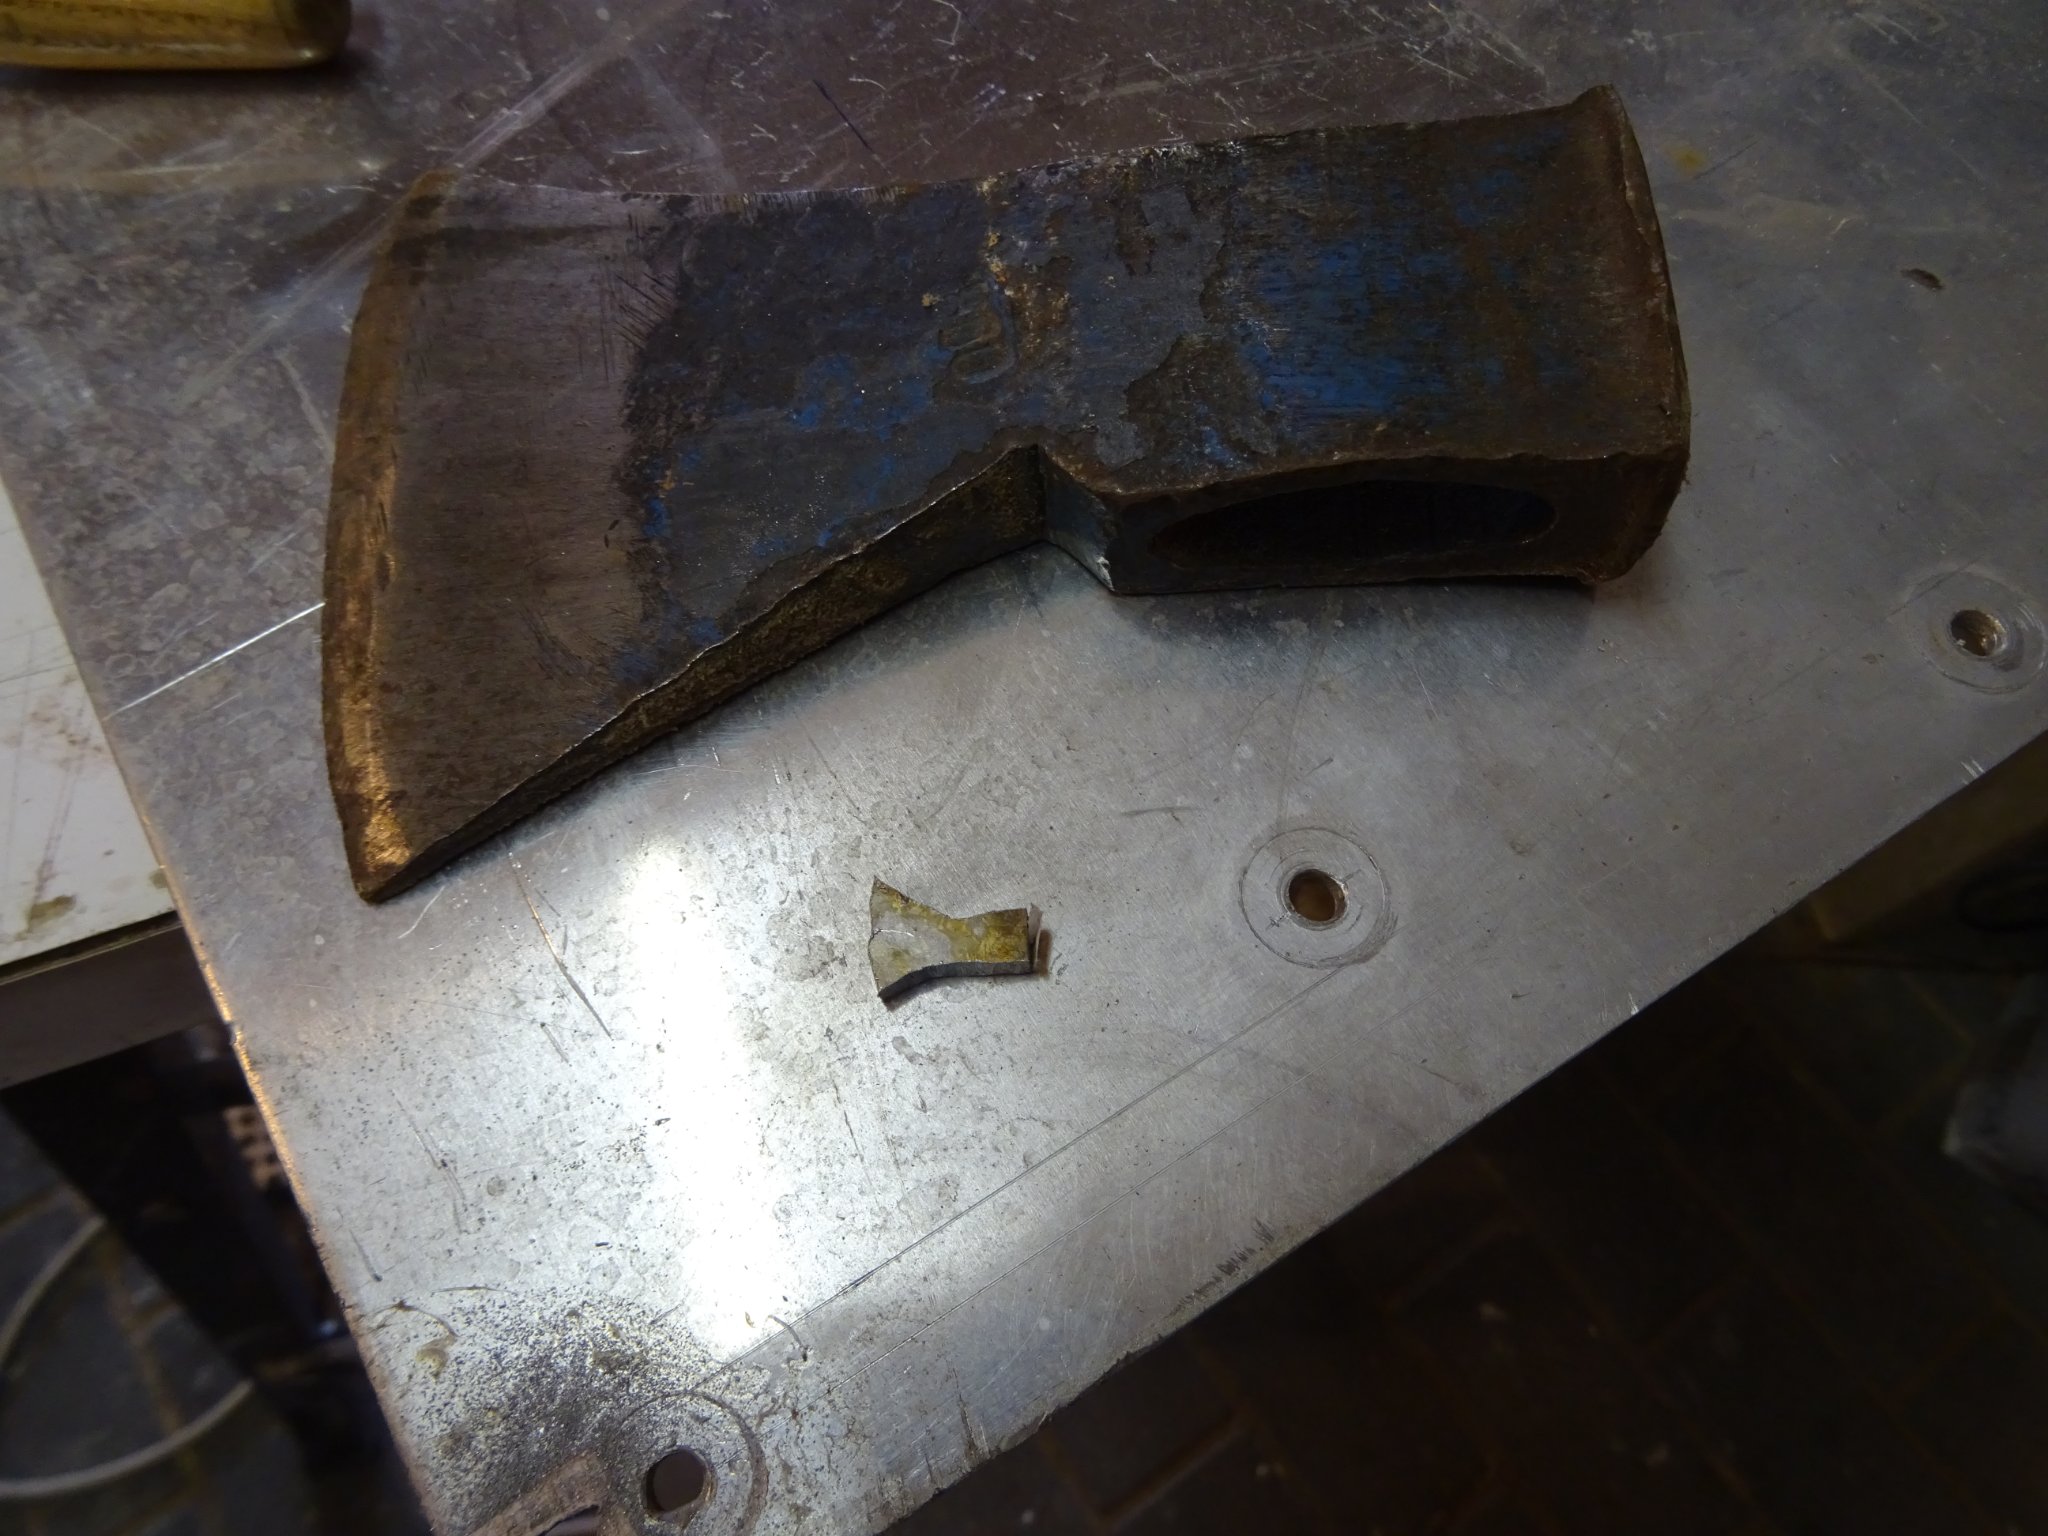
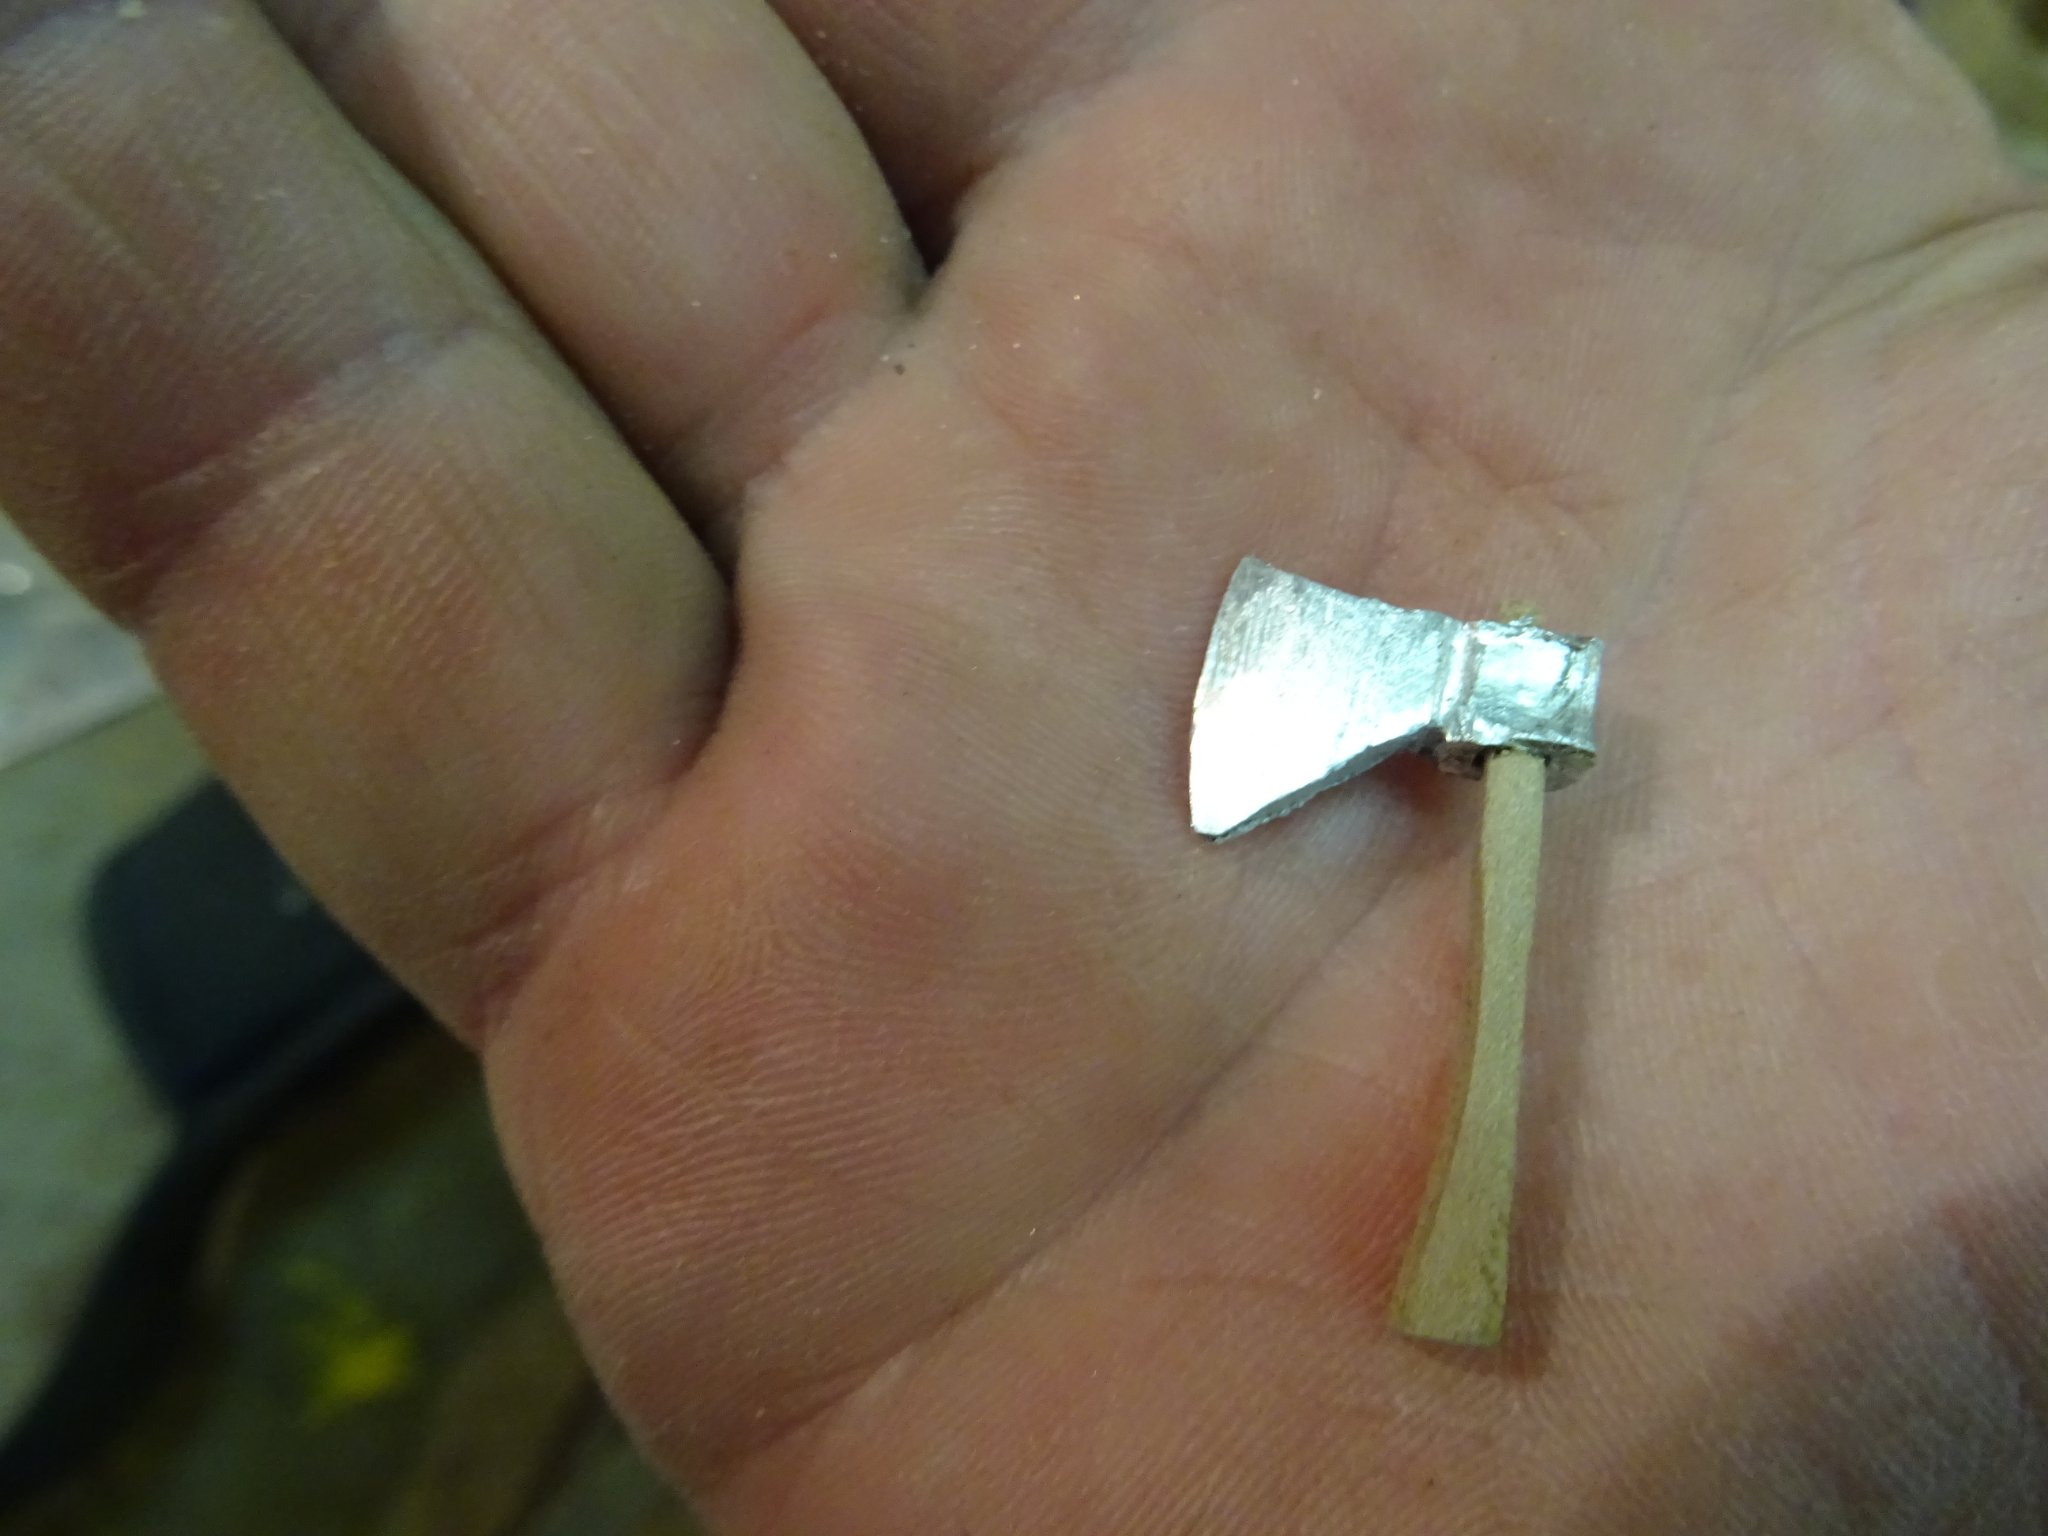
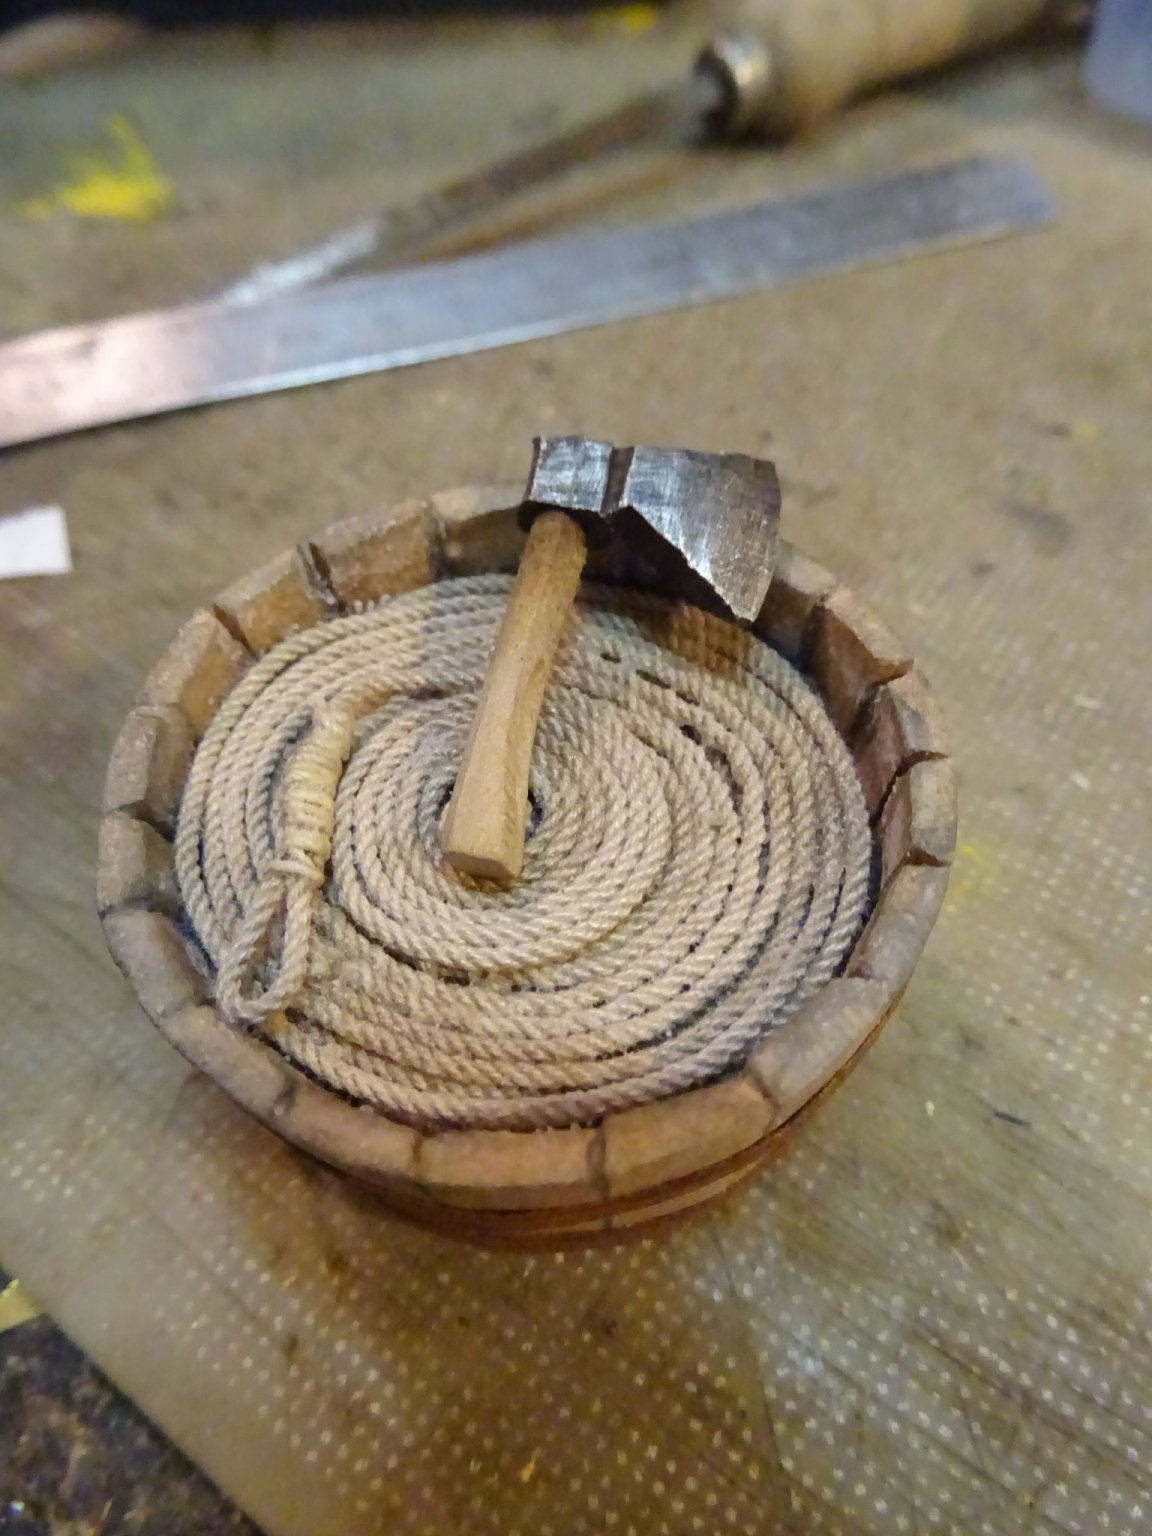
8.10. Boat hatchet
Sometimes it was necessary to cut the harpoon line in a hurry to prevent the whale from capsizing or pulling the boat down. An ax is very handy to cut the line.
I make the hatchet blade out of a piece of aluminium plate.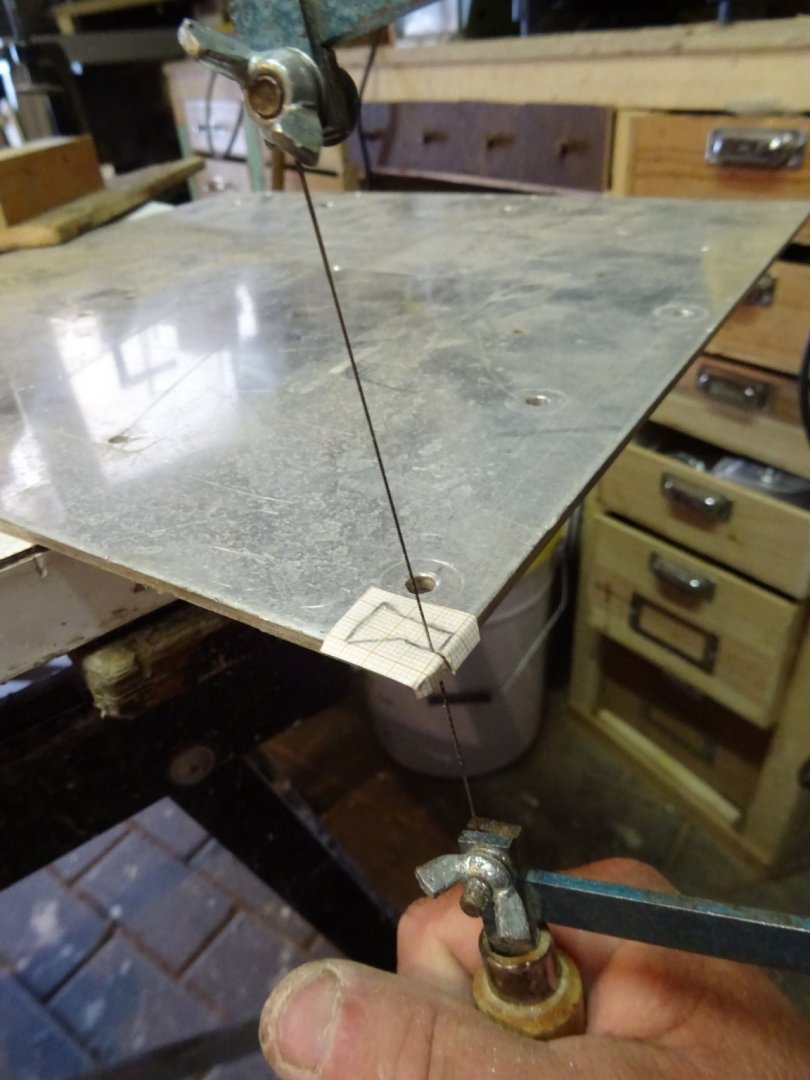
The sawn piece and my example.
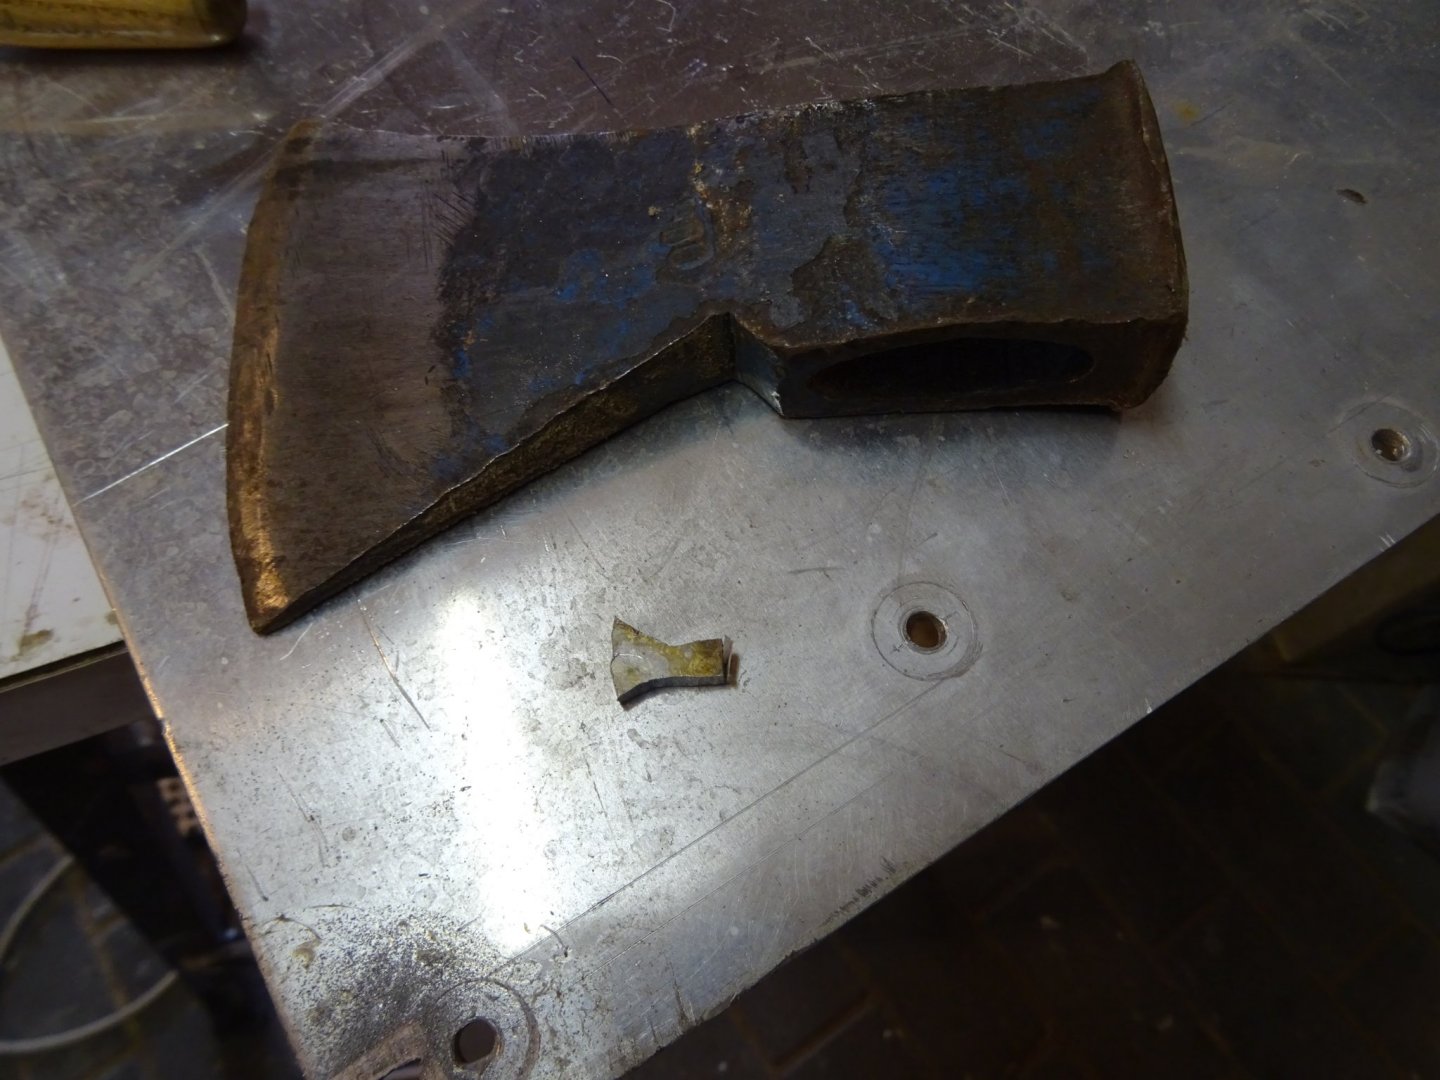
The hatchet blade is now filed into shape.
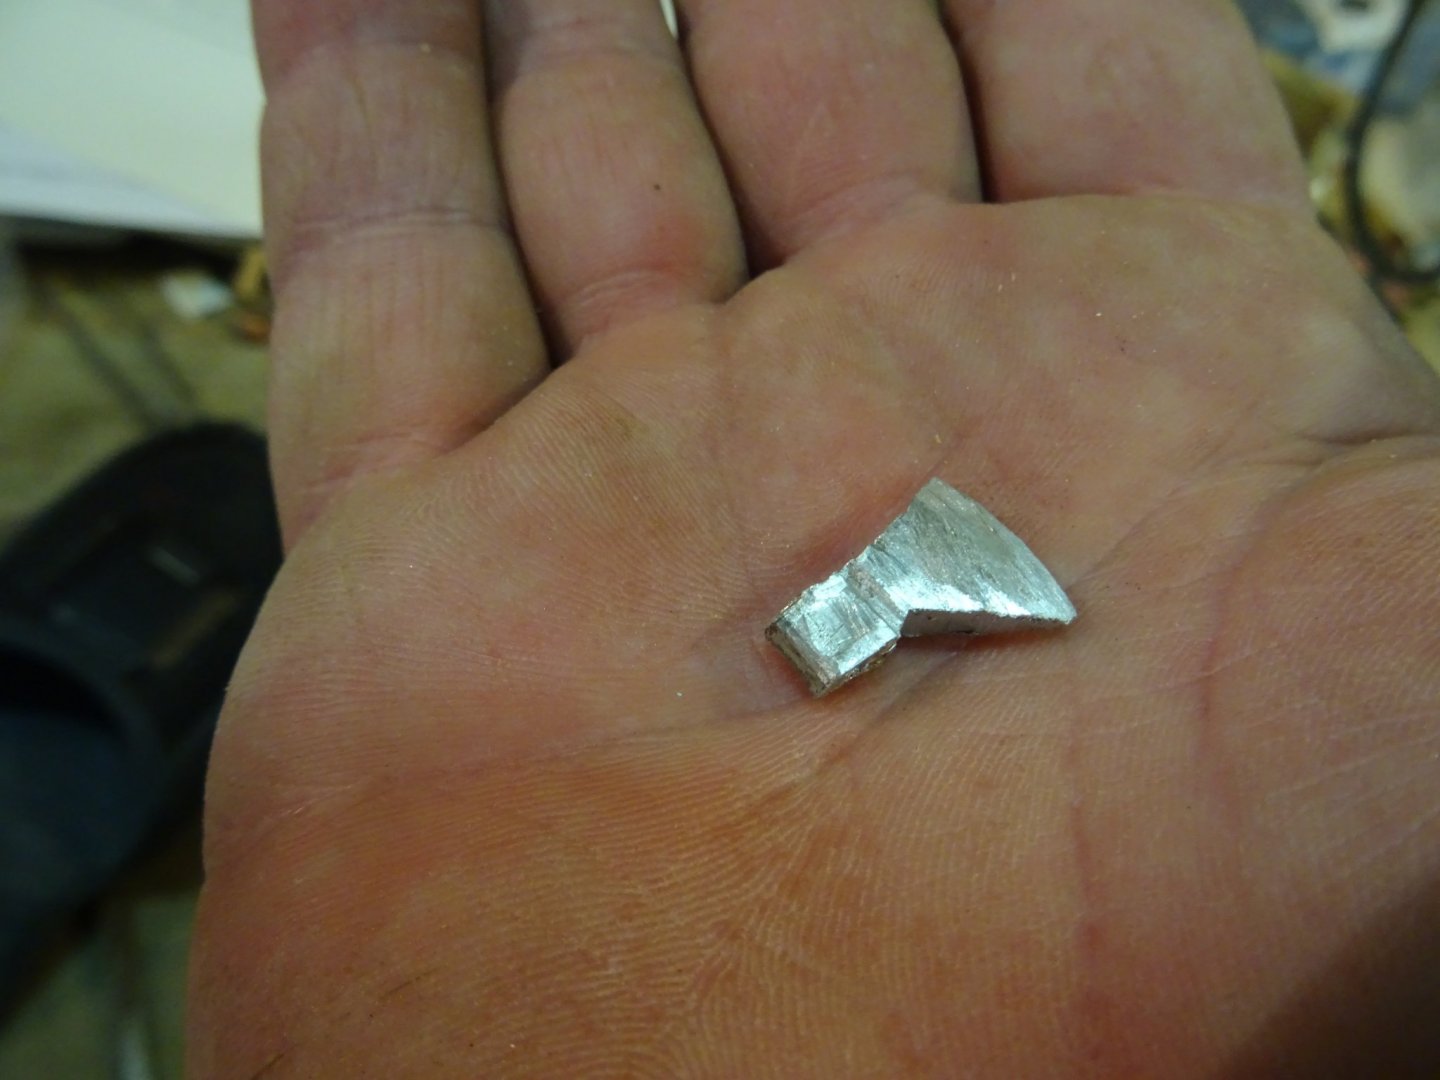
With the stem in it.

The finished hatchet.

The hatchet gets its place in the boat.
- Wintergreen, archjofo, Baker and 2 others
-
5
-
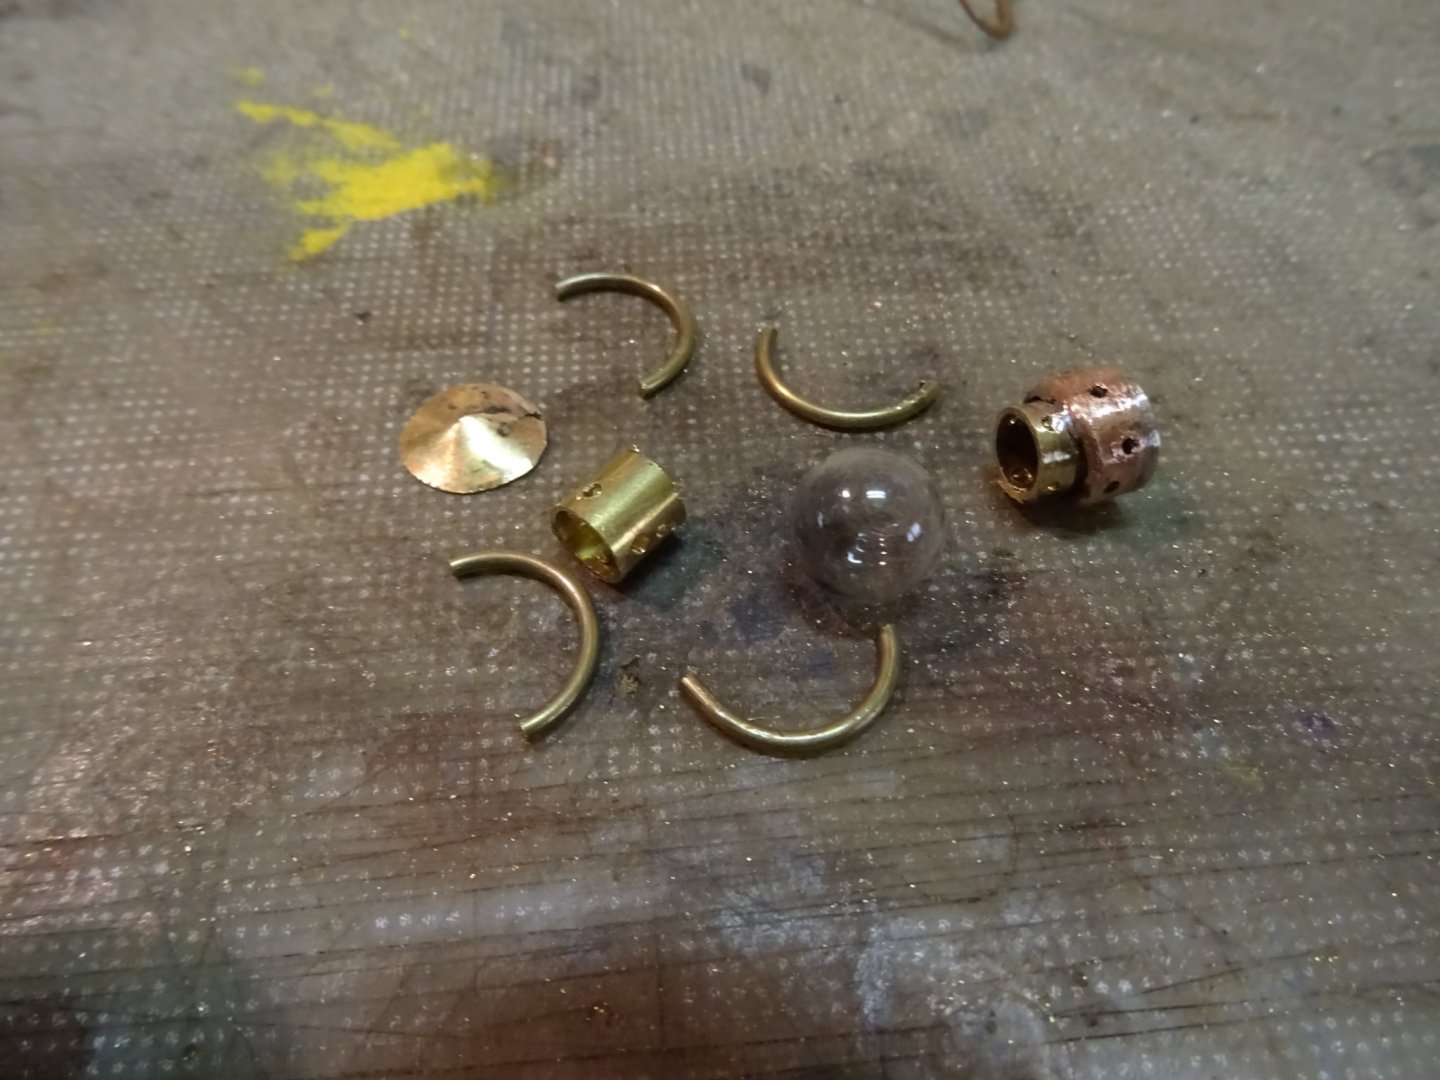
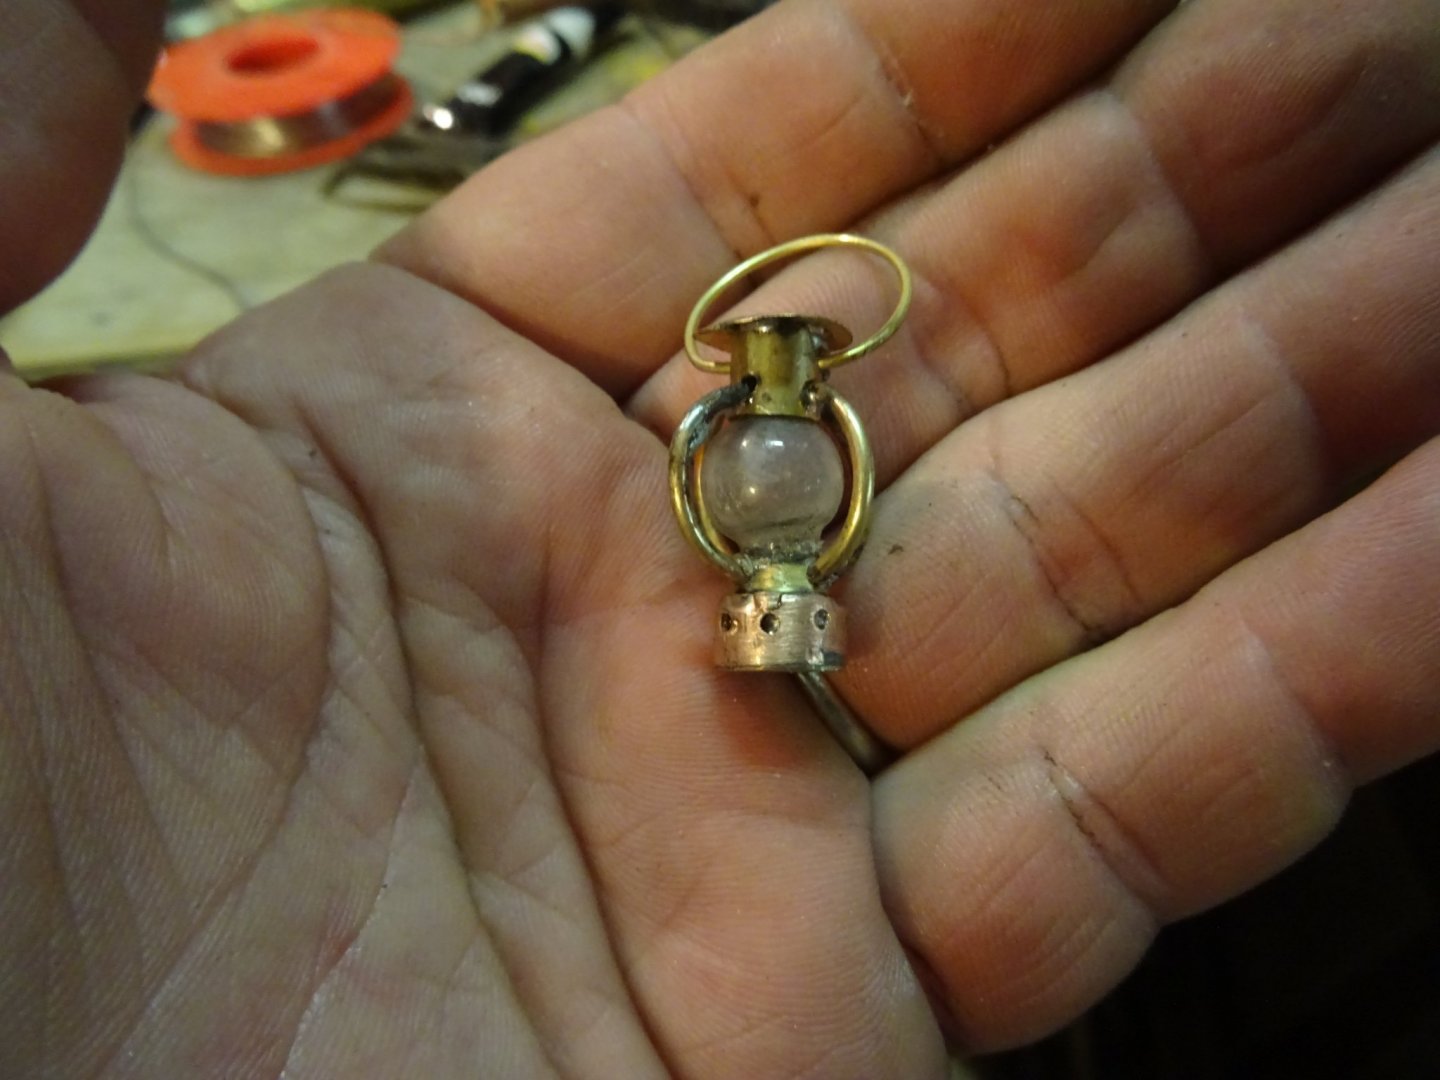
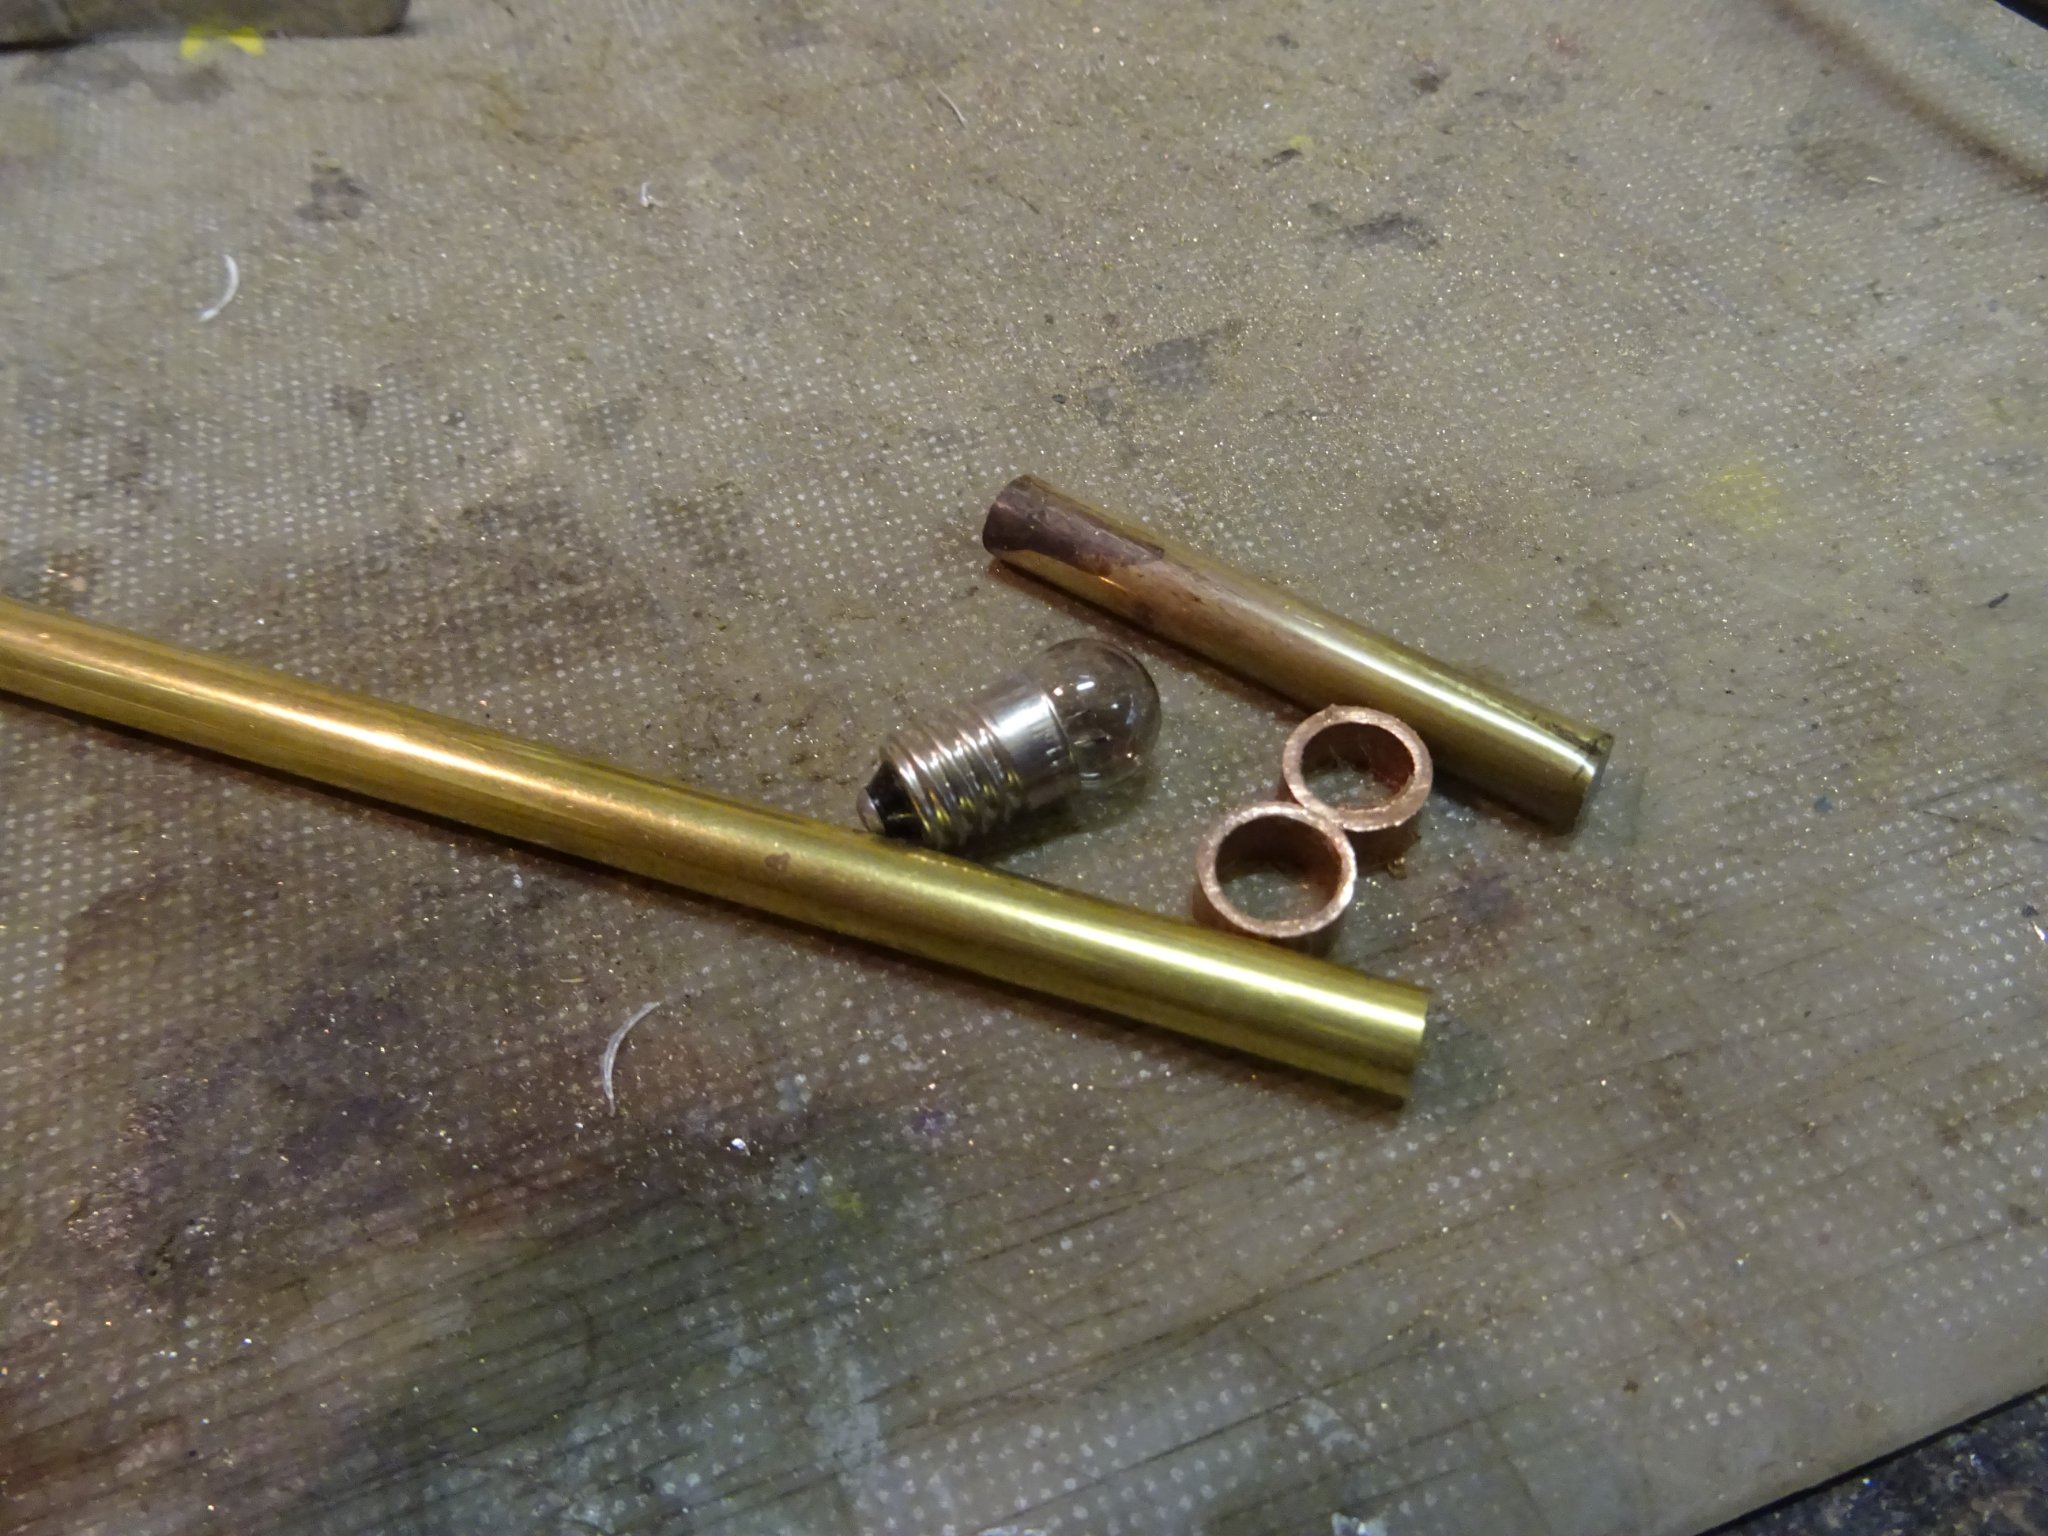
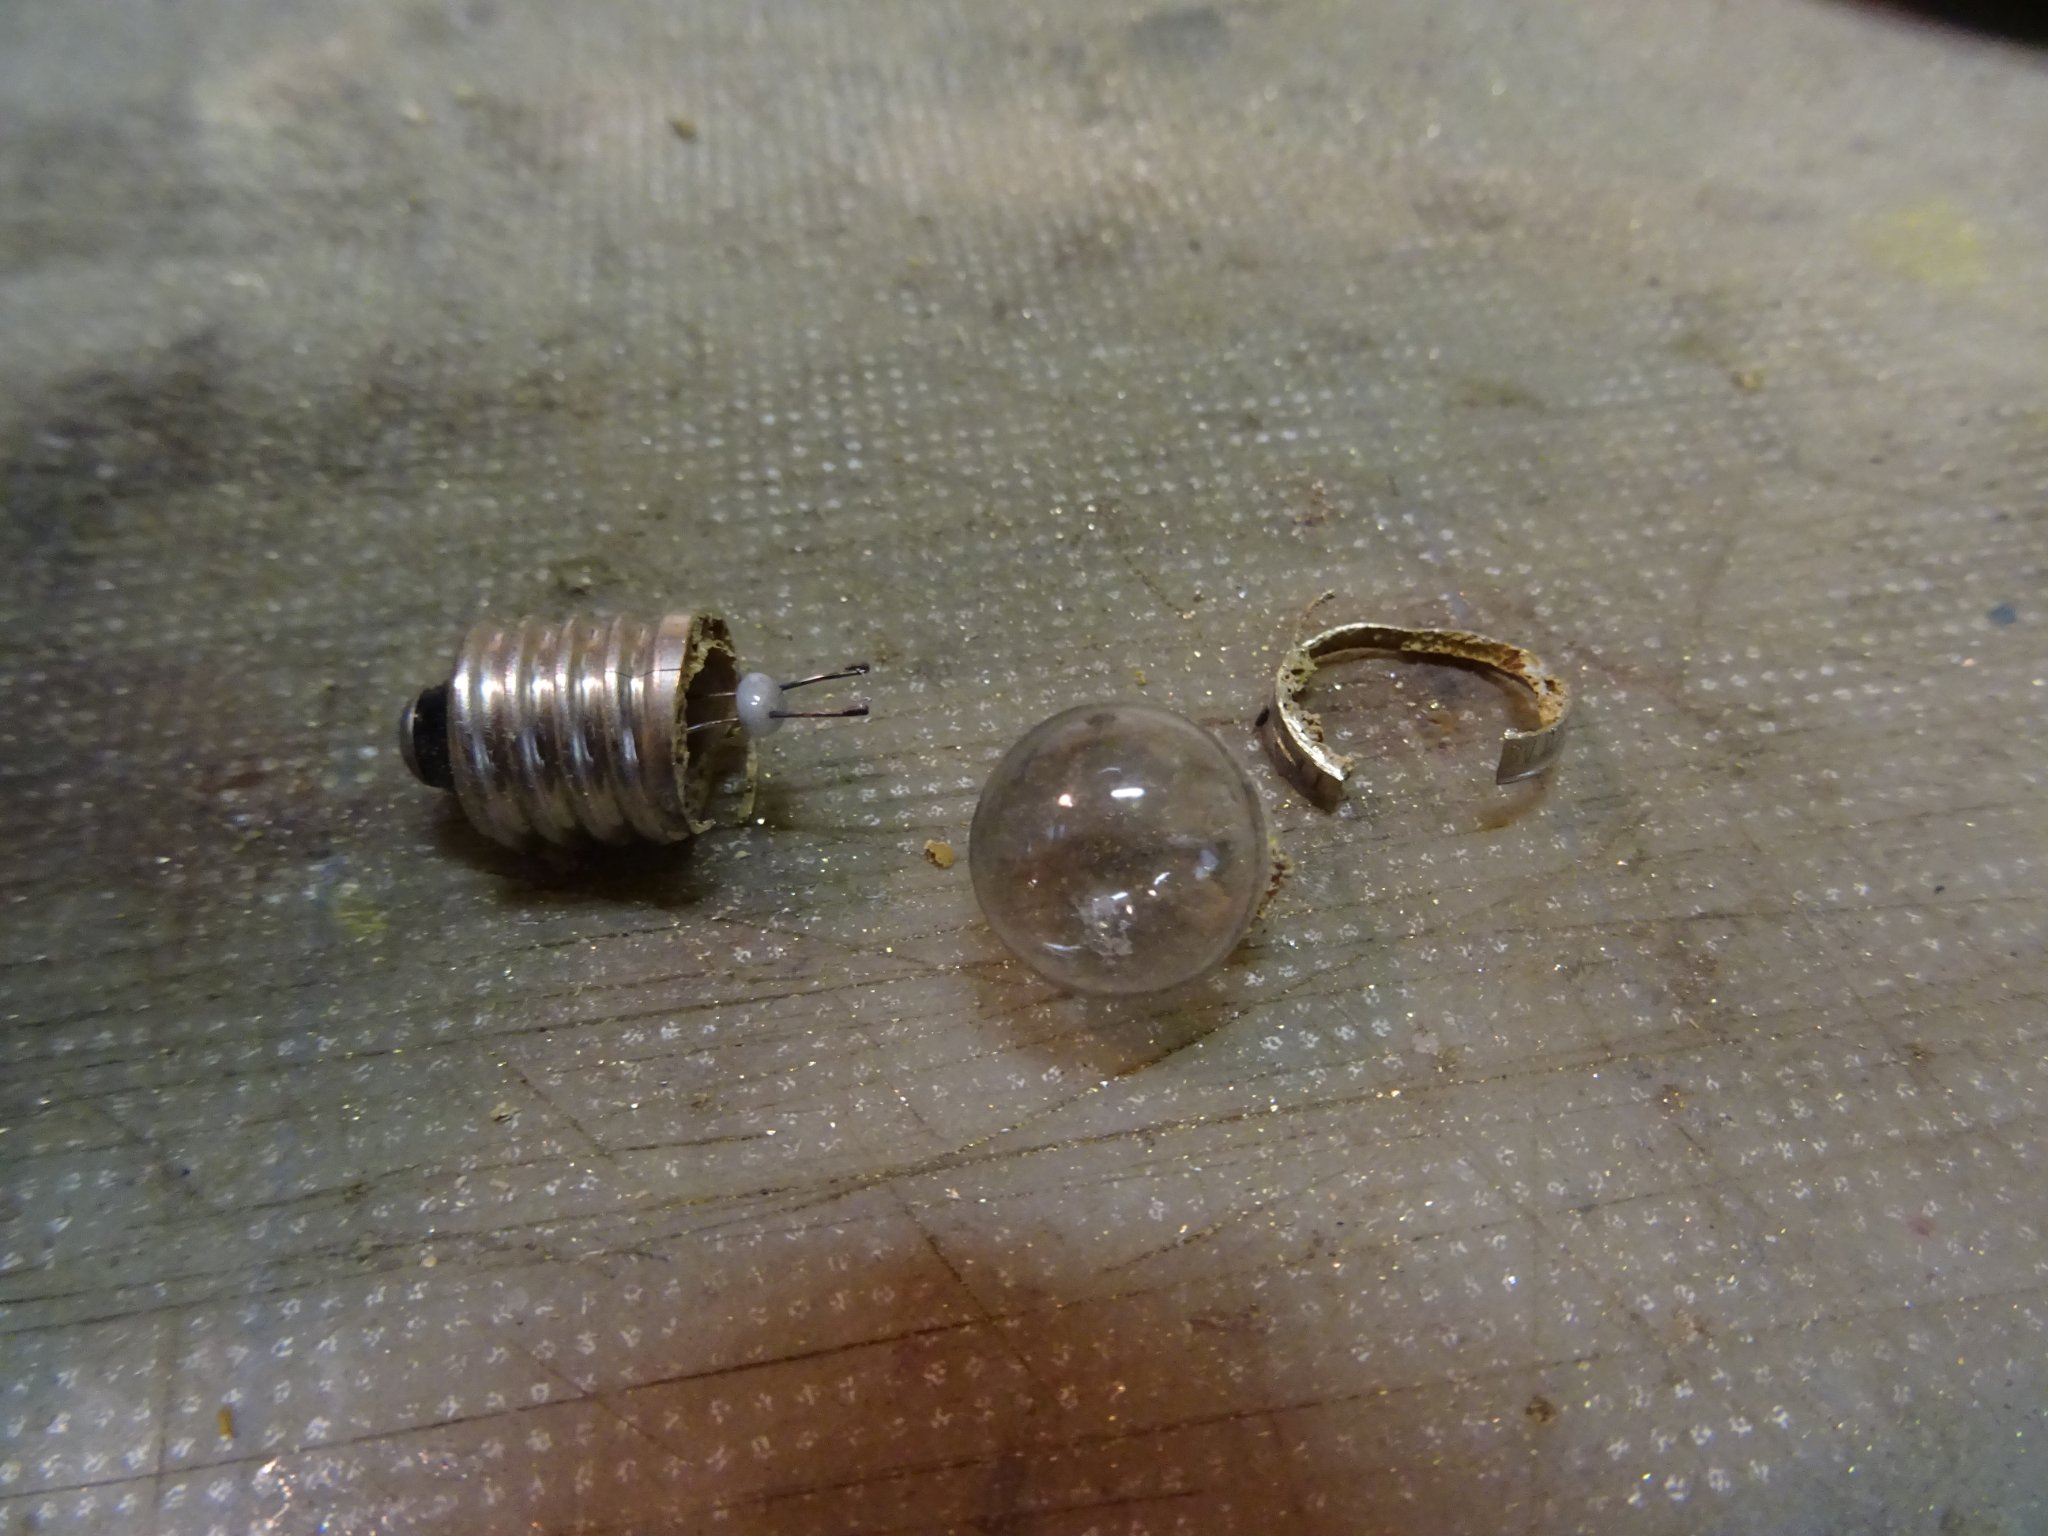
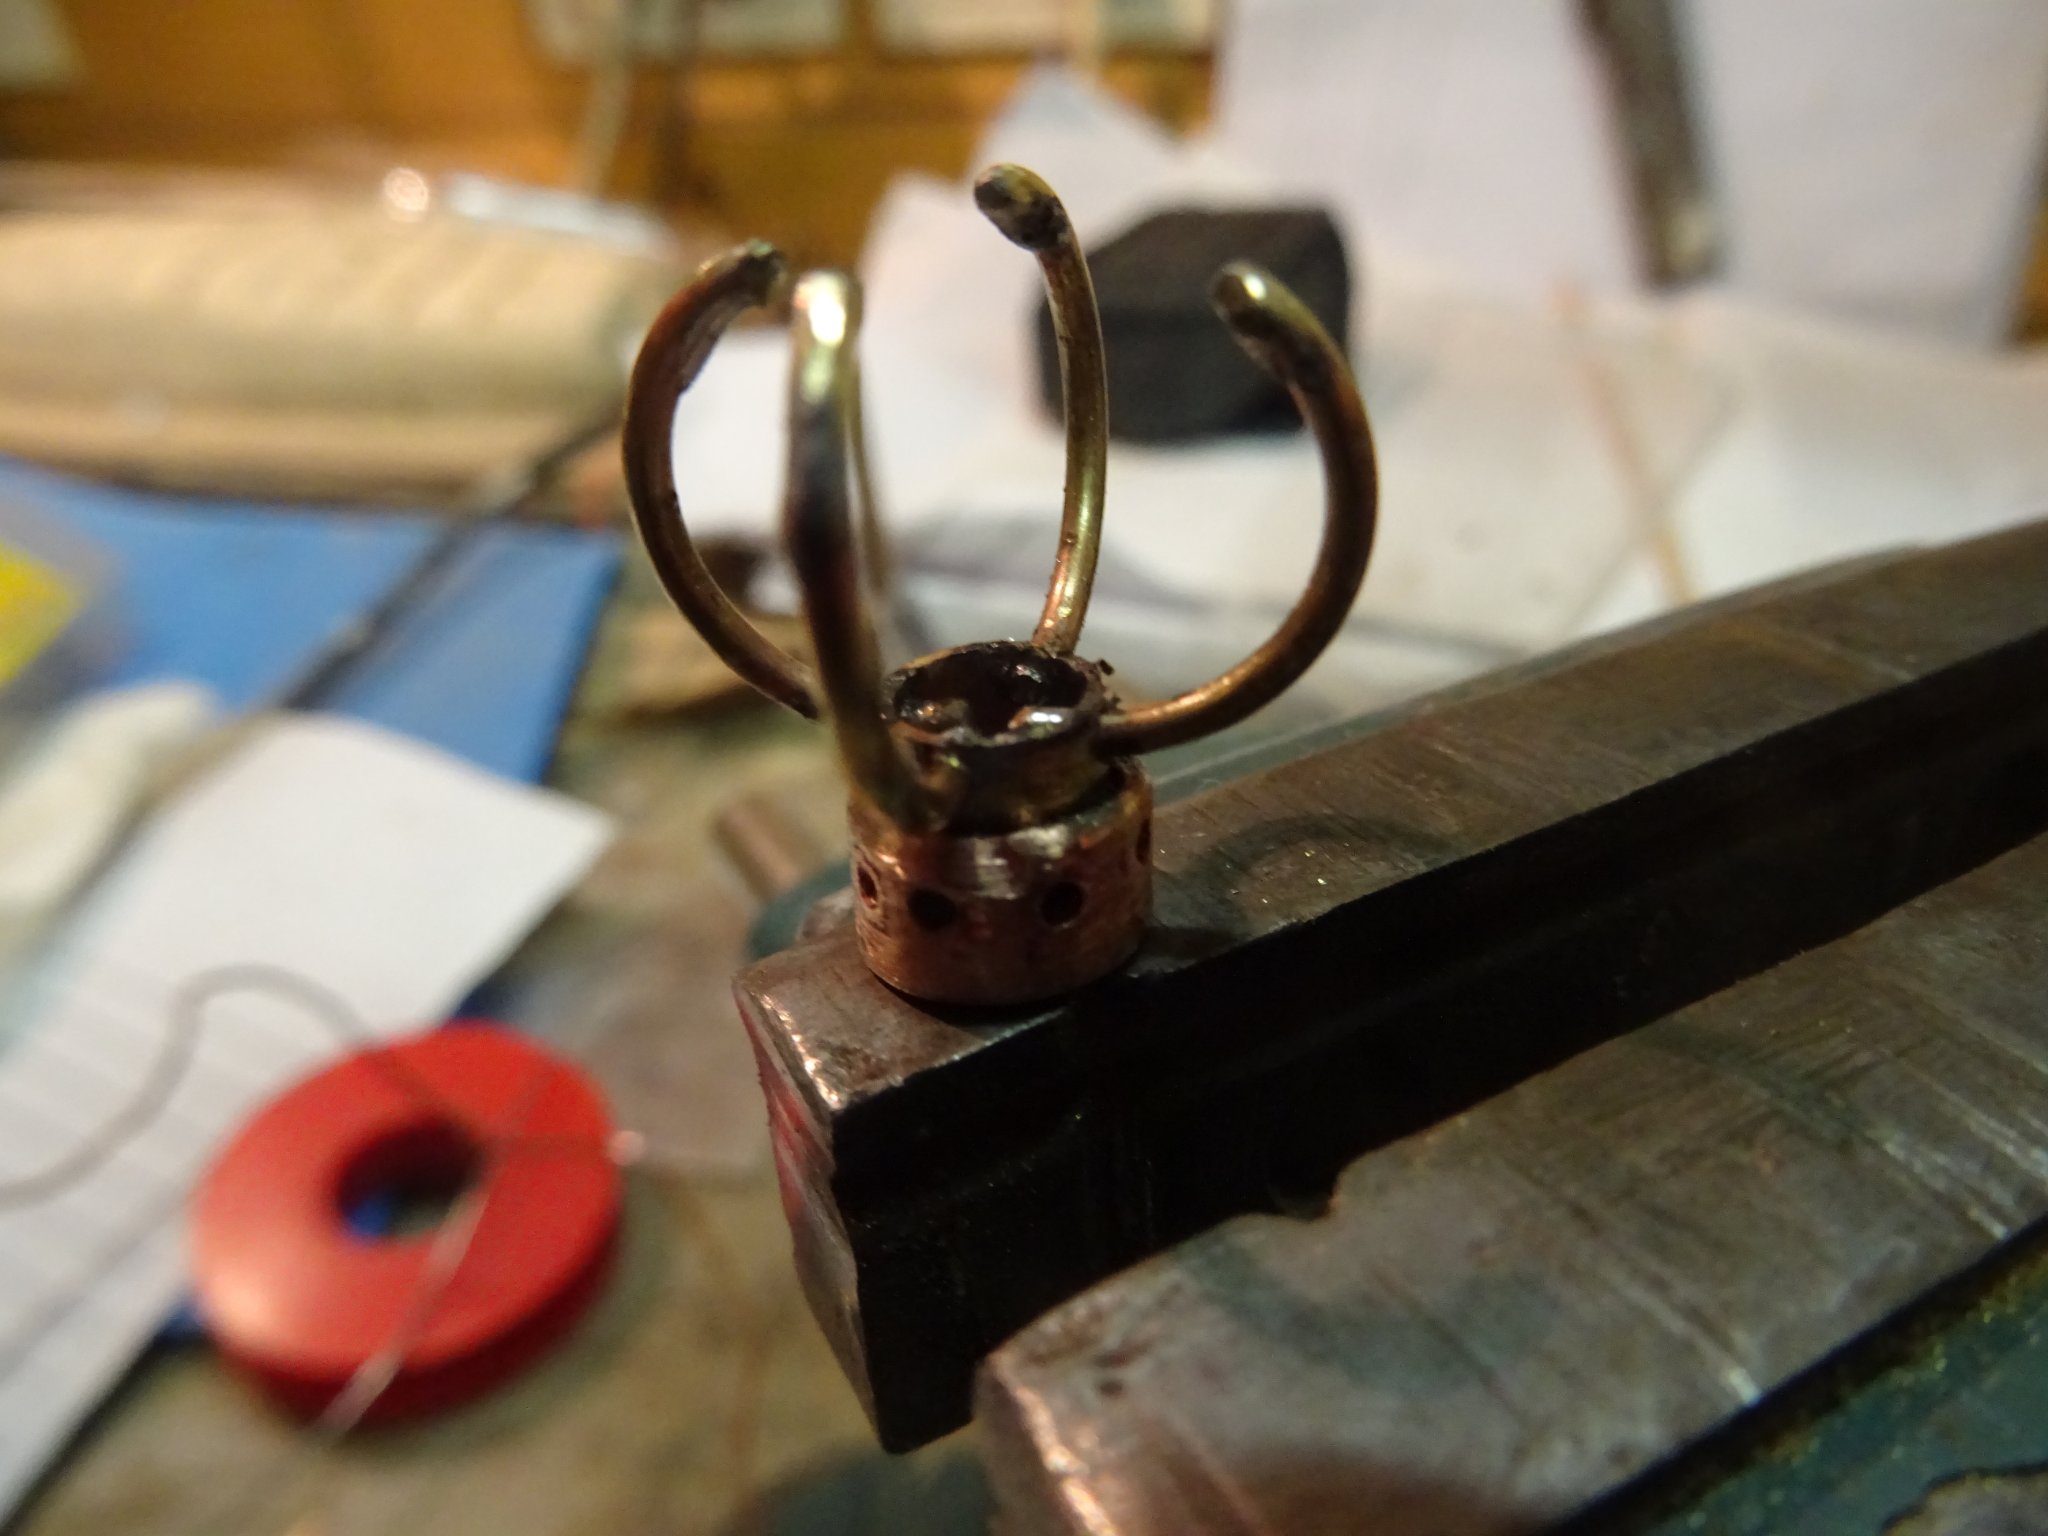
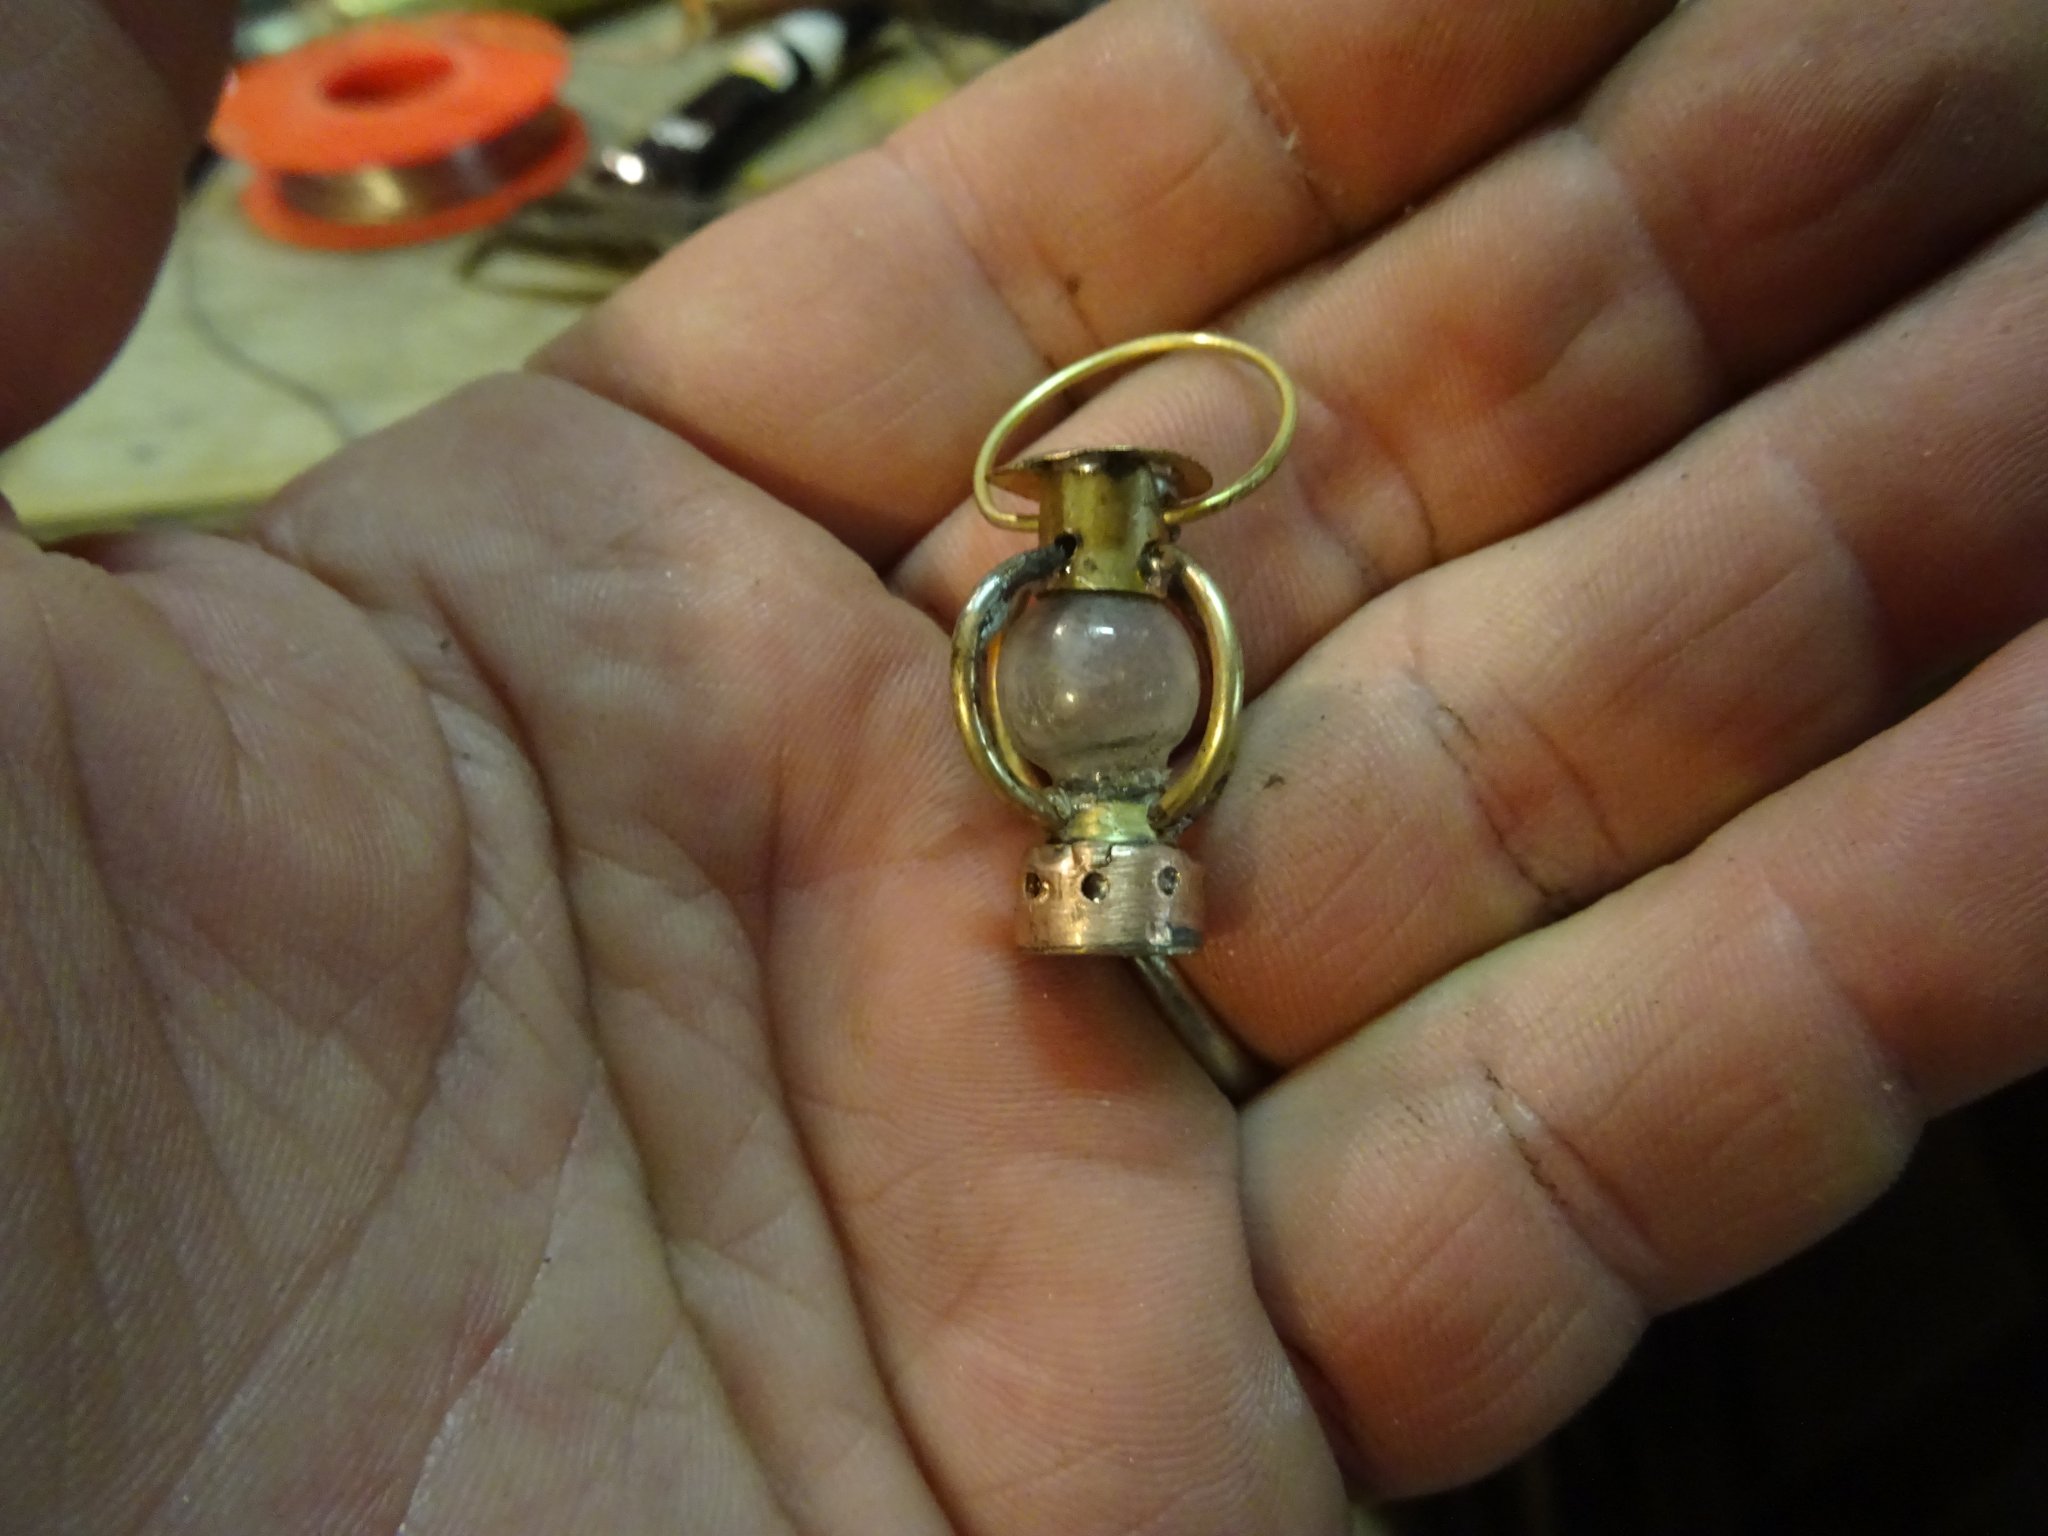
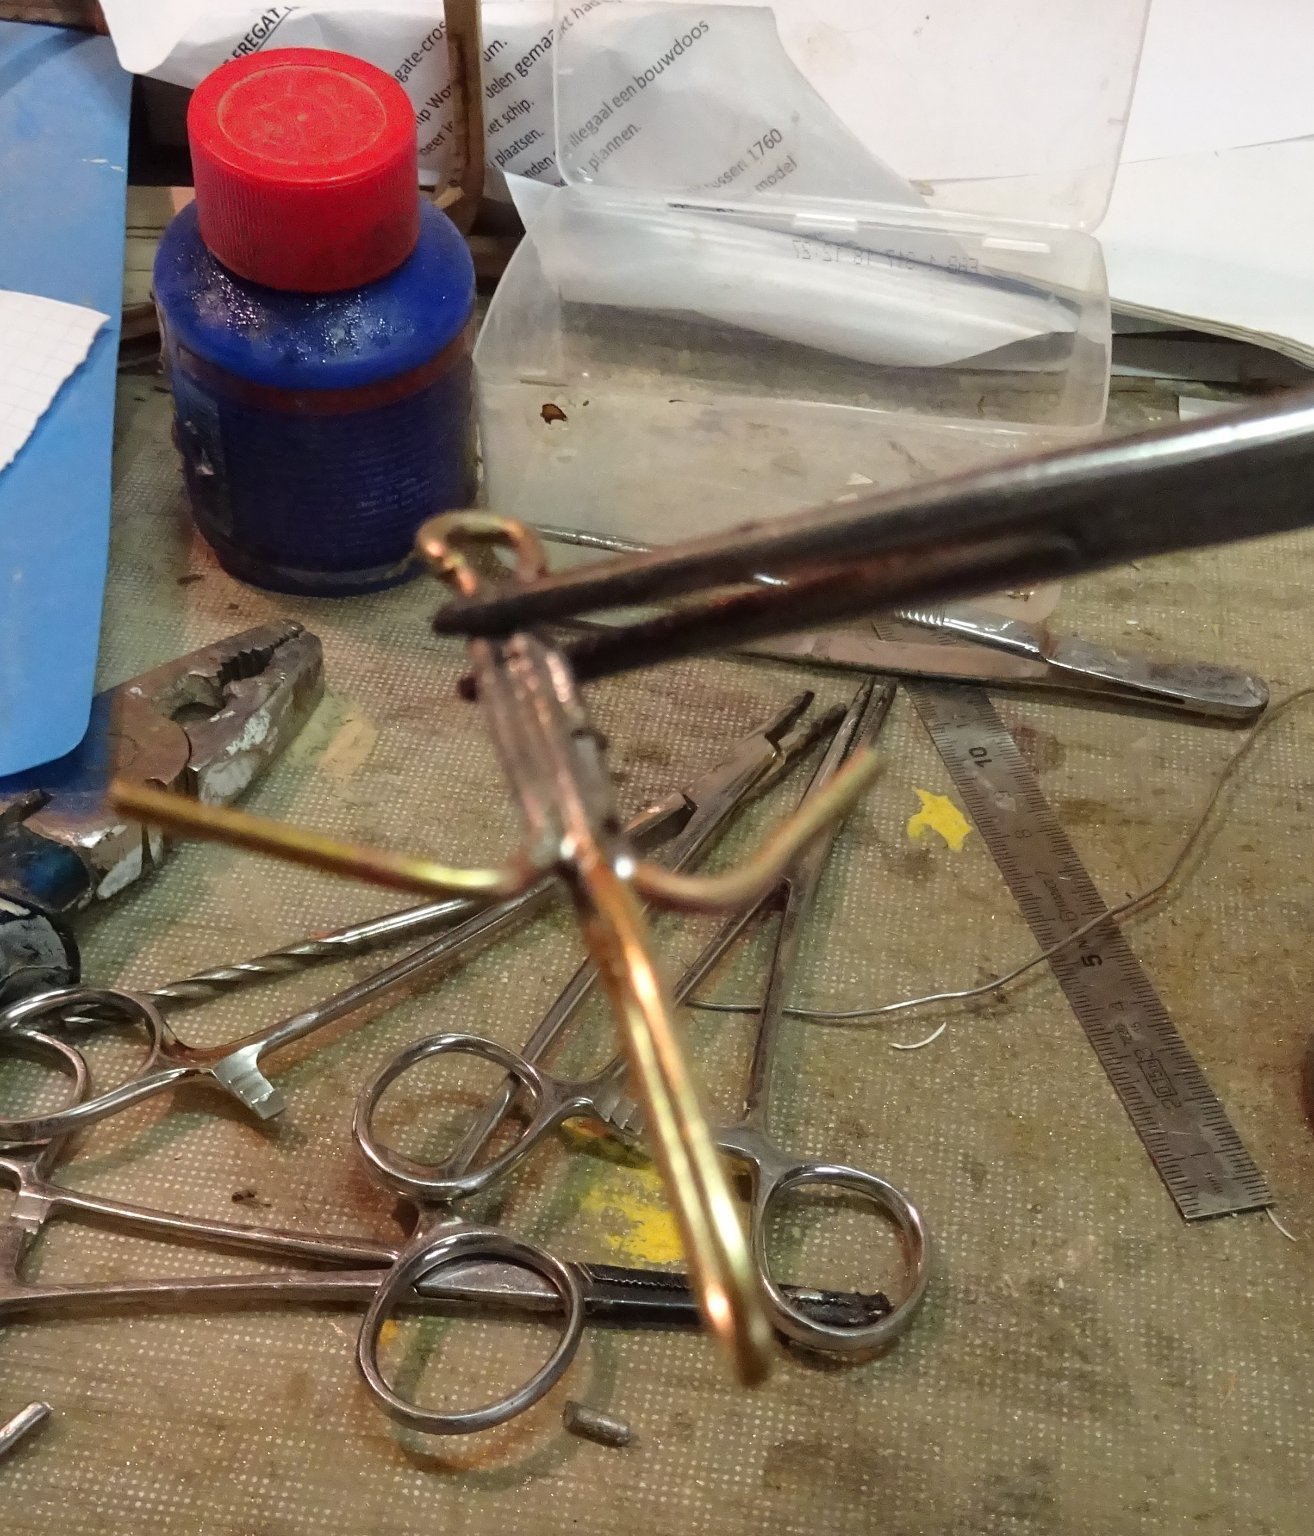
8.9. Lantern
The lantern is made of some pieces of brass and copper tubes and a broken bicycle lamp.
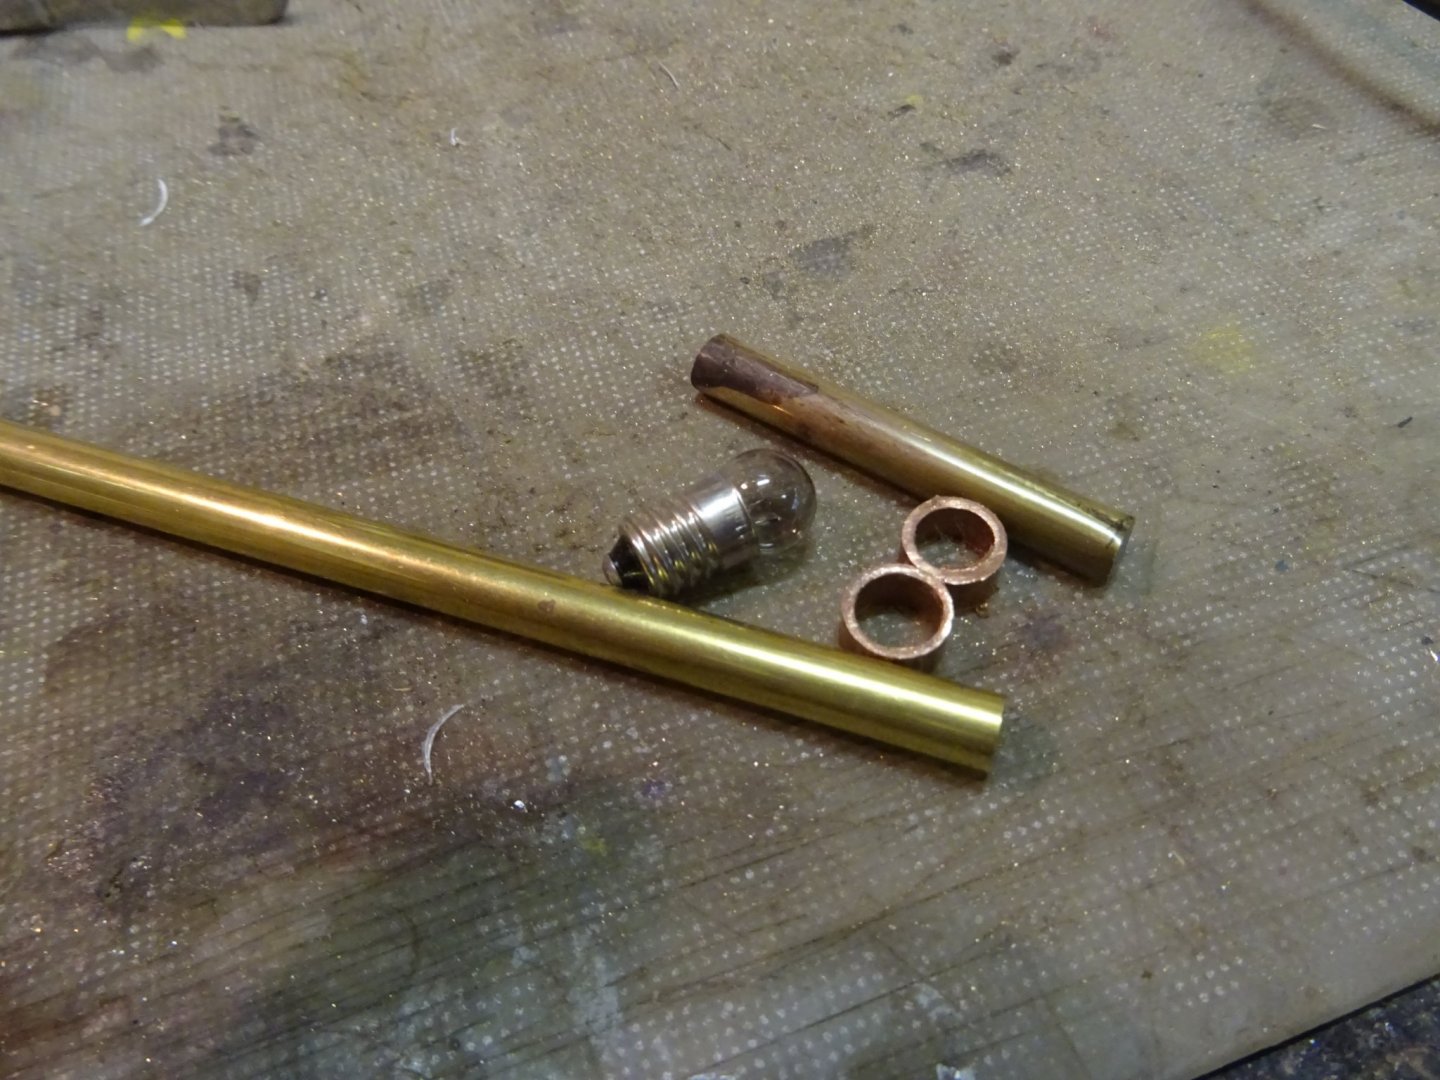
First I disassemble the lamp by sawing off the bulb.

Cutting the hat of the lantern.

The components of the lantern.
Assembling the lantern

The lantern
- Baker, Wintergreen, vaddoc and 1 other
-
4
-
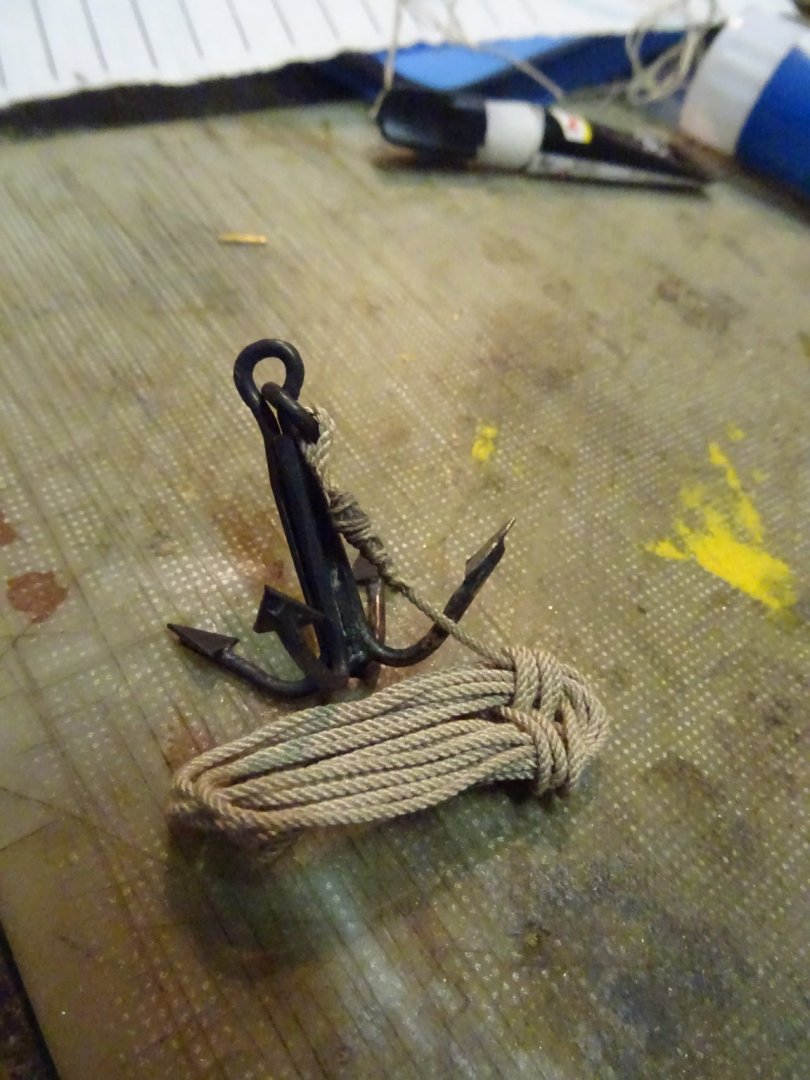
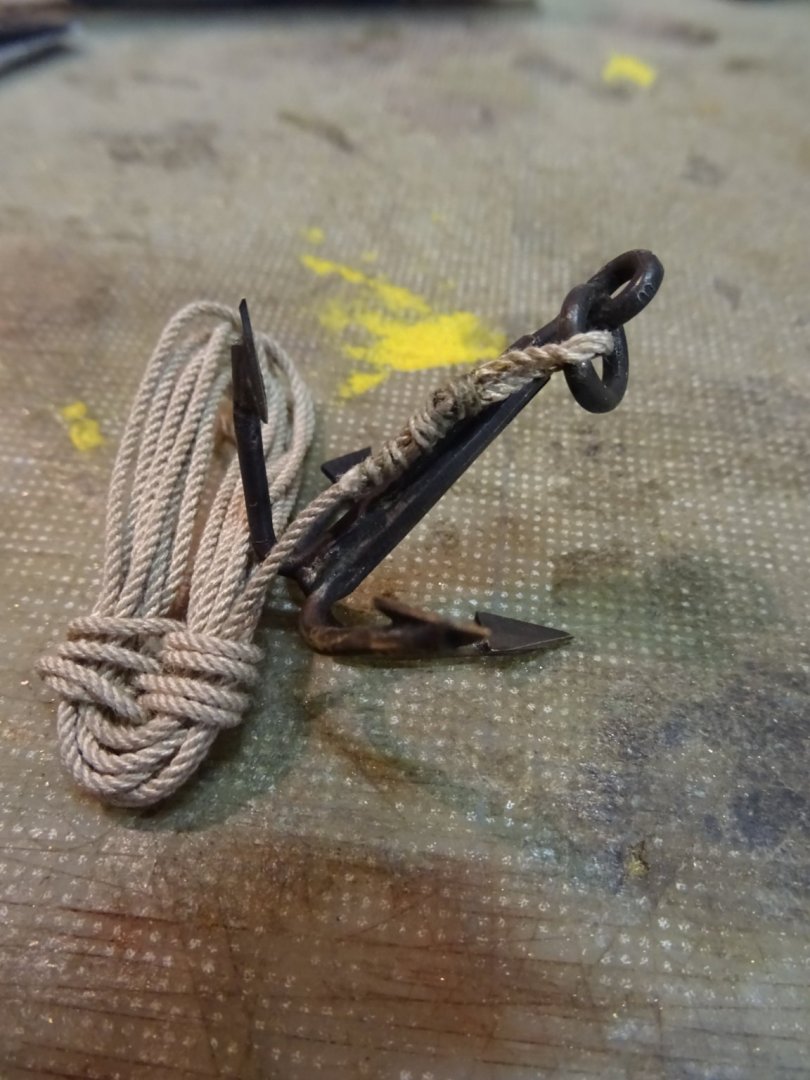
8.8. Grapnel
The grapnel is made of two pieces of brass rod. They are first plied like described by Erik Ronnberg ...
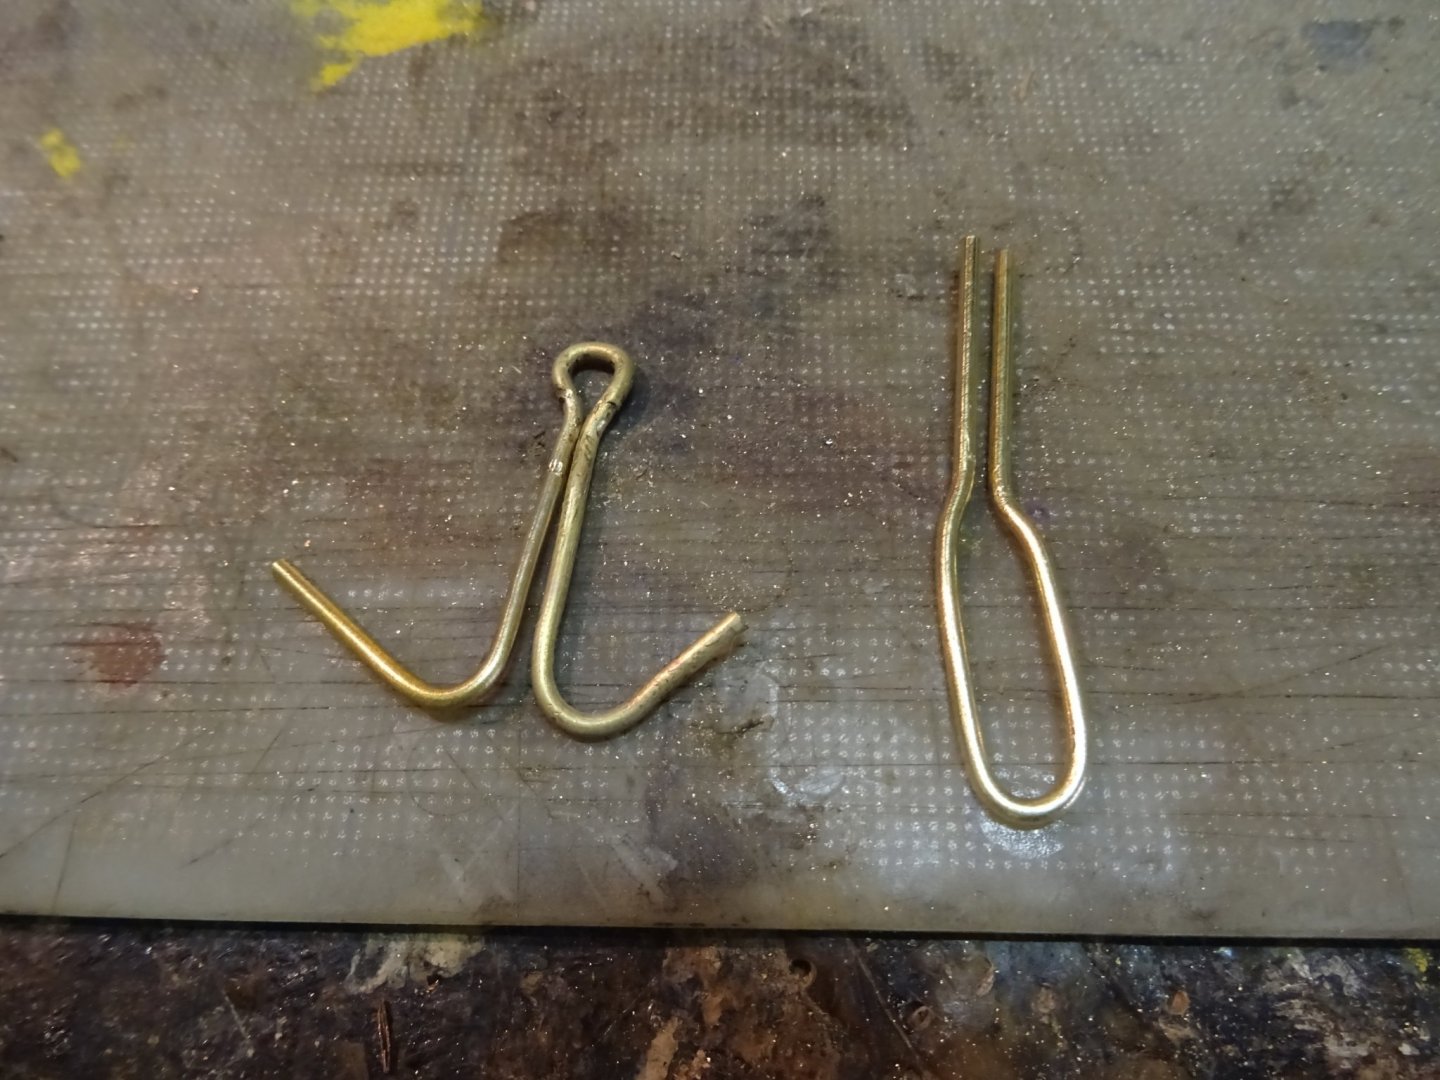
Then they are soldered together.

Then the closed loop at the bottom is cut open and plied in the shape of the arms of the grapnel. The grapnel is then finished by filing it in shape and soldering flukes at the four arms.
-
-
-
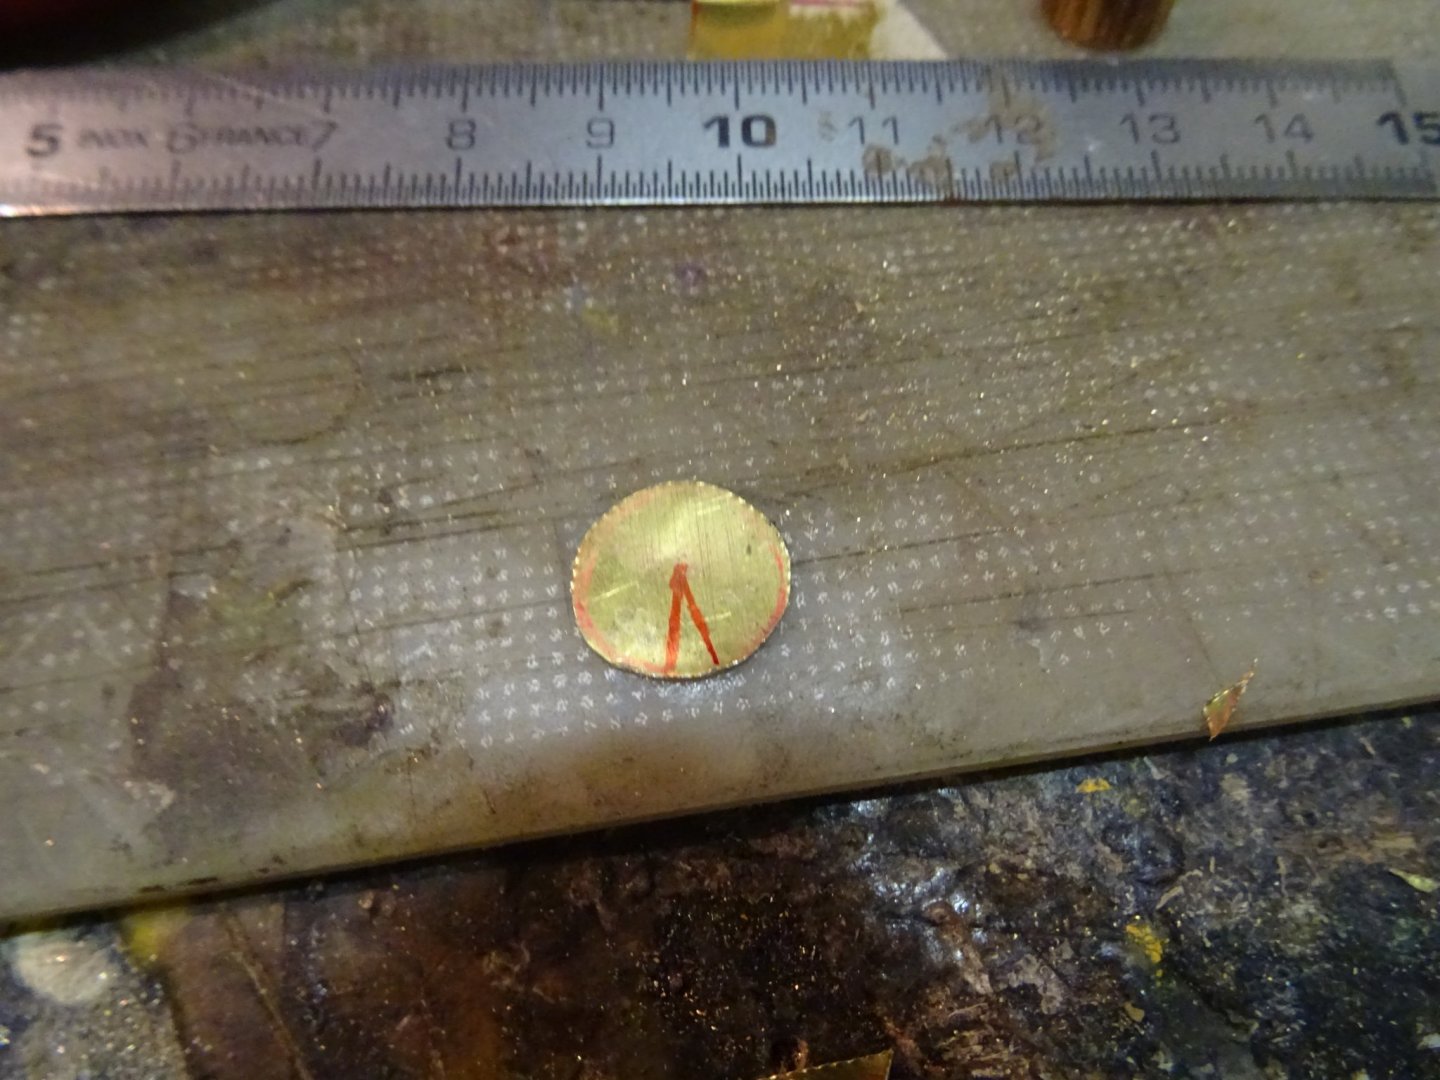
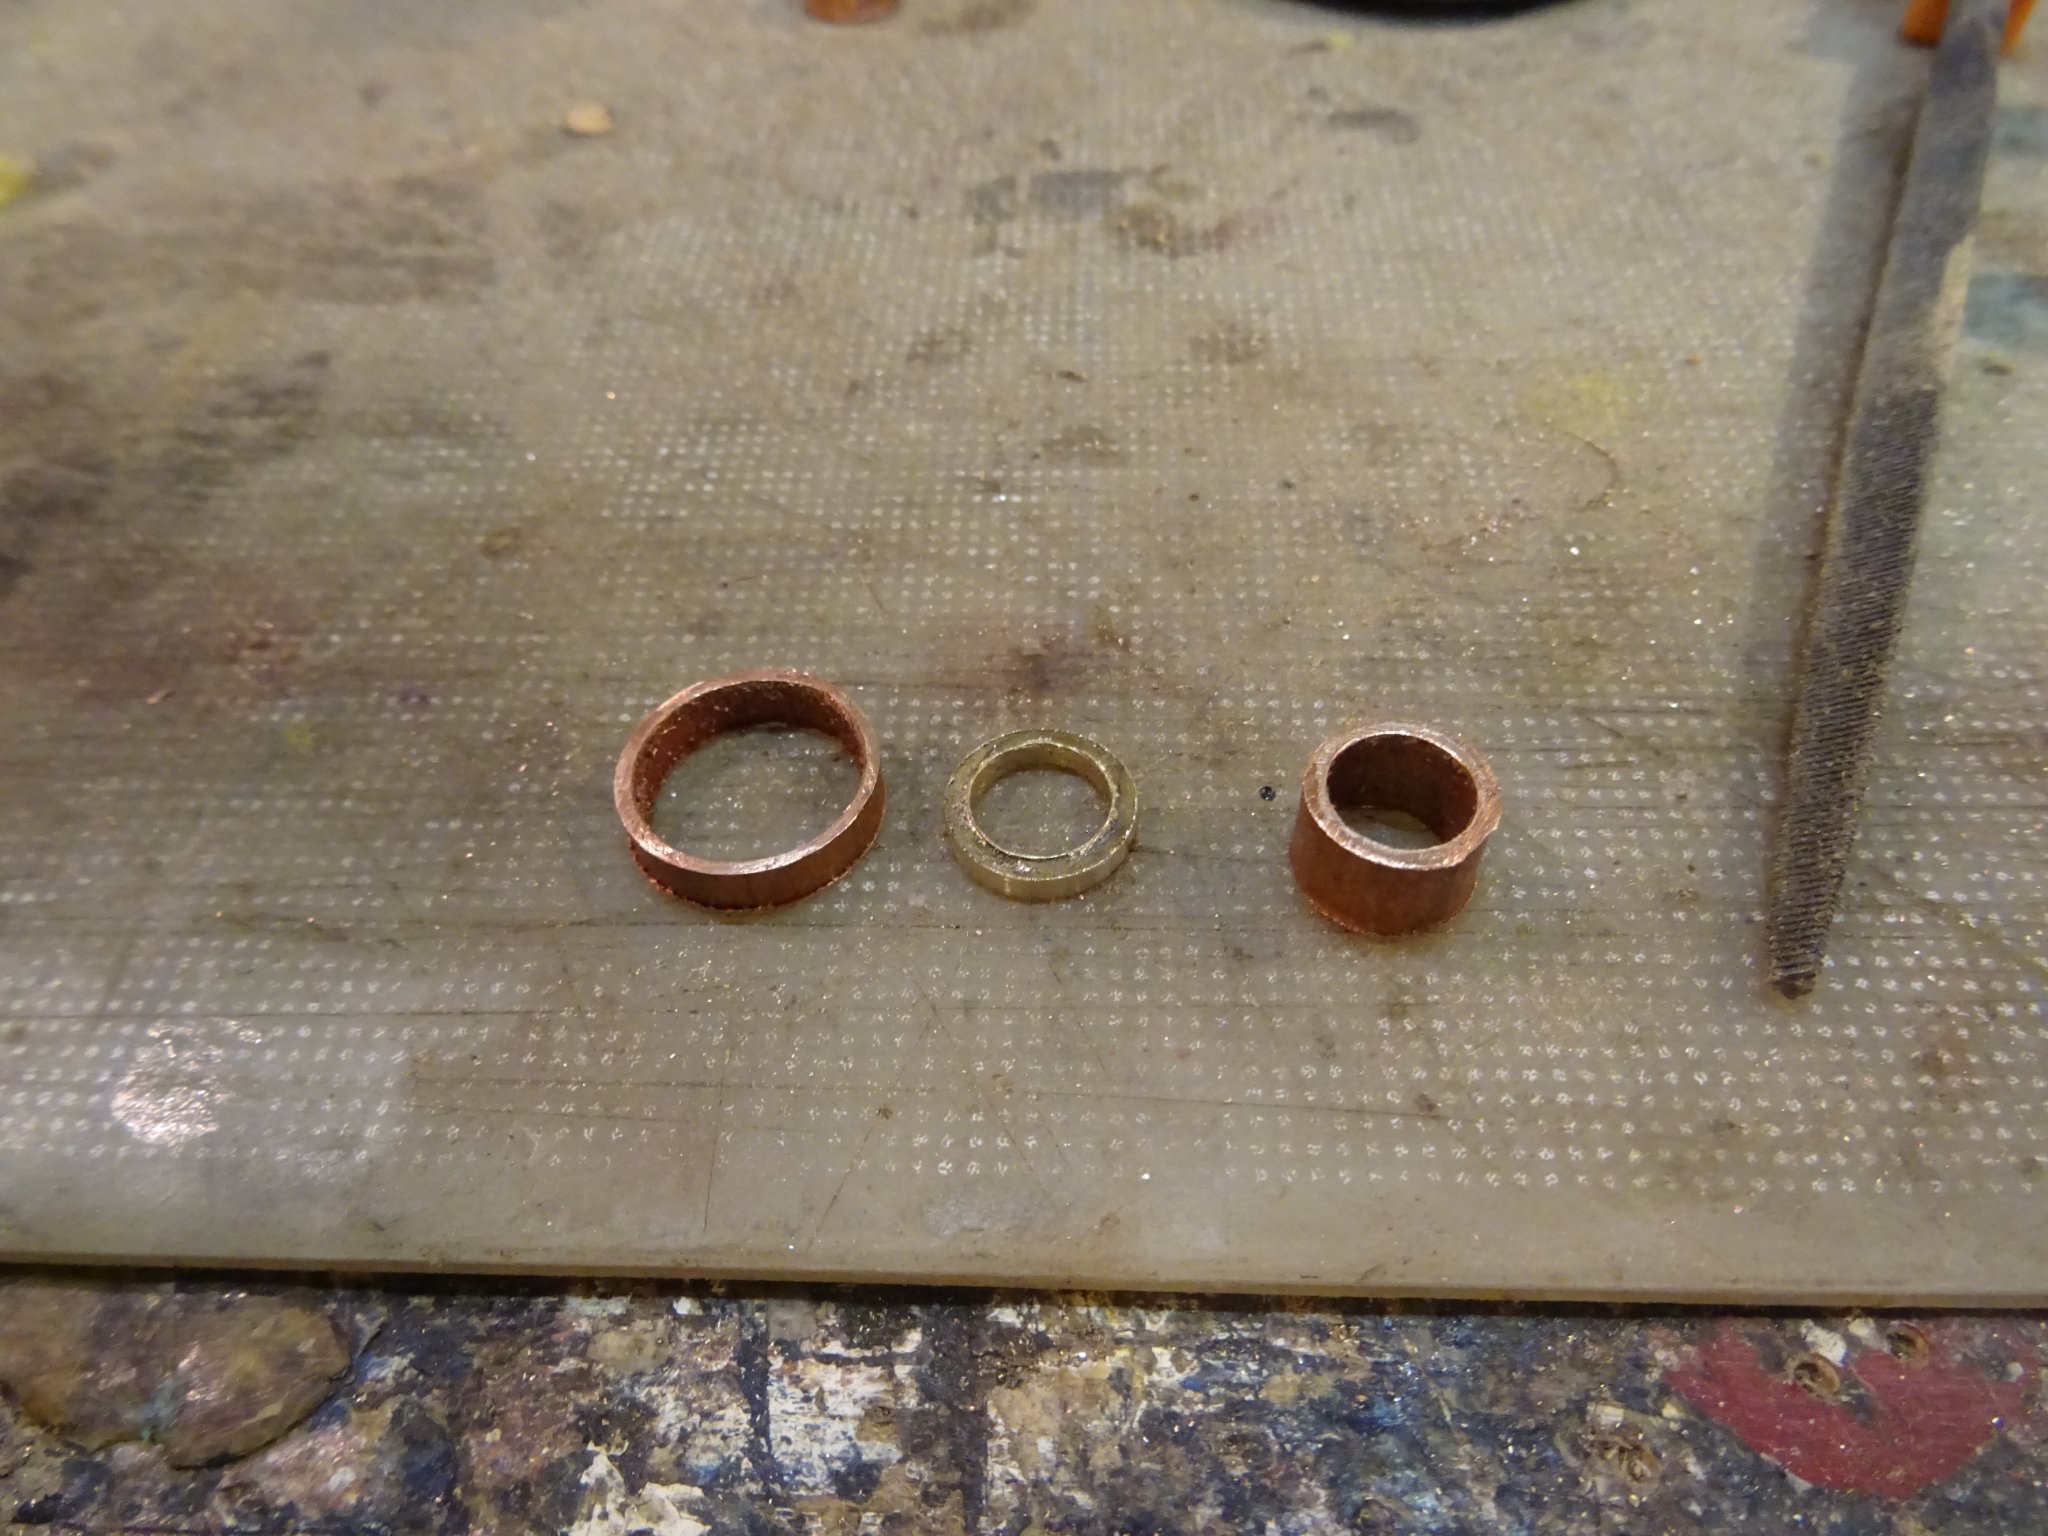
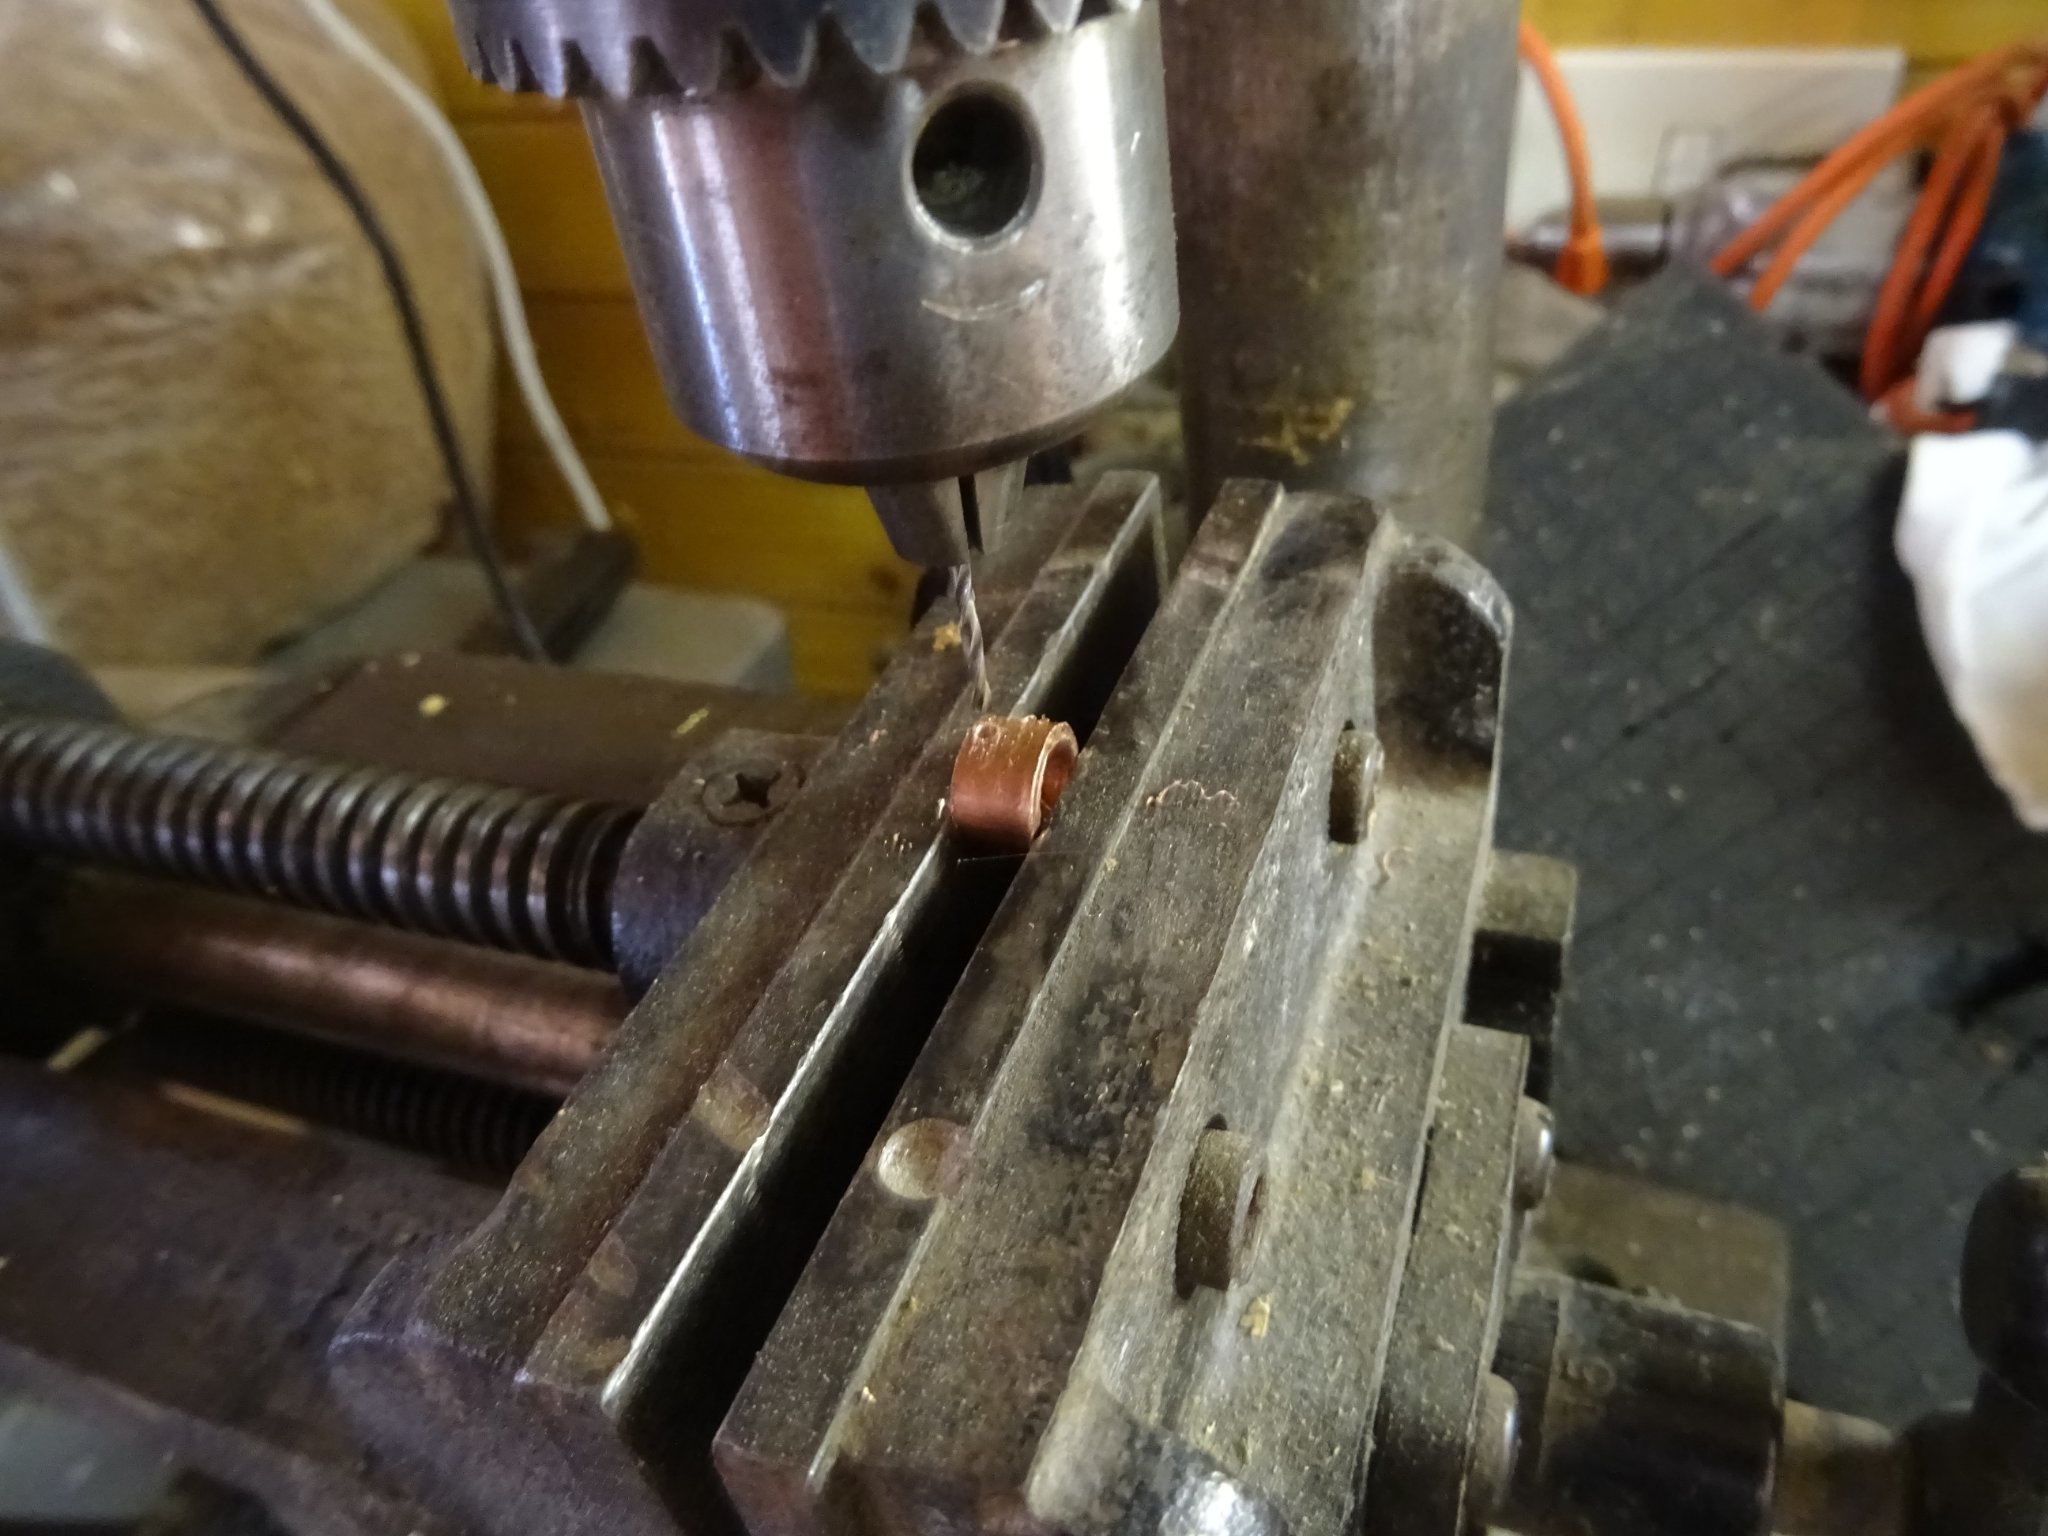
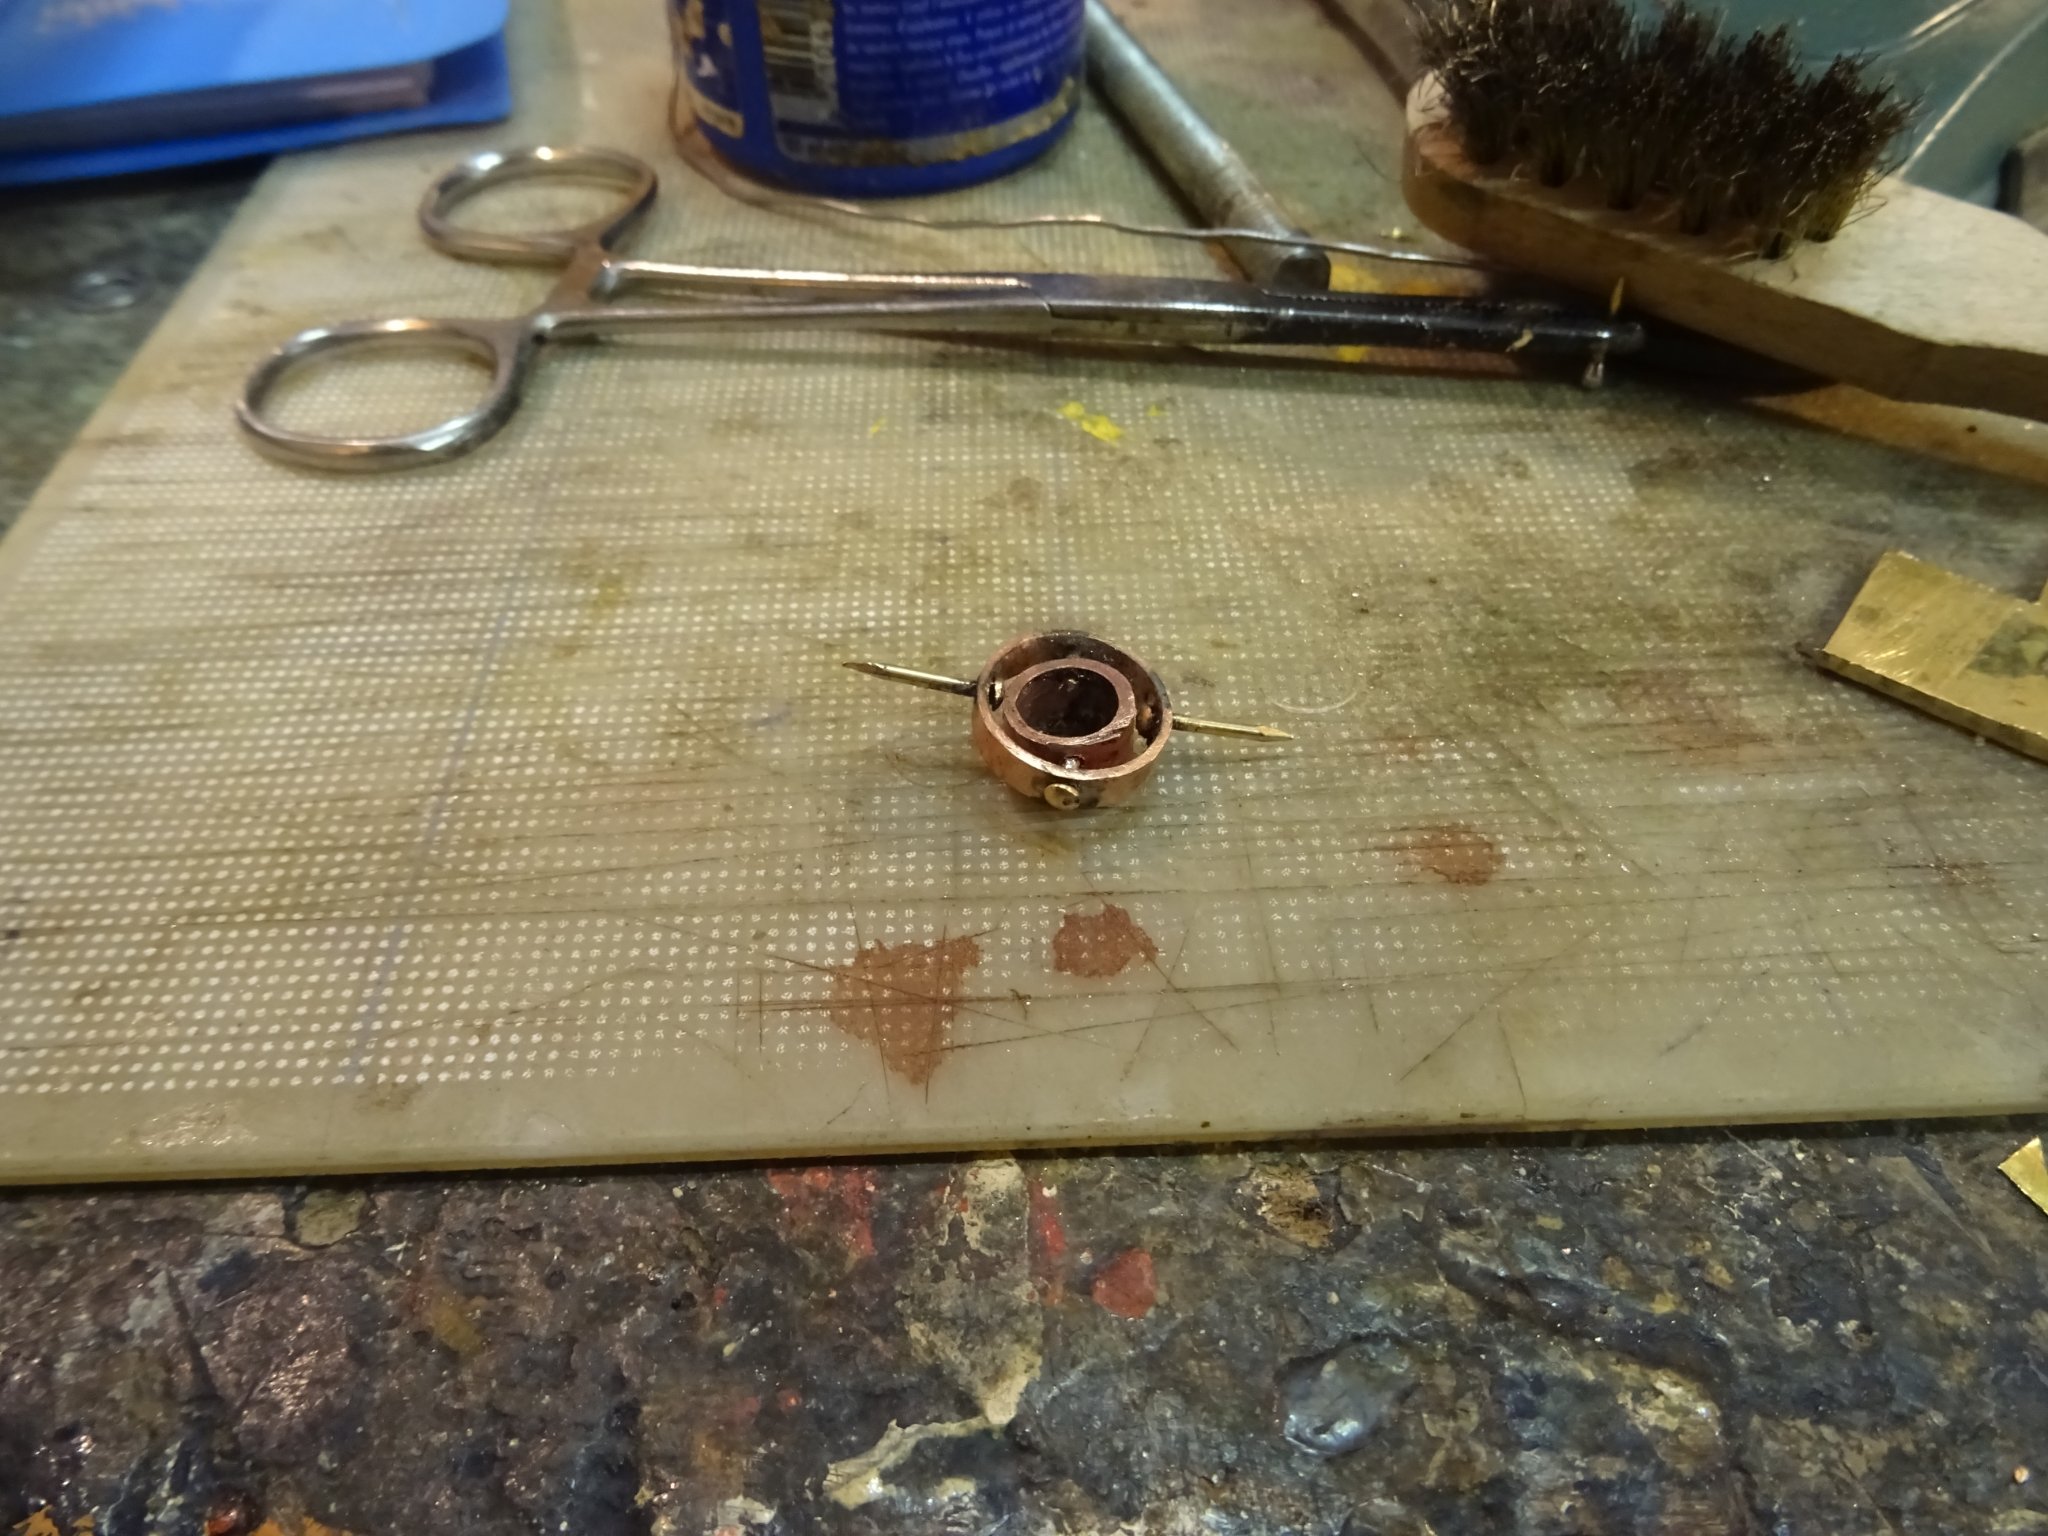
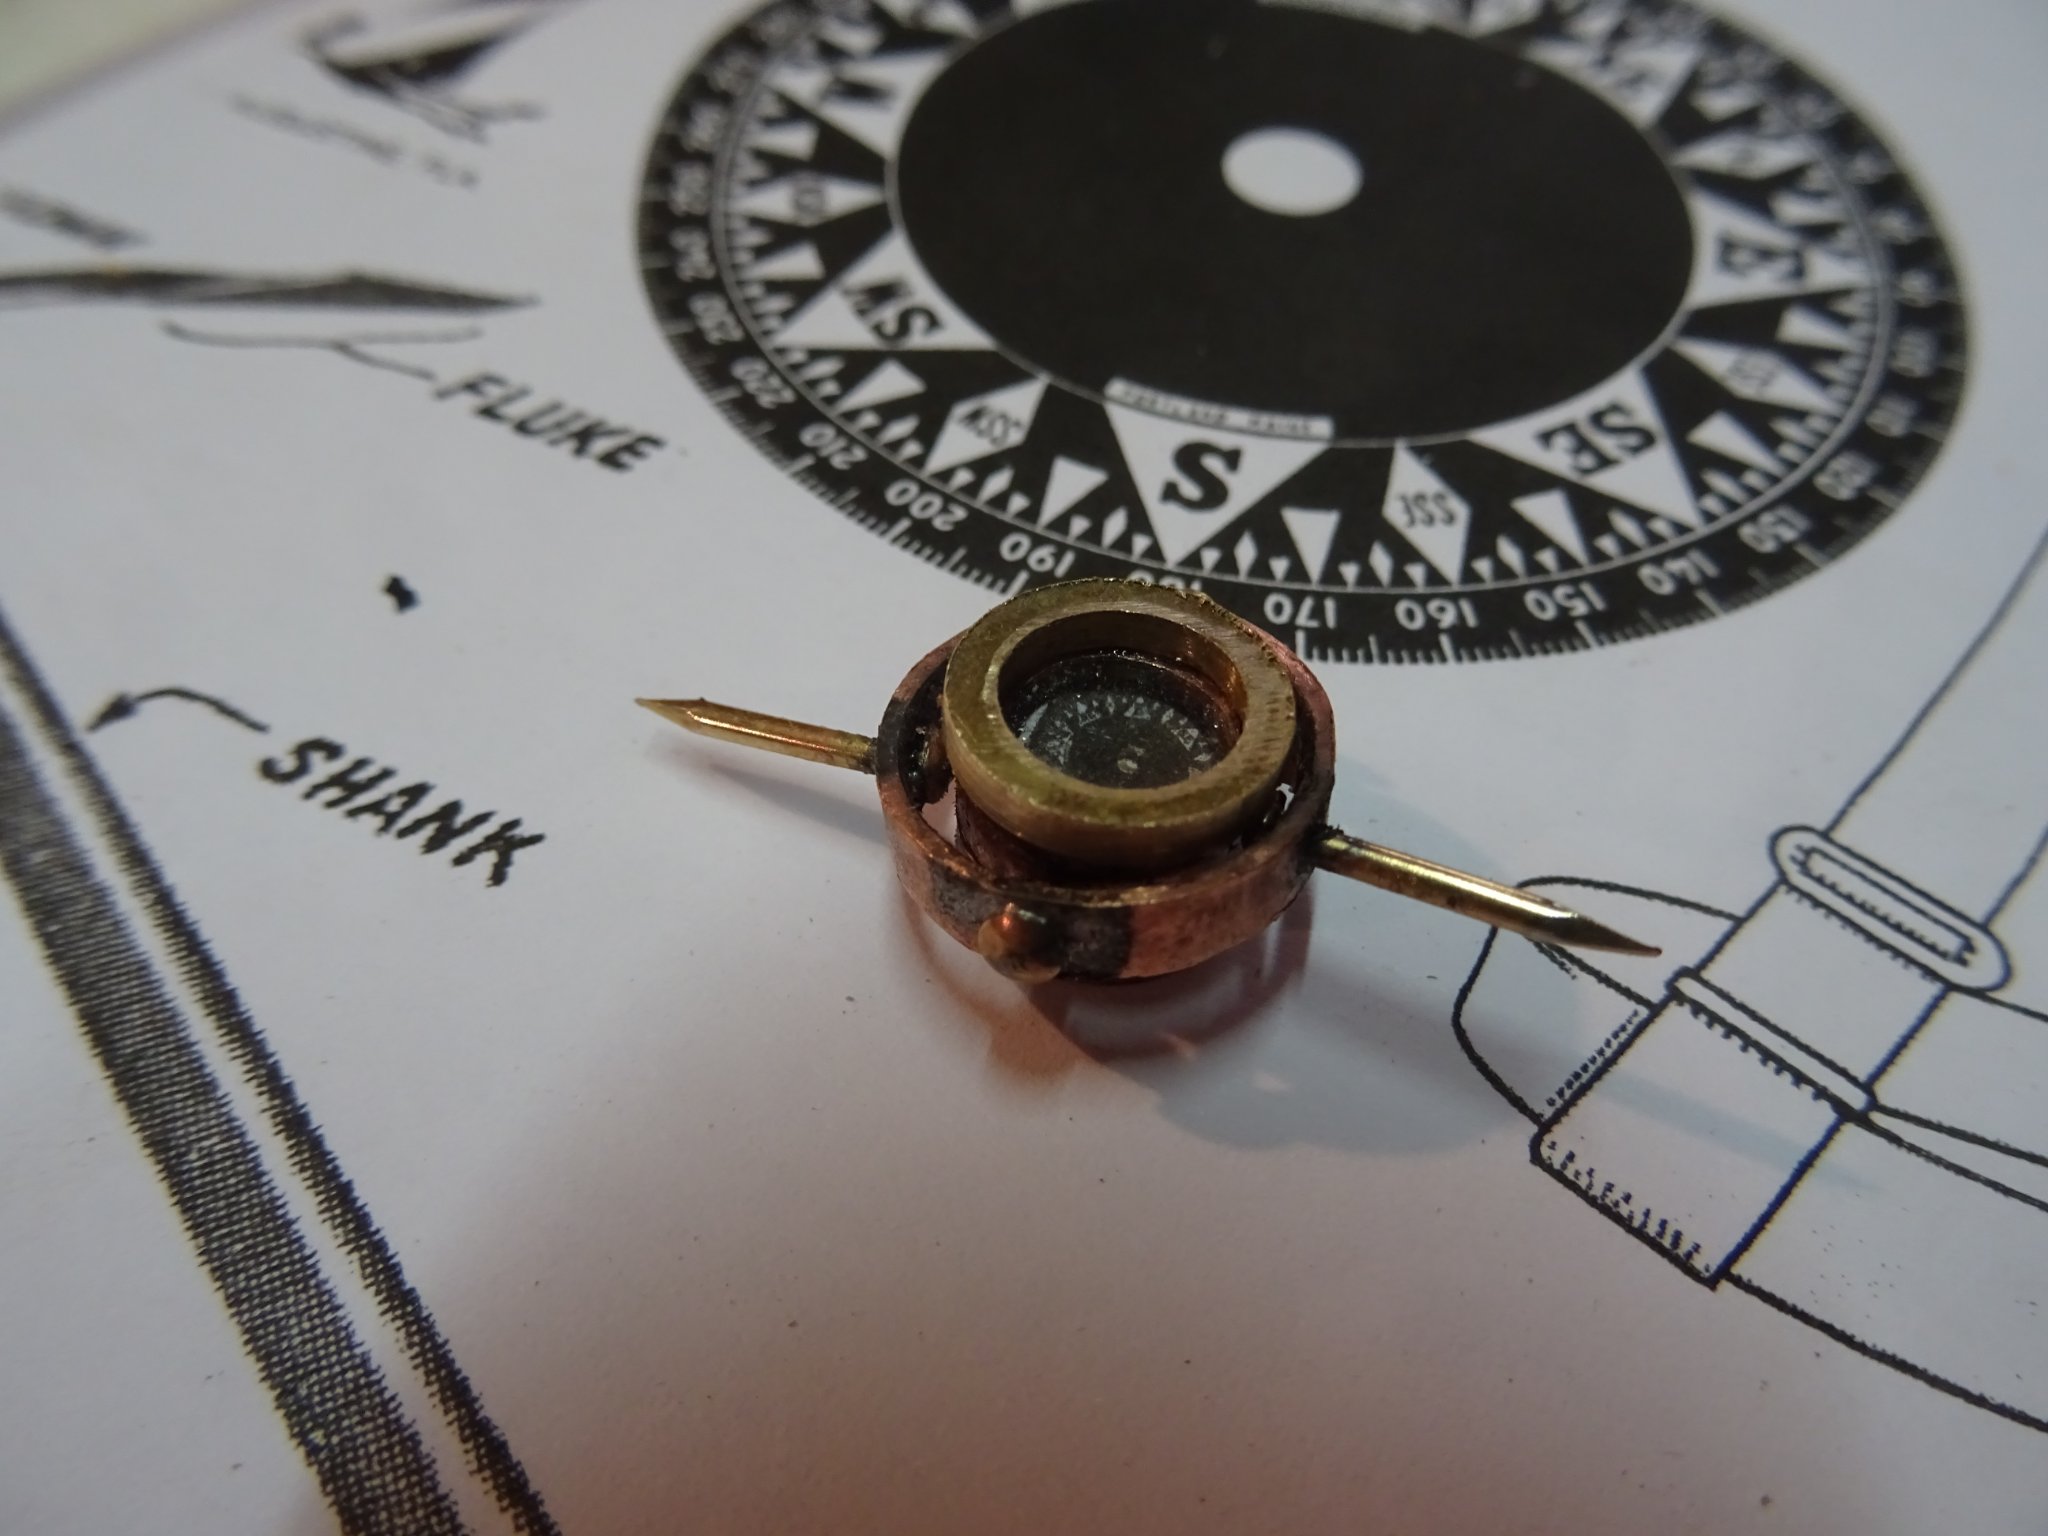
8.7. Boat compass
The magnetic compass is mainly composed of some pieces of copper and brass tubes which are sawn into rings.
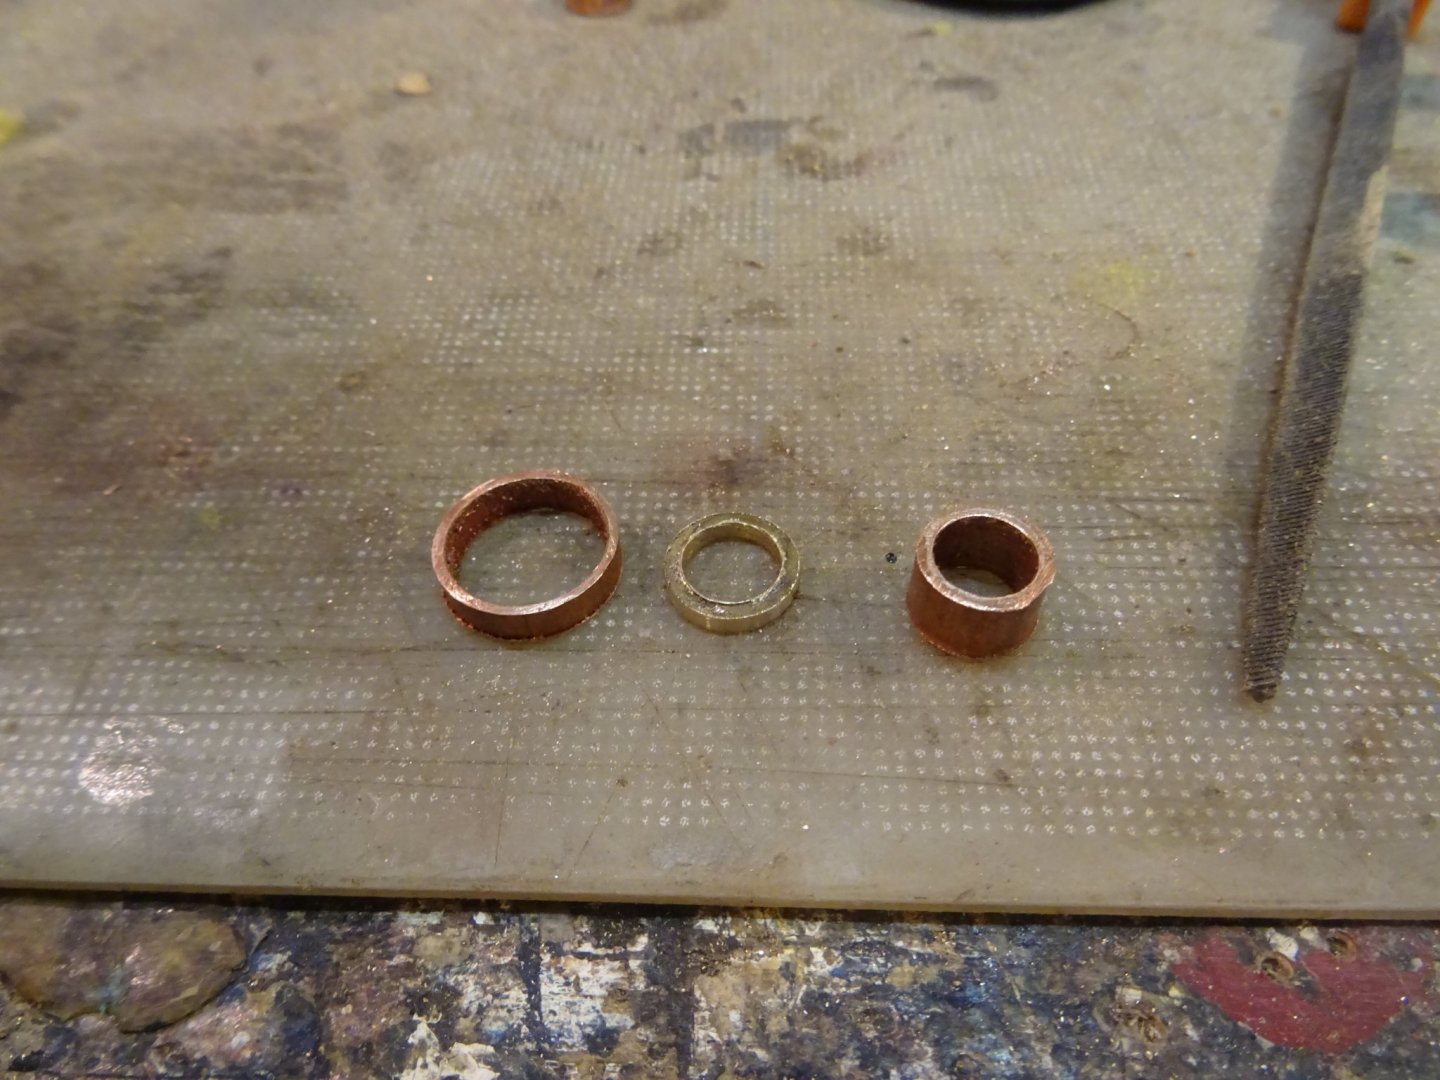
The most right ring will be the compass bowl. A thin round slice of brass is soldered at the bottom to form the bowl. Then I drill two holes at the topside opposite to each other.
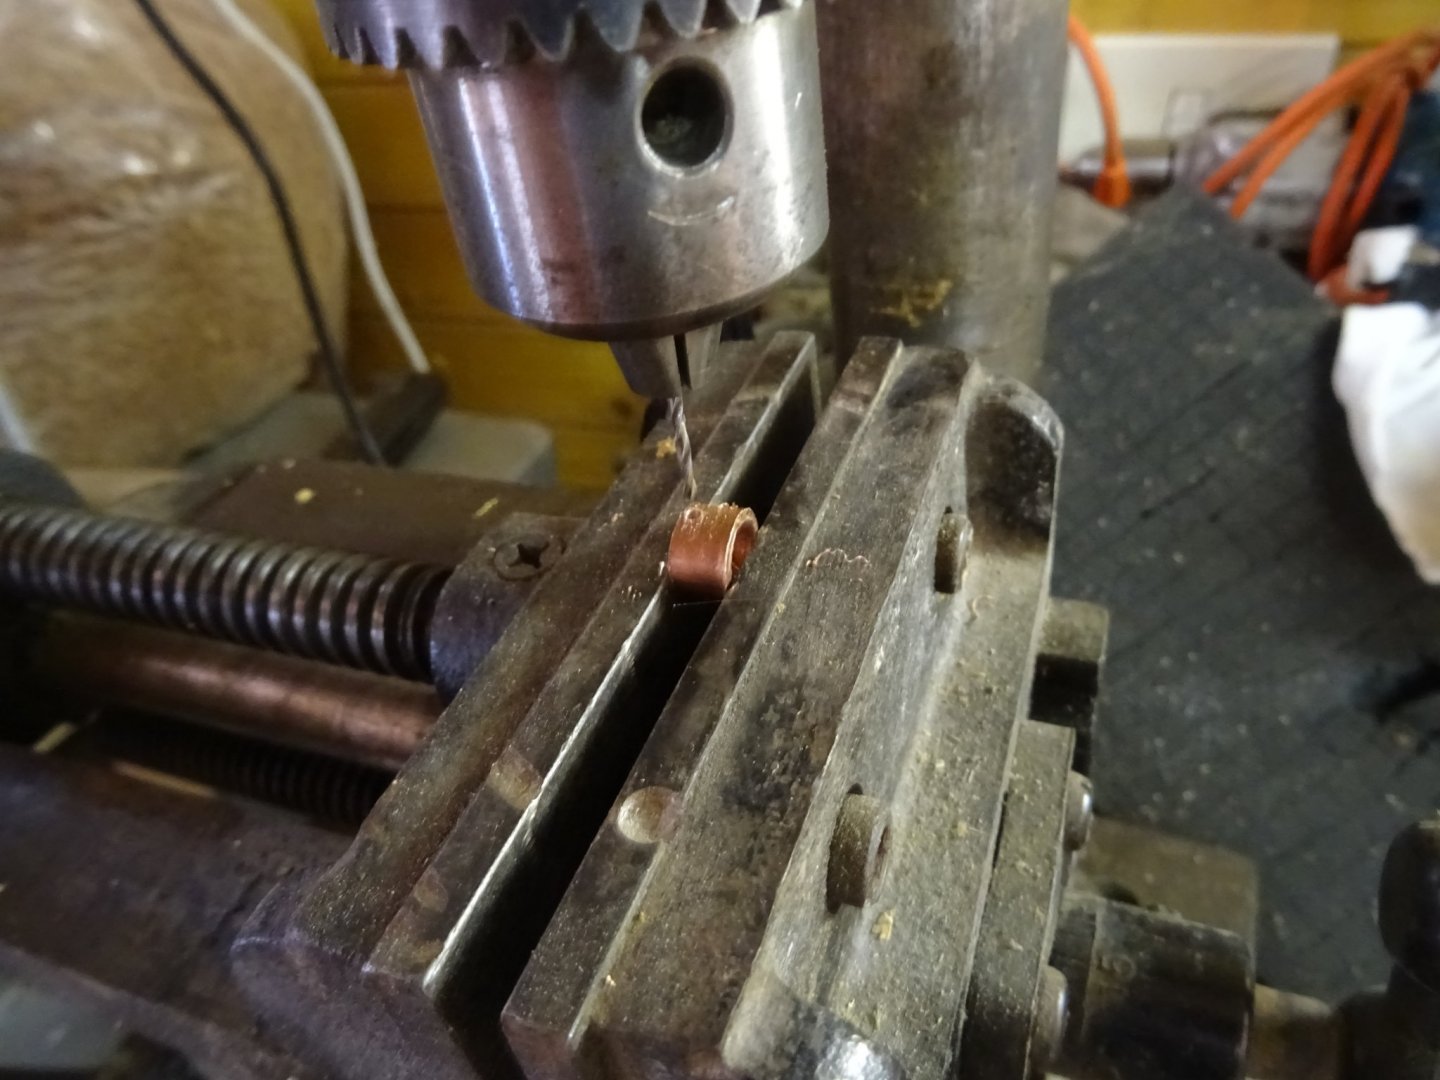
The two holes will hold the inner gimbal pivots. The largest ring of two pictures ago is the gimbal ring. In that ring I drill also two holes and two brass nails from the outer gimbal pivots.

The compass card is a scale photocopy of an image of a compass card.
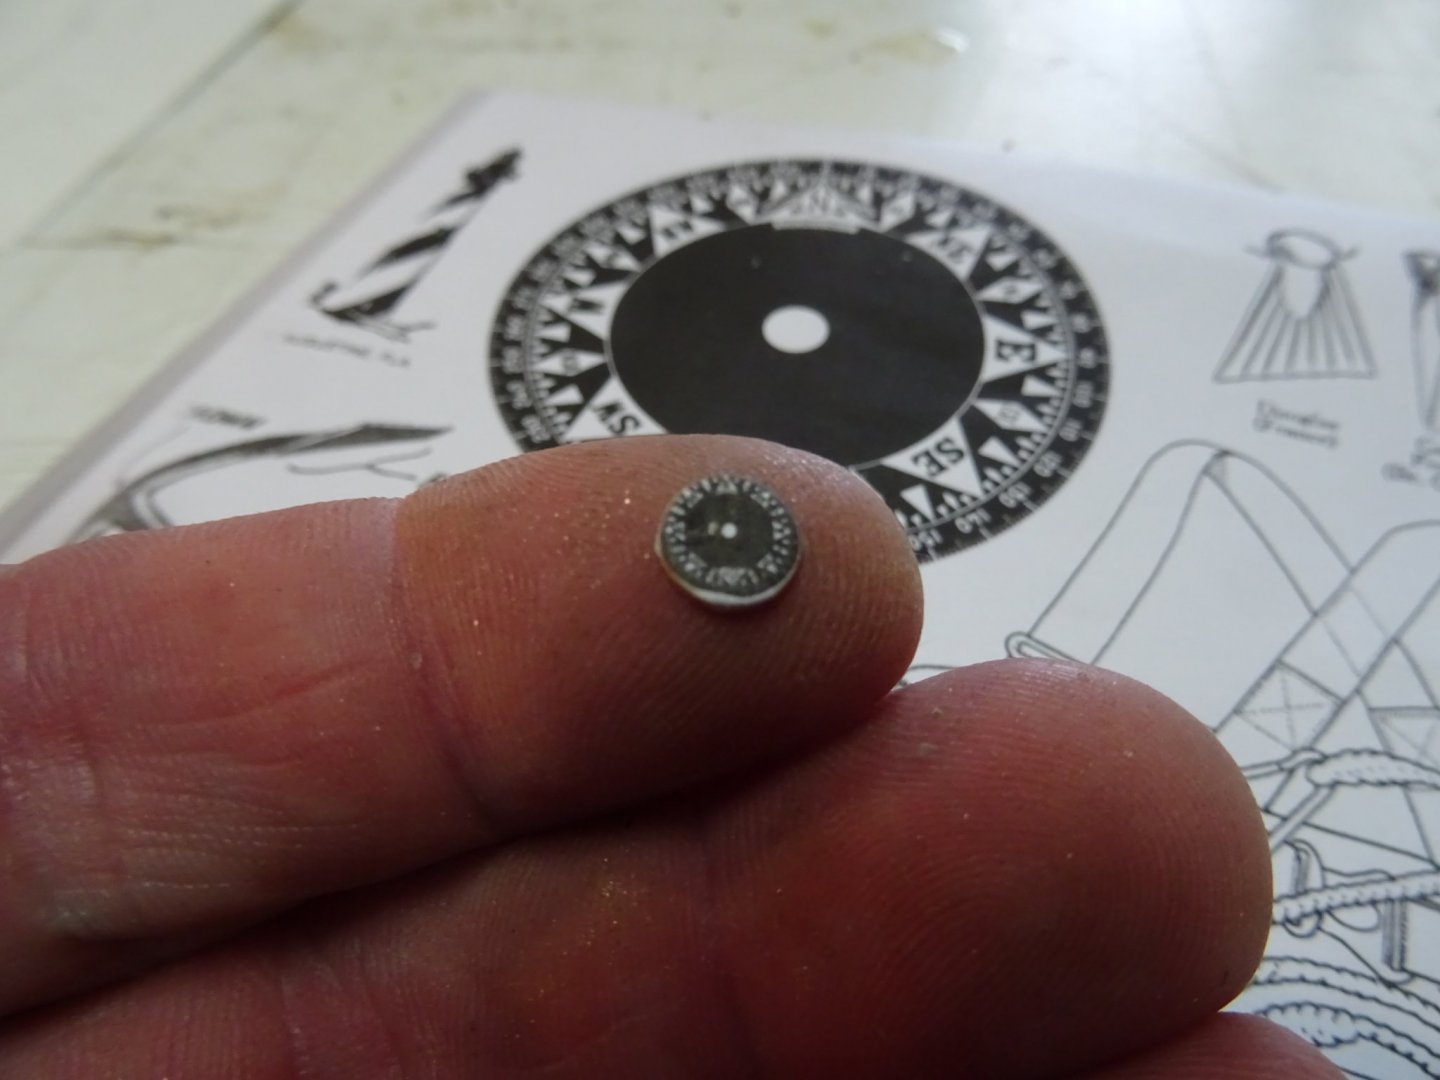
To make the top glass, I punch a round slice out of a piece of food packaging.

My assembled magnetic compass. The compass card is glued at some distance of the top of the compass bowl, the compass glass is glued at the top of the compass bowl and on top of that all a brass ring is glued. Everything still has to be cleaned up a bit.

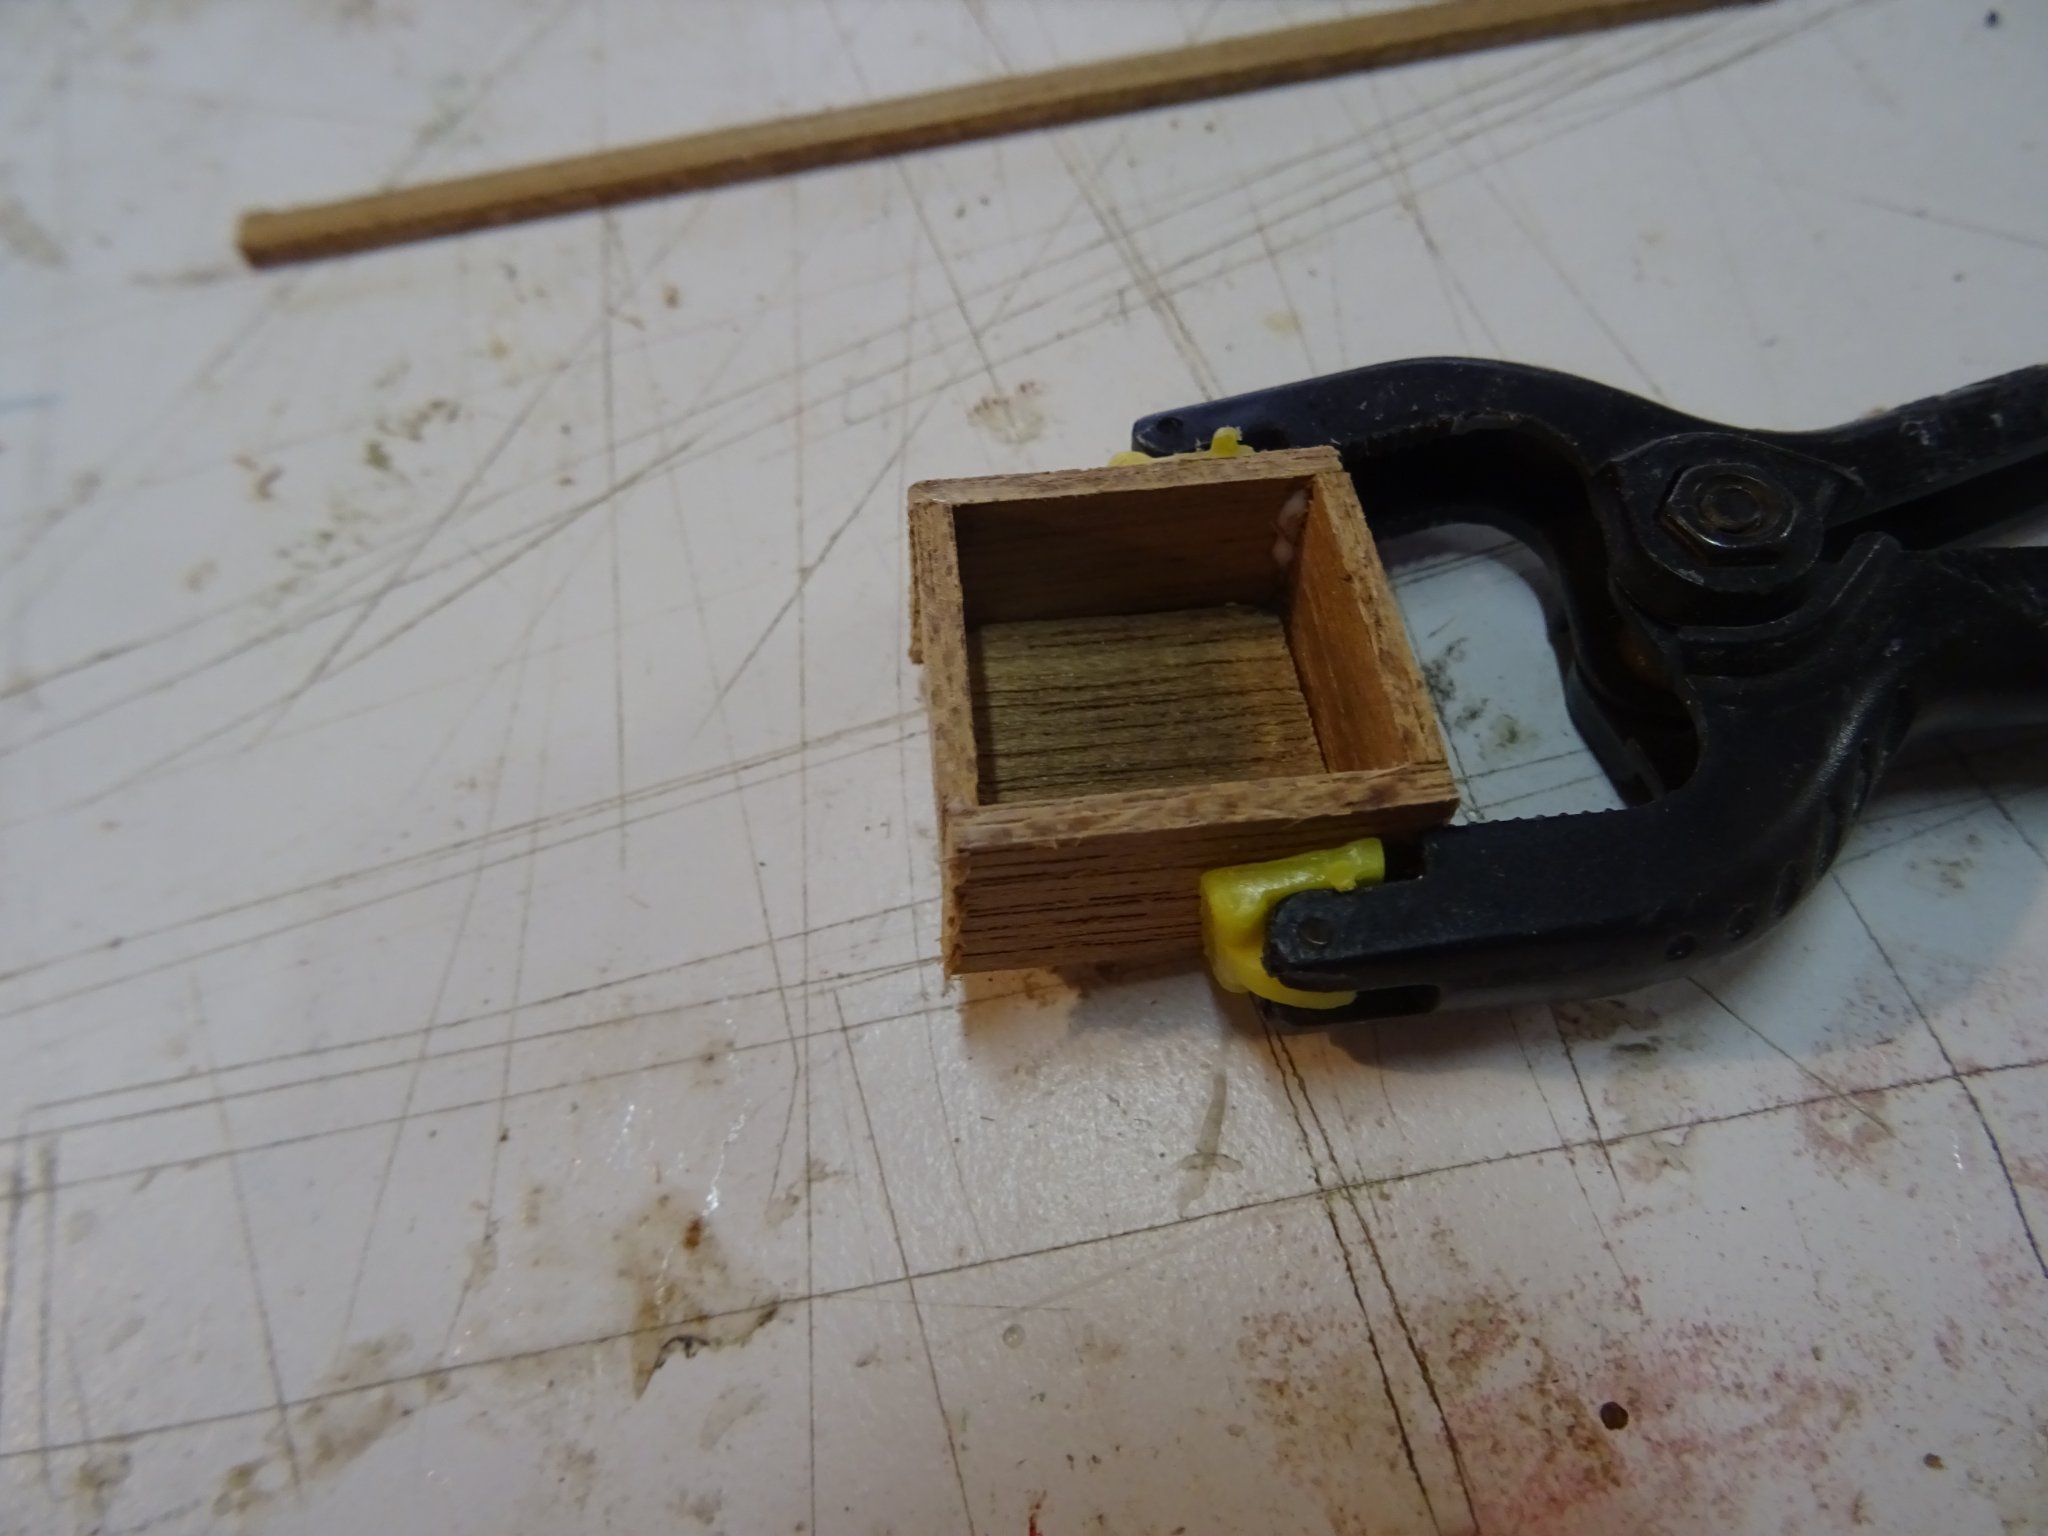
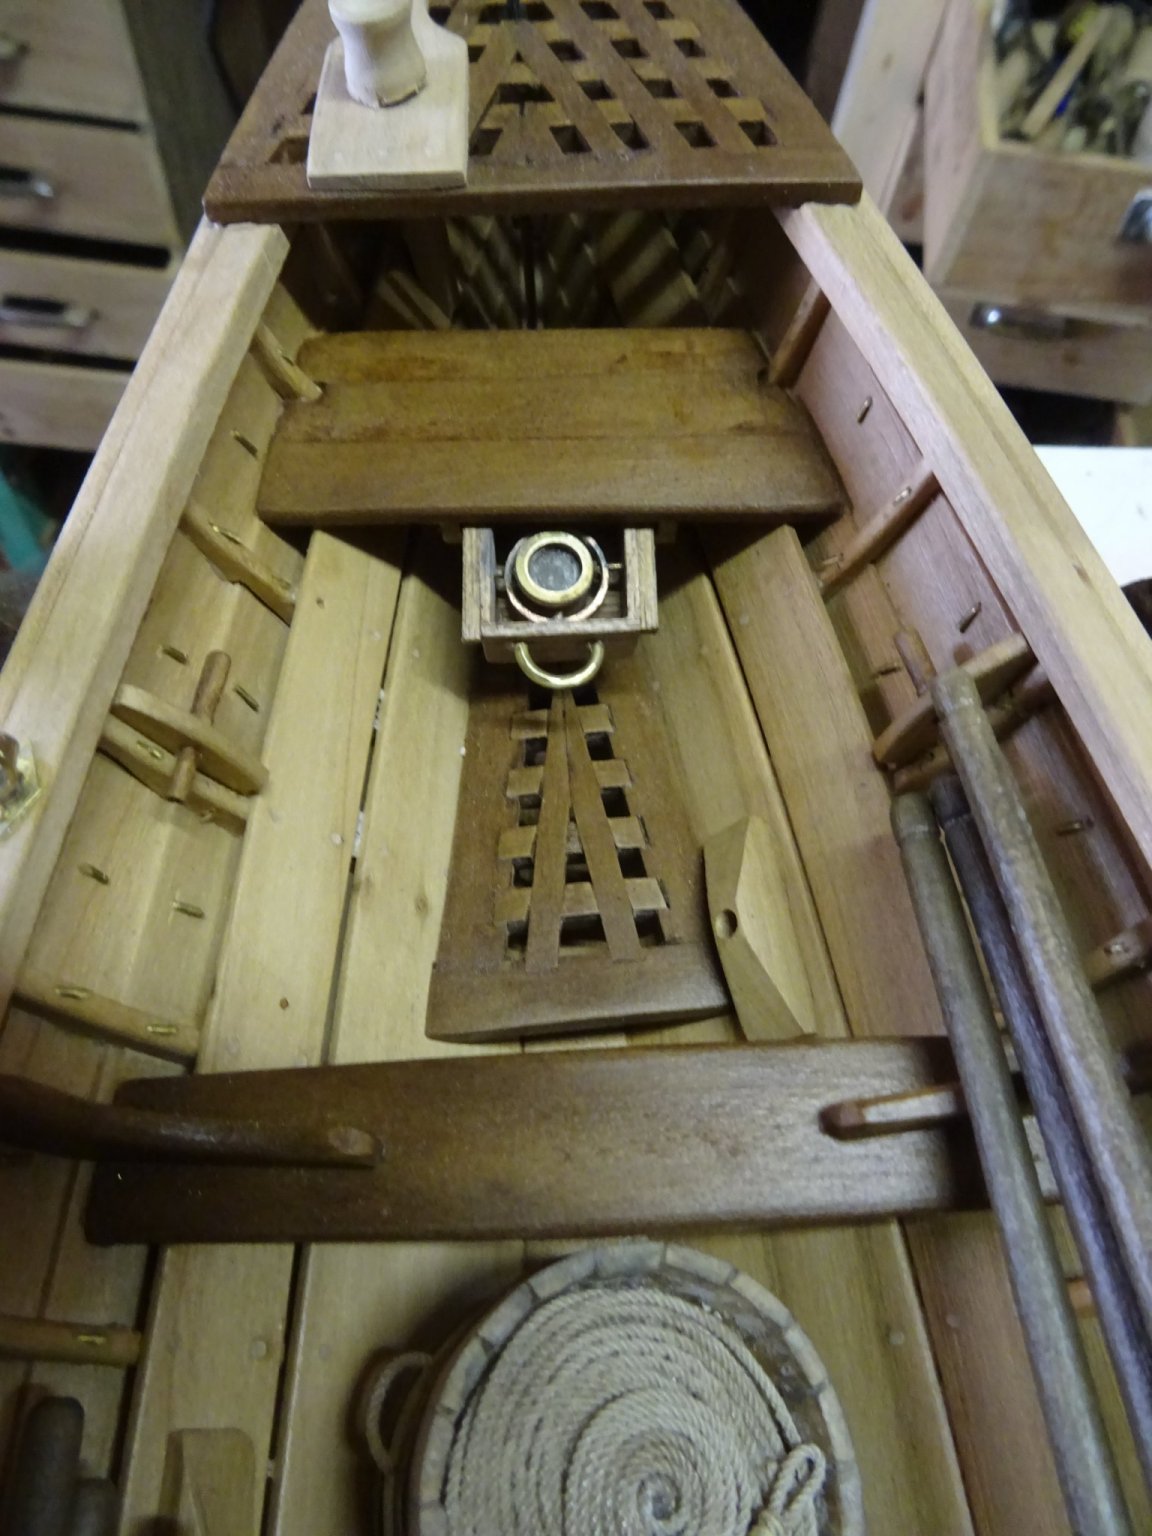
he compass wil hang in its outer gimbal pivots in a wooden box, ...
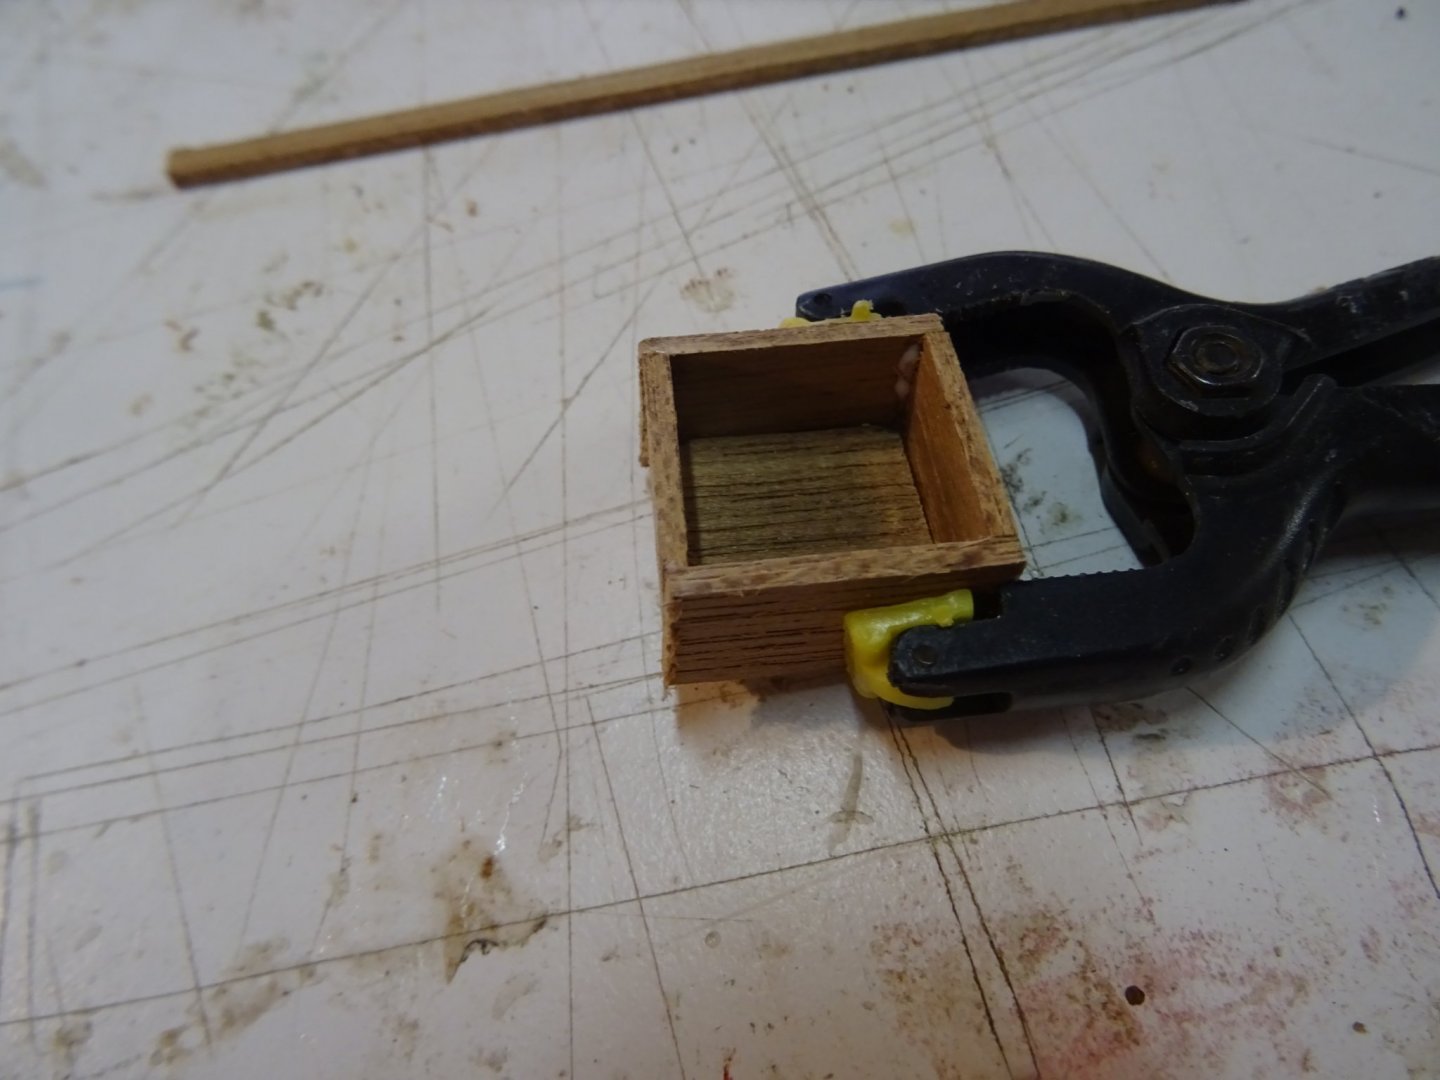
... which can be pulled out like a drawer drawer below the helmsman thwart.
Thank you very much for reading this log and for your likes.
Till next week!
-
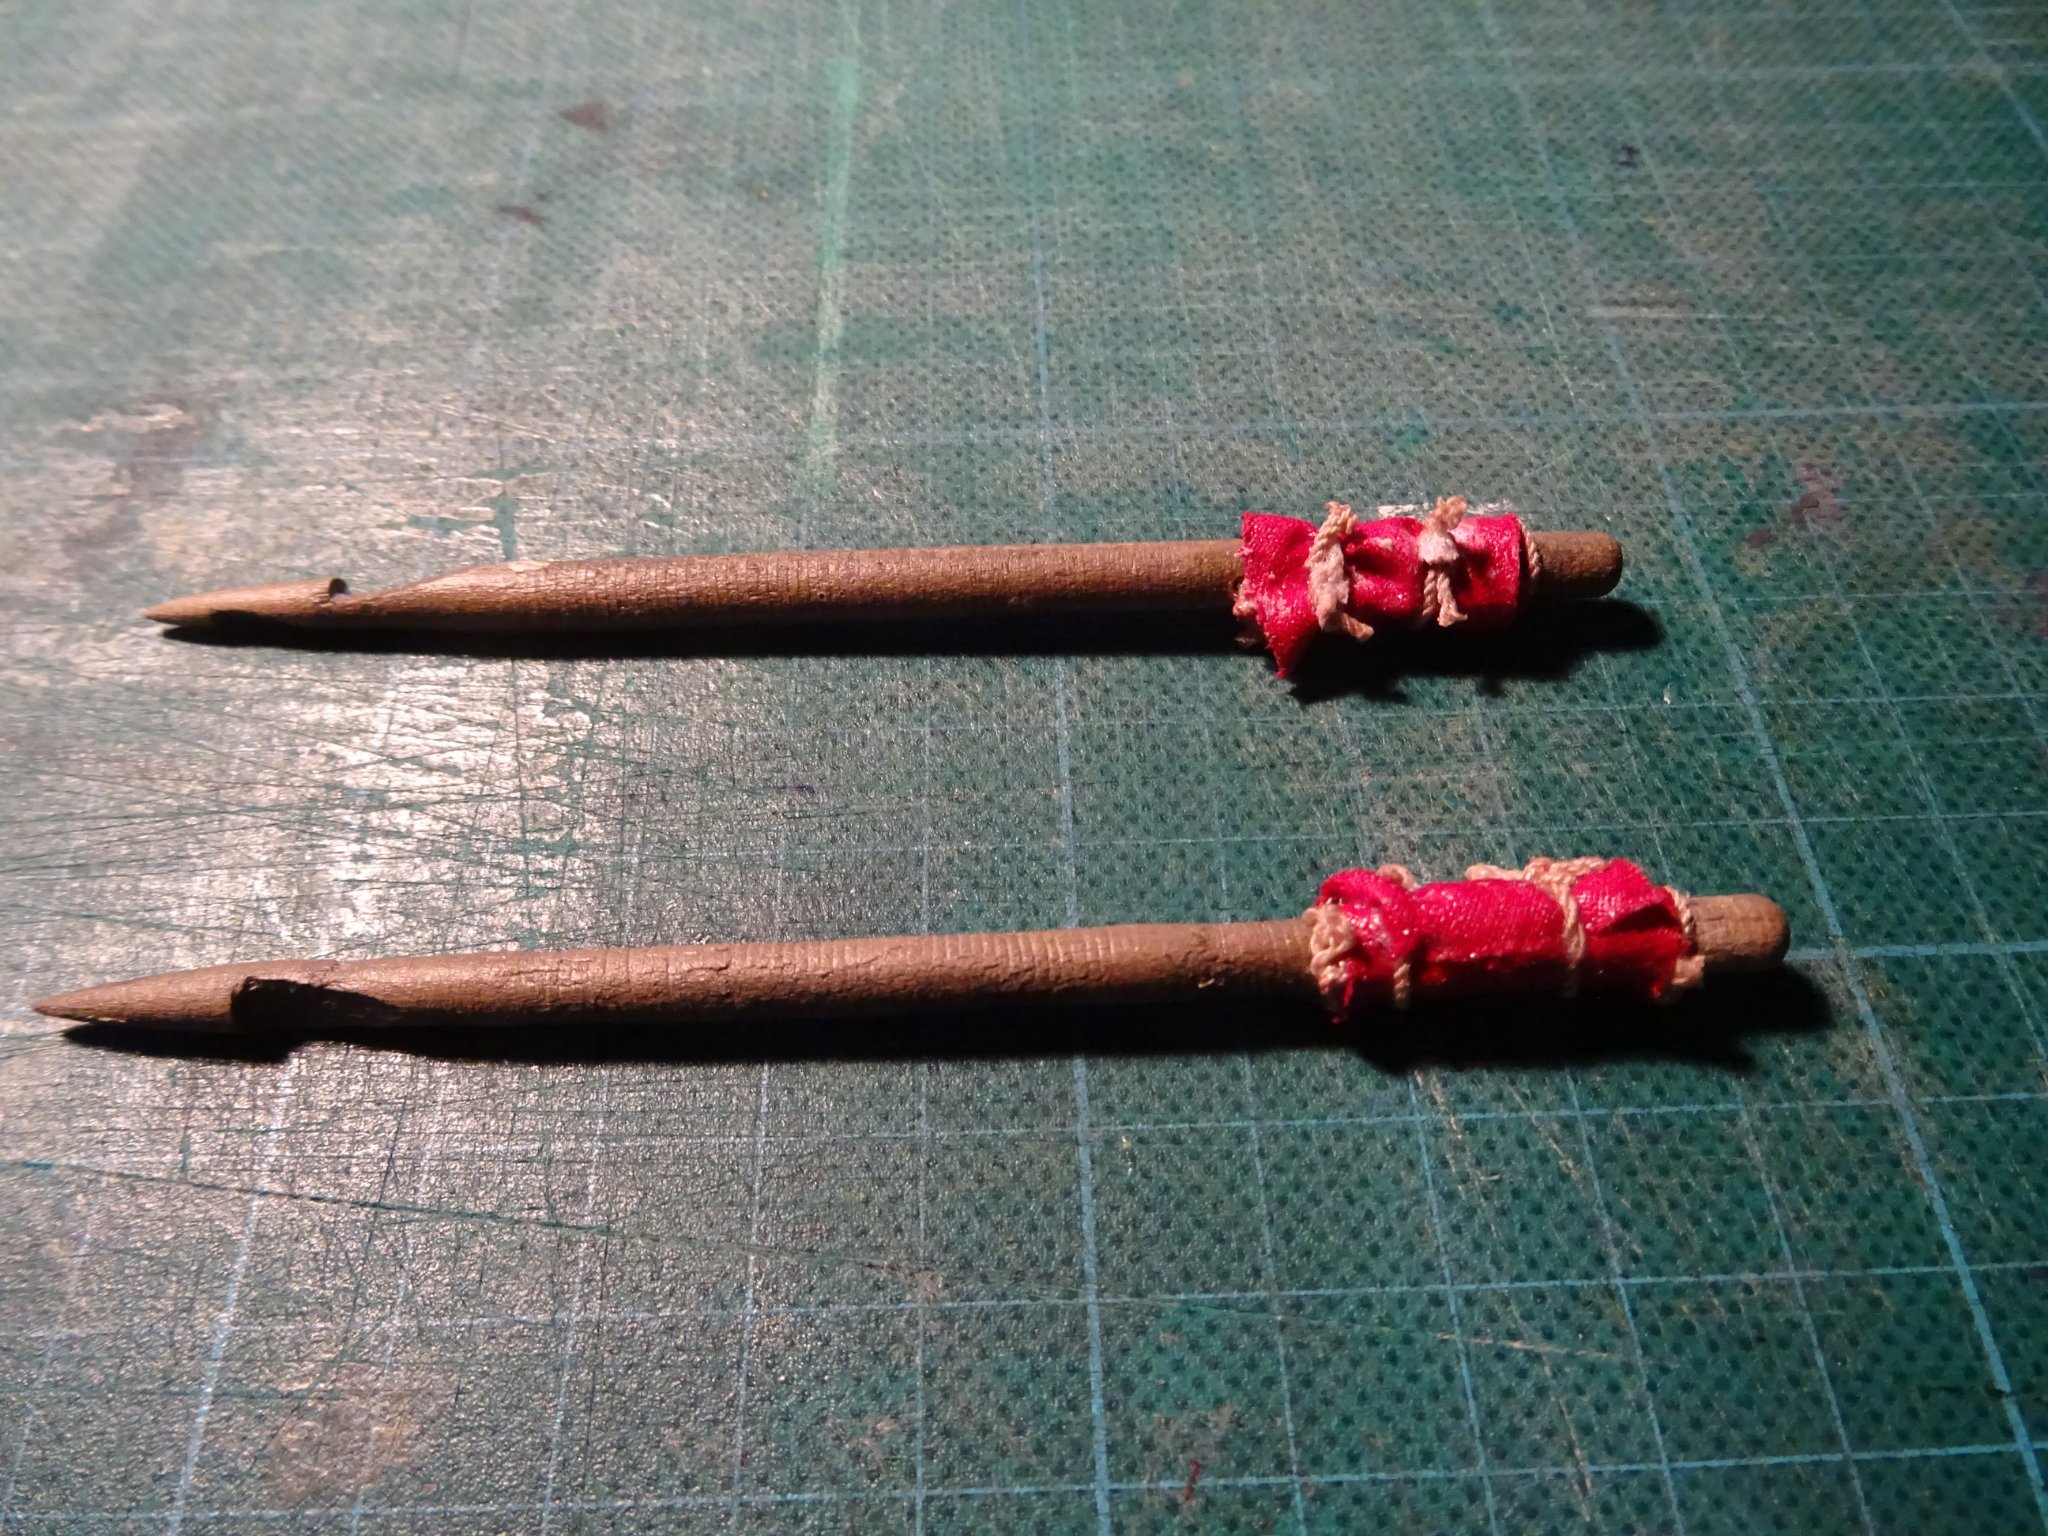
8.6. Marker flags
Sometimes it was not possible to bring the killed whale immediately to the mother ship. The whale was then marked with a flag on a pole which was planted in the blowhole.
My flags are found and tied around the pole and fixed in this shape by soaking them with textile glue. Each pole has a point and two nicks in it to permit a good grip in the blowhole.

- GrandpaPhil, archjofo, Baker and 1 other
-
4
-
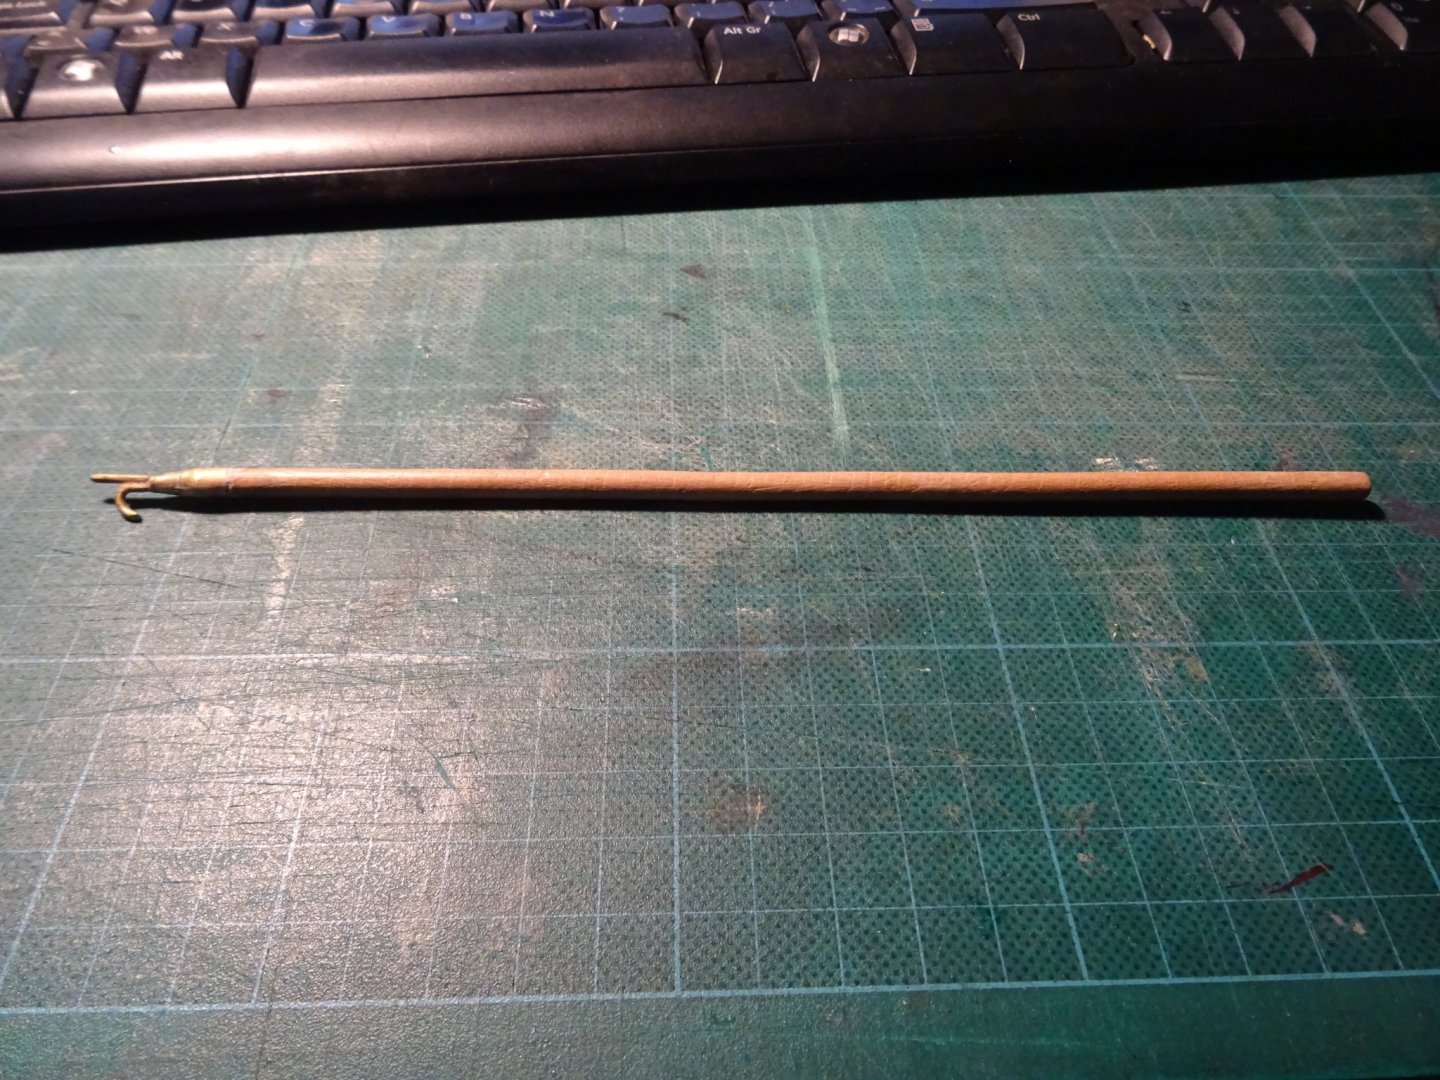
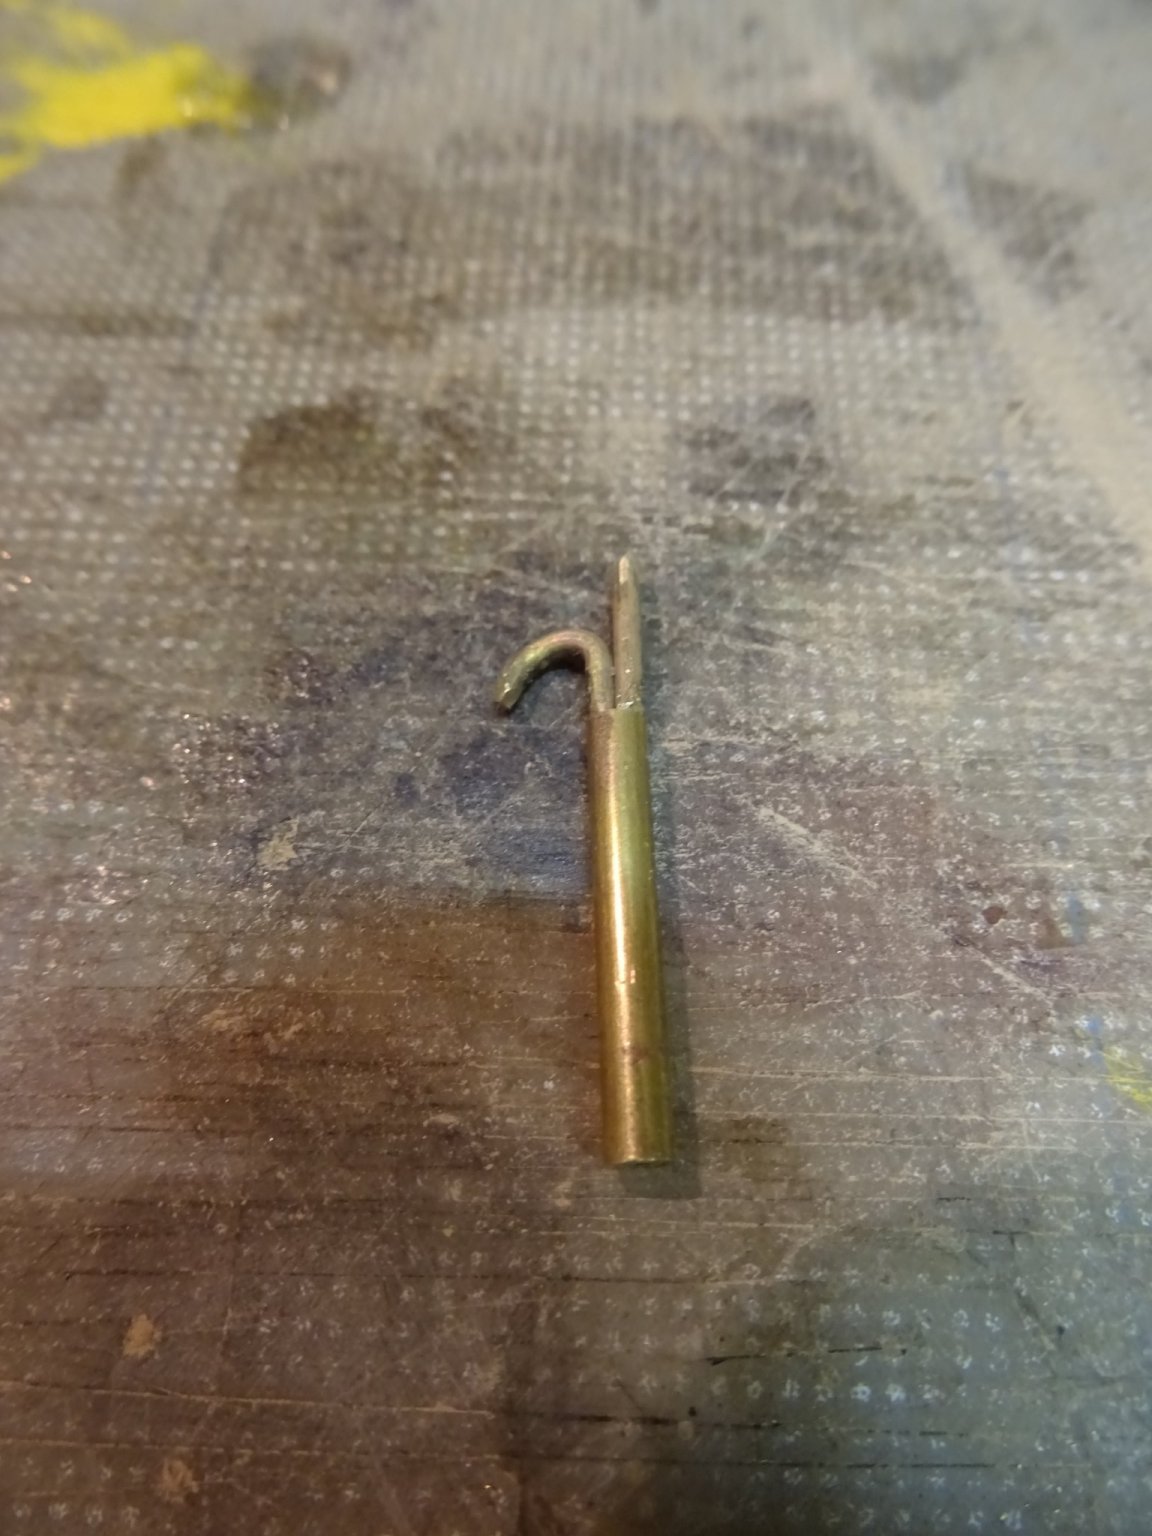
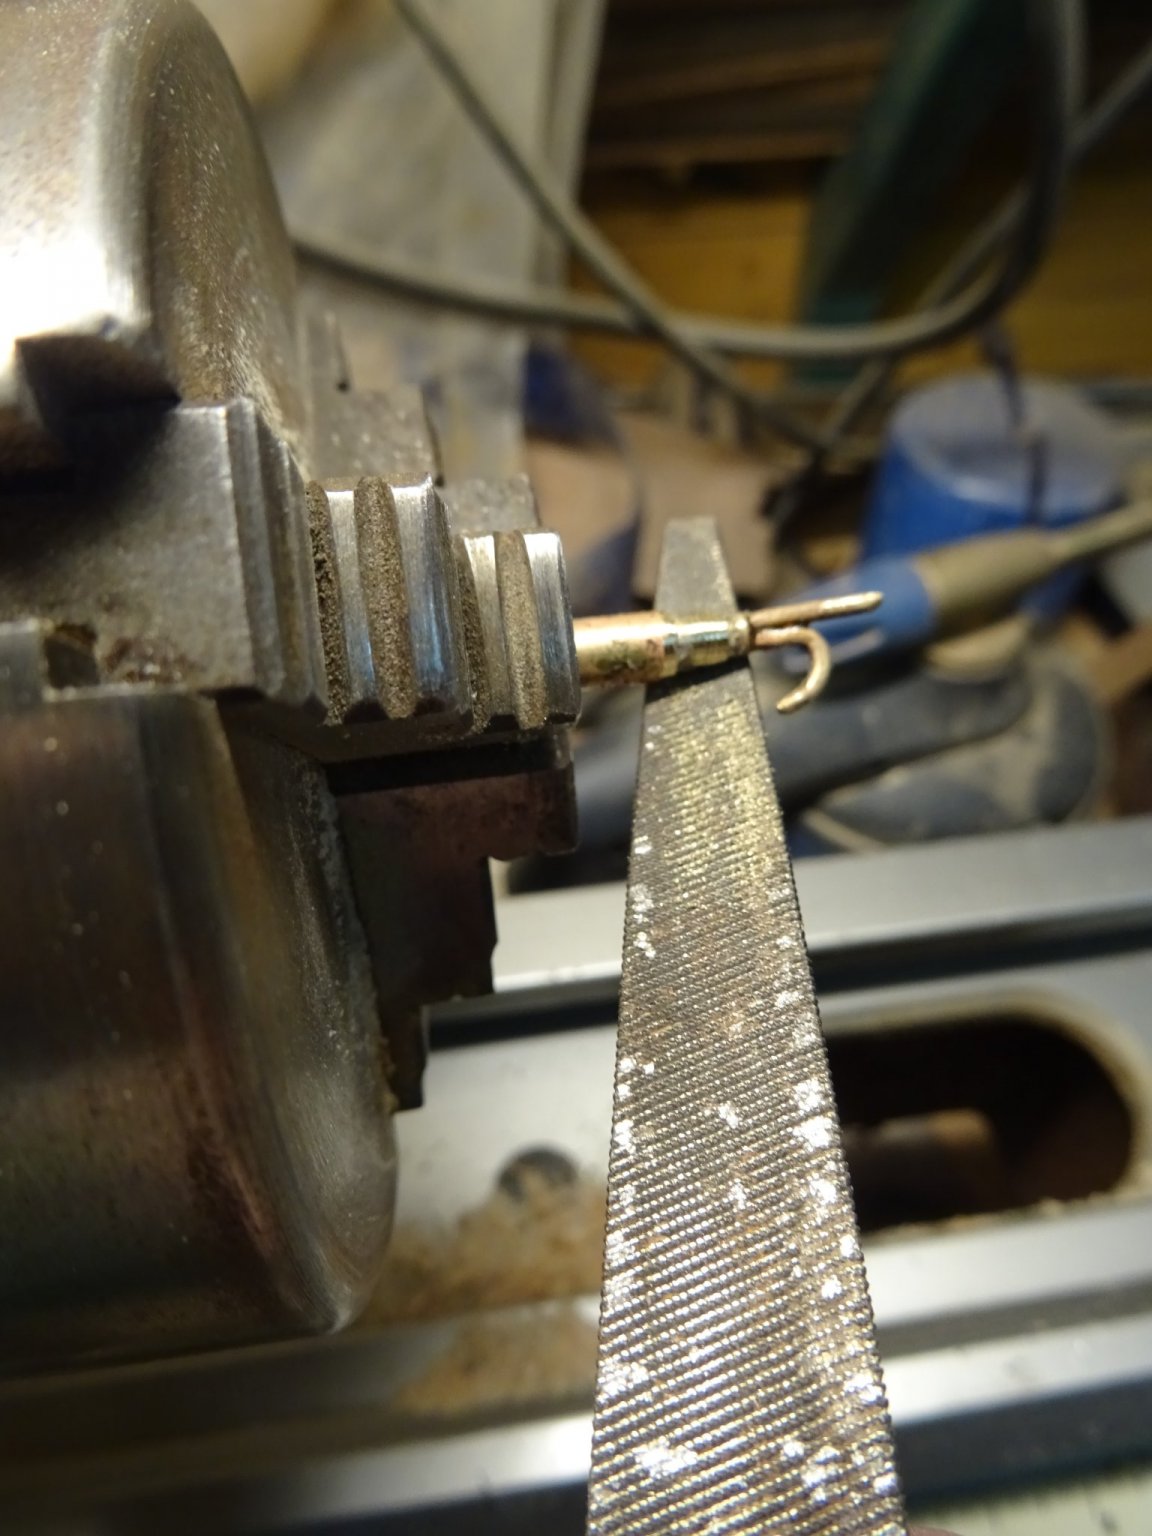
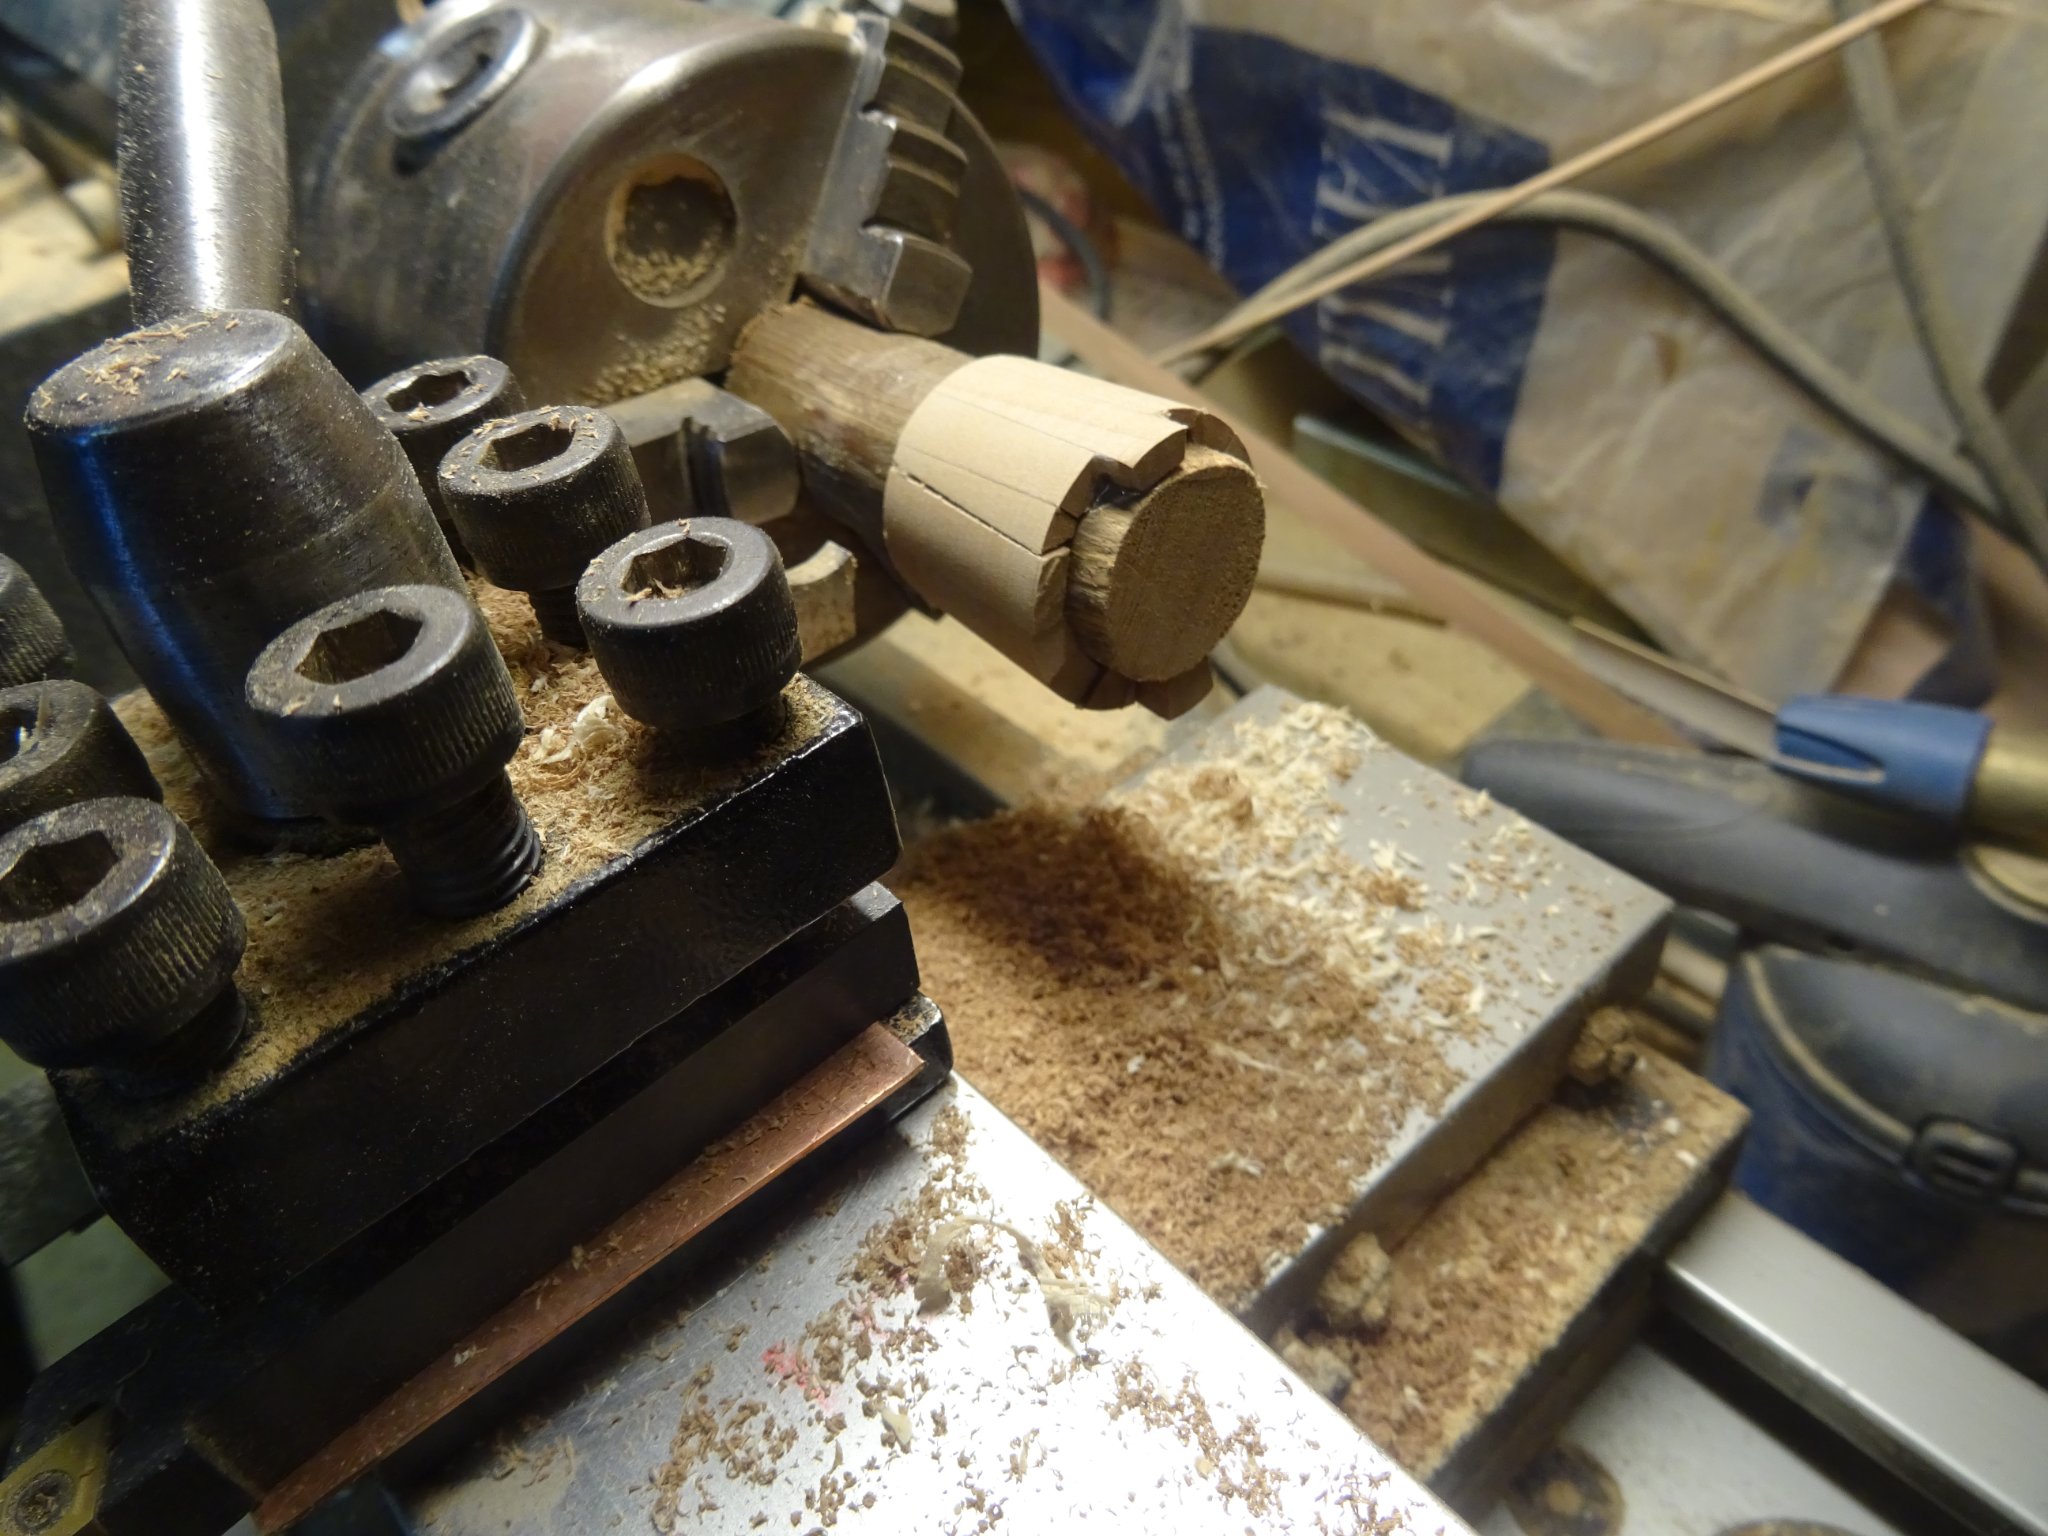
8.5. The boat hook
The boat hook is made by plying the hook in a brass rod.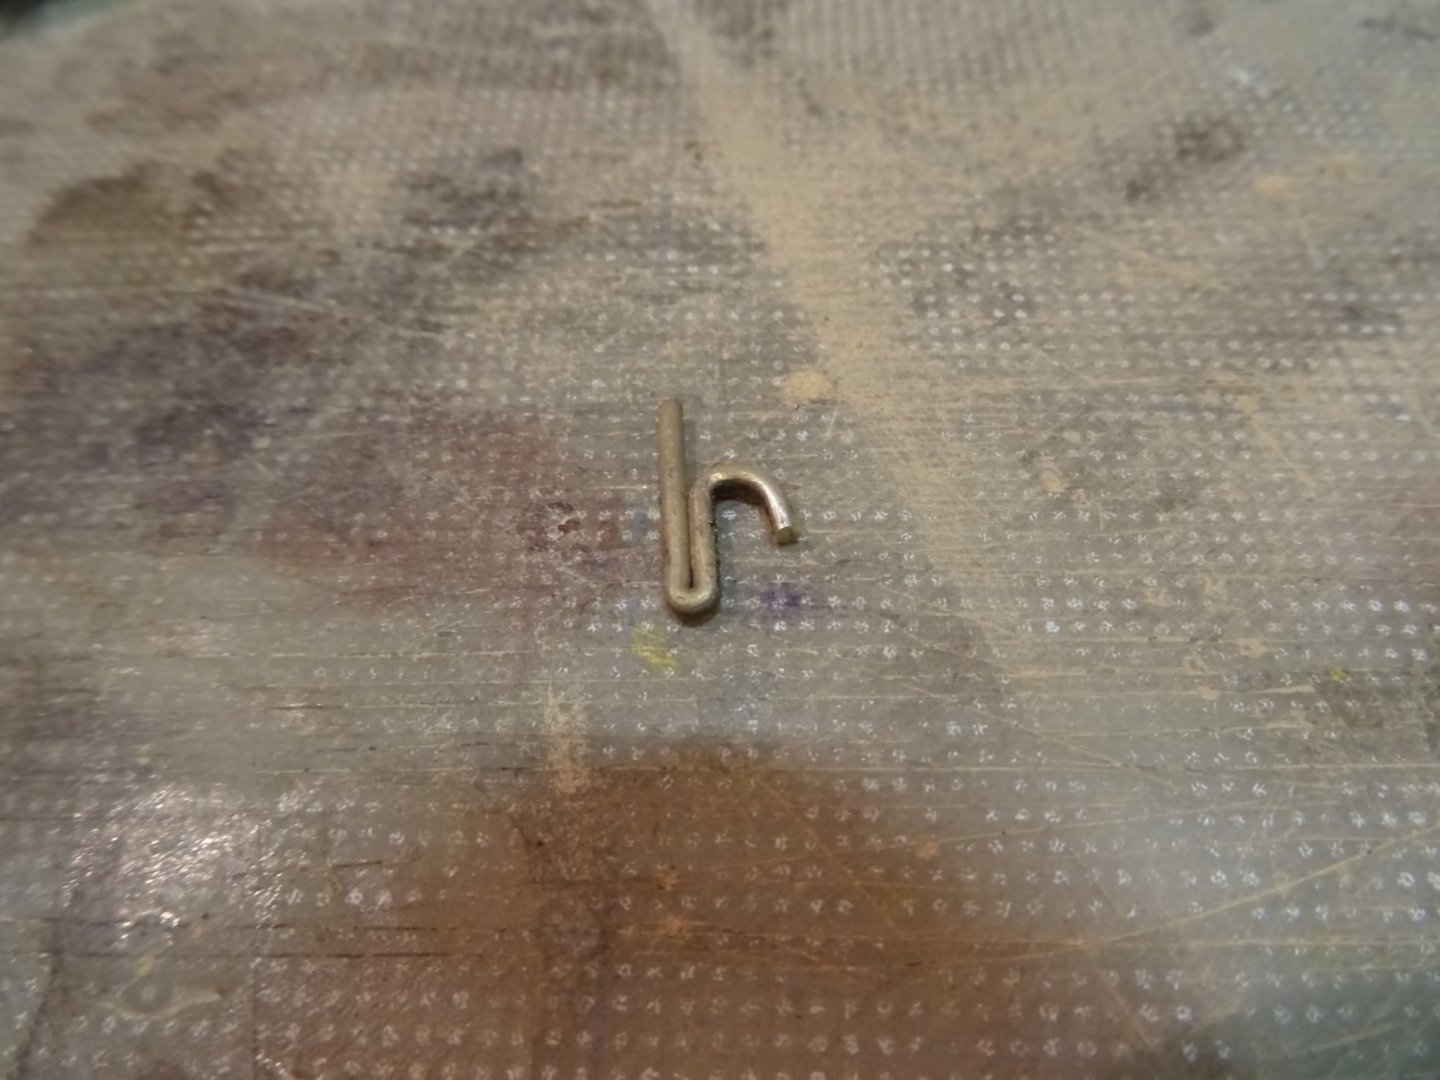
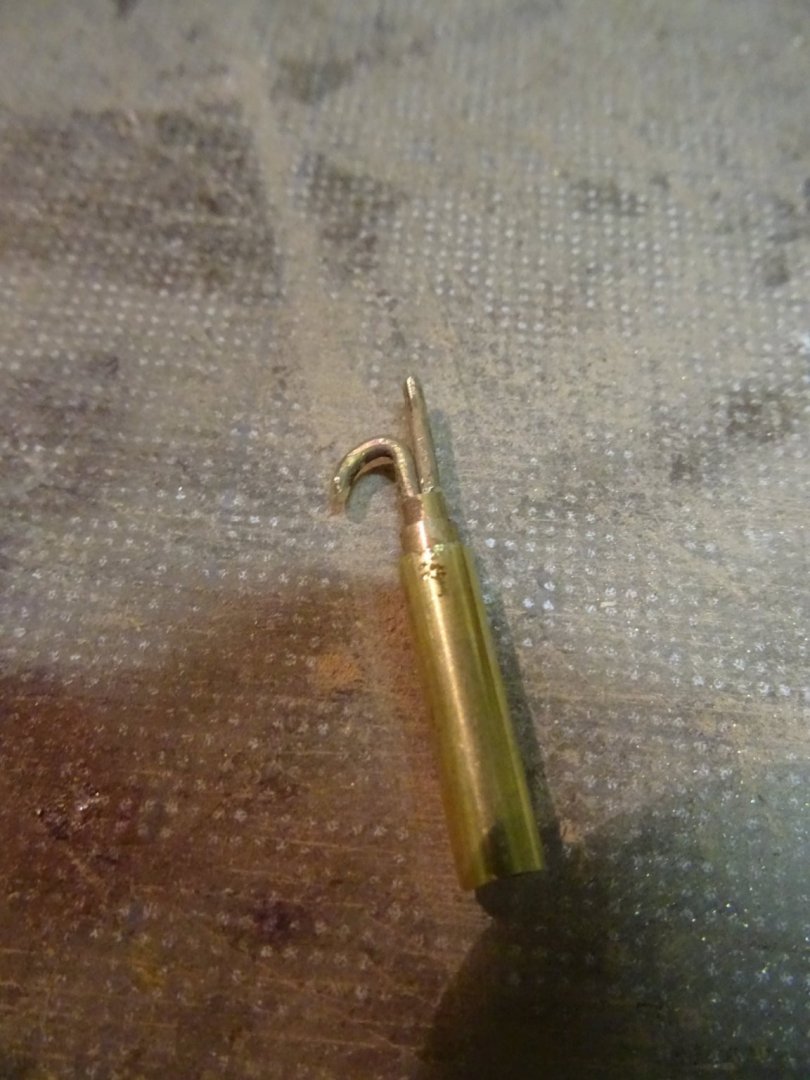
The hook is soldered in a brass tube...

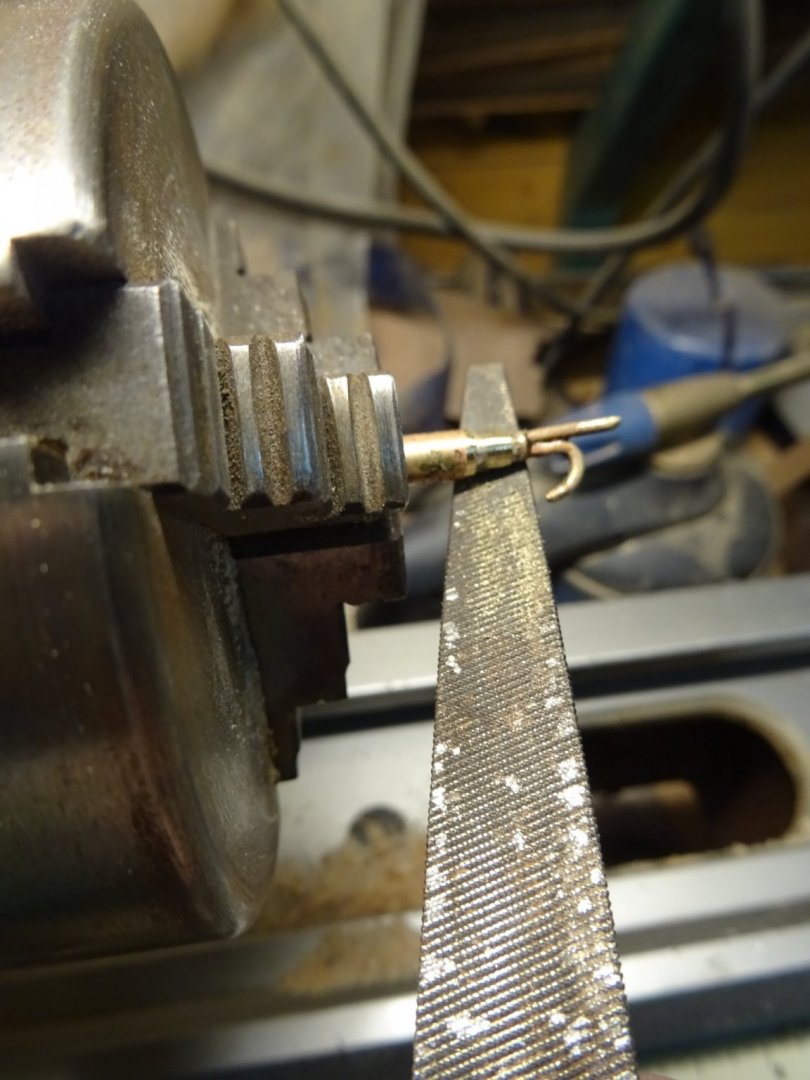
... which is soldered in two gradually larger tubes.
The telescopically protruding particles are filed conically ...
The hook is placed on a wooden stock and the boat hook is ready.
-
-
-
-
I am not an expert, but I agee with Egilman: It is very well done. Your sea surface looks very realistic and is very well painted. Your diorama is full of action.
- CDW, mtaylor, Landlubber Mike and 4 others
-
7
-
Patrick, she looks really good with her masts and bowsprit.
- Baker, mtaylor, Louie da fly and 1 other
-
4
-
-
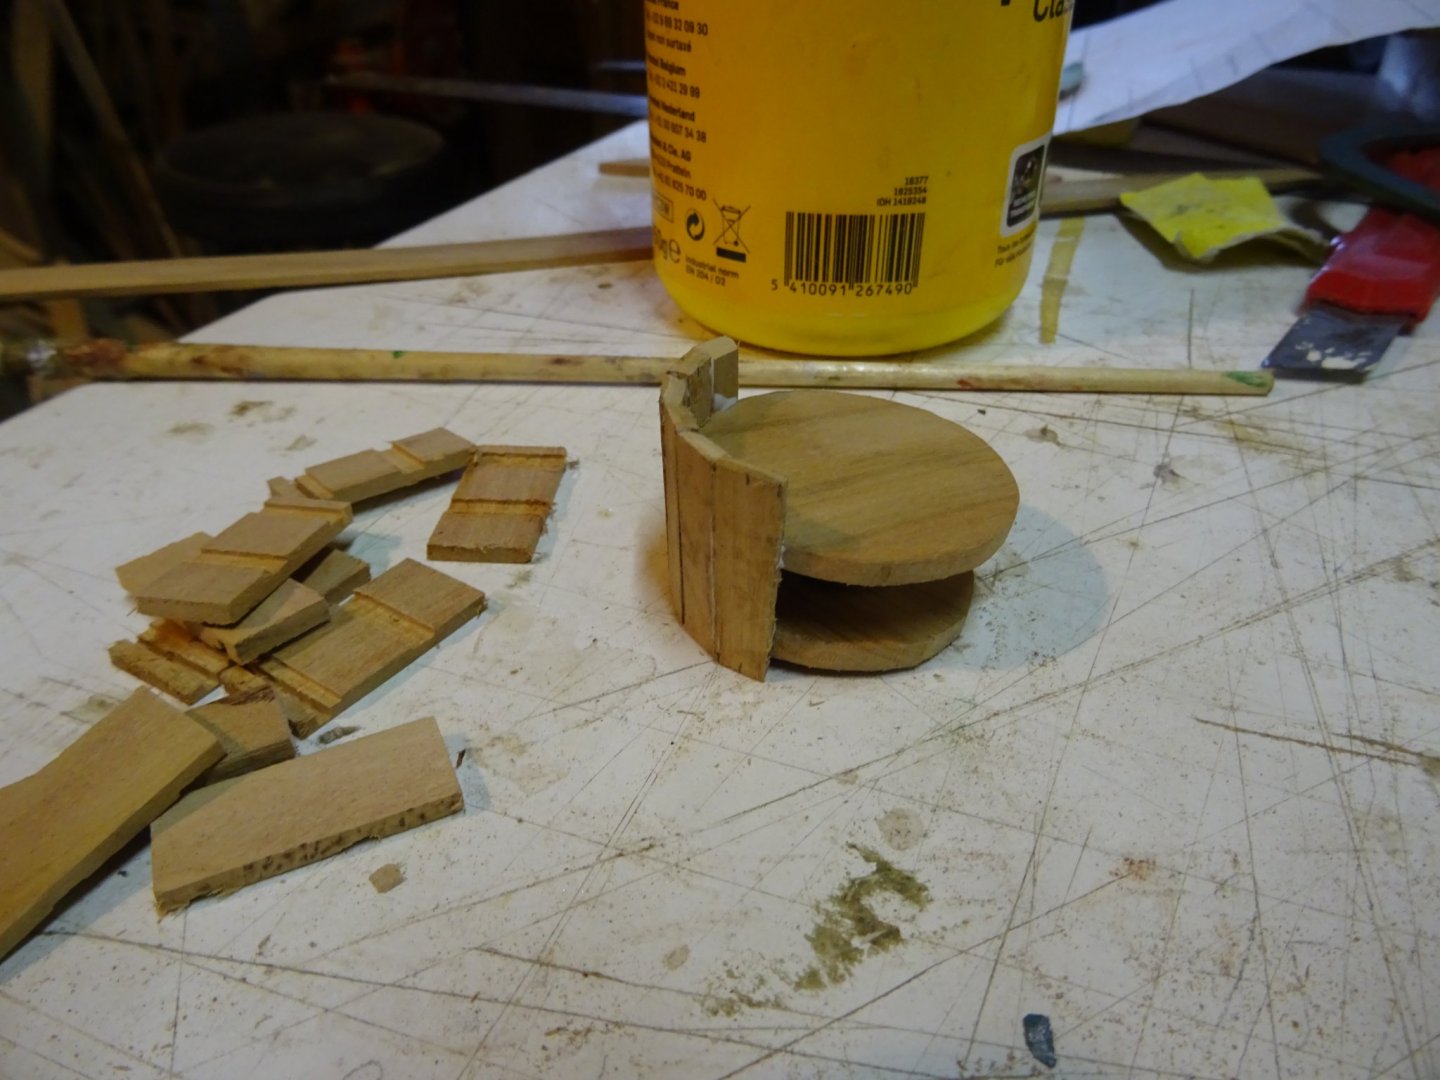
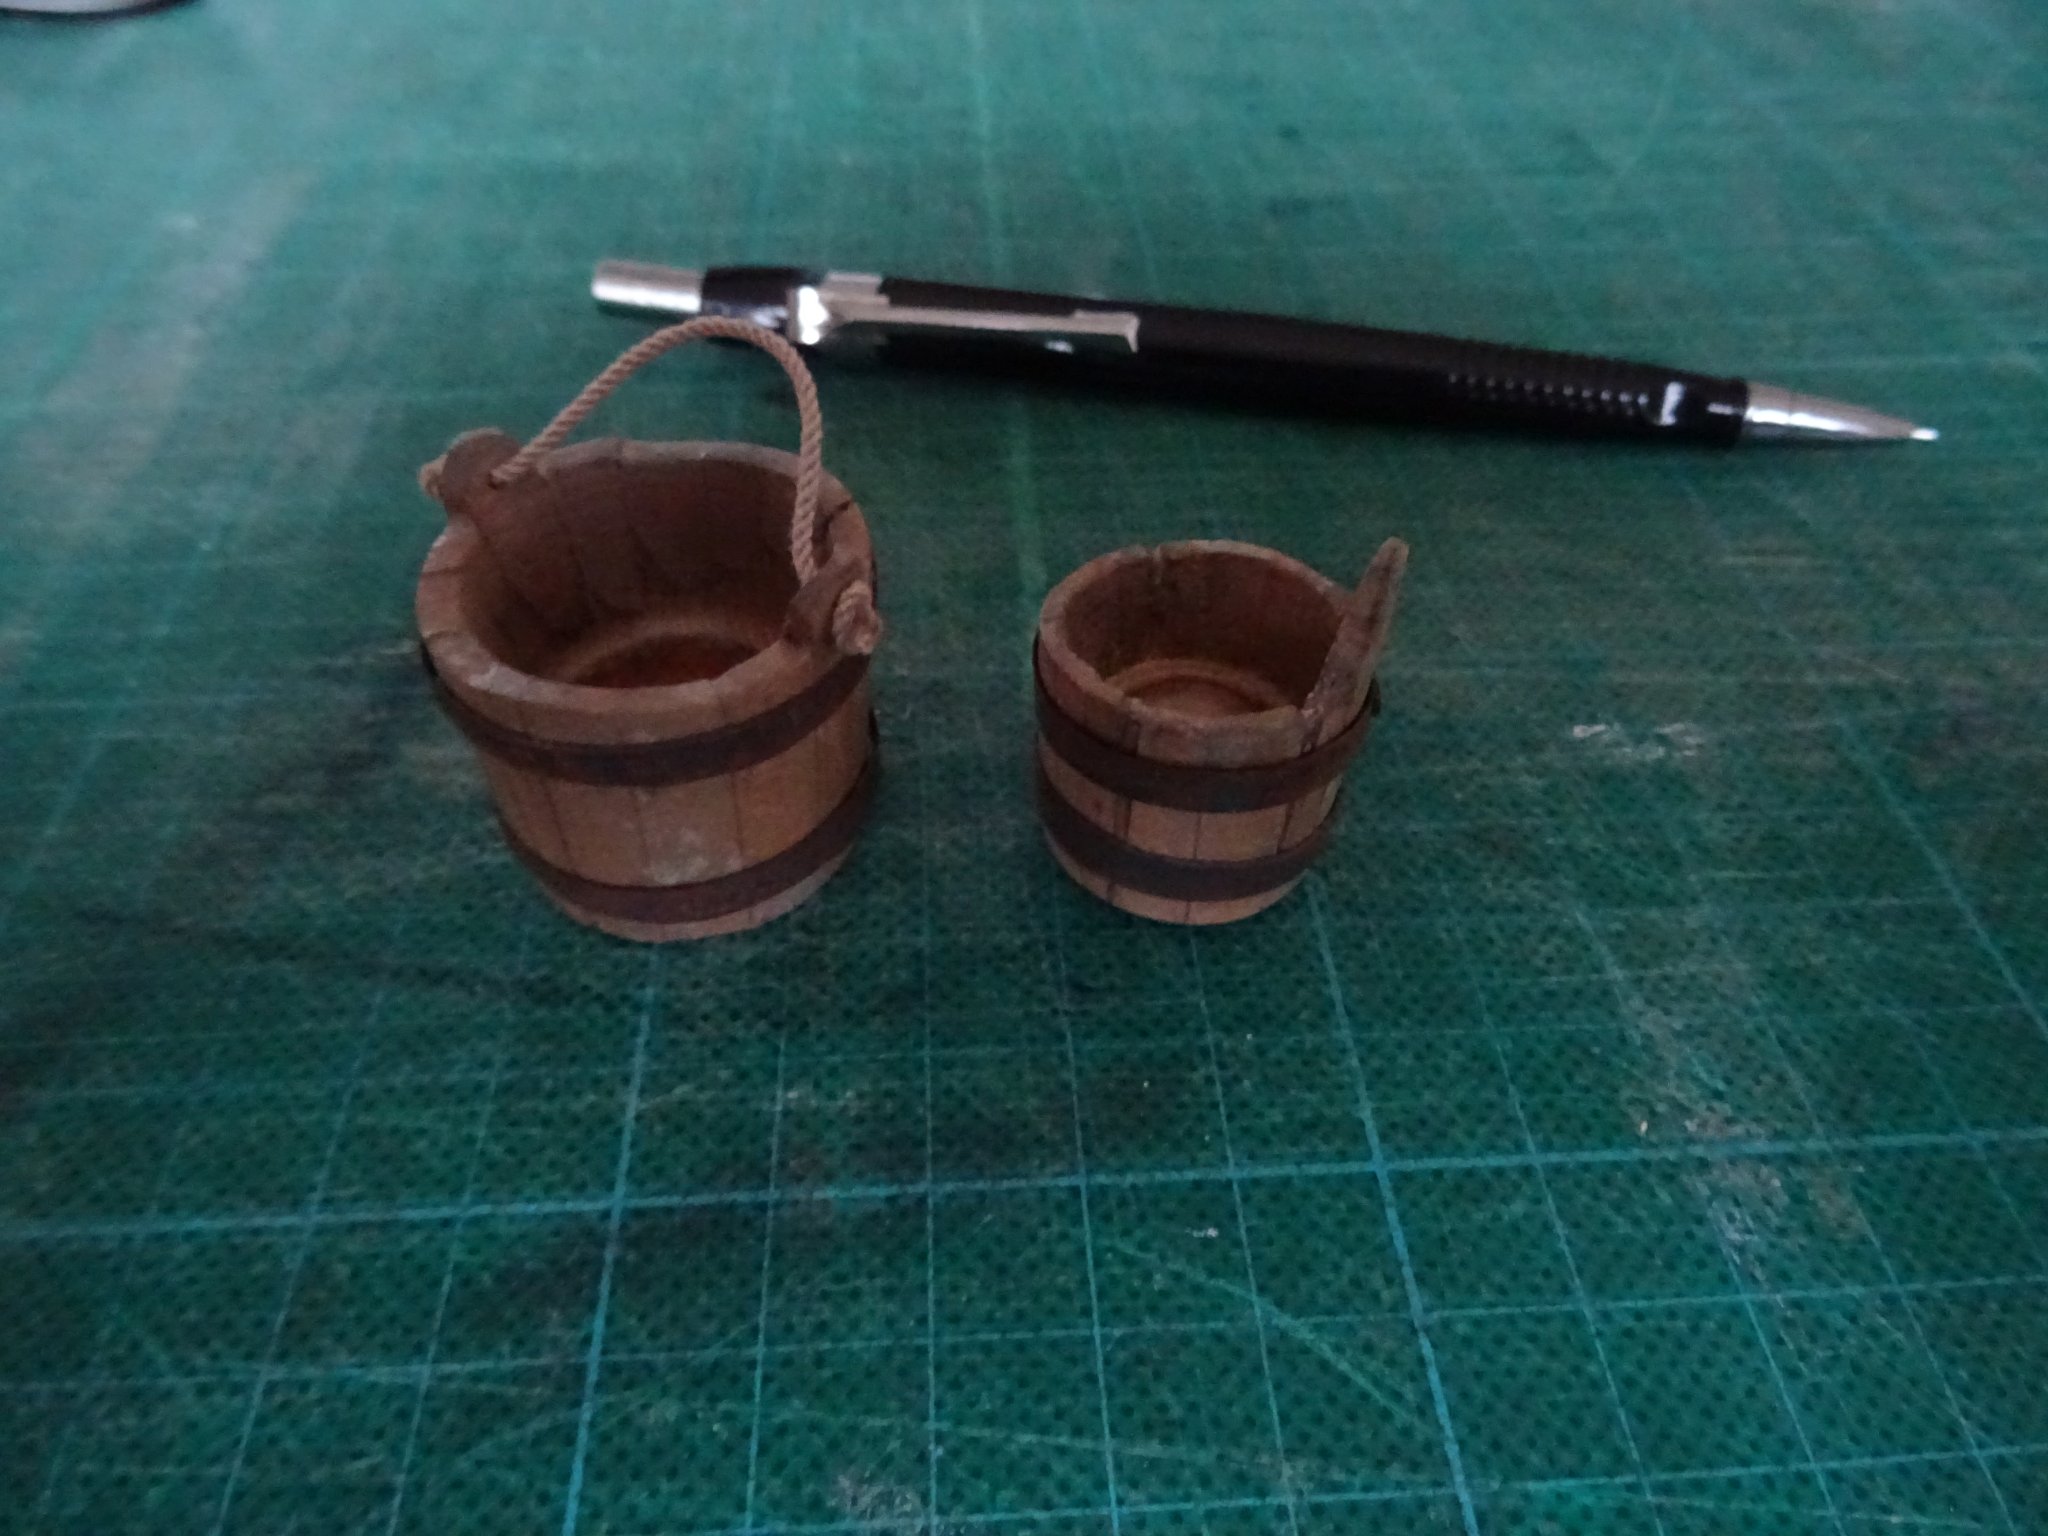
8.4 Bucket and piggin
The production of a bucket and a piggin is very simular of that of the water keg. They are also turned into shape on the lathe and everything that is too much is sawn off and they are drilled hollow.
Both the bucket and the piggin are also provided with two hoops each.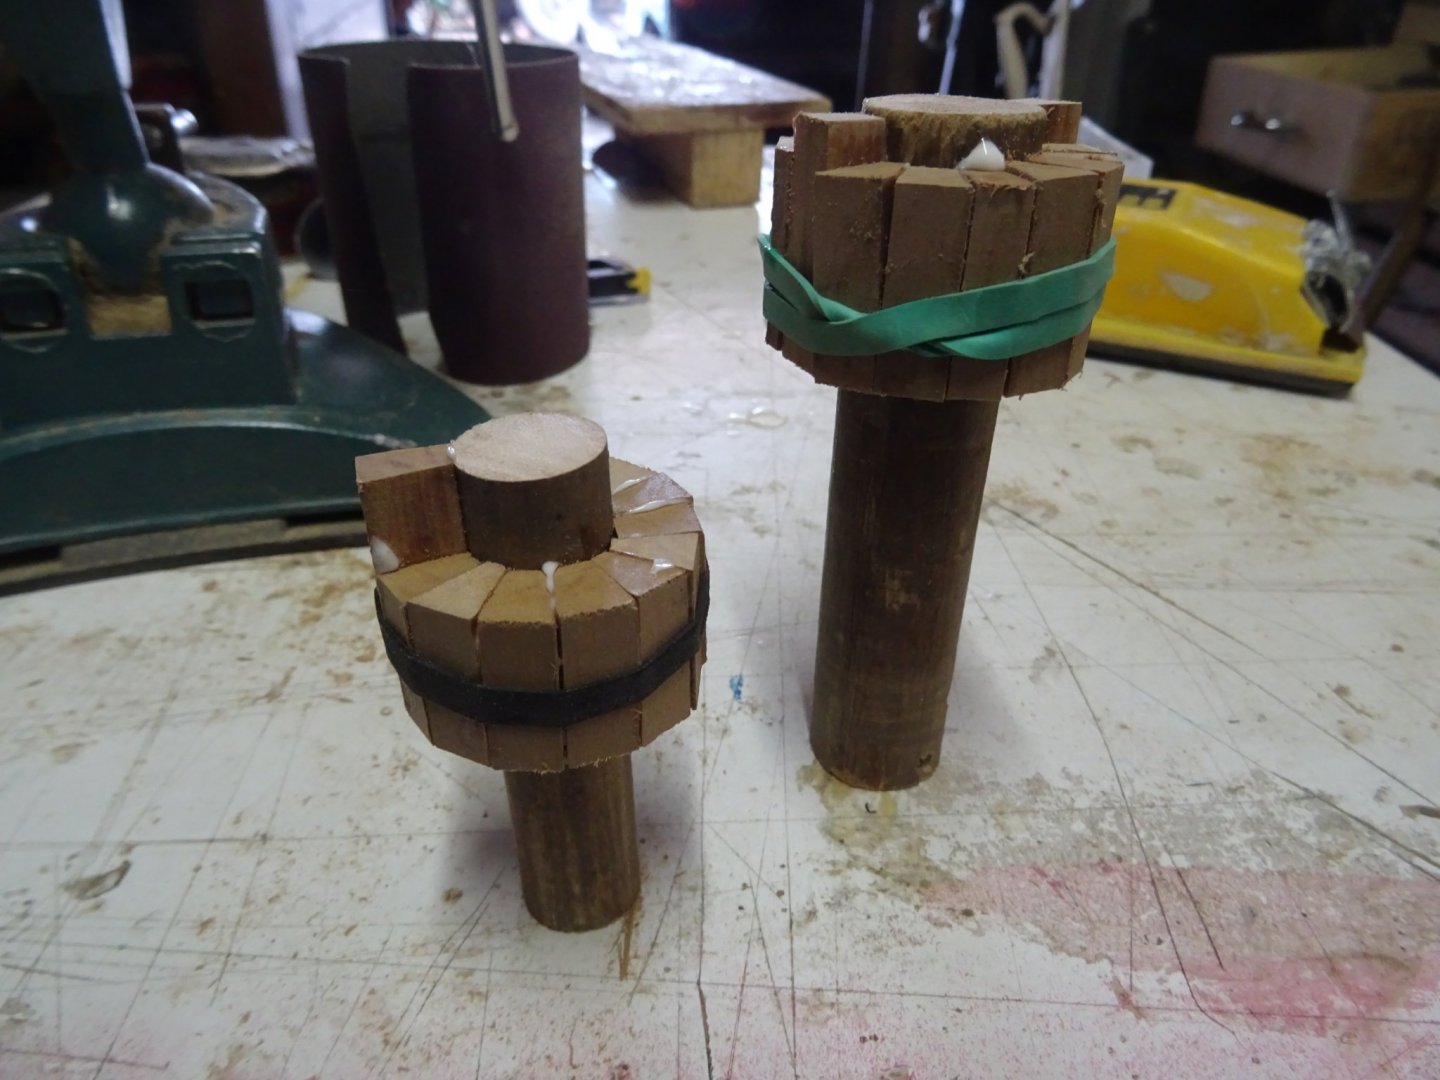


That is the boat as it is now with the finished stuff in it.
Thank you very much for reading this log, for your likes and for your encouraging comments.
Till next week and Happy and Healthy Newyear for you all!
-
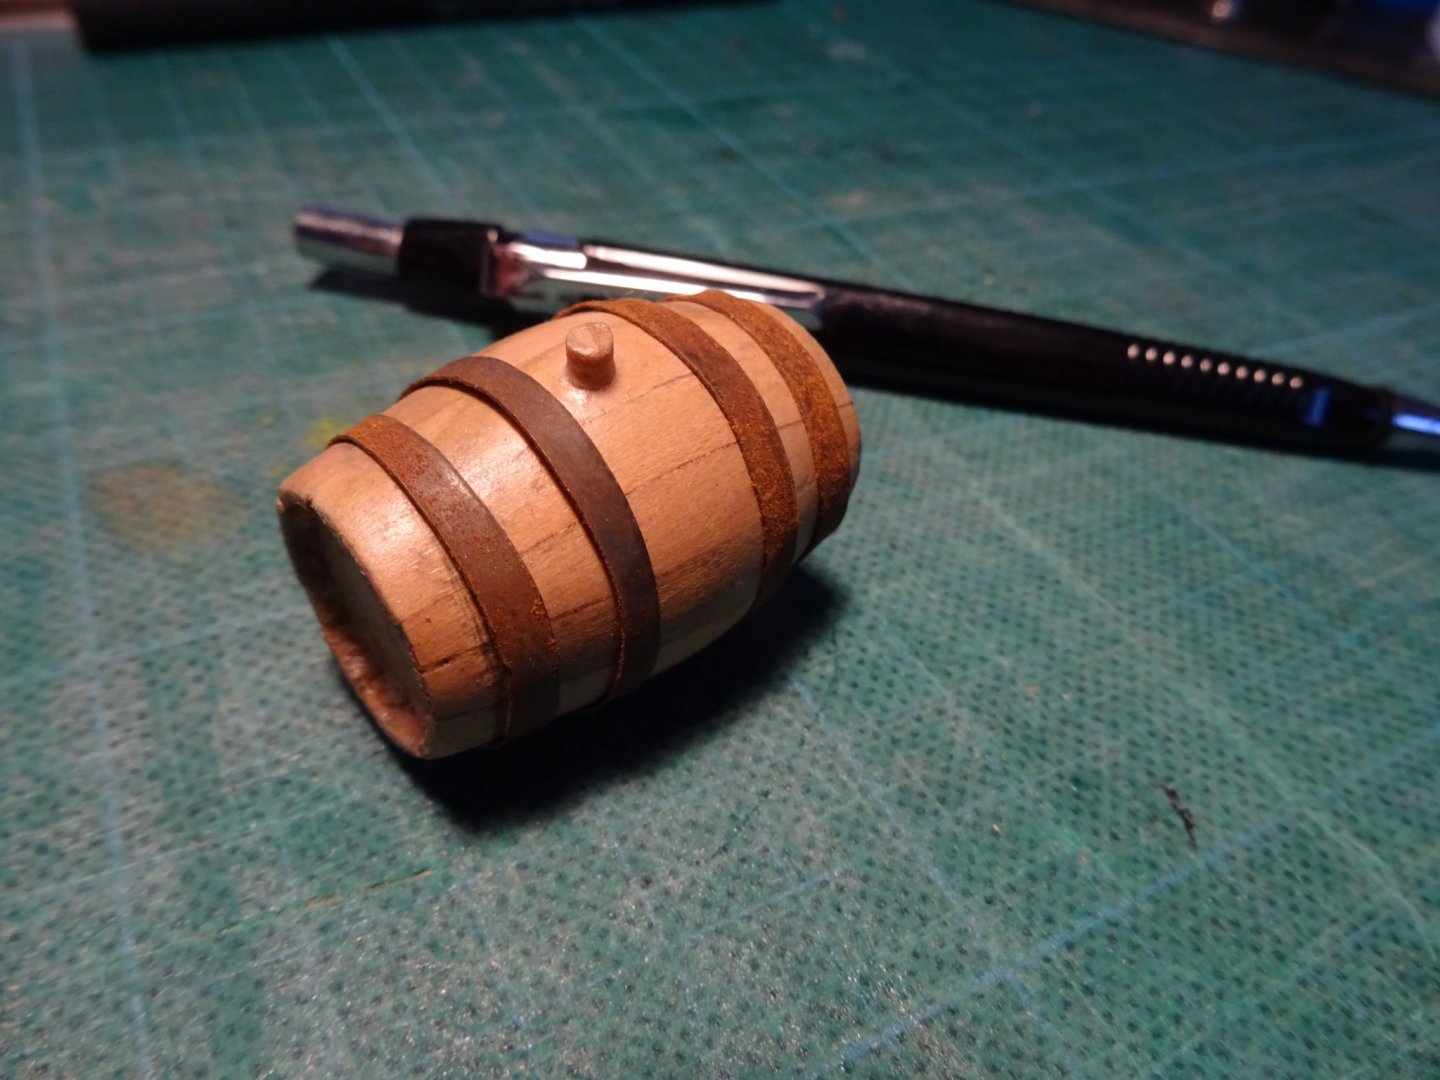
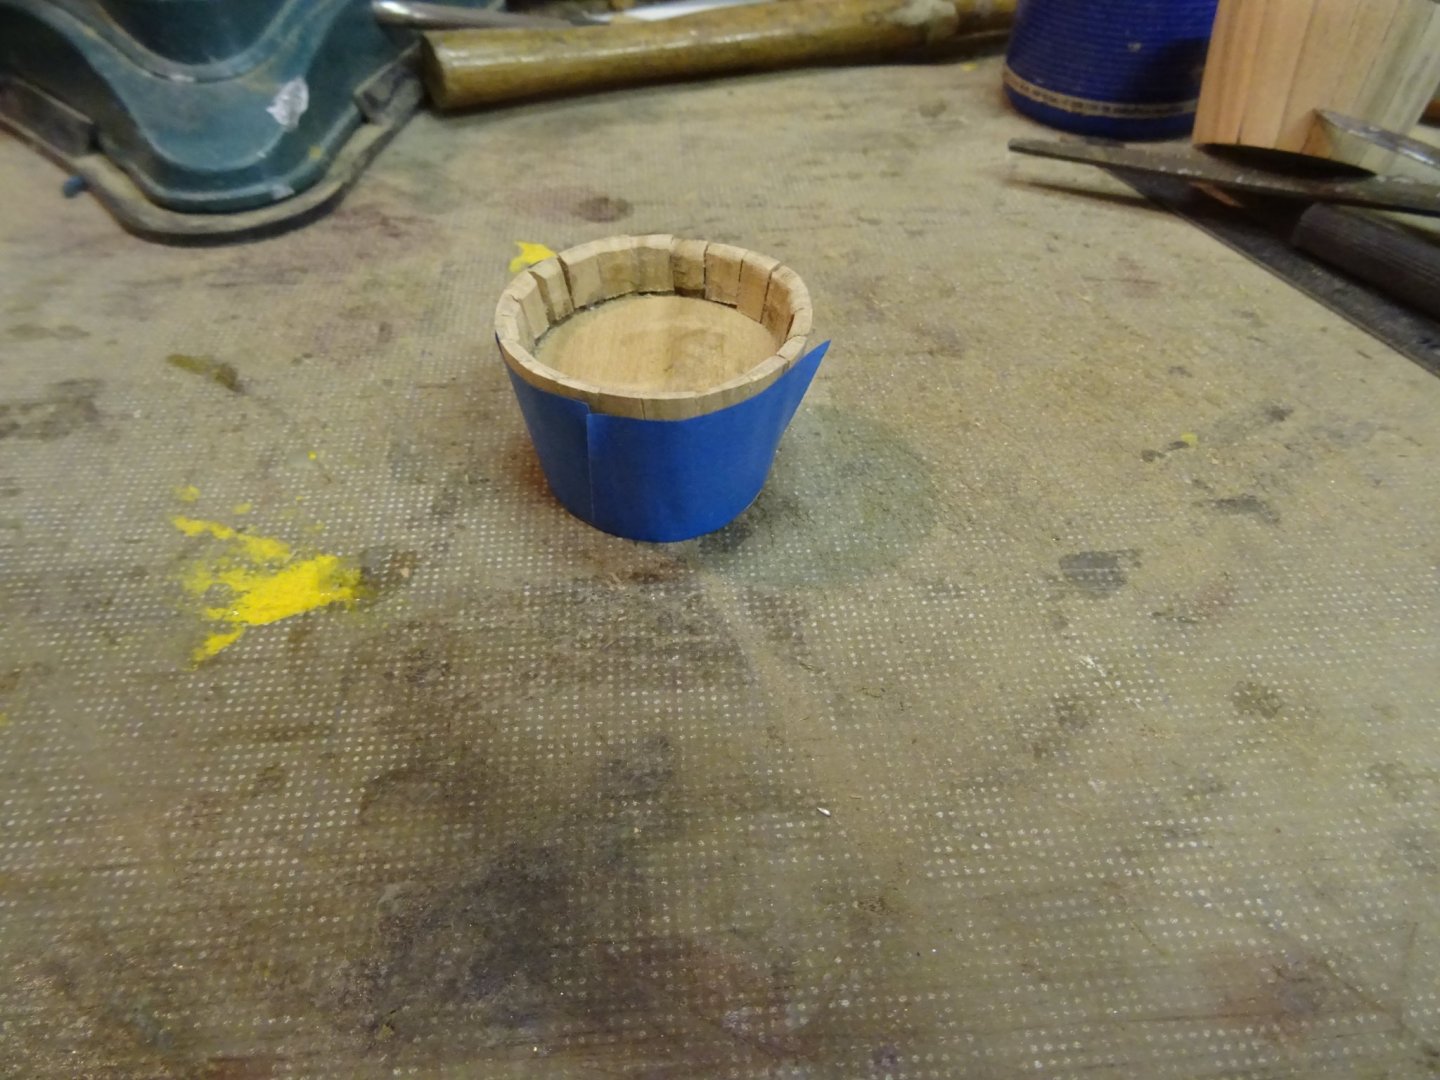
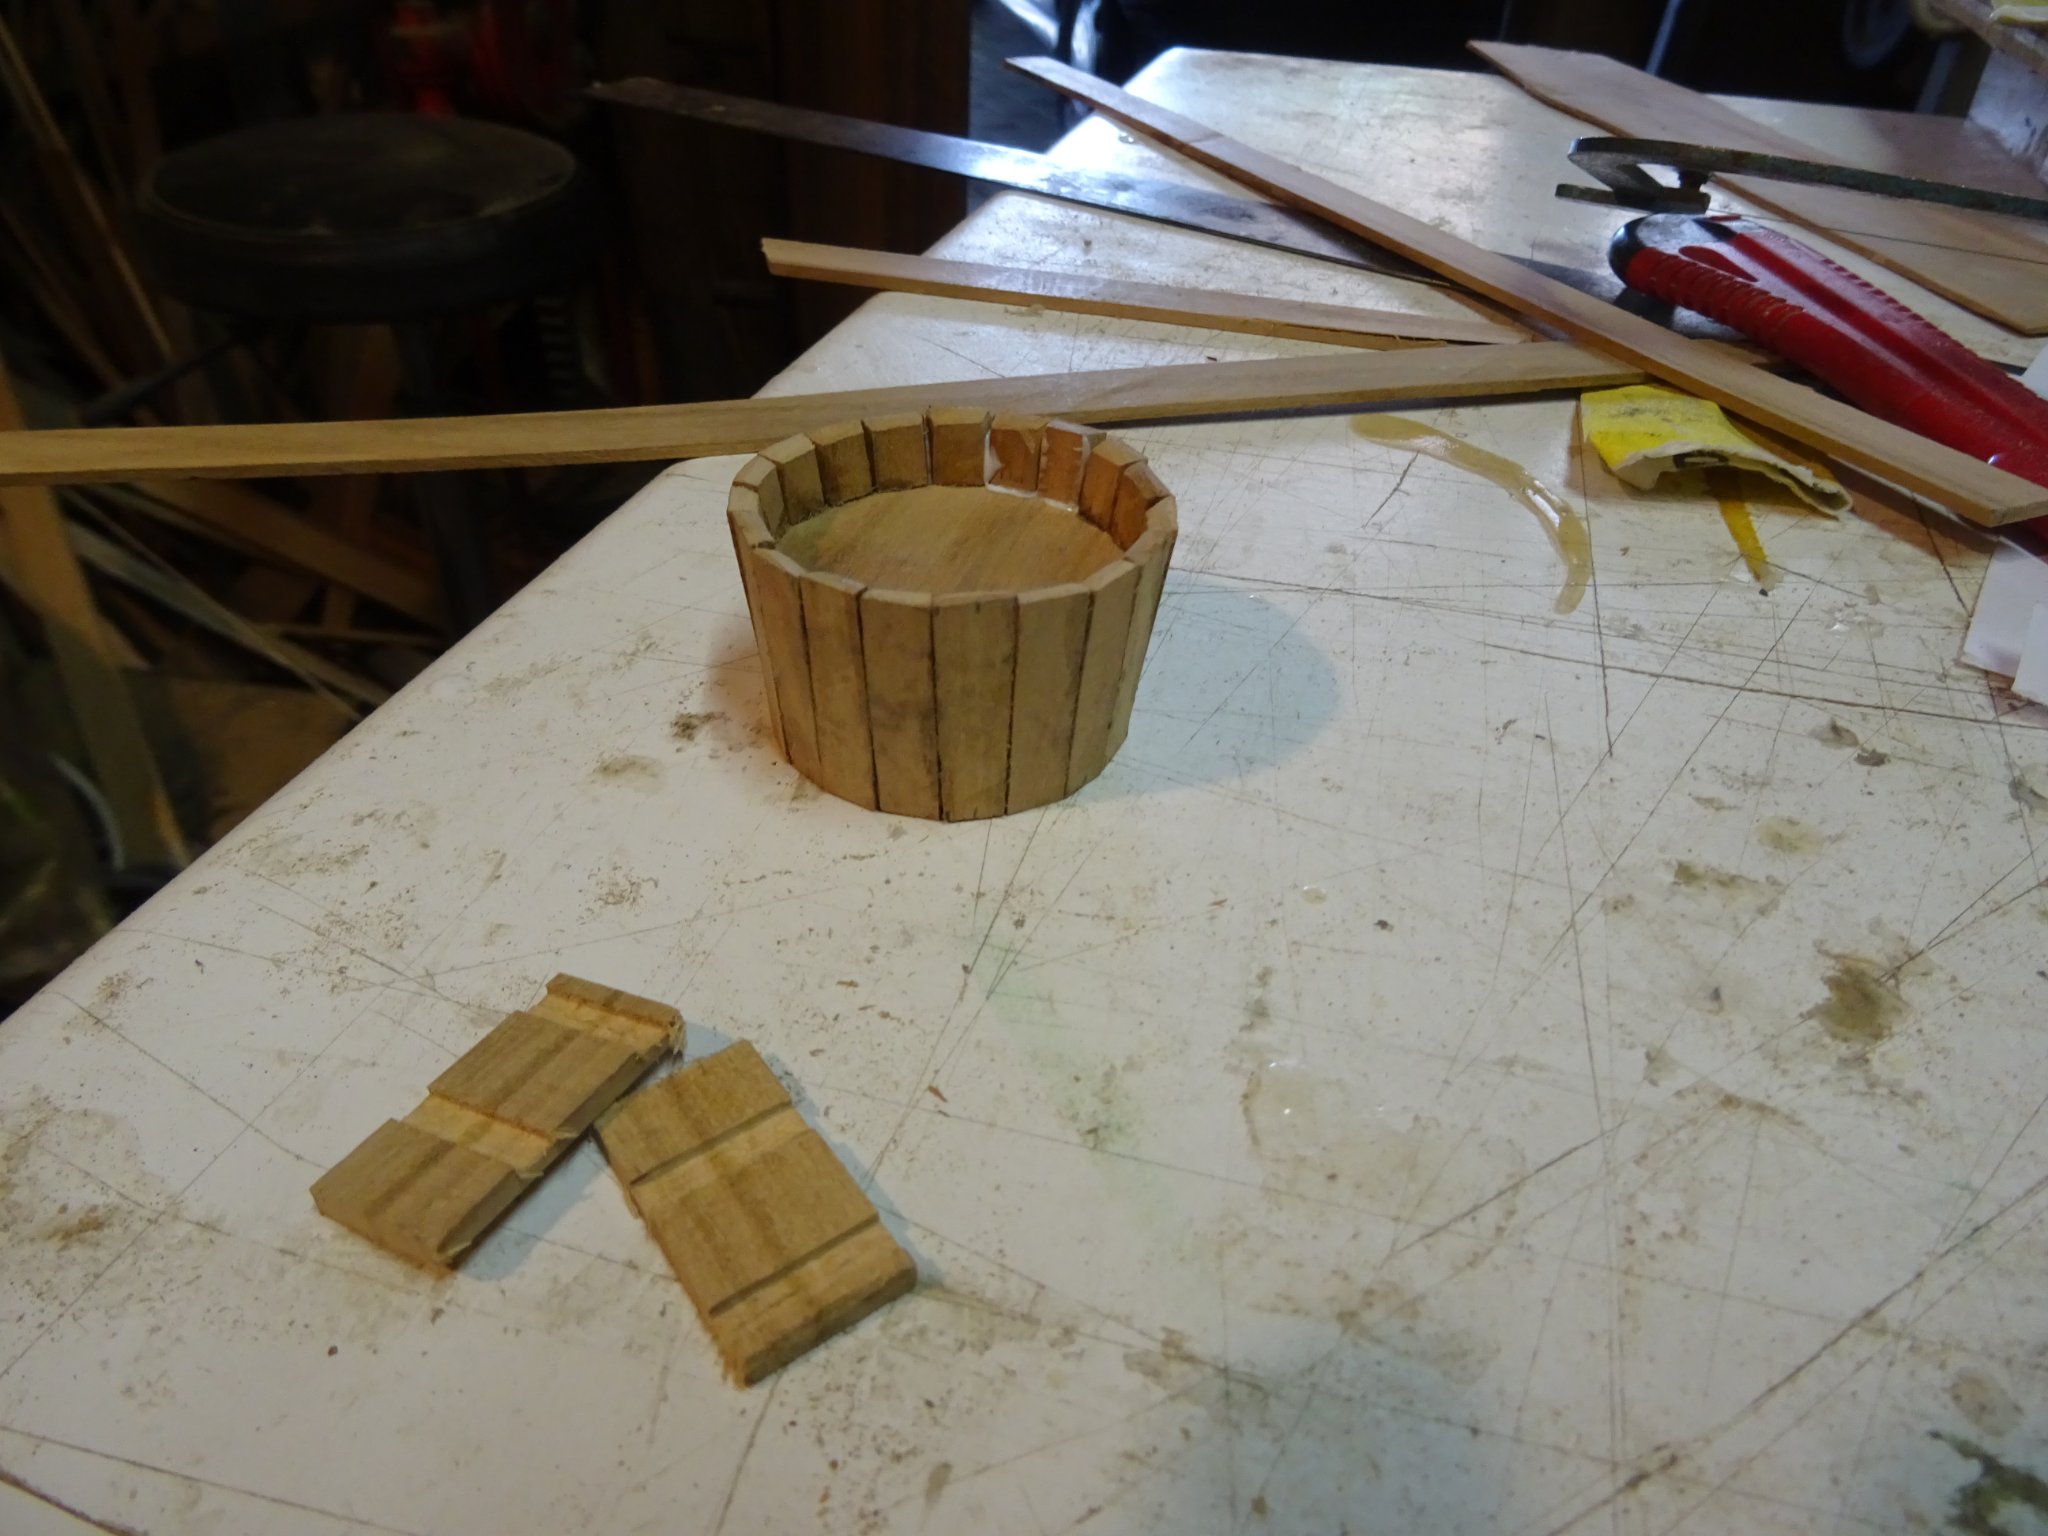
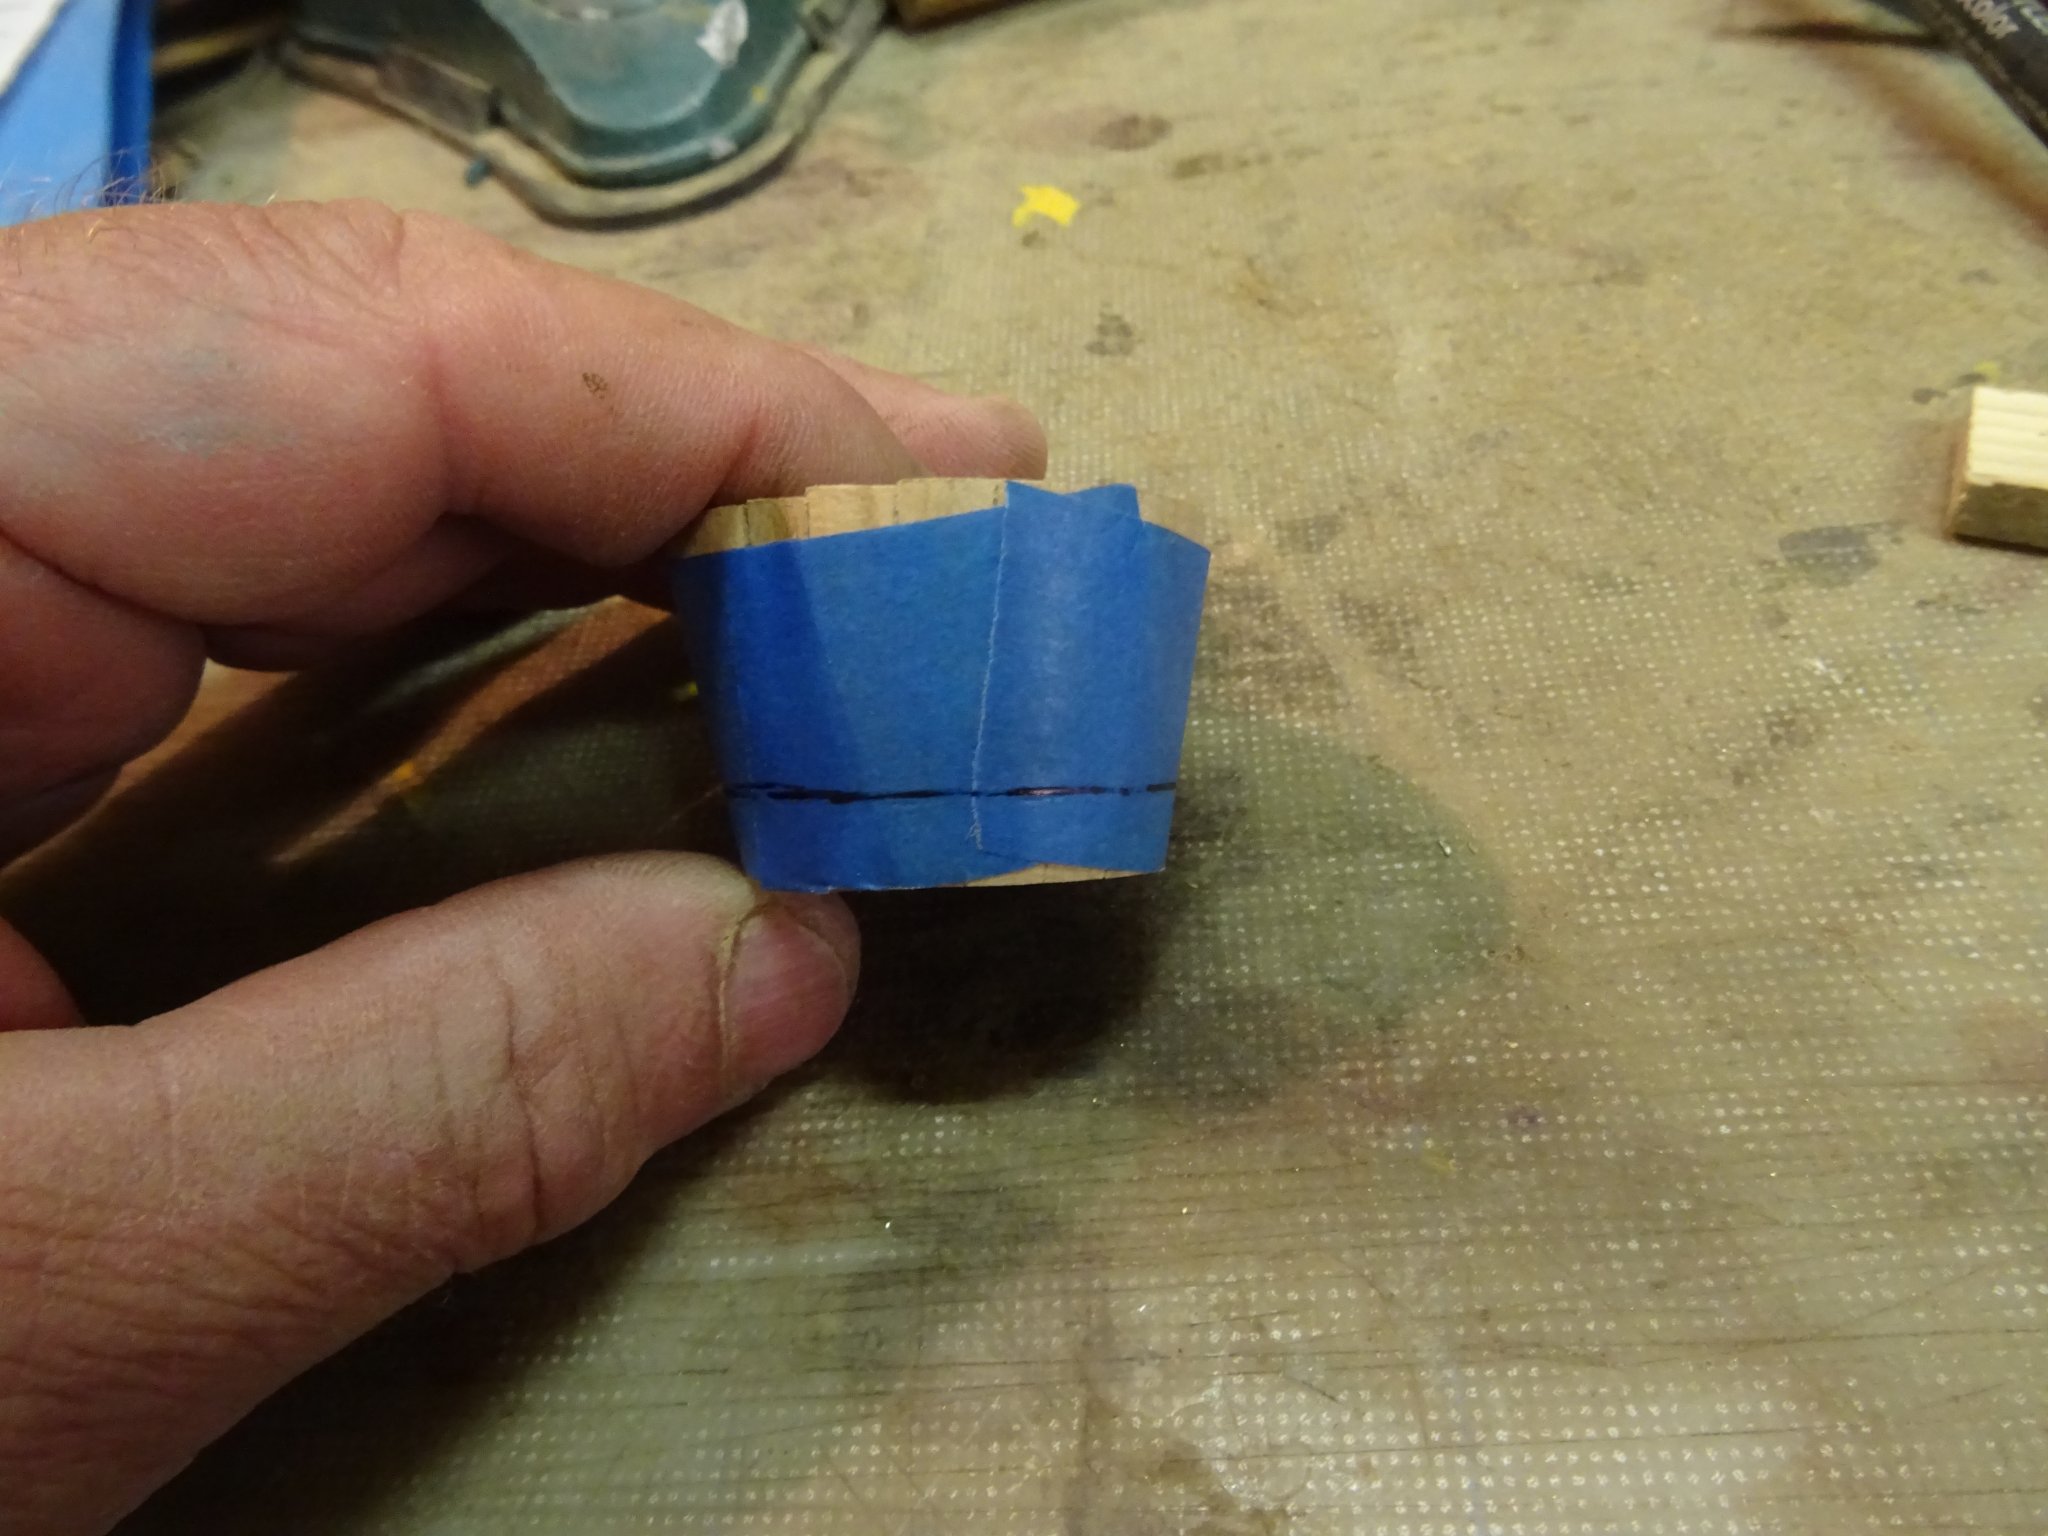
8.3 Water keg
Each boat was equipped with a water keg. I suppose that when the boat got far from the mother ship during a long hunt in tropical waters, the crew could appreciate a drink of fresh water.
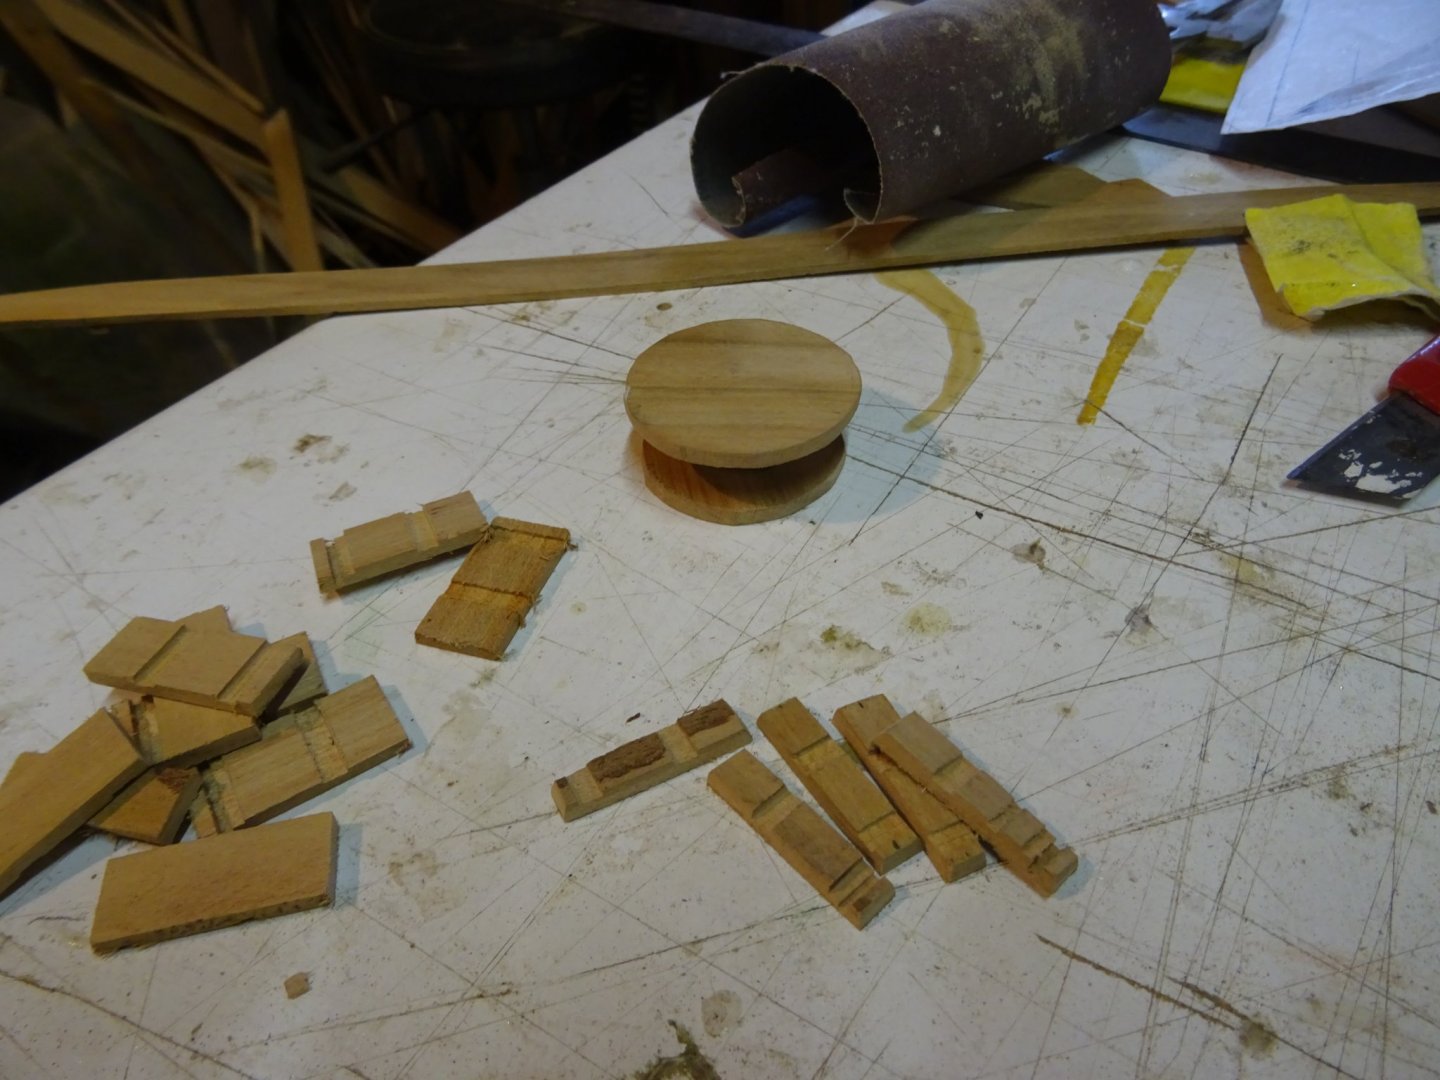
To make the barrel I glue a series of wooden beams with slanted sides around a cylindrical piece of wood.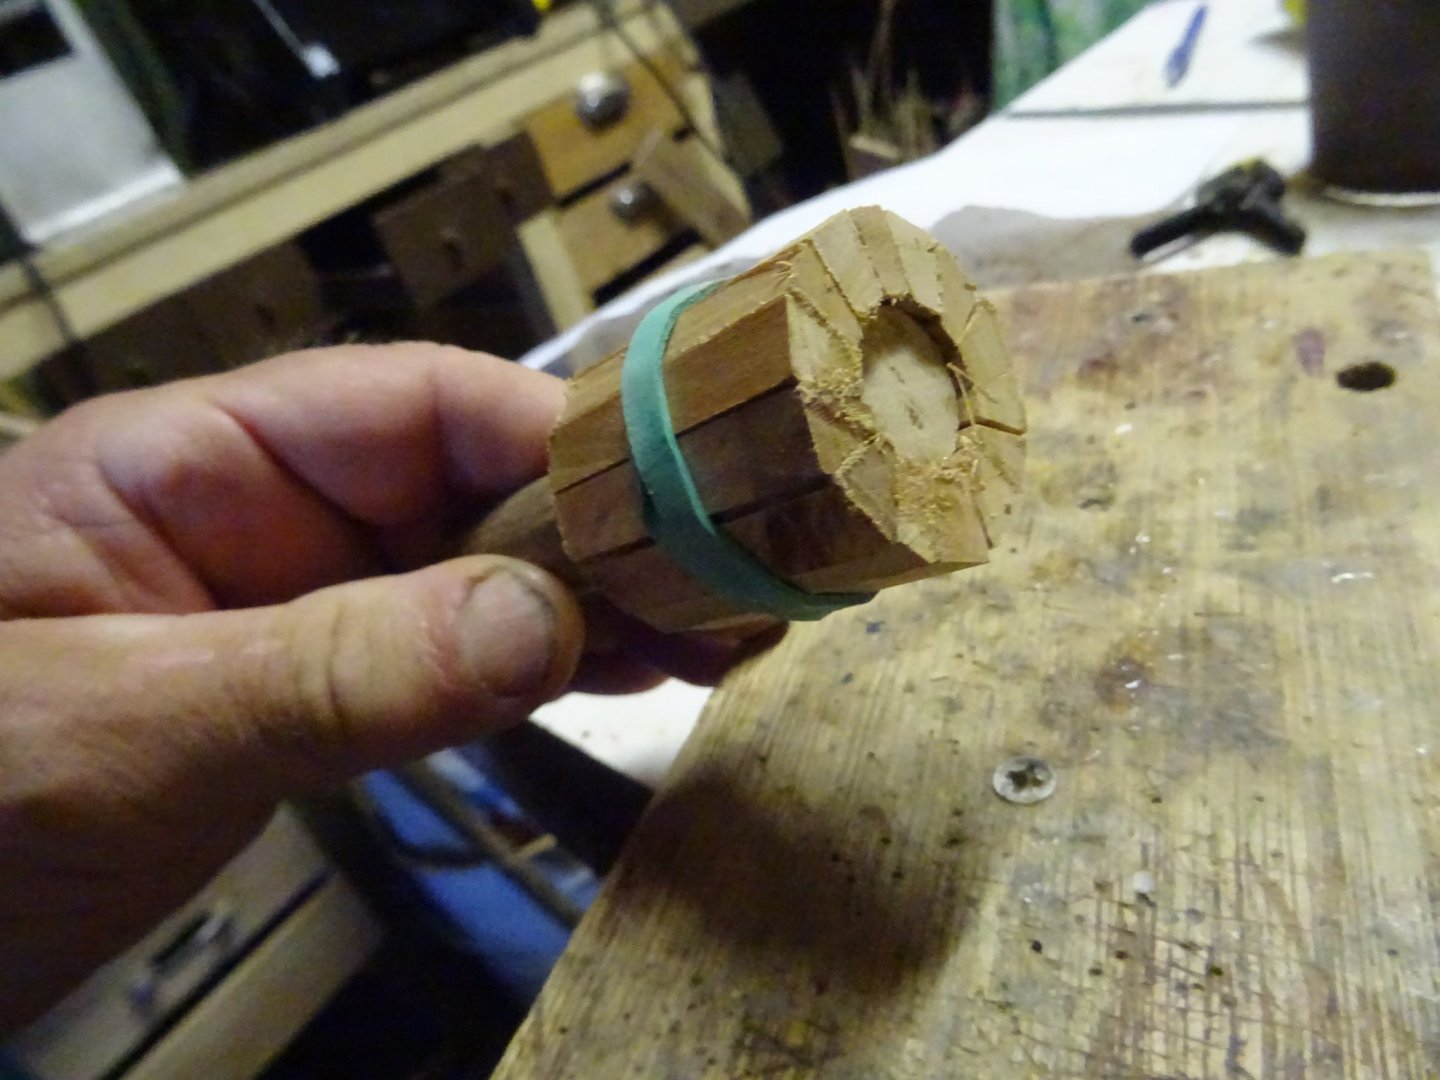
Then I turn it in barrel shape on the lathe.
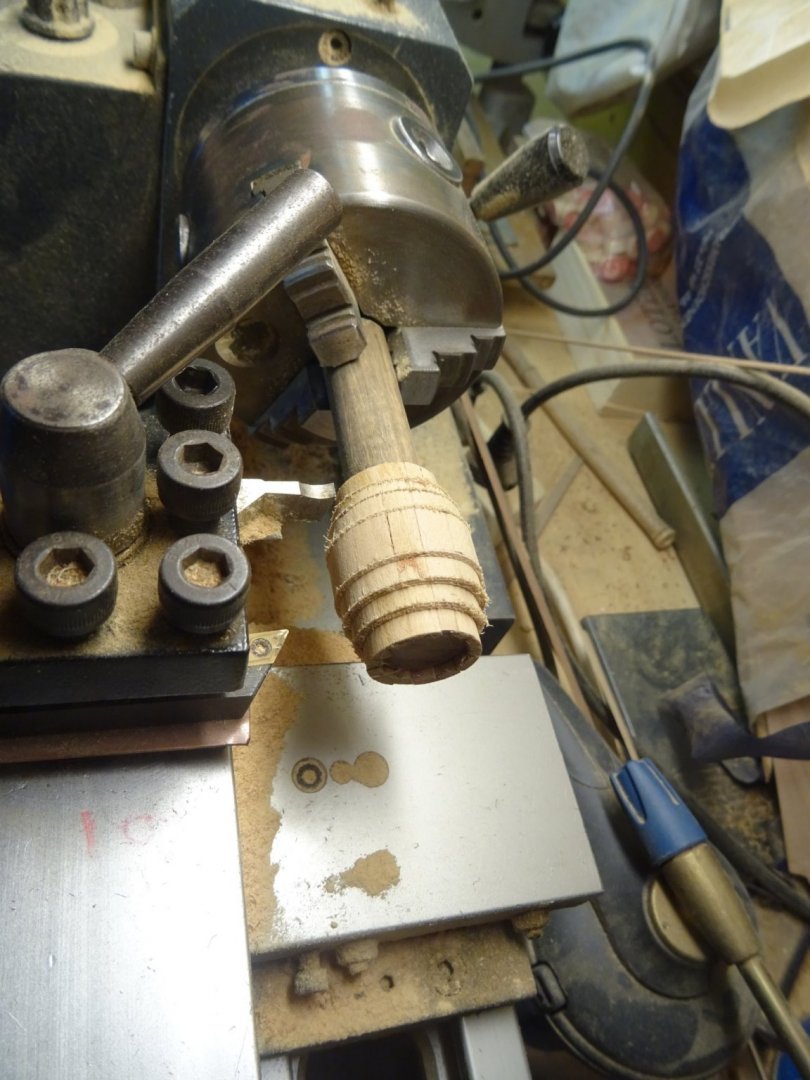
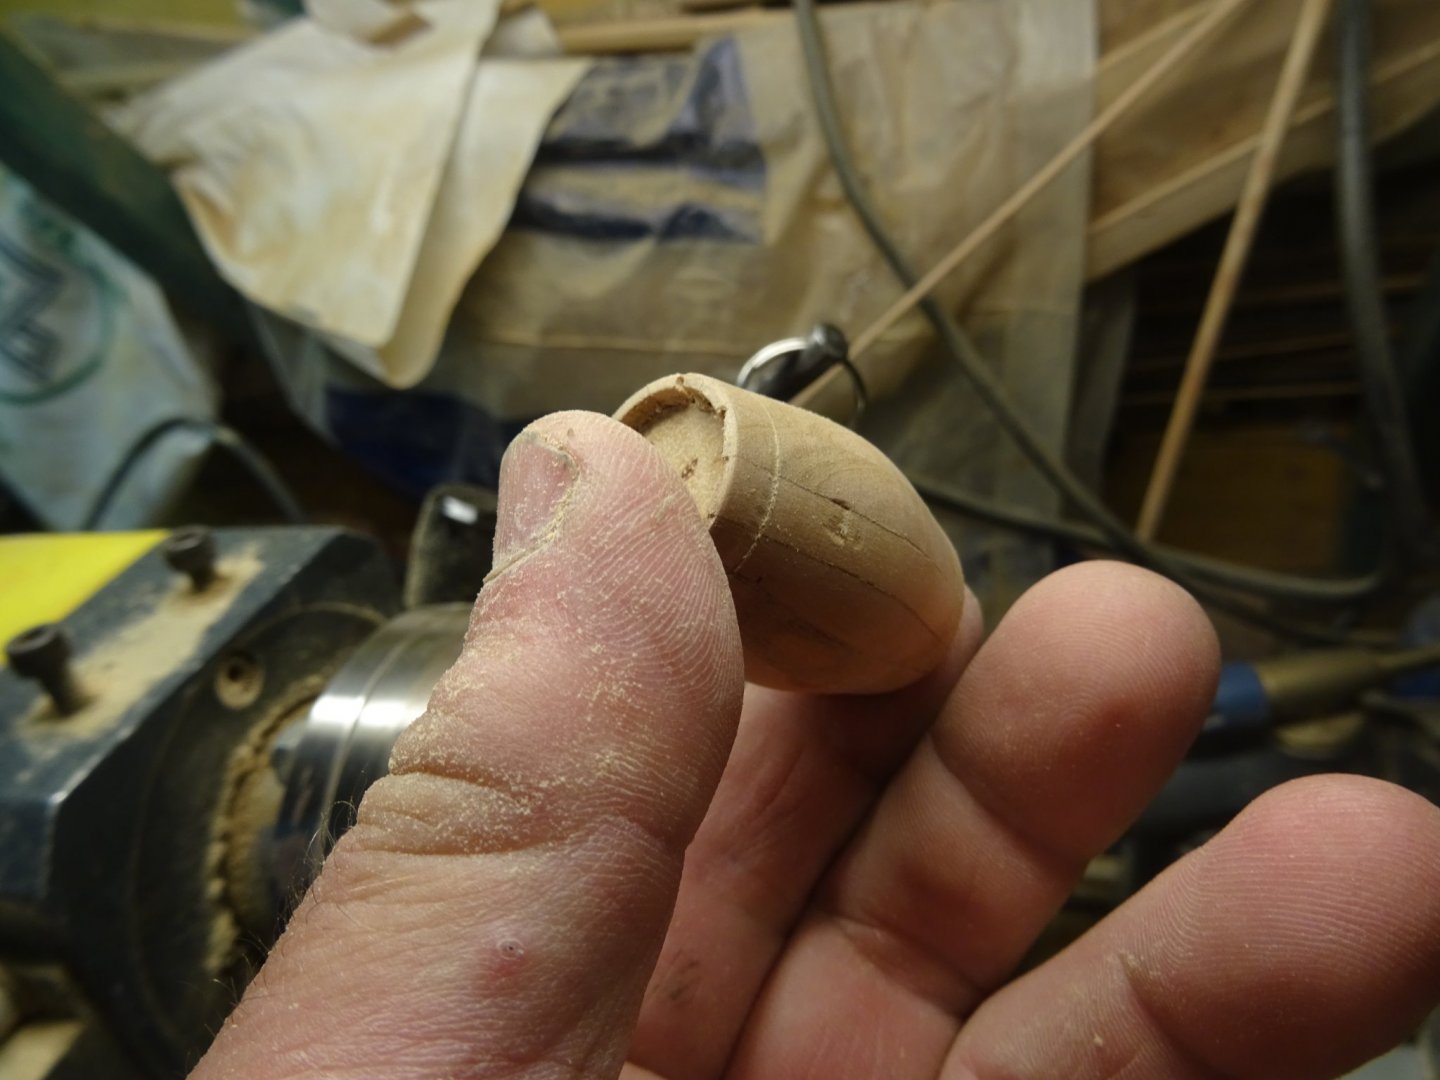
The hoops are made as described in paragraph 8.2 for the line tubs. The excess of the cylindrical stock is sawn of and drilled out a bit. Finally a small hole in the side and a stopper complete the kater keg.
- vaddoc, mtaylor, GrandpaPhil and 4 others
-
7
-
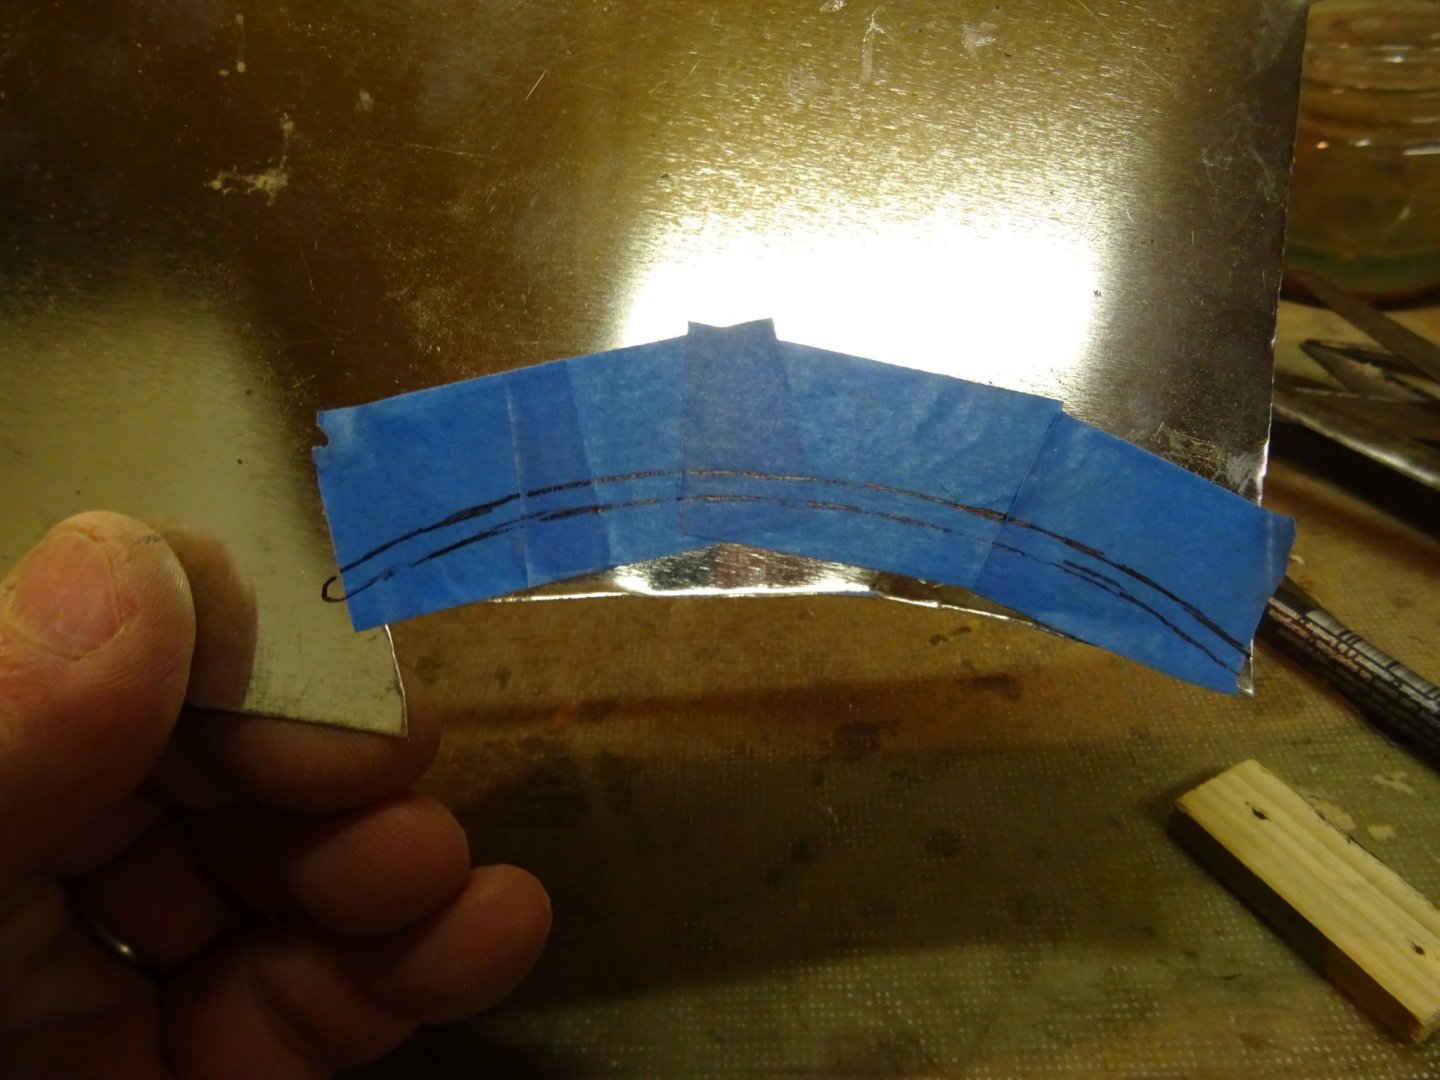
8.2 The line tubs.
According to Erik Ronnberg whaleboats carried some 300 fathoms of harpoon line in two tubs. A tub with 200 fathoms of line and a reserve tub with 100 fathoms.
I start to make two wooden circles, one of them is the tub bottom and the other with a slight larger diameter. Between the two slices, I glue a small wooden block to separate them a bit.
I saw also the side planks of the tub, small planks of which the long sides are a little slanted. In the planks are two grooves which fit into the two circles.
The tub is made by simply gluing the planks around the two disks.

The tub is held together by two metal hoops. As the tub is conical the metal strip which has to come round it cannot be straight. To determine its curve, I glue short strips of duck tape round the tub and mark the level of the hoop.

When the tape is removed from the tub and folded open, I obtain a nice shape of the curve. I glue it on a piece of tin.

I draw the outline of the hoop and my template is ready to cut the tin strip which will form the hoop. The hoop is then folded around the tub and the ends are soldered together.
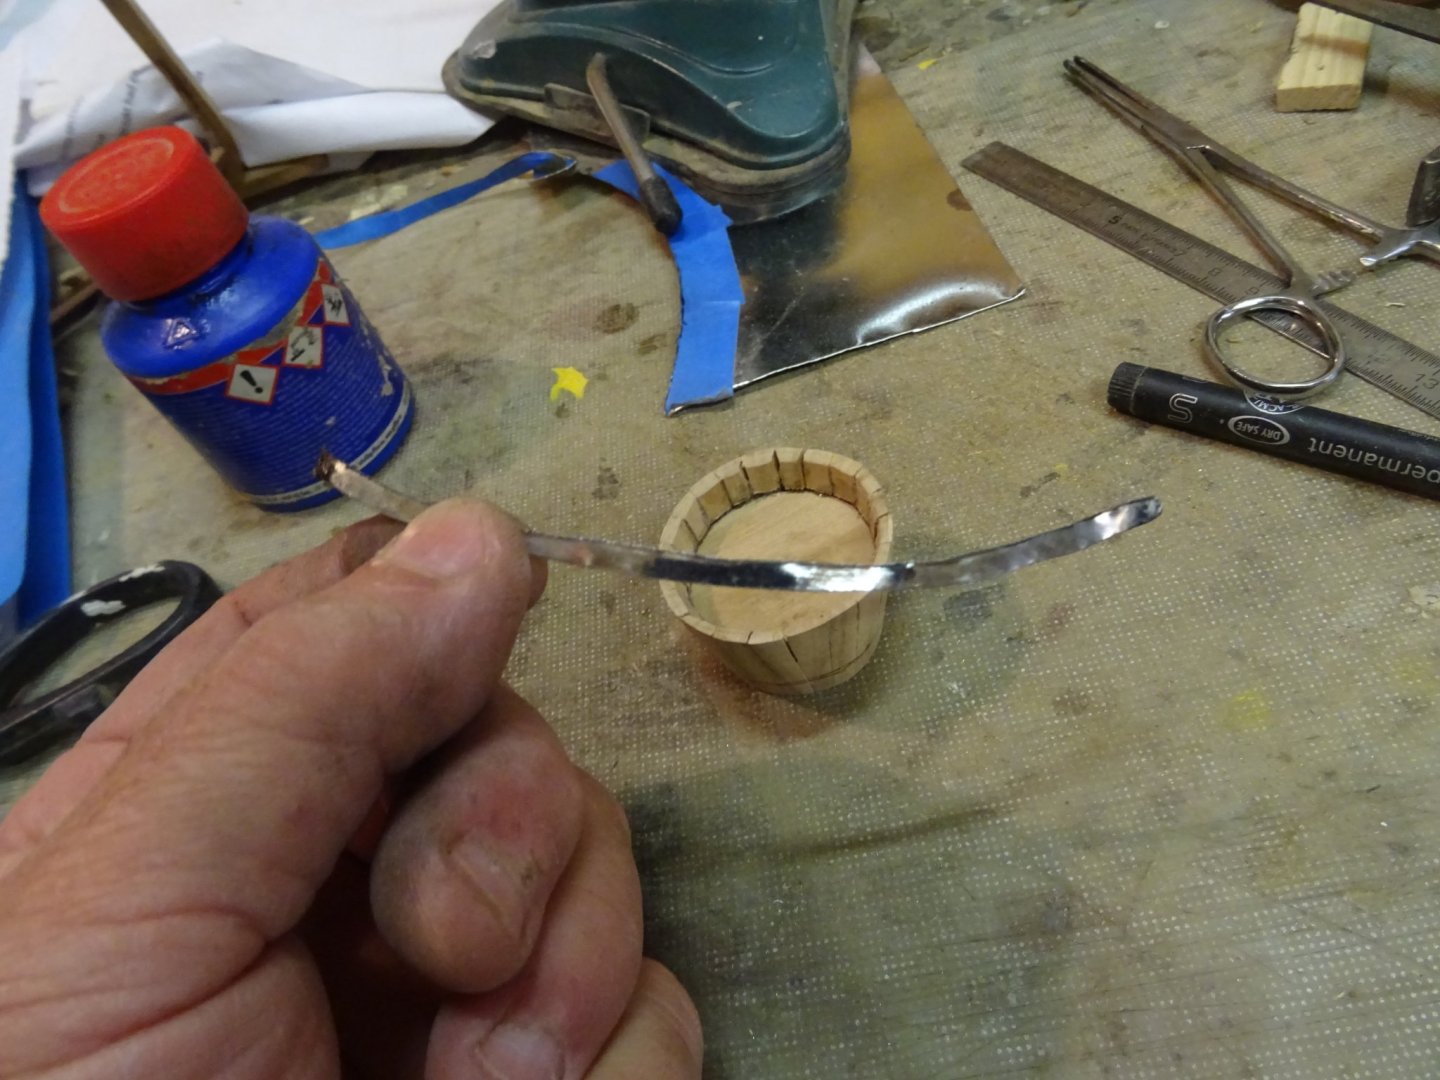
Here are the two finished line tubs. The hoops are blackened. The harpoon line is twisted and glued on the top disk of the tub.

The harpoon lines in their tubs in the boat.
- mtaylor, GrandpaPhil, vaddoc and 2 others
-
5
-
53 minutes ago, yvesvidal said:
Thank you for the compliments.
The lettering.... I used Dry Transfers as the kit does not provide any decals or templates. I went with the Roman font Gold characters from Woodland Scenic MG703.
The characters come is various sizes which makes it handy. Note that you will need two sets because of the scarcity of the letter "M" on one sheet.
The stern marking was done on a piece of white paper painted black with gesso (like the rest of the hull). That piece of paper is carefully cut following the edges of the large oval shape provided in the kit. Basically, the paper edges will be hidden underneath the wood frame, around the name. It is difficult to dry-transfer/rub characters on the hull directly and it is much easier on a piece of paper on an horizontal table. The "bubble" of paper is then glued on the stern and the wood framing is placed on top with four tiny dots of CA glue to hold it.
For the bow markings, I used a small piece of wood, painted black; then I dry-transfered the characters and finally glued the small piece of wood to the hull. It is not entirely prototypical but I could not find a way to place the transfers on the finished hull.
Yves
Thank you very much for the information, Yves.
-
Indeed very nice work Yves.
How did you do the lettering of the ships' name?
-
21 hours ago, vaddoc said:
What a wonderful model! Regrettably I ve only been able to visit GL. Excellent job with the planking and rabets. Actually, top job with everything. Clearly you 're having a lot of fun!
Could you explain how you stained the wood? It came out very good.
Merry Christmas and a happy new Year!
Vaddoc
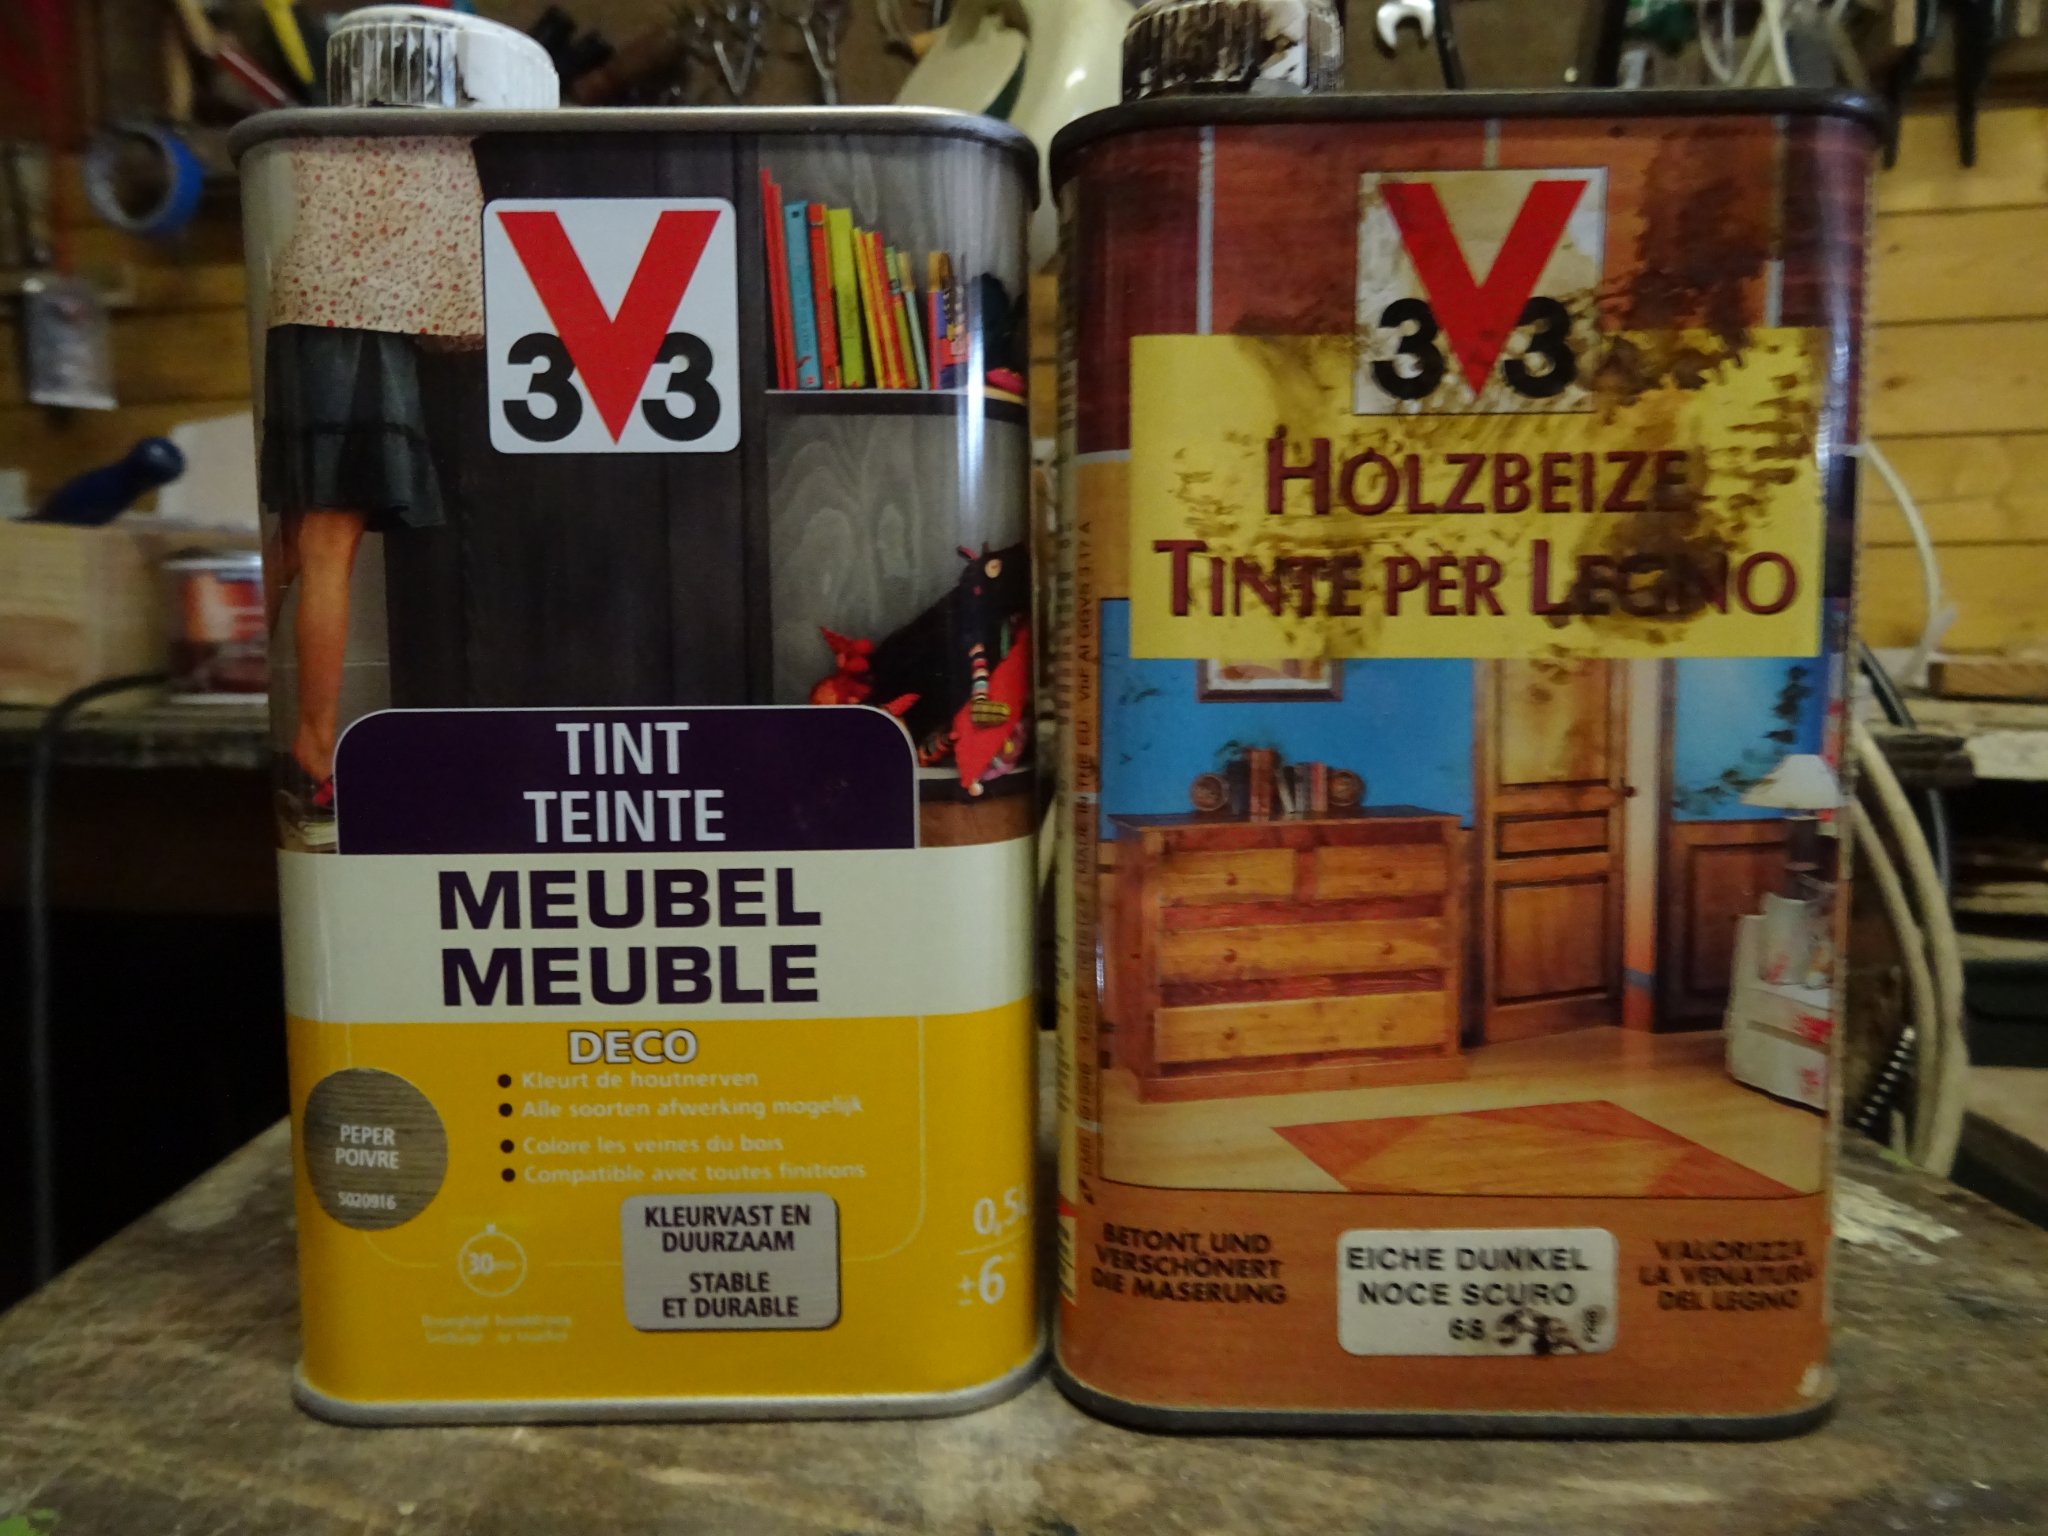
Thank you Vaddoc.
The model is made with cherry wood. The finish is with two coats of clear matt furniture varnisch on water base, softly sanded after the first coat.
The dark parts (thwarts and gratings) are first colored with woodstain color 'dark oak' and afterwards varnished.
The shafts of the harpoons and lances are colored with the 'pepper color' and varnished afterwards.
These are the stains that I use. Dark oak to the right and pepper color th the left.

-


Mary Day by jdbondy - 1:64 scale (3/16" to 1 foot) - Schooner
in - Build logs for subjects built 1901 - Present Day
Posted · Edited by G.L.
That's a very exciting and educational story and very fine craftsmanship.