


G.L.
-
Posts
1,553 -
Joined
-
Last visited
Content Type
Profiles
Forums
Gallery
Events
Posts posted by G.L.
-
-
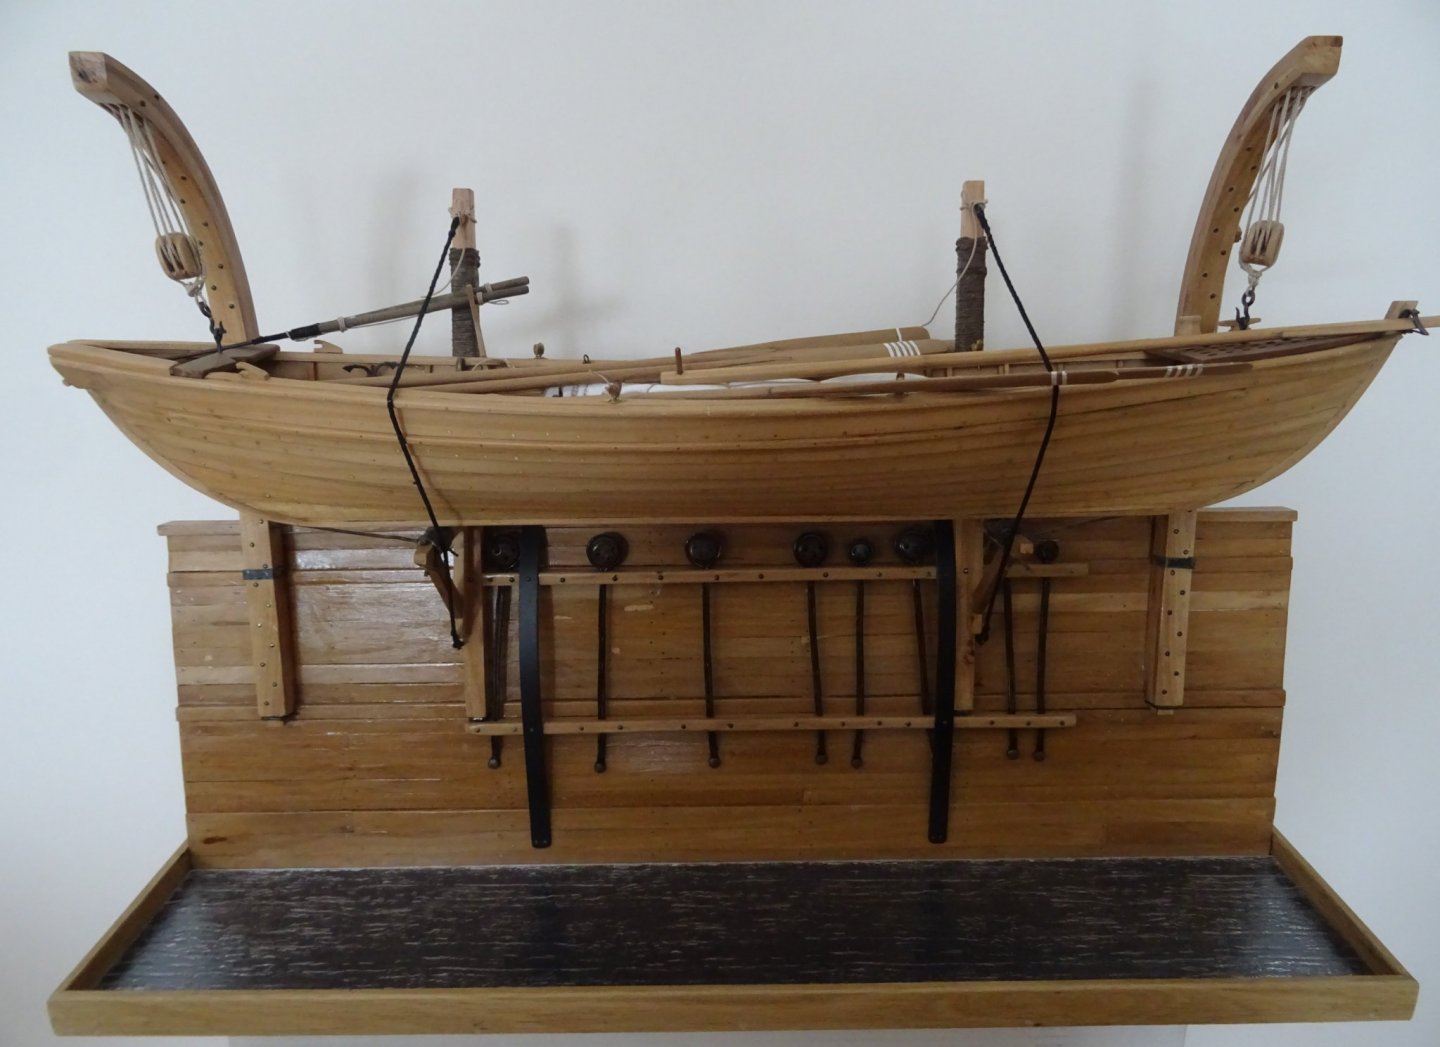
This is the first time since three years that I look back to this log.
Looking to the amount of dust that covers my model, I realize that I neglected this project too long. I was rigging the spars when I ceased regular updates. The rigging work is finished but I failed to take regular notes and pictures on the progress.
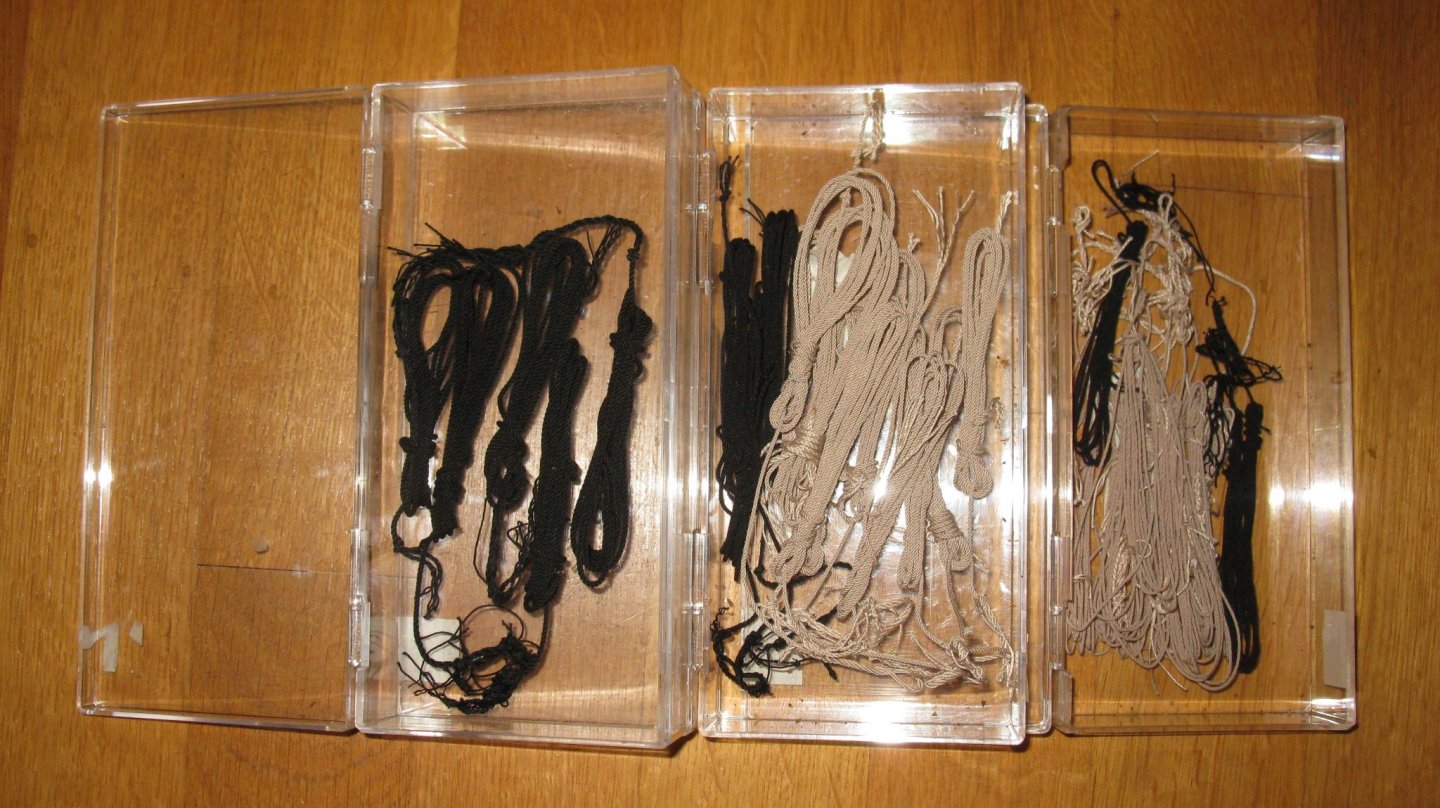
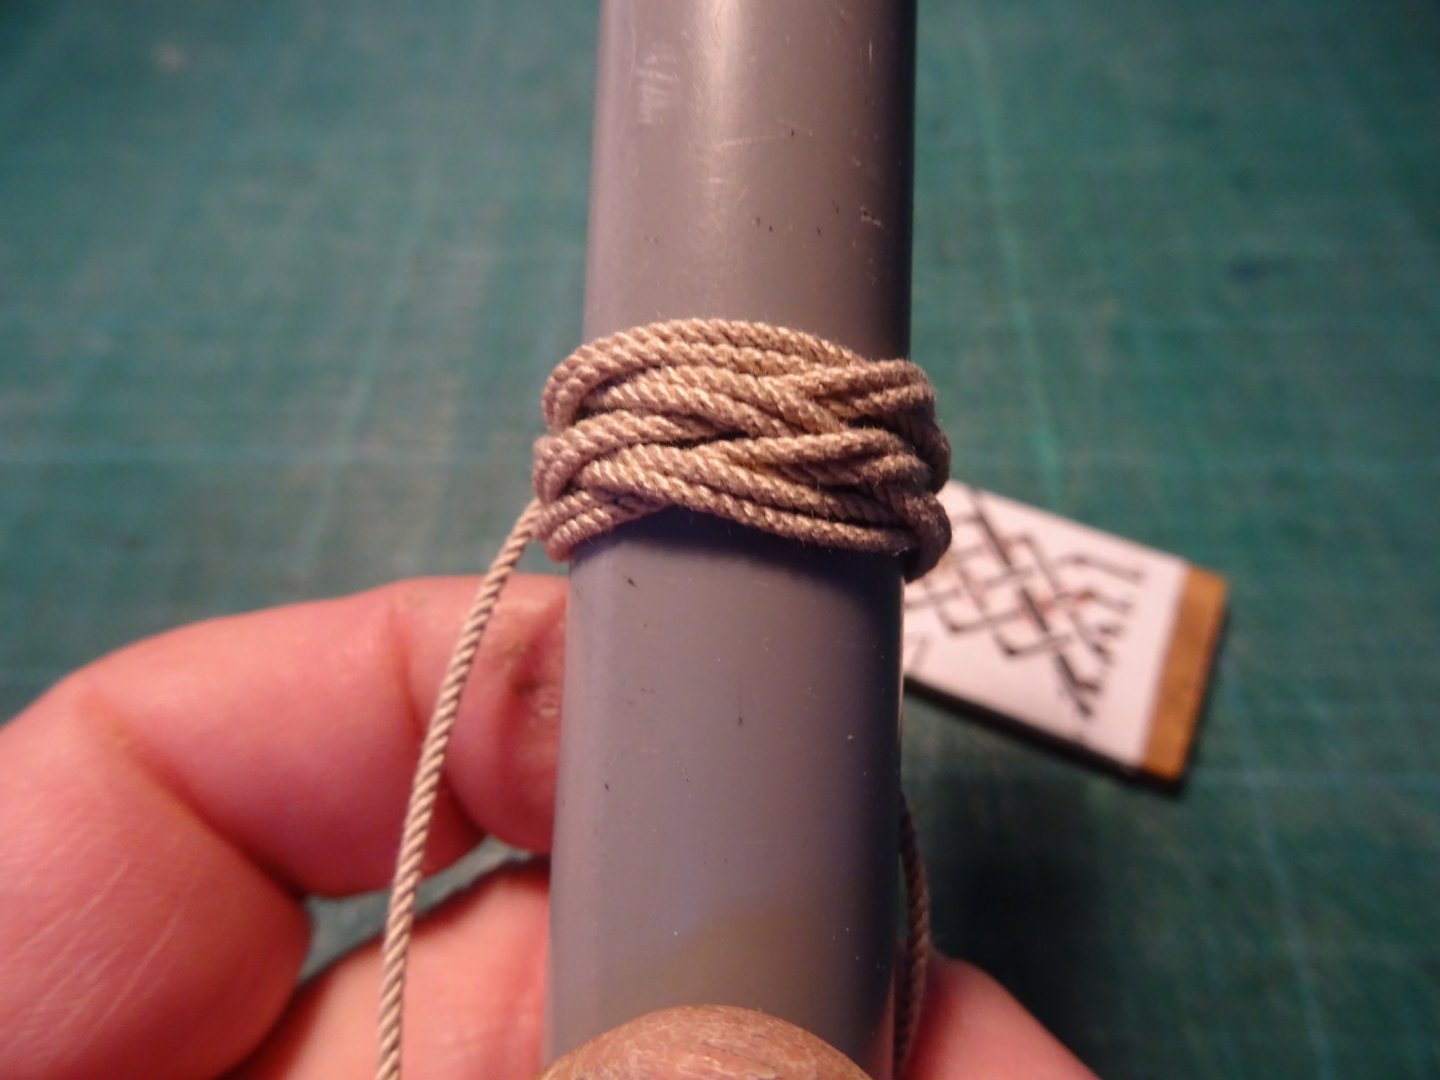
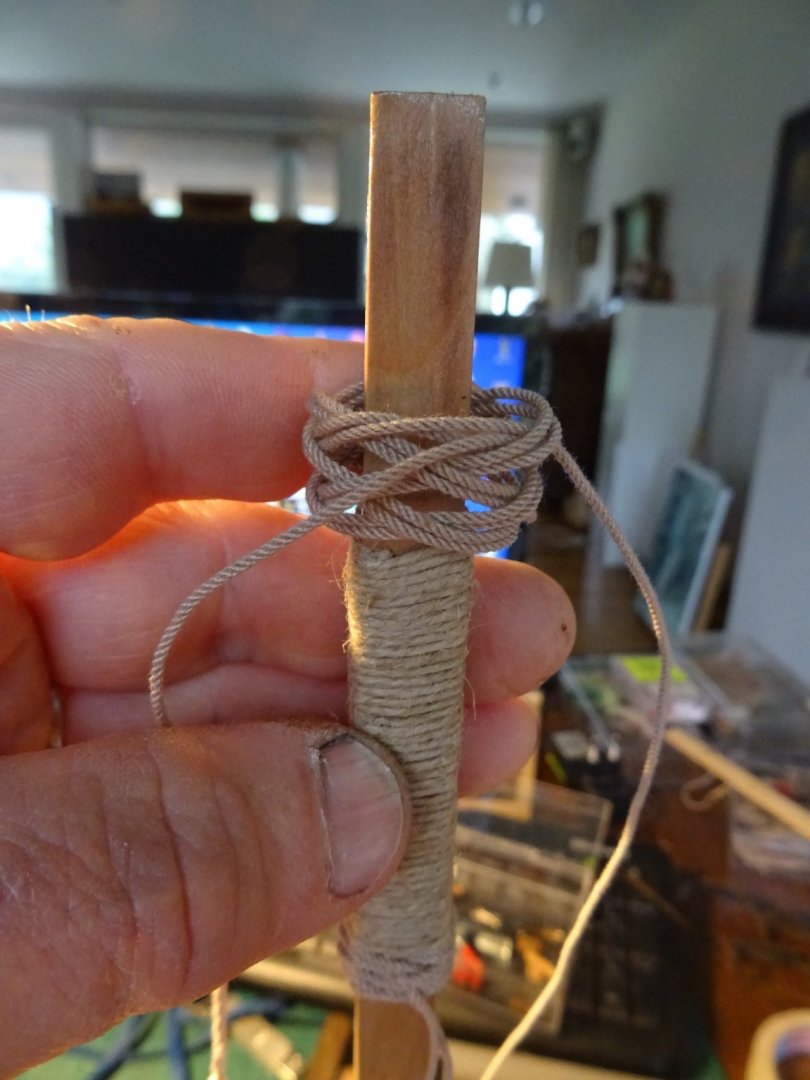
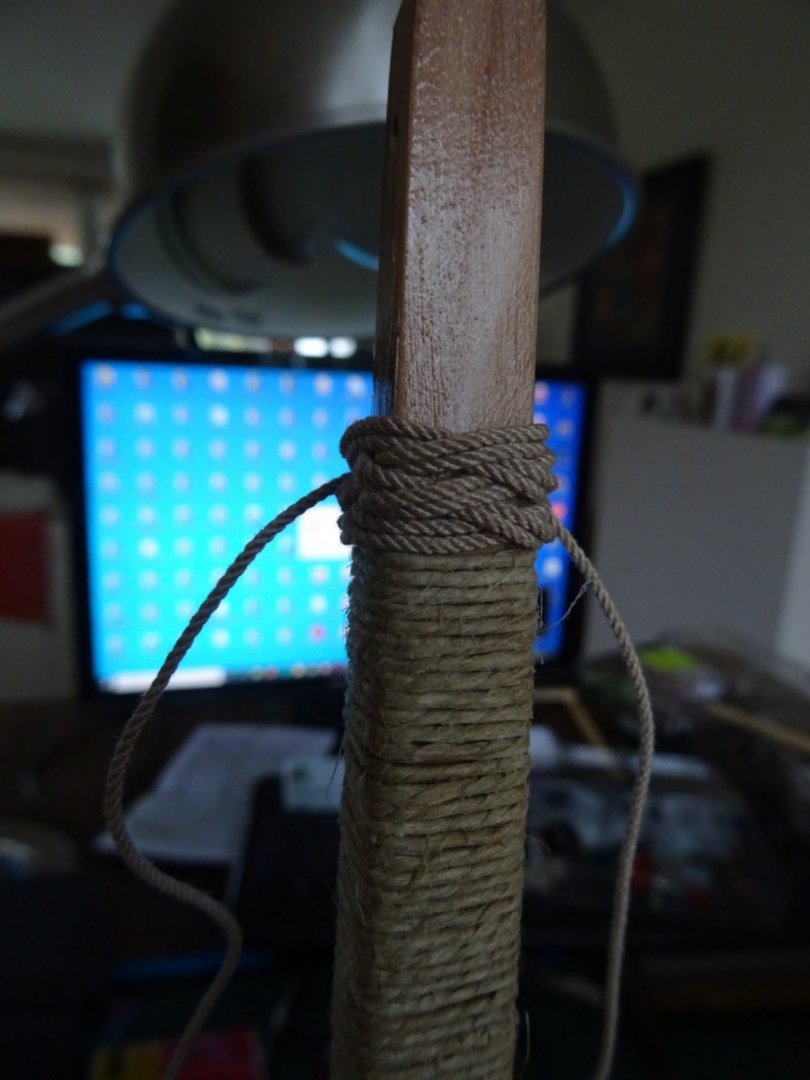
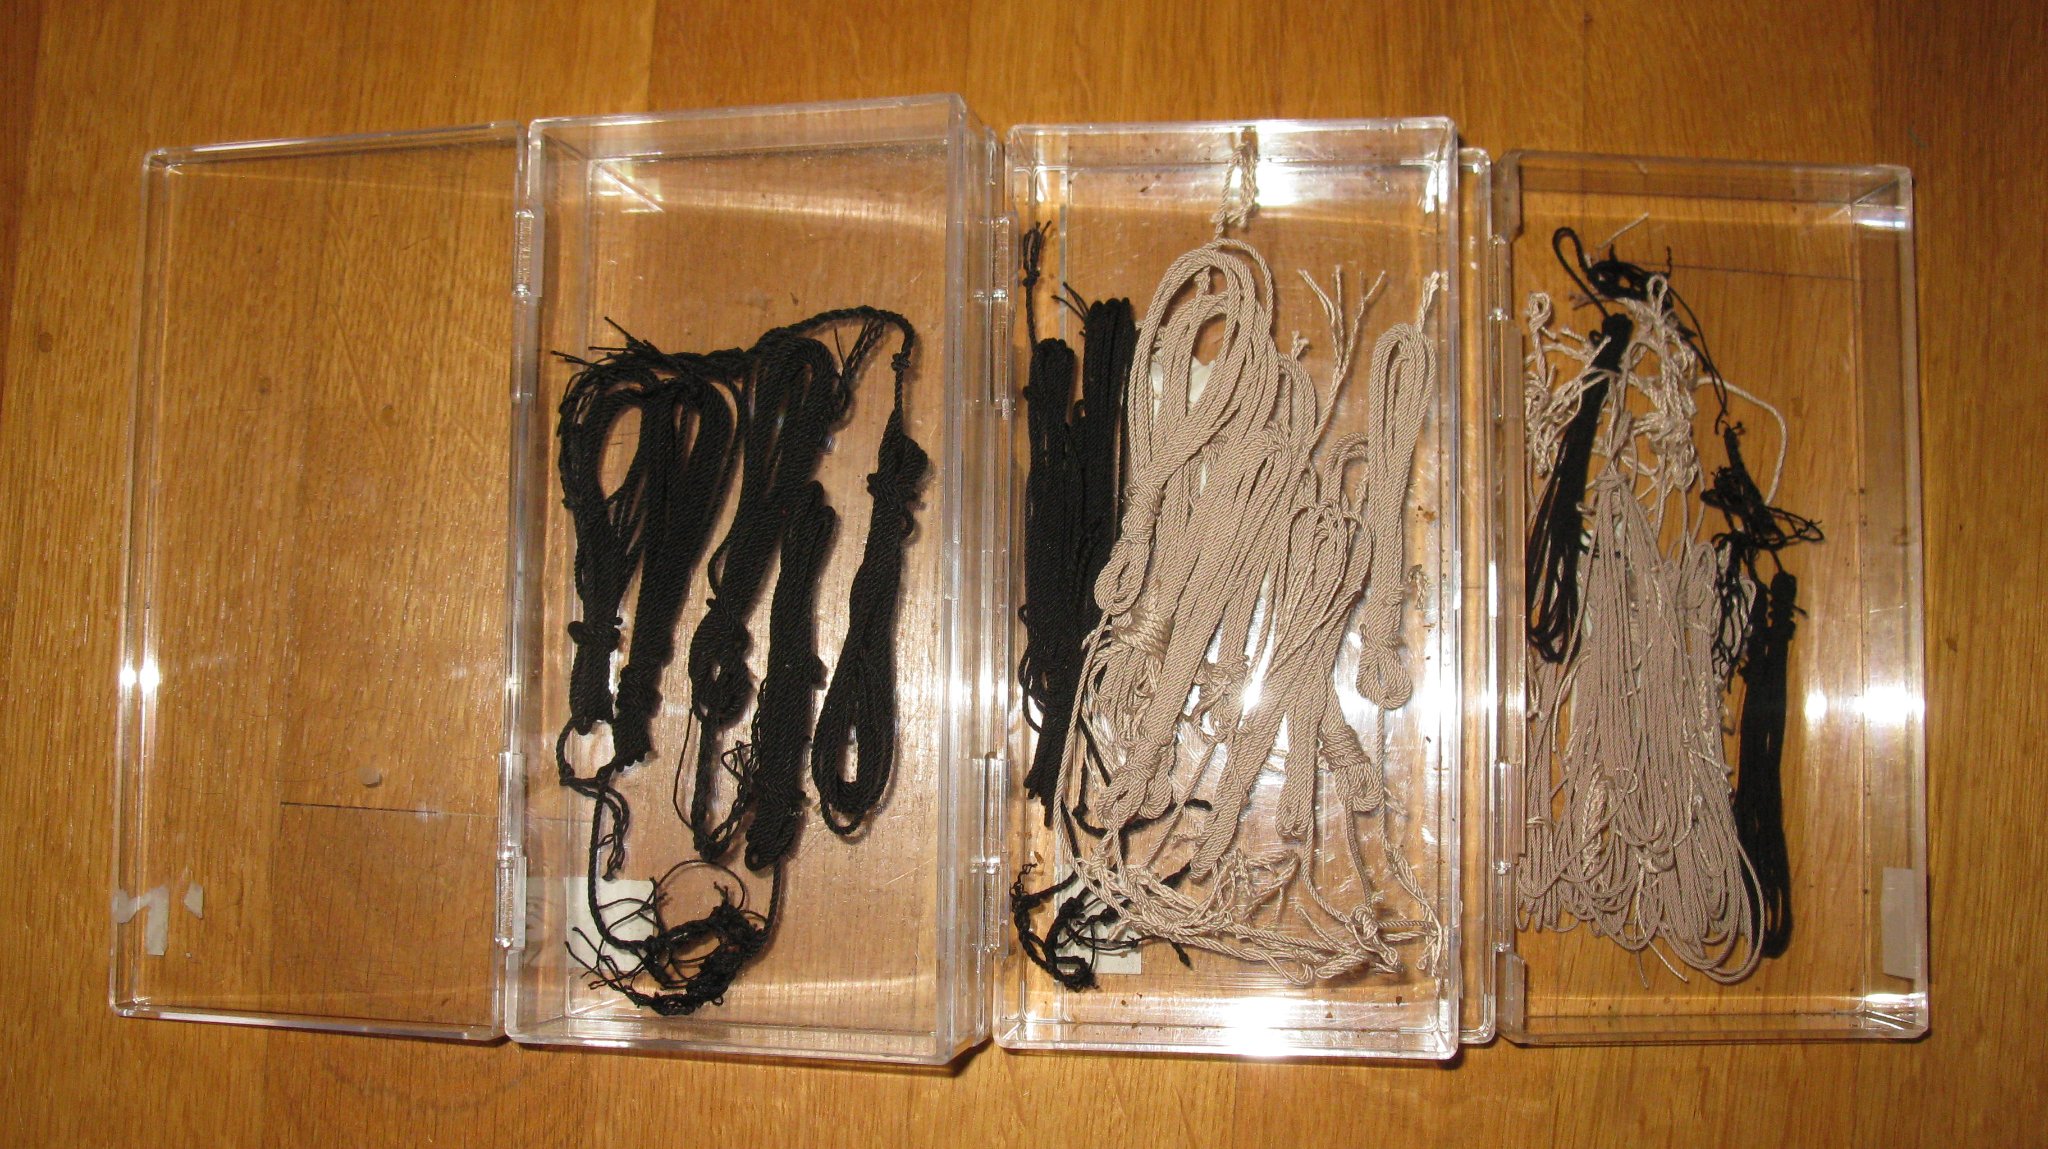
Before reviving this log today, I'll give you a short summary of what has been done since my story began to sleep. From next week on I promise again weekly updates until the shrimper is ready to set sail.The necessary rope is made:
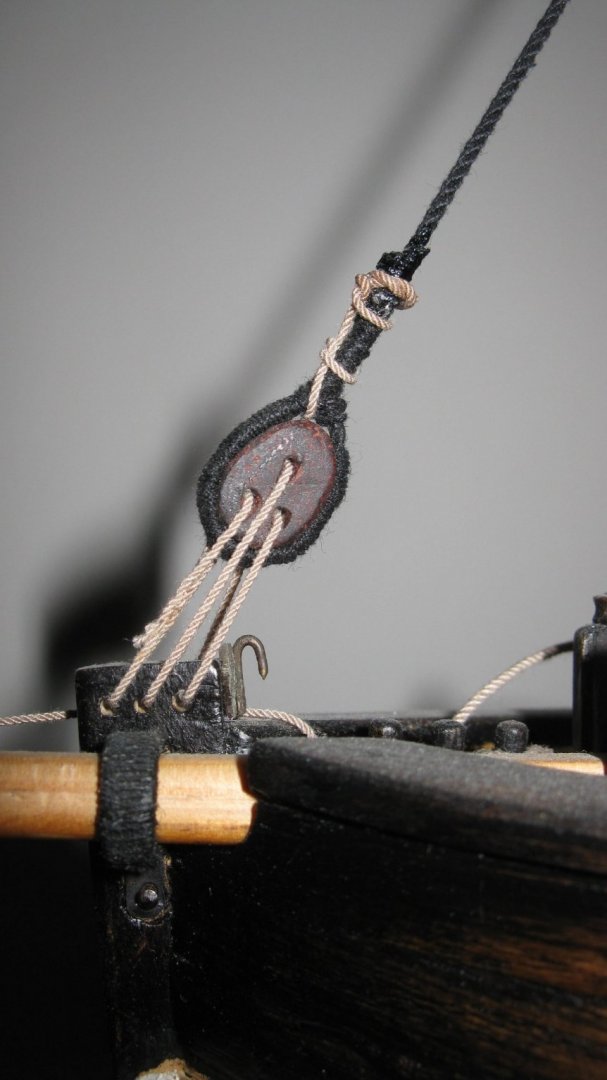
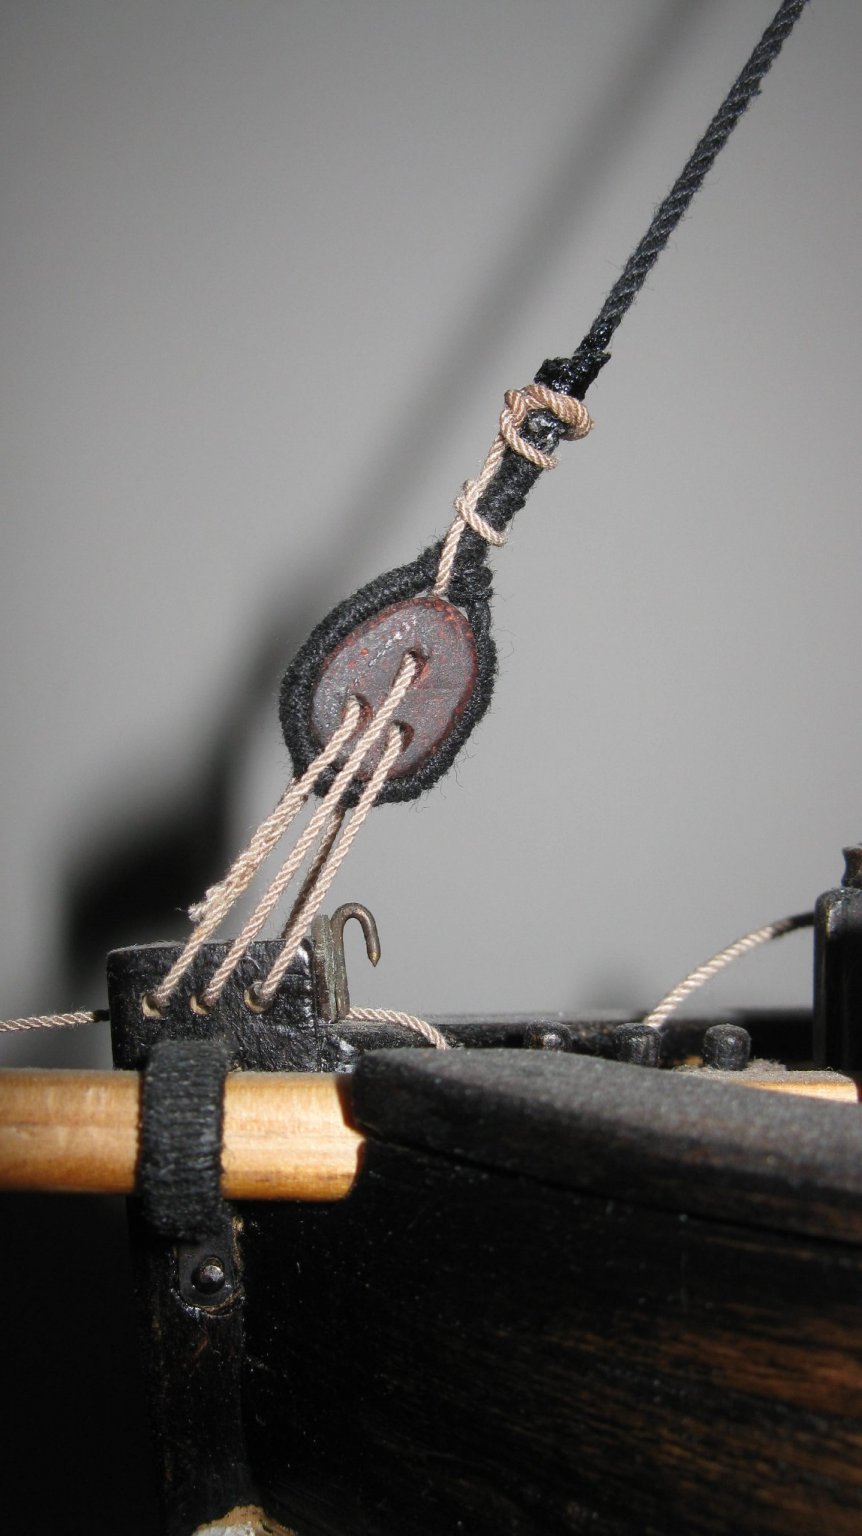
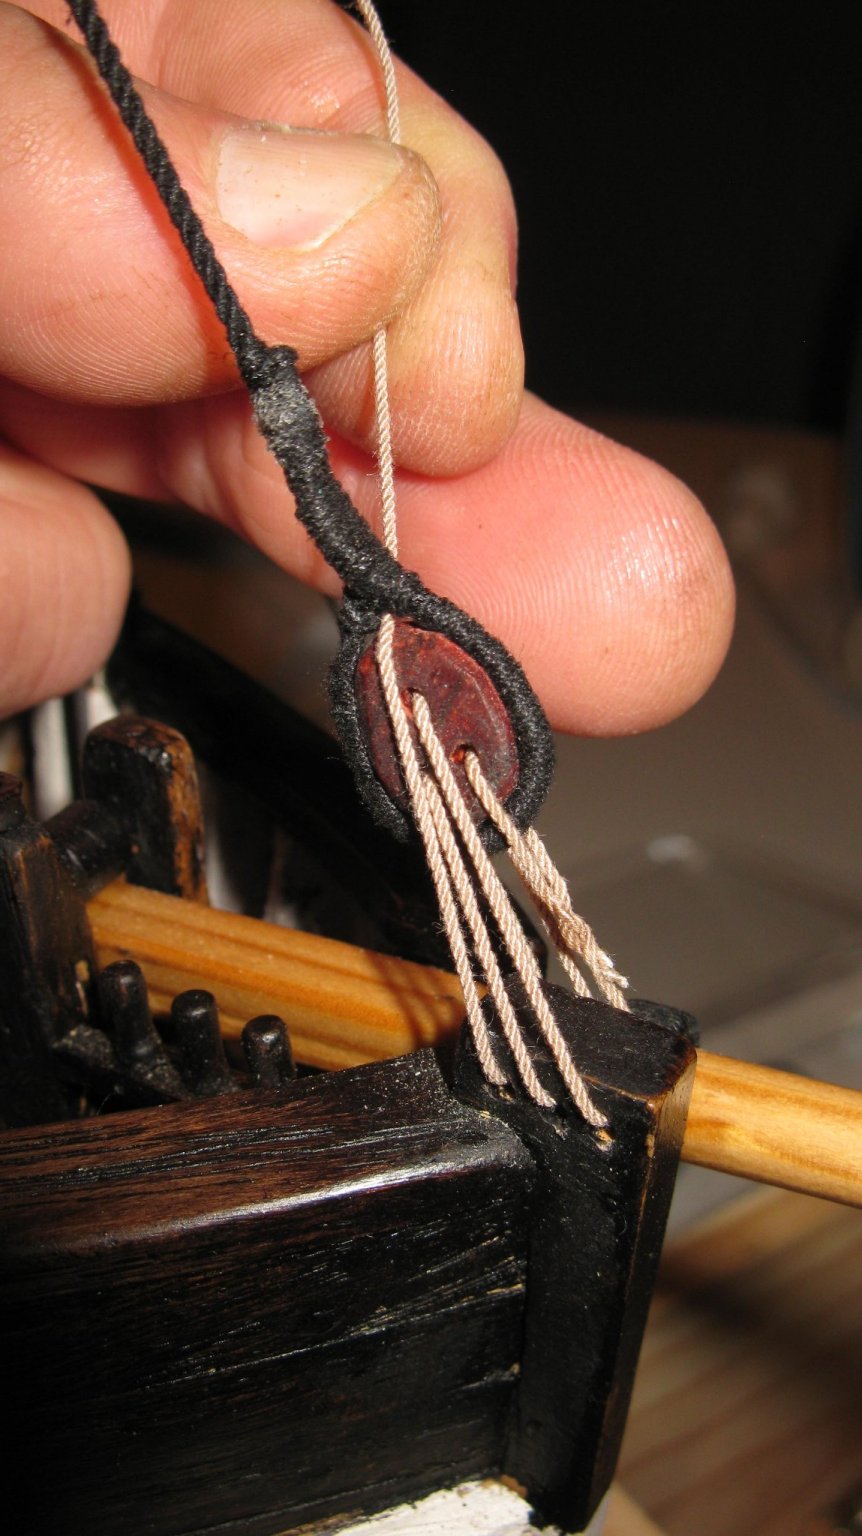
Fastening the forestay:

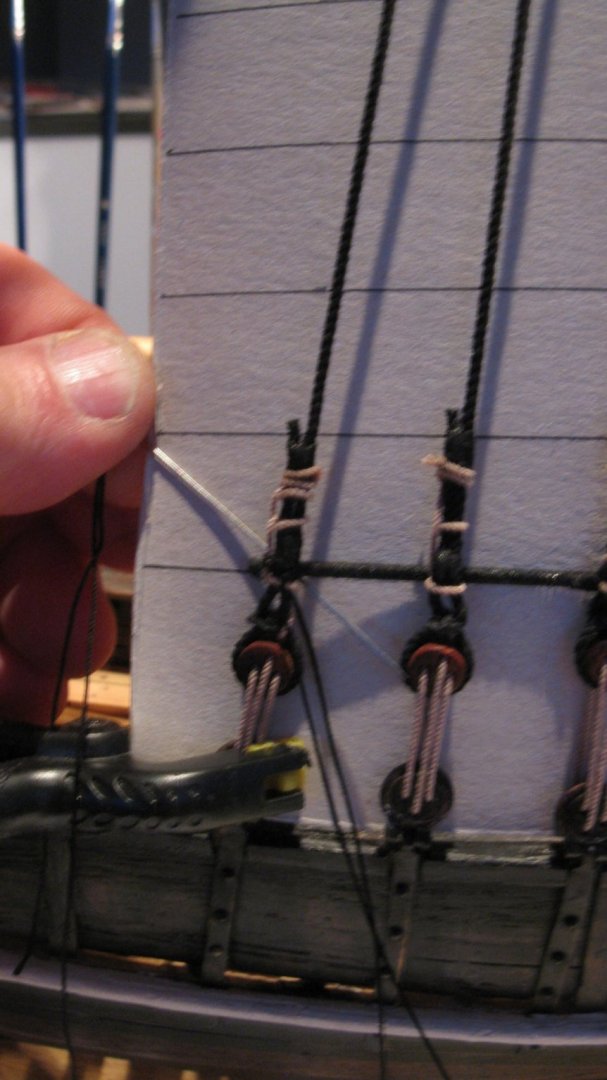
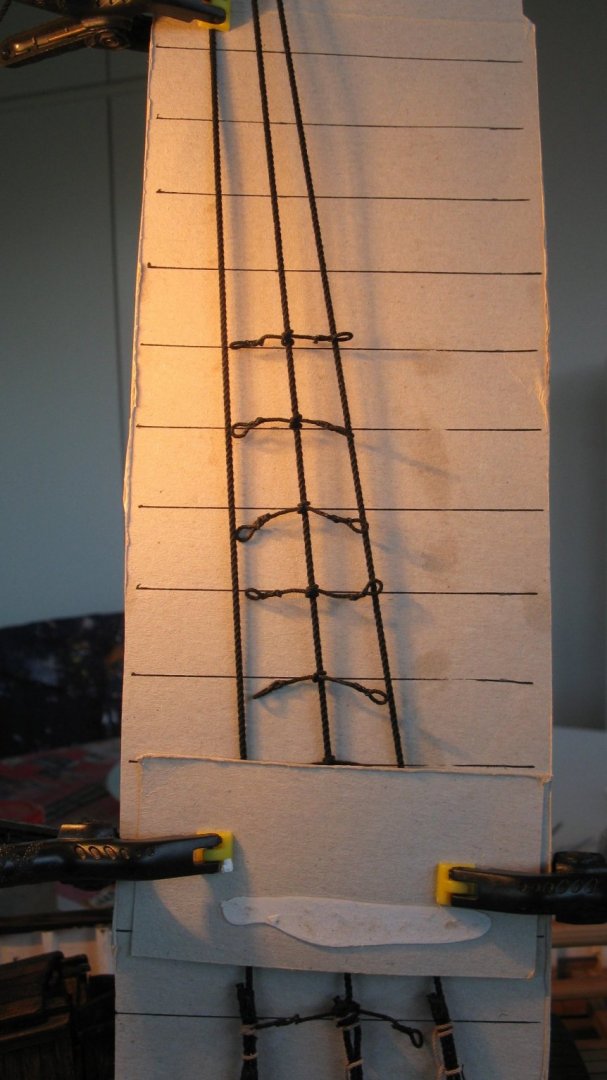
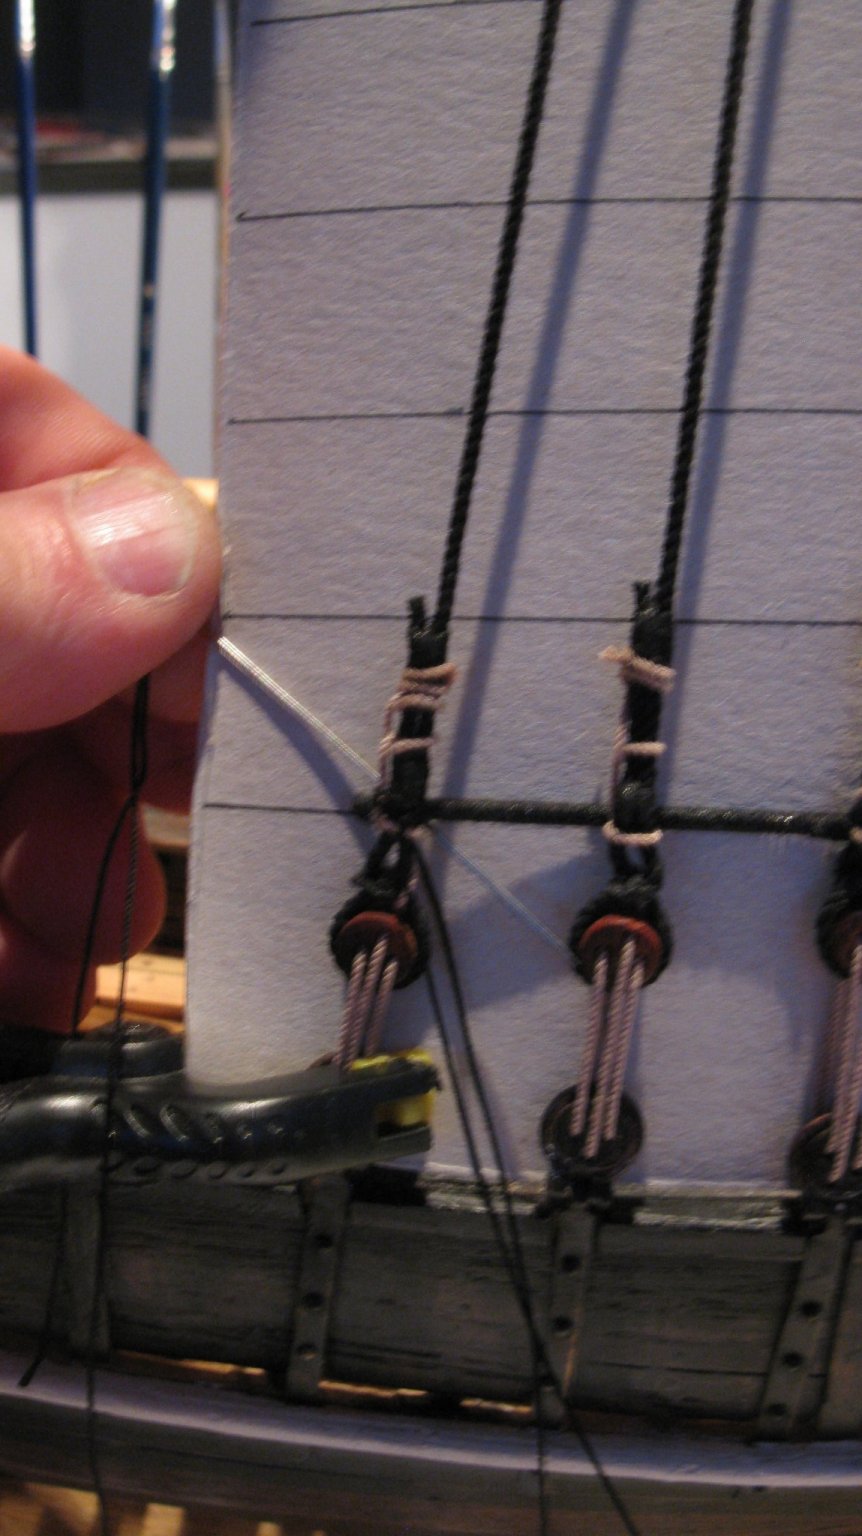
Rigging the mast and shrouds.

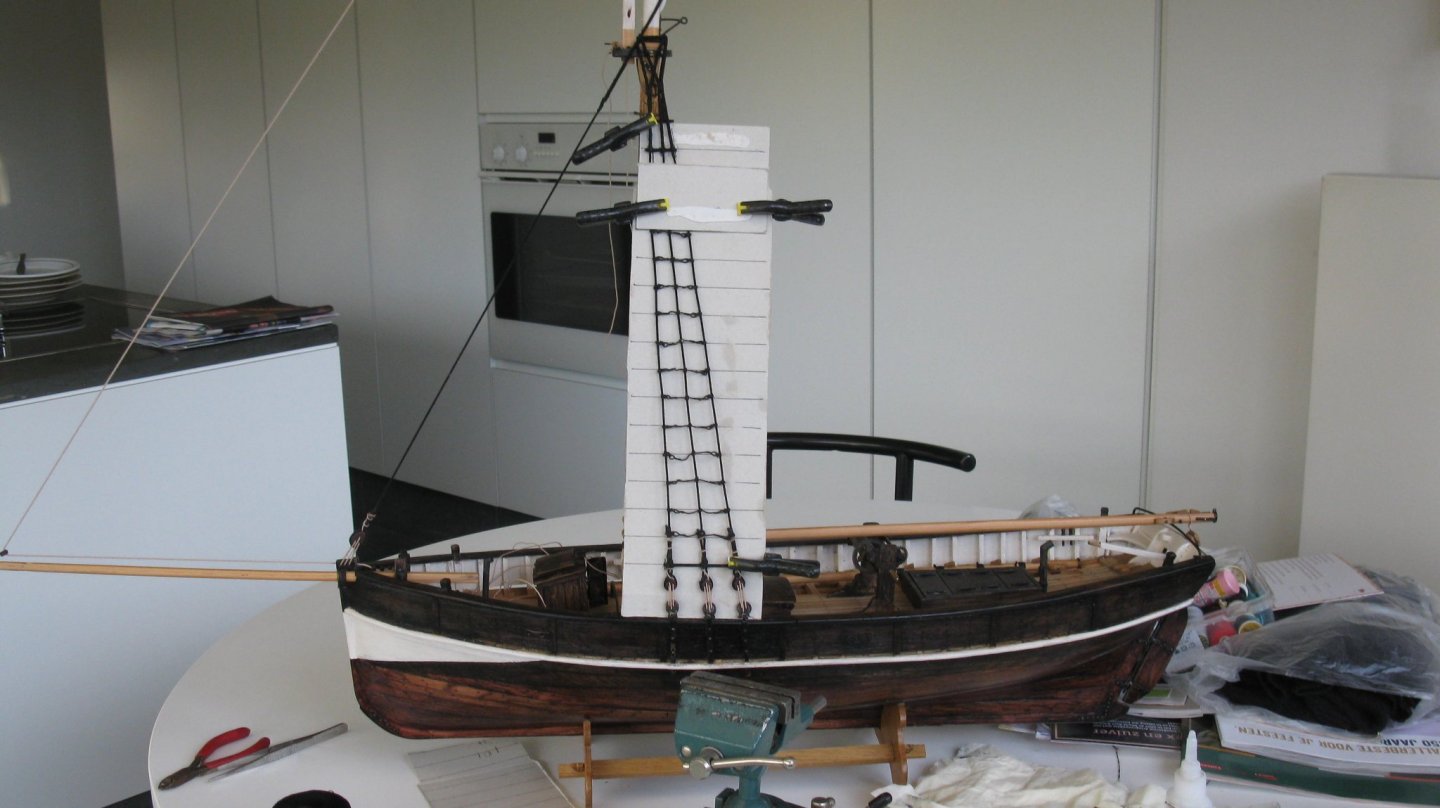
For whom I fly a little too quickly through this topic I refer to cross-section-fishing-smack-by-gl-scale-1/20-pof-approx-1920-finished . Here a more detailed explanation is included.
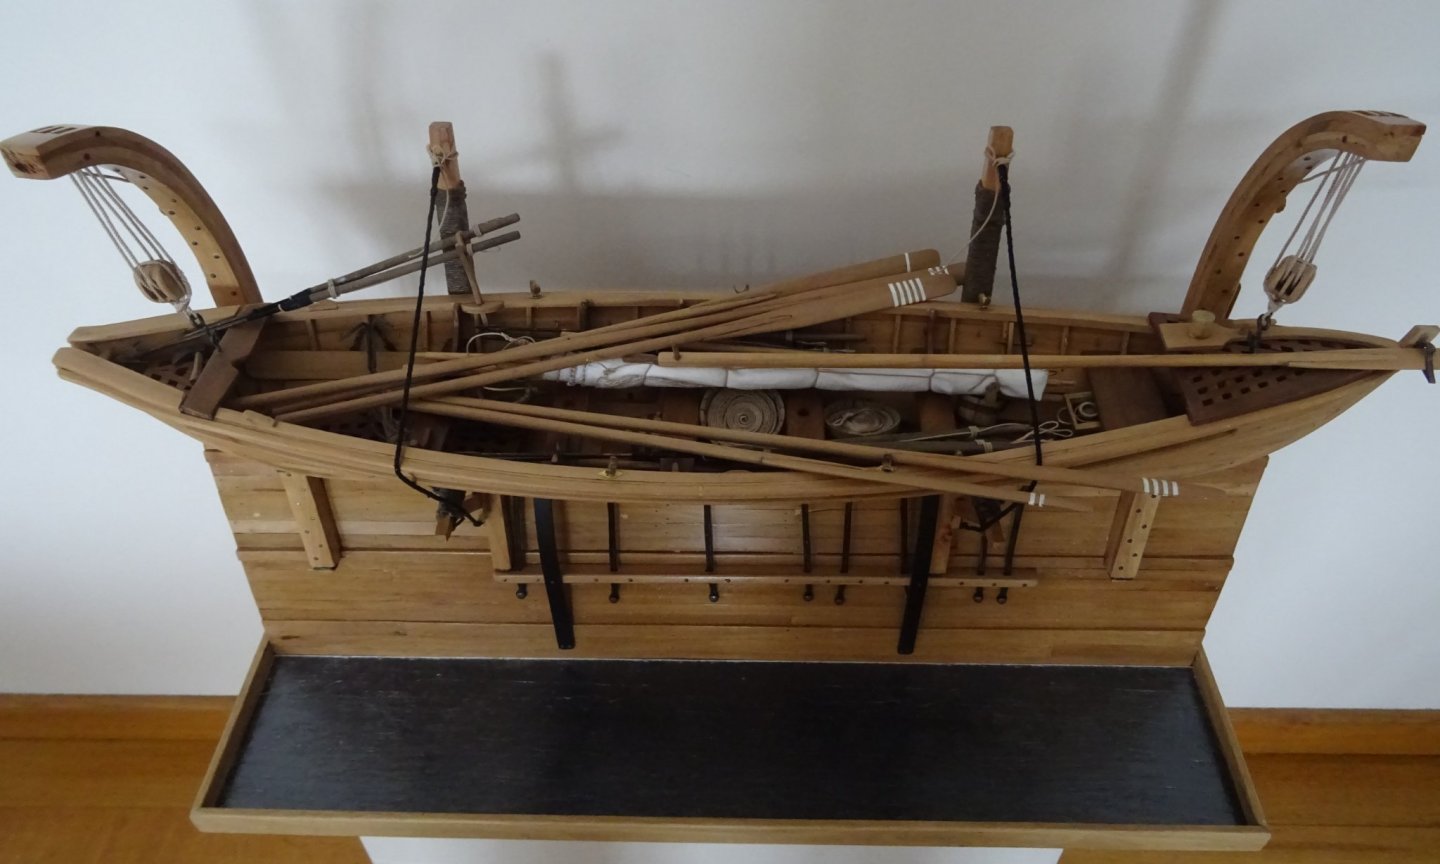
From here I don't have pictures any more of the rigging work.
This is like I presented her the last time to my modeling friends long before we even heard of corona or covid.
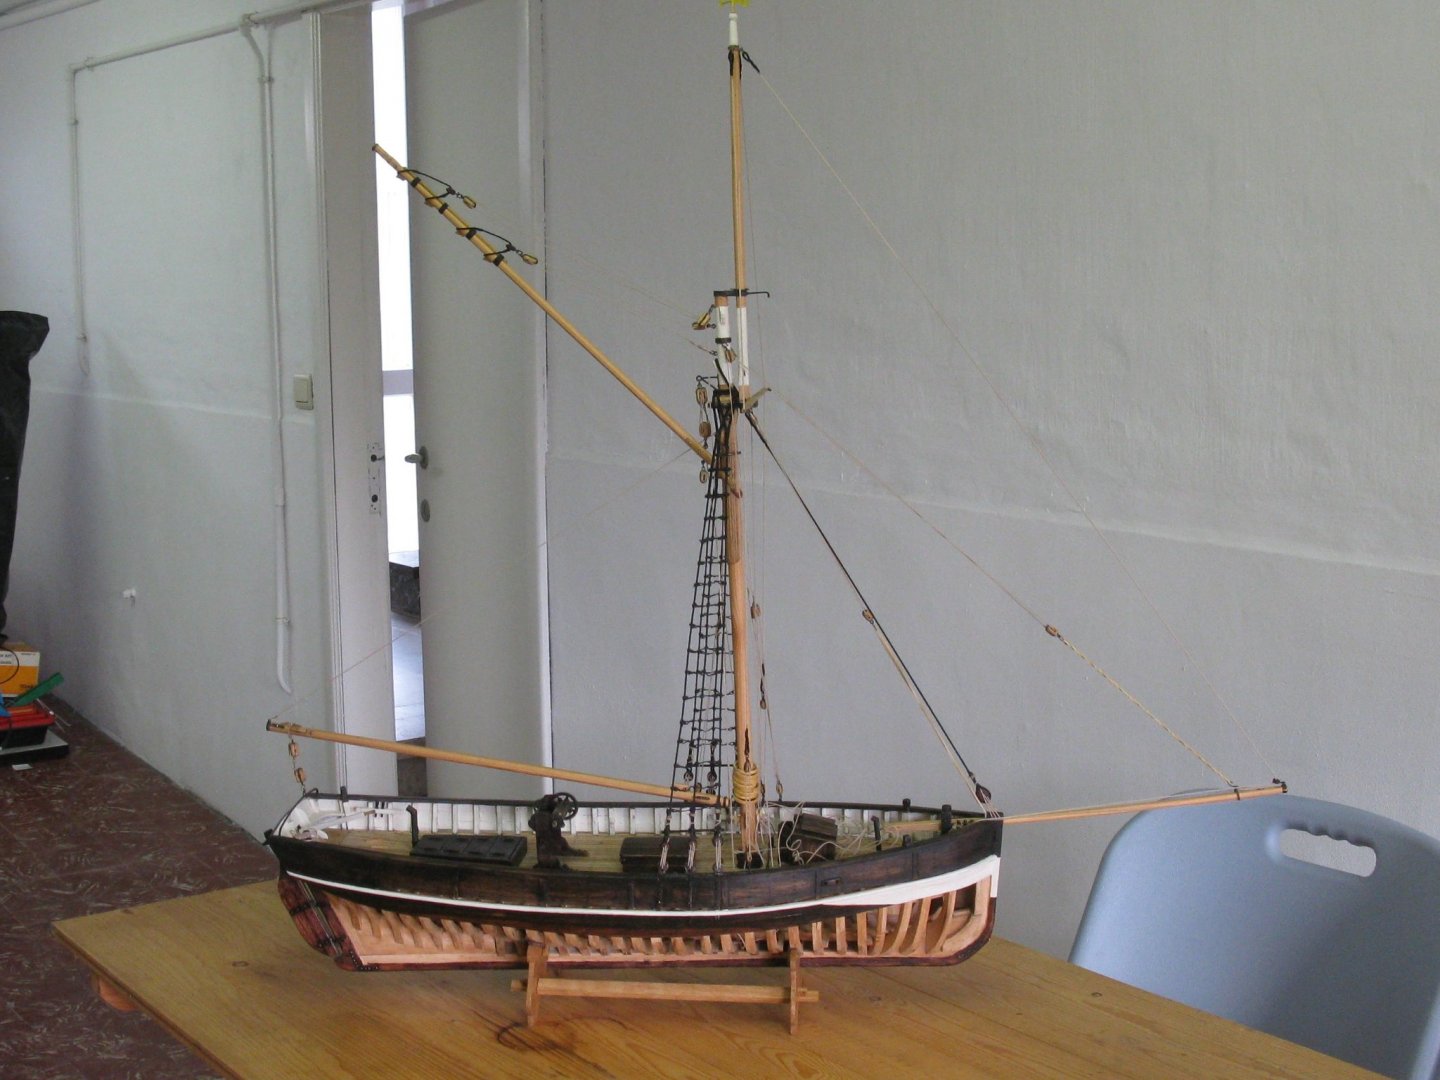
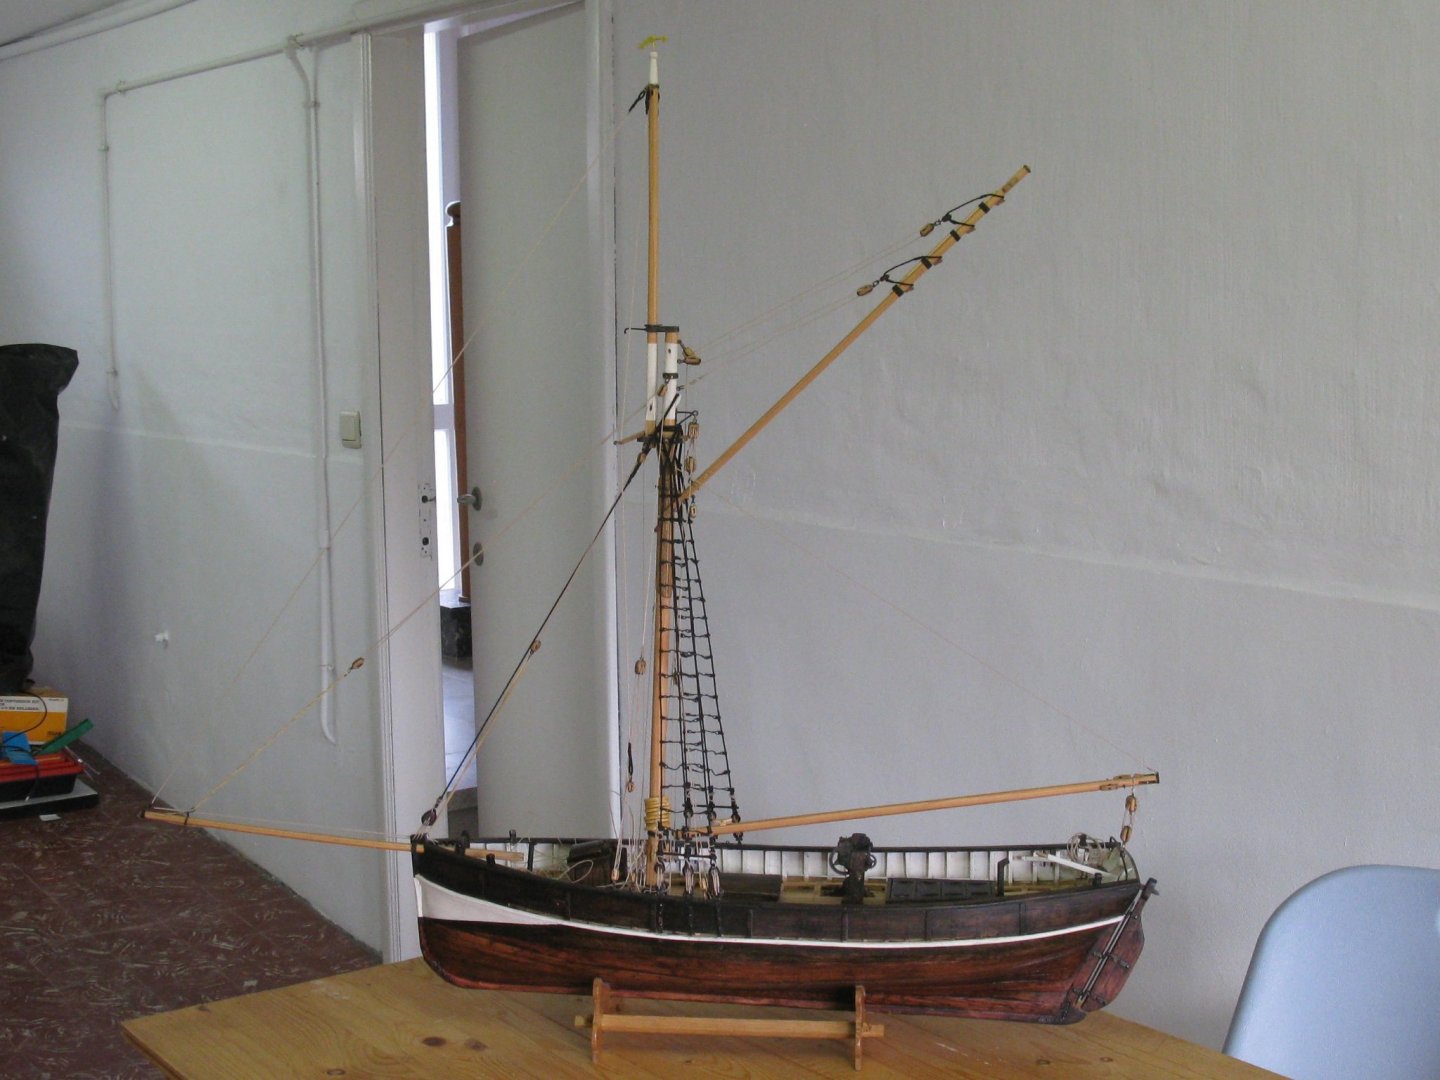
I restart now with deep cleaning the model (when it will be finished a display case will be necessary).
Next week I will start with sail making.- Sonny Skipper, bruce d, tarbrush and 6 others
-
 9
9
-
-
On 3/3/2021 at 8:09 PM, Wintergreen said:
Excellent display!
Thanks for sharing your work with us 🙂
Yes, lockdown is a bummer. Let's restrictions and such will be lifted soon.
On 3/4/2021 at 10:26 PM, vaddoc said:This is wonderful model GL, congratulations! I think the worse is behind us, we ll find a balance soon.
An Ancre monograph, this sounds very exciting. After you ve tied the loose end of course...
Hakan and Vaddoc,
Thank you for your comments.
With respect to the Covid restrictions: I think also that the end of the tunnel is in sight. The government promises relaxation in spring. And my wife and I also have something else to look forward to, a few weeks ago we got the news that in August we will be grandma and grandpa for the first time. So not everything is doom and gloom. -
On 3/3/2021 at 6:37 PM, Blackreed said:
Very nice.
On 3/3/2021 at 6:41 PM, gsdpic said:Wonderful result with great features. I really like the davit display and the "seawater". Just amazing attention to detail here. Some of those pictures in the last post could easily pass for pictures of a life size representation of a whale boat on a davit.
On 3/3/2021 at 7:02 PM, Backer said:Very well done.
Congrats on this nice model.
On 3/4/2021 at 8:57 PM, noel_colledge said:You have outdone yourself again sir, congratulations on completing your build.
Blackreed, Gary, Patrick and Noel,
Thank you all very much for your kind words of appreciation.
-
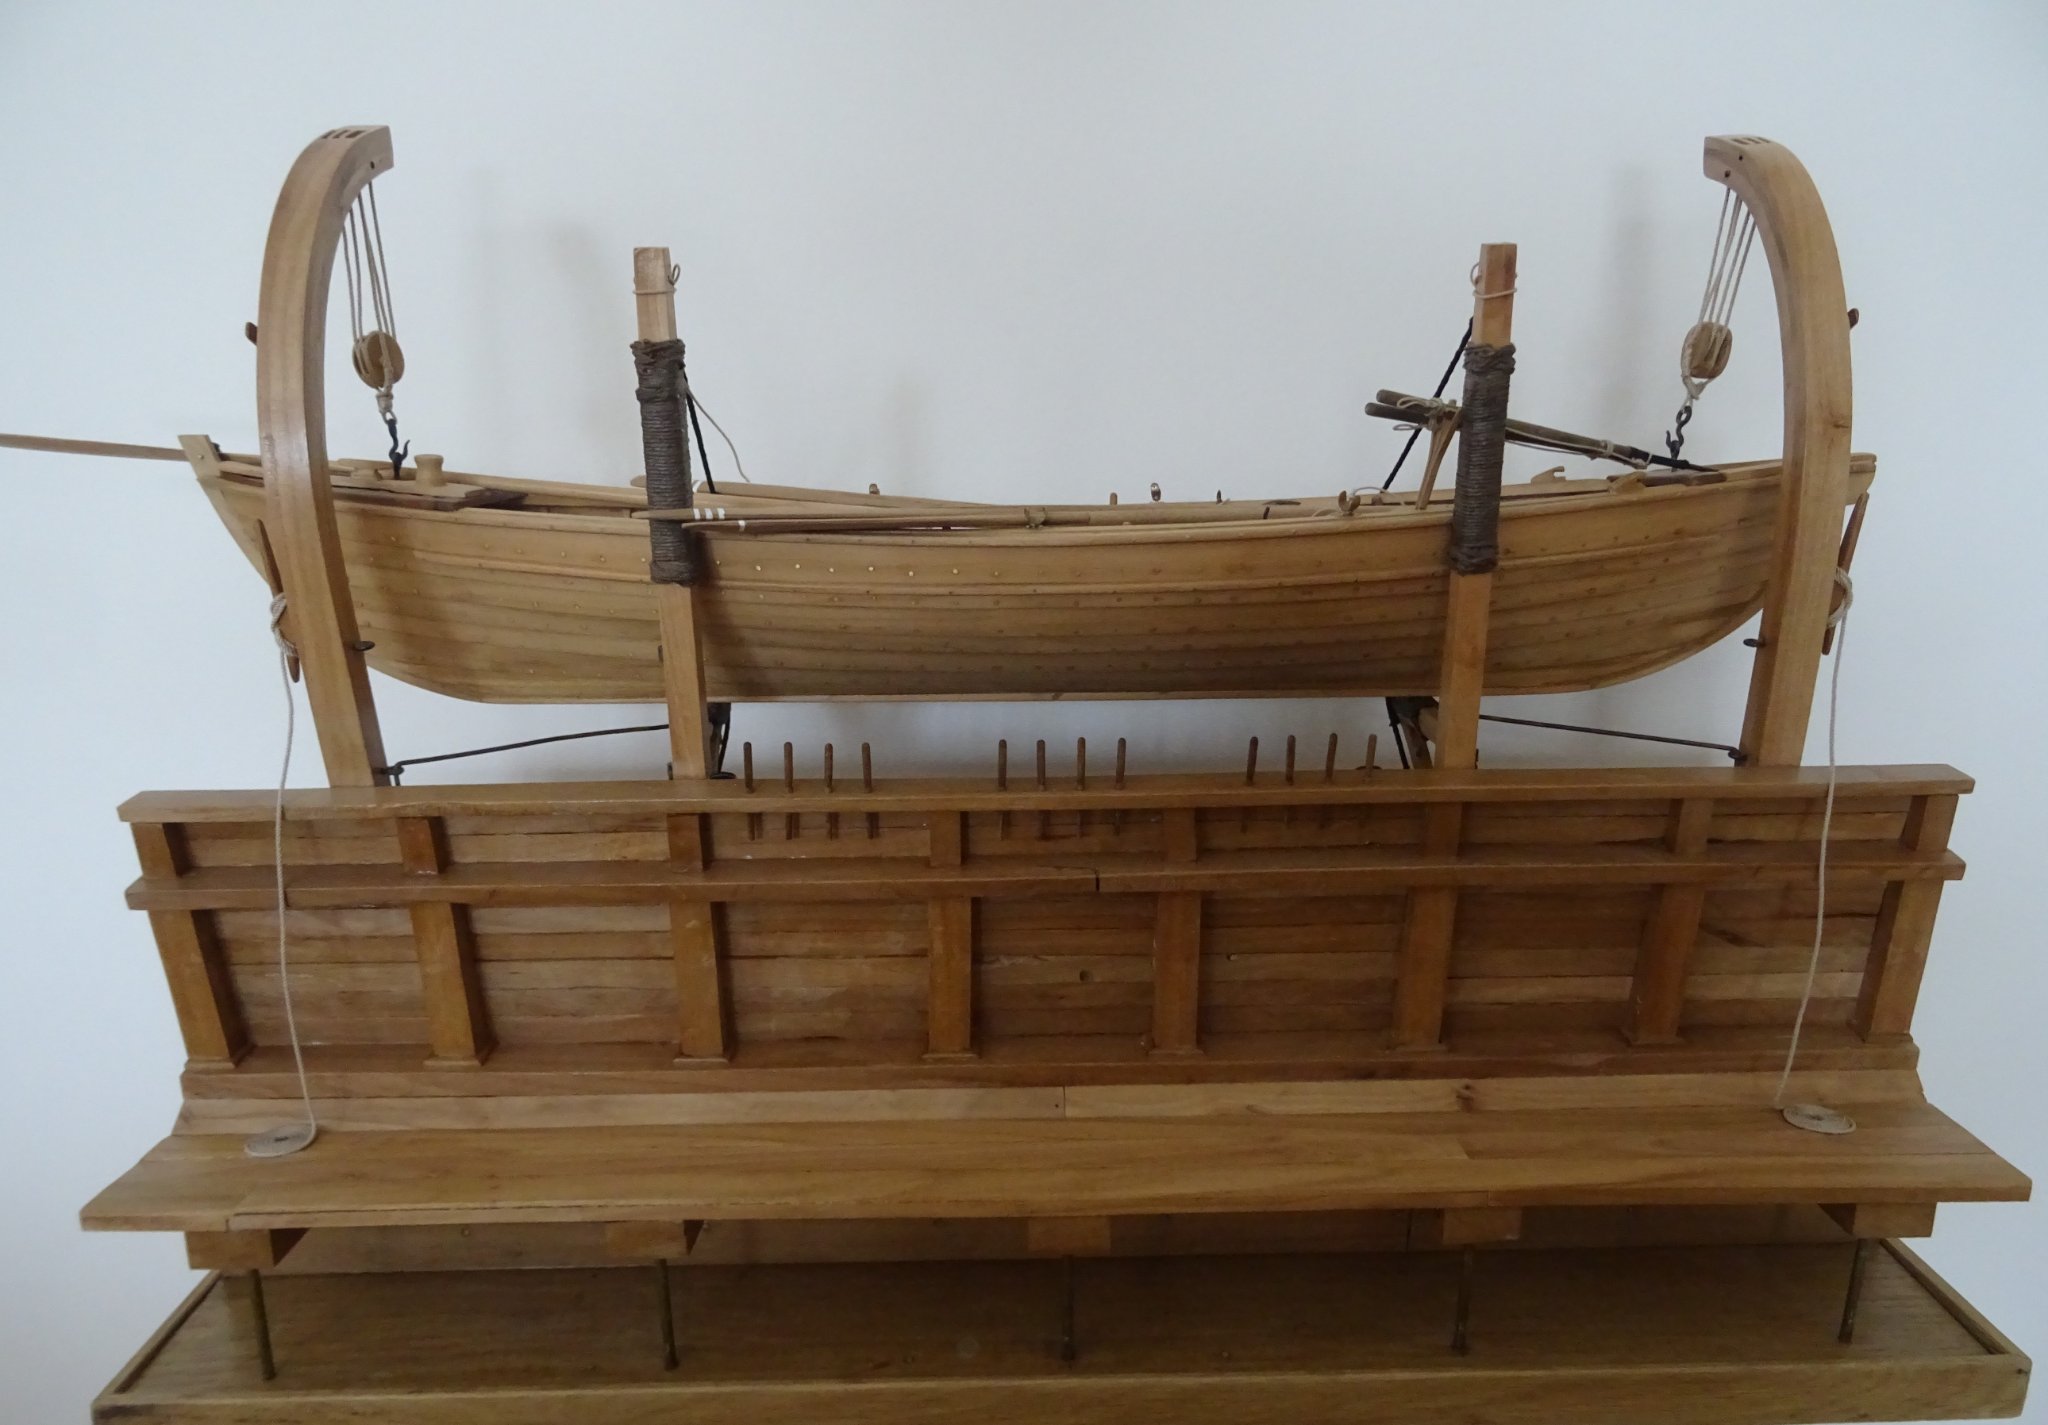
10. Finishing the project
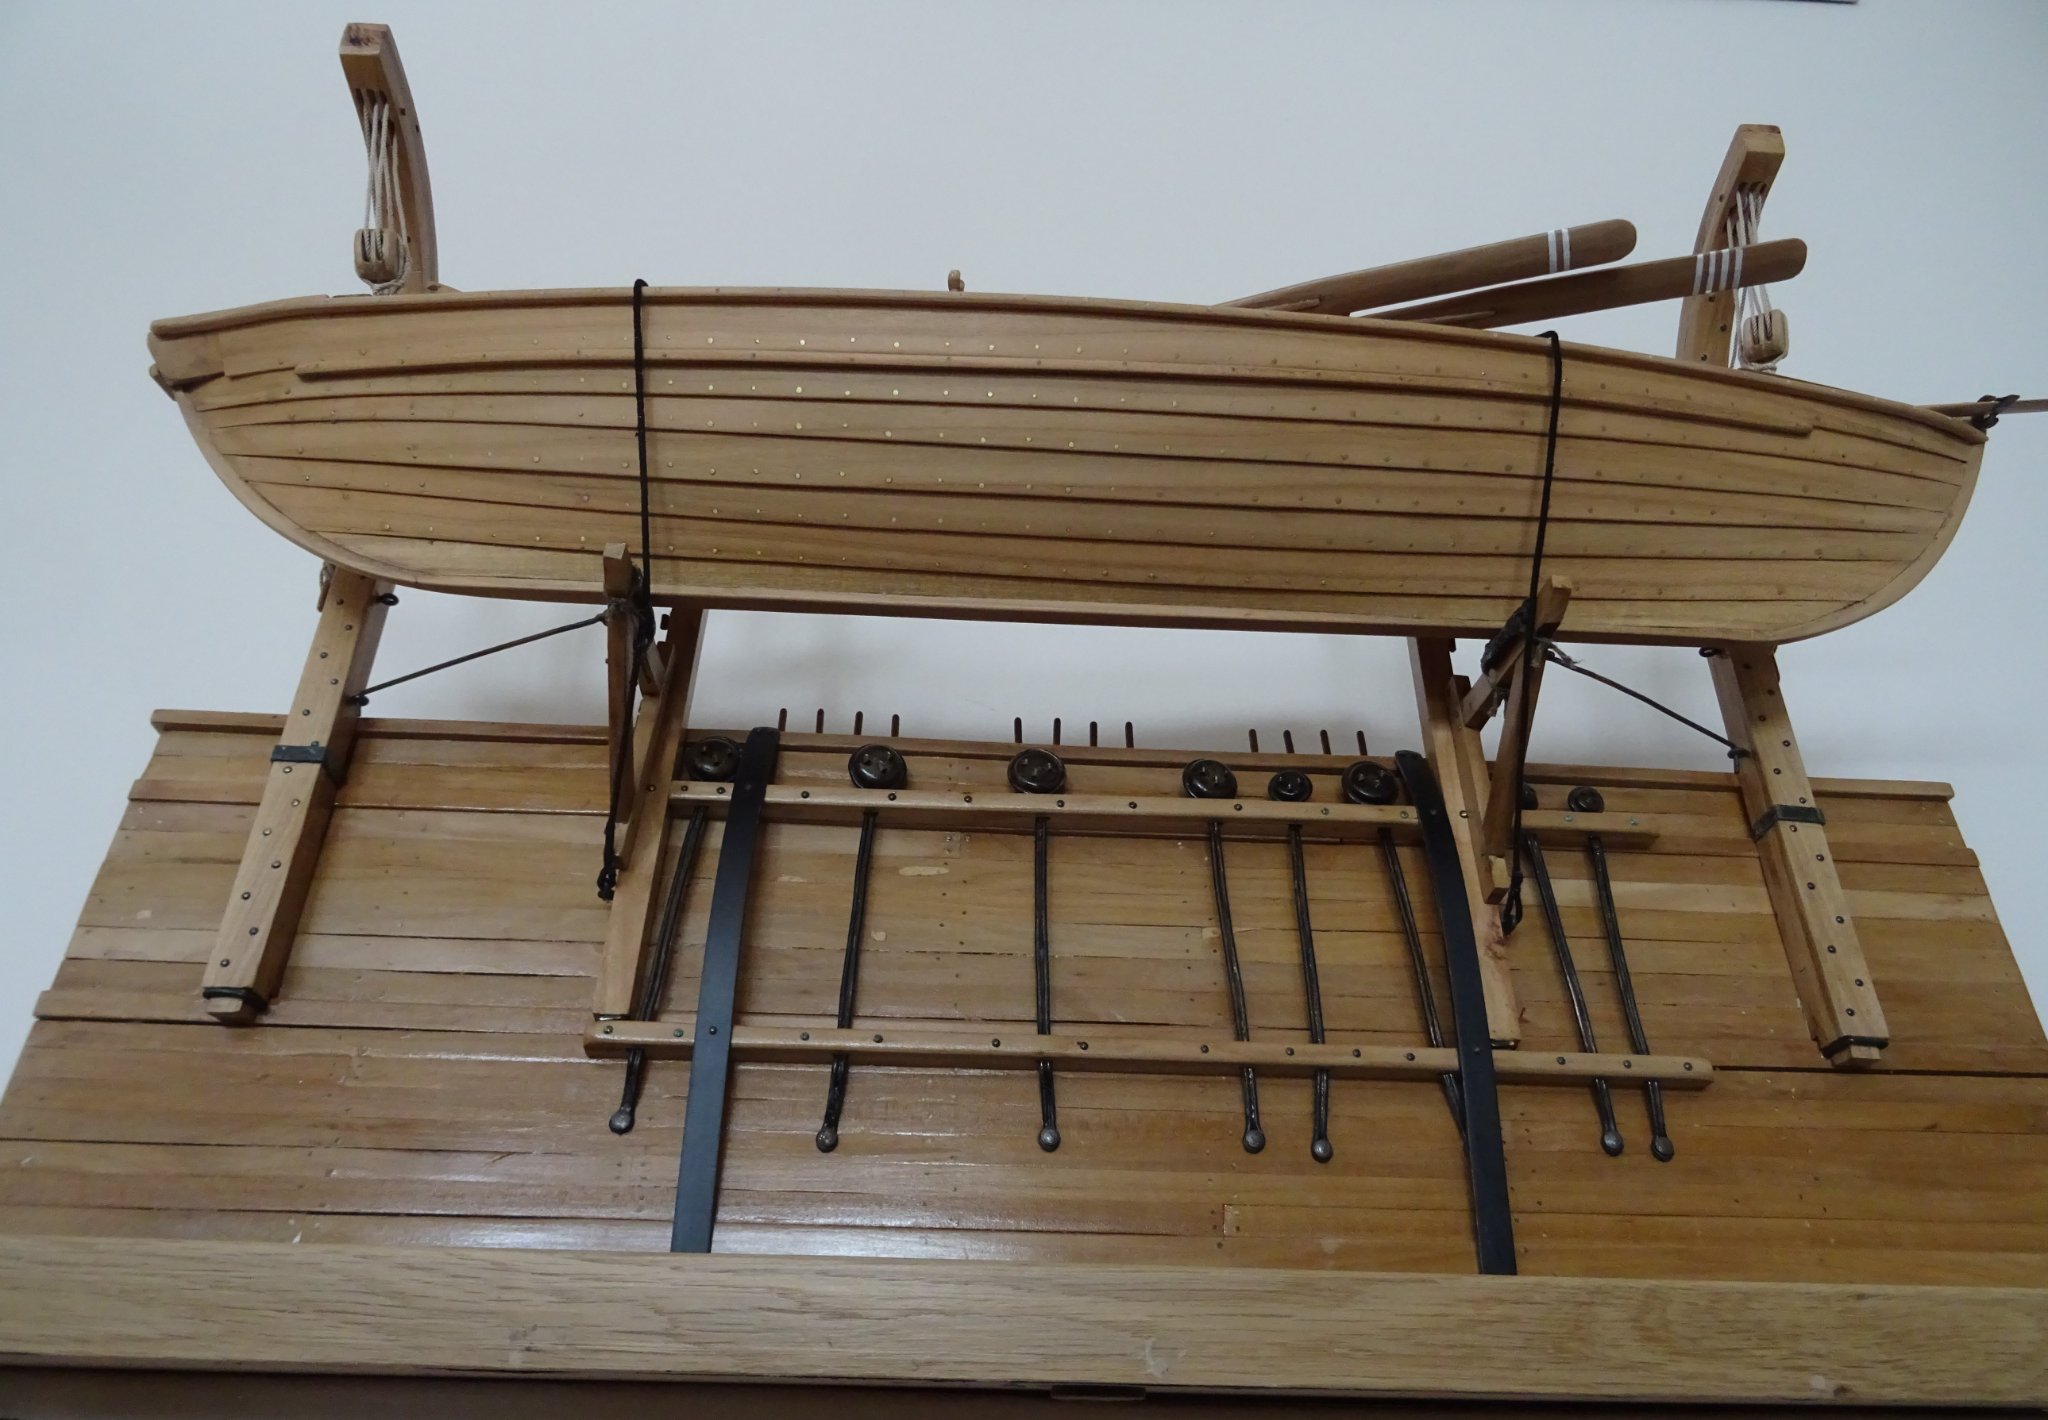
The boat can now be placed in the davits.


This also concludes this project.
This project was fully realized during the Covid 19 epidemy. The lockdowns and other contact restrictions over the past months allowed me to spend more time in the workshop than usual. However, this is little consolation as I miss real contact with my modeling friends during our regular meetings to view, admire and discuss each other's work. Let's hope that life soon comes to normal again. Fortunately there is also this forum where we can keep in touch with so many like-minded friends worldwide.
As for the near future: a monograph from the publisher 'Ancre.fr' for a next project is already laying on my desk.
But first of all, I will finish an old project first.
I thank who read and viewed this log. I thank you for your likes, your advises and your comments. -
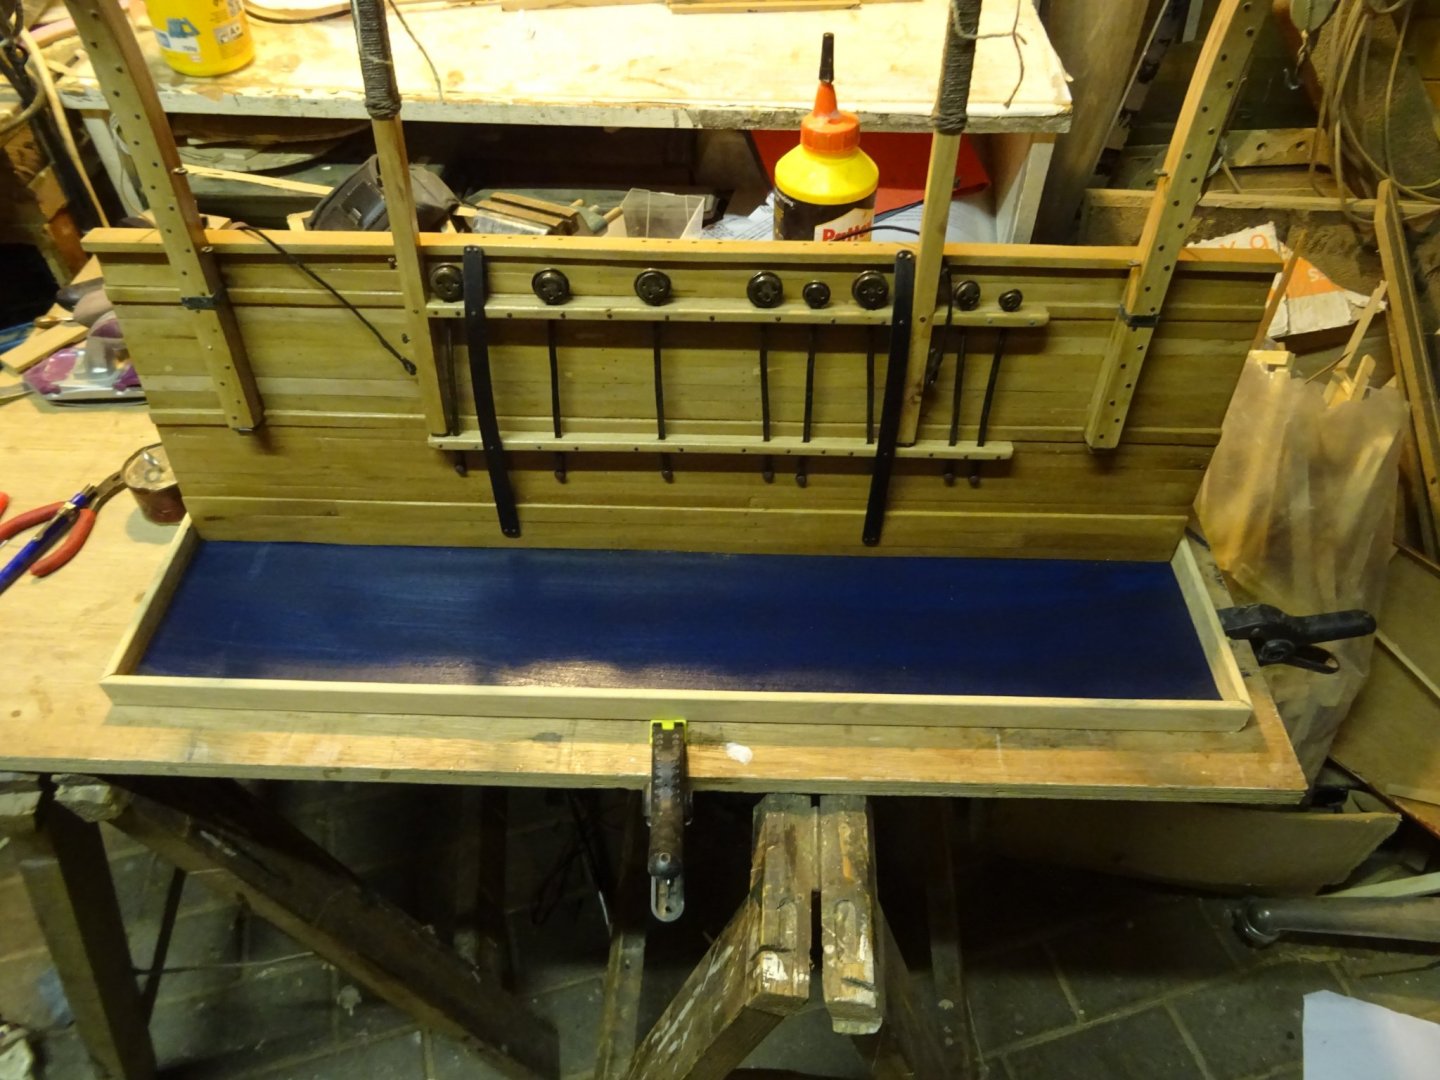
9.7 Finishing the display stand
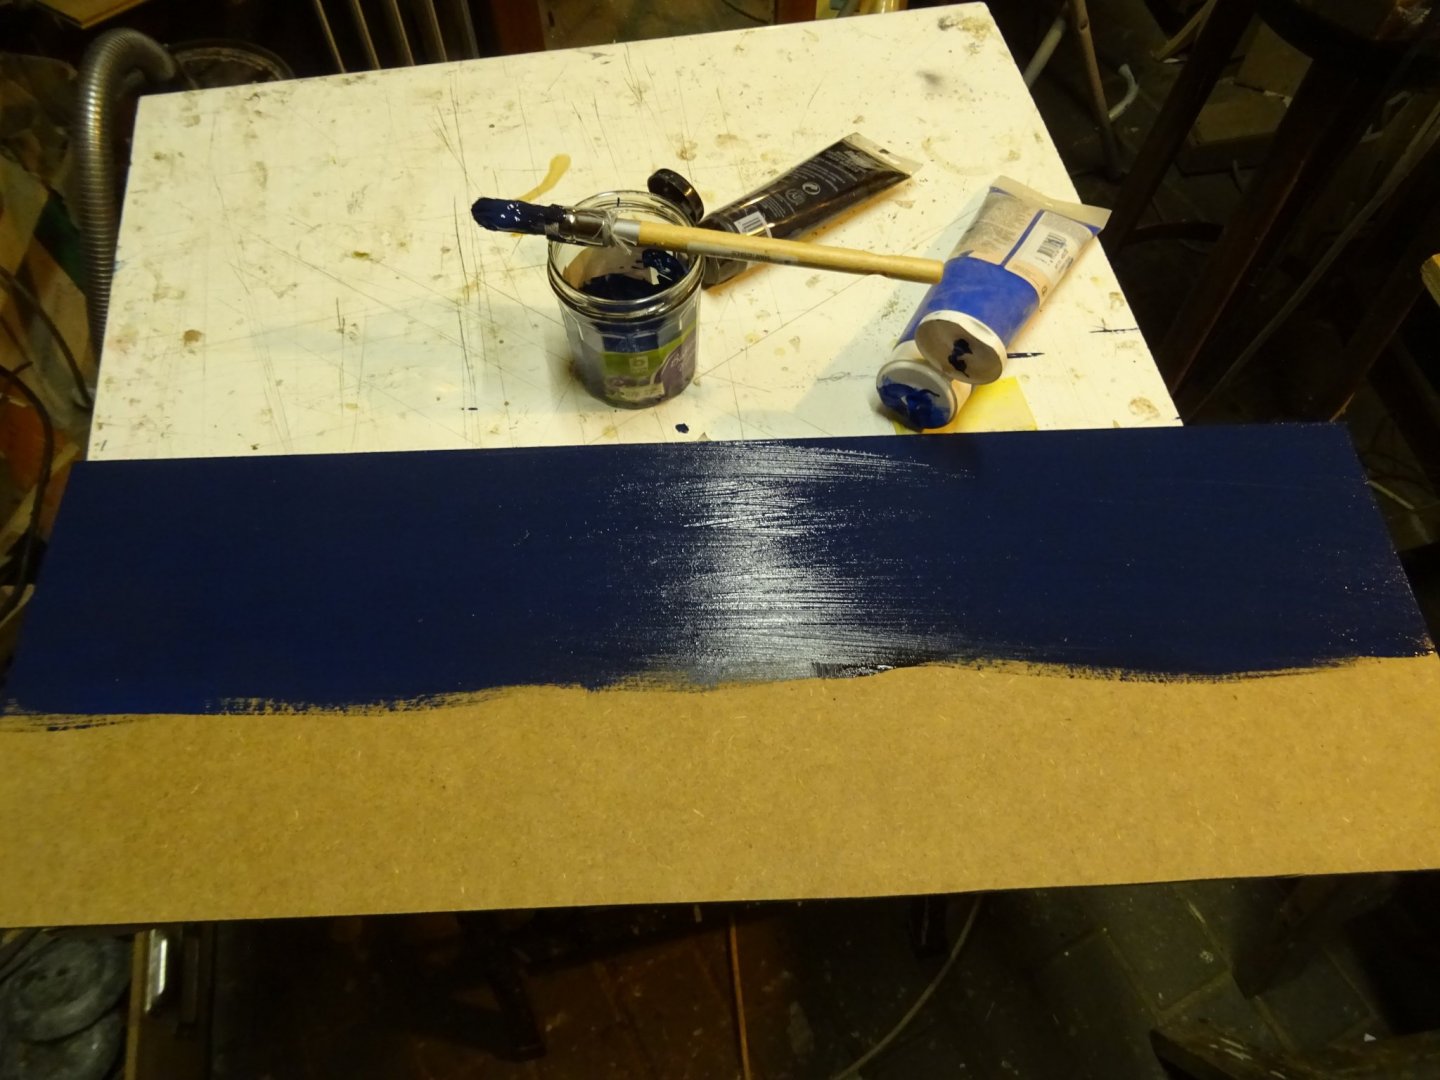
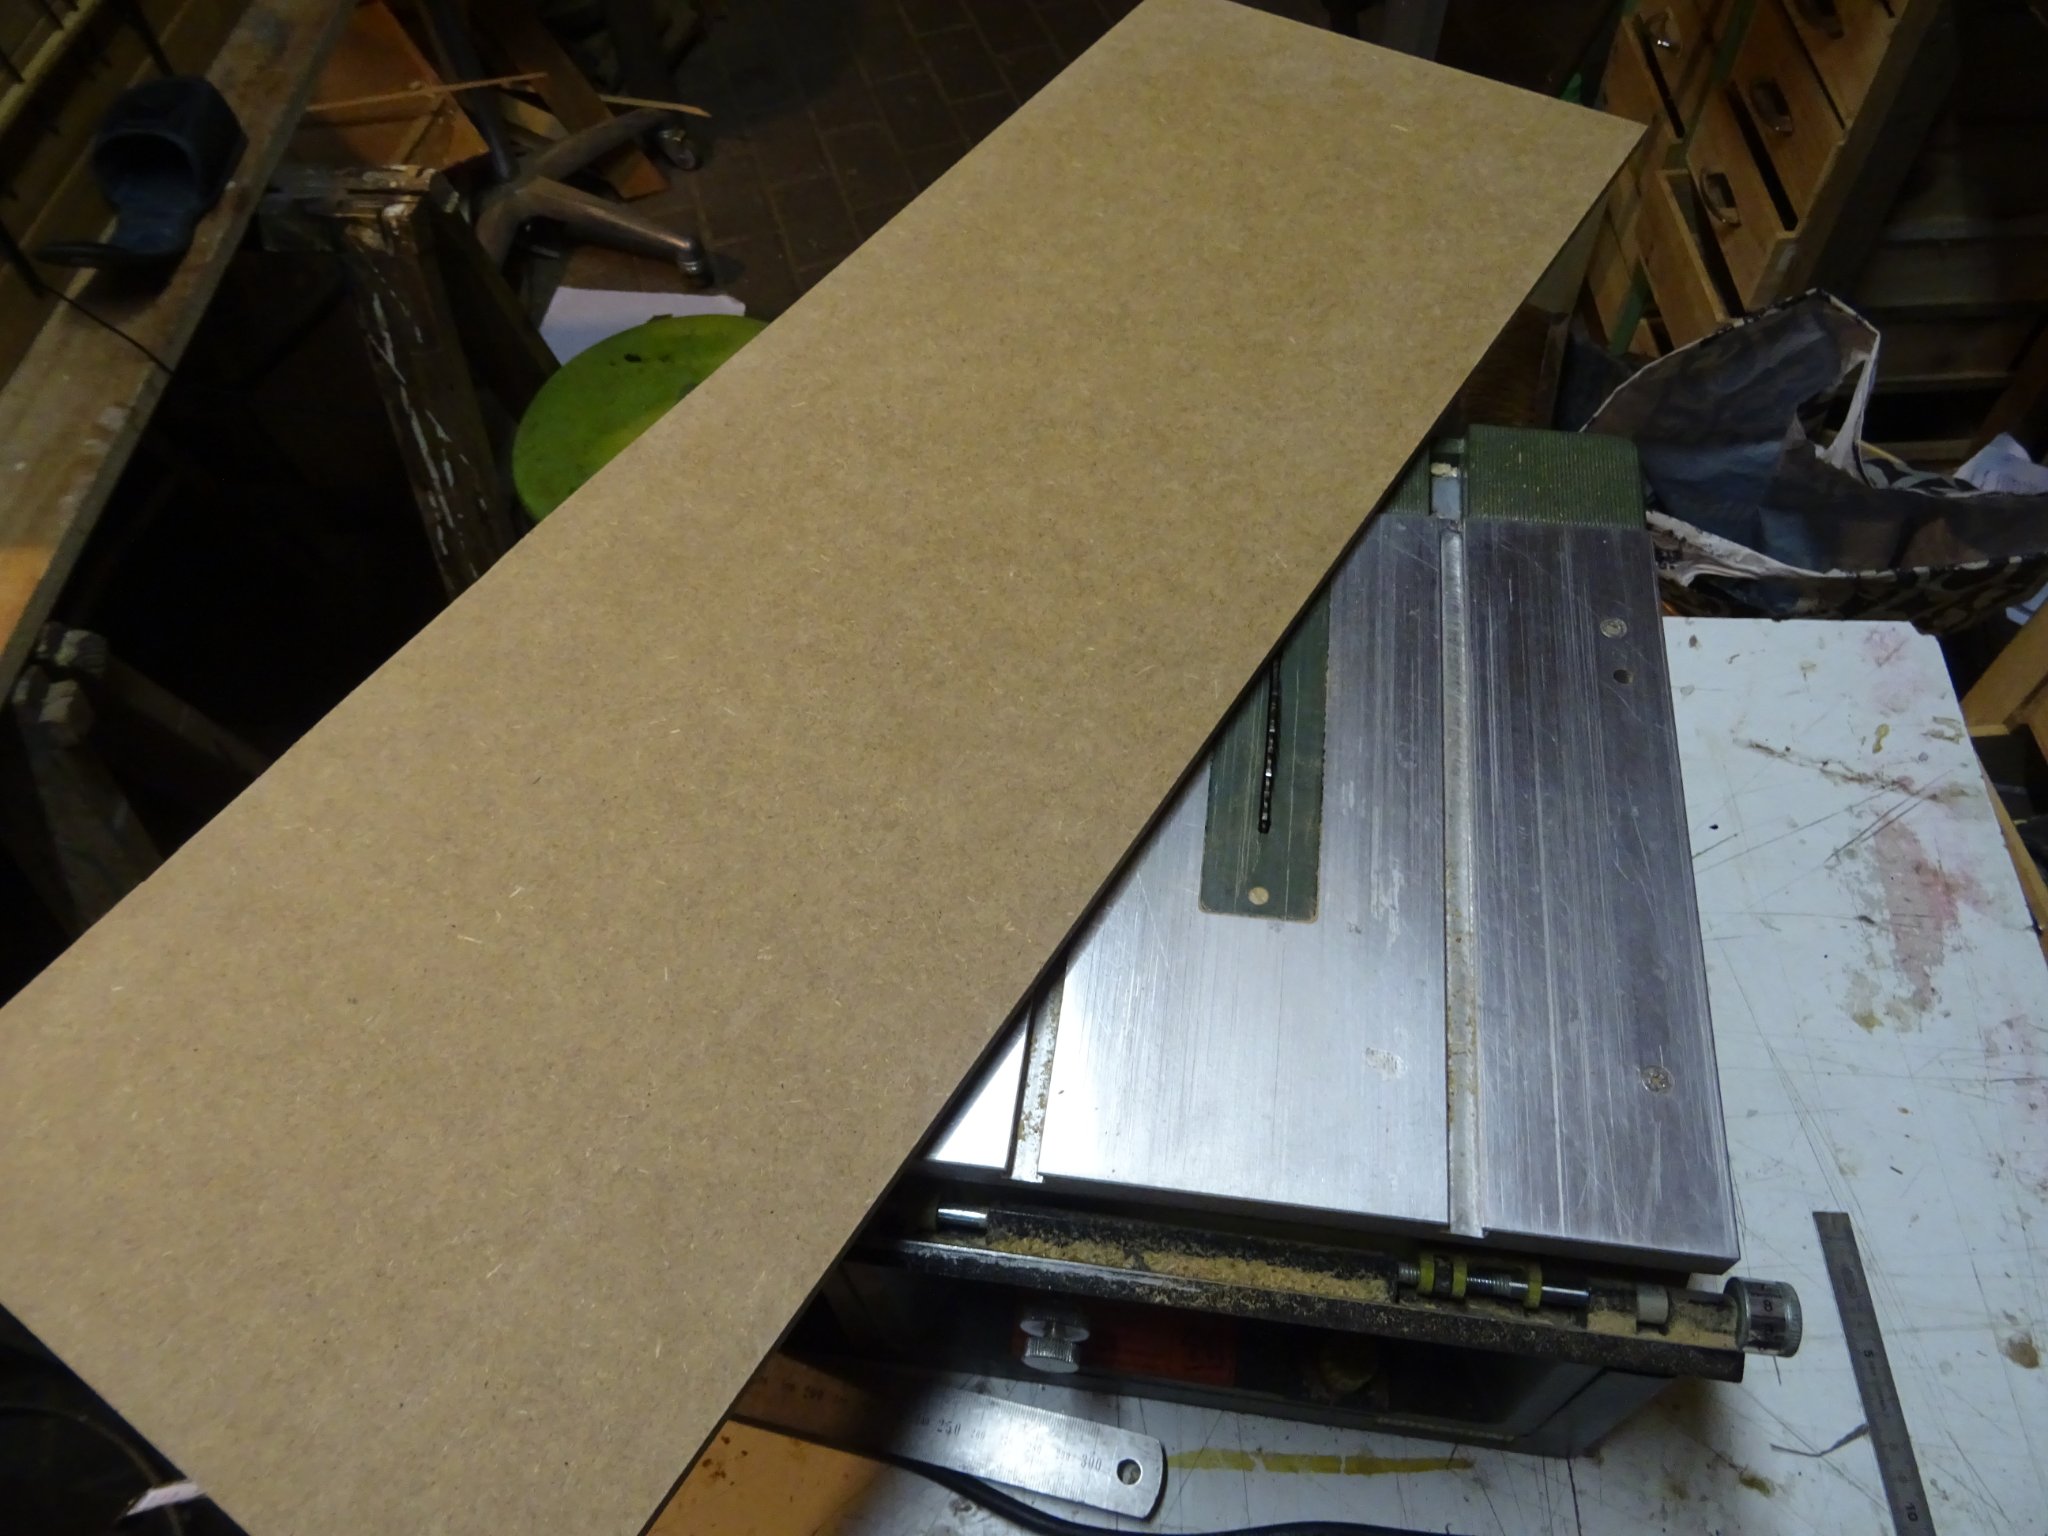
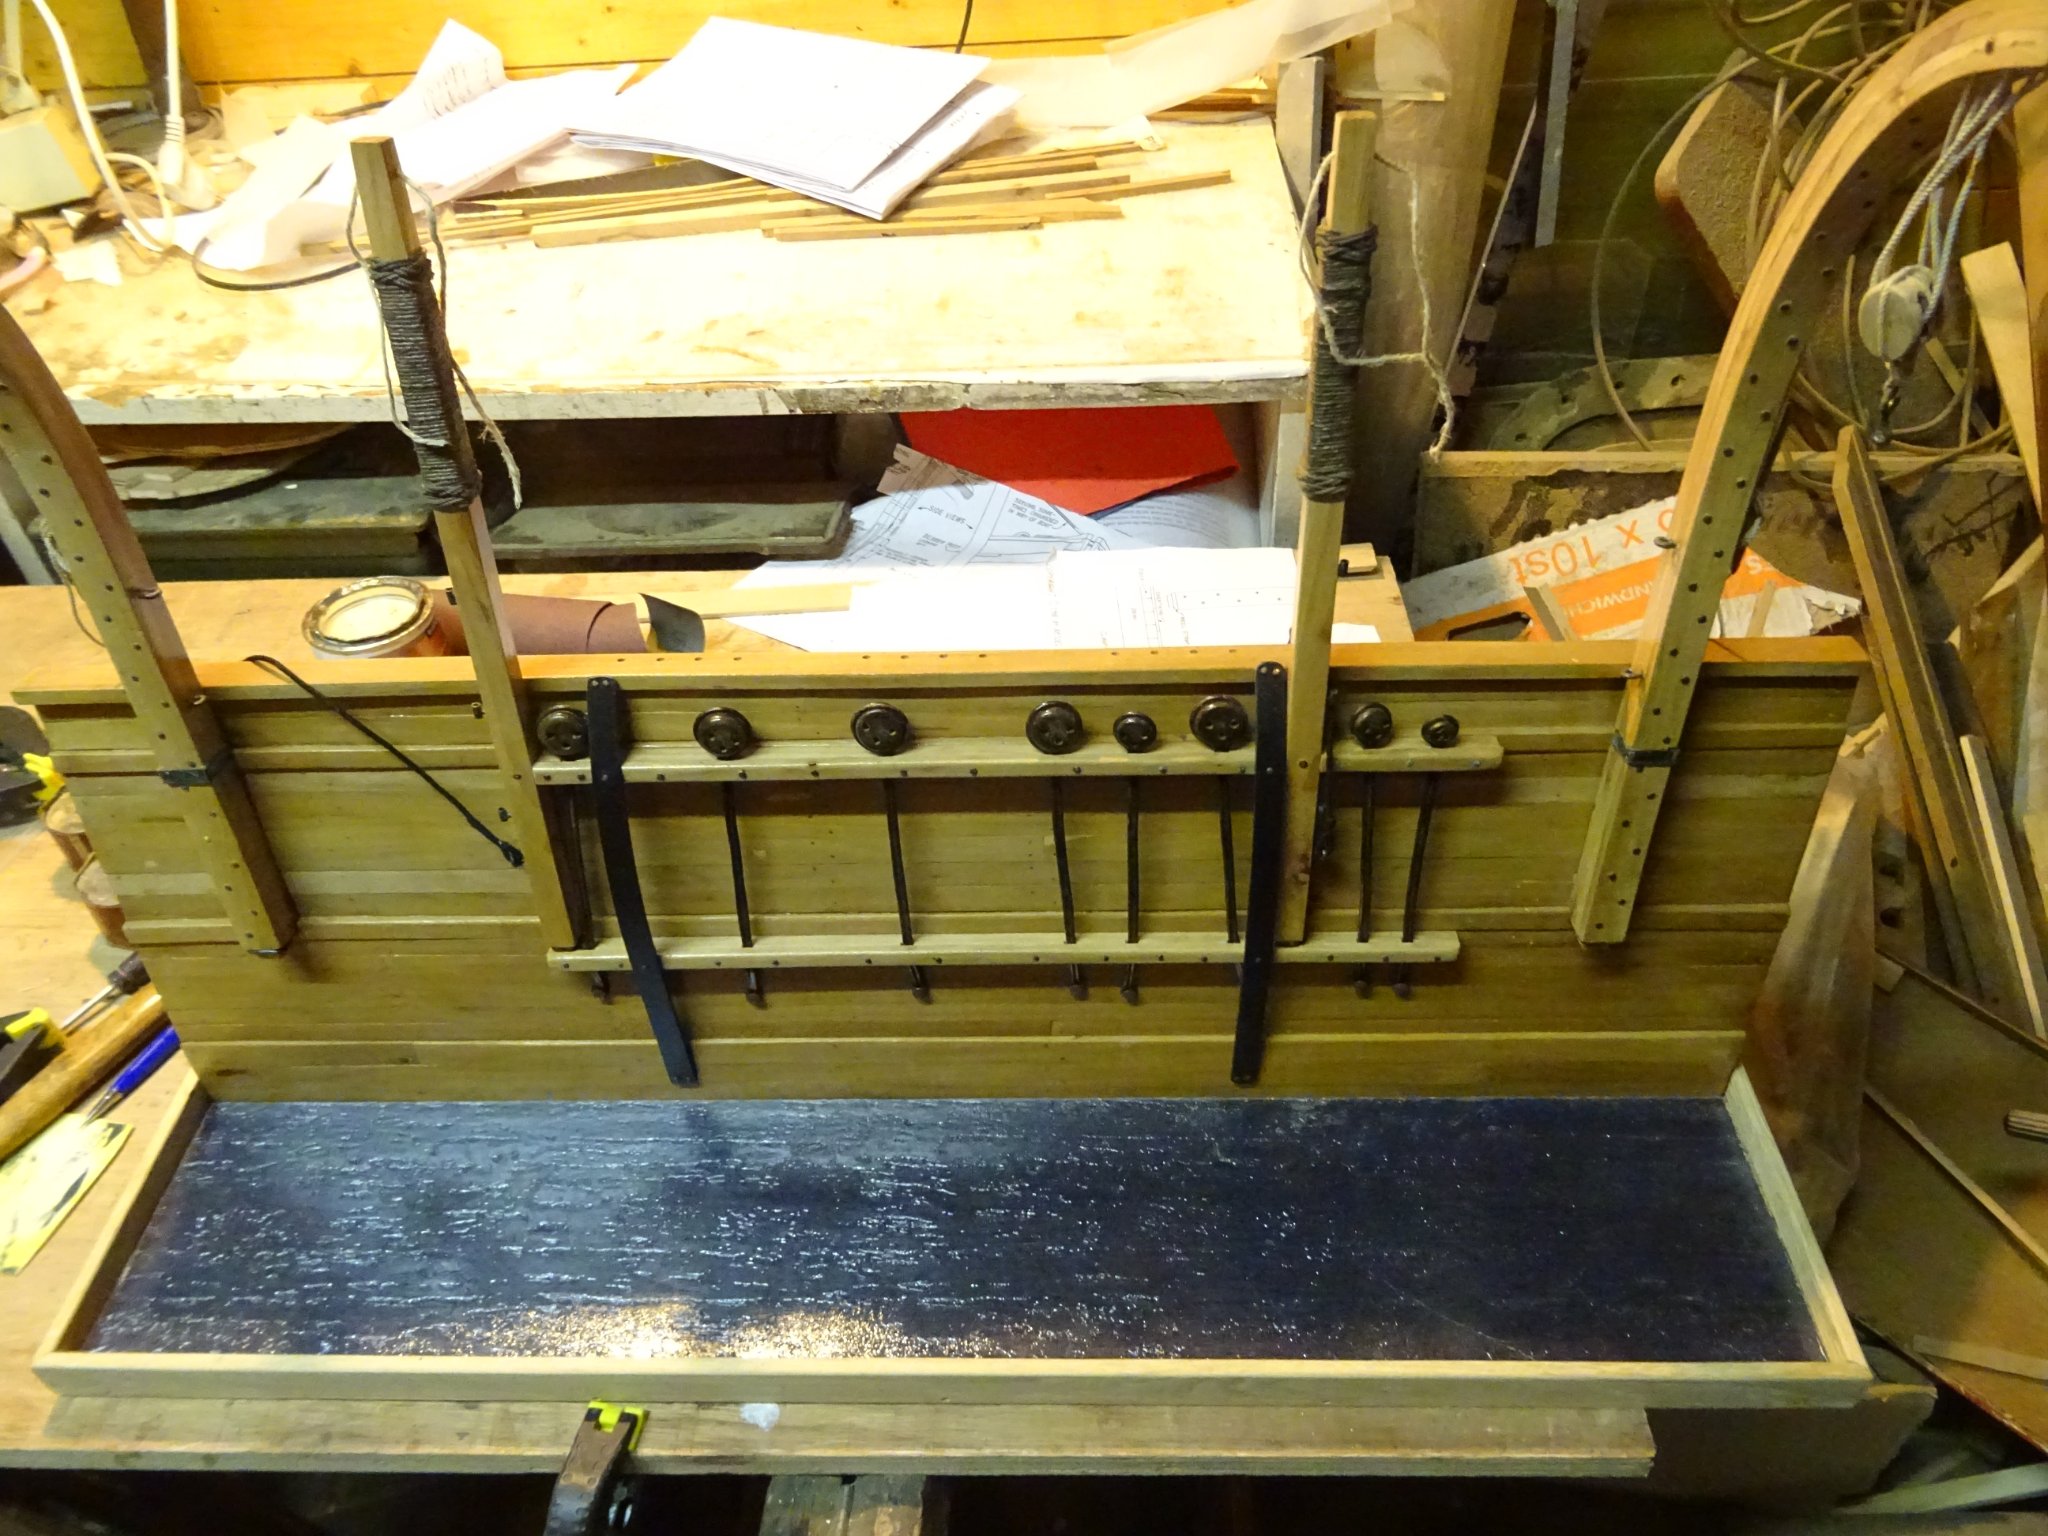
The davits are ready to receive the boat. With the boat on the cranes its full weight comes to the front of the stand. The boat and the equipment don't weigh that much that there is a big risk that the stand falls forward but some more stability will not hurt. Therefore I will expand the base of the stand a bit forward. At the same time it gives the opportunity to show height above the water level at which the boat is hanging.
I start with sawing an MDF base plank.

About half of the plate will remain visible in front of the davits model. I paint is in dark blue to simulate the sea water.
I hammer a wooden frame around the base plate.
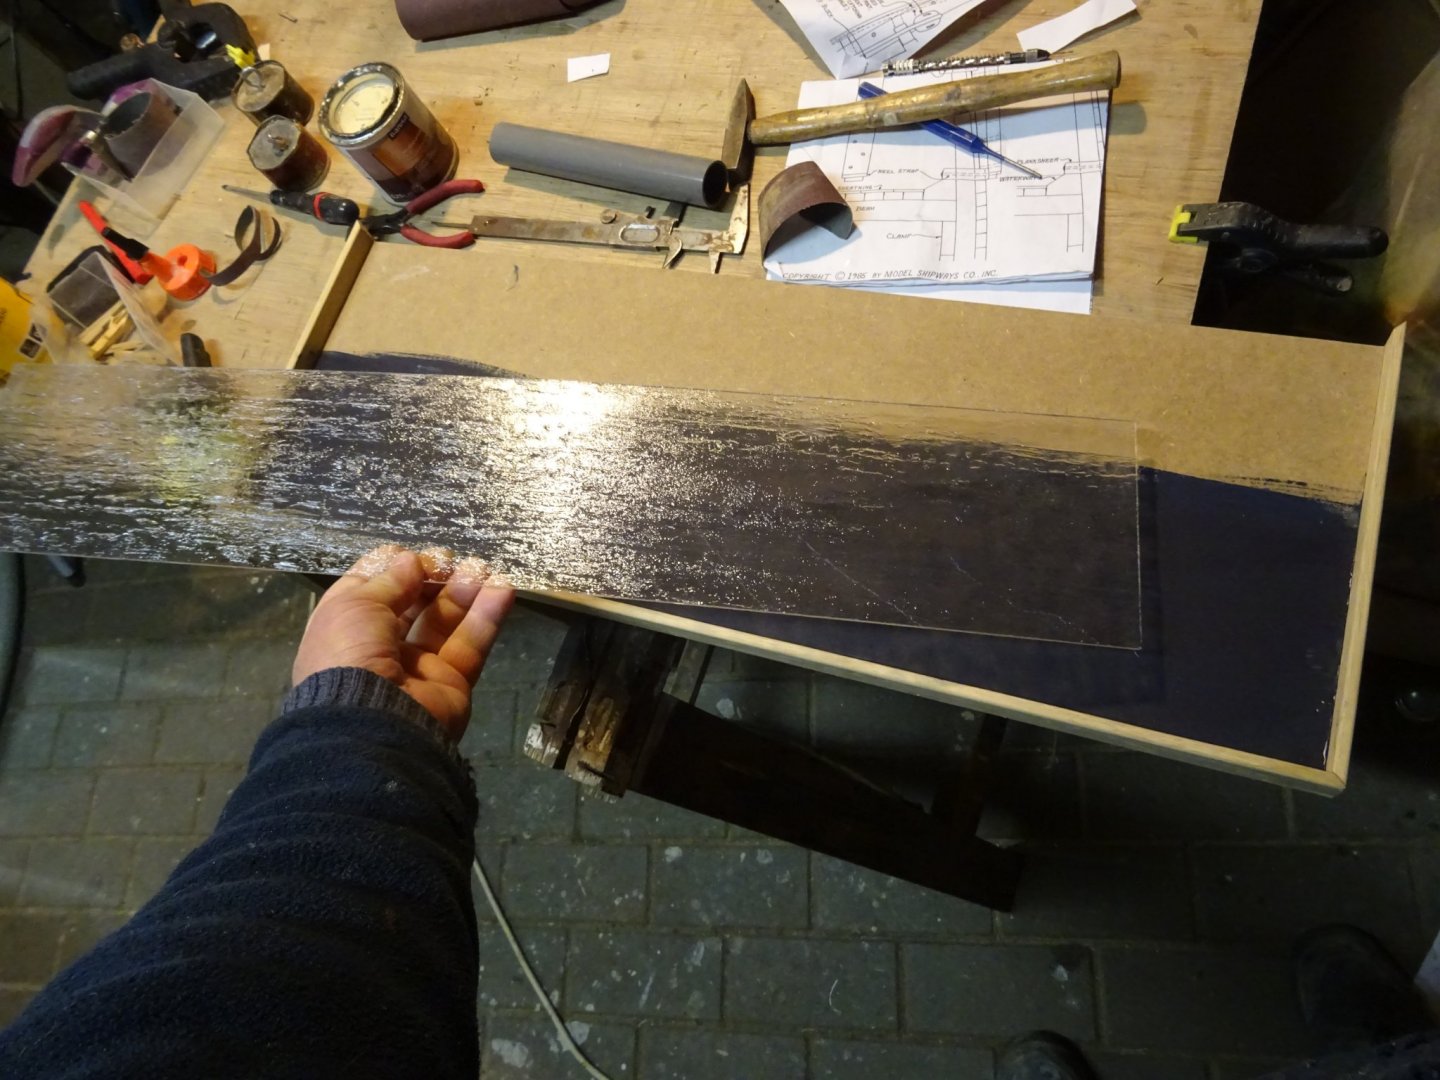
To make it a little bit more 'sea' like I cut a plexi glass with a wrinkled surface to make the sea surface a bit more realistic.
The davits are now ready to receive the boat.
- gsdpic, vaddoc, GrandpaPhil and 3 others
-
6
-
-
Looks perfect.
Why will you steam the planks before installing them? It seems to me that they follow nicely the flow of the frames like this.
-
She looks realy nice, Hakan.
I like the color. It gives her the look of a real working boat.A very interesting log.
-
-
Vaddoc,
It seems to me that you have found the right way to determine the shape of the planks. Getting them out of the wood now is another challenge. I am curious to see your method.I am really fascinated to follow your work.
-
-
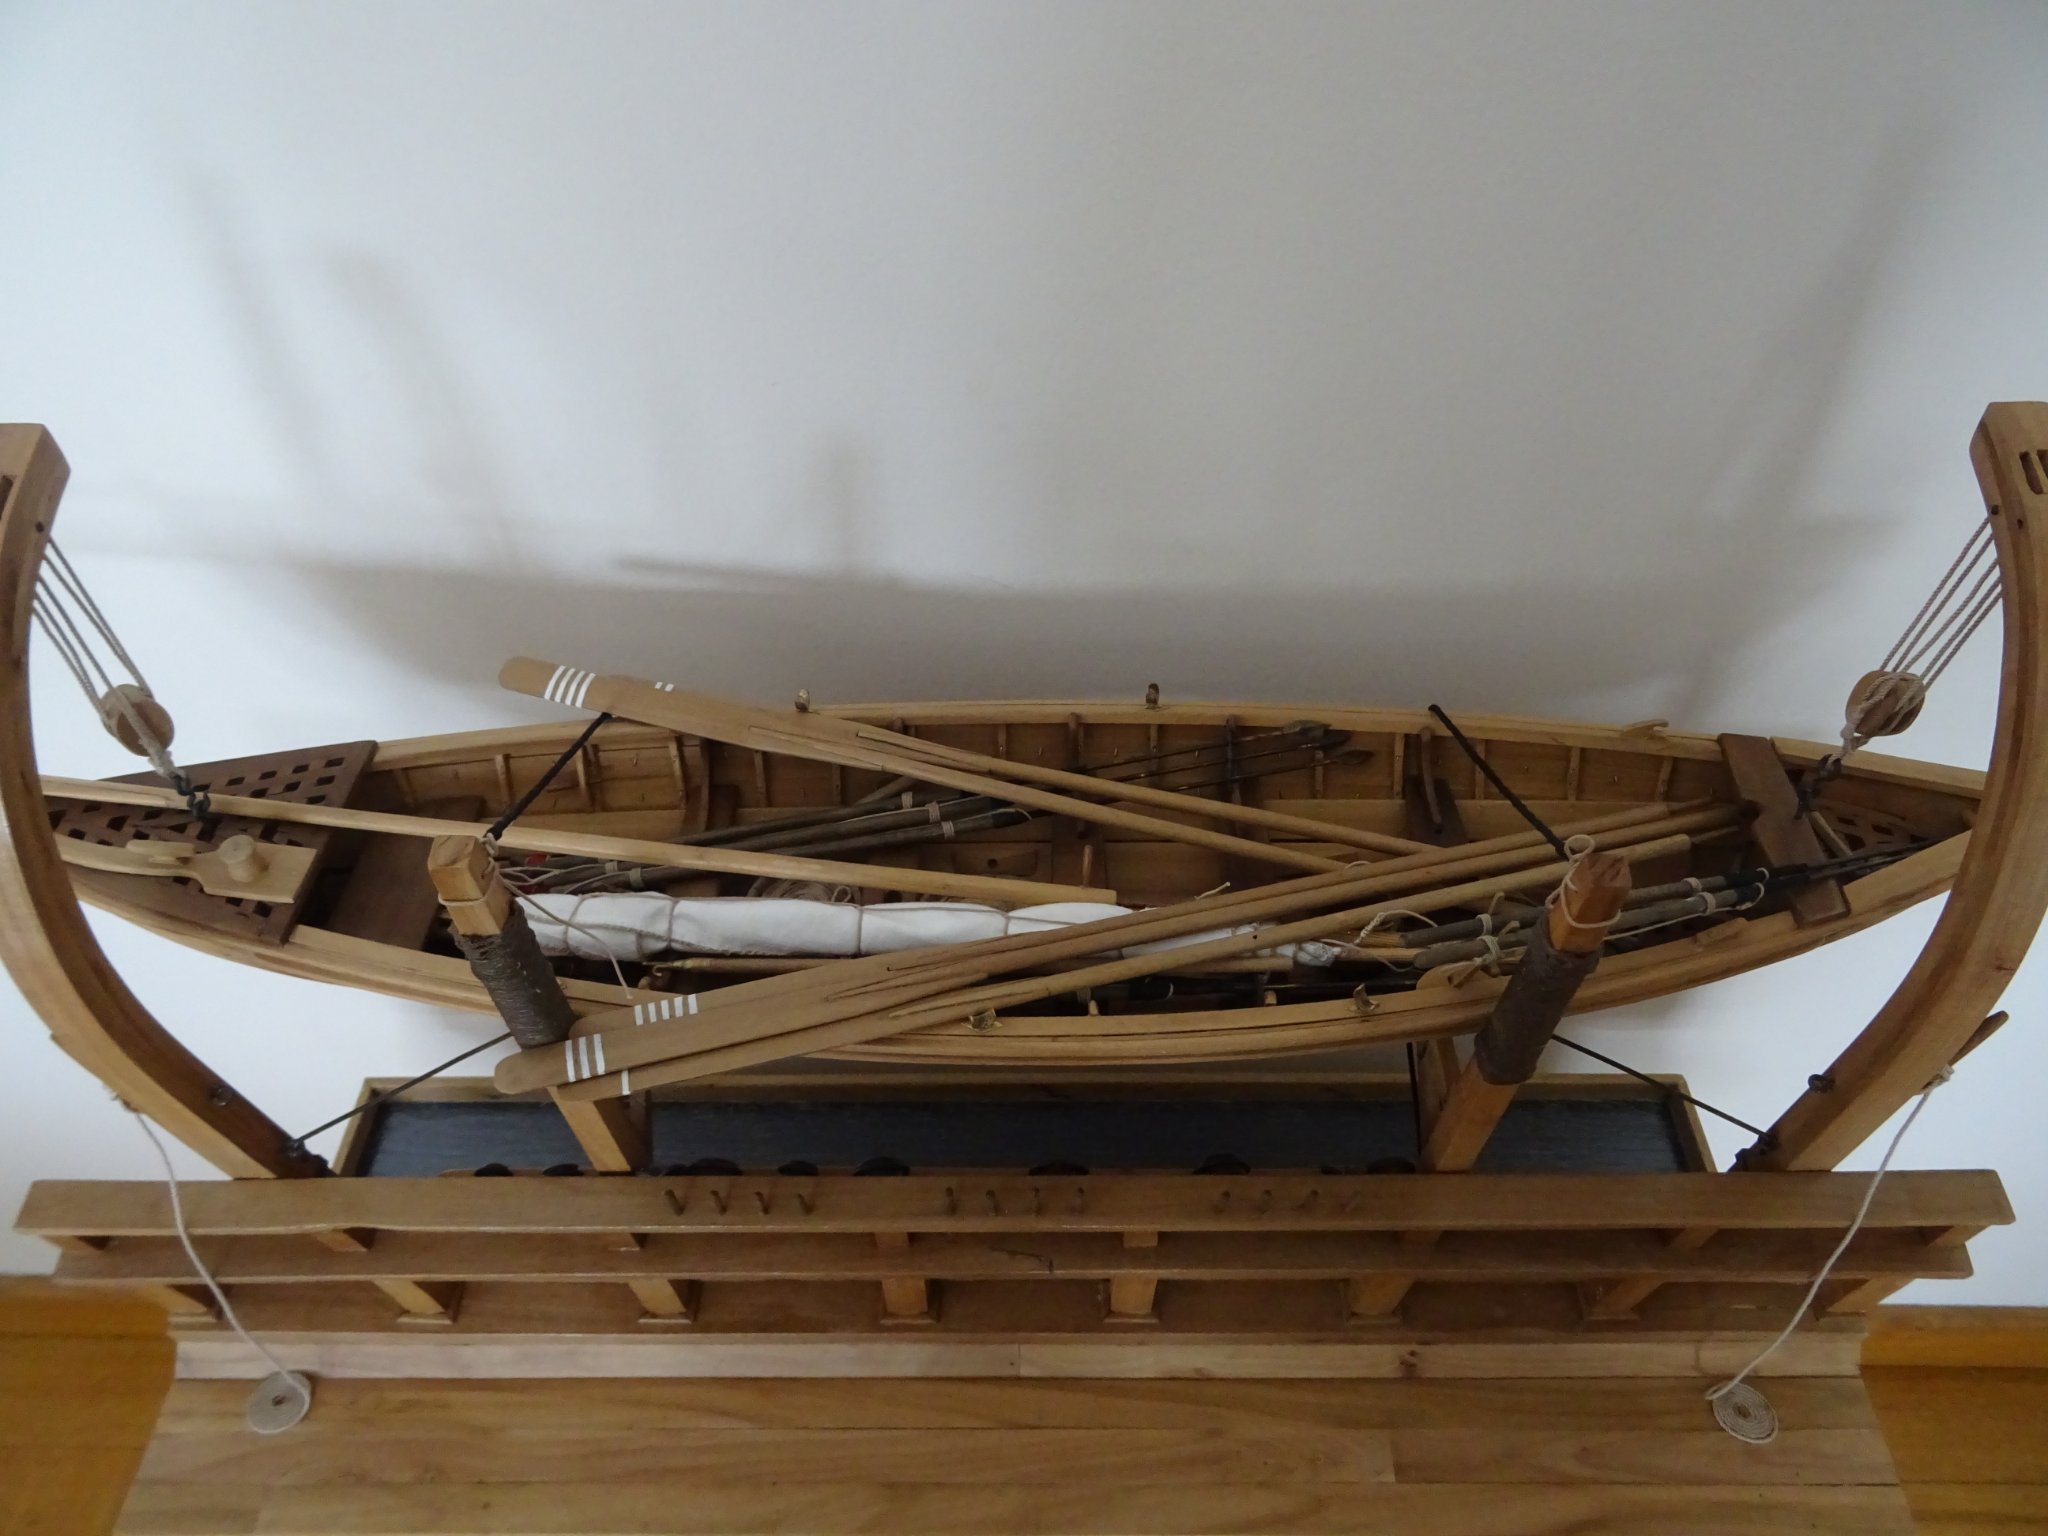
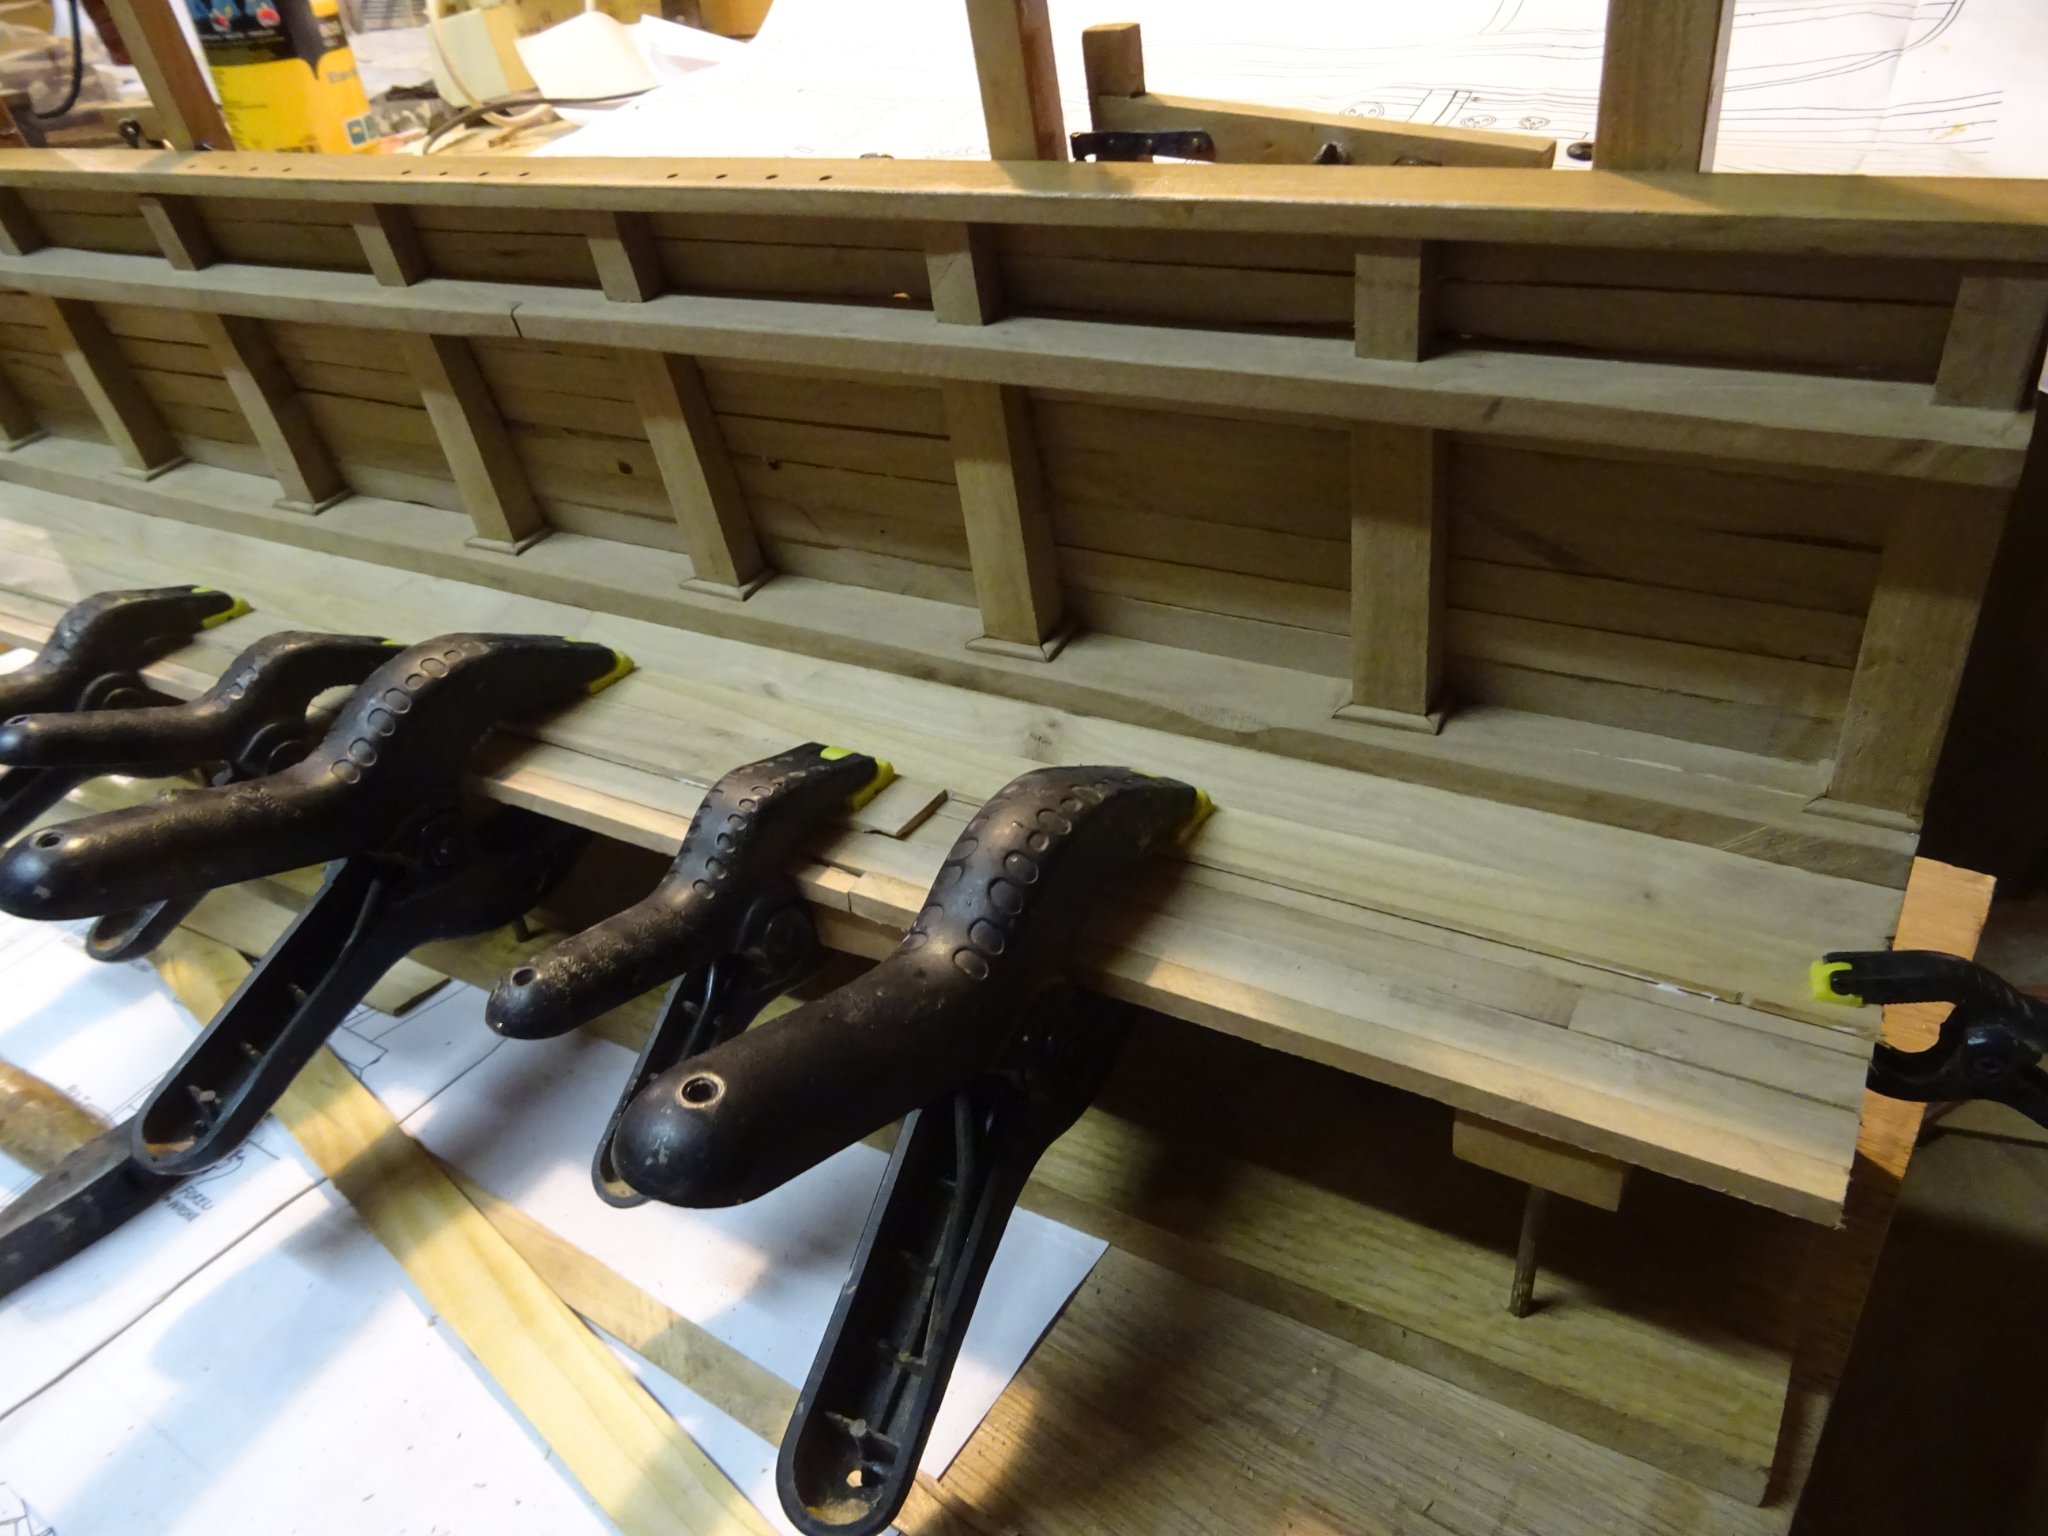
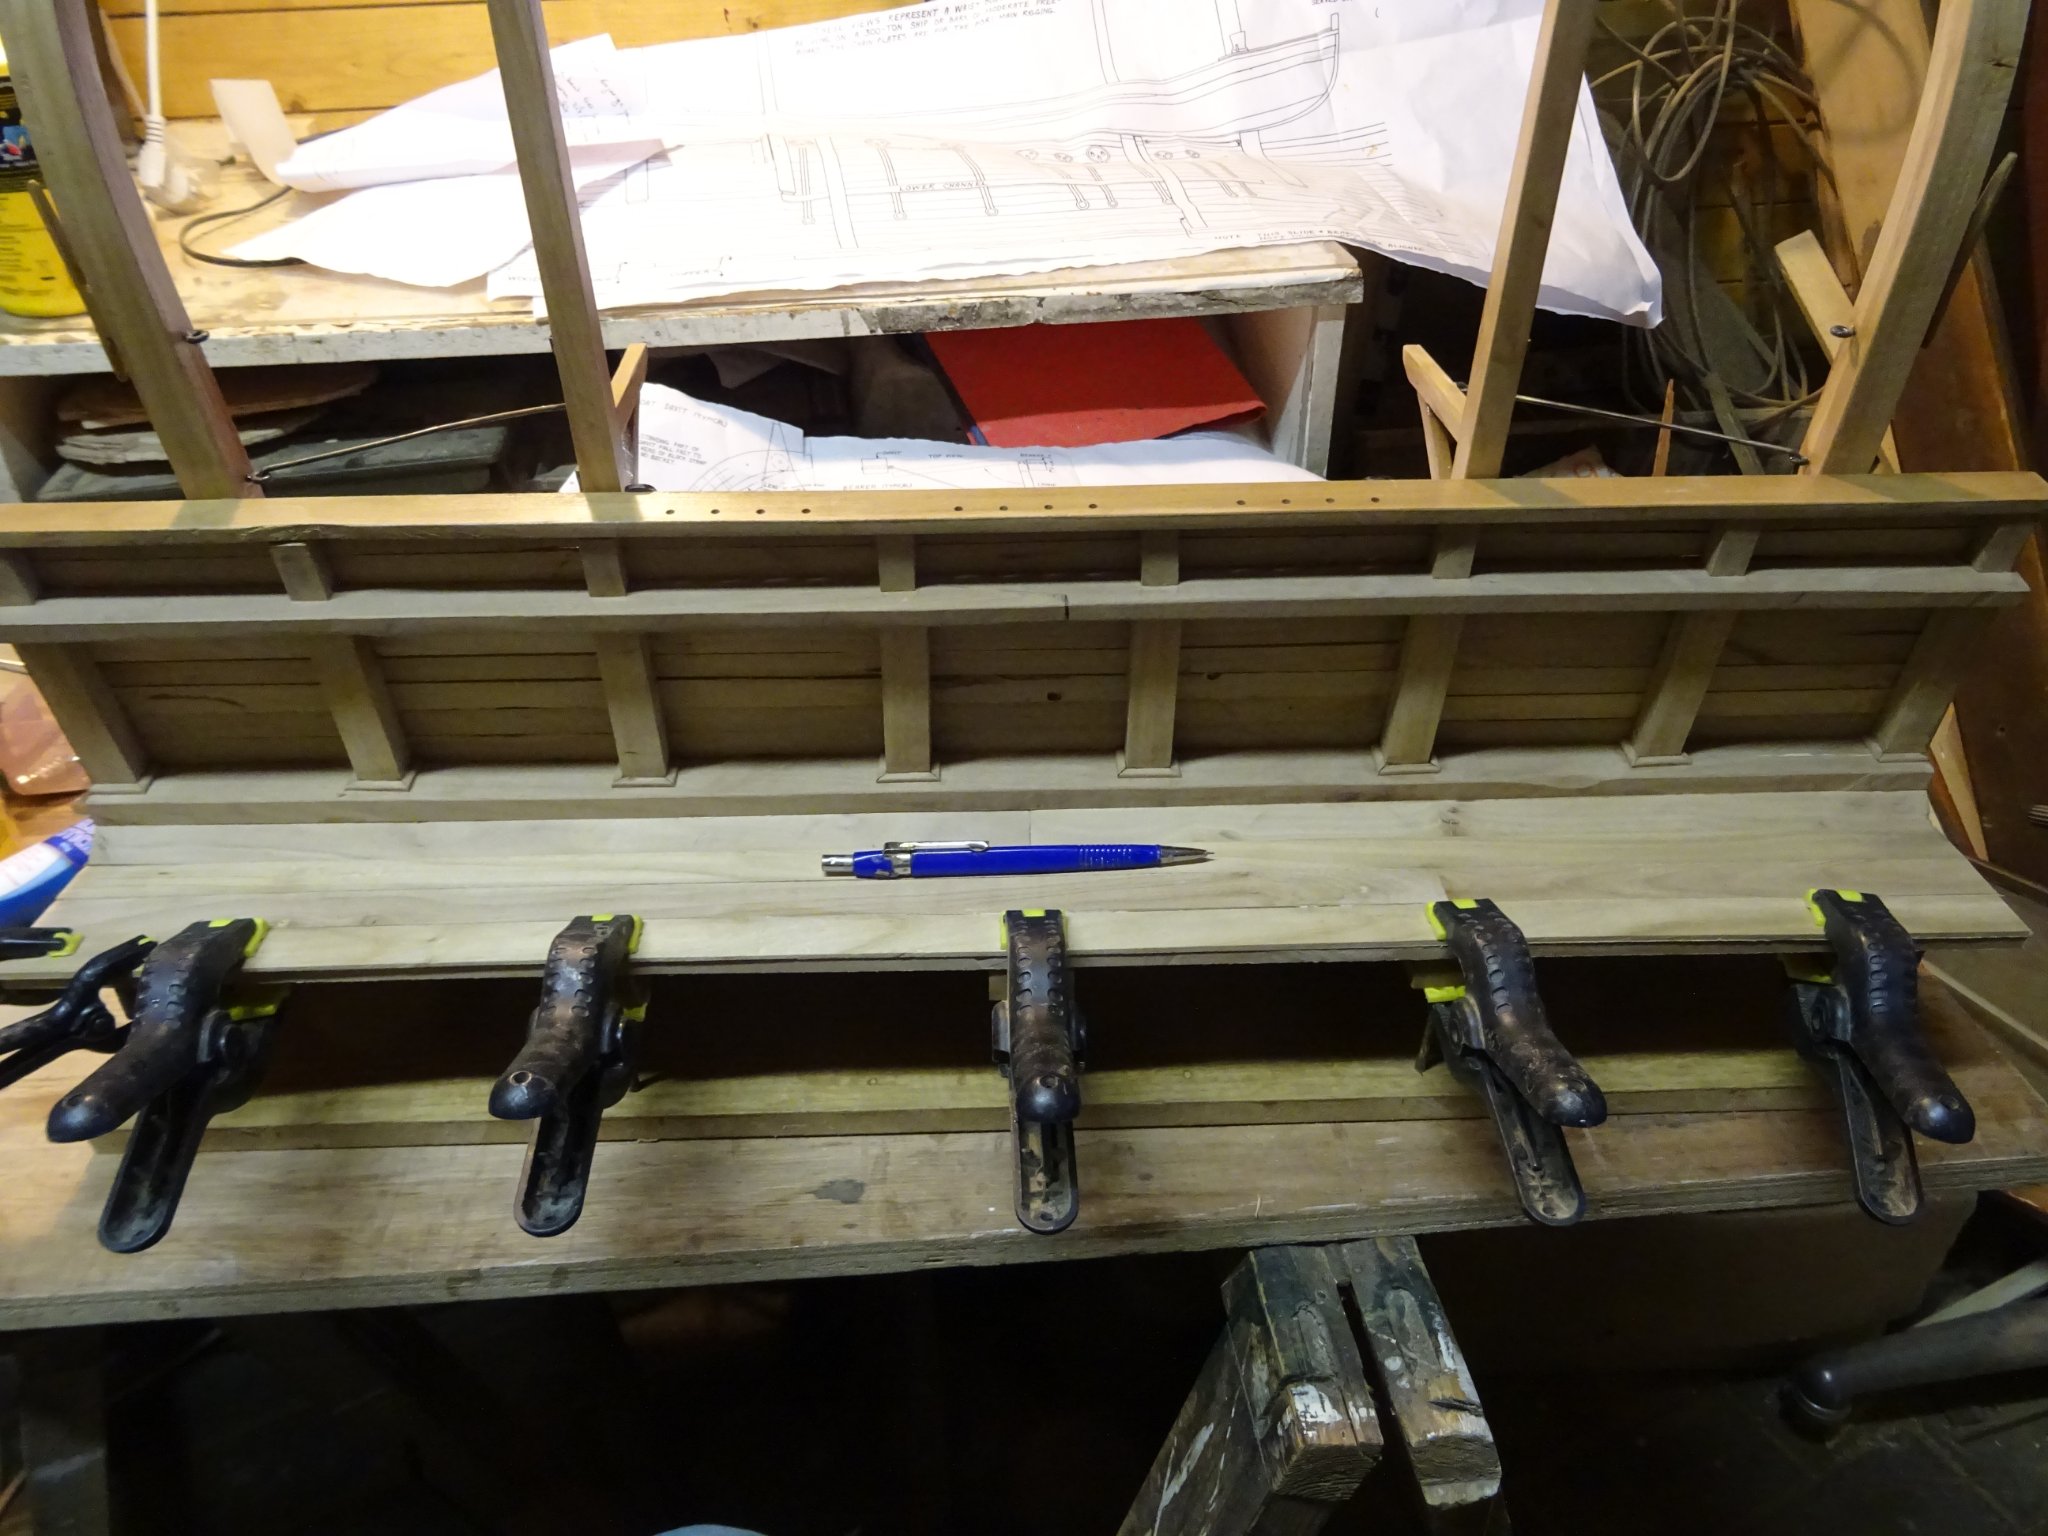
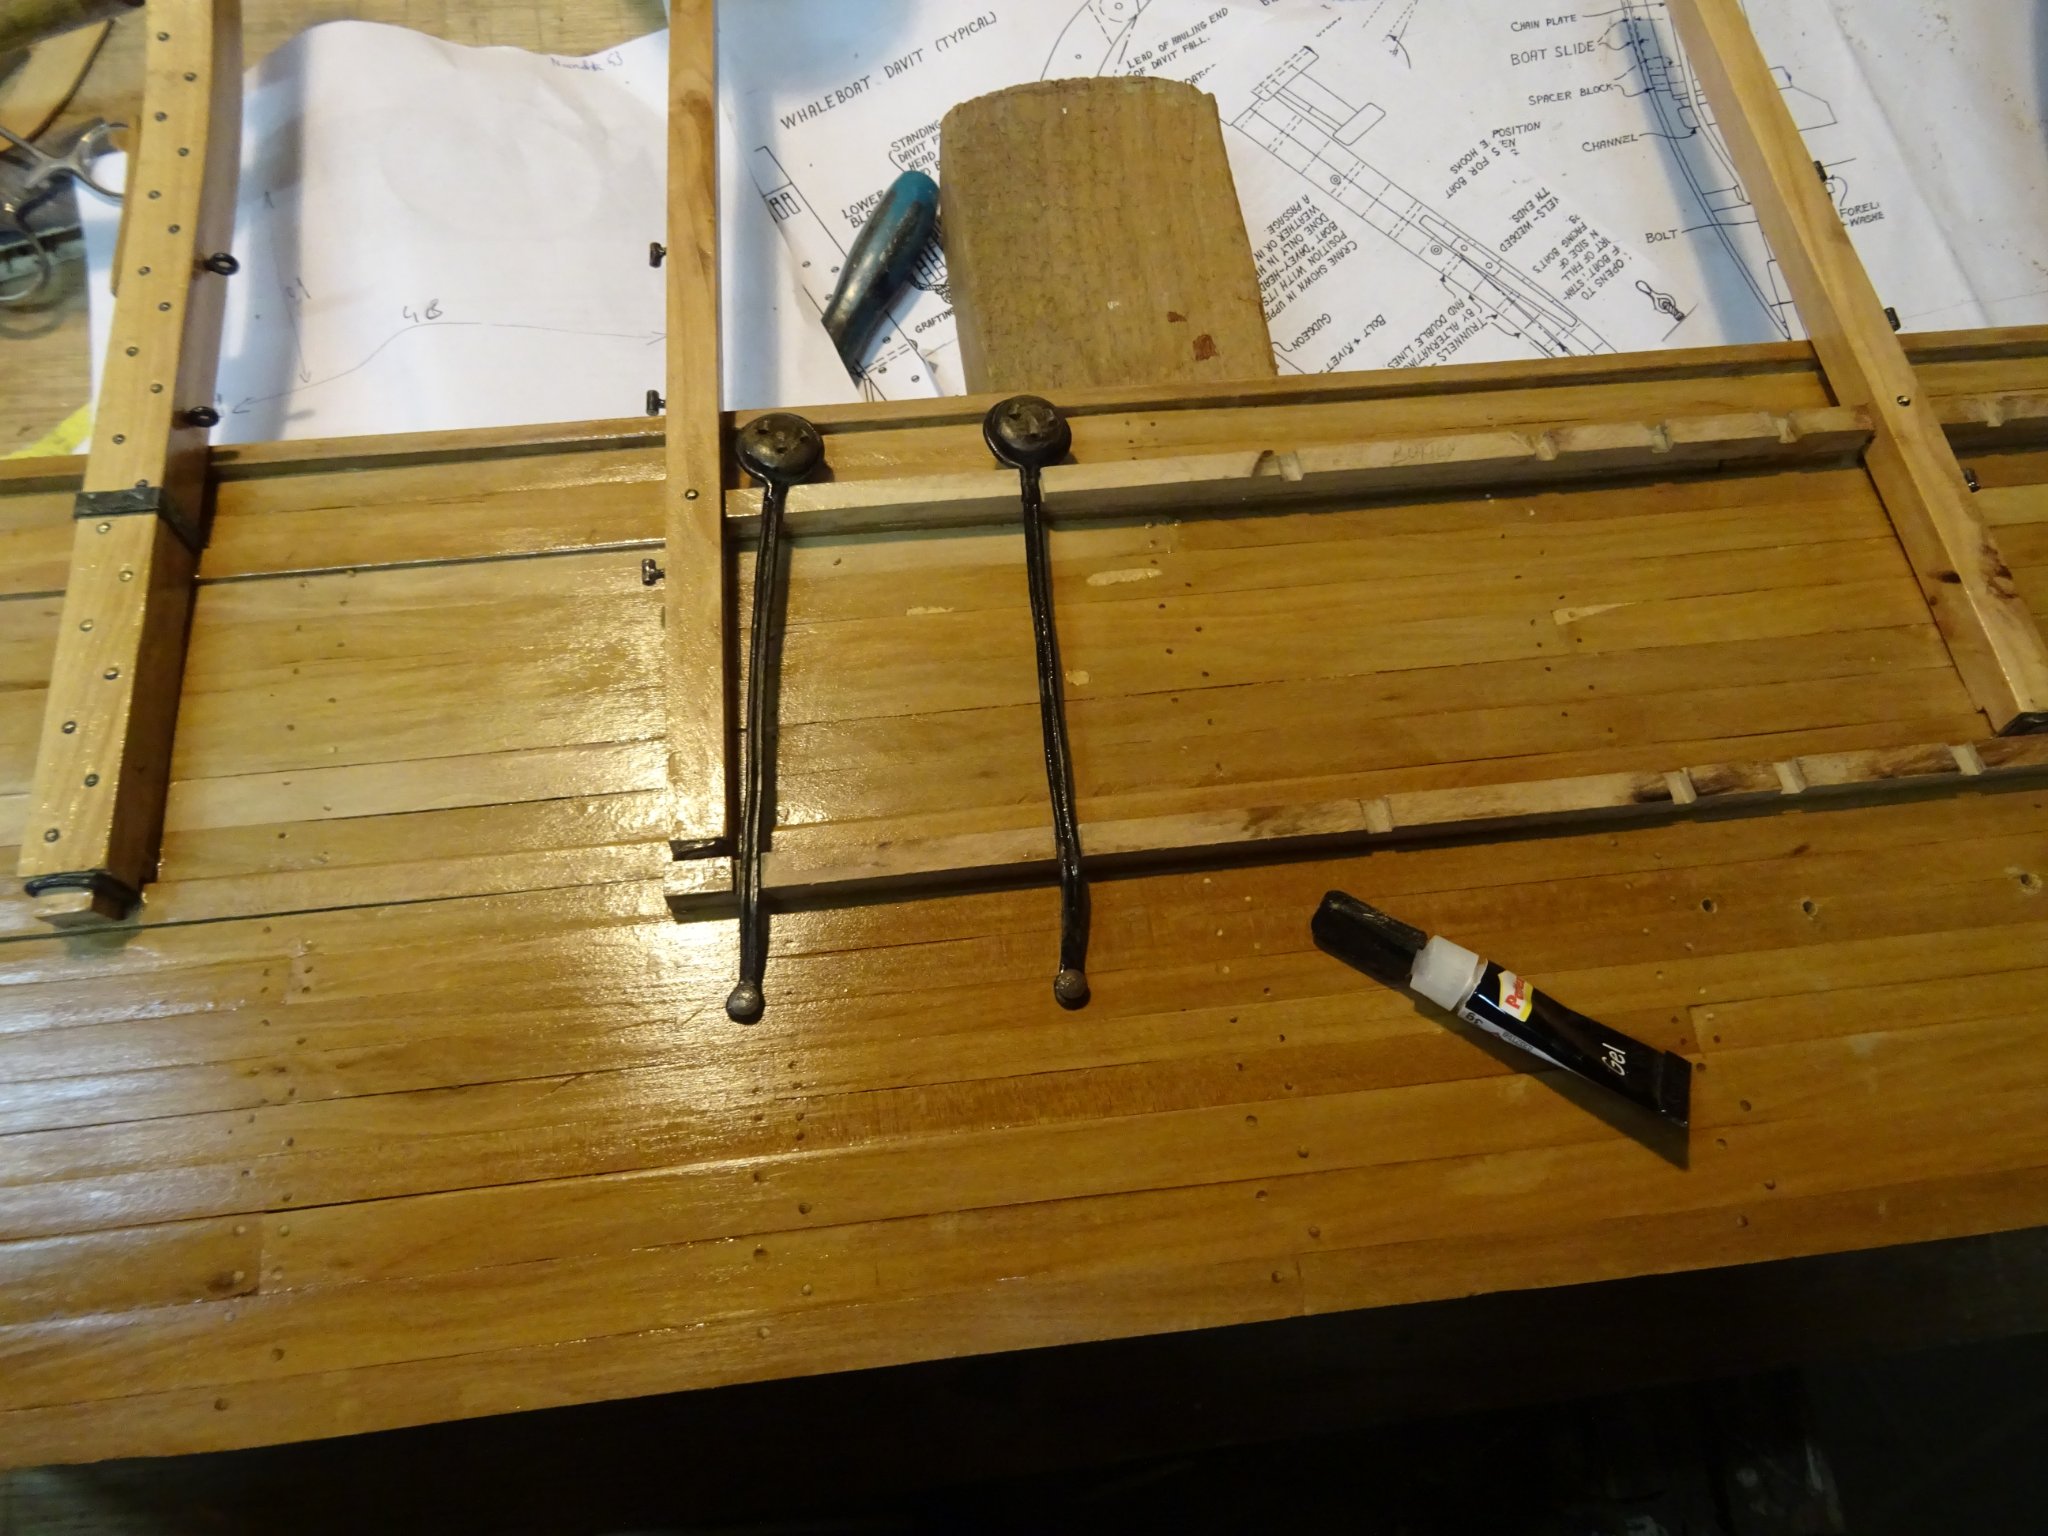
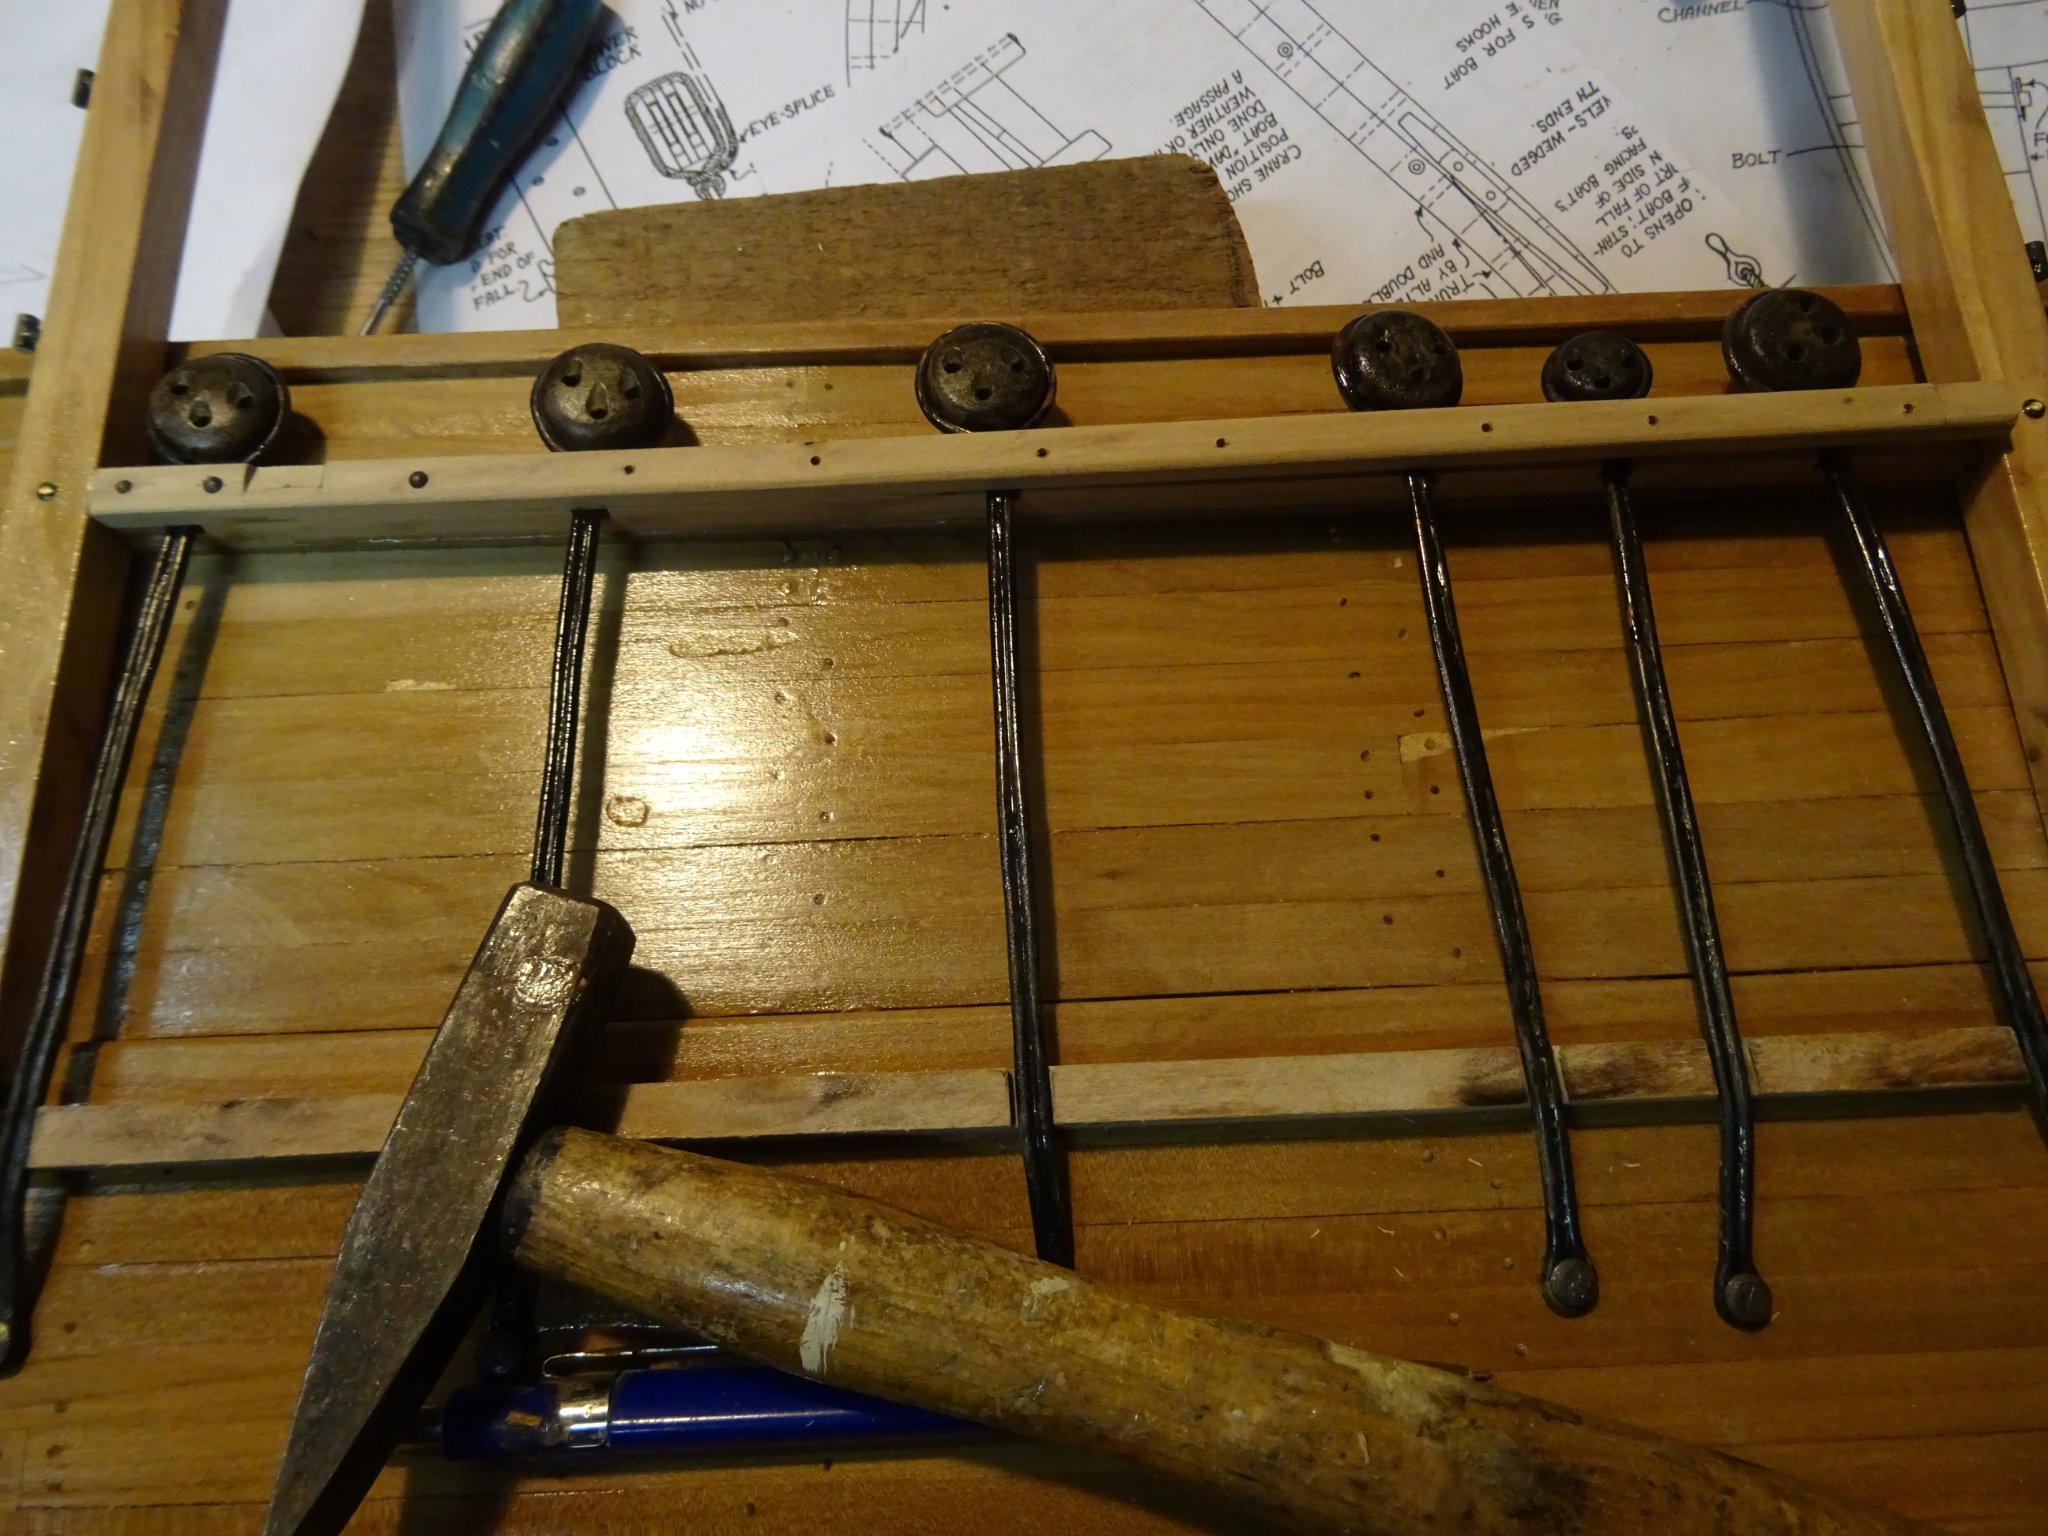
9.6 Deck and pin rail
The deck is consisting of two layers, first the deck planks and on top of those a thinner wooden sheathing. I presume that this was done because flensing and boiling the whale blubber was a dirty job and the oil made the deck greasy and slippery. When a whaler was prepared for a new voyage it was easier and cheaper to remove and replace the upper plank sheathing than replacing the whole deck.
Laying the deck planks.
Covering the deck with sheathing planks.

The deck is ready.
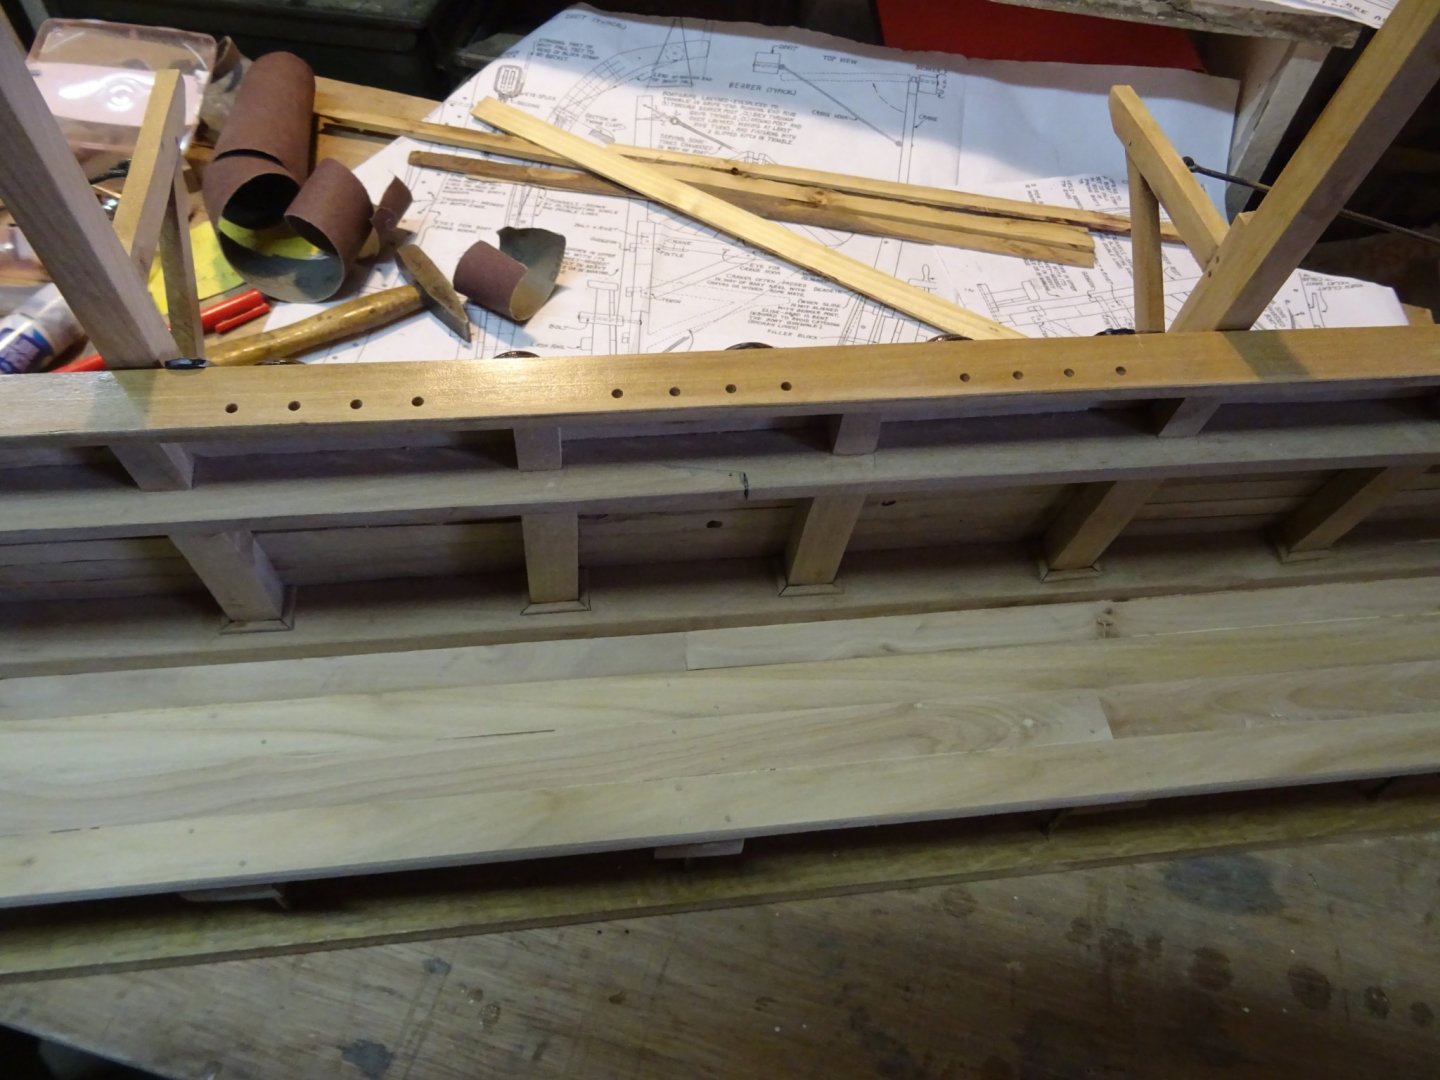
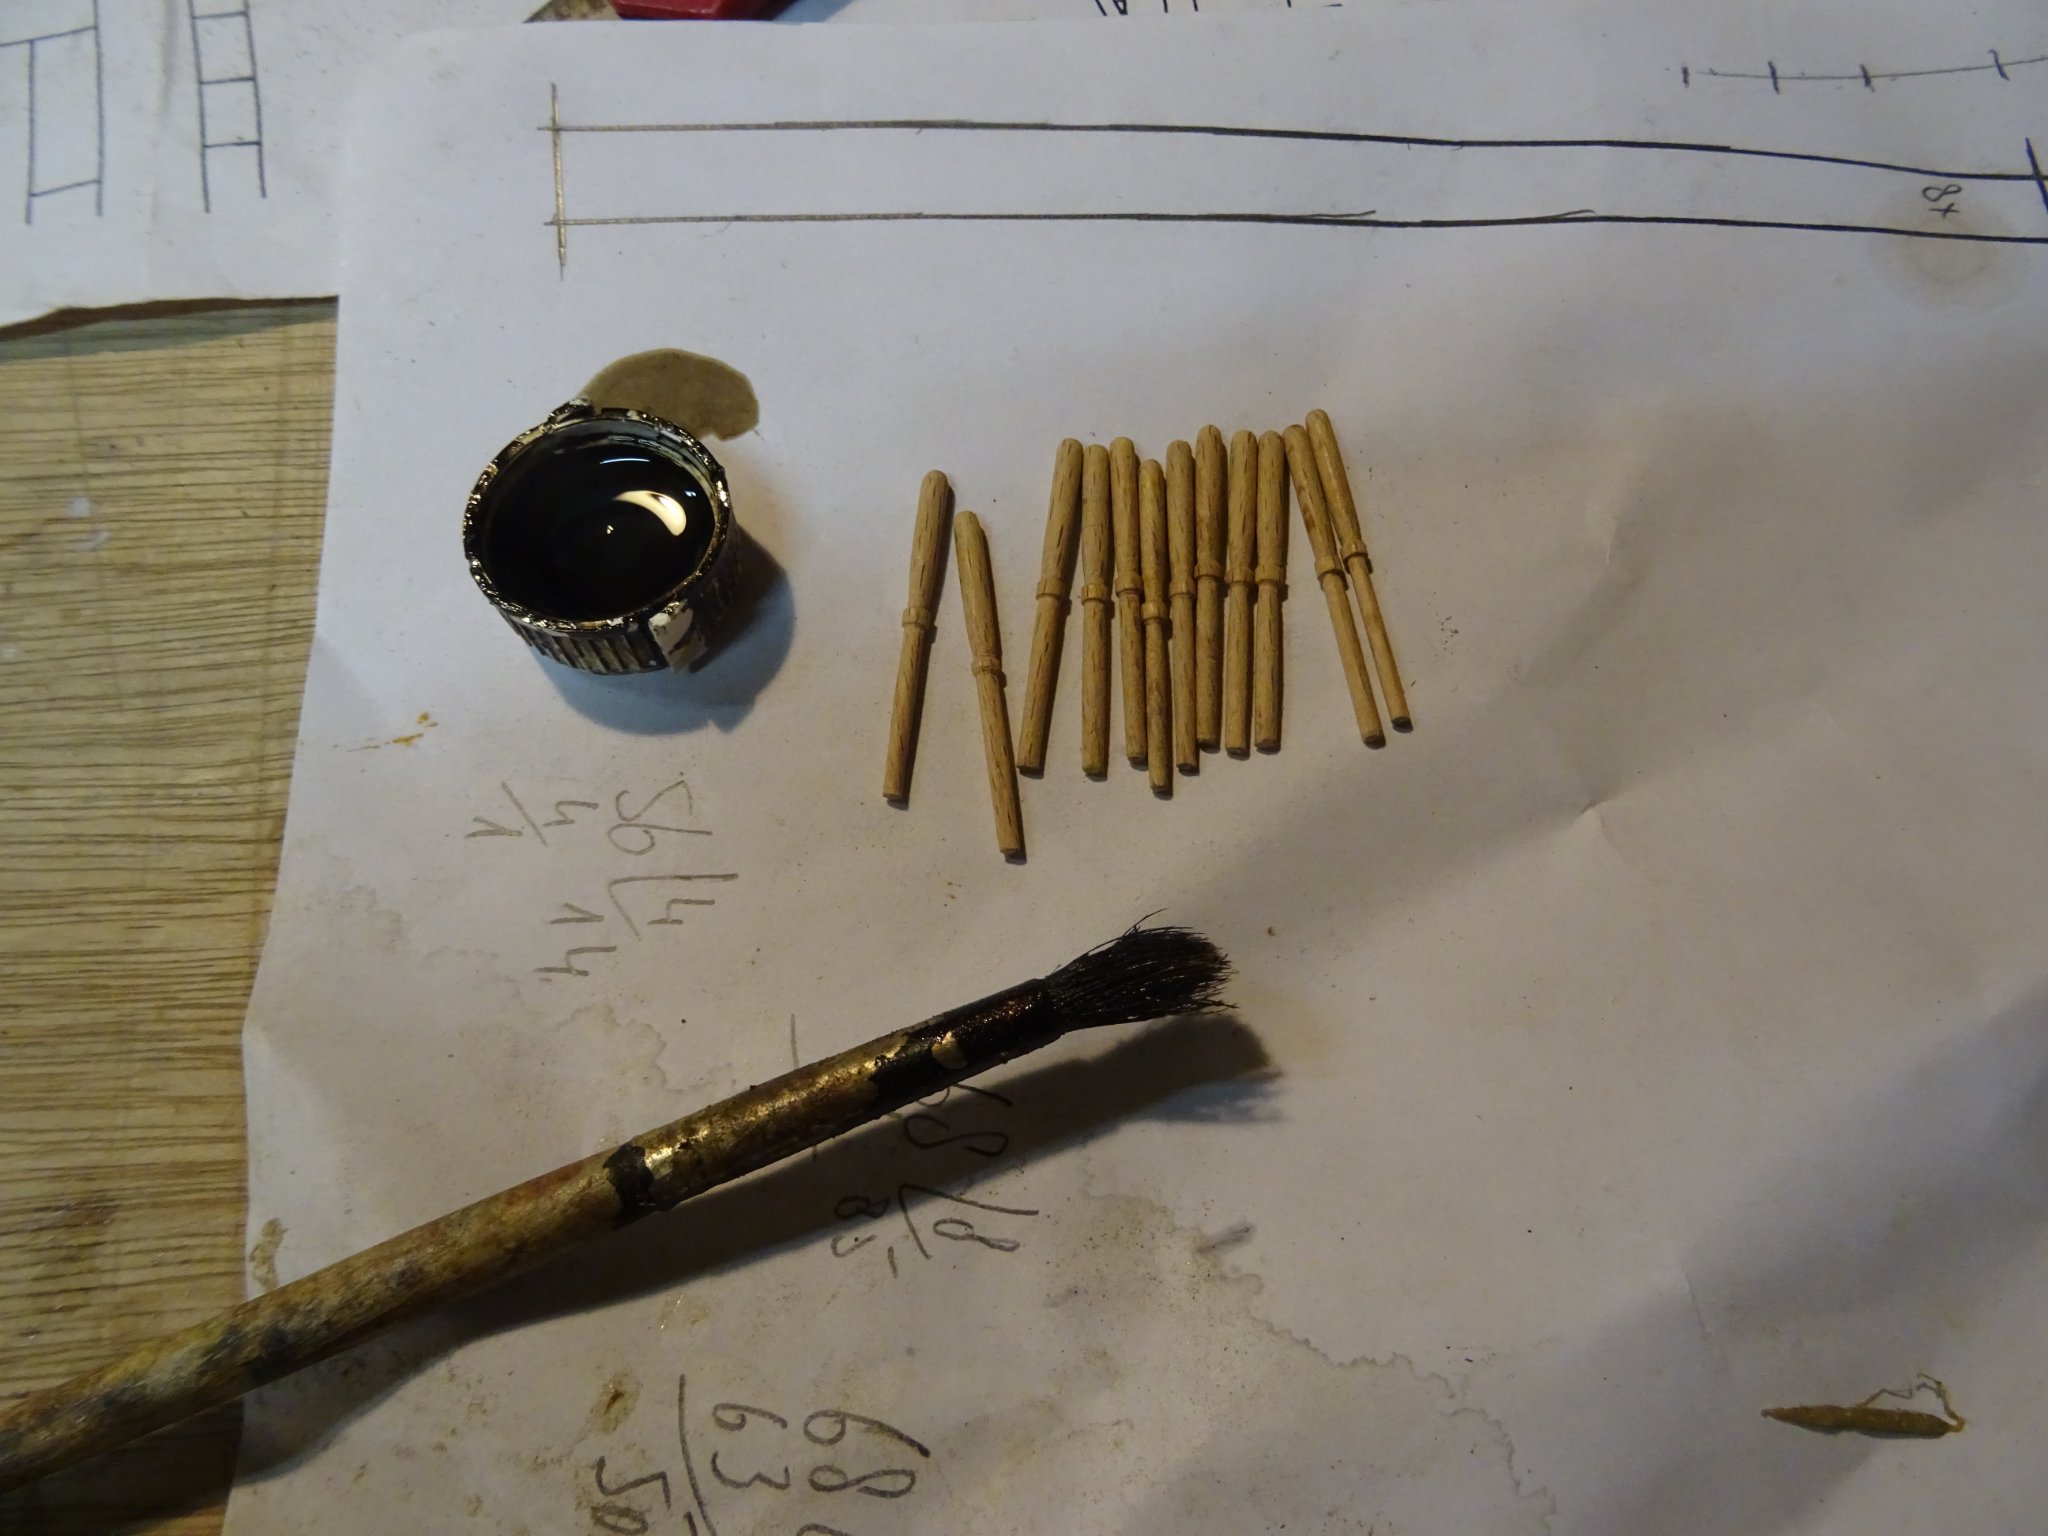
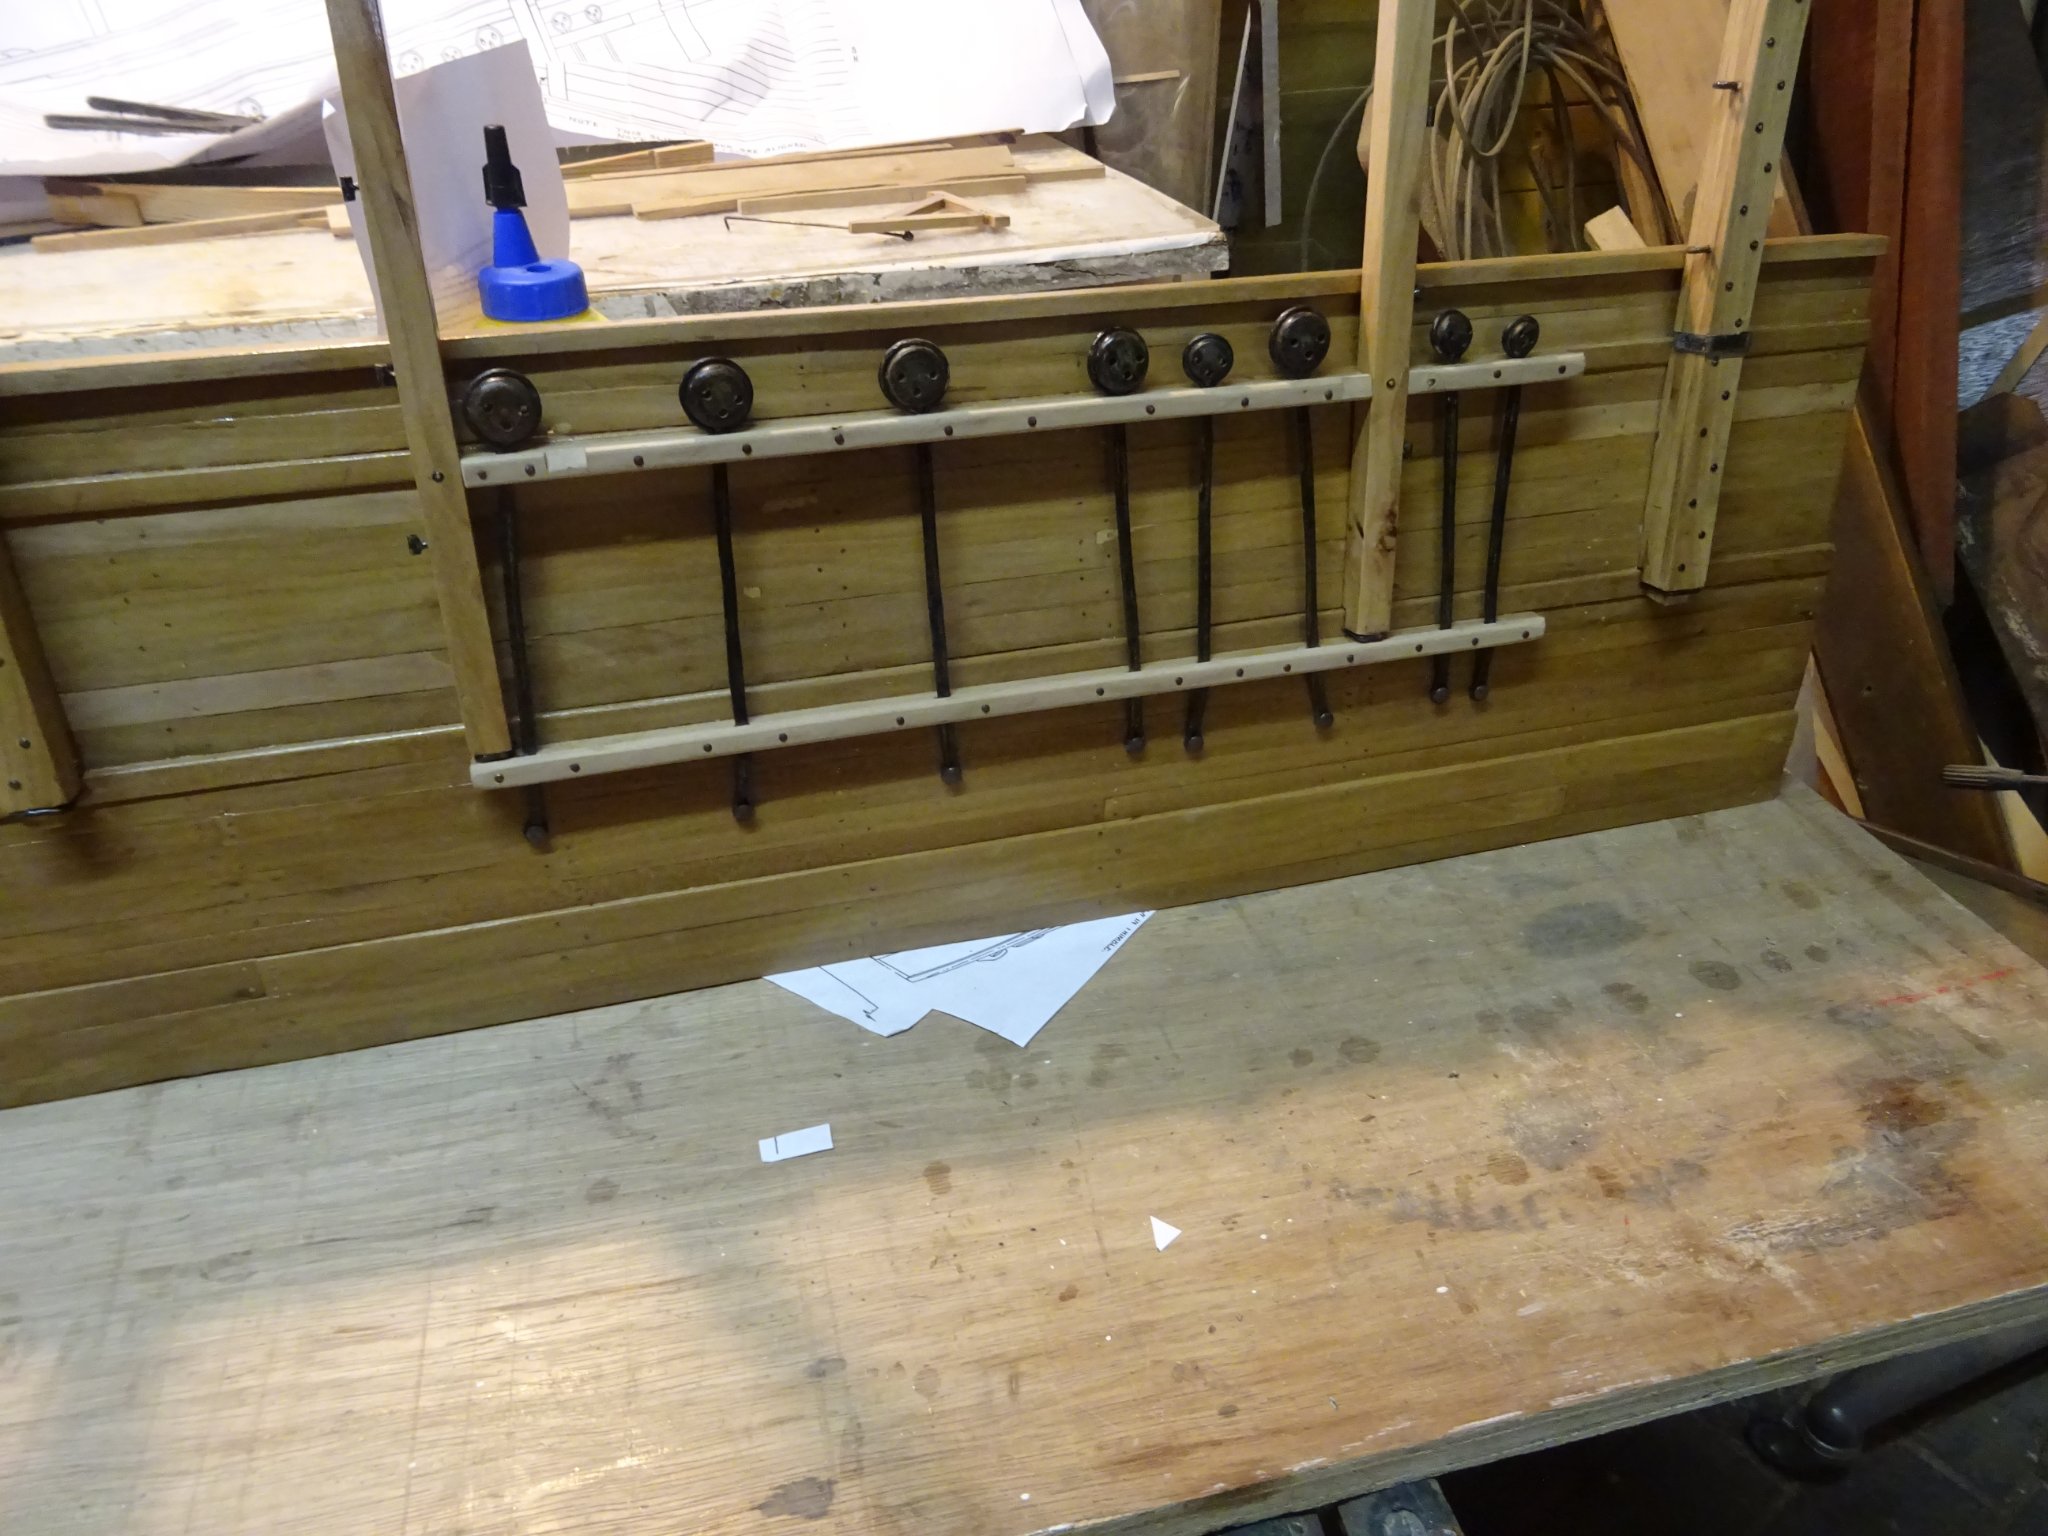
In the picture above , you see in the fancy rail twelve holes. The fancy rail is at the same time pin rail.
Making the belaying pins on the lathe with some small chisels and files and with the help of a wooden jig.

The twelve belaying pins, ready to be stained.

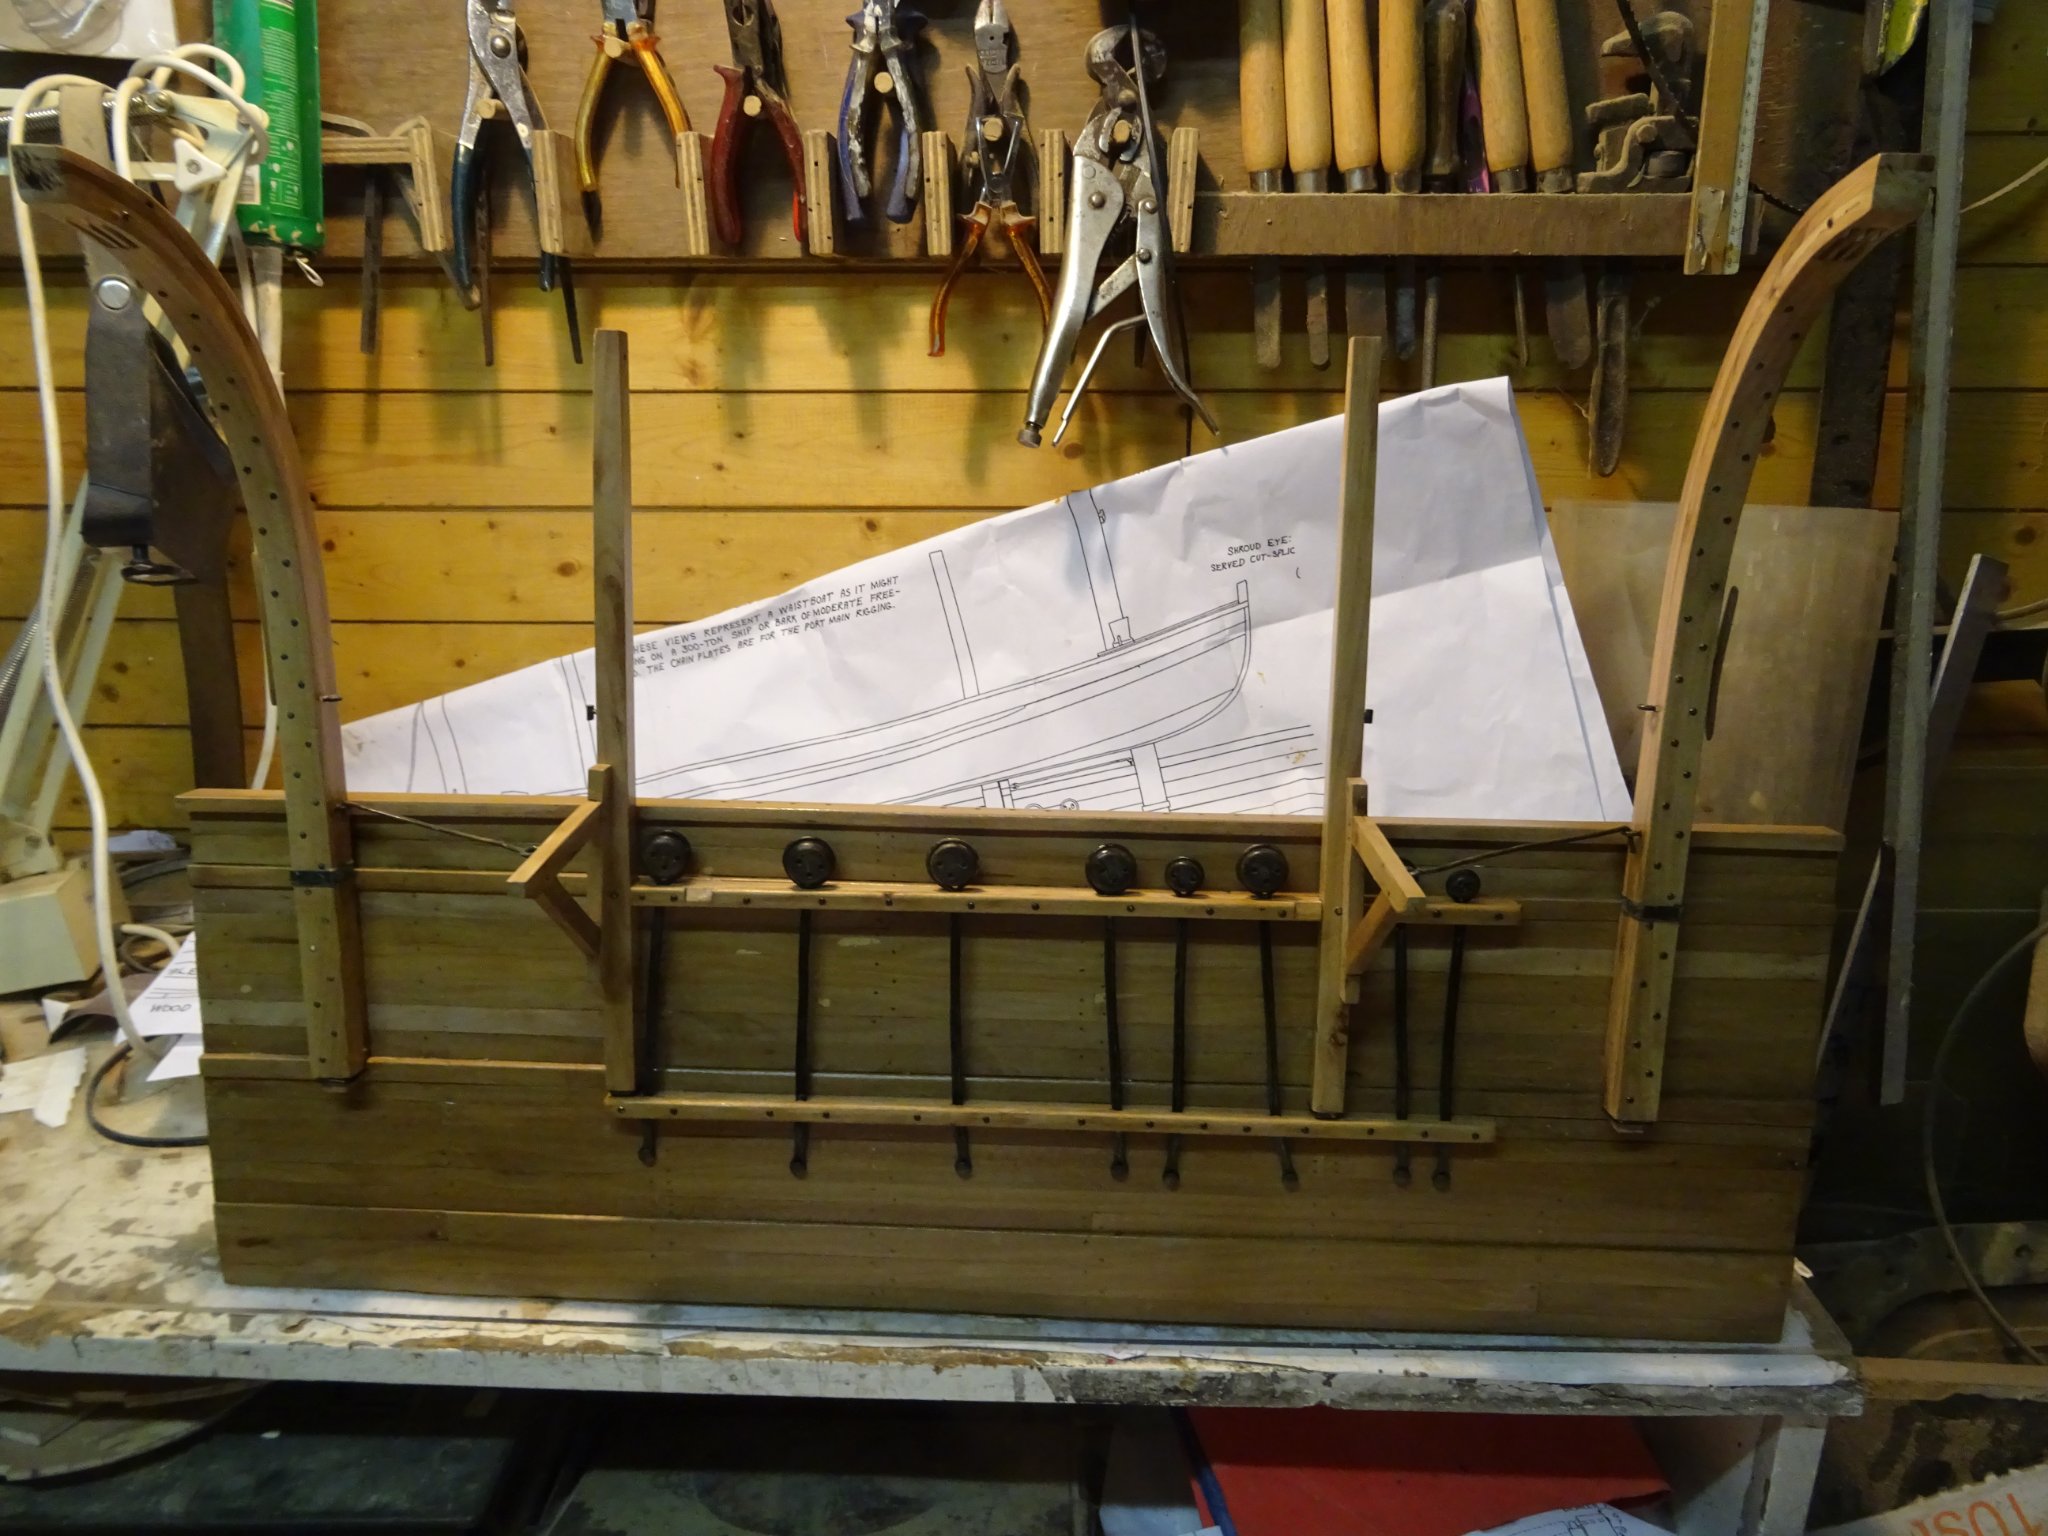
The belaying pins in the fancy rail.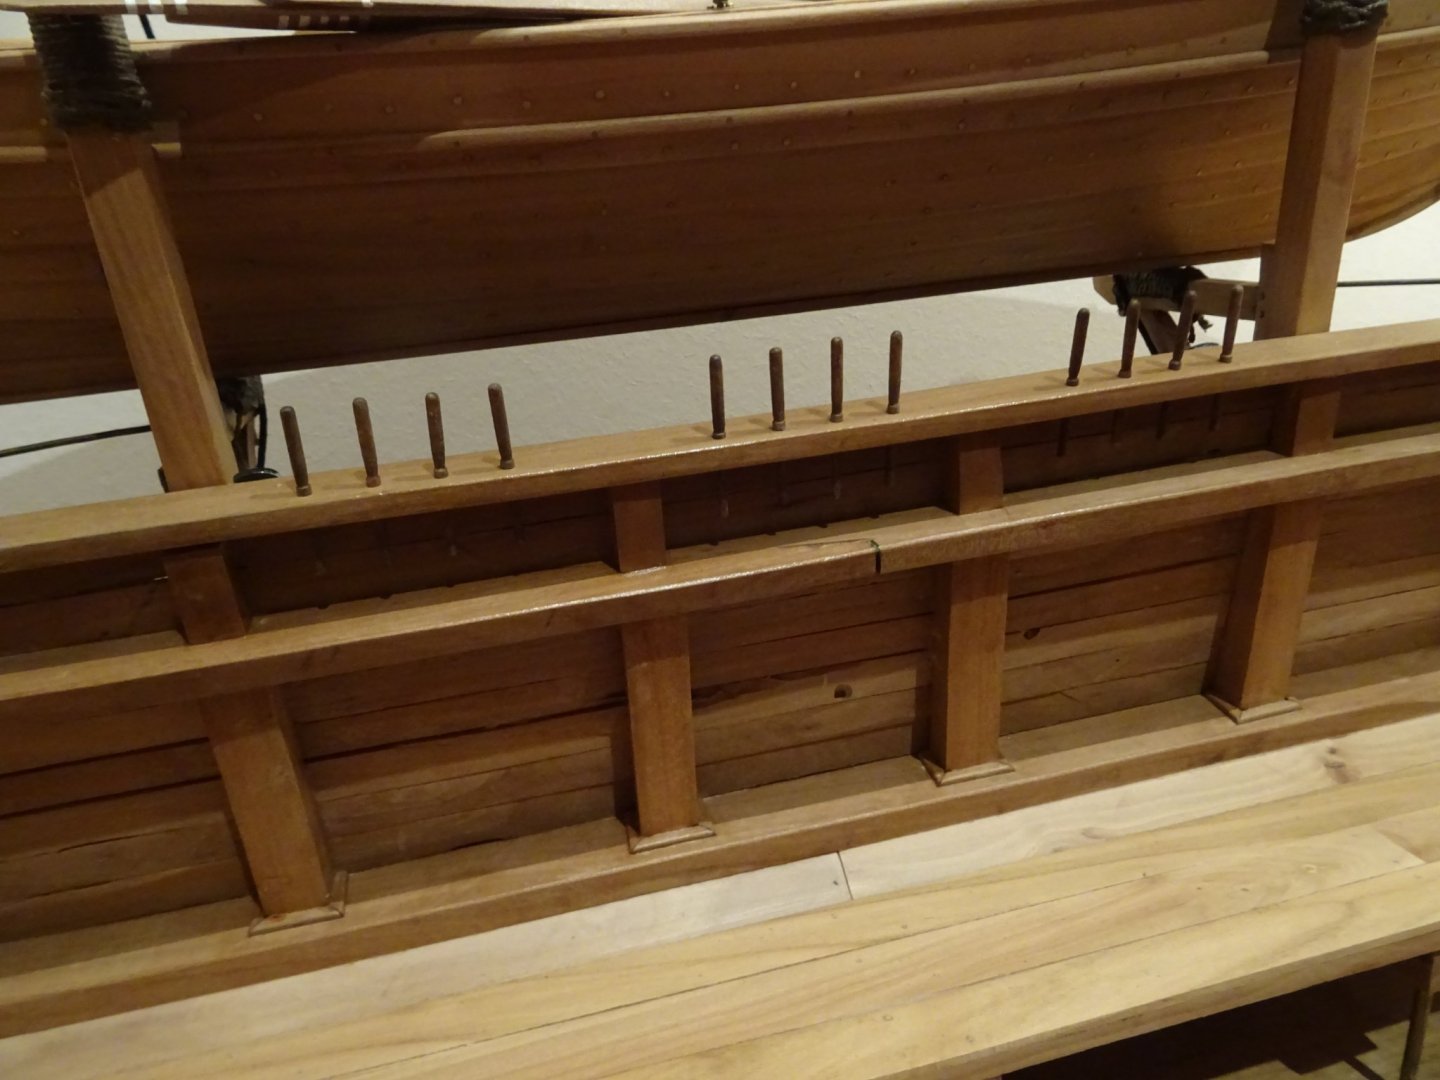
Thank you very much for reading this log, for your likes and for your encouraging comments.
Till next week!
- Ainars Apalais, Blackreed, mtaylor and 3 others
-
6
-
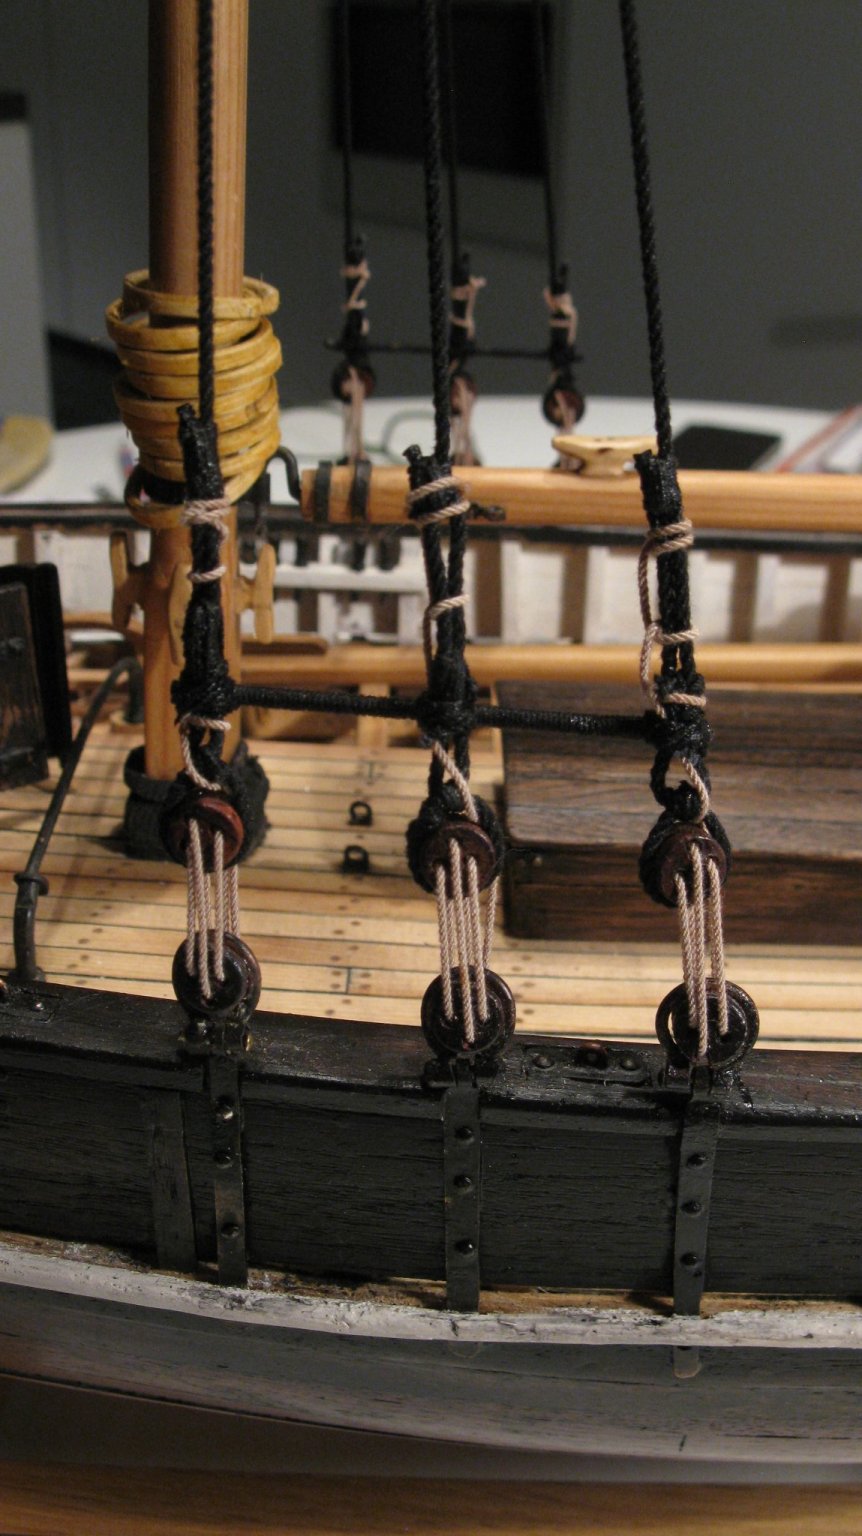
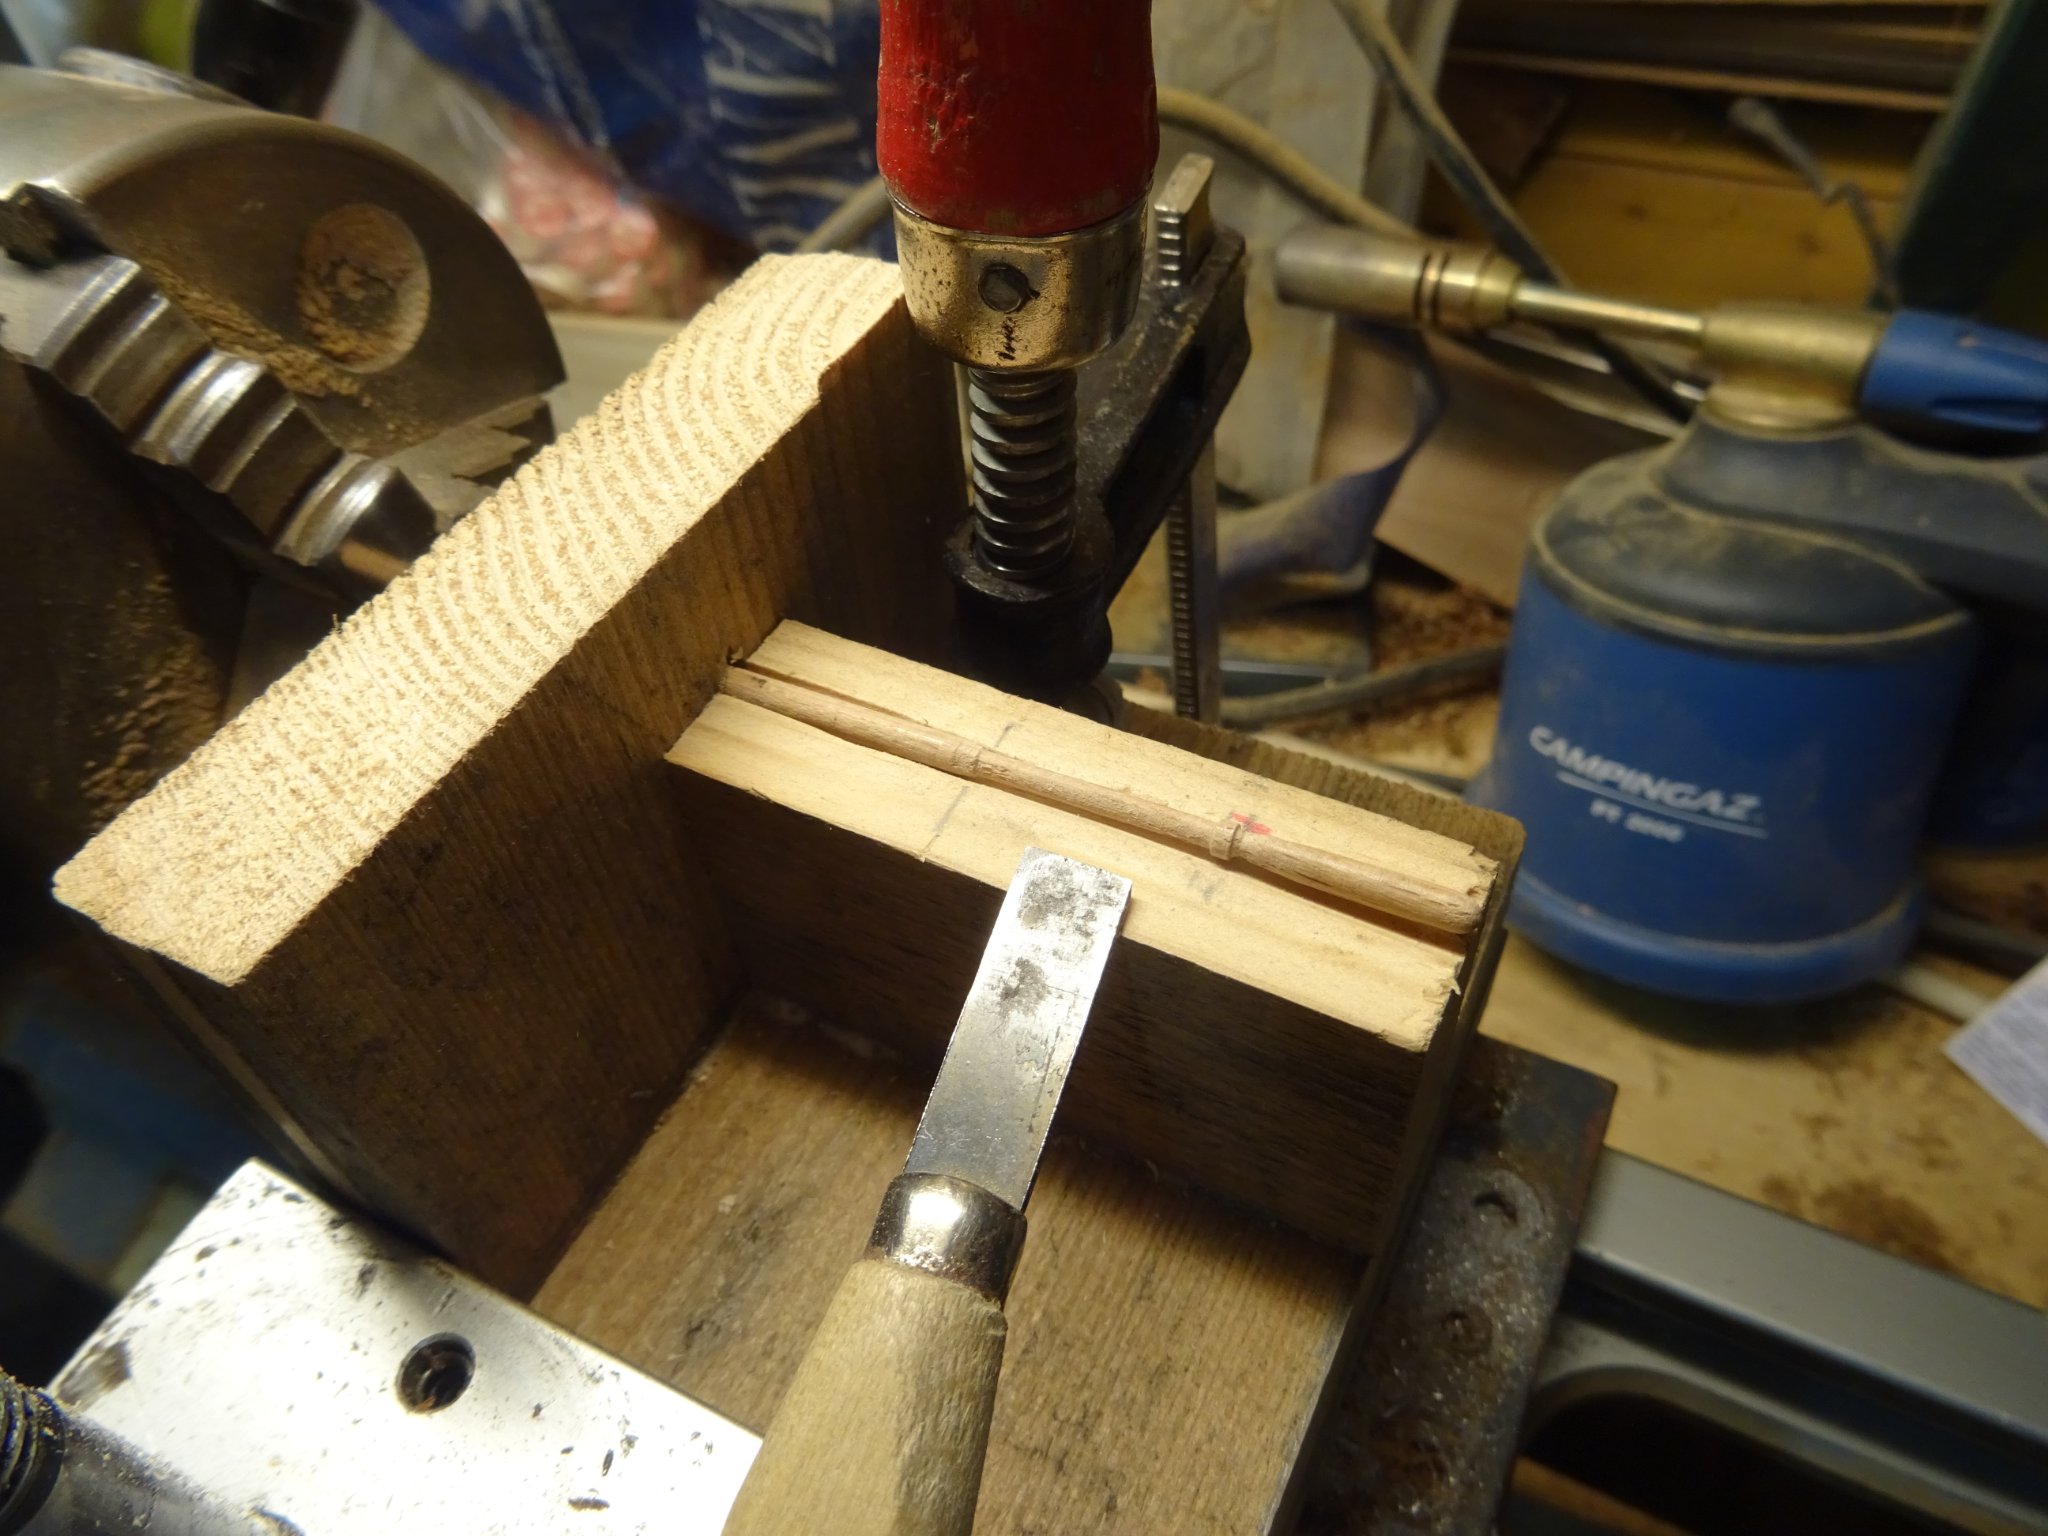
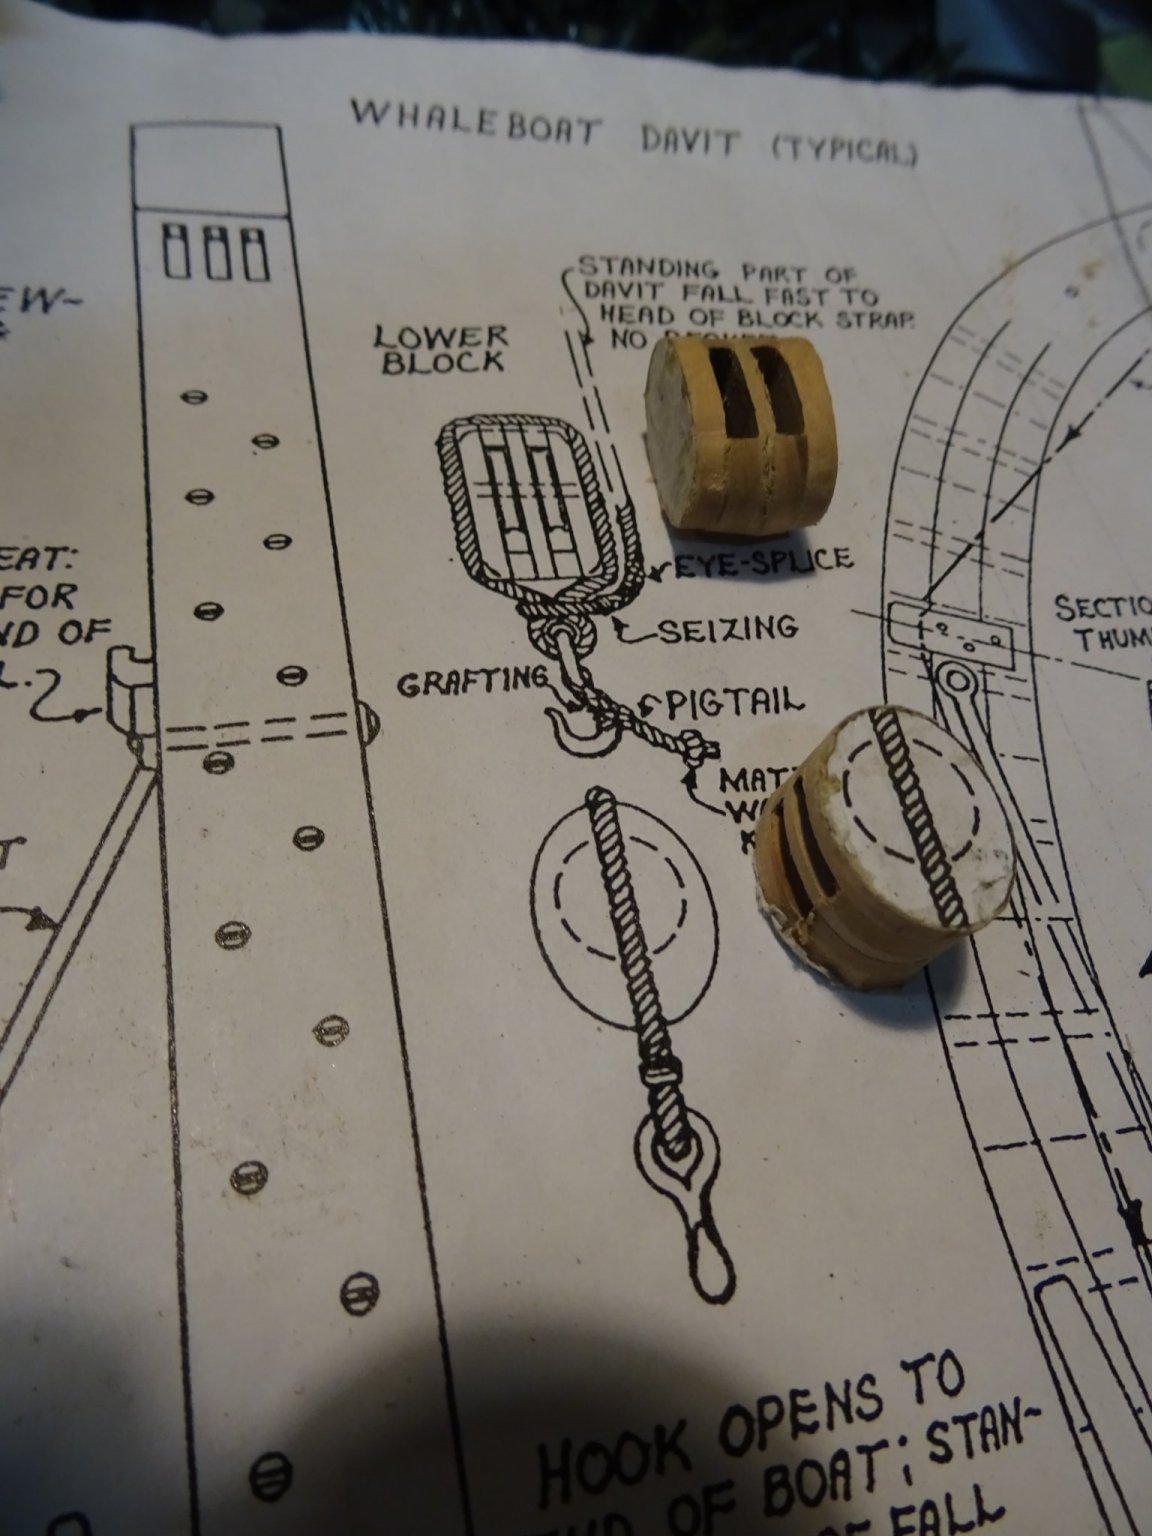
9.6 Lower blocks
The boat is lowered by two-sheave blocks.
Each block is made with three wooden slices.
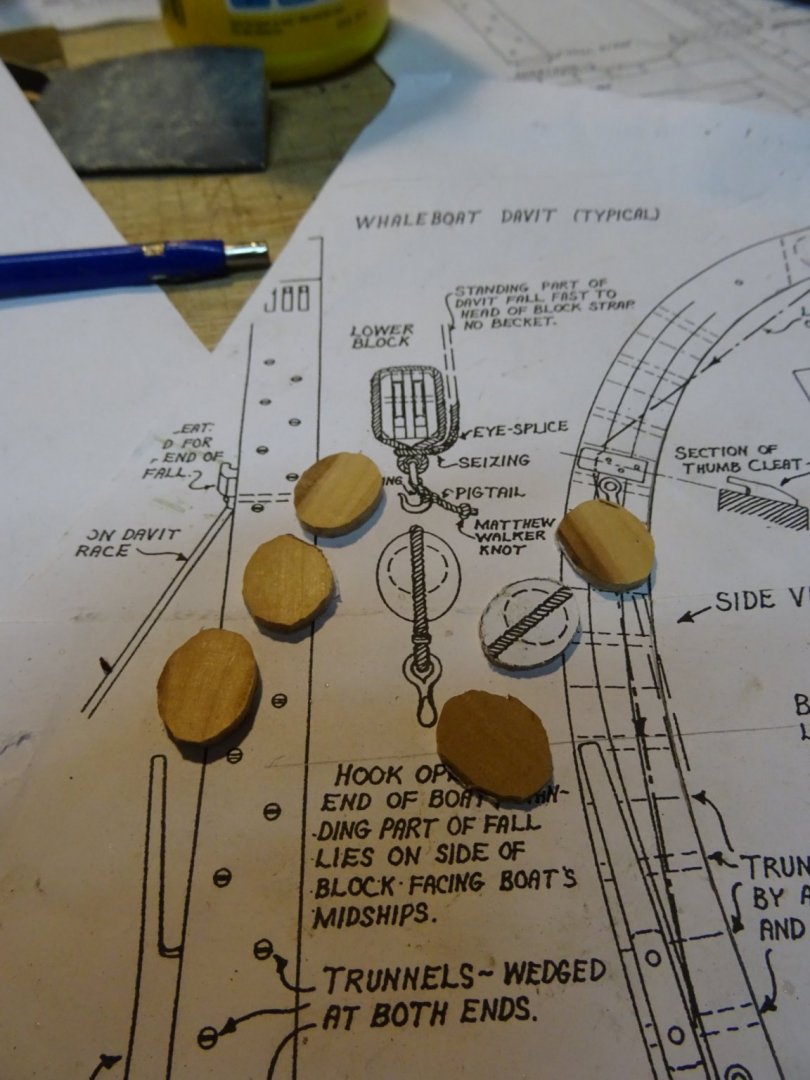
Gluing them together, separated by wooden sticks.

Sanding the blocks when the excesses of the sticks are sawn off.

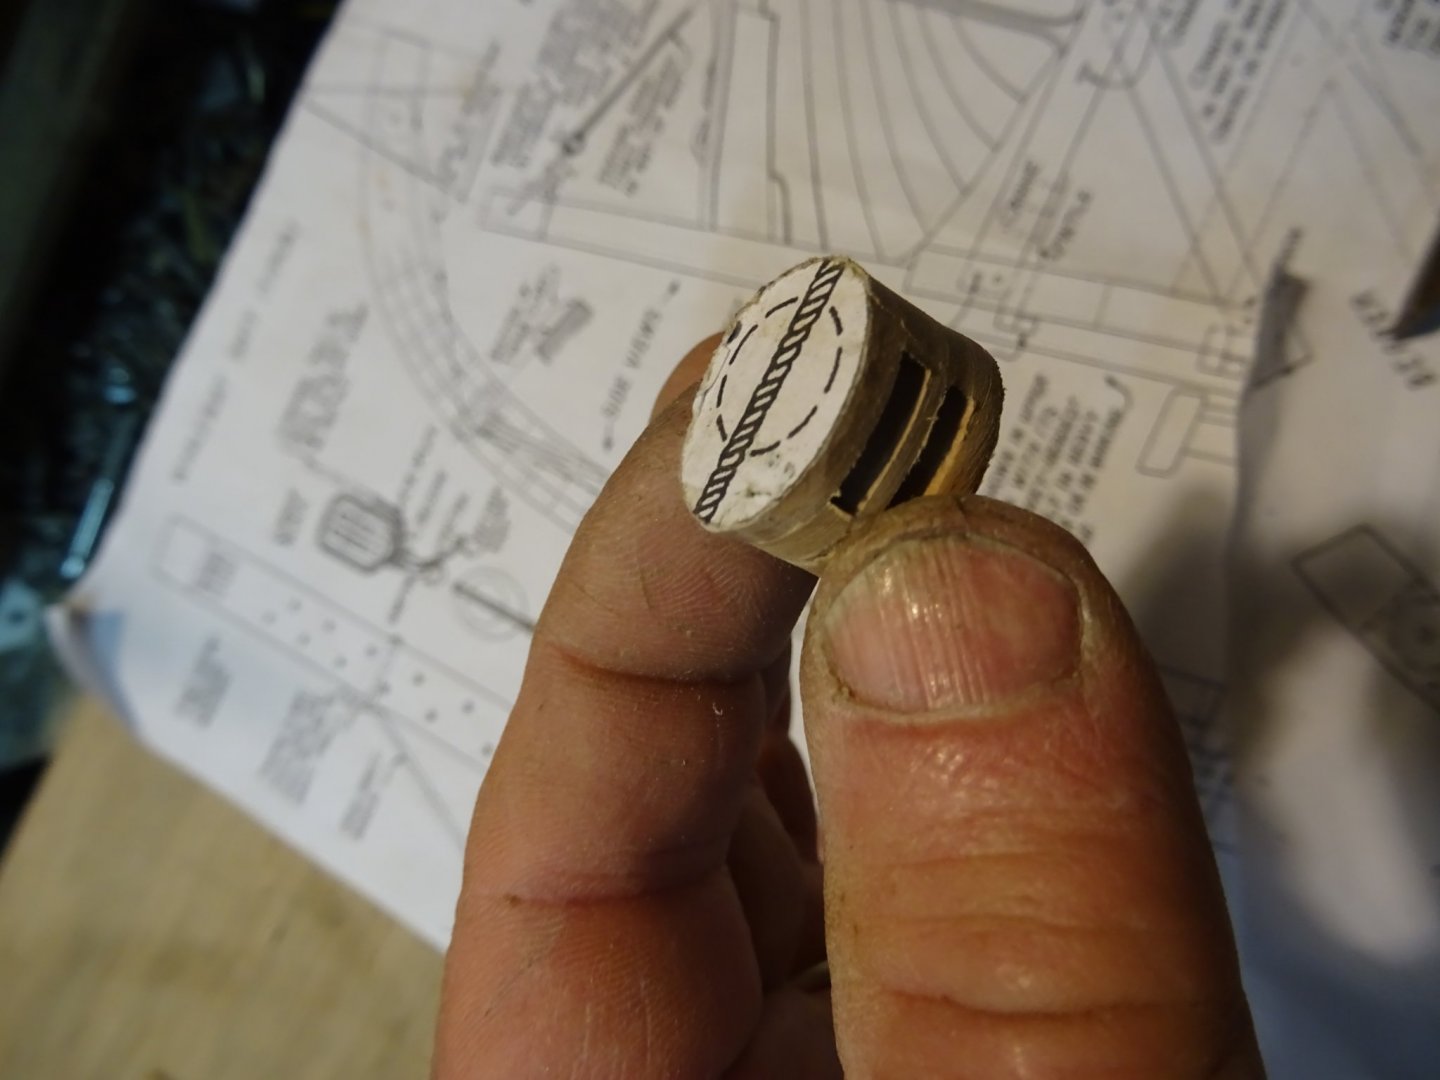

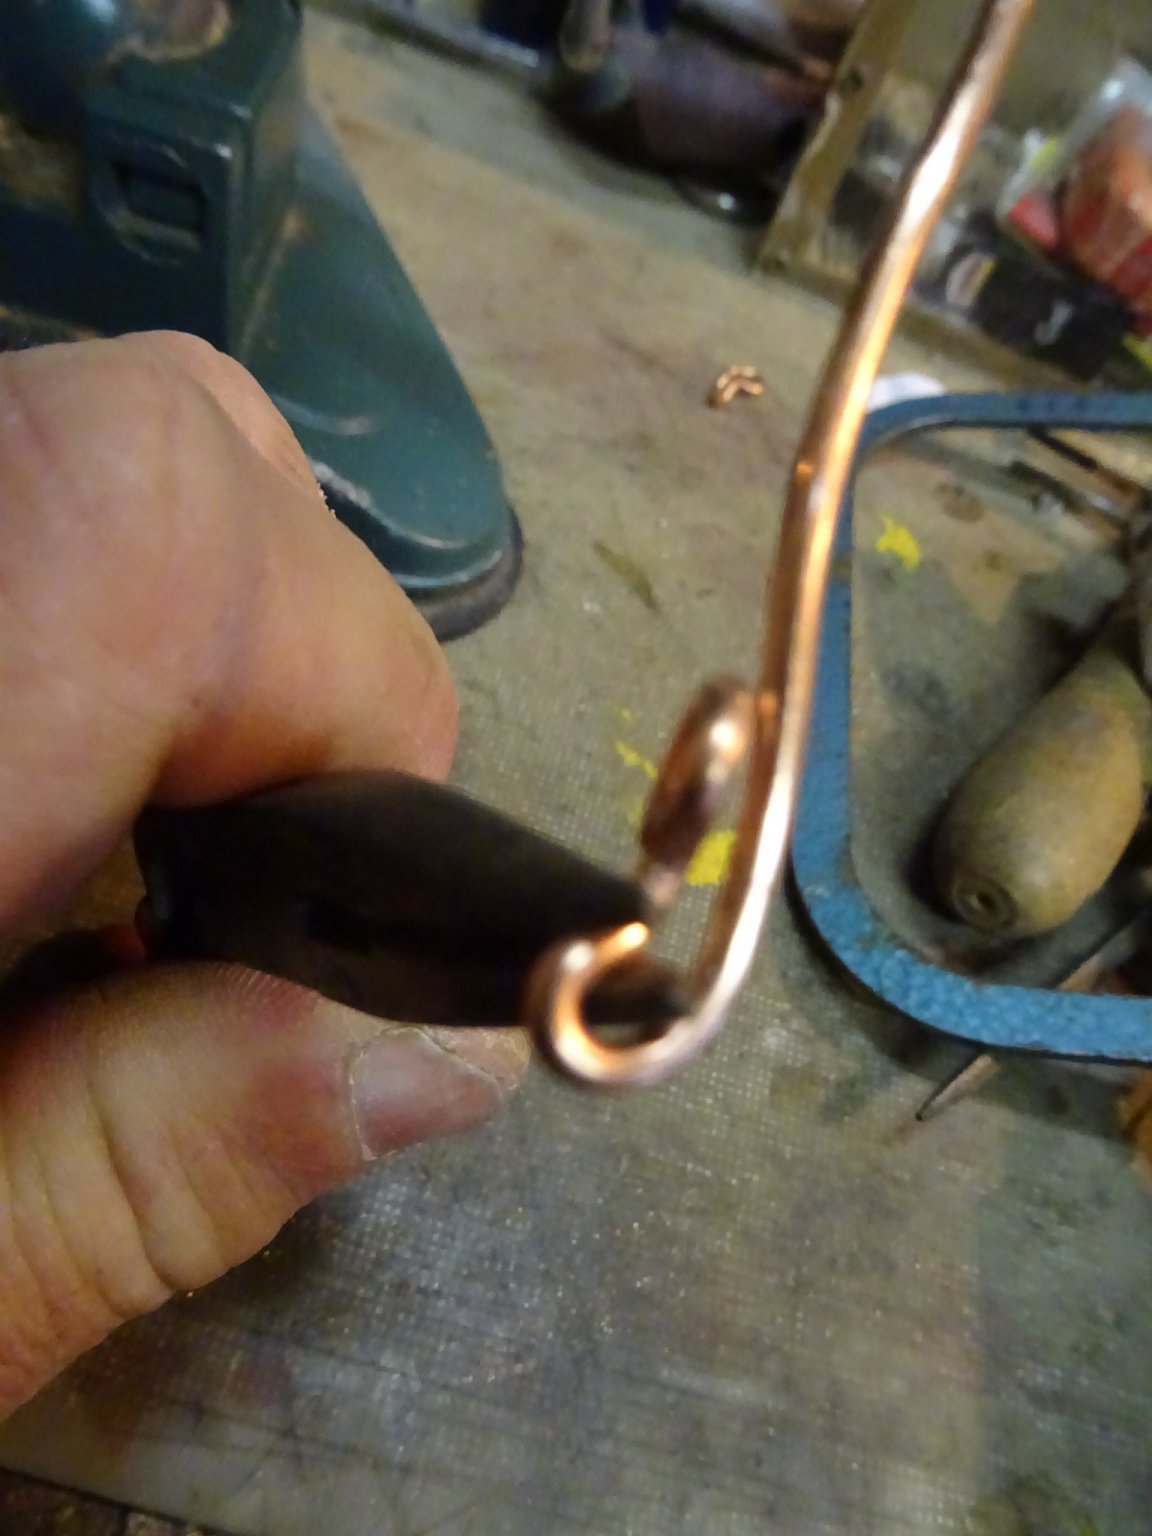
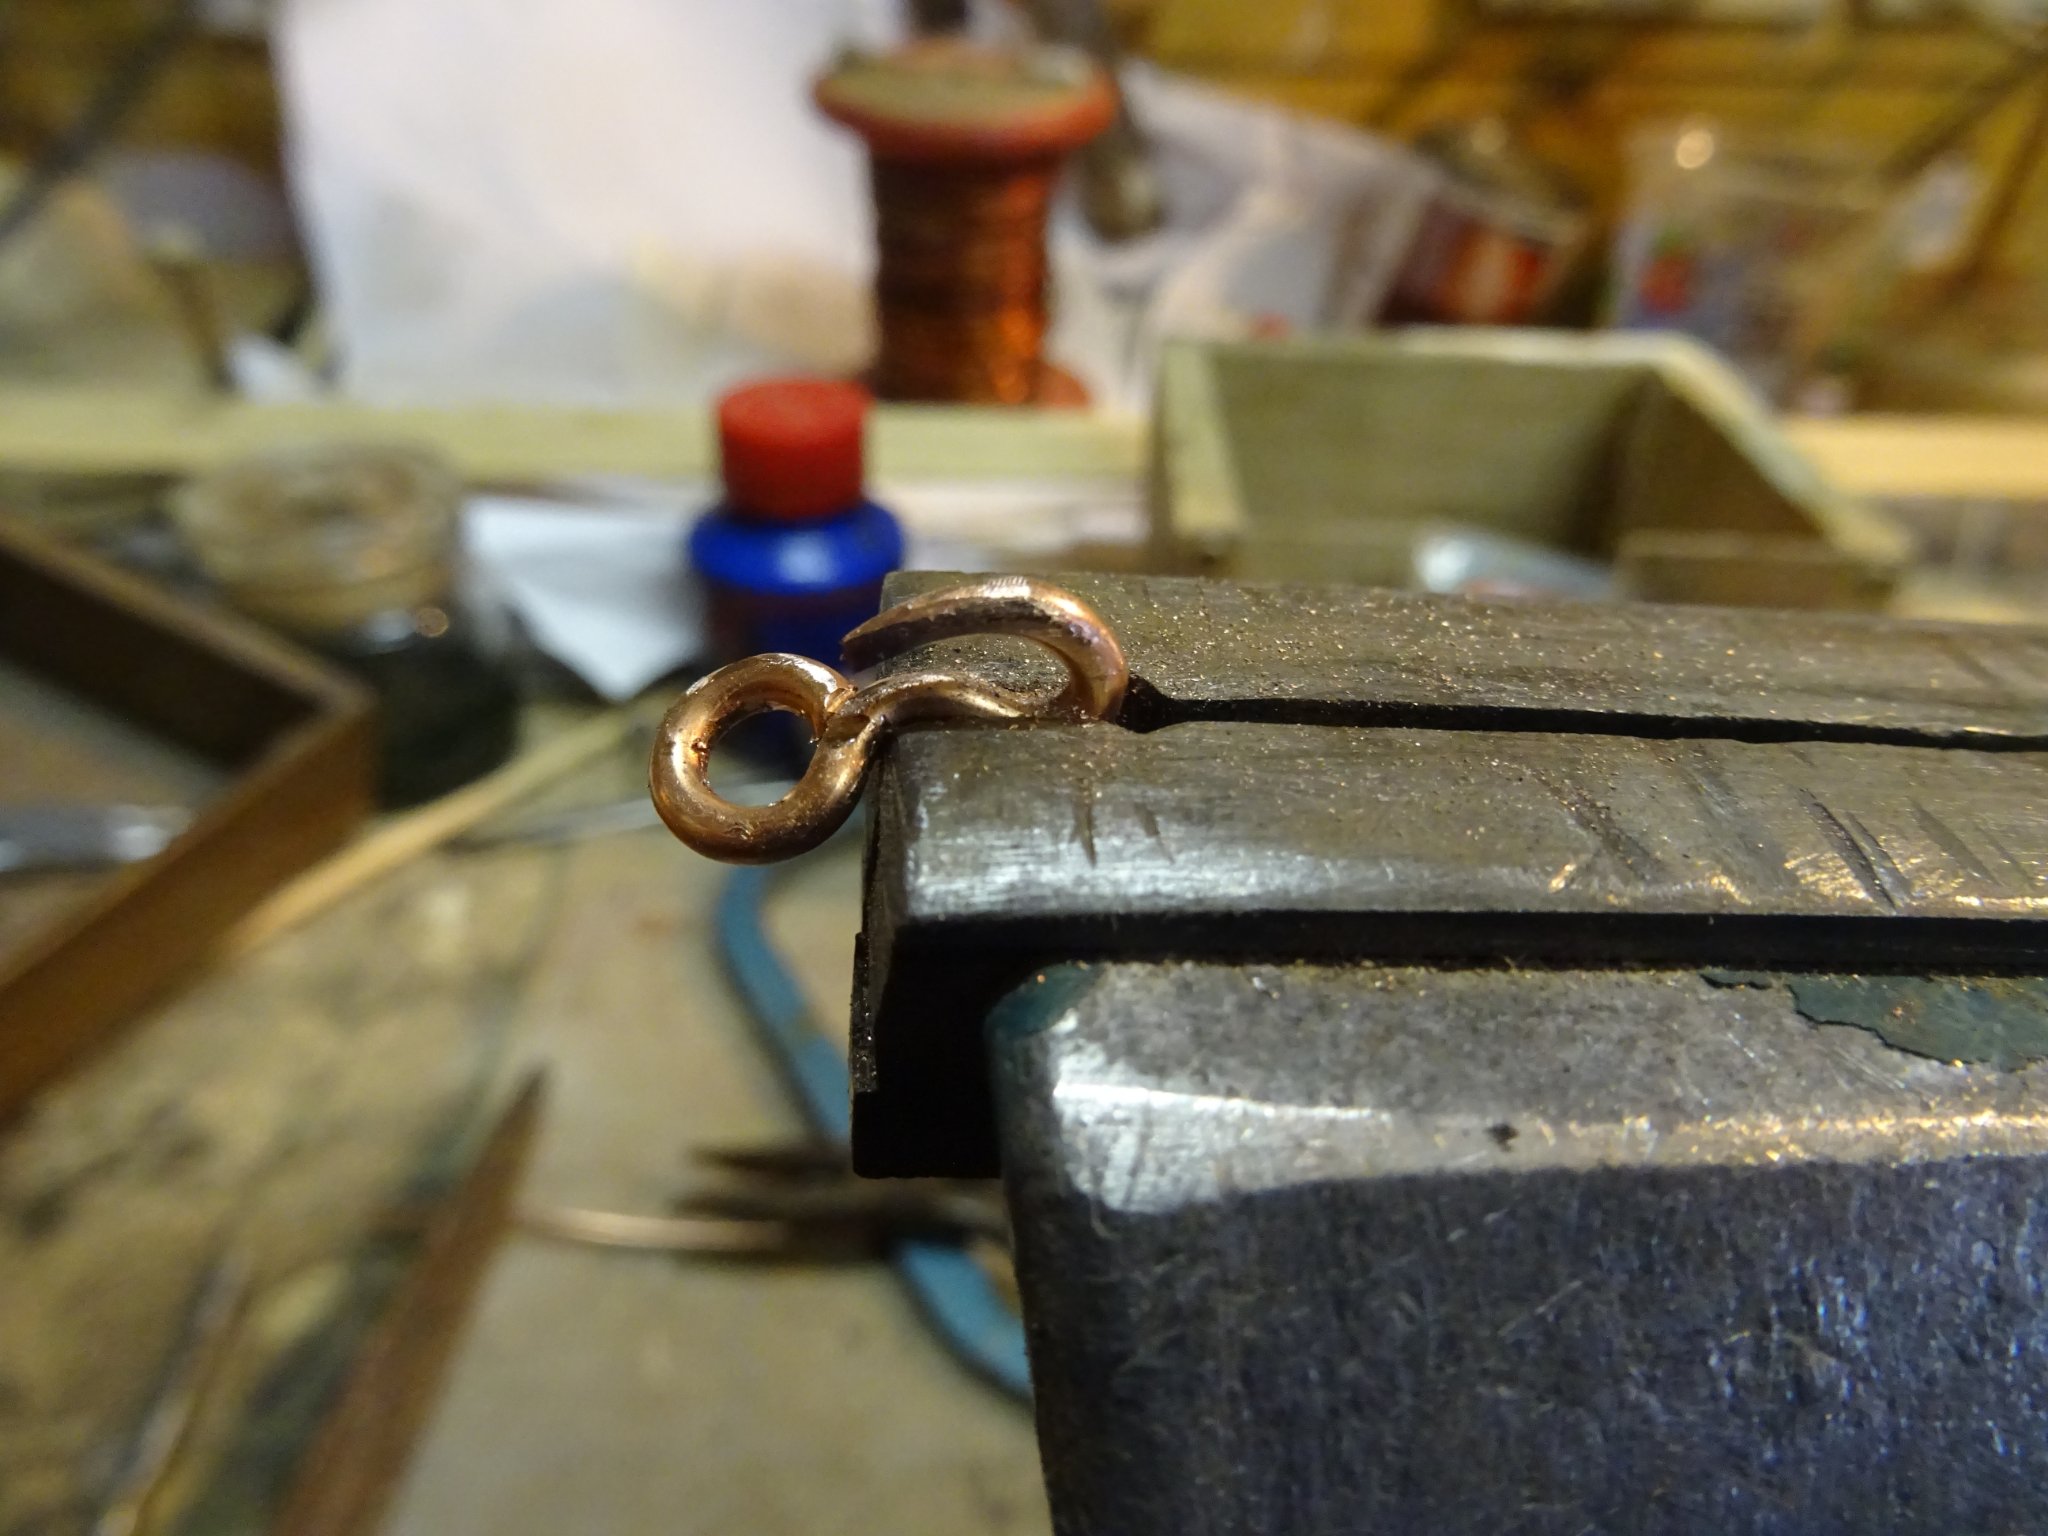
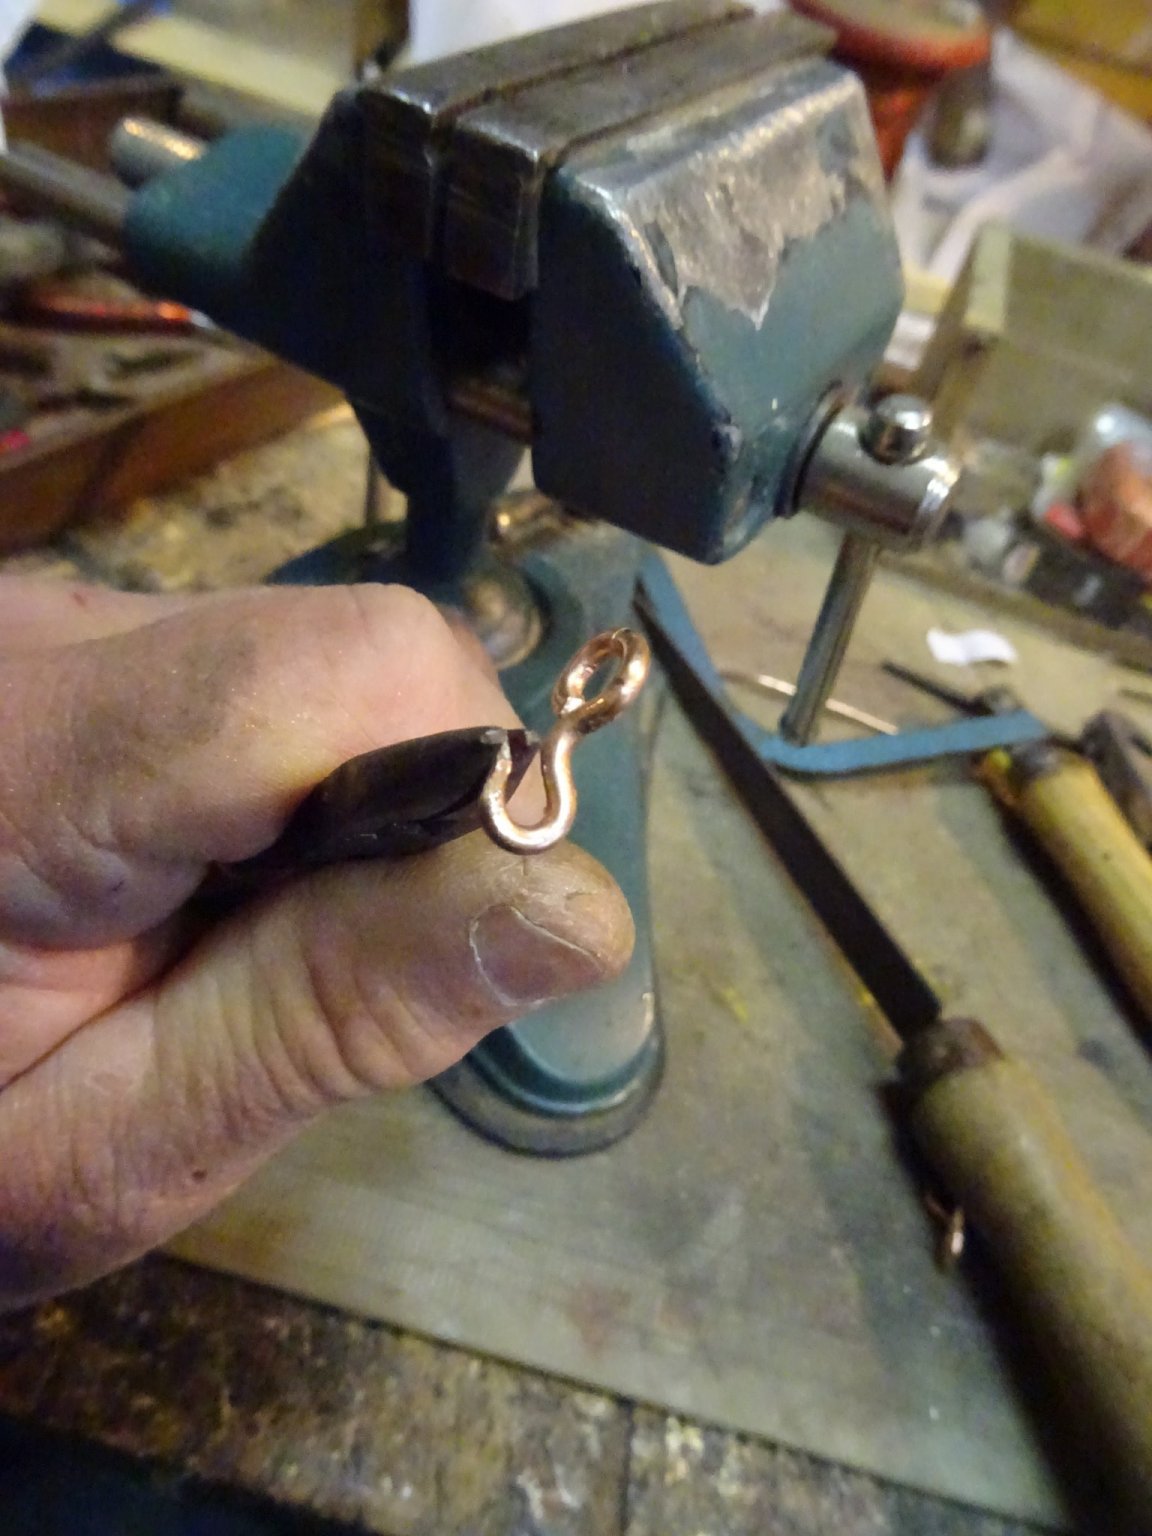
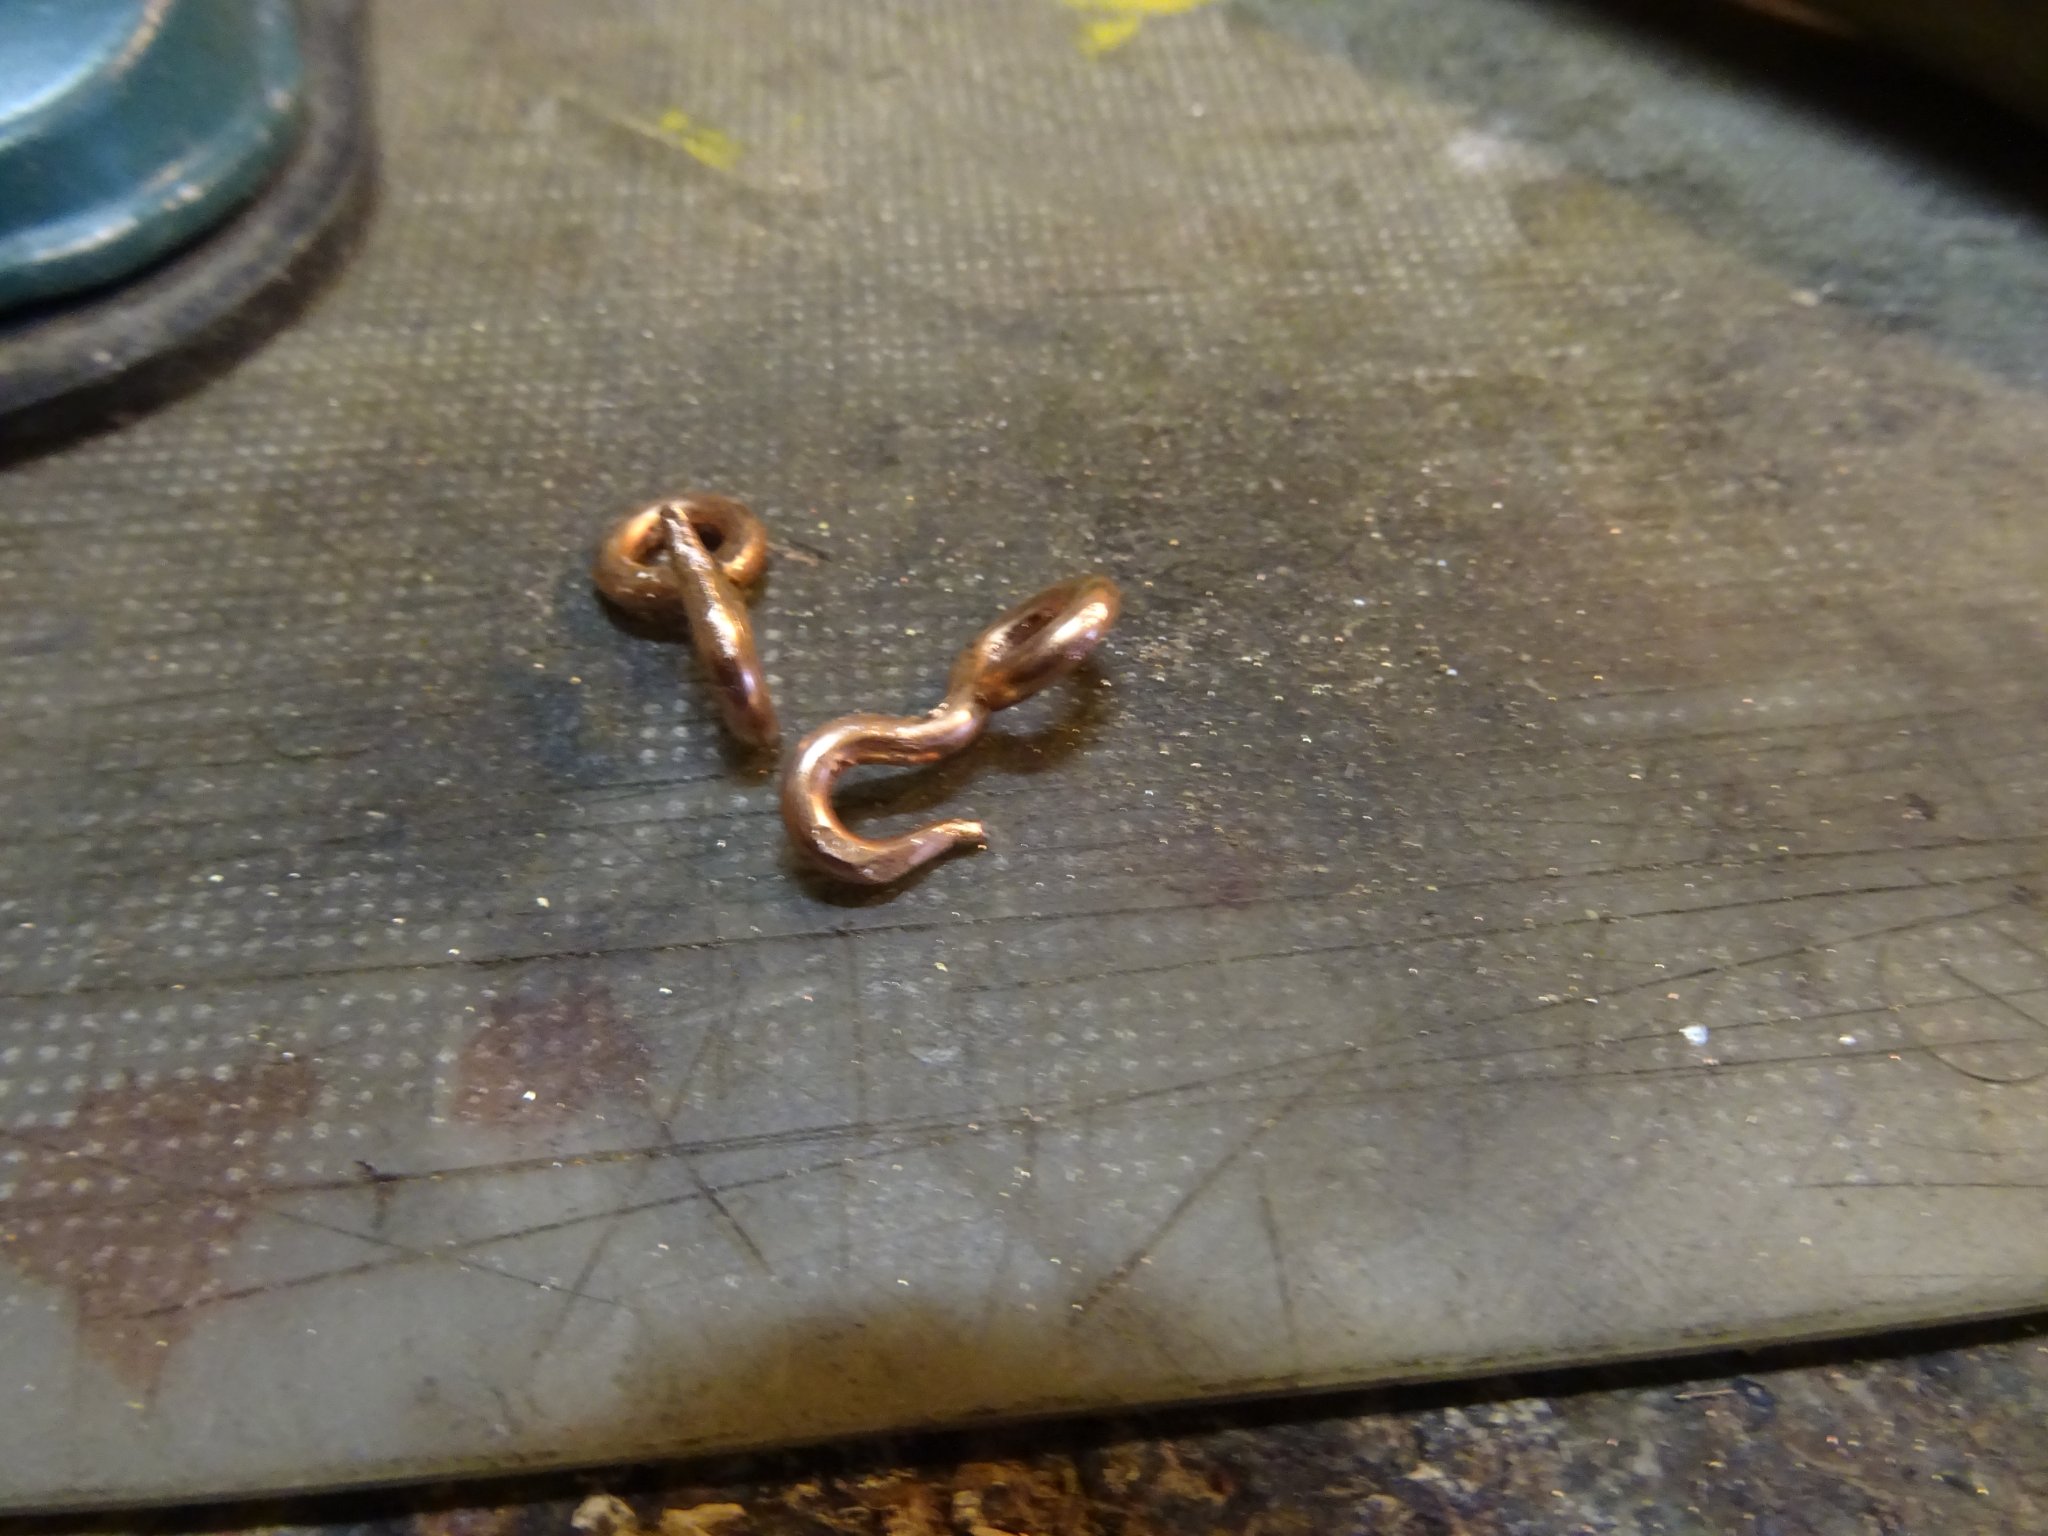
And here I forgot to make some pictures of the finishing of the blocks (final shaping by sanding the edges and placing the sheaves). I'll make up for it by posting some more pictures of making the hooks.
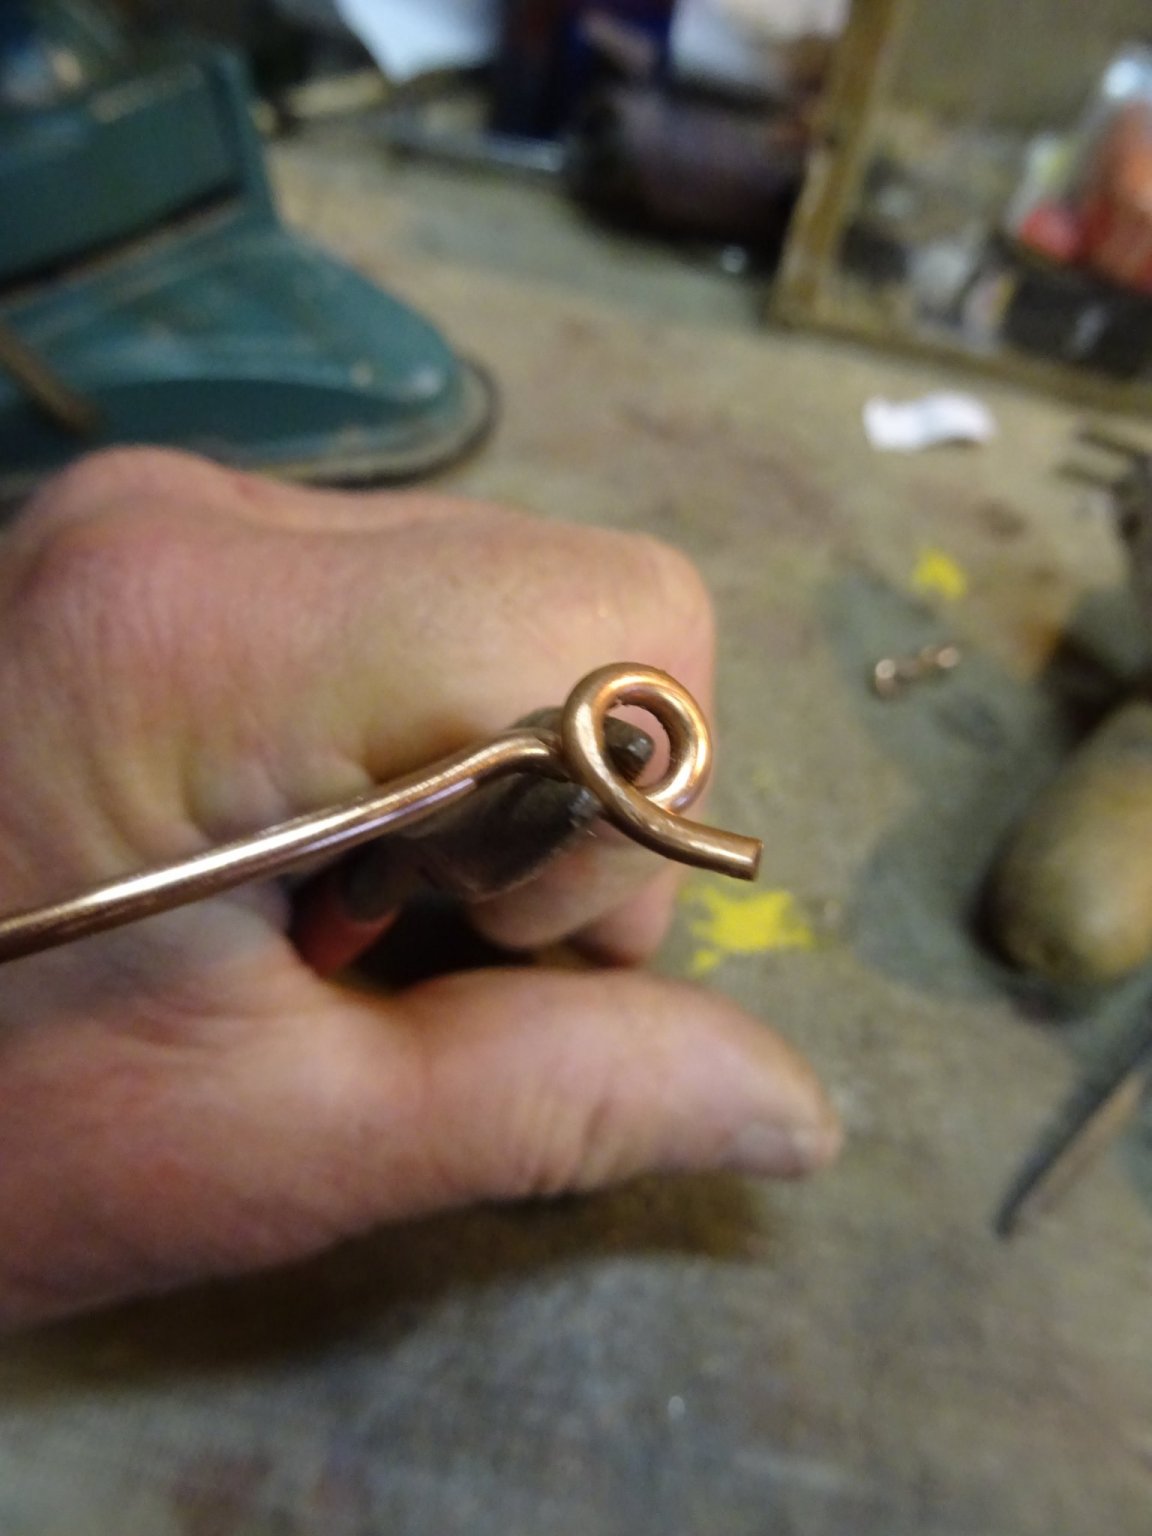
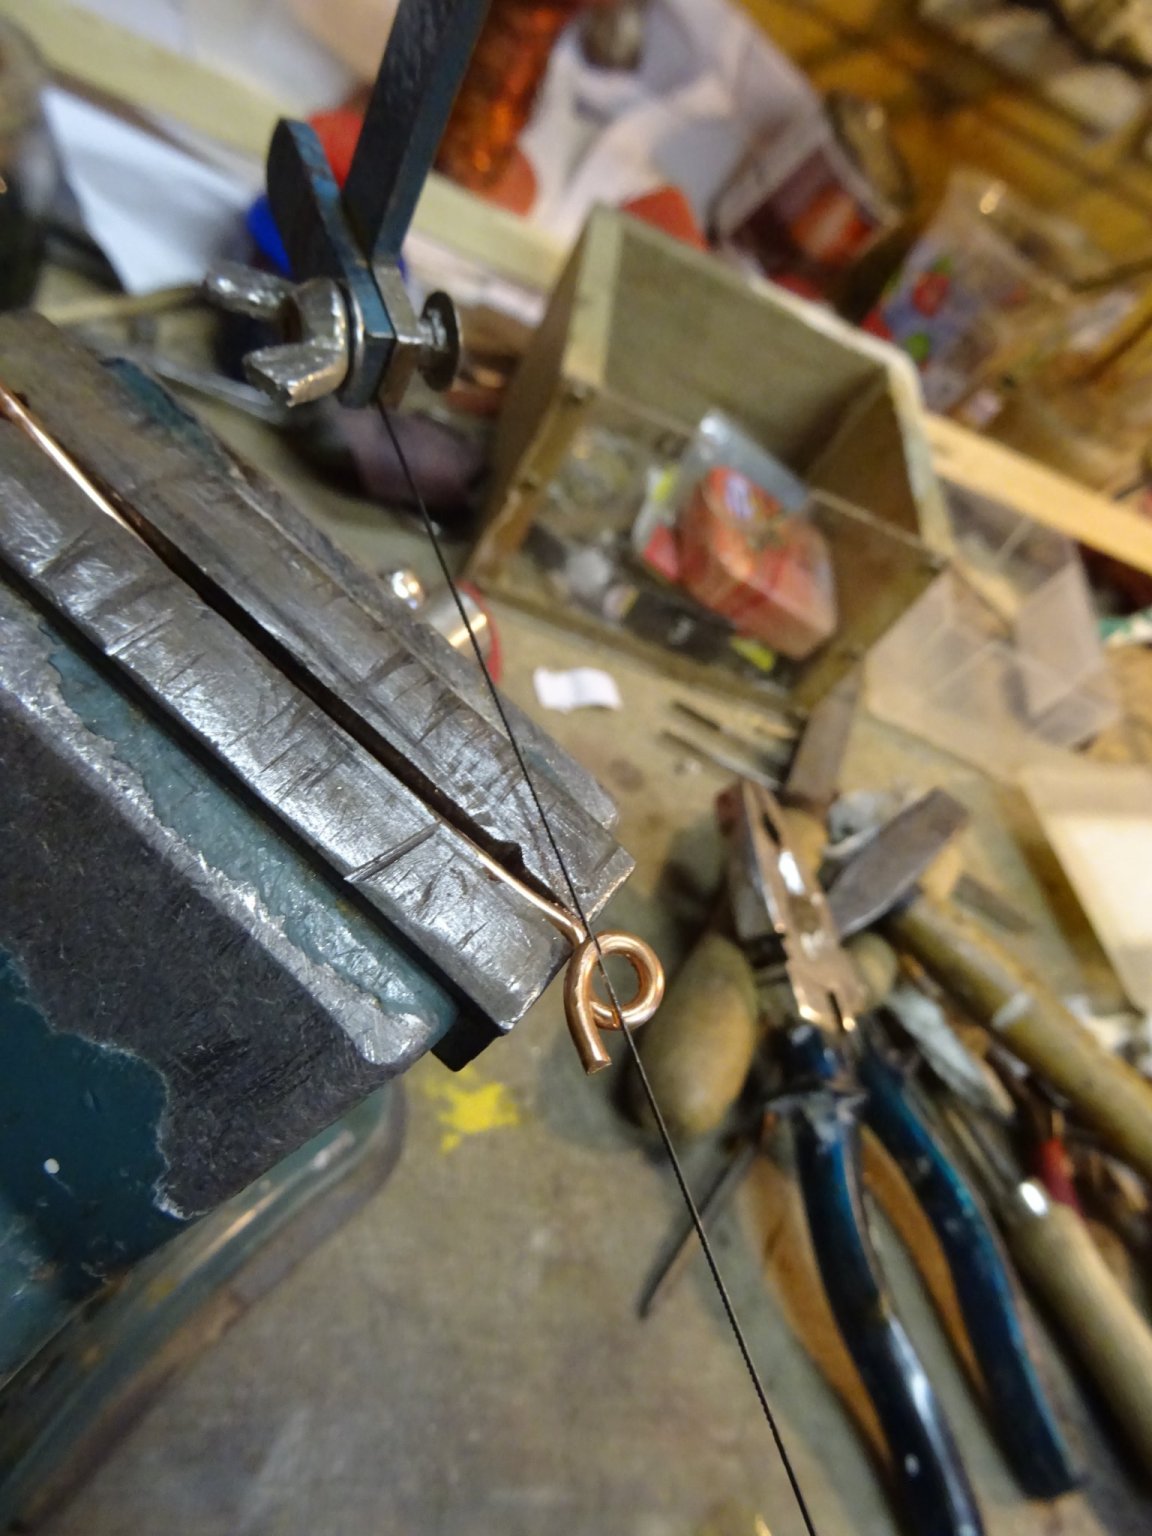
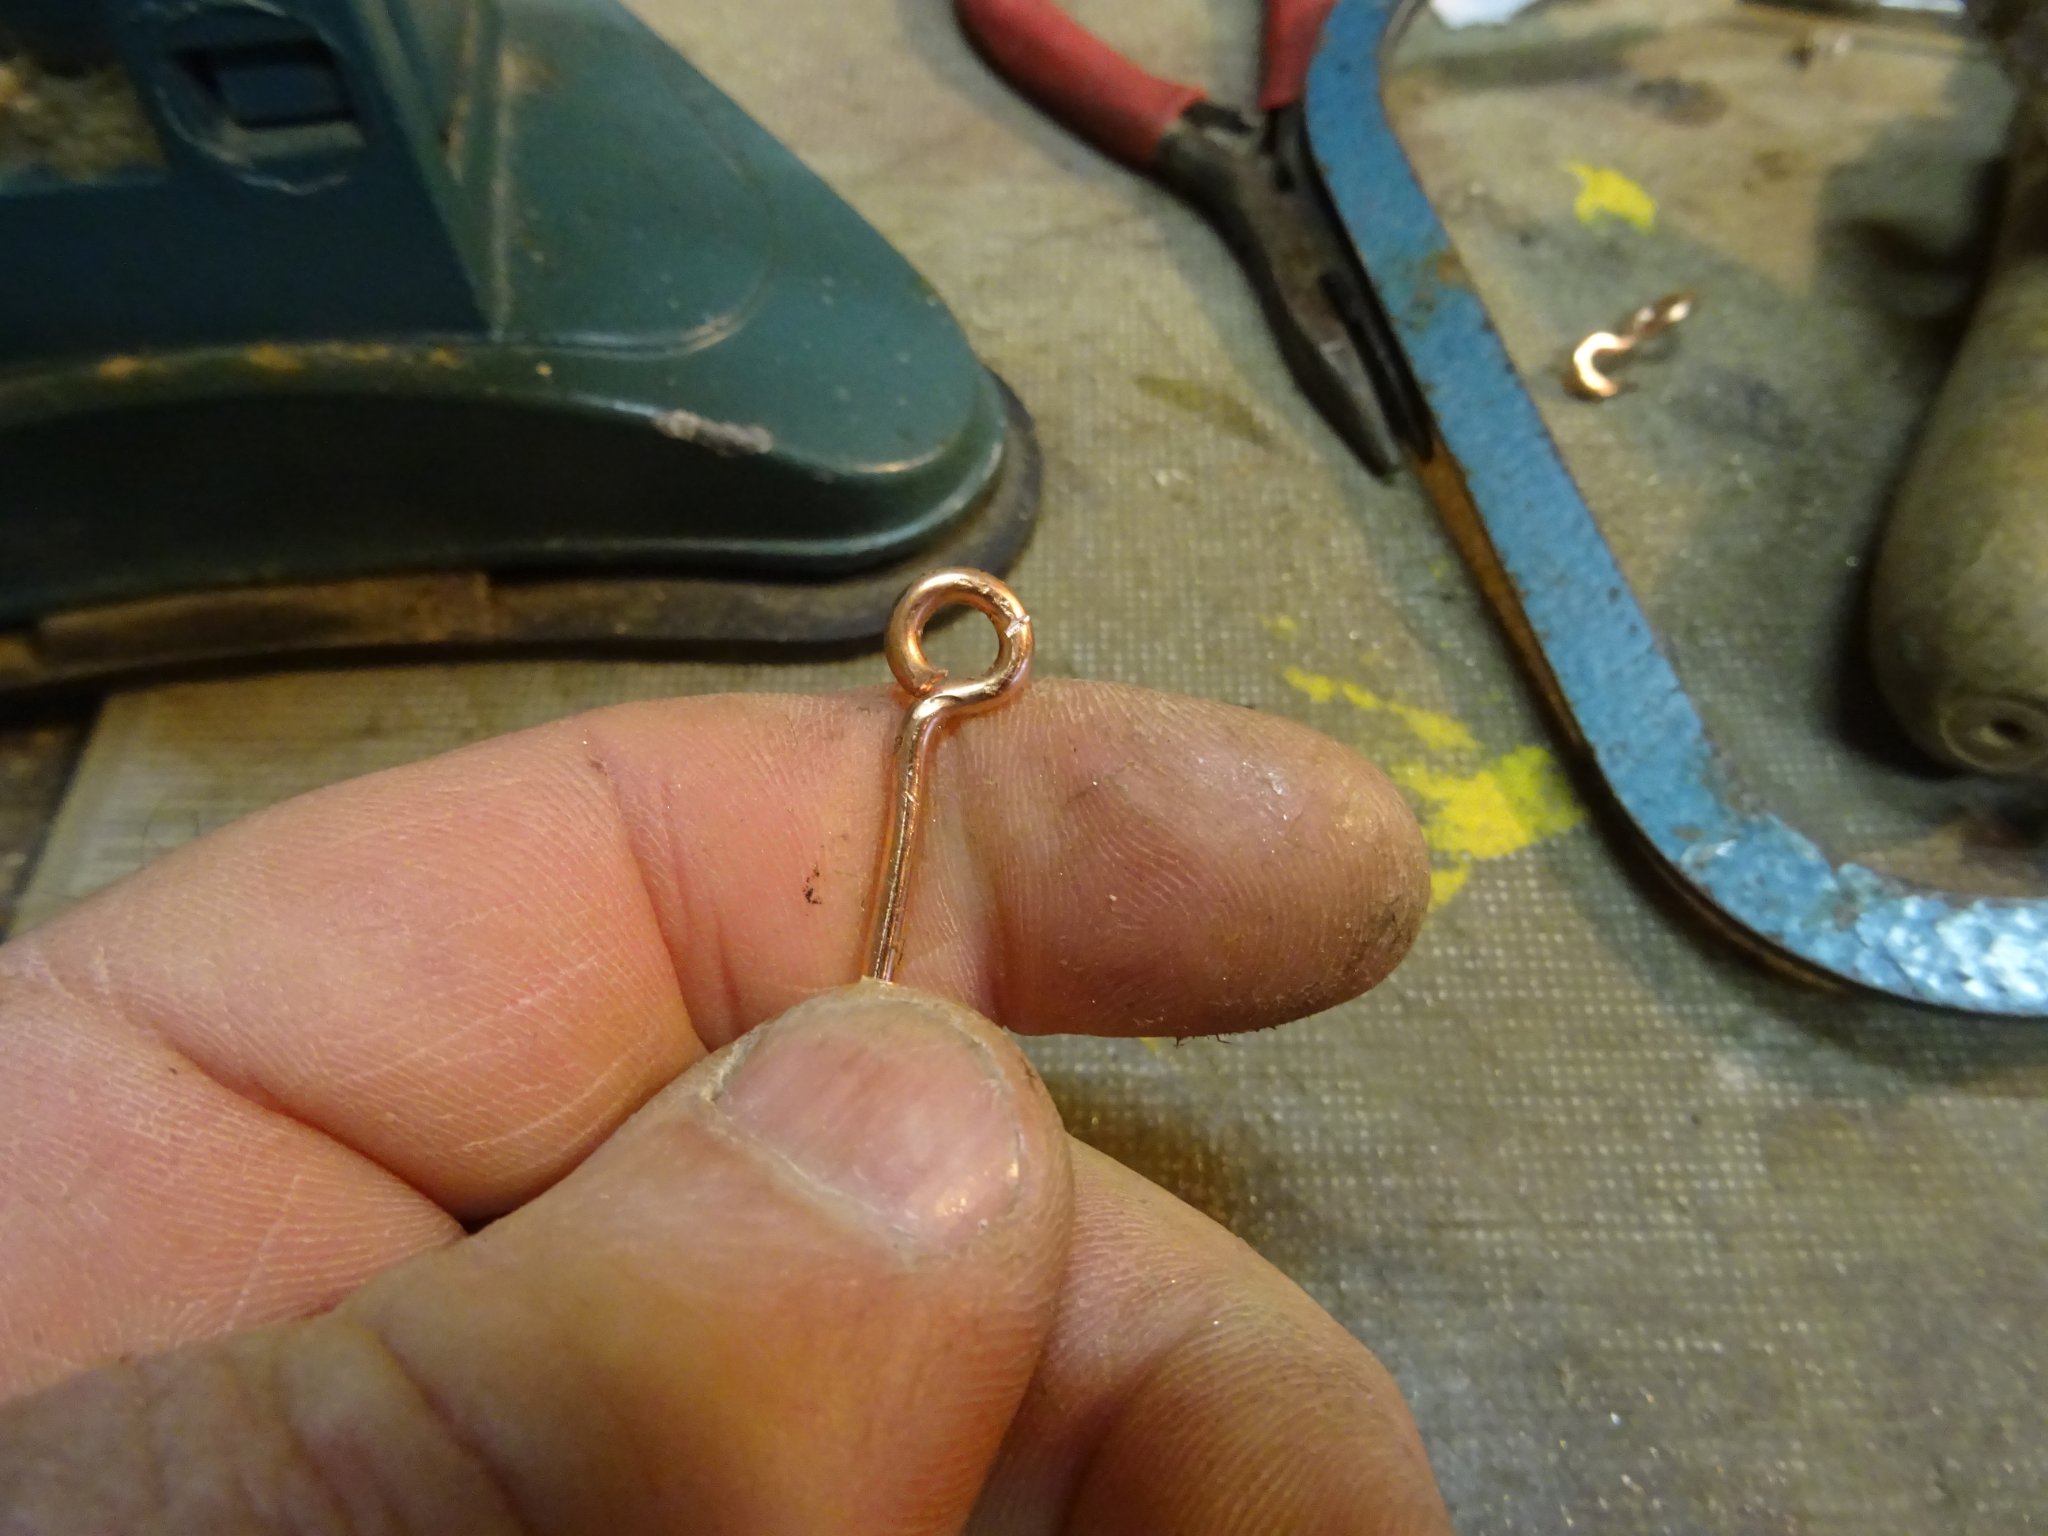
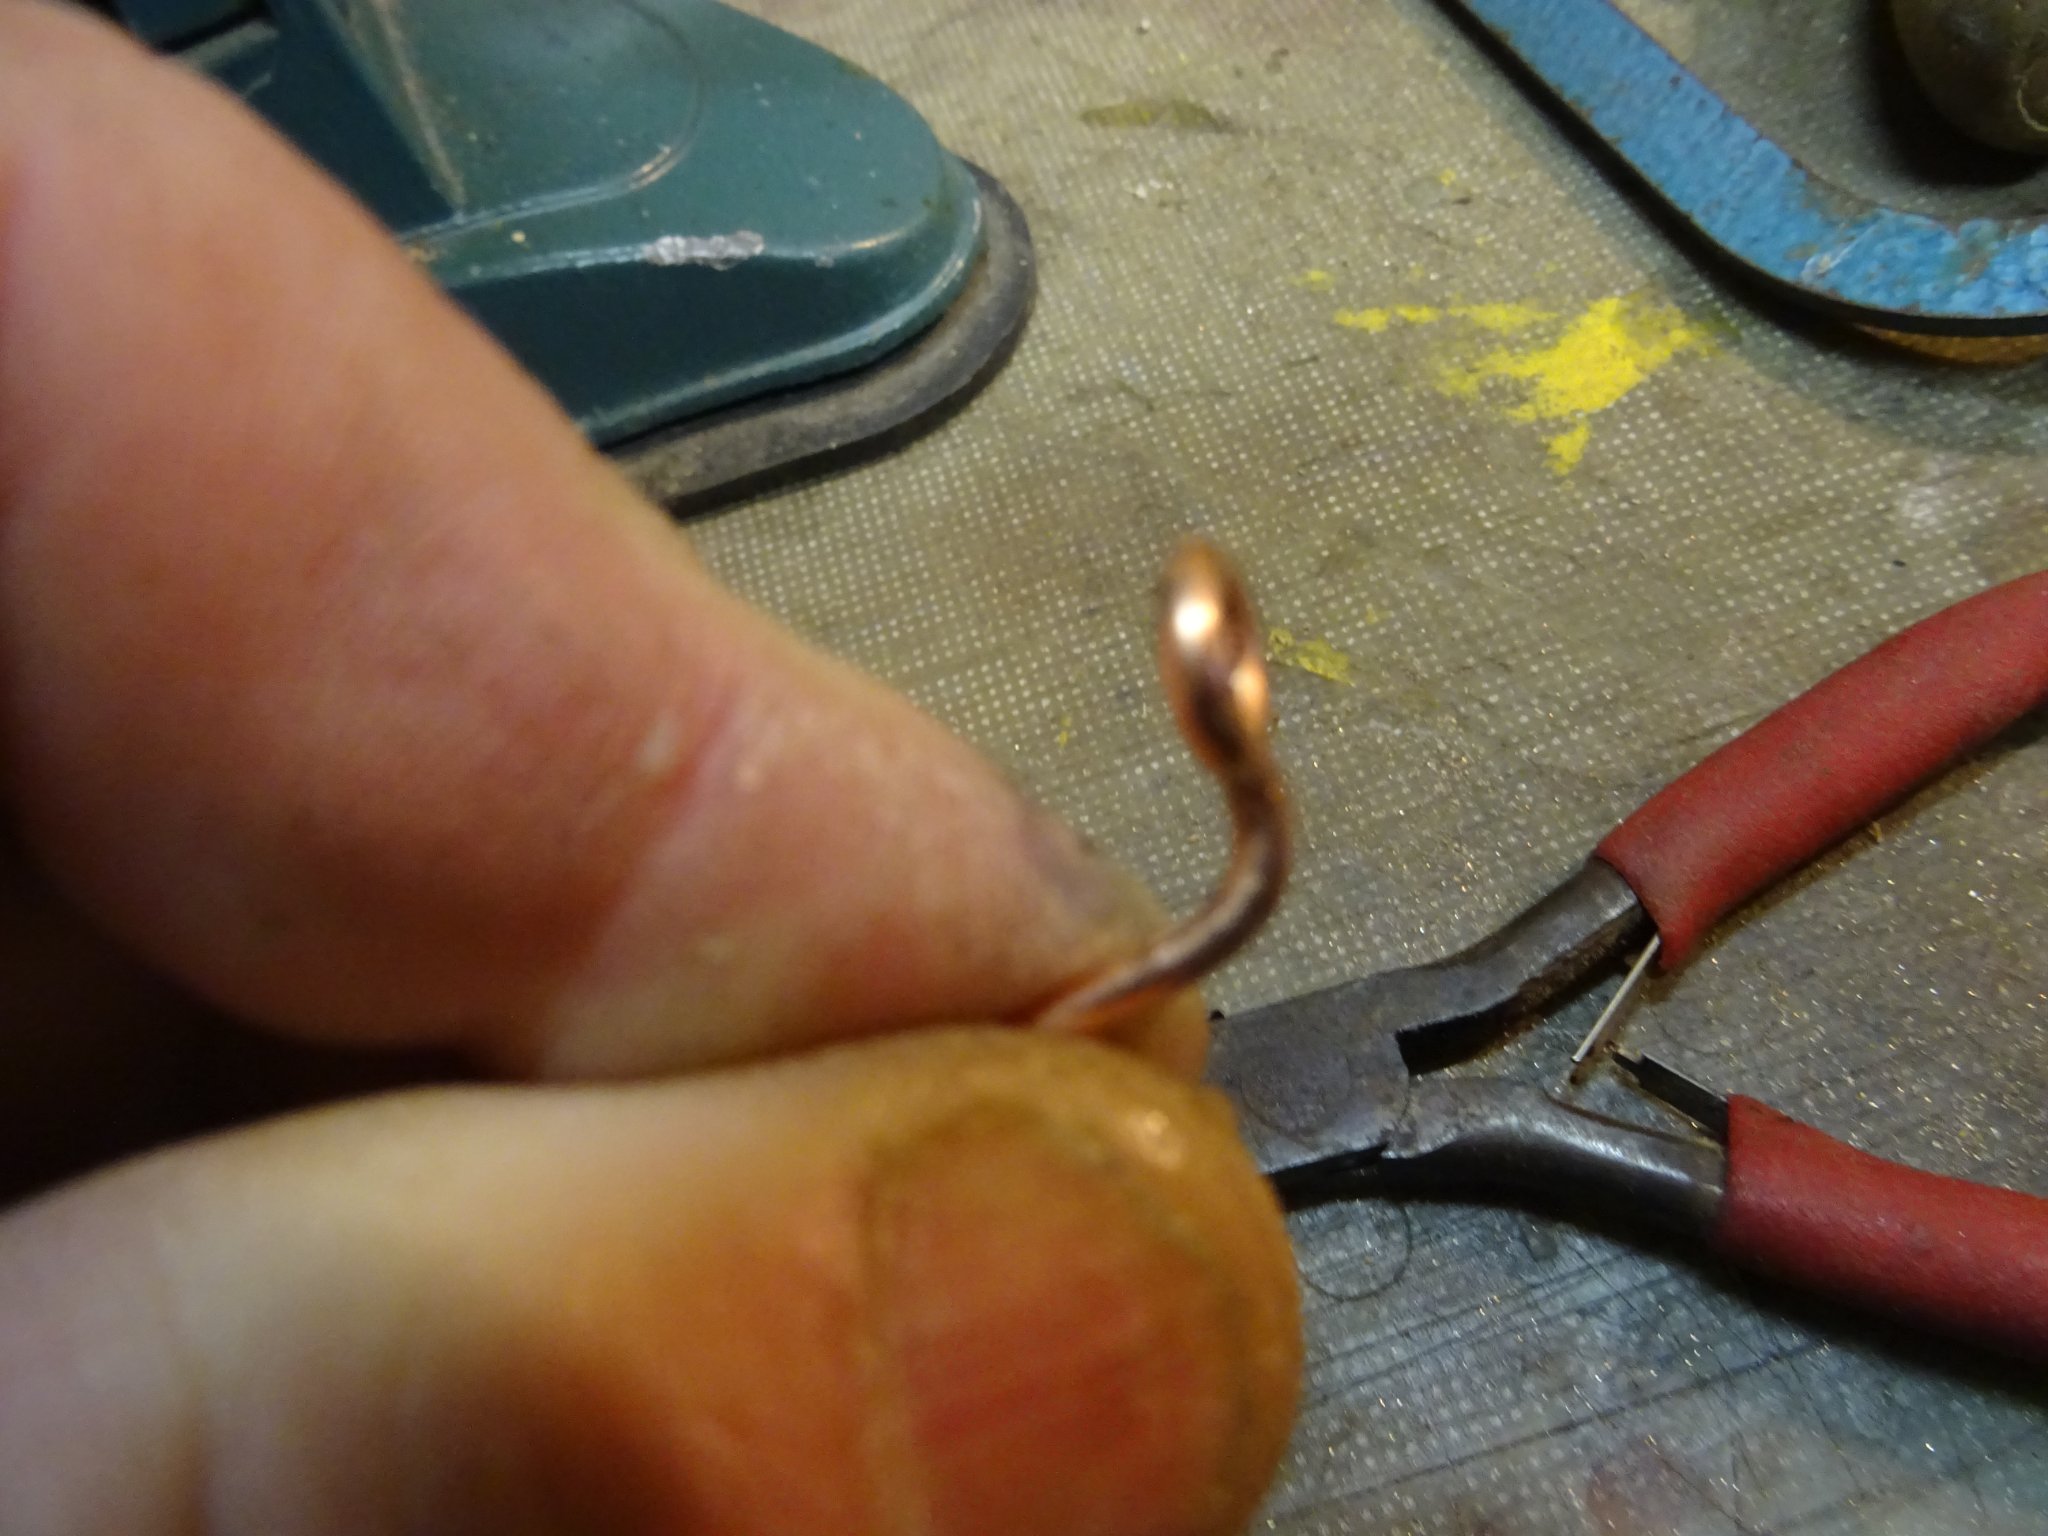
Starting by making an eye in a copper wire.

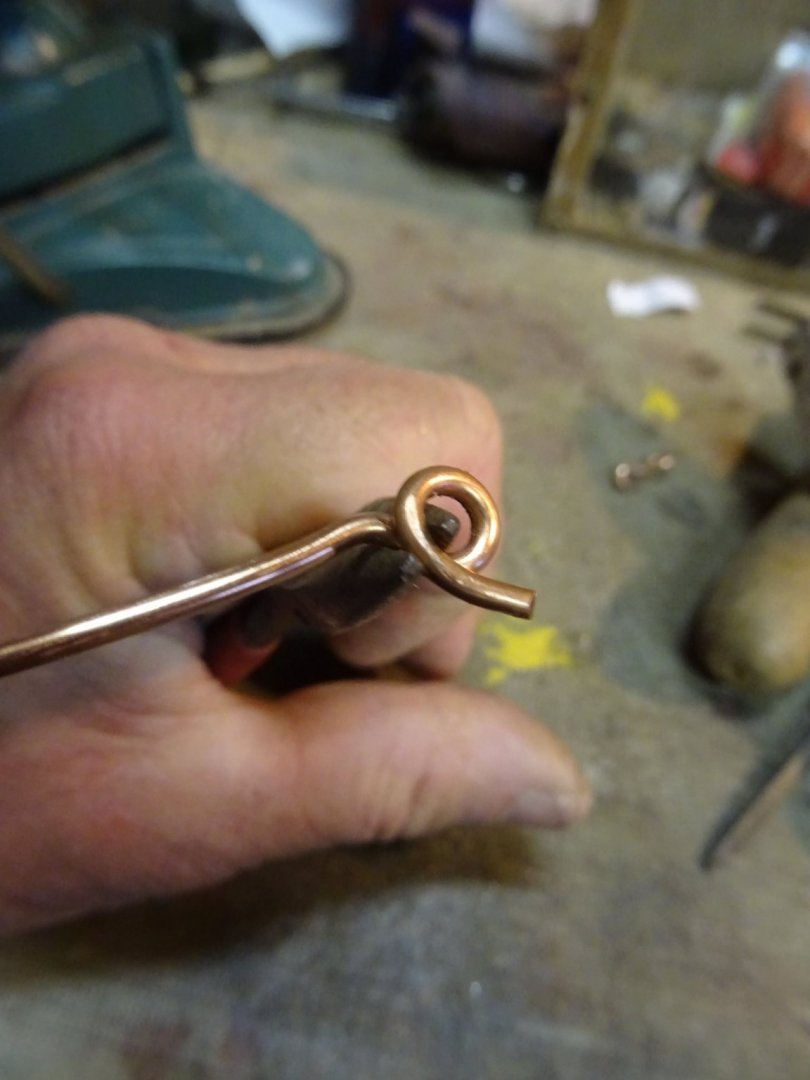
Sawing of the excess.
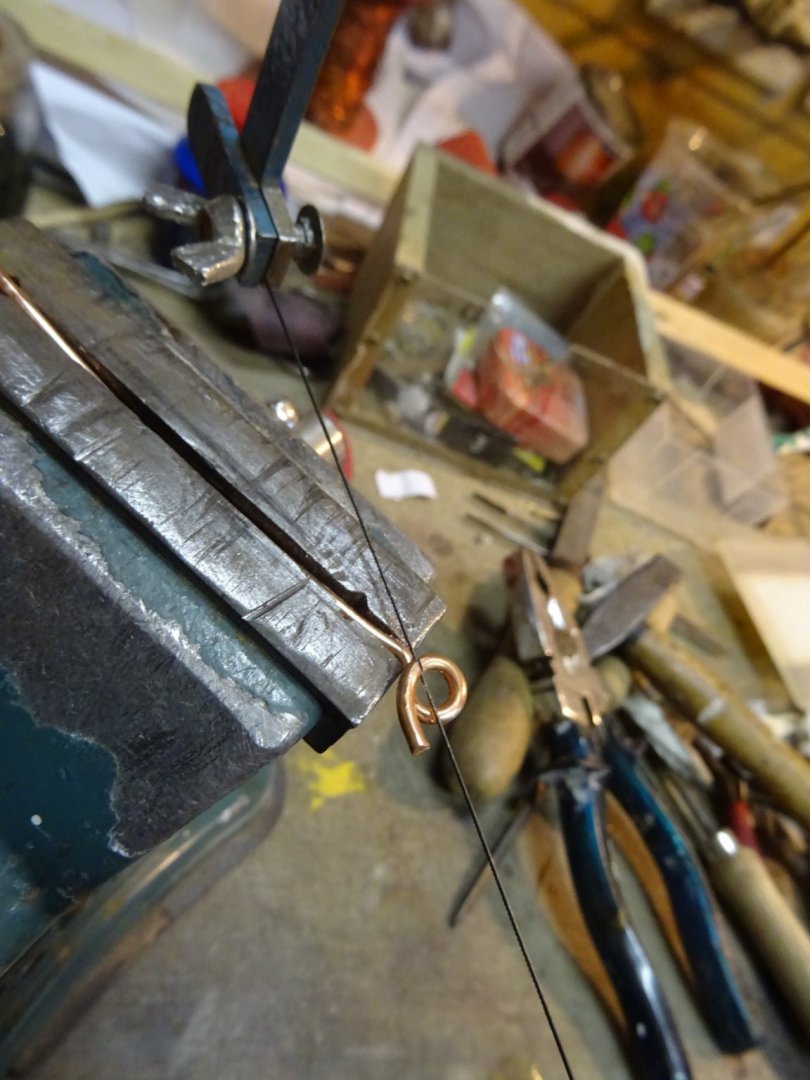

Folding the hook.

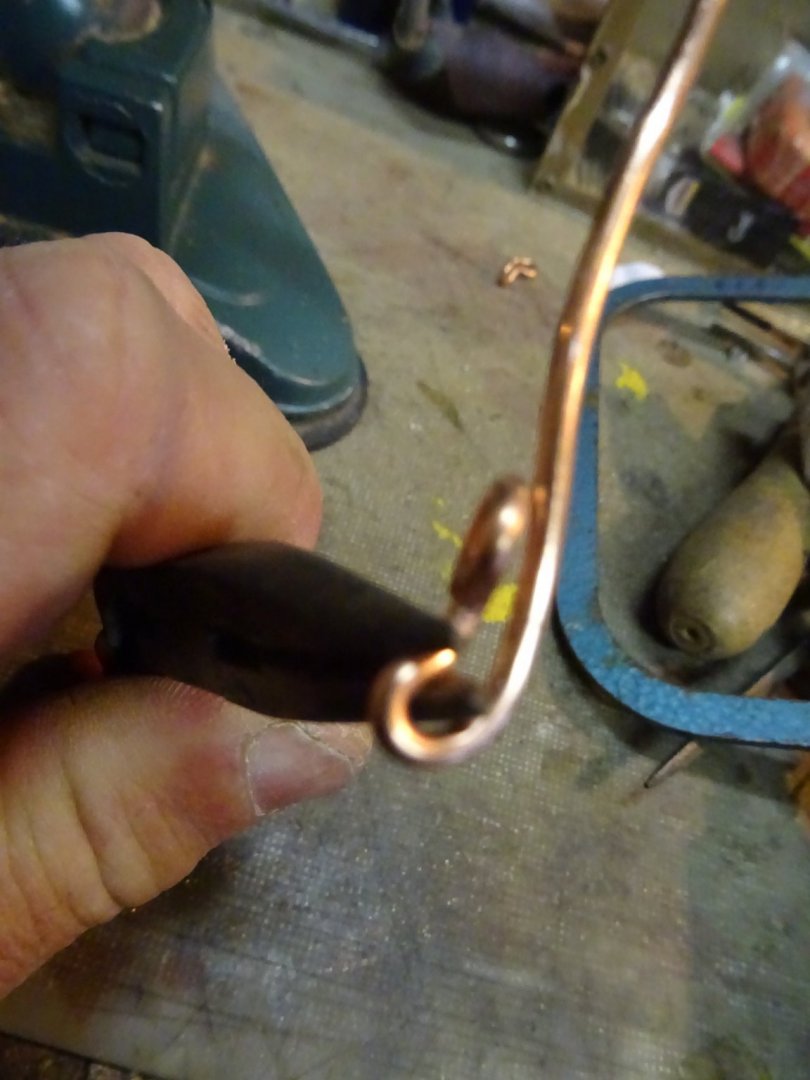

Filing the end sharply.


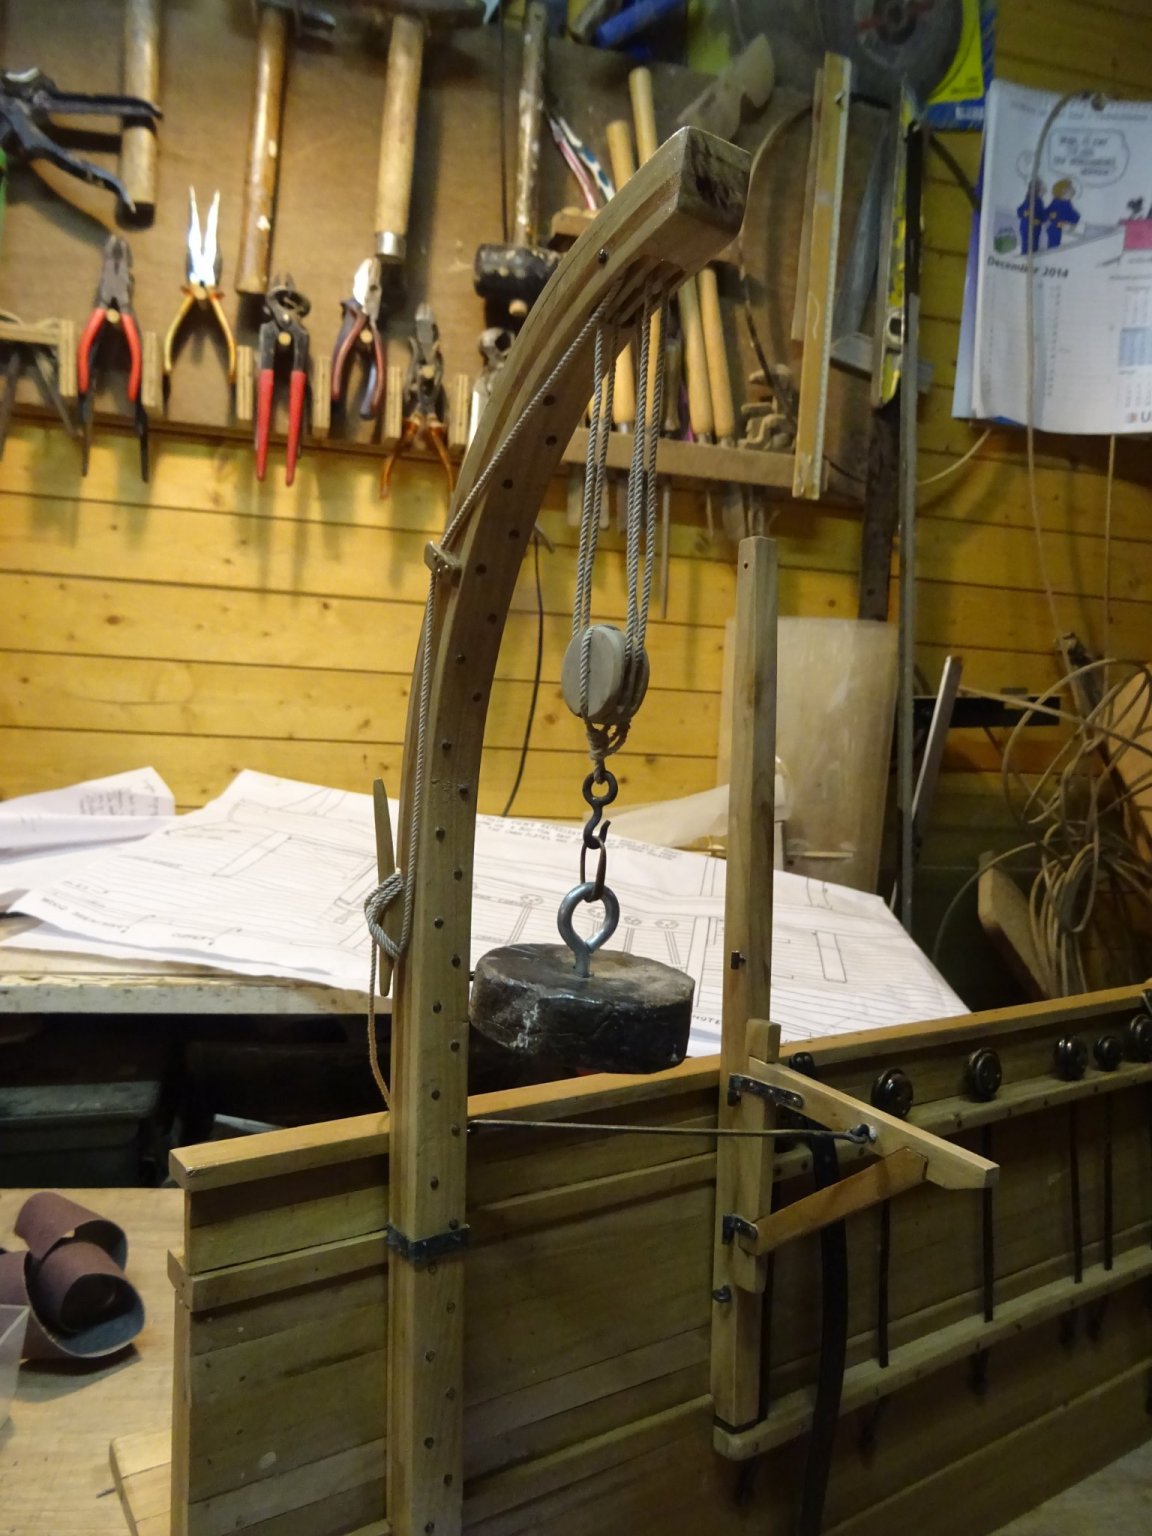
When the blocks are ready, I hang them with weights in the davits to straighten the ropes.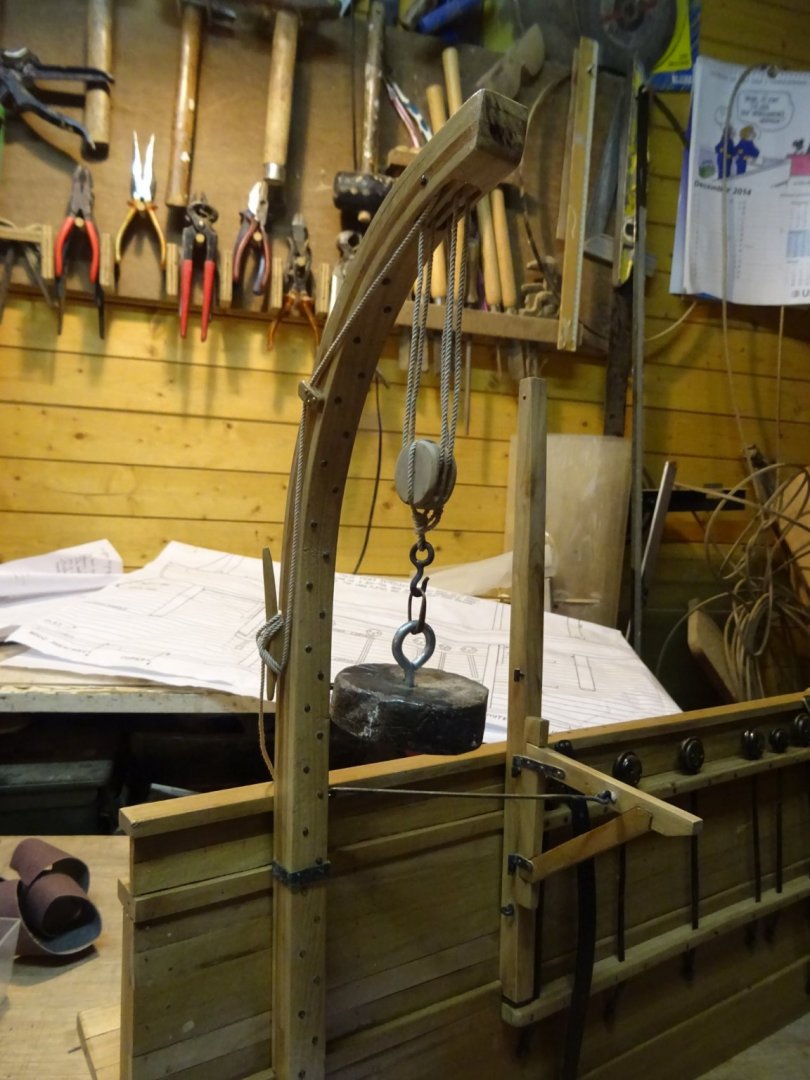
- captain_hook, GrandpaPhil, mtaylor and 3 others
-
6
-
-
On 2/17/2021 at 8:28 PM, Wintergreen said:
Ah, details!
Like spice on a dish, that (not so) little extra 🙂
Suddenly the whale knot found a proper place. Same meaning in Swedish actually, valknop or Turkish head knot. Google told med the origin is from the Viking age. Well what do you know. Used one as a boy scout to keep the scarf taught.
Lovely rope work nevertheless GL!
Thank you Hakan,
Well, if the Turkish knot has a Viking origin, it is certaily at its place on a Norwegian whaleboat.
-
9 hours ago, michael mott said:
Time for a coffee break, My arms ache from all that handsawing.
Michael
Michael,
I think it's very brave how you saw through your deck and cockpit. -
-
Fantastic! You definitely deserved your break.
- druxey, Keith Black, dvm27 and 3 others
-
6
-
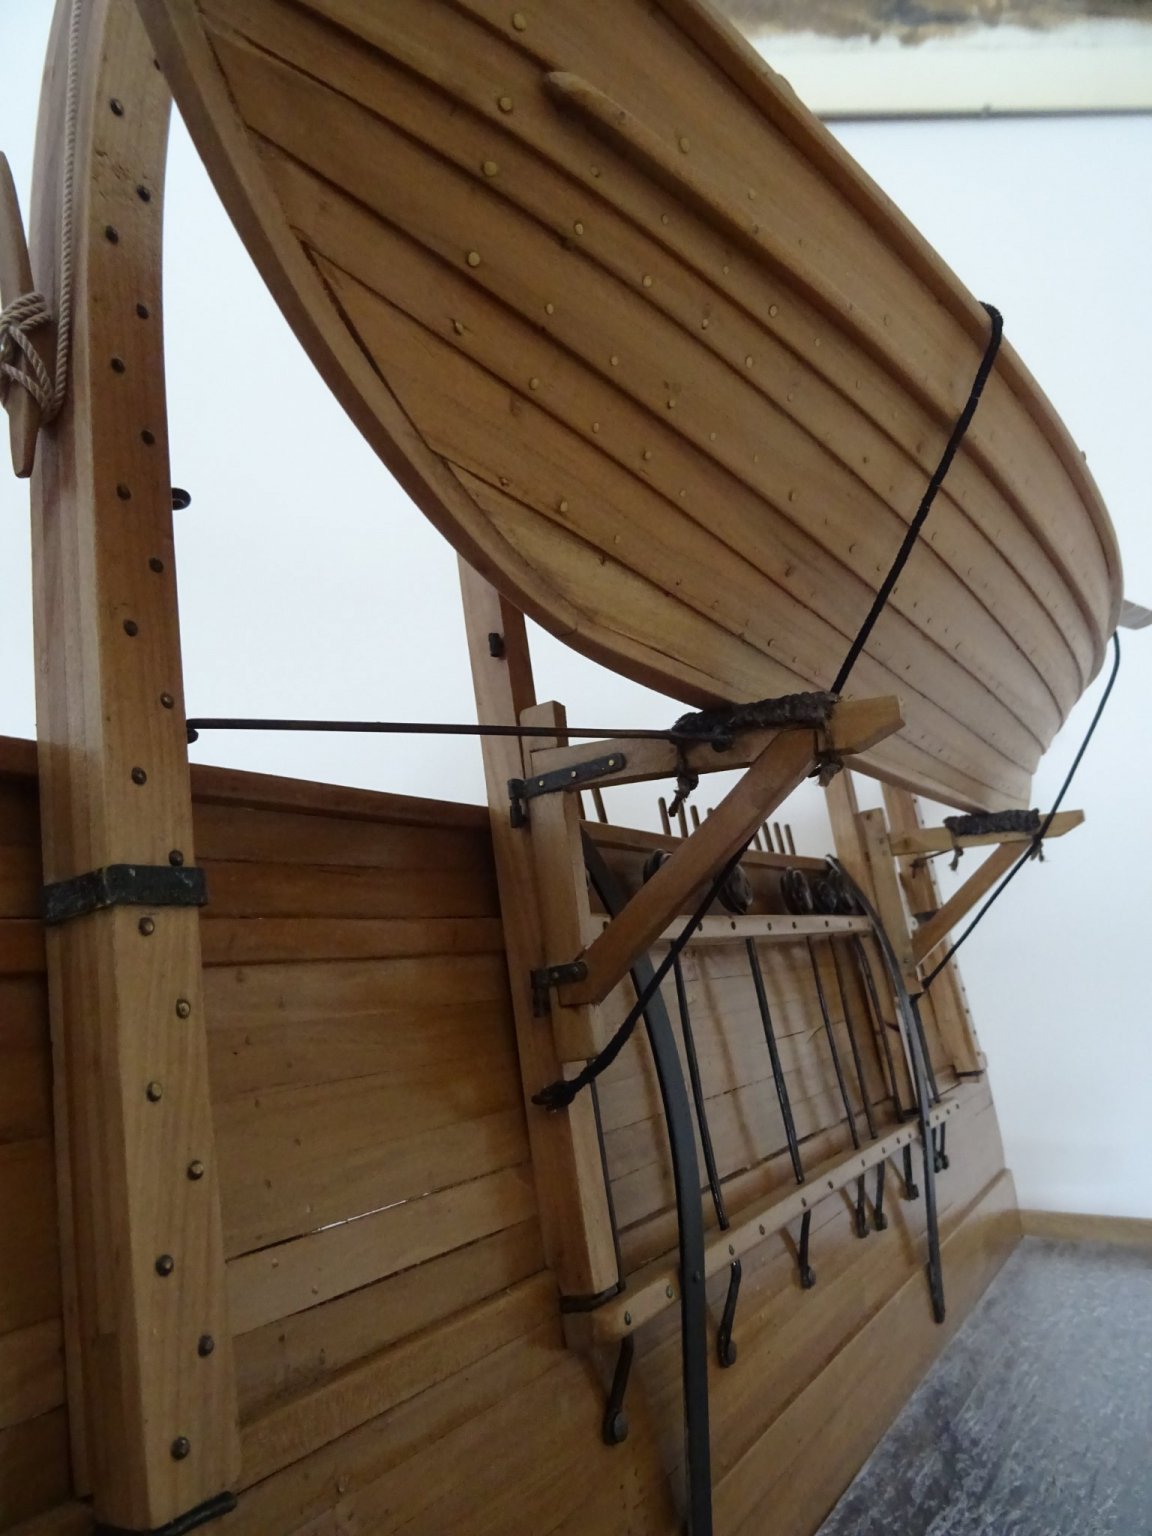
9.5 Boat protection
In the logs for model boat kits I found the log of Mike_in_RI who was building a New Bedford Whale boat in the davits. He made mats to protect the keel of his boat from shafing on the cranes. His first idea was to use mats but finally he made baggy wrinkles. Personally I like the idea of mats and I use his method to make some. I suppose that Mike can forgive my plagiarism as he didn't use himself mats.

When the two mats are weaved, I stain them with dark brown stain and soak them with textile glue around a piece of wood with the same dimensions as the crane to fix the shape of the mats and to flatten the rope fibers.
Then they are tied on the cranes.

With the boat keel standing on the mats:
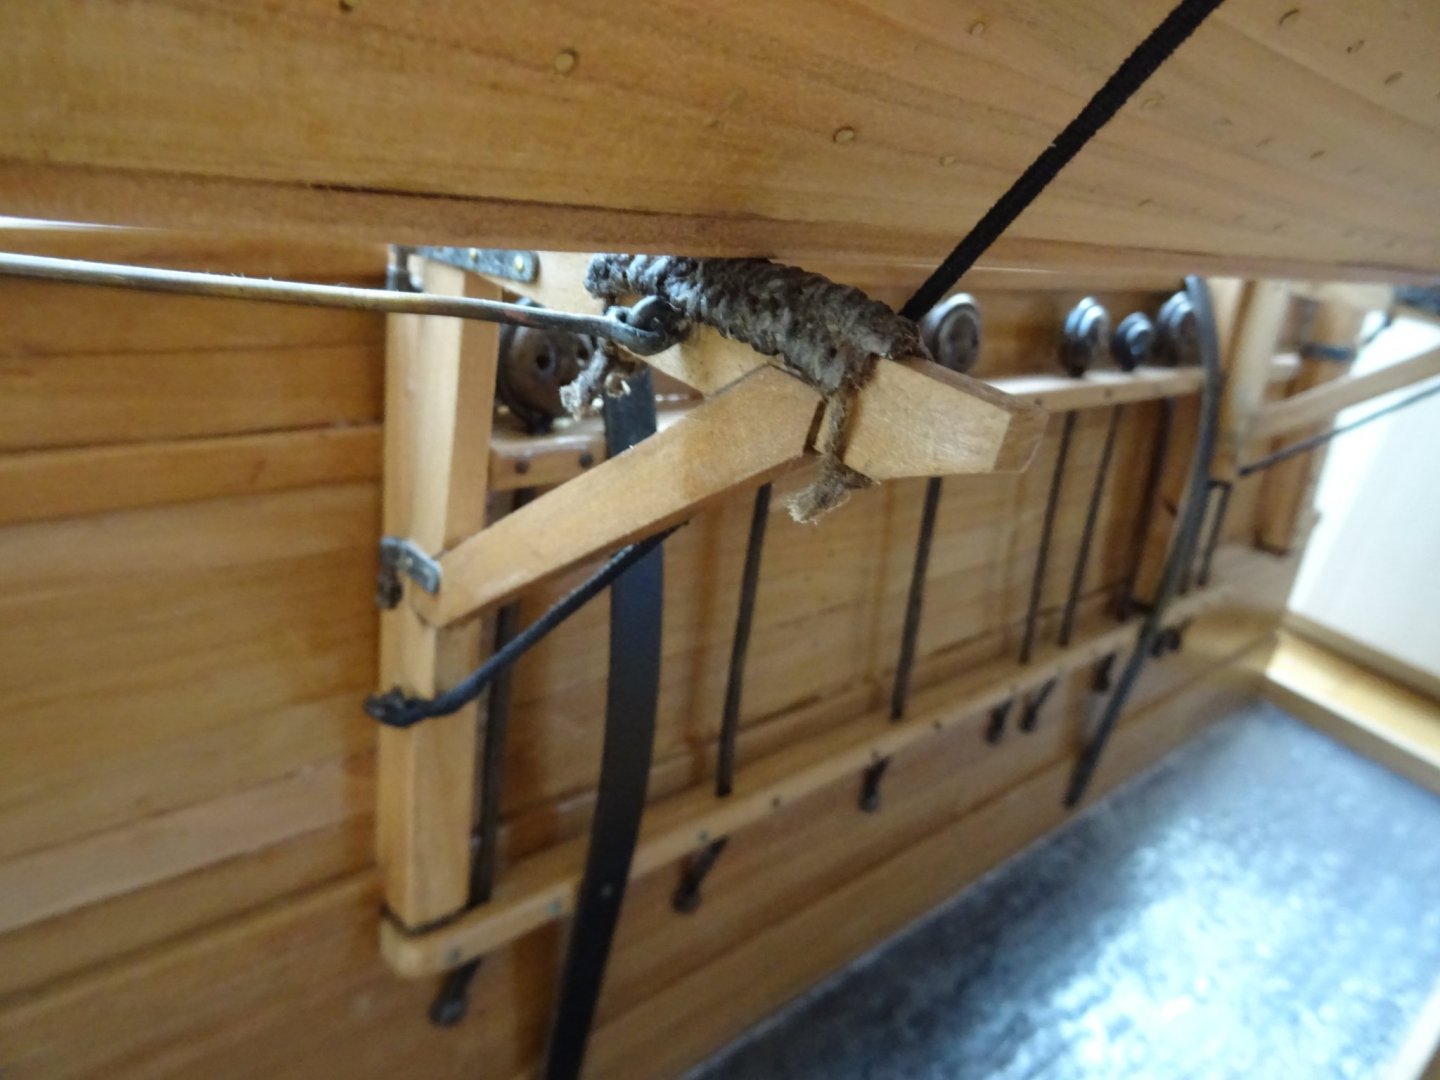

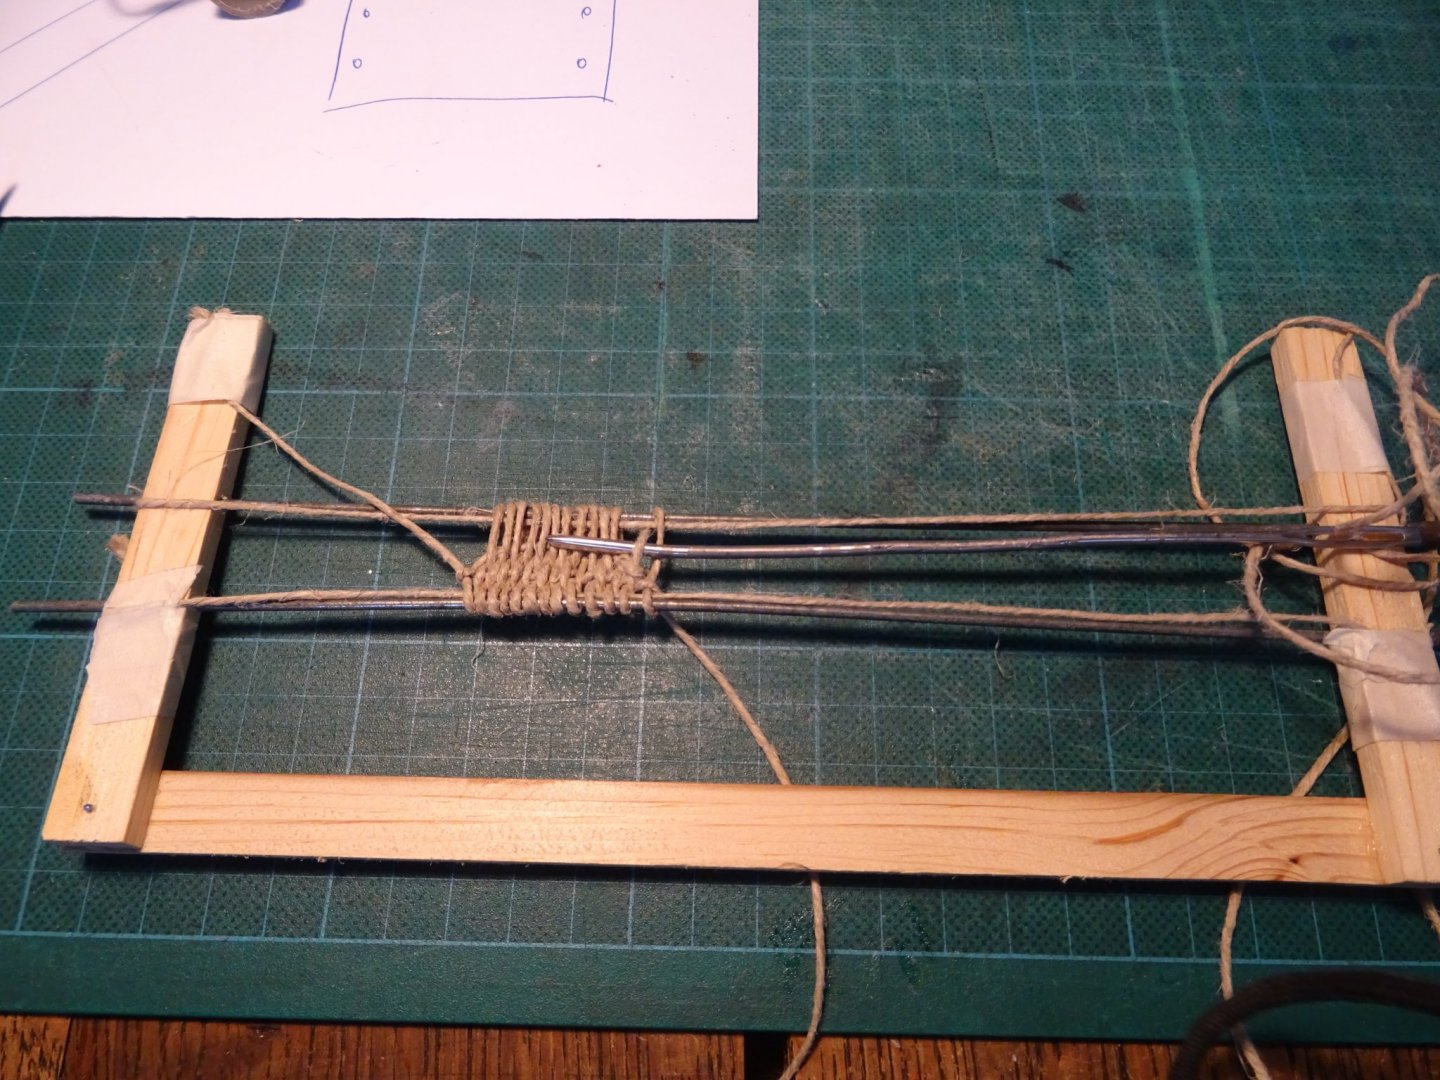
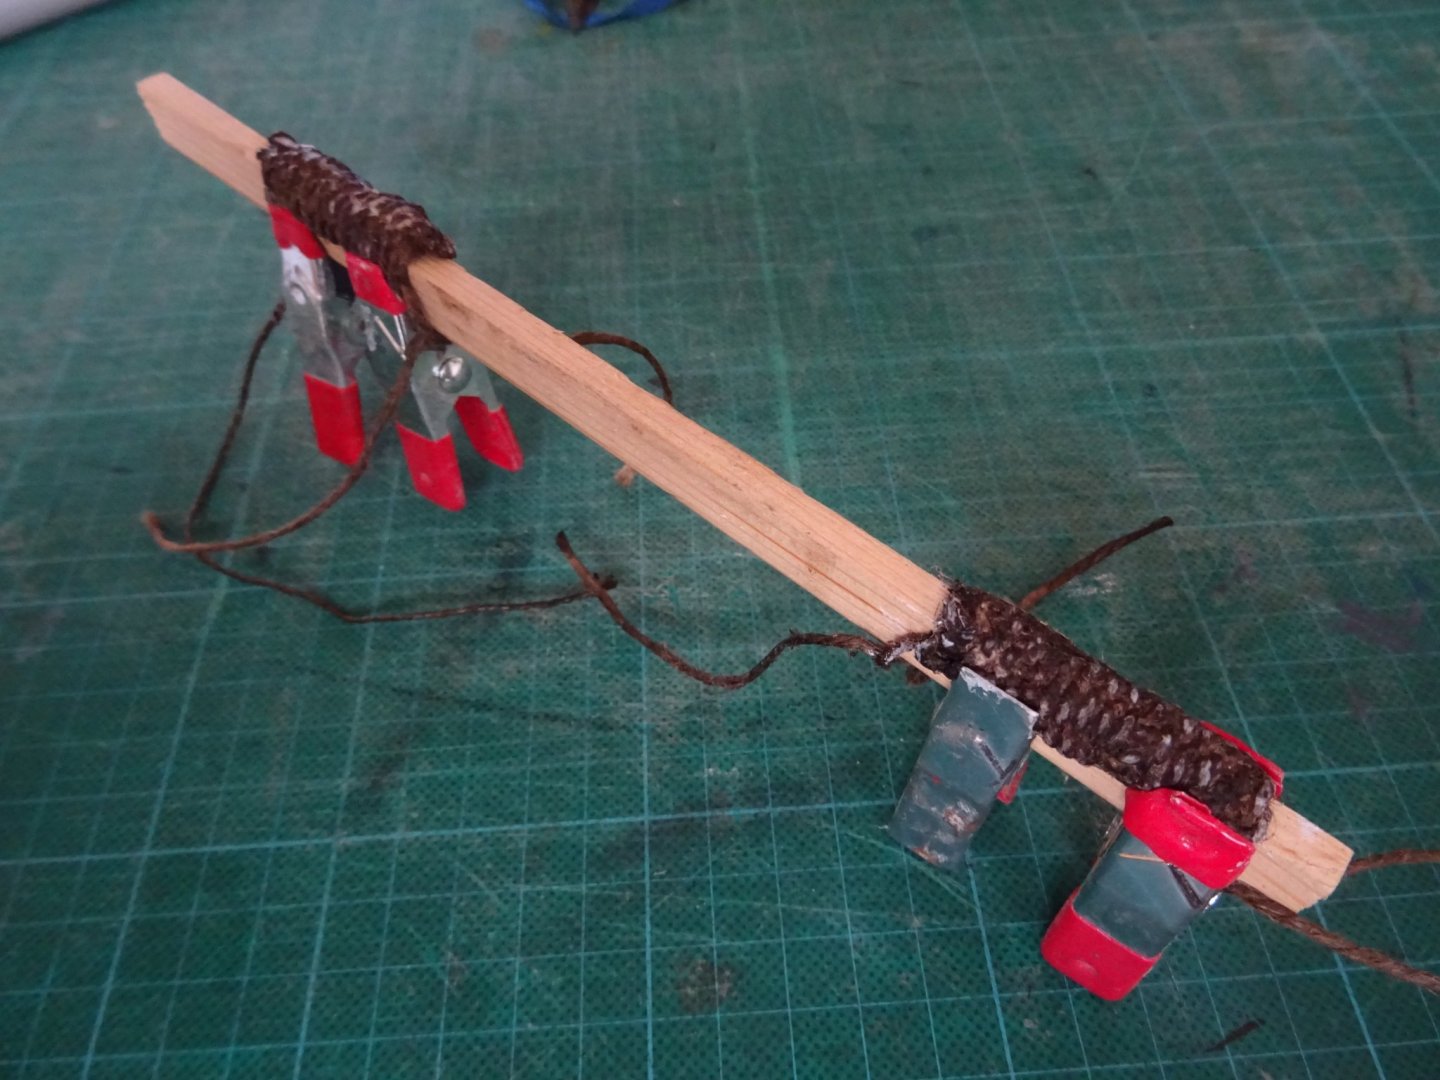
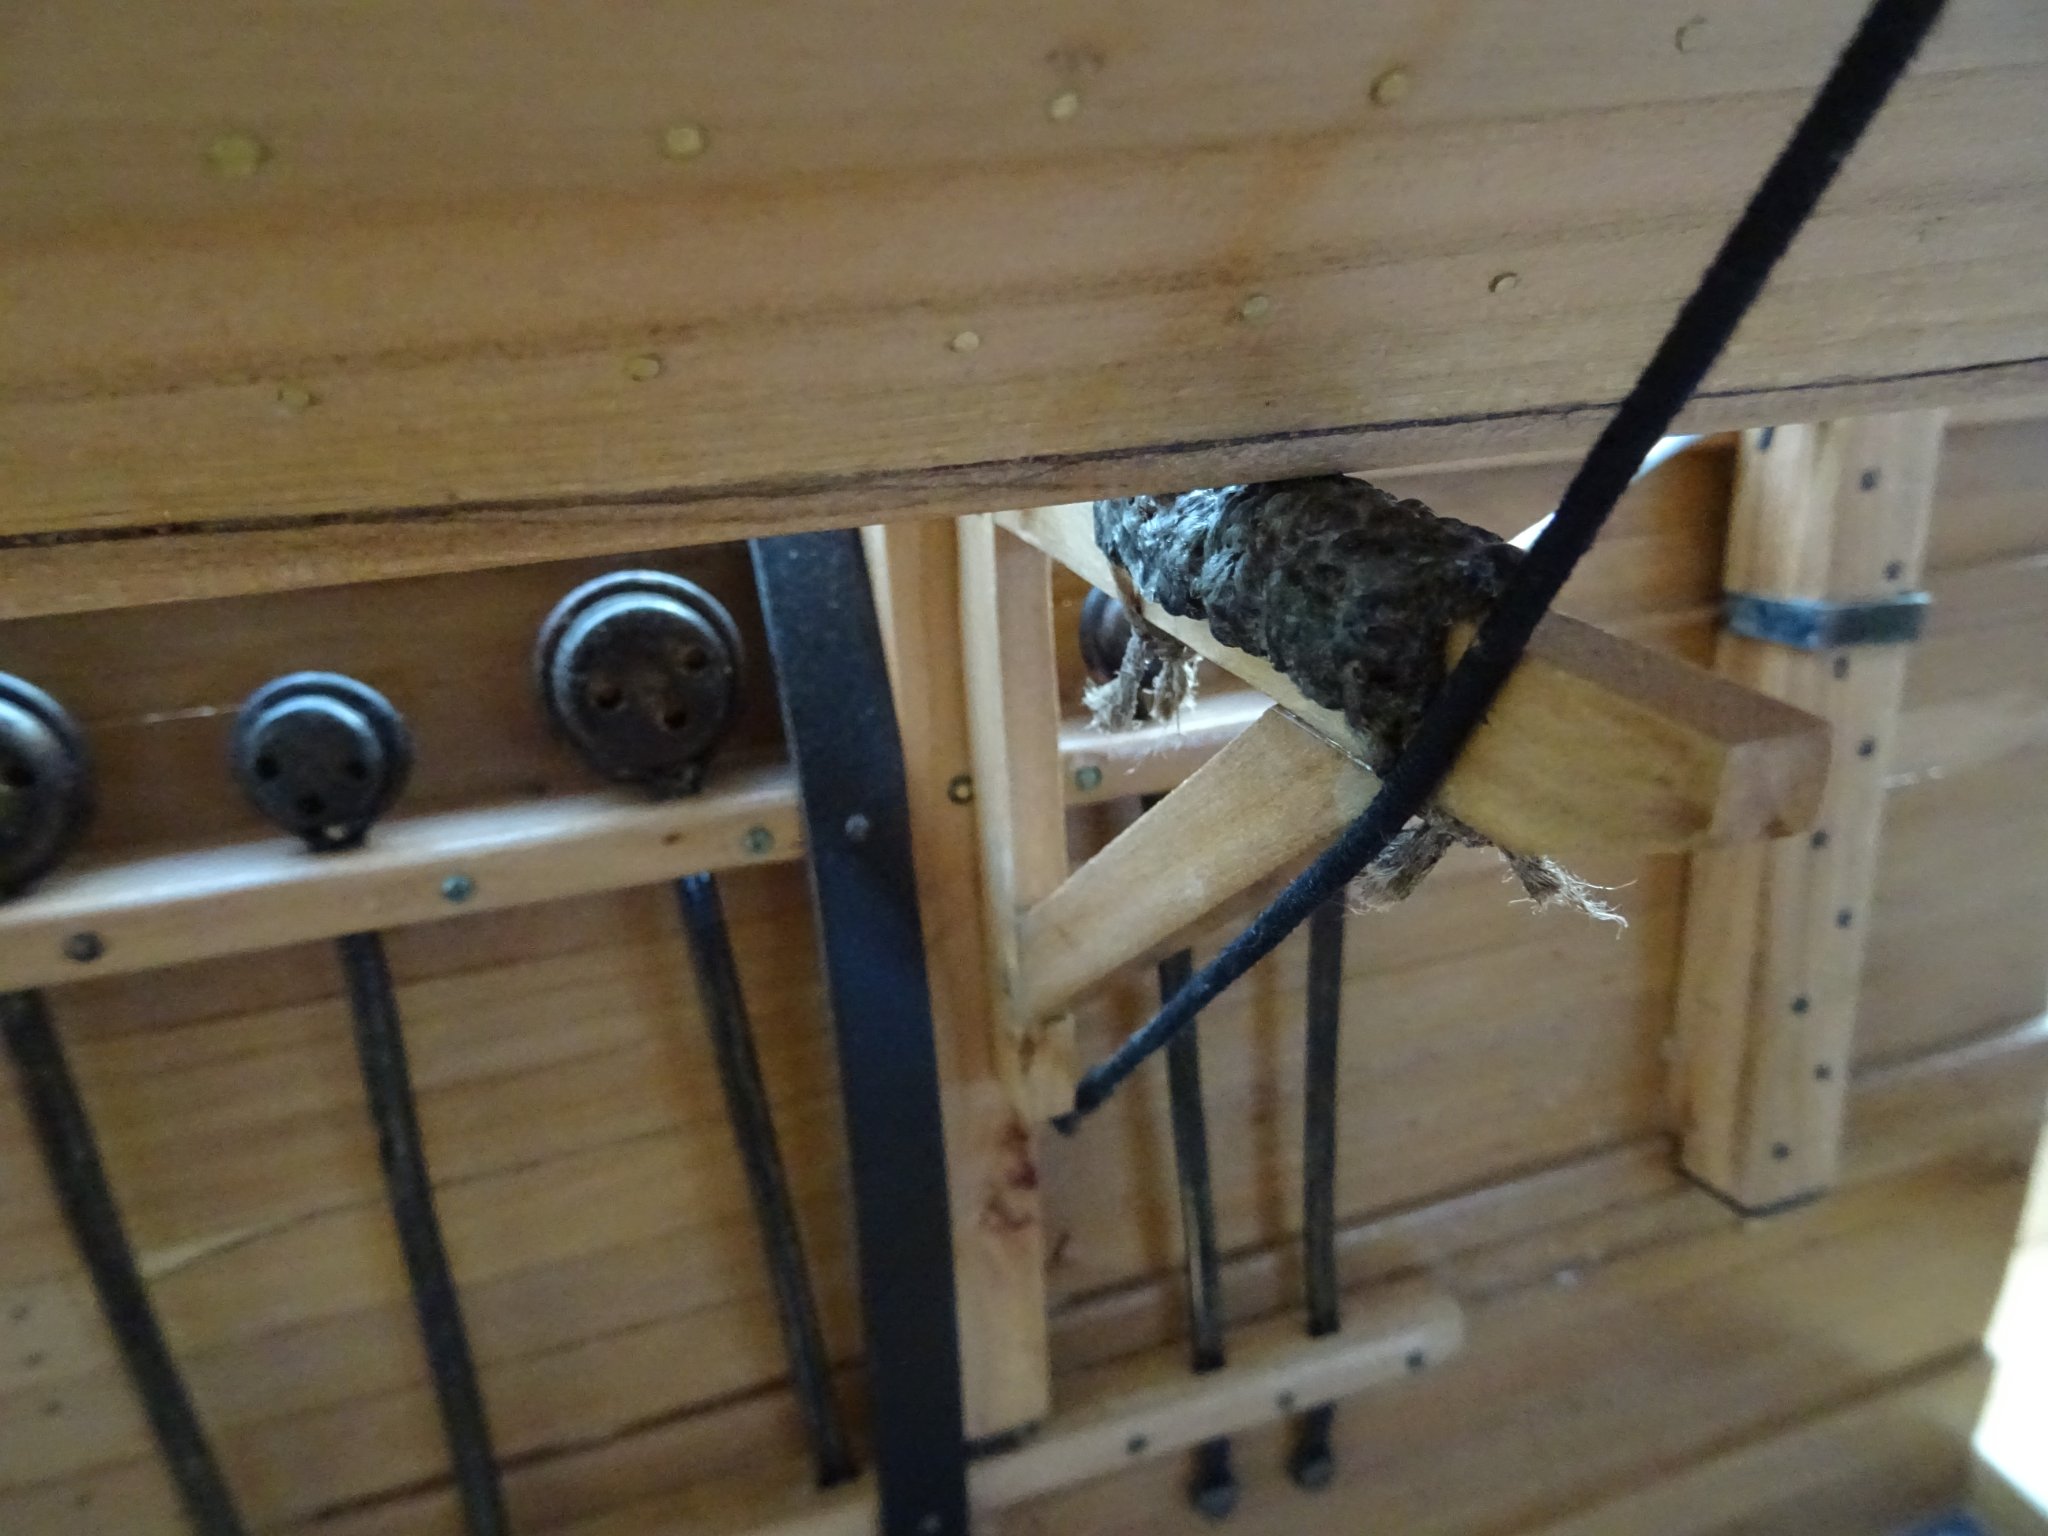
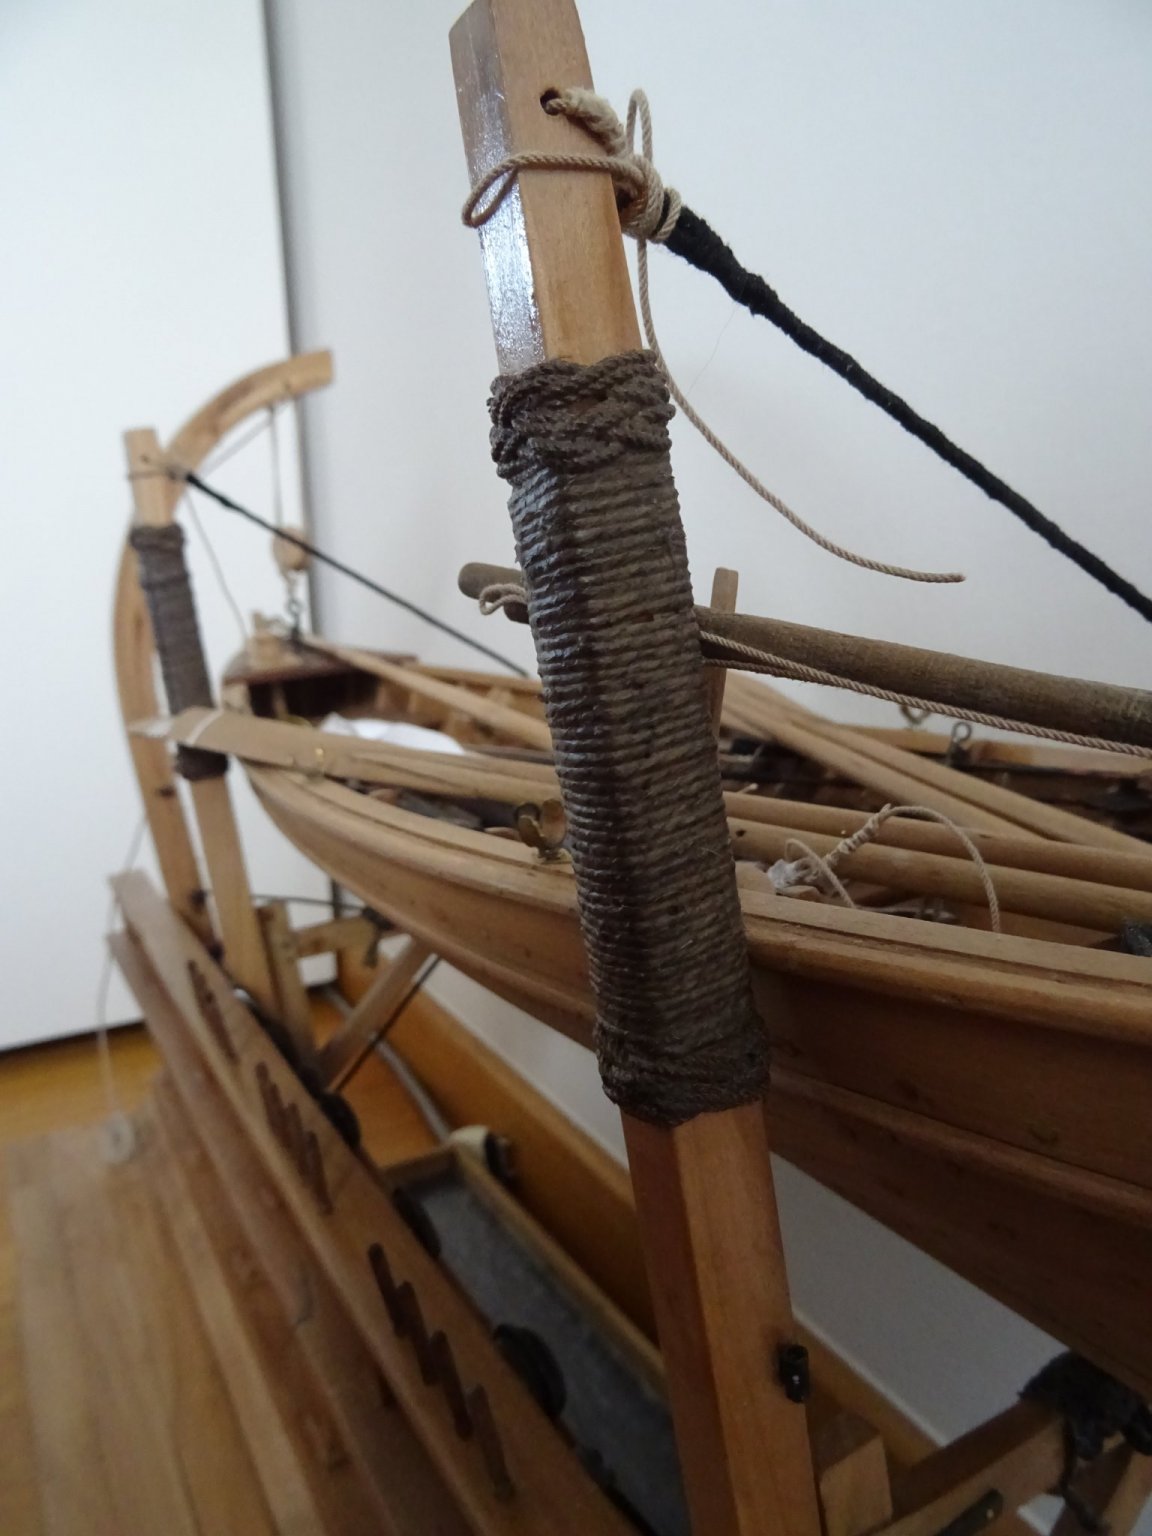
When standing on the cranes, the boat is also leaning against the bearing posts. In heavy weather the boats' rub rail can be damaged by chafing against the bearing posts. To protect the rail I make a rope seizing round the bearing posts.
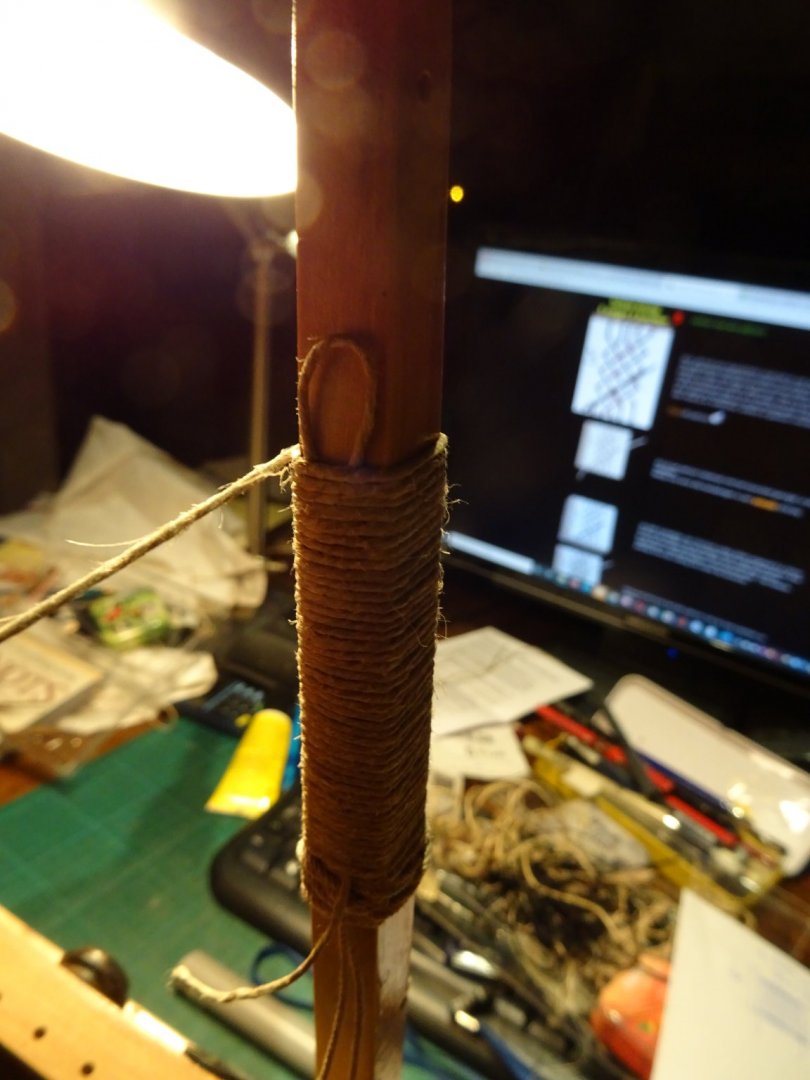
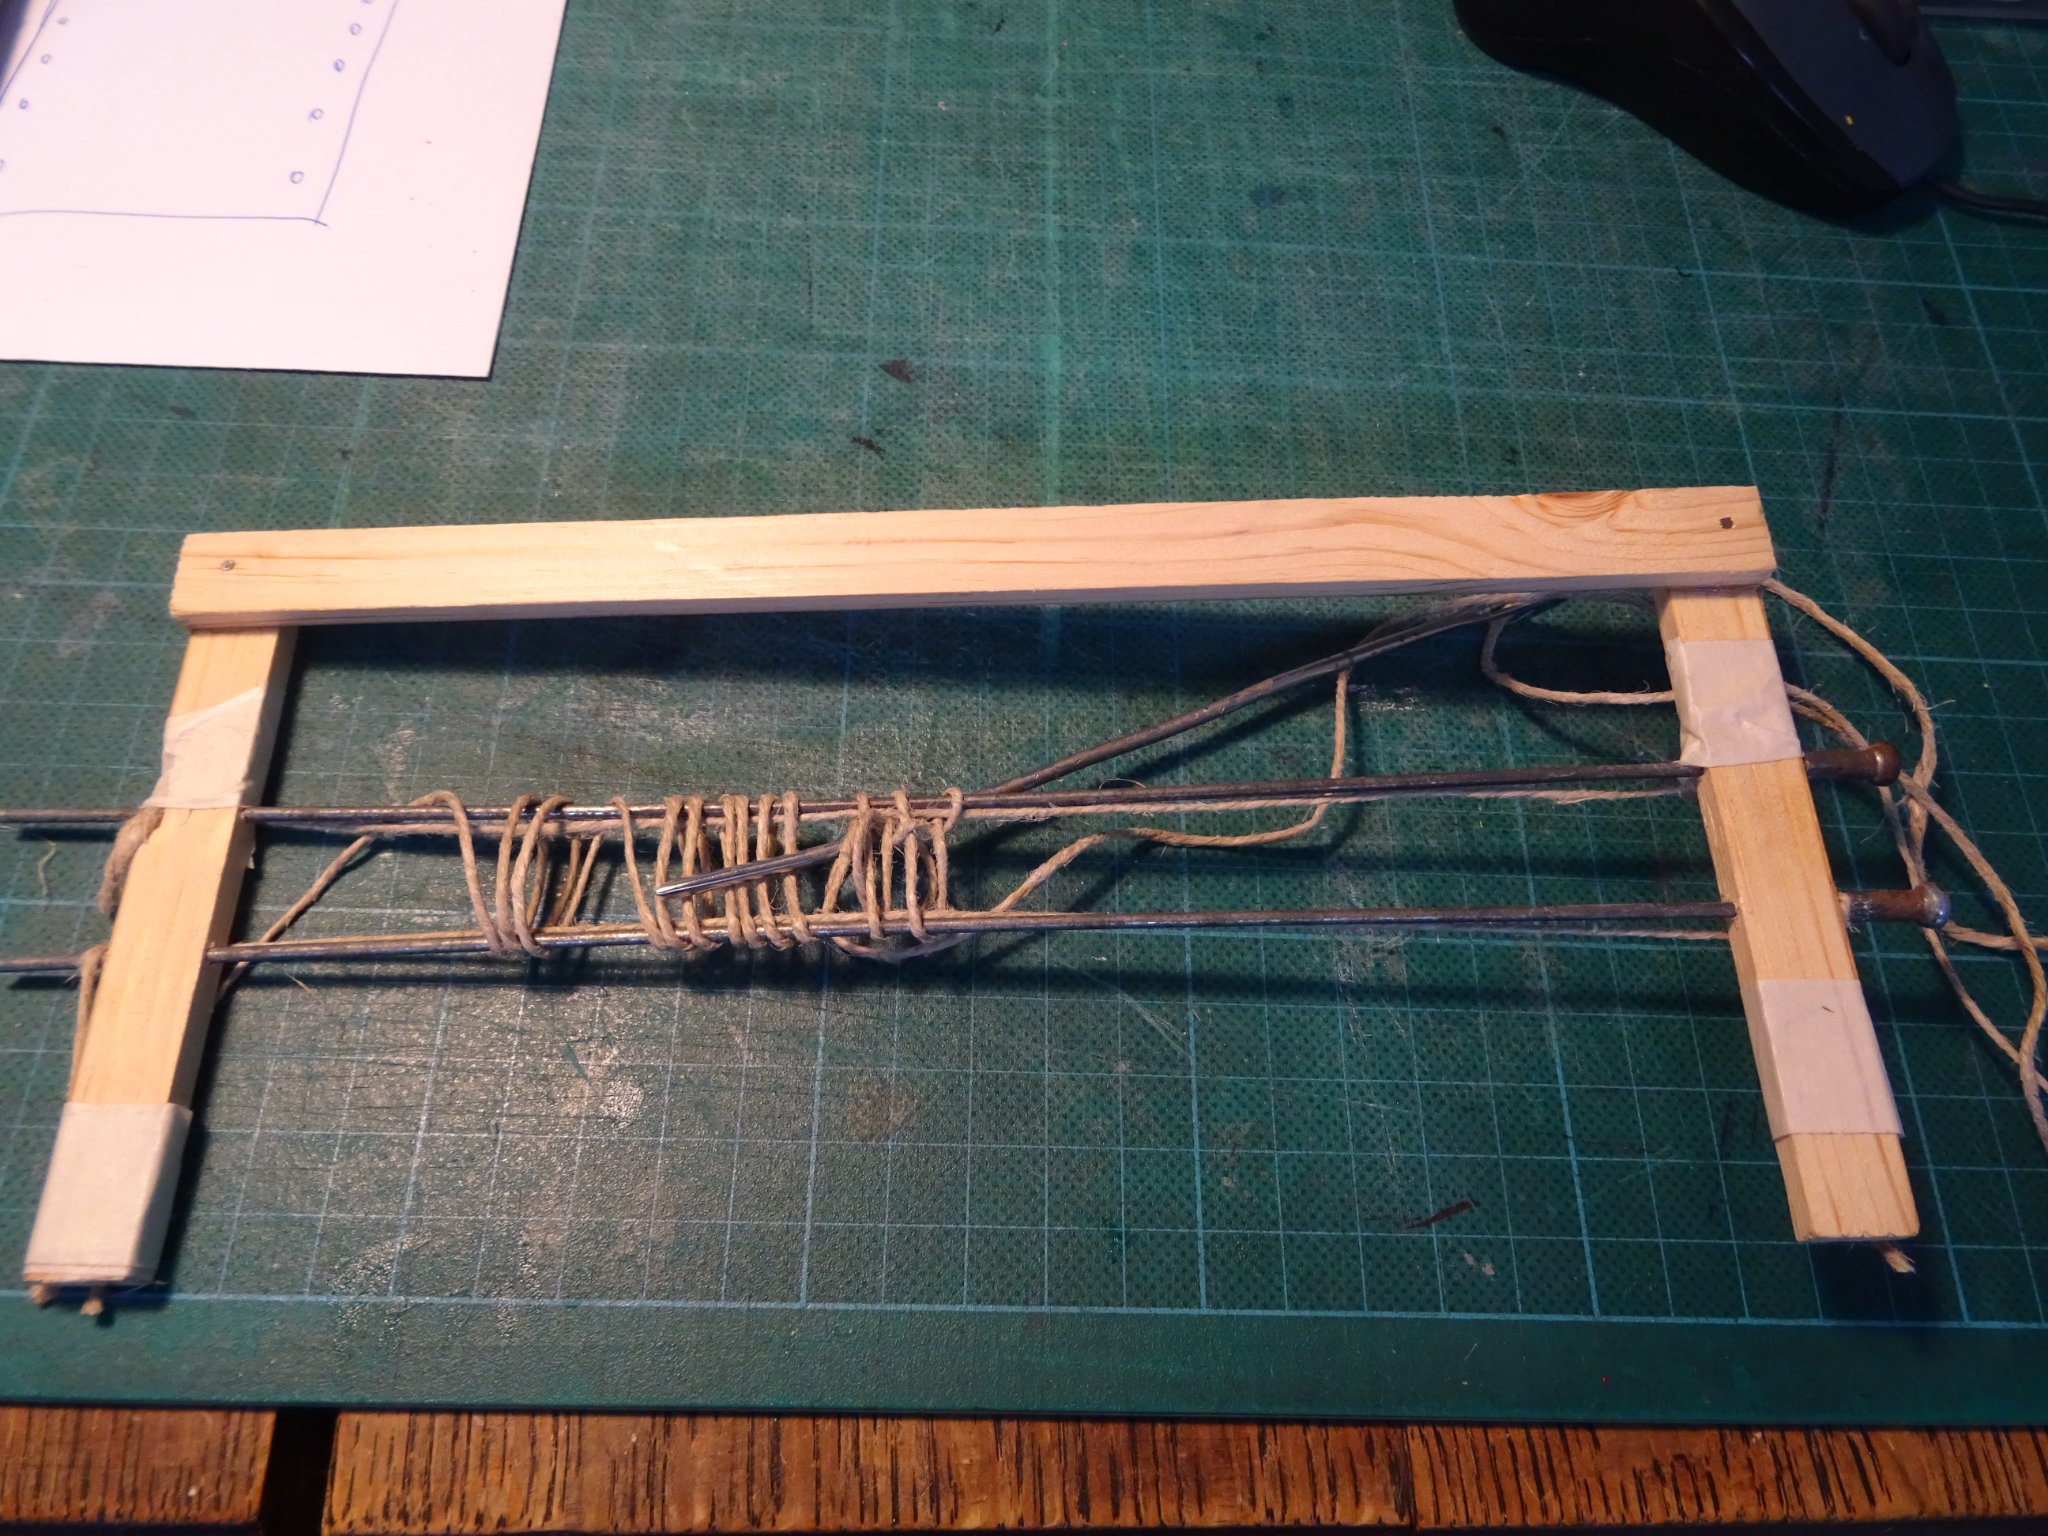
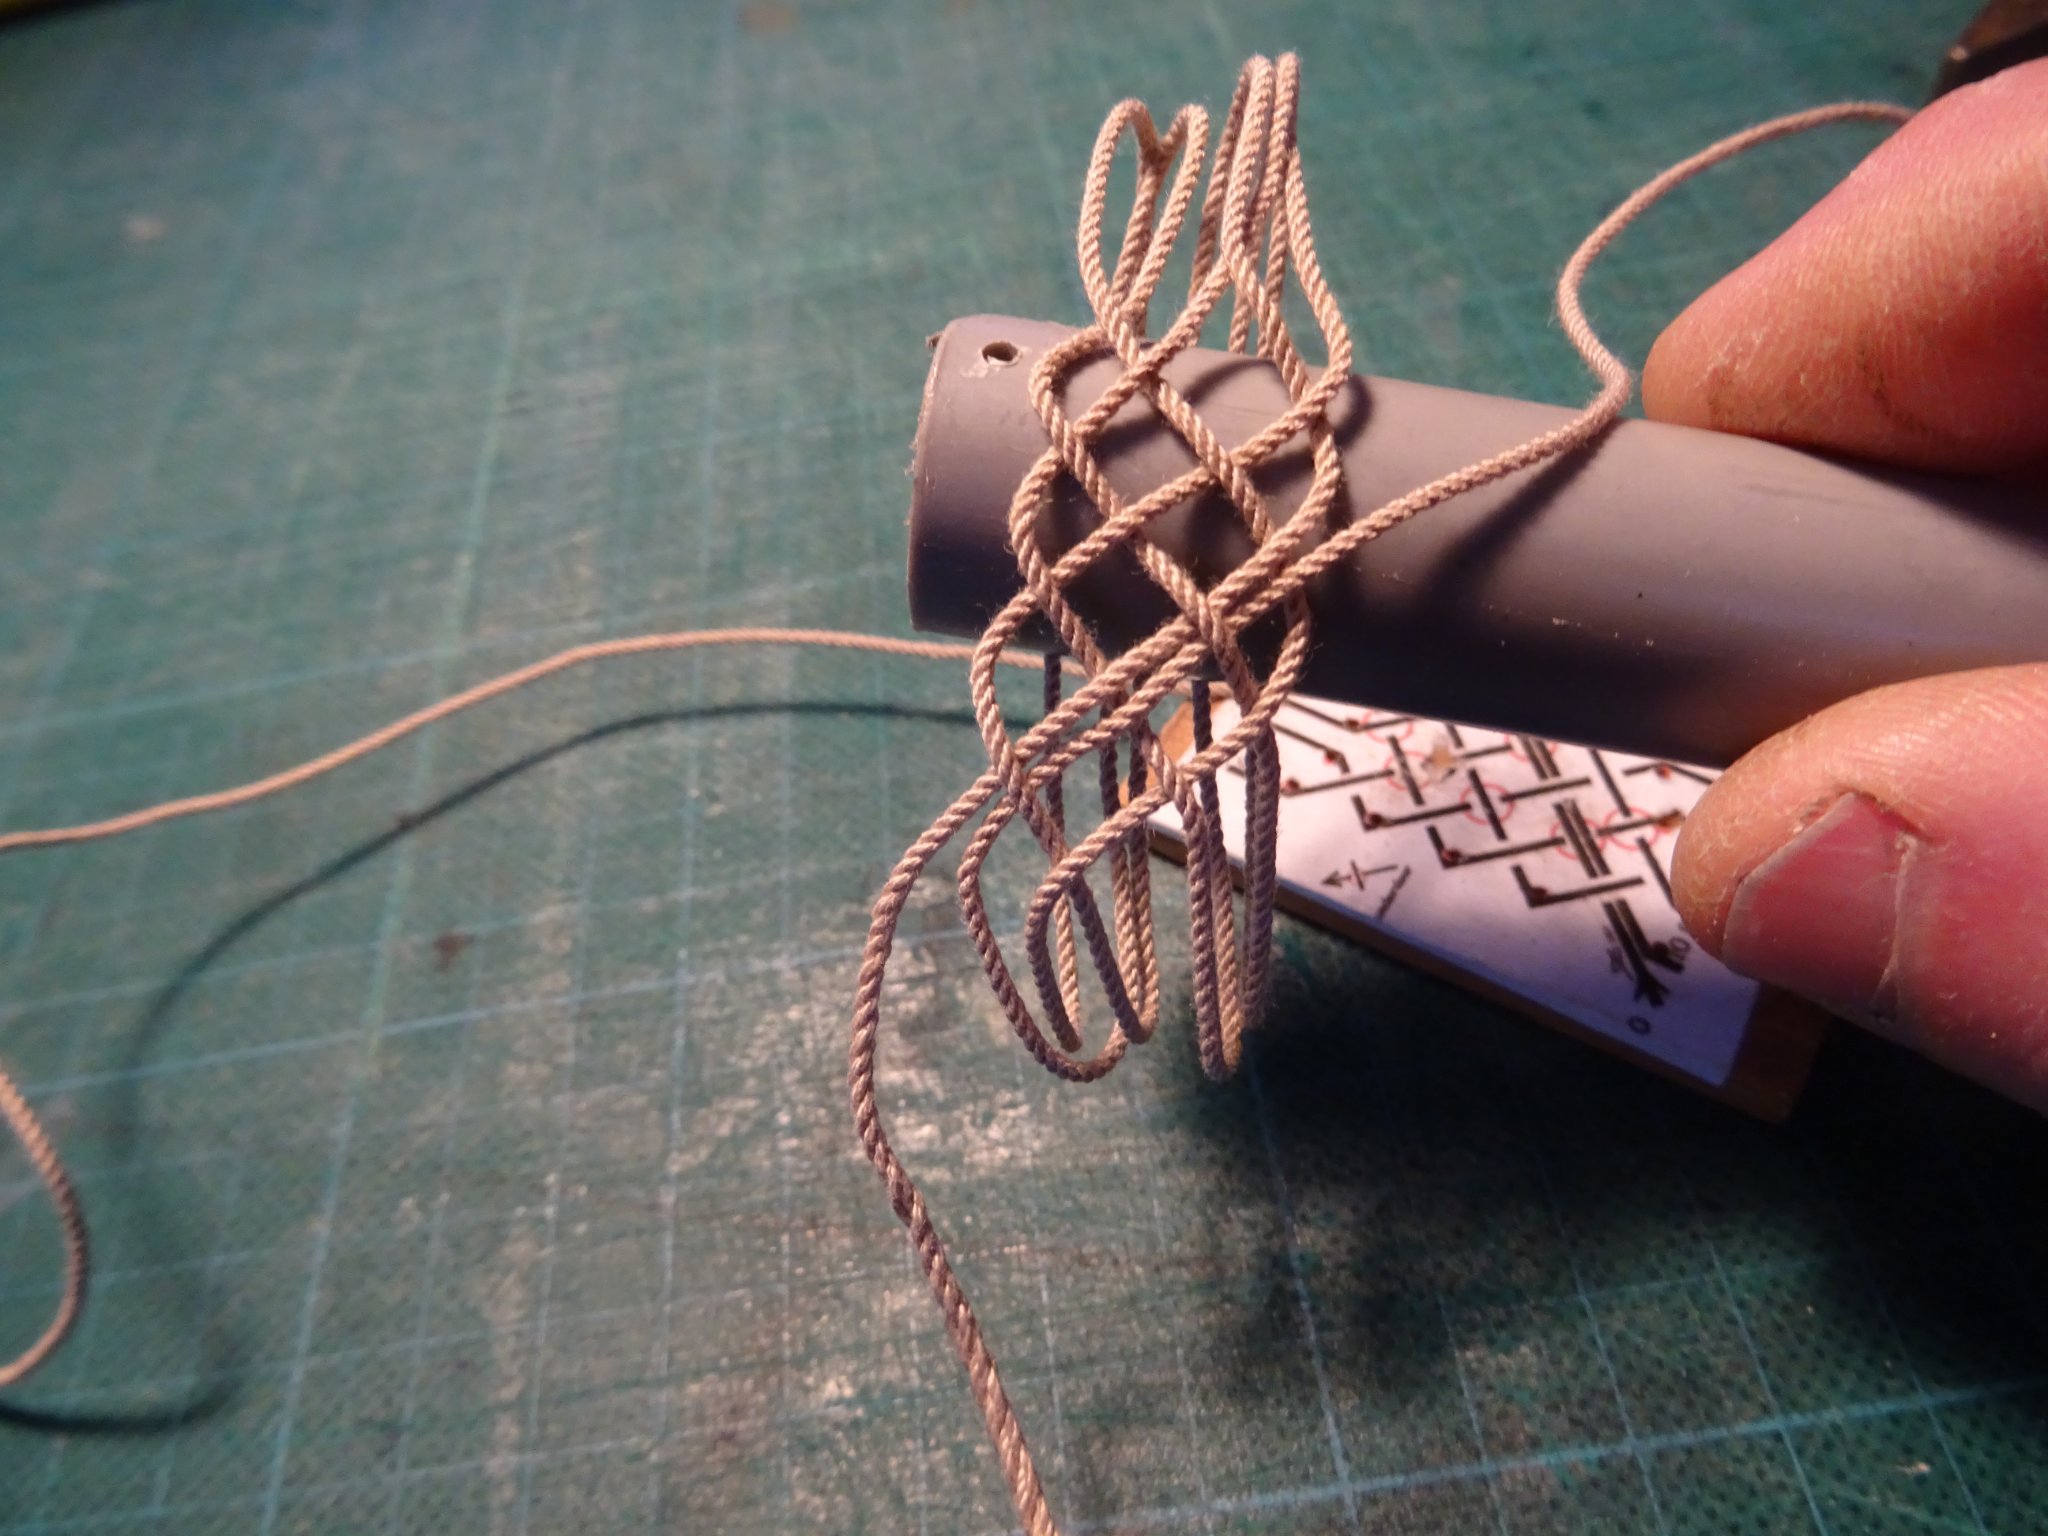
As finish of the seizing I want to place a Turkish knot above and below it. To make the knot I use a googled jig
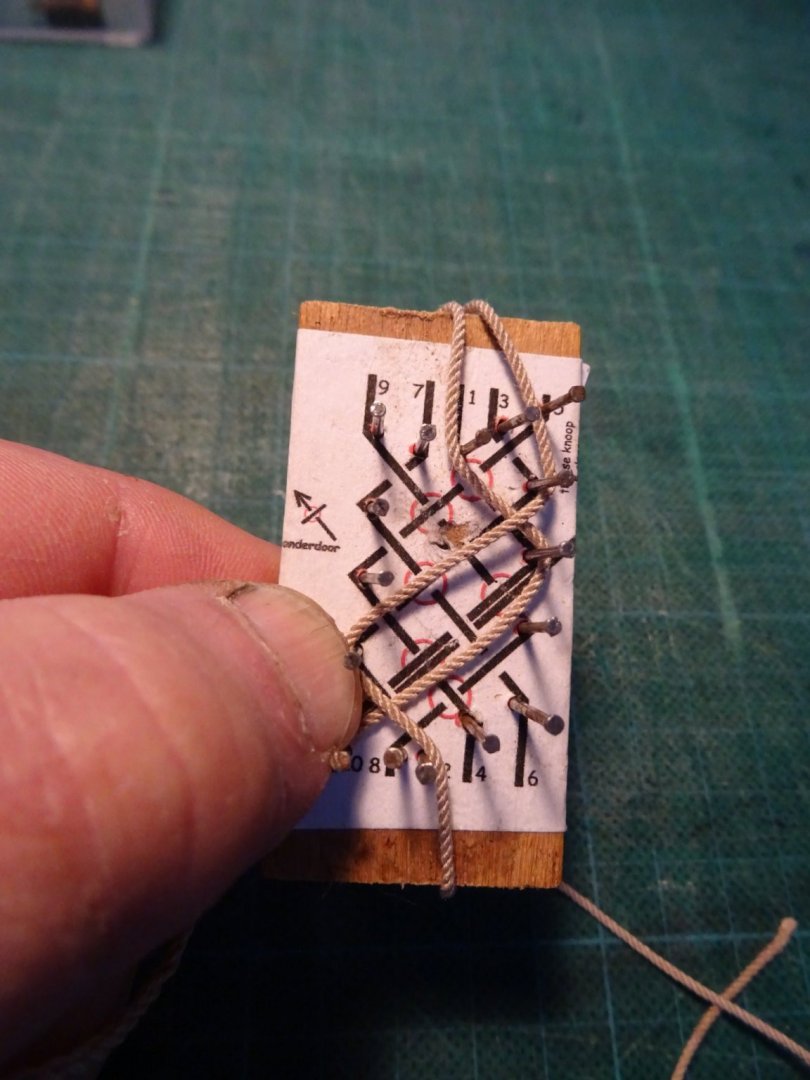
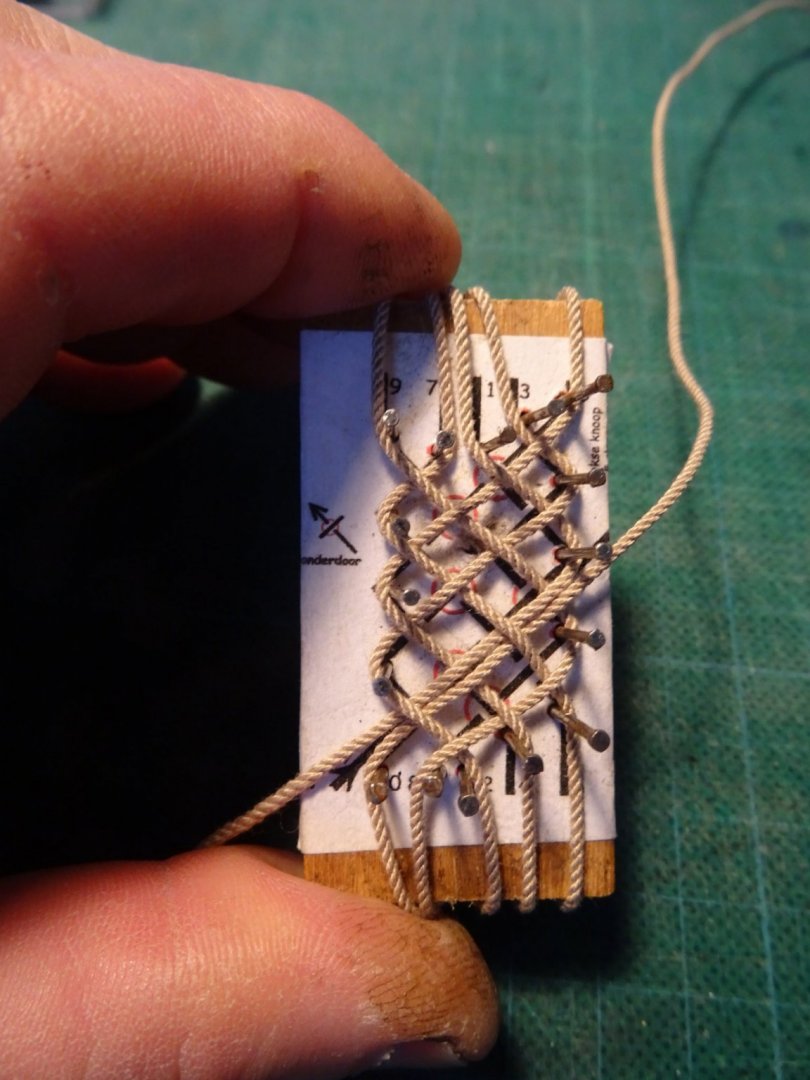
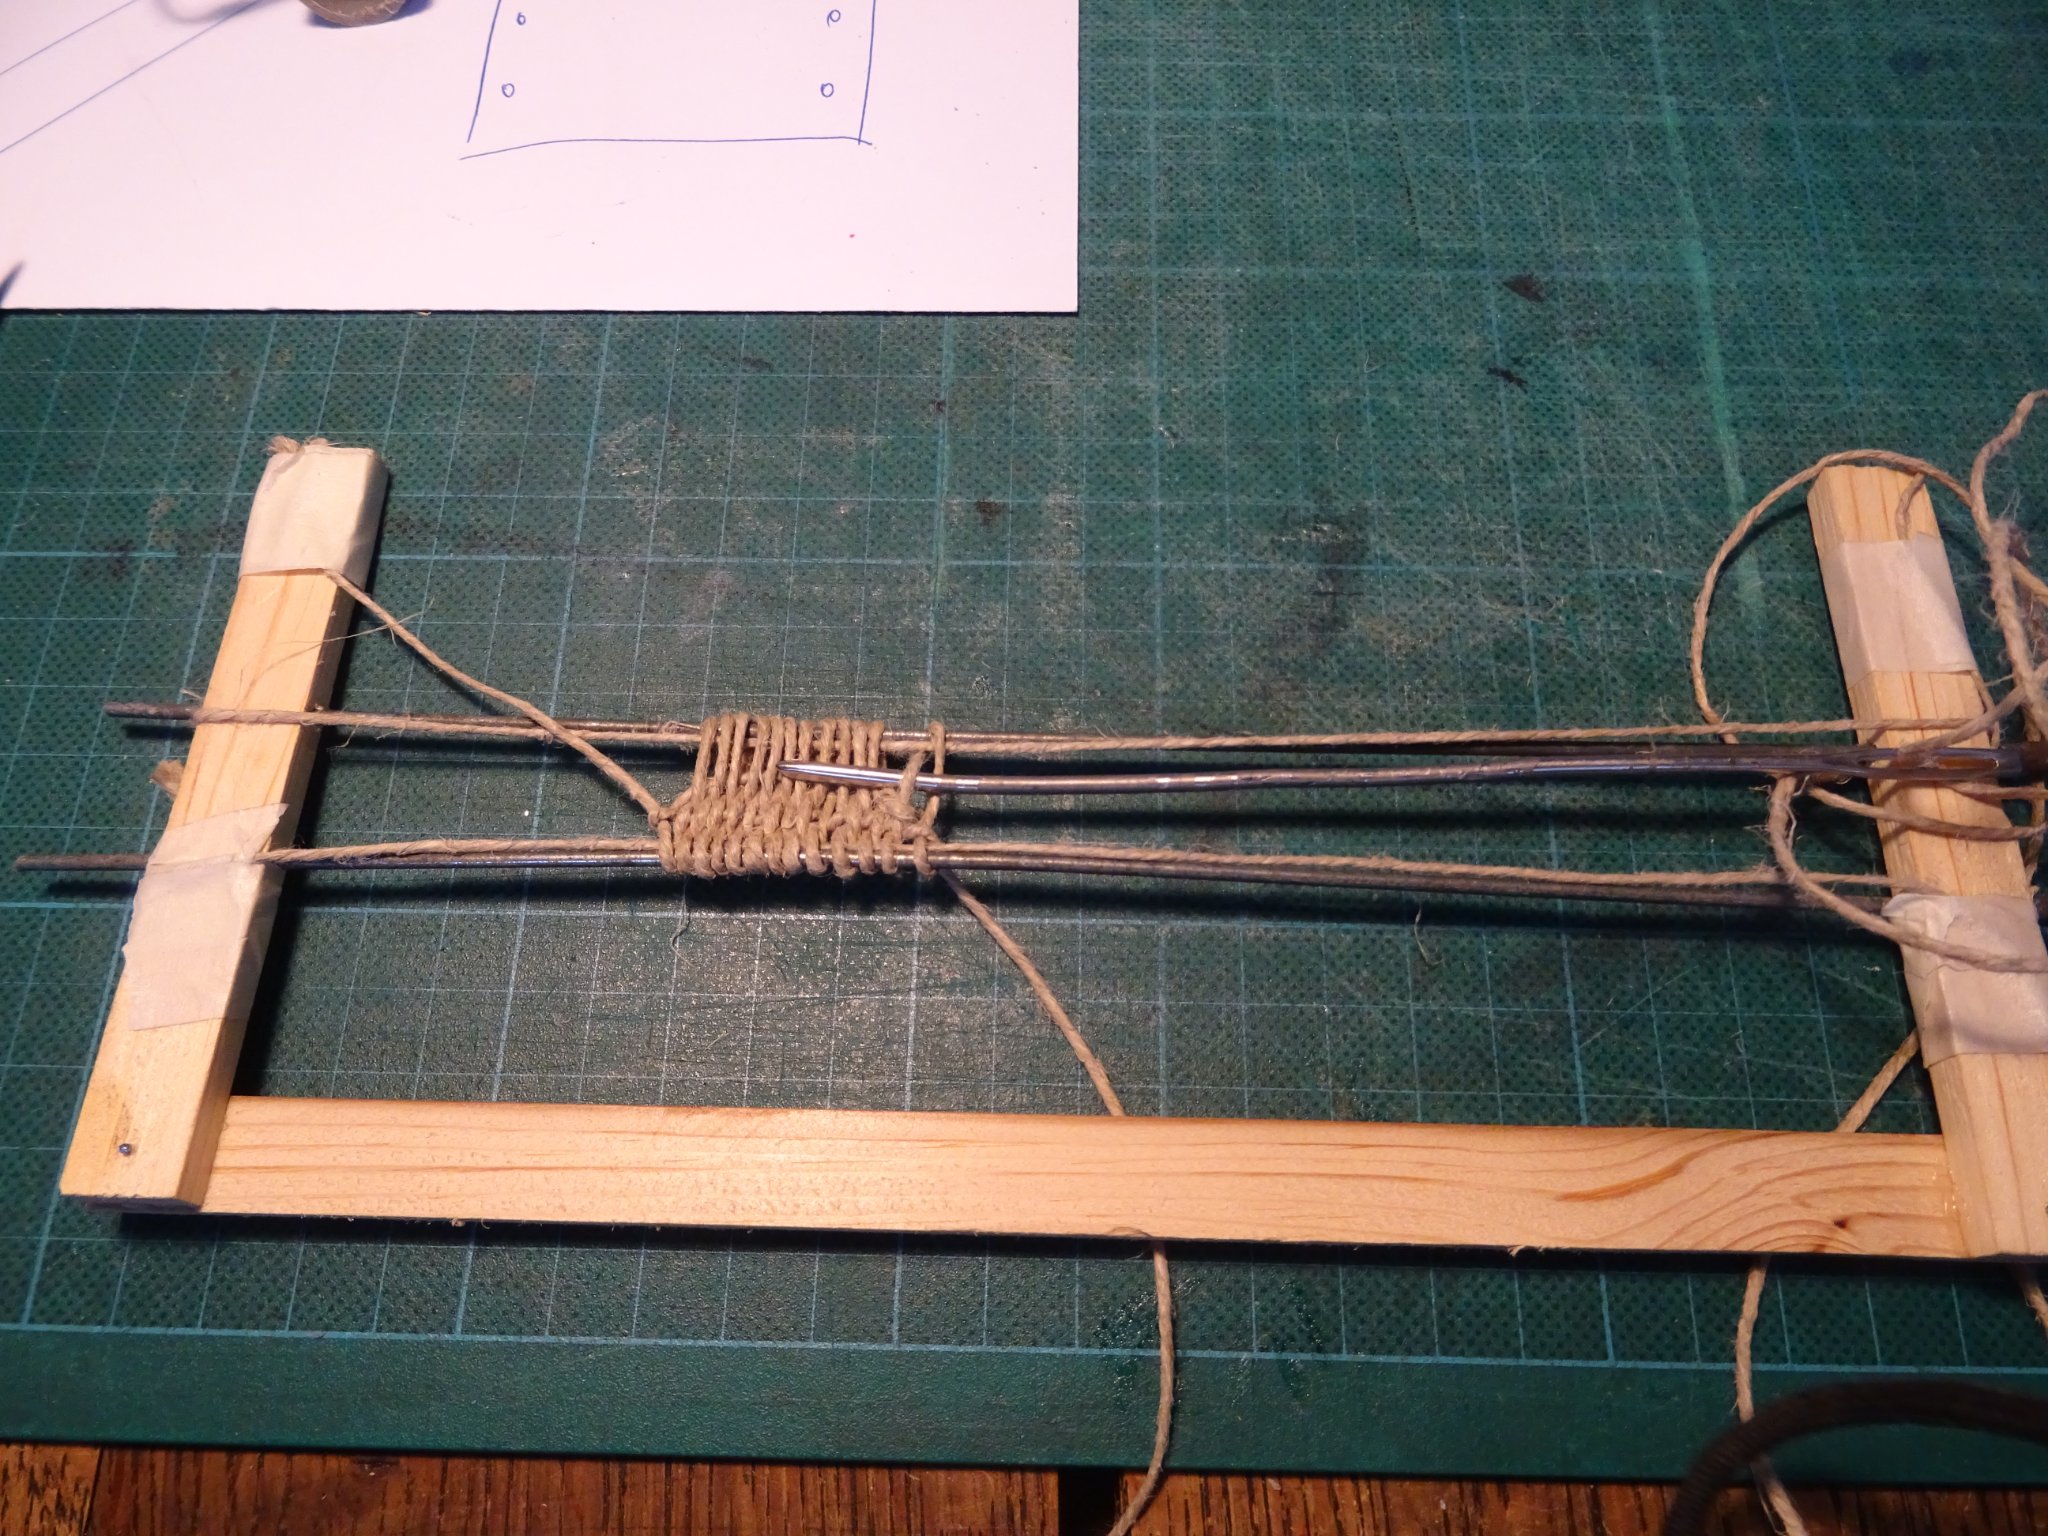
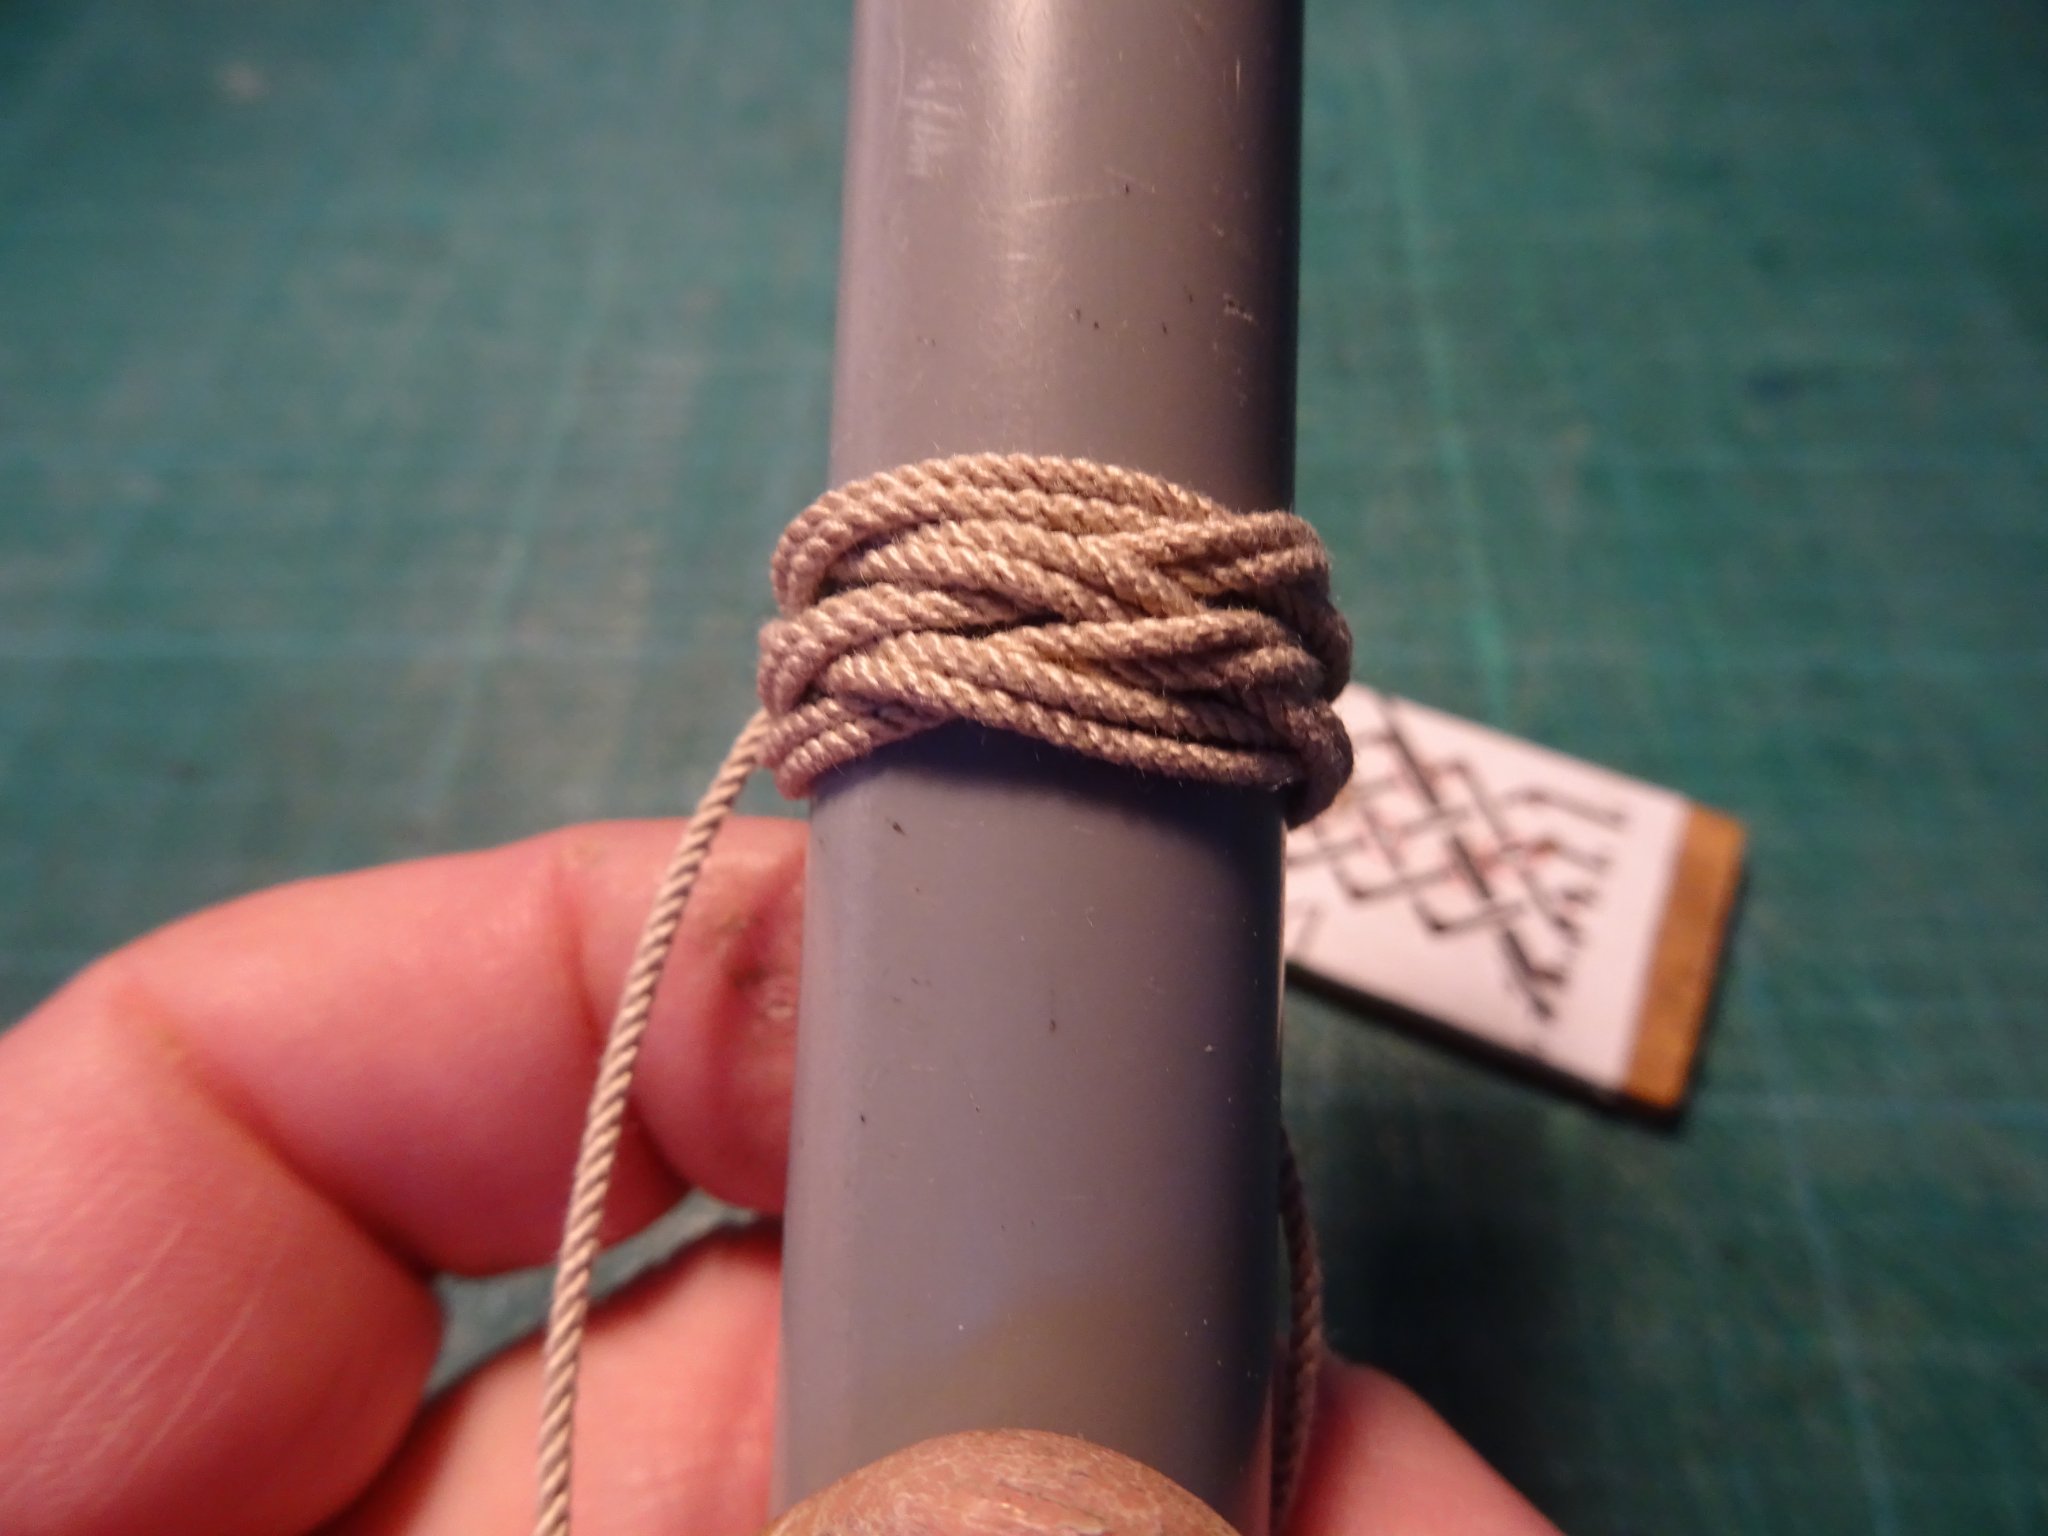
When the whole pattern of the jig has been followed I slide the knot on a round tube to tighten it up a bit ...
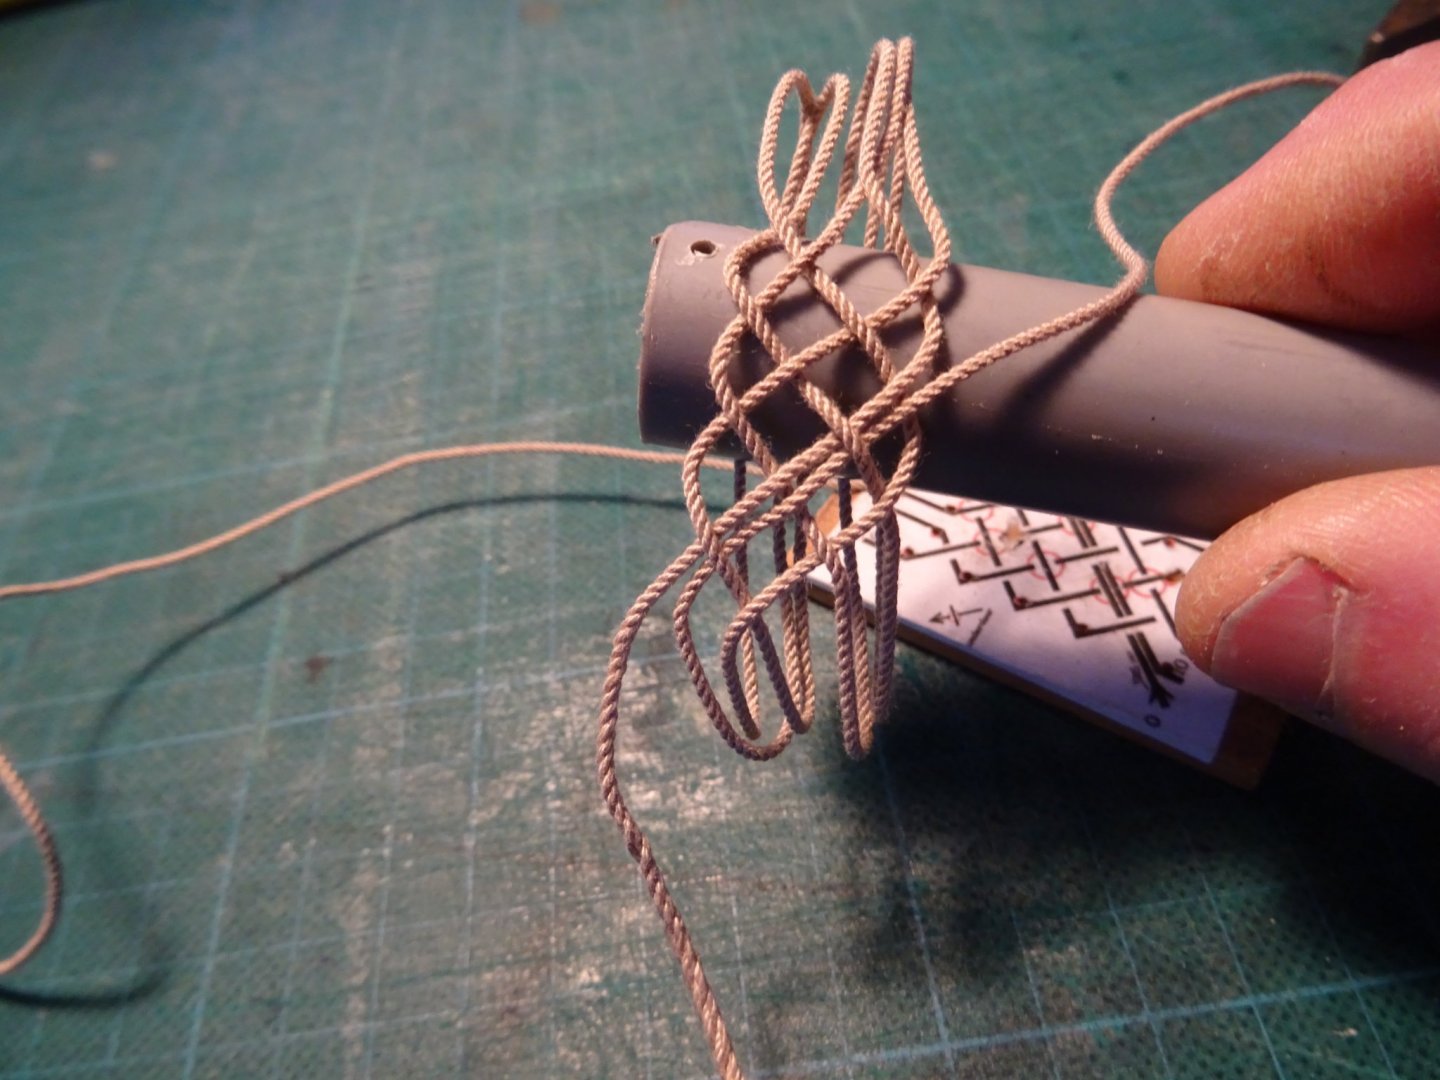
... and to double it.
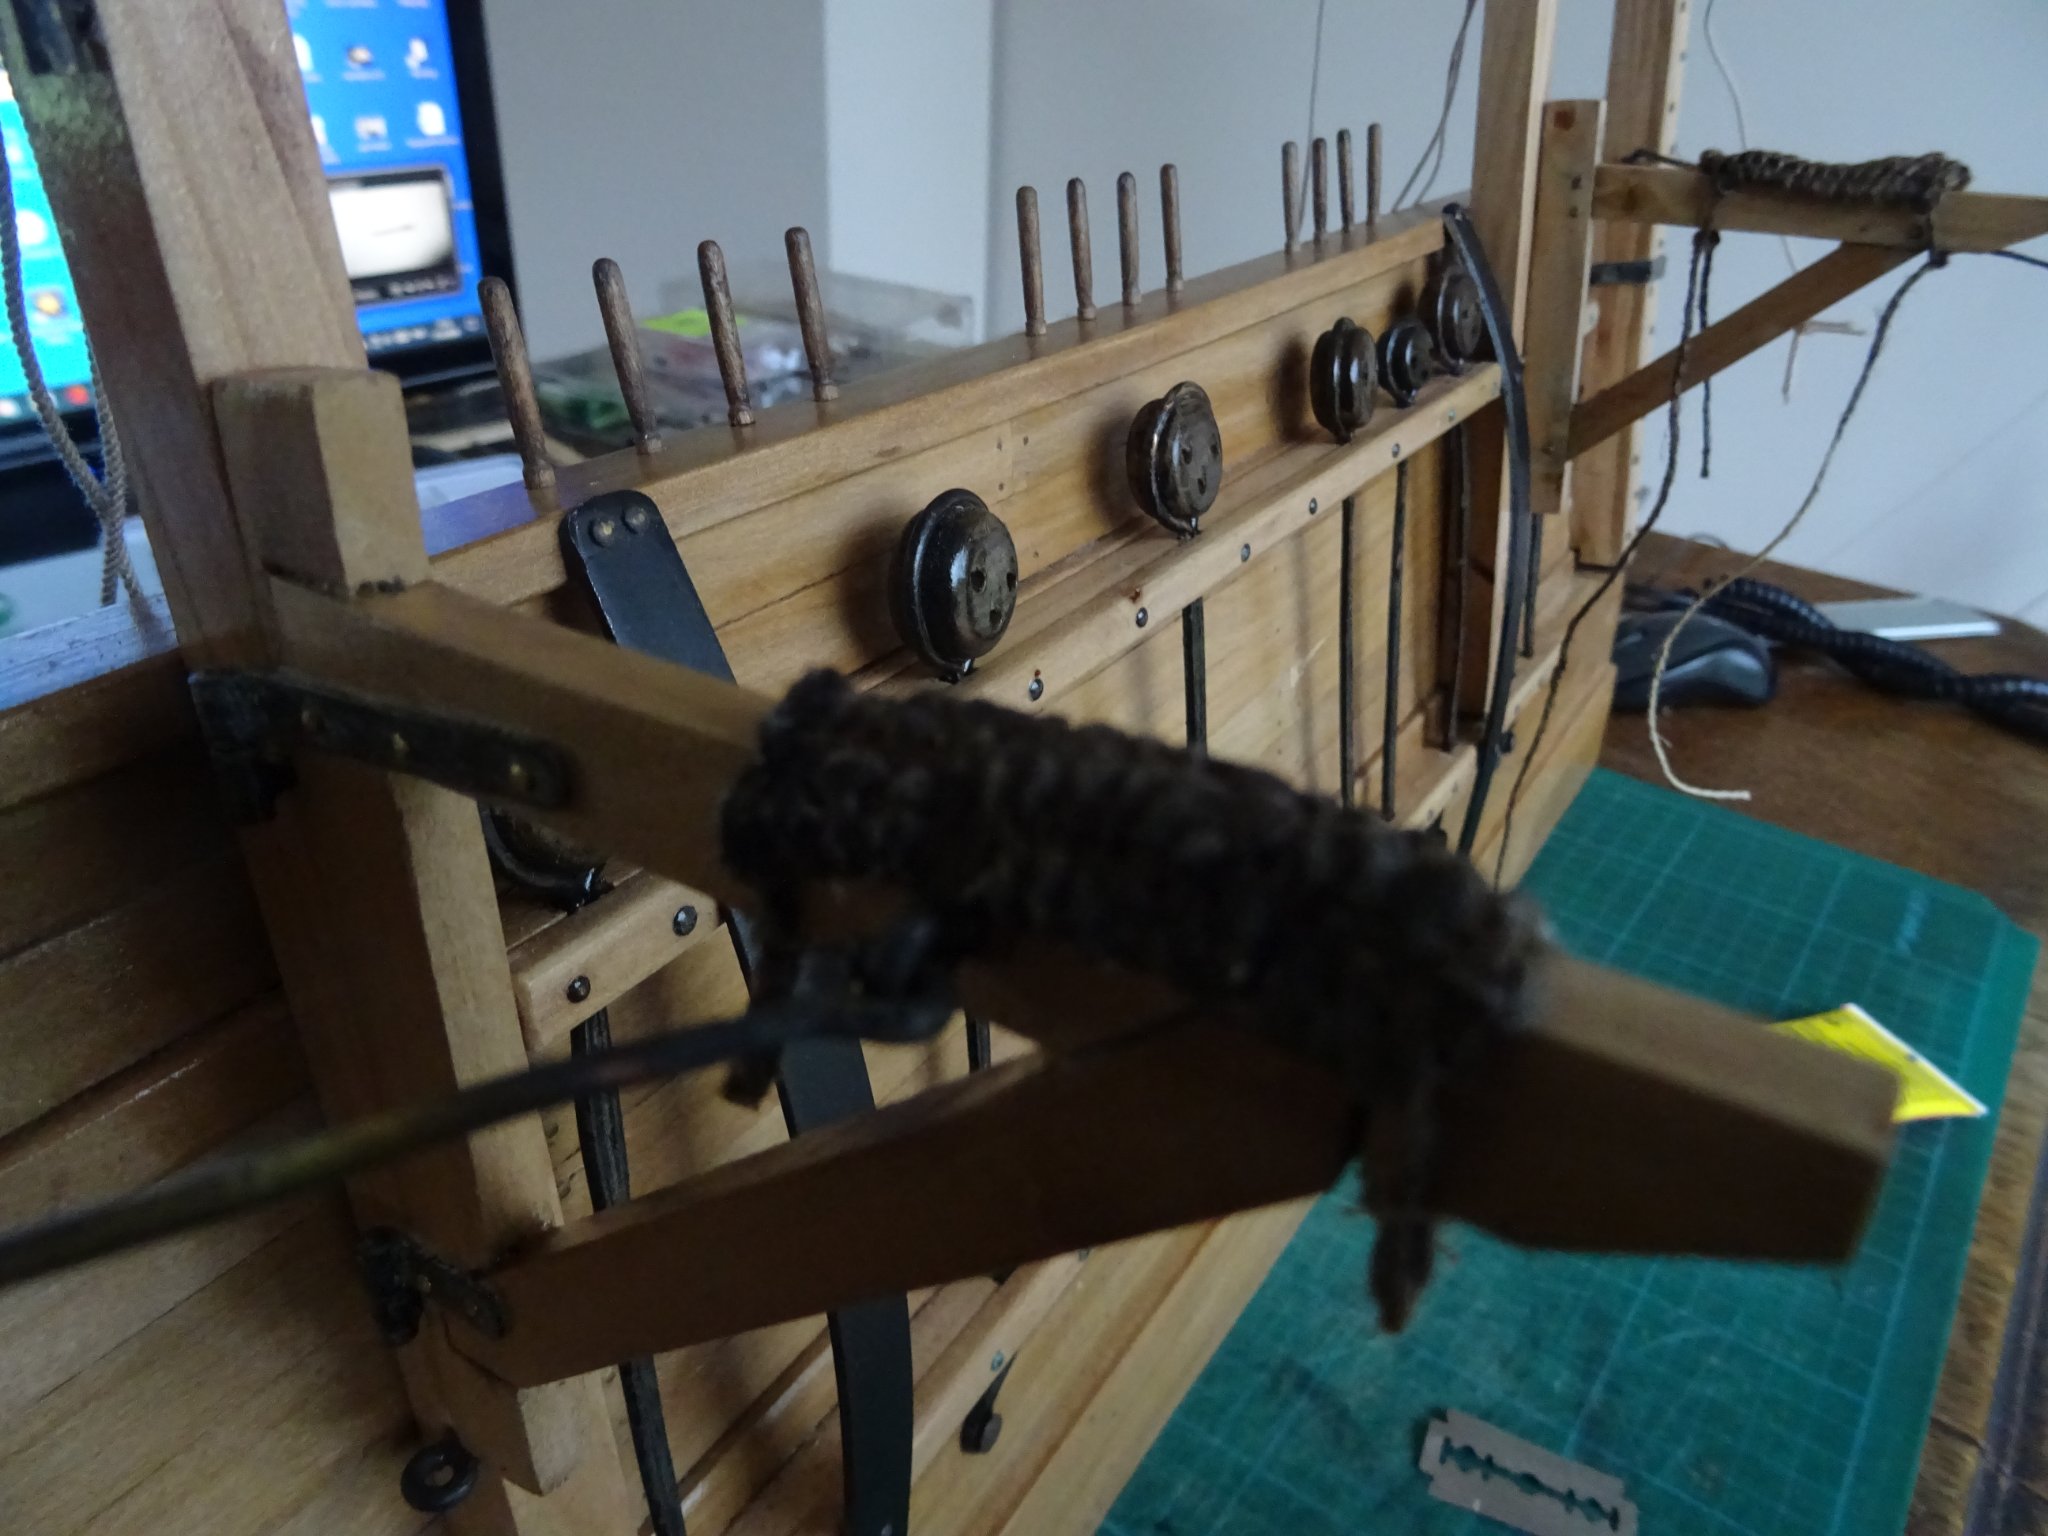
Then I place the knot on the bearing post on top and at the bottom of the seizing.
Finally the rope work is stained dark and coated with mate varnish.

Thank you very much for reading this log, for your likes and for your encouraging comments.
Till next week!
- GrandpaPhil, BLACK VIKING, Baker and 7 others
-
10
-
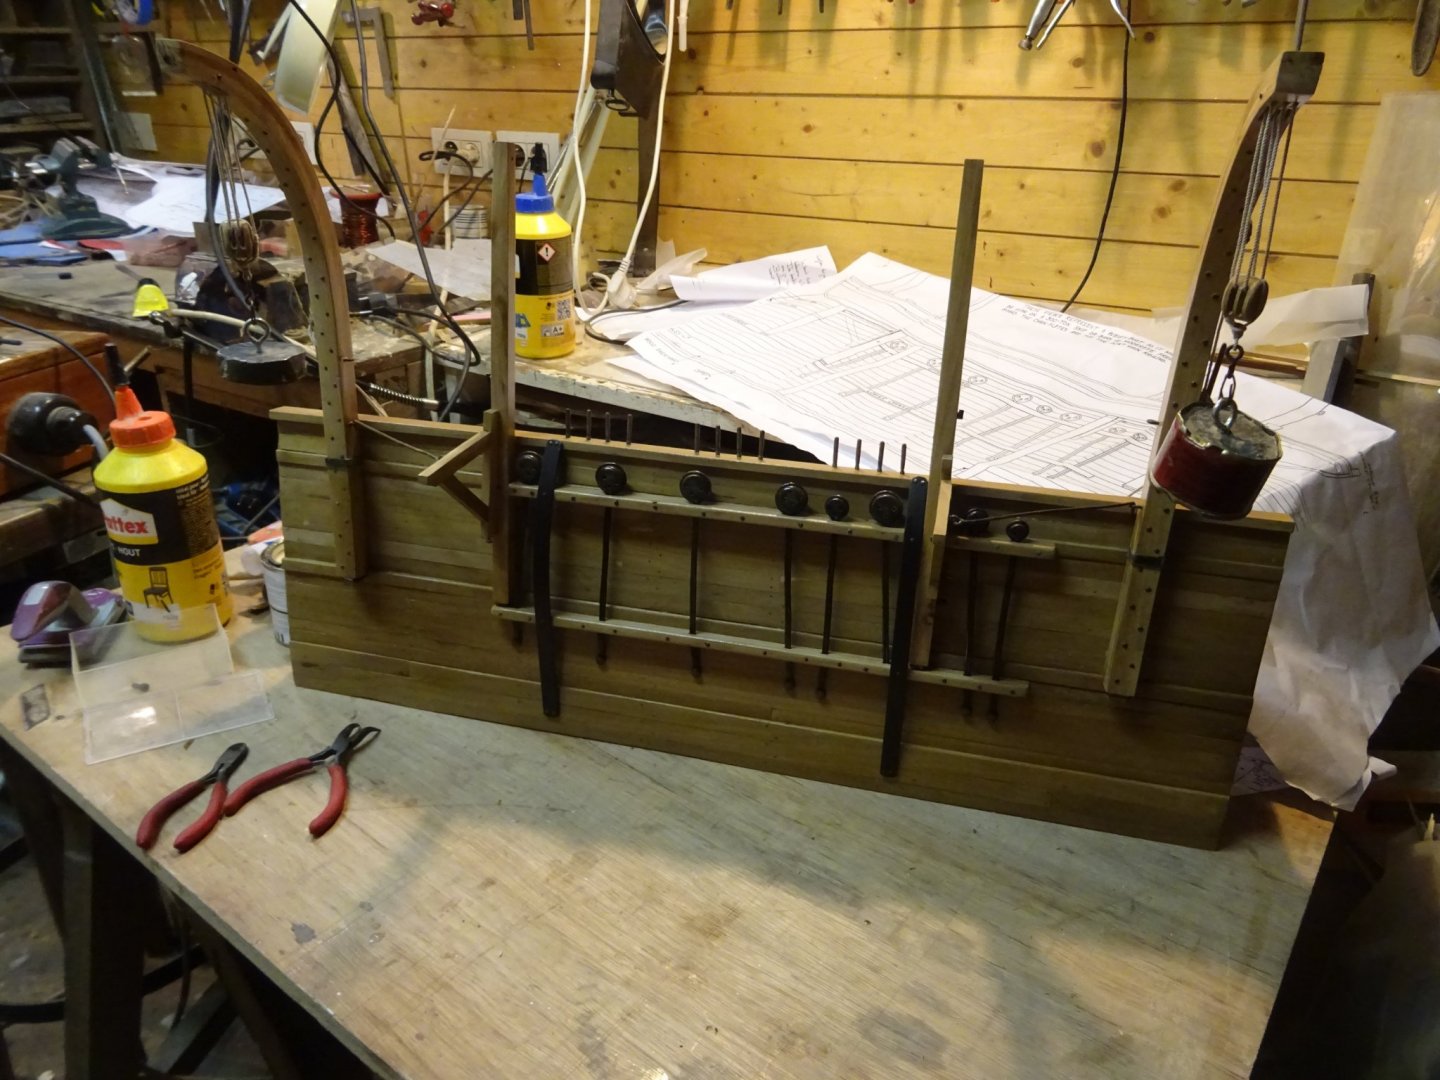
9.2 Dead eyes and chain plates (cont.)
Now I can place the dead eyes and the plates.


Here the boat cranes are swung out. They are kept in their position by metal crane hooks which are hooked in an eye in the davit.
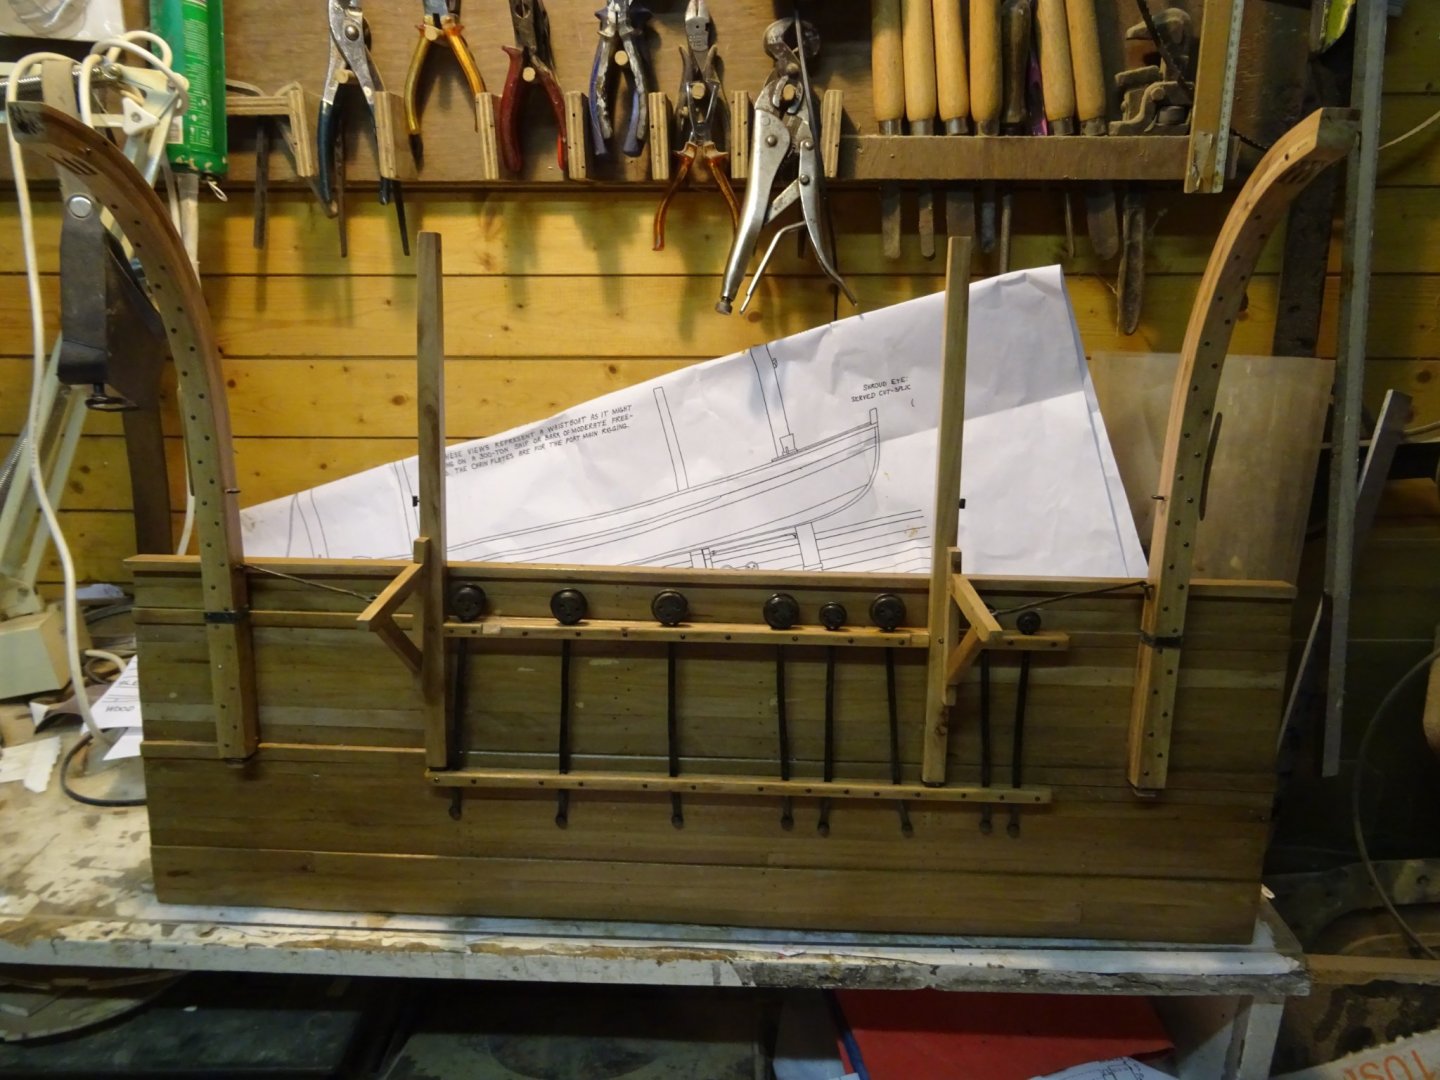
The boat slides can now also be placed. The boat cranes are in their open position for hoisting of lowering the boat.

- vaddoc, mtaylor, GrandpaPhil and 3 others
-
6
-
14 minutes ago, WBlakeny said:
GL thats a work of art! Your buildlogs are always such a joy to go through. They're so informative and instructive. Thank you.
Thank you for your kind words, Chris.
-
4 hours ago, vaddoc said:
GL, the boat came out fantastic, lovely details! Your confidence working with metal and wood, both large chunks and tiny pieces, is impressive. A very enjoyable log apart from the "sticking a pole to the whale's blow hole" part!
Thanks, Vaddoc. That of the pole and the blow hole is not really my invention. The whole of whaling seems to me to be a very bloody event. I am very happy that it is now heavily restricted.
-


La Belle Poule 1765 by mtaylor - Scale 1:64 - POB - French Frigate from ANCRE plans
in - Build logs for subjects built 1751 - 1800
Posted
Looks nice, Mark.