


G.L.
-
Posts
1,553 -
Joined
-
Last visited
Content Type
Profiles
Forums
Gallery
Events
Posts posted by G.L.
-
-
Luckily you still have all your fingers. Working with a table saw is so risky. Both my thumbs know all about it; they were both introduced to the saw blade many years ago. Since then I have become very careful with my circular saw.
I sincerely wish you a prosperous 2022 without sawing accidents and a speedy recovery for the other issue.- mtaylor, Canute, Wintergreen and 3 others
-
 6
6
-
Many thanks, Hakan and Roger.
Not much has happened in the workshop this week. Yesterday the whole family came to help eat the Christmas turkey, so most of the time was spent preparing the feast.
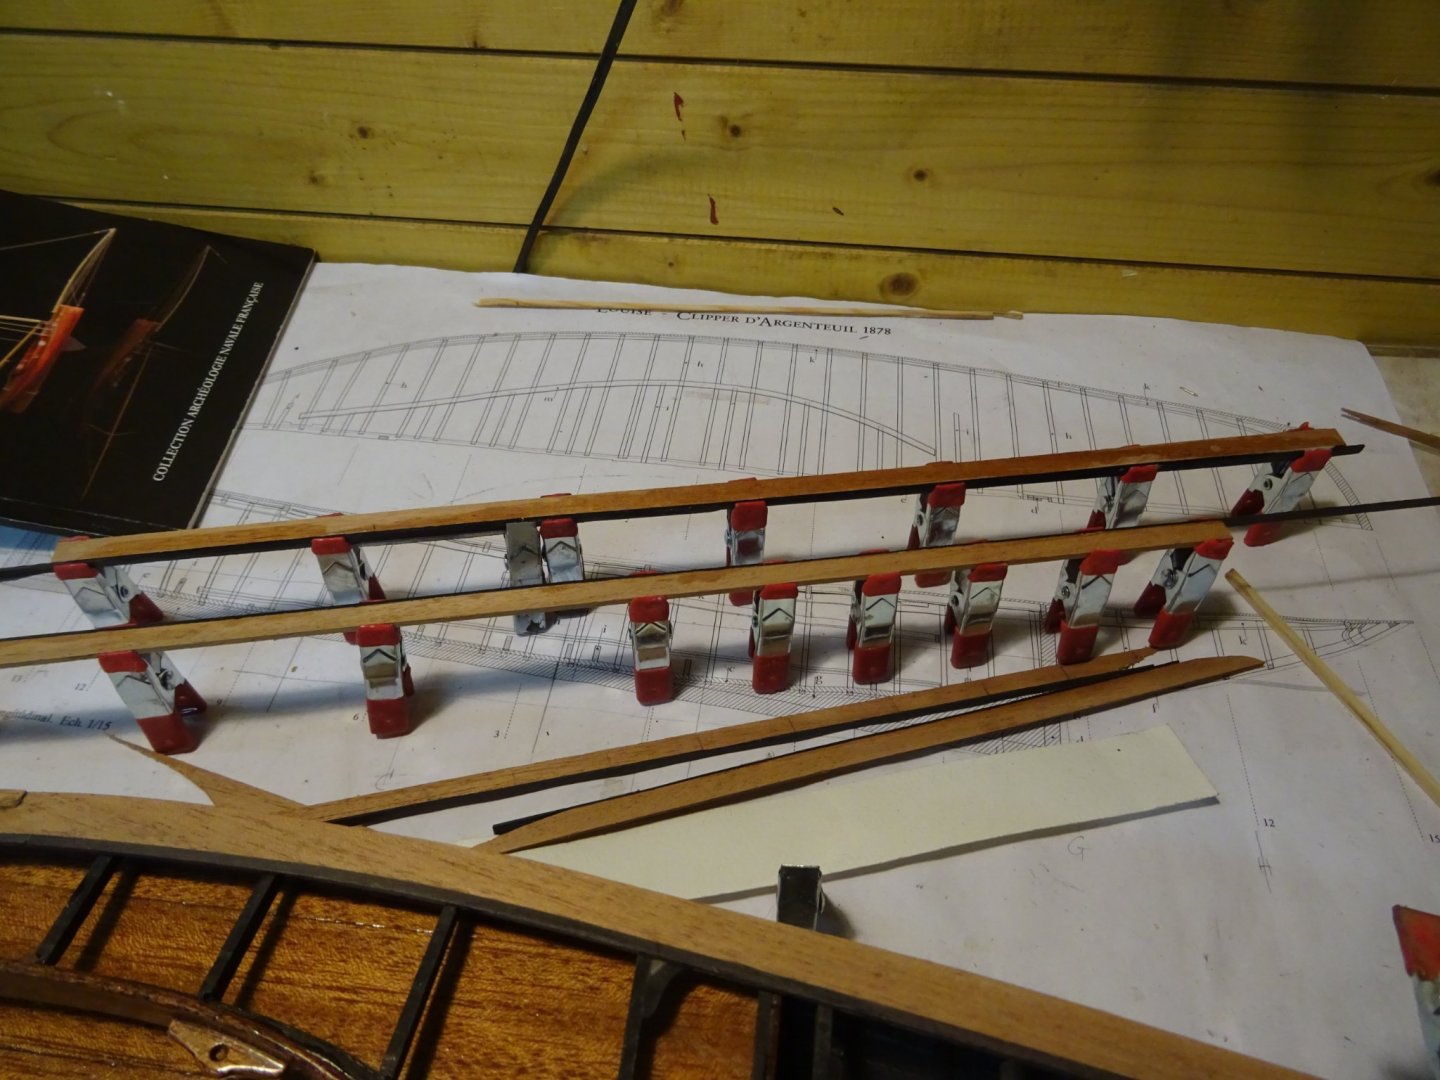
Now the dishes are done and I can look back at what was accomplished this week.2. Cleats
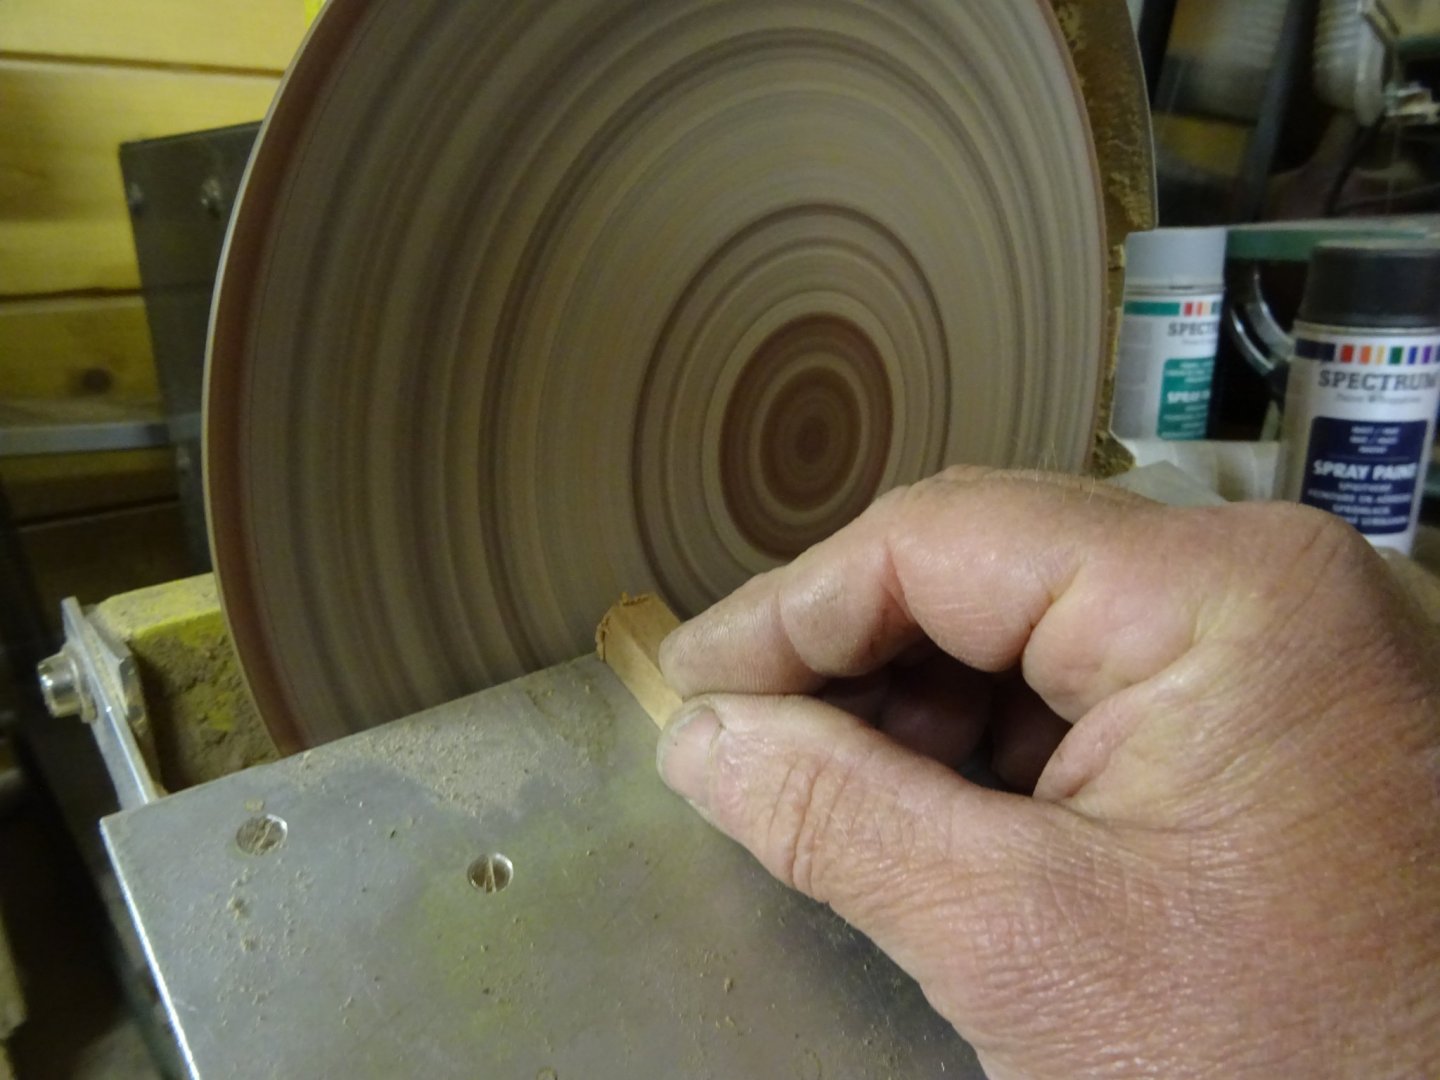
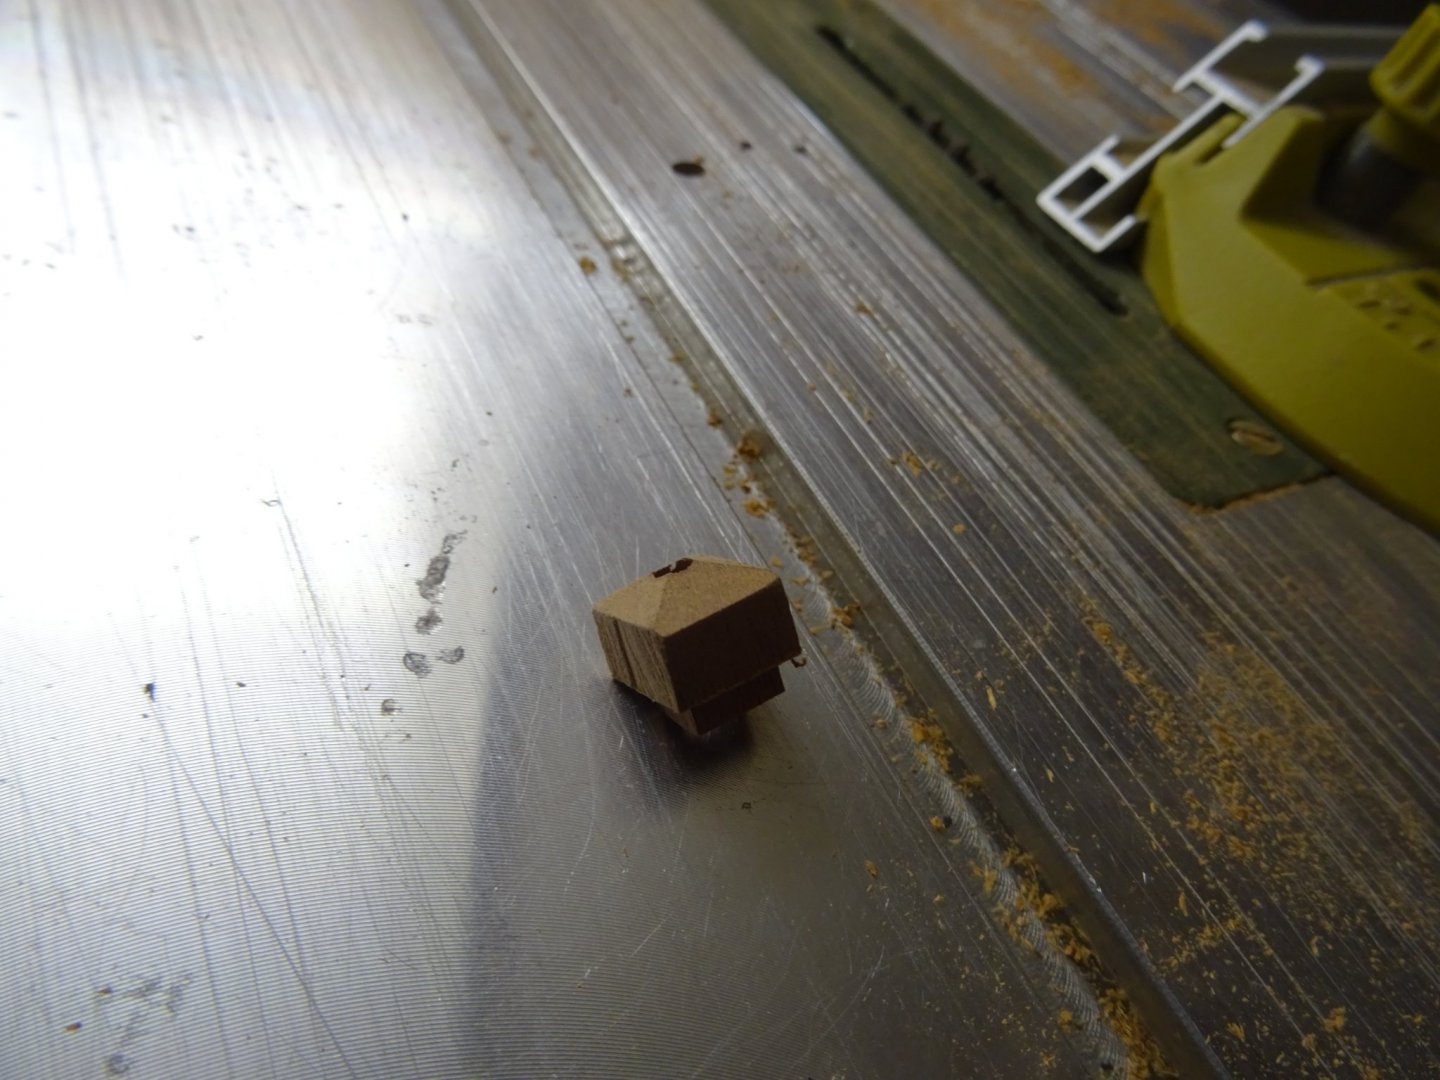
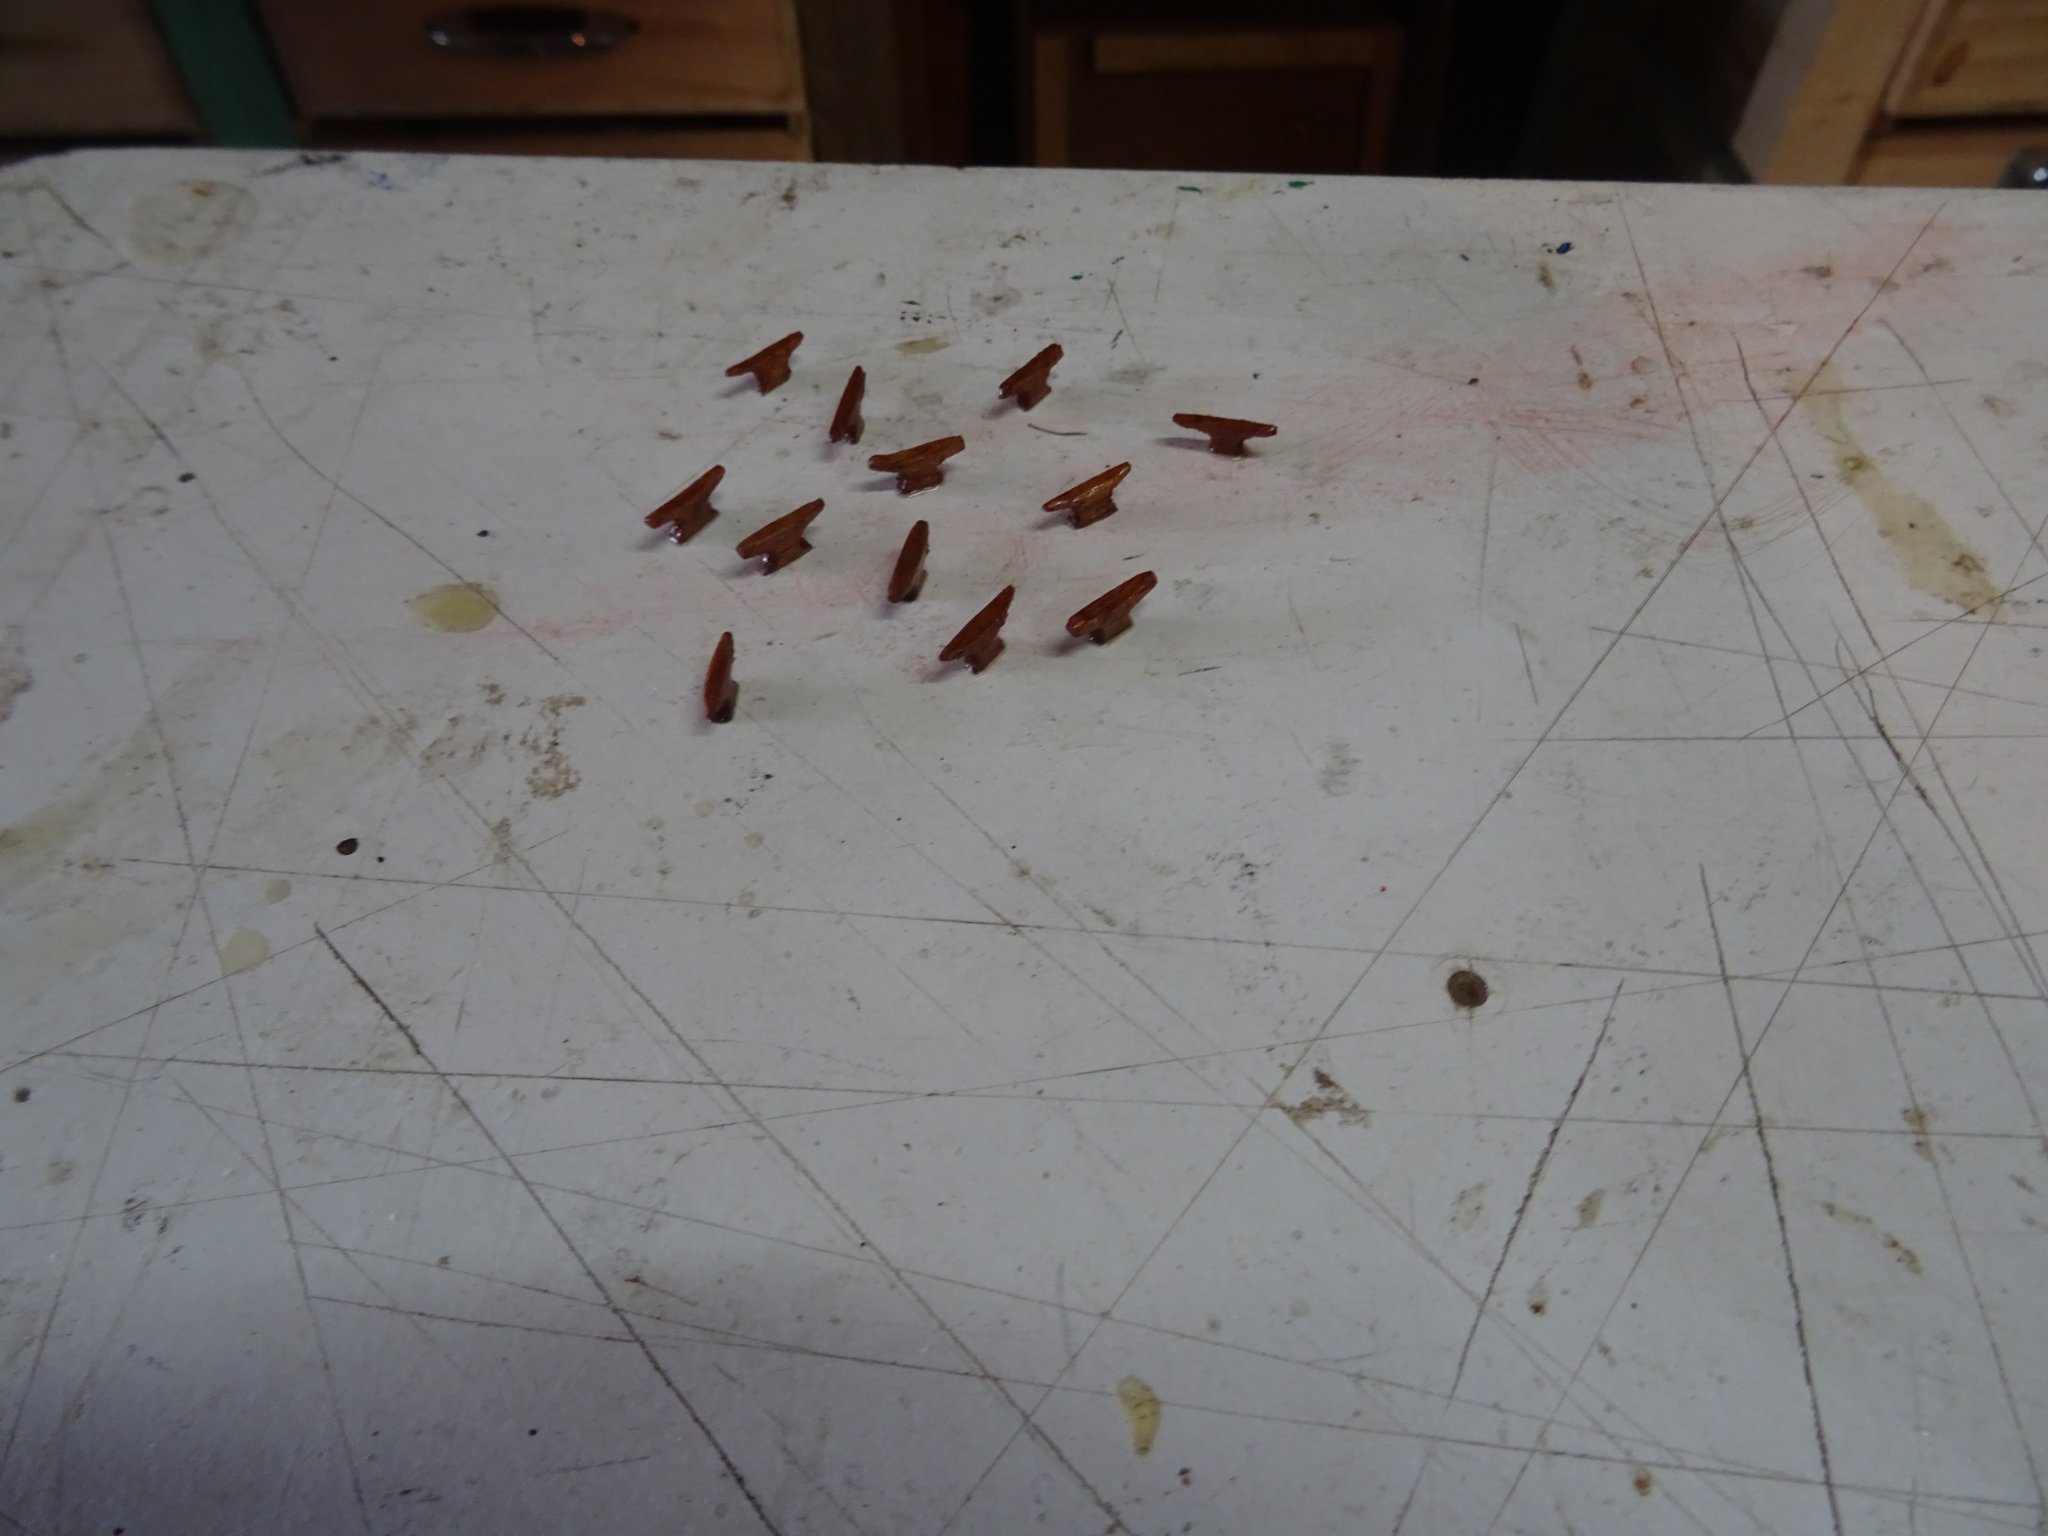
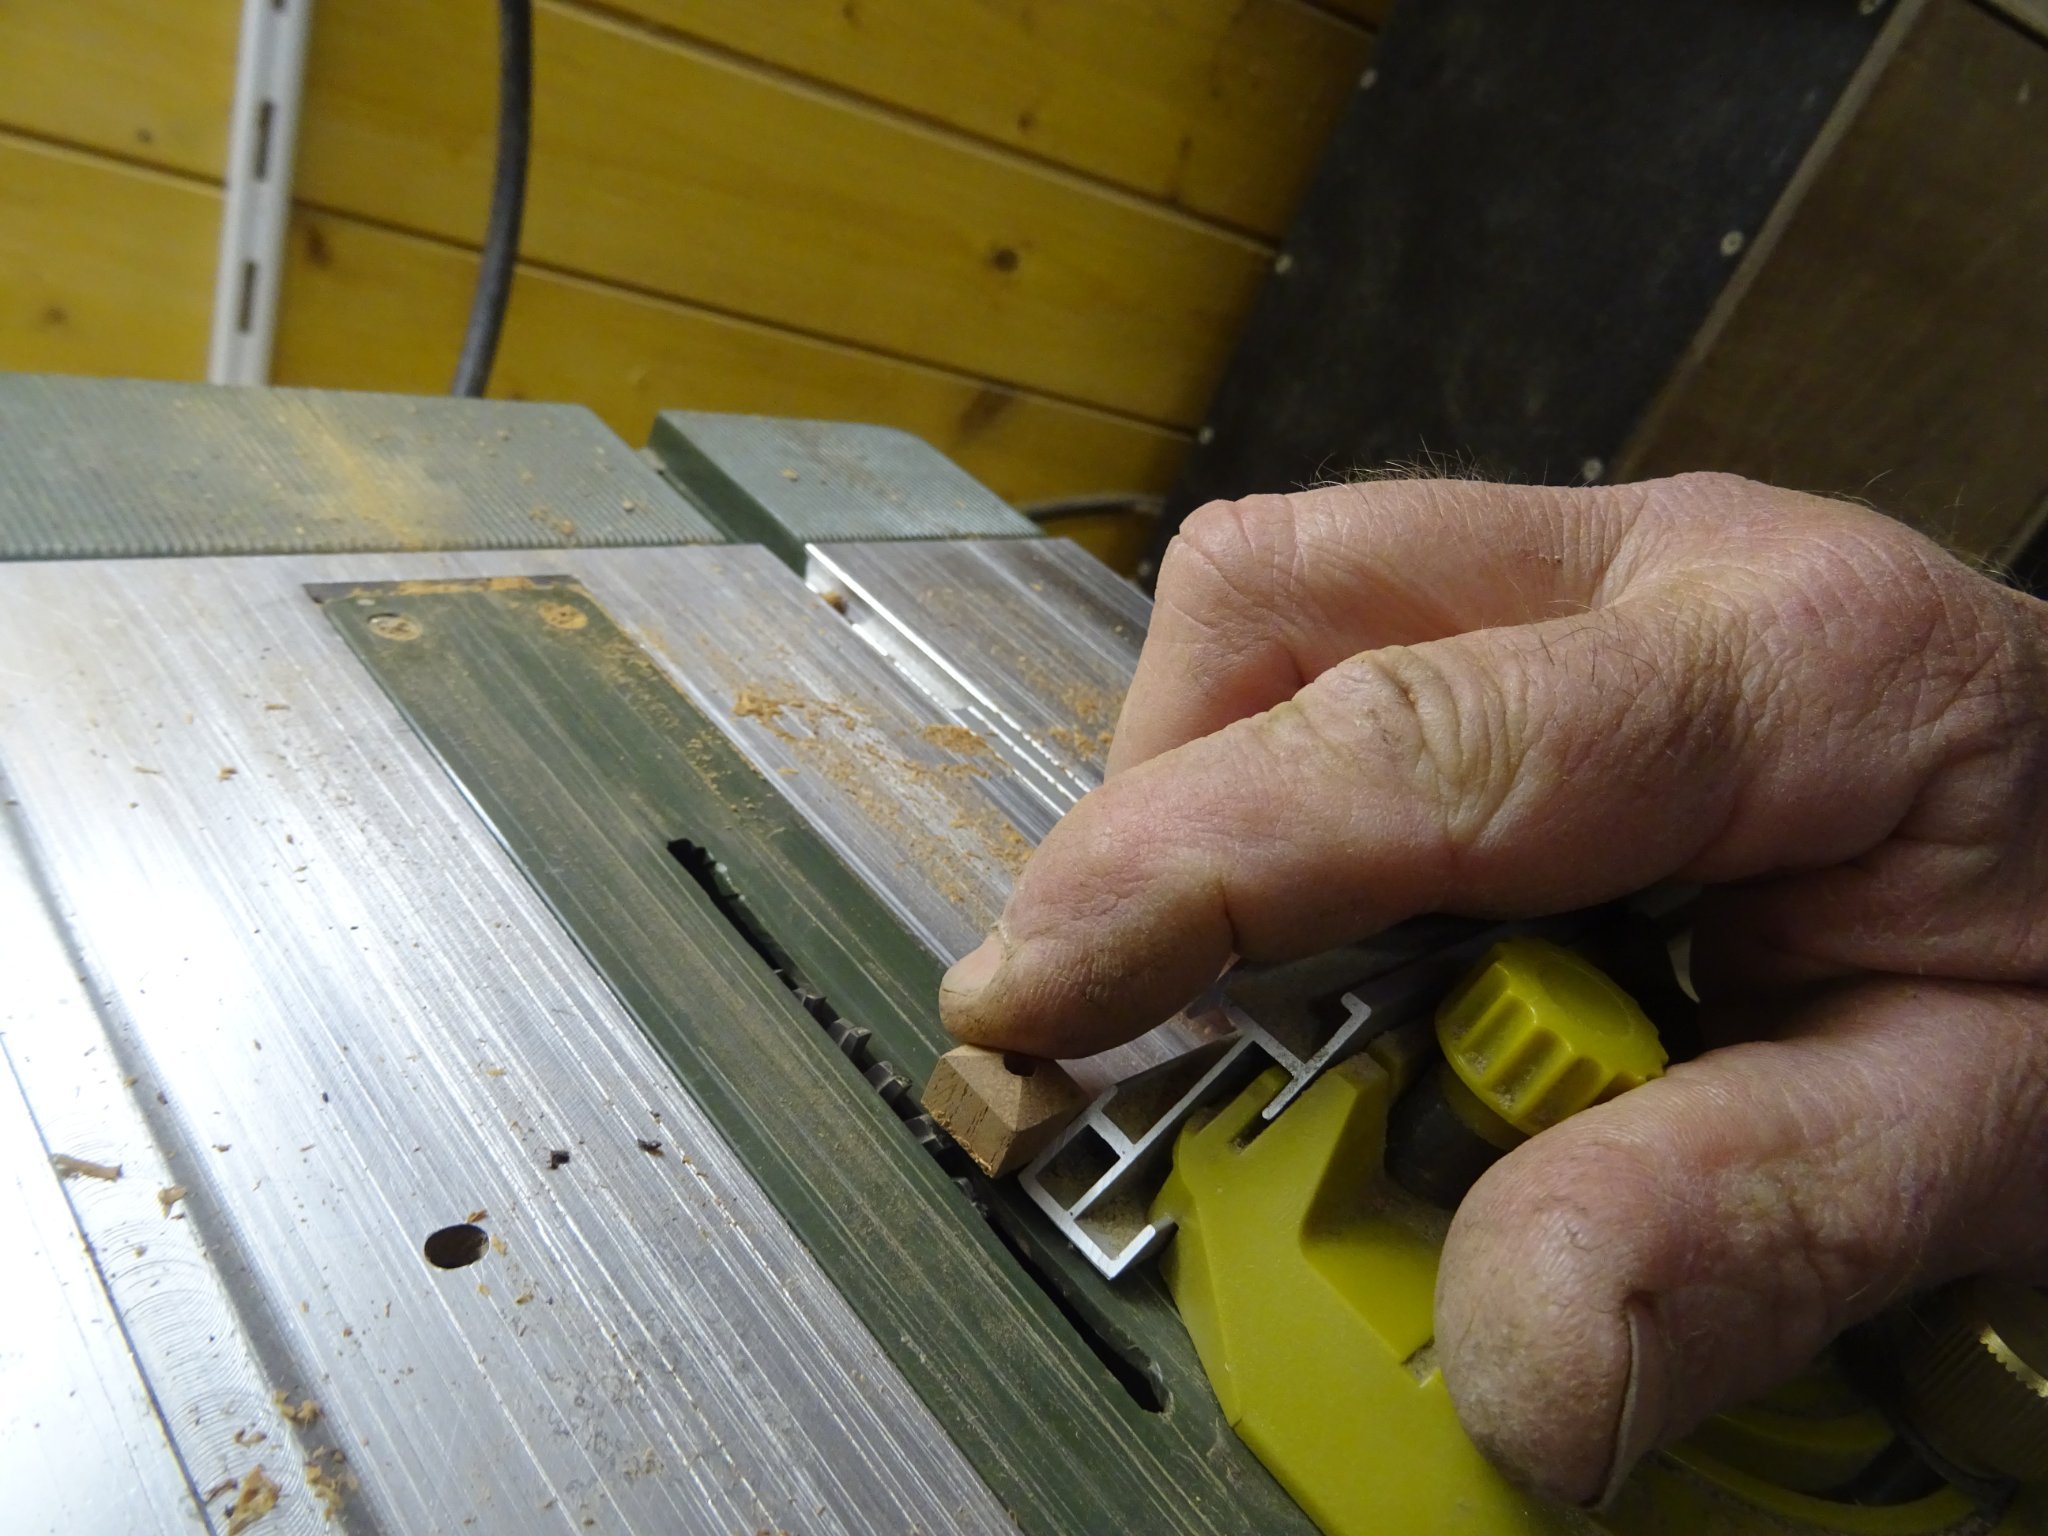
I need also some cleats on the deck, on the bits and on the spars. I make them all at the same time to make them as uniform as possible. I may have a few too many, but that gives me the option to pick the best.
Just like for the blocks, I use mahogany to make the cleats.
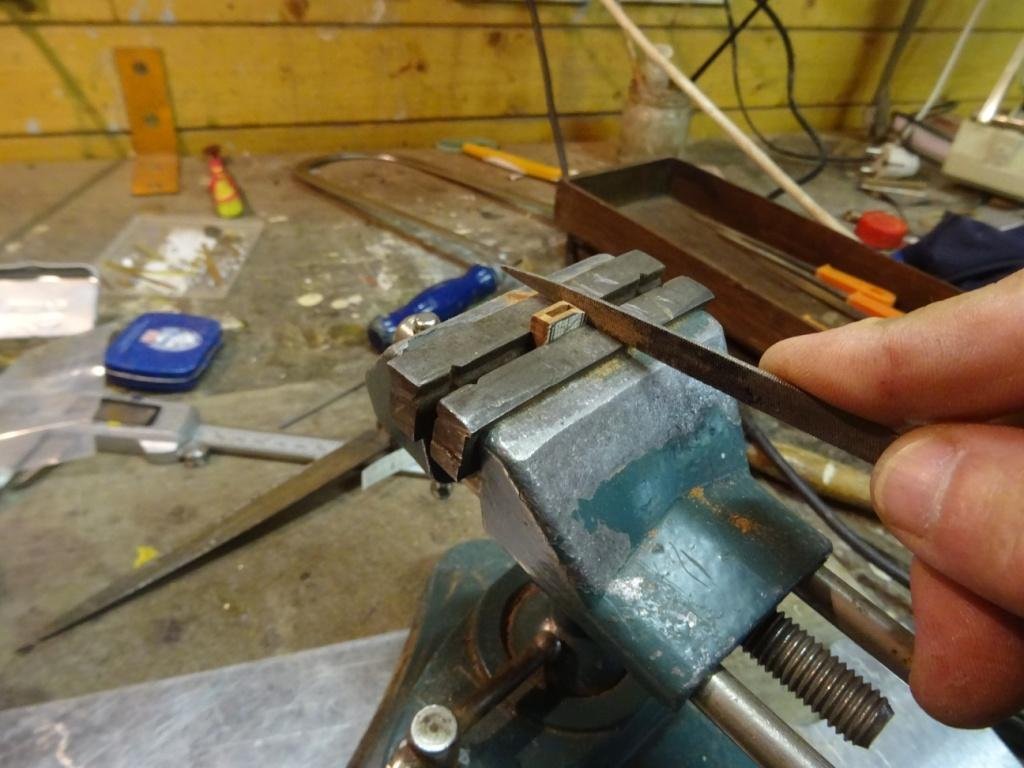
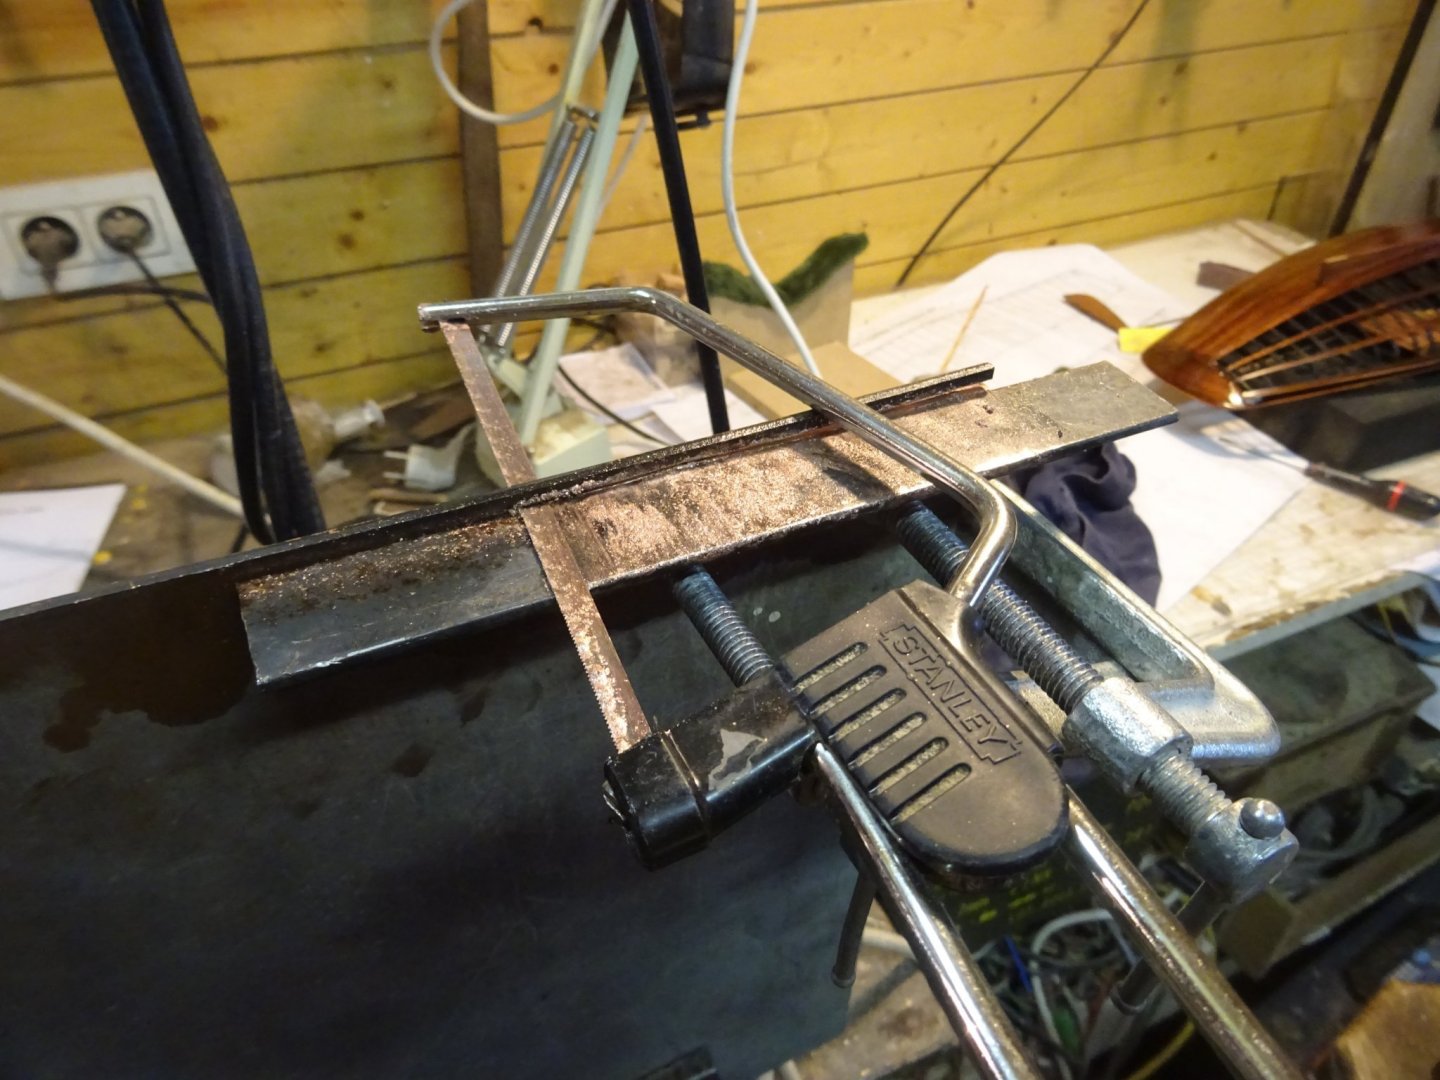
roughly sawing the cleats.
Filing into shape.


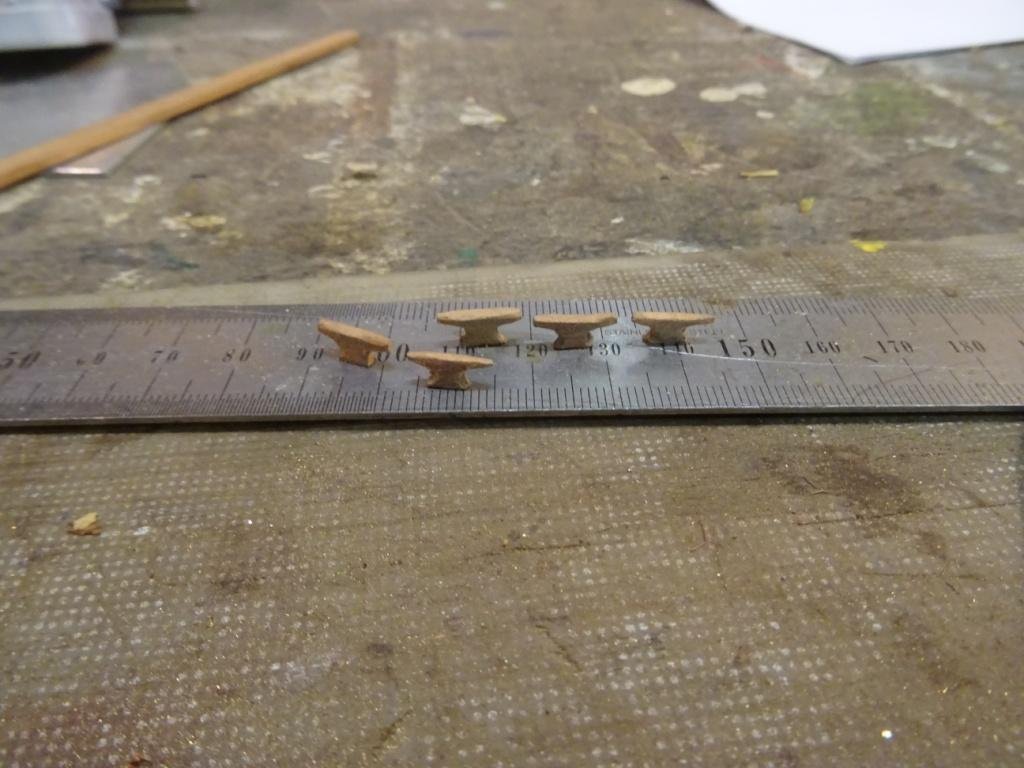
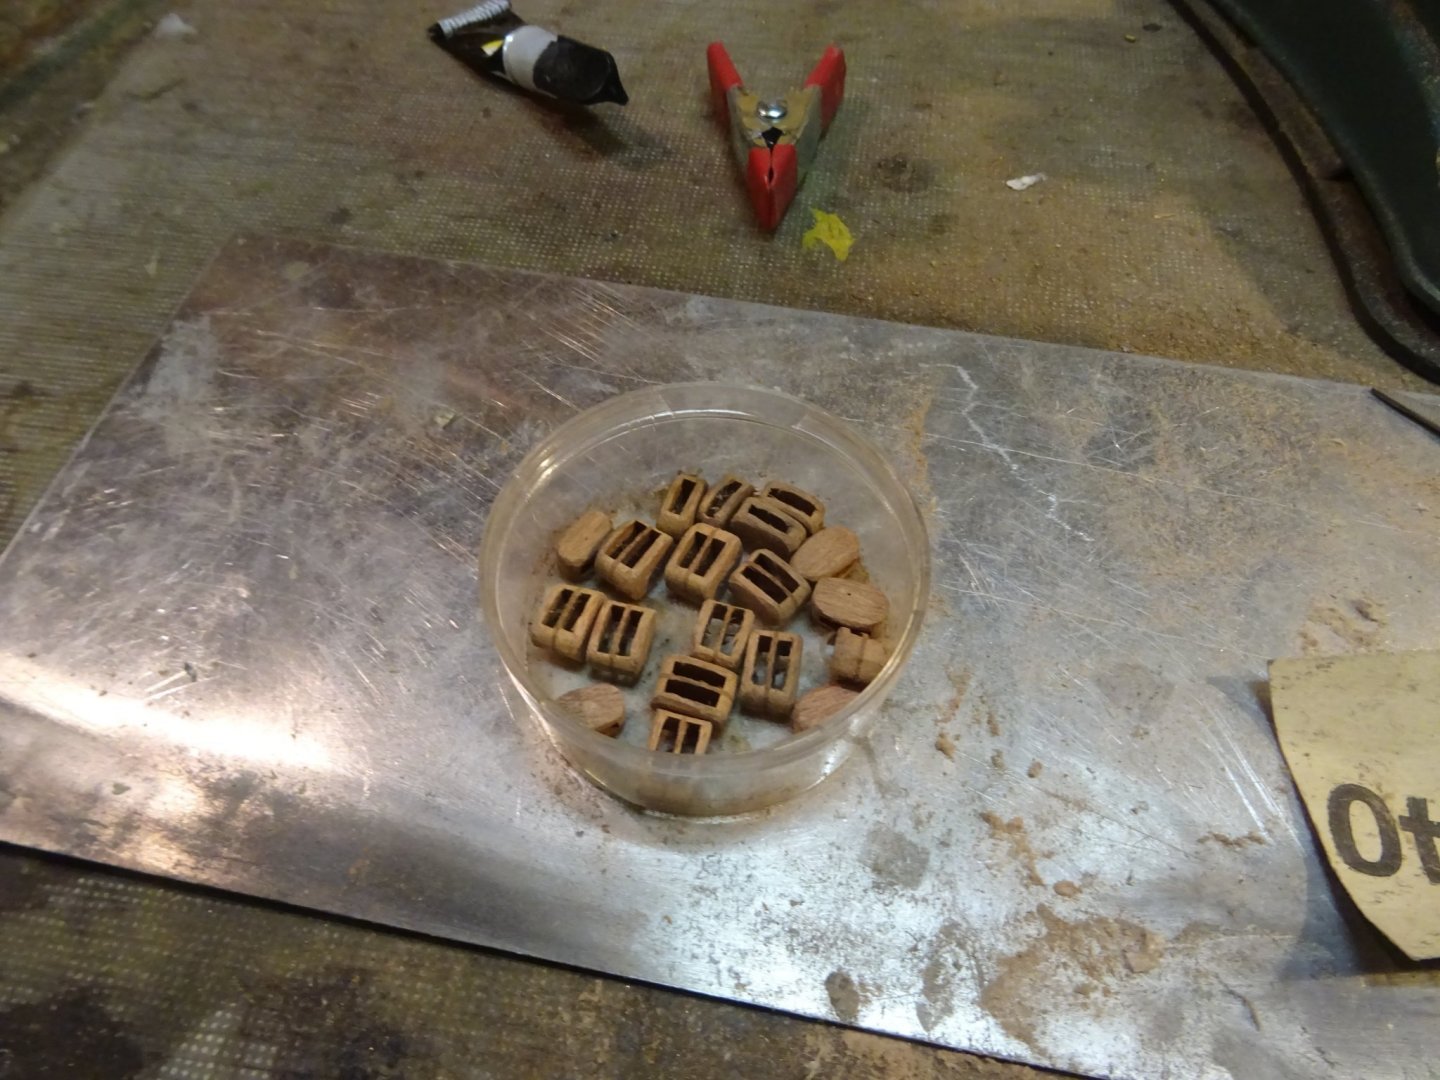
After they are varnished.

Thank you very much for reading this log and for your likes and for your constructive comments.
Till soon!
-
Happy birthday!
You did a wonderful job. Beautiful model. Congratulations!
-
Chapter II. Spars and rigging
1. Blocks
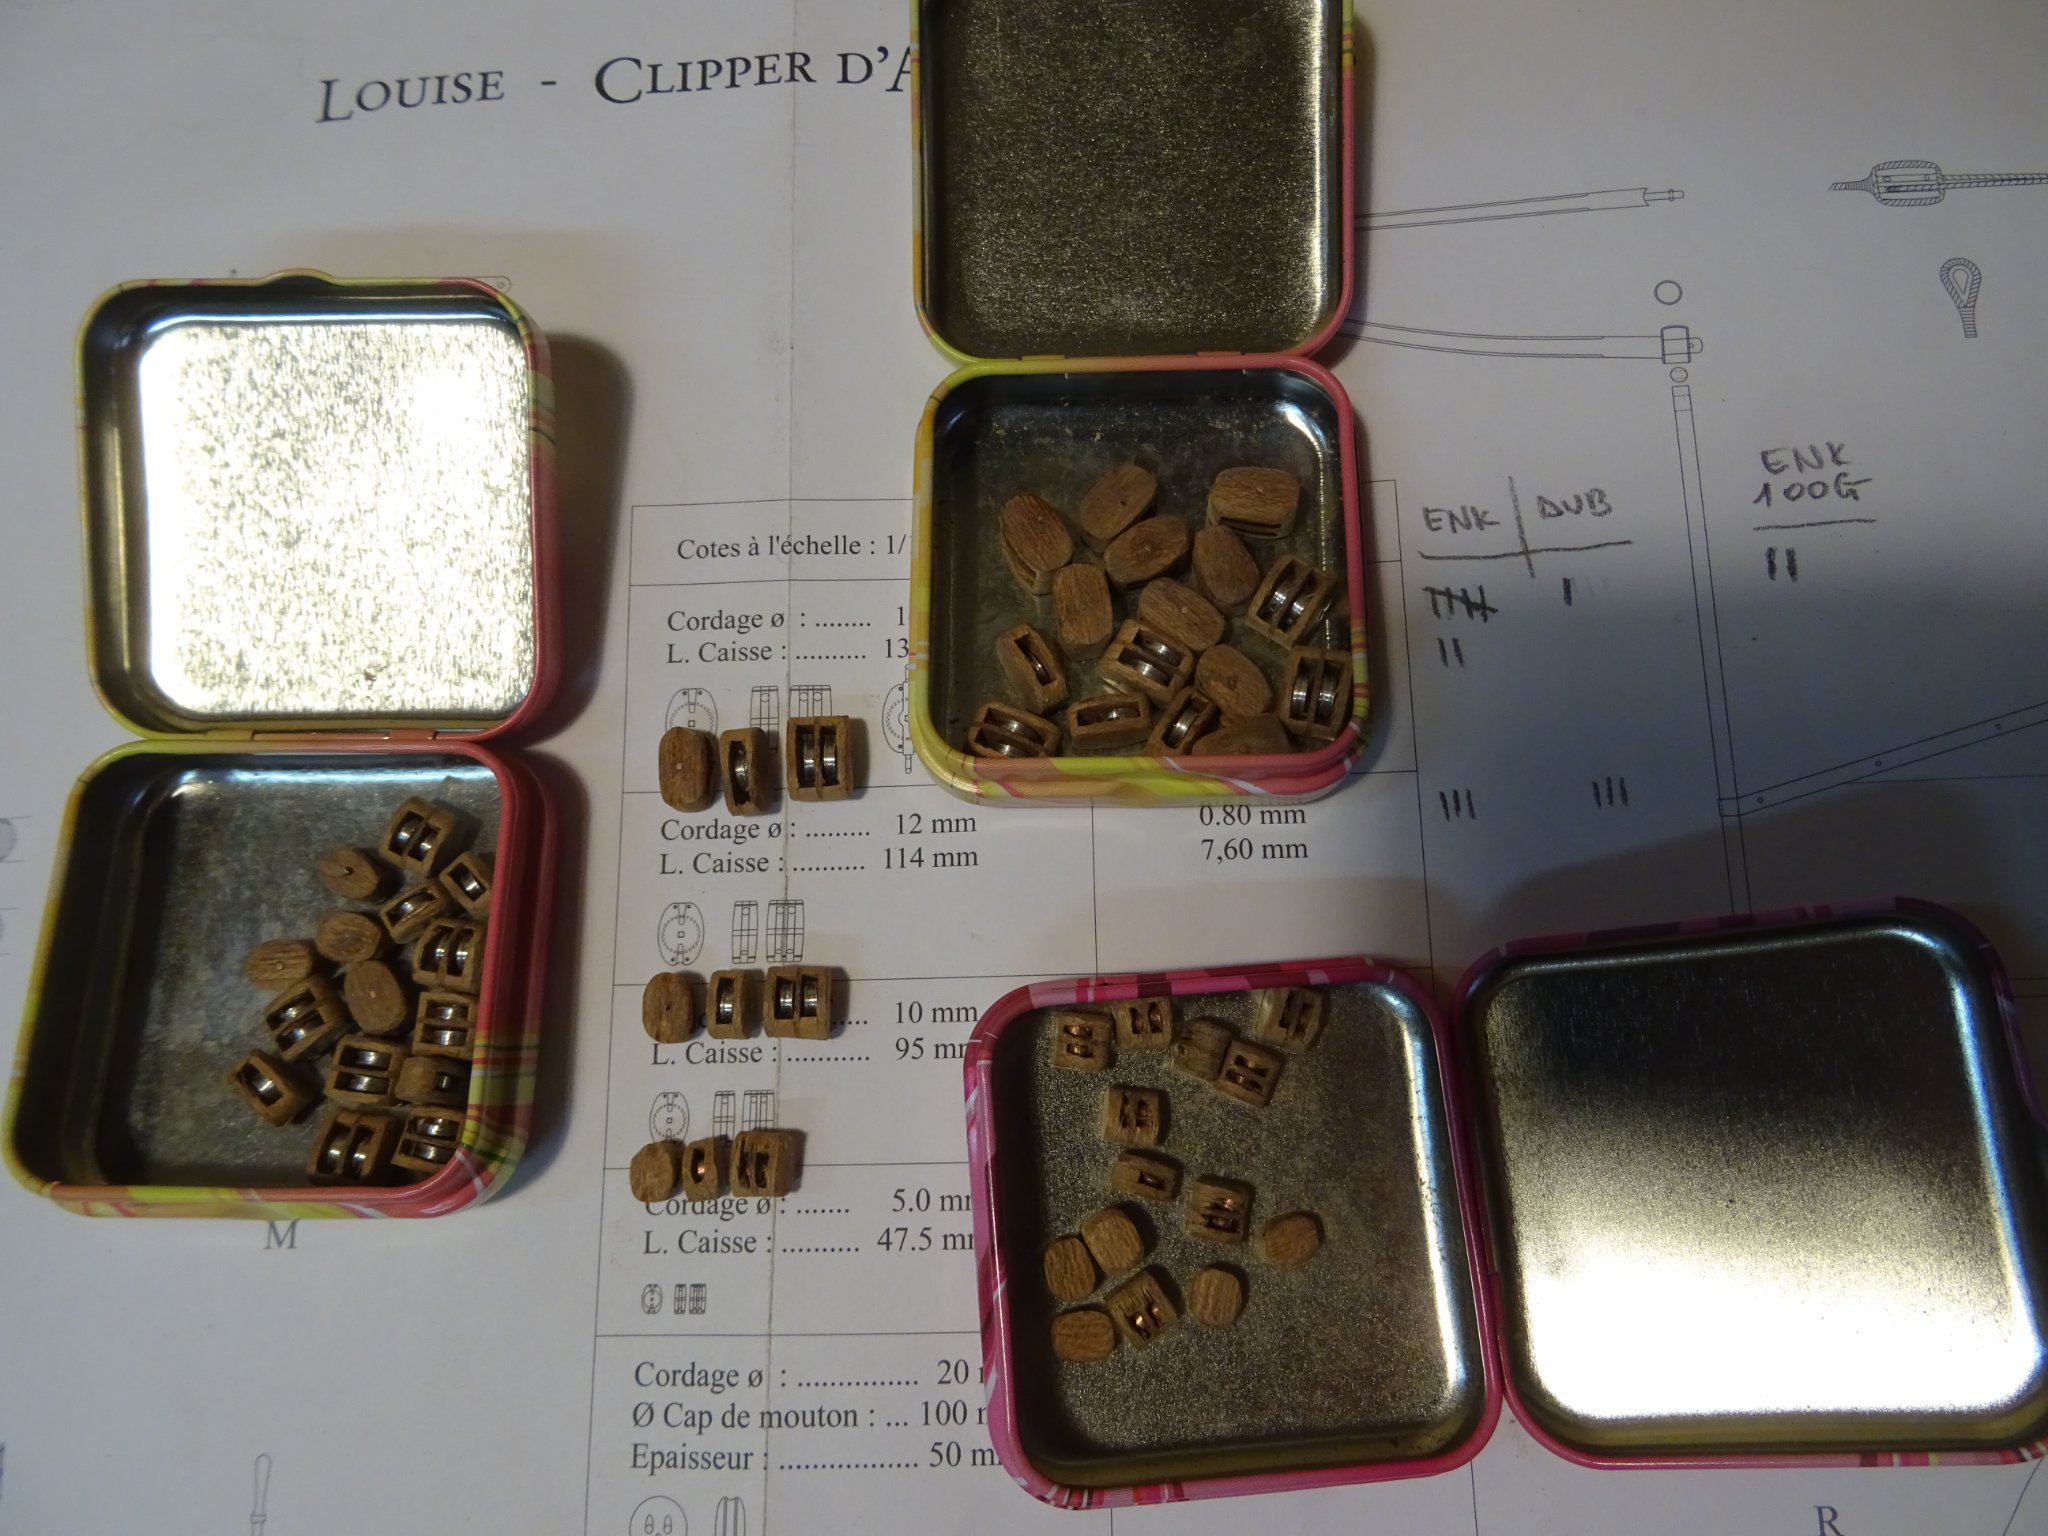
To rig this clipper d'Argenteuil a certain amount of single blocks in three sizes is needed. There is no general inventory of the amount of each kind of blocks which will be used. That will become clear during the rigging, therefore I will make a dozen blocks of each size and kind. If there are more needed, I can always make some more later.
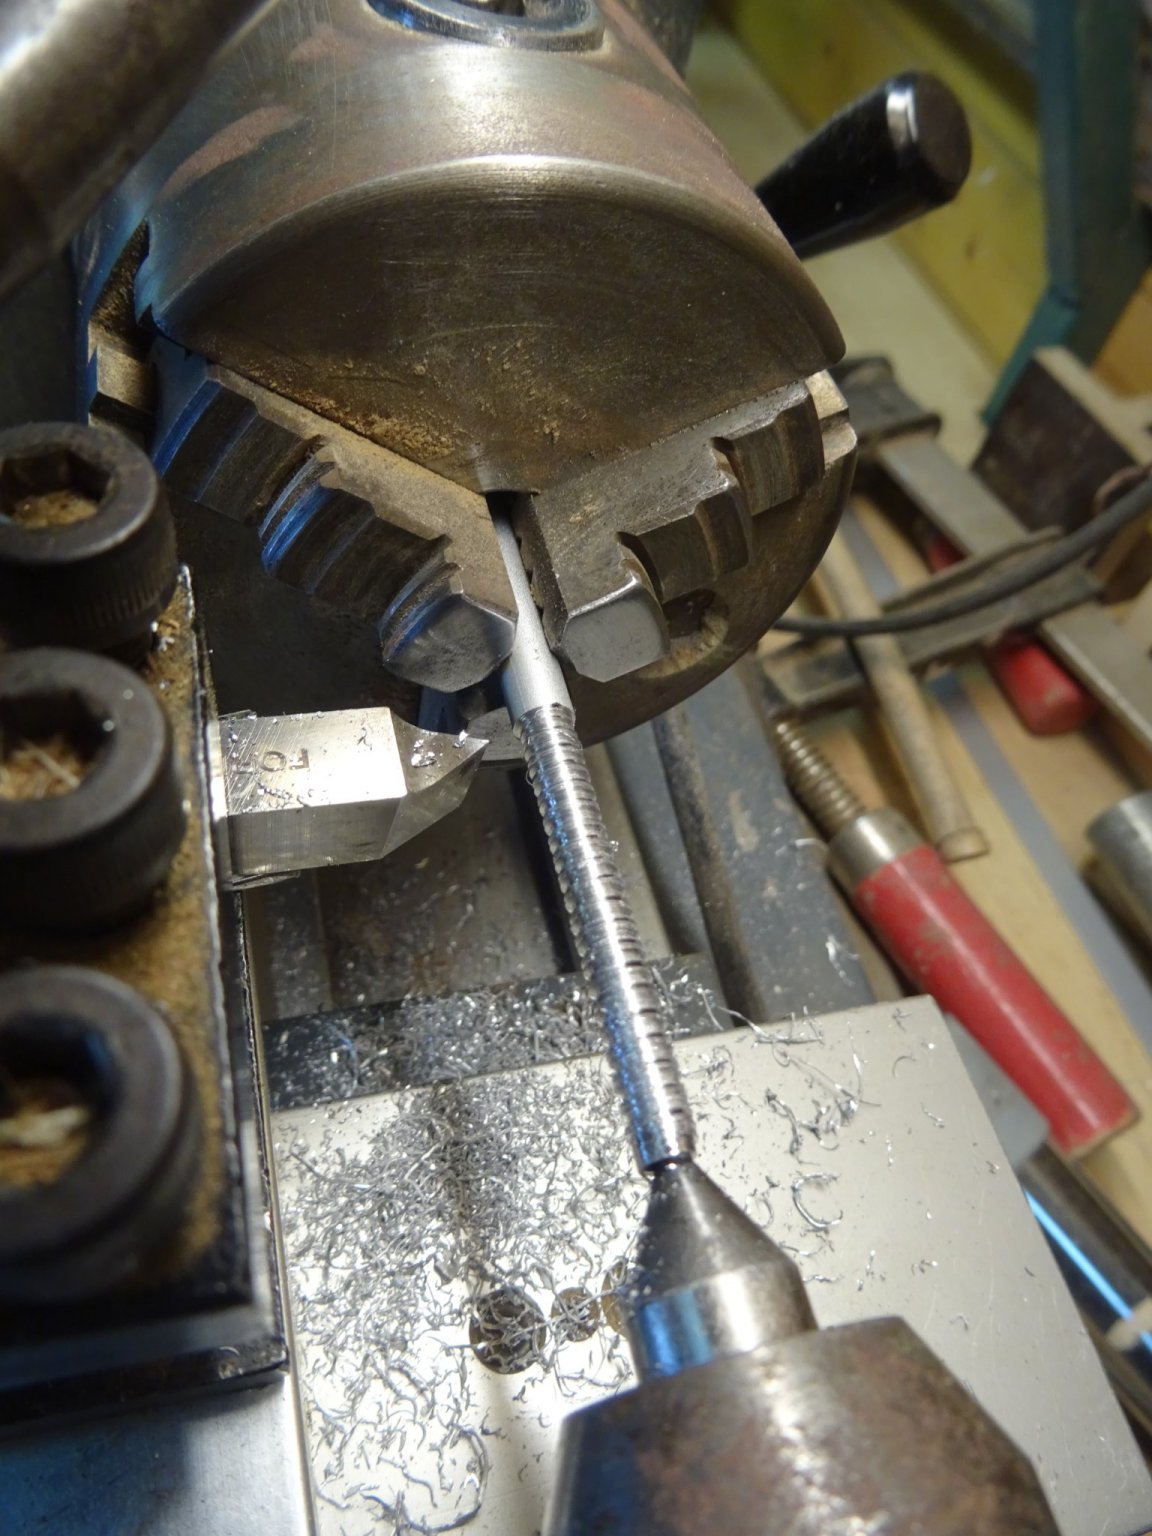
I start with making the sheaves for de blocks.

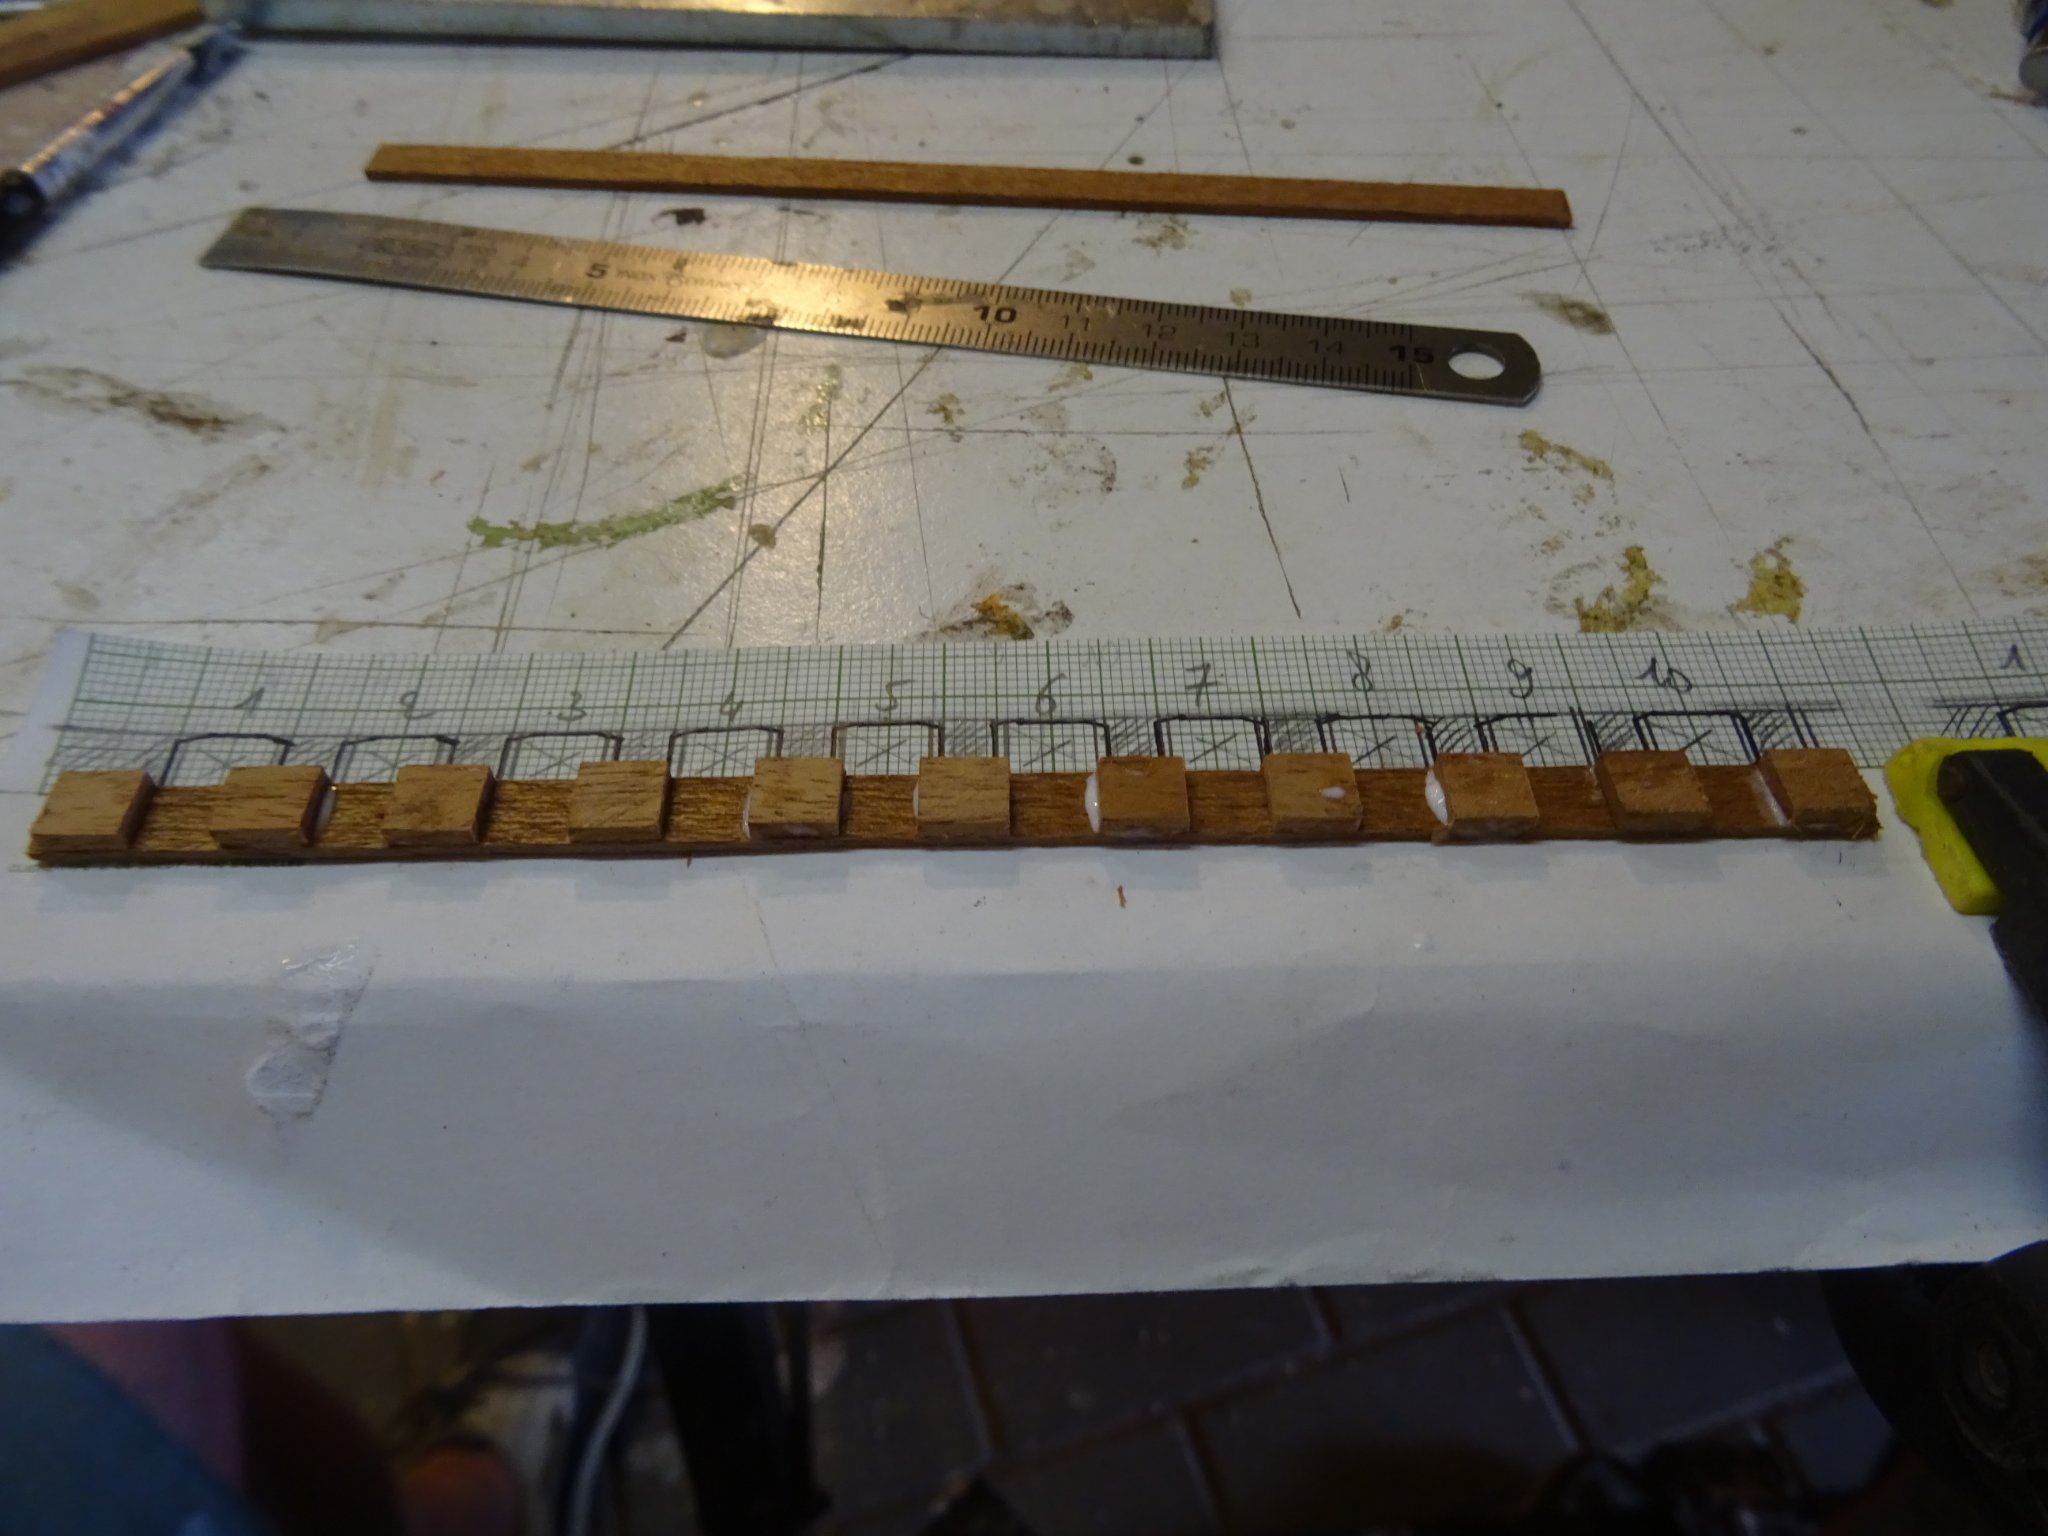
To make the single block, I start with a thin strip of mahogany.
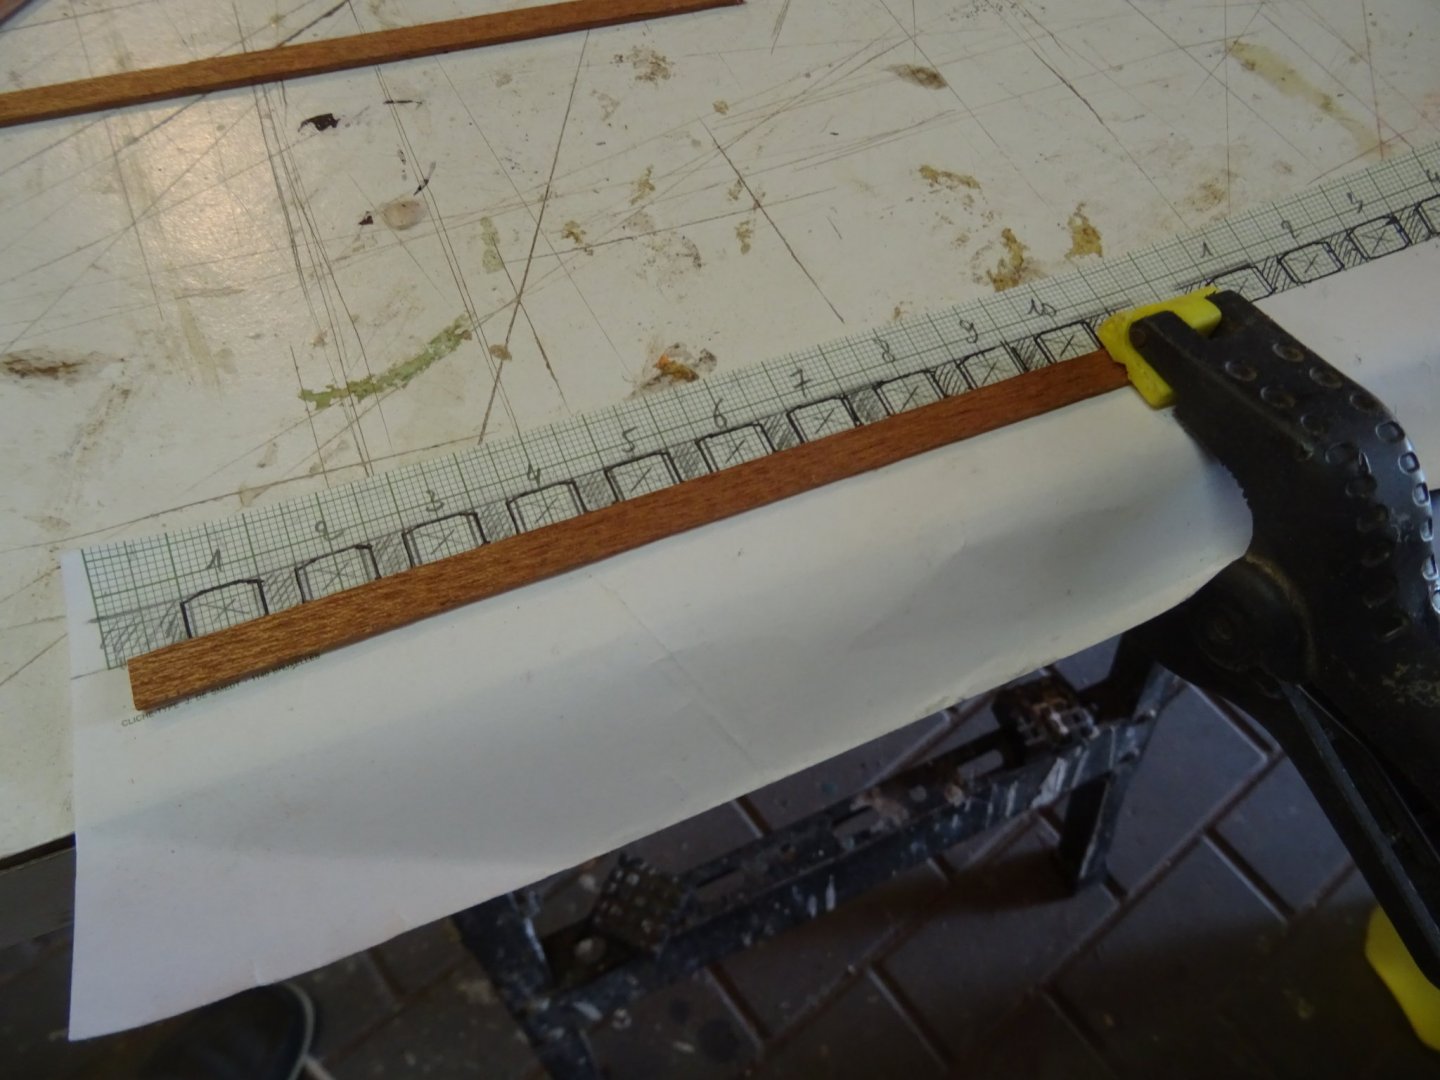
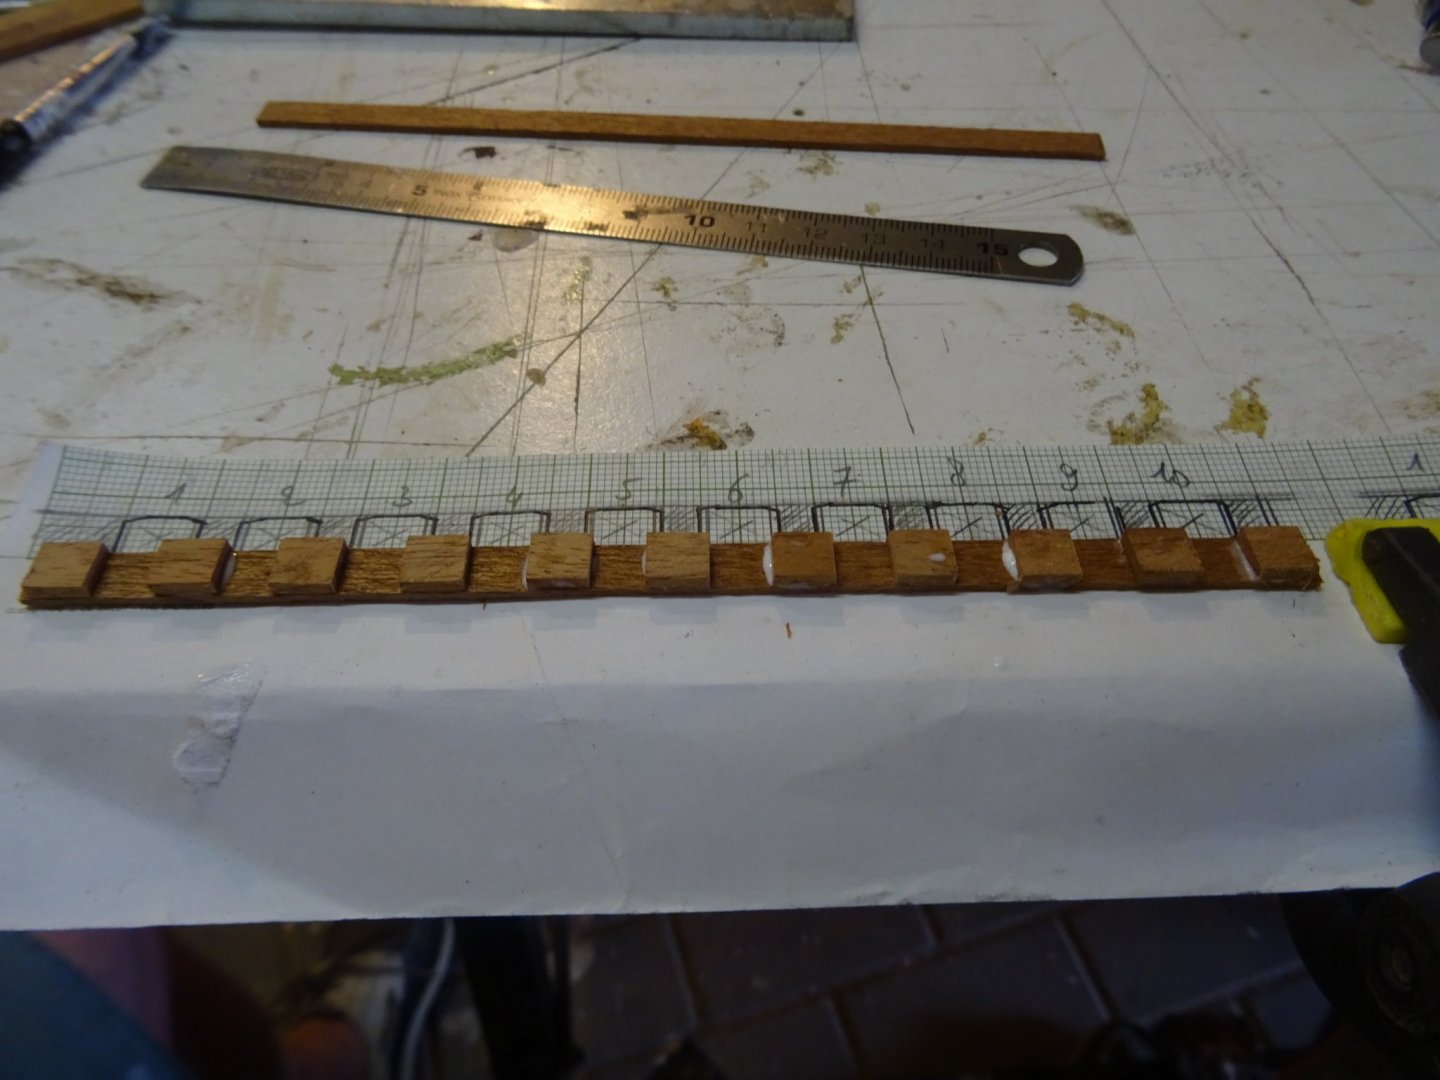
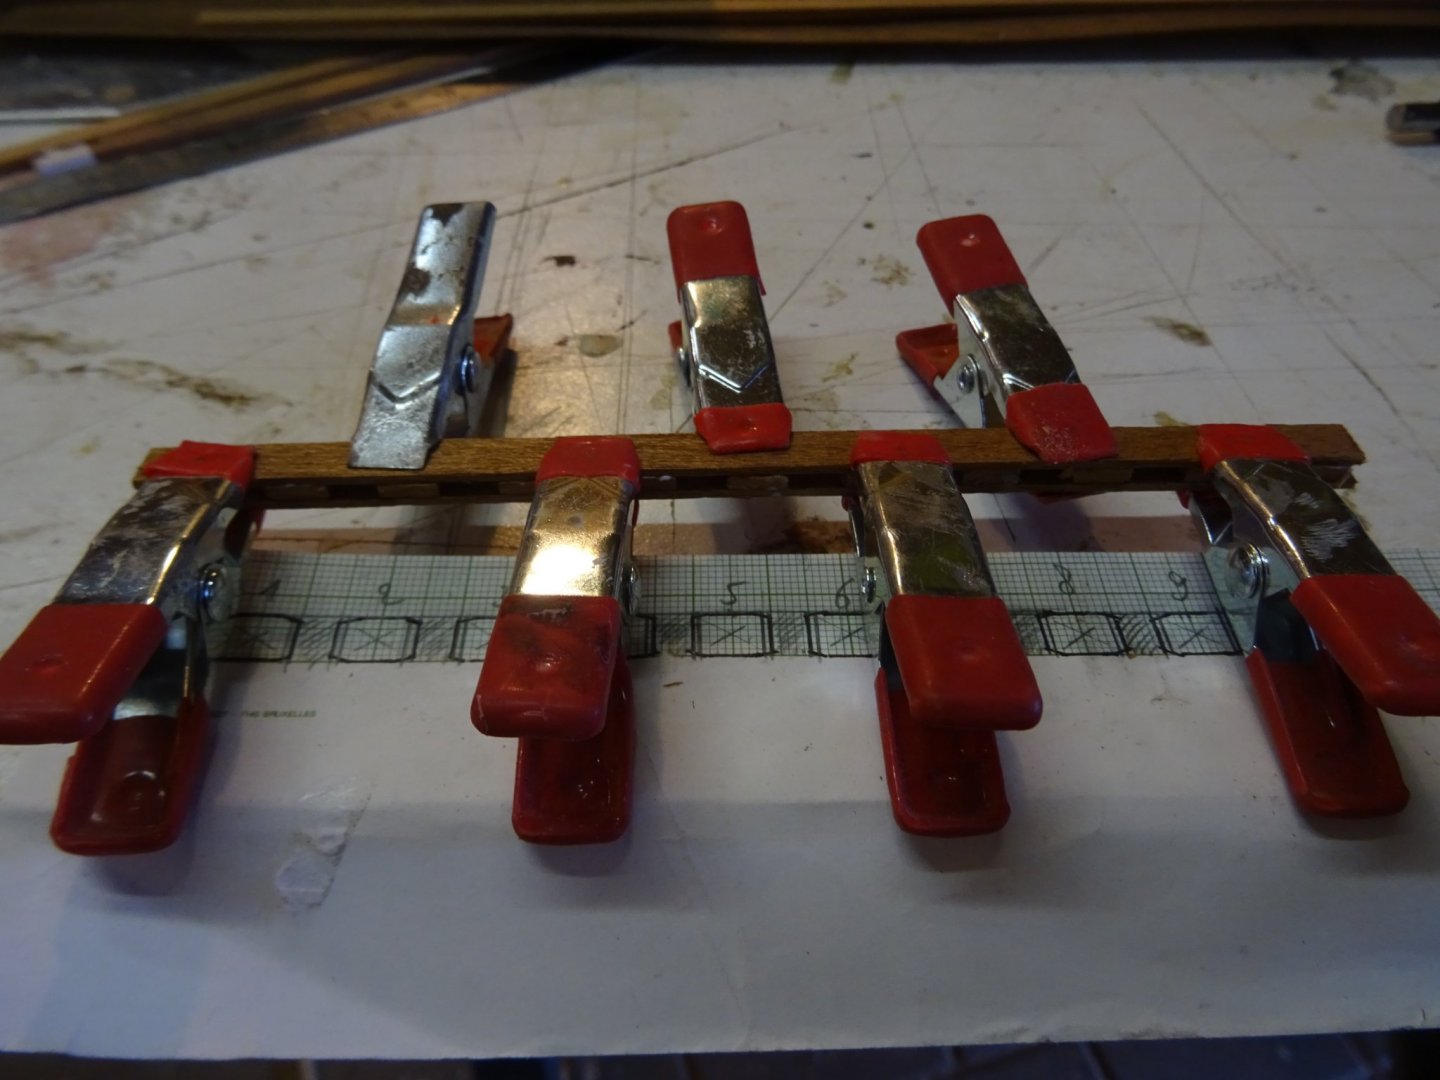
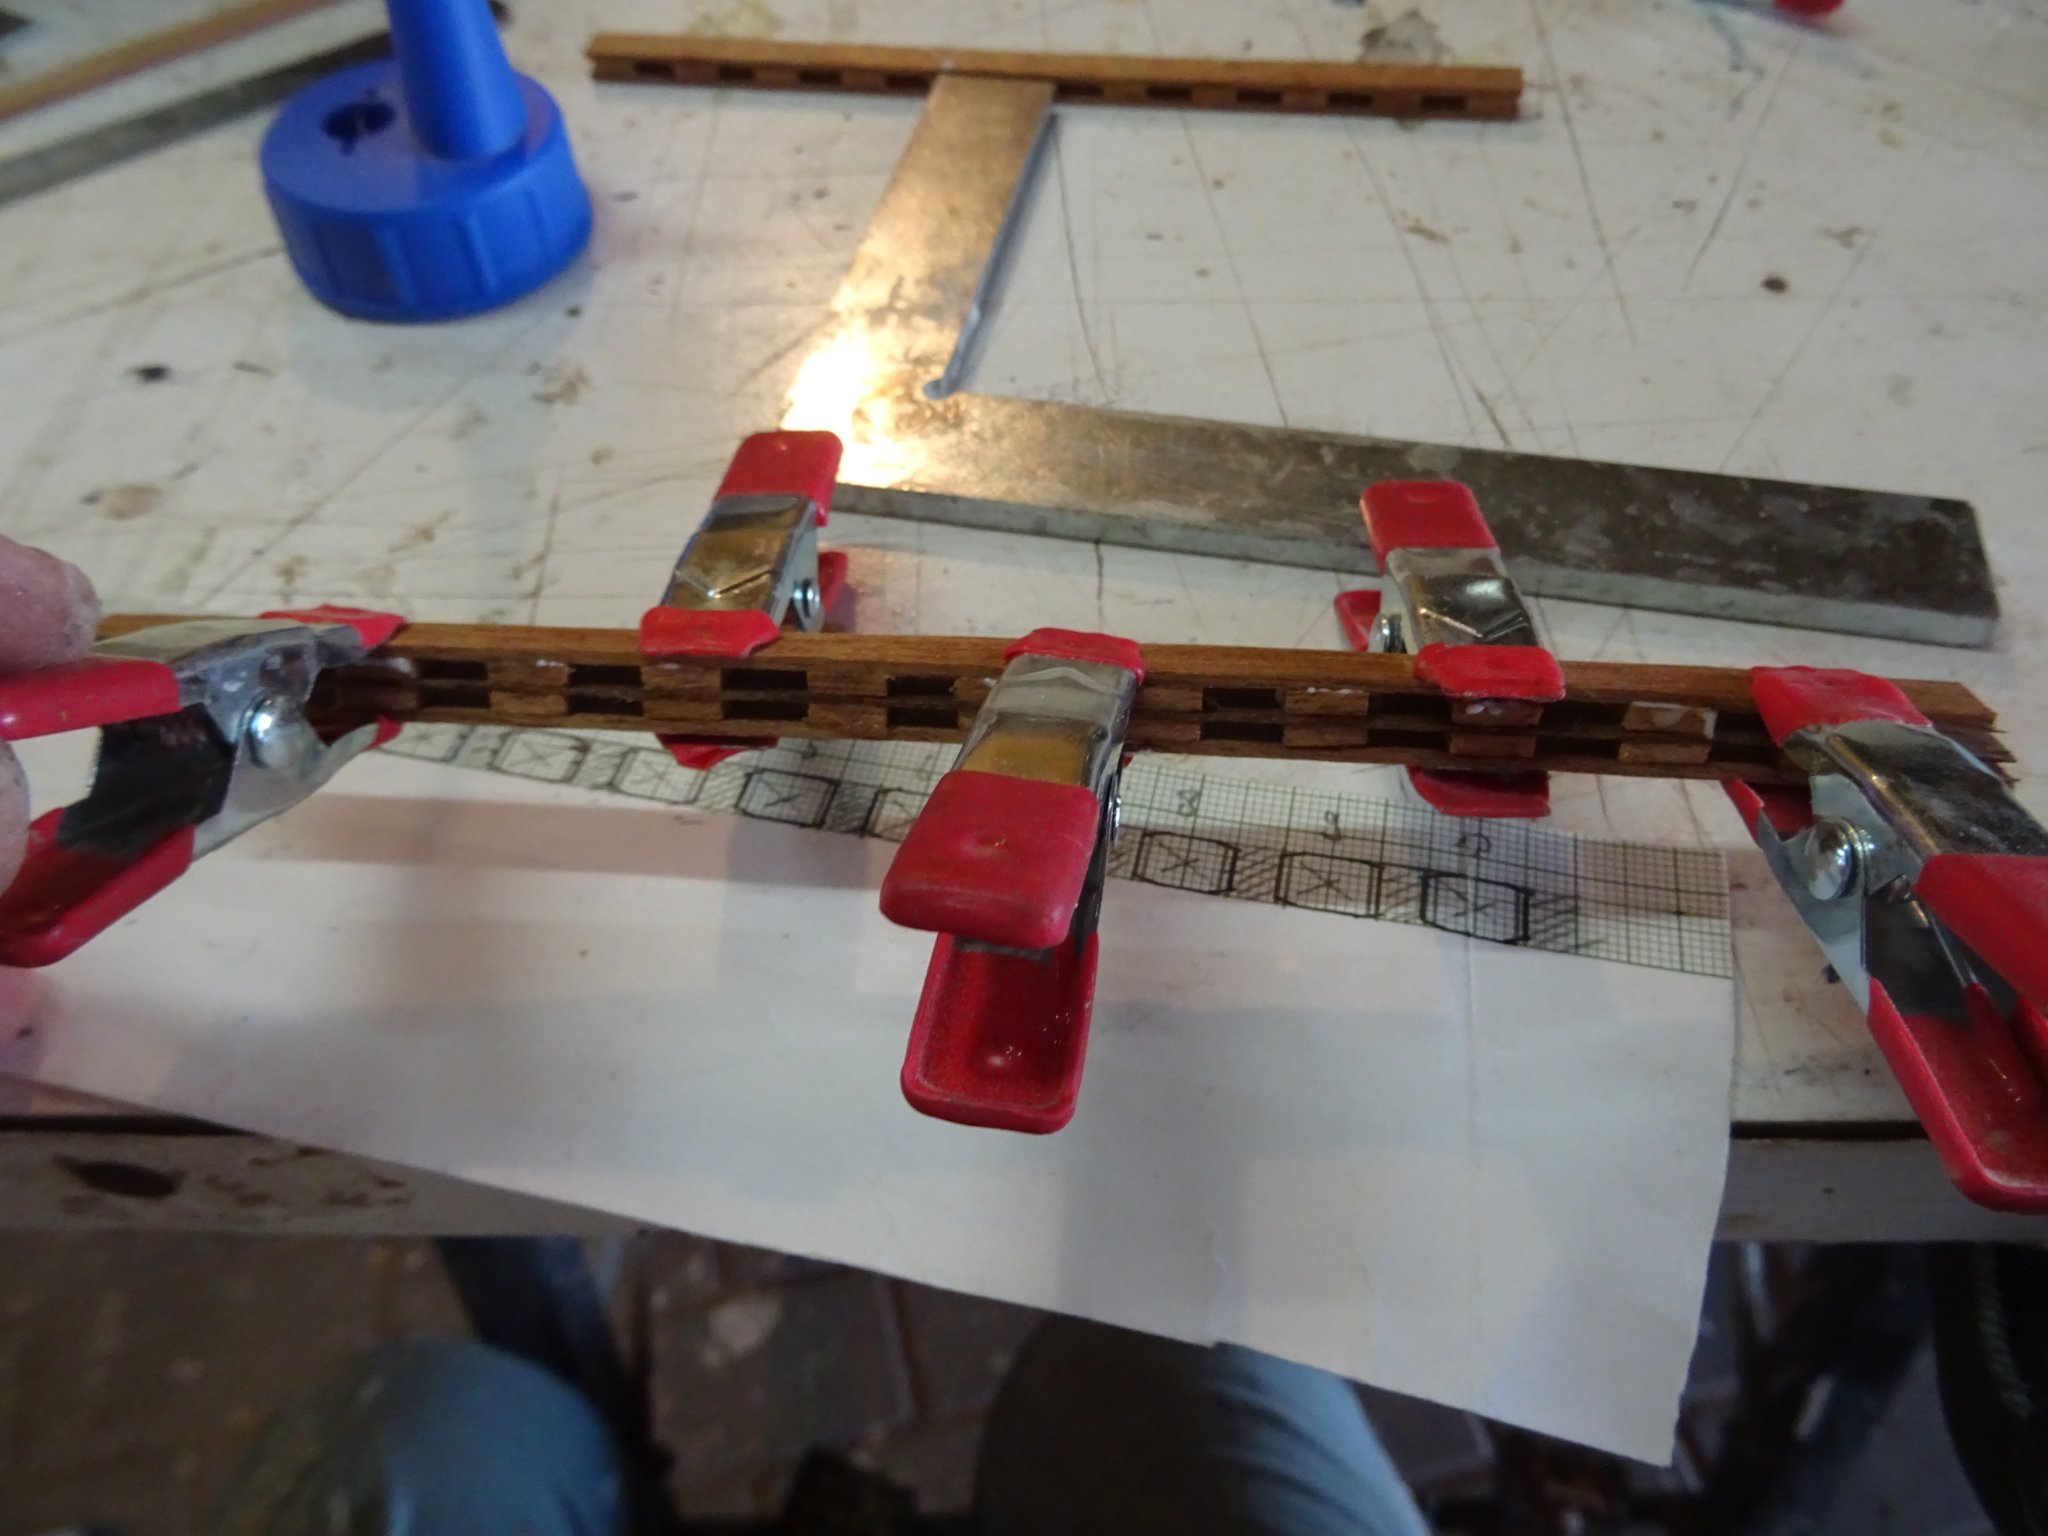
I glue blocks of mahogany on it at equal intervals.
Above that comes another strip of mahogany.
The method is identical for double blocks, only a thin strip of mahogany veneer is added between the two parts.

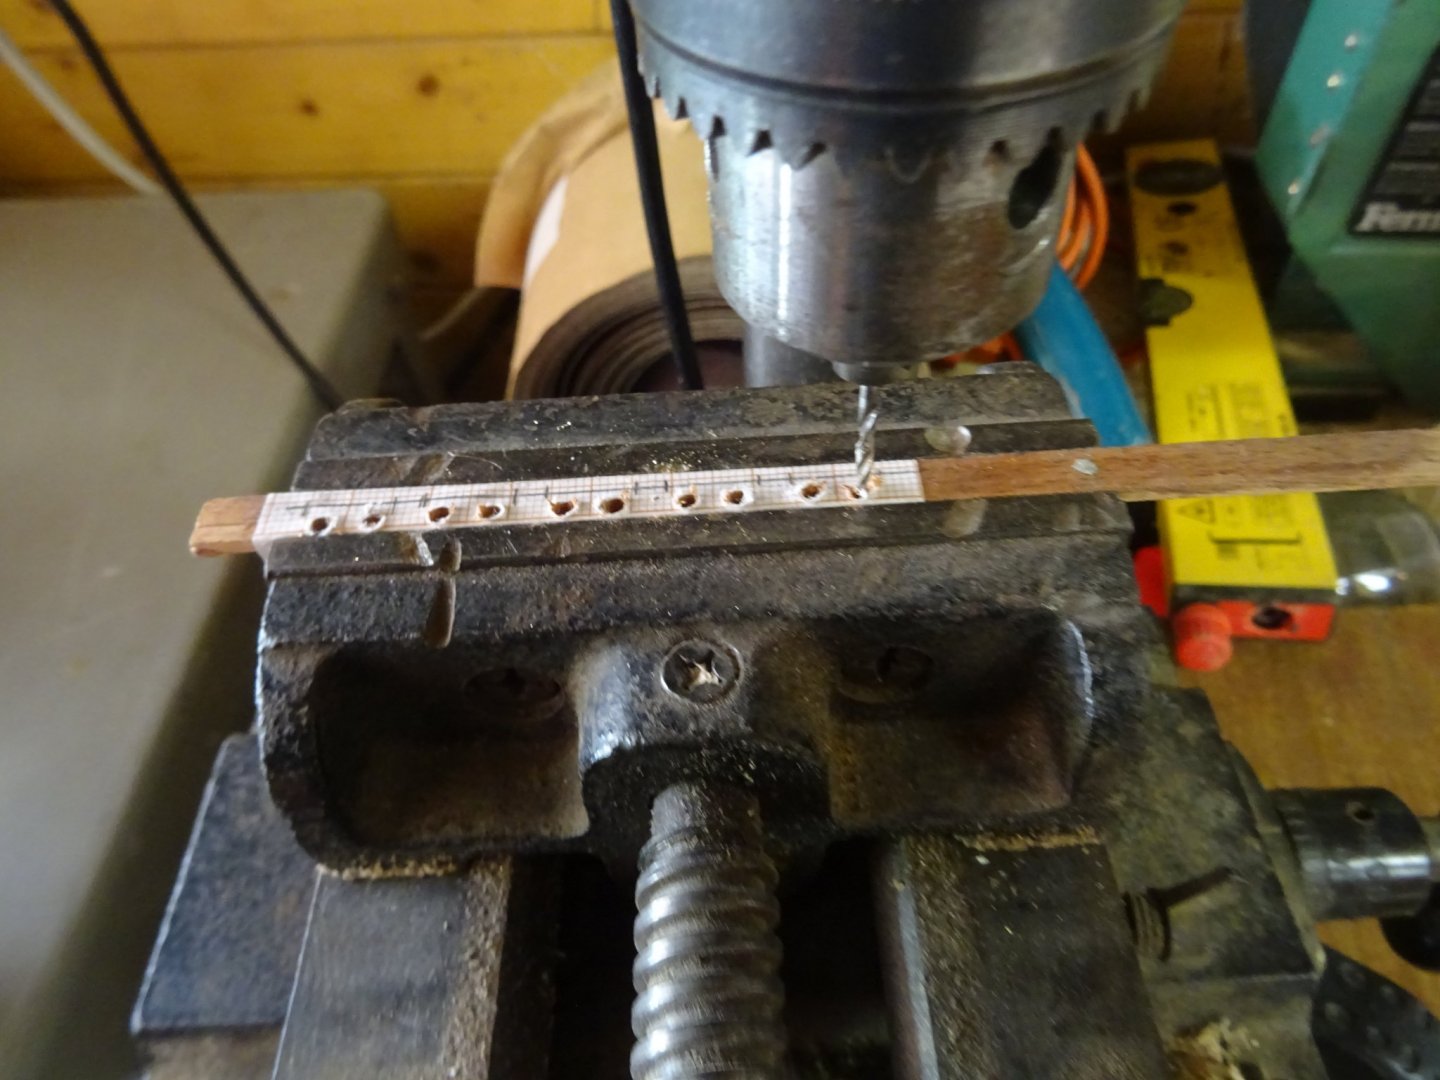
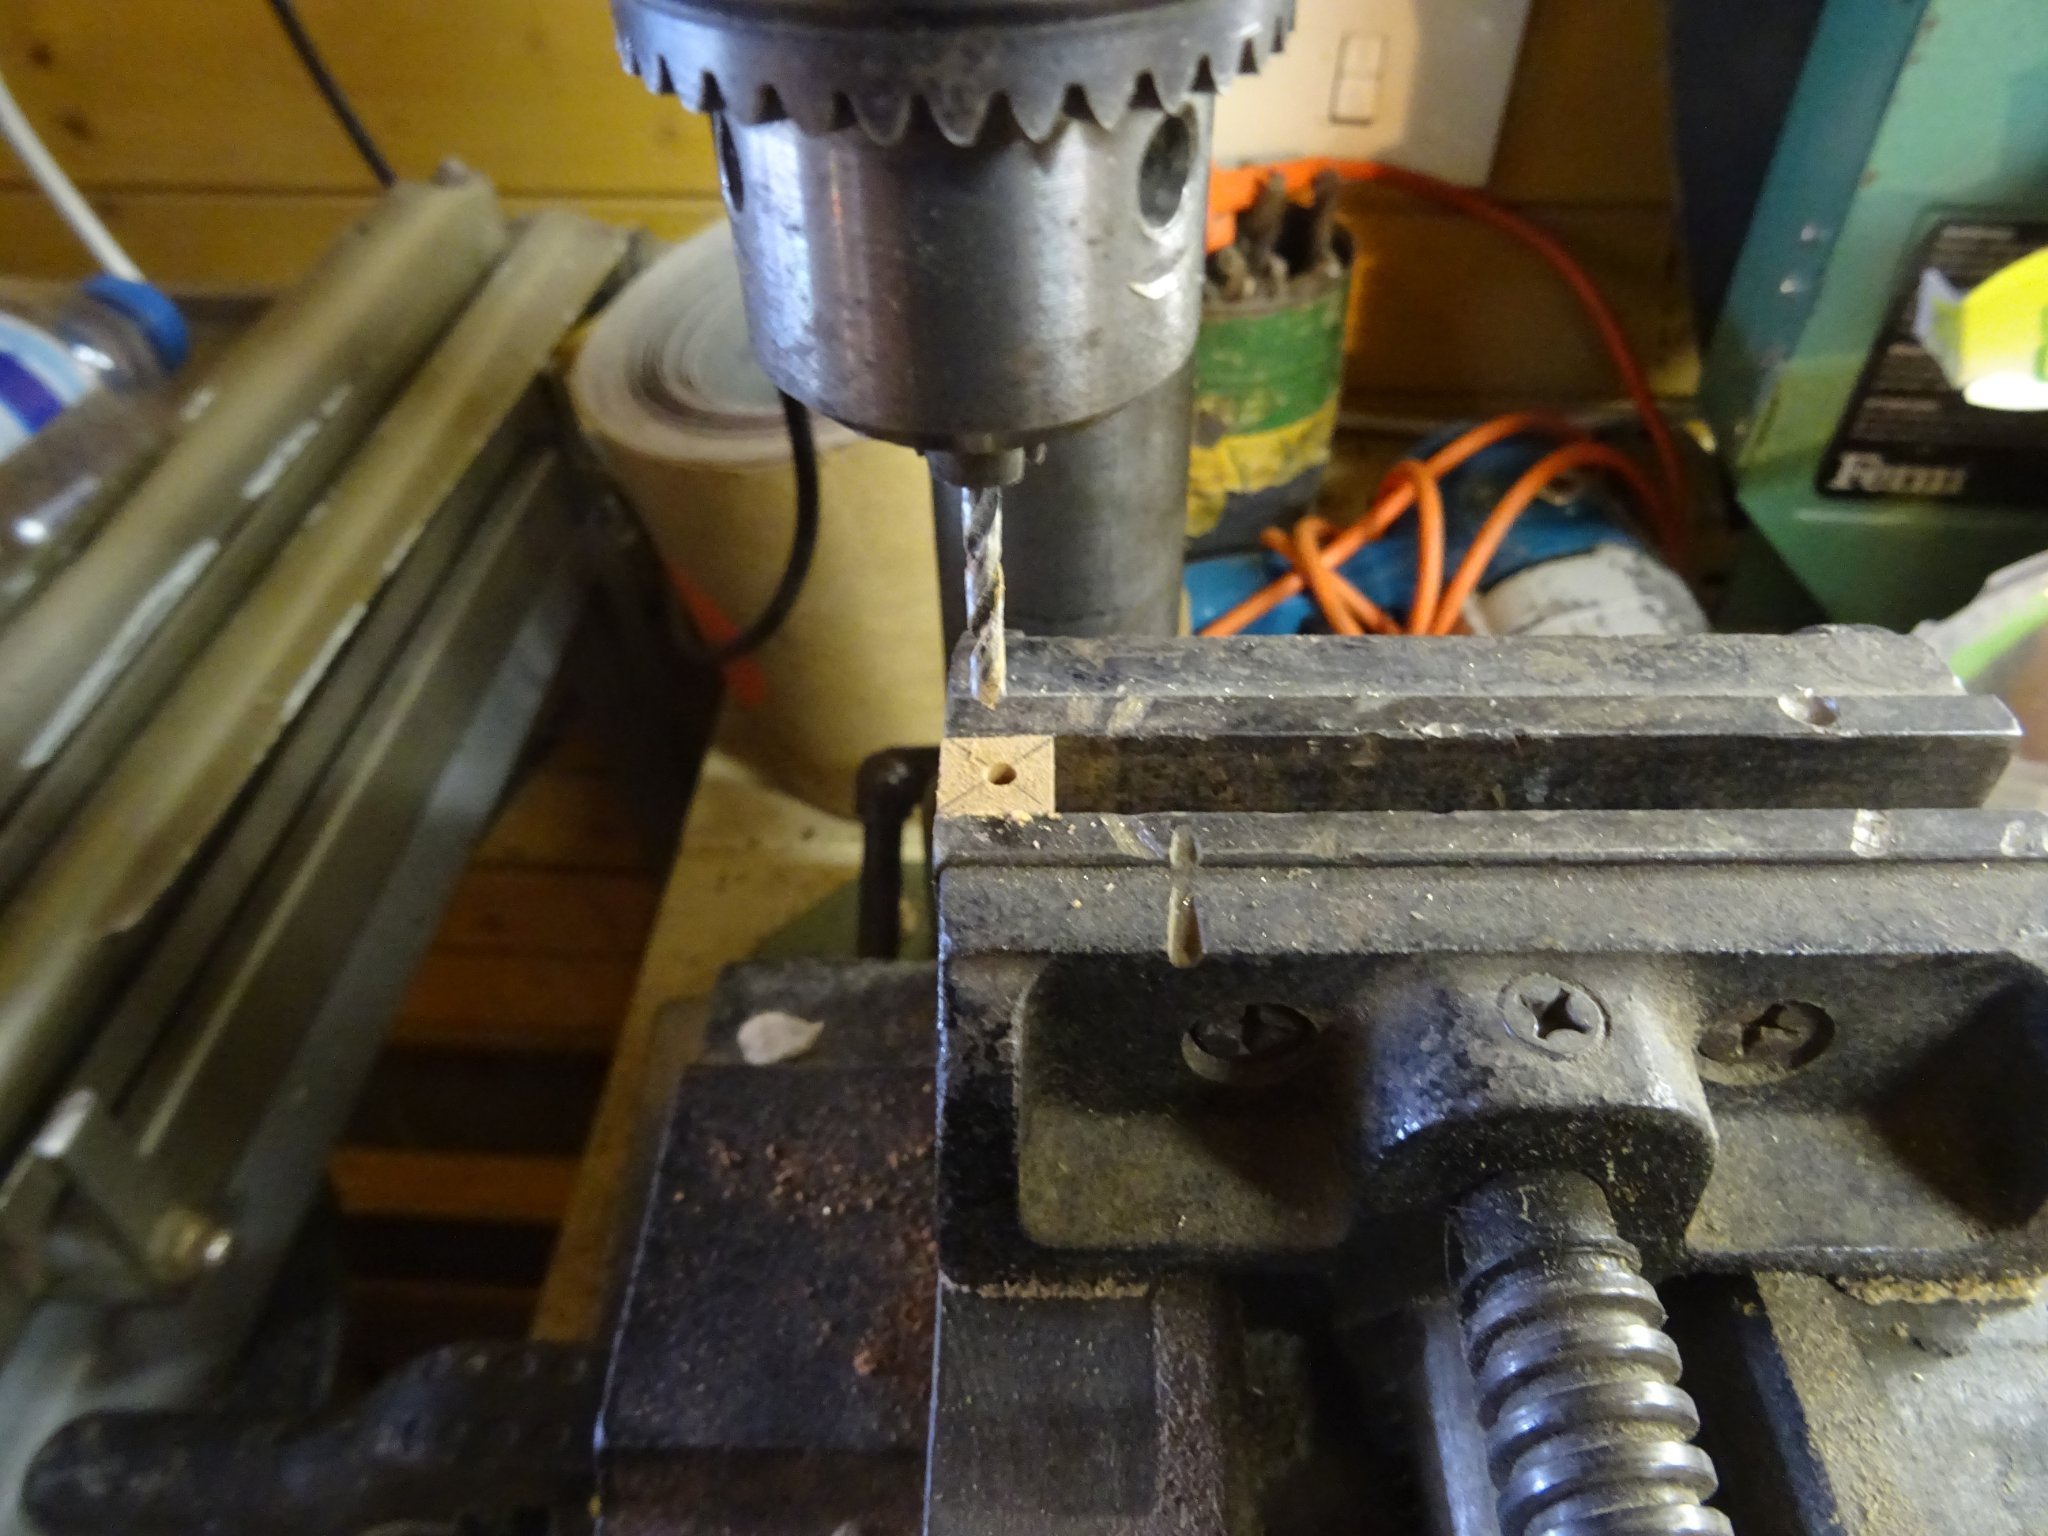
Drilling holes for the shaft of the sheaves.
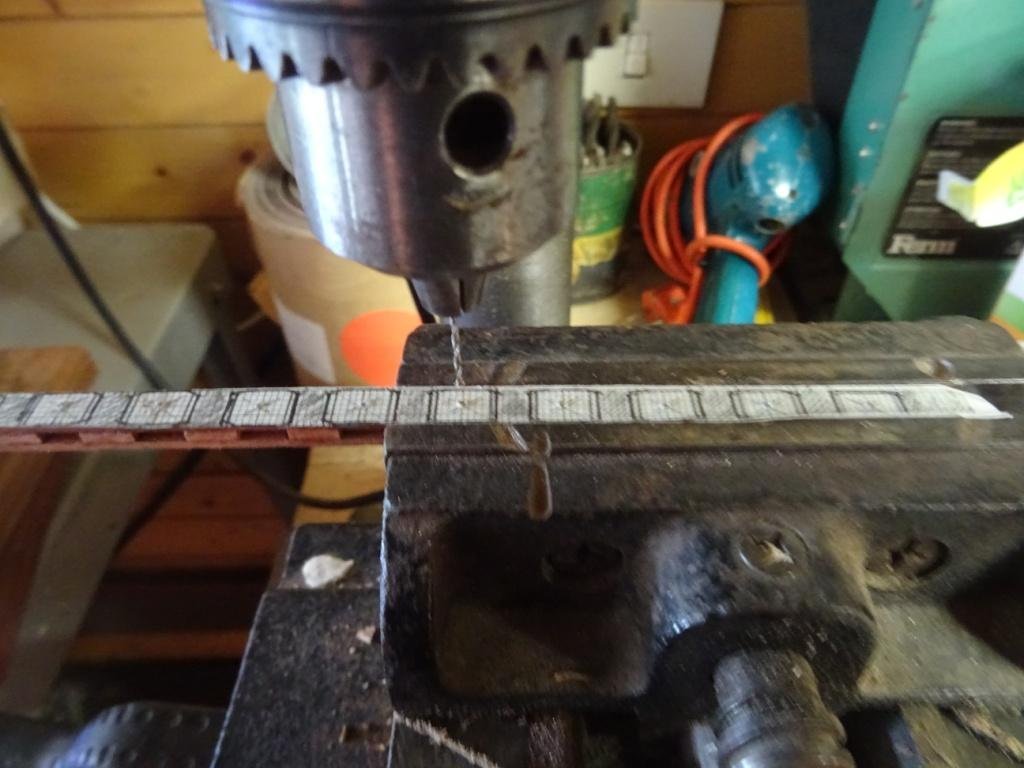
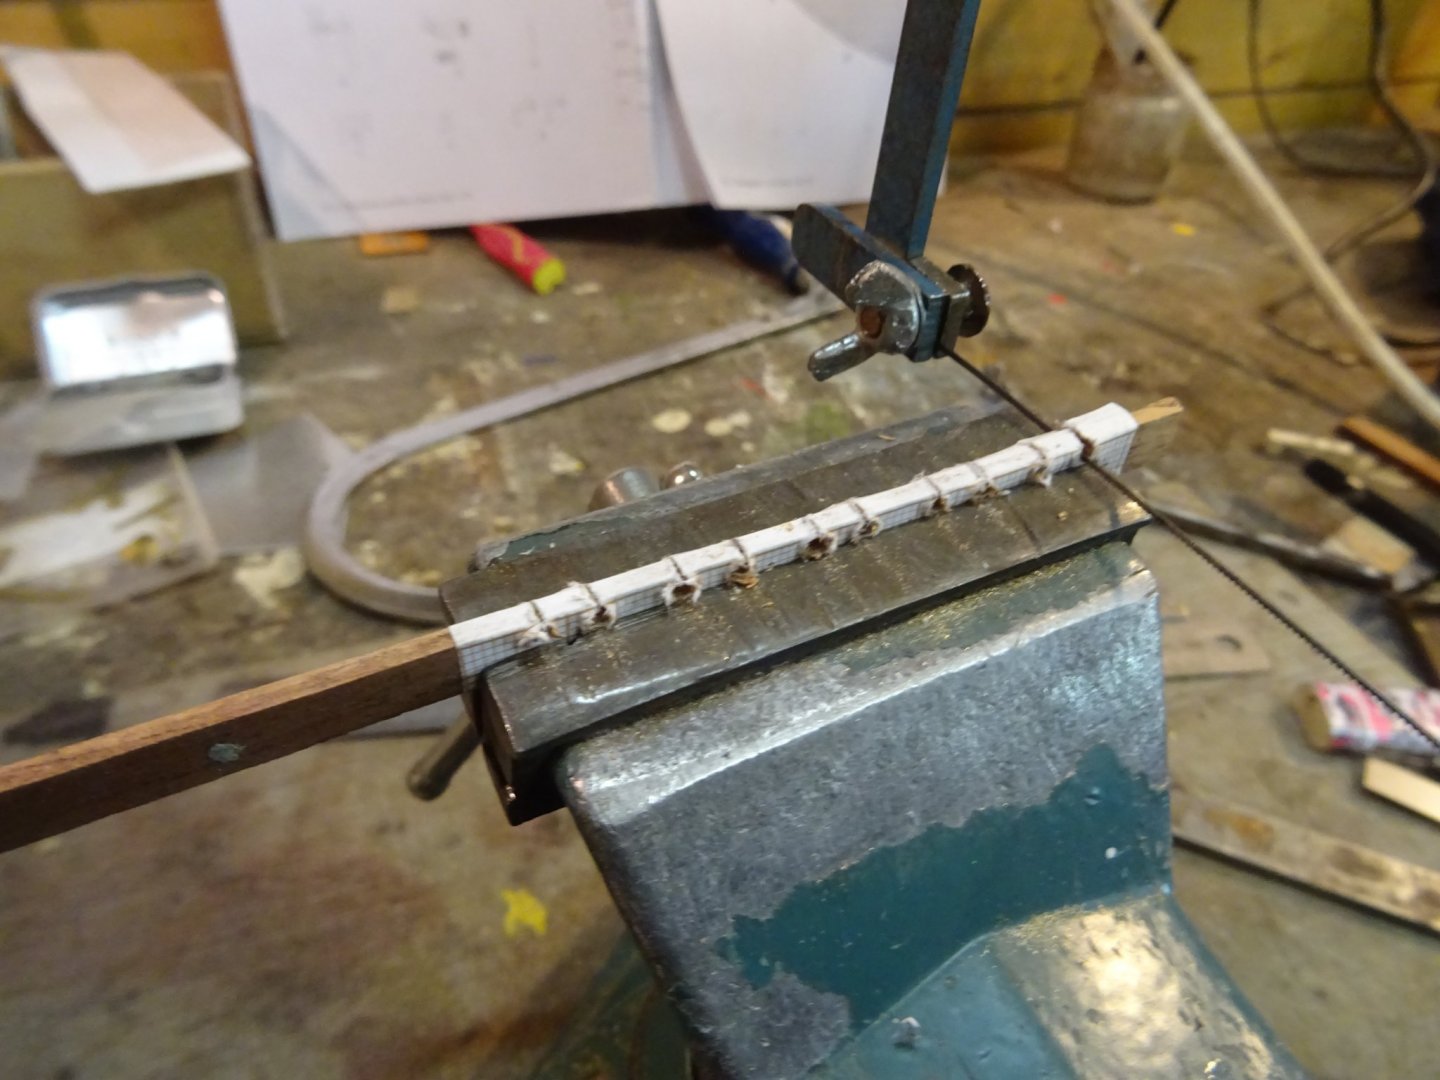
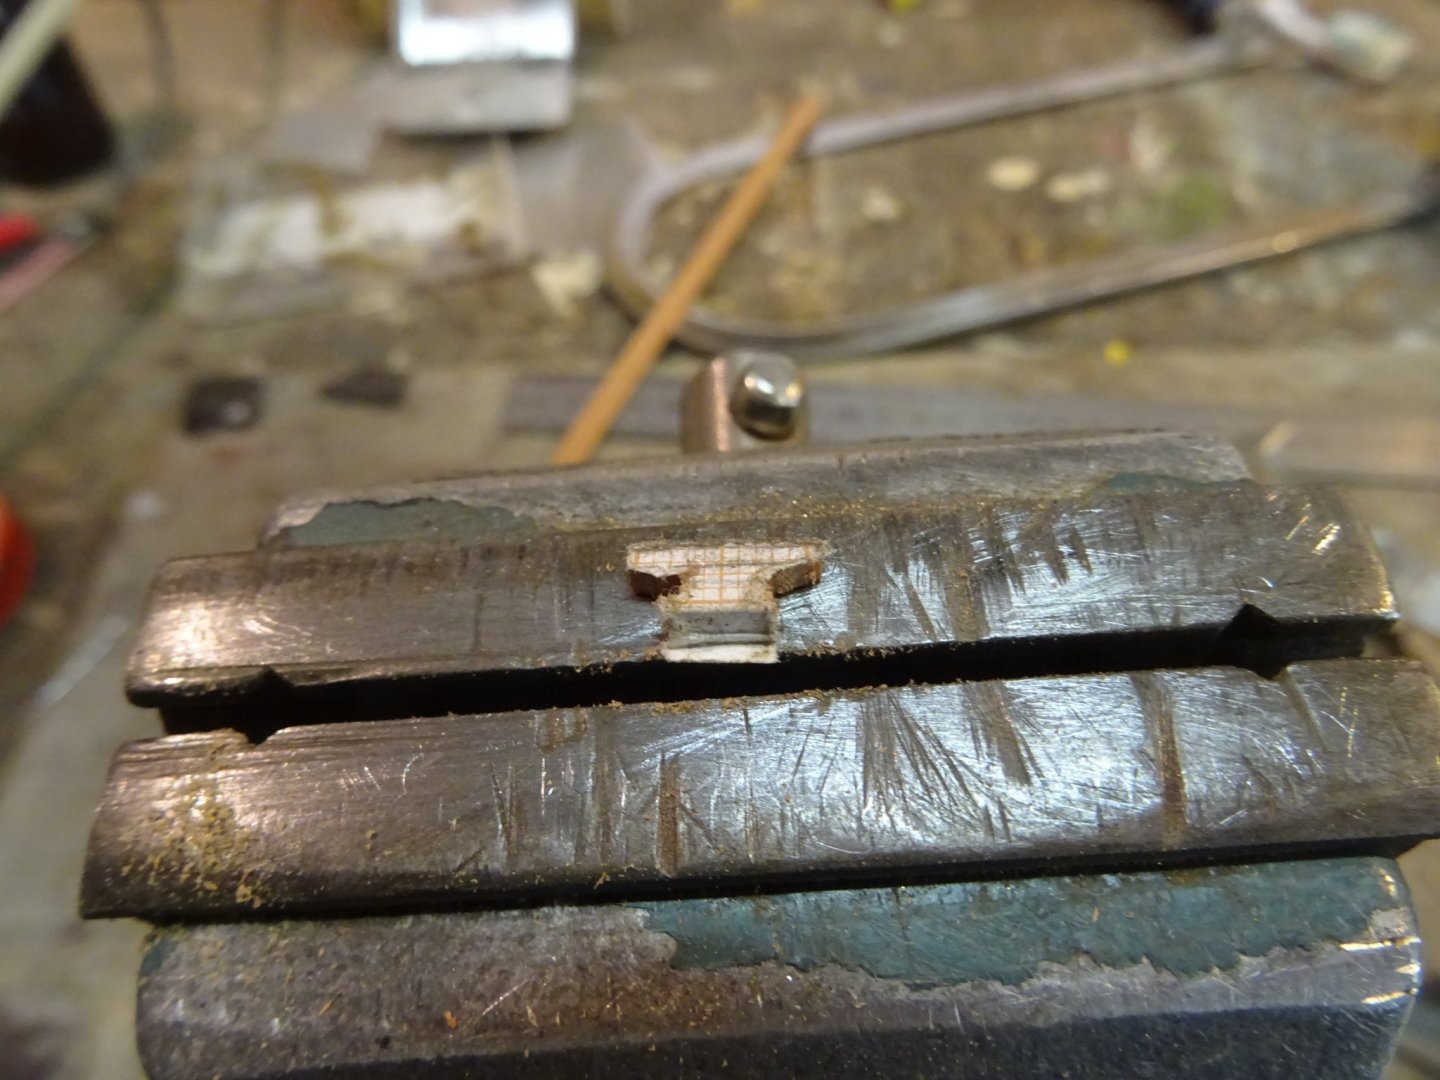
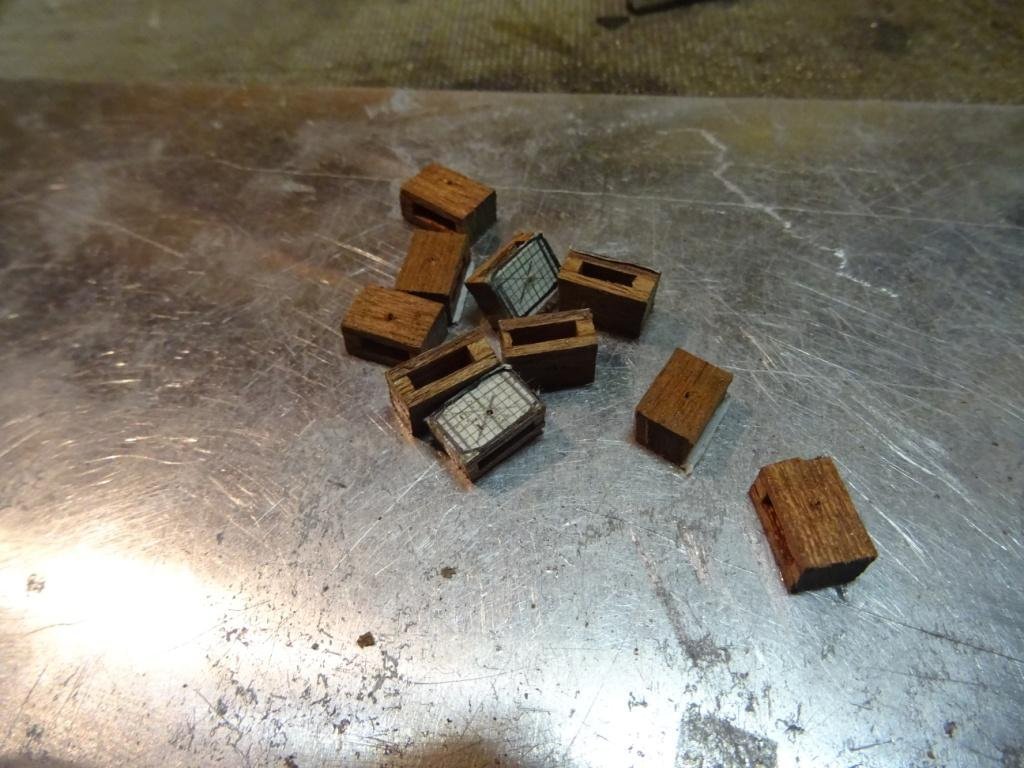
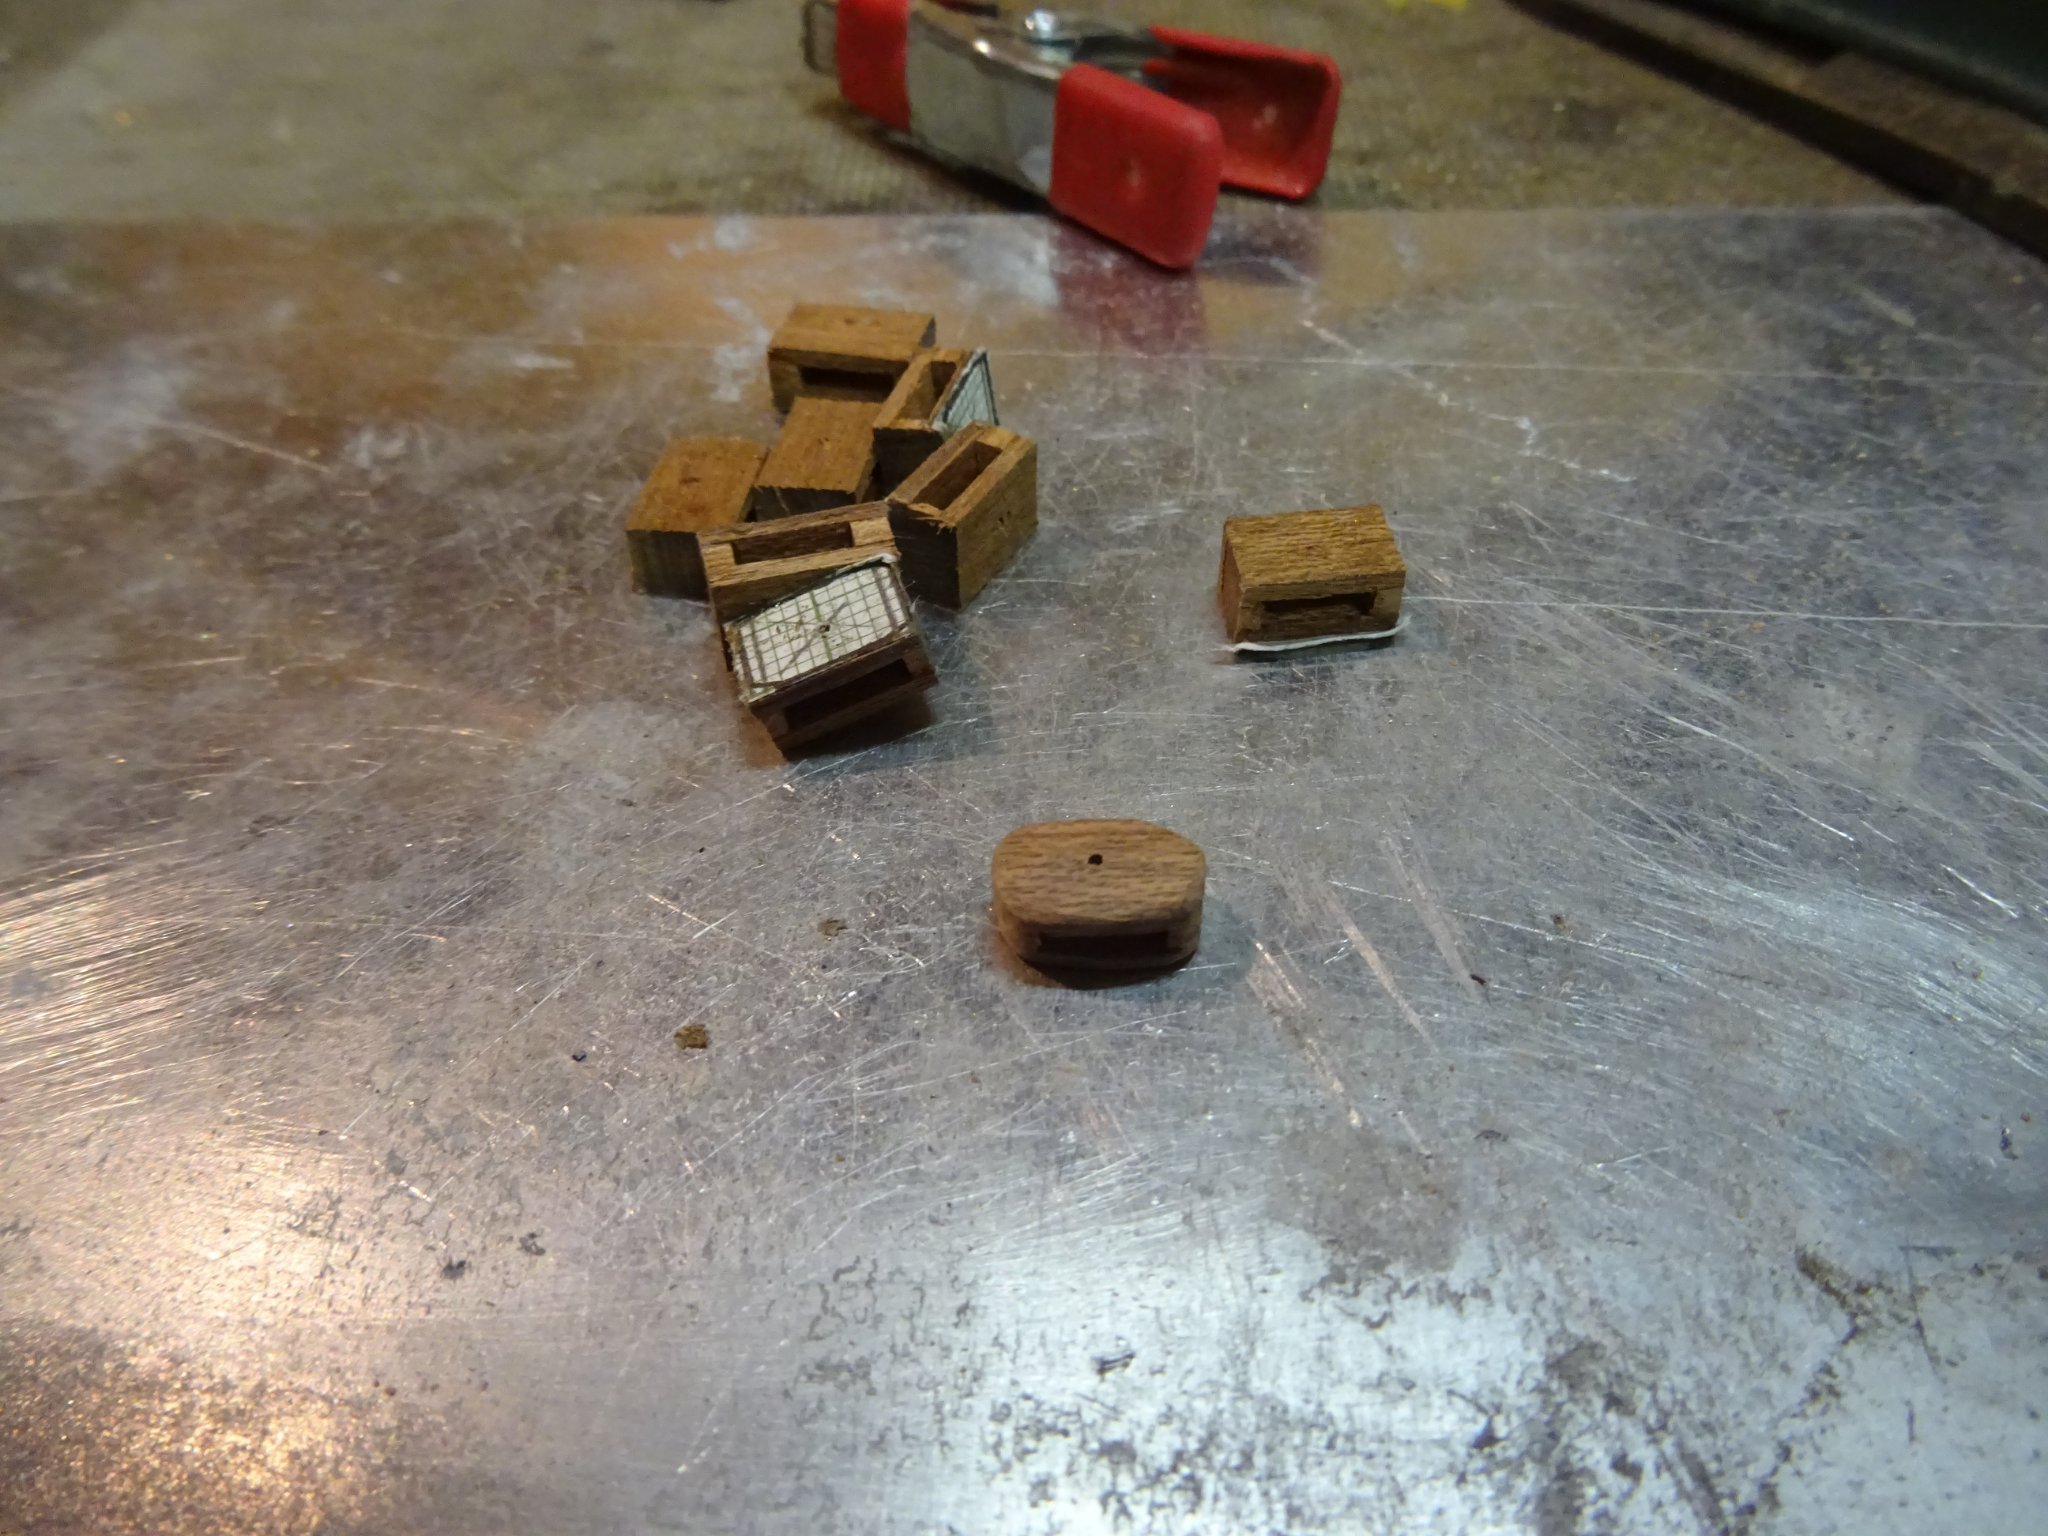
The next step is cutting individual blocks from the glued strips.
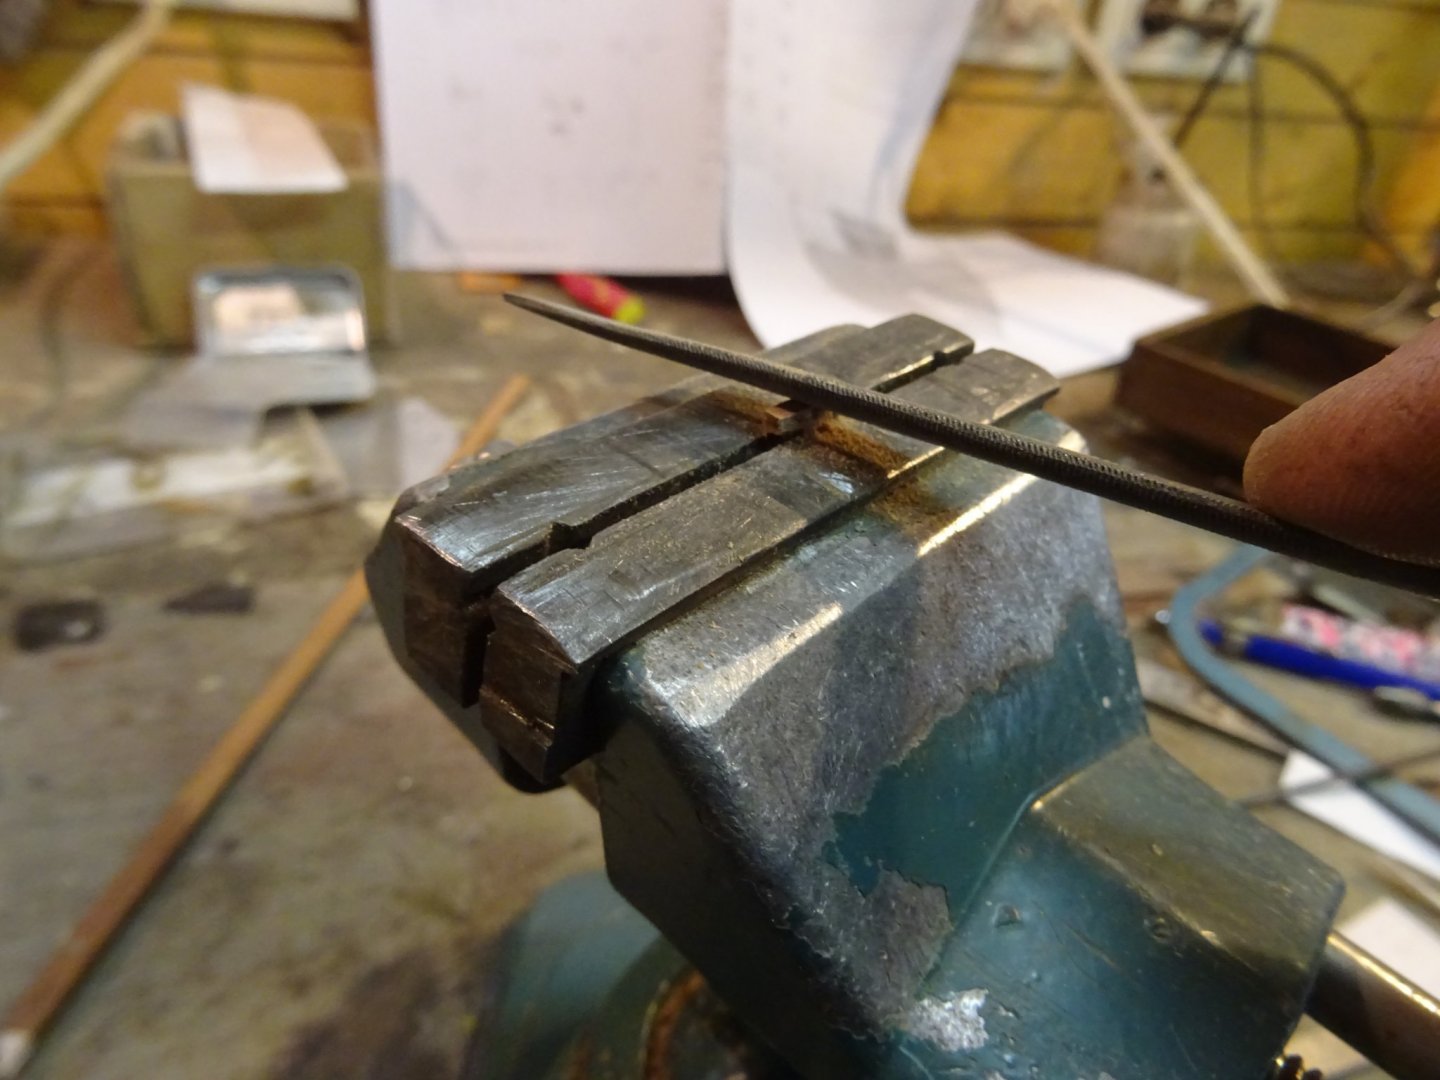
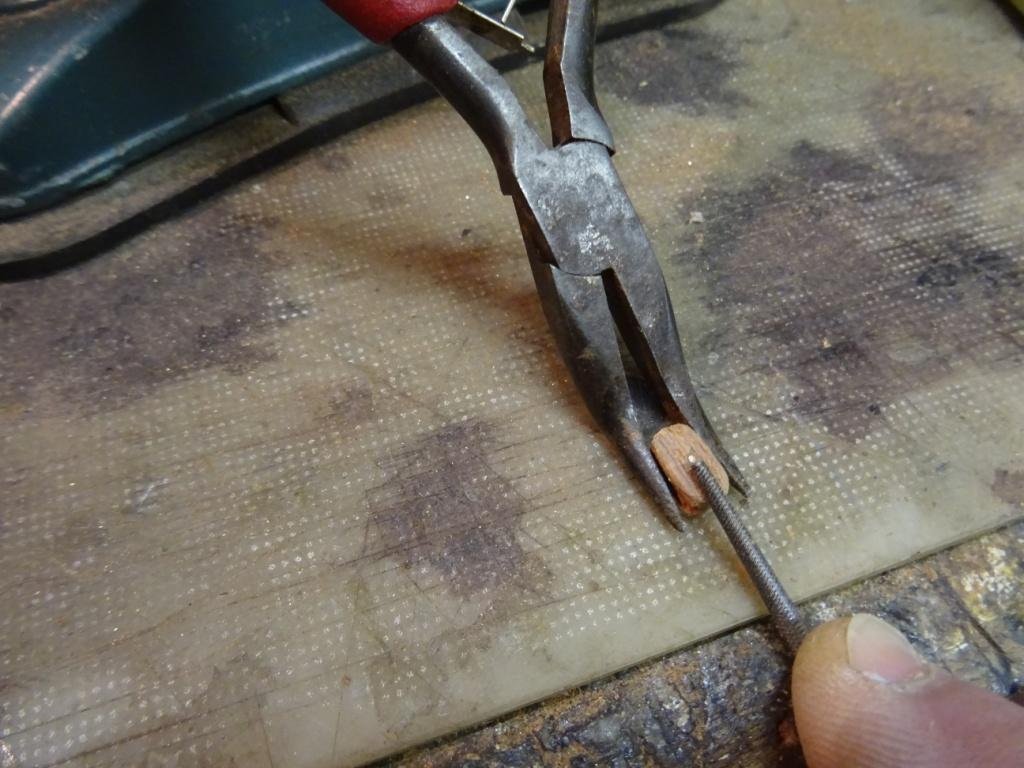
Now every block is filed into shape.
 , 342
, 342

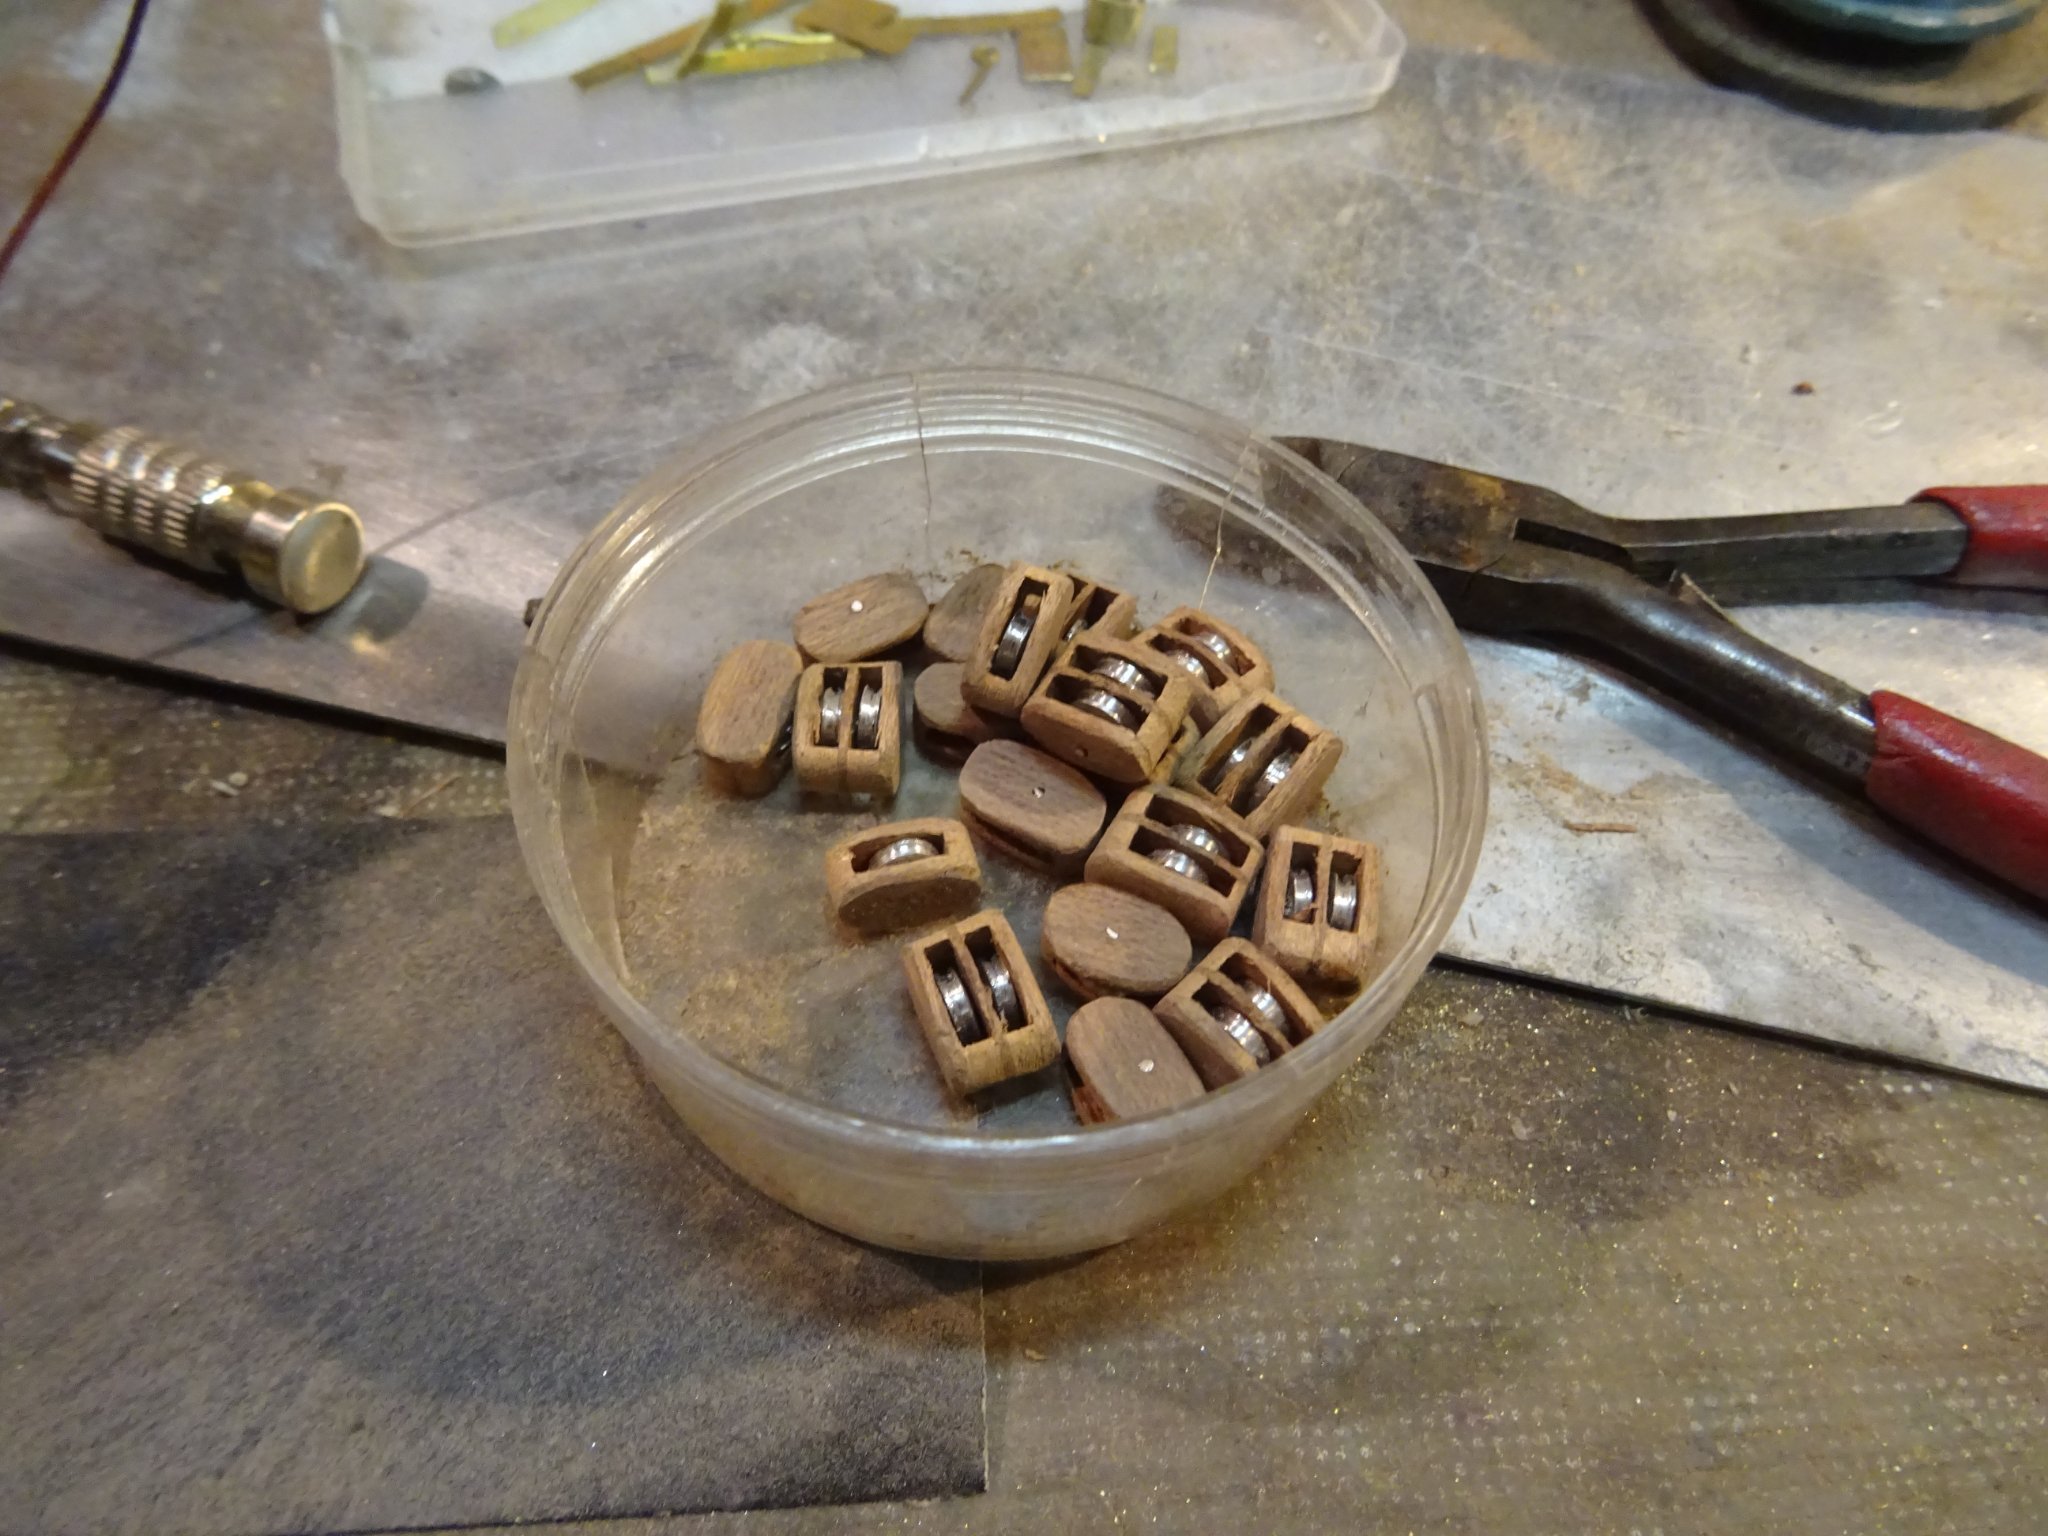
The sheaves are placed in it with a copper shaft.
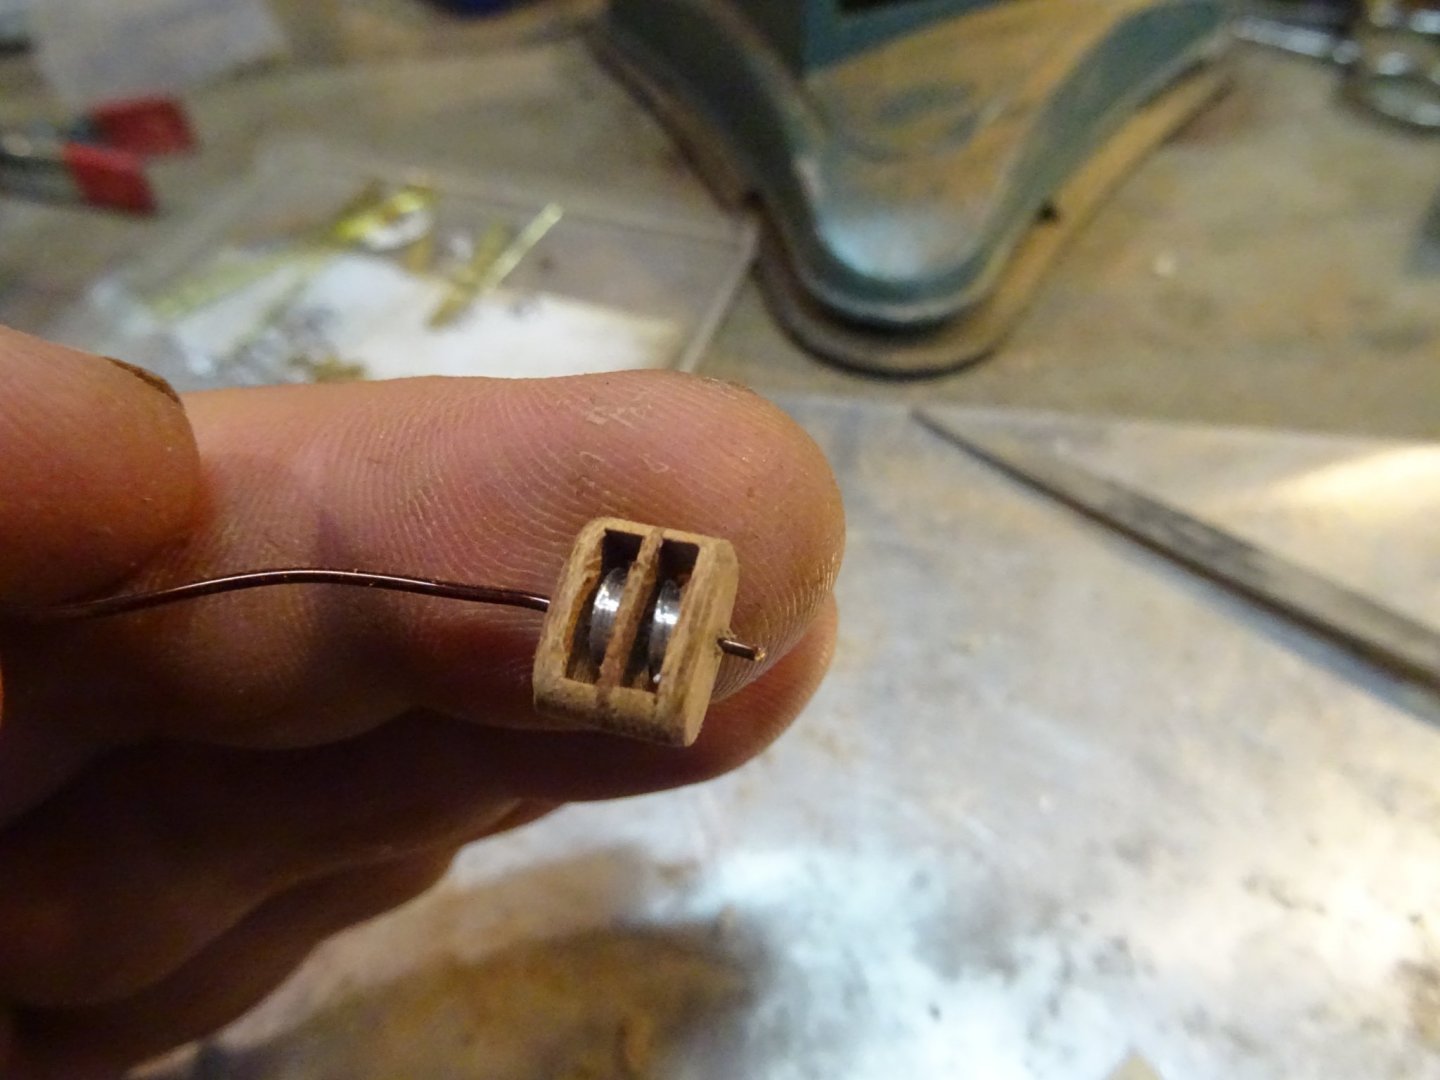
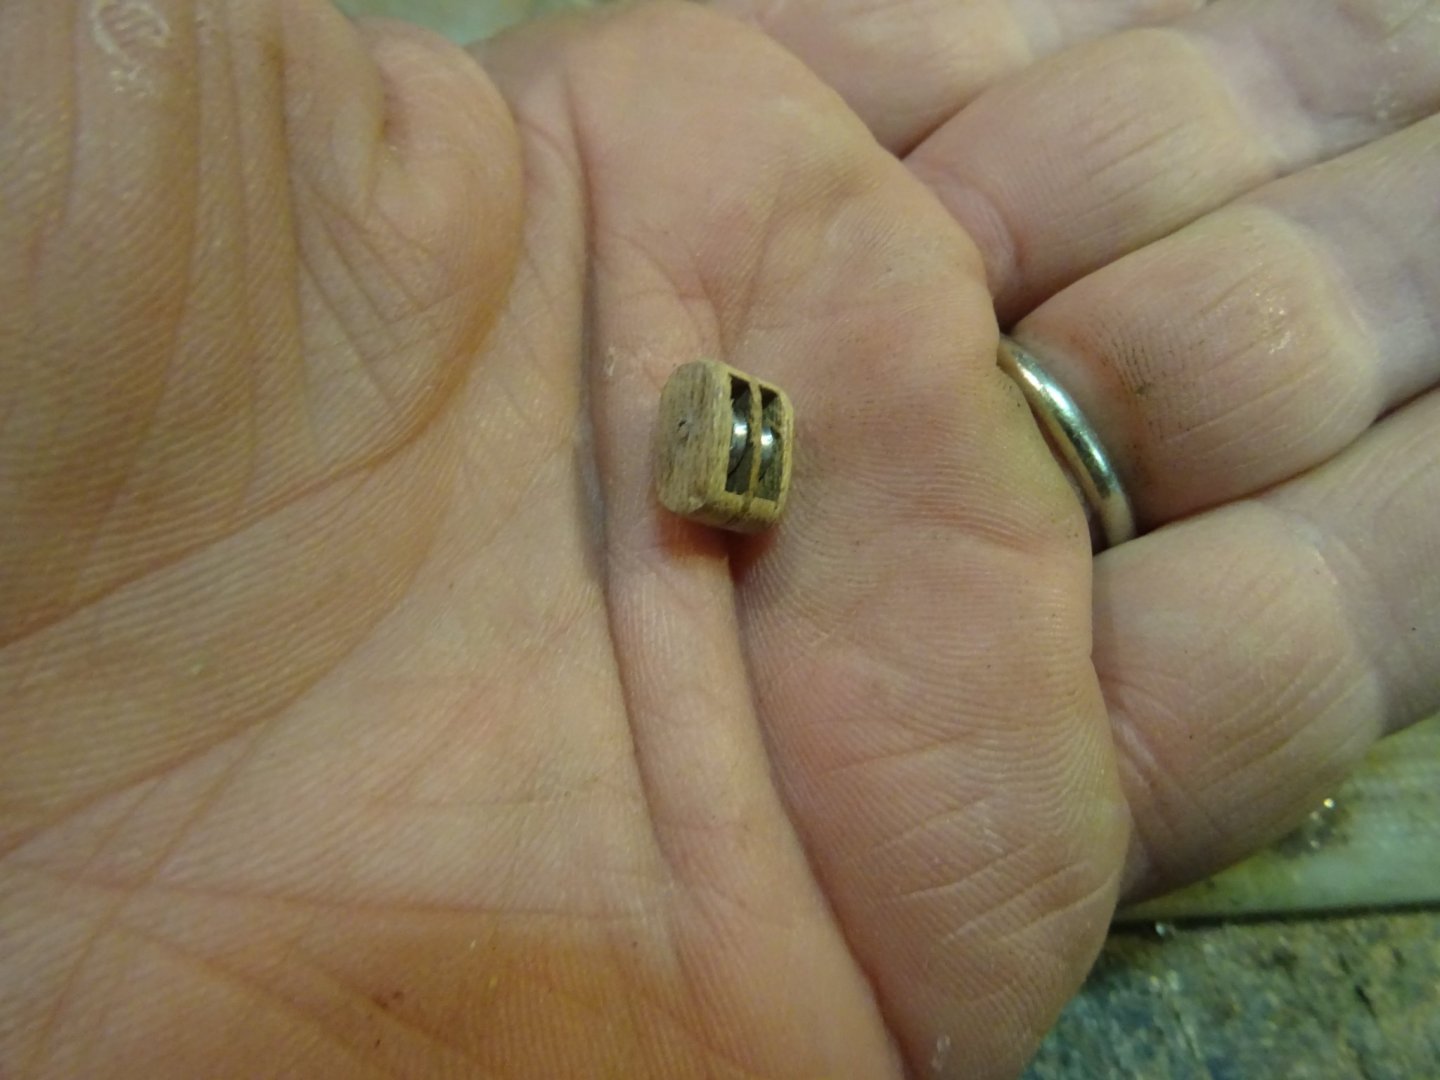

The last thing to do: file a groove for the noose.
Now I have a small supply of blocks of each size. They are about the same size as on the plan, but I can't manage to make them as thin.

Thank you very much for reading this log and for your likes and for your constructive comments.
Till soon!
-
-
On 12/12/2021 at 4:08 PM, Wintergreen said:
Nice work!
About soldering, do you use silver solder (hard soldering) och soft soldering?
Keep it up!
Hakan,
You'll think I'm a dumbass, but to be honest I don't know the difference between hard and soft soldering. I solder as one of my modeling friends showed me with ordinary soldering tin that I buy in the do-it-yourself store.🥴- Wintergreen and mtaylor
-
2
-
Beautiful model, congratulations.
Good idea, the aquarium. -
It all seems as simple as you show it. If I had to try, then...
Well it certainly wouldn't look like that.- mtaylor, Keith Black and FriedClams
-
3
-
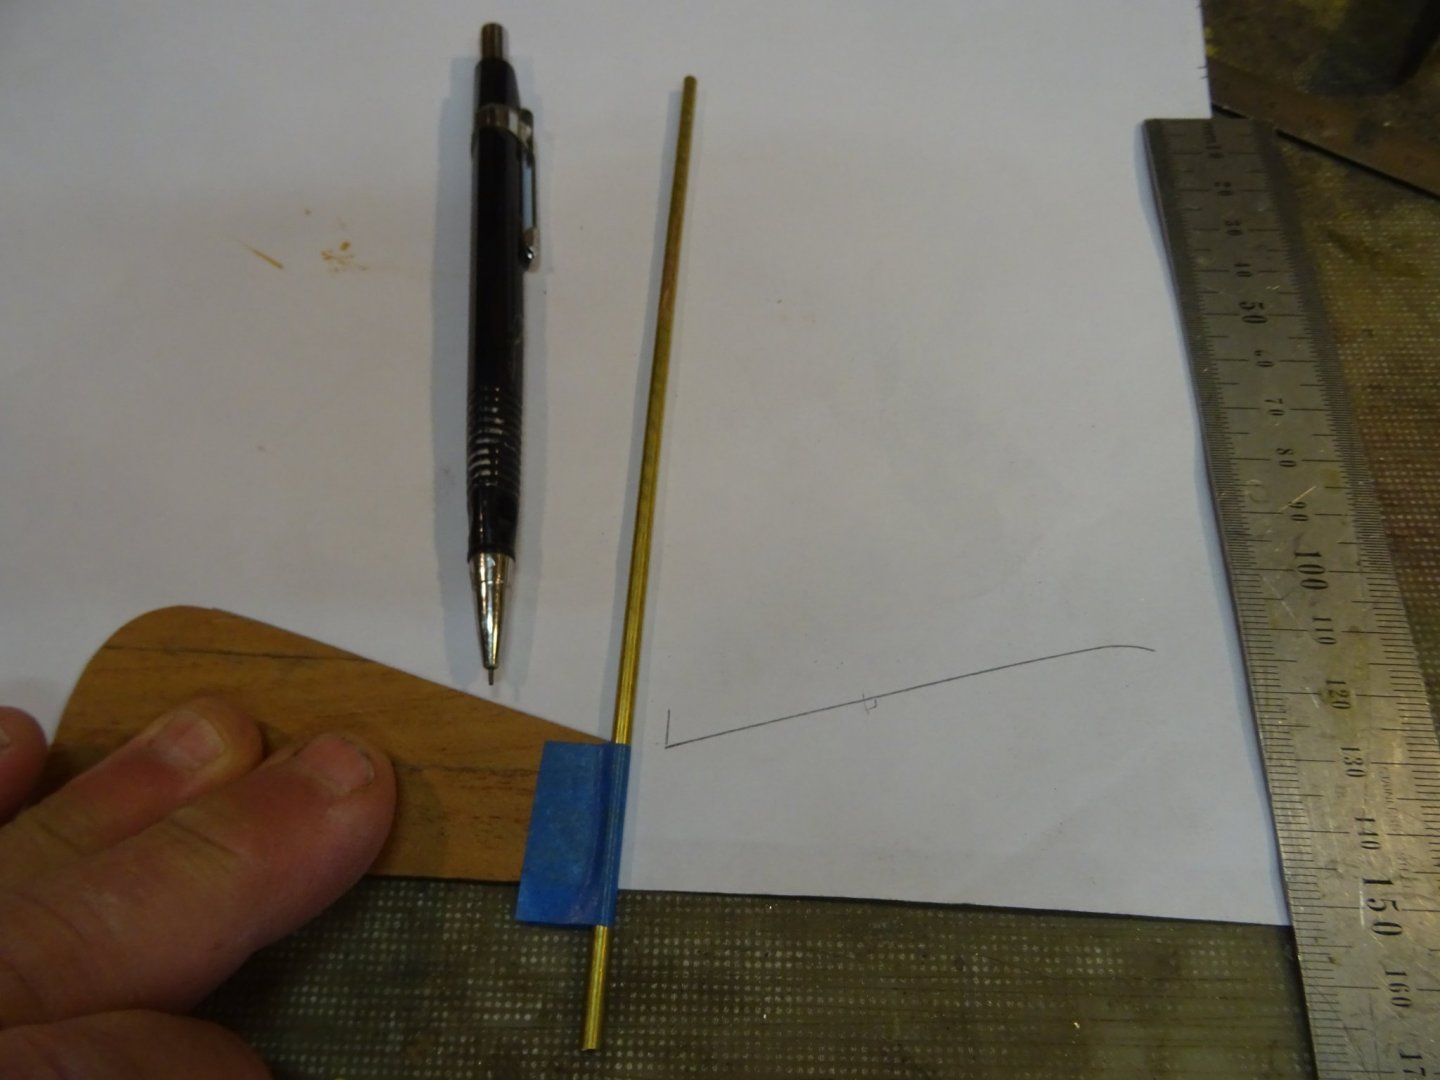
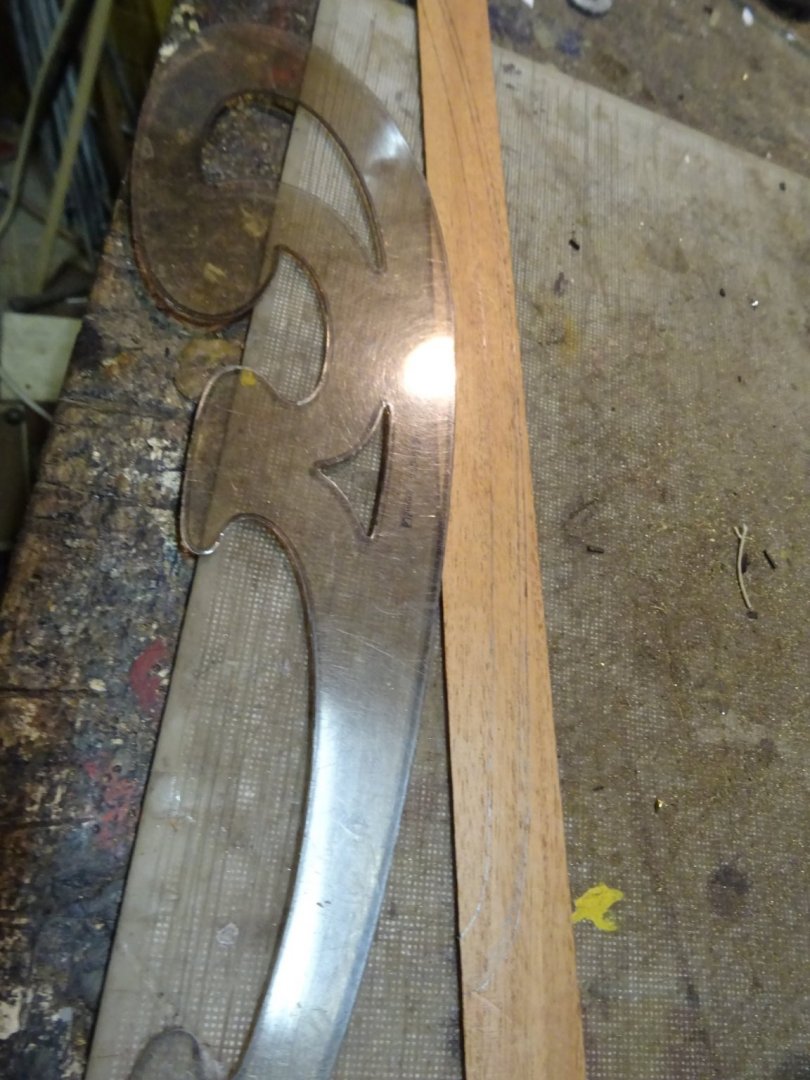
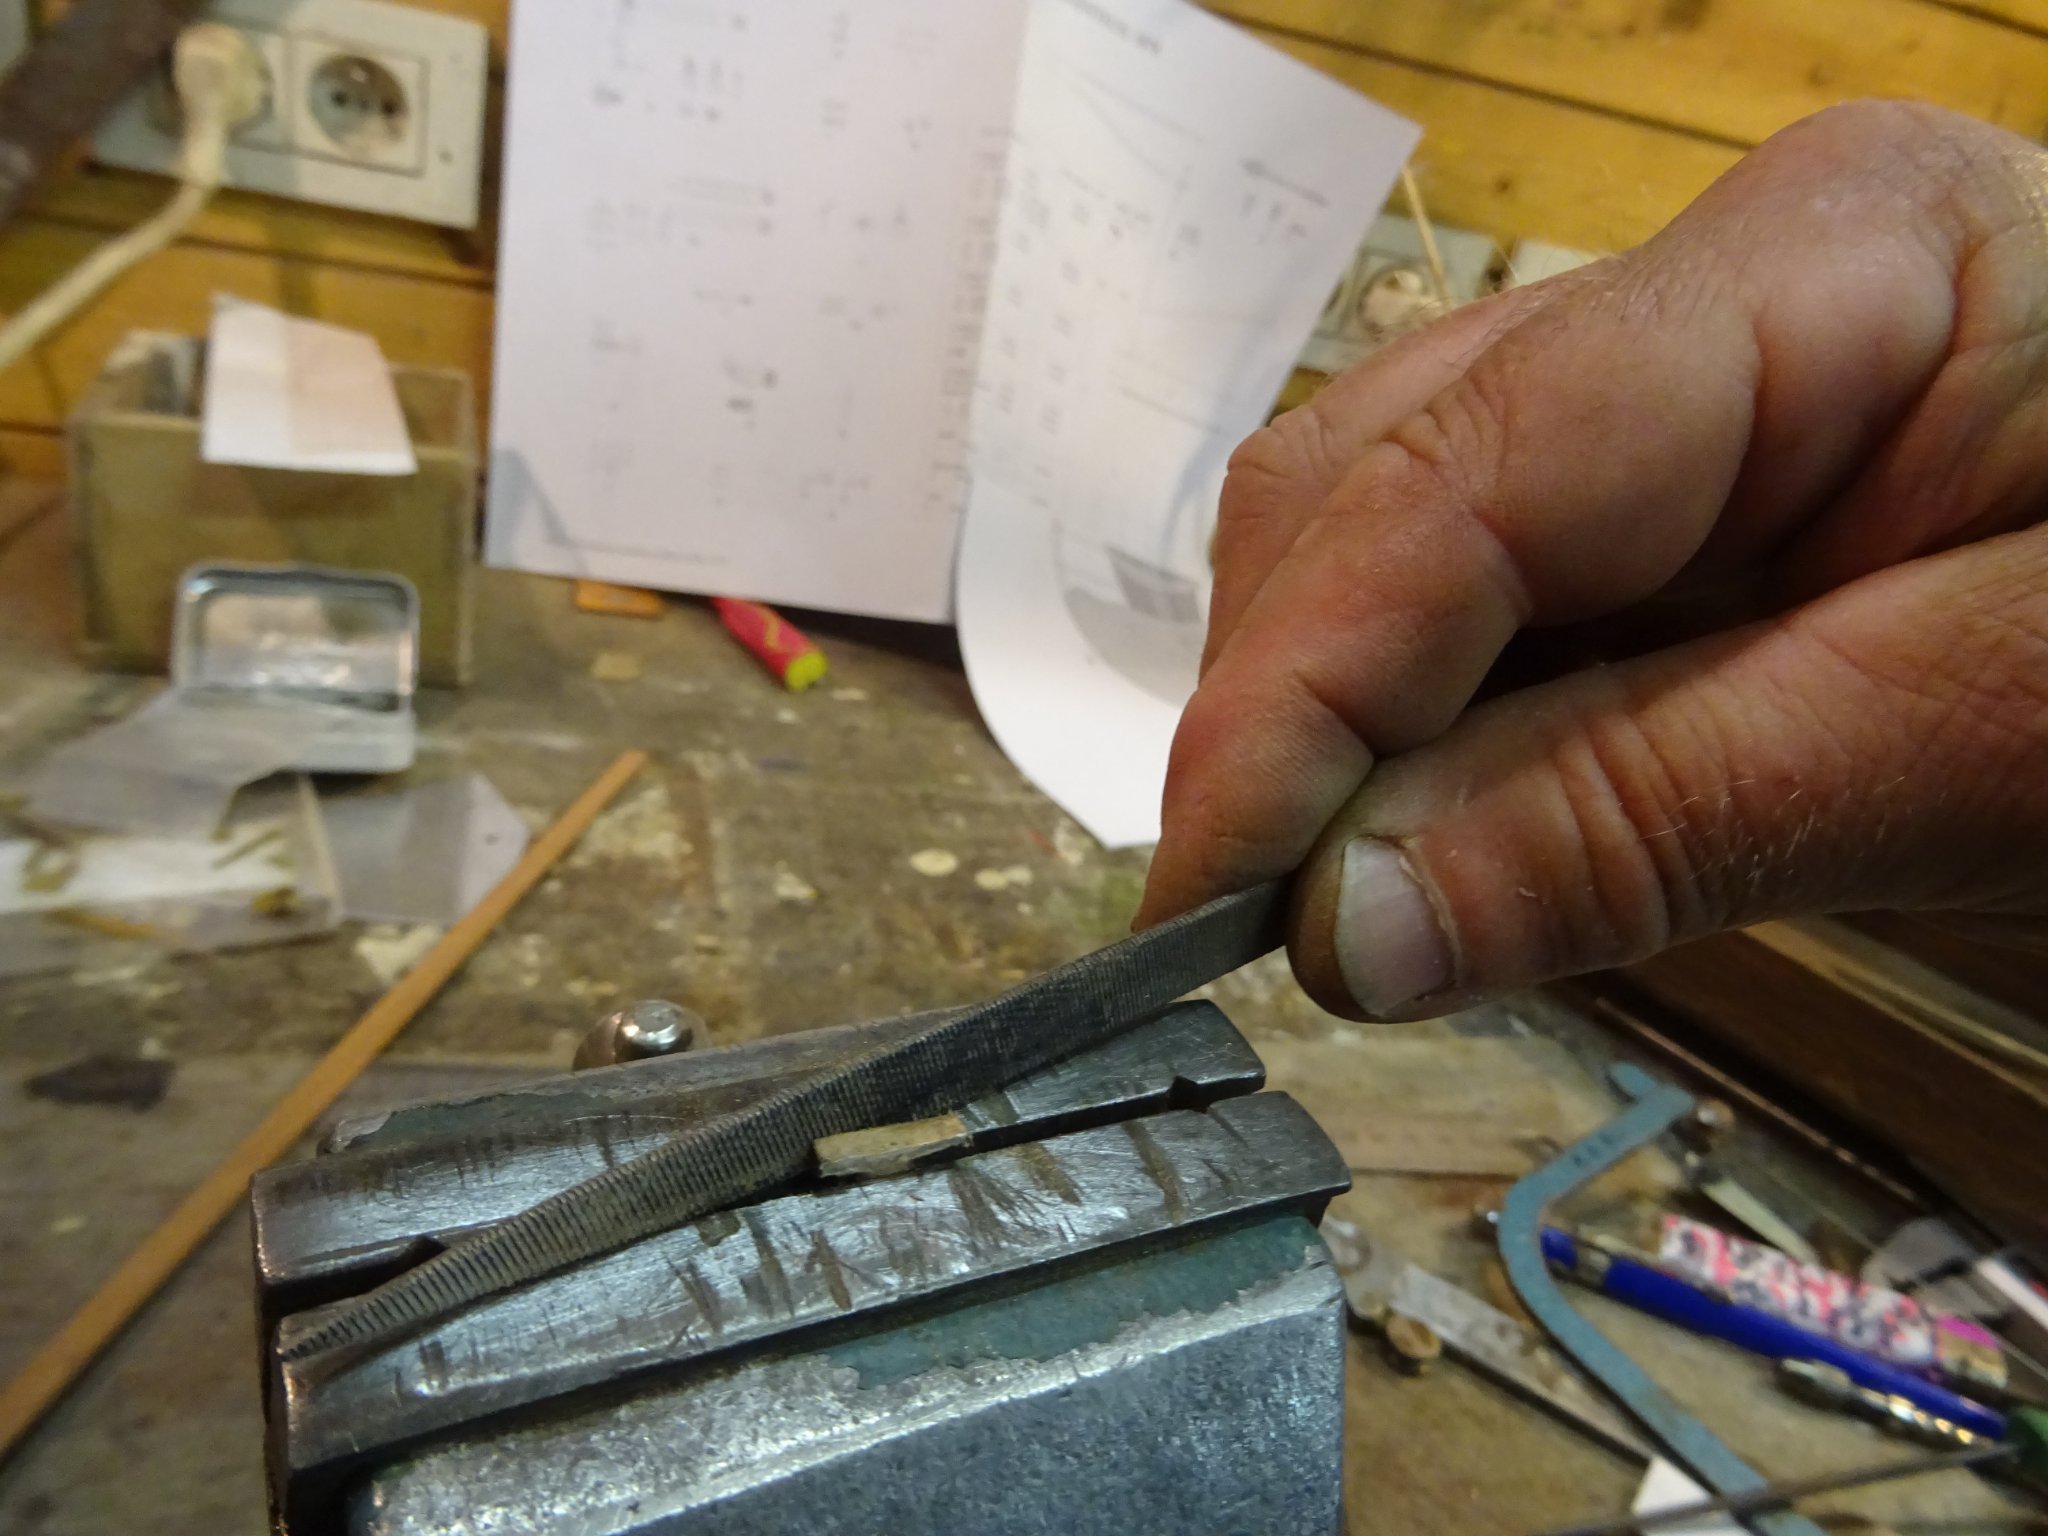
Last thing to make: the tiller.
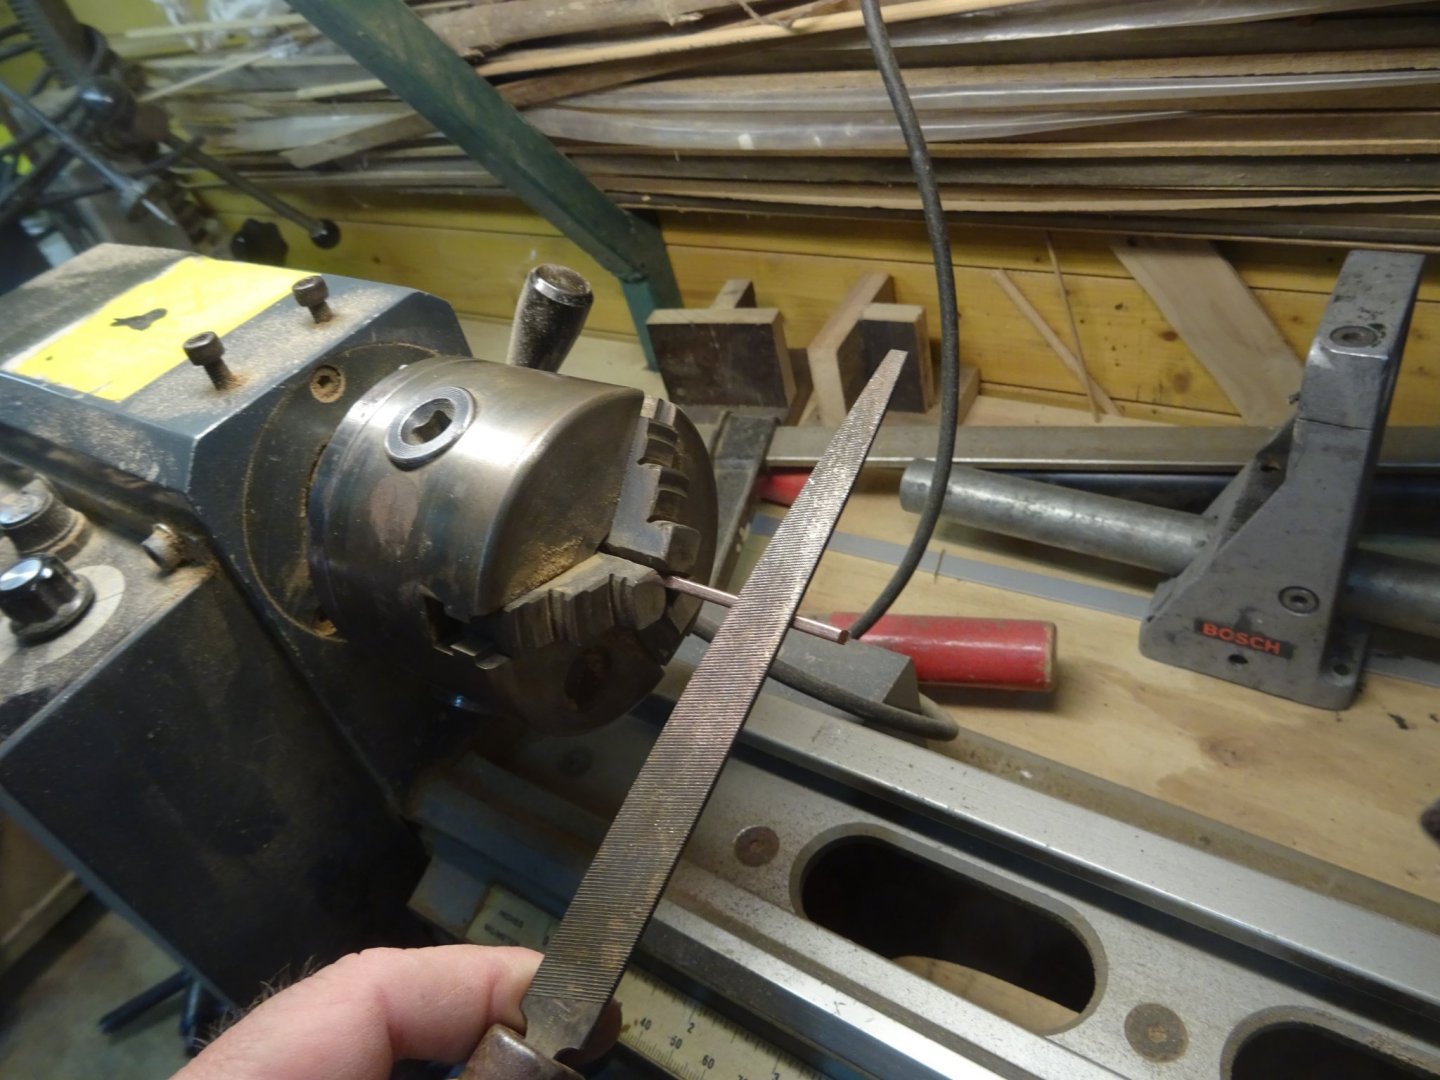
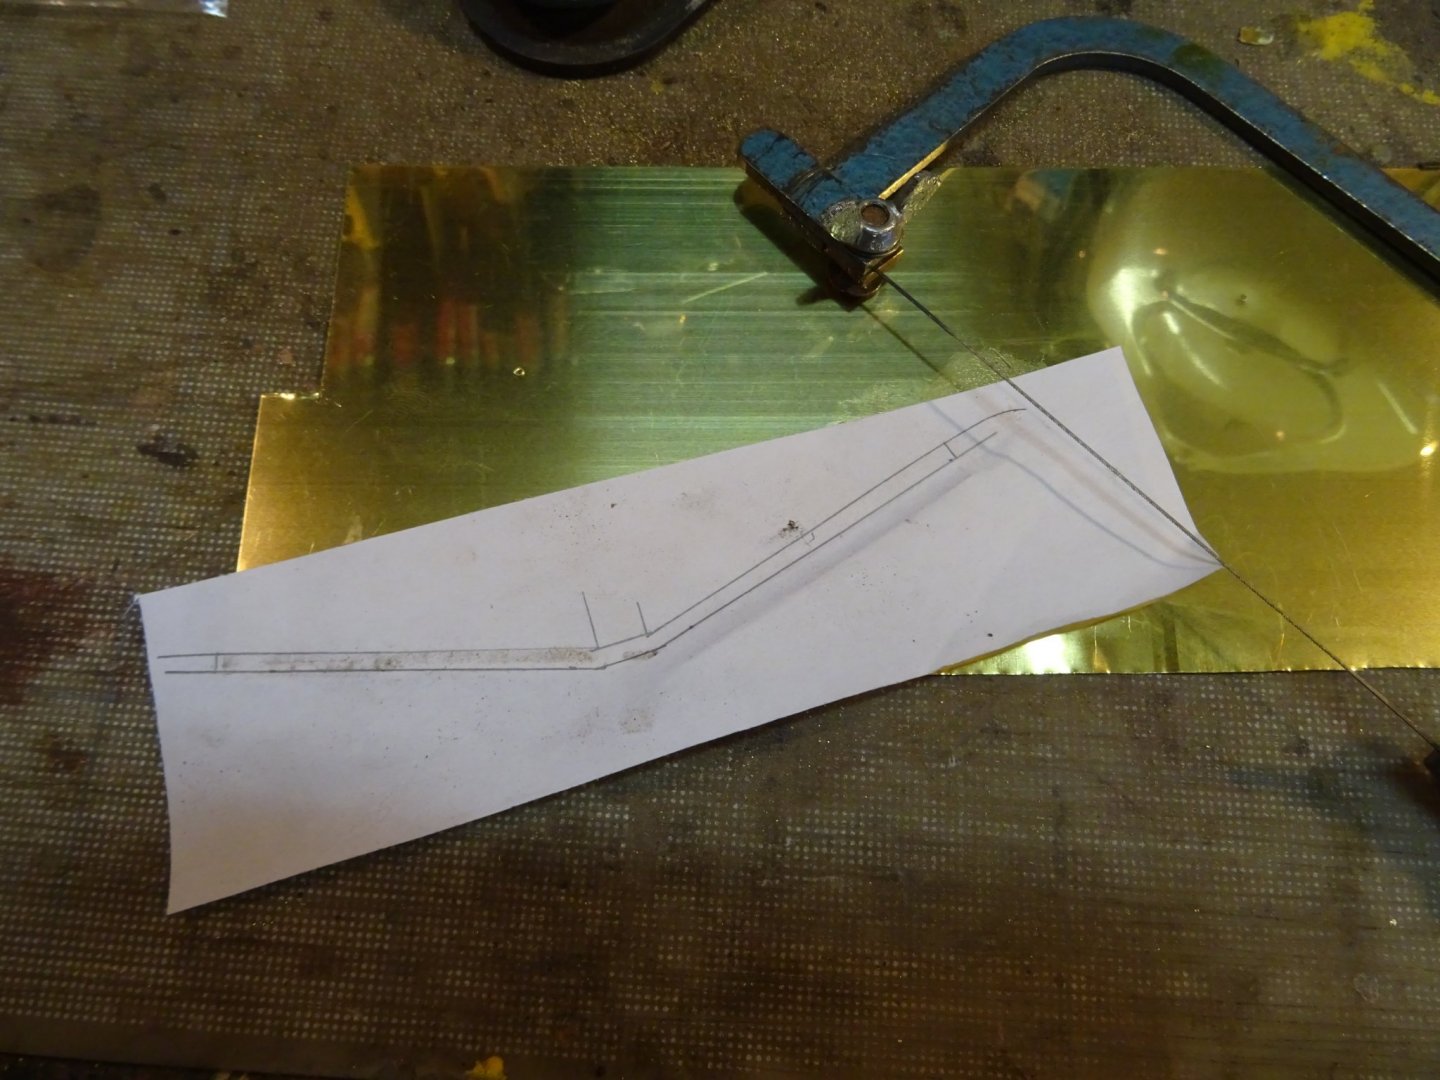
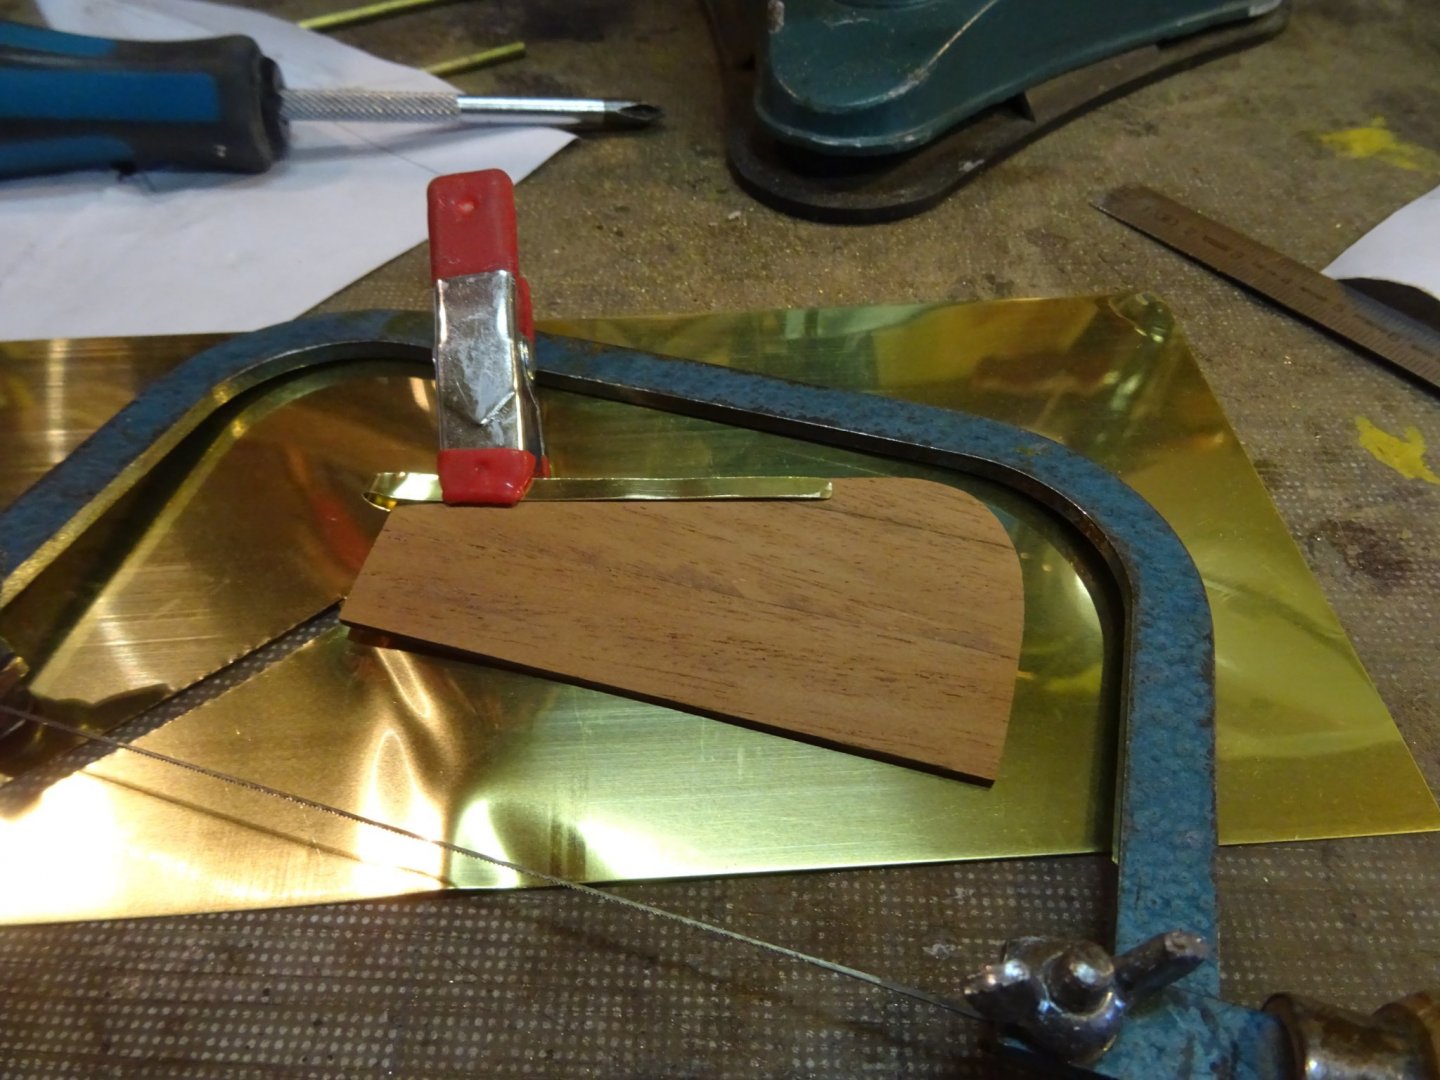
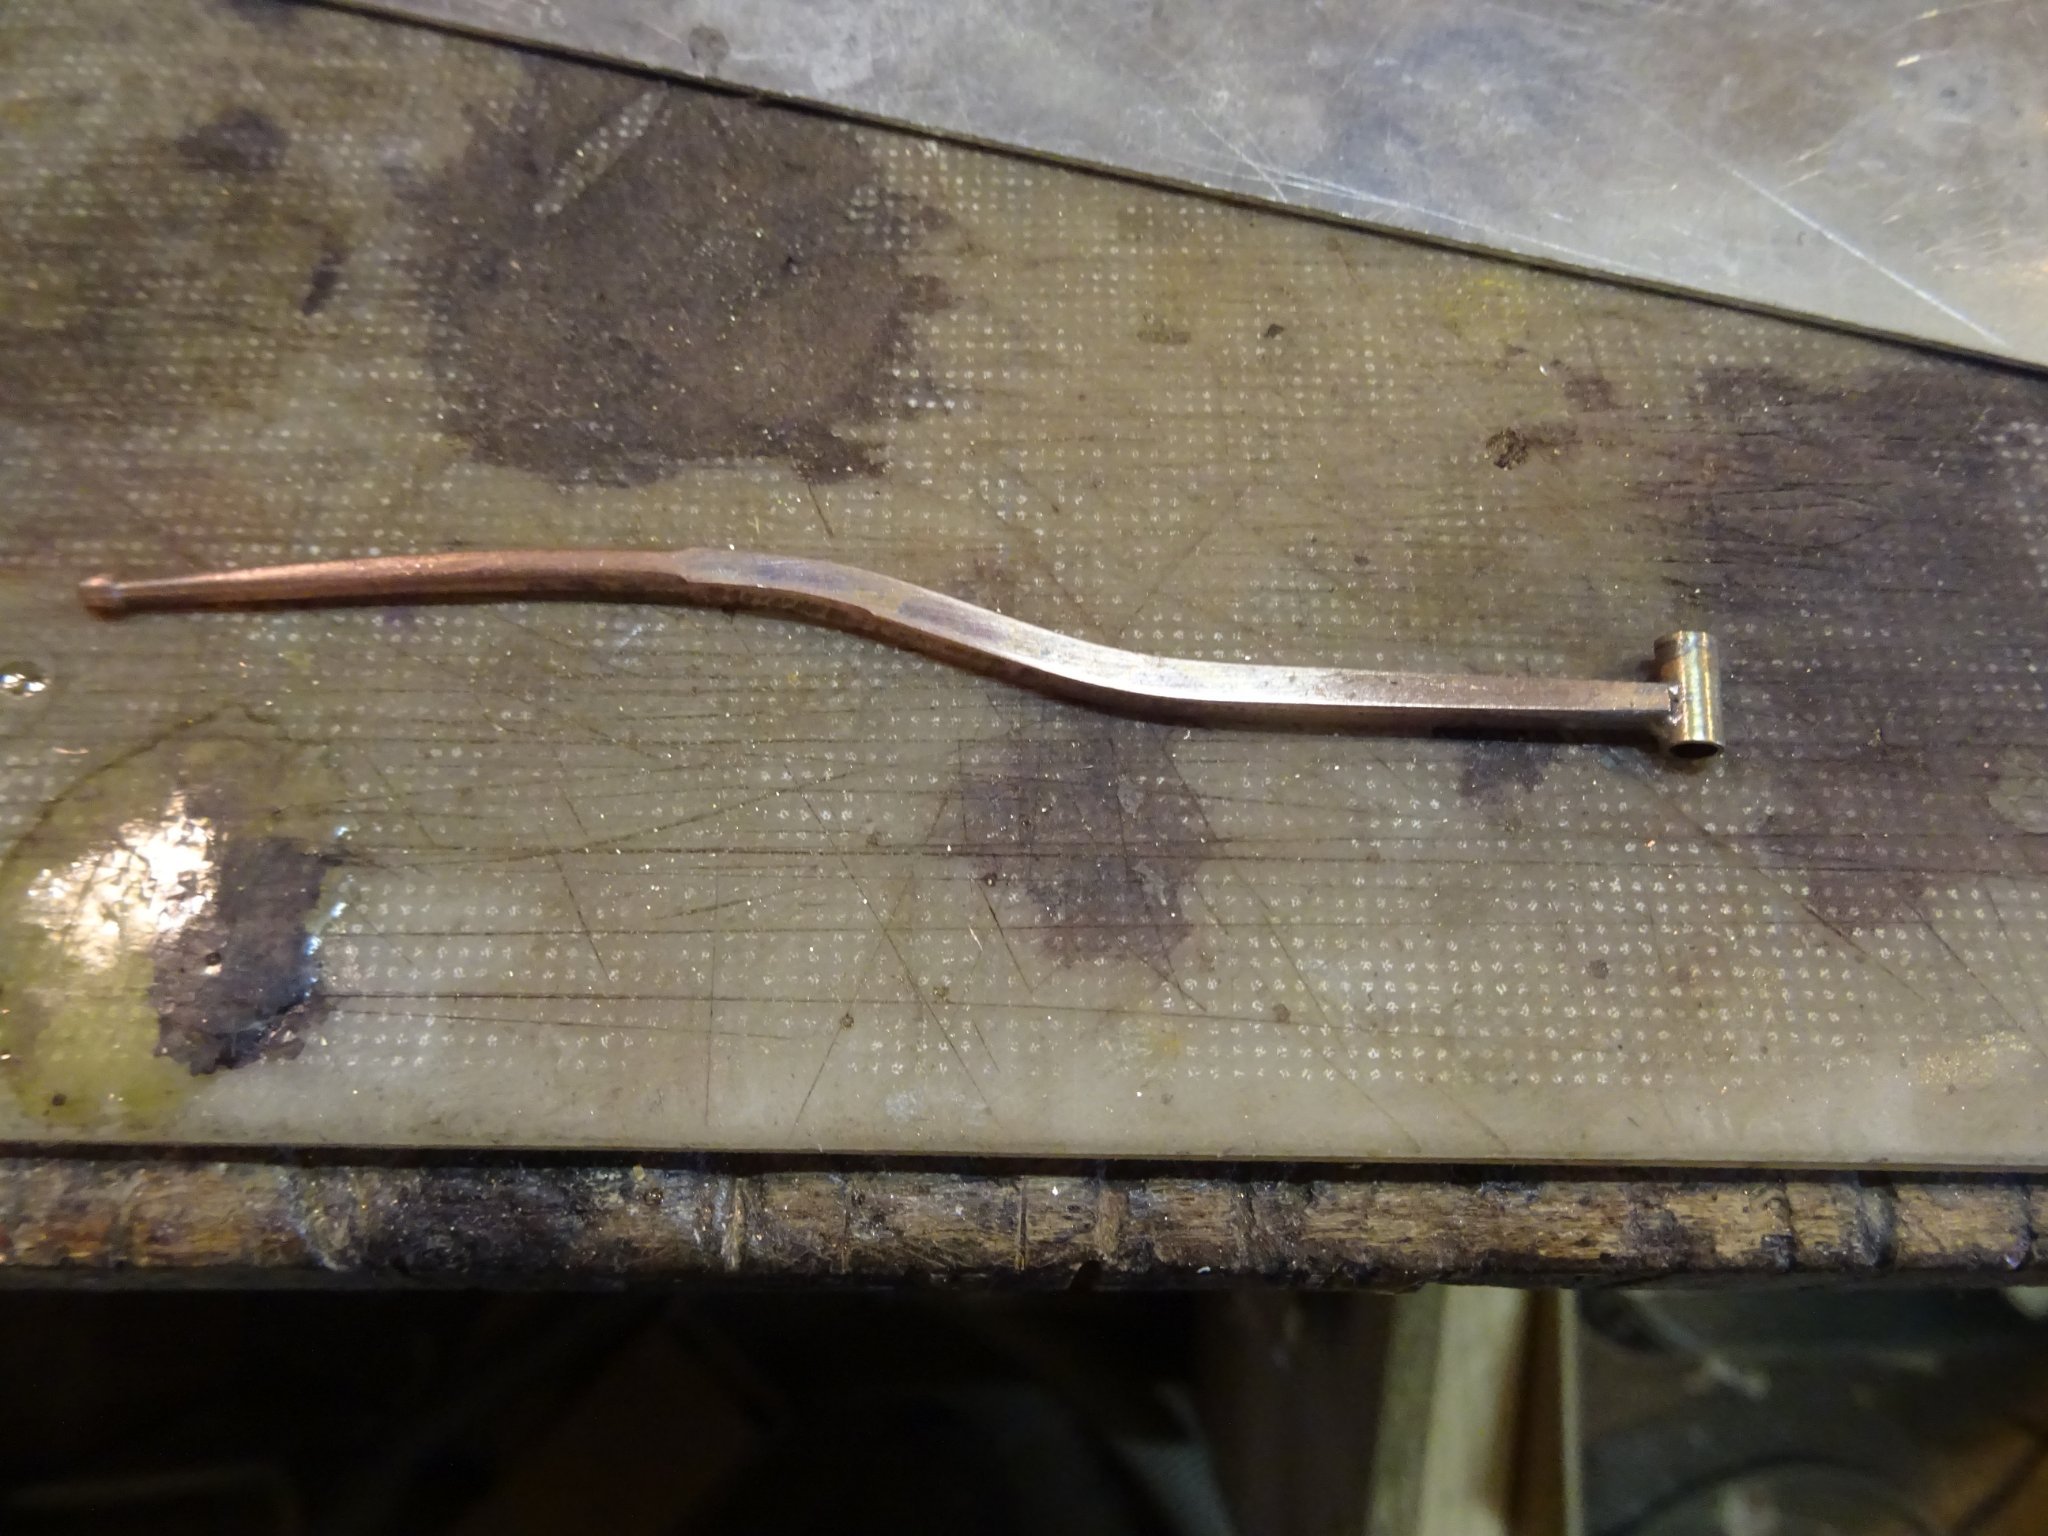
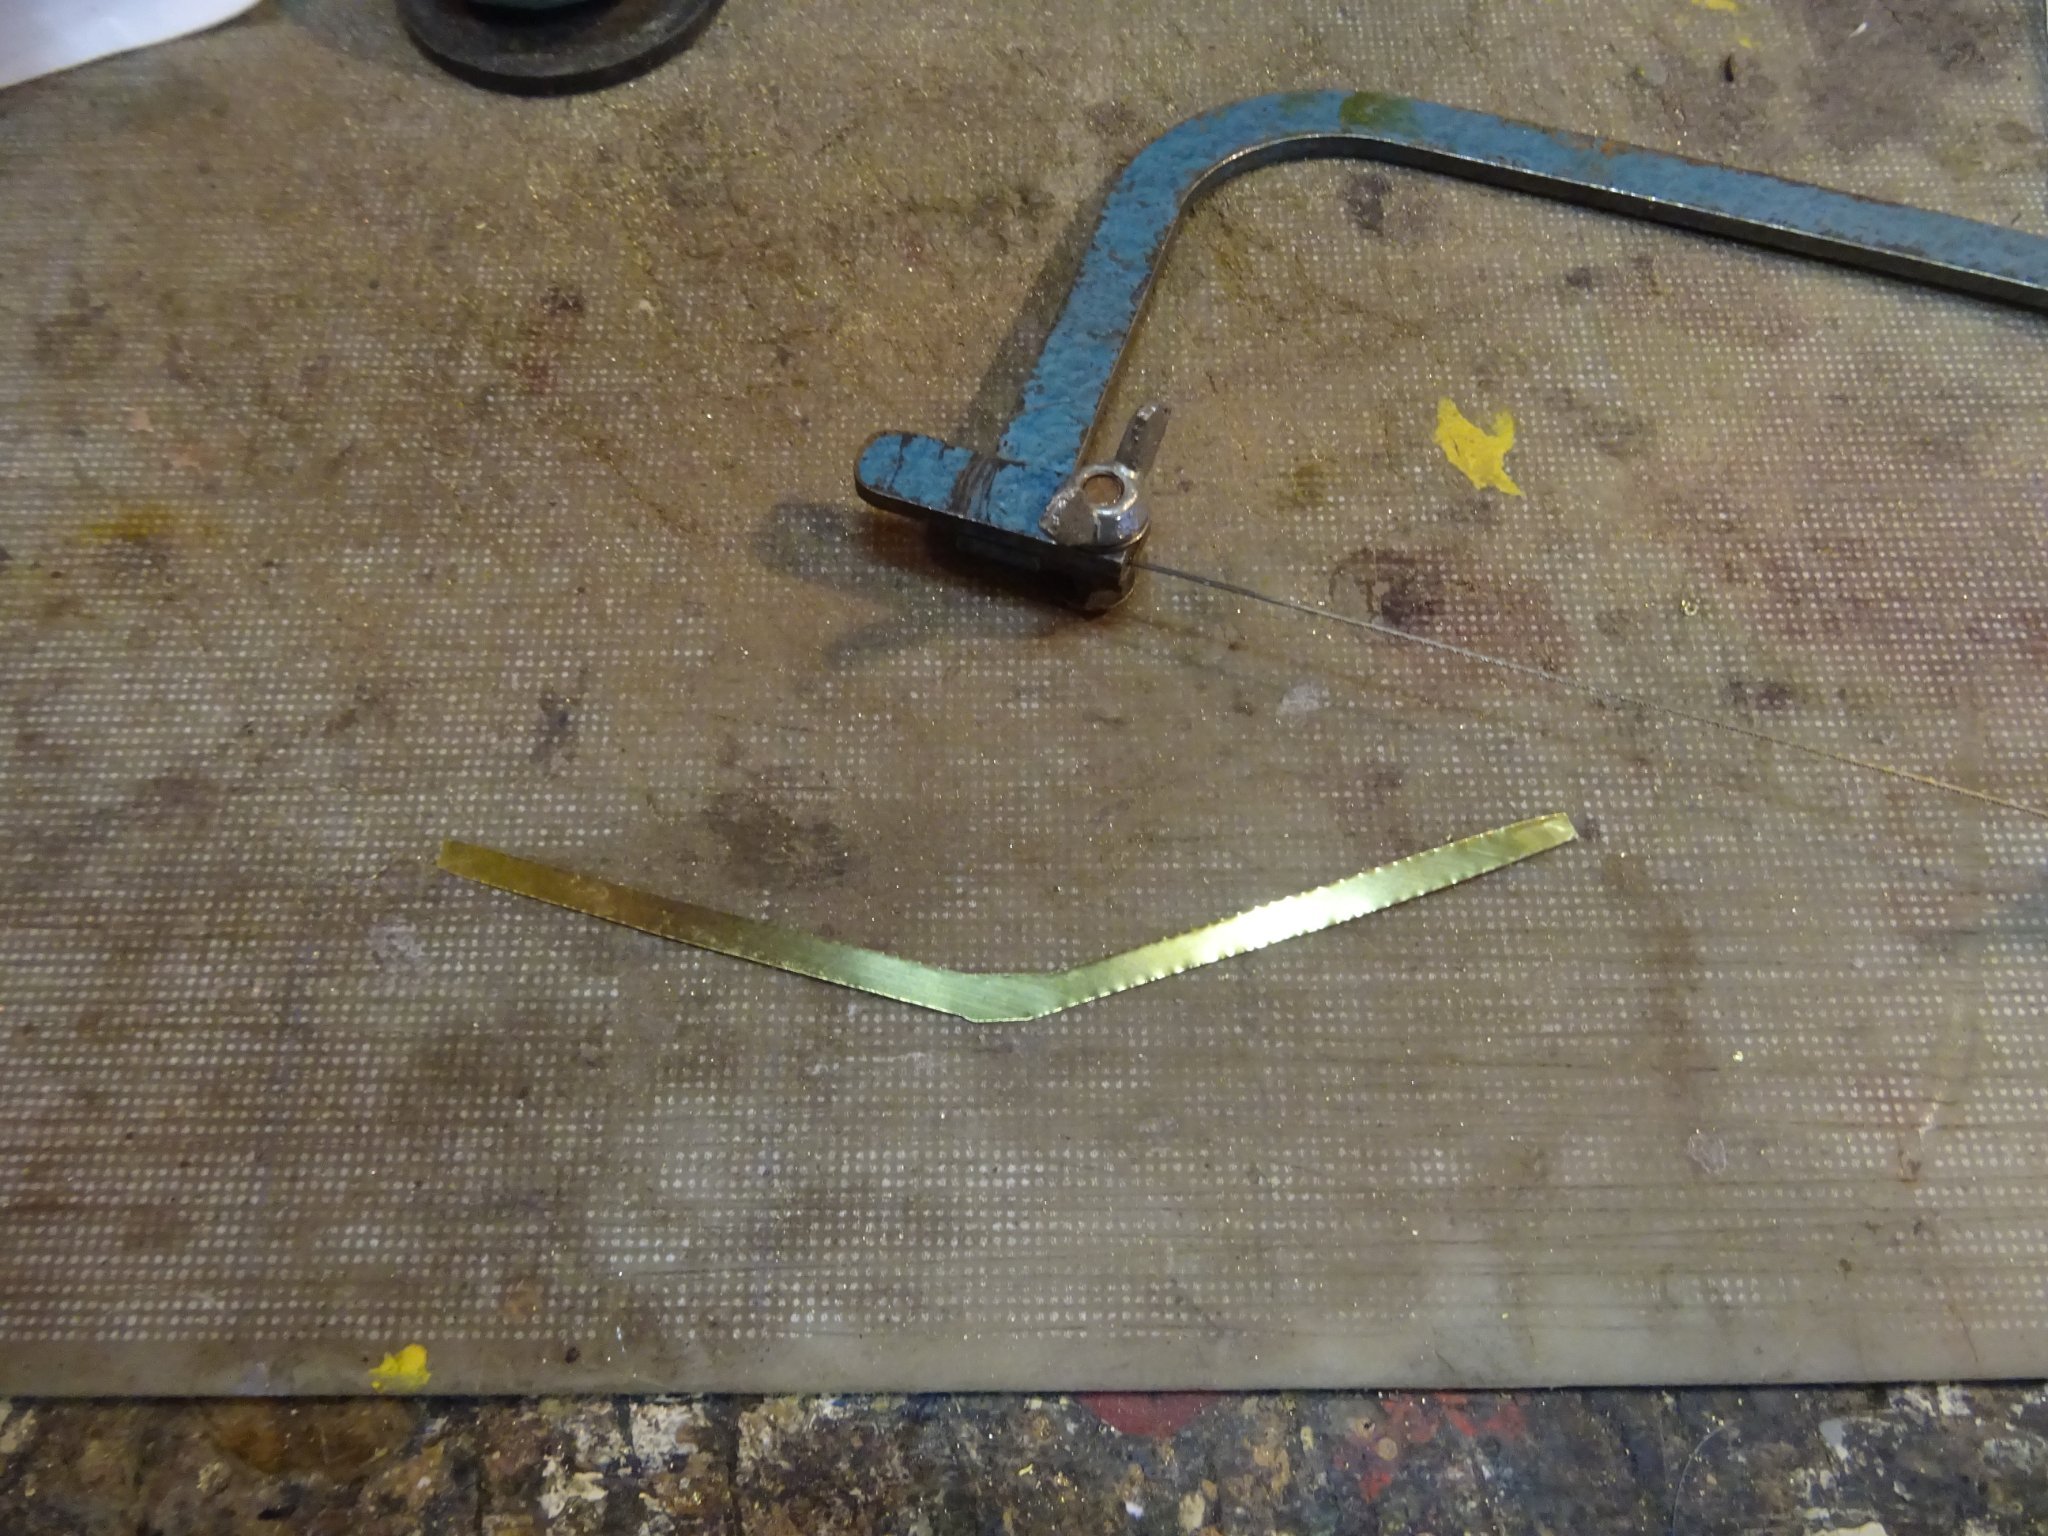
The tiller is made of metal. I saw the strip that I need from a 3 mm thick copper plate that is laying already for many years somewhere in my workshop.
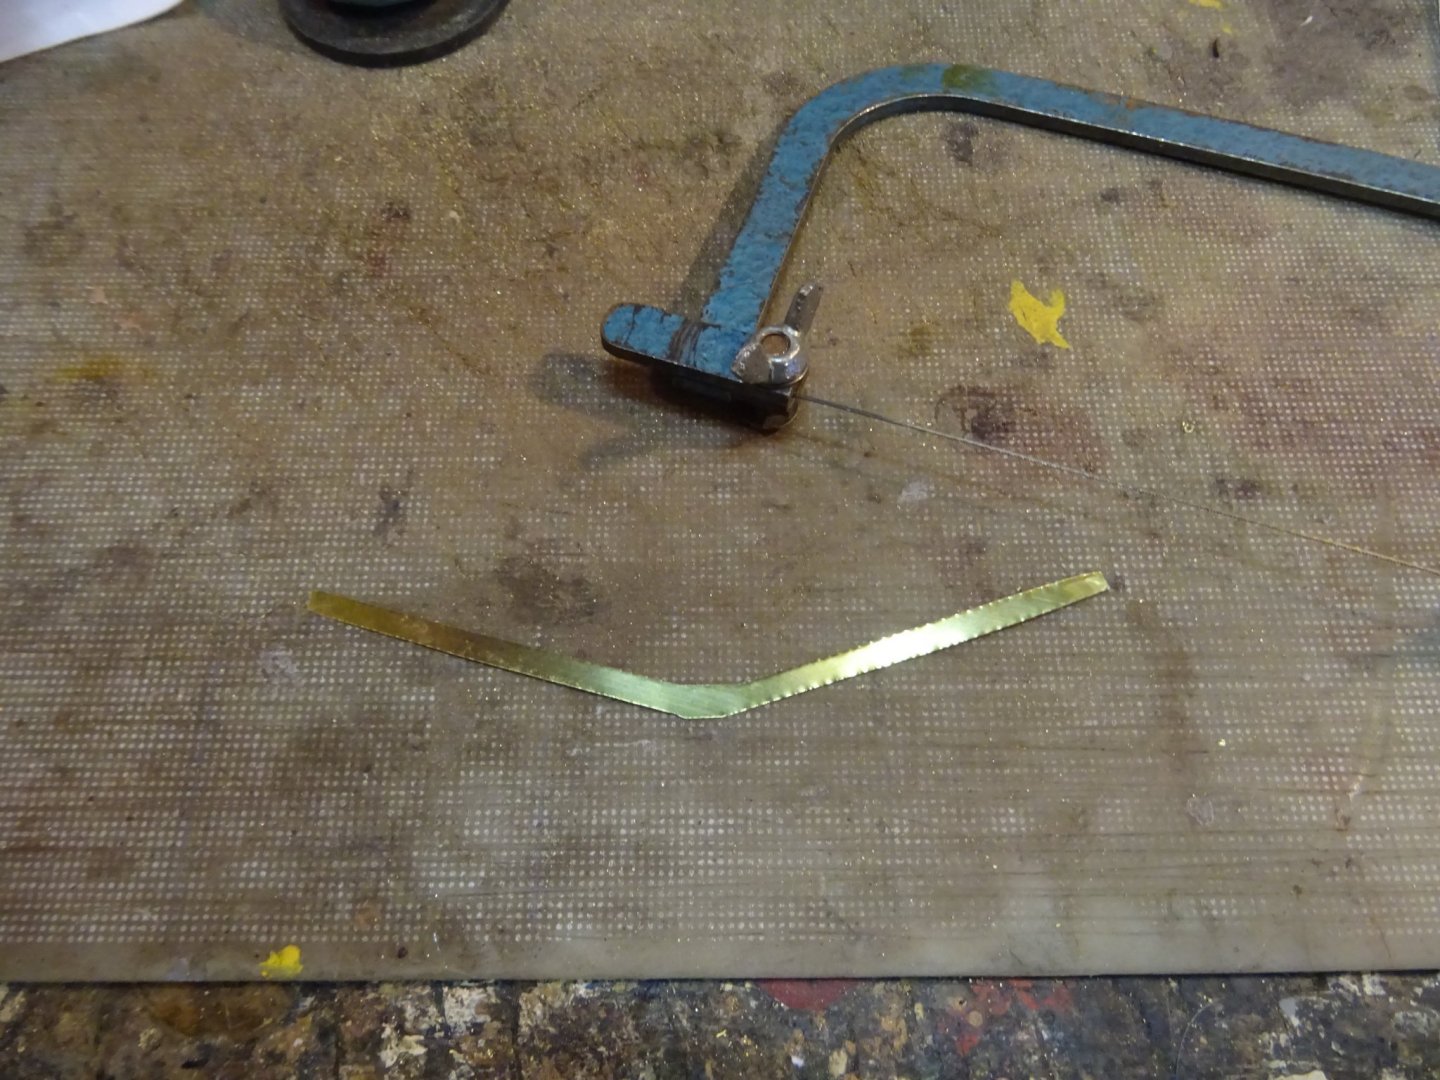
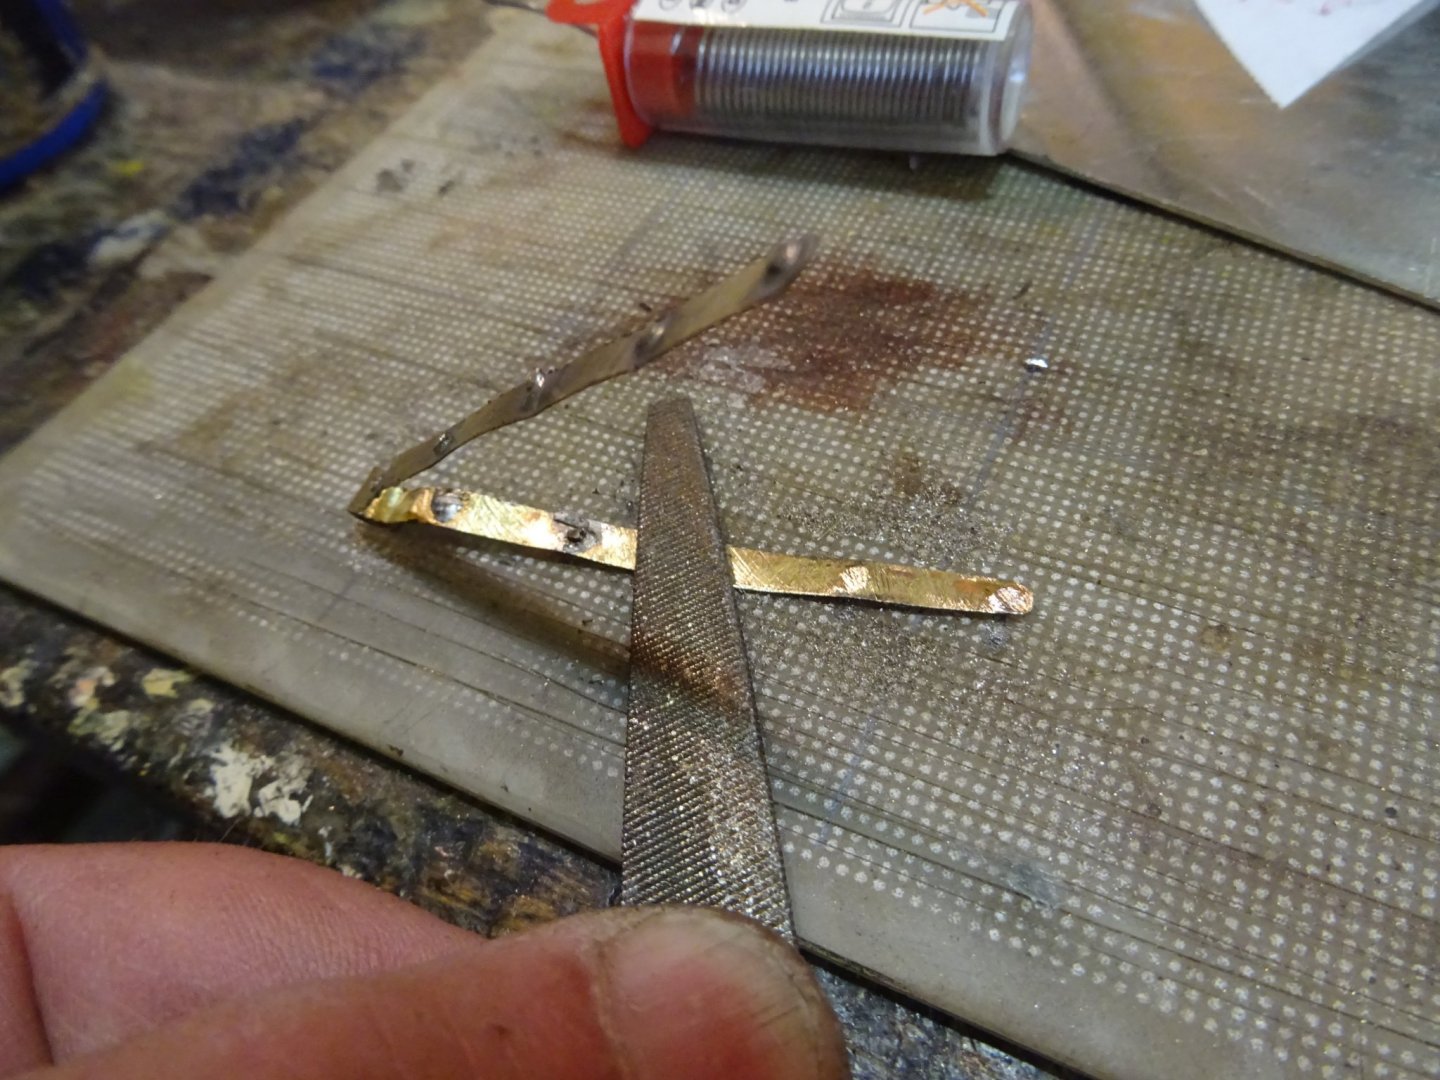
I file the strip in the desired shape.
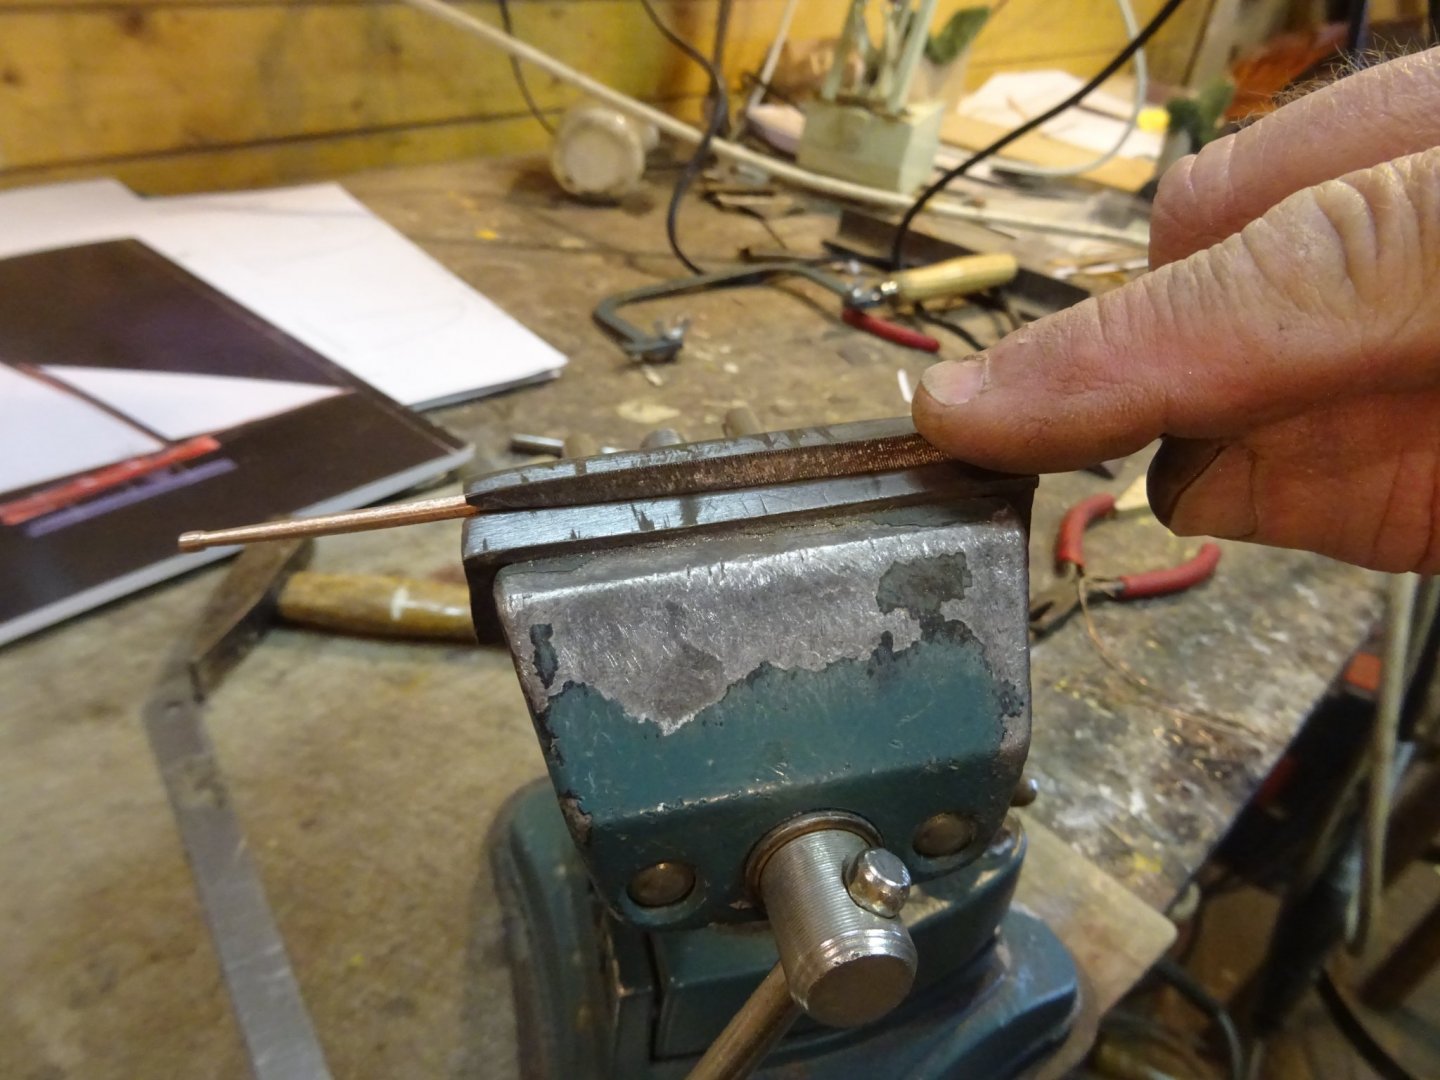
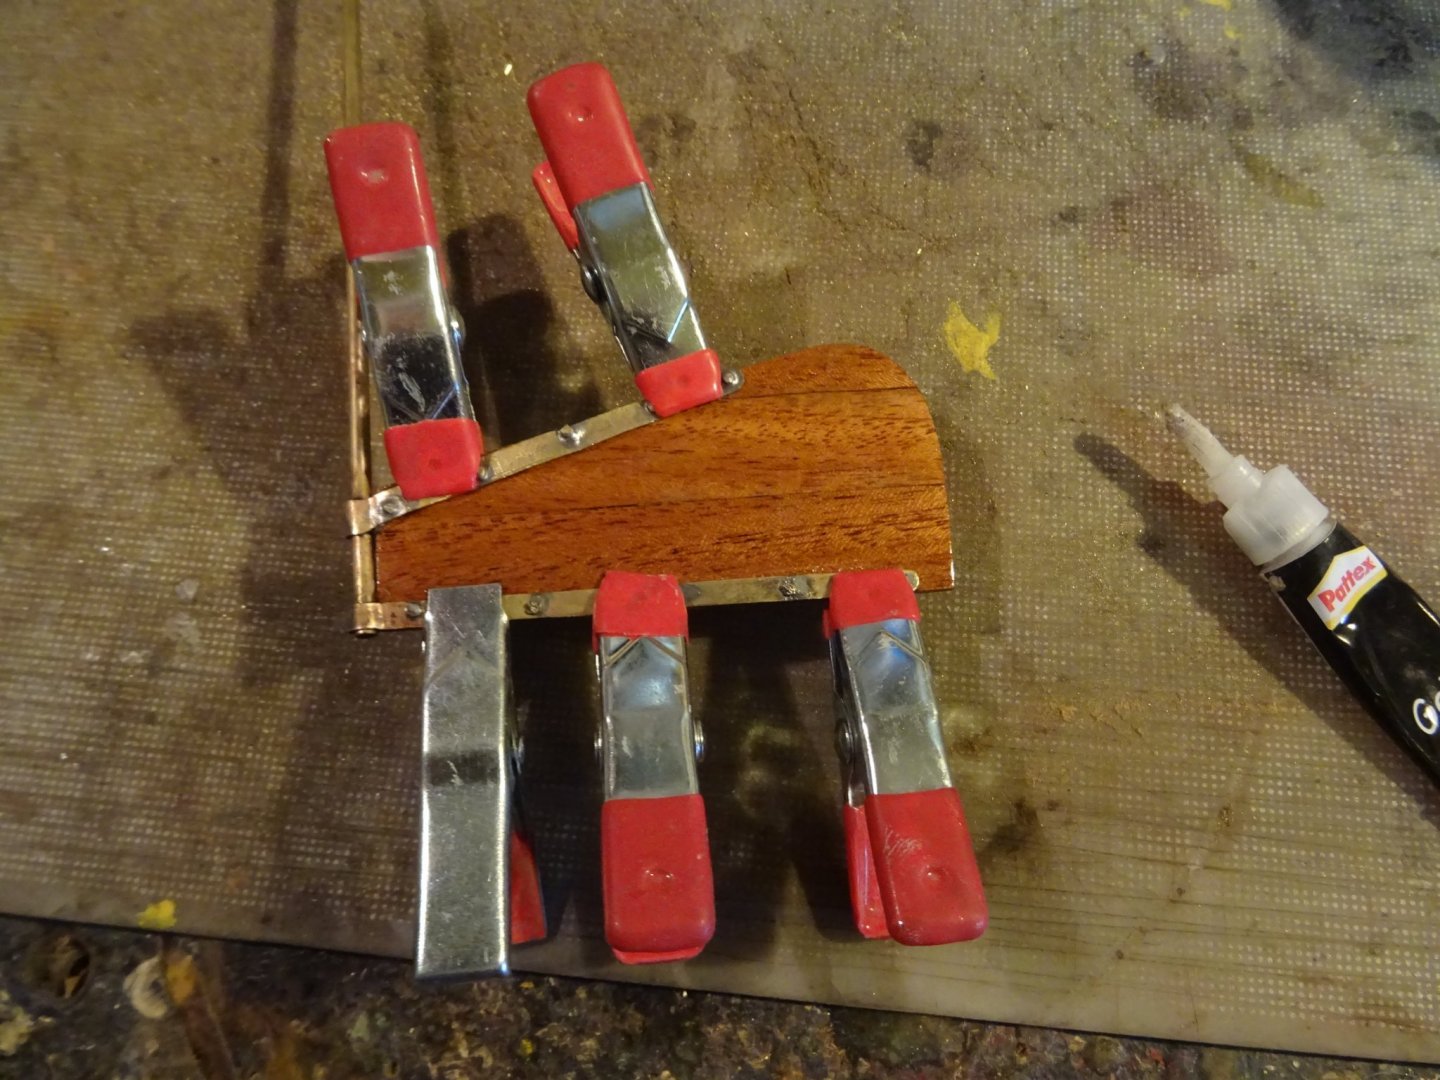
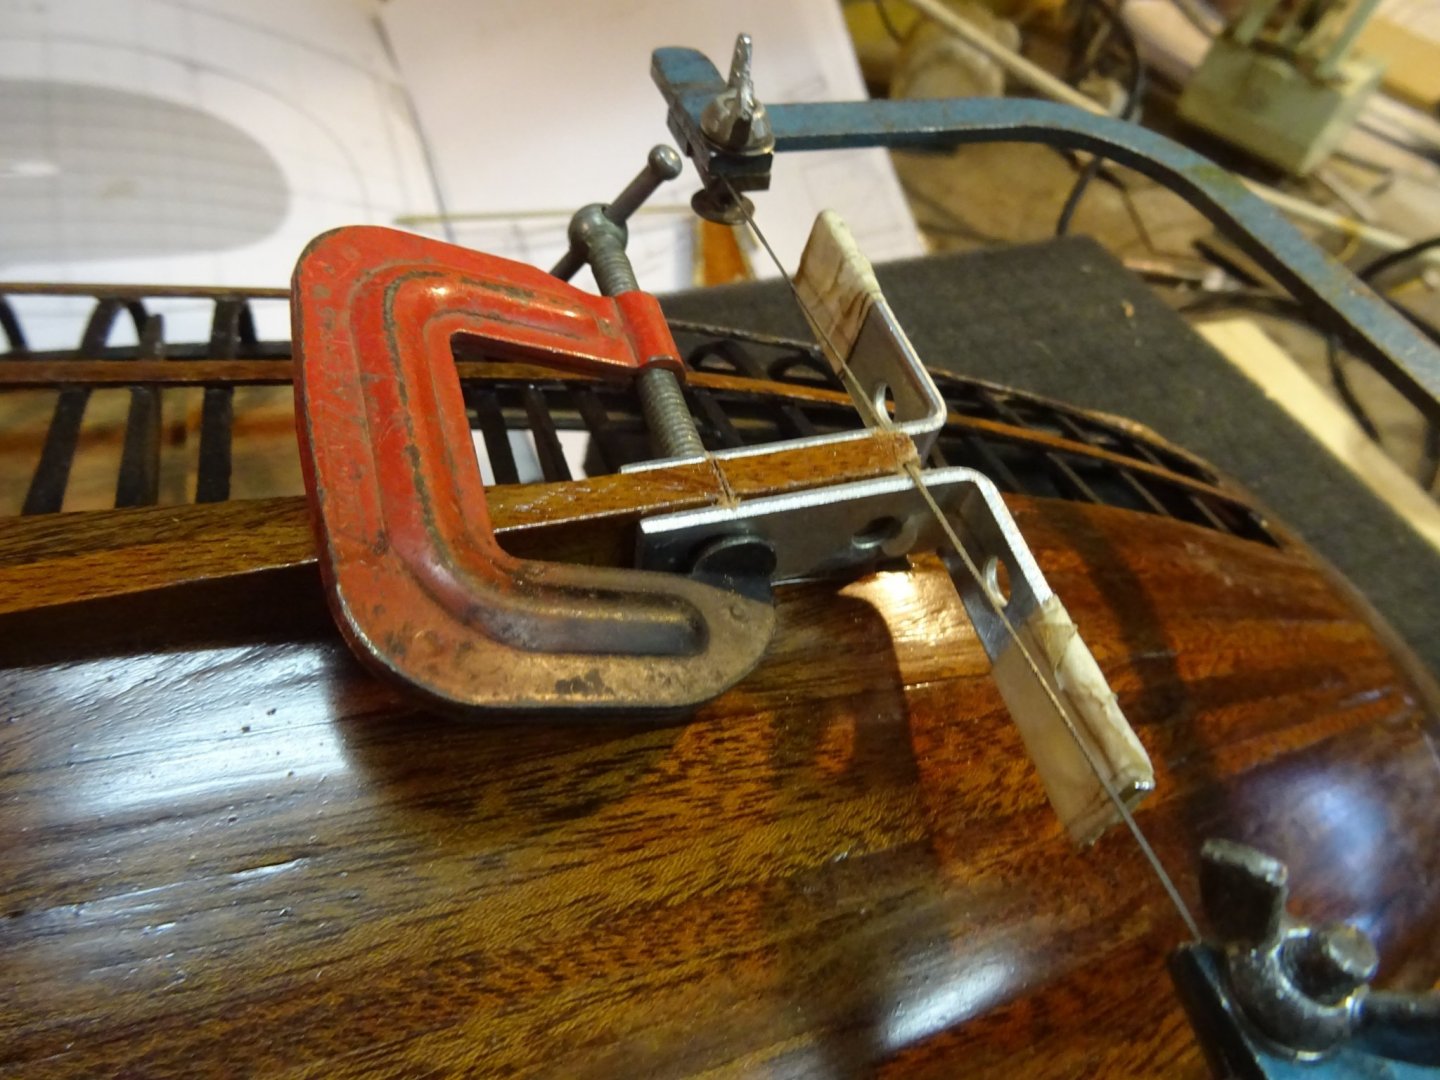
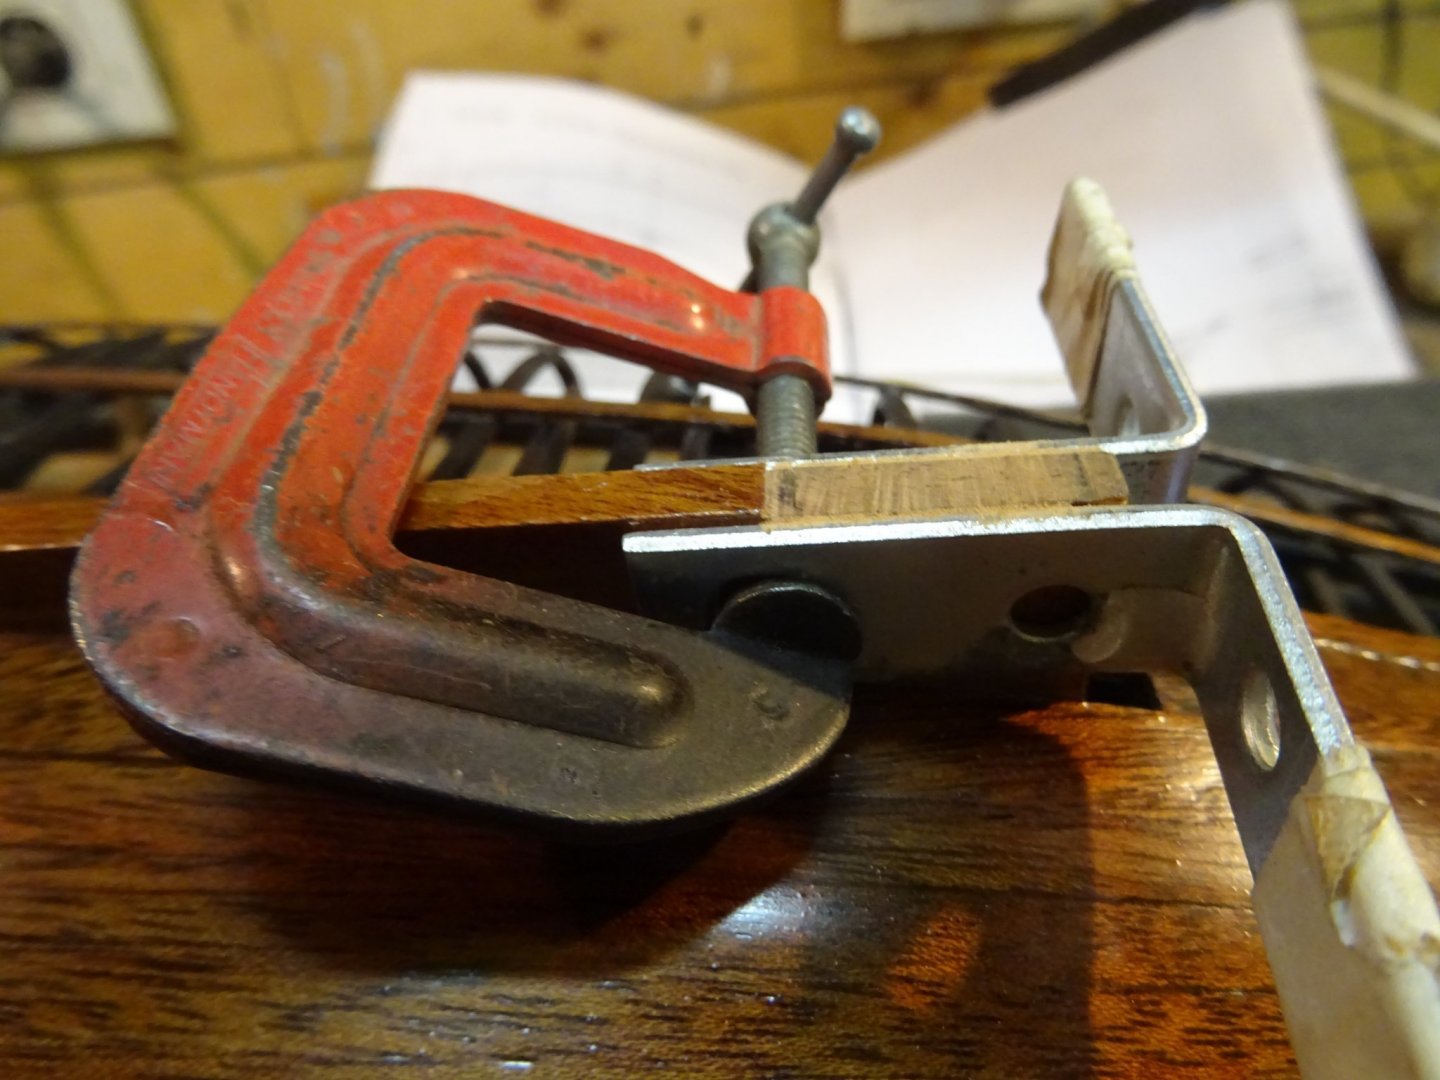
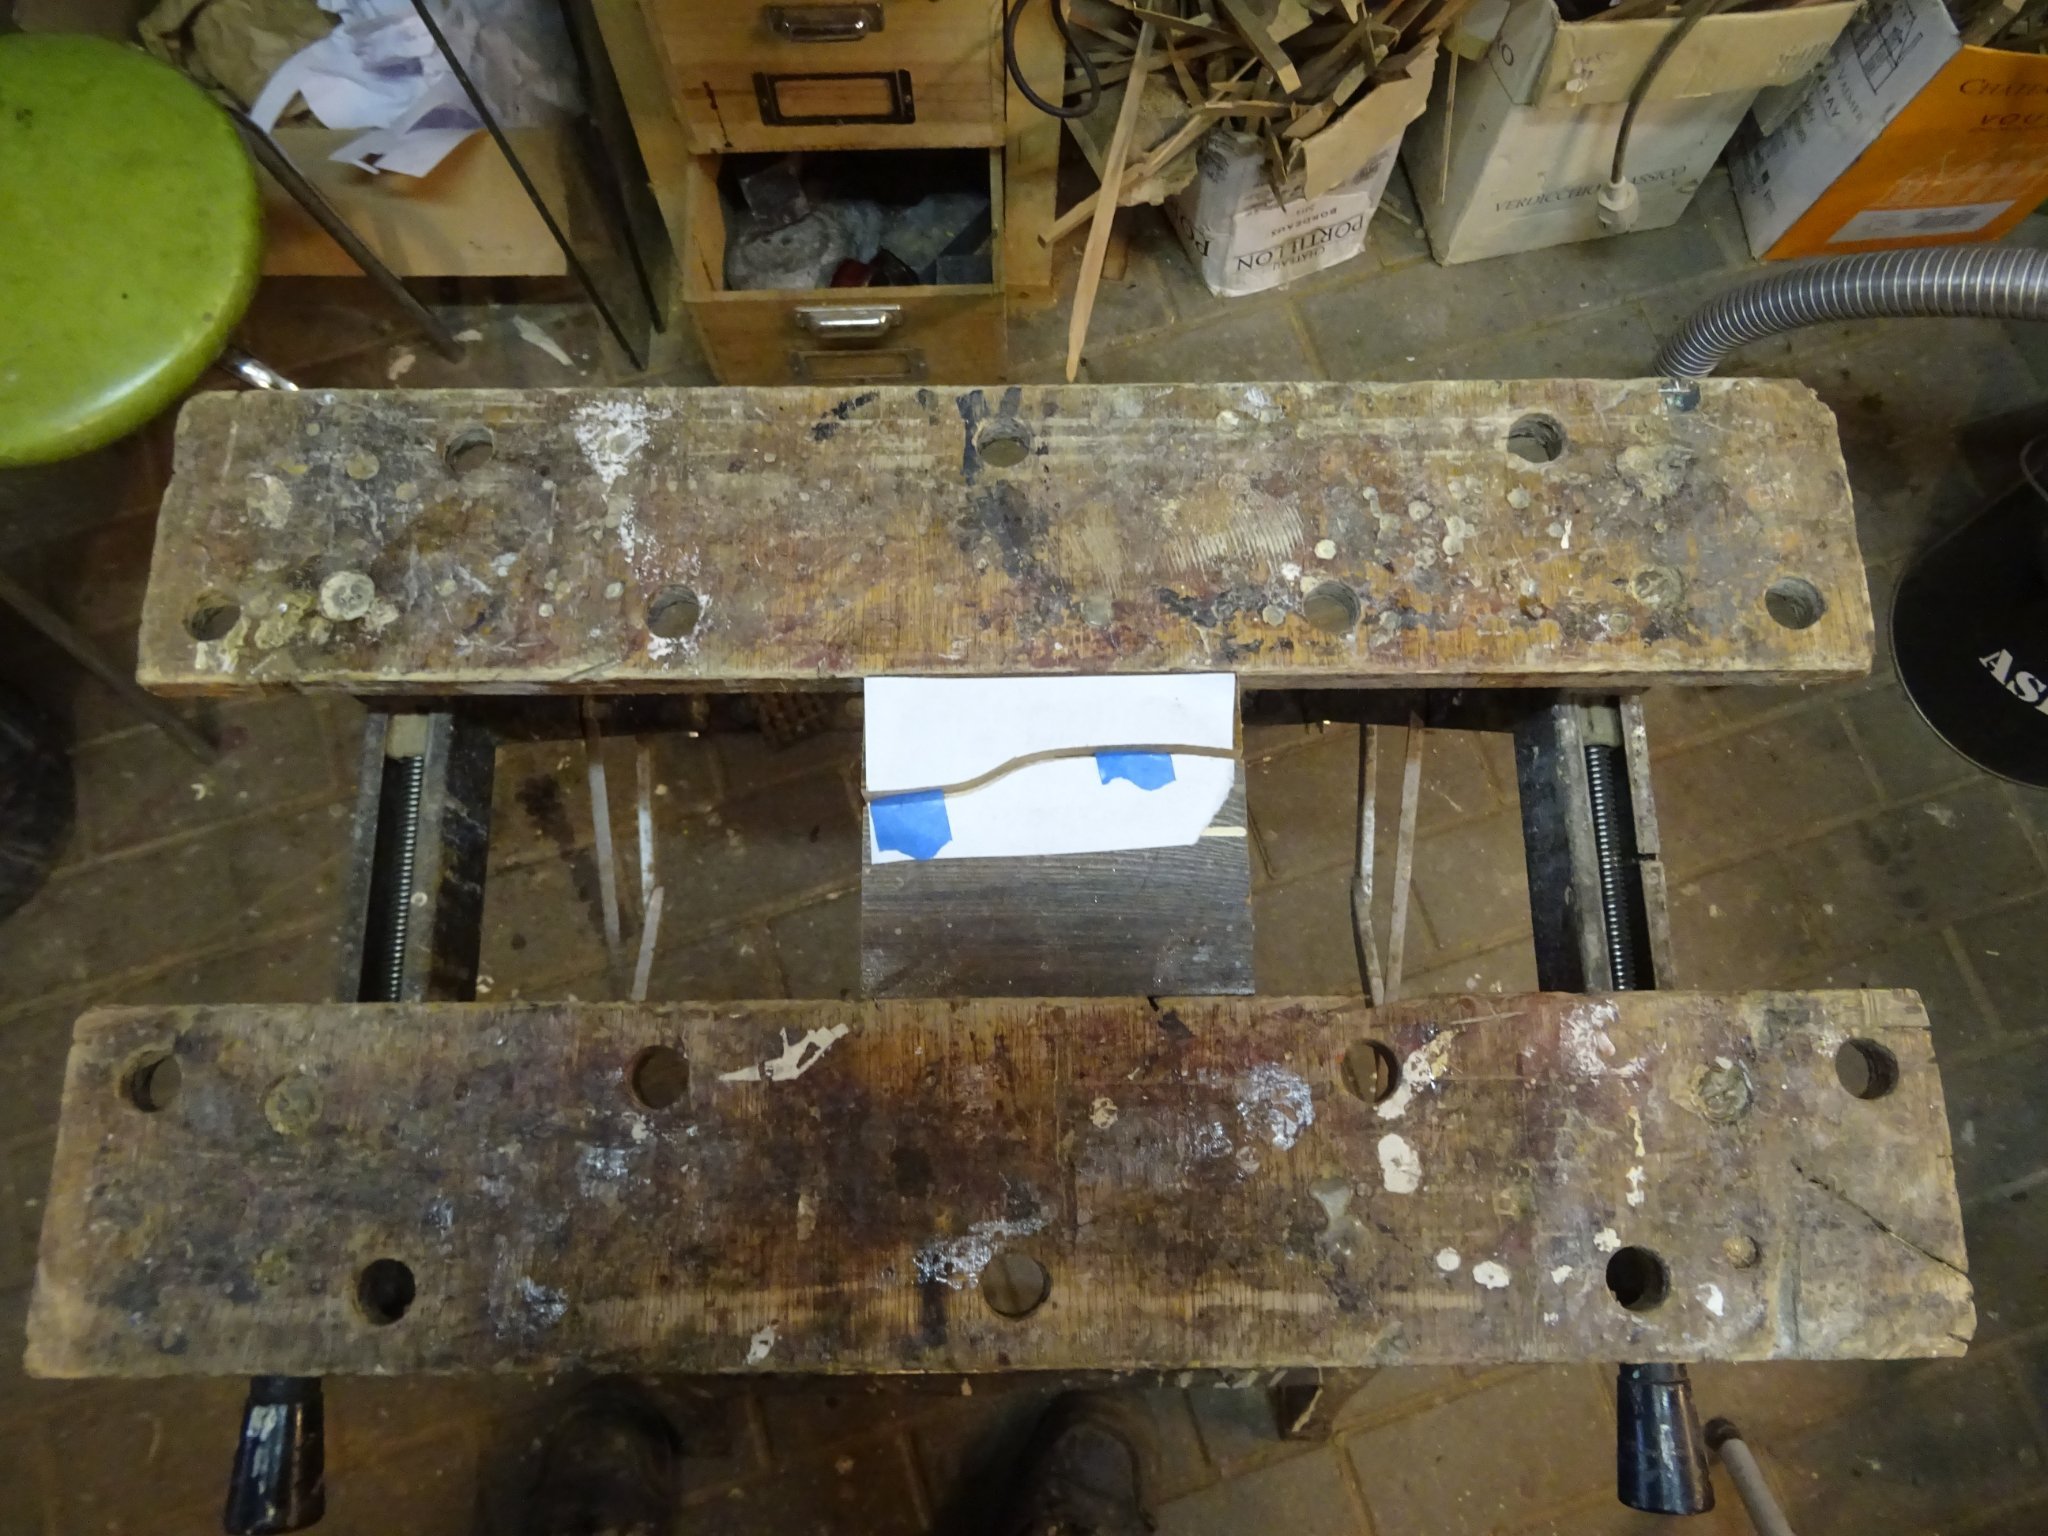
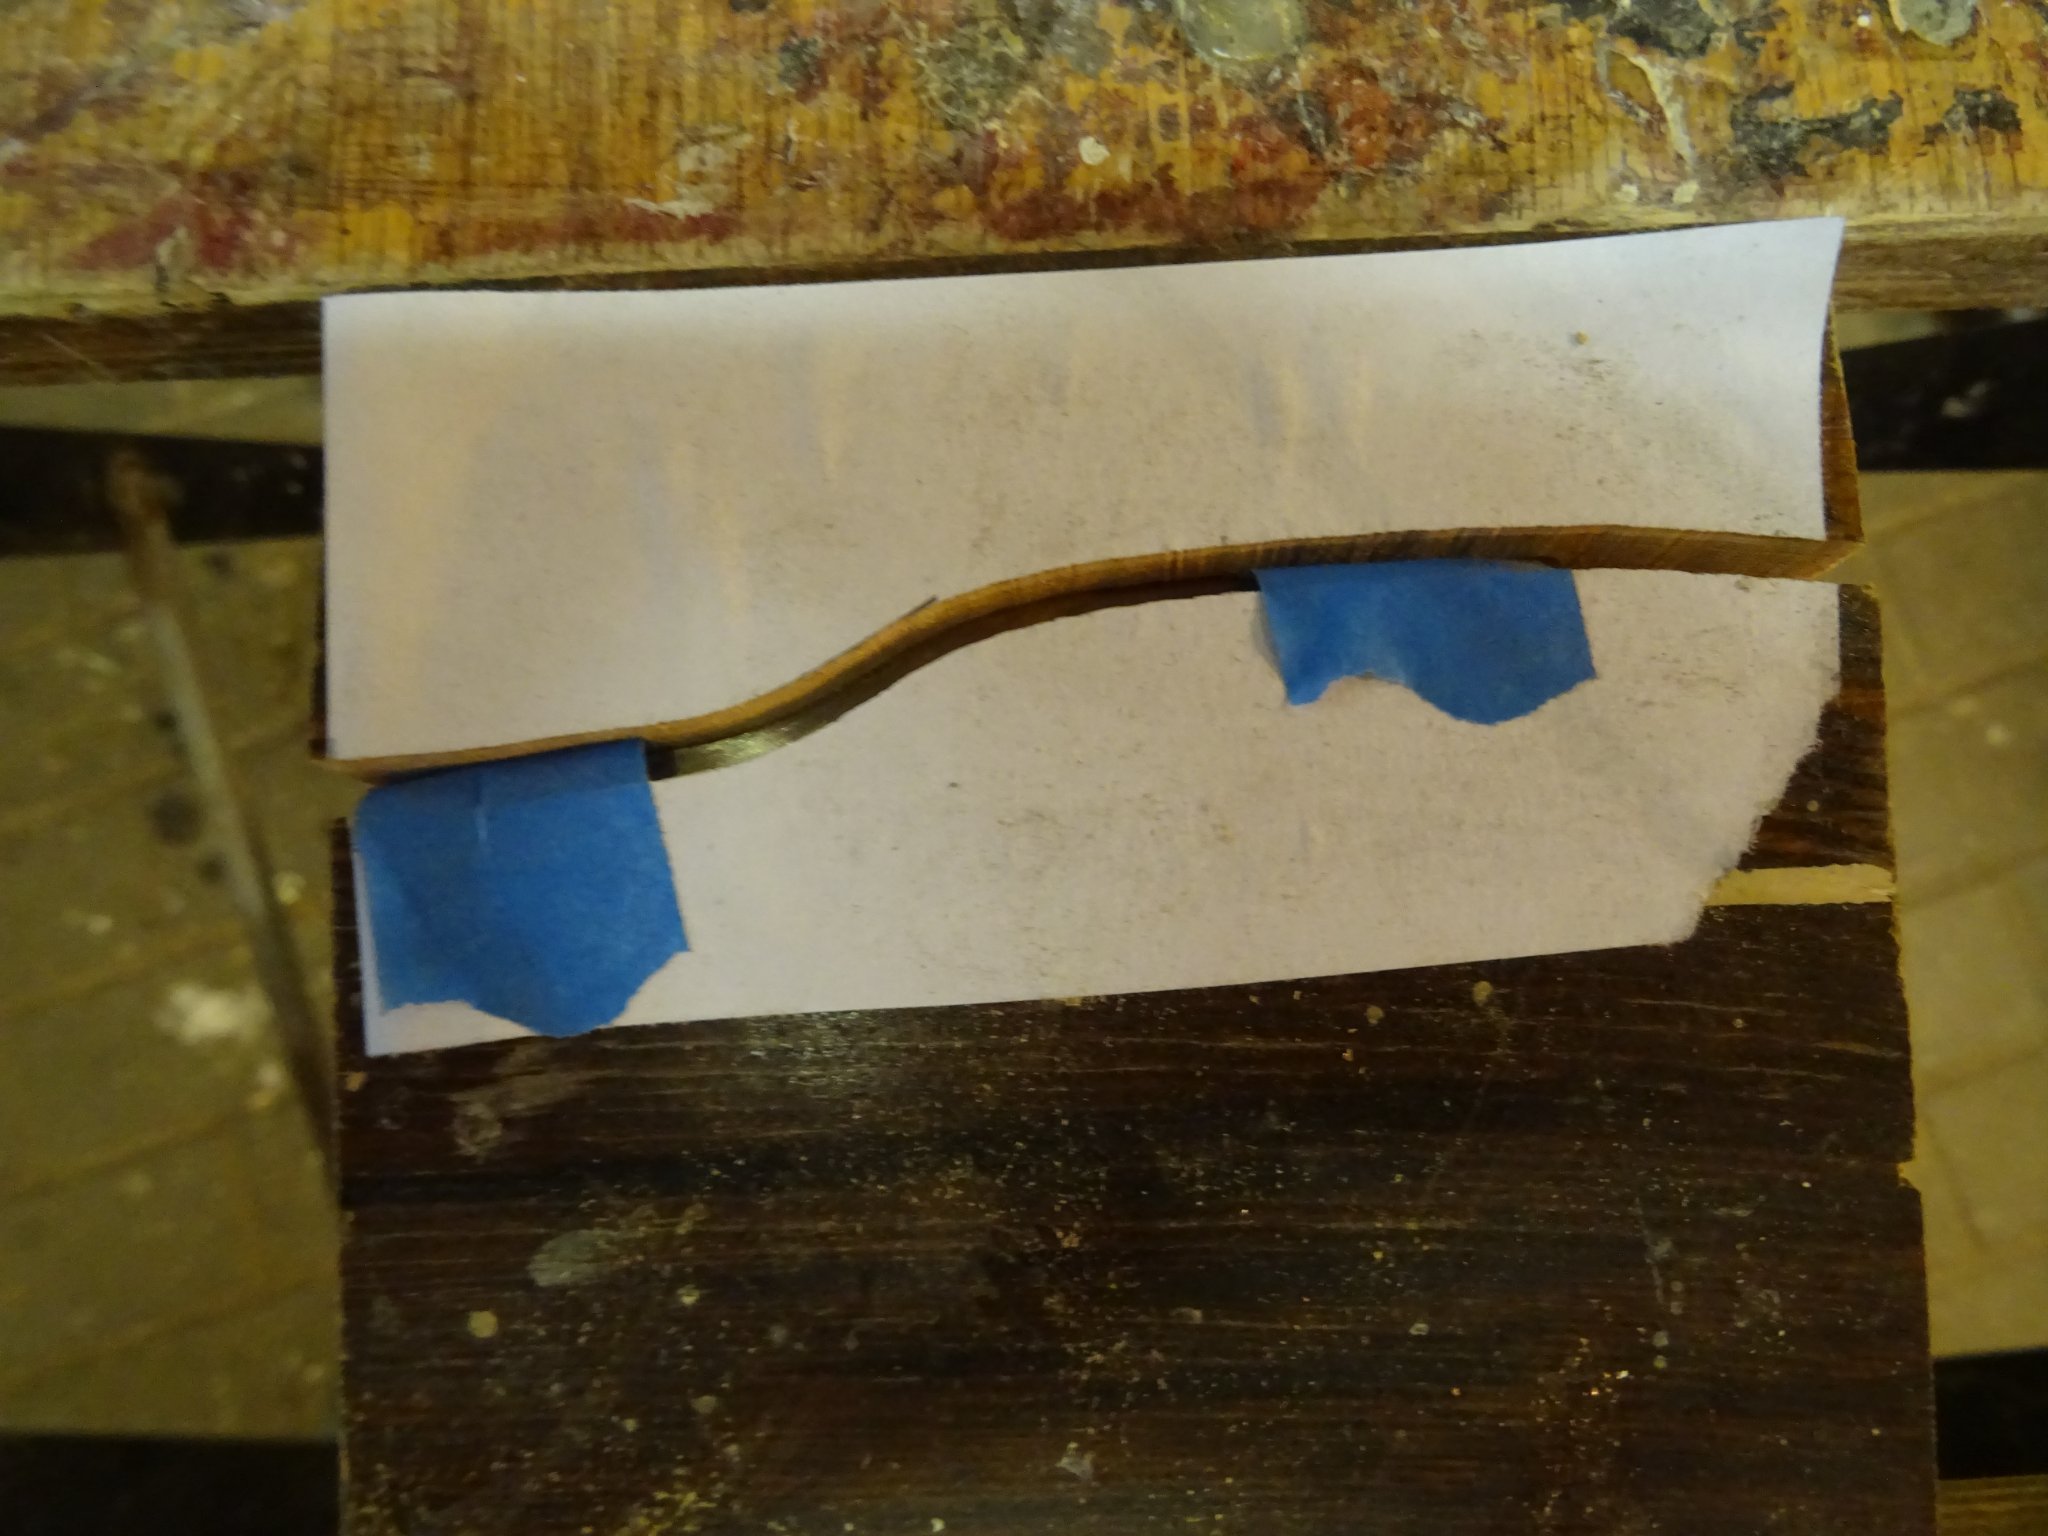
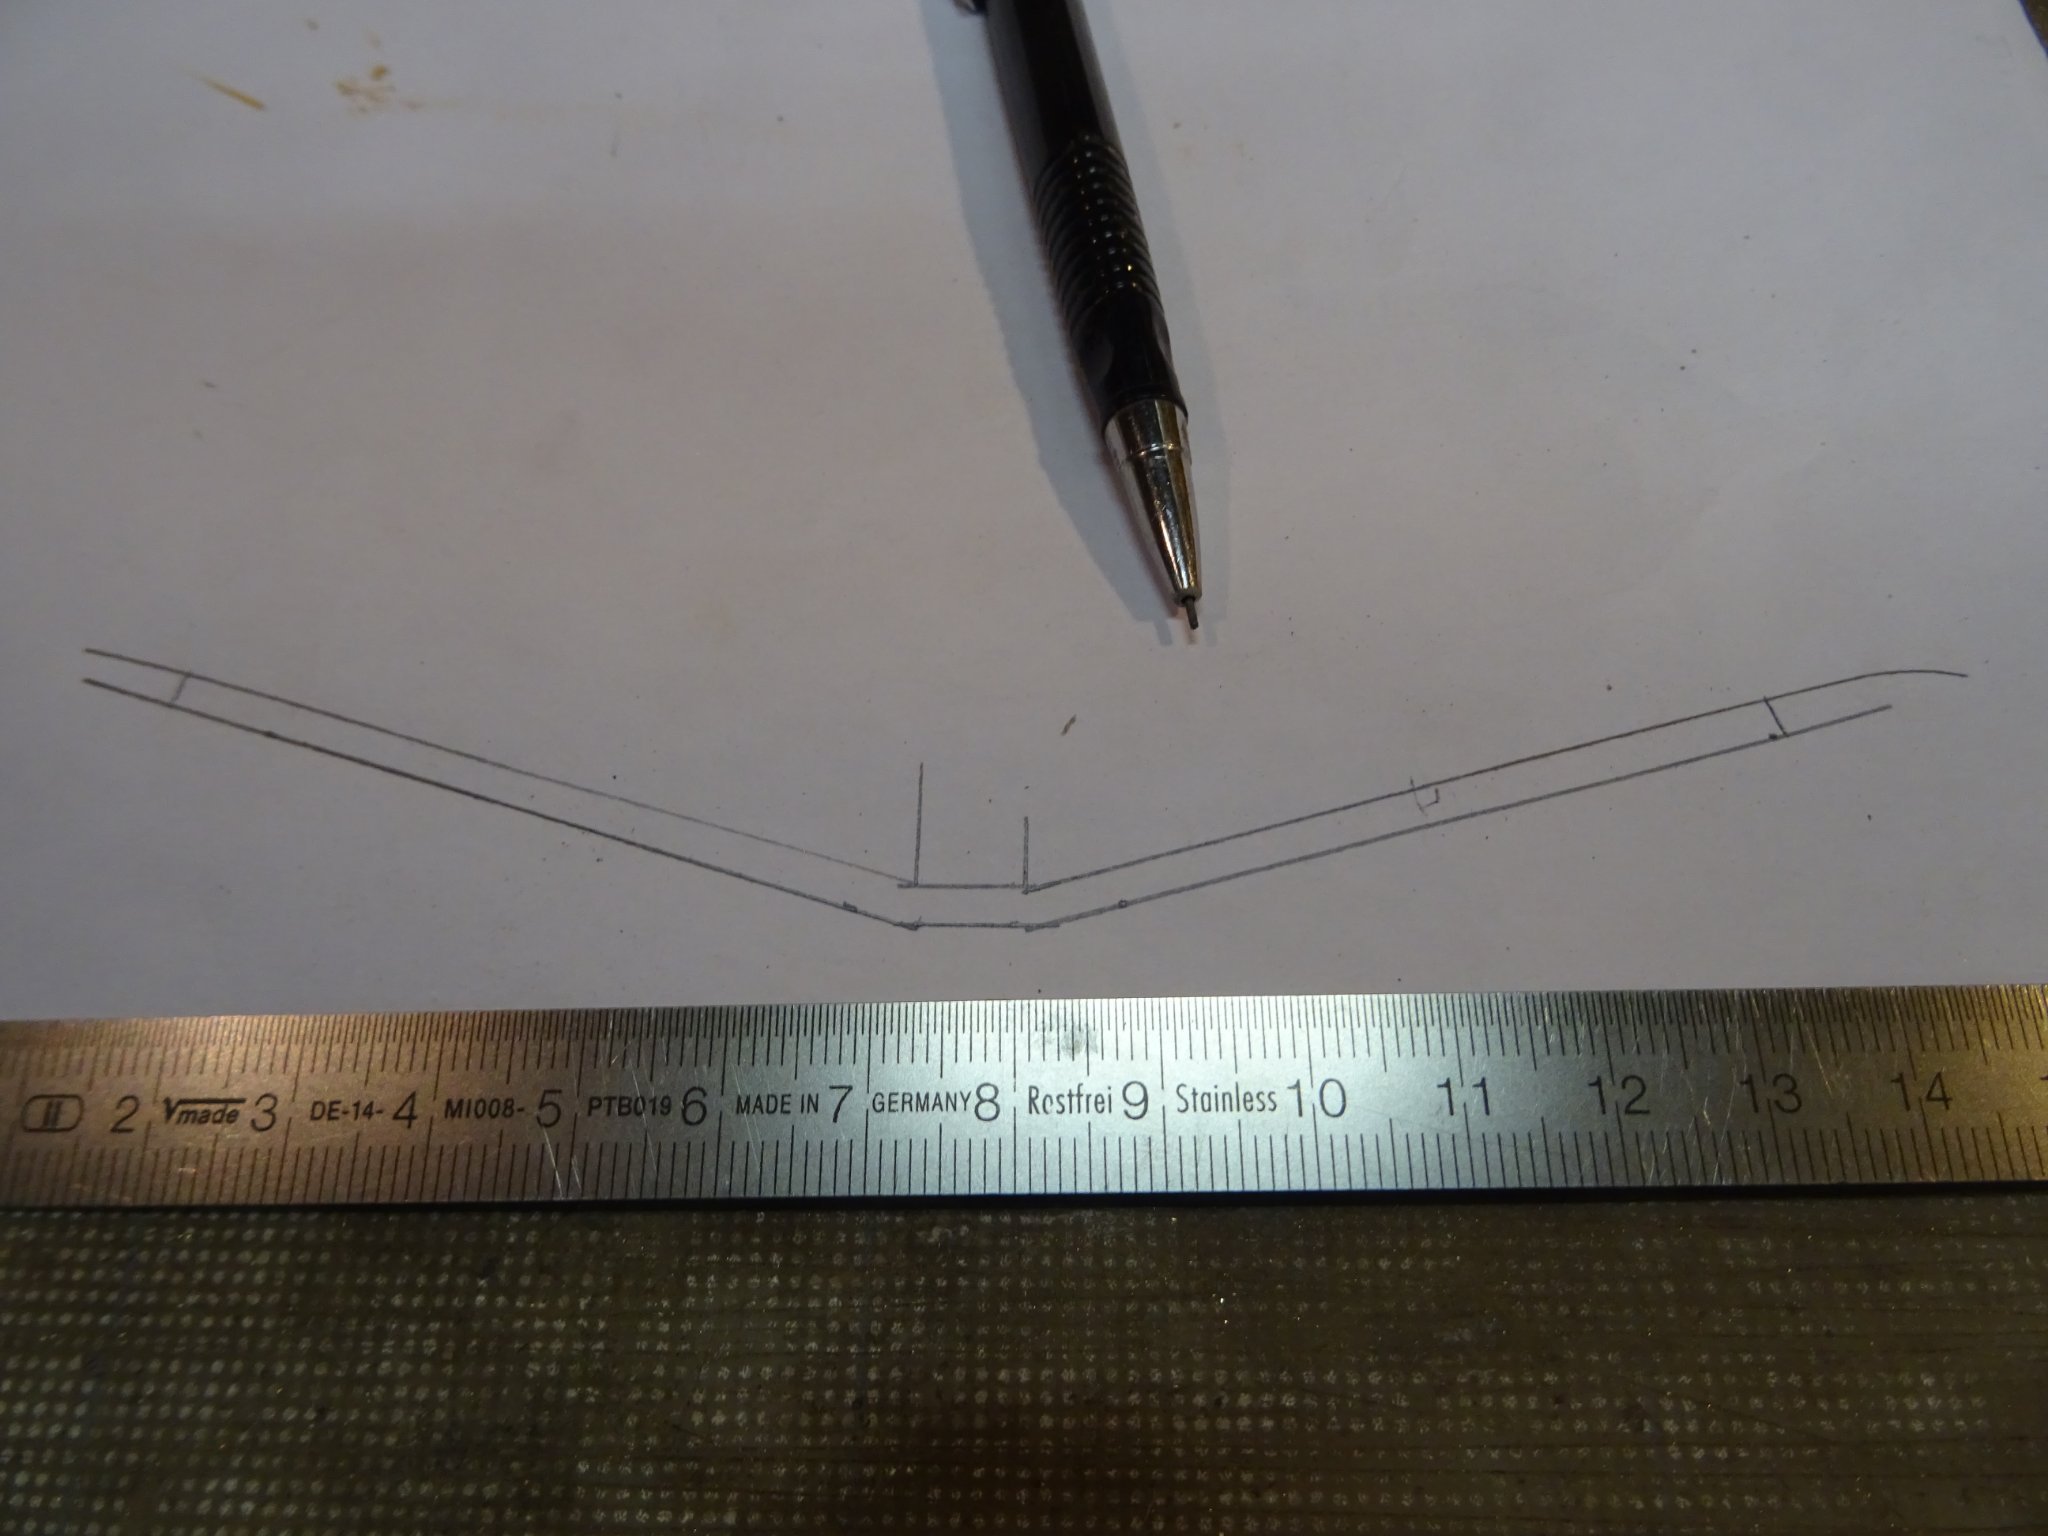
My tiller is now shaped but still straight, like this it cannot pass over the cockpit coaming. The tiller must be bent.
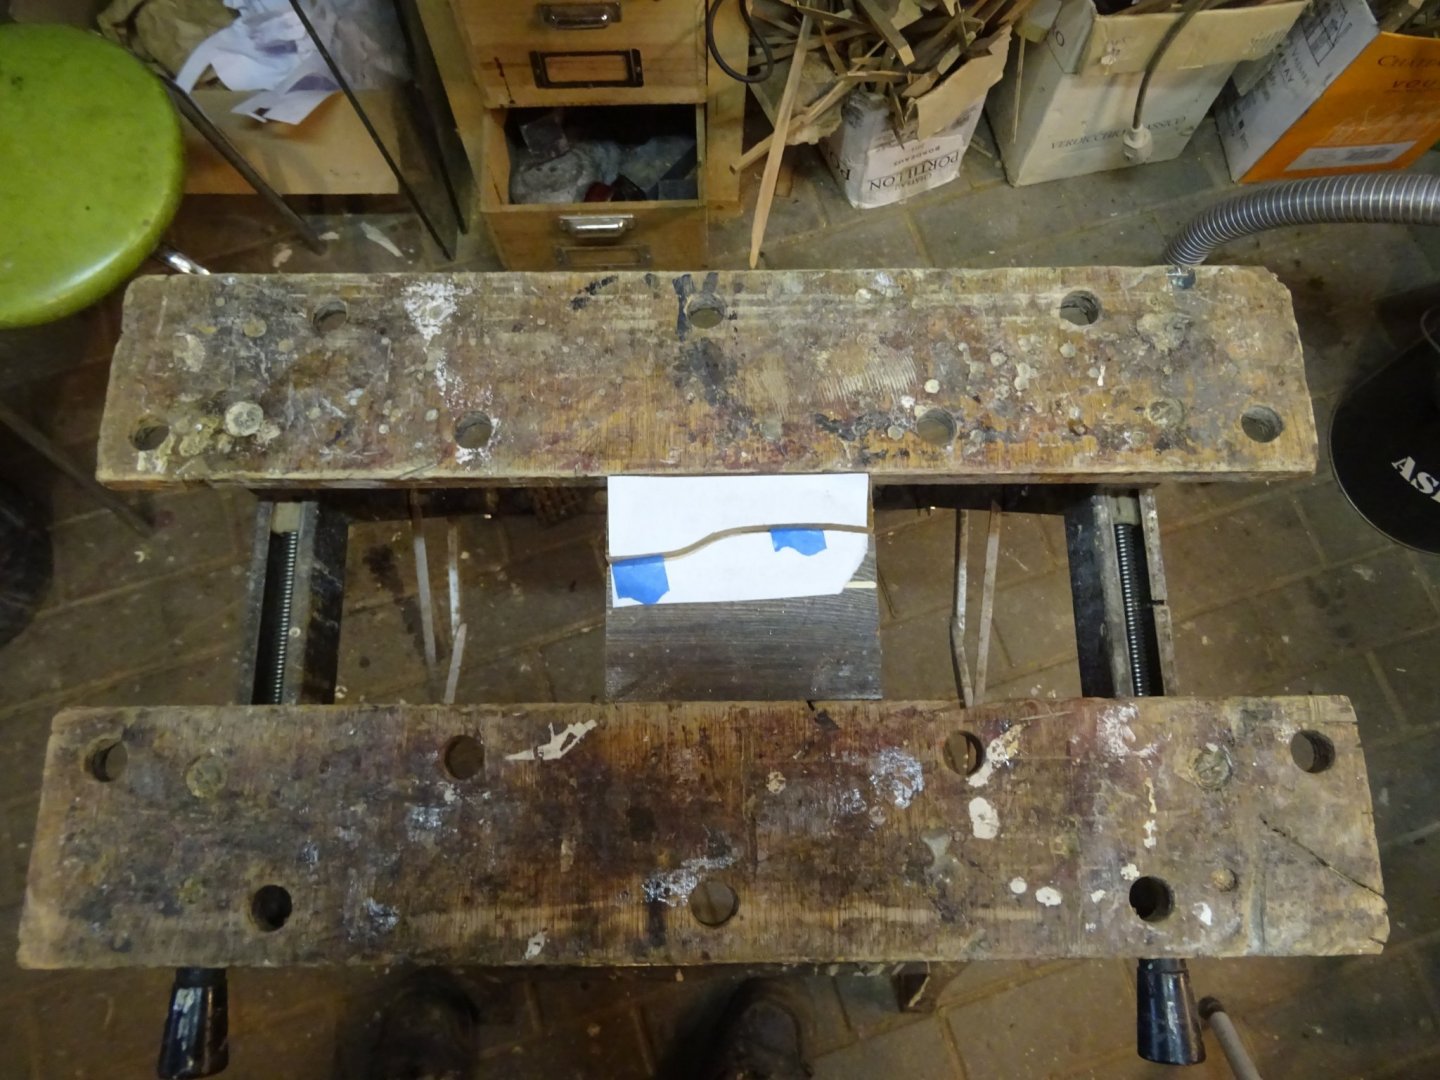
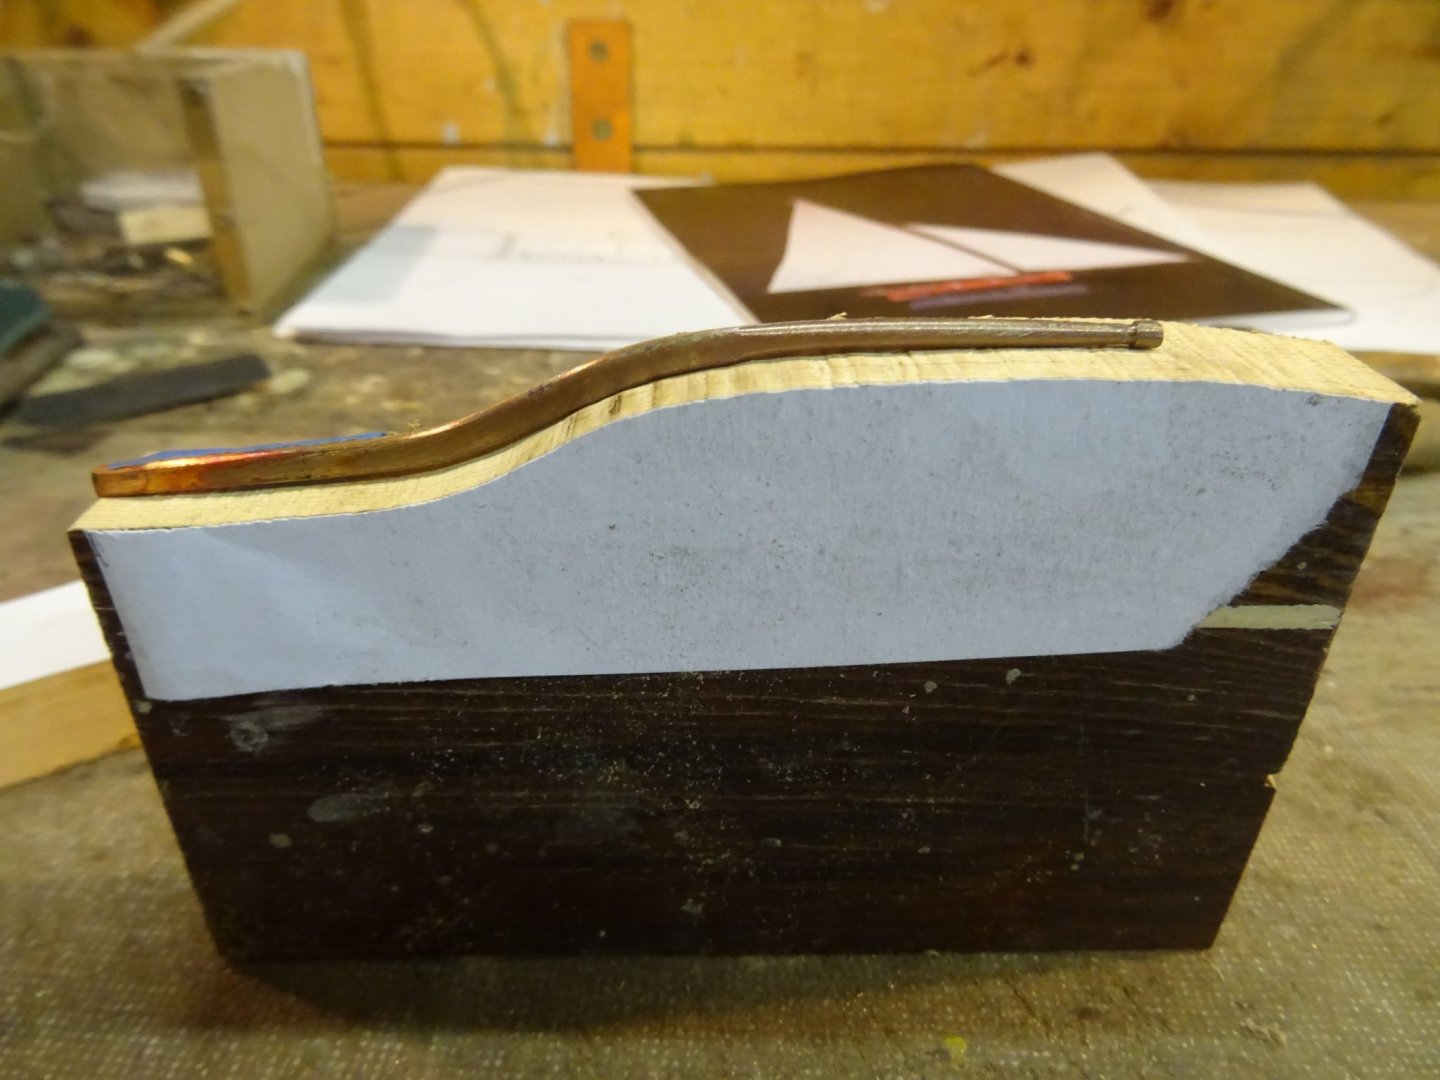
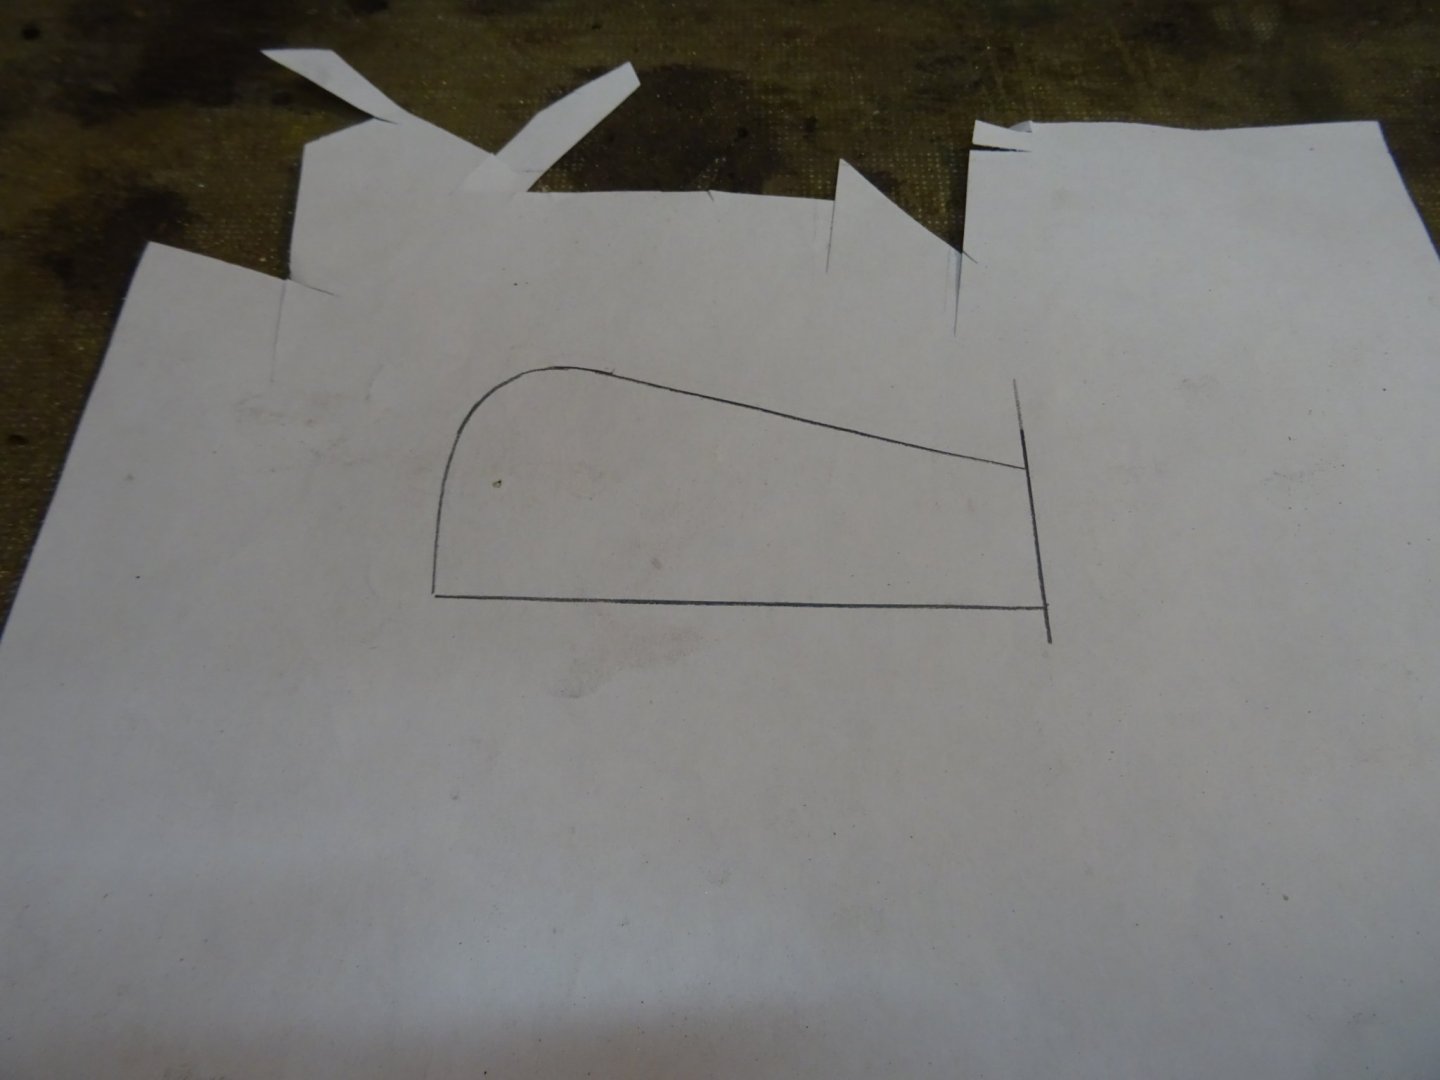
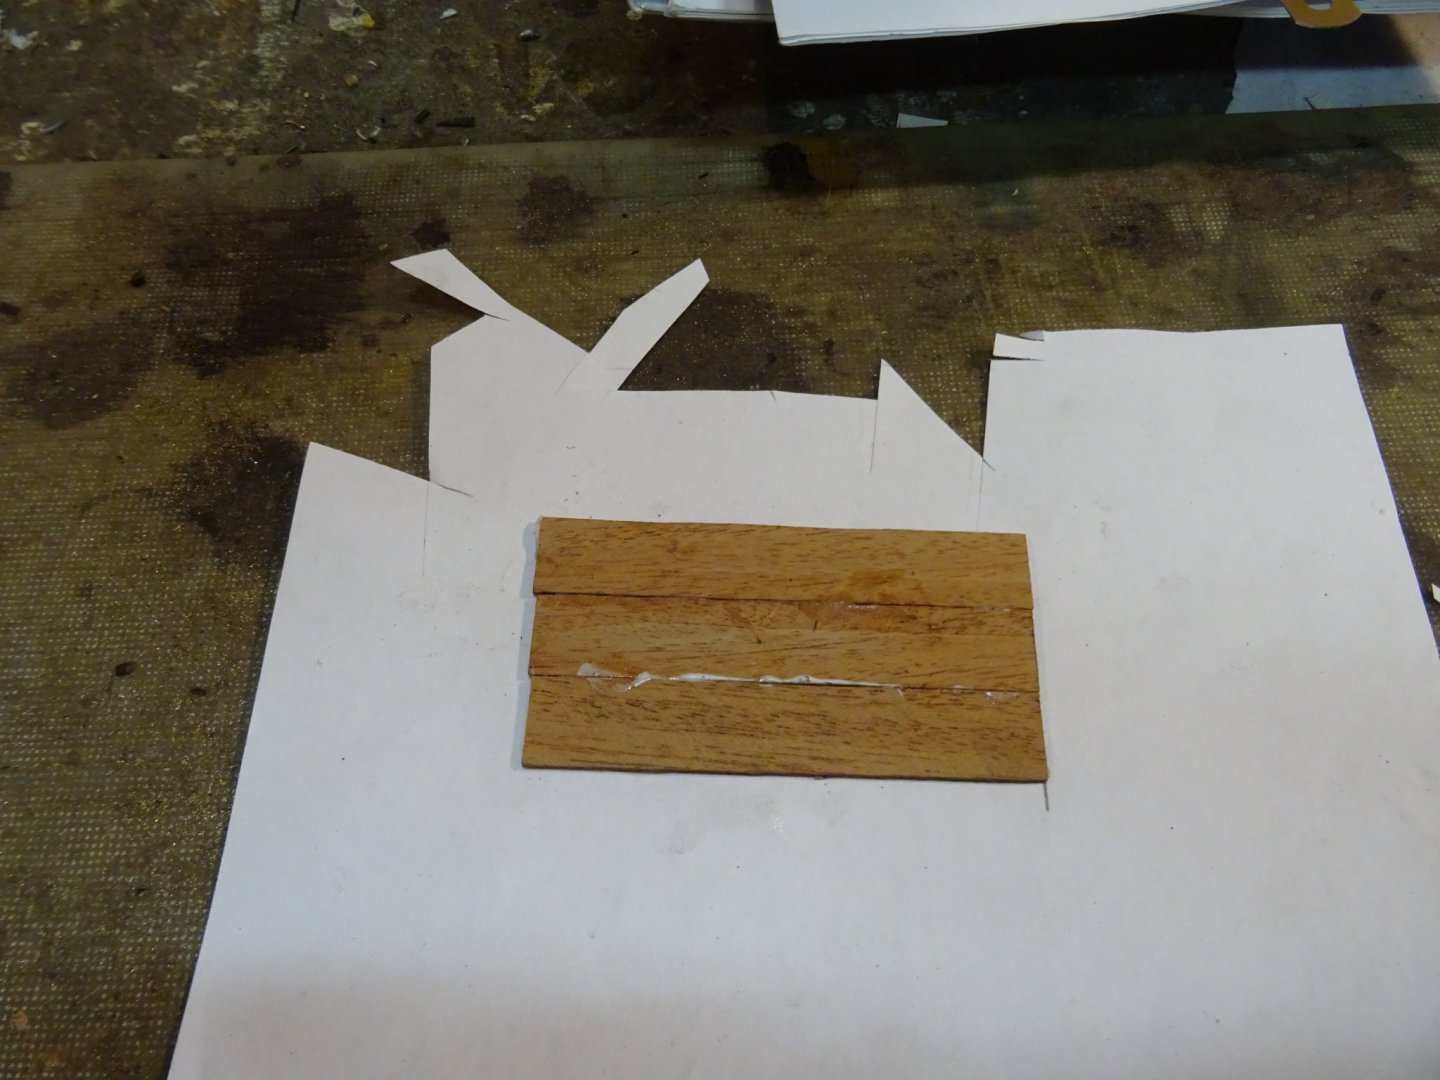
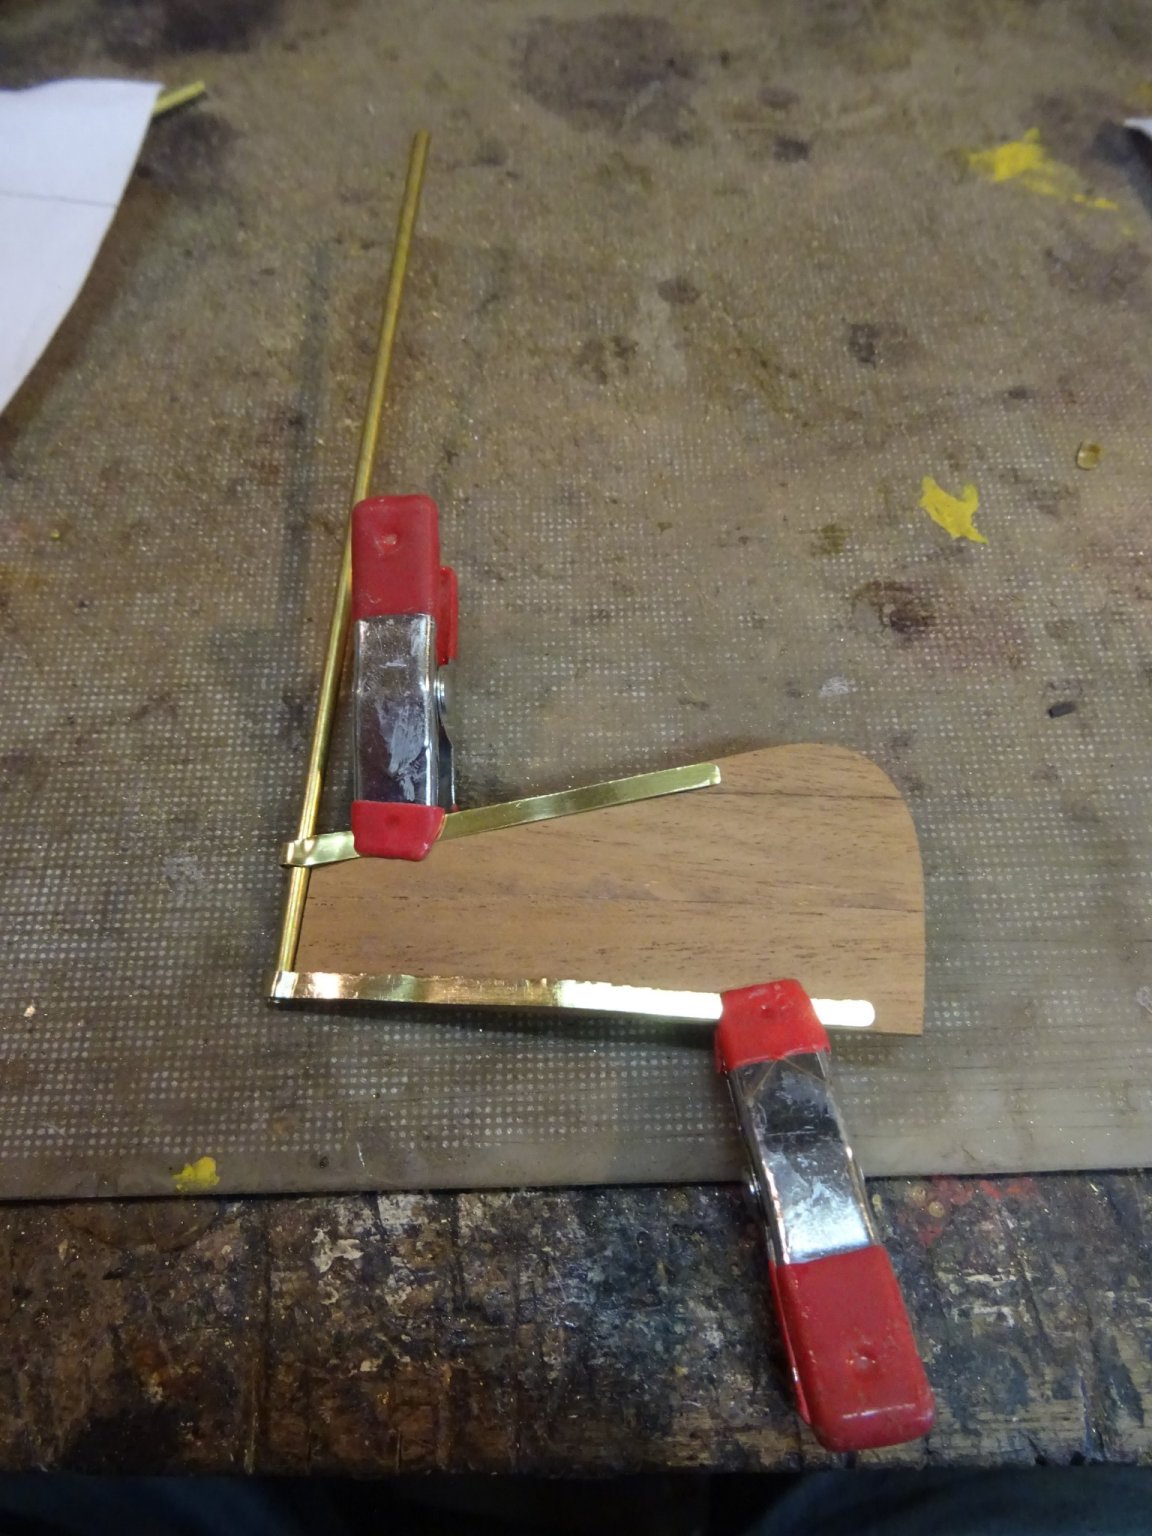
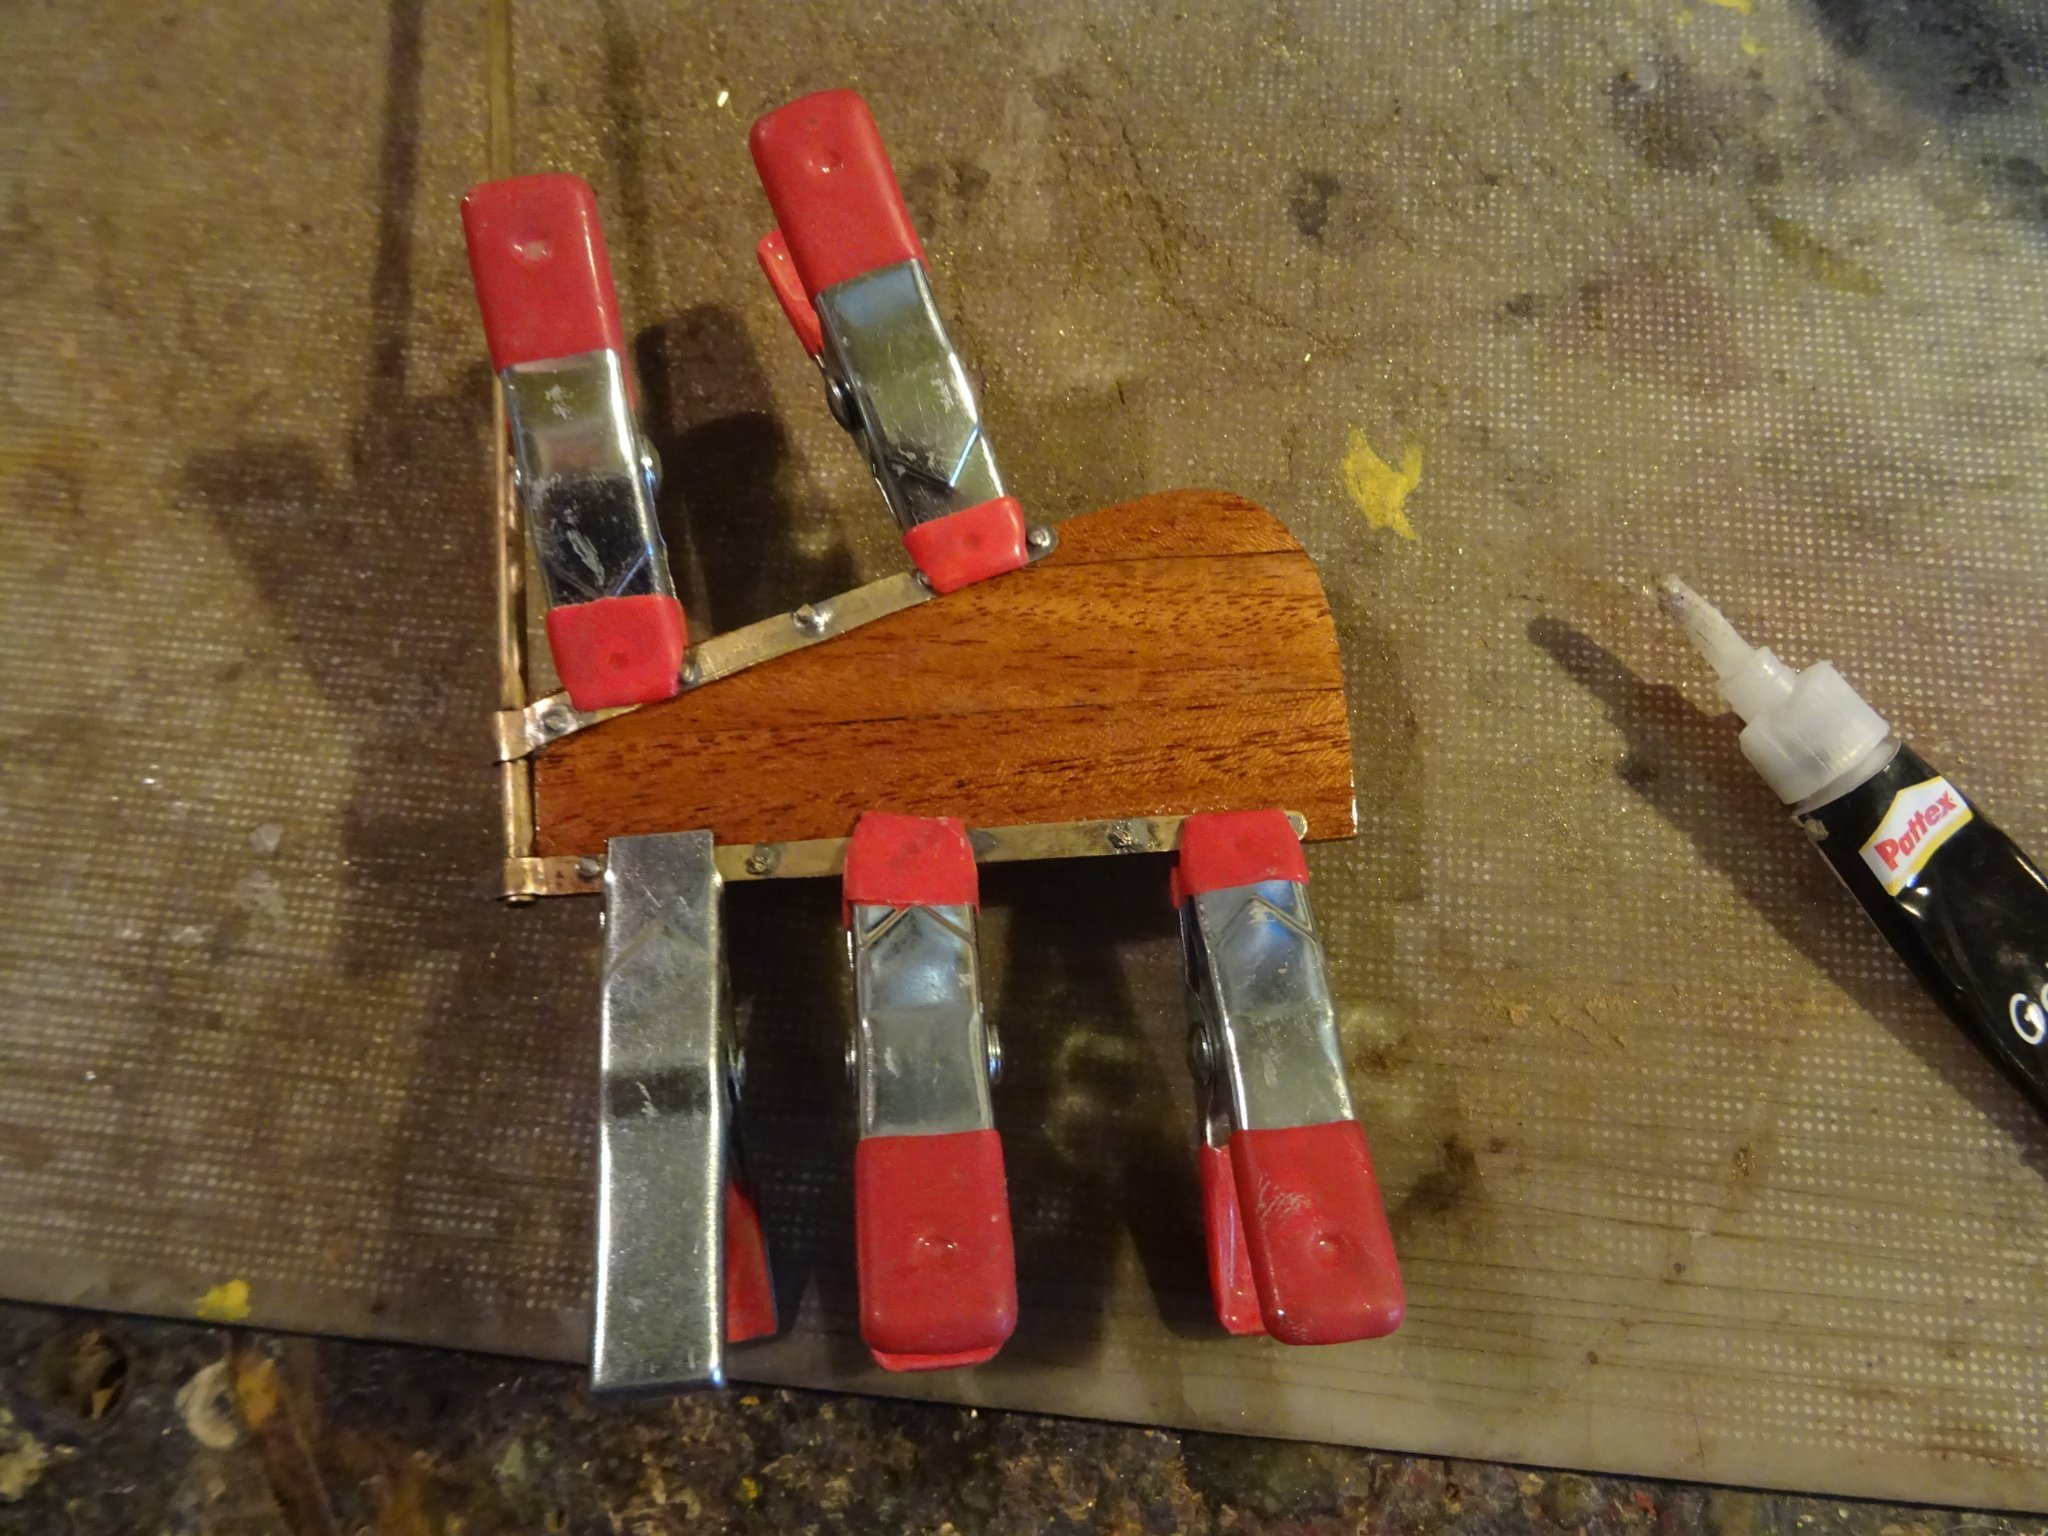
Therefore I make a wooden mold.
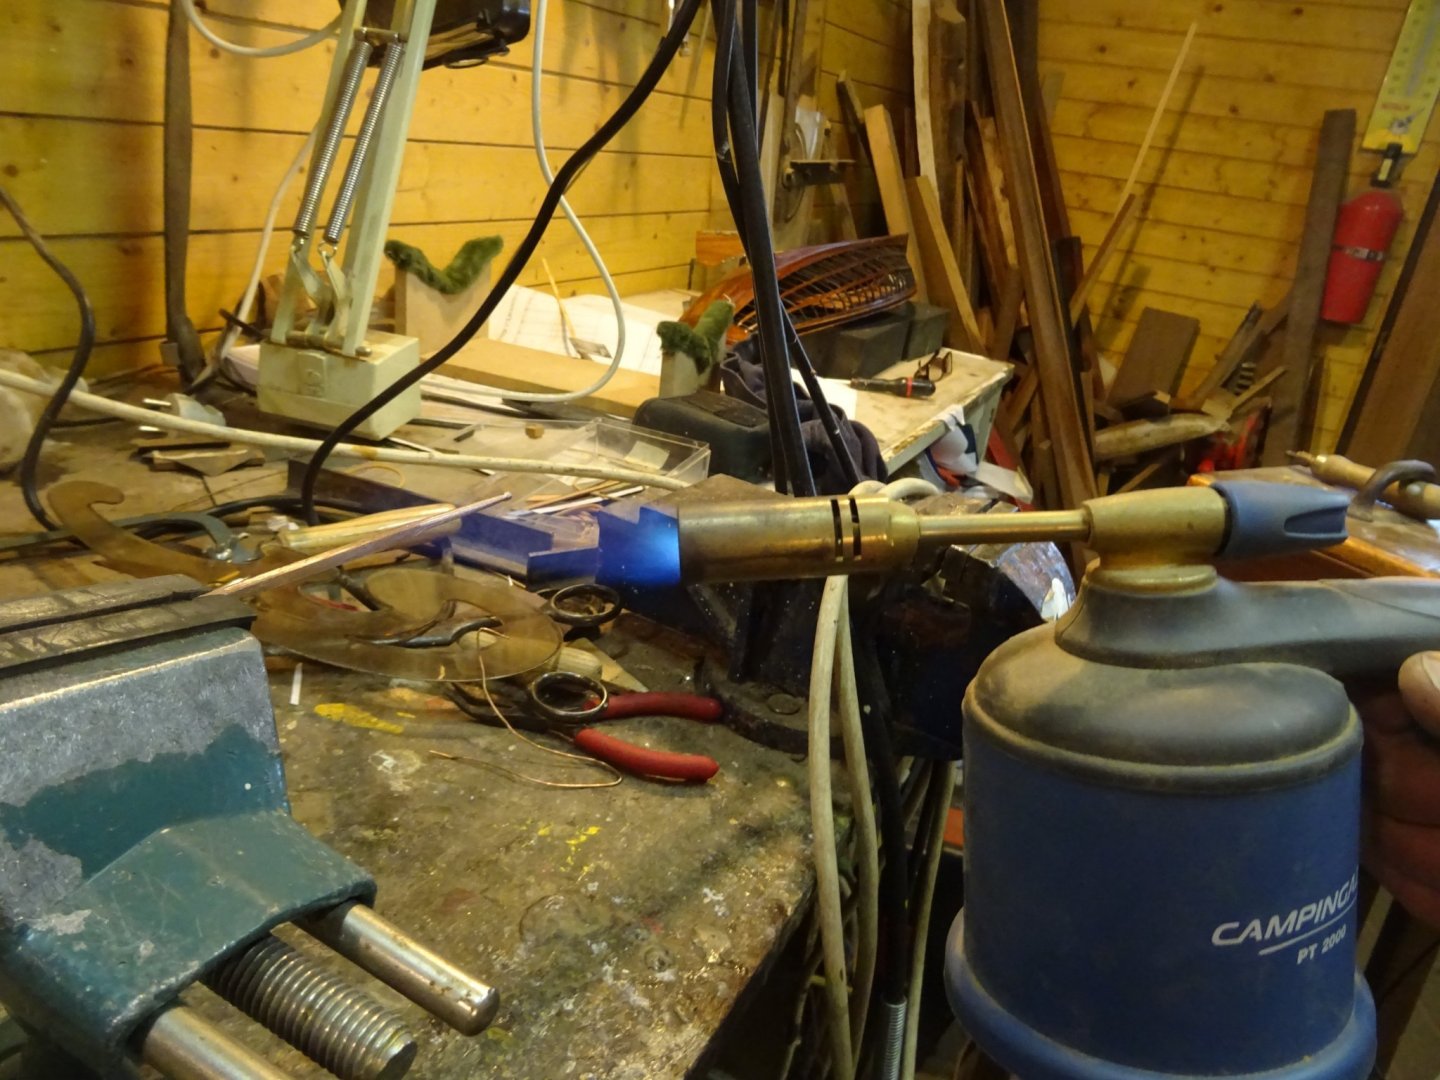
I heat the tiller to soften the metal.
I place the tiller in the mold and clamp it in my workbench.

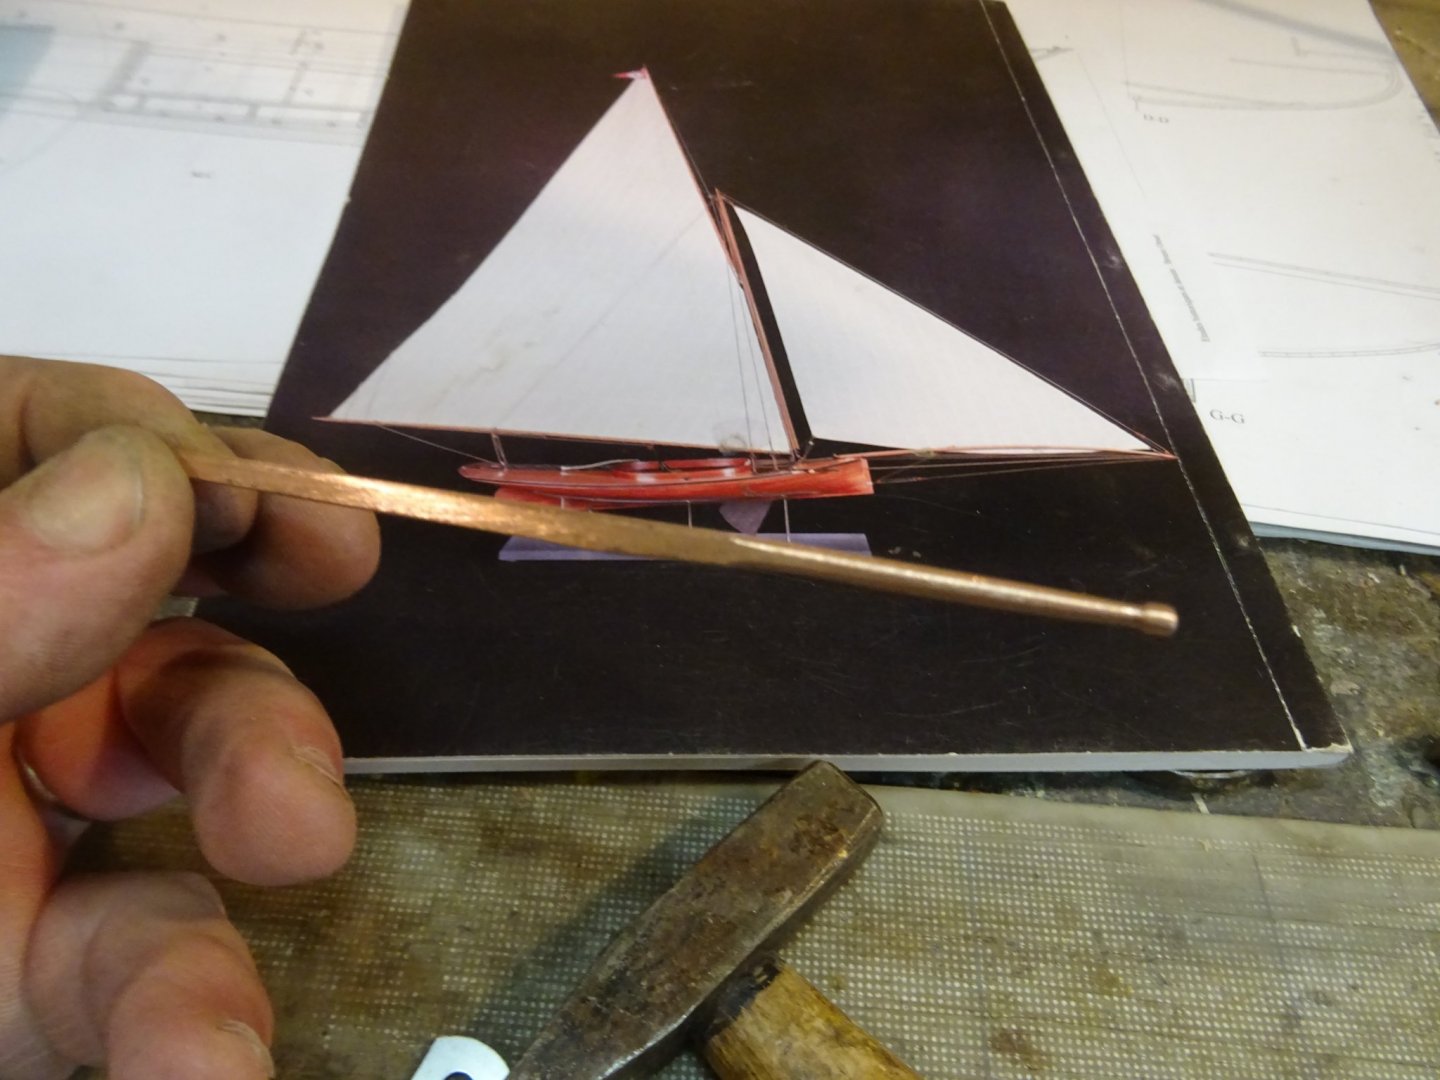
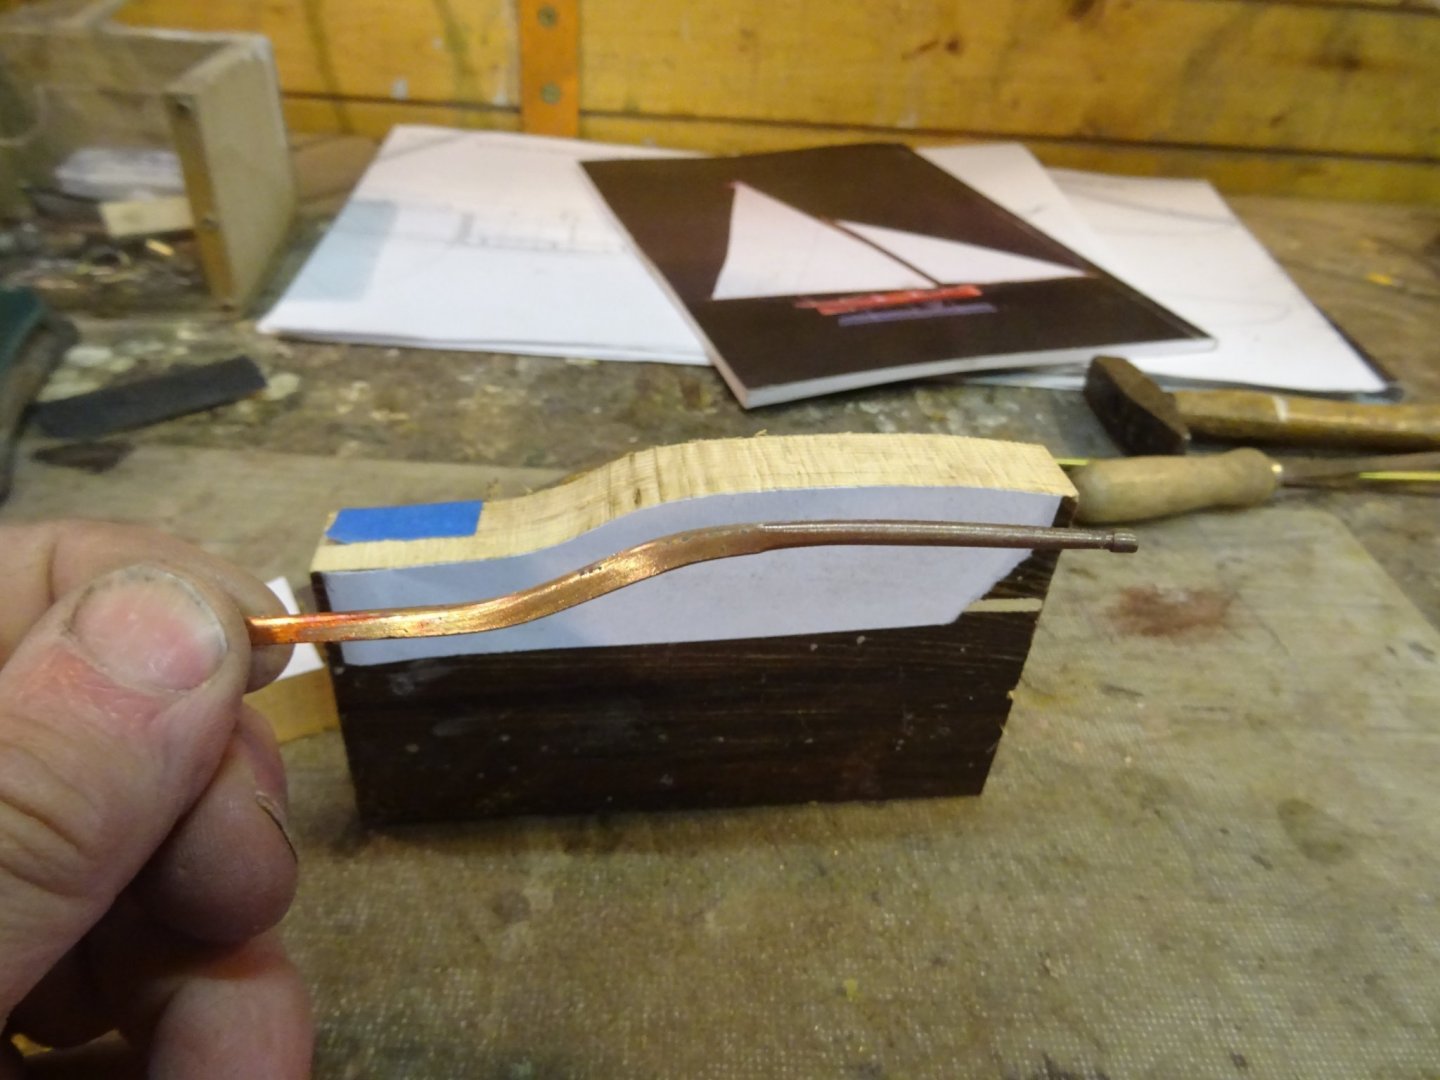
The result: my tiller now has an elegant upward bend.
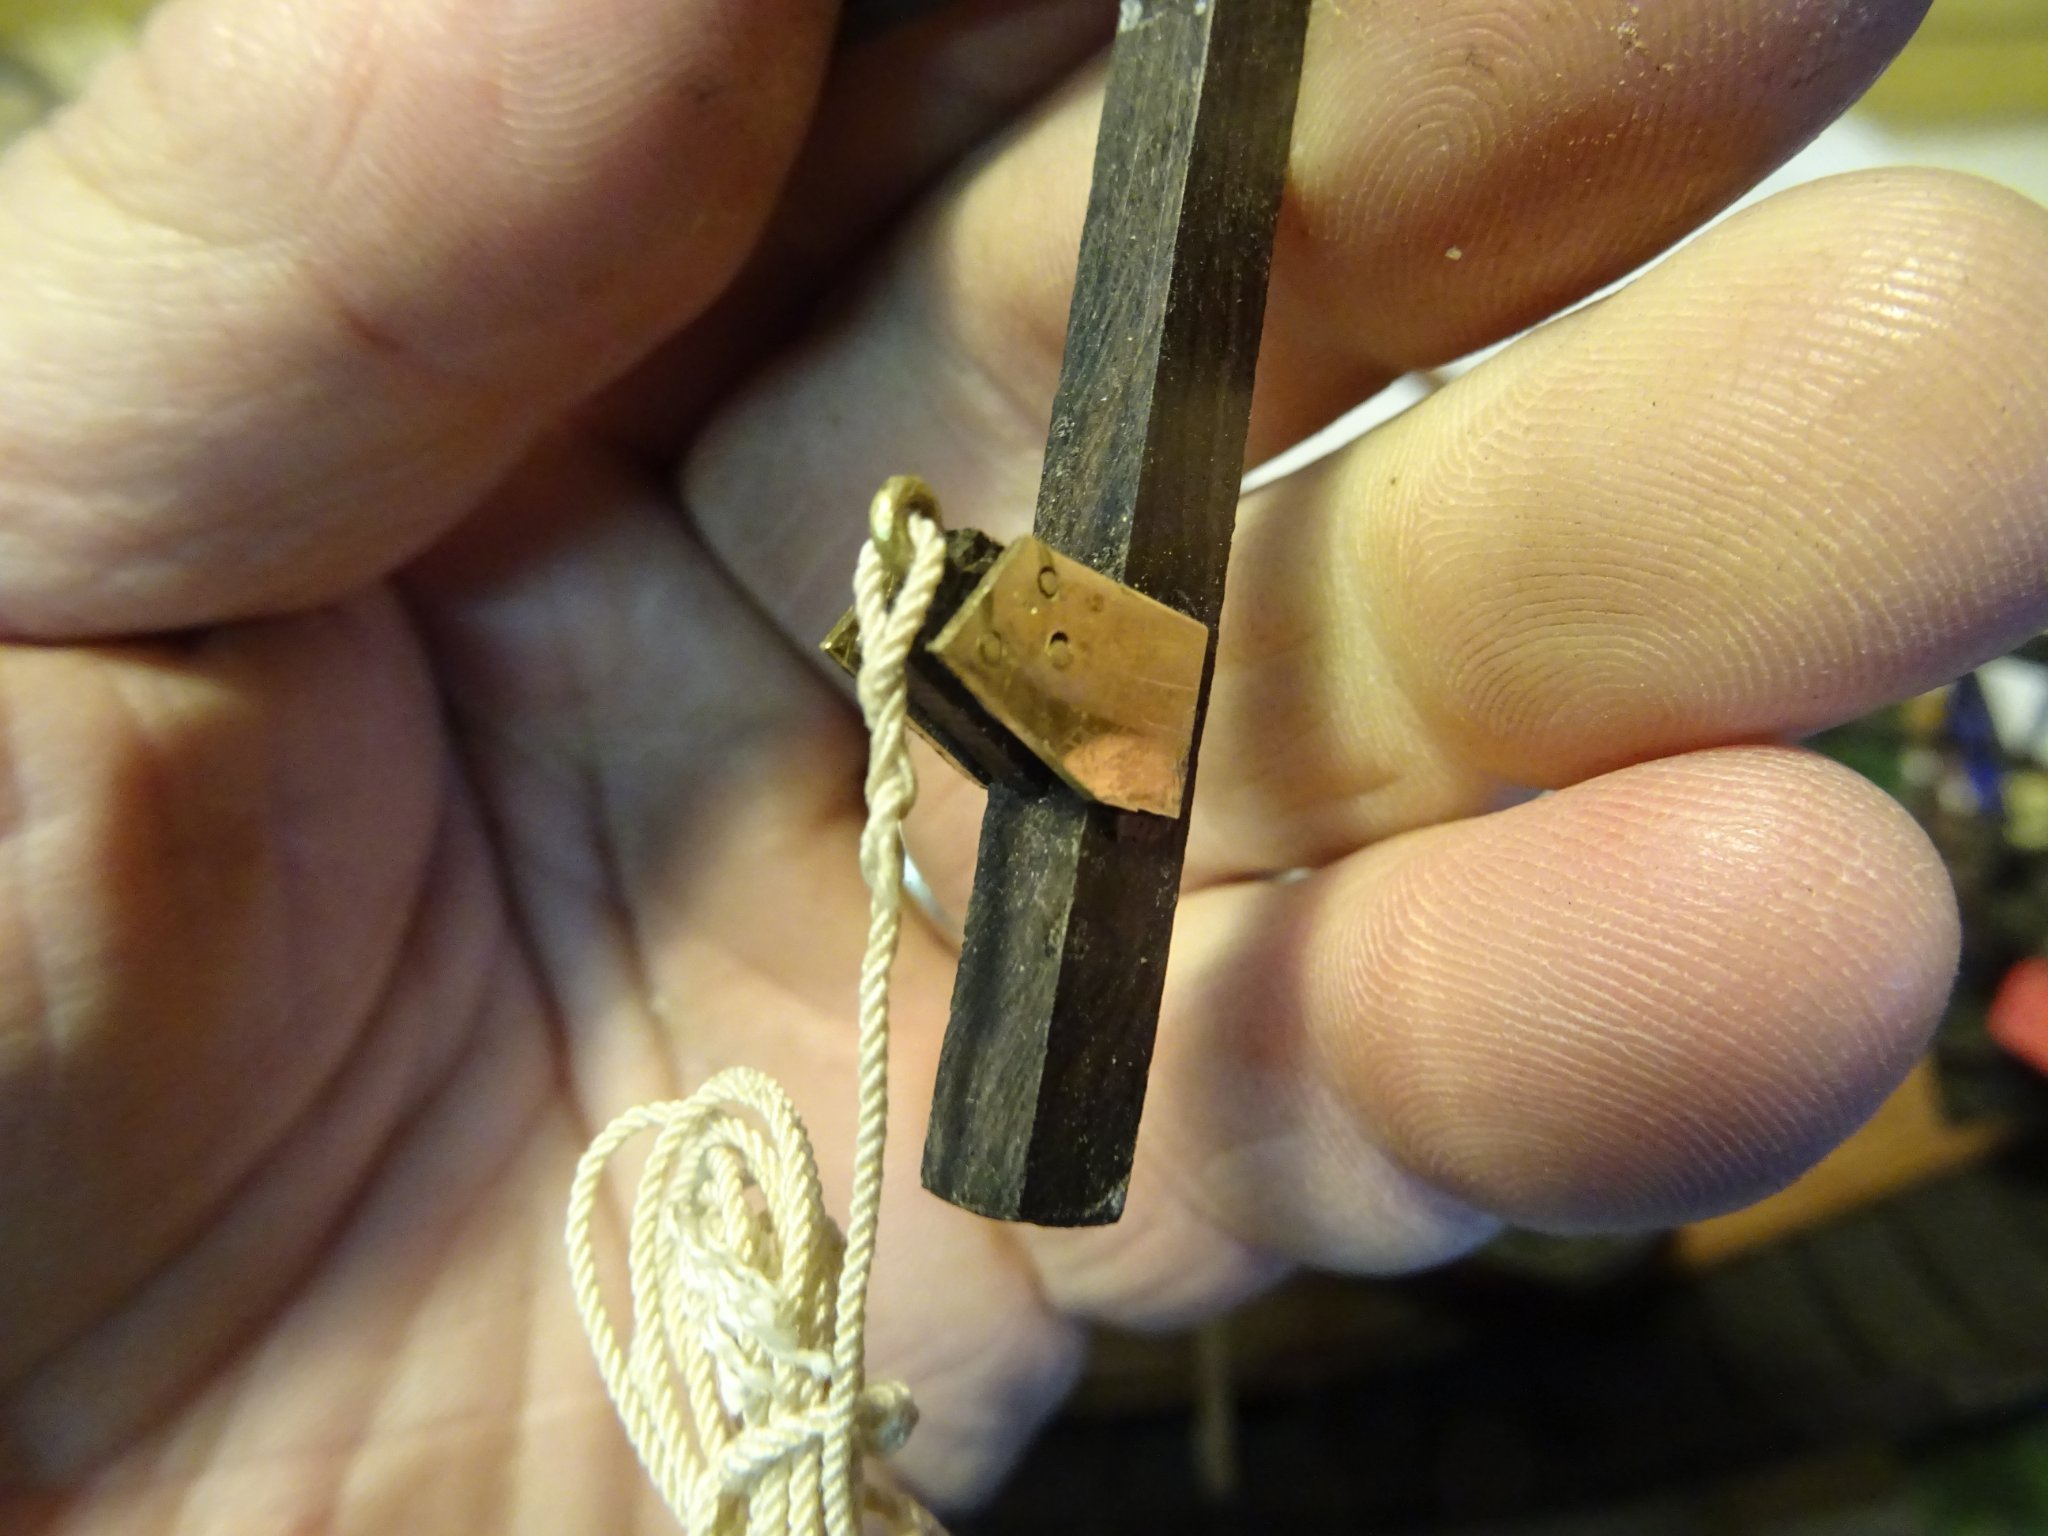
The rudder head soldered to the tiller.
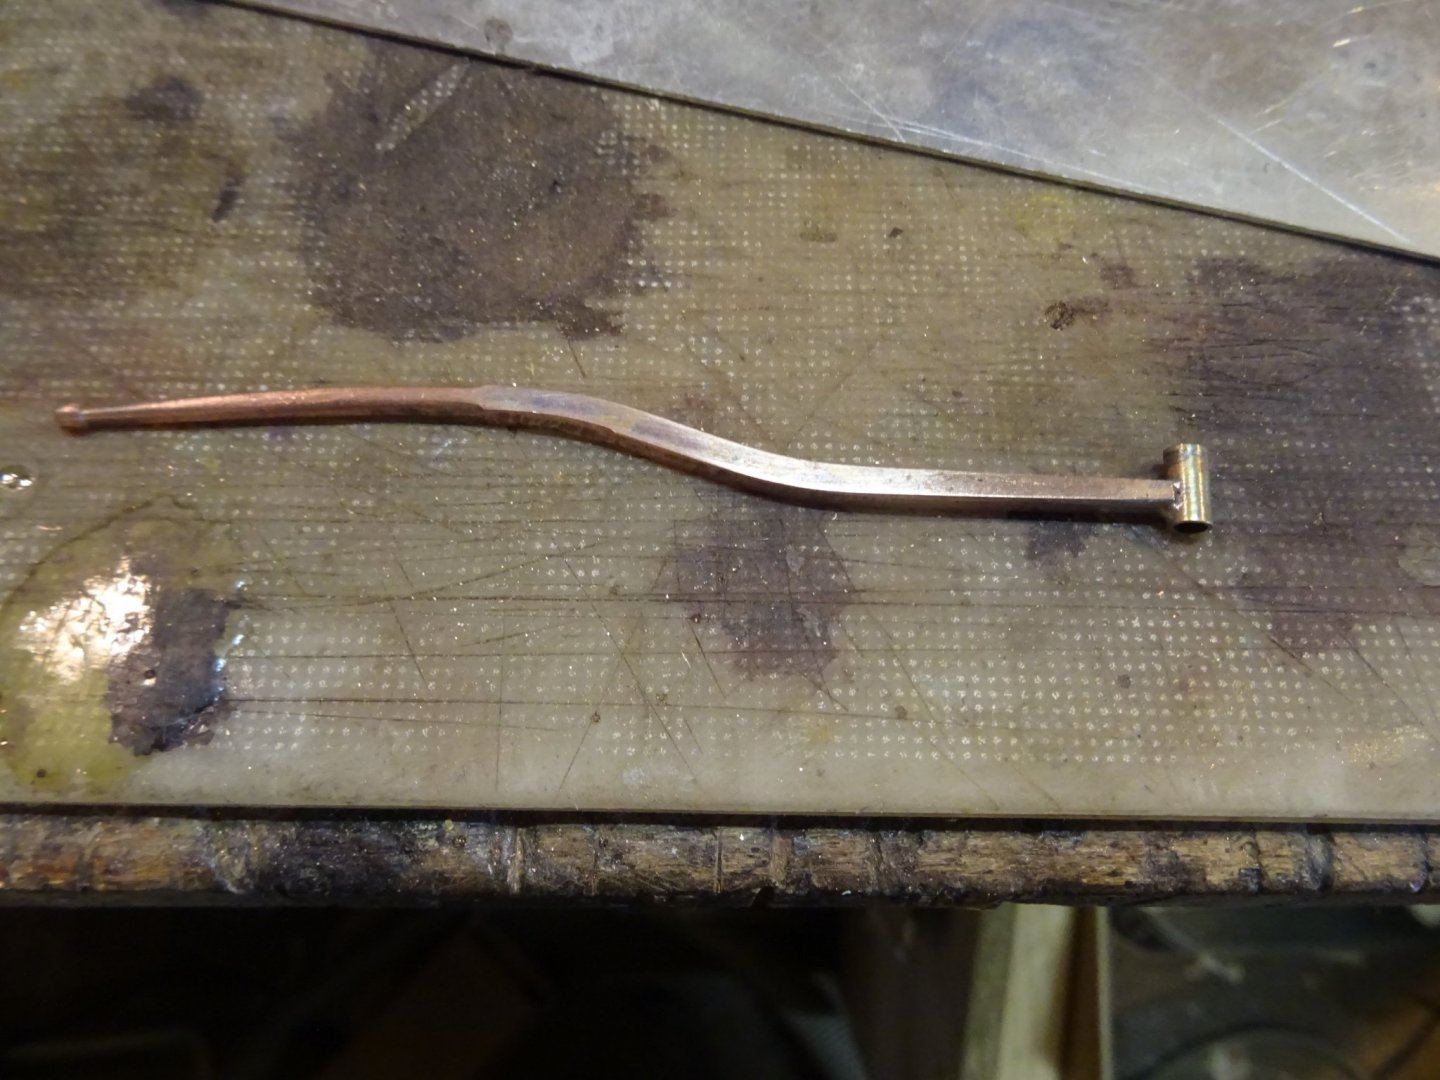
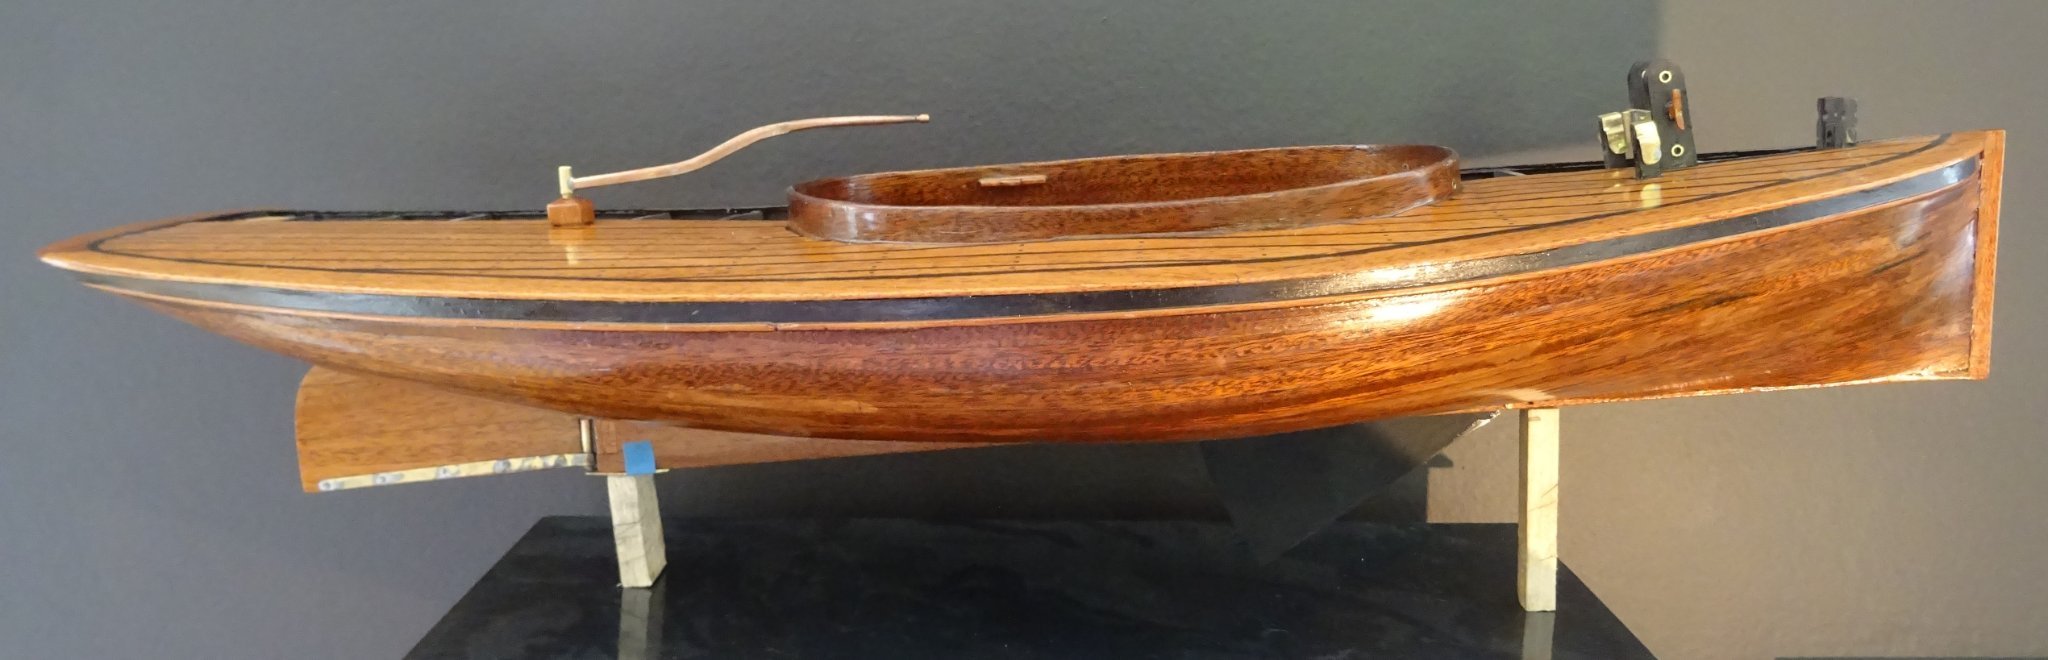
The tiller on the rudder stock.

I believe I can close the second chapter of my log with this. Next time we will start with chapter III: Spars and rigging.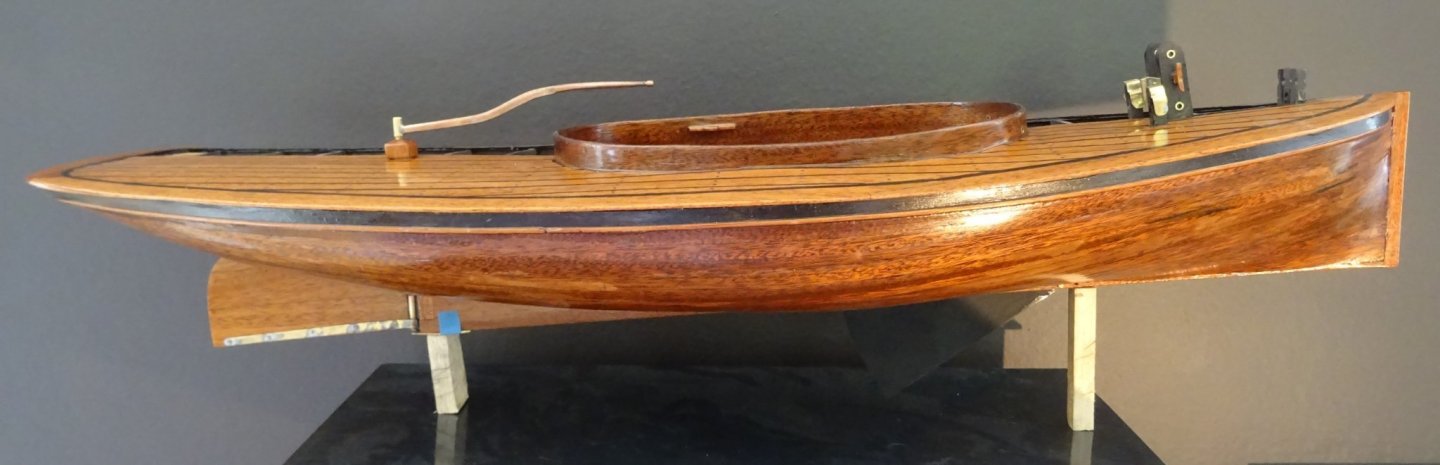
Thank you very much for reading this log and for your likes.
Till soon!
-
-
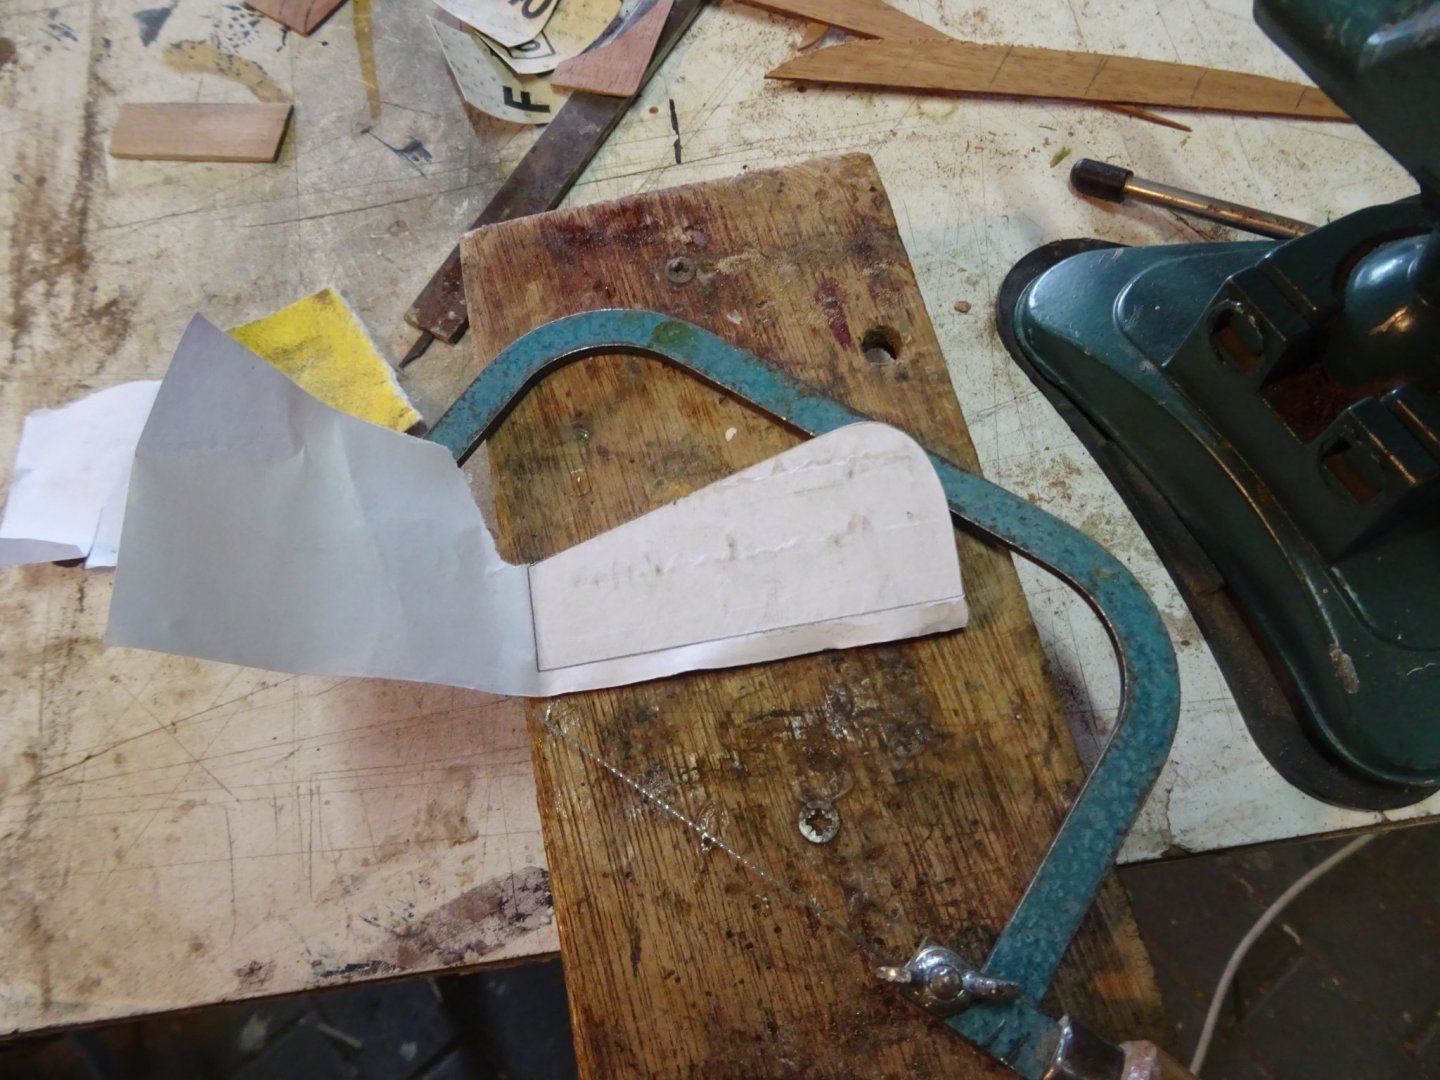
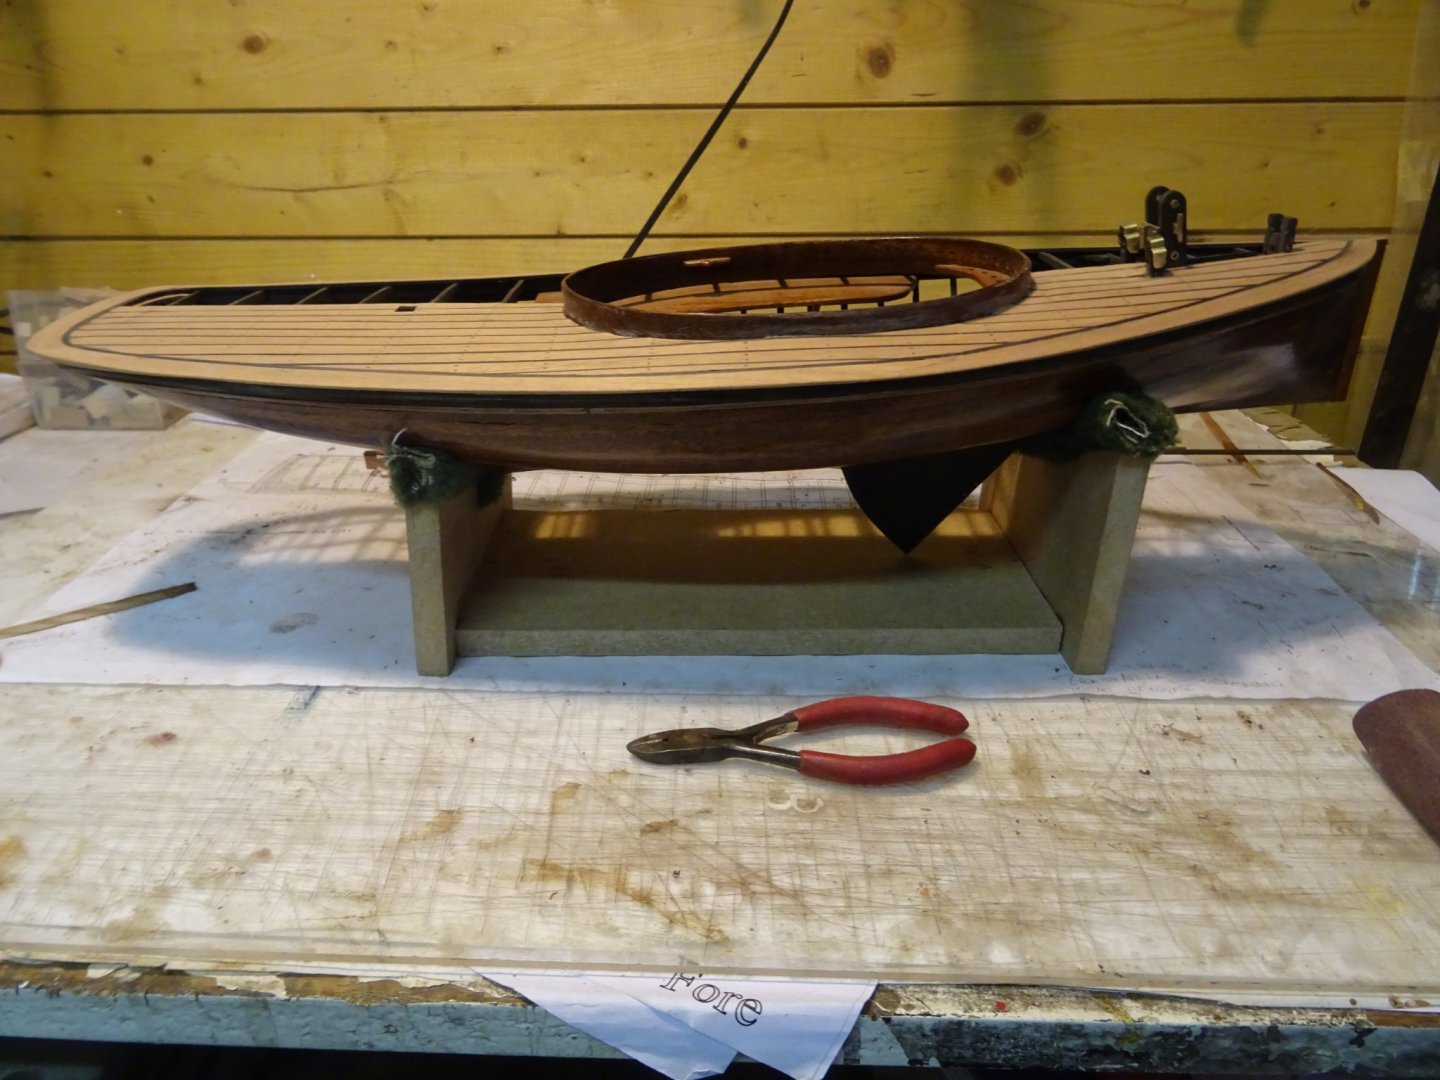
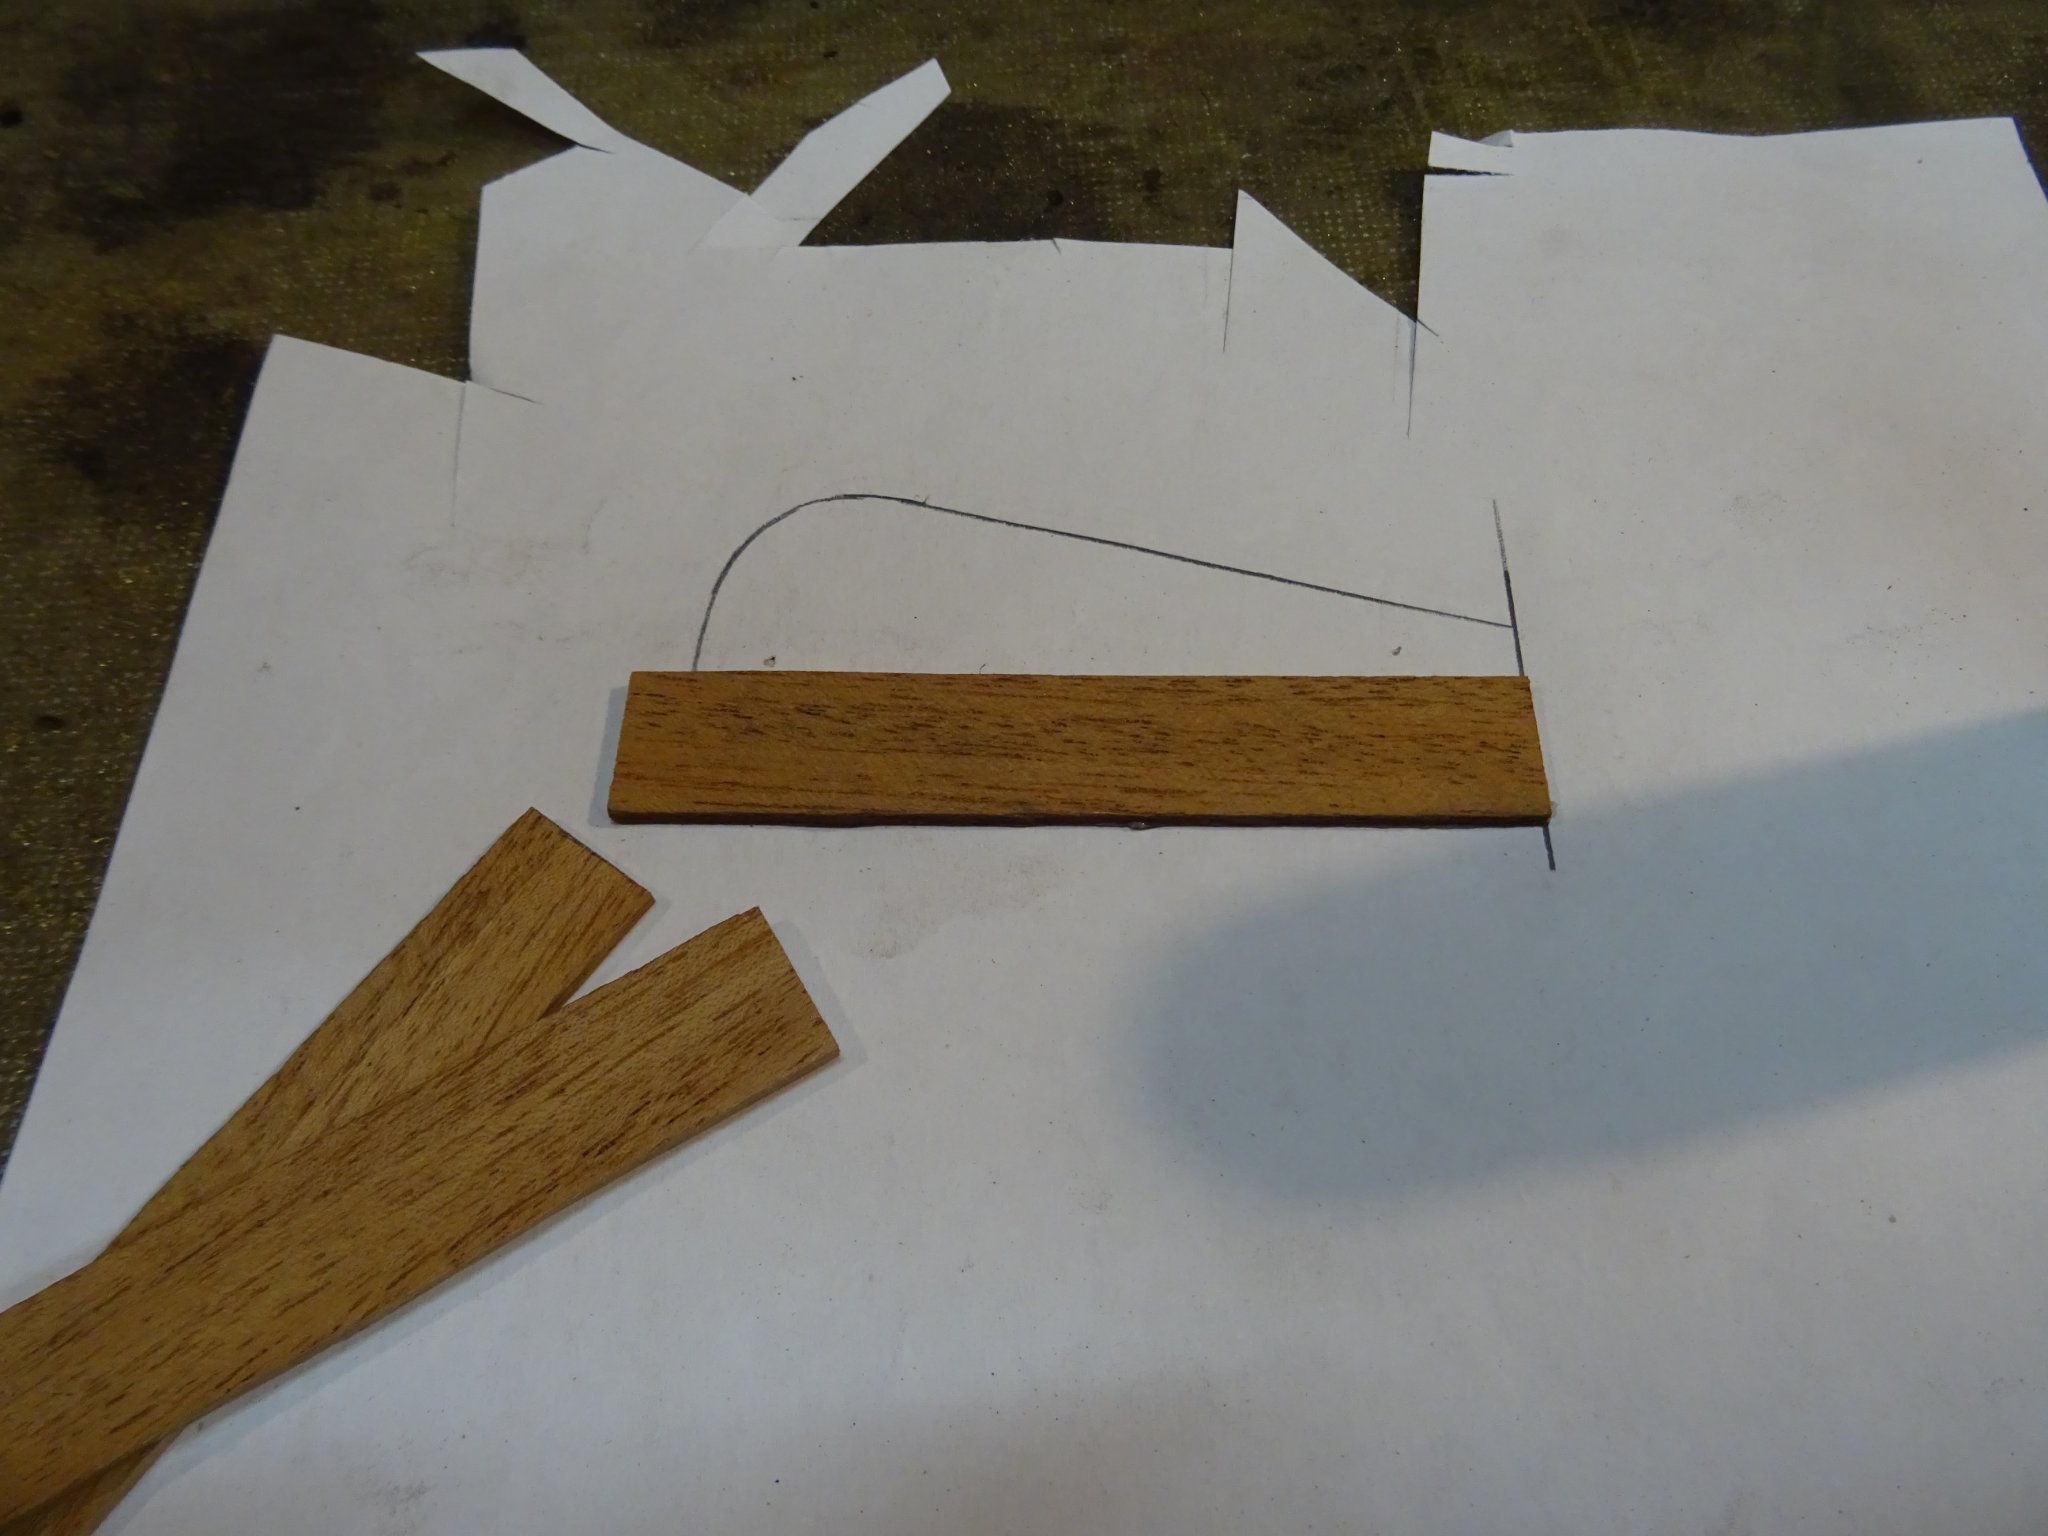
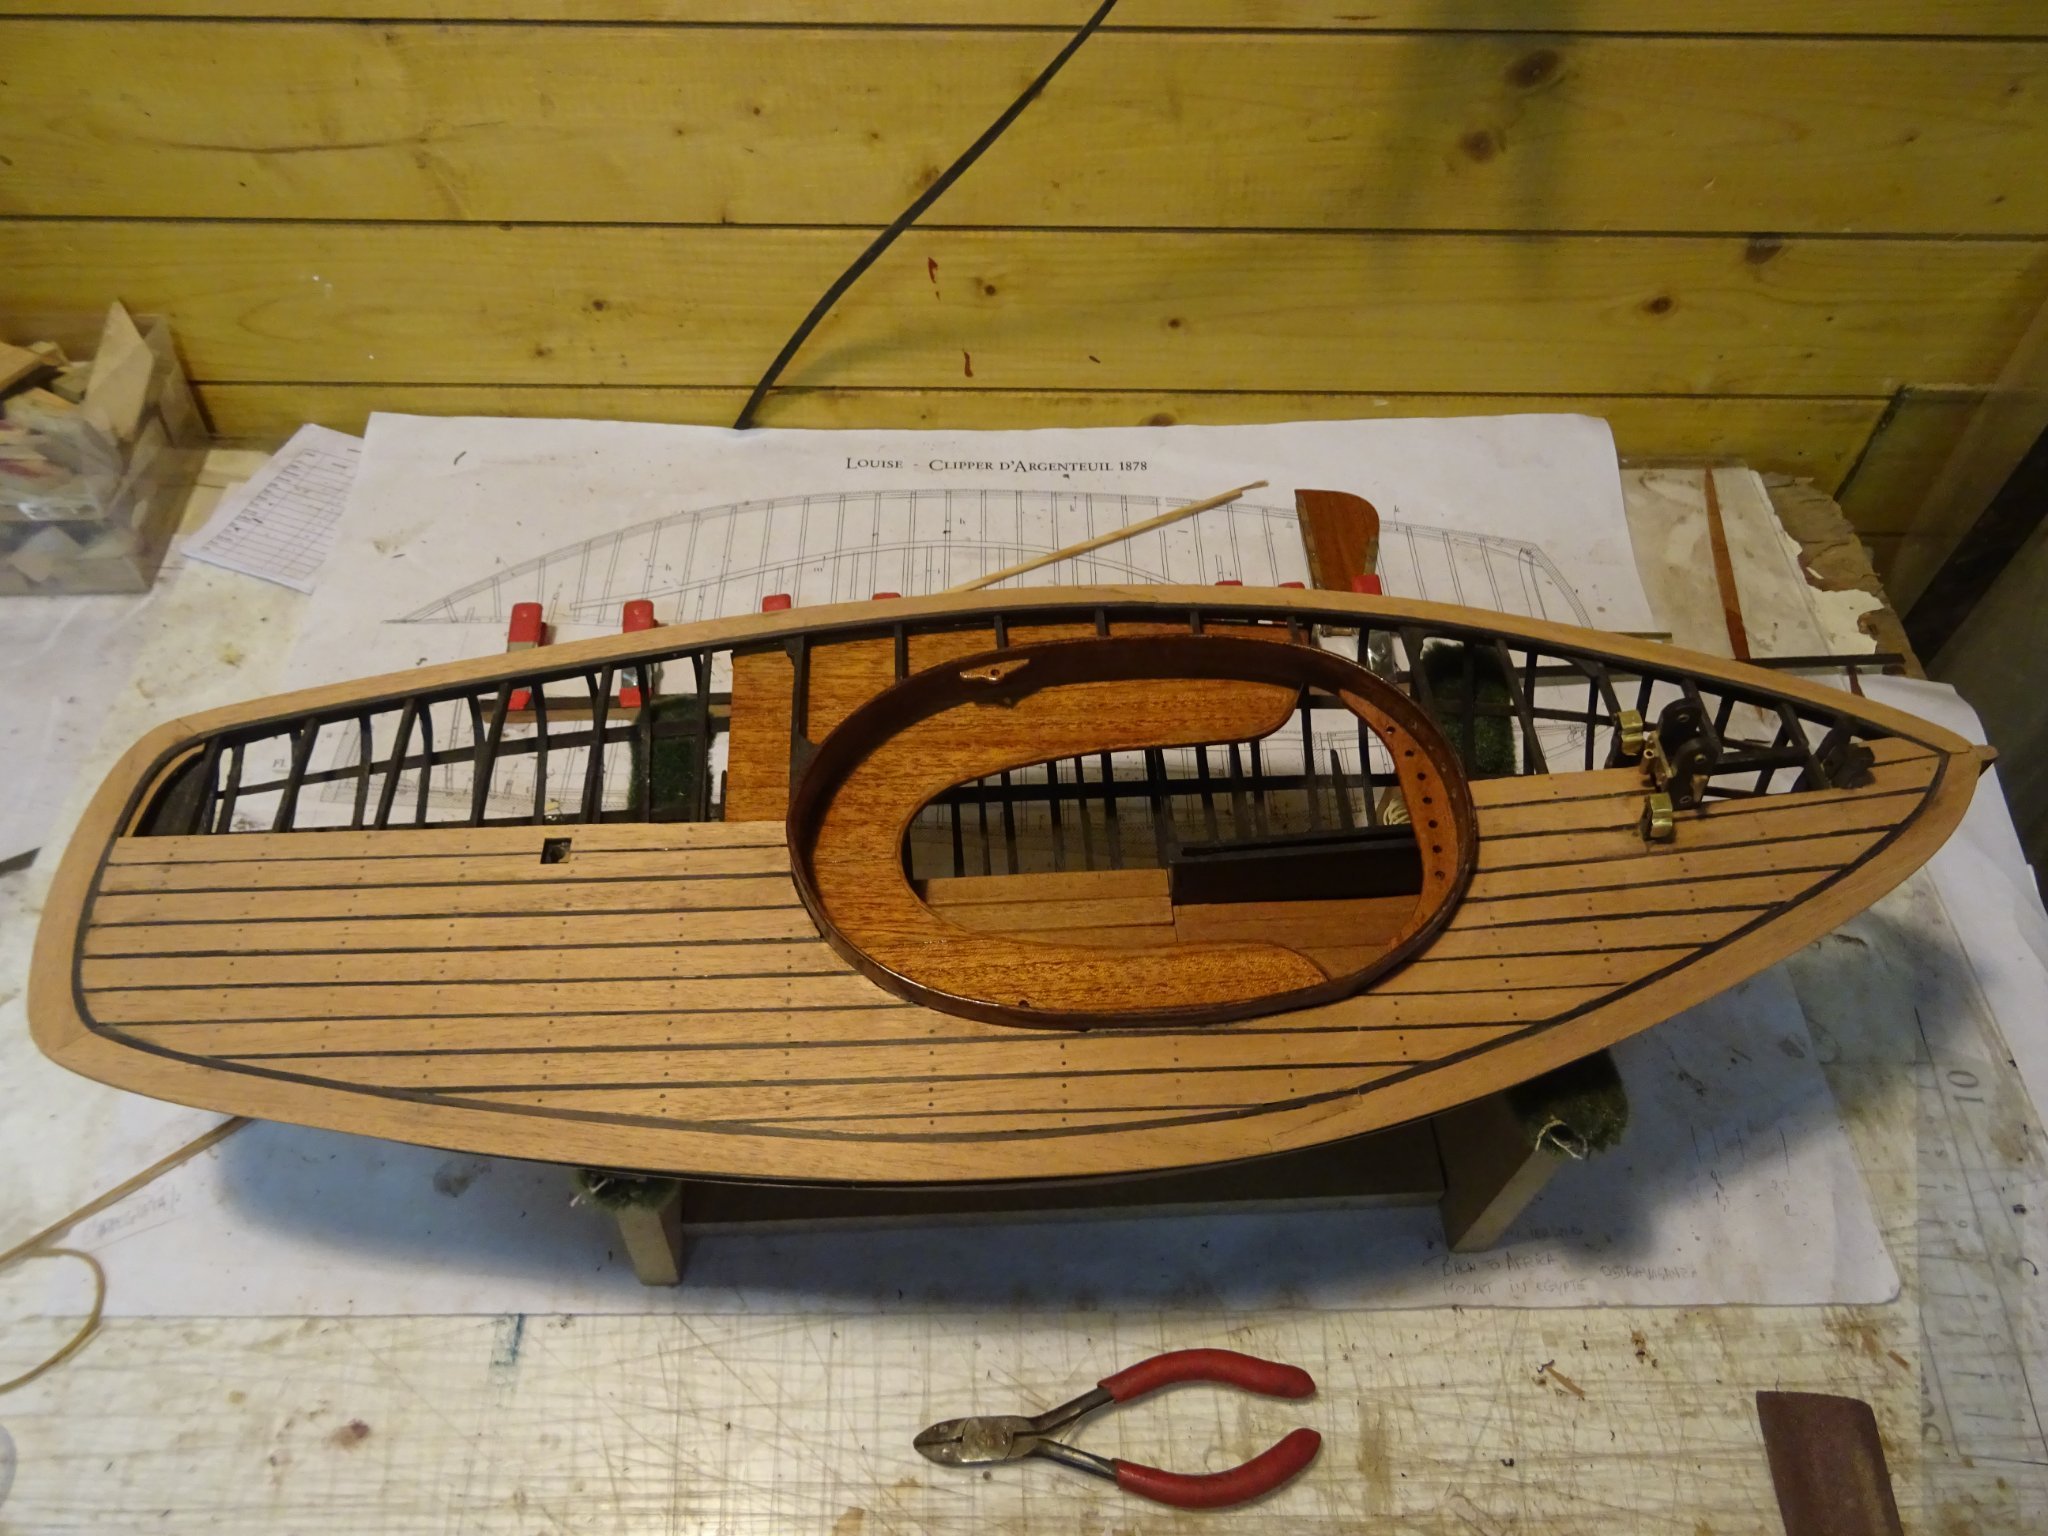
19. Rudder and tiller.
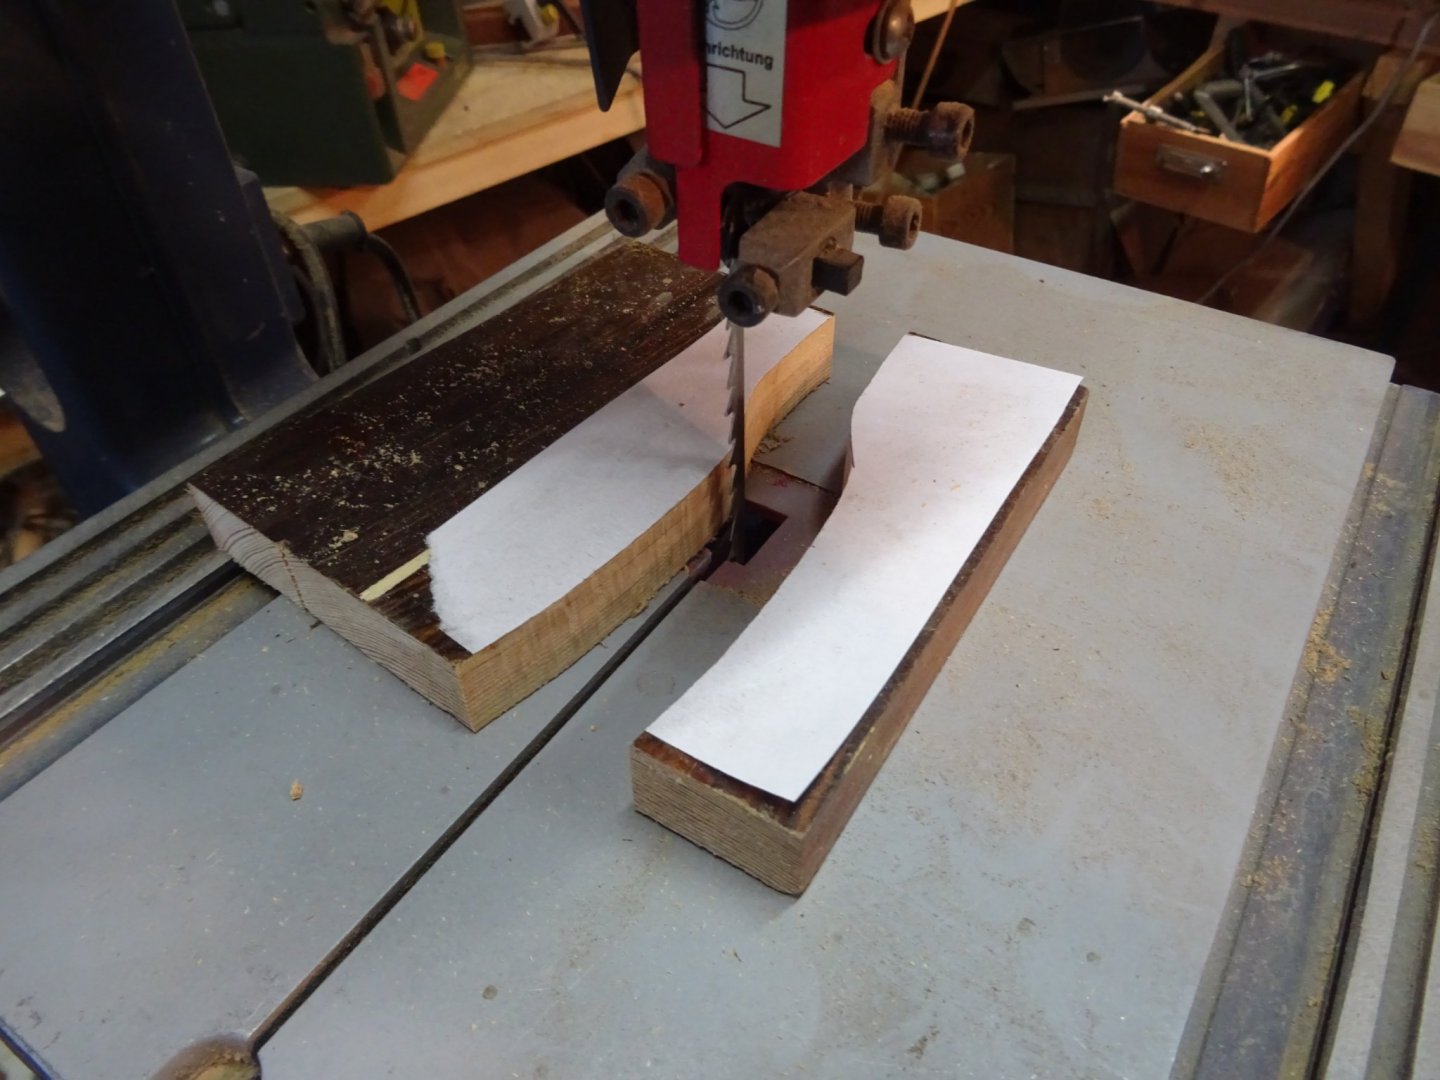
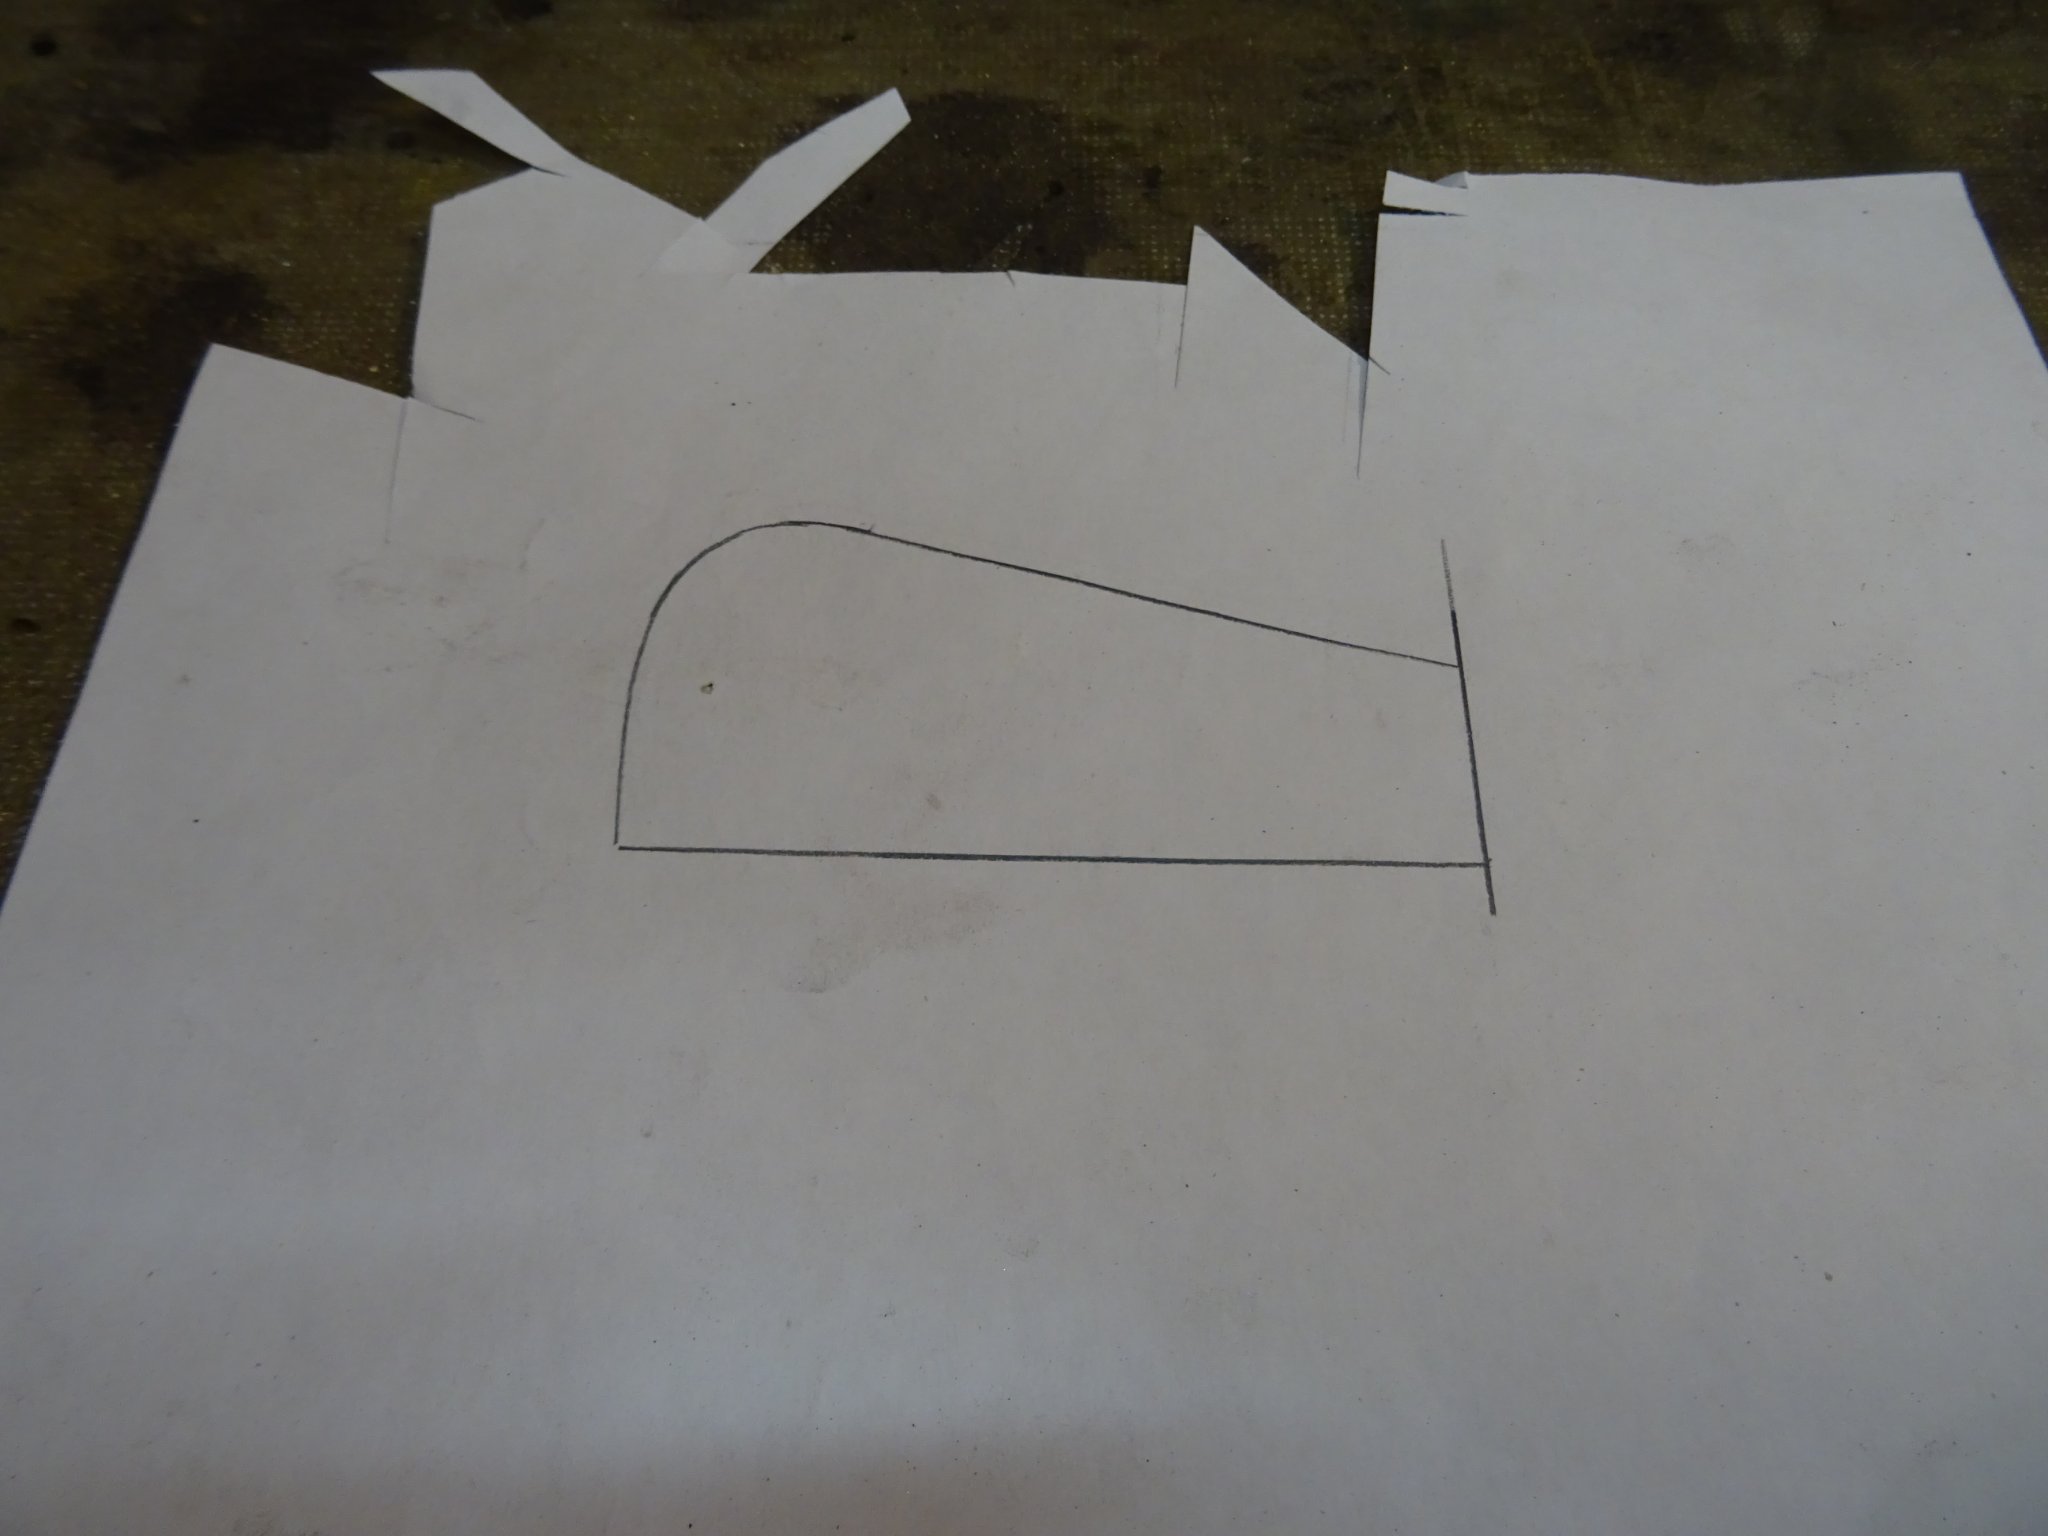
To make the rudder I start by drawing a saw template on paper. The drawing is drawn on both sides using carbon paper.
I glue mahogany planks on top of the drawing.

When the glue is dry, I saw out the rudder.
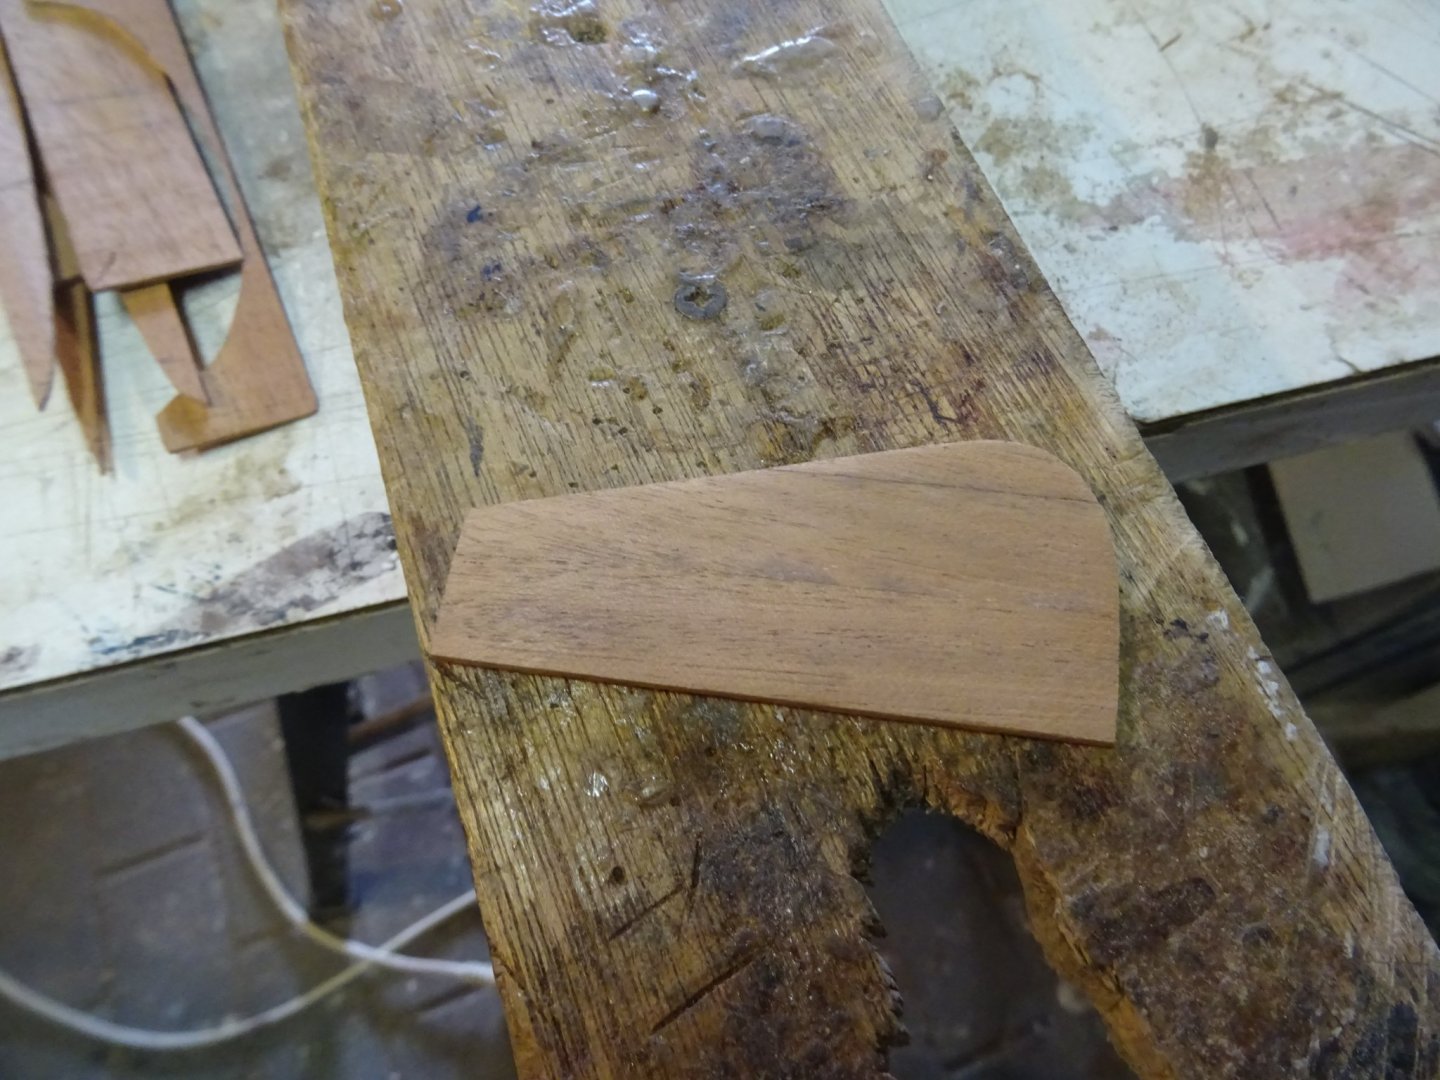
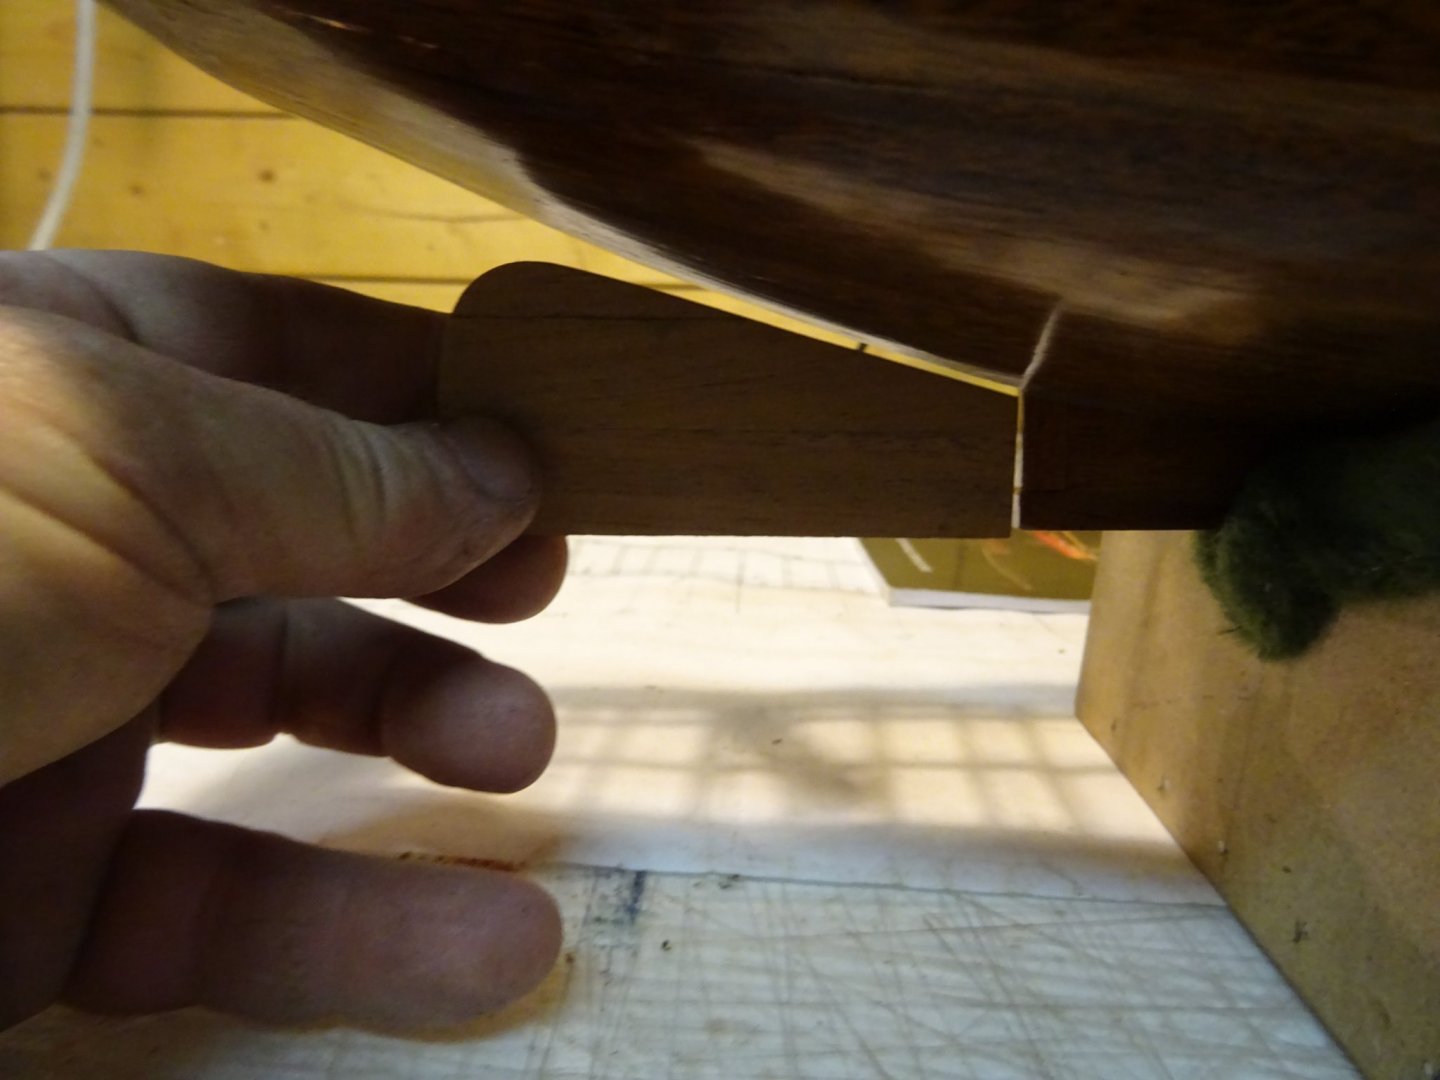
Presenting it into position.
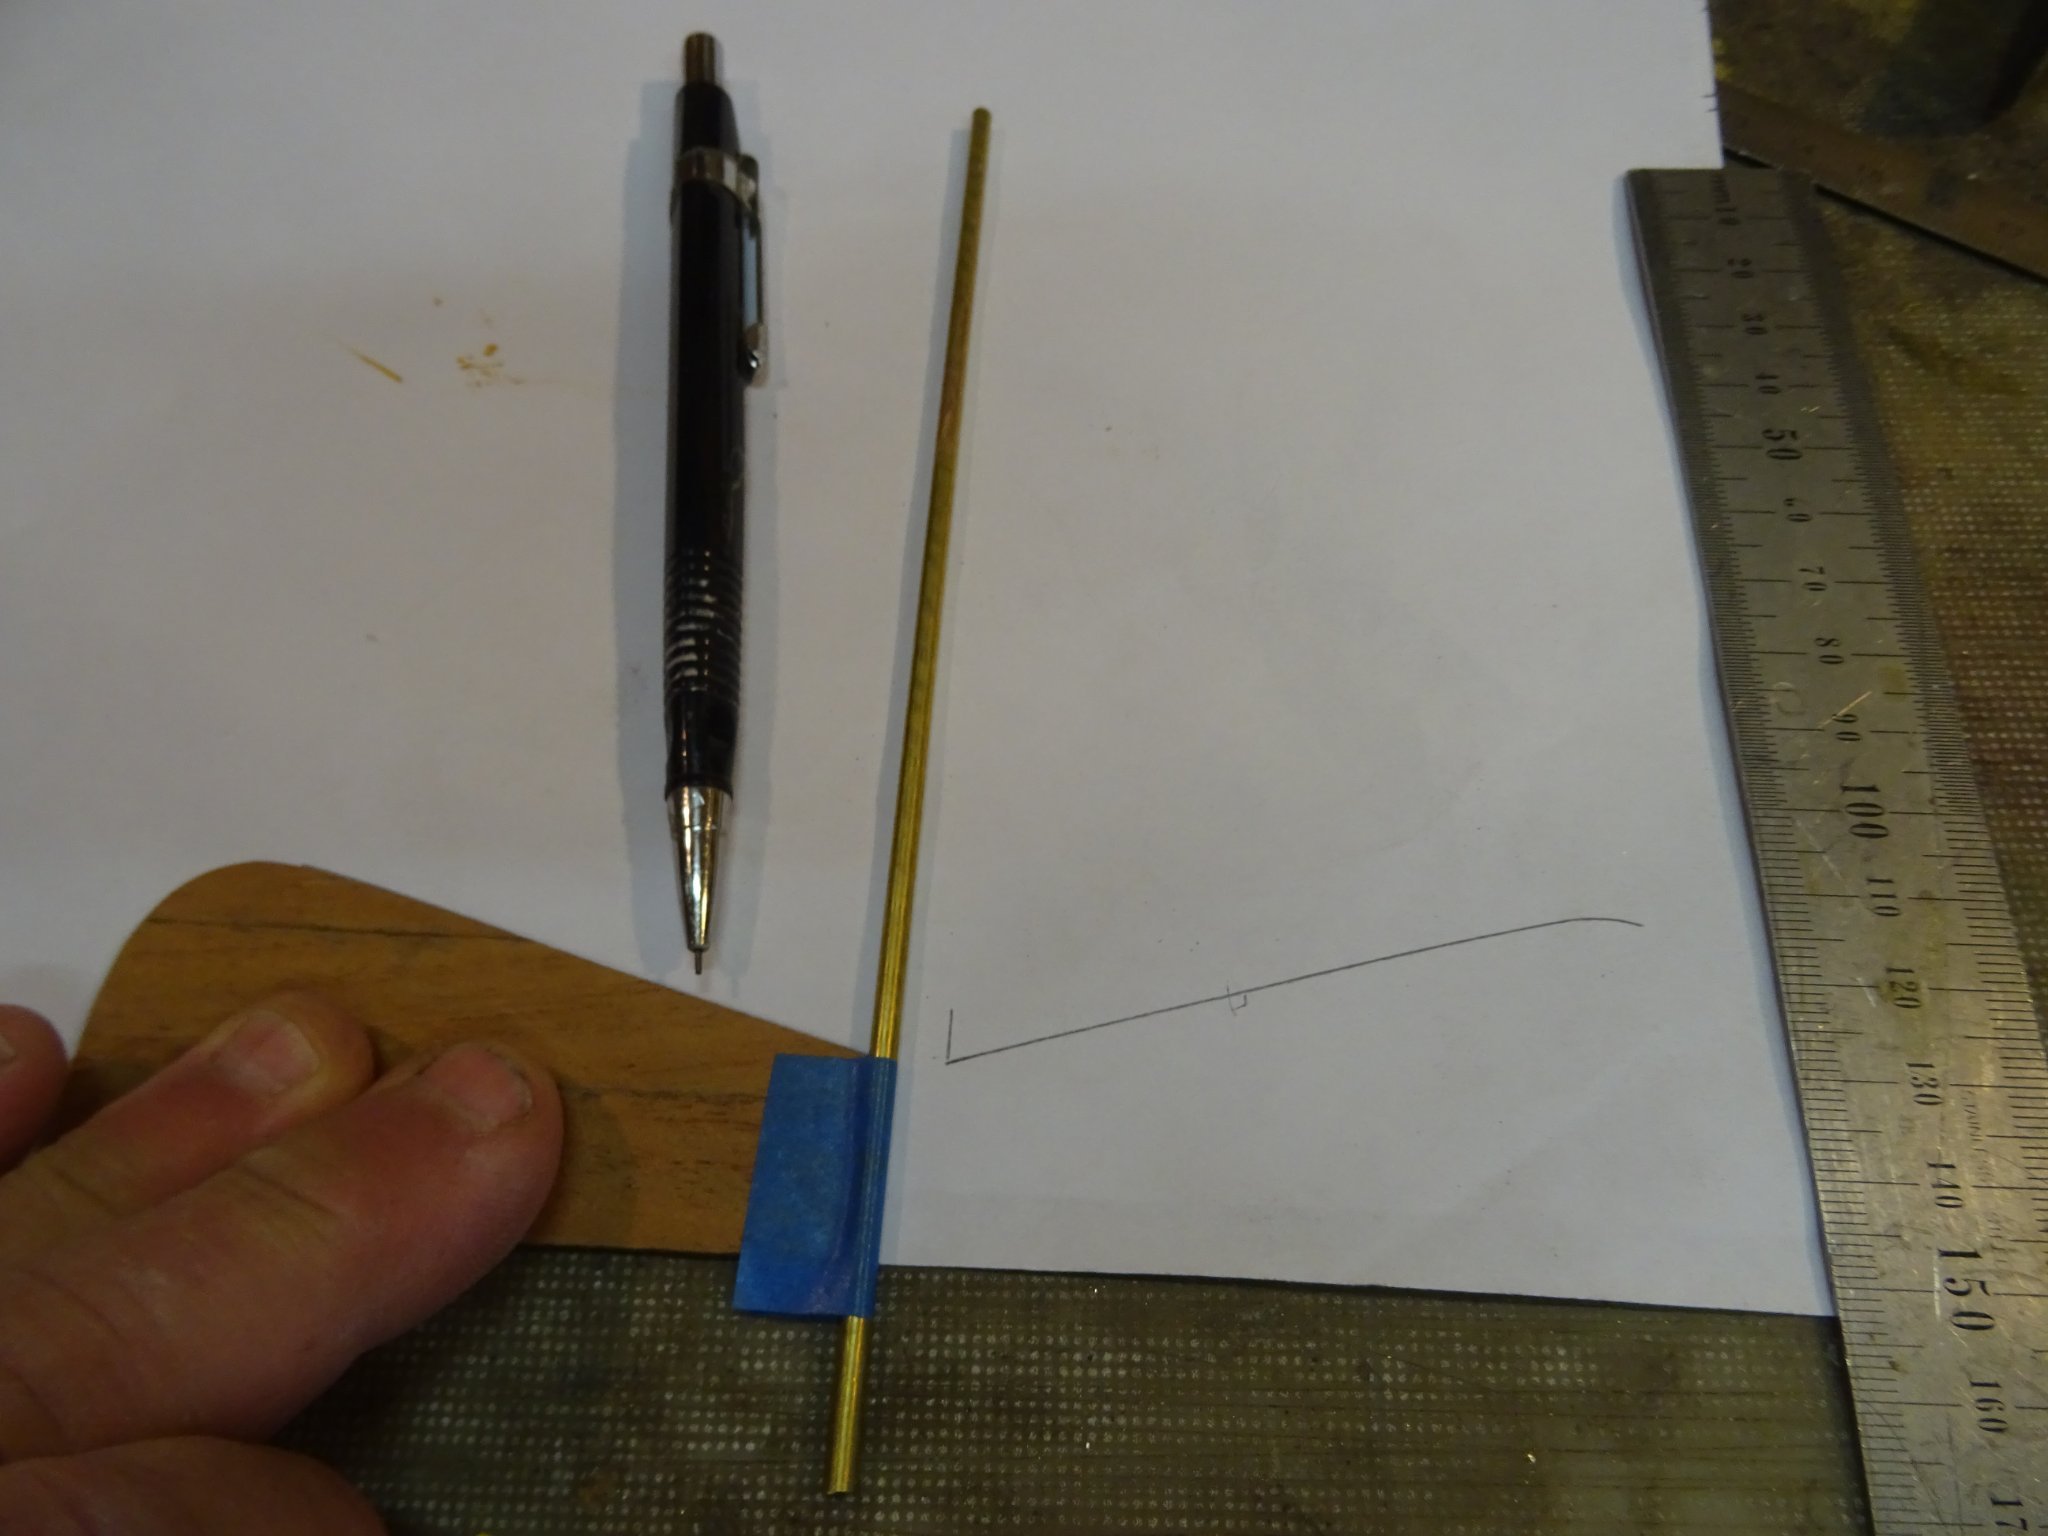
 The rudder stock is a brass tube of Ø 3mm.
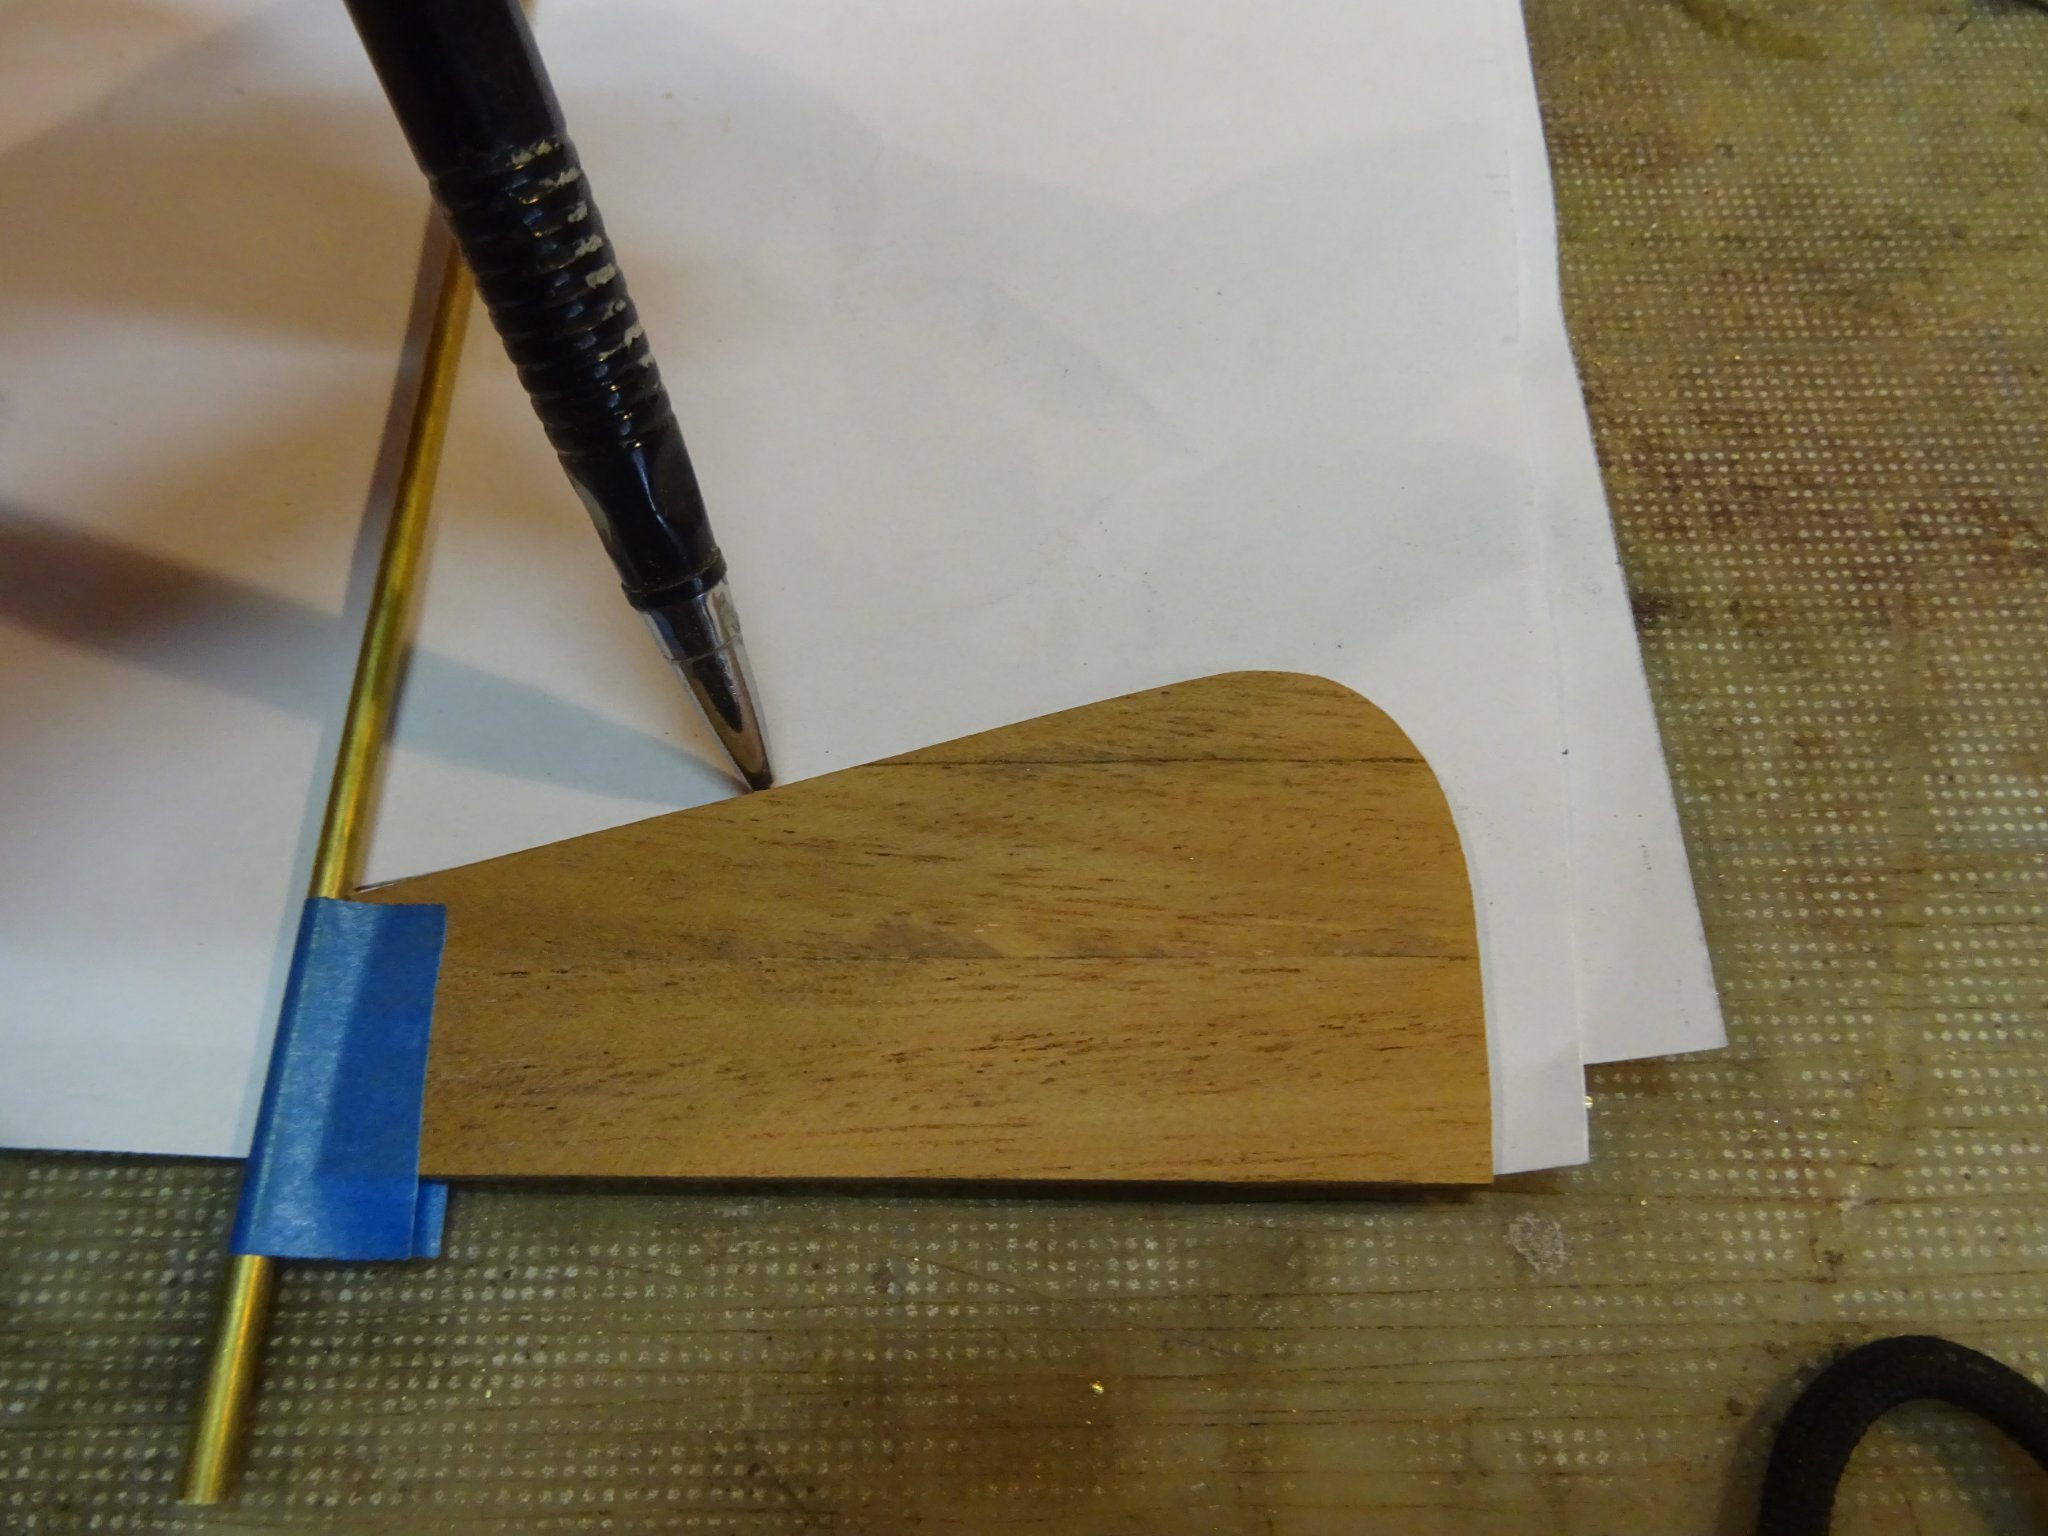
I draw a paper template to saw the upper pintle. I draw first the one upper side of the rudder...
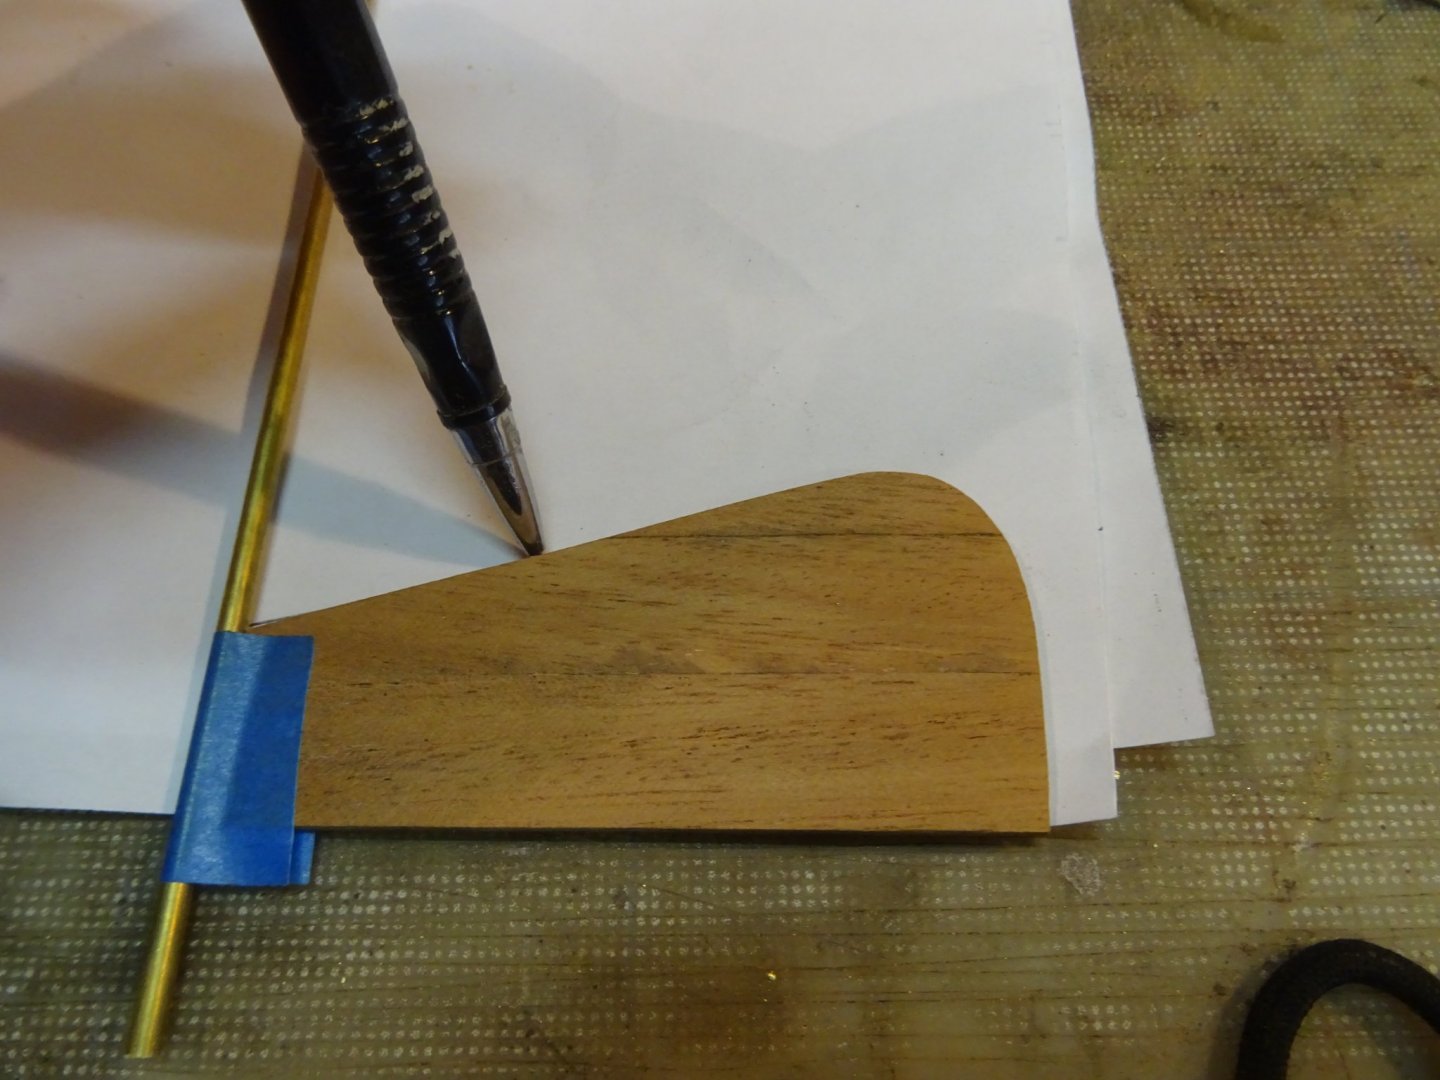
... and then the other side.

Sawing out the pintle:
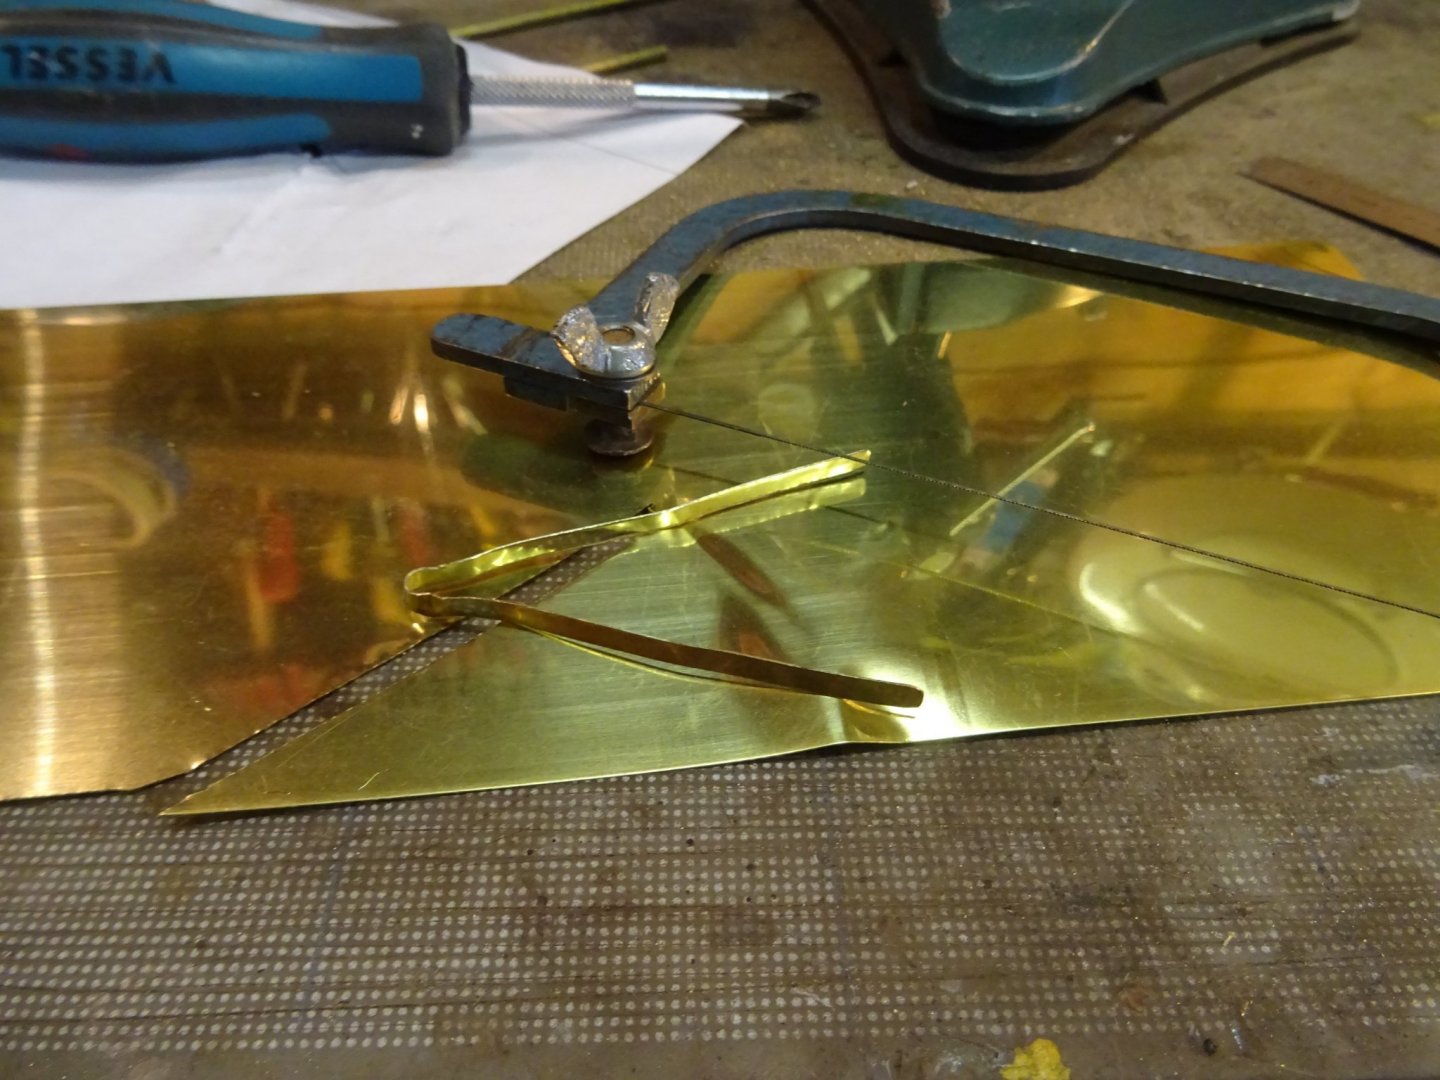
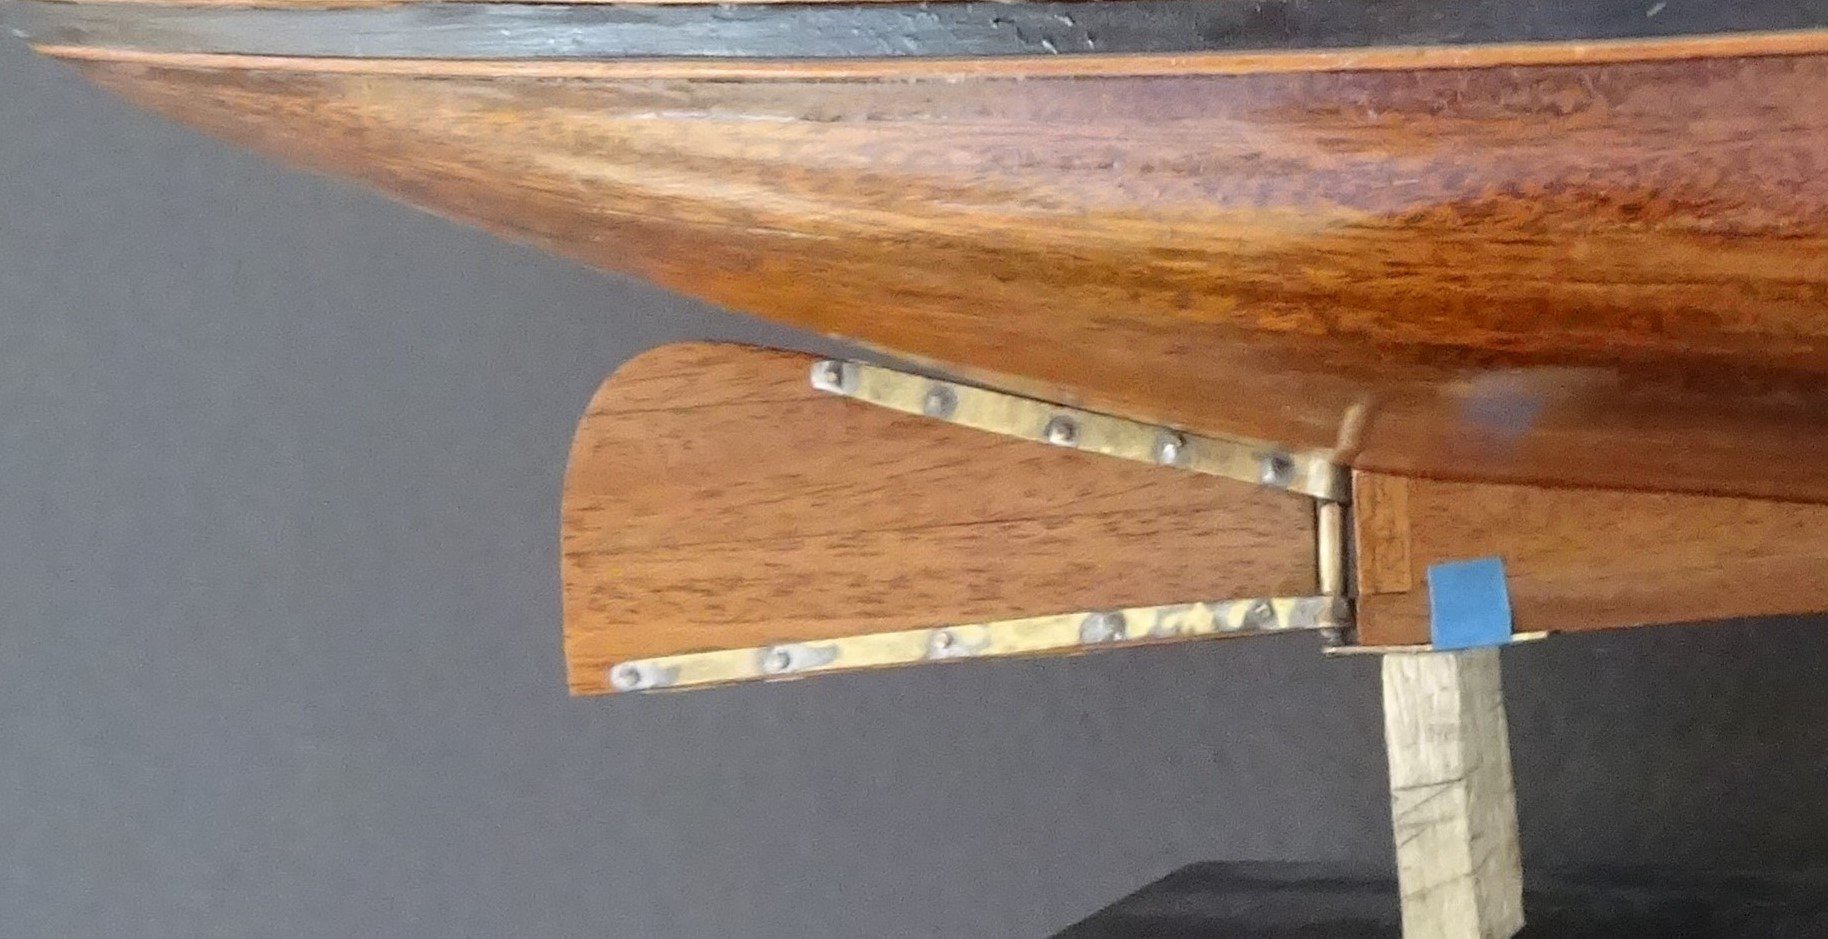
Fitting the two pintles.

I solder nails through the pintles ...
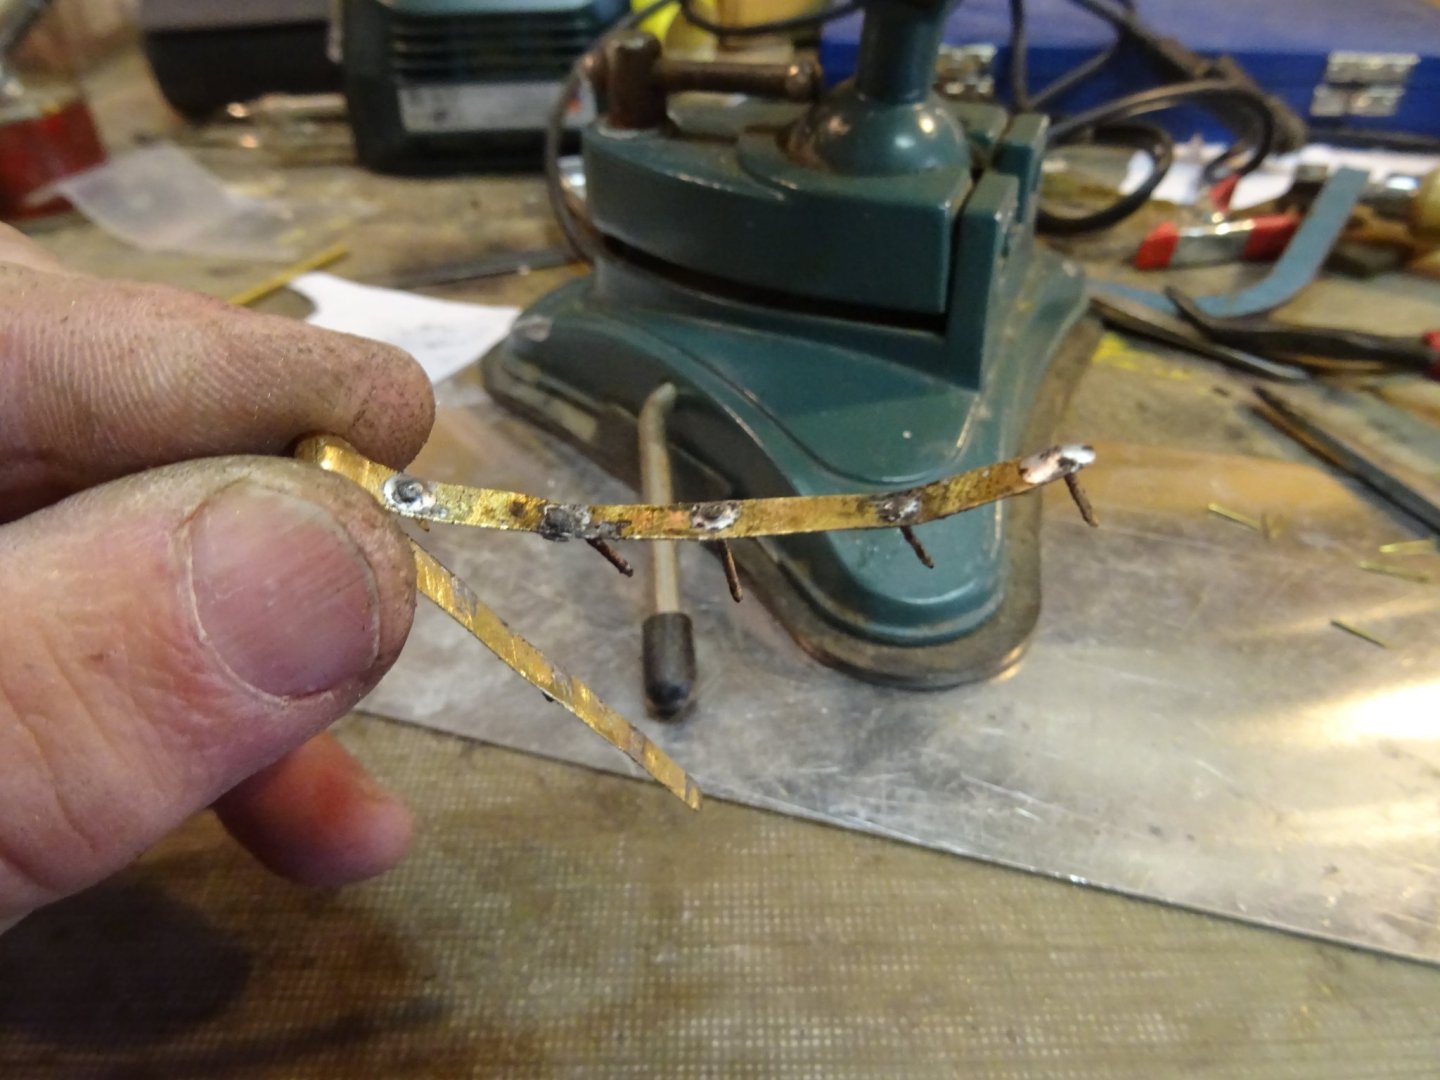
... cut them off and file the inside of the pintles flat.
The rudder skeleton.
Gluing the pintles on the rudder.
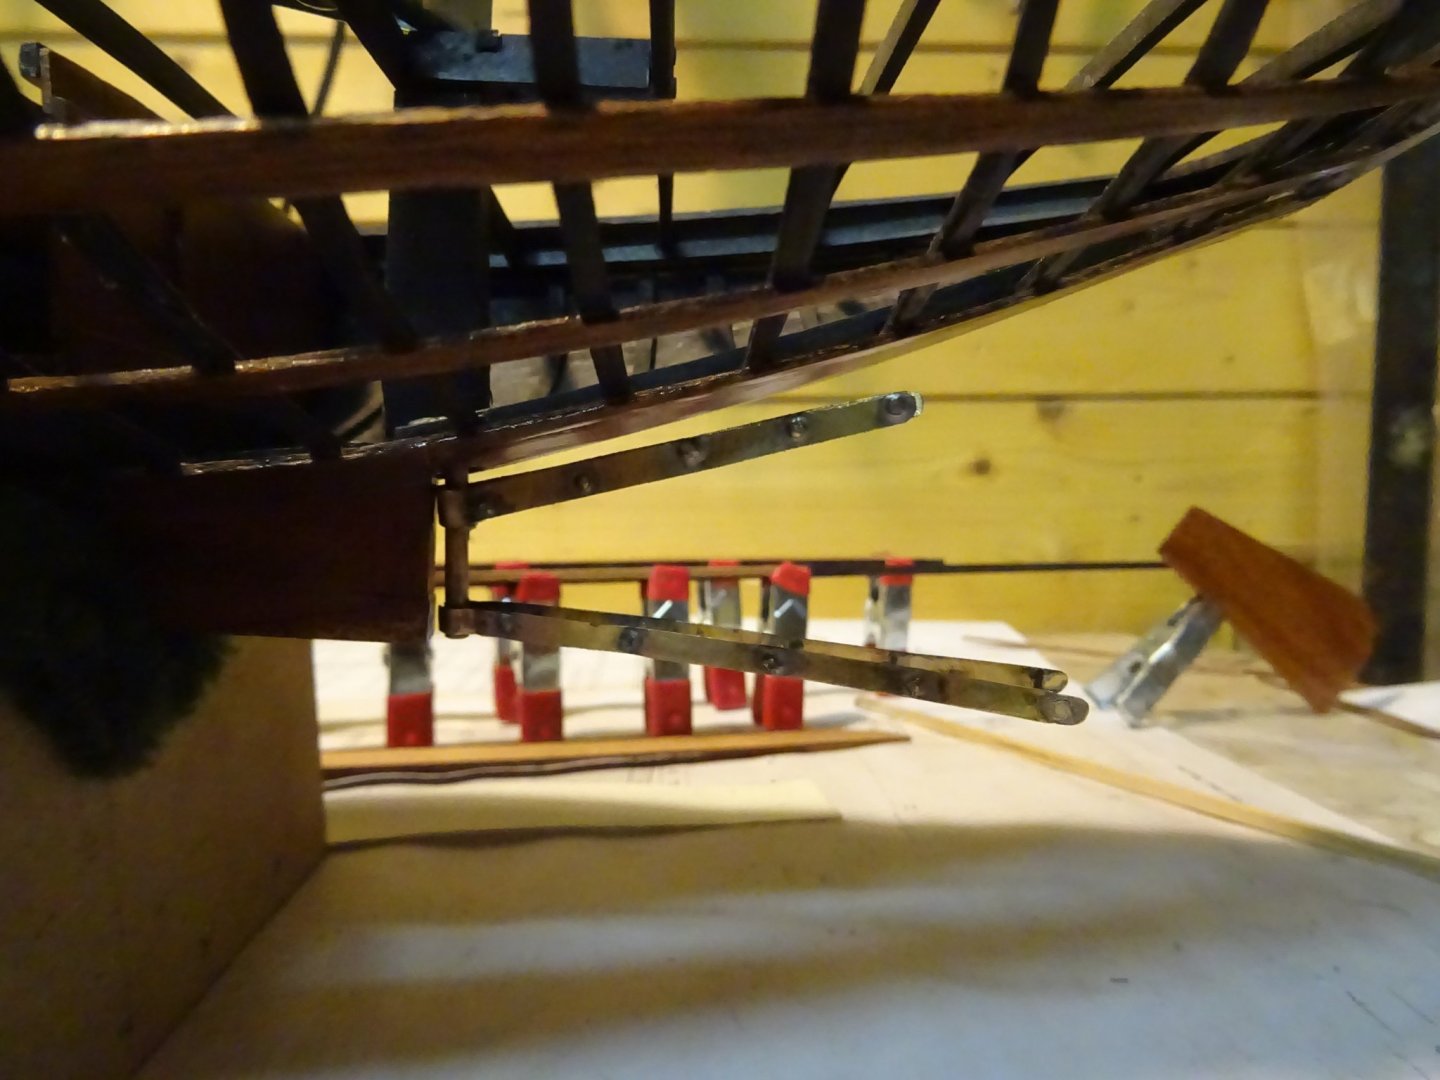
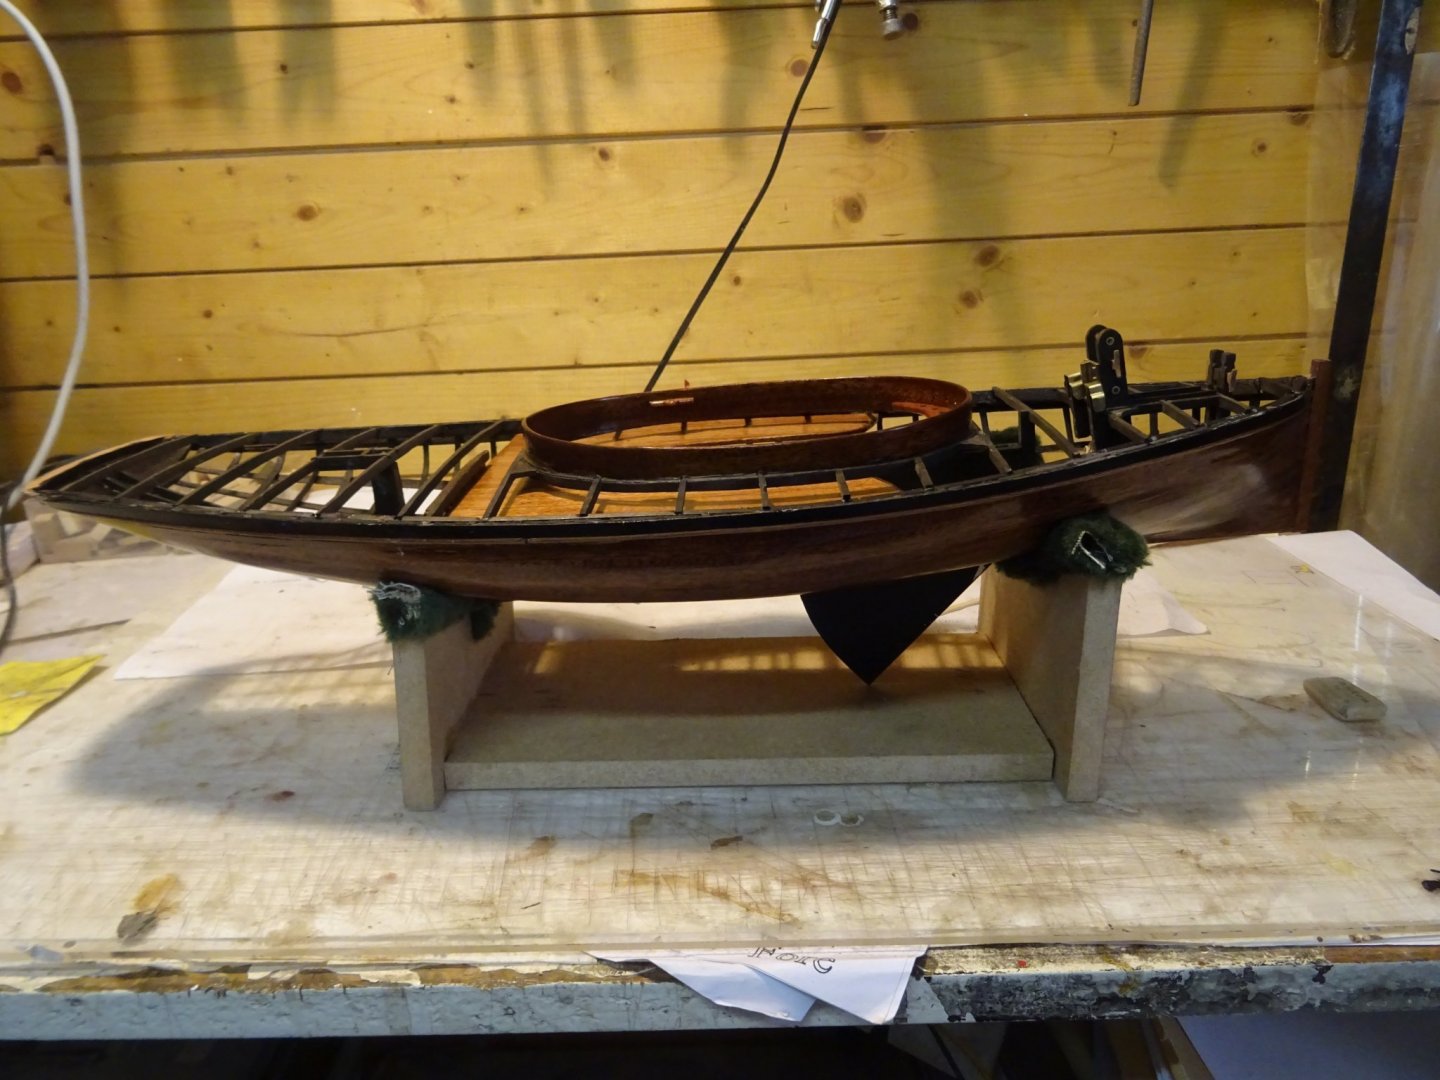
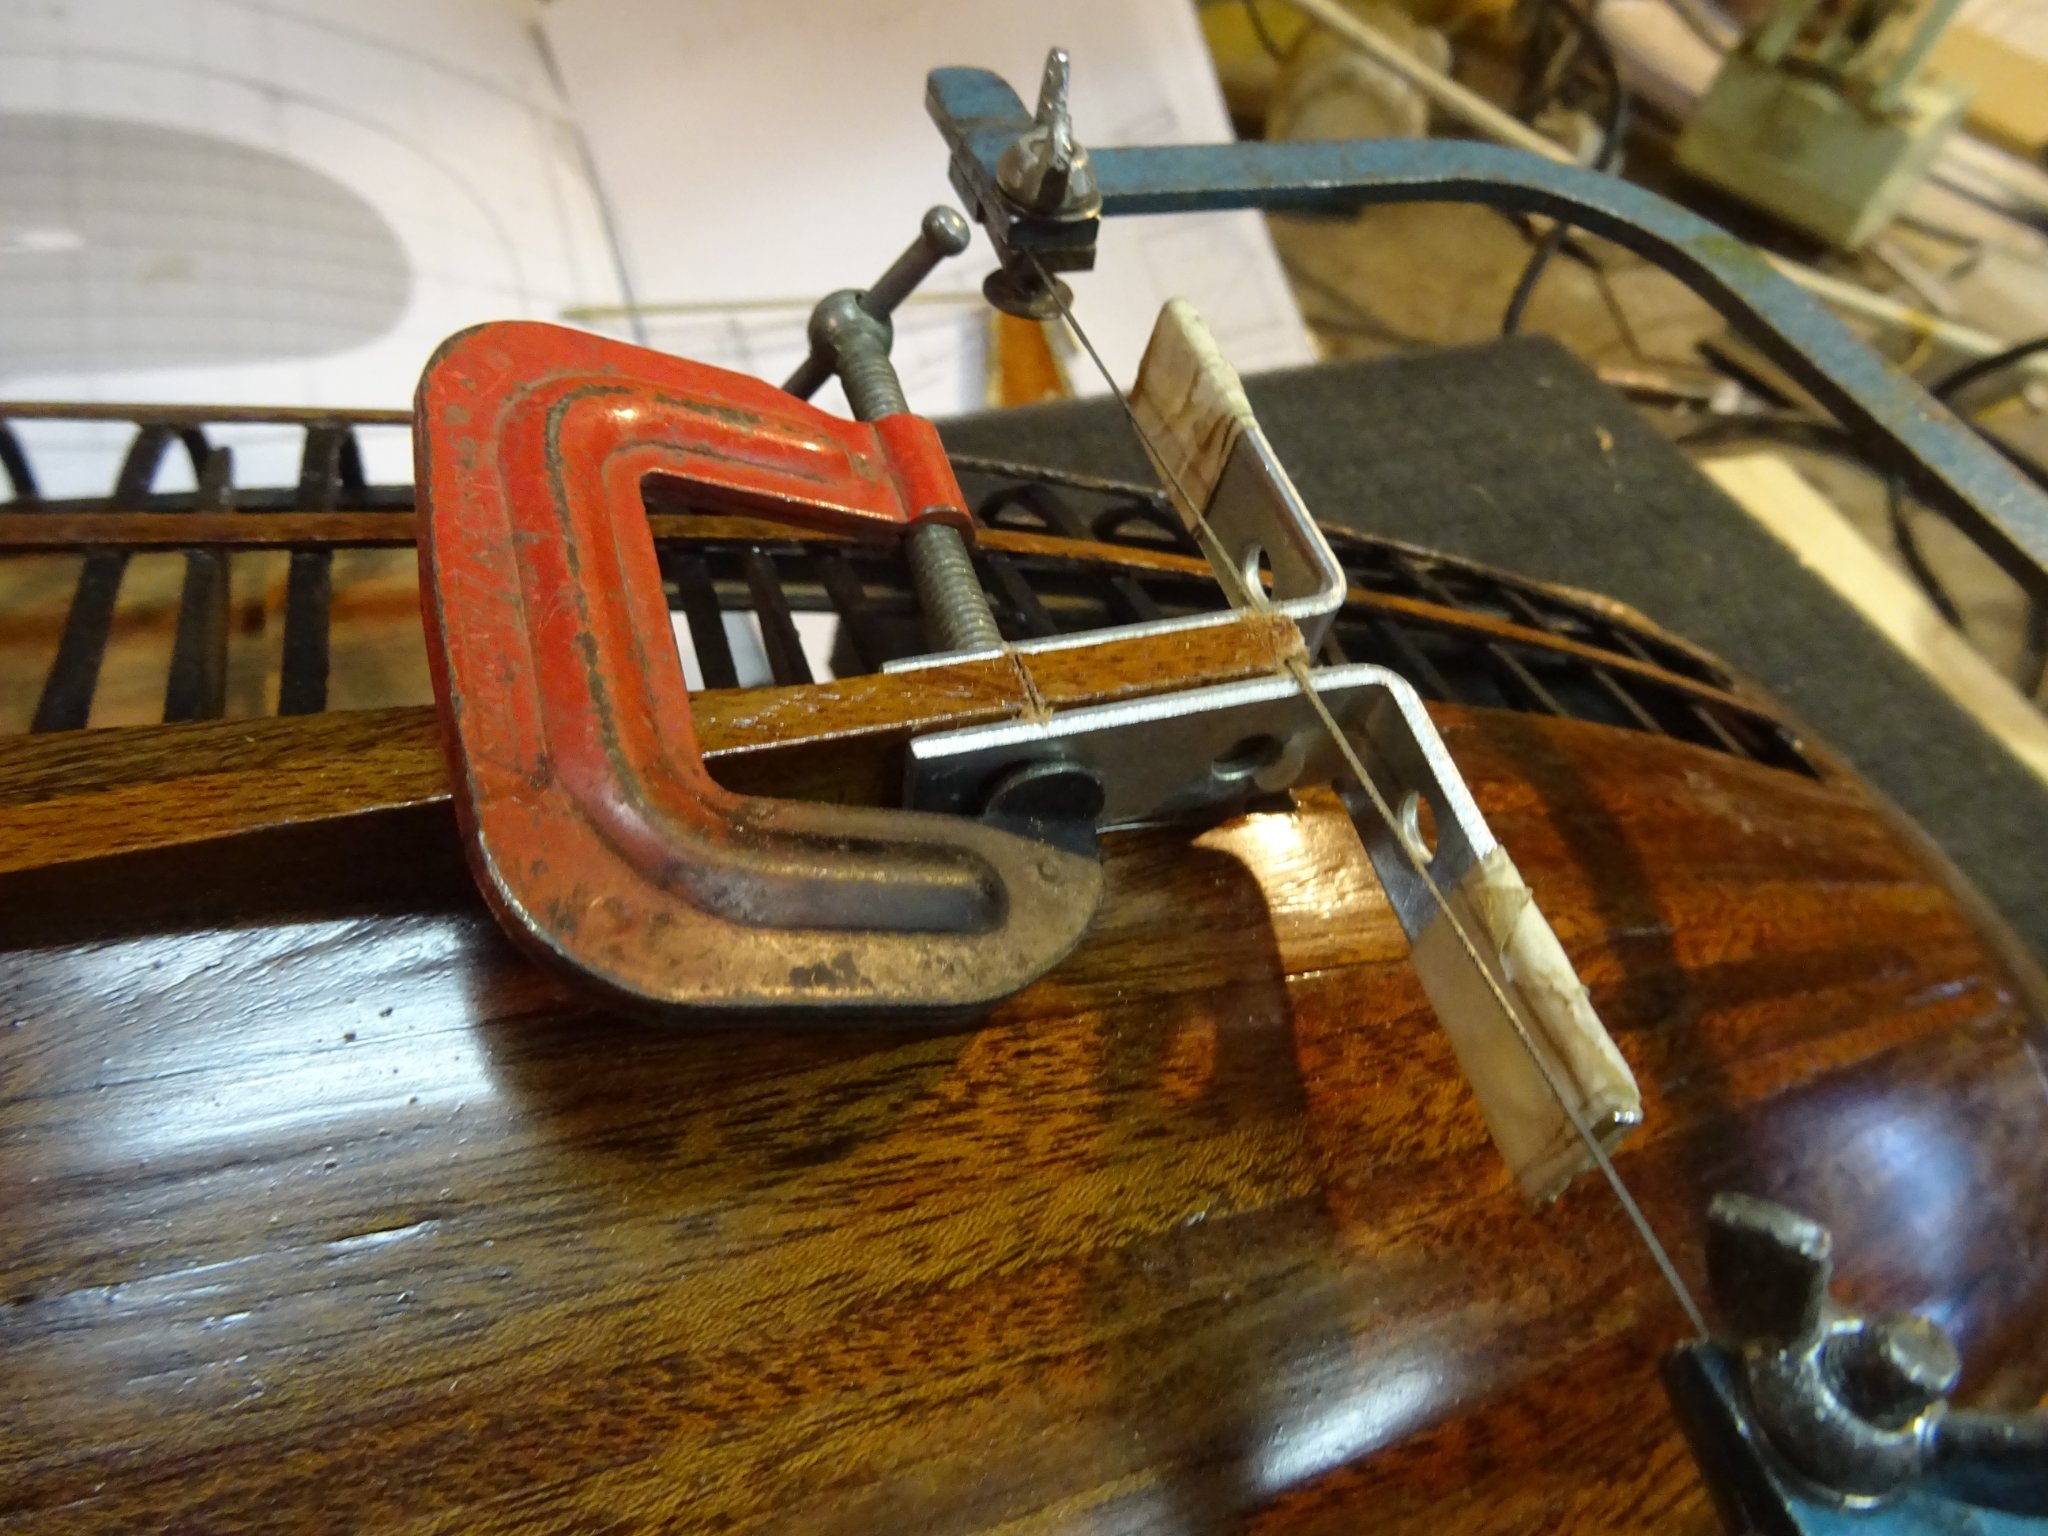
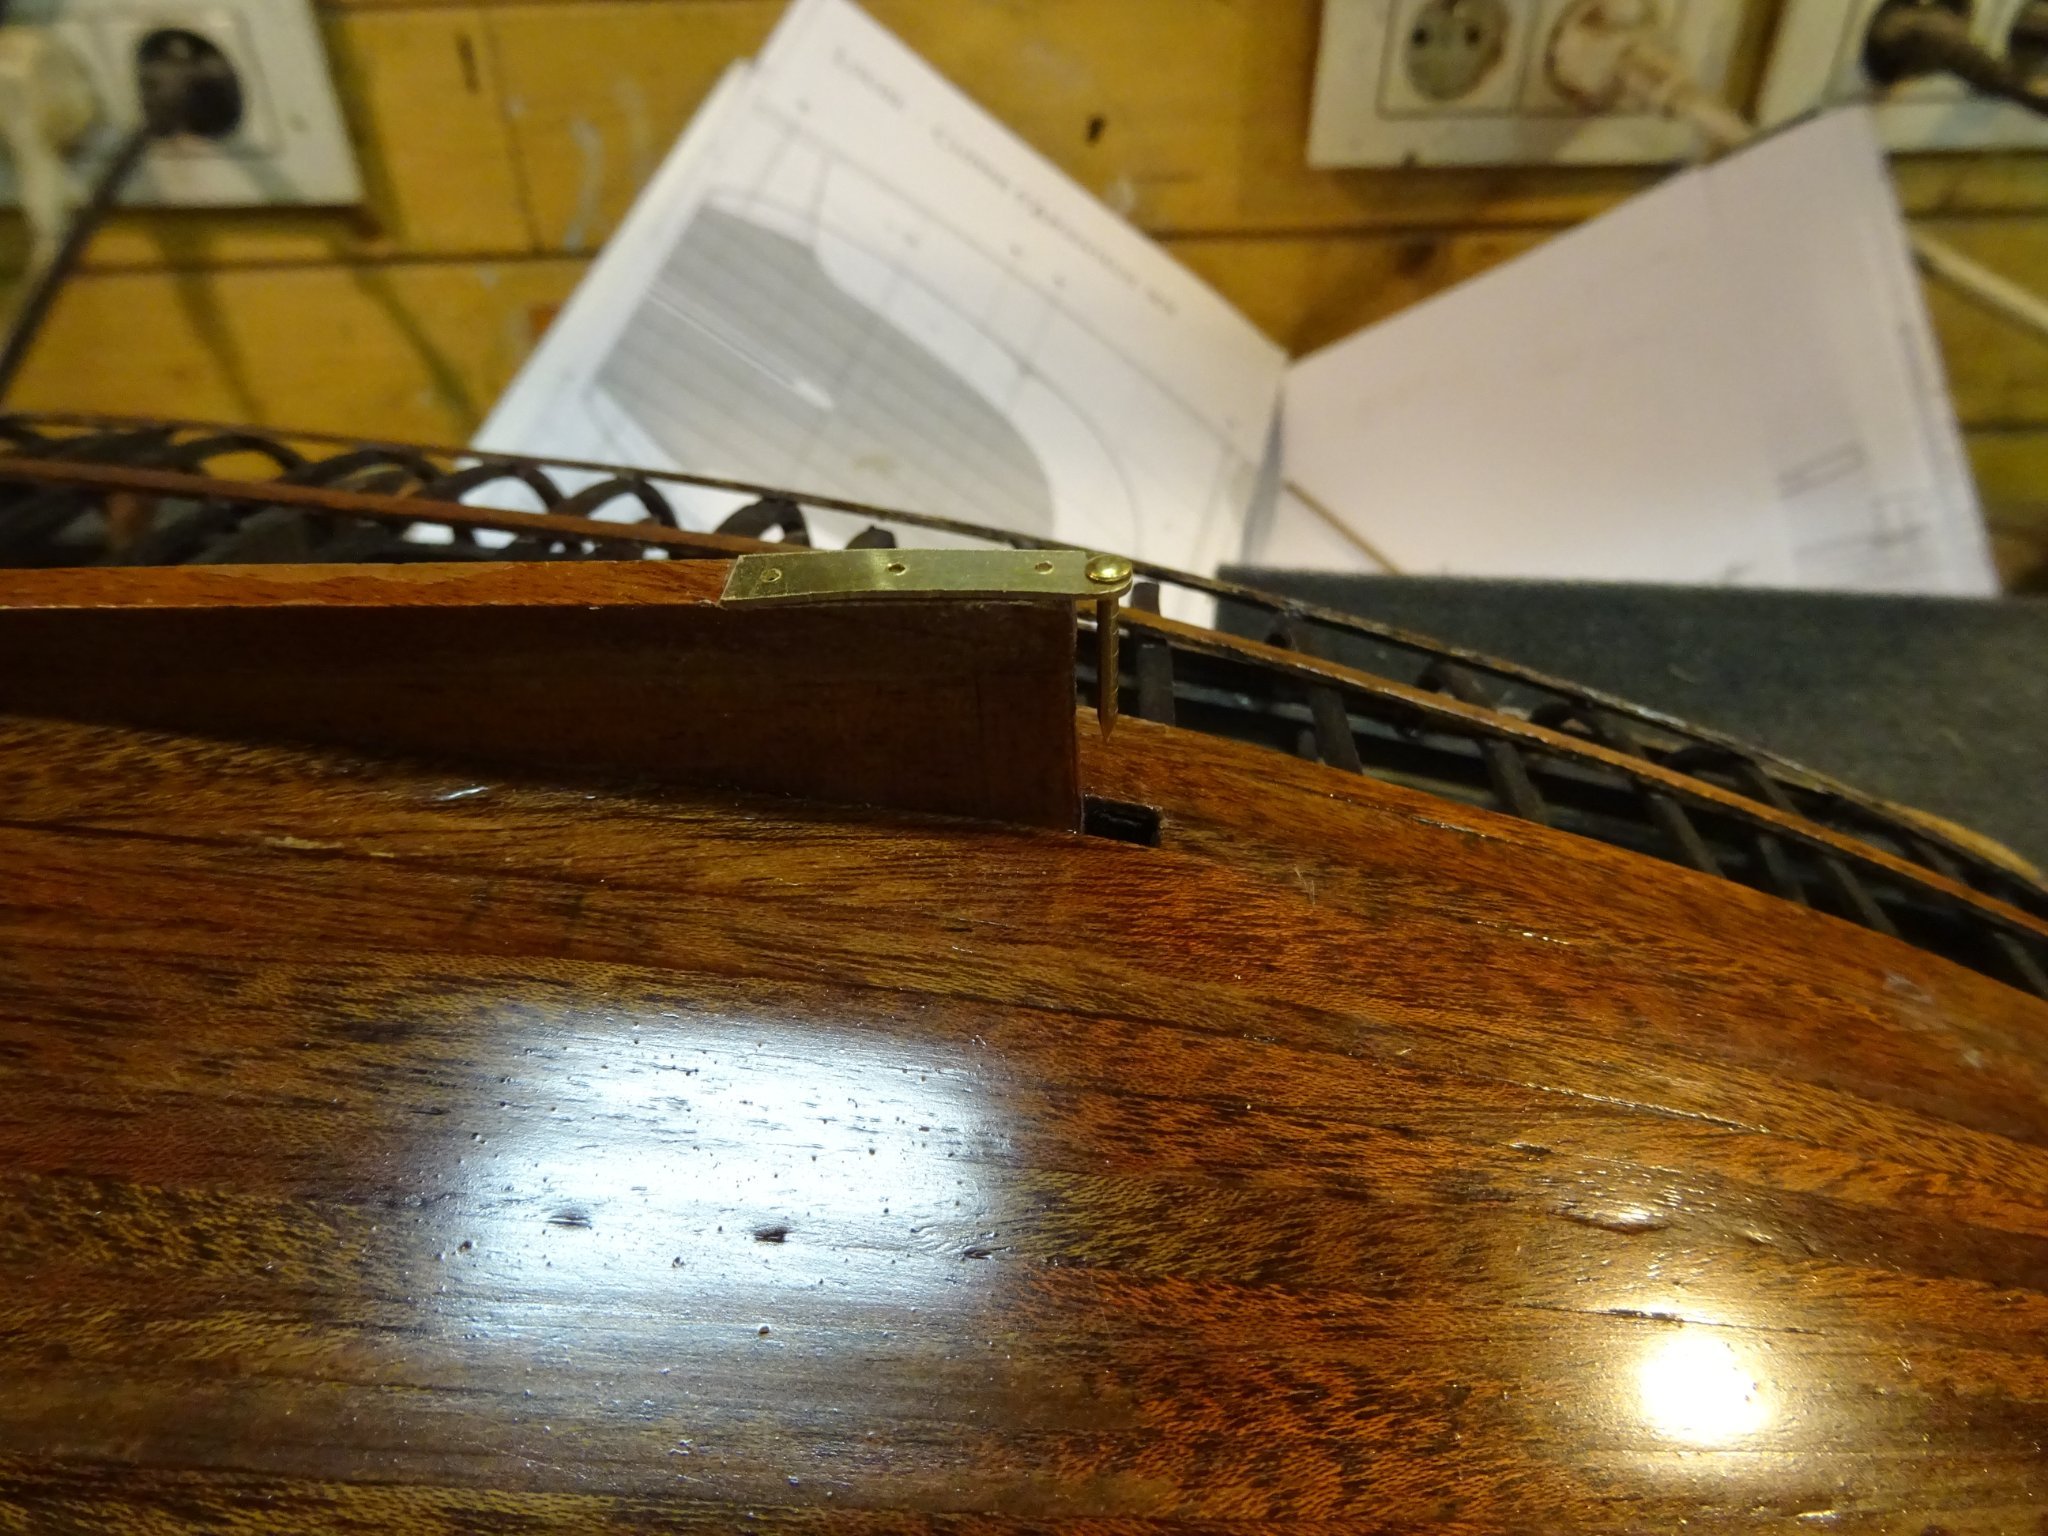
The rudder rests on a sole piece that is incorporated in the keel. To neatly saw out the recess, I attach two metal guides to the keel.
Fitting the rudder:

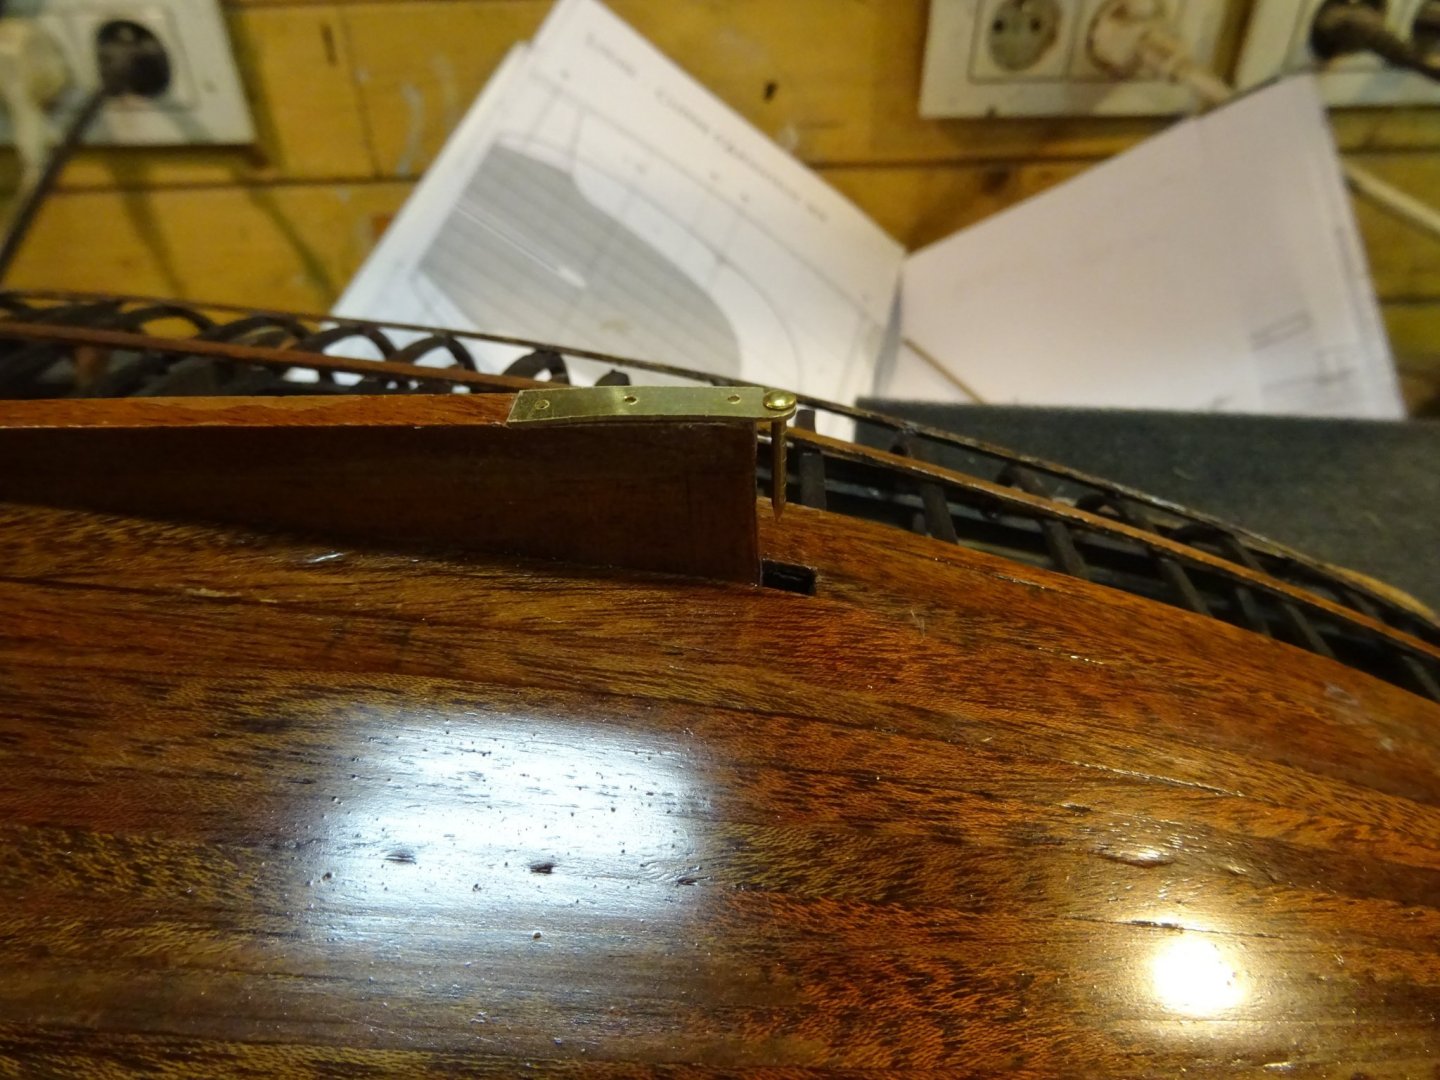
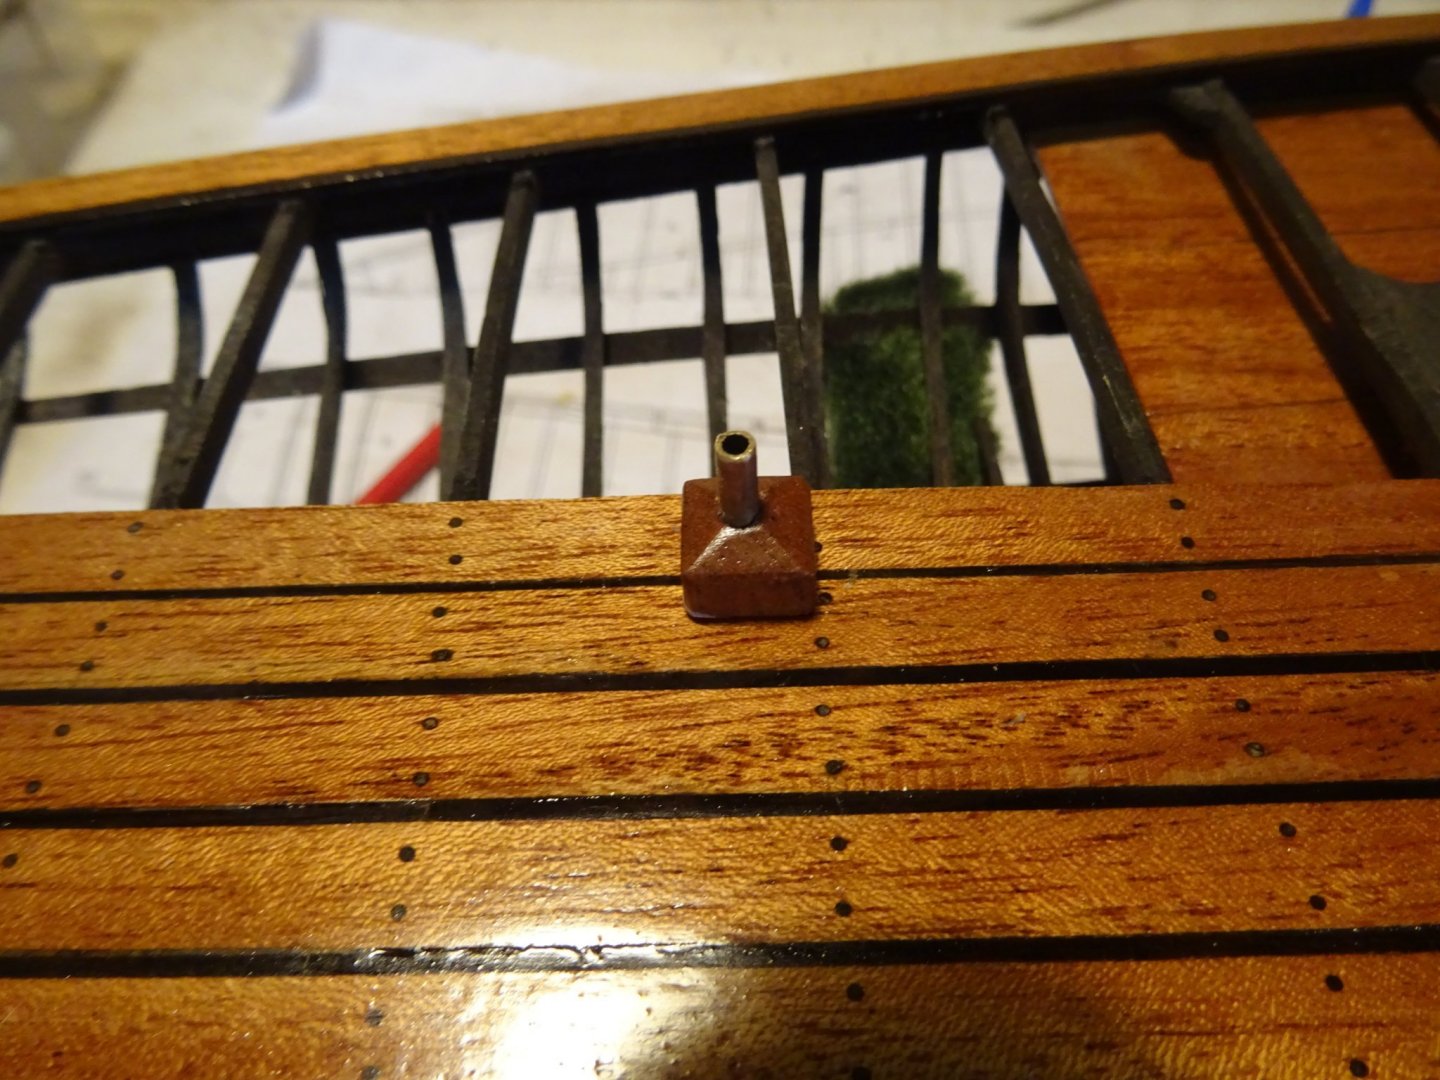
The rudder stock passes through a kind of massive wooden 'deck passage'. Making that deck passage:

Sawing the groove which has to fit in the deck opening

The deck passage;
The deck passage on the deck with the rudder stock:
Thank you very much for reading this log and for your likes and for your comments.
Till soon!
- FriedClams, Ekis, mtaylor and 6 others
-
9
-
On 11/28/2021 at 1:18 PM, Backer said:
A very beautiful result .
Thaks, Patrick.
On 11/28/2021 at 7:41 PM, Wintergreen said:What Patrick said above.
I notice that you haven't treenailed the coverboards and assume that that is intentional. Is it to keep details to an accurate but not overwhelming experience? I mean, treenailing the coverboards will detract interest from the nice deck. As it is now, both the coverboard and the deck stands out on its own.
Keep it up!
On 11/28/2021 at 7:52 PM, wefalck said:Actually, neither of them would have been 'tree-nailed' on the prototype. On the real thing, the planks would have been screwed down with sunk screws and the borehole would be plugged to make it as invisible as possible. The plugs were not tarred, but perhaps covered in some marine glue before driven in. The plugs were cut from the same materials as the planks and with the same grain direction. In this way the deck could be planed absolutely flush before varnishing it.
I am watching this nice progress with interest !
On 11/28/2021 at 8:48 PM, Wintergreen said:That sounds reasonable wefalck. Countersunk and plugged, off course for a varnished surface.
Hakan and Eberhard,
You are absolutely right. The planks were undoubtedly fastened with countersunk screws capped with a wooden plug, in the same wood as the decking. My dark tree nails are probably a bit overdone. On the real boats, the deck probably wasn't even varnished. I was guided by the example of Bruno d'Orsel, he also used dark tree nails, maybe they are a bit thinner than mine. It is not so much about giving an accurate picture of reality, but also about reproducing the atmosphere of a yacht model from the Belle Epoque. I purposely did not use tree nails in the waterways so as not to visually overload the whole.
I suspect that the mahogany decking will darken a bit over time and that the wood stain on the tree nails will fade a bit.- mtaylor, Baker, Wintergreen and 2 others
-
5
-
Thanks for all the kind comments Patrick, Hakan and Keith. Thanks also all who liked.
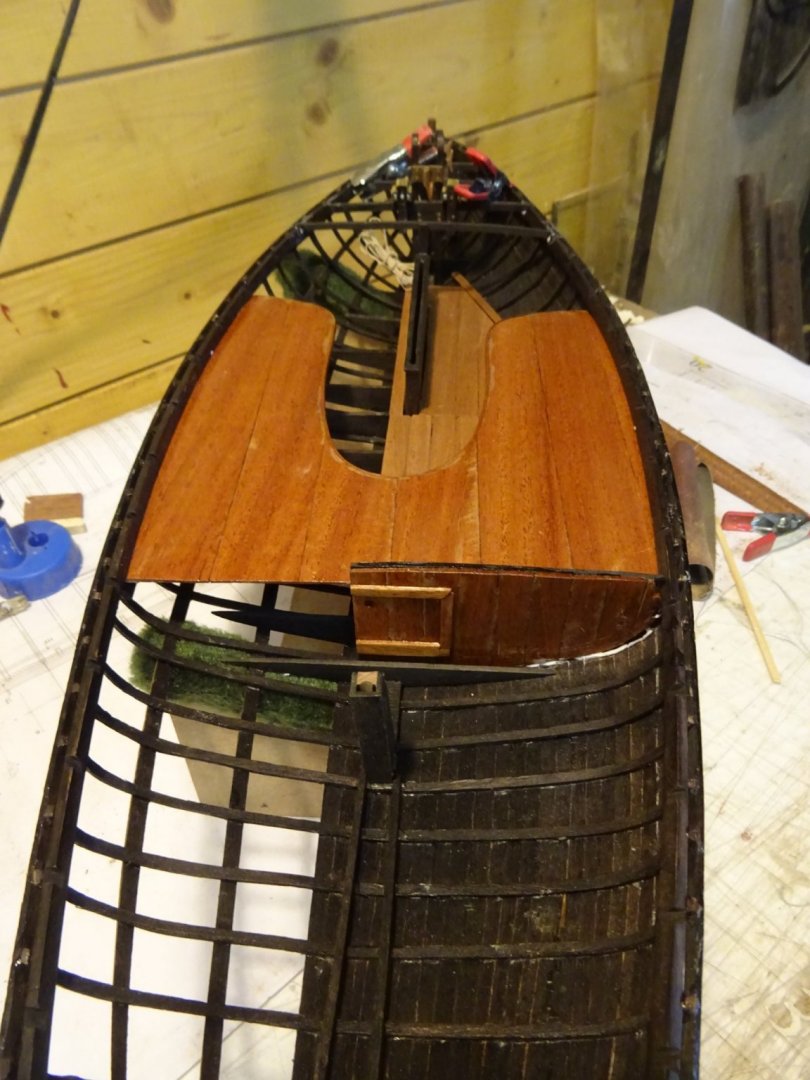
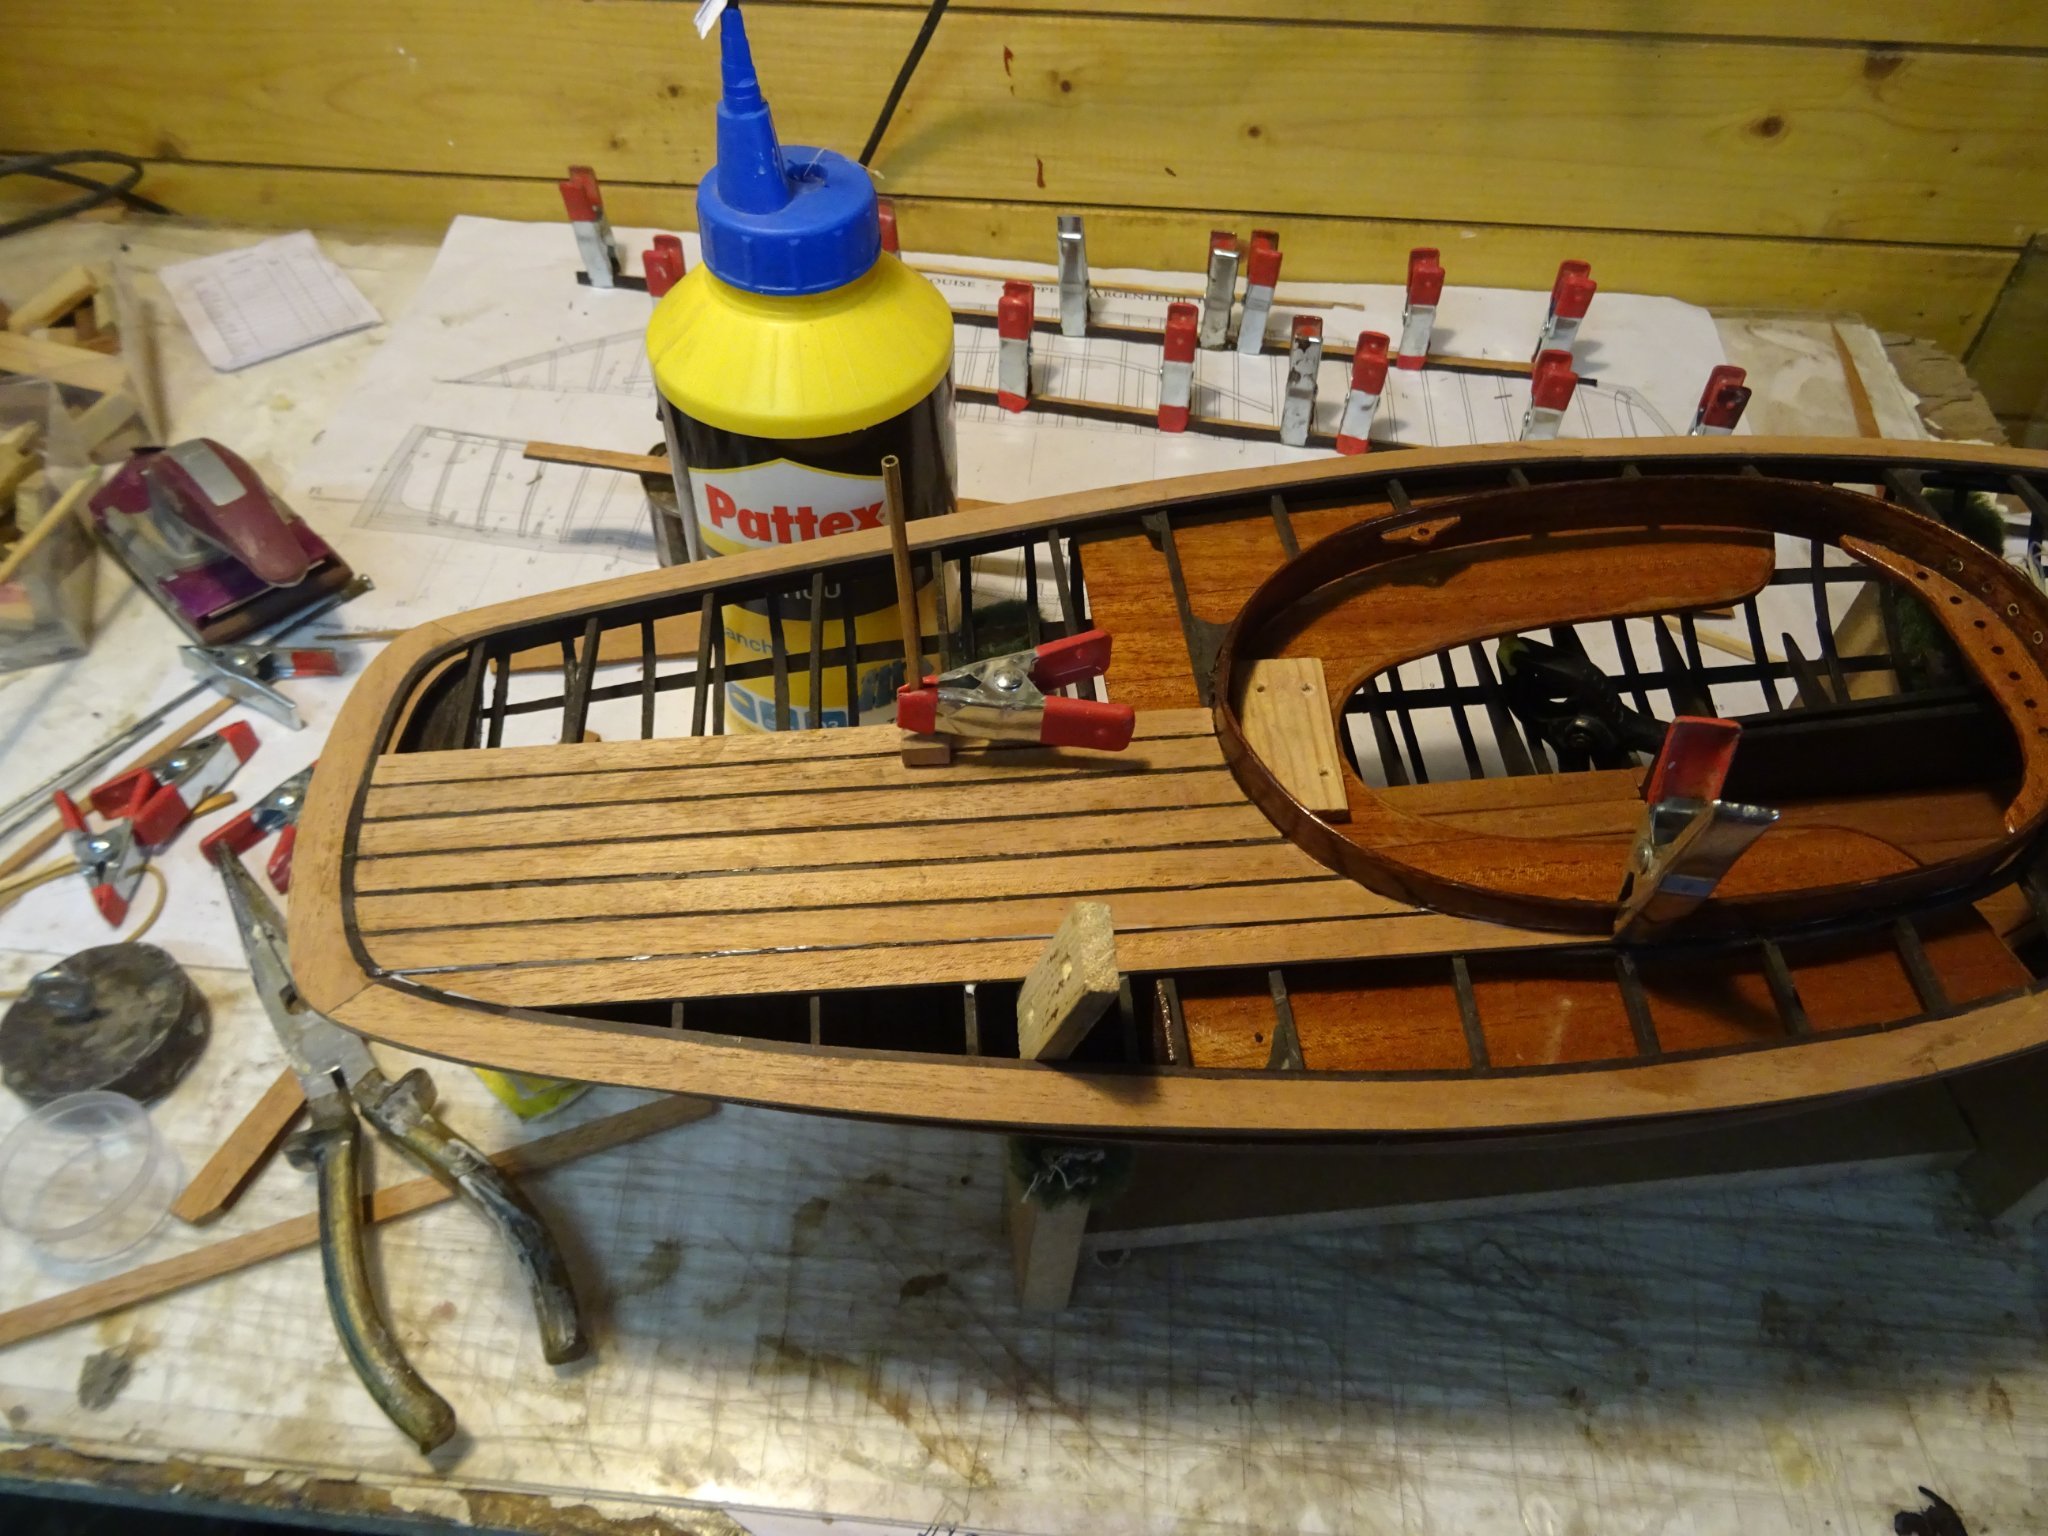
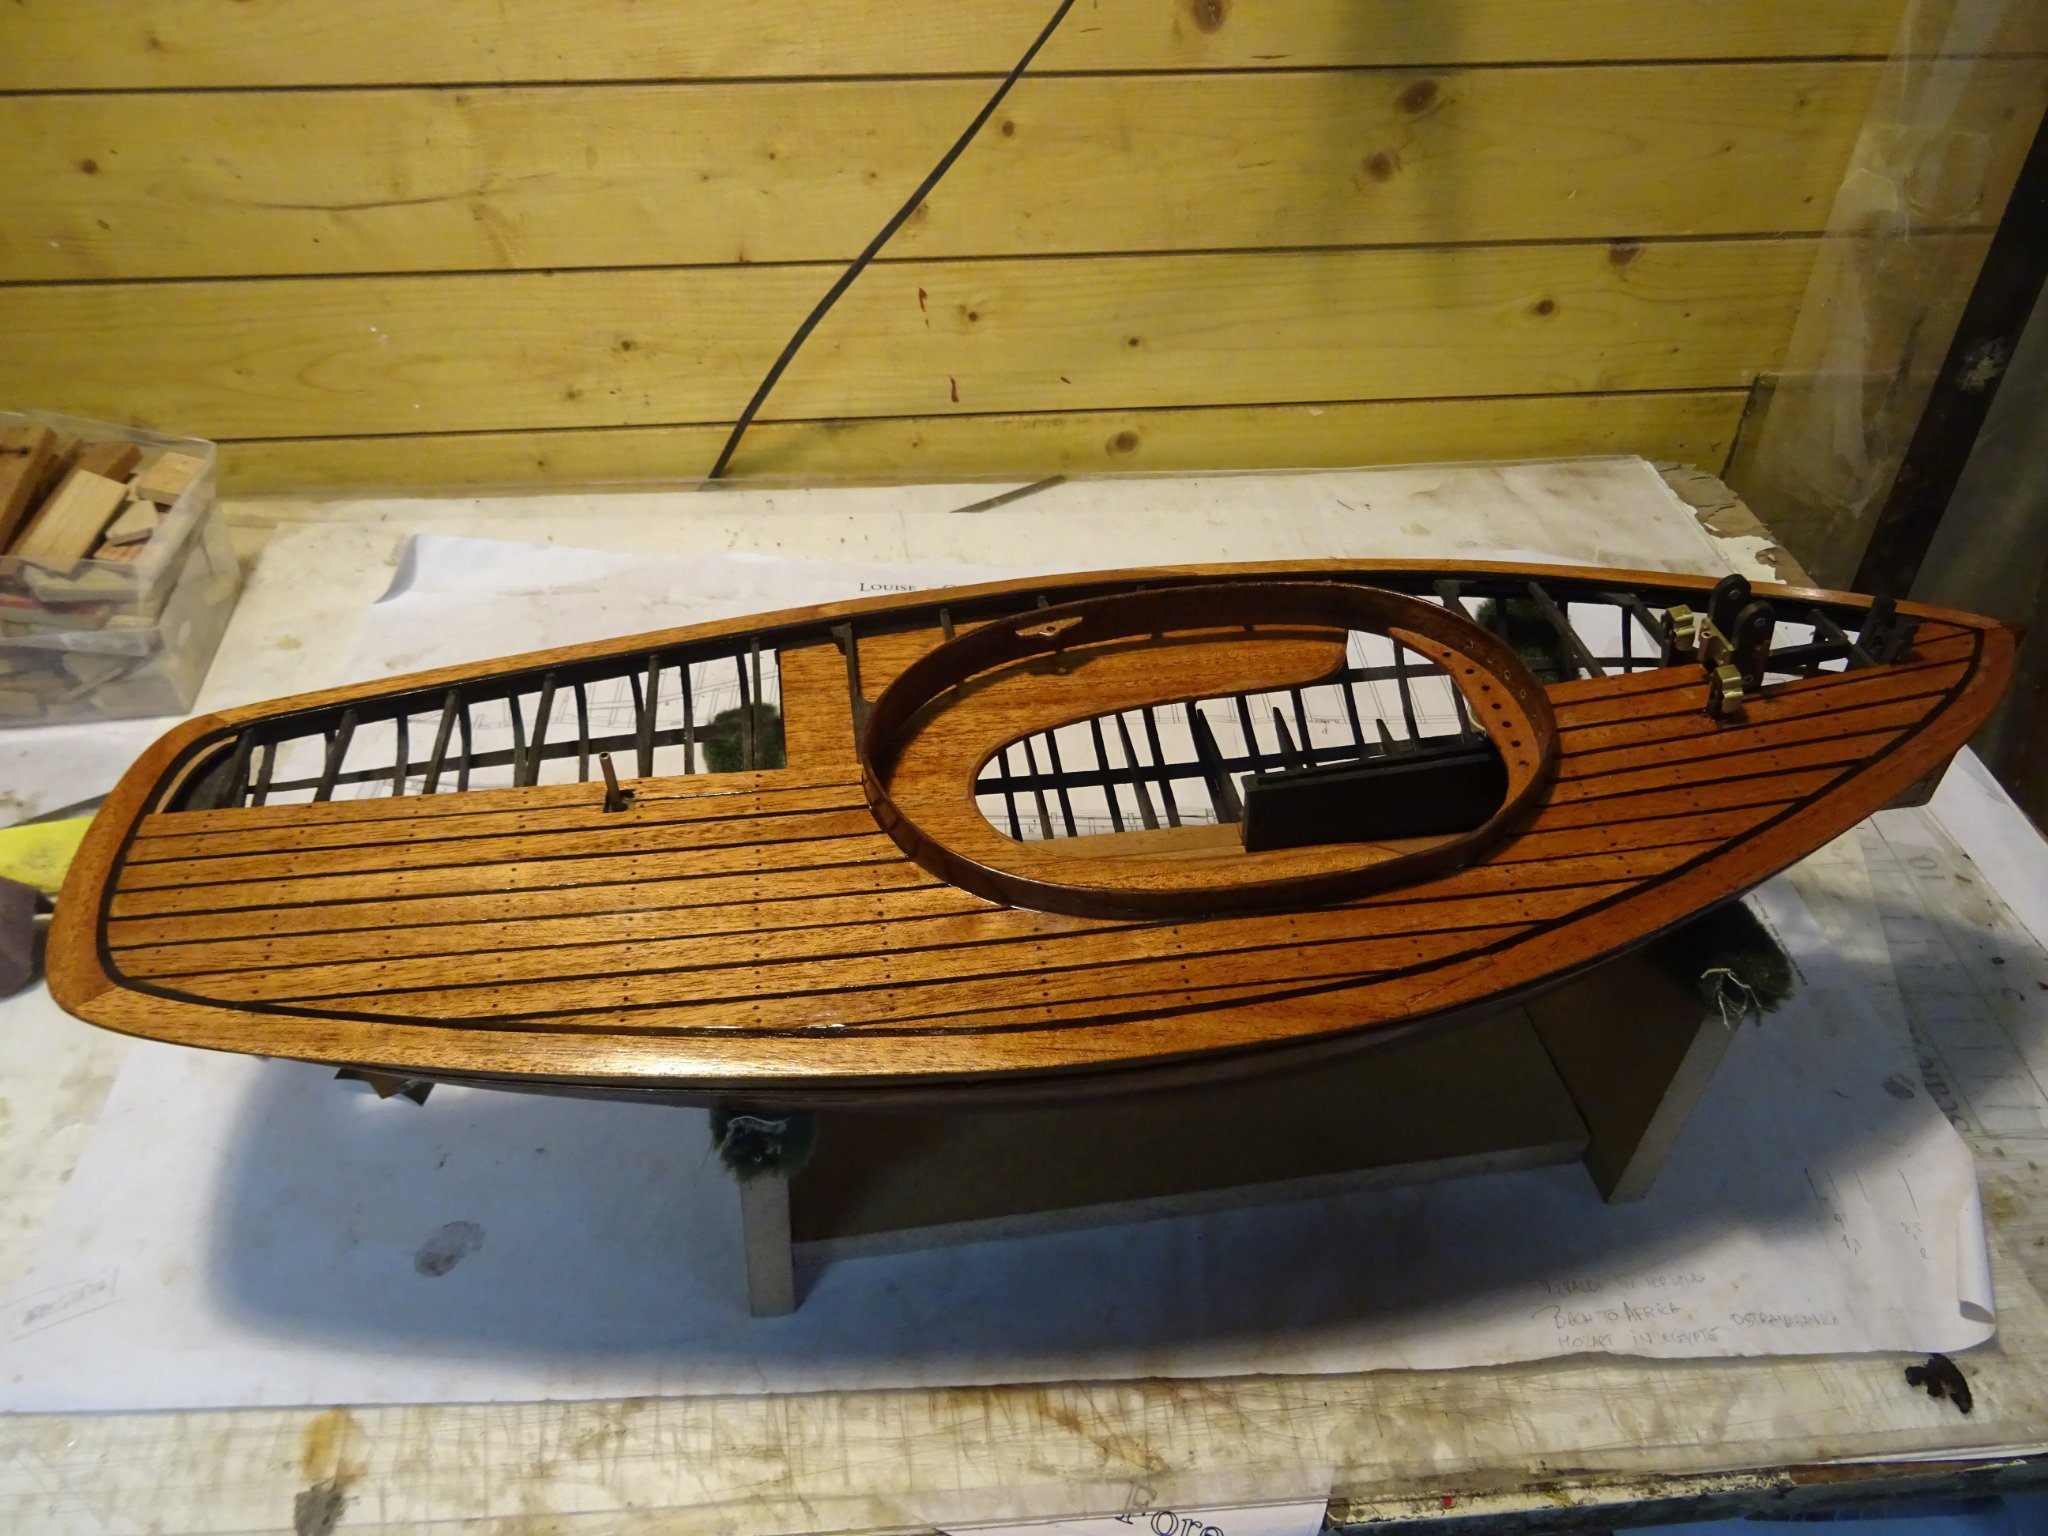
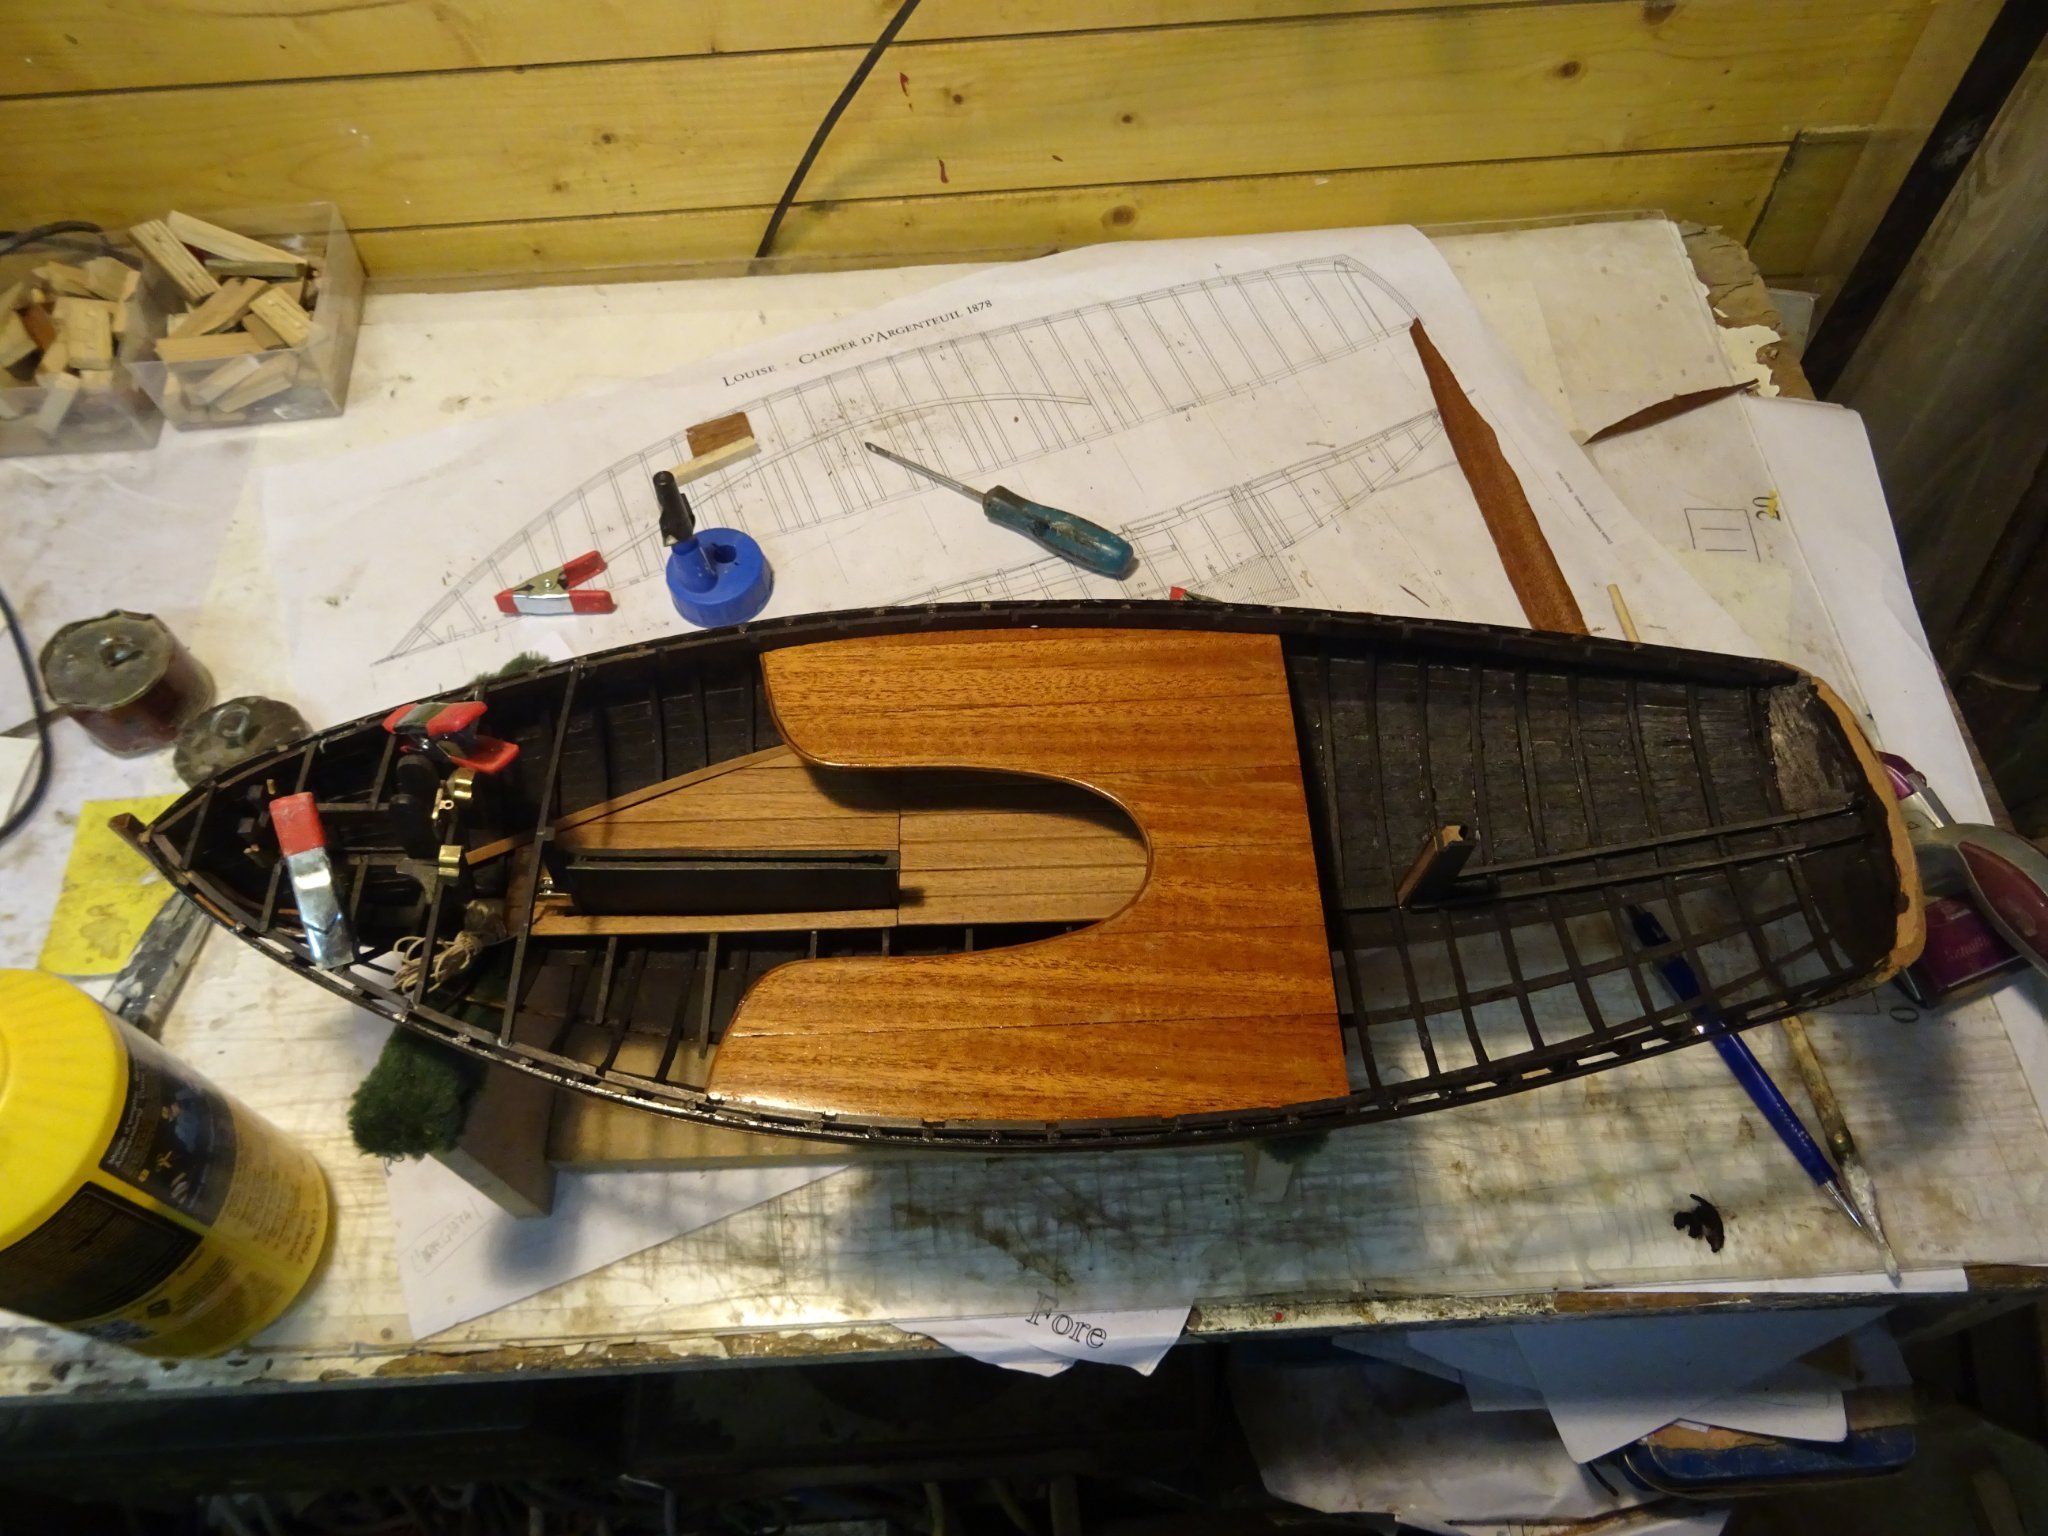
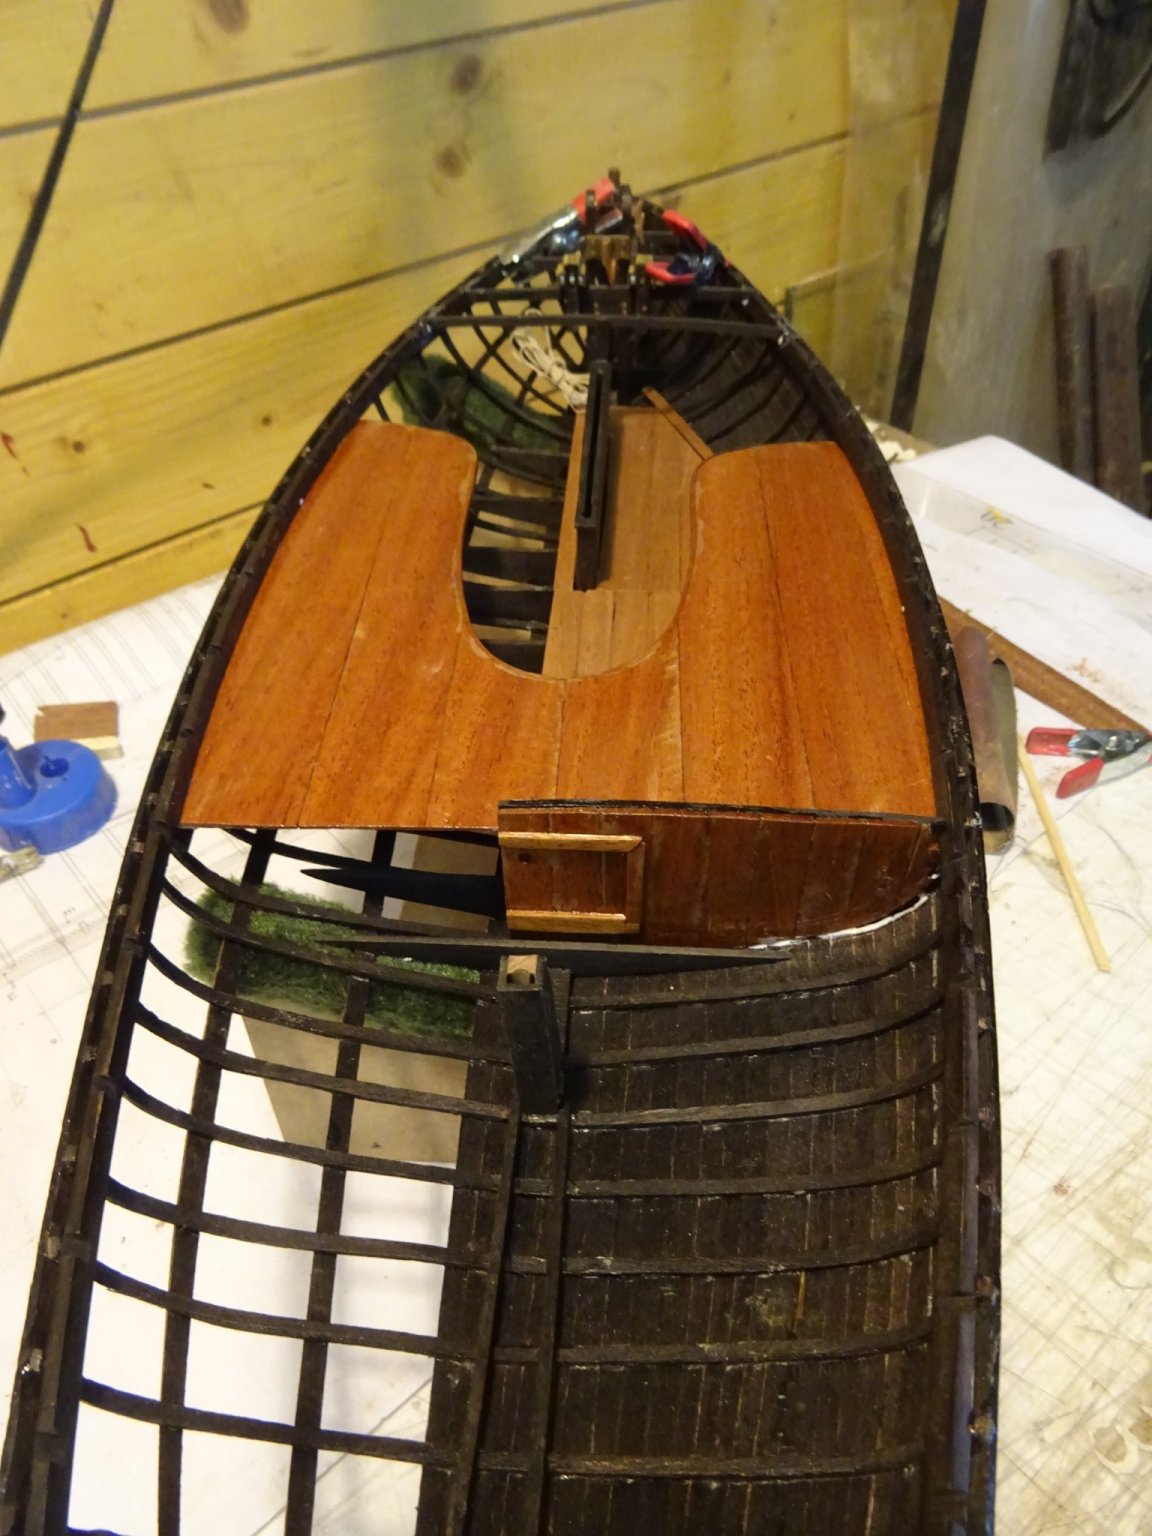
This week I laid the deck.
18. Laying the deck
The deck is made of mahogany, the caulking between the deck planks are ebony strips.
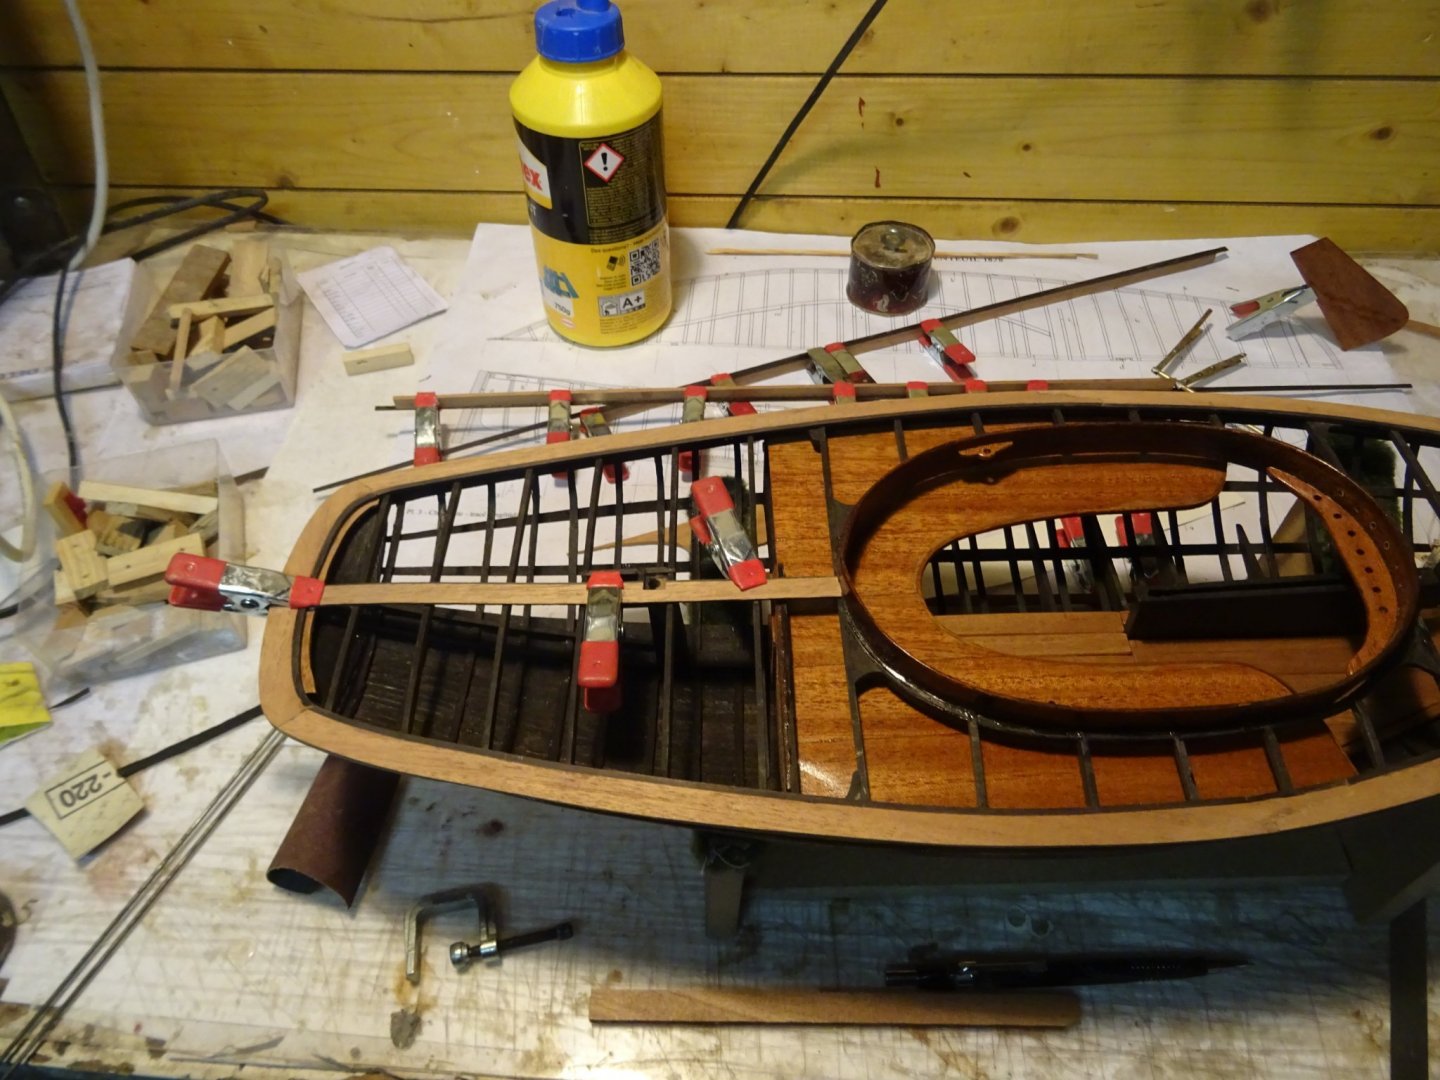
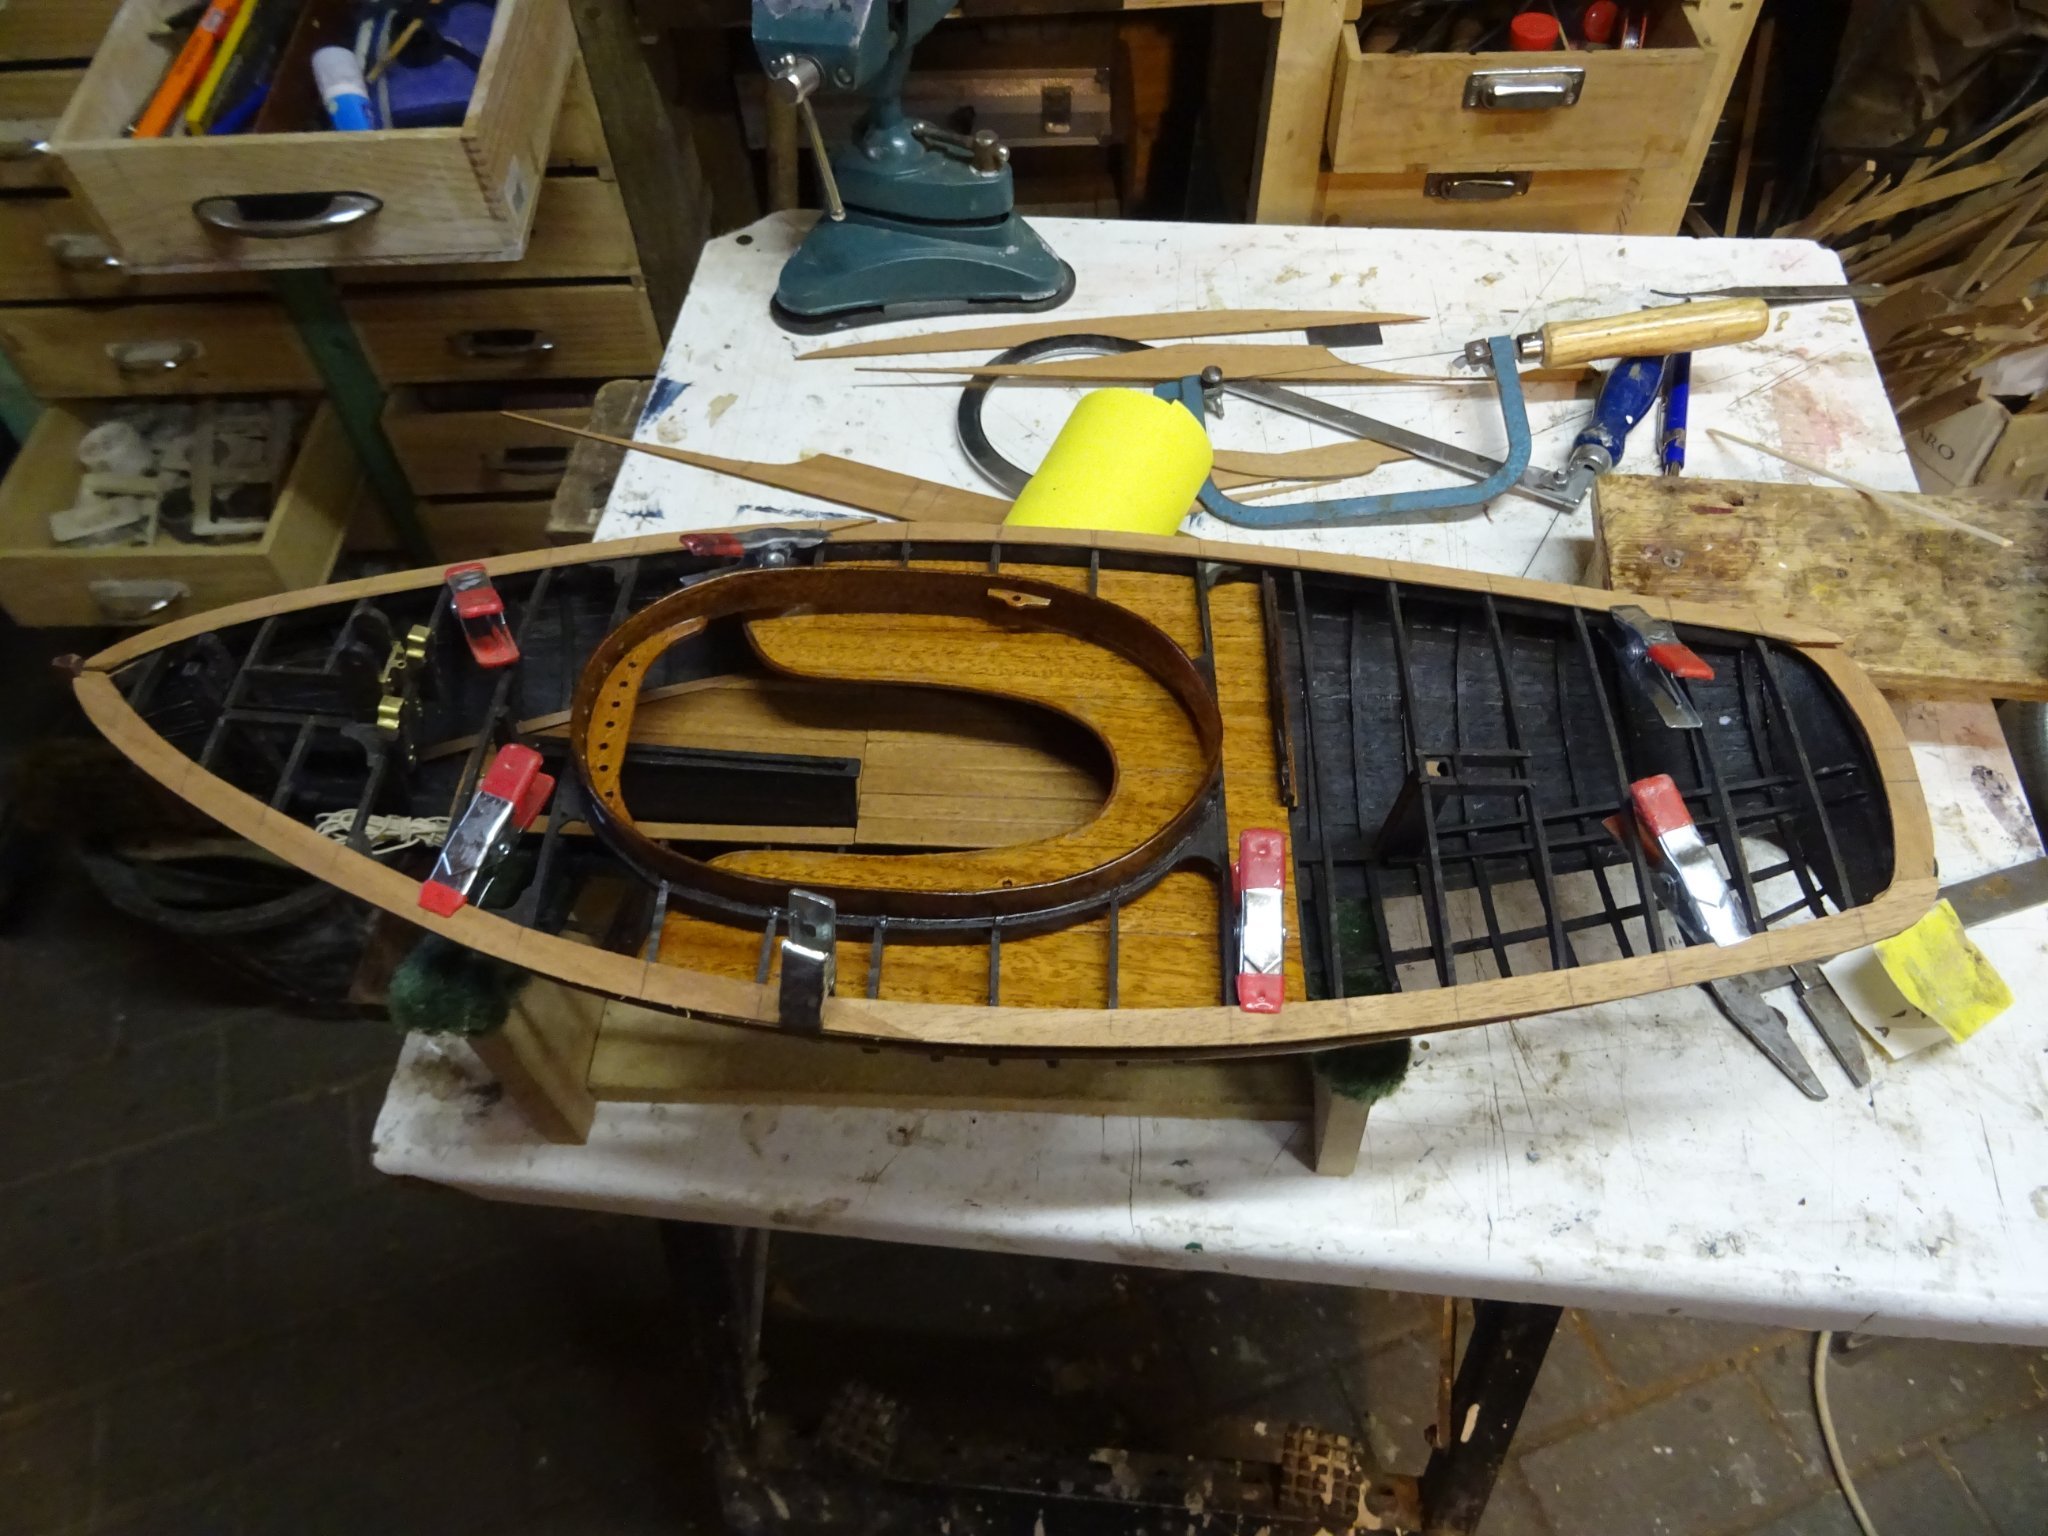
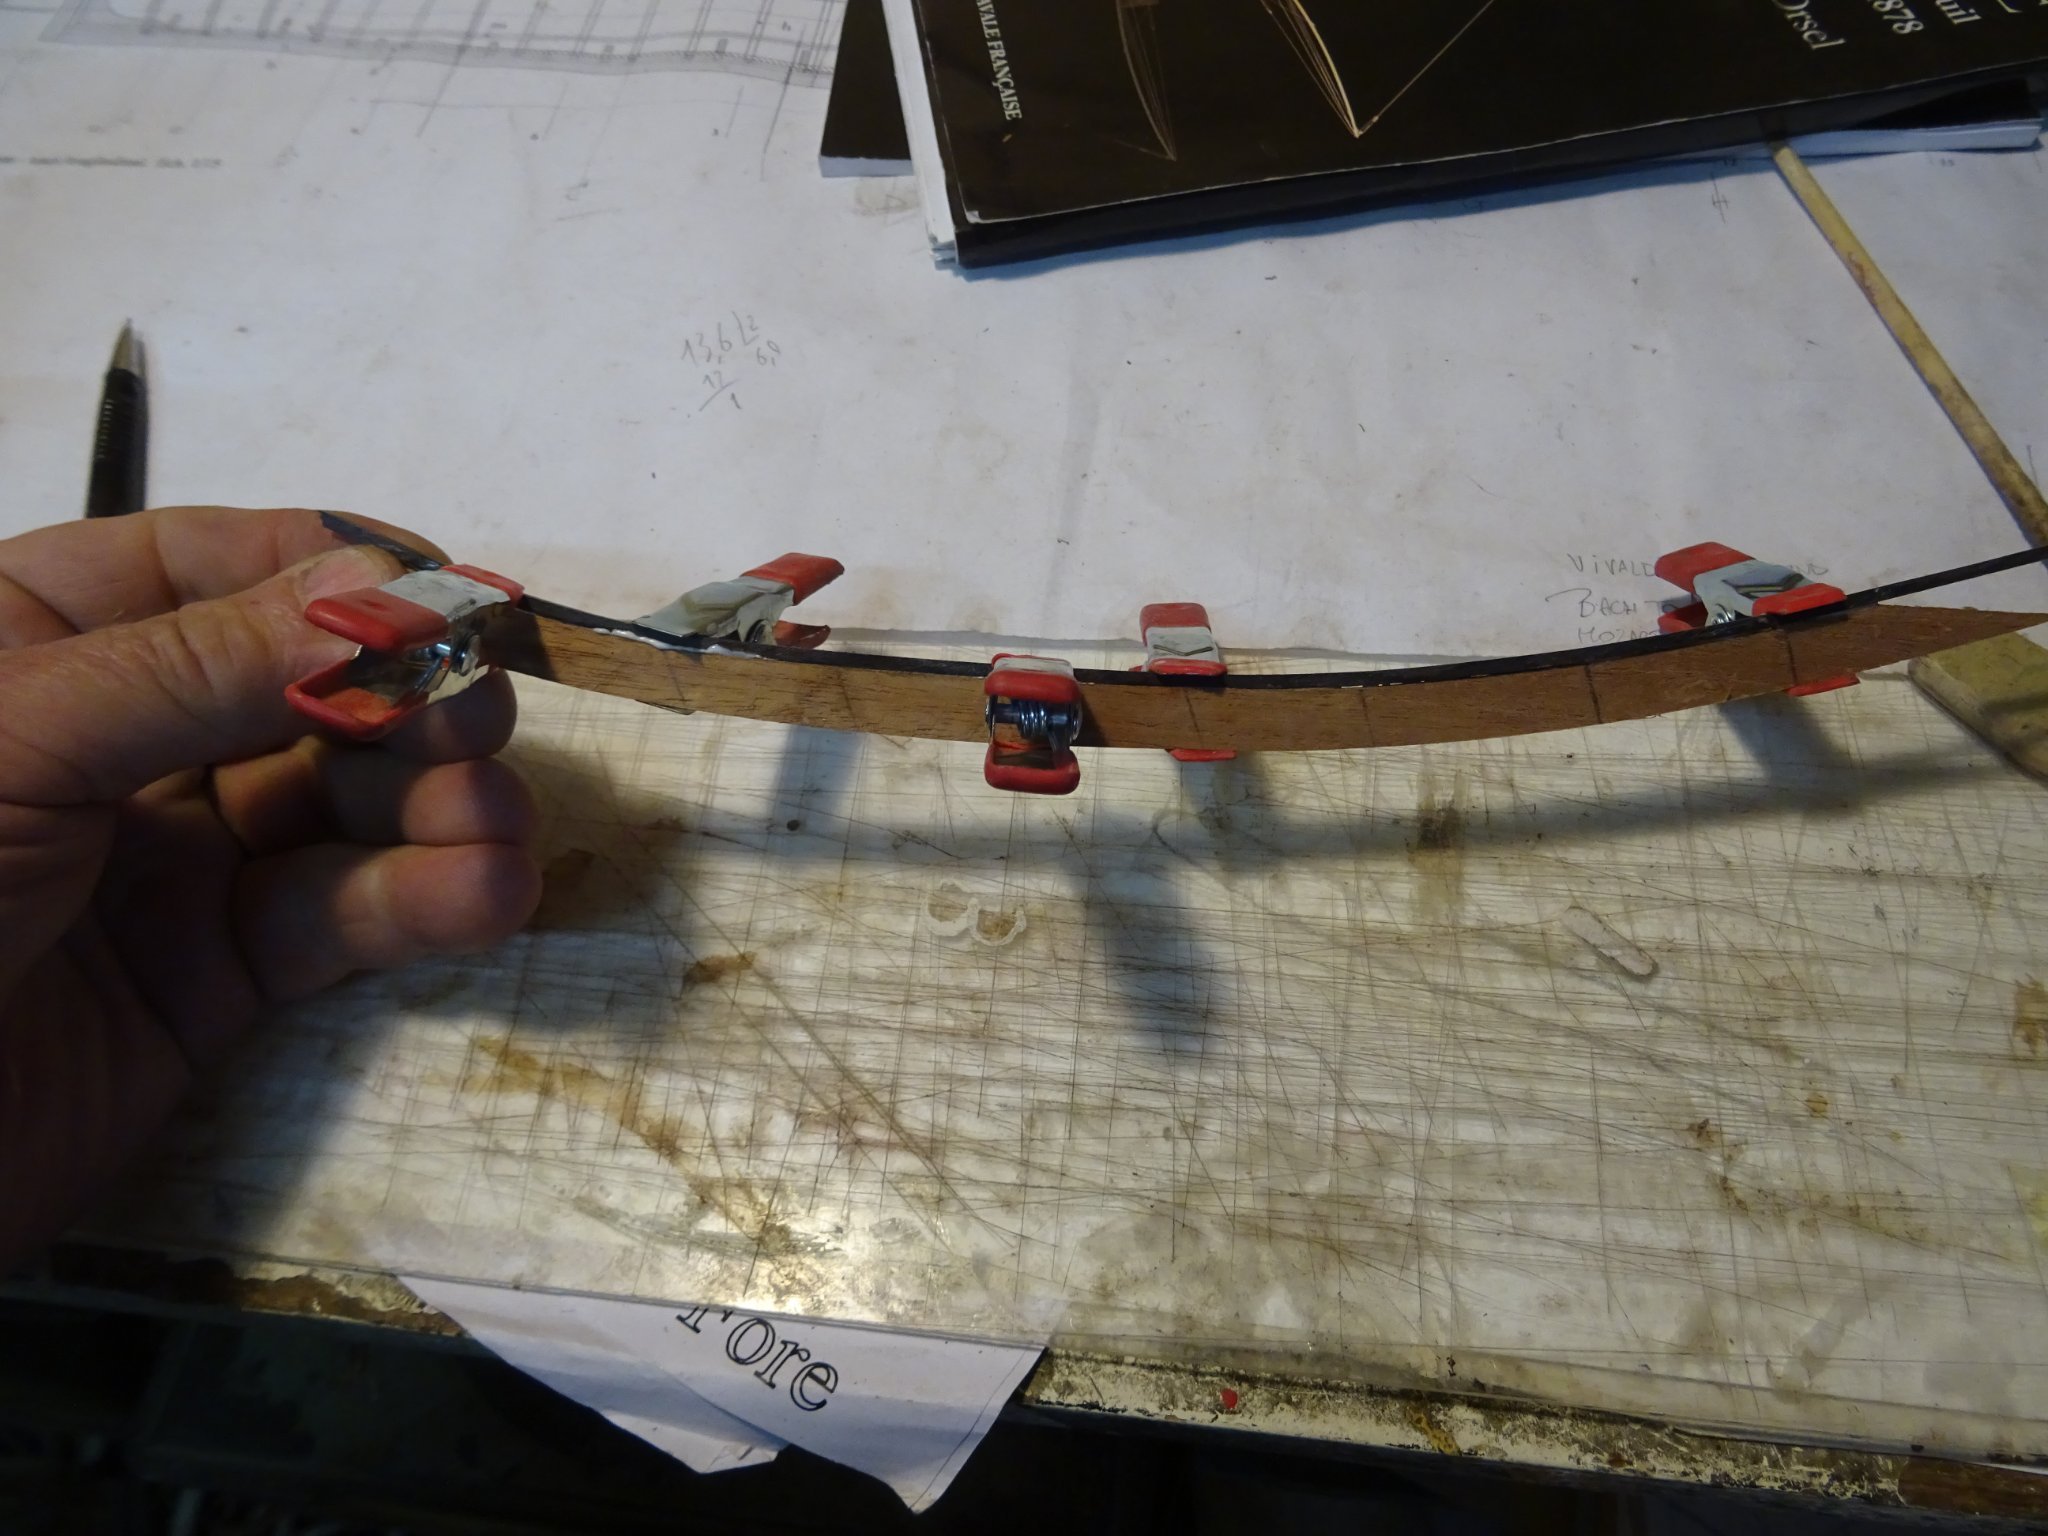
I make first the waterways. To determine the shape I turn the model upside down and draw the contours of the wale on a mahogany plank.
Then I draw the shape of the water way with a pencil with the help of French curves.
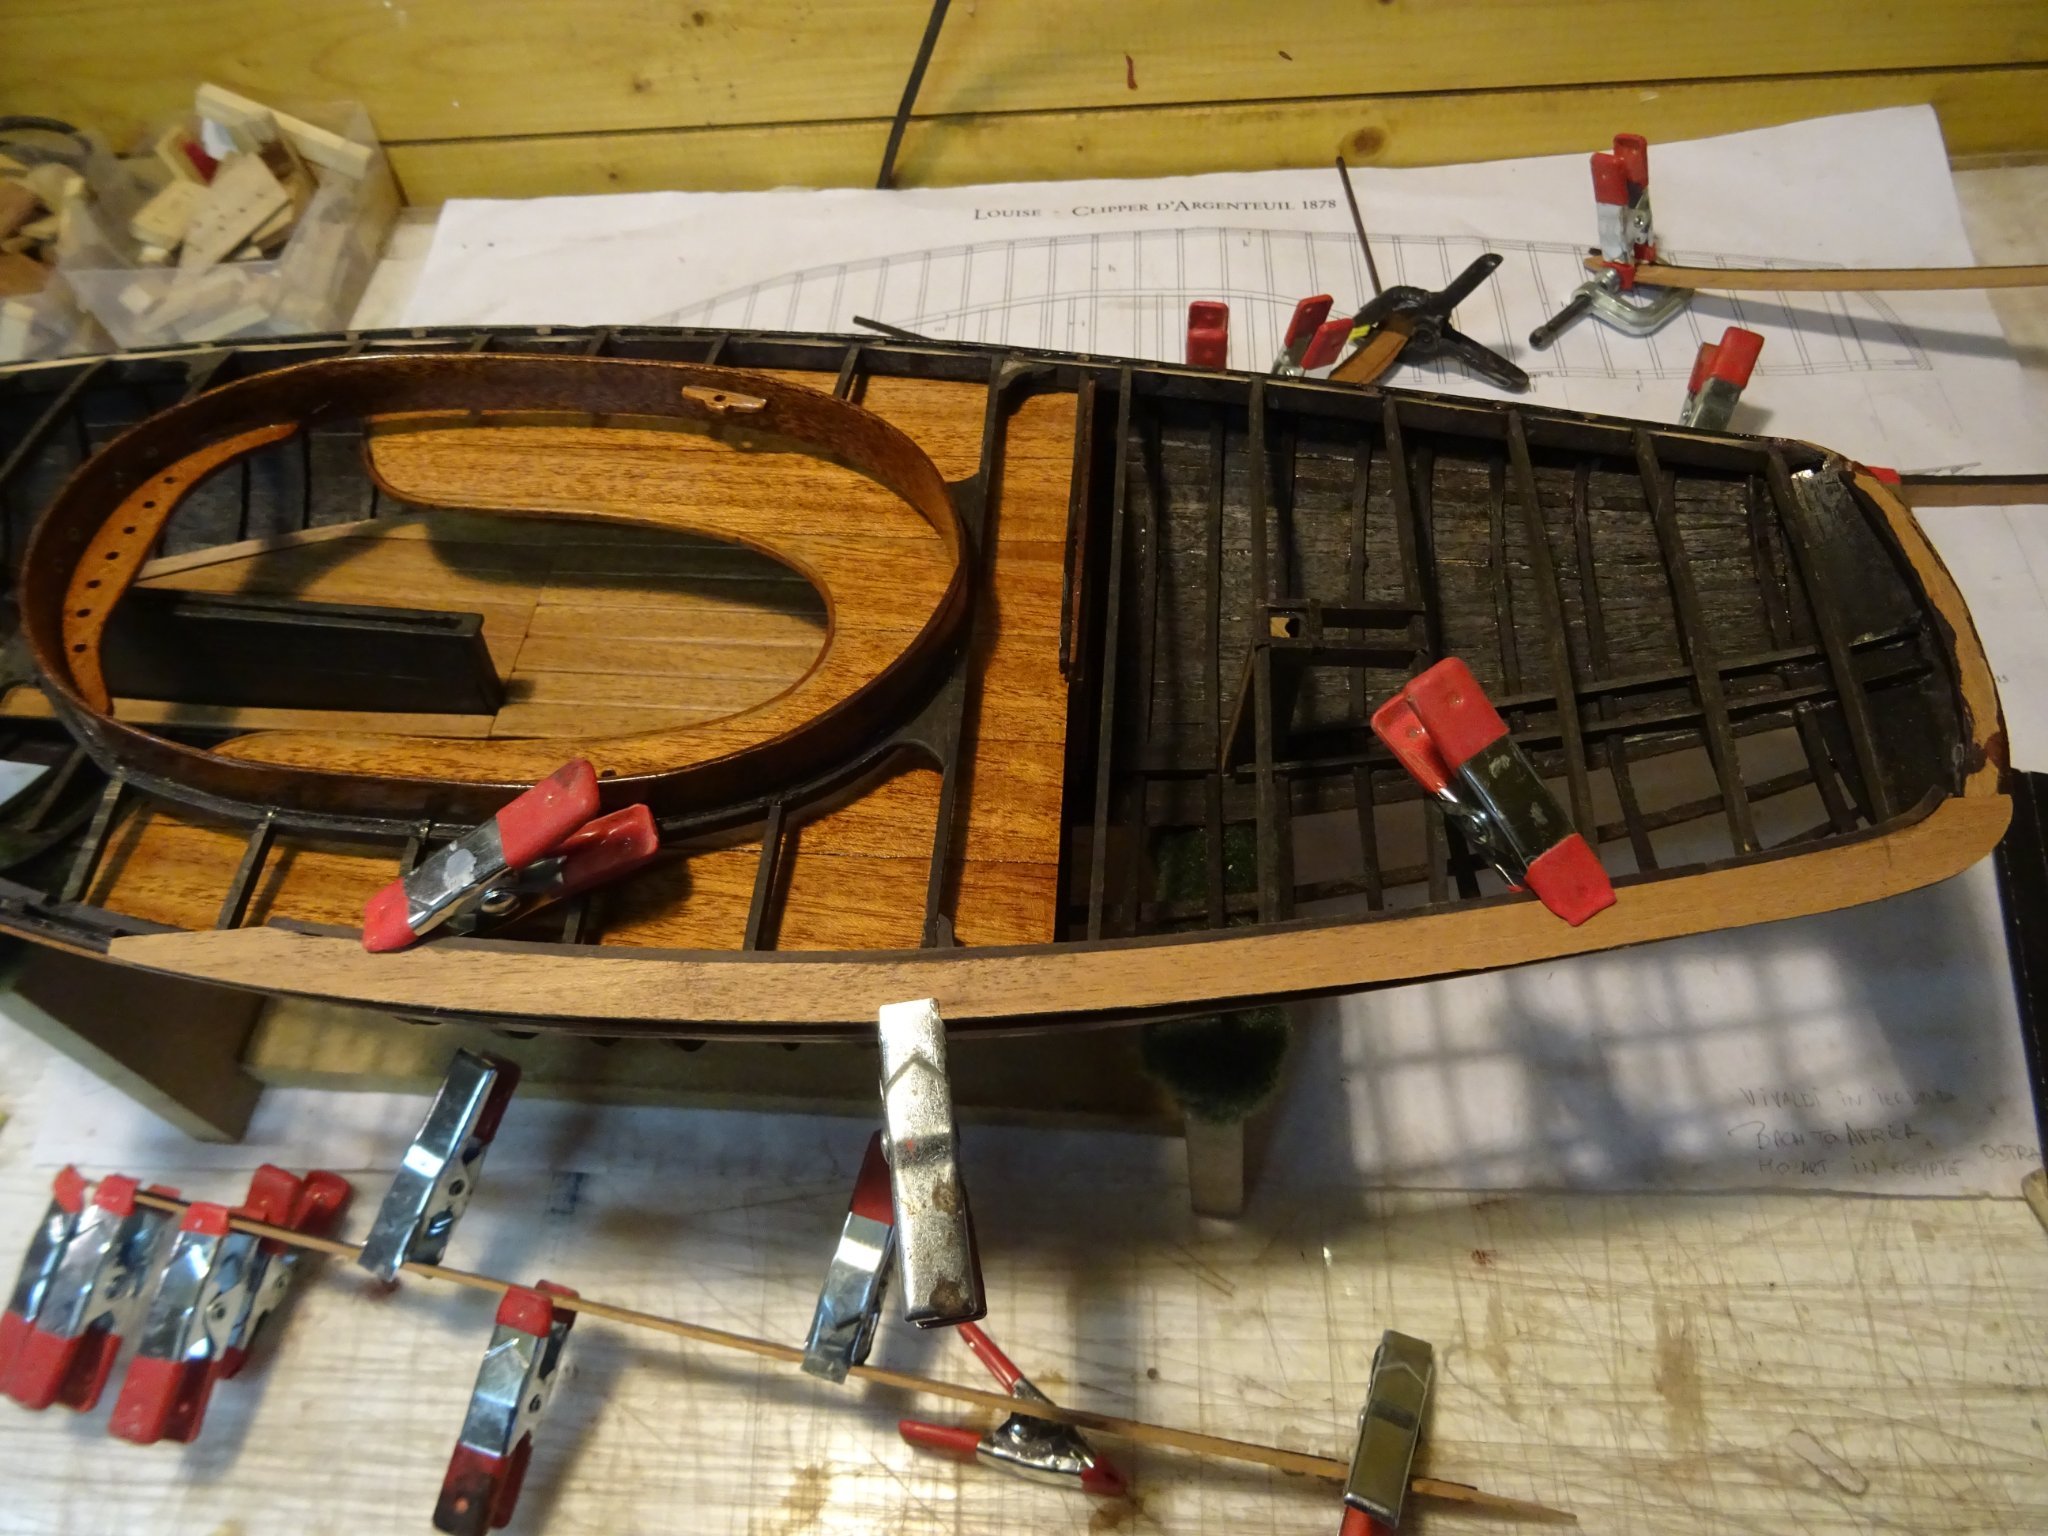
Fitting the sawn water way on the model.
Gradually the complete waterway takes shape.

I glue a strip of ebony on the inside of the water ways.

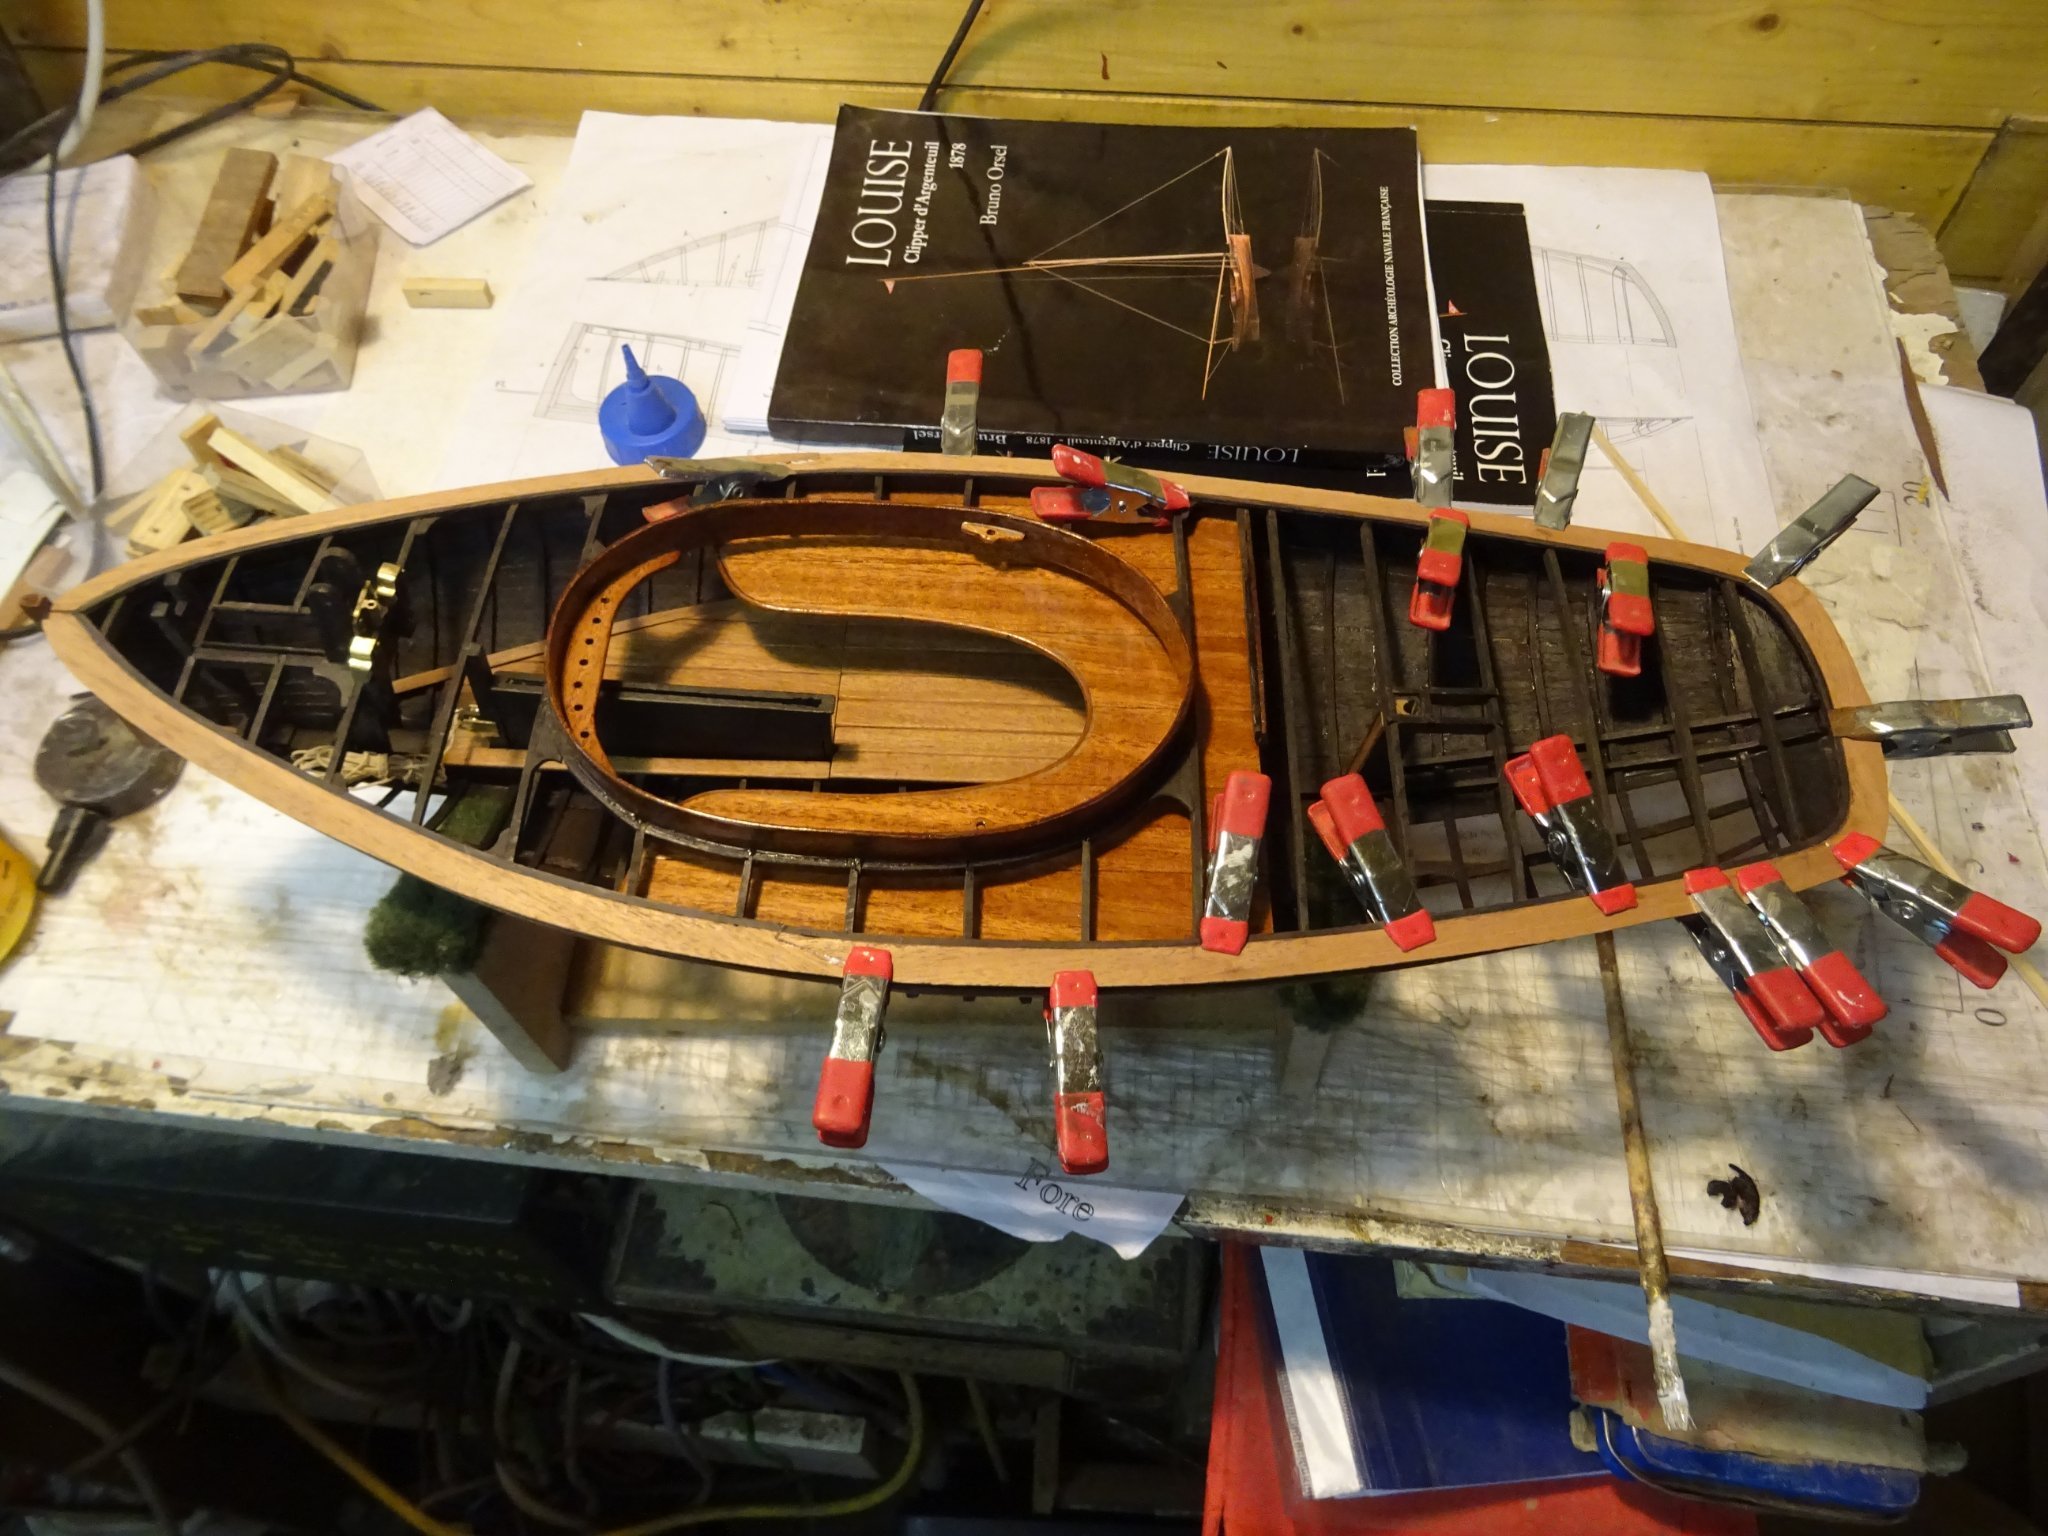
Gluing the waterways into position.
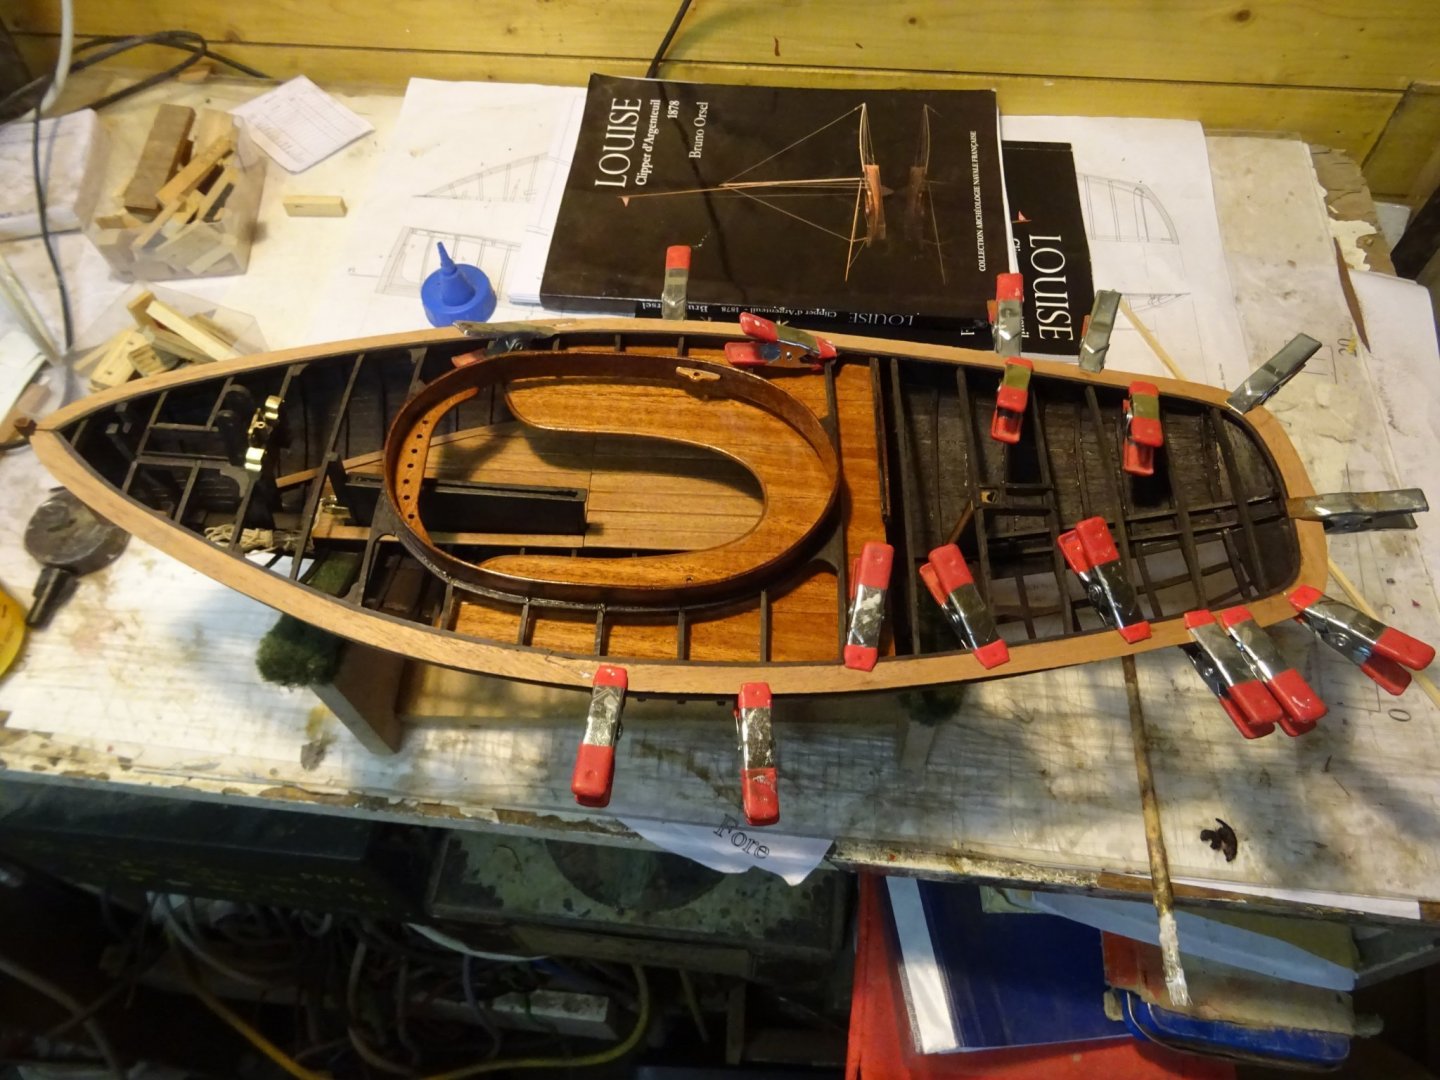
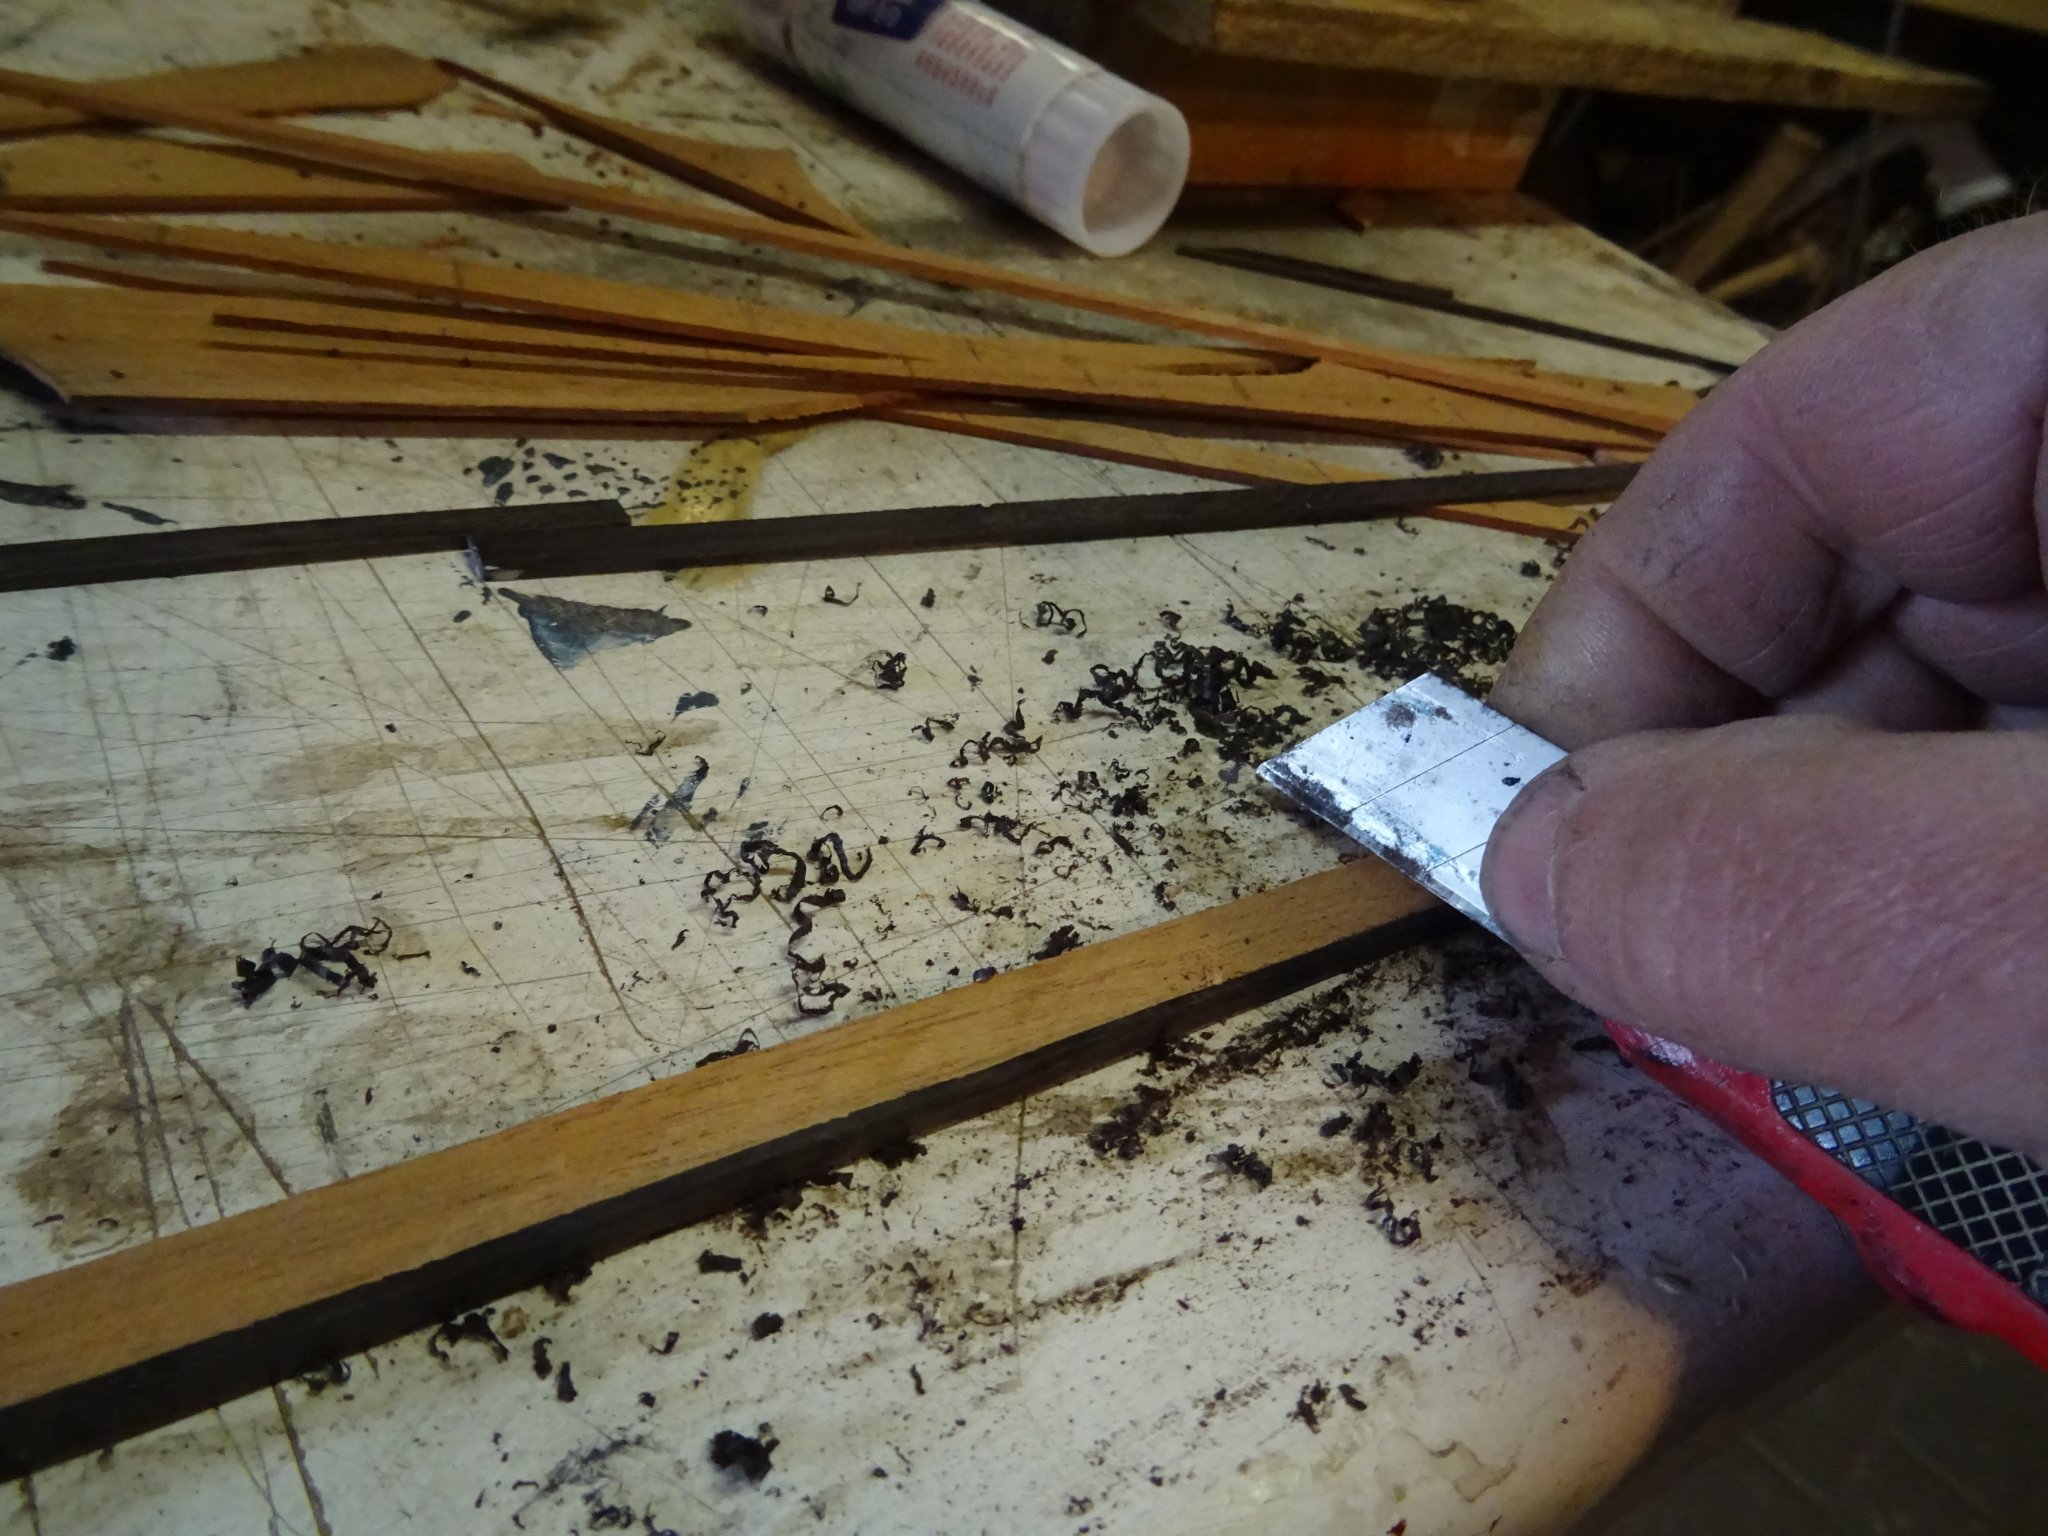
Preparing the deck planks with a strip of ebony, a bit thinner than those on the waterways
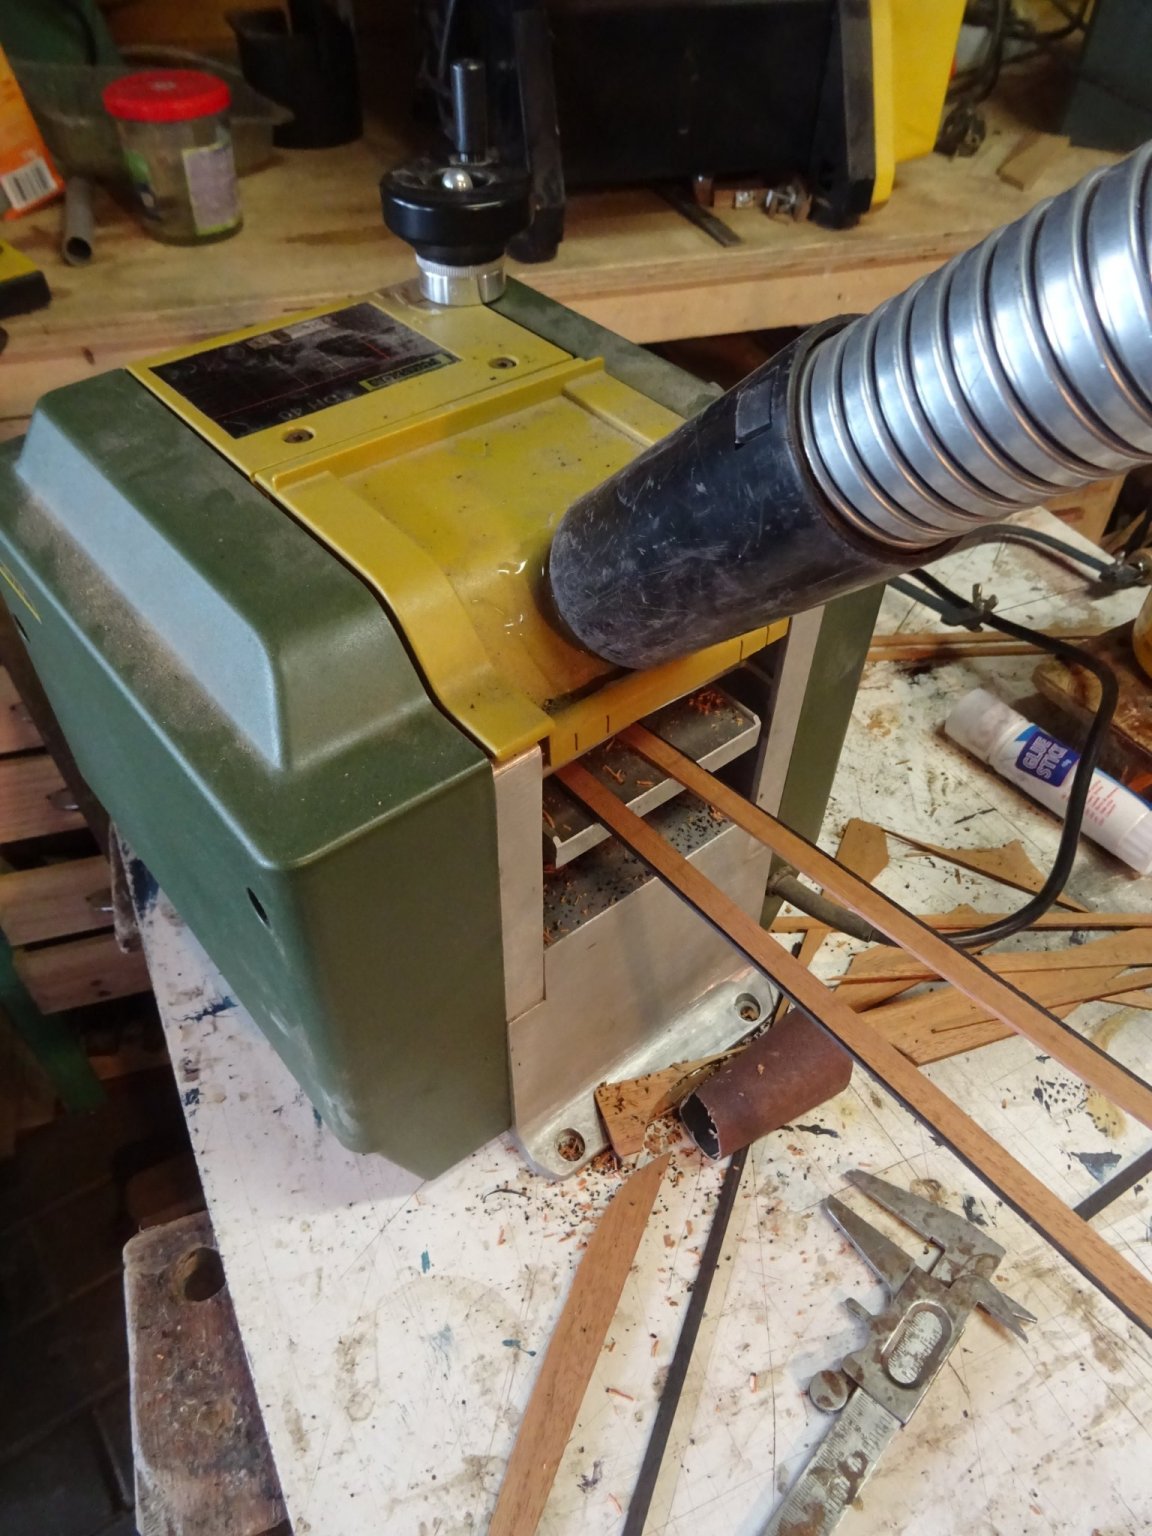
I scrape the ebony strip to almost equal thickness as the planks and plane the whole then to 1.5 mm thickness.


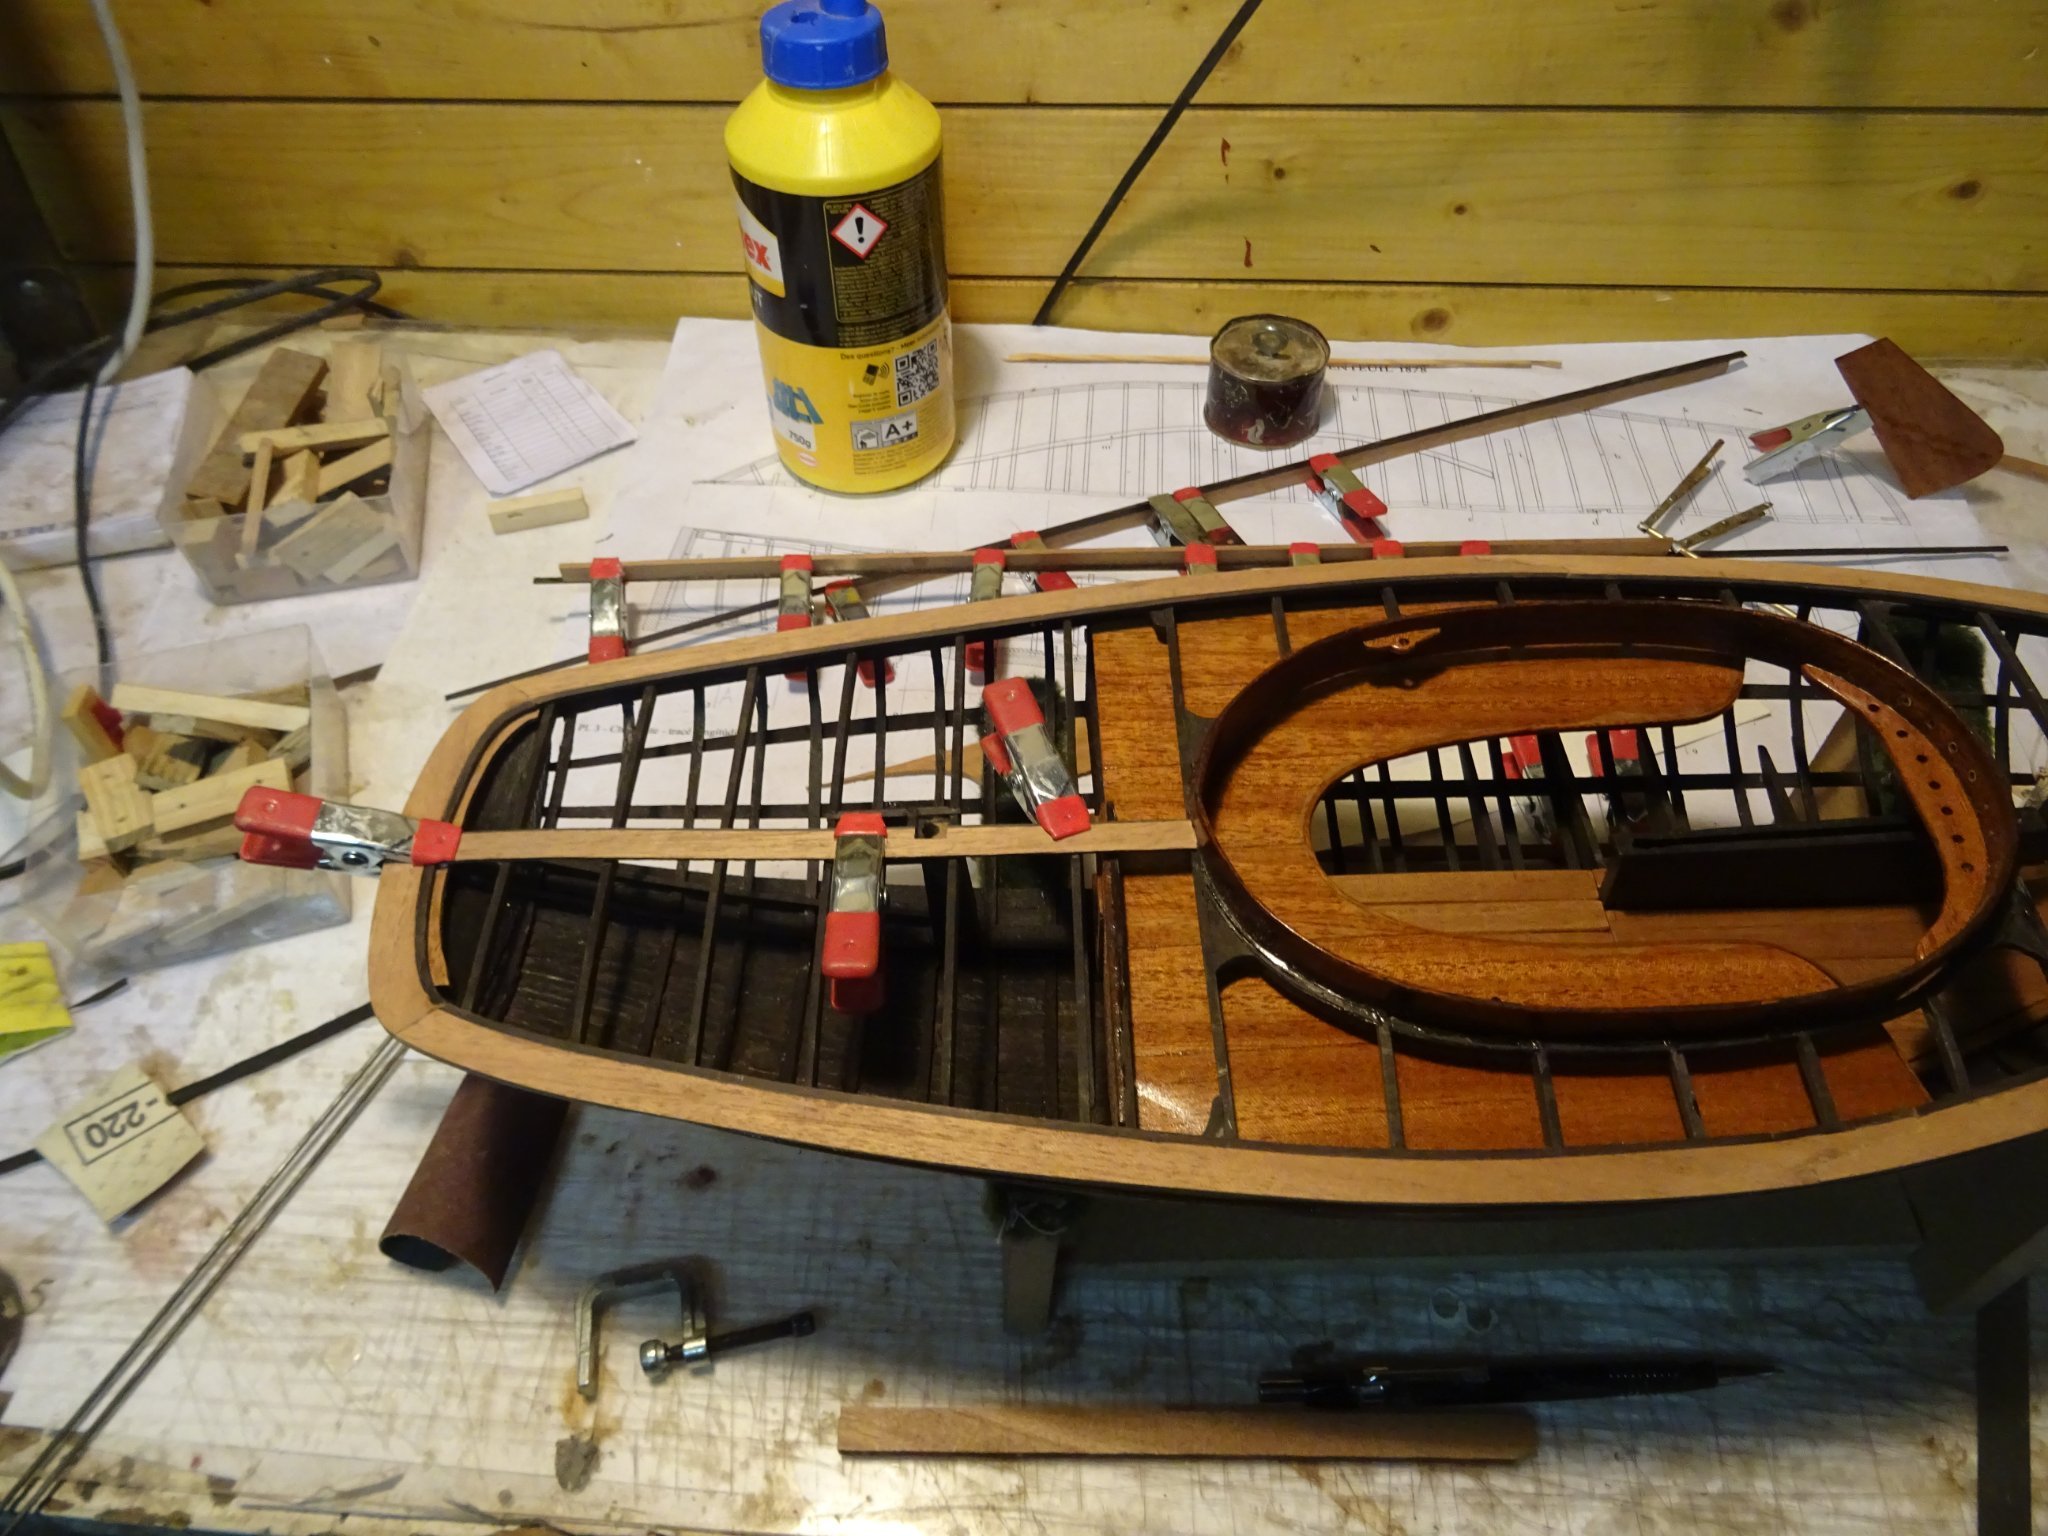
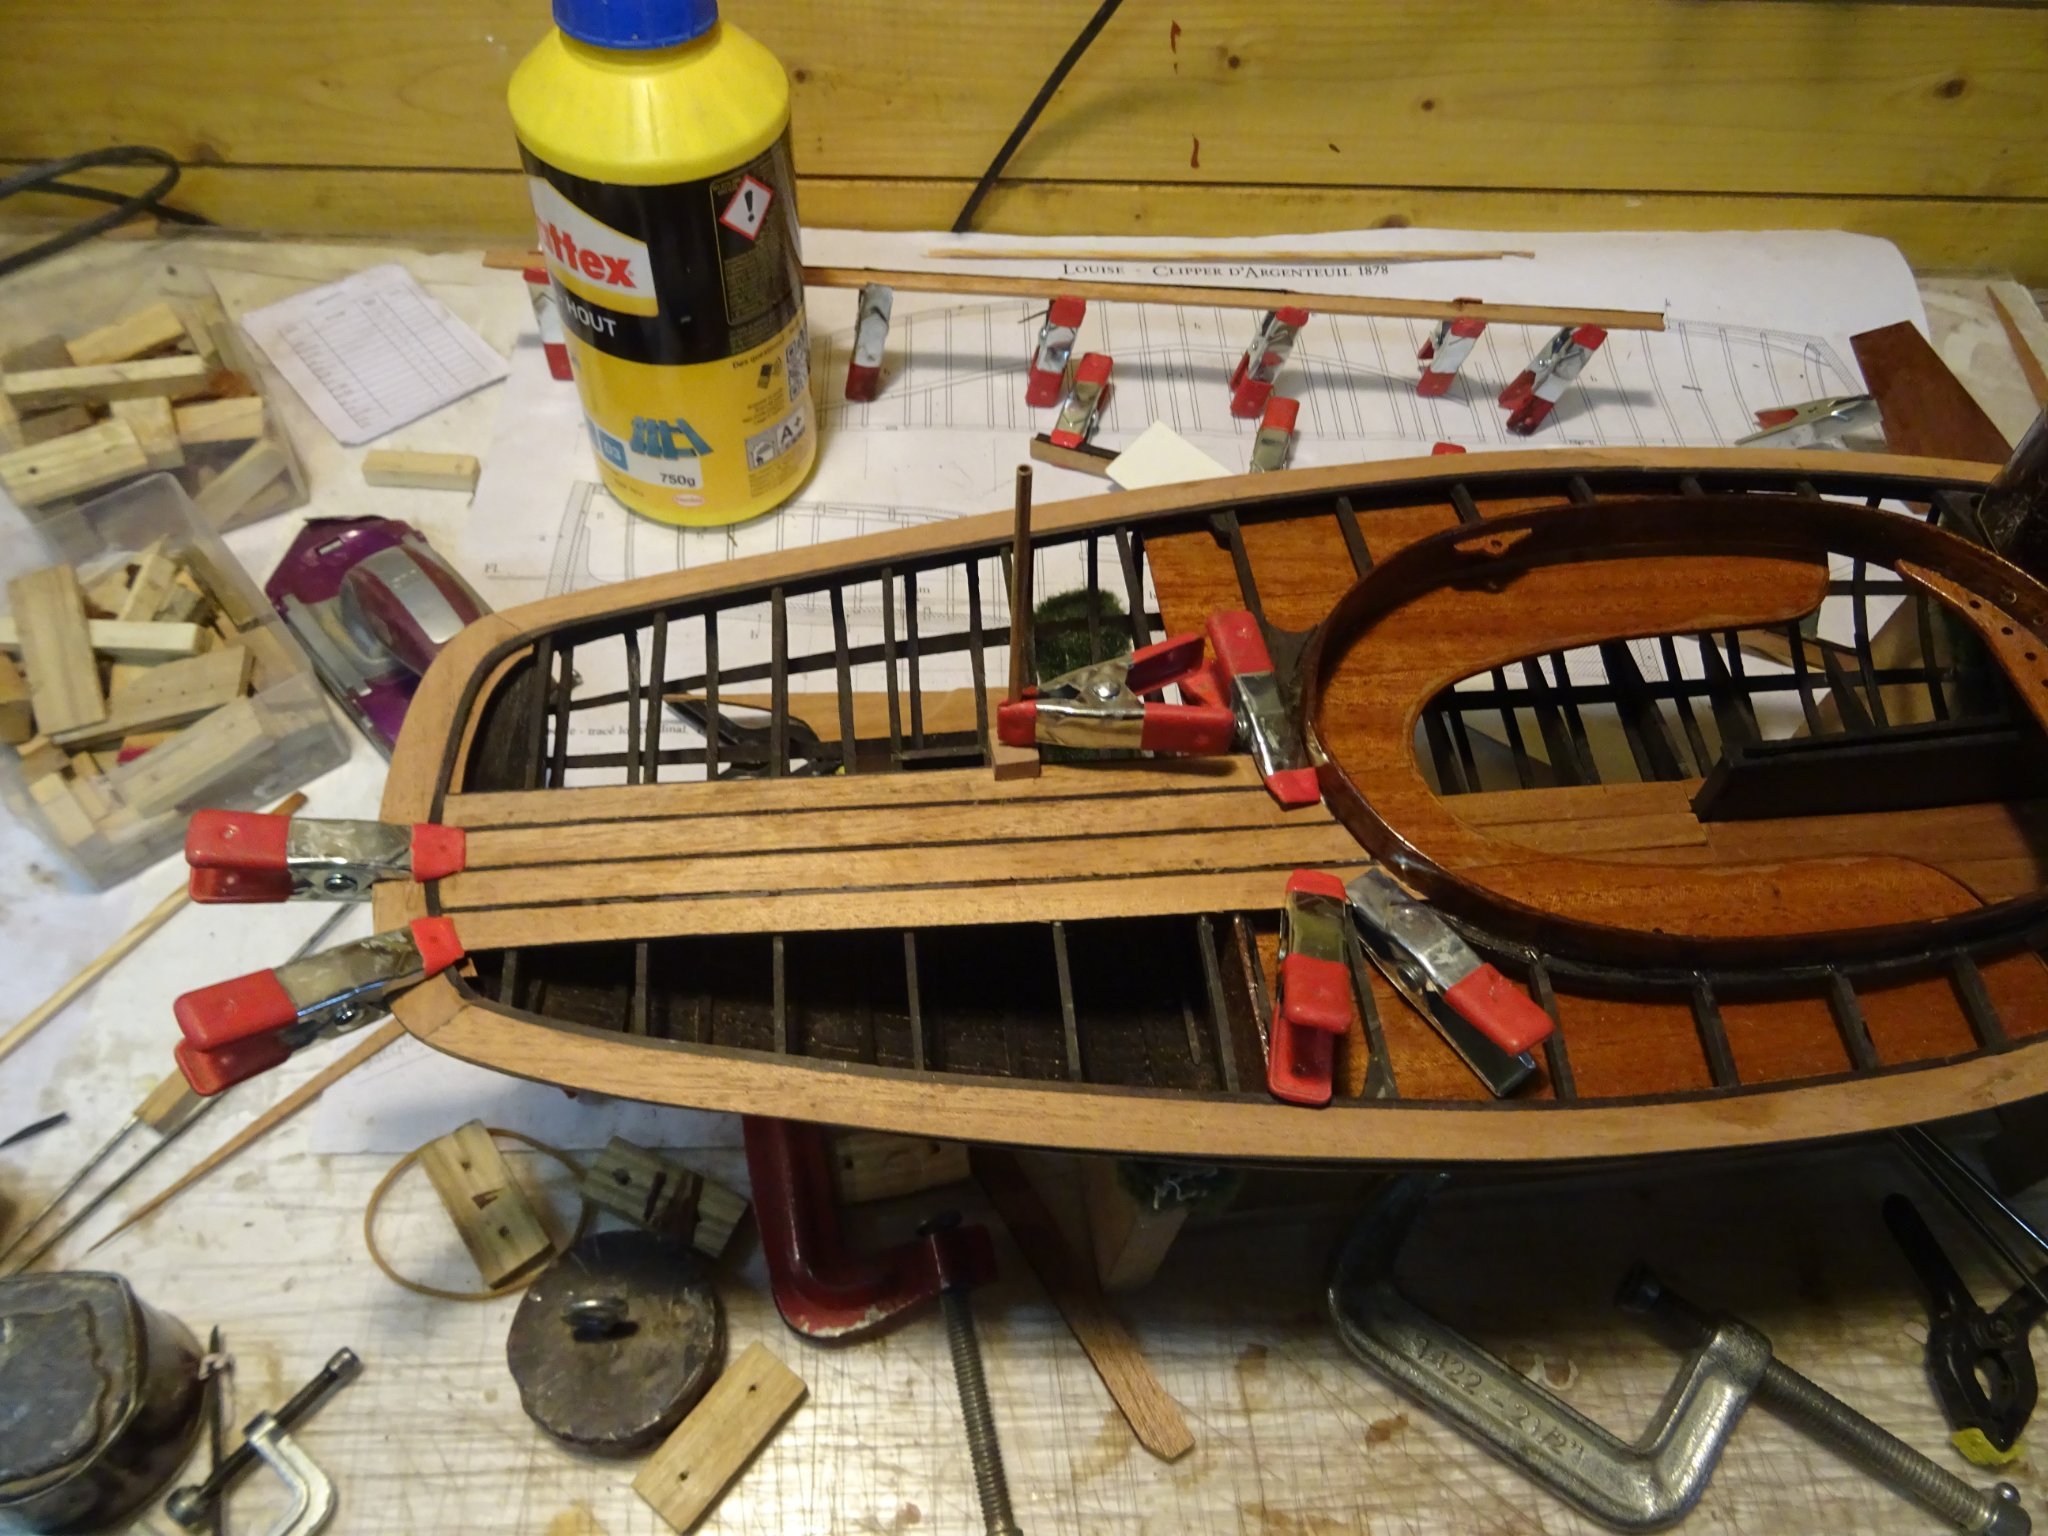
I start to lay the deck at midship on the after deck where I have the longest straight uninterrupted line.
Then it is just gluing plank after plank.

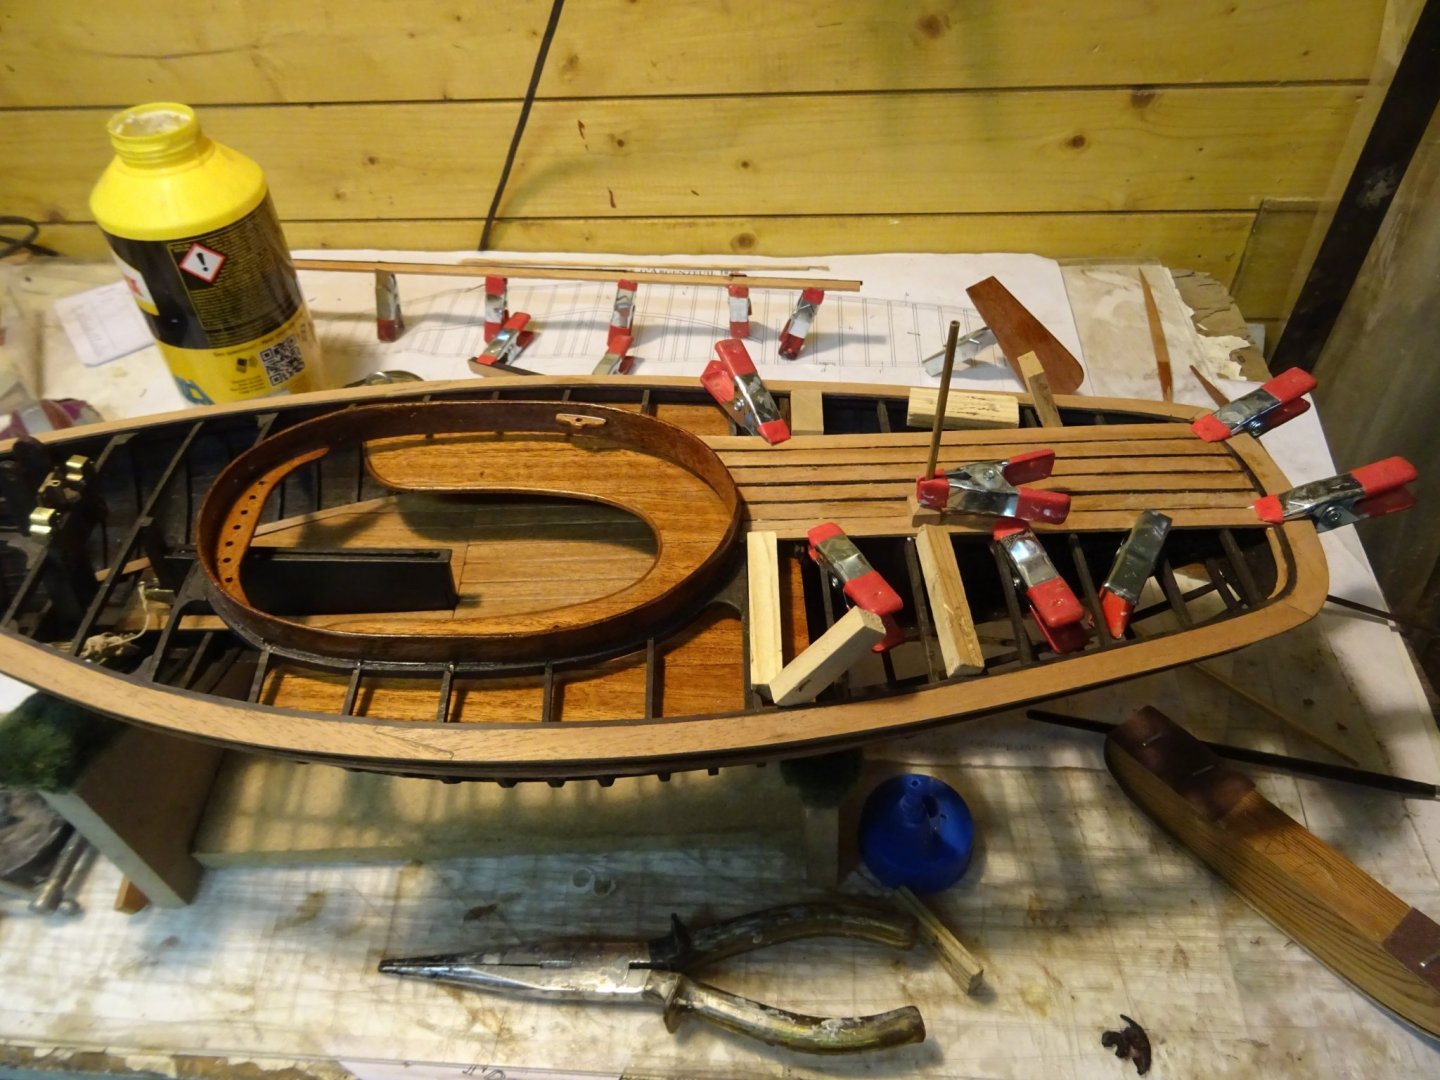


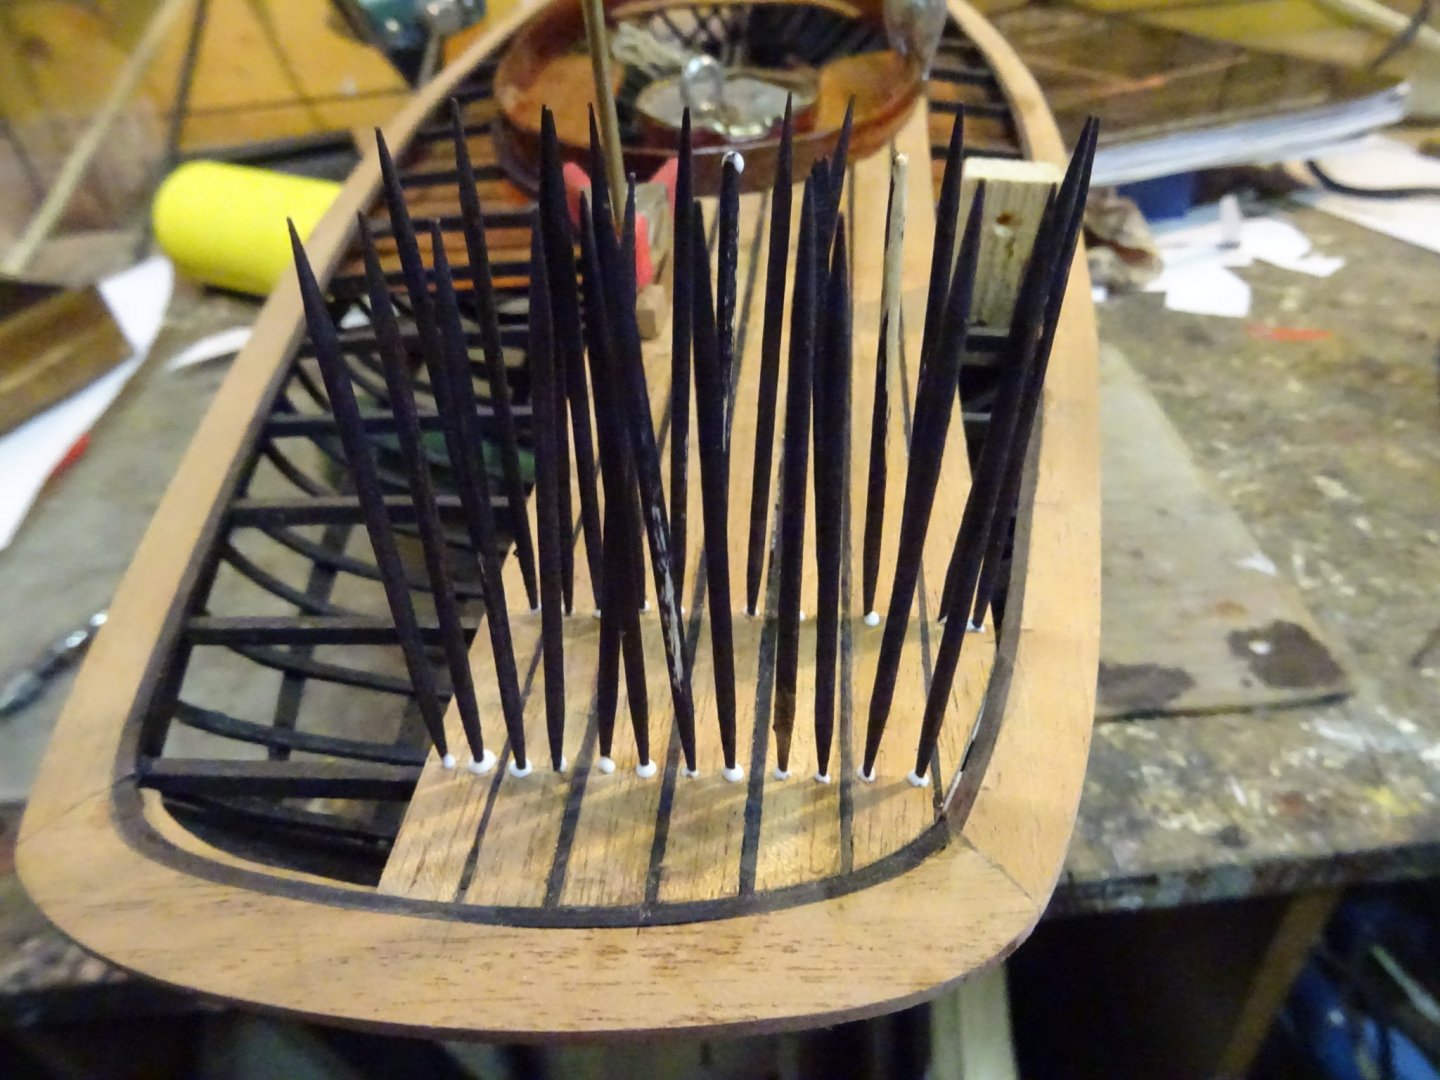
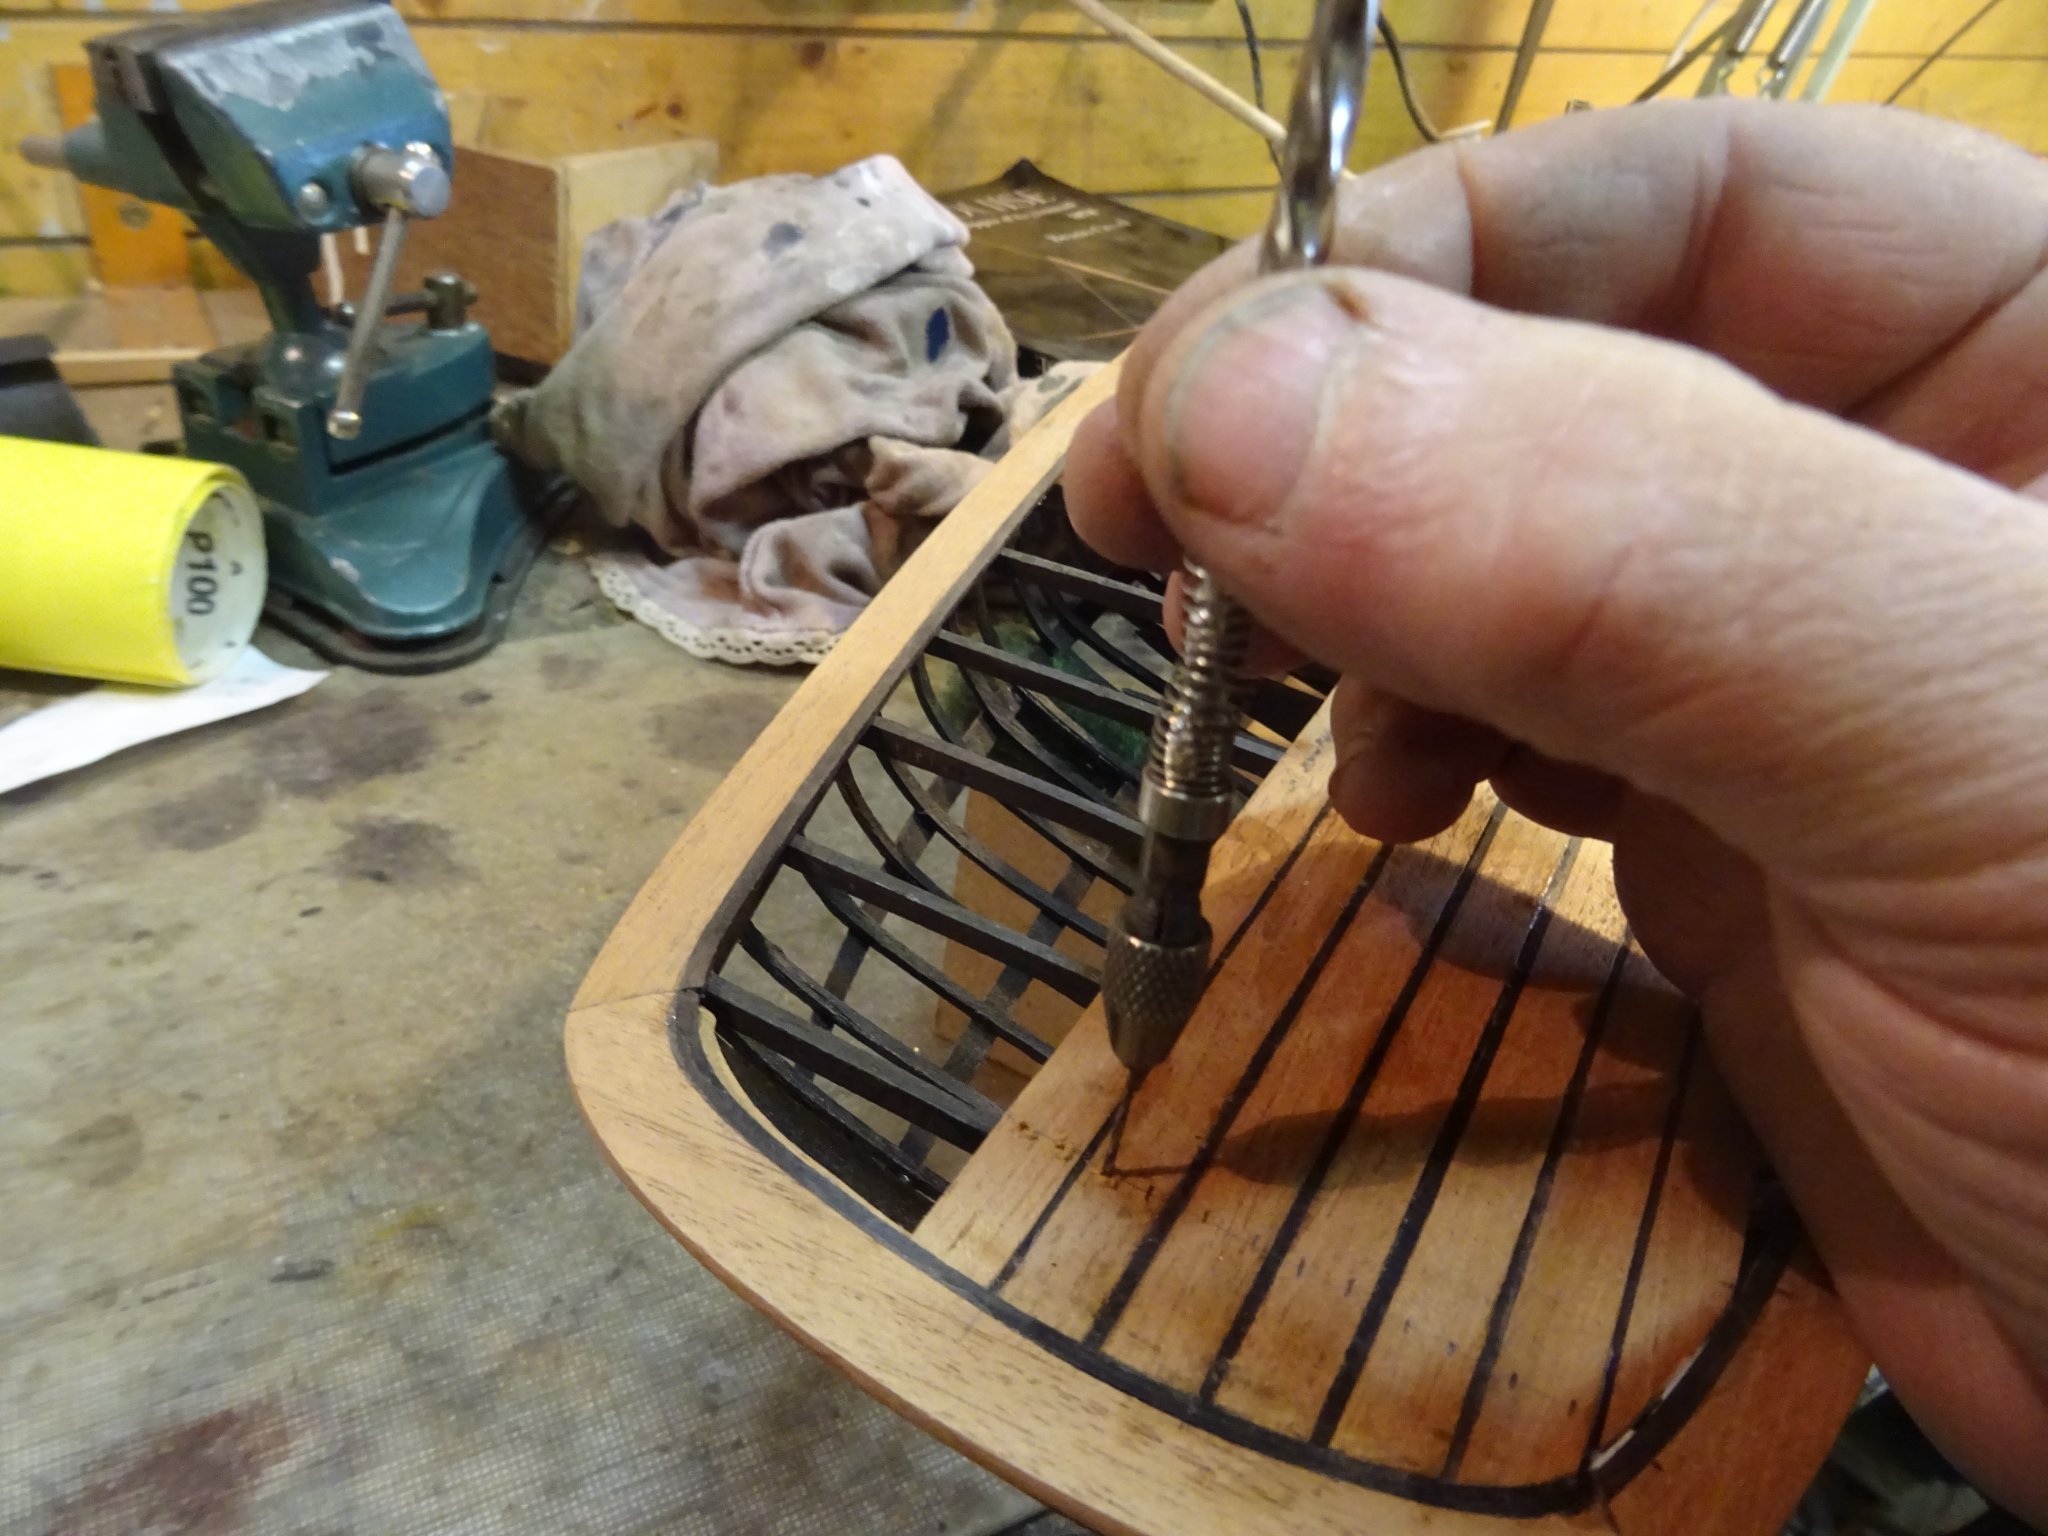
Drilling holes for the tree nails.

The three nail are toothpicks saturated with black stain.
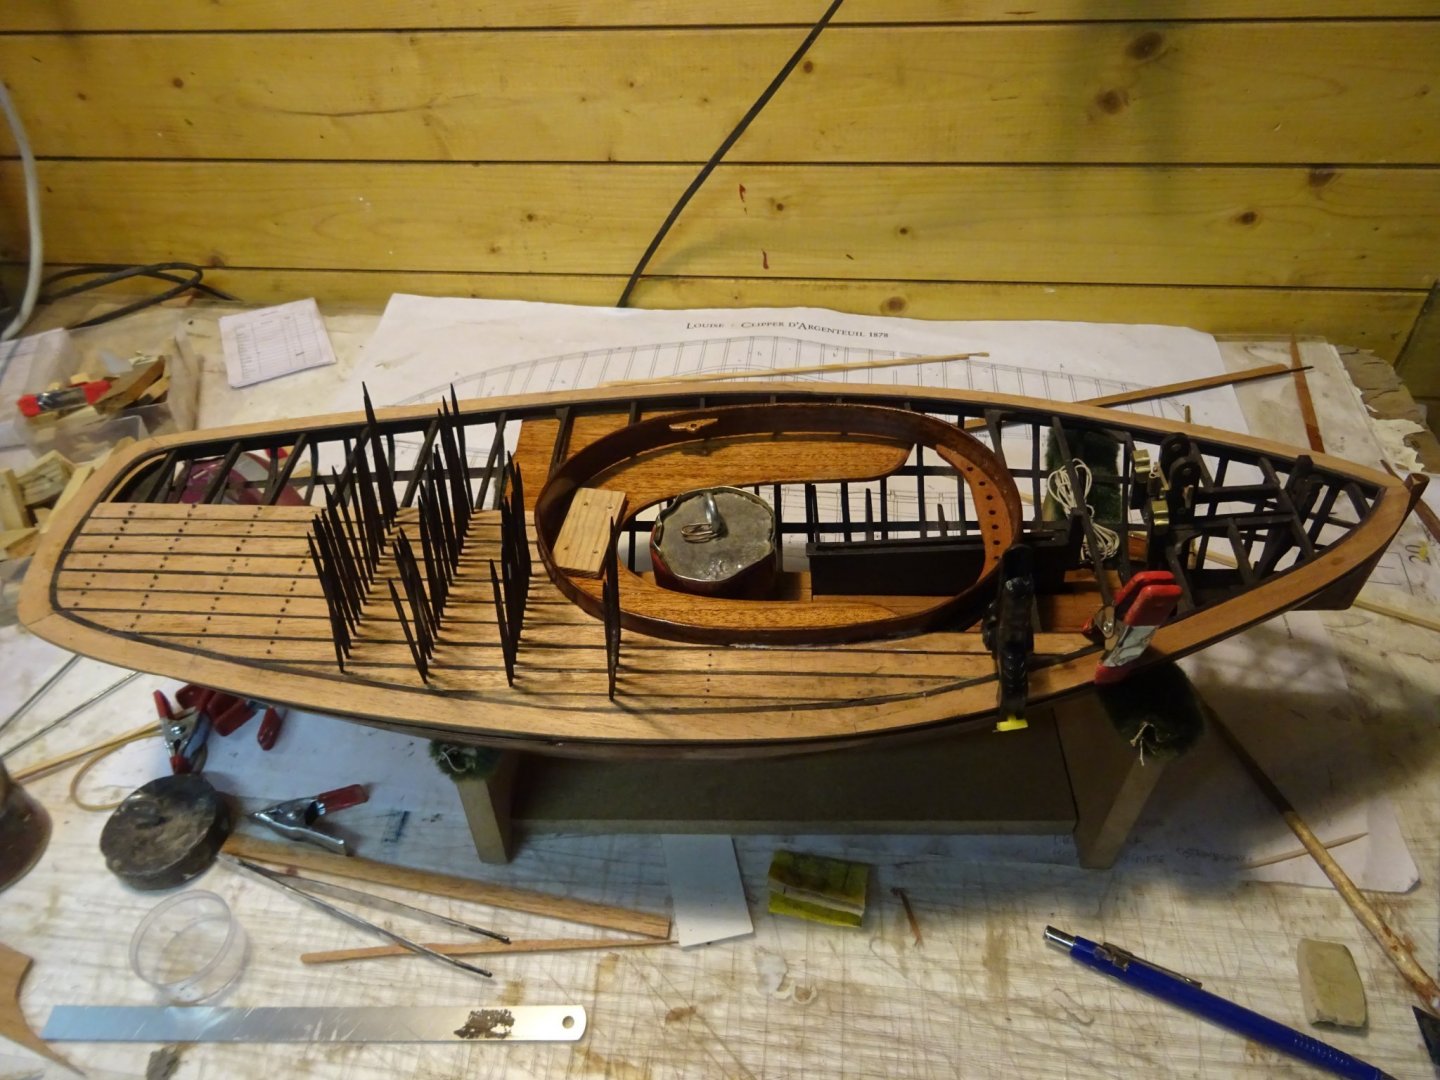
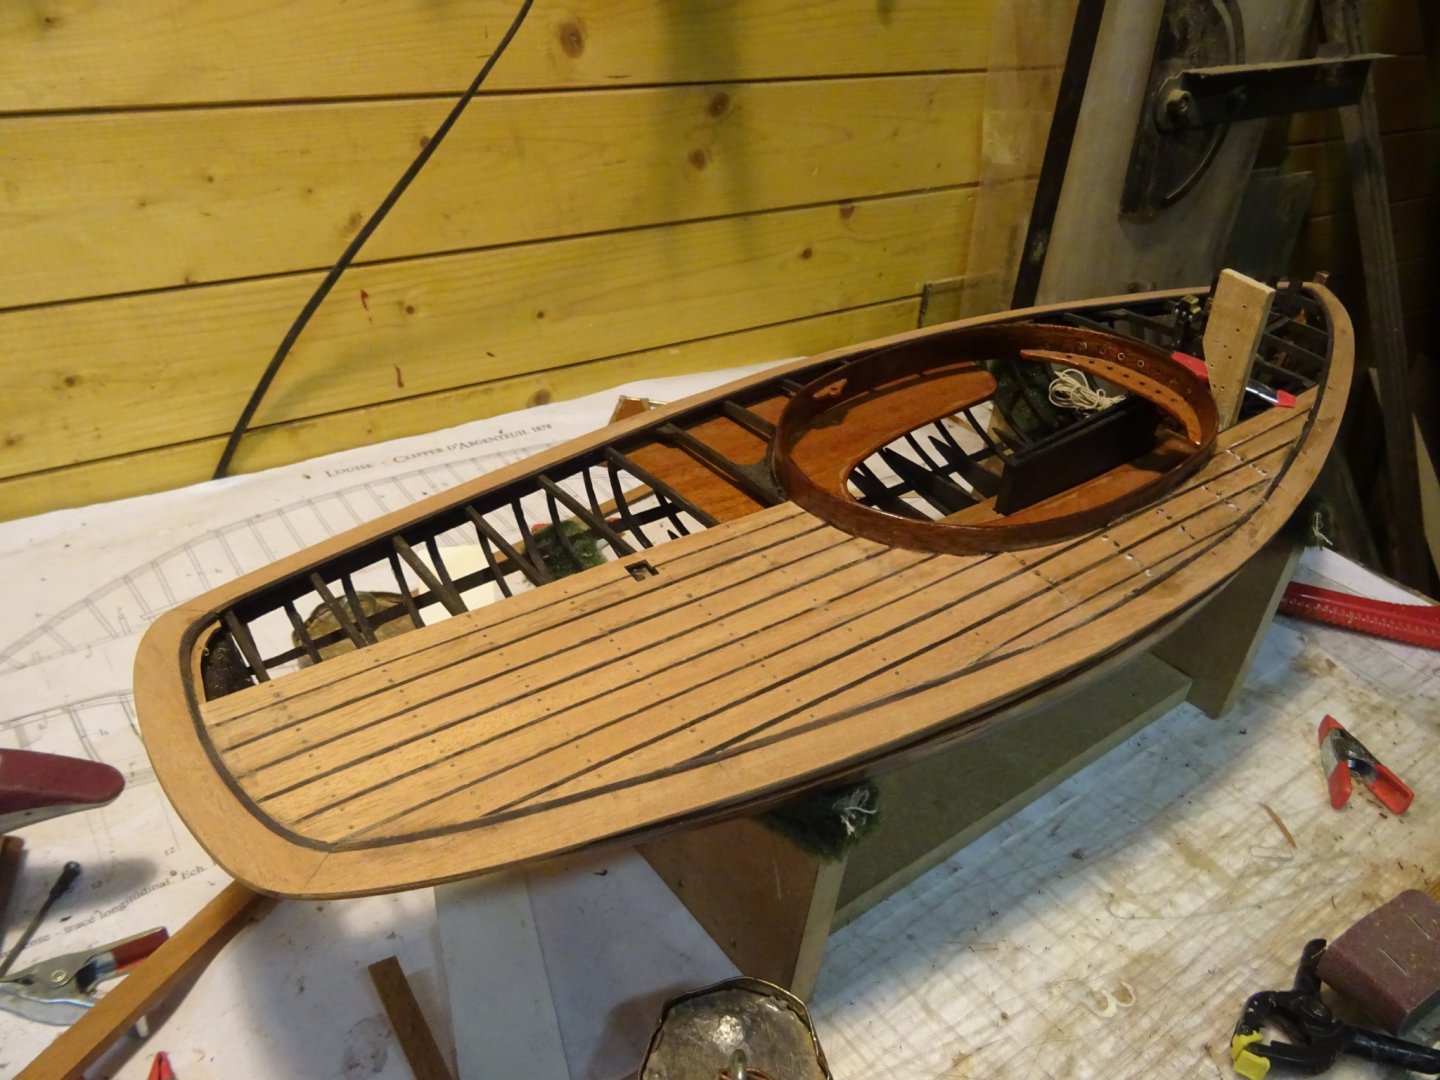

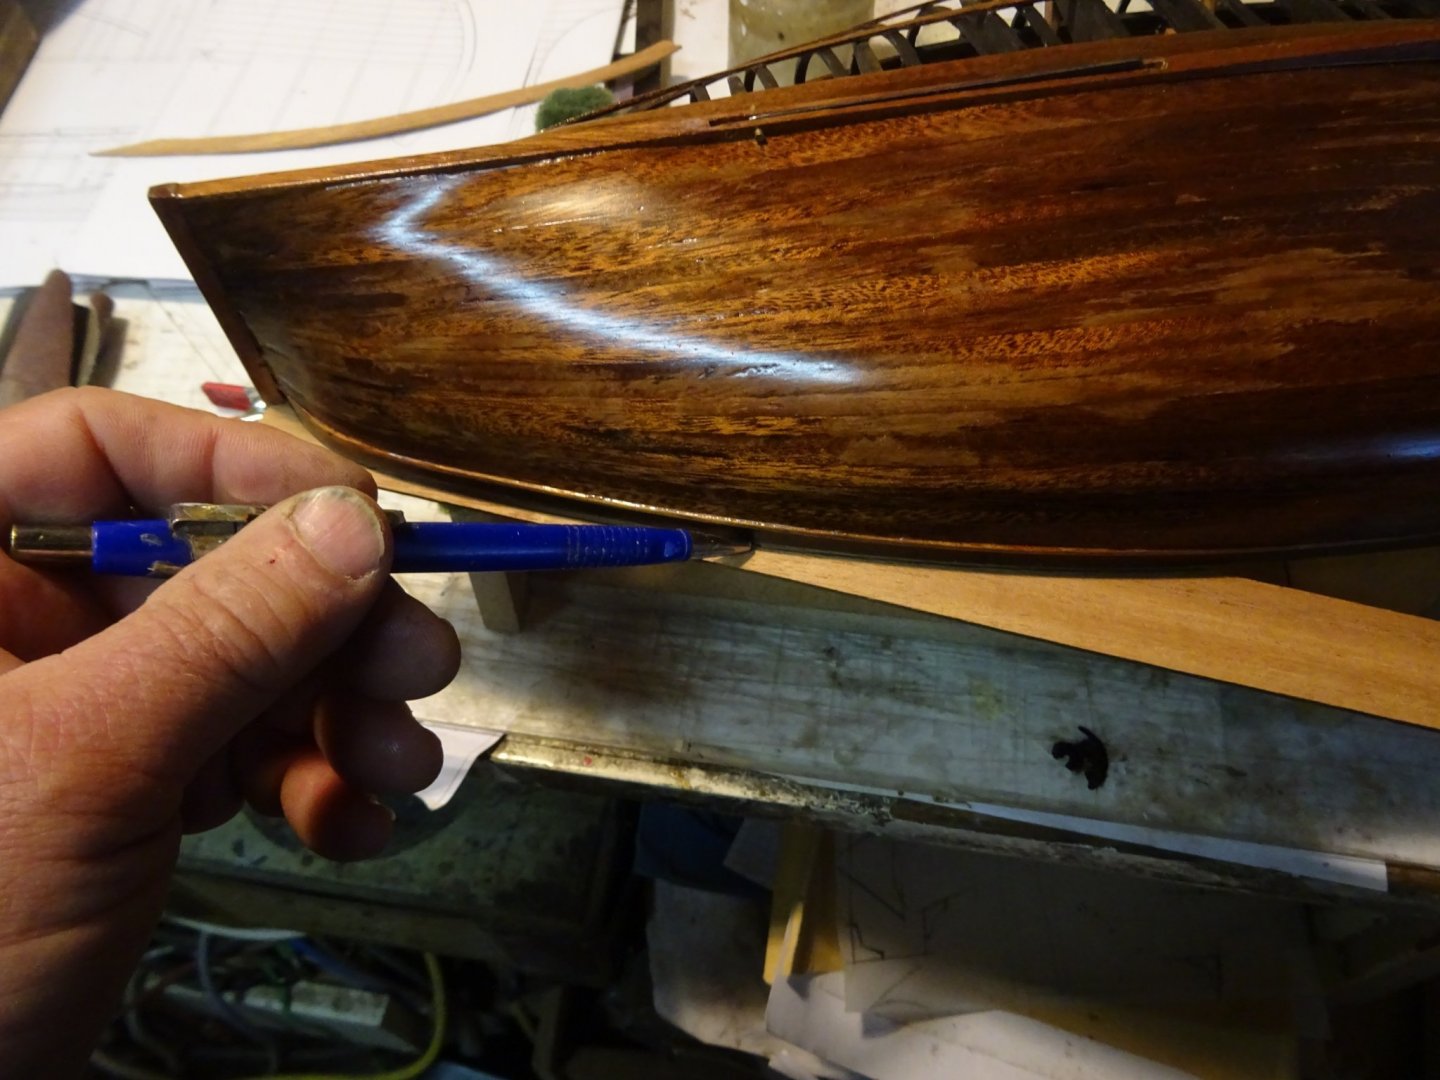
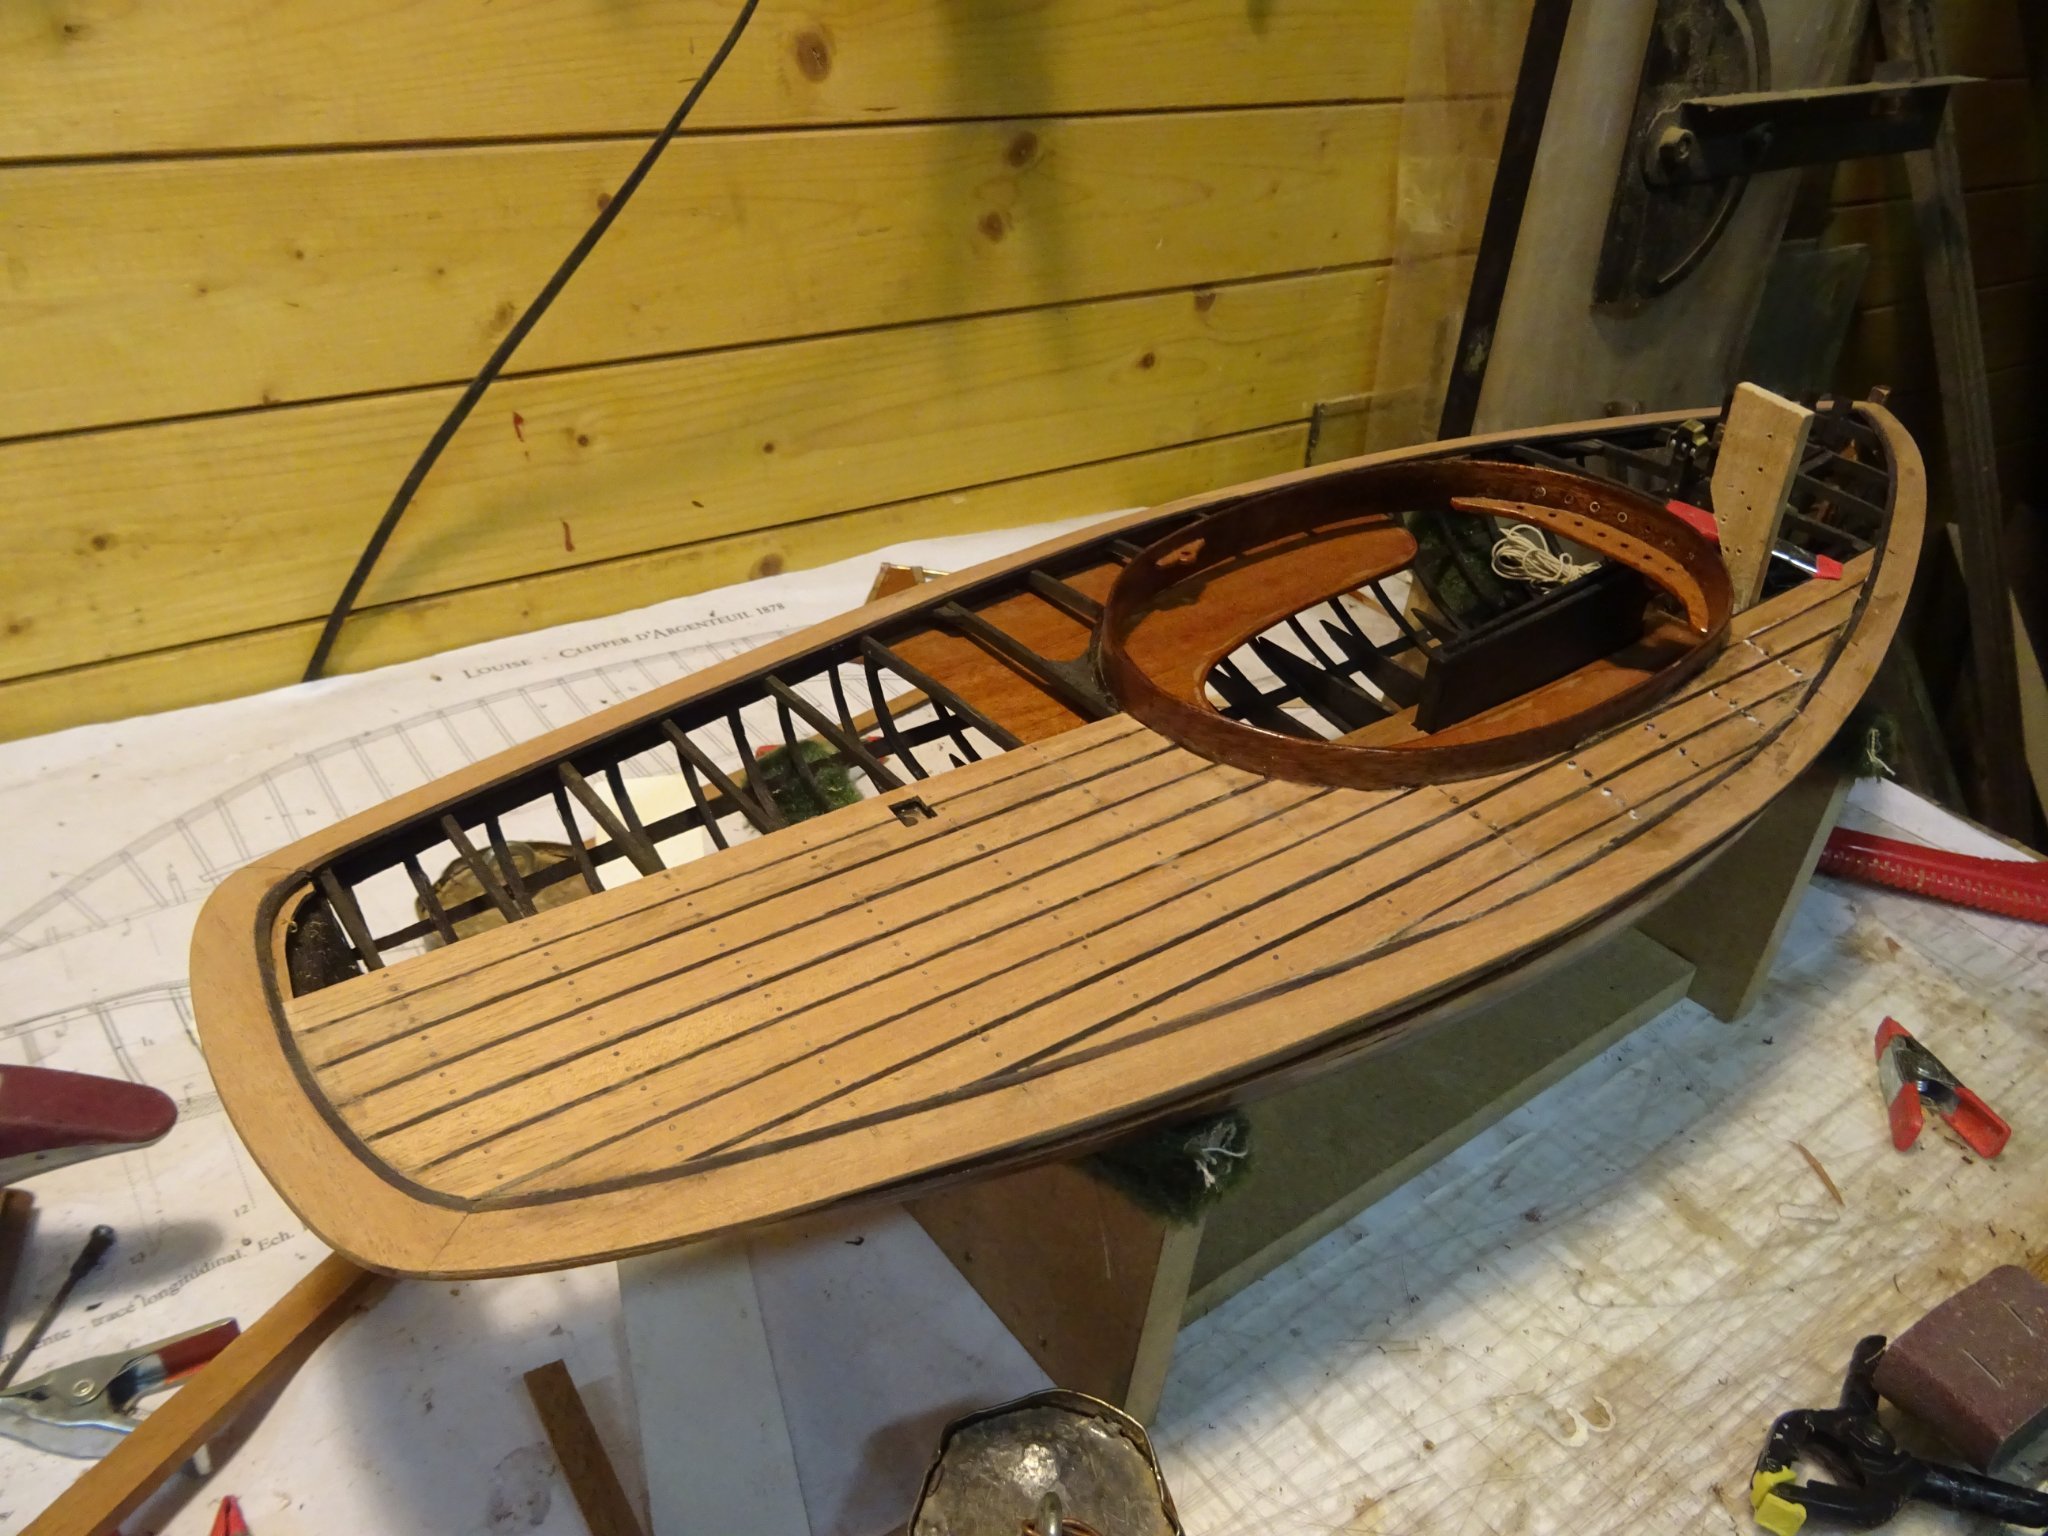
The deck is laid, scraped and sanded.

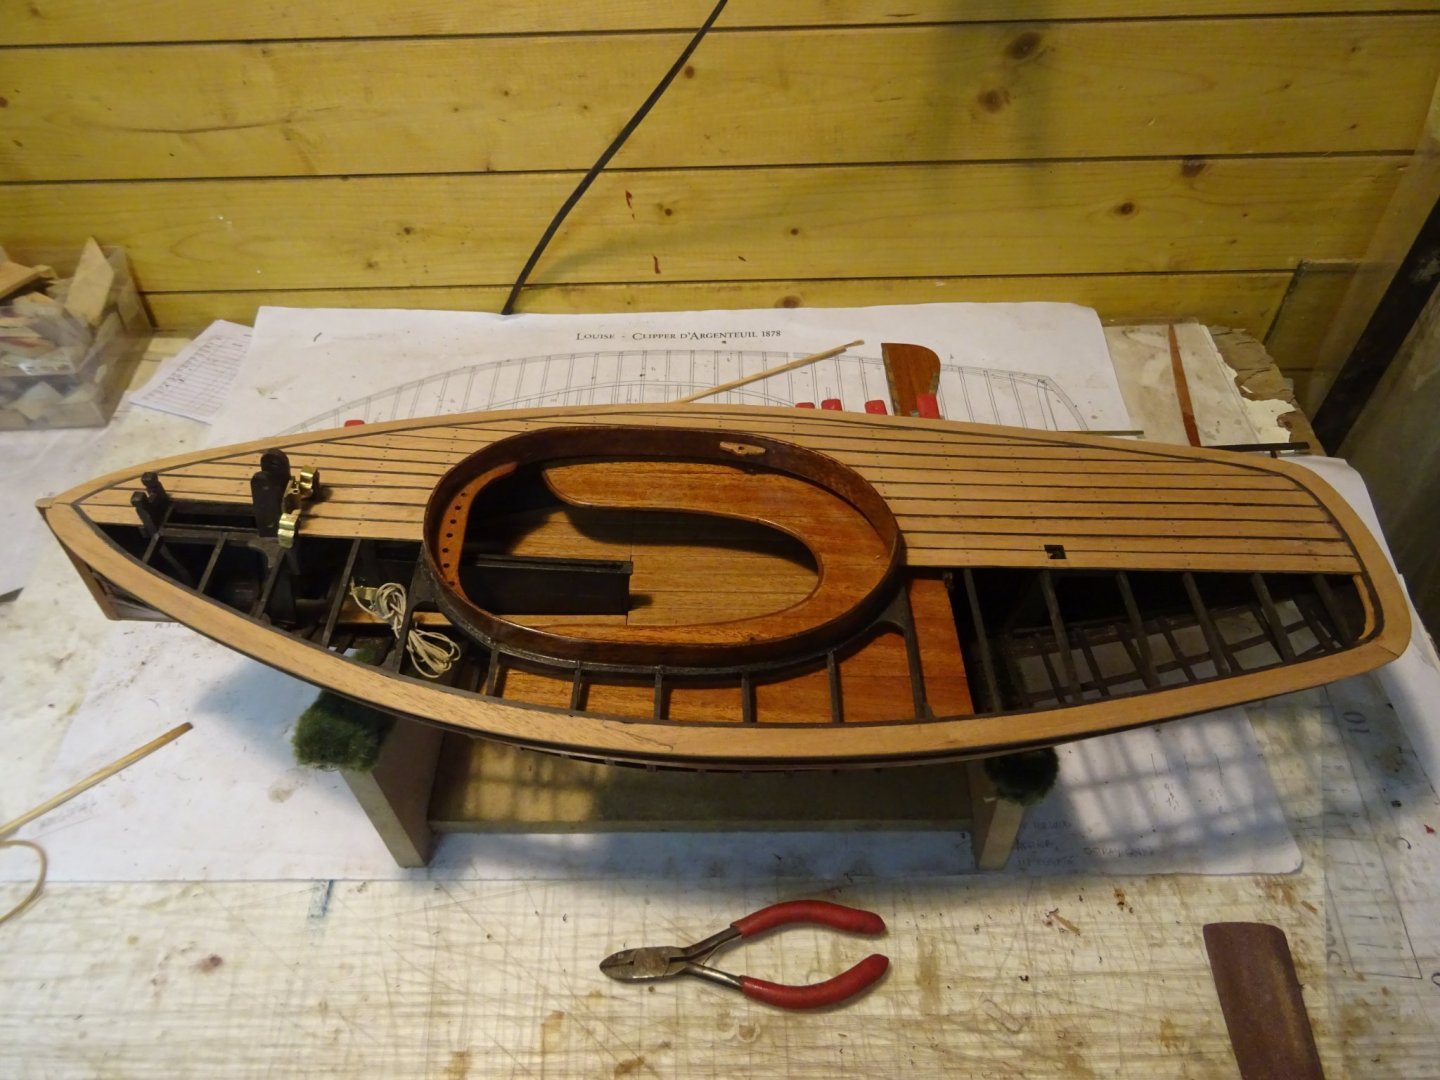
After being varnished.
Thank you very much for reading this log and for your likes and for your comments.
Till soon!
- FriedClams, GrandpaPhil, TBlack and 10 others
-
11
-
 2
2
-
Colonel, this is the kind of model I like to see.
Your start is in any case very promising, I am very curious to see the sequel. I sign up to follow. -
-
Hakan,
Meant as a boost: In 2015 I also had the dreaded c-verdict. Fortunately, it was also detected early. I have completely gotten rid of it, my check up intervals have recently been extended from one to three years.
As far as I can see in the picture you have a beautiful workshop, I am amazed how clean you all can keep your workshop. That never seems to work for me.
Your model looks beautiful.- Wintergreen and mtaylor
-
2
-
Fascinating log!
This will undoubtedly be a beautiful model of an at first sight ordinary workboat.I look forward to seeing the sequel.
-
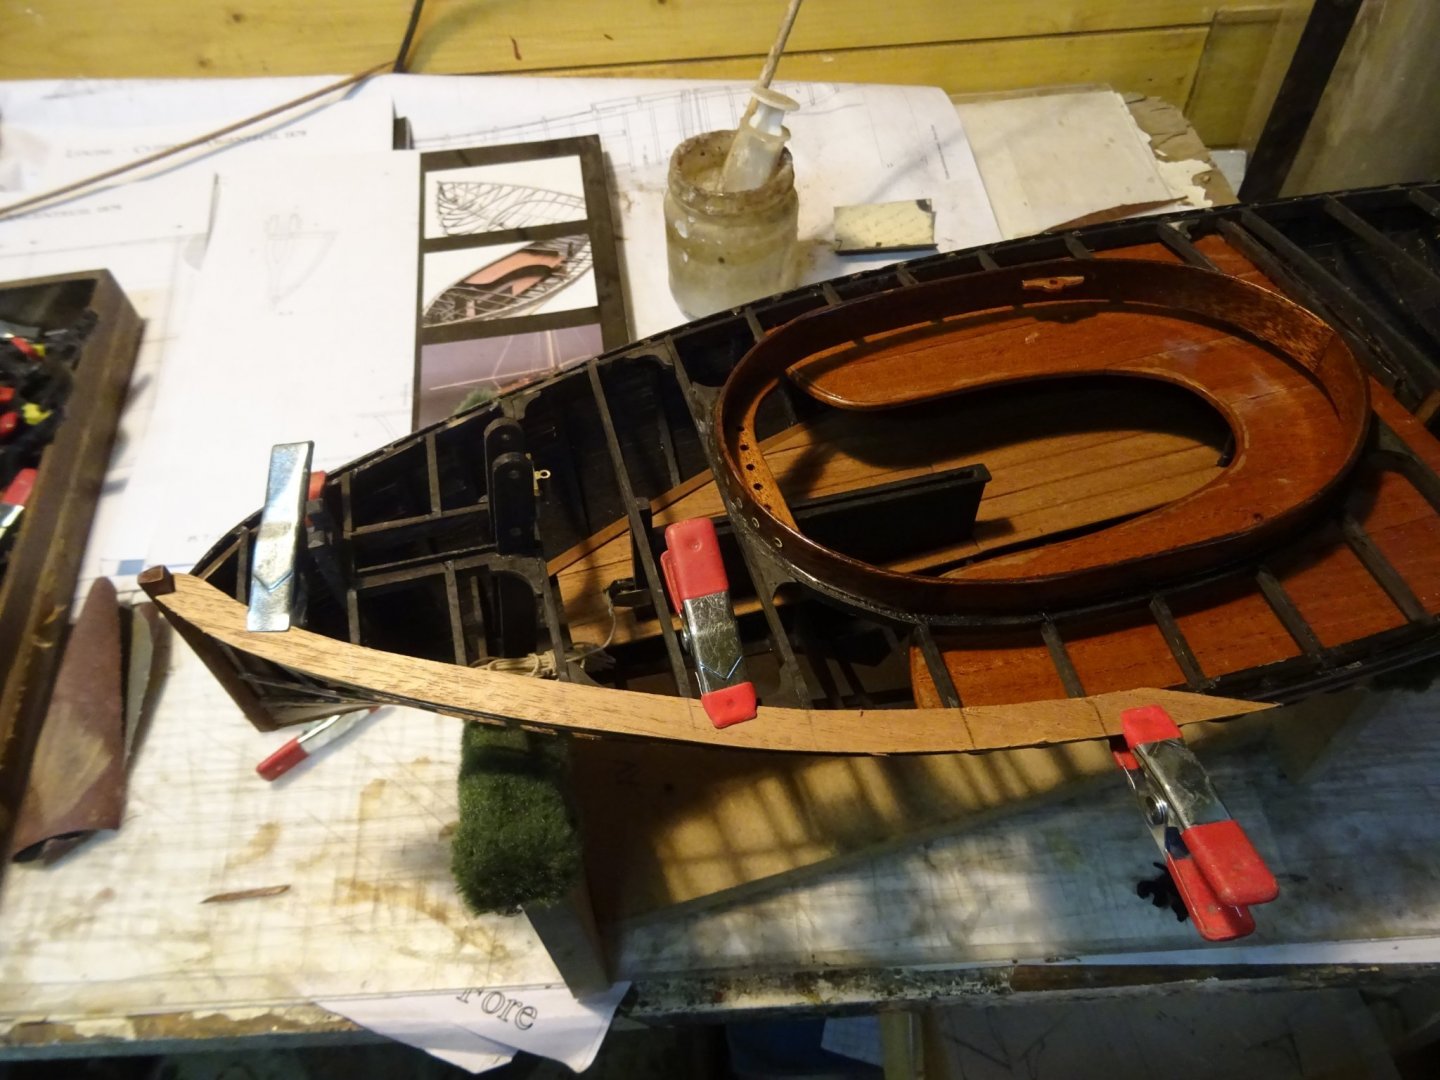
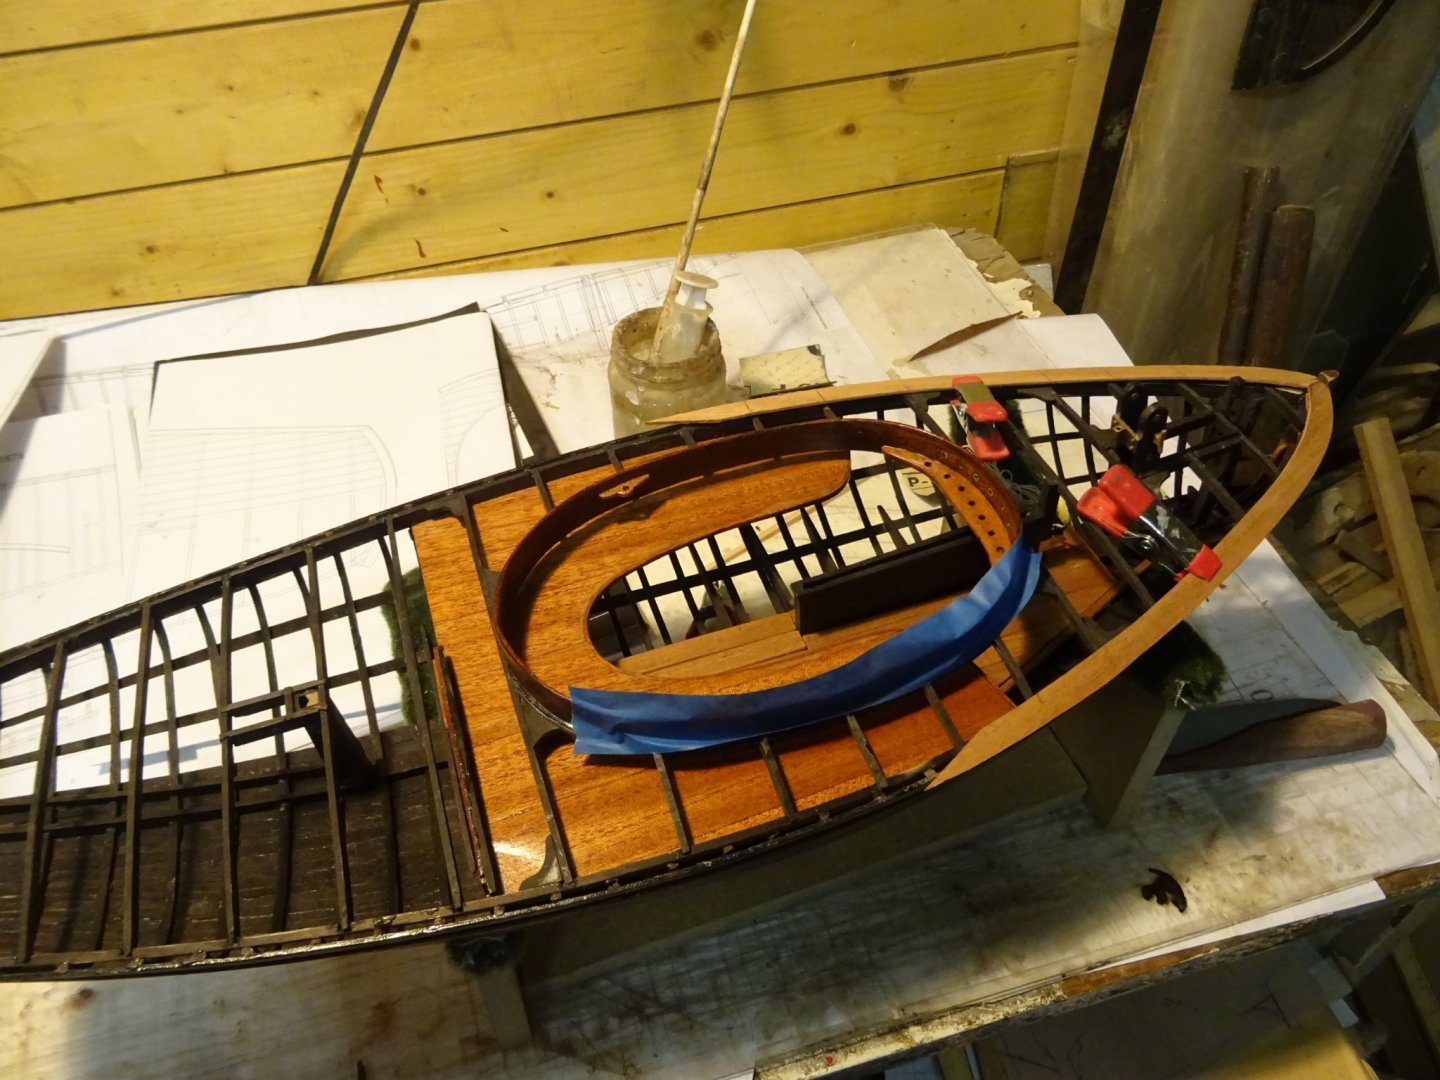
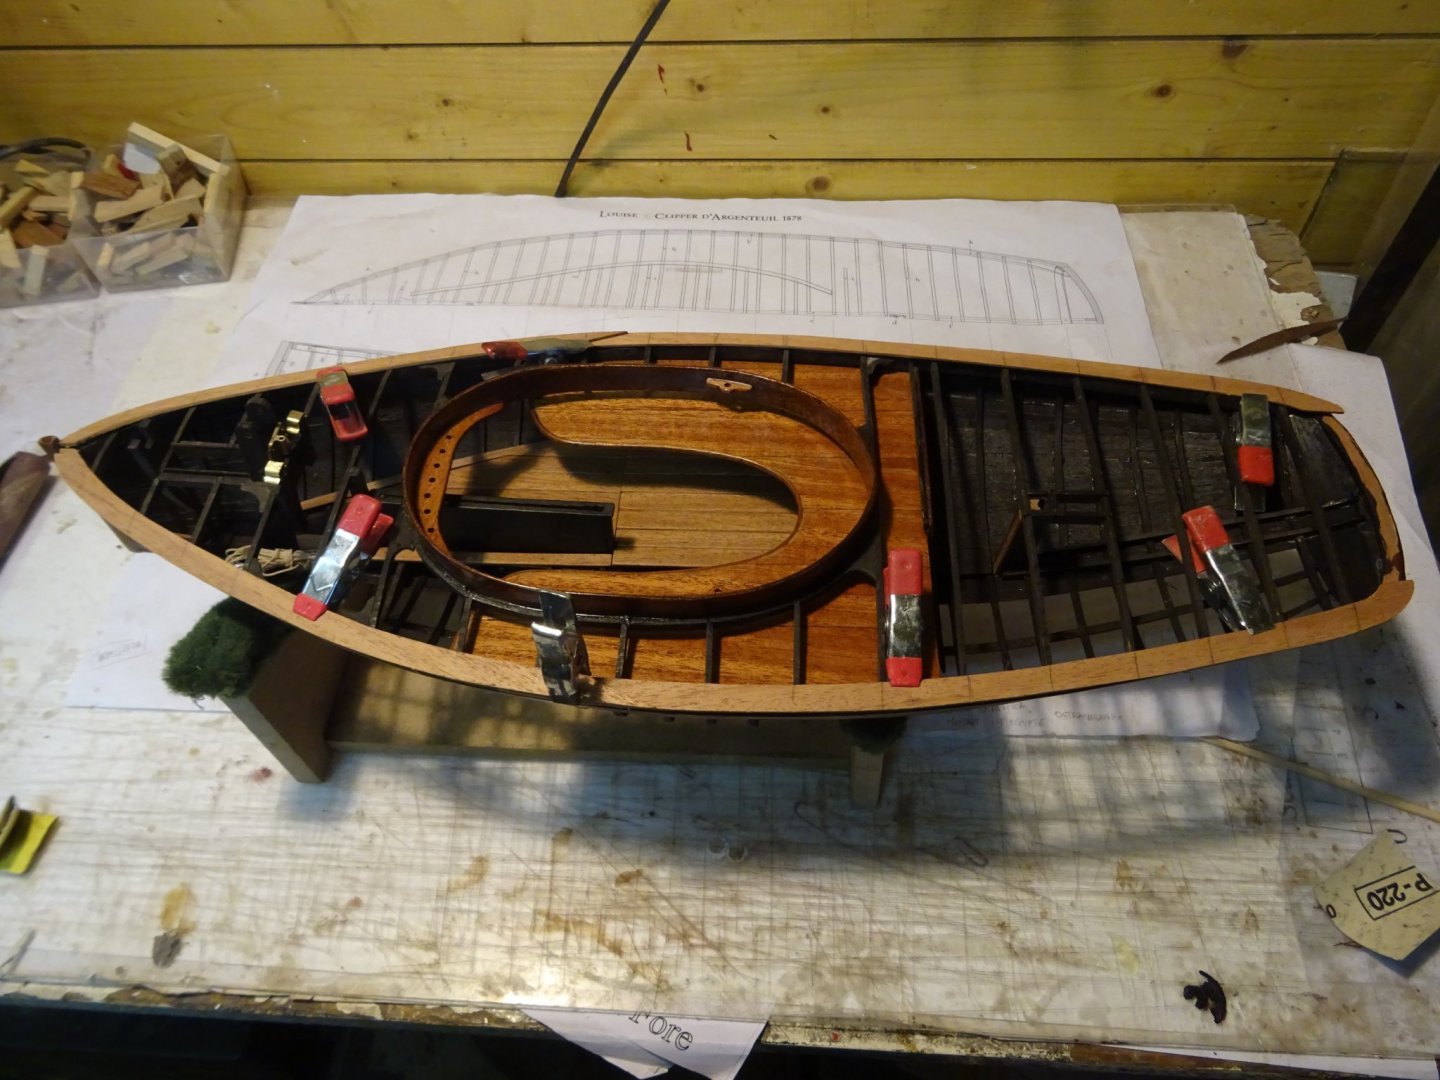
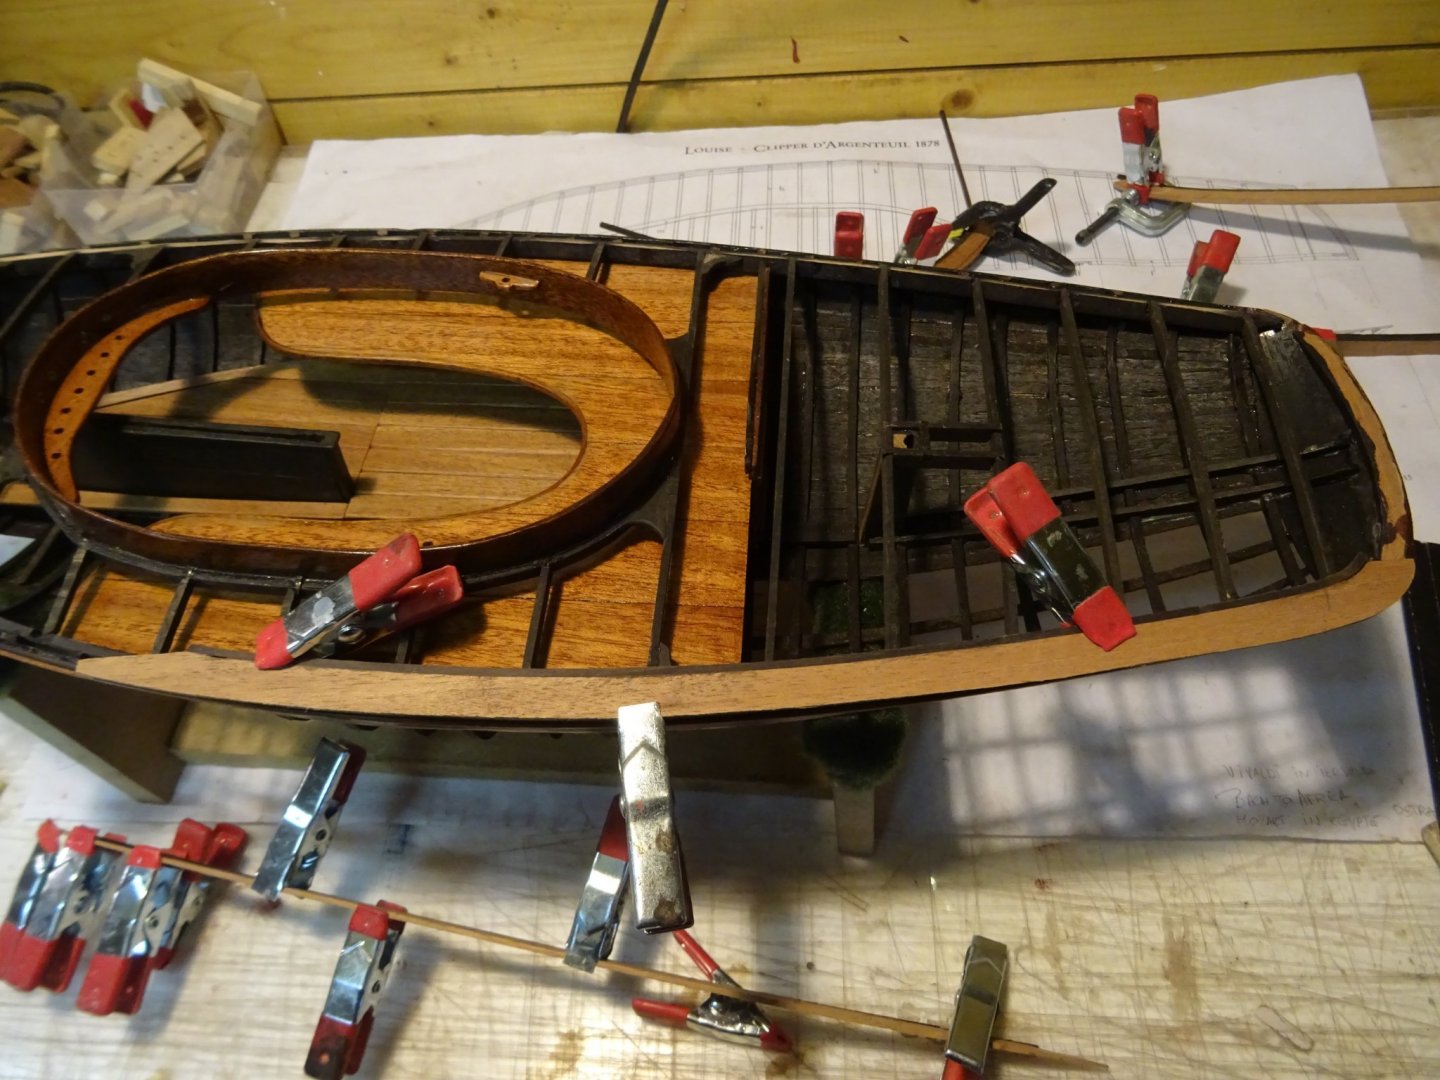
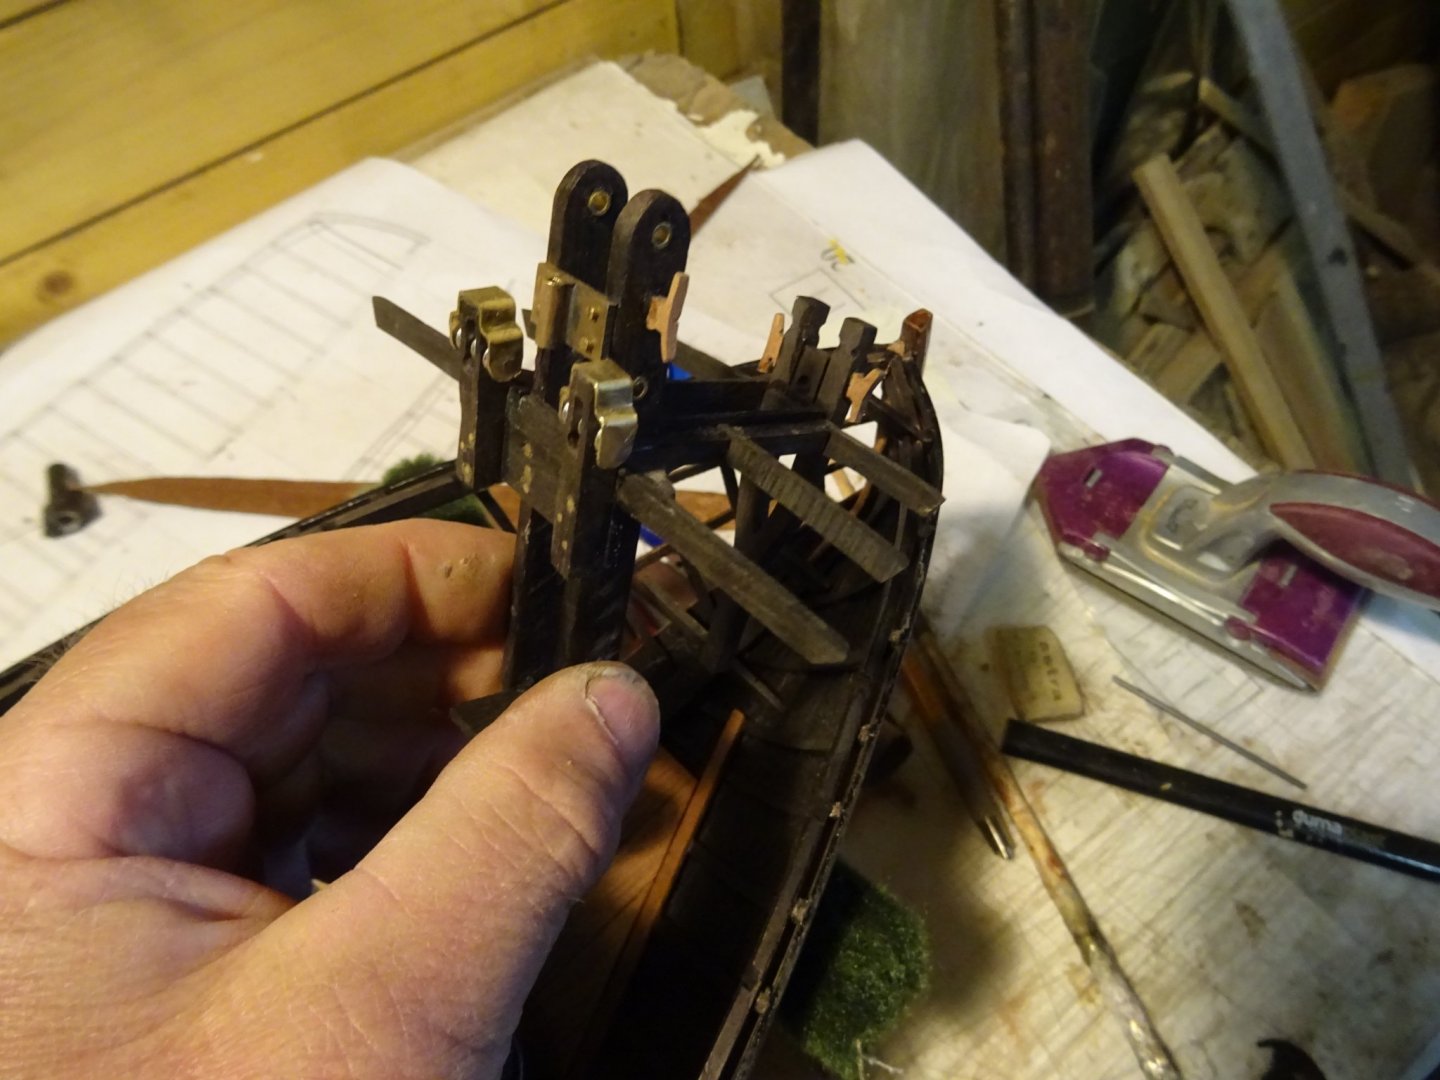
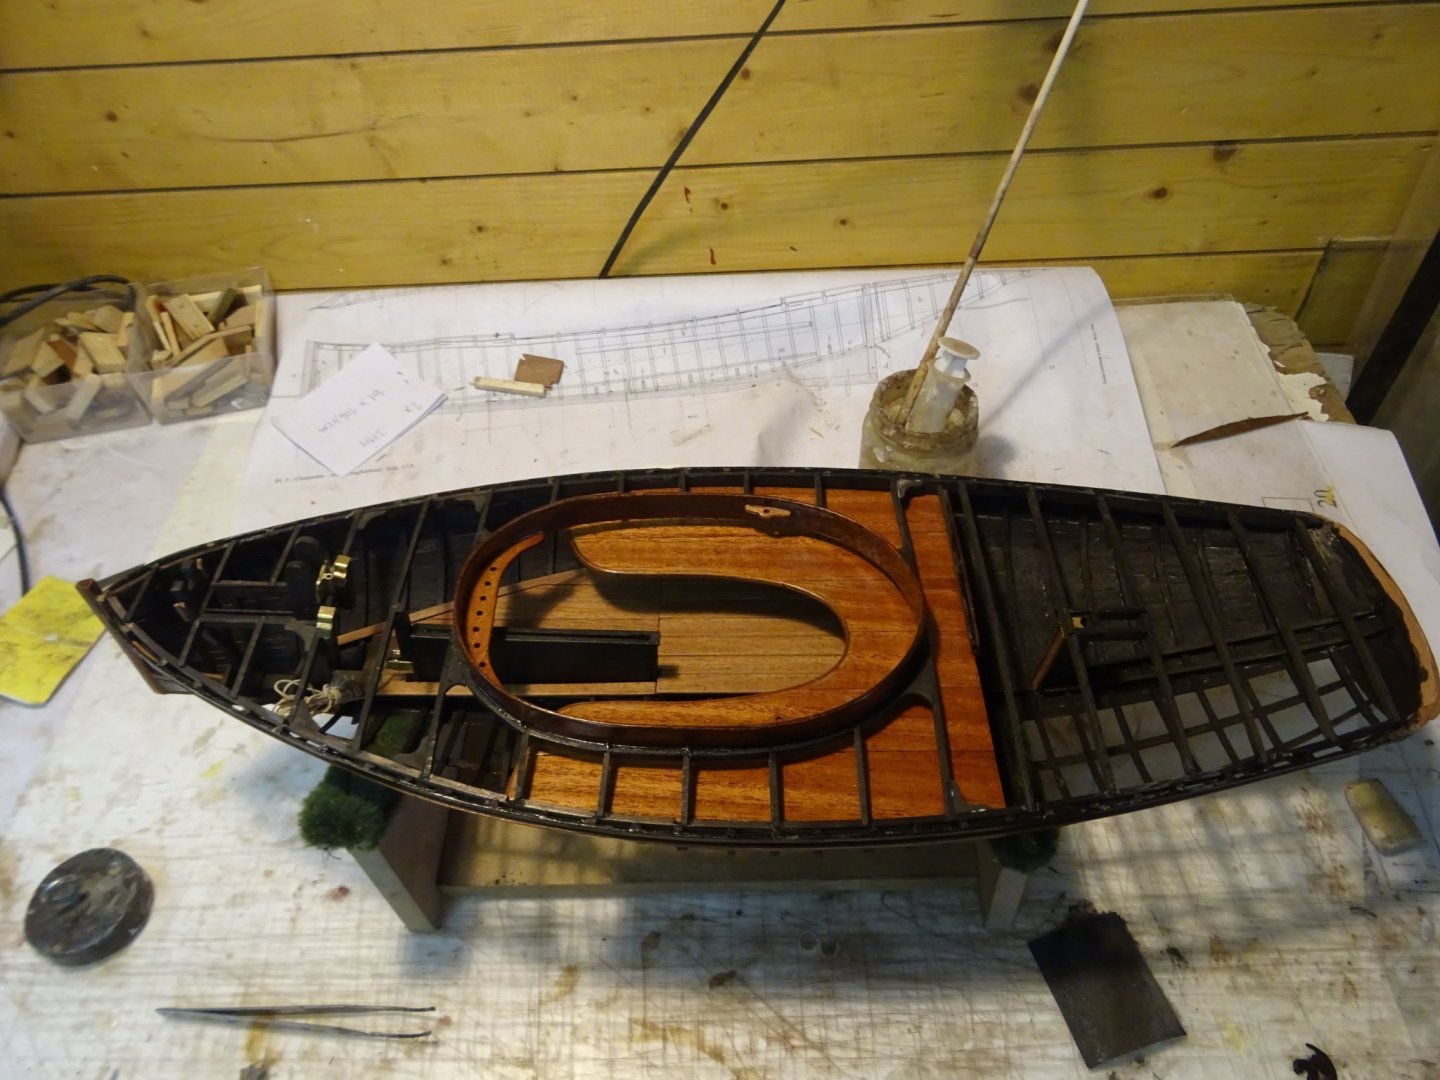
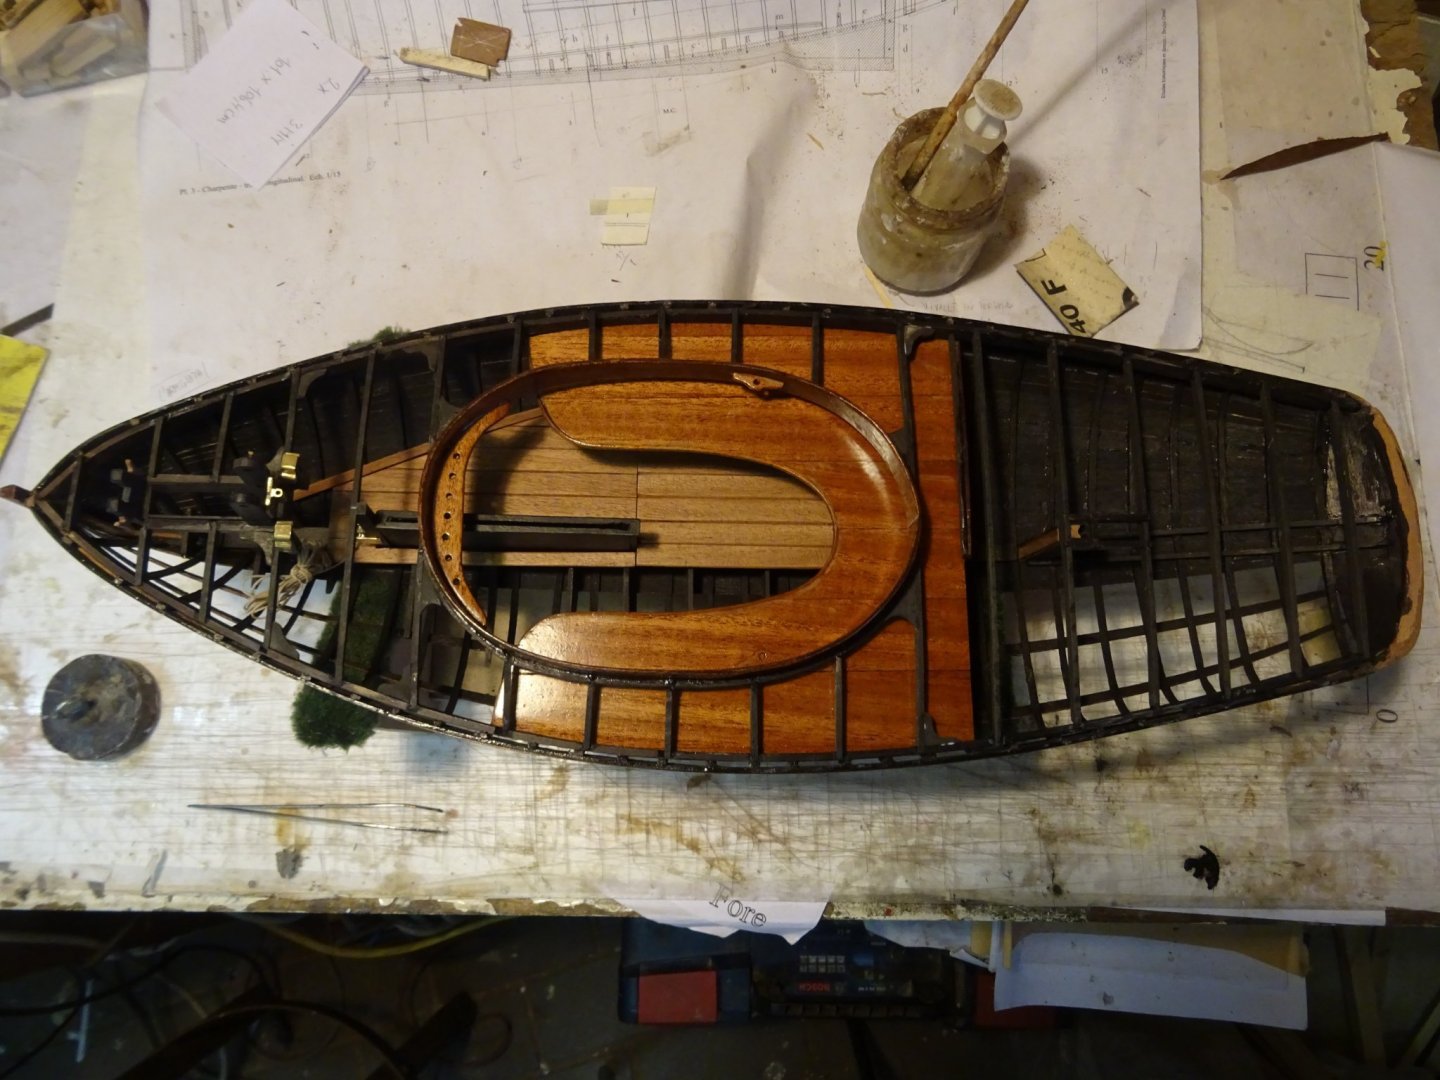
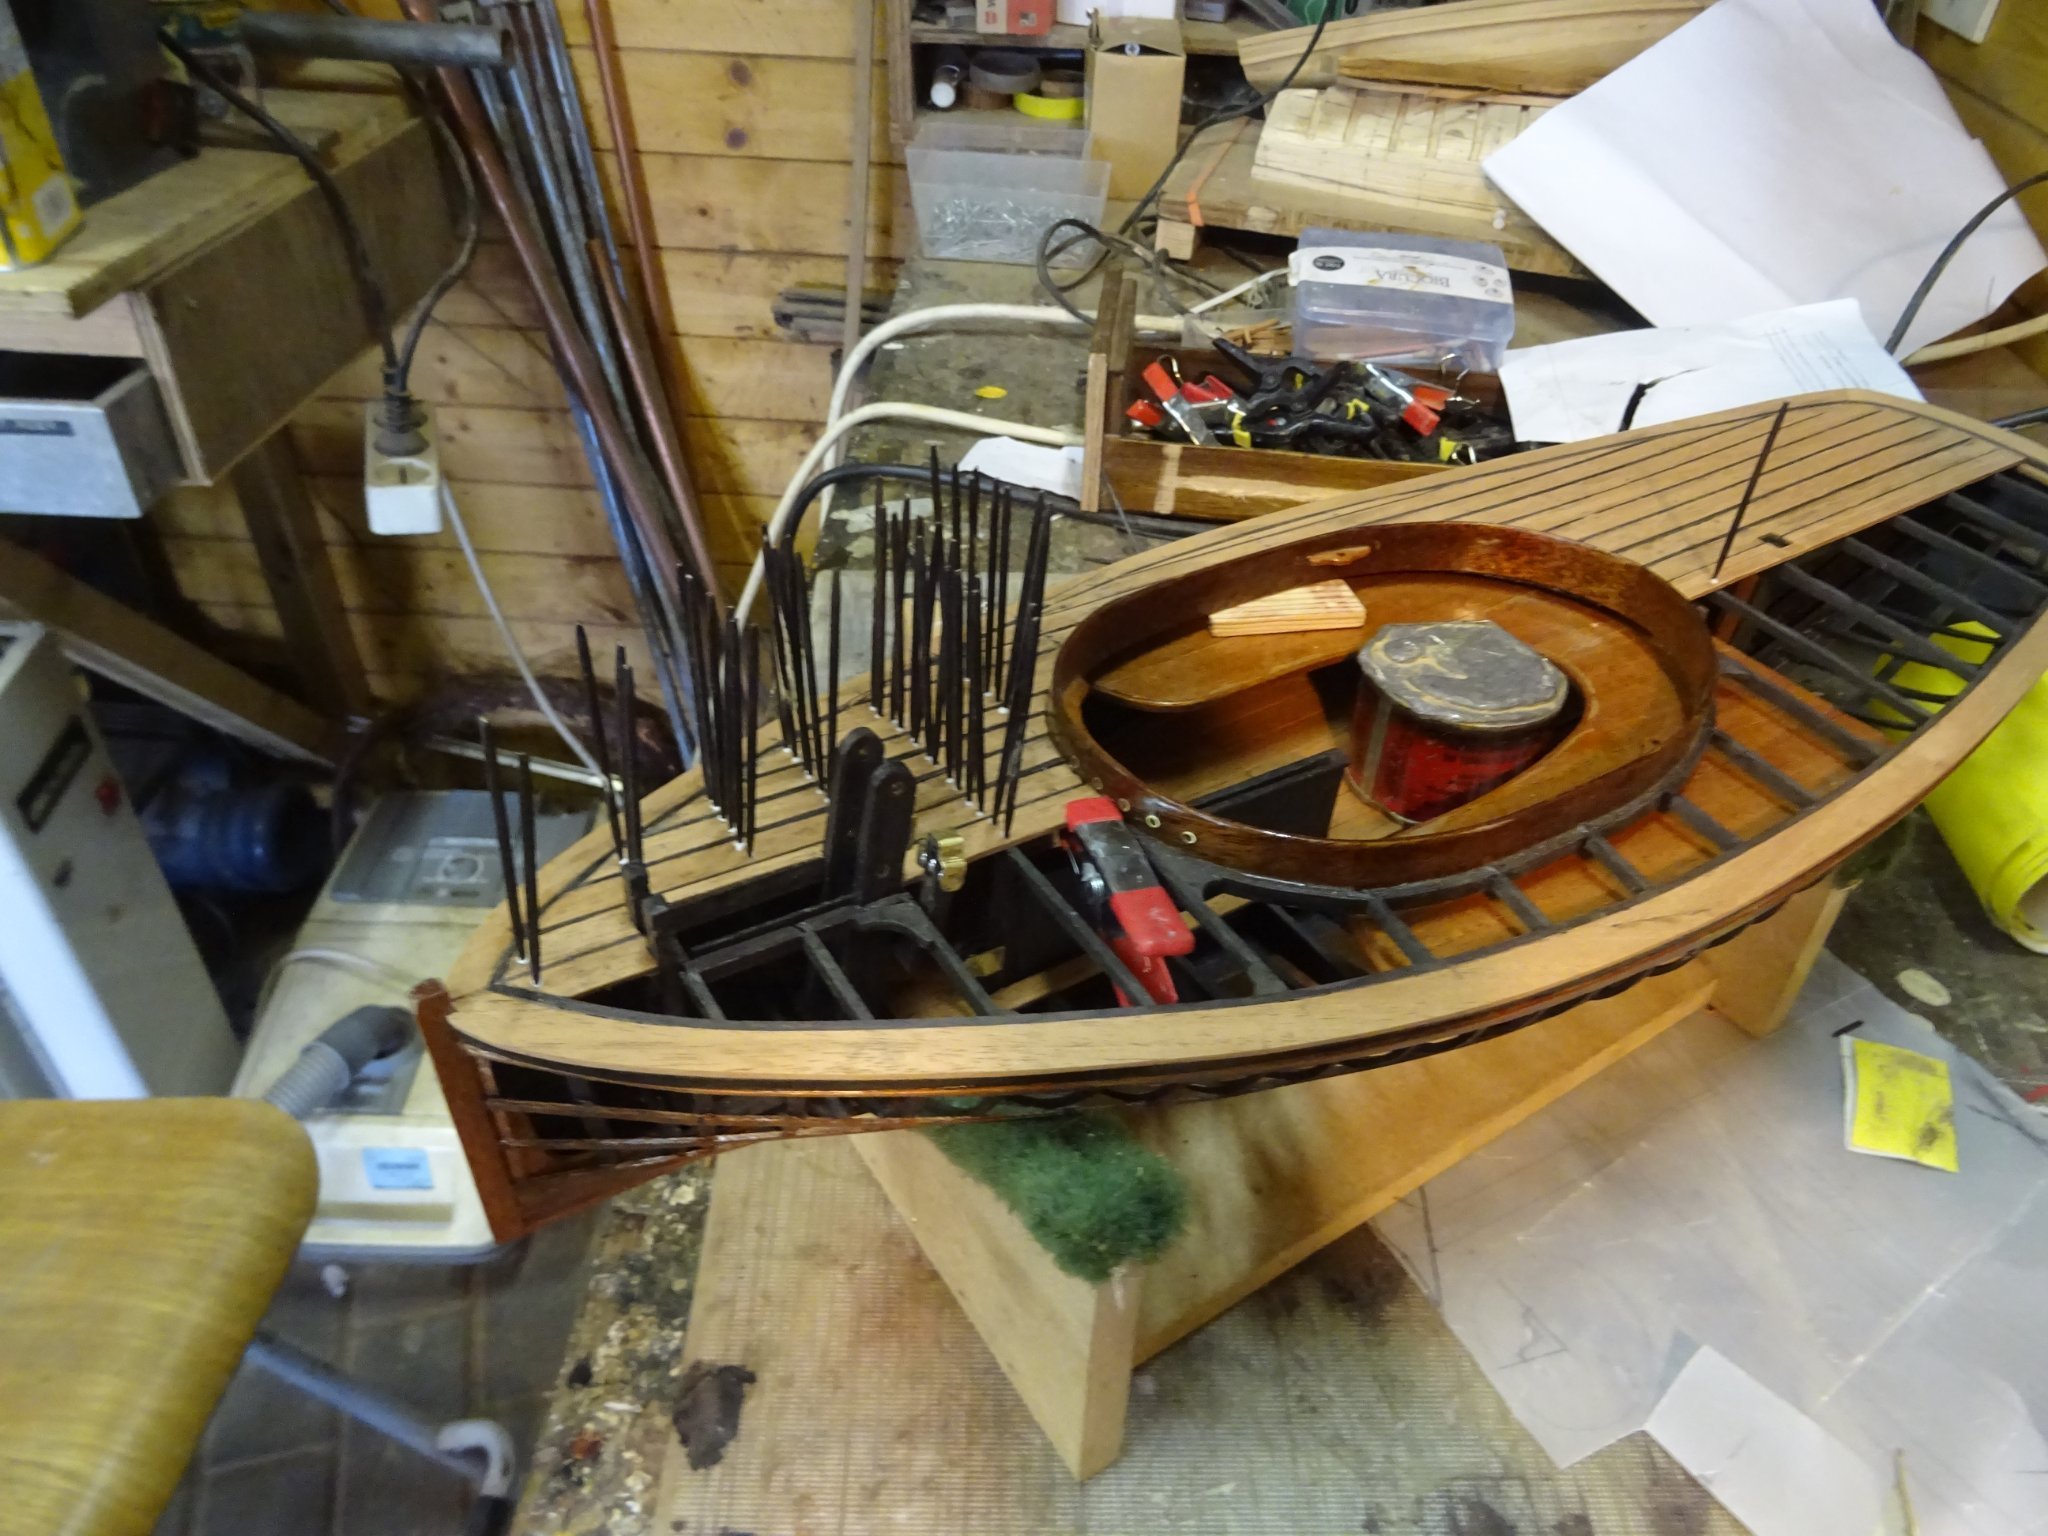
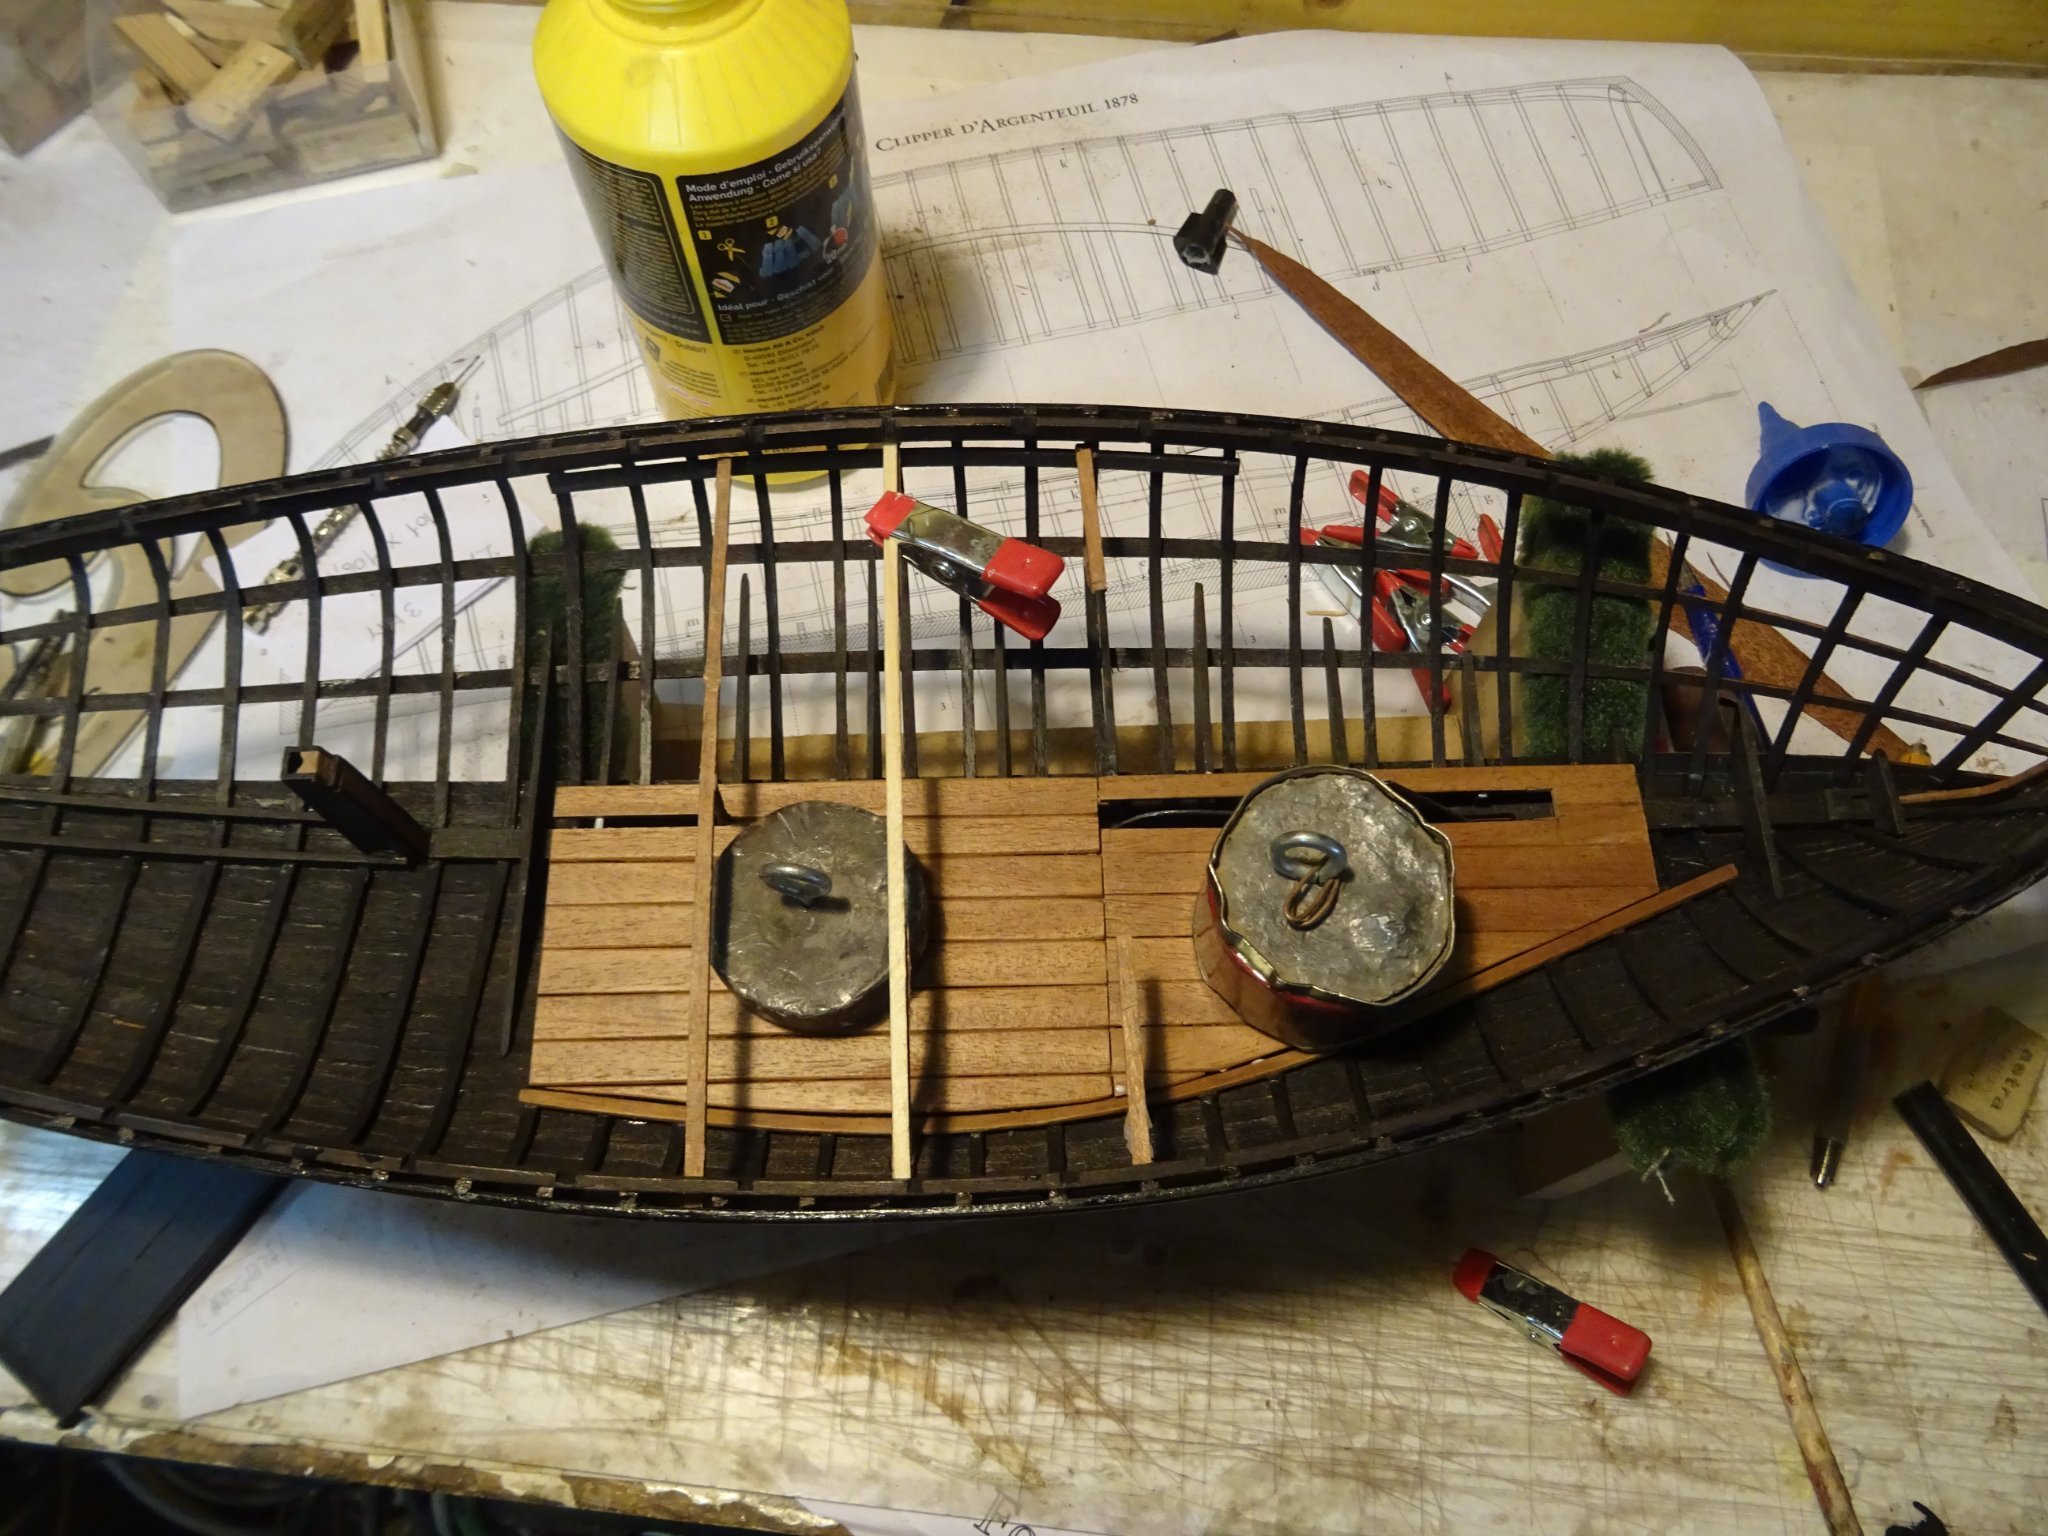
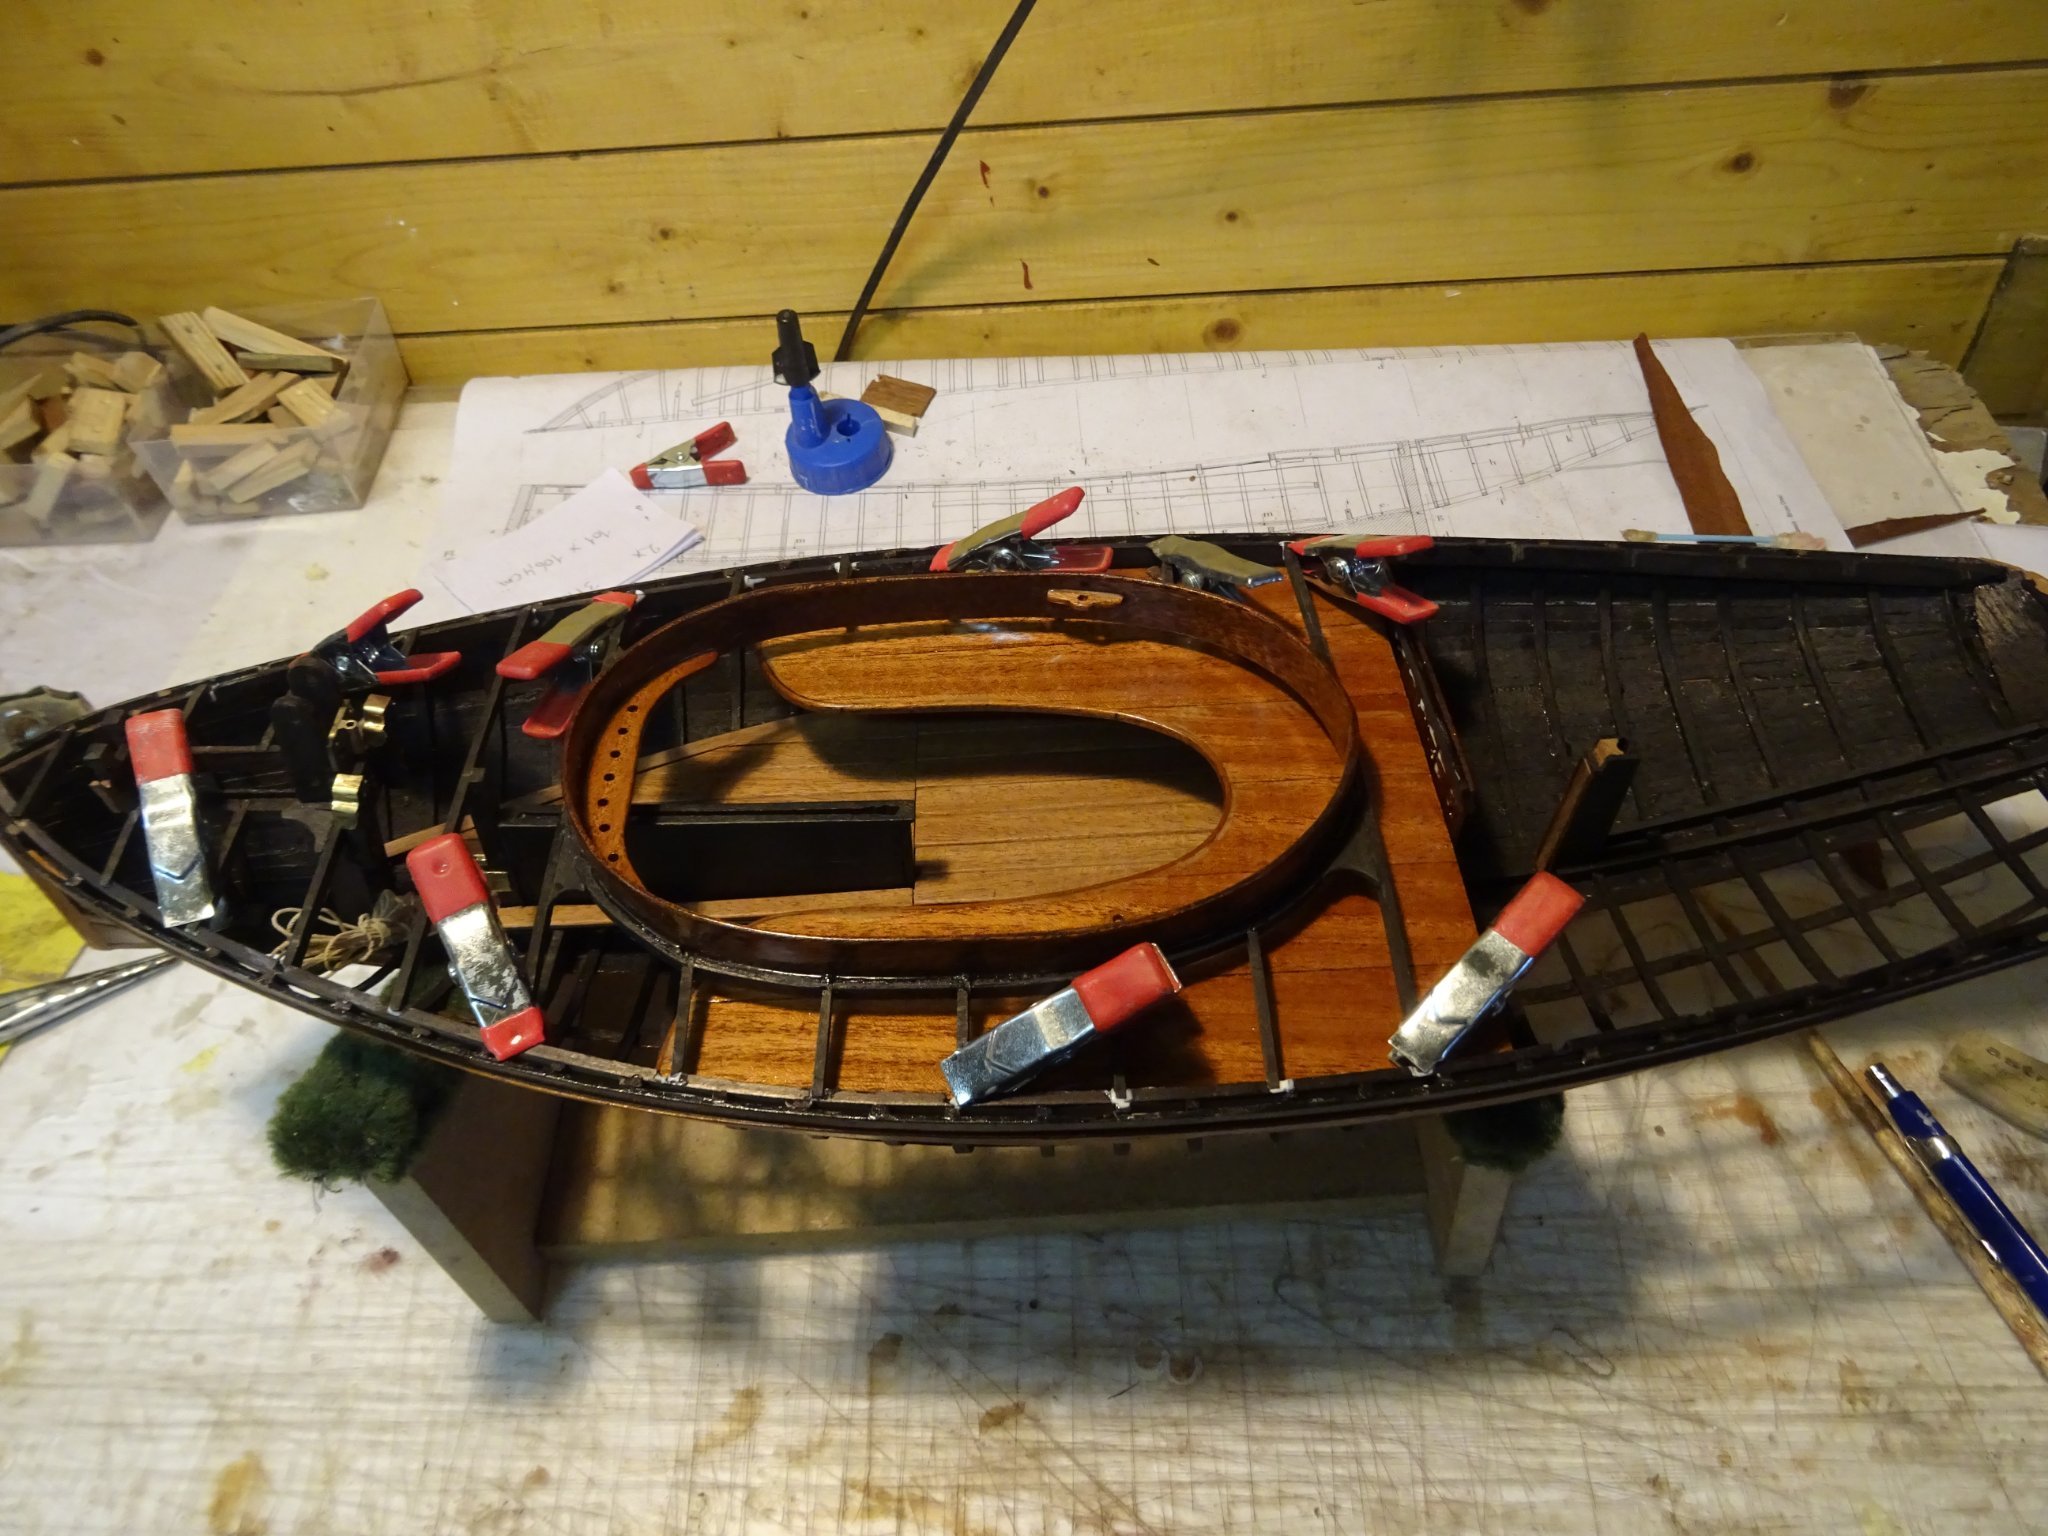
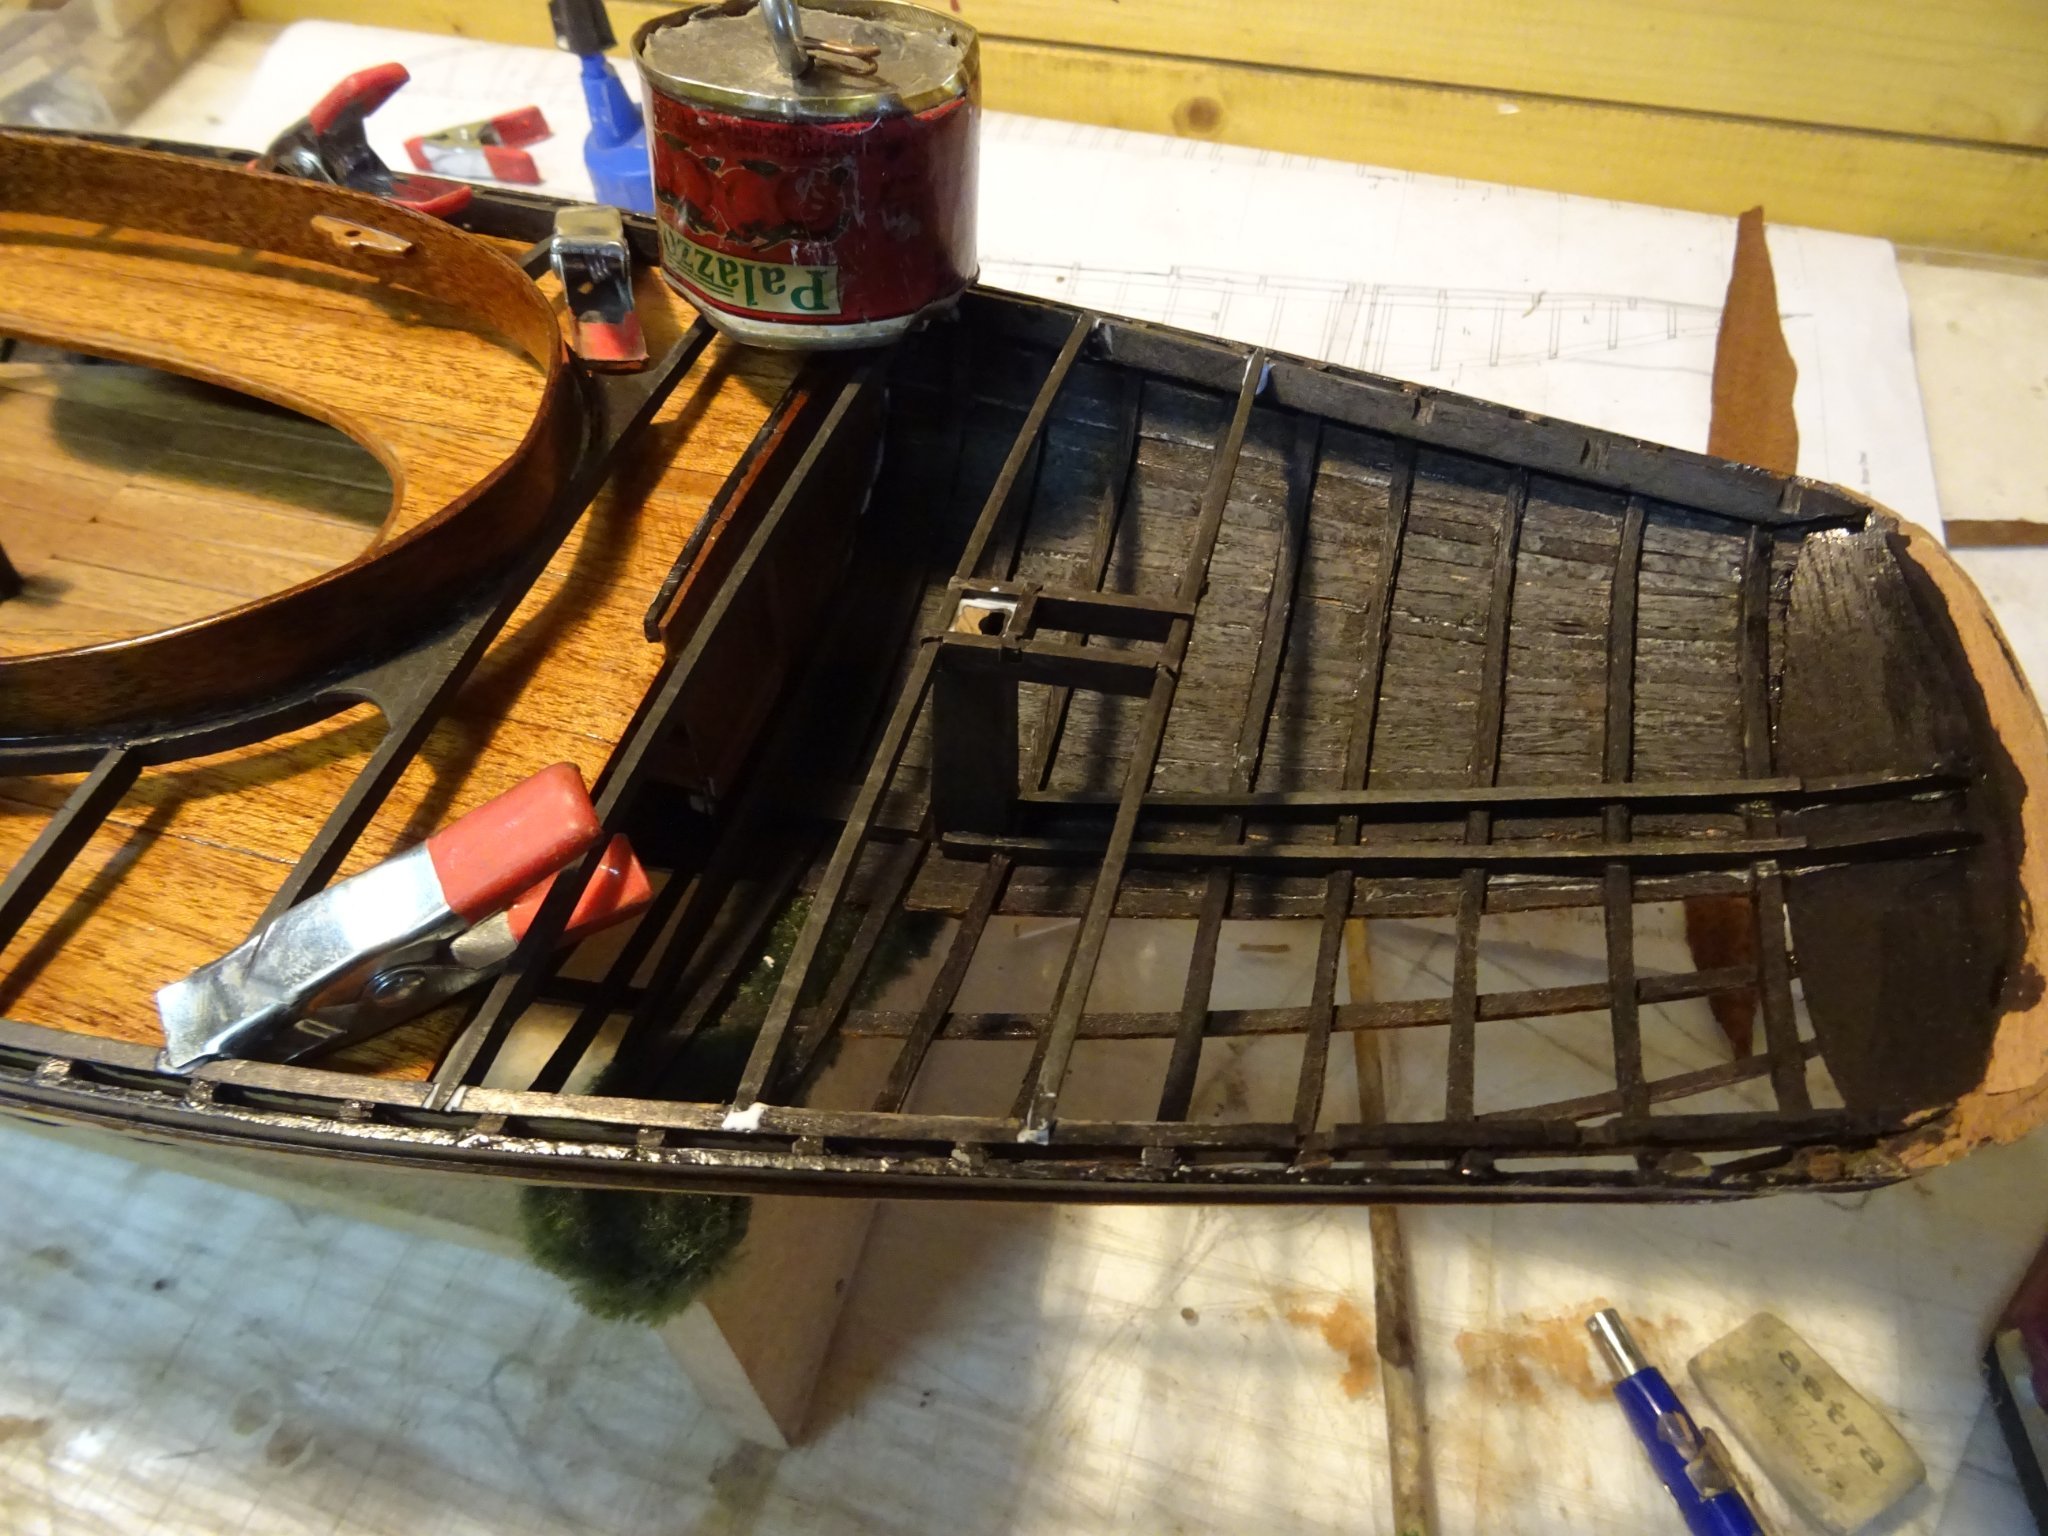
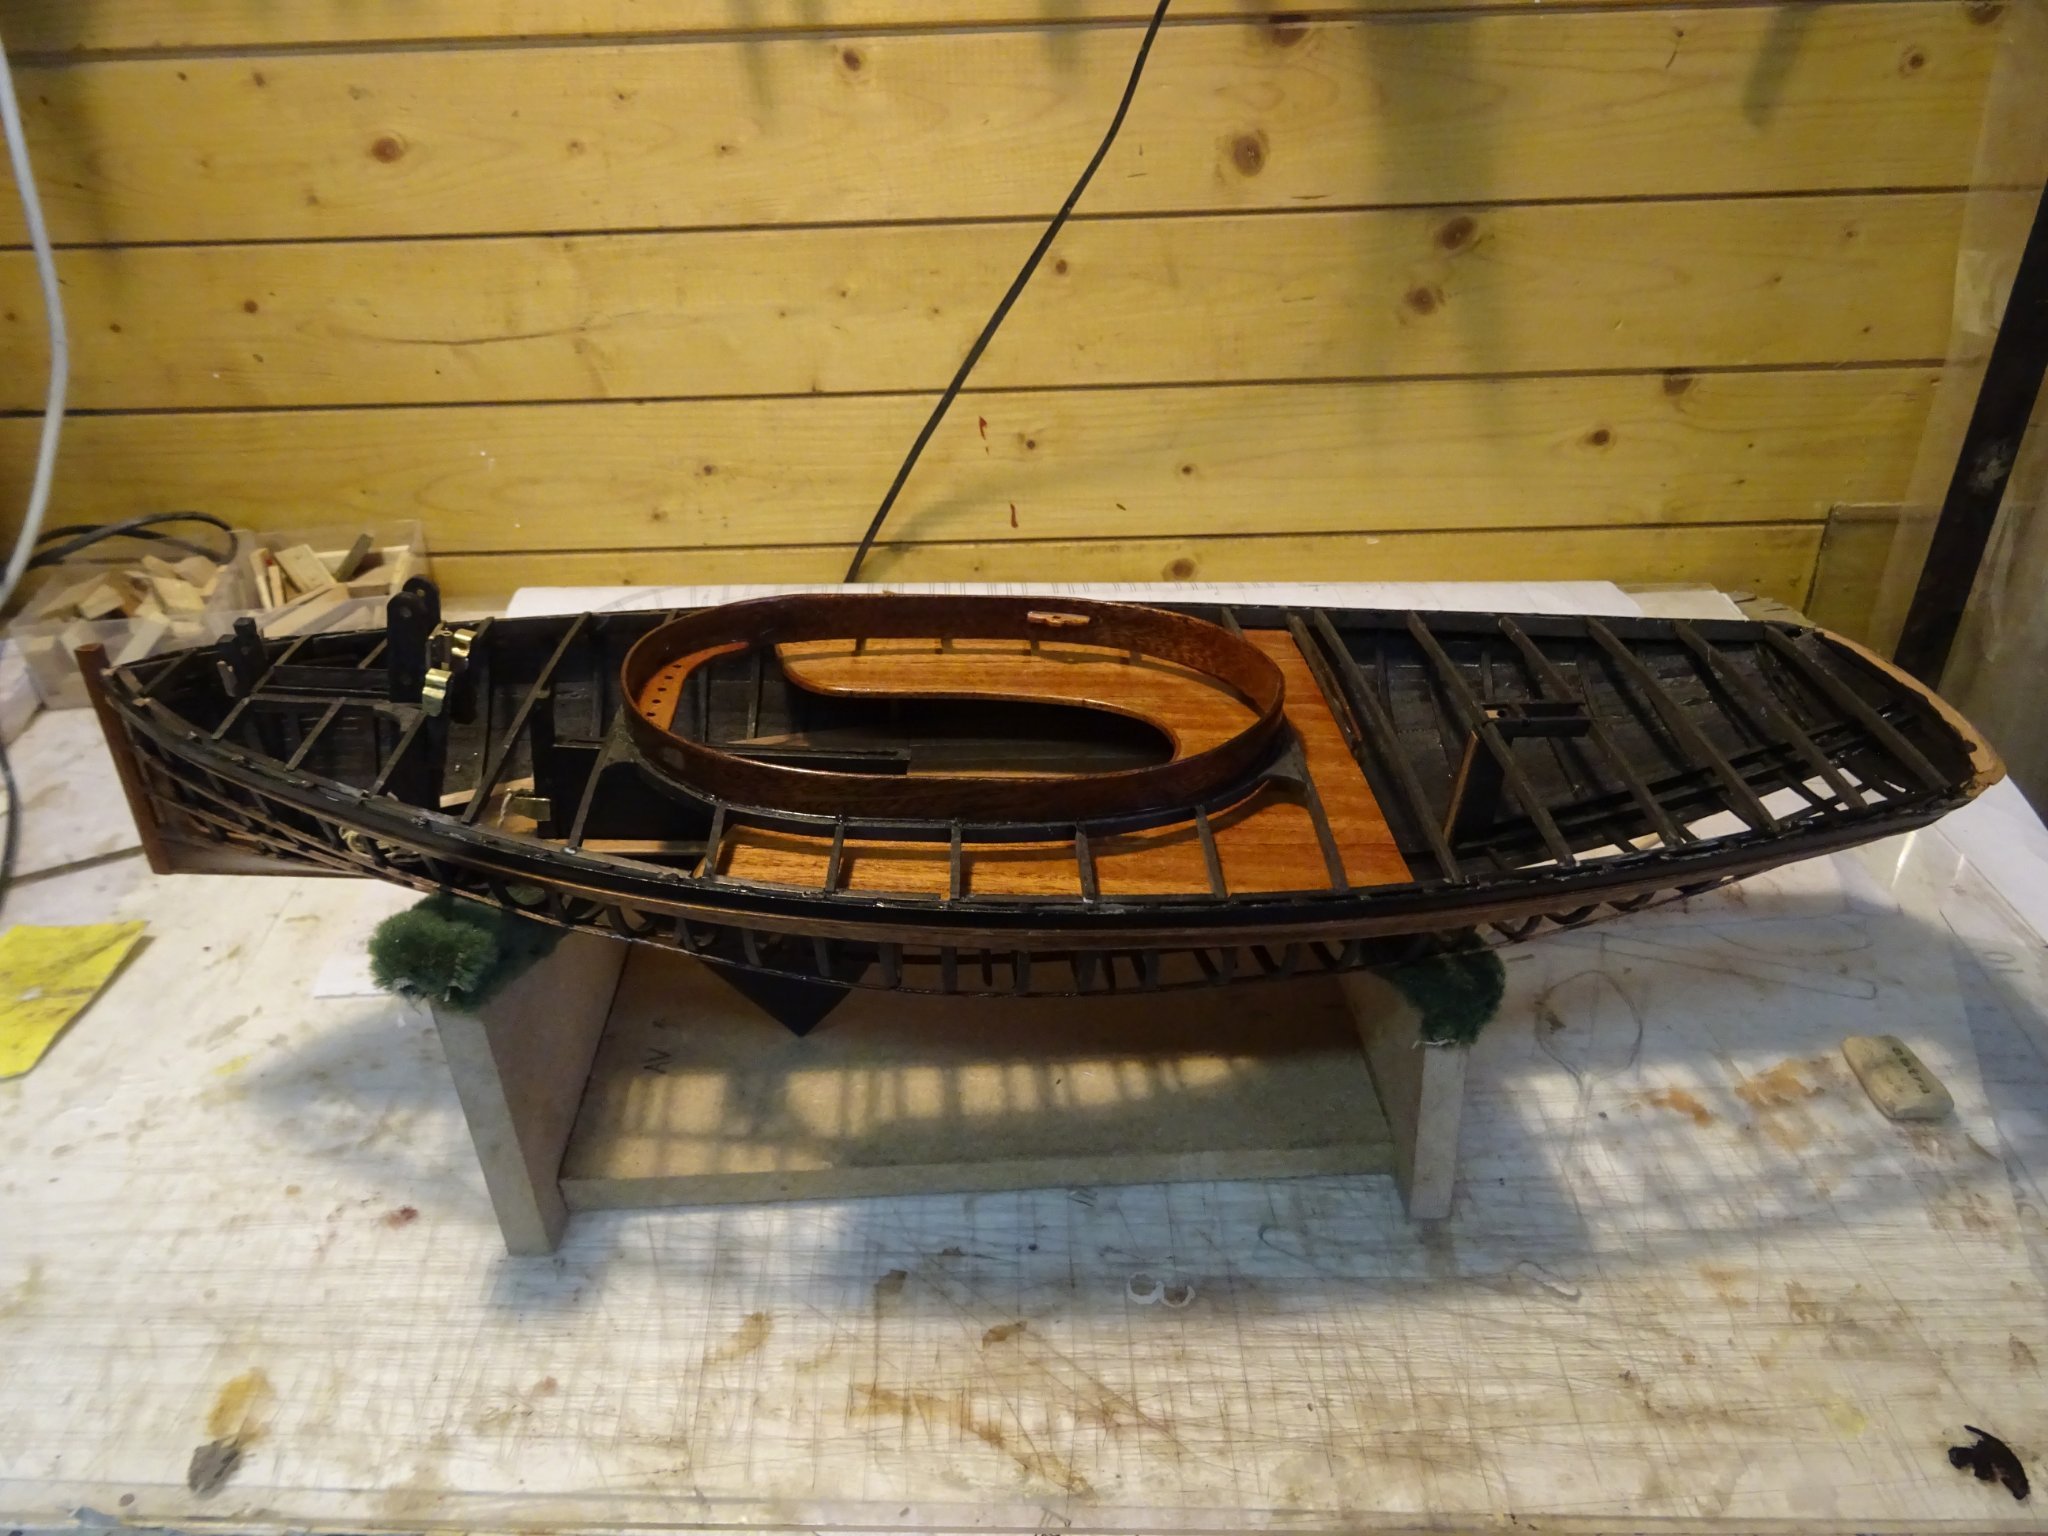
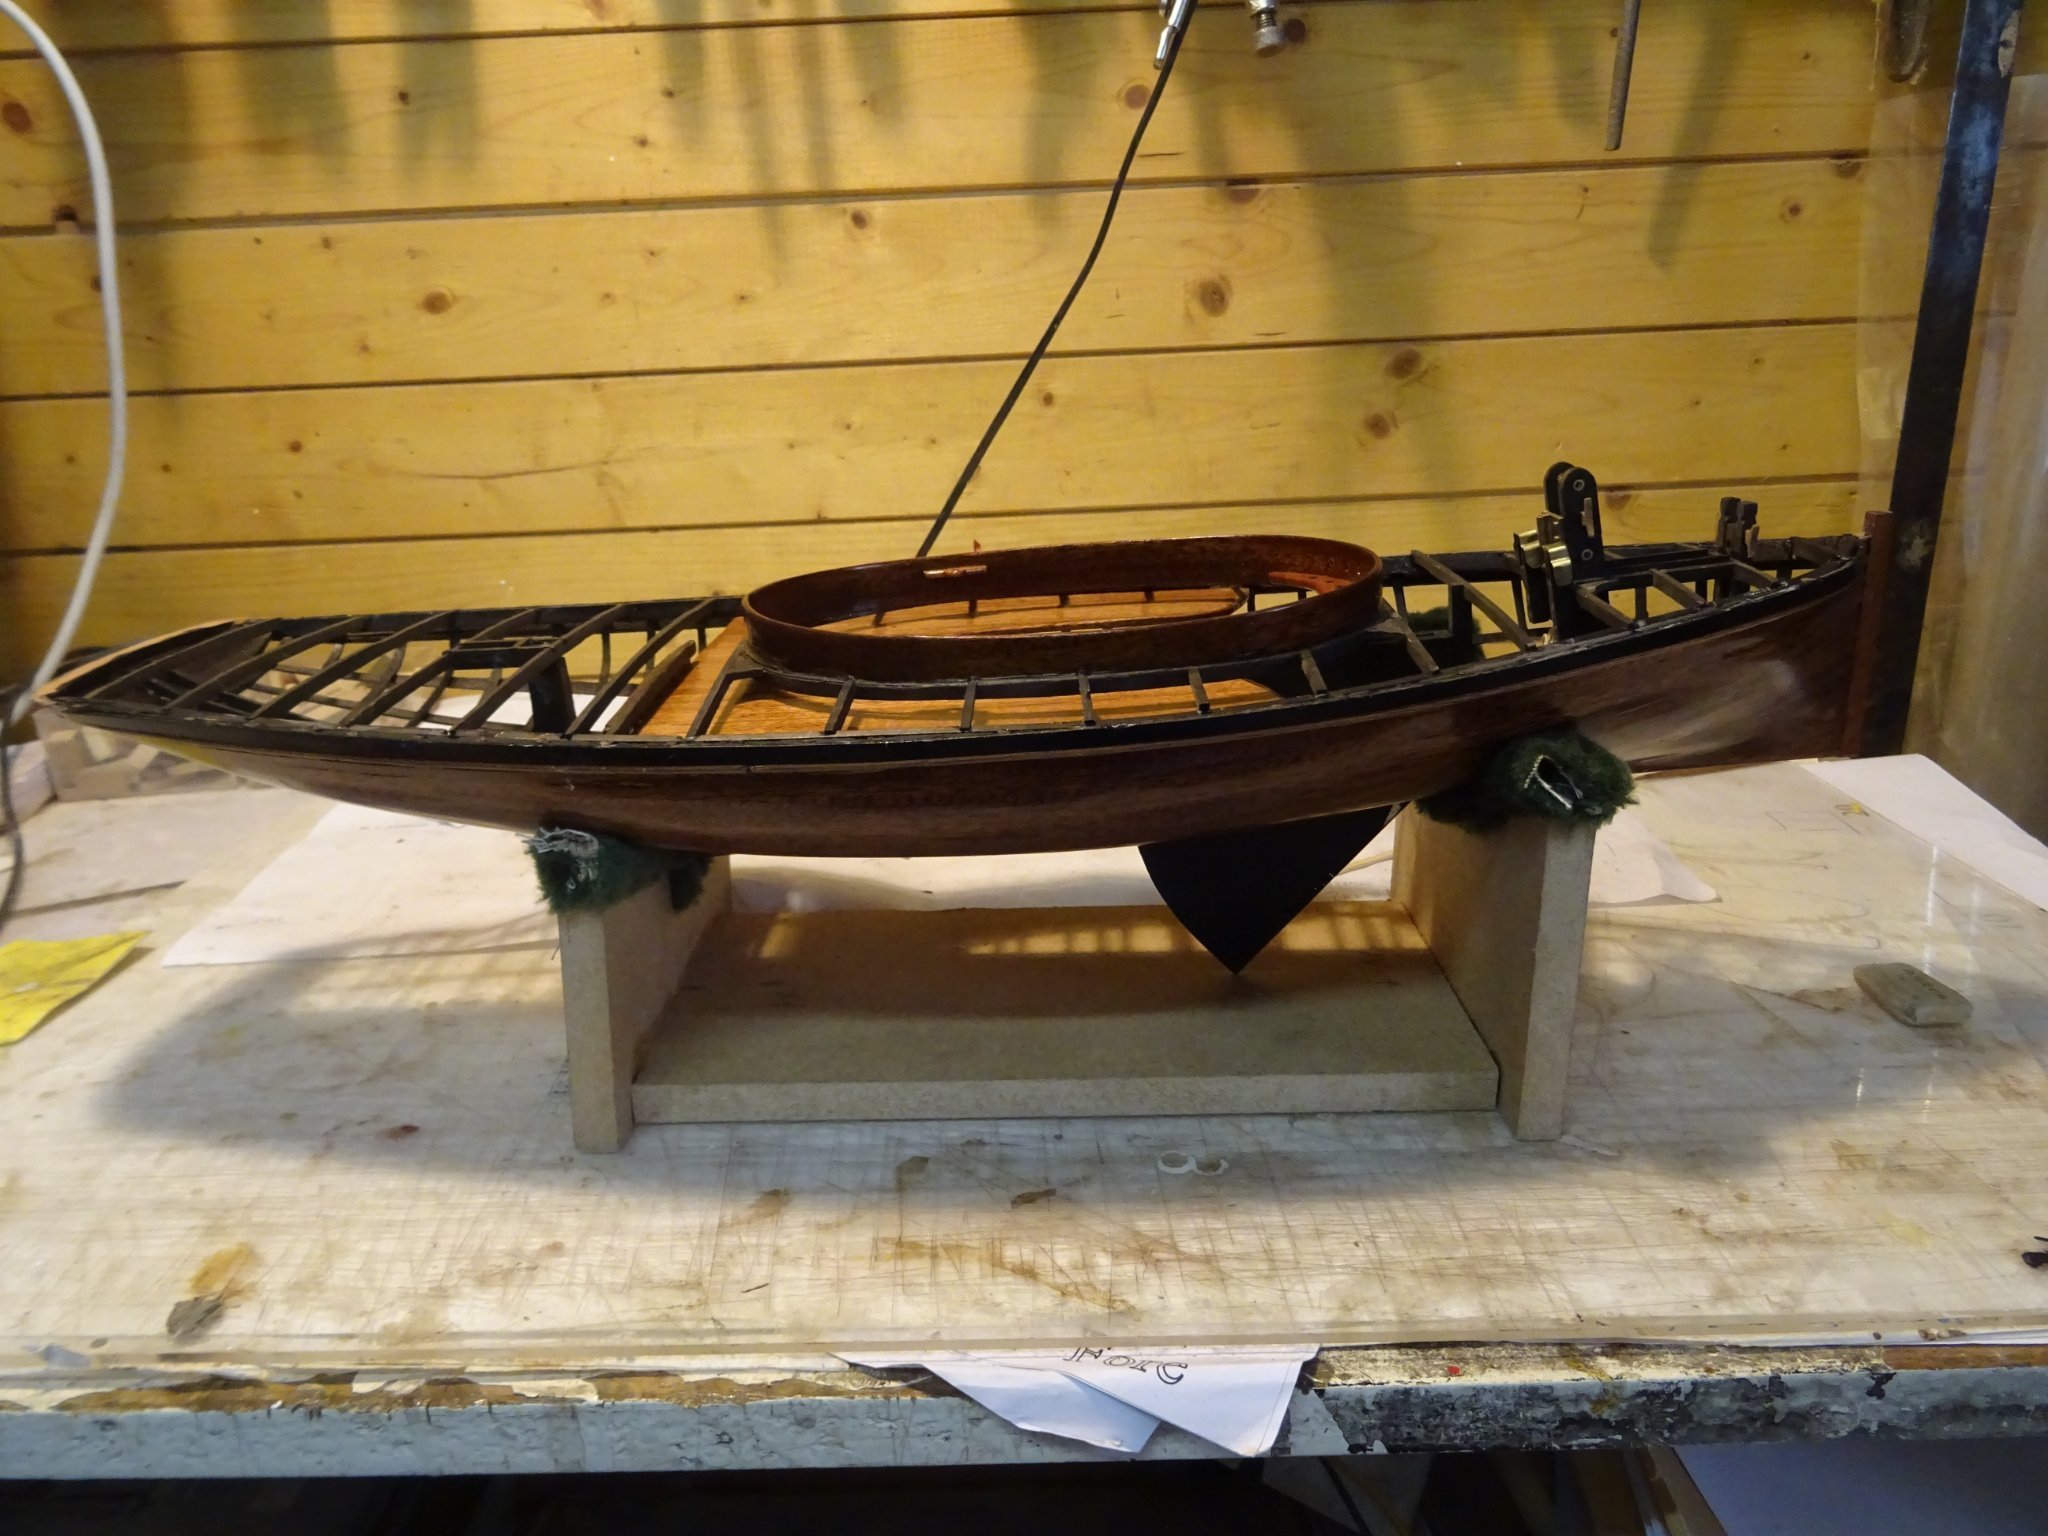
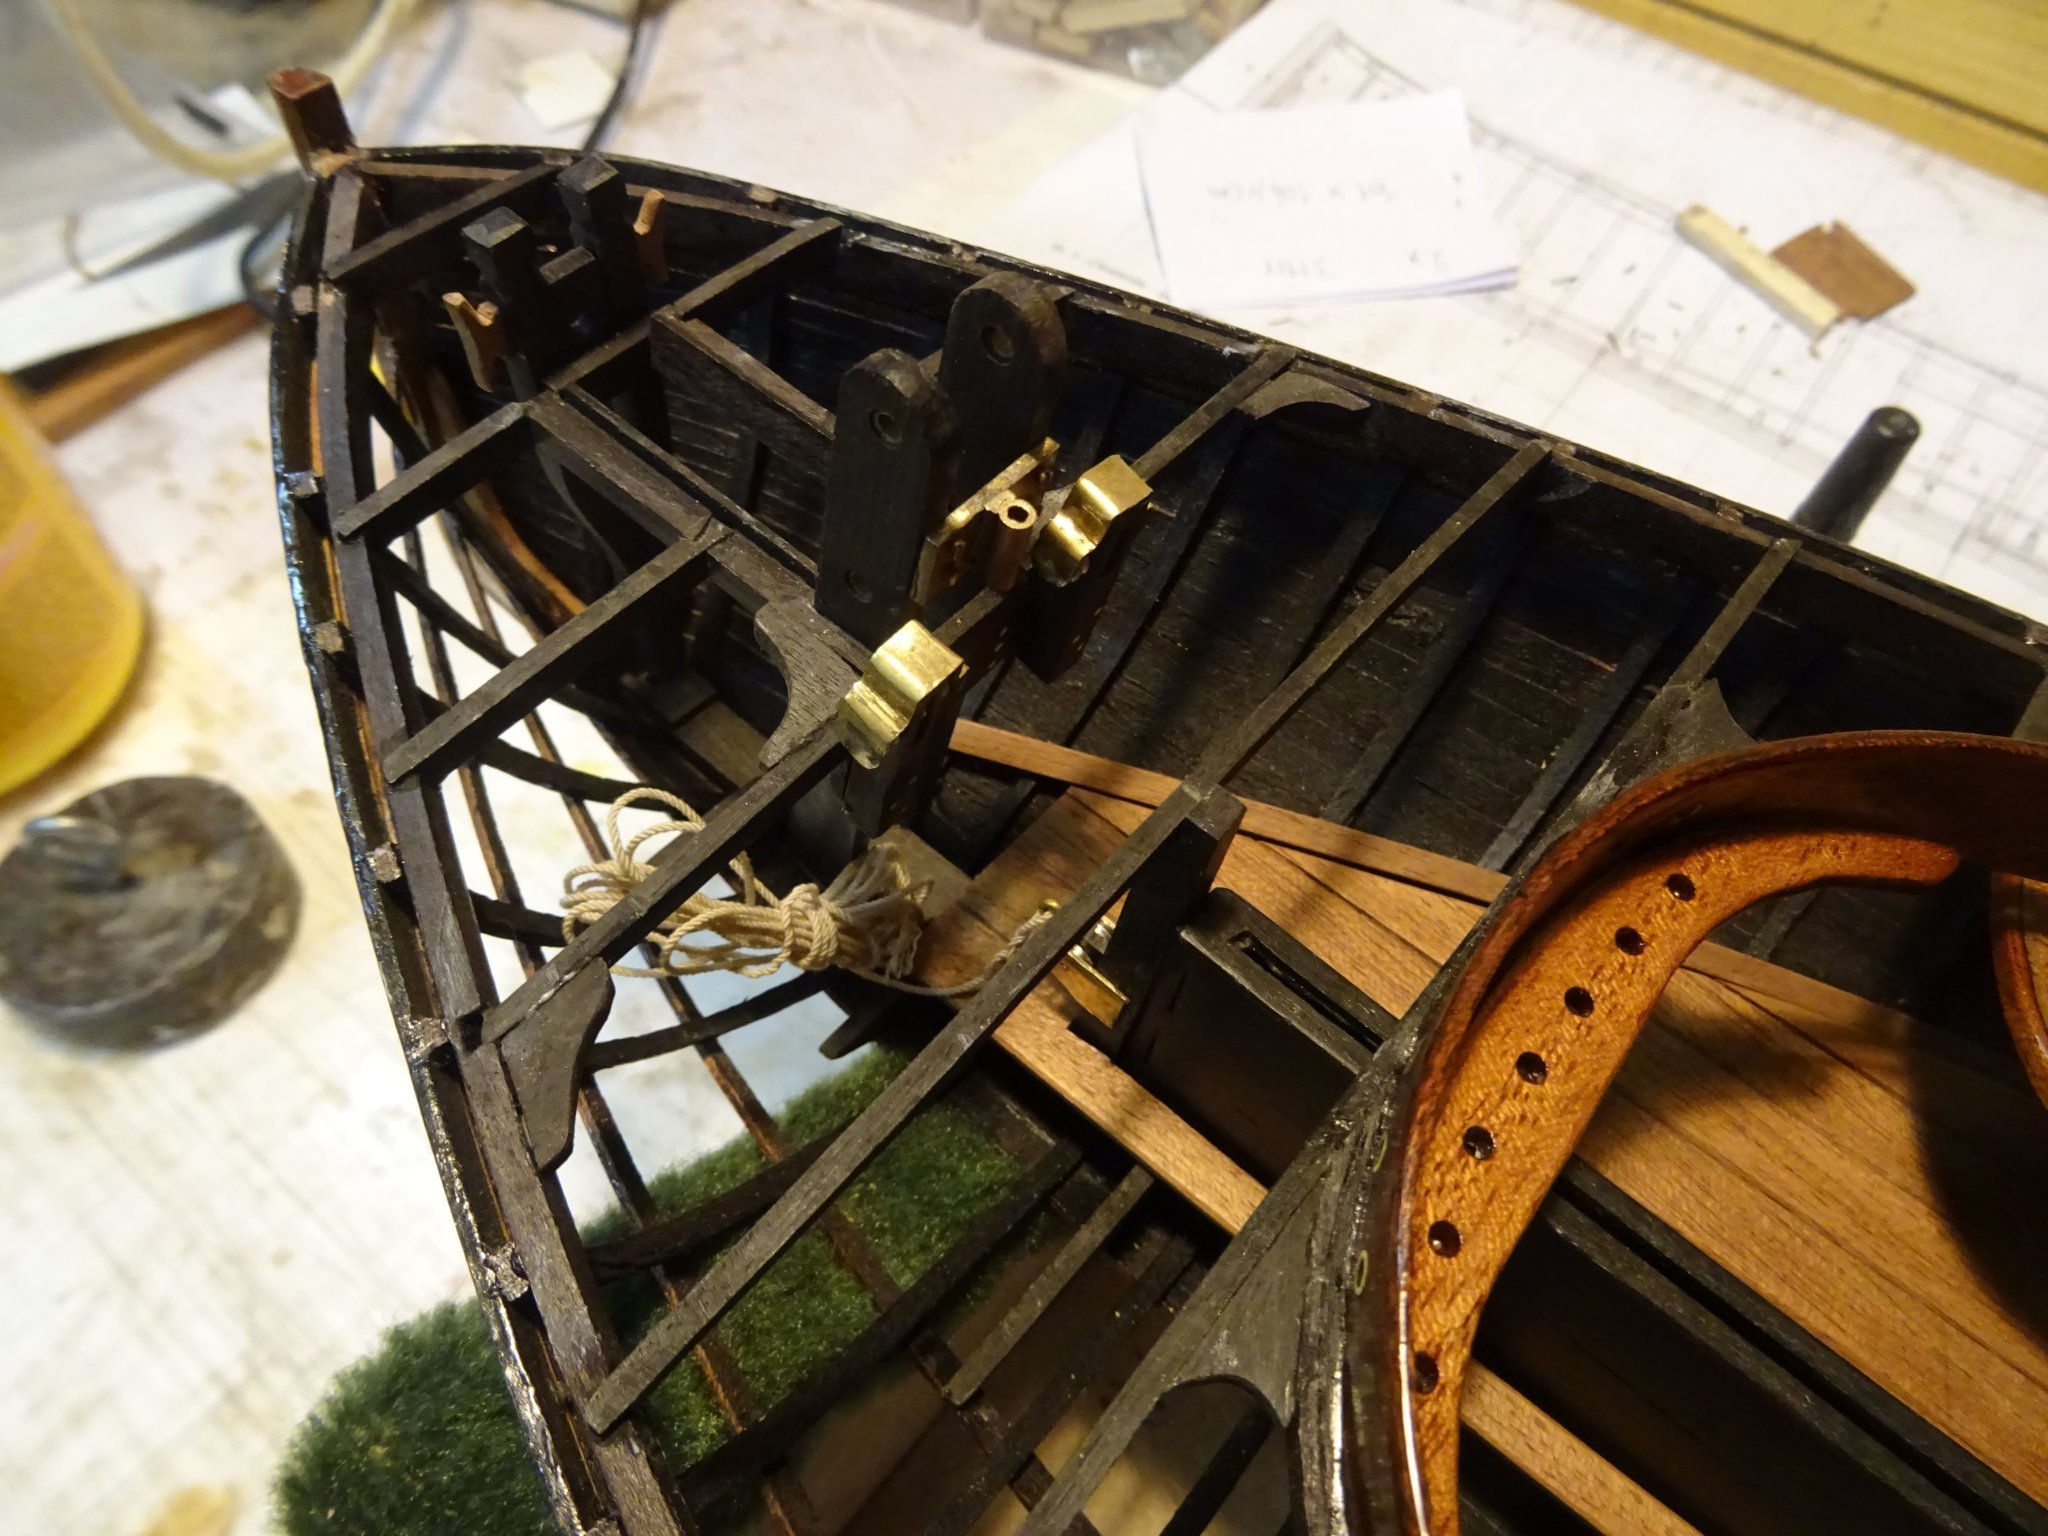
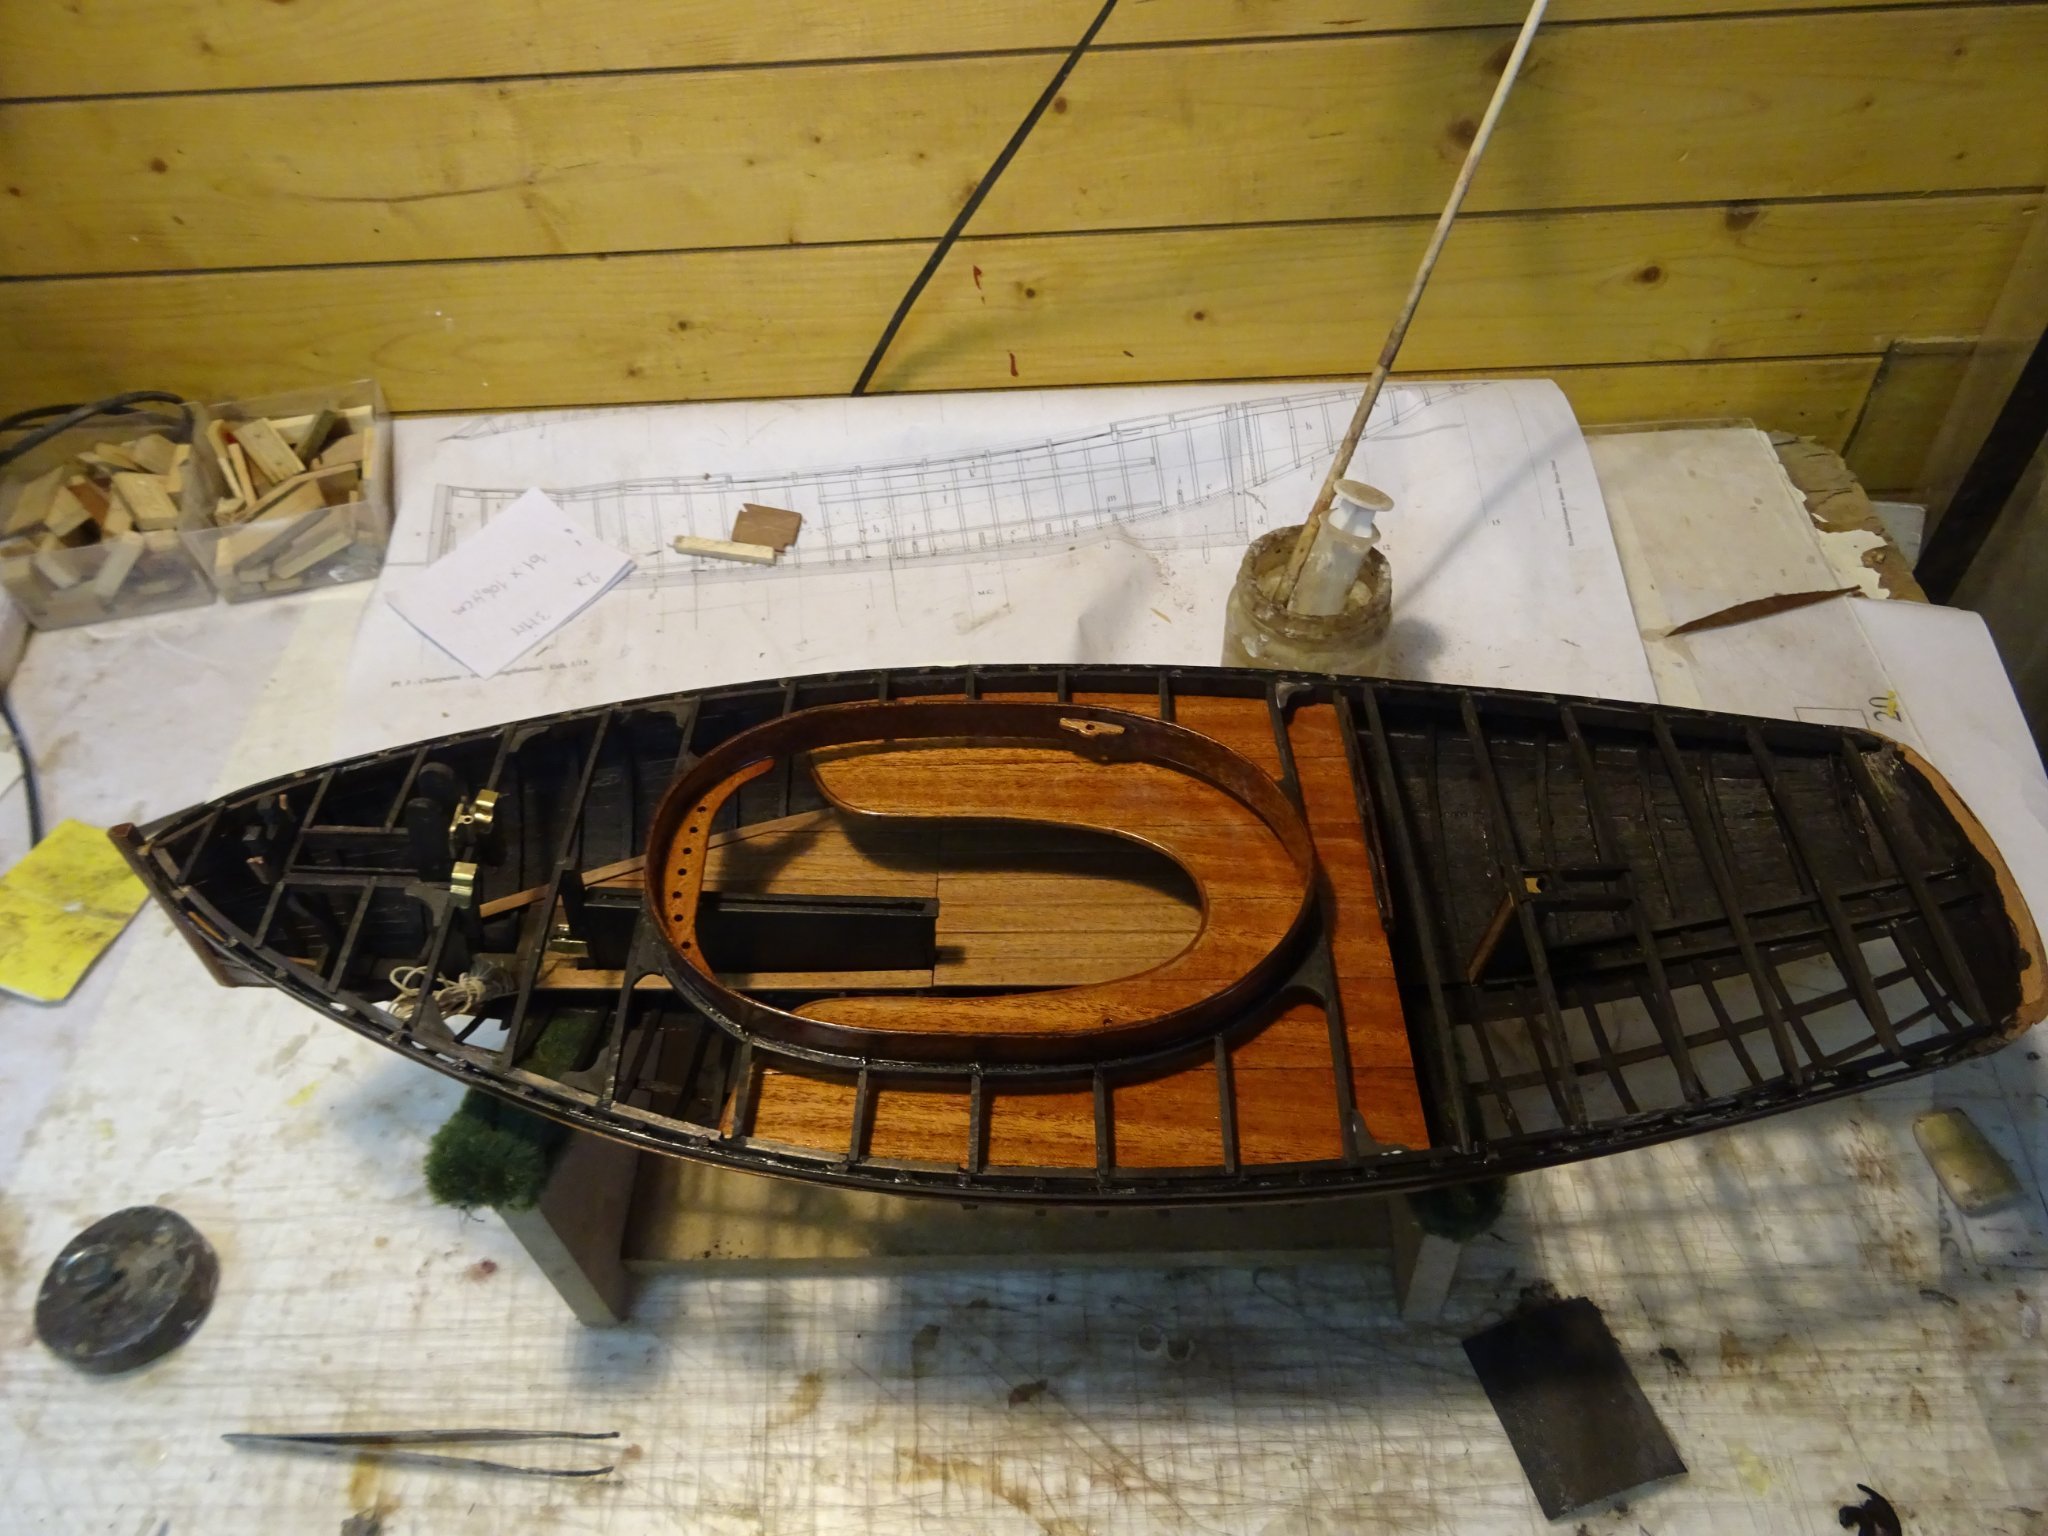
17. Assembly of the prepared sections
My work on the model ended in August with the completion of all structural parts to be built inside the hull.The prepared hull sections can now be finally placed and glued. Before starting with that I stained the deck beam clamp in black.
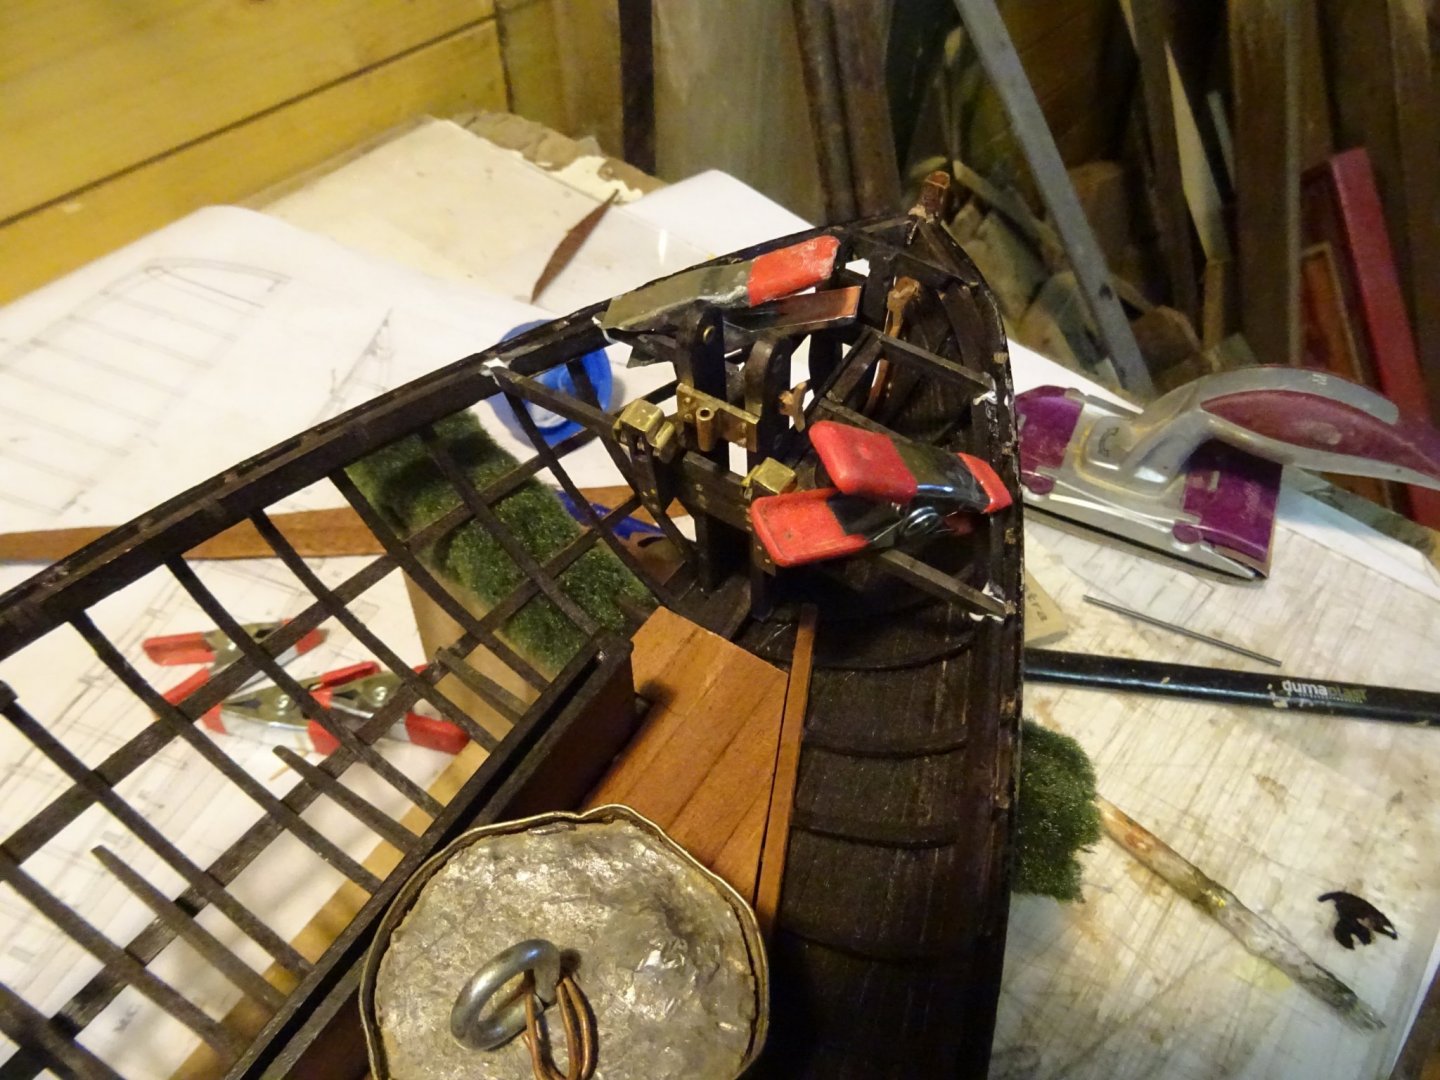
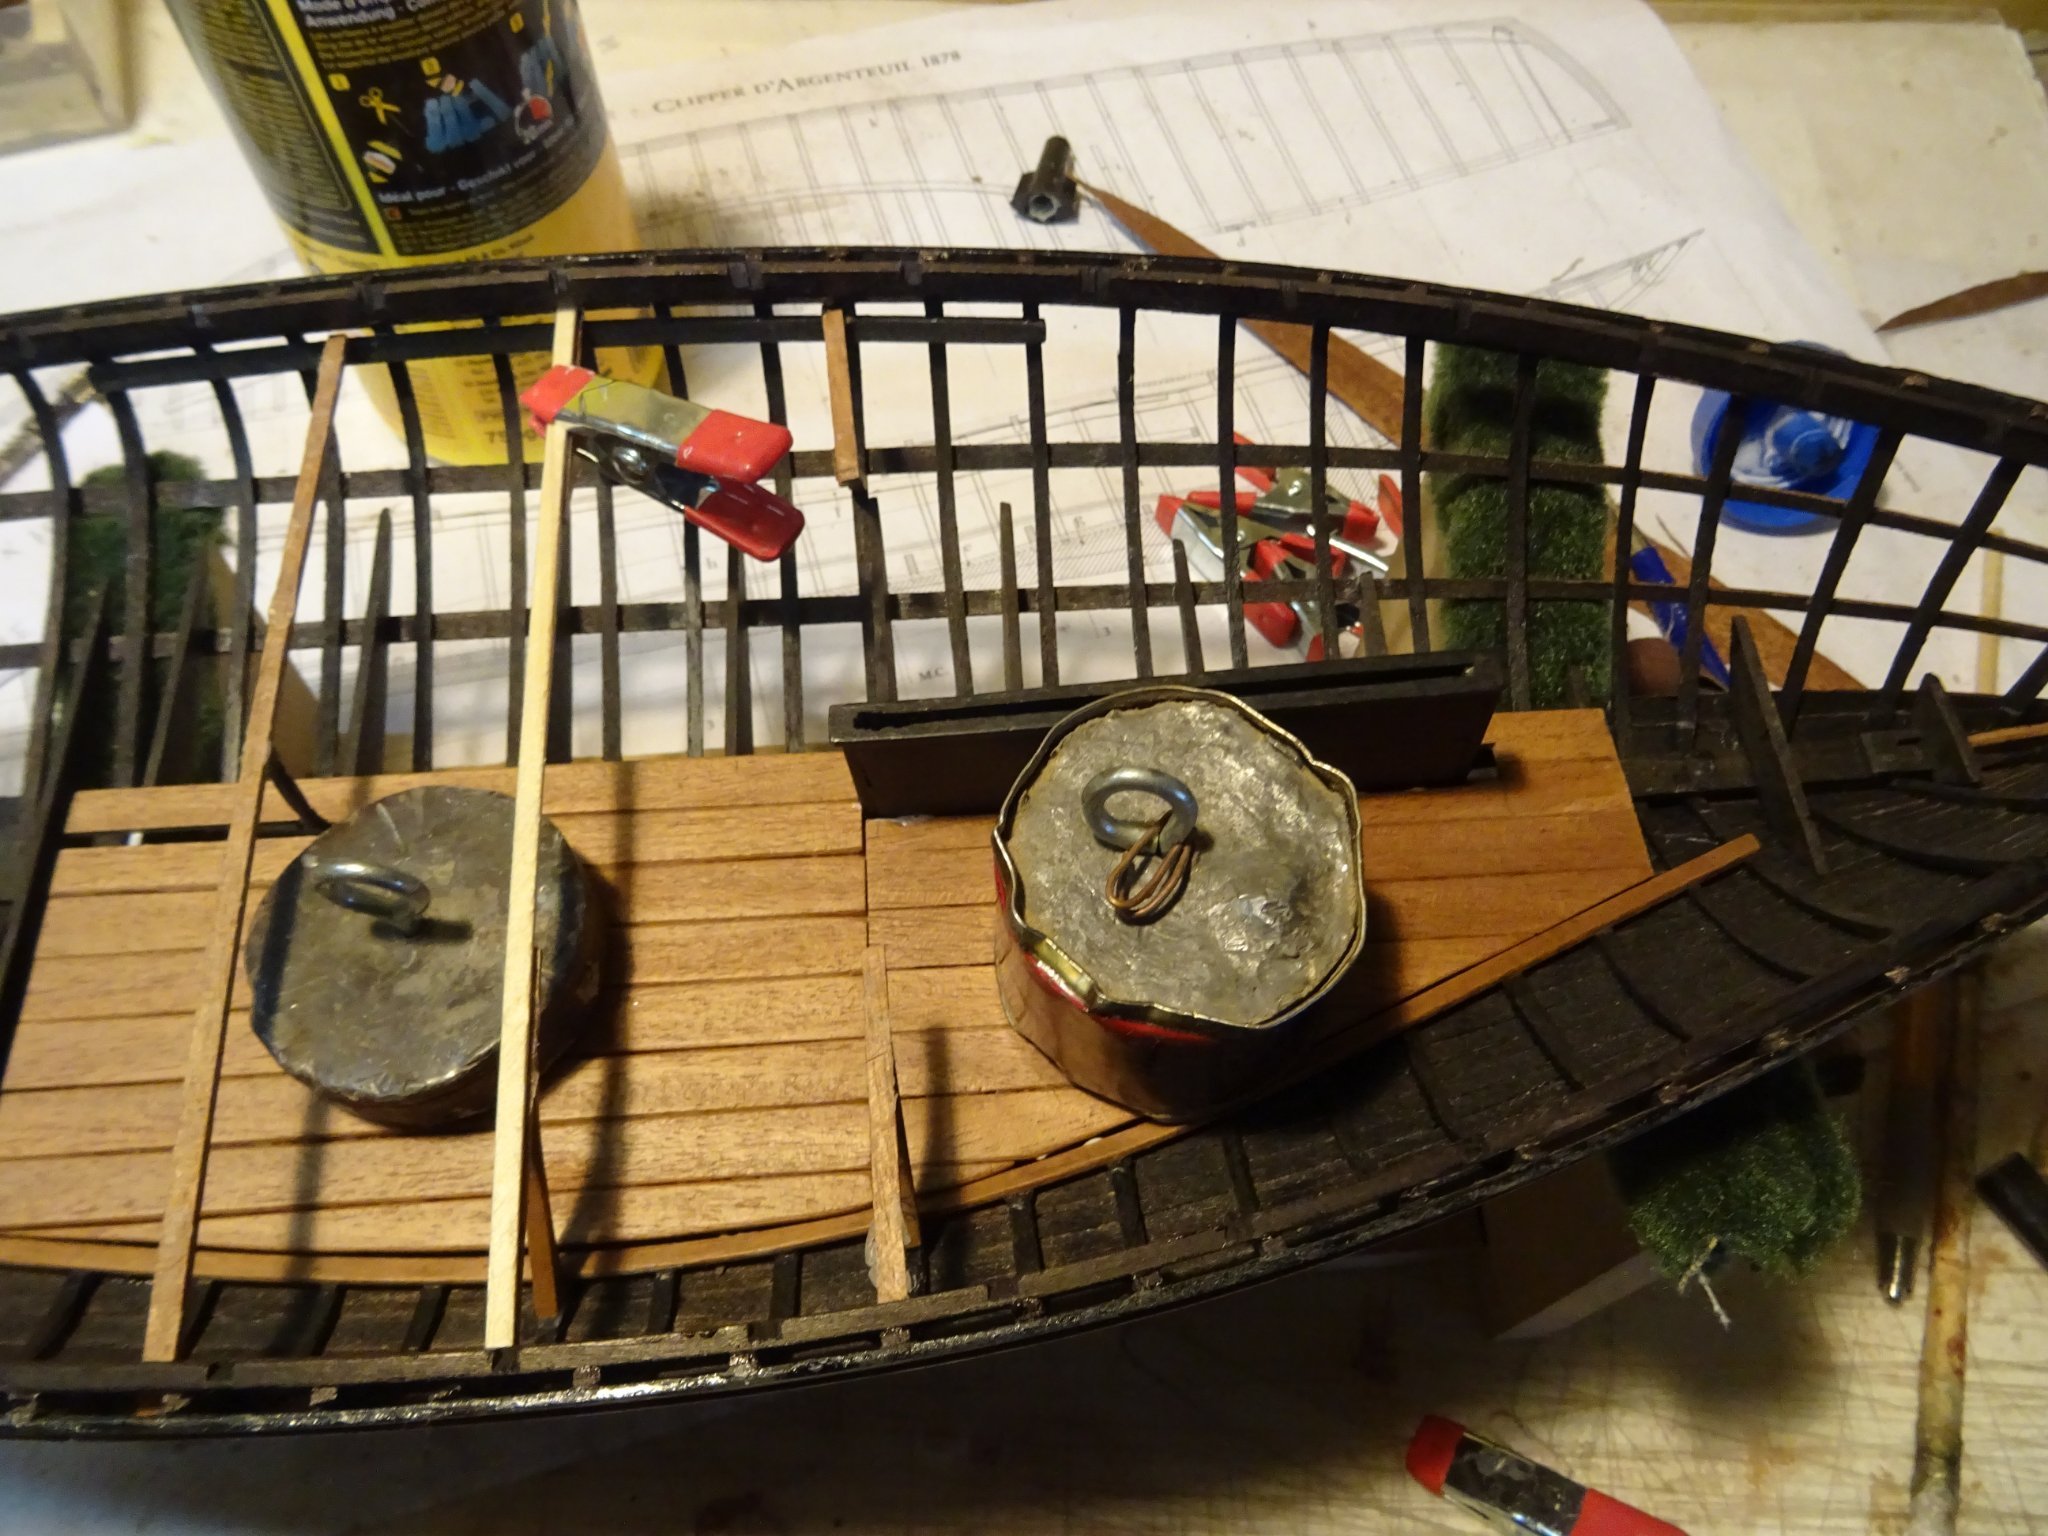
The bottom boards. Some weights to give pressure while the glue is drying.

The center board case.

The foredeck section.
The mast erection installation. Before gluing it into place I splice the mast erection hall yard to the eye because I am afraid that it will be hardly accessible with all the deck beams in position.

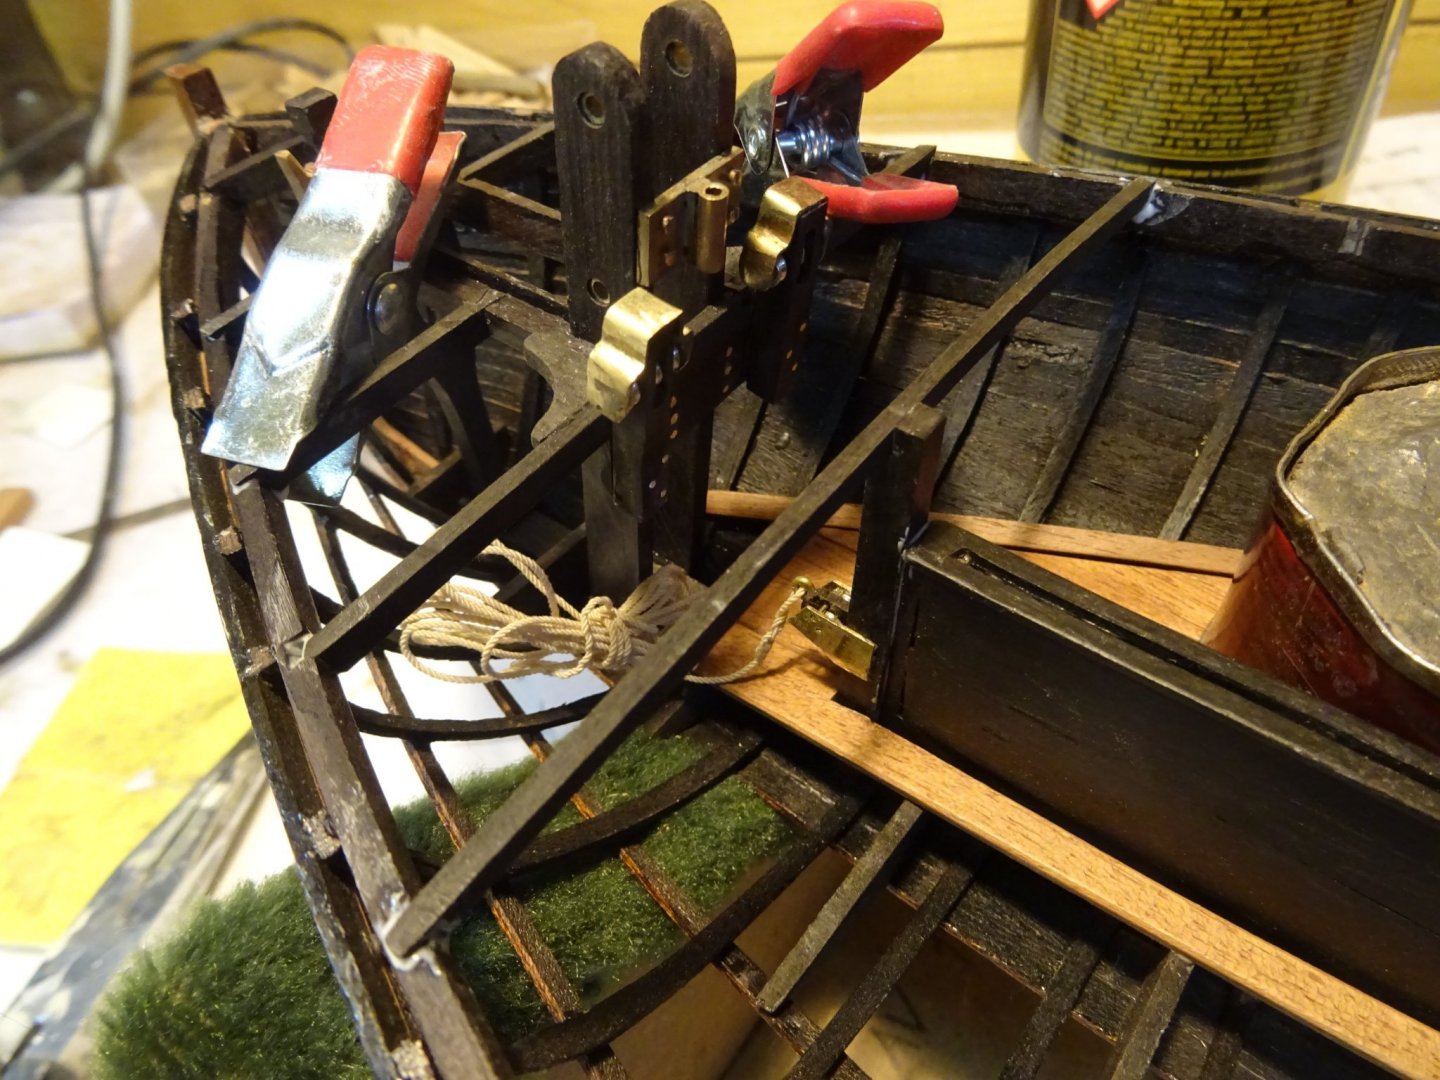
The thwart.

The bulkhead.
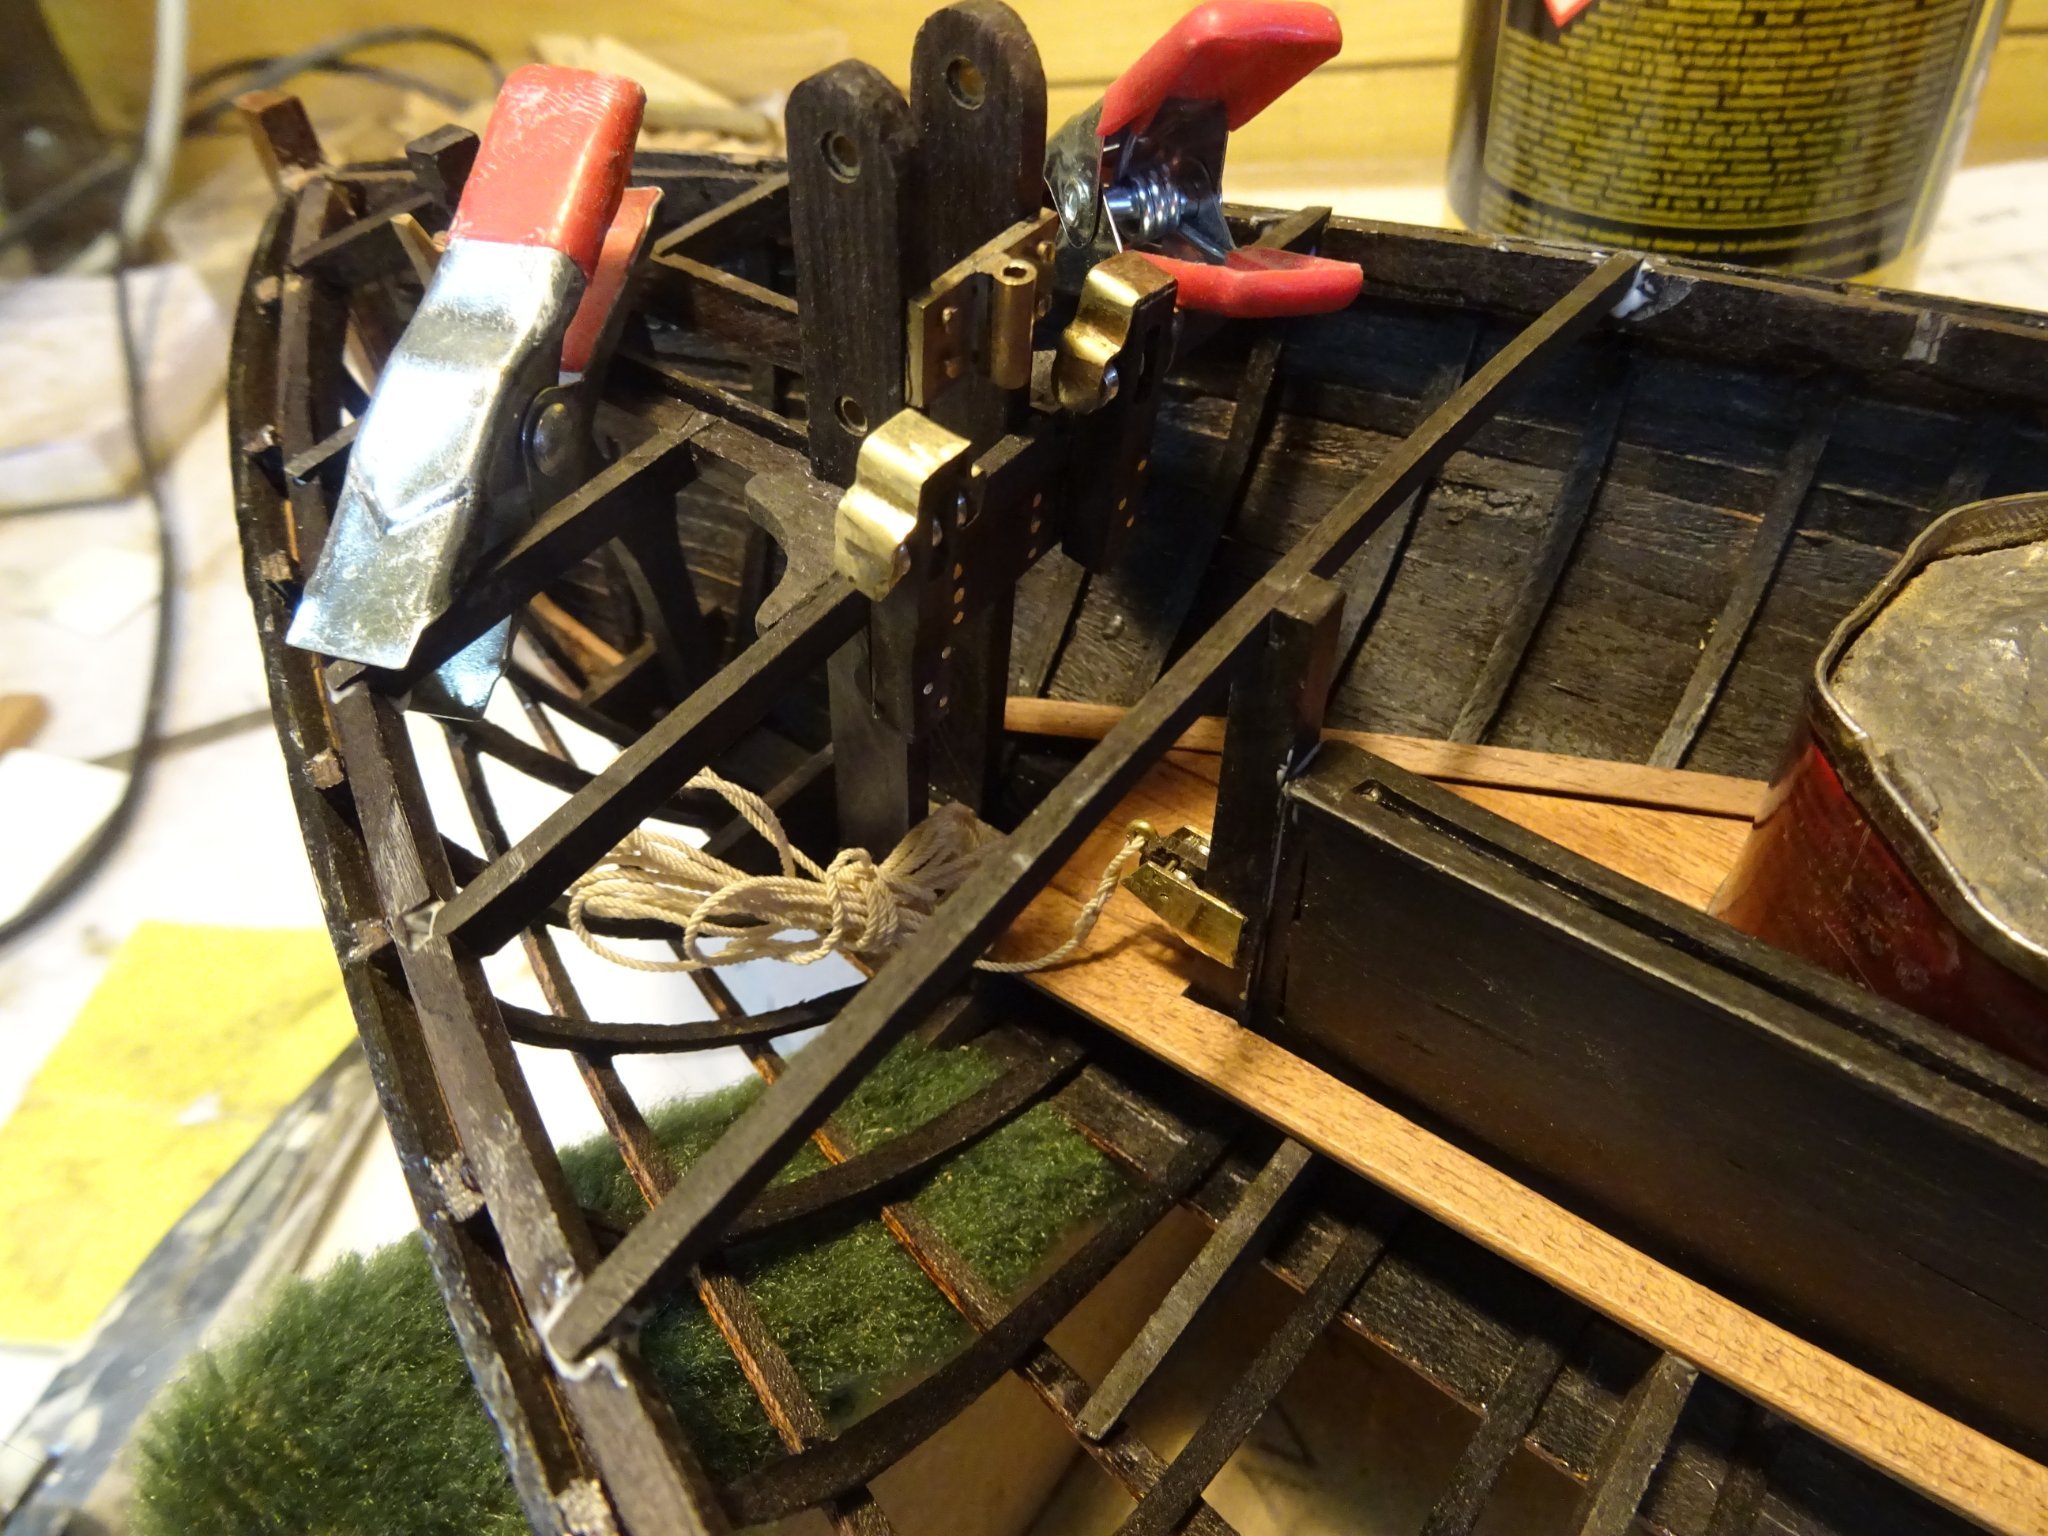
The cockpit coaming and associated deck beams.
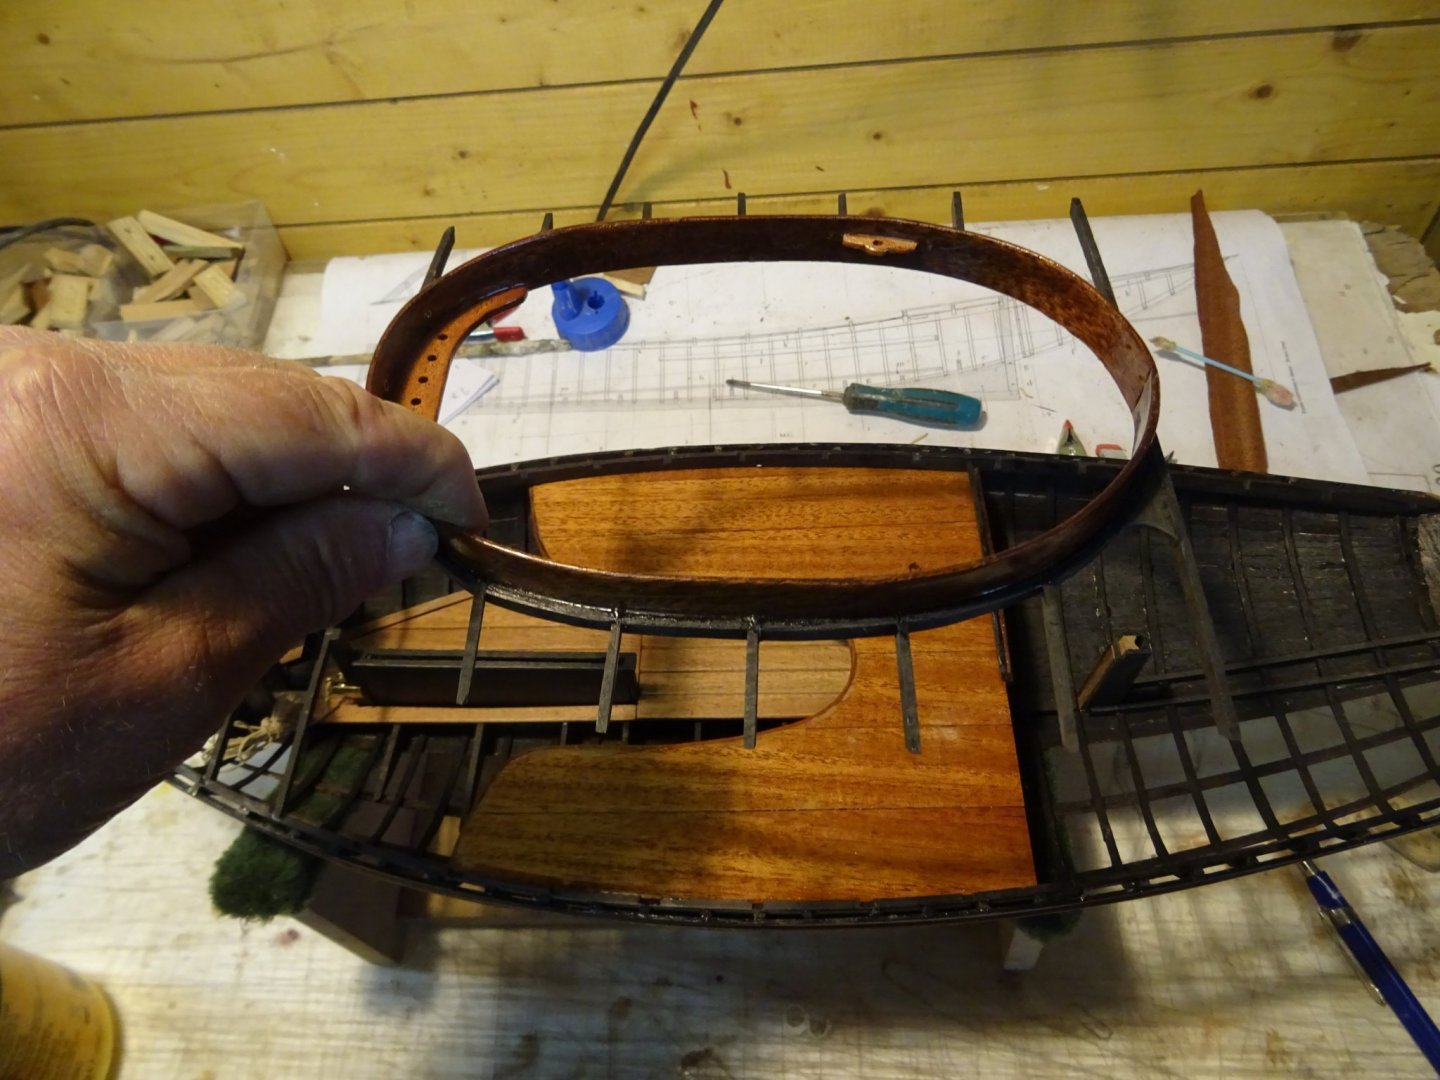

The helm port beams and carlings

And finally the remaining deck beams:


I am working on this again. Hopefully I can go on for a while now. Next job will be laying the deck.
See you soon! -
On 11/14/2021 at 7:13 PM, TBlack said:
Major construction work! Most impressive. Also, the highest compliment when a mature son asks dad for help. And your work on D'Argenteuil
continues to amaze me. You are obviously talented on many different levels.
Tom
On 11/14/2021 at 7:38 PM, Roger Pellett said:This looks like a huge job! Well done.
Thanks Tom and Roger and all who pushed the like button. Yes, it was a huge job, certainly because it was a two man job.
Last week, I finished the floor.
Now I have again some time for modelling. I will try again to give regular updates although it will take some effort to rejoin the routine.
-
All is well with me, Eric, nice of you to inform.
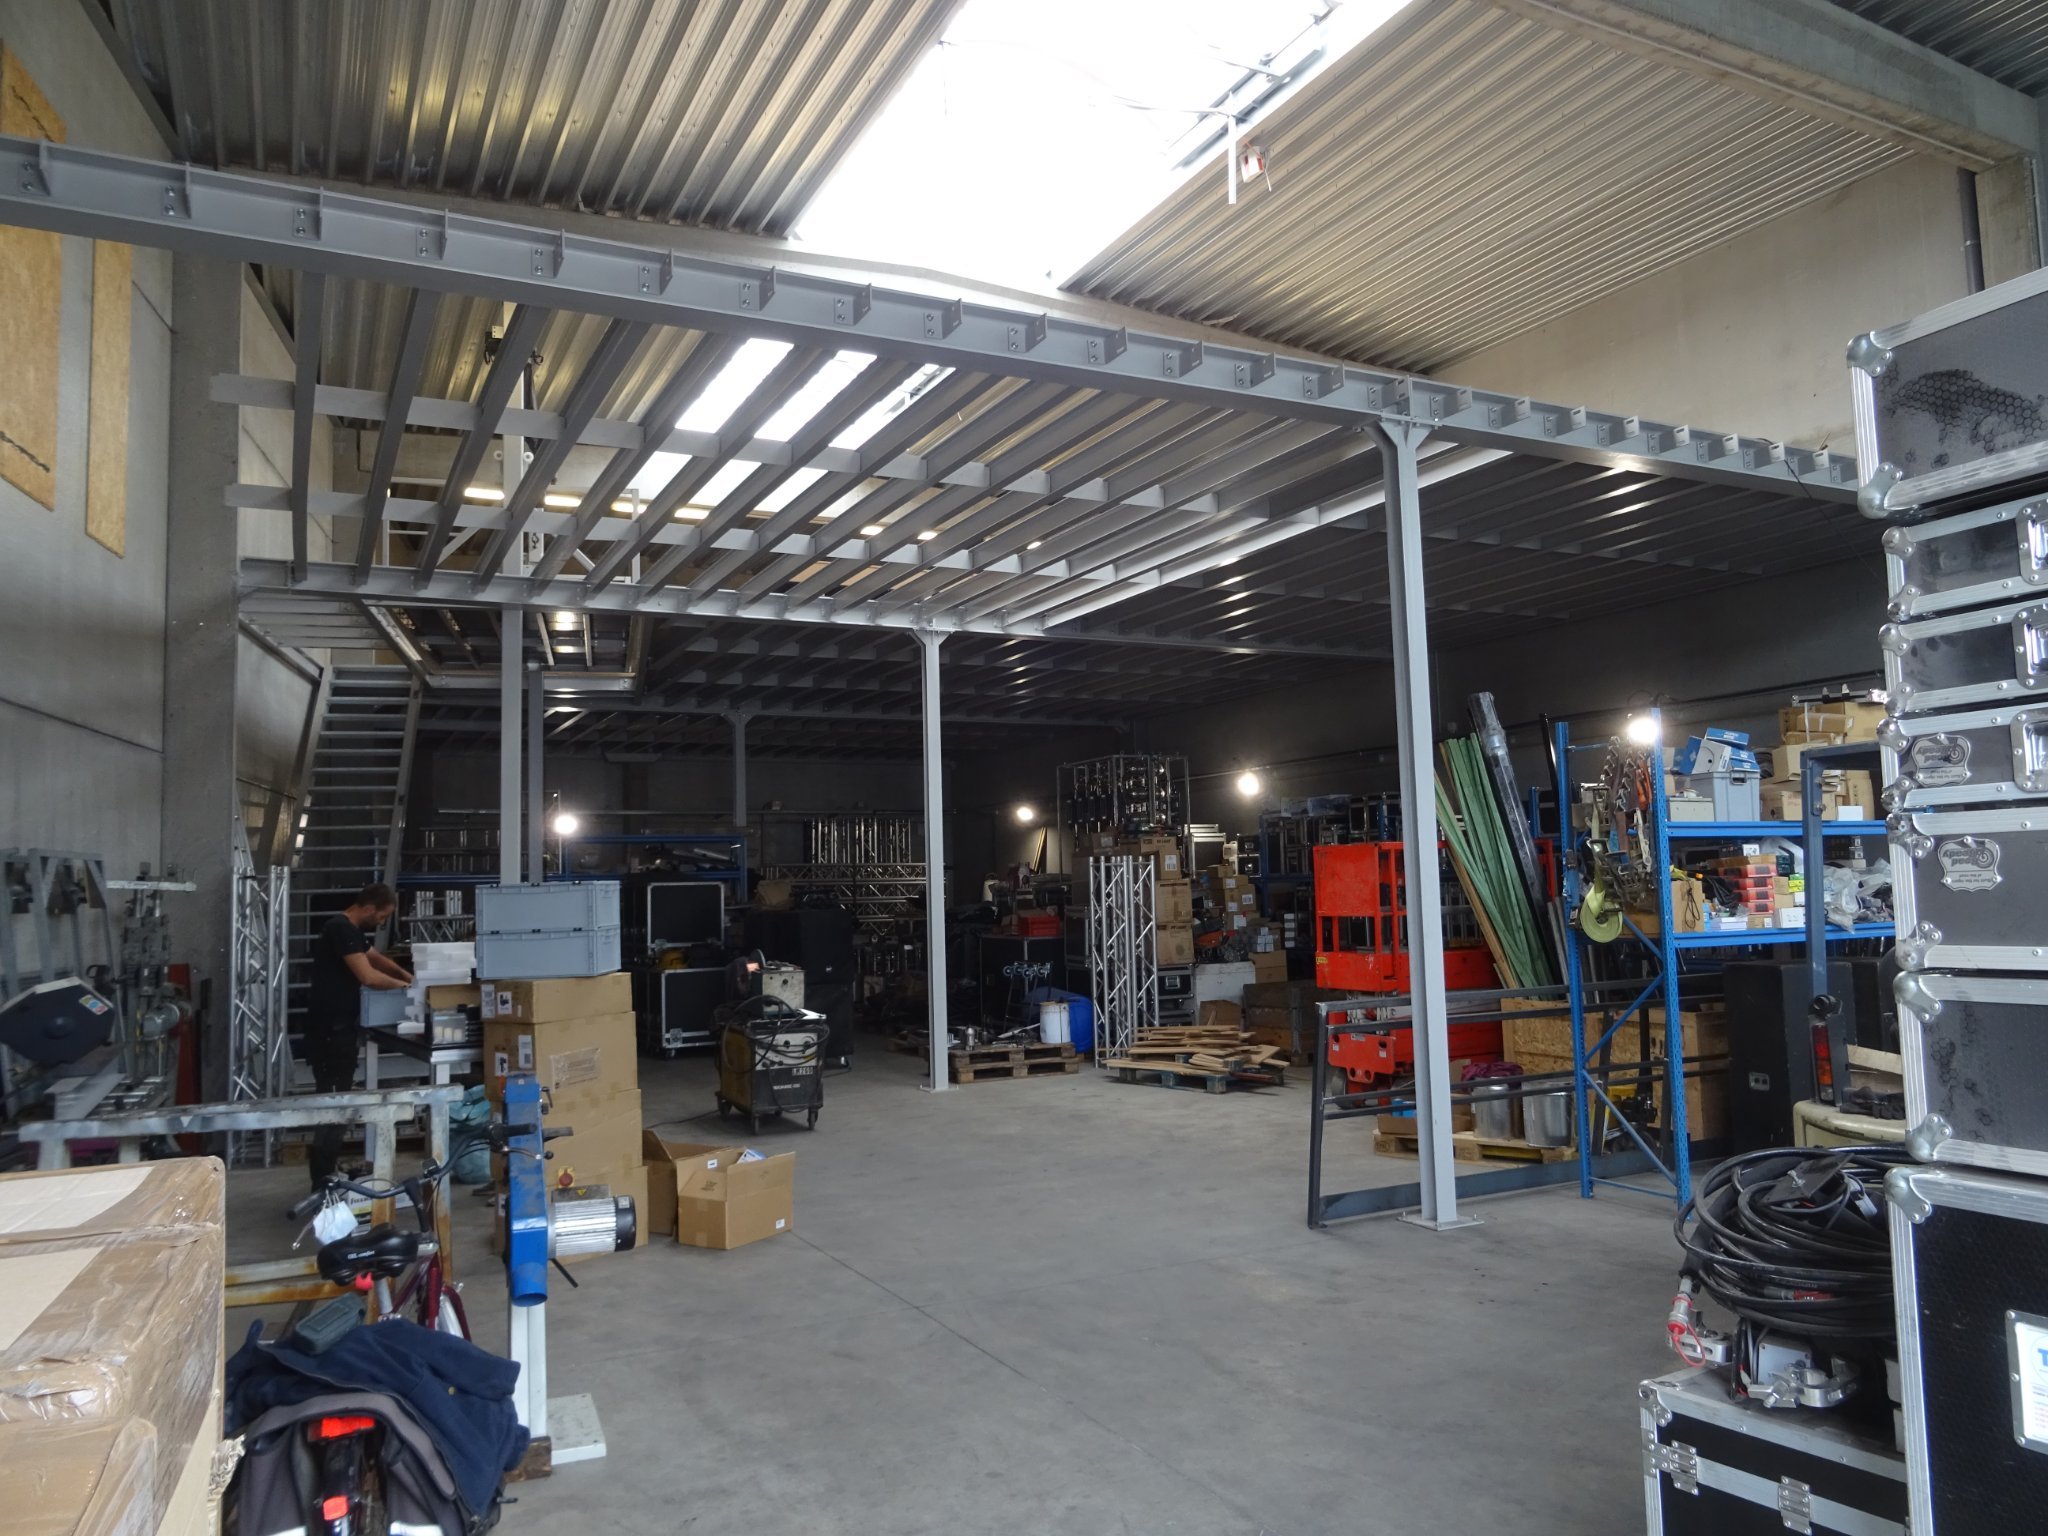
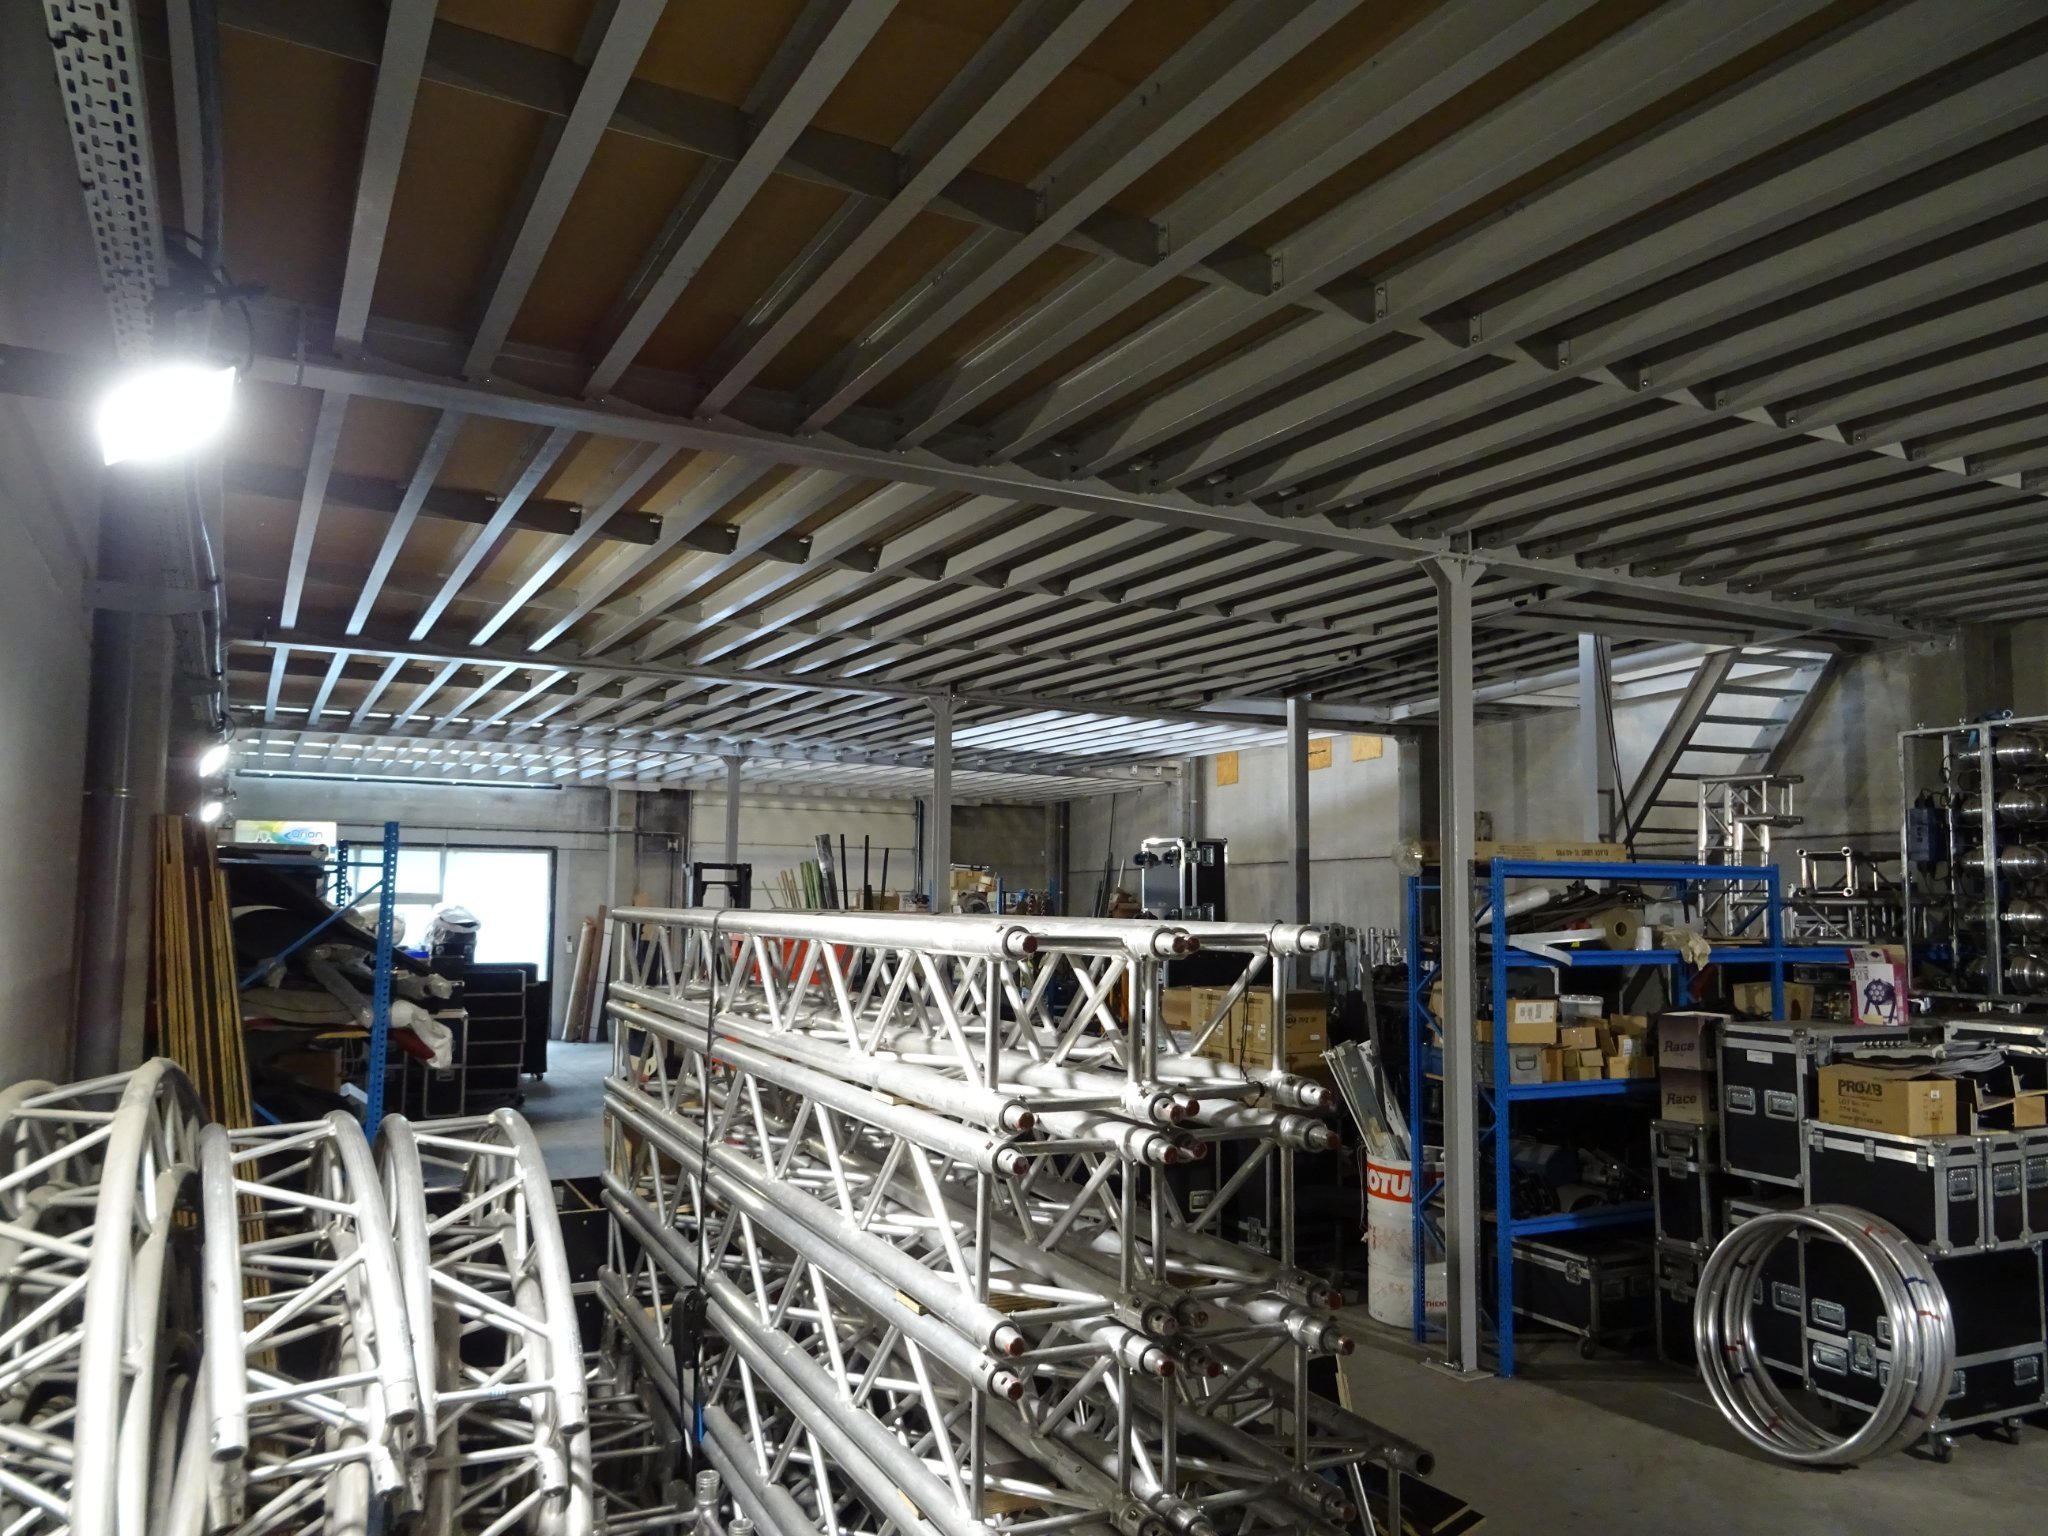
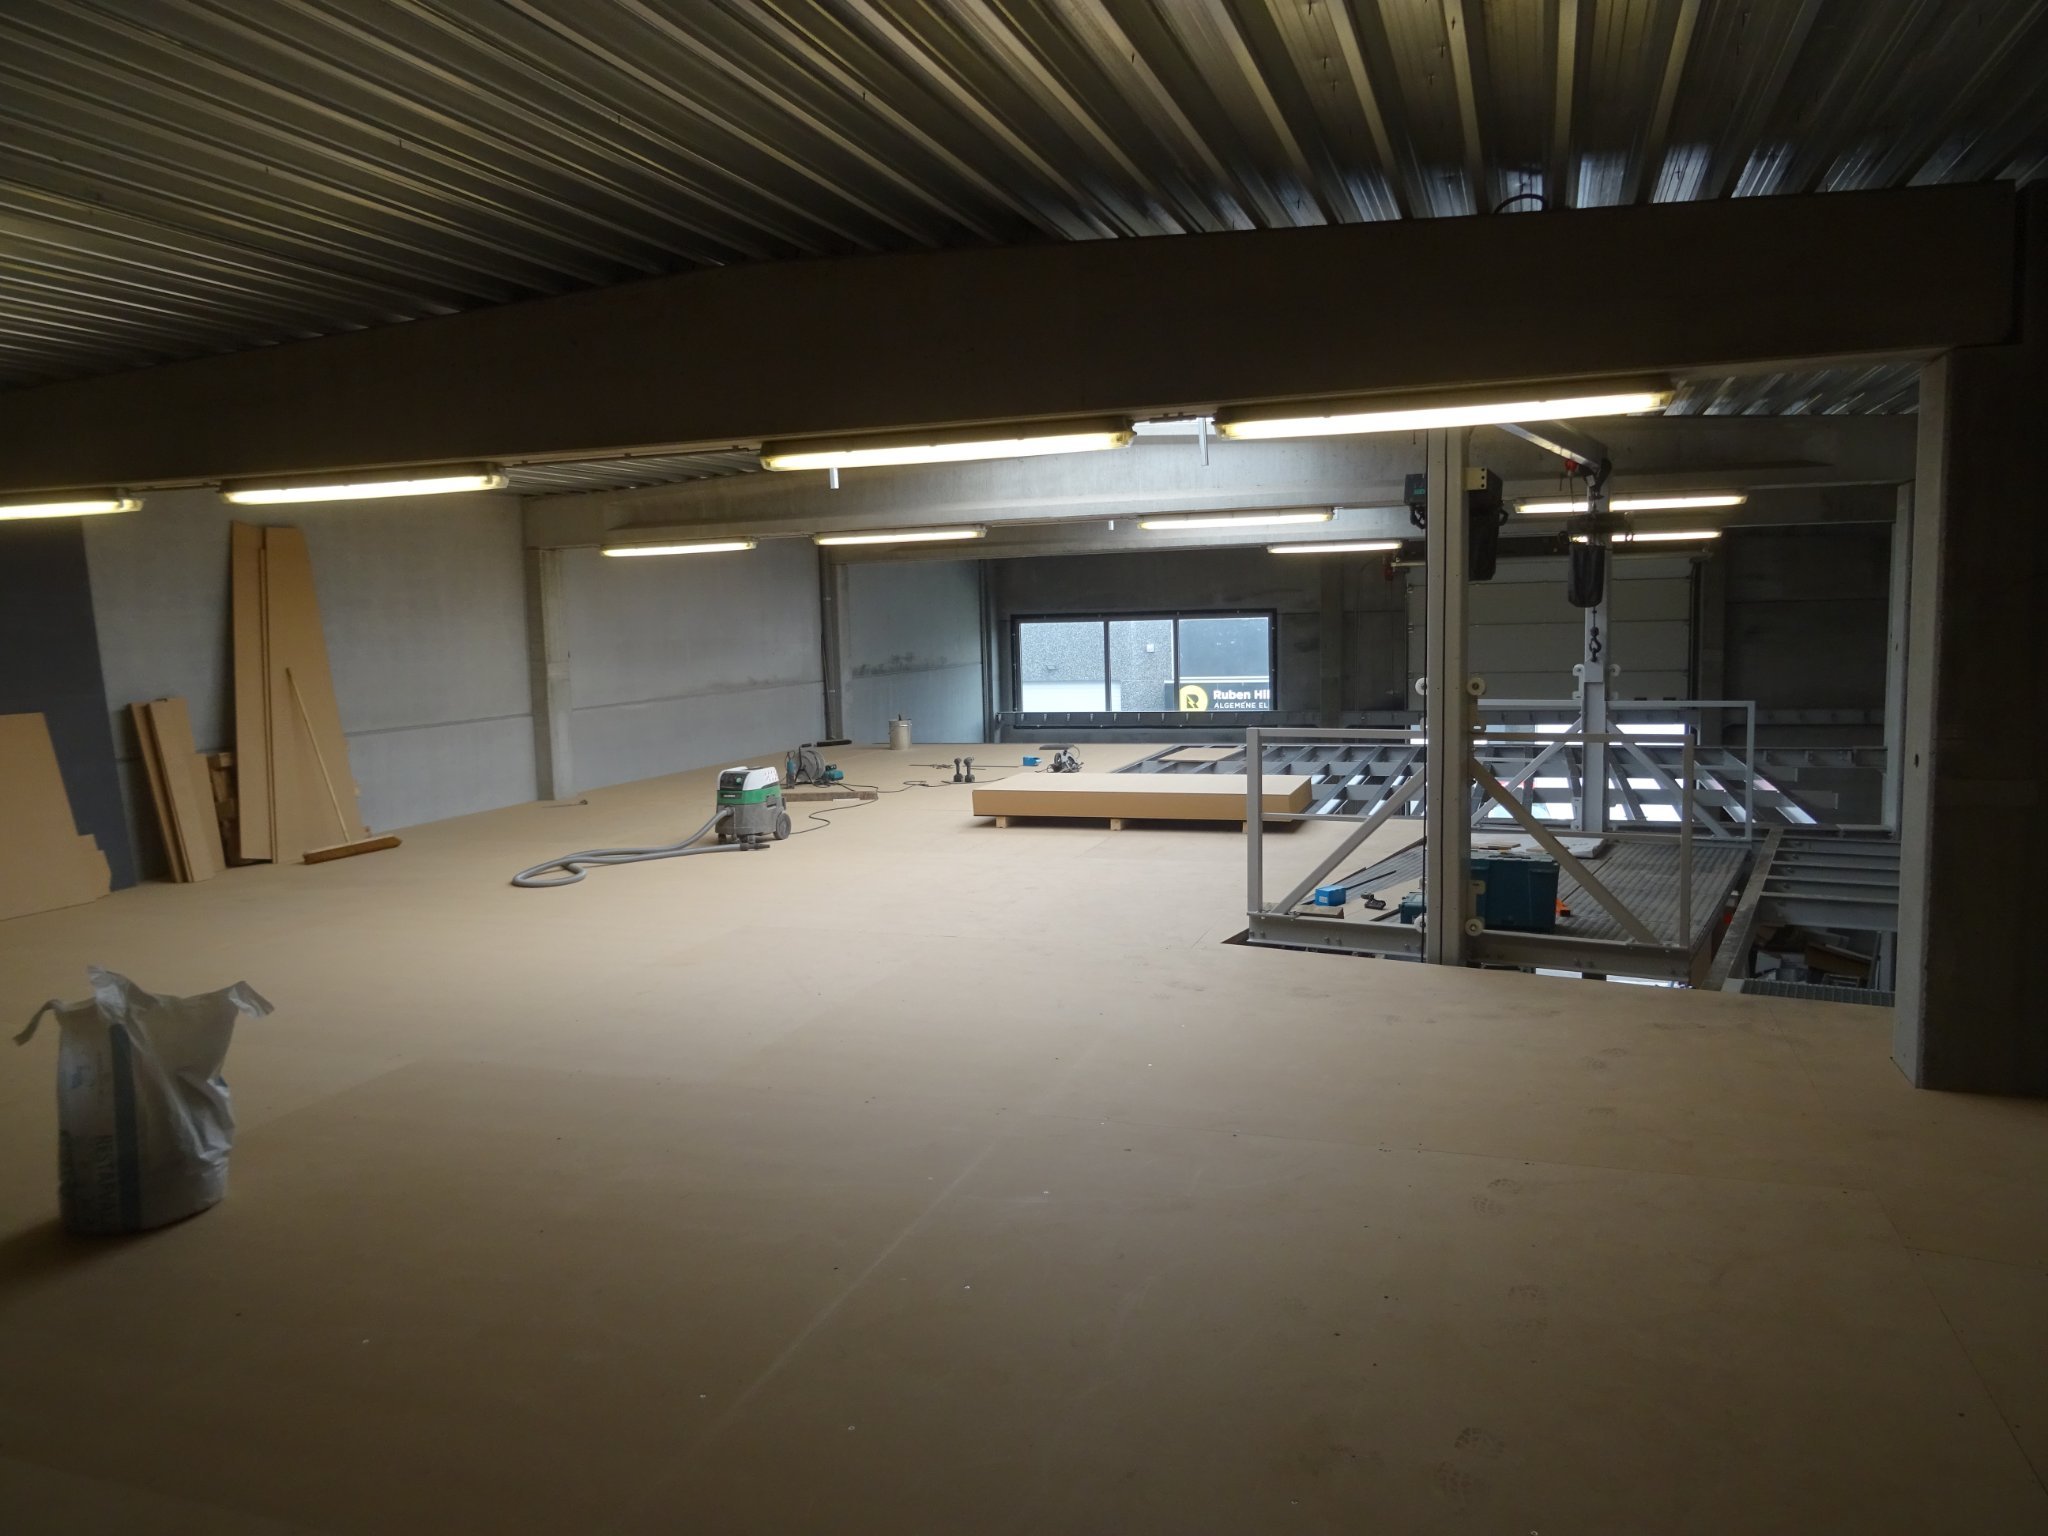
My clipper has been standing untouched for more than two months. Most of my time has gone to another project. My son has a sound and lighting business for major events, festivals, conferences, parties, etc ... He ownes a 300m² warehouse to store his material. In recent years, the warehouse has become too cramped. Due to the covid pandemic, the entire event sector has gone on hold; he wanted to use this time-out to increase the storage capacity of his warehouse. The building has an interior height of nine meters; the plan was to build in a floor at a height of four meters, supported by a system of steel beams.
In order to maintain an income and to be able to pay the investment of the renovation, my son worked temporarily as a freelance maintenance technician for several large companies during the day. In the evenings of the working days he prepared the steel beams: cutting at the correct length, drilling holes where needed, welding flanges, ... During the day it was my job to paint all the prepared beams and during the weekends we both worked together to put them in place.

It's also my job to install the floorboards. I'm about half way through with that. The work was stopped for a few weeks because we had to wait for the next delivery of floorboards. For me this was an opportunity to work in my garden that had been neglected for a long time. On the right of the photo below you can see the freight elevator that we installed.
When the work is finished, storage capacity will have almost doubled. I'm afraid that in a few years there will be too little again.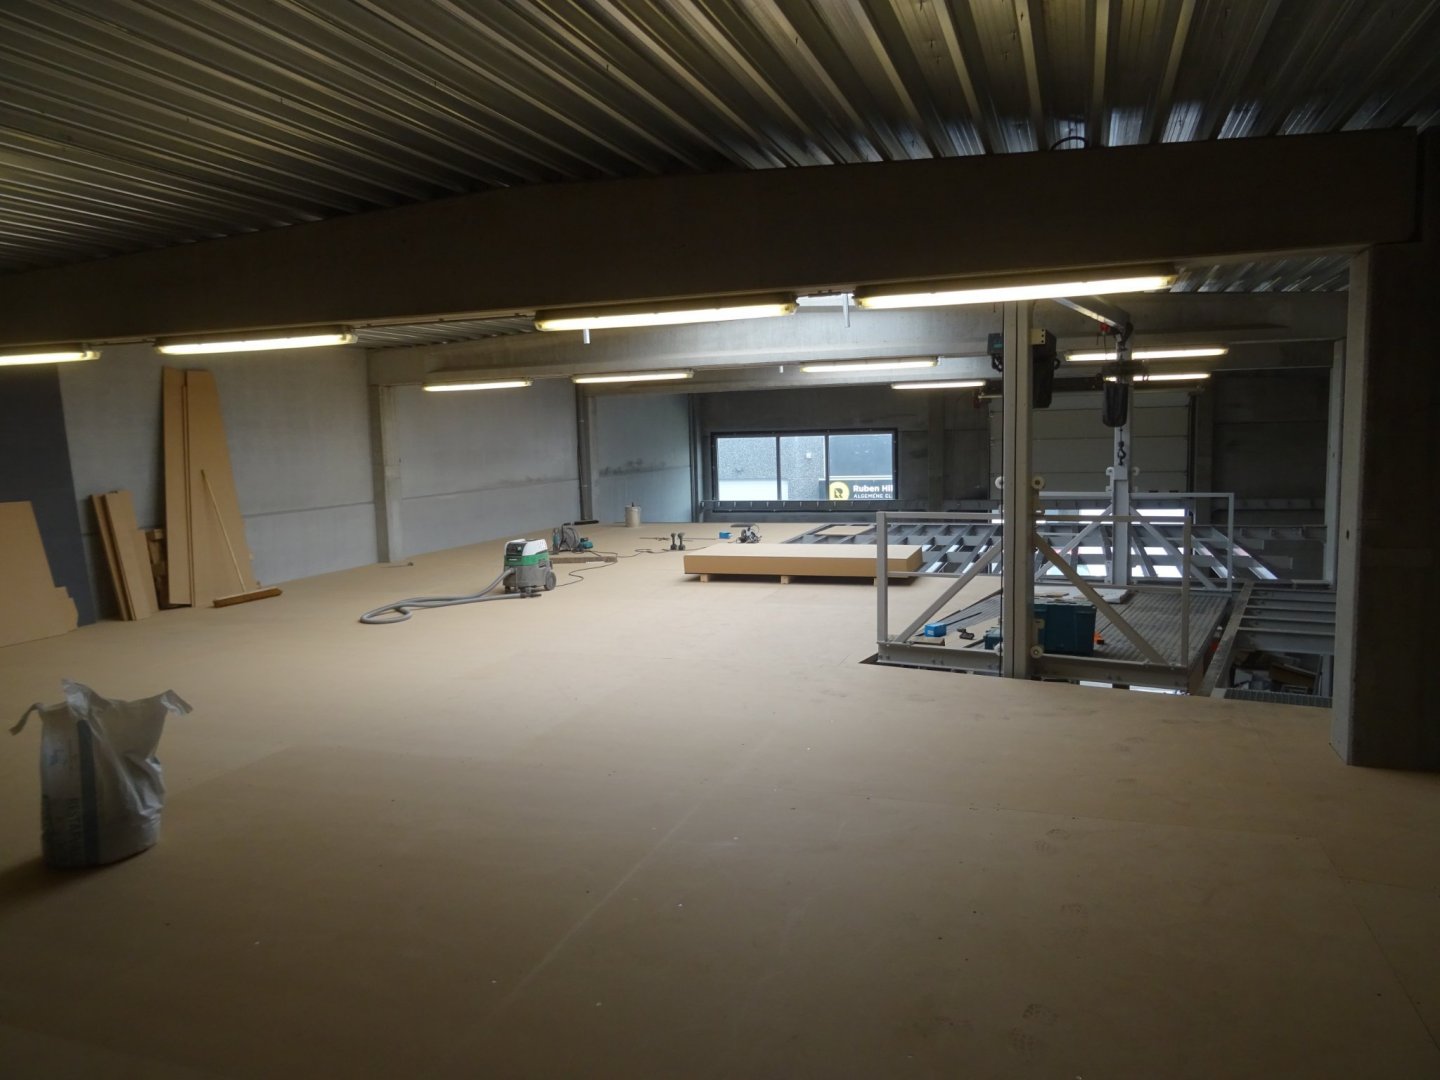
In the meantime, festivals and events have been allowed again (for now anyway). Good news for my son because many orders are coming in again, but bad news for the availability of the alternative storage place where he was allowed to store his material during the change works.
Last week we had our delivery of floorboards so I can complete the work next week. Then I can move on to other important business, such as building my clipper d'Argenteuil.
- Baker, Wintergreen, GrandpaPhil and 4 others
-
5
-
 1
1
-
1
-
Very well done, Tom. you are absolutely ready to build an entire ship from scratch.
- mtaylor and usedtosail
-
2
-
Very nice planking job, Cyclops. You are building just the kind of model that I like. I sign in to follow.
- mtaylor, shipman and USS CYCLOPS
-
3
-
-
Tom, that looks very nice. It is immediately a completely different view with the drum head on top. Seeing your work, I am very much looking forward to starting my own capstan... when I have some more free time.
- mtaylor and usedtosail
-
2


Safety first, second and third. What to never forget.
in Modeling tools and Workshop Equipment
Posted
I suddenly feel very brave: soon I'm going to spend a day in my workshop full of murderers who all want to get to me.😕