


Chuck
-
Posts
9,637 -
Joined
-
Last visited
Content Type
Profiles
Forums
Gallery
Events
Everything posted by Chuck
-
 Try not to look at it, LOL Seriously wont be an issue at all
 -
Thats why i posted it. Let us know how it turns out.
-
Just the front half or 60% of the stem gets tapered. I have created a straight taper.
-
Well that is a loaded question. I believe I mentioned that earlier in this topic. I only have the colors that my clients insisted on. I havent gone through the process of picking my own from the Gutermann line up. They insist on #265 (a bit too orange for my tastes) and #2899 (a bit too greenish) for running rigging. Any dark dark brown will do for standing rigging. Not black. For my new cotton/poly ULTRA blend I custom selected some pantone colors to give the factory and they made it special for me. The running rigging is a bit lighter and less orange than the MARA example. I tried to match a natural hemp color. I am sure there are better colors that you can select from other than the two I have been directed to use by my clients. Svein....If someone else wants to do hat for me and upload it here that would be great. But I just dont have the time. It would be very helpful actually. Chuck
-
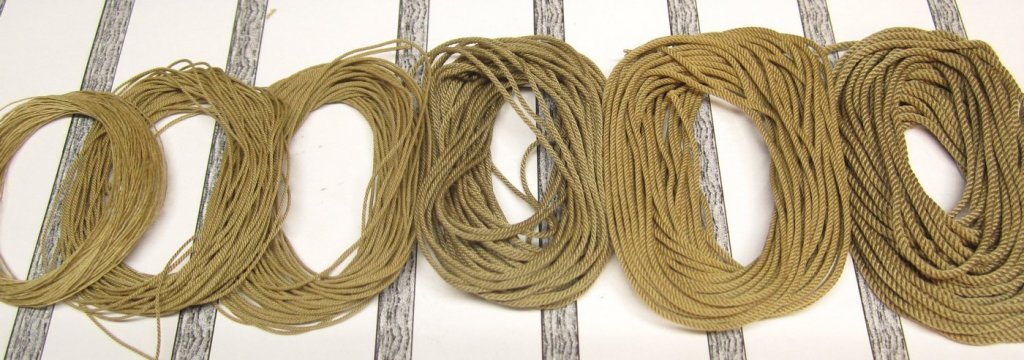
I do want to encourage everyone to take up the skill of making their own rope. Hopefully I will have more ropewalks in stock soon. I am biased but believe the type of manul ropewalk like I offer is the best and quickest way to make it. But whatever ropewalk you choose, I want to try and make it easier for folks. Since I have been making rope available for a few customers on a custom basis using Mara for several years now, I would like to share the recipe for making the various sizes I offer this material in to my clients. Now the sizes you end up with may vary a bit depending on your technique and how tightly or loosely you lay up the rope. But as you can see from above, a tightly laid up rope is much more realistic. So when using MARA try and give more twists to the initial strands than you think. And then you will be able to twist those strands together more tightly in the opposite direction to make better looking rope. So here is my recipe using MARA for the sizes I offer. TPS - threads per strand. S - Number of strands ....or hooks on the ropewalk. .008 rope......mara 120......1 TPS x 3S very tightly laid up .012 rope.......mara 100.......1 TPS x 3S very tightly laid up .018 rope......mara 100.........1 TPS x 4S .025 rope......mara 70.........1 TPS x 4S .035 rope......mara 30.........1 TPS x 4S .045 rope......mara 30...........2 TPS x 3S .055 rope......mara 30.........2 TPS x 4S .065 rope......mara 30.........3 TPS x 4S .080 rope......mara 30..........4 TPS x 4S .095 rope.......mara 30.........5 TPS x 4S Your results may vary as I said. BUT after you lay up your rope, make sure you tie a knot on each end. Poly wants to unravel. Remember Morope!!! Its crazy. Then get yourself a toaster oven....or use a real oven. Wind your rope around a metal sheave or pully. I have these!!!! Garage door pulleys. They work fantastic. Then place these in your toaster oven at 350 degrees for no more than 5 minutes. If you approach 400 degrees yo will make a mess. The poly will melt. After much trial and error this is the best temperature......also, no longer than 5 minutes because it will also change the way the rope looks and feels. Let it cool off on a rack. Now you can cut the ends with a sharp blade without any worry that it will unravel. This recipe and process makes perfect rope out of 100% polyester like Guterman MARA. The best place to buy it in the USA....is Waywak https://www.wawak.com/Thread/Thread-By-Brand/Gutermann/ Gutermann also makes other sizes, like MARA 50. A great size for making rope. But this must be bought from the MFG in large amounts. I have a bunch of this and it changes the recipe above. But the regular stuff you guys can get from Waywak use the recipe I have given. Hope this helps.........start making your own rope. Its rewarding and FUN!!!!!! Untill you have to make 1000 feet per day for seven days every week.
- 115 replies
-
- 16
-

-
Take the two weeks....that is your answer. No quick fix here. Those pieces need to be positioned correctly. You need to place the filler spacers in and keep them in as guides while you position the sills and top pieces.
-
Jeff, Yes you should remove that char. Everything looks good. But make sure the tops of those stern fillers are all even across the transom.... The same is true with the openings for the windows. They look a bit off. This will be problematic later. Did you use the spacers I provided? The outside window openings look a bit short. The spacers are the same size as the actual windows. If they dont fit correctly then the windows wont fit. Notice how the tops and bottoms of the stern window spacers are aligned in a smooth curve. Chuck
-
That wood is awful.....some of the worst I have seen put in a kit. They should absolutely replace it all. Walnut is a tough wood to use and its very dark. Maybe consider changing to another wood....lighter perhaps or even cherry which is a bit dark like walnut. Chuck
-
https://modelshipworld.com/forum/98-planking-downloads-and-tutorials-and-videos/ Its available in the top menu under Modeling Techniques as well. There are also some discussions and topics on this same techniques page. Browse through and enjoy. I am slowly creating focused “techniques” areas on the common subjects of ship modeling expertise. So far two are completed. Planking and rope making. I have moved the more robust and educational topics on each subject along with any downloads, videos etc. to make them easier to find.....hopefully. more will follow. Just have to decide on the next one. any suggestions? Chuck
- 8 replies
-
- 13
-
-
I am sure you couldnt tell them apart if my model was right next to yours. Wonderful work.
- 263 replies
-
- 3
-
-
- Medway Longboat
- Syren Ship Model Company
- (and 1 more)
-
Ryland that looks fantastic. The cedar really looks wonderful and your careful paintwork is what highlights that. You are in the home stretch now.
- 263 replies
-
- 3
-
-
- Medway Longboat
- Syren Ship Model Company
- (and 1 more)
-
Looks very good and its a tricky part of any model to make. Well done!! Chuck
-
Very nice....That will save you a ton of grief later on. Bollards look good too!!!!
-
That looks really good. You could probably remove the lower molding and just place it higher. As long as the plank joint doesnt show. That would close up that space a bit. Chuck
- 221 replies
-
- 1
-
-
- queen anne barge
- Syren Ship Model Company
- (and 1 more)
-
Start a build log and with everyone's help I am sure it will turn out just fine. Chuck
-
I would read through this log.... But keep in mind that you bought what I labeled as an advanced kit. Primarily for the planking. I have said it many times....that kit is not a beginner project at all. But if you must, this is the best place to start. Although it is of my larger design but the same principles are used.
-
HMCSS Victoria 1855 by BANYAN - 1:72
Chuck replied to BANYAN's topic in - Build logs for subjects built 1851 - 1900
Pat she looks great. Its really coming together.- 993 replies
-
- 5
-
-
- gun dispatch vessel
- victoria
- (and 2 more)
-
Looks very good. I bet you are glad to have that all done.
-
That looks excellent. It is shaping up to be an excellent model. Also check out the few other logs that have started chapter 3. There are some really good discussions in those that will certainly help you out. Chuck
- 99 replies
-
- 3
-
-
- winchelsea
- Syren Ship Model Company
- (and 1 more)
-
Actually if you could lower the center window fillers a bit. They are both too high. This will cause you grief later on. They should be level with the ones next to it. Otherwise its looking great. Chuck
-
I have never seen red coamings before on any contemporary models. Thats interesting. Most often they are painted black or left natural. Chuck
- 1,784 replies
-
- 1
-
-
- winchelsea
- Syren Ship Model Company
- (and 1 more)
-
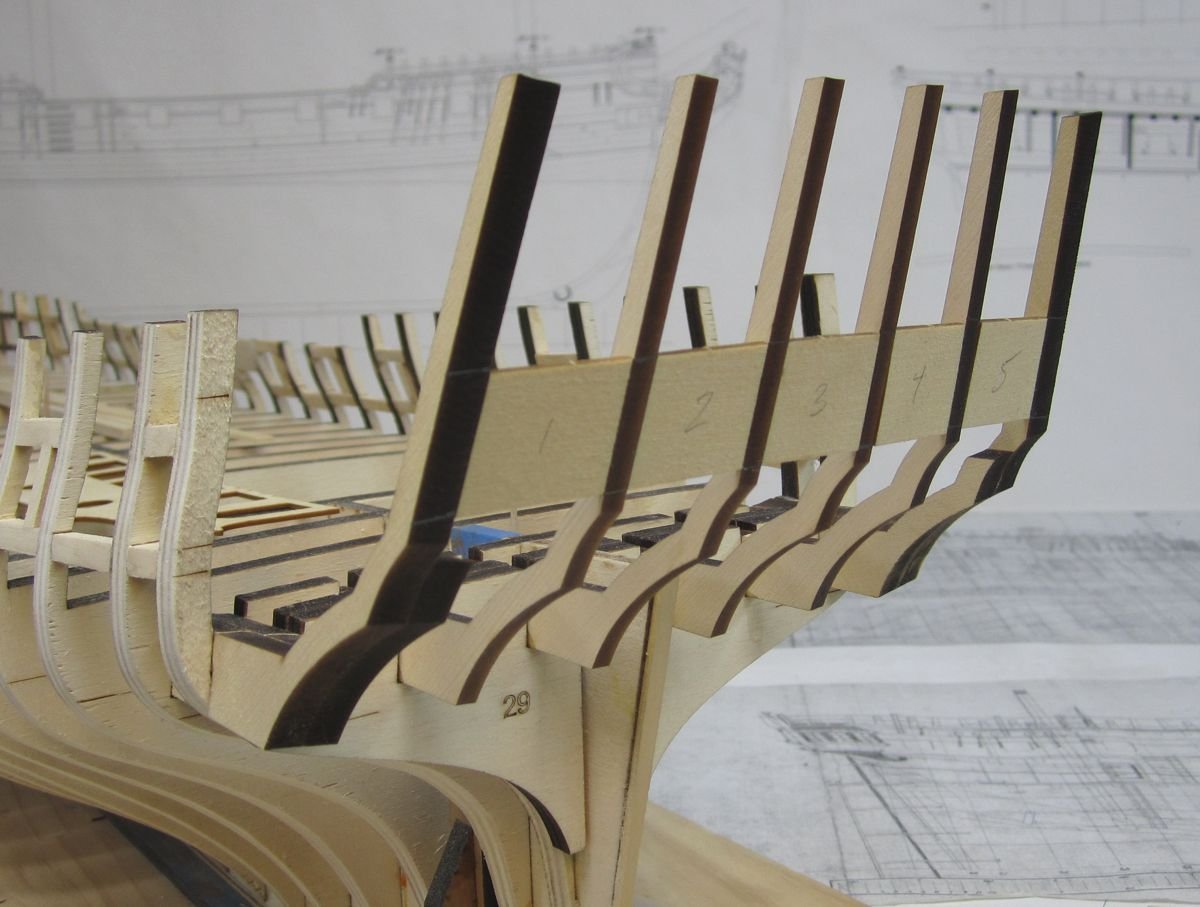
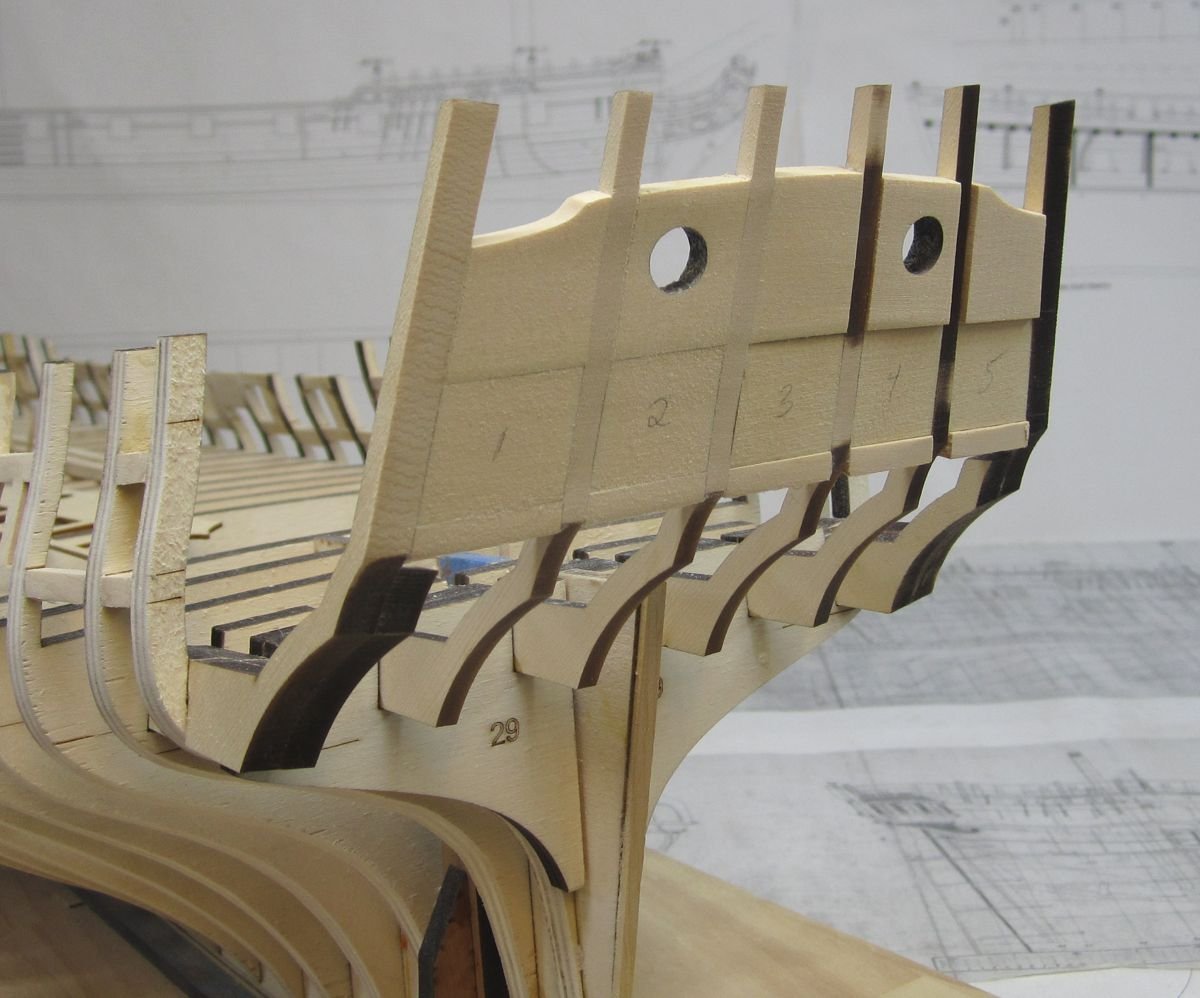
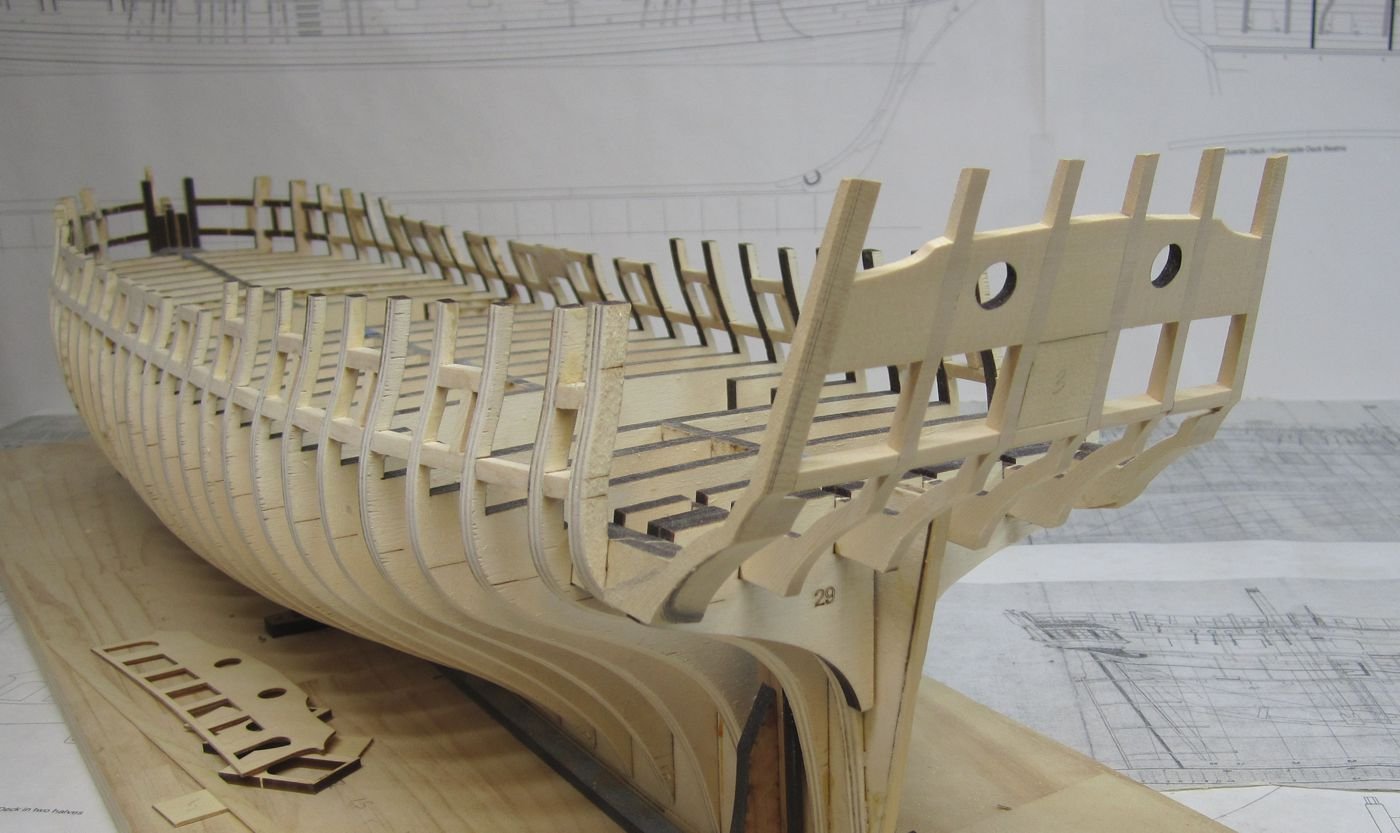
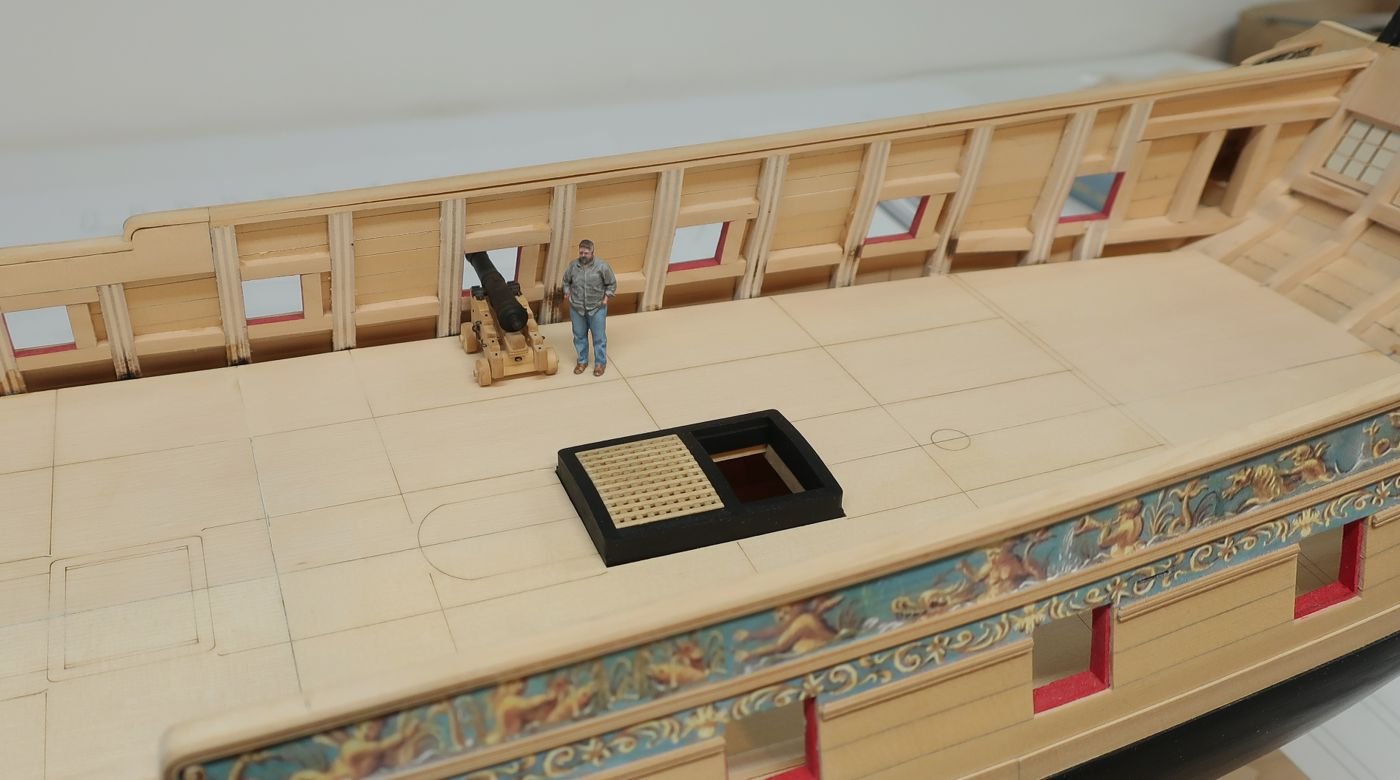
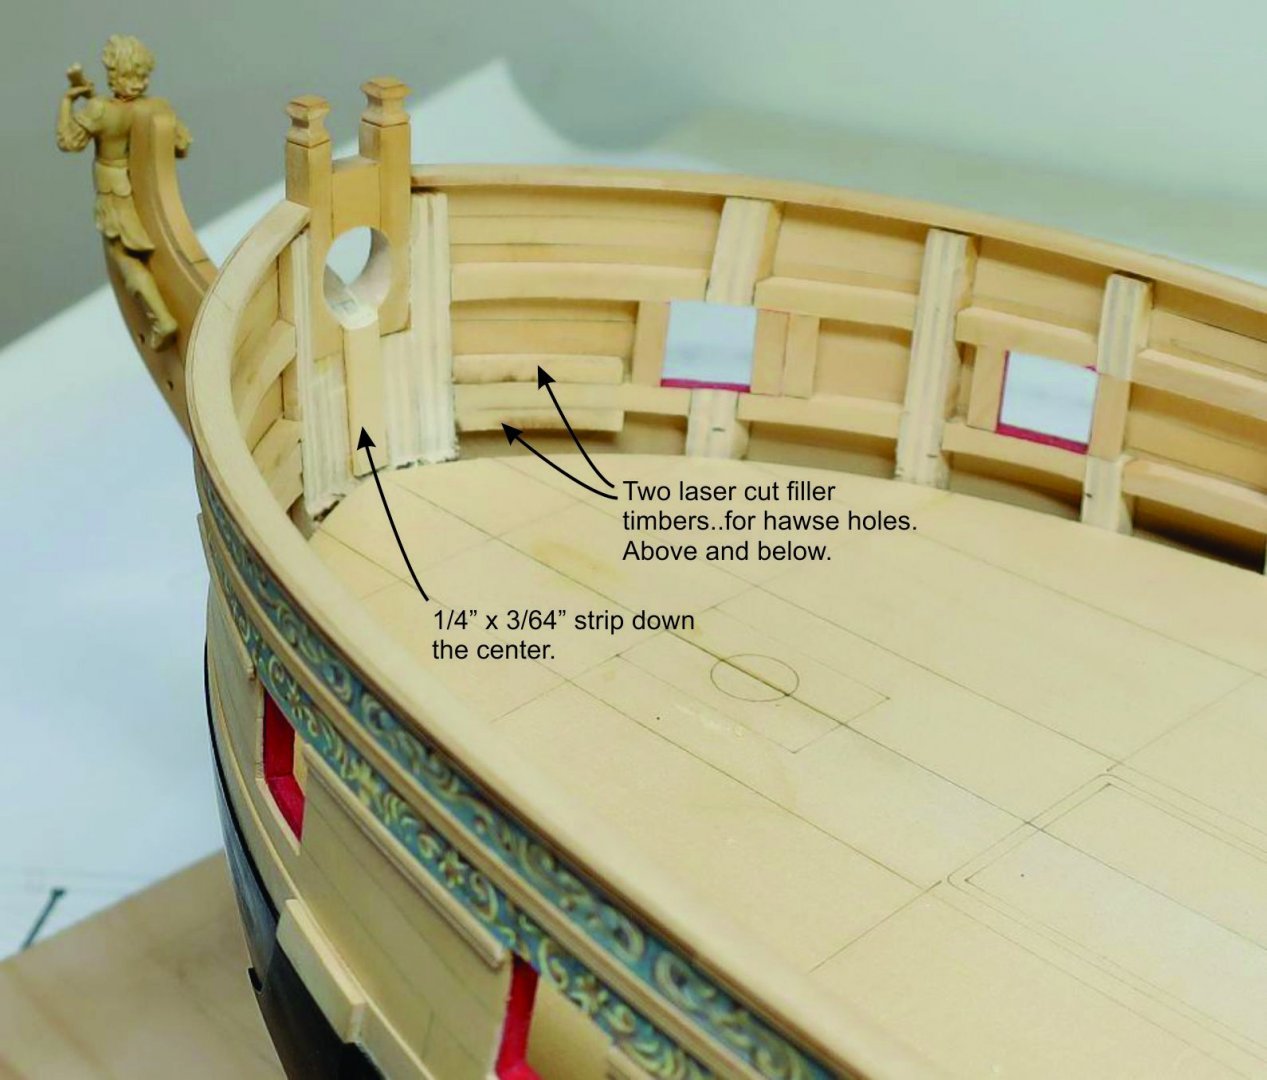
Here is a look at the coaming painted black with a grating in position. But these will be removed when I start planking the bulwarks. But first some pre-planking prep work. Before I can start planking the bulkwarks, I need to add some filler timbers (laser cut) where the hawse holes will be drilled. Then they were faired inboard. In addition, a 1/4" x 3/64" strip was glued down the stem so-to-speak. Shape the top round where the bowsprit hole is neatly. Keep this neat and round. The bulwark planking will abut the side of this vertical strip. And finally the bulwark planking can begin. The two lower strakes are the first layer of spirketting. The top of the spriketing should run even with the lower edge of the port openings. So you need to do some math. The distance from the false deck to the bottom edge of the ports can vary from model to model. It depends on so much....where you placed your sills....whether or not they are flat or angled inboard....etc. So you want to run two strakes for the spirketting 3/64" thick. On my model I used one 7/32" wide strake first and then the second upper strake was 1/4" wide. This combination was the perfect width in my case. Although you will inevitable find some ports that are slightly high or slightly low. You will need to adjust these should that arise....but most of mine lined up pretty good. You will be adding a second 1/32" thick layer to the spirketting later on. I did not simulate the seams with pencil because the bulwarks will be painted red. Except of course for in the captains cabin aft. There is a double line on the false deck showing where the captain cabin starts. So aft of this reference I did in fact simulate the tarred lines. So this photo shows the two strakes of the spirketting and how they run true with the bottom of the ports. I also added the inboard side of the fixed blocks. You can see one in the photo. I used some wire pushed through the sheave holes from outboard to help line them up. Let me know if you have any questions.

- 1,784 replies
-
- 33
-
-
- winchelsea
- Syren Ship Model Company
- (and 1 more)
-
As long as they are on the same side of each frame you will be ok. Best to pick a side.
- 217 replies
-
- 1
-
-
- medway longboat
- Syren Ship Model Company
- (and 1 more)
