Chuck
-
Posts
9,701 -
Joined
-
Last visited
Content Type
Profiles
Forums
Gallery
Events
Everything posted by Chuck
-
 And a few more shots of Gregs cross section of Pegasus.
 -
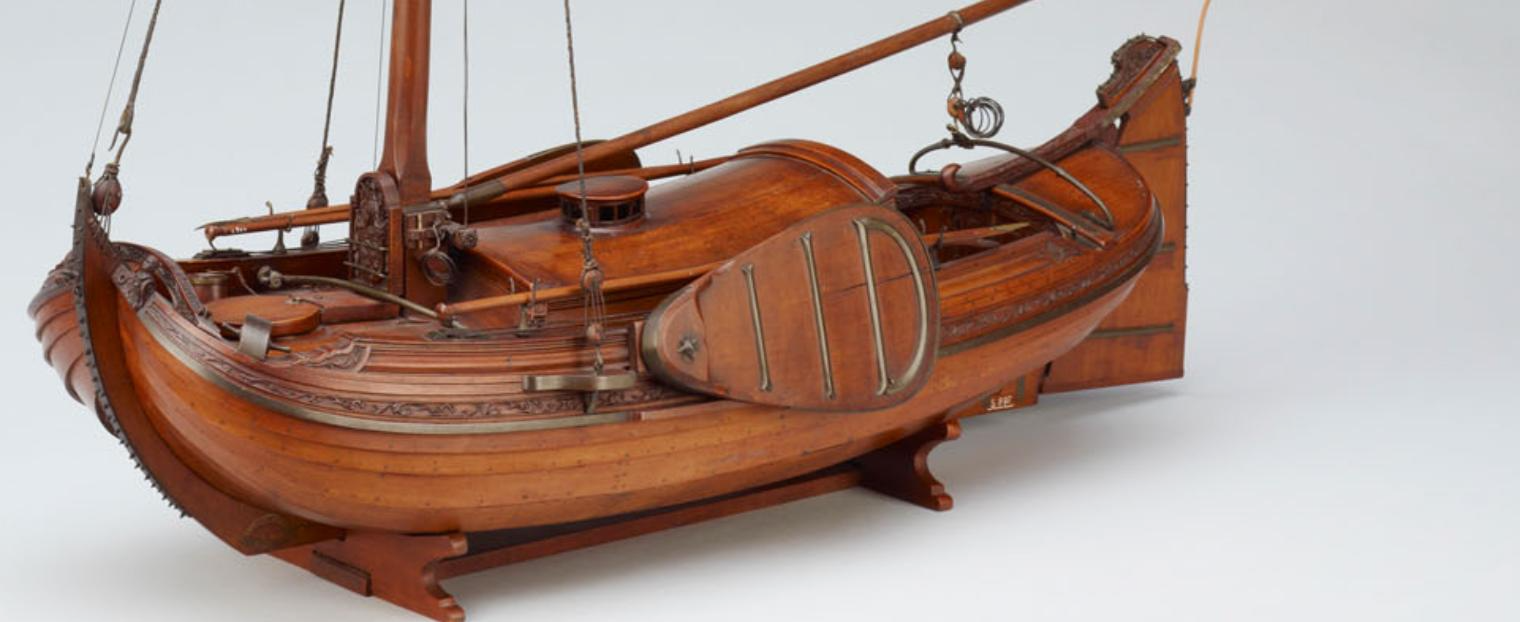
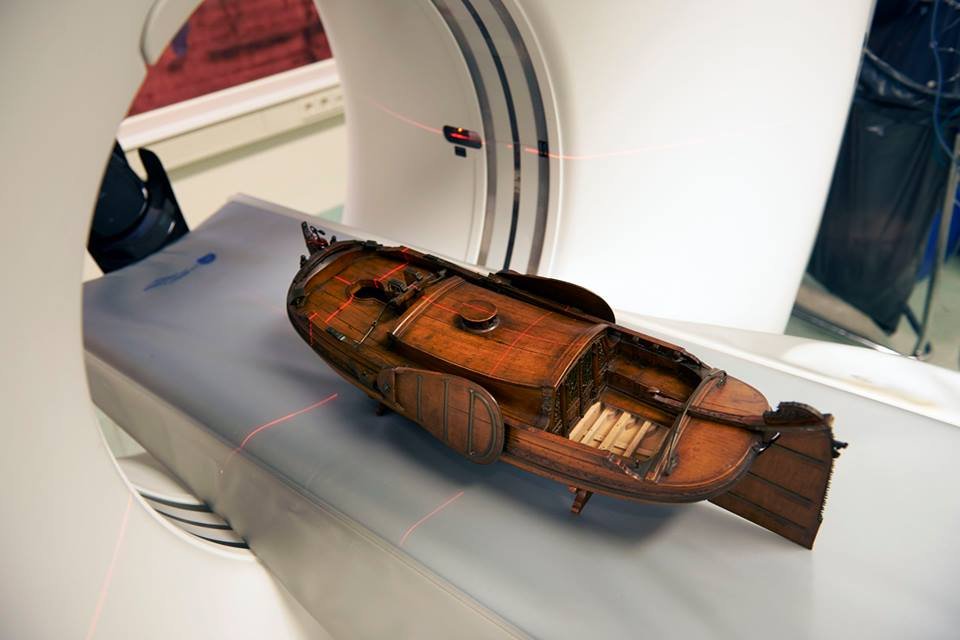
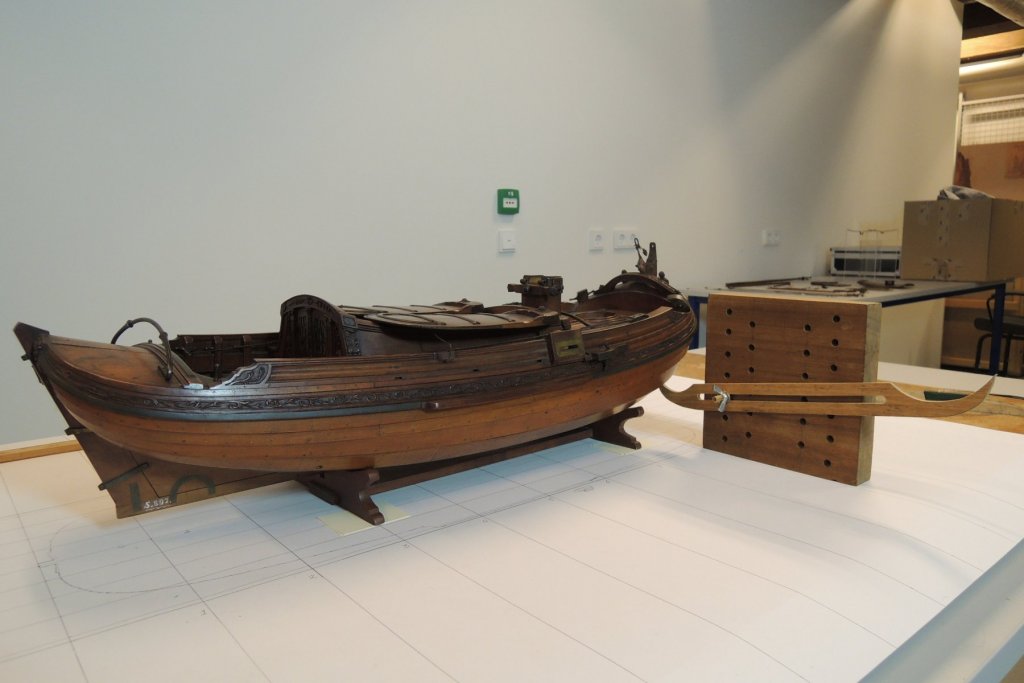
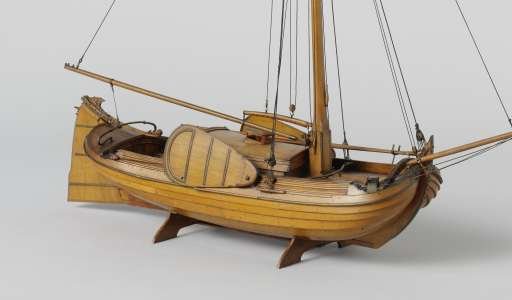
I figured to help folks out a bit more...let me post more images of the boeier. To help folks who need to see more. Since I posted more images of the Chebacco. Contemporary model getting a cat scan. Three and possibly four contemporary models exist of this particular boeier

-
Sam...didnt you read my first post......lets not muddy the waters.....otherwise its just a free for all. Lets stick with the three choices. A very limited menu.
-
I have always known them by the name chebacco....similar to a pinky. Here is a contemporary model of the Lion from the smithsonian. And a Ronnberg model that is in Mystic. Other than these few examples.....not many models of her or other chebaccos are modeled. There is a fellow building an actual full sized representation of the LIon ....he is making great progress.
-
Hello folks, I am just about finished cutting the new bulkheads and keel parts for Winchelsea. The plans are basically completed other than minor tweaking as a I build her. I am excited and eager to start making sawdust on her any day now. Having said that, because the plans are basically done I like to begin drafting my next project as I build the one on my workbench. I have read through the topics we created about what types of kits and projects might be of interest to folks. I started with 12 possibilities and narrowed it down to 6 and then finally down to just three. Because the Winnie is so large I am looking for a smallish project to research/design/draft. Much like the Barge. Which is all done now. So I would like to ask you to help me out here. For all I know, there may be little interest in either of these. So please just dont start suggesting new choices as I want to concentrate on these three. To help me eliminate them from consideration. Should none interest you than select that as your option and I will continue to look for another subject. A - Dutch Boeier, I have been fascinated by these little subjects and to my knowledge no decent kits or projects exist of one. At least not like I would attempt to create one. No Guns but very beautiful and decorative. This is the exact Boeier I am contemplating. 1/4" scale in Cherry most likely B. Pegasus Cross section...you guys know this one. 1/4" scale in Cherry and also second option for Boxwood upgrade. In cooperation with Admiralty models I would prepare a cross section kit for Pegasus. Not because I am hung up on guns or English ships, but because I really want to try my new method for making frames. I am also excited about working with those guys and think my design features will make it incredibly easy for someone to build a fully framed cross section in a fraction of the time that it would take from scratch...or even with one of the new shady cross section kits on the market. C. Chebacco Boat Lion...early american late 18th century ...POB model of another rarely seen subject that I find interesting. New England fishing Chebacco. 1/4" scale in Cherry with Boxwood upgrade available. D. You are not interested in any of them.....I shouldnt waste a year or so designing a kit of any of these because you are certain that you would not buy them. Dont feel bad choosing this. Helping me to eliminate a project that nobody wants will save me years of wasted time. FEEL FREE TO ELABORATE ON WHY YOU CHOSE ONE OF THE THREE OR NONE OF THEM....its very helpful to me.
-
Looks good Ben... Nicely done. Be careful to make sure that the frames are facing the correct way. Its tricky because they are upside down. I think you might have one or two facing the wrong direction in the photo. They switch direction at frame "0". One "0" frame faces one direction and the other "0" frame starts all of them going the other direction. Check your forward "0" frame and your forward "A" frame.
- 74 replies
-
- 4
-

-
- queen anne barge
- Syren Ship Model Company
- (and 1 more)
-
Beautiful start Ben. Everything looks perfect. Enjoy the project.
- 74 replies
-
- 1
-
-
- queen anne barge
- Syren Ship Model Company
- (and 1 more)
-
Master Korabel has designed a wonderful Kit Eugene. I am very fond of the cutter design as many of you already know. I love the hull shape. You guys have done an outstanding job making a unique and beautiful kit for folks to build. Planking looks great and so do the deck fittings and deck arrangements. I look forward to seeing many Avos kits built and its great to have you guys on ModelShipWorld. Good luck with it. Well Done. Chuck
-
Nope...not really.....just one that got started now and one from a close friend of mine in my local club JimL. But he hasnt updated it in a while. Its actually much further along than what you see. But he had to fin9sh up another model for his son. He was actually building it alongside me. Maybe I will see if I can get him start up this log again.
- 269 replies
-
- 9
-
-
- Queen Anne Barge
- Syren Ship Model Company
- (and 1 more)
-
Funny.....Sure tape over your address!!!!! Just kidding Sam. Everyone is welcome in the shop!!! Enjoy the project.
- 47 replies
-
- 1
-
-
- queen anne barge
- Syren Ship Model Company
- (and 1 more)
-
me too!!! I have asked them to. But they are a shy bunch. I will keep asking. Chuck
- 269 replies
-
- 8
-
-
- Queen Anne Barge
- Syren Ship Model Company
- (and 1 more)
-
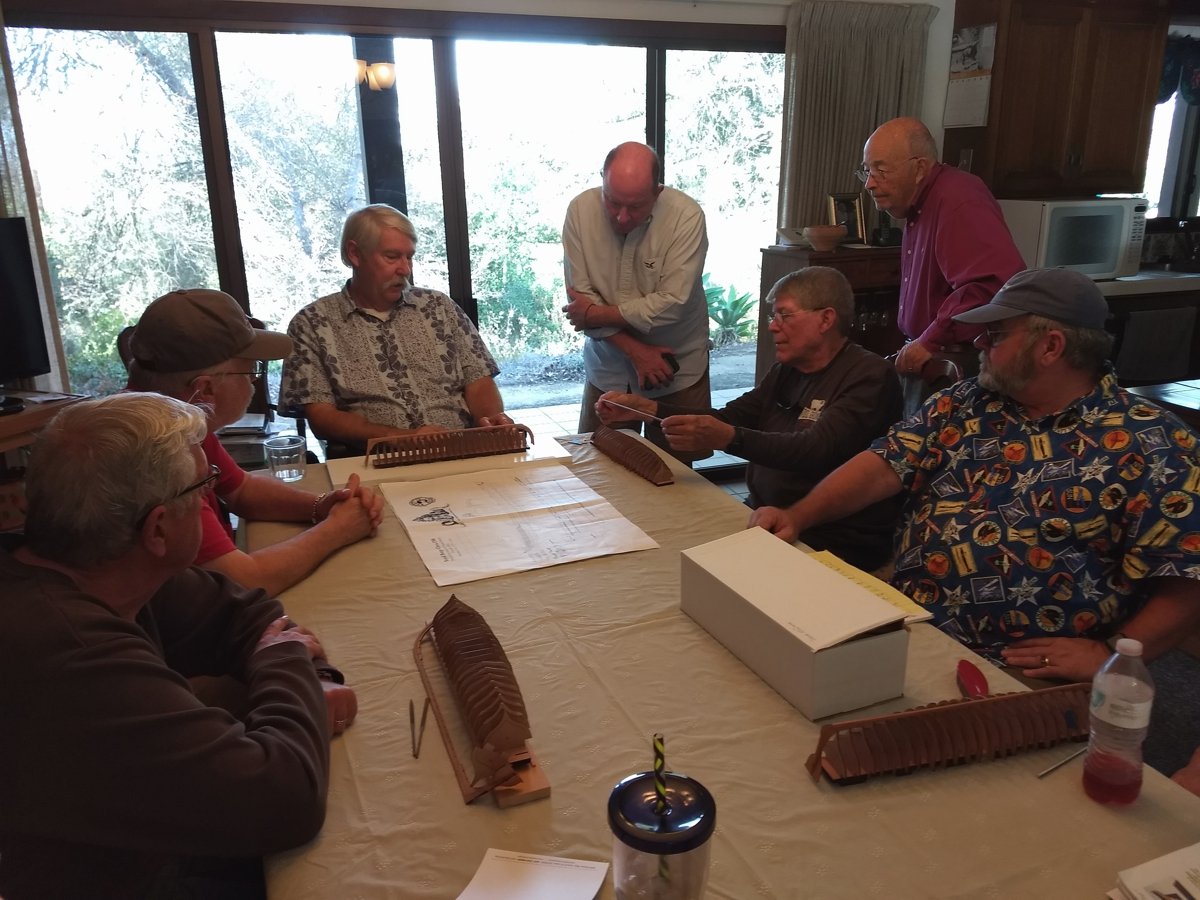
Just wanted to post this image of the SanDiego club. They have a group of 13 building the barge. Dont they look like they are having lots of fun. Anyway....things are moving along. Trying to restock blocks and rope now. As soon as more Cherry and the new castings arrive I will start cutting more kits. I hope they dont mind me sharing one of these photos. But its so nice to see something you worked hard on being enjoyed and built. Chuck

- 269 replies
-
- 31
-
-
- Queen Anne Barge
- Syren Ship Model Company
- (and 1 more)
-
Please give our latest sponsor, Master Korabel a warm welcome. You can see their banner on our forum. Click over to their website and check out their kits and other offerings. I will also let you folks know that MK and Syren Ship Model Company are in discussions to create a collaborative project together. One that will show how two similar companies from across the world can partner to develop projects and offerings together. Stay tuned for more details as this develops. Please give them a warm welcome. Chuck

-
I know how you feel. I am so far behind it isnt funny. You guys are buying my inventory three times faster than I can make everything. LOL Must find a way to to alleviate the need for sleep. Thanks again everyone. Chuck
- 269 replies
-
- 16
-
-
- Queen Anne Barge
- Syren Ship Model Company
- (and 1 more)
-
All 12 kits are gone....sold out. I just ordered a bunch more wood and materials folks. As soon as it arrives, I will start making more. Thanks to all of you who bought one. Hope you enjoy the project. Chuck
- 269 replies
-
- 13
-
-
- Queen Anne Barge
- Syren Ship Model Company
- (and 1 more)
-
Barge kits are now in stock!!!! Finally....but it might be a little while before the next run. Have to order a bunch of materials.
- 269 replies
-
- 16
-
-
- Queen Anne Barge
- Syren Ship Model Company
- (and 1 more)
-
Just wanted to give you guys an update. I actually have 12 barge kits all made.......that is all except for the castings. These take such a long time to do by hand. I was all set to start casting them when out of the blue one of the companies I had contacted got back to me. I had contacted dozens of firms to outsource the resin casting for the kits but most would not take such a small job. But this year is already looking up!!! One such company has decided to cast my pieces and I am very excited about that. This is a huge development for me, I would hardly be able to spend time developing new stuff if it took so much labor to make every part on my own. I just couldnt handle doing this work manually. As wonderful as the news is, it means that these 12 barge kits will be just a bit longer before I can offer them for sale. I am sending the masters down to these folks and they promise a quick turn-around. As soon as these guys deliver the castings I can release these kits and make many more so much quicker now. It took me 3 or 4 days to cast all the parts for six kits by myself. It just wasnt doable. And these guys are professionals who do this all the time. They cast and design resin figures. So these parts should be great and better than anything I could make. Sorry for the continued delay but I want everything in these barge kits to be just perfect. Chuck
- 269 replies
-
- 30
-
-
- Queen Anne Barge
- Syren Ship Model Company
- (and 1 more)
-
Just an update....Hoping to have a bunch of barge kits available in about one week to ten days. In addition, the entire 3 part assembly guide is now complete and you can download it from my website. https://www.syrenshipmodelcompany.com/royal-barge-kit.php Unfortunately for the time being, the accessory sets for those NOT wishing to carve those seven decorations will not be in stock for few more weeks. I just need a bit more time to prepare and make the molds for these seven additional decorative carvings. and cast them So if you really want to order everything at the same time, you will need to wait until the accessory sets are ready. I am working overtime to get everything ready as soon as possible. But while you wait, please do read through the instructions and dont hesitate to ask me any questions.....and Merry Christmas.....and have a very happy New Year.
- 269 replies
-
- 27
-
-
- Queen Anne Barge
- Syren Ship Model Company
- (and 1 more)
-
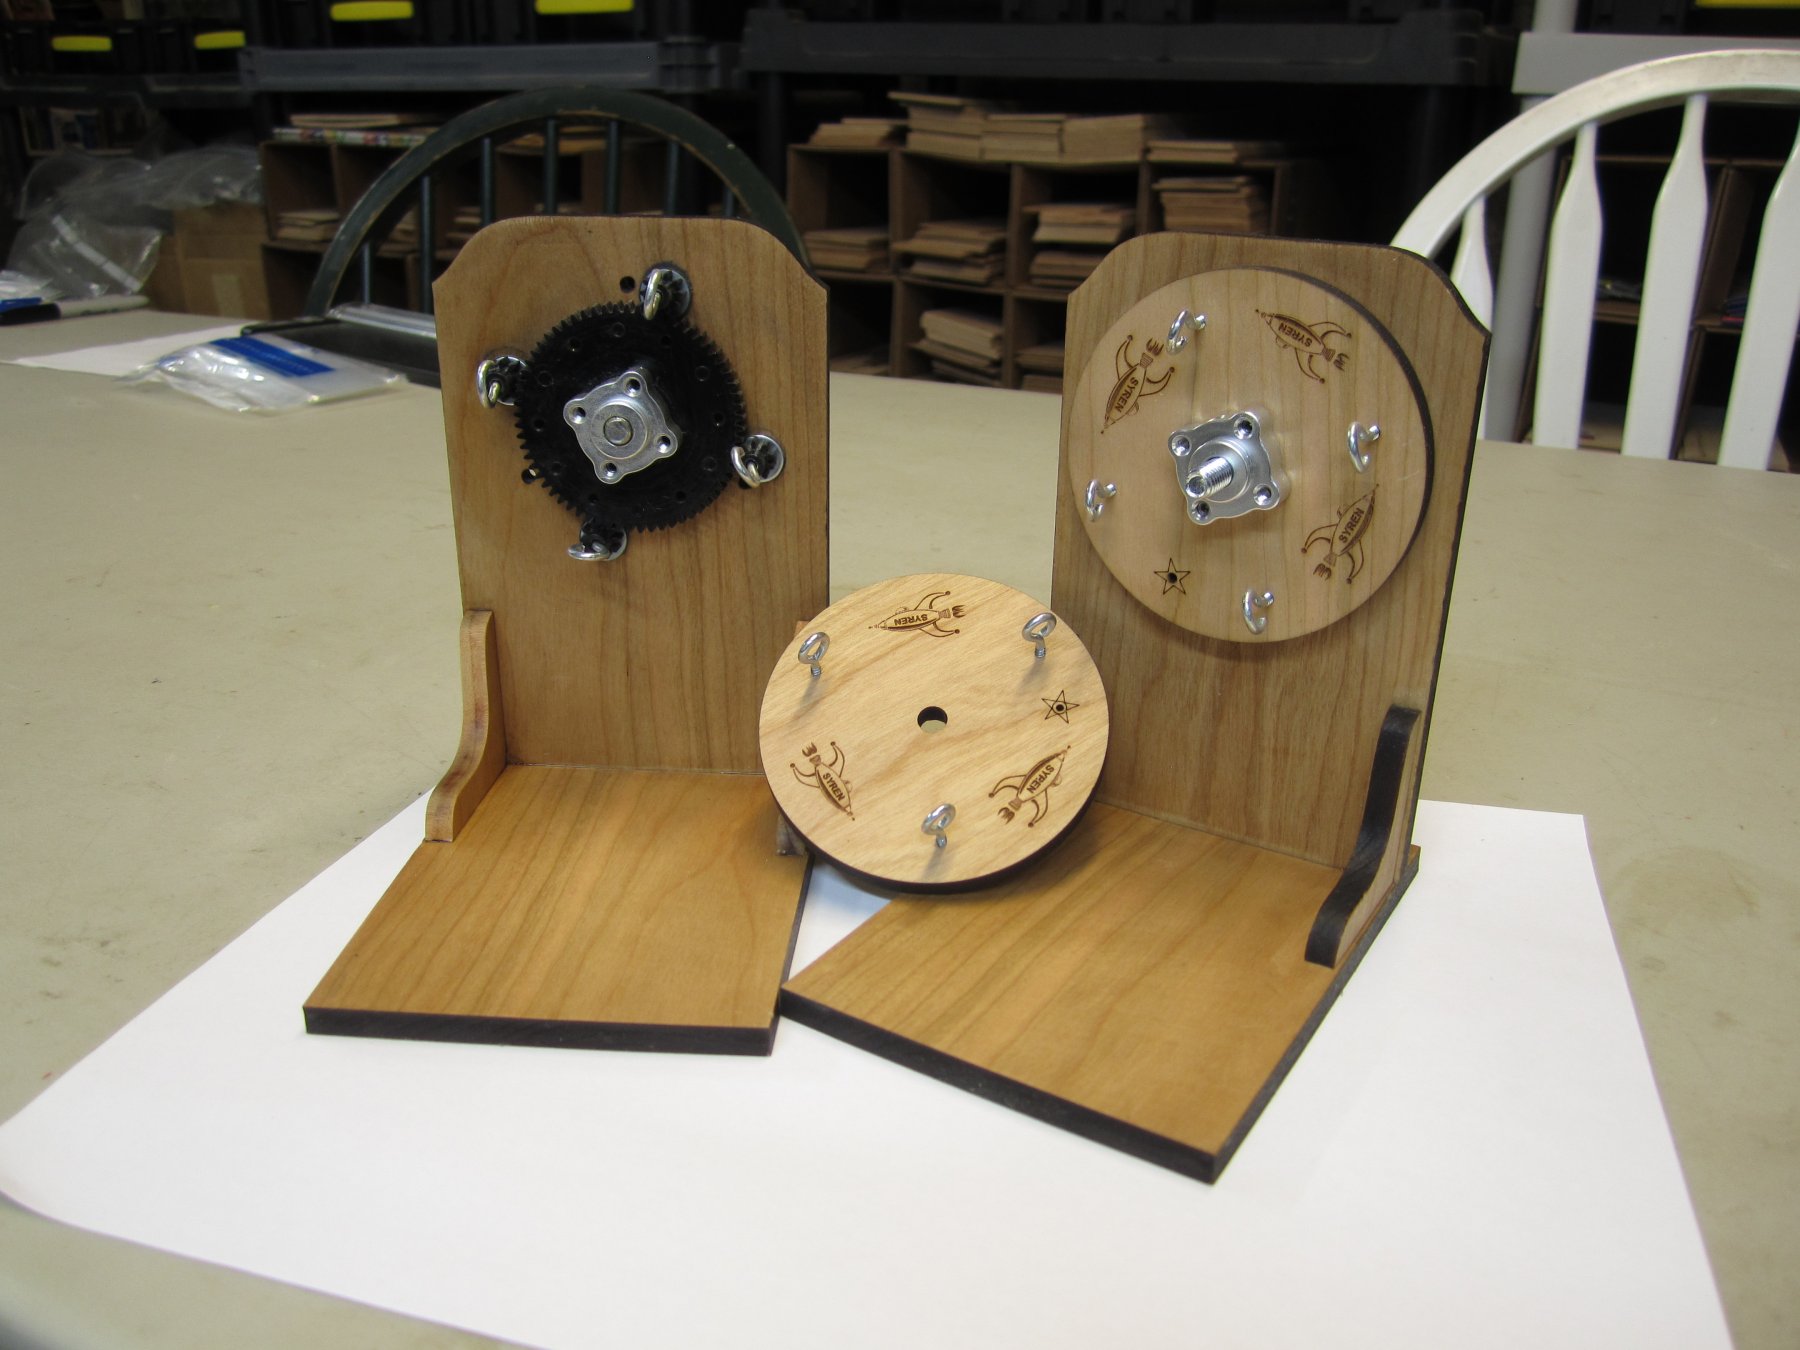
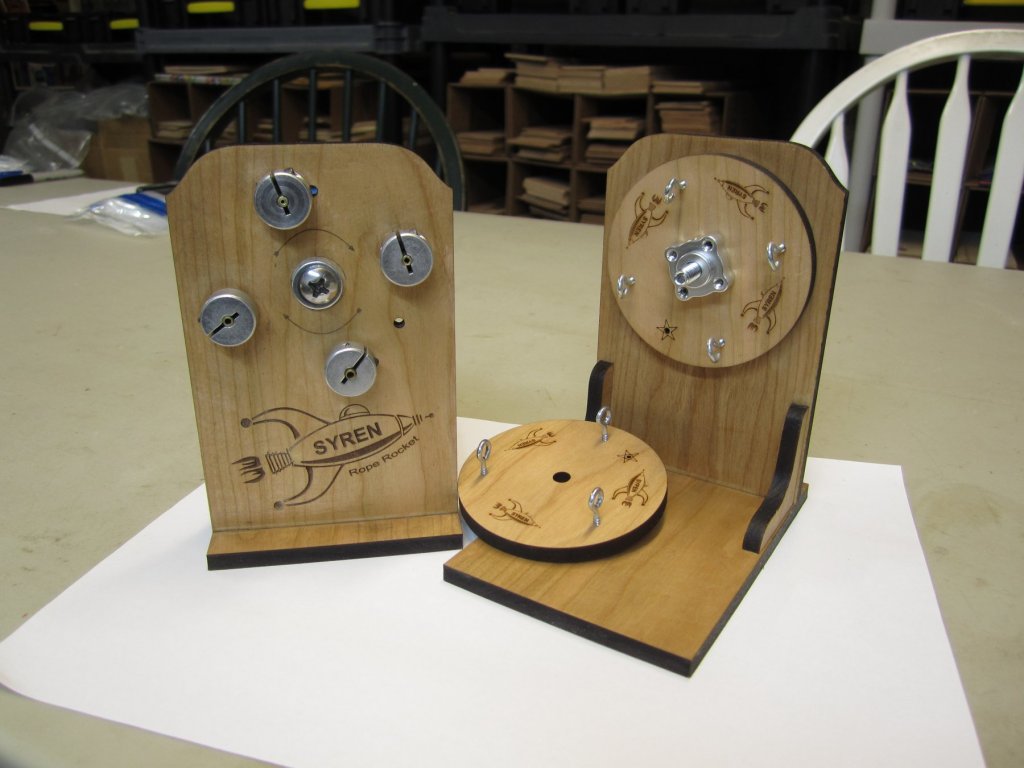
The Syren Rope Rocket is now in stock.... Make your own rope!!! This is the very same machine we make all of our rope with at Syren Ship Model Company. This ropewalk makes rope virtually any length. You can make 3 strand and 4 strand rope. Make left or right hand rope. The Syren Rope Rocket can quickly make tightly laid up rope. Each ropewalk kit comes with one ball of thread you can use while following our online video lessons. Made of sturdy laser cut Cherry wood and steel and stainless steel parts. The rope rocket comes with Delrin gears for a long life. US patent 5232168-28 - With registration in China pending just in case!!! Don't buy Chinese fakes, support your hobby and buy the original. Click here to view the ropewalk page on the Syren website and download the assembly instructions. Online video rope-making lessons will be uploaded very soon!

- 22 replies
-
- 20
-
-
- ropewalk
- rope rocket
- (and 1 more)
-
Giving this a bump!!!! If you havent taken the poll yet. Please do. Lets capture more data for folks making a decision on which kits to buy.
-
For a hull like Victory I would recommend at least one drop plank under the lower wale. This would reduce the total number of planks that need to run to the stem rabbet. In addition as you can see below, not all 25 planks will make it to bulkhead one....or even bulkhead two really. Therefore you need to reduce the number of planks you divide that bulkhead into. Considering that you will most likely have to add that drop plank as mentioned. You will probably only have far fewer planks along bulkhead 1 as you thought. BUT, before you even get that far, find the run of your wales from bow to stern and use battens, thin tape or even string to lay them out on the hull. The positions for the wales can be taken from the plans. It is very important that you find the run of your wales first and once you find the run for your lower wale you will probably need to start the whole process of lining off below them over again. This includes planning for a drop plank. I can not see where you show the run of the wales on your hull. Also see this

-
Ryland.....hope you are doing well. We need at least one update on this model before 2017 is over. Say hello to Pam and have a merry Christmas!!!