HOLIDAY DONATION DRIVE - SUPPORT MSW - DO YOUR PART TO KEEP THIS GREAT FORUM GOING! (Only 36 donations so far out of 49,000 members - C'mon guys!)
×


Chuck
-
Posts
9,660 -
Joined
-
Last visited
Content Type
Profiles
Forums
Gallery
Events
Everything posted by Chuck
-
 Yes I would....I dont have a photo of that but dont worry too much about it. Being your first model just examine the contemporary model as they are best pictures I have.
 -
Bruce ...dont forget to introduce yourself properly to the forum in the appropriate area. Let folks know who you are. There is nothing more suspect than folks who sign up and simply post stuff for sale and then leave. It happens a lot. Folks here are so much more comfortable with these online transactions if you waited a few weeks and in teh meantime post about your cutrrent projects and your introduction to the hobby. Otherwise....it gets a bit scary. Chuck
-
That will happen. Better to just use diluted white glue. It dries clear. It wont darken the line at all. Chuck
-
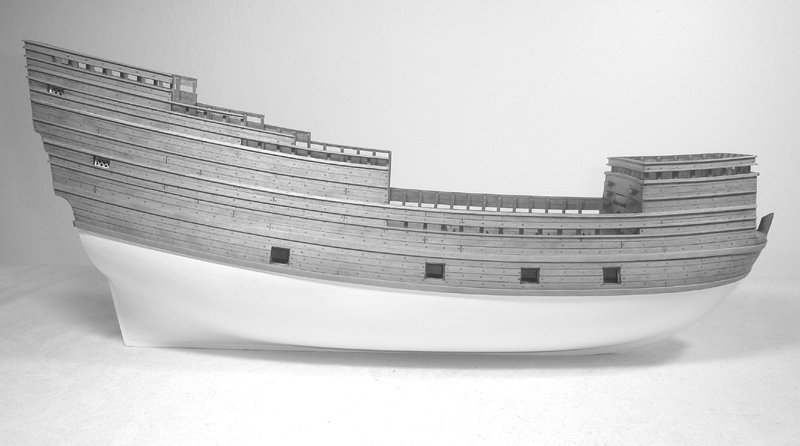
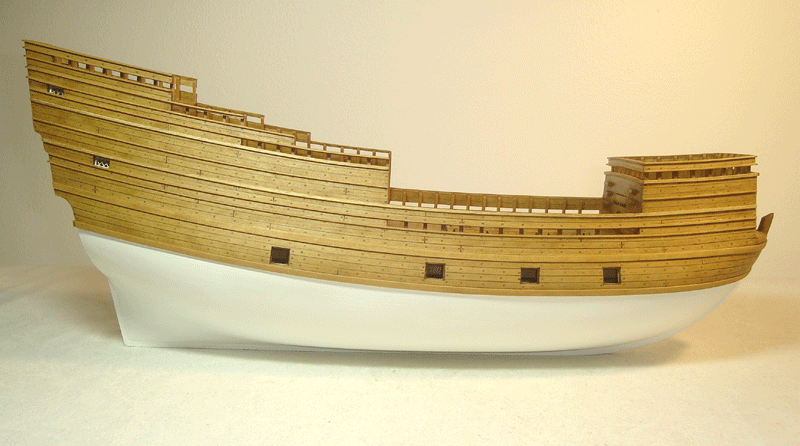
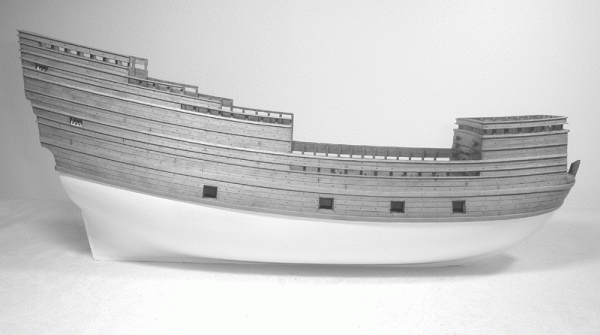
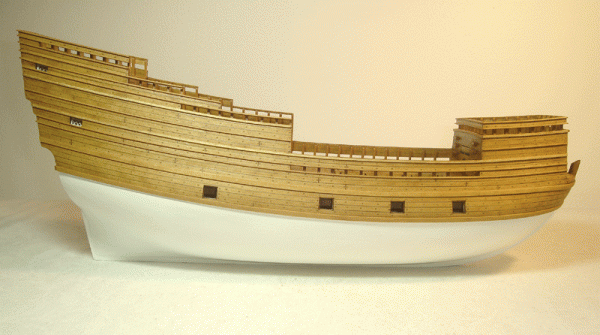
Russ is correct...you can add the keel and stem and even the stern post at any time. One thing you must remember is that every guide or log is only representing the sequences used by that individual builder. There are so many ways to plank the hull. I single planked the prototype also. I would say that if you had planned on double planking you should wait to add the keel. Otherwise it would be too short...or not deep enough. This is why I left it off until after planking. The rabbet is only used for the first layer. A second layer would sit along side the keel and make it look to narrow. So for you it wouldnt matter. Here is a photo of my finished hull with just the bottom painted. One layer only below the wales.
-
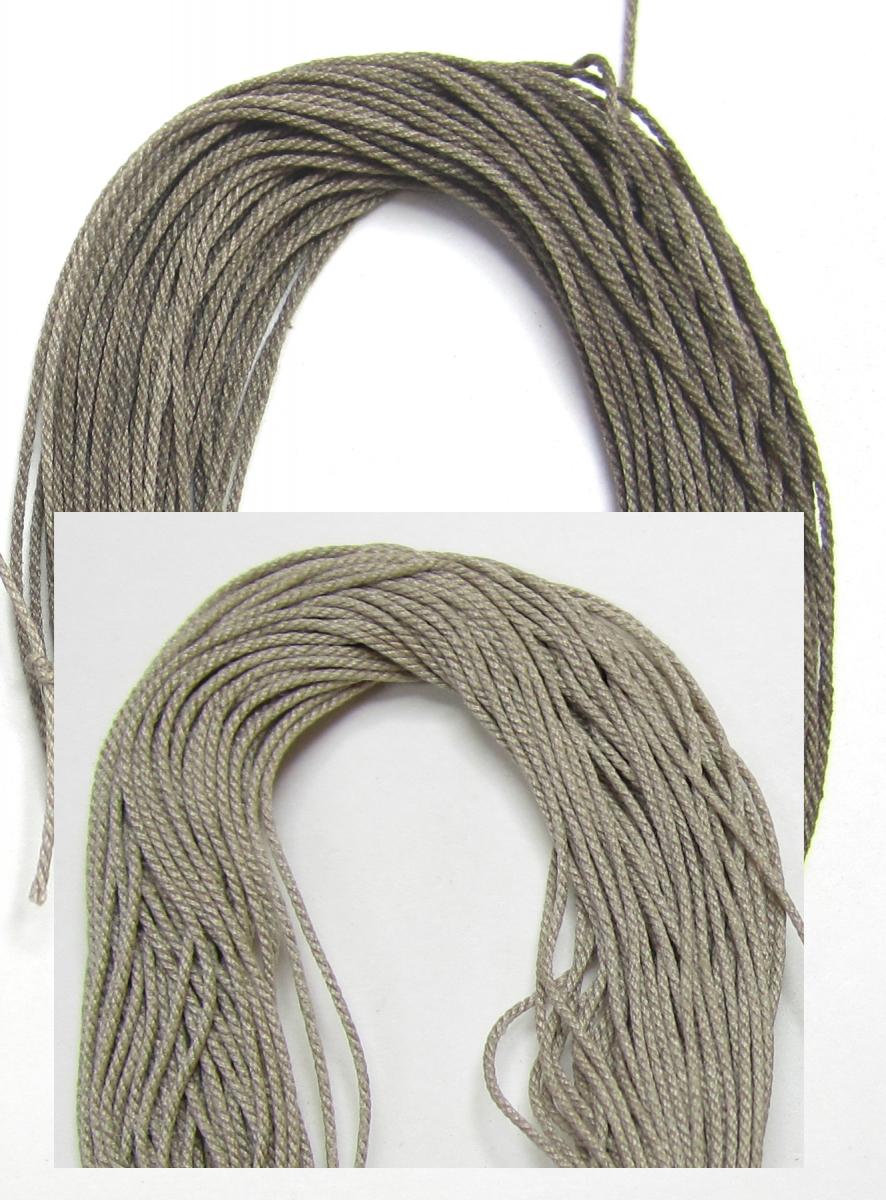
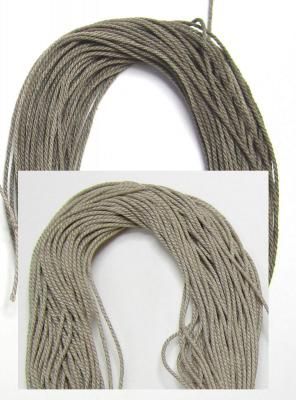
I am often asked by folks who buy my rope how they could make it look less new. They want to know how to give it a more weathered or even just textured look like they see on many contemporary models. First I tell them to wait 300 years and it will look just like they want it to. But then after failing to get a laugh I suggest what I have done for years. Its quick and easy. Its not very messy. But it does take practice. So I figured I would post it here. Model builders have been running their standing rigging (black or brown) through a candle flame for years. They do this to remove the fuzz. Luckily my rope doesnt have any fuzz. BUT.....should you run your light tan rope through a candle flame....it will pick up some nice color. The soot from the burning candle will give your rope some texture. Multiple passes through the candle will make it darker. Running it through very quickly will create a very blotchy and uneven look so dont be afraid to take your time. Take as much time to slowly run it through or over the flame. You will have to practice because obviously if you go too slow it will just catch on fire. Once I run it through the candle flame, I will run the rope between my fingers. This evenly distributes and softens the texturing. In the photo below you will see a brand new and untouched coil of rope and behind it....that was after I ran it through the candle flame twice. If you do it once it wont be as dark but I wanted you guys to actually see the results. So if you are trying to figure out how to weather or darken the running rigging, you might want to give this a try. I havent tried yet....but I am also wondering if different color candles will impart a different shade of soot.....will have to try that next. This effect came from your standard average white unscented candle. Click the thumbnail for a really big version.
- 1 reply
-
- 6
-

-
You are all set....good luck with the build and I hope you enjoy it. Chuck
-
Pops Looking good. You are in a good position to take that cap rail and just thin it down considerably at the bow. That extra piece you added will not be necessary at all. Just carefully thin down the caprail to remove what I have shown below. Then also thin down the frames in that area as well. Dont be afraid to weaken the hull. It will be quite sturdy. Just thin it out. It will make a huge difference. Chuck

- 132 replies
-
- 4
-
-
- 18th century longboat
- model shipways
- (and 1 more)
-
BOO-HOOO Ron.....You really must do a log.....dont be shy, it would be a real treat to follow. I know how inspired you have been and how much help MSW has been for your own model building progression....why not pay it forward? Chuck
-
28 gauge wire and the same shape as shown in the images. Chuck
-
Yes its on the plans and you could certainly have a look at those hi-res photos I posted. They show it very clearly on the contemporary models. Almost all of the blocks had hooks seized to them and they were placed in the holes of the iron bands. This made it possible to un rig the boat quickly and store that stuff. For the kit, I only showed this a few times because it some tiny stuff. To simplify it I simply tied the blocks to the iron bands. But a more historically accurate method is to use hooks. Check out these photos... http://modelshipworld.com/index.php?/topic/1856-large-close-up-images-of-longboat-rigging-on-contemporary-models/
-
Black Strake
Chuck replied to Chuck Seiler's topic in Building, Framing, Planking and plating a ships hull and deck
It wasnt always painted black....historically it was sometimes left natural...black or even another color. I have seen images/paintings/models within classes of ships with a different look and paint scheme. I think it was up to the captain or admiral within reason.....depending on the time period. This is certainly true in the early US.... -
Thats a very nice article....well done. Very interesting. Yes indeed I will see you in st. Louis.....wasnt that an old song? Chuck
-
That looks so good. Wonderful work!!
-
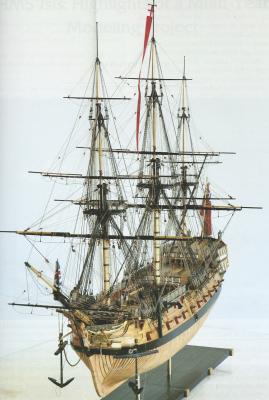
Nautical Research Guild Summer Issue is in the mail. Become a member and get it delivered to your front door every 3 months. Here are some highlights including the table of contents. 3D Printing and Model Ship Building by Patrick Matthews USS Arizona by Oren Long, Jr The East Indiaman Edwin Fox of 1853 by Ian Poole A French War Brig by Richard Simon Coppering the Fleet and an American Entrepreneur by Louis Arthur Norton Building HMS Isis of 1776: Highlights of a Multi-Year Project by Byron Gore Modelers’ Gallery Shipbuilding Literature in the Netherlands (1671-1838), Part 4 by Ab Hoving SHOP NOTES Making Dowels by William E. Sproul MODELERS’ REVIEWS An 8-inch Shear from Harbor Freight Tools by Steve Wheeler The 3D Elbow Bender from UMM-USA Click here to read one of the articles.... A French War Brig by Richard Simon And here is a look at at one of the models featured in this issue. Click on that photo to enlarge it and see what a great model Byron put together. Its stunning. HMS ISIS by Byron Gore For more info on the Journal and the NRG please visit the website.

-
2014 Nautical Research Guild conference St. Louis - October 16, 17 and 18 See the website for Details - CLICK Here A new Conference format is being offered in 2014 to help make this event more affordable. The featured tour will be held on Thursday, and the Technical Sessions, which focus on model making topics, will be held on Friday. These two events have been switched so that those wanting to attend only the two days of classroom discussions can do so without having to incur the cost of an additional room night. At the NRG Charleston Members’ Meeting, a number of attendees suggested that round table sessions should somehow be included in the weekend schedule. In the past, these talks were conducted on Sunday morning when most were leaving the conference. The Friday schedule will have three guest speakers in the morning, and five round table sessions in the afternoon. The General Sessions on Saturday will highlight topics that cover a wide range of nautical interests relating to research and history. The Conference Tour will feature a cruise aboard the Tom Sawyer, a 50-year old riverboat. The journey will take you from downtown St. Louis to Kimmswick, Missouri, a quant riverside town known for its historic homes, shopping, and antiques. The narrated cruise will feature onboard bingo, card games, and riverstyle music. Upon disembarking from the “Sawyer,” lunch will be served at the Blue Owl Restaurant and Bakery. There will also be ample time to shop and explore the town on foot. A motor coach will be provided for transportation back to downtown St. Louis. While visiting Kimmswick, guests must anticipate uneven walking terrain such as stairs and graveled pathways. With that in mind, we cannot recommend this trip for those needing the assistance of a wheelchair, walker, or those with significant physical/heart conditions or limitations. Friday Technical Sessions: Pat Mathews – 3D Printing Greg Grieco – Excavation of the Riverboat Heroine David Antscherl – Building the Fireship Comet Friday Round Table Discussions: David Antscherl – Frieze Painting Steve Wheeler - Electroplating Chuck Passaro – Ropewalk Demo Greg Herbert – Making Scale Moldings John Vojtech – Unique Modeling Tools. Saturday General Sessions: Jack Custer – Using images to take off the lines of steamboats Dan Pariser – Comparing French & English ship building practices Gary Lucy – Researching models and settings for paintings Institute of Nautical Archeology – Speaker & subject to be determined Banquet Guest Speaker Christopher Gordon, President St. Louis Historical Museum Topic: St Louis and The Lewis and Clark Expedition You can download the registration form from the NRG website page here.

-
Something lik e that is better cut from a wide piece to the proper shape. Chuck
-
24 gauge
-
Coppering the 1:64 Syren
Chuck replied to rtropp's topic in Building, Framing, Planking and plating a ships hull and deck
They are for the jig....They are a little big though -
Yupp...thats the stuff. But you can use any color that you like and any brand. I like what you used. I think it looks great. Chuck
-
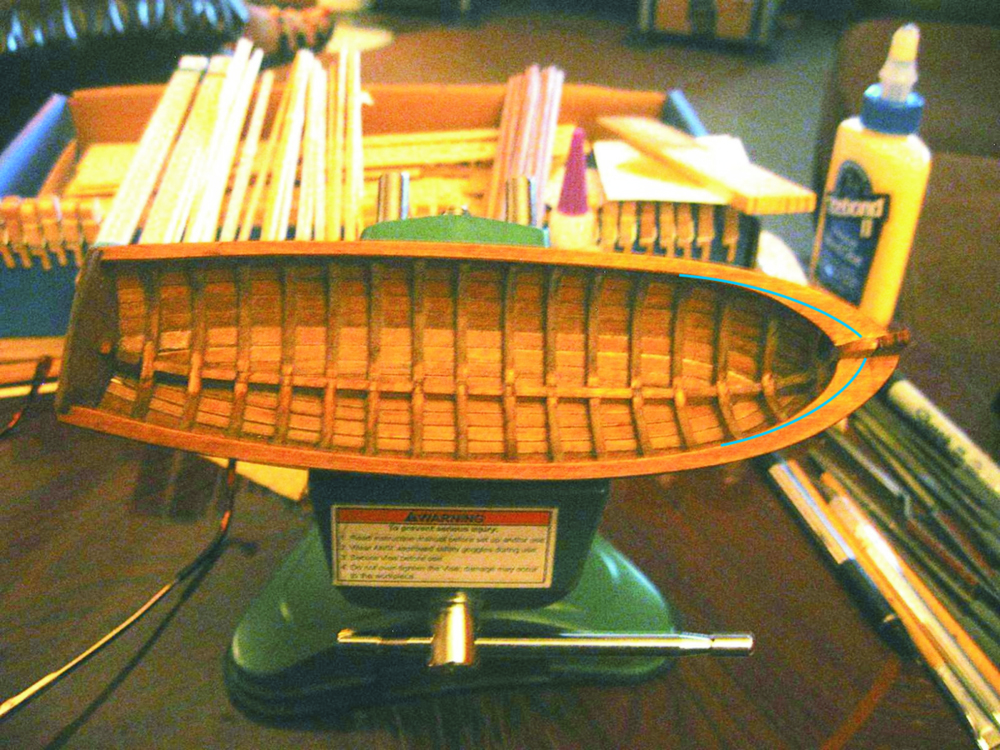
If you line out the hull with tick marks for the planking, you can determine the width of each strake at each bulkhead. What I like to do but couldnt in the kit instructions, (pre milled strips and all) would be to place the first sheer strake into position. Then line off the hull from the bottom of the shear strake to the keel NOT INCLUDING THE GARBOARD. After you line off the hull it will reveal the shape of the garboard....this can be cut and positioned early so that you will have a consistent remaining space to plank. Planking the garboard early allows you the opportunity to see the negative unplanked space remaining and see how that space runs bow to stern. If you see that negative space getting too wide or too narrow in places...it probably means your garboard is shaped incorrectly. By lining off the hull you can also avoid any guesswork. See Bob's build log. I would do it exactly the same way...in fact this is exactly how I planked the hull except I do add the shear strake first. It strengthens the hull and allows me to create the shear curve I want before lining off the rest of the hull. http://modelshipworld.com/index.php?/topic/1465-18th-century-longboat-by-bobf-ms-148-tri-club/page-2 Chuck
-
Removing paint
Chuck replied to Don Quixote's topic in Painting, finishing and weathering products and techniques
You can carefully scrape it away with various sharp razors or hobby blades. Just dont use the points. Use the edge of the blade. Light passes with the blade at an angle. The different shaped blades help you get in all of the crannies. -
US Brig Syren by Gahm - Model Shipways
Chuck replied to Gahm's topic in - Kit build logs for subjects built from 1801 - 1850
Splendid......very well done. I love the quality of your figure. Chuck -
Looking really fine. Clean and crisp work. Chuck
-
I know how it feels to hit the shop after a long absence. Well done and try to sneak a few more sessions soon. Its good for the soul!!!
-
Been a while since I checked in on your Essex. Its looking A-Ok Bob. Framing those decks is a lot of fun... I am looking at those images though and have a question, did you give the quarter deck beams and forecastle deck beams a camber? I remember when I started building her many moons ago..The decks had quite a bit of camber from what I remembered, its hard to tell from the photos but they look flat or is it just an optical illusion? With no camber the fittings along the center of the gun deck might look very tall. I am wondering if the absence of camber is what I am seeing. Sam sure did add a lot of nice detail to those deck fittings. At that scale is great to see a kit show them all. They look great Bob, you are almost done for crying out loud....you work quick. Chuck