HOLIDAY DONATION DRIVE - SUPPORT MSW - DO YOUR PART TO KEEP THIS GREAT FORUM GOING! (Only 51 donations so far out of 49,000 members - C'mon guys!)
×


michael mott
-
Posts
5,198 -
Joined
-
Last visited
Content Type
Profiles
Forums
Gallery
Events
Everything posted by michael mott
-
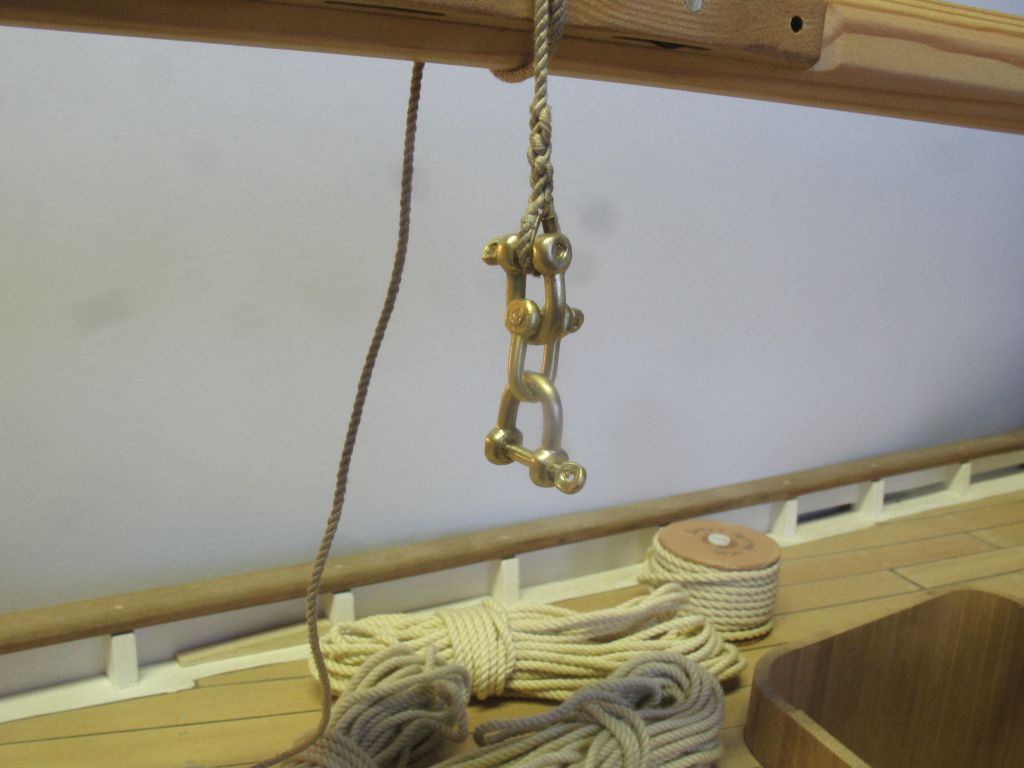
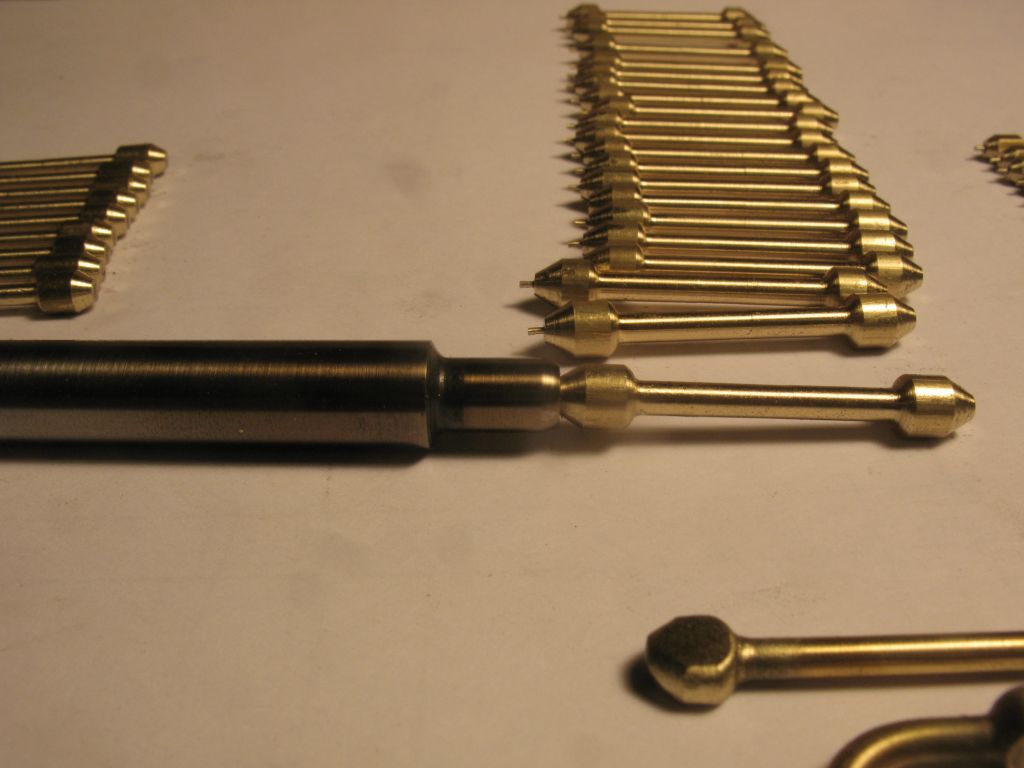
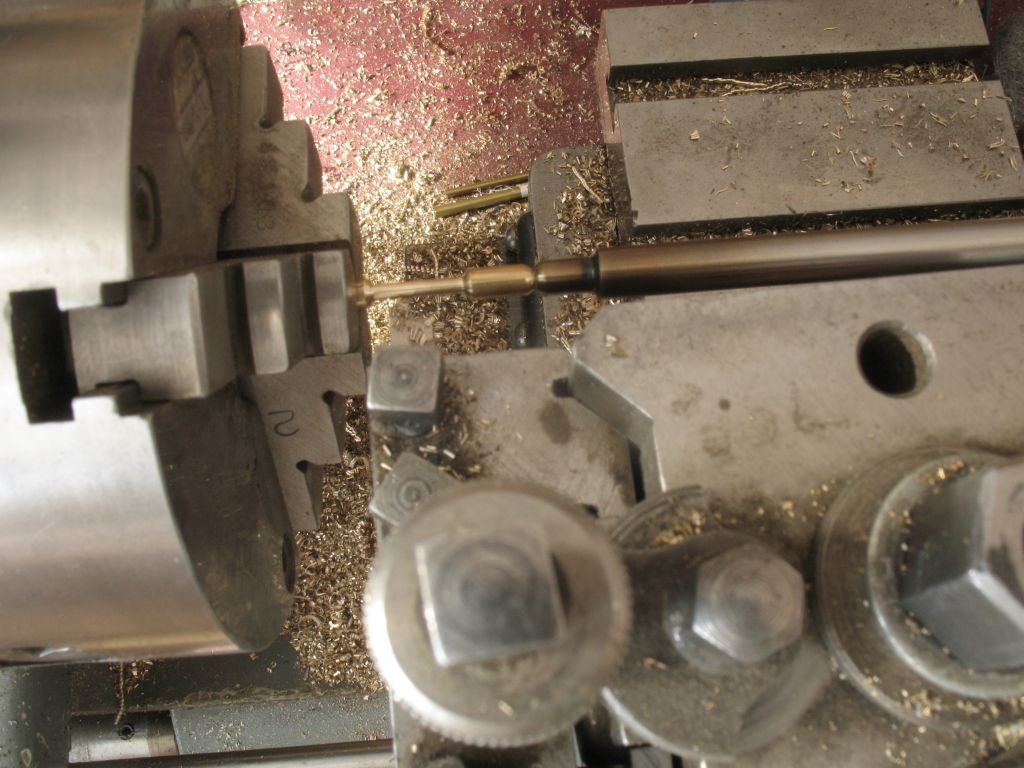
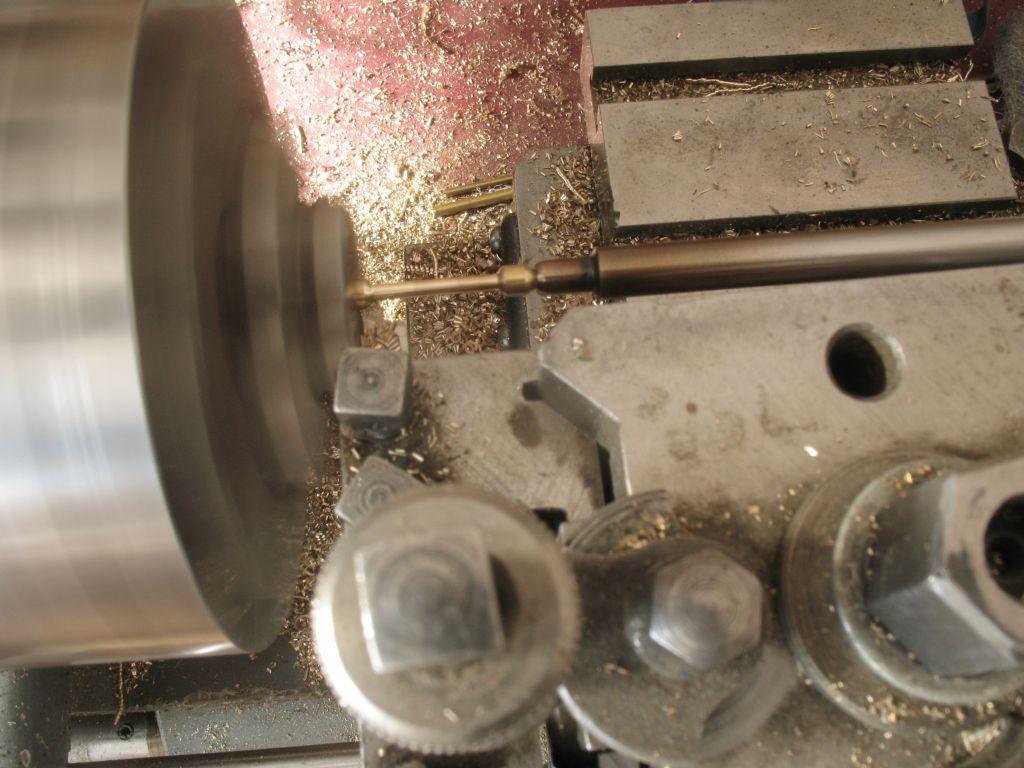
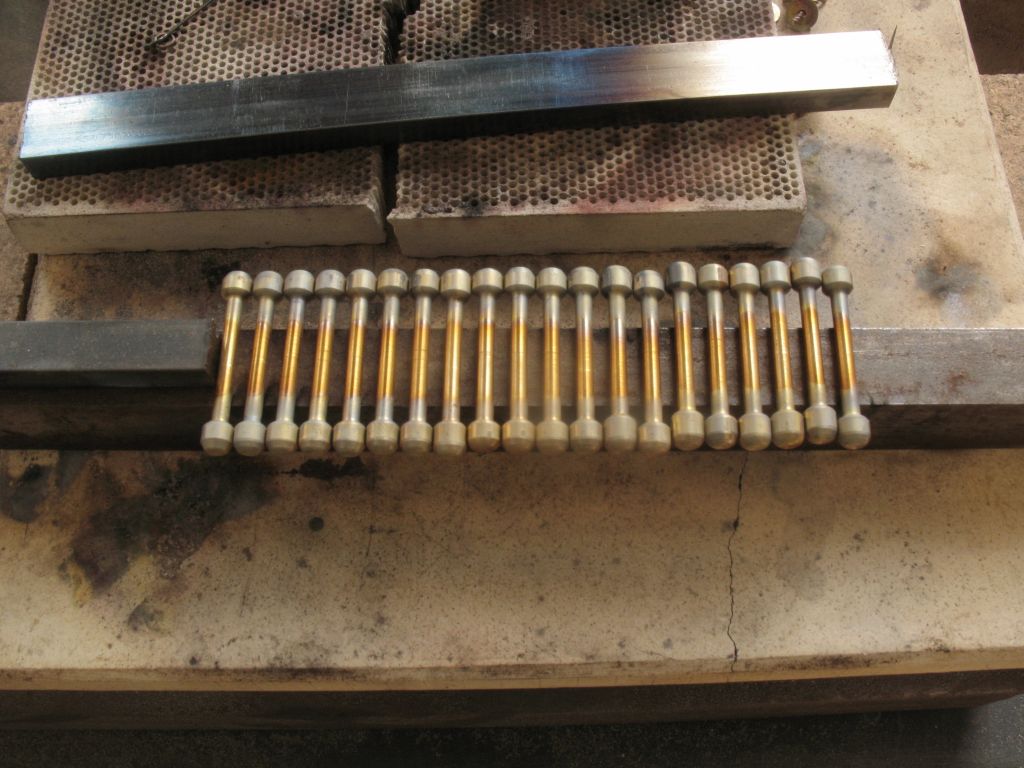
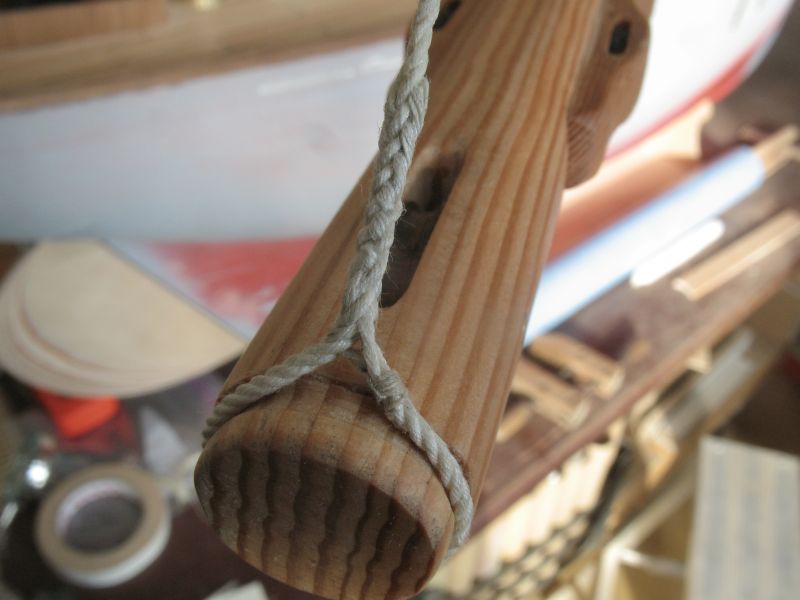
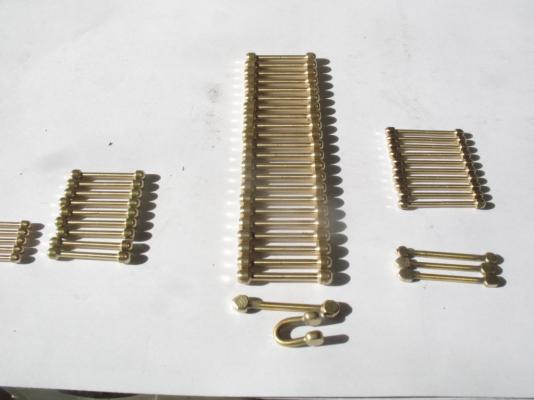
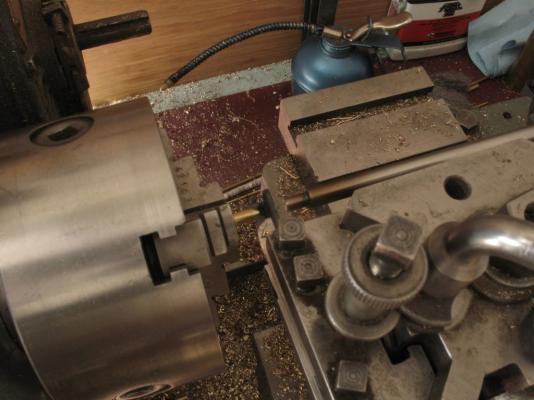
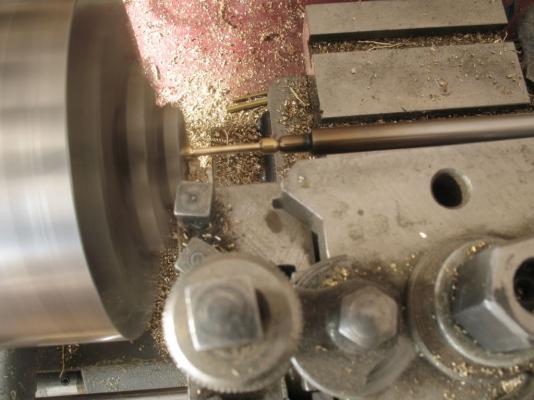
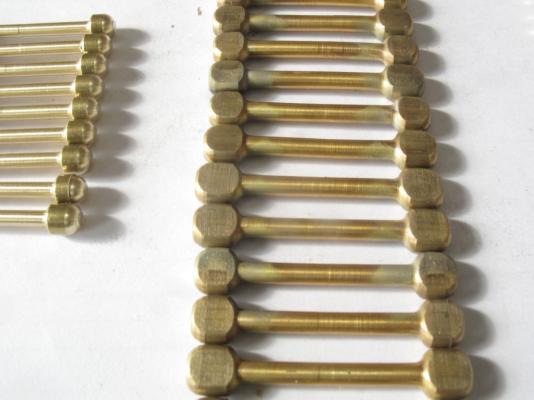
 Bob, Thank you for your compliment I really appreciate it. Doris, thank you very much for your kindness I continue to draw some of my inspiration from the very high standards that you are setting. Yesterday and today I spent most of the days working on some new shackles, I mentioned the cone cup centre, the first picture shows getting the blanks ready for necking down by machining the 60 degree bevel on both ends. With the cone centre set in the tailstock and the blank clamped in the three jaw chuck the first step down is started in the middle of the 3/16 free machining brass blank and the form tool cuts down to the finished diameter in 2 passes the tool is prevented from running into the chuck by an adjustable stop that engages with the carriage. The stock is removed from the three jaw and end for ended and re clamped in the three jaw without moving the cone centre, this ensures that the ends are machined to the same length (mostly) the next picture shows the centre with one of the blanks after the first stage of the machining the outer ends are then shaped with the same form tool to round them off After the second stage with the ends rounded Next they set up on a heat sink so that both ends could be annealed prior to squashing flat. The flattening was done with the Milling machine vice. A pin was machined from the 1/8 hex stock threaded 2x56 and then flattened for the finger pad finally drilled and cleaned up with the wire wheel. The bending was done in the same manner as the previous shackles with the round nosed pliers. The next picture shows 3 slightly different sizes hung up ready for service, Michael


-
Beautiful work on the cleats Doris. Michael
- 883 replies
-
- 1
-

-
- royal caroline
- ship of the line
- (and 1 more)
-
34ft Danish Cutter by adamdt
michael mott replied to adamdt's topic in - Build logs for subjects built 1901 - Present Day
Adamdt your drawings look good, I will follow along. Michael -
Bedford, thanks for the support. Denis, yes I will have to redo them now, at least there are only 6 that have been done that way. Now I am thinking about how many lines there are that will need an eye. I'm just happy that this is not a three masted schooner with topsail's. I think I would be ready for the boys with the white jackets. I have been working the lathe all day making stock for more shackles of various sizes. I found a good way to handle the small diameter that needed necking down in the centre. I used a cone cup centre and then made the ends of the stock the same angle as the centre drill that I used to make the cone cup. The cone cup was very simple length of 3/8 stock about 5 inches long and I turned down one end to 3/16 then drilled it with the centre drill, then polished it up hardened it and tempered it. Then some toolmakers clamps on the bed of the lathe to give me repeatable stops The brass rod which I purchased from Home Depot I was good quality free machining so I was pleasantly surprised, it was much better than the KS engineering stock that I had on hand for machining, the KS stuff was a bit gummy likely just yellow brass. Using the cone cup allowed me to have 80% of the length of the blanks for the shackles out away from the chuck, I will take some pictures tomorrow. In over 50 years of using a lathe today was the first time that I used a cone cup centre, and what a useful accessory it is, I had to keep it well lubricated because it is not a live centre, but it worked very well. One never stops learning when it come to machining it seems. Michael
-
I thought you might say that.... oh well its just more work. I need to keep the natives happy;~) And thank you to all the people who hit the likes button. Michael
-
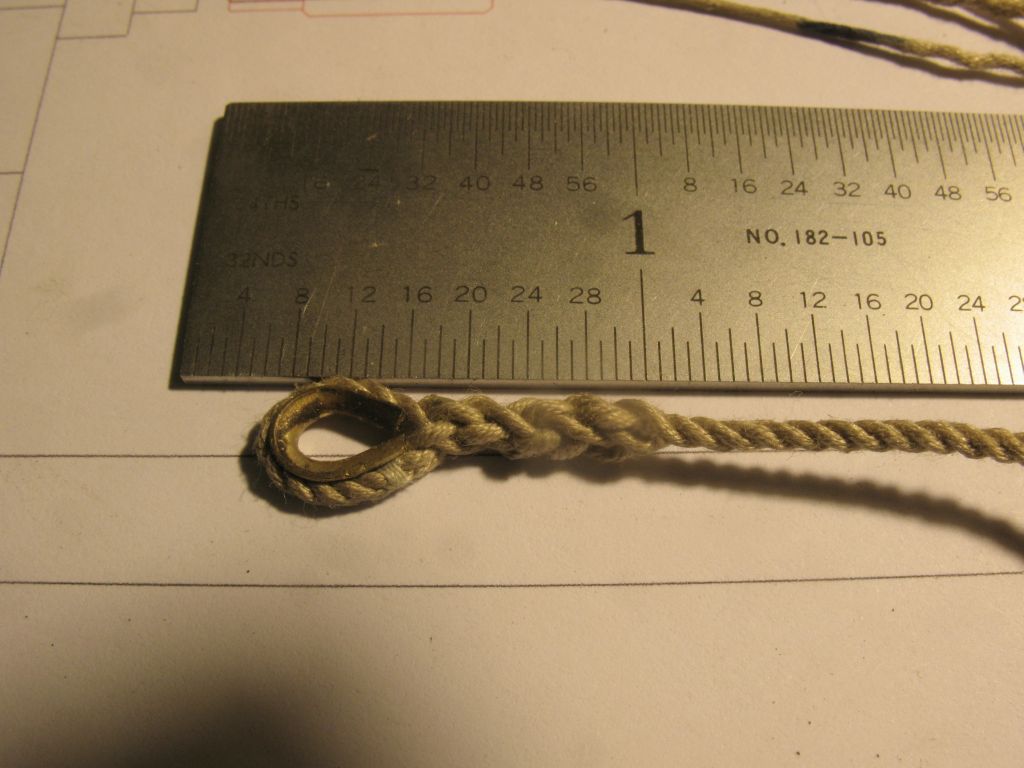
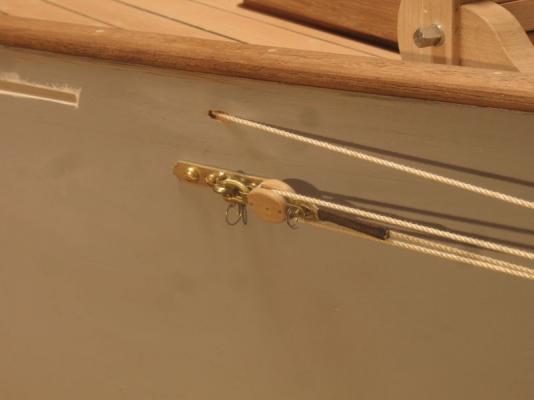
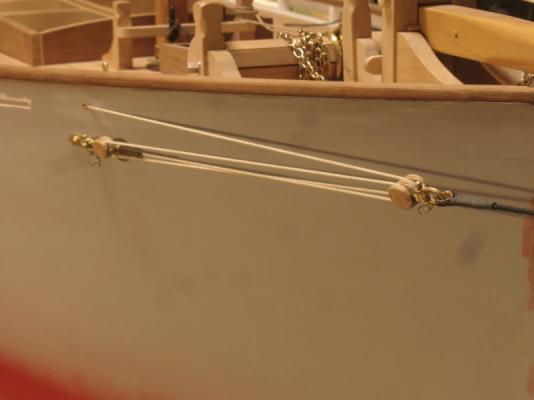
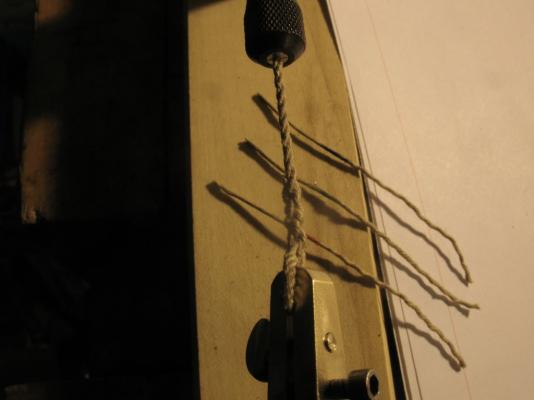
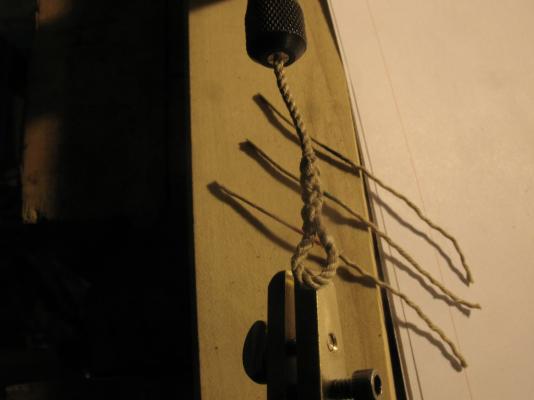
Mark, It was much easier making the giant rule ;~) B.E. Thank you I am glad it is useful. Sailor, That sounds a lot easier said than done. I will see what I can do. Earlier when I was making the bowsprit stays and creating some eyes with the shrink tube I did give the tapering some thought, and I did serve the whole area to cover the shrink tube on one of the eyes. In the following picture the shrink has been served but I did not taper the strands. The eye on the right toward the end of the bowsprit still needs to be served to cover the shrink. One of the reasons for learning how to make the real splice is because one of the shrink eyes did come loose early on, it could be seized and only a short piece of shrink used then served and it would look Ok but it would not be as strong. Michael
-
A clamp for holding rope for splicing
michael mott replied to michael mott's topic in Modeling tools and Workshop Equipment
Jud, no I did not put a crown knot there I think I need to do some better photos. I will talk to Walter about getting busy with his feet in the future. You are correct about freeing up both hands in fact that is exactly the reason for making this clamp in the first place. Michael -
Thank you Crackers, after all it was Doris that got me into the whole model boat building caper. Thanks Bob, My hope is to improve both the look and the time it takes to do it. Denis I take it you have experience the terrible twos? Greg Thanks , and I can see why it takes a few times to get it right. John I don't think my finger would take to kindly to getting skewered with fine wires. Mark thanks, your commendation is greatly appreciated. Texxn5 thank you for looking in and your kind remark. I have been "practicing" today and made some sequential pics of this splice here. Now all I have to do is learn how to taper the splice make some better thimbles. and make more shackles and blocks Michael

-
A clamp for holding rope for splicing
michael mott replied to michael mott's topic in Modeling tools and Workshop Equipment
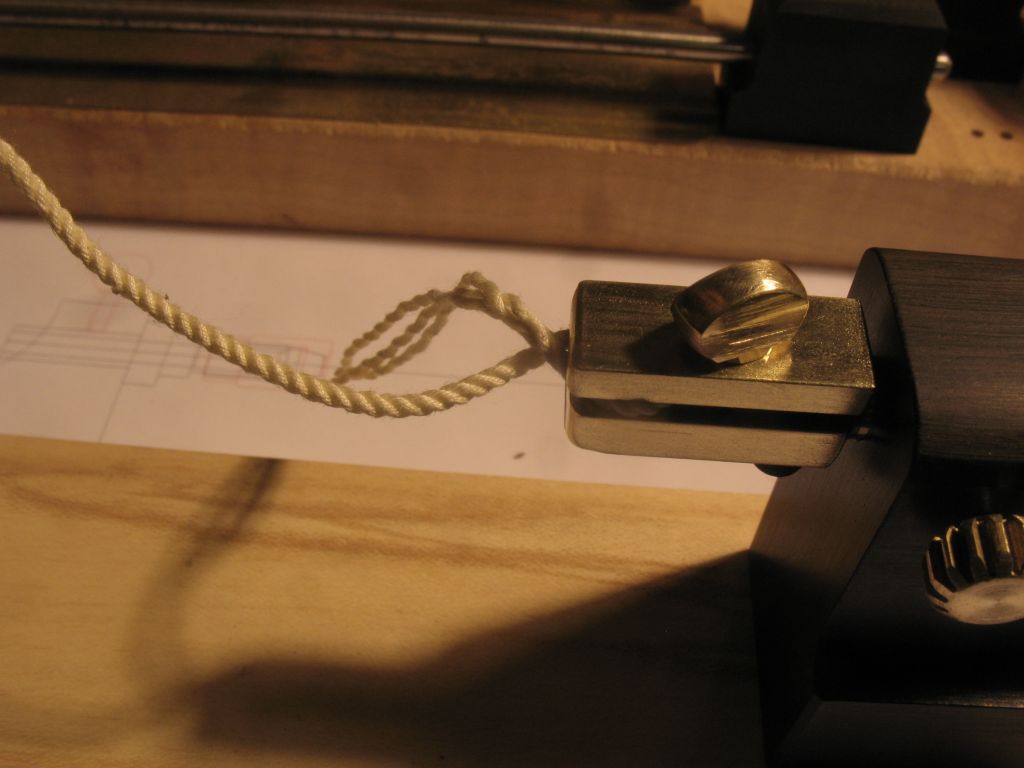
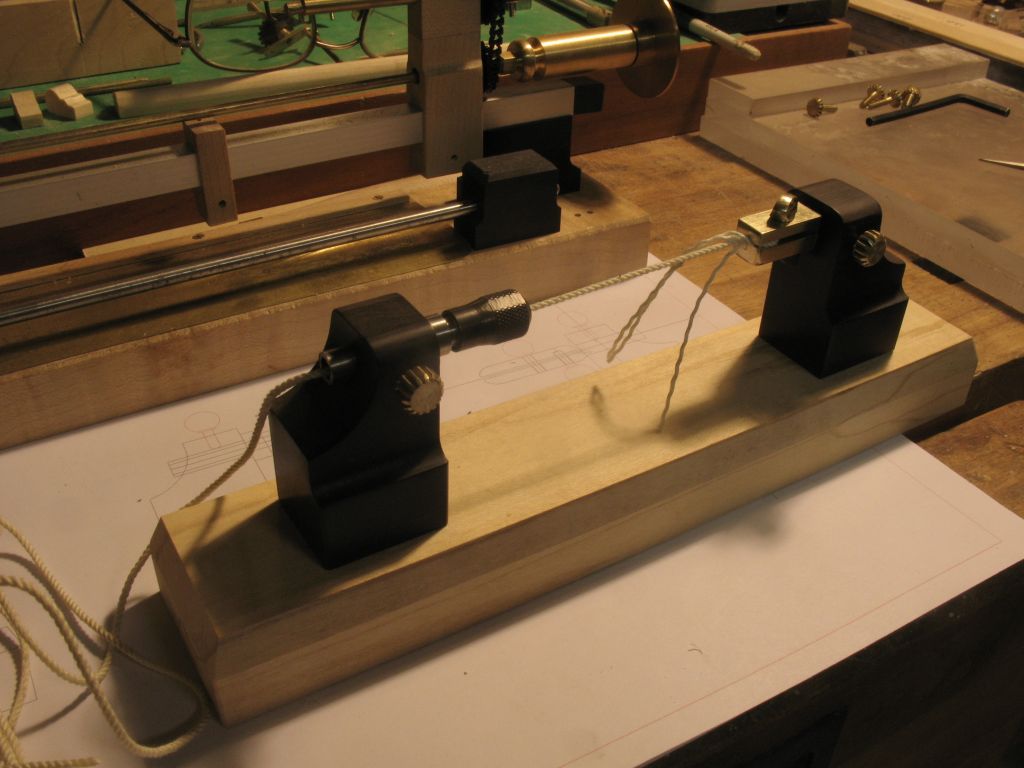
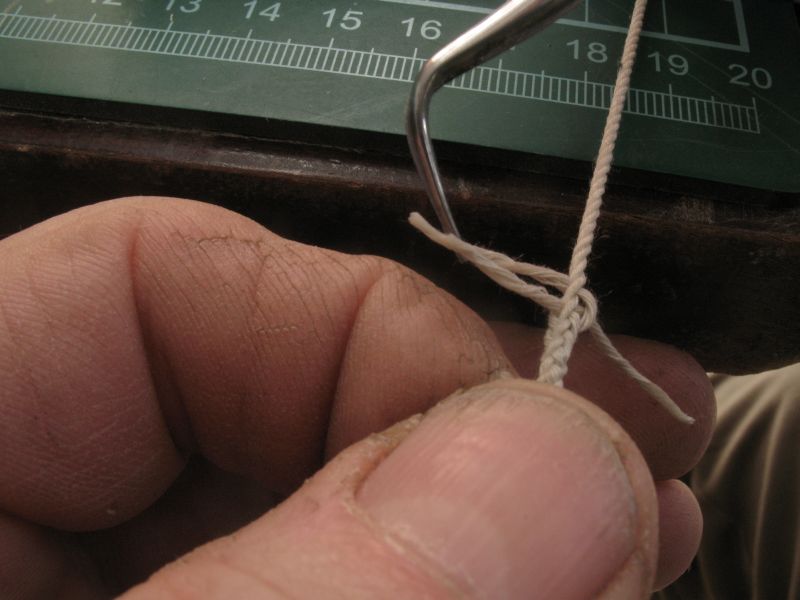
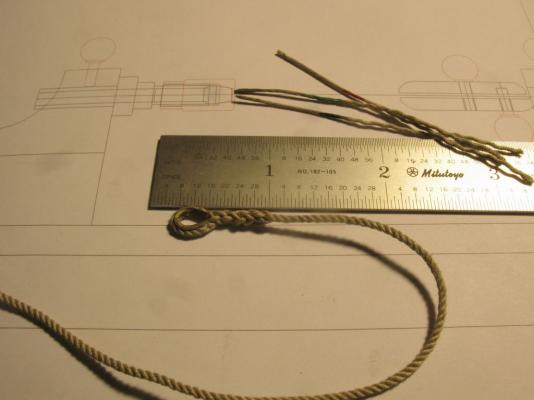
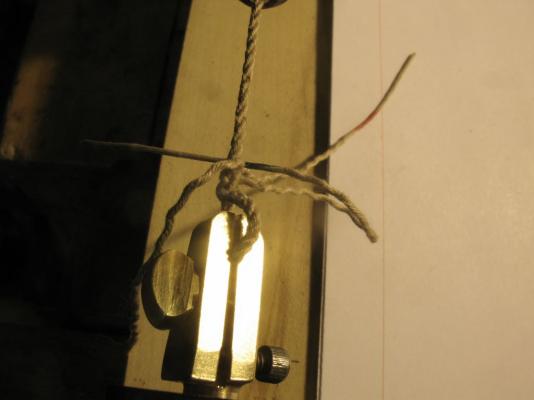
part 2 The tails are now snipped off. Then the eye is unclamped. Next a thimble is inserted. I am pleased with the overall look of this one, Now all I have to do is more of the same. The clamp now that the modification are started, showing the extended collet end, and the refined clamp end. Like any tool it will take a while to get comfortable with its operation. Michael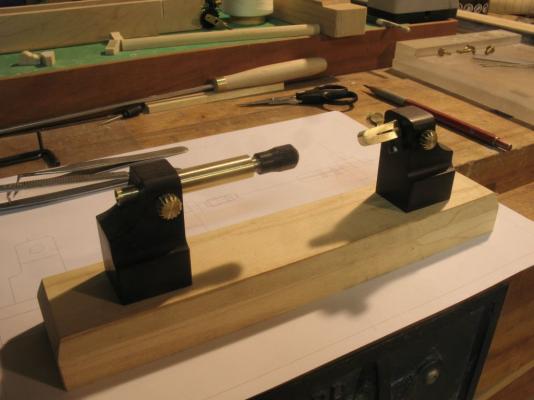

-
A clamp for holding rope for splicing
michael mott replied to michael mott's topic in Modeling tools and Workshop Equipment
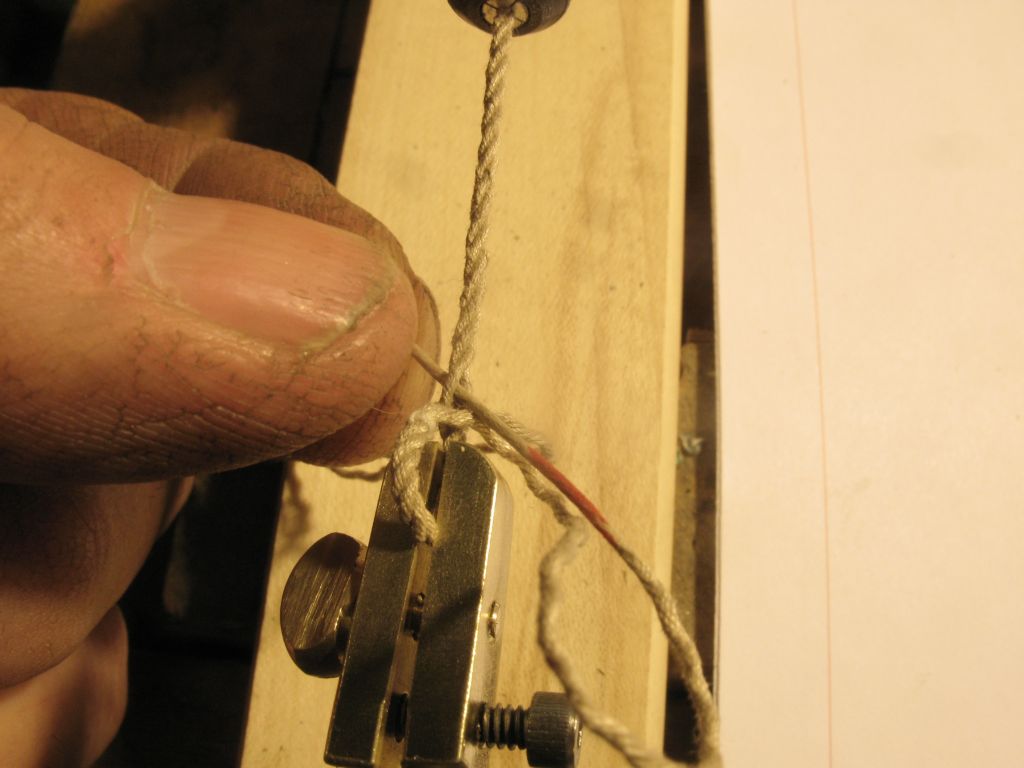
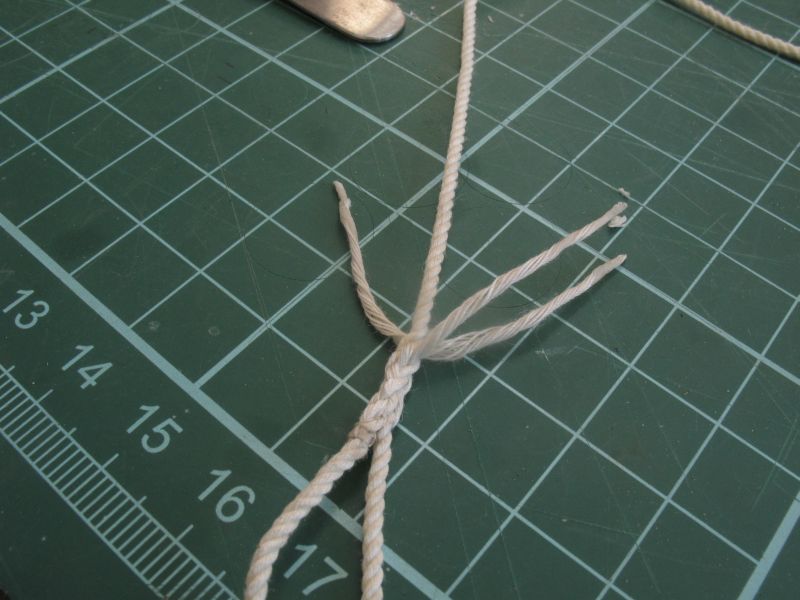
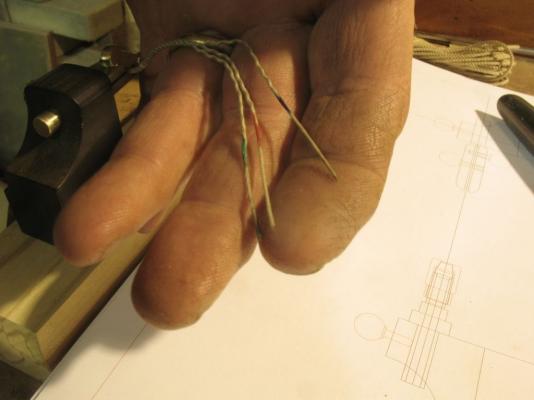
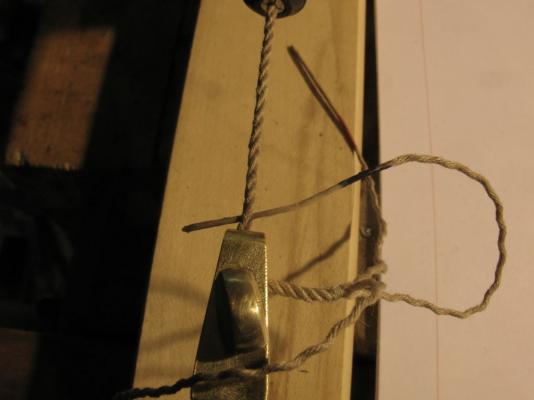
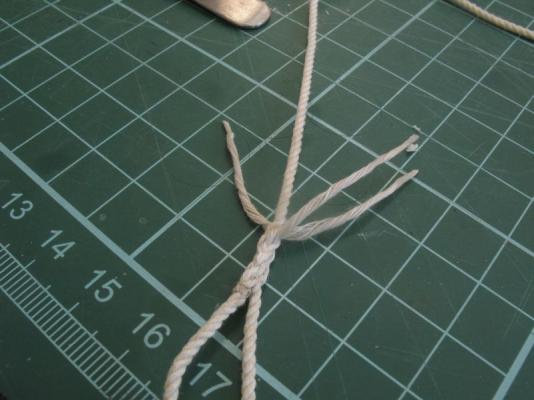
This evening I was able to sequence the splice as follows. The set up includes making the three strands stiff for about and inch I used carpenters glue rather than the CA you have to wait a bit longer but I think it is better. next the three ends are marked with the colours I used red blue and green because I had them handy. Next the end of the unraveled rope is siezed. Now the sequence begins I used Blue Green Red After a few rounds end of part one Michael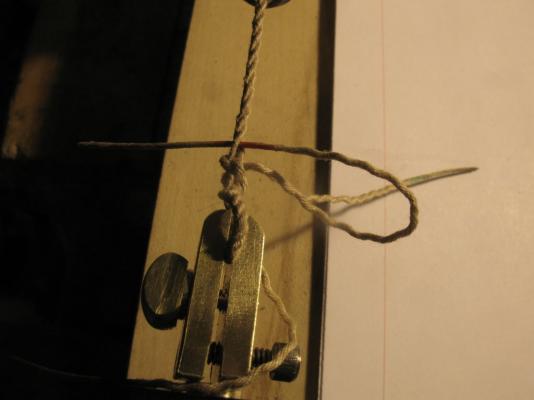


-
A clamp for holding rope for splicing
michael mott replied to michael mott's topic in Modeling tools and Workshop Equipment
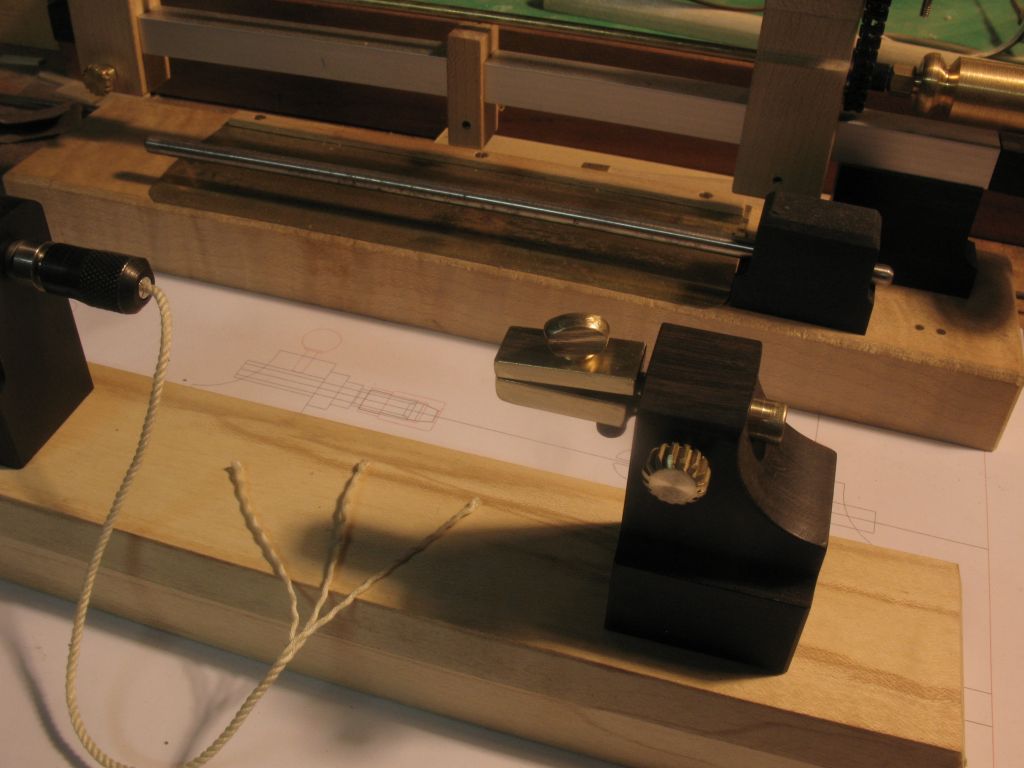
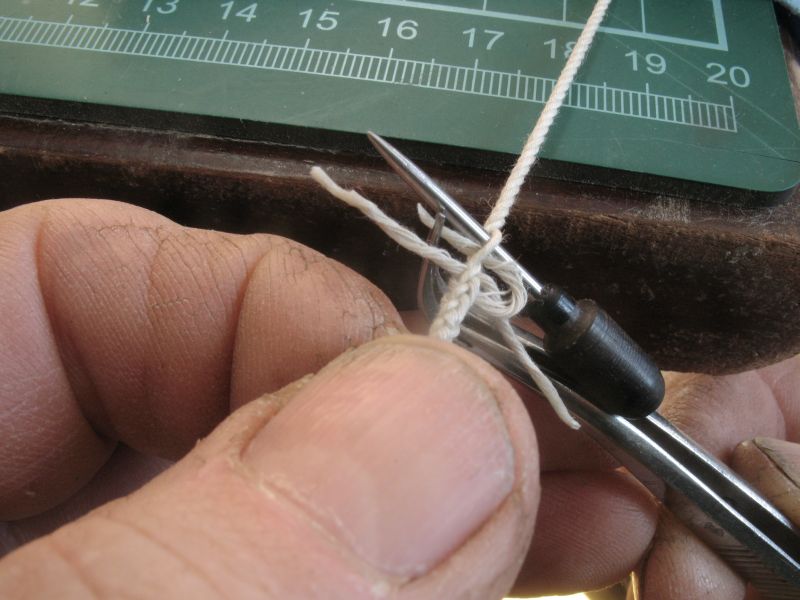
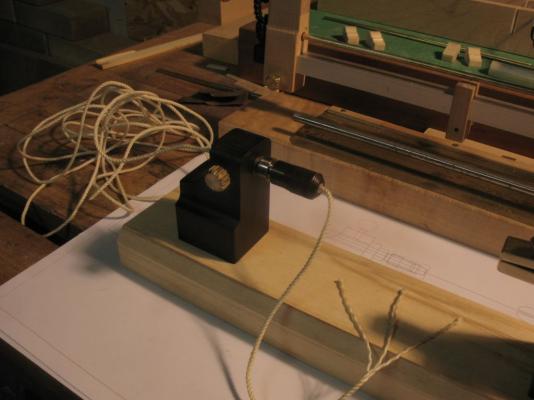
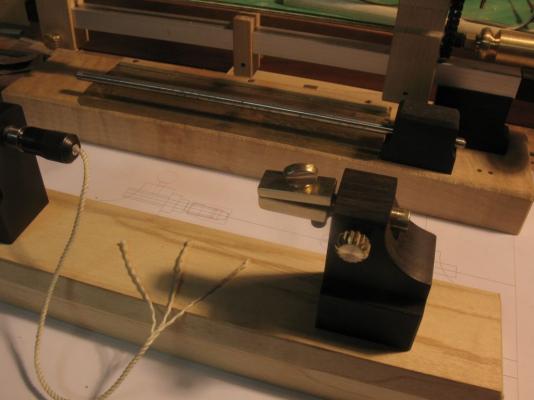
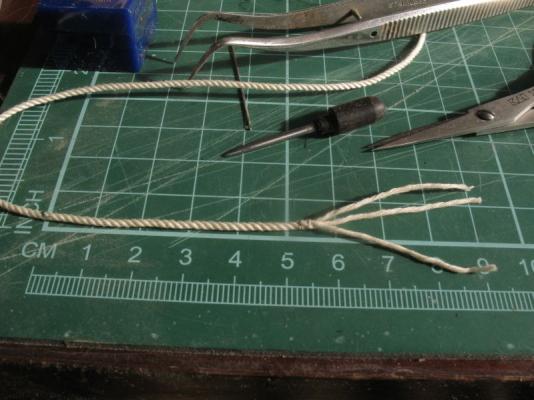
Joe, I will post some more pictures as soon as i get a little practice in. Bob, Glad that some of this will be useful. Today while making a couple of new goes at some small eyes in scale 1/2 inch rope I found the brass clamp to be a bit too large so today I have reshaped it a little giving it a bit of taper and also I made a brass sleeve for the dremel chuck to bring it closer to the clamp. another modification I am thinking about is to make the chuck and the clamp be able to swivel freely when needed this will entail adding a collar to the back end of both elements. I have also found that by unraveling a little more of the rope that would customarily be the case so that I can turn the ends into their own needles or marlins if you get my drift. (sorry Bob I couldn't resist). the last thing is that the tips of the three ropes are now going to be colour coded red, blue, green, this helps to keep the sequence in order. Michael -
It is always great to see your update pictures Gaetan Michael
-
Karl, stunning workmanship, simply stunning! What wood is the barrel made of? Michael
- 662 replies
-
- 1
-
-
- bonhomme richard
- frigate
- (and 1 more)
-
Ah yes the wrong datum line club, welcome. it meets on the third Thursdays of the Month the second Thursdays are reserved for the snipping the wrong tail on the shrouds club. Michael
- 745 replies
-
- 6
-
-
- francis pritt
- mission ship
- (and 1 more)
-
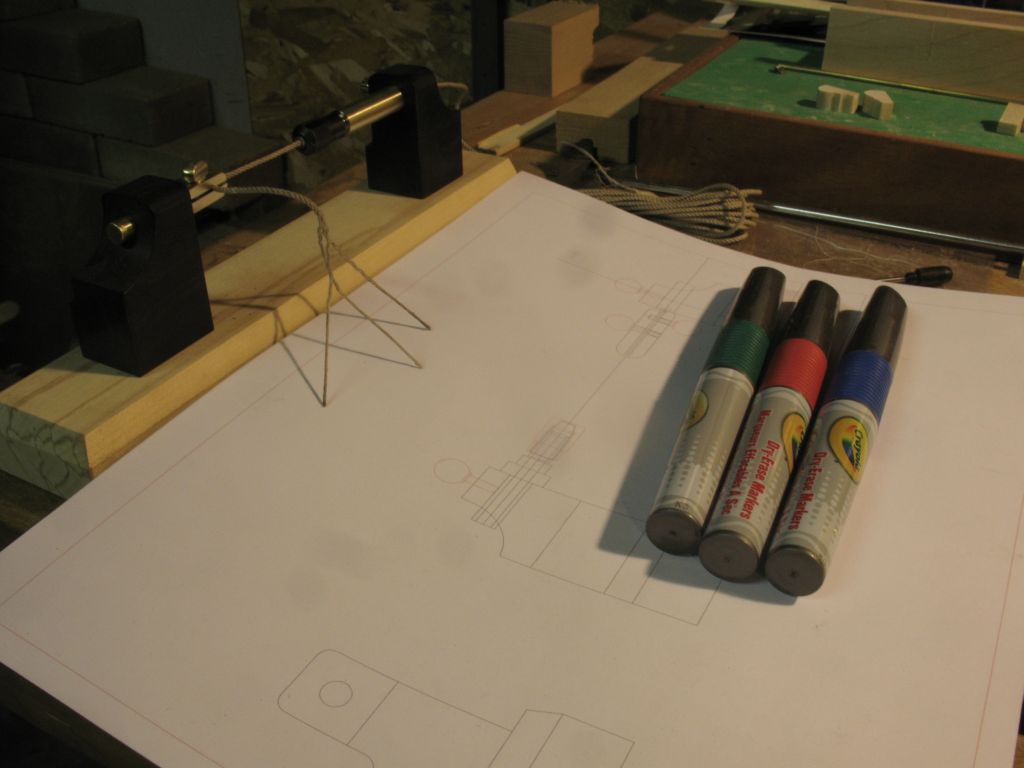
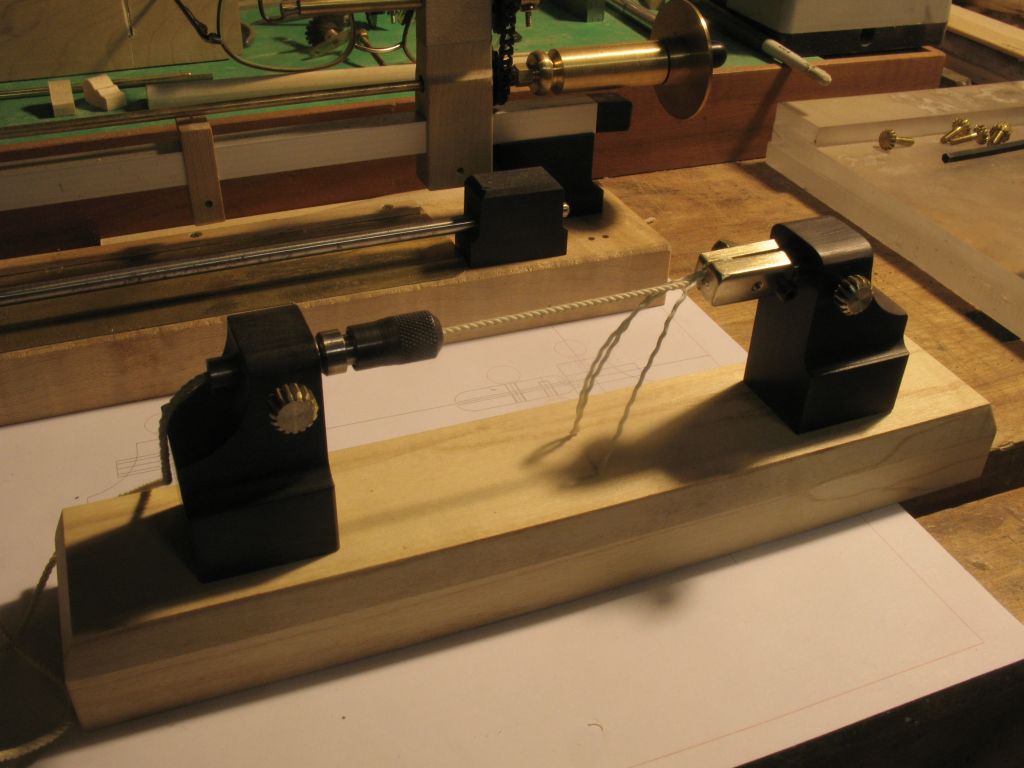
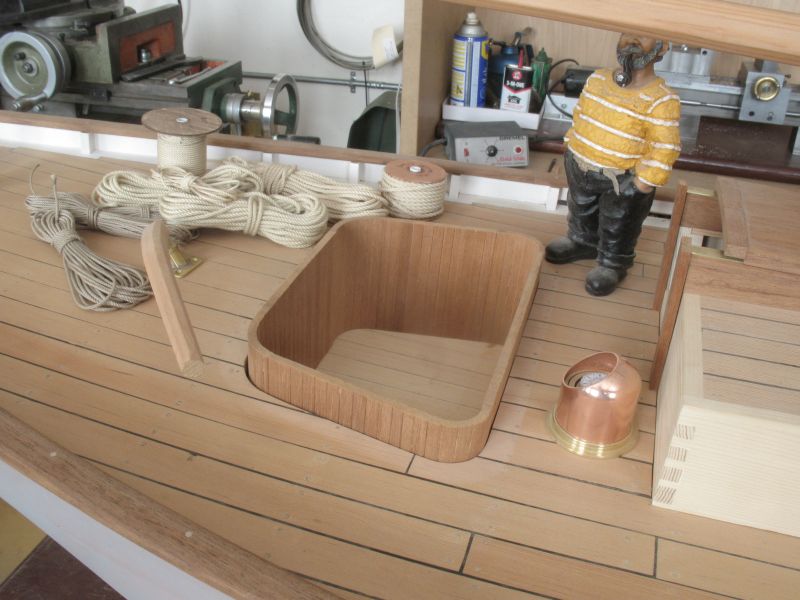
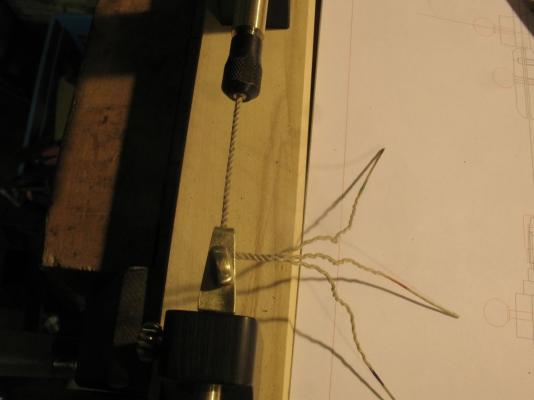
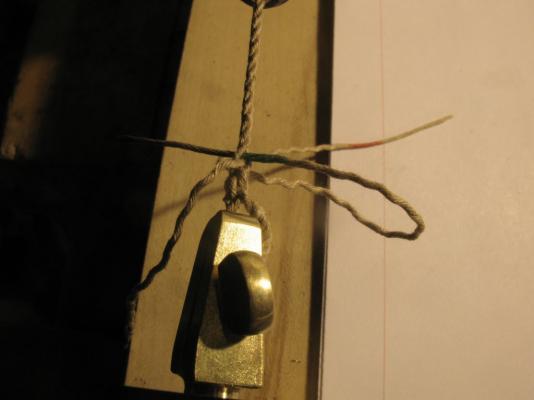
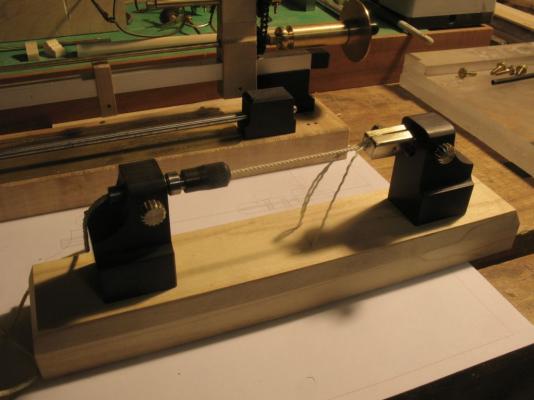
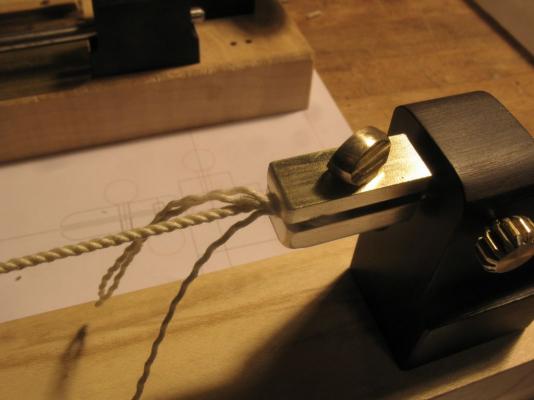
After spending a couple of hours yesterday sorting out the whole splicing gig, I felt that it would be much easier to clamp the smaller lines to free up both hands while threading and weaving the strands back on themselves so using up a few odds and ends this is what I came up with. first I took the dremel chuck out of the earlier mini drill and fitted it to an ebony block. The dremel chuck will allow for different size ropes because of the interchangeable collets. The other end was made from a short length of 3/8 hex brass both ends can be rotated in their holders. By using an adjustable clamp I can use different rope sizes and create different eye sizes easily After the rope is clamped to the loop end the rope is pulled through the dremel collet then the collet tightened to put some tension on the rope that will be threaded into. I did have to drill through the dremel holder to allow the rope to pass through. and now rotated a quarter turn Tomorrow I will see how the clamp works. Michael


-
What a great project I look forward to seeing the restoration, then I am rather partial to the cutter design. Michael
-
sanding drum ?
michael mott replied to rafterrat_2005's topic in Modeling tools and Workshop Equipment
Technically the difference is that a sander rips the surface of the material in the same way that a fall on the concrete rips your skin to lesser and lesser degrees depending on the size of the rocks glued to the paper and a planer cuts the skin as if you were slicing it with a razor or other sharp or dull blade. also remembering that dull tools are very dangerous. this applies equally to sanding drums a dull one can cause a fire because of the friction. That said, it really depends on the use that each tool is used for. It is easier to control a thickness sander than it is to control a thickness planer, because when the material is fed through the thickness sander the drum presses down on the material and it does not try to jump up, the planer blades because of the nature of their action try to raise the material and so there needs to be rollers to hold down the material being planed as it is fed through machine. The type of wood the density of the grain and hardness all have a bearing on how well it planes and as already stated above the blades need to be very sharp to ensure a good surface. The planer cannot polish metal as the sander can. If I had an option to purchase either or and was going to be using ready prepared dimensional material I would opt for the sander, and for larger billets I would and do use a jointer planer rather than a thickness planer. A good saw and the sander would provide the most versatility for resizing wood supplied by the reputable suppliers of wood for model shipbuilding. This is just my opinion on the principles of your question as I do not own either tool but have adapted others to do the same work when I have needed. Michael -
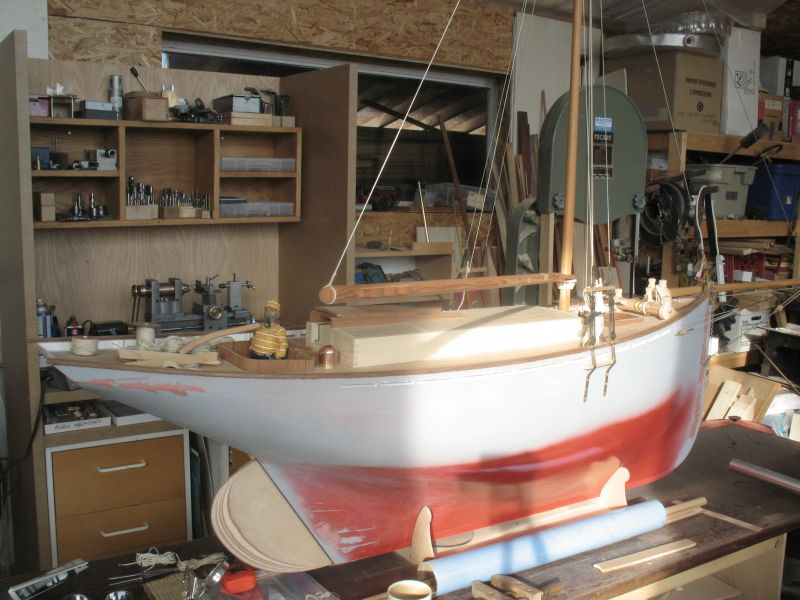
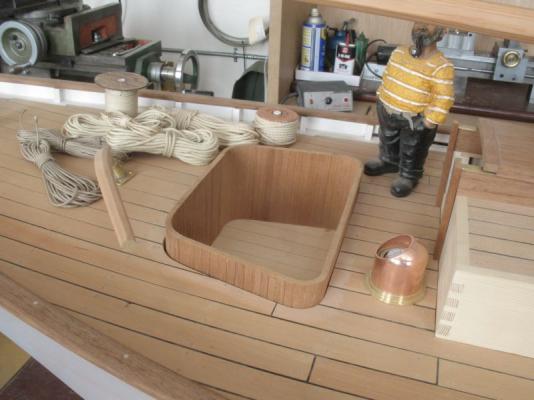
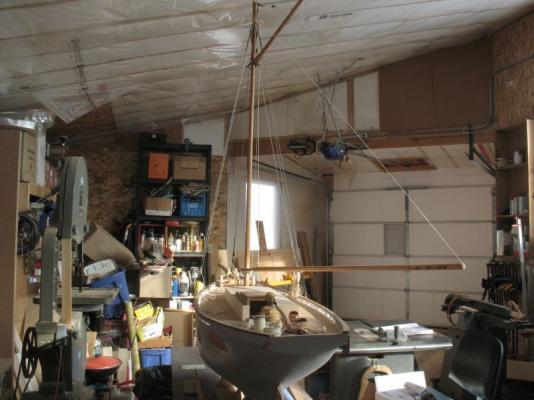
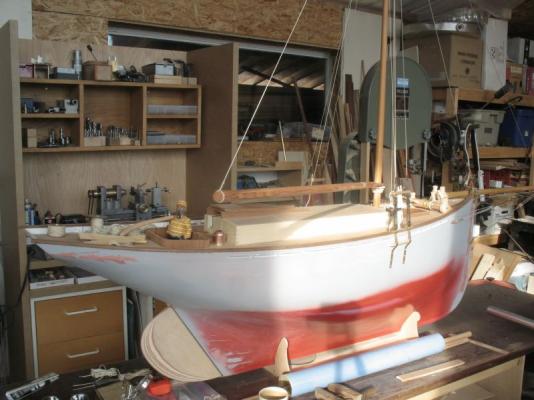
Thank you all for your nice remarks and for all the likes. Today I did do the eye-splice for the topping lift it was harder to do than I expected. I eneded up gluing the ends of the three strands to create a stiff end to thread under the lay. I found that it was a bit easier to have the rope clamped to the bench and then be able to pull on it while doing the threading Looped over the boom I also sanded the top of the cockpit walls ready to start on the cap. The first piece of wood for the boat it was 2 years ago this month that I began building this cutter, this first picture of one of the frames was taken on March 9th 2012, it seems like it was both yesterday and years ago at the same time. Michael


-
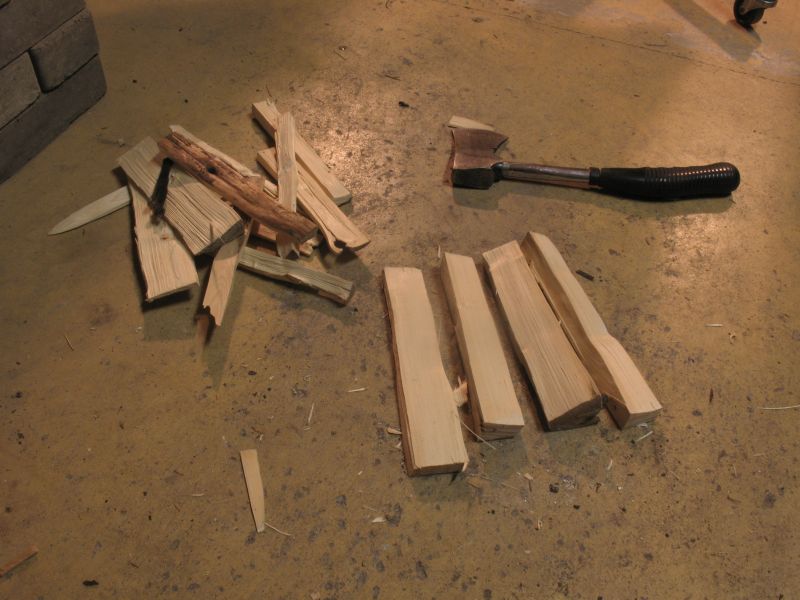
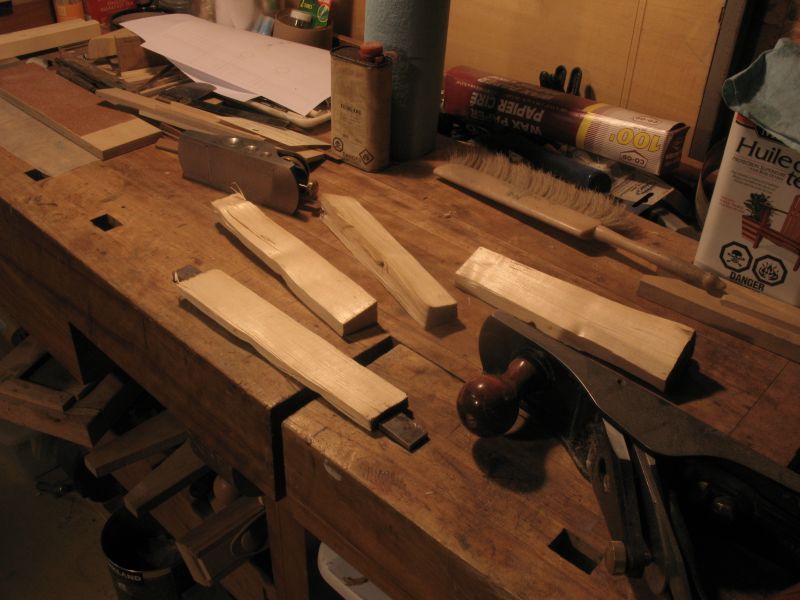
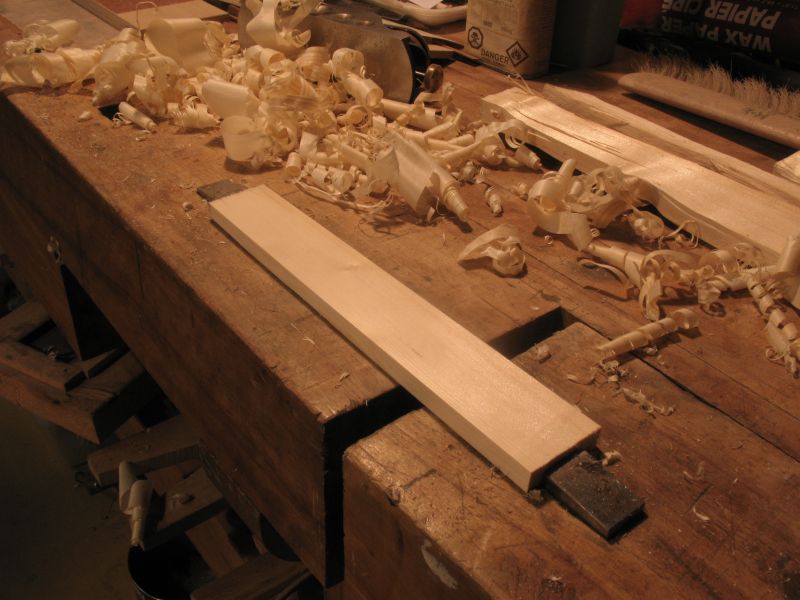
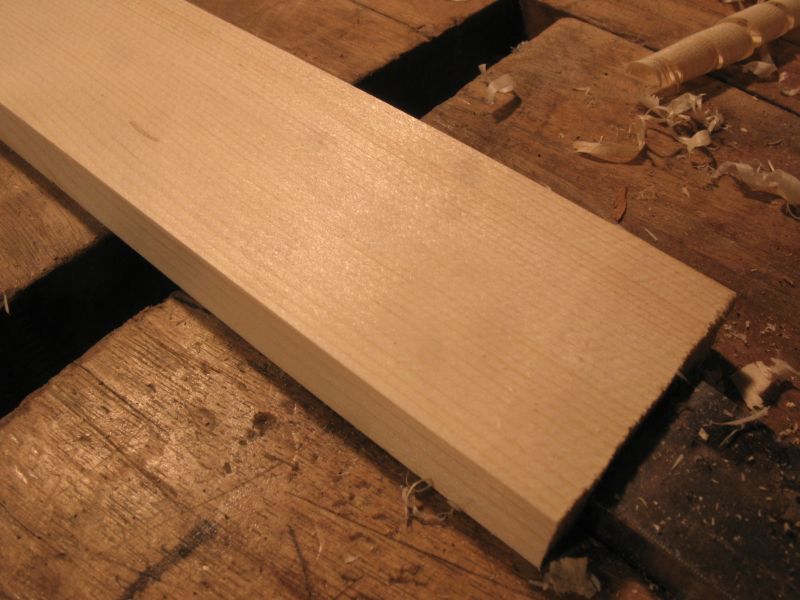
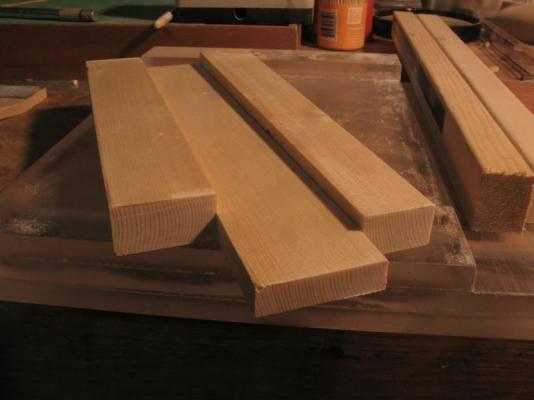
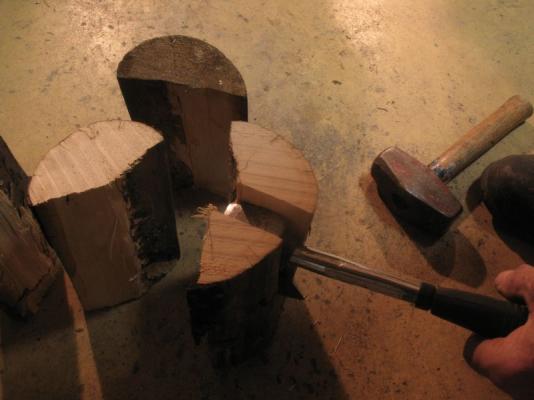
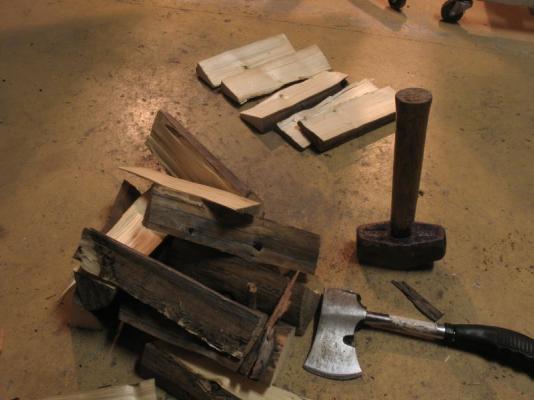
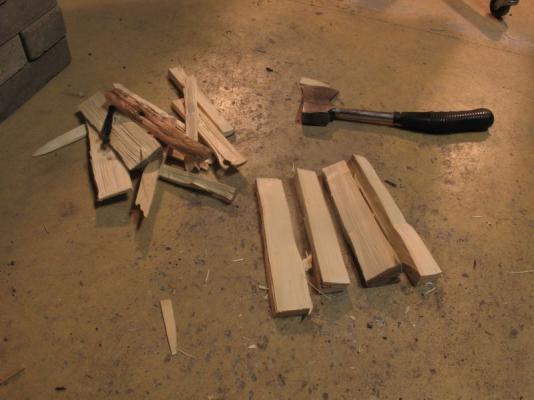
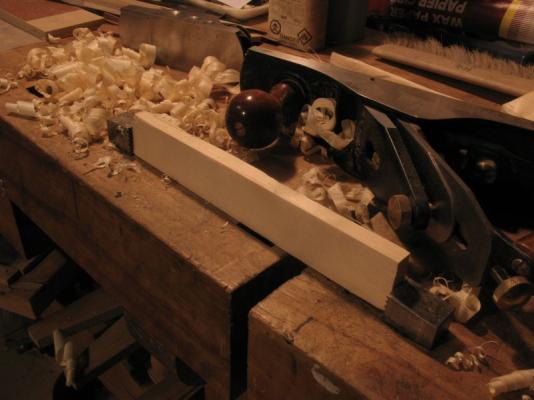
Last evening I was cutting and splitting some spruce firewood which seemed pretty dry and weathered so I decided to prep some for later use in modelwork. first the log was split using a small hatchet and a little sledge, you can see the darker area that is the result of the wood splitting naturally and the fresh white area from the secondary splitting that I did. I split the wood radially in order to get the grain as close to quarter cut as possible the best pieces put to one side, the rest went into the stove. the selected pieces further trimmed. then transferred to the workbench beginning the planing with the jack plane squaring up the final smoothing done with the small low angle block plane ready for storing for later use. A final comment this firewood was harvested by a friend from an area that had suffered from a Forrest Fire some years ago. this is exactly the same process that I used for preparing the wood I used yesterday for the boom rest here Michael


-
Wonderful to follow another build, You must not have to sleep like the rest of us ;~) Michael
- 222 replies
-
- 2
-
-
- gorch fock
- barque
- (and 2 more)
-
She is looking very sharp Andy, that is a lot of styrene looks to be about 5 foot or more in length. Michael
- 382 replies
-
- 1
-
-
- stadacona
- sylvan scale models
- (and 1 more)
-
Sherry the shot from below the stern shows what a beautiful job you are doing, I say this because it is a view that we do not see a great deal and it is a difficult area to build it looks really superb. Michael
-
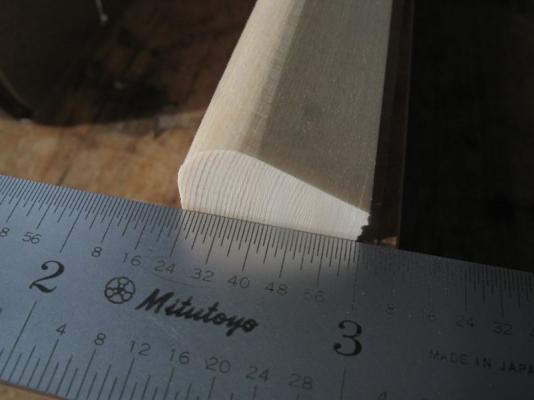
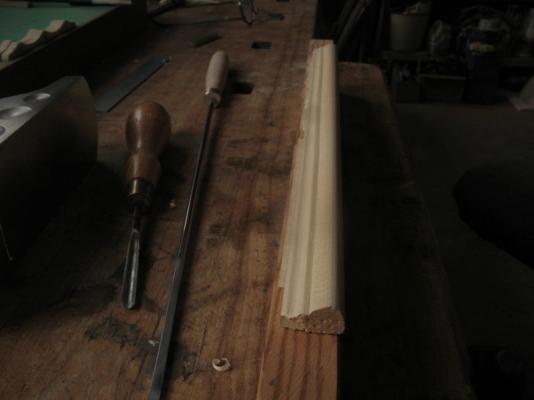
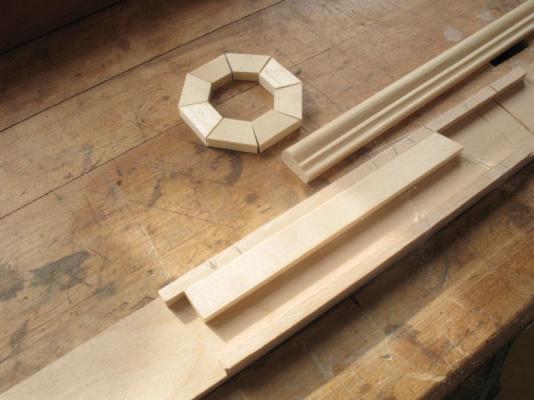
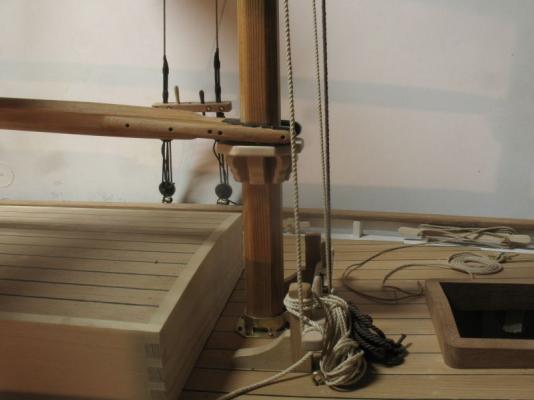
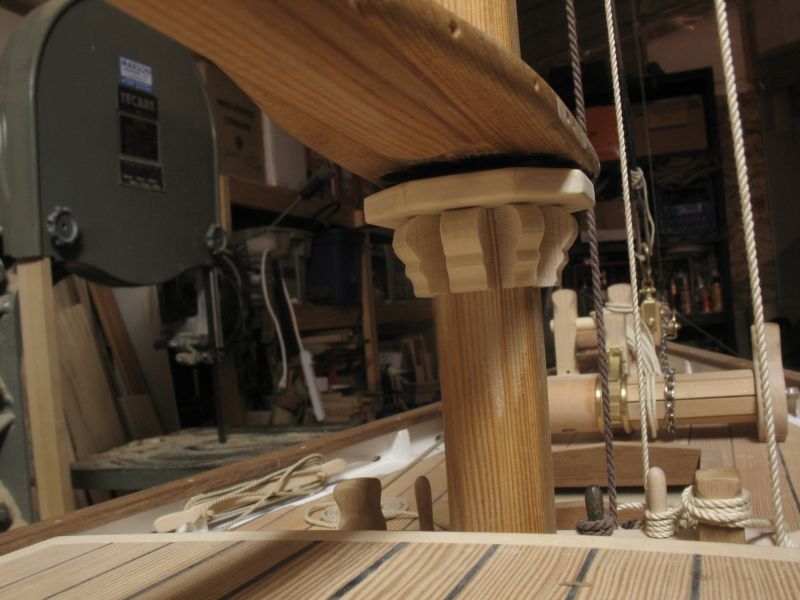
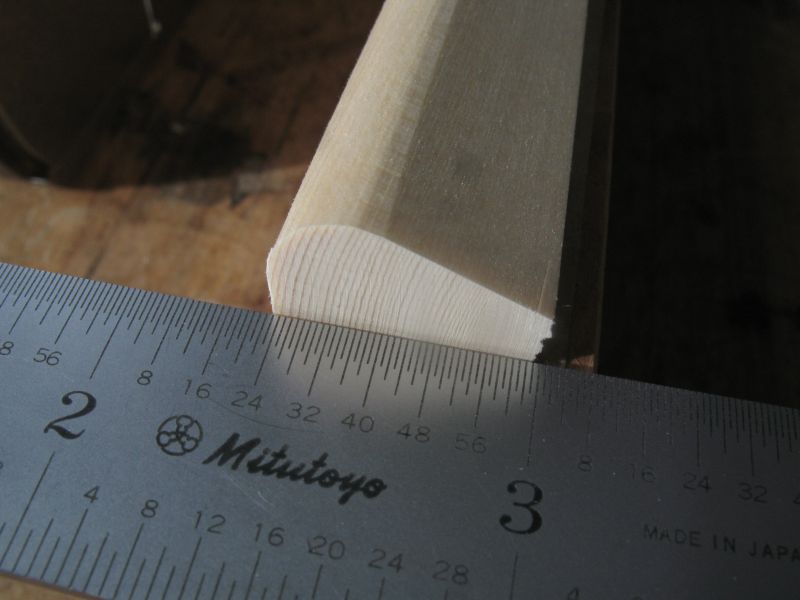
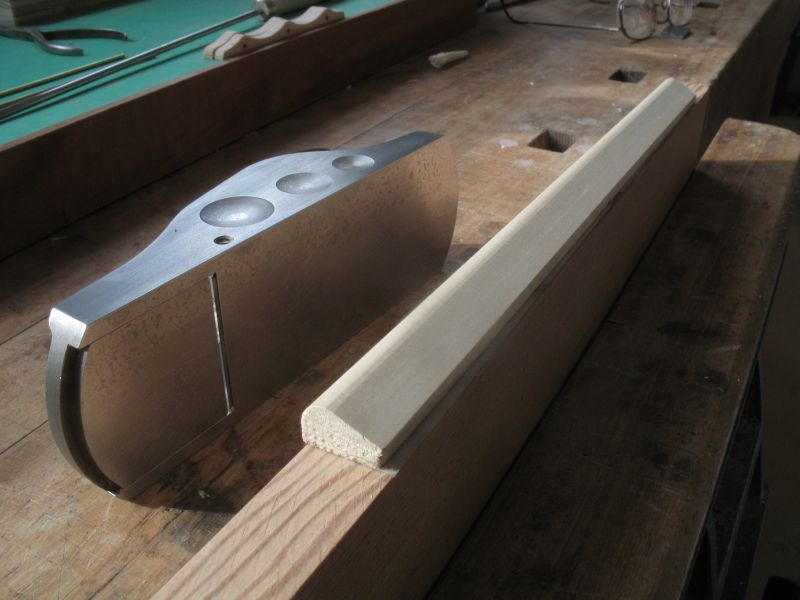
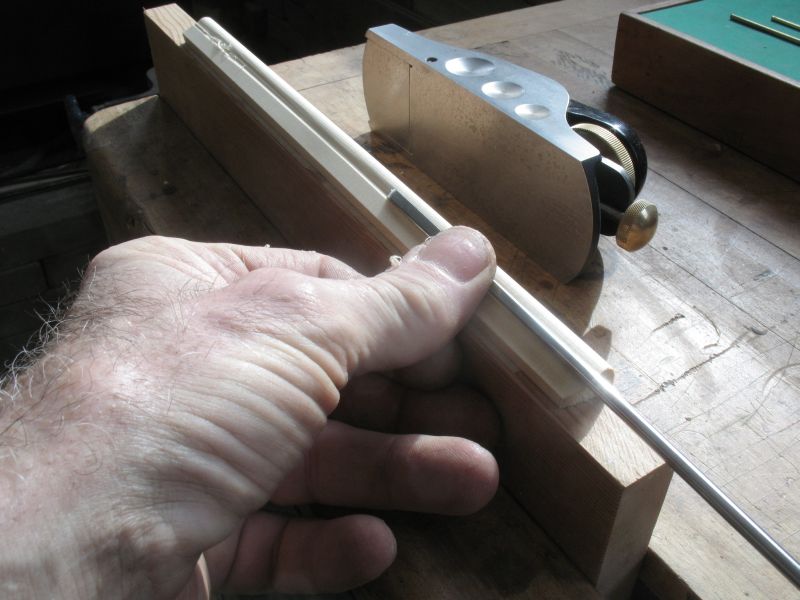
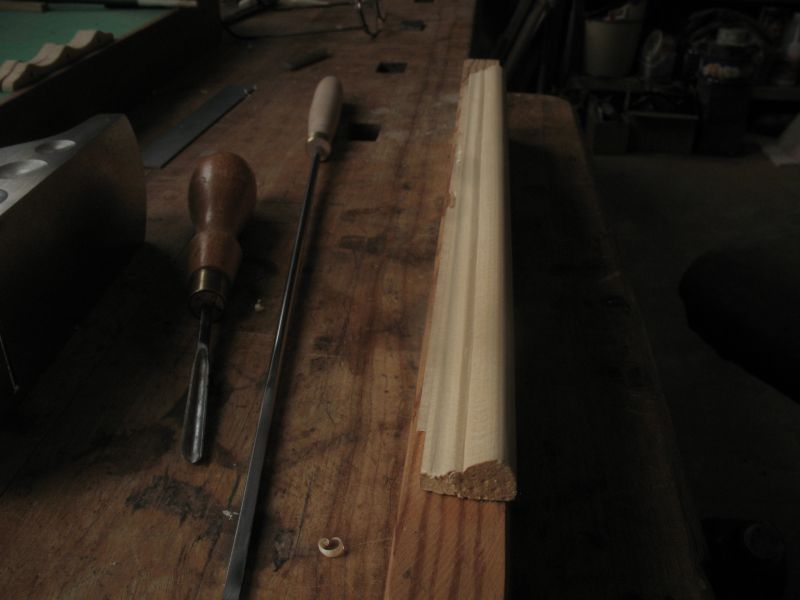
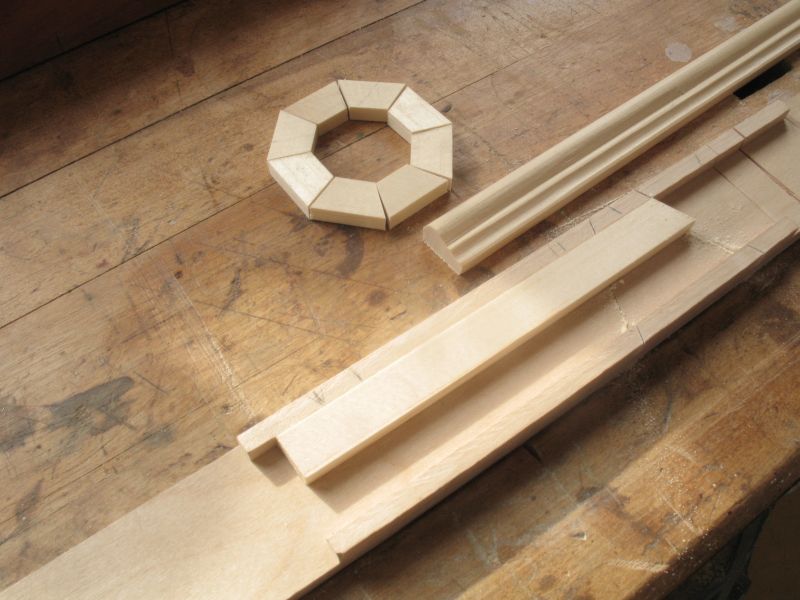
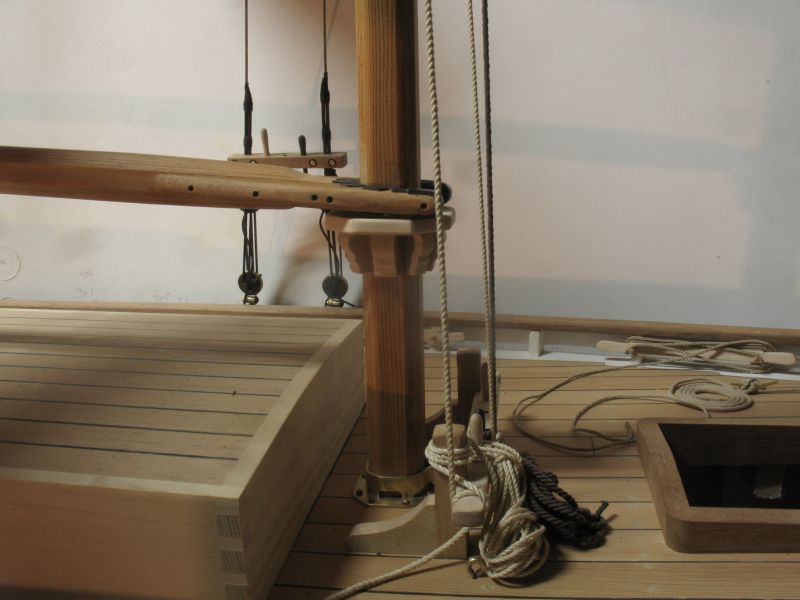
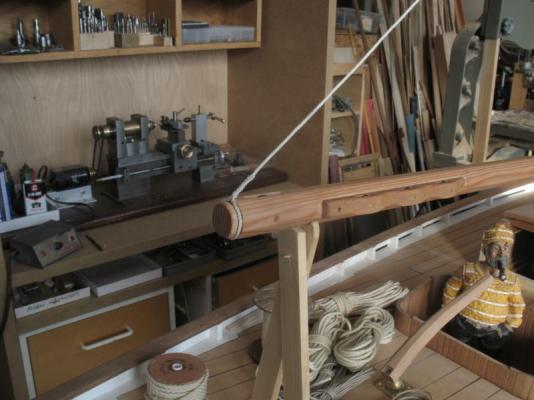
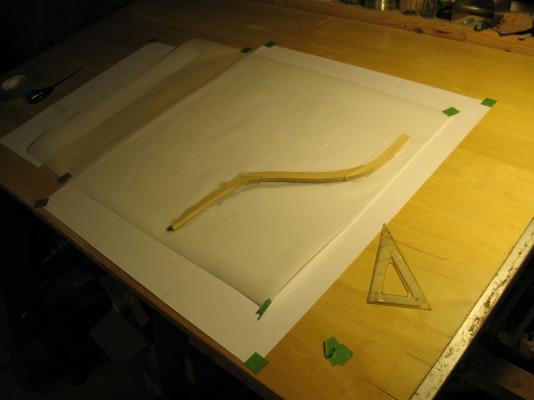
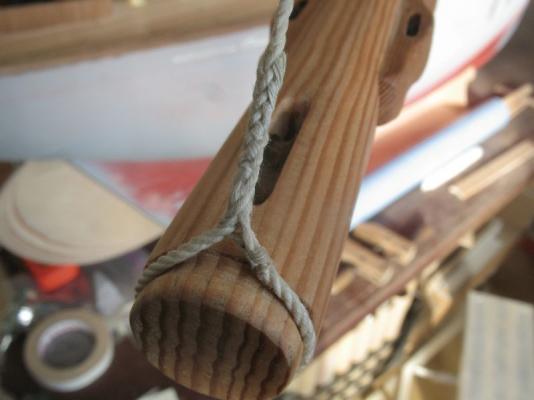
Garry, Nils, and John, thank you for following along with the encouraging remarks. I worked at building the boom rest at the base of the mast today. I began by reshaping a stick of very fine grained spruce firewood. I stuck it to a piece of fir with some carpet tape so that I could clamp it in the vice to plane it to shape. Using just the block plane to start I rough shaped the stick to a sort of pear-drop type shape Then switching to my long small chisel I cut the recess below the curve. This was followed by a small gouge to completed the shaping, I decided not to sand the surface but to just leave the cut surface. Another piece of the same firewood was used to make the top ring to fit around the mast, I glued the sections together 2 at a time without clamps but by rubbing the two surfaced together , I find this works just as well as clamping if not better in some cases. The form piece was cut to short lengths to act as support blocks under the ring, their sides were hand sanded using the shooting board with a block of wood with sandpaper glued to it which acted like an sanding plane The blocks and the two halves of the ring were then glued to the mast. . Walter's viewpoint Tomorrow some parrel beads and then some more tackle. perhaps I will have a go at making the topping lift eye splice. Michael