michael mott
-
Posts
5,200 -
Joined
-
Last visited
Content Type
Profiles
Forums
Gallery
Events
Everything posted by michael mott
-
 I can only echo what has been said by others, superb work Johann Michael
 -
Congratulations Mehmet You have added a lot of life and character to your model, very well done. Michael
- 83 replies
-
- 3
-

-
- sponge boat
- finished
- (and 1 more)
-
Vaddoc, First Congratulations on a finely executed model, I have really enjoyed following your journey. I think that the sails furled are a good choice, mainly because it is not in the water and sailing. Sitting in the cradle it makes good sense to have the sails furled, you also know that they are proper sails. Again congratulations on you fine model. So what's next? Michael
- 253 replies
-
- 2
-
-
- ketkch
- gaff-rigged
- (and 1 more)
-
Congratulations Jack on a great finish, a very delightful story to round off the history of the vessel. a great job all round, looks like you might soon be venturing into so heavy kit-bashing or even perhaps a small scratch now with all this experience you have gained...... Might I suggest one of those beautiful Ice yachts that would look great it say 1/12th 0r 1/16th to slide right into it. Michael
- 203 replies
-
- 4
-
-
- artesania latina
- marie jeanne
- (and 1 more)
-
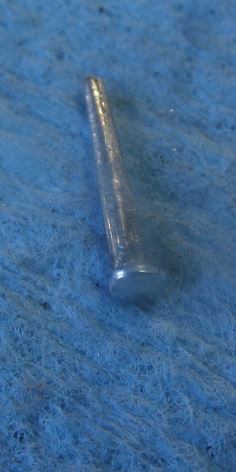
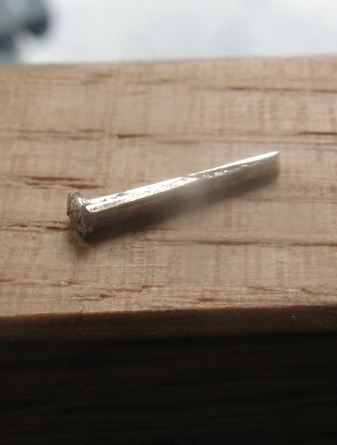
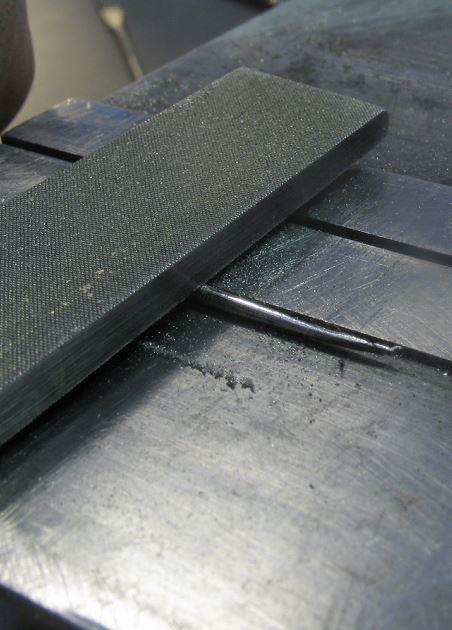
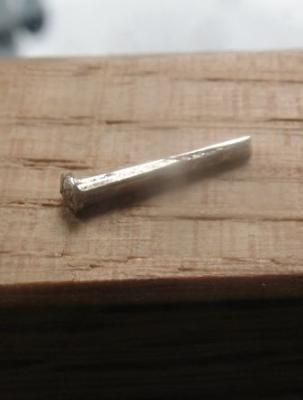
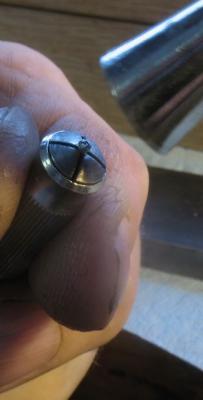
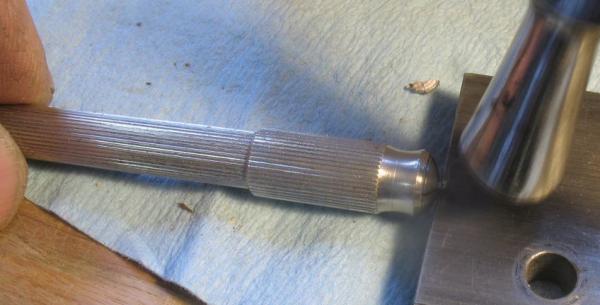
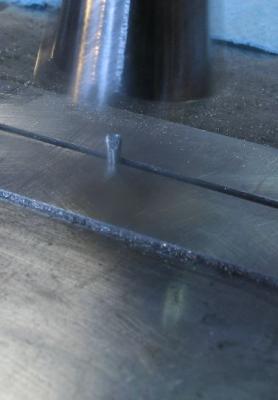
I have been working on a small project that required some small silver nails, these nails are 1/4 inch long and .035" at the largest diameter. step 1 was to cut a wedge of silver from some annealed sheet silver, and using a tiny watchmakers hammer forge it roughtly into a rounded shape step 2 was to clean up the long blank with a fine file Step 3 using the same small watchmakers hammer to upset the head step 4 back to the steel plate to tap the head into a round shape step 5 with the rough nail in a pin vice a second peening to dome the head. step 6 the top was polished with a leather polishing stick (Basically a strip of wood with some leather off cut stuck to it with double sided carpet tape) The finished nails I actually had to make 2 of them. Michael


- 7 replies
-
- 16
-
-
Very interesting, understanding the programs to move from an Idea to the finished machined part take a particular set of skills, sometimes I wish I was 30 years younger. then I might have the time to climb that steep curve. Michael
-
They look a bit like old printer gears. Michael
- 2,625 replies
-
- 4
-
-
- kaiser wilhelm der grosse
- passenger steamer
- (and 1 more)
-
5/8th at 1:48 scale =.013" Fine work indeed sir! michael
- 641 replies
-
- 6
-
-
- greenwich hospital
- barge
- (and 1 more)
-
Ed Thanks for the detailed explanation. I suppose some brass dowels and pins soldered in with soft solder would work very well to solve the slippage problem.... Hmmm Michael
- 3,618 replies
-
- 4
-
-
- young america
- clipper
- (and 1 more)
-
Alan when you can shave with the chisel it is sharp enough in my opinion, and yes having the mirrored surfaces on the back and bevels is really a great aid to accuracy. Michael
-
Nice work on the winch Nils. Michael
- 2,625 replies
-
- 3
-
-
- kaiser wilhelm der grosse
- passenger steamer
- (and 1 more)
-
very clean workmanship Ed. I am enjoying watching these small craft evolve by your hand., A question regarding the pins through the small dowels which obviously also form a type of pin clamp. Are these "clamps " inserted by twisting them in with your fingers or are you tapping them "home" with a tiny hammer? The pins also appear to be glued into the dowels, is this correct? Michael
- 3,618 replies
-
- 3
-
-
- young america
- clipper
- (and 1 more)
-
Thanks for the update Walter, it is good to hear that you are able to get busy with the various aspects of your workplace. Michael
- 208 replies
-
- 2
-
-
- meridea
- repair ship
- (and 1 more)
-
Great to hear that your health is improving Walter, I look forward to seeing the next update. Regarding the workroom situation, I sometimes find myself in the same mood. I find that just putting one or two items away is all the kick I need to feel that I have accomplished a great deal. One of my woodworking heroes James Krenov would simply pick up the broom and sweep the floor when this happened to him. Michael
- 208 replies
-
- 2
-
-
- meridea
- repair ship
- (and 1 more)
-
In the same way I am running out of ways to express what an amazing artist you are regarding this build. your attention to detail reminds me of the philosopher Ruskin who admonished that( I am paraphrasing here) "just because you cannot see a detail does not mean that you should neglect to do the same quality as that seen" Michael
- 3,618 replies
-
- 10
-
-
- young america
- clipper
- (and 1 more)
-
Glenn I am not sure that I would have been able to cut up the flywheel....I would have faked the waterline in that area. Stunning work all the same. Michael
-
Very nice work on the windows Mark, I am just waiting for the day that you cut her loose from the massive sheet of wood. Michael
-
A really beautiful job Pete, I hope that my one turns out as nicely. Michael
- 258 replies
-
- 5
-
-
- buzzards bay
- herreshoff
- (and 1 more)
-
Vaddoc great rework of the lines and shrouds, overall it looks very nice indeed, you should be pleased I know I would be. Michael
- 253 replies
-
- 2
-
-
- ketkch
- gaff-rigged
- (and 1 more)
-
You are definitely off the deep end with the jet skis, do they stop when the rider falls off? nice work on the rest of the accouterments. Michael