donrobinson
-
Posts
1,909 -
Joined
-
Last visited
Content Type
Profiles
Forums
Gallery
Events
Everything posted by donrobinson
-
Simply beautiful Dave!! Your taste and skill in "painting" with wood is truly artistic. Congratulations!!
- 75 replies
-
- 2
-

-
- constitution
- mamoli
- (and 2 more)
-
Very nice build David, you certainly can be proud of it. With all the problems you had I am a little surprised you are going to another MS kit again so soon, however, I know you will do just fine. I'll be watching for your next build log
-
She looks much better with the full sail Messis, great work!! I recently finished the Liburnian Novilara by MarisStella(no build log) and achieved the same effect by installing wires into the edges of the sail. Very nice build!!
-
kit review 1:72 Ragusian Galley 18thCentury - MarisStella
donrobinson replied to James H's topic in REVIEWS: Model kits
Wonderful review on another fine kit from MarisStella -
None yet, I am just finishing up another project and will get back at Stefano soon. Thanks for dropping in
-
A true masterpiece Nils, your skill and eye for detail always amaze me. I hope you solve the problem with room in your house as I look forward to following your next build. Until then take care.
- 692 replies
-
- 6
-
-
- eagle of algier
- chebec
- (and 2 more)
-
If you don't have a rotary tool(Dremel) now may be the time to invest in one. The only solution I see is to carve out enough of the blocks to give yourself some "wiggle" room and hopefully the laser tabs break off easily. I don't think the alcohol and floss will work as it will not get deep enough, as Chuck says. It looks as though the blocks are higher than the frames so adding strips is not an option now or I would say to do this now while you have lots of room to work with. I have built several kits using strips for reinforcement and they do a fine job and are easy to remove when required. I am building MarisStella's Pasara which is a similar frame built boat and it has seven strips across the top of the frames. The frames are made of plywood, which is much harder to fair versus basswood, and I had no problems with frames breaking. I wish you luck.
-
Great build! The details are amazing
-
David: Thanks so much Mark: The filler block is mostly balsa but for some reason, I can't remember why, there was also some basswood I put in also Mike: It's true, it's true haha! Feel free to use it anytime!!! Messis: Yes, below the waterline will be copper plated, Thanks OC: Thanks for stopping in Robert: I would like to see your Stefano build, post a picture here if you want I would not mind or better yet start a log . Ian: hello, have not heard from you for a long time. What have you been building lately? Hubac: Thanks so much, Good of you to drop by
-
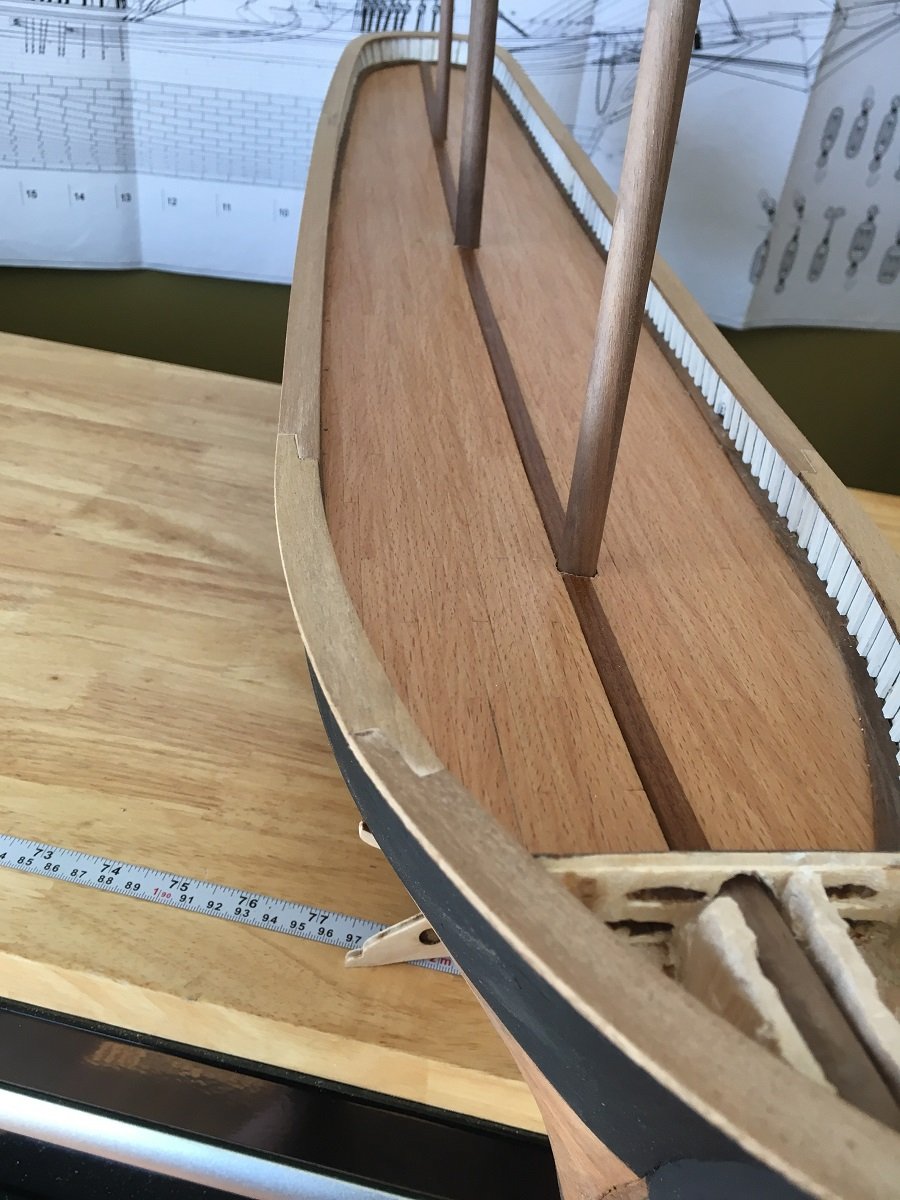
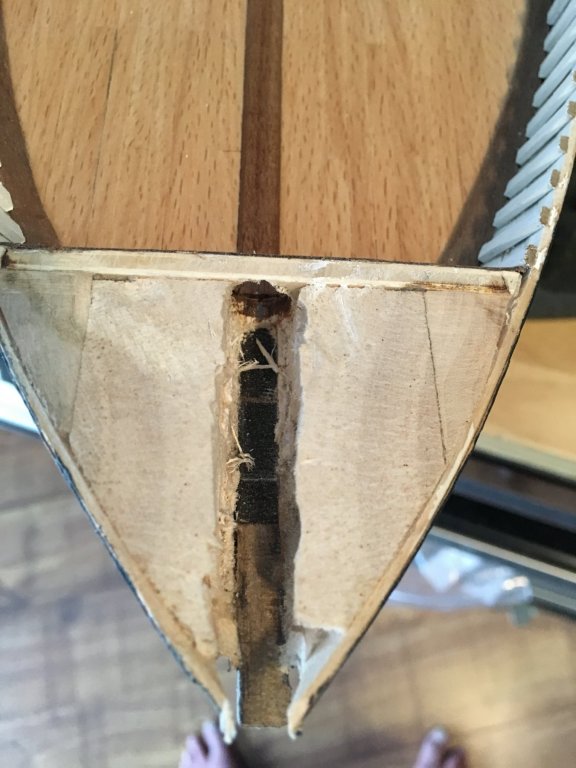
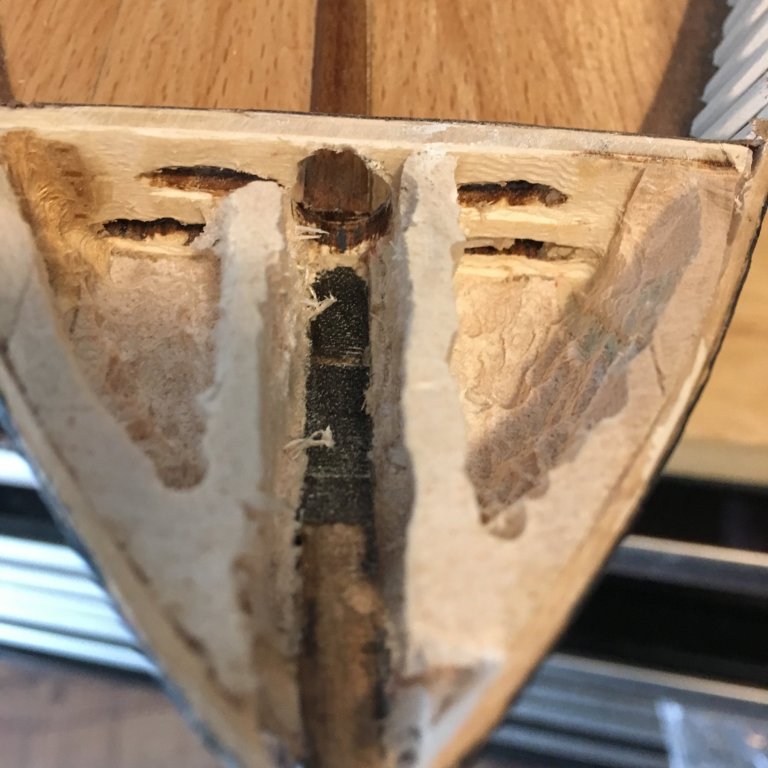
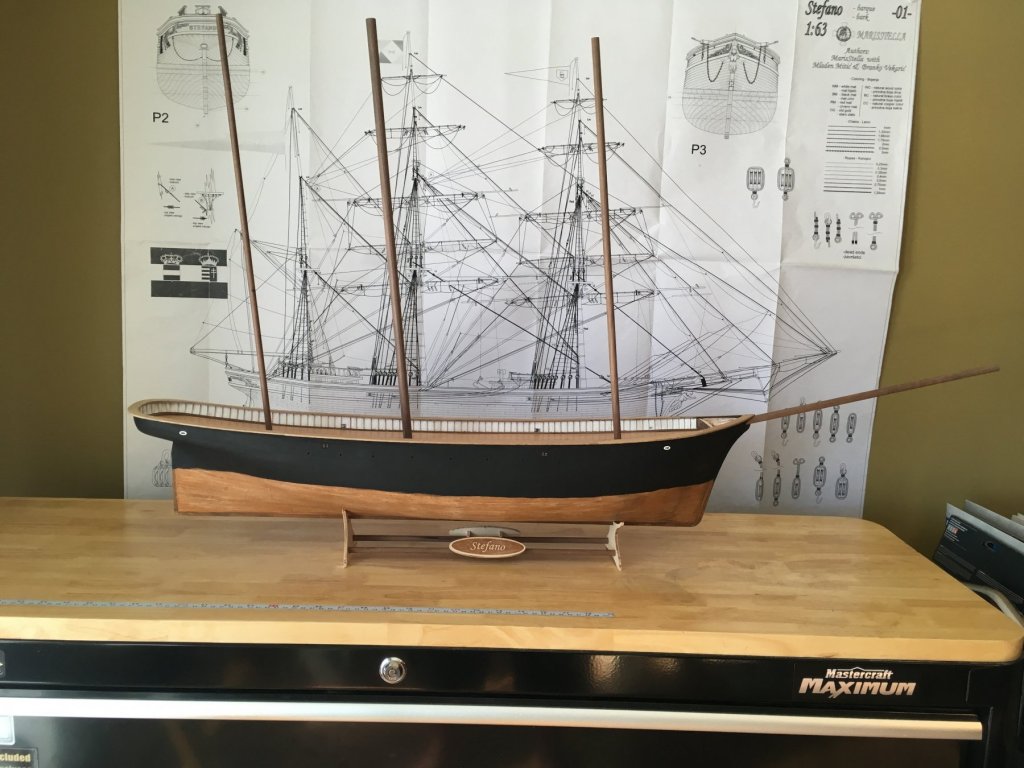
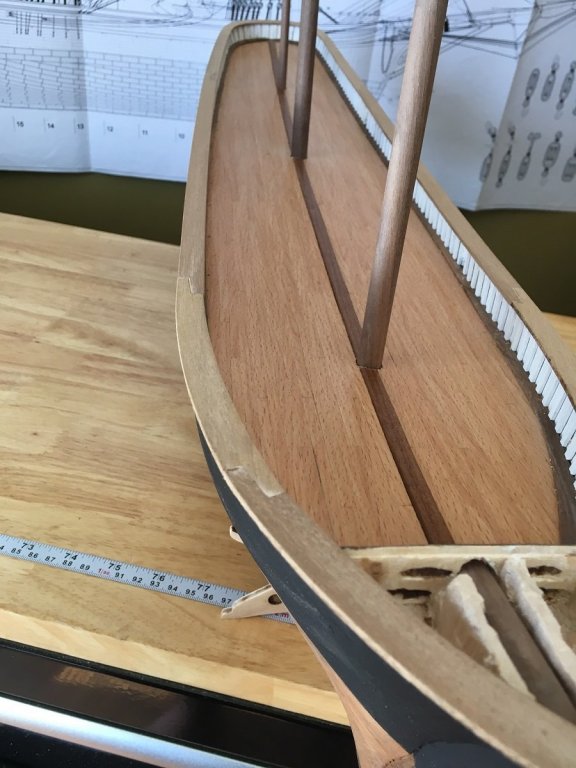
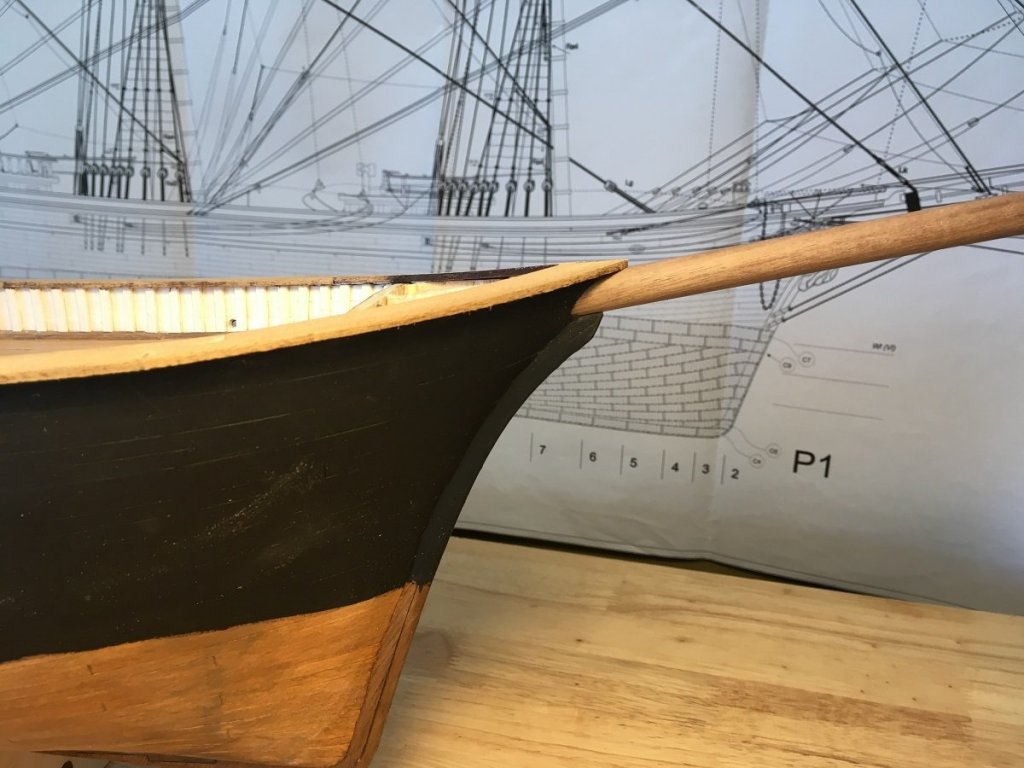
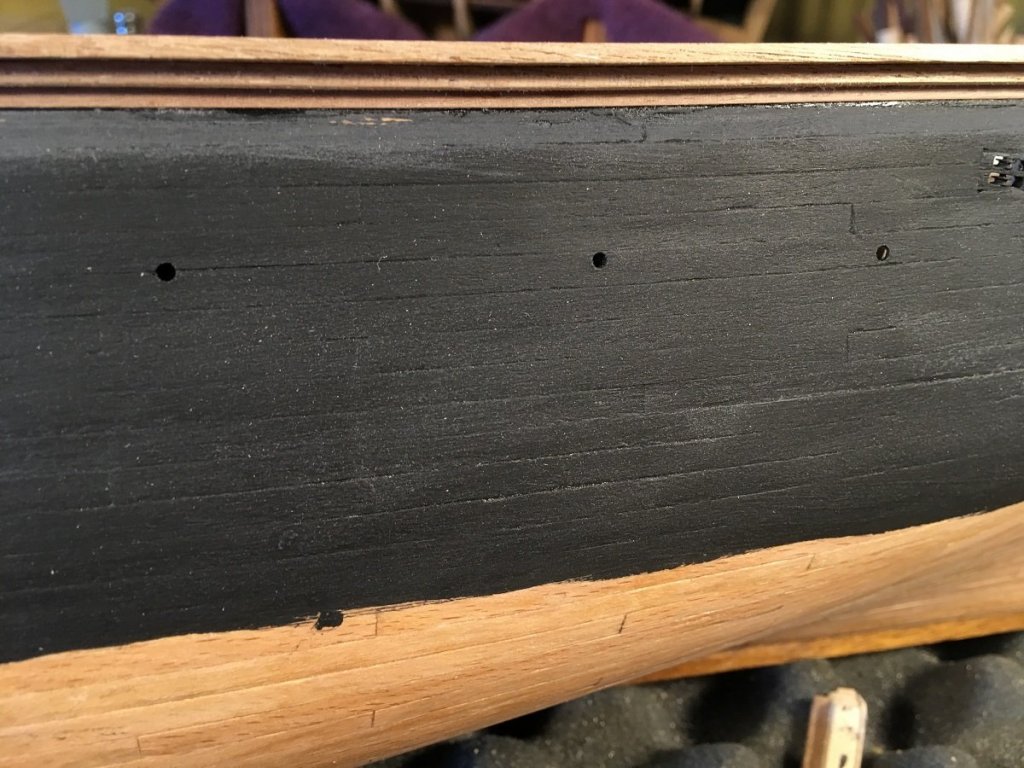
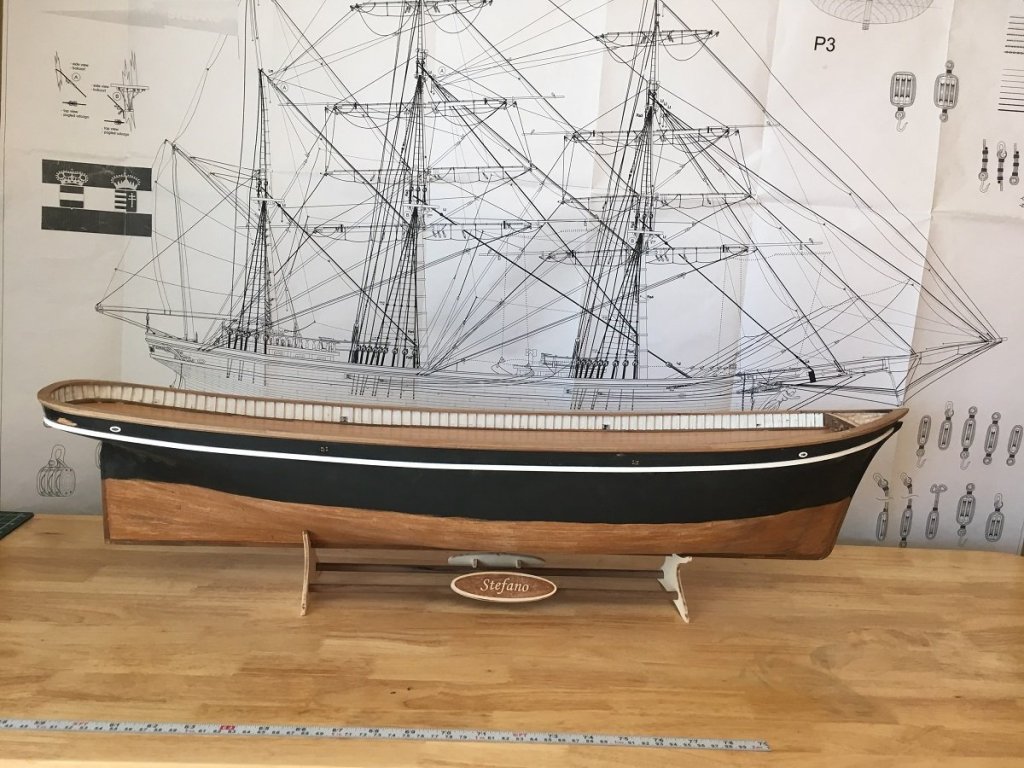
Thank you all for stopping in, for the likes and comments. A small update to show: Carving out the bow filler block for bowsprit More carving to allow for future rigging to pass through and also anchor chains Holes where drilled in deck for masts, this is a dry fit only. If the rake seems off compared to the plan it is only because the plan is not hung level on wall. I need a better qualified helper!! Rails where installed. These were laser cut pieces, they now need to be sanded and narrowed by about 2 mm Showing the pieces installed under the rail (can't remember proper name now ) How he looks now with the wale installed. Next is the top gallant rail and it's related pieces. Have a good day

- 223 replies
-
- 17
-
-
Very nice work Mark, your hull is spectacular!
- 331 replies
-
- 3
-
-
- nuestra senora del pilar
- occre
- (and 1 more)
-
Totally agree with Mark about the colours, looking great
- 455 replies
-
- 4
-
-
- slightly modified
- greyhound
- (and 1 more)
-
Masts look very good
-
Looking good Lou, this is going to be very interesting
-
Beautiful build Nils, I was wondering how you flatten the ends for the clevis pieces
- 692 replies
-
- 5
-
-
- eagle of algier
- chebec
- (and 2 more)
-
Looks very good Messis, nice work
-
You are working at warp speed!! Looking very nice David
- 126 replies
-
- 2
-
-
- fly
- victory models
- (and 1 more)
-
Typically deck planks are cut into shorter lengths or even if you are planning on planking with one single plank for each strake(row) a good rule of thumb is to use the shortest strips possible