


donrobinson
-
Posts
1,909 -
Joined
-
Last visited
Content Type
Profiles
Forums
Gallery
Events
Posts posted by donrobinson
-
-
Wonderful job of bringing an old girl back to her glorious youth.
-
This method is very interesting, and I am thinking of using it on my Stefano when the time comes. Do you think the sails will interfere with tying the shrouds and ratlines? Great looking ship!
-
Nice work, I believe it is called a traveller and you did a remarkable job on it
- Elijah, popeye the sailor, captgino and 1 other
-
 4
4
-
I'm with Bob, great work. Every time I come to your log that green just stands out and catches my eye, Love it!!
- zappto, Old Collingwood and Ferit
-
3
-
Such detail Nils, you never stop impressing me!!!
-
Sweet,Sweet build Bob, congratulations on an exceptional job, Sad to hear about the Stefano, but so happy about the news of your next build. I'll say goodbye here and Hello on your new log. Take Care
- Canute and popeye the sailor
-
2
-
Fine looking model Mike, I like the green
-
I've never used linseed oil yet but have been wanting to try. Did you use the boiled linseed oil or the raw?
-
The finish really brings out the grain, looks great
- Heronguy and MarisStella.hr
-
2
-
I have all three of Alexey"s machines and have had nothing but the best customer service from him
- Ryland Craze, Heronguy, Canute and 1 other
-
4
-
All these details are so cool. Nice job on the wipers
- John Allen, drobinson02199, Nirvana and 1 other
-
4
-
Looks like you are close to the end with the rigging, hang in there. She all looks good
-
Mike: I've been slowly trying to bend these pieces since last week but to no avail. I am going to accept defeat on this one and try a different approach. The biggest problem with bending this wide of a plank is the wood on the inside of the curve has no where to go and "bunches" up. I tried cutting kerfs in it, as you would a 2" board, but with this scale the pieces in between the kerfs chip away. I was not too confident in this method but thought I would give it a try. That's all good, lots of options left yet.
Ian: I am surprised you did not hear my description in Calgary, it was defiantly loud enough
") . As I mentioned to Mike bending is not an option for something this size and scale. Not to worry we will conquer this beast!!
. As I mentioned to Mike bending is not an option for something this size and scale. Not to worry we will conquer this beast!!
Doug: I have thought of that, and would have been done this by now, but I am saving that as a last resort. I would really like to complete this build with kit materials if possible. If it does come to it I will have no shame in using that method

Zoran: that was my next thought, I was a little worried about the looks but it will all be covered with the grated deck and the joint could be hid under a pin rail. I will make a bending form first then cut some strips and give it a try.
- robdurant, Heronguy, MarisStella.hr and 3 others
-
6
-
Hi Mike: You are right I have seen that before, probably on your log. Not so sure how good it would work for edges bending a 1,5 x 7mm walnut strip almost 90 degrees. My first few attempts have not gone so well but will try again to day.
Samson: Thanks Samson, you are more than welcome to join along there is always room
-
Doug: That's a good idea, I could have my own MarisStella show room.
Mike: Would you mind posting a picture here?
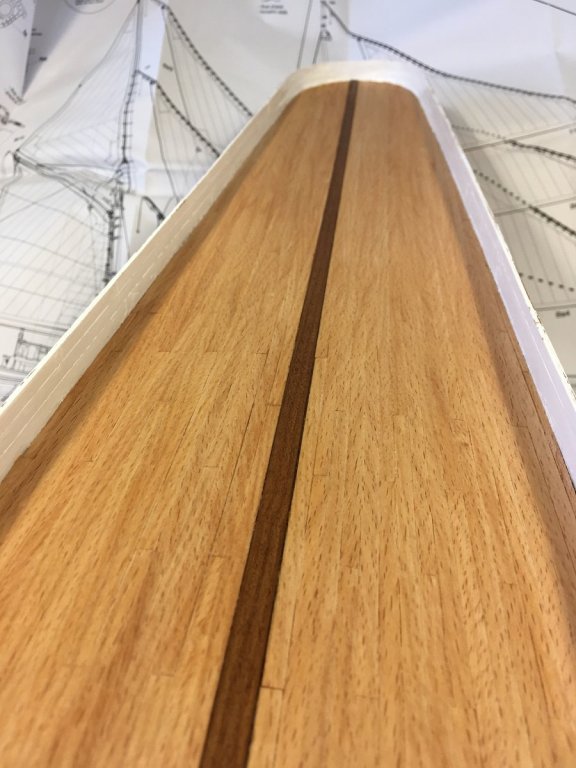
Robert: The middle plank is 1.5 x 7 mm walnut. A walnut deck would look good too, I would change the centre board to something lighter like cherry then. The contrast would look very good. There is a certain amount of the deck gets finished before plating , but not all of it. I painted a little ahead of time as I was worried about ruining the deck.
- EJ_L and Old Collingwood
-
2
-
Doug: I must miss planking because I started planking the Pasara yesterday.
Mike: Thanks Mike. I made a rough bending board yesterday and started experimenting using soaked planks and a heat gun, the kind that are used for stripping paint. I had to quit after a bit as the wooden dowels I was using to hold the plank in place were burning, so had to stop and make some out of aluminium on my lathe(hint hint)
. I will post my results when I get back at it
- CaptainSteve, EJ_L and Heronguy
-
3
-
Hey Mike how are things? I took out all of what I previously wrote. It was too early and not enough coffee. I'll sit back and be quiet now
. I was looking at something else. Good thing you are at work.
The planking looks a little challenging but I'm sure you will be just fine. I would be tempted to draw a line on the waterway to mark where the planking ends, to give myself something to work up to.
All looks good(
-
Looks and sounds like a good wood, even used for boat building
") . I would certainly give it a try
. I would certainly give it a try
- Tim Curtis and John Allen
-
2
-
Thanks David, you are soooo right about it being never ending
-
Thanks Dave. Yes I have a mill also they are both Sherline the lathe is a 4400 and the mill is a 5400, if you are thing of buying get one of their packages that come with accessories. I also highly highly recommend getting the digital read out at the same time, it really helps with accuracy and is a real saviour when it comes to repetitive cuts.
-
Good morning everyone, I hope all is good and you are ready for another day of modelling. thanks to all for visiting.
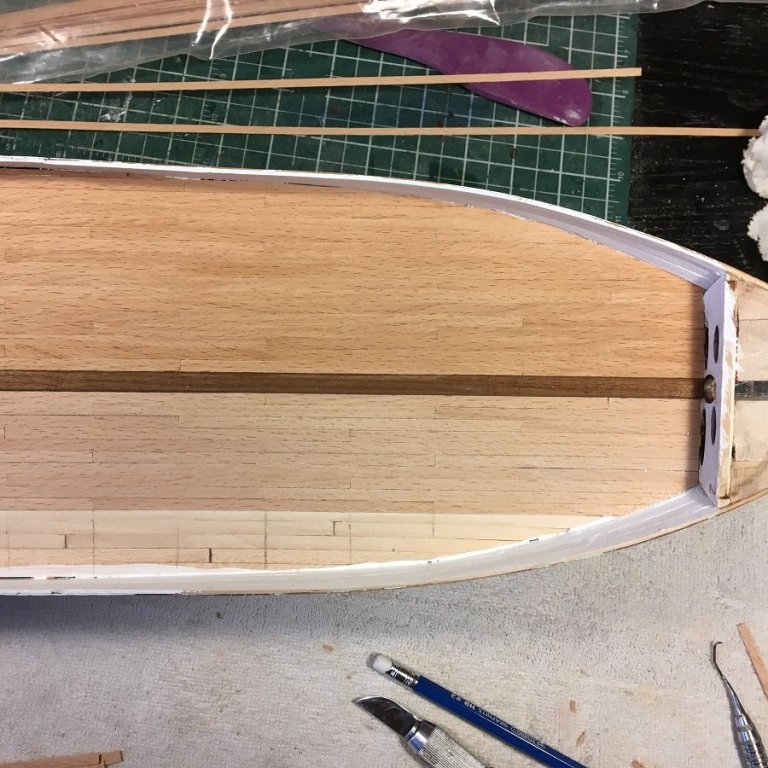
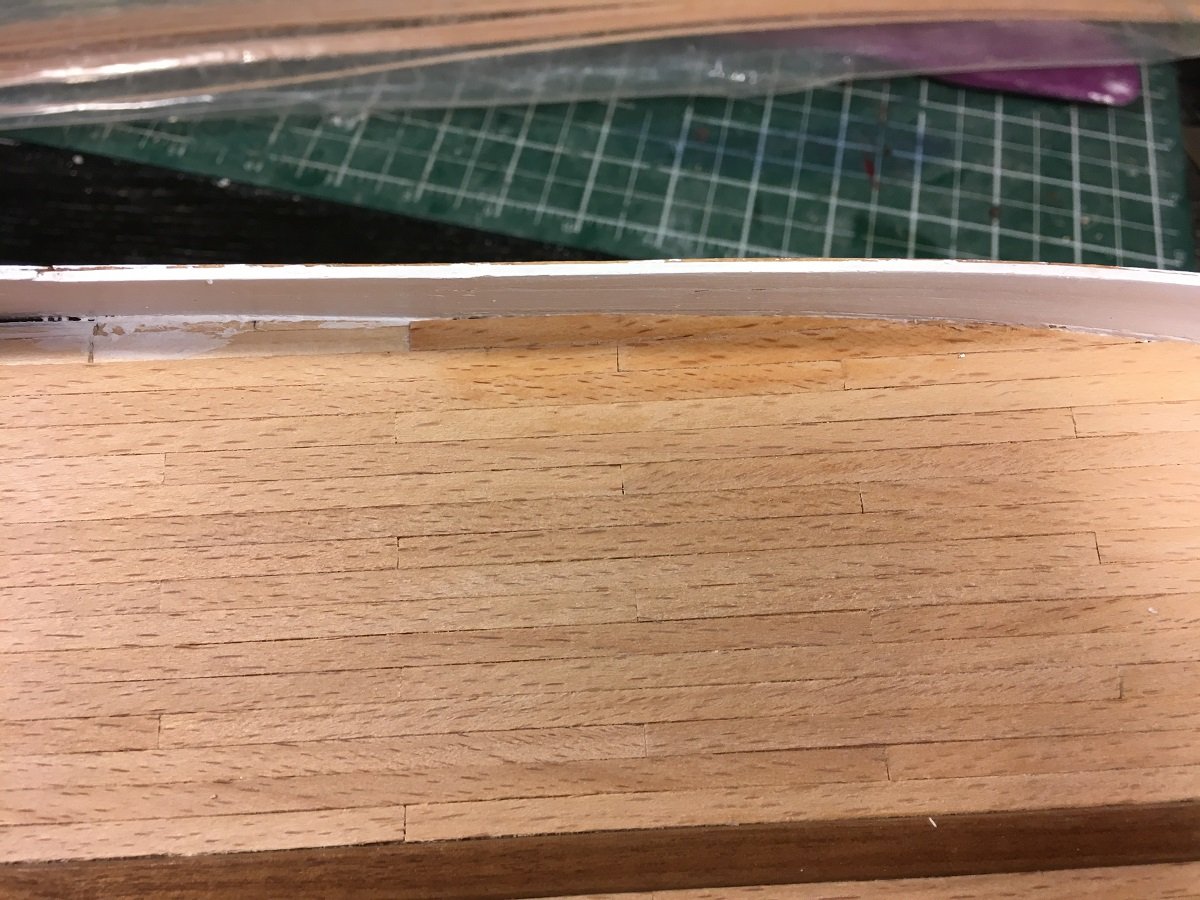
Well another milestone has been reached. Planking is finally complete! After approximately 1200 individual planks, two layers on hull and two layers on deck, this part of the build is now behind me. I opted not to simulate caulking as I usually don't really care for it, however, with my deck I am realising maybe I should have. Looking at my hull I thought there was enough definition between the planks but for some reason the deck is not so. It is very hard to see the butt ends and it almost looks like it maybe one solid sheet of wood. At any rate I am not about to tear it up. As of now it has two coats of wipe on poly and I will put on another two or three.
The next step will be installing the covering board or waterway which will entail laterally bending a 6 mm plank to the shape of the stern, so we'll see how that works.
Installing the planking
I used Weldbond glue, ca glue is not required for this step. Weldbond, with a little burnishing, adheres in seconds proving to be adequate as I had no lifting of the planks after installation.
Here are a few pictures:

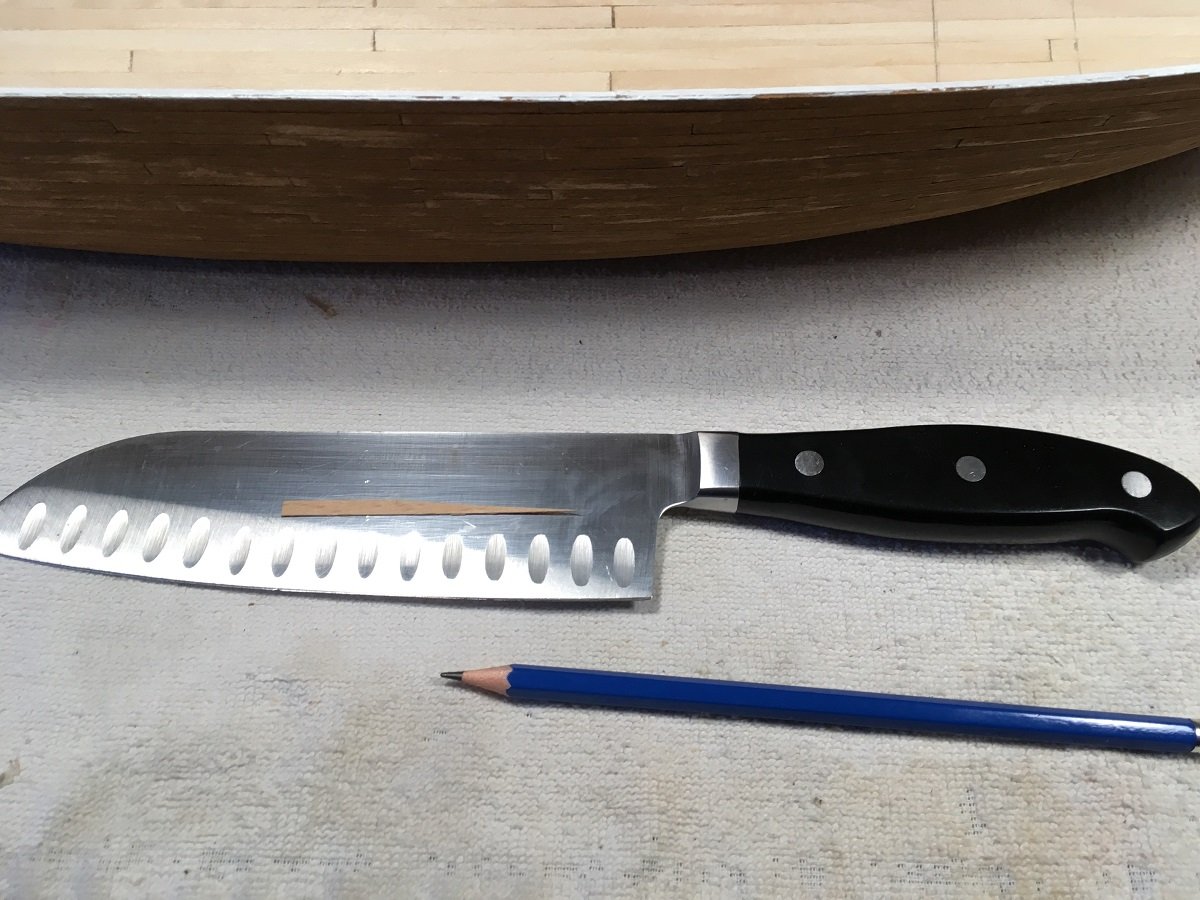
Here is my new found plank shear, works great for cutting long angles. I recommend for those of you who have admirals to wait until she is gone before using this tool
And here it is in place, well that is not quite true as the one shown above had the glue applied to the wrong side!!
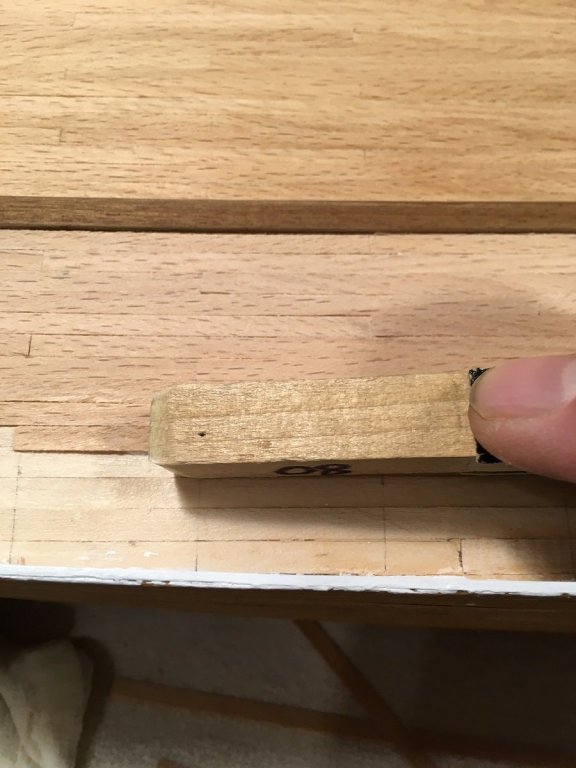
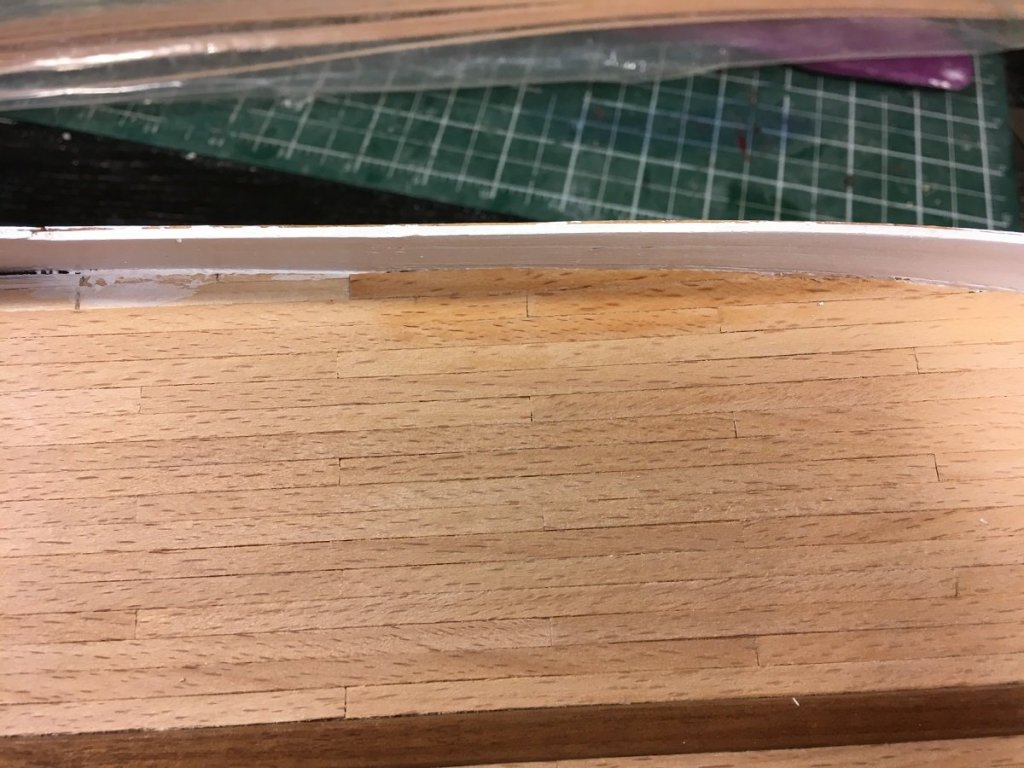
This is the burnishing tool I use. Simply just apiece of 13 mm (1/2") square stock. Doing this helps spread and level the glue and flattens out the plank. Sanding and scraping was so much easier, I think I spent a maximum of 20 minutes of sanding the deck. Well worth the effort to try this if you are not doing it already.

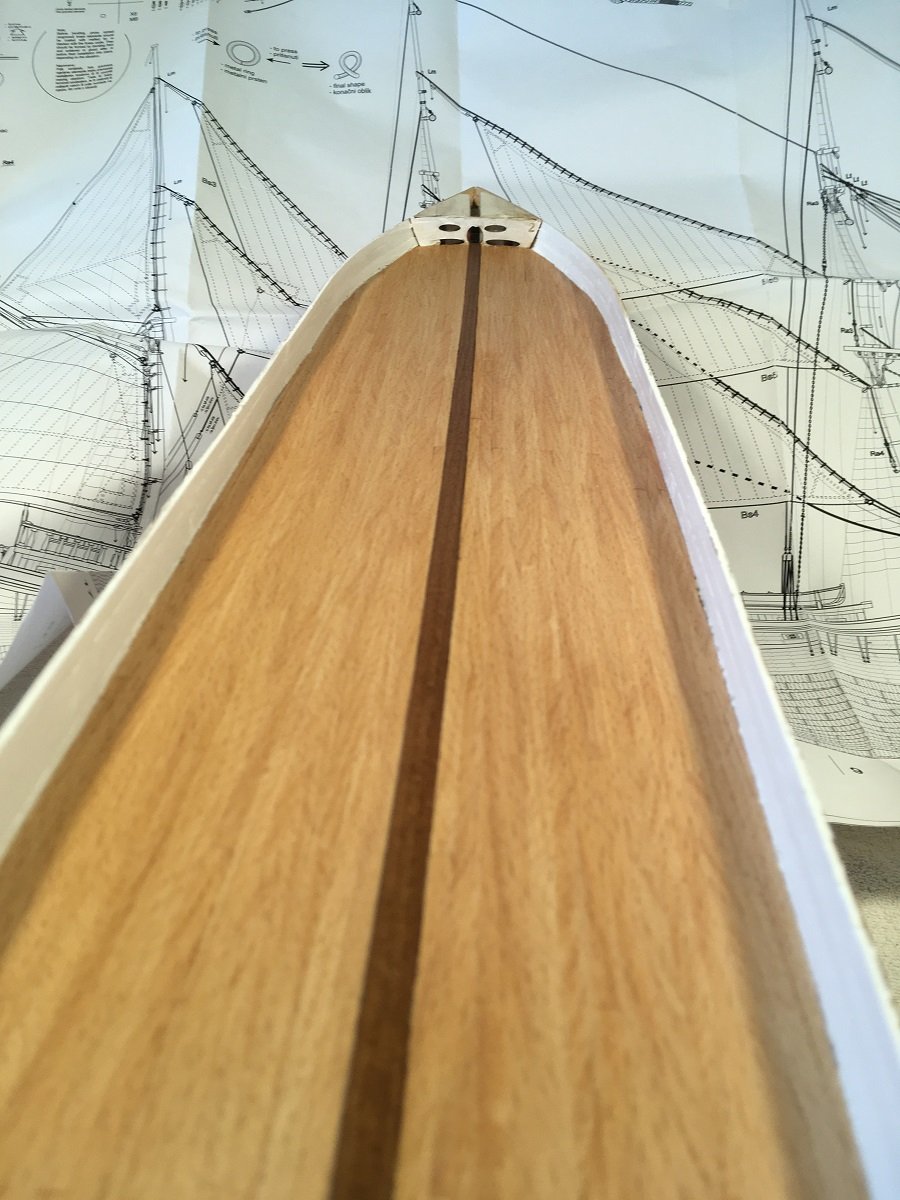
As you can see there are no real defined planks or butt ends, but trust me when I say it is a four plank shift and all shift lines are straight
That's it for today, I hope you enjoyed. Thanks for stopping by and we'll see you soon
- robdurant, John Allen, mikiek and 15 others
-
18
-
Hey Mike get it down, it is real good stress relief!
- Landlubber Mike and Elijah
-
2
-
Looks like you are off to a good start, I have not built the Bounty so I will let others help with the planking question. Welcome to MSW
-


Trajta by mikiek - FINISHED - Marisstella
in - Kit build logs for subjects built from 1501 - 1750
Posted
Looking good Mike, would that piece fit on the bottom of the rudder? Just guessing