


donrobinson
-
Posts
1,909 -
Joined
-
Last visited
Content Type
Profiles
Forums
Gallery
Events
Posts posted by donrobinson
-
-
-
I finally got the Stefano back on the bench this past week and made a little progress after a long break in progress on him. I took a short break to build the Liburnian Novilara as a little side diversion. A trip to North Carolina also used up some shipyard days but was well worth the time spent.
It took me a little while to get back into the mindset again with Stefano, in case you are thinking not much got done in a week😉.
I always feel lots of pictures helps hide the lack of work and progress, so here we go.....
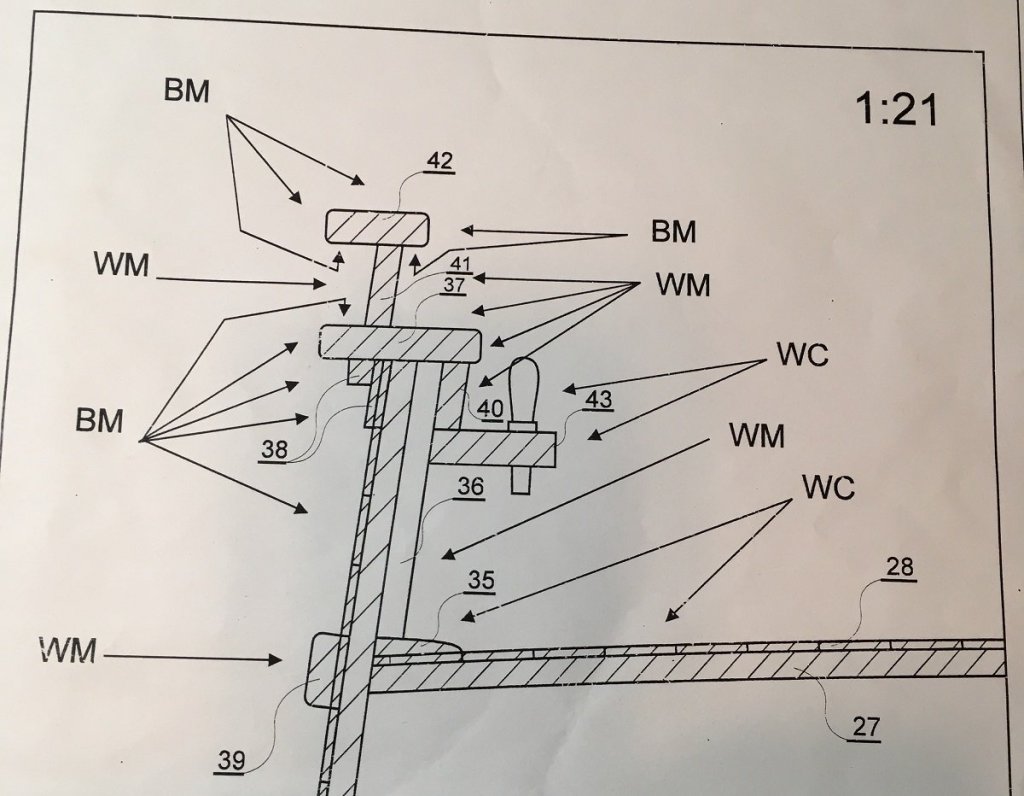
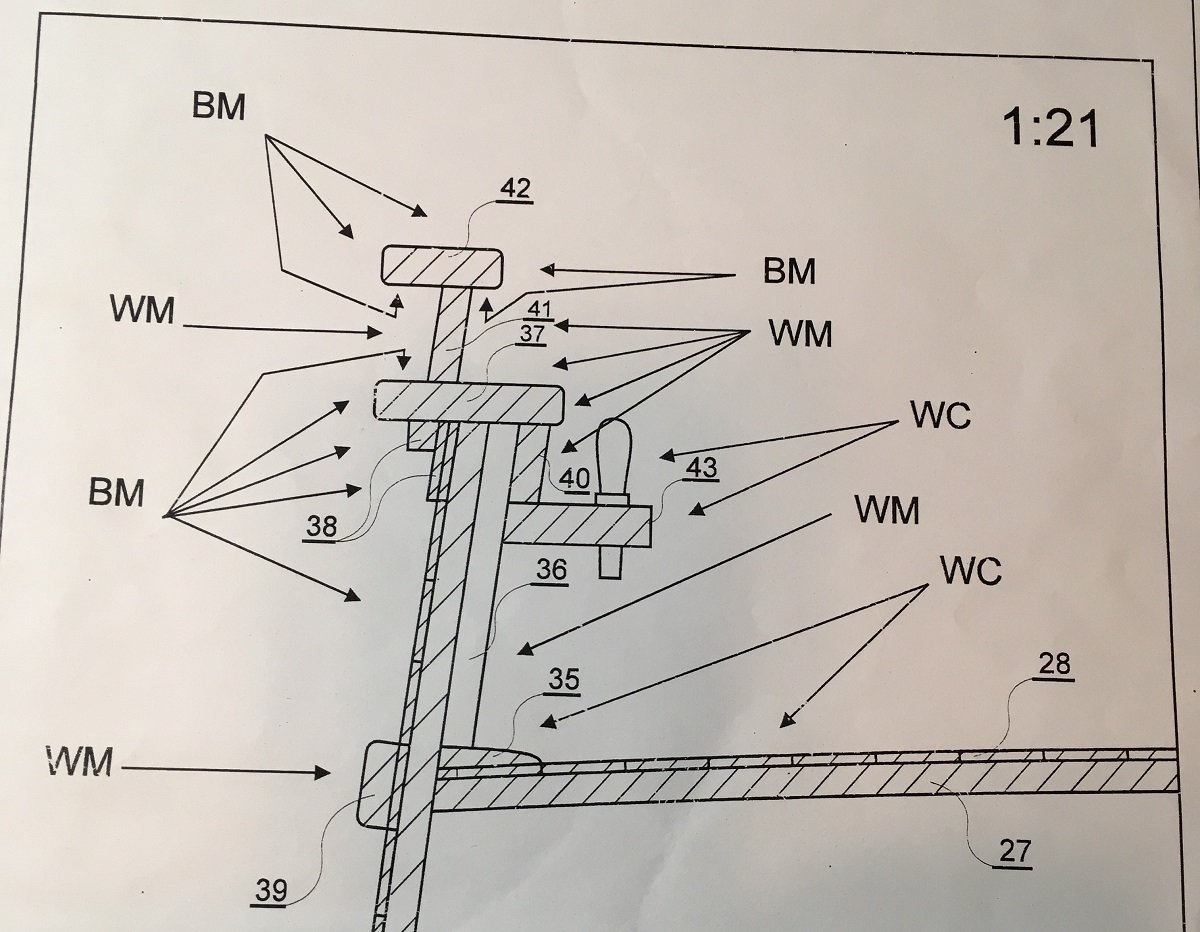
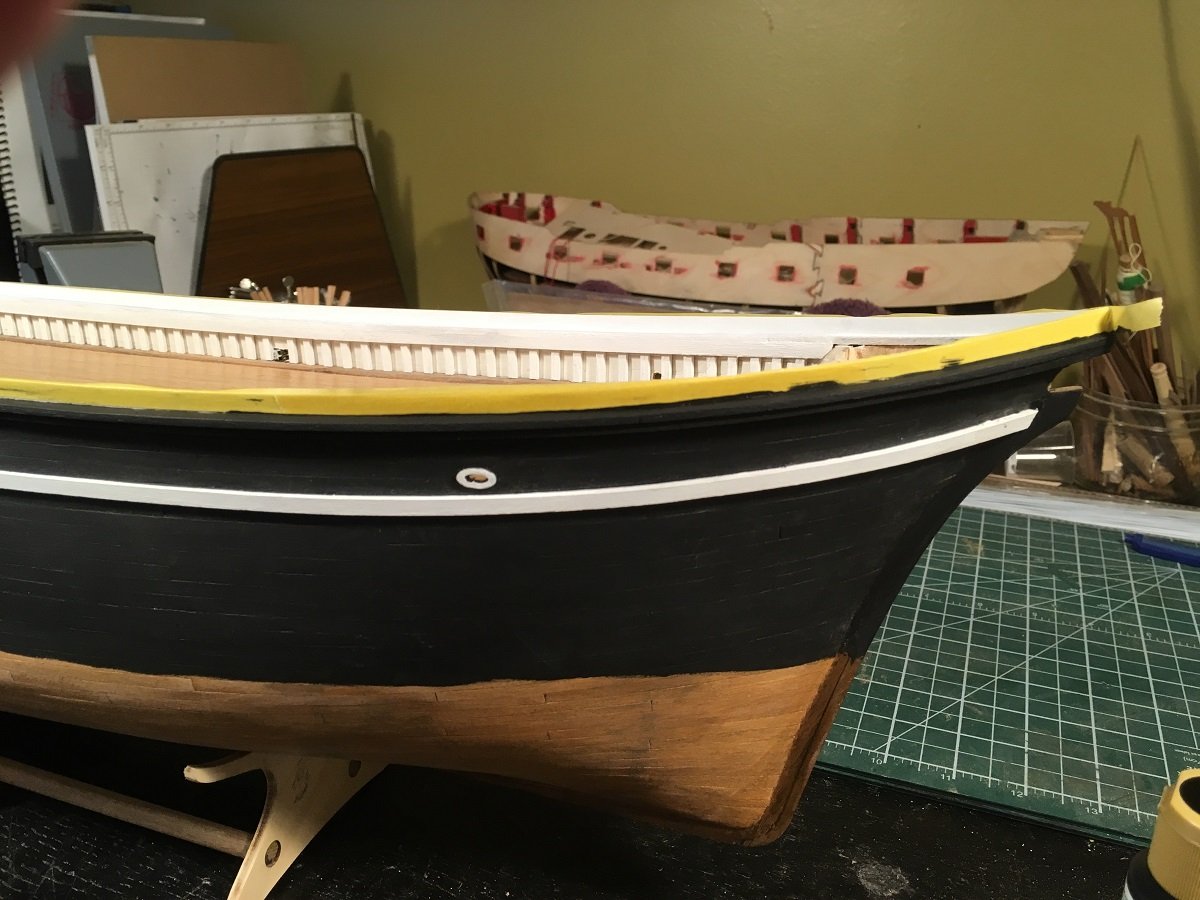
The goal last week was to install pieces 40, 41, 42 and 43. I failed in this as I did not get the pin rails installed but they will be up next!!
The letters are showing you what colours to paint: BM=matte black, WM=matte white and WC= wood colour or varnished, poly etc.

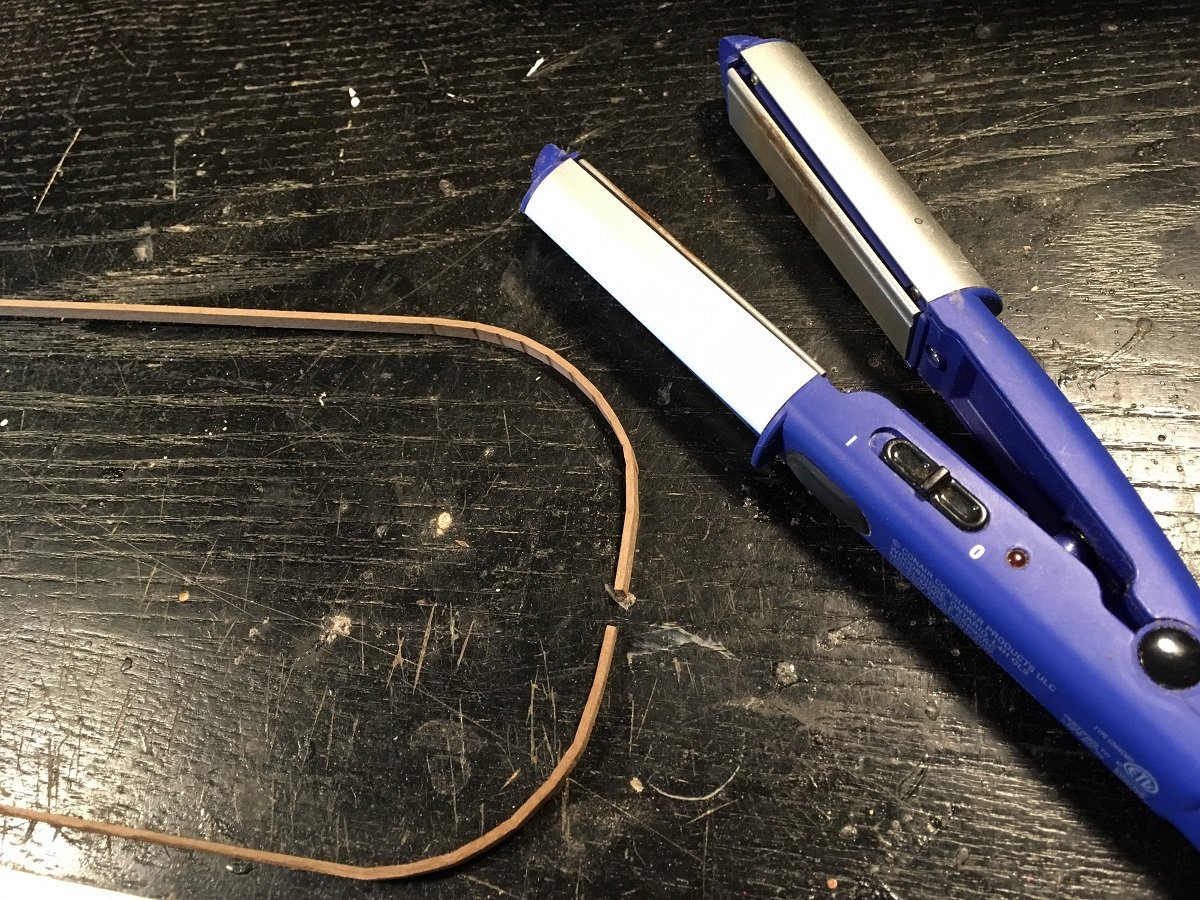
First up was to bend the side stringer(40) and the top gallant bulwark(41) into shape. the side stringers are 1.5 x 4 mm strips and the top gallant bull warks are 1.5 x 5 mm strips. I gave these a light soaking in water then used a simple iron, as shown above, to bend them, The little indents on the inside of the curve are easily sanded smooth before installing.
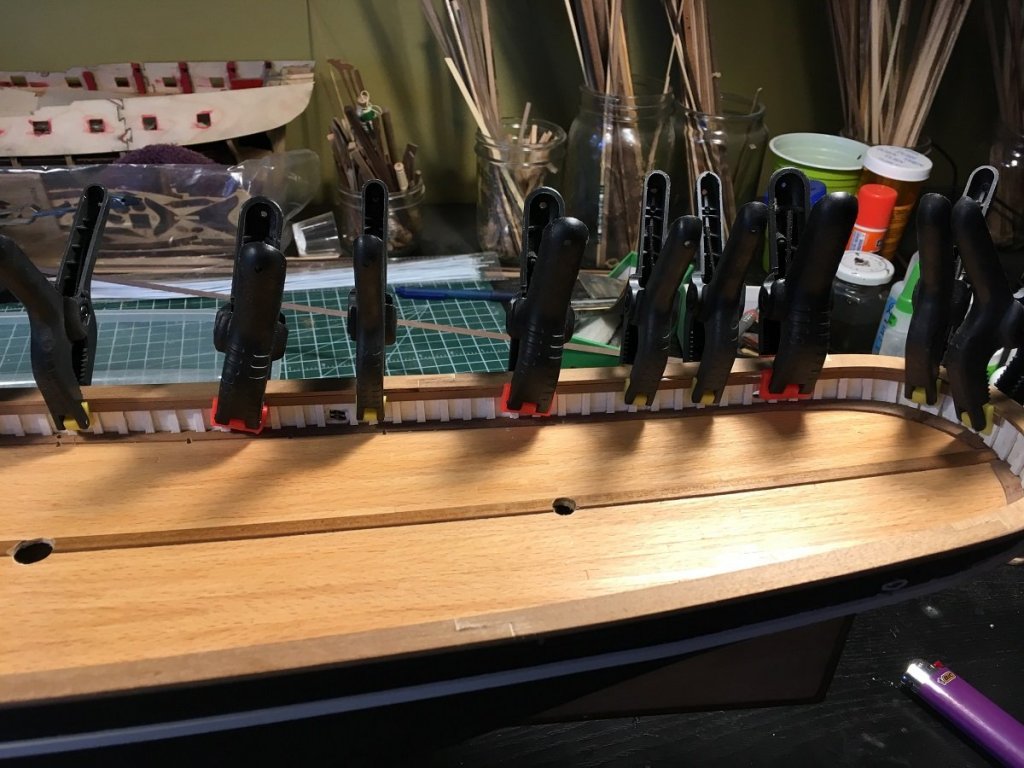
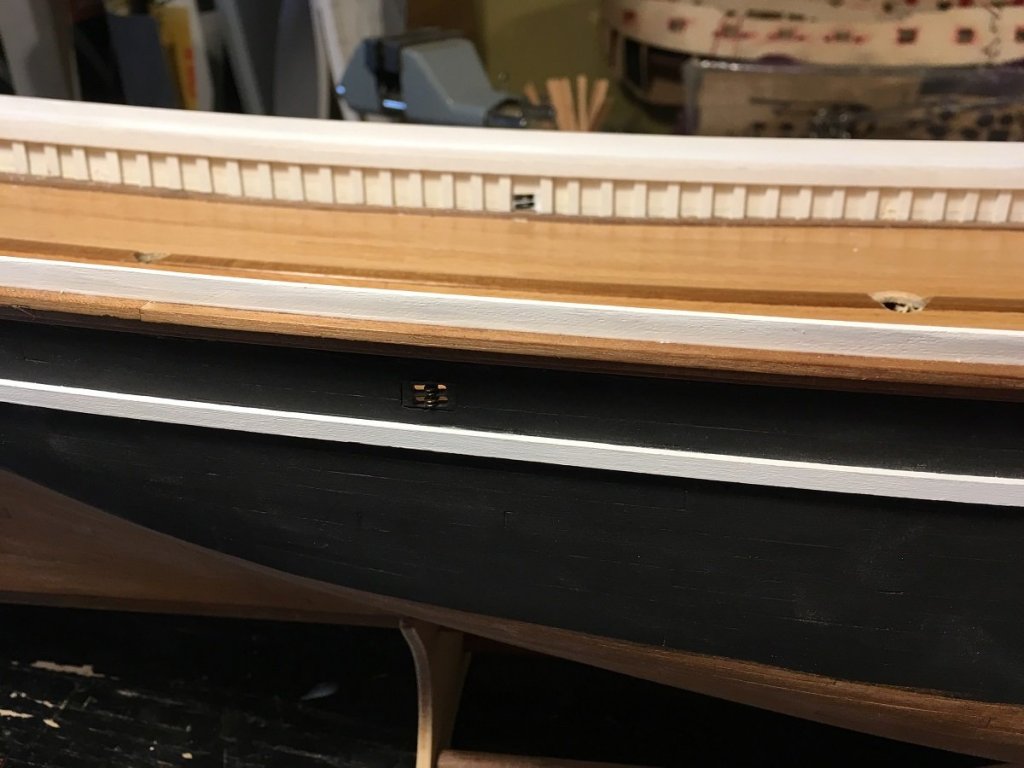
Clamping the side stringer in place, pva glue was used to allow for positioning of the piece
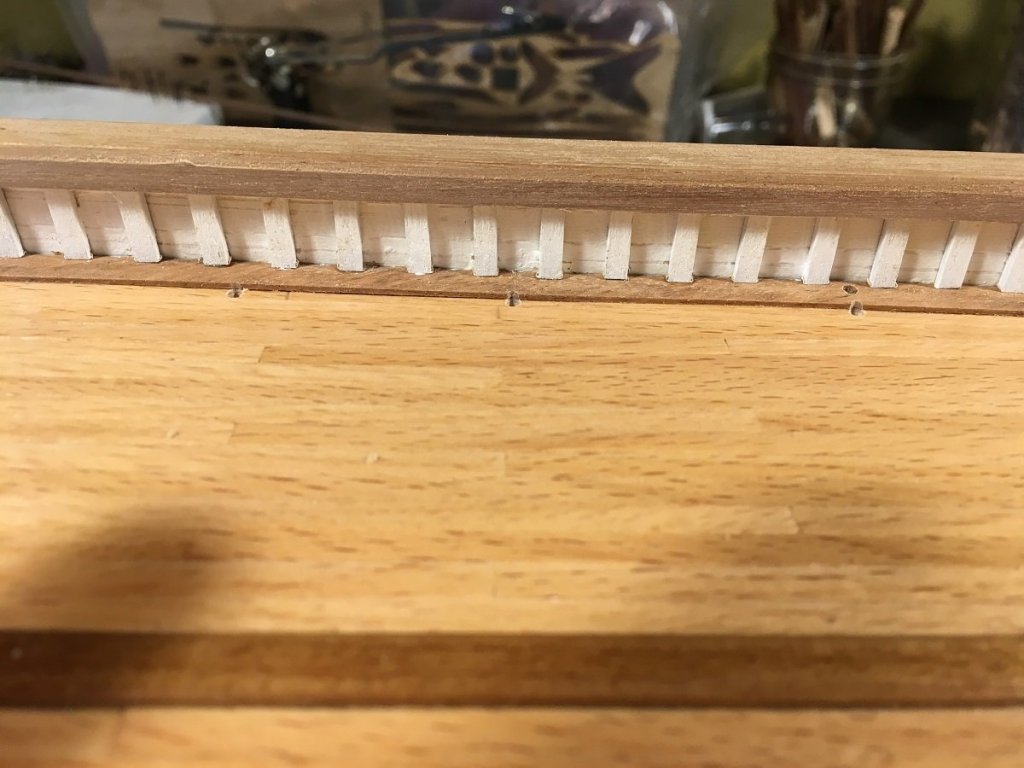
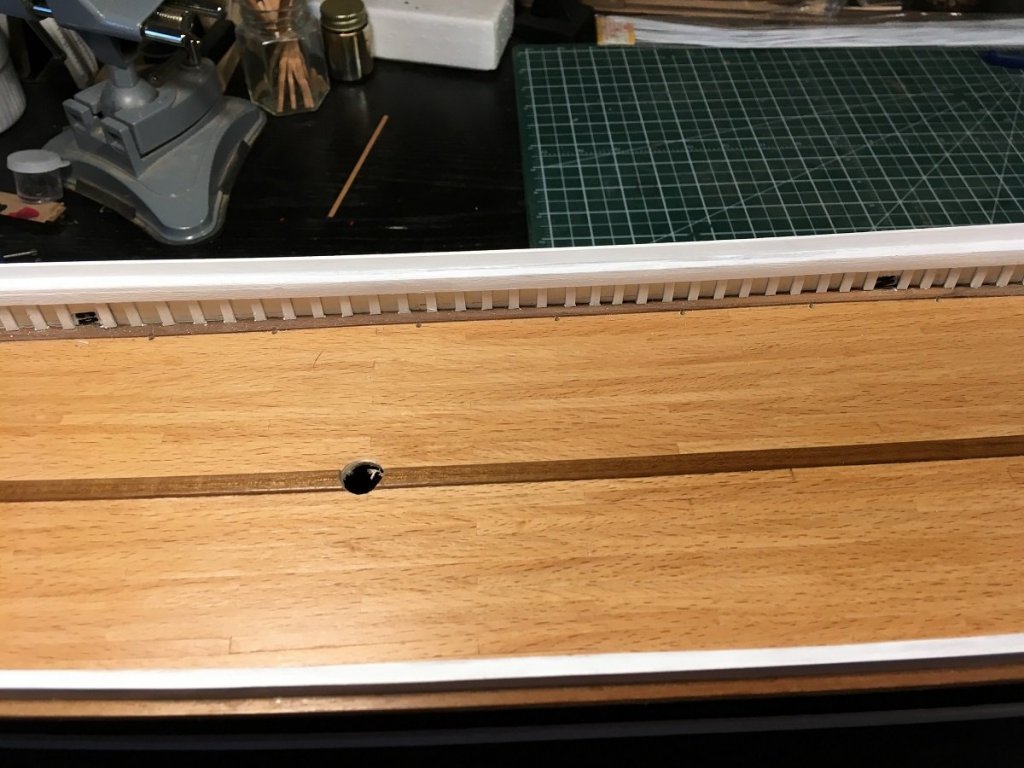
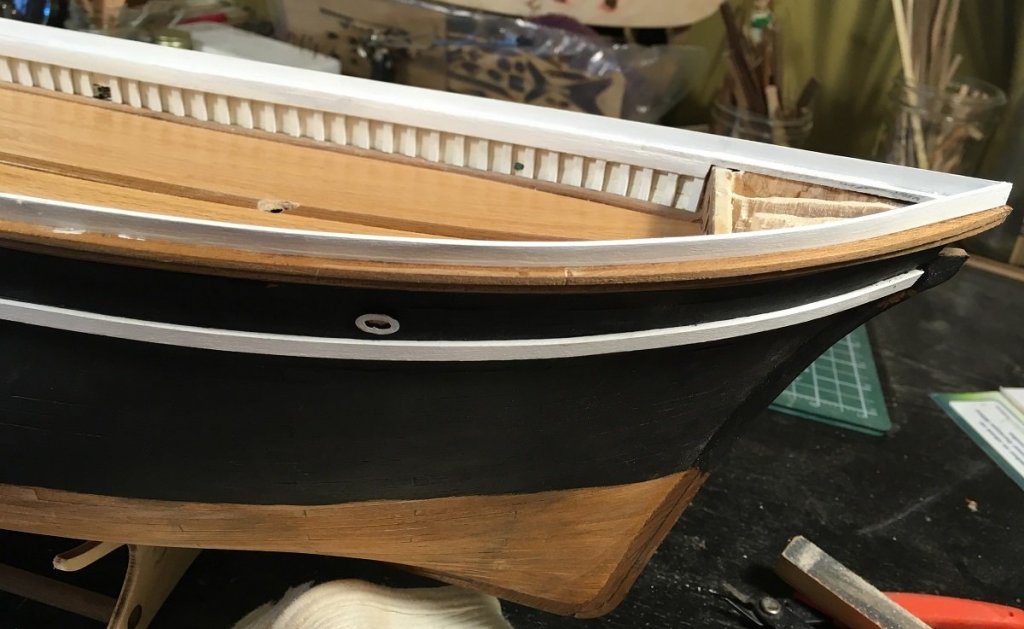
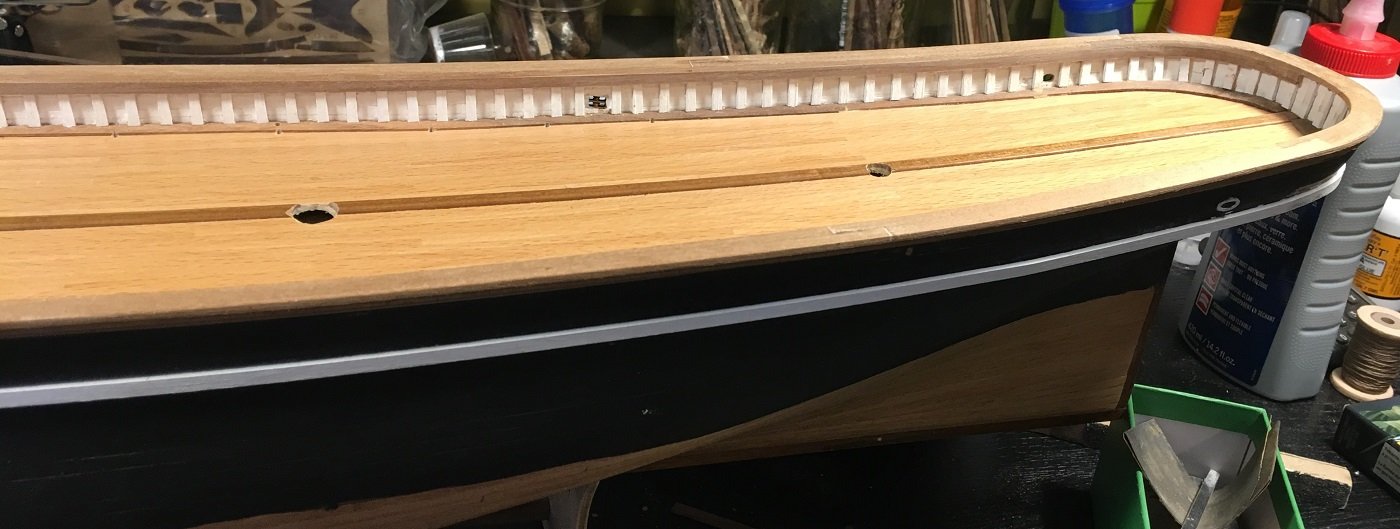
Side stringers are installed and sanded, ready for painting. A little note here is that I sanded mine flush with the rail when in fact there should have been a slight overlap left. Not a big deal as everything will still work, just one of those things that happens when you leave something idle this long.
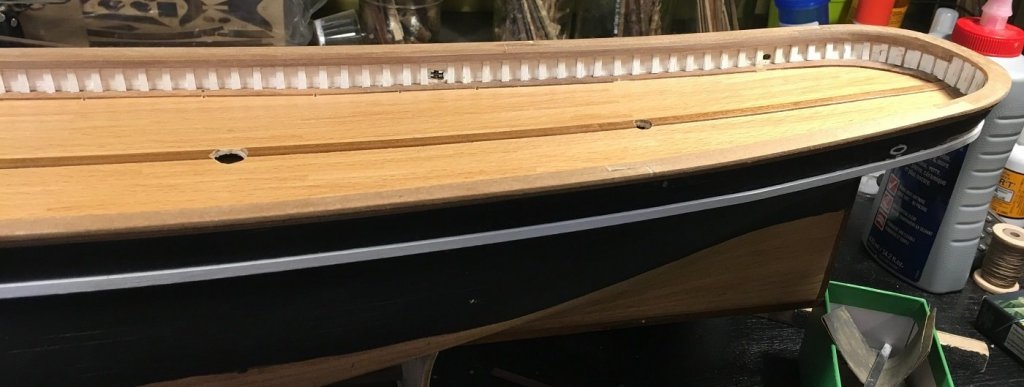
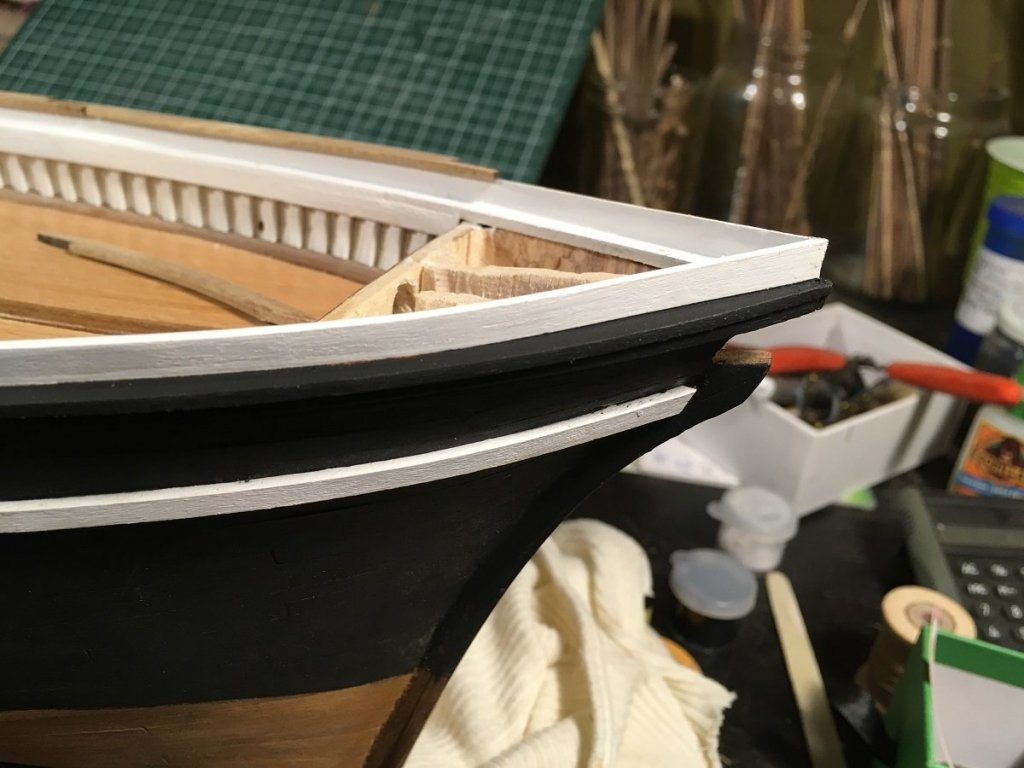
Here you can see the top gallant bulwark has been installed. I gave it several coats of diluted acrylic paint before gluing it into position. I used thin ca for this, I would hold it in place apply glue to a few cm`s of it hold until dry then move along applying glue until the end. There really is no other way of gluing a piece this long, pva will not work as there is no way of clamping. Shorter pieces could have been used and been easier to handle but would not have looked as good.
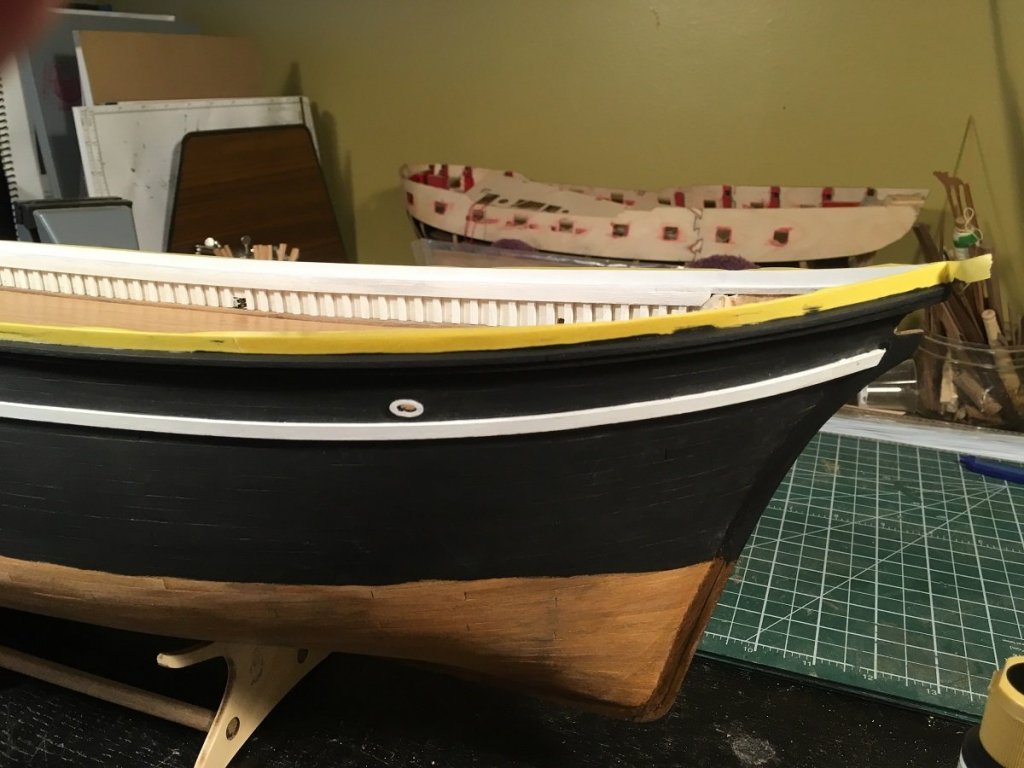
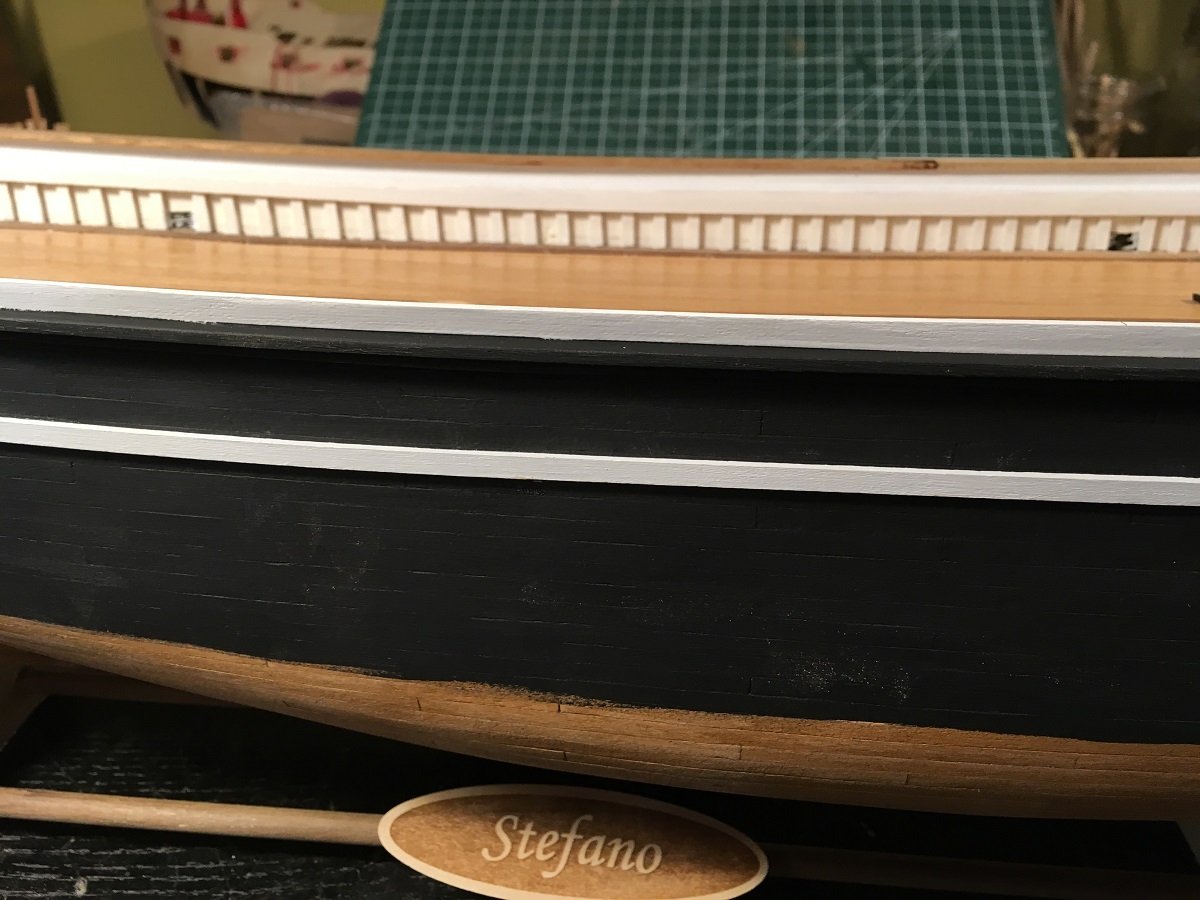
Masking the top gallant bulwark in order to paint the main rail(37)
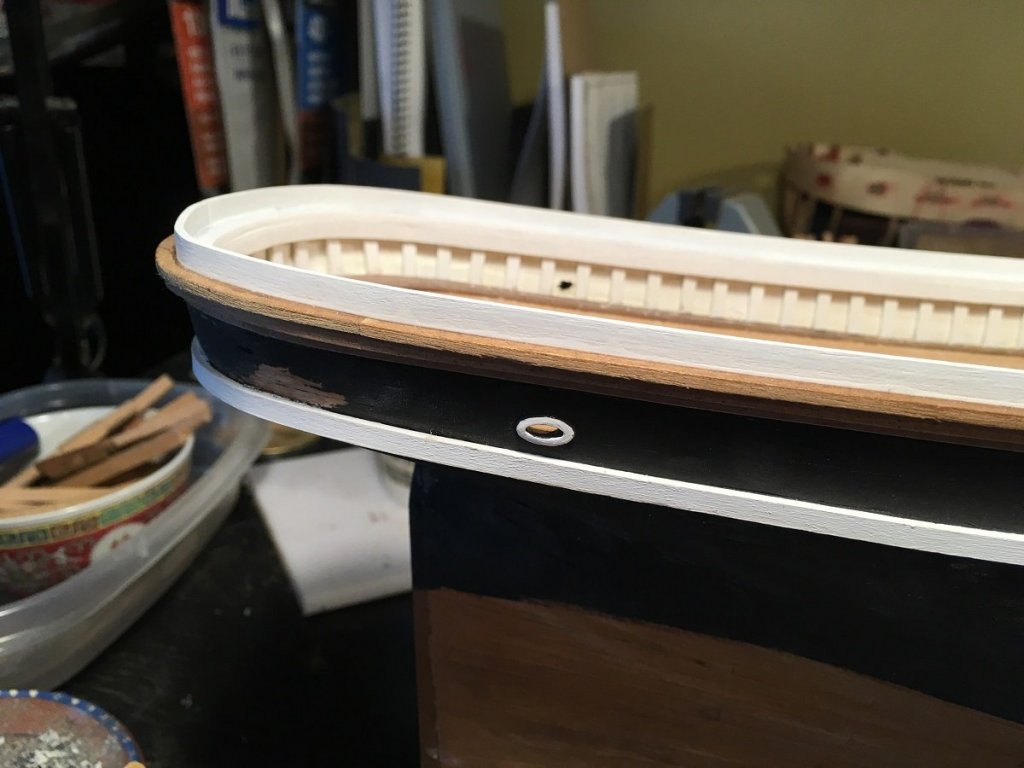
Tape removed. Here you can also see the top gallant rail is being installed. This is laser cut on a walnut billet

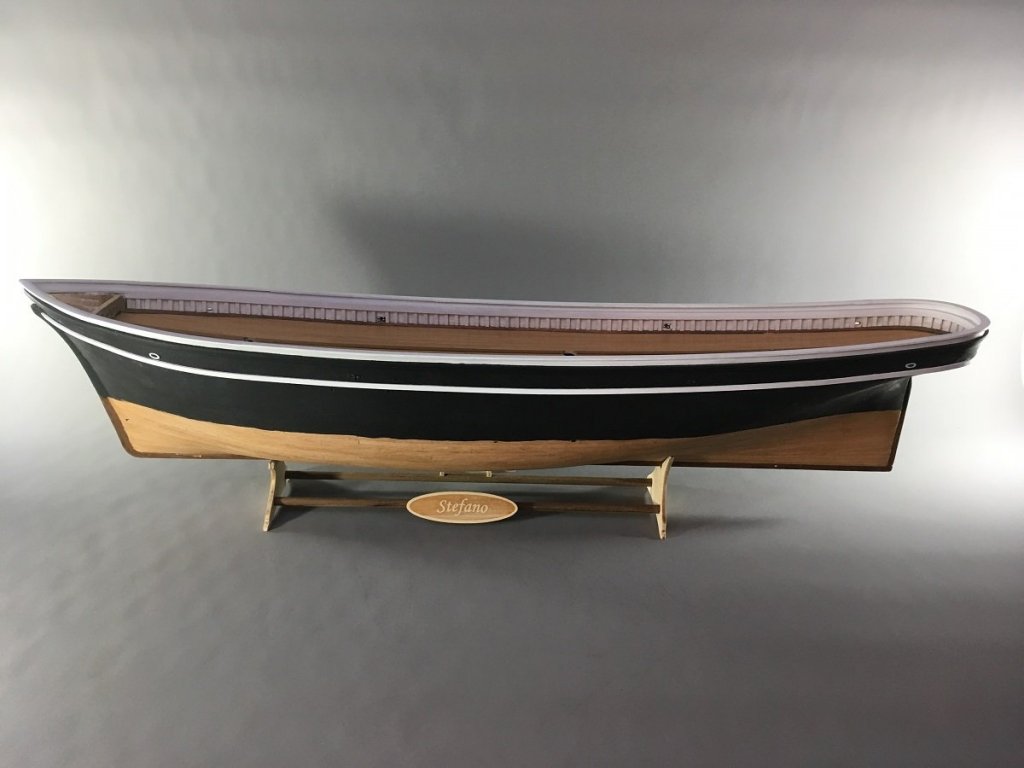
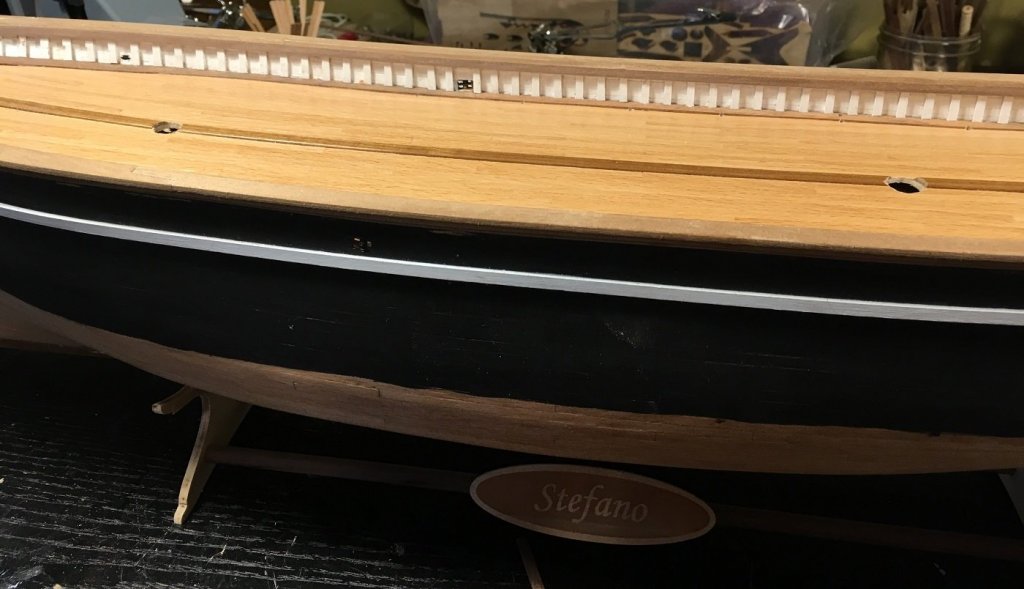
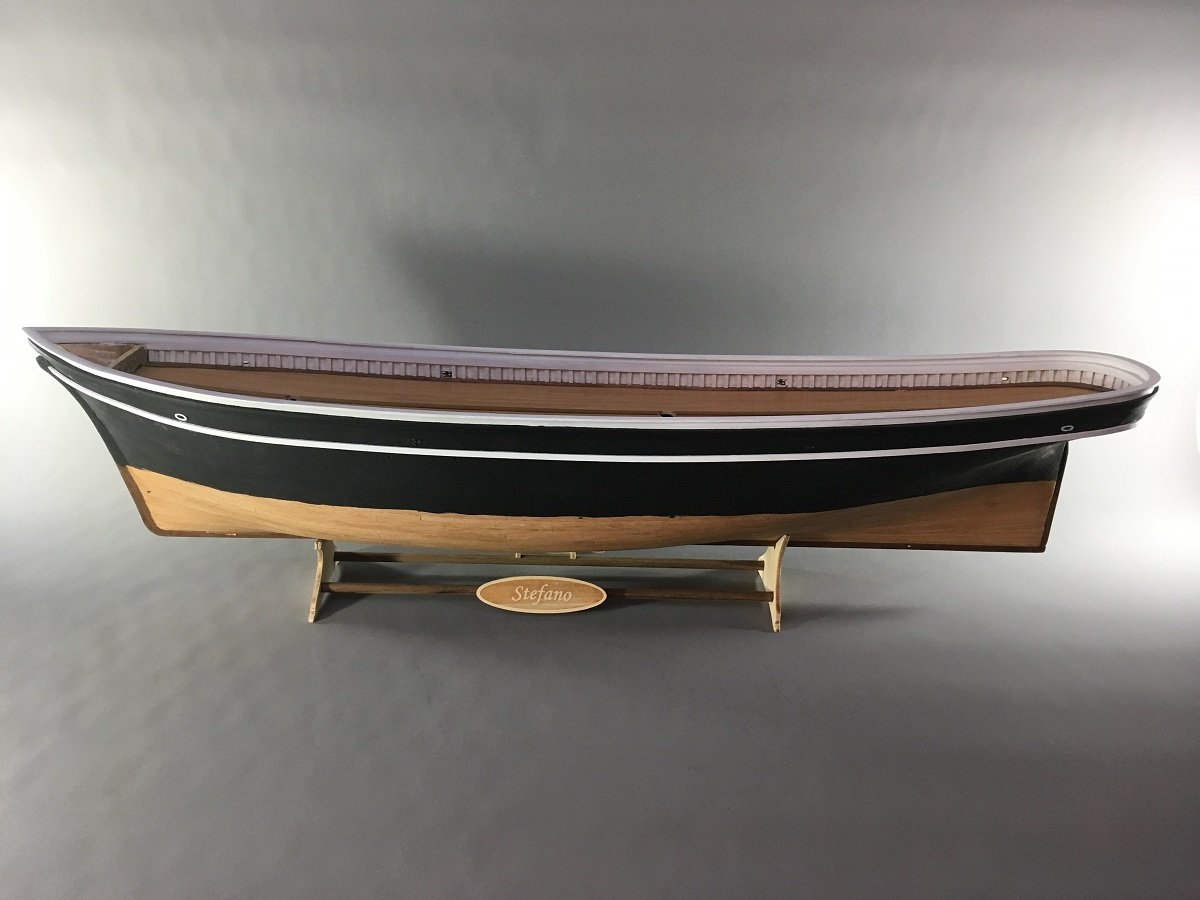
And here is how he sits with the top gallant rail completed.
Thanks for watching
- David Lester, Tim Curtis, gsdpic and 15 others
-
 18
18
-
Thanks Bob, a little out of the ordinary but it was a nice change of pace
-
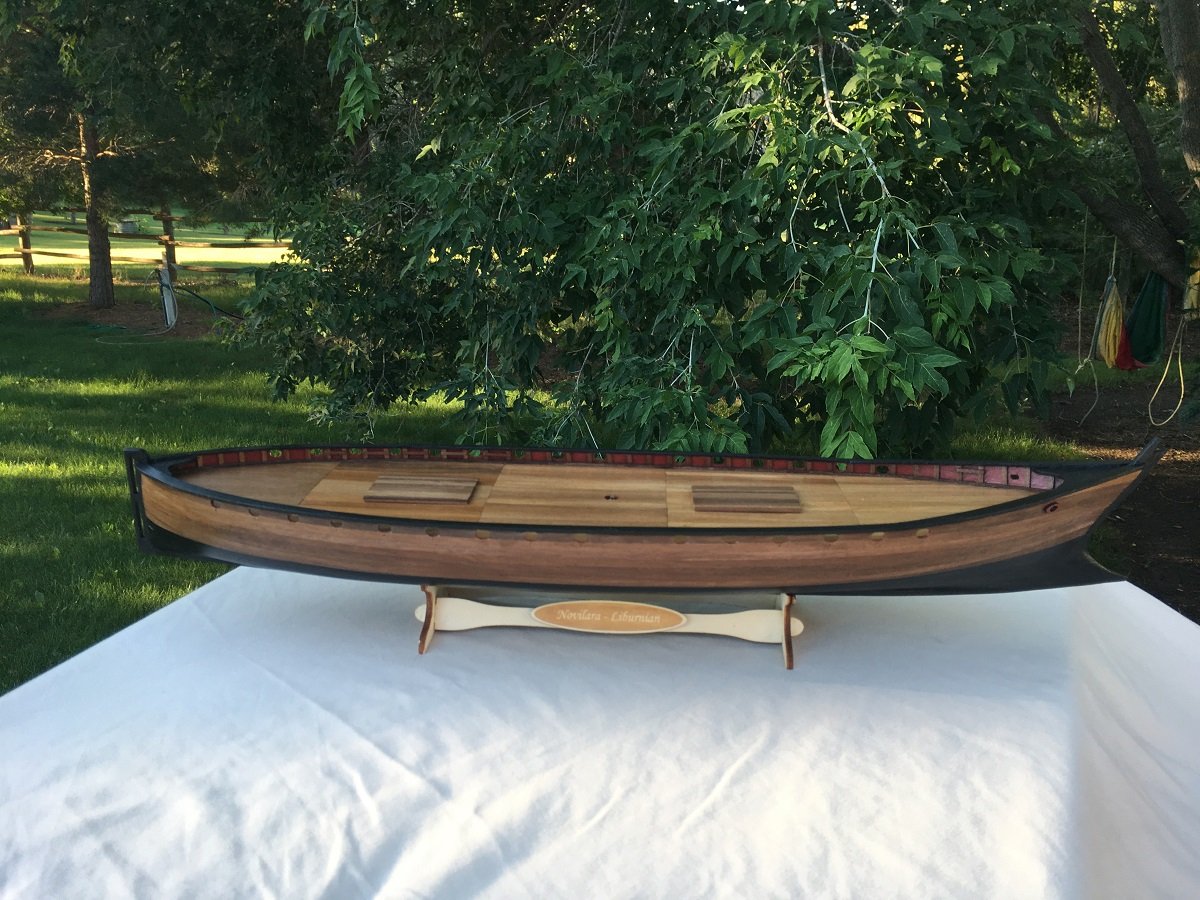
And here are the final pictures:


Thanks so Much, and Have A Good One!!
- Altduck, GrandpaPhil, hof00 and 11 others
-
14
-
Hello everyone,Thanks for dropping, for the likes and comments. All very much appreciated. This post will be the finish of the Liburnian Novilara from MarisStella. This was a relatively quick and fun build, nothing too mind bending but still taught me a few more things about this hobby. I definitely would recommend this for any skill level.
Thanks Again

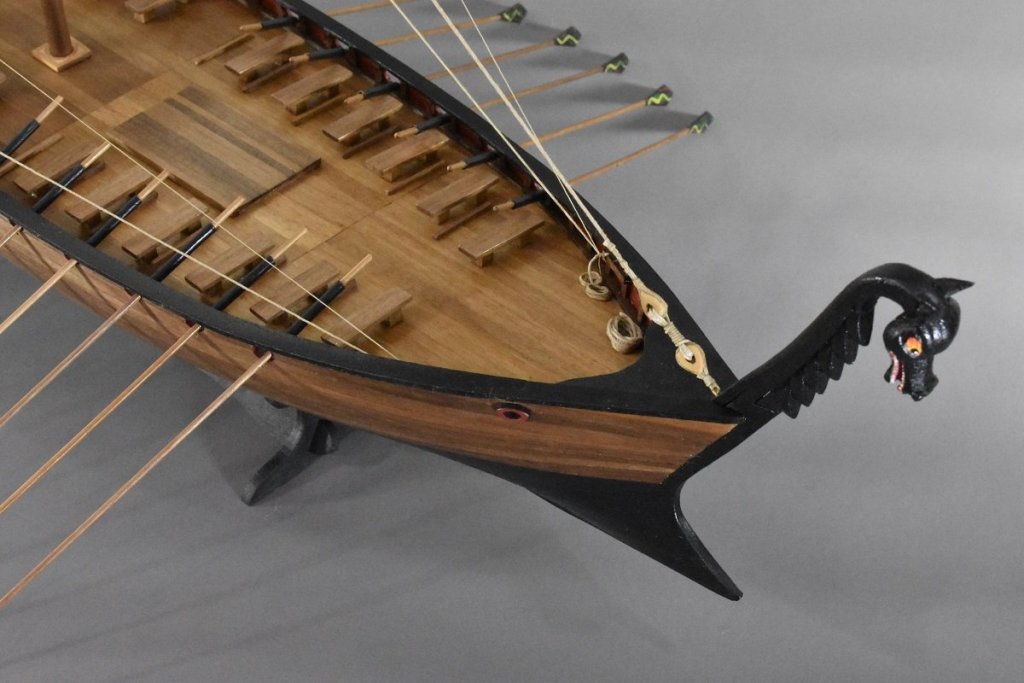
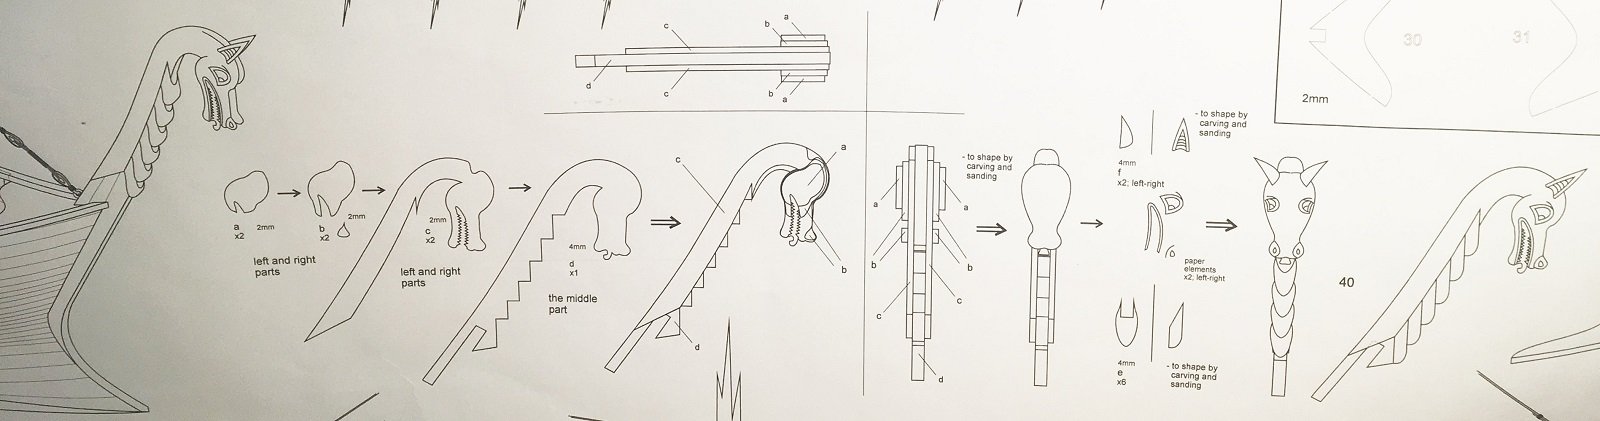
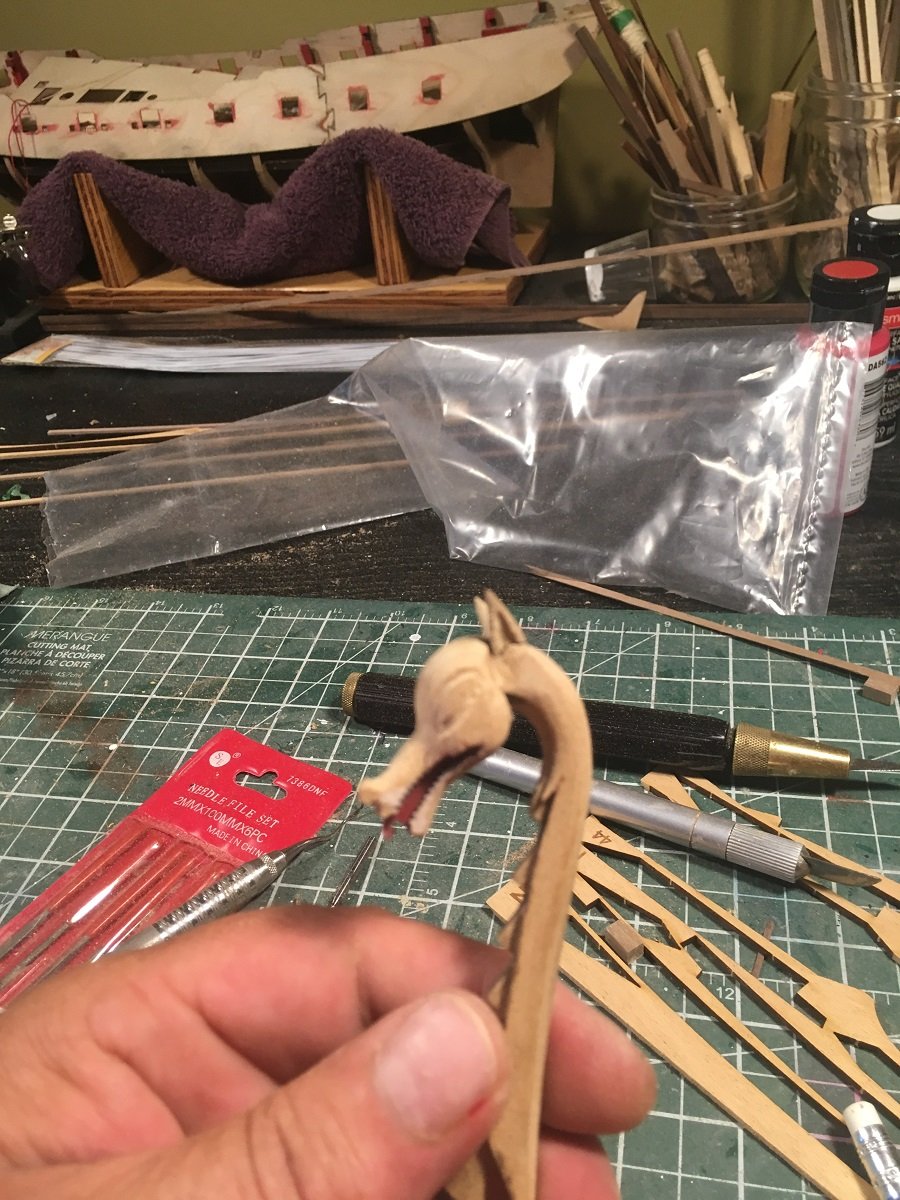
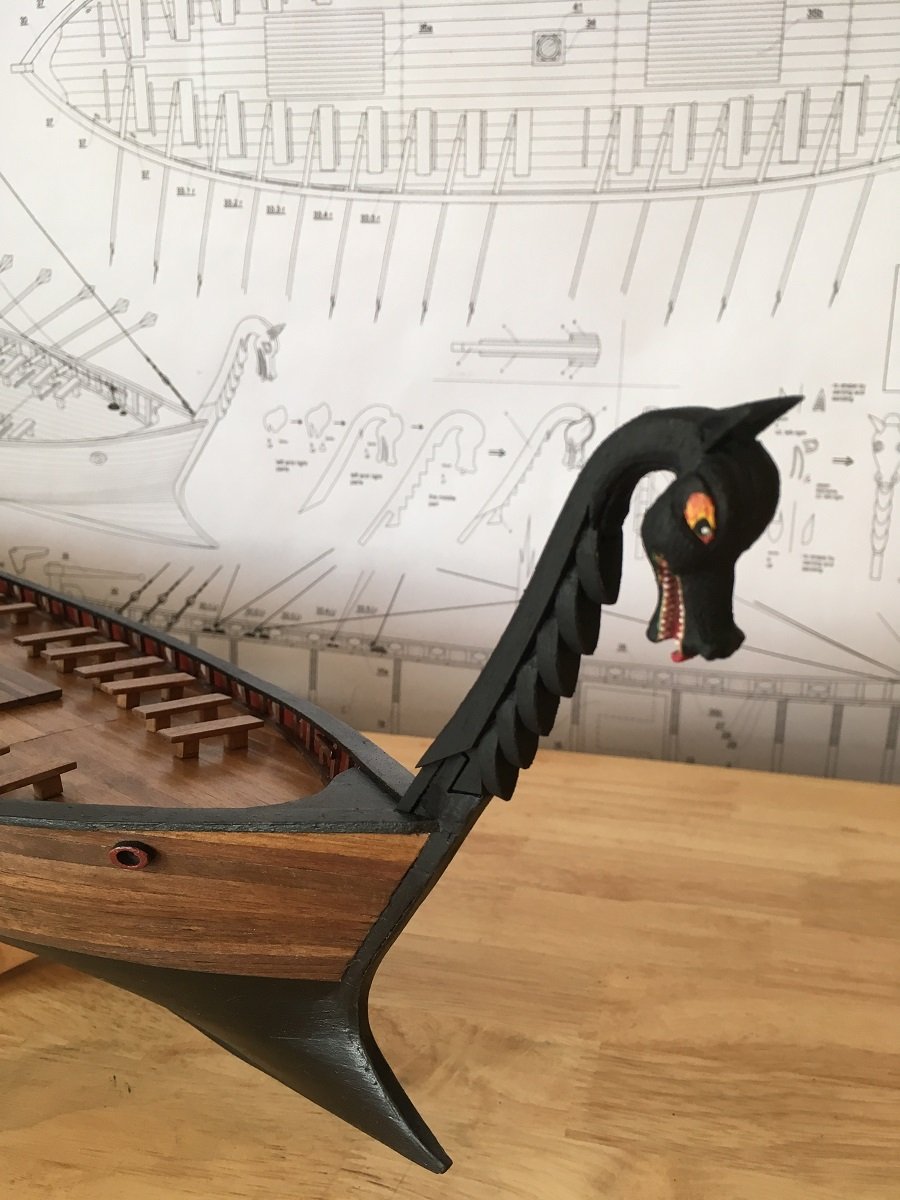
Showing the next step which is masking the figure head


Carved painted and installed

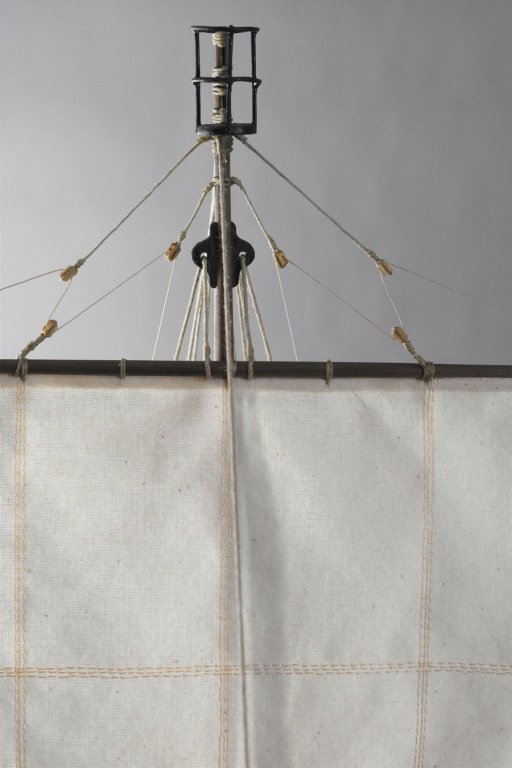
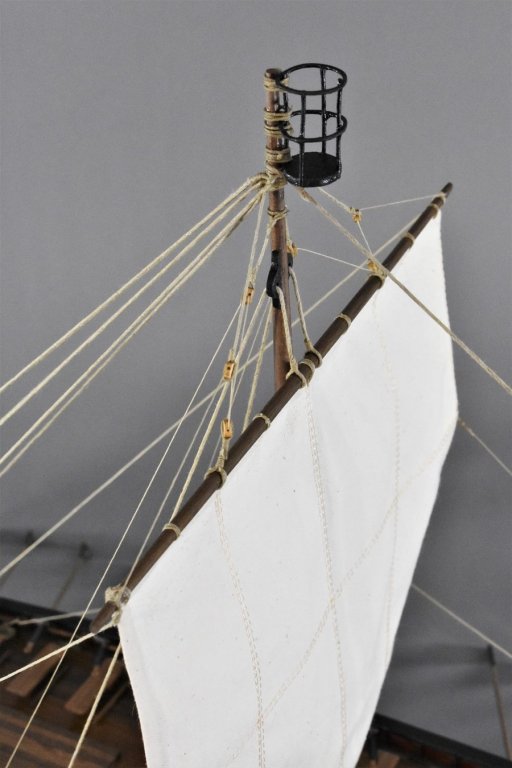
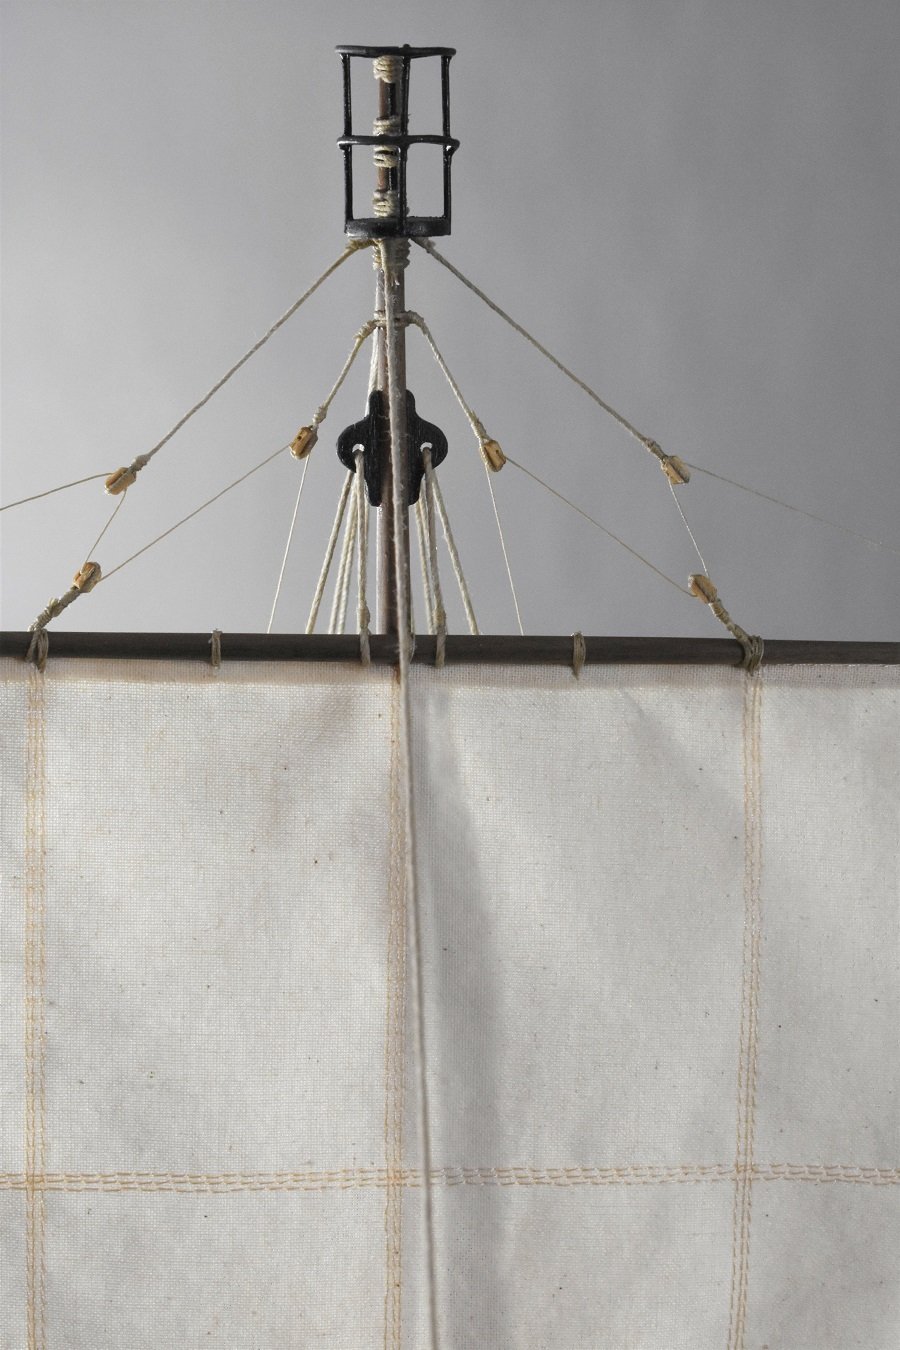
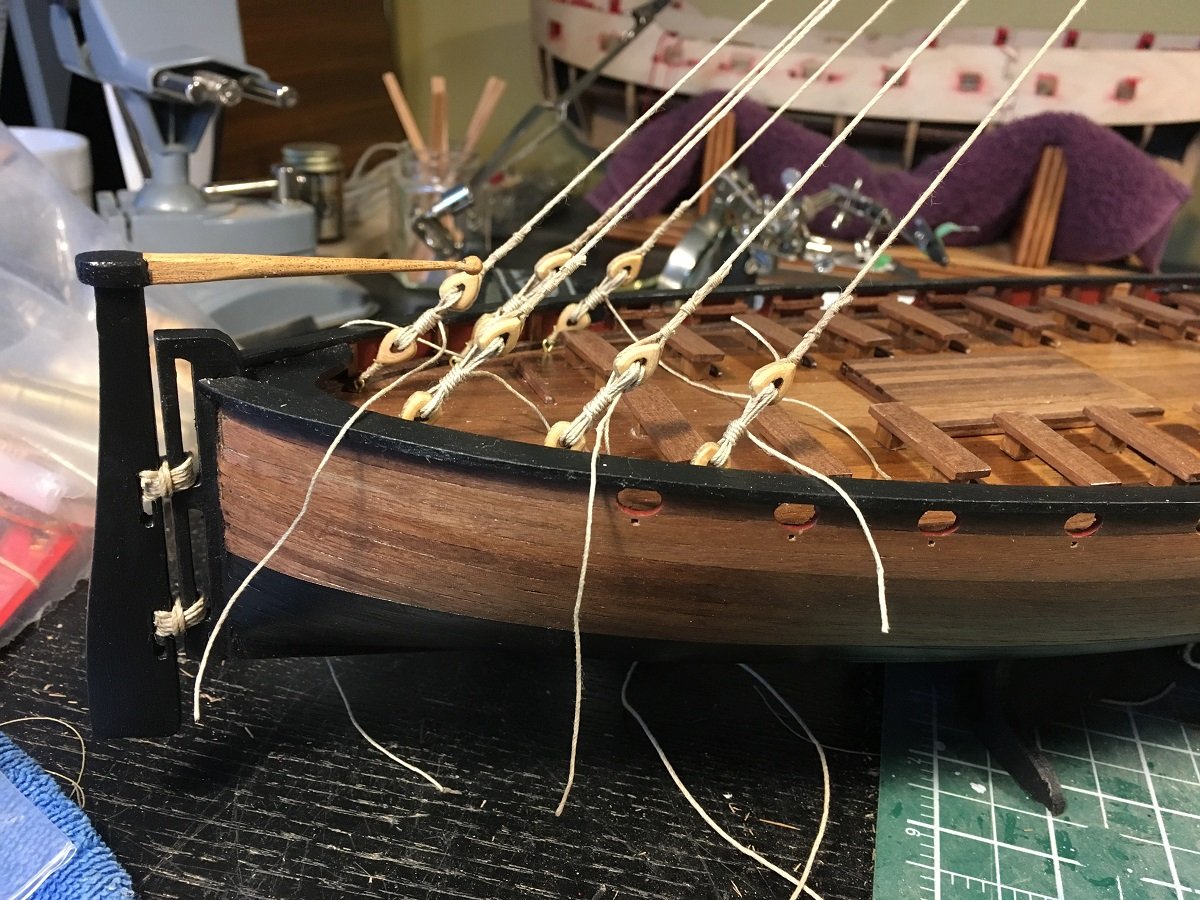
Rigging has started, a little different from the normal battle ship. With so much room to work with it proved to be very relaxing and fun.
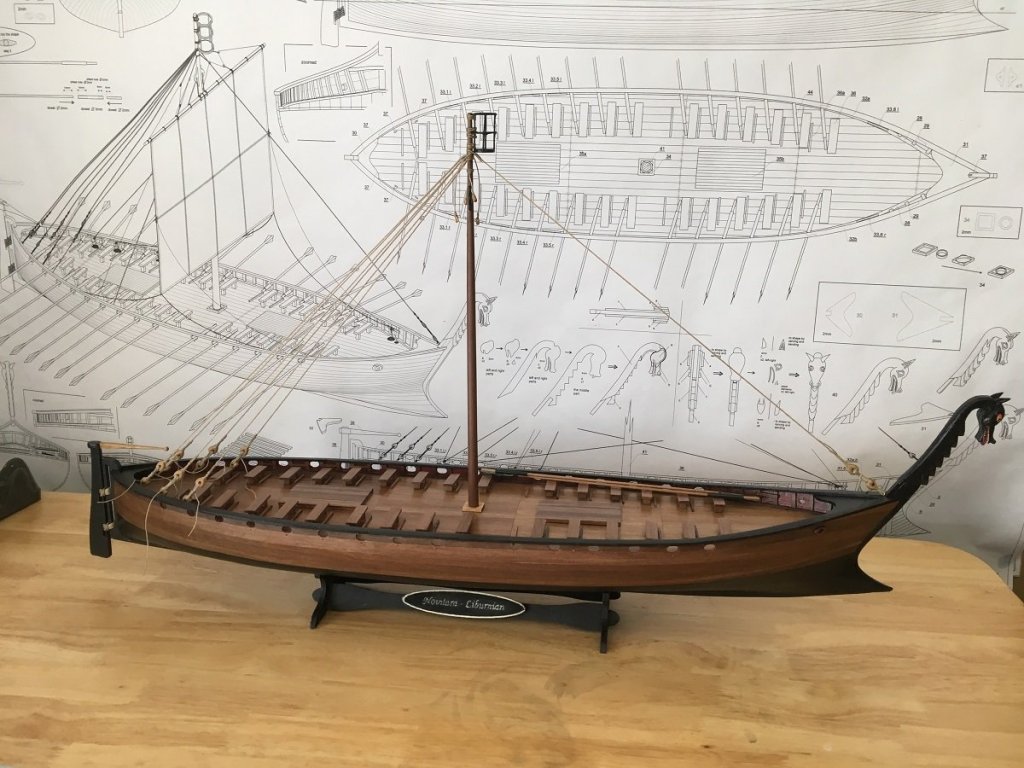
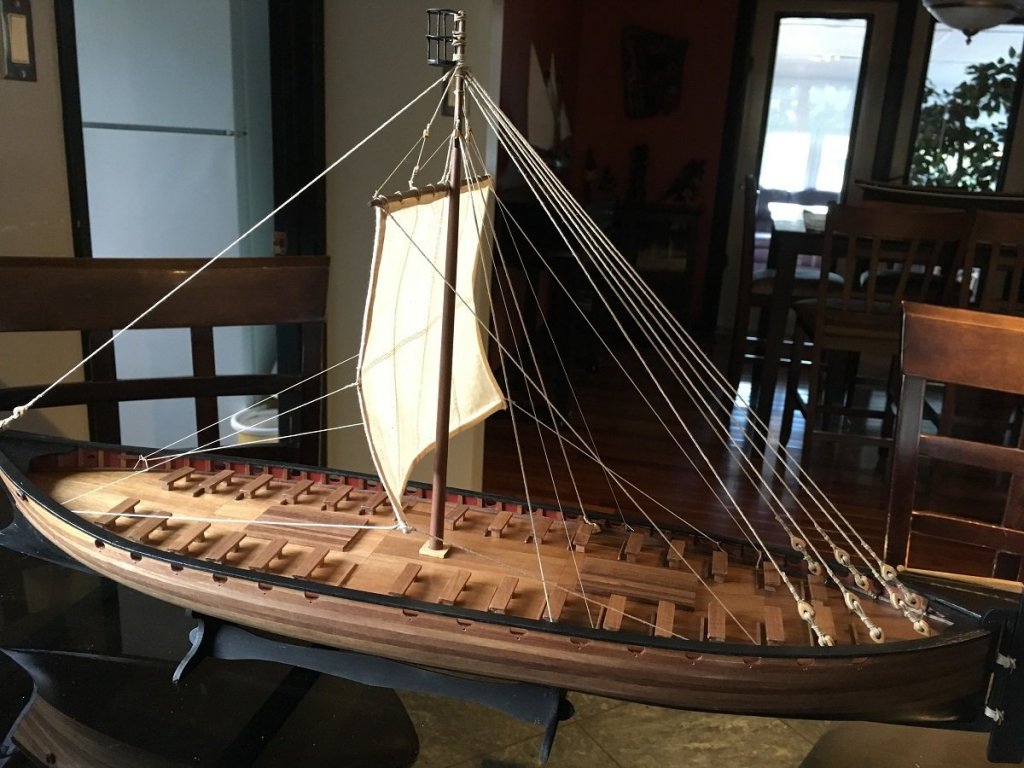
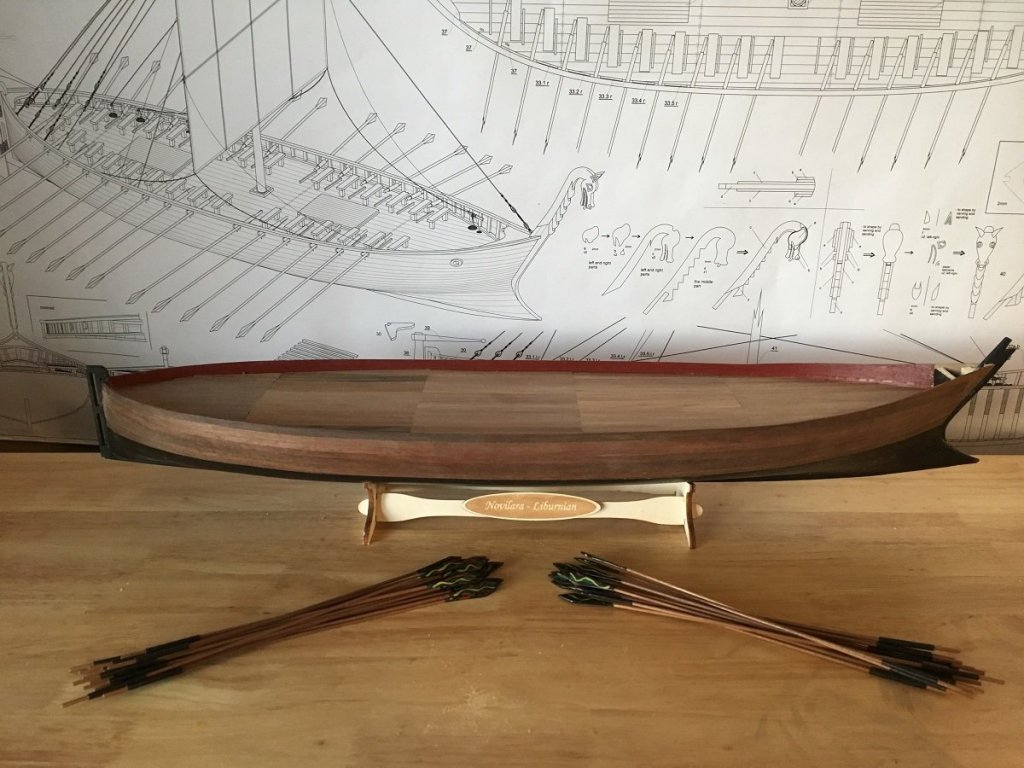
Rigging completed and sail installed. A few minor touch ups and a little tidying up and I will call this completed.
- marktiedens, Nikiforos, Seventynet and 4 others
-
7
-
Beautiful work Bob, hope you are feeling better
- Elijah, Old Collingwood, KenW and 2 others
-
5
-
The weekend proved to be a little fruitful and a little work was accomplished on the Station:
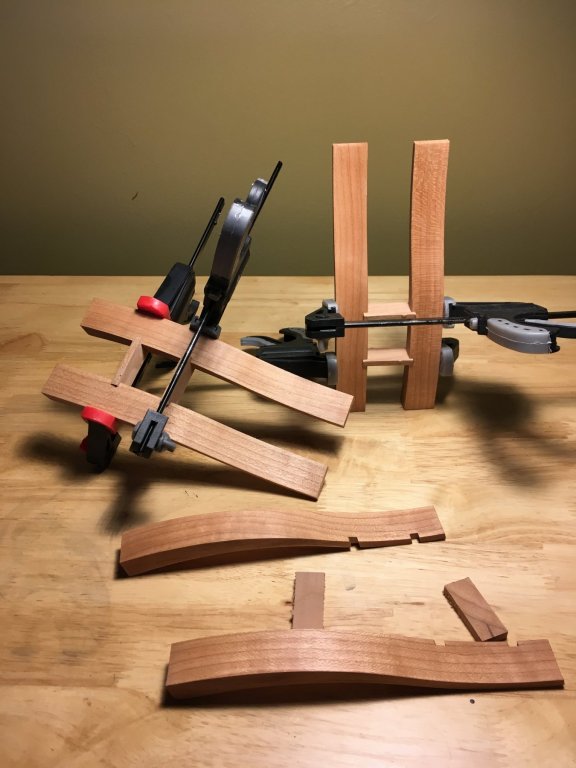
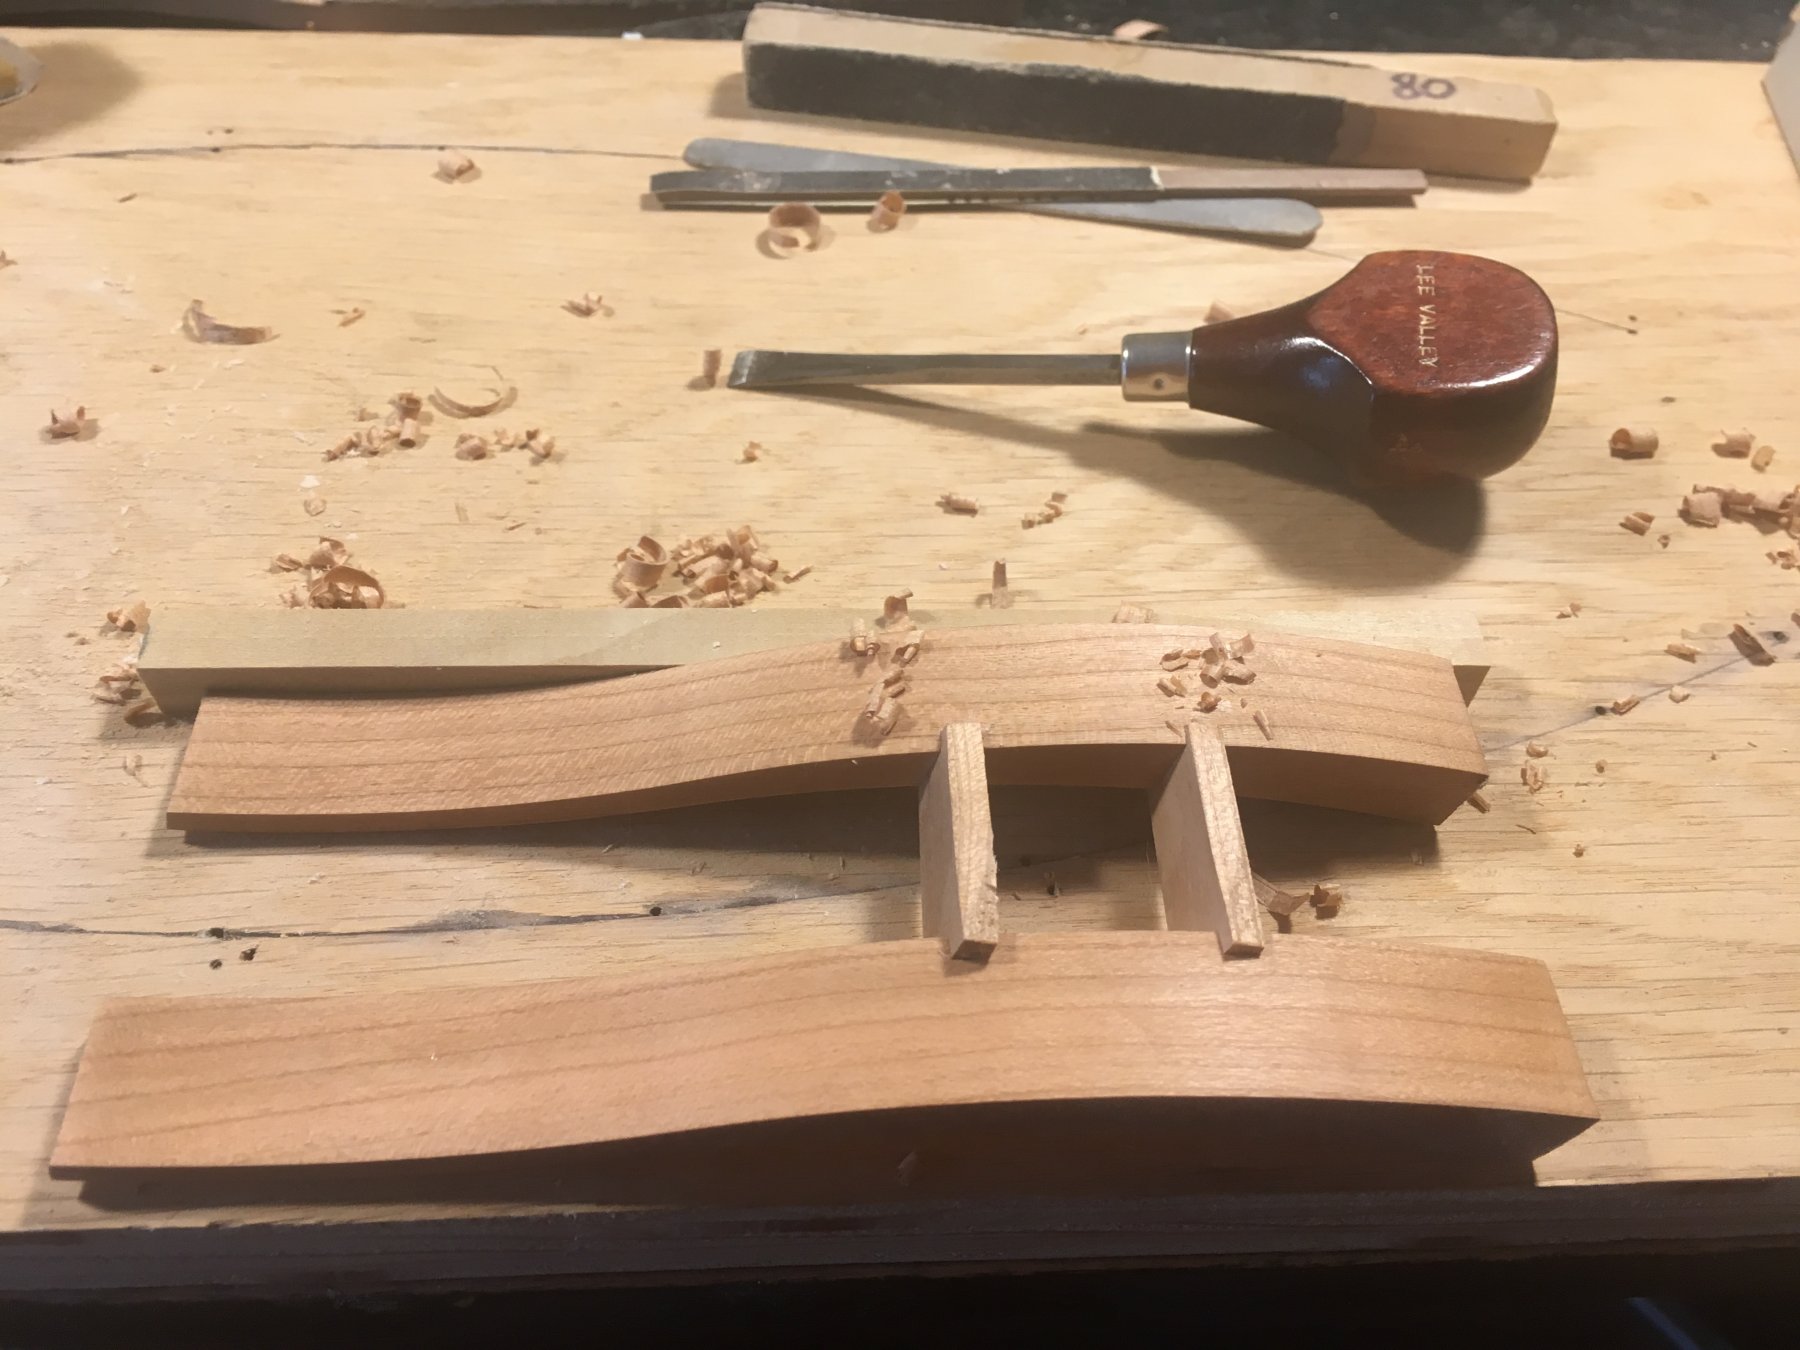
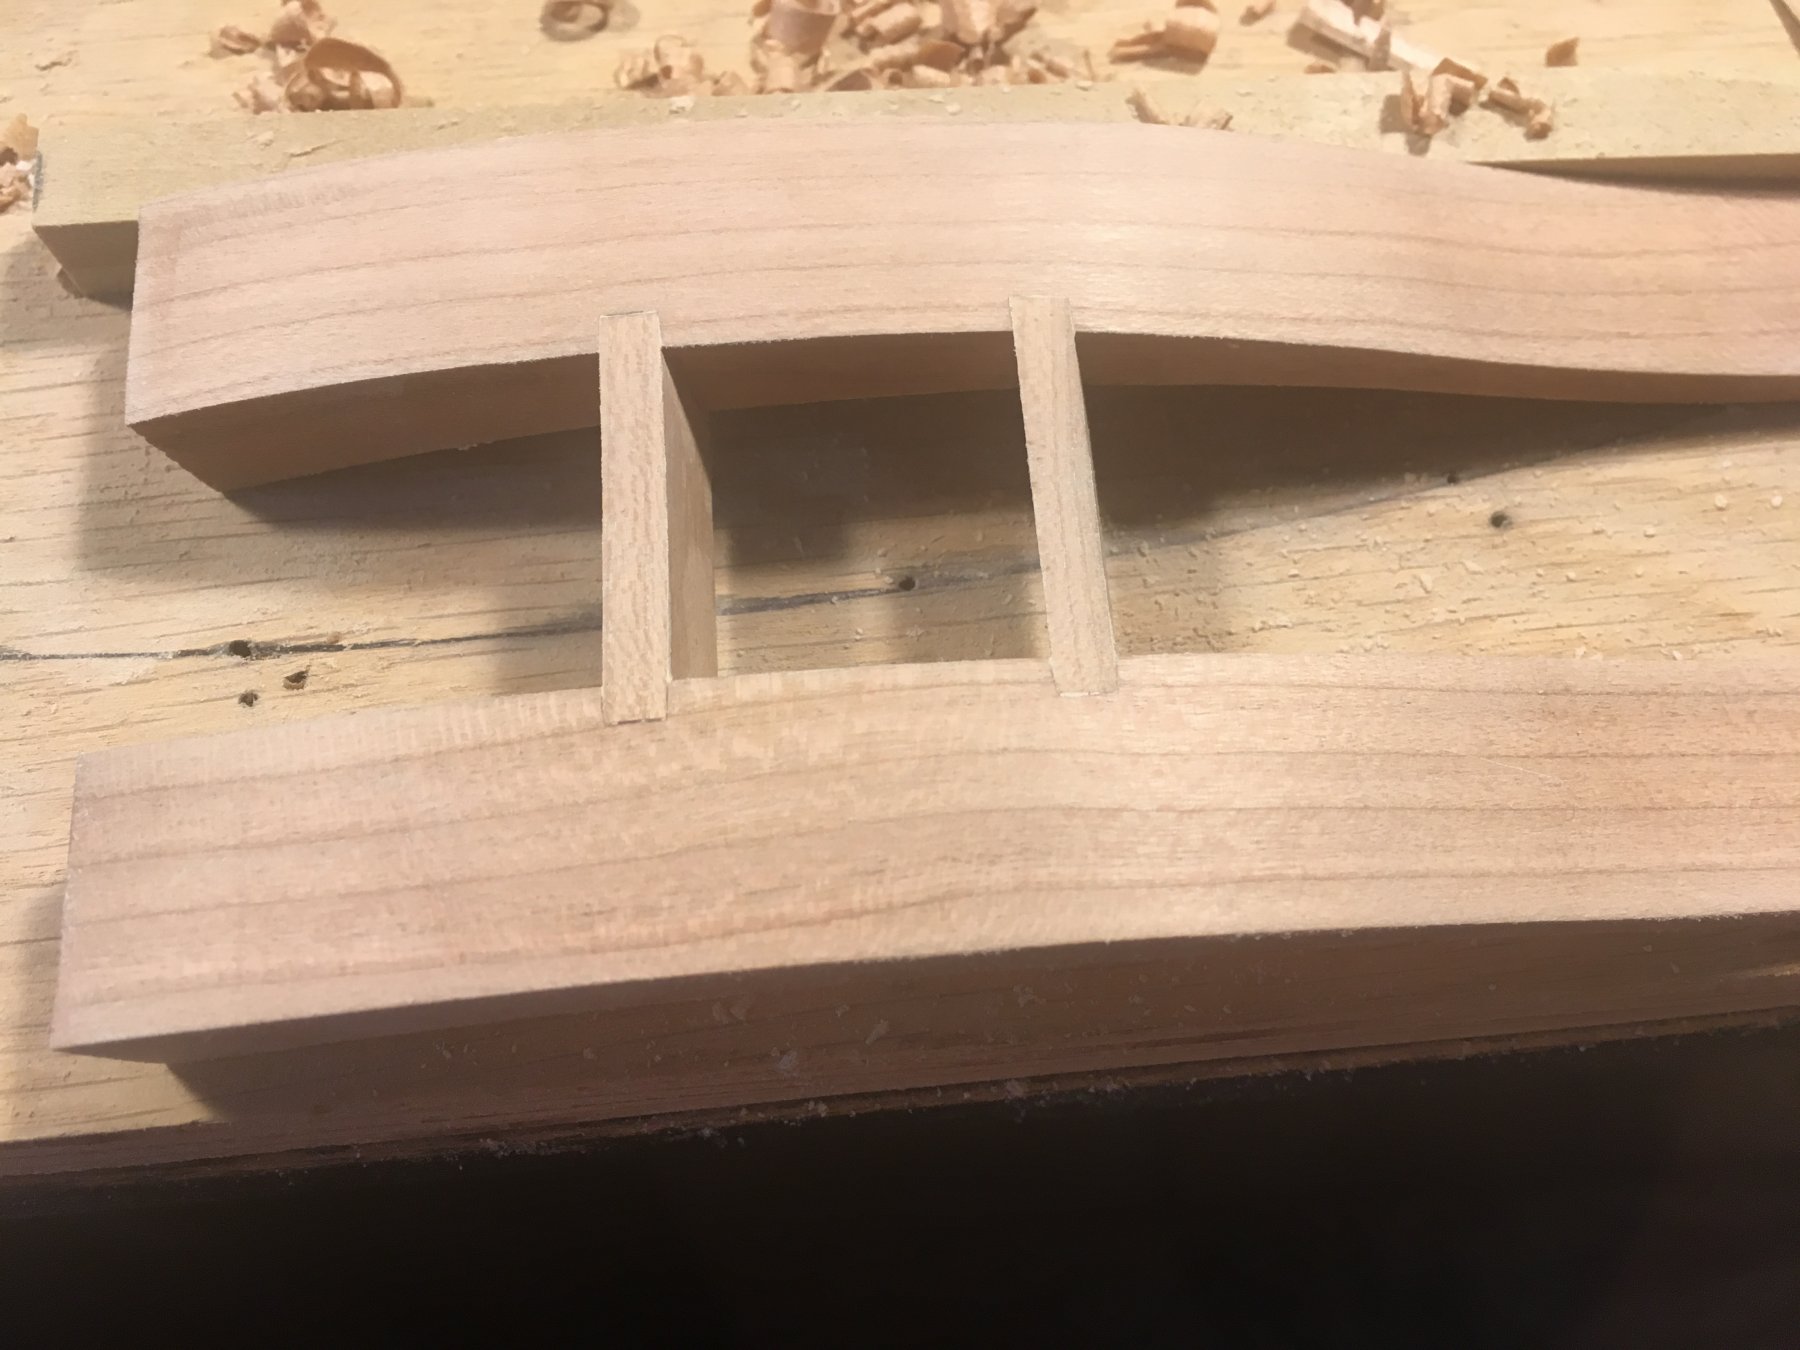
Gunport sills are being added to the frames. Frames and sills are made from cherry

The sills are made over sized then need to be trimmed flush to the frames

The final product
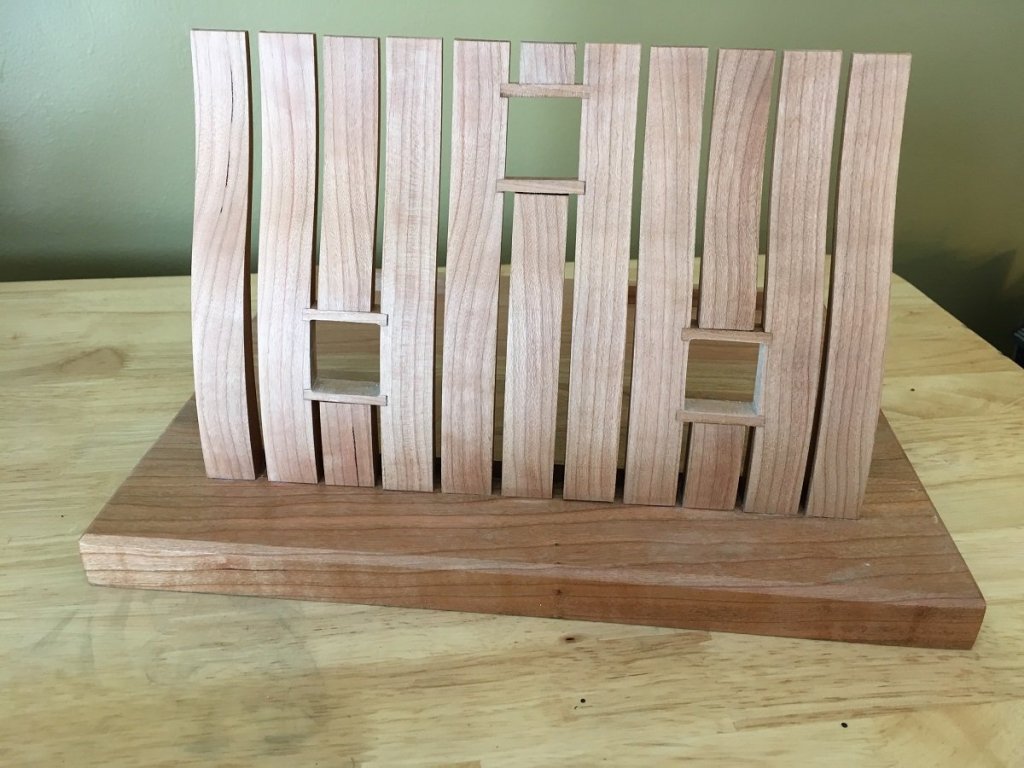
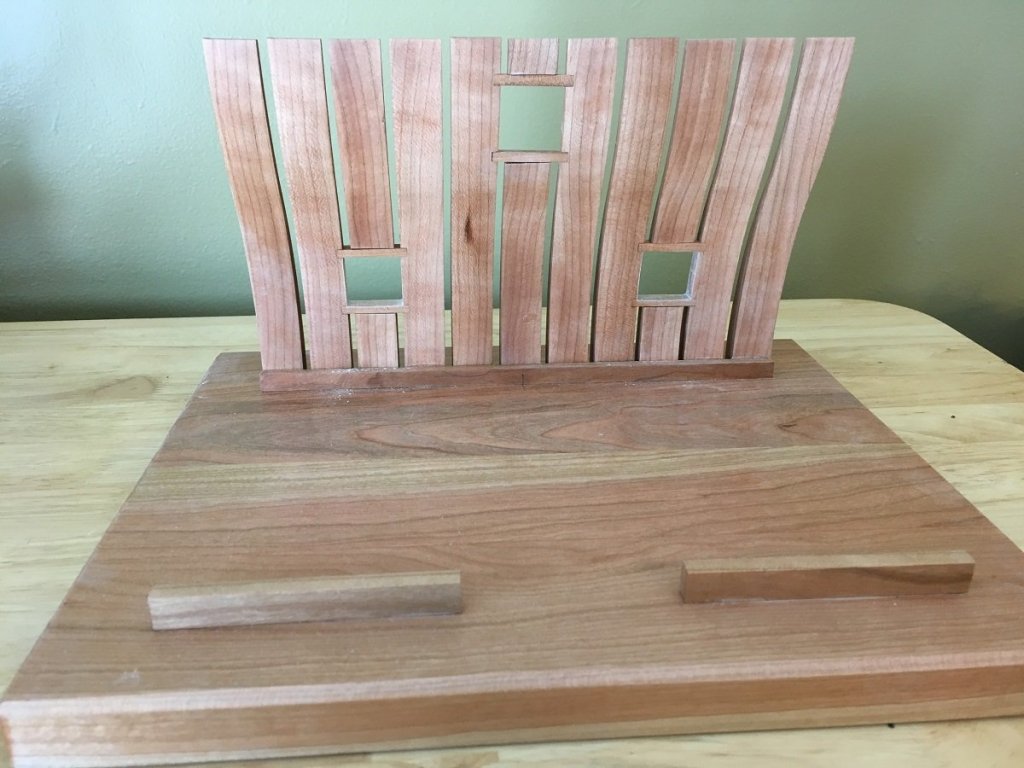
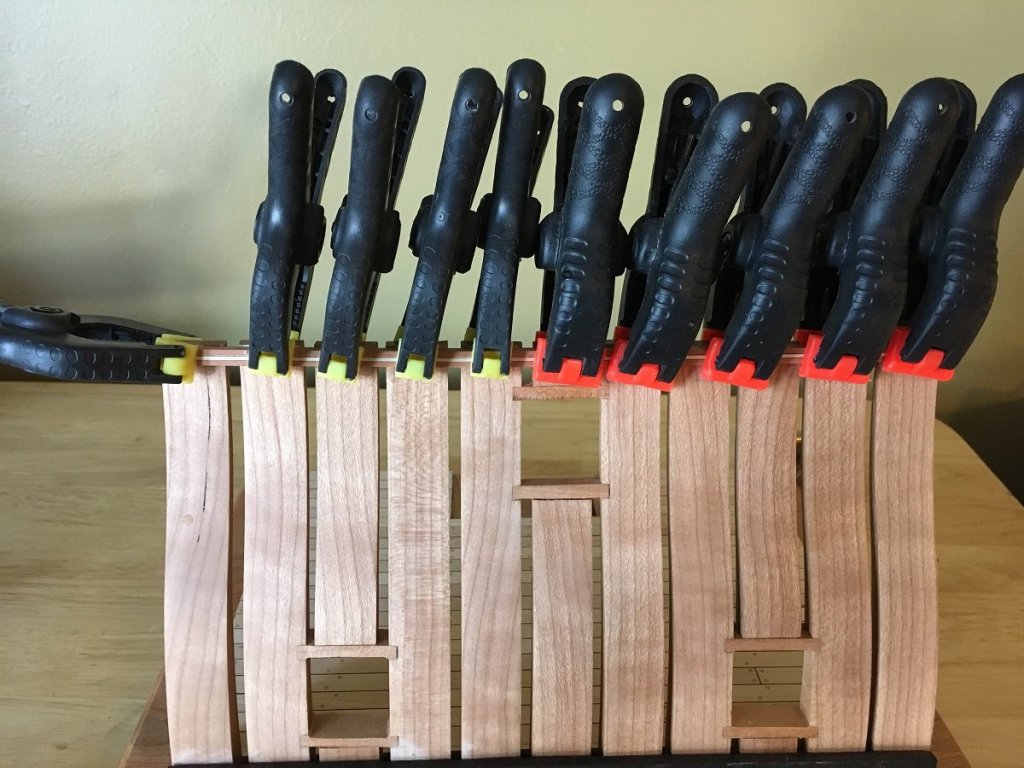
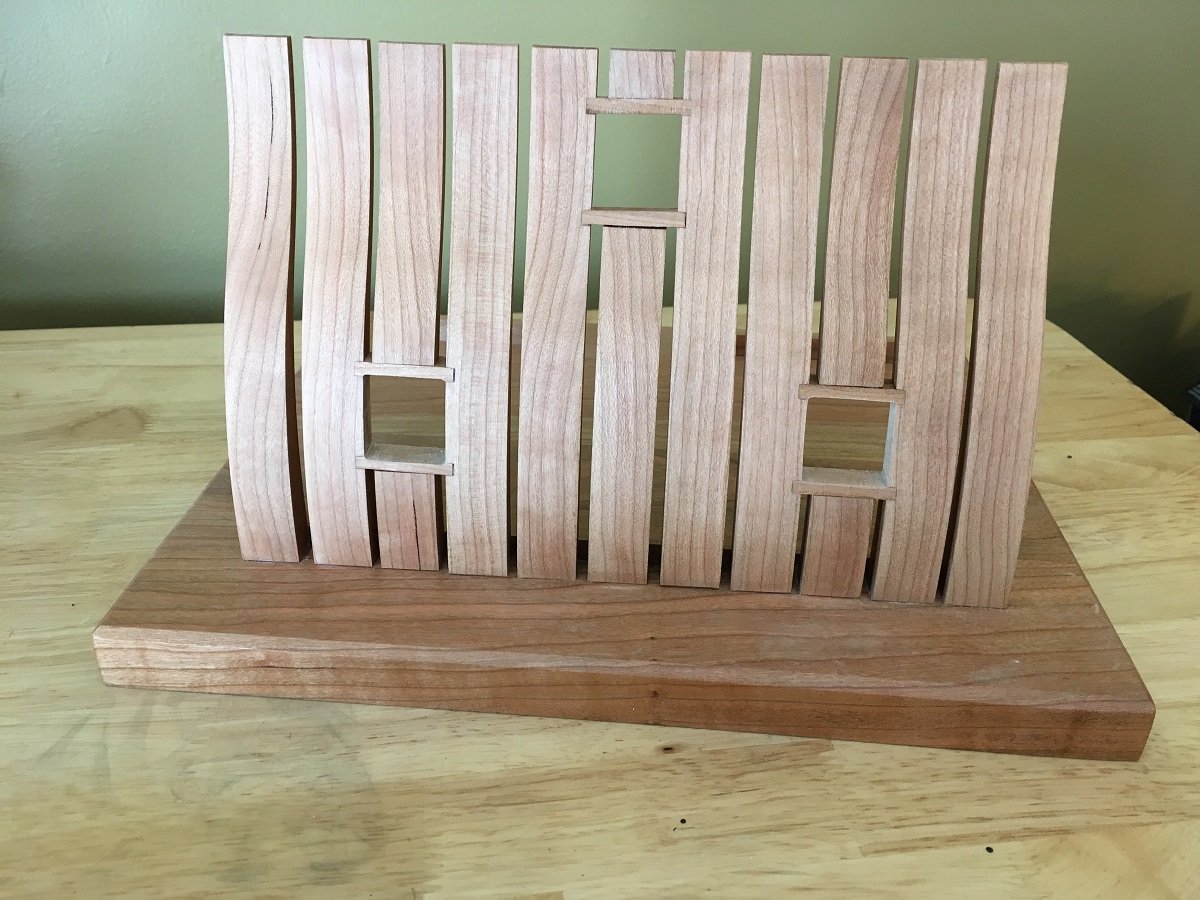
Frames are erected and glued into place

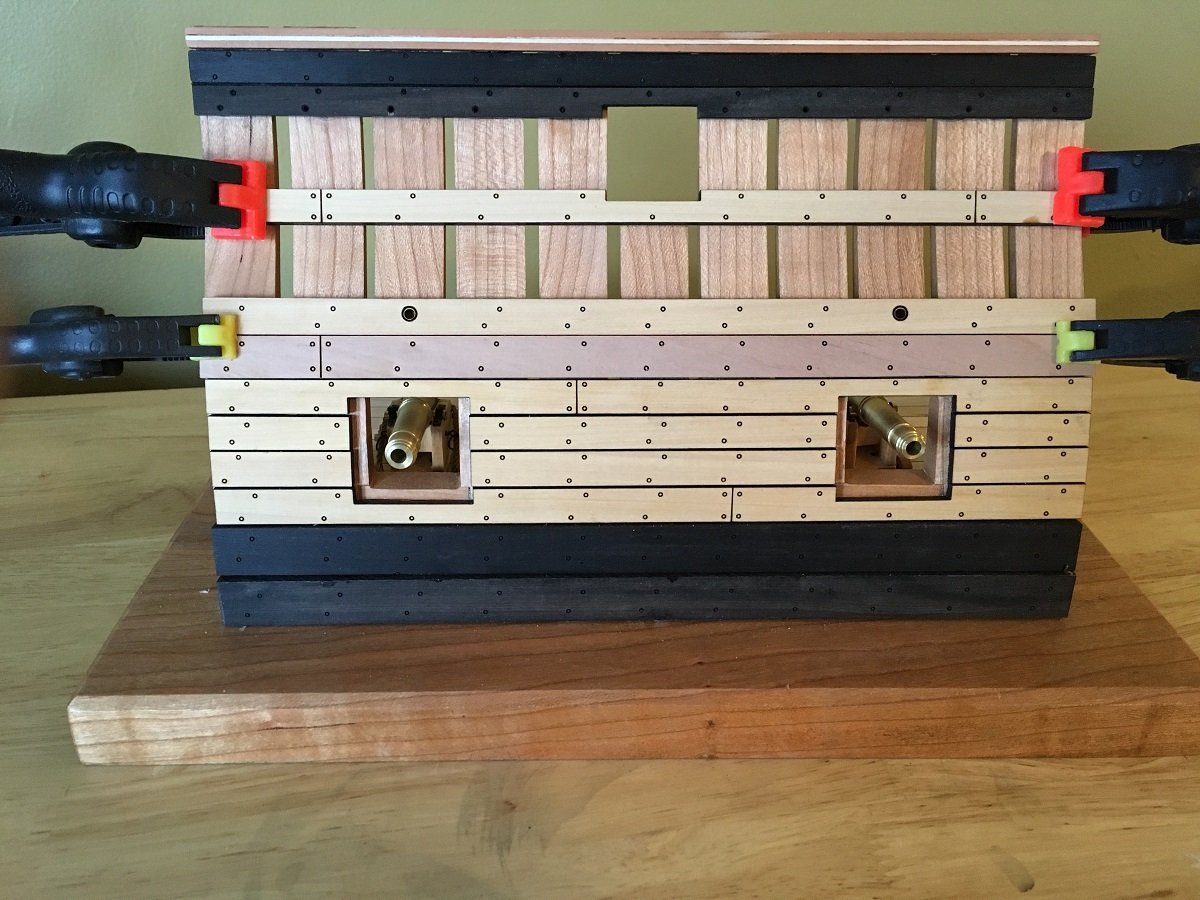
Installing the lower deck has begun, deck planks are made from maple
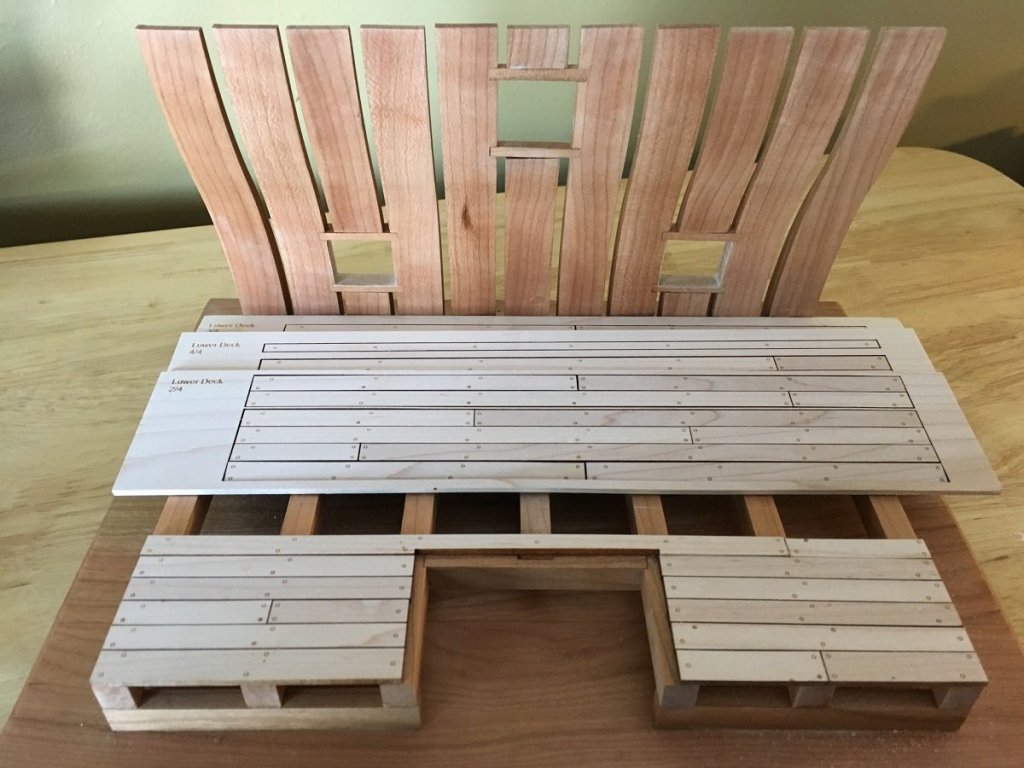
Here is a picture of the planks while still in their billets
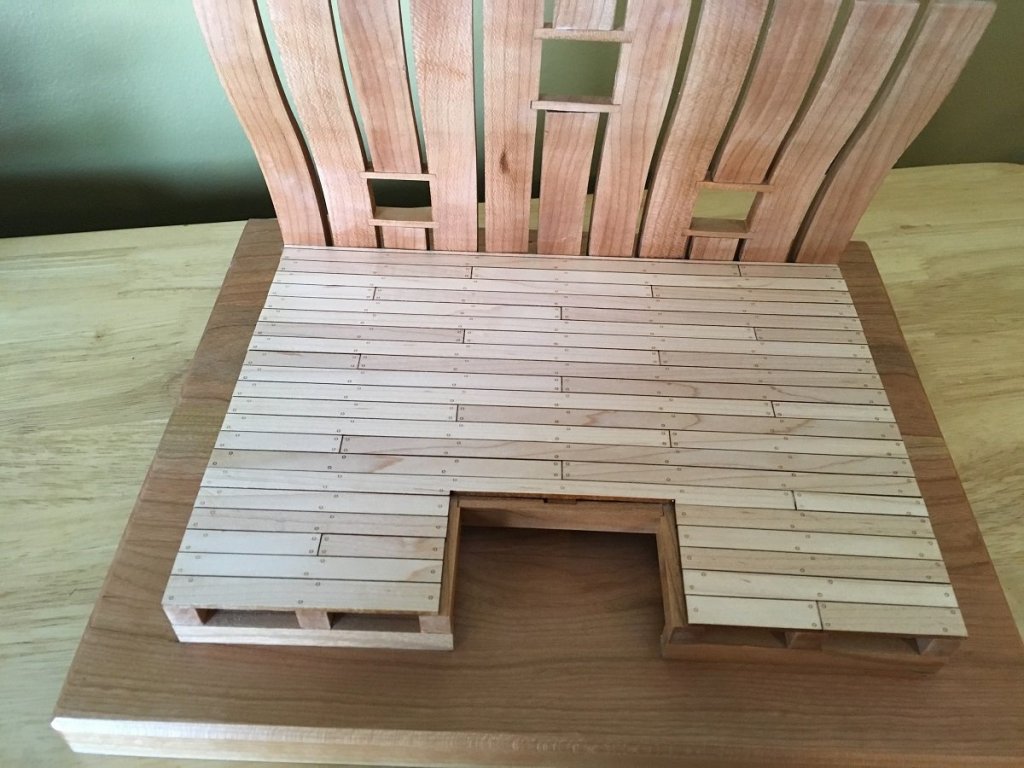
Lower deck completed completed with one coat of wipe on poly applied
Installing the top moulding, this is an extra we added to the plans. The moulding is made from swiss pear with a strip of maple glued into a groove that was cut

Here is how it looks now. Woods used are ebony, boxwood and swiss pear. am now deciding whether to stop any further planking. I like the cherry frames so much that I hate to cover them entirely up.
So until I decide on this that's it for now.
Thanks to you all for the interest, comments and likes. Have a great Day!!
- GrandpaPhil, cristikc, GuntherMT and 12 others
-
15
-
-
-
Another huge ship!!
- AntonyUK, mtaylor and thibaultron
-
3
-
Last picture is a little out of sequence 😁
-
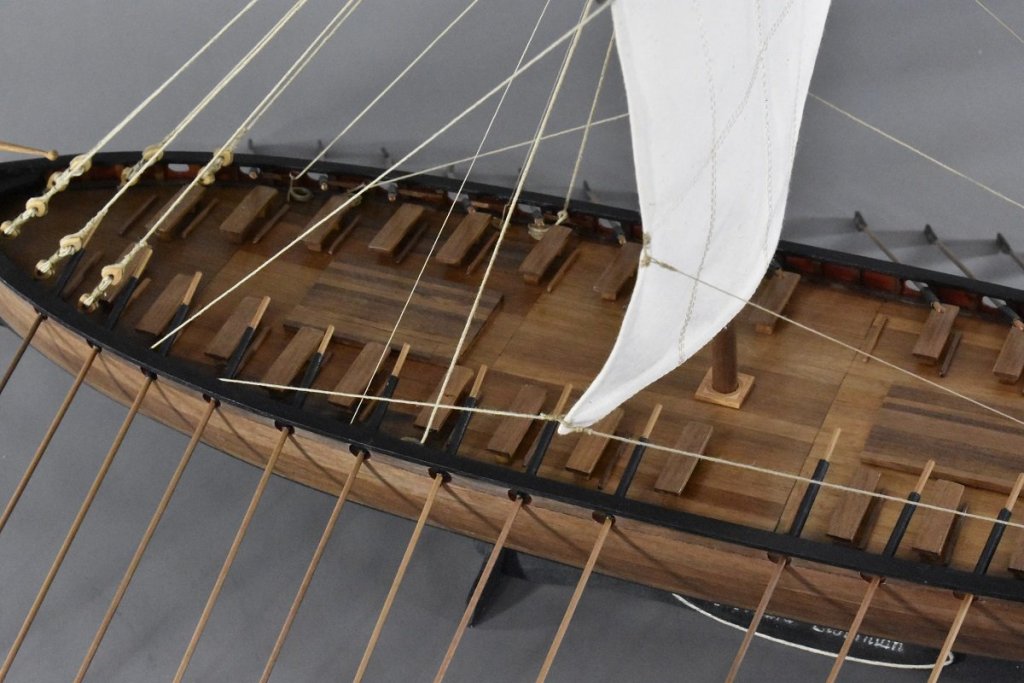
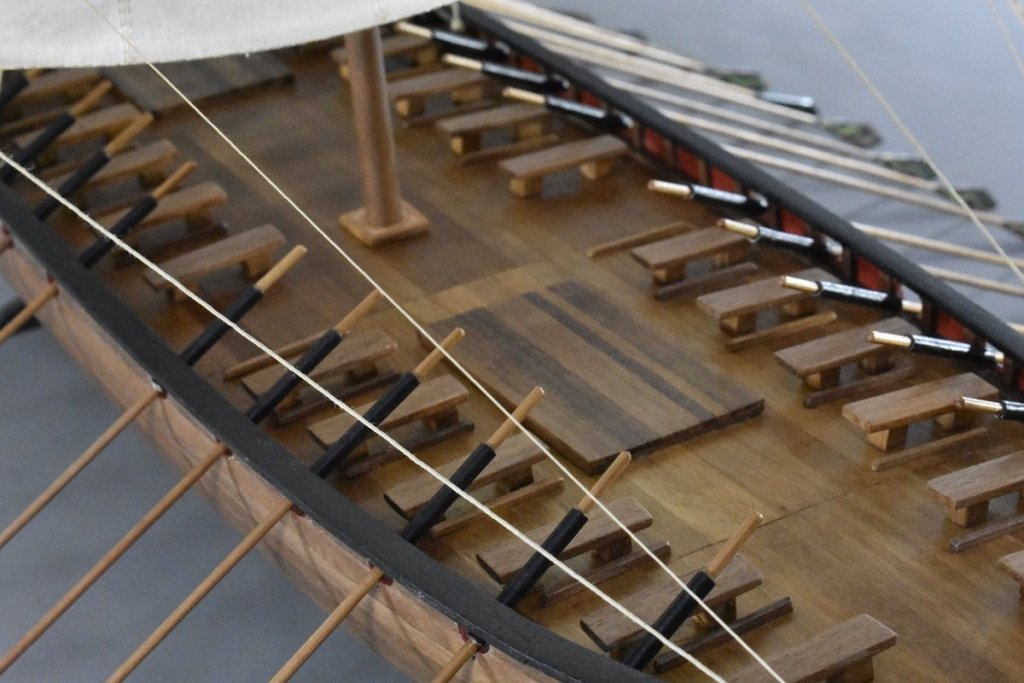
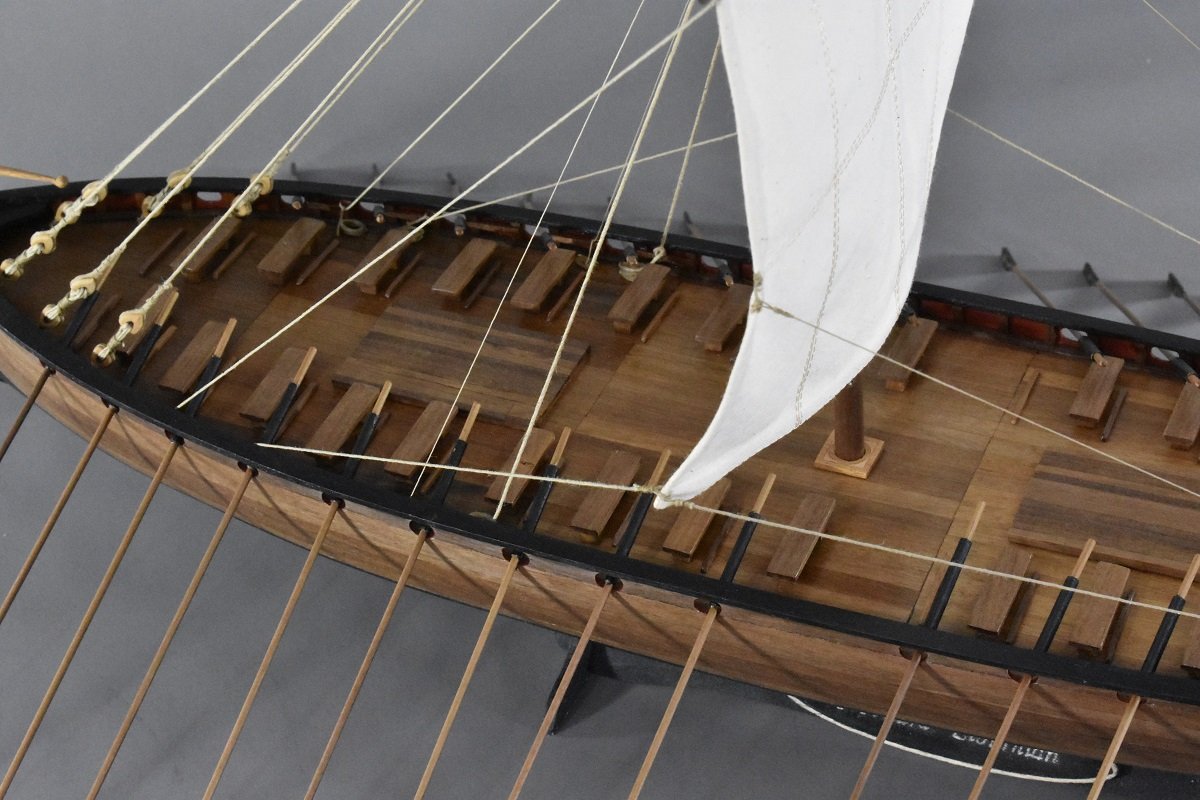
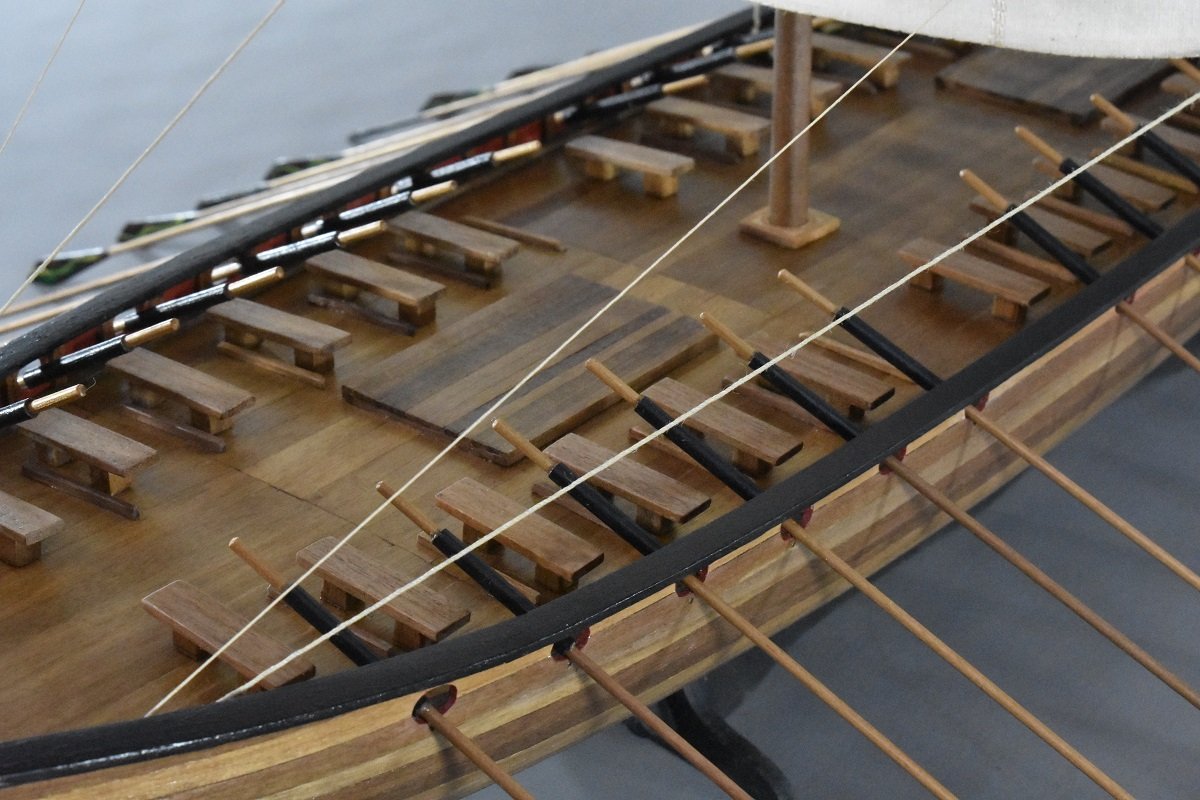
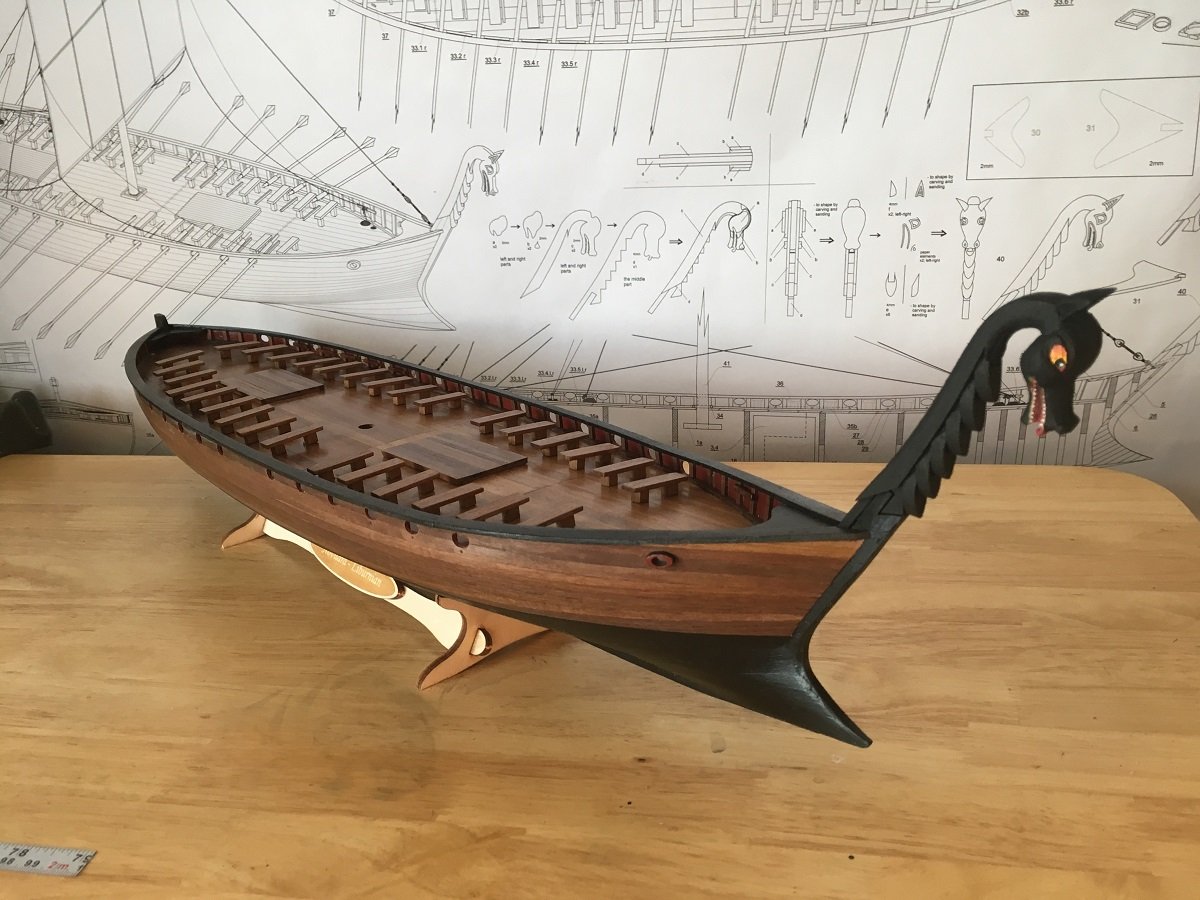
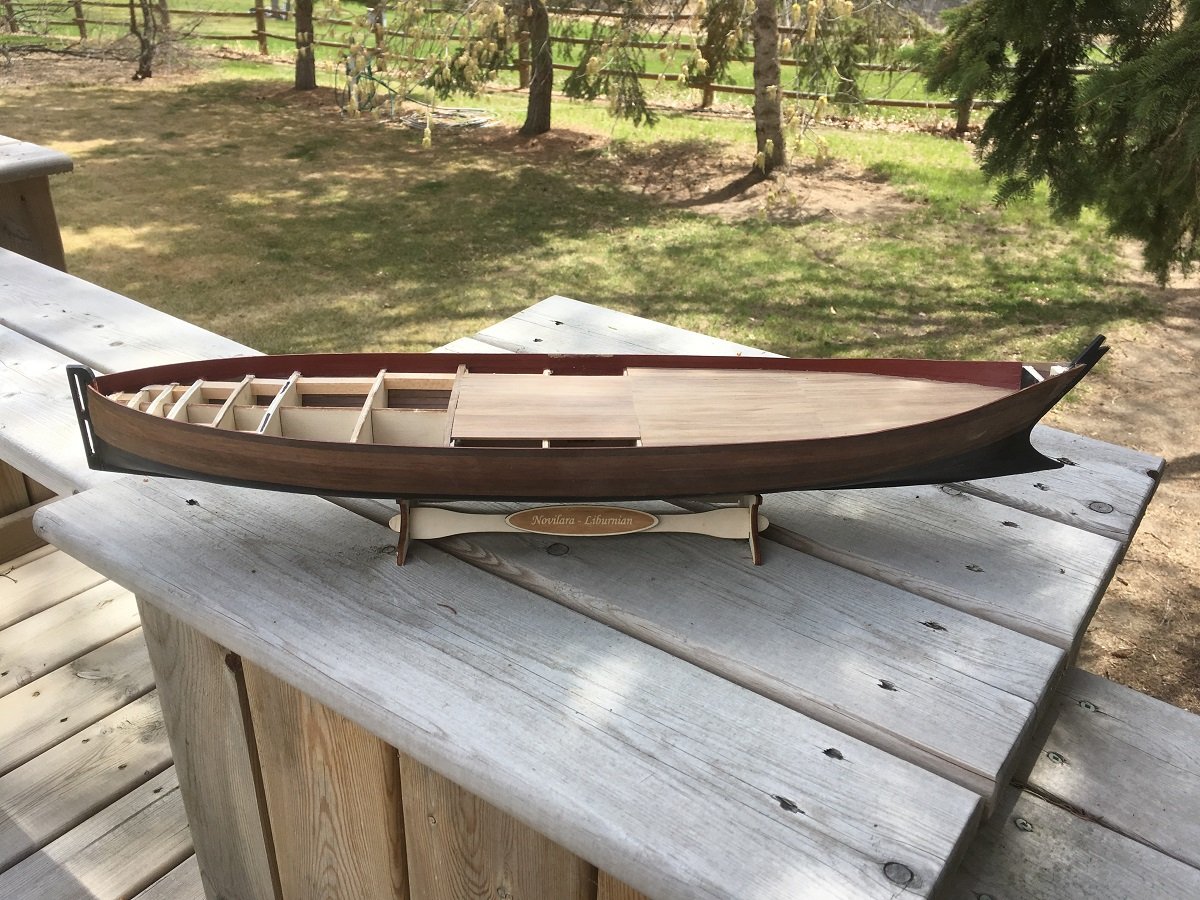
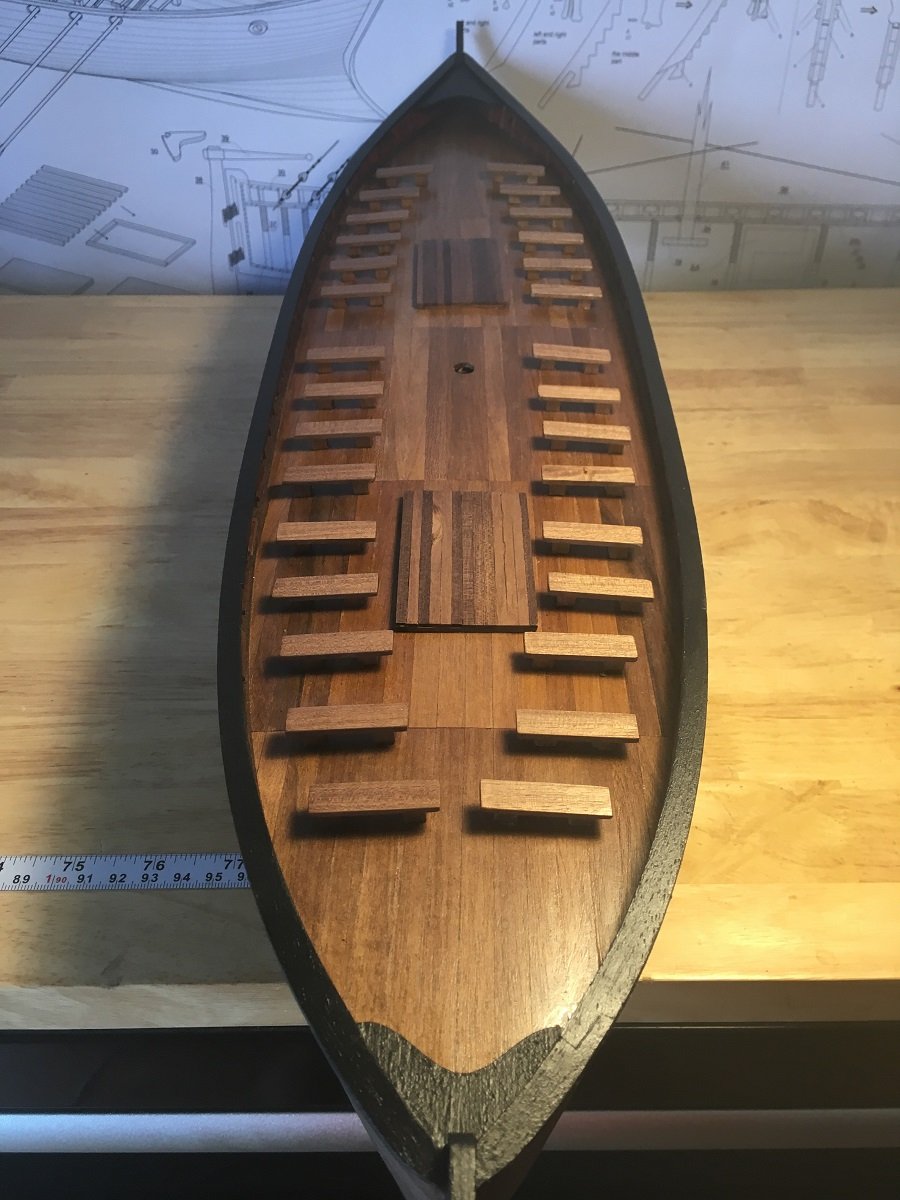
Deck planking has started using 1.5 x 5 mm walnut planks

Deck planking completed
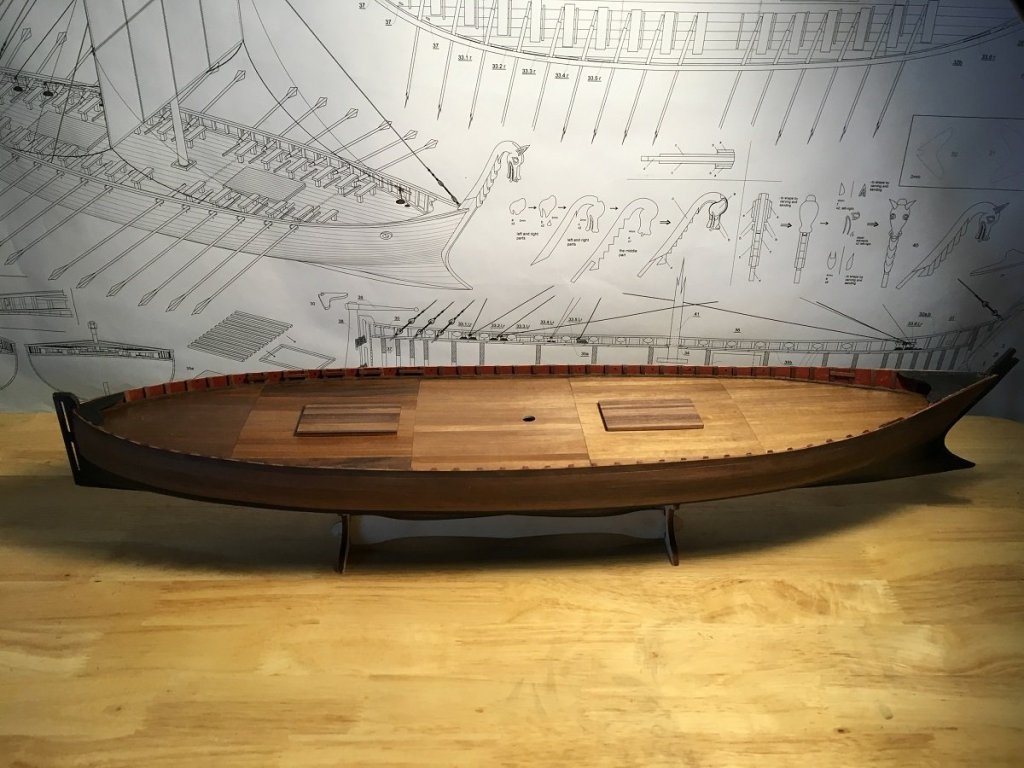
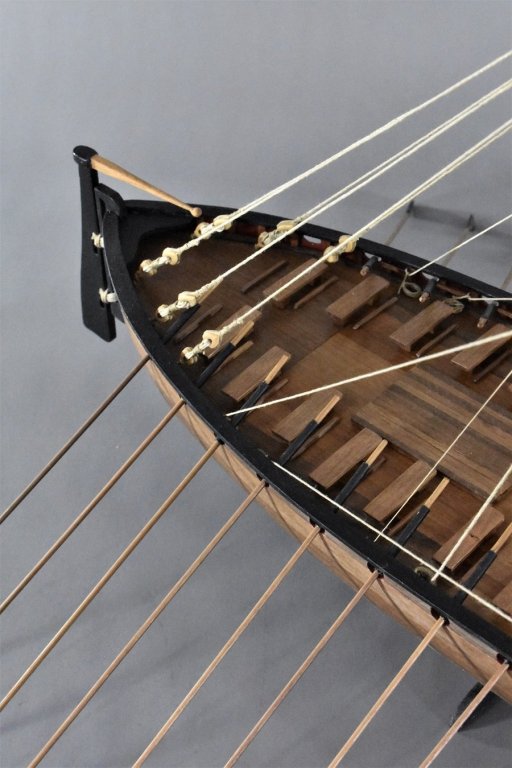
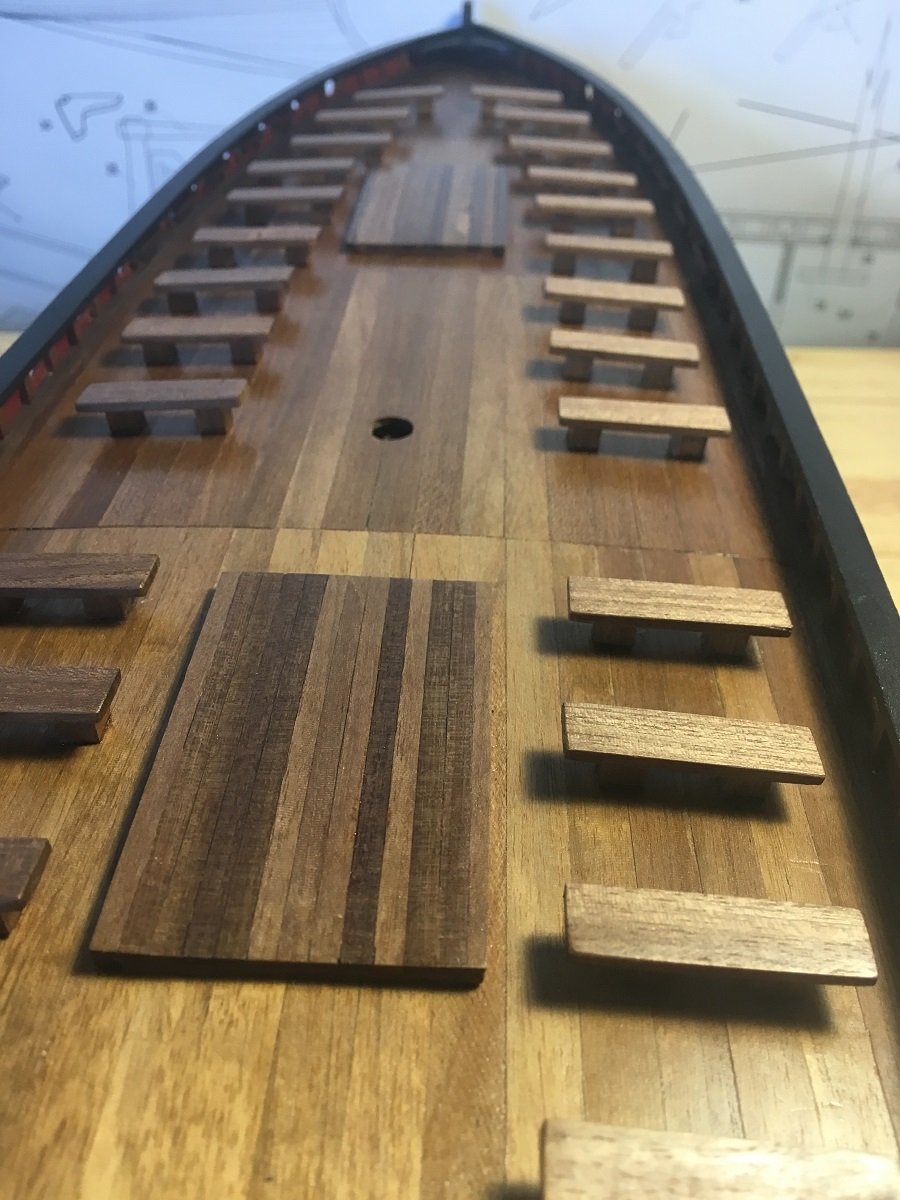
Stanchions and hatches installed
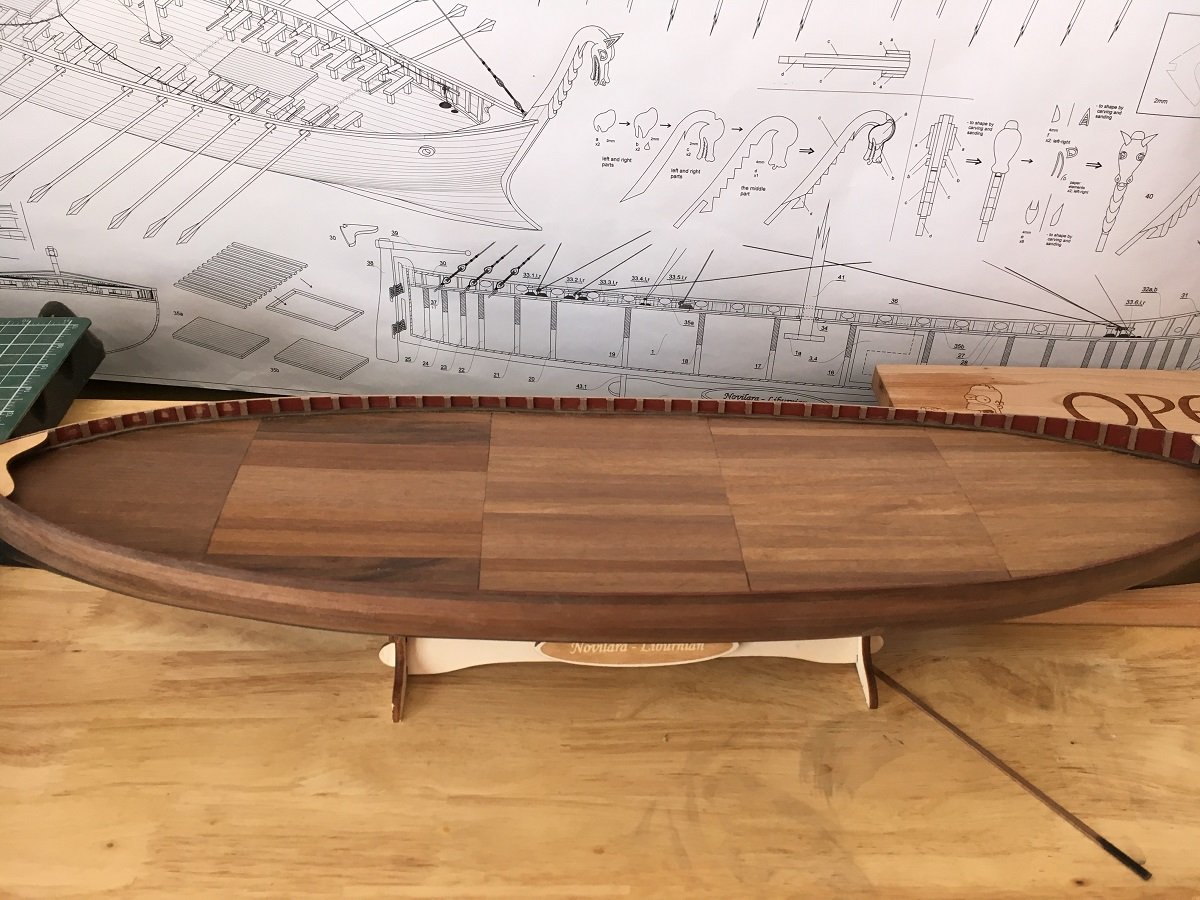
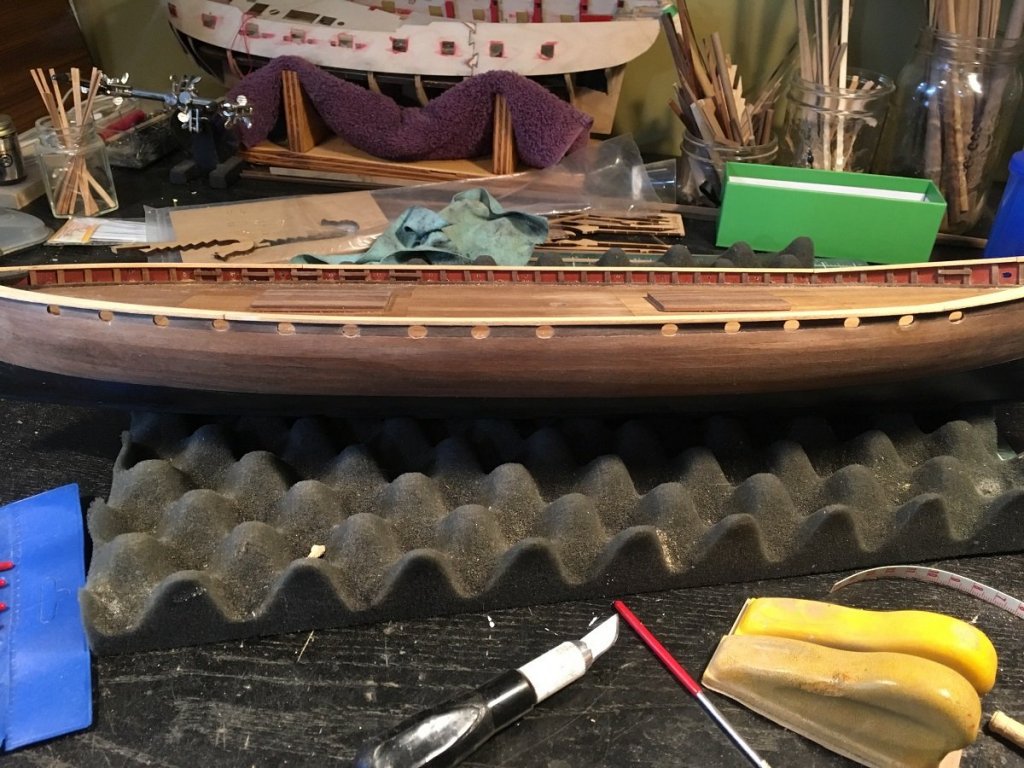 Oar ports cut out and rail installed
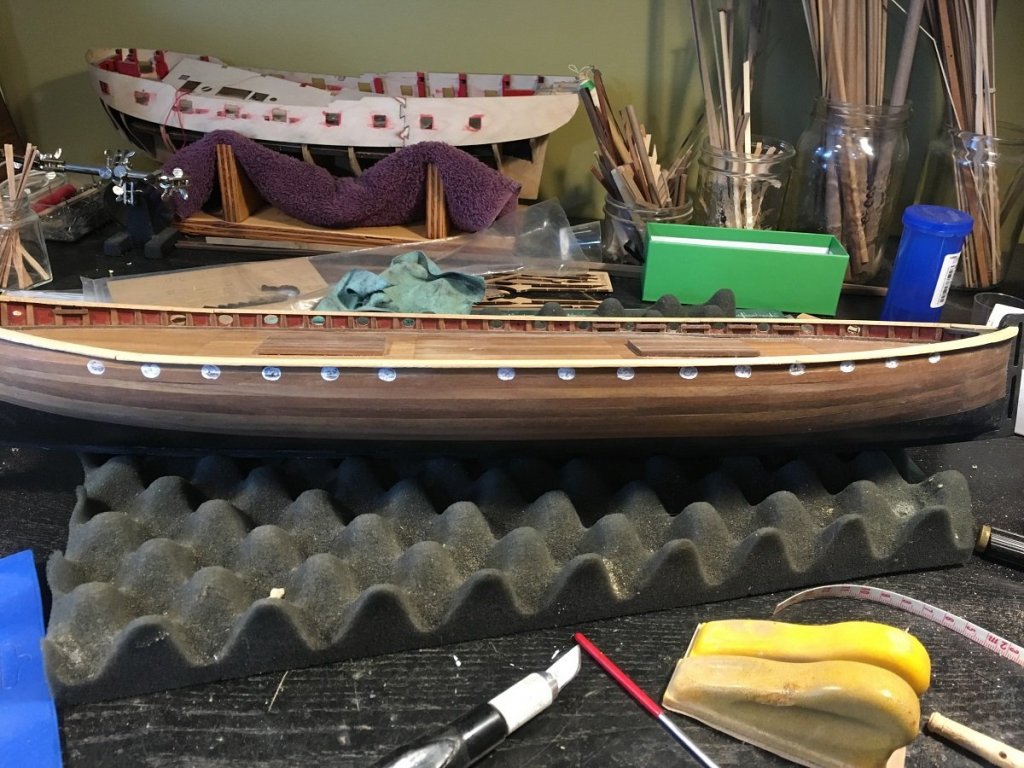
To size and place the oar ports properly I carved a piece of dowel to shape and size. Then I would put a light coat of paint to the end of the dowel then mark the side of the hull. Ports were first rough cut with a dremel then finished with a file and sandpaper
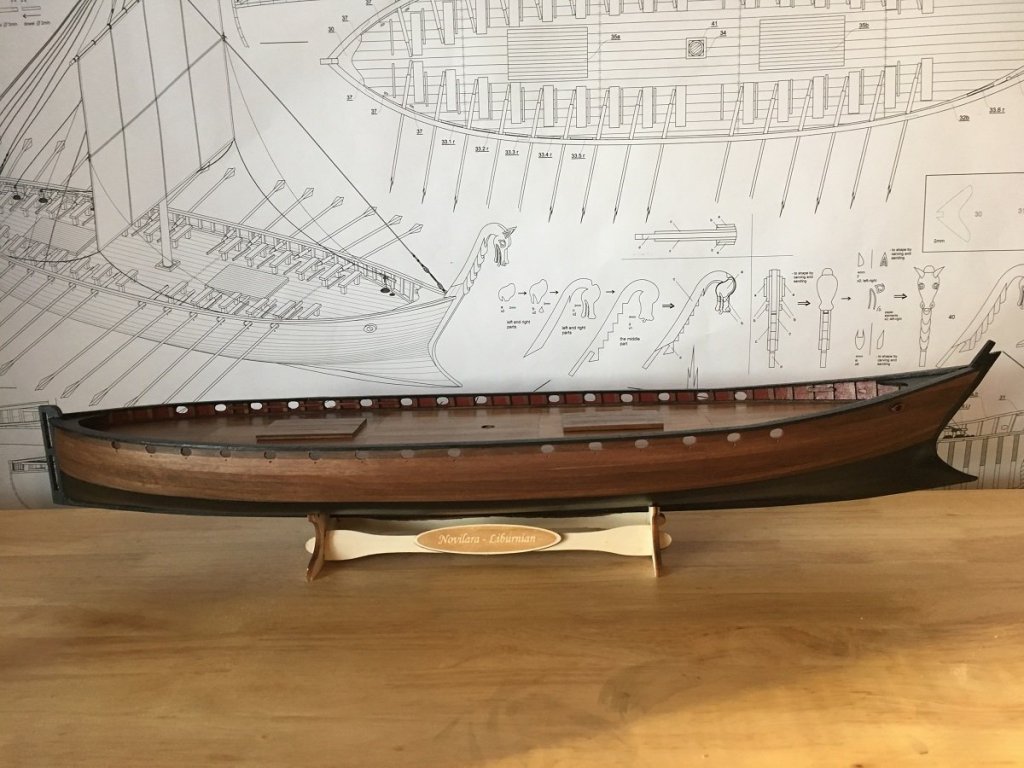


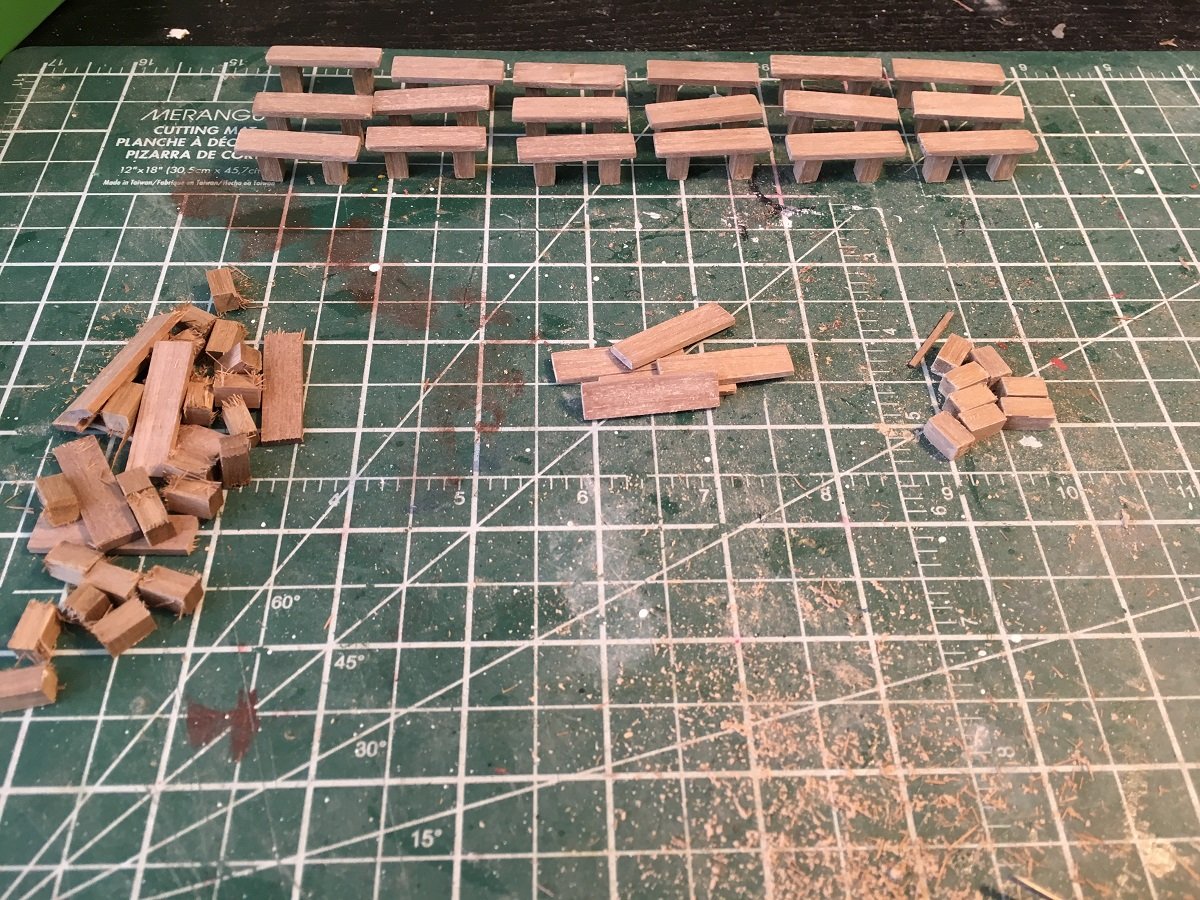
Assembling the thirty benches required


That's it for now.
Thanks to all for stopping by, leaving likes and comments I truly appreciate it

-
Thanks Antony, I just found your gondola build. That will be an interesting build to watch, looking forward to seeing more on that one.
- mtaylor and Louie da fly
-
2
-
Very interesting Antony, I love these boats and am excited to see how you tackle this one!! I'll be watching
- thibaultron and mtaylor
-
2
-
You are correct Steven
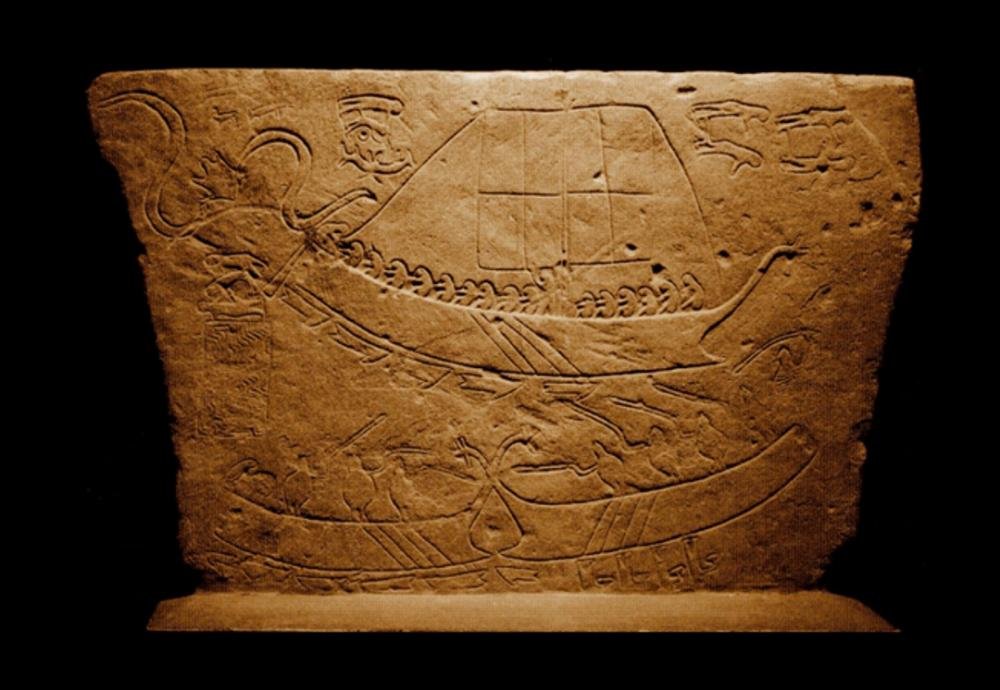
This taken from the MarisStella site. They did use this as a reference. There was some argument as to whether there was a rudder or steering oars, but as you can see there is a rudder
- Louie da fly and mtaylor
-
2
-
-
-
-
-
Thanks Steven, I am also getting to have a real like for these style of ships
- Elijah and John Allen
-
2
-
Thanks for your comments Dan. We were also unsure where this style of carriage came from but decided to go with it as the plans showed this. To be honest I have never seen where the breaching rope went though the carriage like that, I am certainly no expert on armament, you have completely surprised me with this. I will defiantly give this some thought.
If you happen to stick around longer with this build you will notice more things that are not necessarily correct in actual ship building that we did not bother to change from the plans. I am thinking Jeff designed this plan for novice scratch builders, such as myself, not so much for historical value but more for "getting your feet wet" in the world of scratch building.
In saying that I am not really sure why I am here as I am learning neither, being that all the pieces are pre made!! I am having fun though if that counts.
Again thanks for your input, it is because of your information I have now learned something today👍! Hope you stay on board
-
The following is my build log for MarisStella's Liburnian Novilara. MarisStella has recently re-designed this kit somewhat and has added new instructions and step by step drawings to help guide you through the build, it also still comes complete with detailed plans.
I do not have pictures of the box opening as it did not arrive in a box as such but I can assure all material is of top quality and up to the usual high standard MarisStella has set for itself.
I would rate this kit as a junior plus or possibly even an intermediate .
The hull is single planked as is the deck (no plywood), planks are all walnut. Keel and bulkheads are laser cut from plywood and posed no problems fitting together. One of the many features of this kit is the partial carving of the figurehead. MarisStella does supply the pieces for you to get the basic shape but the final shaping is done by hand which proved to be lots of fun.
Rigging is fairly basic, however quite different from the ships of later years. For instance rather than shrouds there are three back stays on either side, no rat lines to tie!! There is also a sewn sail included which adds to the rigging but is not that difficult to install.
Overall this was a real enjoyable build and I would recommend it to anyone, especially for those who are looking for something a little different from the normal battleship and want a completion in a relatively short time.
I hope you enjoy the build even though I am lacking detailed pictures as I was not planning on doing a build log. If you have any questions please feel free to ask, and all comments are always welcome.

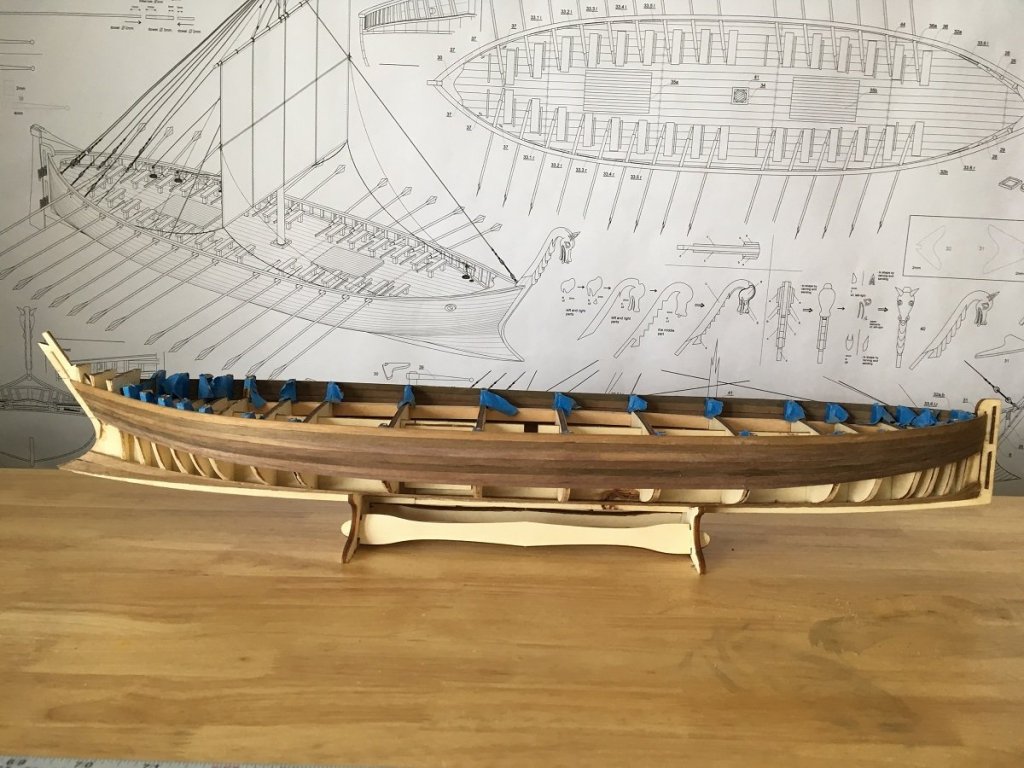
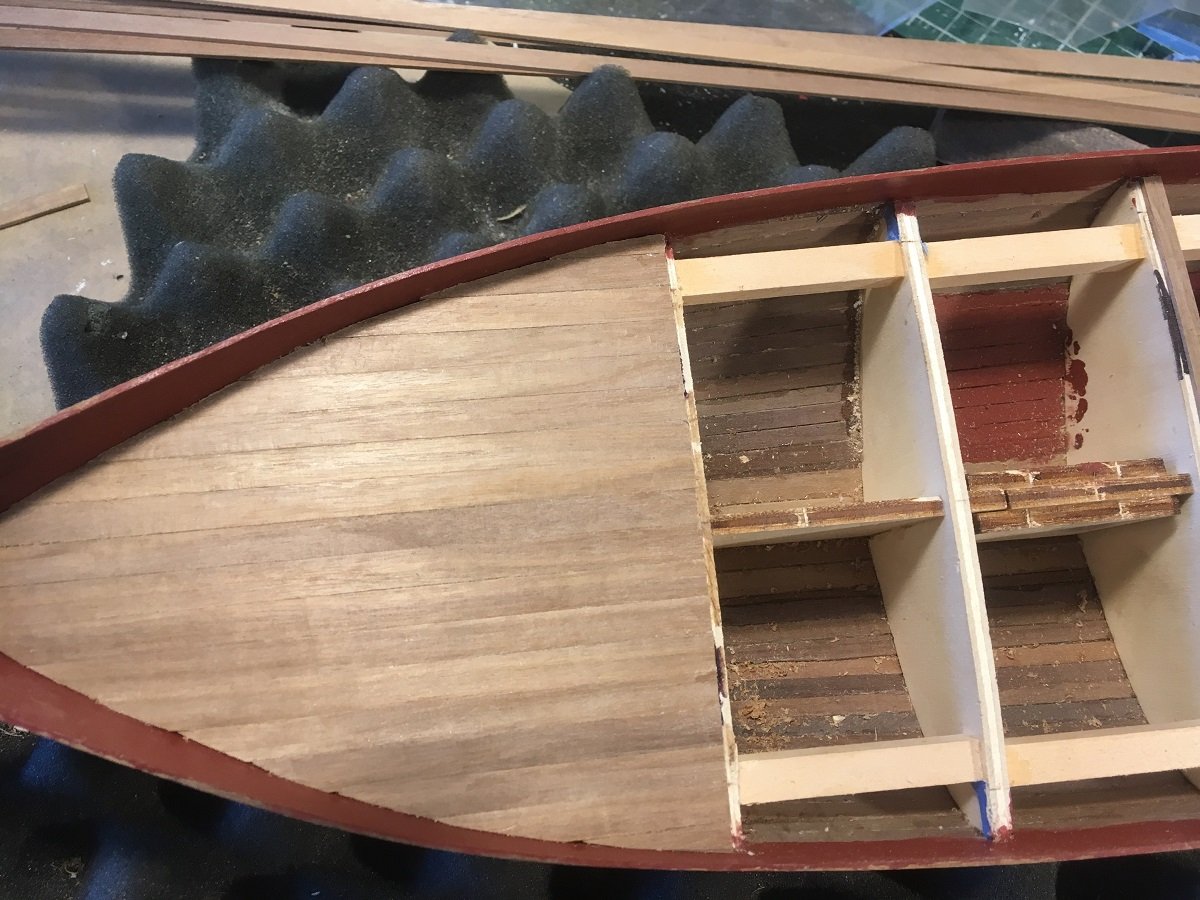
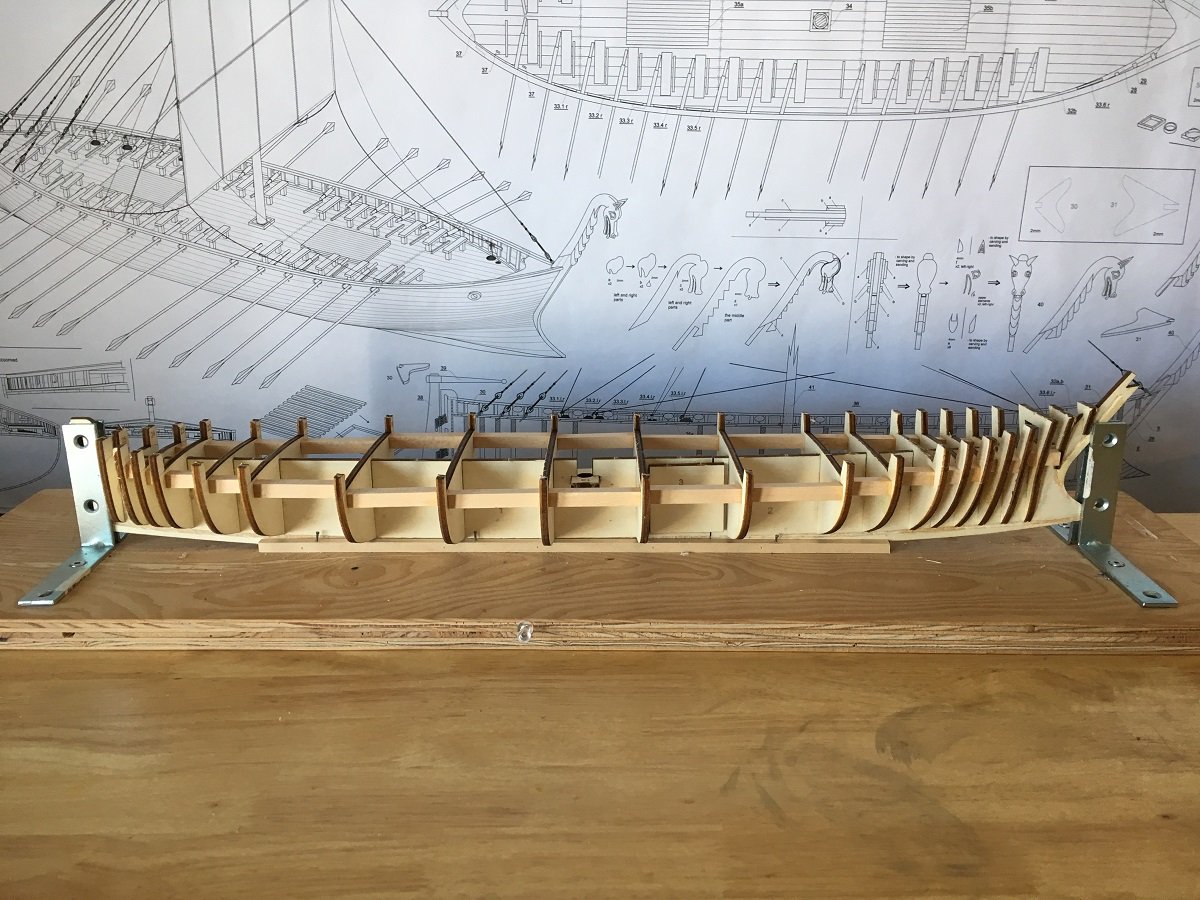
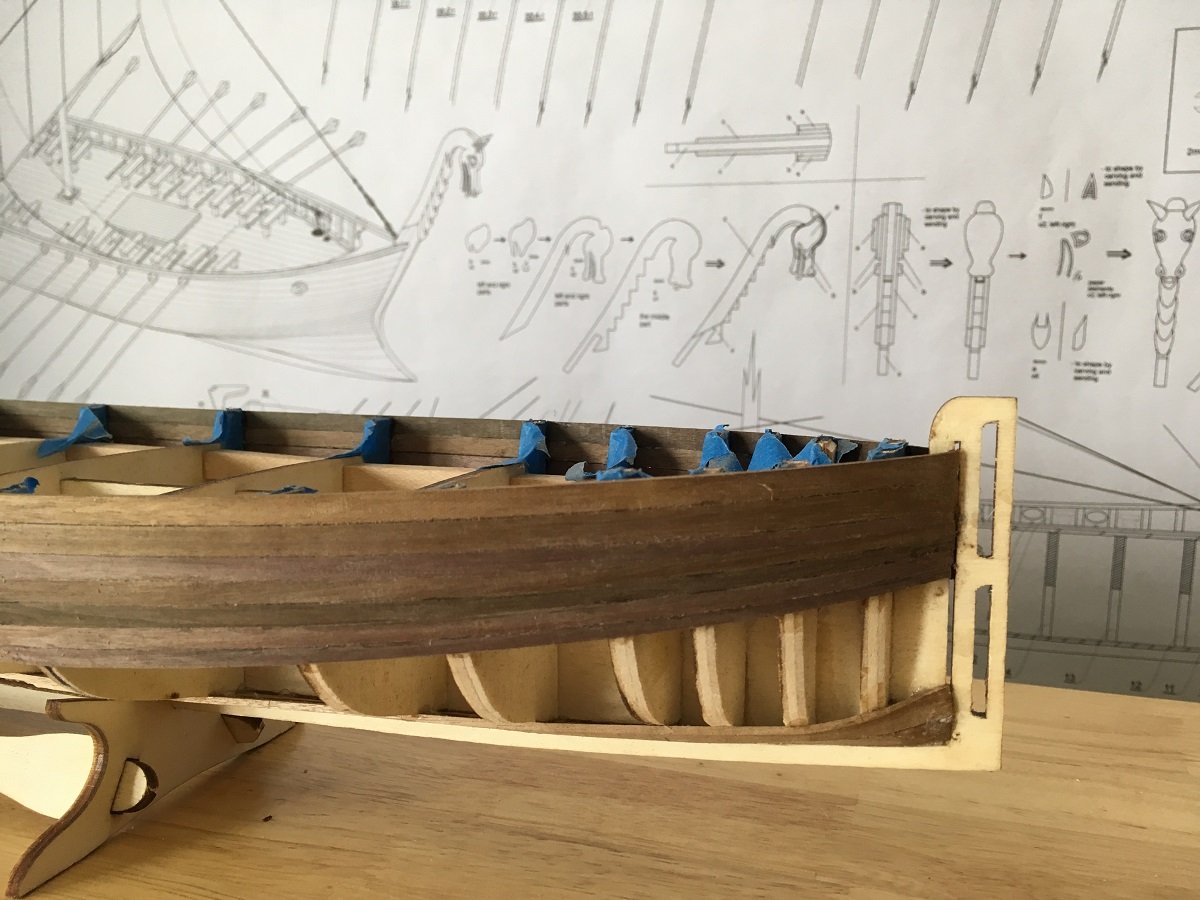
Here the two piece keel has been put together, bulkheads installed and the rabbit cut. The spacer blocks are included and can be left in or taken out after fairing and planking have been completed. There really is no reason to remove them as they will not be seen after deck planking is done. Notice the extra bulkheads at the bow and stern, this is one of the improvements on this kit.
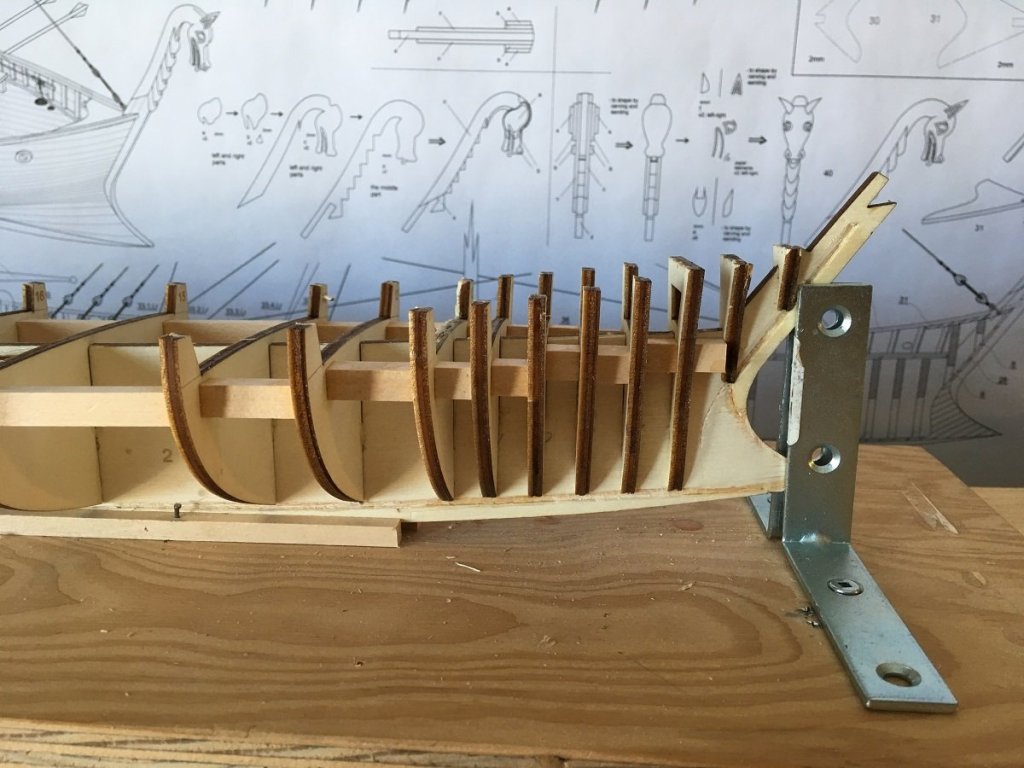
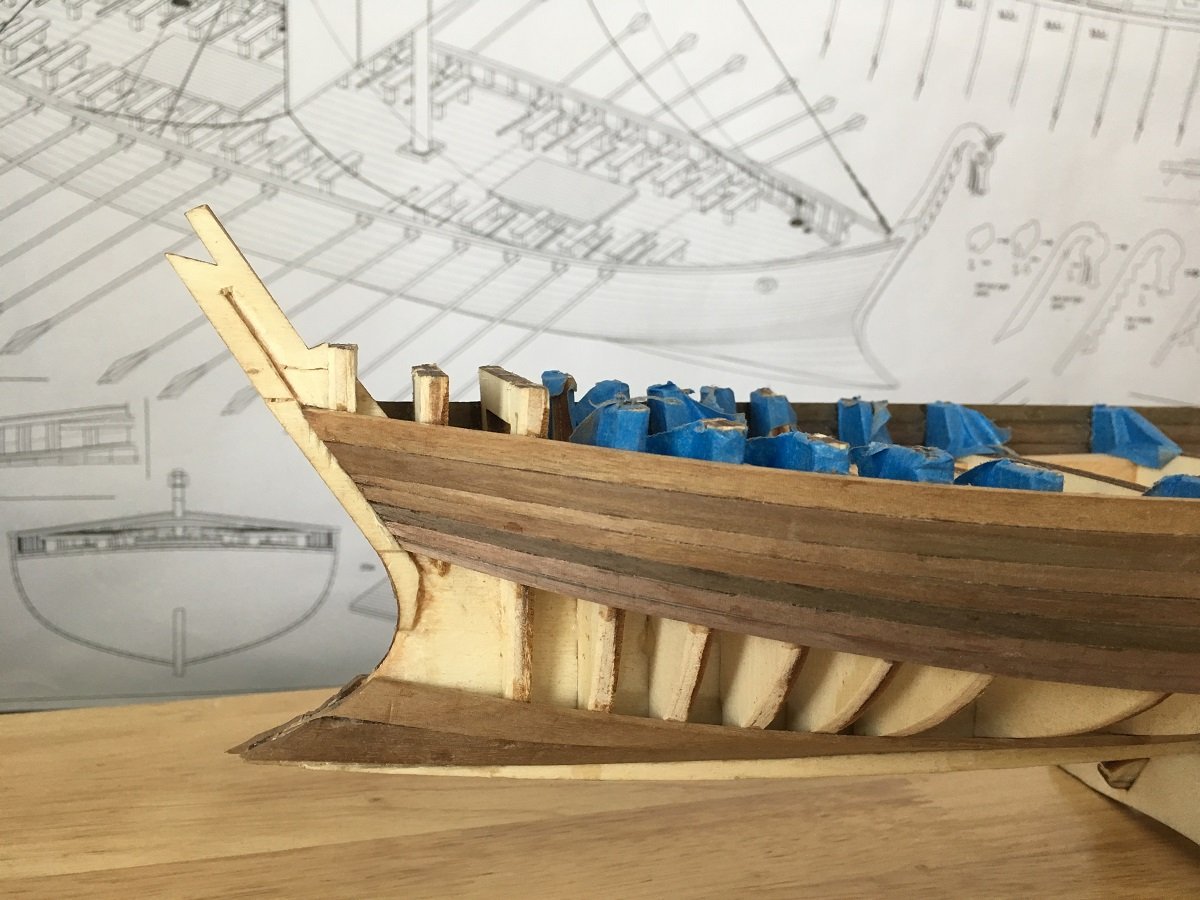
Just a close shot of the bow and my not so good rabbit😁
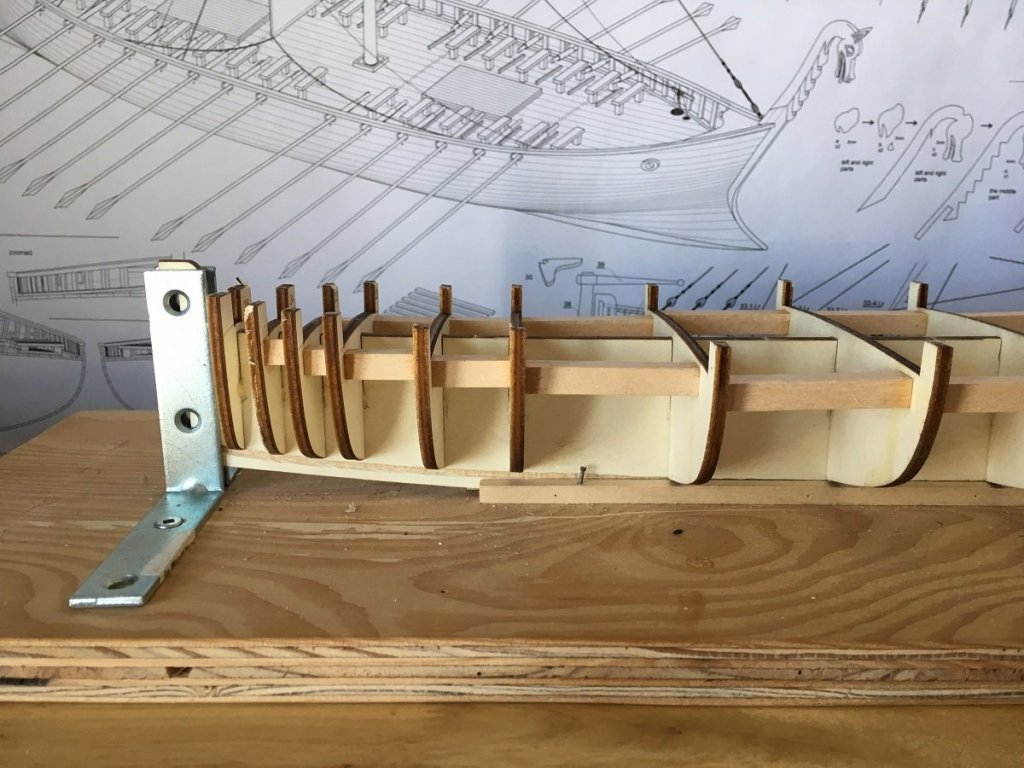
And the stern area
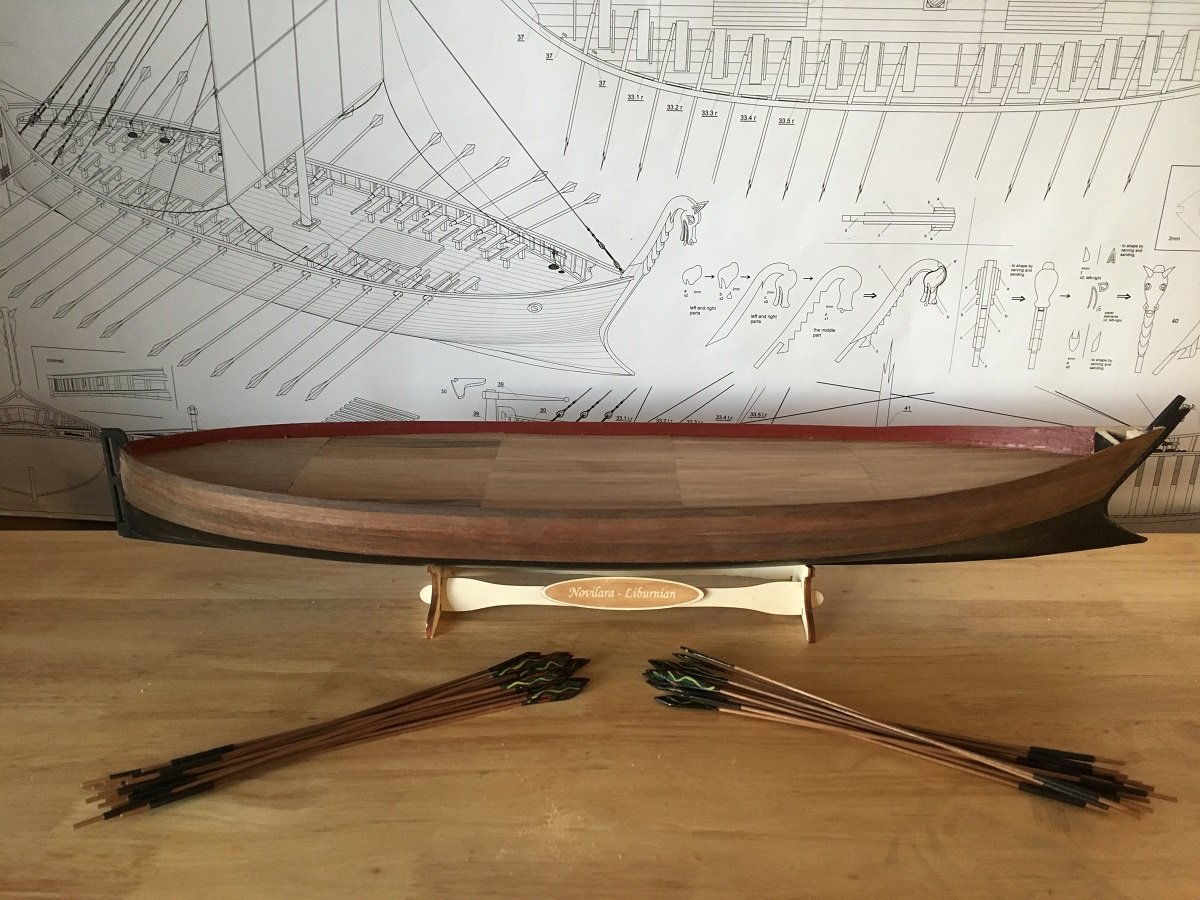
Planking has begun using 1.5 x 5 mm walnut planks. the top planks at the bow are left till a little later in the build. Planking is relatively easy with not too much twisting and bending involved. Each plank after the first two top ones require tapering.

As I mentioned most planks require tapering and I later corrected the rise at the stern


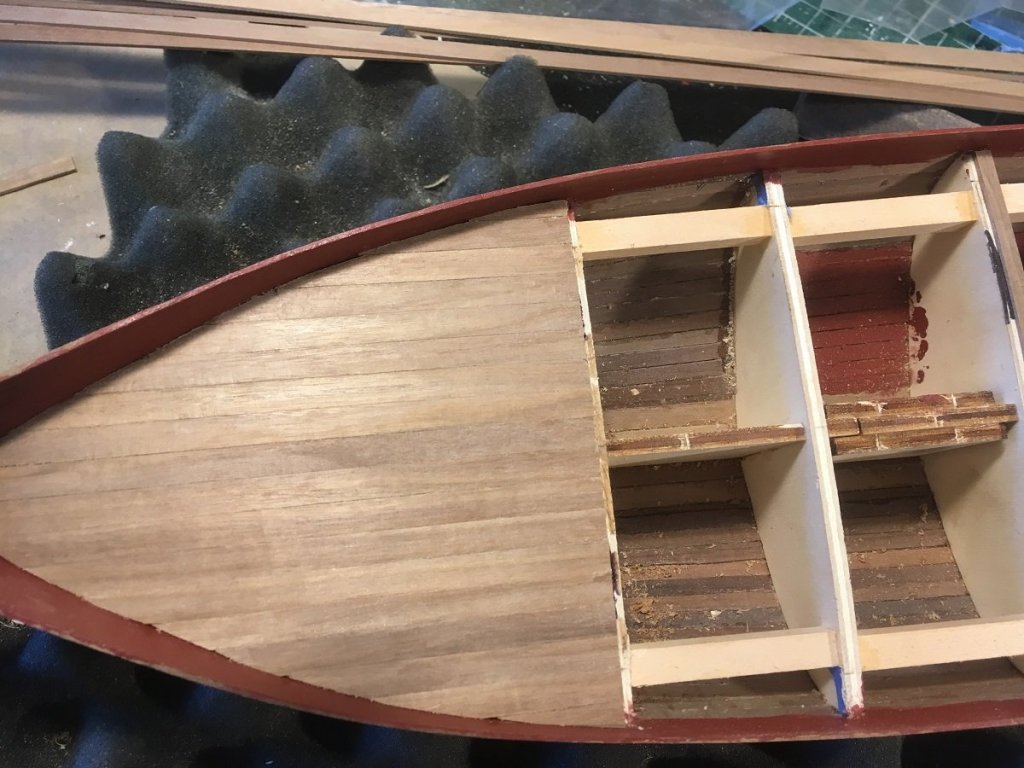
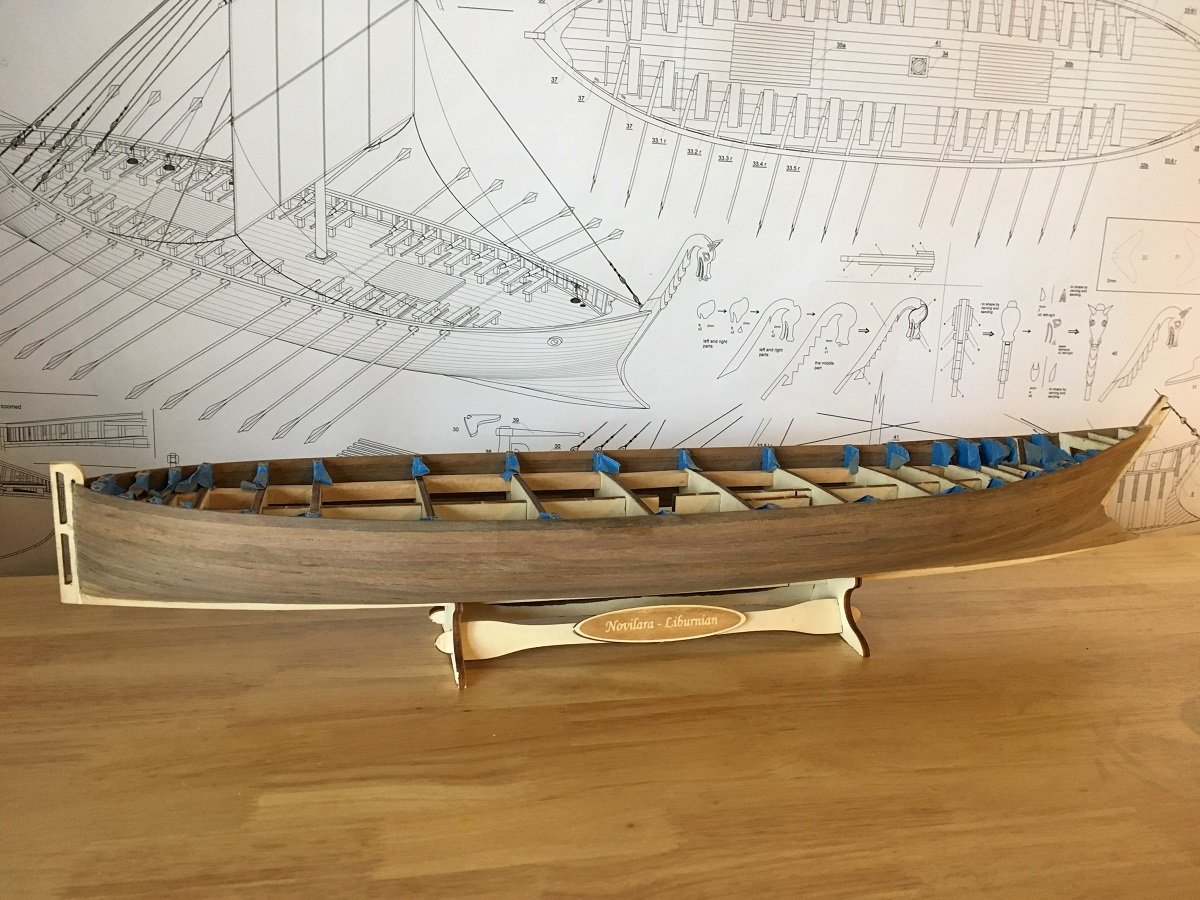
Planking finished, not yet sanded. Here is where I am lacking pictures, the bow is now completed and I wish I could have shown you the process
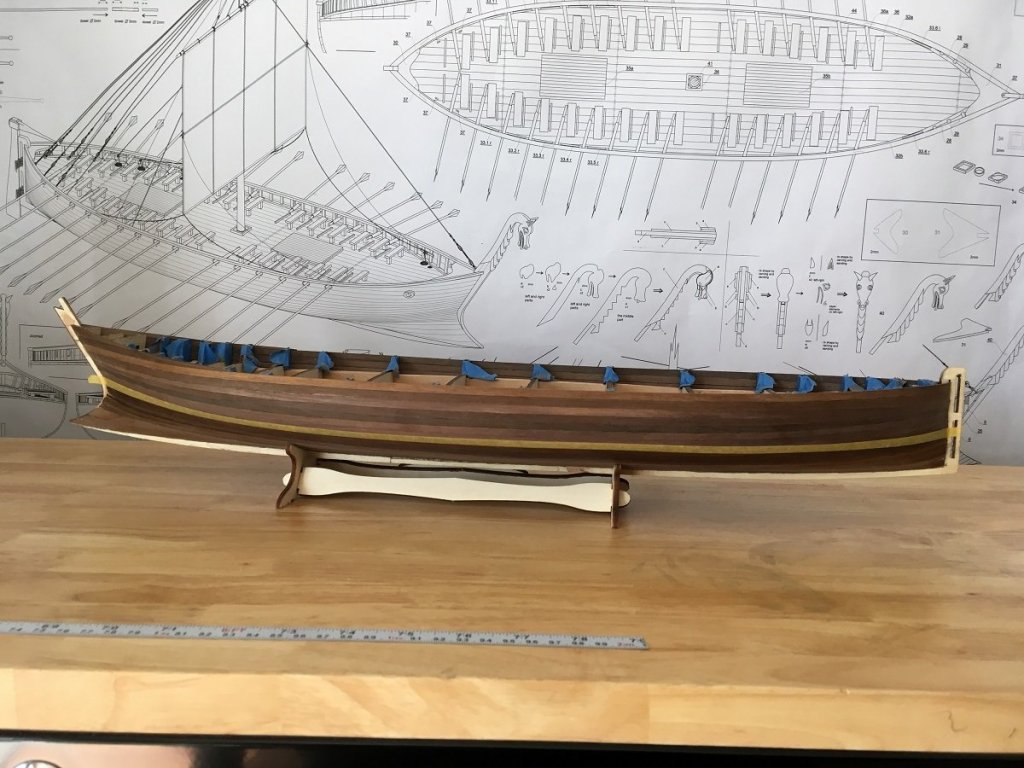
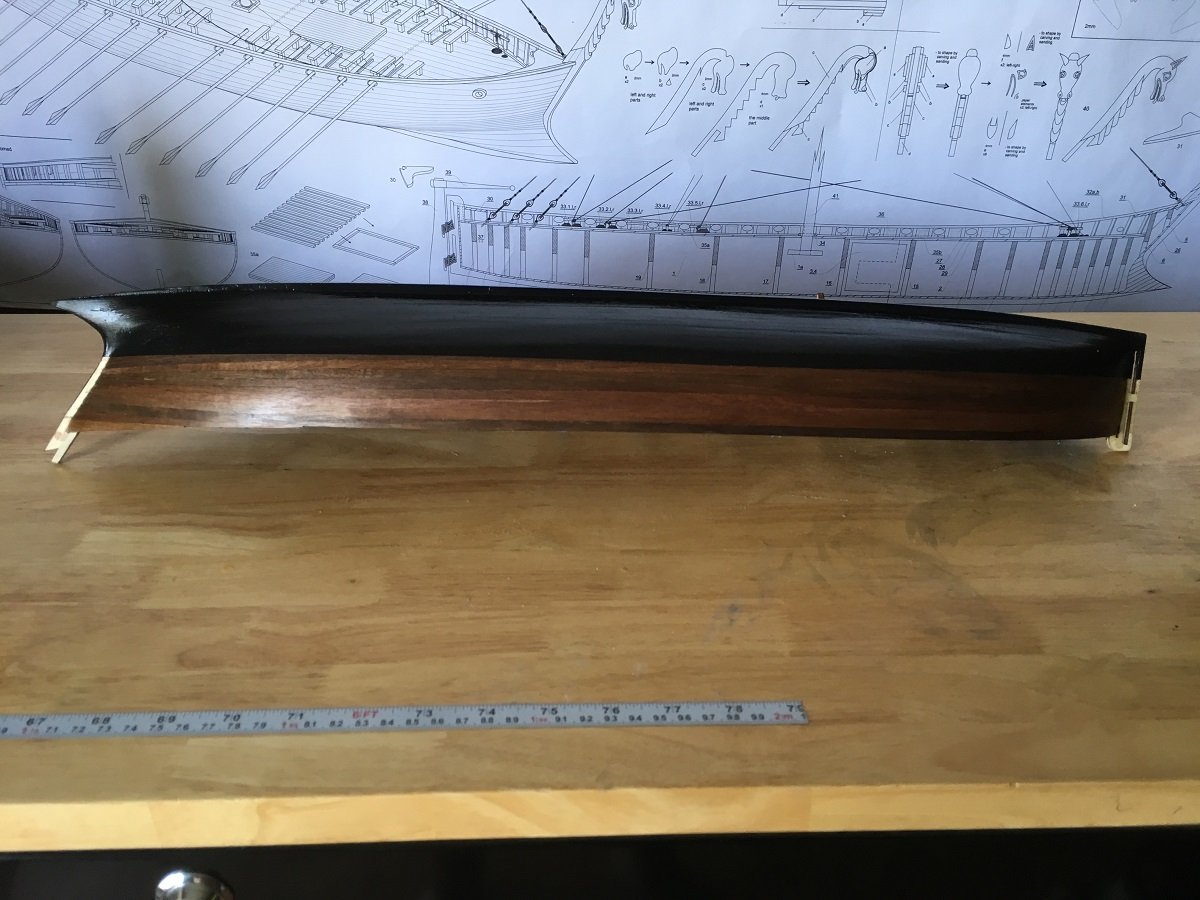
Waterline masked off and ready for painting

Showing the waterline painted with a few coats of wipe on poly

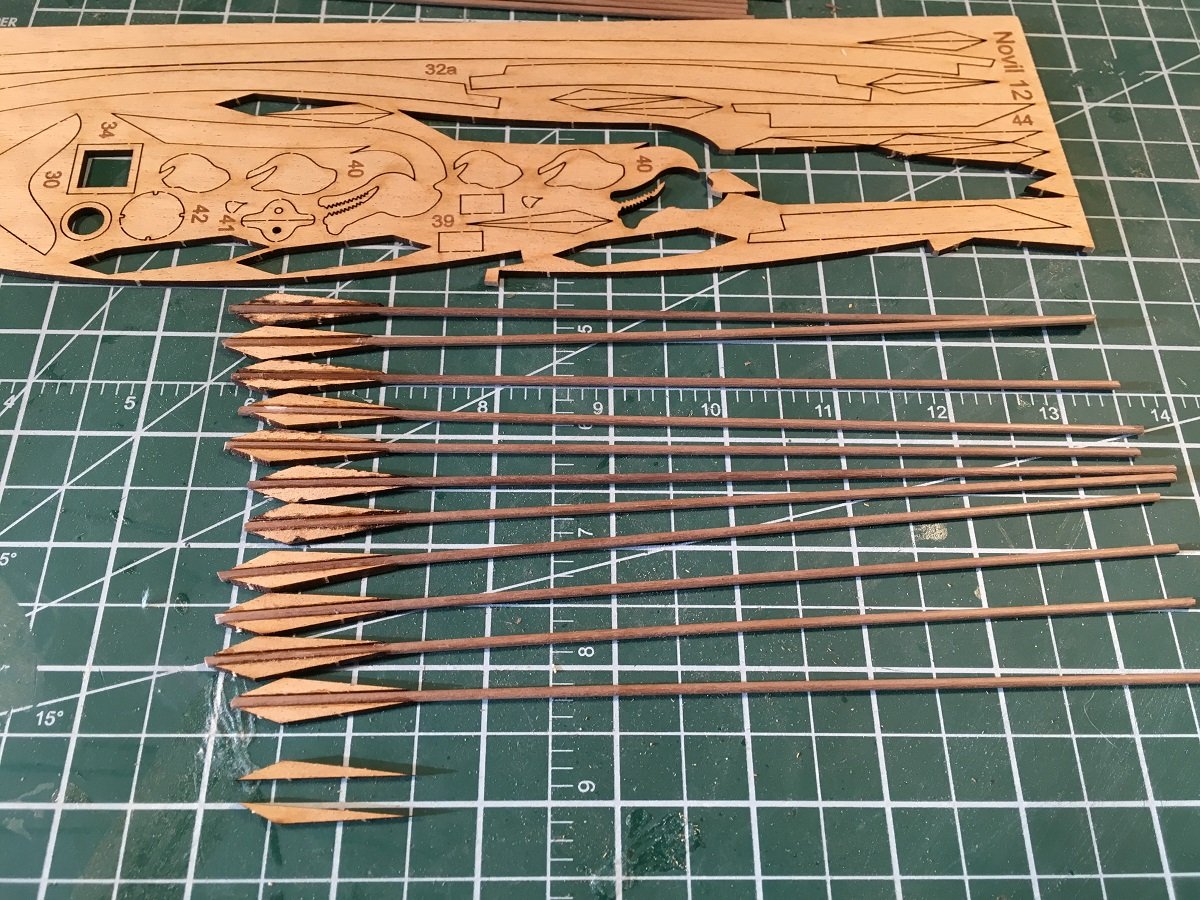
Making of the oars
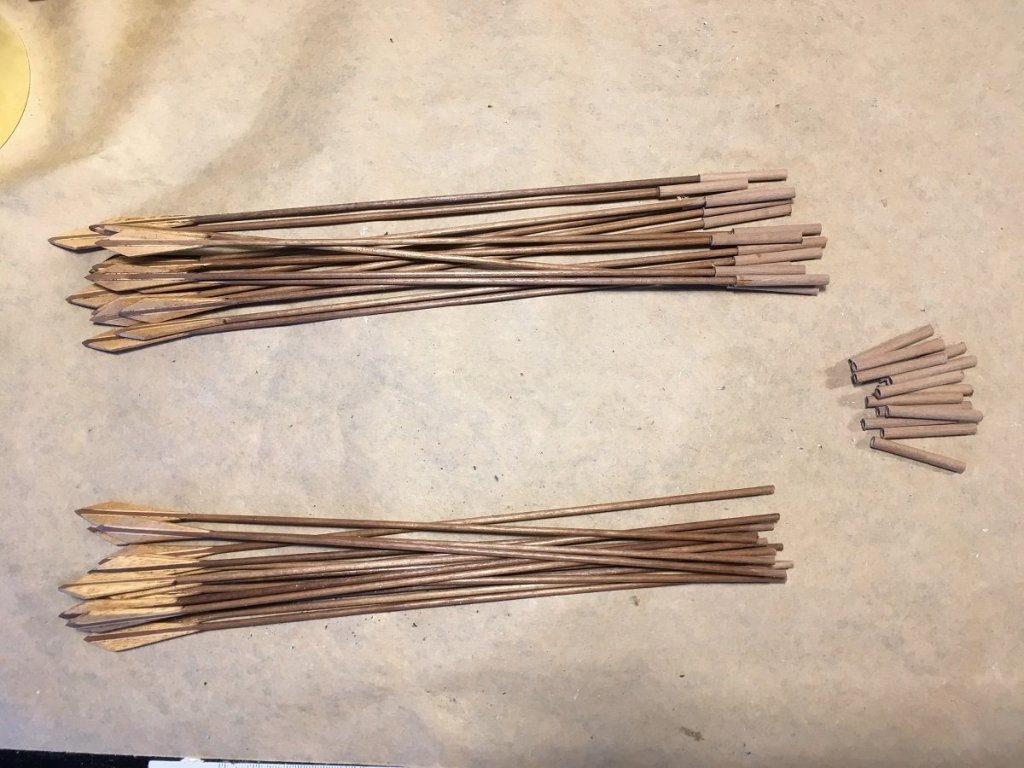
Each of the 30 oars consists of five pieces, although not shown here there is one more piece that goes into the end. It is hard to see but after gluing the blades on filler is used to fill the gap where joined to the dowel.

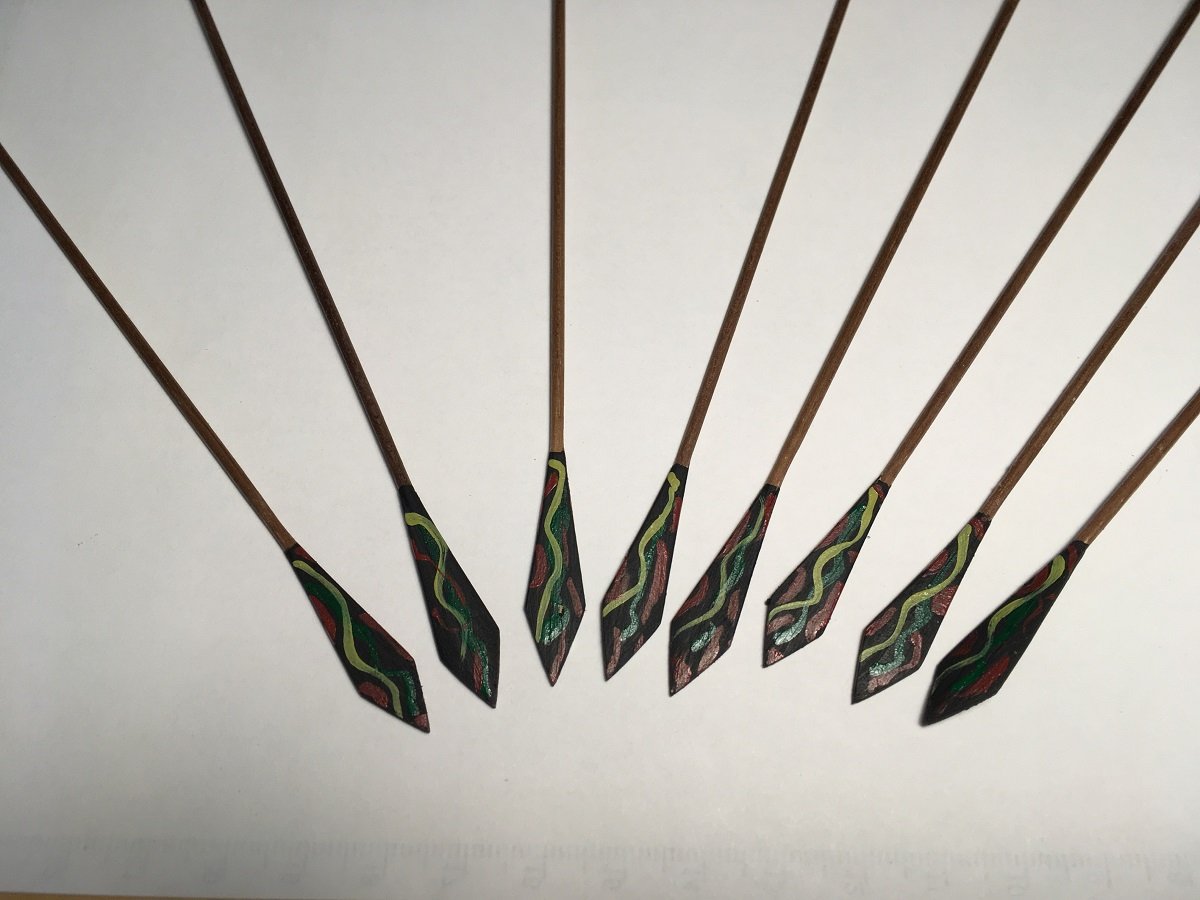
Oars sanded to shape and given a paint job. This is far as my artistic abilities go!!

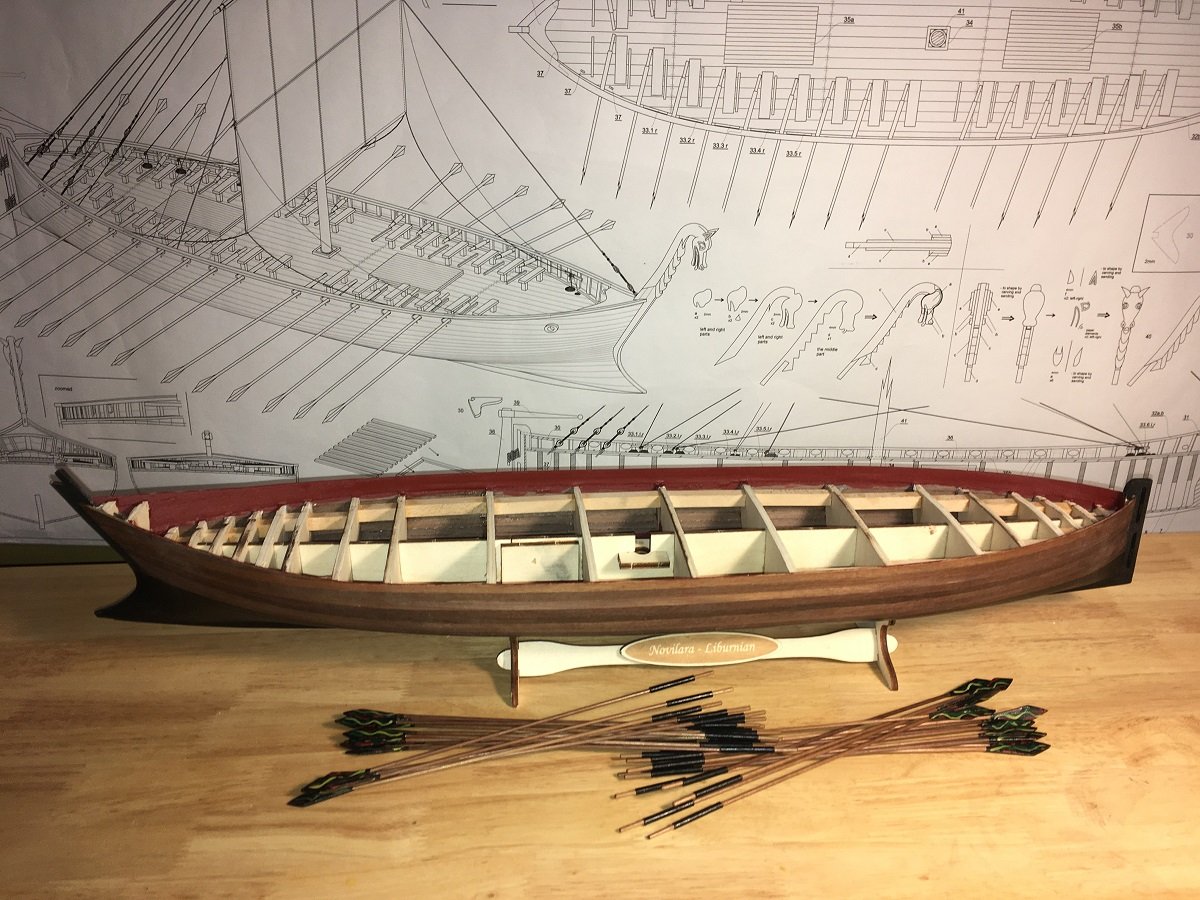
Bulwarks painted and oars completed.
Thanks for checking things out, see you soon
- Tim Curtis, JpR62, Nikiforos and 12 others
-
15
-
And the last few pictures for now:
The carriages completed

Bolts, rings and cannons added
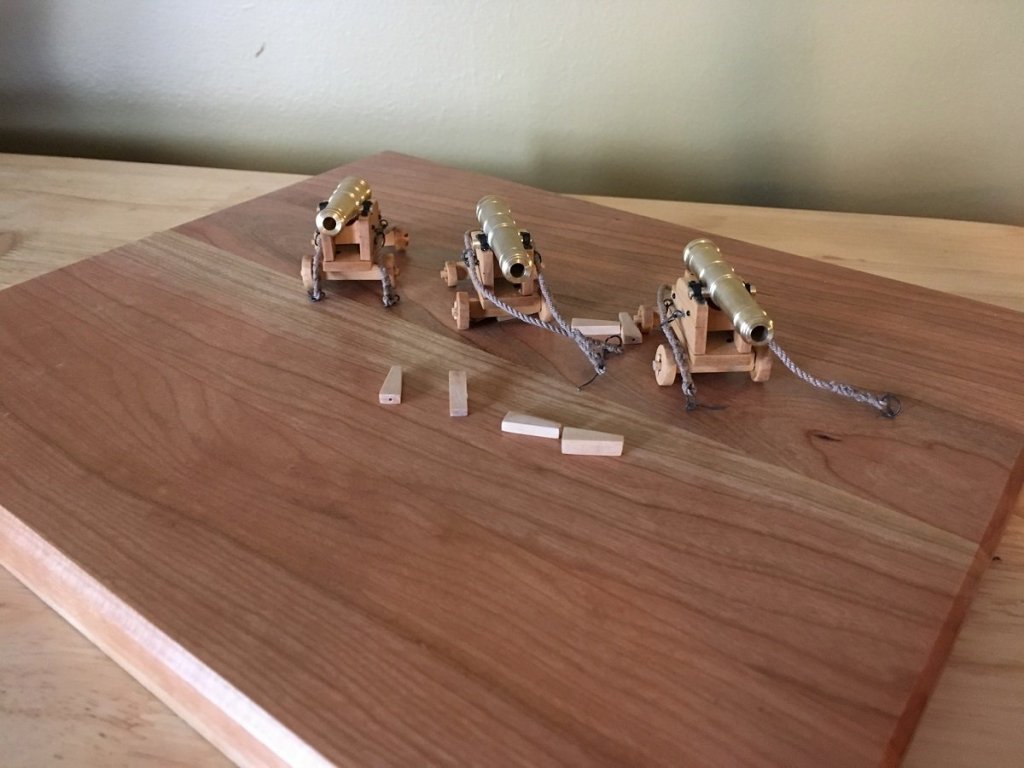
Partially rigged sitting on the cherry wood base I intend on using.
Thanks for having a look and if you want to see more please visit Doc Blake's log as he is much further ahead with his and is doing a beautiful job. I would place a link here for it but I am not sure how do do that
-
This will be my log on building the 17th Century Battle Station based on plans by Jeff Staudt. This was a joint effort by three of us to develop this model and they are Mike Shanks, Doc Blake and myself. Doc did all the milling work on the wood, Mike supplied the expertise and skills on the cnc and laser machines and I did the turnings and whatever metal work that was required. The model is not entirely historically correct, however, does make into a nice model for display. We did do some minor changes to the plans and things, such as the grates, we did a little out of the norm but it was all out of fun and experimentation.
Doc Blake has a log already started here so if you haven't visited his yet you may want to as his has a more detailed description of the process. His writing skills are much more advanced than mine, I am finding that with everything else with my body and mind the writing skills are also slipping away. I am not using spell check for single syllable words yet but I am sure it is not too far in the future!😉
I must also apologise ahead of time, I did at one time have extensive pictures of what I have done(such as turning the cannons) but seem to have misplaced them. If I do ever find them I will post, in the meantime I will continue beating myself.
So let's start:
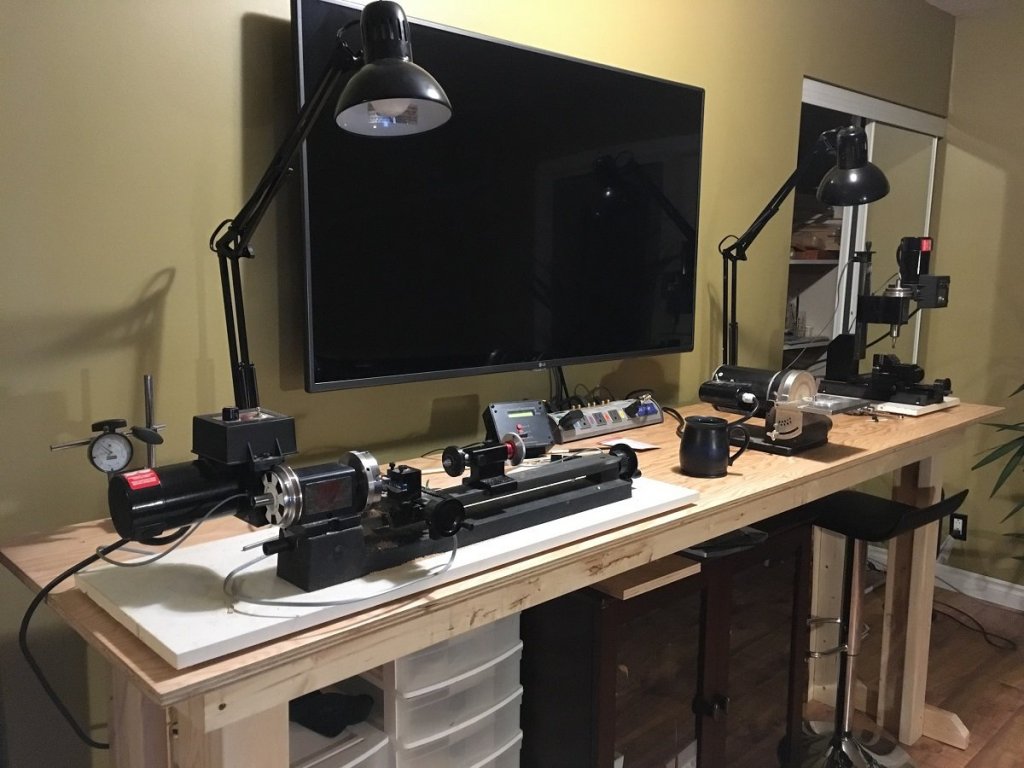
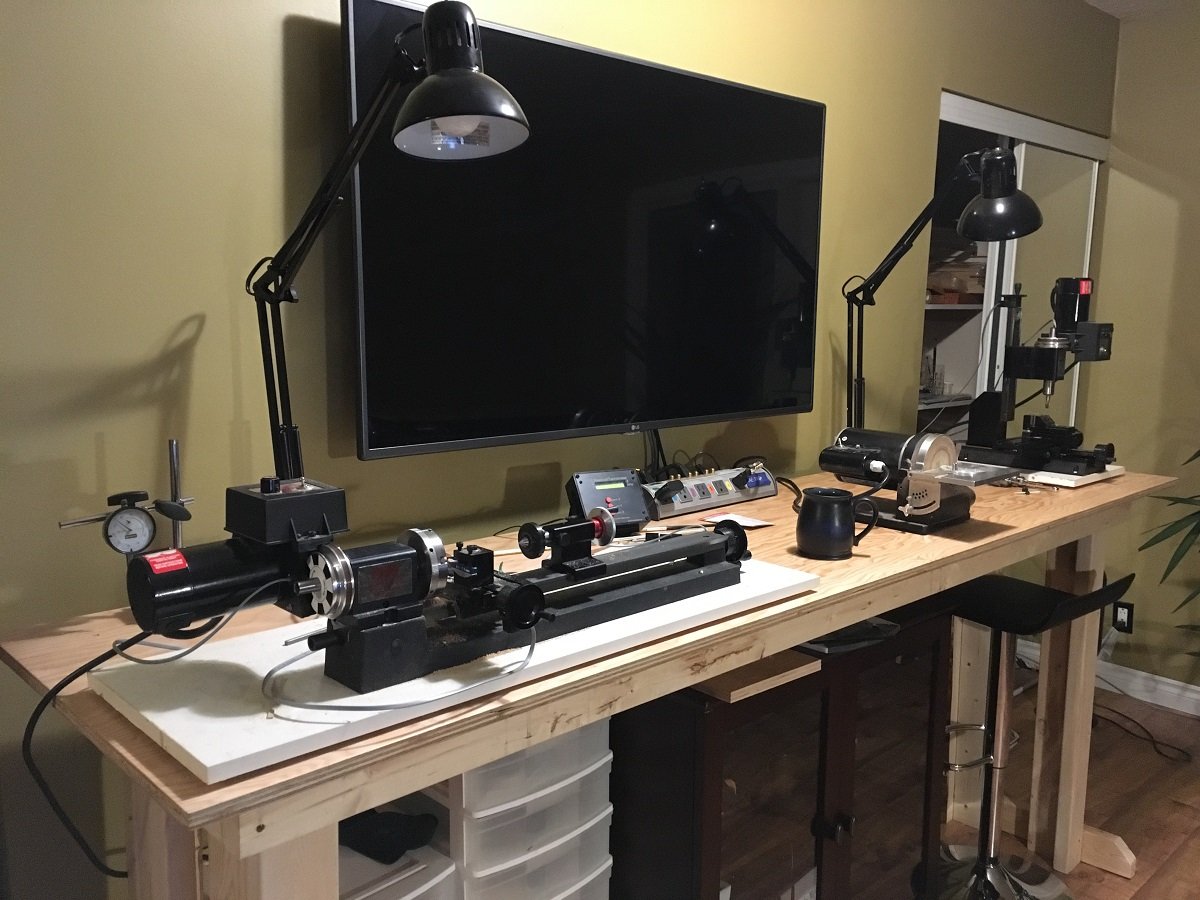
Here is a rare shot of one half of my shipyard, I say rare as it is never this clean. I am starting my build a little different while I wait for parts to come from Mike, I will be doing the cannons and carriages first.
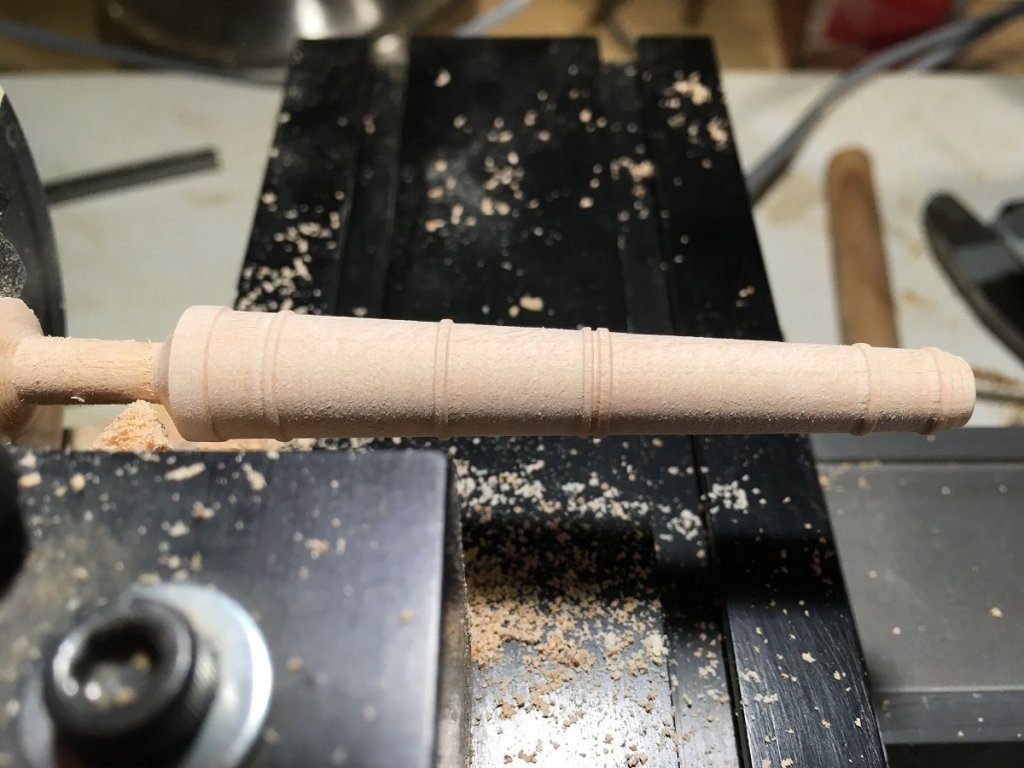
Another rarity, and that is a picture of the cannon turning. Unfortunately I have none of the actual brass cannons being turned. With the 1/2" brass rod being over $30/ft I made several ( around 😎 of these first out of wood first, carefully documenting all steps and measurements.
The process I finally used was to first drill the trunnion hole on the mill move to the lathe mount in chuck face the blank and drill out the bore. From this point on it is a good idea to not remove the blank from the chuck until completion. Next is to set the angle of the headstock then start turning as per the determined steps and dimensions.
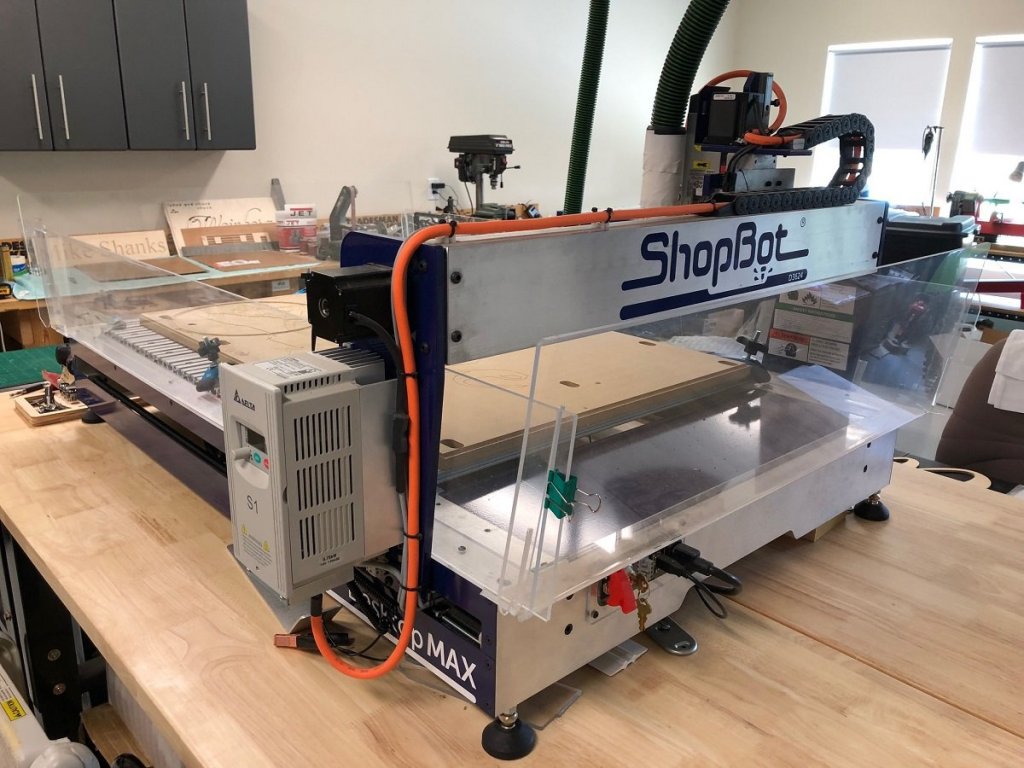

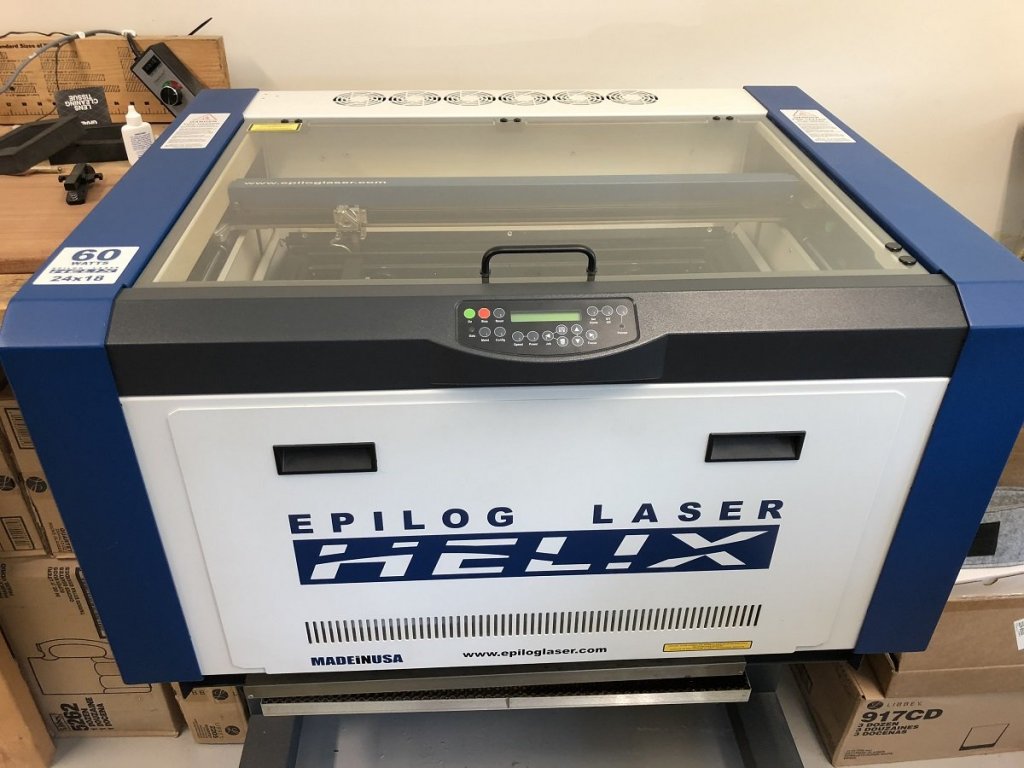
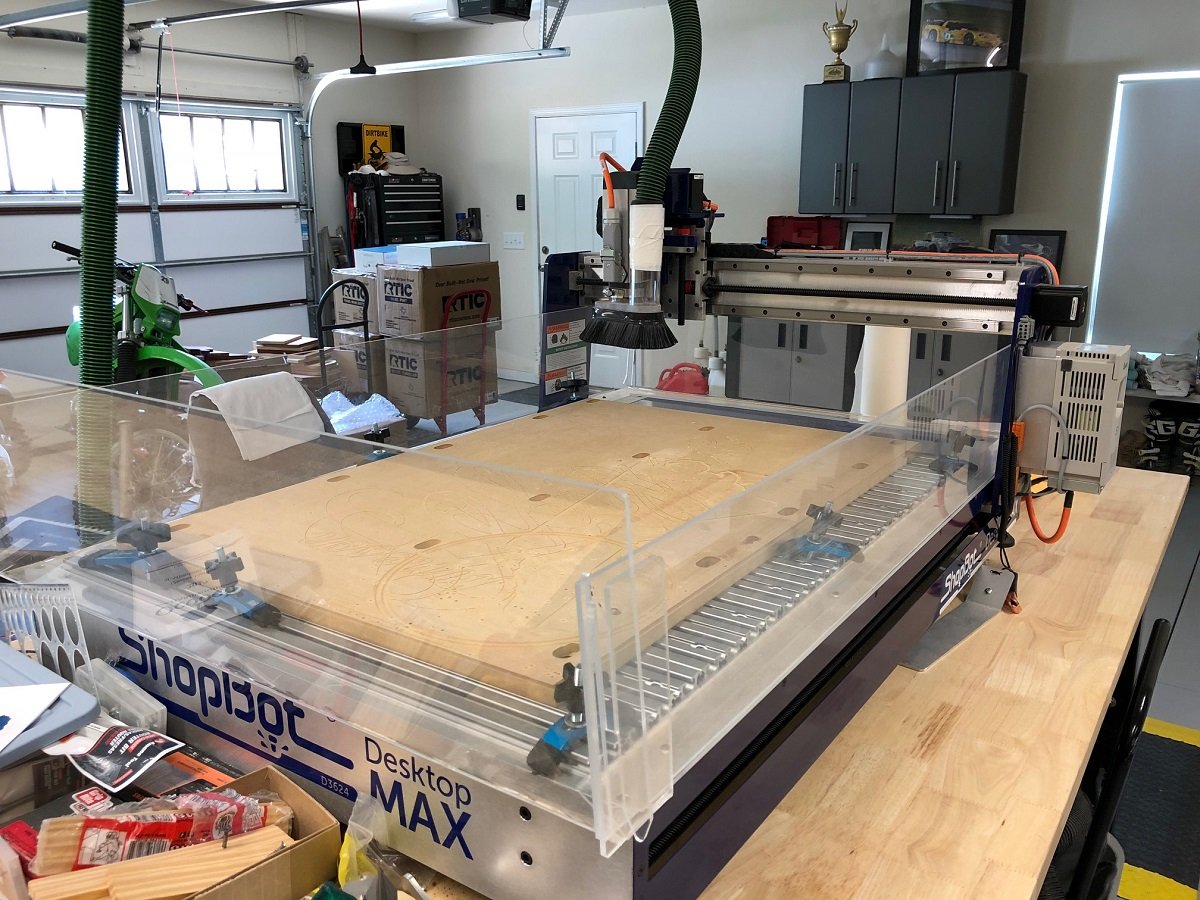
Here are some pictures of Mike's laser and cnc machine. I had the opportunity to visit Mike this summer in North Carolina to see these in action, they are just incredible what they are capable of. Mike's wife has a home business called "Well Written Gifts" where they are etching everything from wine glasses to cutting boards and numerous other items, to watch these in action is a real treat.

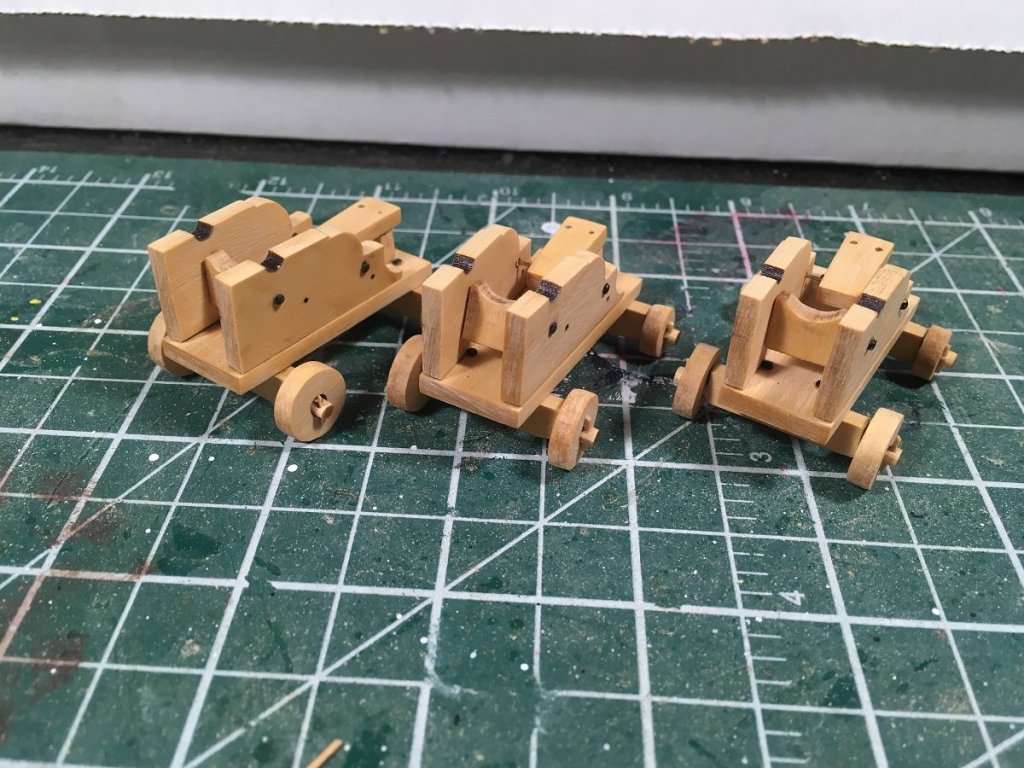
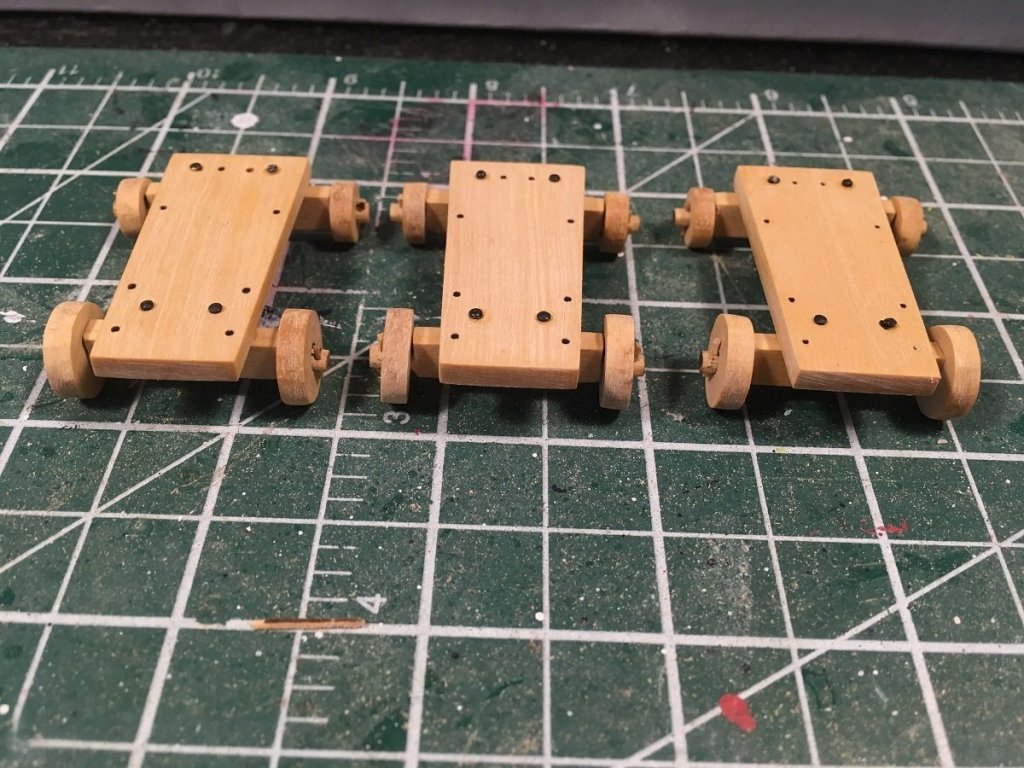
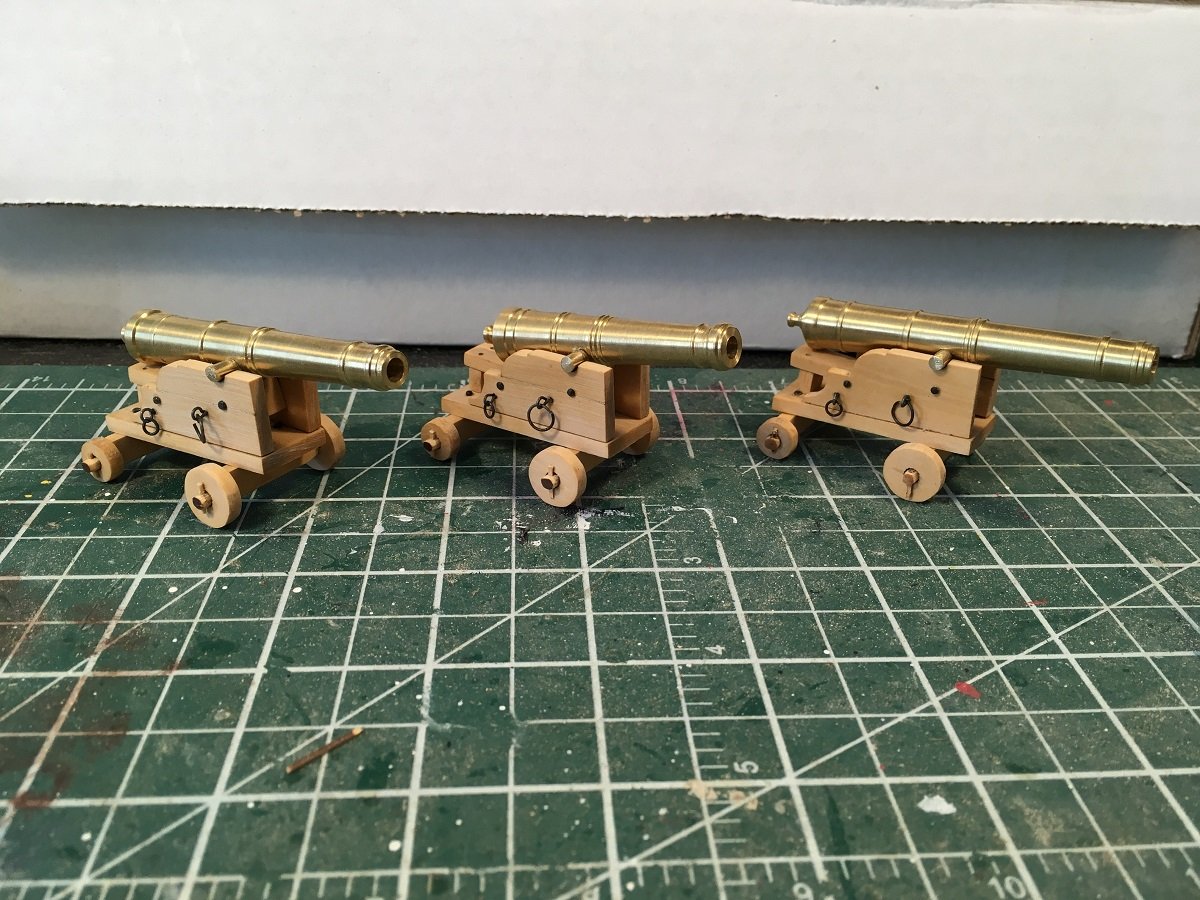
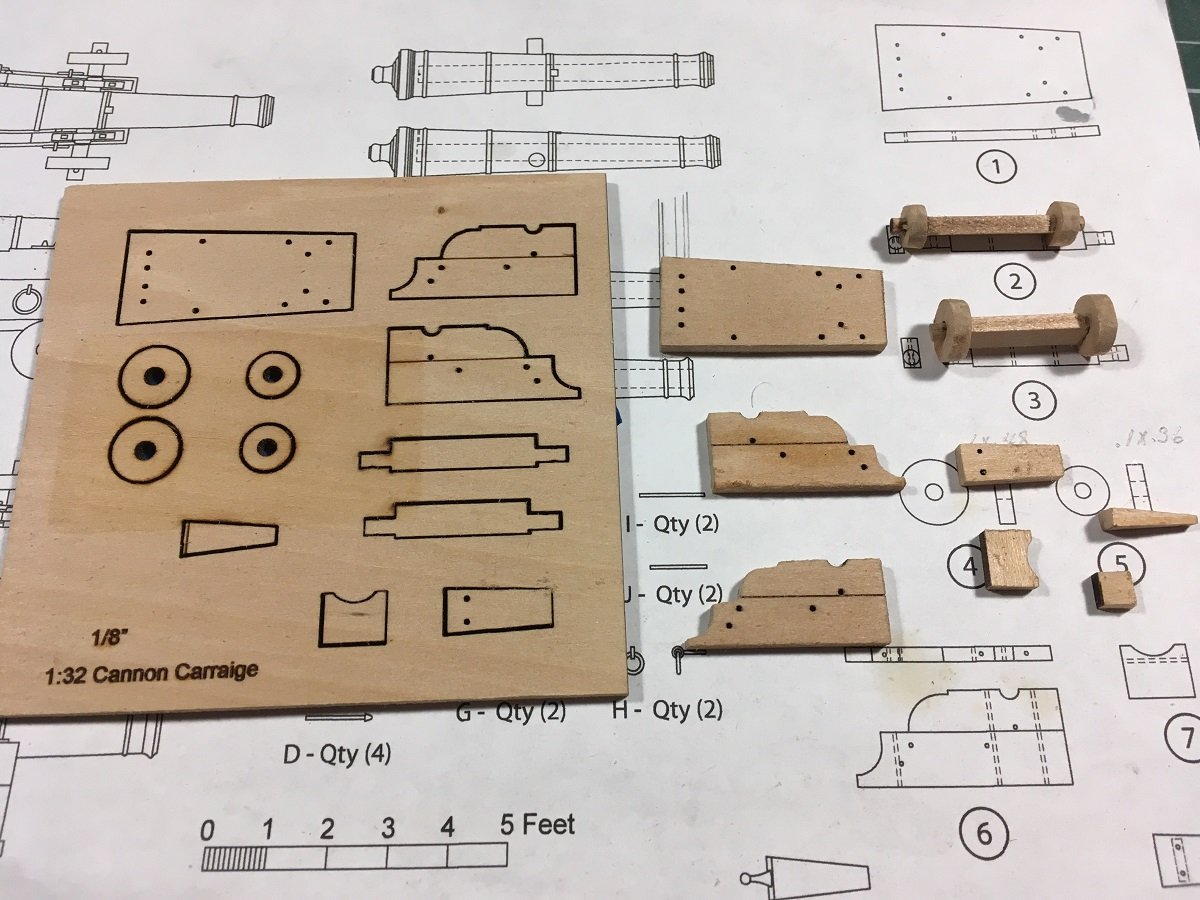
Mike sent some prototype carriages to try with the wooden barrels
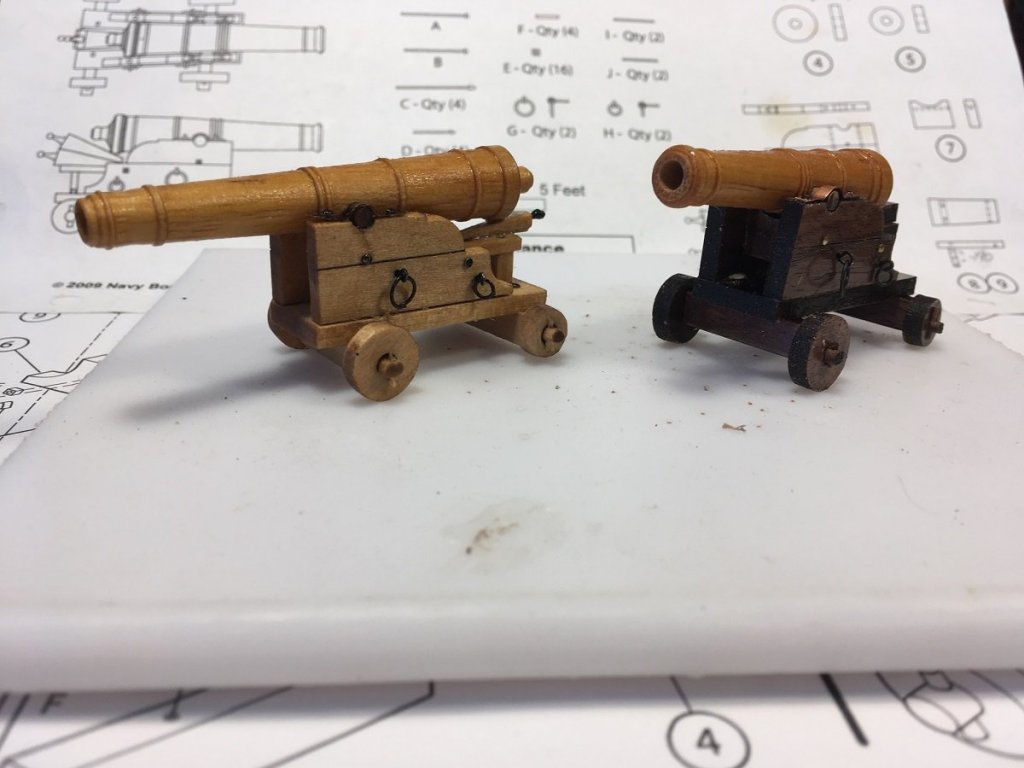

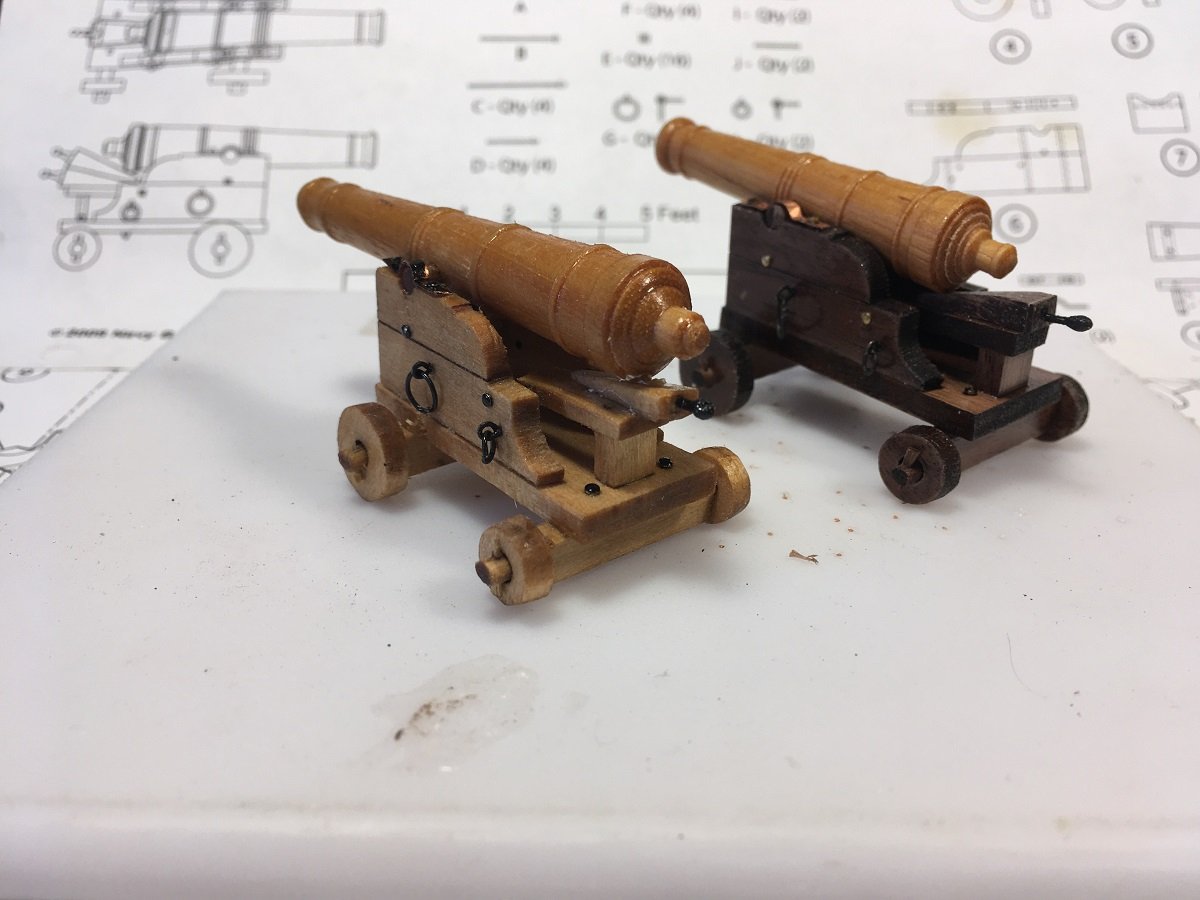
And here is the final result, there are two different sized barrels both on the same sized carriages, not historically correct I'm sure but will work for this model as that is what the plans called for
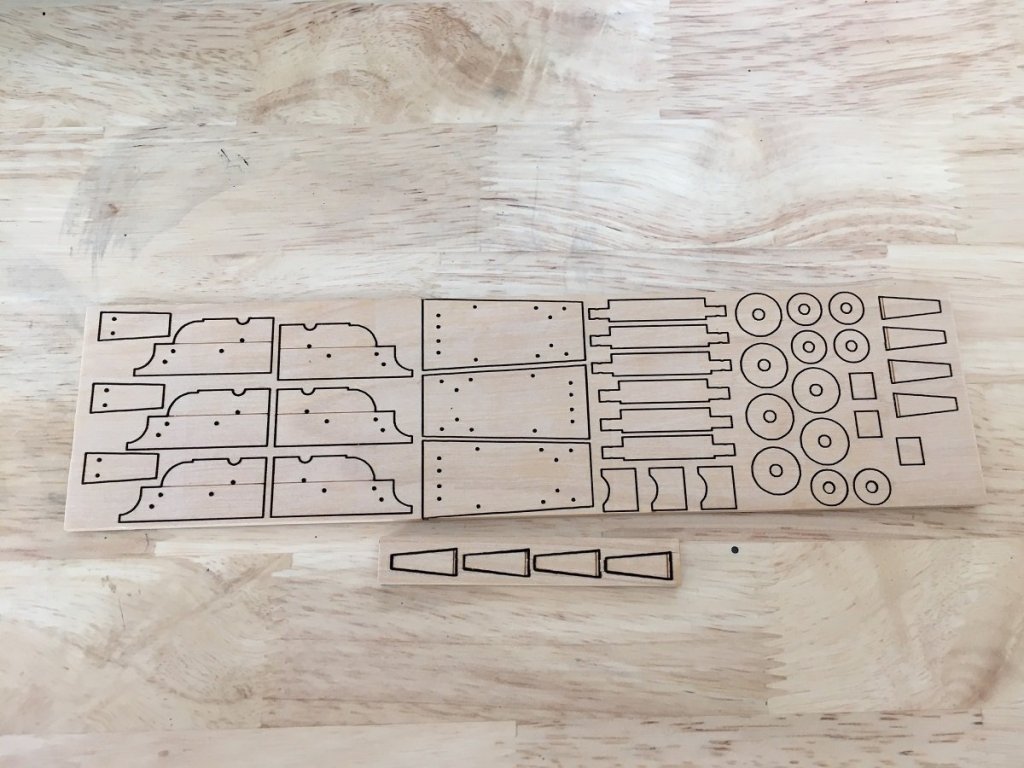
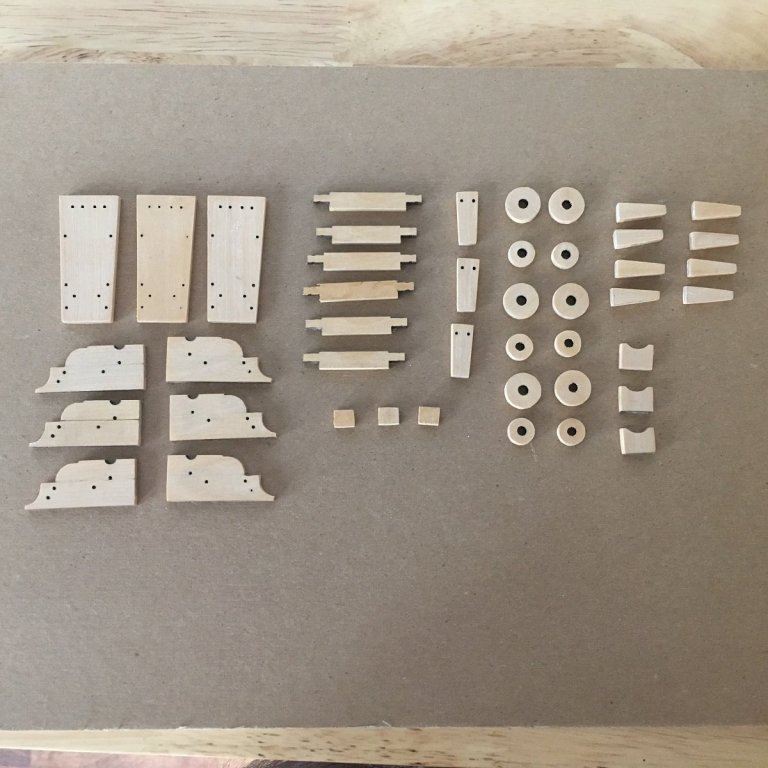
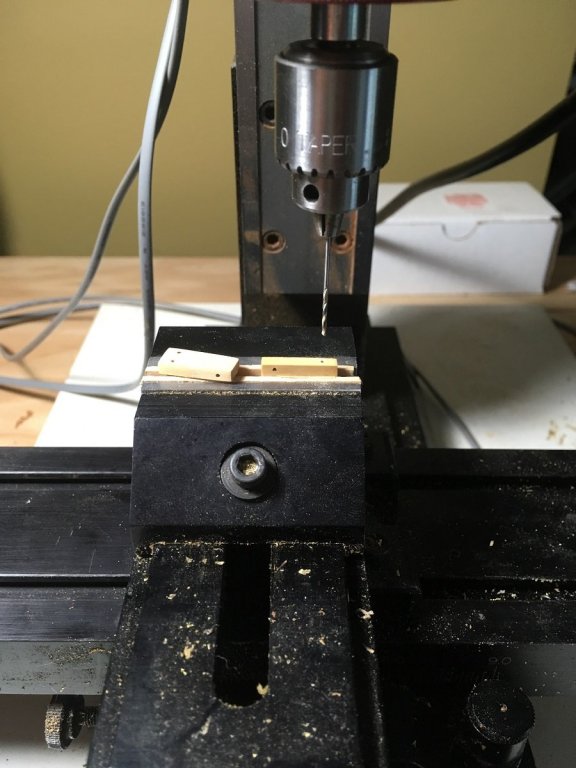
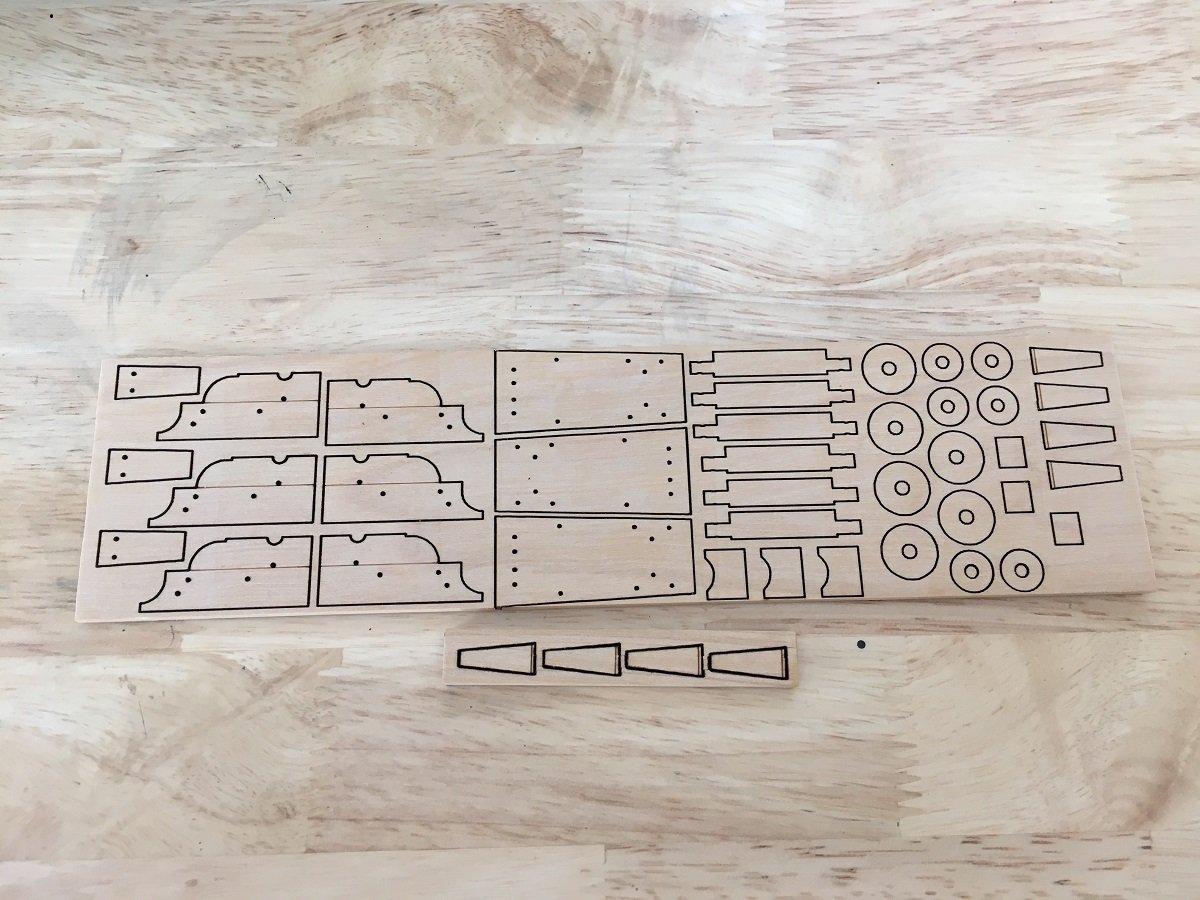
Now for the real thing, cut from boxwood
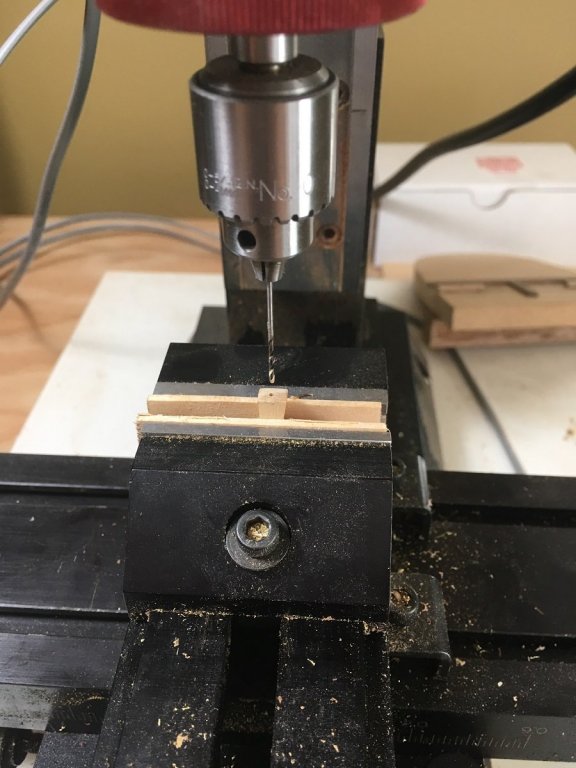
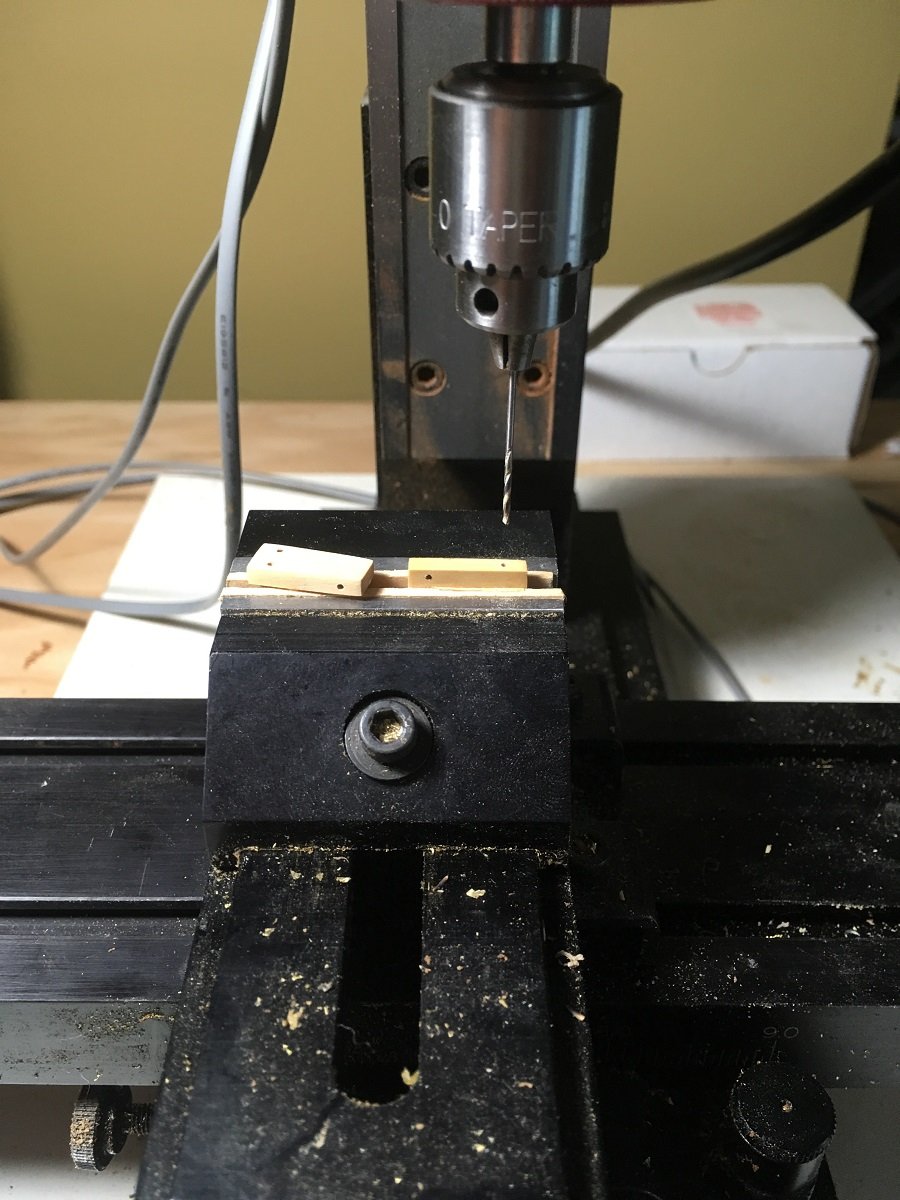
Here I am drilling the quoin for the handles
And drilling the axles
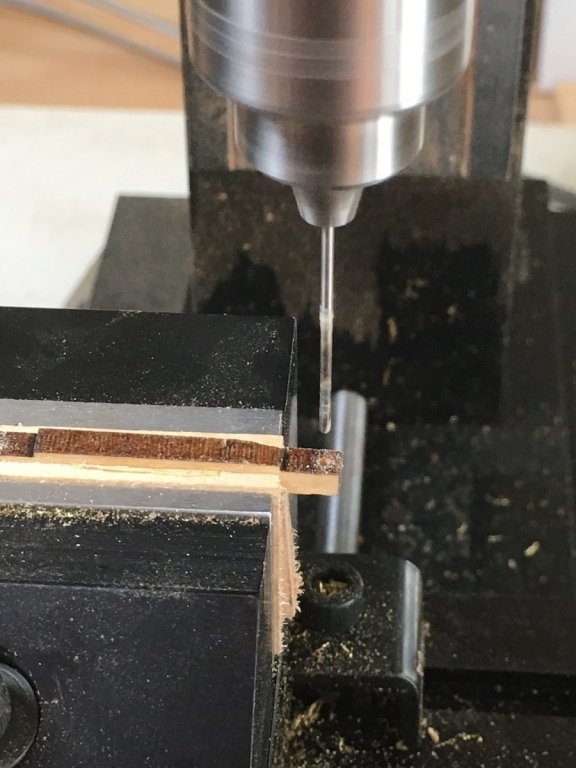
Drilling the back bed that supports the cannon, this should be drilled completely through
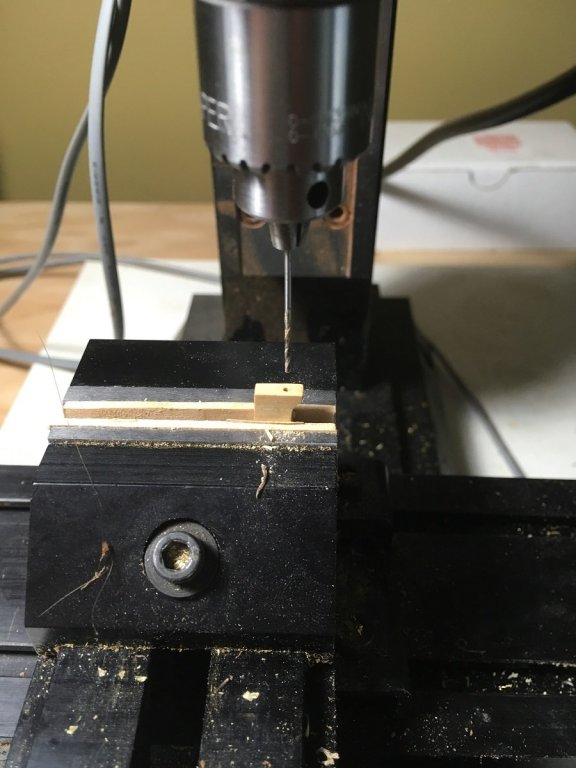
And drilling the front support, which also needs to be drilled completely through. I did not realise until too late but I should have only drilled halfway through then flipped it and completed the drilling, these tiny bits tend to wander.
I am at my max fifteen pics so I will be right back!!
- kees de mol, Canute, coxswain and 16 others
-
19


Liburnian Novilara by donrobinson - FINISHED - MarisStella
in - Kit subjects built Up to and including 1500 AD
Posted
Thanks Mark, I had a blast building it