EJ_L
-
Posts
2,246 -
Joined
-
Last visited
Content Type
Profiles
Forums
Gallery
Events
Everything posted by EJ_L
-
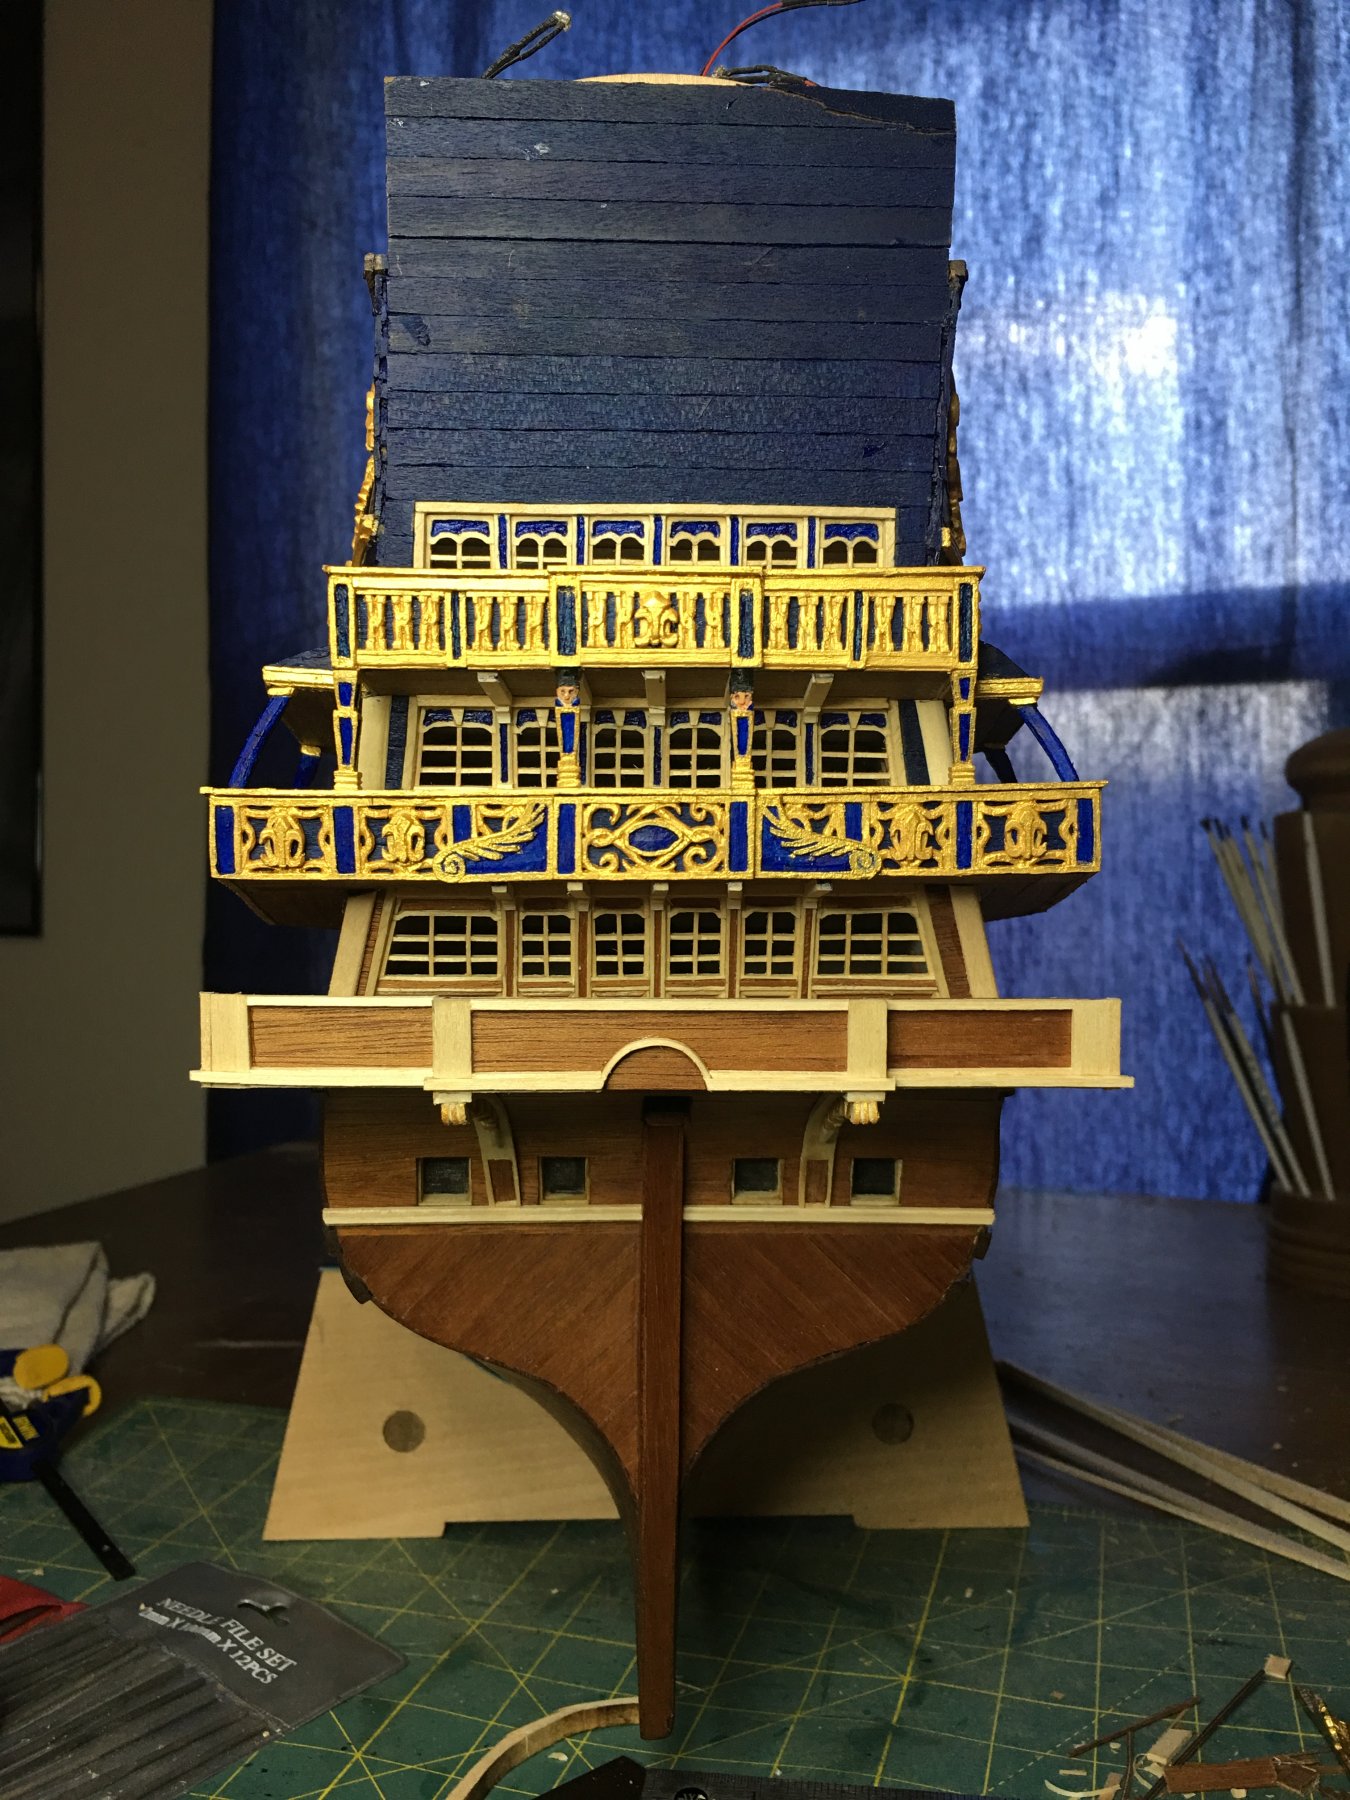
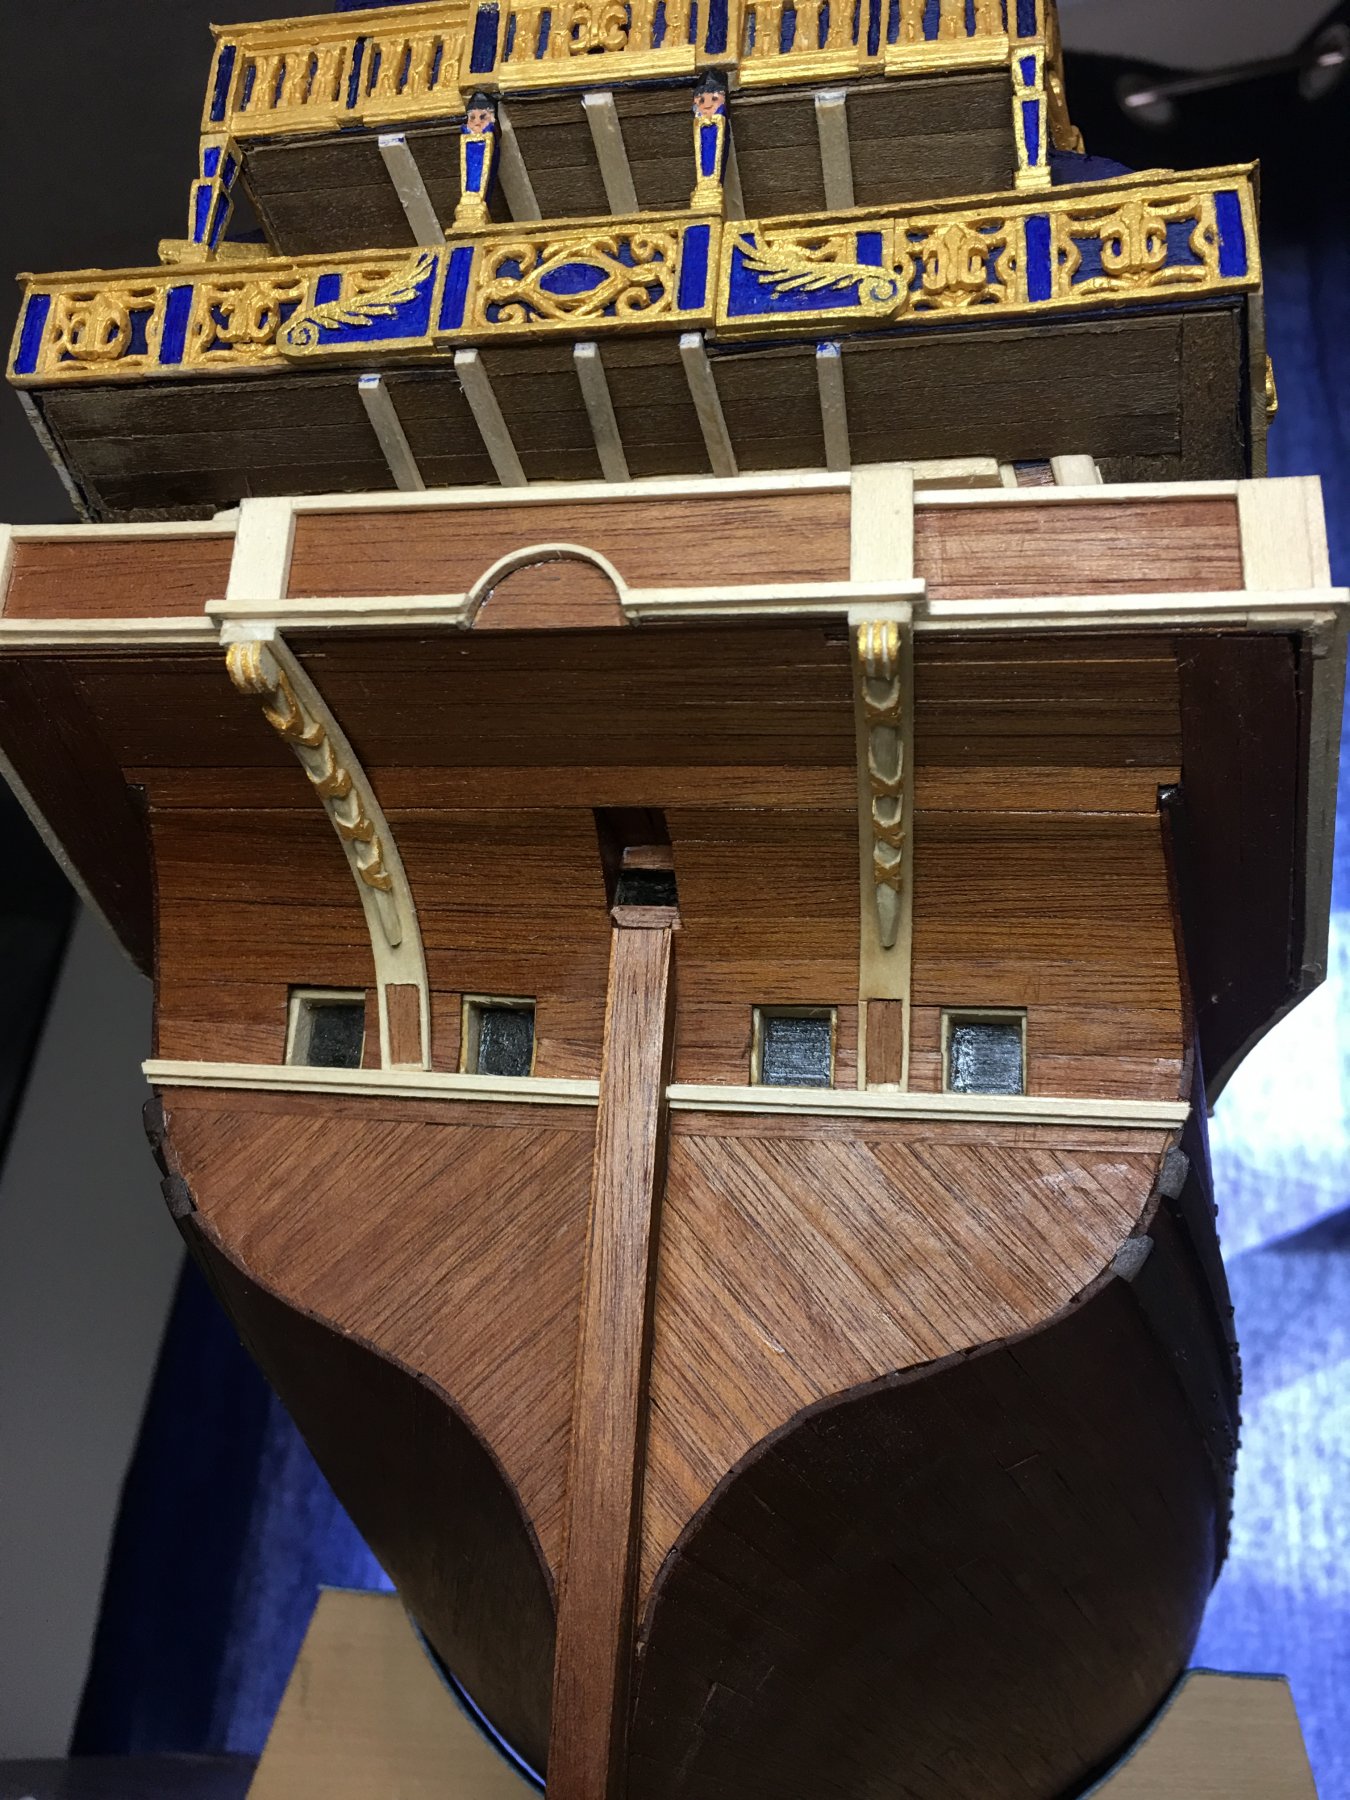
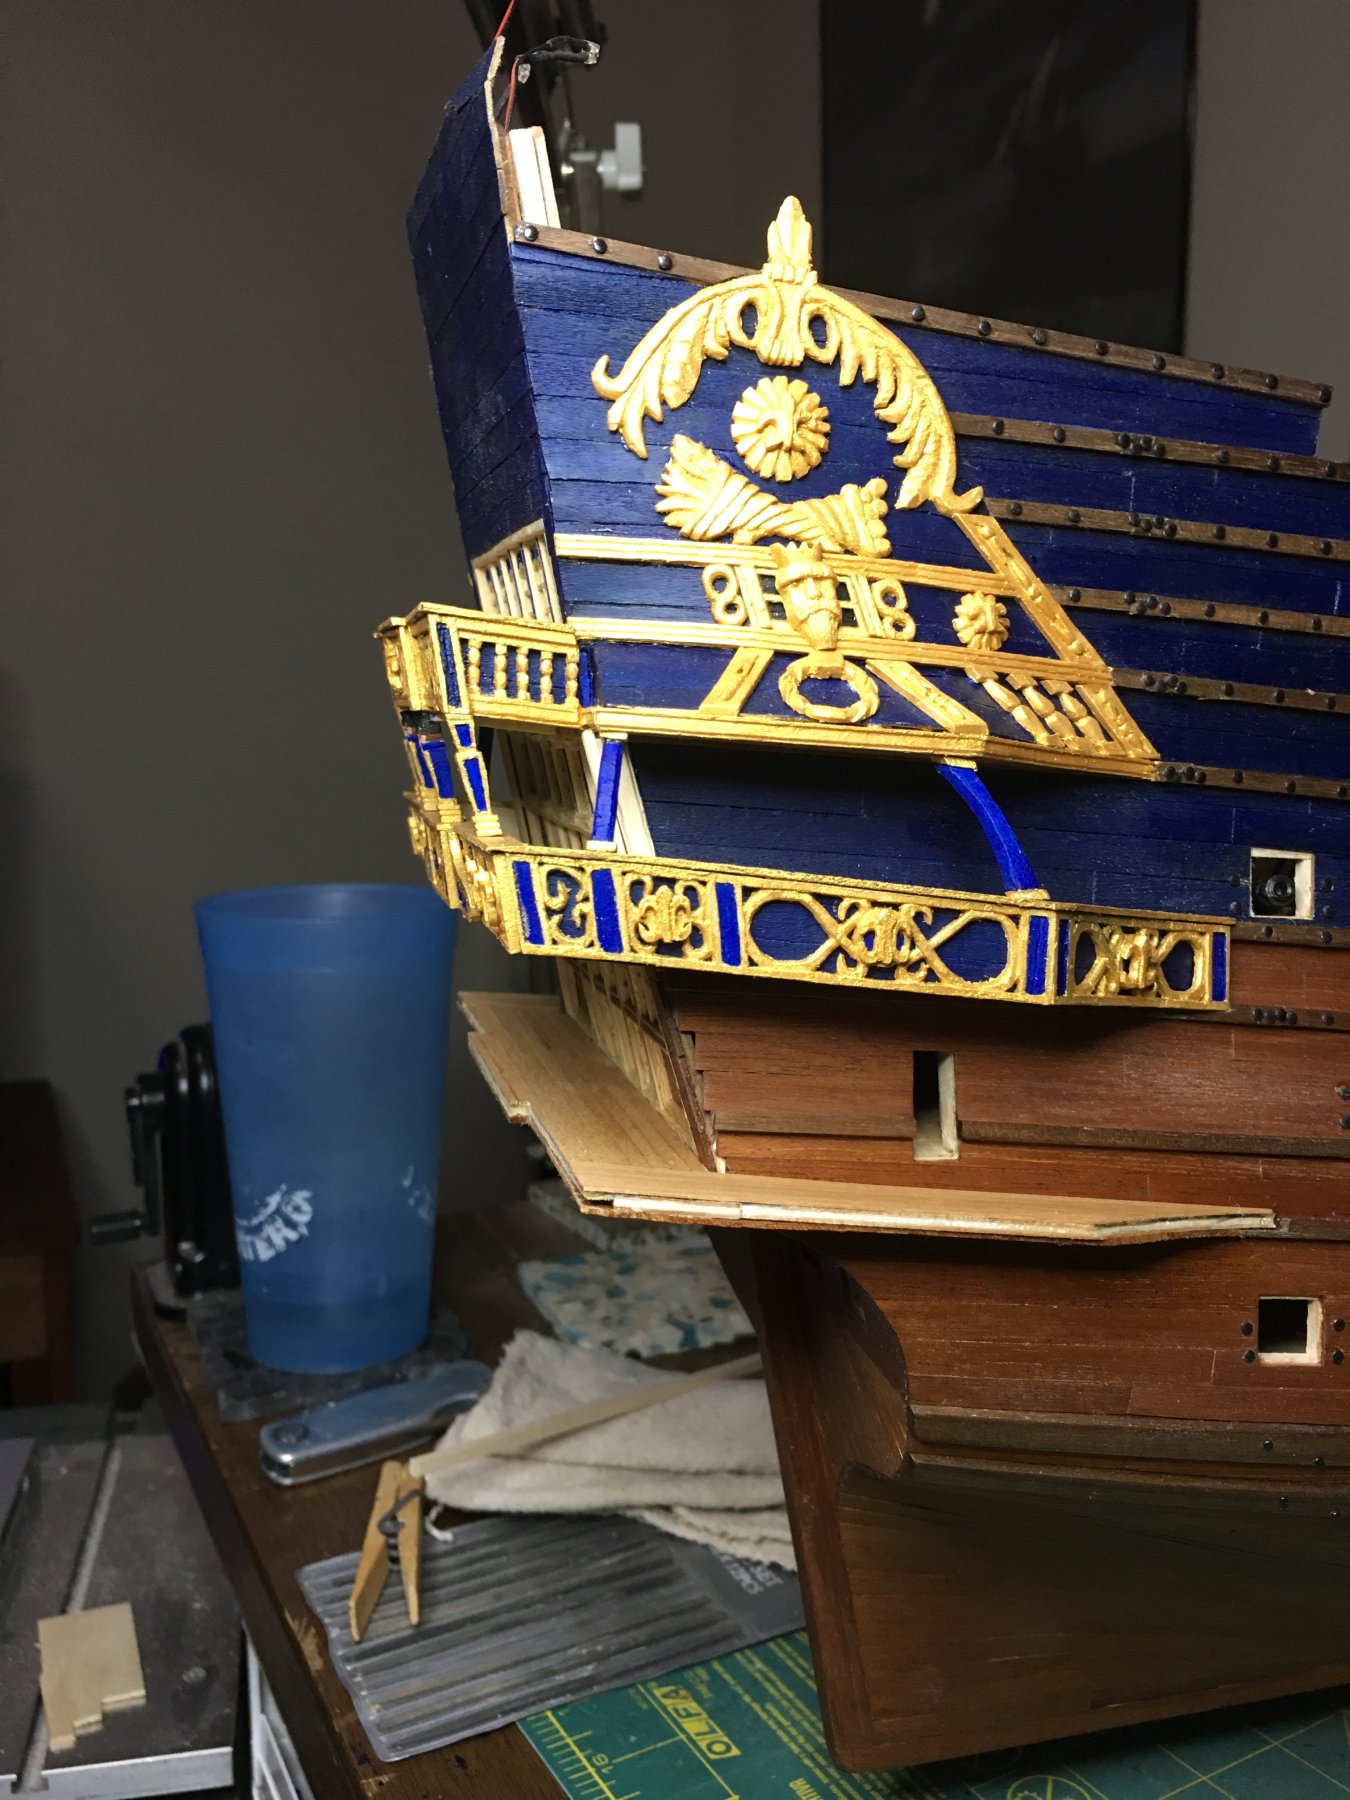
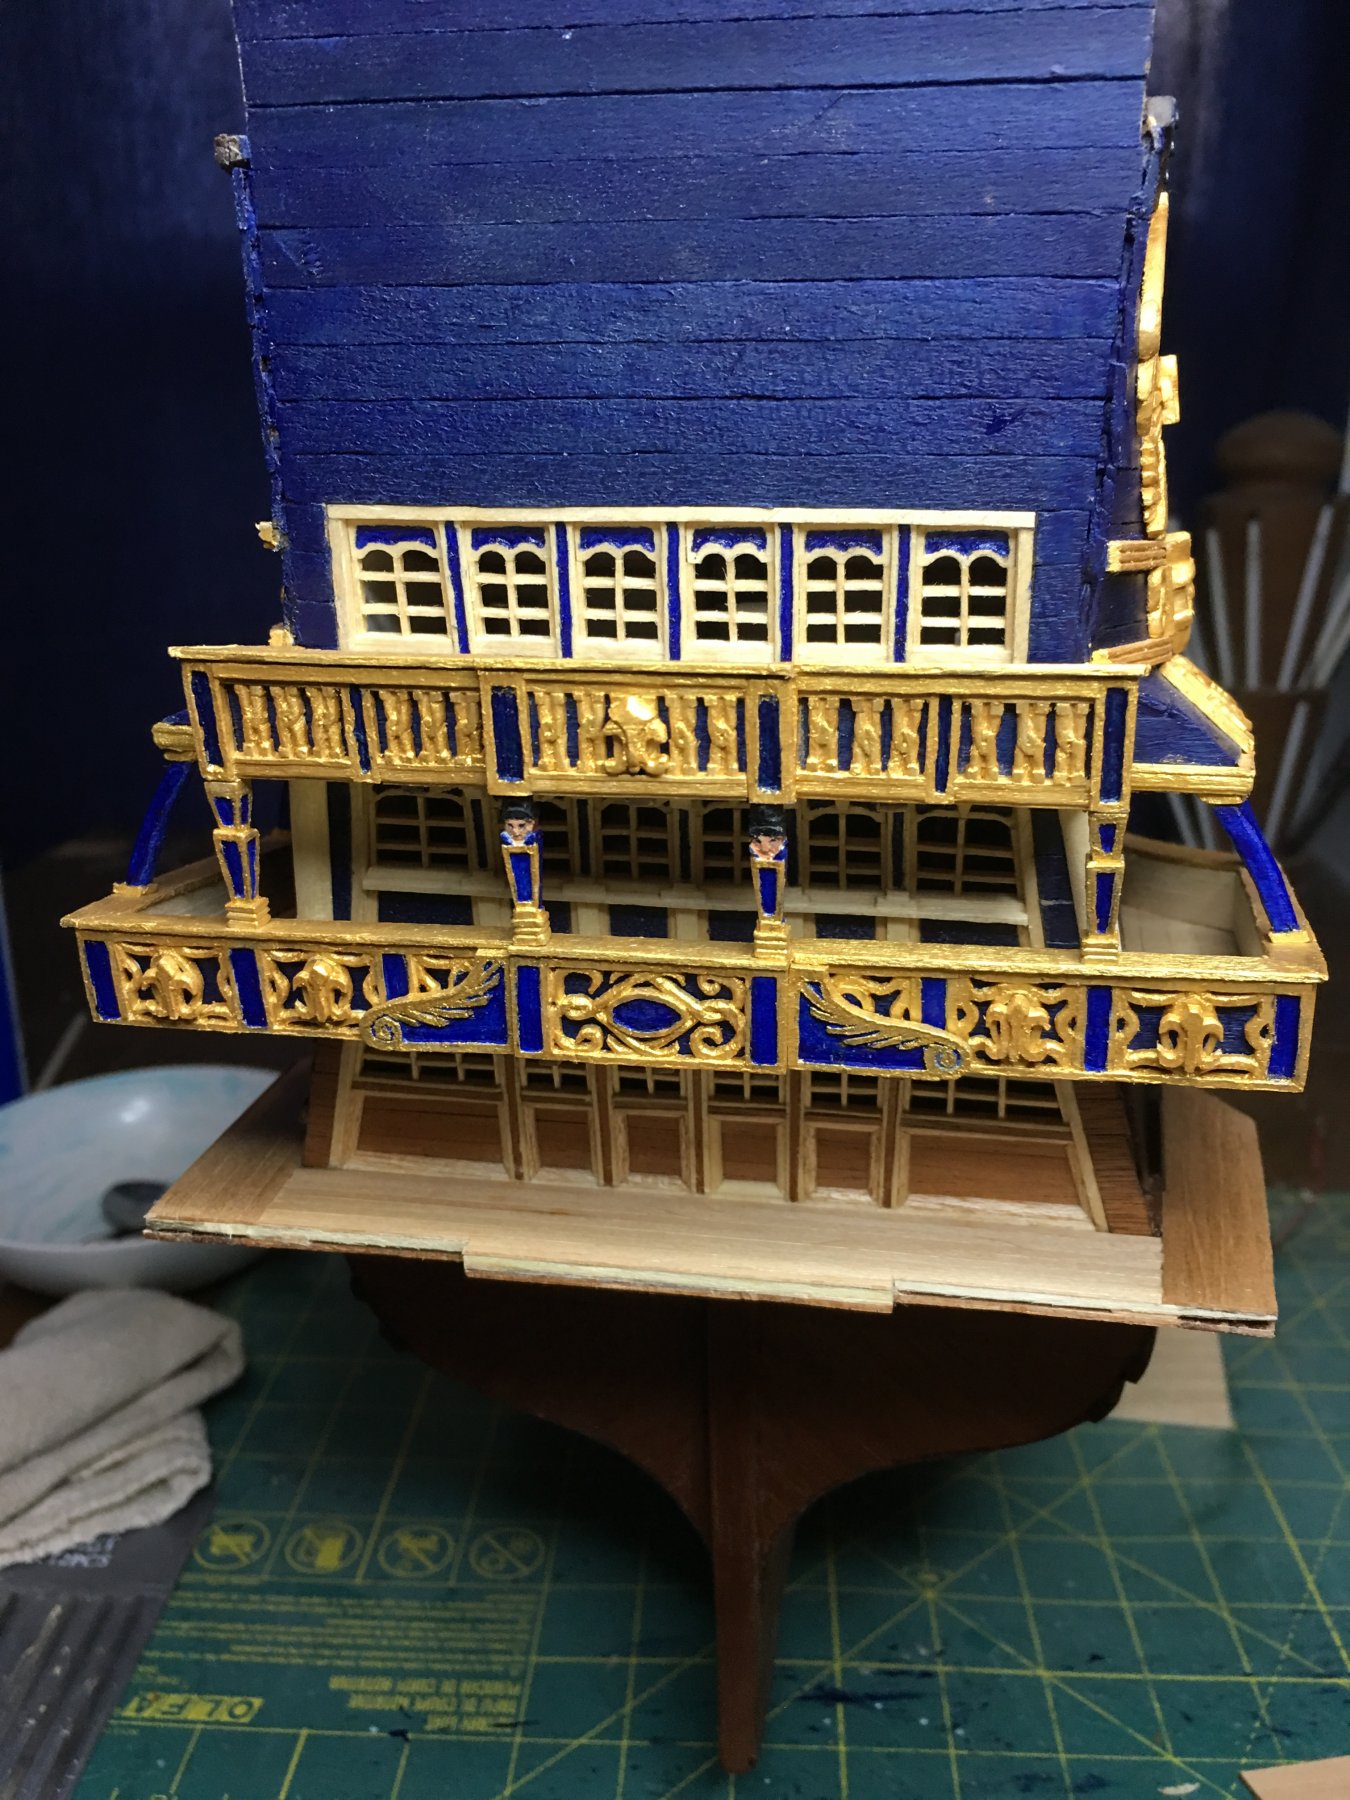
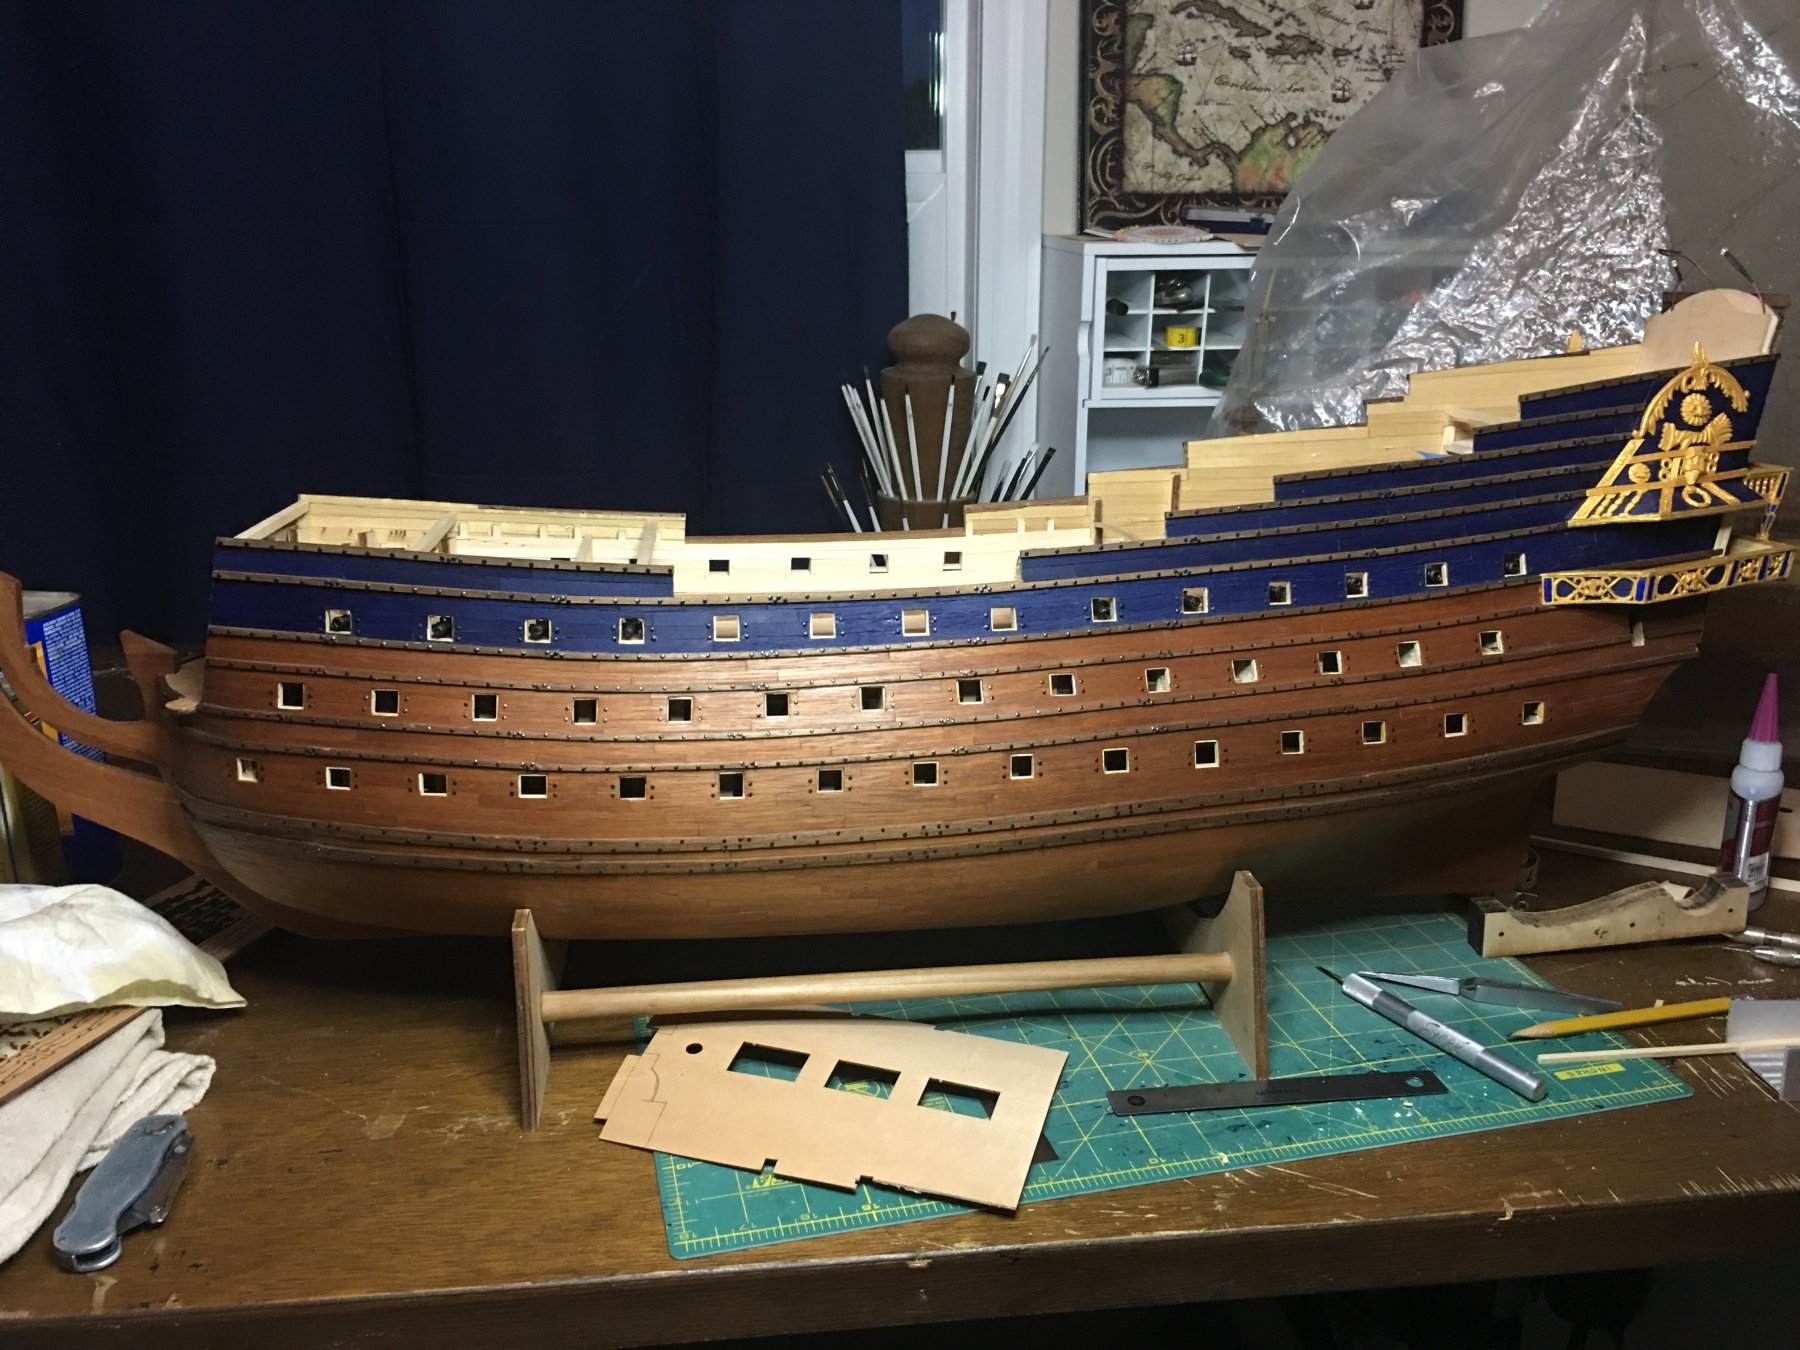
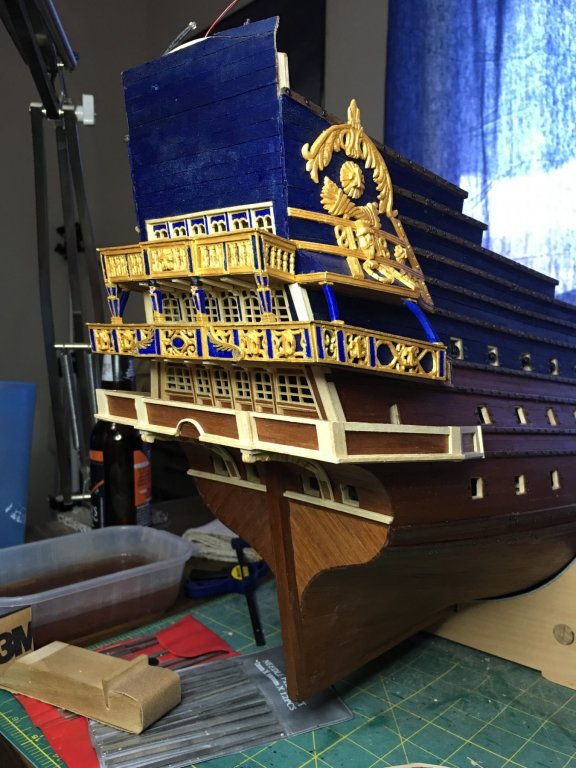
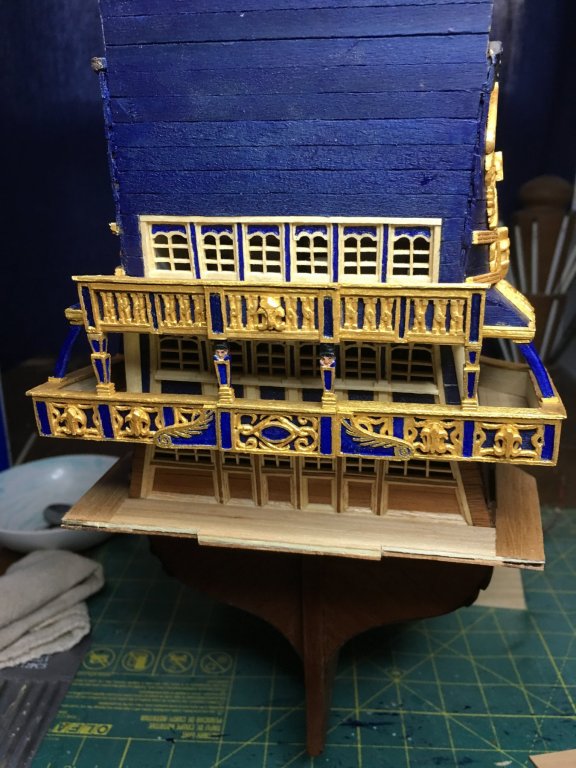
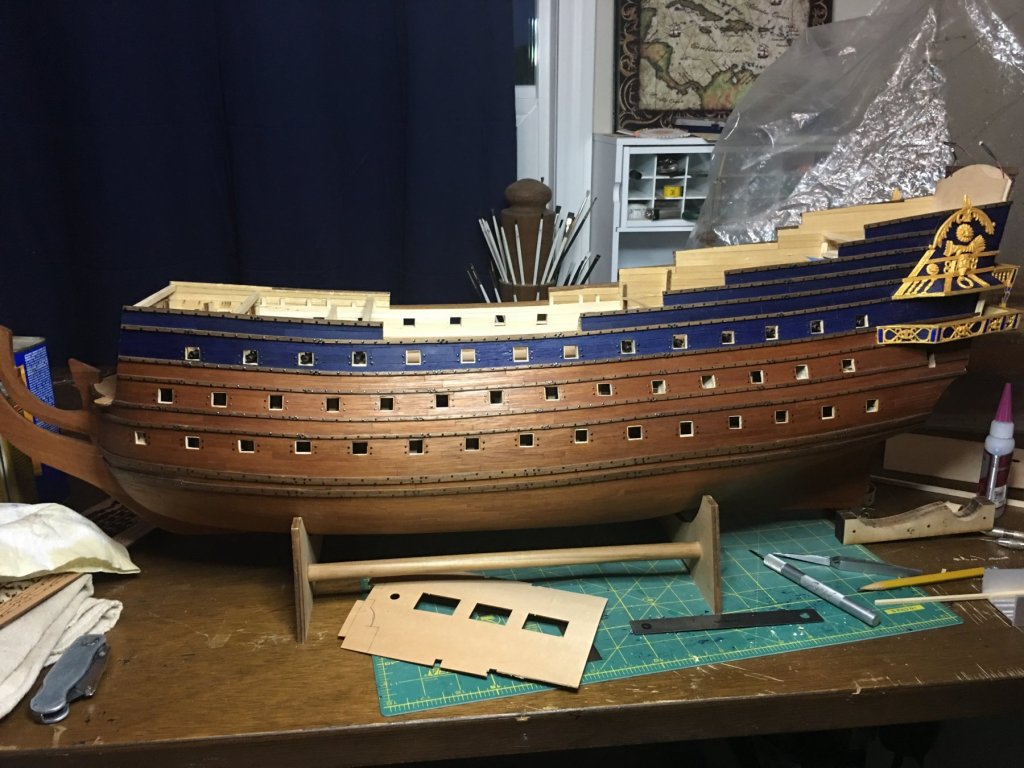
 Thank you all for the compliments and likes! Ive has a very nice long weekend and managed to get a bunch done on the last balcony. This one I am doing in the same mahogany wood coloring as the hull with white the predominate trim color. The gold on this tier will only be used as an accent to the carvings such as what is done on the balcony supports on the stern counter. Still have ave plenty of work to do but it is nice to finally see all three balconies in place.

- 961 replies
-
- 12
-

-
Cameras are our own best friends and worst enemies all at once. While they can help us see those imperfections that are often overlooked with the naked eye to help us improve a build, they can also make us think that there are problems where there are none or make a minor one seem major. As always, excellent work. This has really been pushing at me to start working on the plans for my scratch build cross section of La Couronne. Your work continues to inspire!
-
Looking good indeed! I always enjoying seeing those changes that each builder puts into basic kits. It is to me what makes the hobby enduring. You can open 5 different logs of any given model and have 5 different experiences all of which are enjoyable and interesting as the builders bring their own unique skills and customizing ideas. Even those who say they are going to stick to the kit design rarely do to the letter. Looking forward to seeing what you do next!
- 171 replies
-
- 6
-
-
- krabbenkutter
- authentic models
- (and 1 more)
-
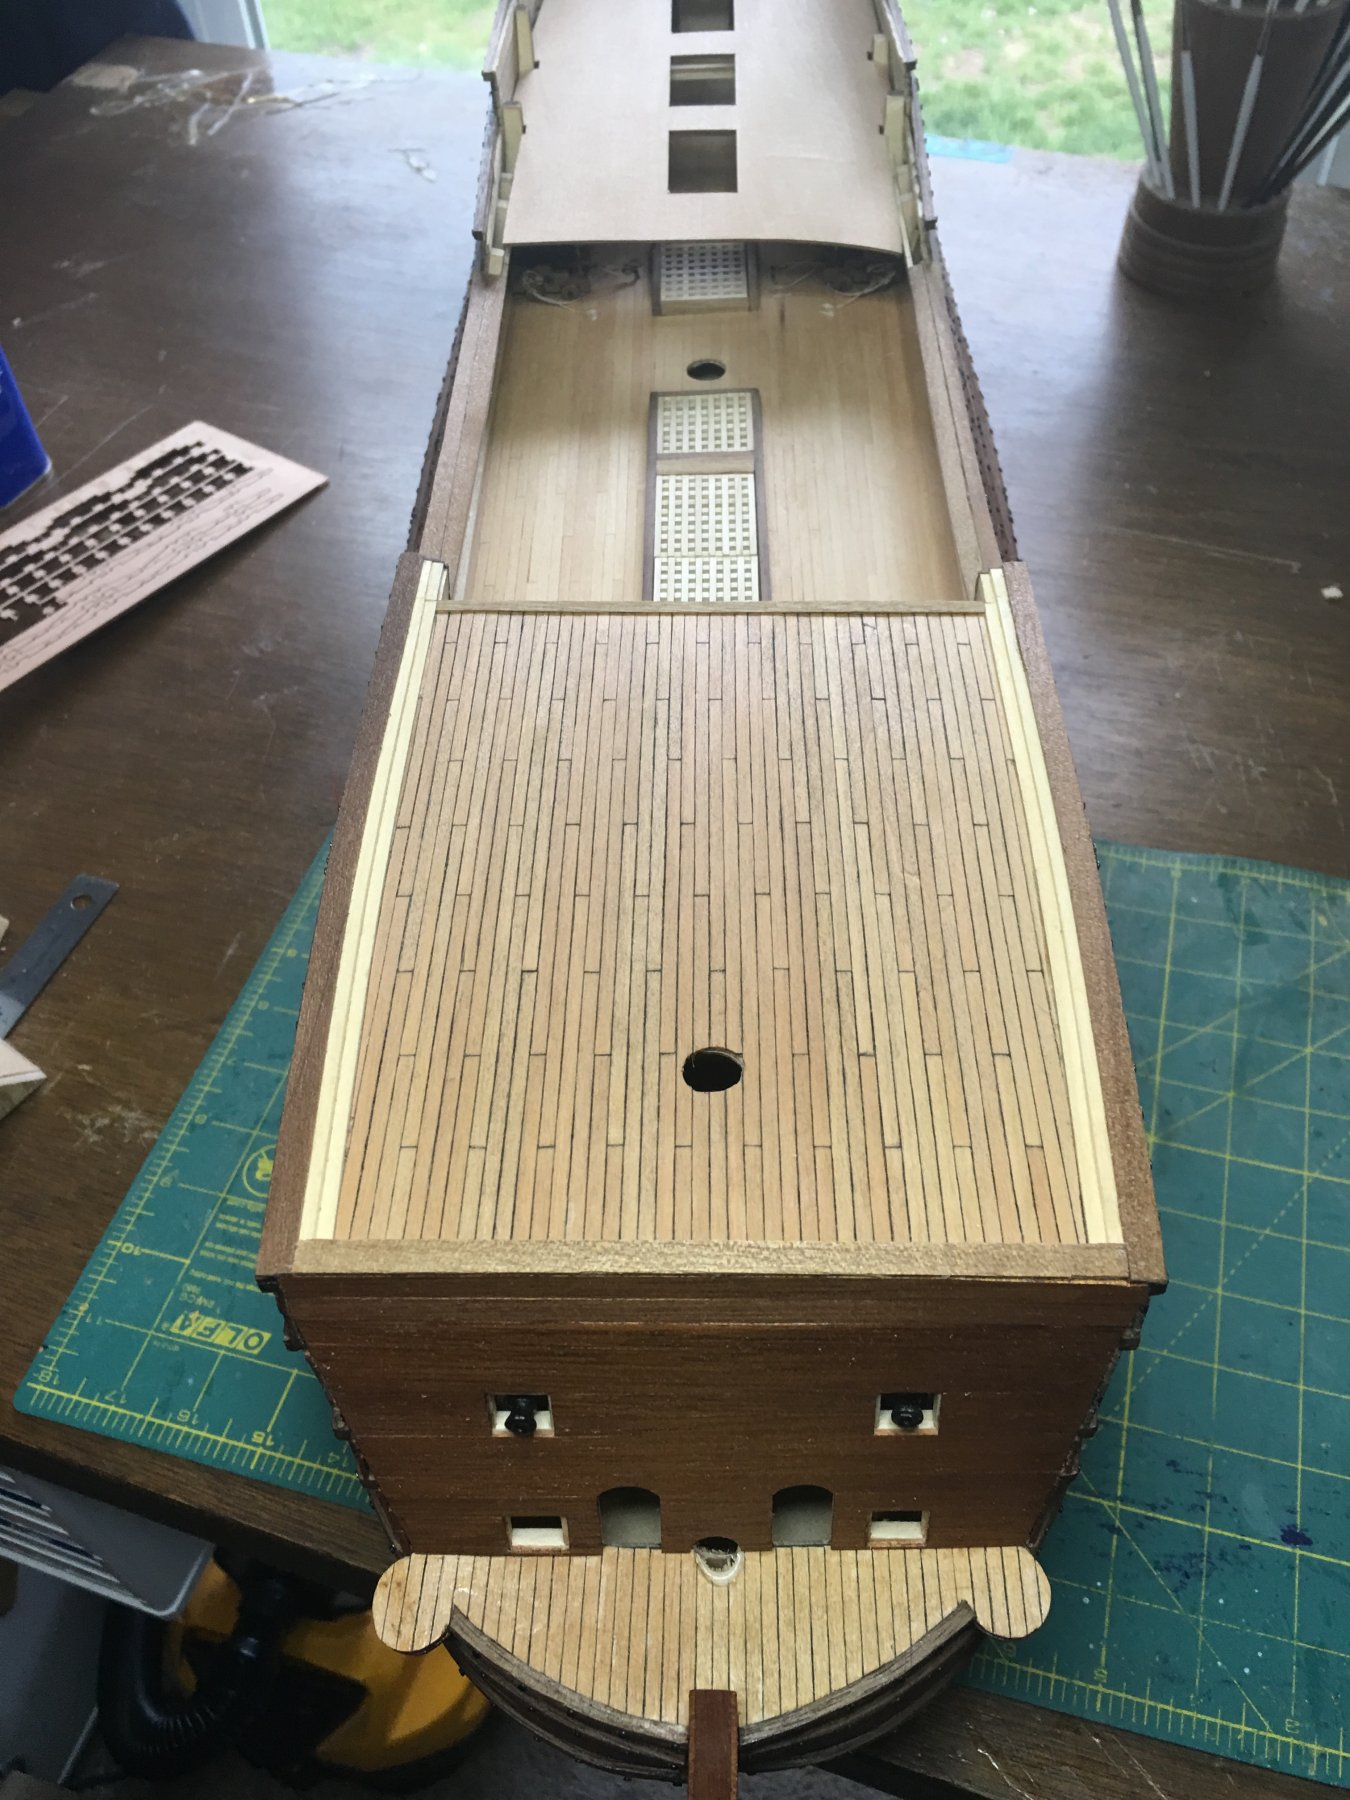
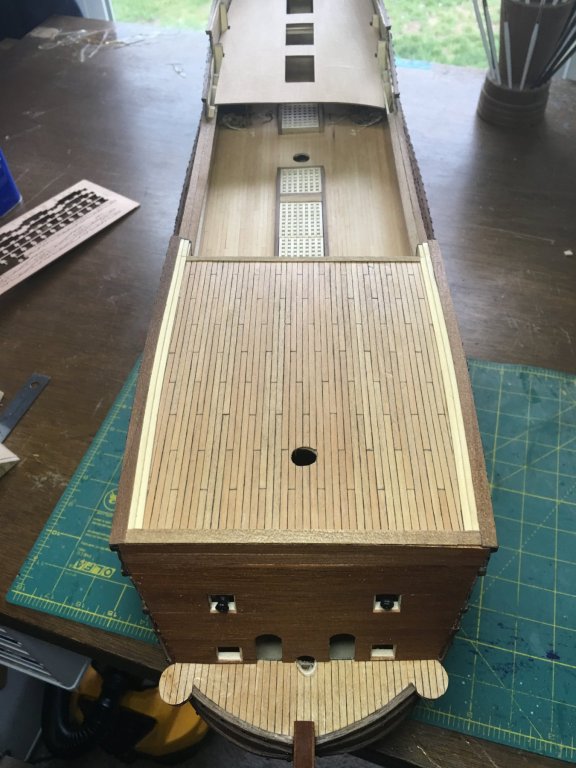
Thanks you all for your nice comments, likes and visiting. Always appreciated and motivating! Building the last balcony. Finished the deck planking tonight and will start fitting the bulkheads next. The easy part is almost done then back to carving.

- 961 replies
-
- 10
-
-
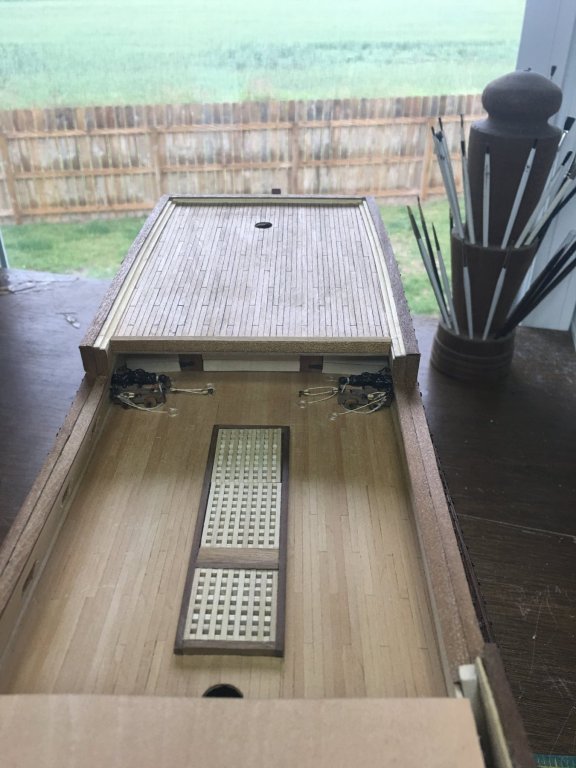
Forecastle deck is built! I think I’m gonna go back to working on the stern balconies and quarter galleys. Time to get back to carving!
- 961 replies
-
- 12
-
-
Denis, I'm a bit late to this one but, it looks like it is shaping up to be another great build. Looking forward to following along with you again!
- 171 replies
-
- 7
-
-
- krabbenkutter
- authentic models
- (and 1 more)
-
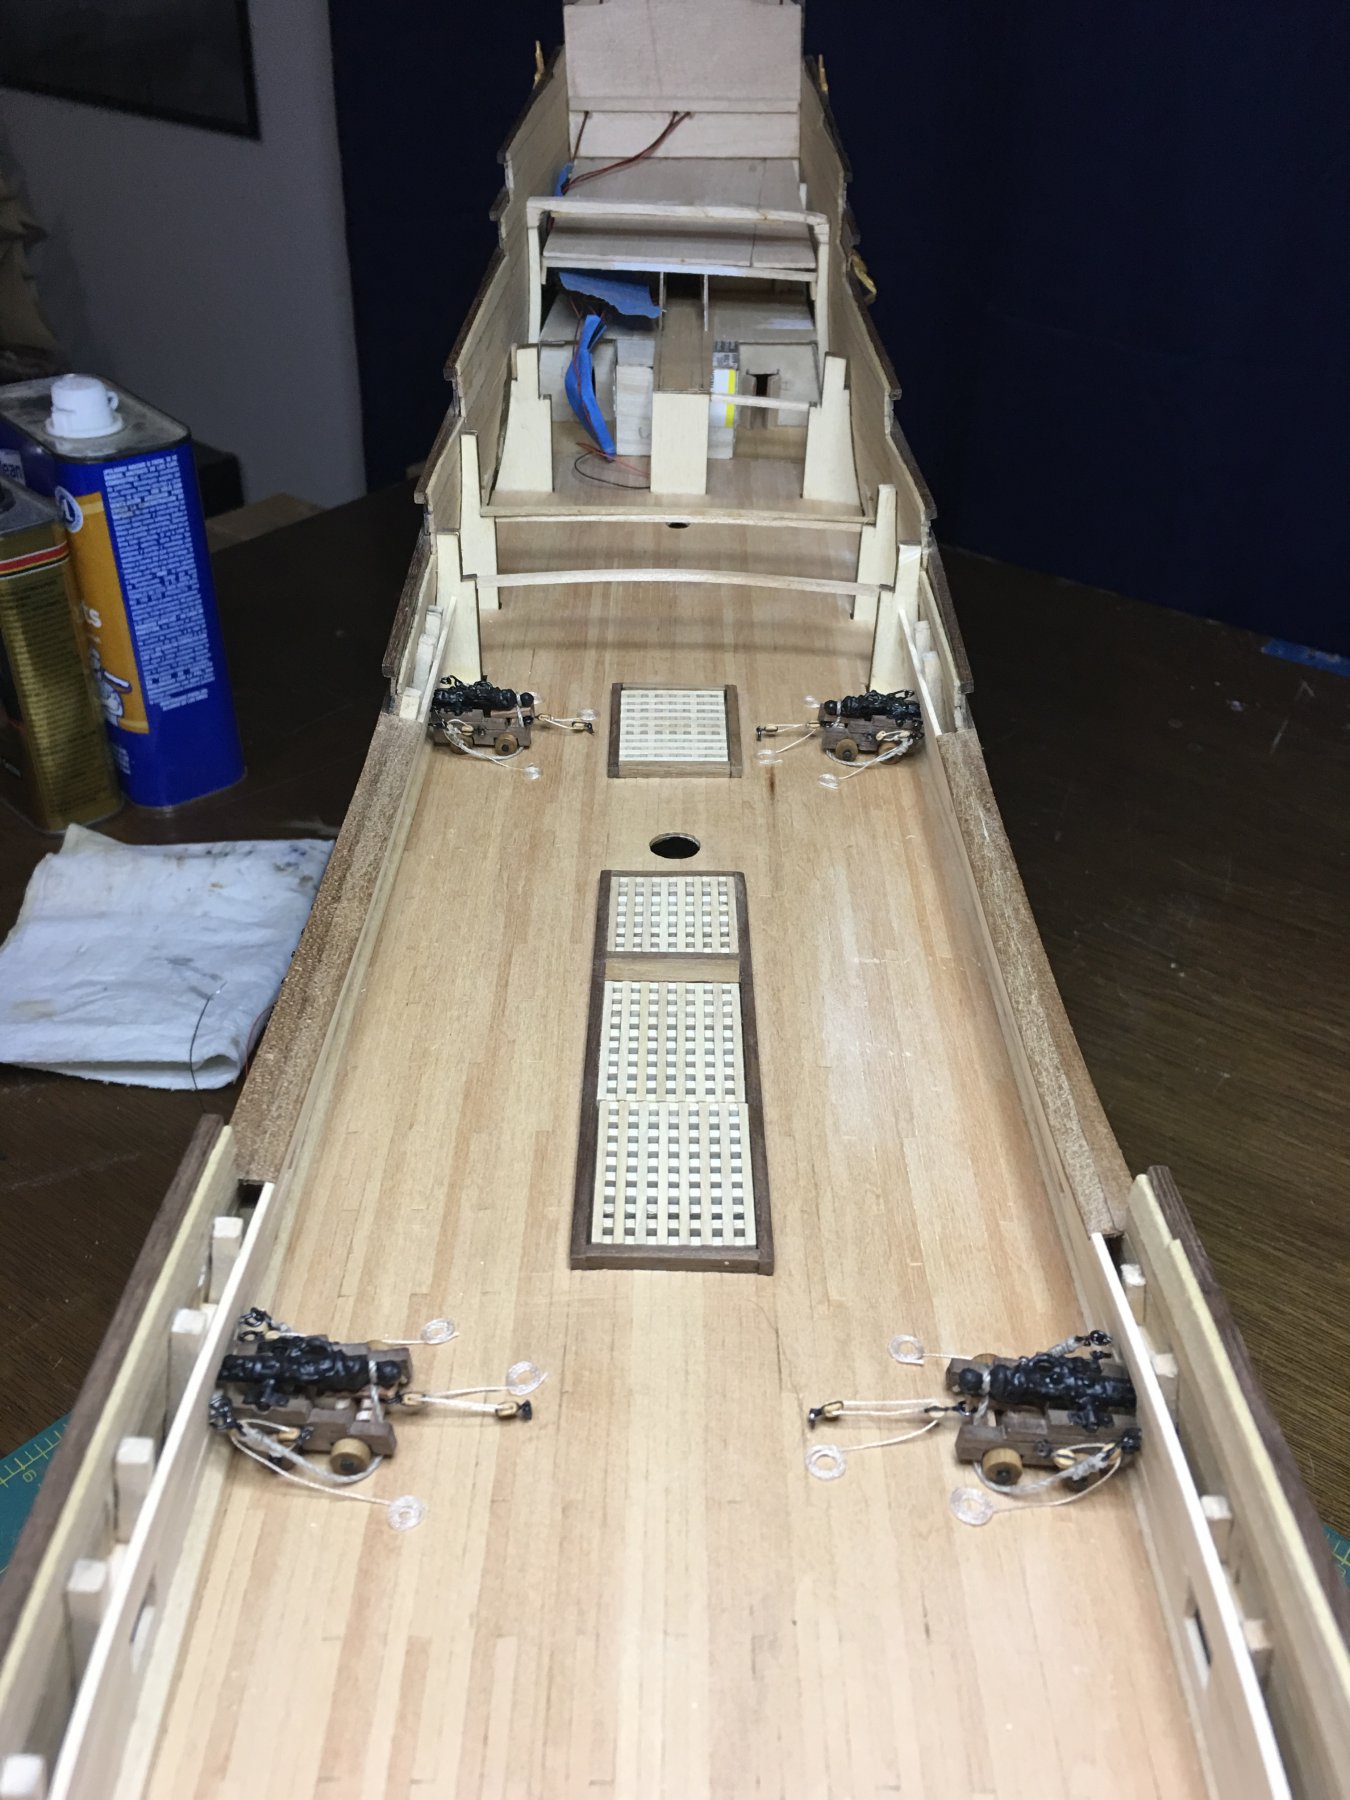
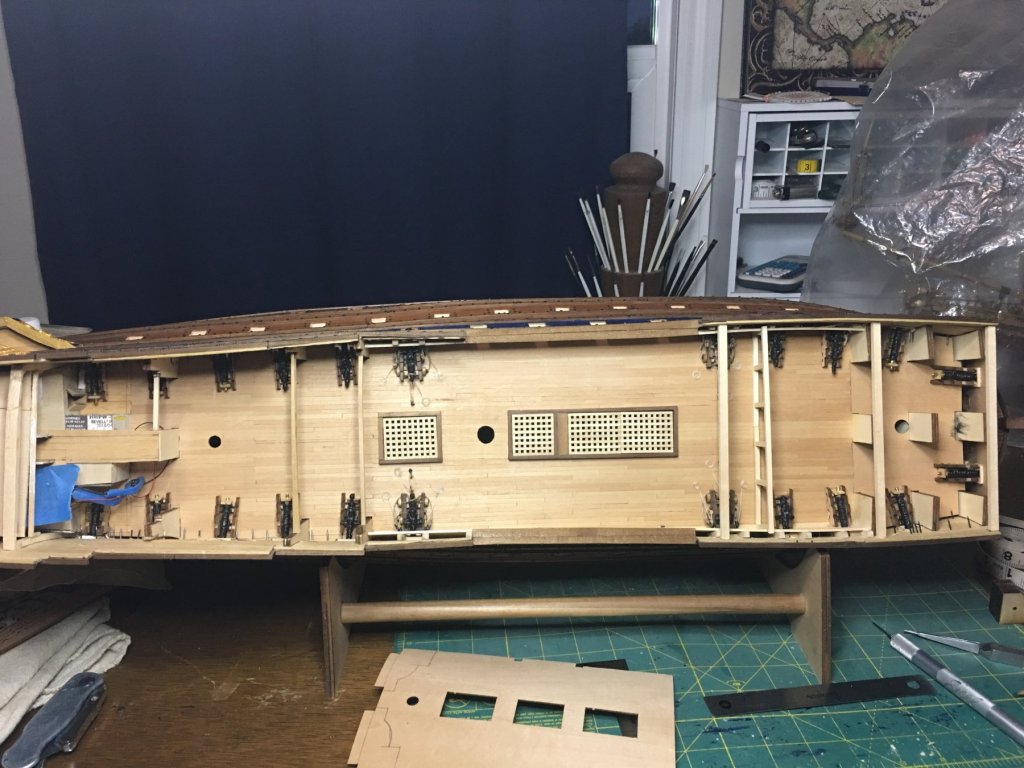
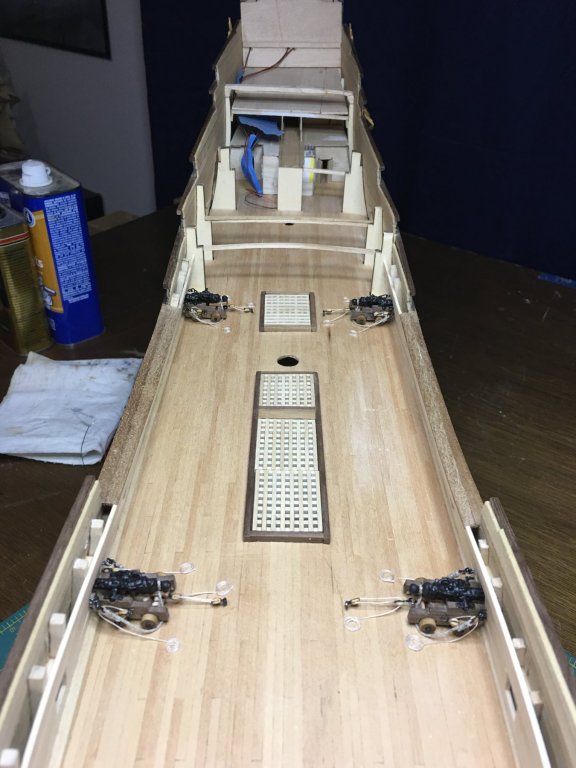
Close to 2,500 nails have been placed to simulate through bolts and I am happy to say that I am almost done with them!! Still have a few here and there plus some when the quarter galleys are in place but, the bulk of them are now complete. I have also finished setting the dummy canons on the upper gun deck. These are just resting in carriages with no details. The first pair under the forecastle and quarter decks are rigged and in place and all the guns in the waist will be rigged but are still awaiting parts. With th that work done, I have now started to work on framing up the forecastle deck to close off that space. Due to changes in the ship deck layout, the original false bulkhead framing does not work here and so all new framing must be created. This will keep me busy for a while but it is more fun than pounding nails!
-
Wow! Great job! I hope the casting does take all the details as those look very nice indeed. I still have no clue how I'm going to achieve all those decorations on mine so seeing how yours turn out is very fascinating and gives me ideas.
- 2,699 replies
-
- 1
-
-
- heller
- soleil royal
- (and 9 more)
-
Beautiful! Looking forward to seeing her at sea! It is on my wish list to build one that can actually be sailed. Love watching videos of them on the water. Some day...
- 213 replies
-
- 2
-
-
- la couronne
- 74 gun
- (and 2 more)
-
Welcome back! Glad to hear all your ships have survived those moves. I'm looking forward to seeing some of your work!
-
Your first try at plank bending in any method was far better than mine! It is definitely a skill that takes some practice.
-
Beautifully done Martyn! Definitely a model to be proud with your excellent craftsmanship. Congratulations on finishing! Any thoughts as to your next build? This was an enjoyable build so I'm looking forward to seeing what you do next.
-
I've bought the eyebolts from the bead/jewelry department before and they do work great. They are actually on my shopping list for whenever I get back over there. Last trip they were out so I need to stock up. Scale is a common problem for a lot of what the stores regularly stock at least for the smaller scales. Larger ones would probably have it a bit easier. Admiral would probably kick me out though if I tried to build one of these first rates at a 1:48 scale or larger! Build update, I have been working on her a lot these past couple of weeks. Not much to show in the way of pictures yet but the non-rigged "dummy" guns are all in place and I've started to rough fit the next decks to get the layout of what will be covered, what needs supports, where those will go and any other items that need to go down before they are covered up. Mostly a lot of holding pieces in place, making pencil marks for locates and then pulling it back apart. In addition to that work, I have also continued adding through bolts on the wales as I had not completed that earlier since I had run out of nails. I am hoping to get permission to take the good ship Visa out for a small expedition to acquire some more blocks and rope to complete the gun rigging and some better quality carving wood for the figure carvings on the stern. I think I have almost completed enough items on the "Honey Do" list to get that wish granted.
-
Your planking turned out very nice. Had you not said anything about the whoops, I would have never known. Are you going to stain & finish the outside of the hull or paint?
- 20 replies
-
- 2
-
-
- lady nelson
- victory models
- (and 2 more)
-
Excellent work on those interior faces. That is one side of a model that often gets overlooked in the early prep stages and then tends to stand out later when those bad spots appear. That extra effort will be worth it especially on a model that you are trying to attract attention to the tiny details. I'm looking forward to seeing how the paint comes out on her. I like the way you are approaching it and while I am not doing it on my own, I think your plans are realistically founded. With the learning of Victory's coloring being a far more muted color than the traditional "bumble bee" scheme that we are used to, I have begun to shift a lot of my thinking to a similar scheme on other vessels. It would make a lot of sense as paint was and is expensive especially in vibrant colors. Add to that the huge costs of maintaining that paint job during a ships service and I could easily see how the field and largest of areas would have been painted with cheaper colors reserving the expensive coloring for areas deemed most important. I hope one day we can learn the truth!
- 2,699 replies
-
- 1
-
-
- heller
- soleil royal
- (and 9 more)
-
I'm little late to the discussion but, I went with the flickering amber lights on my interior work on SR. They are the same ones I have used for simulating campfires on my model railroad and I think look very nice as they give the space that orange, fire glow. The flickering is I think important for a flame sourced light. As for the lantern, mine (though a bit large for the scale) are made from air line tubing for the glass and wood trimmed to make the frames. Nothing fancy but they serve their purpose. I think you could probably scratch something together easily enough. The wiring is small enough that you should be able to run it inside the framework with little trouble. Be sure to plan where the wires are going to exit and what will turn them on and off! I have mine exiting the bottom of the hull and will travel down the stand in to the display case bottom. There it will connect to a switch/battery compartment for the power and easy access for on/off. Good luck! Looking forward to your new improvements!
-
Looks good to me! I fully understand the desire to push yourself harder and do better. I've been going through a lot of that on my build lately where I'm happy with what I am doing but keep wondering if I can do better. That is probably a common thought to most of us I bet.
-
Congratulations on completing your build! That is always a great feeling. What do you think will be your next project? I see you have a few nice choices listed in your shipyard. Let us know and I'm sure we will be ready and happy to follow along with that one too!
- 108 replies
-
- 2
-
-
- mamoli
- constitution
- (and 2 more)
-
That is good to know about the red sharpie and walnut. I have an abundant supply of walnut scraps perfect for ship building but my blood wood supply is much more limited. May have to file that information back for a future project I am starting to put together.
- 75 replies
-
- 1
-
-
- constitution
- mamoli
- (and 2 more)
-
Very nice. The rope coils are looking good. They really add to the operational look of the ship and are a great detail. It was not uncommon for there to be coils attached to the shrouds so I think your decision there is good to go. I would add the wire to the gun ports if time permits. Even if it is just one in the center of the lid that would improve their look. Have a good time at your meeting!
- 108 replies
-
- 2
-
-
- mamoli
- constitution
- (and 2 more)
-
First 4 rigged canons are in place. Till I can order more blocks I plan on installing the non rigged guns that will be covered by the upper decks. This will allow for construction to continue while I wait on additional blocks. While Im working under the decks, I need to look ahead on the rigging plans. I believe there are some knight heads and bits that sit under the quarter deck that I will need to build and attach any blocks to now rather than try to do that later.
-
Indeed we do Michael! That is the greatest part of this forum, being able to learn and share that knowledge with each other. The knowledge I have gained since becoming a member here has allowed me to grow in leaps and bounds from where I was previously. Especially being out here in Kansas where most of the modelers I know are far more interested in planes, helicopters and cars than the are of ships, having this community is a huge boon!
-
That tool is called a One Step Looper Tool by Beadsmith. Here is an Amazon link to it. They are rather common in craft store like Michael's and Hobby Lobby in the jewelry department which is where I picked mine up at. It works great for making eyebolts and hooks easily. Simply insert the end of the wire you want to use and squeeze. The pliers bend the wire around the post then trim off the length you want. They make them in a couple of different sizes. I got the 1.5mm one which has been handling the size wire I'm using for my 1:77 scale build. There are larger ones but unless you are building in 1:48 or larger, I doubt you would need it. I have found that the jewelry departments have a lot of great stuff for model ship building. Thanks, all for looking in and the likes! I should have a few more canons rigged up soon.