HOLIDAY DONATION DRIVE - SUPPORT MSW - DO YOUR PART TO KEEP THIS GREAT FORUM GOING! (Only 20 donations so far - C'mon guys!)
×


garyshipwright
-
Posts
927 -
Joined
-
Last visited
Content Type
Profiles
Forums
Gallery
Events
Everything posted by garyshipwright
-
 Hi Ed. I must say sir you have your metal work cut out for you. Young America has become a very interesting build and the way you are building her is in line with your last build. Every update is a joy to read and the photo's a real treasure for the eyes. Will be looking fwd to the next one. Gary
 -
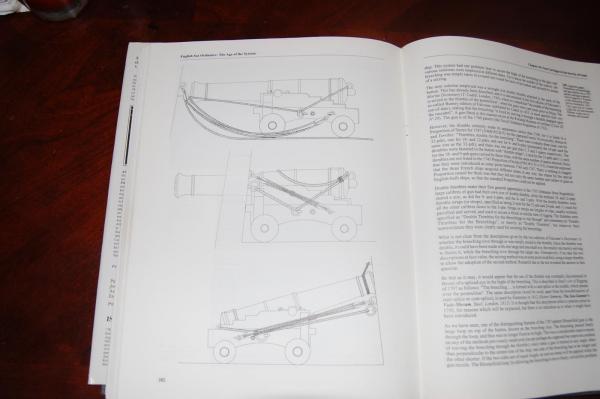
Hi Robert. Do believe that the breeching rope should be going through the ring bolt the other way, so have to agree with the others, that the artest is just a tad wrong. Here is a photo of a page in Adrian B Caruana book, Volume 2, The age of the System, 1715-1815, which should set things right. Gary
-
Thanks Jay and glad it will give you some ideal's for your Pelican. Those pins do help hold things in place thats for sure and the ones I use, once they are beat and bent up, the heads make real good door knob's. Gary
-
Mark I looked in Boudroit book, The 74 gun ship, Vol 2, and seems this is were I found the information on the wheel, rudder and tiller rope. As I posted above the rope was taken around the barrel a even number of turns and then taken back down to the tiller. Boudriot says that the mid point of the tiller rope is nailed to the barrel, and on either side of this fixed point it is wound round twice in opposing directions; thus if the barrel is turned in one direction the rope is wound on of the fixed point and unwound in the other, abaft the fixed point. Gary
-
Hi Mark and thank you sir. Some where and please don't ask me were, maybe in Goodwin's book, that the cable was taken around the spool or drum about 5 turns. They then put a nail or staple, on the middle run on the bottom of the drum, which means you had two and a half turns to port and two and a half turns to starboard. How far that would turn the rudder, this am unsure, maybe some one know's the answer to this one and will chime in here. This also as you said above gave space for the cable on the drum. Hum very interesting. Gary
-
Thanks Jay.As far as the pins, they are dress maker type pins and their size is usually the size of the bolt or treenail that replaces it when the part is attached for good. They help me align the parts and pieces during the building process. Gary
-
Hi Mark. It is very interesting that you say the lines for the steering was brought up independently and allways thought like you that they were one line. Can you post were this information came from? Very very interested in this. Thank you sir. Gary
-
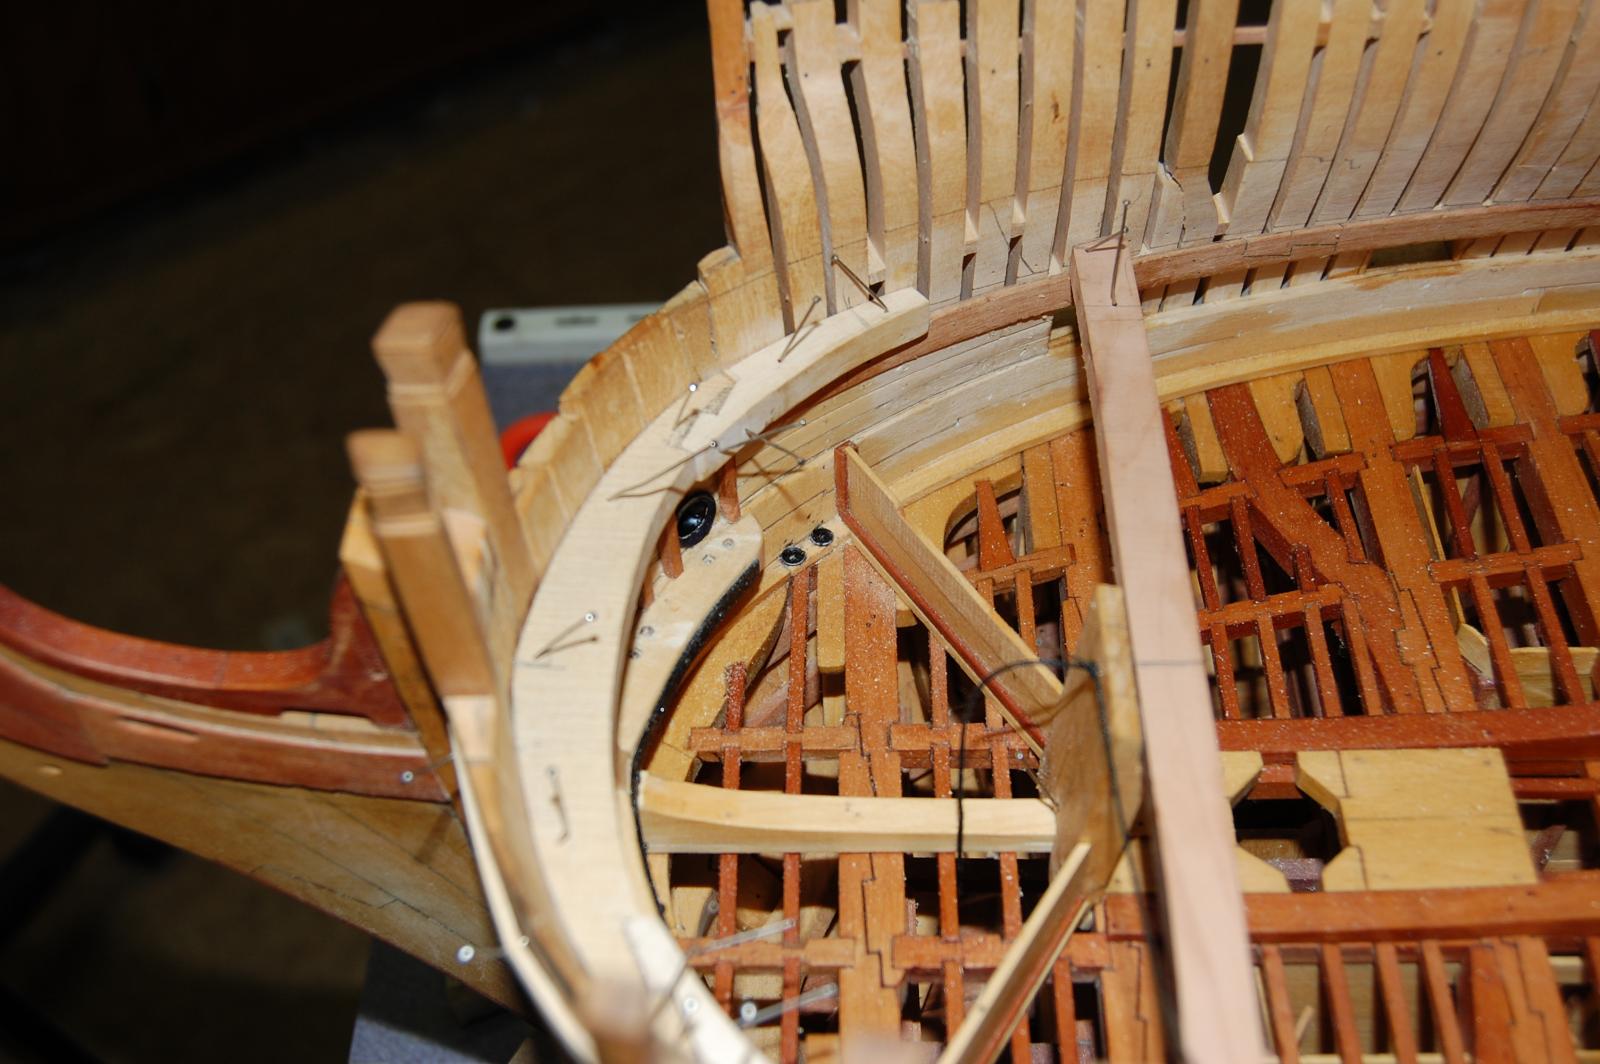
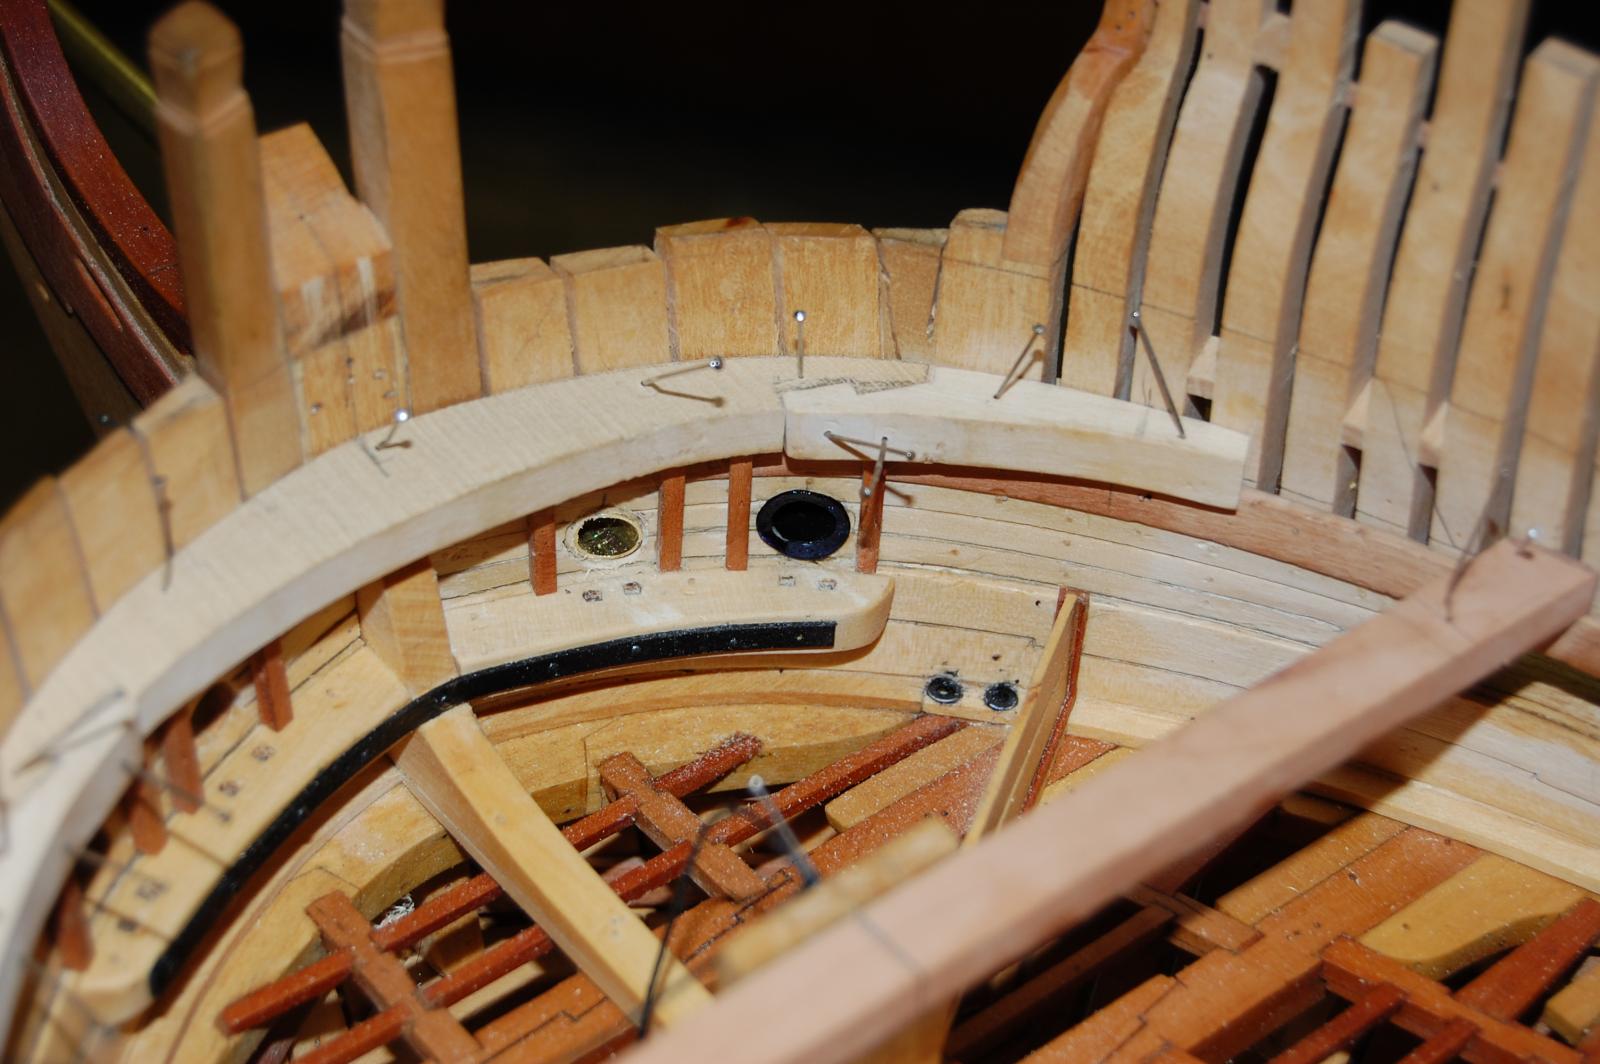
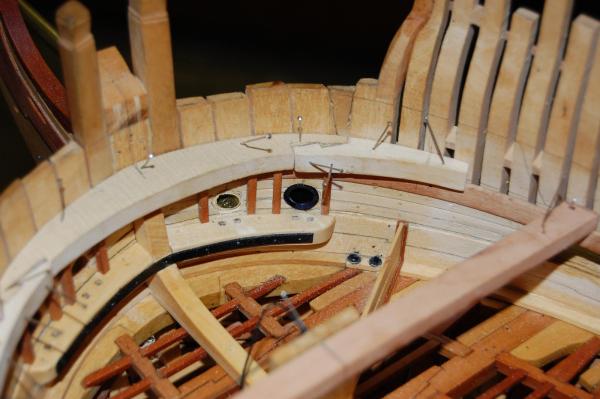
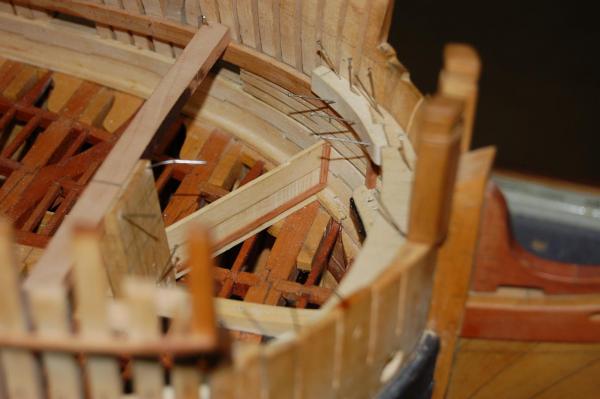
Sorry Jay. Got a little busy but here is a couple of photo's showing them along with the scuppers and manger. Still some work going on in this area so forgive the mess. Hope it helps down the road. Gary

-
Looks good Alex. Glad to see a update sir and have been missing them. Really like how she looks. Any ideally's about adding a figure of your self to show her scale sir. Keep up the good work and will keep watch her come to life. Gary
-
Hi Colin. Thank you sir for letting me know that my memory is ok for at least the moment. David, have to agree with Colin sir and it is typical English planking and as David said is called thickstuff under the wale and the diminishing strakes. Took a look in the AOS Diana and shows the same type planking as on page 61. Gary
-
Thanks Ed and boy o boy what a large hull. Nice going sir and by chance have you pop the cork yet? Look fwd to more up dates. Gary
-
Micro drill holders
garyshipwright replied to Trussben's topic in Modeling tools and Workshop Equipment
Hi Wacko. Is that by chance a brake in your second photo above sitting on top of the drill box? Any good advice about it. Am thinking about getting a sheer/brake and was wondering about how much use one would get in this hobby of ours out of one. Be nice to have nice bends in metal thats for sure. Gary -
Hi David. Need a bit of information sir on your Surprize and will see what I can come up with on the planking question. What year is she, were was she built and by whom? With those answer we can figure out how her planking may of been laid. There are a few Surprize's in David Lyon's book and knowing what years, will help located her in his book. If memory serves me she was French built and not English built so let me know and will see what I can come up with. Gary
-
Hi Hollowneck. Hawse Bucklers were board's that was put over the holes on the inside and was wedge in place with pieces of wood fitted in holes in the breast hooks, in Alfred time of 1780. They had two types, one was fitted for sea and the other had a hole in it for when they were at anchor. Here's a photo of Alfred's bucklers, one is solid and the other has a hole in it. They are made of two wooden boards each fitted with a rabbet on the edge so they could be fitted and made water tight. Hum can't seem to find any photo's of this. Most of this infomation that I have on them came from the The Fully Framed Model, Volume II , so on this one the credit goes to David. Give me a little bit and will add some photo's. Hope this helps. Gary
-
Hi Antony. Good job on the midsection sir and will be watching how you lay out all the equipment for the cannons. Will give me some ideals for Alfred. On a different note , can any one tell me what that odd looking stove is in the second picture please? It looks like a up to date smoker and have not run across this untill now and was wondering if it was around in their time. Gary.
-
Thanks bucknbarney. Hi Tim,and thank you. It has been awhile, but at the moment my memory fails me on those pictures sir, that and the computer crash I had a couple of years ago. Could you send me a couple more please or just post them here on the log. Gary.
-
Hi Larry. No hurry and my wife says that I move like a snail. As far as the issues with the water draining off of the cables, the deck boards were not made water tight being that the orlop deck was below the water line, and guess they figure it would not do any good, make getting at the supplies harder. The cable tier beams in that picture seem to be a little on the large size and would of looked more like the ones on page 114. You probably already know this part but they were just used to provide a space for air movement underneith the cable's to help them dry and prevent rot. The reseach I done on that part Larry said that the battens were 2 inches thick and was placed every 2 foot in the cable tier. Being that I didn't put any planks in the area only left me the top of the beams to put them. Let me know good sir if there is any more info or help on her. Gary
-
Hi Ed. Not sure what to say other then a heck of a job. On a side note and would like to see him but could you put your figure next to the hull like in photo 7 above. Just want to see how it looks with him standing beside all of that framing which Is what I like best about building them. Thank you sir. Gary
- 3,618 replies
-
- 1
-

-
- young america
- clipper
- (and 1 more)
-
Good to see you back Mark. Wil be keeping a eye on this part and am sure to learn some thing to help on Alfred Stern. Does seem that this is one of the hardest parts other then the rail at the stem. Keep up the good work sir. Gary
-
Thanks Tim. It was a fun project. I got some more metal from Micro Mart for making some more pot's and pan's, but havn't got around to doing them yet. Been working on the capstan and a good shop clean up. Funny how not finding a tool because of the other stuff on top of it will make let you know that its time to clean up the shop. Gary
-
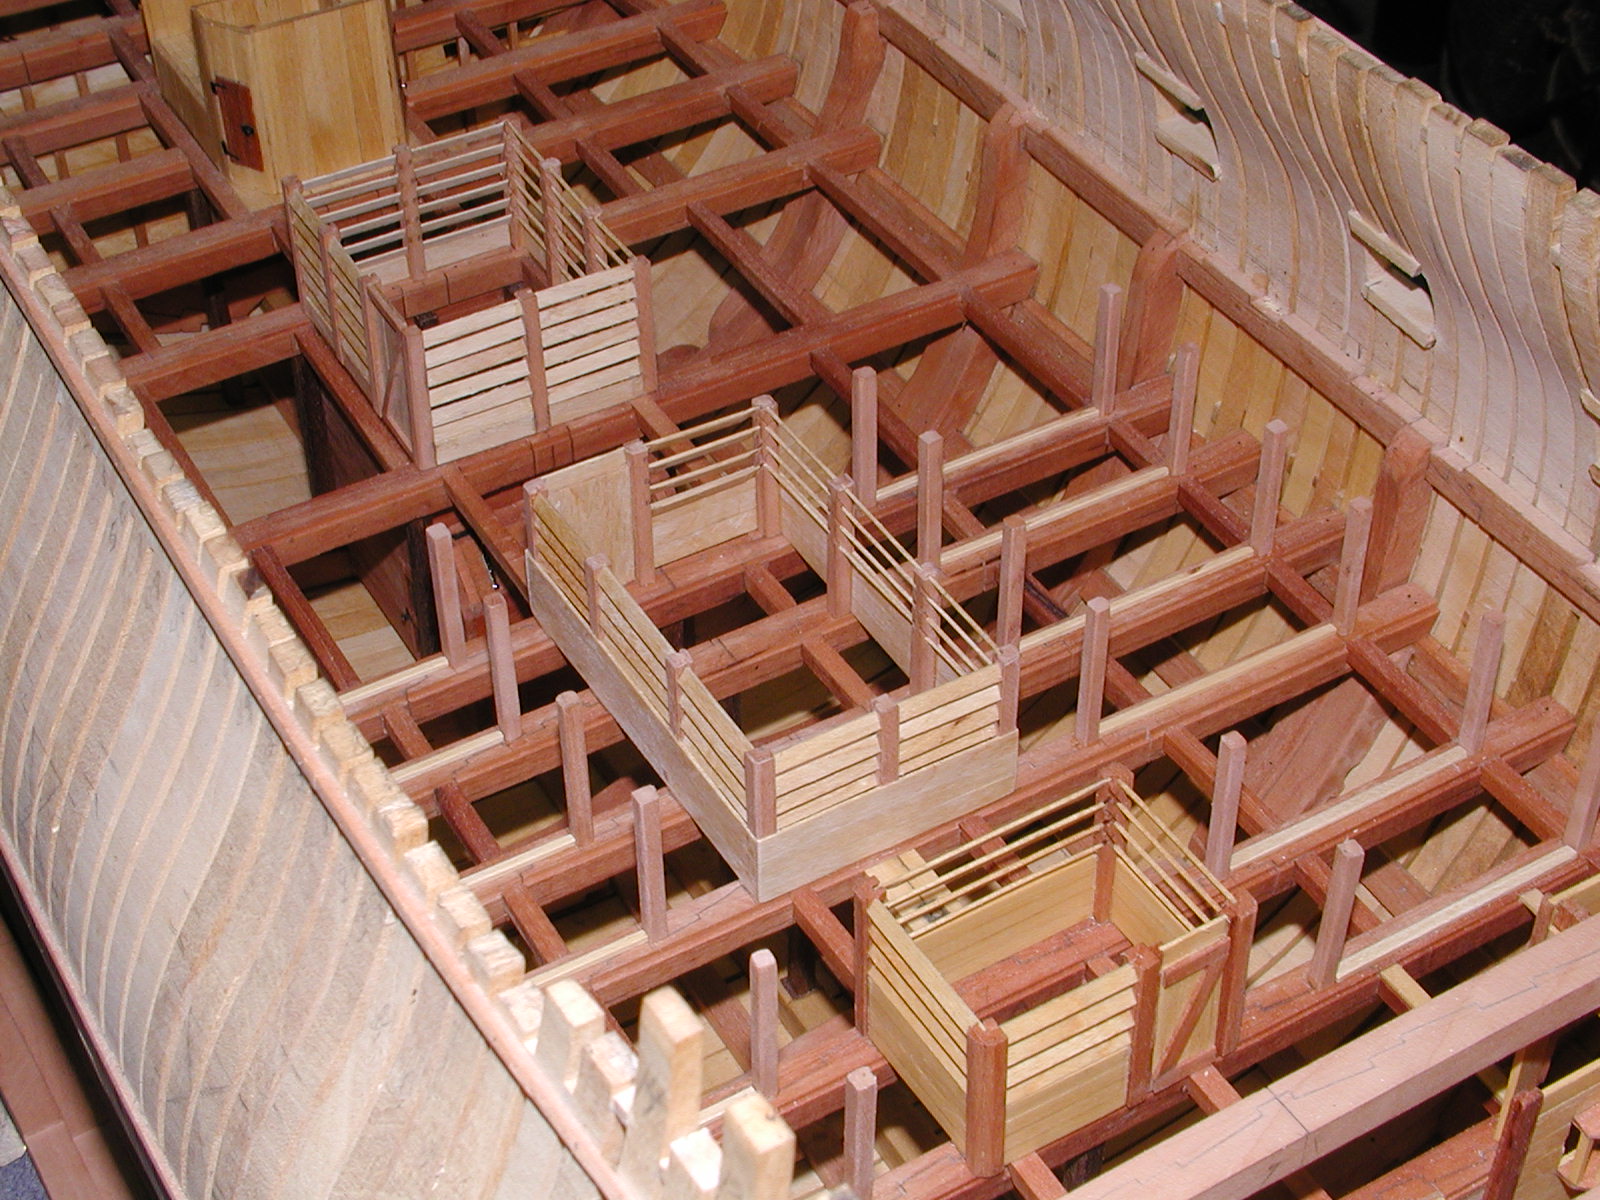
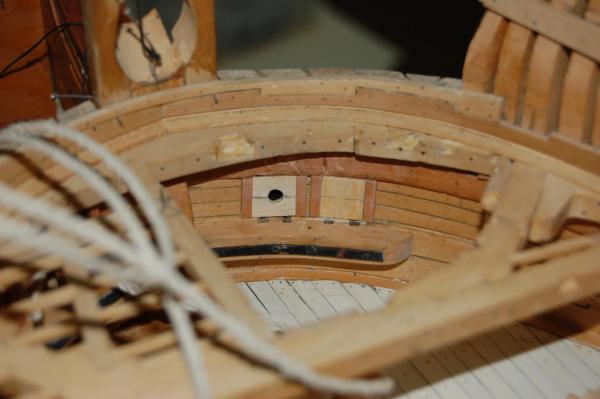
Thanks Mark. It does make one stop and think till you been on a air craft carrier which had a crew of 7000. Try feeding that many guys. That is untill you find out that they had three kitchens that usually work 24/7. Had to work in one for two weeks when I was on board the Midway. Lots of fun for sure. Hi Larry.Thank you sir and am glad that my log is a help to you. I was going to ask Larry but have you started a build log and would love to see your Alfred on here. Now if I understand your question your asking about the grating/deck planking on the orlop deck around the pump well? As far as grating on this deck am not sure that other then in the middle were hatches would of been may of been the only place for grating, which probably been flushed with the planking. Most of the plank's would of been short and fitted in to rabbets on the forward and aft edges of the top of the beams, which could be removed in order to get at the supplies in the hold. If I was going to plank it I would have just cut short planks to fit between the beams. They did also fit carlings and ledges between the orlop beams to help strengthen the short planks between the beams but I didn't install them also. You may of miss this detail on the orlop deck so have included a photo showing the rabbet. Peter Goodwin in his book Sailing Man of War, show's on page 59 fig 2/8 how the planks would of looked accept I do believe they would have been flush with the beams. Keeps one from stubbing a toe that's for sure. Hope this is of some help Larry. If it doesn't answer you question let me know and we will come up with the right answer. Gary

- 835 replies
-
- 18
-
-
Hi Rob. She looks very very good sir and is really showing her curves, just like a beautiful women. Your wood working is very good and have been watching your build and looking forward to seeing more of her come to life. Good job sir. Gary
-
Hi Mark. Just to let you know sir, the French did have sister frames like Hahn did, only they were thicker sister frames. Your right they didn't have cant frames but one and this would have been all the way back at the stern, which I do believe was the fashion frame that connected the stern framing with the last square frame at the aft part of the ship. As far as the spacing have to agree with you, this also was different then what Hahn did and at the moment am unsure of what that is but will take a look in the Boudroit books and let you know. If you need any kind of information on the French ship sir, please let me know. I have quite a few of the Boudriot books and will be more then happy to pass along any info that you may need to help you. I have the L'Amarante of 1741, the La Renommee of 1744, the Salamandre of 1752 and the Boullongne of 1759 which should help you build her in her time frame. Look forward to your new build sir. Gary
-
Hi Alex. Its a outstanding carving and am sure I will never be able to do one with just detail and beauti but isn't his left arm post to be at chest level and his right arm at waist level? Outstanding carving sir thats for sure, and thank you for sharing. Gary
-
Hi Guys. Have been using one for a few years but have the number 7 lens the longest. I went and brought the number 4 from, micro mart I believe and after trying it went back to the number 7 which seems to work best, for me. Don't believe that micro mart or model expo sells the number 7 but if your interested in getting this one go to http://www.contenti.com/index.html You also just may find other thing's you just may want to add to your ship building tool's. One thing I have learned over the years and am sure many of you have known this, but jewelry places sells some of the best and accurate tools for ship builder's. Gary