


jfhealey
-
Posts
361 -
Joined
-
Last visited
Content Type
Profiles
Forums
Gallery
Events
Posts posted by jfhealey
-
-
Good mrning all and thabk you for your kind words.
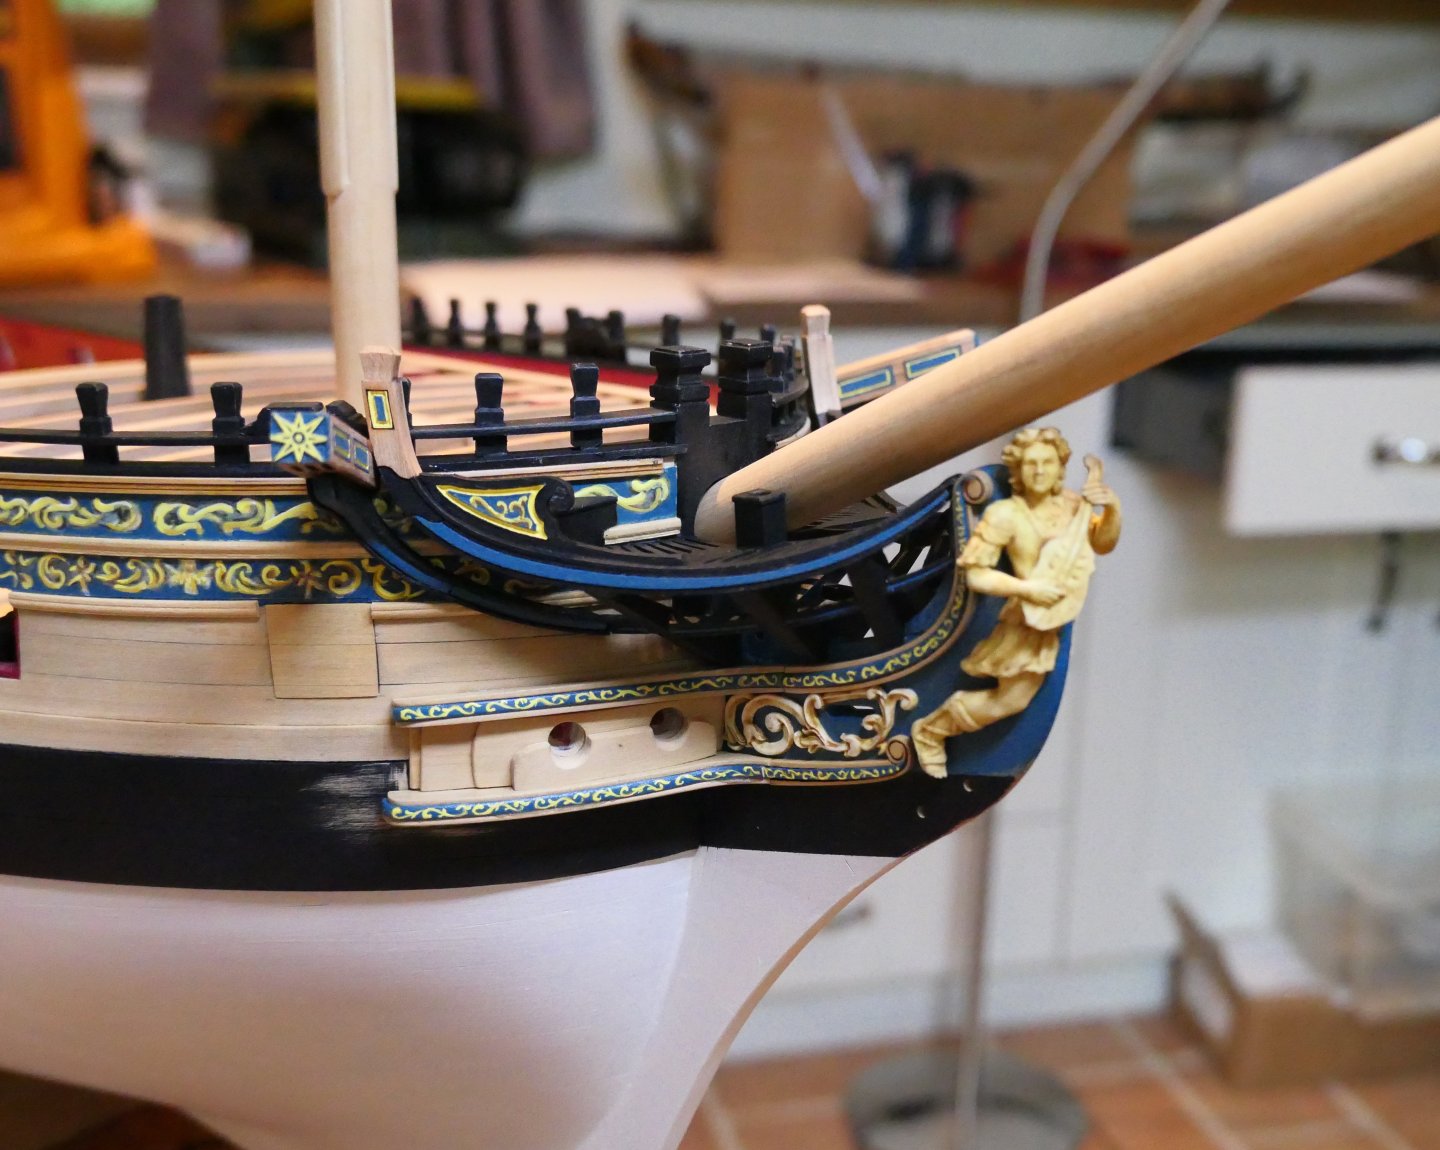
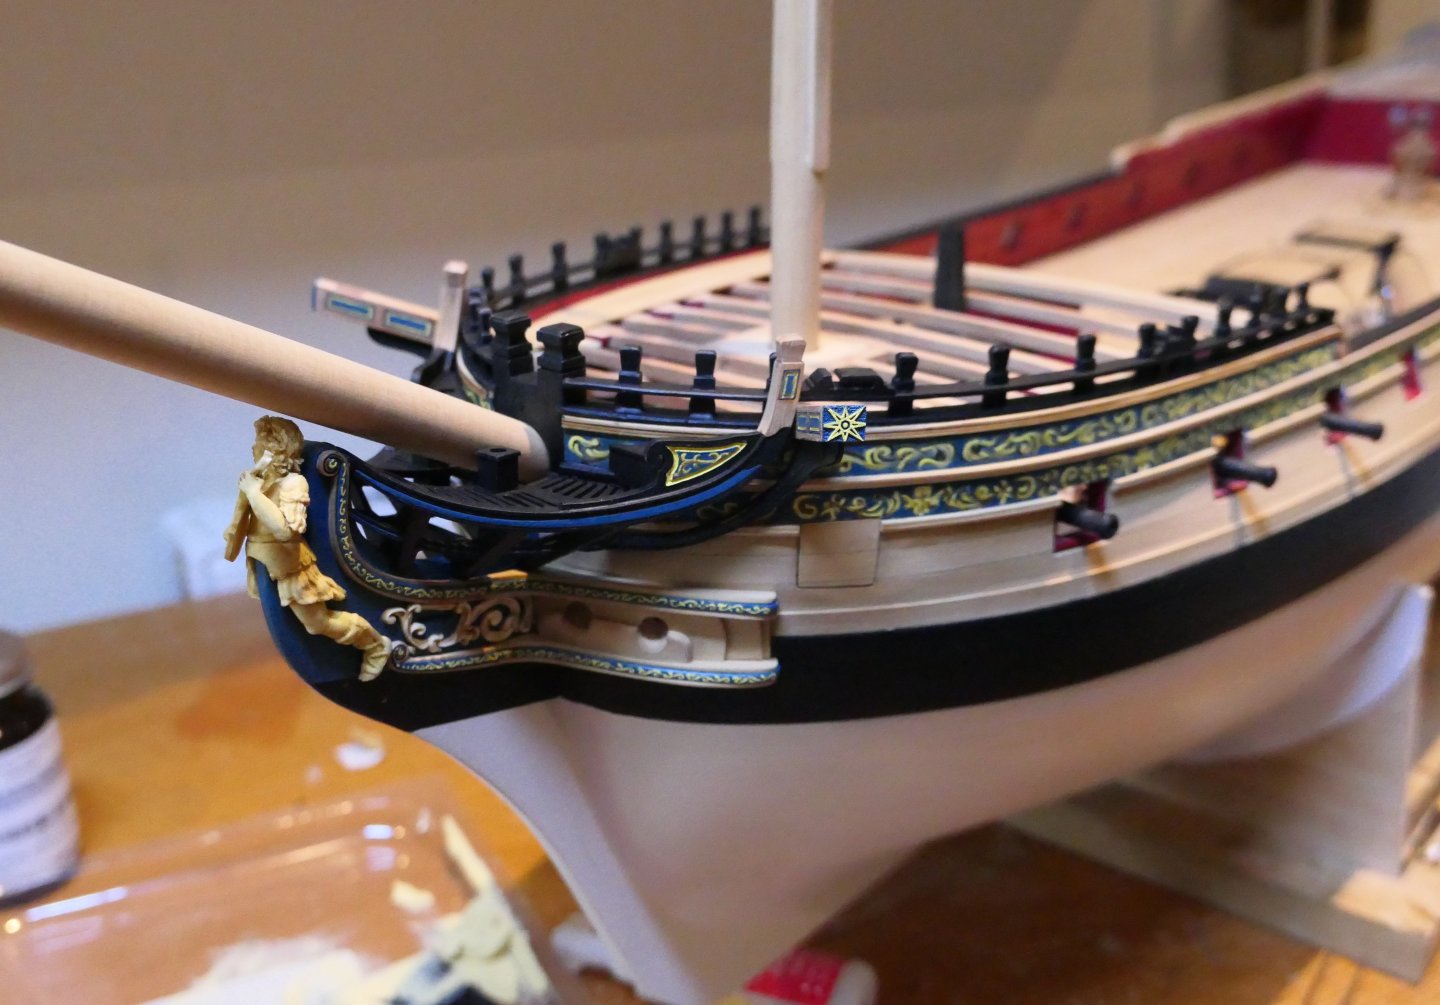
The head rails and the whole head assembly are a miracle of design and engineering. The top rails fit together perfectly straight out of the box without even showing them a piece of sandpaper. The head timbers I found less easy. I quickly realised that filing out the mortices for the lower rails was likely to confound me. I adopted a different approach: I did not cut mortices at all but rather cut the lower rail in to four sections and carefully fitted the pieces between the head timbers. I used a 5 minute epoxy for that on the footing it has some gap filling properties which I would need. It actually worked out reasonably well. There is a bit of "swelling" around some of the joints resulting from the generous application of the epoxy but nothing noticeable without making a point of looking and I would rather have that than an unsightly gap.
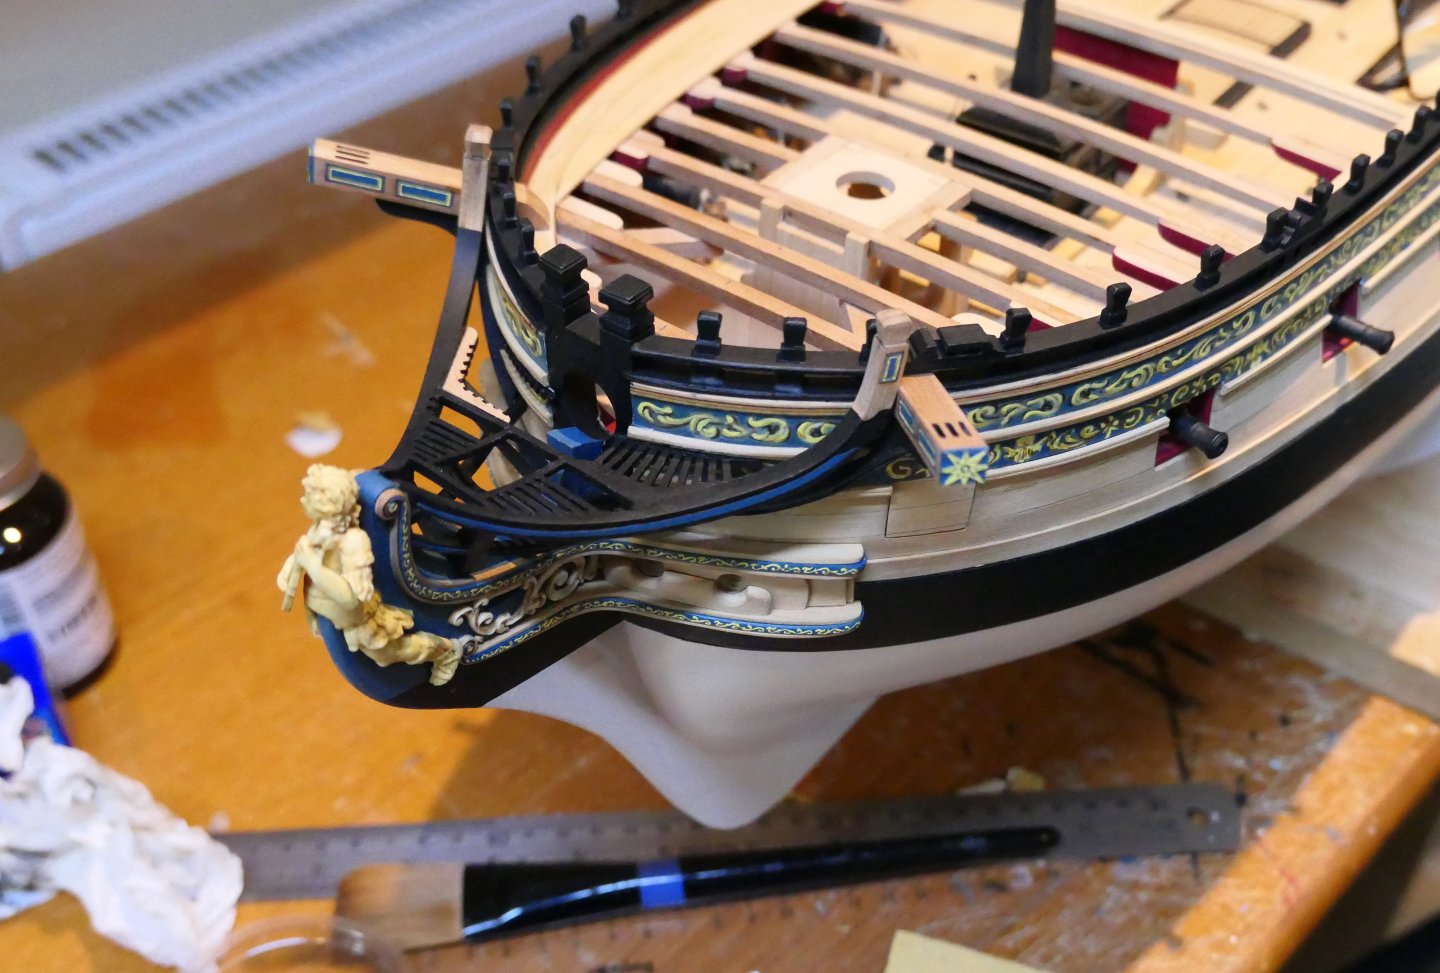
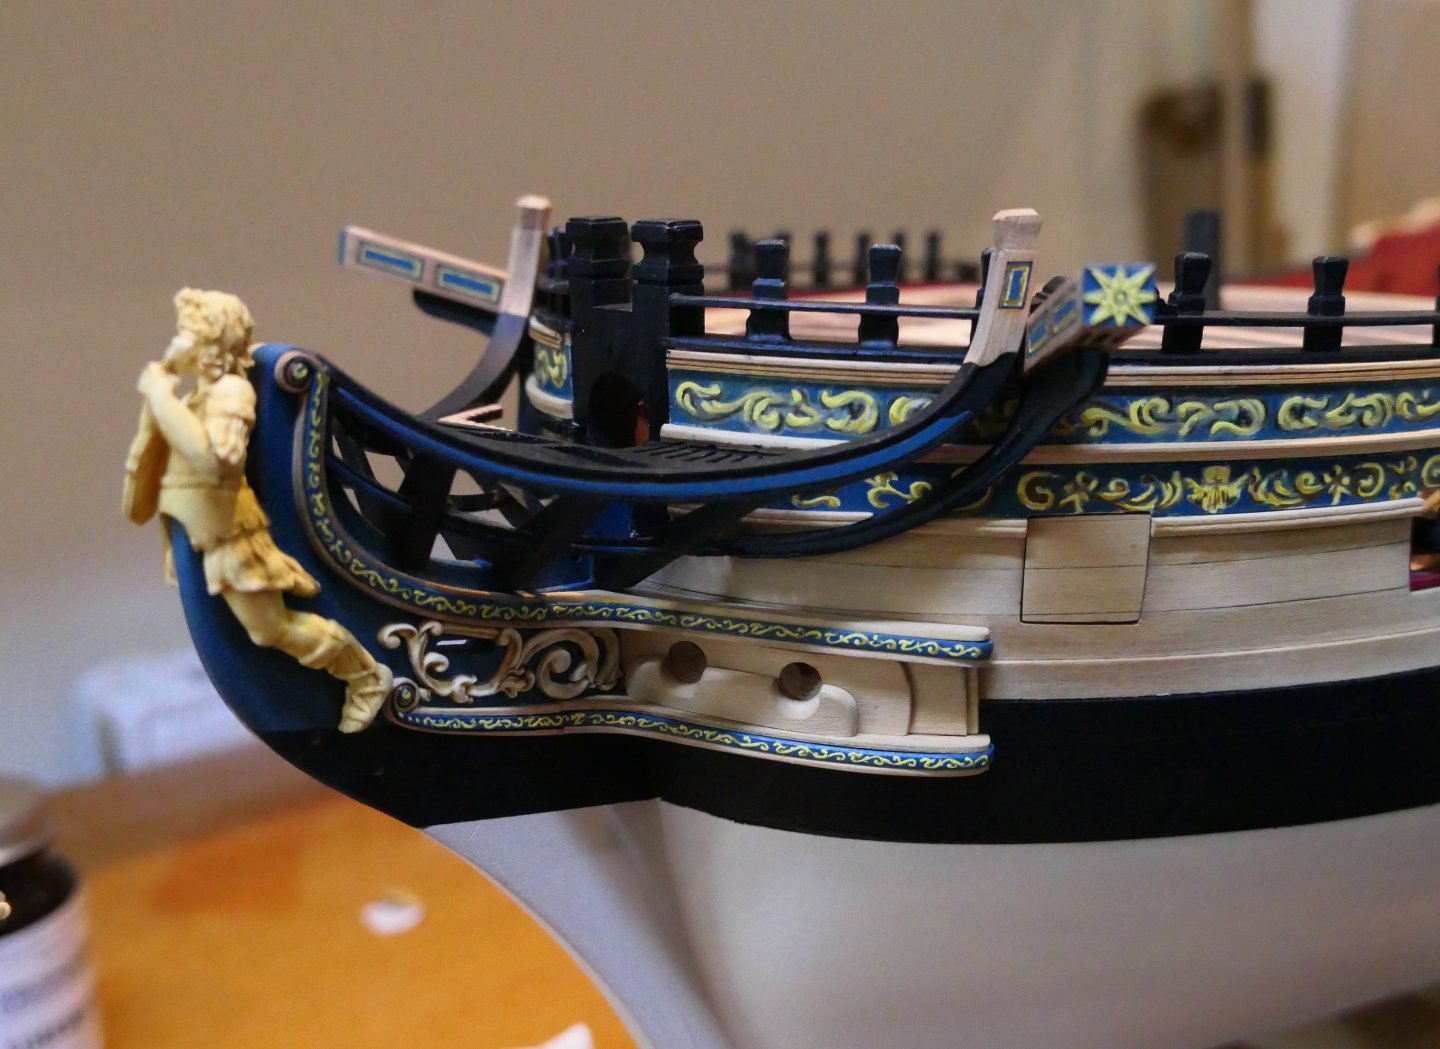
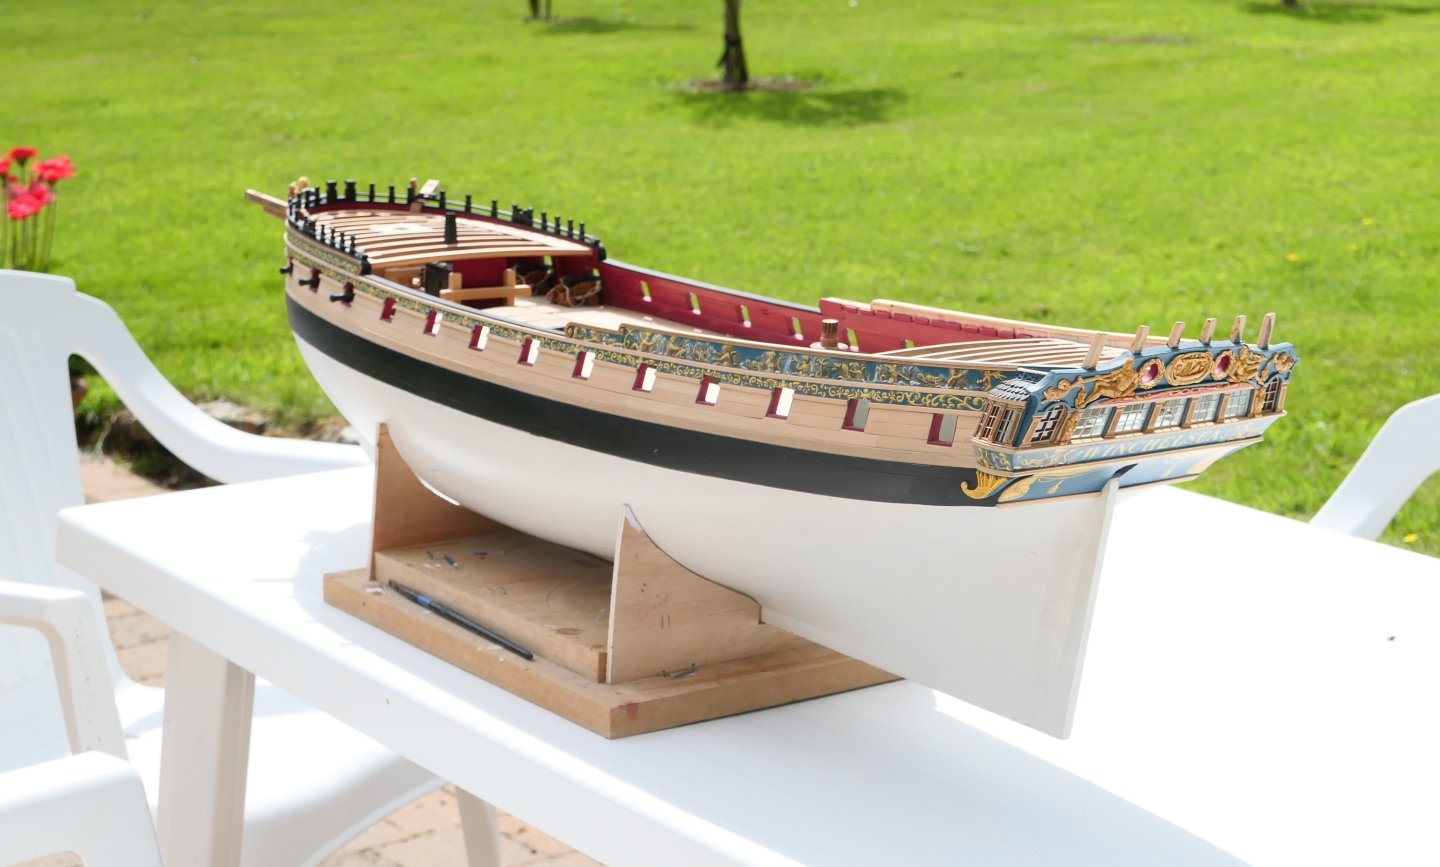
To paint or not to paint is a connundrum we have all resolved in our different ways. I elected to paint because I thought the black paint added some theatre - a bit of drama to what is after all a warship.

The gratings again fit perfectly straight out of the box. Fitting requires patience but little skill - Chuck has done the tricky bits for us.
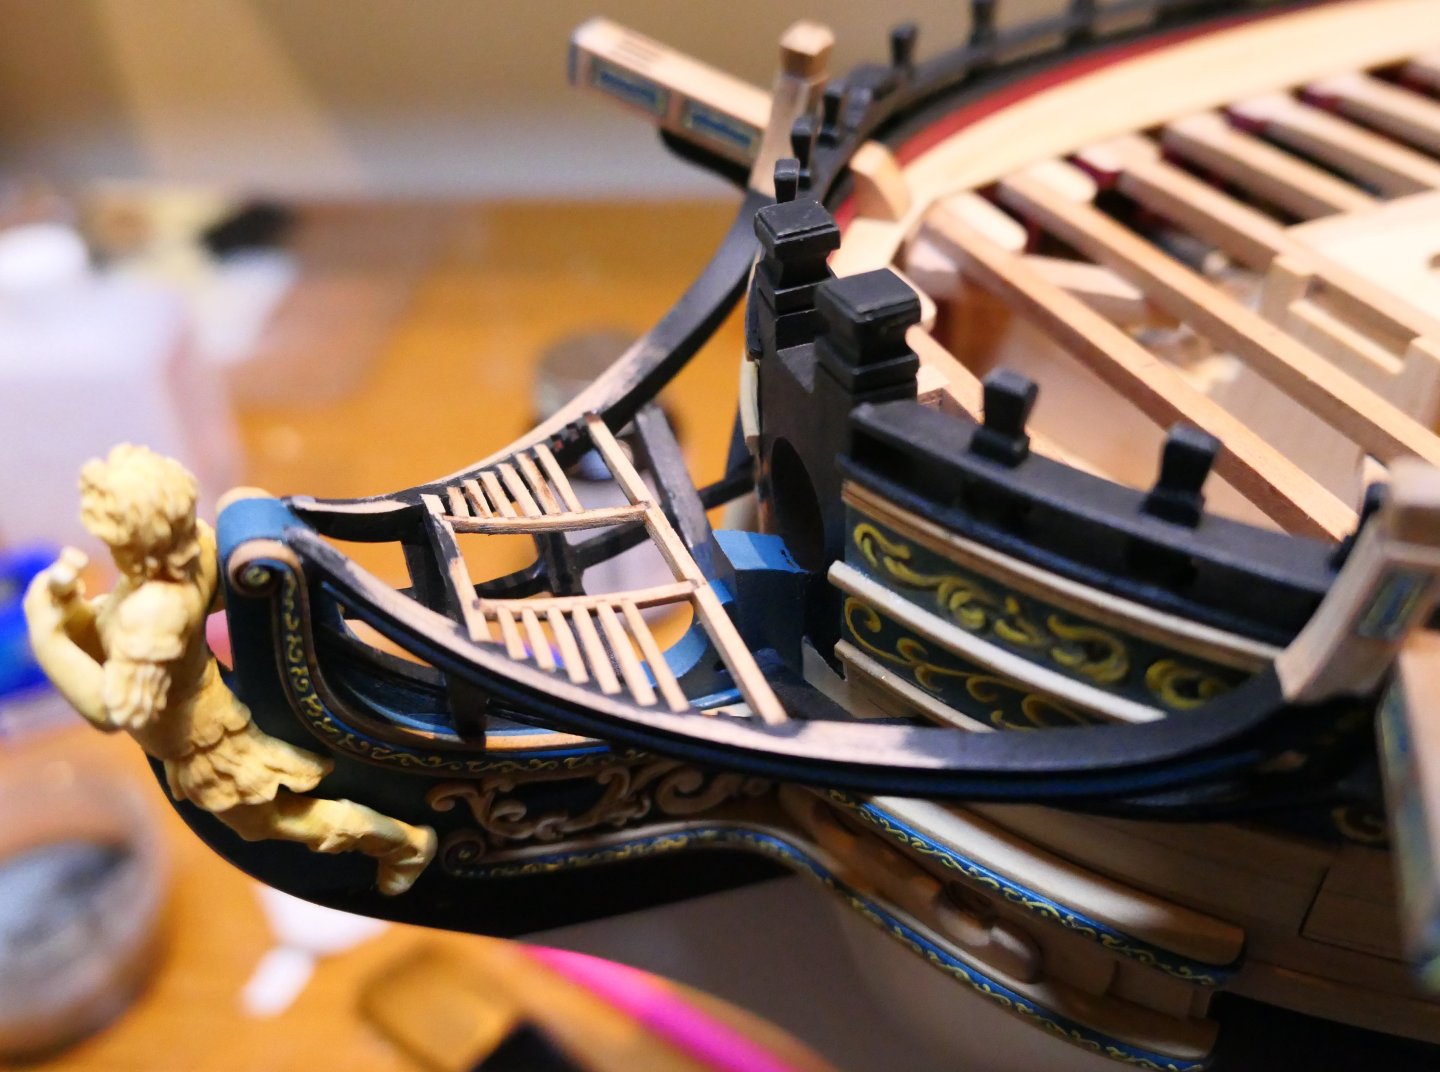
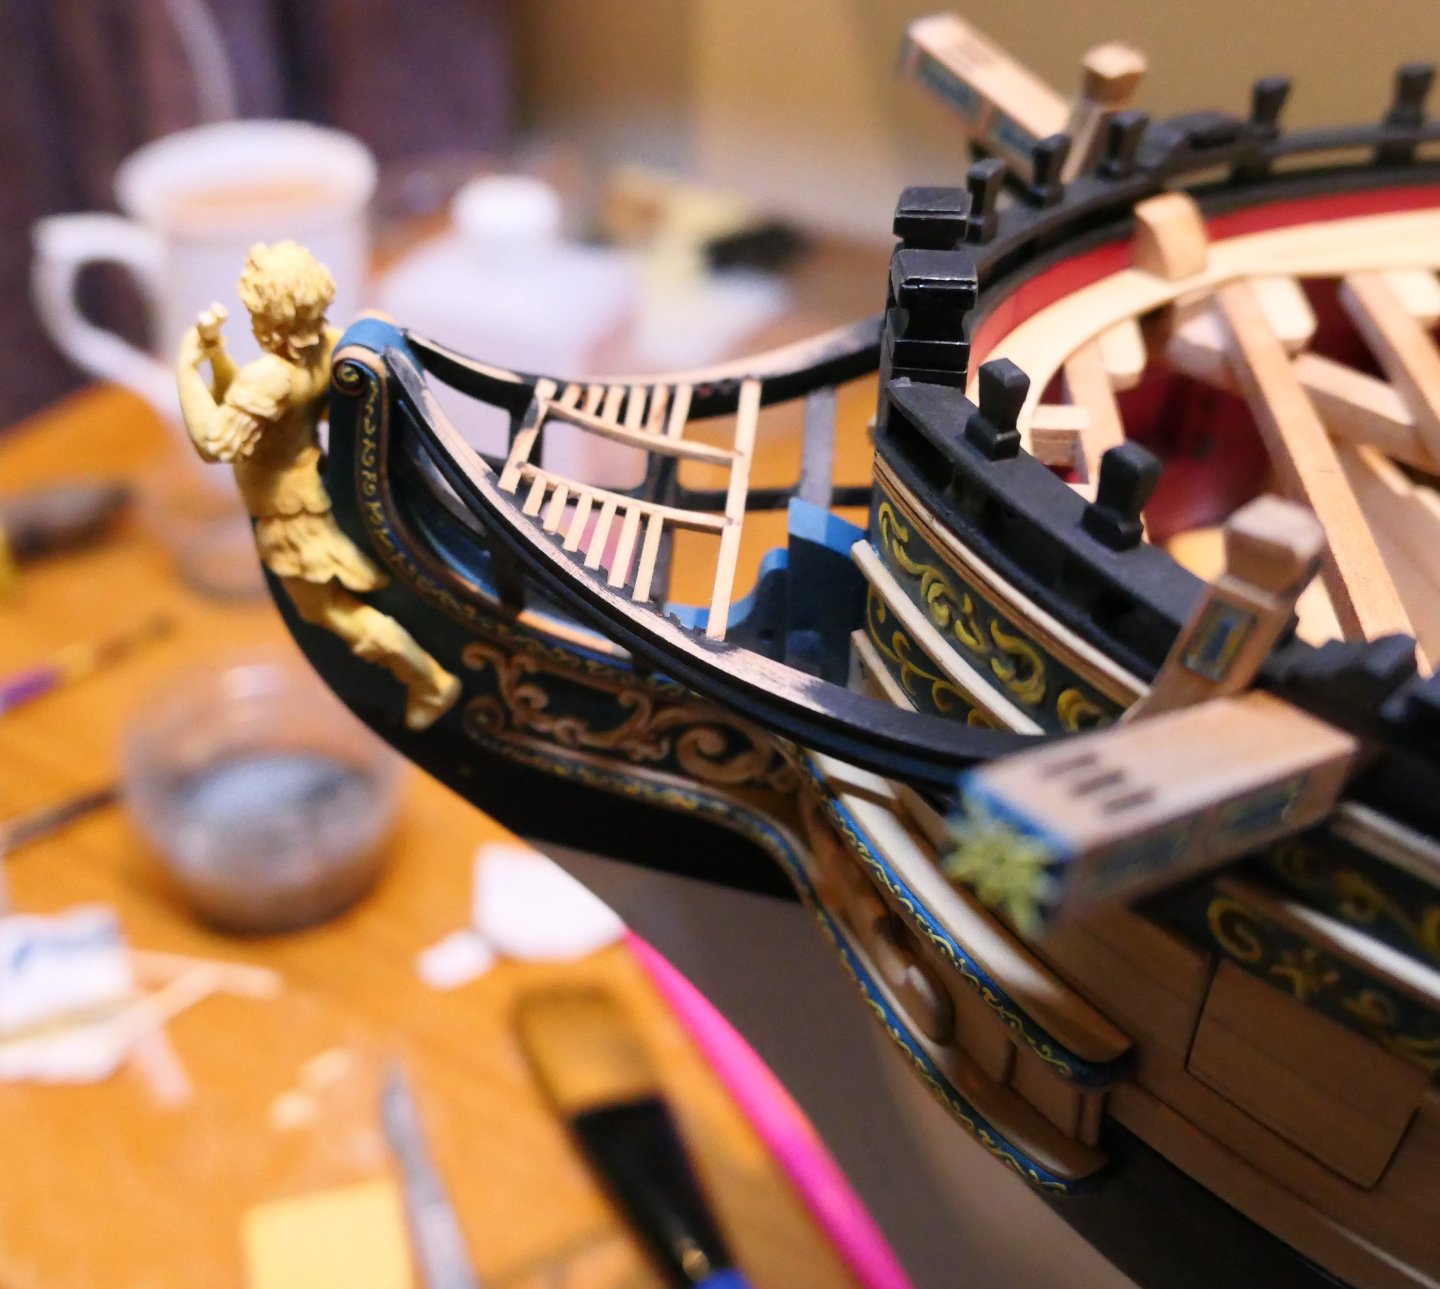
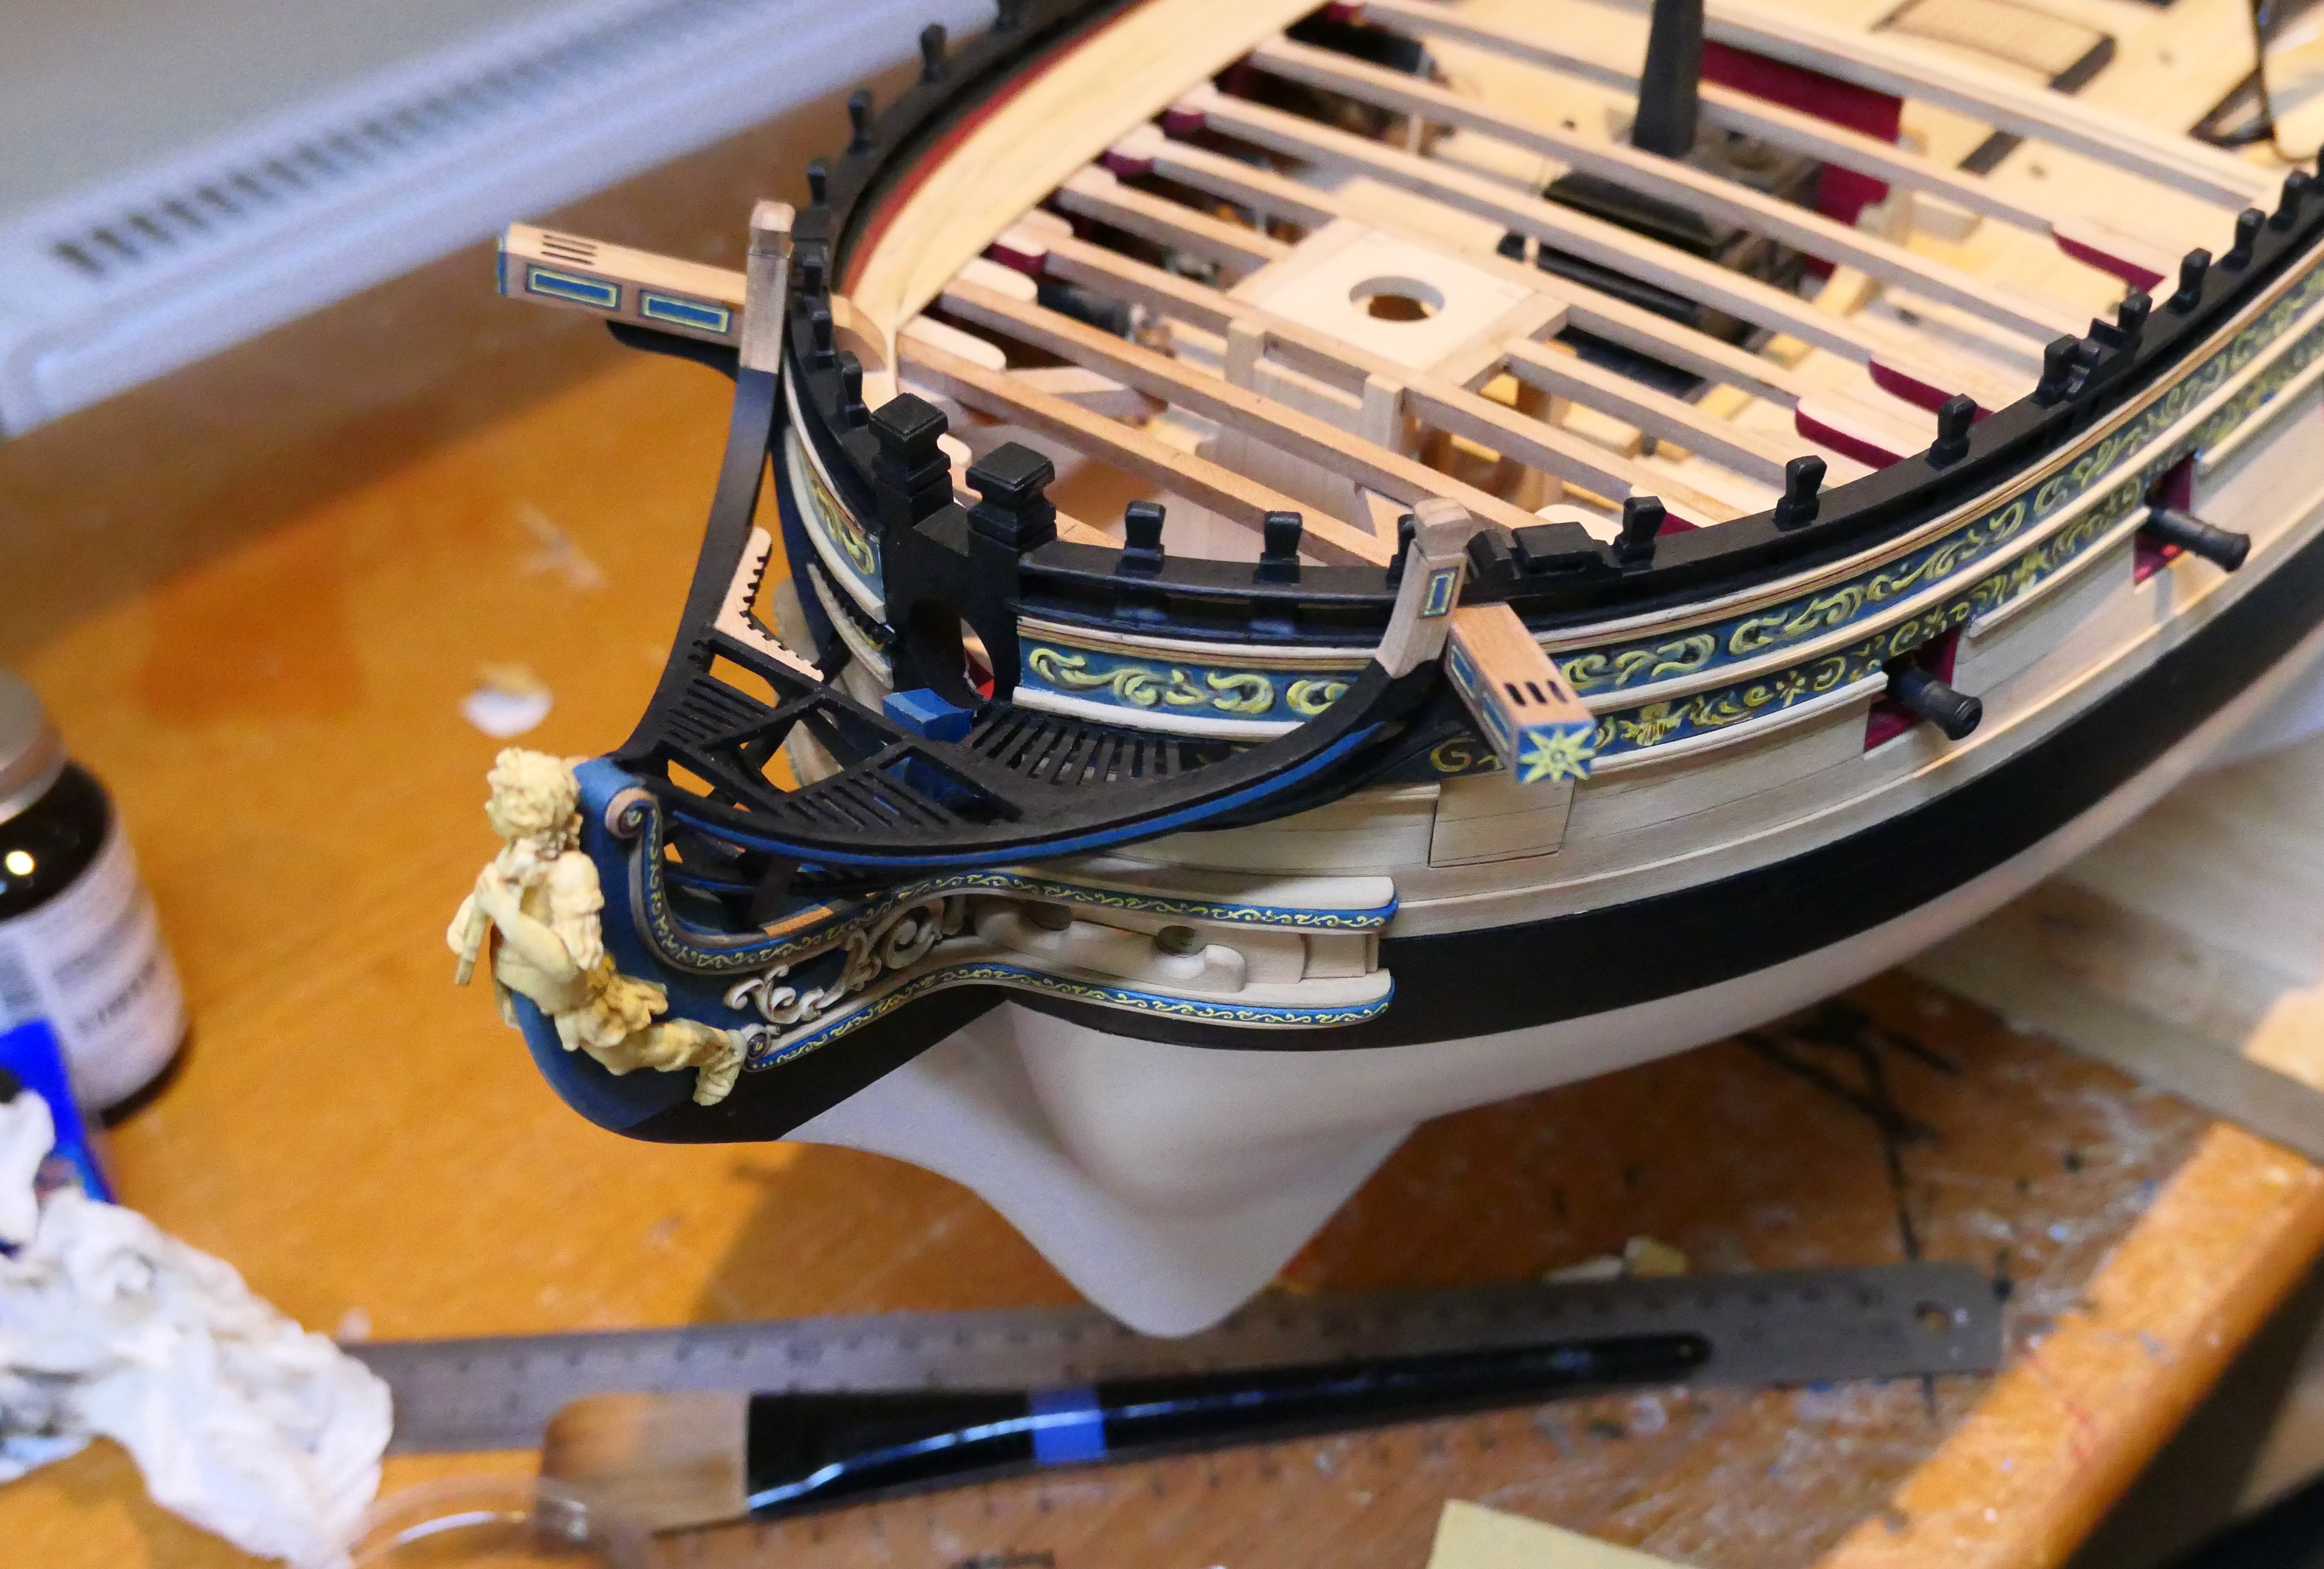
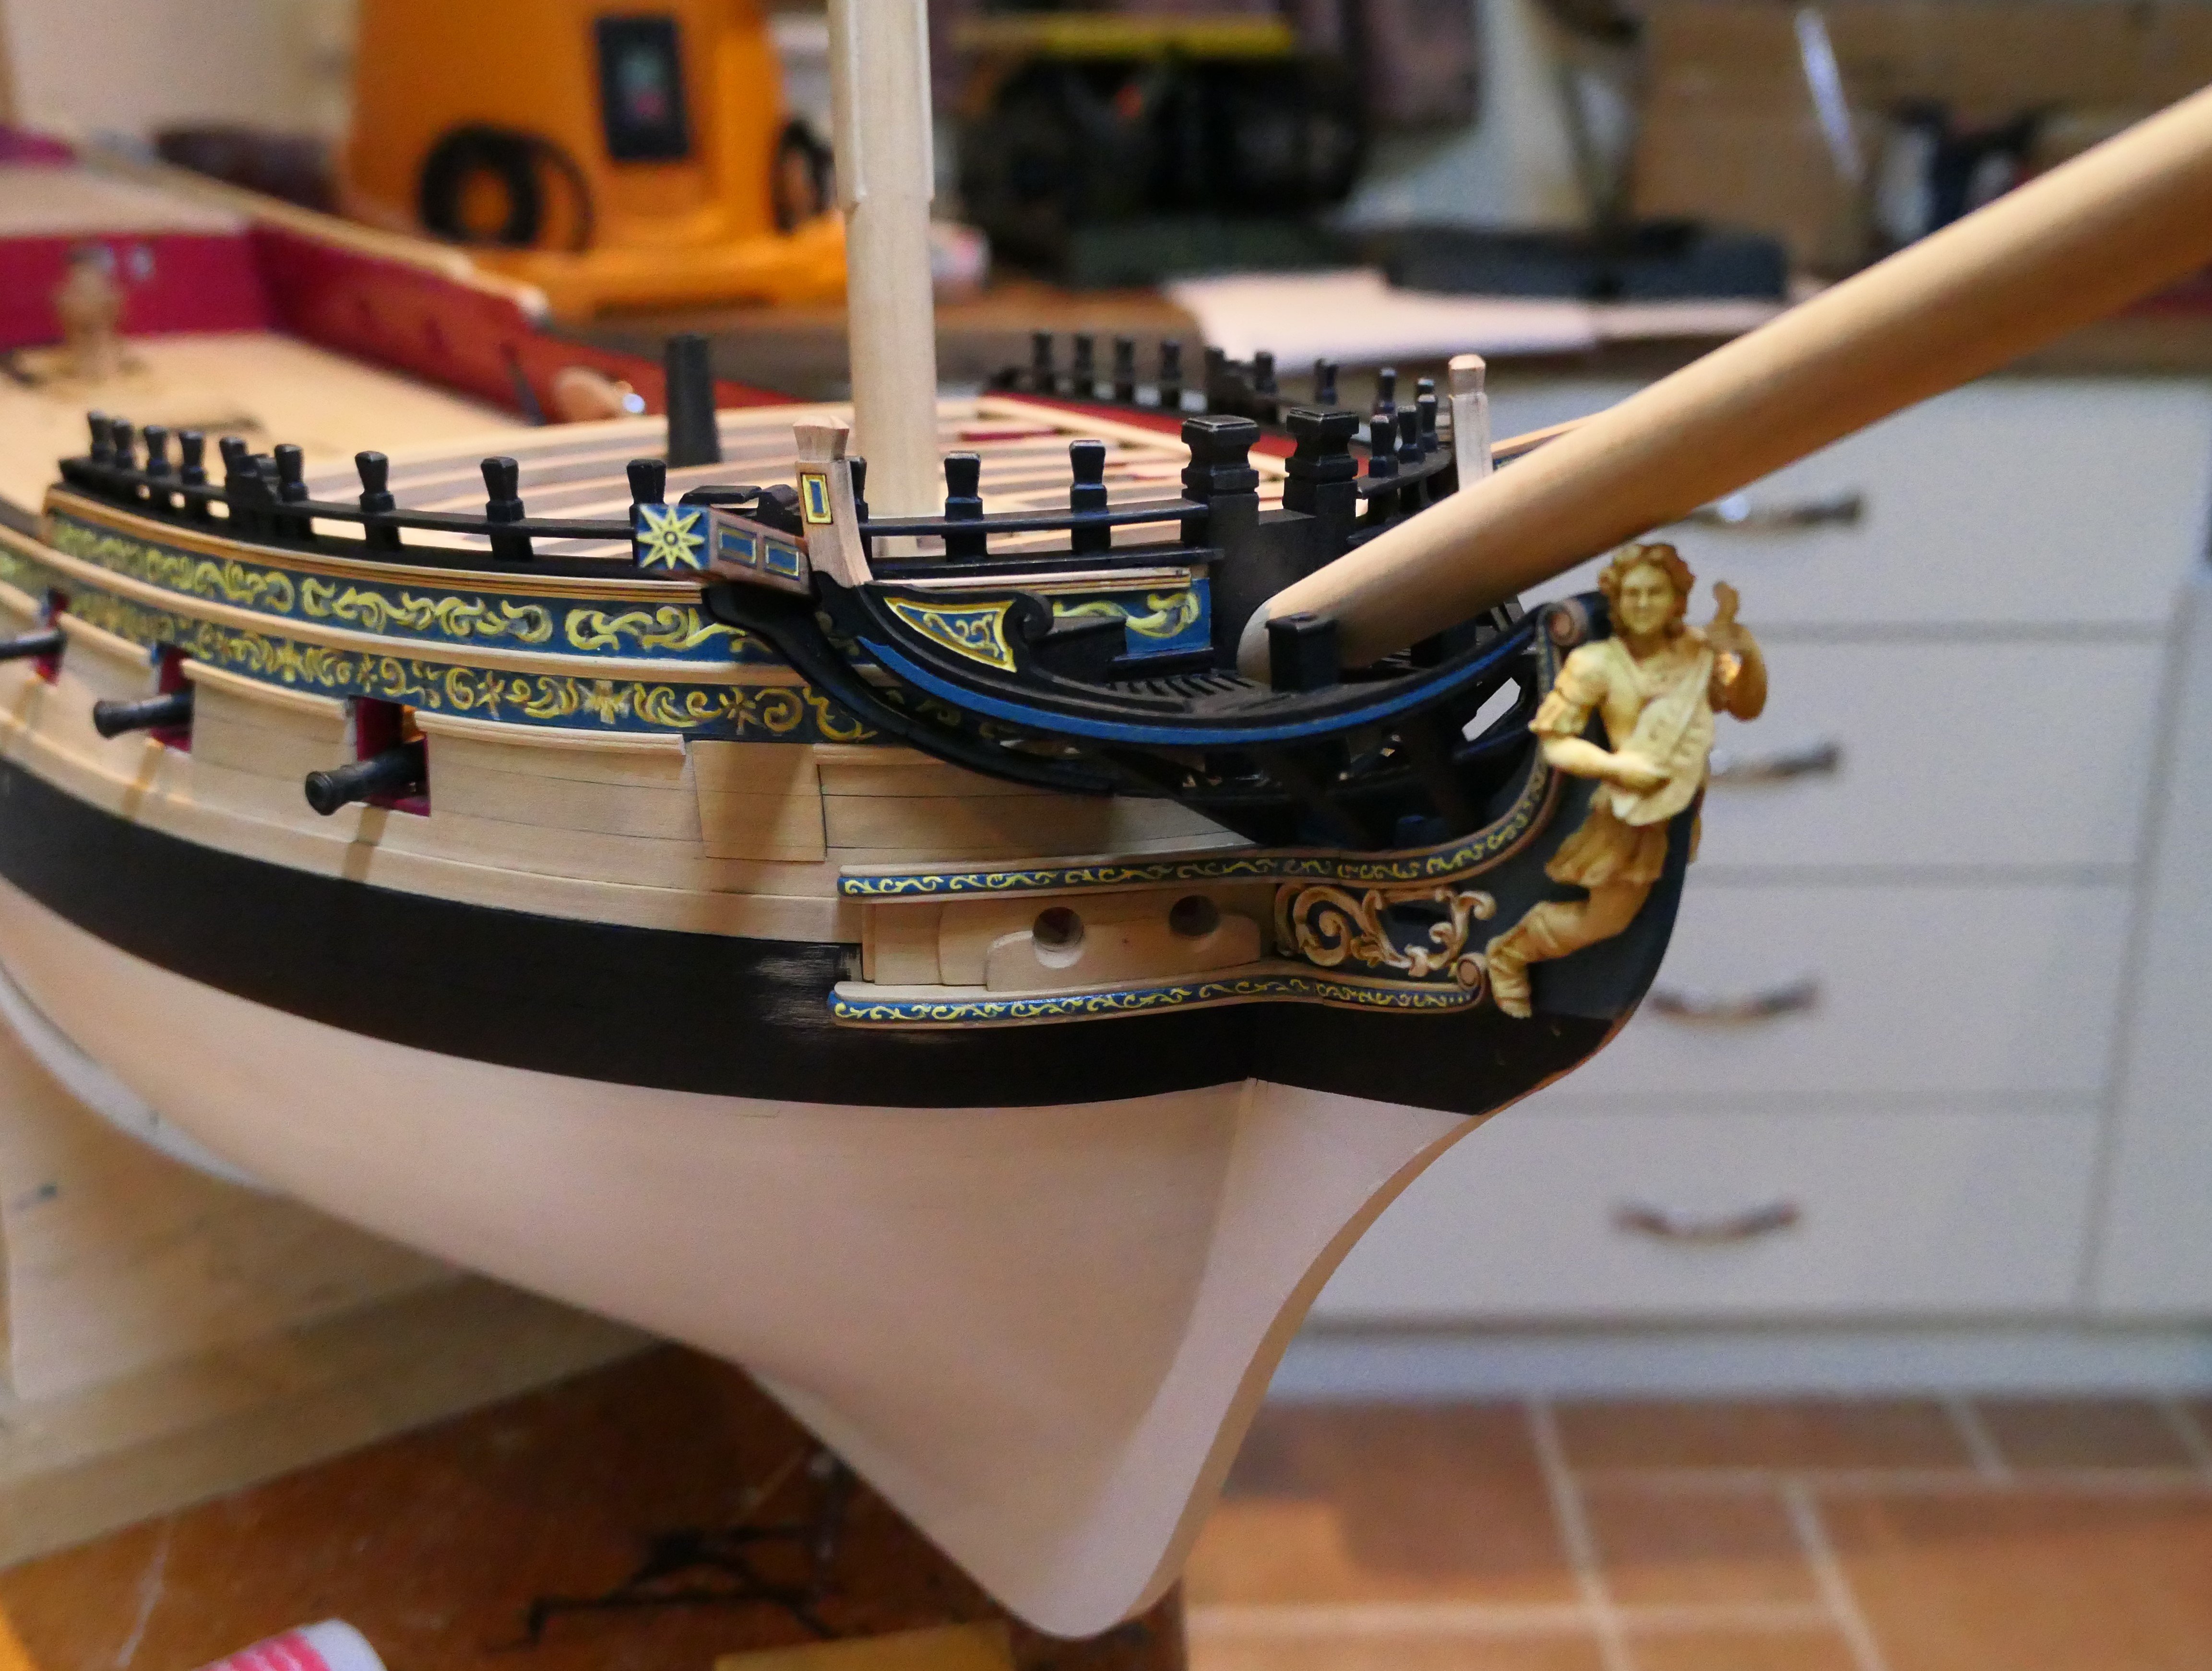
Moving on to the aft section of gratings I found the L shaped piece required a bit of adjustment. I can see where I went wrong. I allowed the head rails to sway outwards a little ( you can see it in the picture below - the starboard timberhead is leaning in a bit as is the port timberhead though the picture does not shoe it) having failed to notch the fancy rail adjacent to the cathead. That's annoying - I just took my eye off the ball in the final minute of the game but it's not the end of the world. It does however throw the laser cut pieces out a little.
After that its a home run - just the heads and a tidy up. The bowsprit is not yet set at the finished angle - I don't want/can't secure the inboard end down until it is finally glued in and pegged. The gammoning rope is looking like it amy be a bit of a fiddle when the time comes.

Thank you for looking by.
Fred
- Nunnehi (Don), Archi, woodartist and 16 others
-
 17
17
-
 2
2
-
Beautiful work. I love it.
Fred
- giampieroricci, Tony Hunt and mtaylor
-
2
-
 1
1
-
Thank you gentlemen for your kind remarks and likes which, as always, as a comparative newcomer to this hobby, I greatly appreciate.
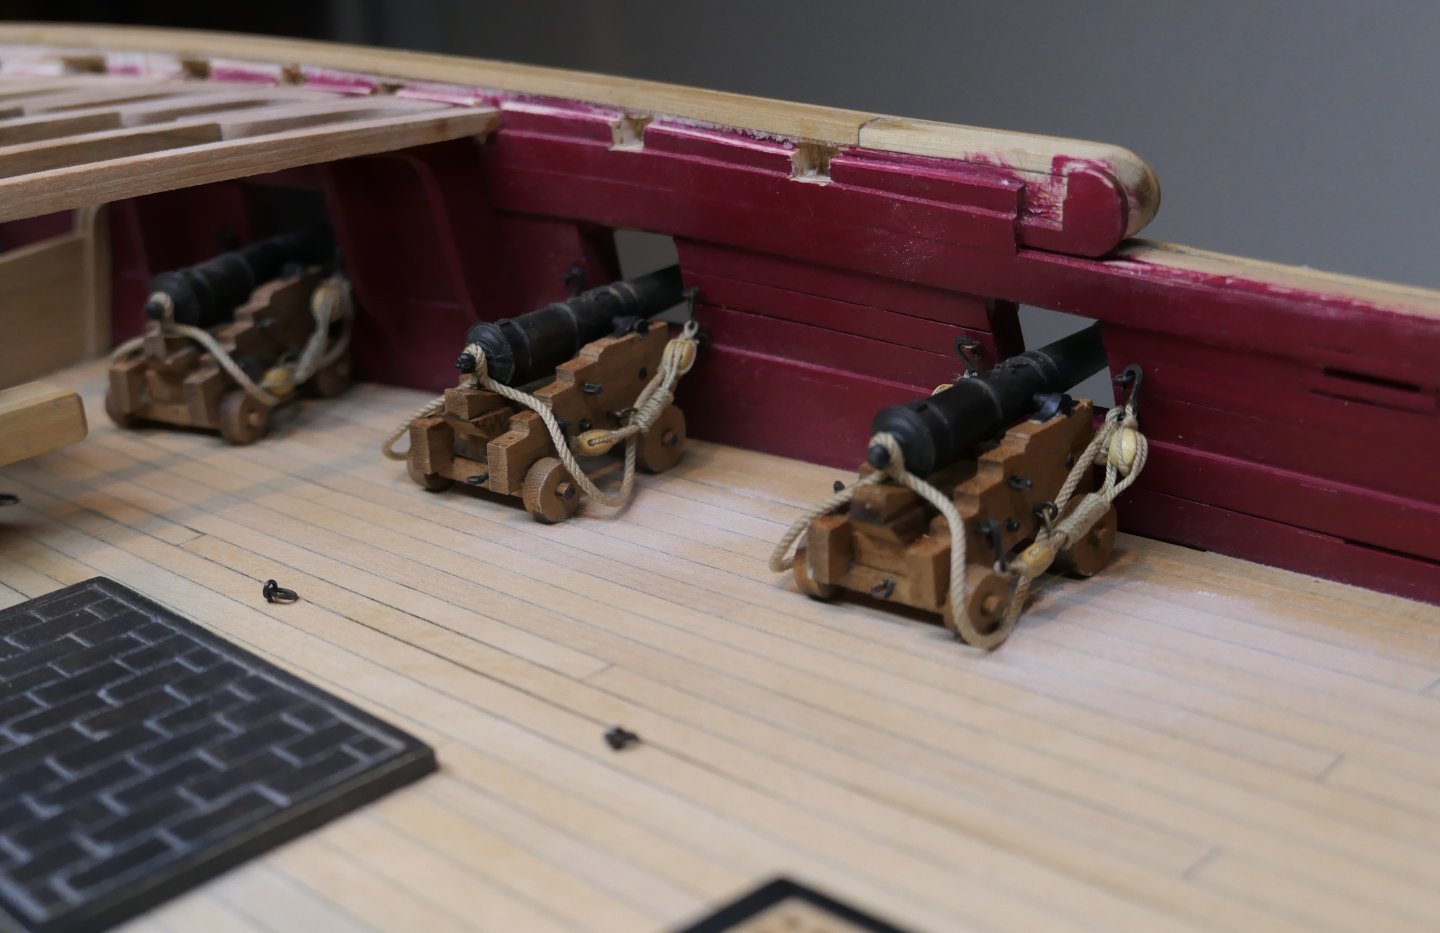
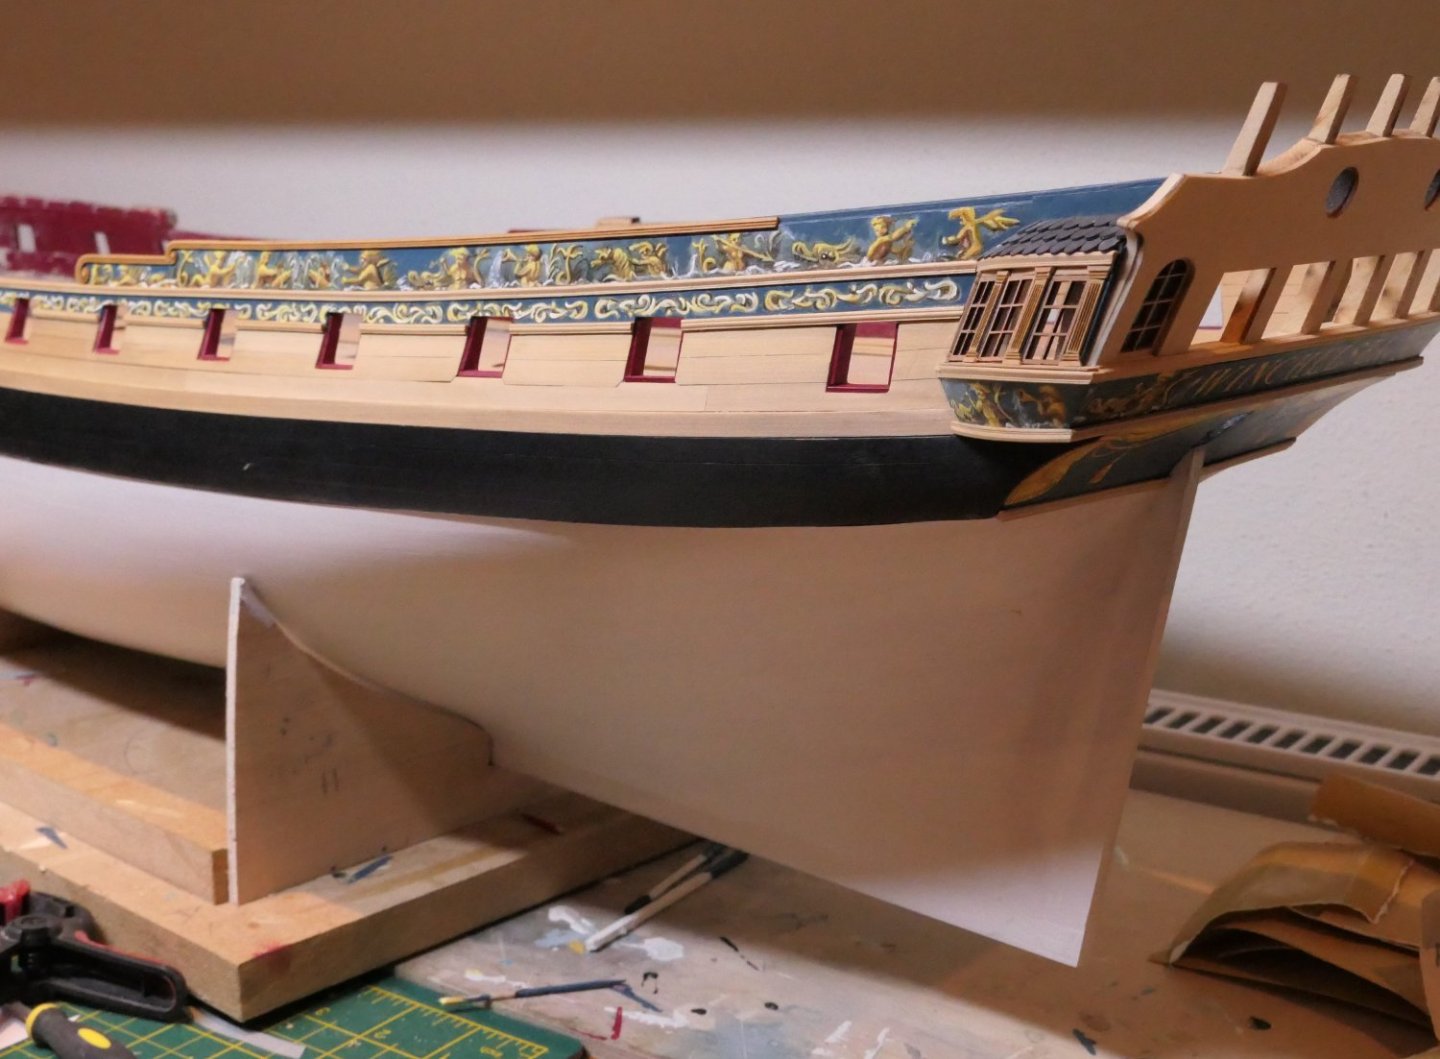
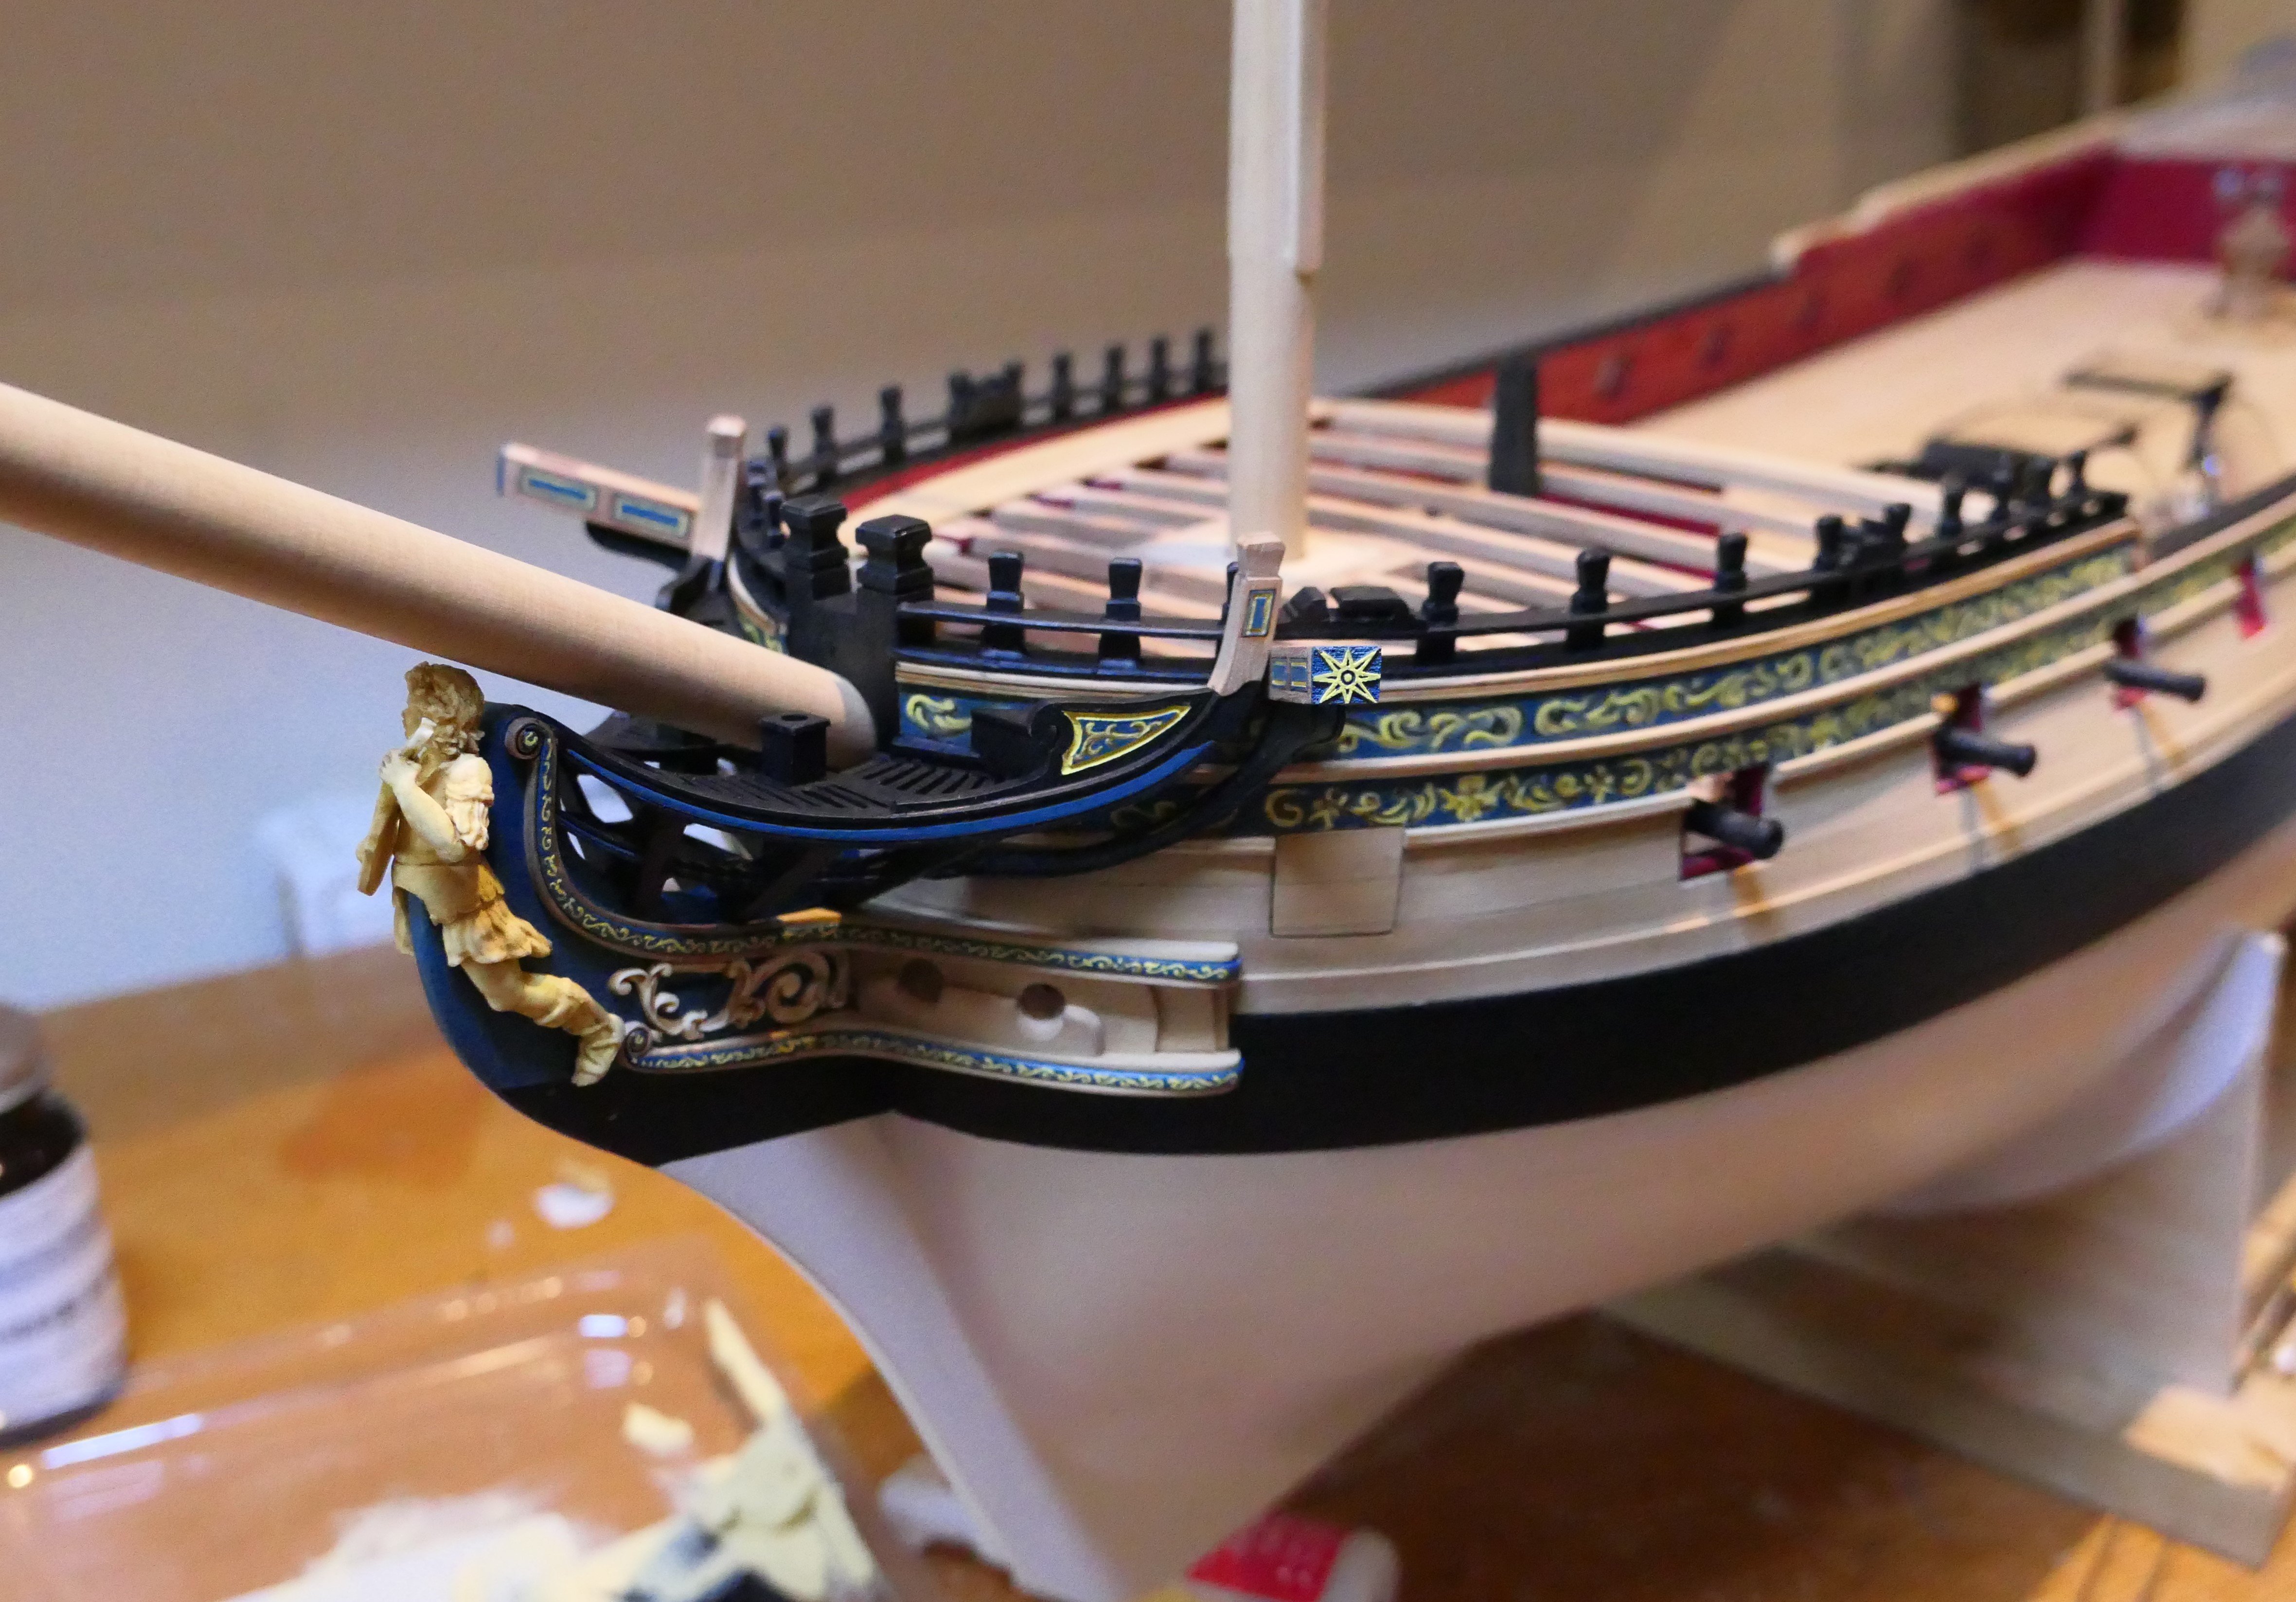
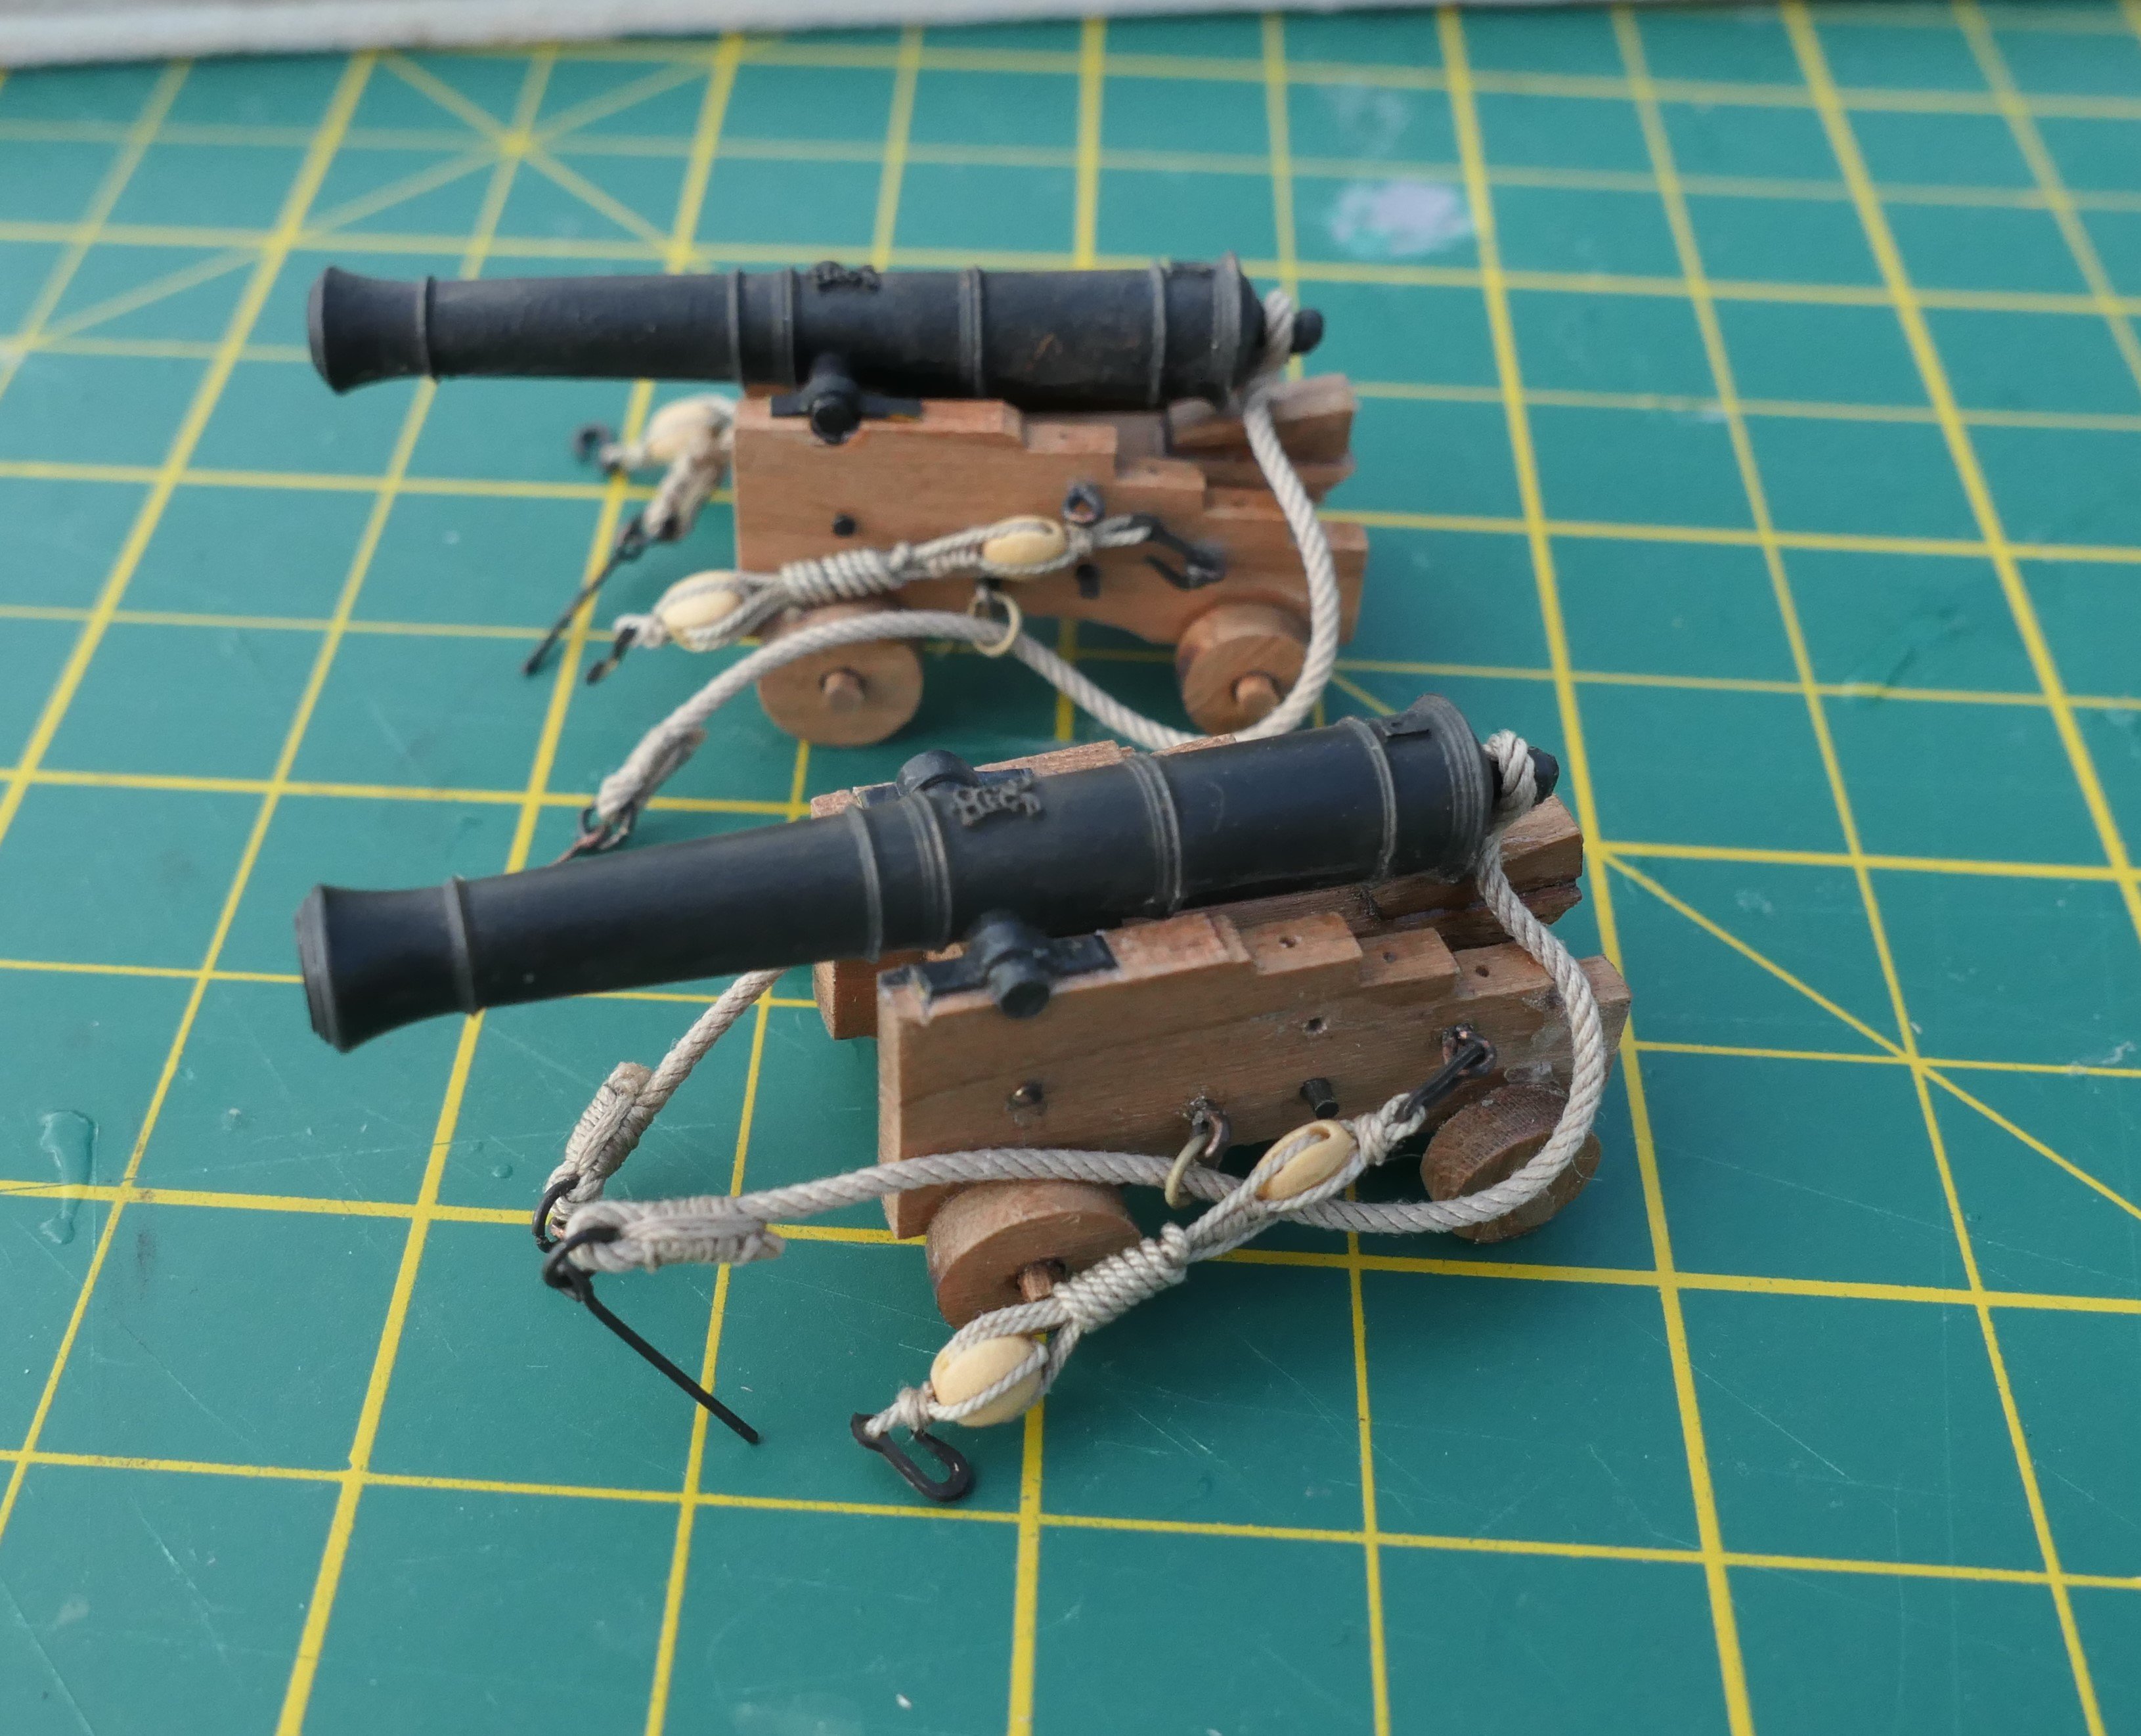
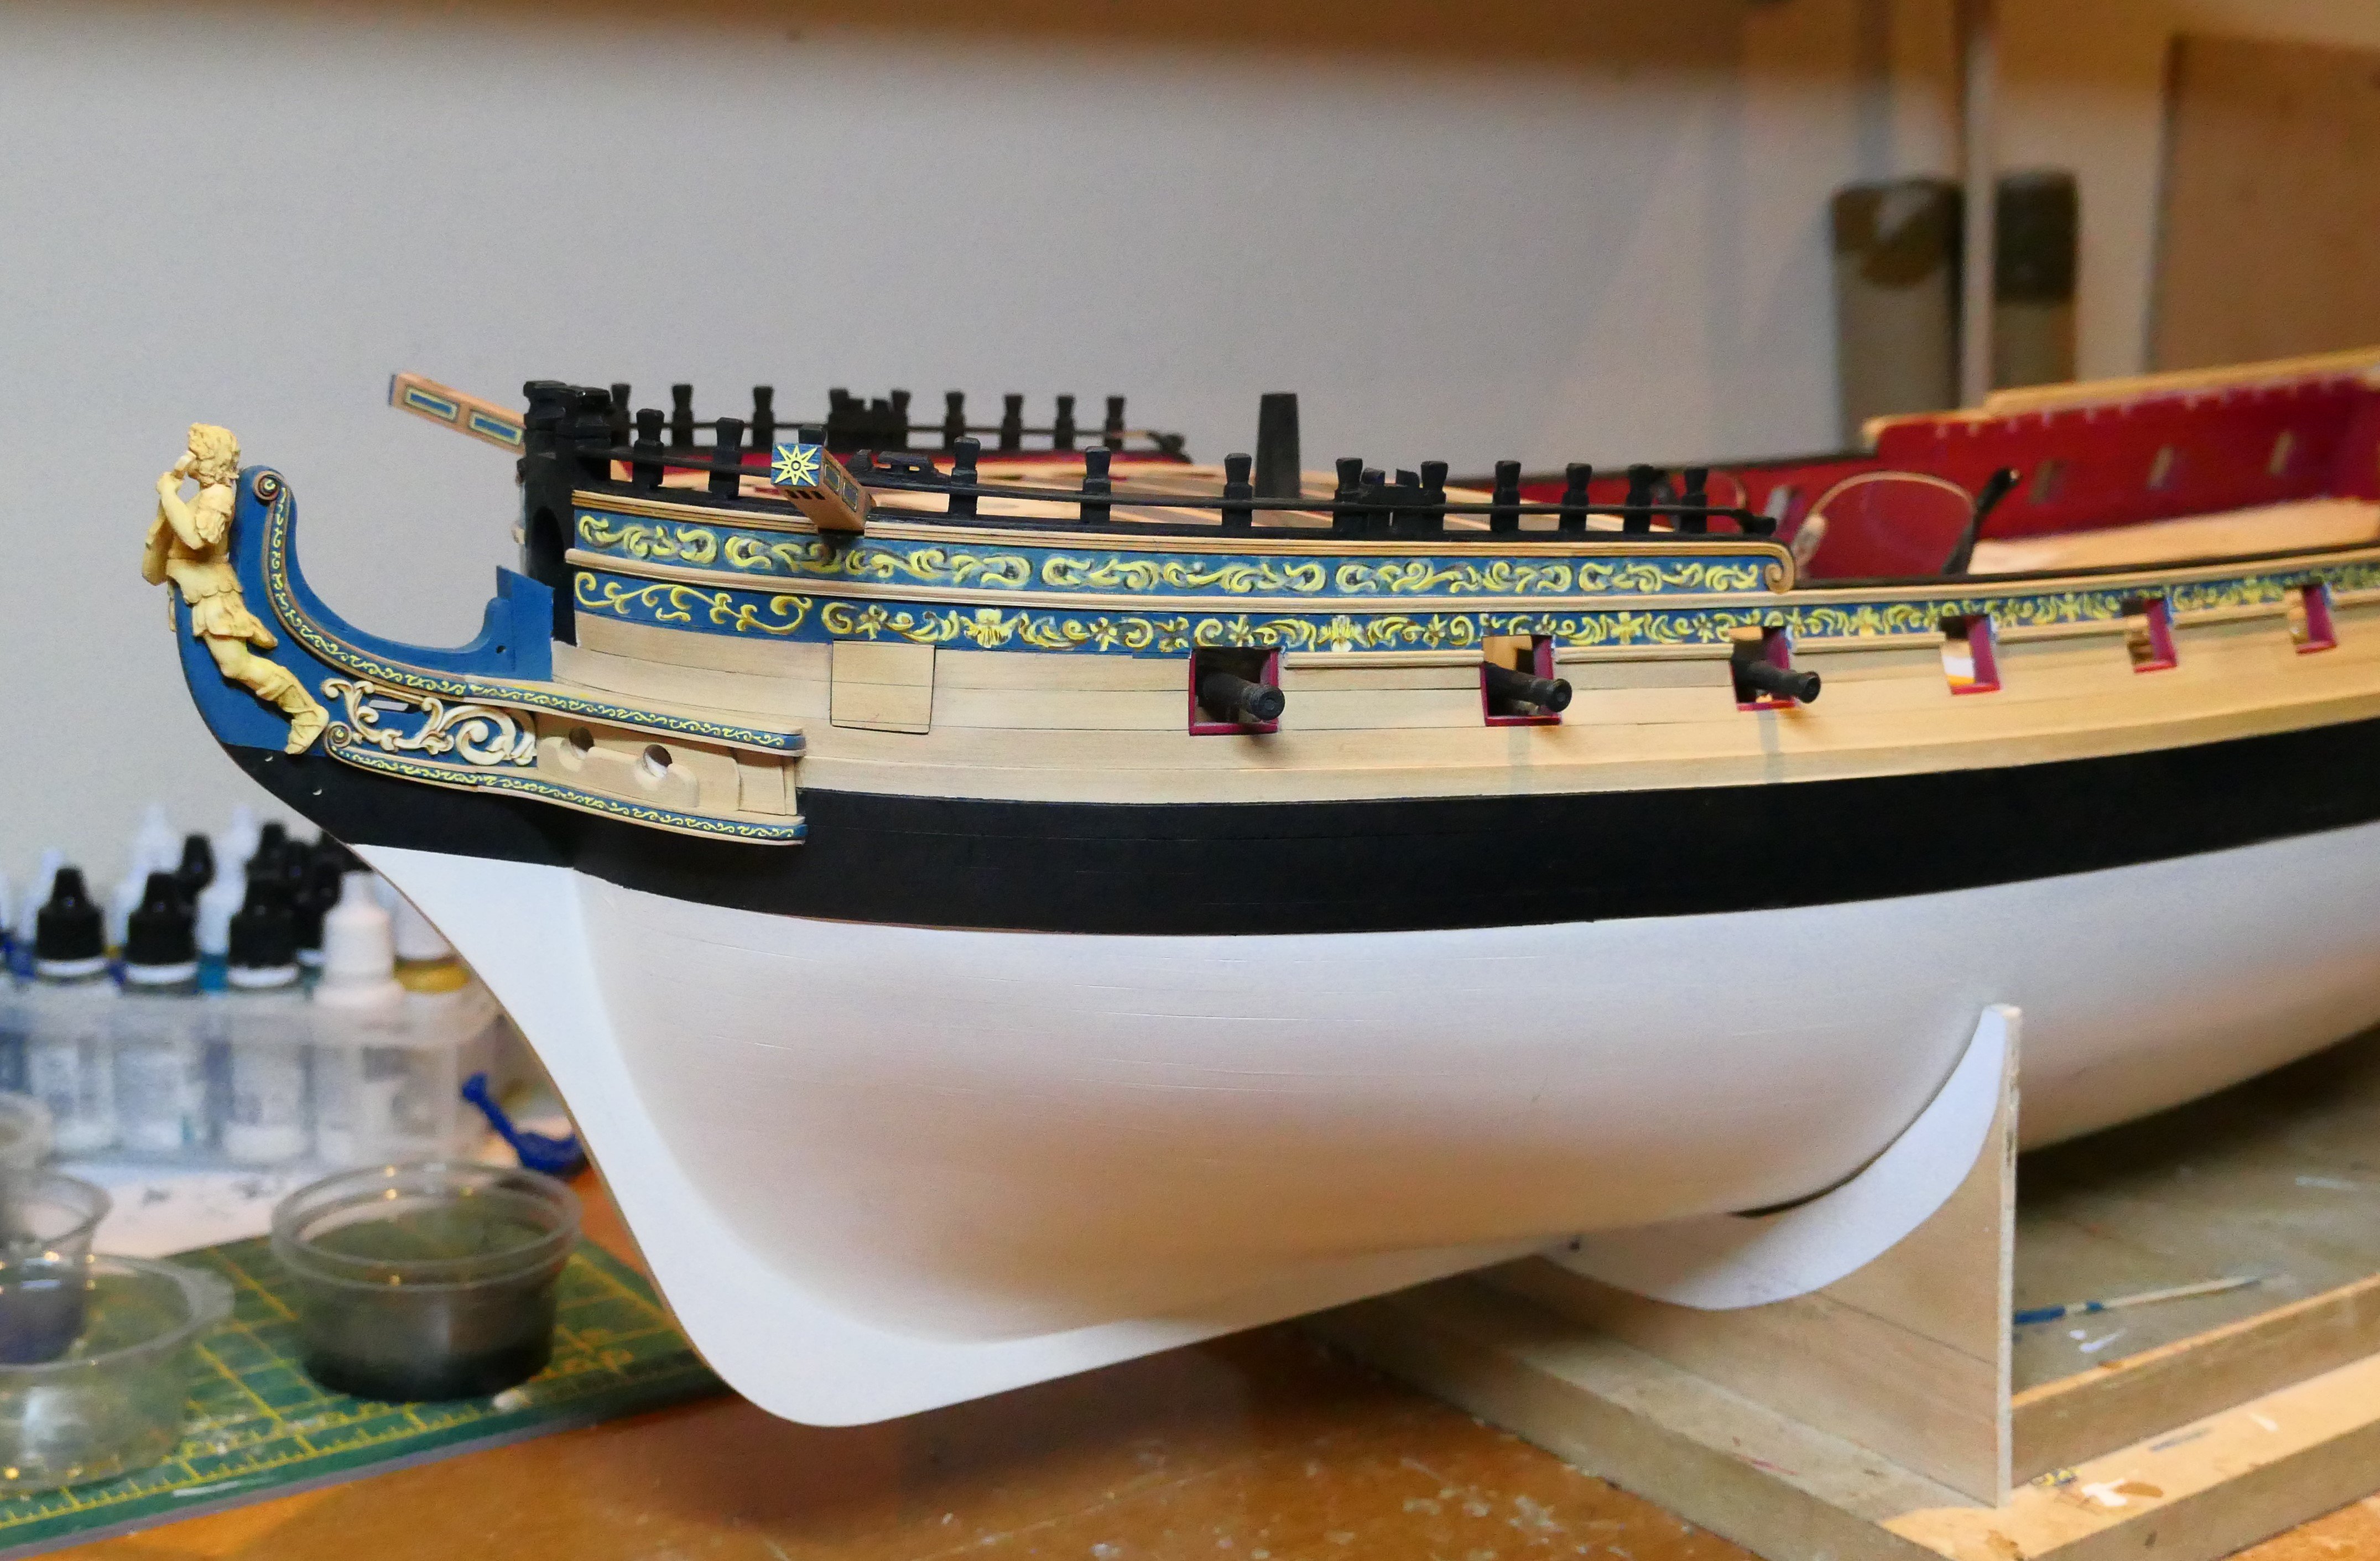
I decided to focus on the fo'c'sle and bows. To that end I rigged 6 cannons with Syren Ultra rope. They were glued in before Chuck made the capsquares available in this scale. I doubt it matters very much: they will be difficult to see when the foredeck is part planked. I will use the Syren capsquares for the remainder however.

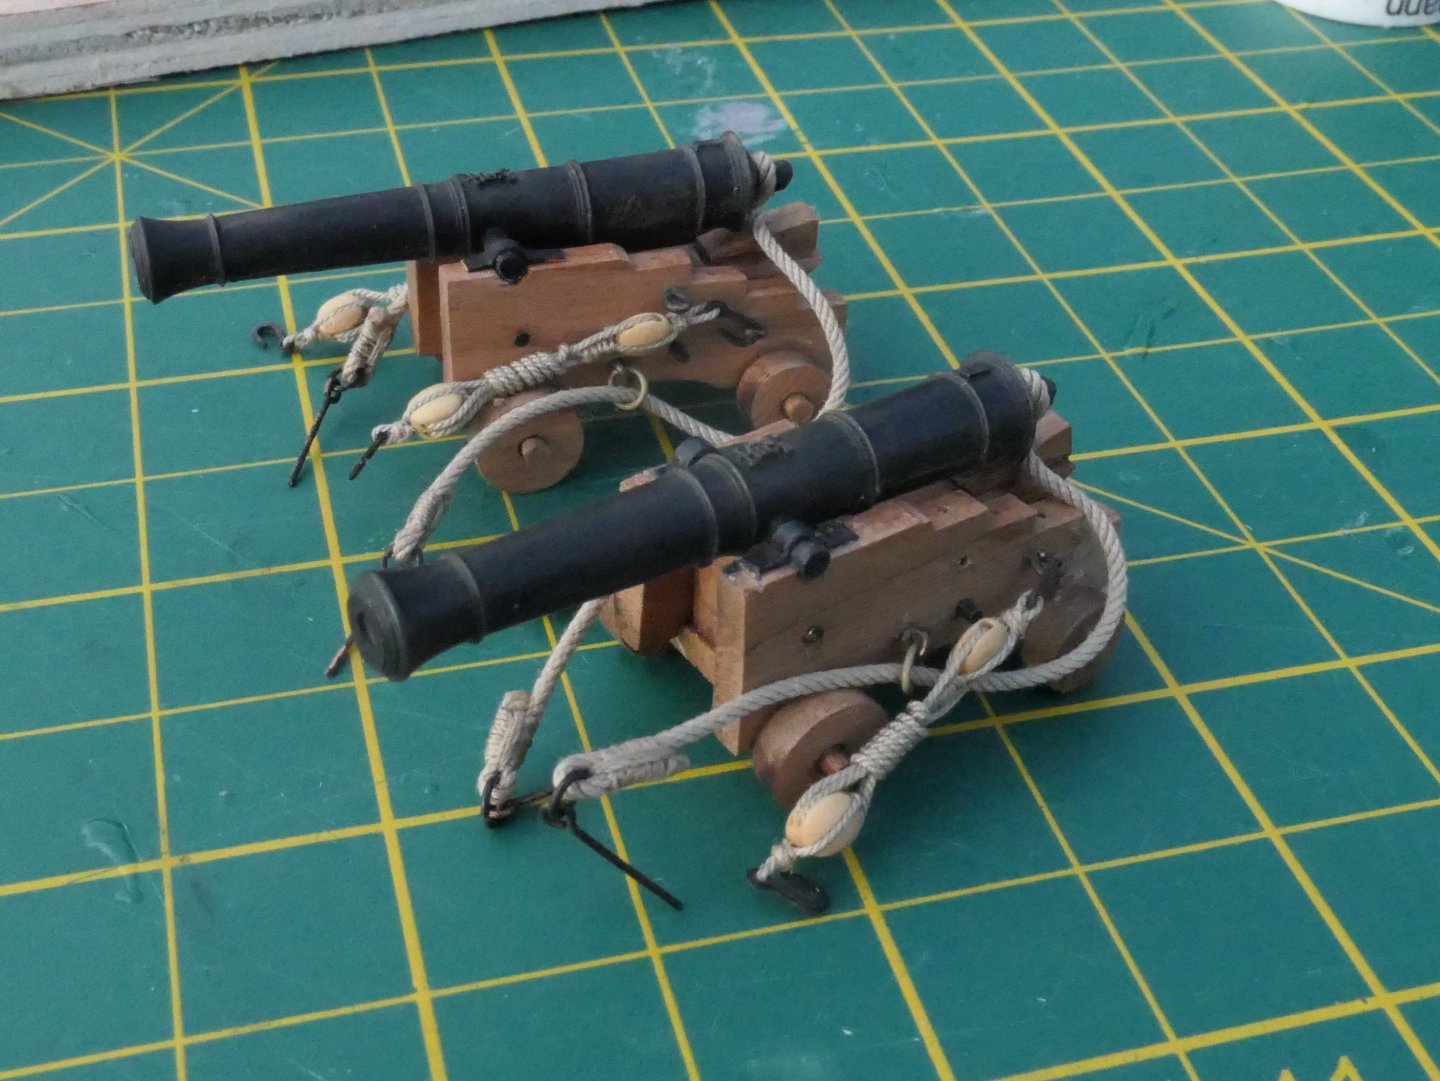
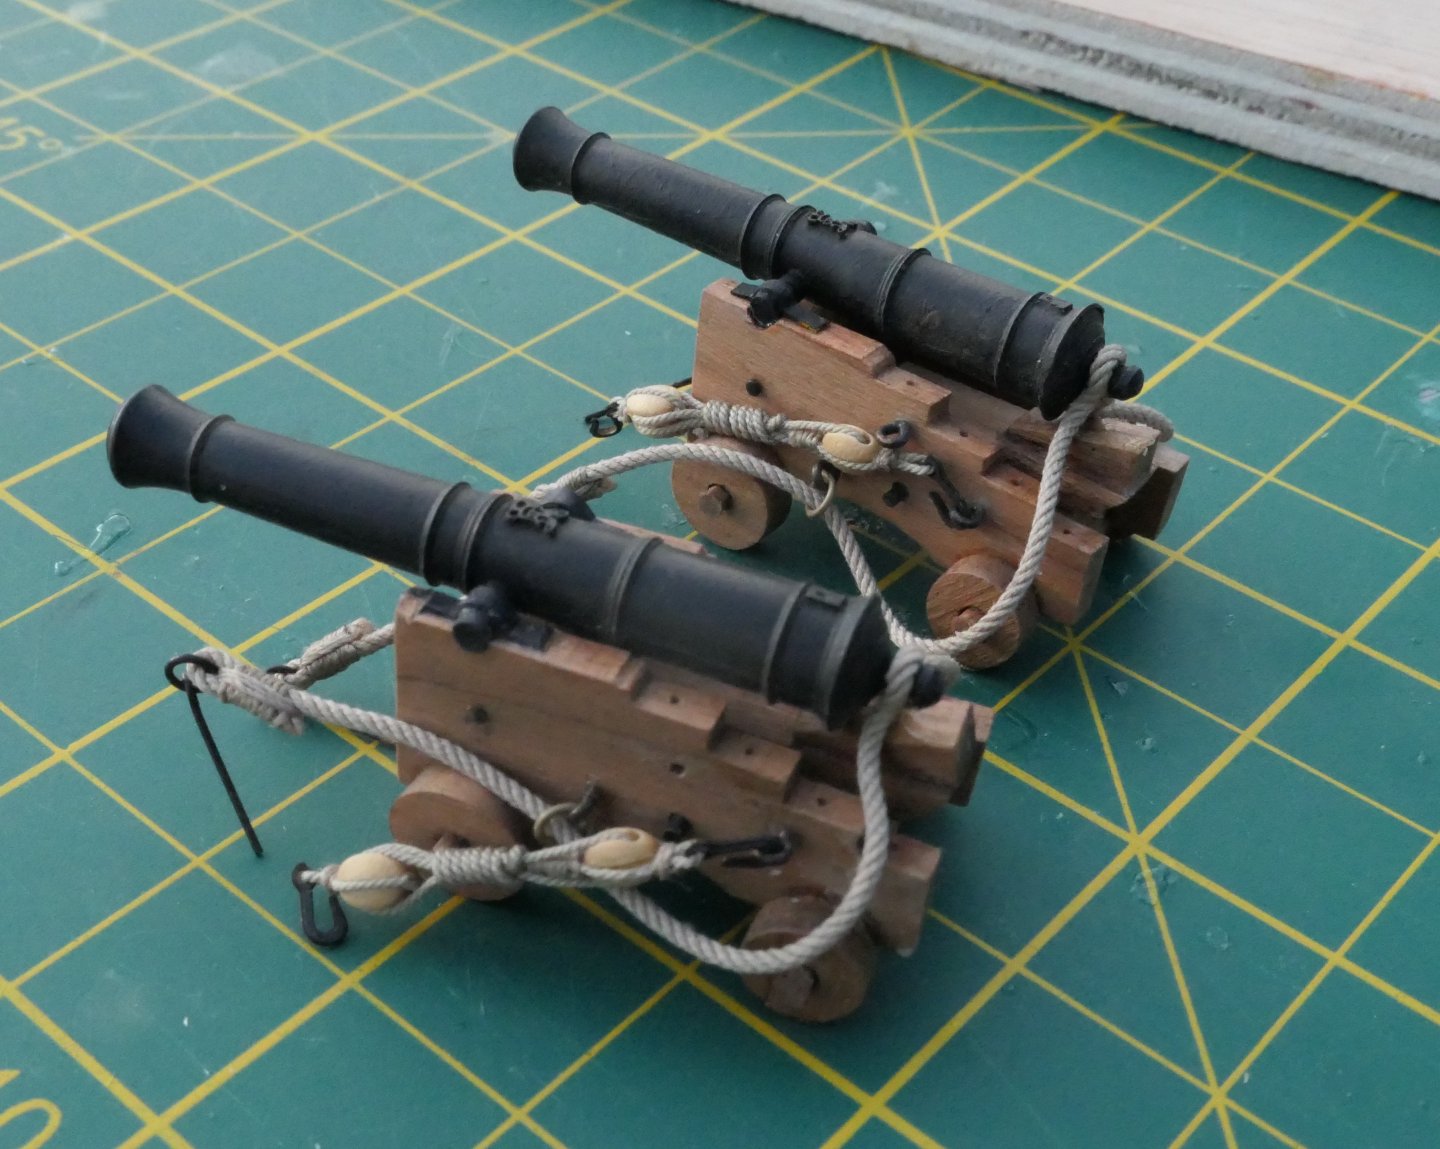
Funny how you see things in the pictures you overlook when looking at the piece - I see there is a ringbolt missing but nothing I can do about it now. Here they are glued in.

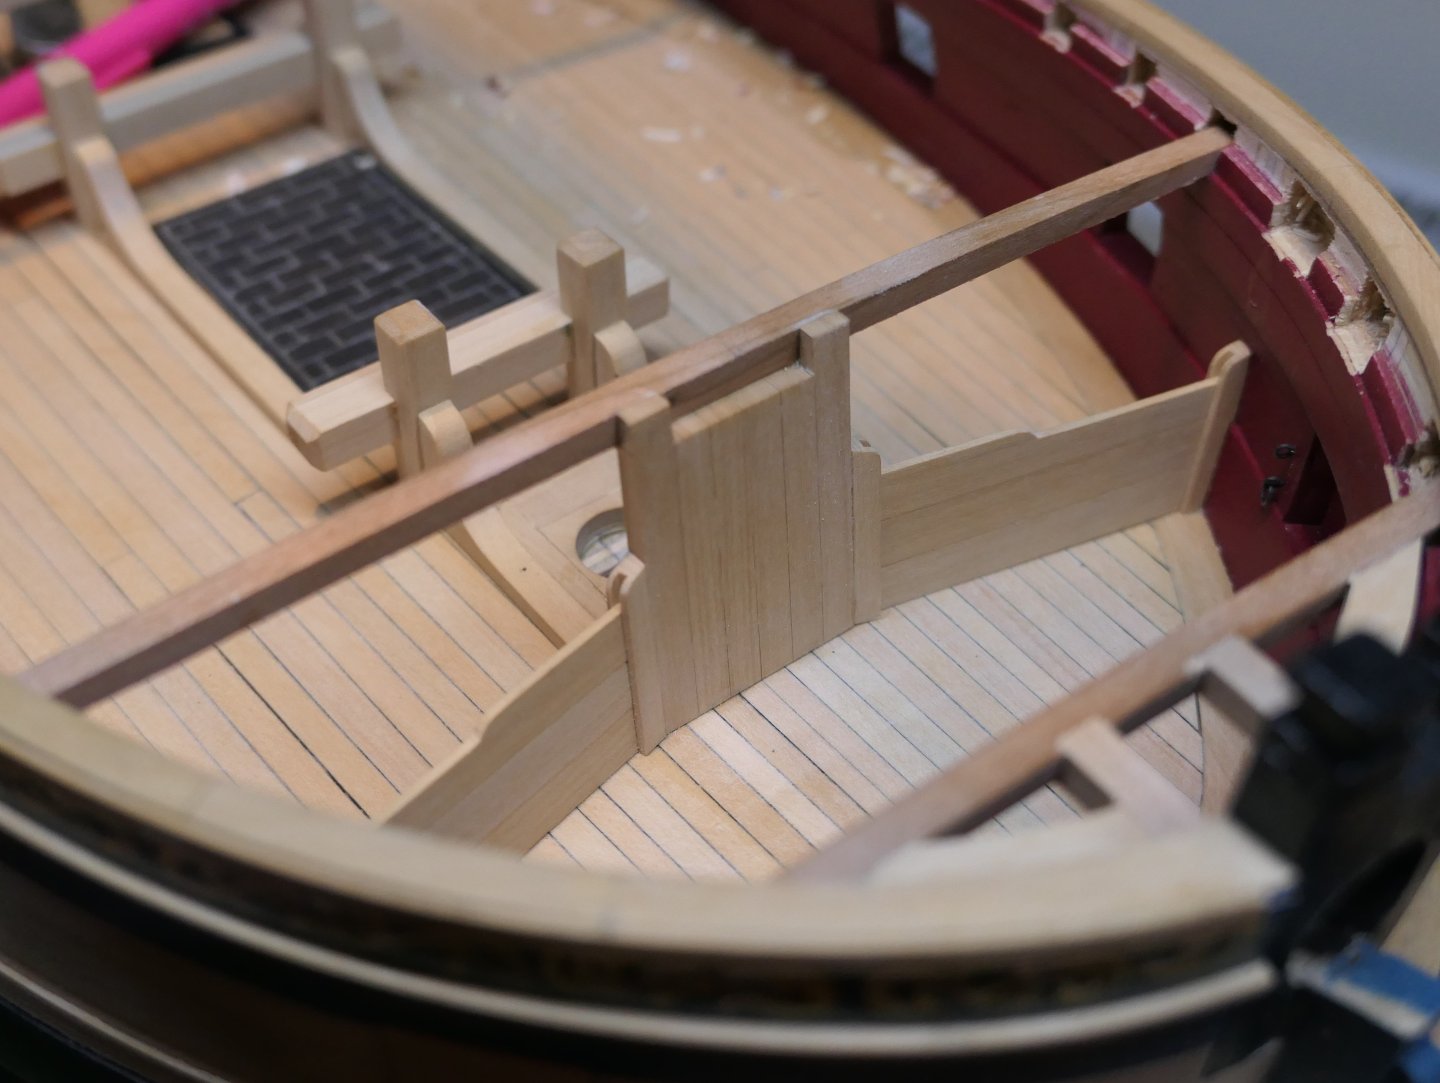
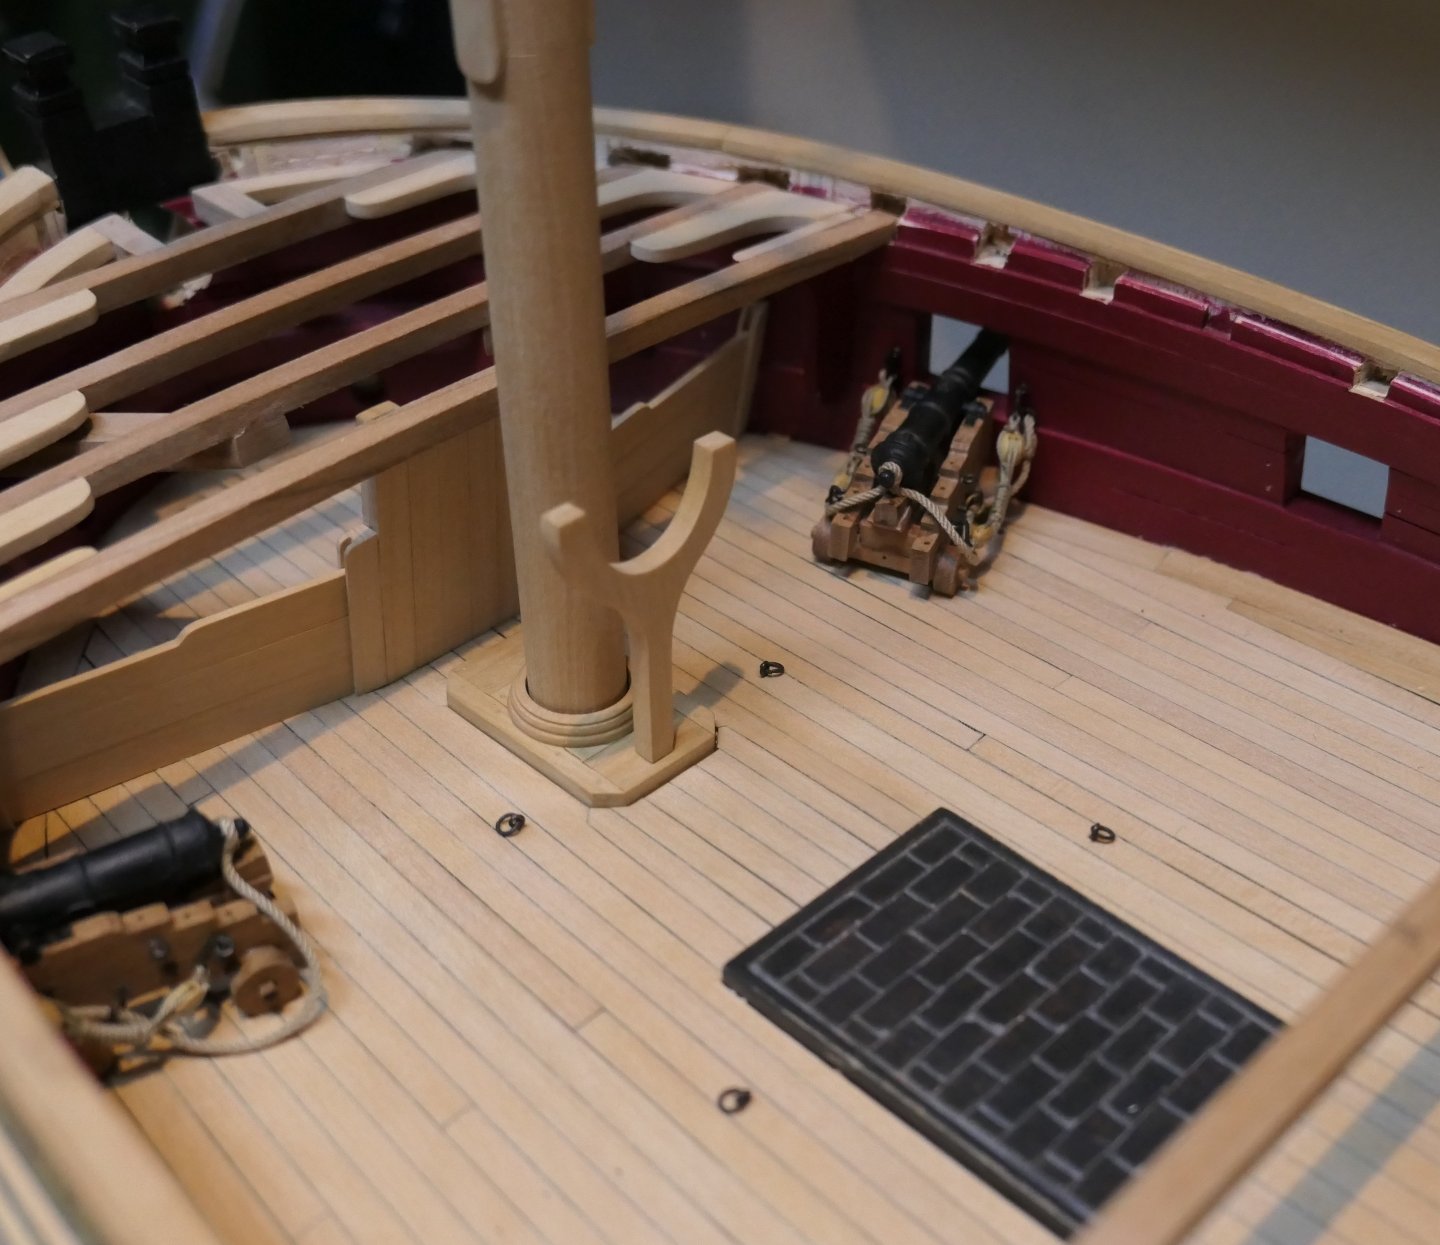
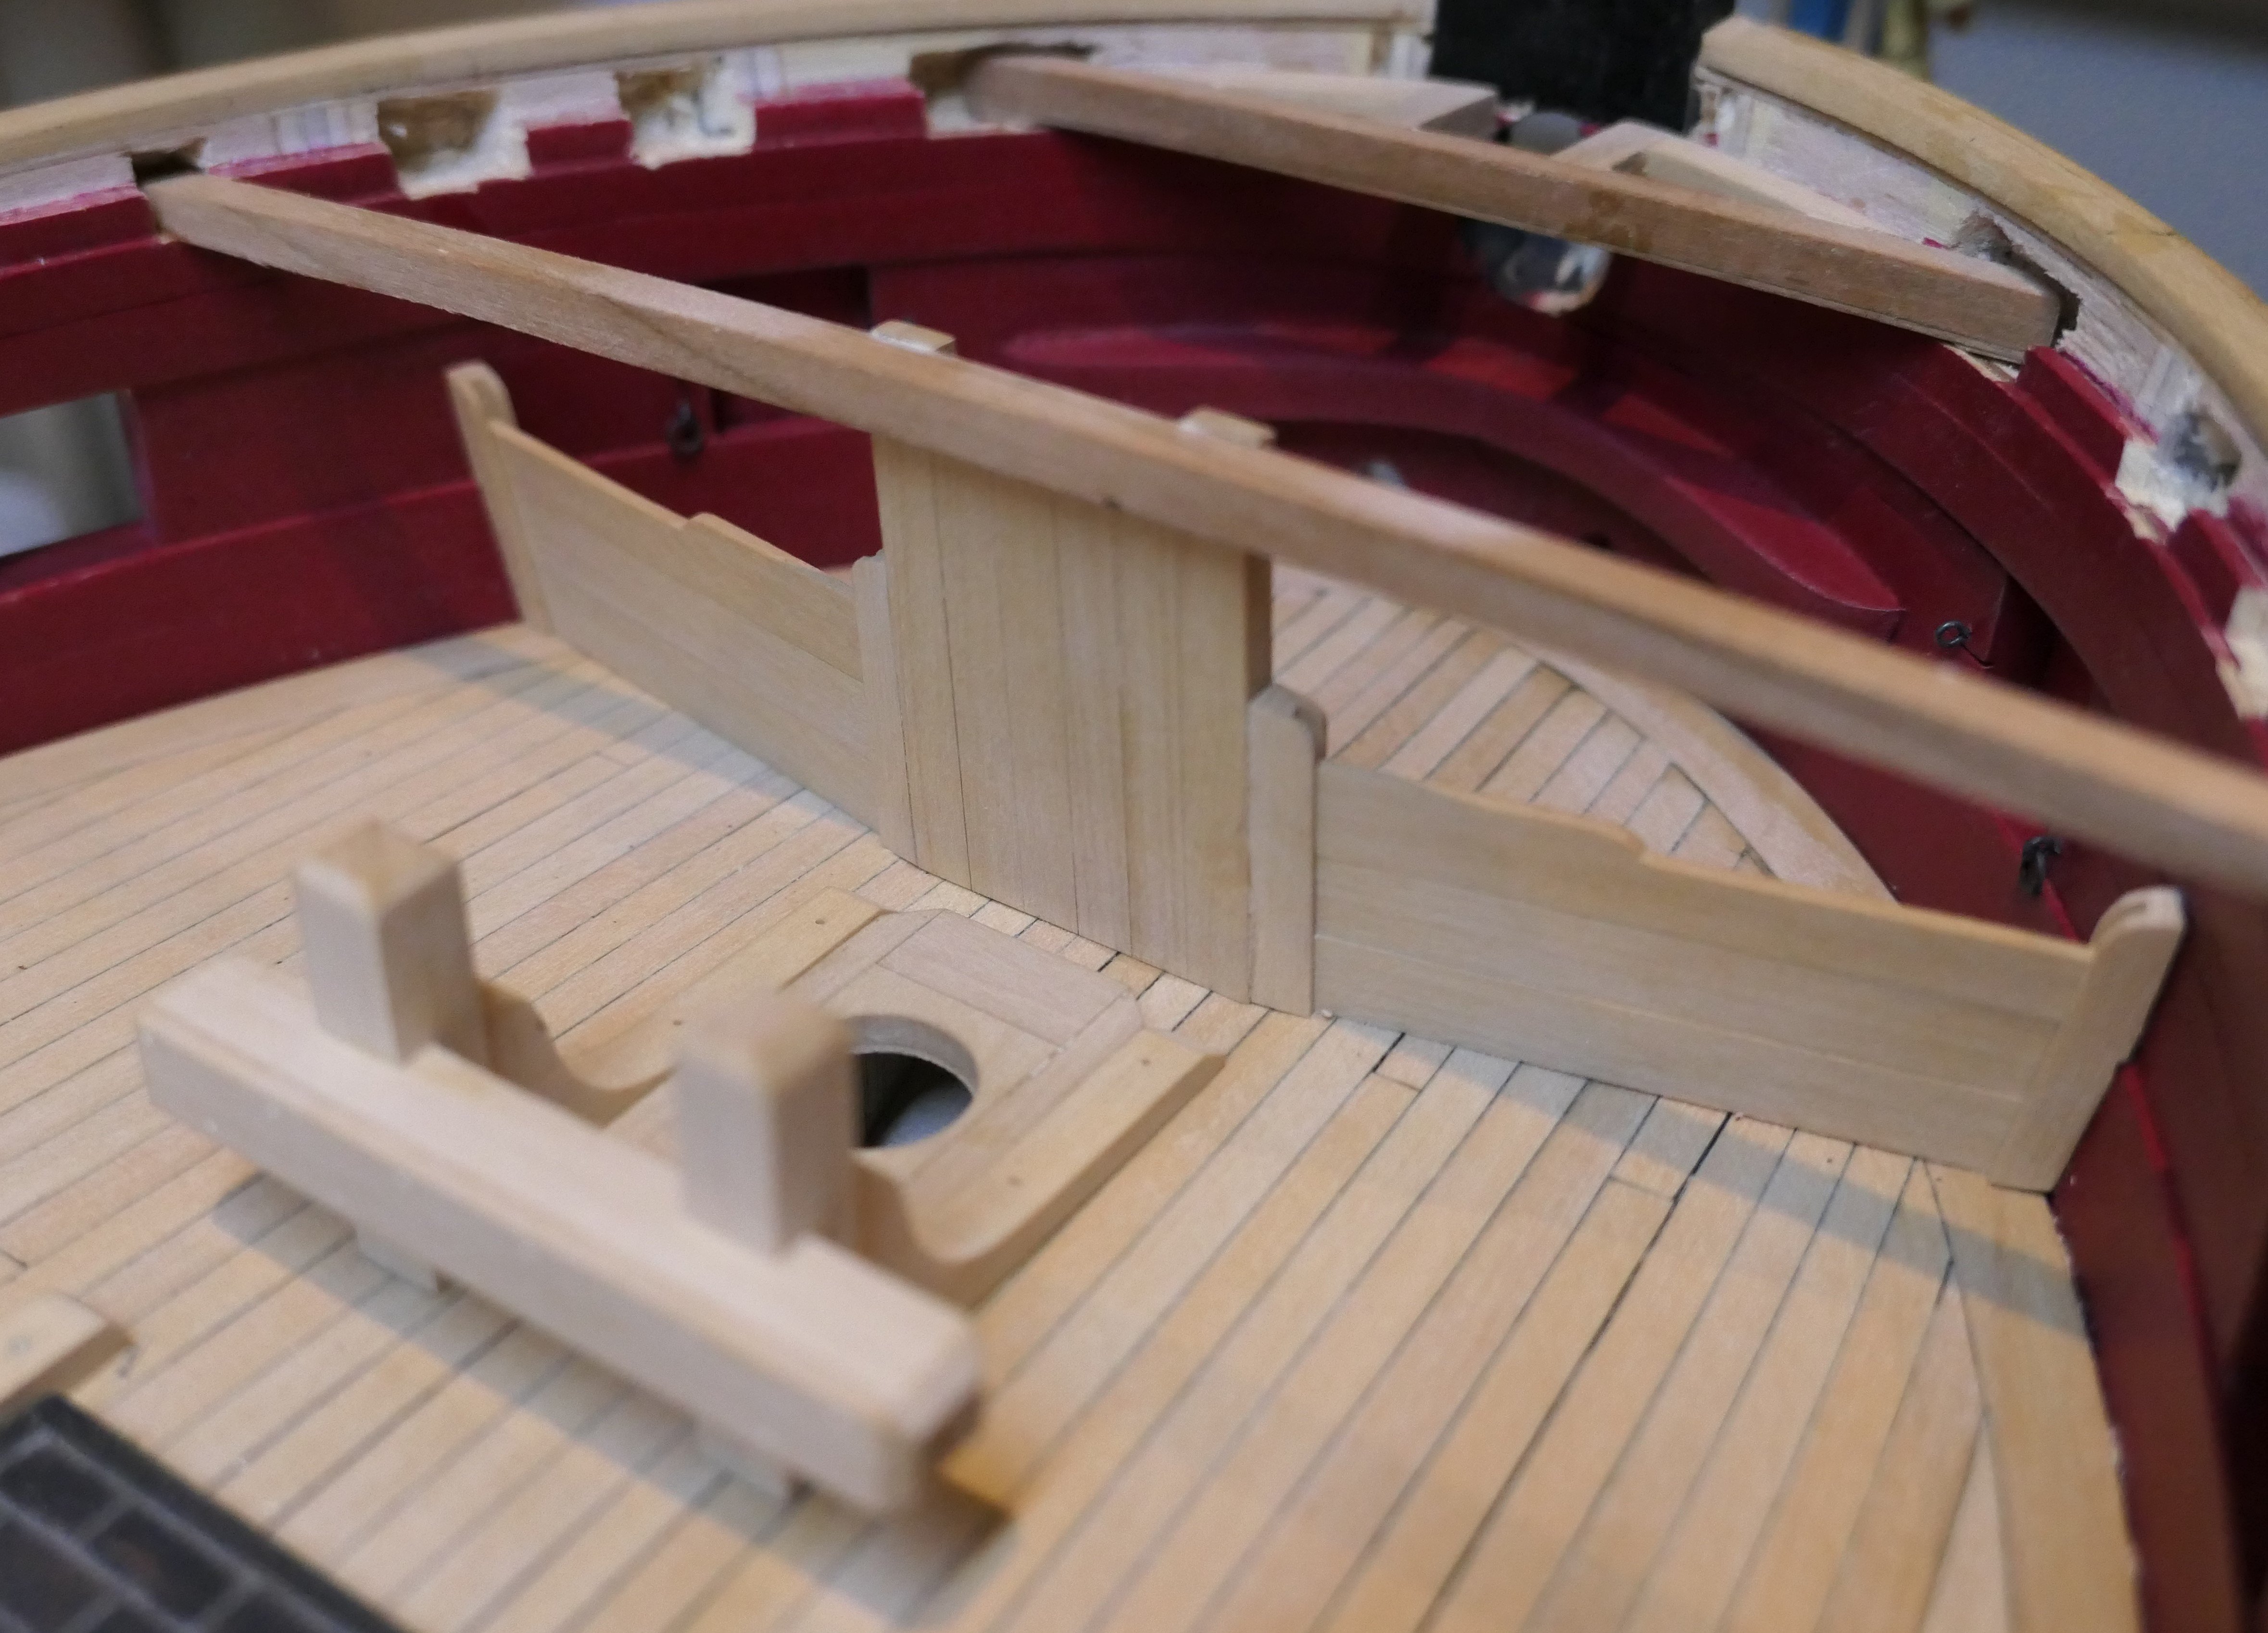
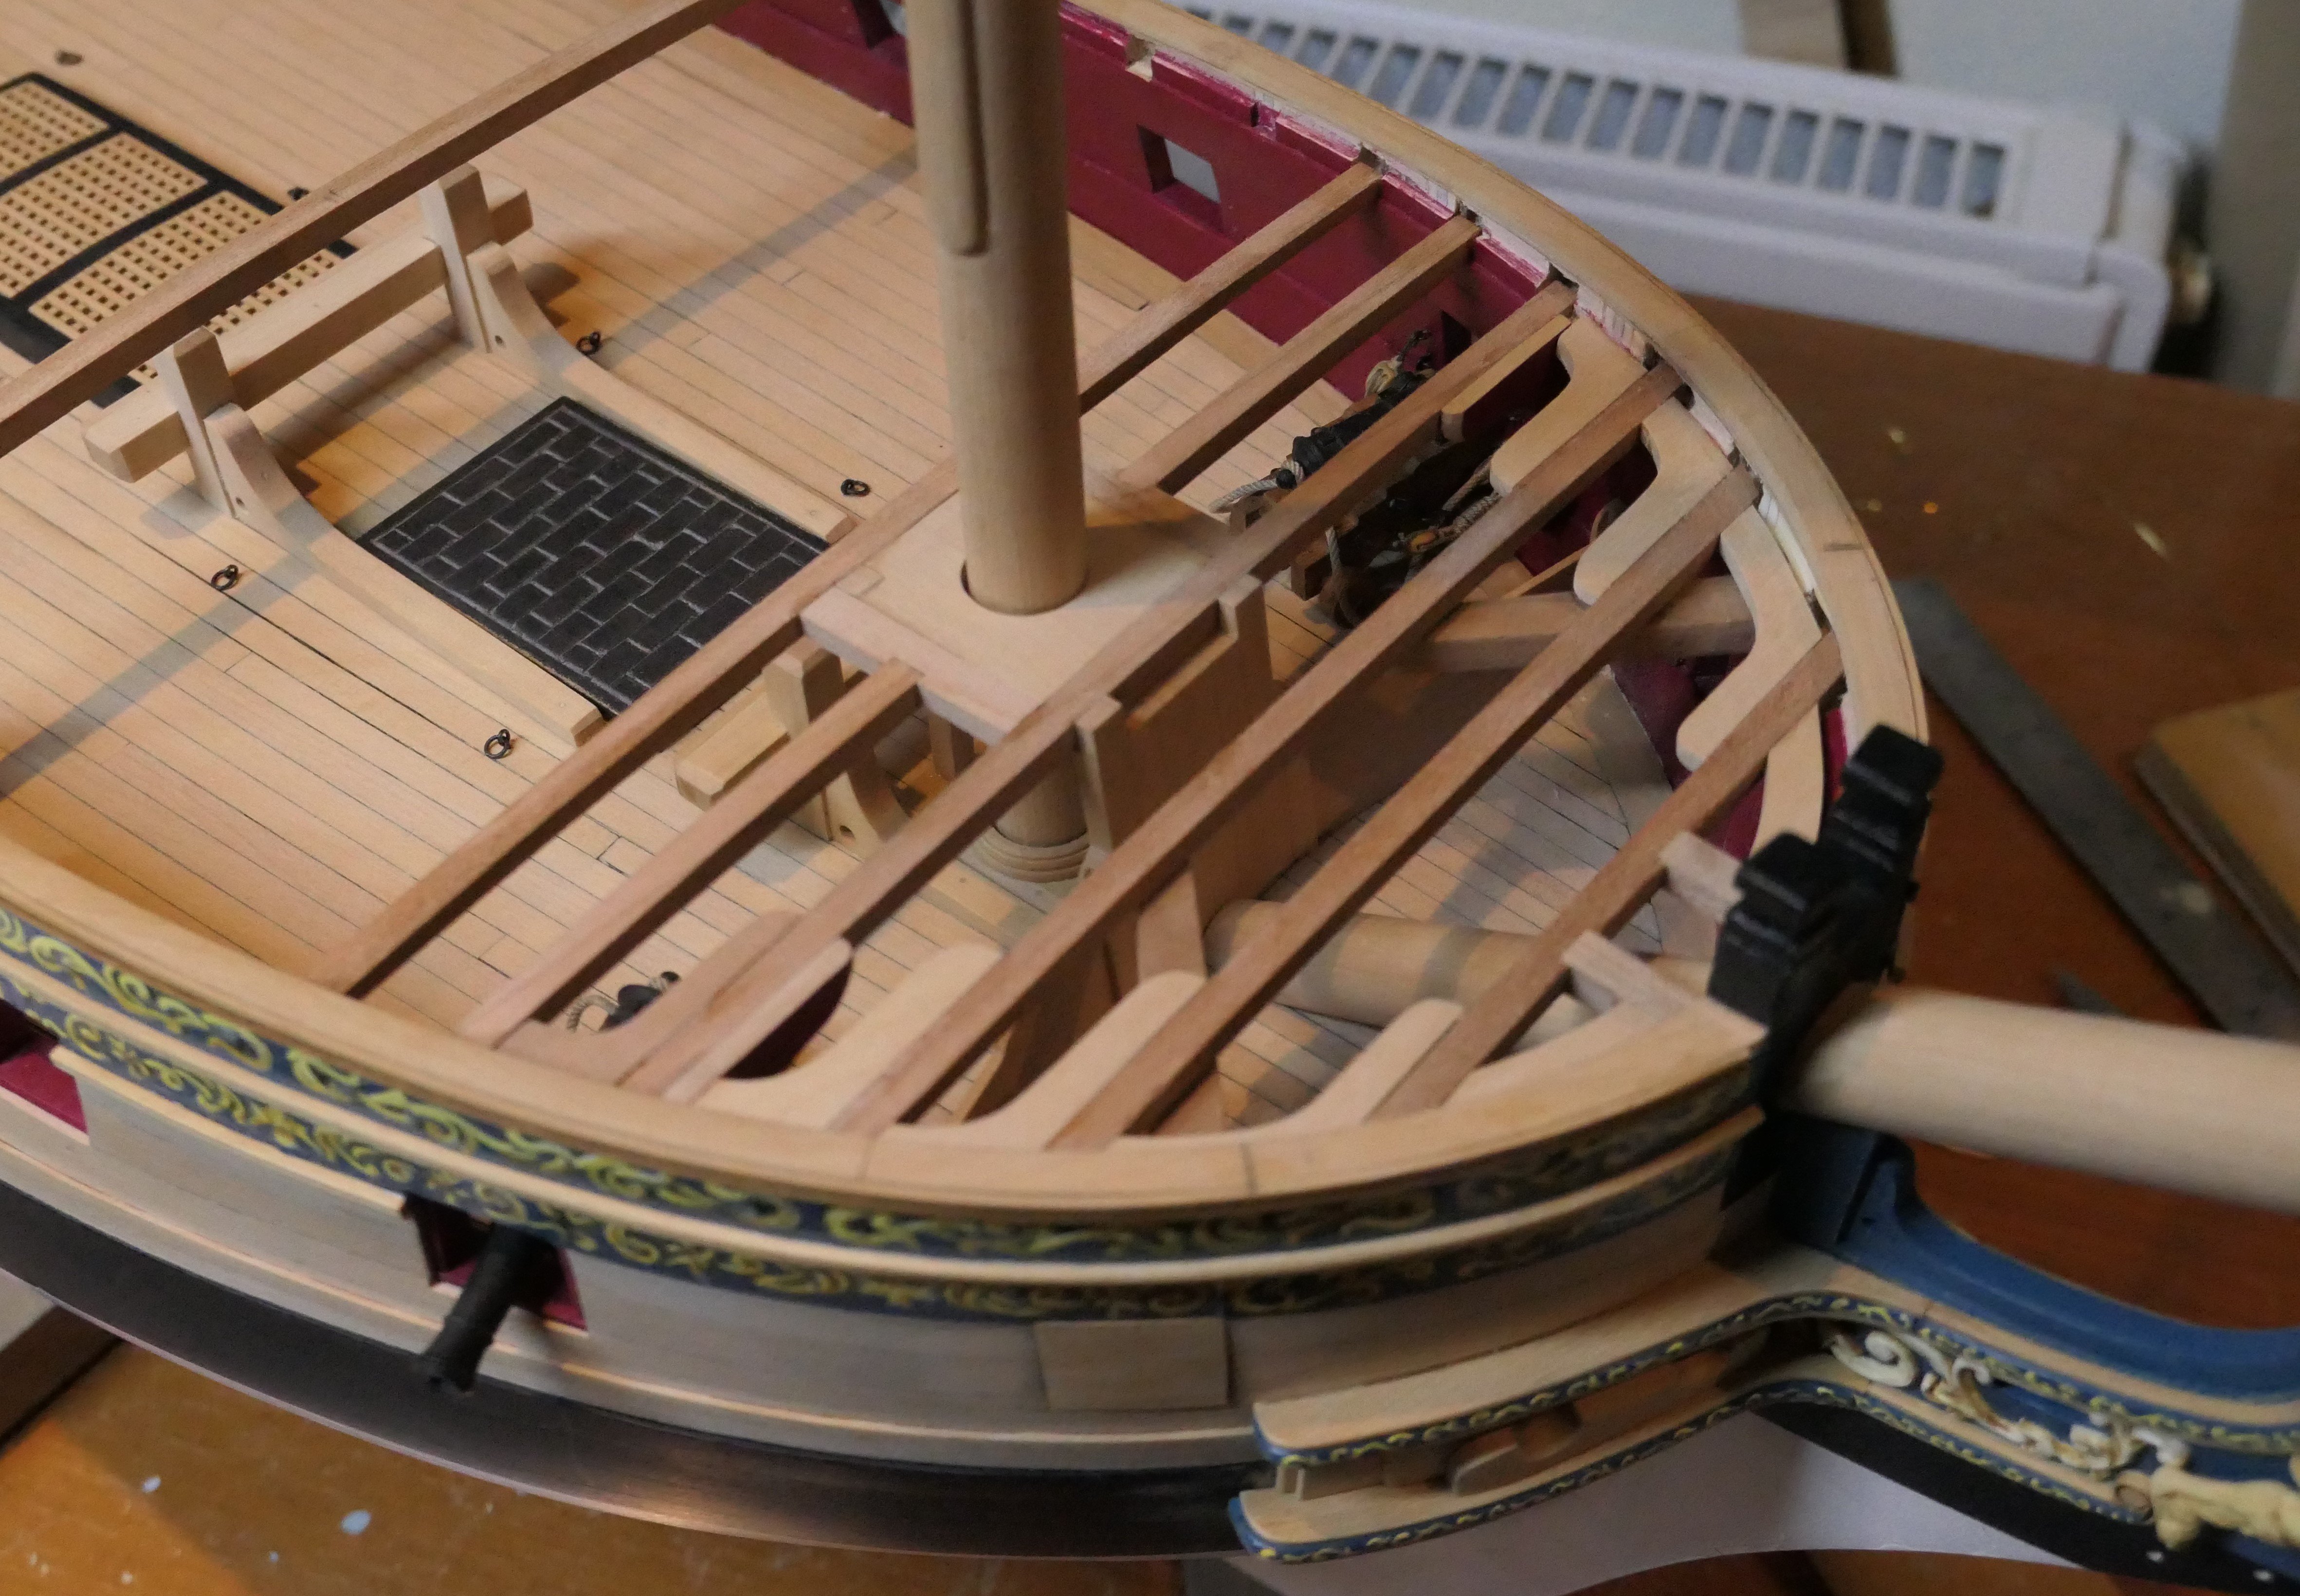
With these six guns installed I can put in the deck beams for the foredeck. I made up the manger from costello boxwood along with the mast partner, mast foot and the little Y shaped piece


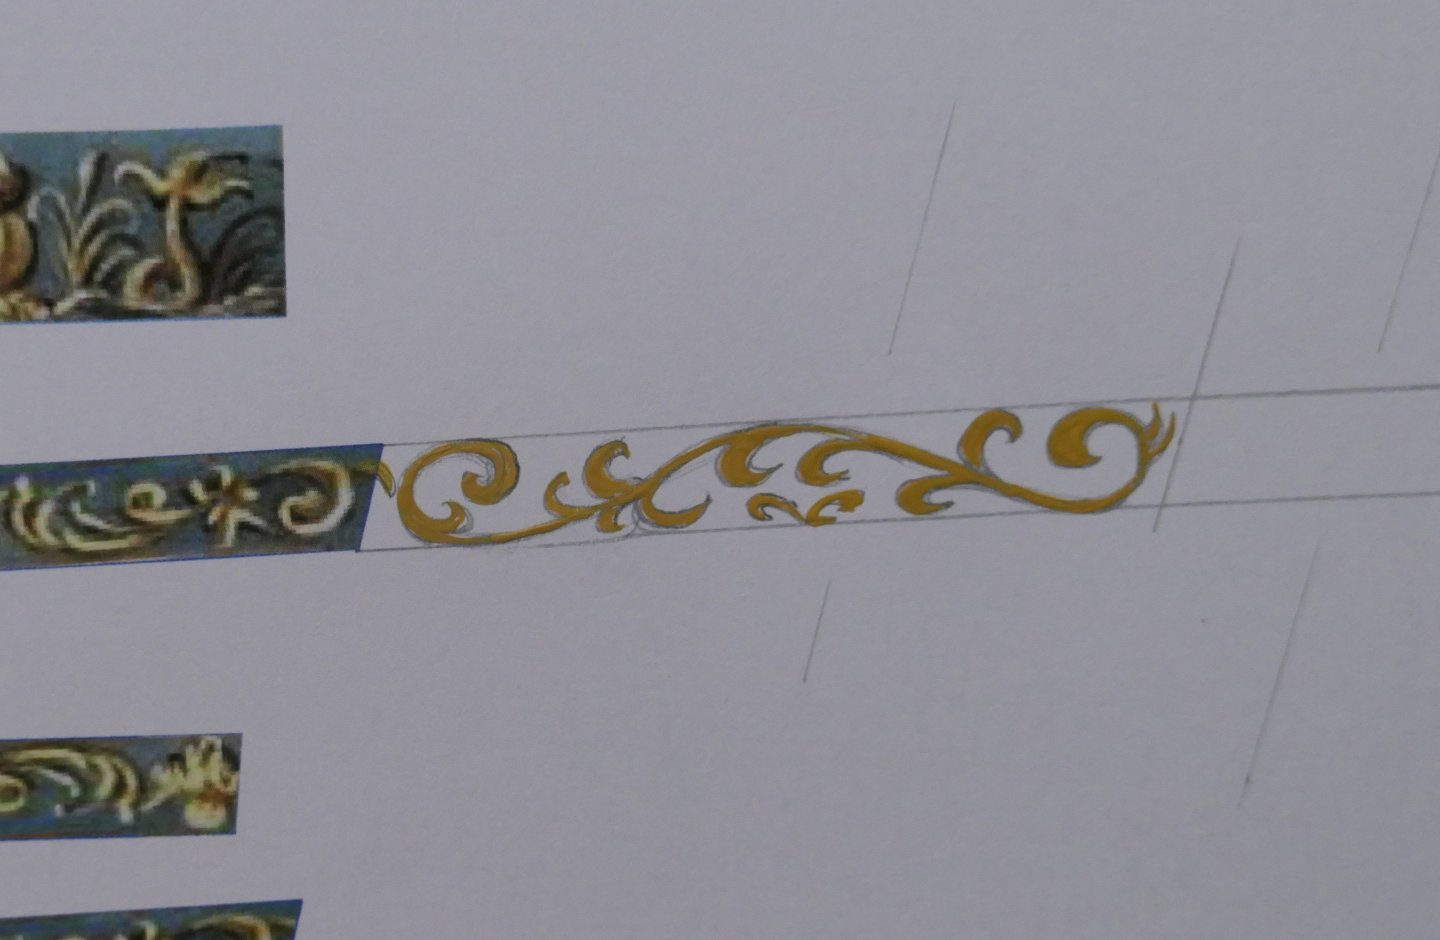
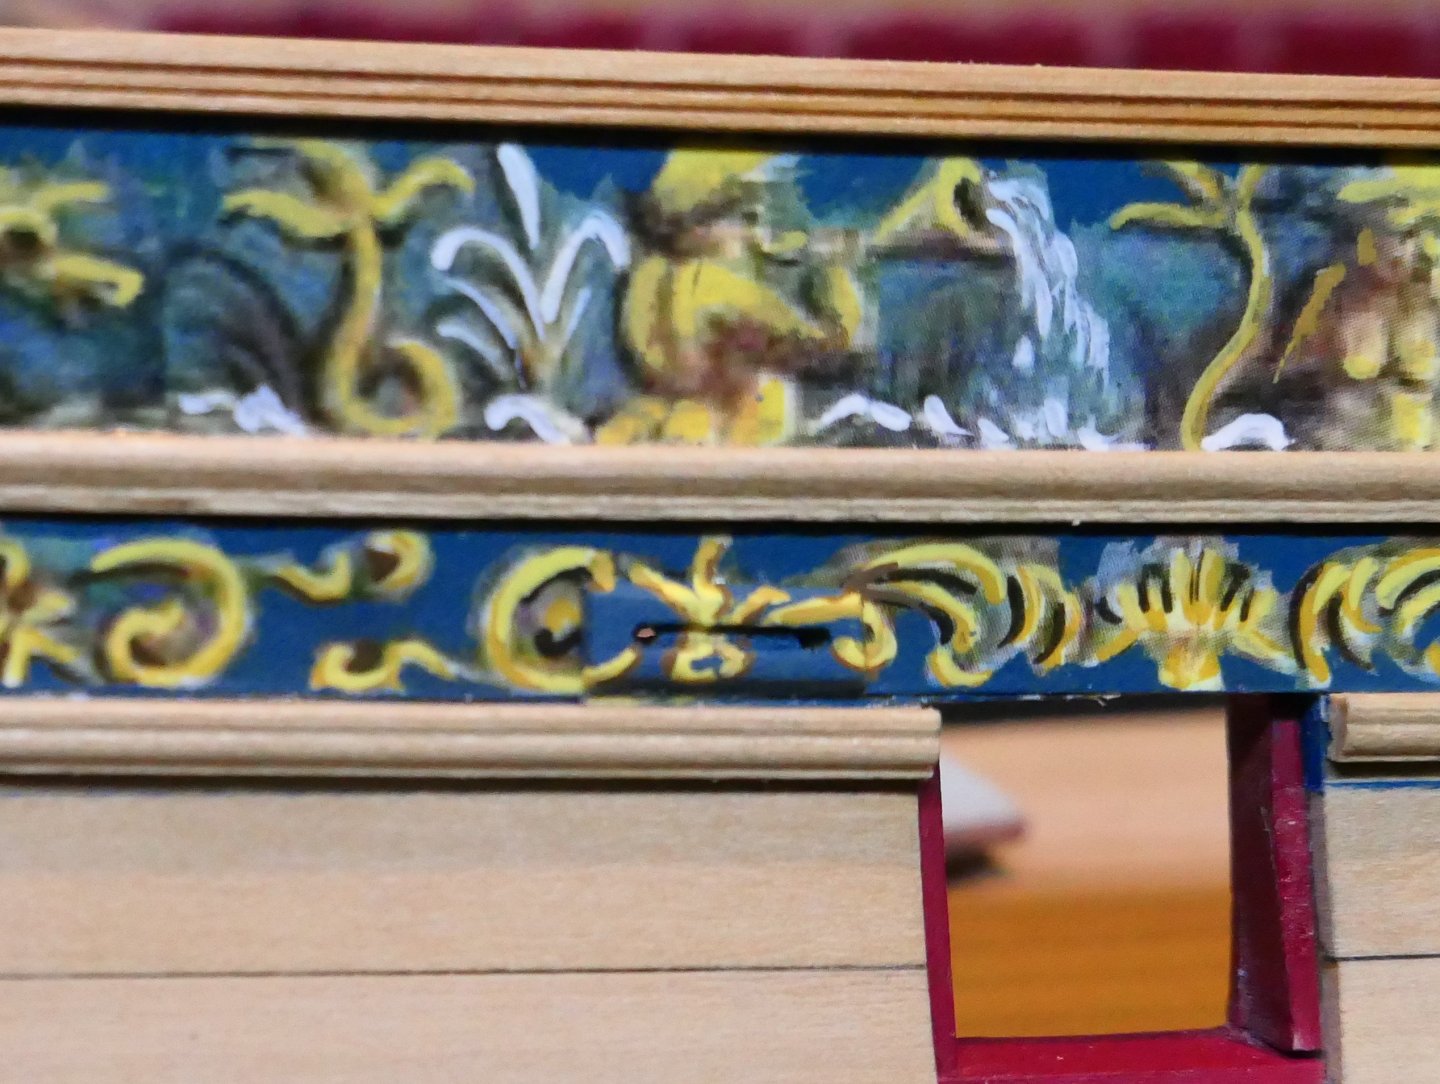
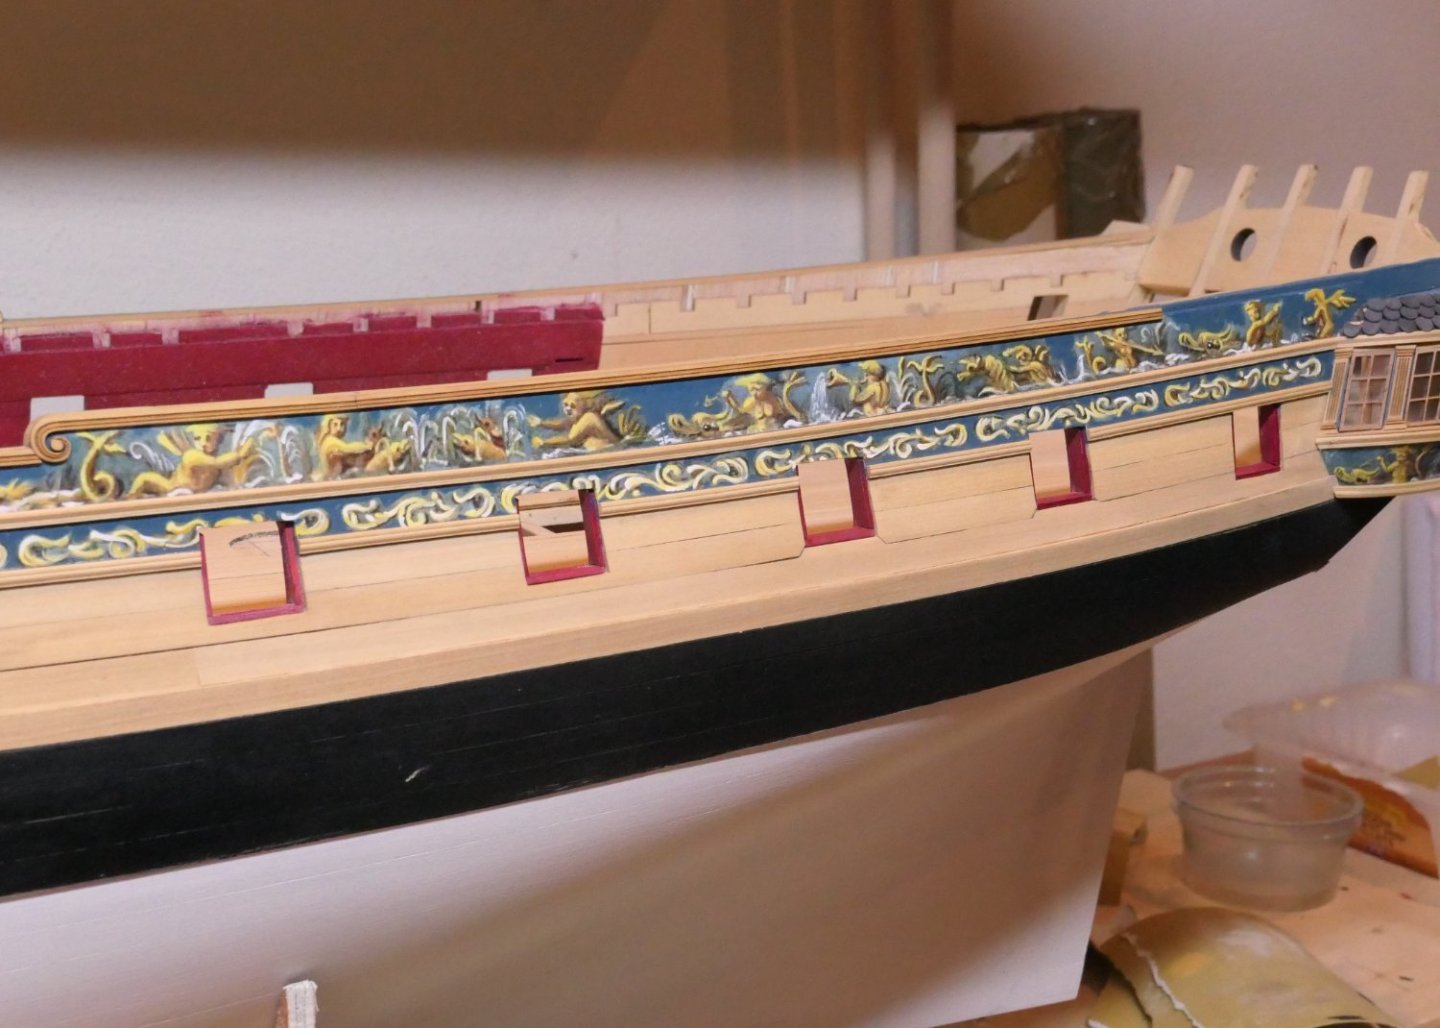
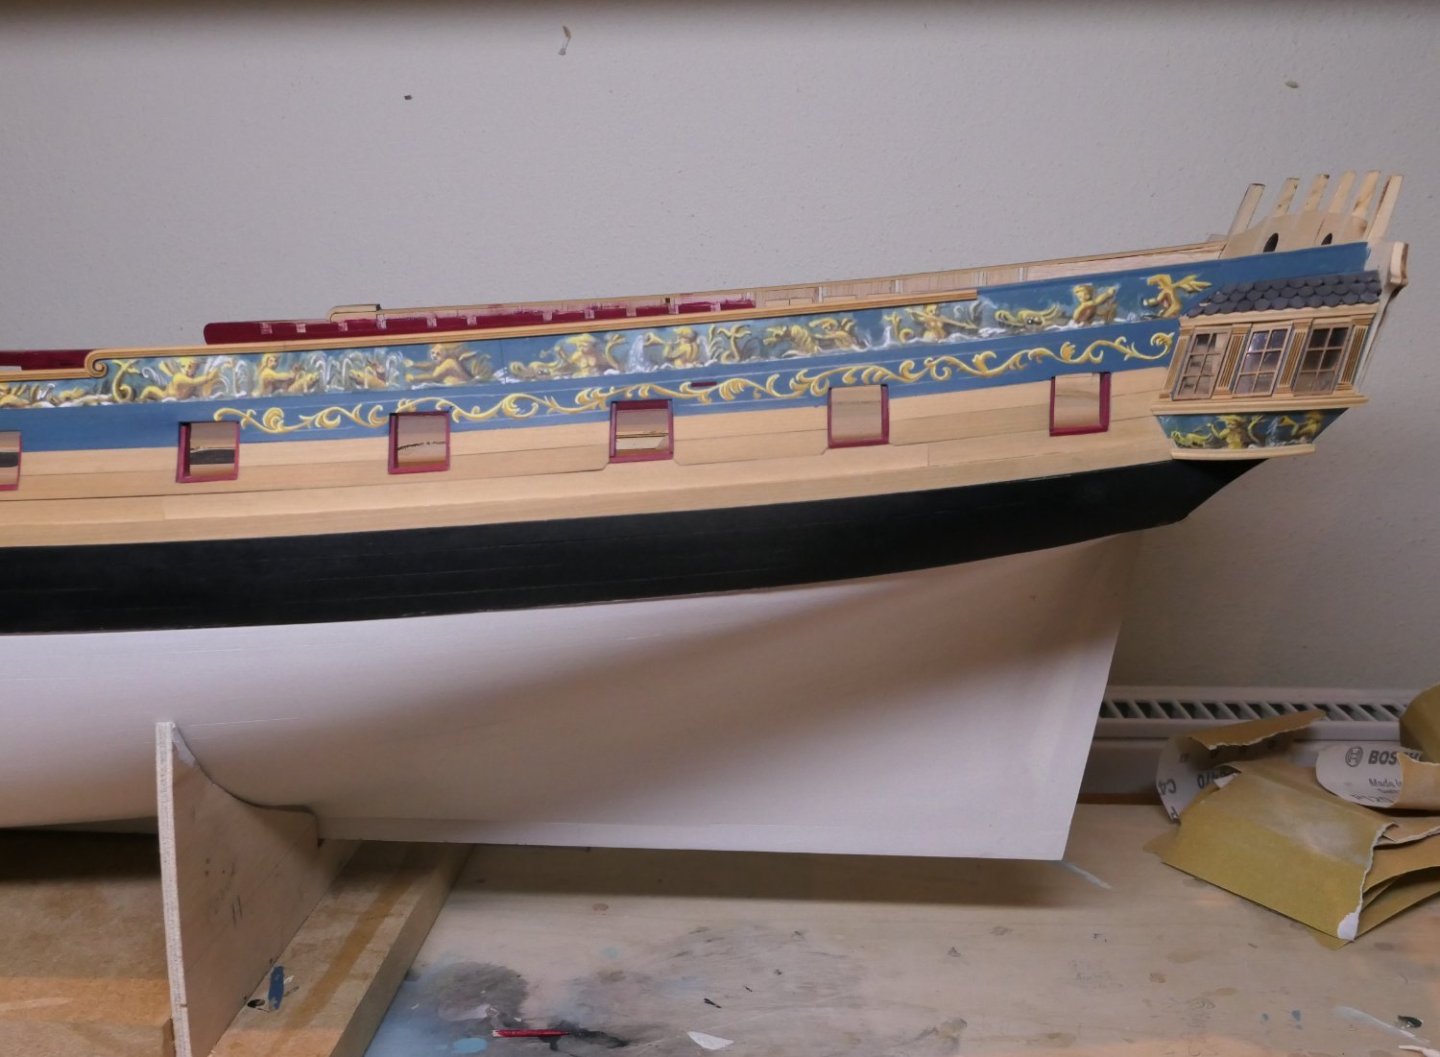
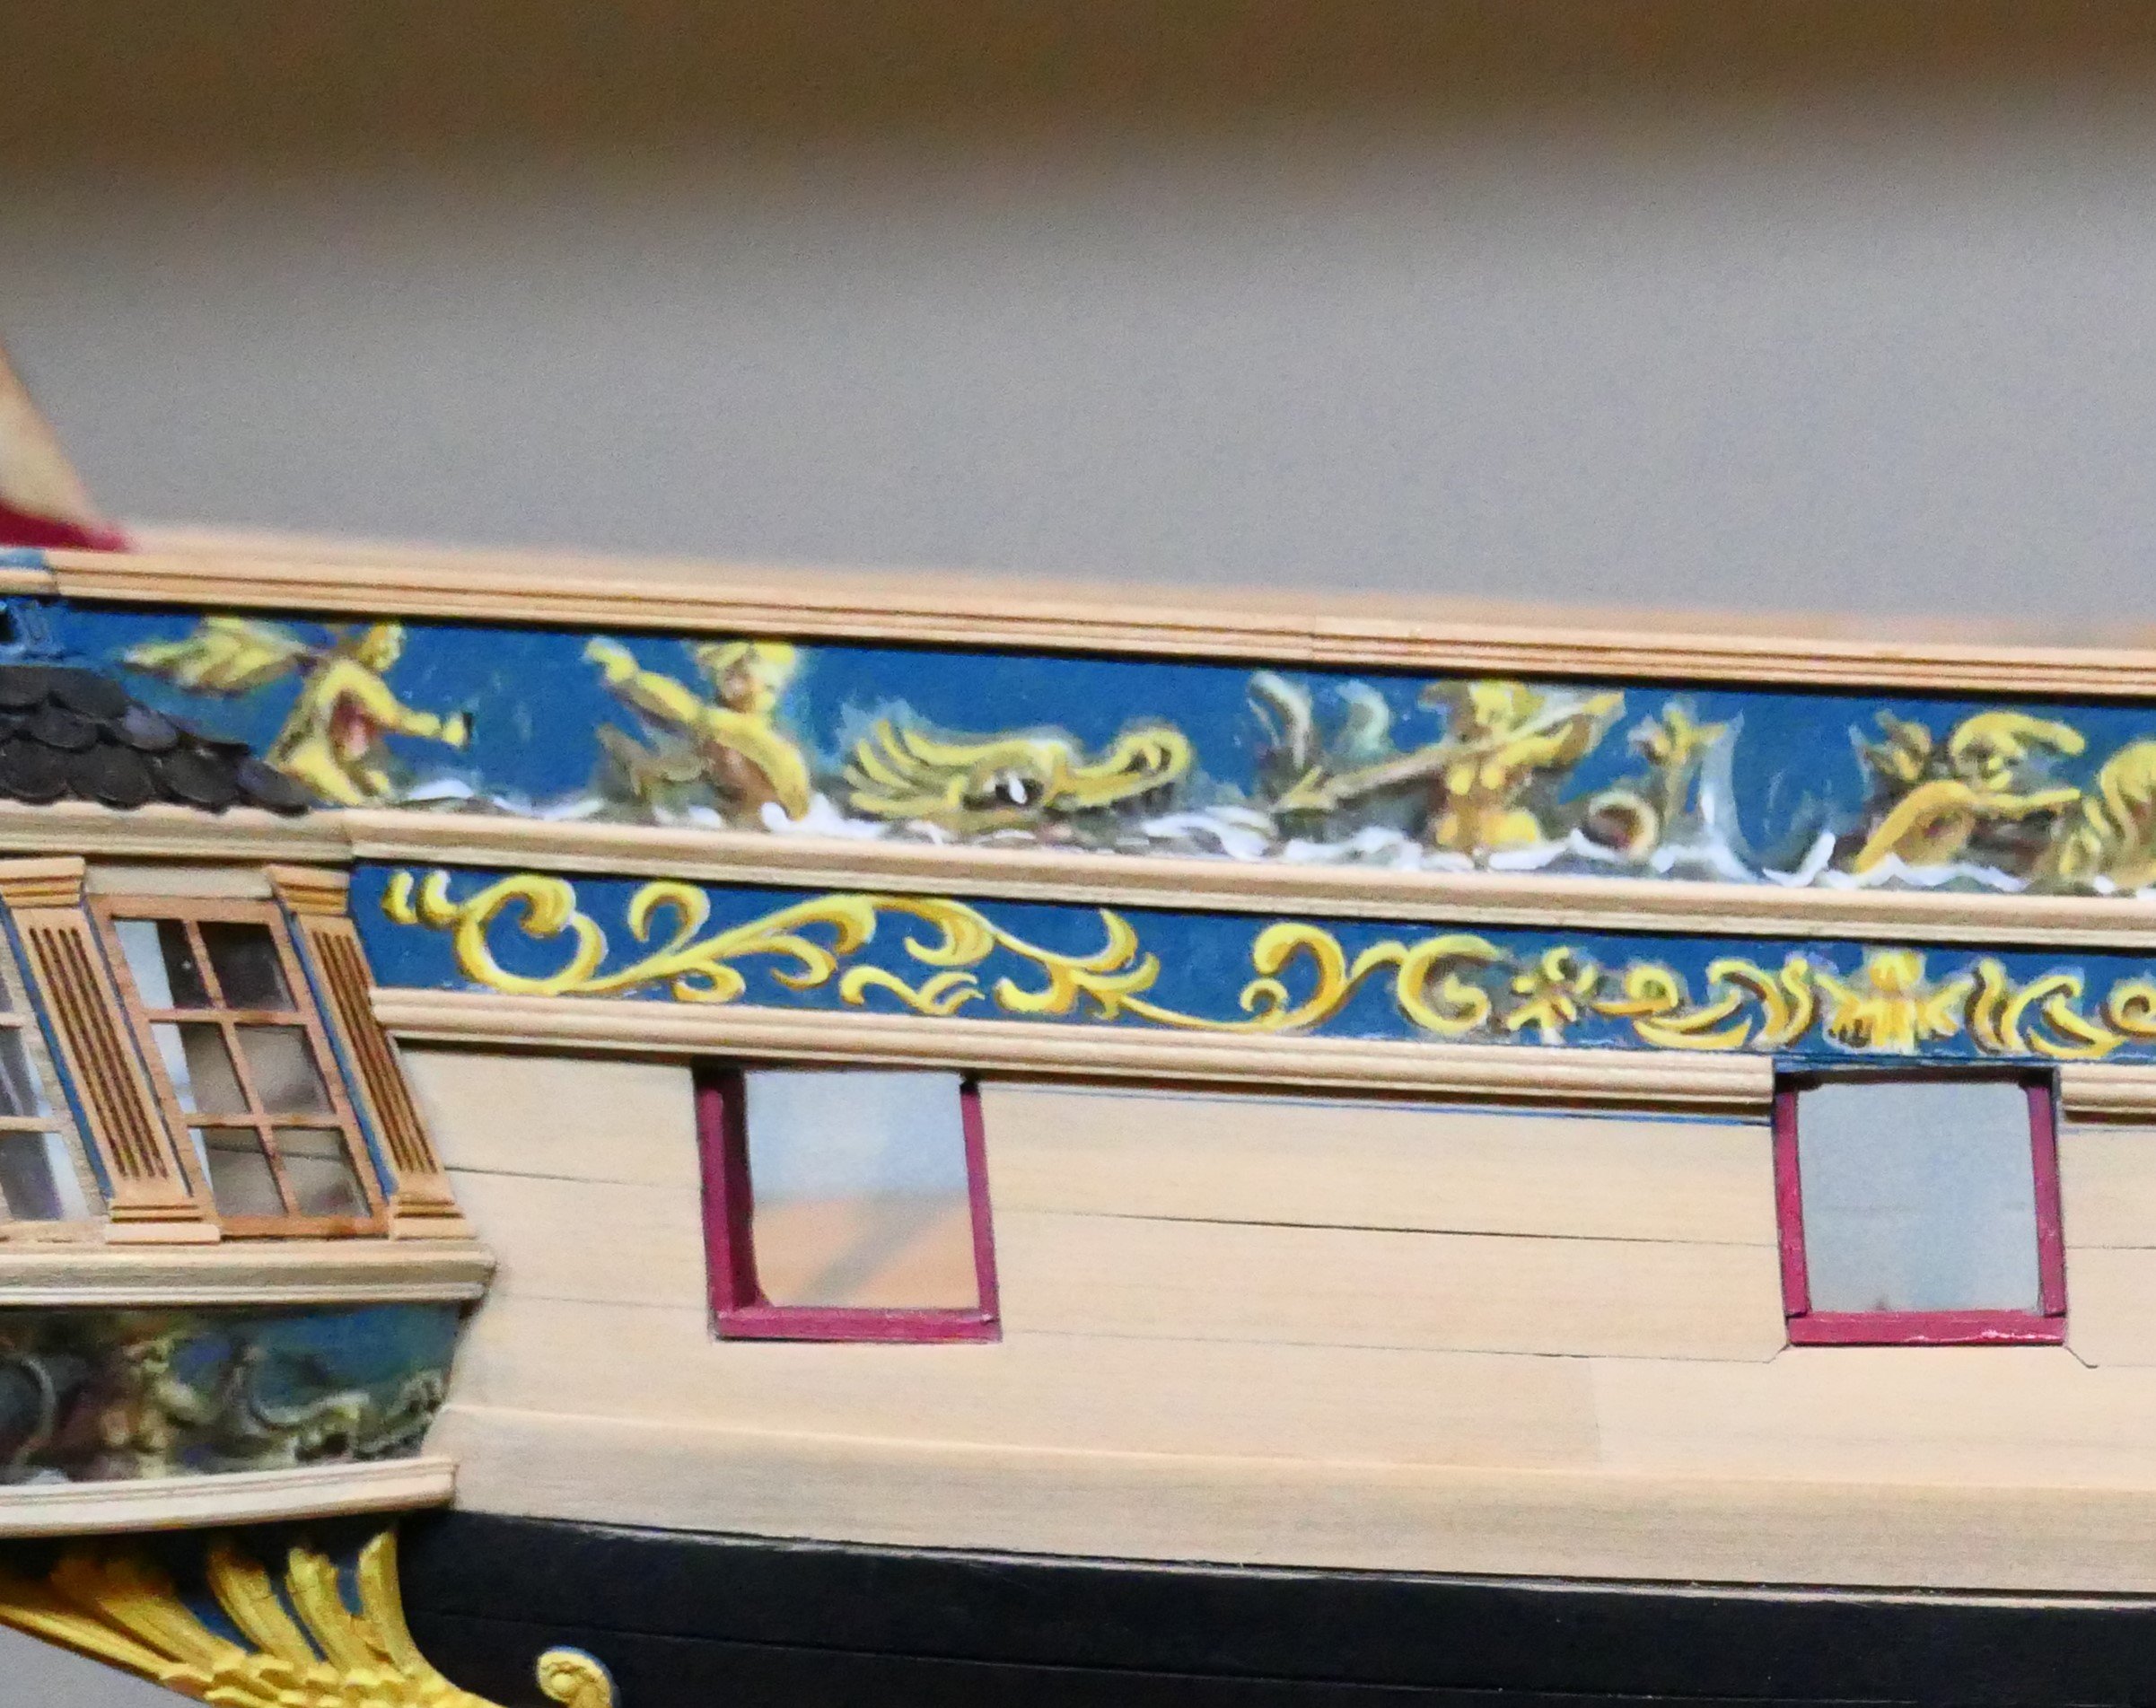
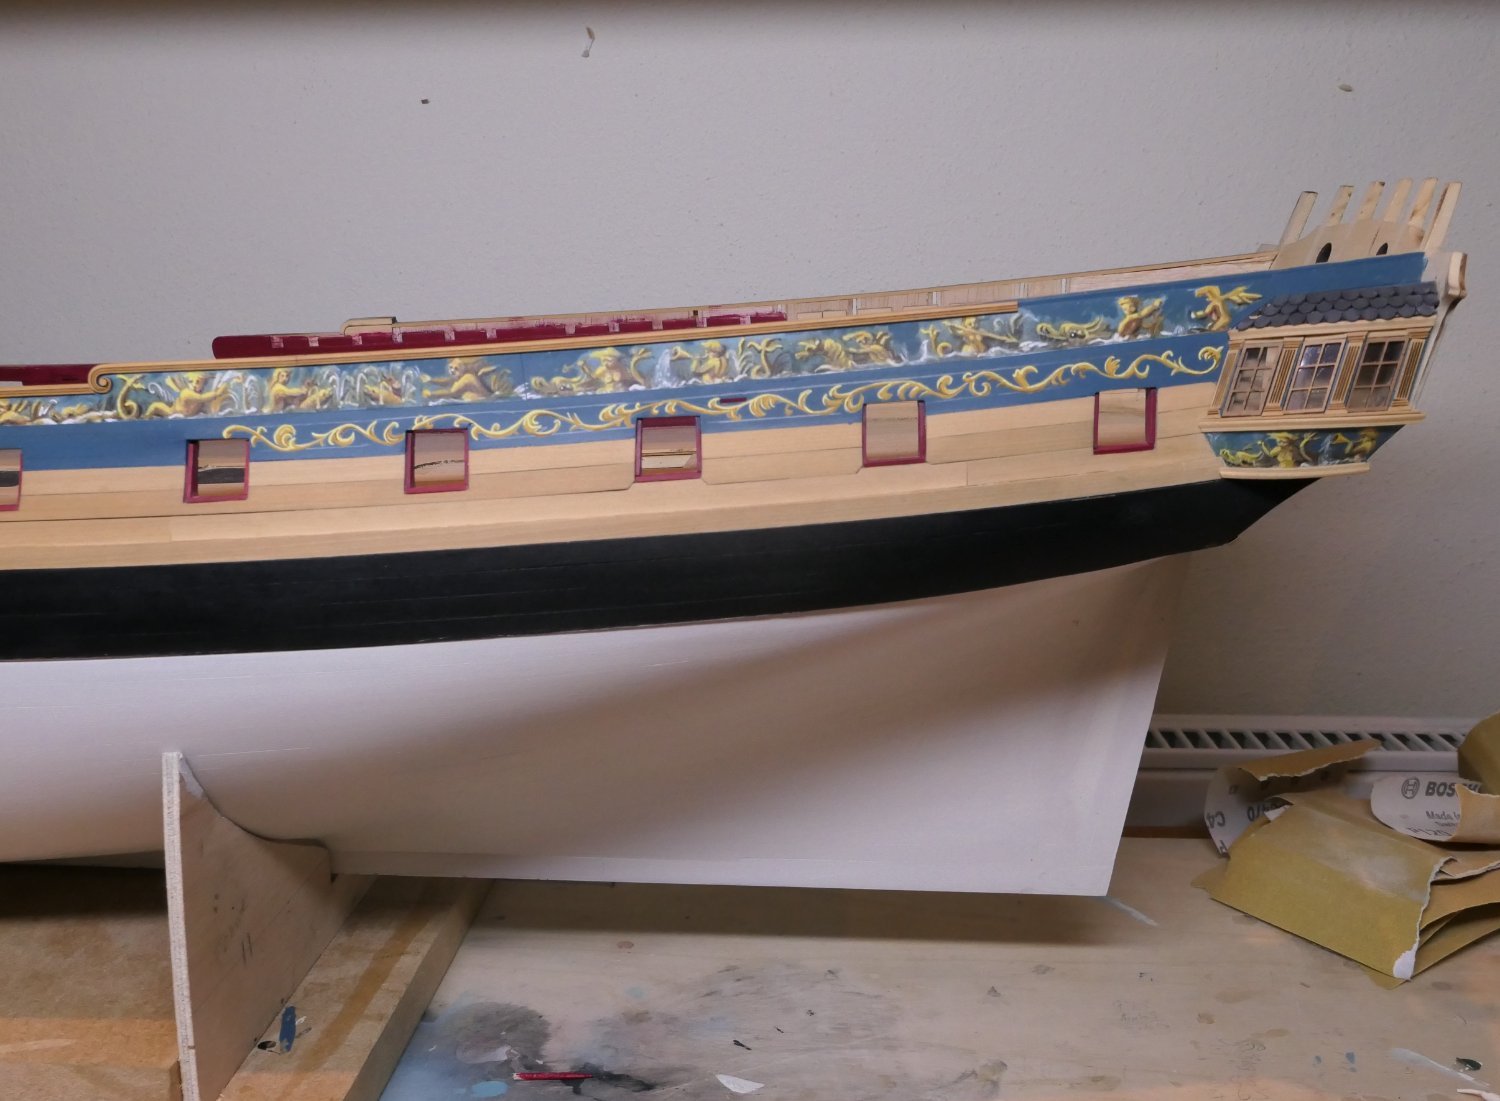
I reworked the lower frieze. Looking at page 1 of chapter 1 of the instructions it appears the frieze starts (and perhaps ends at the bows) with a fairly conventional acanthus leaf decoration before the painters and decorators went off on one. I had a go at replicating that.


And this is what it looks like fixed on.
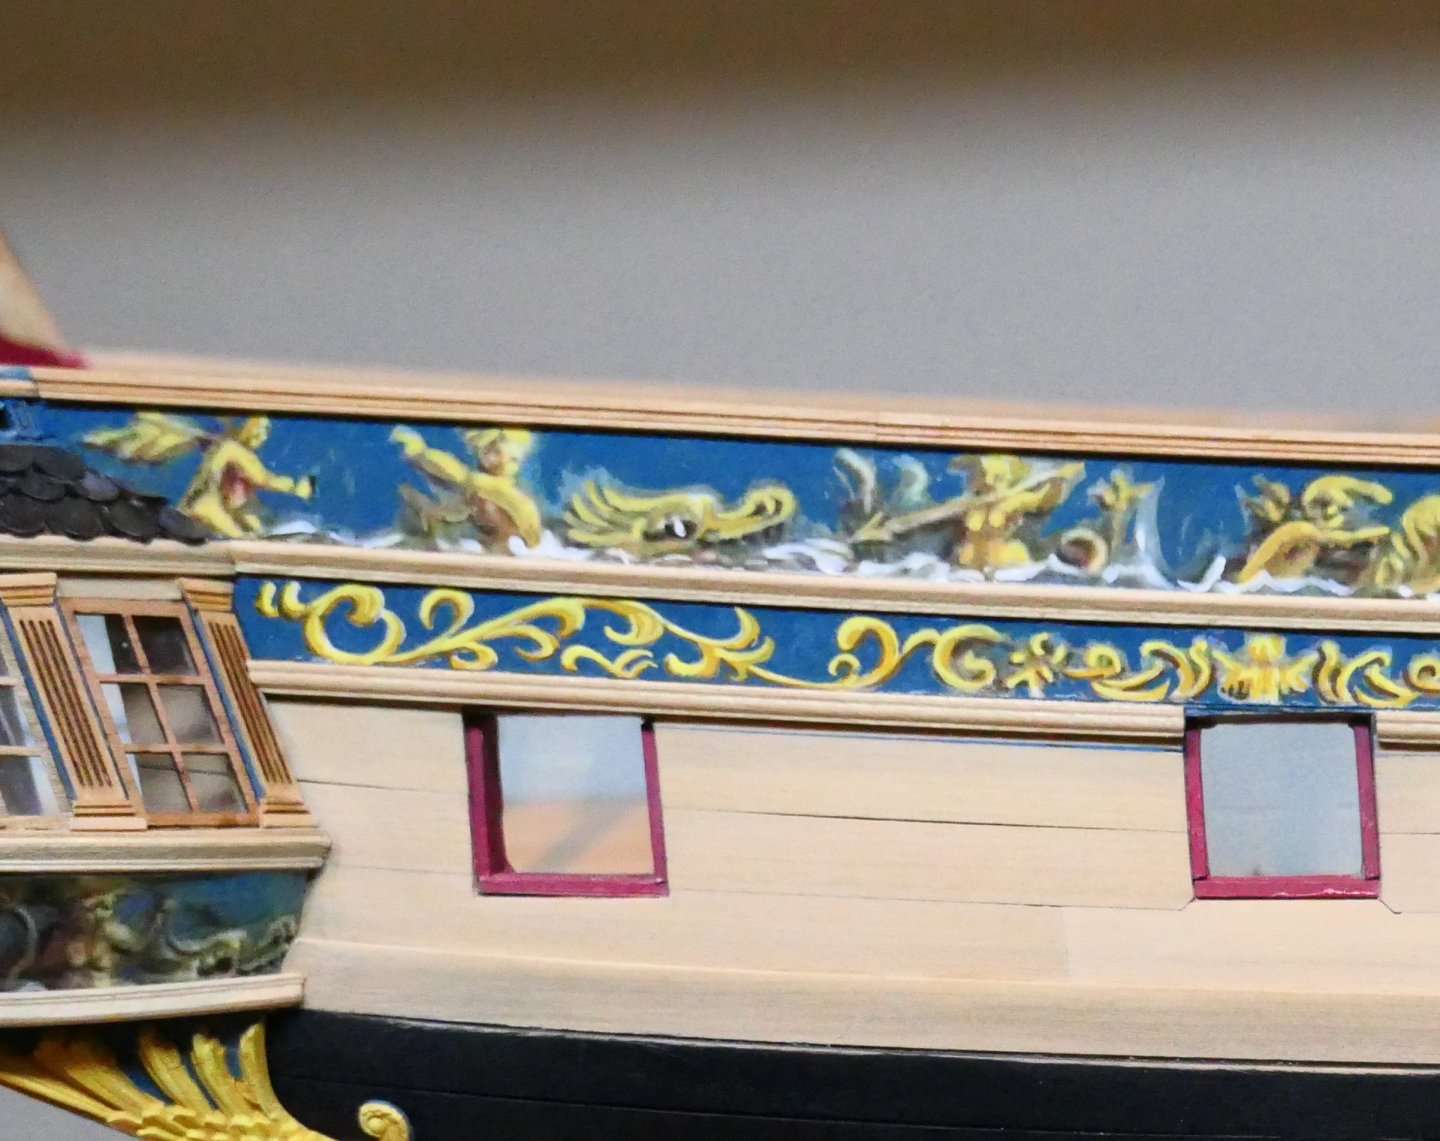
I spent a lot of time making up fixed blocks in costello box without realising the extent to which they disappear in situ. I decided to glue the Syren parts, sanded very thin and edge bevelled to the planking and to paint them, as best I was able, to match the friezes. Here they are.

This is where I am now.

All the best
Fred

-
A stunning model set off in a beautiful case. In a hundred years time perhaps one of your great grandchildren will say to his chums: "My great grandad made that" and they will look on with wonder.
Best wishes
Fred
- shipman, scrubbyj427, mtaylor and 1 other
-
4
-
-
Wonderful work. A dazzling creation.
- mtaylor, billocrates and giampieroricci
-
2
-
1
-
Are you, by any chance, going to make the capsquares available as a stand alone purchase for use with the resin barrels and gun carriages already available? I hope so!
I am presently rigging the guns on my Winchelsea. I shall follow your rigging of the guns with interest and I suspect a sinking feeling when I see how a master does it.
Best wishes
Fred
-
17 hours ago, dvm27 said:
Nothing screams out "look at me" but the entire effect is extraordinary
That elegantly puts in to words a feeling I had but I couldn't quite put my finger on what it was.
Fred
- dvm27, FrankWouts, Jack12477 and 1 other
-
4
-
8 hours ago, tlevine said:
Your Pegasus is beautiful and deserves to be appreciated by the modelling community.
I am sure it is.
It deserves a gold medal every day of the week in my eyes.
Fred
- billocrates and mtaylor
-
2
-
Thank you gentlemen for your likes and comments.
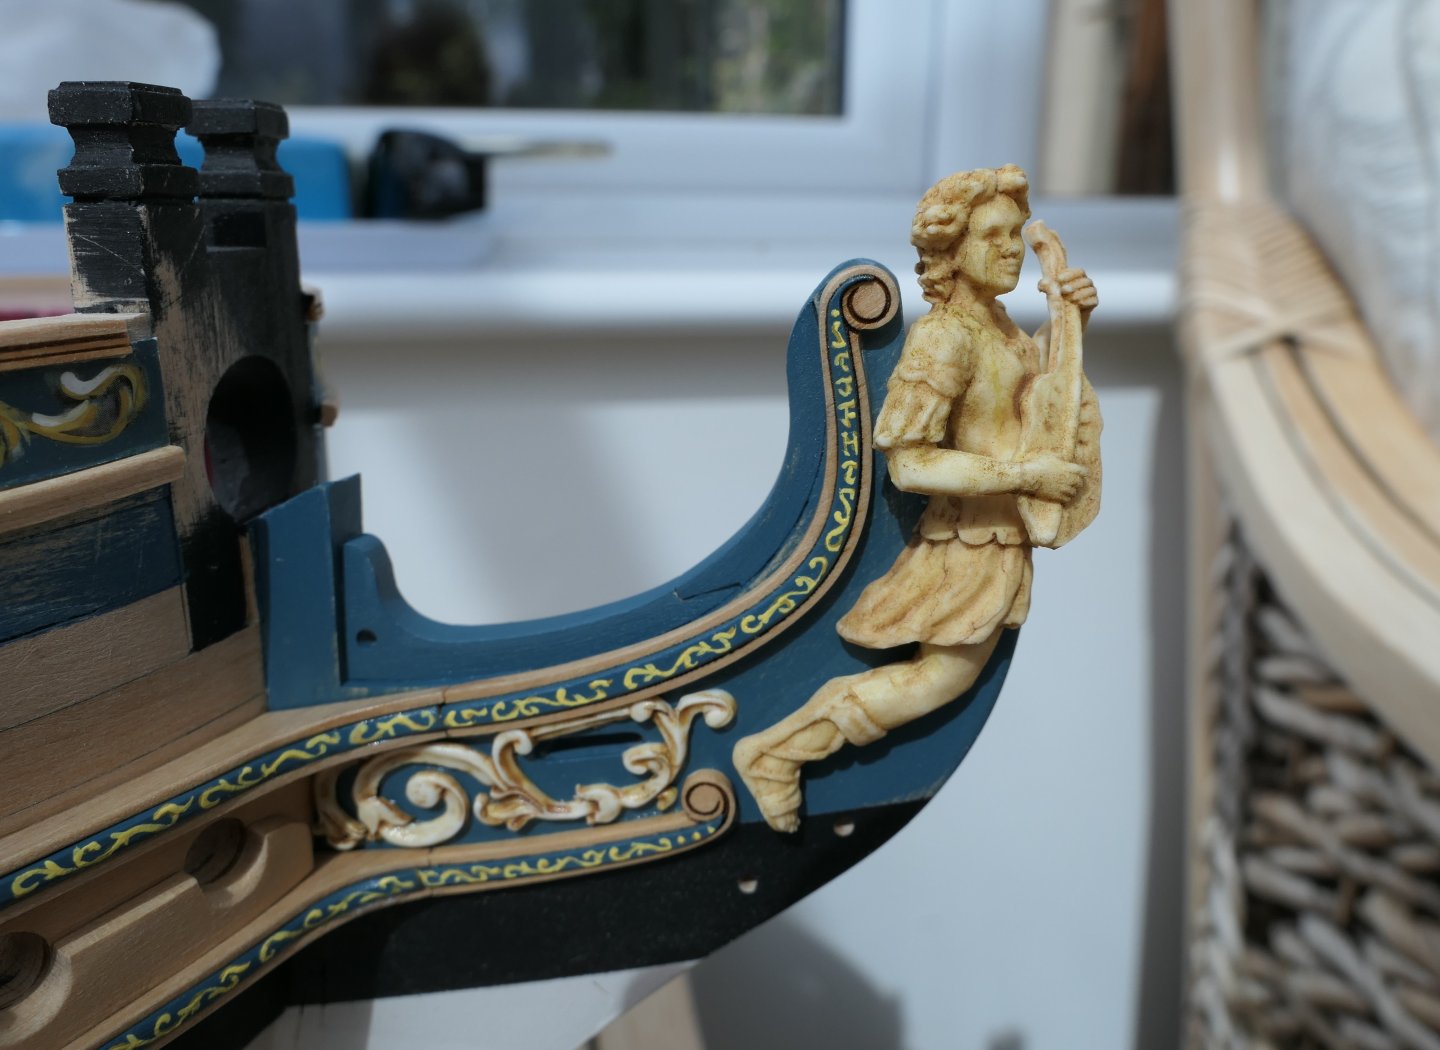
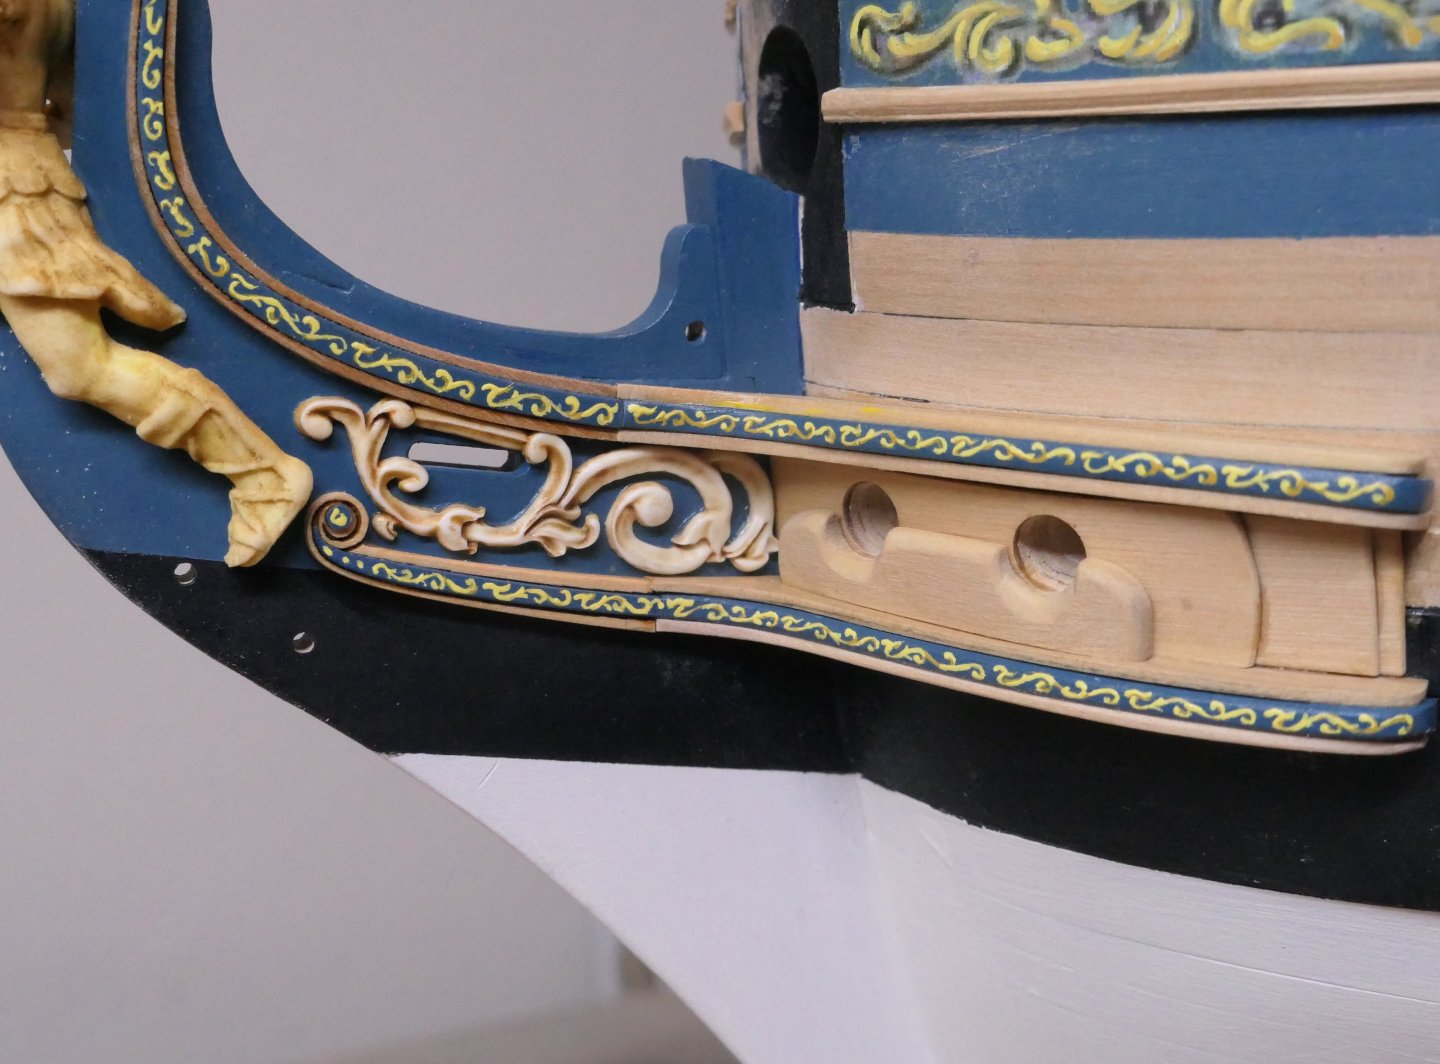
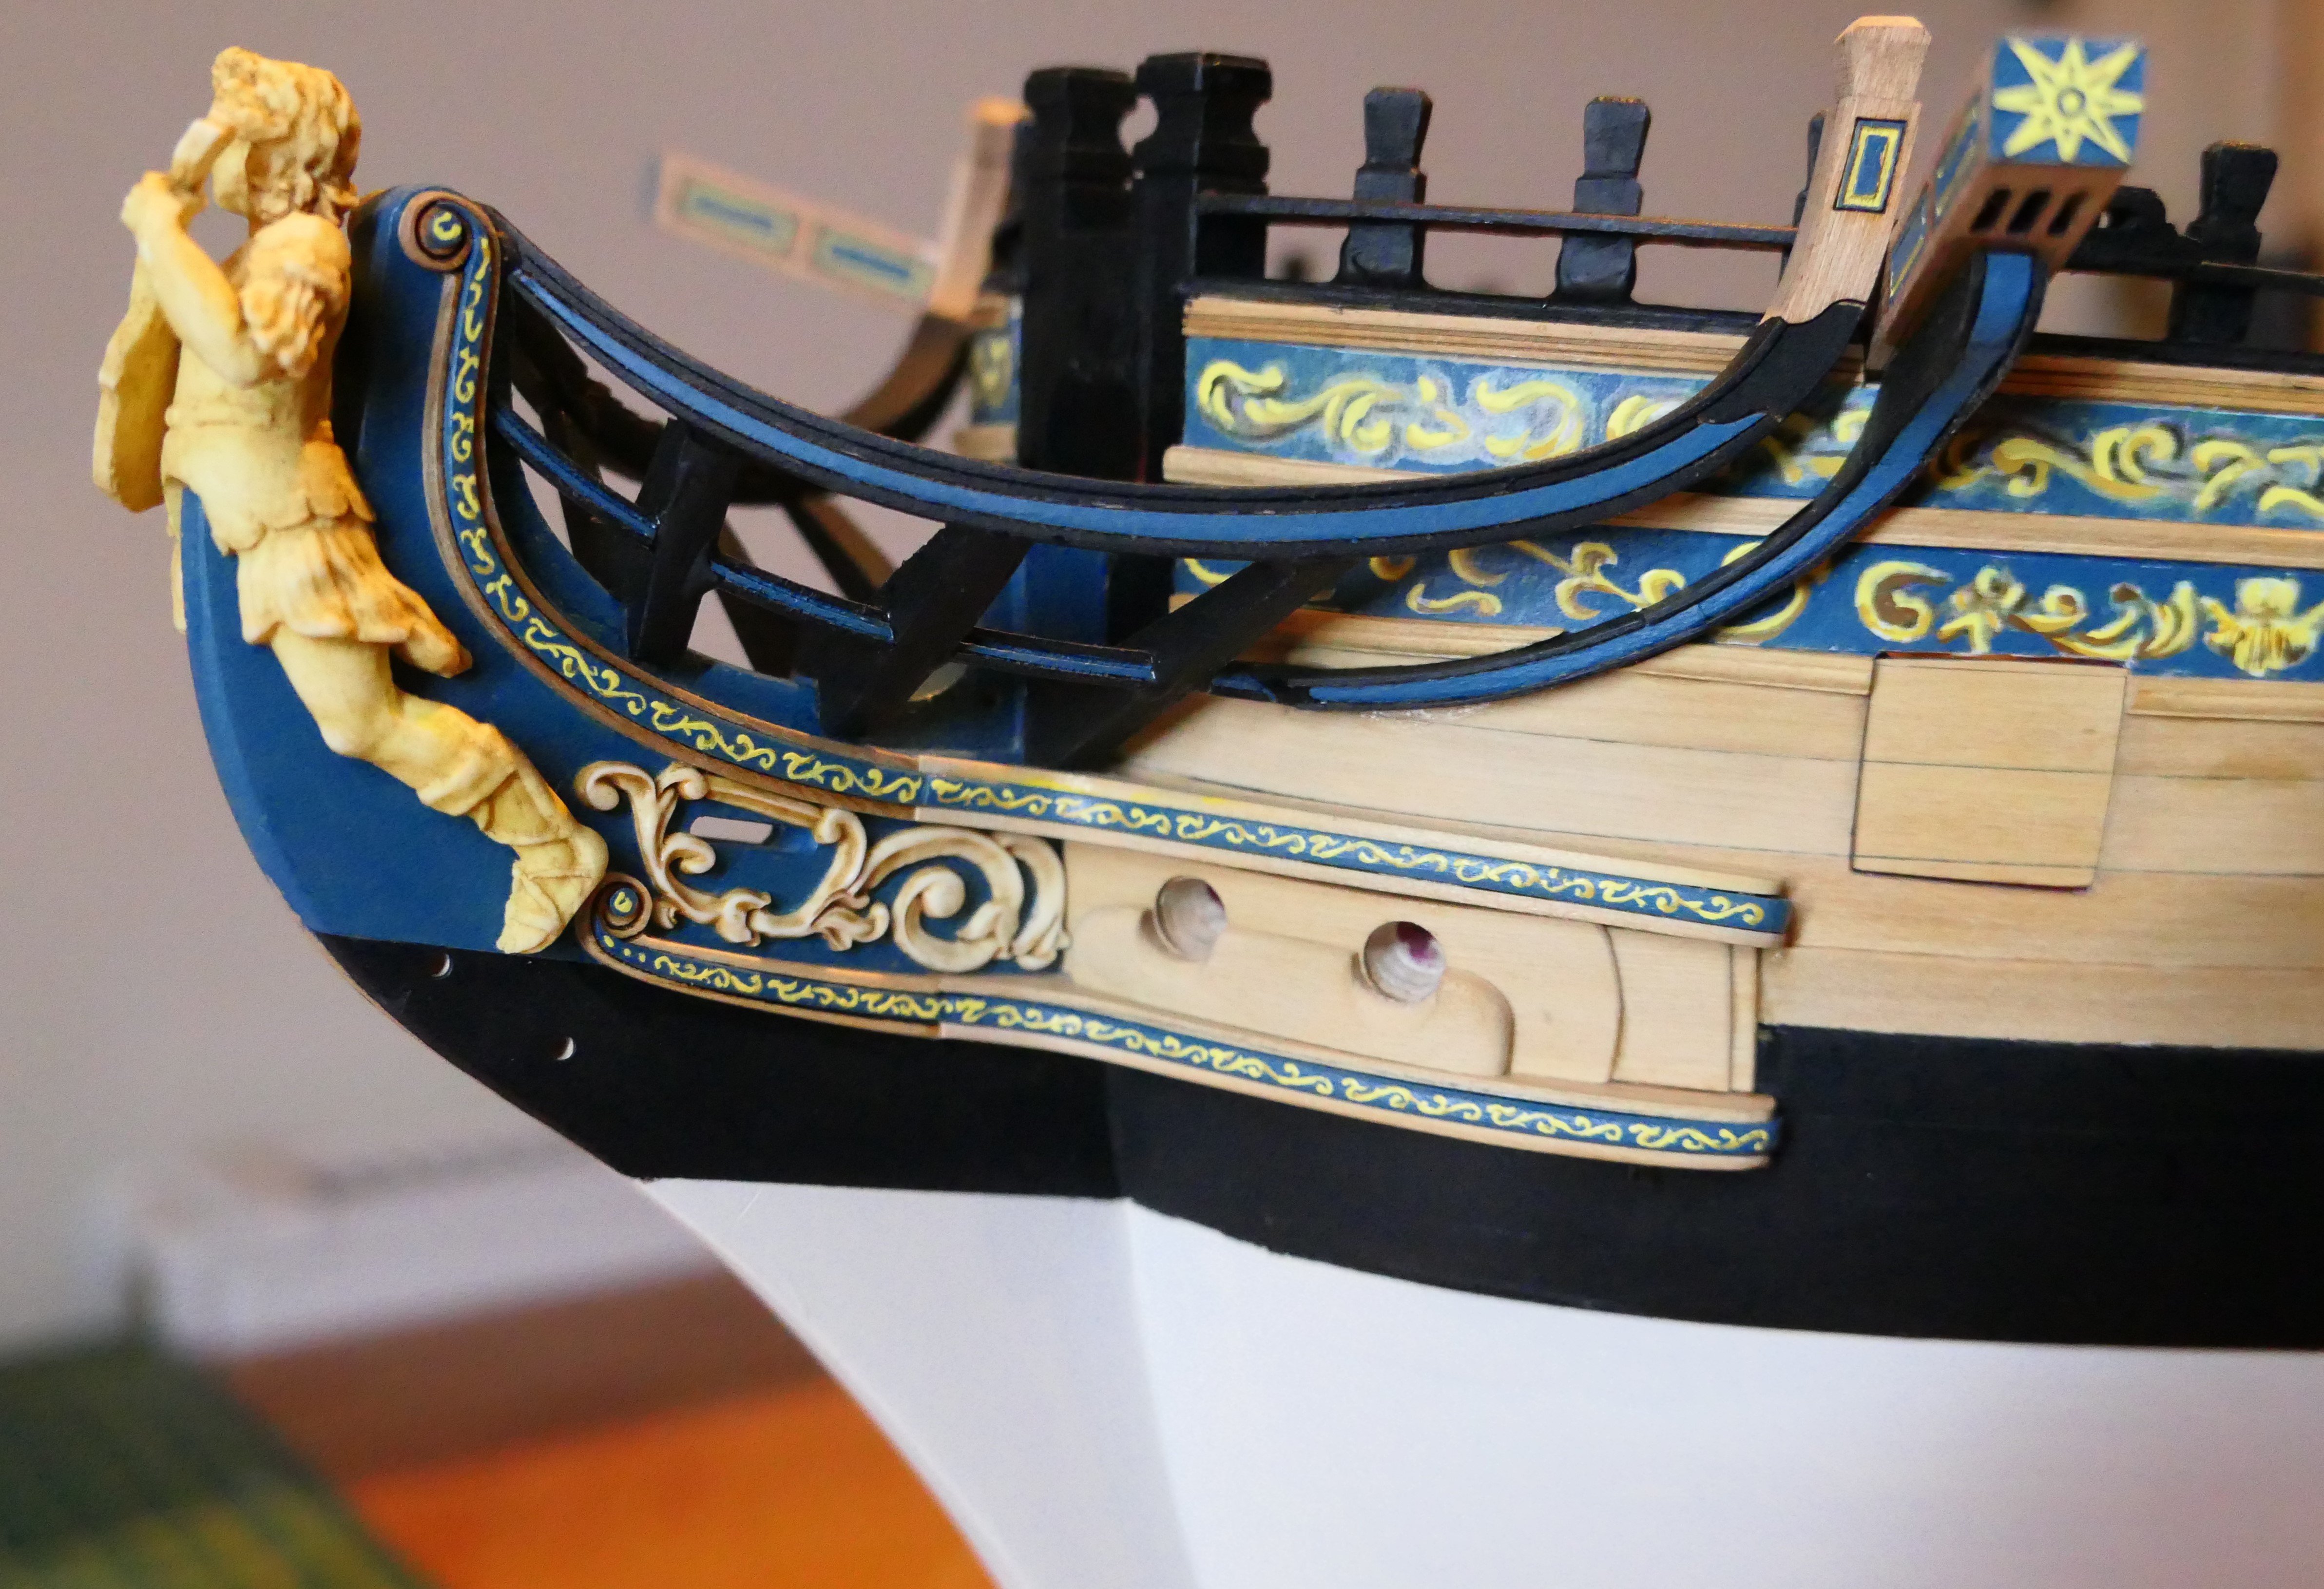
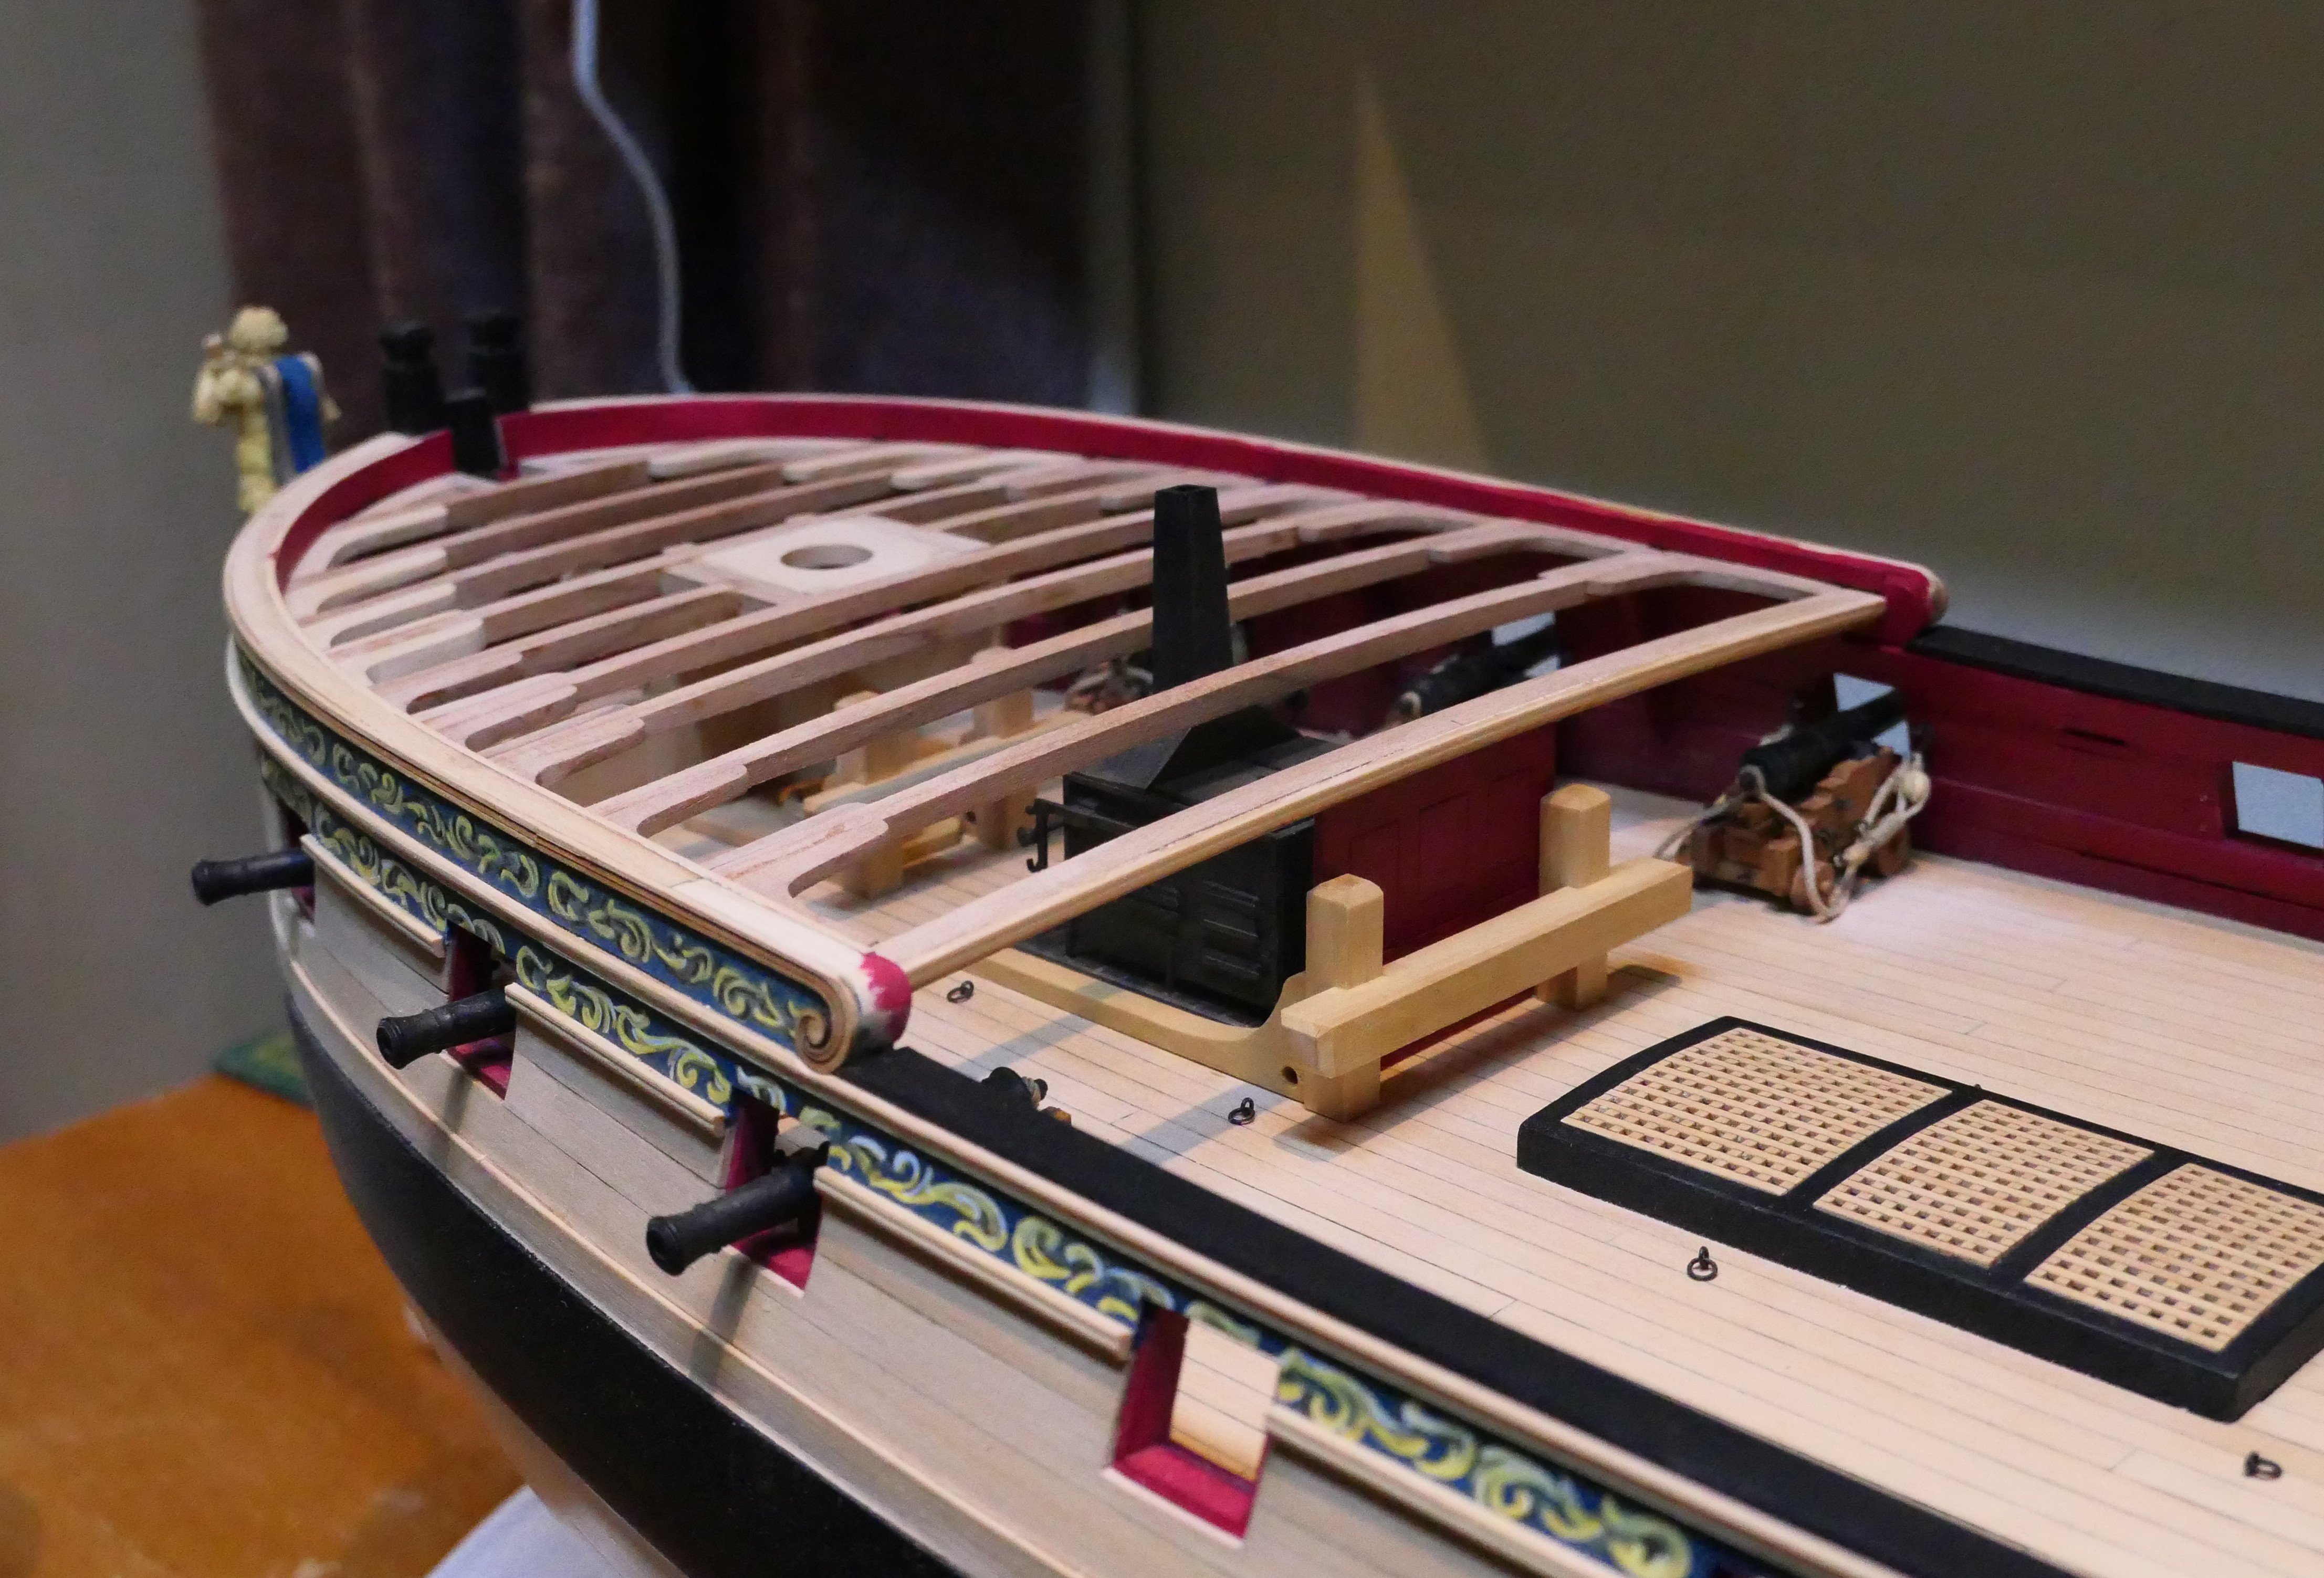
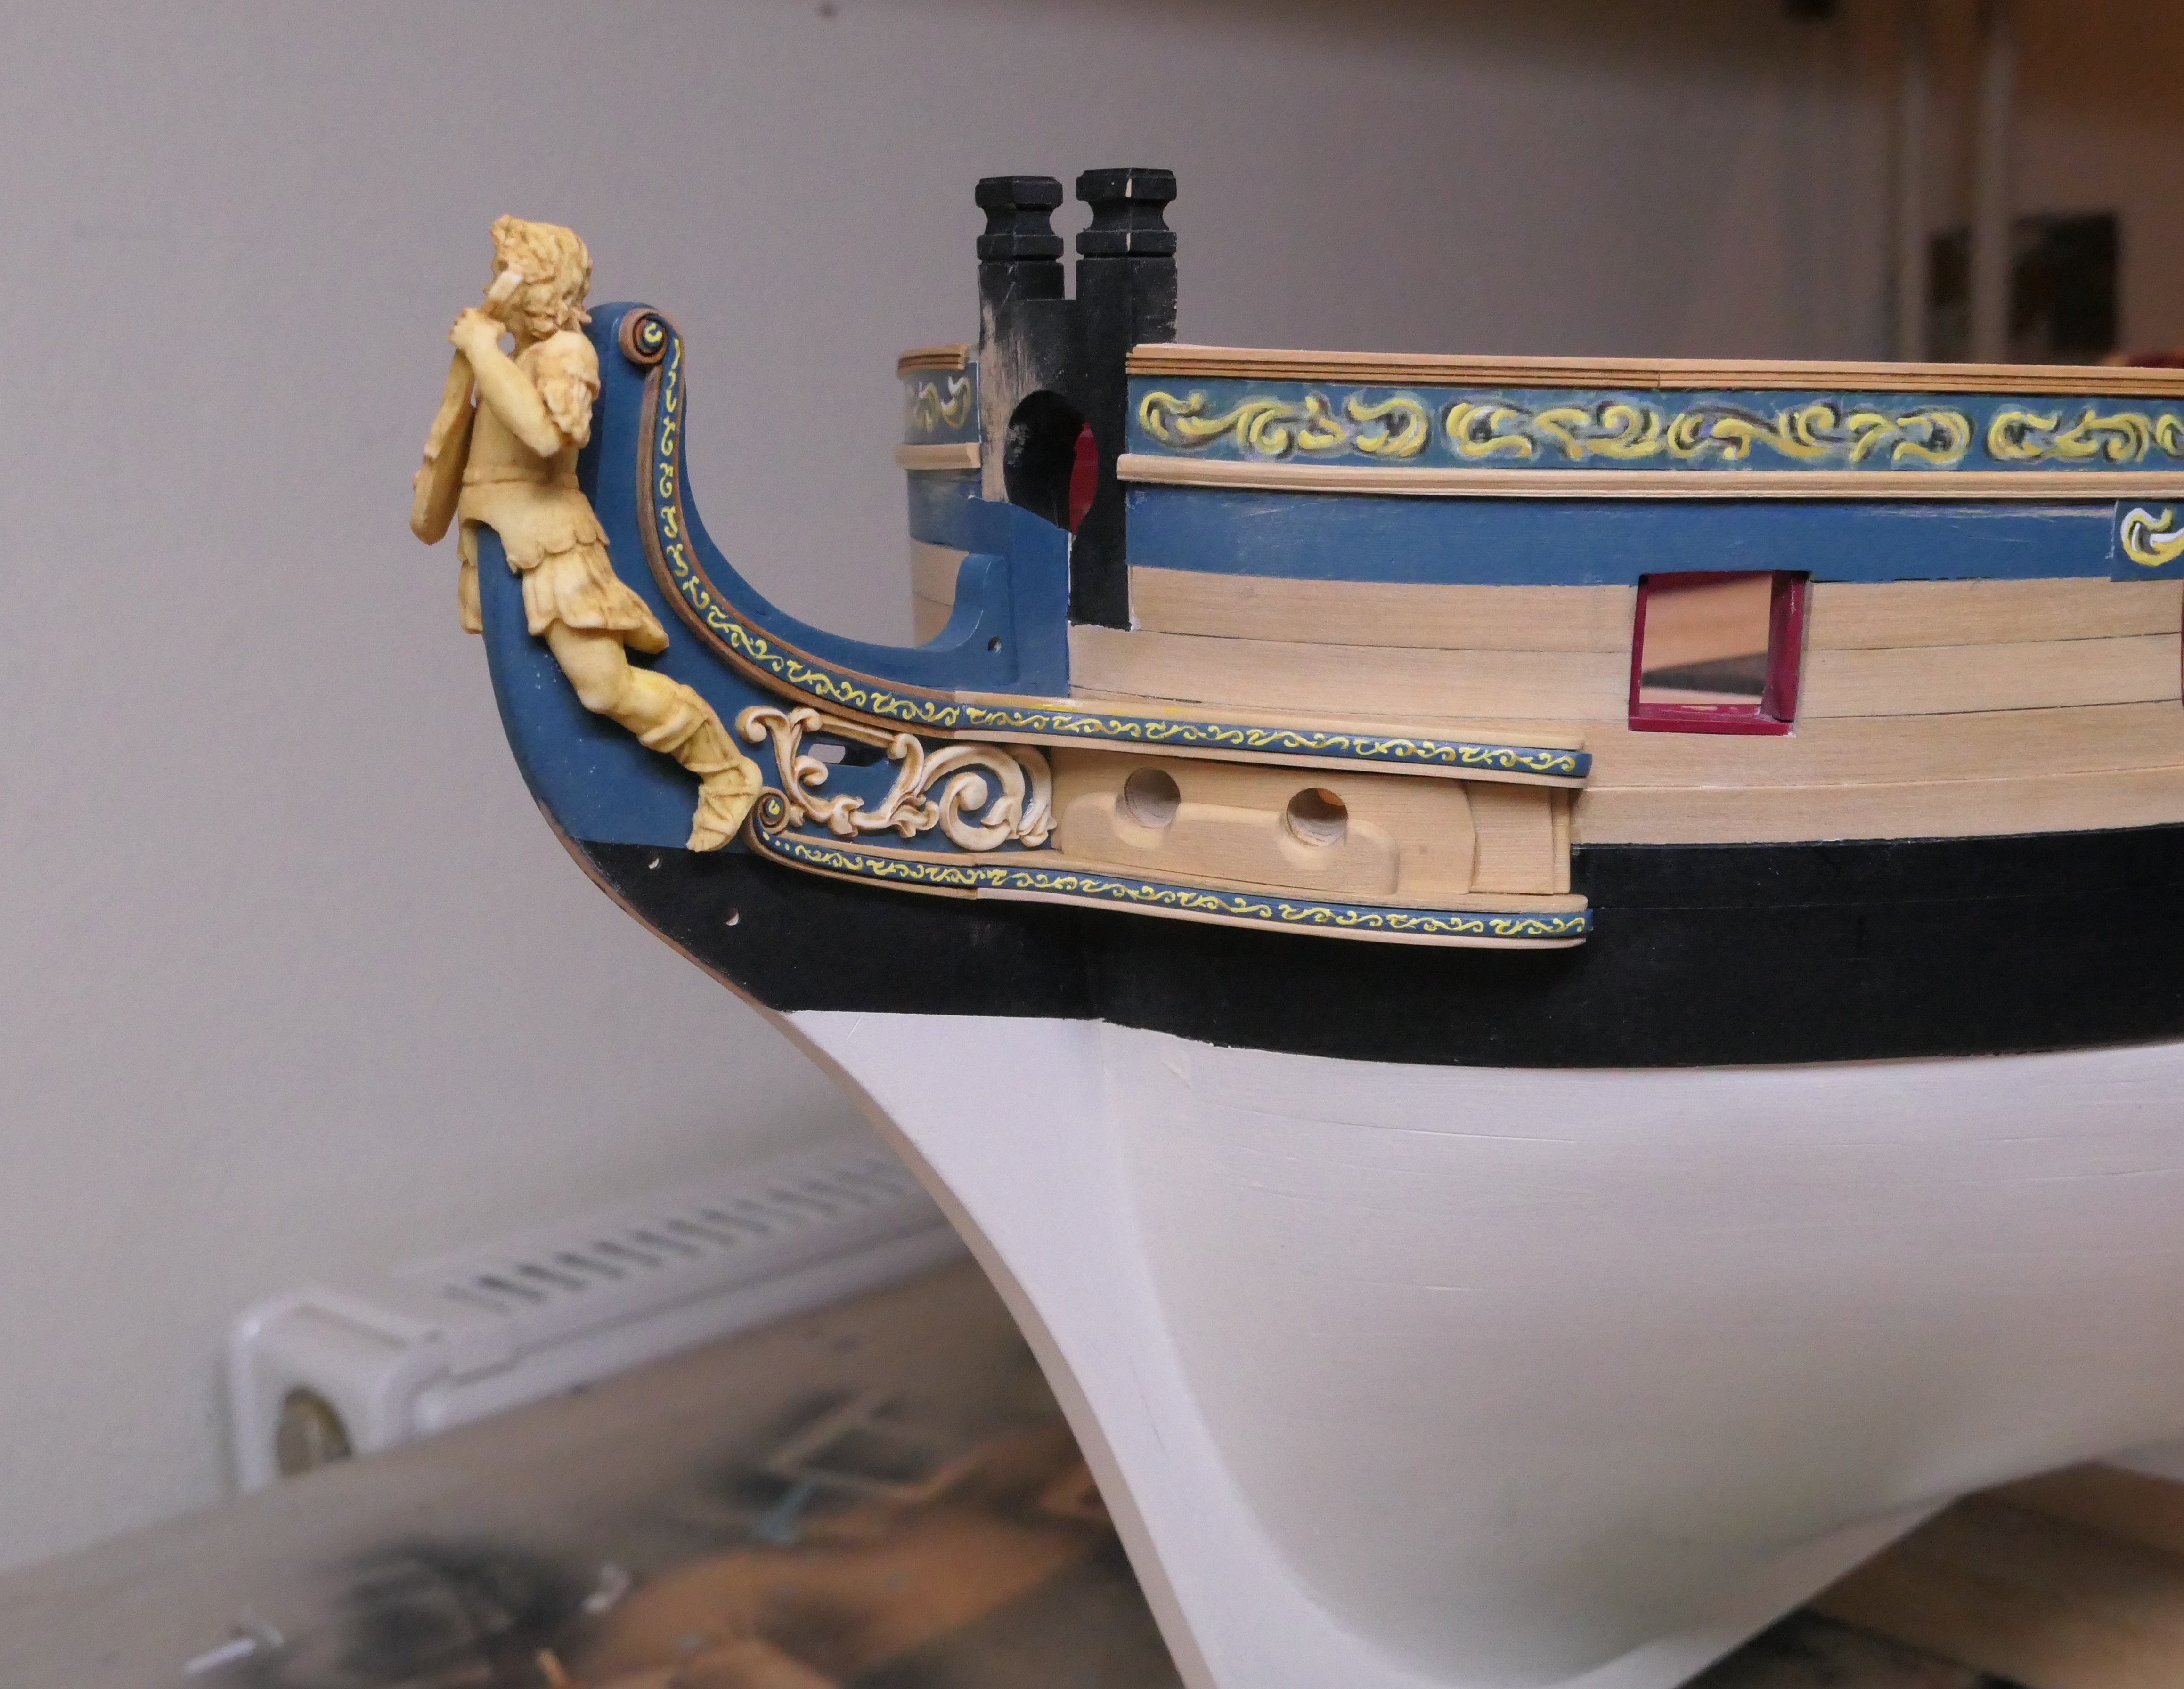
Here is a small update on the hair brackets and cheeks. I thought I would paint them blue with a yellow facing. It seemed like a good idea but it didn't work out - and sanding the paint off was a bit of a disaster. Chuck very kindly sent me replacements.
I didn't entirely follow the building order set out in the instructions. After ages of fiddling about trying to line things up I settled on starting with the upper hair bracket and using that as a datum point as it were.
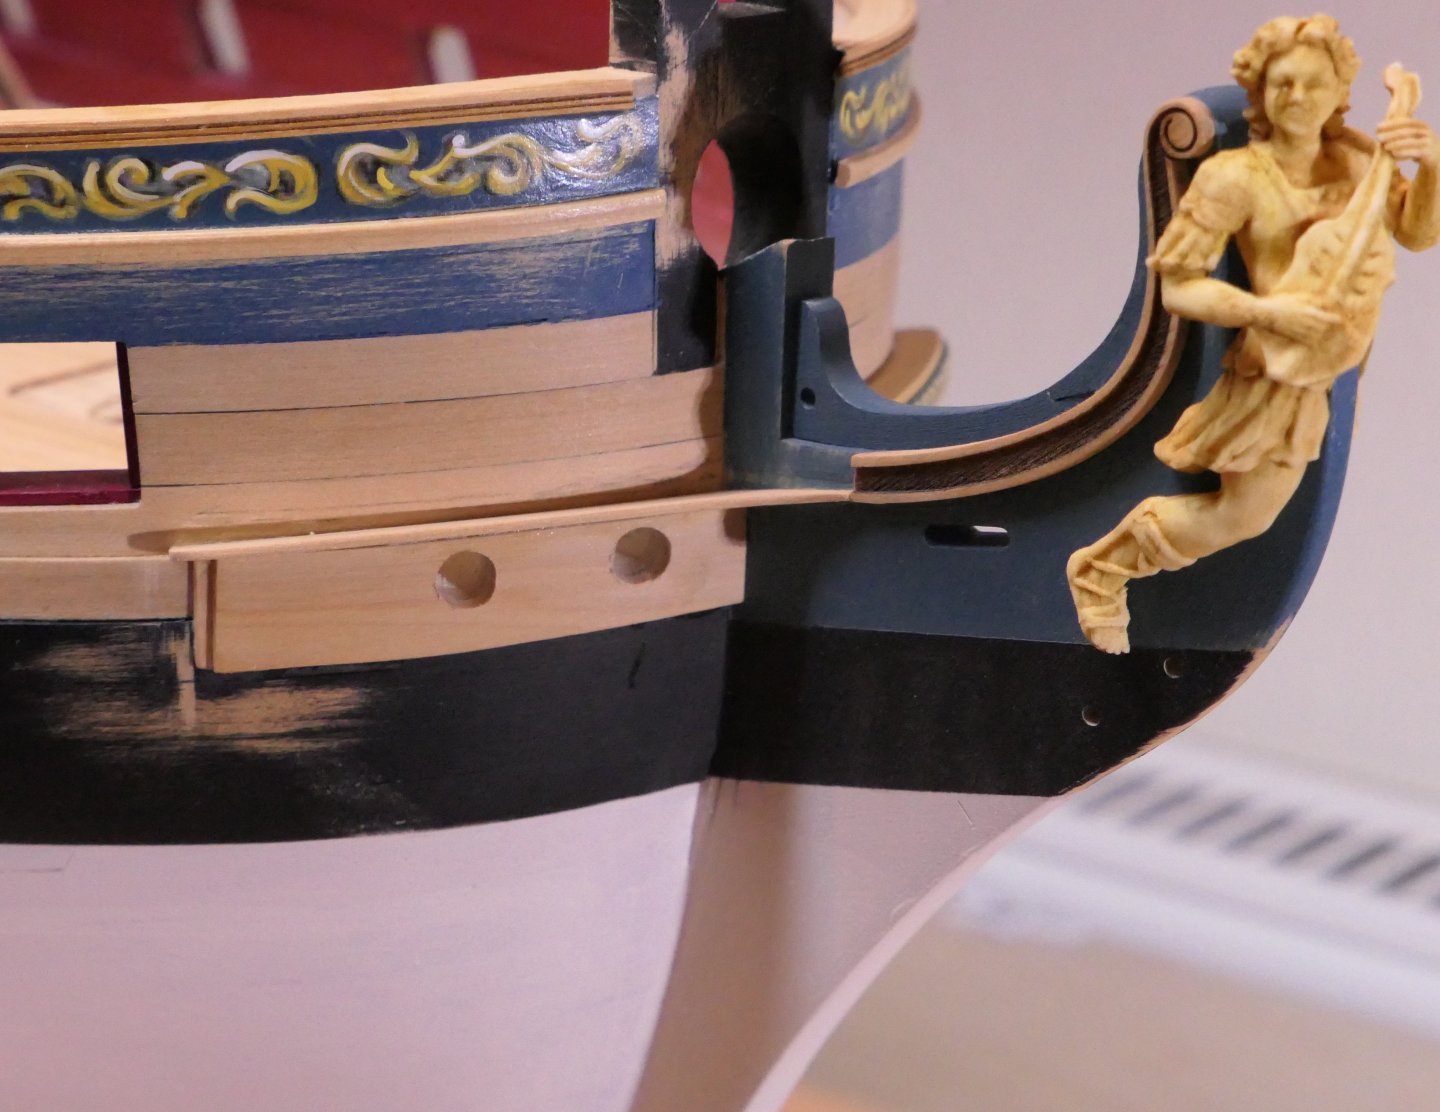
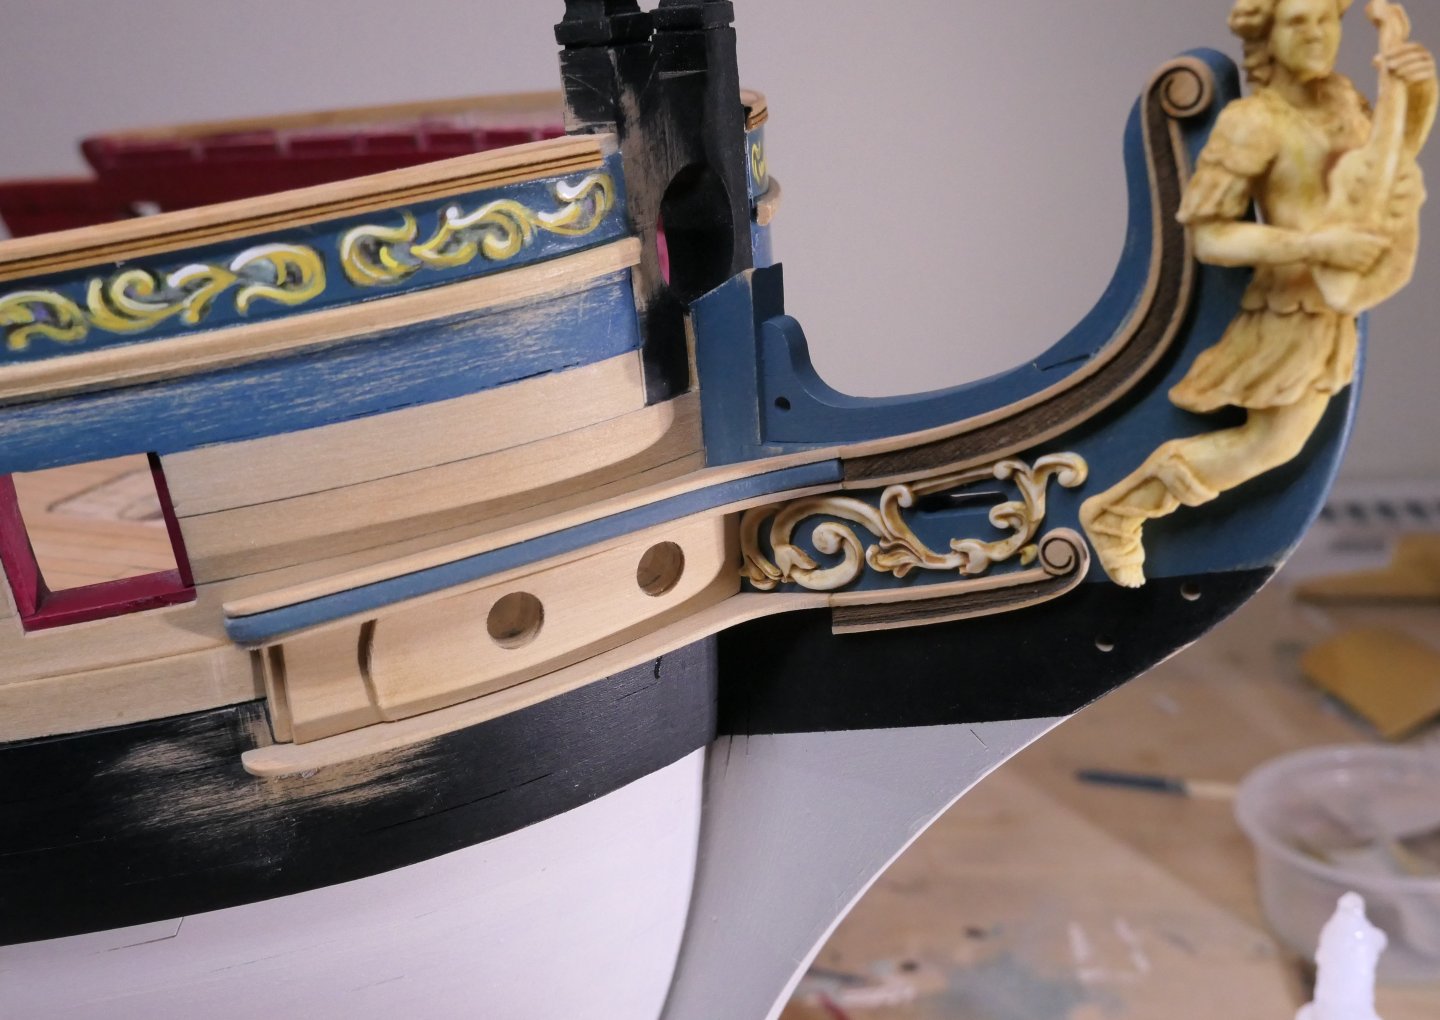
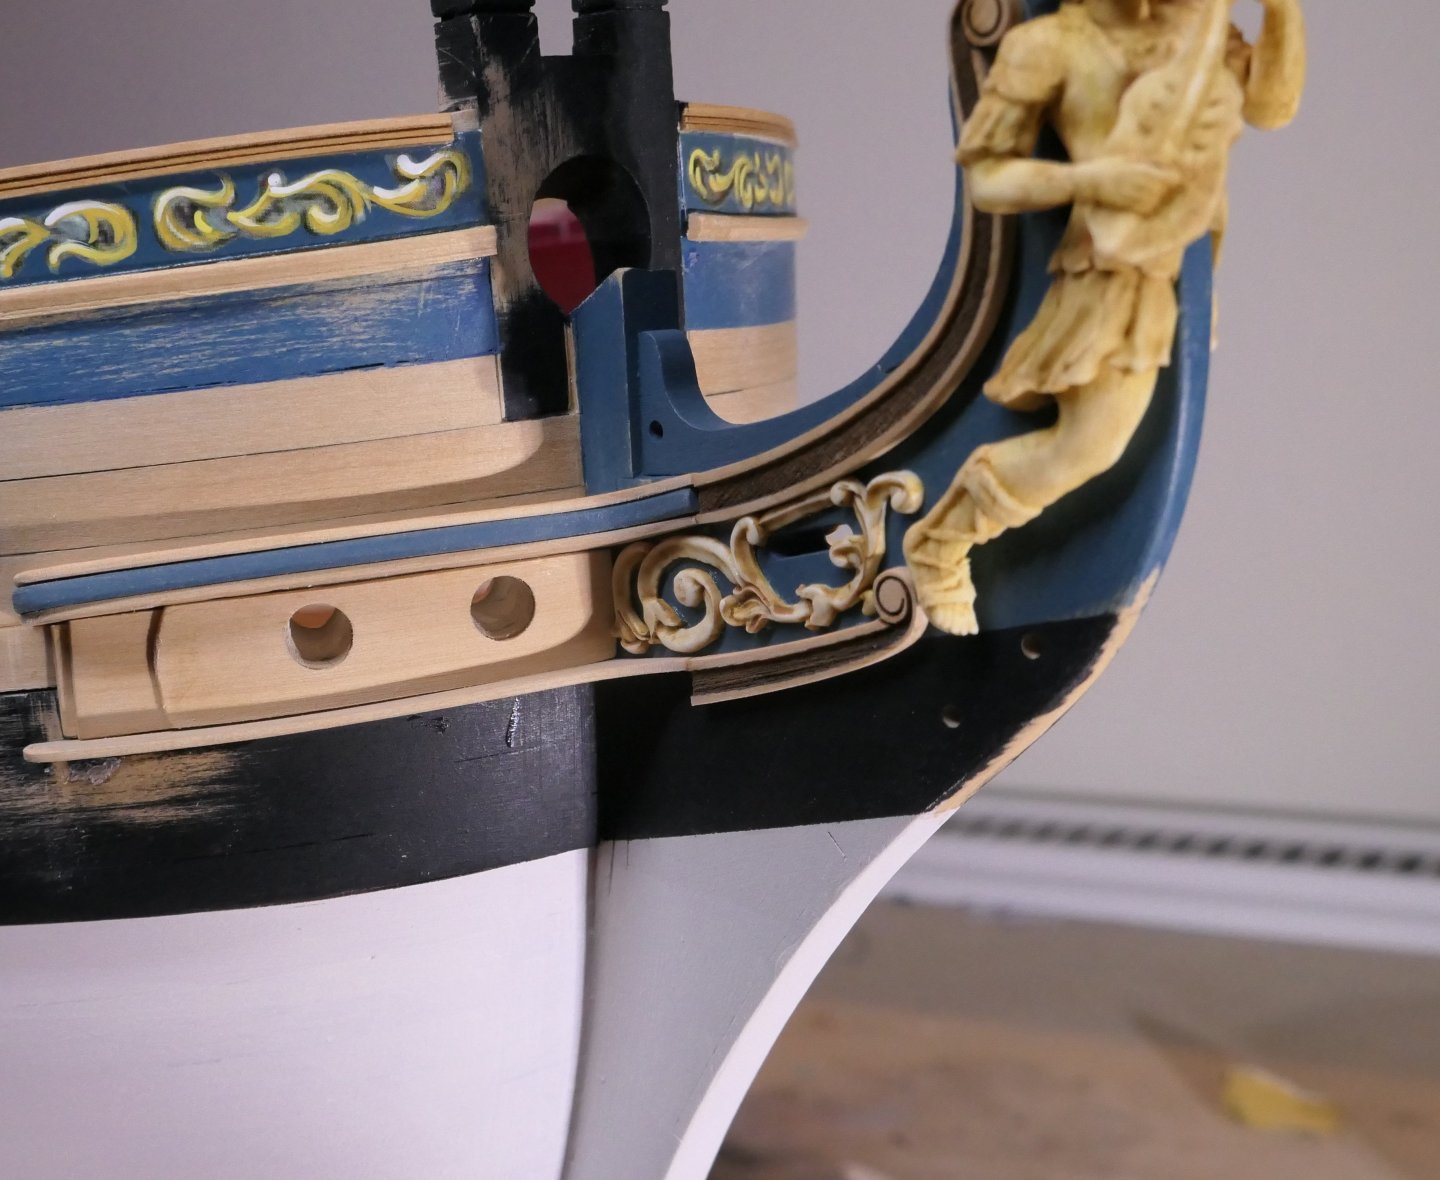
I painted the friezes off the model.
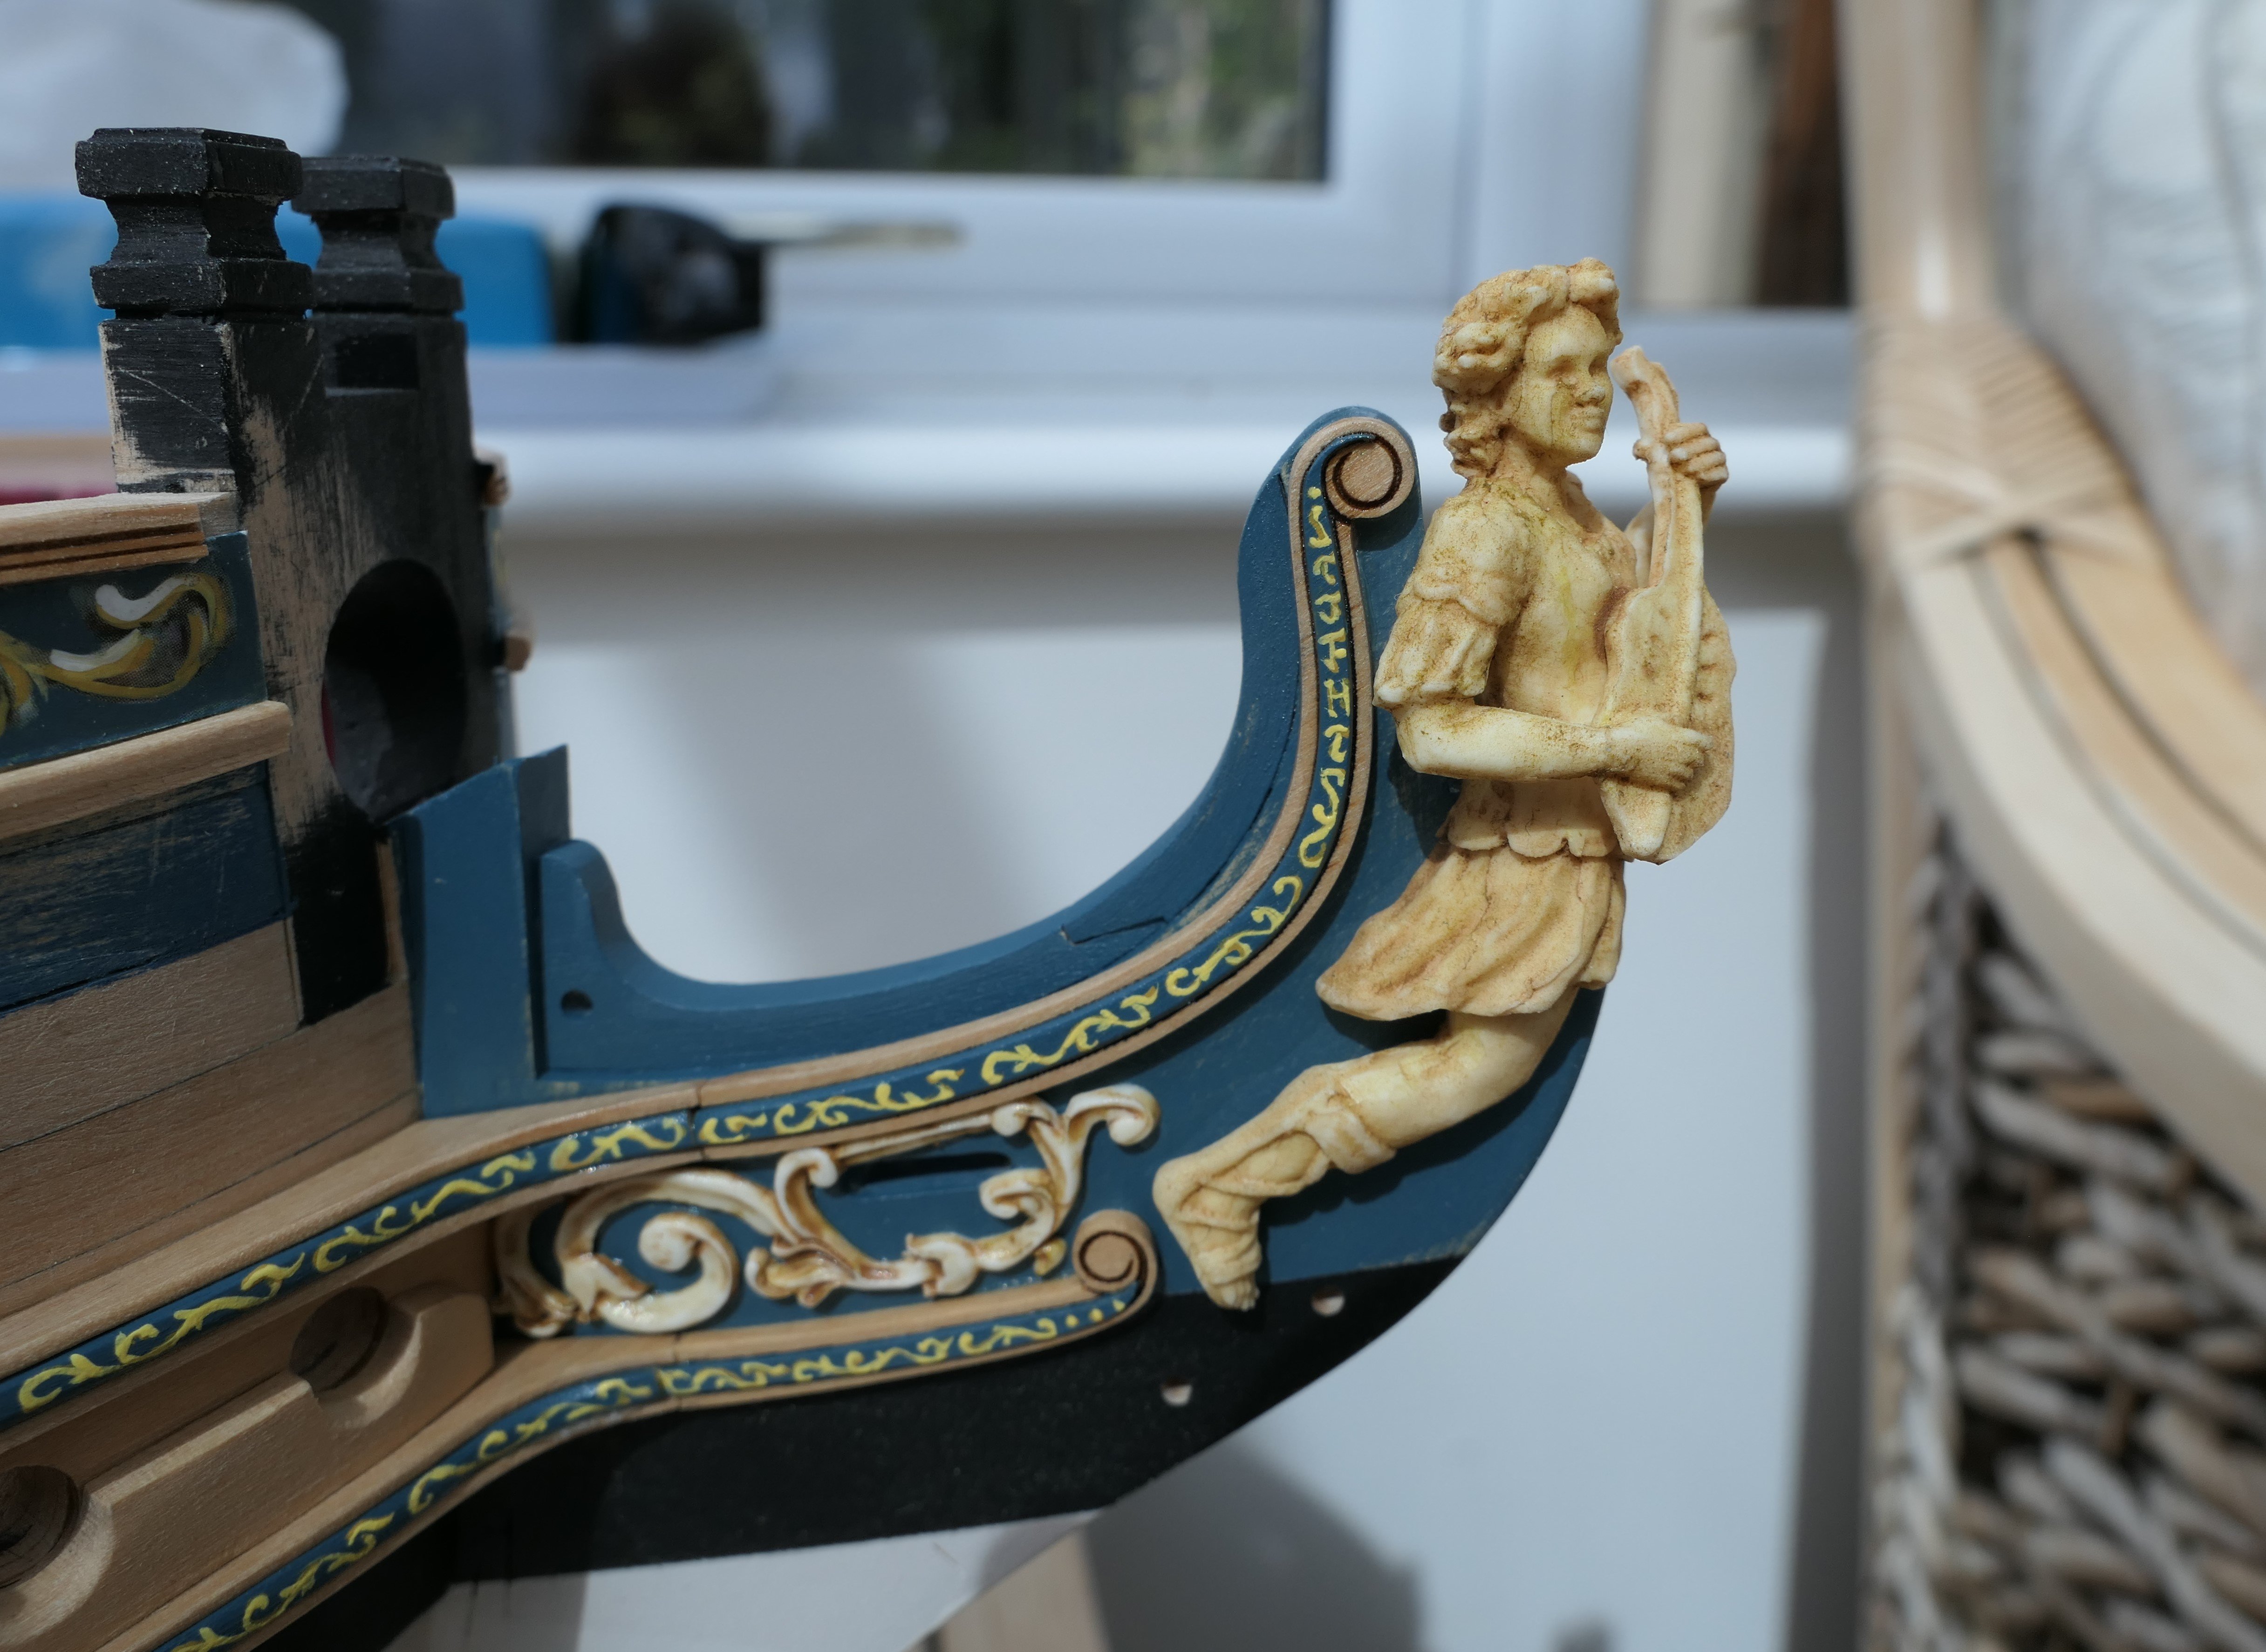
And this is how they came out. I painted my initials (JFH) on the starboard hair bracket - just behind the figurehead's upper arm - for a bit of fun.
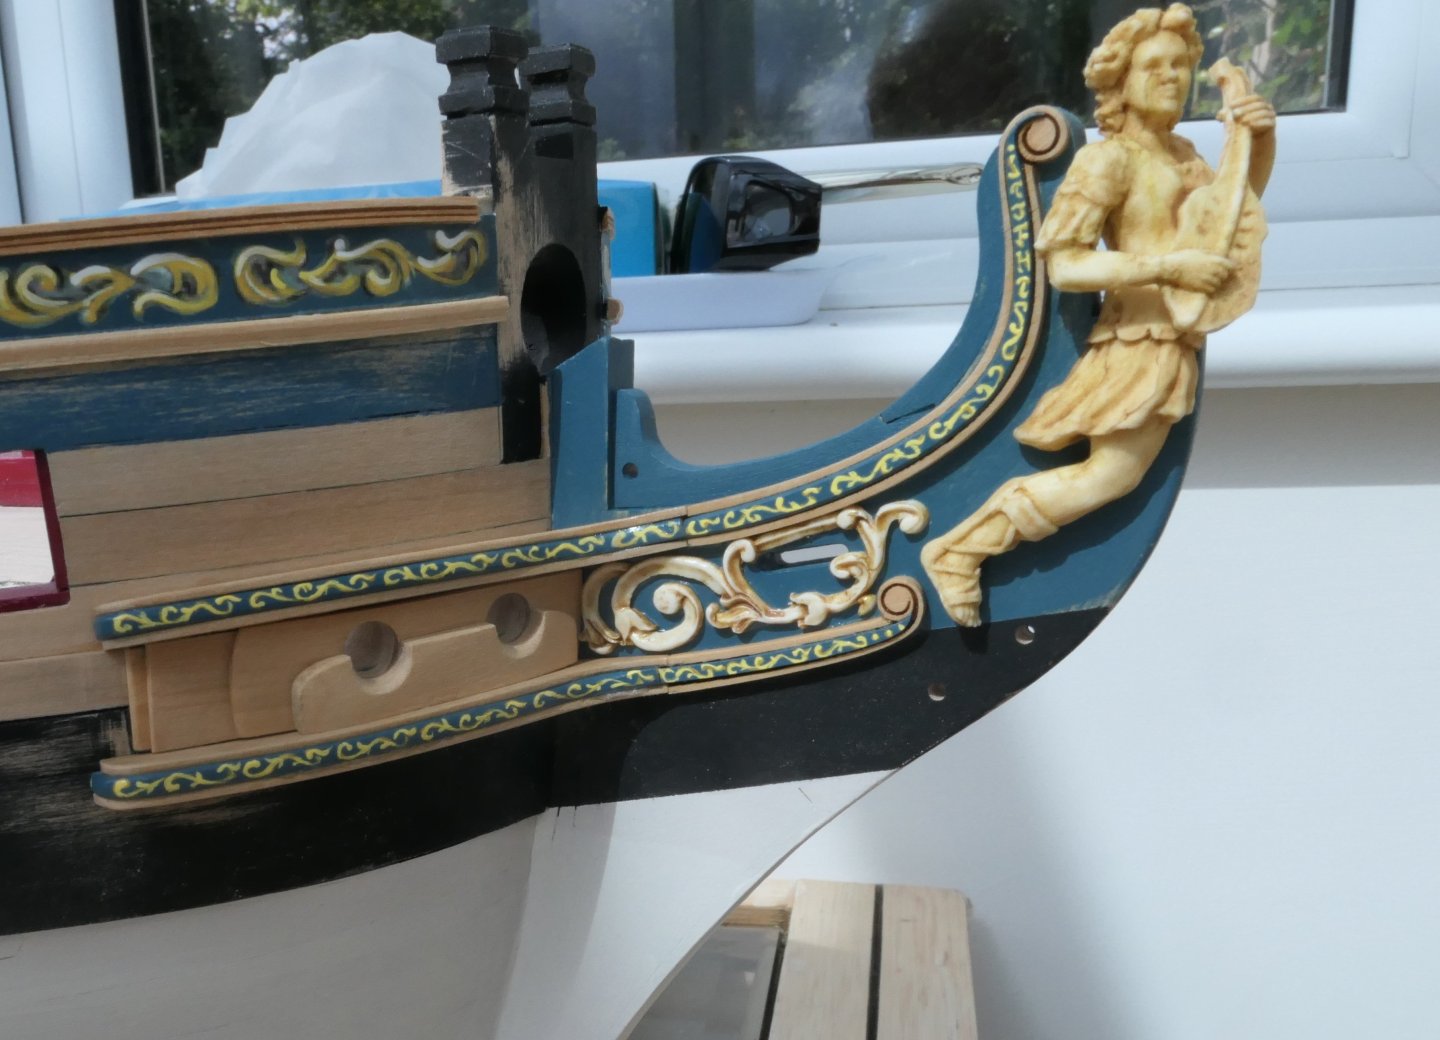
And here is the port side. Some tidying up of the scruffy paint work required but otherwise I'm happy with the outcome.

All the best
Fred
-
Oh dear! That must be hugely upsetting. I know, however, you will sort it out one way or another.
- archjofo, Keith Black and mtaylor
-
3
-
-
Beatiful, beautiful, beatiful. I love it. The only problem I have with it is this. I look at your work - and Siggi's and Johann's and Chuck's to name a few and I think: "B*****, I am going to take up gardening or ball room dancing or something....."
Best wishes
Fred
- James G, billocrates, GrandpaPhil and 4 others
-
4
-
 3
3
-
Johaan - would you post a few photos of the whole ship as she stands - as distinct from close ups of your extraordinary rigging? This truly is a remakable build. One for the ages.
best wishes
Fred
- davyboy, Keith Black, mtaylor and 3 others
-
6
-
Especially folding the friezes around the chesstrees and achieving continuity in the pattern.
- glbarlow and FrankWouts
-
2
-
I love it. Really nice work.
Best wishes
Fred
- glbarlow and FrankWouts
-
2
-
10 minutes ago, scrubbyj427 said:
Will be posting an update soon.
Good-oh
- scrubbyj427 and mtaylor
-
2
-
-
Wonderful - simply stunning.
If, now I have retired, I take up international burglary for a pastime, your house (and those fellows Siggi and Archjofo in Germany and Giampieroricci in Italy to name a few) is one I plan to visit. Would you be very kind and send me your address and a list of any days you will be away on holiday?
Many thanks
Fred
-
It's diffficult to see how it would be possible to build a finer version of Cheerful. Nothing, as far as I can see, could be improved. Superb.
Fred
- Erik W, Ryland Craze, CiscoH and 1 other
-
4
-
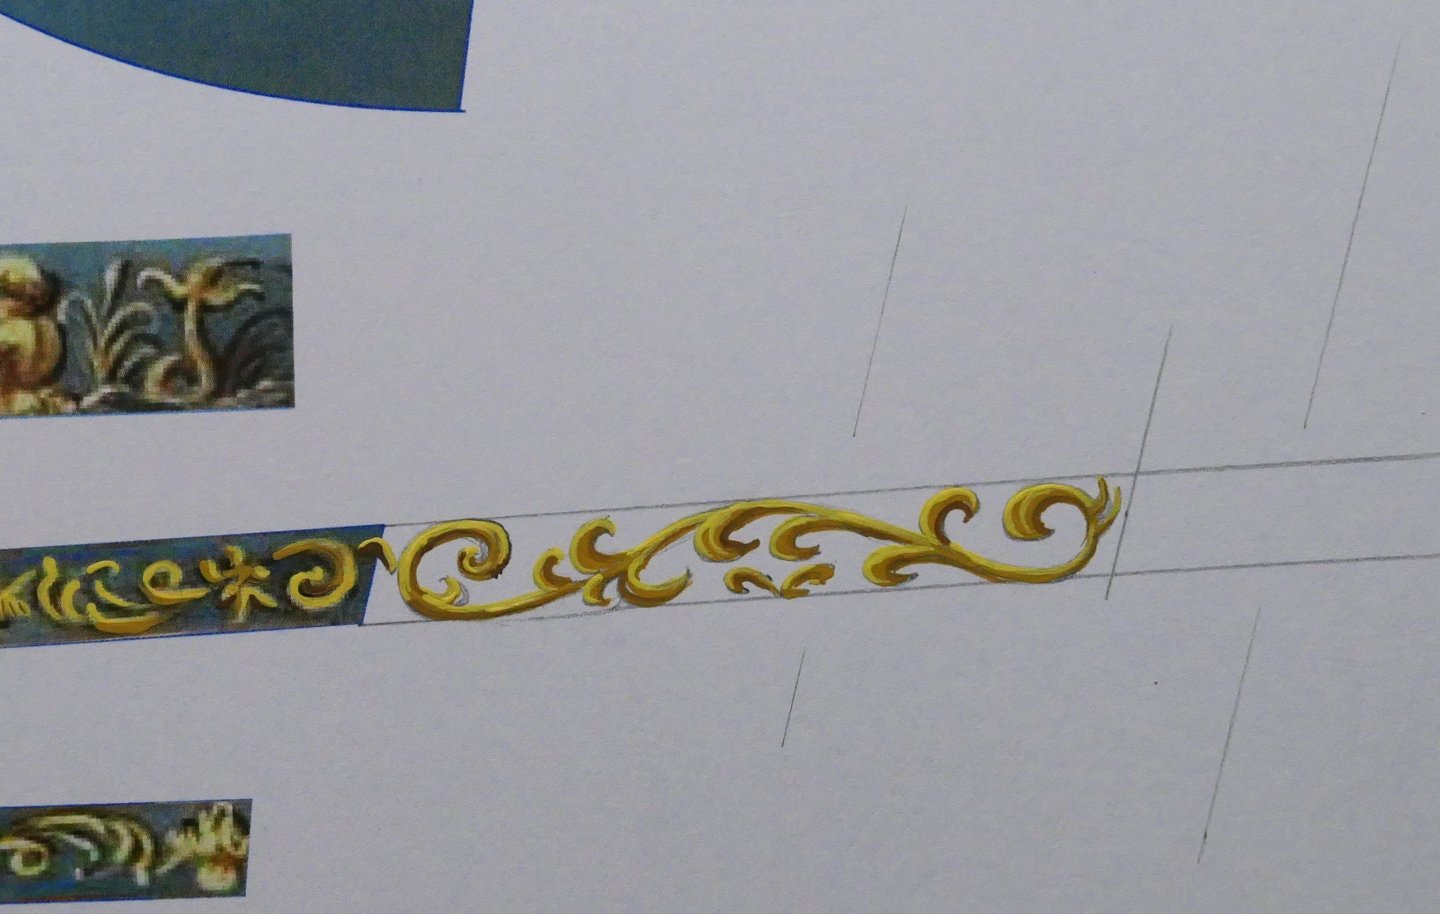
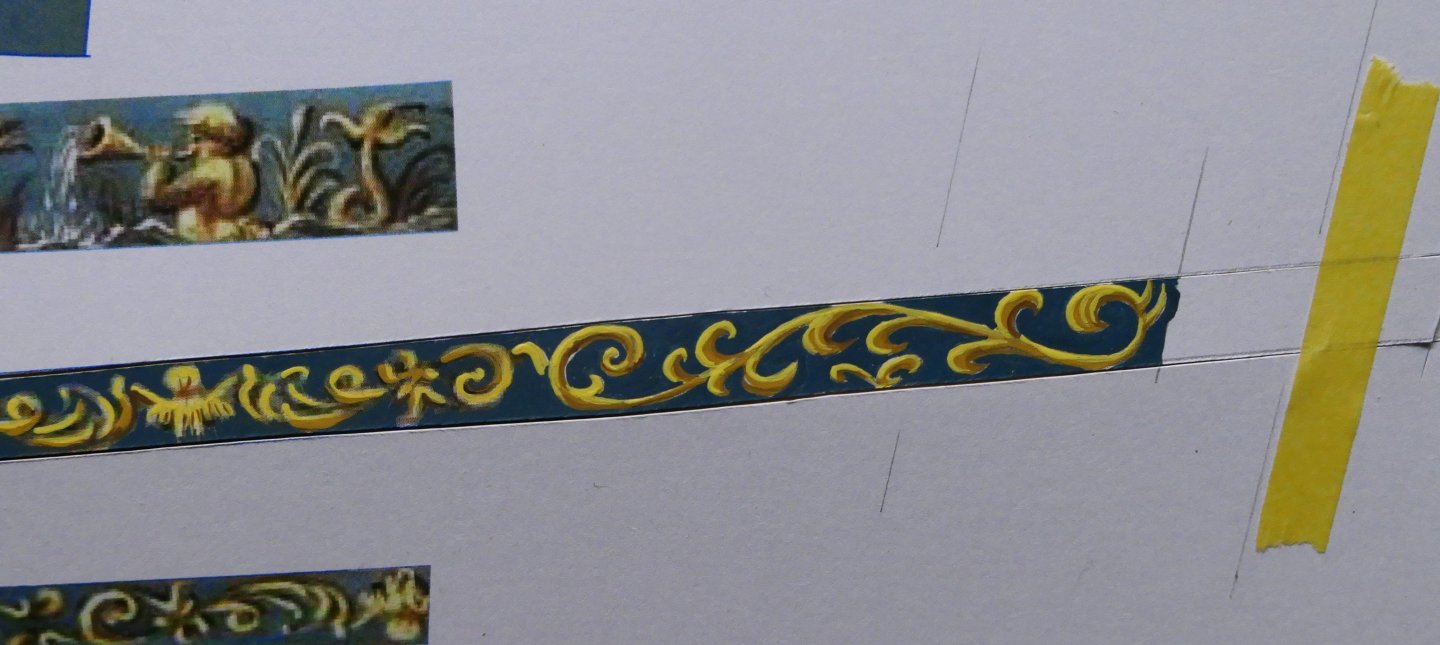
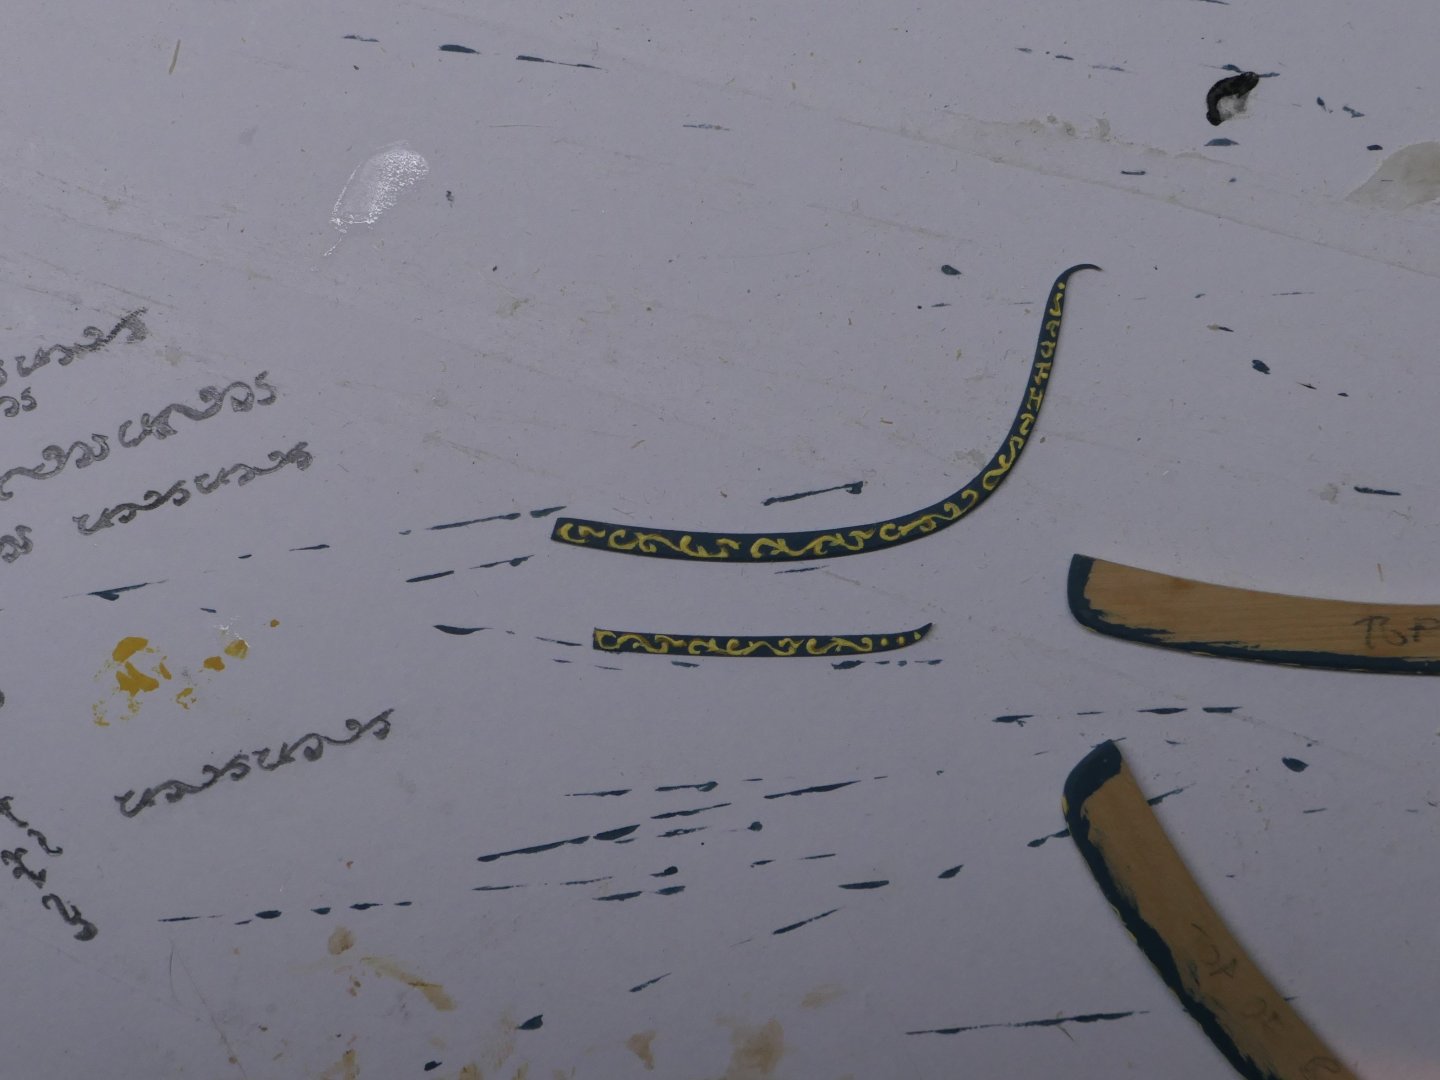
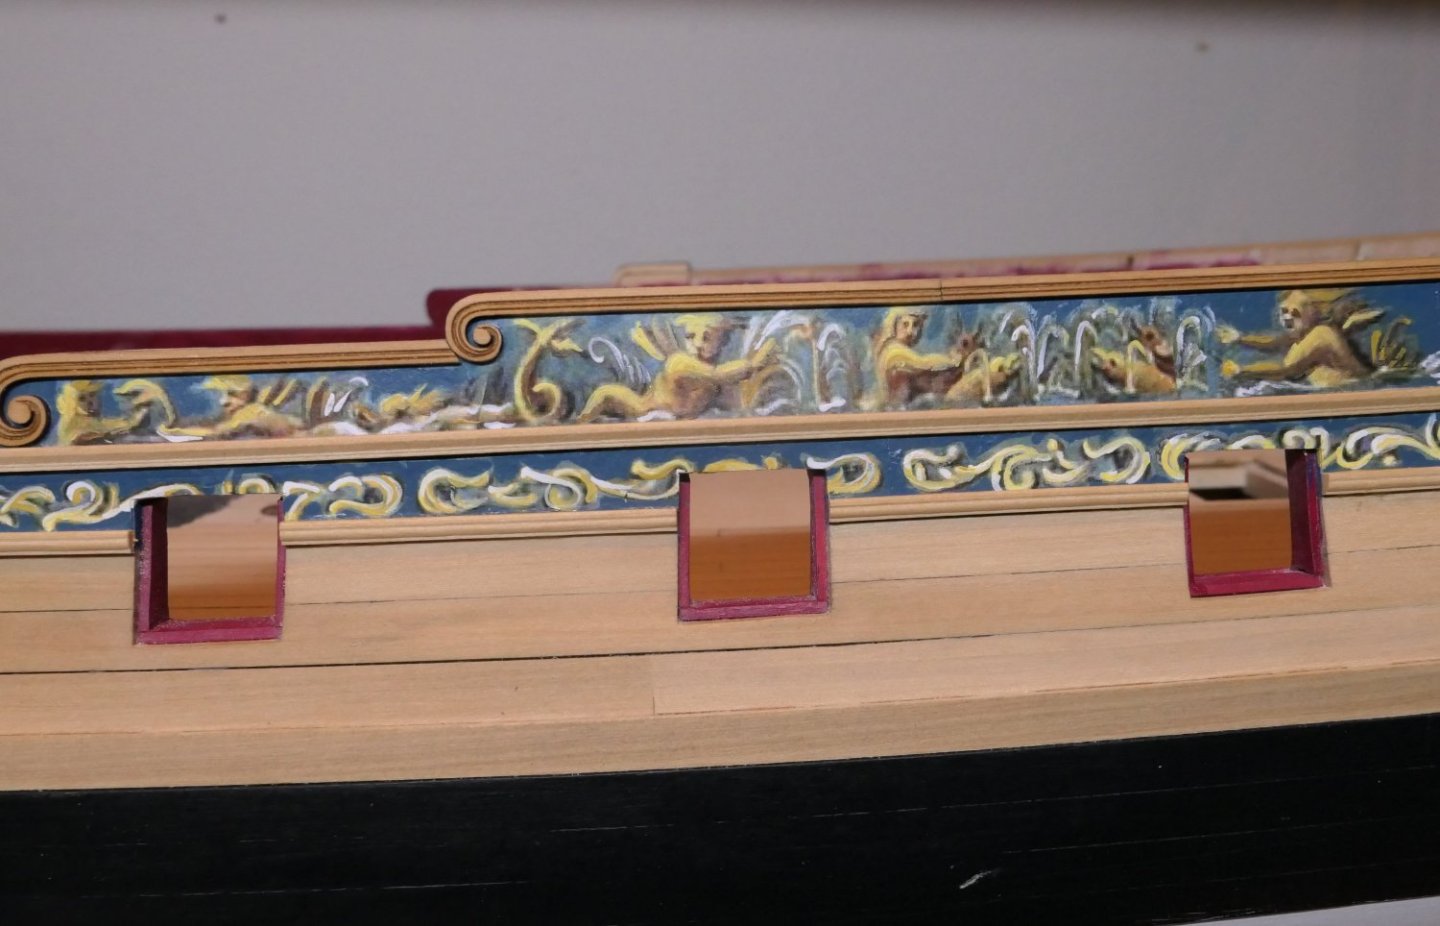
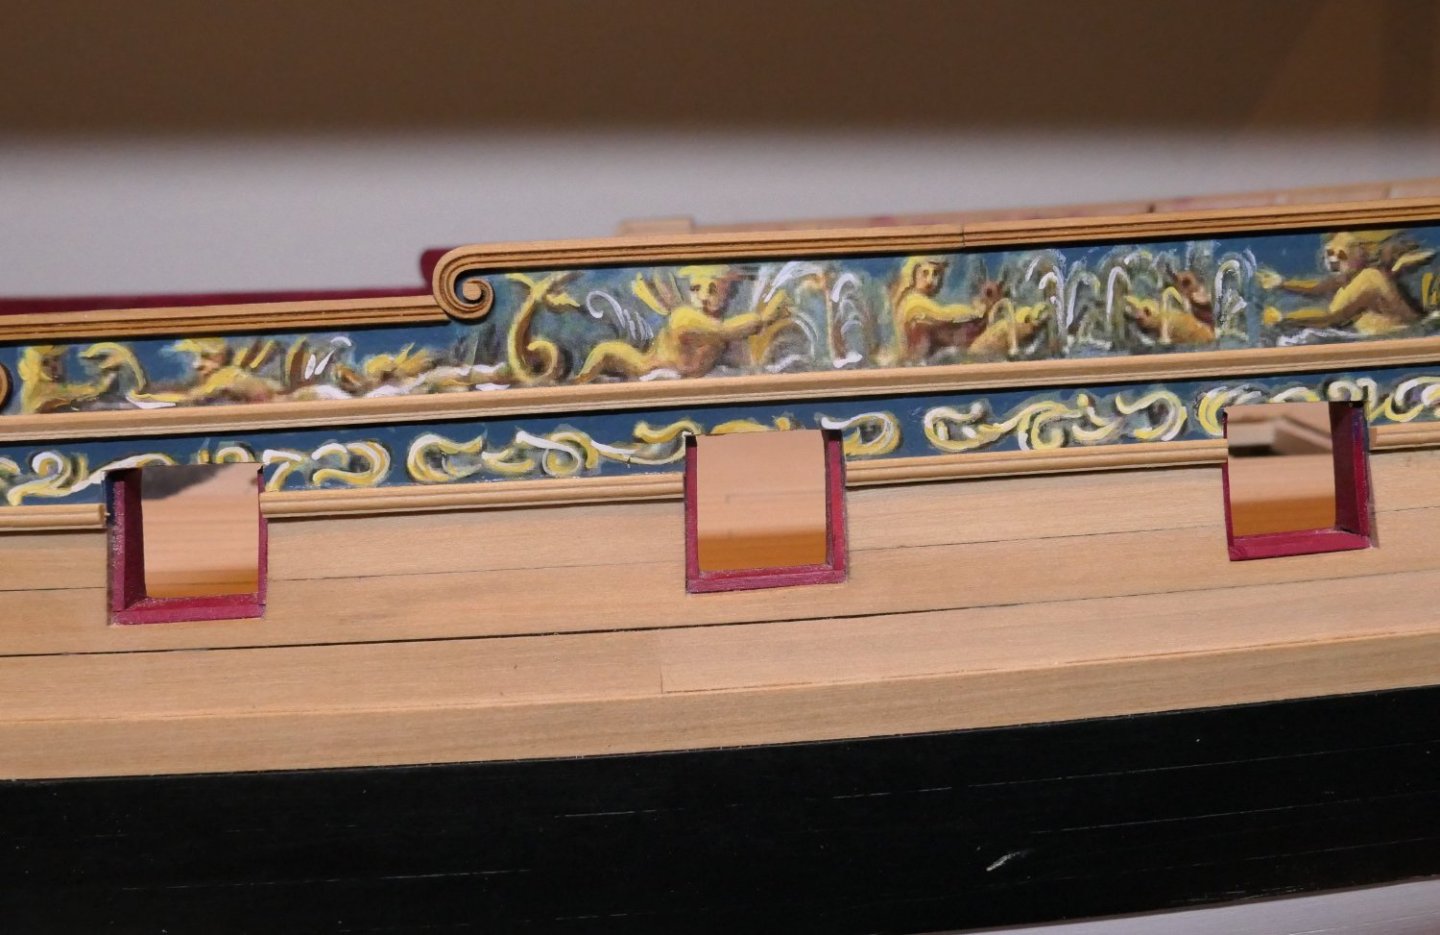
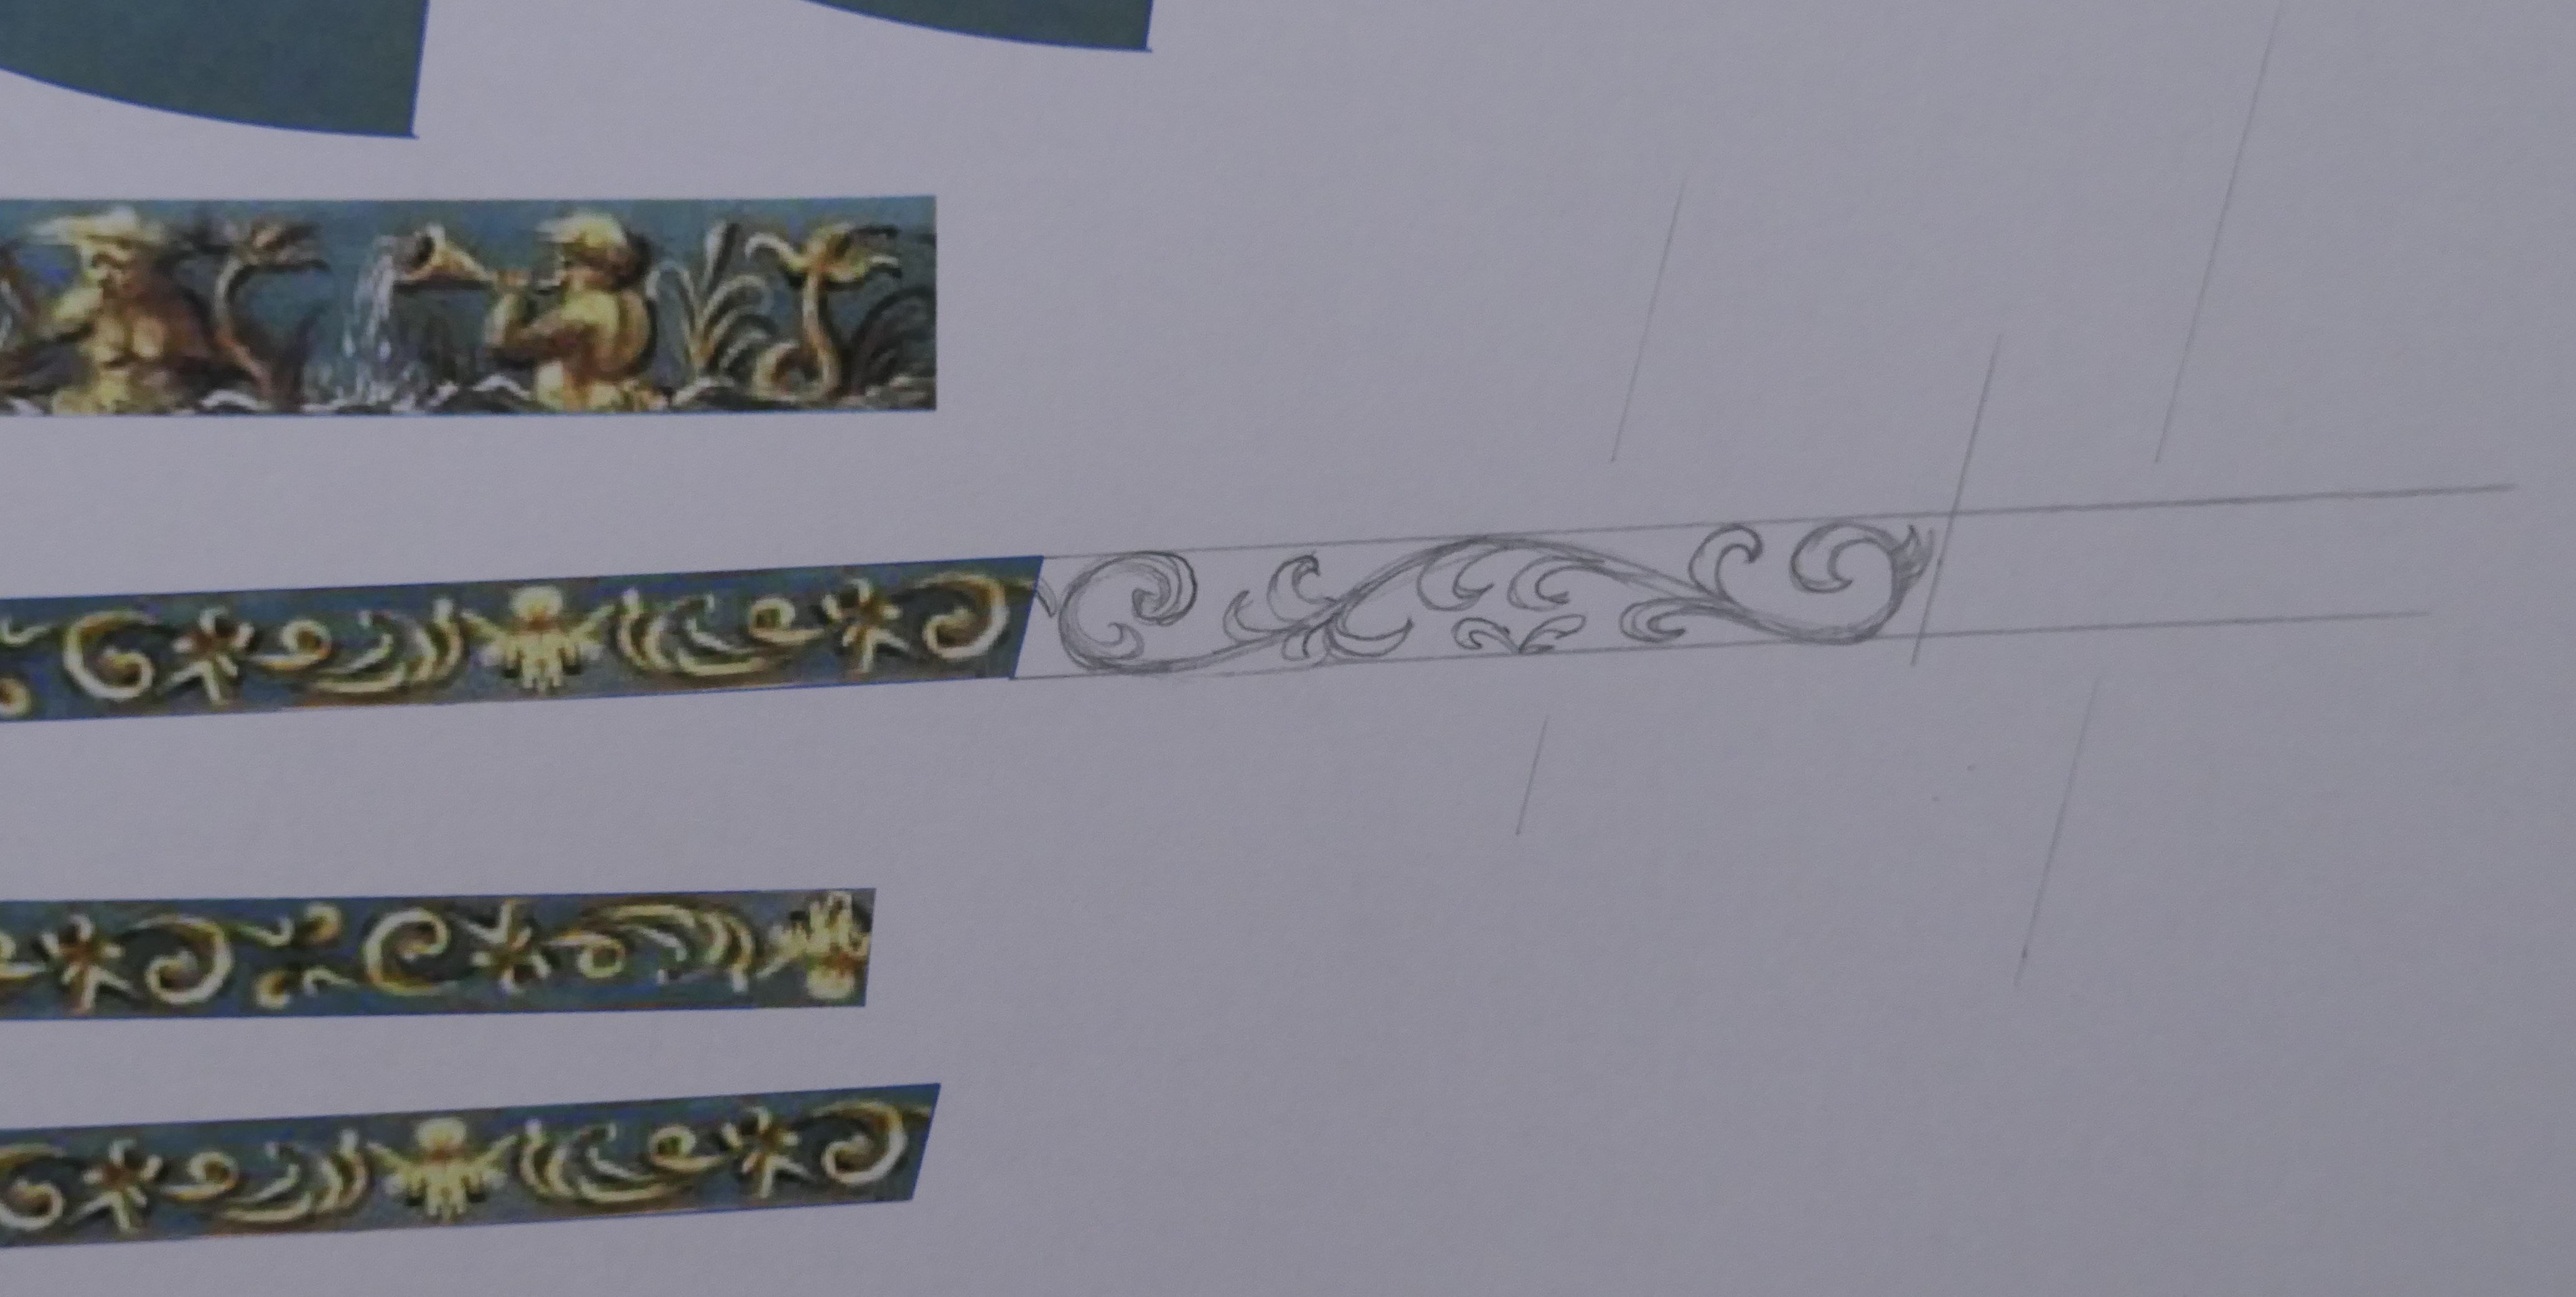
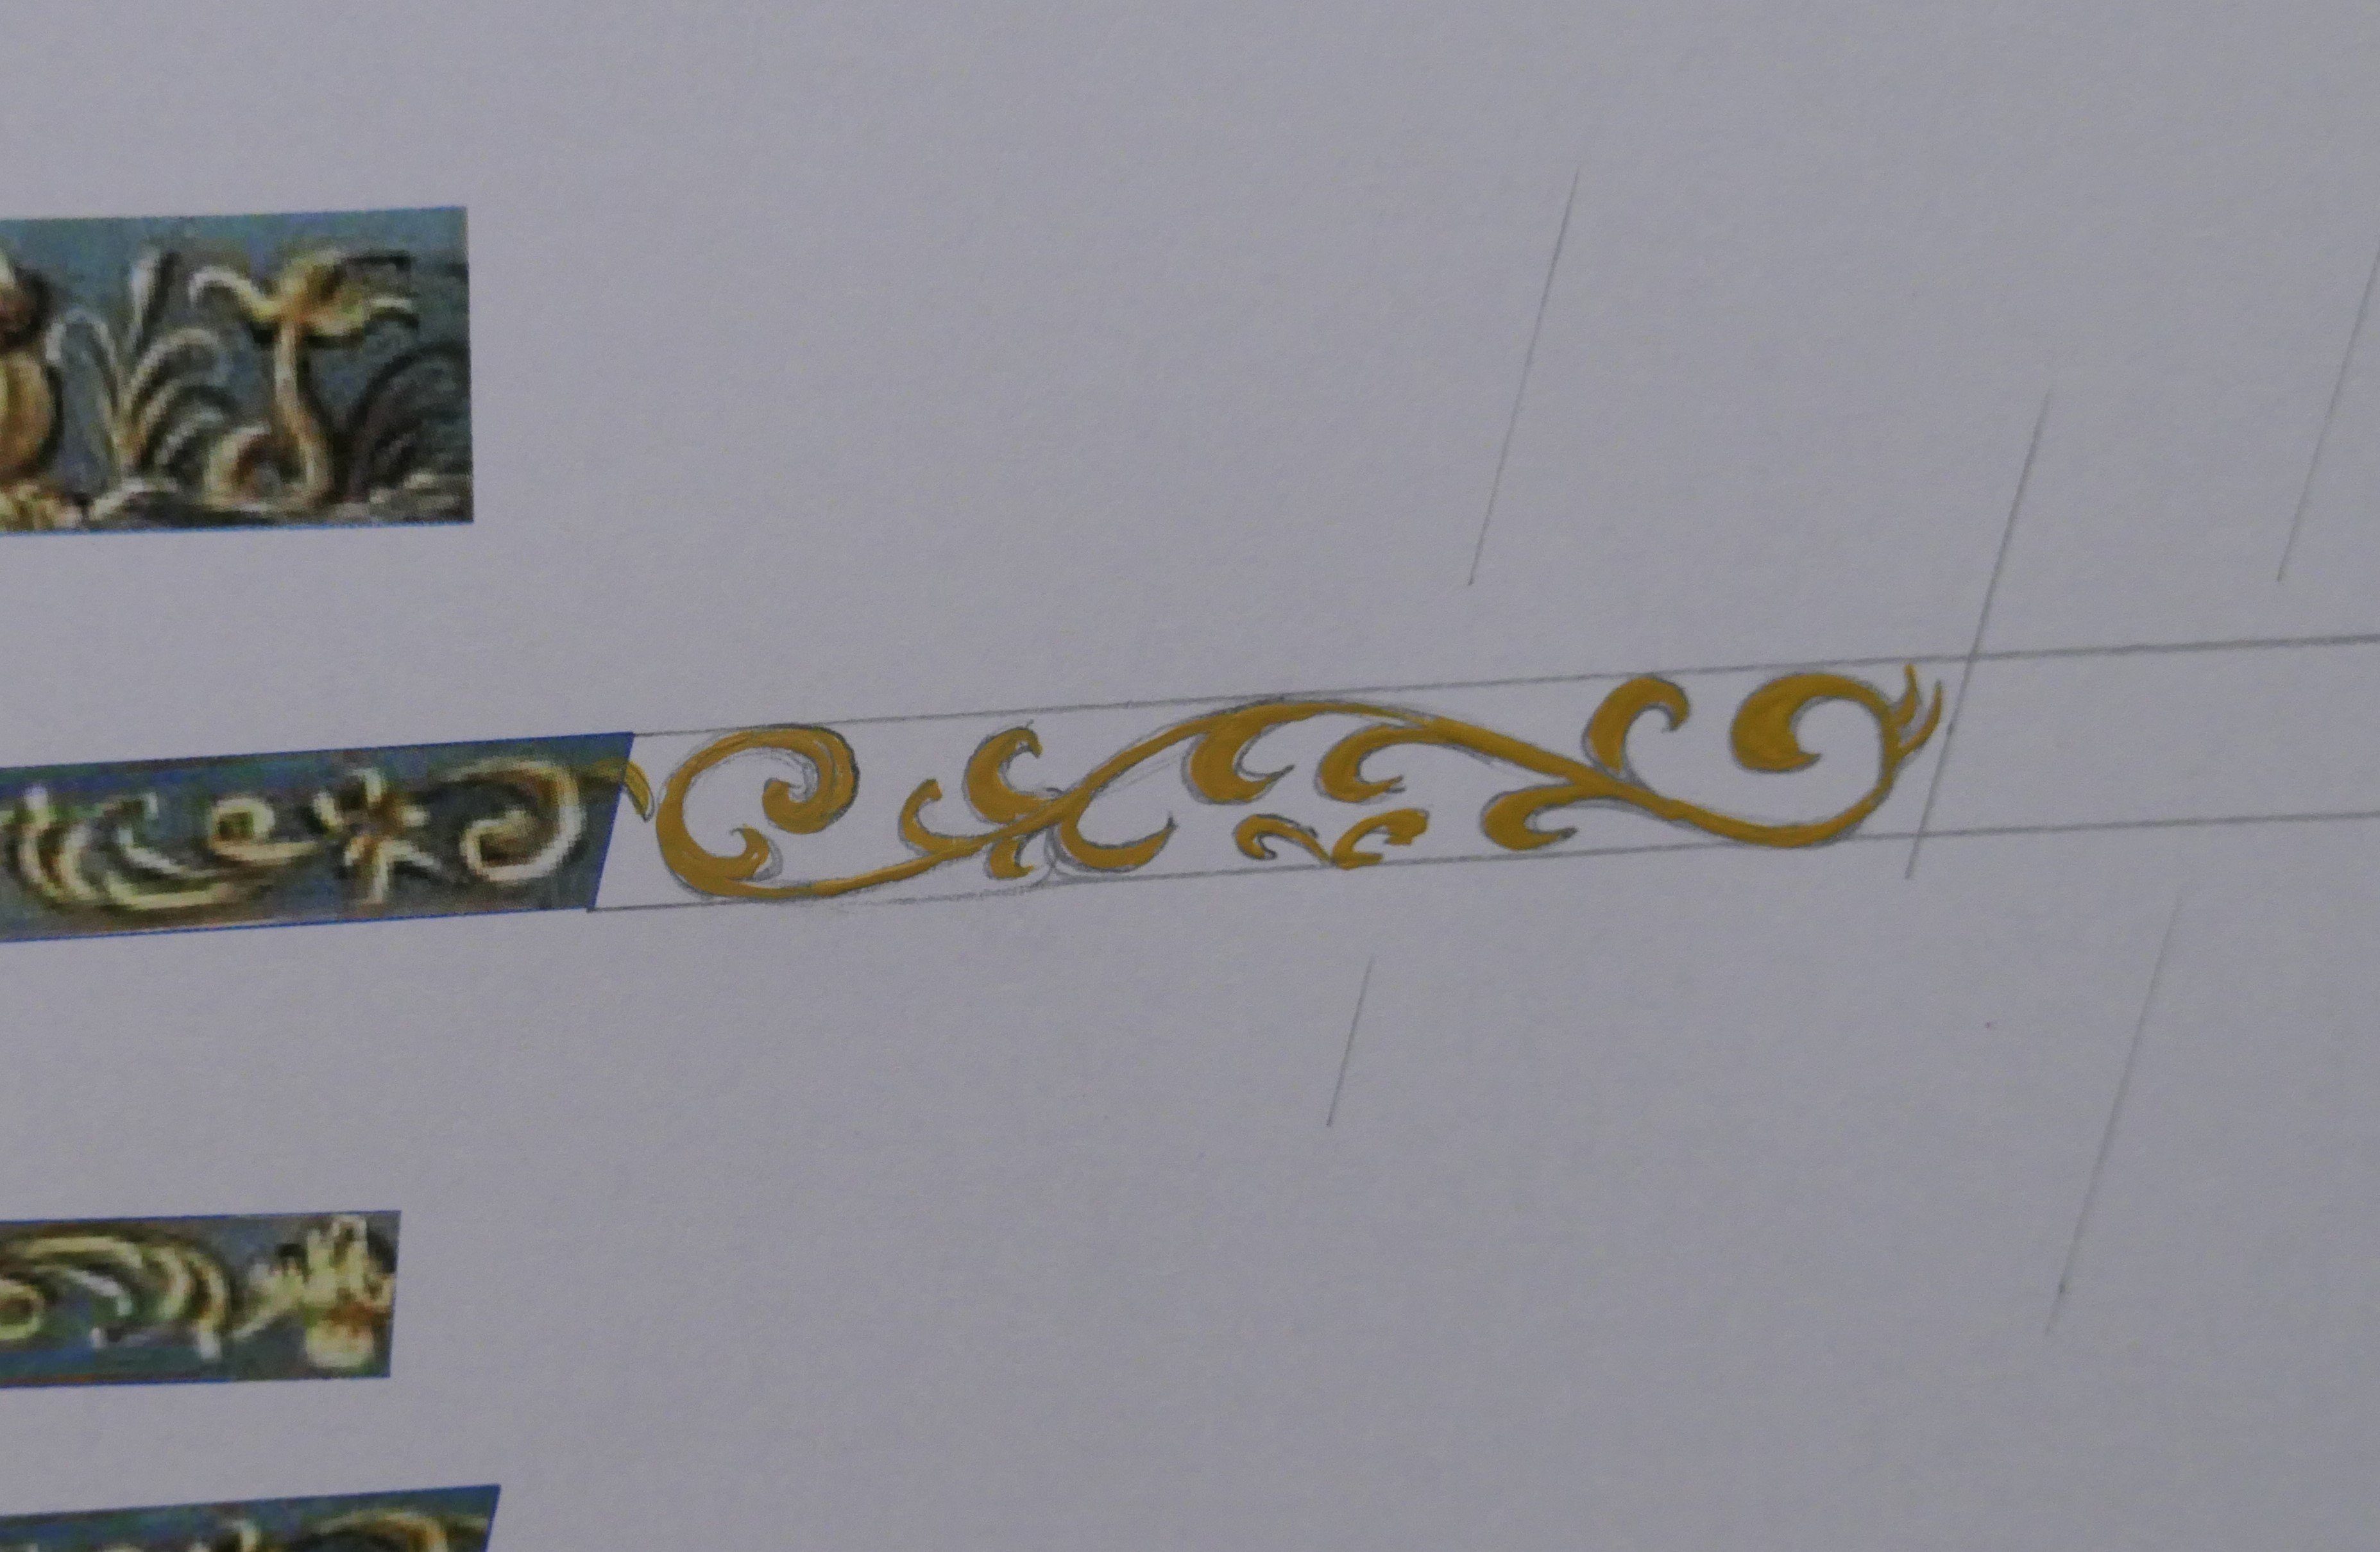
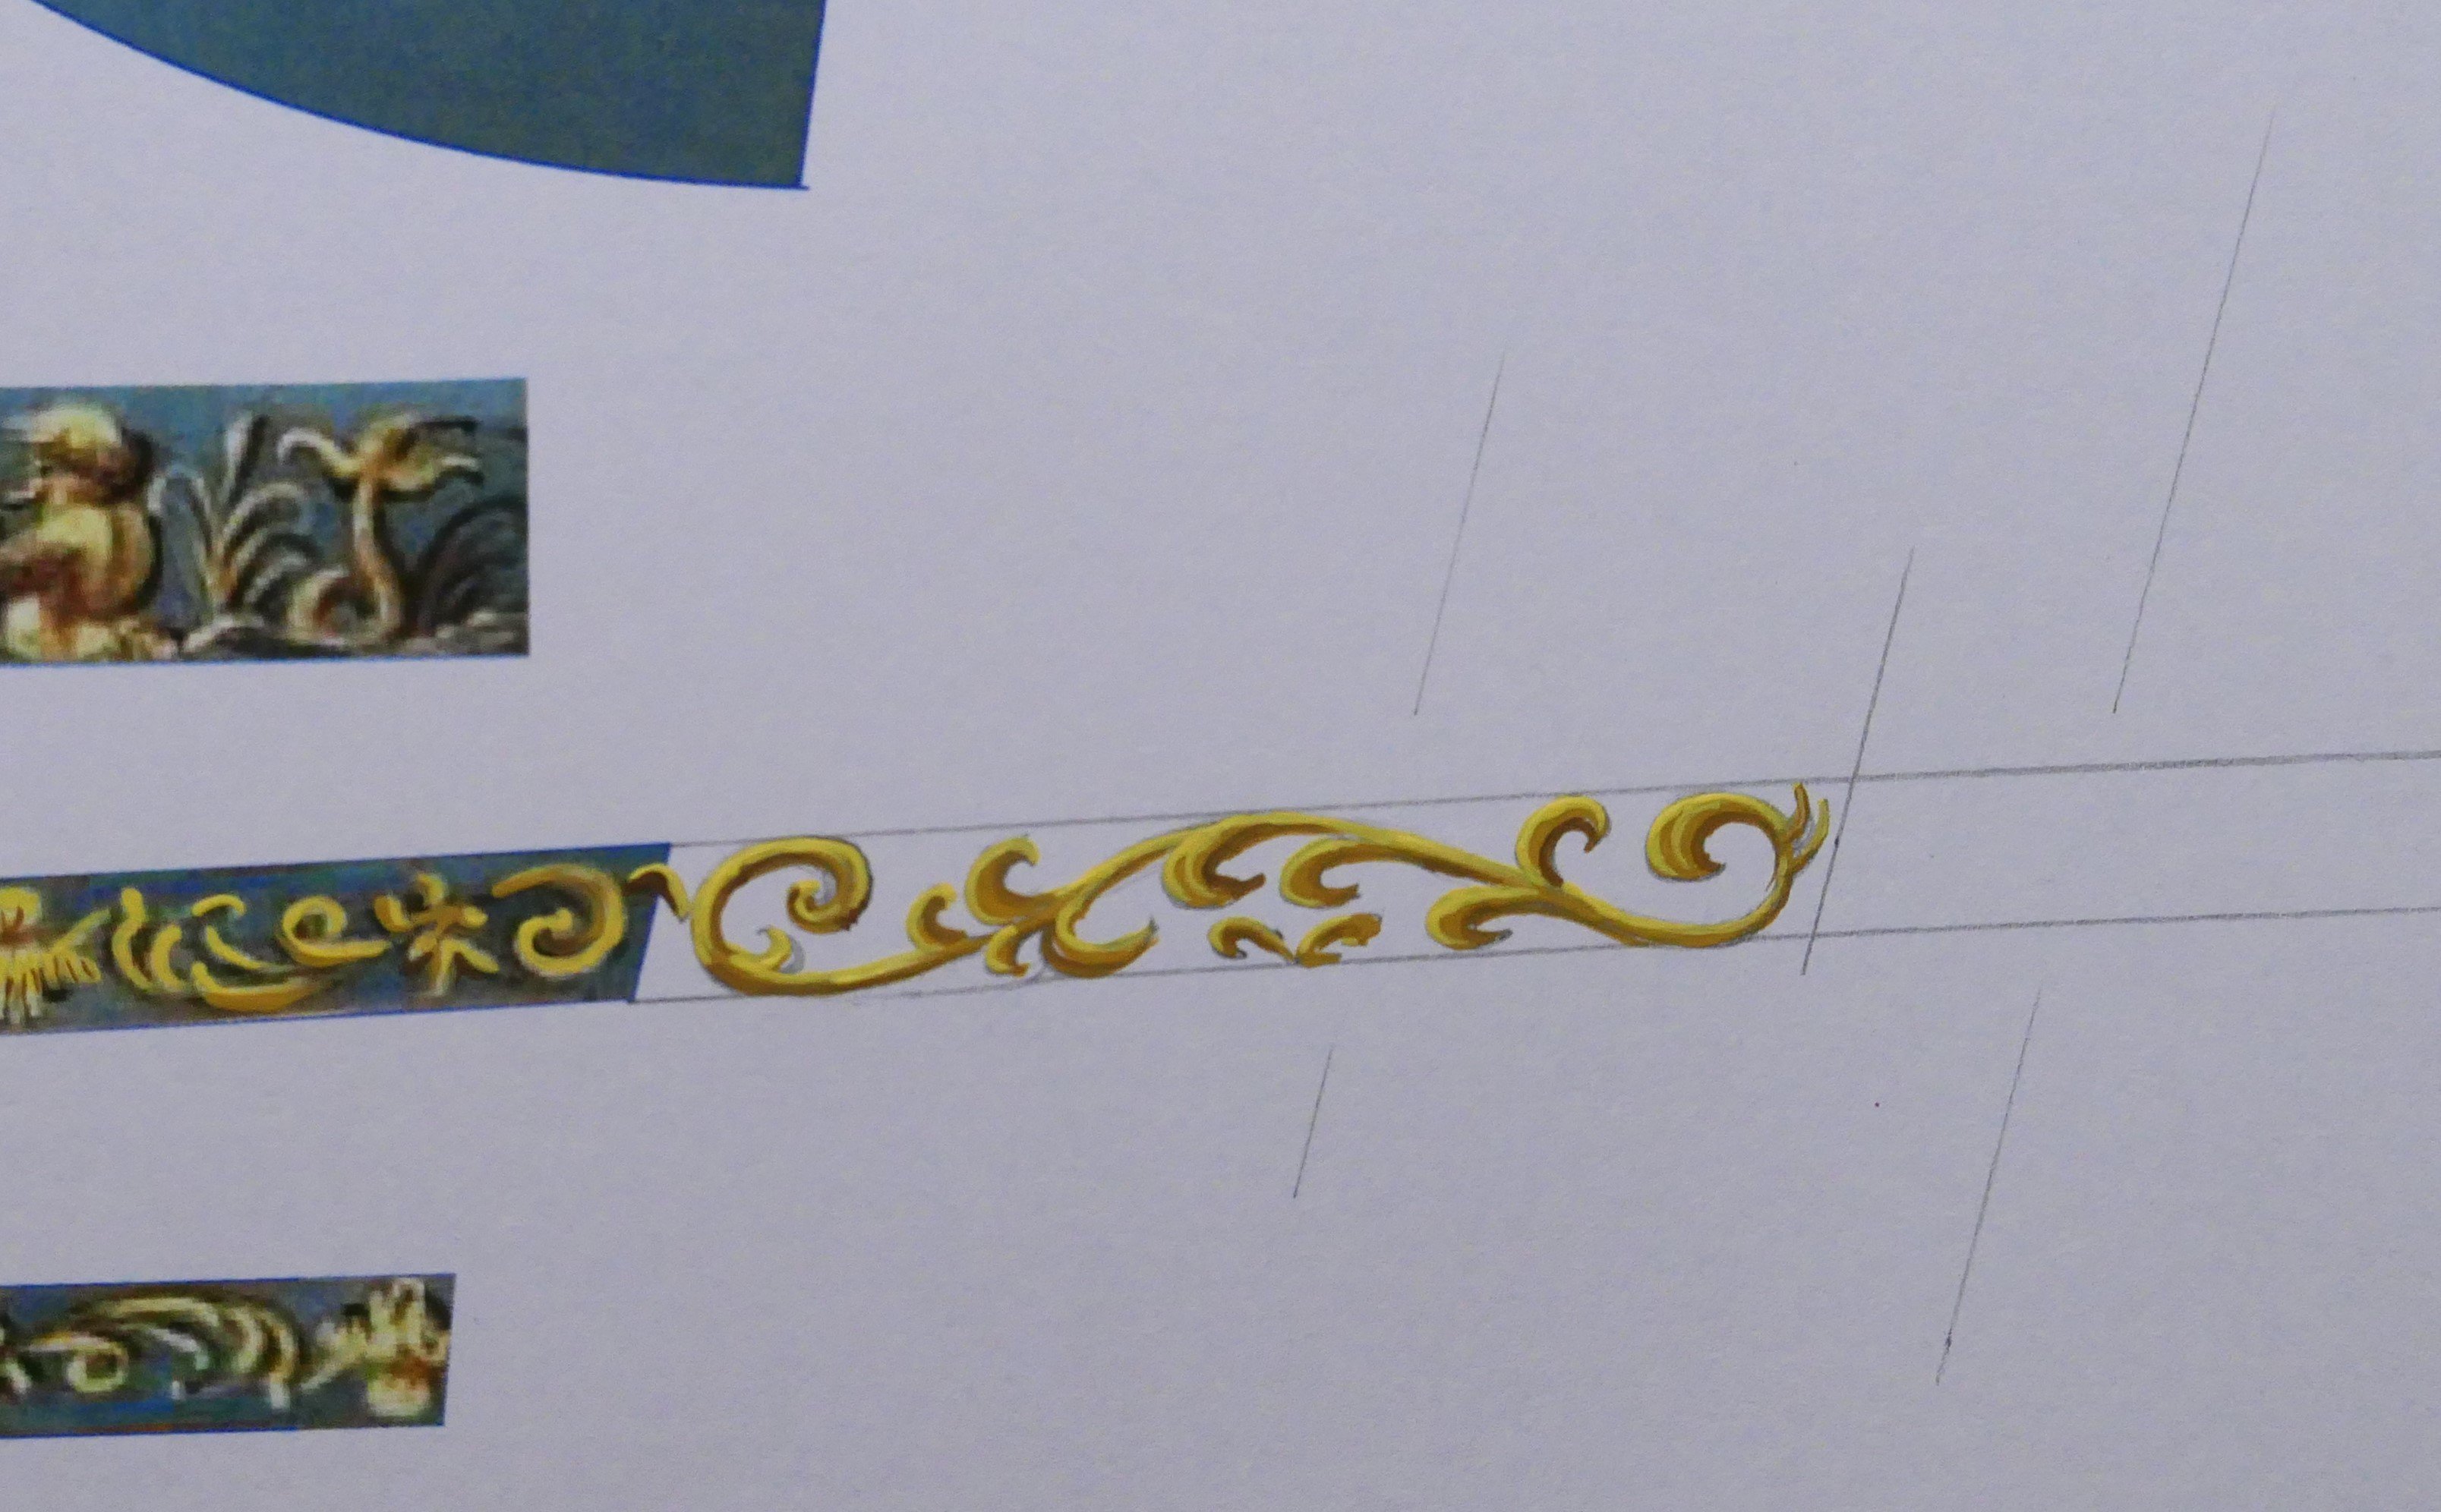
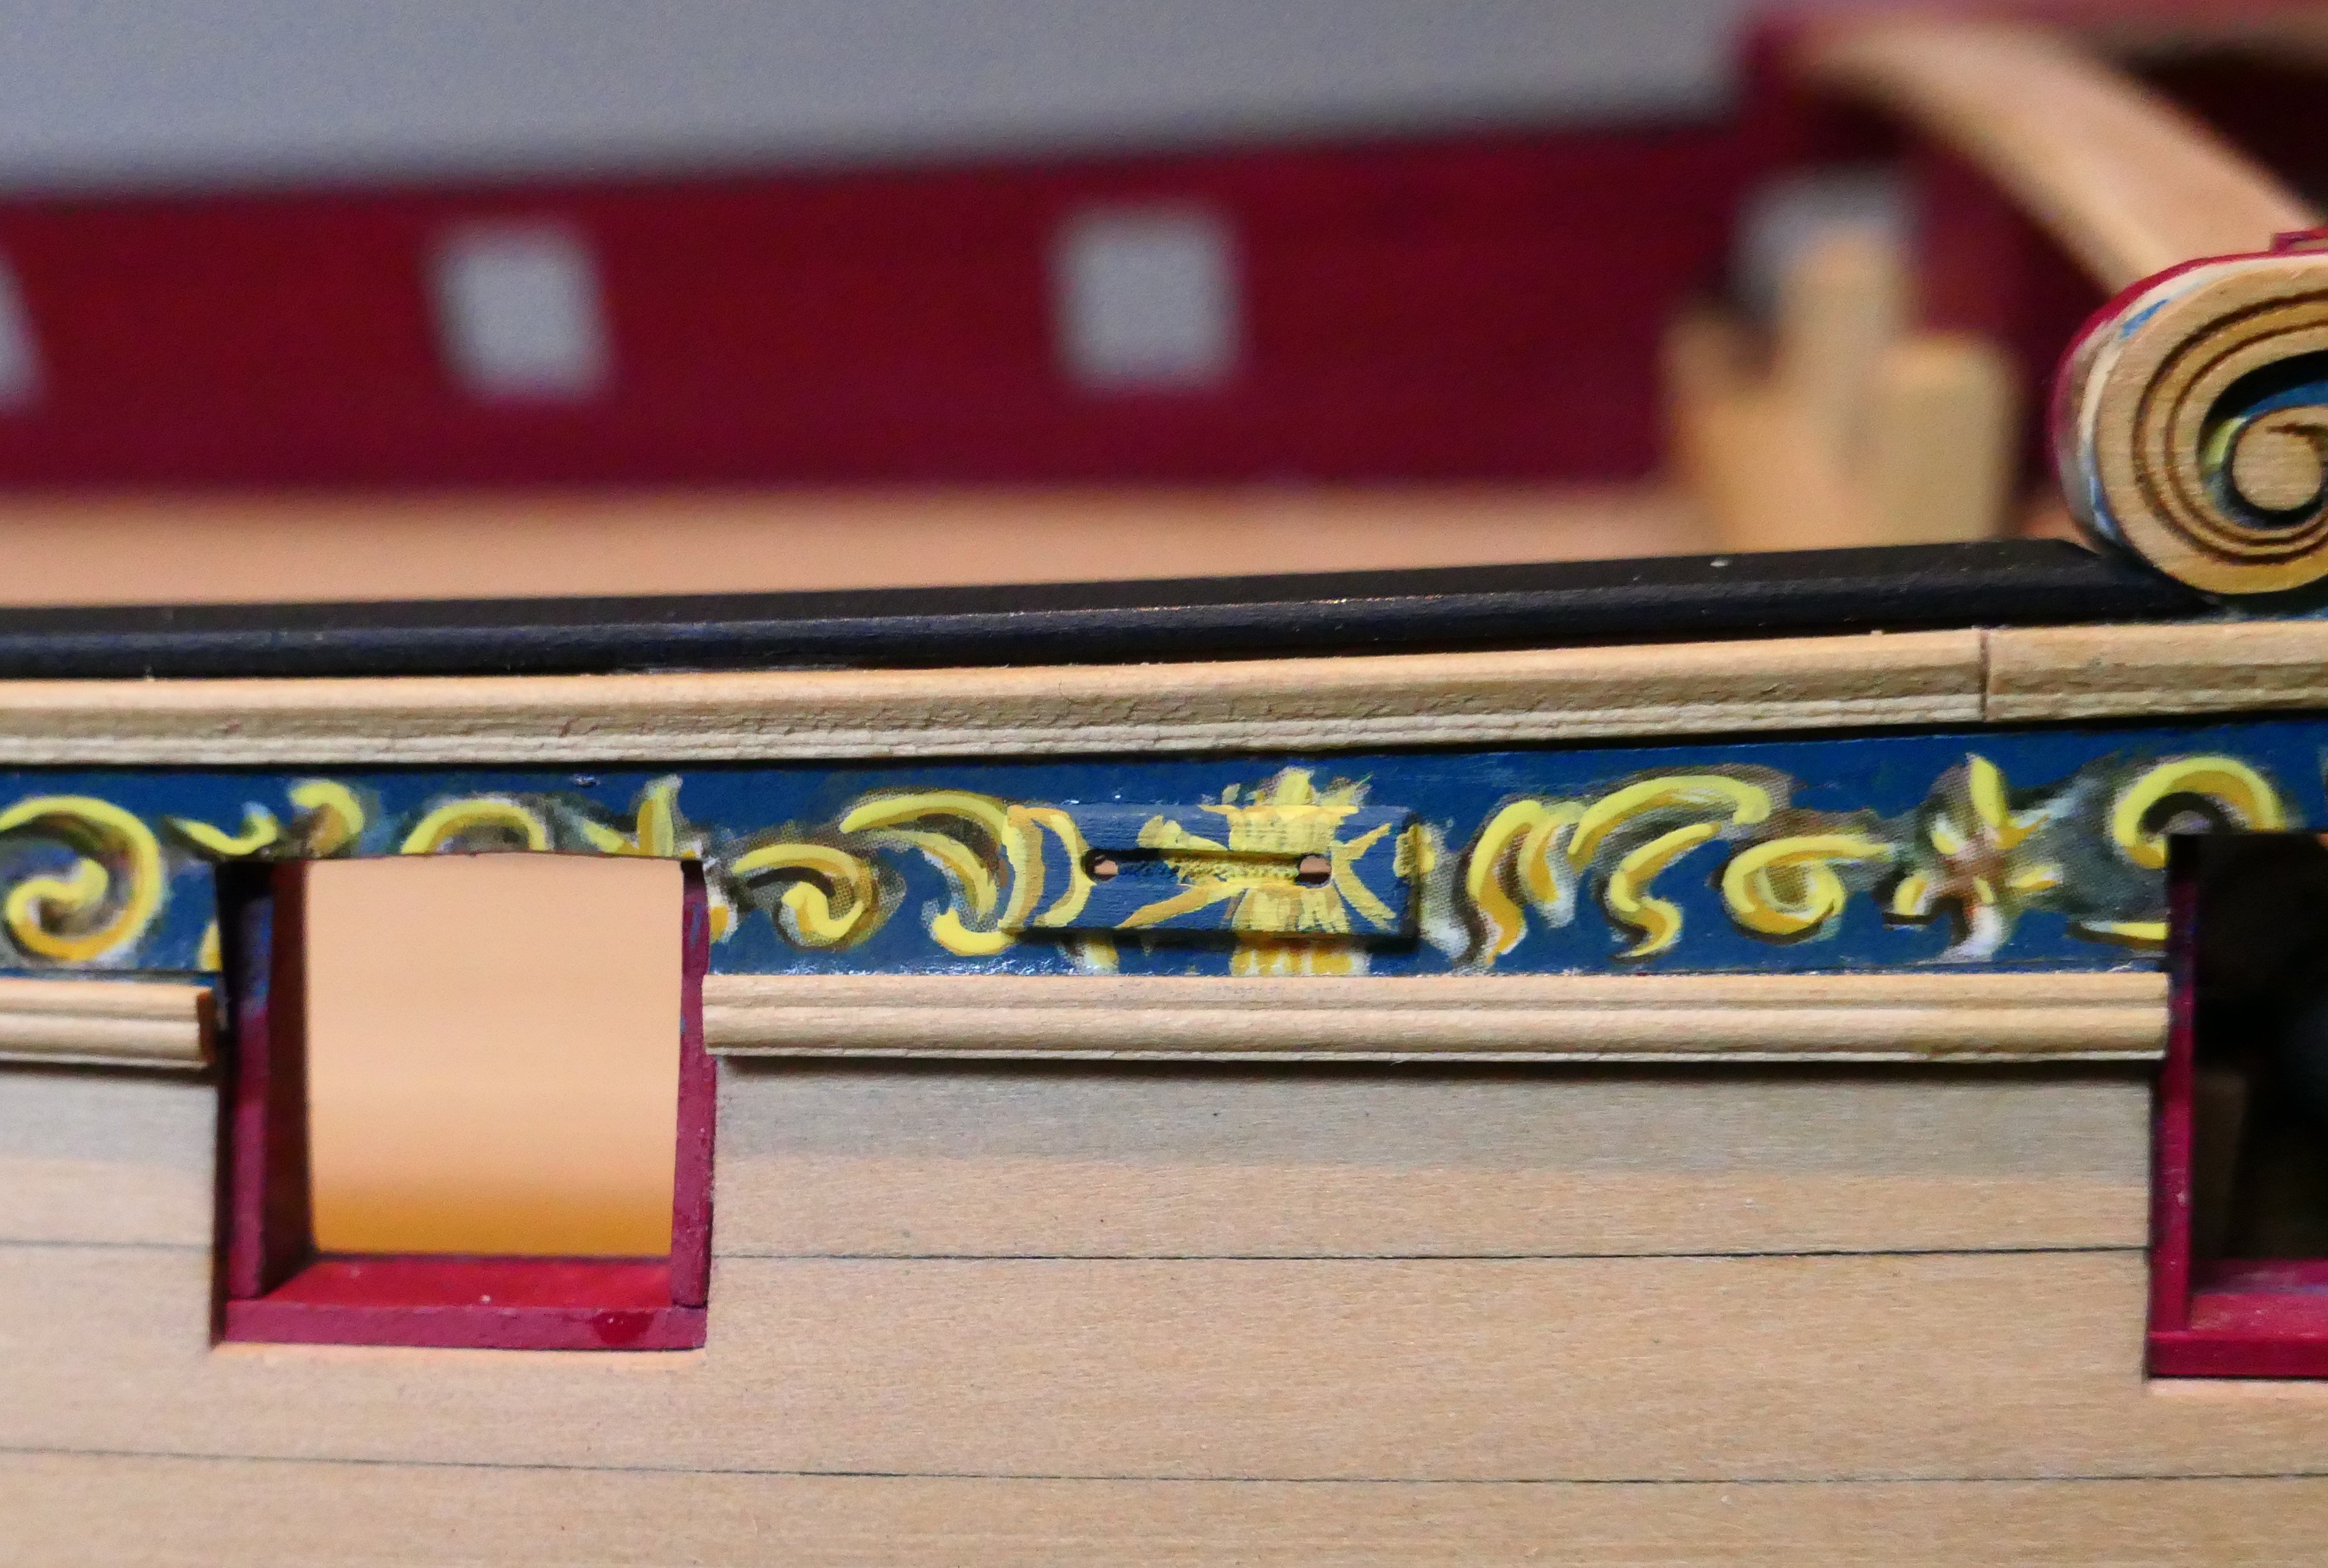
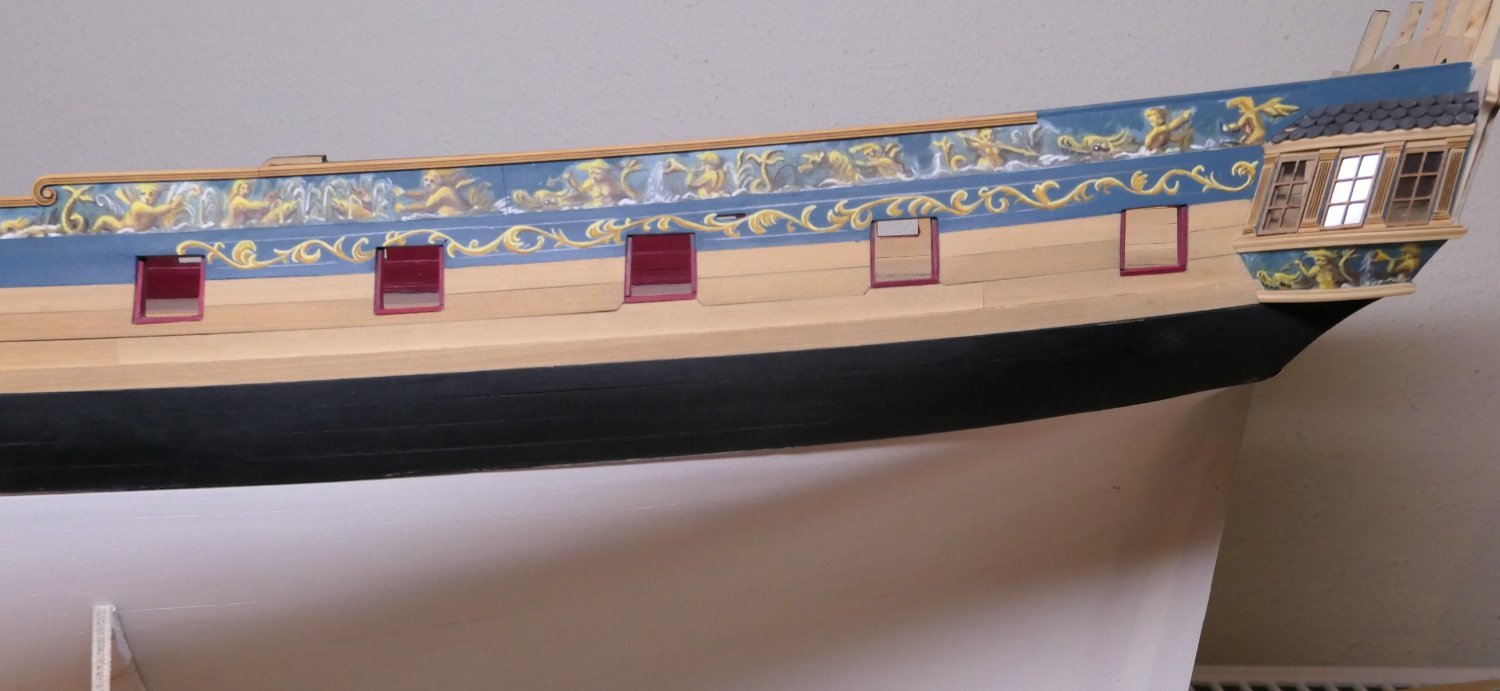
Thanks Thukydides. That is hugely impressive painting. I am only just discovering (a) how hard it is to paint and (b) how doubly difficult it is to paint direct on to the ship. So hard,in fact, that I've given up on my feeble attempts to paint acanthus leaves: a loy more practice required. Instead I'm using the Syren friezes albeit the wrong ones - I know its inaccurate but I prefer the look and I won't be the first to say: "It's my ship........"!
I painted over the friezes a bit to add a few highlights. Probably a mistake but still....Curiously overpainting the friezes has been a good learning excercise in painting. I think I'd make a better job of acanthus leaves next time around. But overall, and looking at what others have achieved with this model i just wish I had 10 years more experience at this hobby than I have. Still, onwards and upwards as they say.
Best wishes
Fred
- Rustyj, scrubbyj427, Ryland Craze and 7 others
-
7
-
3
-
That looks fantastic.
Incidentally I agree with your analysis of the rake of the masts posted on my log. On re-measuring I think there is a very small aft rake on the foremast, a little more aft rake on the main mast and still more on the mizzen.
I bought the Enterprize plans from Cornwall Model Boats which ships internationally I'm sure. They are actually produced by www.model-shipyard.com in Poland so they should be readily available. I do hope you rig: I shall follow with keen interest and learn!
Fred
-
-
I had a go at acanthus leaves. I might leave things overnight and see what I think in the morning. Just at the moment I'm not completely convinced. I painted a continuous string of acanthus. I think it would look better broken up into shorter lengths with a small division between. And I don't like the bit over the third gunport from te stern: funny how little things that you know will get lost in the bigger picture have the capacity to bug you disproportionately.


HM Cutter Alert by Thukydides - FINISHED - Vanguard Models - 1:64 - first build
in - Kit build logs for subjects built from 1751 - 1800
Posted
A lovely model indeed. Very, very nice work.
Best wishes
Fred