

Ekis
-
Posts
526 -
Joined
-
Last visited
Content Type
Profiles
Forums
Gallery
Events
Posts posted by Ekis
-
-
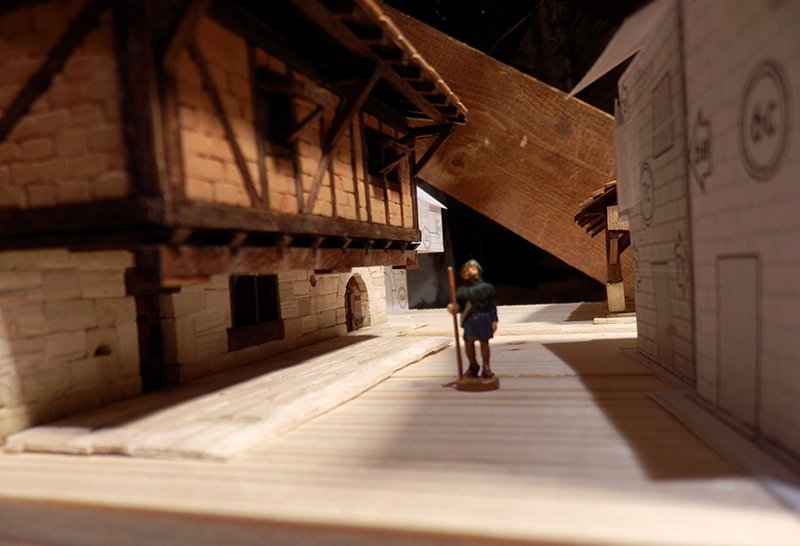
Here's the last one out of the yard...

Next !!
")
-
In my opinion, it will be more like the Autumn Festival... 😅
- Old Collingwood, lmagna, Canute and 2 others
-
 5
5
-
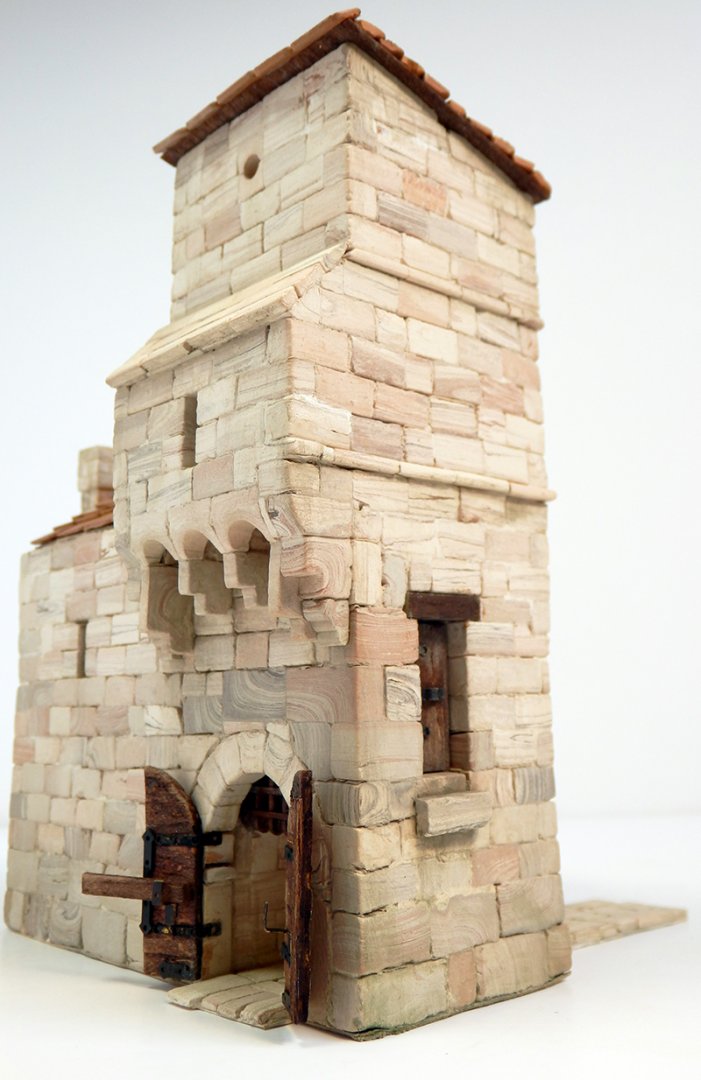
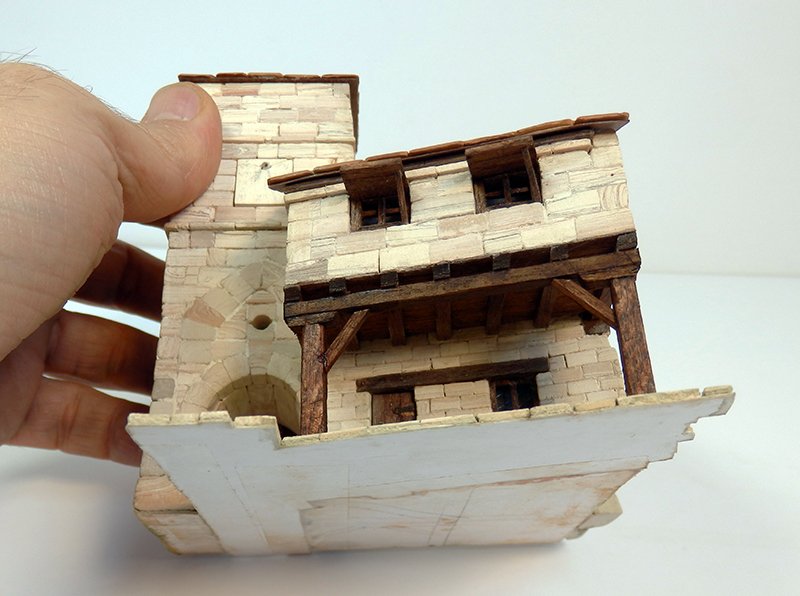
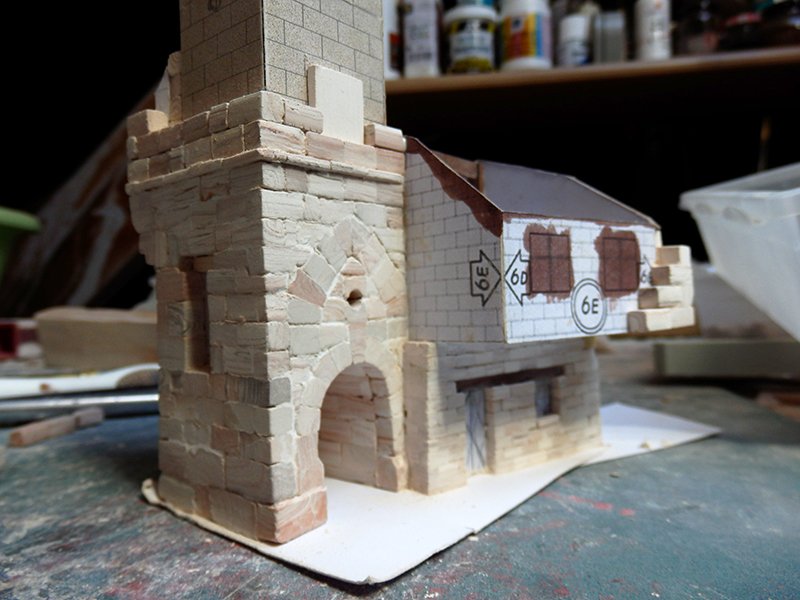
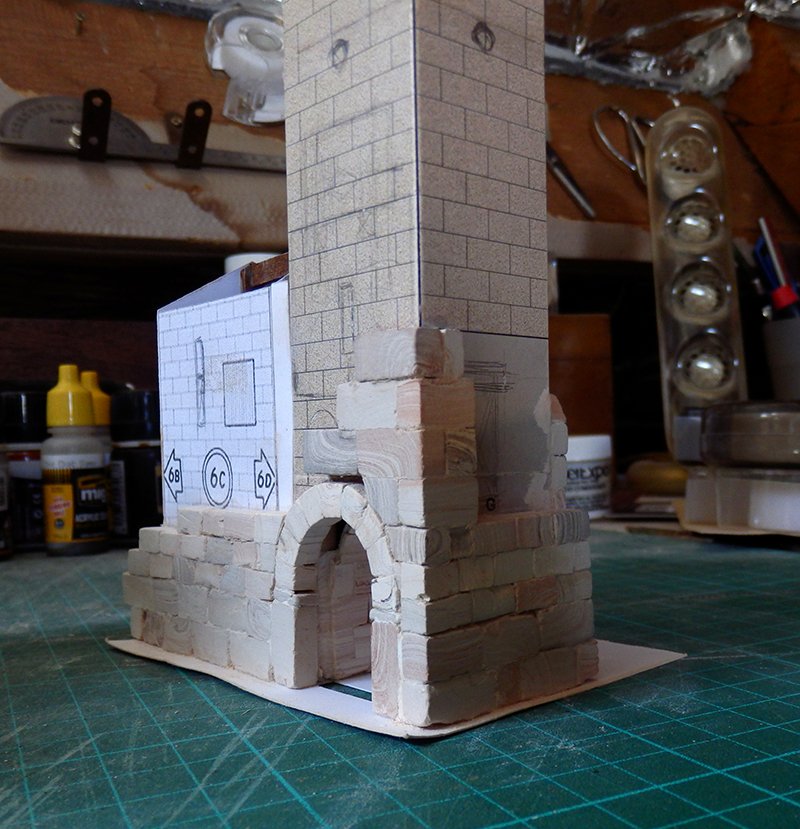
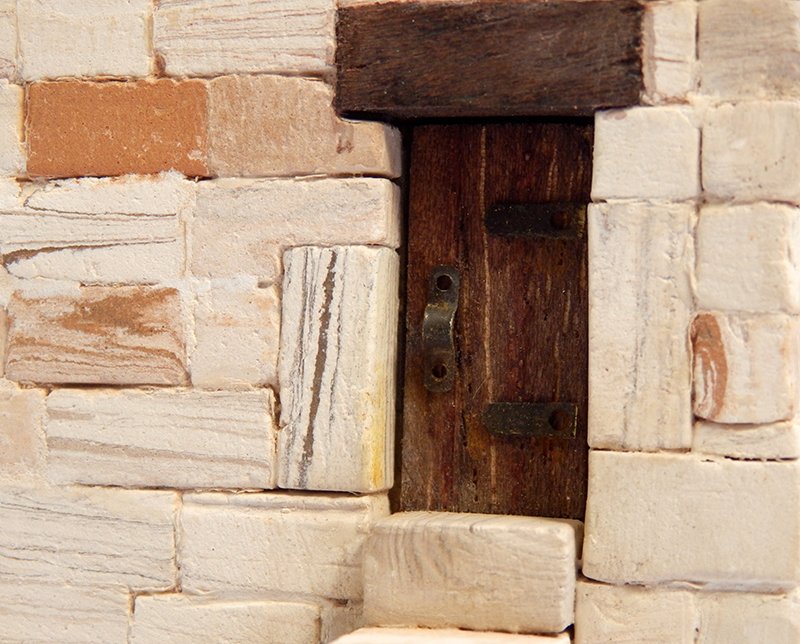
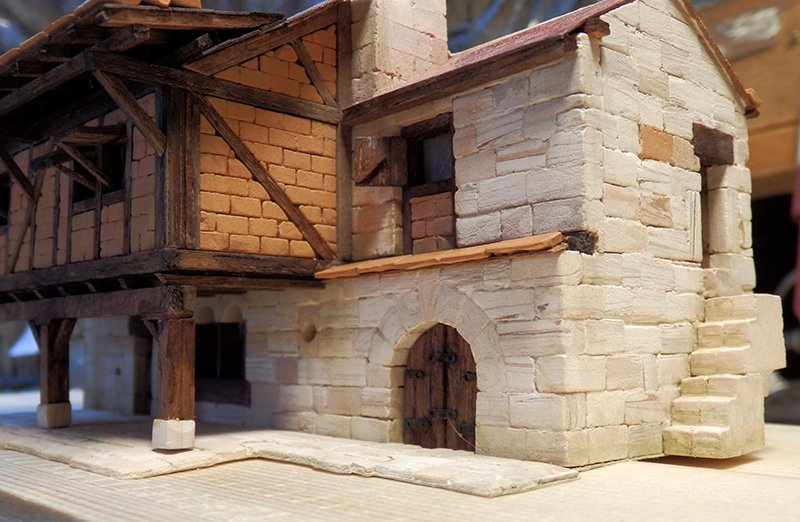
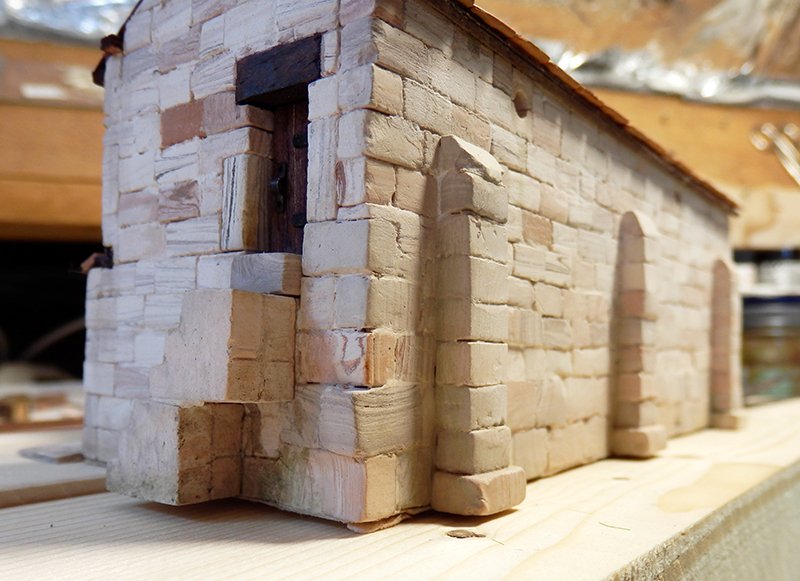
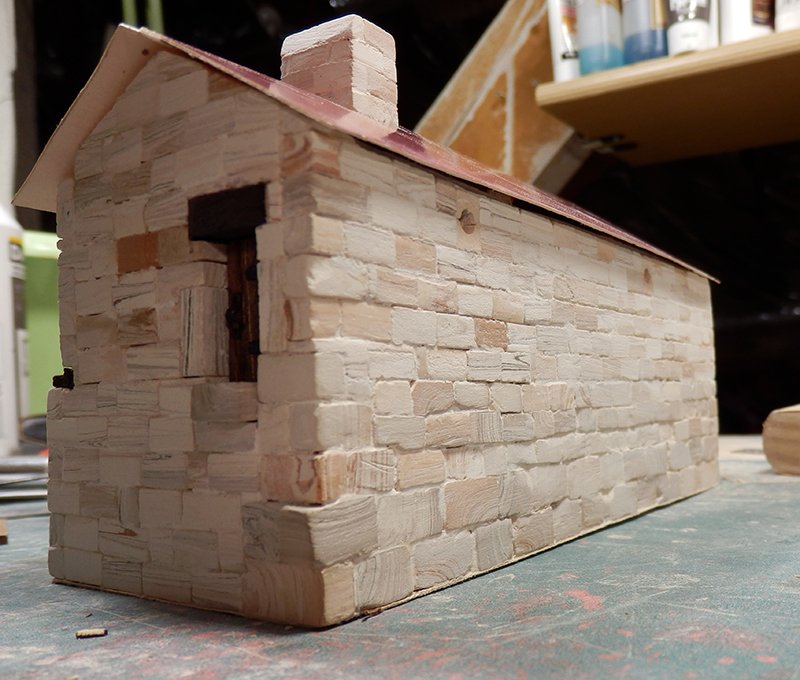
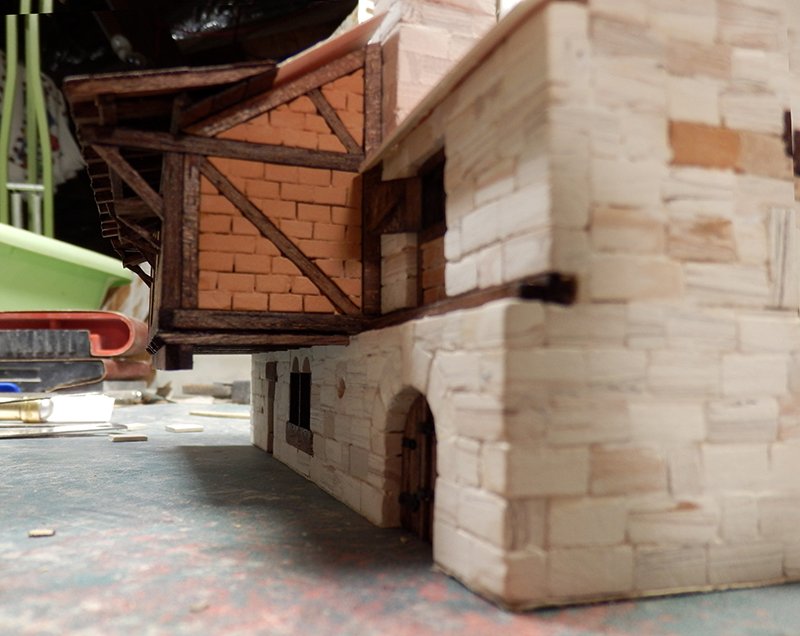
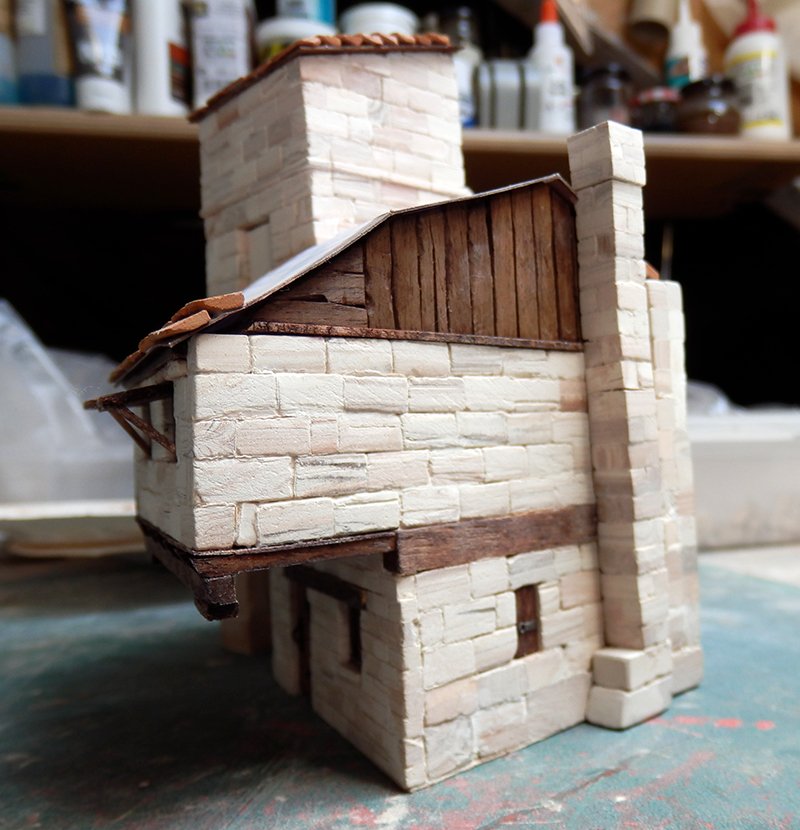
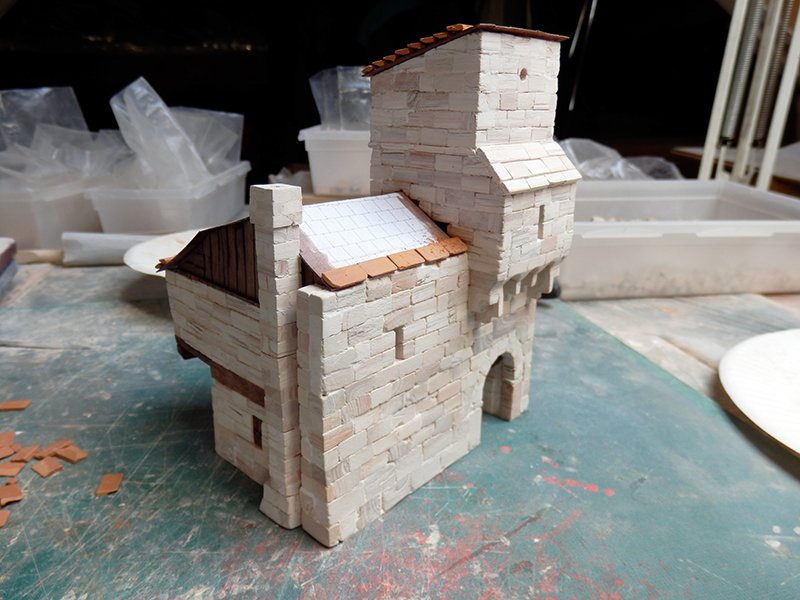
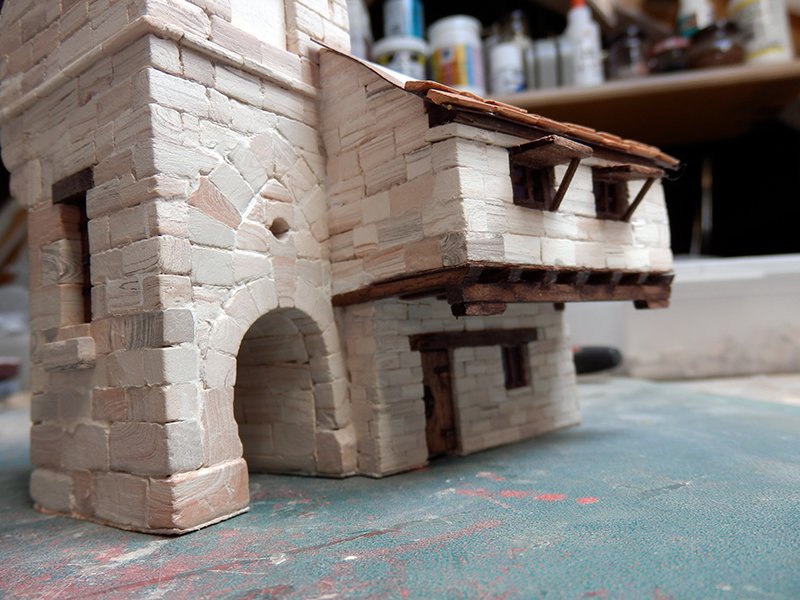
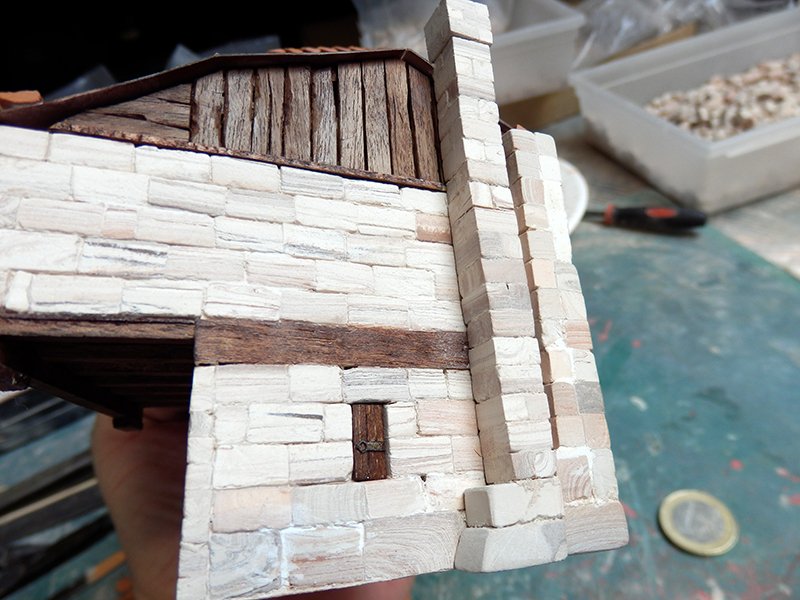
Yes Kurt, indeed, this building was quite complicated to do with this door through the wall, but also the diagonal position of the house, or the machicolation on the back side, or the use of 4 different sizes of stones.
But these were deliberate choices that will serve me well for the other buildings to come ...In short, I continue to have fun with this village, and I learn very quickly the basics of medieval architecture! 😃
- lmagna, Edwardkenway, mtaylor and 4 others
-
7
-
-
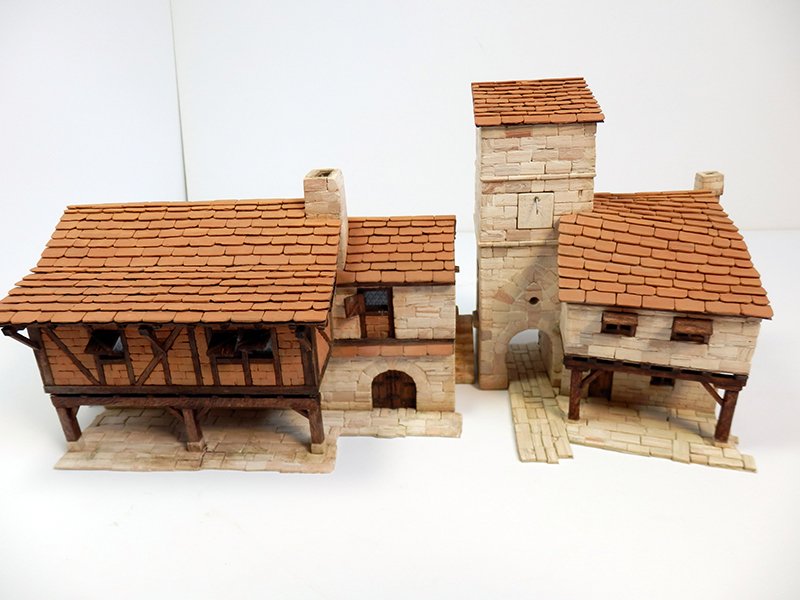
What's next!
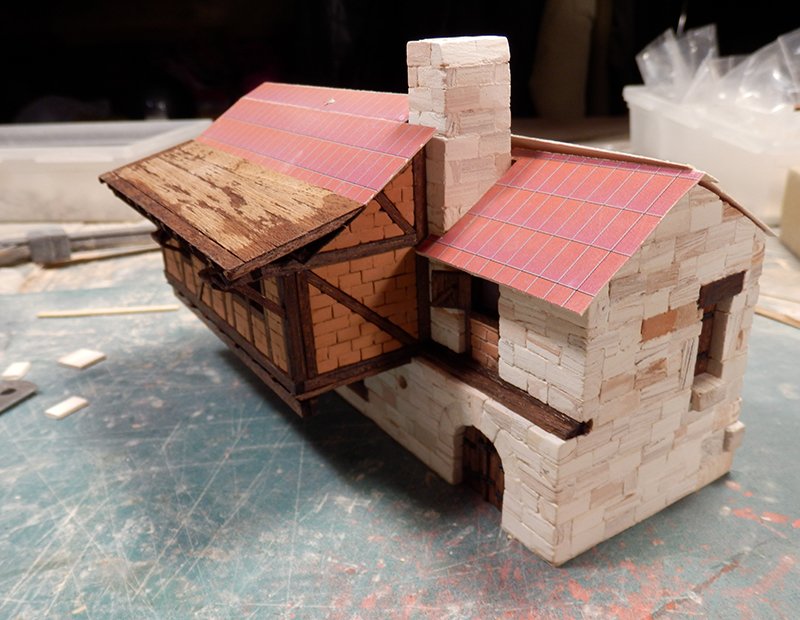
This double building is not very important by its surface, however it gives me a lot of work!
I have to say that I have a bit more difficulties on this one.The open door through the tower, addition of a stone hoarding with machicolation, house attached at an angle with corbelling, 2 kinds of stone cutting, a wooden wall covering for the last level, extension of the wall at the back of the building ...
In short, there is still work to be done! 😛
- Canute, Edwardkenway, mtaylor and 10 others
-
13
-
-
43 minutes ago, popeye the sailor said:
so....aren't we getting a little bold now..........already kit bashing huh
 your use to the process now.........you can expand a little. it's good to get comfy with your hobby....love what your doing with the place
 ")
Thanx !
Indeed, I believe I have acquired a certain mastery of materials. So, I apply all ideas without restriction, but always respecting the buildings of the Middle Ages!16 minutes ago, Kurt Johnson said:It looks like such an enjoyable project. I’m sure the planning is as much fun as the building! When you’re done you should get a GoPro camera and give us a walking tour!
You're right: being able to customize each element without referring to a more or less creative plan from a manufacturer is very pleasant . But that's what I do every time with my boats!
For the filmed tour, we'll see it at the end: it can be fun!
- Canute, Egilman, popeye the sailor and 4 others
-
7
-
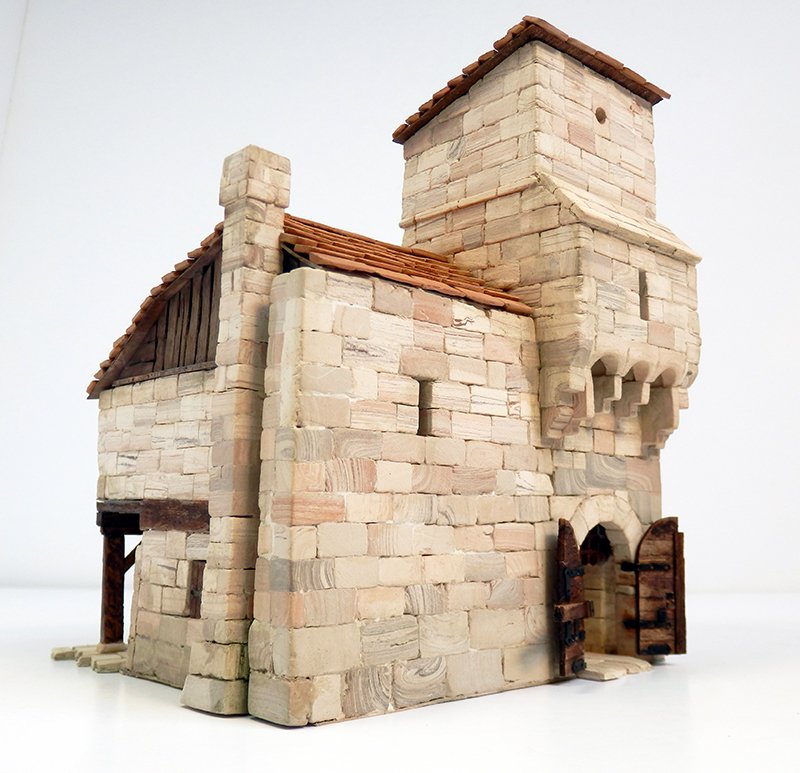
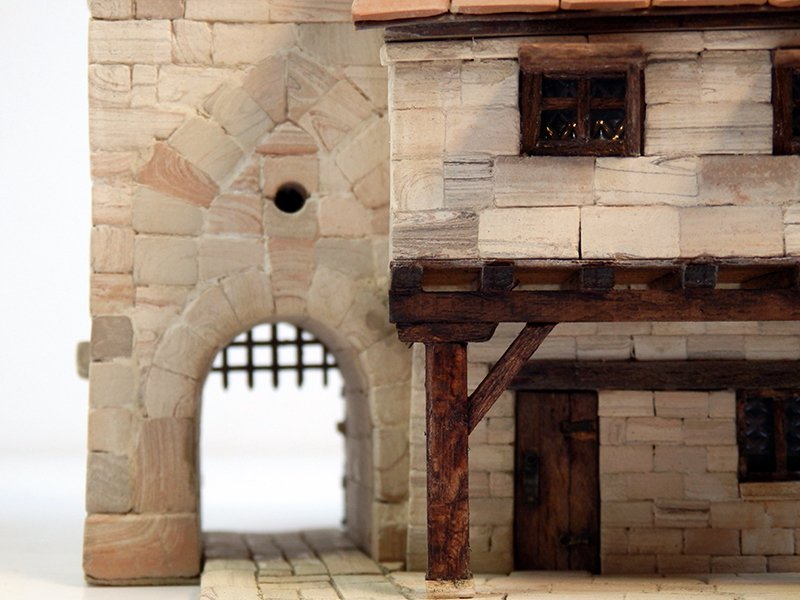
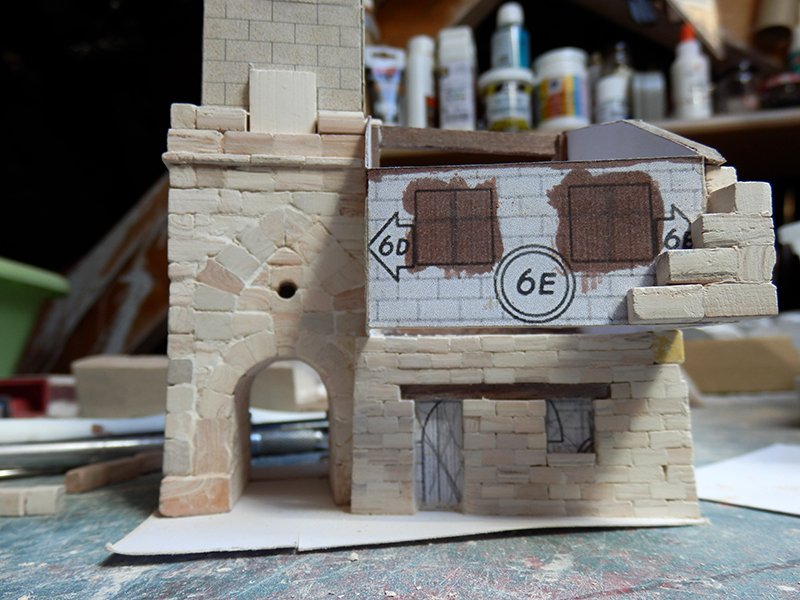
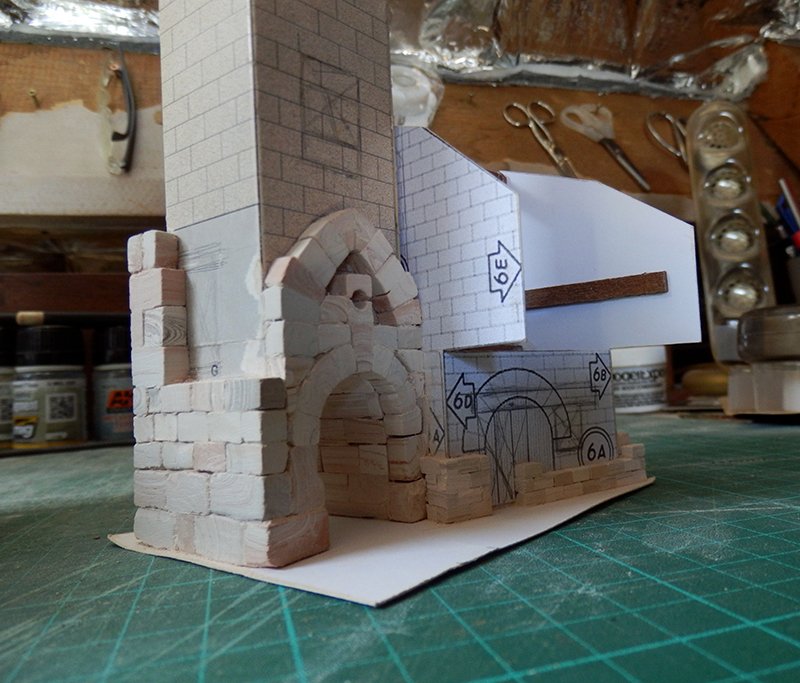
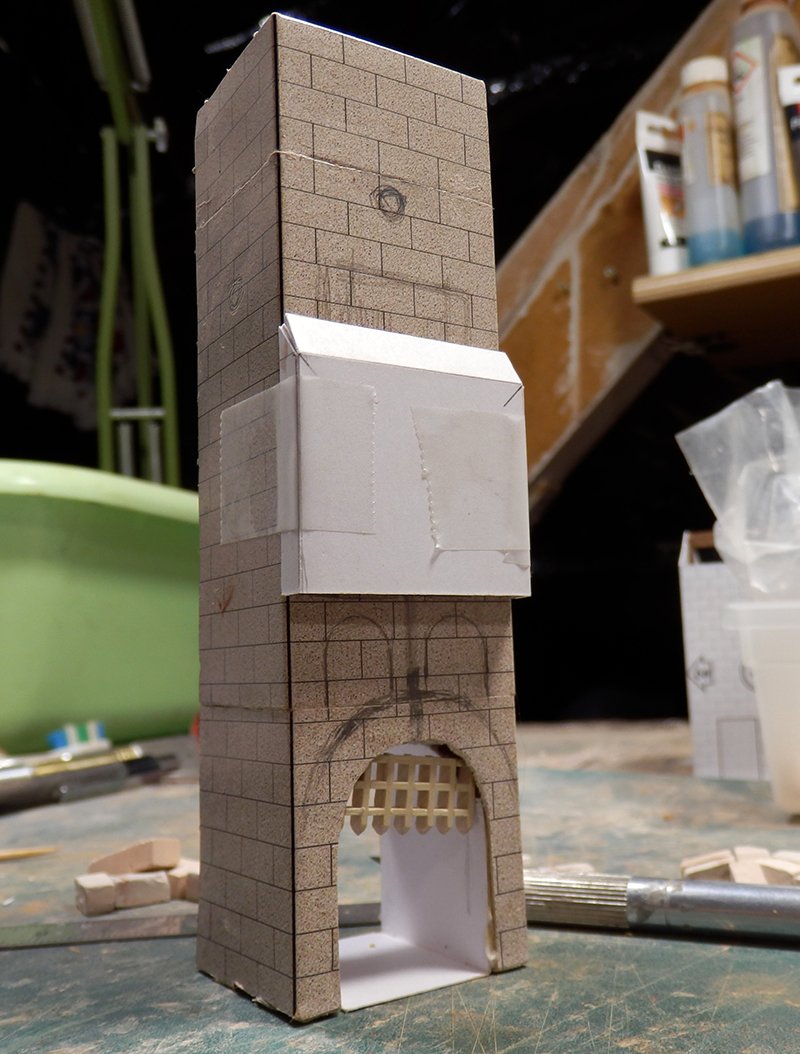
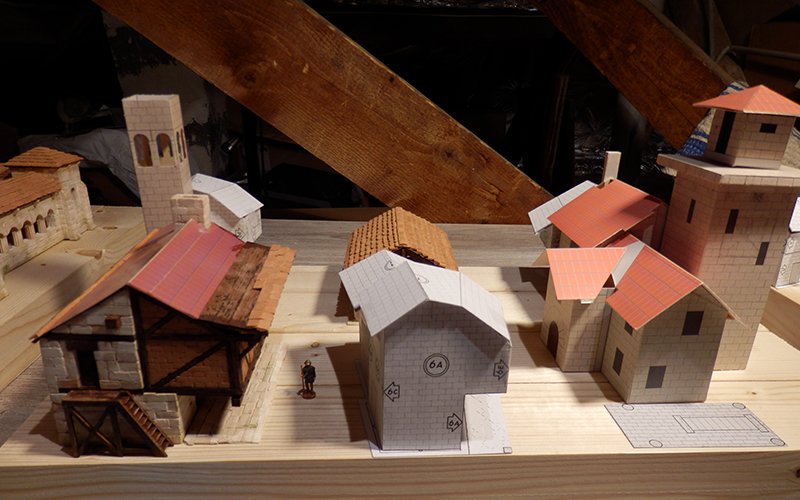
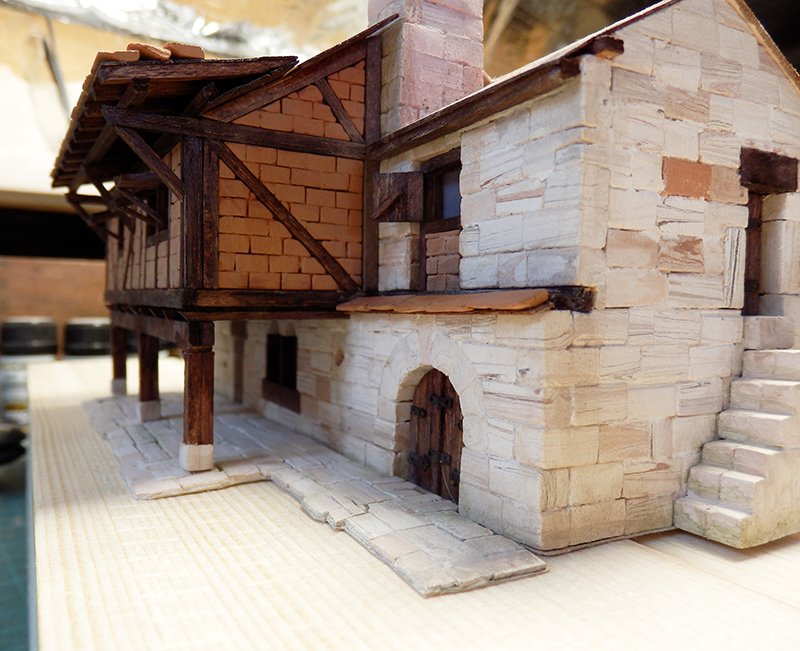
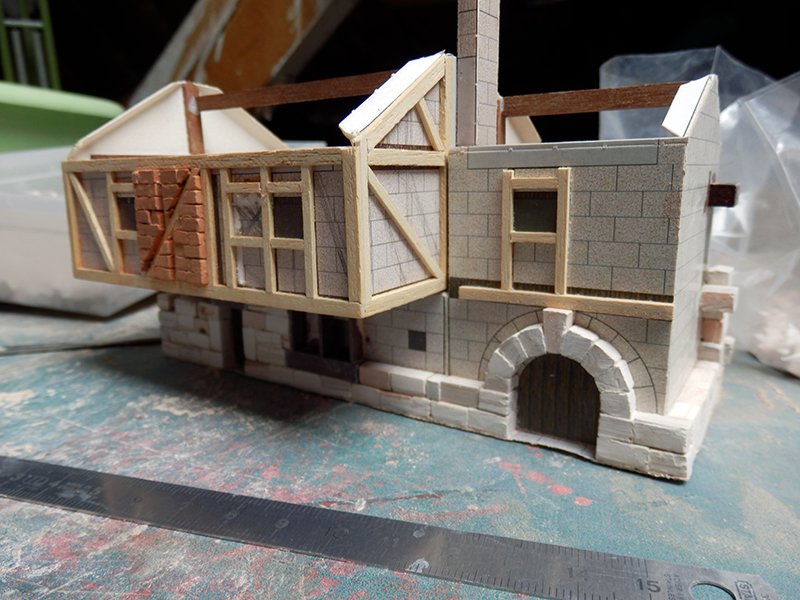
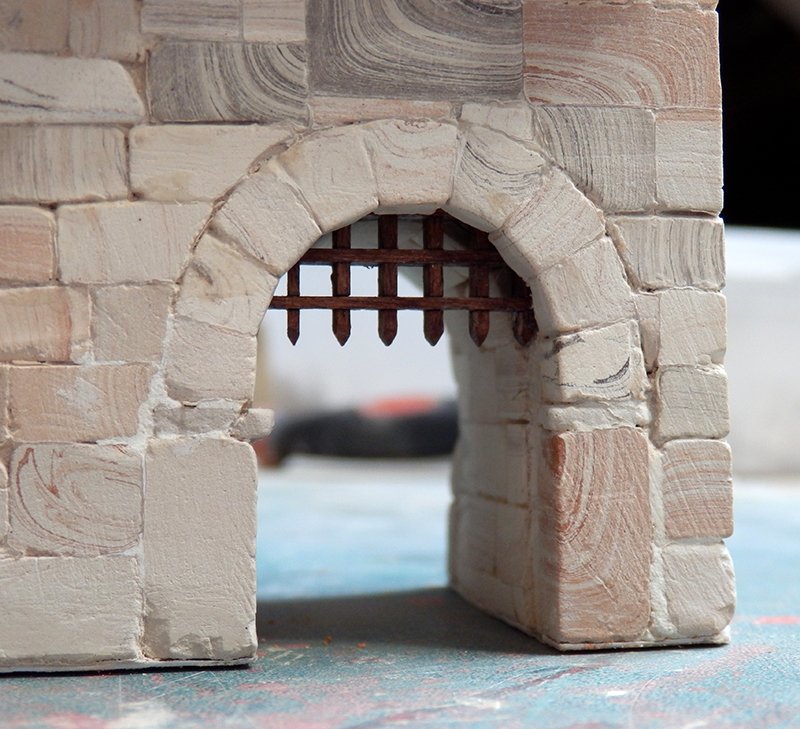
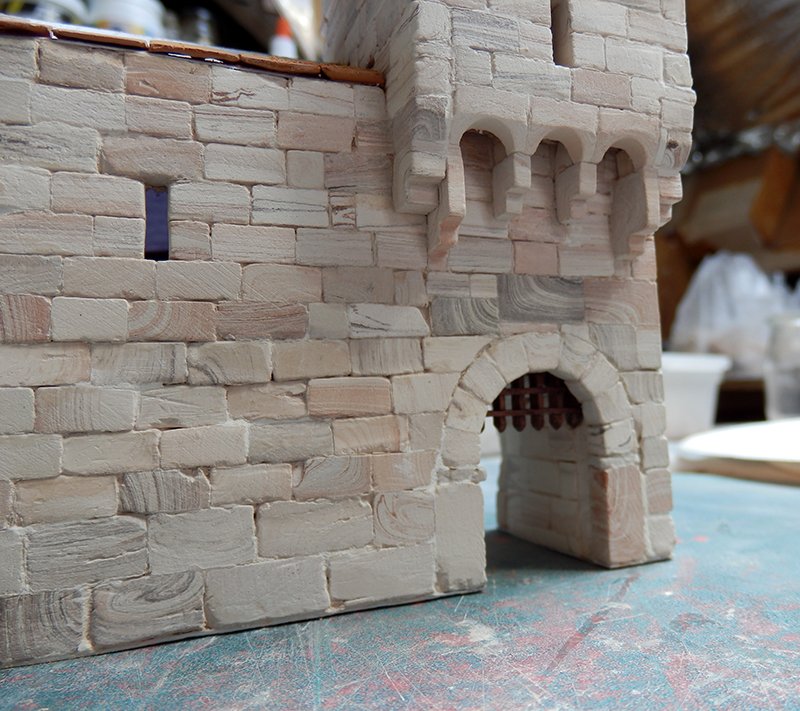
Some news: The entrance is done, the tower is going up, the house is attached with a facade of small white bricks.
Just to anticipate a little, I'm already planning the modifications to the Lord's house on the other side of the village:
-
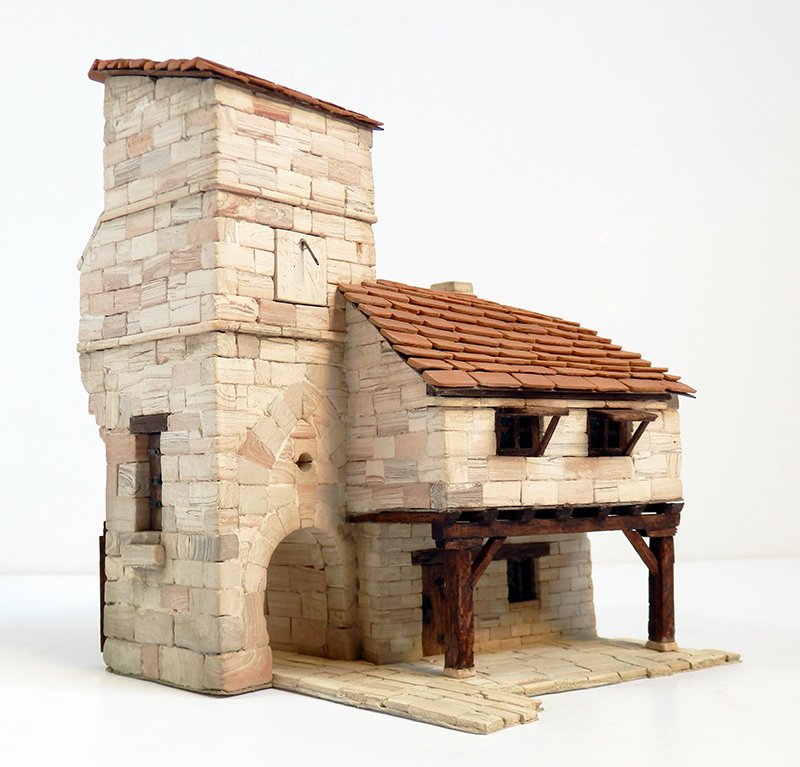
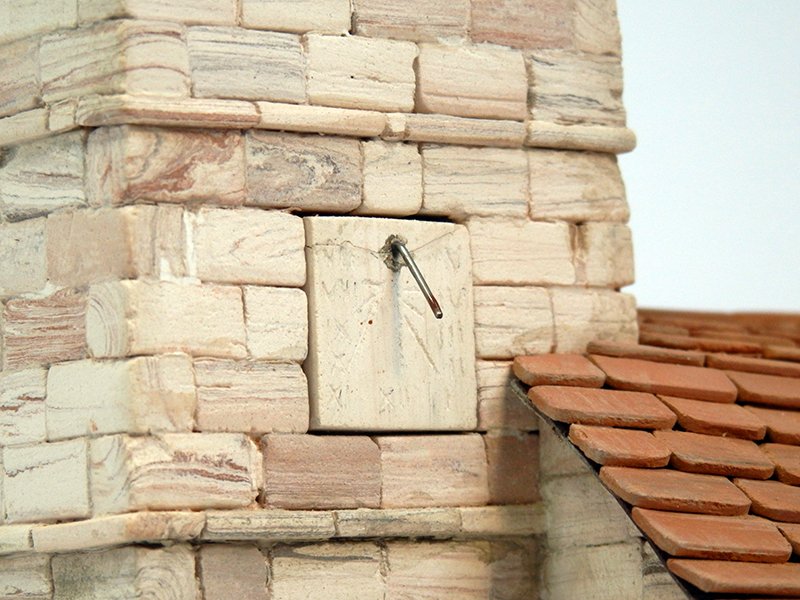
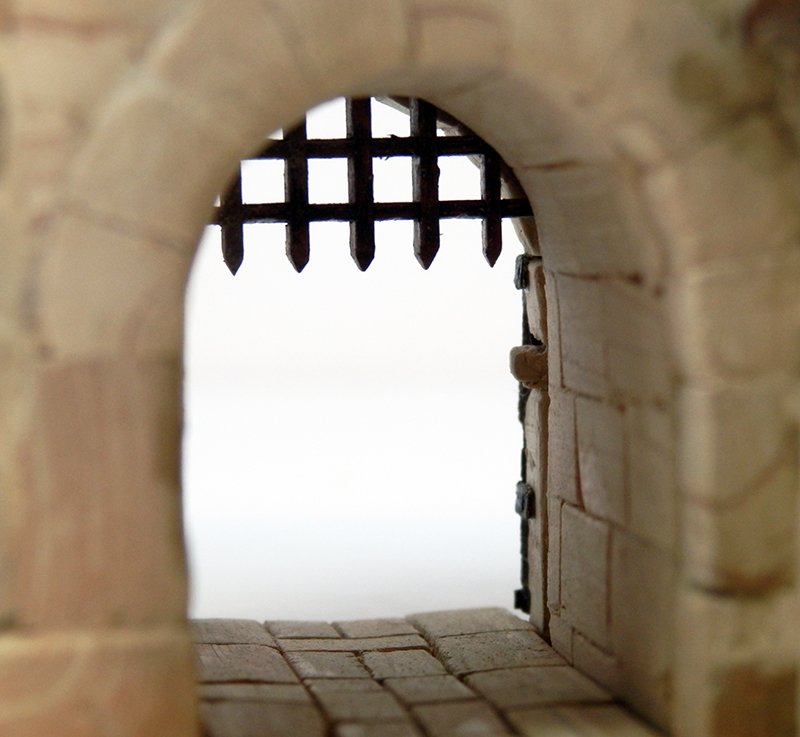
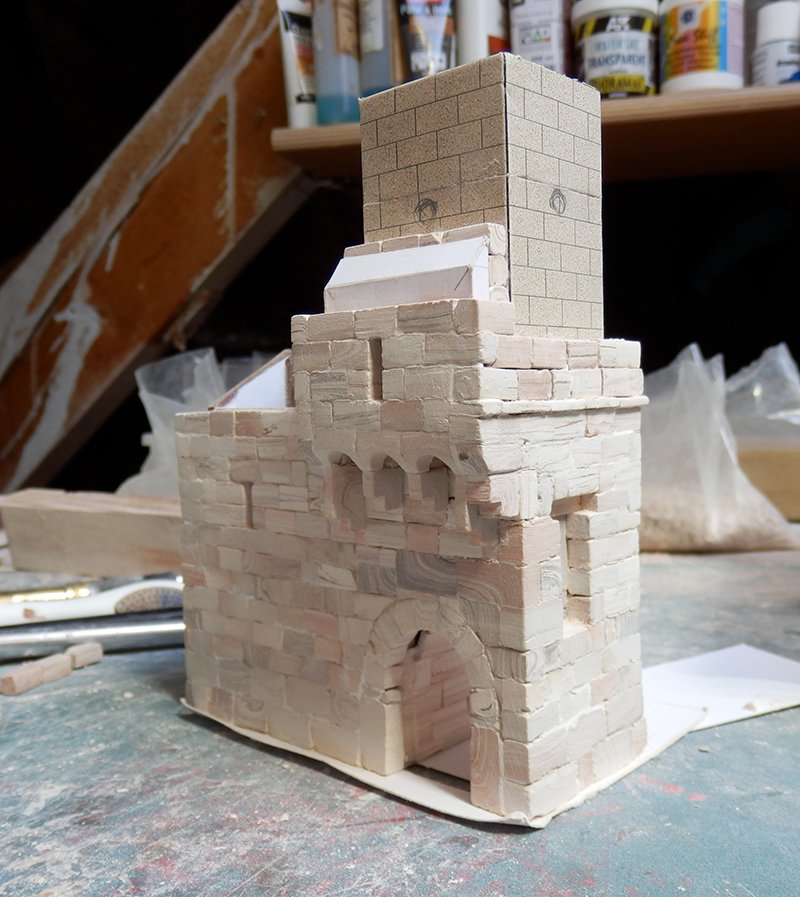
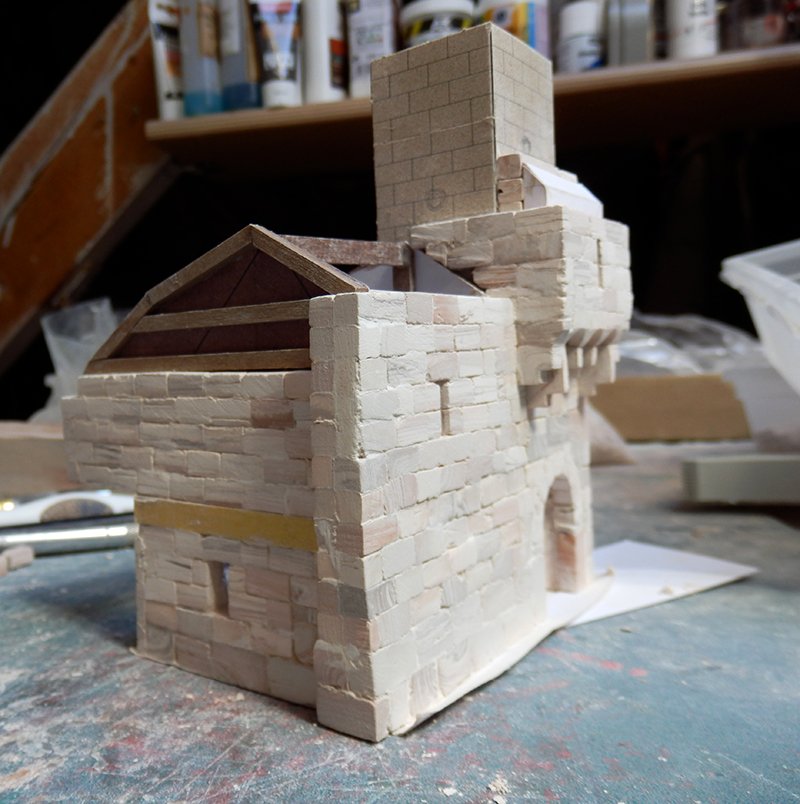
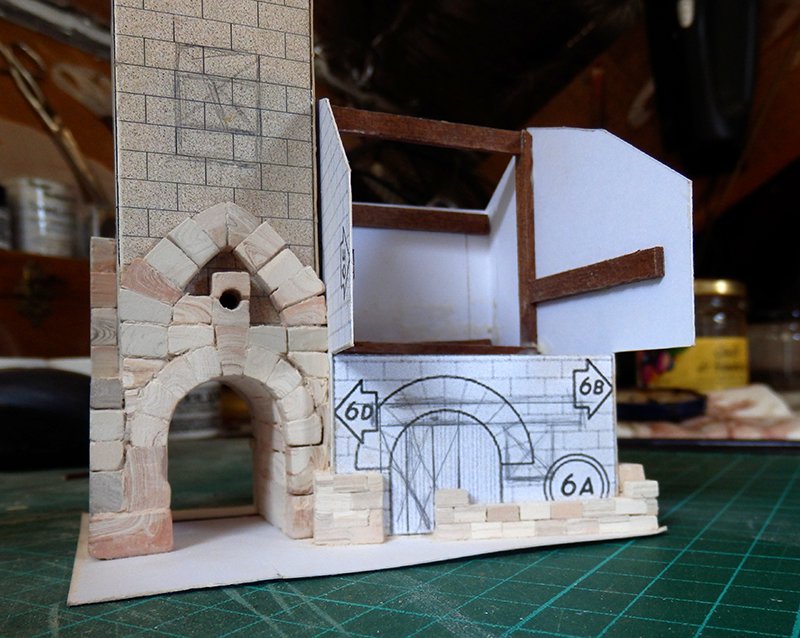
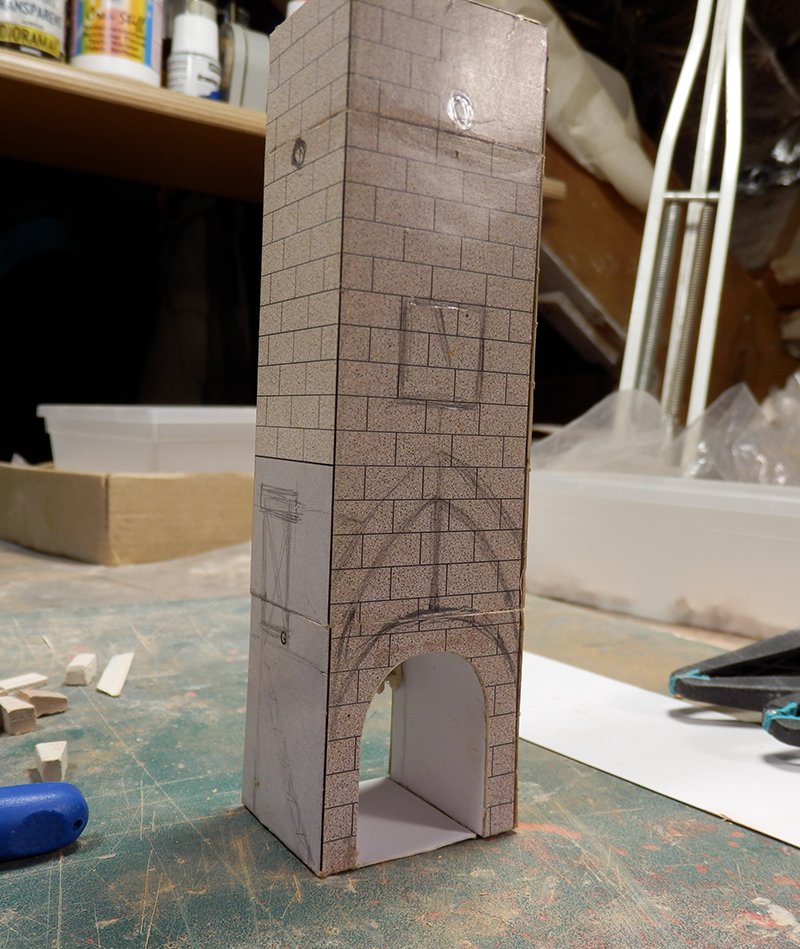
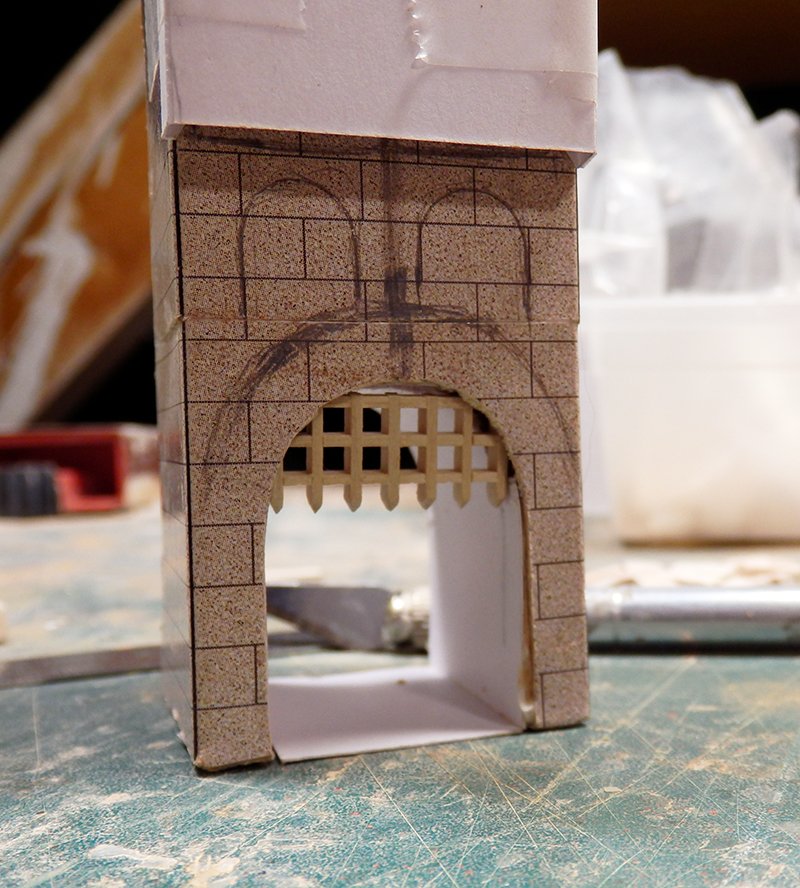
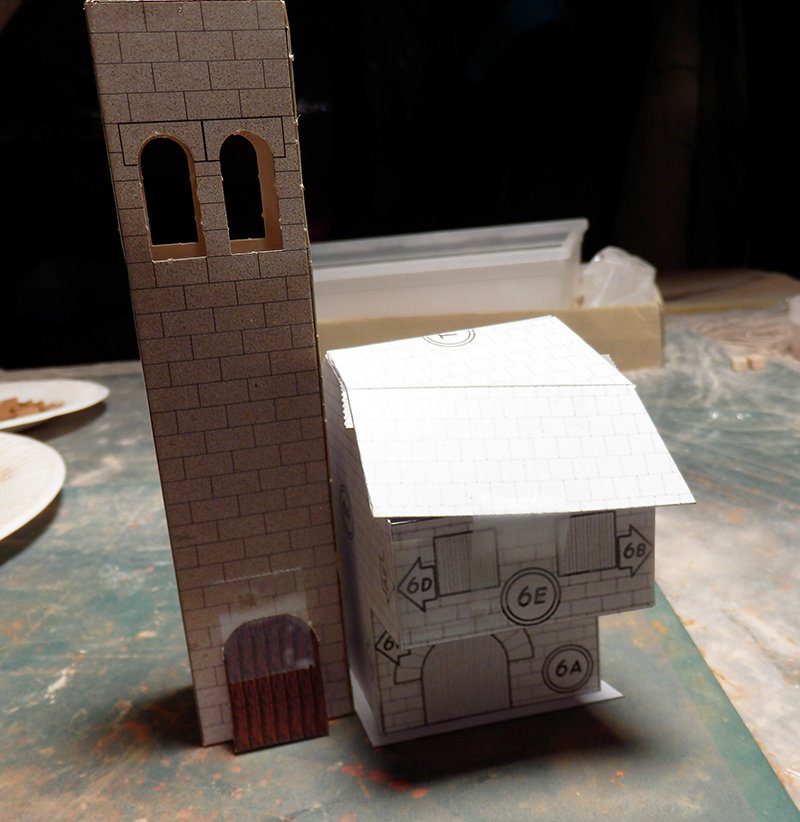
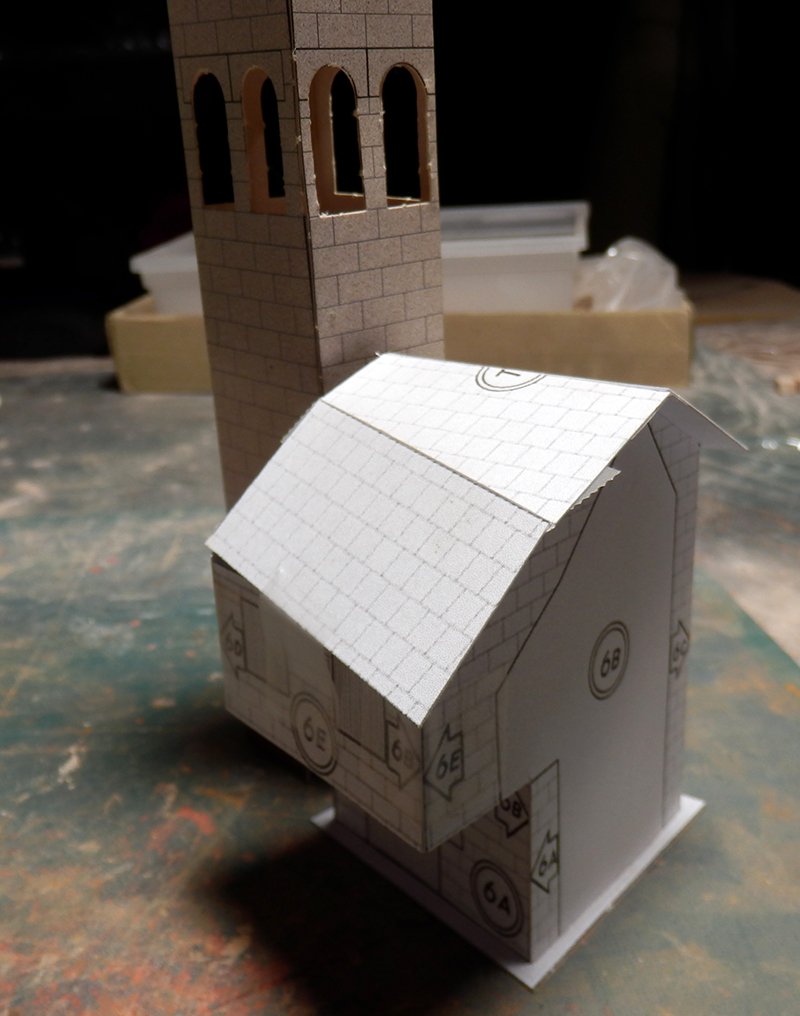
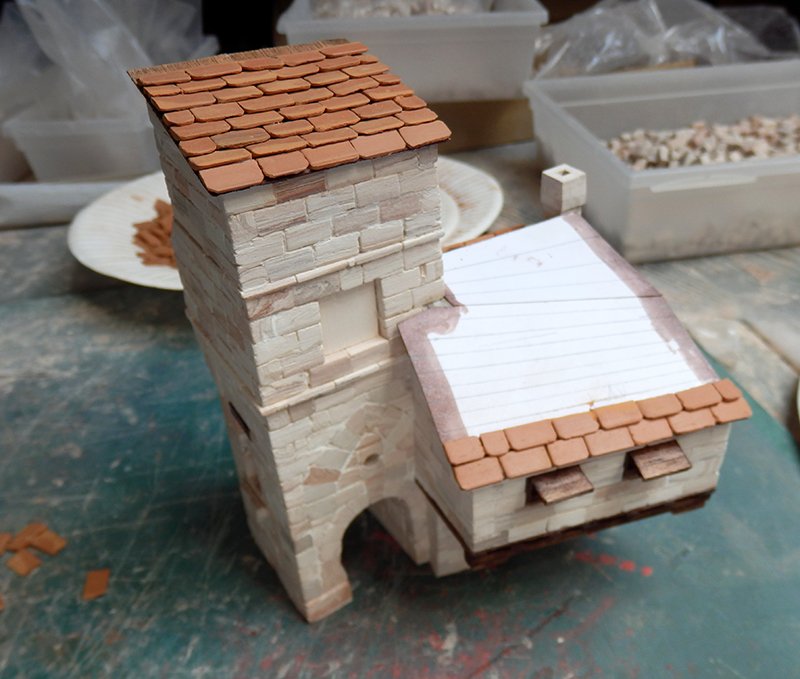
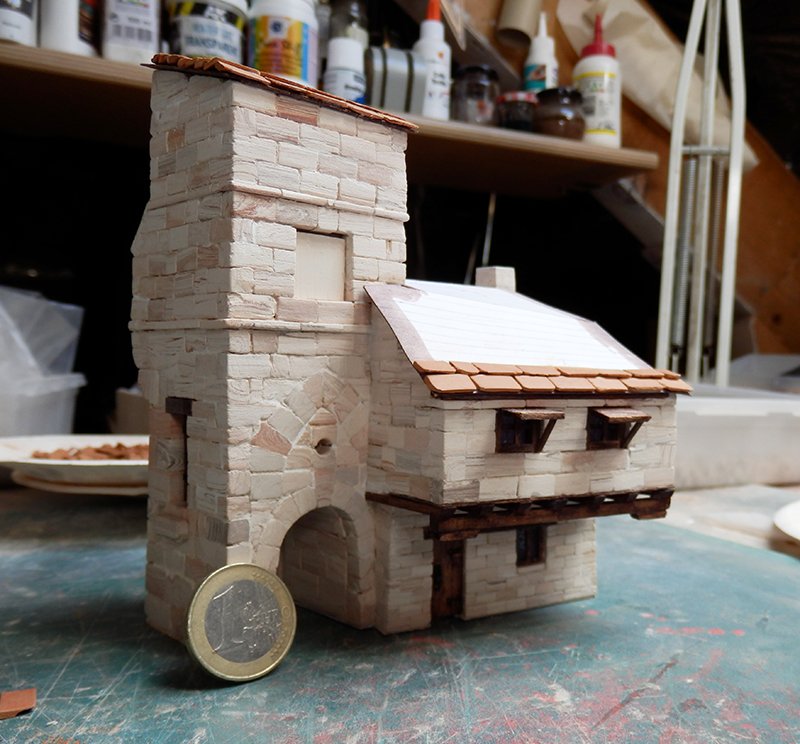
I had to realize an idea to transform my cardboard bell tower base (see above) into a fortress/belfry door.
This tower became what I wanted, here are the transformations. I'll be able to start the structural work!
- modeller_masa, G.L., GrandpaPhil and 11 others
-
14
-
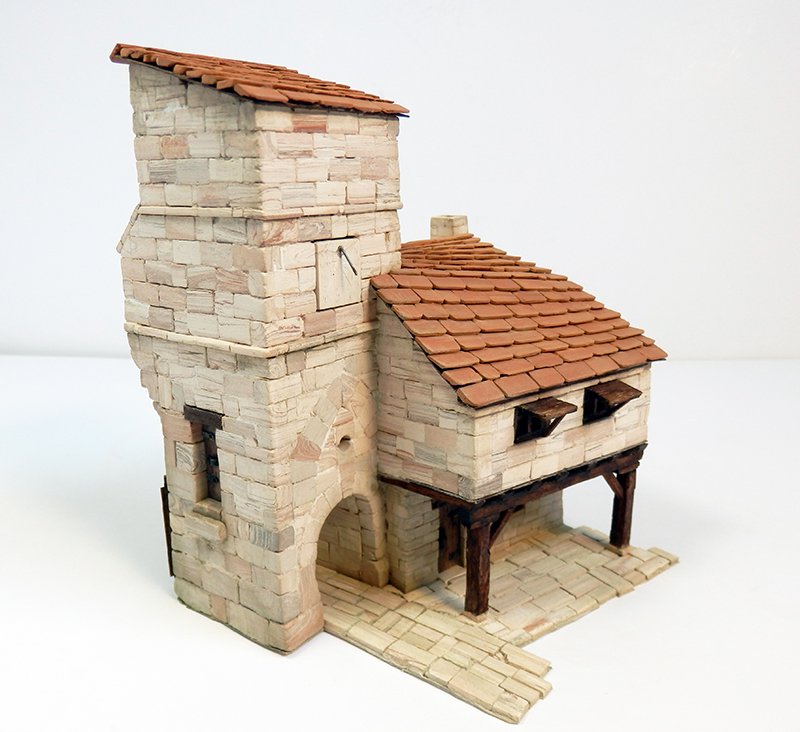
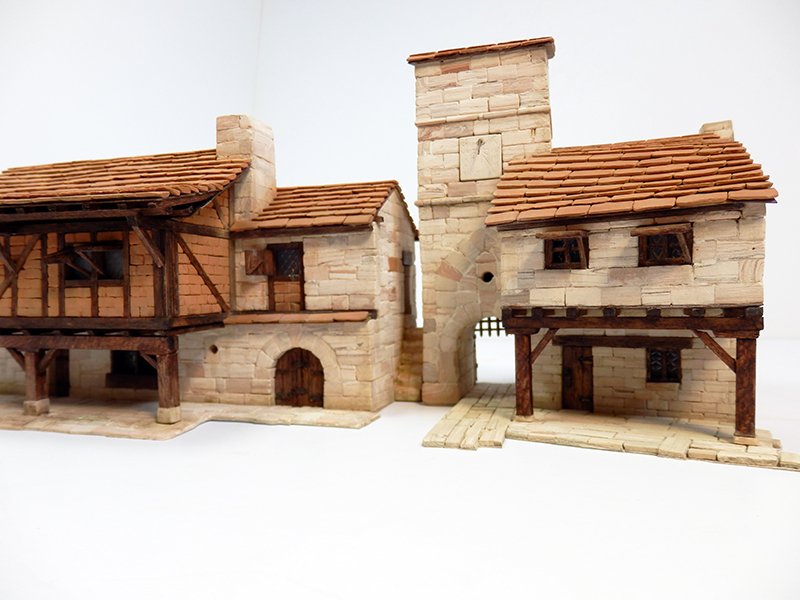
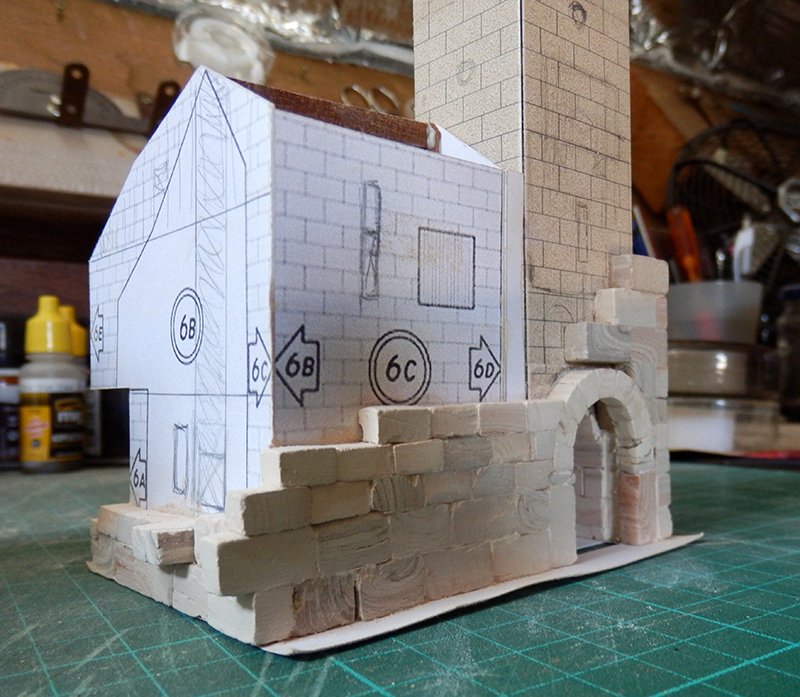
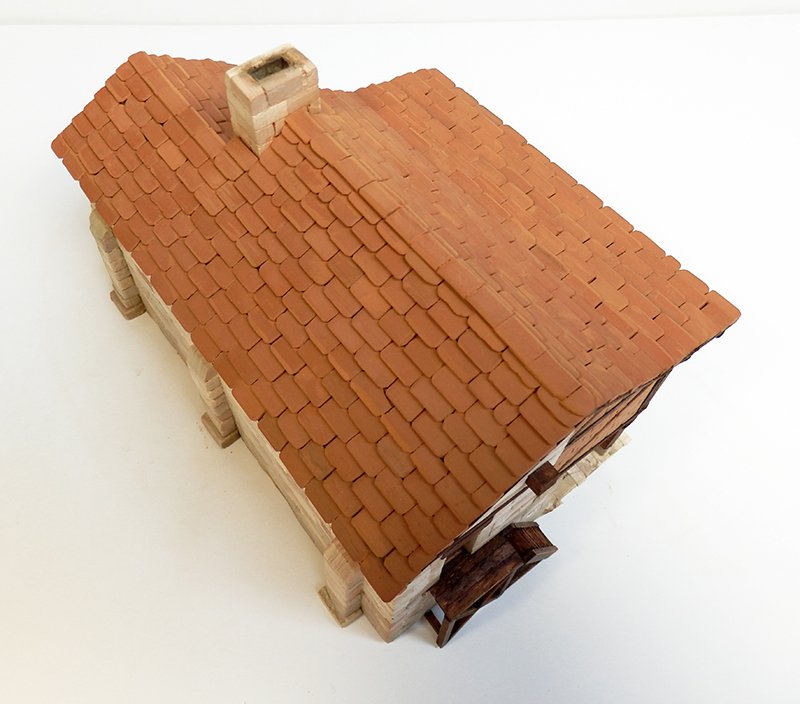
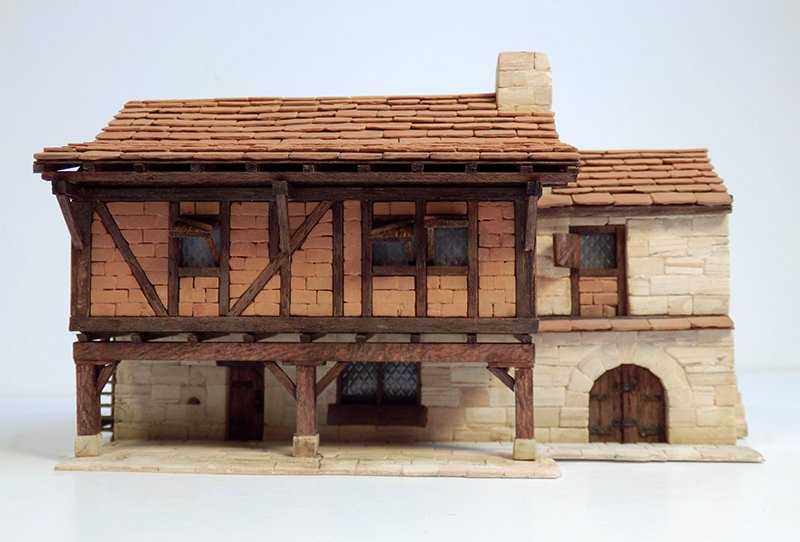
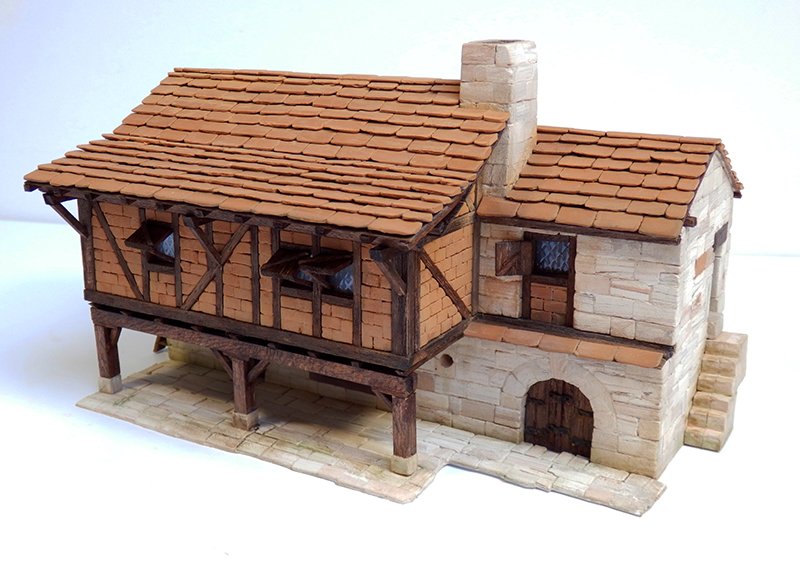
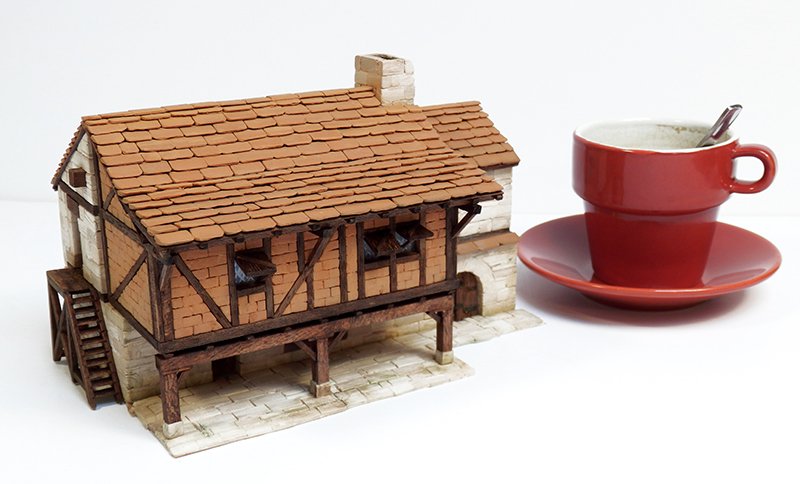
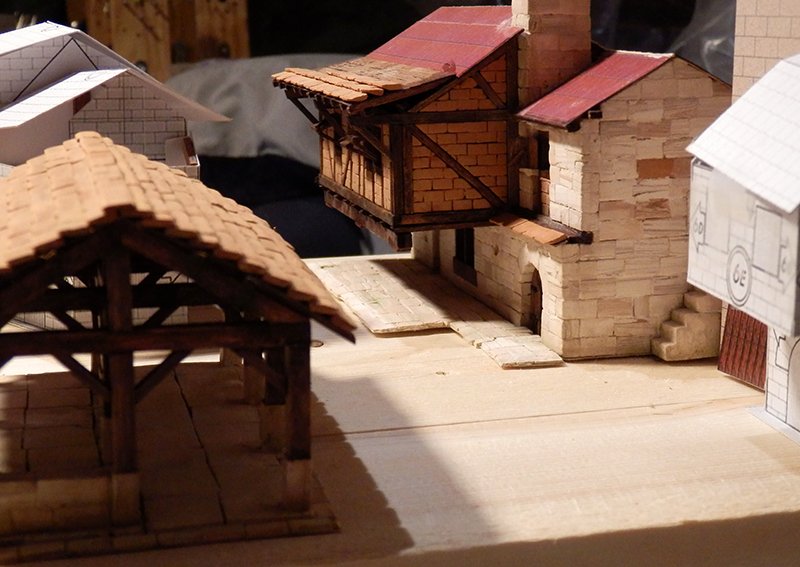
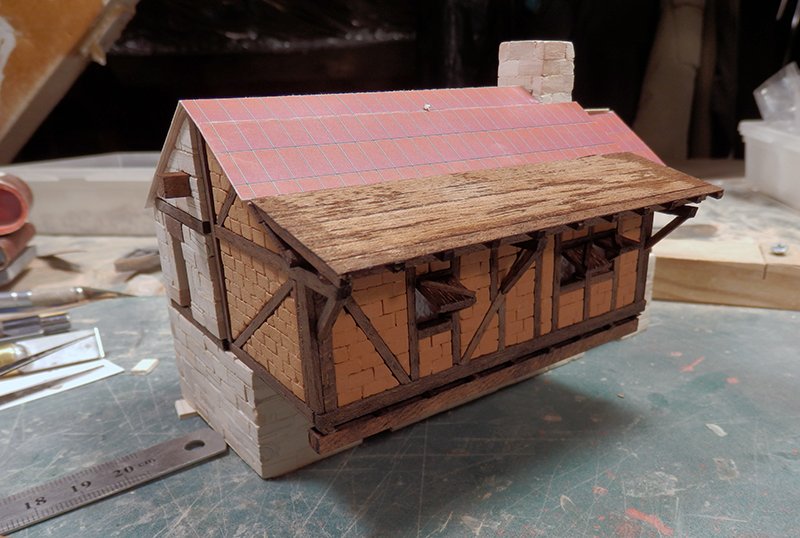
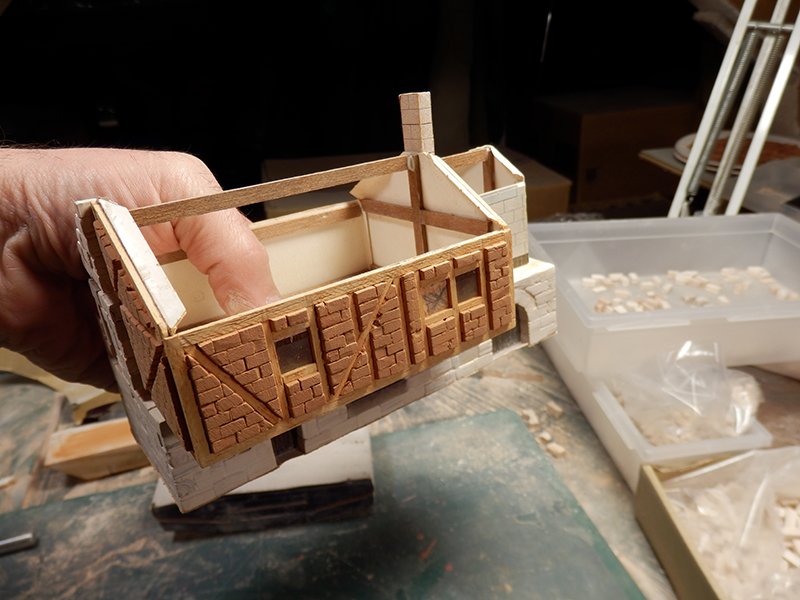
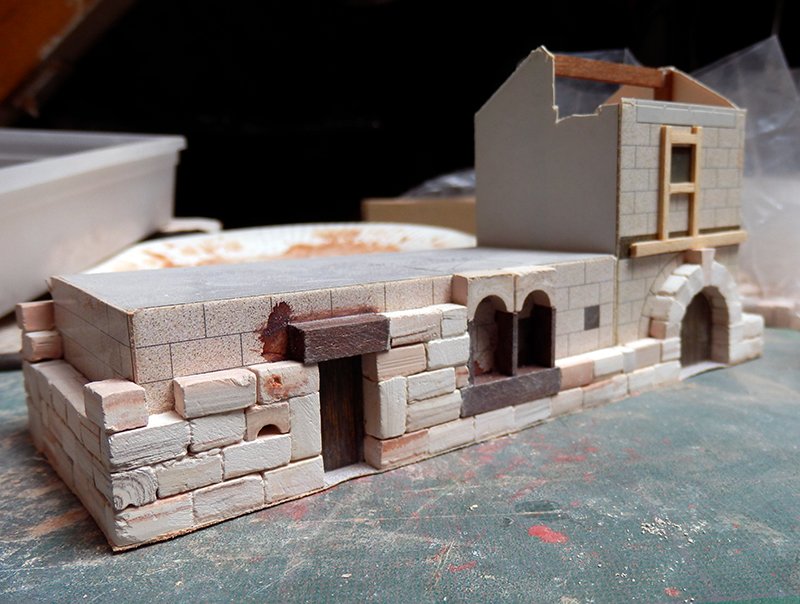
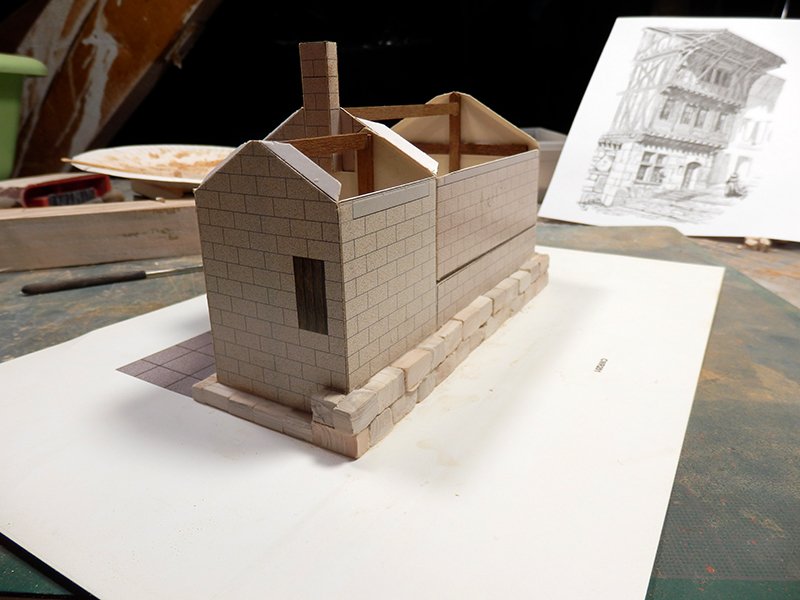
This house is finished.
Some final pictures :
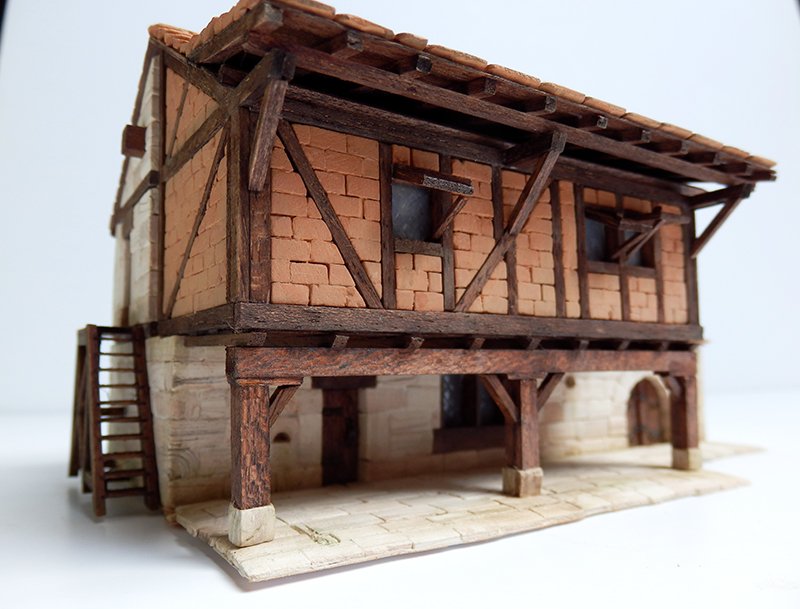
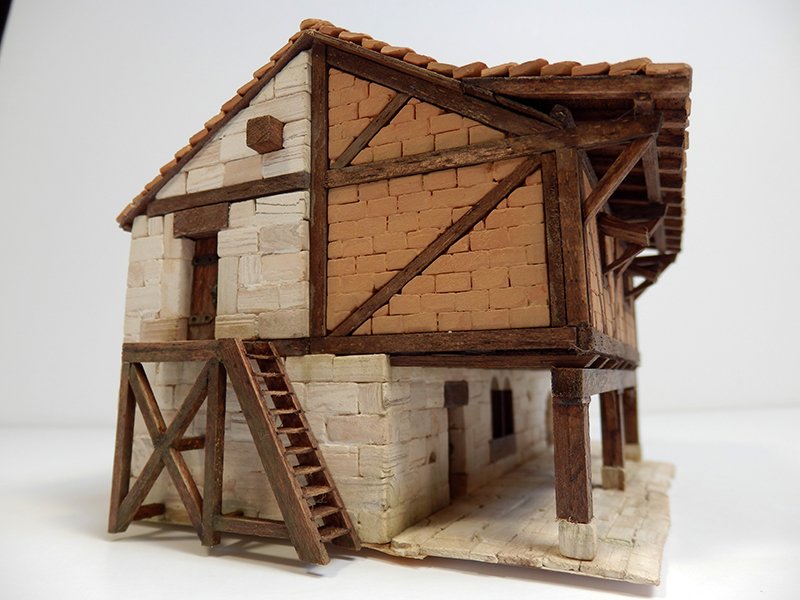
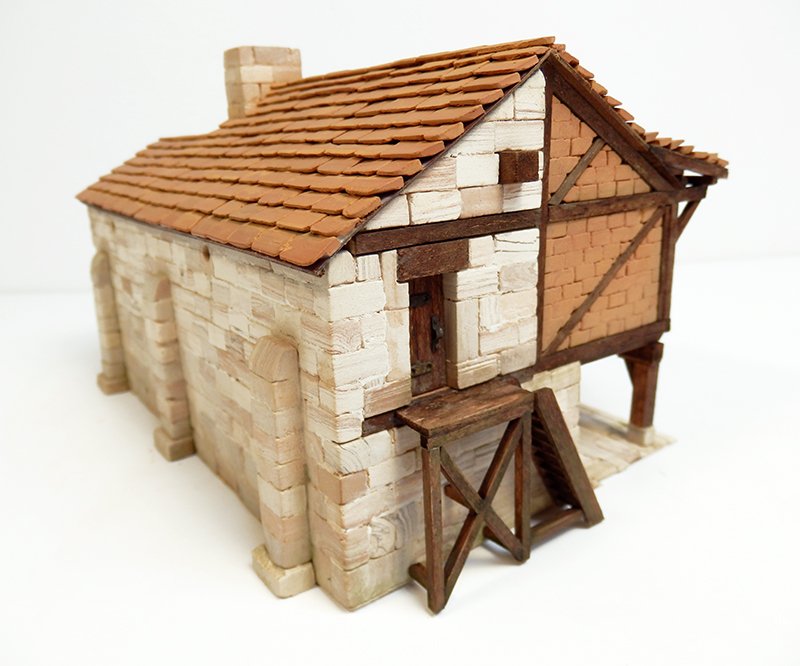


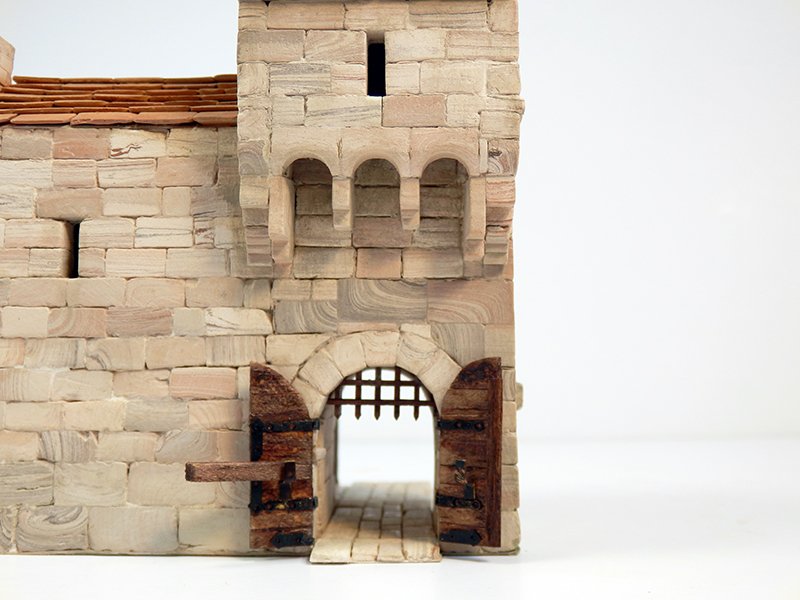
Next, it will be the belfry/west door attached to a small house.
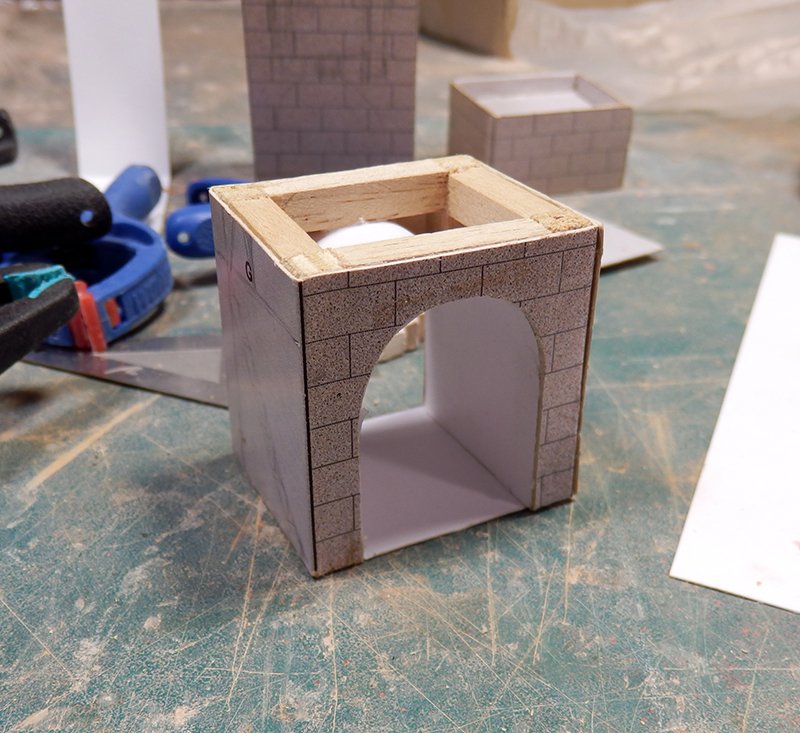
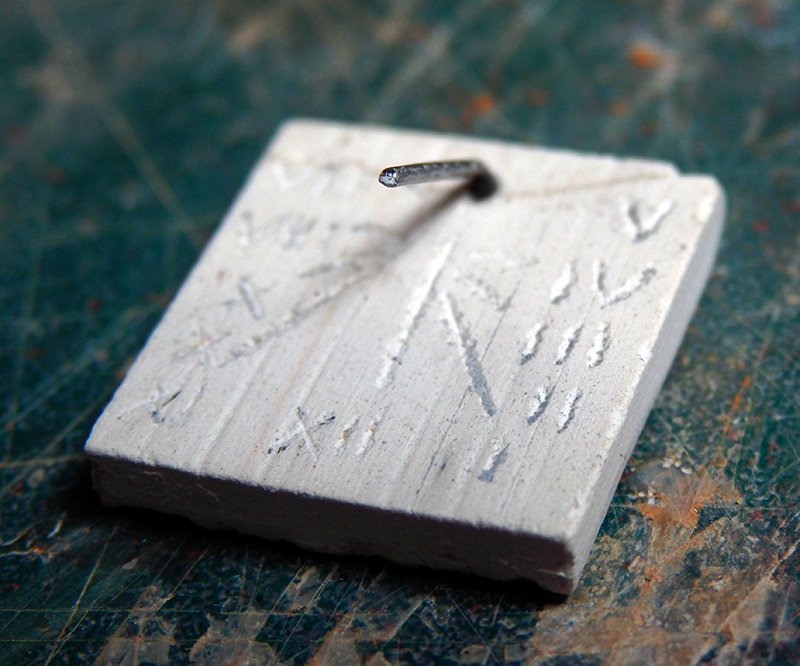
The tower of the belfry comes from an error in sending the kit: I received twice the cardboard base of the church bell tower...
I'm going to transform this base to create the open doors, insert a hoist, a sundial, eliminate the bell tower openings, put a roof, decrease the height a bit.
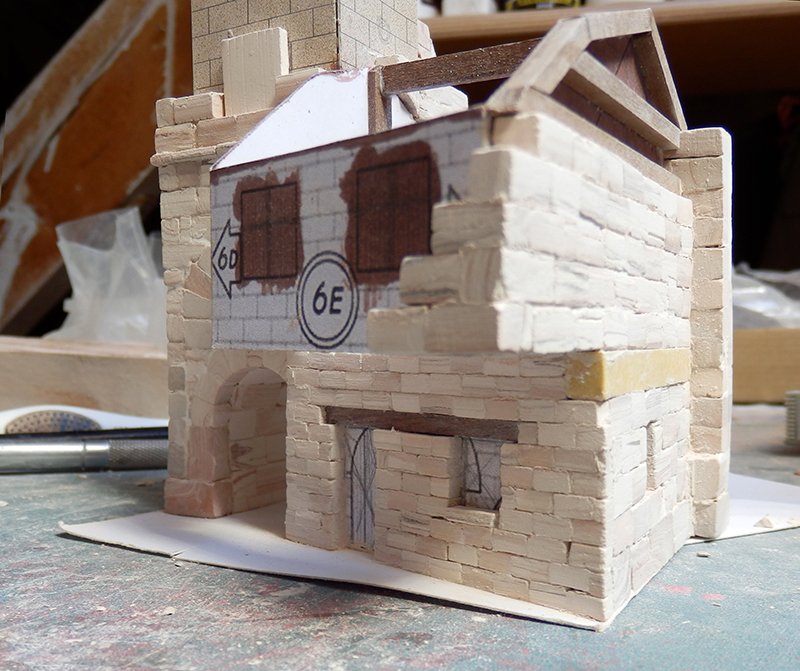
The little house will be glued directly to the tower to have a city block.
-
-
12 minutes ago, Javlin said:
When I look at the build it seems it would be relaxing work?
Kevin
Yes, it's a series of models that are rather relaxing to set up. But no more than a model of a historical ship or anything else.
It is necessary, like an 18th century 3-decker, to anticipate the final and overall result, to prepare and anticipate the next steps, to know the basics of the time and a little bit about historical architecture.There are phases a little bit tedious like preparing the stones and tiles (like the assembly of the batteries of guns on a ship). Others that require attention like some walls or half-timbering (like the hulls of ships). Finally, some really rewarding things like weathering.
In short, it's like any other type of model, I think. 😉
-
Just put the tiles down!


-
Many thanks, Kurt ! 😃
- popeye the sailor, lmagna, Egilman and 2 others
-
5
-
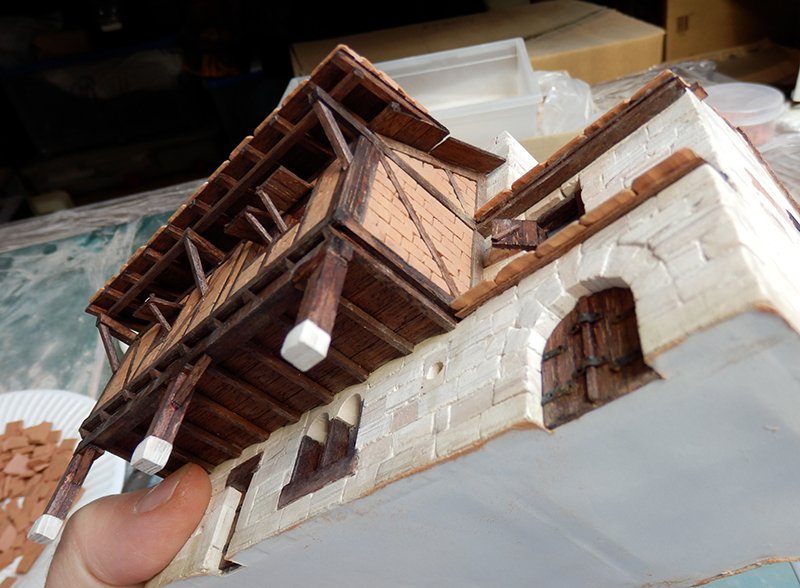
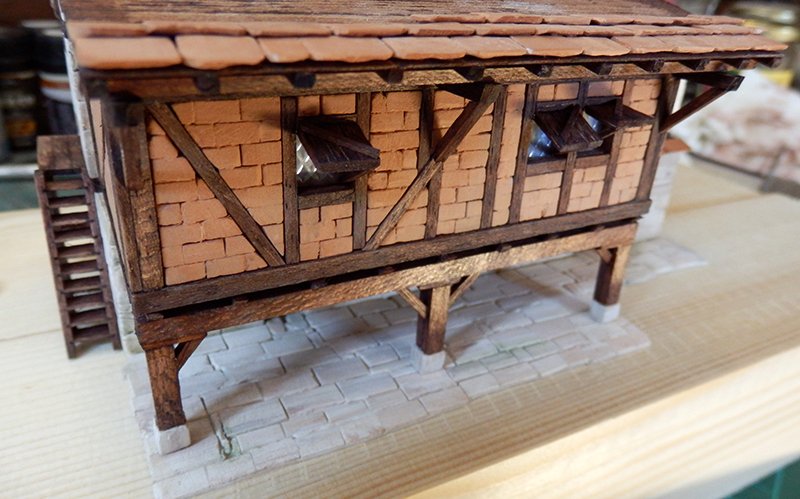
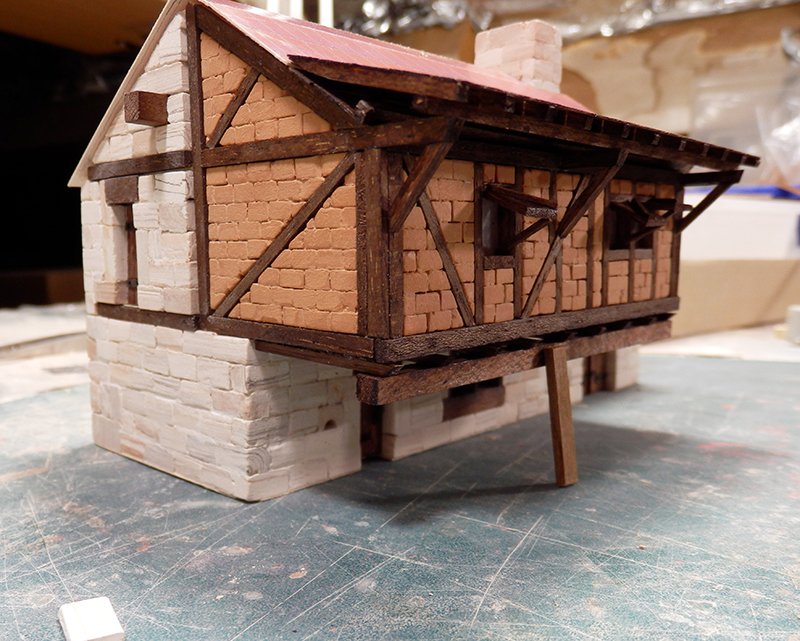
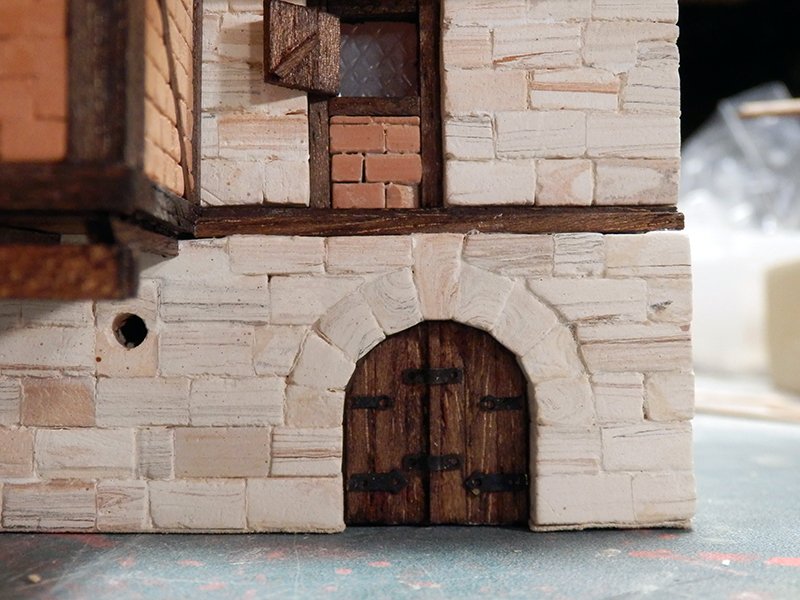
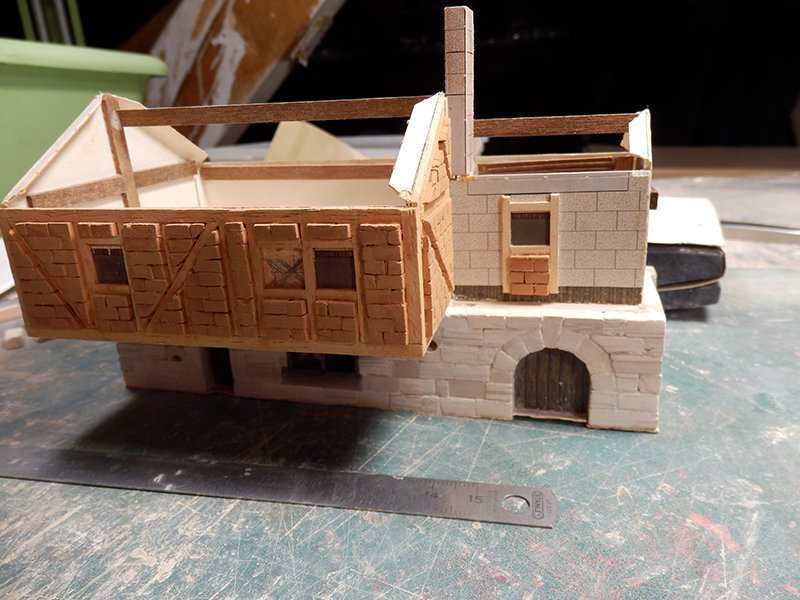
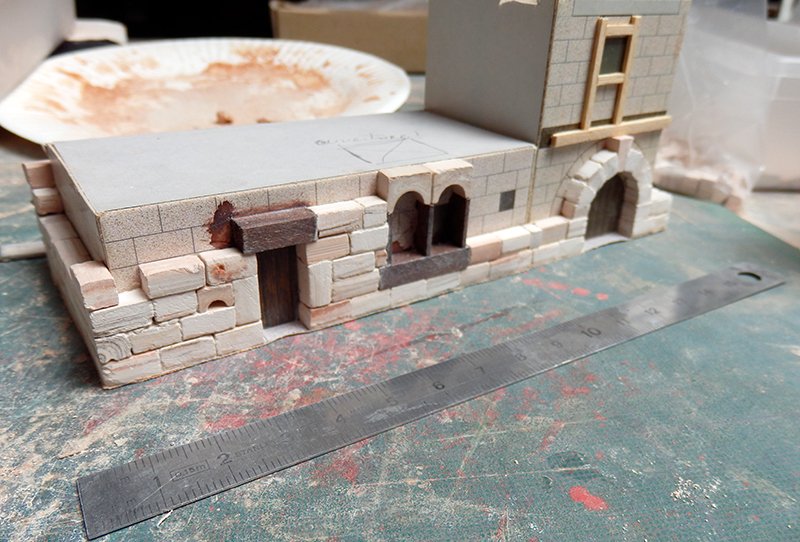
Small update :
- finished stone walls
- the studs are in place
- the first floor roof canopy
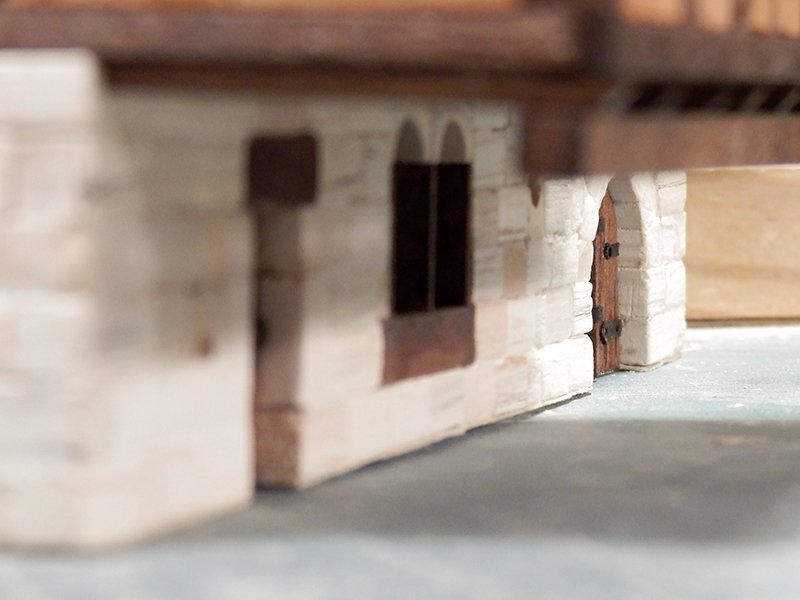
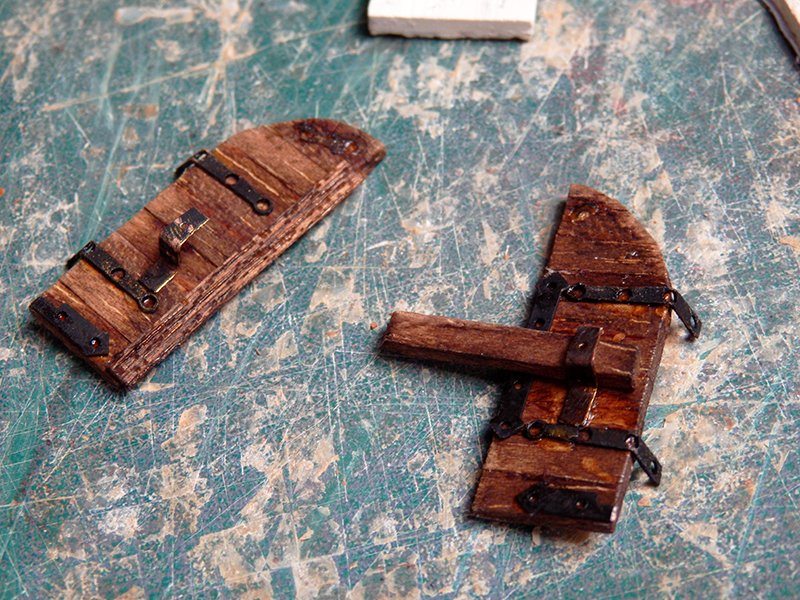
- window shutters
- all doors
There's still work to be done:
- the tiles in their entirety
- the stairs on the right (stone) and left (wood)
- stone doorsteps
- paving on the floor
- the pillars of support
- overall ageing
- pythagoras, Barbossa, popeye2sea and 14 others
-
17
-
7 hours ago, lmagna said:
I have never seen post and beam construction with the fill area so much thicker than the beams. Interesting look.
Thank you all!
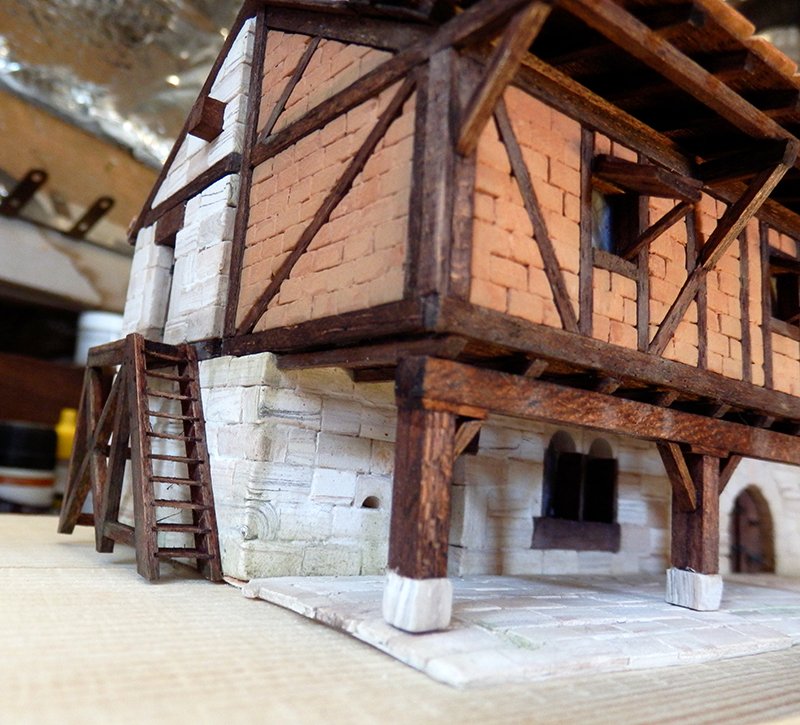
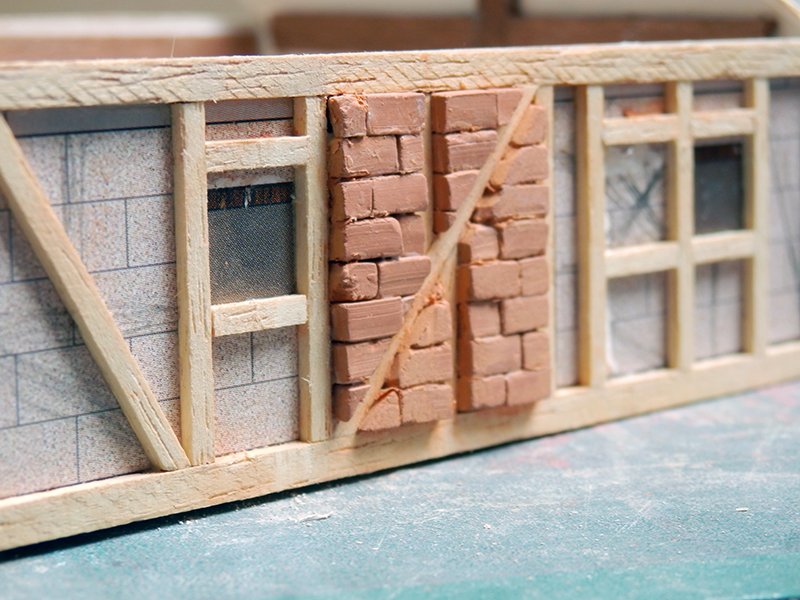
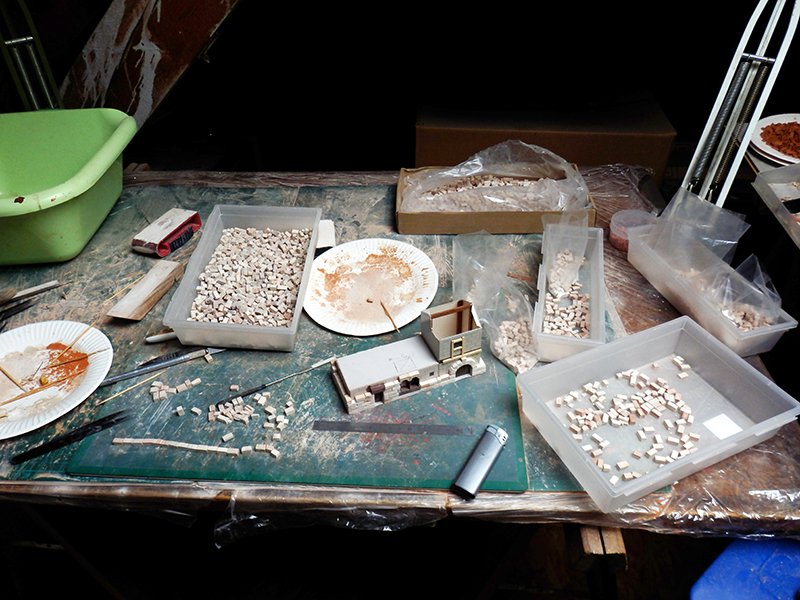
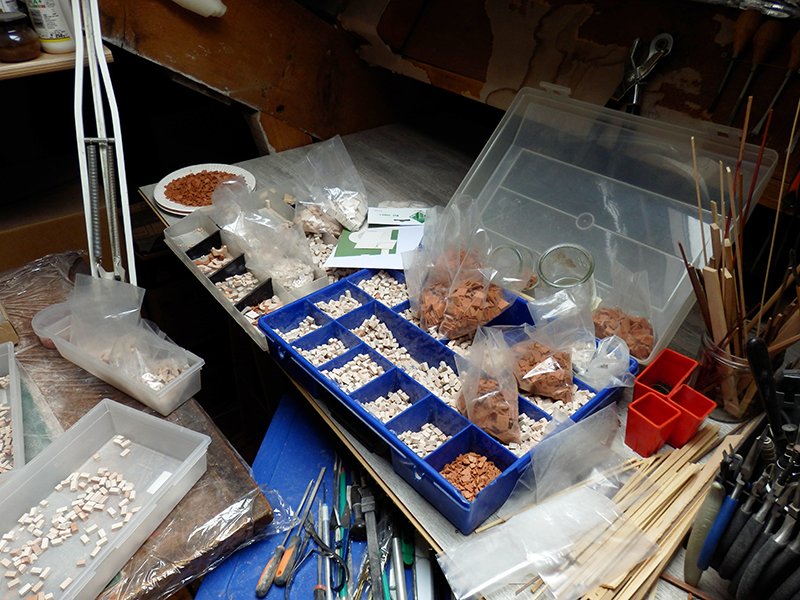
In fact Imagna, what you see at the moment is the placing of the bricks and stones with a first layer of wood that helps to glue properly and make the cuts.
In order not to put dust everywhere on the studs during the sanding, I first finish this step before "filling" the gaps with a 2nd layer of wood, this time tinted dark like at the time ...
But this final step will be in place only when I will not make any more dust, including with the roof tiles.- popeye the sailor, druxey, lmagna and 3 others
-
6
-
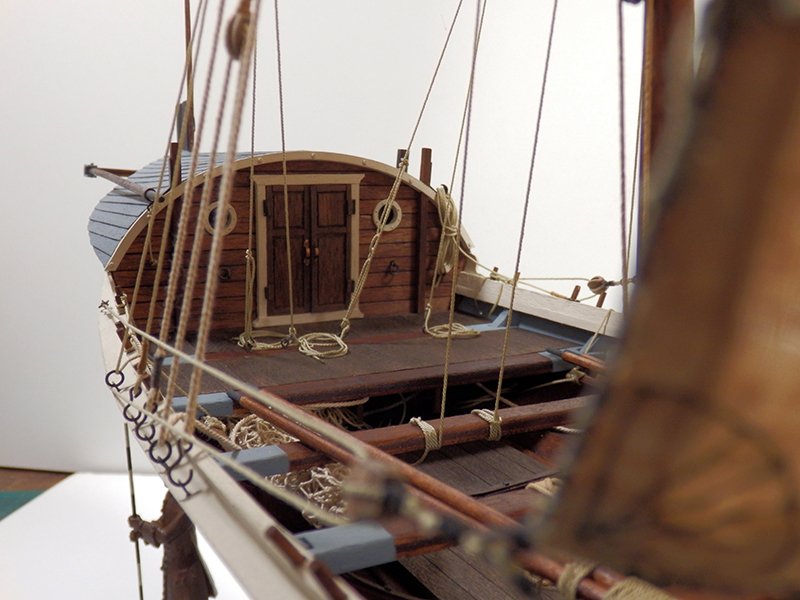
The assembly of this boat, the precision of each machined part... it's all very impressive!
- FriedClams, mtaylor, KeithAug and 1 other
-
4
-
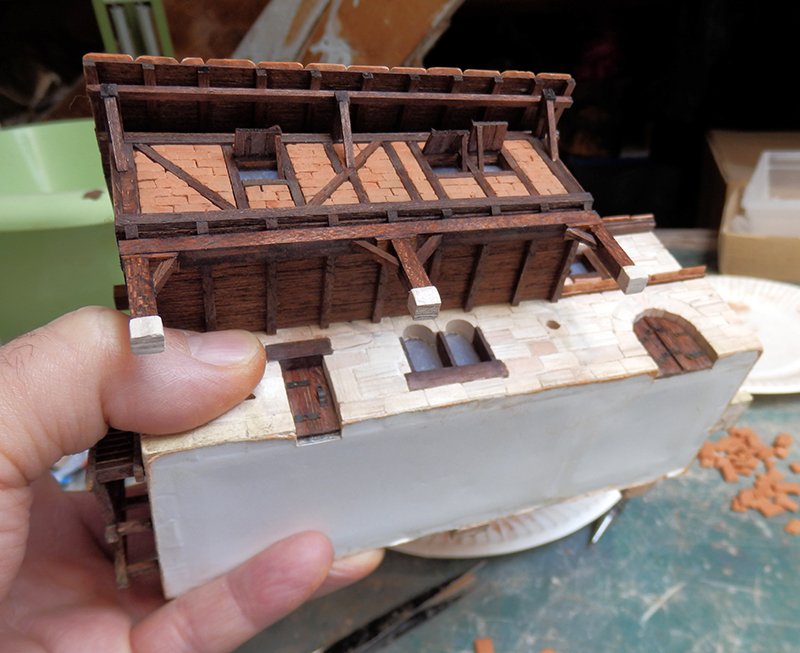
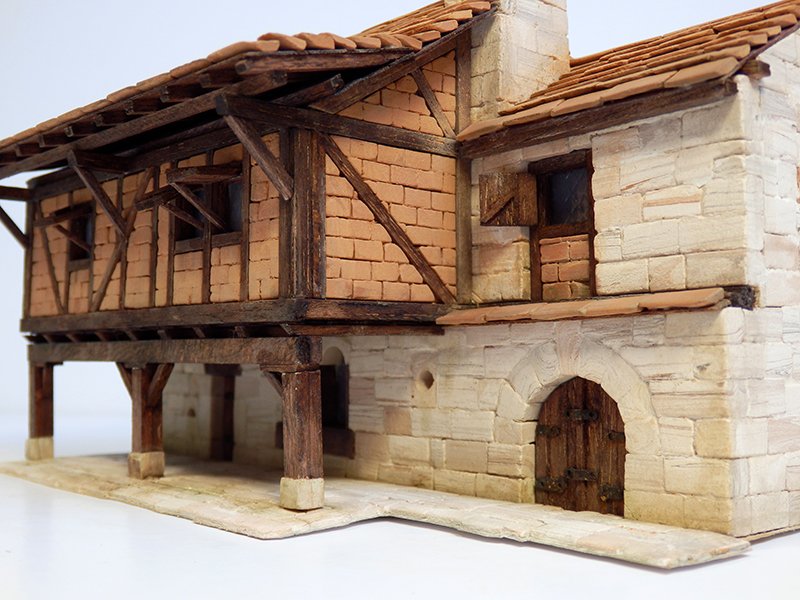
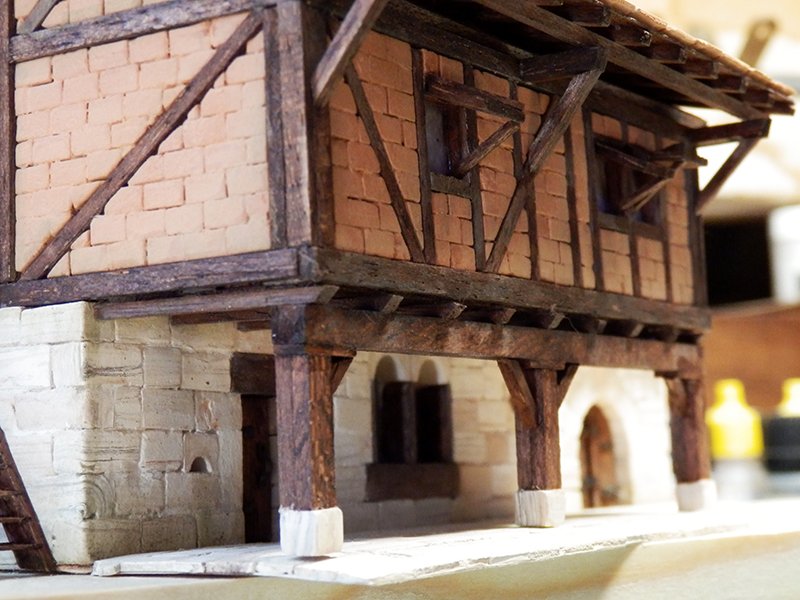
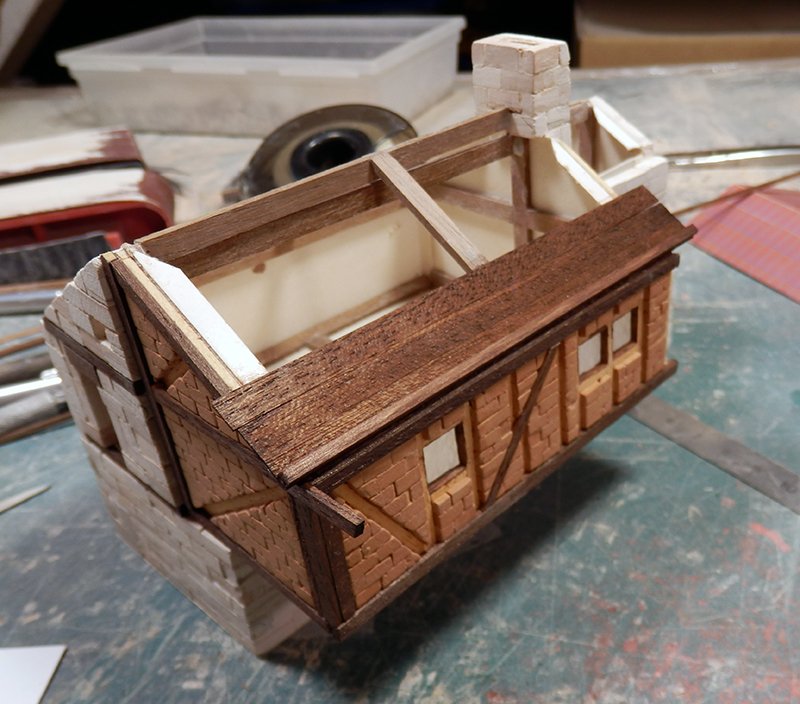
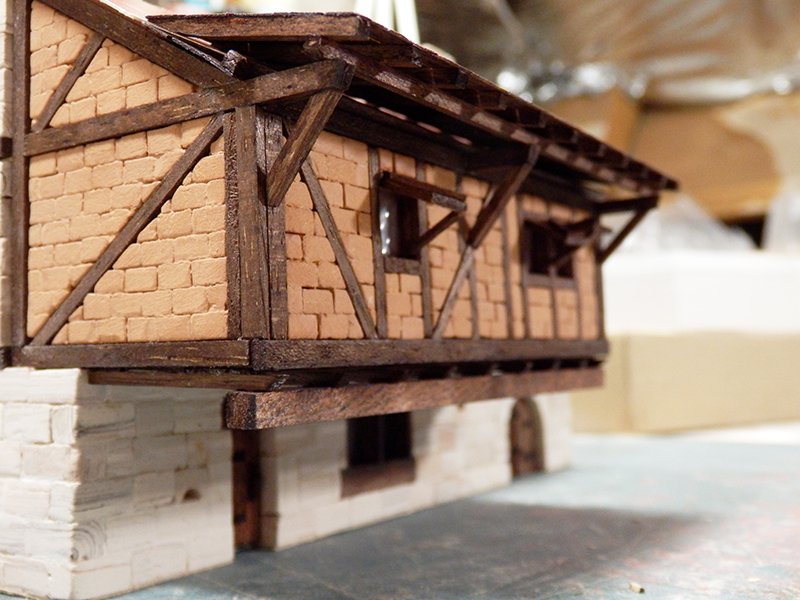
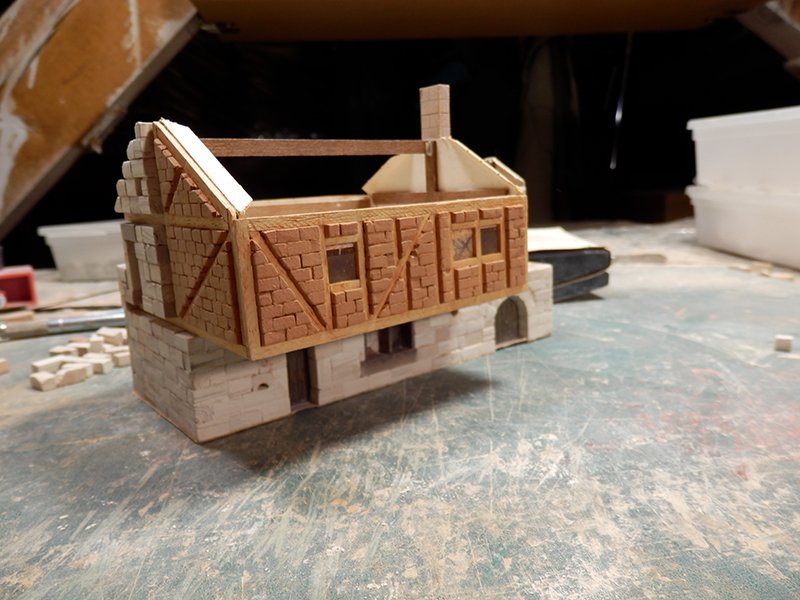
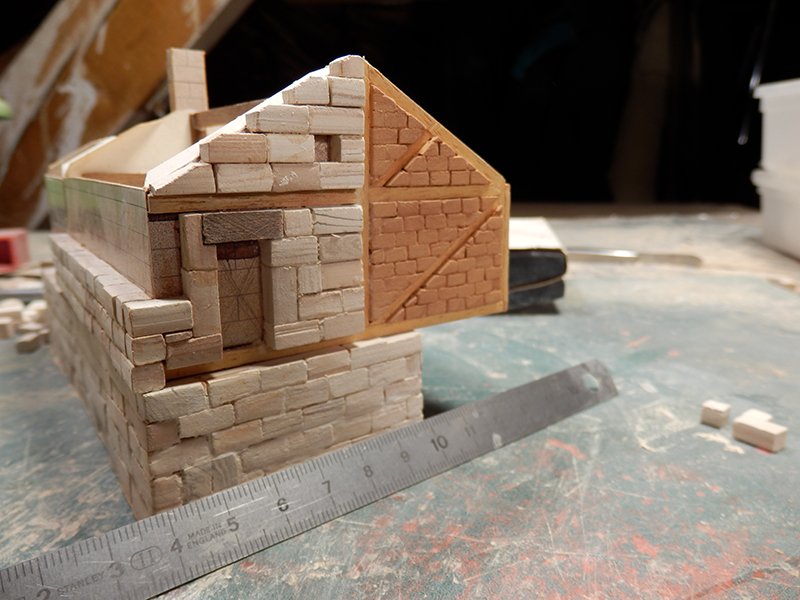
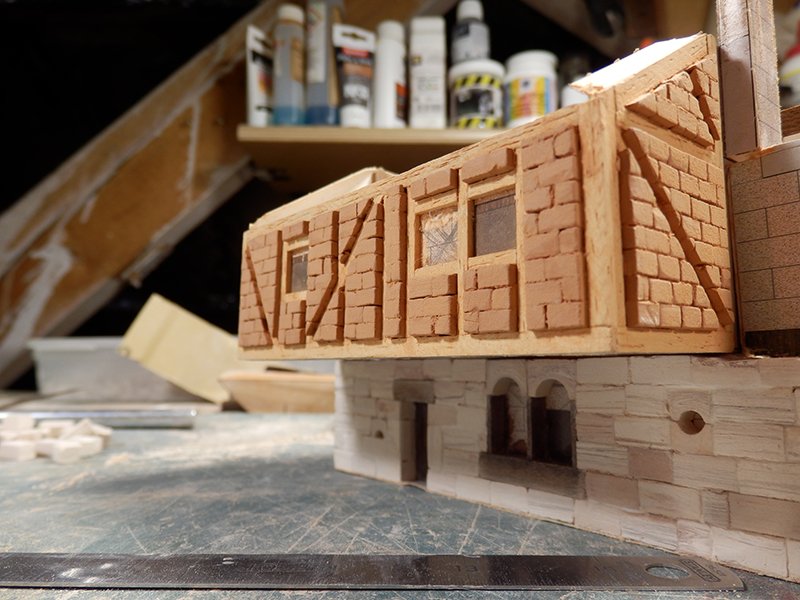
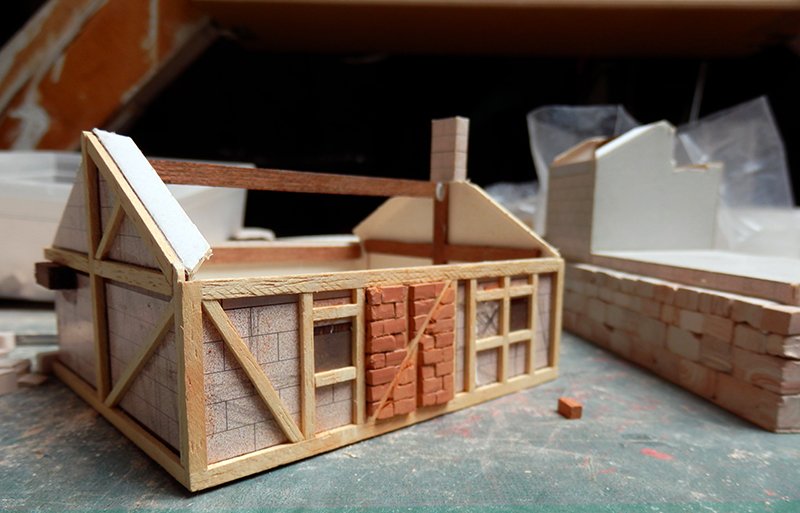
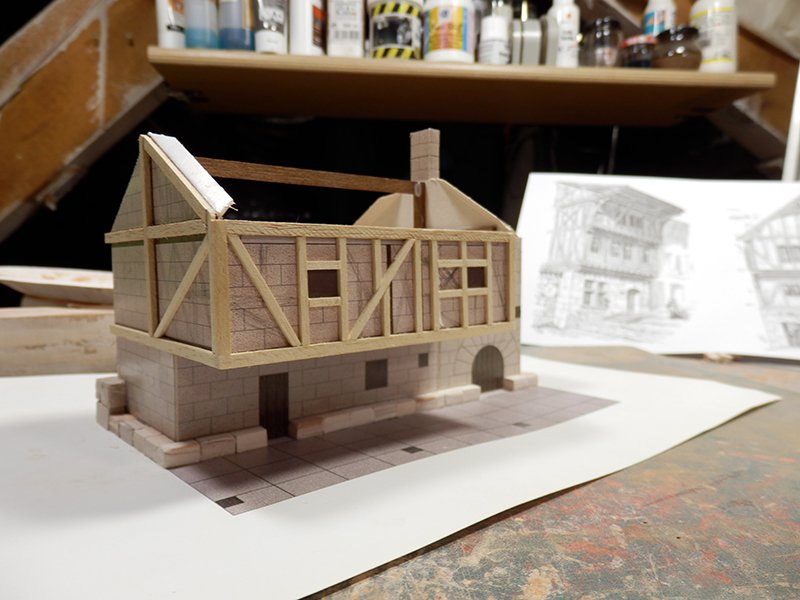
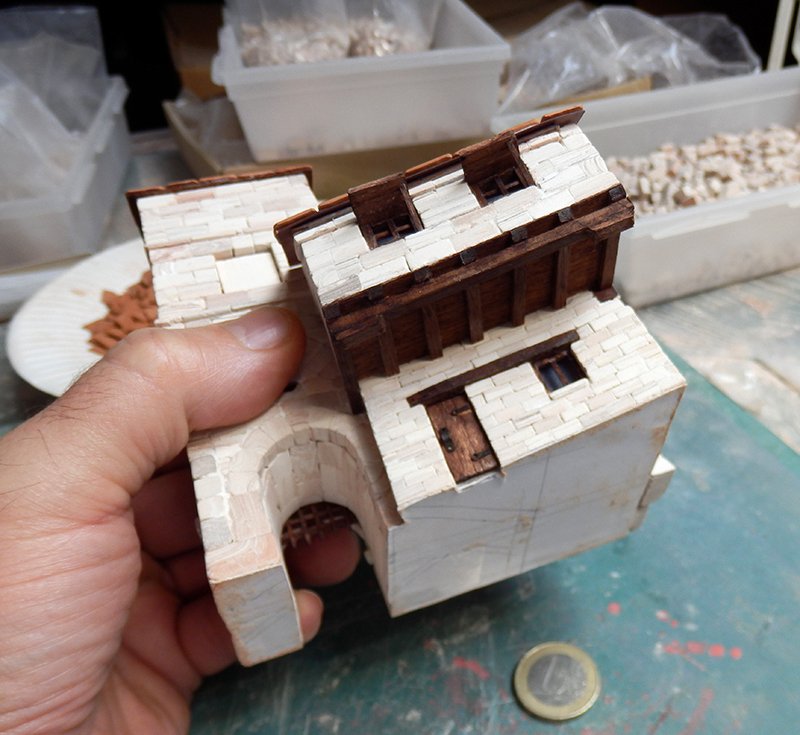
A suite for this house.
The half-timbered bricks are done: tedious work!
The walls are being finished, the woodwork is ready to be ironed in stain. The 1st floor is glued, I will be able to complete the walls.

- druxey, modeller_masa, Javlin and 13 others
-
16
-
Thank you all for your comments: it really motivates to keep putting stones and bricks on top of each other!
There's still a very long way to go to the end of this village, but if I manage to shape all the ideas I have planned, then it will be a success for this stone model.It has waited 20 years for me to build it, it deserves some attention... 😁
-
Thanks for your answer: I still appreciate it! ☺️
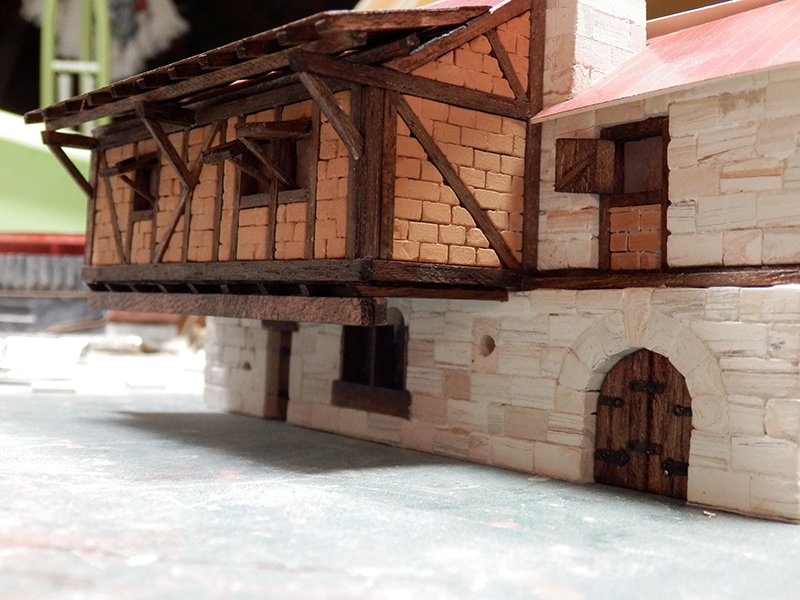
Yes, of course, there will be pillars to support this very heavy first floor.
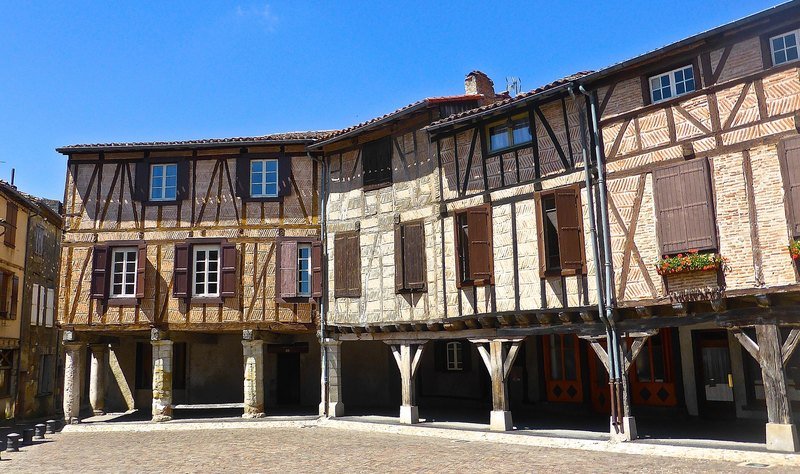
For this first house, I don't know yet whether I'm making them out of stone columns or wooden pillars.
I'll see that at the end of the construction...But it will look like this type of thing:
-
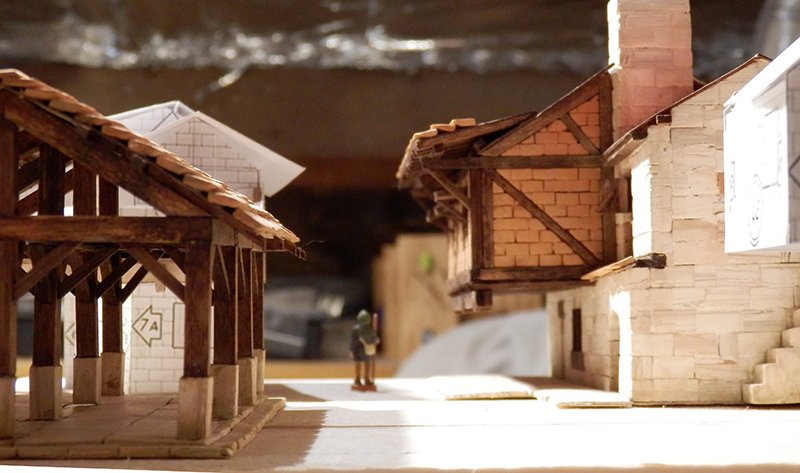
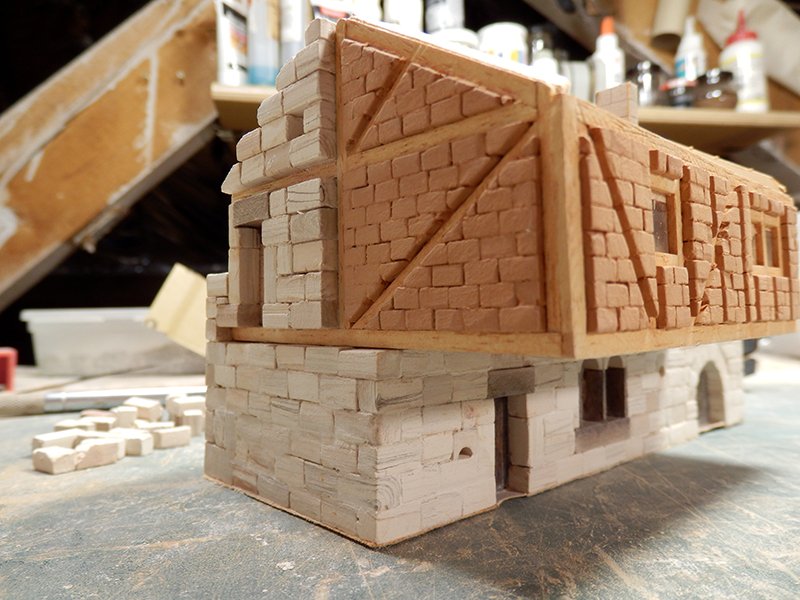
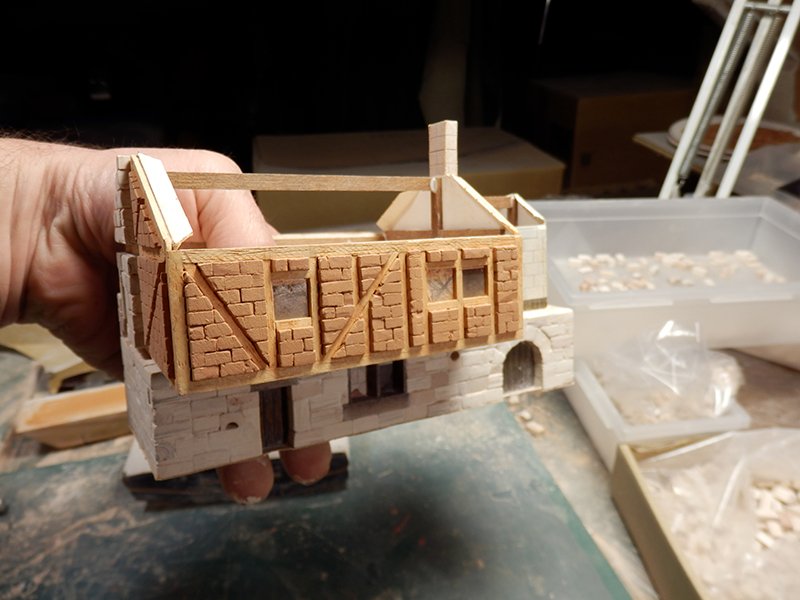
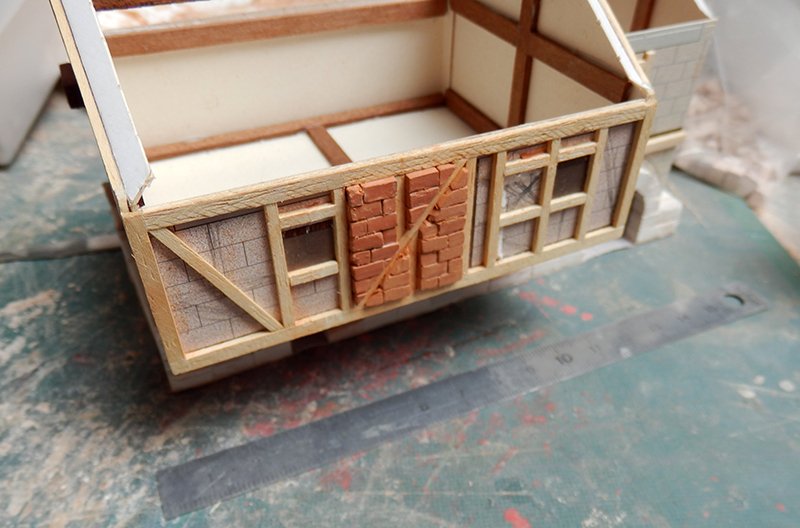
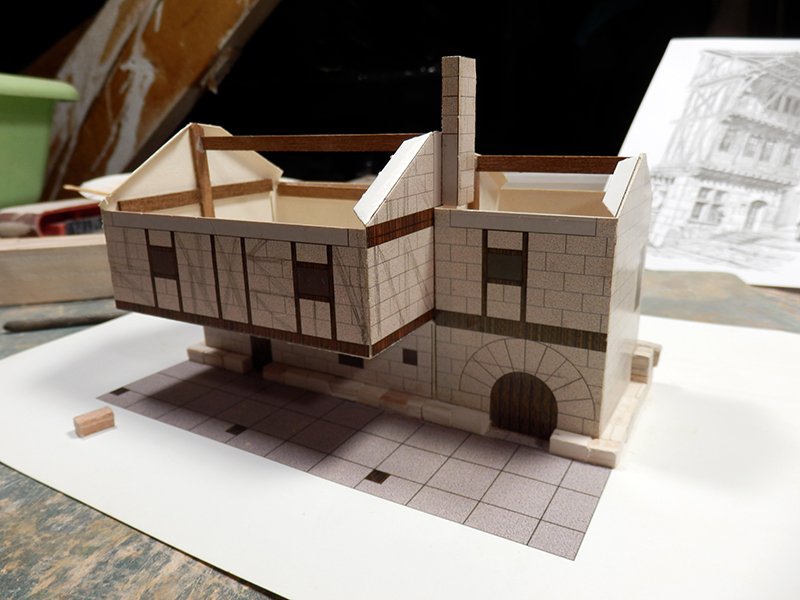
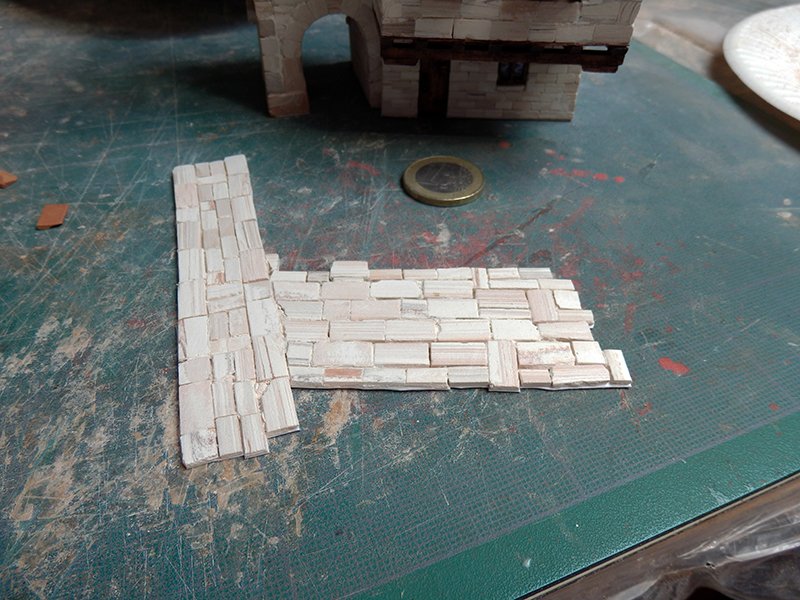
The construction continues quietly with the installation of the openings.
On the back, the stones are part of the outer wall, so they are rougher on purpose. The first bricks between the half-timbering are also started to see what it looks like.
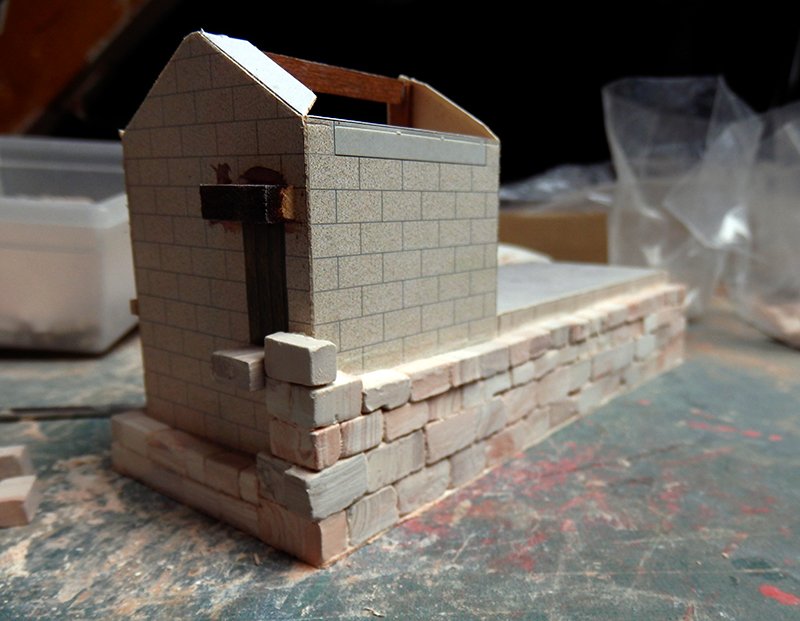

A little idea of the mess on the desks:

- Barbossa, BLACK VIKING, druxey and 12 others
-
15
-
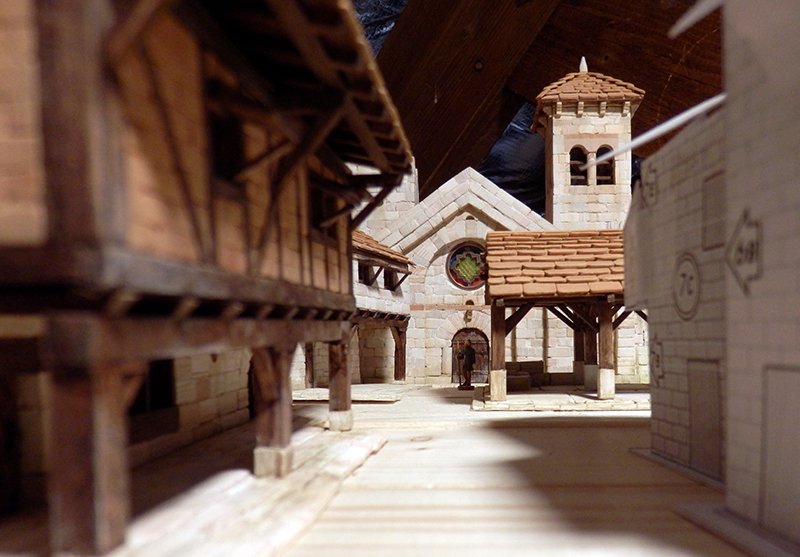
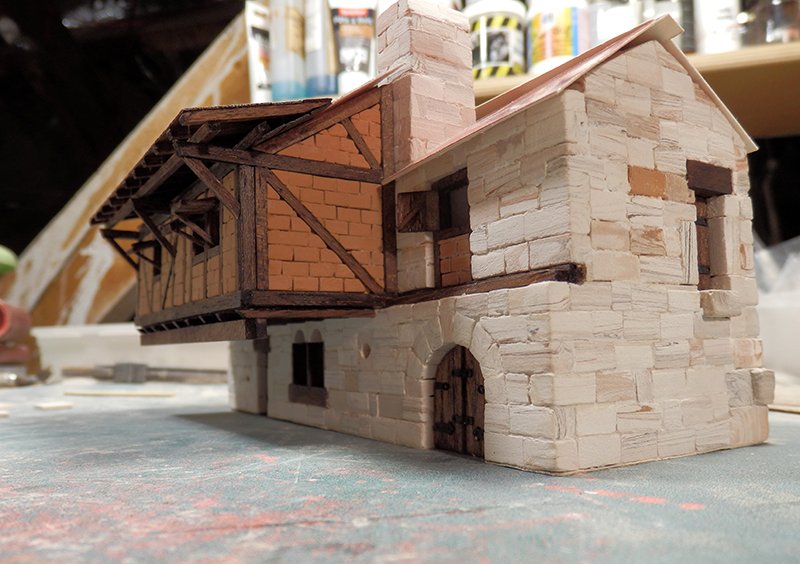
I finished laying the tiles in the covered market.
So I'm moving on to the suite that will be the "rural" house... Actually a town house. I'll have more to do, but this is the one from the basic kit.
And I'm transforming a bit what was planned: everything was to be made of stone. My version will have half-timbering on the first floor, which will be filled with bricks, the ground level remaining in stone.
The back wall is a part of the village wall: it will be with large stones for the sole, and normal size for the rest.
A 1st thin structure (1mm) of the studs is in place: it allows the 3mm thick bricks to be wedged. Once the bricks have been sanded, a 2nd layer of 2mm stained wood will come flush with the bricks

-
Thx again, Bob ! 😃
- Keith Black, Canute, mtaylor and 2 others
-
5
-
I built this airplane from Amati a few years ago: it's really a very nice model to make!
Some pictures of my Blériot XI here : https://www.flickr.com/photos/ekisg/albums/72157691497741740 ☺️- Canute, James H, thibaultron and 5 others
-
8
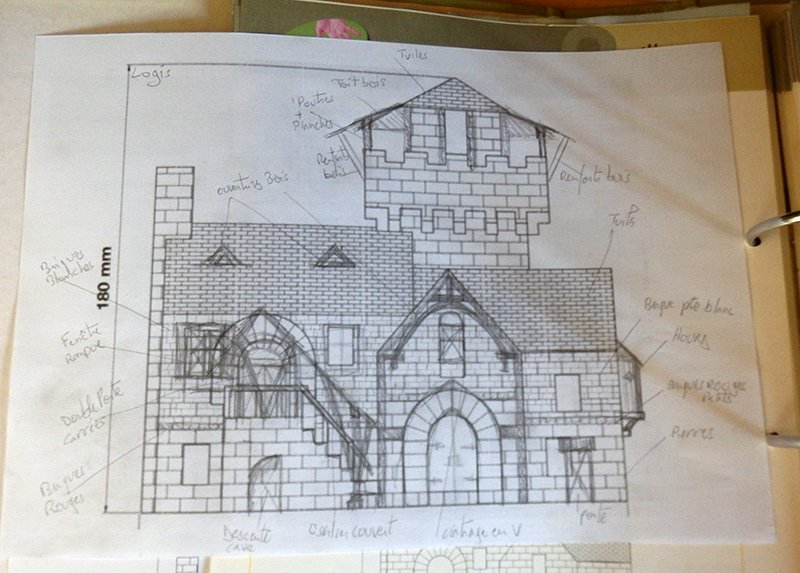
Medieval Fortified Village by Ekis - 1/87 scratch base kit Aedes Ars
in Non-ship/categorised builds
Posted
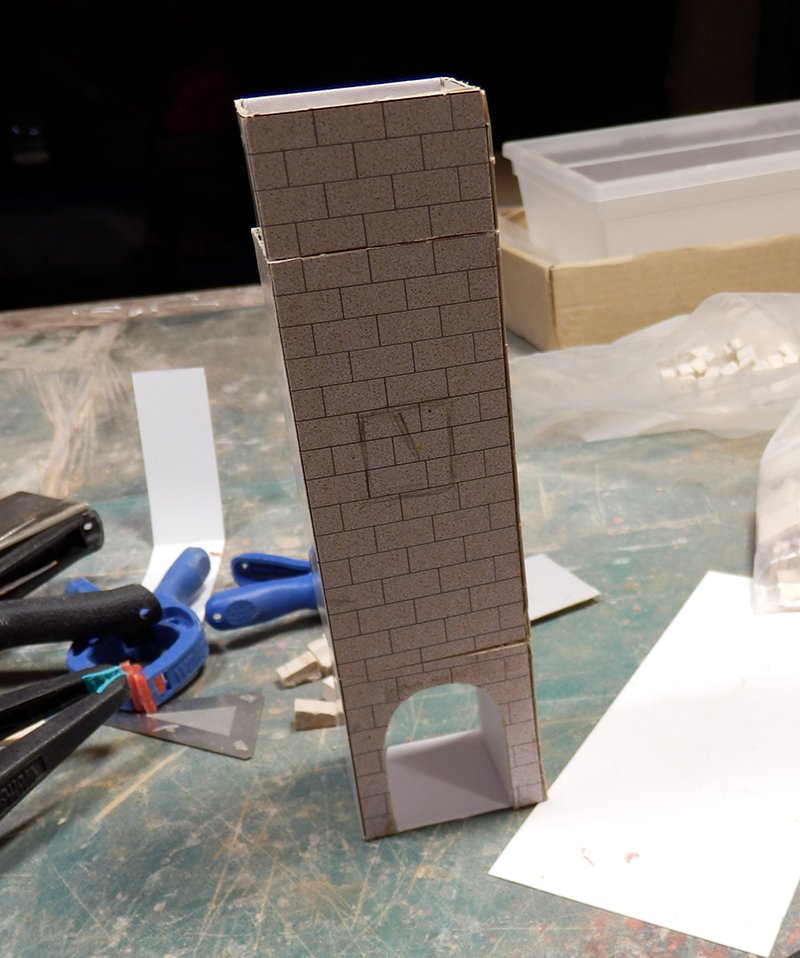
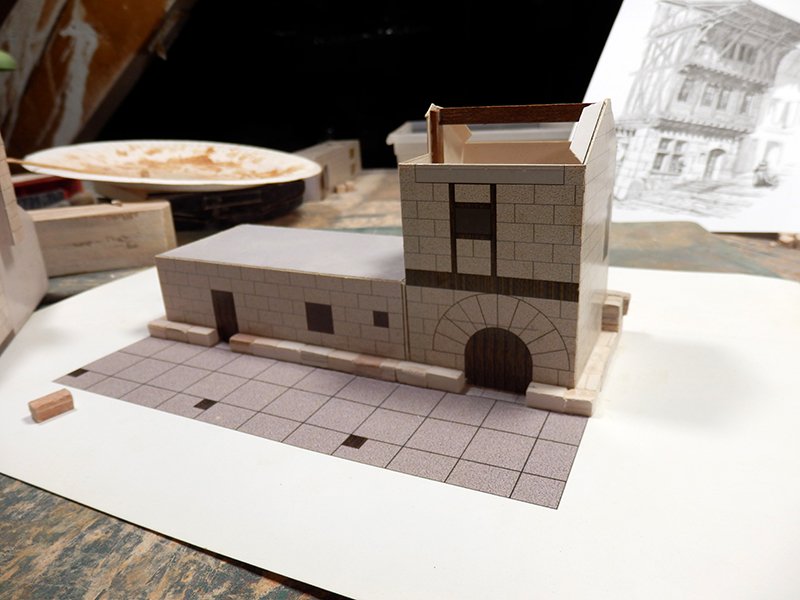
The next building will be the guard tower or dungeon.
In the end, the kit proposes this:
Well... it will evolve a little, of course")
While waiting for the improvements, the basic walls are still to be done: