

.jpg.01e54eff8de6be562e7bc1146f40d40a.jpg)
Matt D
-
Posts
612 -
Joined
-
Last visited
Content Type
Profiles
Forums
Gallery
Events
Posts posted by Matt D
-
-
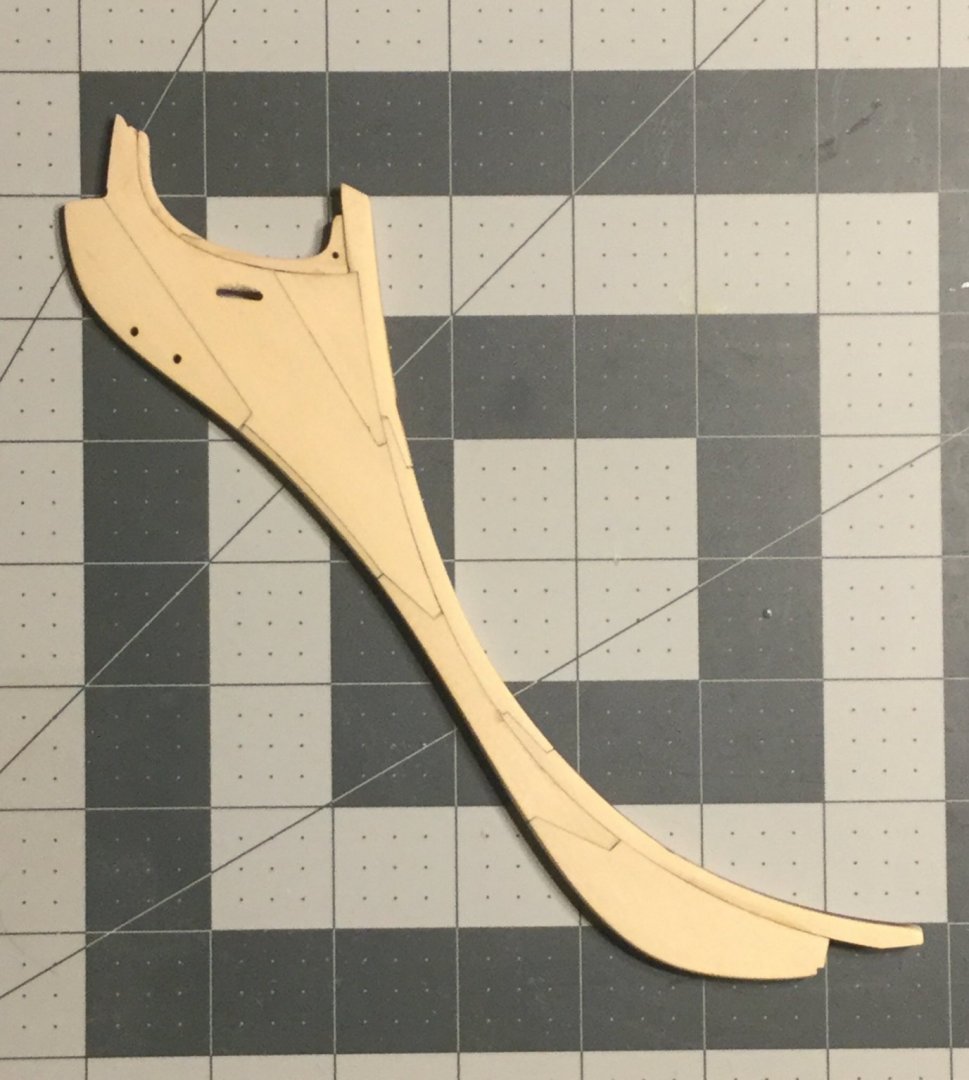
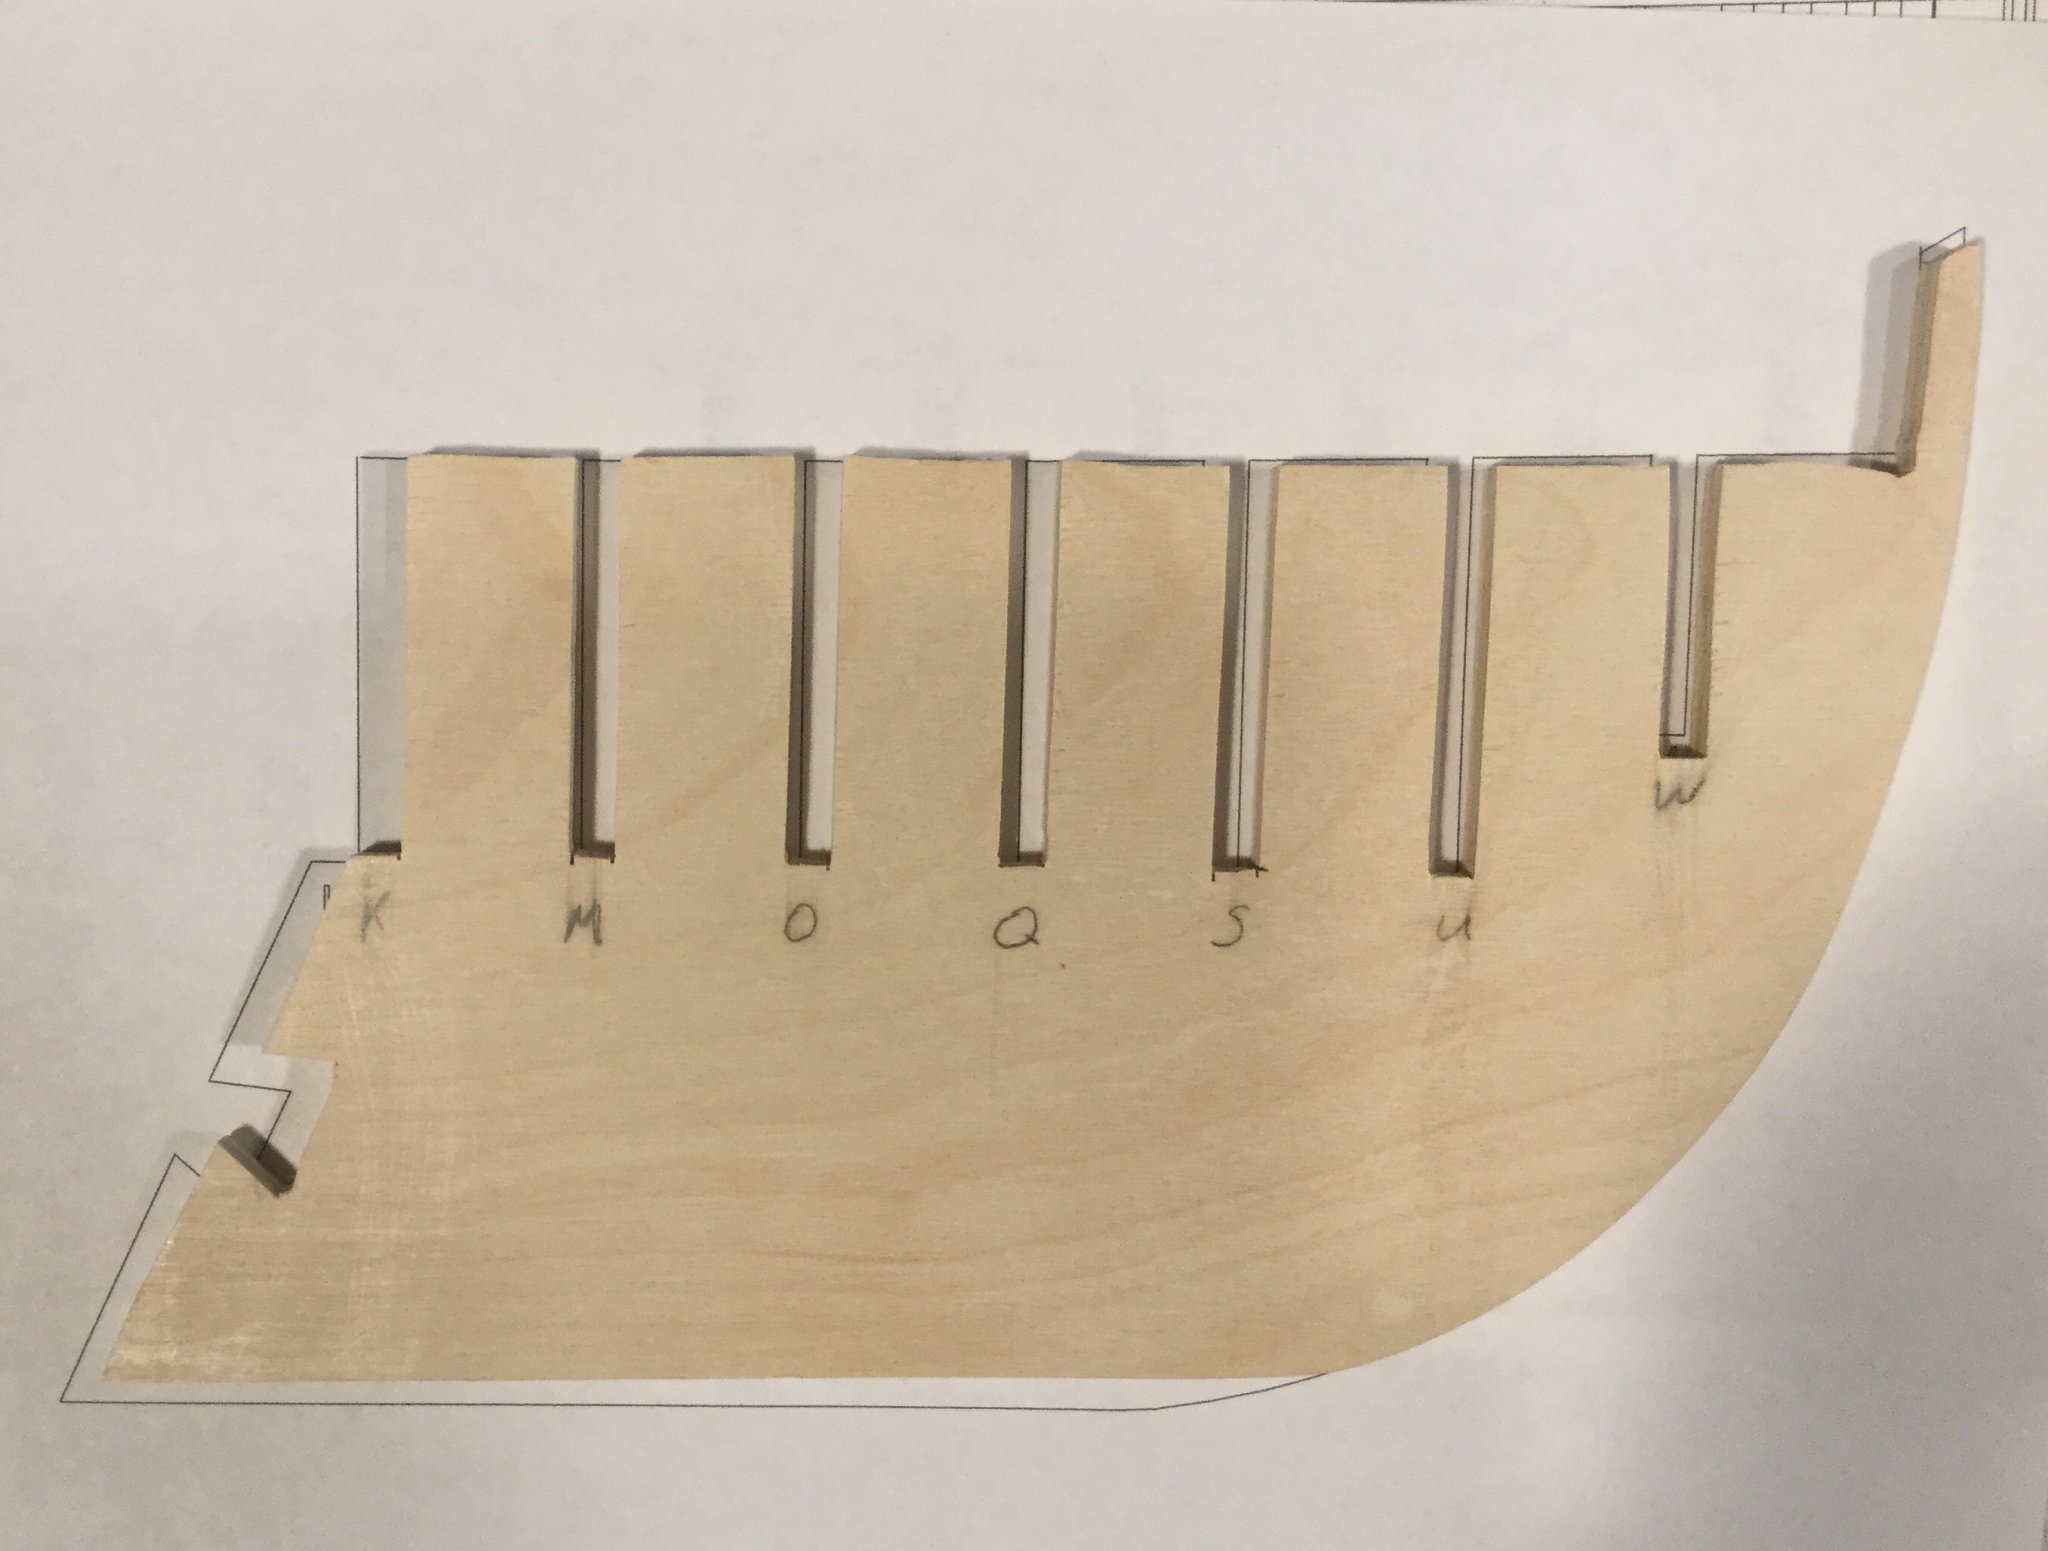
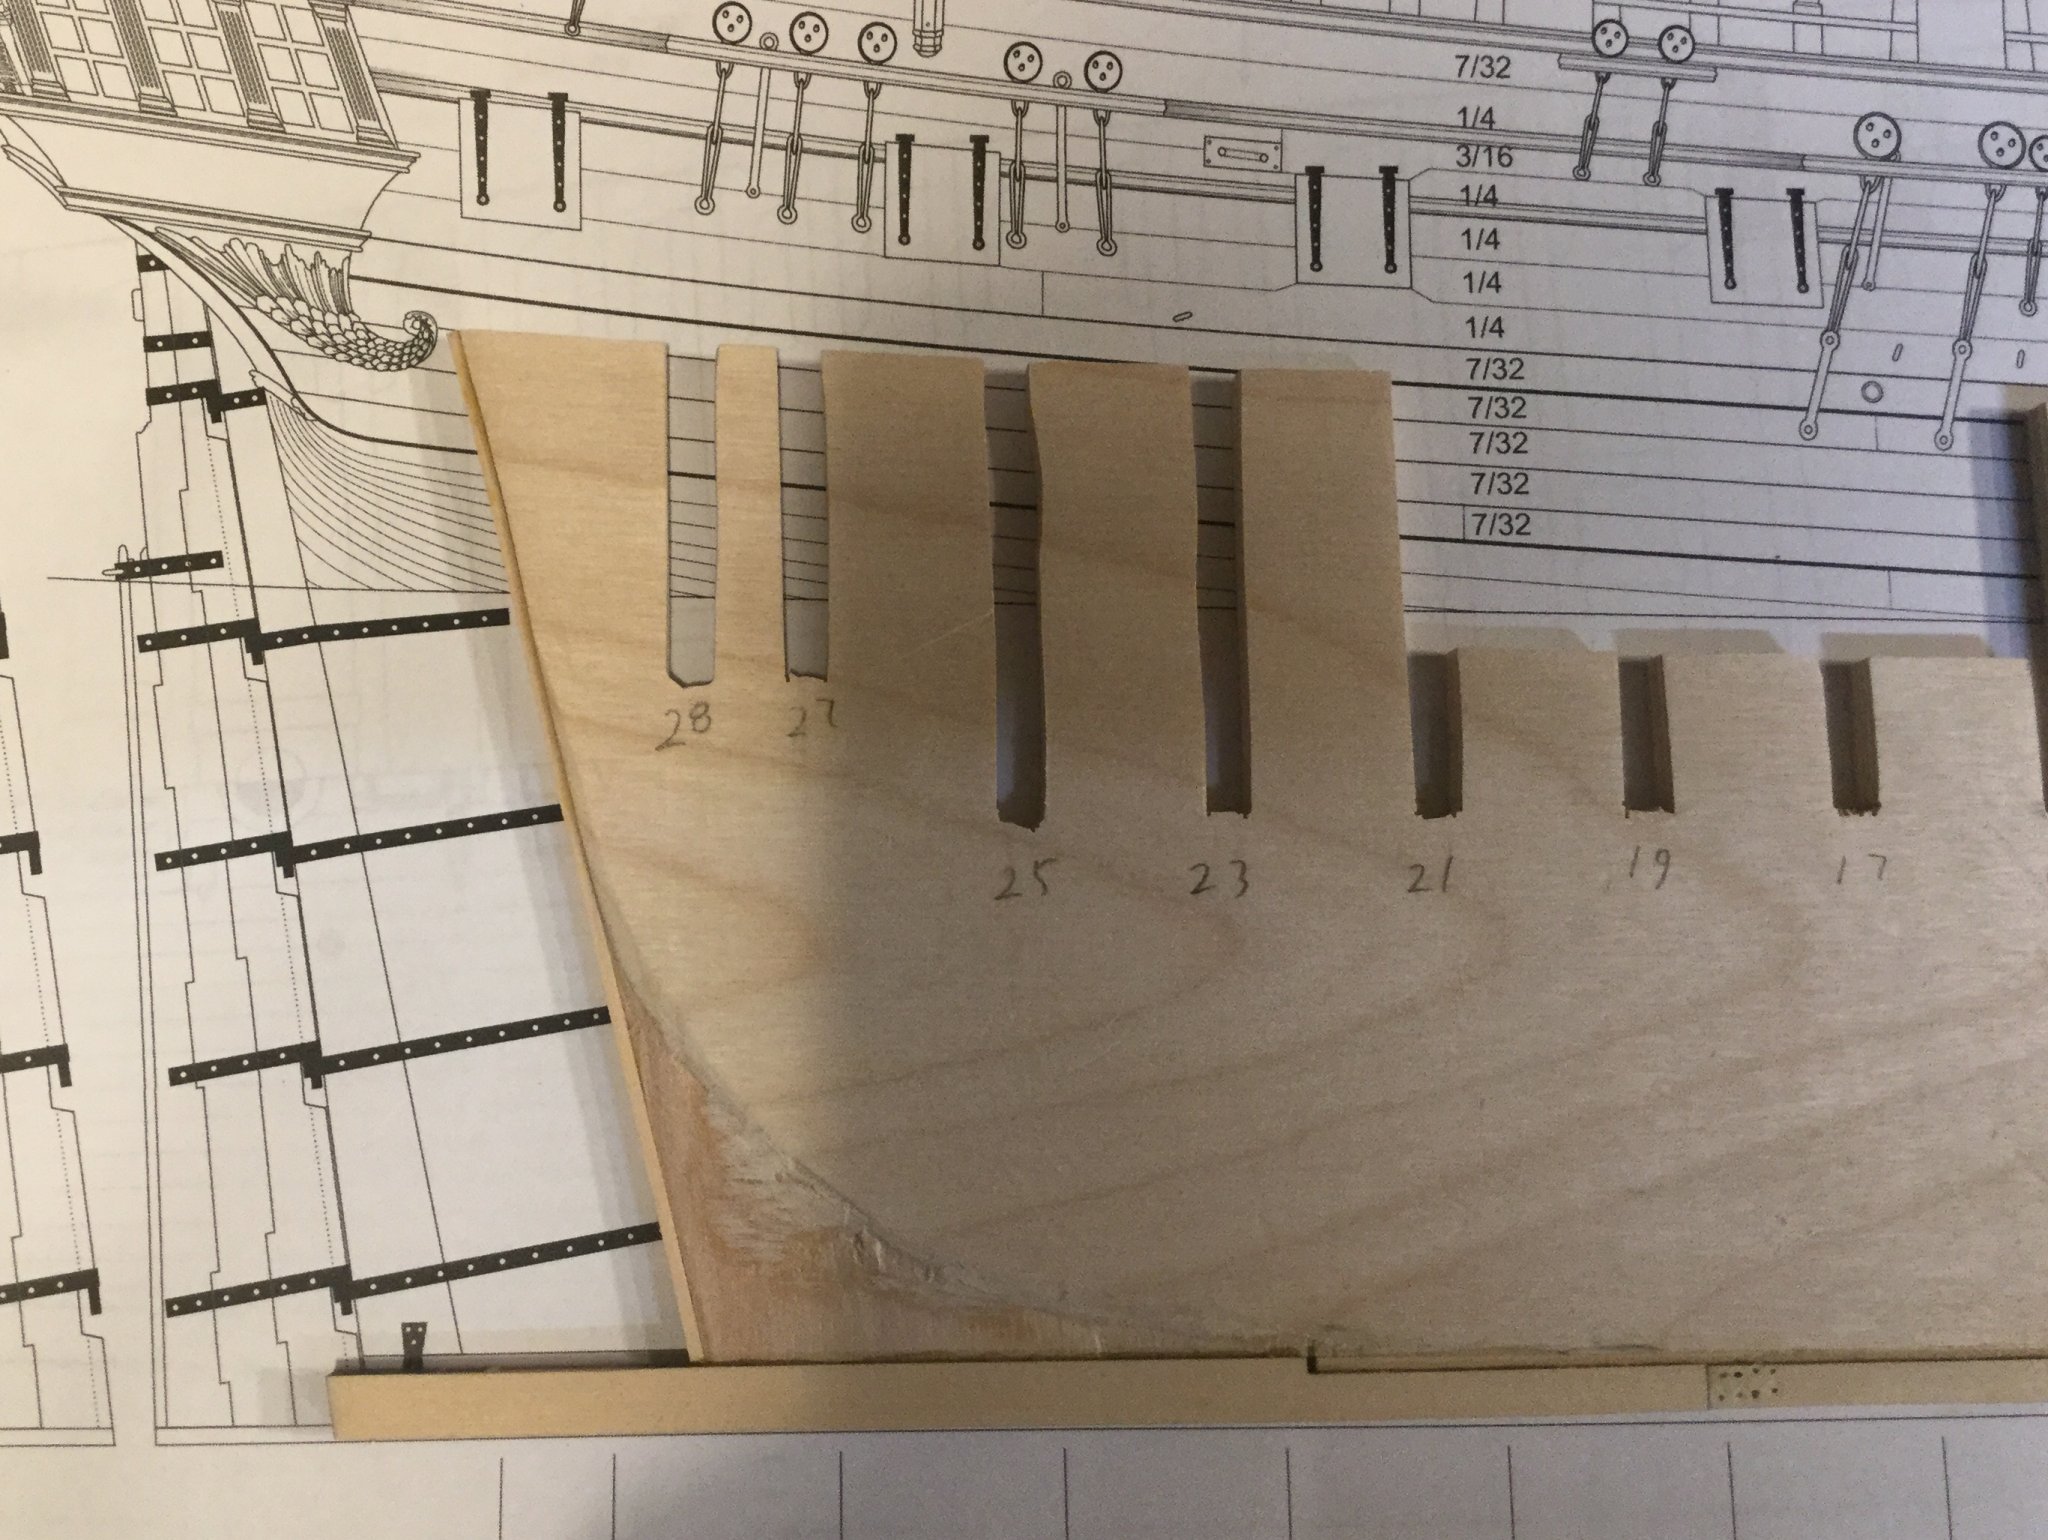
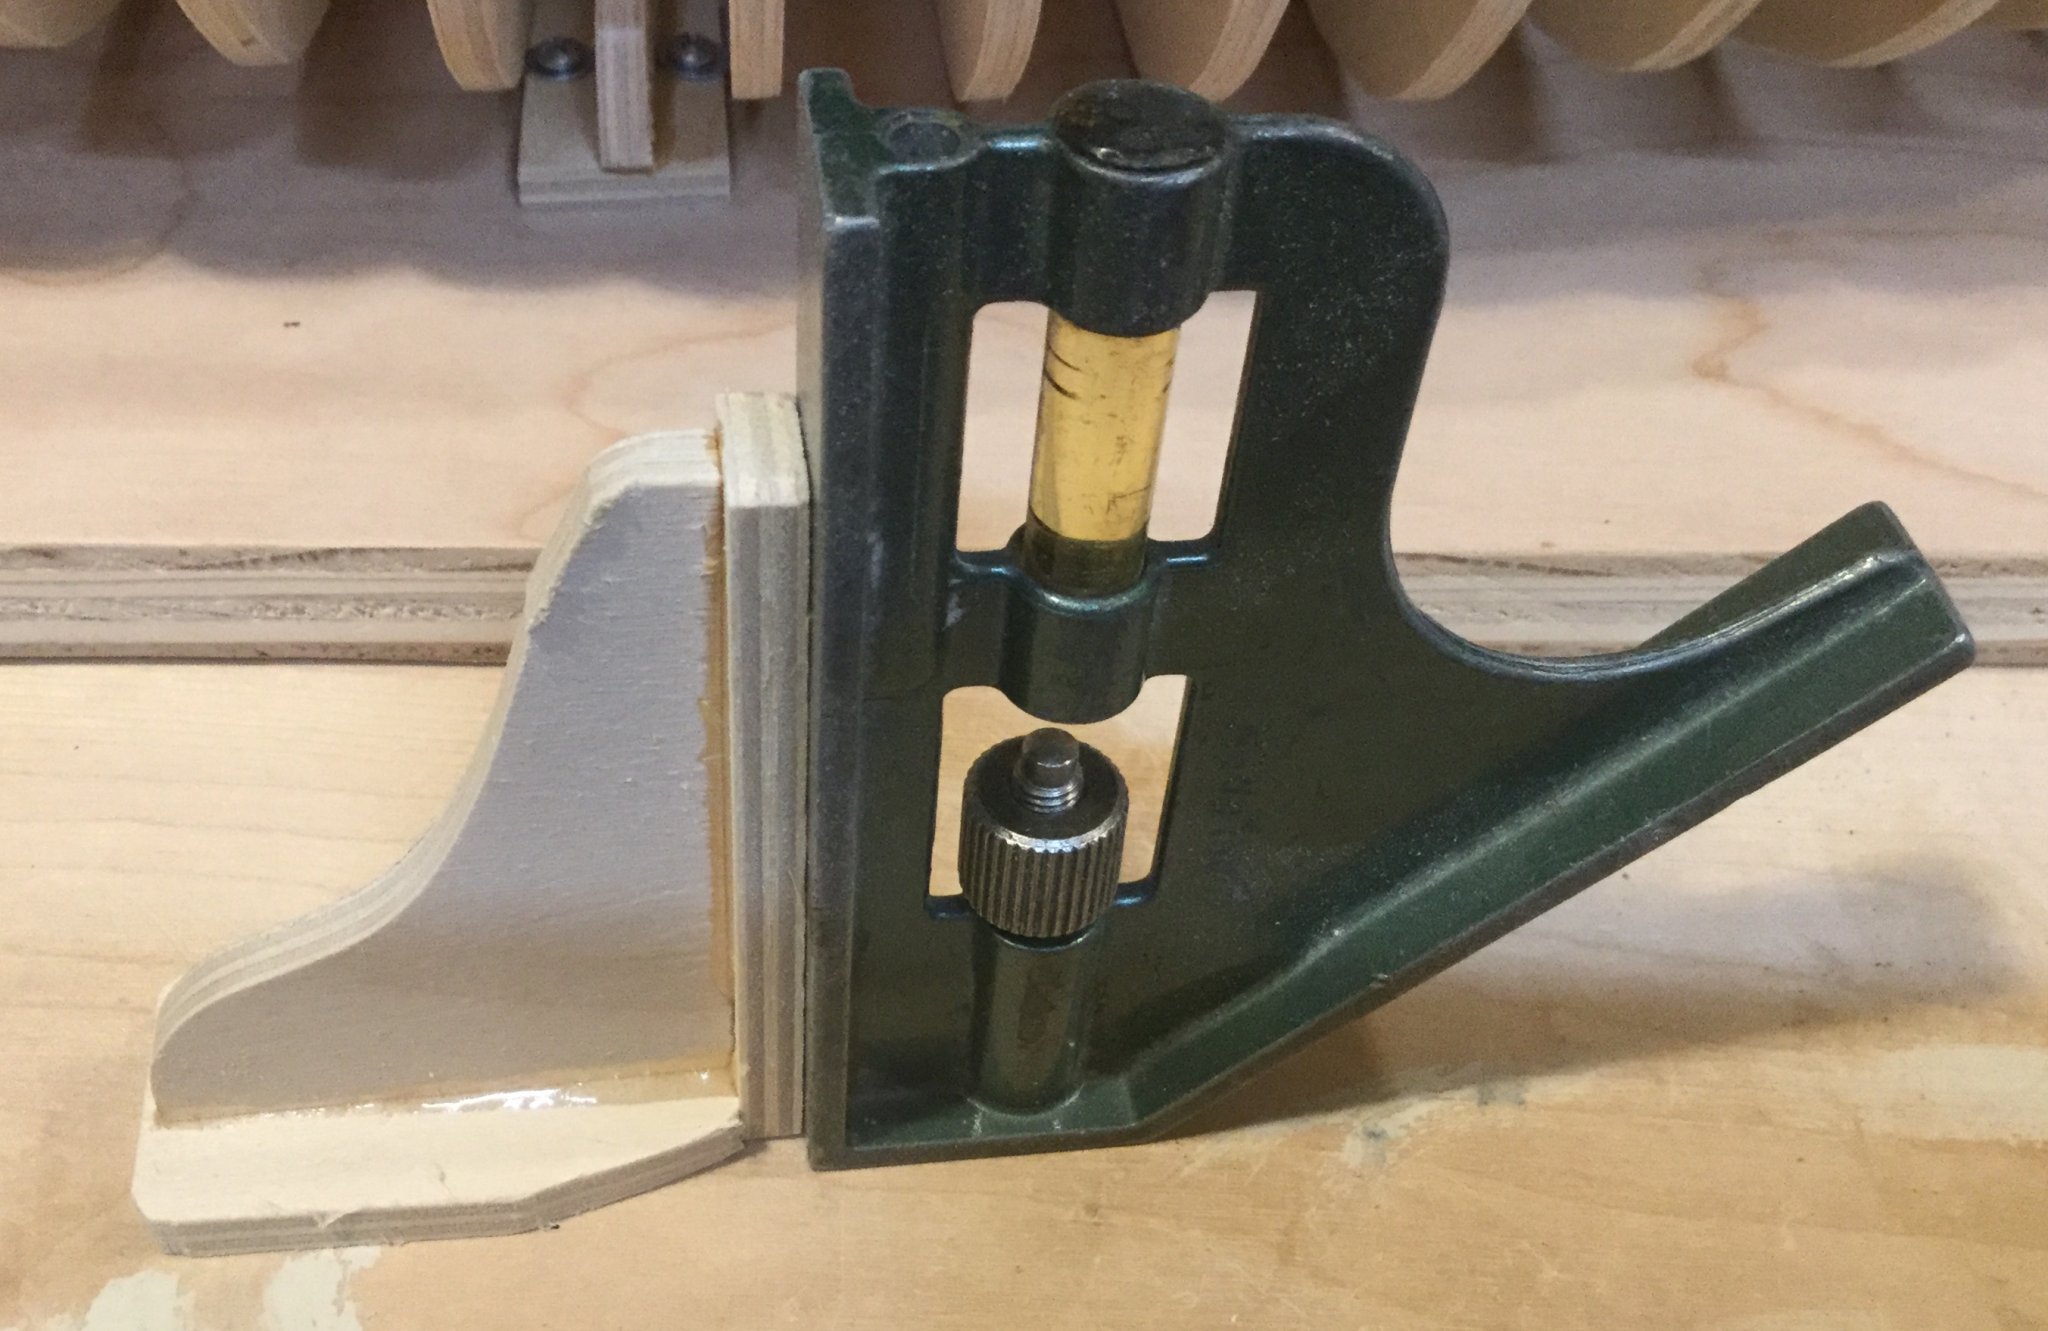
I have suffered a major setback on my Winnie project. I had thought that my large sheets were a little oversized because I printed them on a 34x44 plotter. But I had it set to 100% scale. Apparently, those sheets are right and my bulkhead sheets were printed a little small. I found out when I put the keel on and then laid it on the full size sheet. The keel goes exactly to the end on the sheet and my false keel comes up short. I did a little more testing and determined that every plywood piece is small. I have to cut the whole thing out again. Luckily, I think I can salvage the keel and stem using my #11 ungluer.


- svein erik, JeffT, Stuntflyer and 6 others
-
 8
8
-
 1
1
-
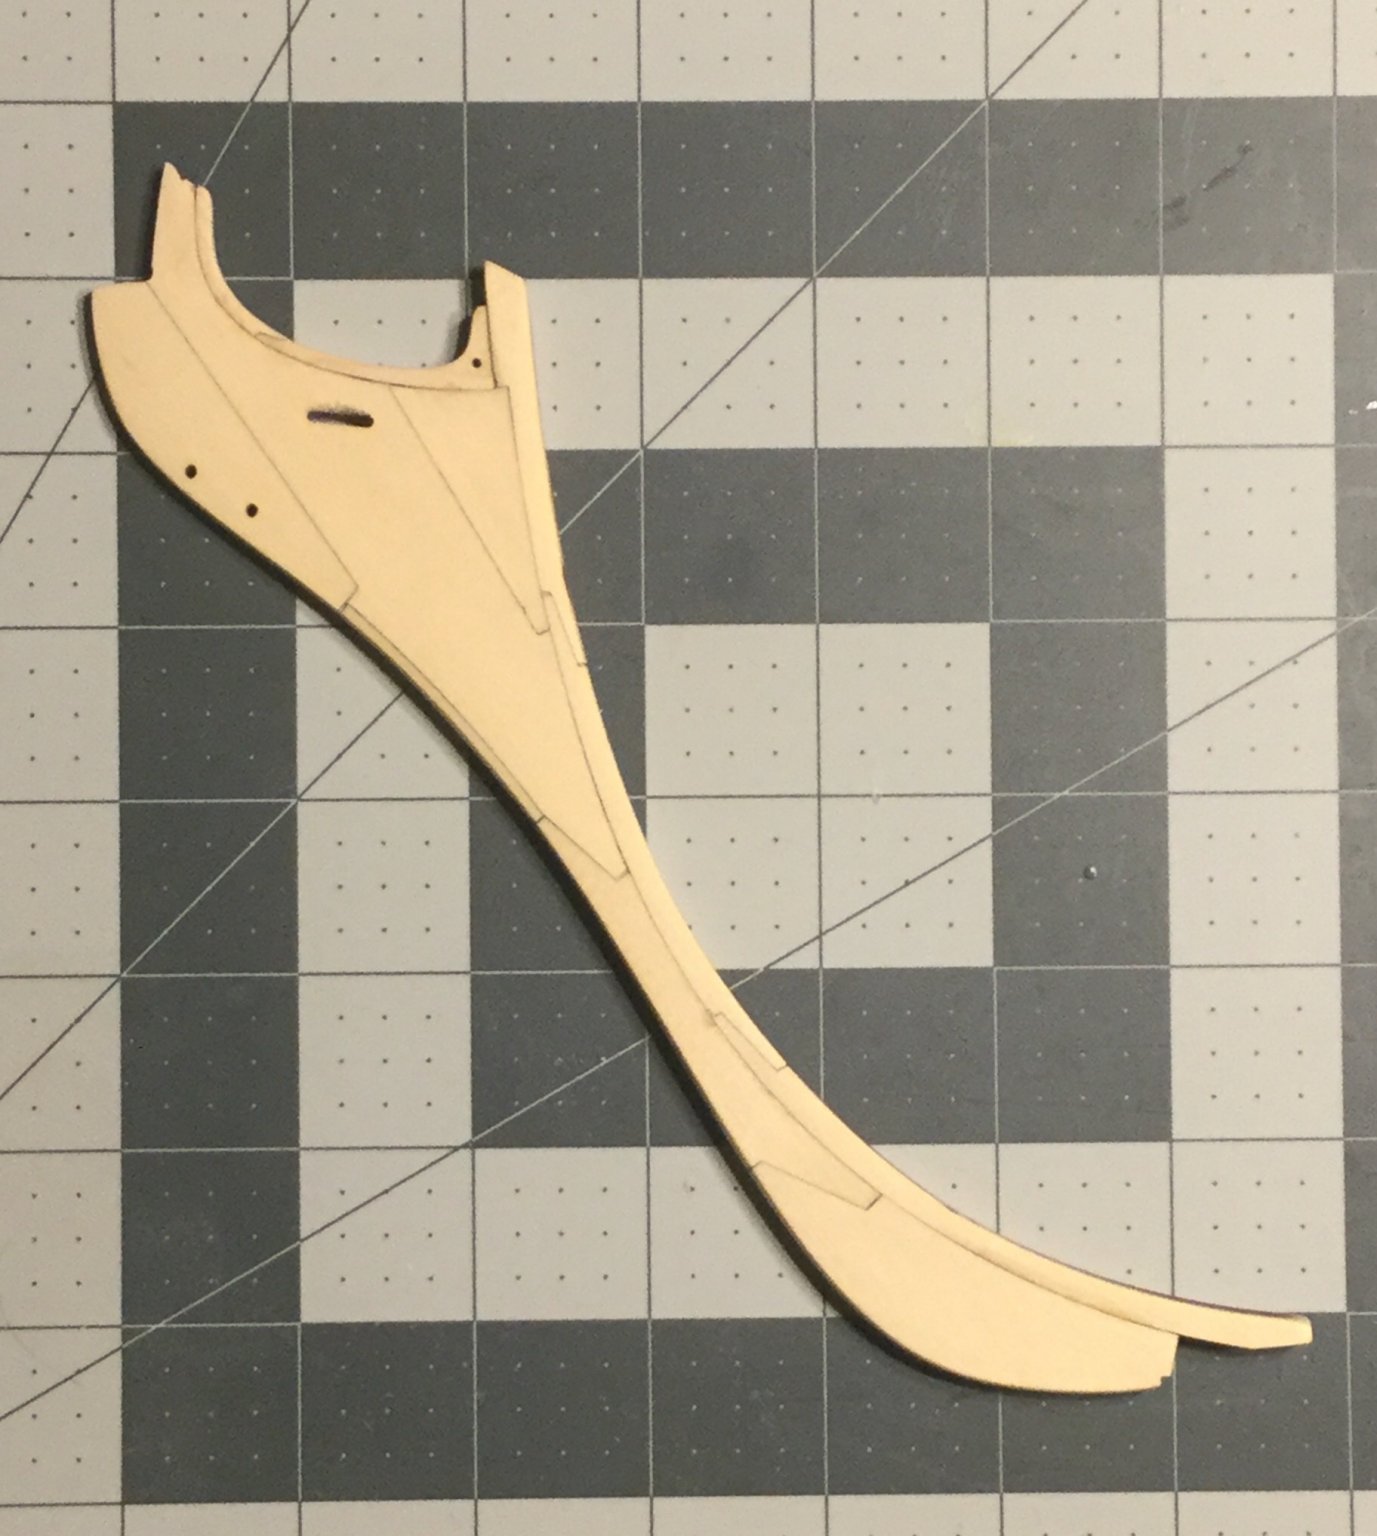
I received my chapter 1 parts just before leaving town for work. So I couldn’t get much done for a couple of weeks. I’ve assembled, tapered, and installed the stem pieces along with the rabbet. Now, I’m working on the keel.
Chuck, I’m struggling in my mind with the false keel. According to the parts list, there is one piece that is 1/4 x 5/64 and 15 inches long. And that’s what is in my chapter 1 set. That piece won’t cover the full length of the keel. Is there another piece that I’ve overlooked?
- rafine, FrankWouts, GrandpaPhil and 4 others
-
7
-
-
-
8 hours ago, Wallace said:
The effort and attention to squaring it all off will pay dividends later on down the line Matt, believe me.
Of that, I am certain! Plus, this model will be on the build board for a long time because there's a ton of work to do before planking! I suspect that I will need to build a hull contoured cradle for it to sit in at that point, and that replace the 90° stands with cradle pieces.
Chuck, it's a long ways down the road, but I thought I read in your log that there will be a longboat for Winnie. Is that true? If so, I'm really looking forward to it.
- FrankWouts and Saburo
-
2
-
I made the build board and test fit the frame assembly in it. The right angle brackets are made from scraps and held together with epoxy. I used factory corners from my plywood to ensure that they are accurately 90 degrees. The one in the picture below is the best one of the bunch.

- Rustyj, Kevin, Tigersteve and 11 others
-
14
-
Thanks, Chuck. Your picture and direction help a lot.
- Saburo and FrankWouts
-
2
-
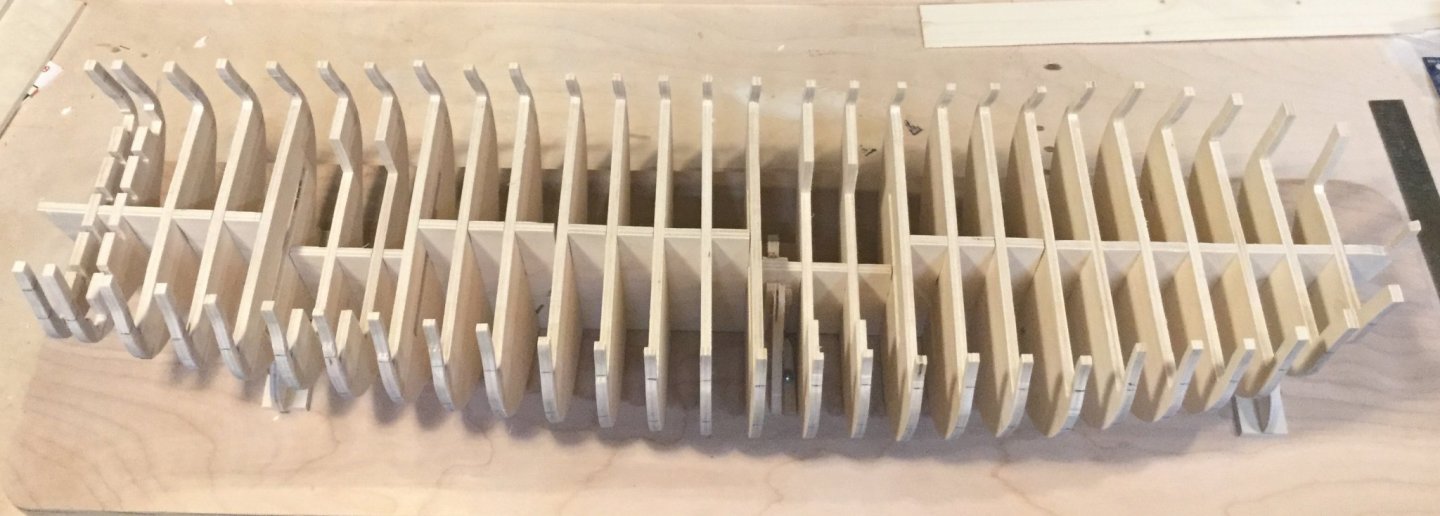
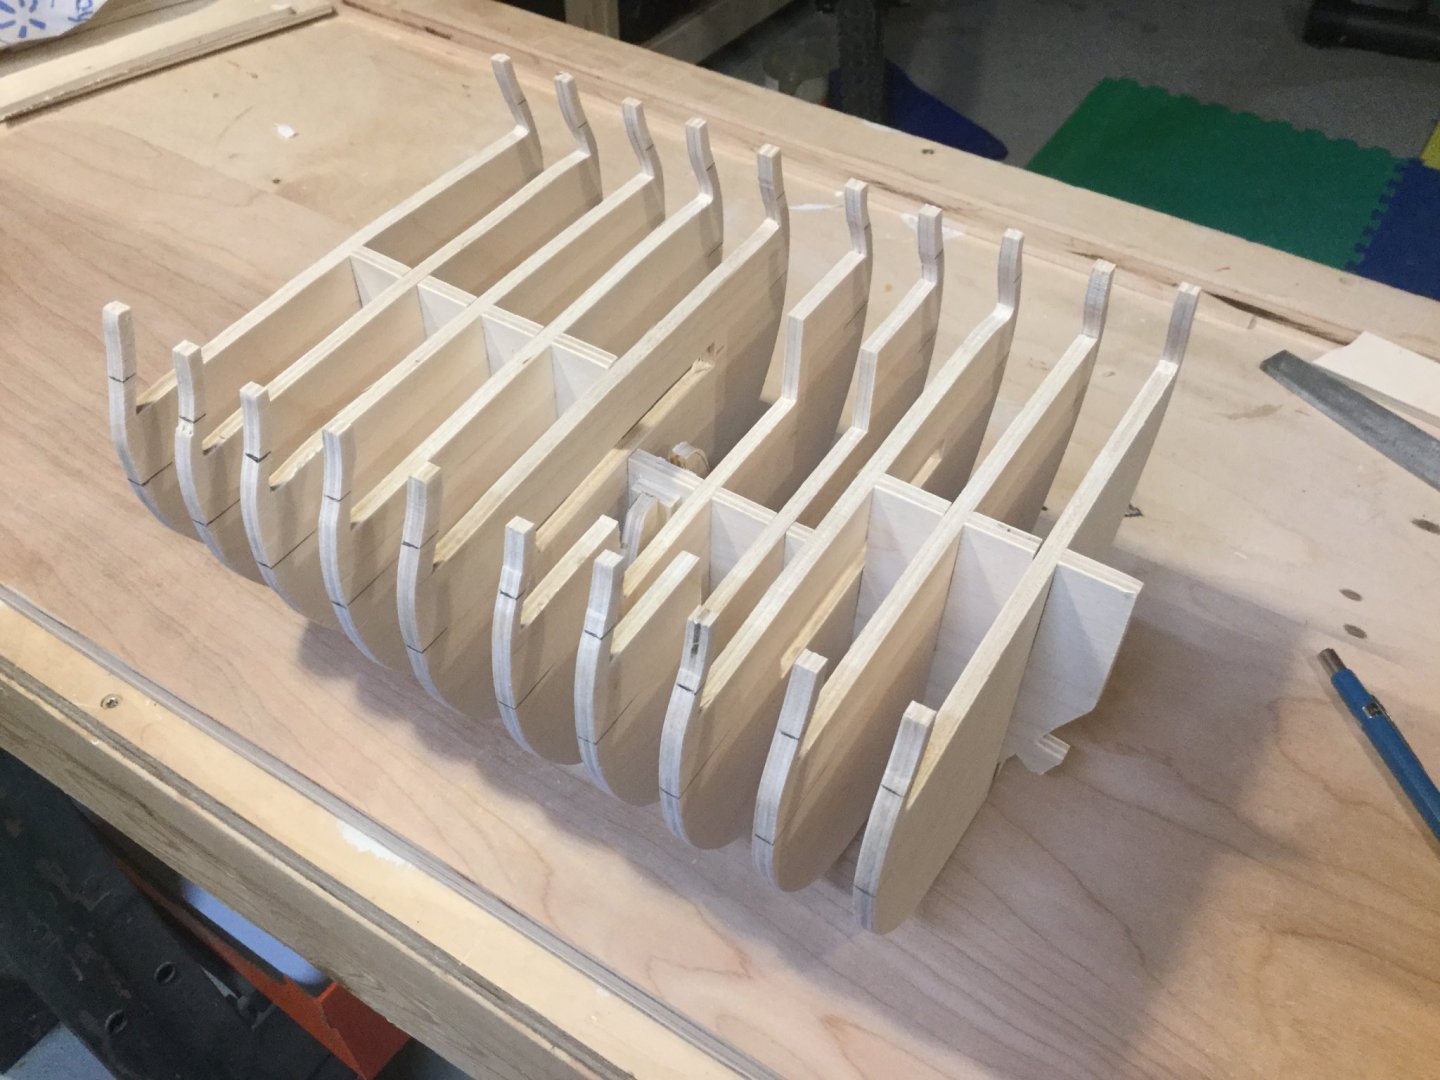
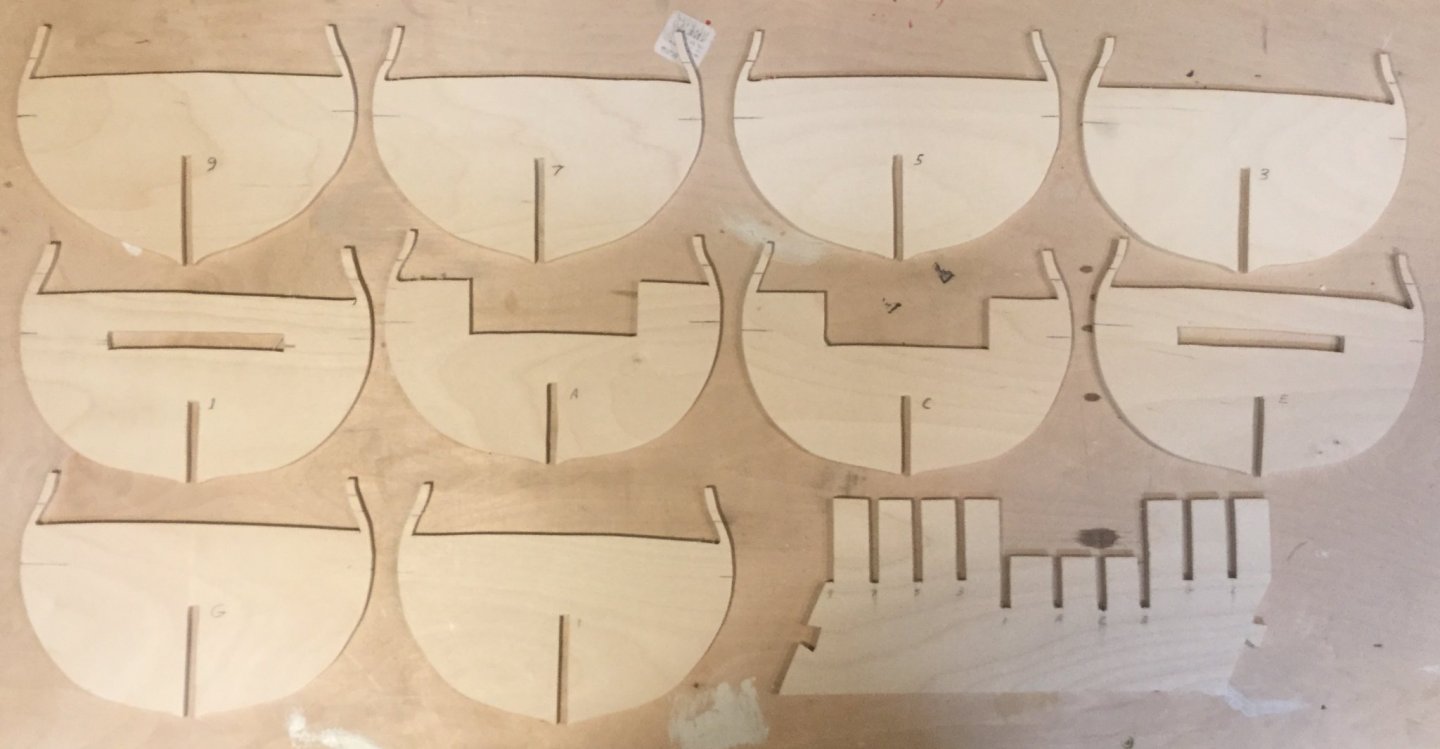
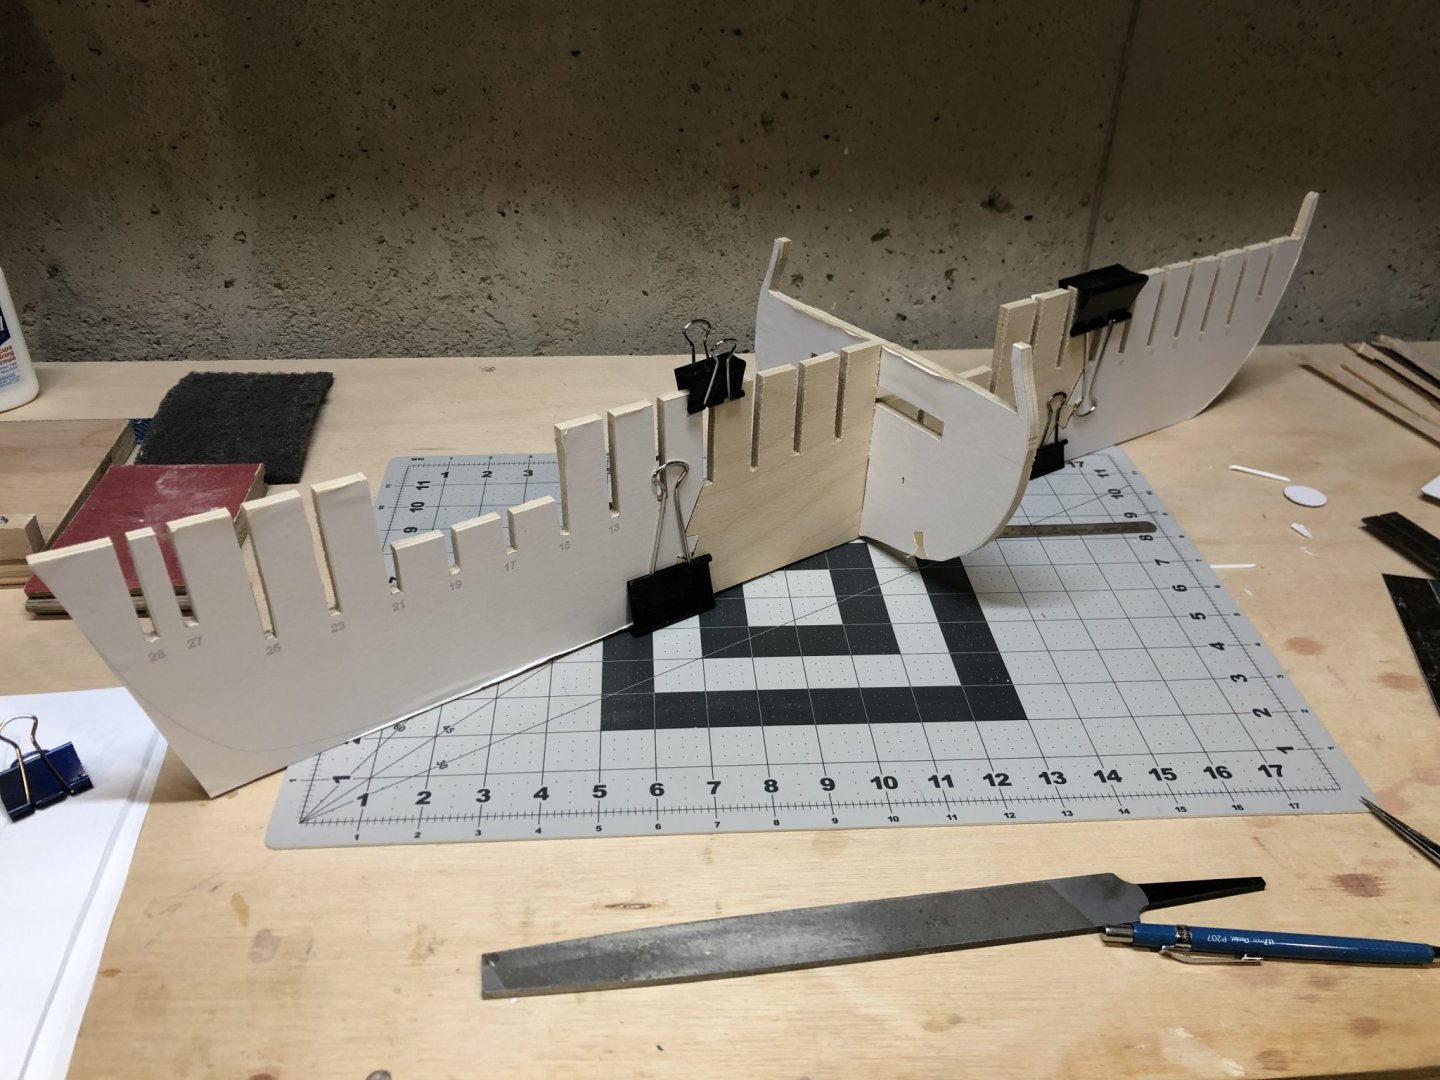
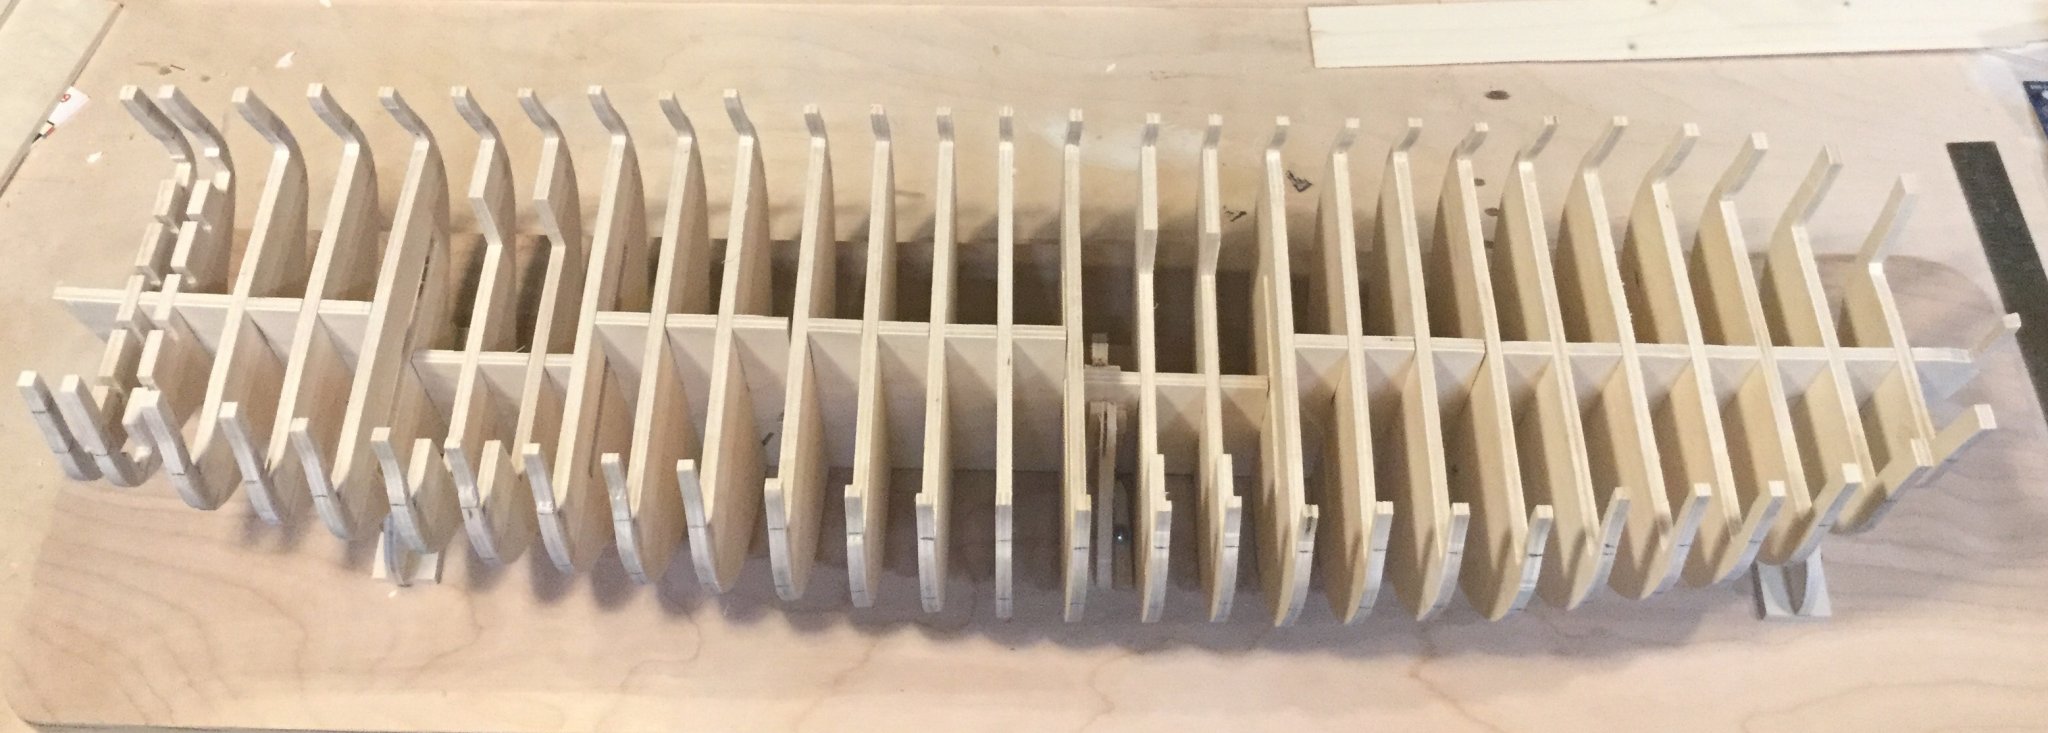
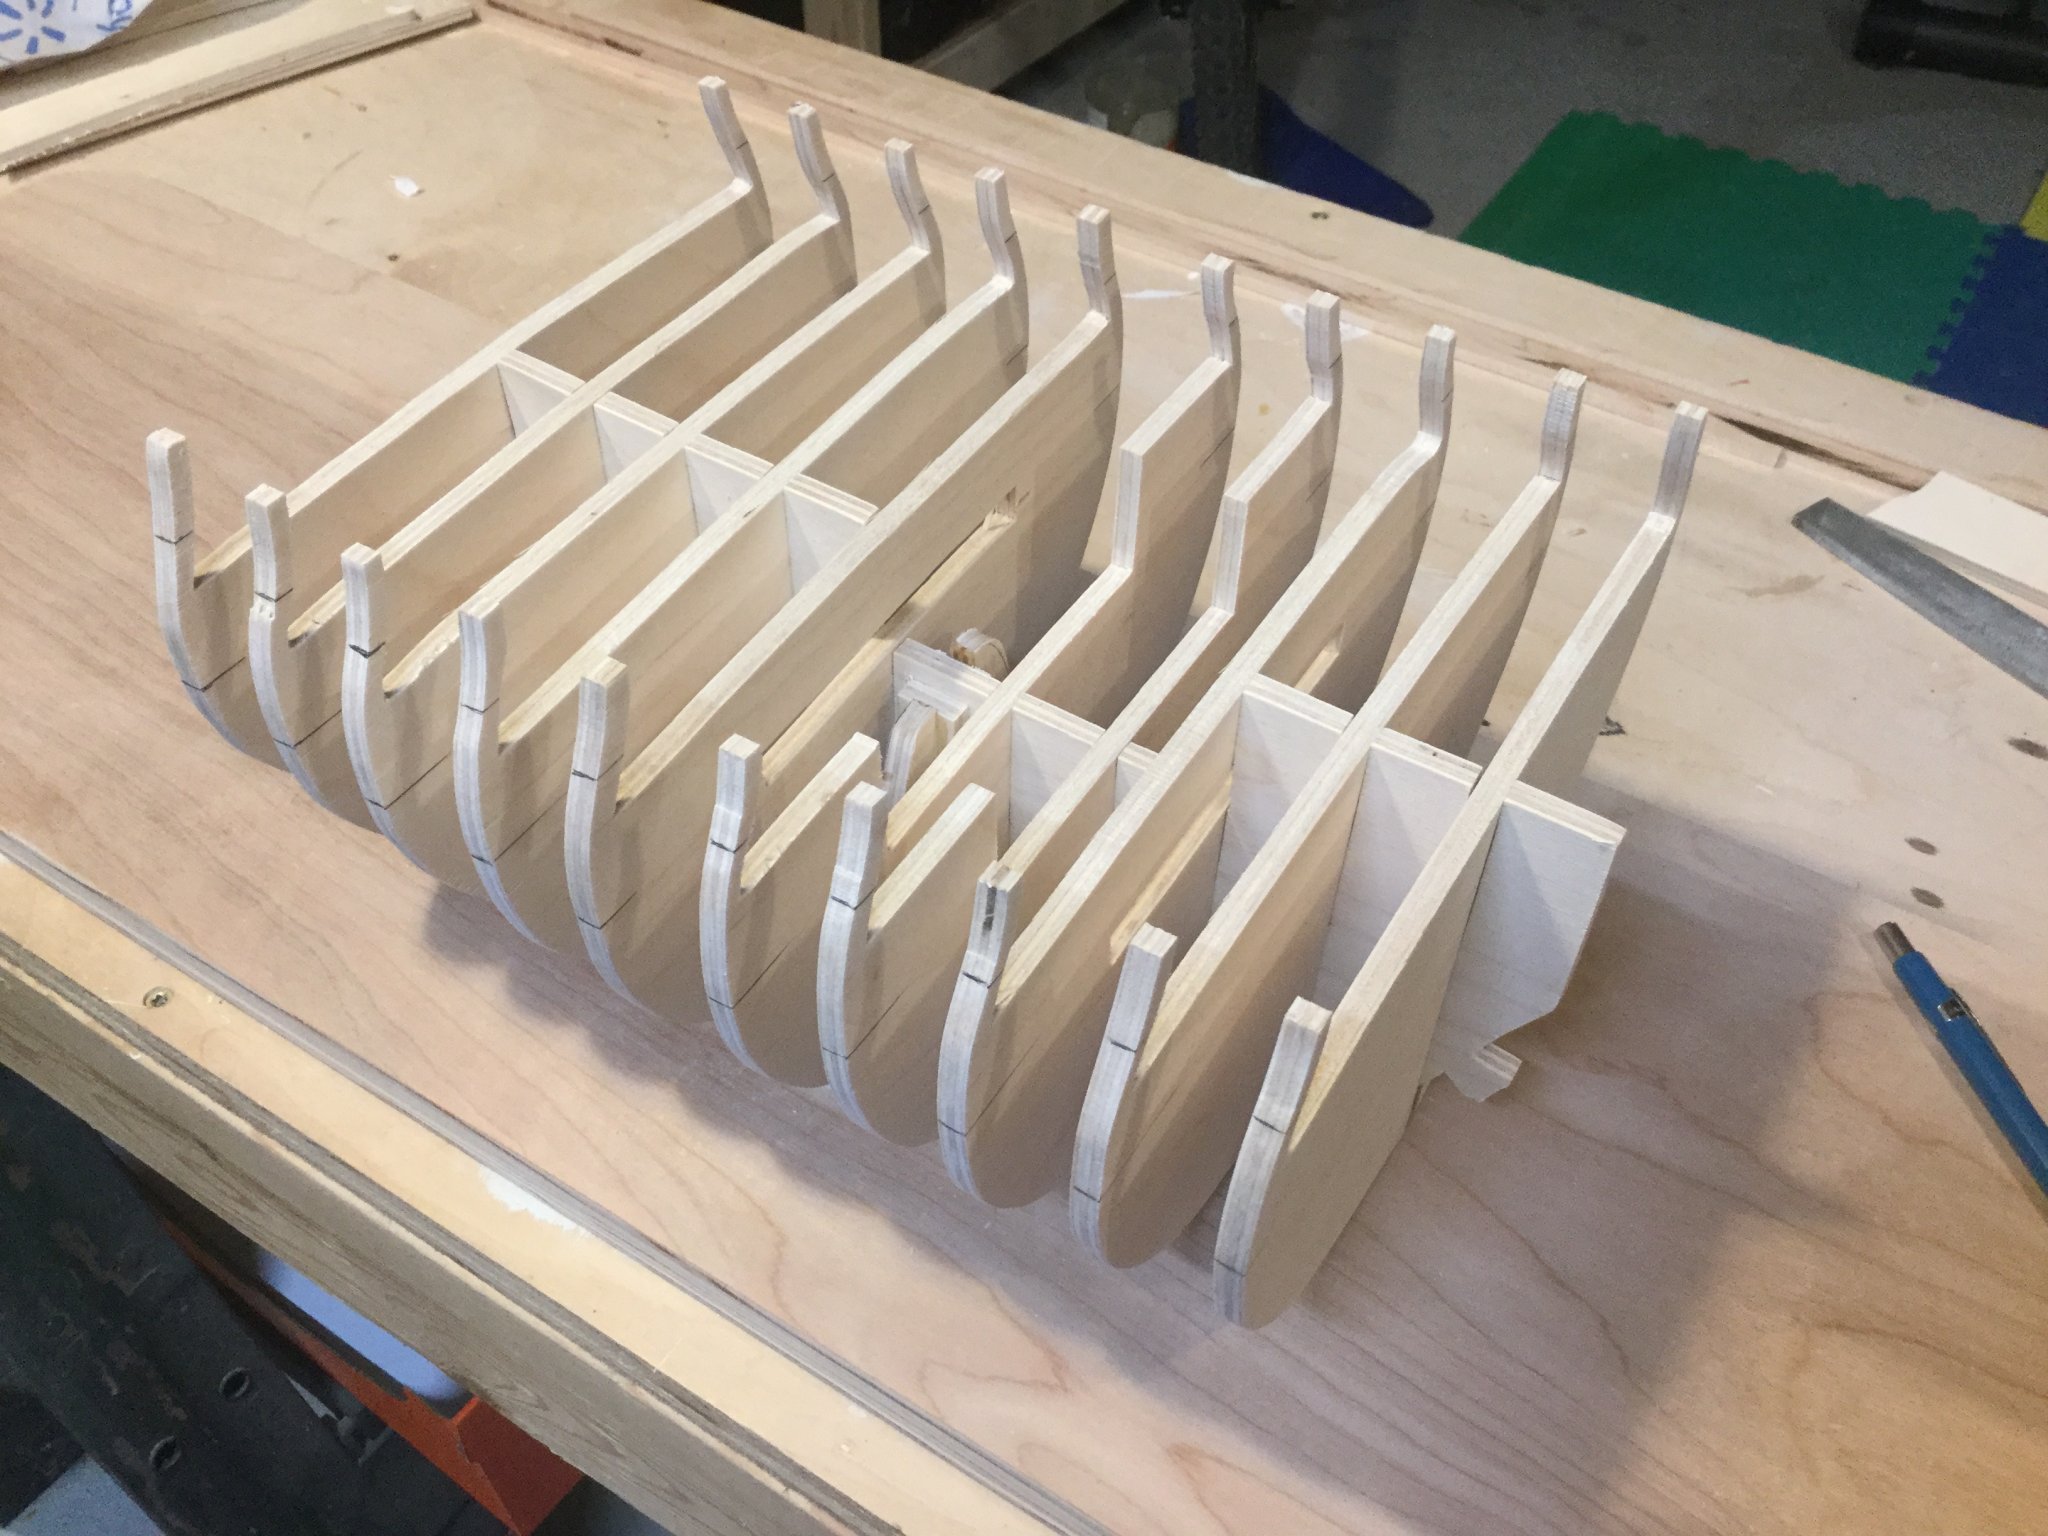
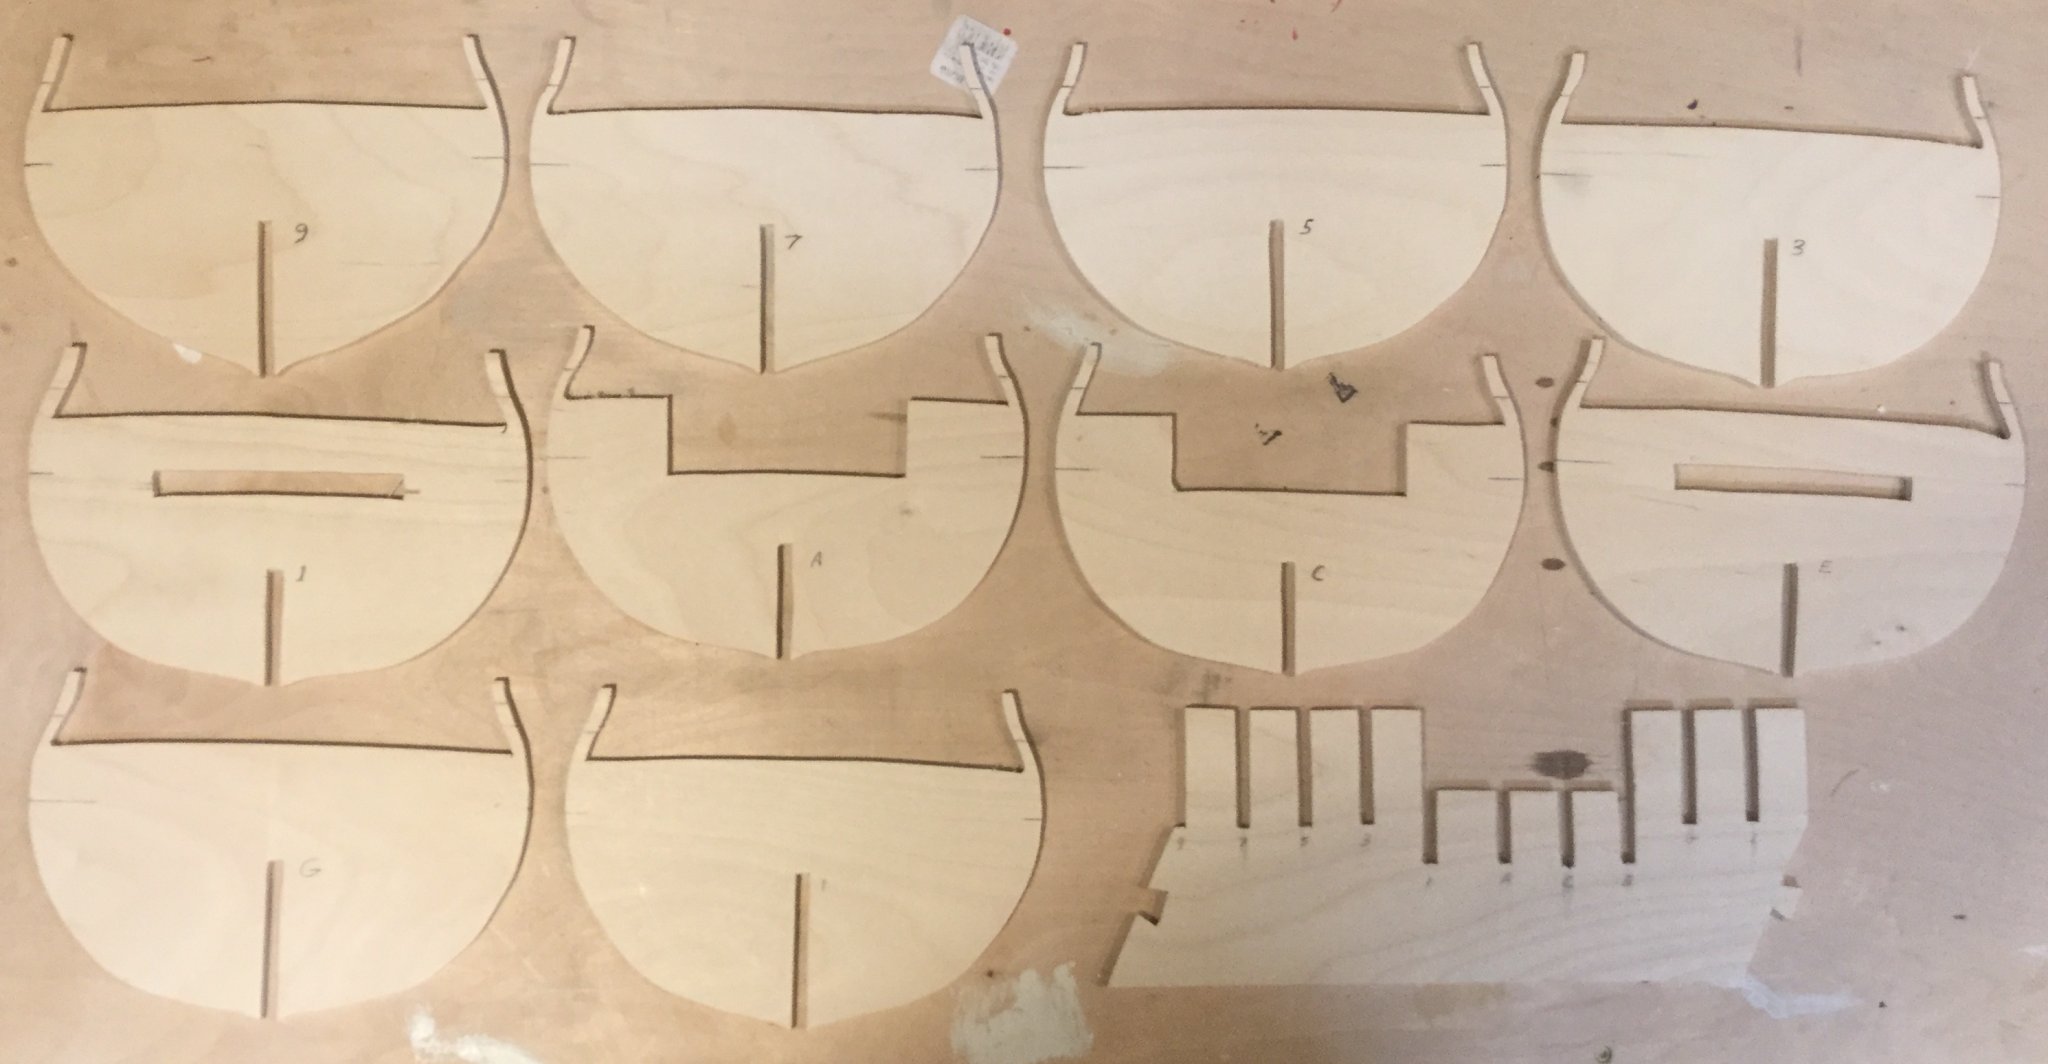
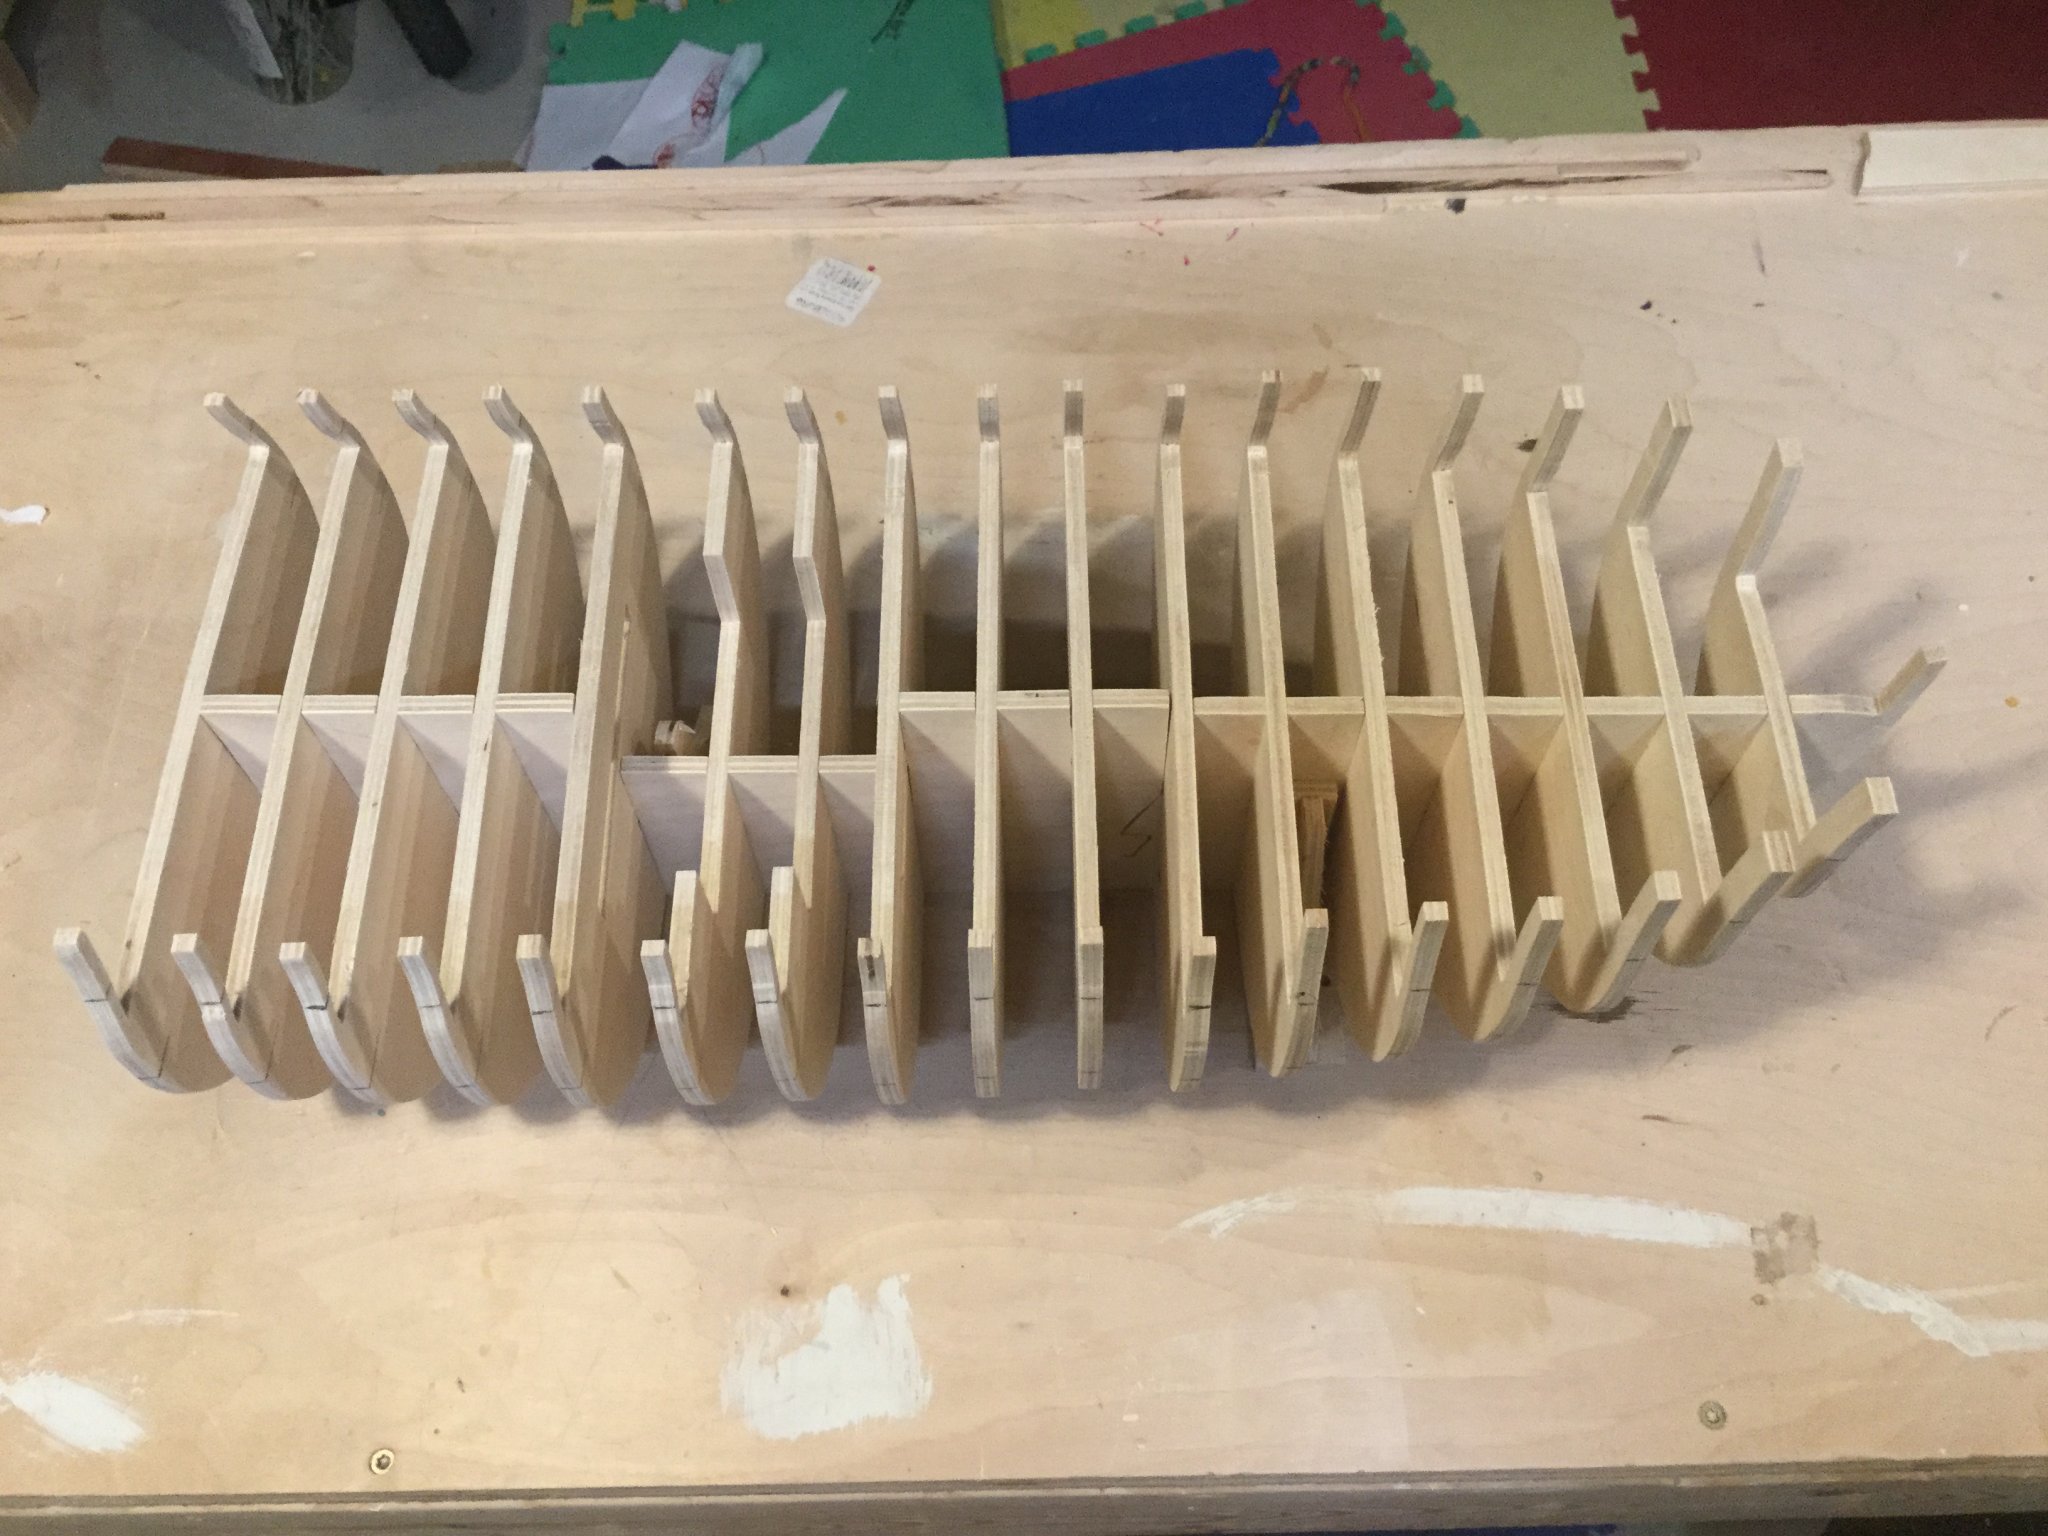
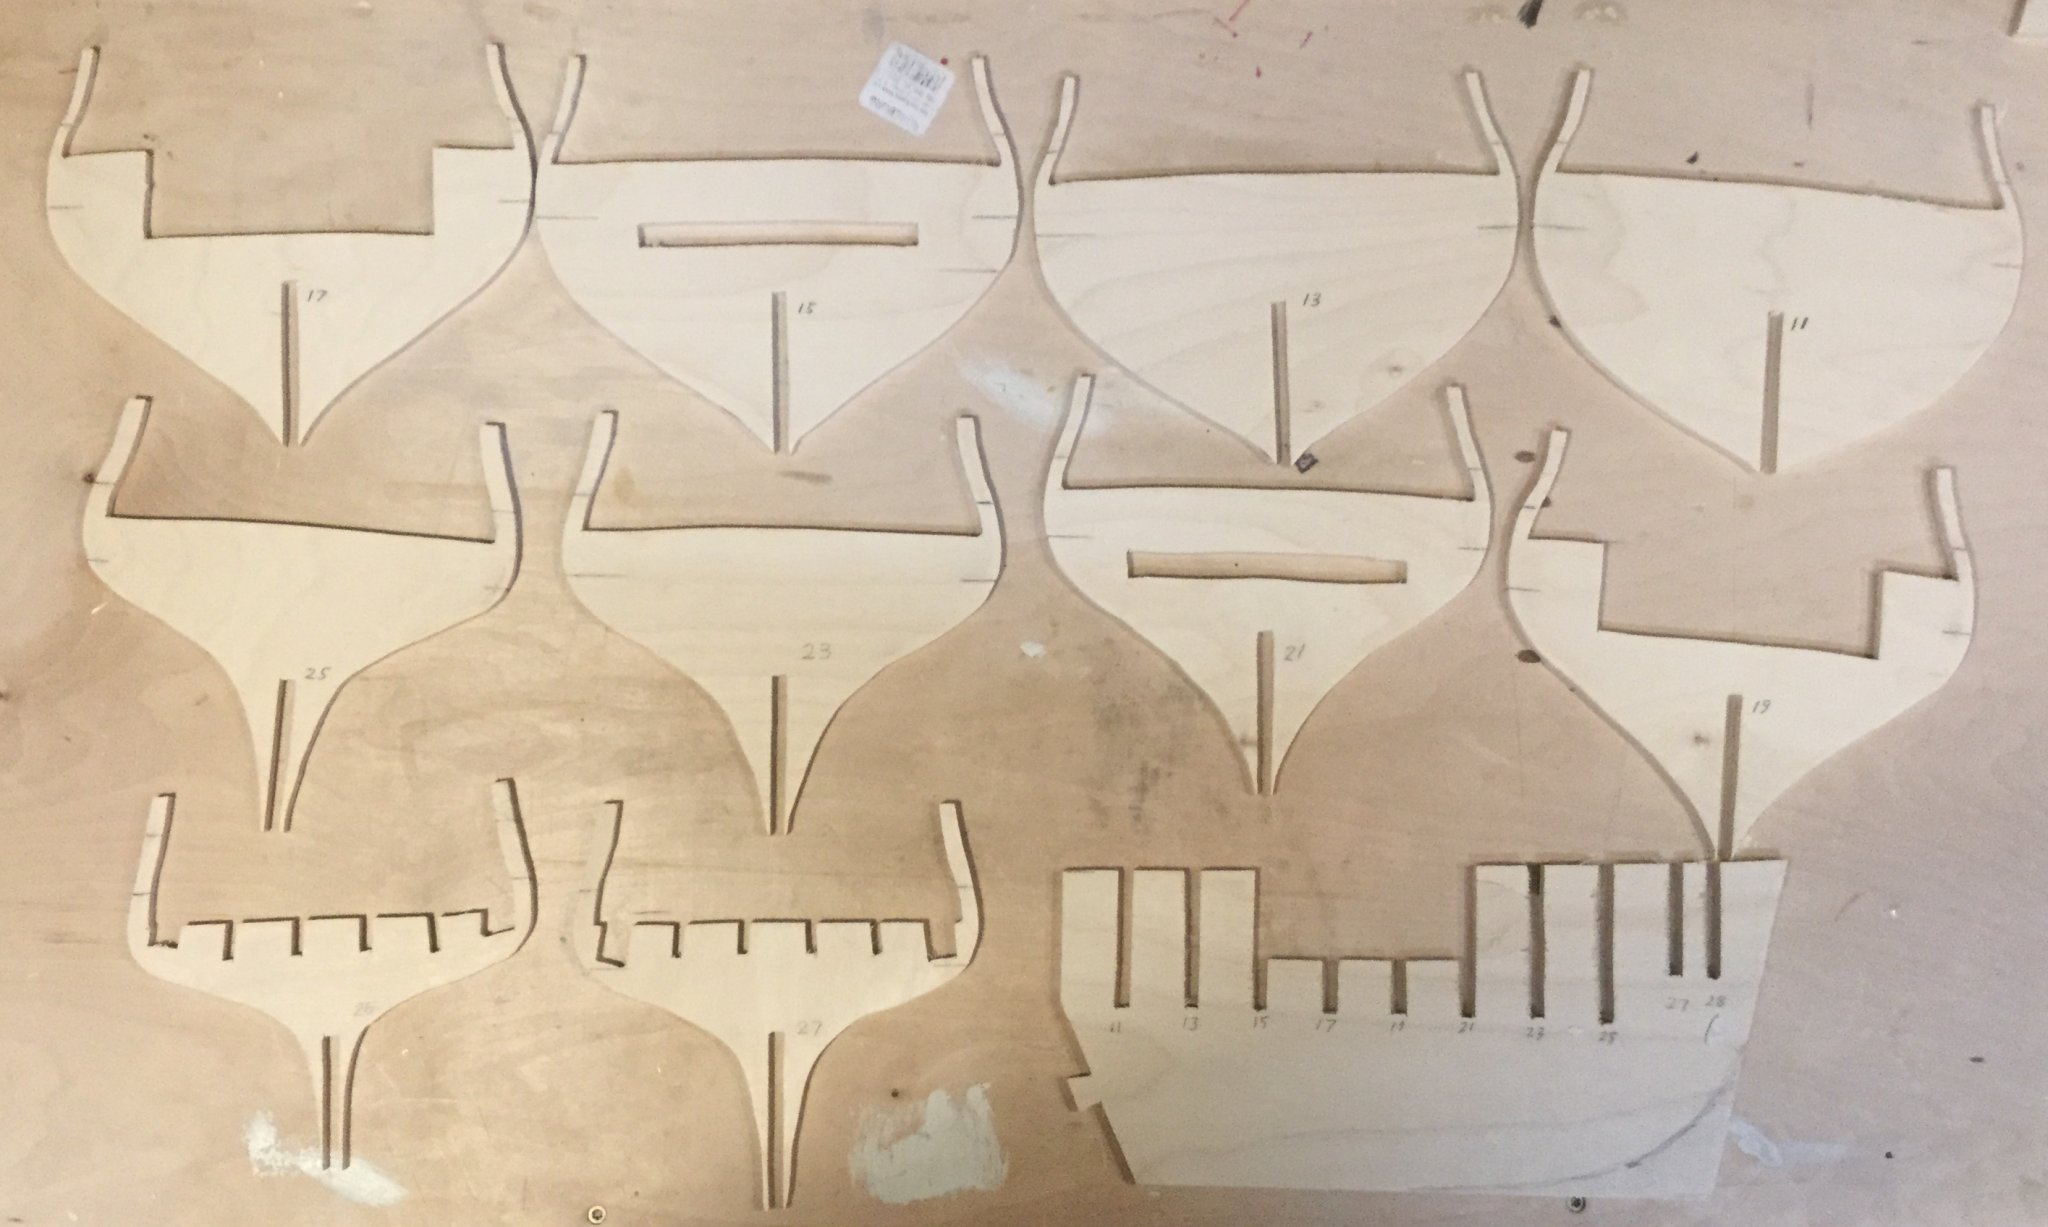
I have cut out all of the bulkheads and dry fitted them to the false keel. It’s very gratifying to see this frame set coming together.
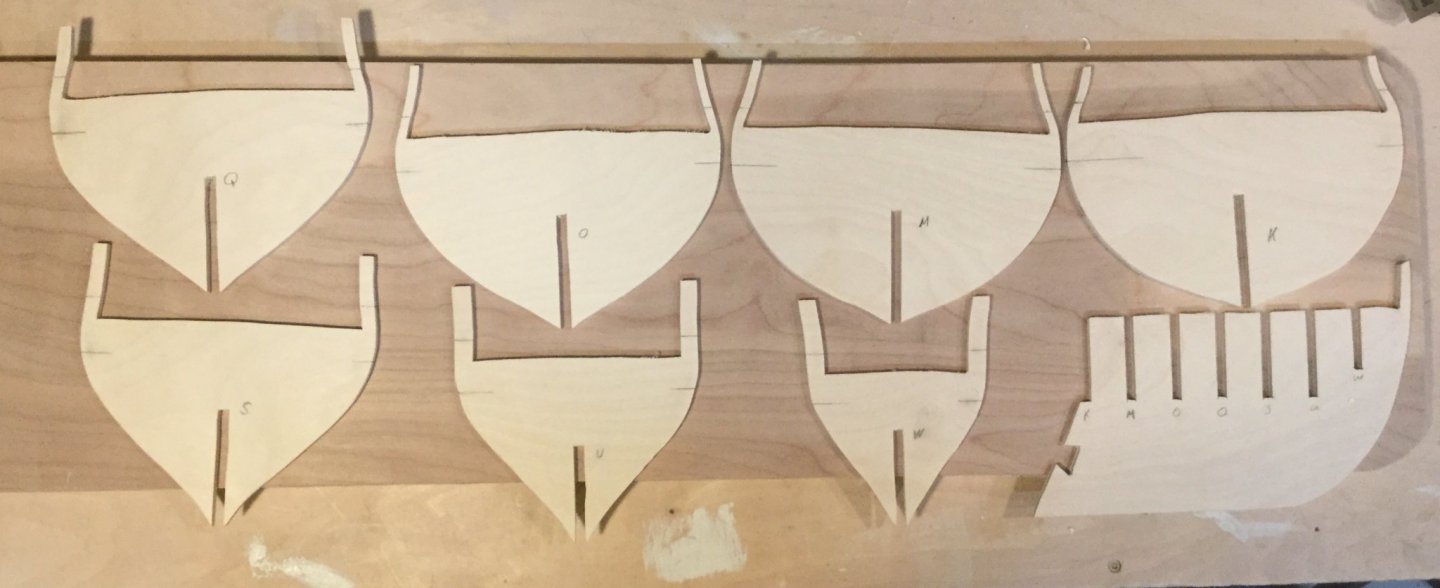
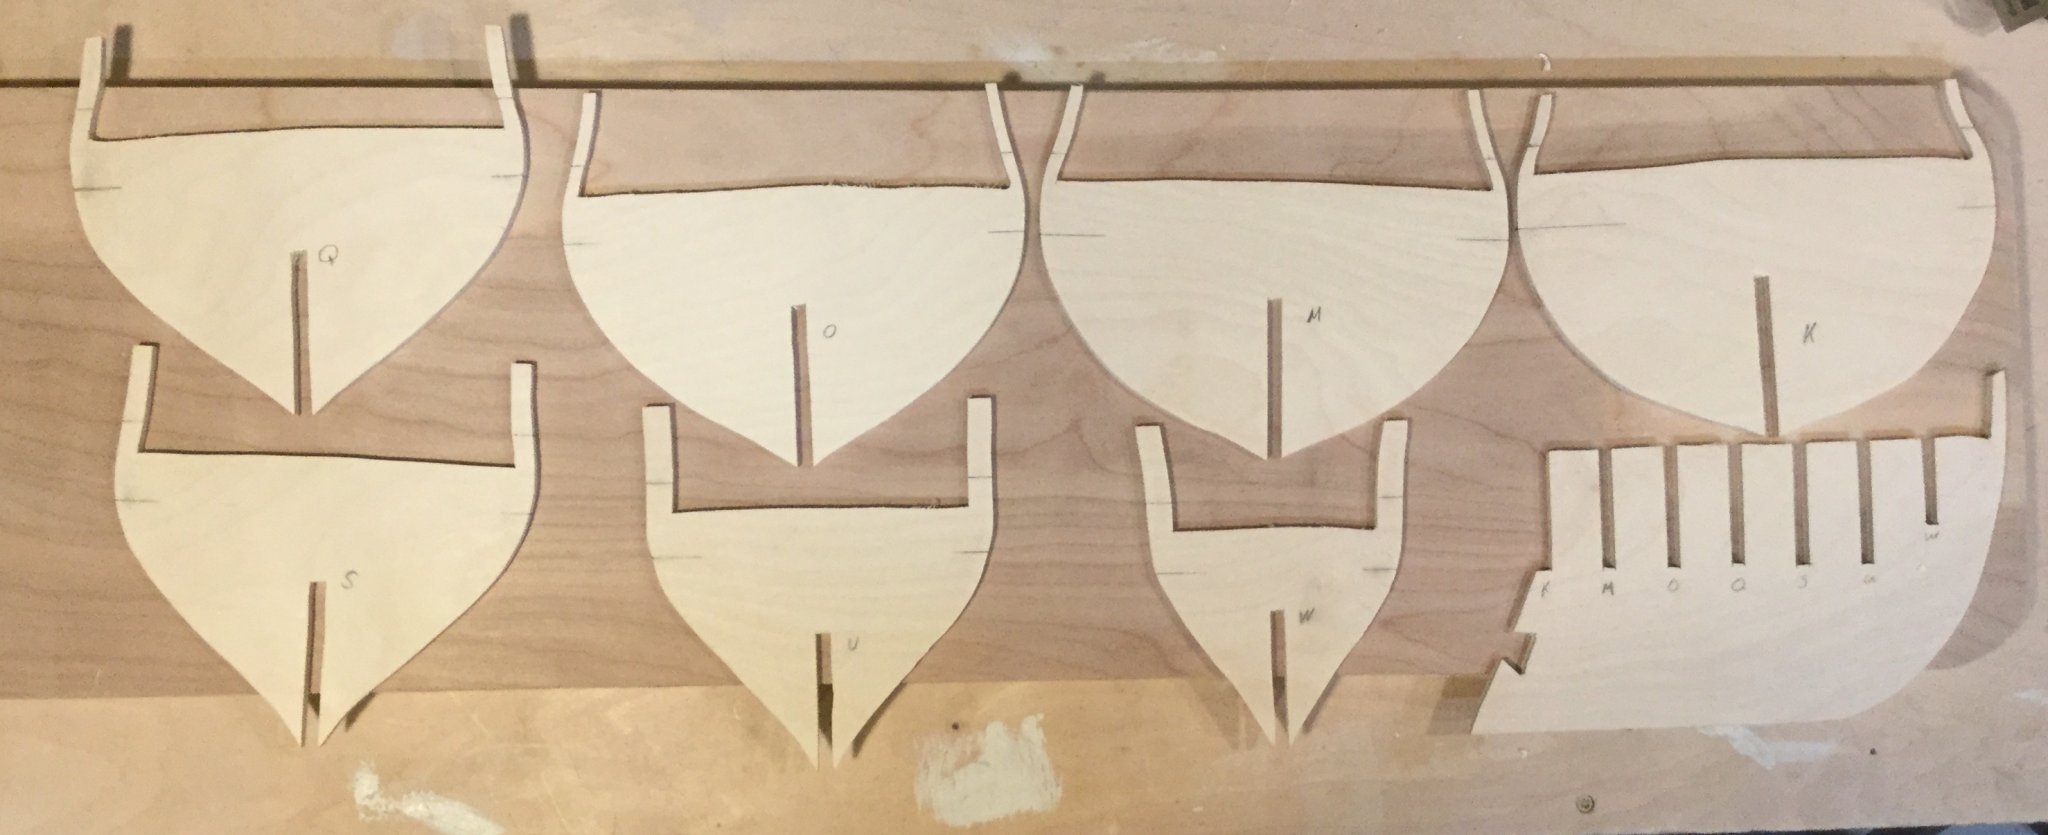
Bow section parts
 bow section assembled
Mid ship section assembly
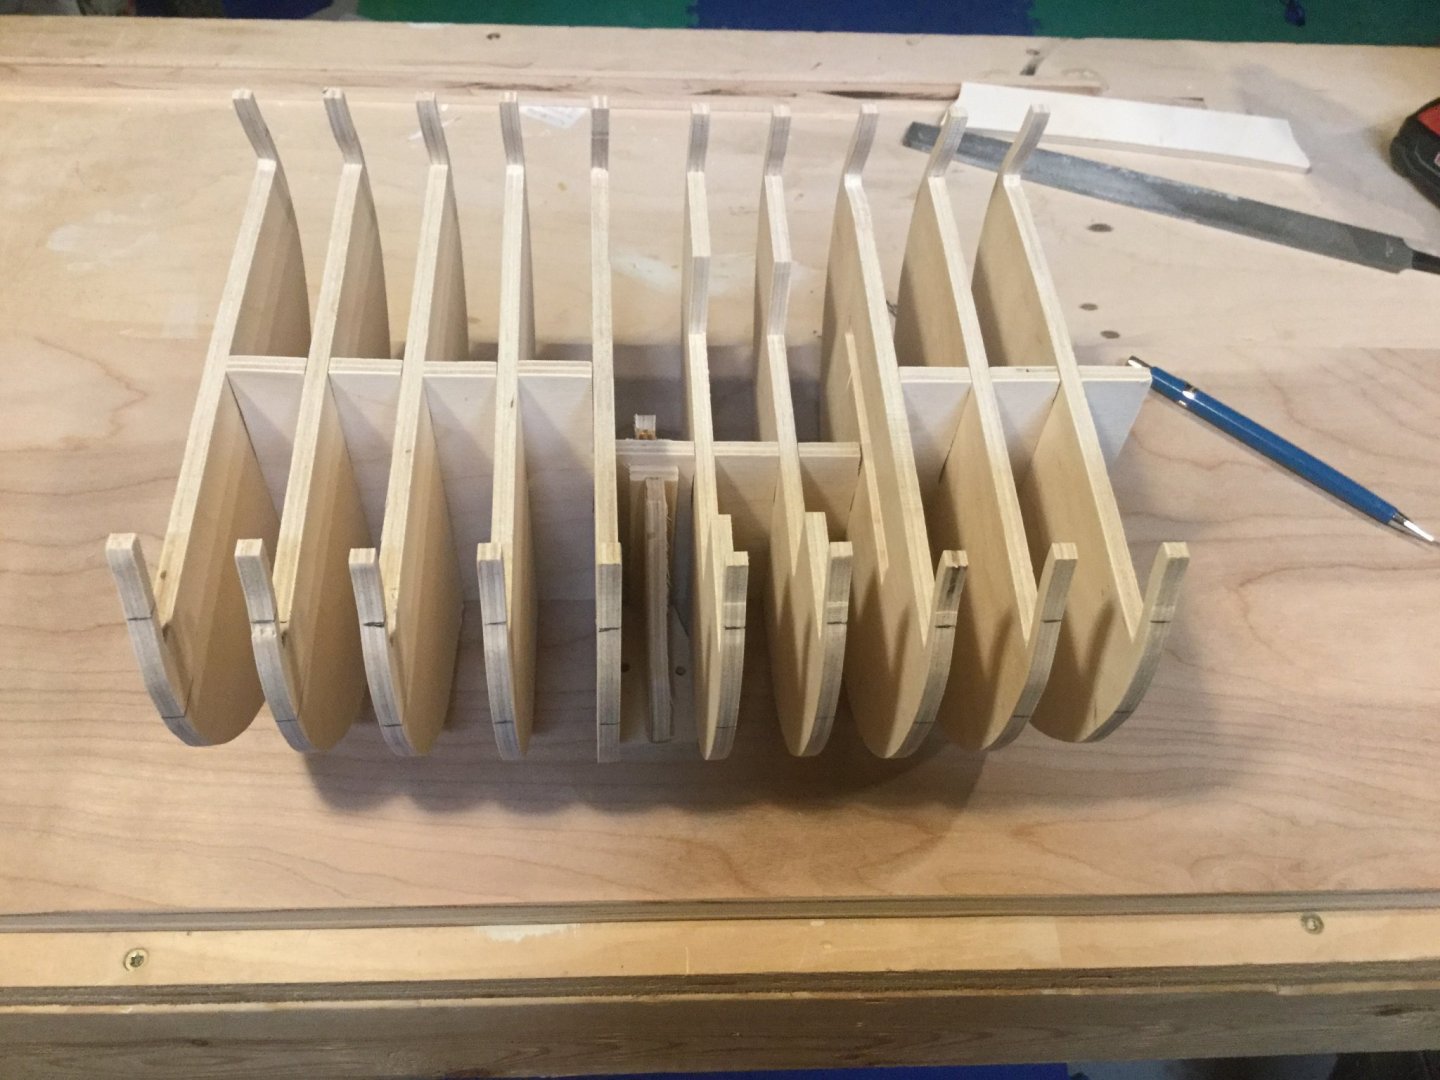
Mid-ship parts
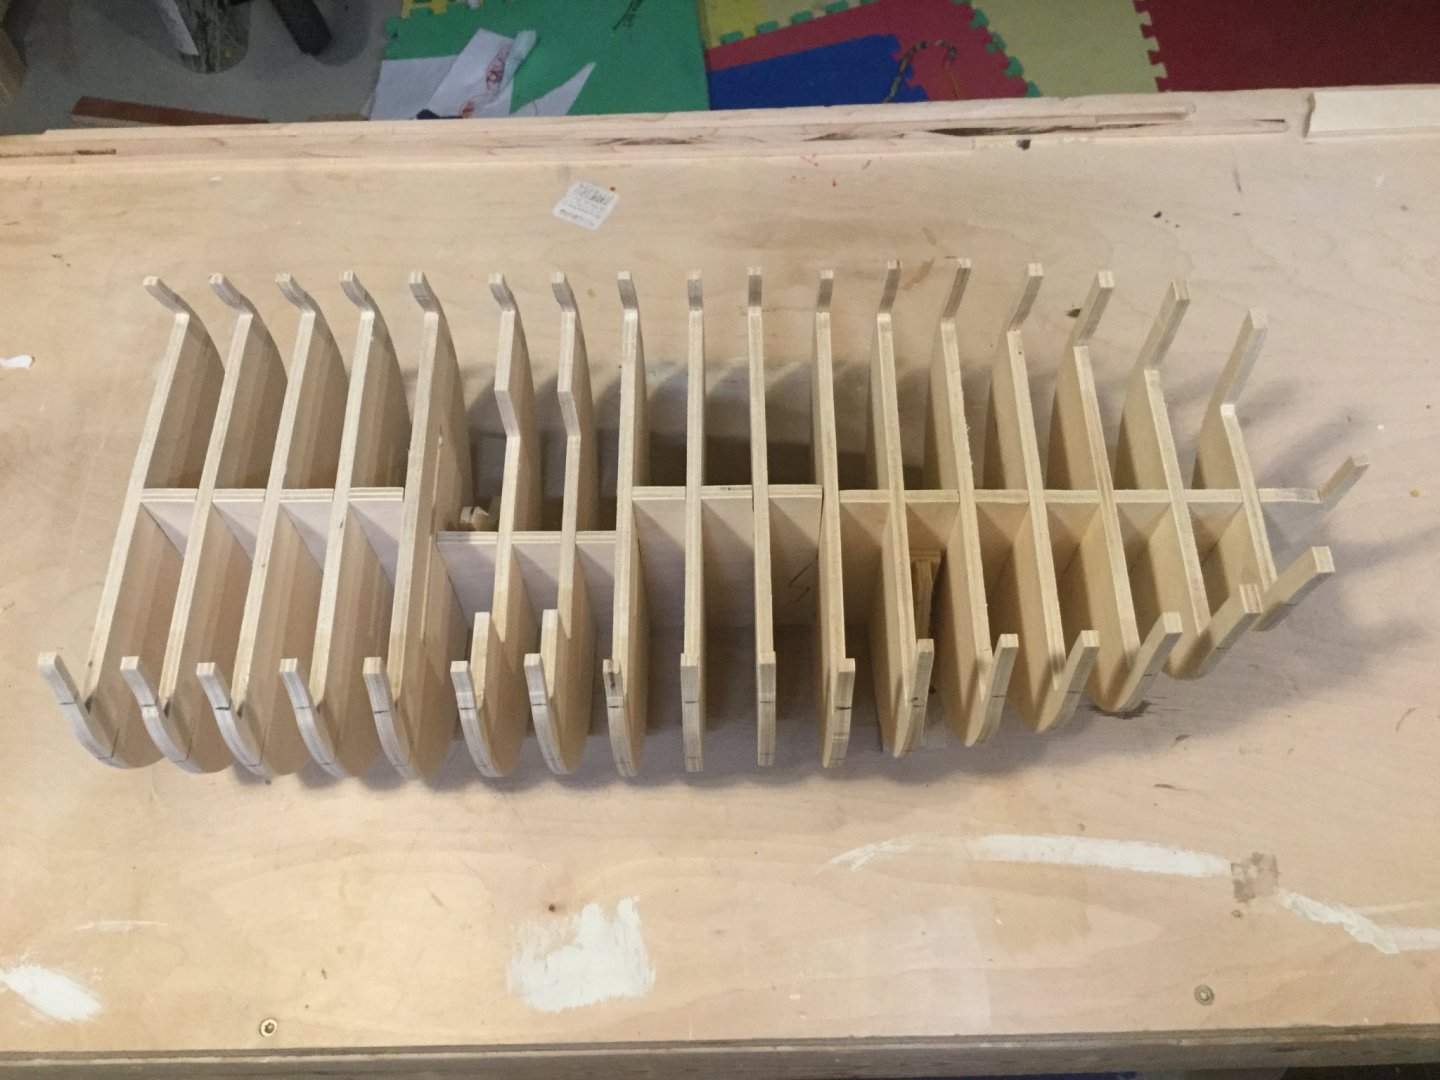
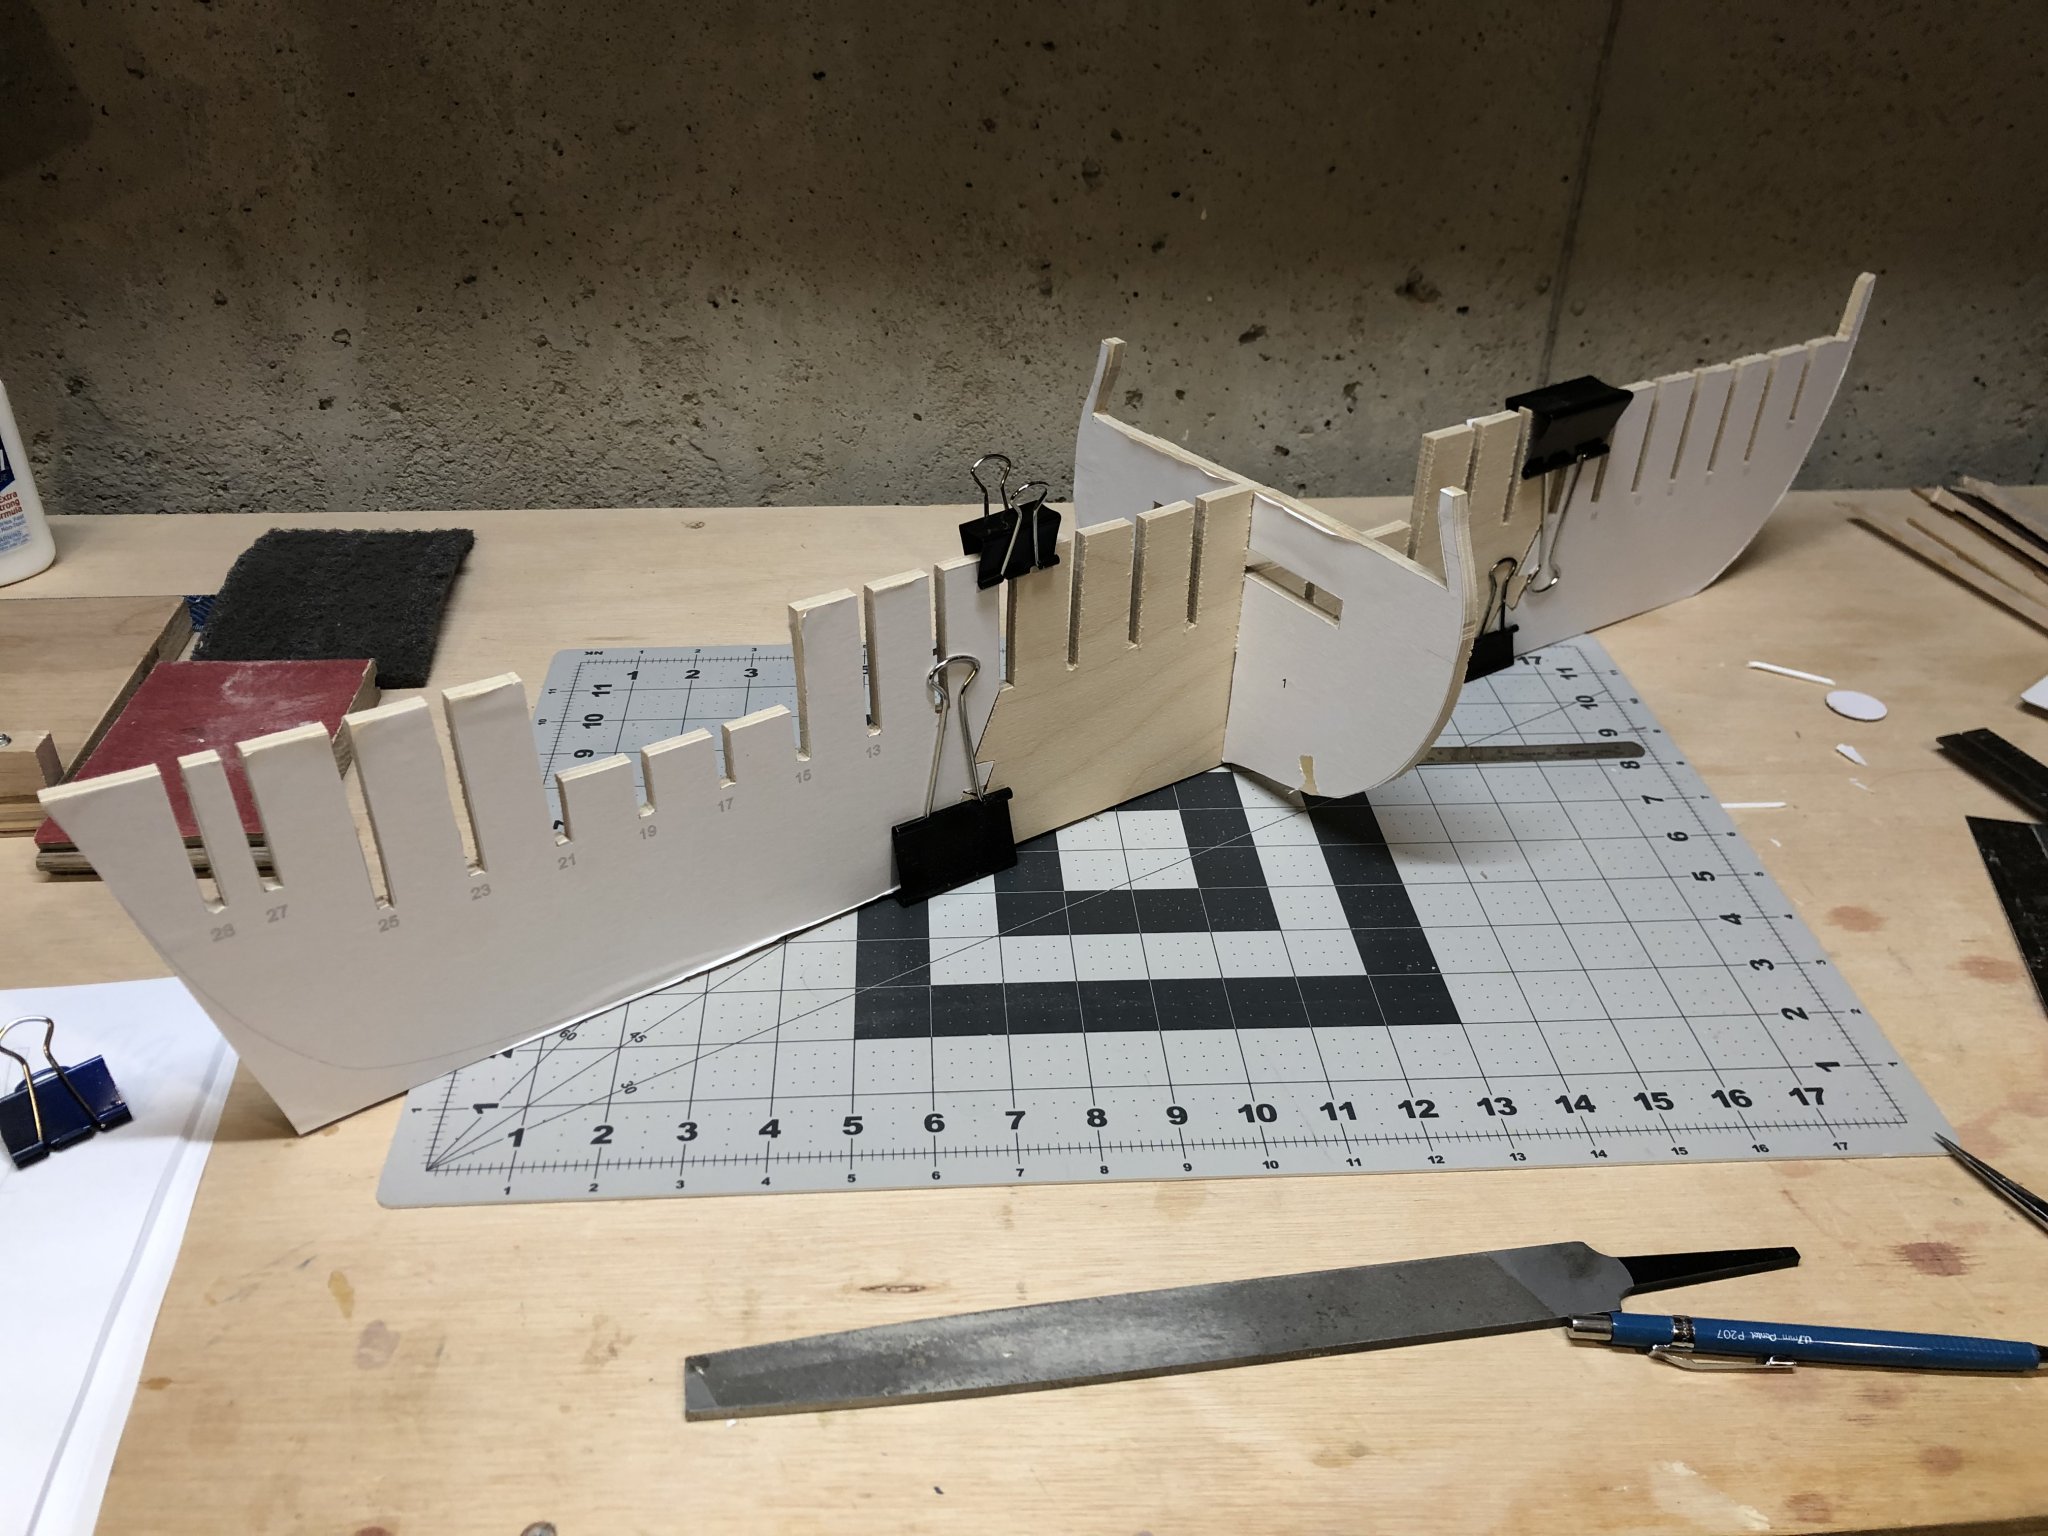
Here is the bow and midsection just loose fit together
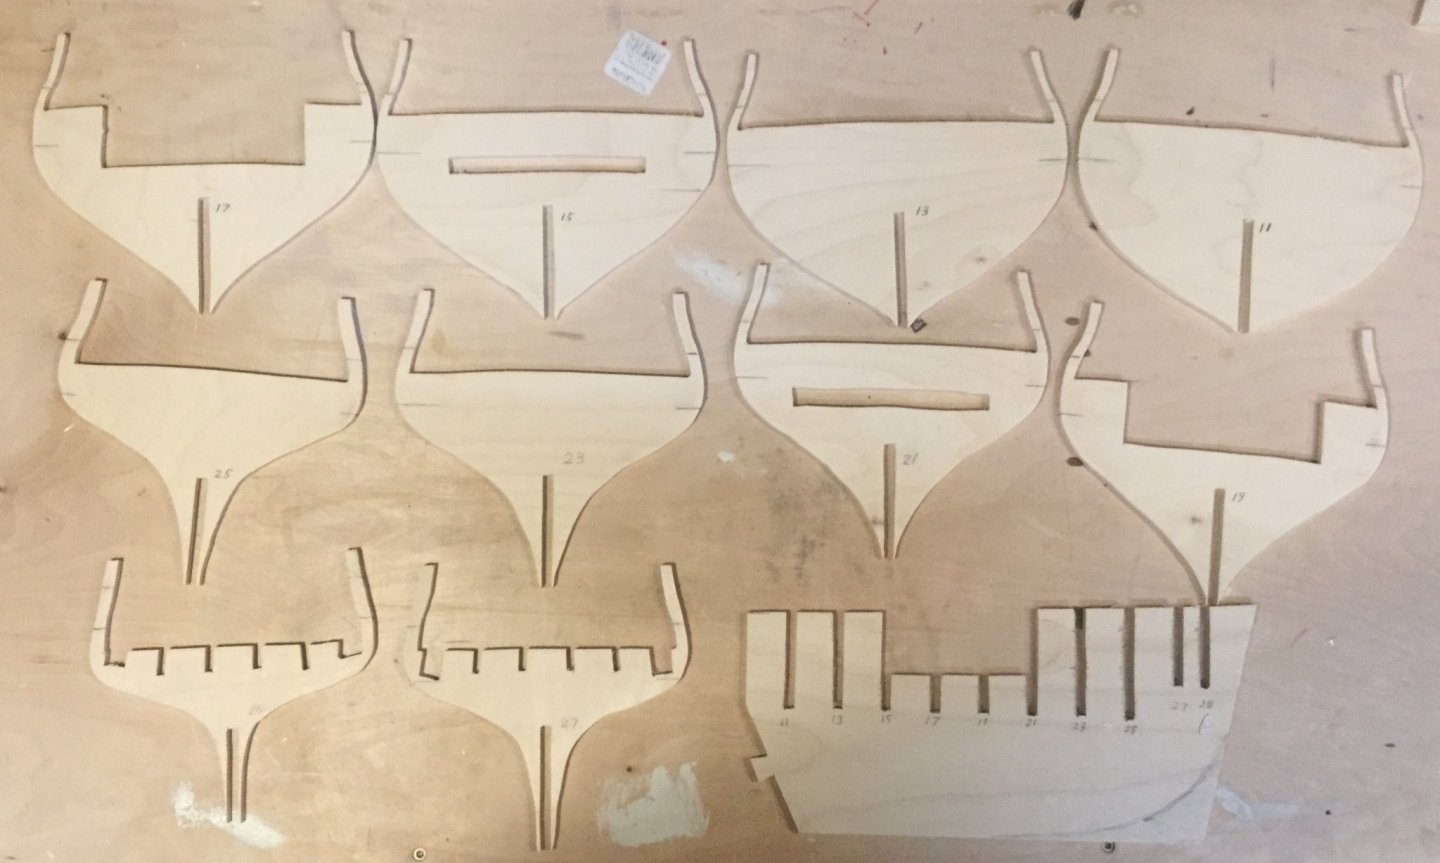
This is the aft section parts

This is the aft section assembly.
next, I’ll built the build board. I’ve made the right angle stands and cut out the board. I just need to assemble the pieces.
- Archi, Jorge Diaz O, JpR62 and 9 others
-
12
-
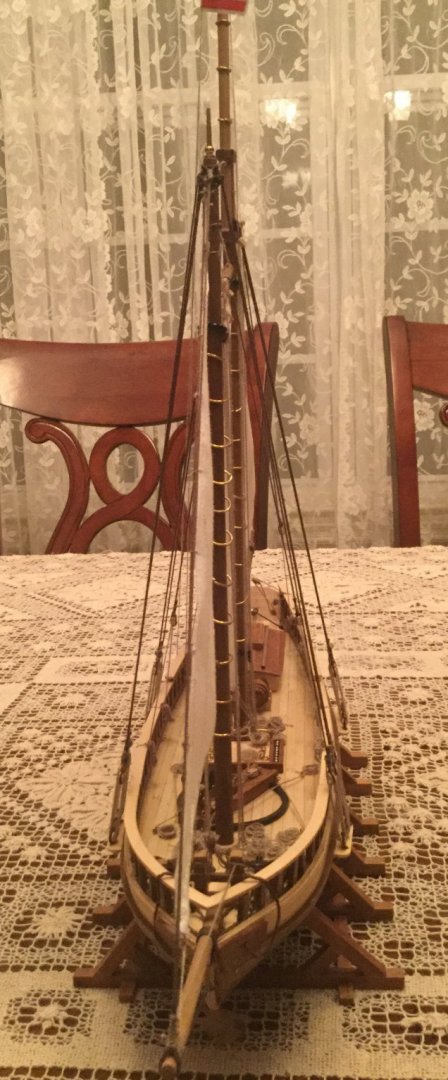
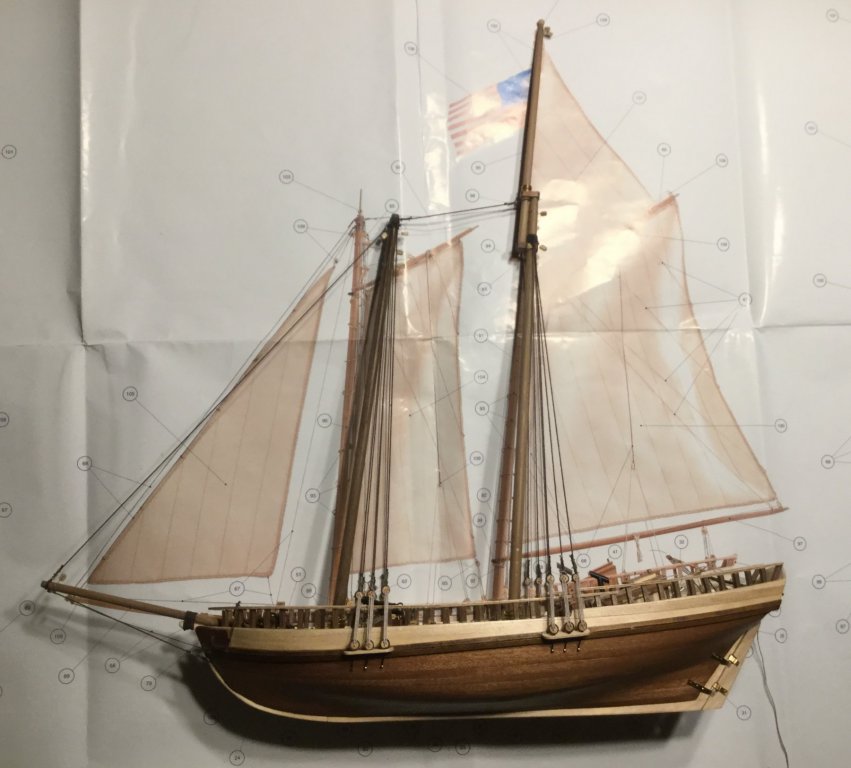
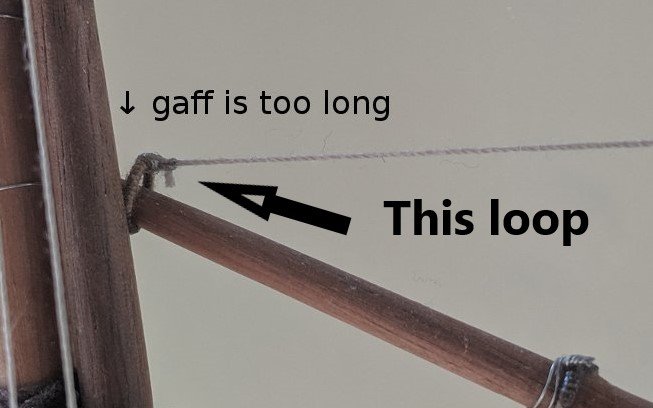
Hi Alec. I don't know if you can do anything about it, but if you look at post #80 in my Virginia build log, you'll see that the foremast is pitched too far back. It's on page 3 of the log and you can link to it from my signature below. That caused me to have to shorten the gaff on that mast. I think some other builders have had the same problem, which leads me to believe it's an error in the false keel. You might want to push your masts in and lay the model on the plan as I show in my picture to see where you are there. You can still get to the false keel if you need to file a little away and fill it in on the other side. It might be easier to fix now than it would be down the road.
-
1 hour ago, Wallace said:
And off we go. Will you be using a jig to keep that keel and the bulkheads nice and square?
Yes. I have some large scraps of 3/4" birch plywood hanging around my basement that I will use to build the base. I'm going to use scraps from the 1/4" Baltic birch plywood to make right angle brackets to hold it square. The base will be 12x36. This model is gigantic! I held it up next to my Virginia 1819. The hull will be twice as long and almost twice as wide. I knew that going in, but it's different when it's sitting on the bench. Of course, you have to feel the same way about your HMS Victory.
- Chuck, Saburo and FrankWouts
-
3
-
I’ve started working on frames. I won’t get much more done until the weekend, but I really wanted to get the false keel and one bulkhead cut out and fit together.
- Saburo, bdgiantman2, Ryland Craze and 9 others
-
12
-
I am happy to announce that I have purchased the plans and am starting my build log for the HMS Winchelsea. I've been interested in this since the first time I saw the project on the Syren Ship Models website. I'm very excited to start a group project early on in its inception. It will be fun to work on this with so many other modelers. Thank you, Chuck, for putting this together and sharing your hard work and passion with us. I will download the plans and get started on cutting frames this week.
- Sea Hoss, FrankWouts, Saburo and 2 others
-
5
-
Thank you Mark and Paul. It meant a lot to me to have all the help and support from people like you on this site. This community makes modelling a lot more fun and has really helped me grow my abilities.
I have too many ideas for my next build. I bought Model Shipways Fair American a few months ago and have been looking forward to building it. I really like the transom windows, stern framing, painted wales, and the gun port framing to name a few of the features that drew me to that kit. But I've also discovered the group projects portion of Model Ship World. I bought the Triton plans in hopes of building the cross section model of that ship, but there are very few active logs of it right now and the cutting precision is very demanding. I've actually tried building the frames with marginal success to see if I should proceed. I think it will have to wait until I get a little better at building from scratch. However, the newest project, HMS Winchelsea, has just started and looks like a really nice model. I've been lurking over there for a few weeks and I think I'm going to buy the plans and start cutting plywood this week. There are about 20 new build logs and a lot of discussion going on in that forum and I think I would like to be a part of that.
-
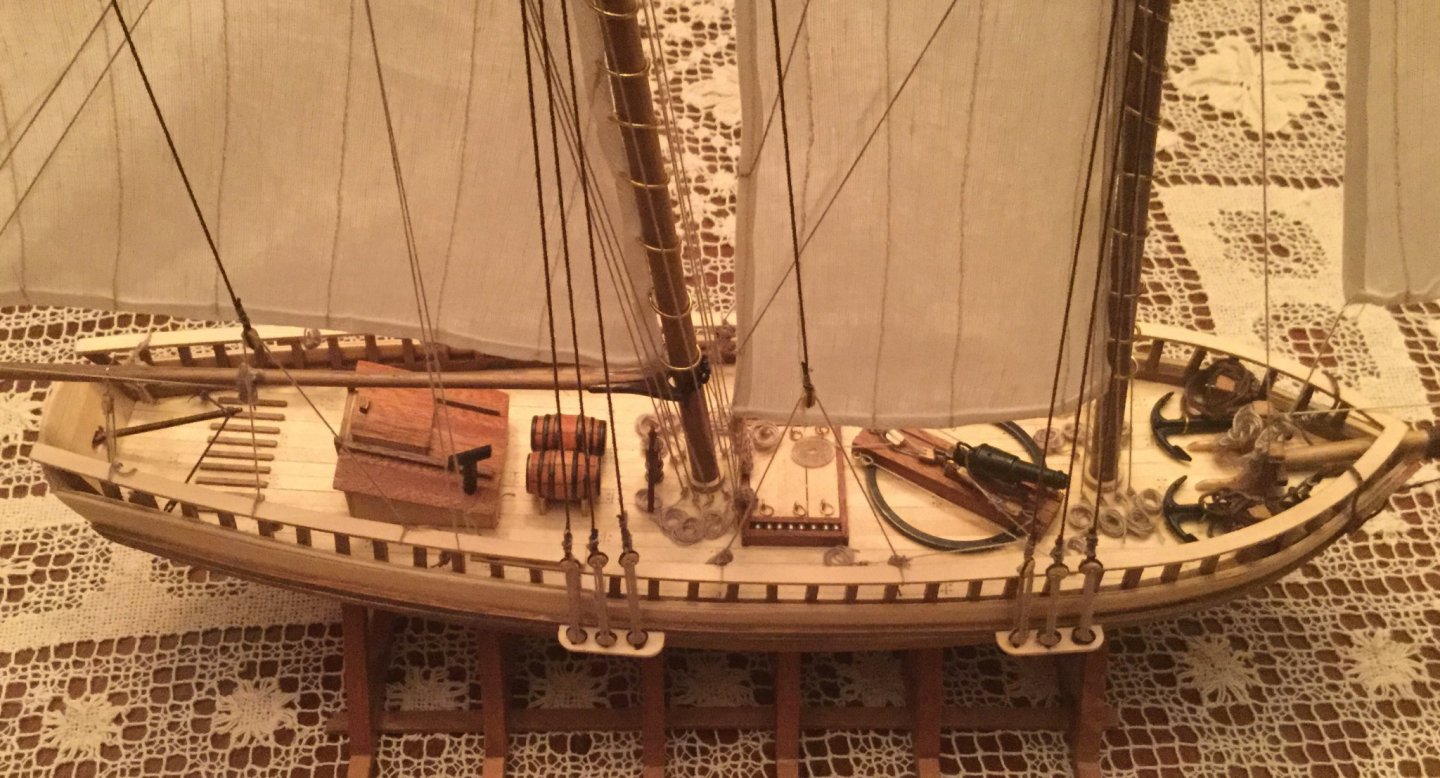
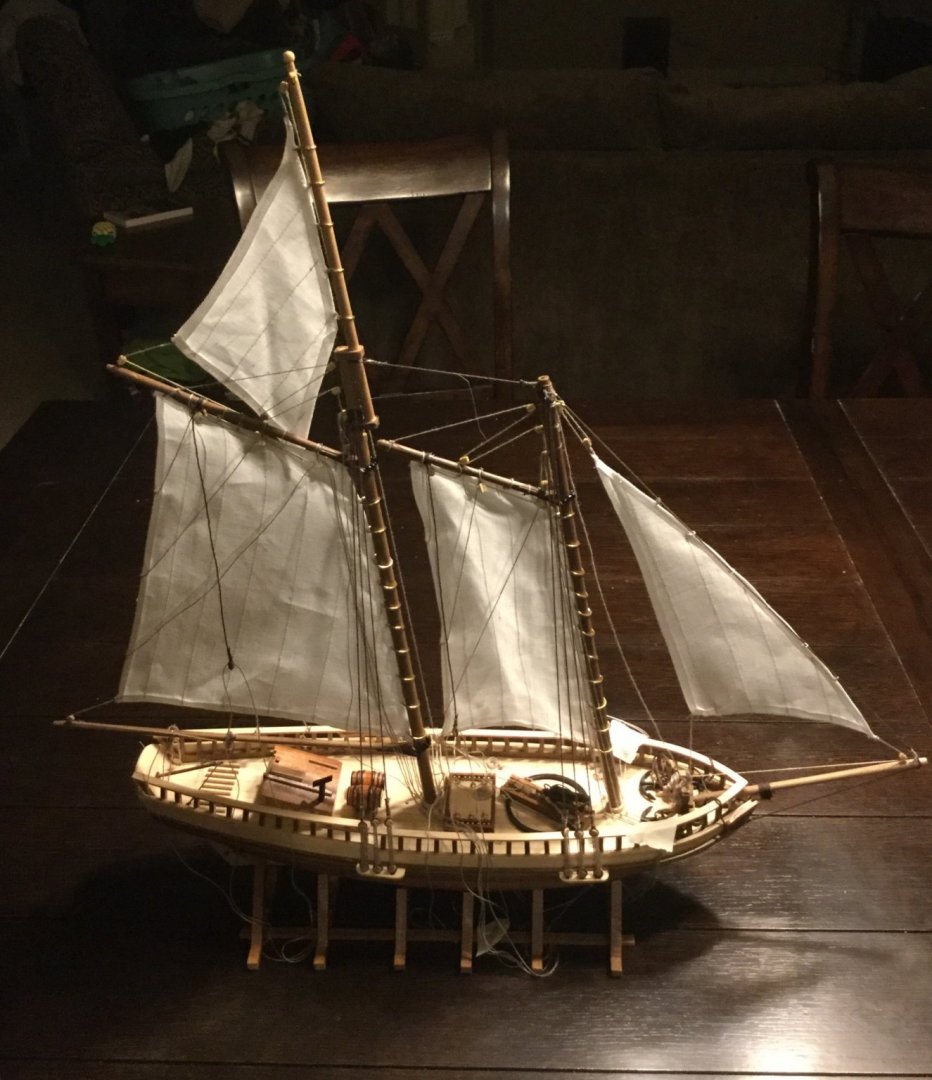
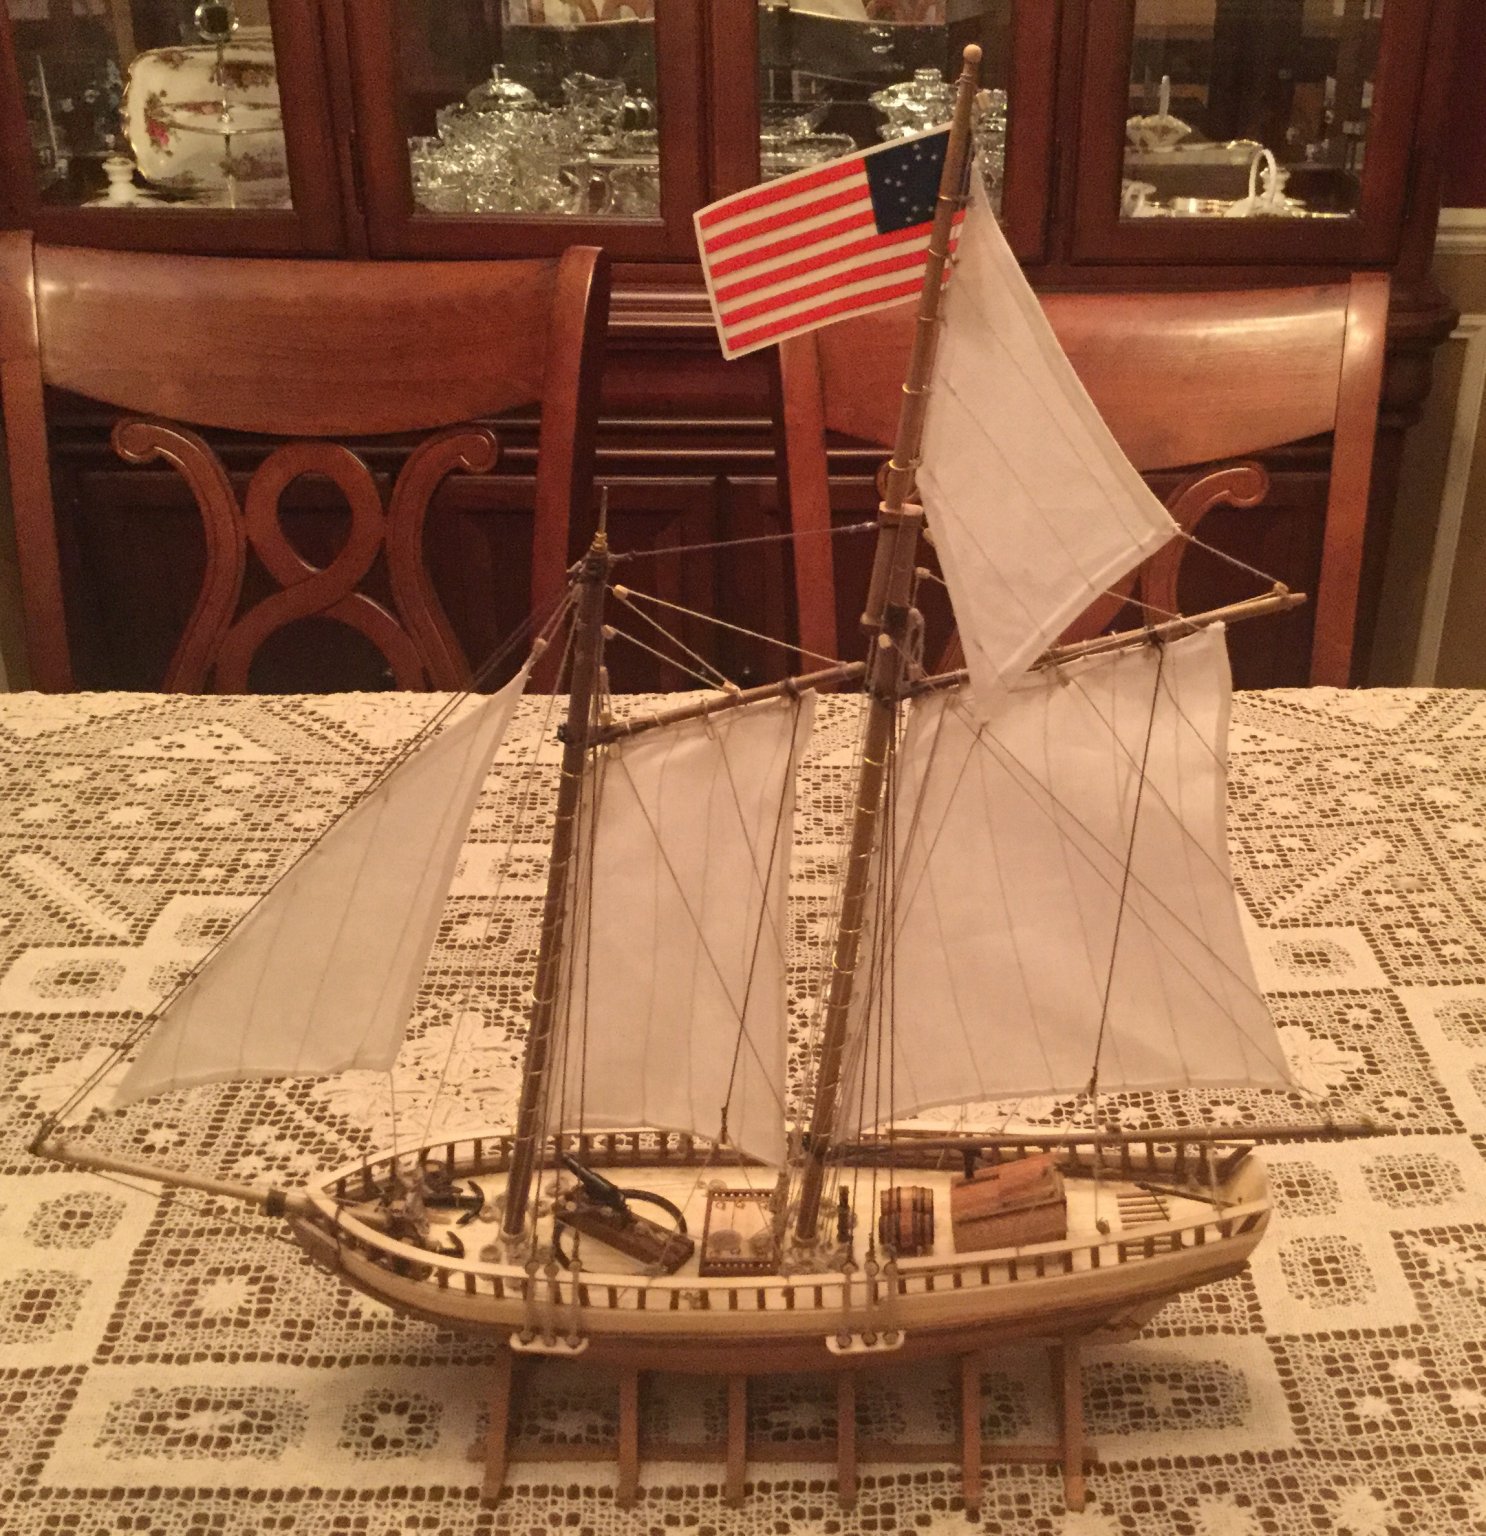
Here is my completed model. I made a ton of mistakes on it, but I’m very pleased with how it turned out. I feel like this was an excellent choice for a first ship model and I looking forward to starting another one. There’s no doubt that I’m hooked!


- Kathy Teel, nikbud, GrandpaPhil and 5 others
-
8
-
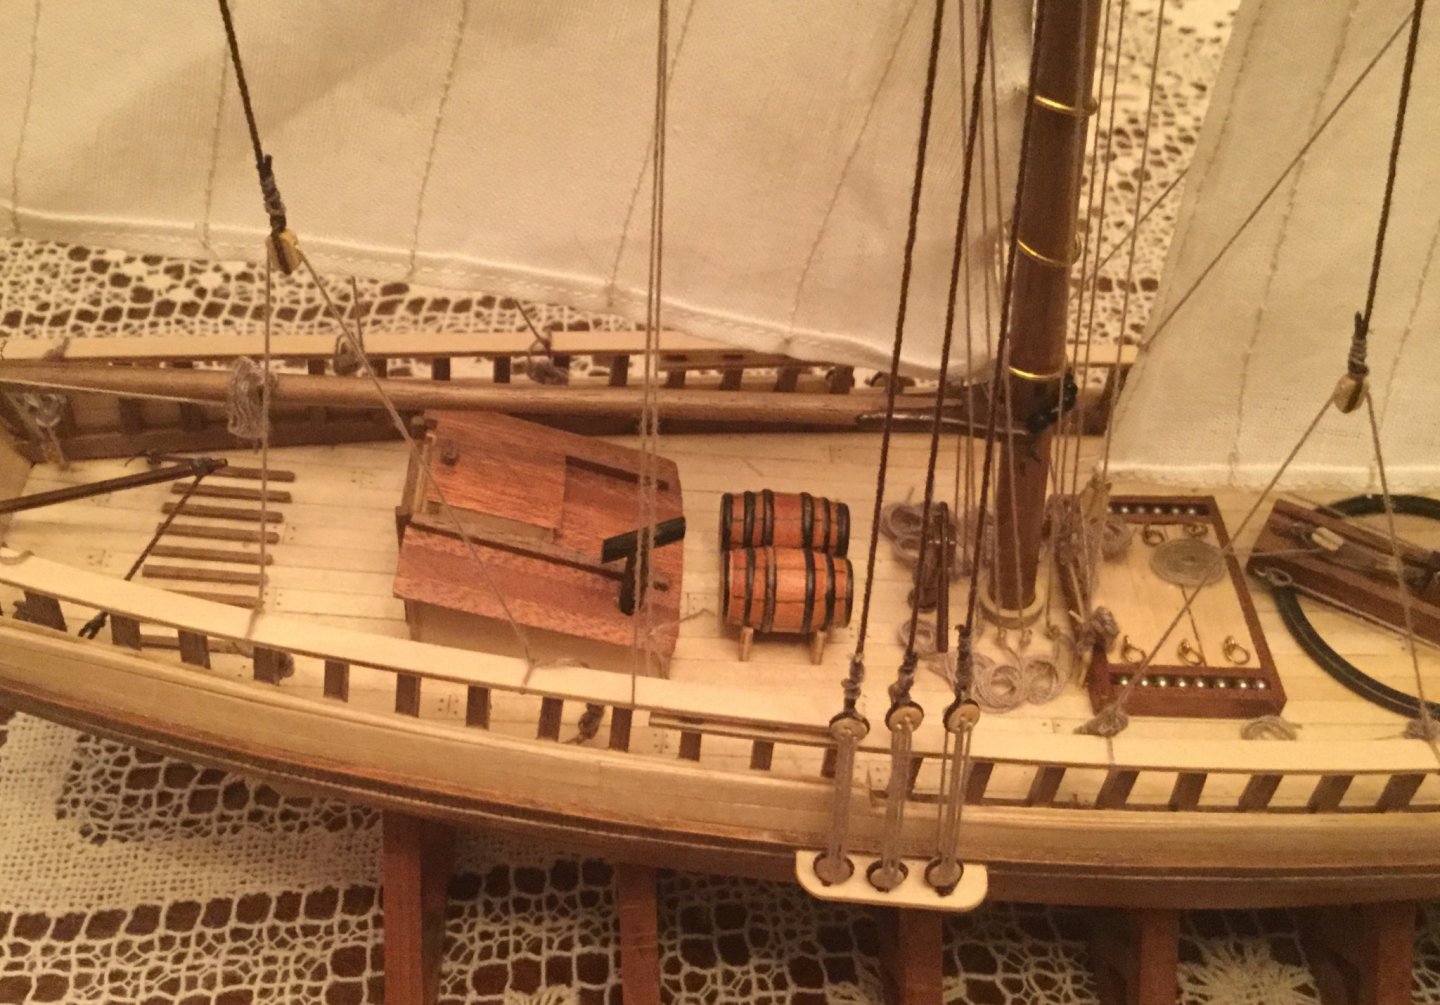
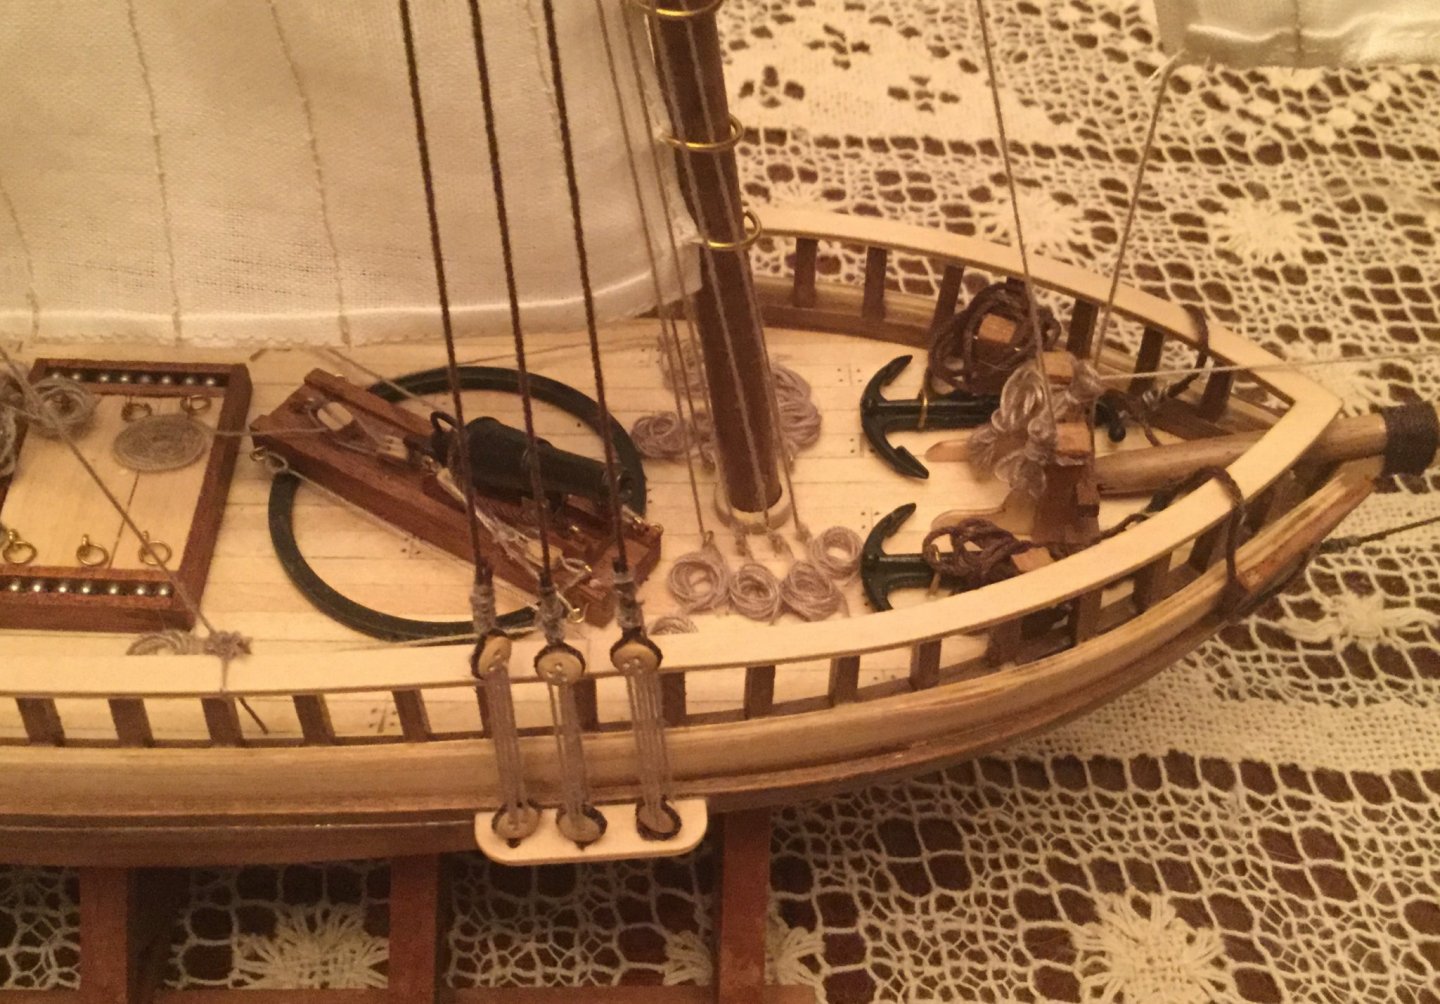
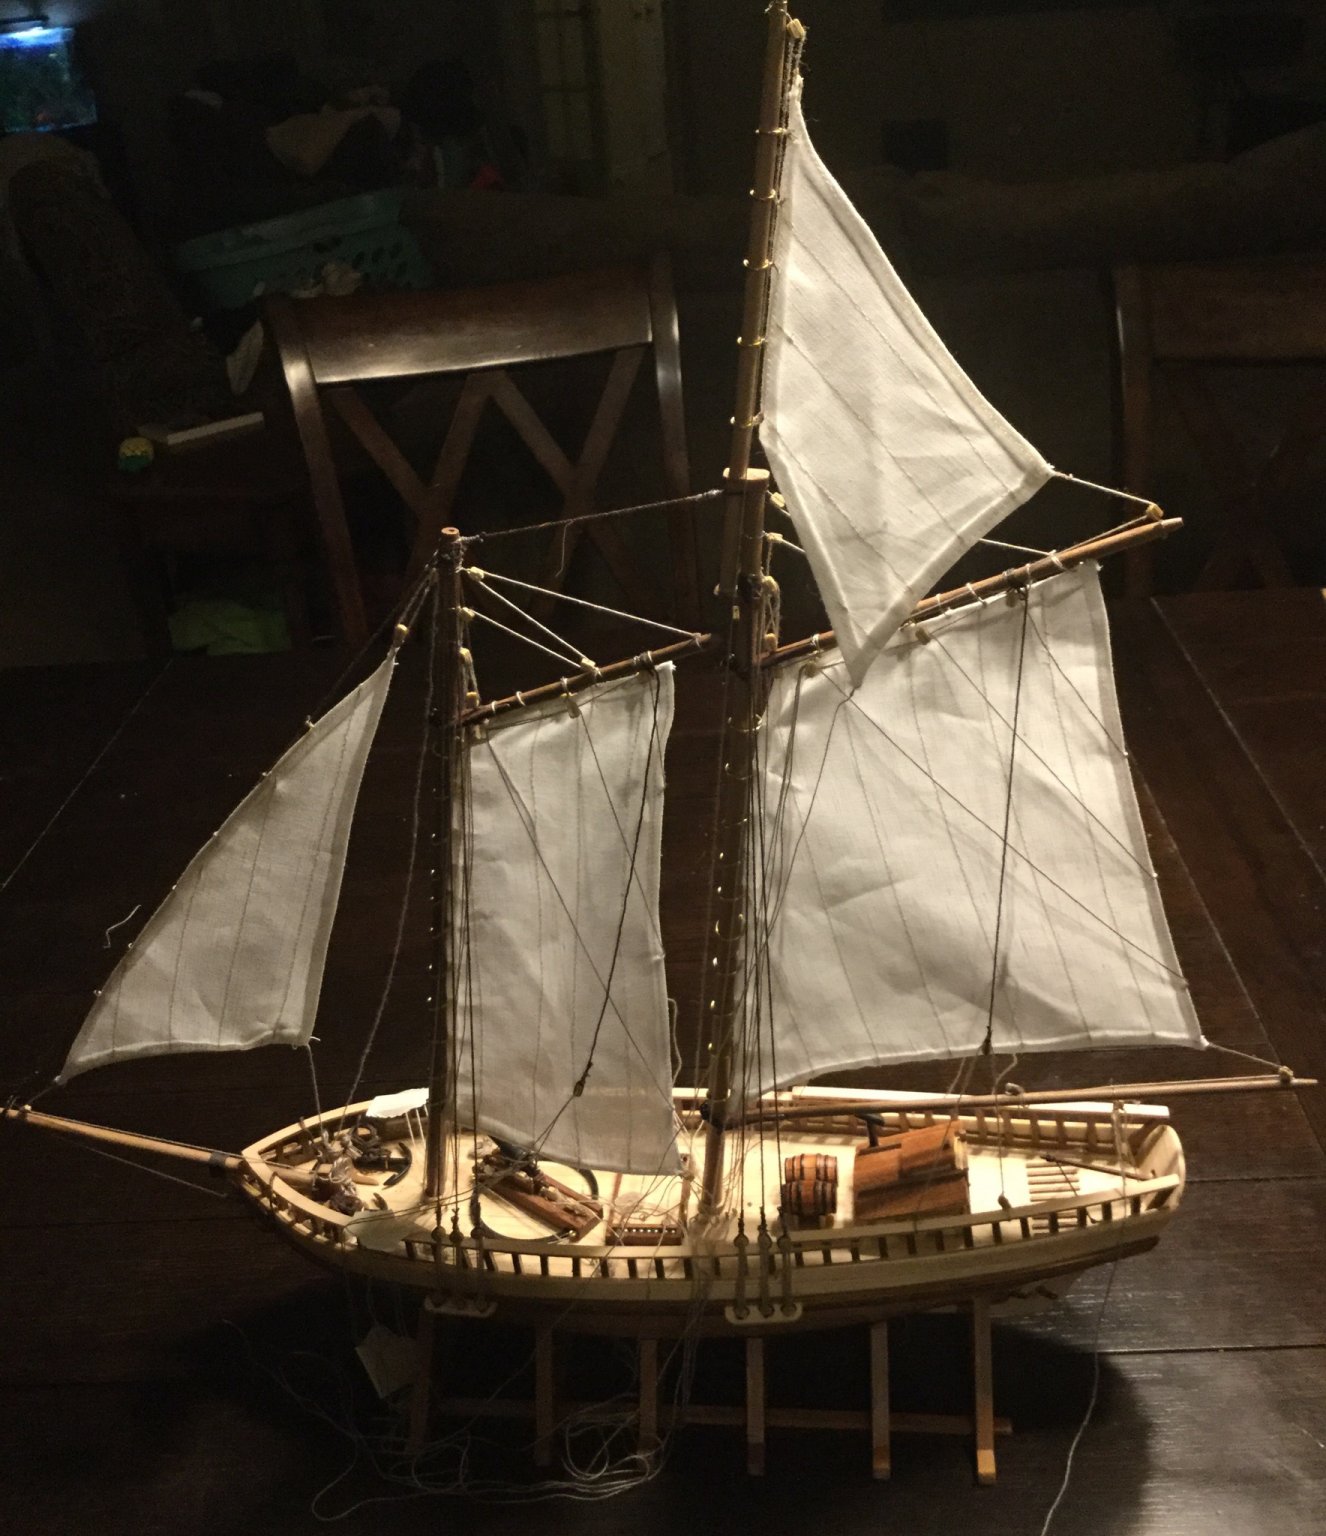
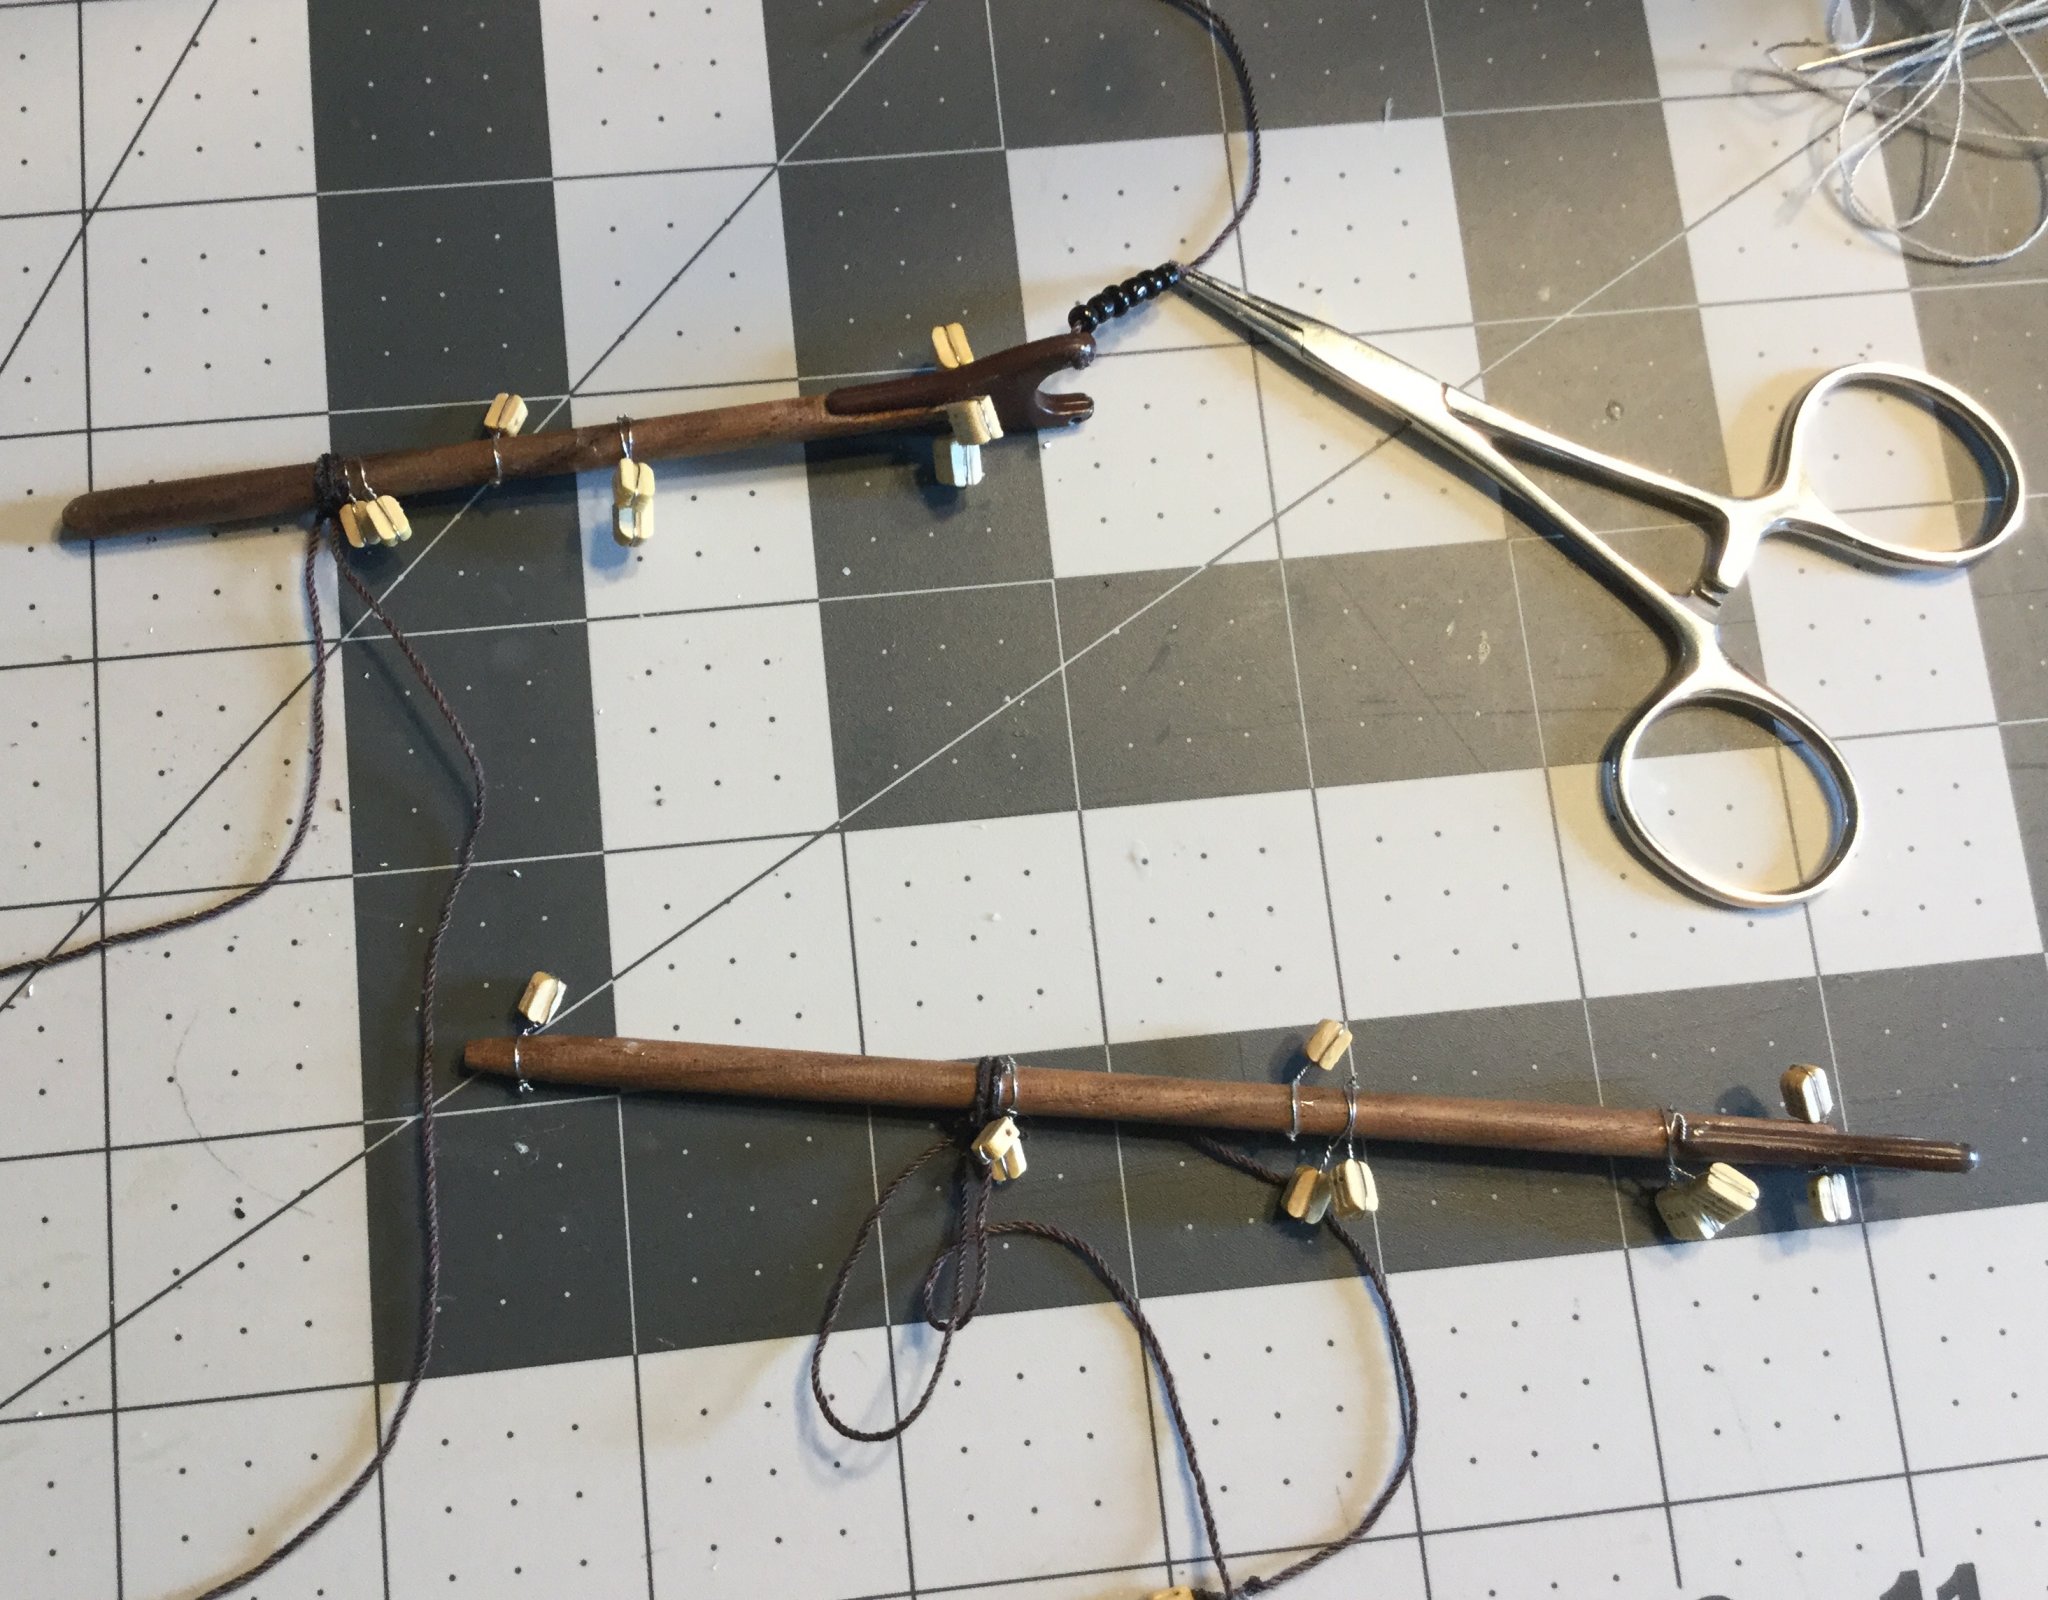
I’ve done a poor job of updating this log through the rest of the rigging. Here are some photos of the work of installing the sails and running rigging. I attached the mail sail to its gaff before mounting the gaff. It was tricky getting the tension right on each line. The most interesting part to me was seeing how the running lines and pulleys actually work to pull the gaffs into place and set the sails. I struggled the most with making the rope coils look decent. I decided to make loose coils because it seemed much harder to make really tight pinwheel style coils. Its tight quarters working on the ropes with the rest of the lines in the way. My long tweezers and hemostats were indispensable for that work. My next post will show the finished model.


-
12 hours ago, Alec Hosterman said:
Actually Wallace, I think I have a question. I noticed the metal pieces are painted bronze or black. What paint brand is best to use? Any preference? From my model kit days, I used to use Testors or Tamiya. Are these good to use or is there one better for these pieces?
Hi Alec. I used Testors enamel on the canon and the gaff cheeks with just a little trouble: CA stripped a little bit of paint off of the gaff cheeks. In the end, it was so little that I didn’t bother touching it up for fear of making a bigger mess.
-
She’s looking great! What variety of Home Depot plywood are you using? I was thinking about starting this project and doing the same thing, but I am not sure which 1/4 inch plywood would work well versus the more expensive Baltic birch 5-ply stuff that I’ve seen at the craft stores. I don’t mind spending $70 on plywood, unless I can get away with spending $30.
-
It looks like you’re off to a good start. I’m nearing completion on the same kit. I recommend reviewing the other build logs to see examples of how others have built this model. I have learned a lot from reading and interacting on this site. I hope you have a great experience building and logging it as I have.
-
Your pieces look fantastic, Matthias! I think making the false keel in one piece instead of three was a good idea.
-
I have only found their Spanish website, www.constructo.es. They make an updated version of the same kit today. Model Expo now carries it, too. I have the same kit you have sitting on a shelf waiting to be built. So I will follow your progress with great interest.
-
Dan, In case you haven’t been thanked for this lately, I wanted to tell you how much I appreciate your work on these log files. They are a great help and I use them all the time. I’m sure you put a lot of effort into keeping them updated. Thank you!
-
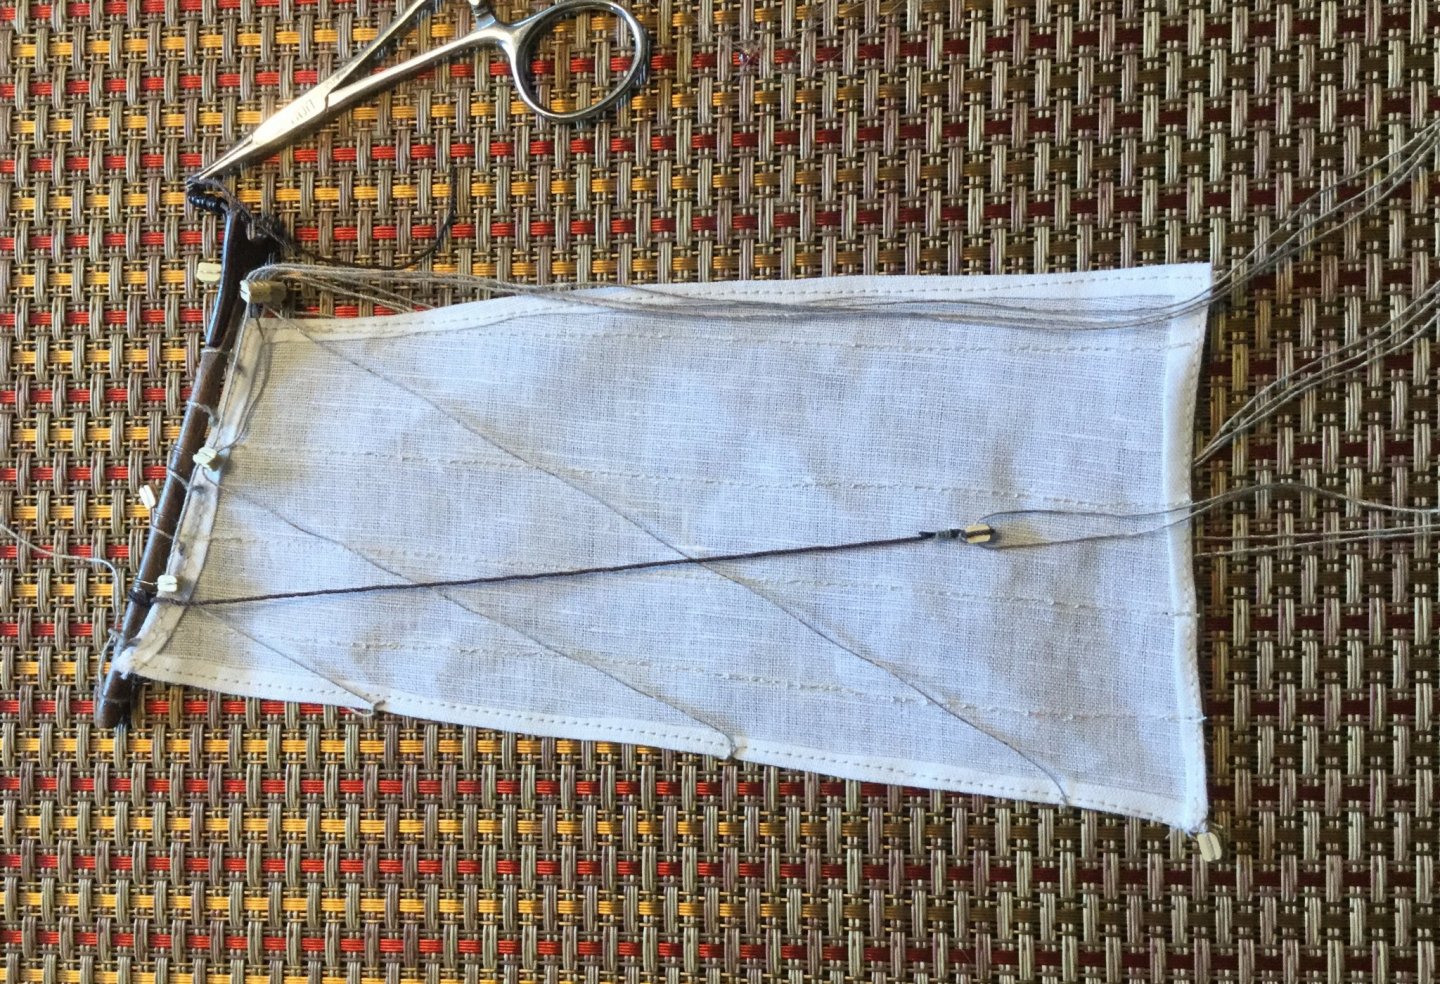
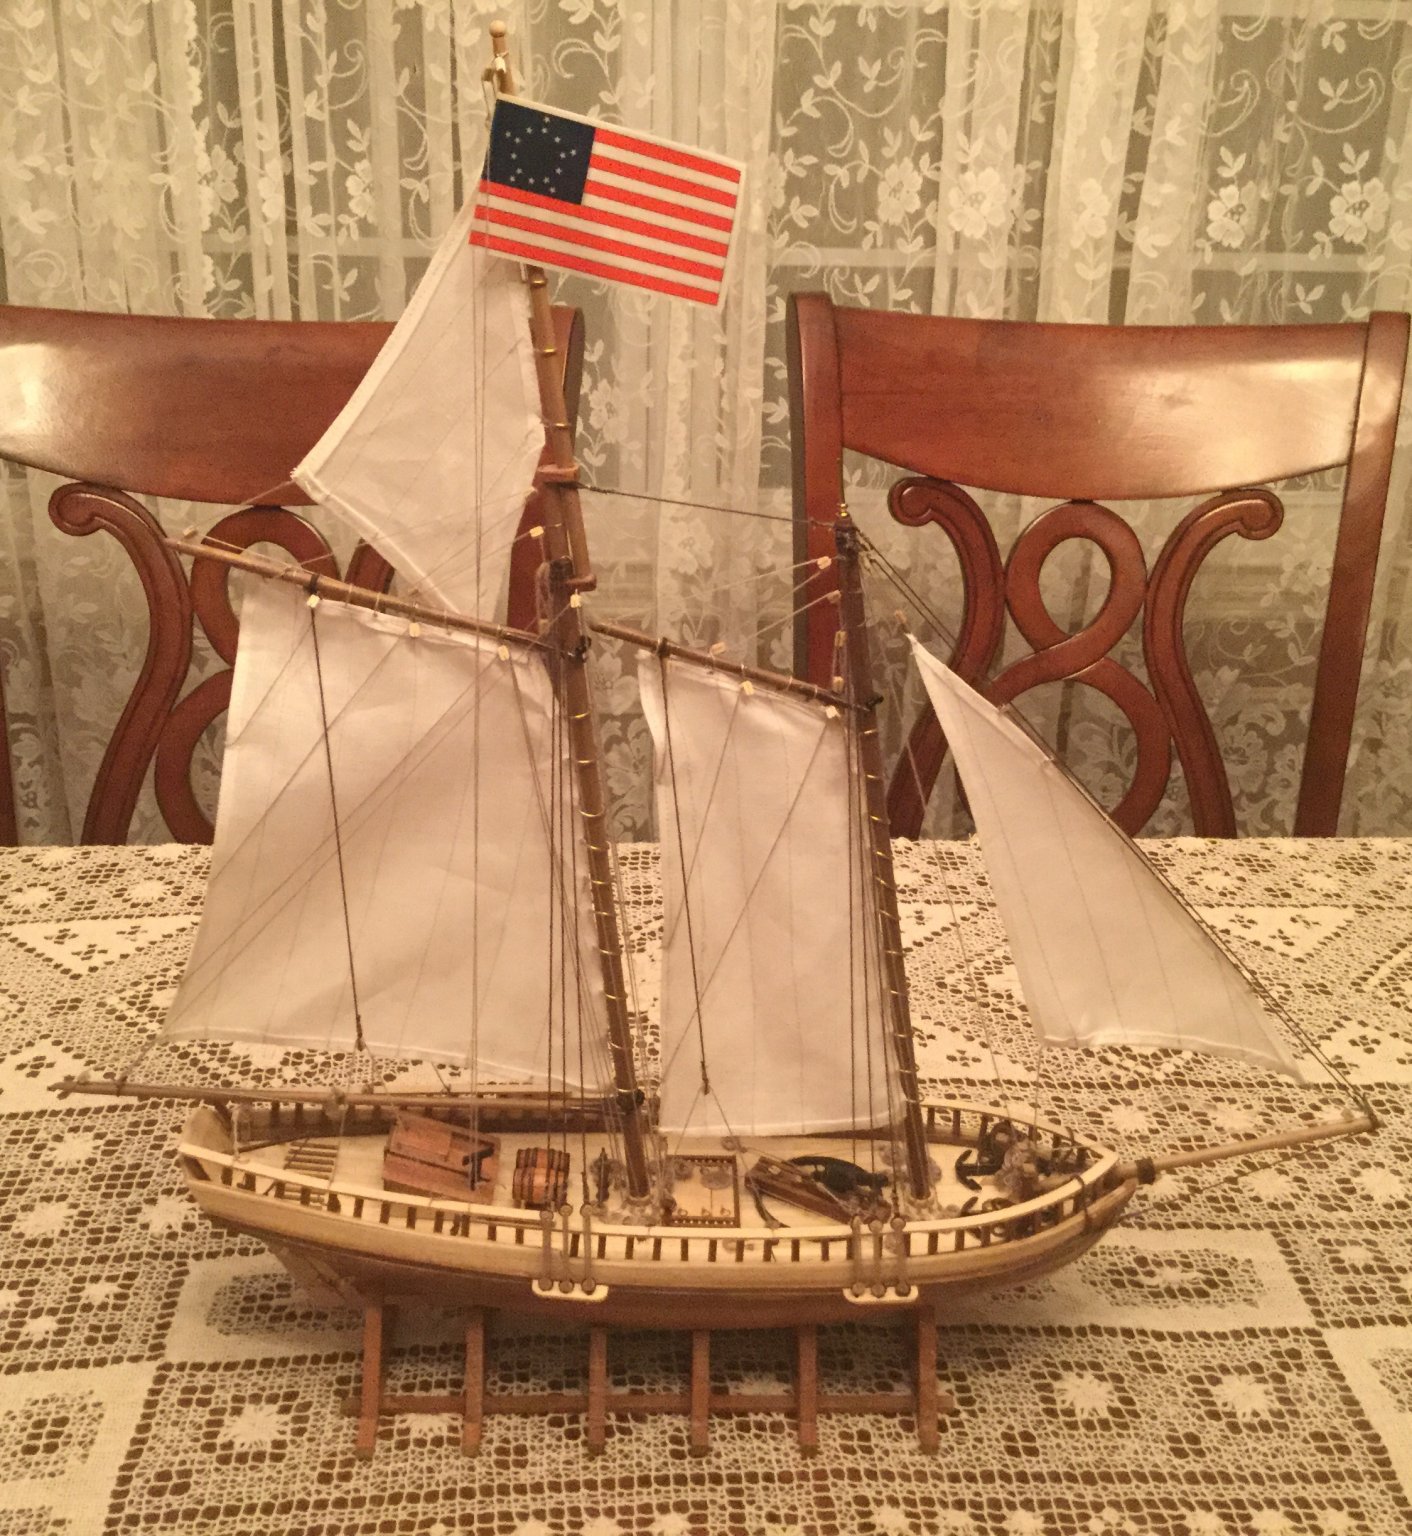
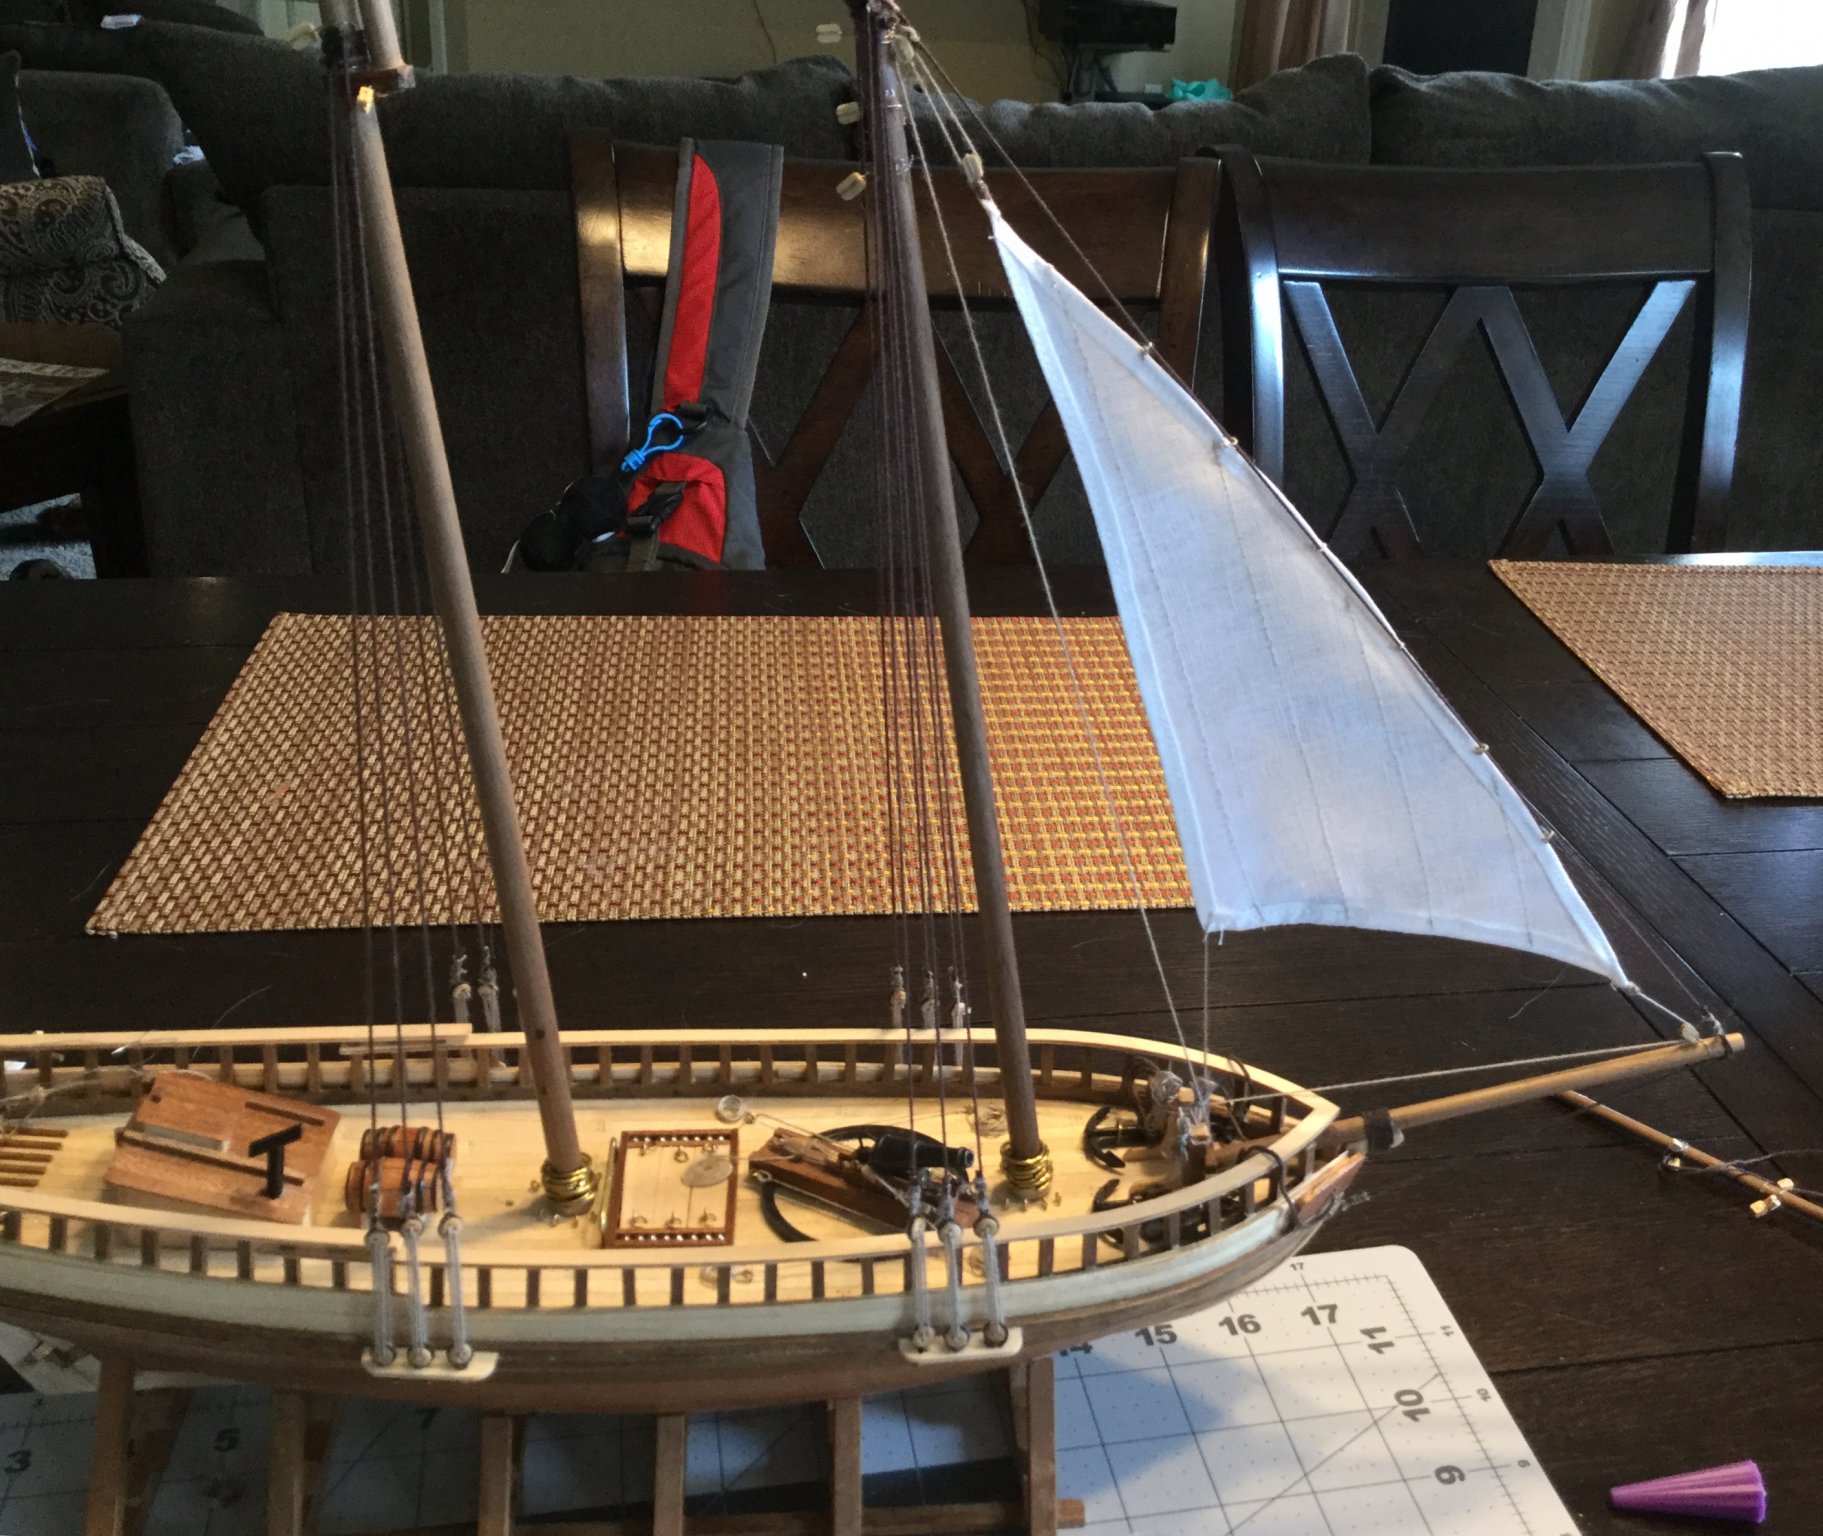
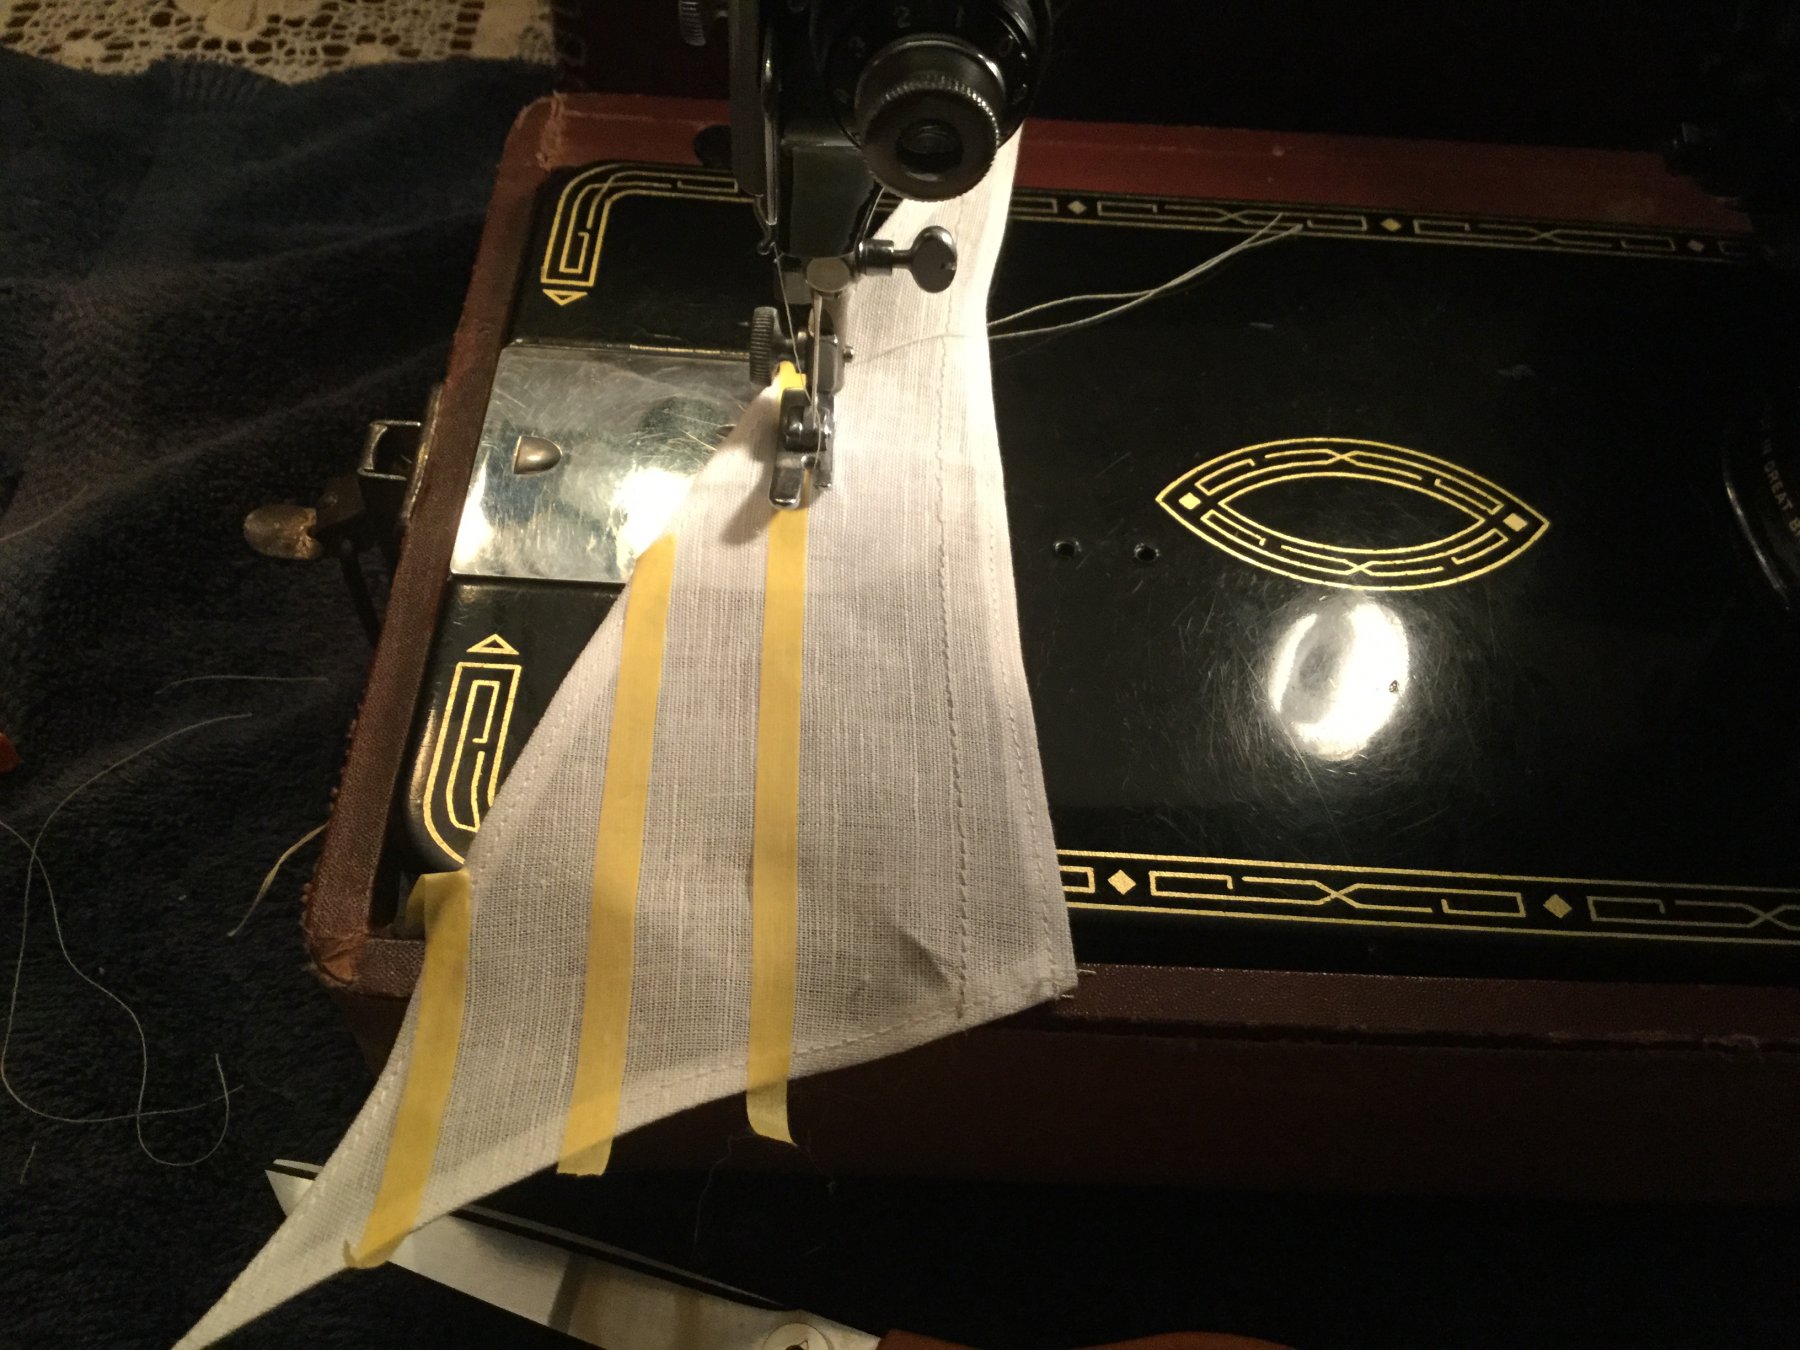
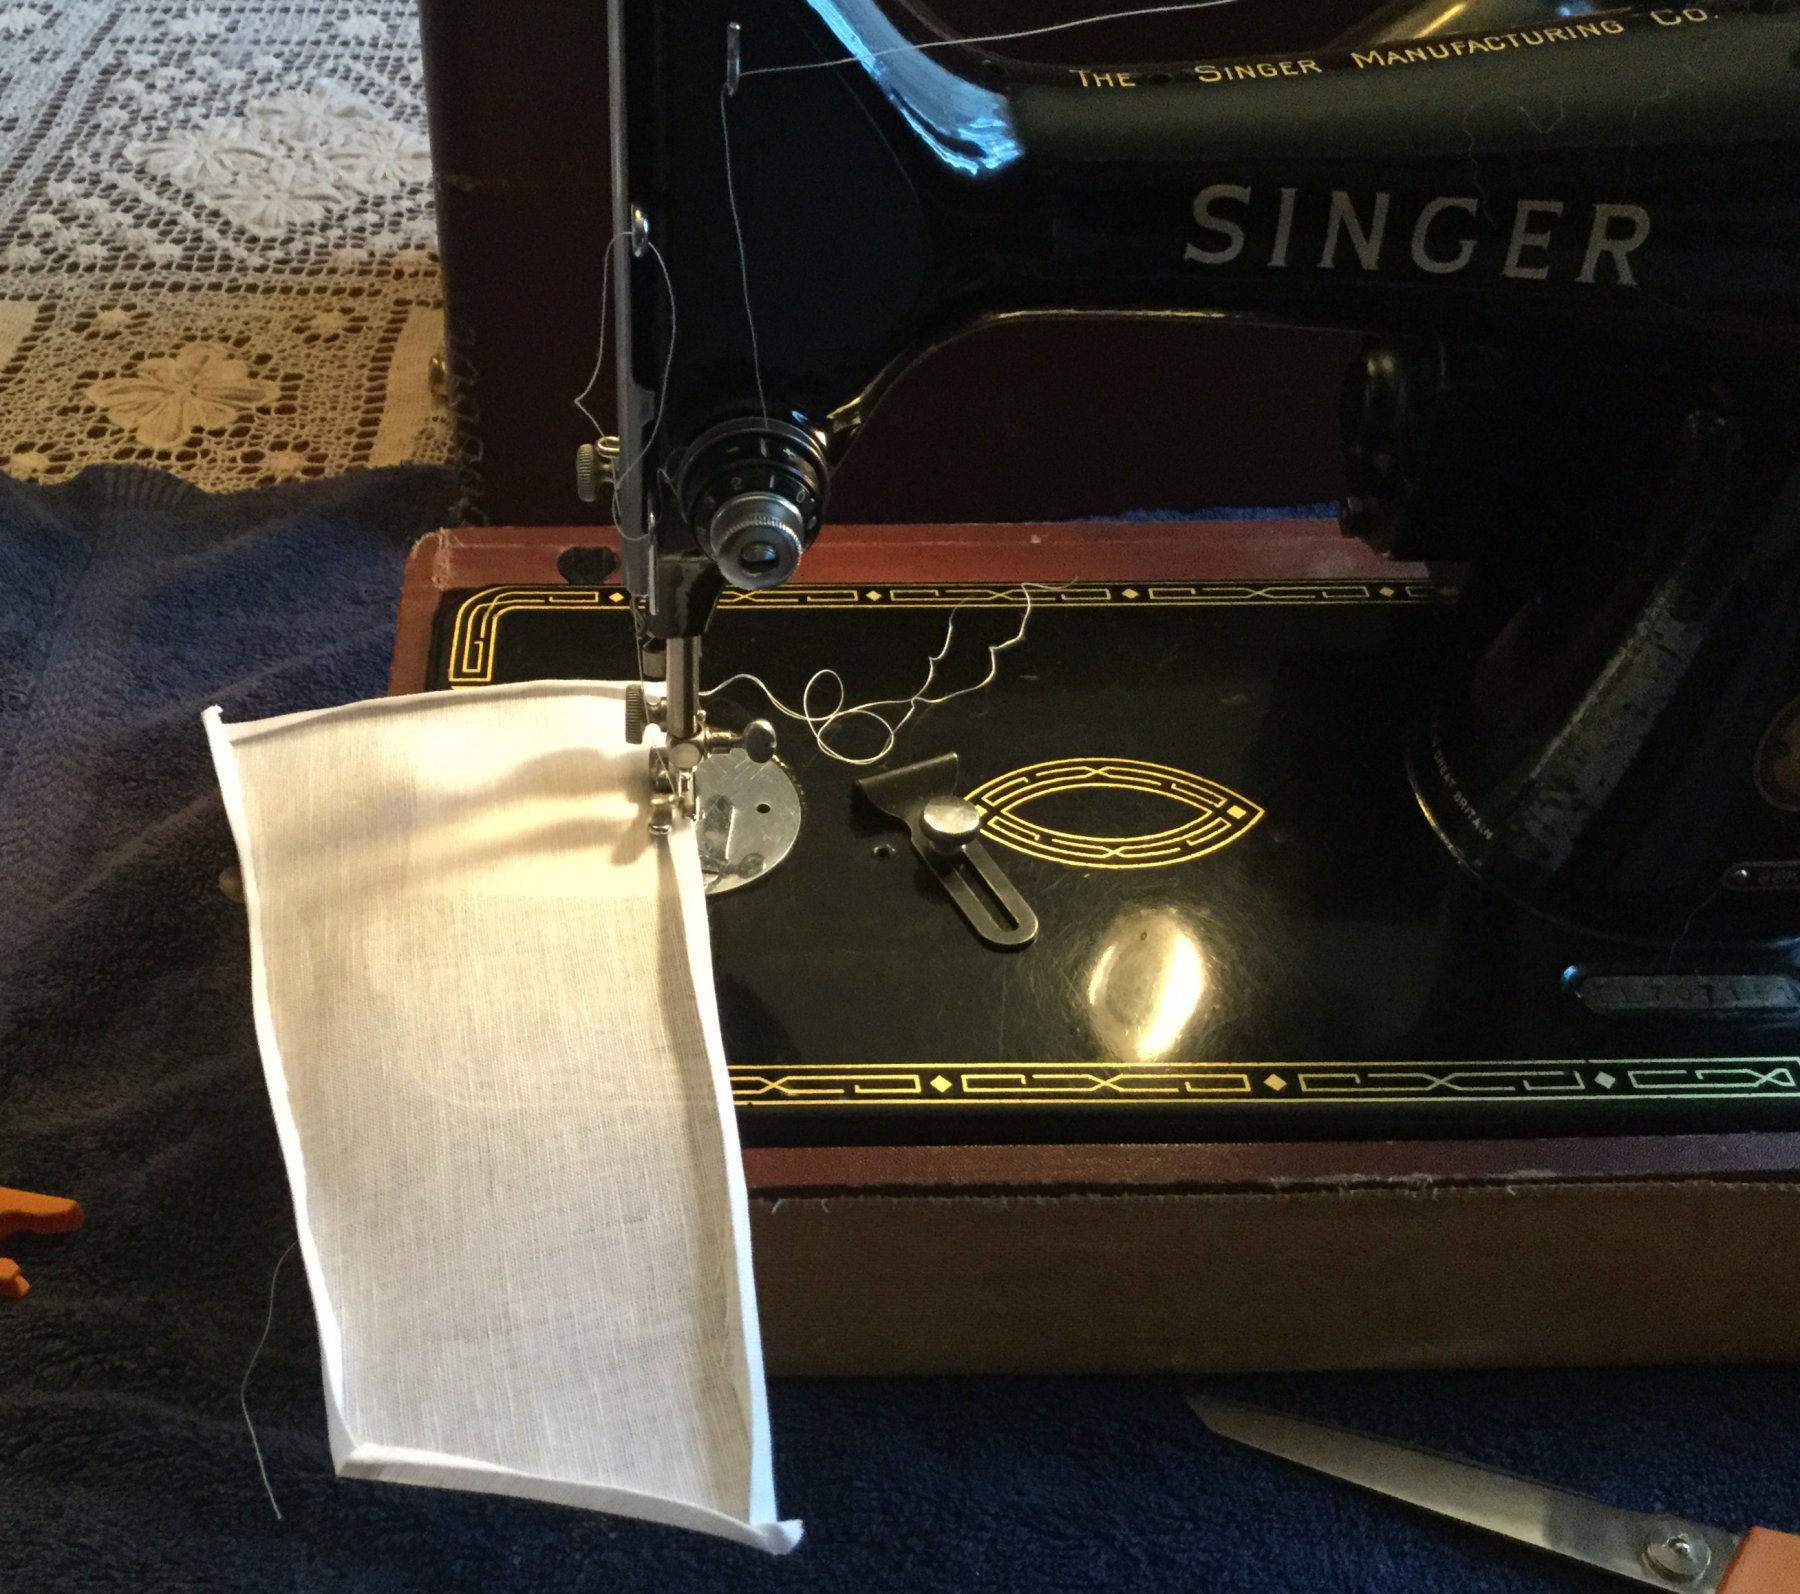
I made my sails this evening. I had the material - a fine linen remnant - from a few months ago when I first started thinking about making my own sails. I used masking tape to mark the seam lines the same way that Sardonicmeow did it. I picked thread that I thought would show up, but it blends in pretty well with the fabric.

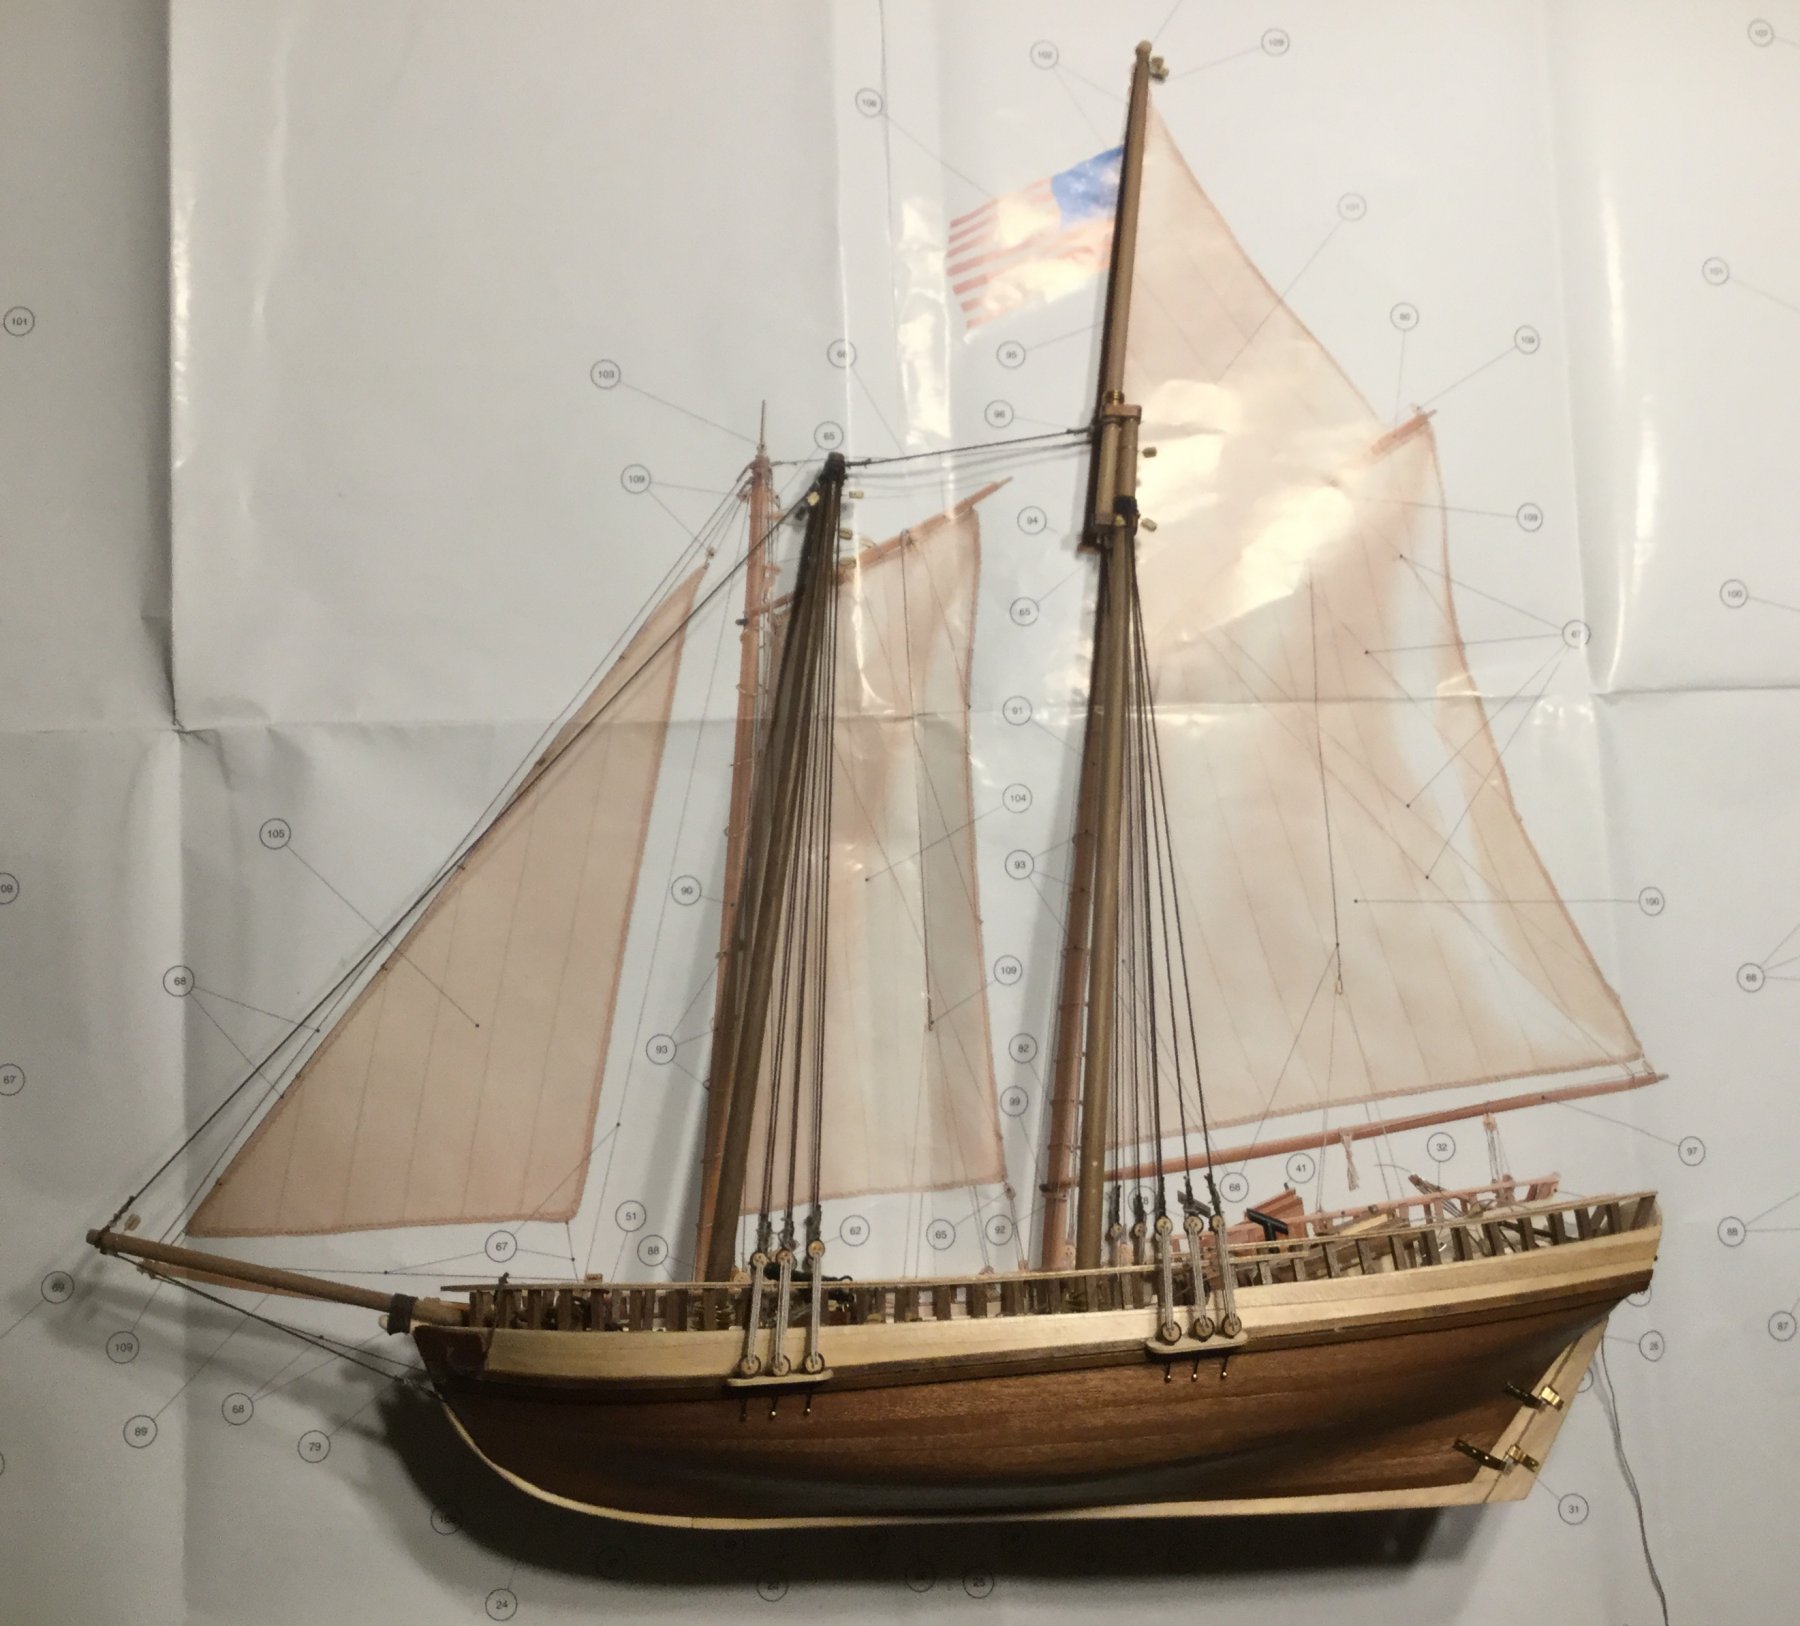
Here are my sails with the factory sails.
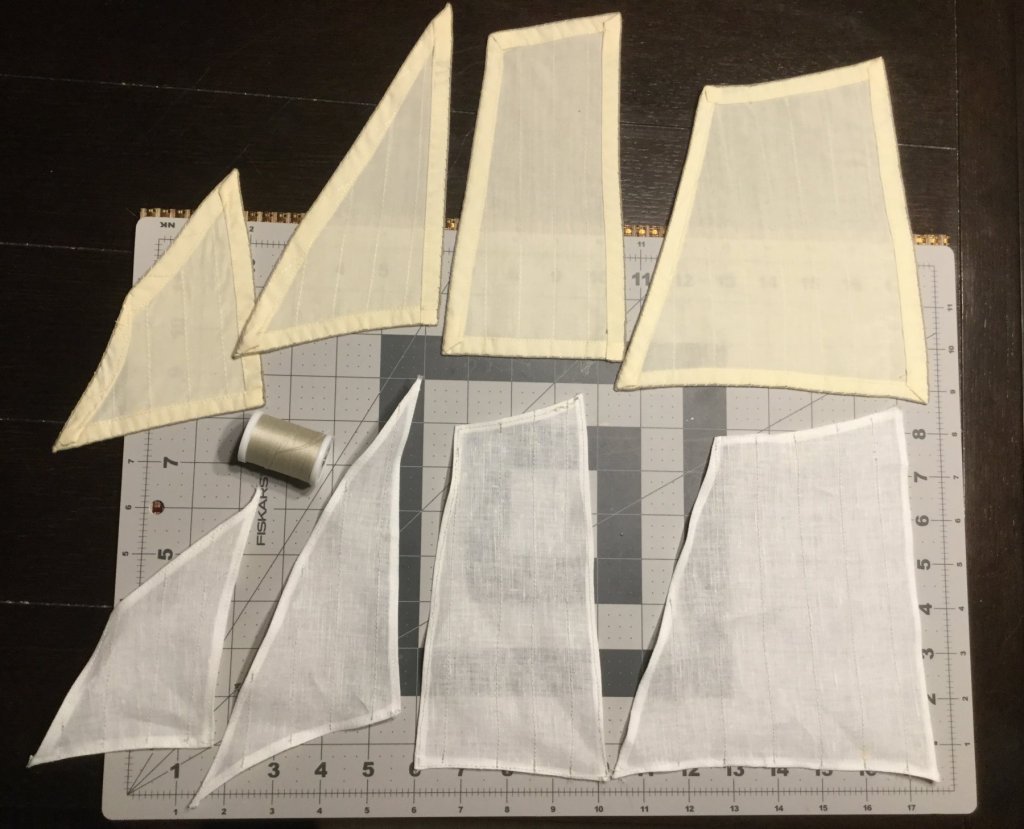
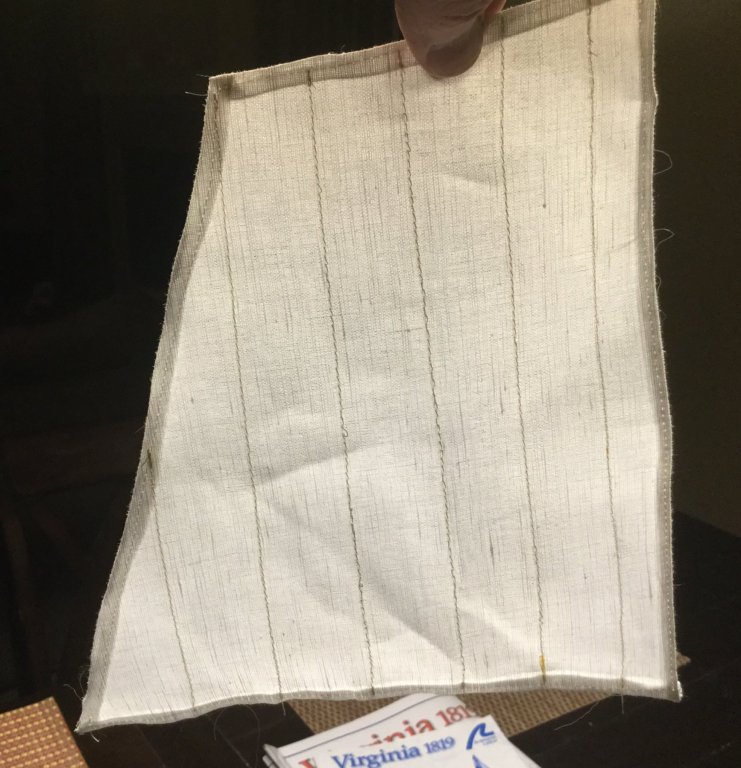
The seams show up pretty well with any amount of backlighting.
Here is the rake issue I described earlier. I think this is an error in the kit, but it's pretty minor. I will shorten the gaff to avoid interference with the main mast.
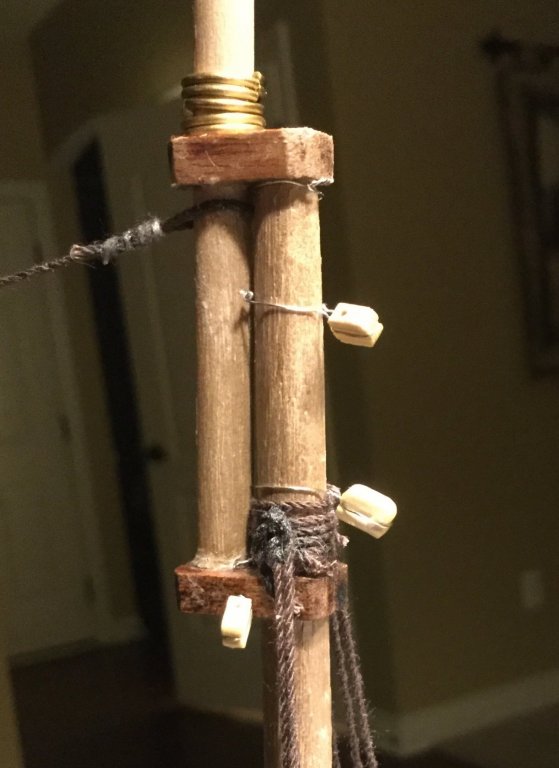
As Peter recommended, I have moved the double-block to above the shroud lines
Peter, Paul, and Mark: Thank you very much for your feedback today.

- nikbud, EricWilliamMarshall, J11 and 1 other
-
4
-
8 hours ago, SardonicMeow said:
Sorry, but I'm not sure what "loops" you mean. Are you asking how the sails are attached to the gaffs?


HMS Winchelsea 1764 by Matt D 1:48
in Member Build logs for the HMS Winchelsea
Posted
Thank you guys for all the nice words of encouragement. And thanks for the likes. I’m leaping right back to work on Winnie frame V2.0. Luckily, I had enough Baltic Birch 5 ply to make the bulkhead former and I have plywood for the bulkheads as well. So I’m taking advantage of the fact that the admiral is at work today and I’m at home.