

Edwardkenway
-
Posts
3,011 -
Joined
-
Last visited
Content Type
Profiles
Forums
Gallery
Events
Posts posted by Edwardkenway
-
-
 , welcome to MSW
- AJohnson, mtaylor, Keith Black and 1 other
-
 4
4
-
-
Very nice!!! Beautiful model again Chris.
-
Those stencils look amazing!
I agree with Ken, so much better than waterslide decals
-
-
-
-
They have a 1/32 mask for this camo

she's looking smart Chris
-
Rob, welcome to MSW
- Keith Black and mtaylor
-
2
-
8 hours ago, realworkingsailor said:
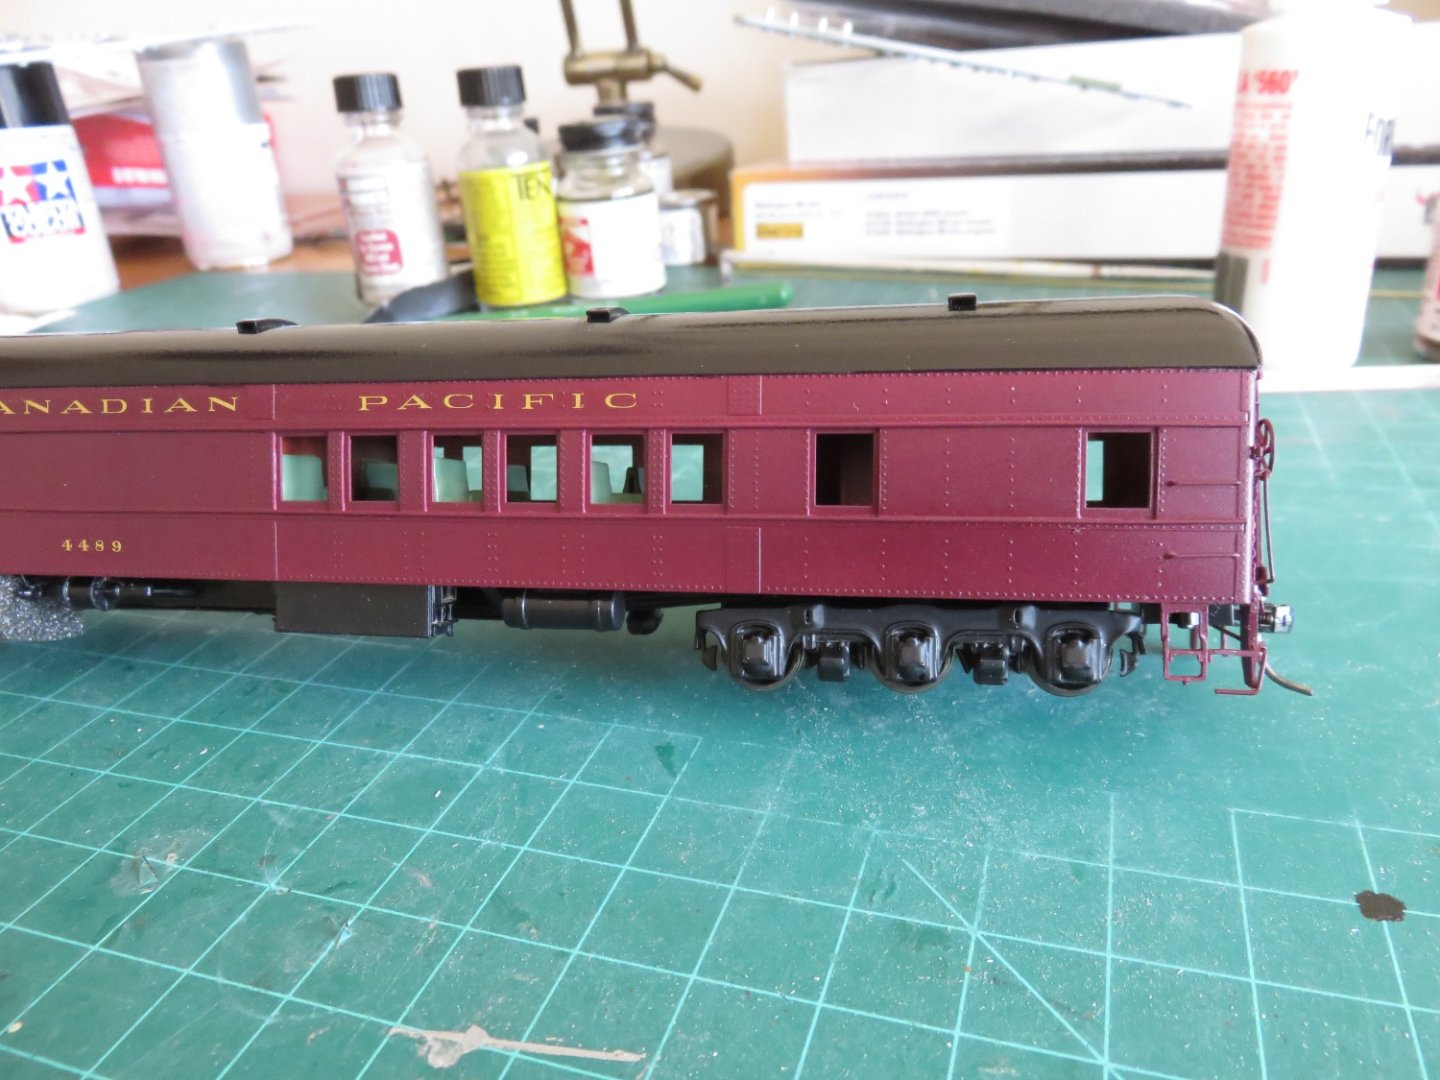
I am far from being an expert, and it's been a few years, but I do have some experience airbrushing with acrylic. I agree that acrylics are not the easiest to spray, you have to really know your equipment, and what adjustments can be made to achieve a desired result (different sized needles, air pressures, those sorts of things). I can begin to make suggestions as every airbrush is different in construction and adjustment, so it's something that each person should become familiar with on their own.
Not to go on a rant or anything, but I've seen what I consider to be misleading information/advice floating around MSW regarding acrylics and thinners. I've seen people swear up and down that acrylics can be thinned down with water with no problems. This is not a good approach for airbrushing. Most hobby acrylics that I've painted with use some form of glycol ethers or isobutanol as their solvents. These are types of alcohol that evaporate readily in air (which is why hobby acrylics cure quickly), and because alcohol and water do mix, after a fashion, it's given rise to the myth that acrylics are "water based". Thinning acrylics down to a consistency suitable for airbrushing using water will break down the paint matrix. Acrylic binders do not dissolve in water (otherwise you could clean up dried acrylic paint with it), and by diluting the alcohol, the curing process begins (which leads to gummed up airbrushes). The trick with airbrushing is to use a compatible thinner that will forestall this curing process as long as possible. I've used thinners made specifically for the paint I was using, or, for a cheaper alternative, window cleaner, such as Windex. I've never had any issues with the blue tint of Windex affecting the paint colour, even white.
I think it's safe to say, with a properly adjusted airbrush and correctly thinned paint, airbrushing with acrylics can be relatively hassle free.
For what its worth, I painted the tuscan red on this brass model railway car with acrylics (thinned with Windex) using a Grex GenisisXT airbrush (the primer was rattle can Tamiya):
Andy
For years of figure painting with Citadel acrylic paints, albeit only with brushes, I must admit I only ever thinned the paint down with water. I know better now.
1 hour ago, Bob Cleek said:Excellent post! Full of good information. Today's "coatings" are far more technical than plain old paint.
Total agreement!
-
Is the Mig ammo primer their One Shot stuff?
I'm sure OC would know a good make of primer, he seems to get excellent results on his Waterloo figures.
Very nice job on the recesses 👍
-
-
and welcome to MSW
- mtaylor and Keith Black
-
2
-
A couple hours last night, and experimenting with darkening the panel lines, not having as specifically made paint for it, I've tried a Games Workshop/Citadel armour wash on the rear wings

It looked OK, so did it on starboard main wing,

Not so good, I'll try citadel black ink.
Also I dry fitted everything in the fuselage, the fit of the parts is really good, no gaps to fill.
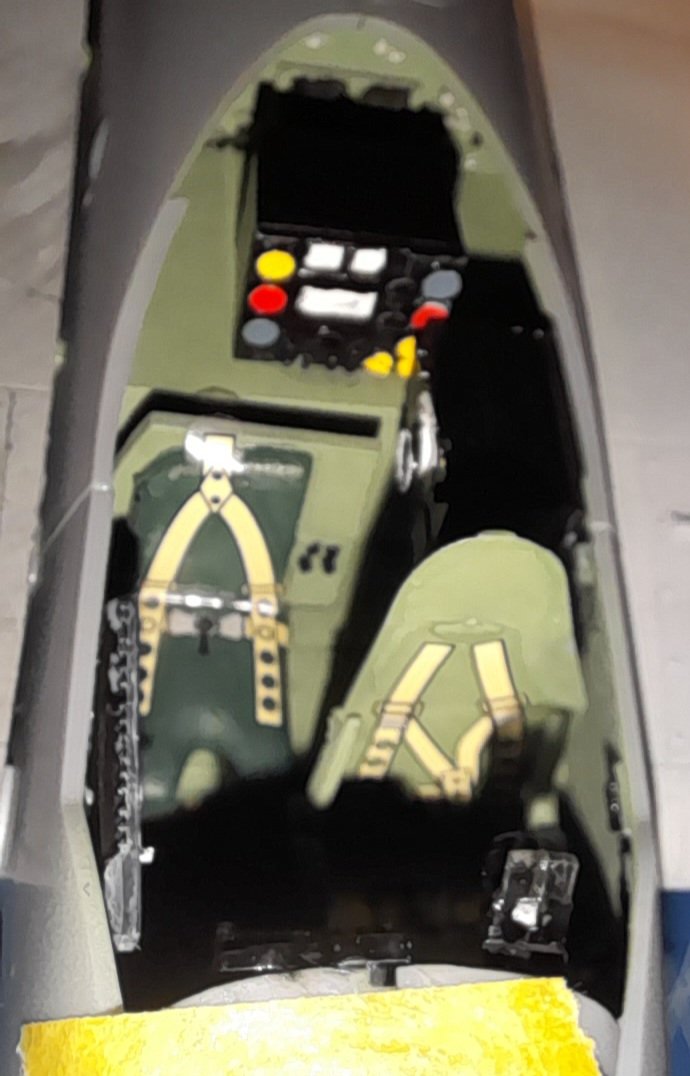
The seat belts are decals, not sure if I like them that much.
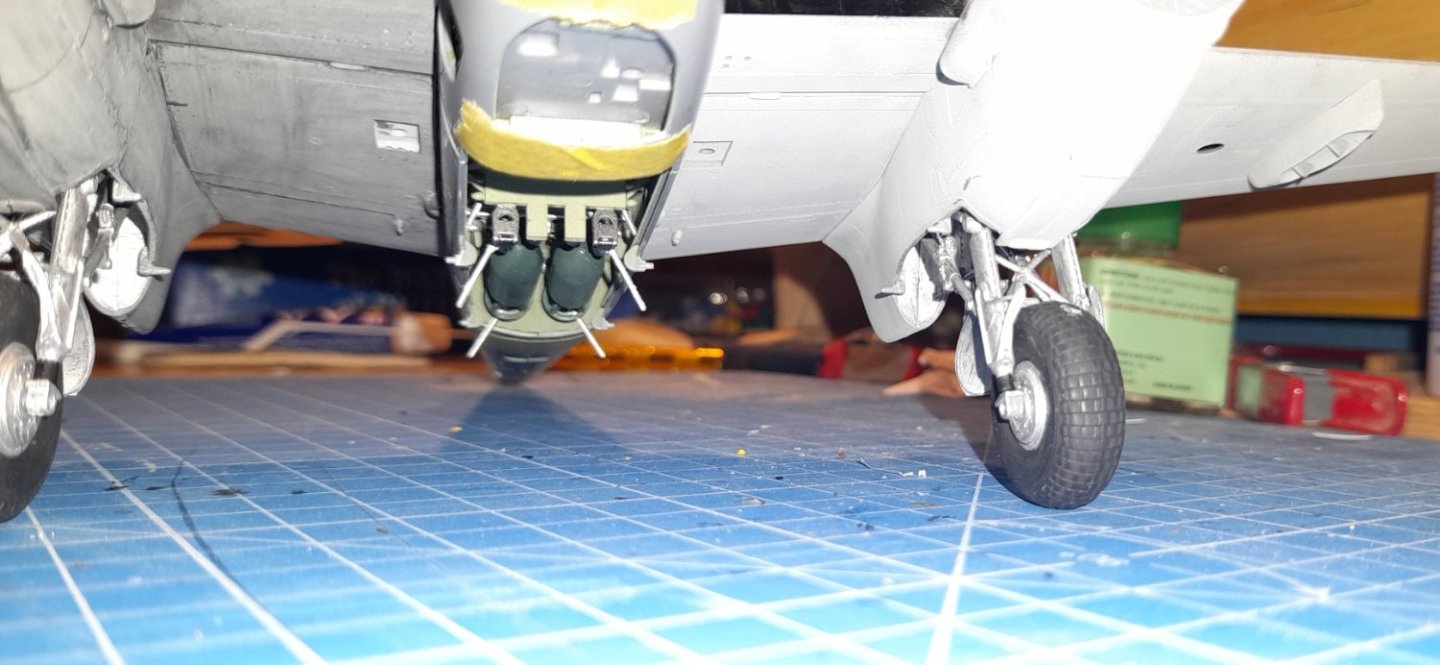 bomb bay minus the doors, they'll go on after painting is done.
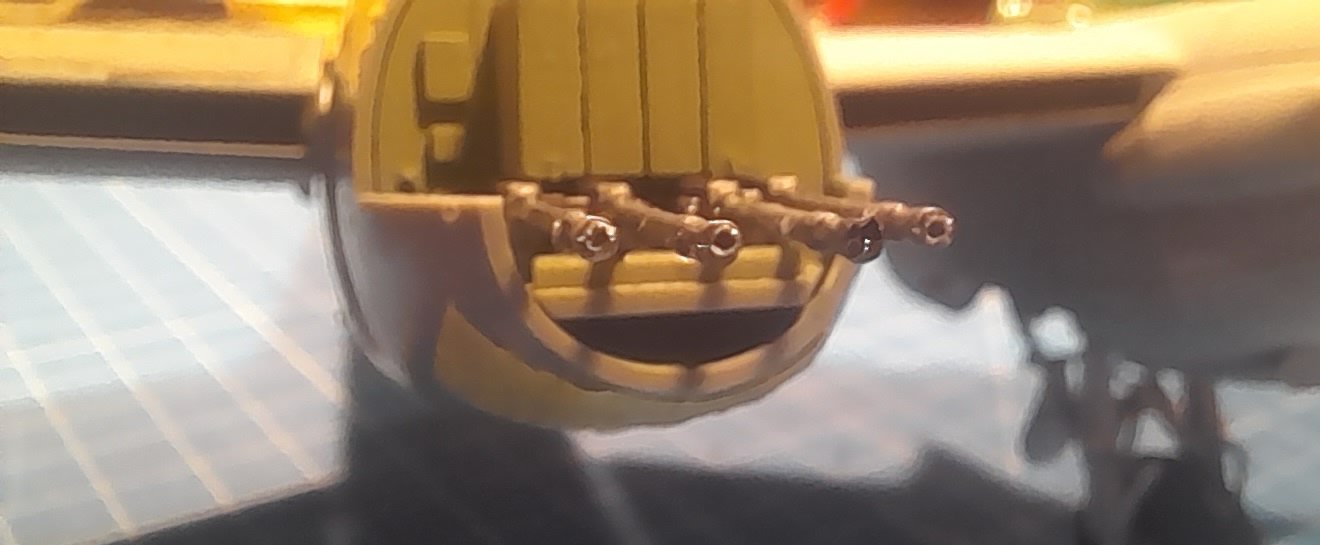
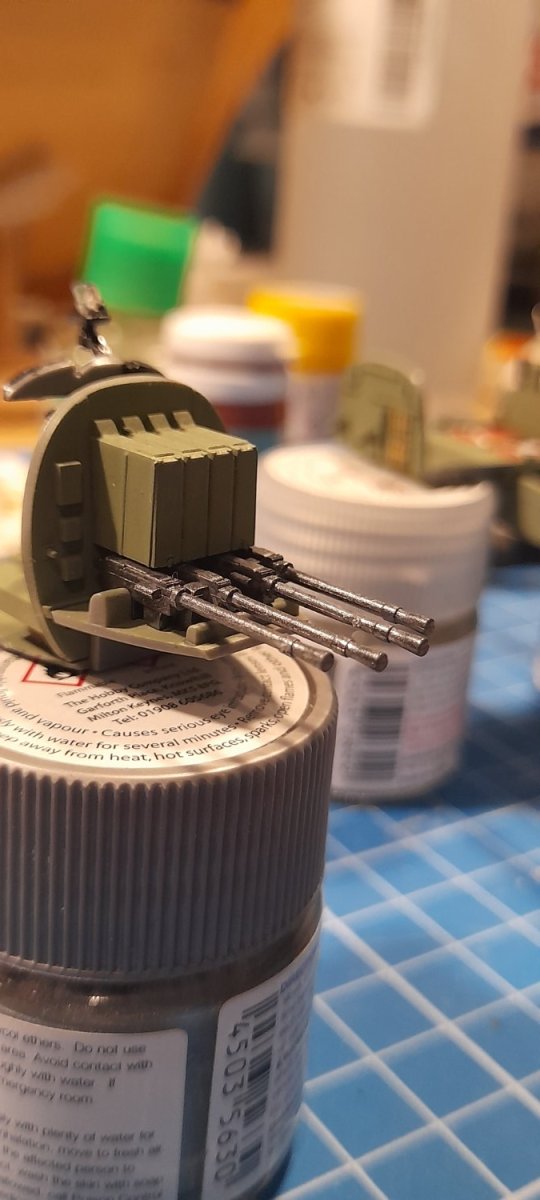
I had a go drilling as @yvesvidal suggested, three barrels wents ok, one barrel the drill bit went awry, my fault for not being careful.
Thanks for the likes and comments, all is appreciated.
Cheers
-
2 minutes ago, yvesvidal said:
Fantastic job. I would try to drill a little bit, these canons for realism.....It is difficult to say, from the picture.
Yves
I'll give it a go, thanks for the tip!
-
-
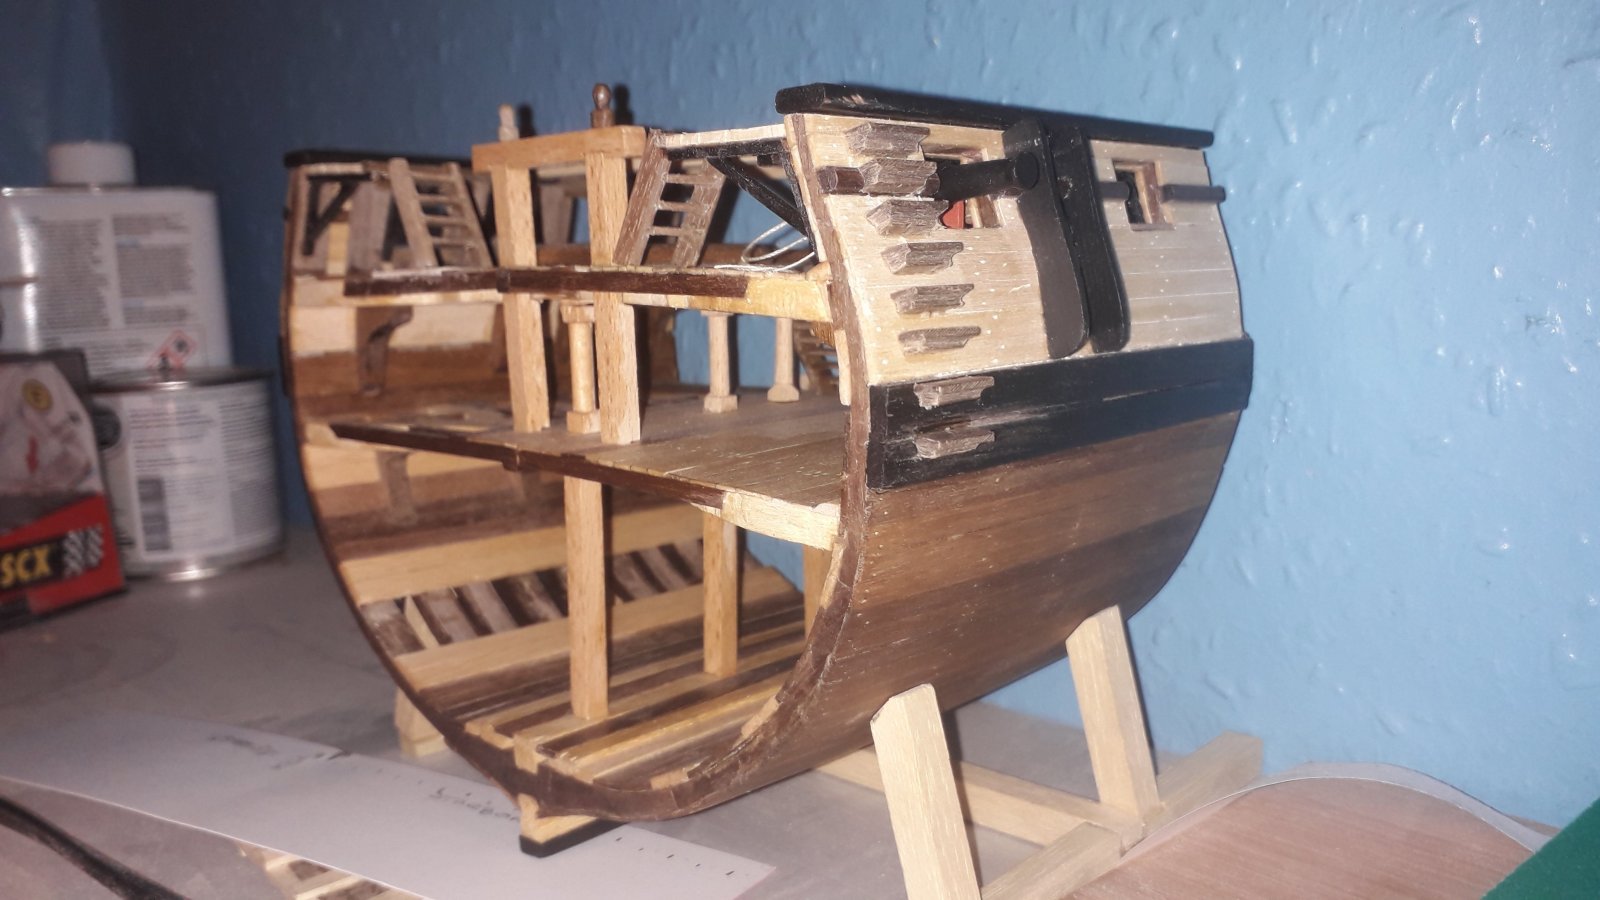
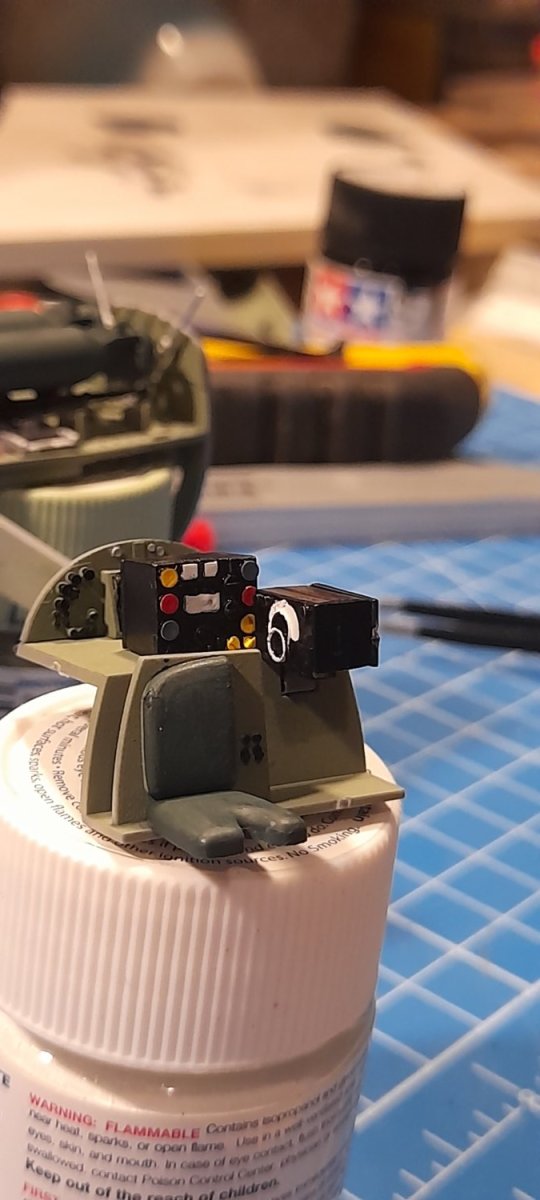
I've been working on the cockpit and bomb bay
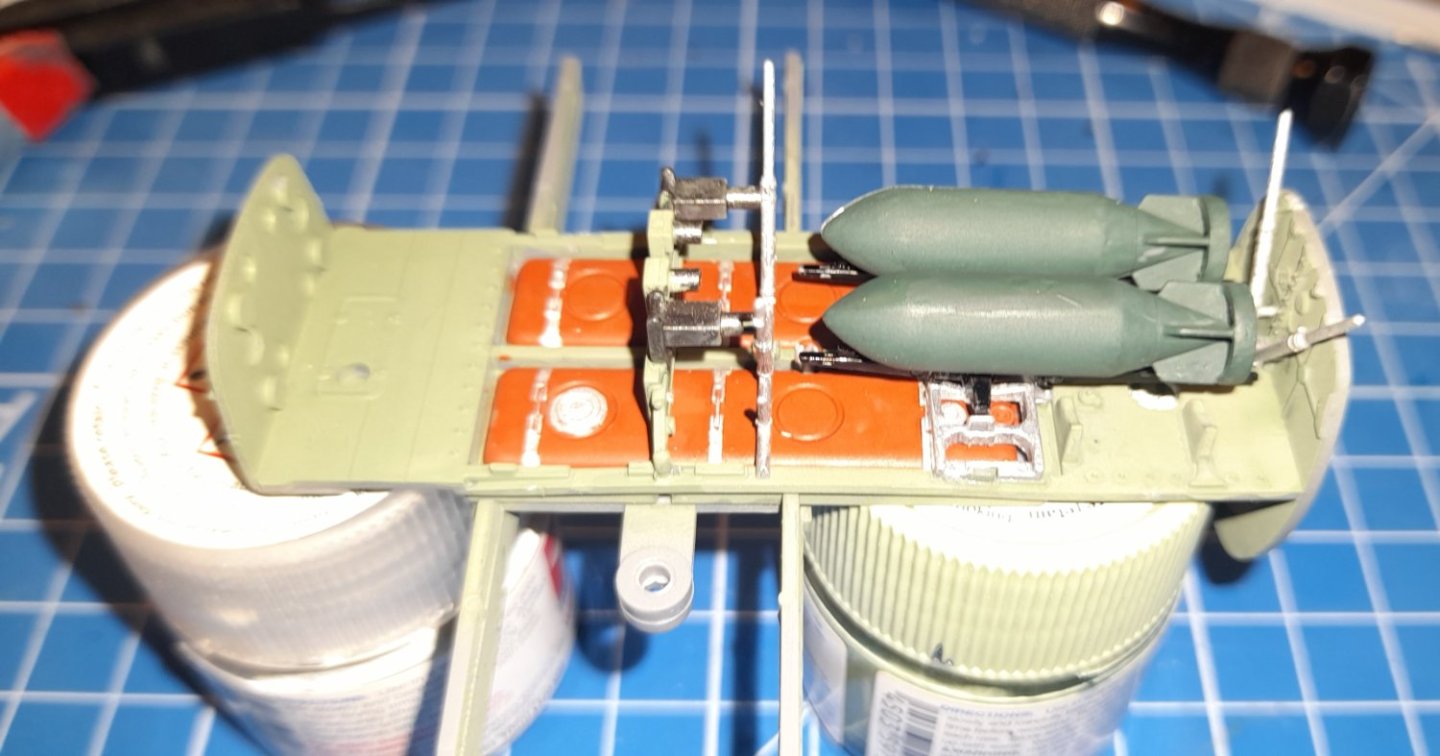
with the aircraft option I've chosen the bomb bay doors will be open

the nose cannon

and the control panel
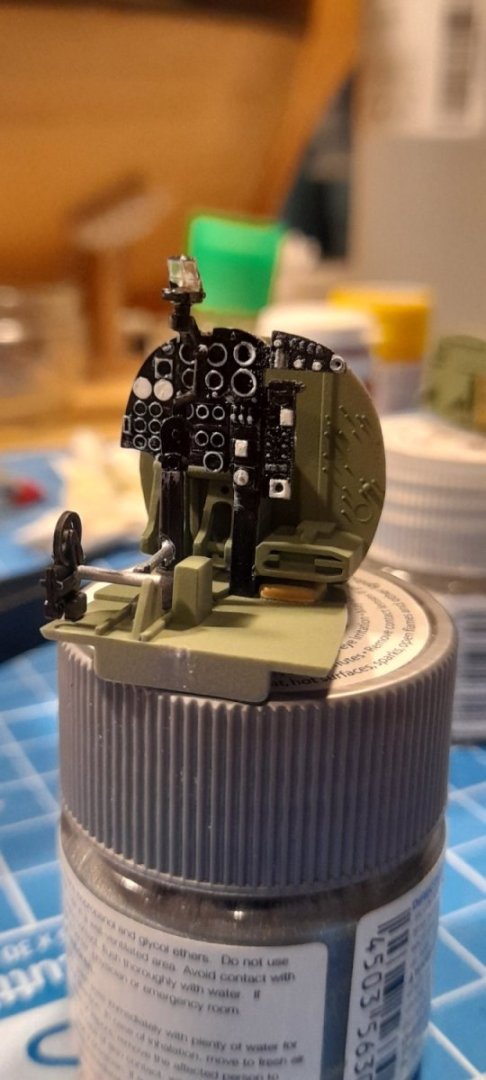
there is a decal supplied for the cp dials but it is slightly too large, so I binned it and drybrushed white over the raised details.
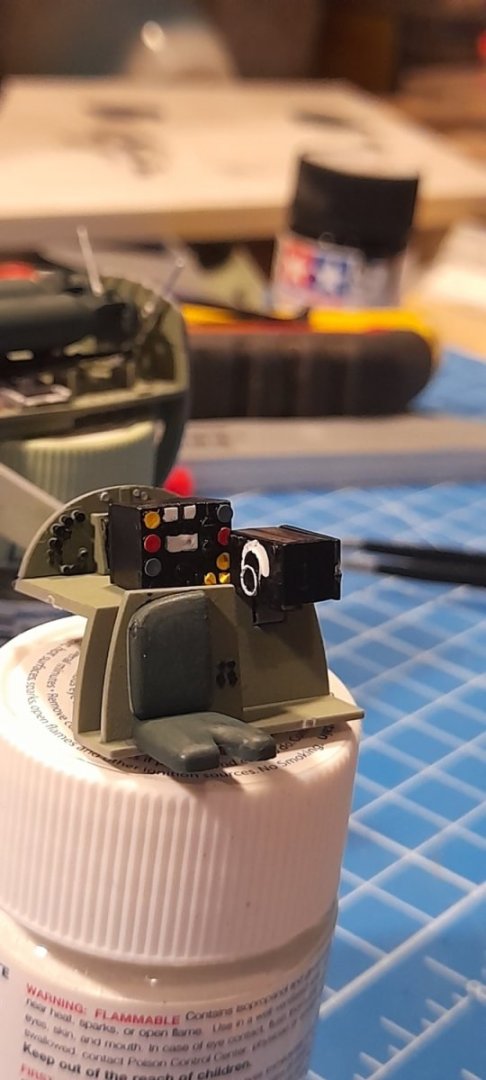 the radio room!!
Thanks for all the comments, advice and general interest. Also for hitting the like button.
Cheers
-
When I first started work, the bricklayer I learnt from wore a suit and tie, under overalls.
He always looked dapper when going home.😉
- hollowneck, mbp521, Ian_Grant and 3 others
-
6
-
36 minutes ago, Egilman said:
No blame was cast here brother, just trying to educate, my apologies if it came across as something else...
No apologies required brother, I WAS careless and have learned from my mistake! Ain't that the way we all learn.
These logs wouldn't be half as interesting without the admission of errors, the conversations on what and how it went wrong and how it's put right, with the advice received and diligently (although not always😊) used.
In hindsight, text didn't convey my humorous aside very well🤷♂️.
- Jack12477, Old Collingwood, mtaylor and 5 others
-
8
-
4 hours ago, Egilman said:
Decal silvering is caused by incorrect or careless application, period...
Careless application! That sounds like just what I was doing😔. I'll consider myself reprimanded🥺🤭😊😉
Thanks for all the information gentlemen .
- Old Collingwood, Egilman, mtaylor and 5 others
-
8
-
This is the stuff I've got coming with the paint
I'll have a look for that stuff though.
-
Well done to Miss CDW on graduation, and a big up for doing it debt free😉
- popeye the sailor, CDW, thibaultron and 7 others
-
9
-
 1
1
-
Welcome Jack, the show's only just started.
-
8 minutes ago, Old Collingwood said:
Im here also Edward, as you know I built the 1/48 Revell kit both a quite similar in different ways, looking forward to this.
OC.
Welcome to the show OC.
Yes I recall your mossie build. I've got a extremely high standard to match yours!!😊. Hopefully I'll do it justice.


Smokey & the Bandit Kenworth Rig by Egilman - AMT - 1/25th scale - East Bound & Down
in Non-ship/categorised builds
Posted
That's always the way of things, the next kit takes over, and then the next😊😇😉
Don't worry EG we'll wait😁