


cog
-
Posts
8,764 -
Joined
Content Type
Profiles
Forums
Gallery
Events
Everything posted by cog
-
 Well, you have really delivered on this one. She turned out spiffy and very crisp looking. I have thoroughly enjoyed the ride. Very well done! Mayby you should finish the flybridge railing after all ... she does look a bit .. naked
 -
I use both curved and straight blades on both hradwood and glazed wall tile. Presently I use the hardwood a lot. I recently got a piece of scrap black perspex, which I will try on my current build - not a ship.
- 179 replies
-
- 9
-

-
- hatsuzakura
- pit road
- (and 2 more)
-
Nice ittle ship, good for a first build indeed, especially if you have little time. So far your workspace looks spic and span .. wonder how long that will take to change ;) Have fun building, Mark
-
Then I hope you will be able to find the spot on the ship where you have to put it, hope those are dry decals too, don't want to loose one in the tub
-
Probably because people tend to forget the dangers, or simply are forgetting danger lurks in every corner of a warship. Is that only British man of War? Nice decals though, texts look Russian to me
-
Thanks Mike. The Germans had few more such designs. I've found a few kits i.e. the Ho 229 (Hoorden) and another Messerschmit: ME - 329 (a flying saucer) To be built sometime in the future
-
Thanks gents, "likes" and comments much appreciated. It was a fun project, even if it took me quite a while ... probably due to the COVID-blues Time to get the Ferrari 330 P4 back on the table. The kit will also be slightly bashed, it gets an open engine bay, and an engine I bought through ebay. I got another engine through Modelbuilders Ware House which is by far more detailed and looks the part (for the second kit I've got)
-
Thanks gents, much appreciated! It seems I managed to create a flying German Gemini
-
Another lovely model. Dan. I do like the way your sea turned out too.
- 33 replies
-
- 2
-
-
- James B Colgate
- whaleback
- (and 2 more)
-
Thanks OC, there are still some kits to finish ... but this brought back some fun in building
-
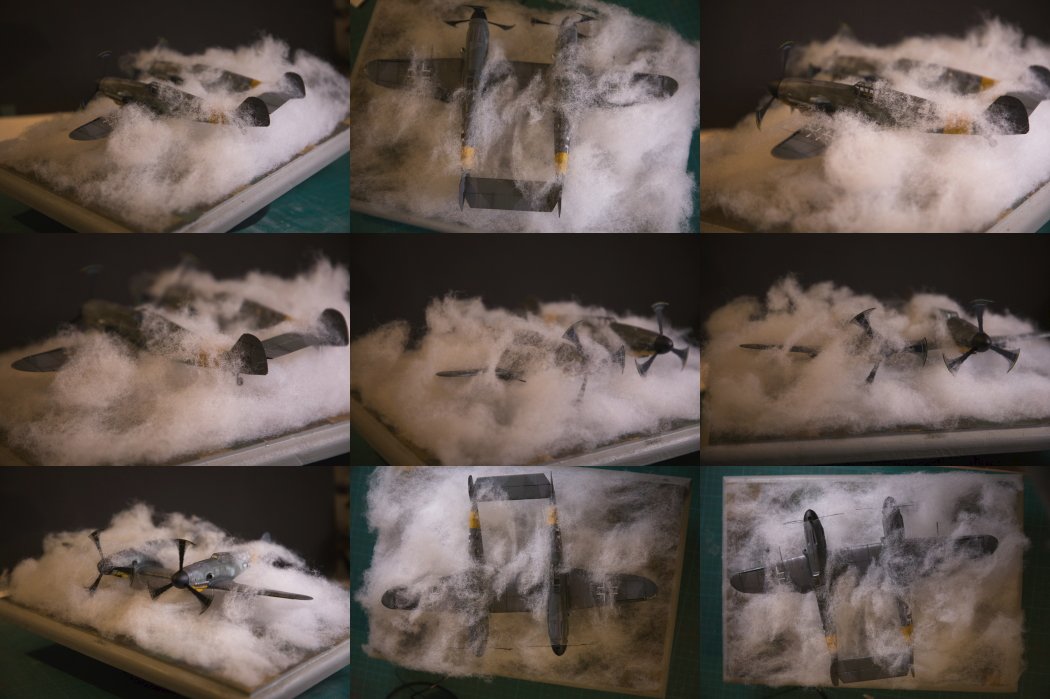
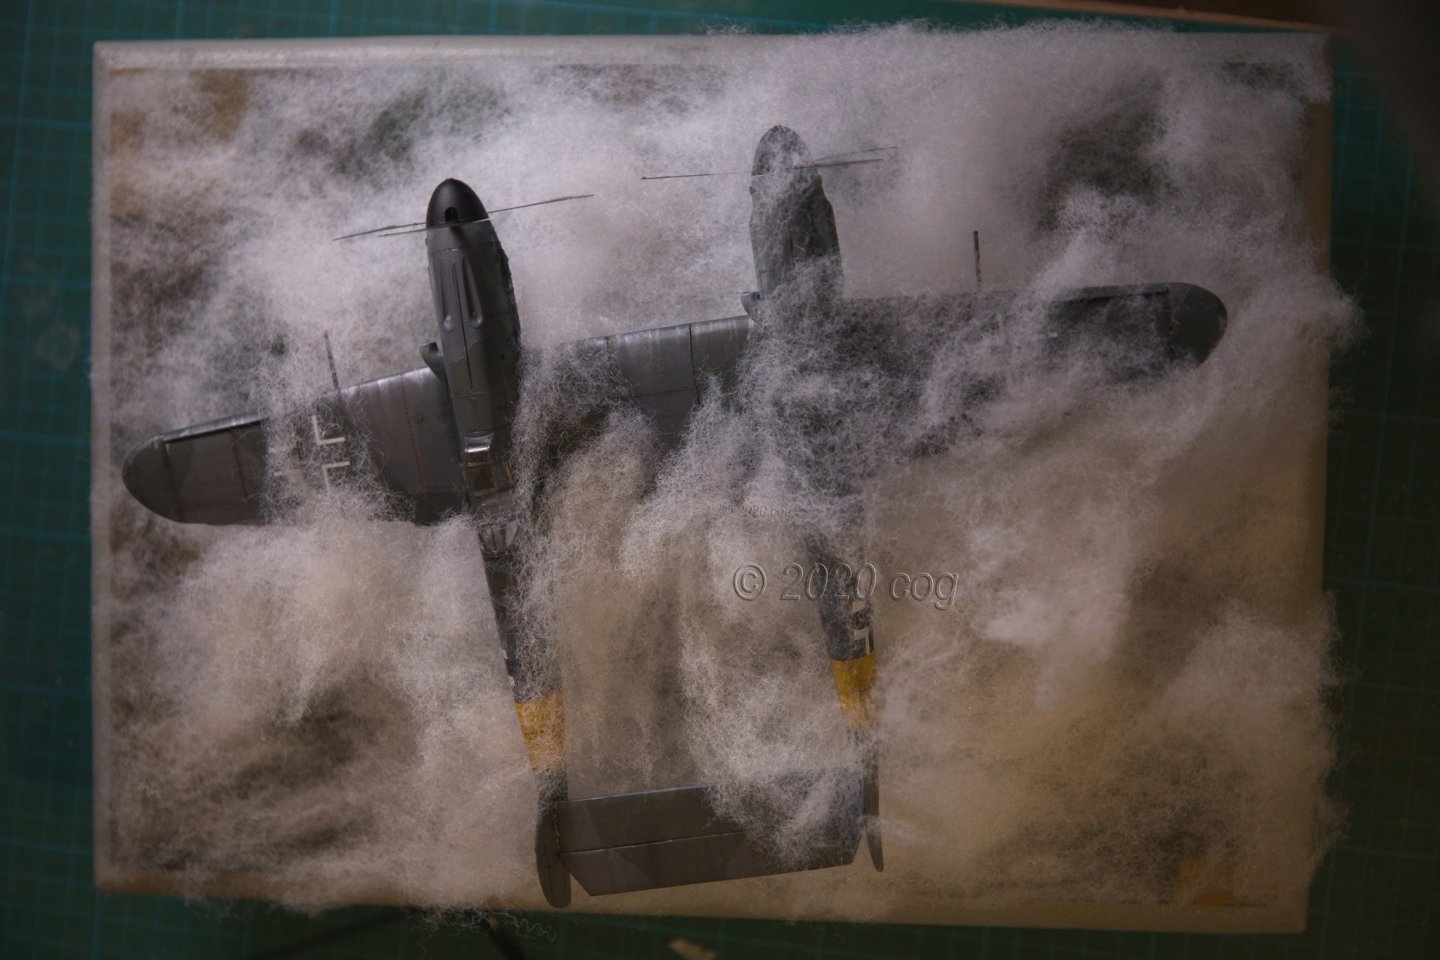
Last but not least, the display. Since I wanted something flying, I started looking for moving props, which I found State side. Propblur, but to make it look like the plane is actually flying I couldn't let it be just slightly above ground, and I thought about it flying above, or through clouds. I experimented with coton, and I finaly decided for aquarium filter coton, and here is the result

- 16 replies
-
- 15
-
-
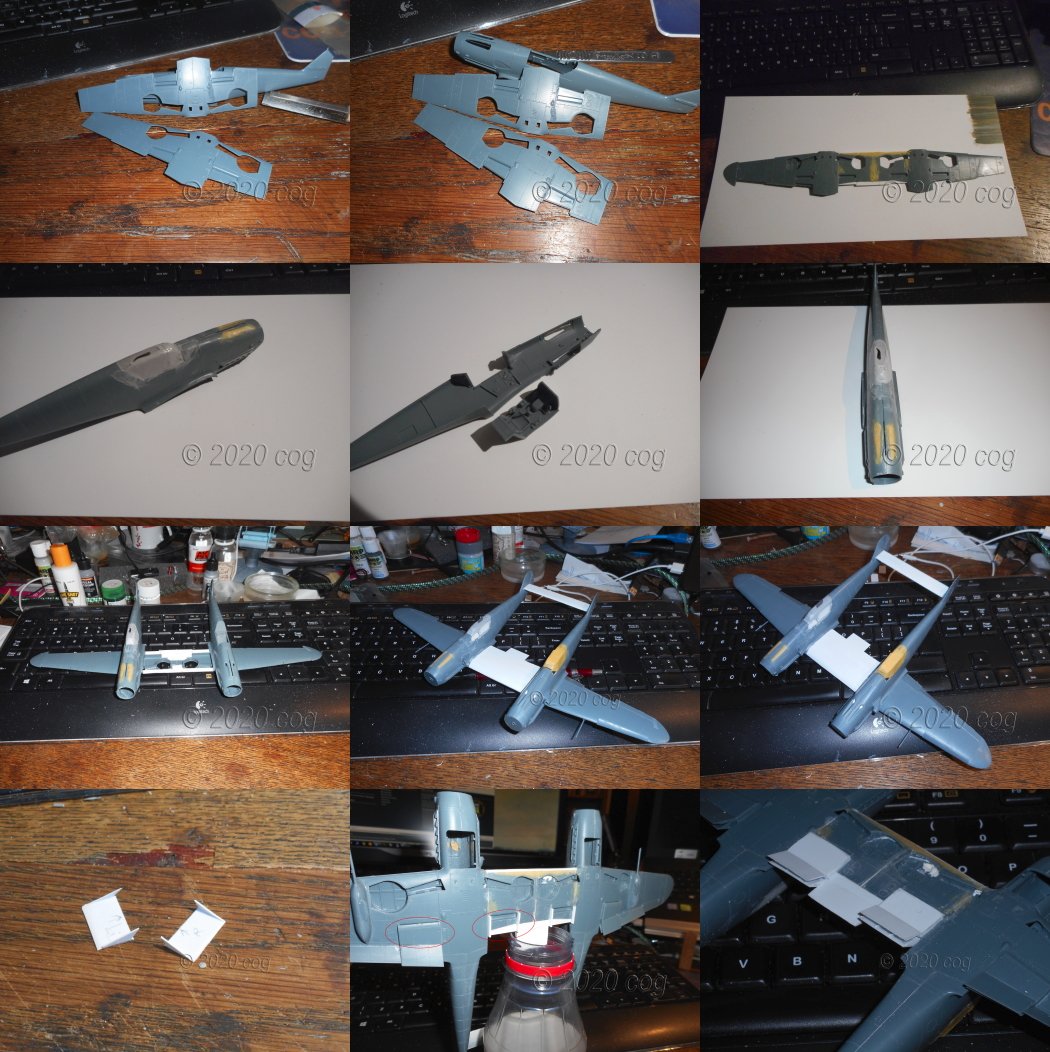
Next step: rattle cans ... First grey primer. more sanding and yet more primer. Since I wanted to do same shading and weathering, I used a previously applied method of black basing. Hence the black body colour - got that from an aussie builder on the Tube (not RGL ) Next step painting the panels with an airbrush, a light colour to define the panels, and then layers of the final colour or camouflage. The weathering has been done with a brush (all AK paints/powders) Paint used: Grey primer: Tamiya (rattle can) Black primer: Vallejo (rattle can) Airbrush Mr Paint (need to get the colour numbers, memory isn't that good )

-
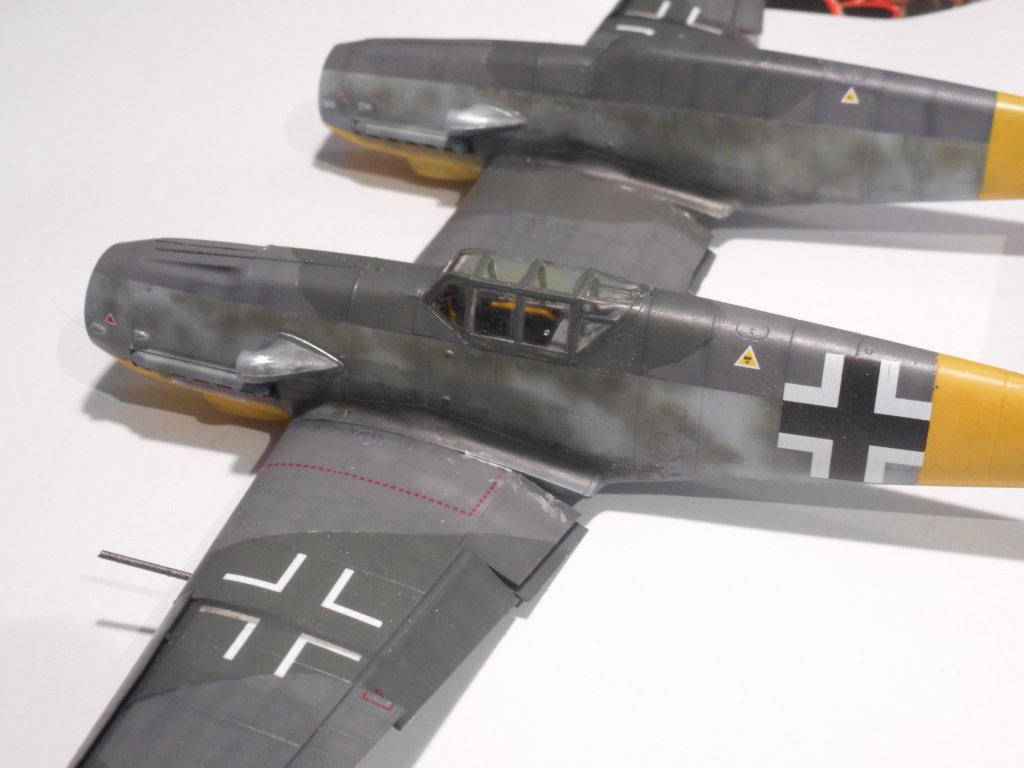
Very short build log, since I started this last year. I found information on the net for the Messerschmitt Bf 109Z (Zwilling) I partly used information of the ME 109Z (Zerstörer) and anything I could find on the net. Eduard has, besides their full kits, overtrees for certain models which are in fact stripped boxes. No PE, no decals, just the plastic parts. I used two of their BF 109G-2 (82116) overtree since I had to do a fair amount of kit bashing. I started to modify the centre wing by cutting a righ and left wing, one from each kit. Created the center bottom part making a very large wing. After that I build the body with the cockpit, with the standard plstic interior, and the new colsed fuselage for thge other side. After that, the difficulties started. I had to heat the under side of the centre wing to bend it and get both fuselages vertical, after that I could start with the top of the centre wing. I preshaped styrene, and filled the wing as much as possible to be able to glue the formed styrene to the lower wing between the two fuselages. After that ther was the rear wing which had to be scratch built. I used laminated styrene to get the right thickness and sanded that down to shape, after wich I used putty to smooth the scratches out. Once that was done I could start to paint. Here goes
-
Nice to see a liner between all the warships. Looking very good. Any PE detailup available for this one?
- 55 replies
-
- 4
-
-
- Blue Ridge Models
- Normandie
- (and 2 more)
-
US Brig Syren by Gahm - Model Shipways
cog replied to Gahm's topic in - Kit build logs for subjects built from 1801 - 1850
Another miniature side build, very well done. It's a real beauty -
The tool is as good as it's wielder ... lovely work Amalio
-
Marvelous work Kees. I especially like the weathered look of the fishbuns. Hard times we have to deal with and especially people like you in "care services" get the brunt of the work. Take care
-
The only advantage youhave at this scale is the numbe of parts. Where at 1/350 you might have some 16 - 20 individual parts, you have but 4. However, the size would drive me nuts! Well done, not to say, very well done
- 179 replies
-
- 8
-
-
- hatsuzakura
- pit road
- (and 2 more)
-
Hmmm, must be the air you breath through your face mask, not enough fesh air ... glad you could salvage that one. It is hard to fly with two right wings, so I'm told
-
That AA gun is a hughe improvement, just like Lou wrote
- 179 replies
-
- 8
-
-
- hatsuzakura
- pit road
- (and 2 more)
-
Nice build, but when I look at the scale and at the PE ... I know RGL is right!!! Good luck, don't break your magnifying glass
- 179 replies
-
- 8
-
-
- hatsuzakura
- pit road
- (and 2 more)
-
You can do a half hull display ... I didn't see the difference though ... either minimal difference or very well taken photographs
-
Very nice Håkan, very nifty building stand too. (IT ... yes I know, they can't leave us be enjoy our hobby somehow )


