Mirabell61
-
Posts
7,403 -
Joined
-
Last visited
Content Type
Profiles
Forums
Gallery
Events
Everything posted by Mirabell61
-
 Wonderful build Mark, clean, accurate, precise joinings, etc... Nils
 -
Looking good Mr. Puco, very nice that you are Fitting out interior / furniture etc... Nils
-
Pandora by marsalv - FINISHED - 1:52
Mirabell61 replied to marsalv's topic in - Build logs for subjects built 1751 - 1800
very nice joining work on wales Marsalv Nils -
Beautiful Fitting out Bob, The catheads also look great Nils
-
lovely build Craig, Nils
-
Hi Doris, many thanks for your appreciative words, its great to find you back at the Forum... Nils
-
Thank you very much B.E., good explaination, shall have to Keep this in mind when rigging the sails. Some (not this one)plans I saw, Show masts with Center axis. and one side "bare stick" other side set sail. That is a good help for understanding the sail relevant operating lines. Nils
-
Thank you B.E., I`ll look at your log pages you meant... BTW I`ve been studying the plans several times and still am not sure if all the Yards (as they are fitted with lifts that go to the outer Yard Ends)are foreseen for vertical hoisting / lowering, or only those with with haleyard blocks in the Yard Center area ? On the tallships I built 3 out of 6 Yards were fixed hight, only the three others were hight moveable Nils
-
Thank you Omega, You`ve won that bet,....., blocks are ordered, still Need to buy some certain rope (sewing thread) Diameters, and of course studying the function of all those rigging lines, I intend to spend her a full suit of set rigged sails. Next ship on the horizon is still out in the mist...., if I had the space in my home left I would like to challenge one of those famous nostalgic four stackers (Cunards Lusitania, or one of the many german 4 funnel black hull ocean runners of that time) Nils
-
You`re right B.E. I had my doubts with that mizen platform on the plan when I first saw it. Now all 3 platforms are corresponding with you research results, many thanks again. In the Moment I have not made up my mind yet, if the masts shall be or partially blackend in the platform Areas. If I put black wooldings on It perhaps may be contrast enough to the natural Wood, I was thinking of blackening the Yards though. The mizen topmast as well as the fore- and main top masts and the two topgallant masts (acc. to plan ) look ver fragile in the waist Areas. Did you follow the plan here with yours ? platform widths now: mizen 44 mm Foremast 54 mm Mainmast 59,5 mm Nils


-
Hi Bob, I know it sounds crasy, no joke, but I have neighther a lathe nor milling machine. Rotation symetric parts are done with my electr. Speed contgrolled hand Drilling machine as good as it goes, and small round parts are cut off with a saw blade. Nils
-
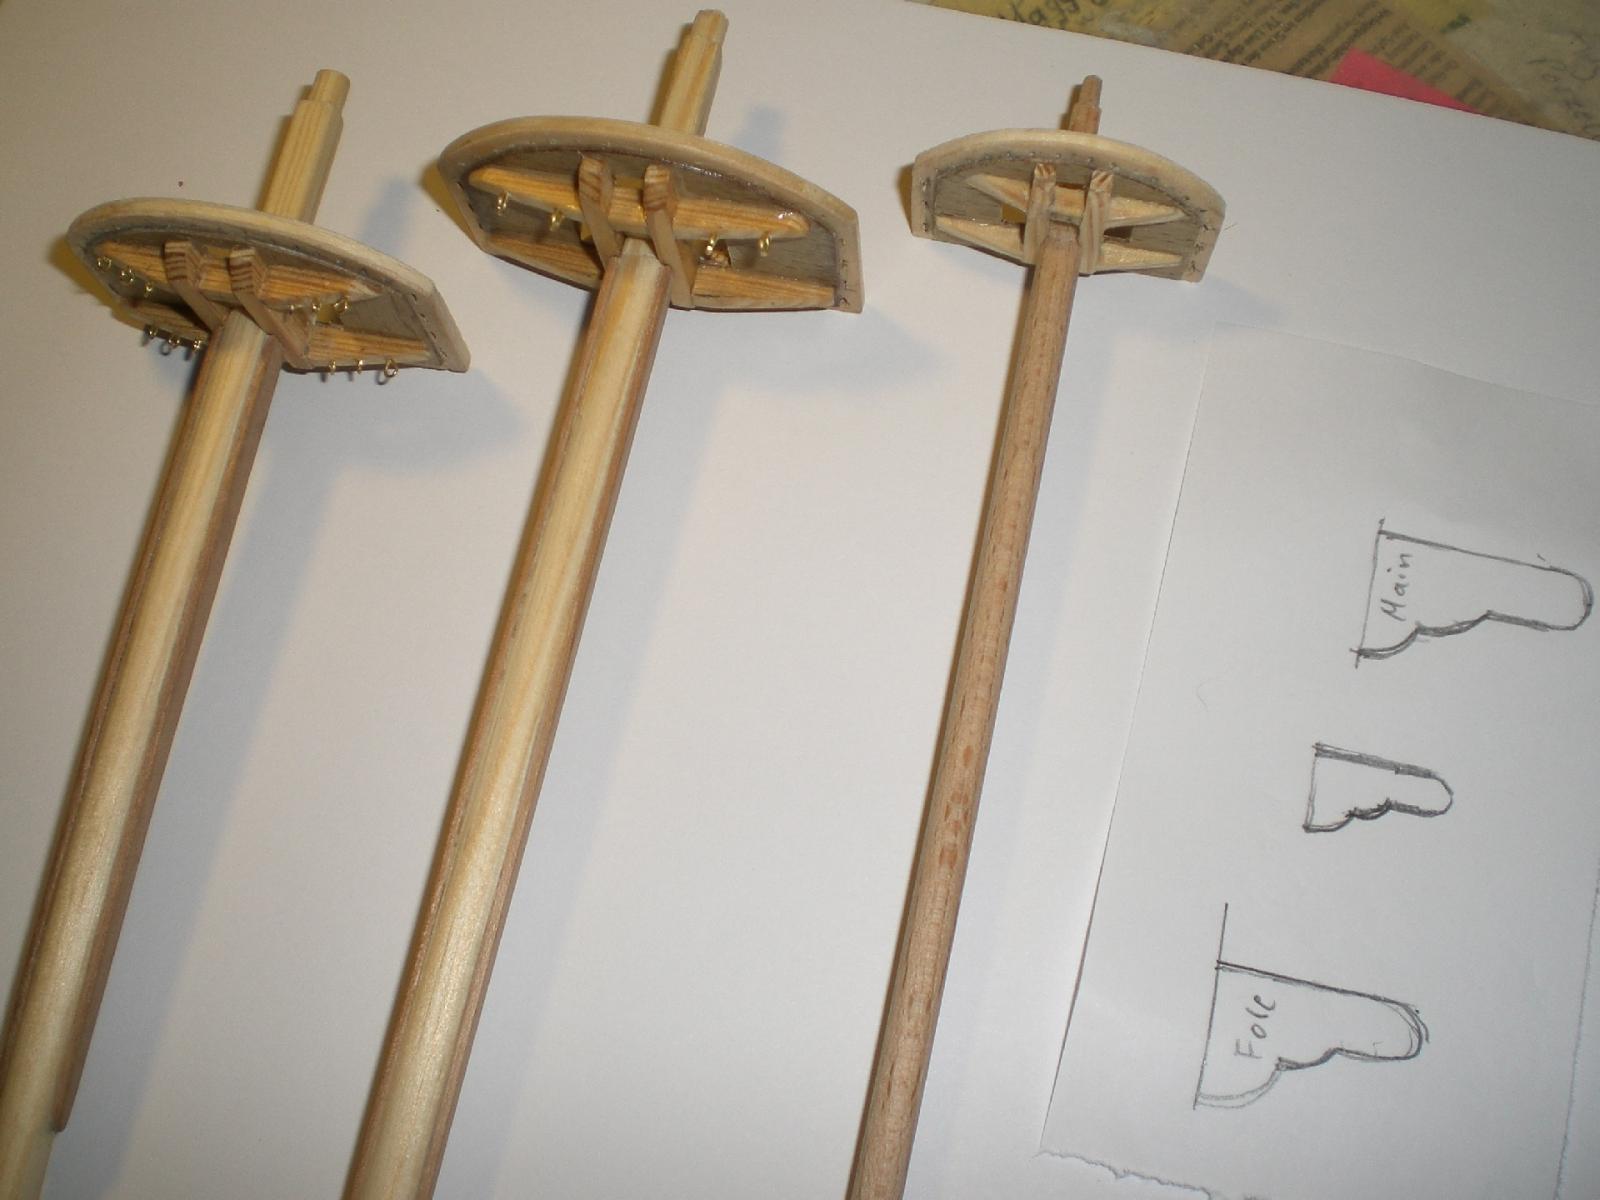
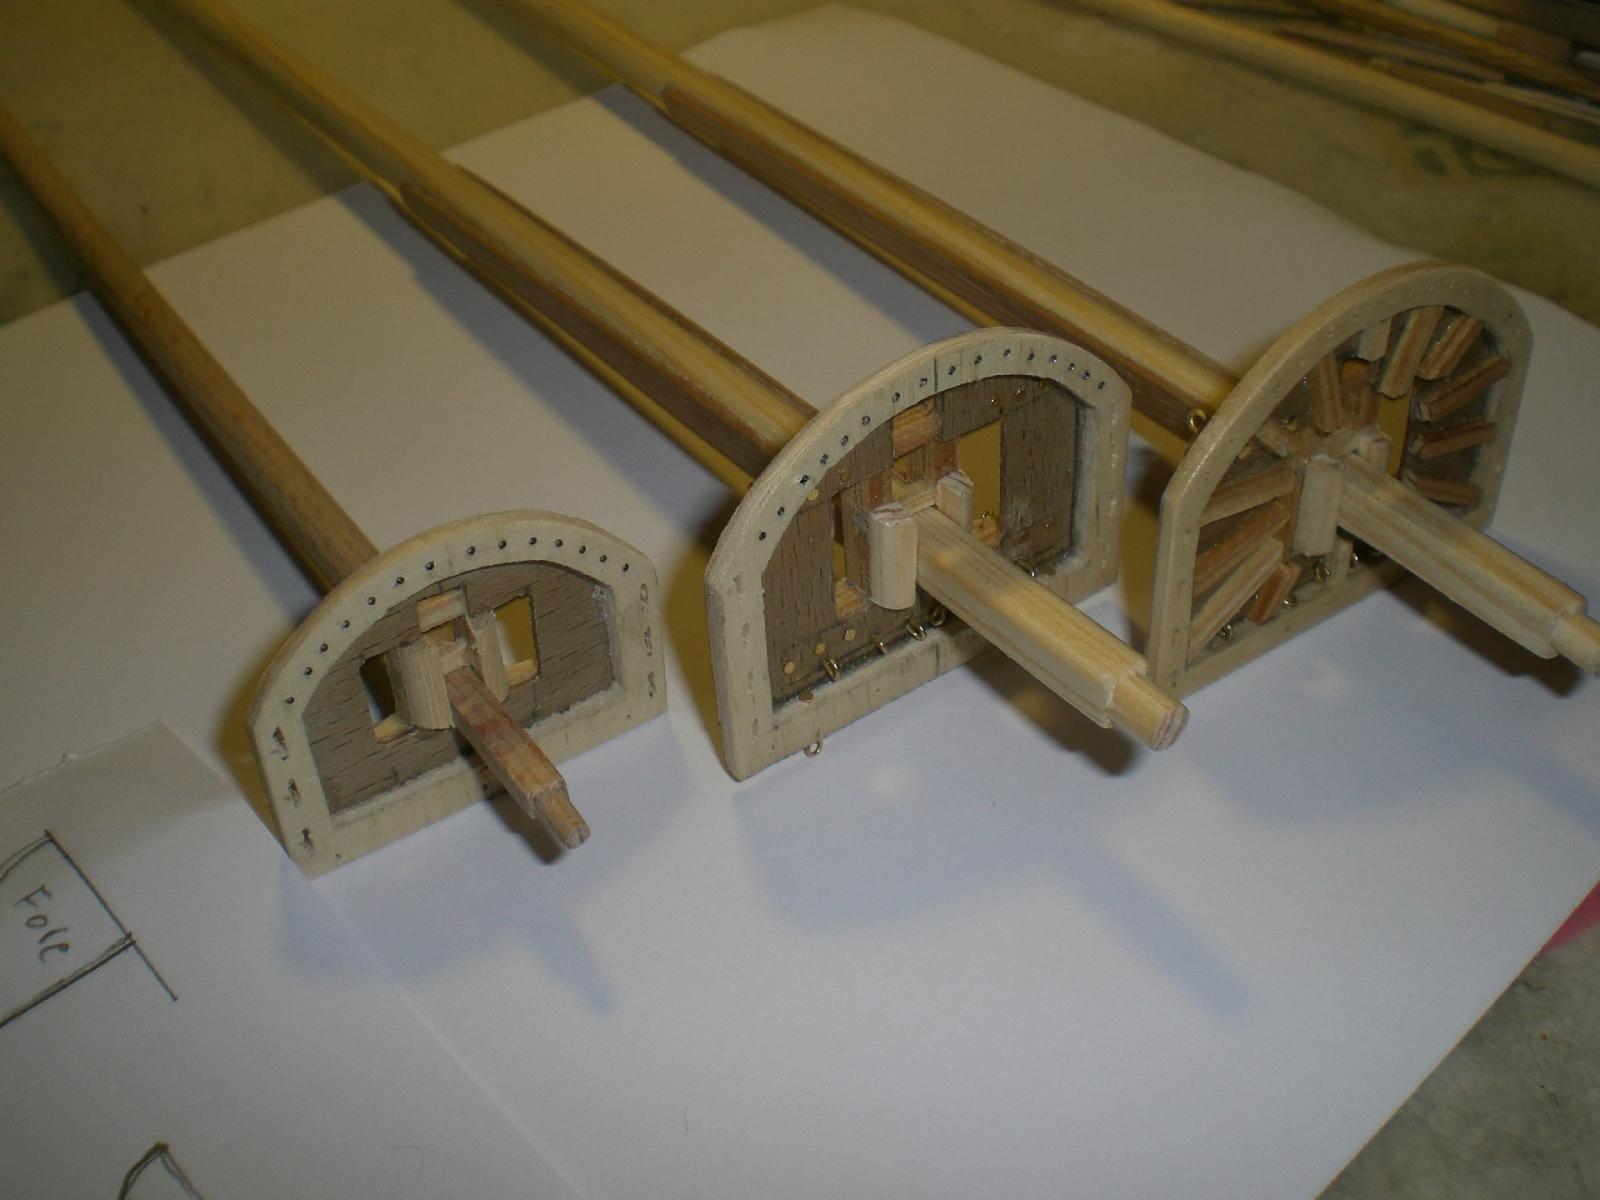
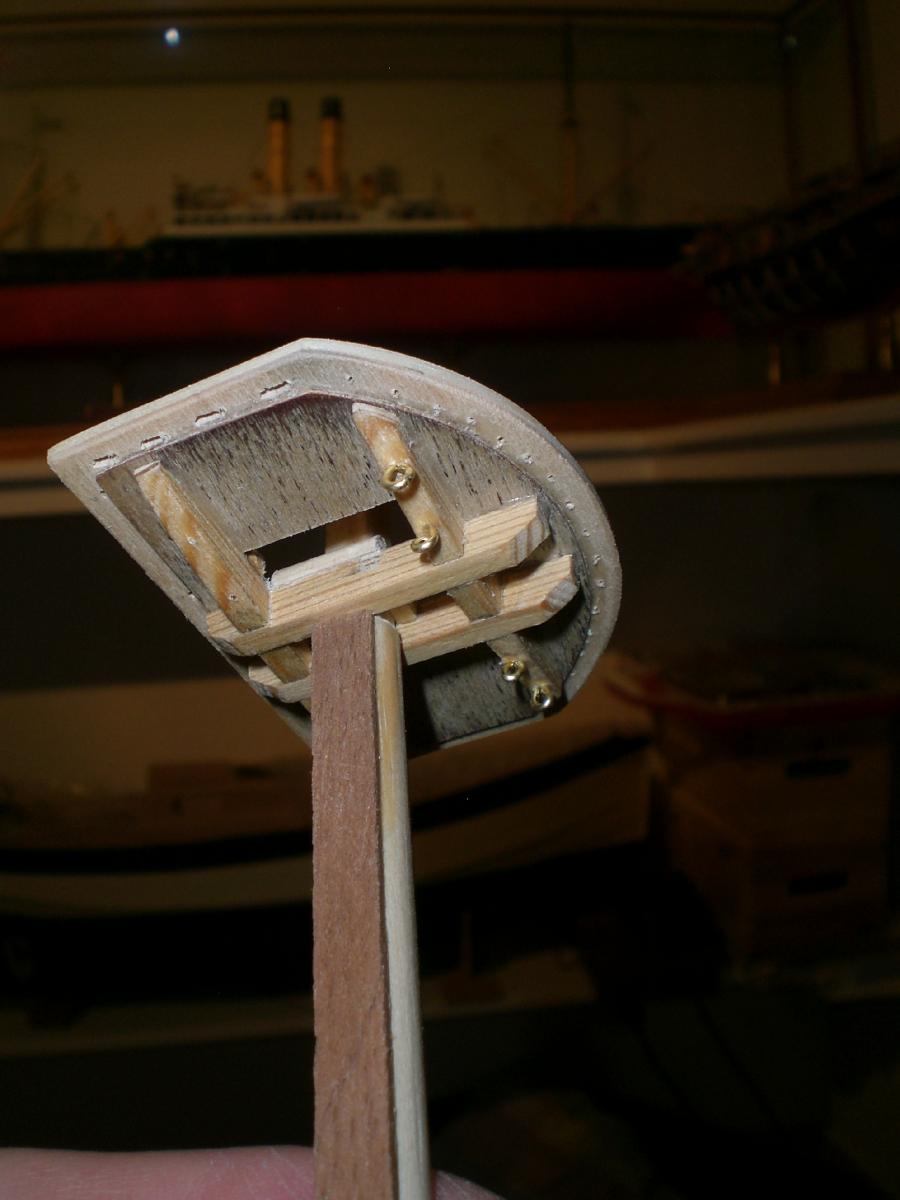
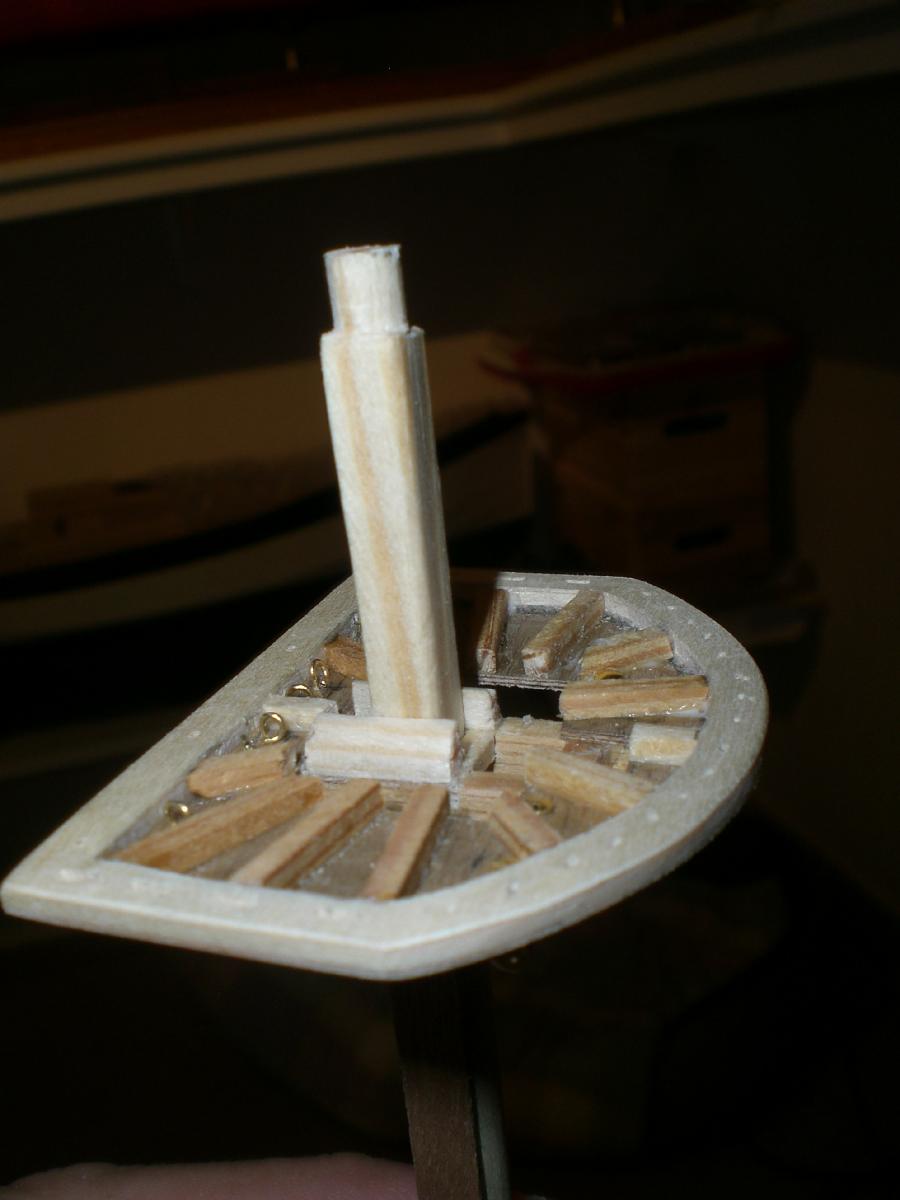
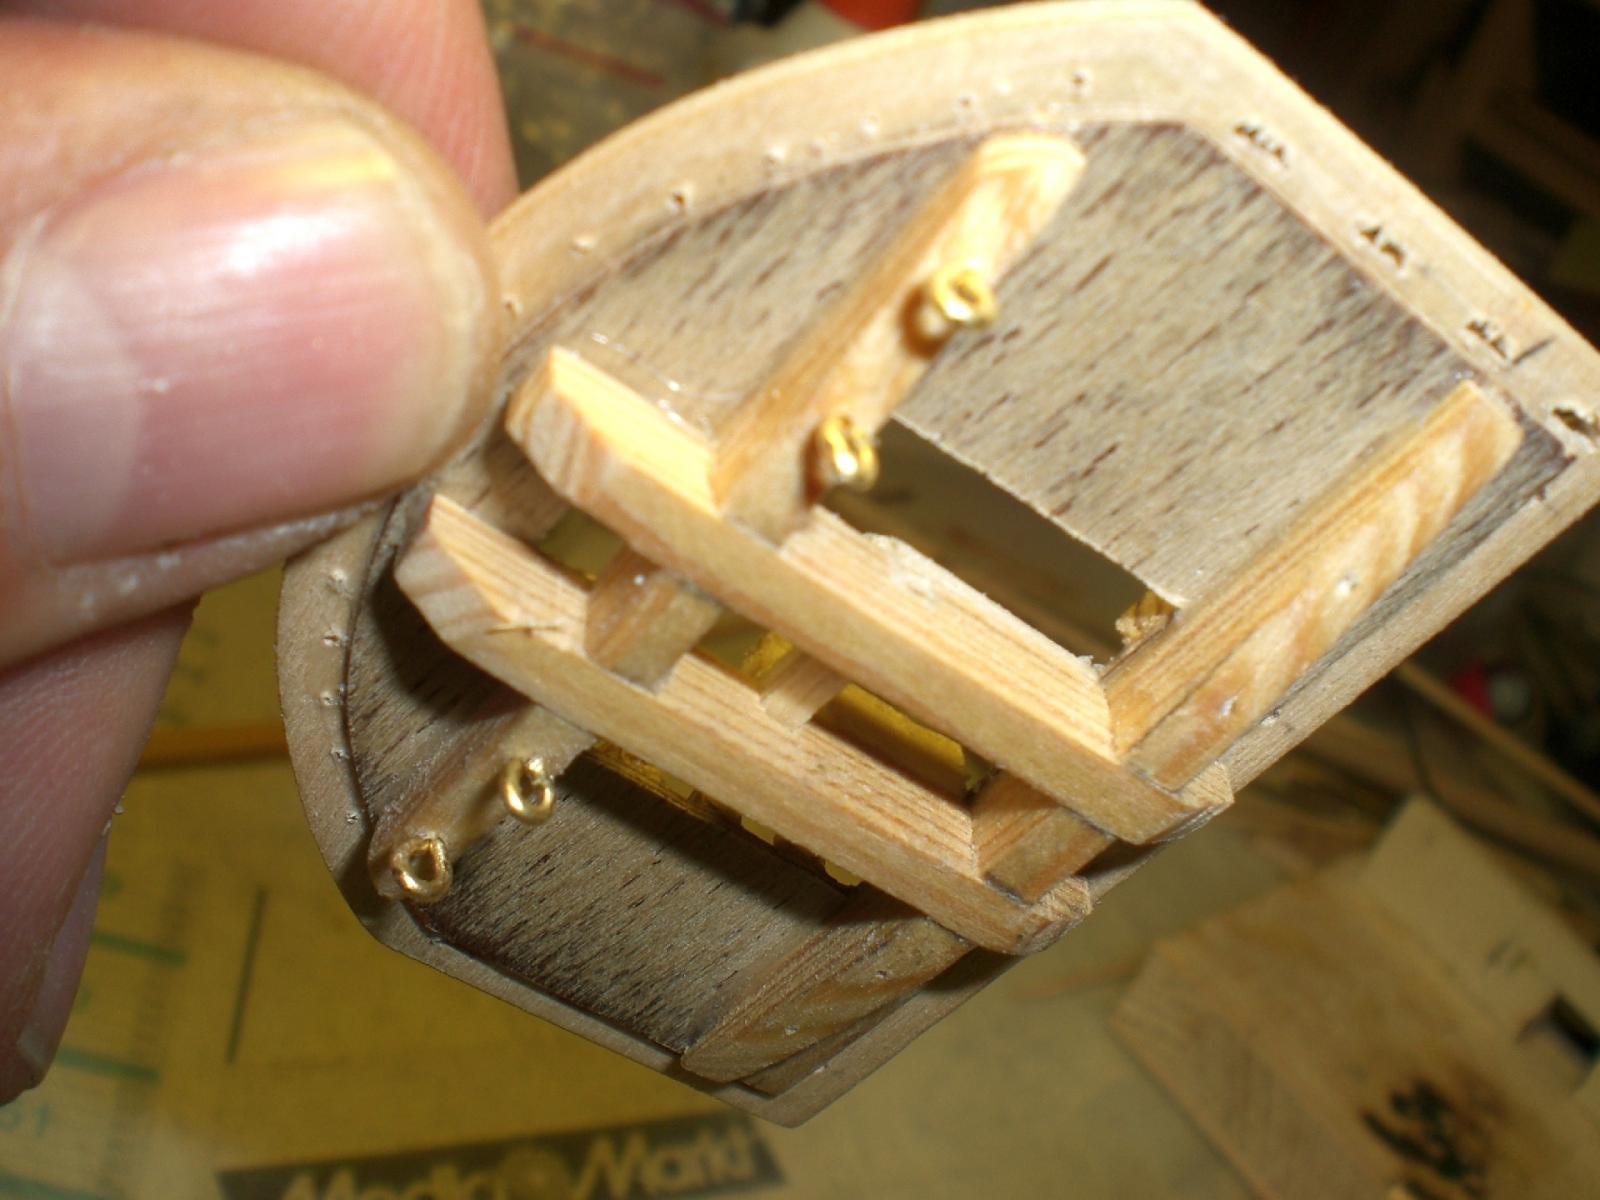
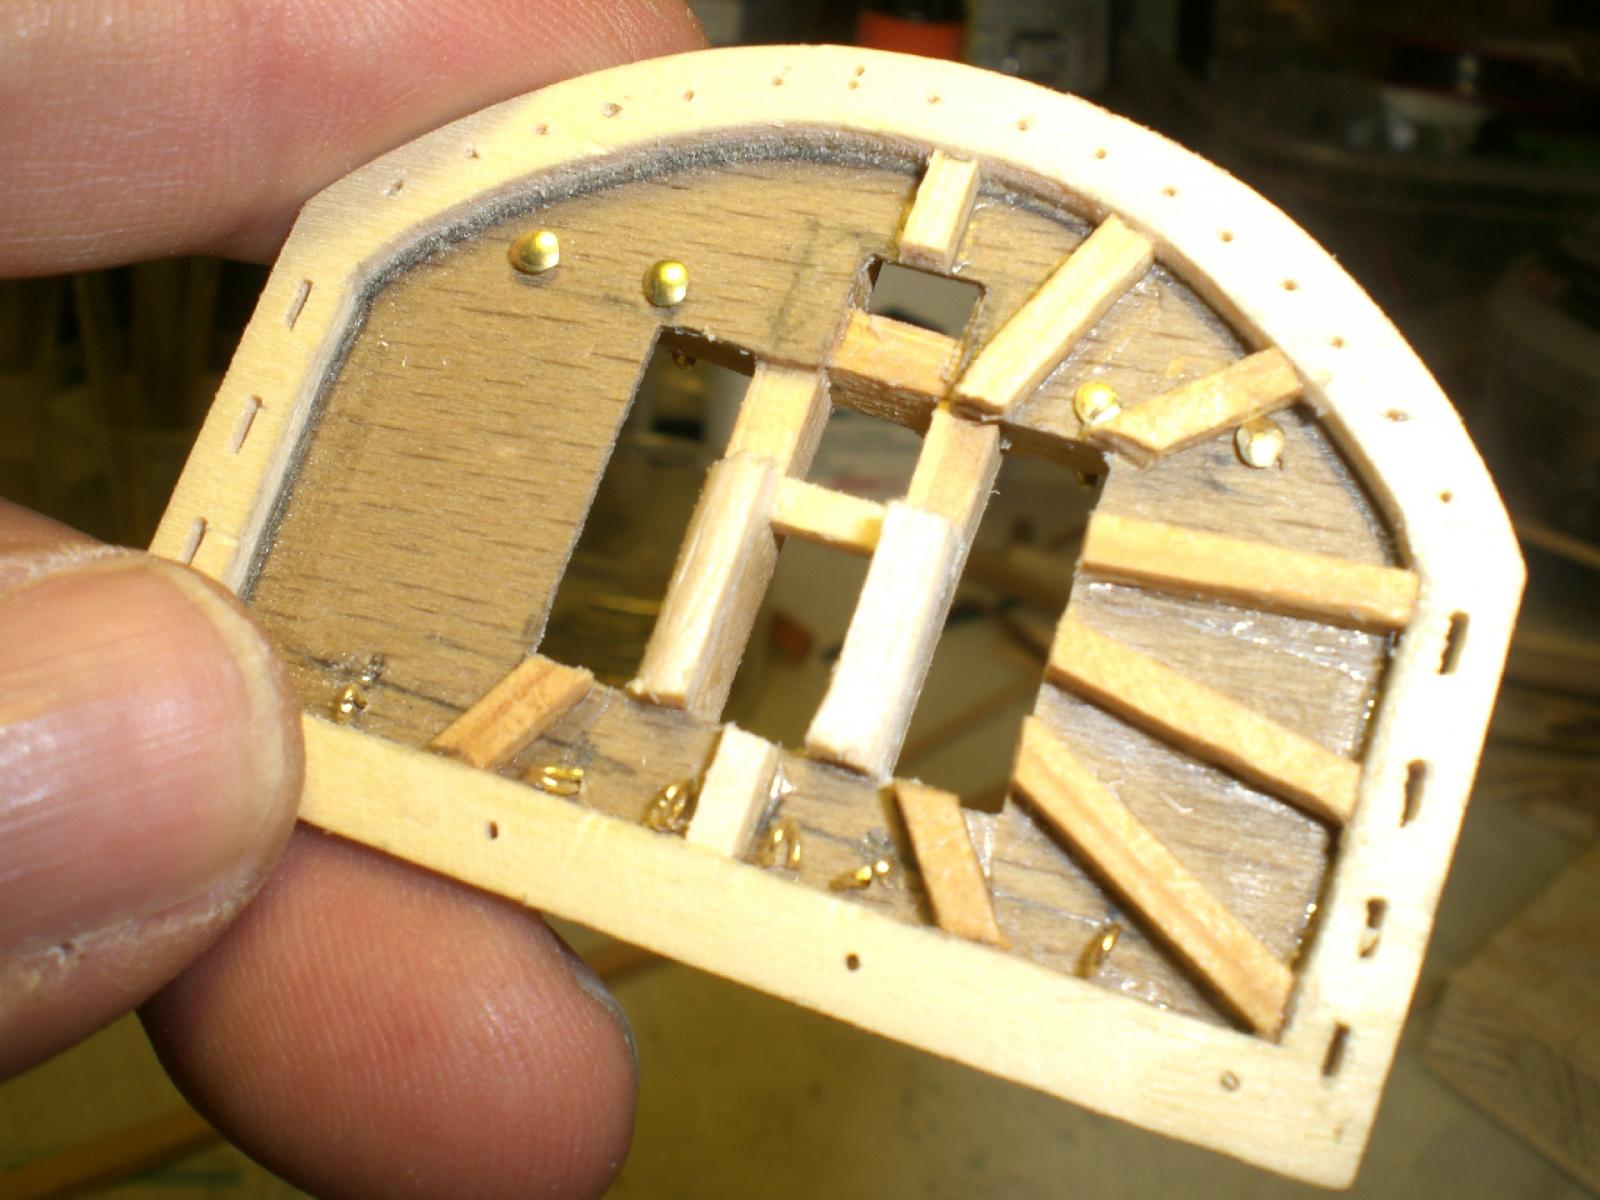
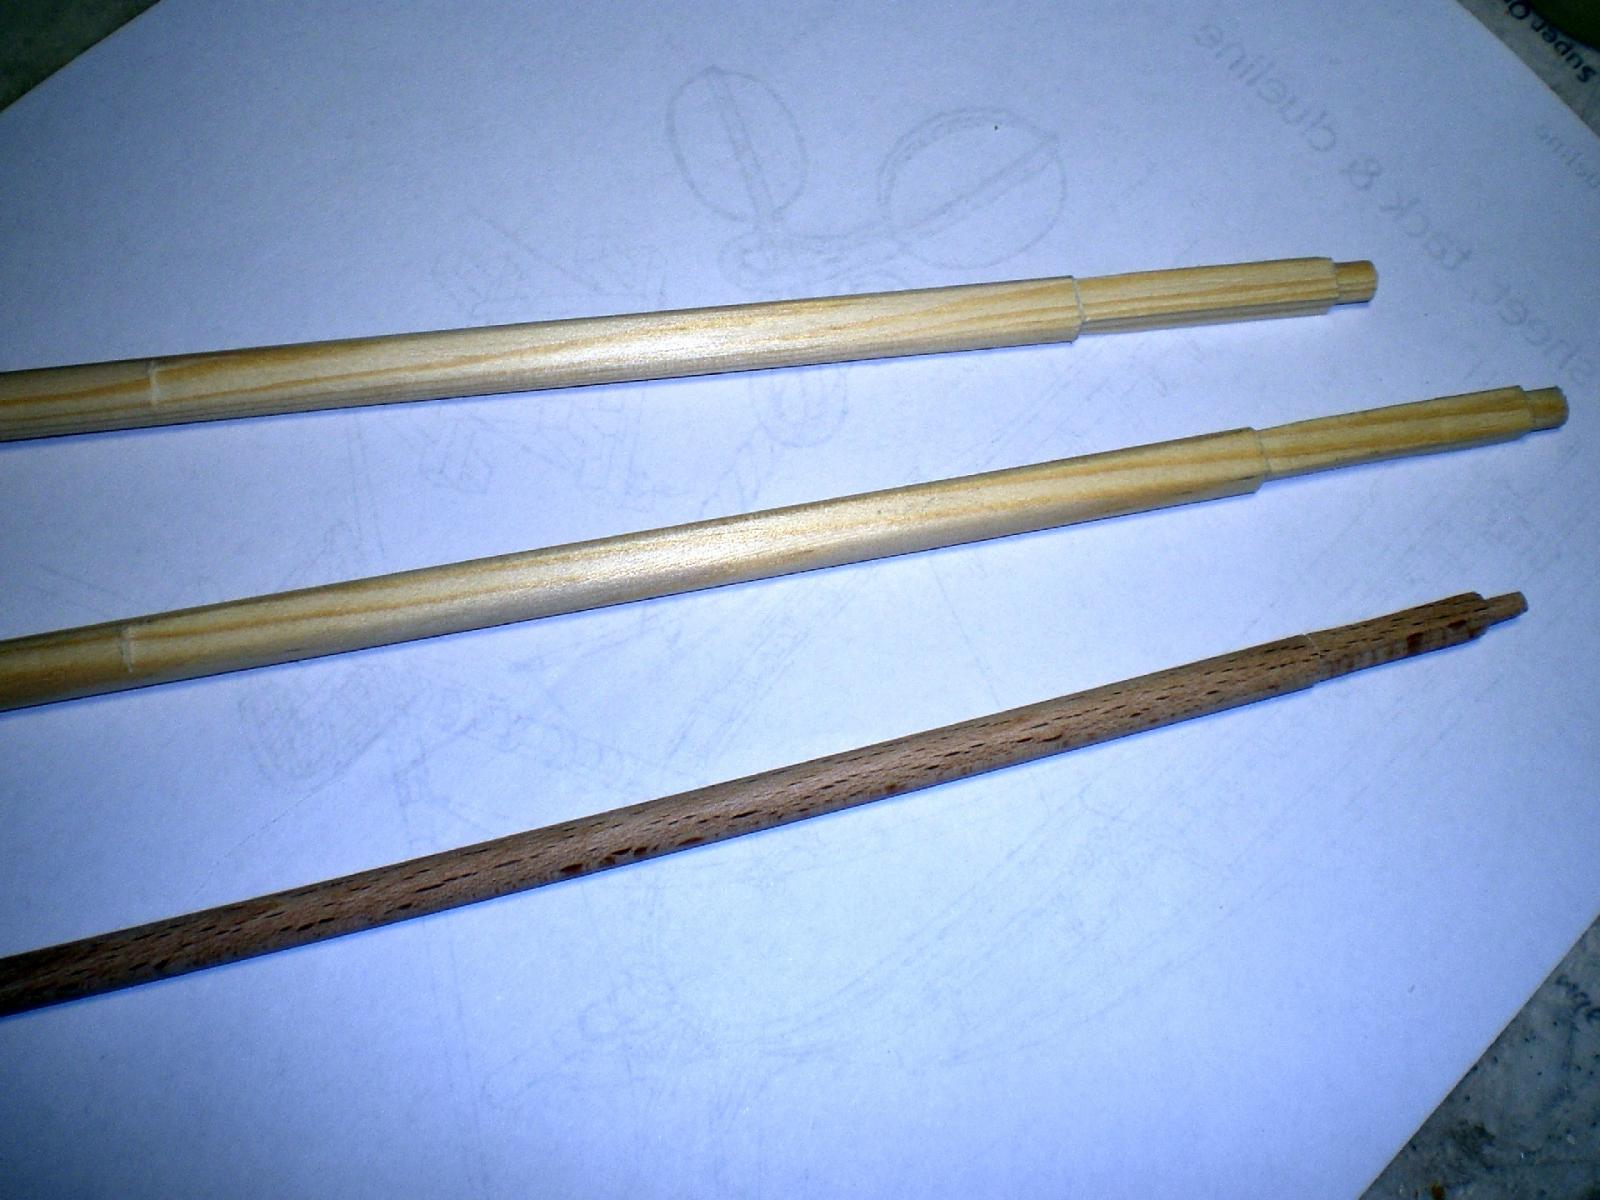
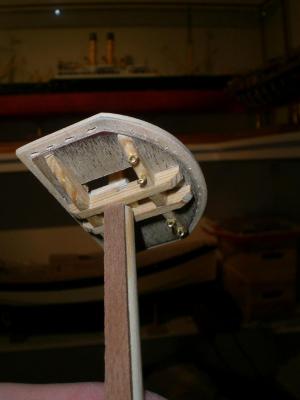
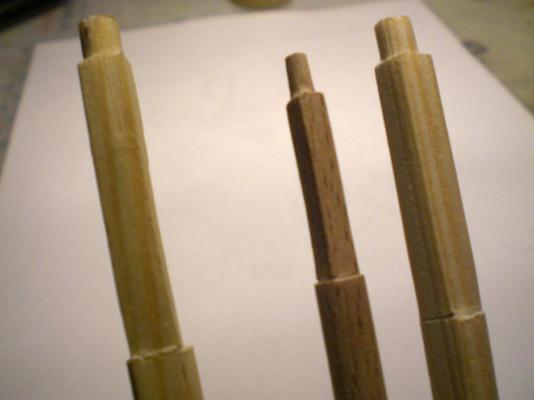
Build log part 52 Starting with the masting, and the top platforms. as I have no milling Equipment the mast dowels are being filed down to the required measurements shaping, fore, main and mizzen it worked dfine so far and the main top platform has a tight fit within the rated dimensions the lower cheeks are fitted, the upper cheeks will be of ply B.E once showed a wonderful tuteral for Platform Ratings, more orientated on Steel`s dimensions rather than the plans dimensions. Here the main top is 59,5 mm broad instead of 56 mm Thanks to B.E. for this Research ! The fastening Points for the blocks are prefitted. The outer platform rim is of 3 mm ply and the Slots for the deadeye tacke are ready, as well as the 16 0,5 mm holes for the crows feet lines the threstle timbers are quite sturdy Nils


-
Pandora by marsalv - FINISHED - 1:52
Mirabell61 replied to marsalv's topic in - Build logs for subjects built 1751 - 1800
Hello Marsalv, lovely clean and accurate build so far, this promisses to become a very nice looking ship. The lines of the "Pandora" are also beautifull... Nils -
Rusty, Nice pre-work for putting on a well thought through planking. The Winchelsea has wonderful lines, and ship is beautiful built so far.. Nils
-
Always a pleasure to look at Omega Nils
-
Hi Thomas, very nice work, lovely build, I liked the technique you produced your copper tiles with, asume you must be a professional toolmaker or so... the ship Looks great in all details Nils
-
Nice planking on all 3 decks Vitus, your "HMS Fly" is coming on very well... Nils
-
Very nicely done Klaus, clean and accurately built, Looks great... Nils
-
Great and ambitious idea Peter, whatever your choise, any of these three ships will look marvelous under sails, am curious already... Nils
- 431 replies
-
- 1
-

-
- pegasus
- victory models
- (and 1 more)
-
The rigging is coming on very nice Peter, would love to see one or two sails completely rigged and set, the ship Looks great as she is... Nils
- 431 replies
-
- 1
-
-
- pegasus
- victory models
- (and 1 more)
-
Many thanks for your explaination B.E., I`ll see it now from that Point of view relating to the rigging.. Nils Thank you for your word Pete, I am meanwhile gathering the required Information.... Nils
-
Pete , I saw a U-tube Clip with the AC72 flying above the San Francisco Bay Waters, just the foils streaming the water. The helmsman was talking of 30 Knots, unbelievable ! Nils
-
Mark, looks like you have now reached your set Goal with the "Druid", congratulations on your fine and excellent work. You have the "Lady Anne" on your slipway already, also a very nice build with wonderful Detail and Fitting out work, trust we shall see more from that Corner of your shipyard in the next weeks... Nils
-
that musket is an eyecatcher Remco, great Detail as all your other fine Details I like, trust we shall see some more surprizes as you carry on... Nils
- 1,207 replies
-
- 1
-
-
- sloop
- kingfisher
- (and 1 more)