

Gregory
-
Posts
3,079 -
Joined
-
Last visited
Content Type
Profiles
Forums
Gallery
Events
Posts posted by Gregory
-
-
-
Don't want to clutter up your log, but how did you get the elephant and lion shots? Are they telephoto?
In any event, they are stunning!
- FrankWouts, glbarlow and Dave_E
-
 3
3
-
-
You can use a tumbler like the Block Buster.
I have my own little version that works better for me..
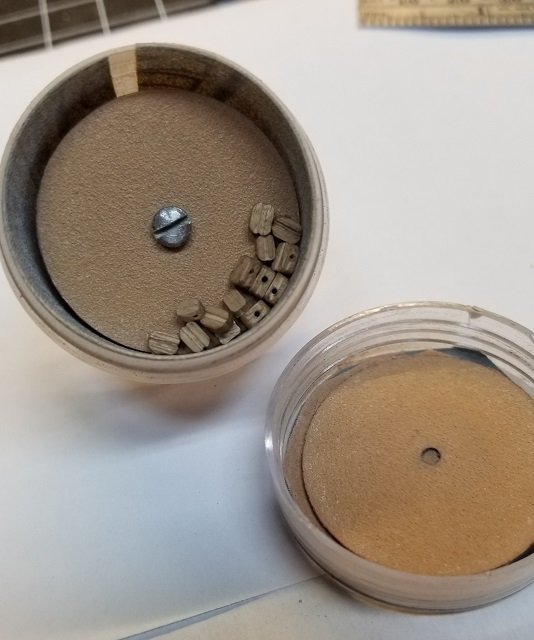
I have a pretty good stash of Chuck's blocks so I wouldn't go to the trouble of making the kit blocks work these days.
But there was a time when it was all the kit builder had.
Of course there are some kits like Vanguard, that come with pretty decent blocks.
-
On 9/21/2023 at 4:42 PM, tmj said:
"How were those stanchions/pillars, etc. actually 'anchored' in place?"
A little late to this, but I think they would have been hammered in place with a very tight fit.
It seems I remember that some of the pillars on the gun deck could be swung up, out of the way, so that would have involved some sort of hinge.
-
Good info. The finish really looks good.
-
2 minutes ago, Dr PR said:
After washing and drying I used a 50:50 mixture of Birchwood Casey Brass Black to finish it.
What was the other 50 ?
-
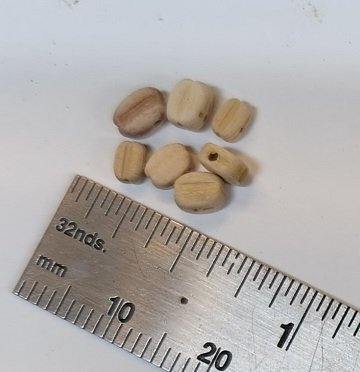
I've stained those 'bargain' blocks with Fiebing's Leather Dye.. I'm satisfied with results..
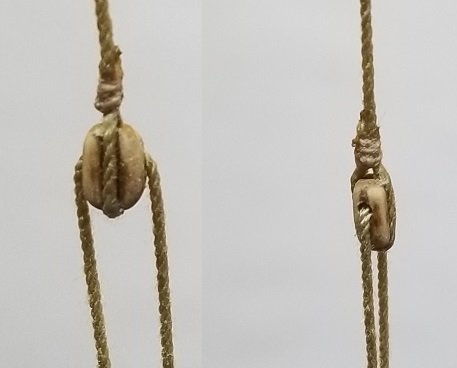
You can see I ended up with some variation, but i think that image is light overall, because my rope is darker than seen in the image.
Just a note, based on another user's experience. If you use shellac on the rope and block after it is in place, the dye can leach out into the rope..
- thibaultron, mtaylor and Canute
-
2
-
 1
1
-
-
Besides being very high quality, your blocks are very competitively priced. Any chance they are being re-sold?
- thibaultron, mtaylor and Canute
-
3
-
Thanks for the info.
- allanyed and Keith Black
-
2
-
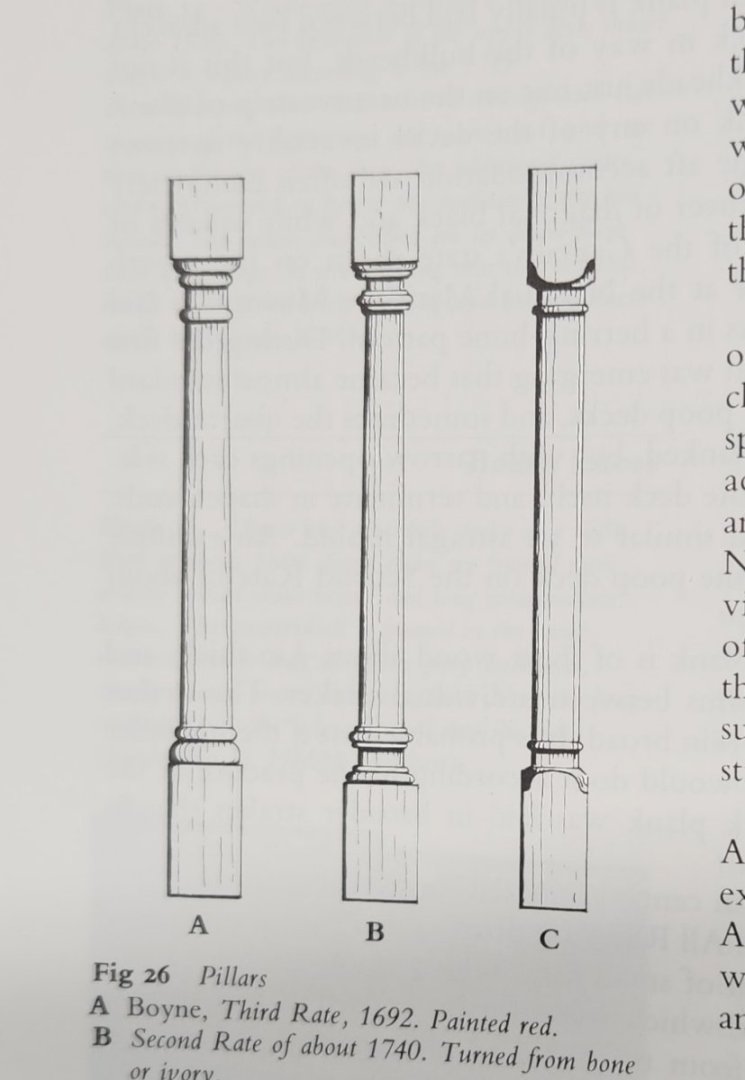
12 minutes ago, allanyed said:
But, this is a topic circa1805 so turned pillars may not be apropos
Is there good reason to believe Victory's pillars would have been replaced between 1765 and 1805?
( I am still looking for some apropos examples )
- mtaylor and Keith Black
-
2
-
Just to keep the discussion going.
Here is a draught of " 'Dorsetshire' (1757) Scale: 1:48. Plan showing the capstans, lanterns, turned columns,
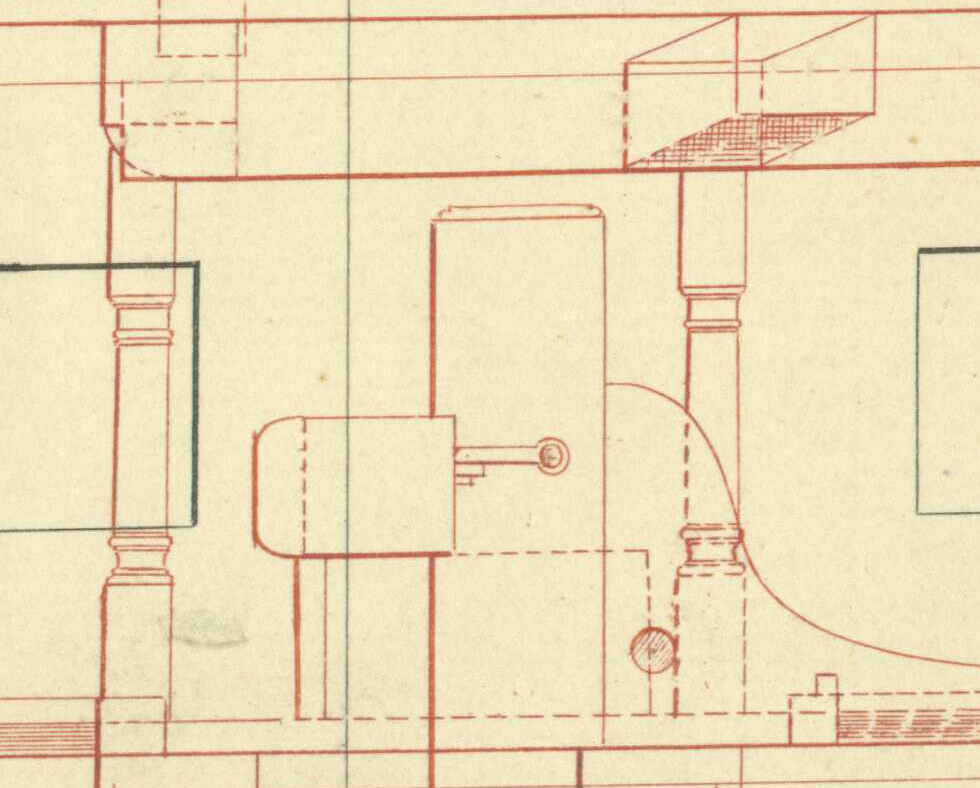
A snip from that drawing. Did someone not follow the 1750 establishments? 😁
One More:
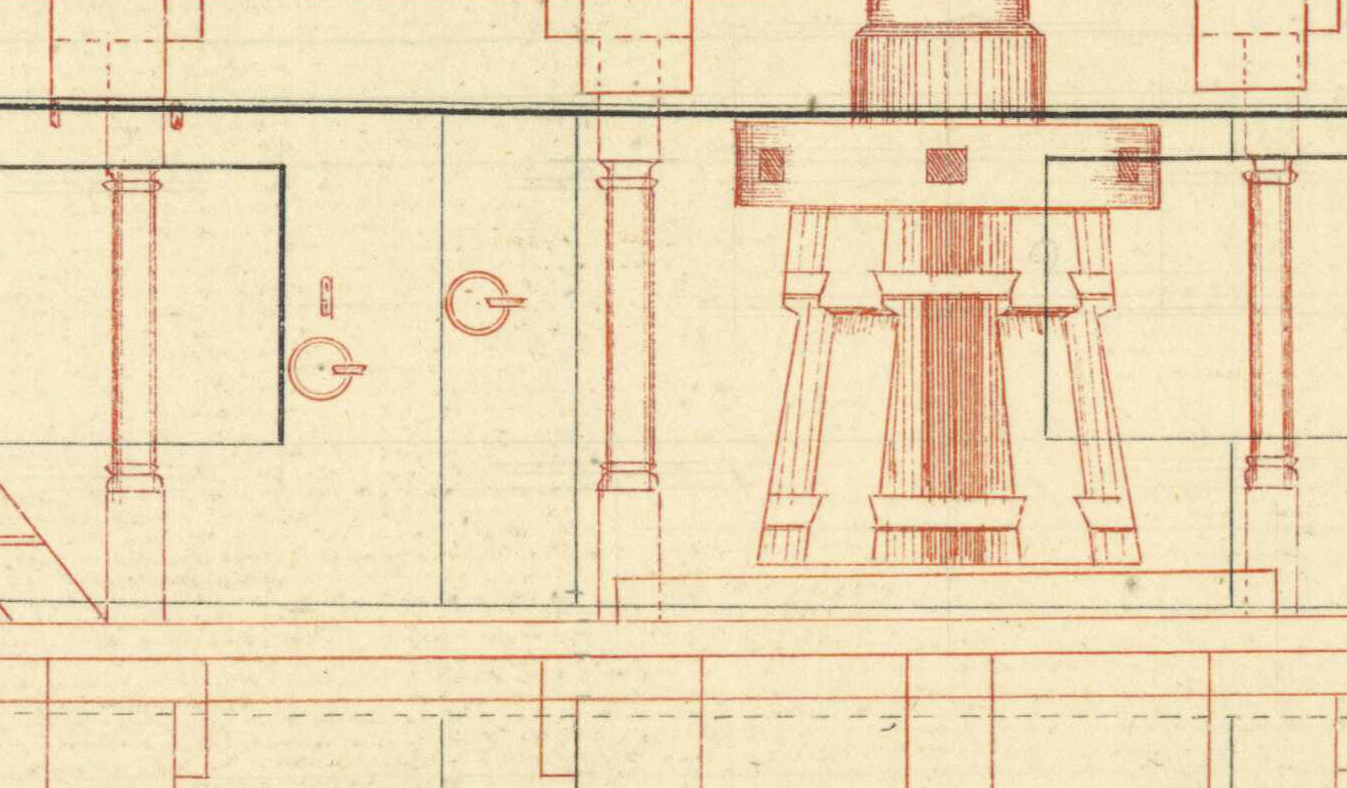
Prudent 1768 . The shading would seem to indicate the centers are turned.
P.S.
I realize, without further evidence, we cannot assume the ship was built as drawn.
- tmj, Keith Black, Dlowder and 2 others
-
5
-
1 hour ago, allanyed said:
It is written that the pillars were square, but I imagine the four corners in the middle 3/4's square section were chamfered.
Chamfering the corners would not reduce the square diameter from 16" to 13". Besides, you would now have an octagon and not a square. Are octagonal pillars described anywhere for these ships?
Are "square" pillars found in any contemporary drawings?
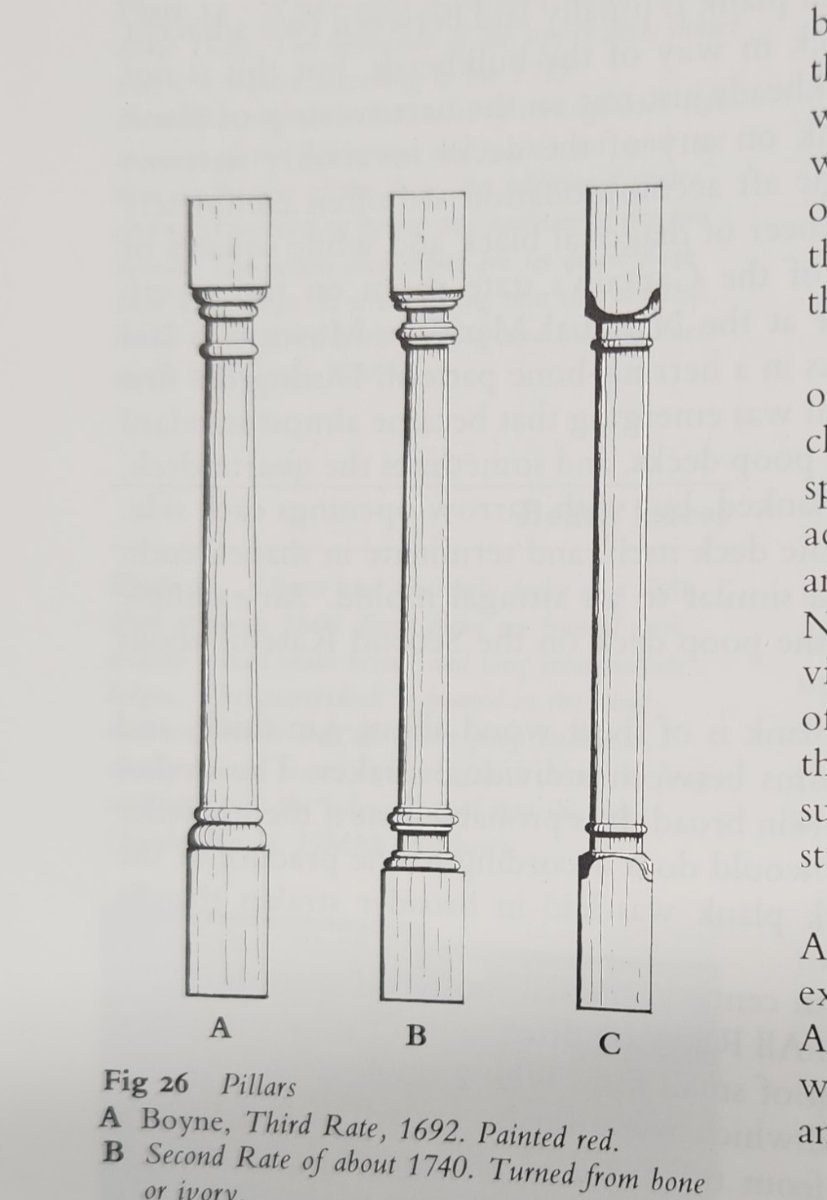
This is an illustration from " Navy Board Ship models".
Of course it doesn't prove anything about Victory during the time in question, however in the absence of contemporary drawings to the contrary,
I think McKay's opinion is as good as any.
P.S.
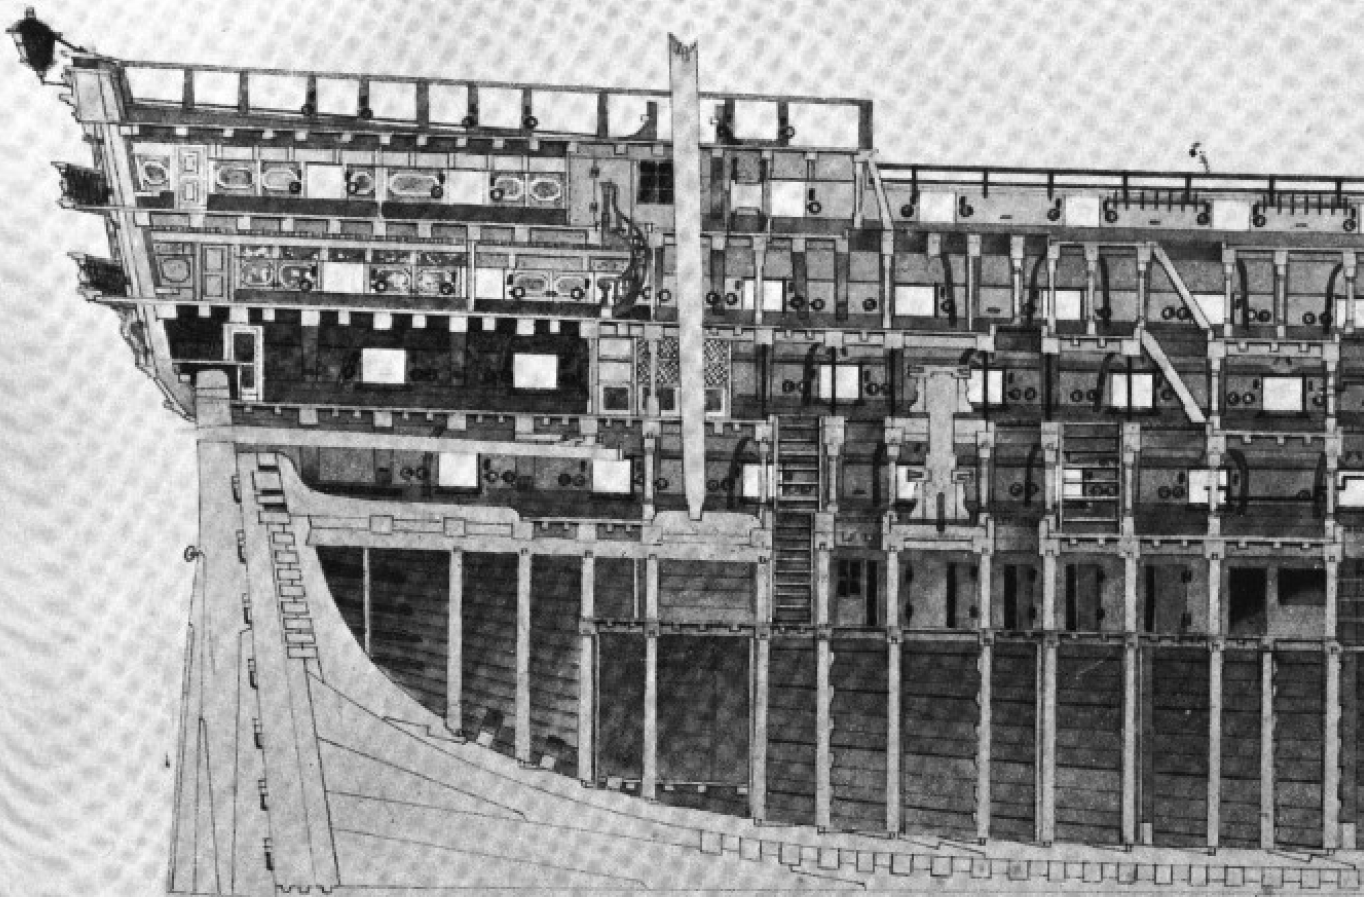
Here is an illustration from Lavery of " Early 19th Century First Rate " ..
I guess those pillars could be square, but they don't give that impression.
- tmj, mtaylor and Keith Black
-
3
-
On 9/18/2023 at 7:25 AM, allanyed said:
According to contemporary information in David Steel's 1805 Elements and Practice of Naval Architecture, the pillars in the hold were not round at that period of time.
Pillars under the orlop beams and gun deck -
13" square along the middle 3/4 of the overall length
At the lower 1/8 of the length they are 16" fore and aft, and 14" athwartships
At the upper 1/8 of the length they are 14" fore and aft and 13" athwartships.
Allan,
Do you know for a fact that Steel, in giving the square dimensions, that they were not rounded in any segment?
Making them 'square' in the middle would have been a lot more work than rounding them off with the given dimensions.
Just a thought.
- tmj, Keith Black and mtaylor
-
3
-
8 hours ago, Srenner said:
Does anyone know can you get glass encrusted thread or some sort of file approx 0.6mm that you can thread through and clean out the cleats?
The linked item is ~.457mm They have a variety of sizes.
-
The AOTS Blandford also shows double + single for 6 pounders. I guess Goodwin didn't read Caruana.😁
Lavery in " The Arming and Fitting, etc... "
 .. without regard to caliber.
Takakjian in AOTS 'Essex' shows double + single for 12 pounder.
Was Caruana's data part of the establishments?
Did armorers always follow this practice?
Double + single has become a modeling convention, particularly with kits, and most builders will never be shown anything to the contrary until after they have done all the work. ( ....hours of fiddly work. )
I agree with Thukydides that the aesthetics come into play with ship models, in many areas that are contrary to contemporary full size practice.
With that said, Thukydides, your Alert sets a high standard in ship modeling.
I apologize if I have cluttered up your log with this distraction.
- Thukydides, jpalmer1970, dunnock and 4 others
-
7
-
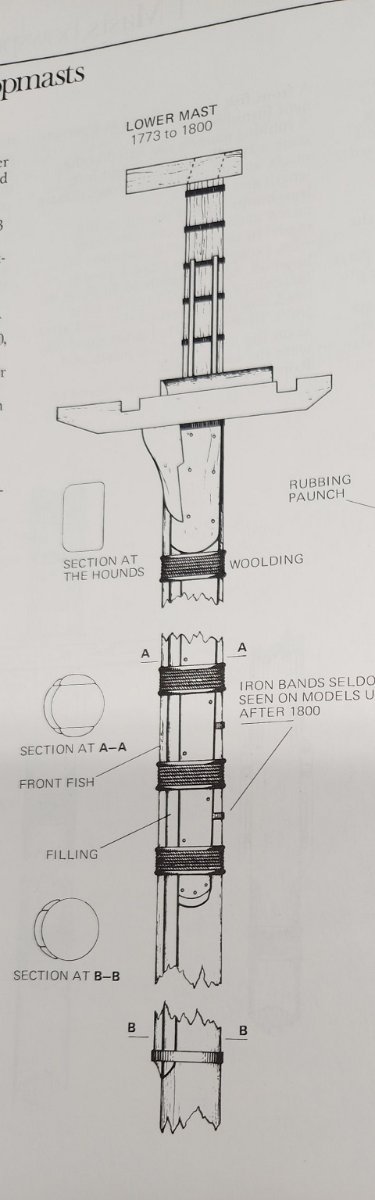
When you say " how", do you mean tools and methods, or just design?
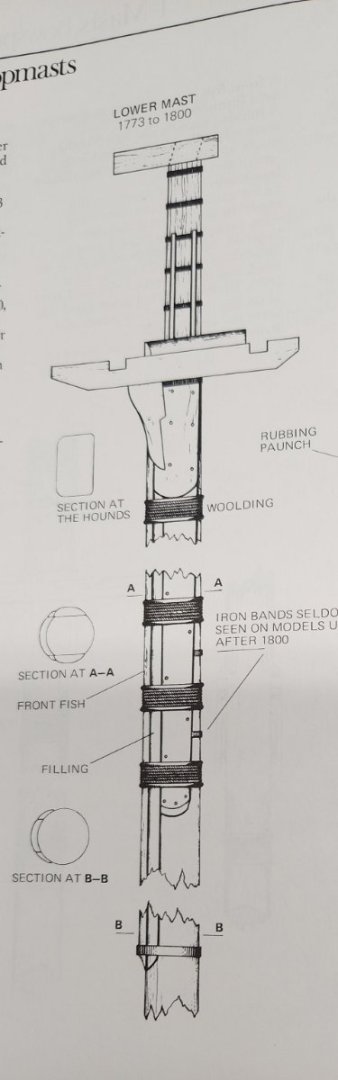
Lees shows a lower mast from 1773 to 1800. Note the sections.
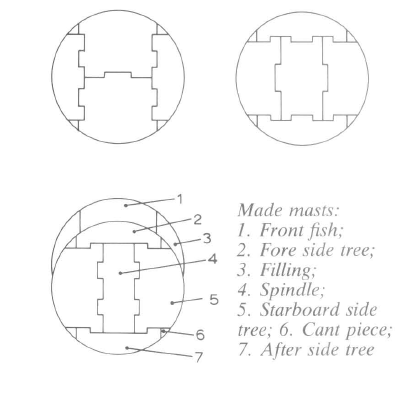
Mondfeld shows the cross section of a made mast, but there would be little point and somewhat challenging, in trying trying to model this type of construction, unless you wanted to
score some lines along the mast to to represent the pieces used.
For more details you could get a copy of James Lees The Masting and Rigging of English Ships of War, 1625-1860 or Historic Ship Models by Wolfram zu Mondfeld.
The Anatomy of Nelson's Ships by Longridge is also a good modeling reference for Victory.
-
How long does that cedar stay aromatic?
One of my favorite scents...
- Keith Black, Jack12477, Egilman and 2 others
-
5
-
-
Do you have any links for the YouTube tutorials for Fusion360 based on the drawings in this book.
I could not find any.
All the videos I see are for AutoCAD
The book says:

In fact, it provides no instructions at all for using the interface of Fusion360
It is just a collection of CAD drawings with the dimensions.
It really does not look very useful for learning Fusion 360.
-
Good find.. looks interesting.
Here is a three pack at Amazon for $8.99
I saw one for as little as $2.99 , but delivery takes a bit longer.
- mtaylor, robert952, thibaultron and 1 other
-
4
-
Allan,
Of interest also, the contemporary drawings earlier in the discussion show one piece and no bolts.
- mtaylor, thibaultron and Keith Black
-
3
-
44 minutes ago, allanyed said:
I do not see any mention of the trucks being constructed in pieces bolted together.
This is interesting in that the trucks are often depicted with bolts, which wouldn't be necessary if there was only one piece.
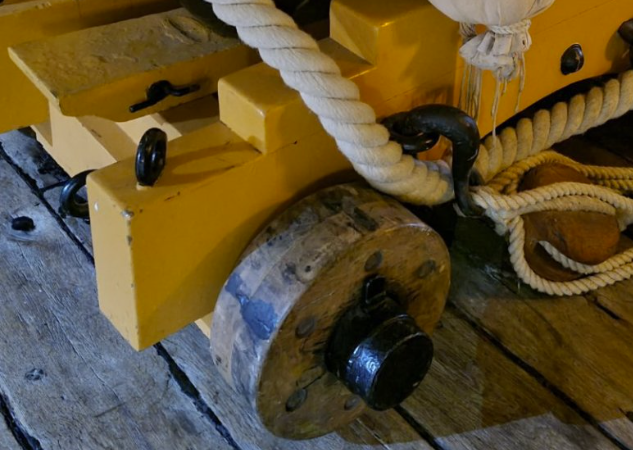
Here is a truck from Victory with two pieces bolted together. However I have seen other carriages from Victory with the trucks being one piece and no bolts.
I realize the current Victory carriages are probably mostly modern reconstructions.
- thibaultron, Archi, mtaylor and 1 other
-
4

_RMG_J3113.png)
_J8184.jpg)
How to cut chamfers?
in Modeling tools and Workshop Equipment
Posted · Edited by Gregory
I got the little 8mm blade.
Want to see if it helps making molding strips and other details, and because it's hard to resist pretty little tools.